Home » Anime » Dragon Ball » How to draw Kid Goku riding on the Flying Nimbus

How to draw Kid Goku riding on the Flying Nimbus

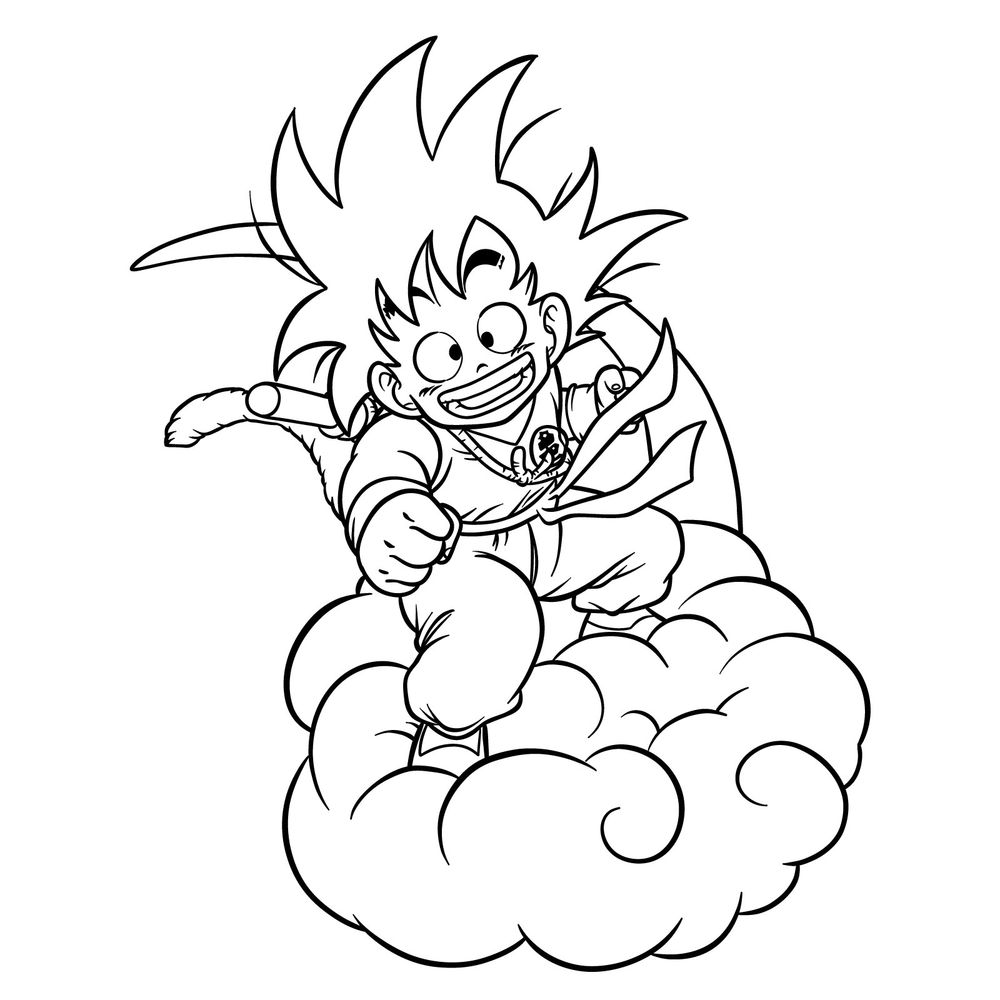
Welcome! Today, I’m excited to show you how to draw Kid Goku on the Flying Nimbus. This iconic image from the beloved series captures Goku’s adventurous spirit and joy. We’ll break down the drawing process into easy steps, ensuring that by the end, you’ll have a piece you’re proud of. So, let’s grab our pencils and get started on this classic pose of Kid Goku soaring the skies!

Capturing Kid Goku’s Iconic Features

  • Focus on Goku’s spiky black hair with distinctive bangs framing his forehead.
  • His cheerful facial expression includes bright eyes and a wide, welcoming smile.
  • Remember Goku’s Saiyan tail, a key aspect of his heritage.
  • For his attire, the trademark orange gi is essential, complete with the knot tied at the waist.
  • Pay attention to the cloud’s fluffy texture to give the Flying Nimbus its magical feel.
  • Link to related characters by considering dynamic scenes with Vegeta SSB Evolved or showing Goku’s evolution to Mastering Ultra Instinct.

The Journey Through Drawing Kid Goku

Our guide to drawing Kid Goku on the Flying Nimbus includes 28 comprehensive steps. The layout is intuitive, showing you exactly where to draw each line:

  • Red Color: Highlights the new lines to be drawn in the current step.
  • Black Color: Indicates all the lines drawn up to the current point.
  • Grey Color: Shows the basic sketch from the first step.

Starting with a grey sketch helps establish the correct proportions. When all the steps are complete, inking over your pencil lines can really make your drawing pop. Be sure to let the ink dry to avoid smudging, and then lightly erase the pencil lines for a clean, finished look.

Step 01

How to draw Kid Goku riding on the Flying Nimbus - step 01

Step 02

How to draw Kid Goku riding on the Flying Nimbus - step 02

Step 03

How to draw Kid Goku riding on the Flying Nimbus - step 03

Step 04

How to draw Kid Goku riding on the Flying Nimbus - step 04

Step 05

How to draw Kid Goku riding on the Flying Nimbus - step 05

Step 06

How to draw Kid Goku riding on the Flying Nimbus - step 06

Step 07

How to draw Kid Goku riding on the Flying Nimbus - step 07

Step 08

How to draw Kid Goku riding on the Flying Nimbus - step 08

Step 09

How to draw Kid Goku riding on the Flying Nimbus - step 09

Step 10

How to draw Kid Goku riding on the Flying Nimbus - step 10

Step 11

How to draw Kid Goku riding on the Flying Nimbus - step 11

Step 12

How to draw Kid Goku riding on the Flying Nimbus - step 12

Step 13

How to draw Kid Goku riding on the Flying Nimbus - step 13

Step 14

How to draw Kid Goku riding on the Flying Nimbus - step 14

Step 15

How to draw Kid Goku riding on the Flying Nimbus - step 15

Step 16

How to draw Kid Goku riding on the Flying Nimbus - step 16

Step 17

How to draw Kid Goku riding on the Flying Nimbus - step 17

Step 18

How to draw Kid Goku riding on the Flying Nimbus - step 18

Step 19

How to draw Kid Goku riding on the Flying Nimbus - step 19

Step 20

How to draw Kid Goku riding on the Flying Nimbus - step 20

Step 21

How to draw Kid Goku riding on the Flying Nimbus - step 21

Step 22

How to draw Kid Goku riding on the Flying Nimbus - step 22

Step 23

How to draw Kid Goku riding on the Flying Nimbus - step 23

Step 24

How to draw Kid Goku riding on the Flying Nimbus - step 24

Step 25

How to draw Kid Goku riding on the Flying Nimbus - step 25

Step 26

How to draw Kid Goku riding on the Flying Nimbus - step 26

Step 27

How to draw Kid Goku riding on the Flying Nimbus - step 27

Step 28

How to draw Kid Goku riding on the Flying Nimbus - final step

Bringing Your Kid Goku Drawing to Completion

And there you have it—how to draw Kid Goku on the Flying Nimbus, step by step. With these guidelines, I hope you’ve created a drawing that brings out the joy and excitement of Goku’s character. Keep practicing, and don’t shy away from experimenting with different scenes and actions!

Connect with other artists and share your masterpiece by following SketchOk:

Thanks for following along, and I can’t wait to see you in the next tutorial on drawing your favorite characters!
Disclaimer: All original artworks and photos used as references for the creation of these drawing tutorials are the property of their respective owners. If your work has been featured without proper credit, please kindly leave a comment below, and the issue will be promptly addressed. We greatly appreciate your exceptional art. Thank you.

Did you like the tutorial?

You can support the author of this website and also suggest your own ideas for new drawings by making a small donation here:

Leave a Comment

111