Last Updated on May 14, 2026
If you’ve ever wondered about the process of bringing animated characters like Roger Rabbit to life on a blank canvas, you’re in for a treat. Our guide will walk you through the journey of how to draw Roger Rabbit, the beloved bunny from the ’80s film classic ‘Who Framed Roger Rabbit’. This 15-step guide is beginner-friendly, and all you need is a pencil, an eraser, and a dose of creativity!
Unveiling Roger Rabbit: Character Design and Features
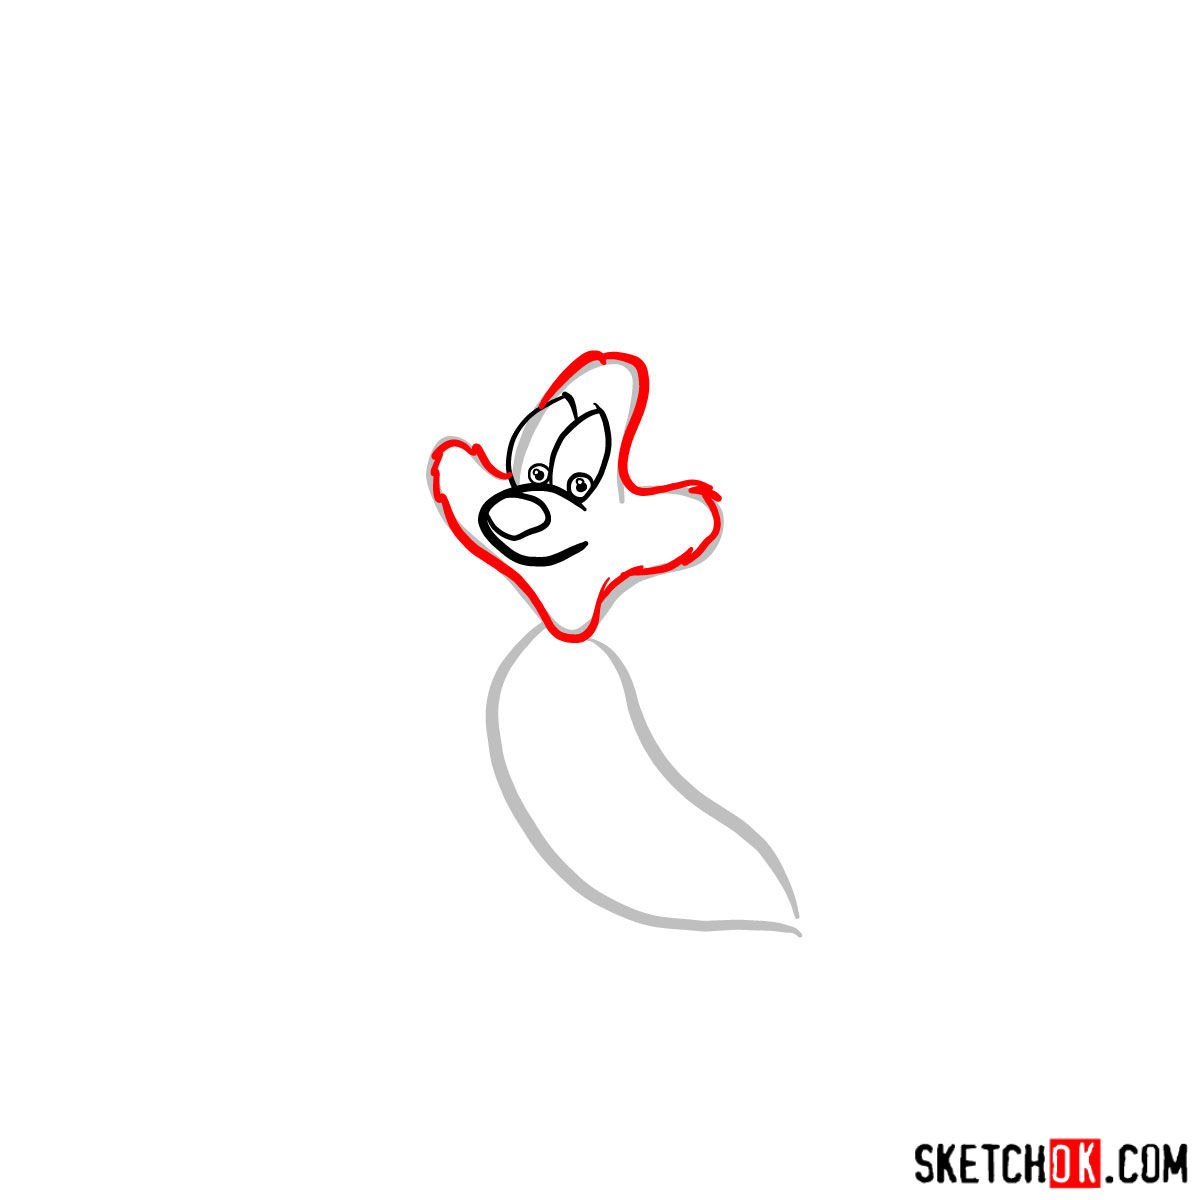
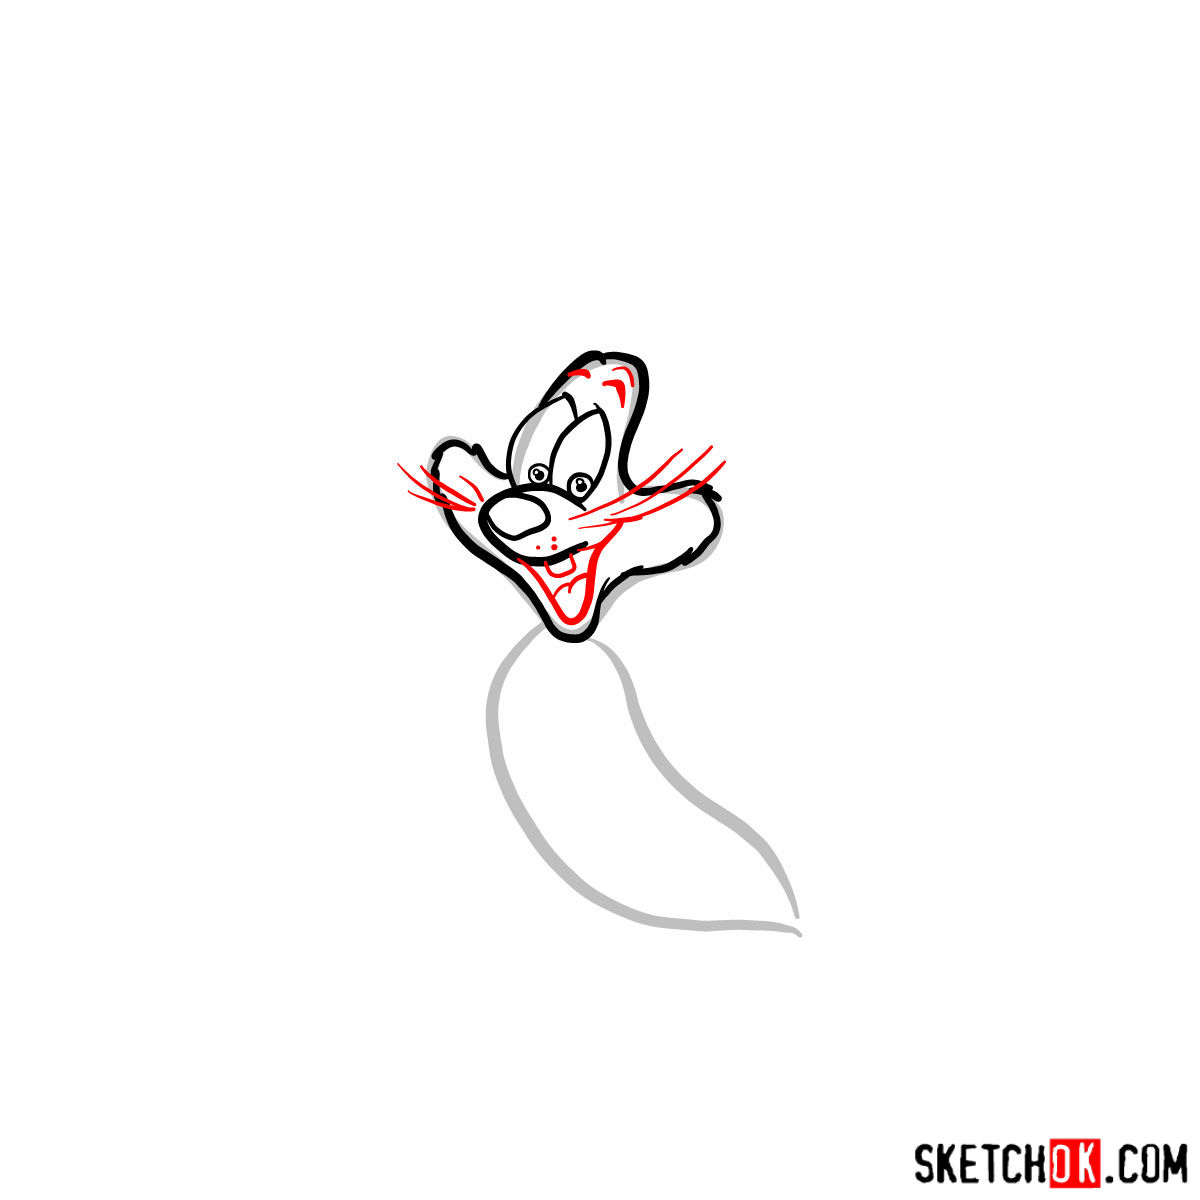
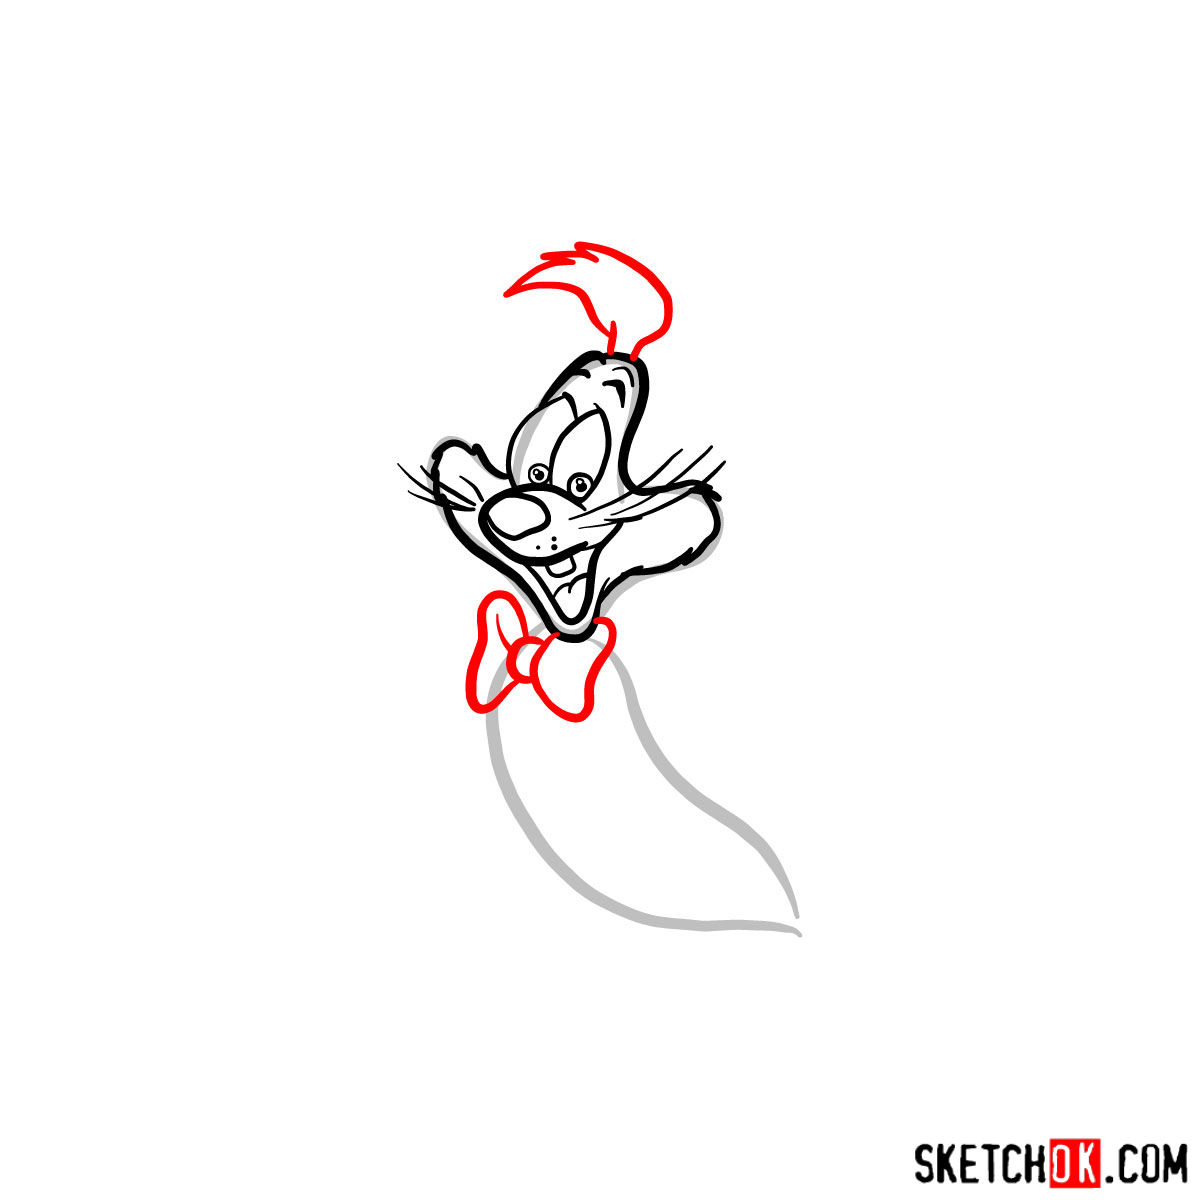
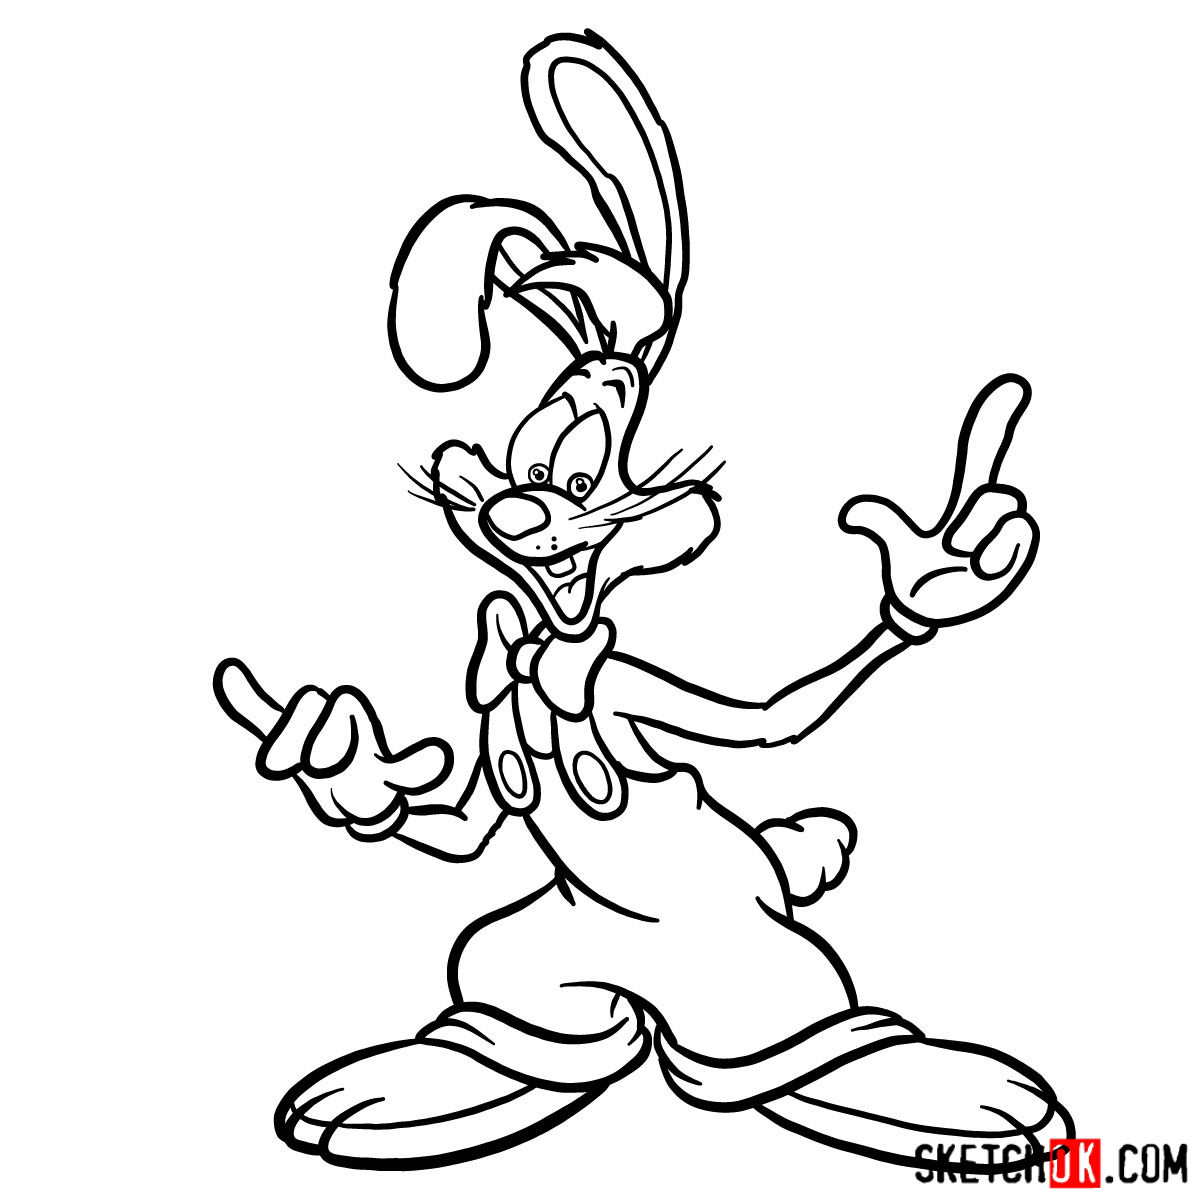
Roger Rabbit is an anthropomorphic rabbit, a testament to the classic animation era. He’s known for his oversized, expressive eyes and floppy rabbit ears, which add to his comical charm. Sporting red overalls and a jaunty blue bow tie, Roger’s attire complements his vibrant personality.
The character design involves various intricate details which include:
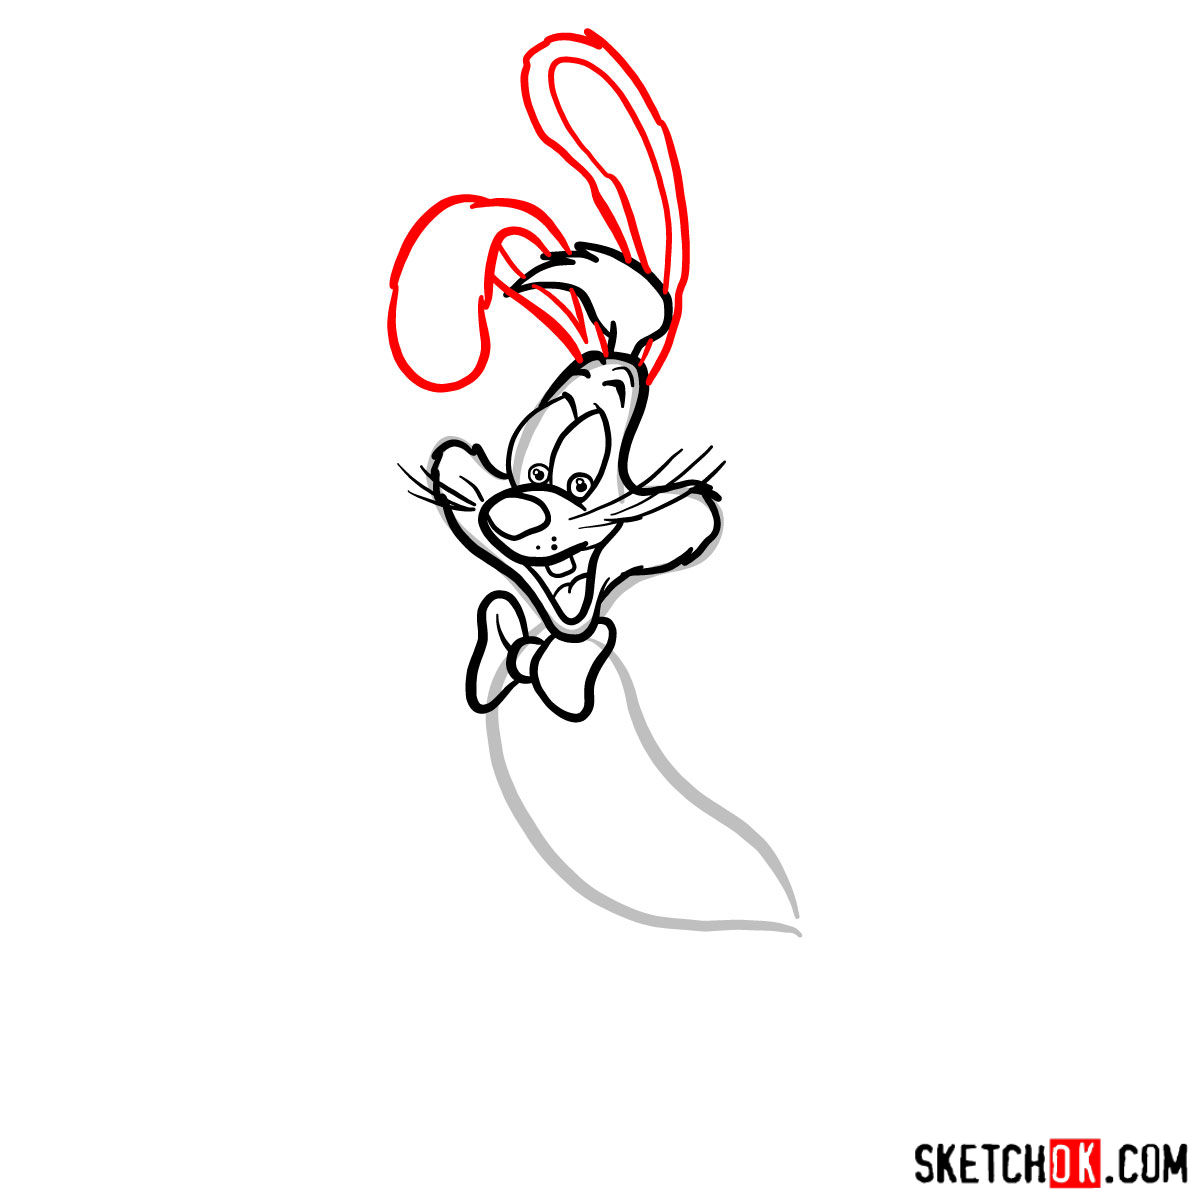
- Roger’s exaggerated long ears that flop at the top.
- His wide, round eyes, expressive eyebrows, and a perpetually surprised look.
- A round nose, and a big, toothy grin.
- Roger’s red overalls with large yellow buttons.
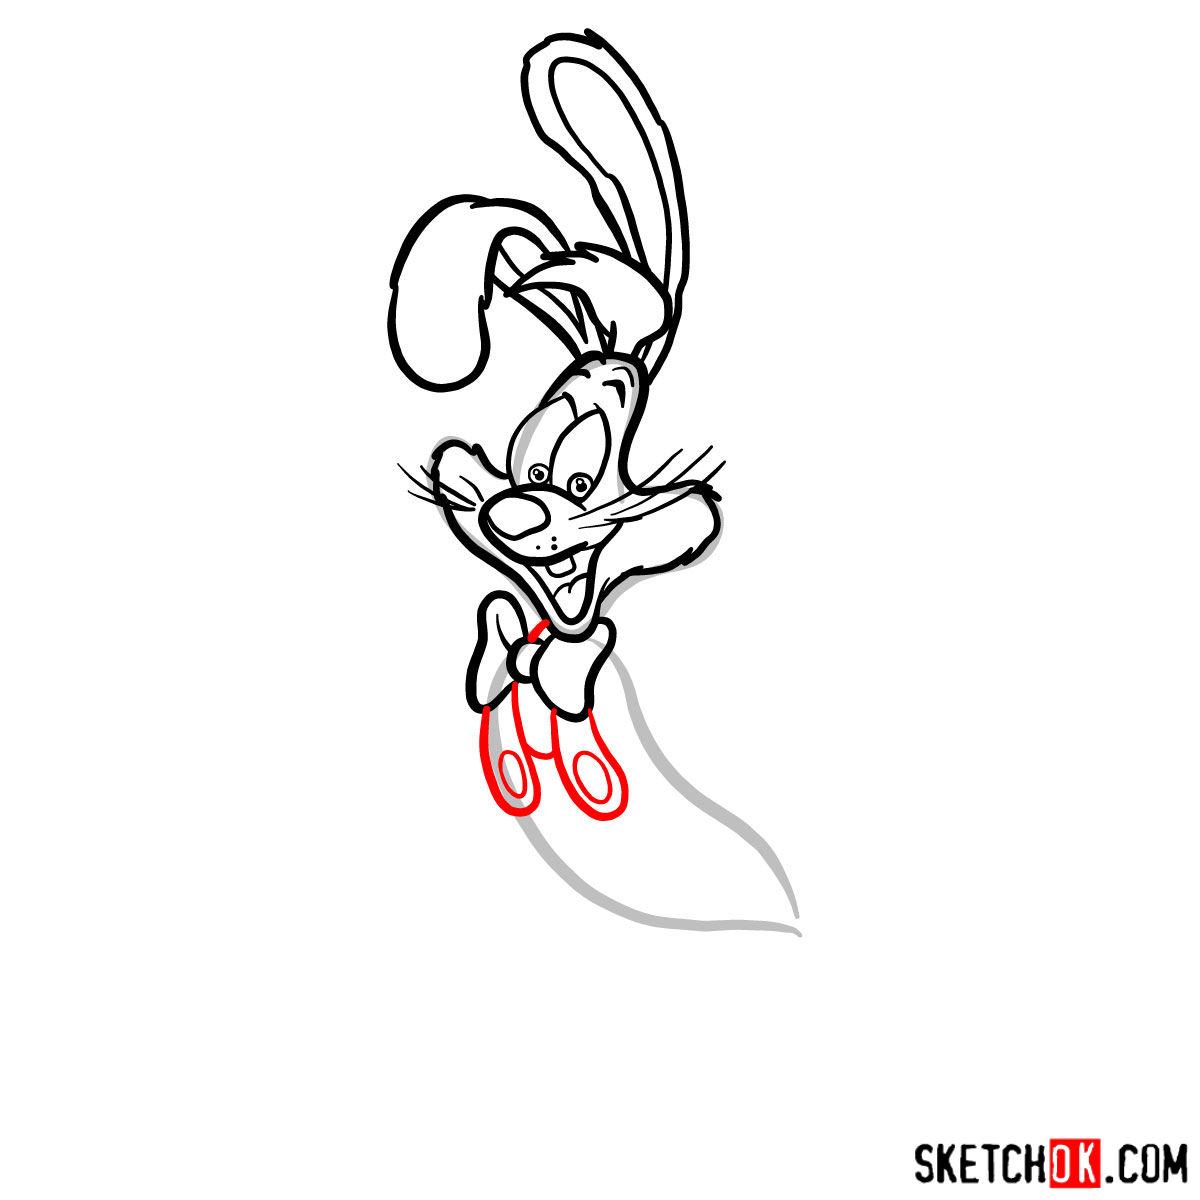
- His fluffy bunny tail.
As you sketch, consider adding characters like Bugs Bunny or Lola Bunny to the scene for an intriguing composition, or even Jessica Rabbit, enhancing the theme of ‘Toontown’.
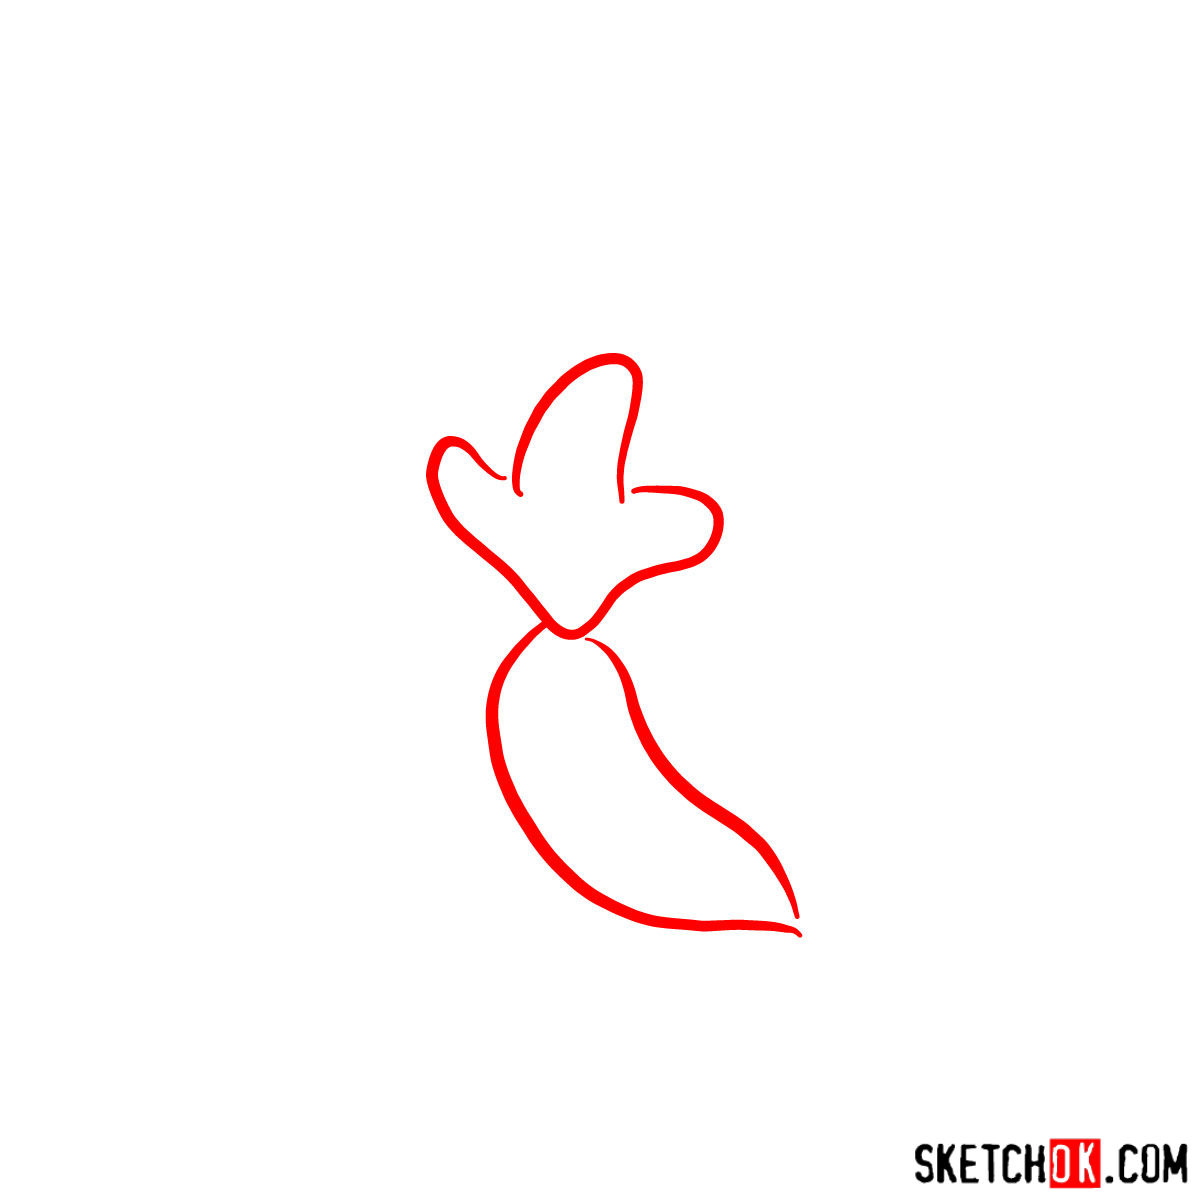
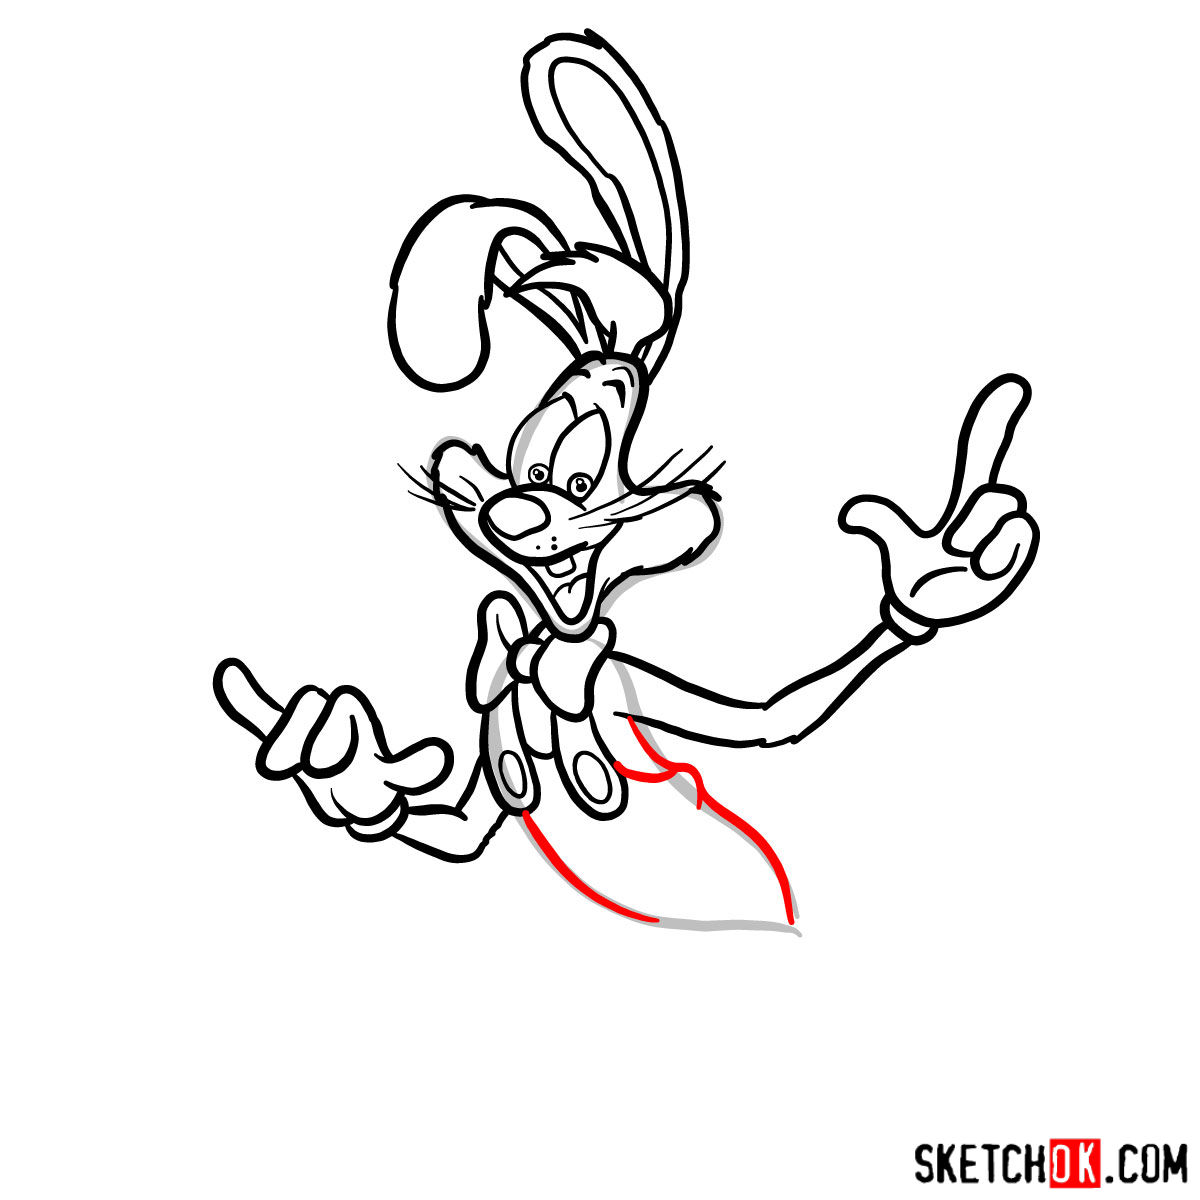
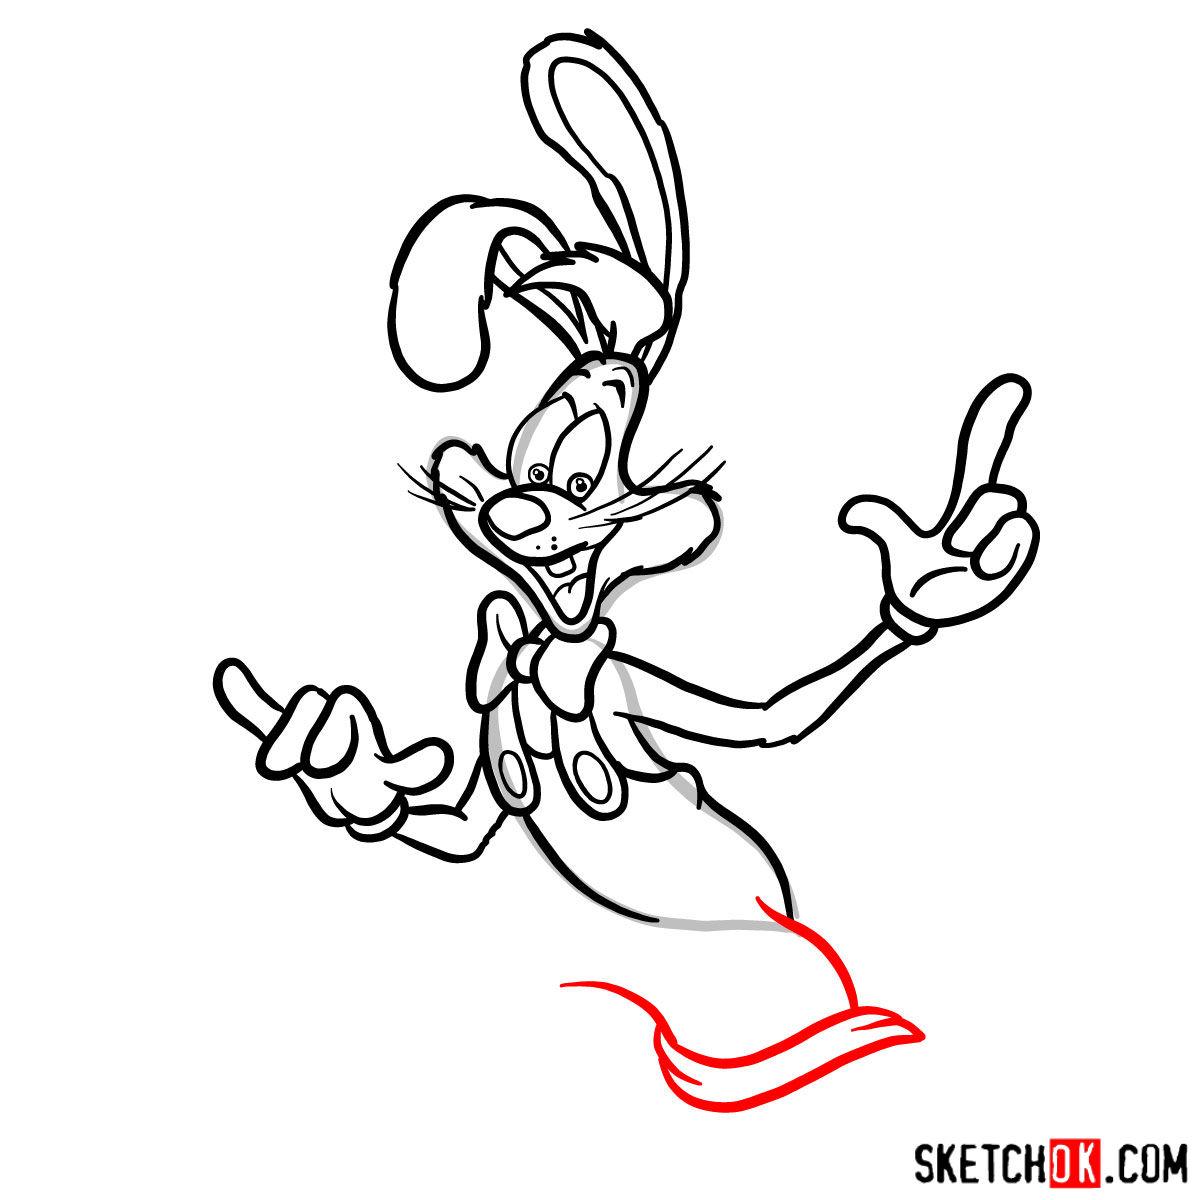
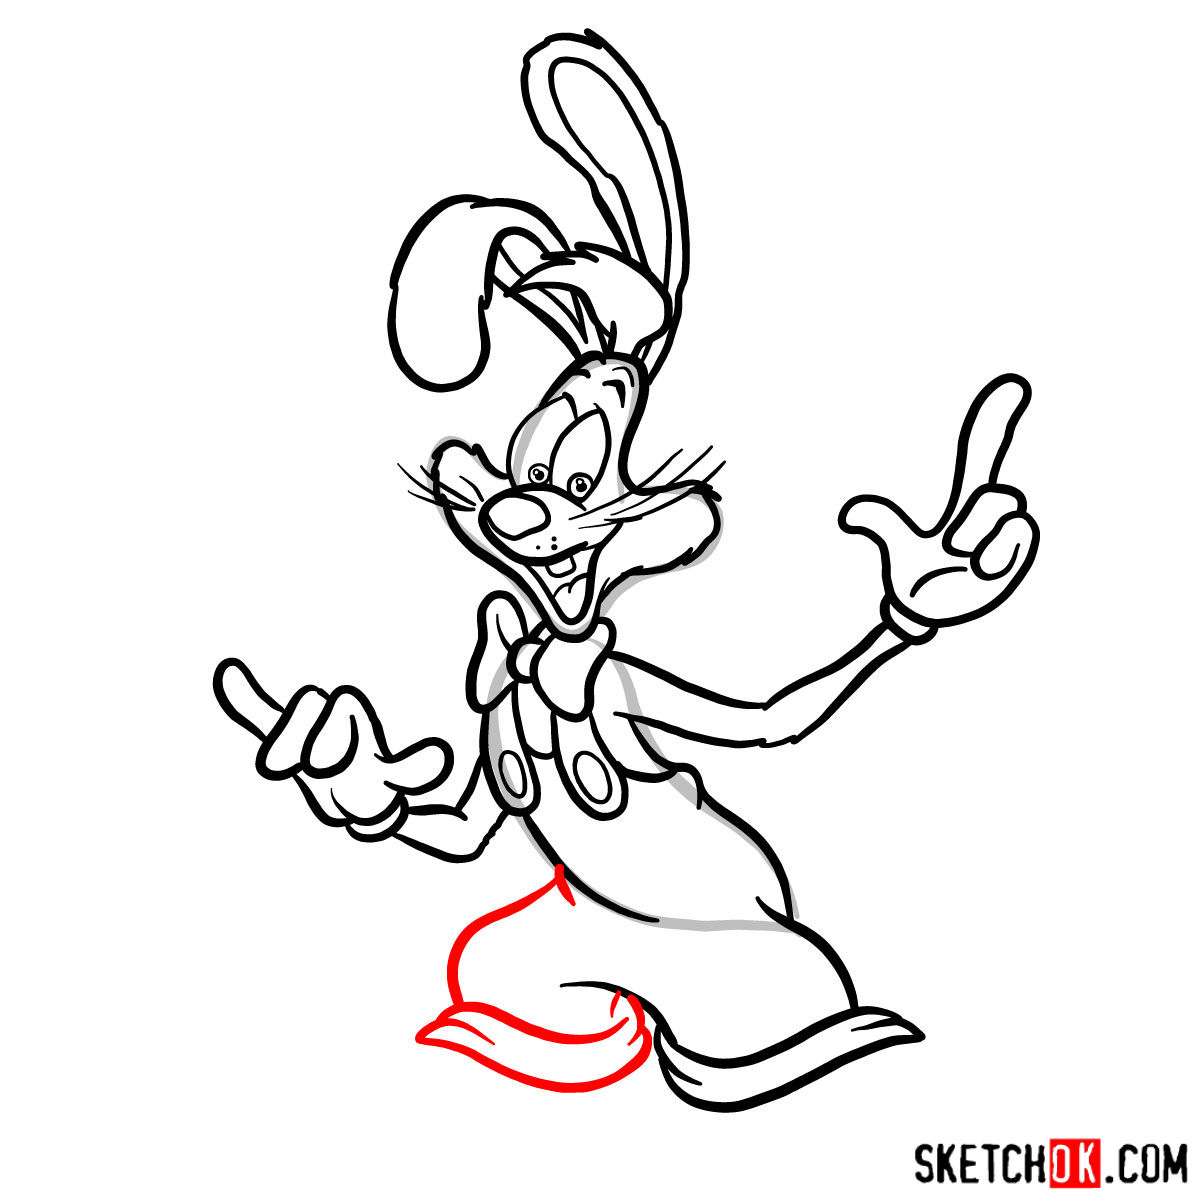
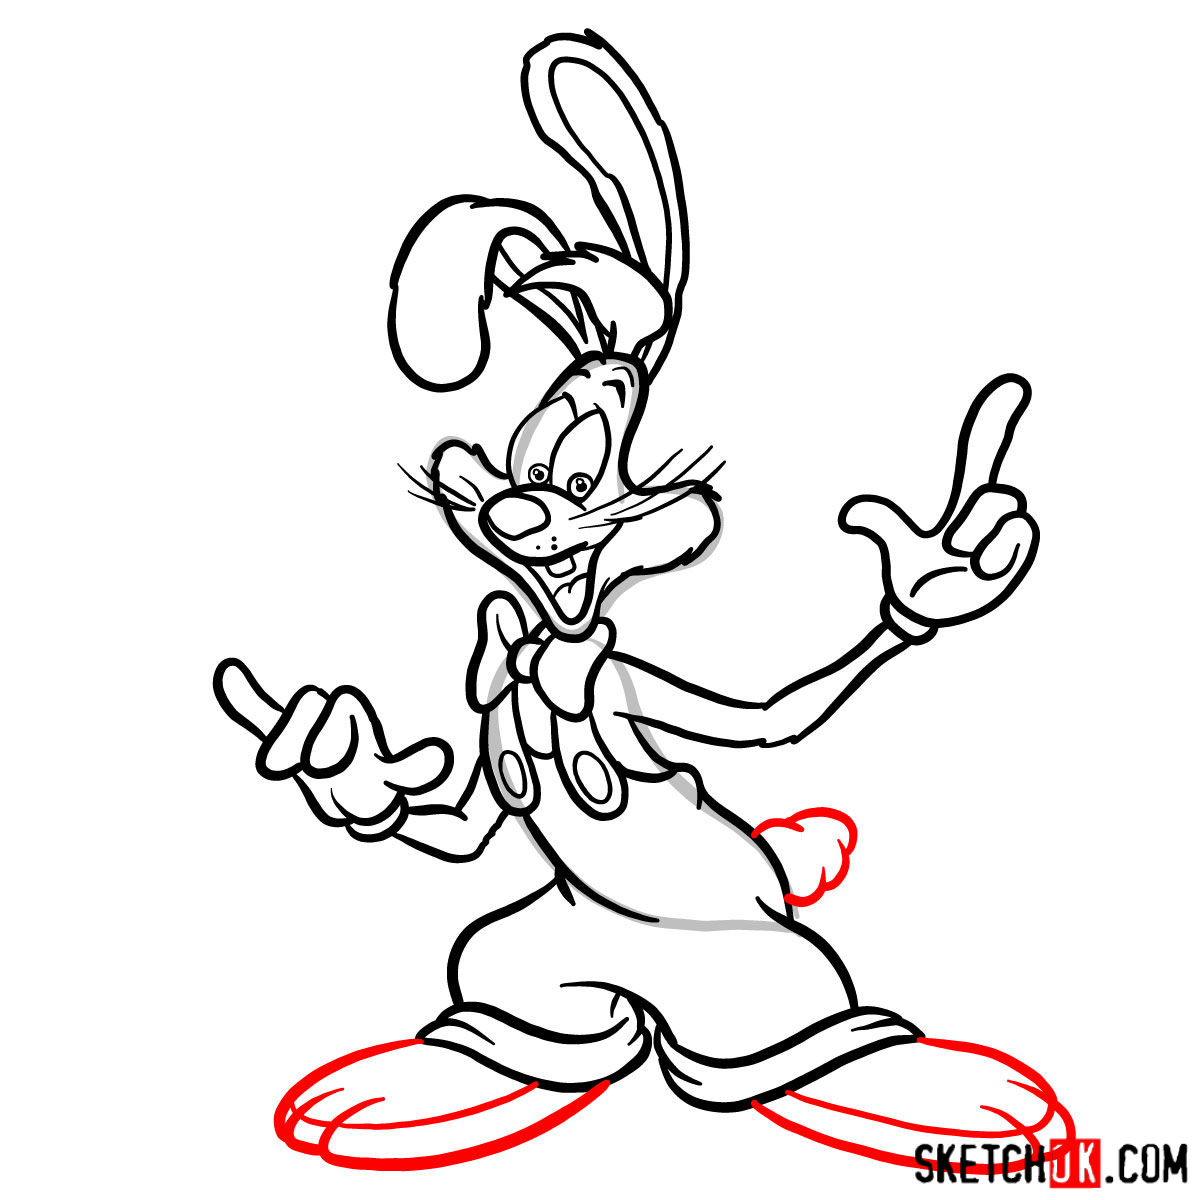
Understanding the Guide: Color Coding and Guidelines
Our drawing guide employs a straightforward color-coding system to assist you in navigating the 15-step process:
- Red Color: Highlights the current drawing step.
- Black Color: Depicts the lines you have previously drawn.
- Grey Color: Represents the basic sketch or under-drawing, serving as a guide for proportions and alignments.
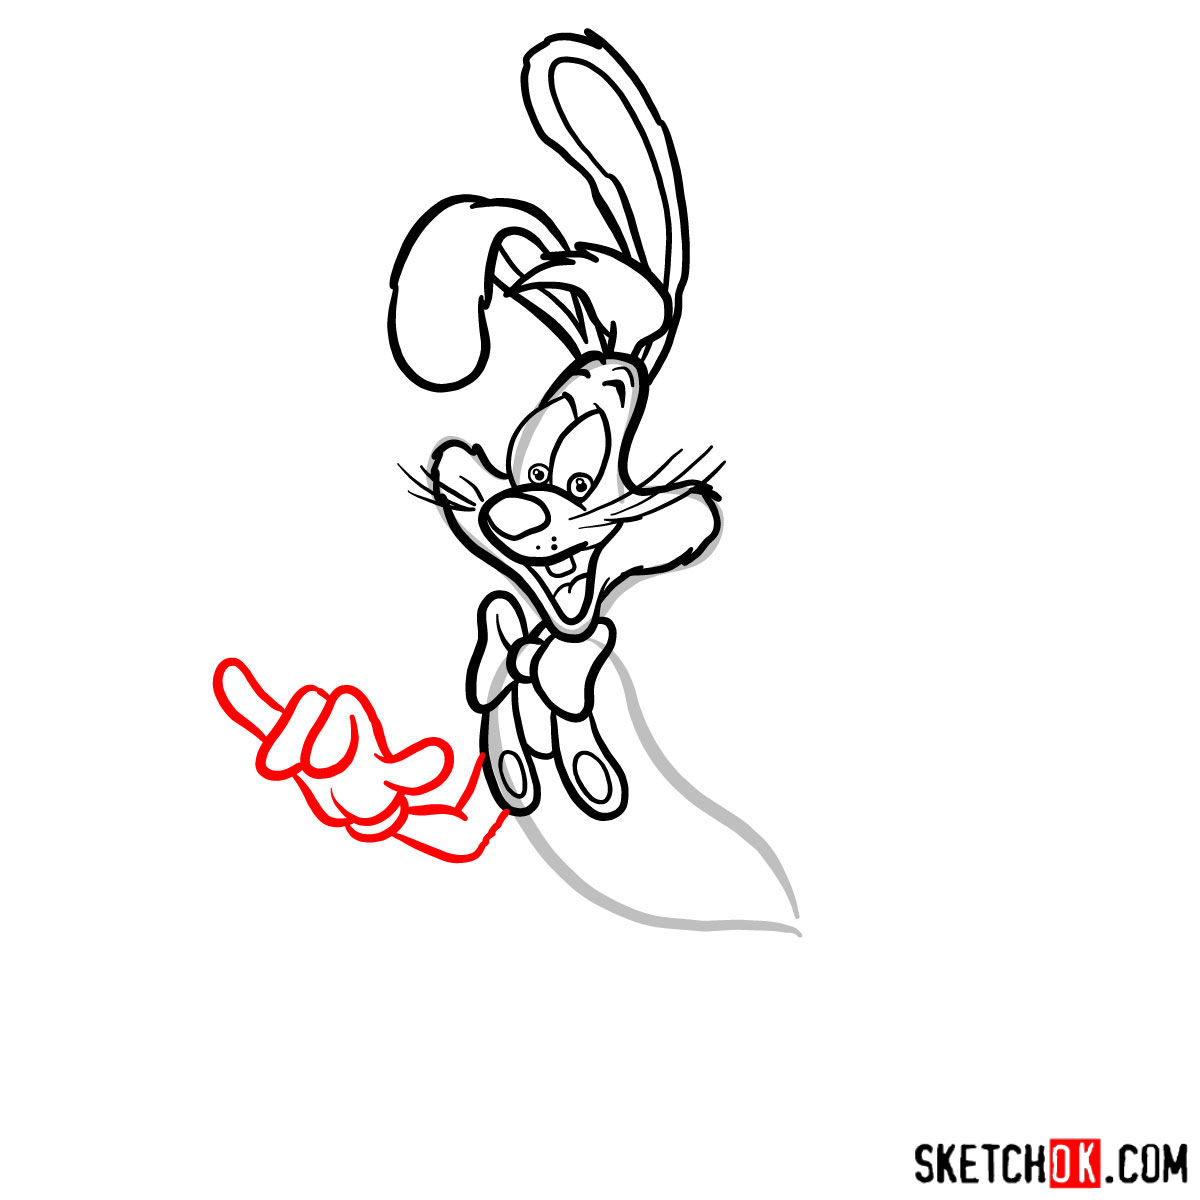
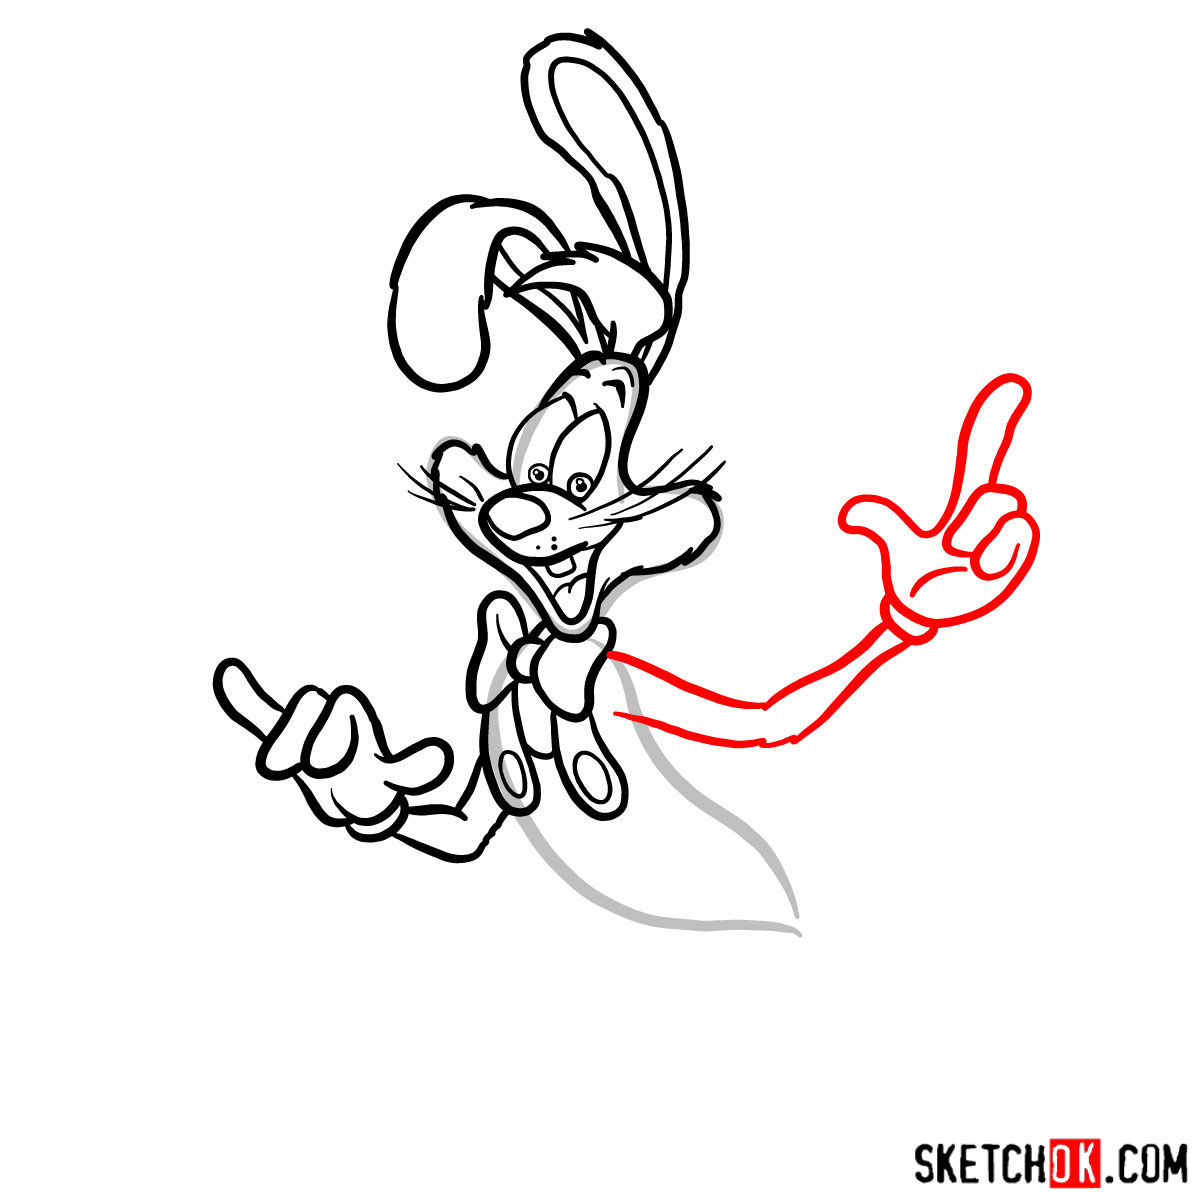
Starting with a basic sketch, you will build your drawing in stages. The last step gives you the option to ink the sketch. Inking is done with a pen or marker, going over the pencil lines once they’re perfected. It’s important to let the ink dry to avoid smudging, and afterward, gently erase the initial pencil lines for a clean, vibrant final drawing.


One of the more interesting things about learning how to draw Roger Rabbit is seeing how differently people interpret his rubbery, expressive look, since some artists lean into the chaos while others clean him up into something almost refined. Drop your version in the comments on the pinned Pinterest post and see how it stacks up against what others came up with. If you want a steady stream of new guides, the signup form at the top of the page gets you a weekly digest.