Home » Anime » One Piece » How to Draw Luffy’s Gear 3 Without Haki

How to Draw Luffy’s Gear 3 Without Haki

For fans of the iconic anime and manga series, One Piece, Luffy’s Gear 3 transformation without haki isn’t just a technique—it’s an art form. As the Straw Hat Pirates journey across the Grand Line, the Gomu Gomu no Mi unveils new strengths, and one of the most awe-inspiring among them is Gear 3. Today, we dive deep into bringing this legendary transformation to paper.

Capturing Luffy in Mid-Air Majesty

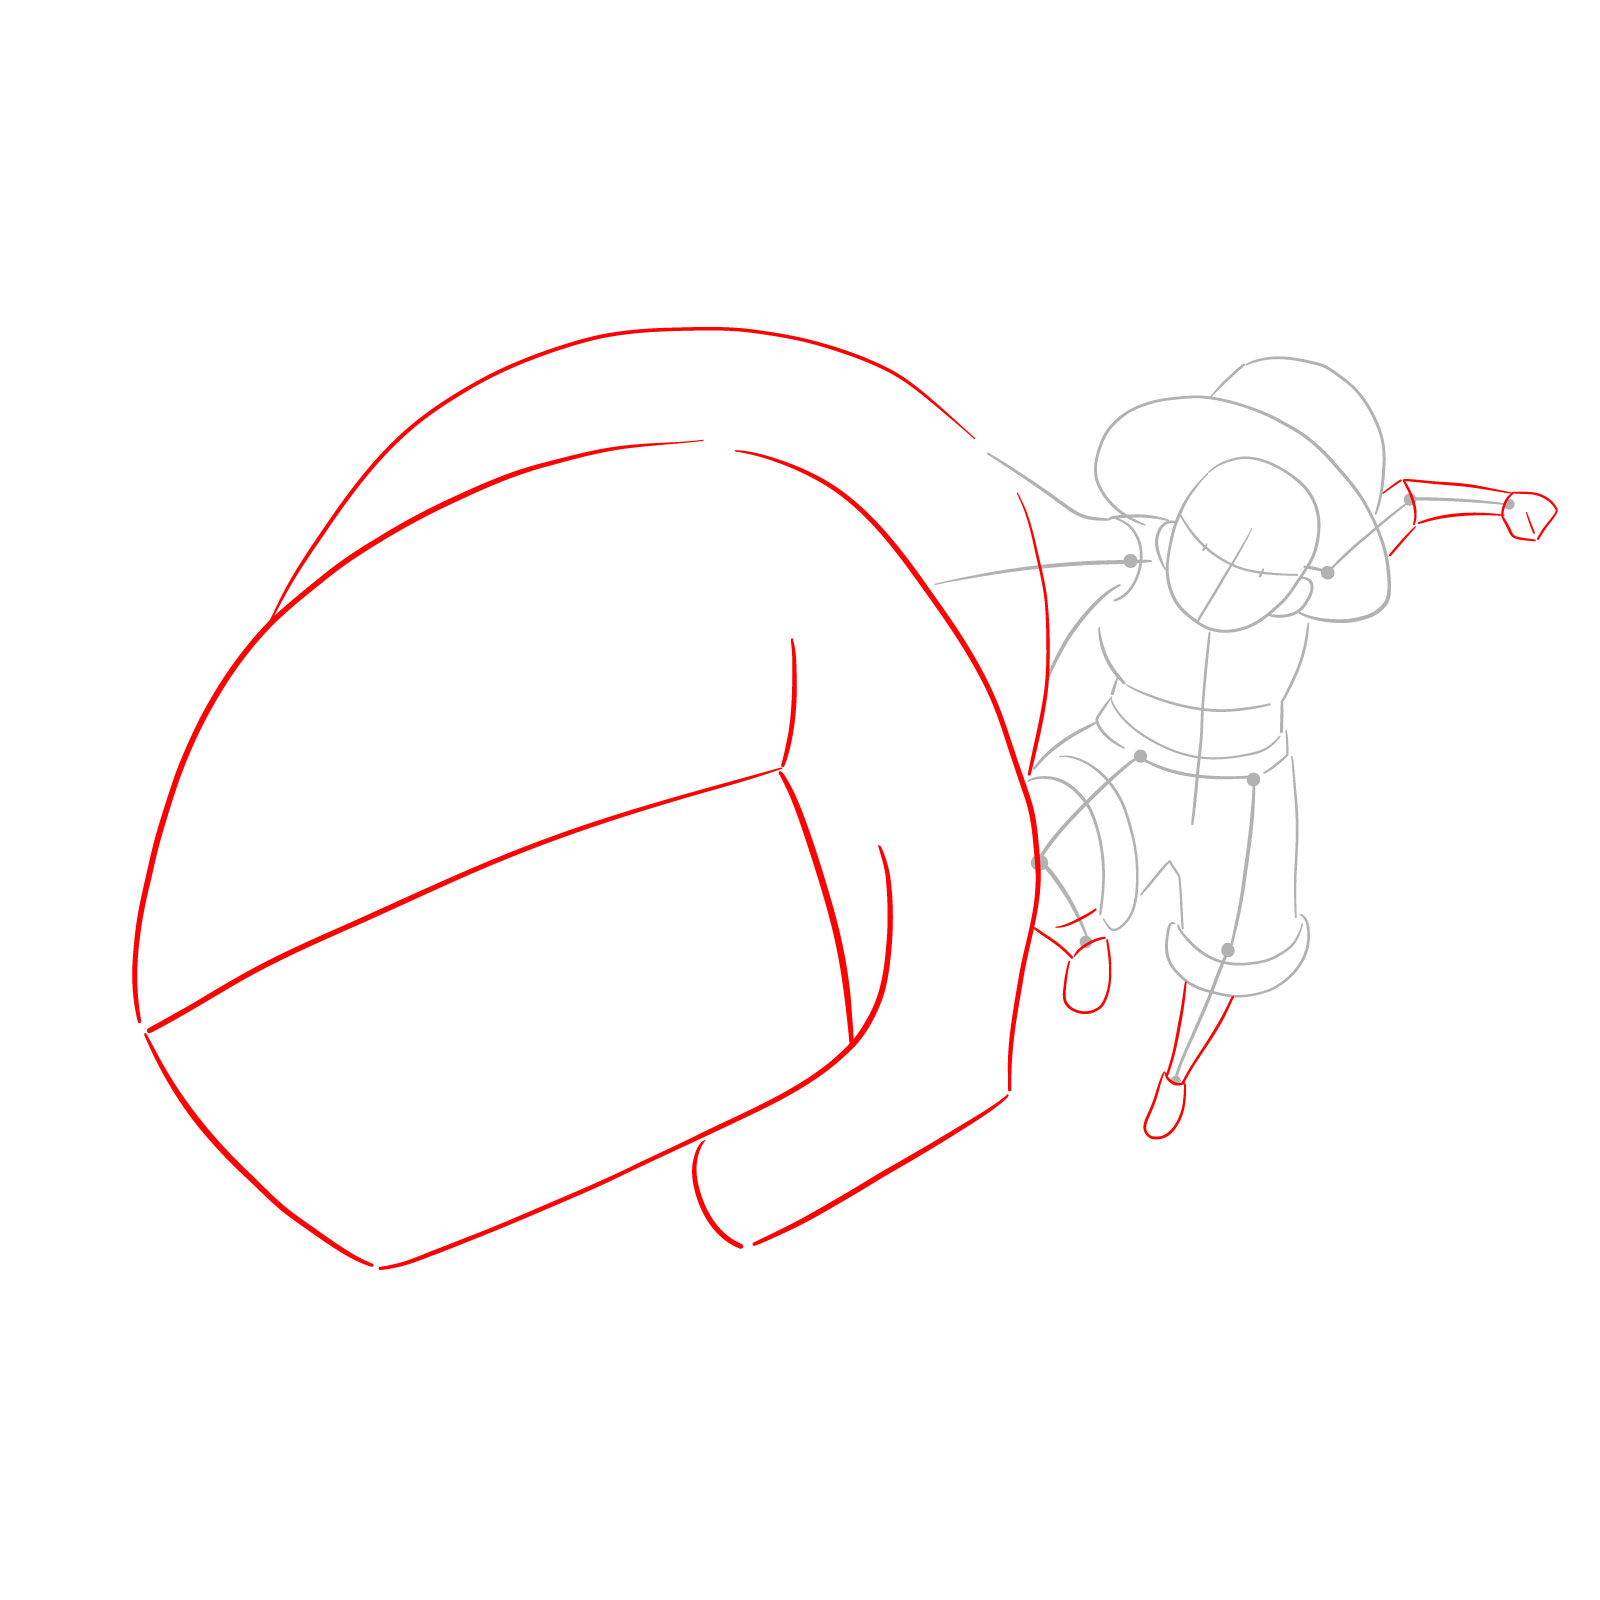
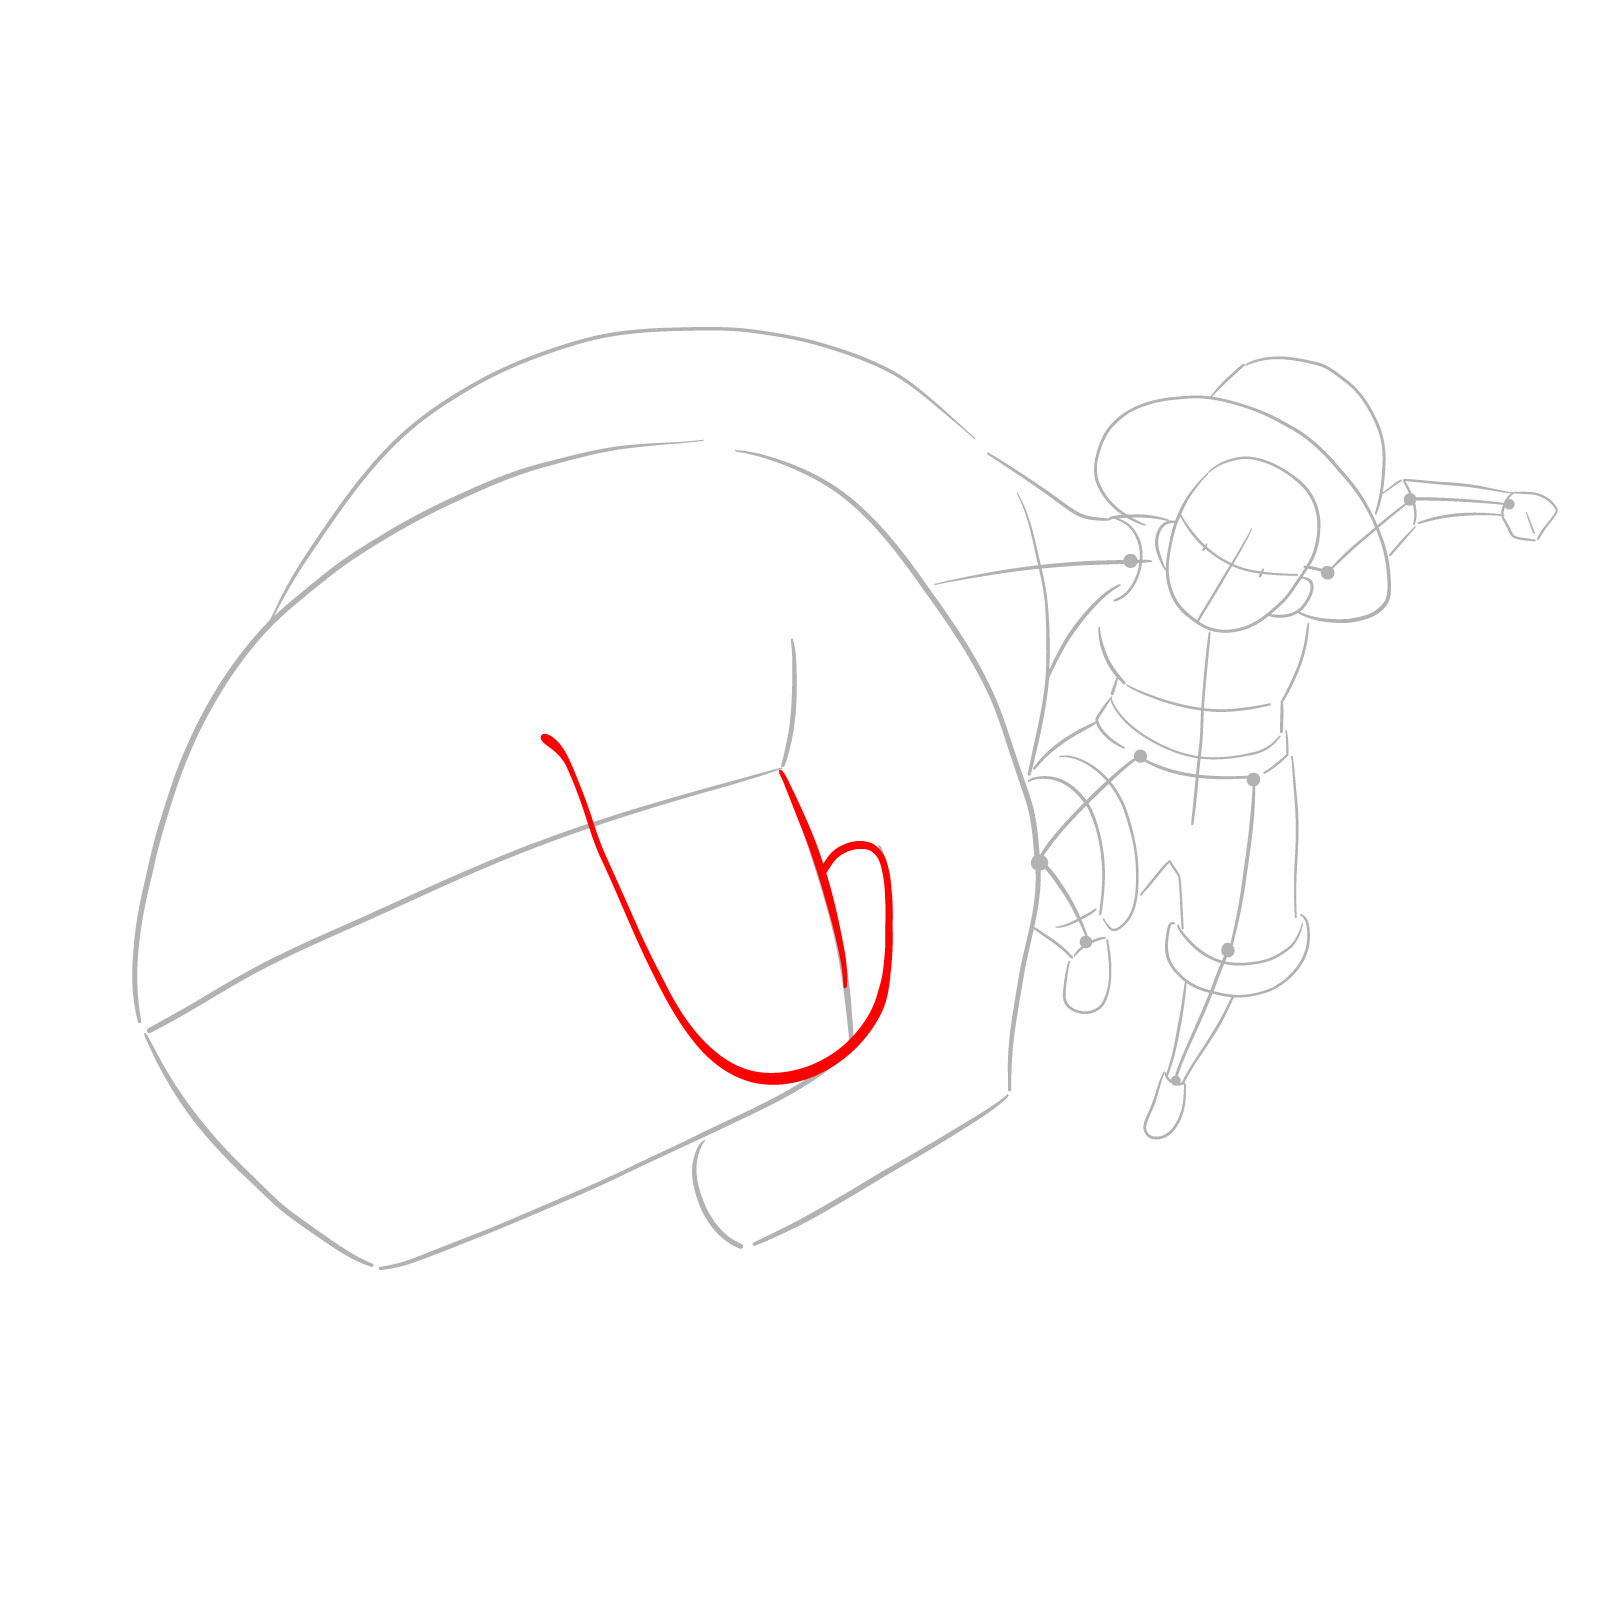
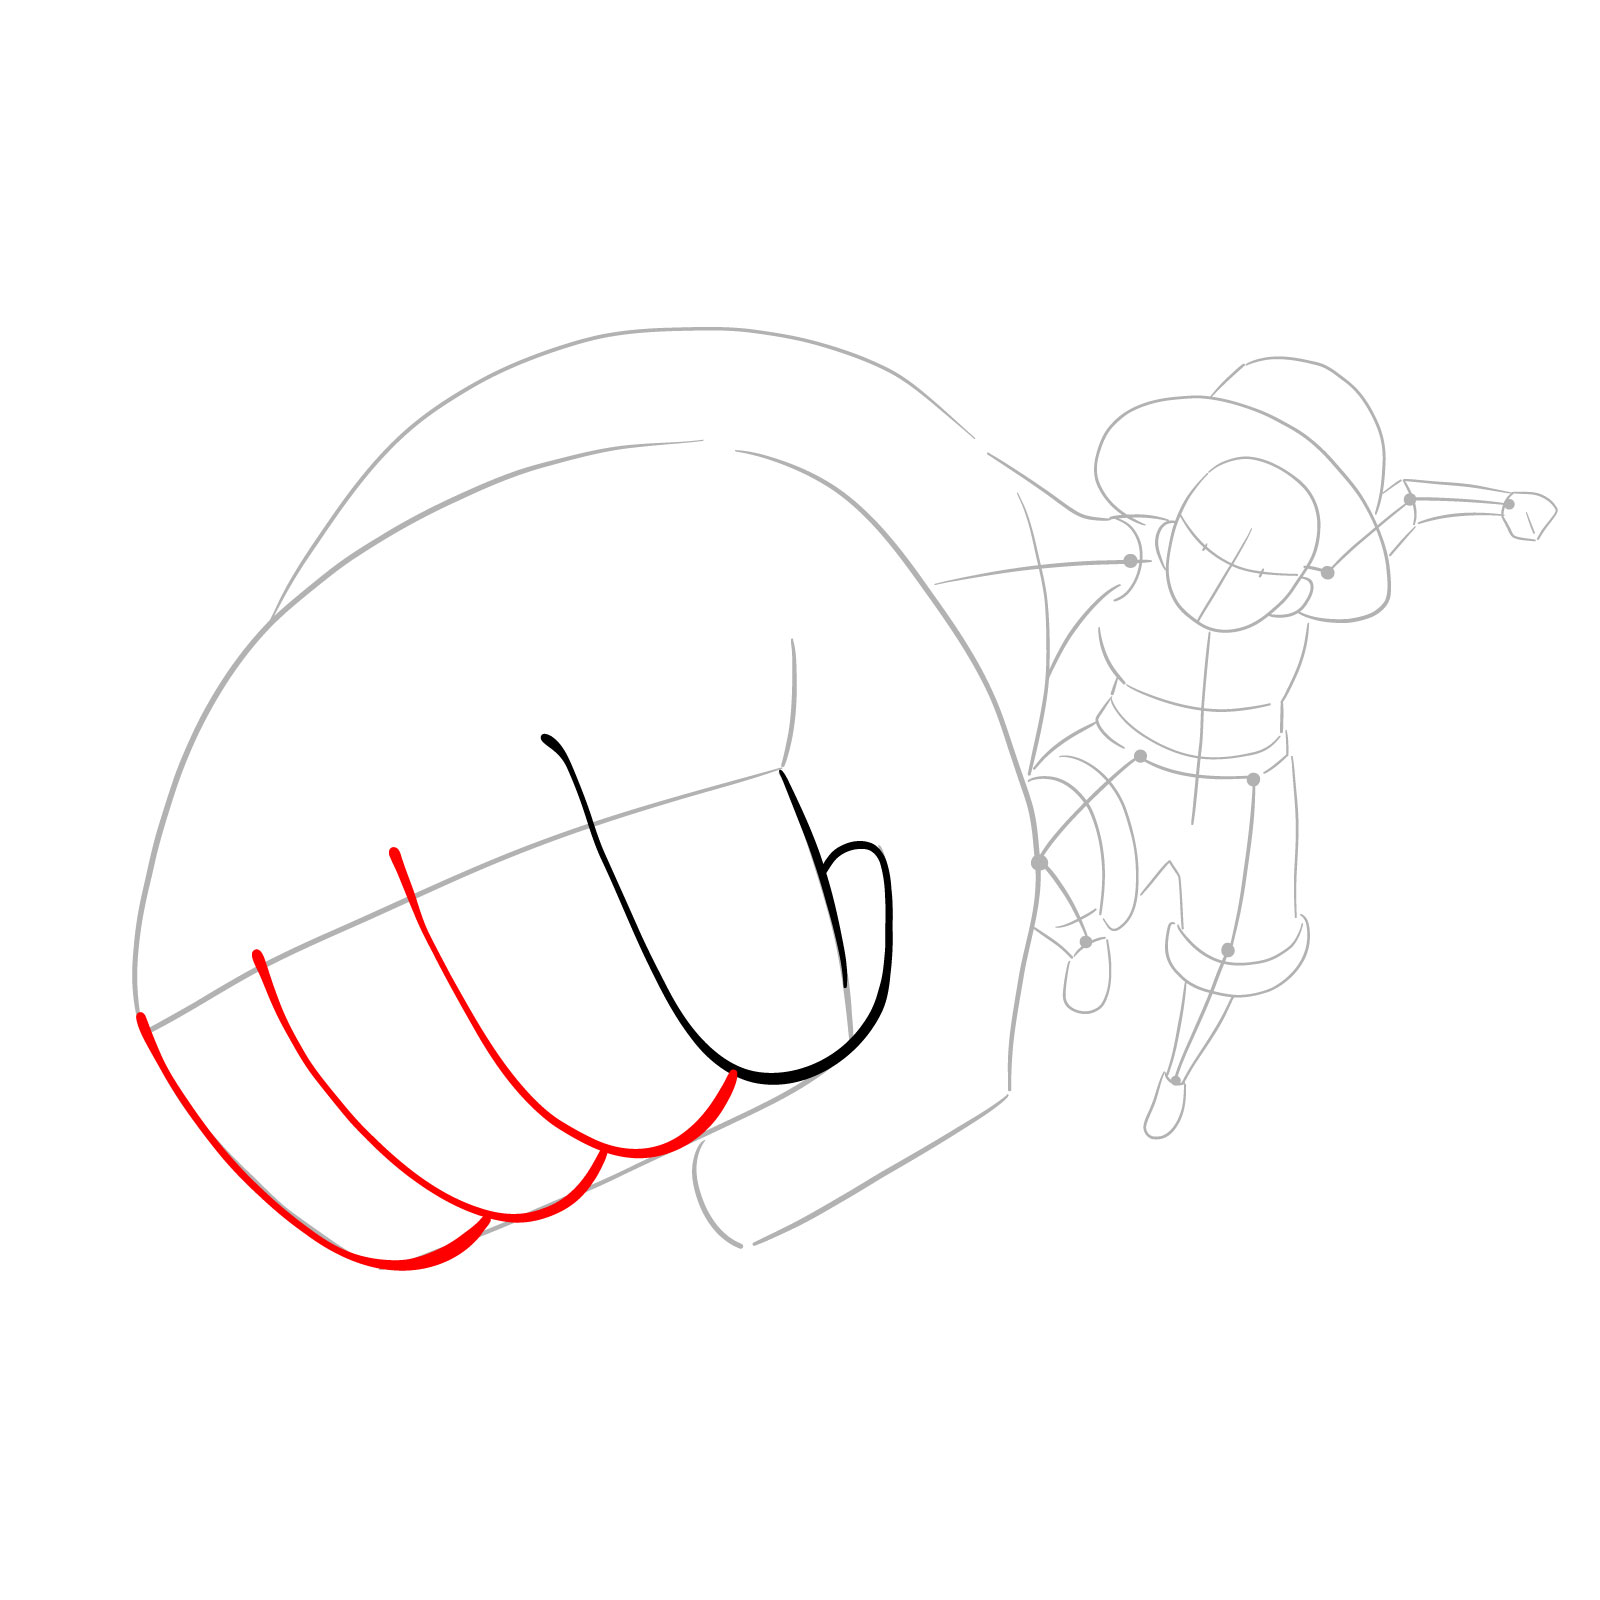
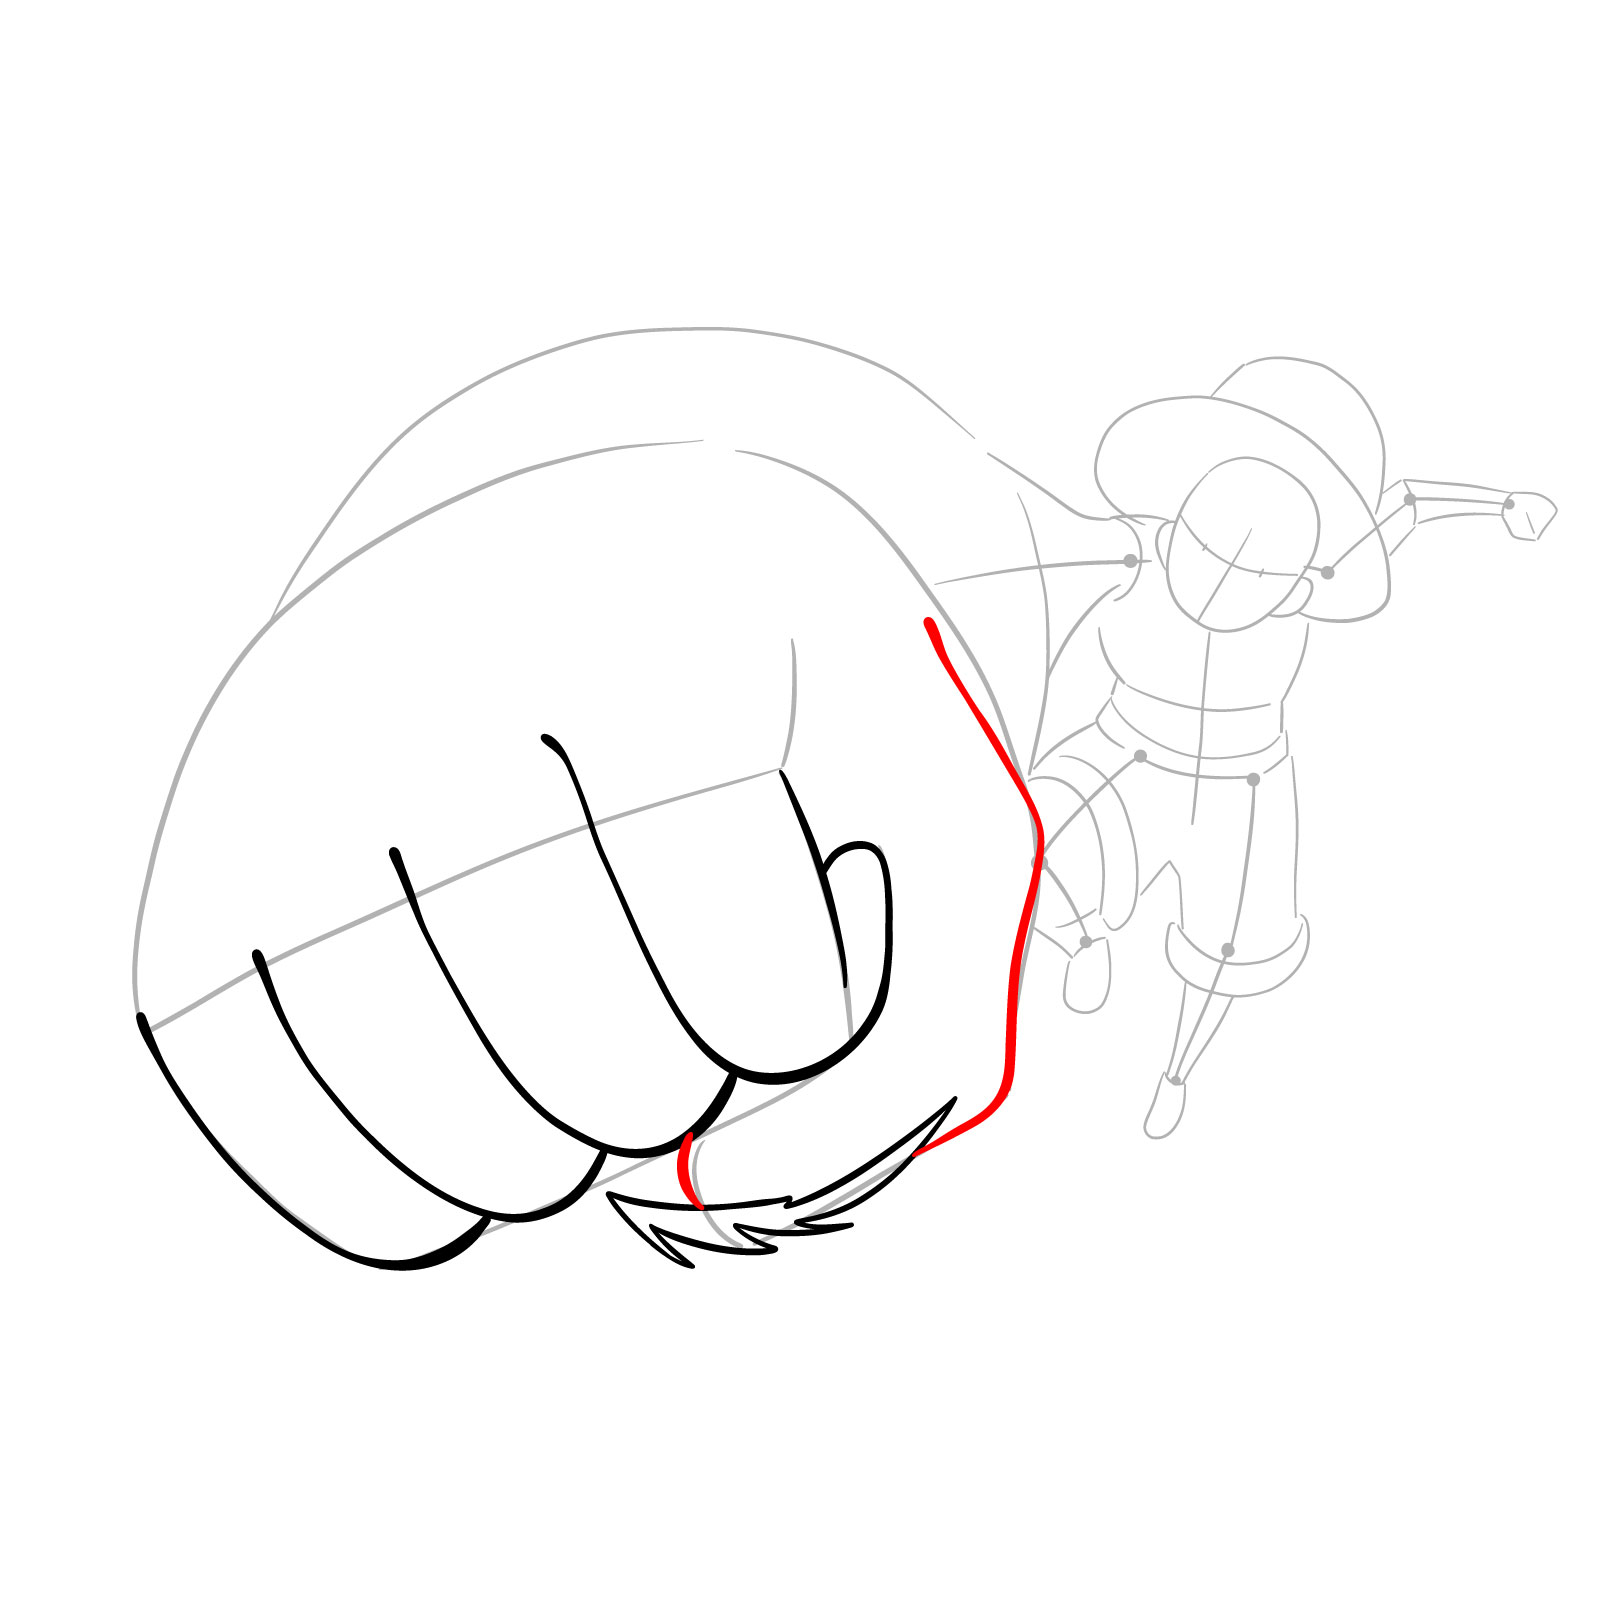
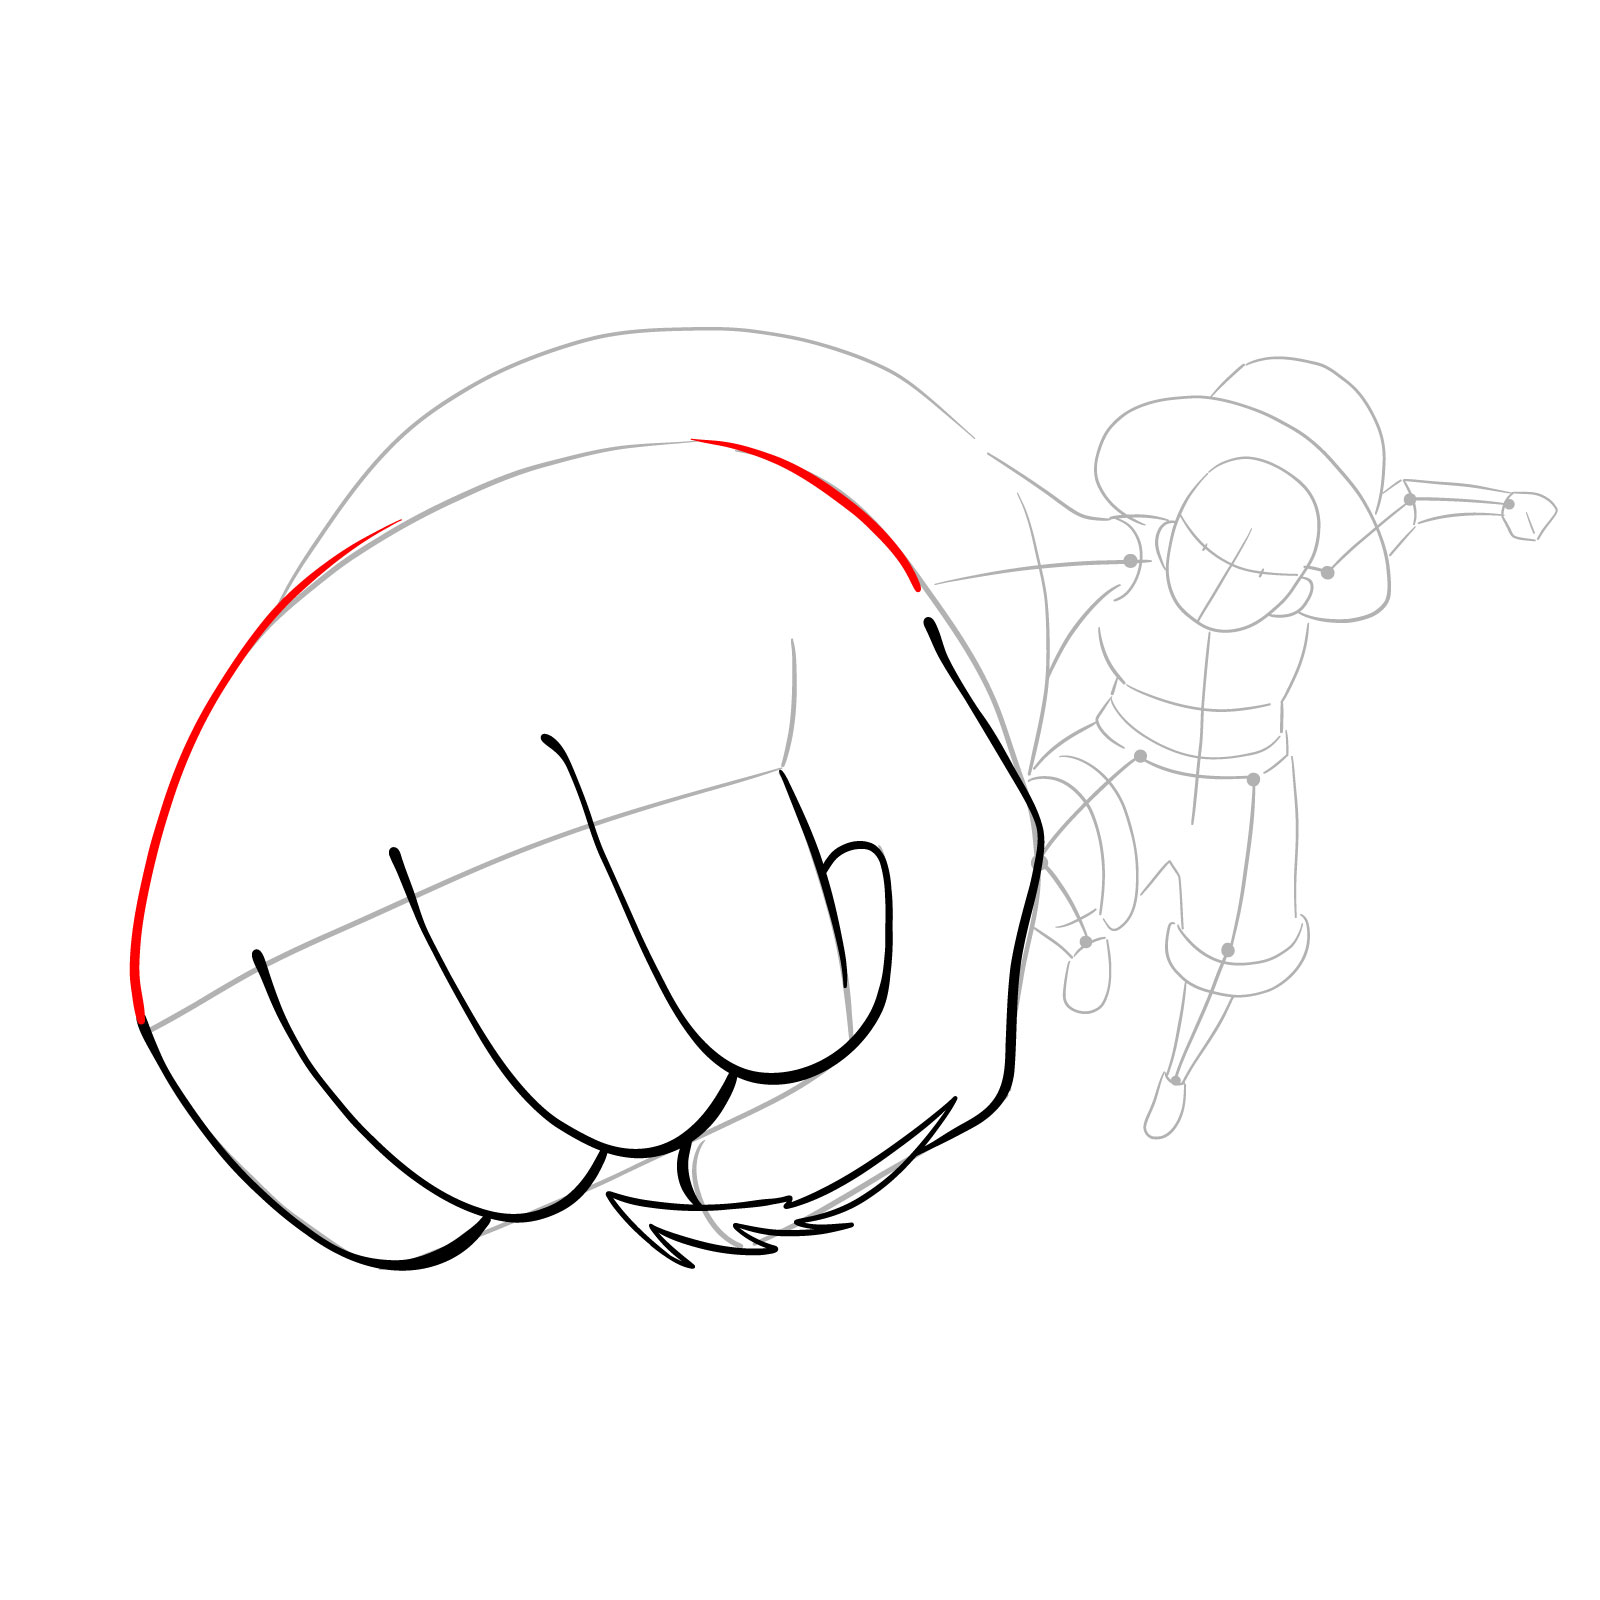
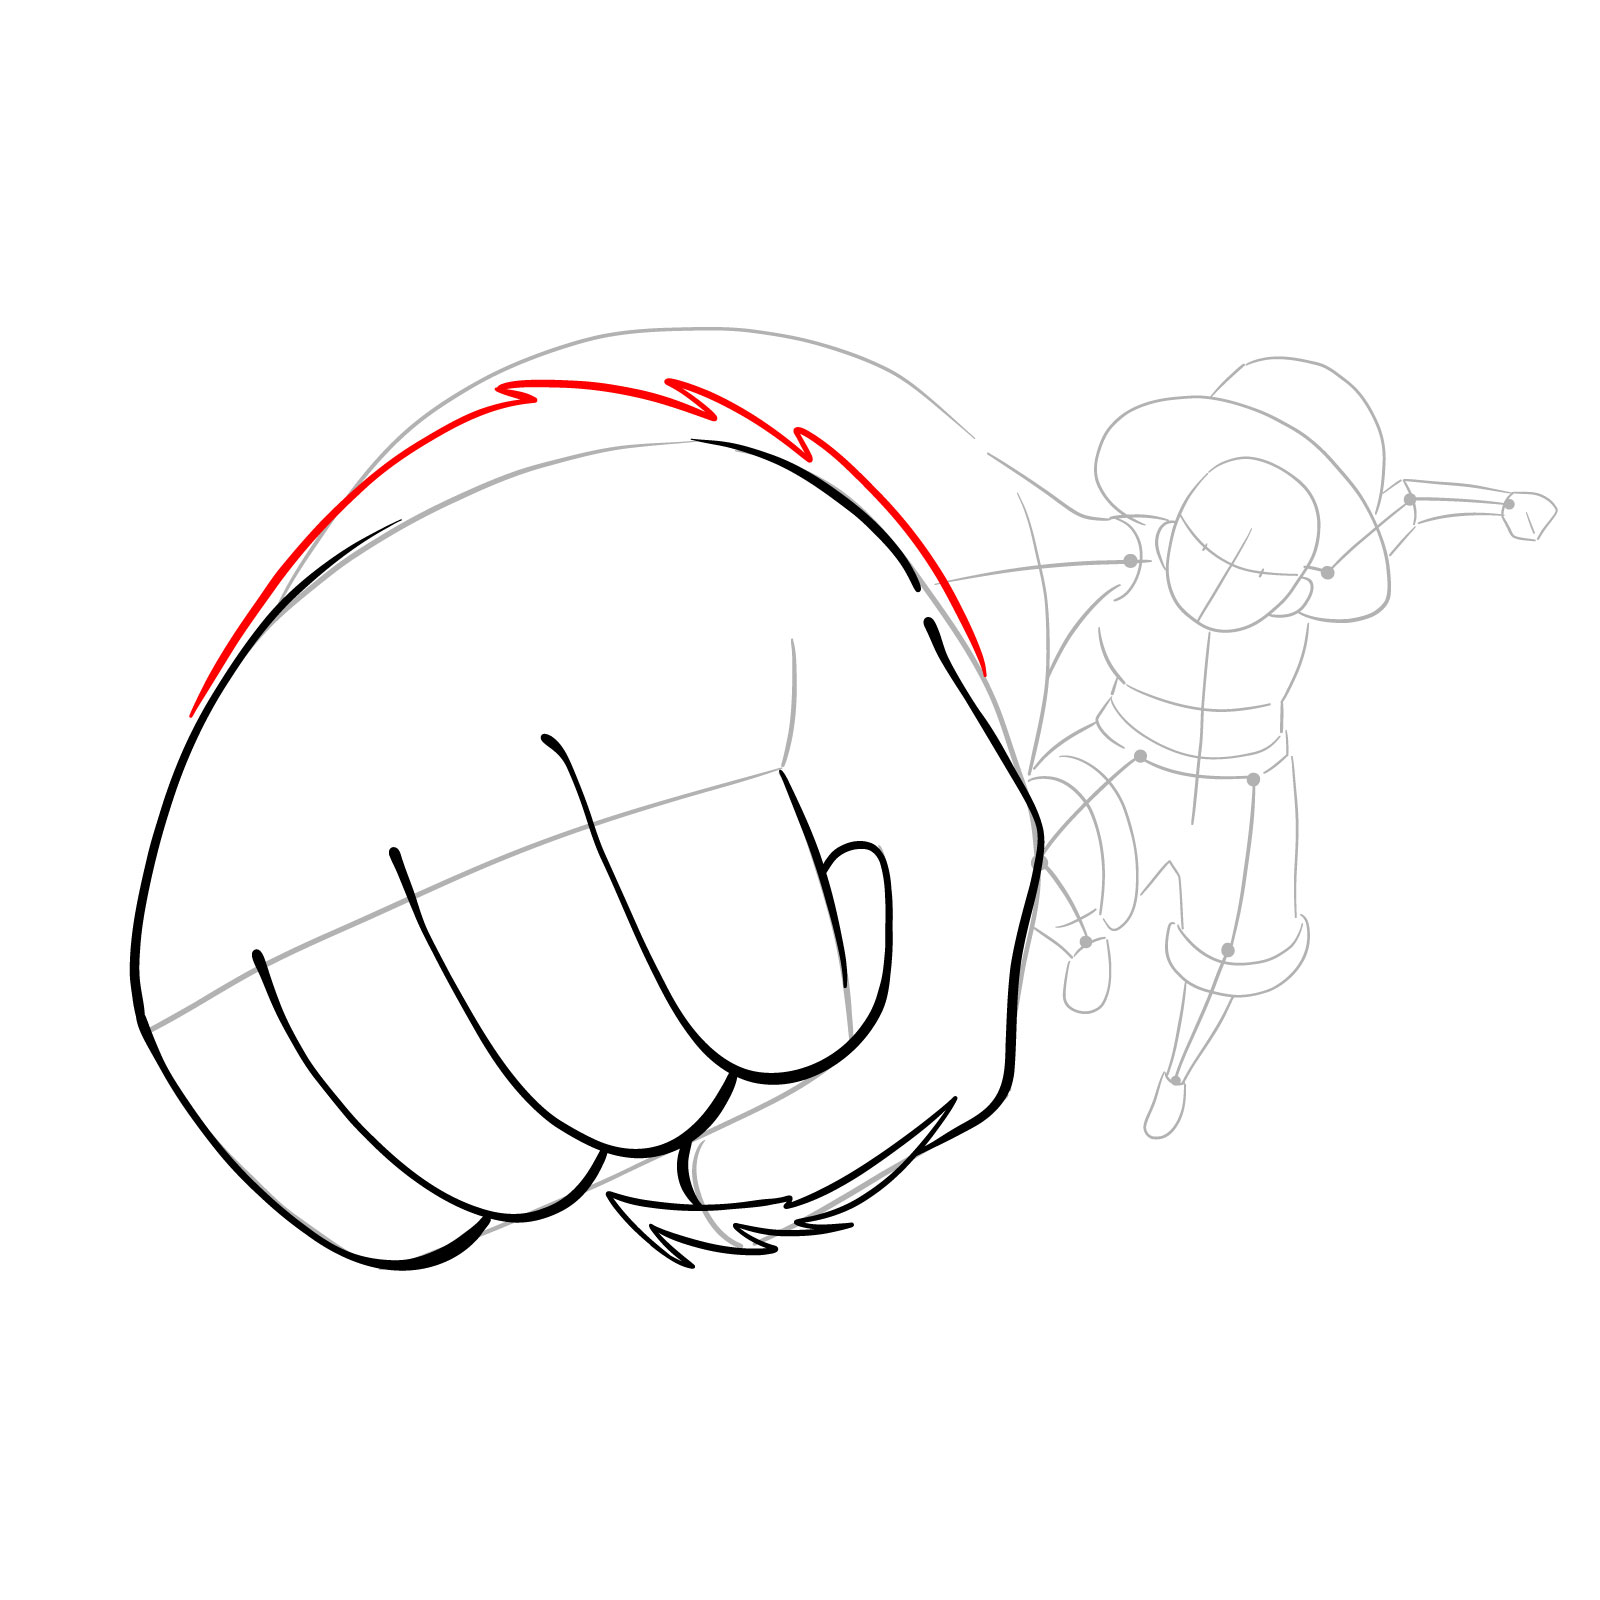
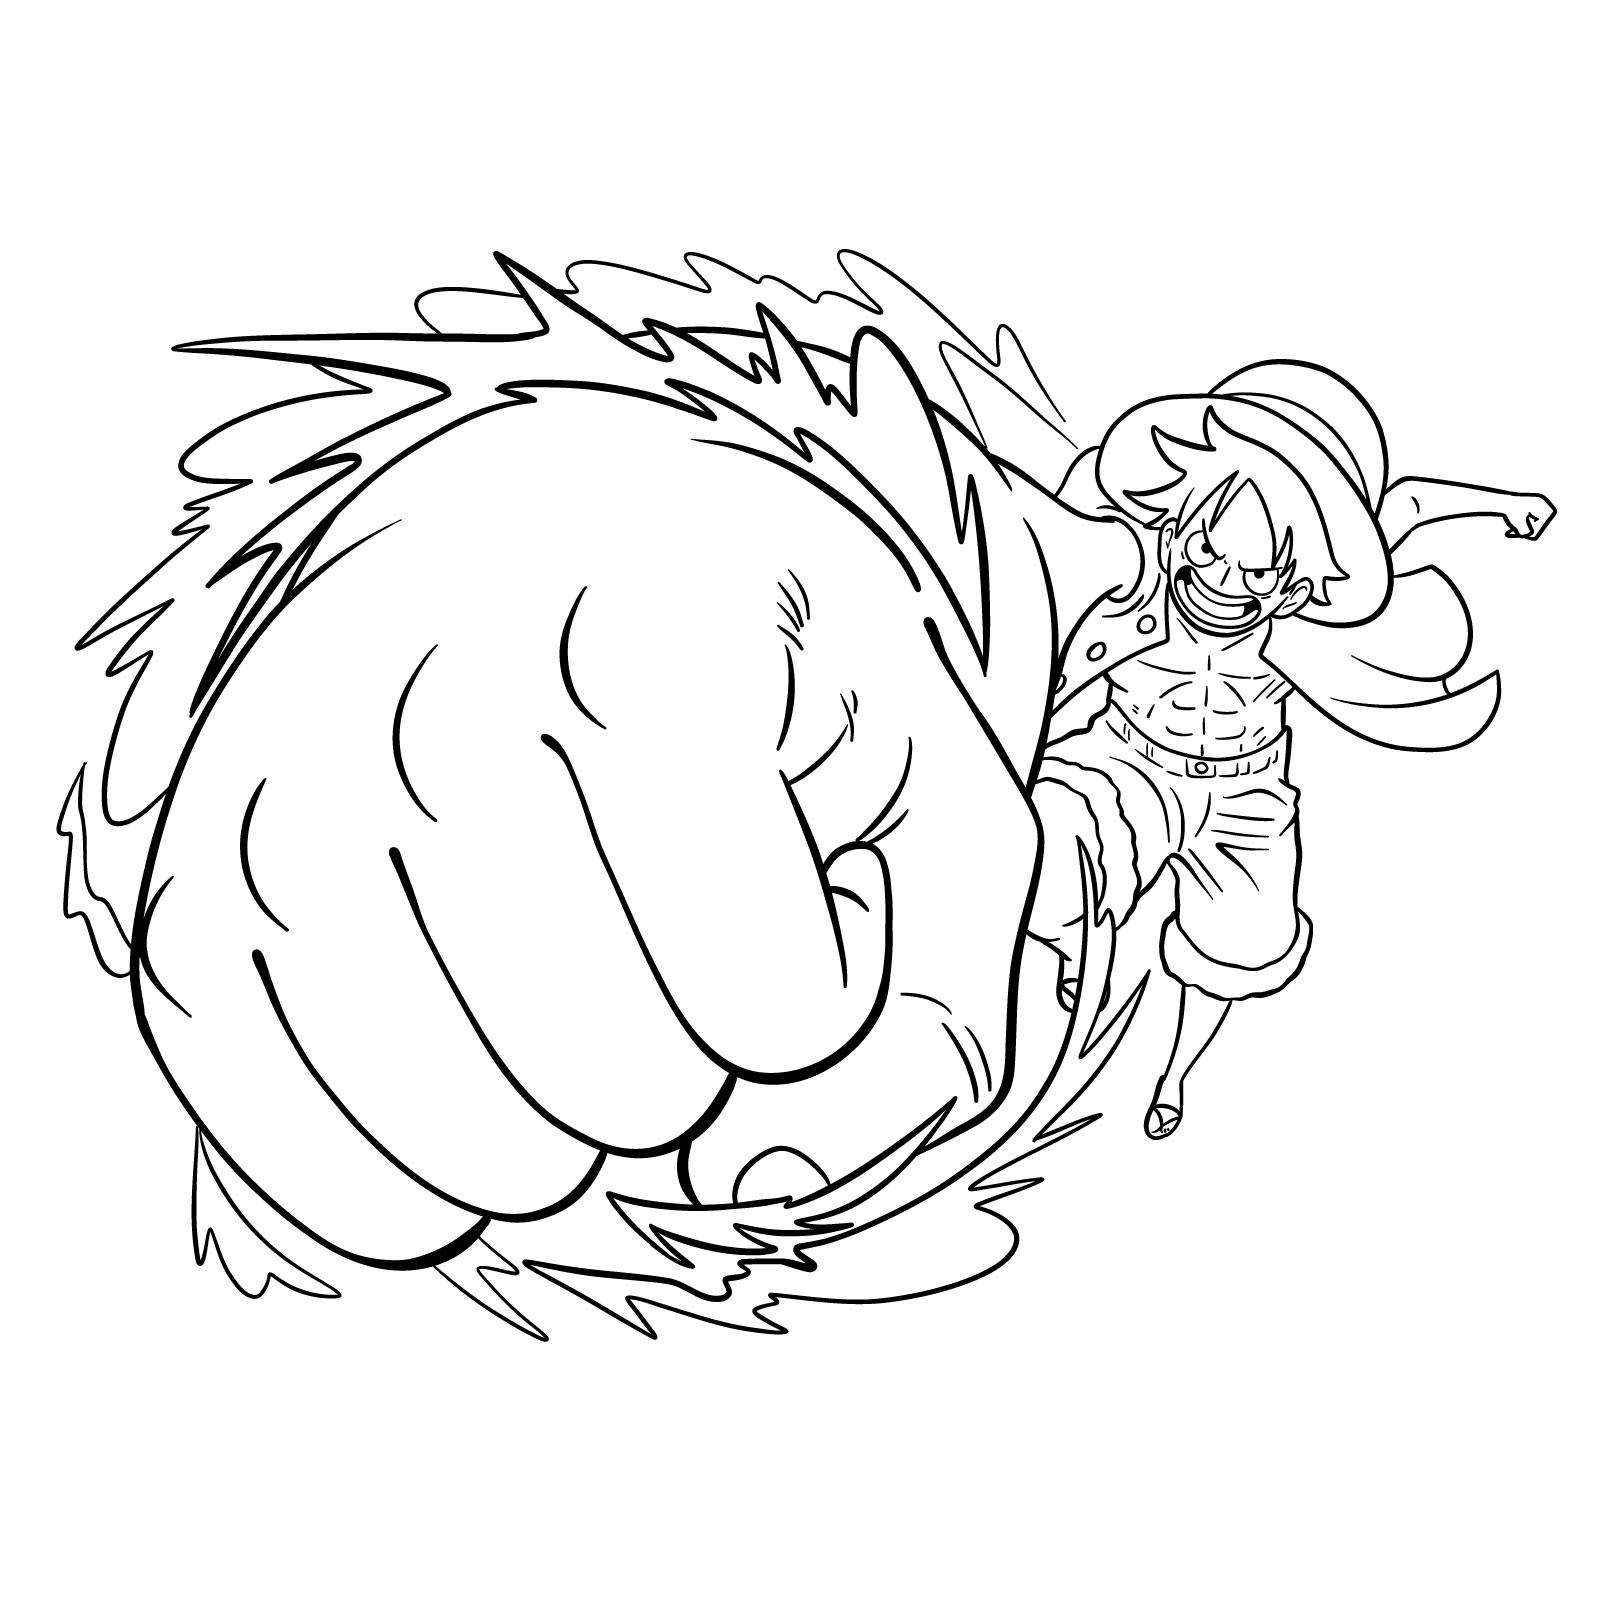
  • The Inflated Fist: It’s all about the size, with details giving it the necessary depth and sense of weight.
  • Dynamic Pose: Luffy’s airborne stance is not only about elevation but the raw emotion and anticipation of a mighty strike.
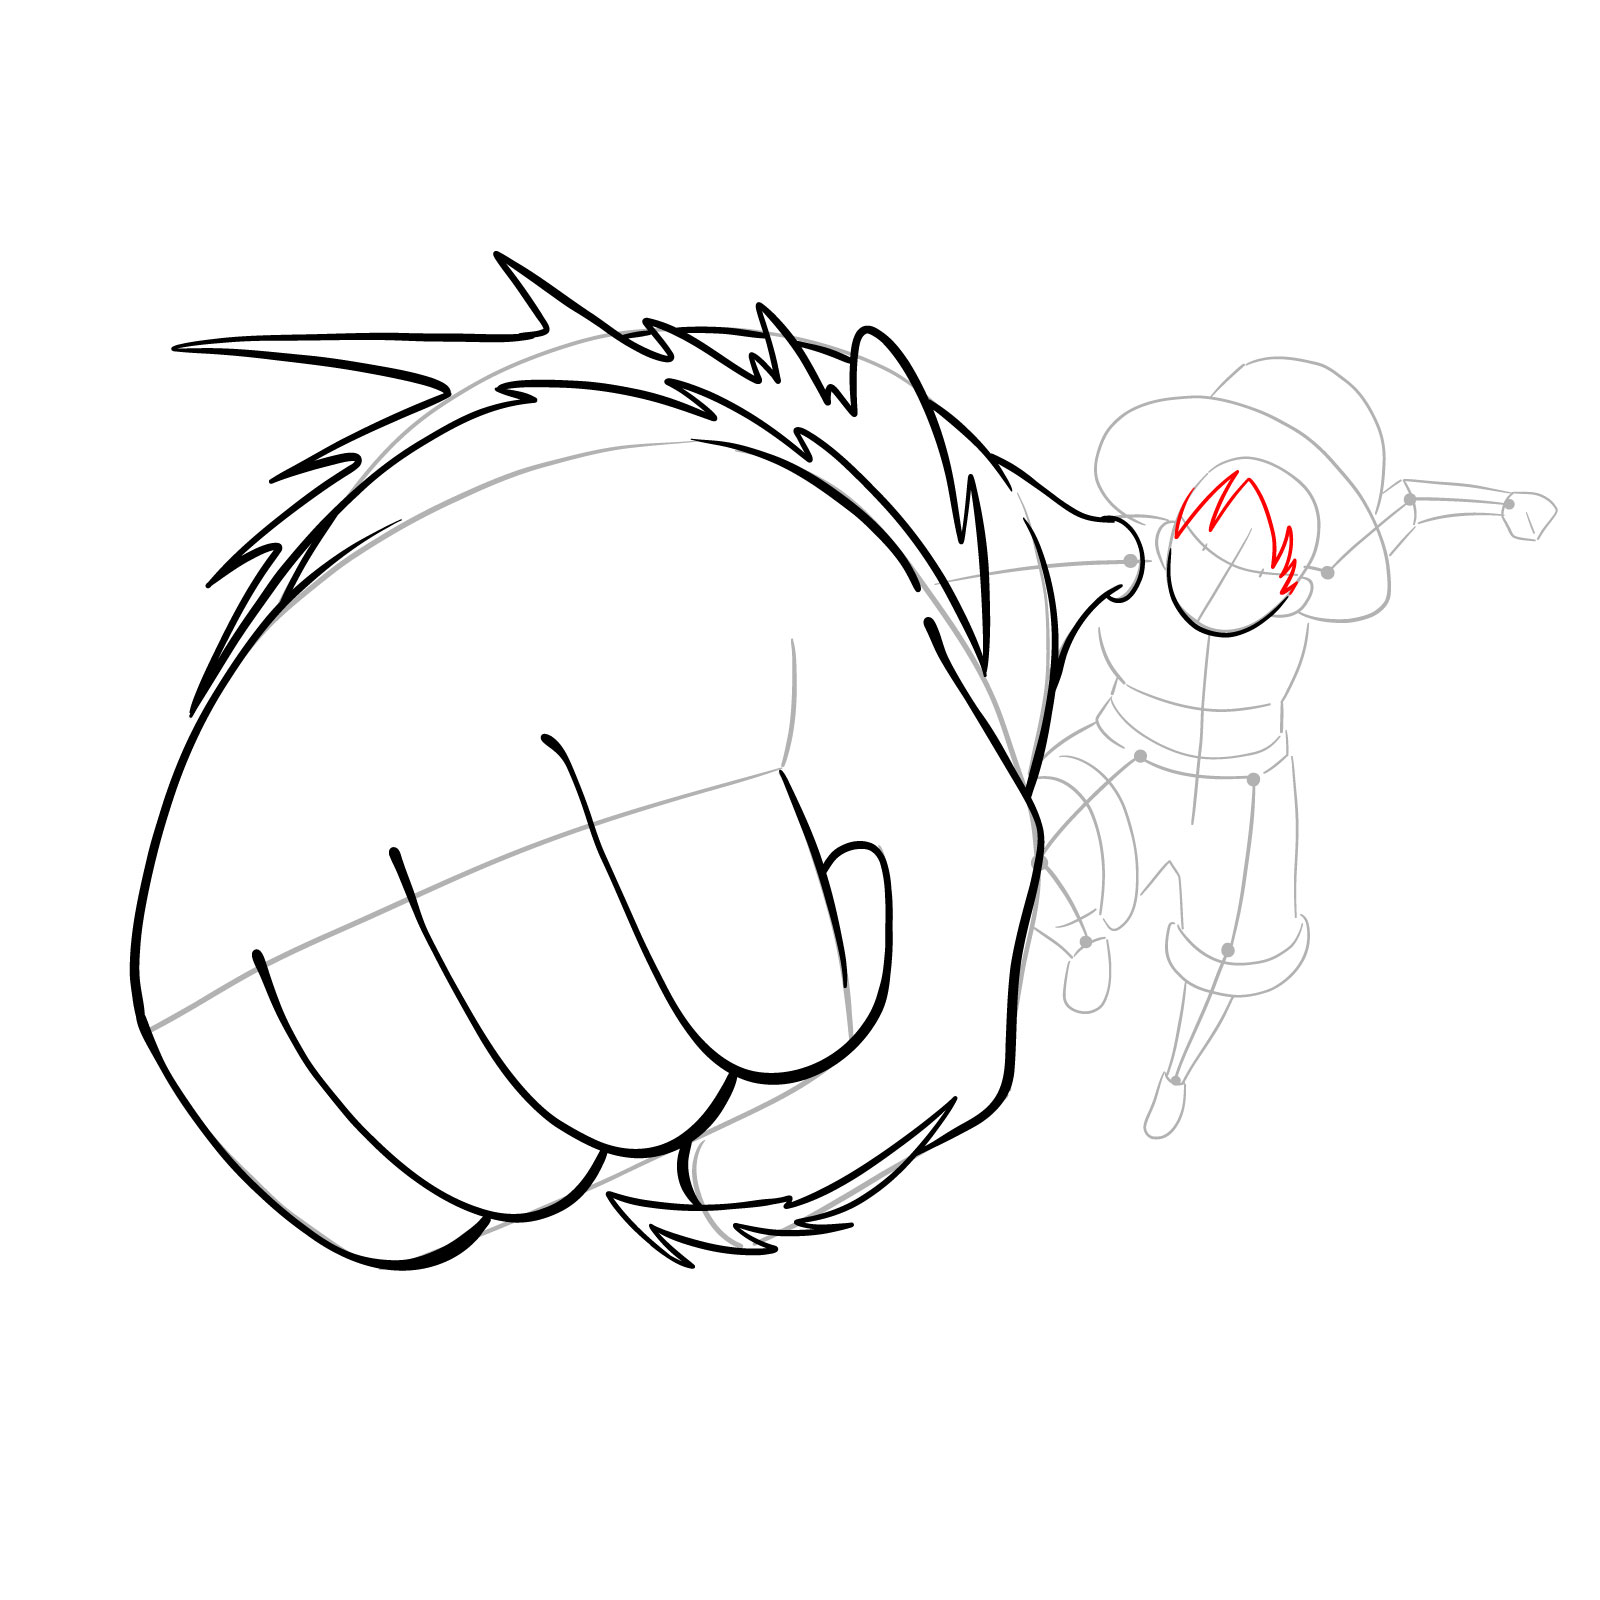
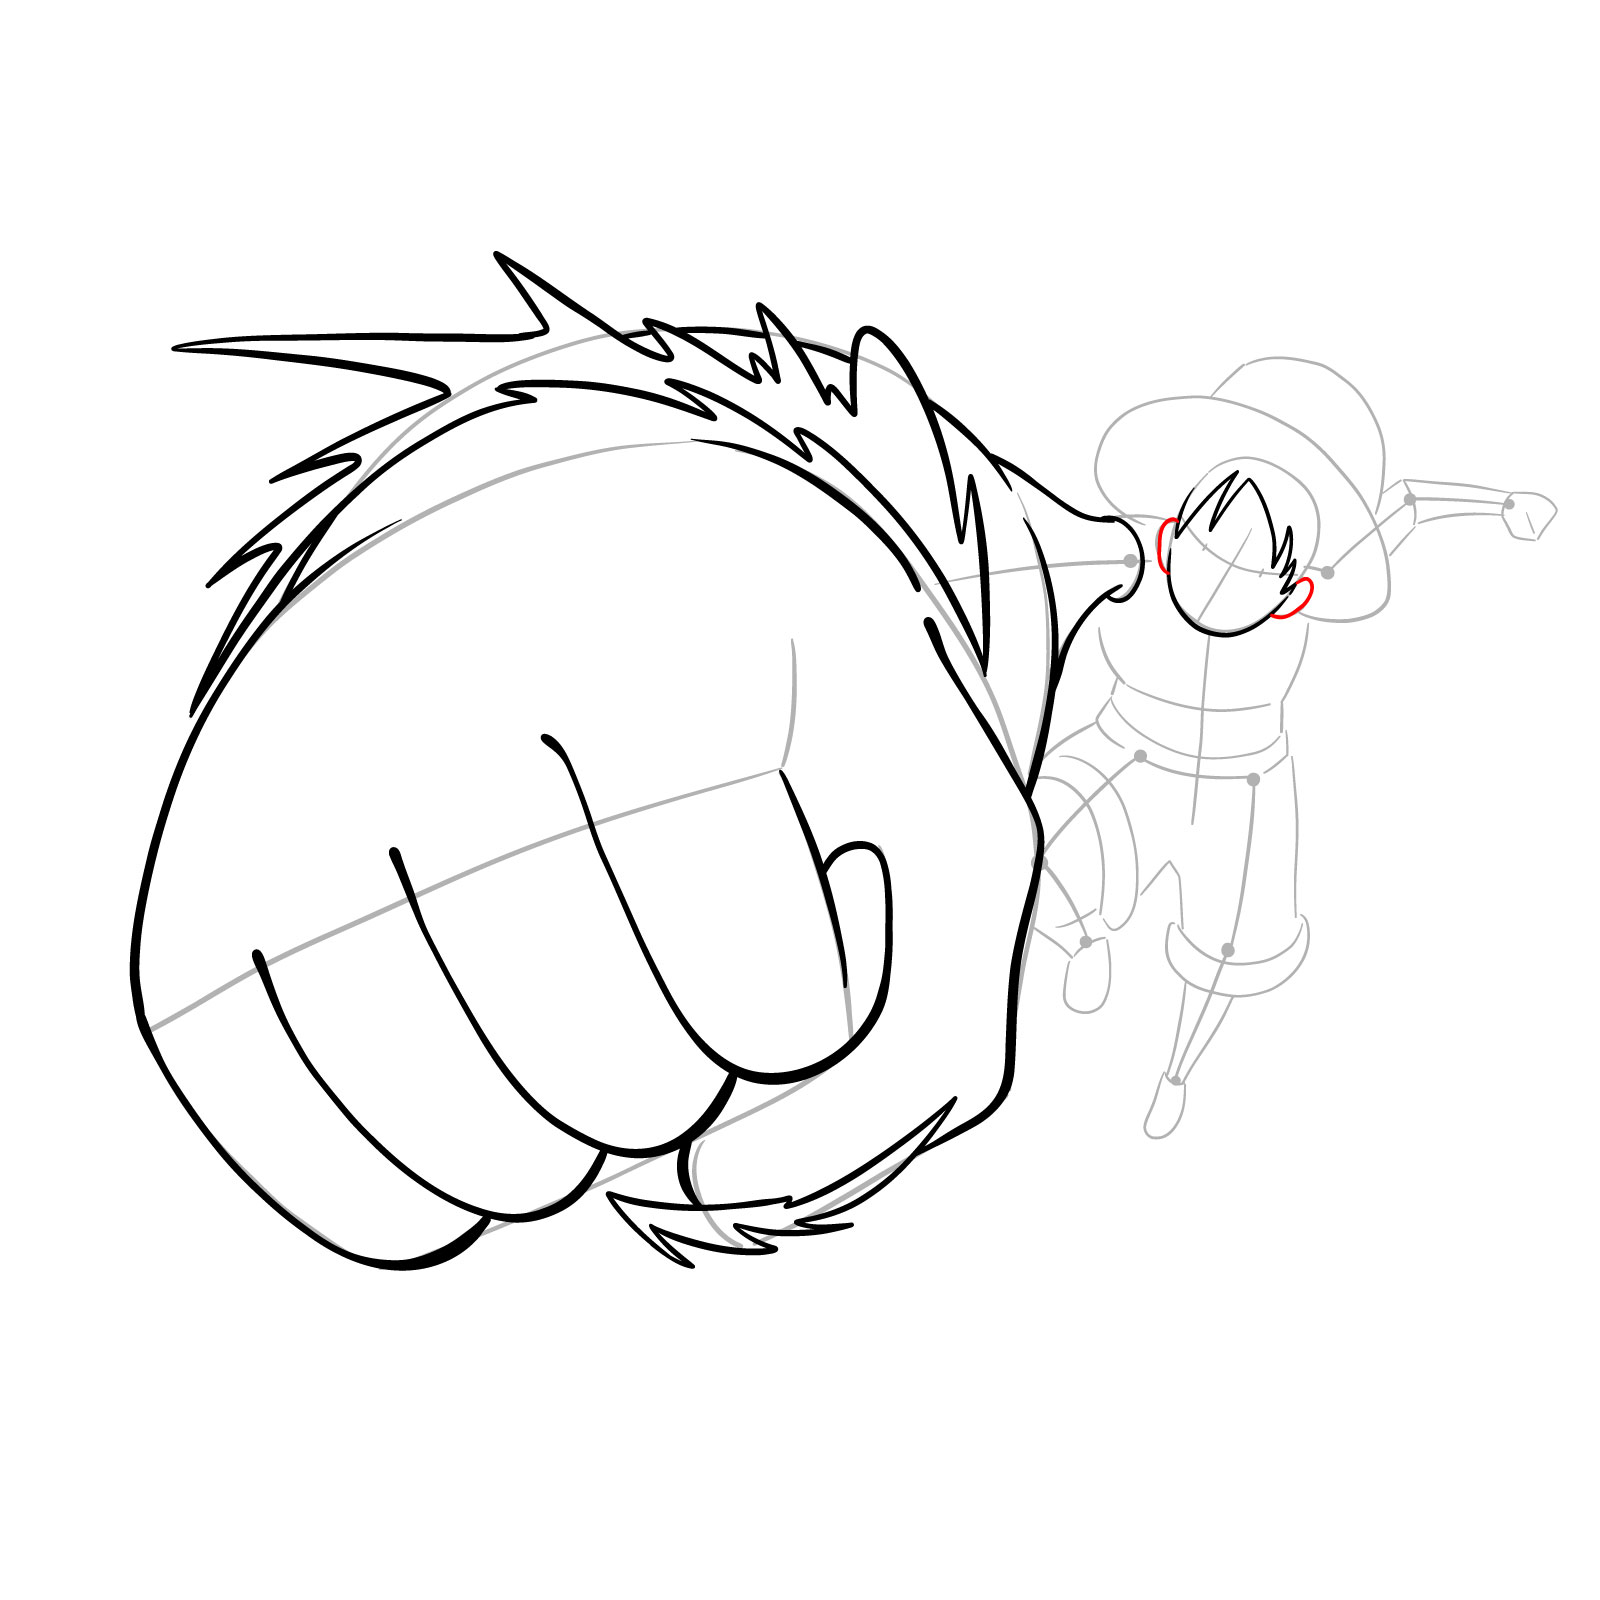
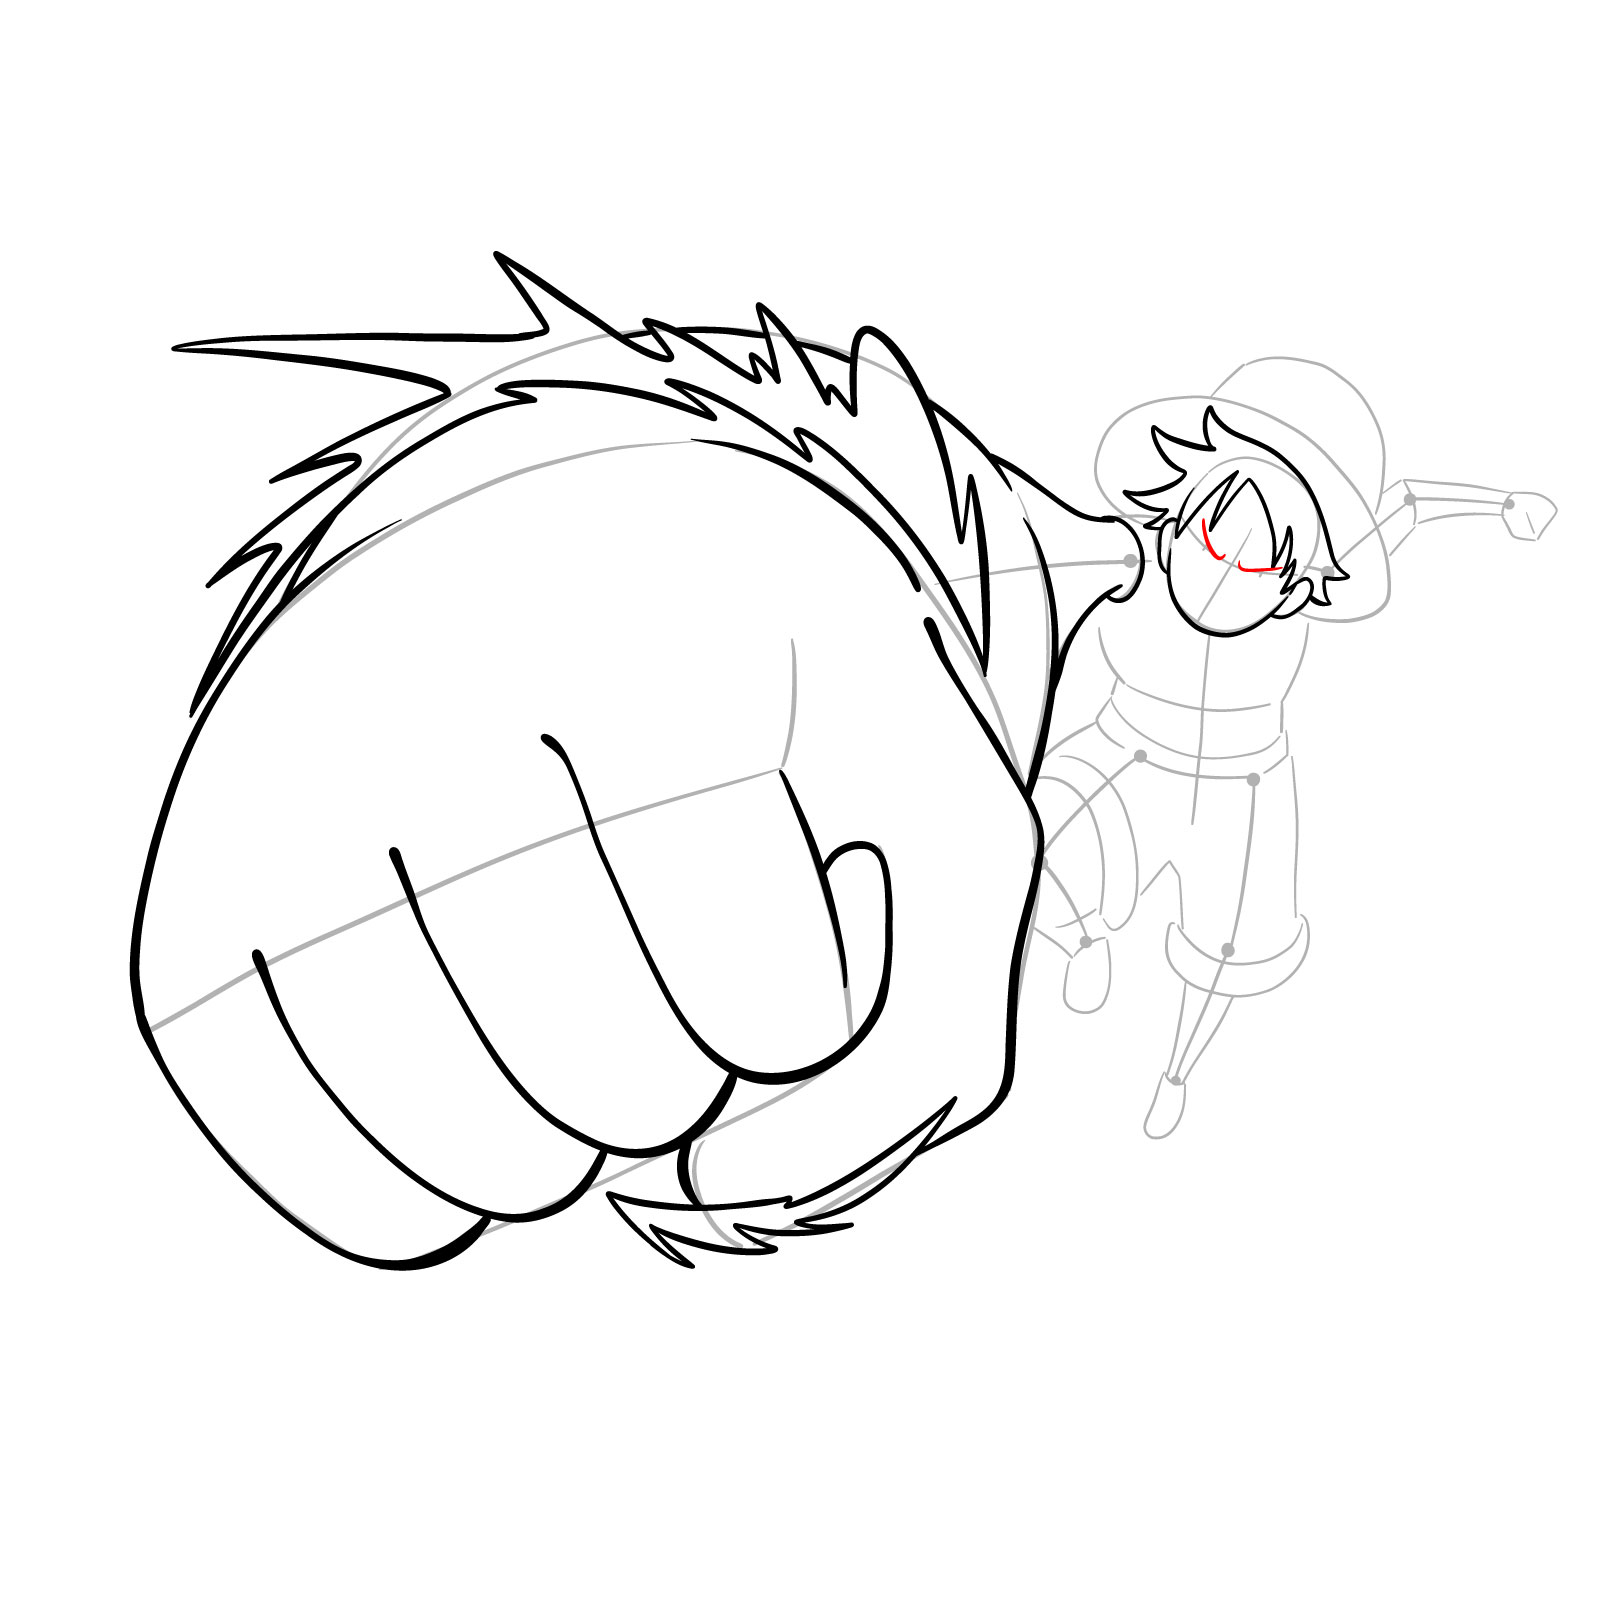
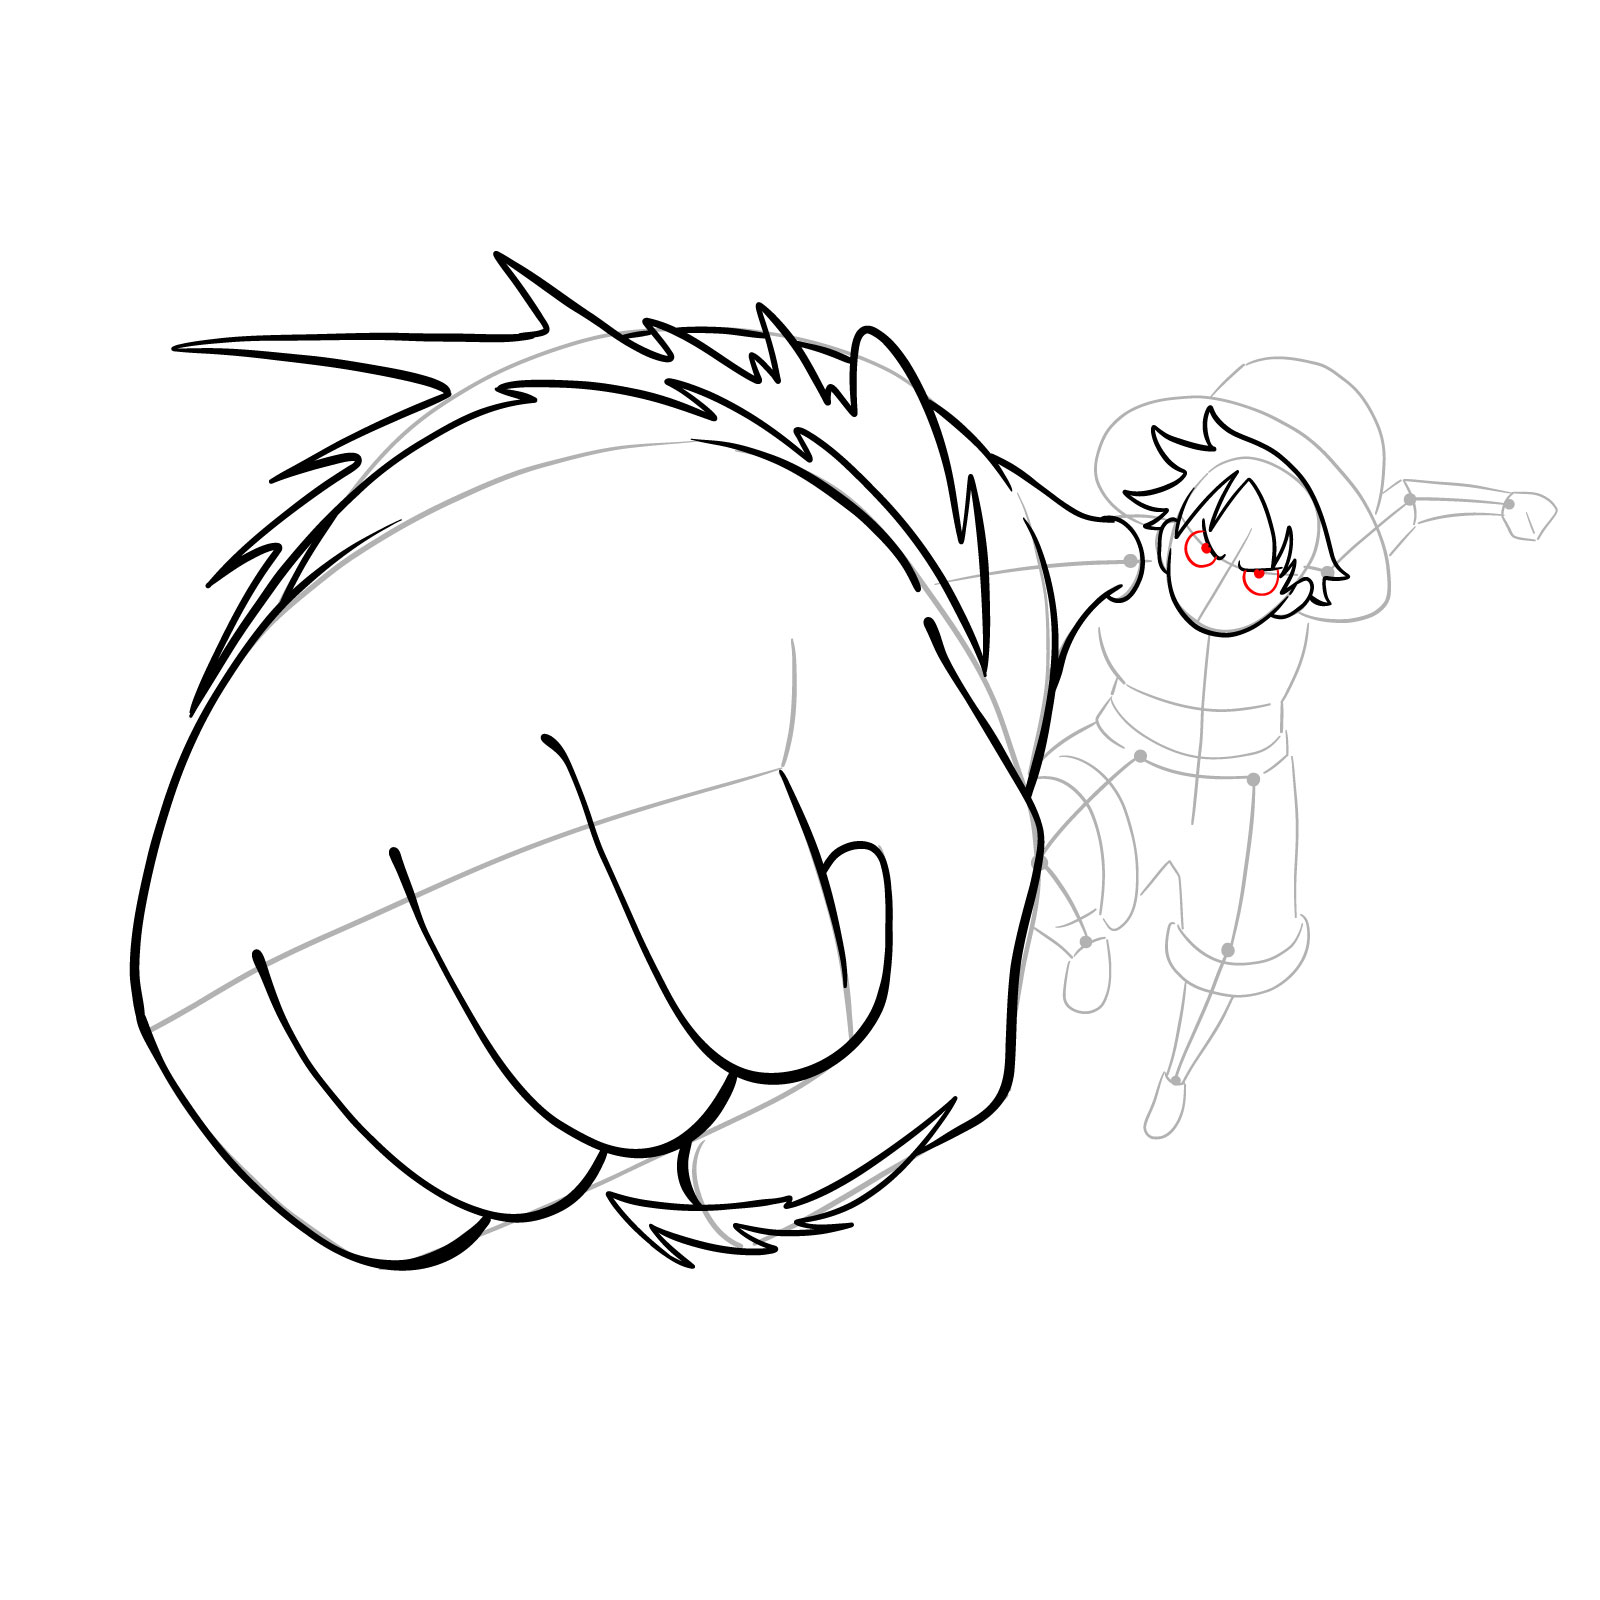
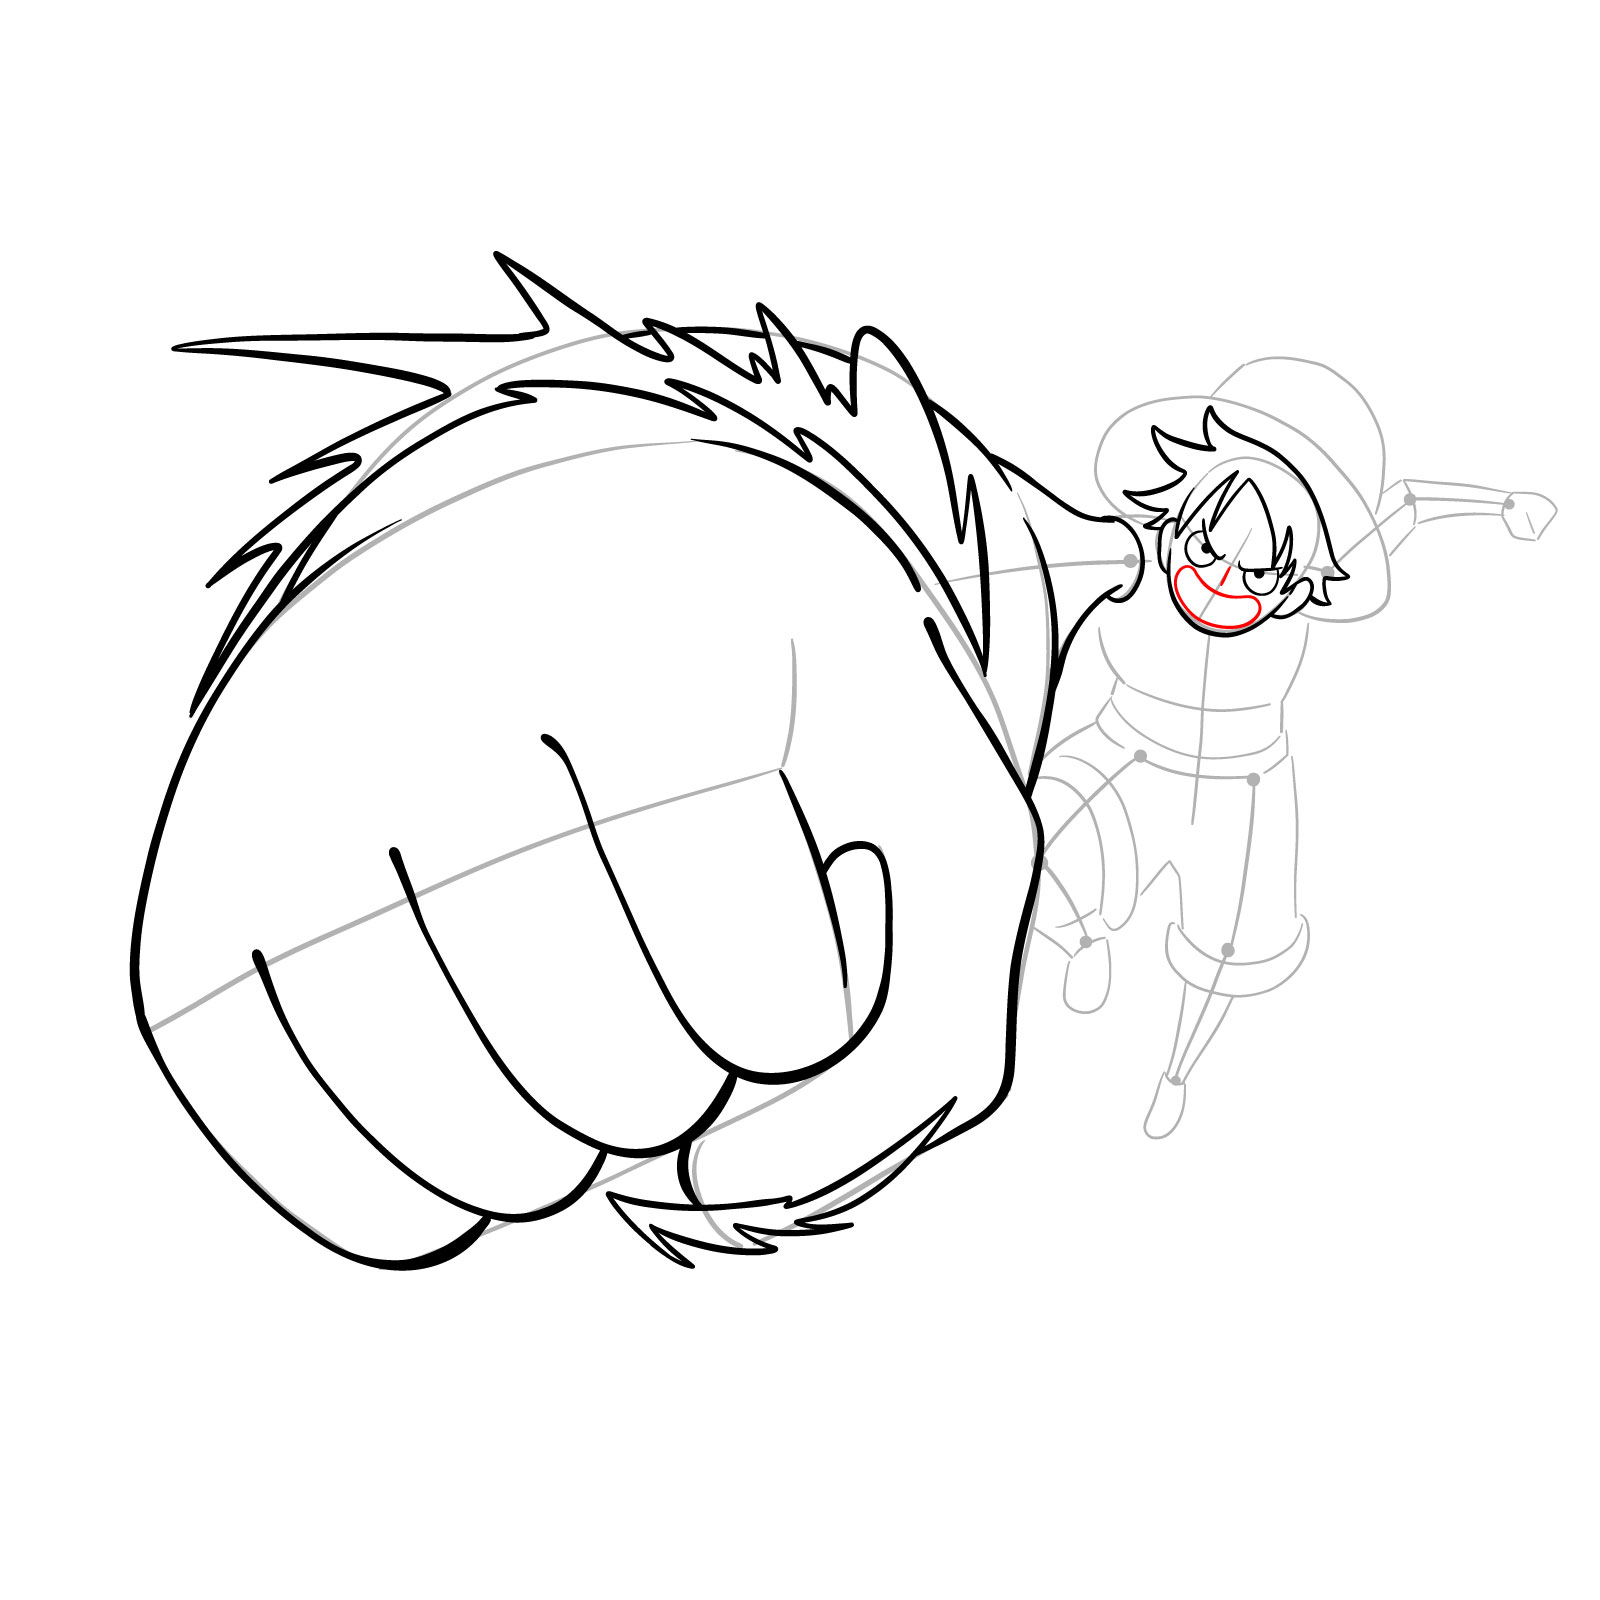
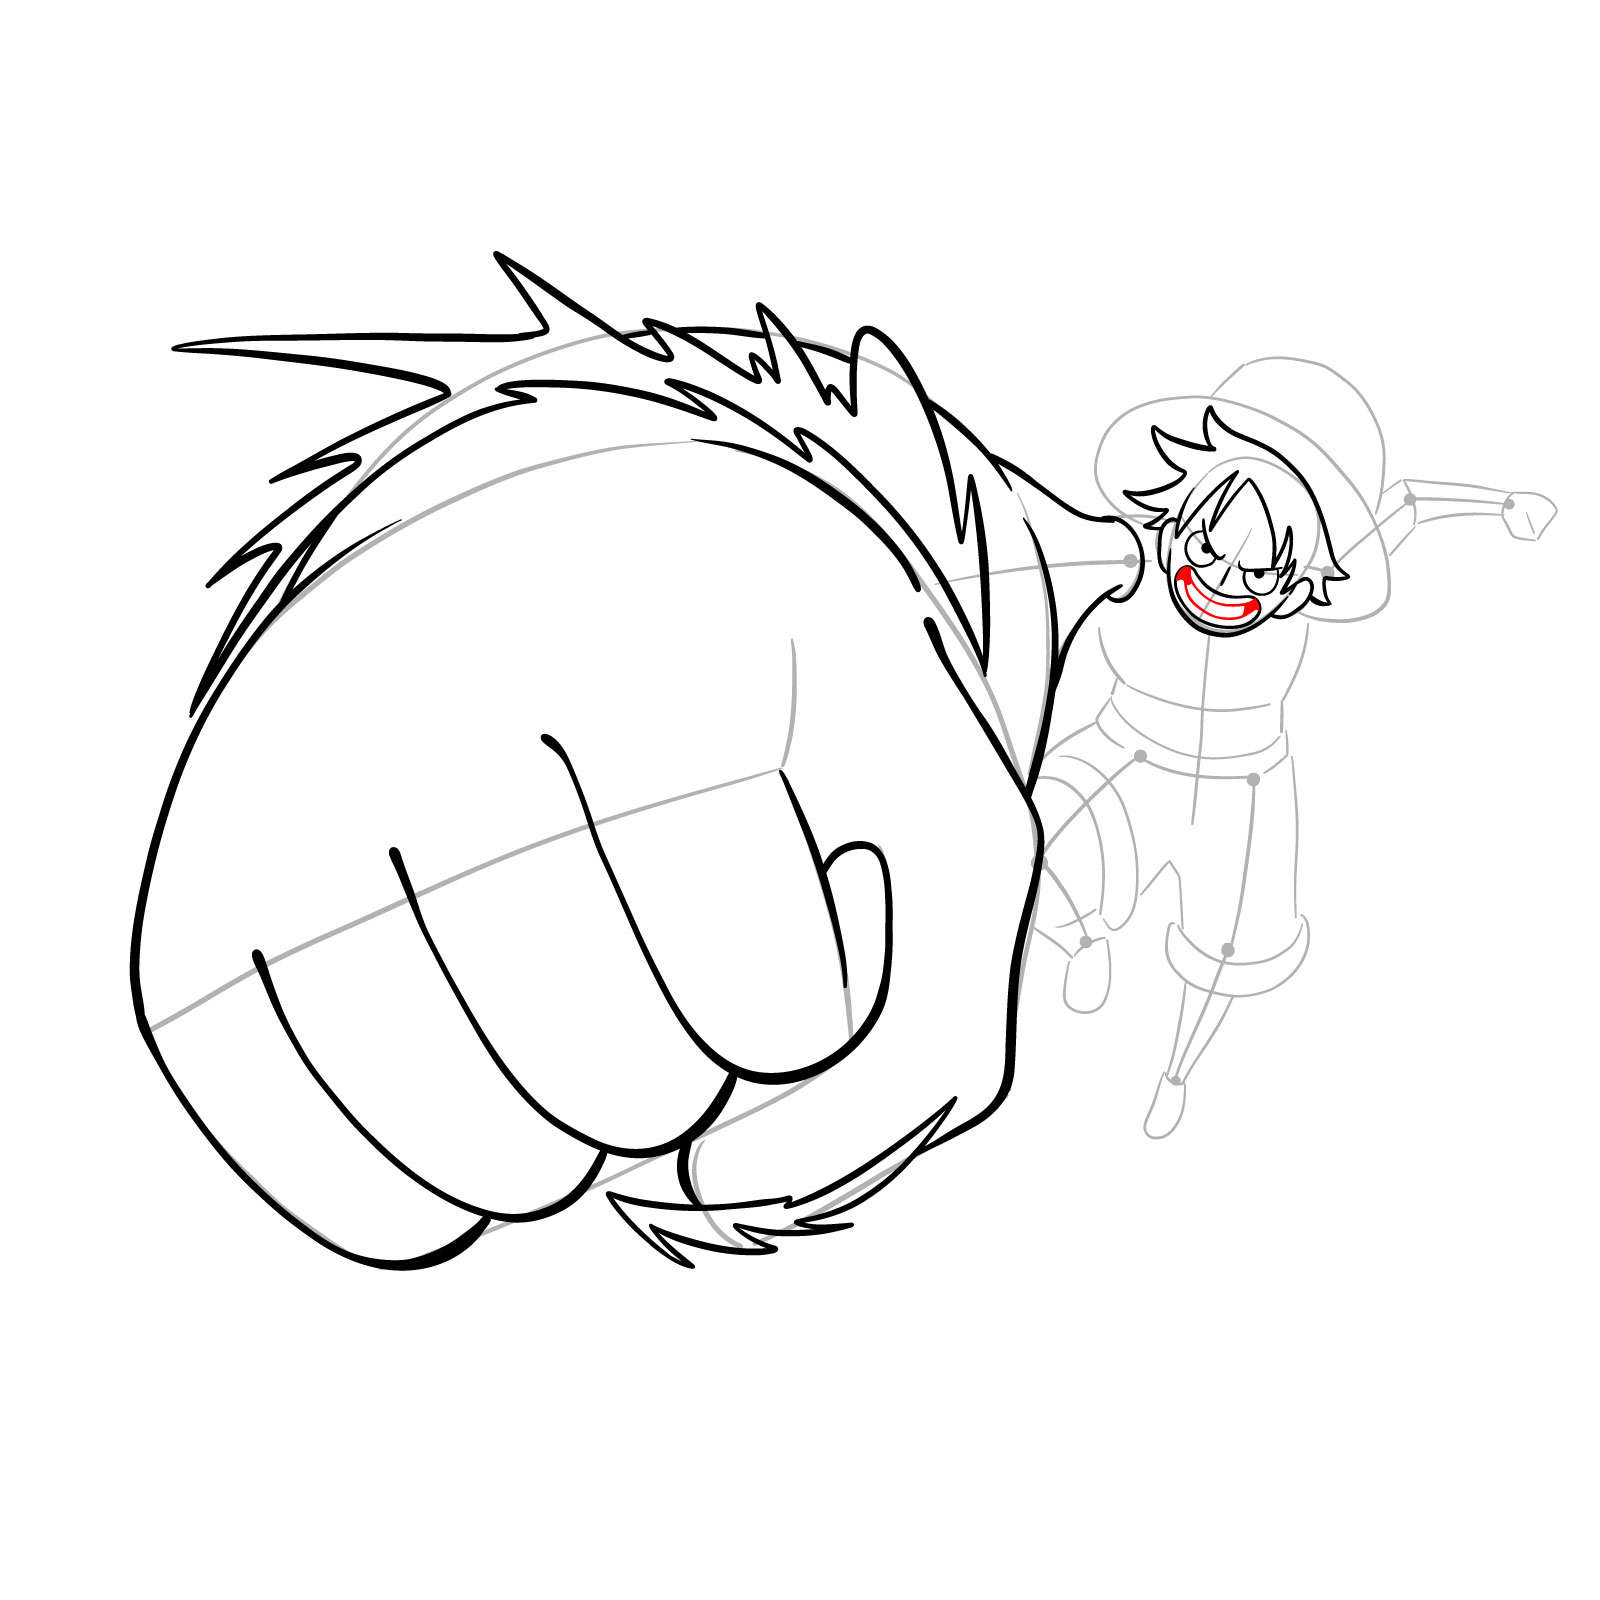
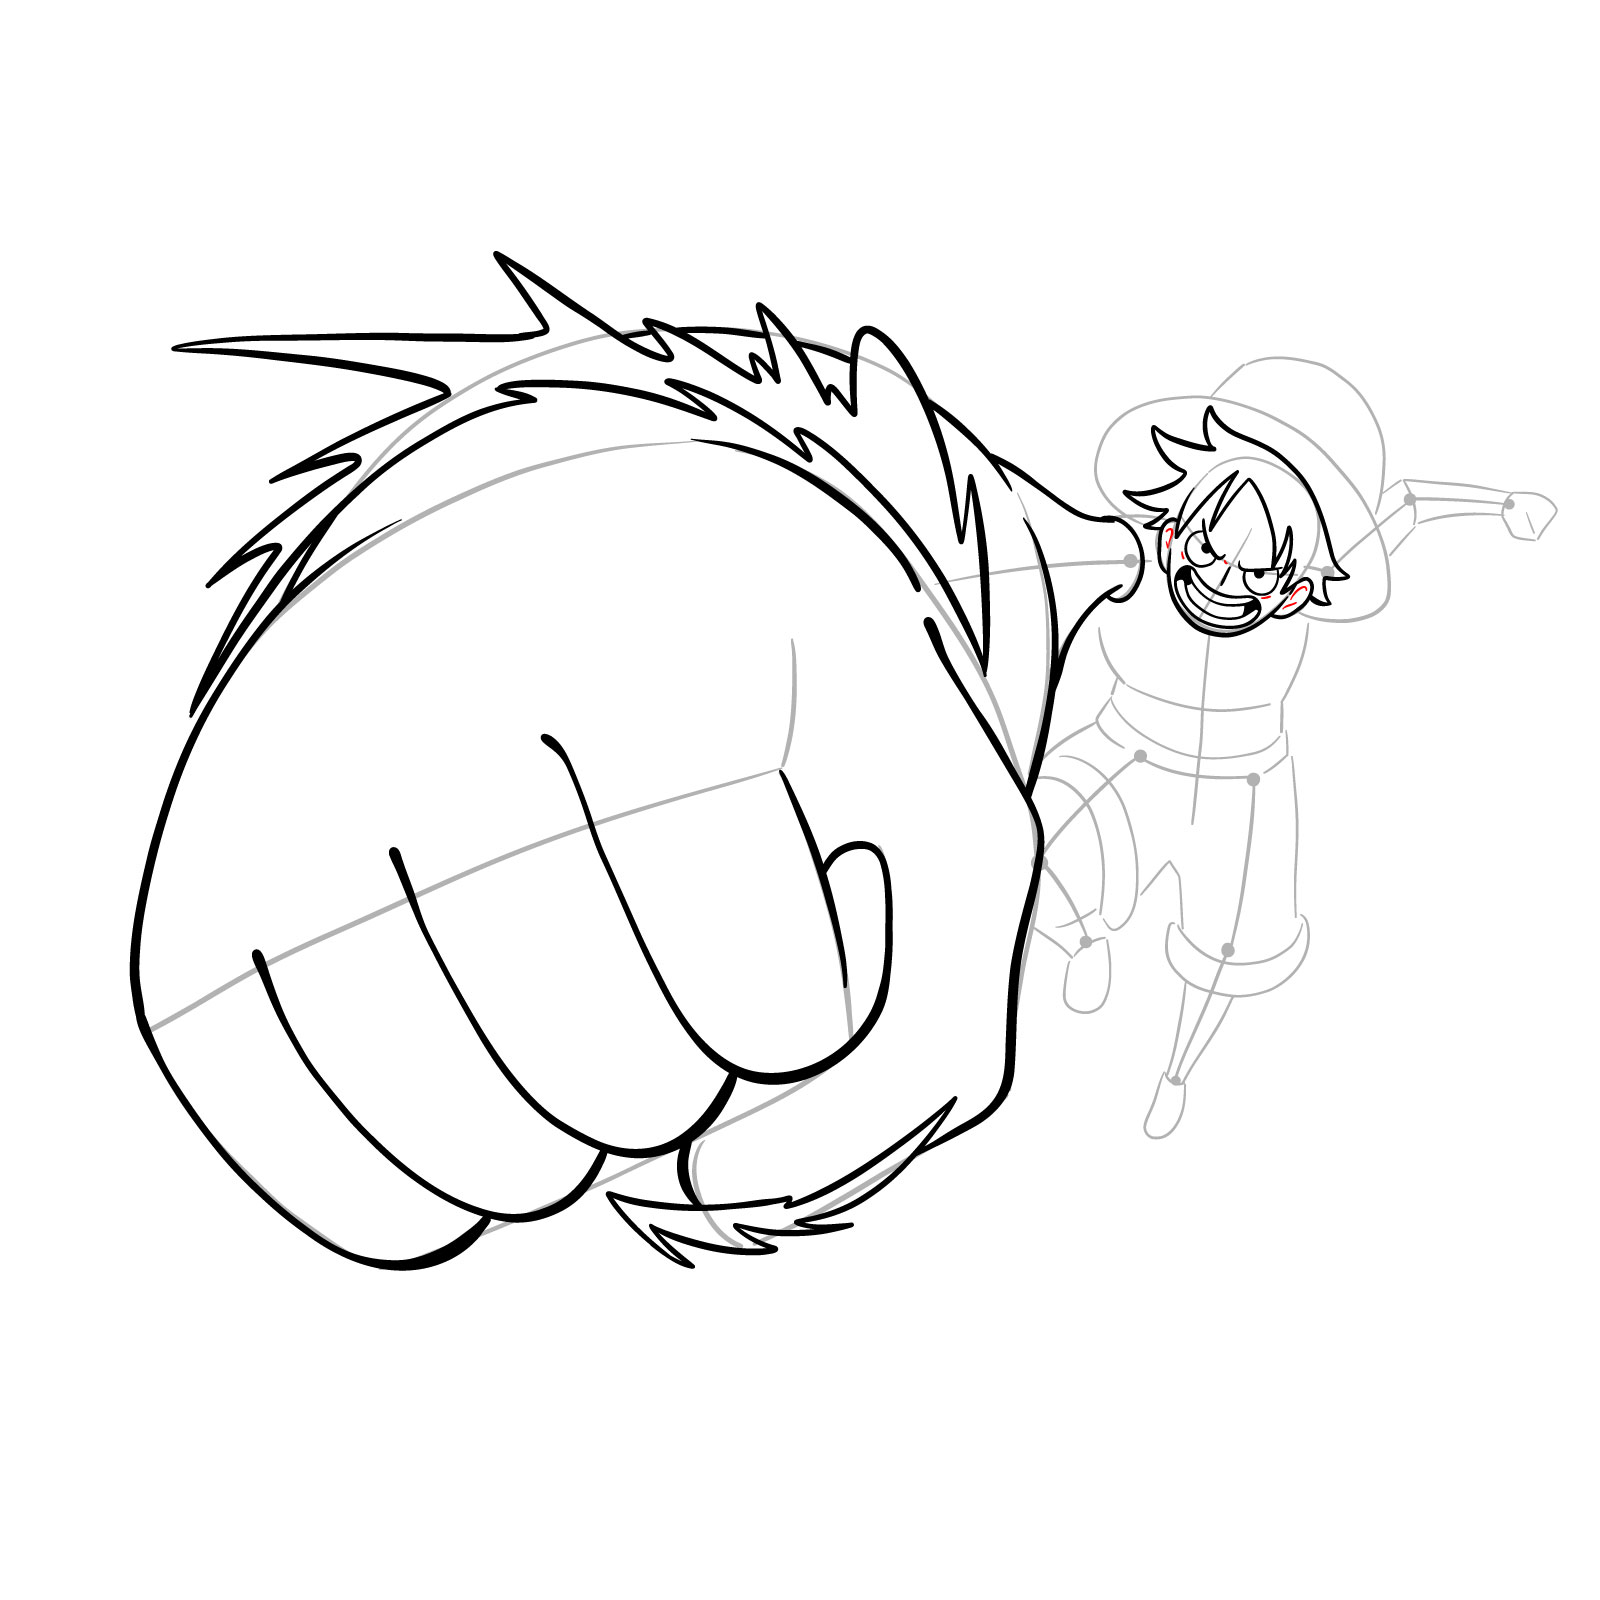
  • Expression: The determination in Luffy’s eyes, the gritted teeth—all scream of the impending action.
  • Relative Characters: Why not complement your Luffy sketch with other Straw Hat Pirates like Nami or Usopp? Giving context or setting a scene can be a great way to amplify your art.

Just a quick note:

We also have another Luffy’s transformation drawings for you to enjoy: Gear Second, Gear 3 with armanent haki, Gear 4 Snakeman, Nightmare Luffy.

Guiding Colors in Your Journey

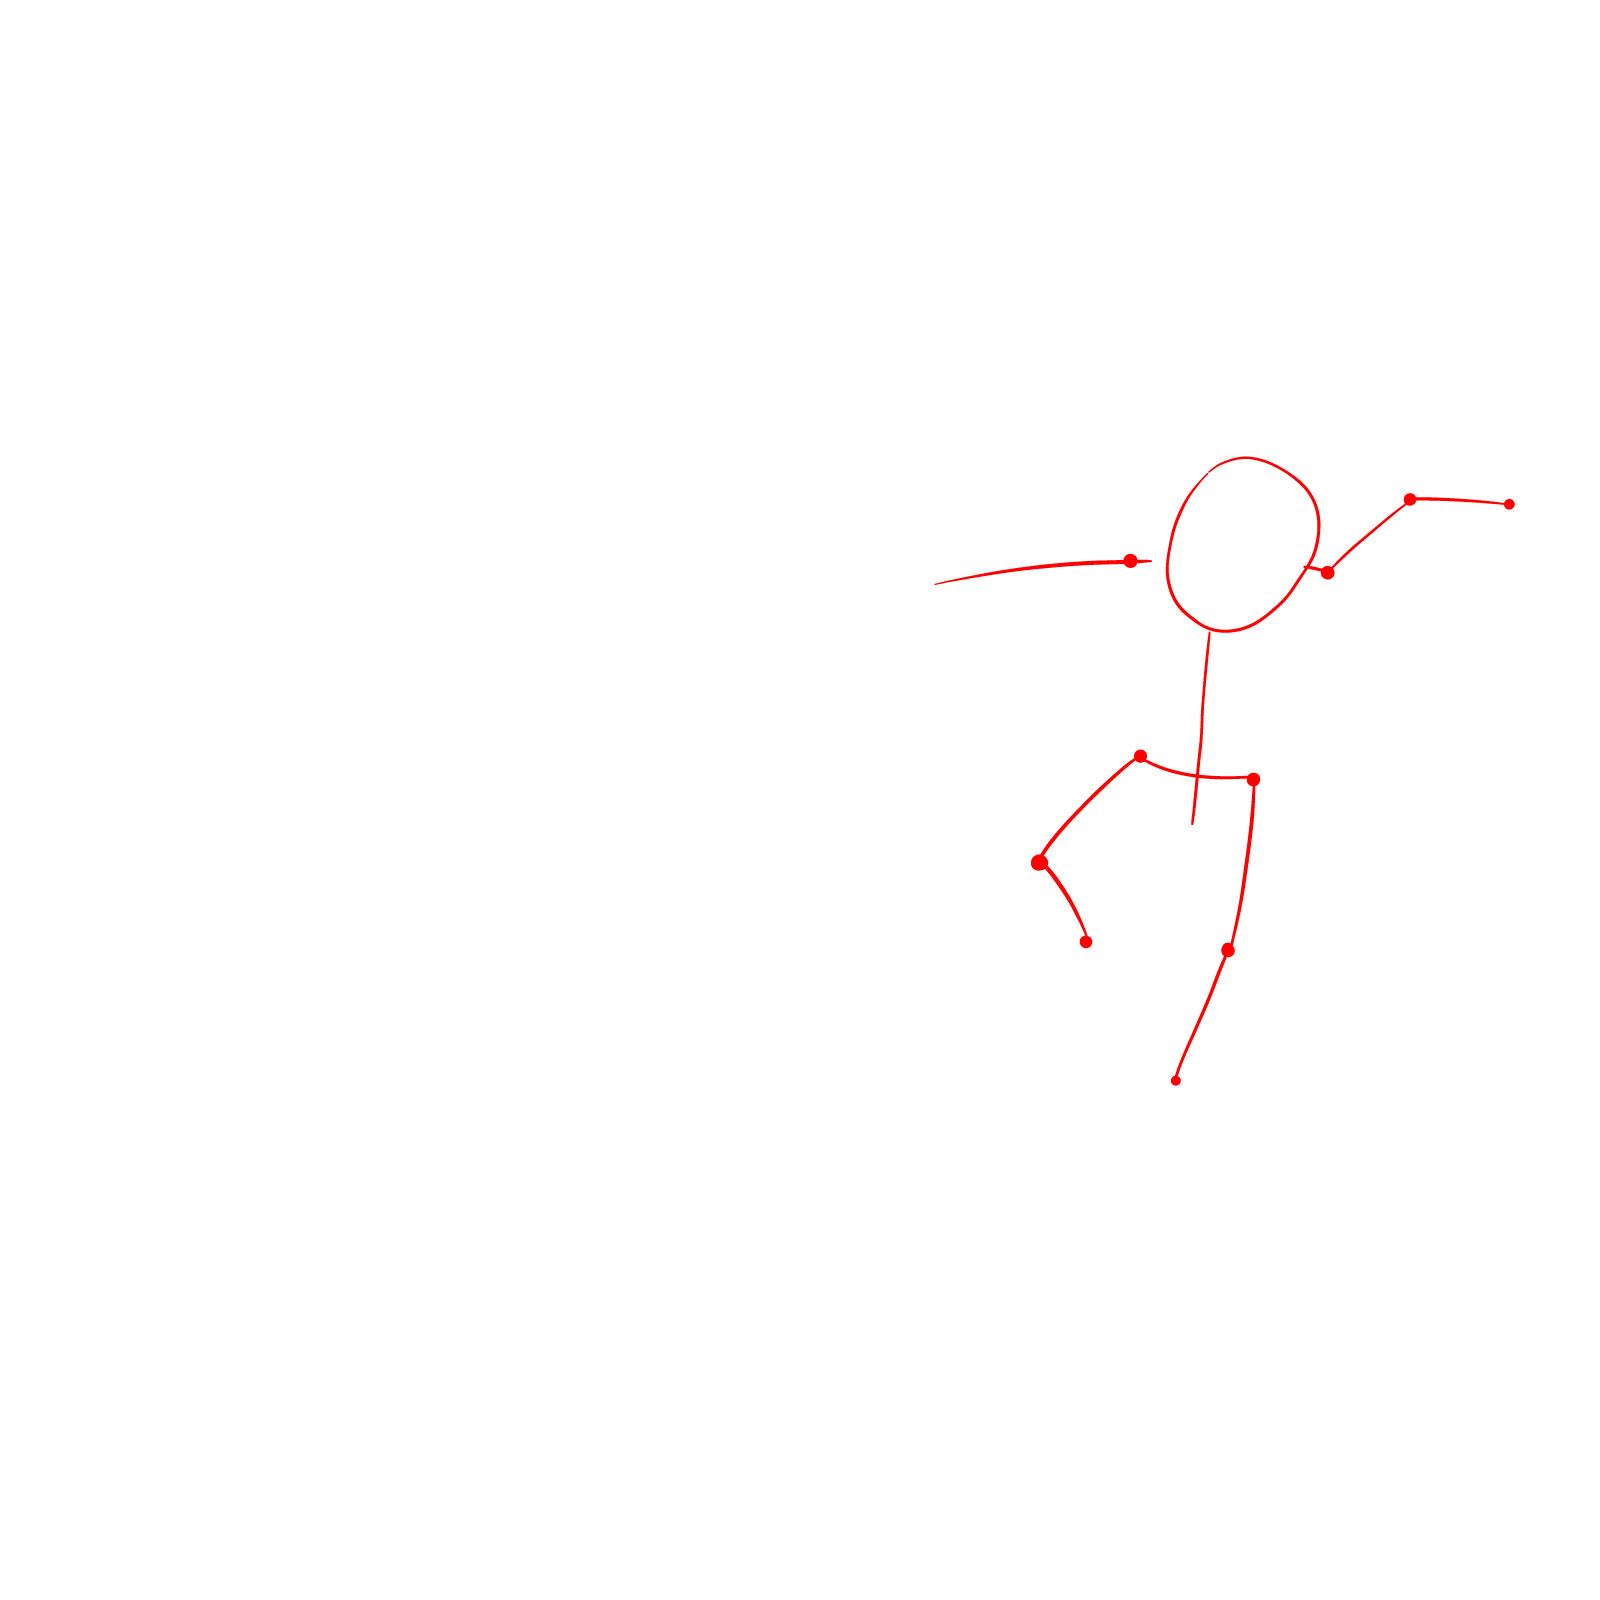
Drawing is all about evolution – beginning from a basic structure and moving to intricate details. To simplify your journey, this guide uses a color-coded system:

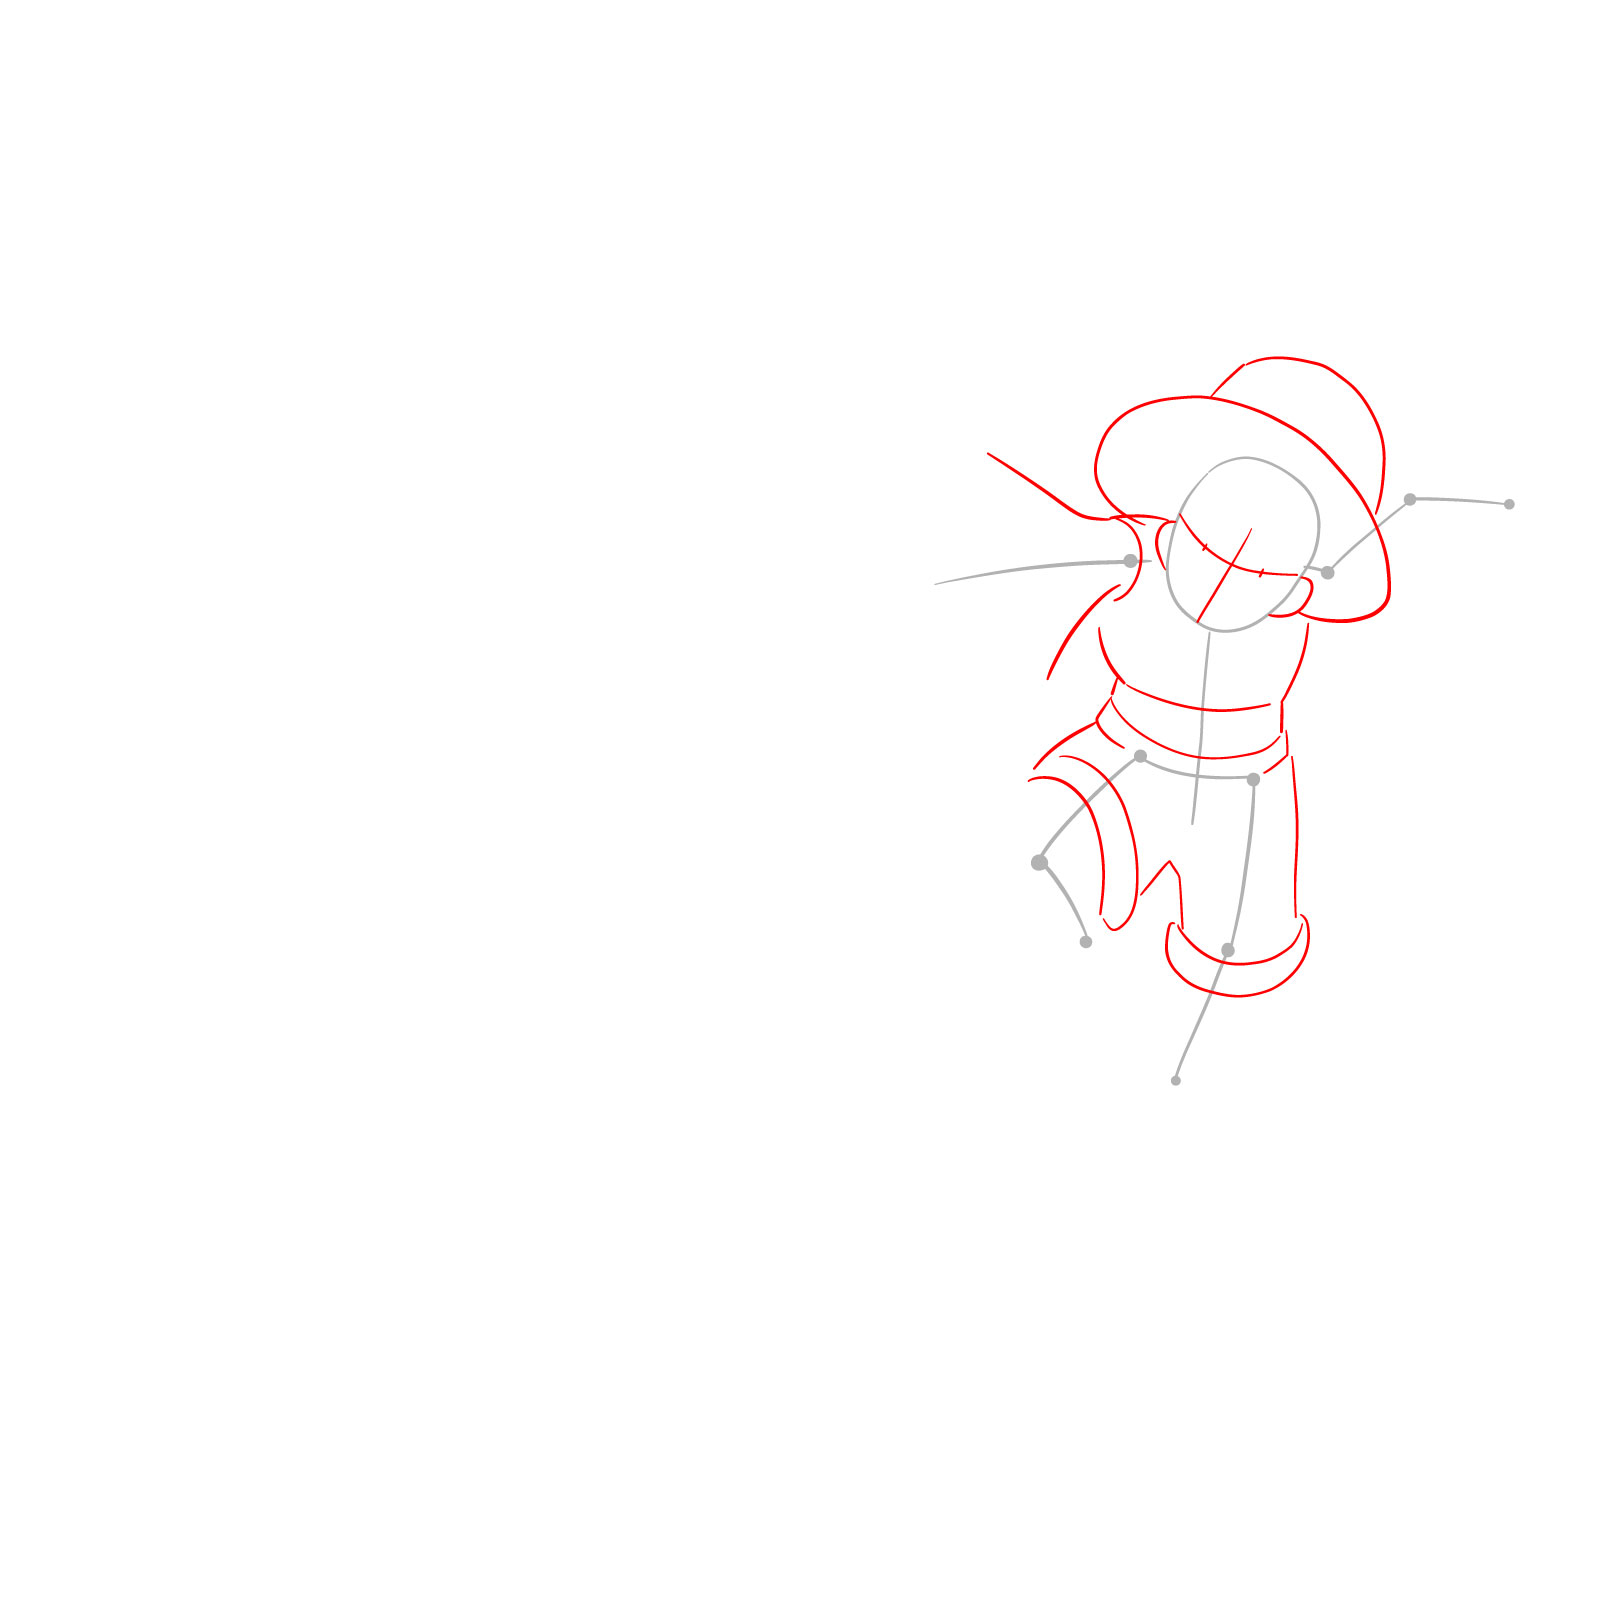
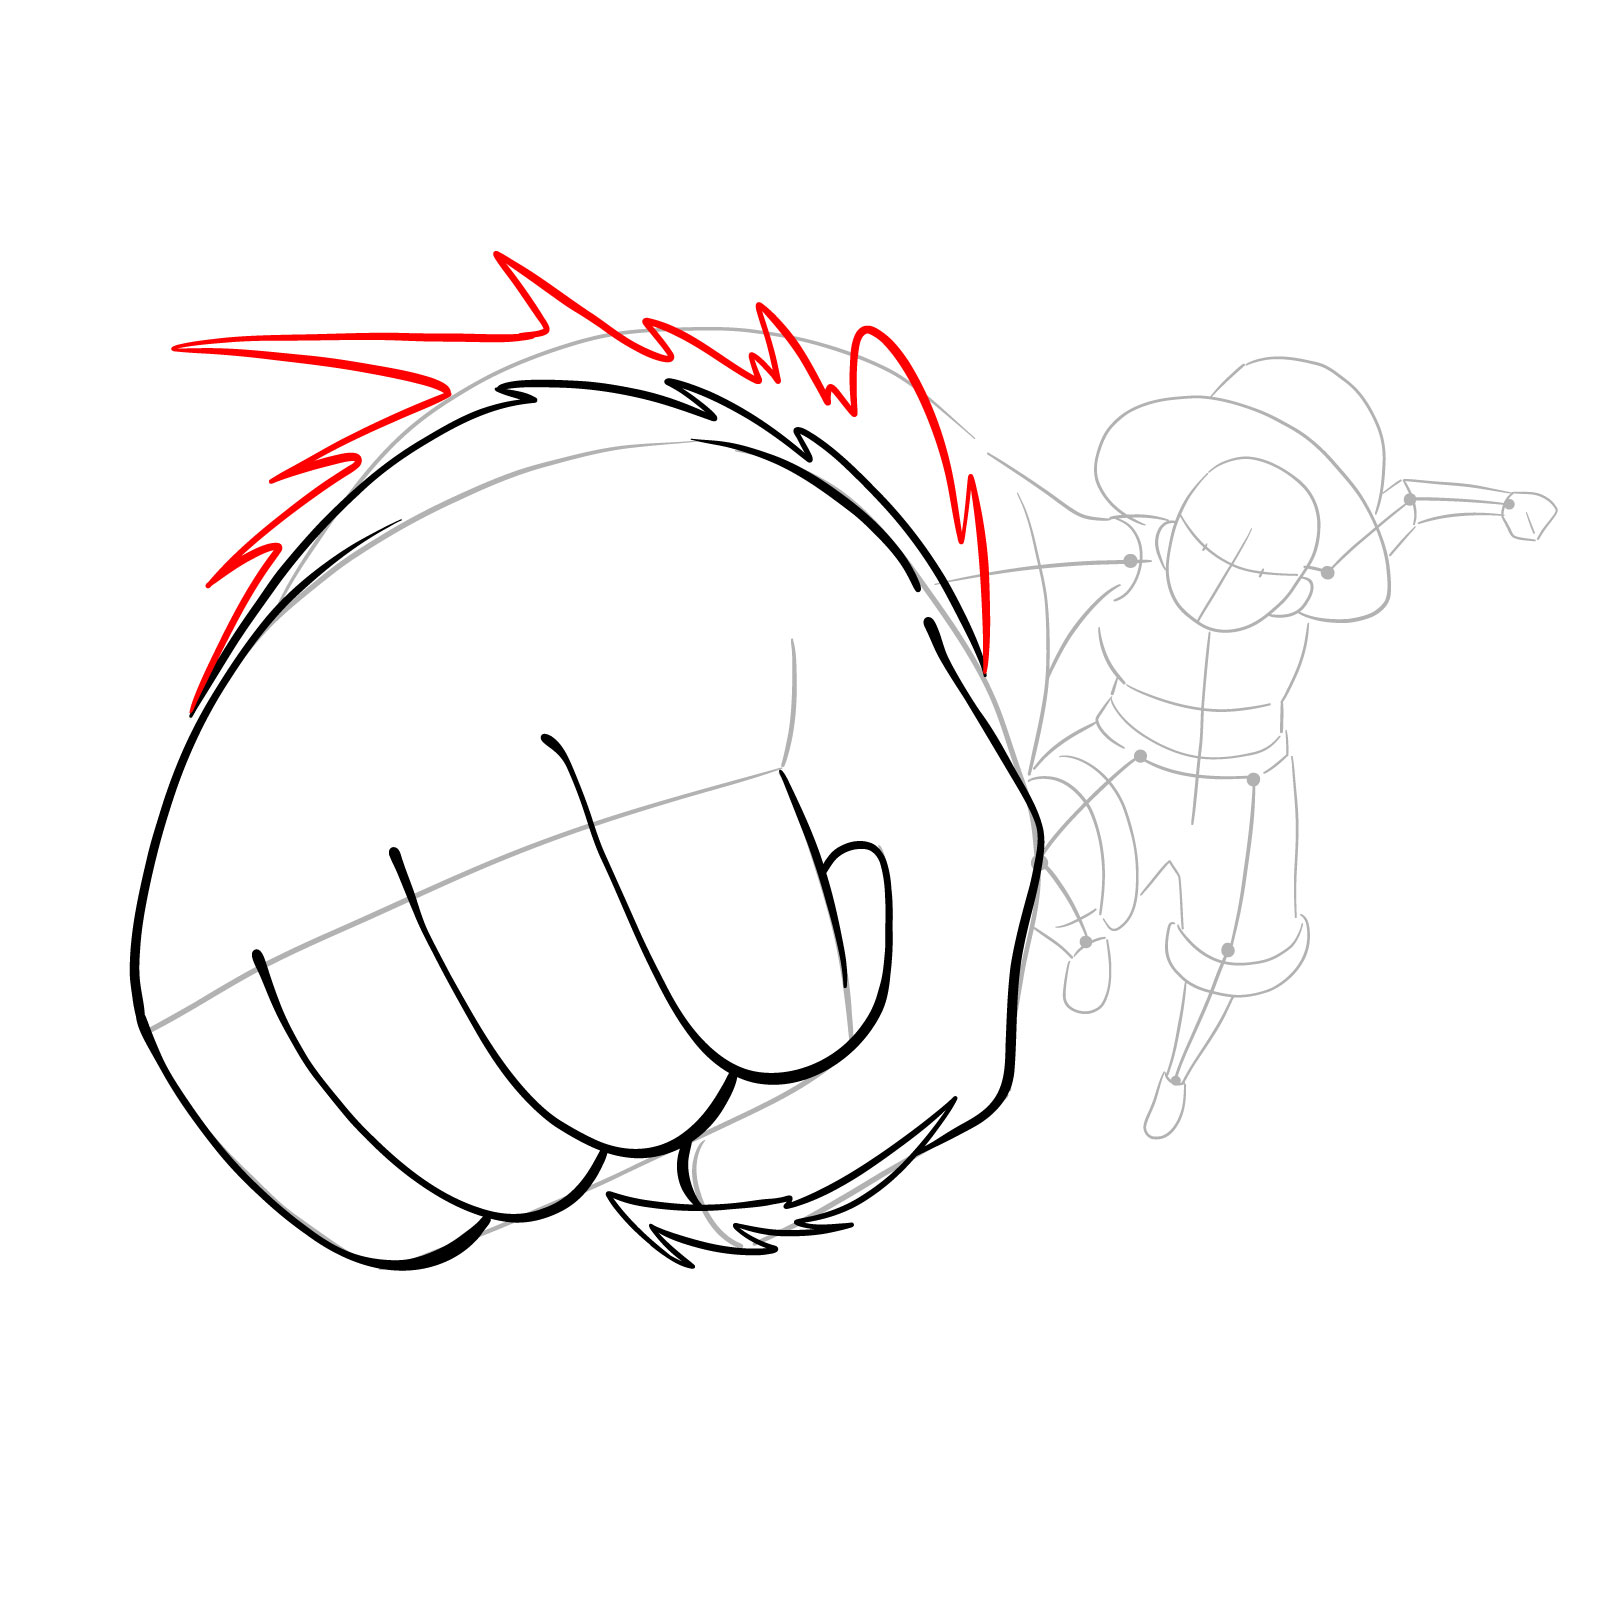
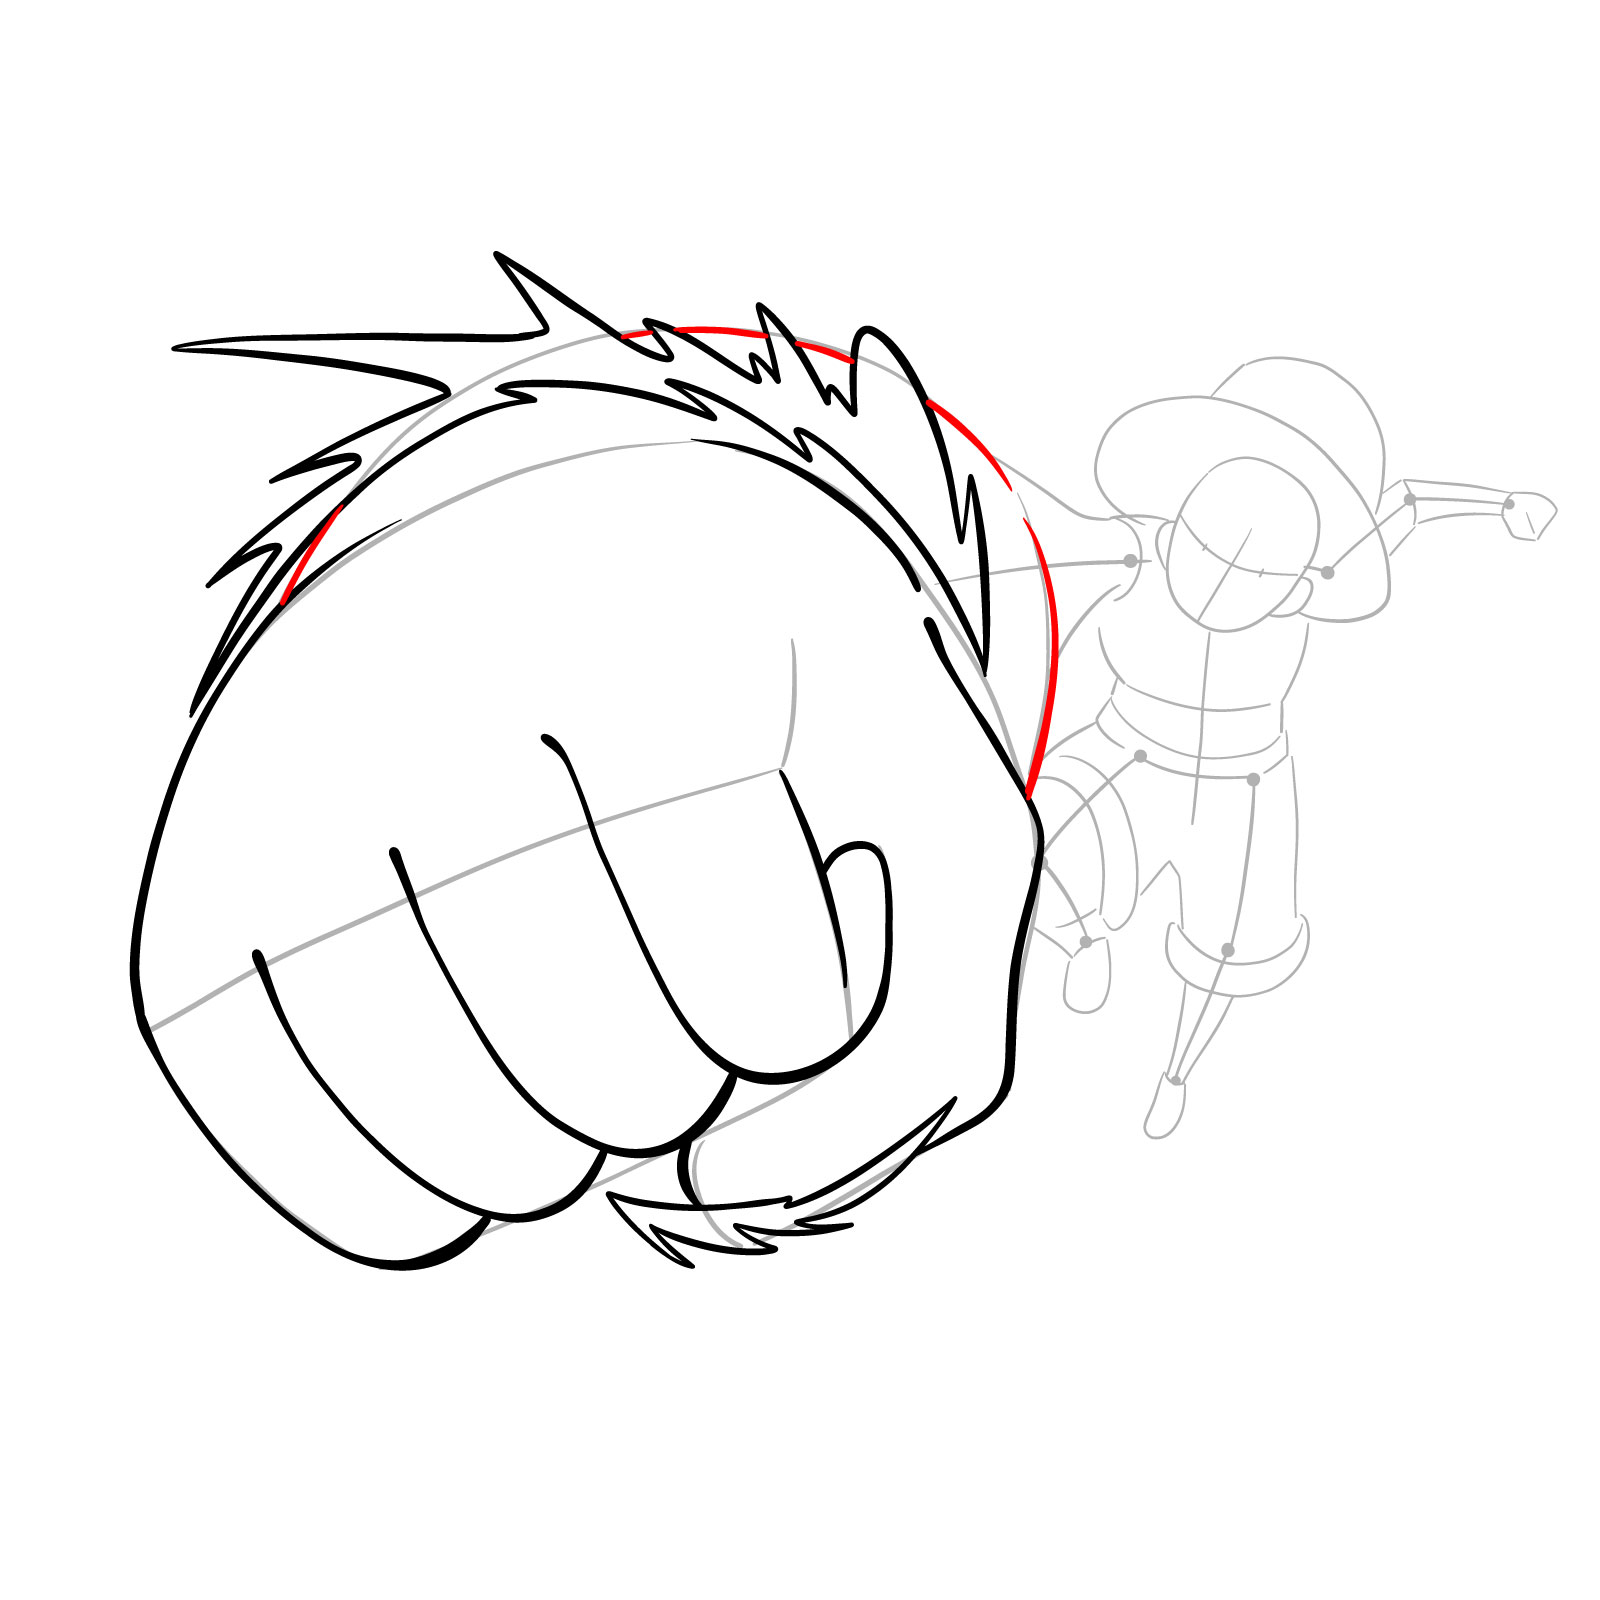
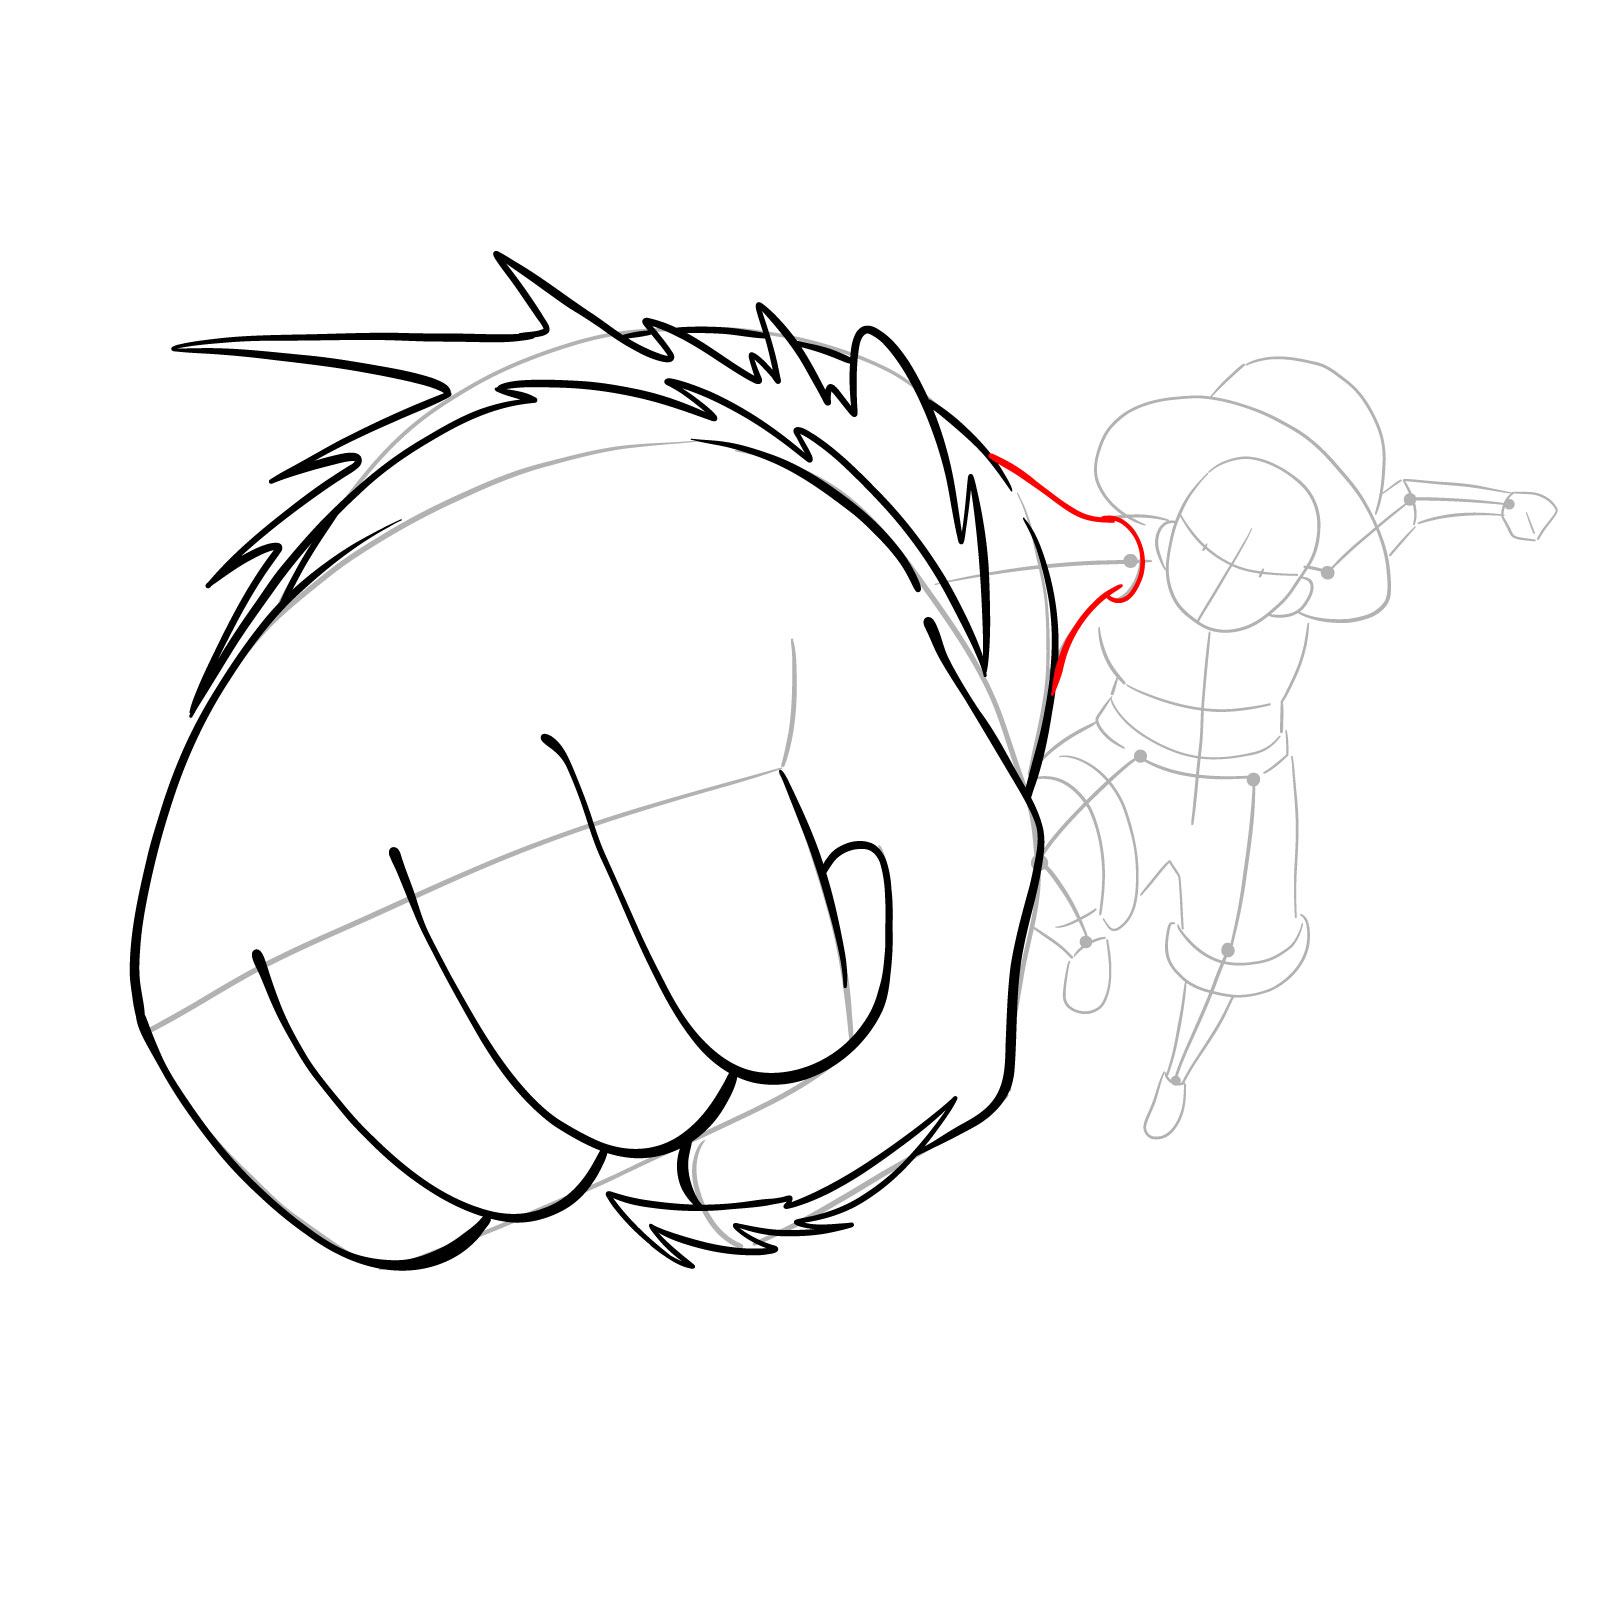
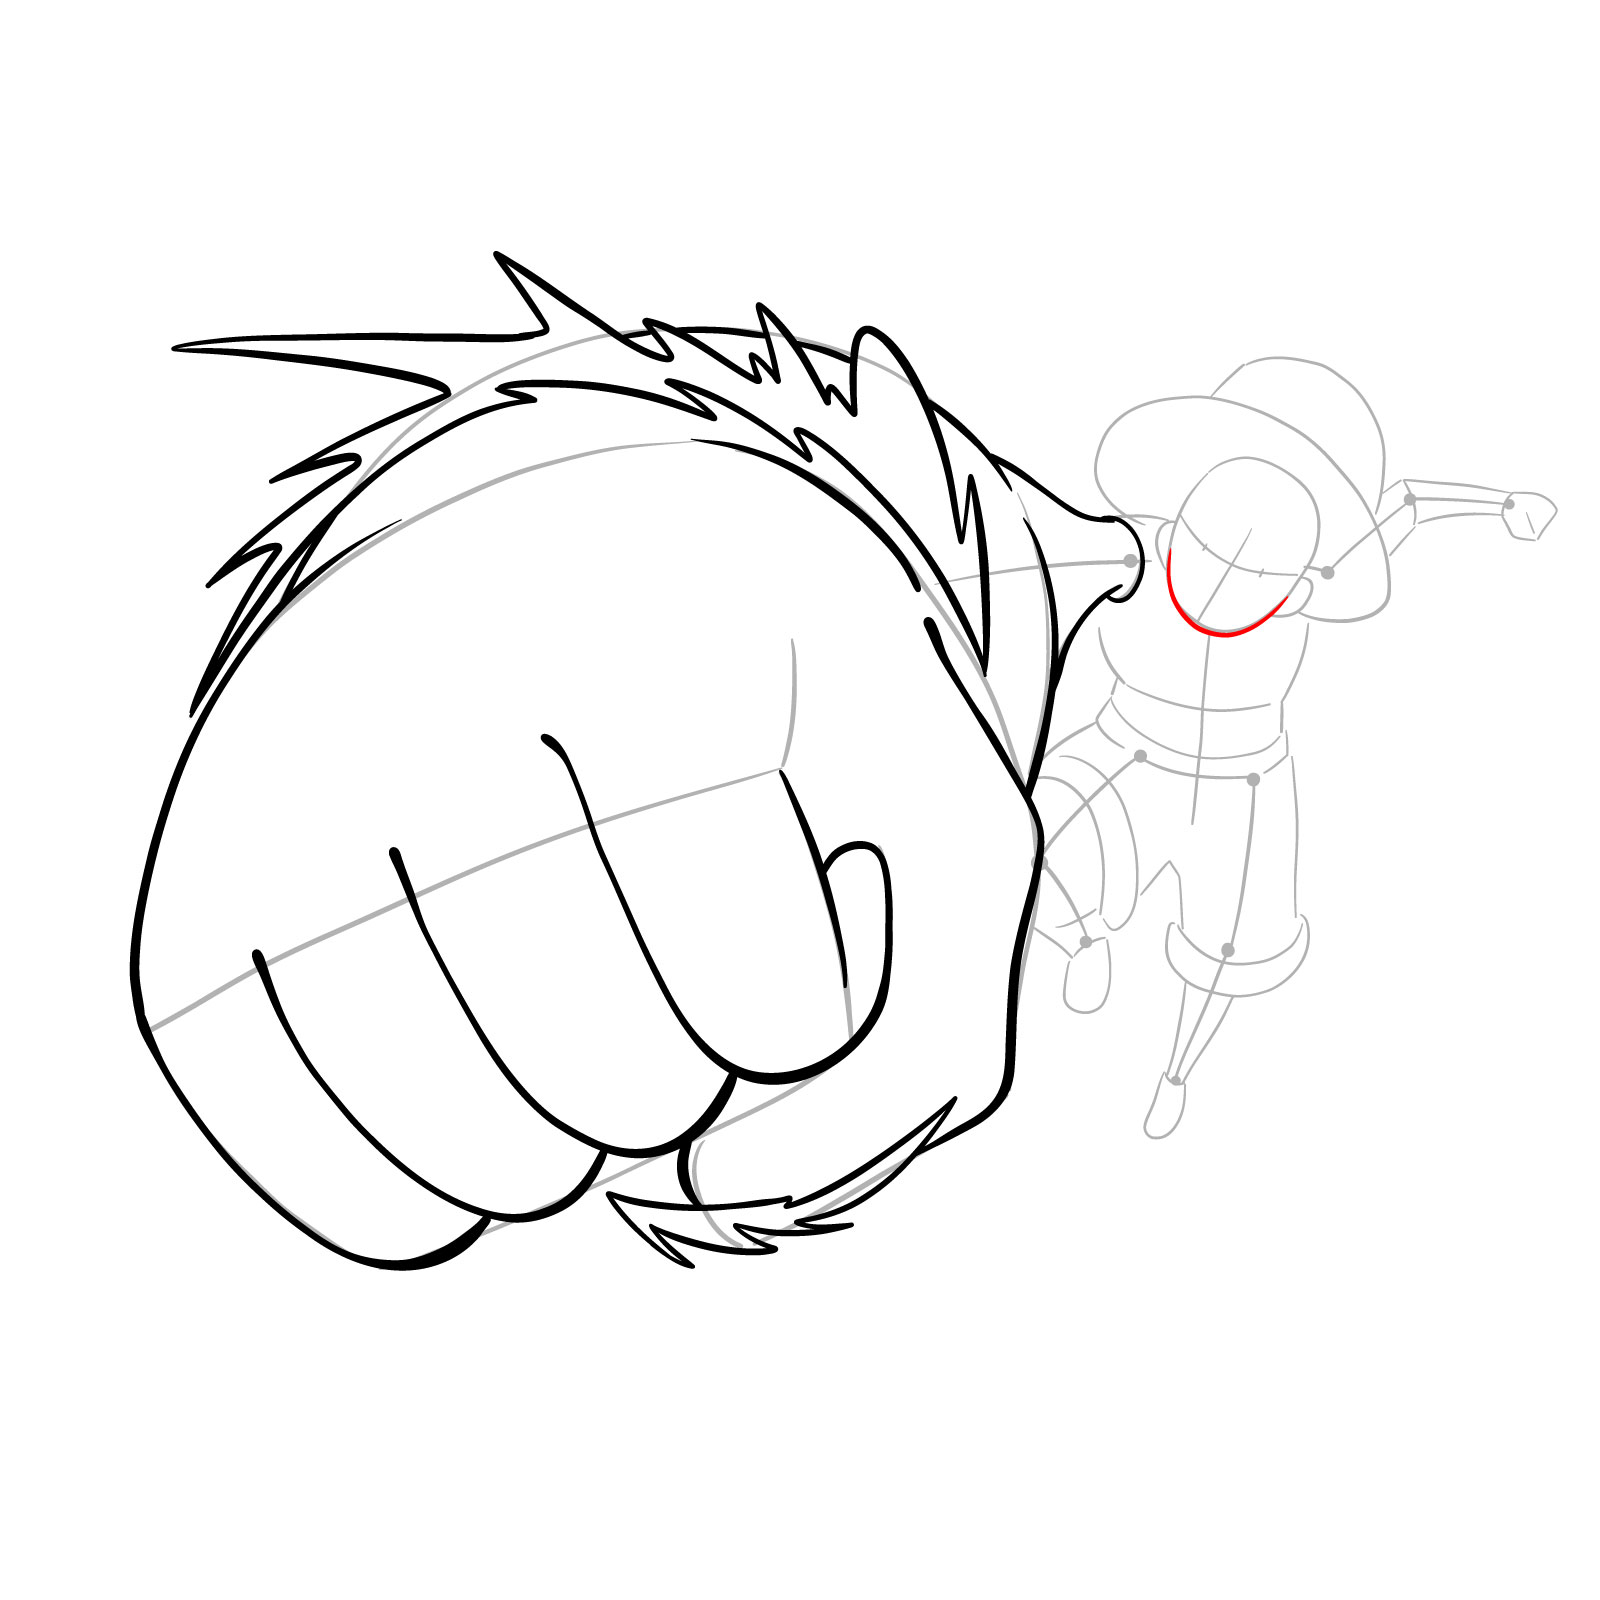
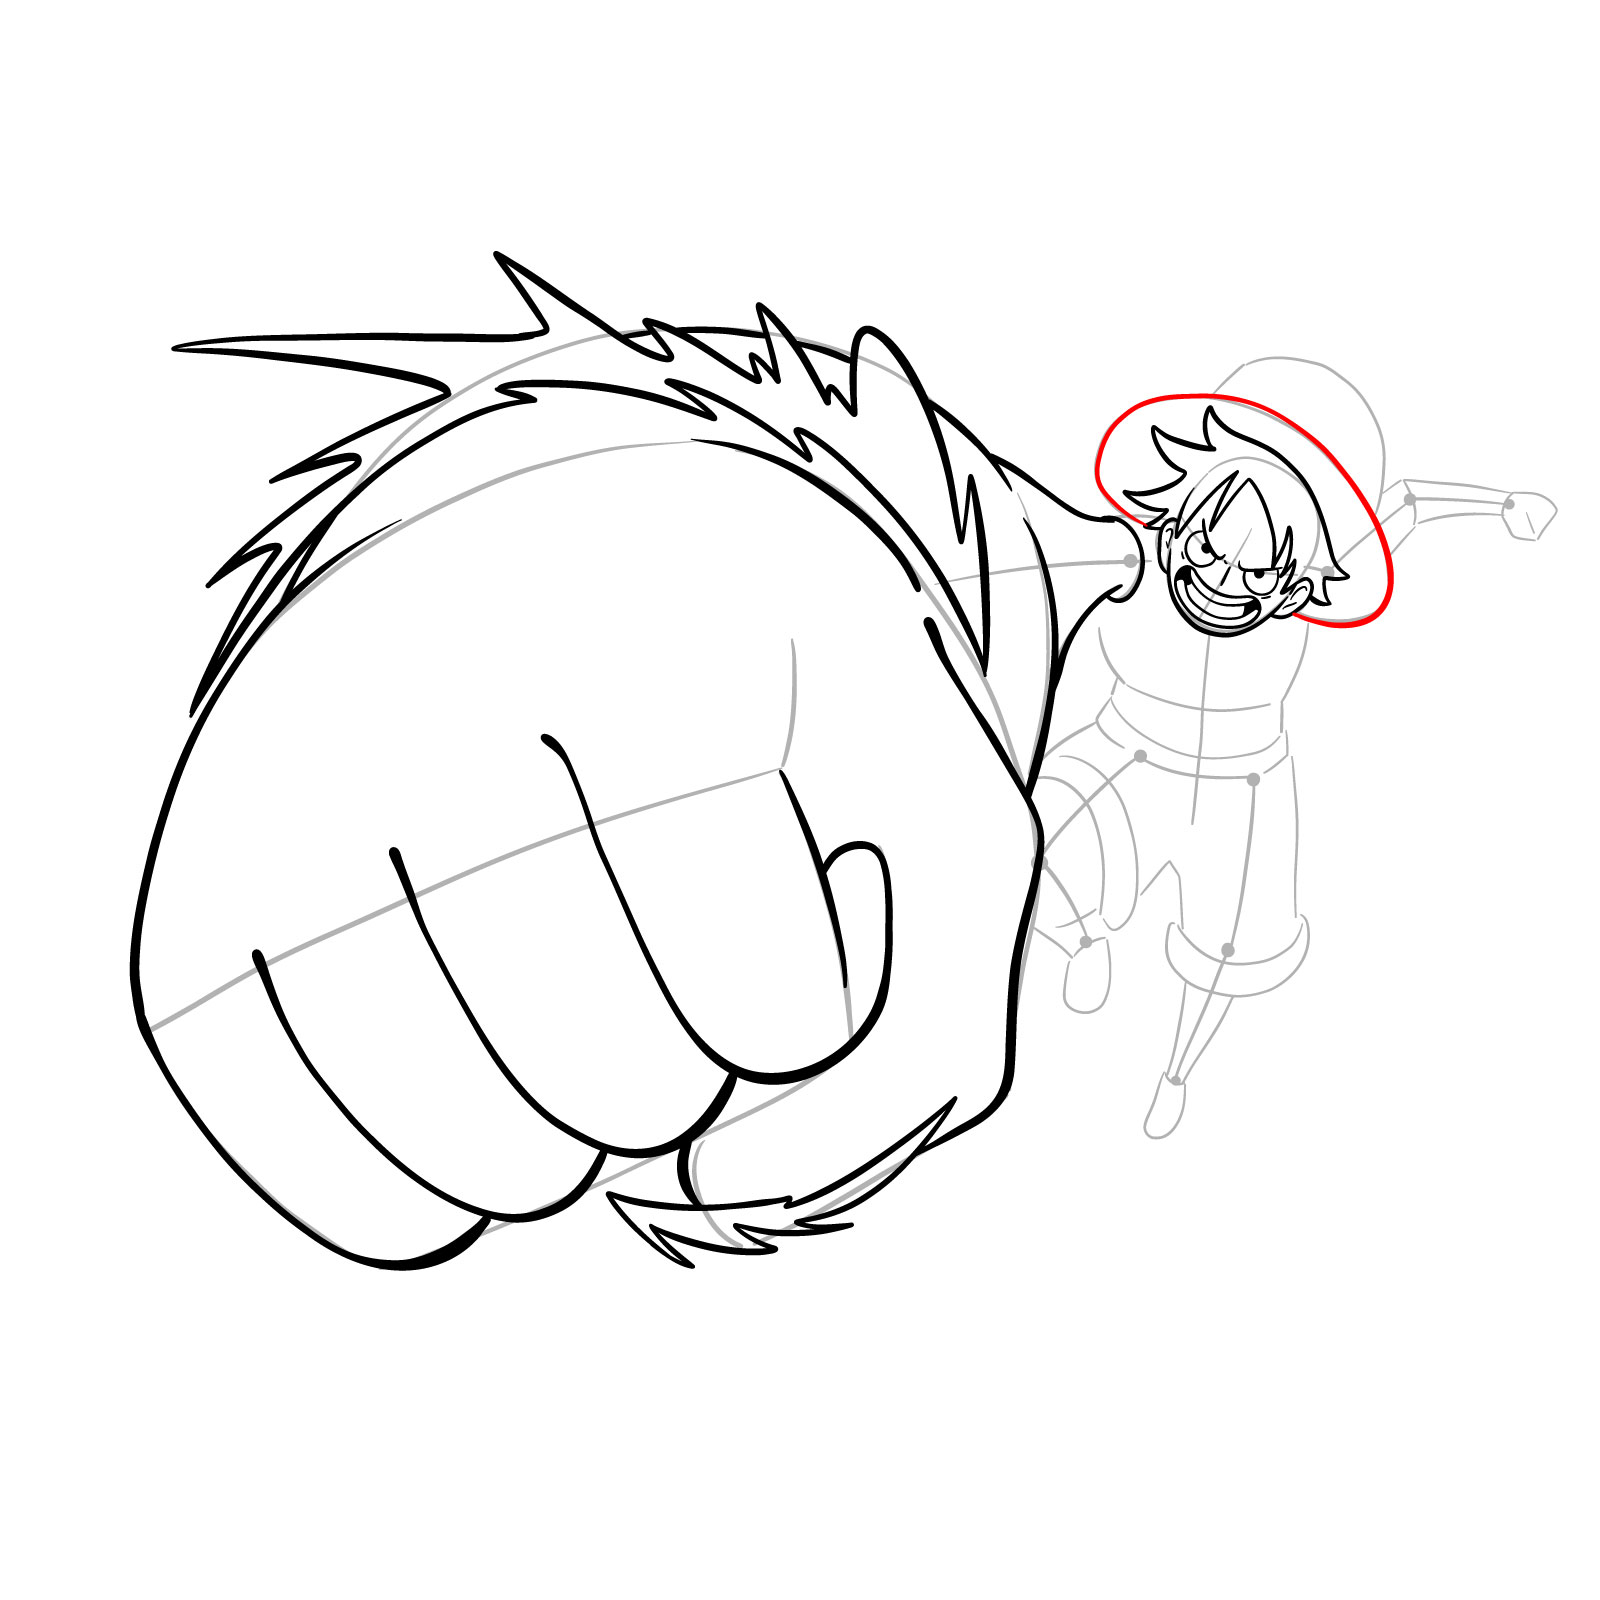
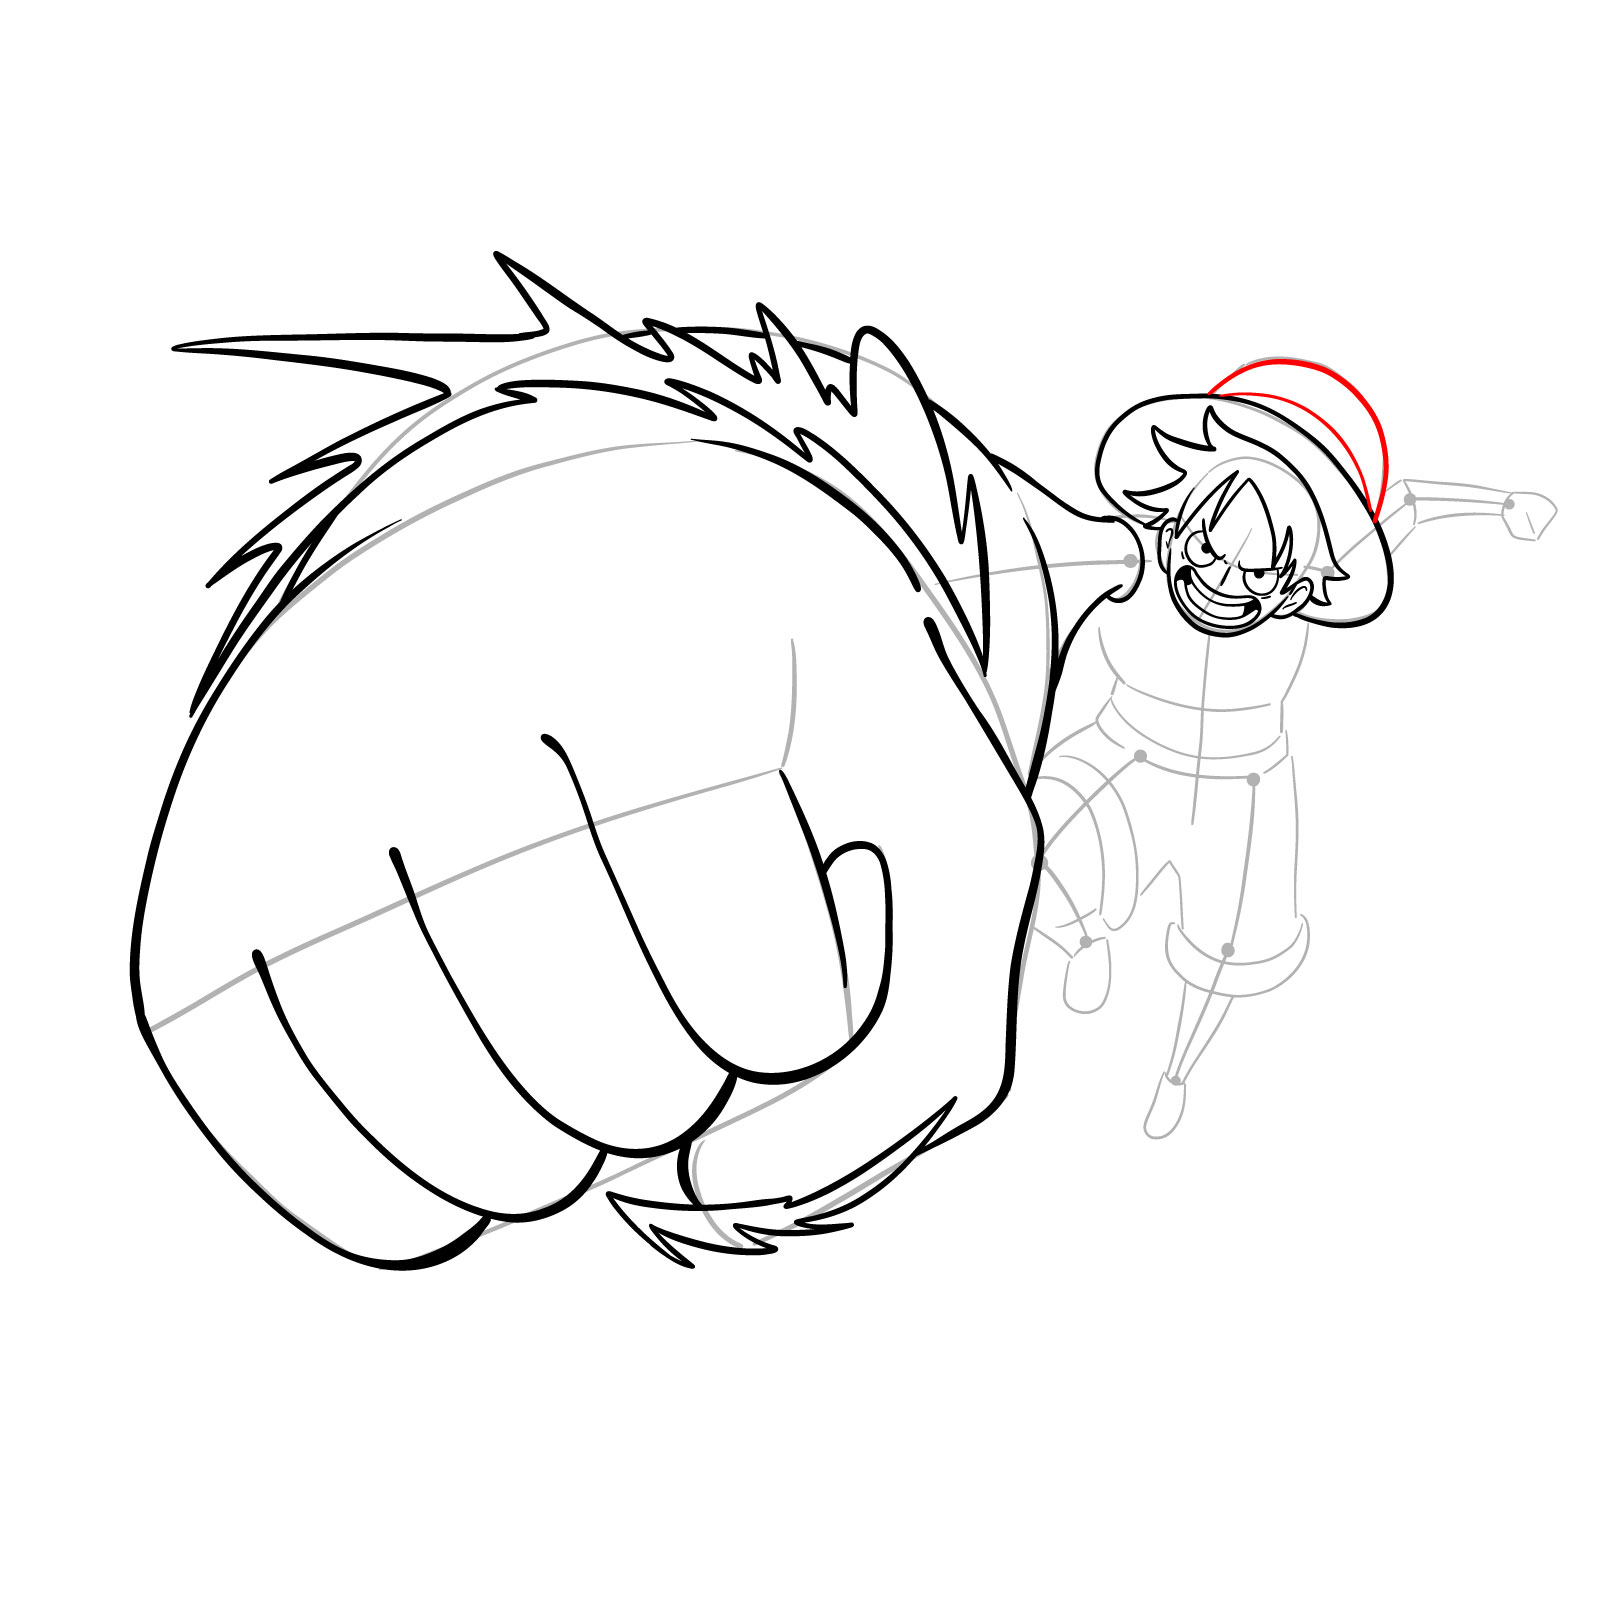
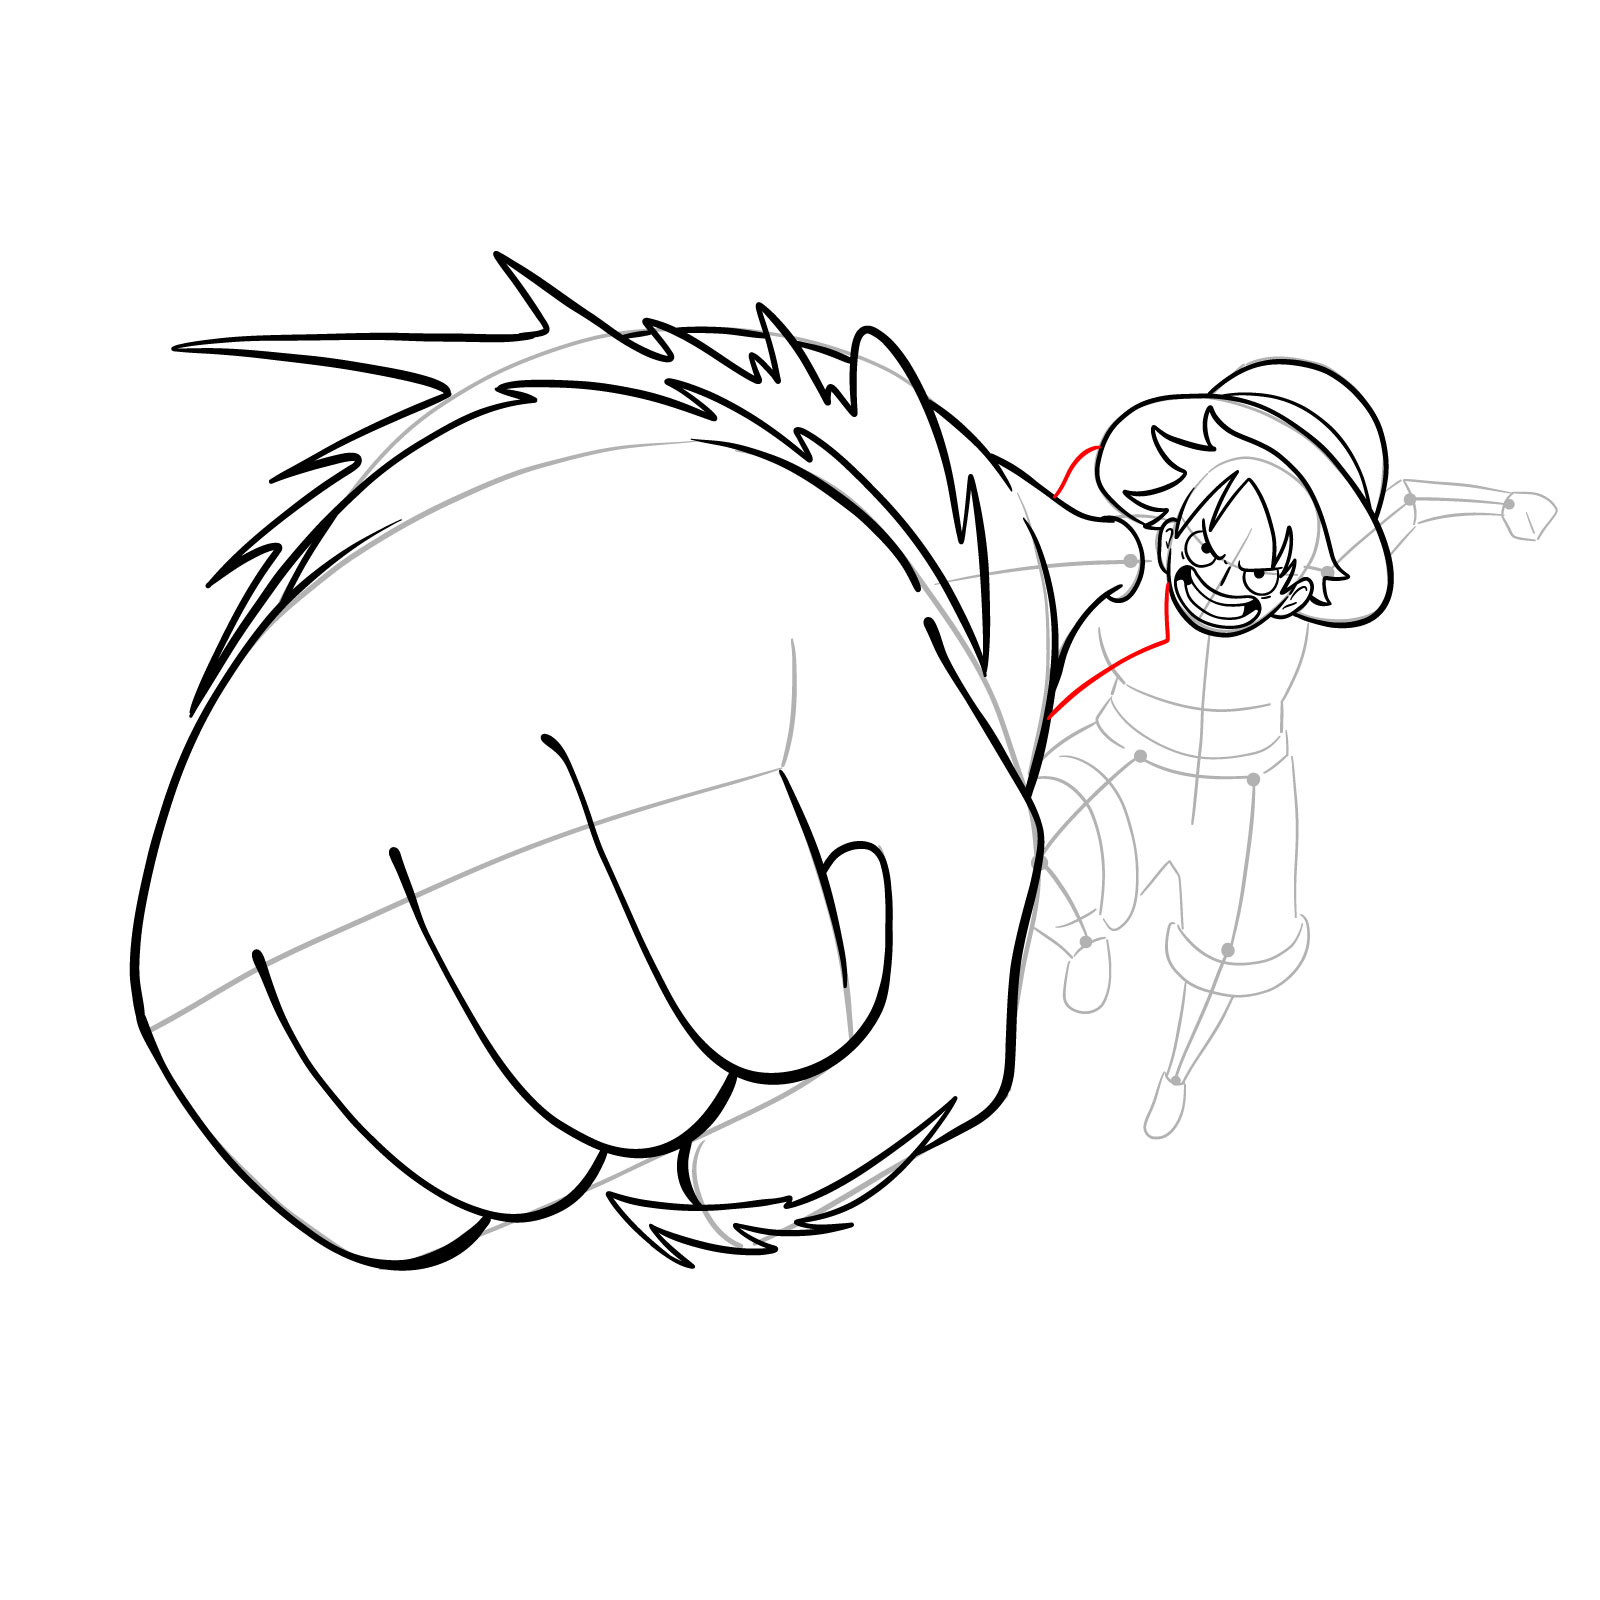
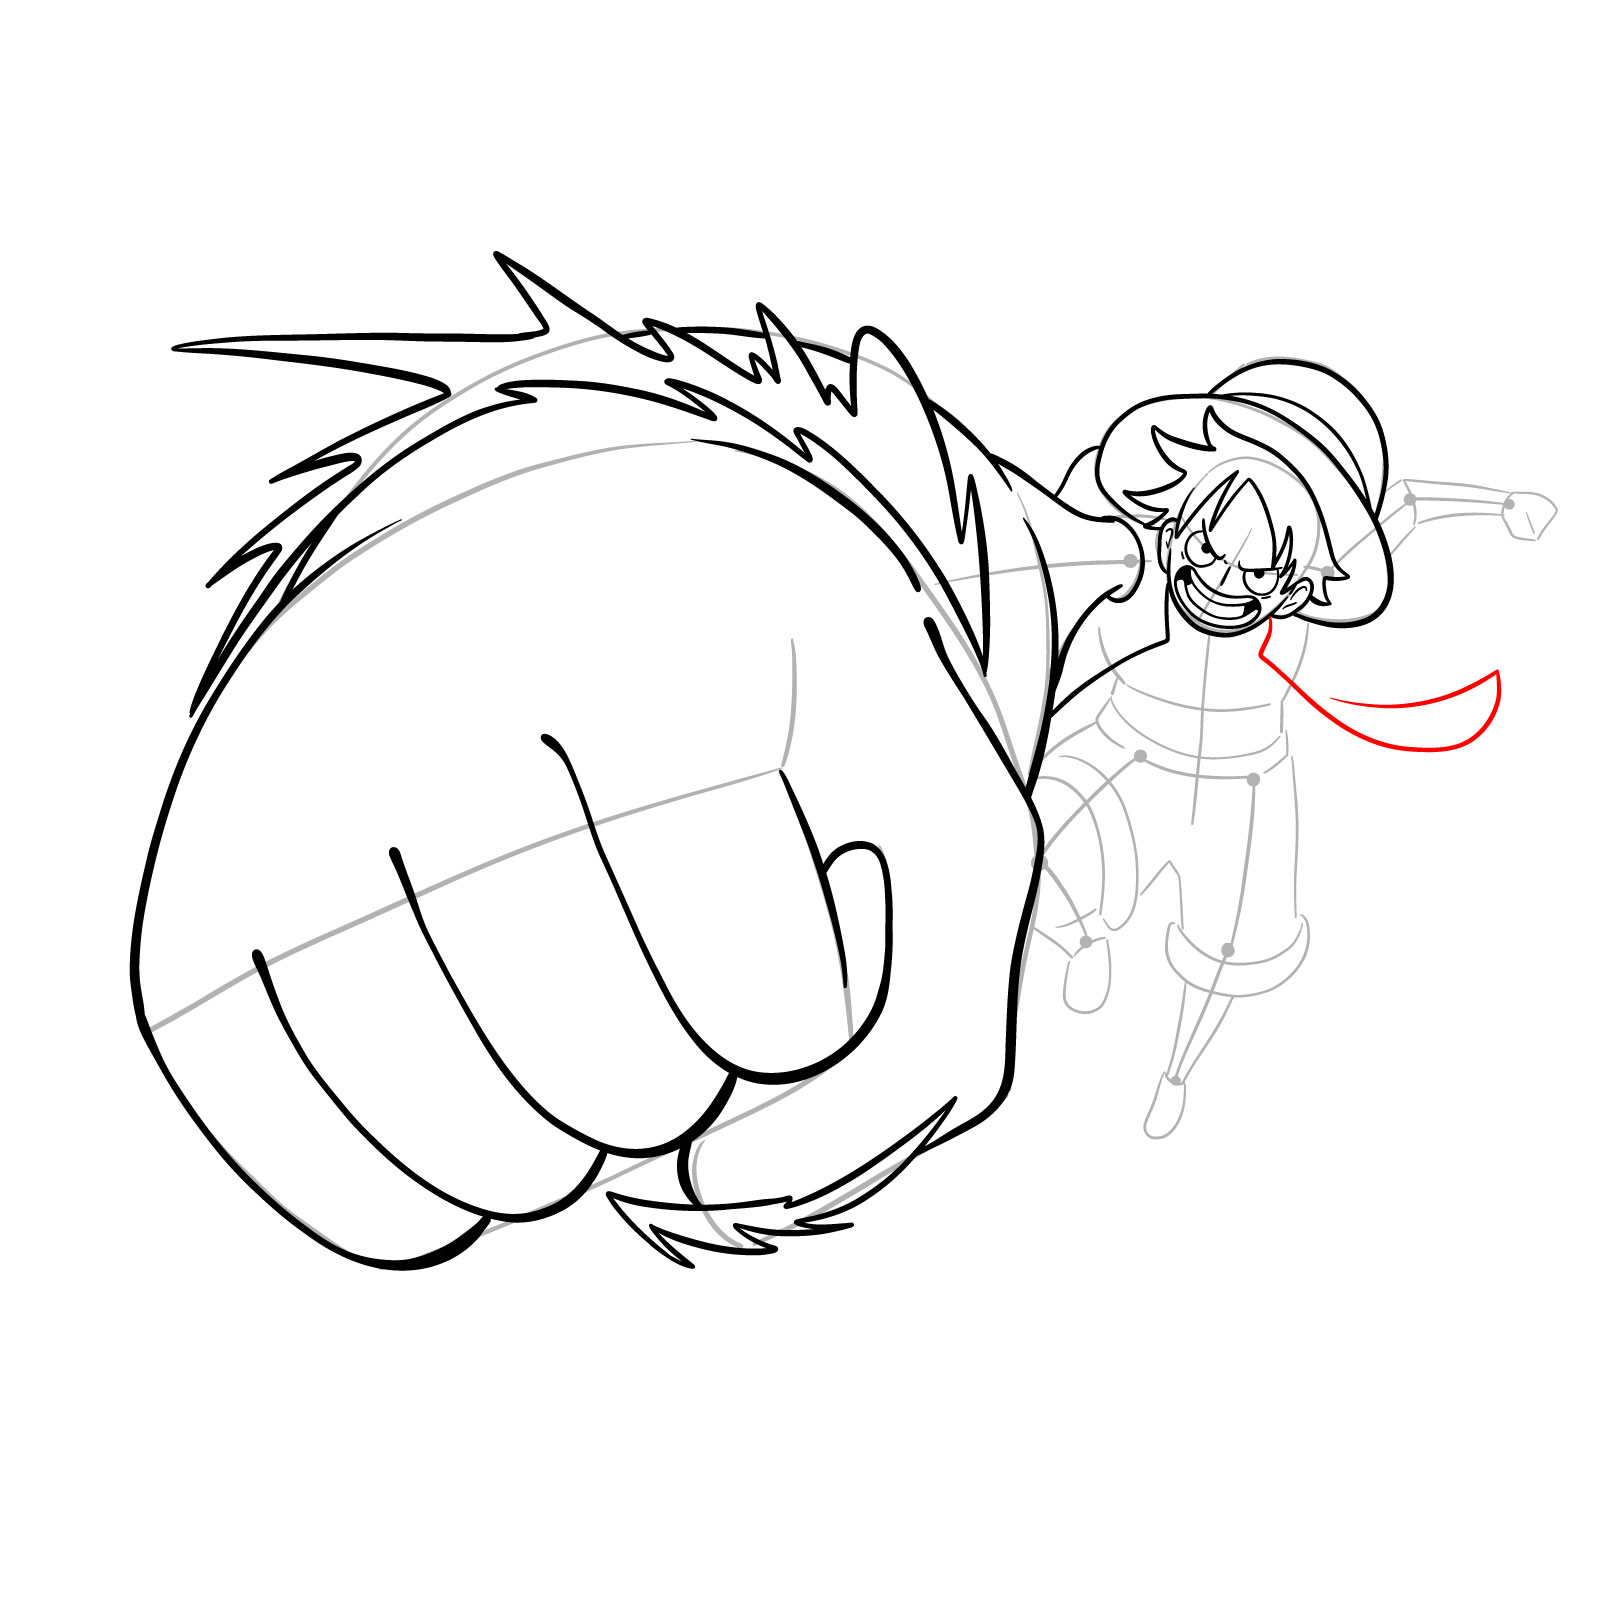
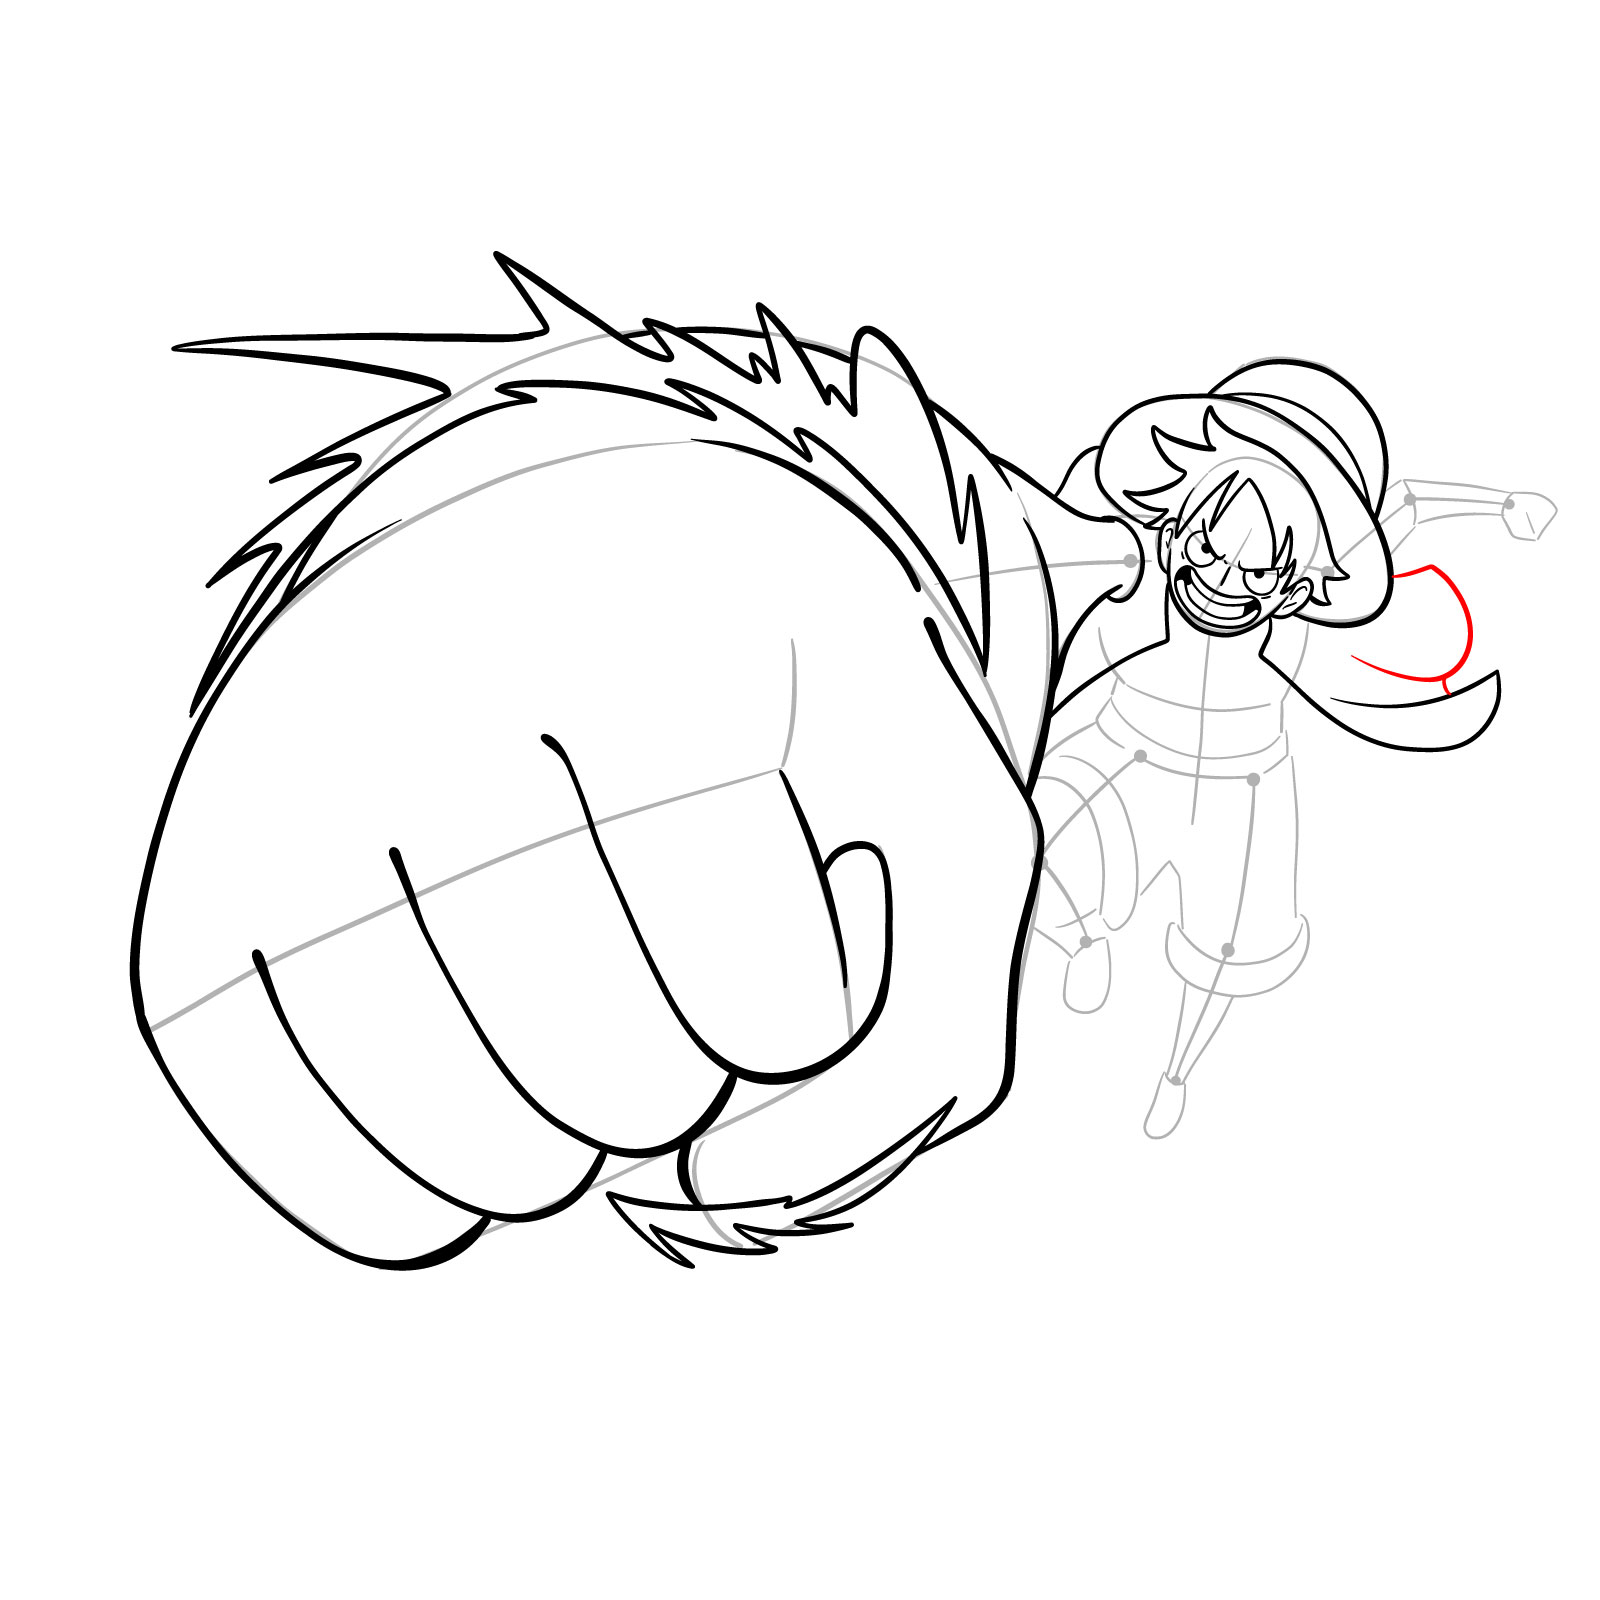
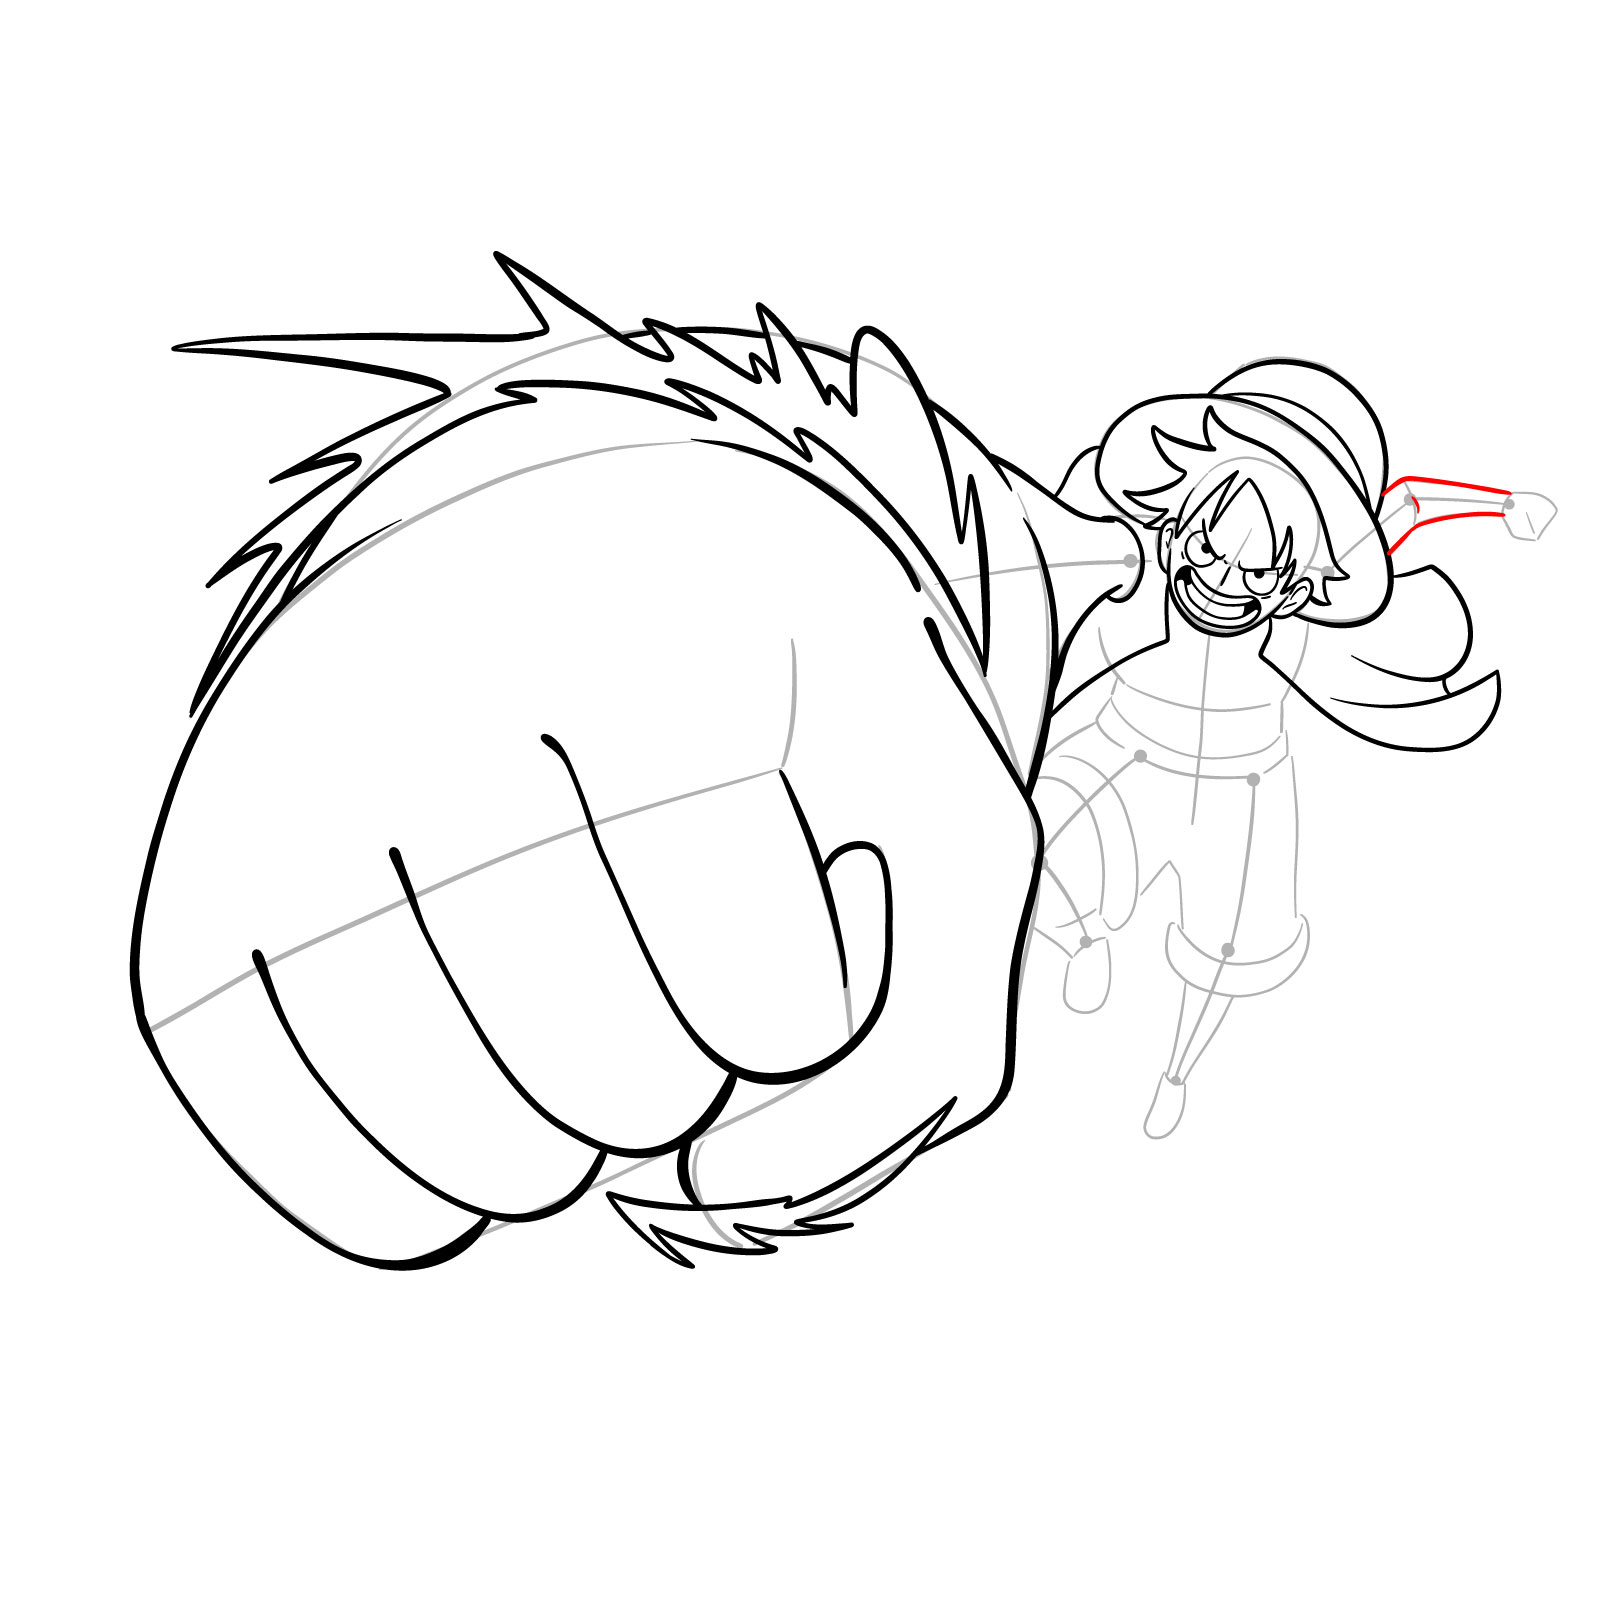
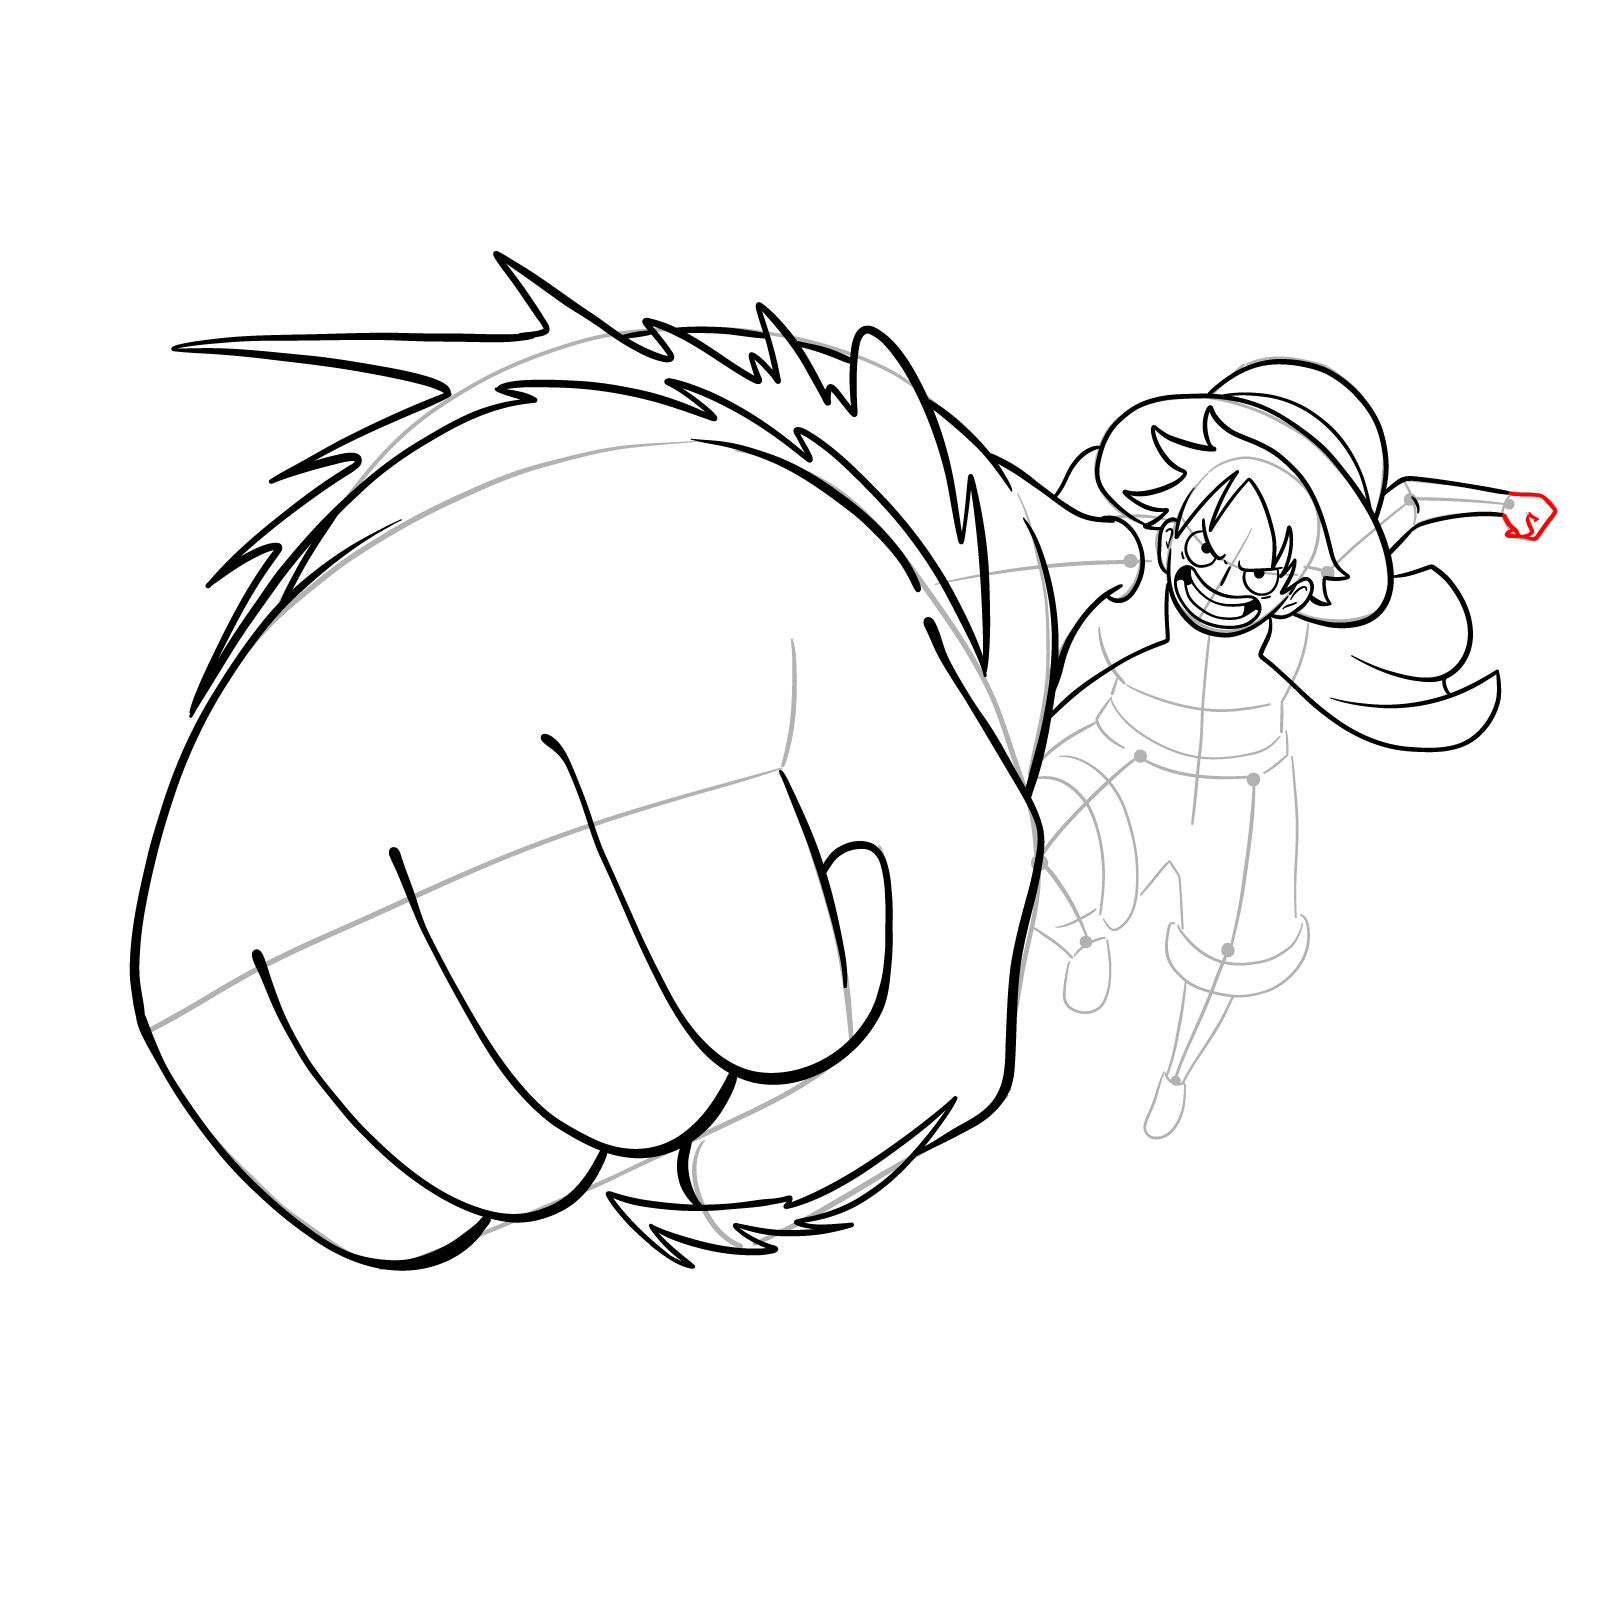
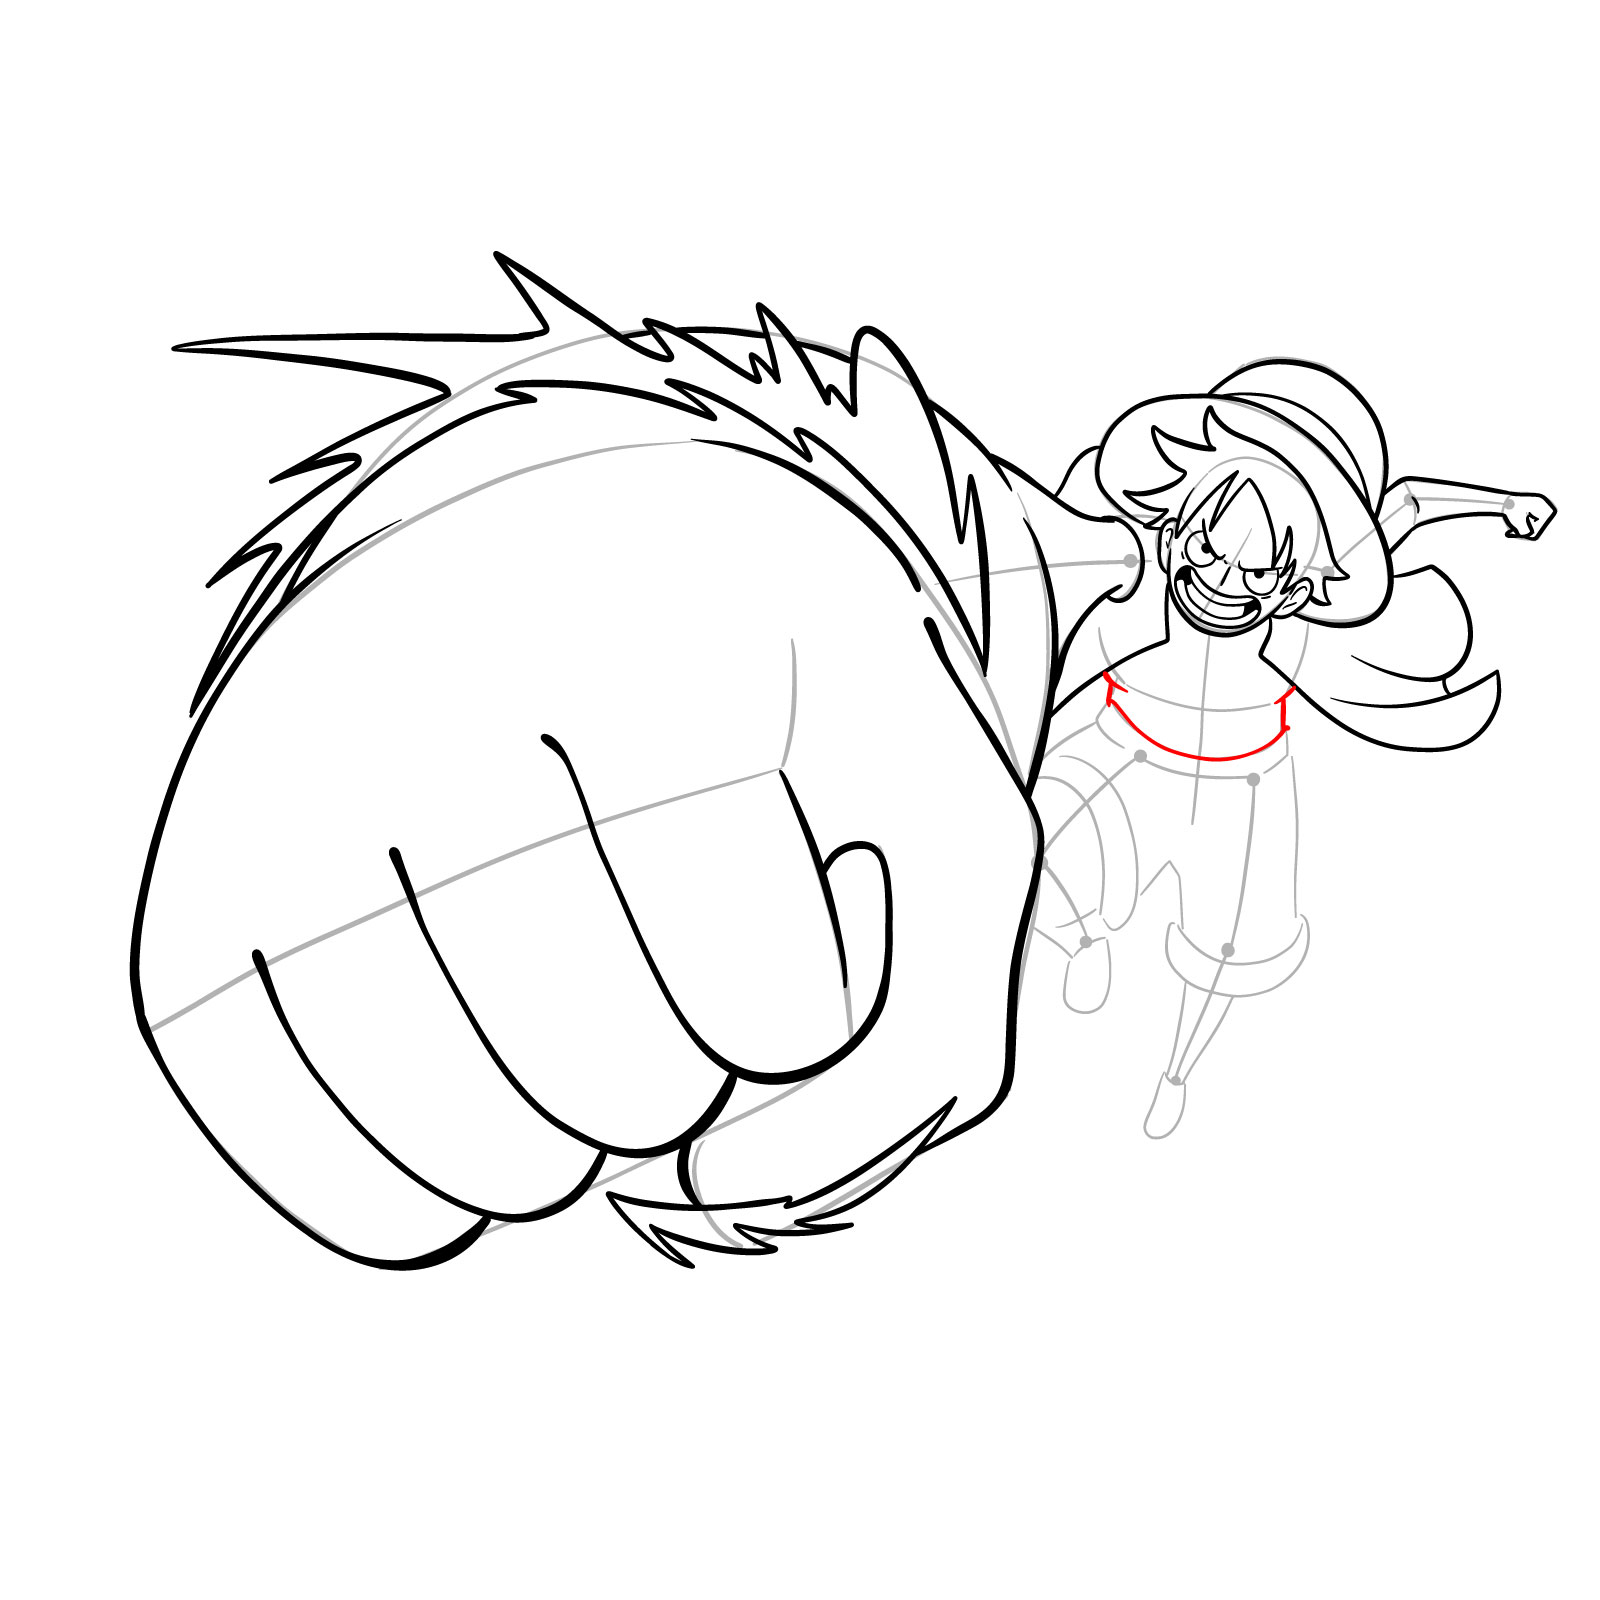
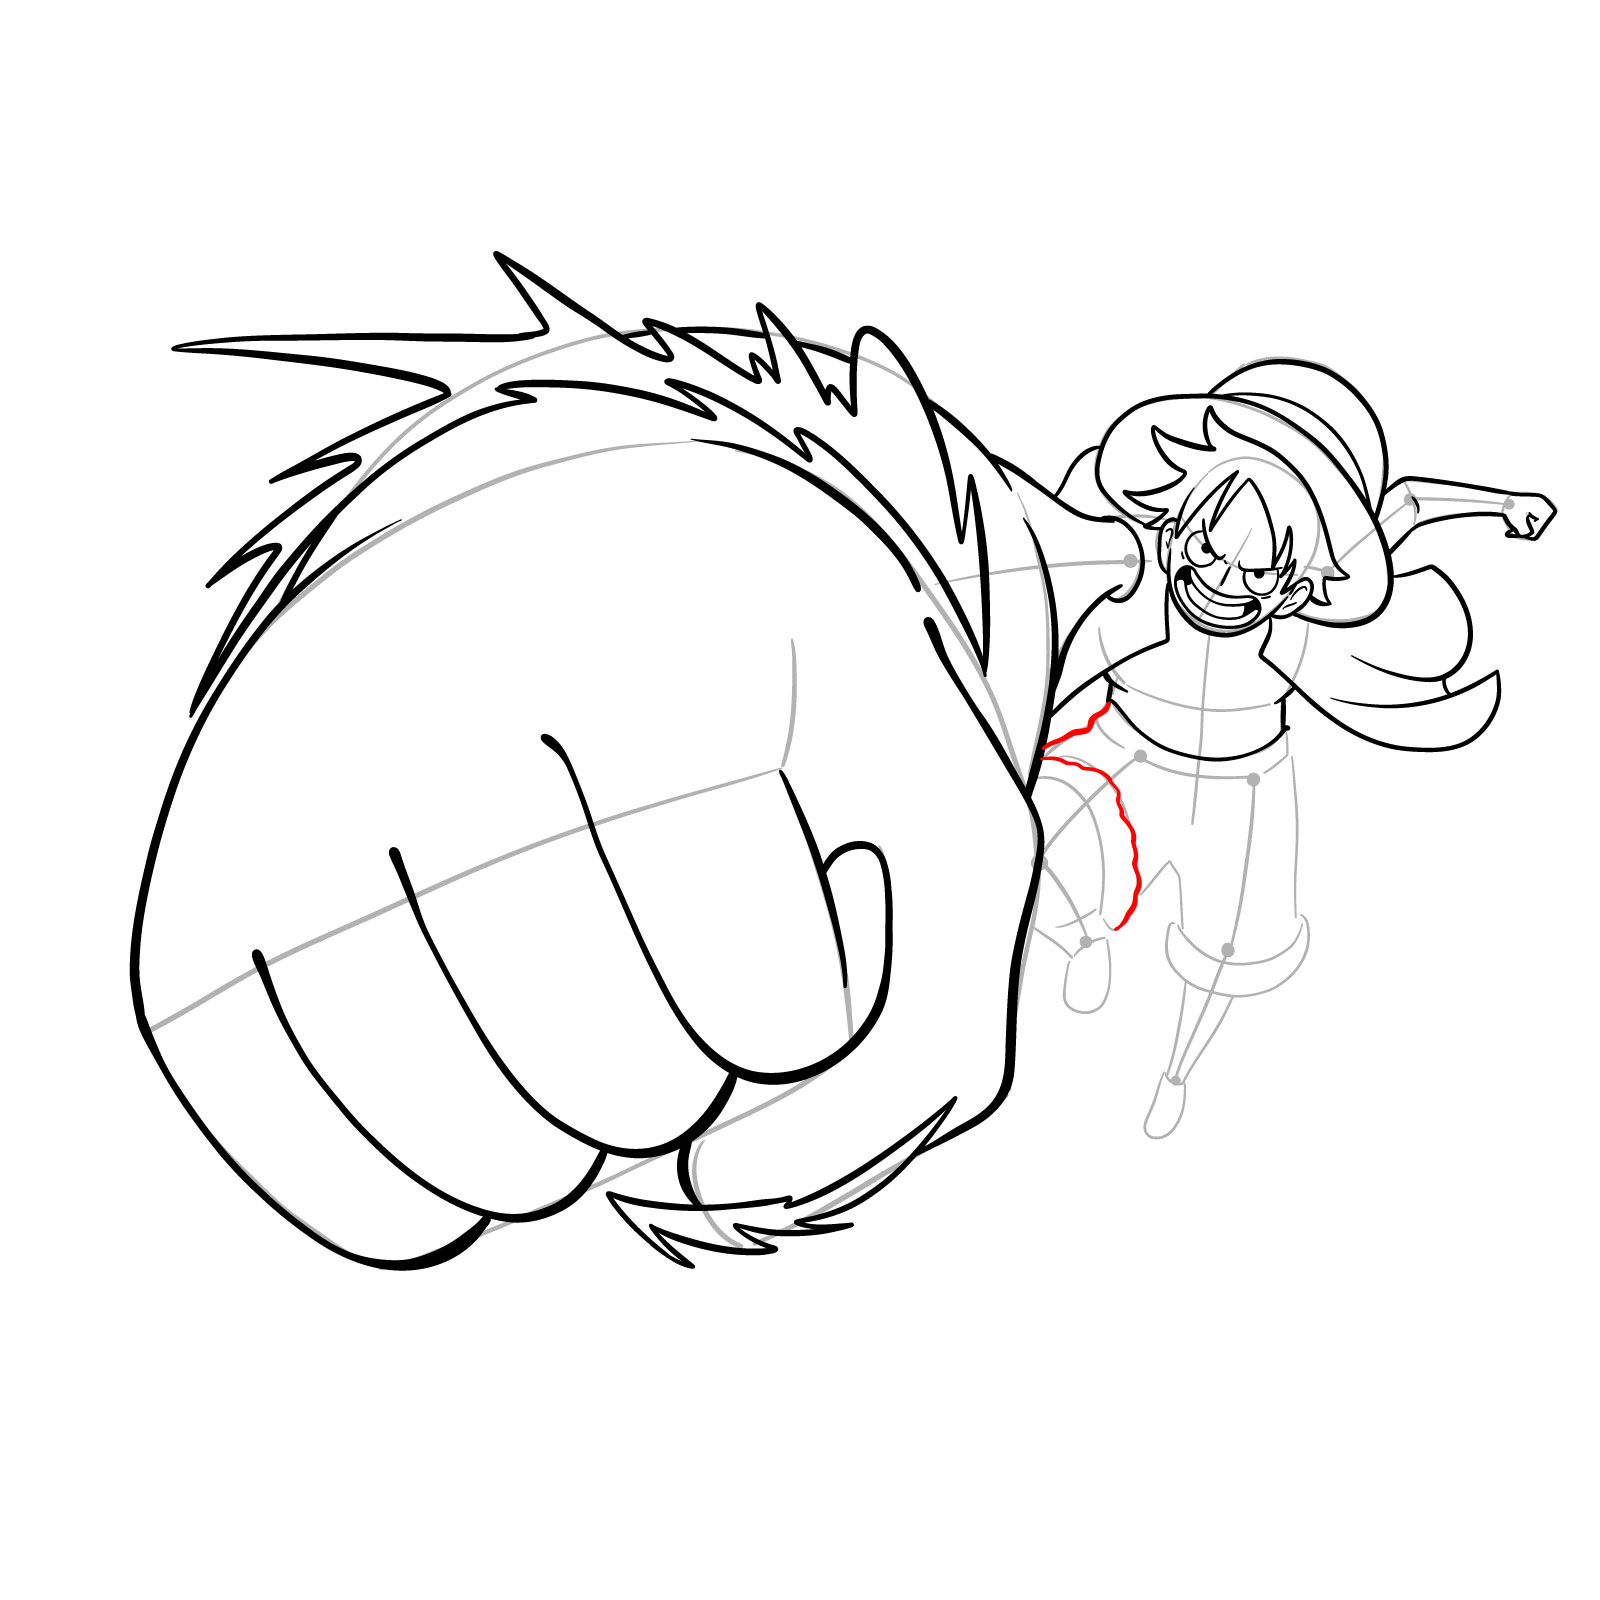
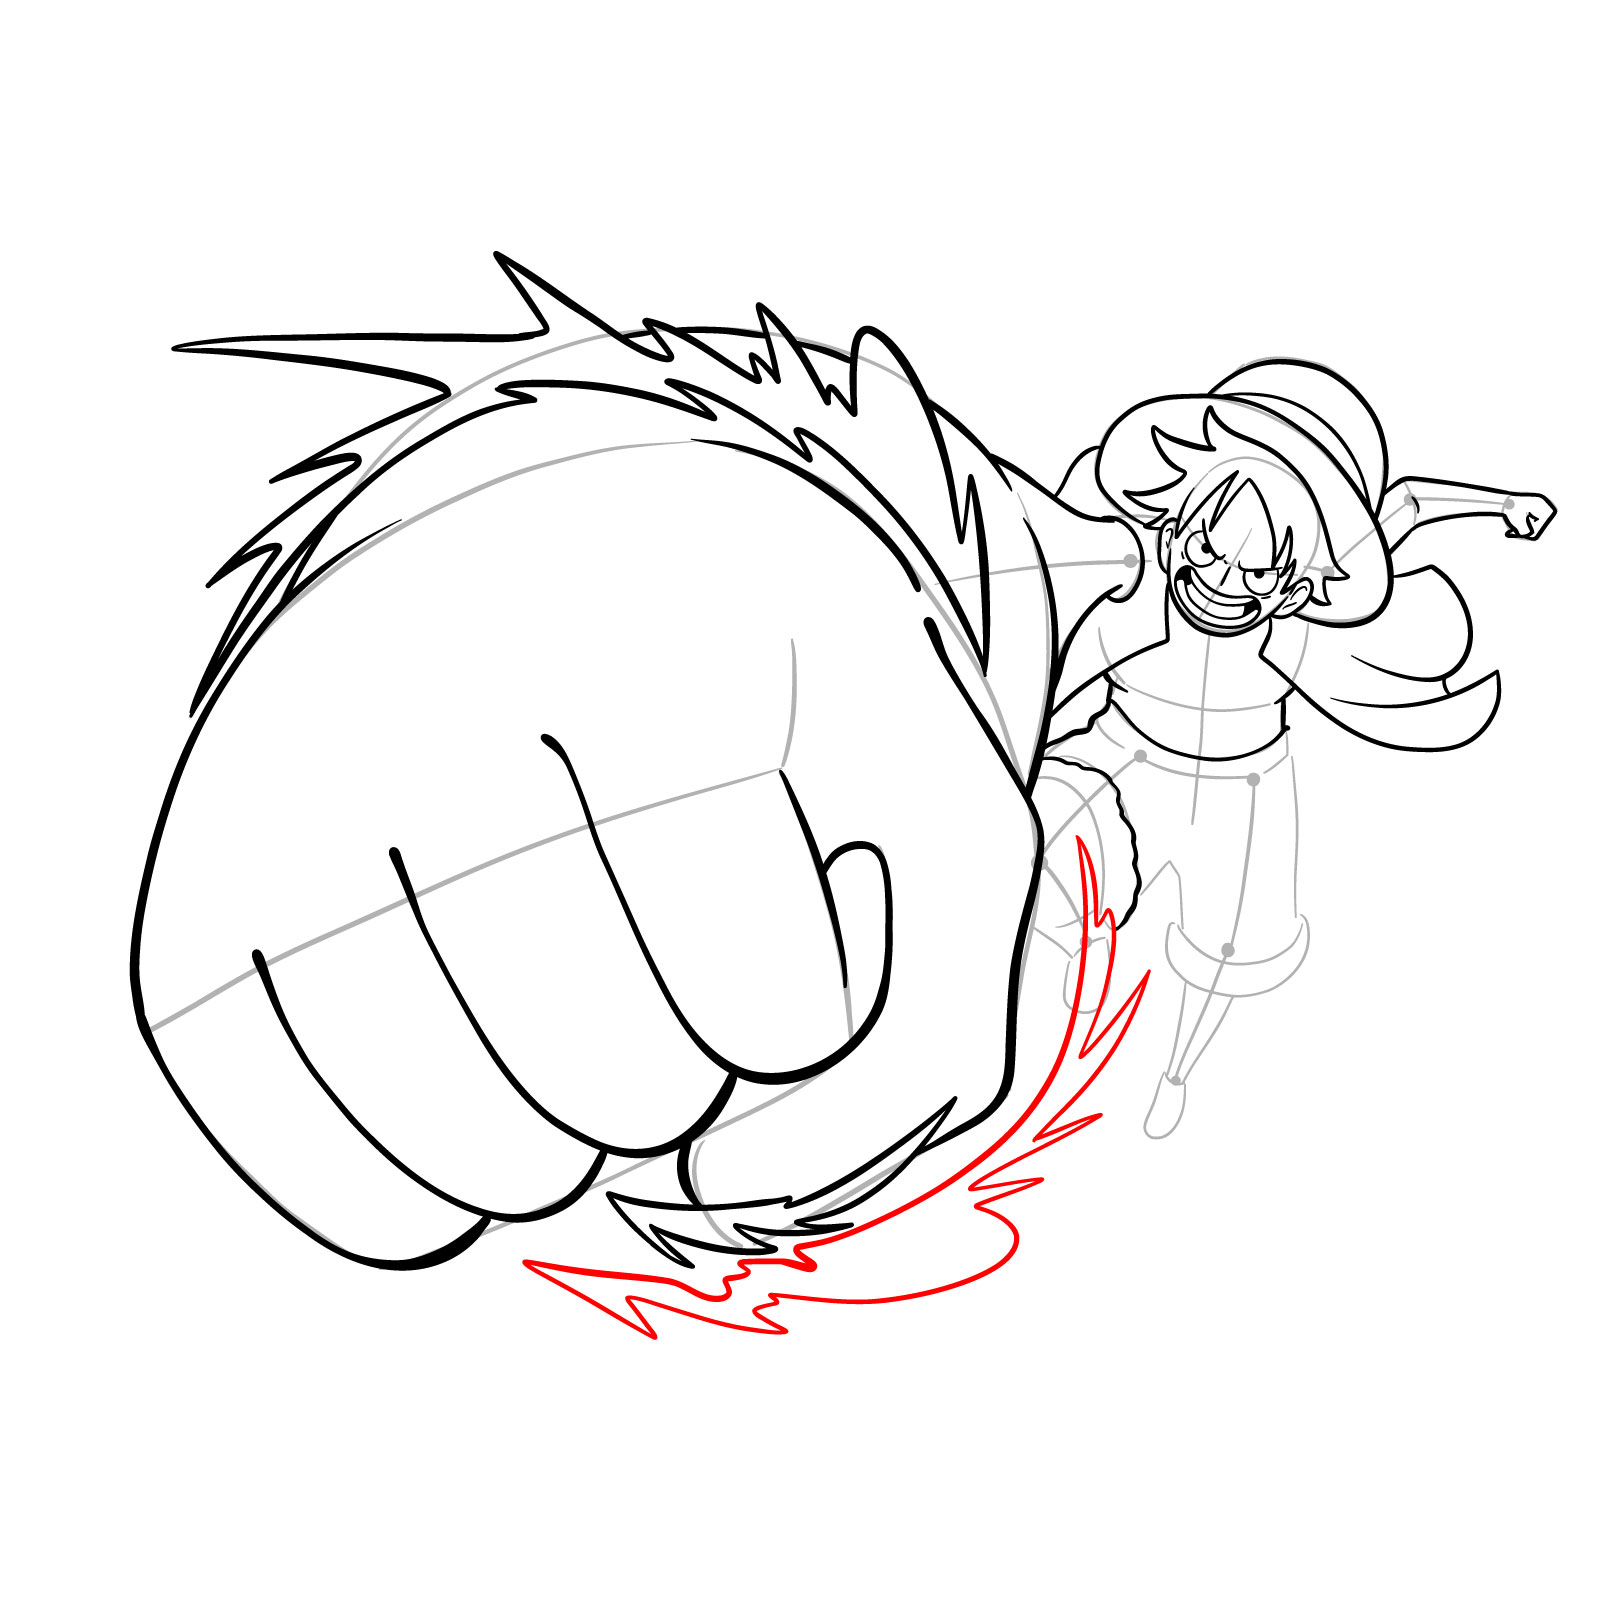
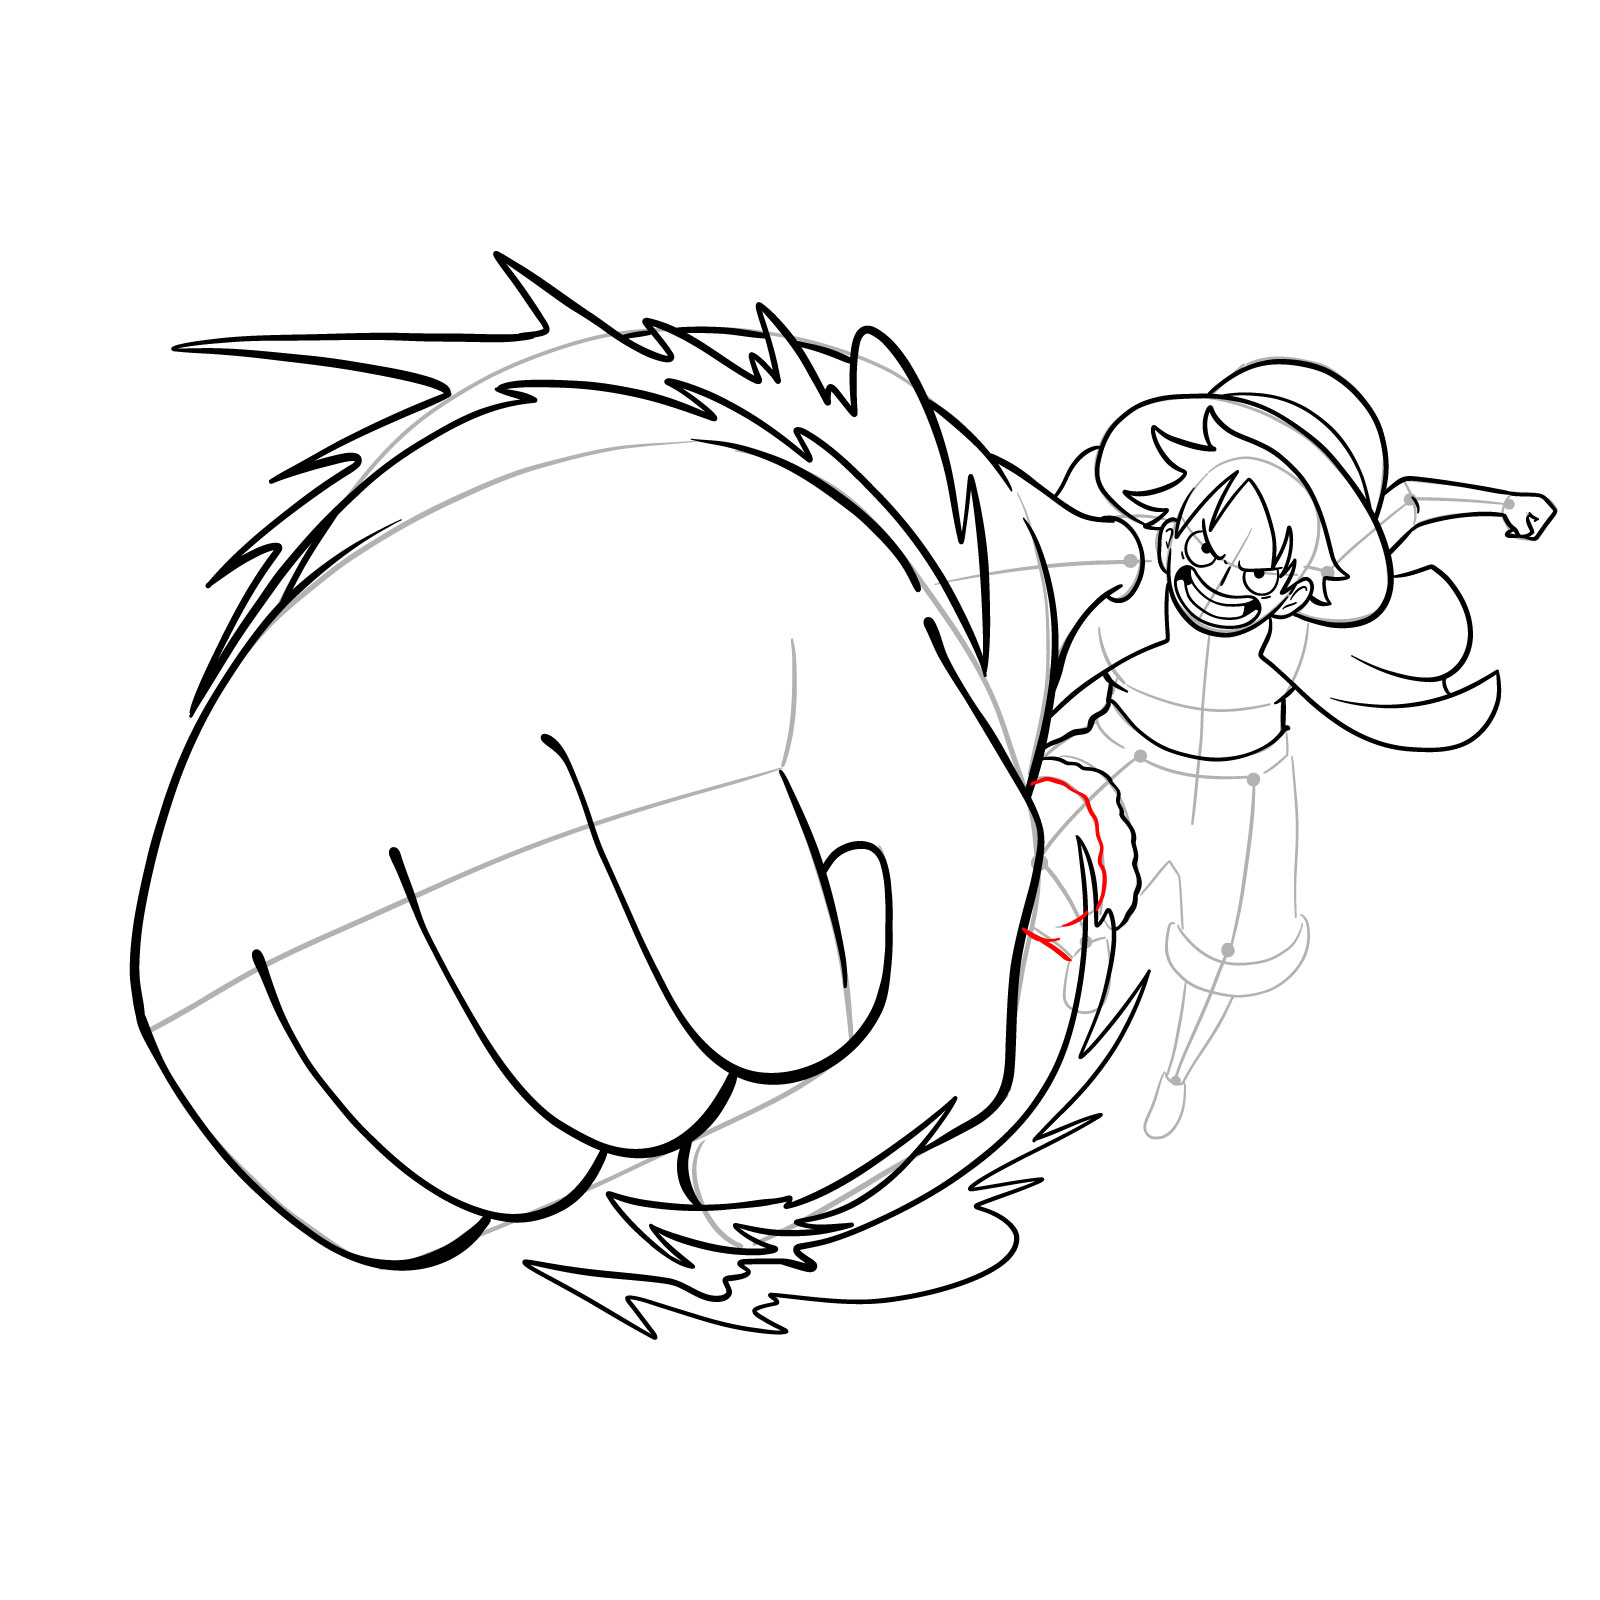
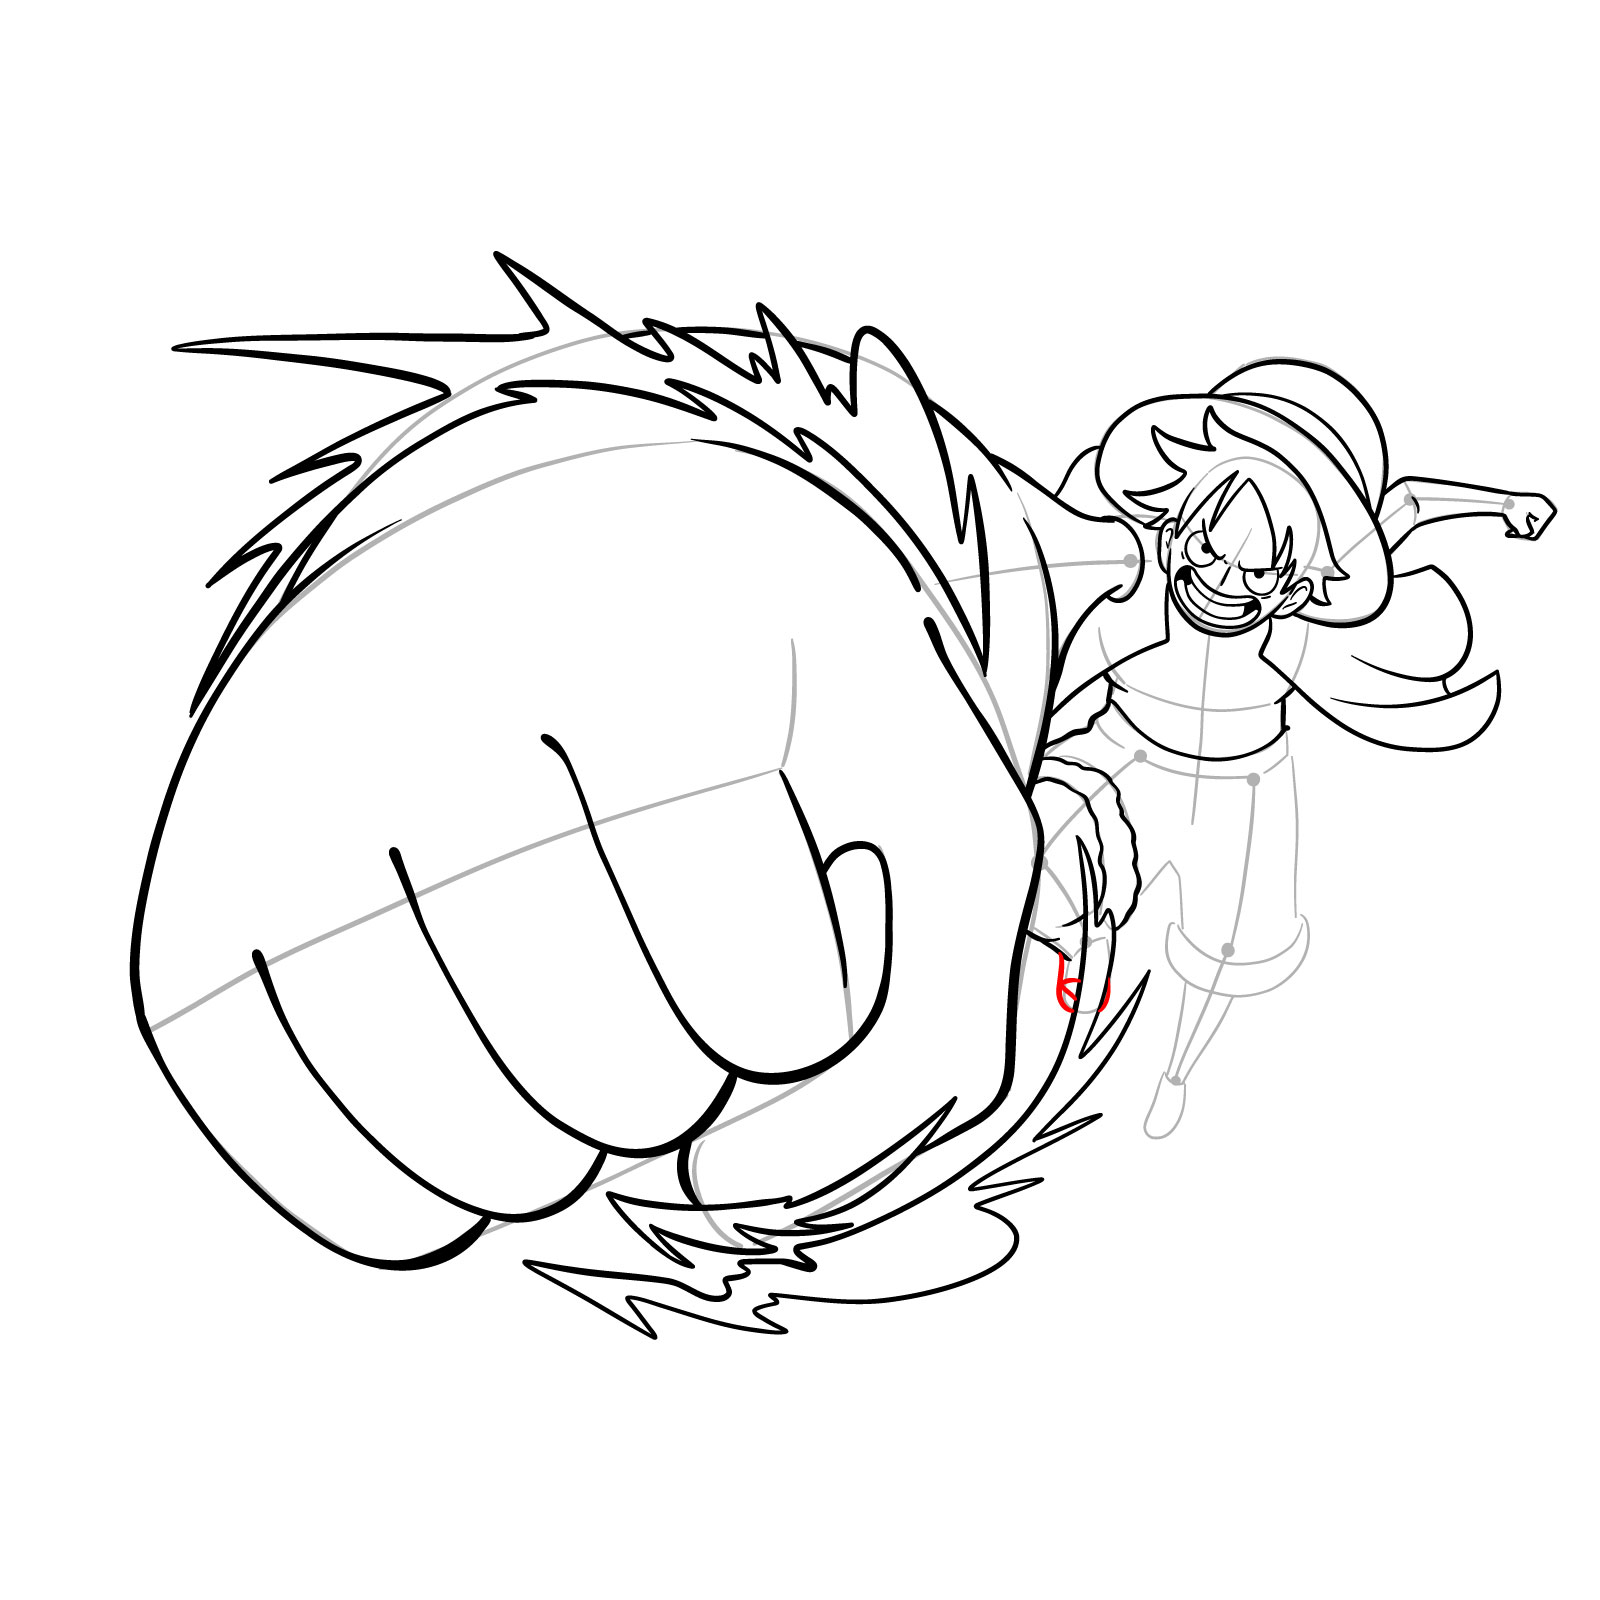
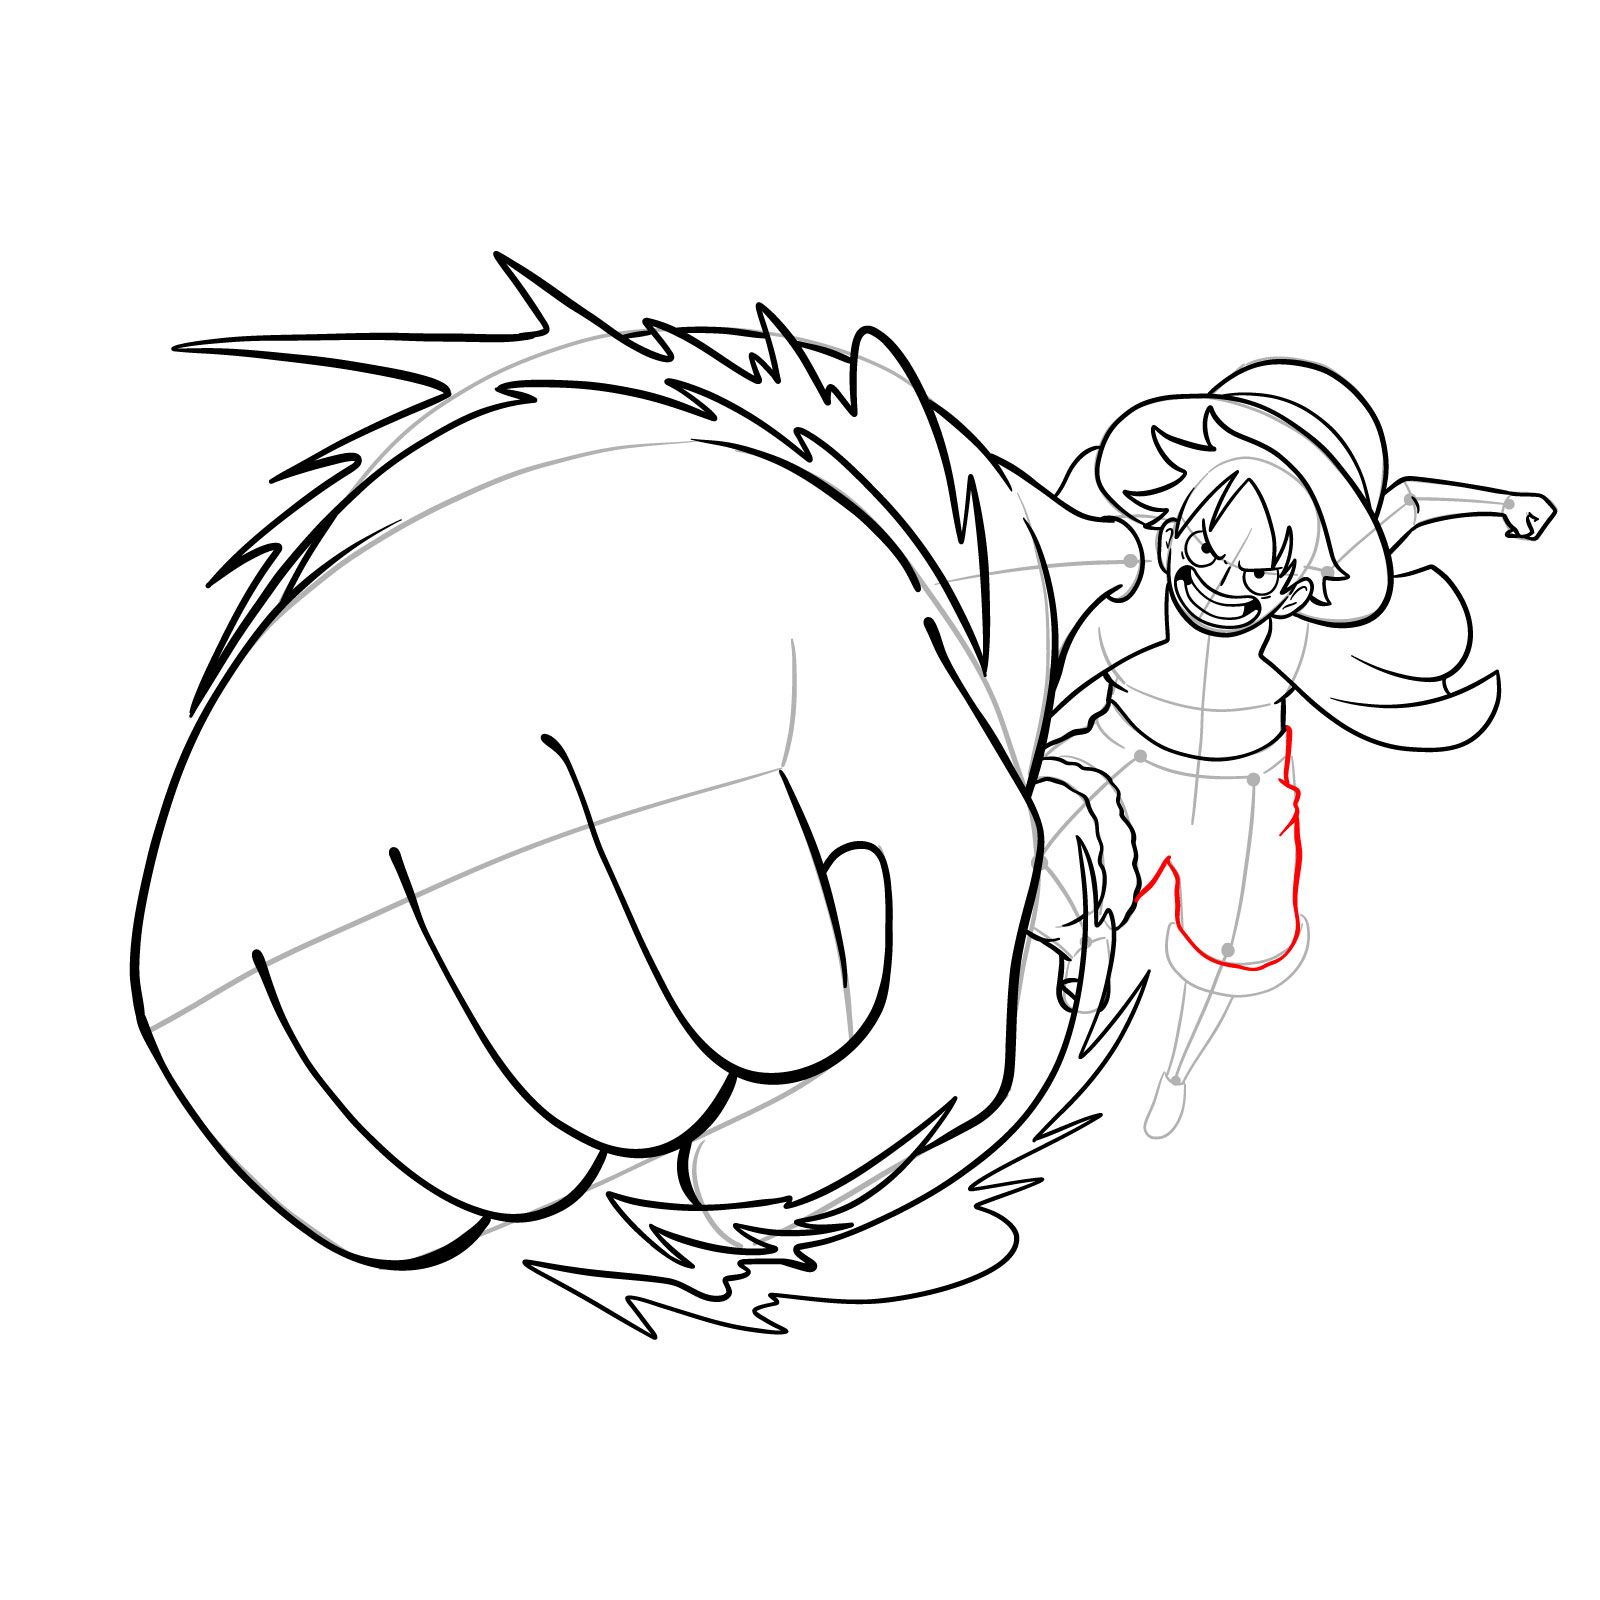
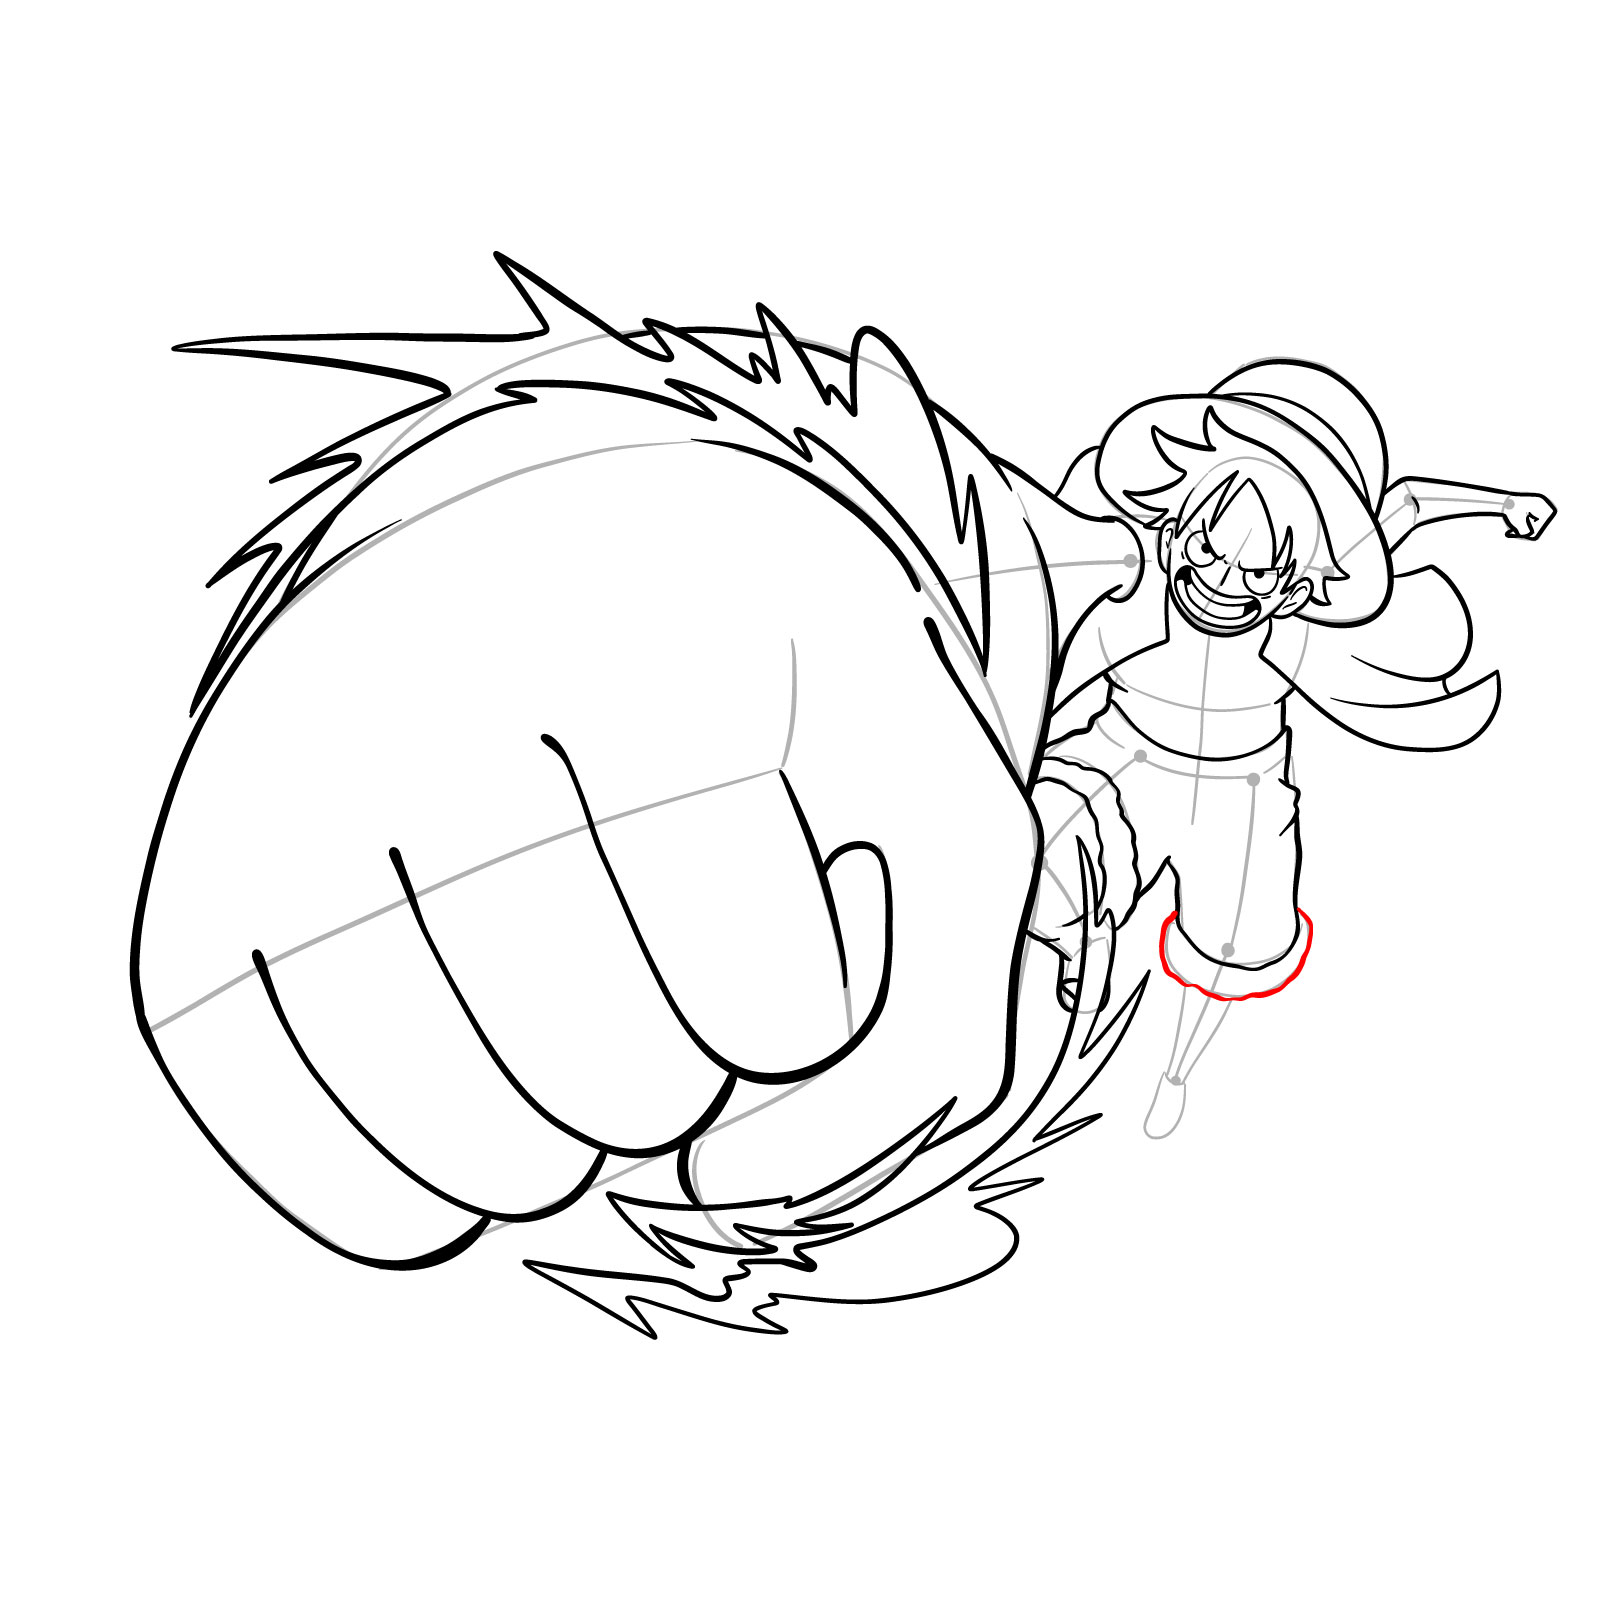
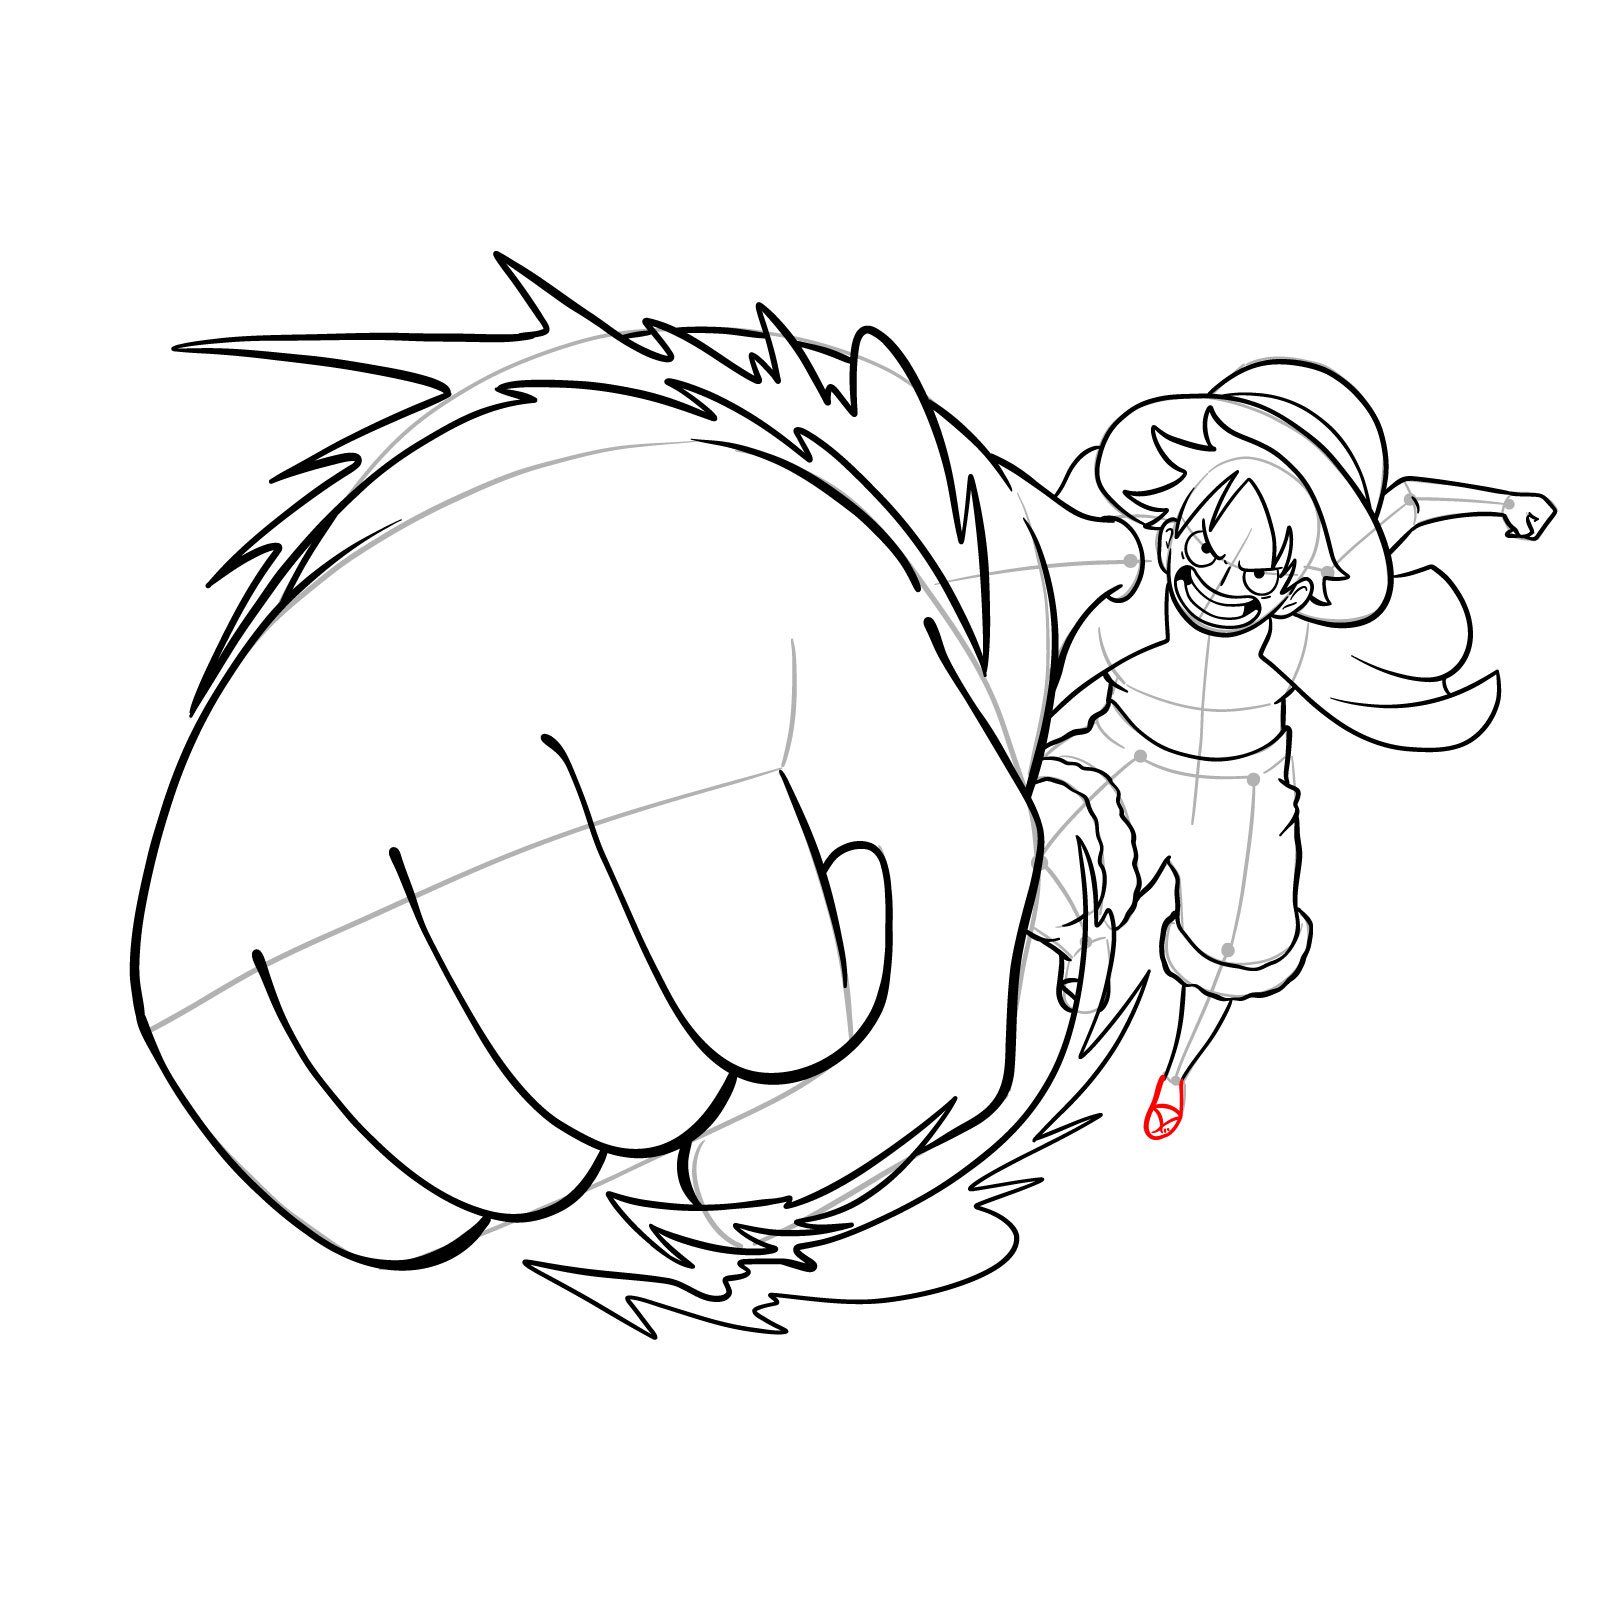
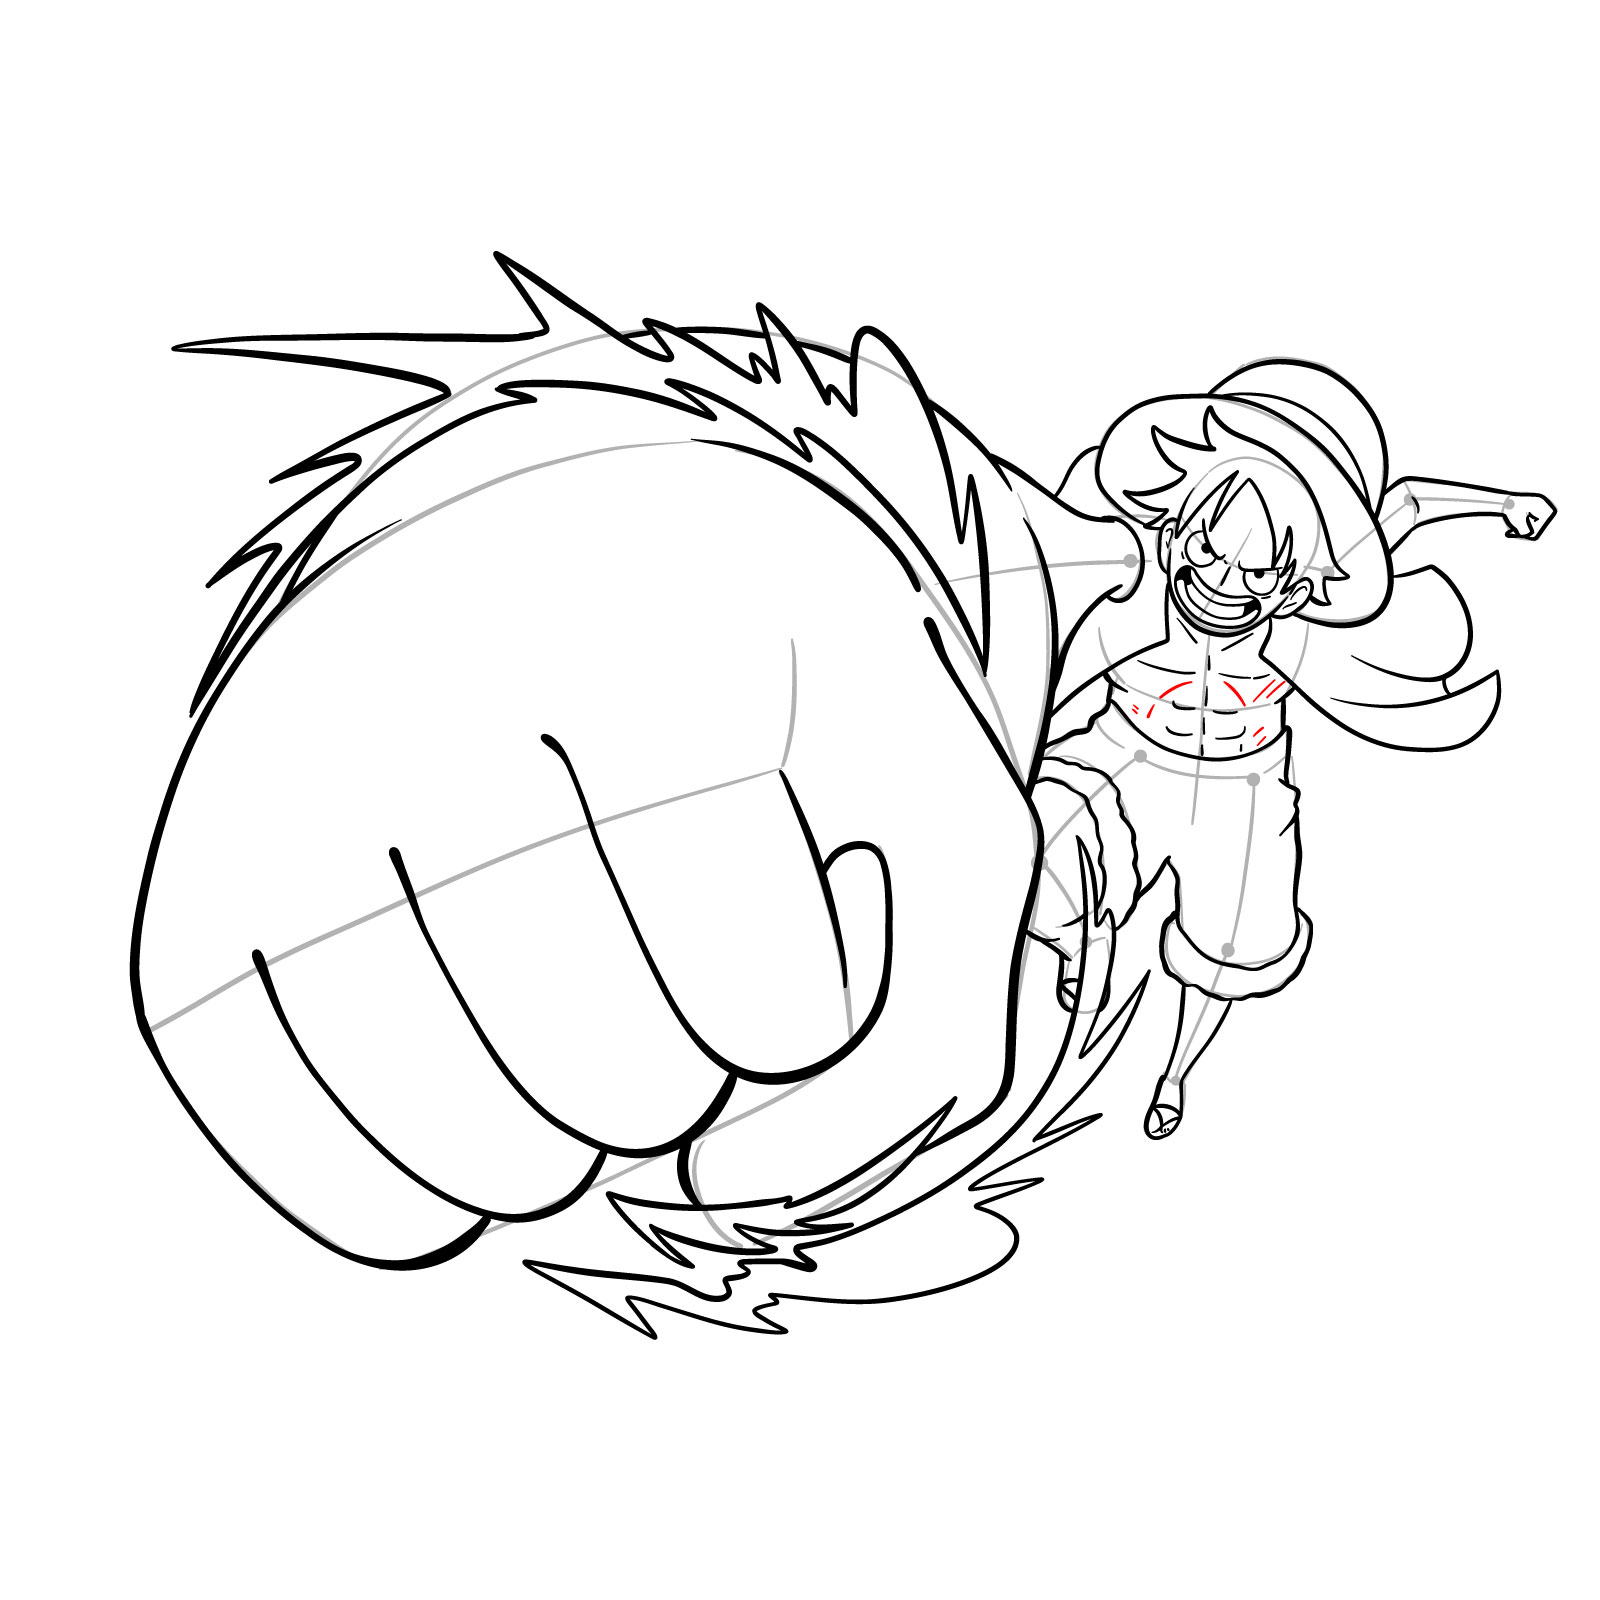
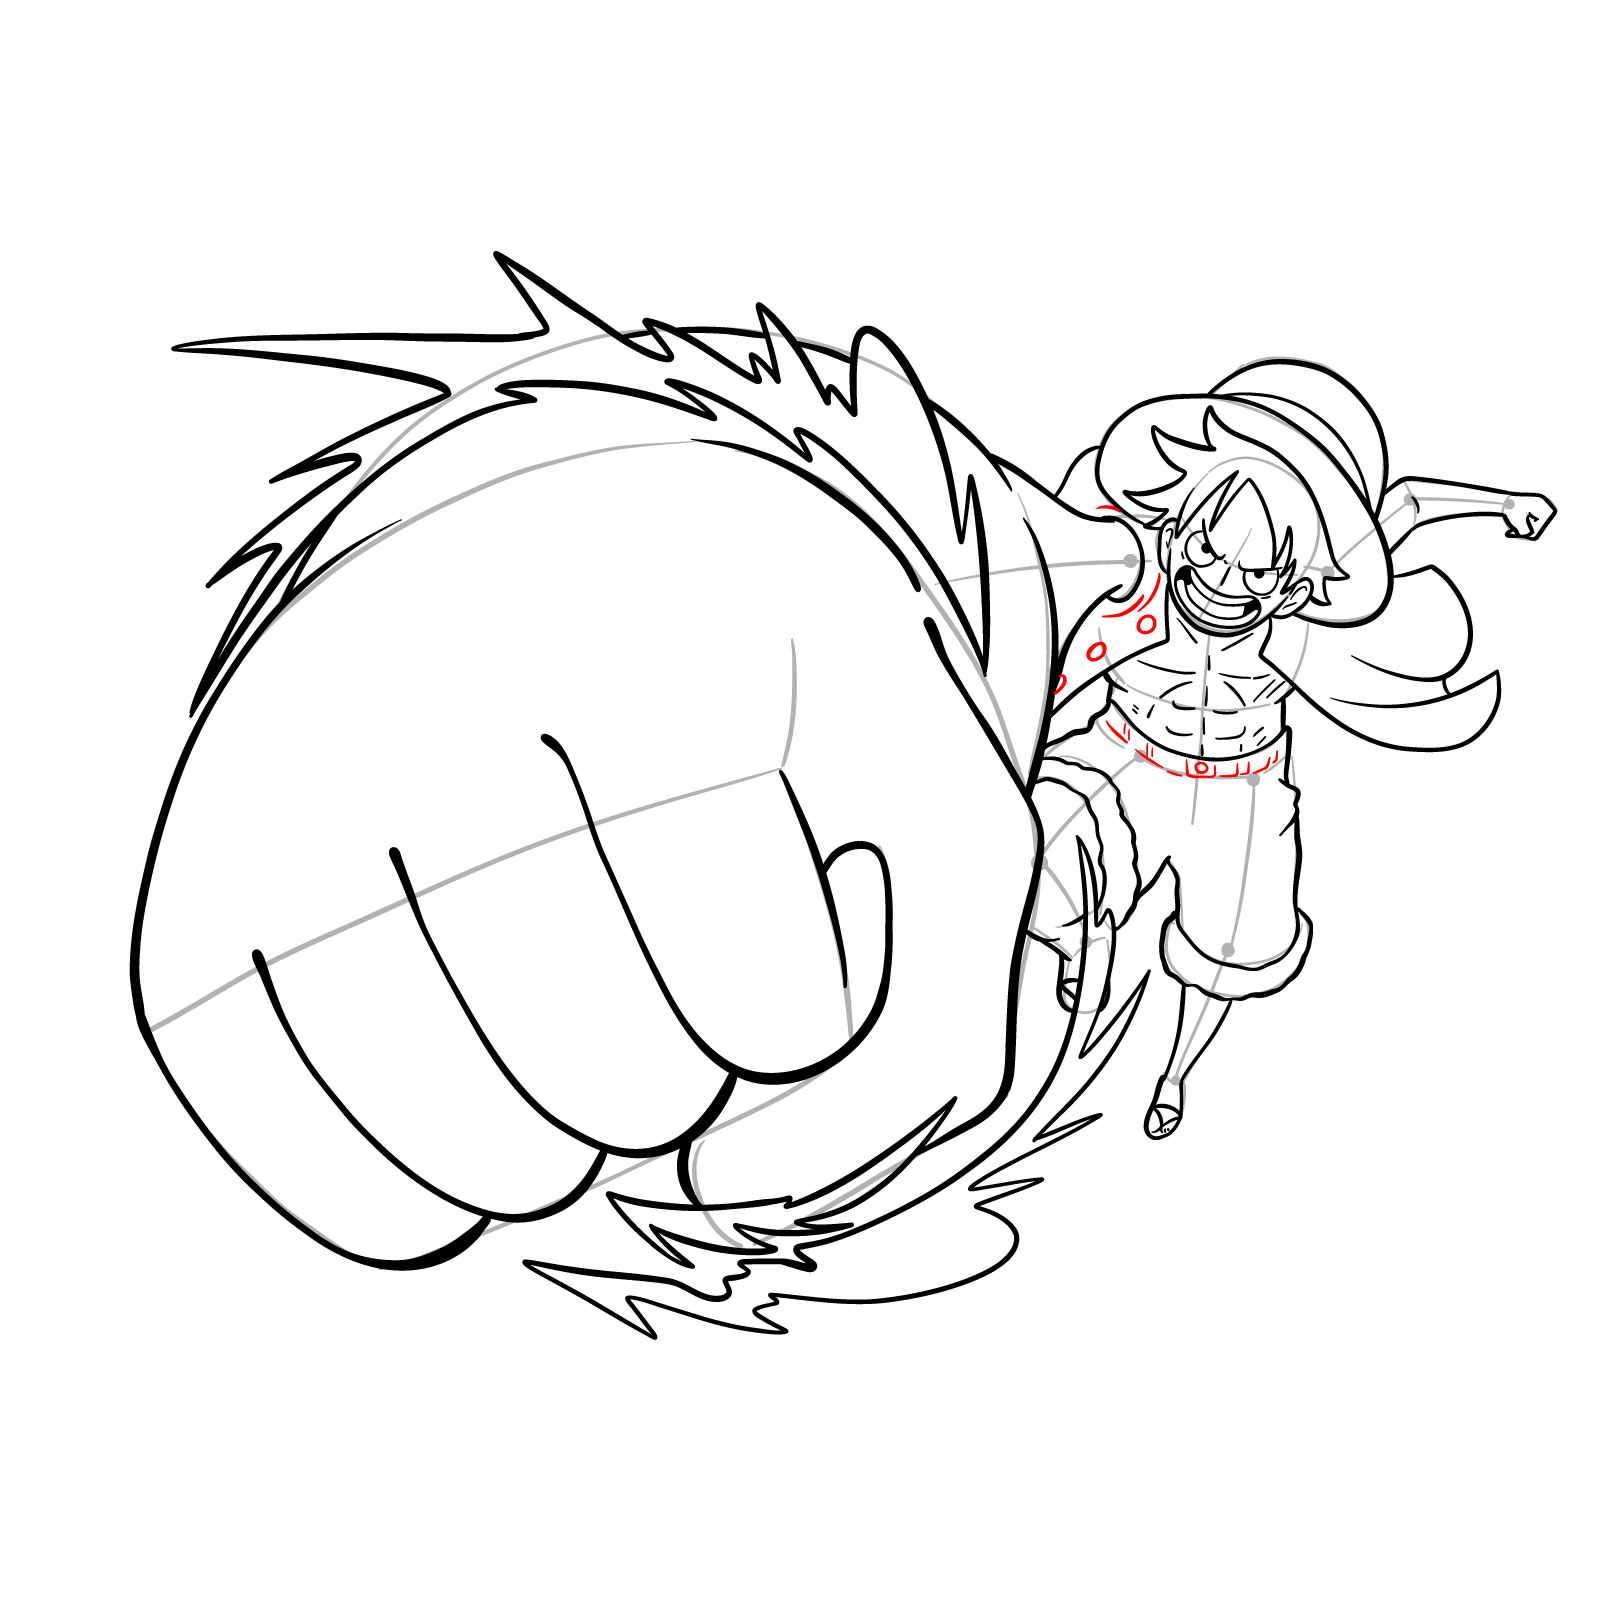
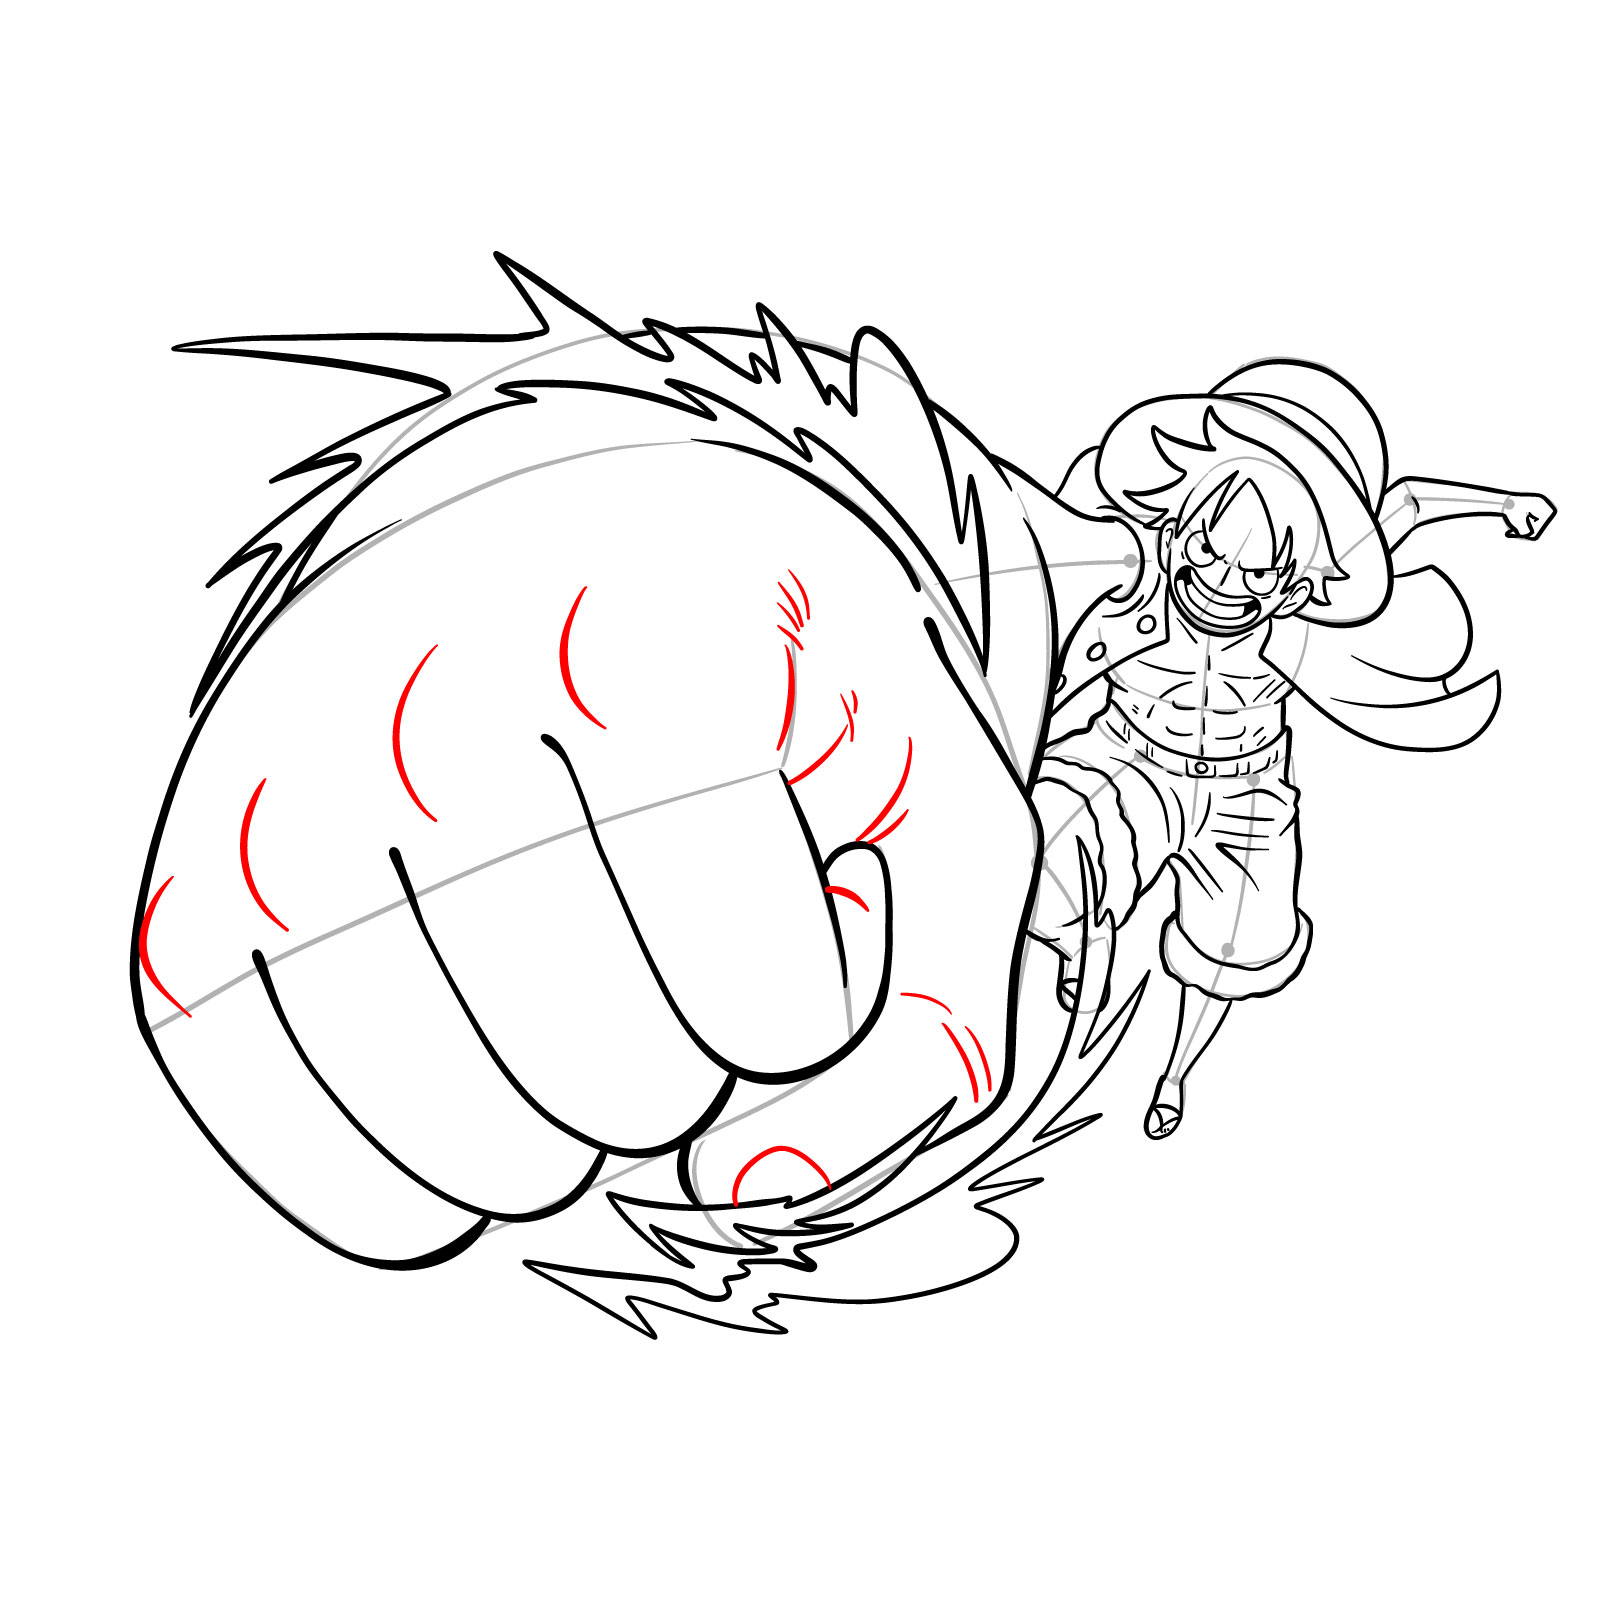
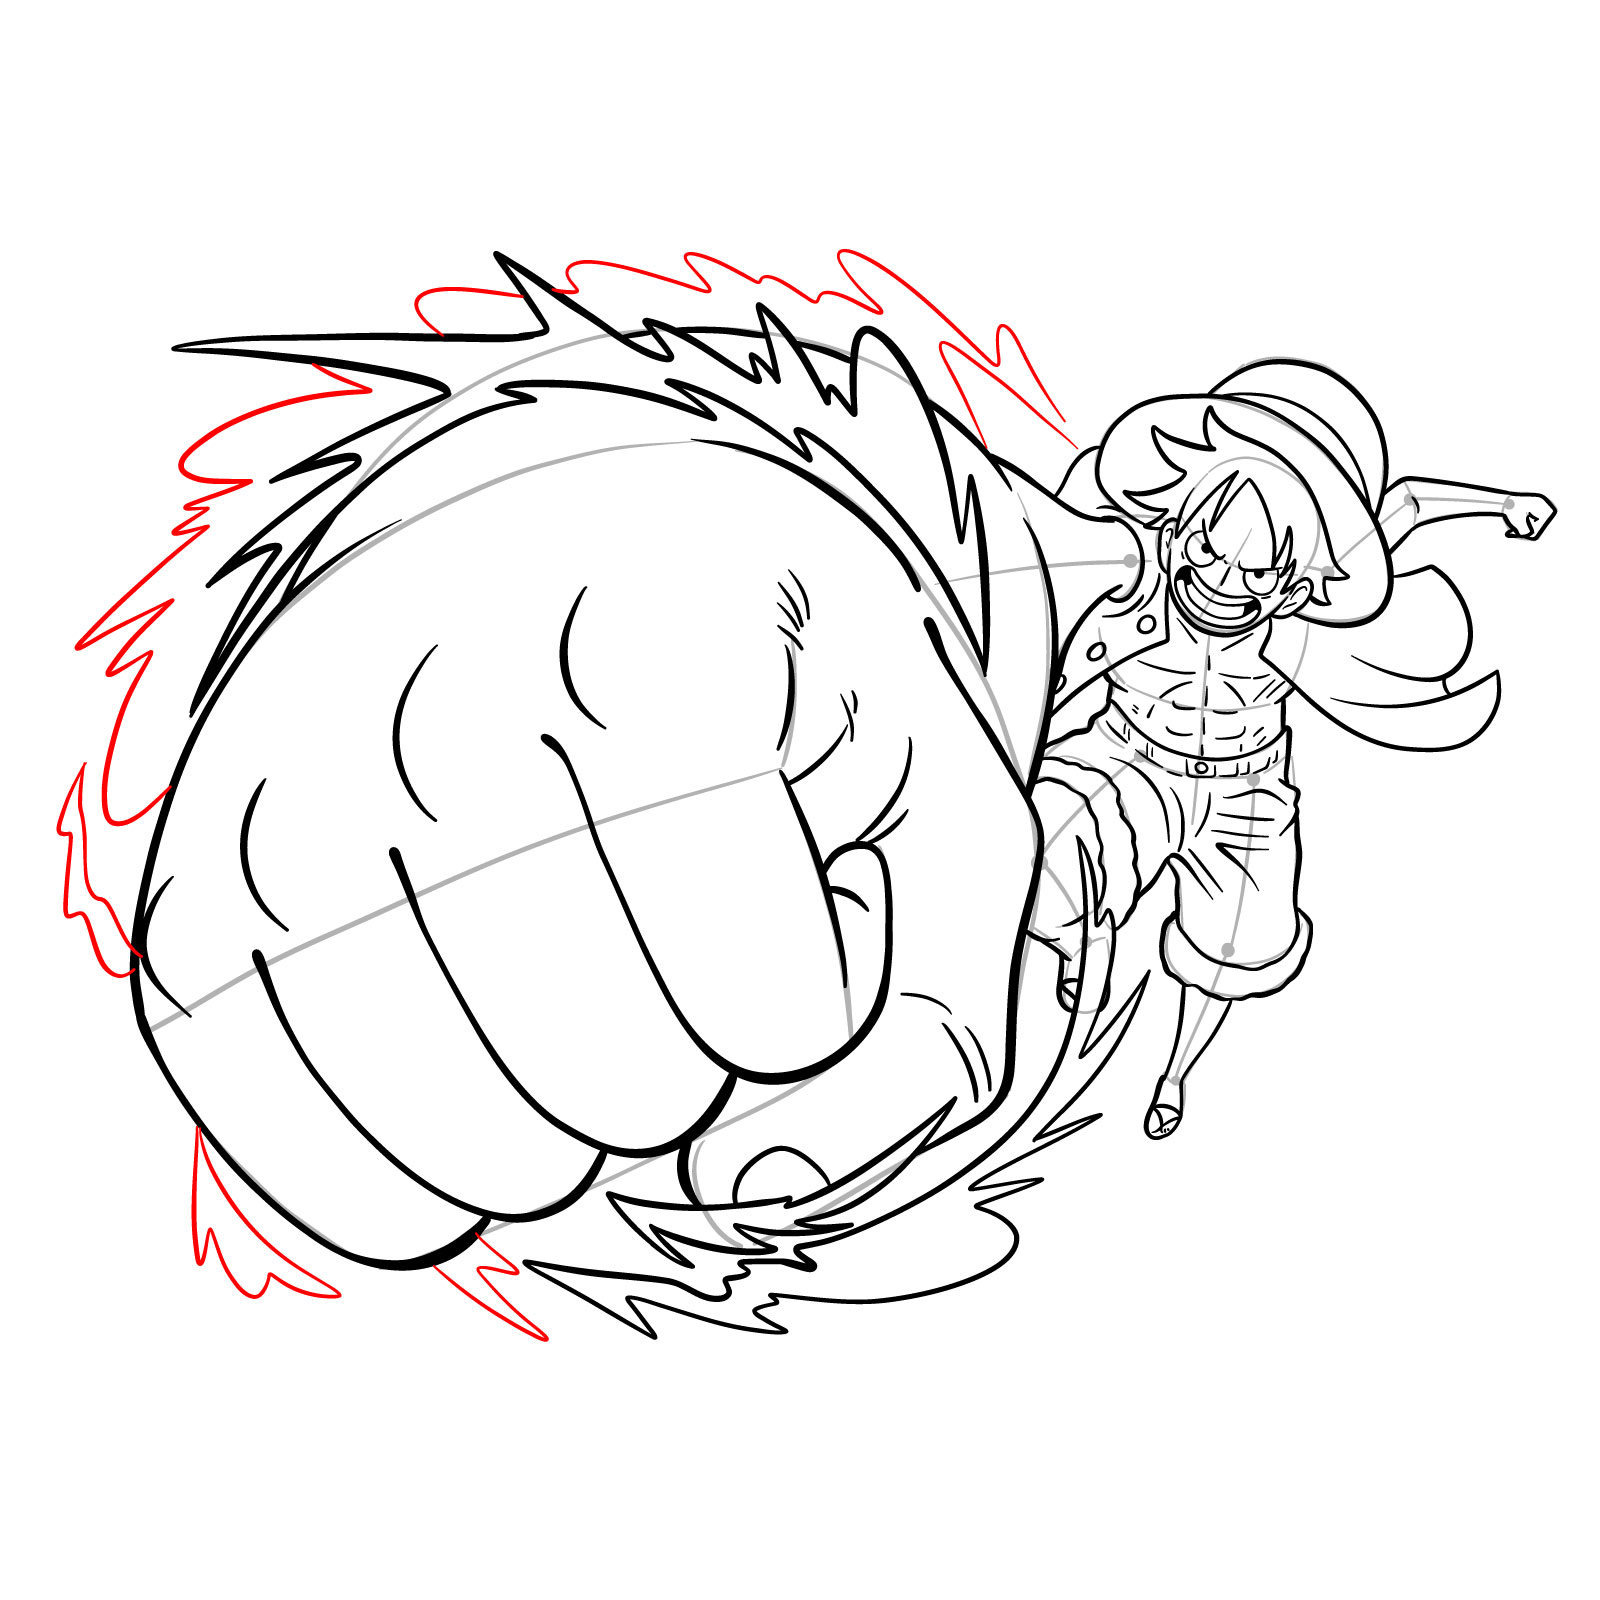
  • Red Color: Indicates the current step, focusing on the immediate lines and strokes.
  • Black Color: Showcases lines previously crafted, guiding continuity.
  • Grey Color: The foundational sketch, crucial for proportion and structure.

Spanning 44 steps, this guide starts with the first three focusing on the skeletal structure. Remember, this is just the beginning, the blueprint. Towards the end, after breathing life into Luffy’s Gear 3, you can choose to ink your sketch. But patience is key! Let the ink dry, lest it smudge, before erasing the pencil traces.

Step 01

How to draw Luffy's Gear 3 without haki - step 01Pin

Step 02

How to draw Luffy's Gear 3 without haki - step 02Pin

Step 03

How to draw Luffy's Gear 3 without haki - step 03Pin

Step 04

How to draw Luffy's Gear 3 without haki - step 04Pin

Step 05

How to draw Luffy's Gear 3 without haki - step 05Pin

Step 06

How to draw Luffy's Gear 3 without haki - step 06Pin

Step 07

How to draw Luffy's Gear 3 without haki - step 07Pin

Step 08

How to draw Luffy's Gear 3 without haki - step 08Pin

Step 09

How to draw Luffy's Gear 3 without haki - step 09Pin

Step 10

How to draw Luffy's Gear 3 without haki - step 10Pin

Step 11

How to draw Luffy's Gear 3 without haki - step 11Pin

Step 12

How to draw Luffy's Gear 3 without haki - step 12Pin

Step 13

How to draw Luffy's Gear 3 without haki - step 13Pin

Step 14

How to draw Luffy's Gear 3 without haki - step 14Pin

Step 15

How to draw Luffy's Gear 3 without haki - step 15Pin

Step 16

How to draw Luffy's Gear 3 without haki - step 16Pin

Step 17

How to draw Luffy's Gear 3 without haki - step 17Pin

Step 18

How to draw Luffy's Gear 3 without haki - step 18Pin

Step 19

How to draw Luffy's Gear 3 without haki - step 19Pin

Step 20

How to draw Luffy's Gear 3 without haki - step 20Pin

Step 21

How to draw Luffy's Gear 3 without haki - step 21Pin

Step 22

How to draw Luffy's Gear 3 without haki - step 22Pin

Step 23

How to draw Luffy's Gear 3 without haki - step 23Pin

Step 24

How to draw Luffy's Gear 3 without haki - step 24Pin

Step 25

How to draw Luffy's Gear 3 without haki - step 25Pin

Step 26

How to draw Luffy's Gear 3 without haki - step 26Pin

Step 27

How to draw Luffy's Gear 3 without haki - step 27Pin

Step 28

How to draw Luffy's Gear 3 without haki - step 28Pin

Step 29

How to draw Luffy's Gear 3 without haki - step 29Pin

Step 30

How to draw Luffy's Gear 3 without haki - step 30Pin

Step 31

How to draw Luffy's Gear 3 without haki - step 31Pin

Step 32

How to draw Luffy's Gear 3 without haki - step 32Pin

Step 33

How to draw Luffy's Gear 3 without haki - step 33Pin

Step 34

How to draw Luffy's Gear 3 without haki - step 34Pin

Step 35

How to draw Luffy's Gear 3 without haki - step 35Pin

Step 36

How to draw Luffy's Gear 3 without haki - step 36Pin

Step 37

How to draw Luffy's Gear 3 without haki - step 37Pin

Step 38

How to draw Luffy's Gear 3 without haki - step 38Pin

Step 39

How to draw Luffy's Gear 3 without haki - step 39Pin

Step 40

How to draw Luffy's Gear 3 without haki - step 40Pin

Step 41

How to draw Luffy's Gear 3 without haki - step 41Pin

Step 42

How to draw Luffy's Gear 3 without haki - step 42Pin

Step 43

How to draw Luffy's Gear 3 without haki - step 43Pin

Step 44

How to draw Luffy's Gear 3 without haki - final stepPin

Puzzled? Let’s Clear Some Clouds

What’s the best approach to draw Luffy’s inflated fist in Gear 3?

Given its immense size and intricate detail, it’s advisable to start with a basic rectangular shapes for proportion. From there, add contours and details to depict its enormity and power. Remember, it’s not just size, but the weight of the fist that needs to be conveyed. Shadows and depth can help with this.

How do I ensure the dynamism of Luffy’s jump is captured?

Dynamism comes from the interplay of motion lines, body posture, and expression. Use swift, bold strokes to indicate movement, and angle Luffy’s body in a way that suggests momentum. His facial expression, especially the eyes, will inject the emotion into your drawing.

How can I add more realism to the inflated bones?

Unlike Luffy’s standard balloon form, Gear 3 has a hardness and structure to it. To depict this, focus on rendering tight skin stretches, slight creases, and shadows. The interaction of light will greatly enhance the solidity of the form.

Concluding Your Gear 3 Expedition

Embarking on this journey, we hoped to bring you closer to the world of One Piece and the magic of drawing. But remember, each art piece is a stepping stone, a chapter in your artistic journey. So, share this guide! Let fellow enthusiasts bask in the joy of crafting Luffy’s might.

Why not take it a step further? Donate and support SketchOk. Your contributions keep us afloat, letting us churn out free guides and heed to your ideas for fresh tutorials. Follow us on Facebook, Instagram, and Pinterest for more art-tastic content!

Did you like the tutorial?

You can support the author of this website and also suggest your own ideas for new drawings by making a small donation here:

Leave a Comment

65