Last Updated on May 13, 2026
Welcome, aspiring artists and fellow fans of One Piece! In this step-by-step drawing tutorial, we will dive into the captivating world of Nightmare Luffy, the fearsome alter ego of Monkey D. Luffy, and will learn how to draw him.
Appearance and Story: A Colossal Force Unleashed
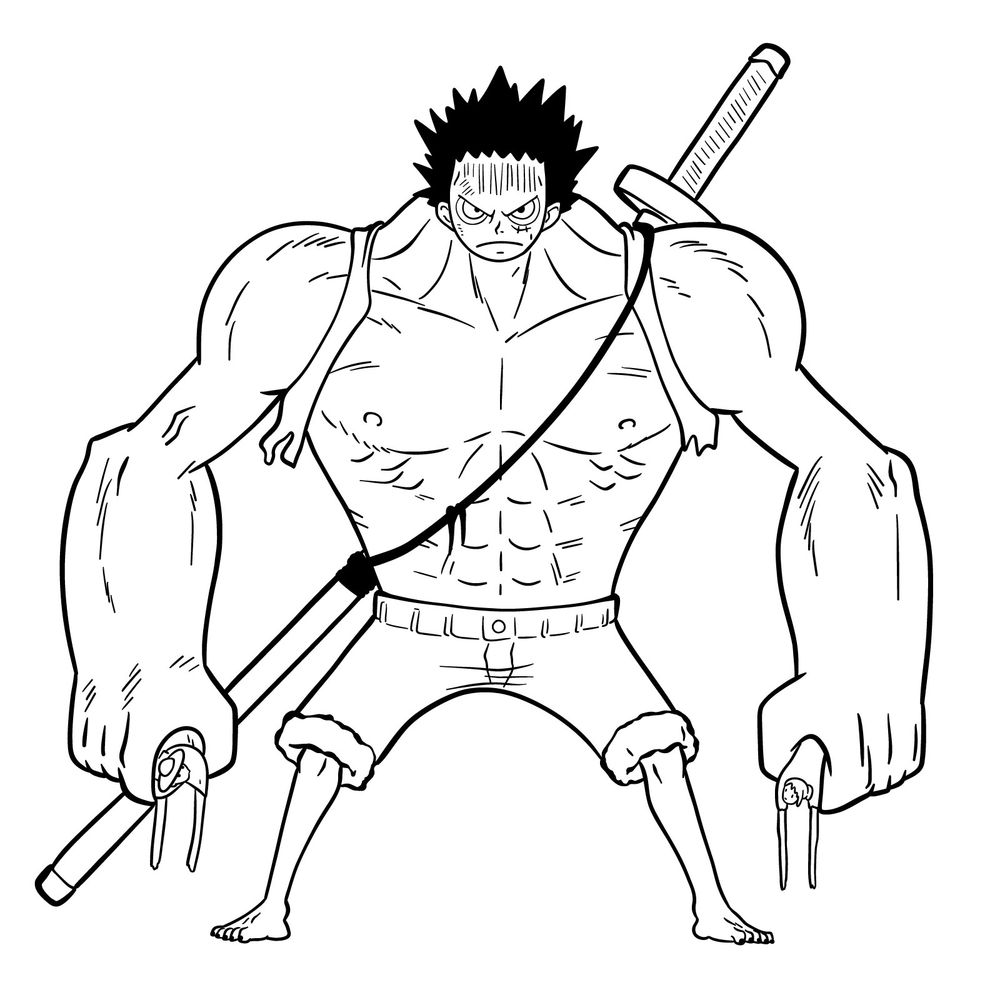
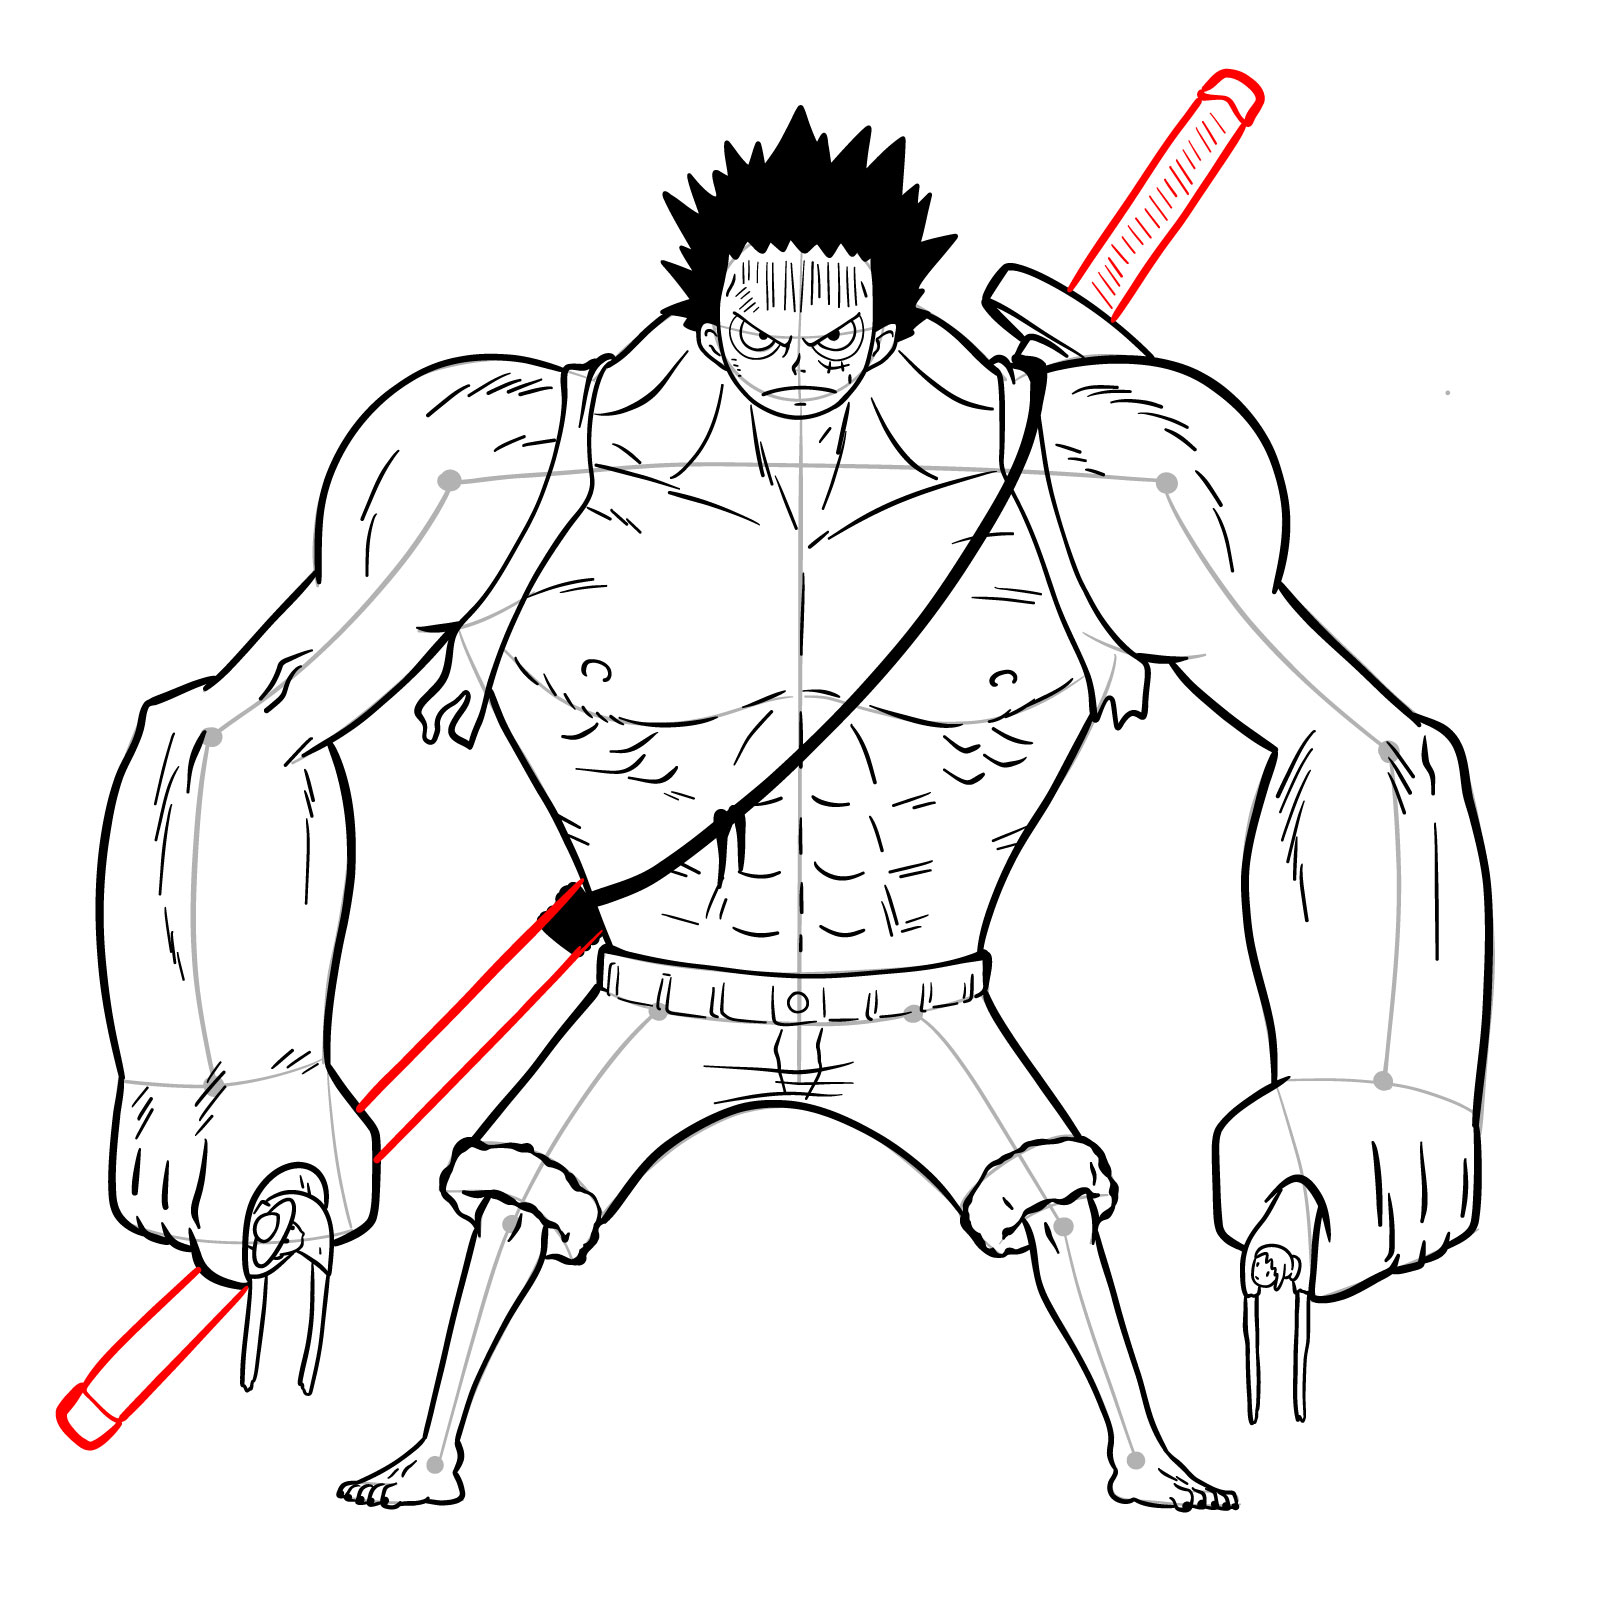
As Nightmare Luffy, our beloved protagonist takes on a striking transformation. Visualize a colossal figure with a gigantic body, adorned with long, muscular arms and shorter, thinner legs. He proudly wears his classic shorts, while a massive katana rests upon his back, a testament to his formidable strength. The stark contrast between Nightmare Luffy and his regular form showcases the sheer magnitude of his power.
Born in Foosha Village, Luffy, also known as “Straw Hat Luffy,” aspires to become the Pirate King, searching for Gol D. Roger’s legendary treasure. His unwavering pursuit of freedom and adventure defines his character, captivating audiences with his relentless spirit. With his rubbery abilities granted by the Gomu Gomu no Mi Devil Fruit, Luffy’s stretchy limbs add a unique twist to his fearsome appearance as Nightmare Luffy.
Join us as we delve into the mesmerizing world of Nightmare Luffy and translate his imposing presence onto paper!
Materials and Tools: Equipping Your Artistic Arsenal
Before we embark on our artistic voyage, let’s ensure we have the necessary materials and tools at our disposal. Here’s a list of recommended supplies:
- Pencils: Ranging from H to B, for sketching and shading
- Eraser: To correct mistakes and refine your artwork
- Paper: drawing paper or sketchbook
- Inking Pens: Waterproof pens for inking and outlining
- Coloring Materials: Colored pencils, markers, or paints for adding vibrant hues (optional)
Step-by-Step Drawing Guide: Unraveling the Nightmare
Now, let’s dive into the step-by-step process of on how to draw Nightmare Luffy to life. In the following sections, we’ll guide you through each stage of the drawing process.
Part 1: Basic Sketch
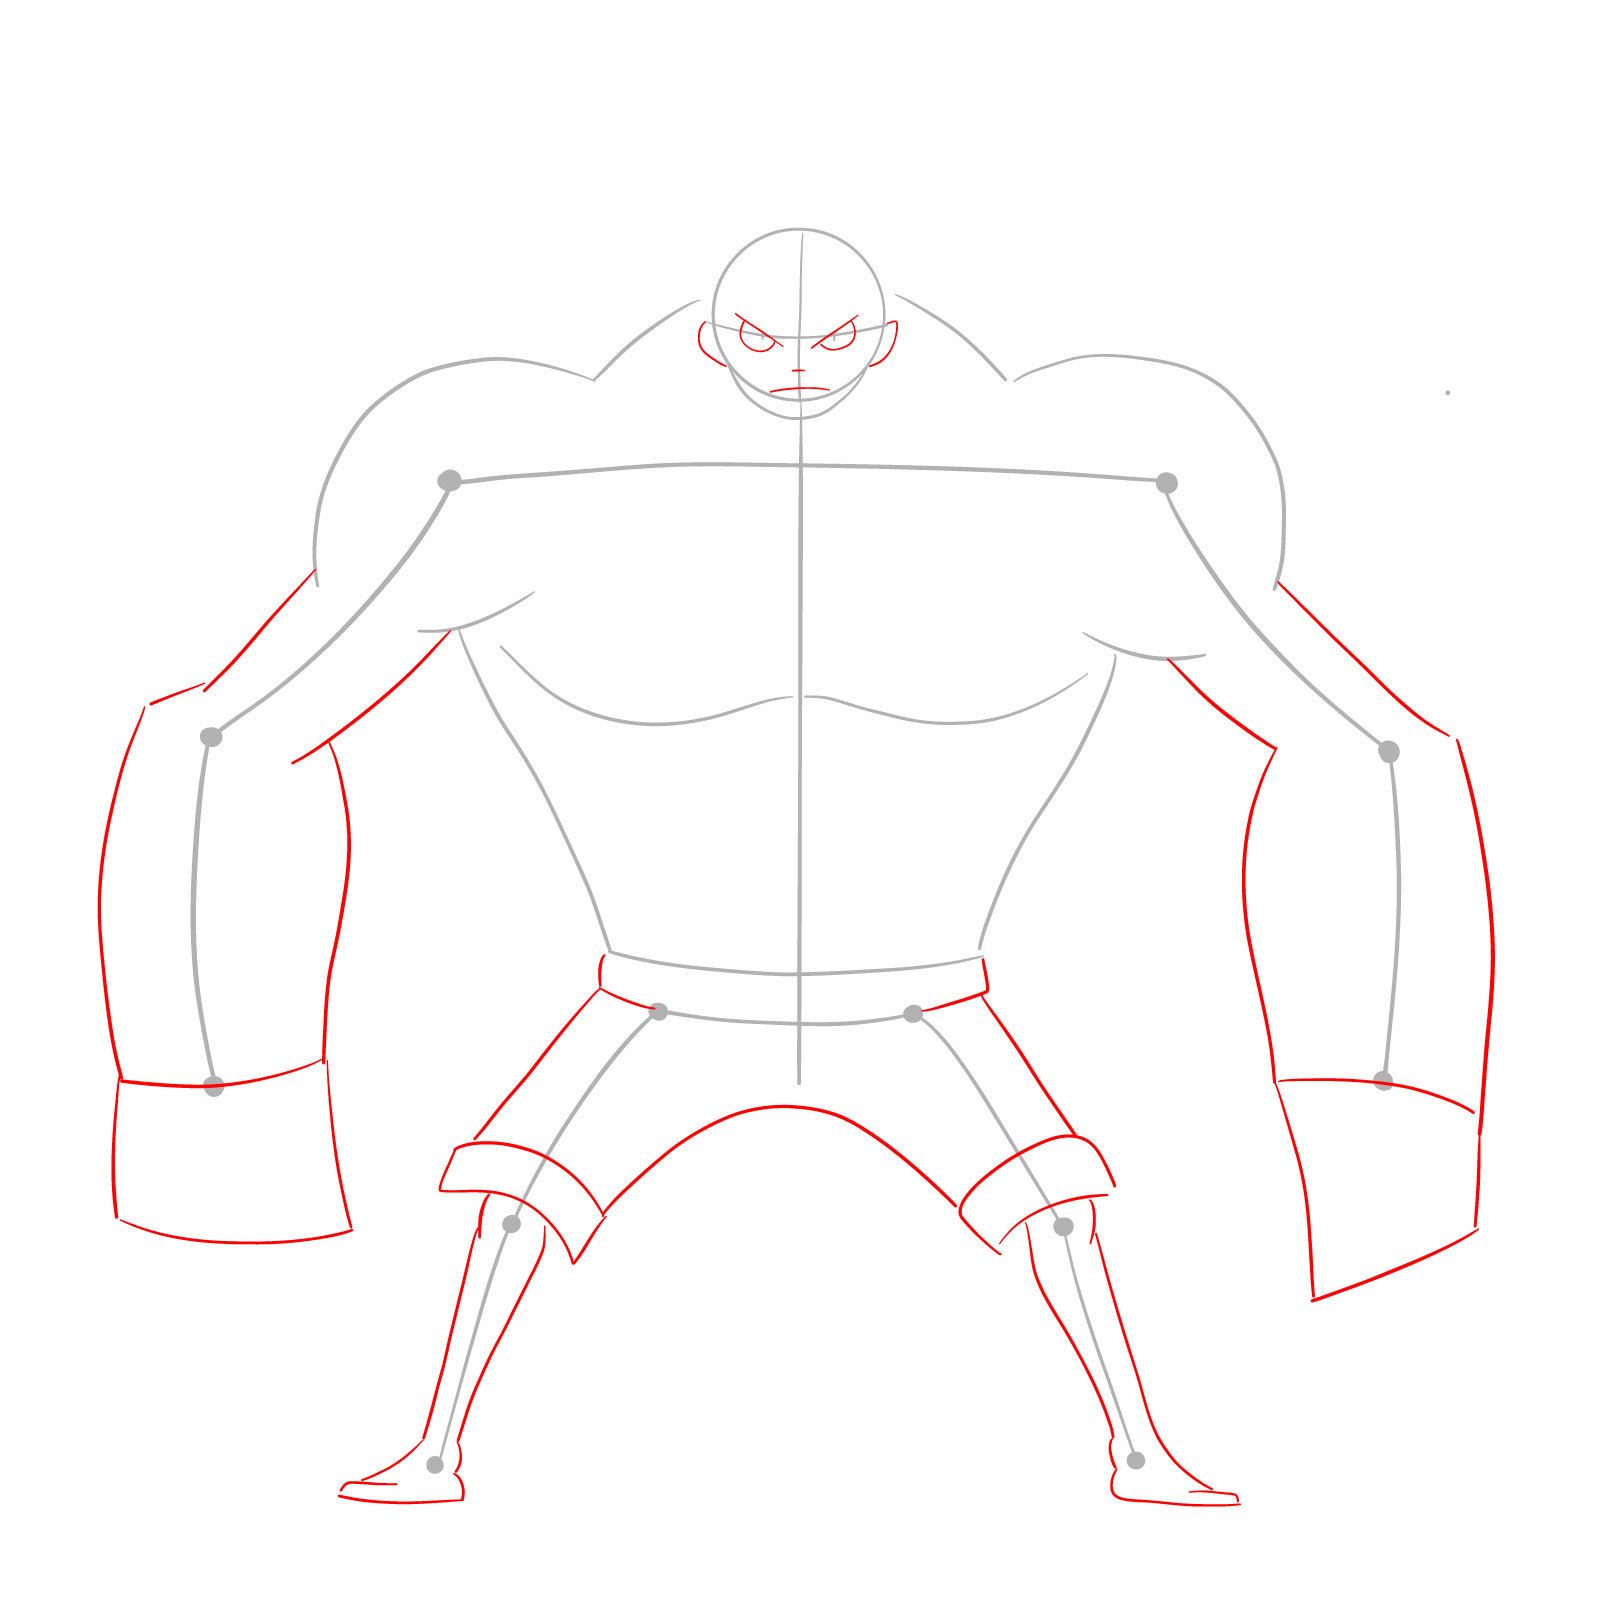
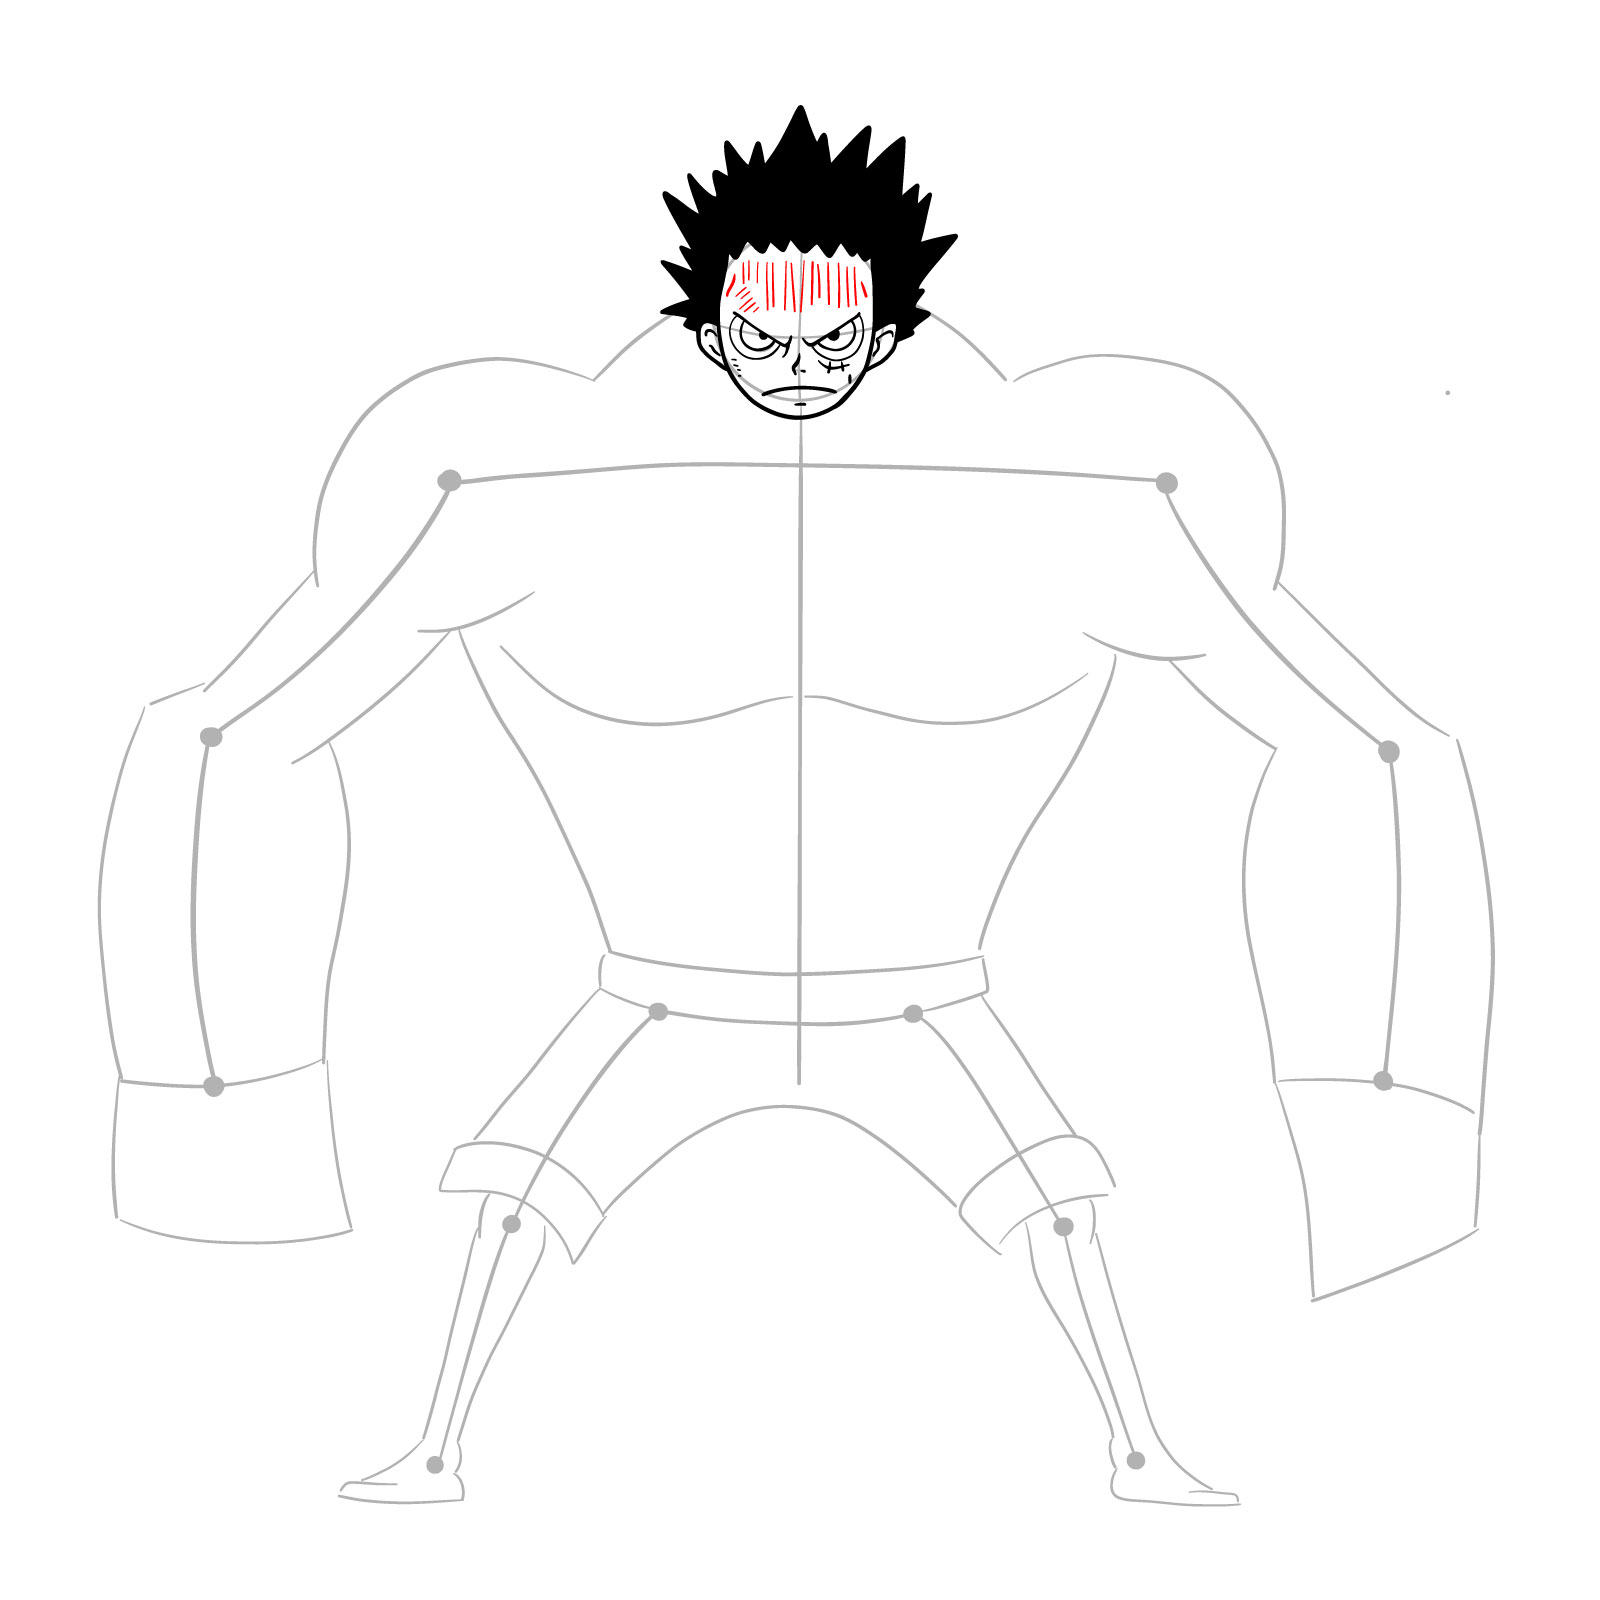
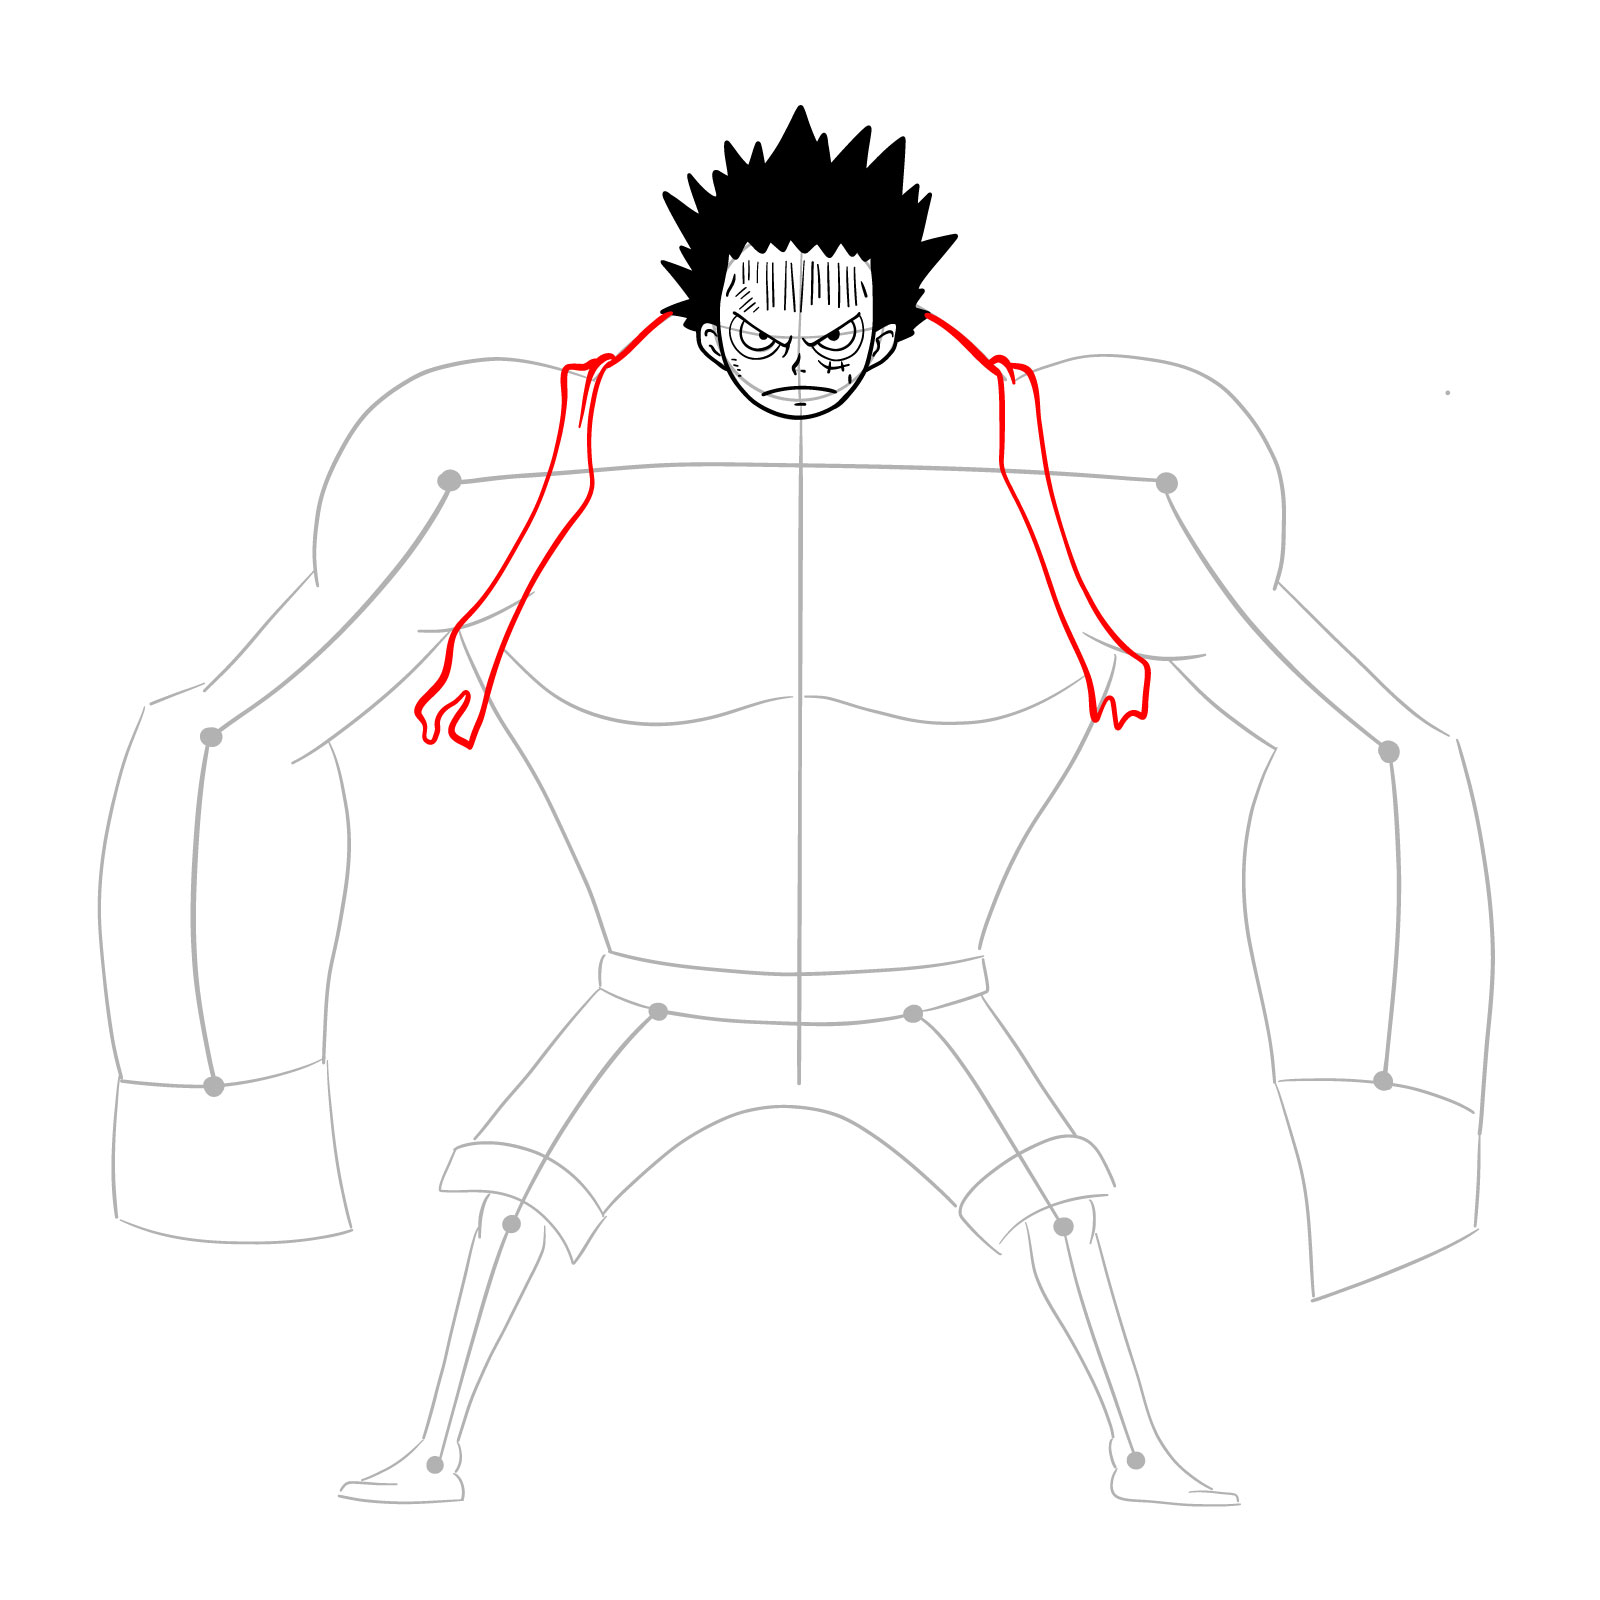
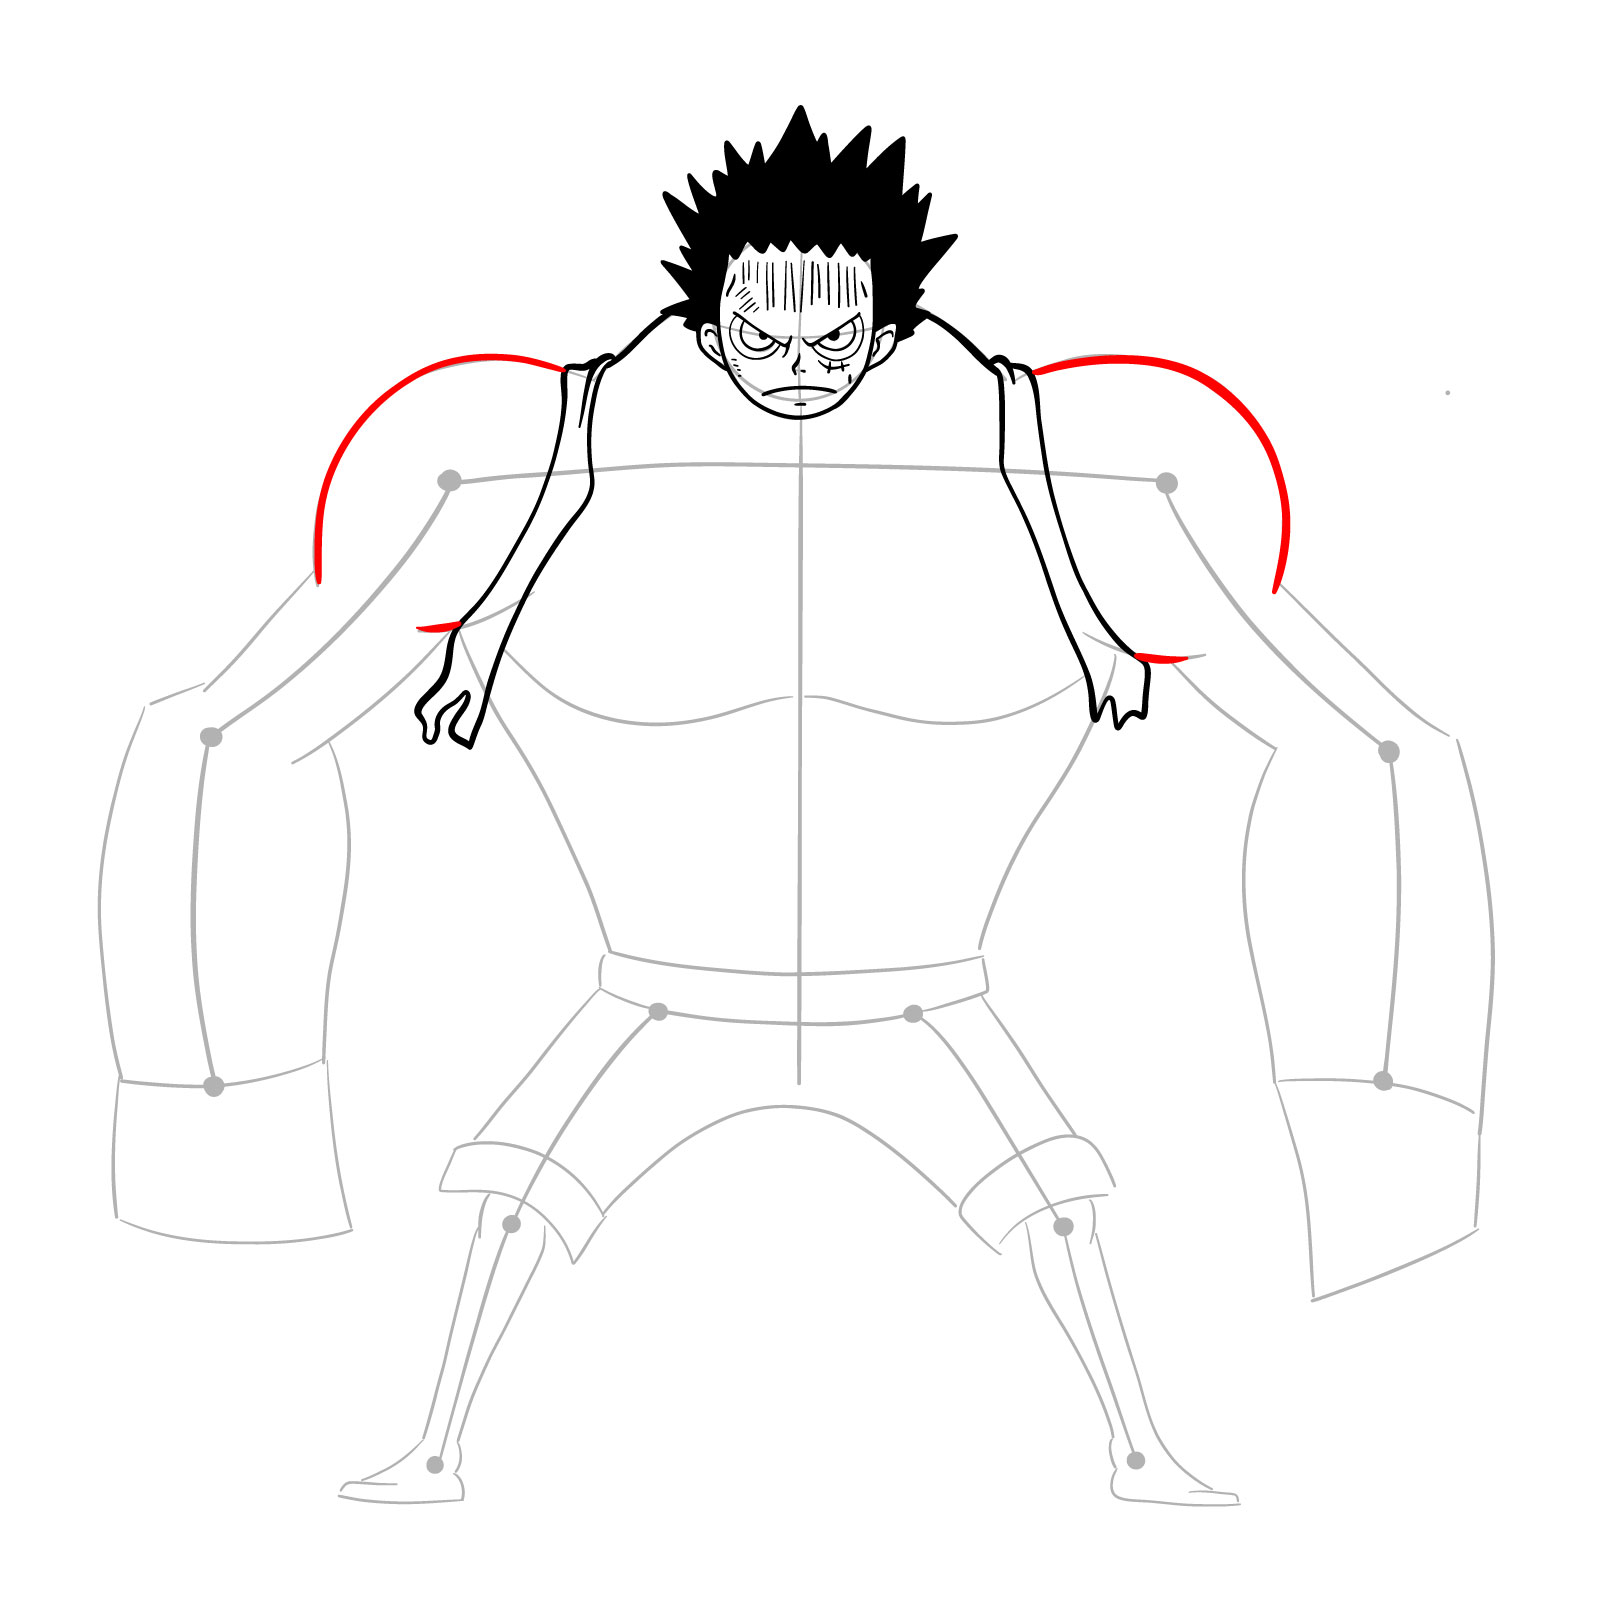
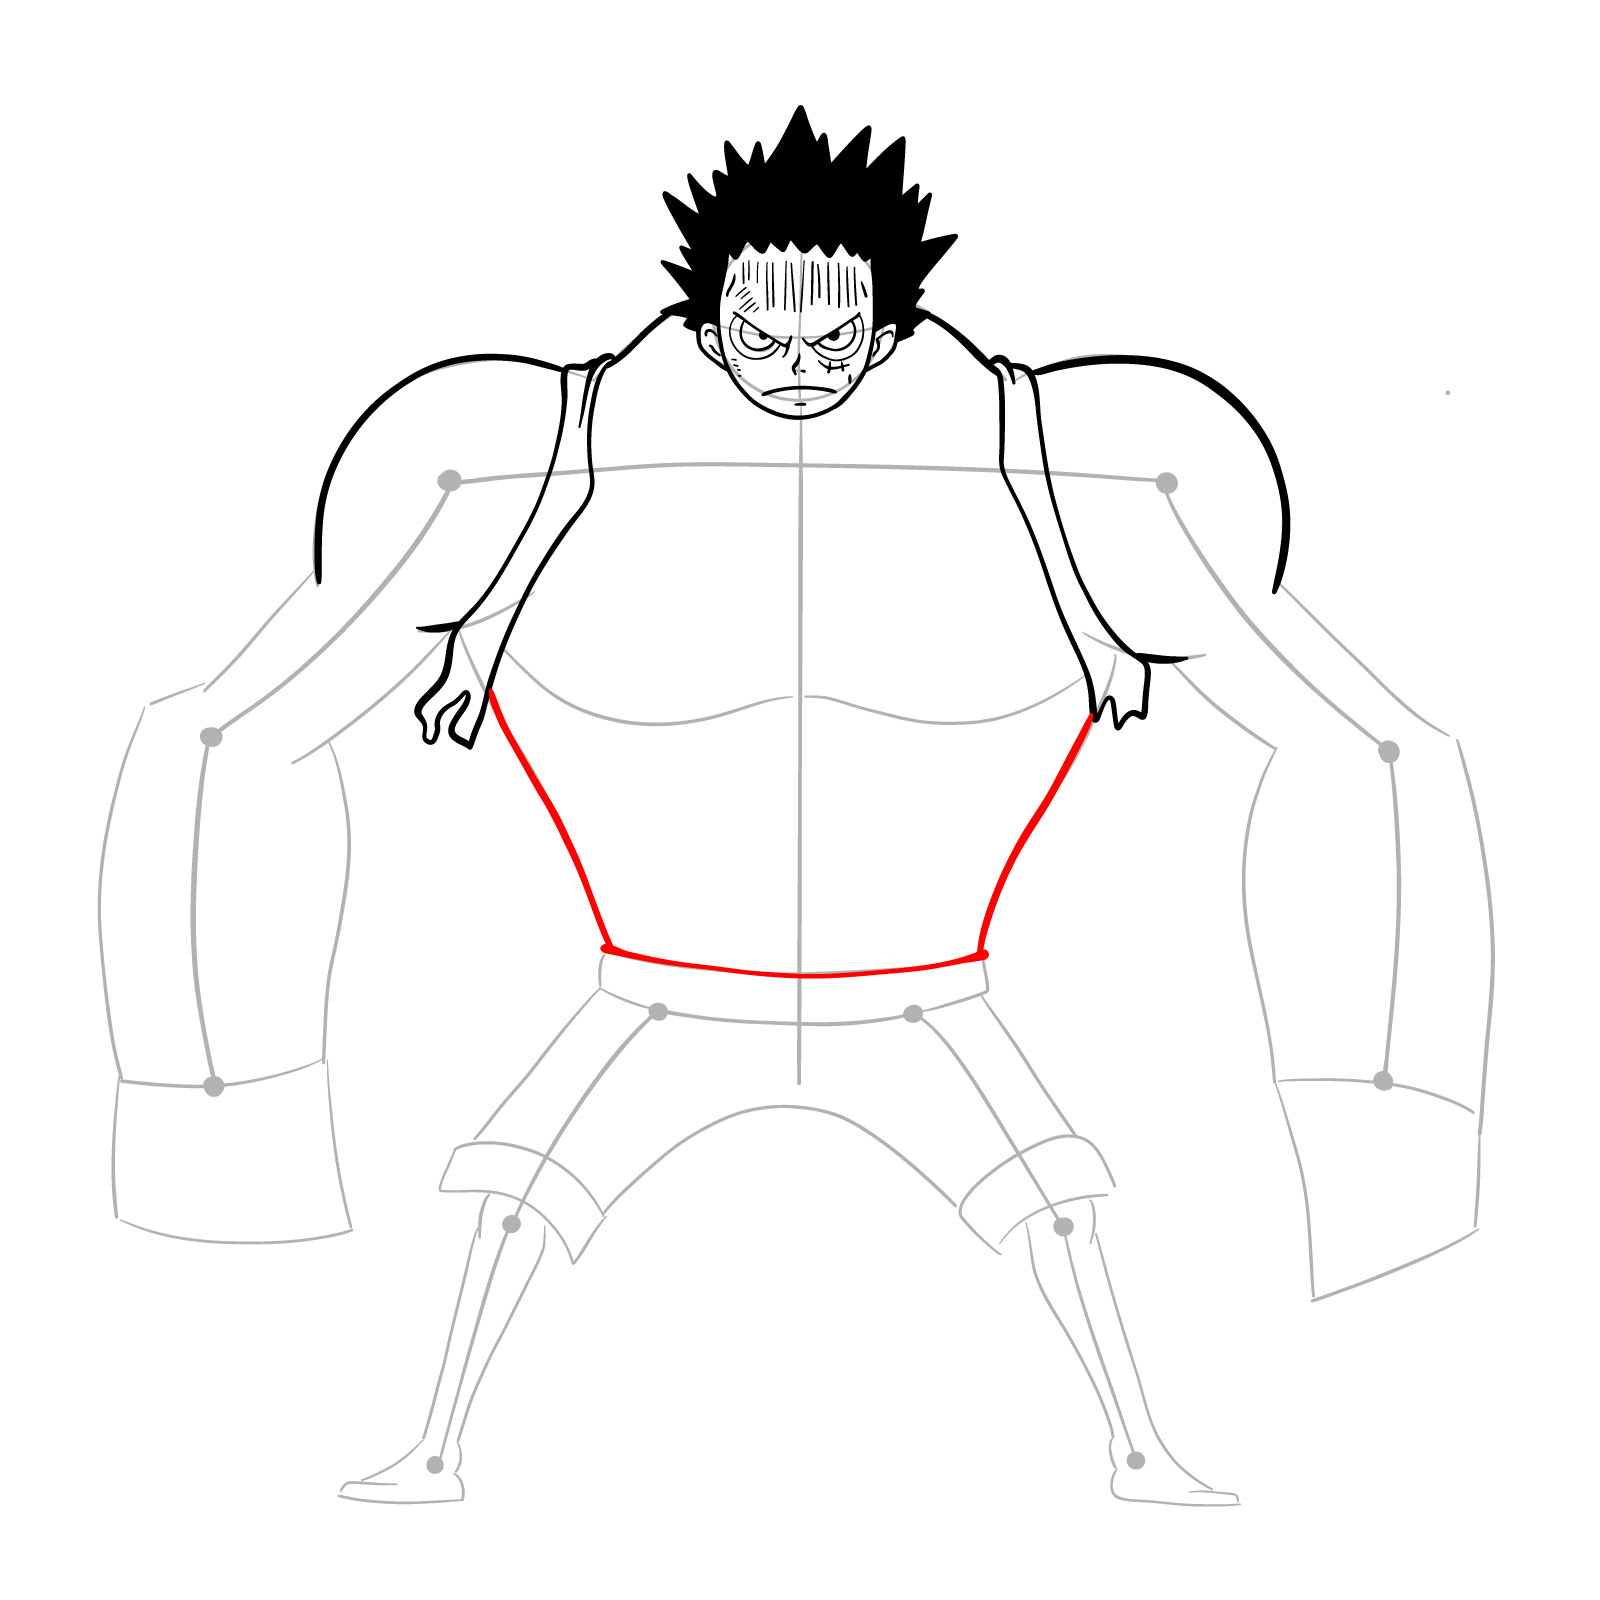
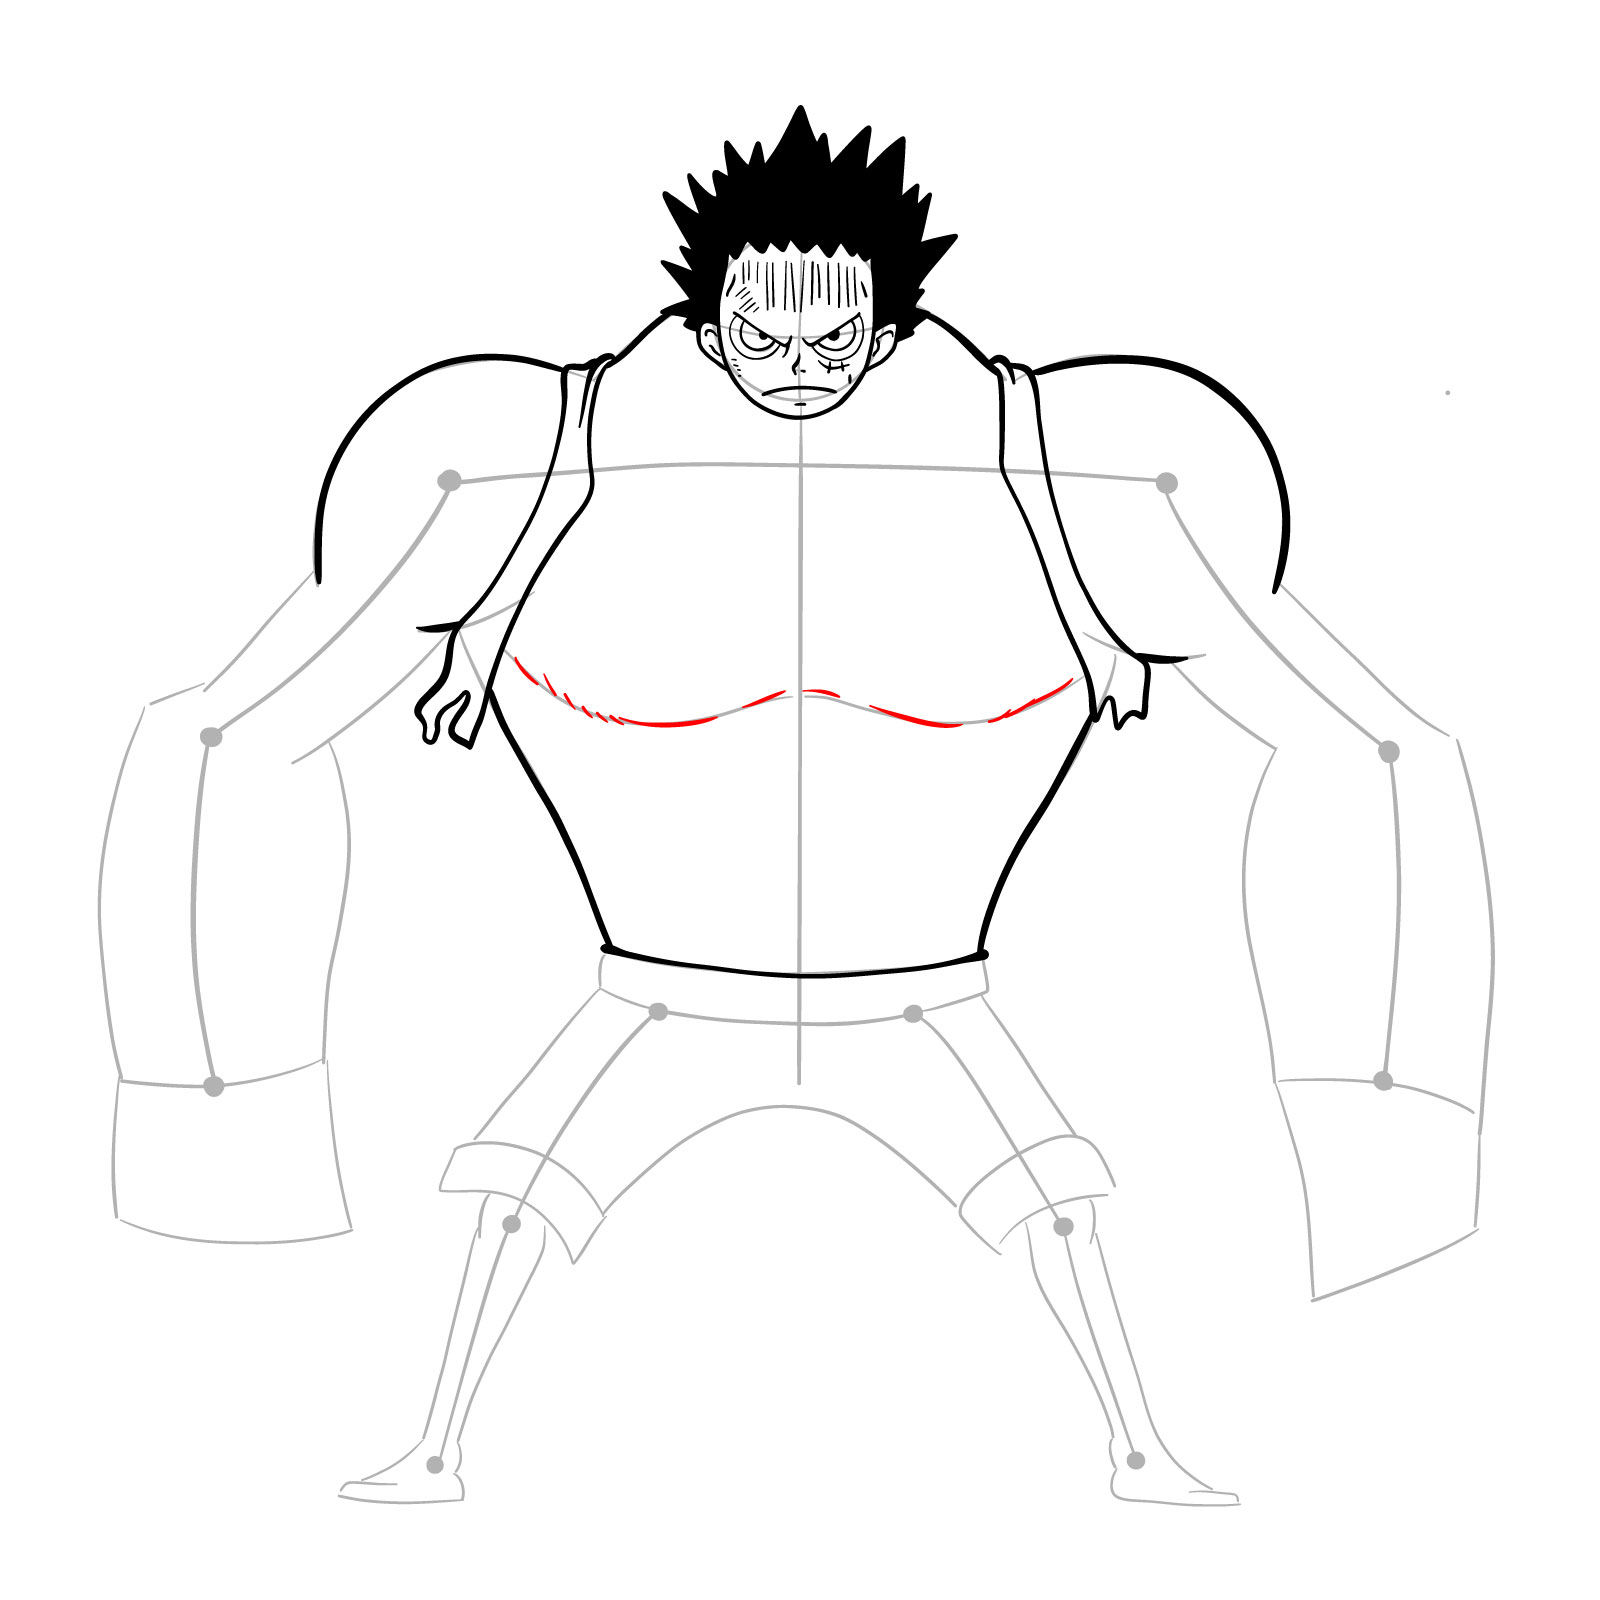
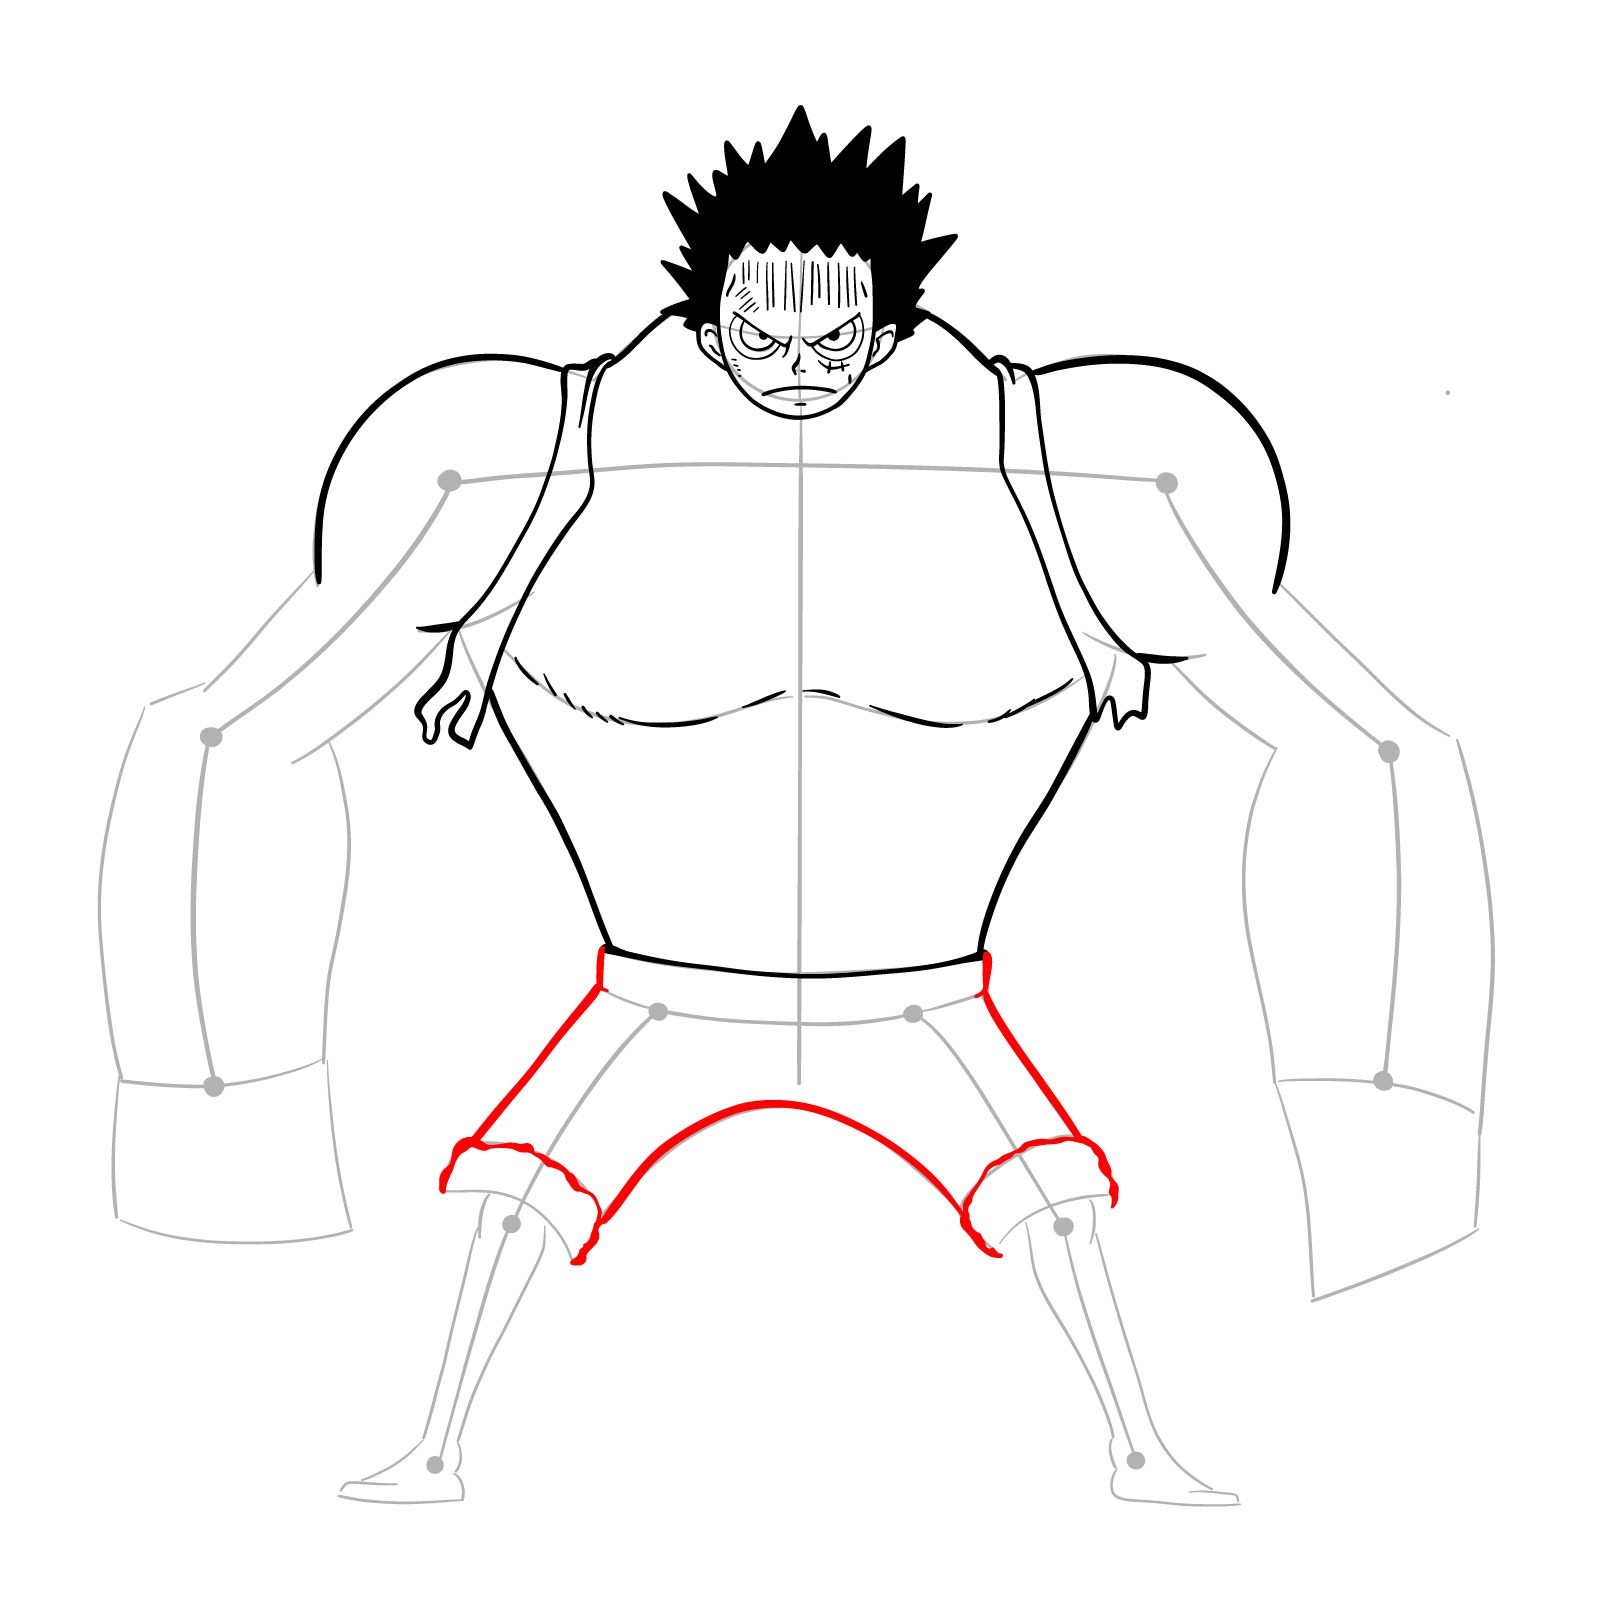
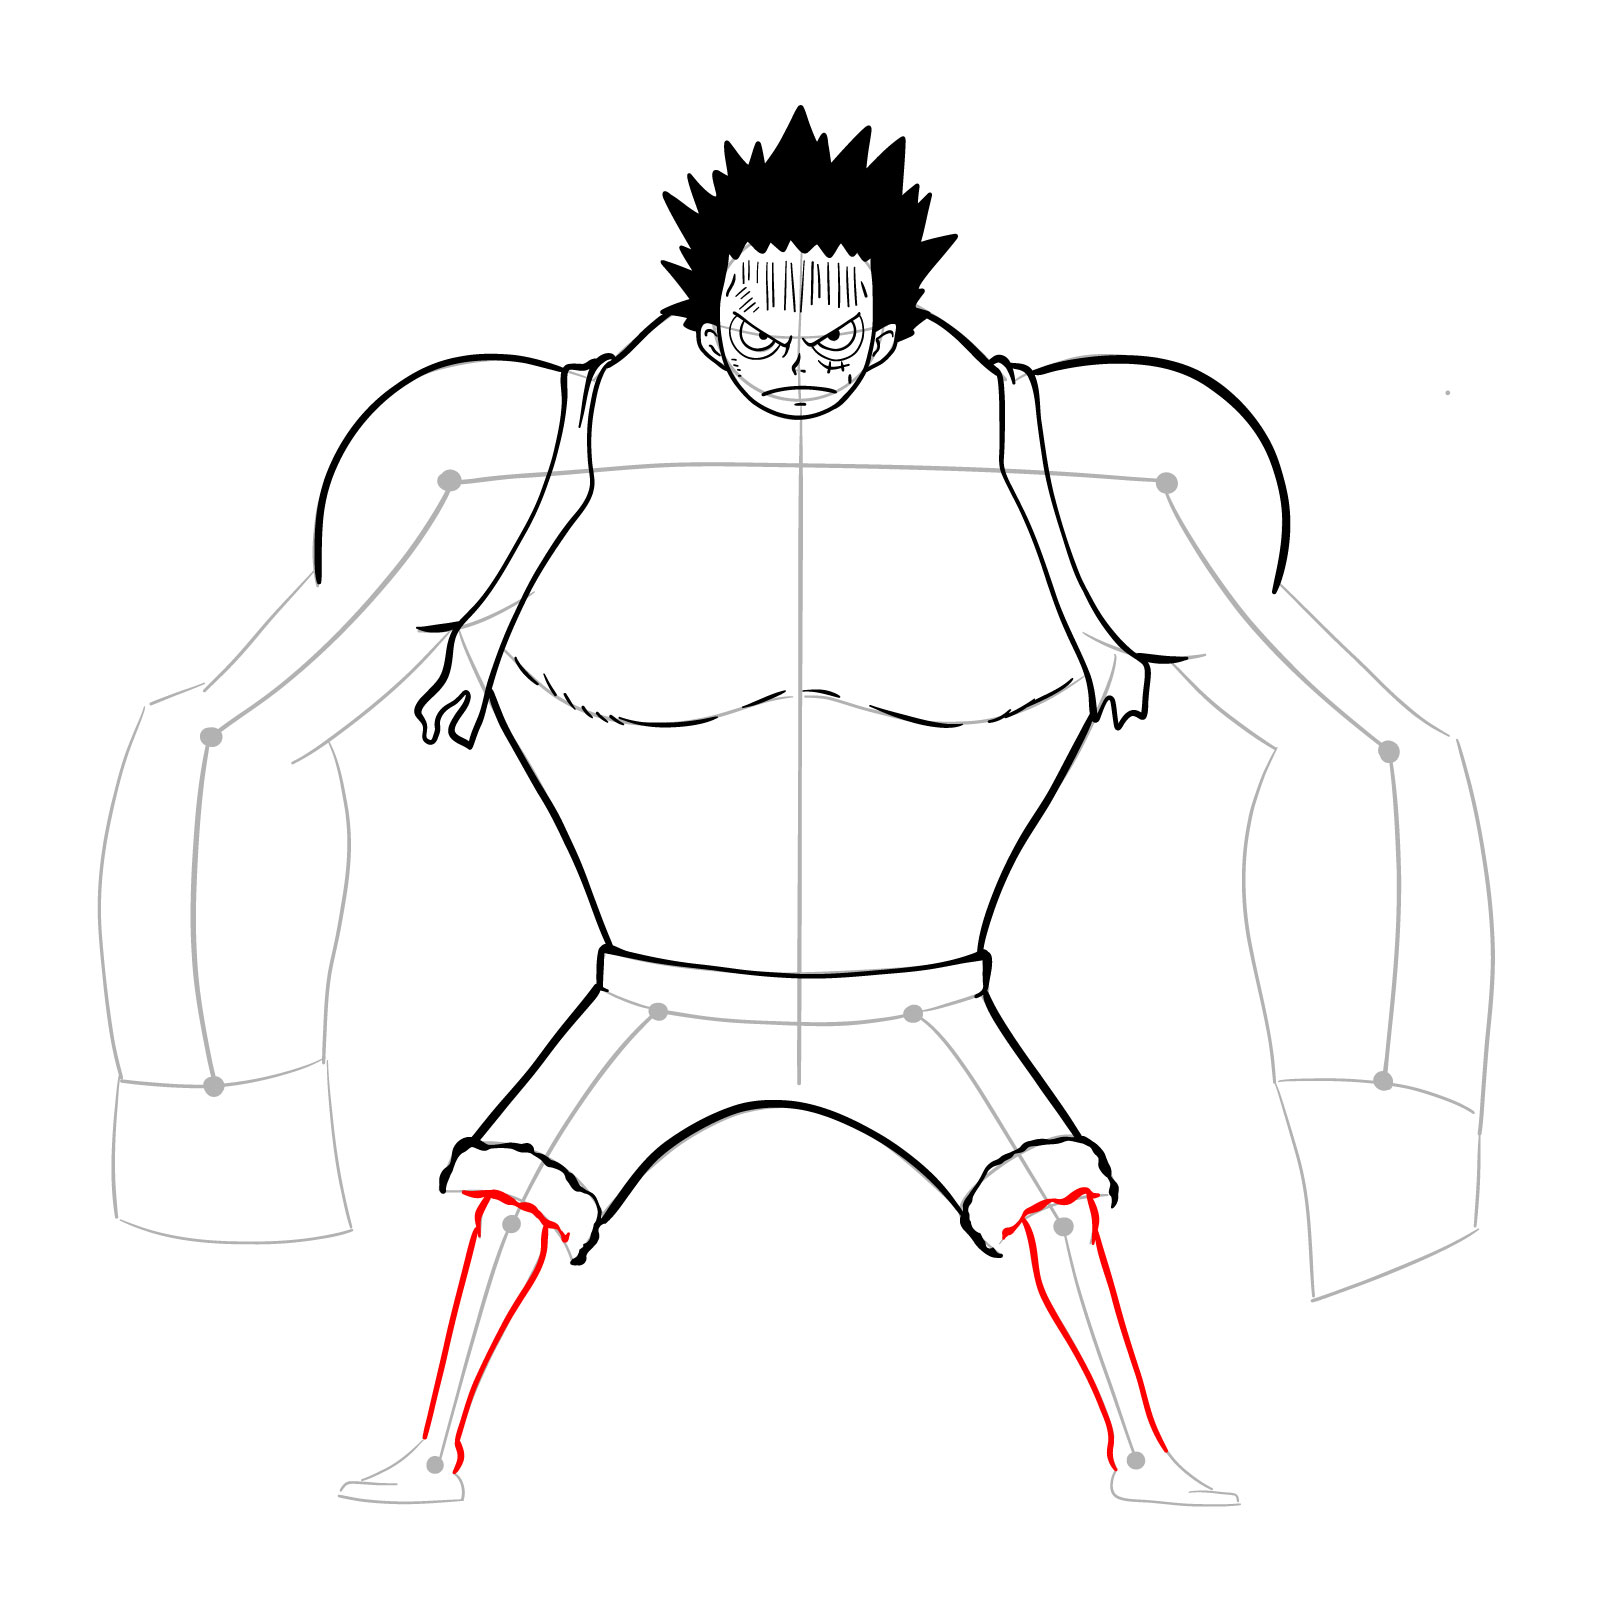
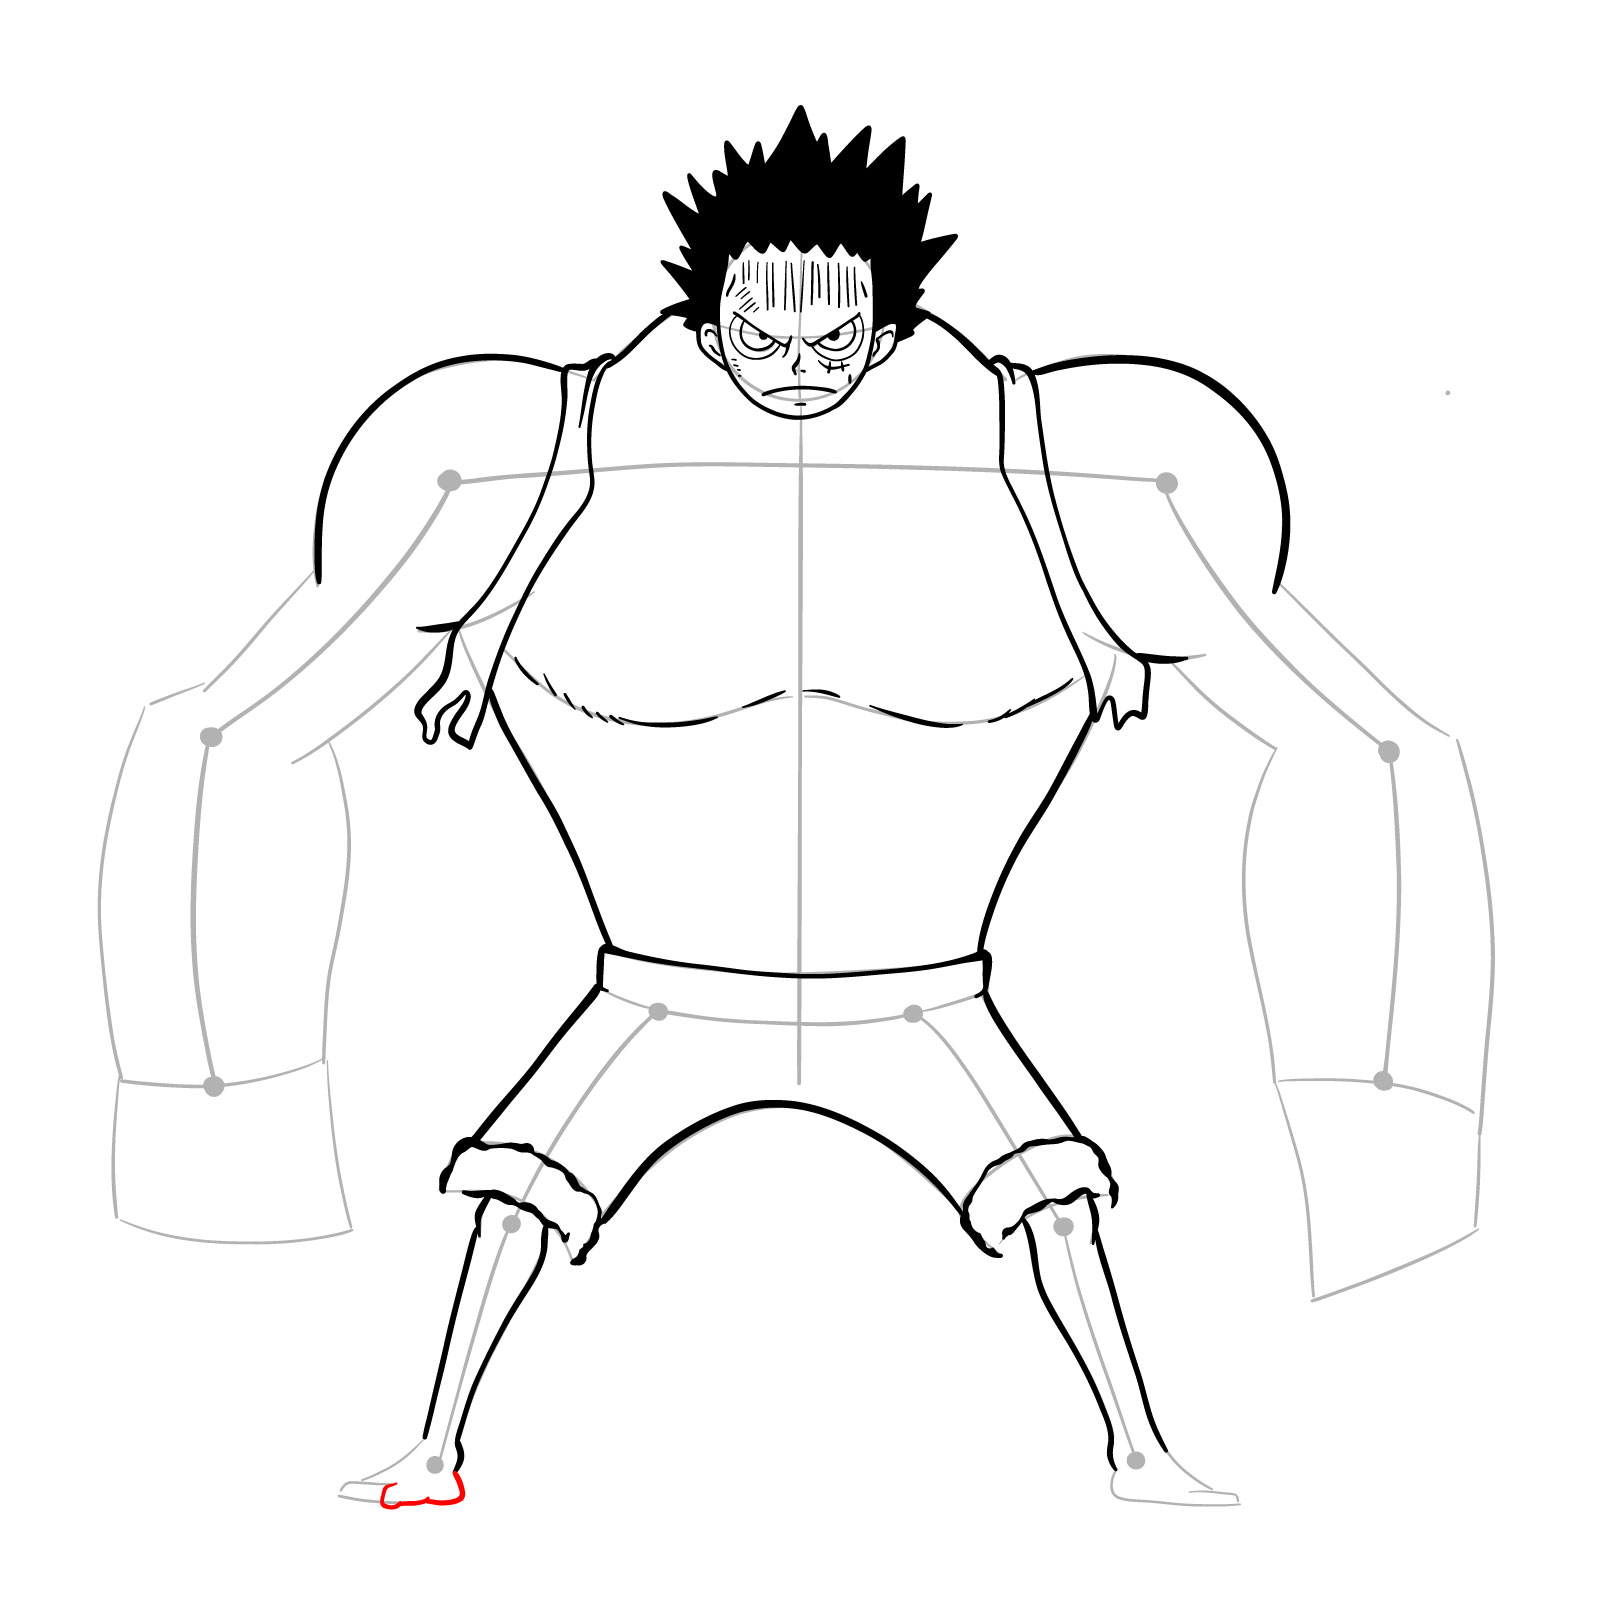
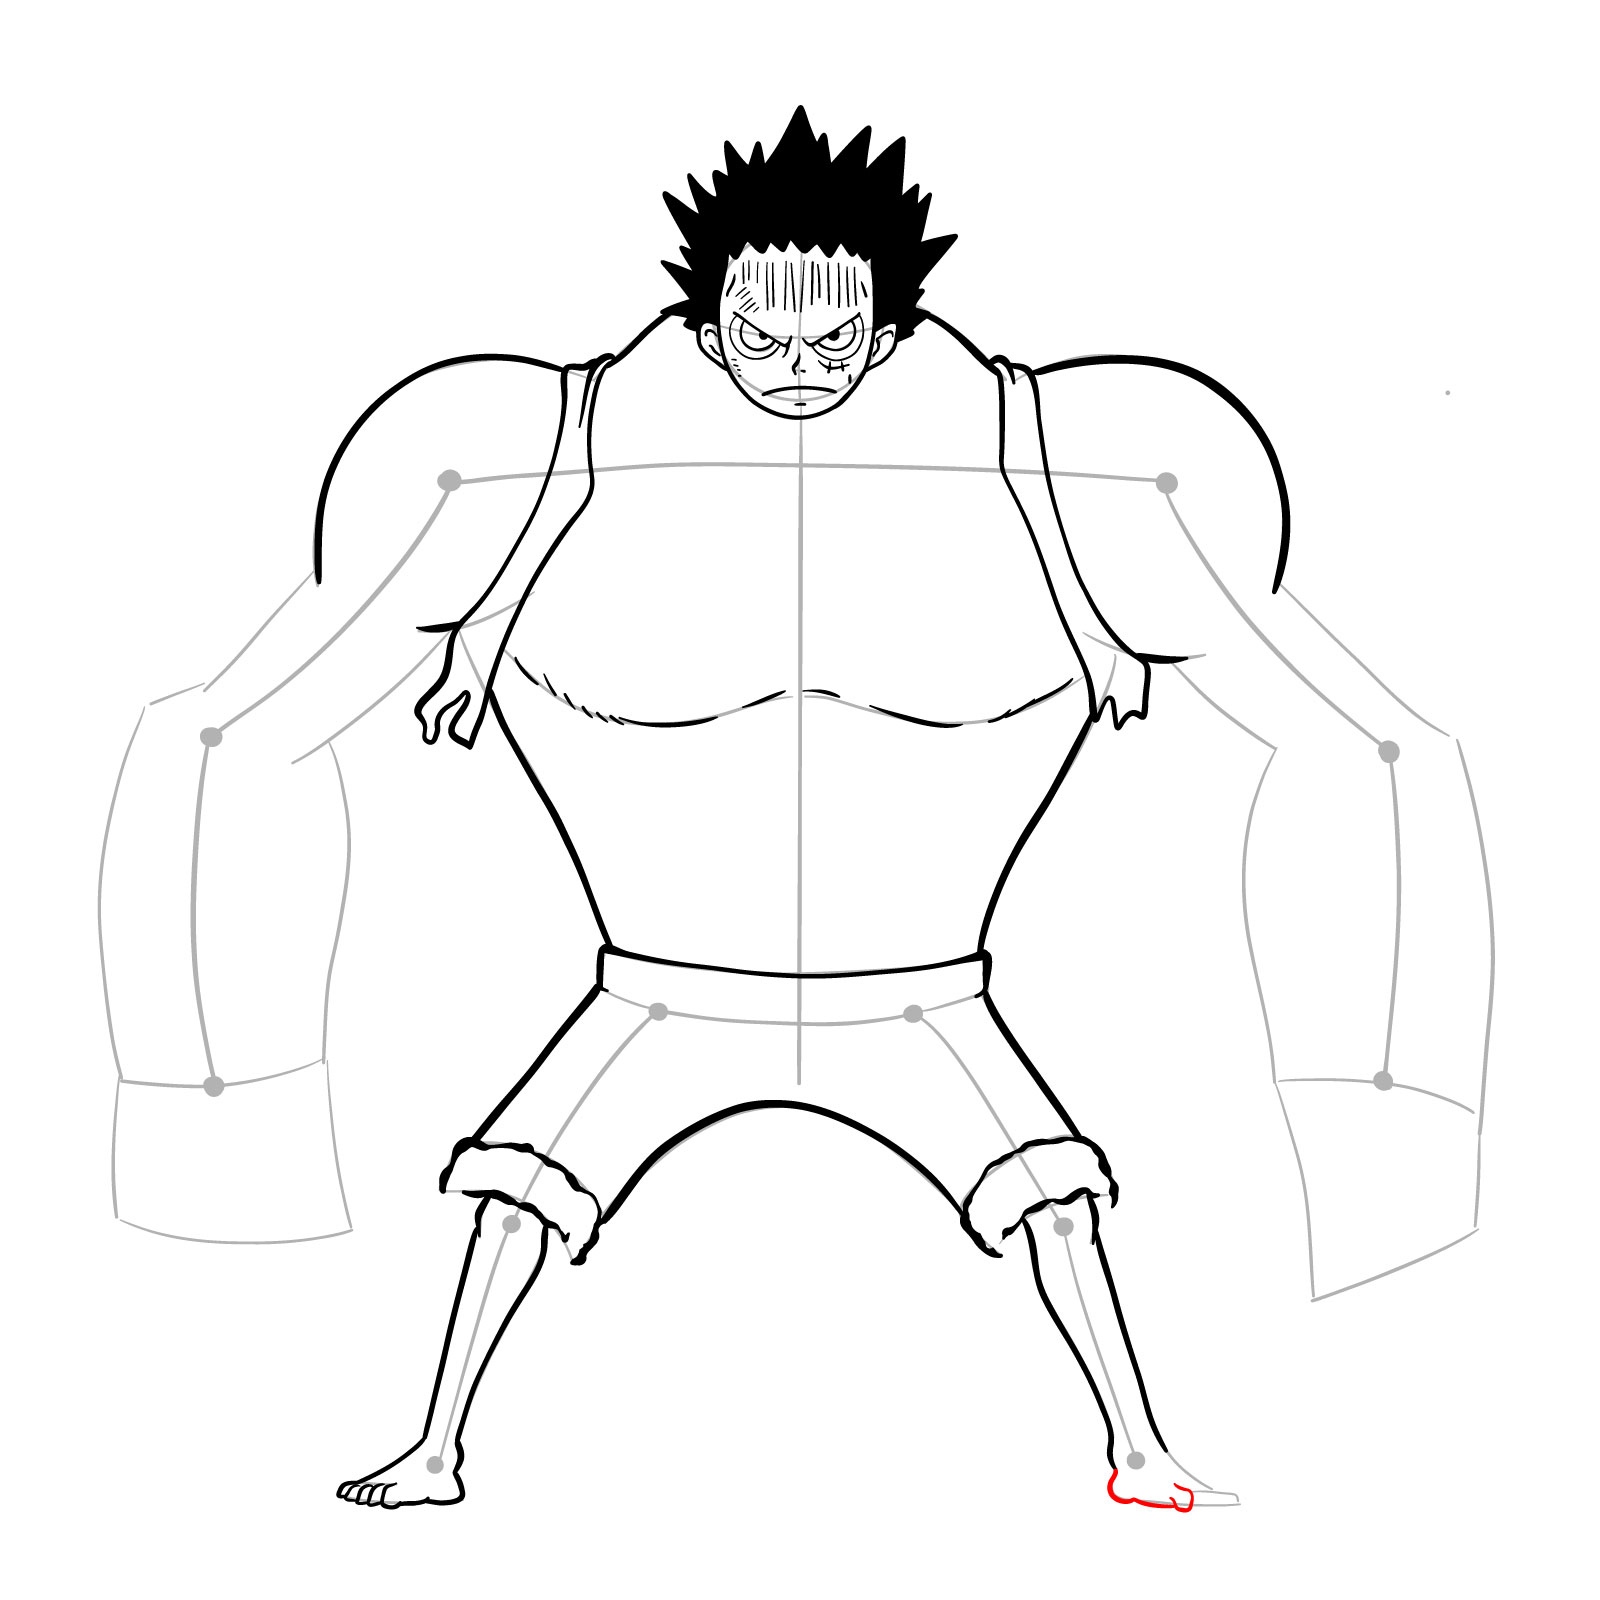
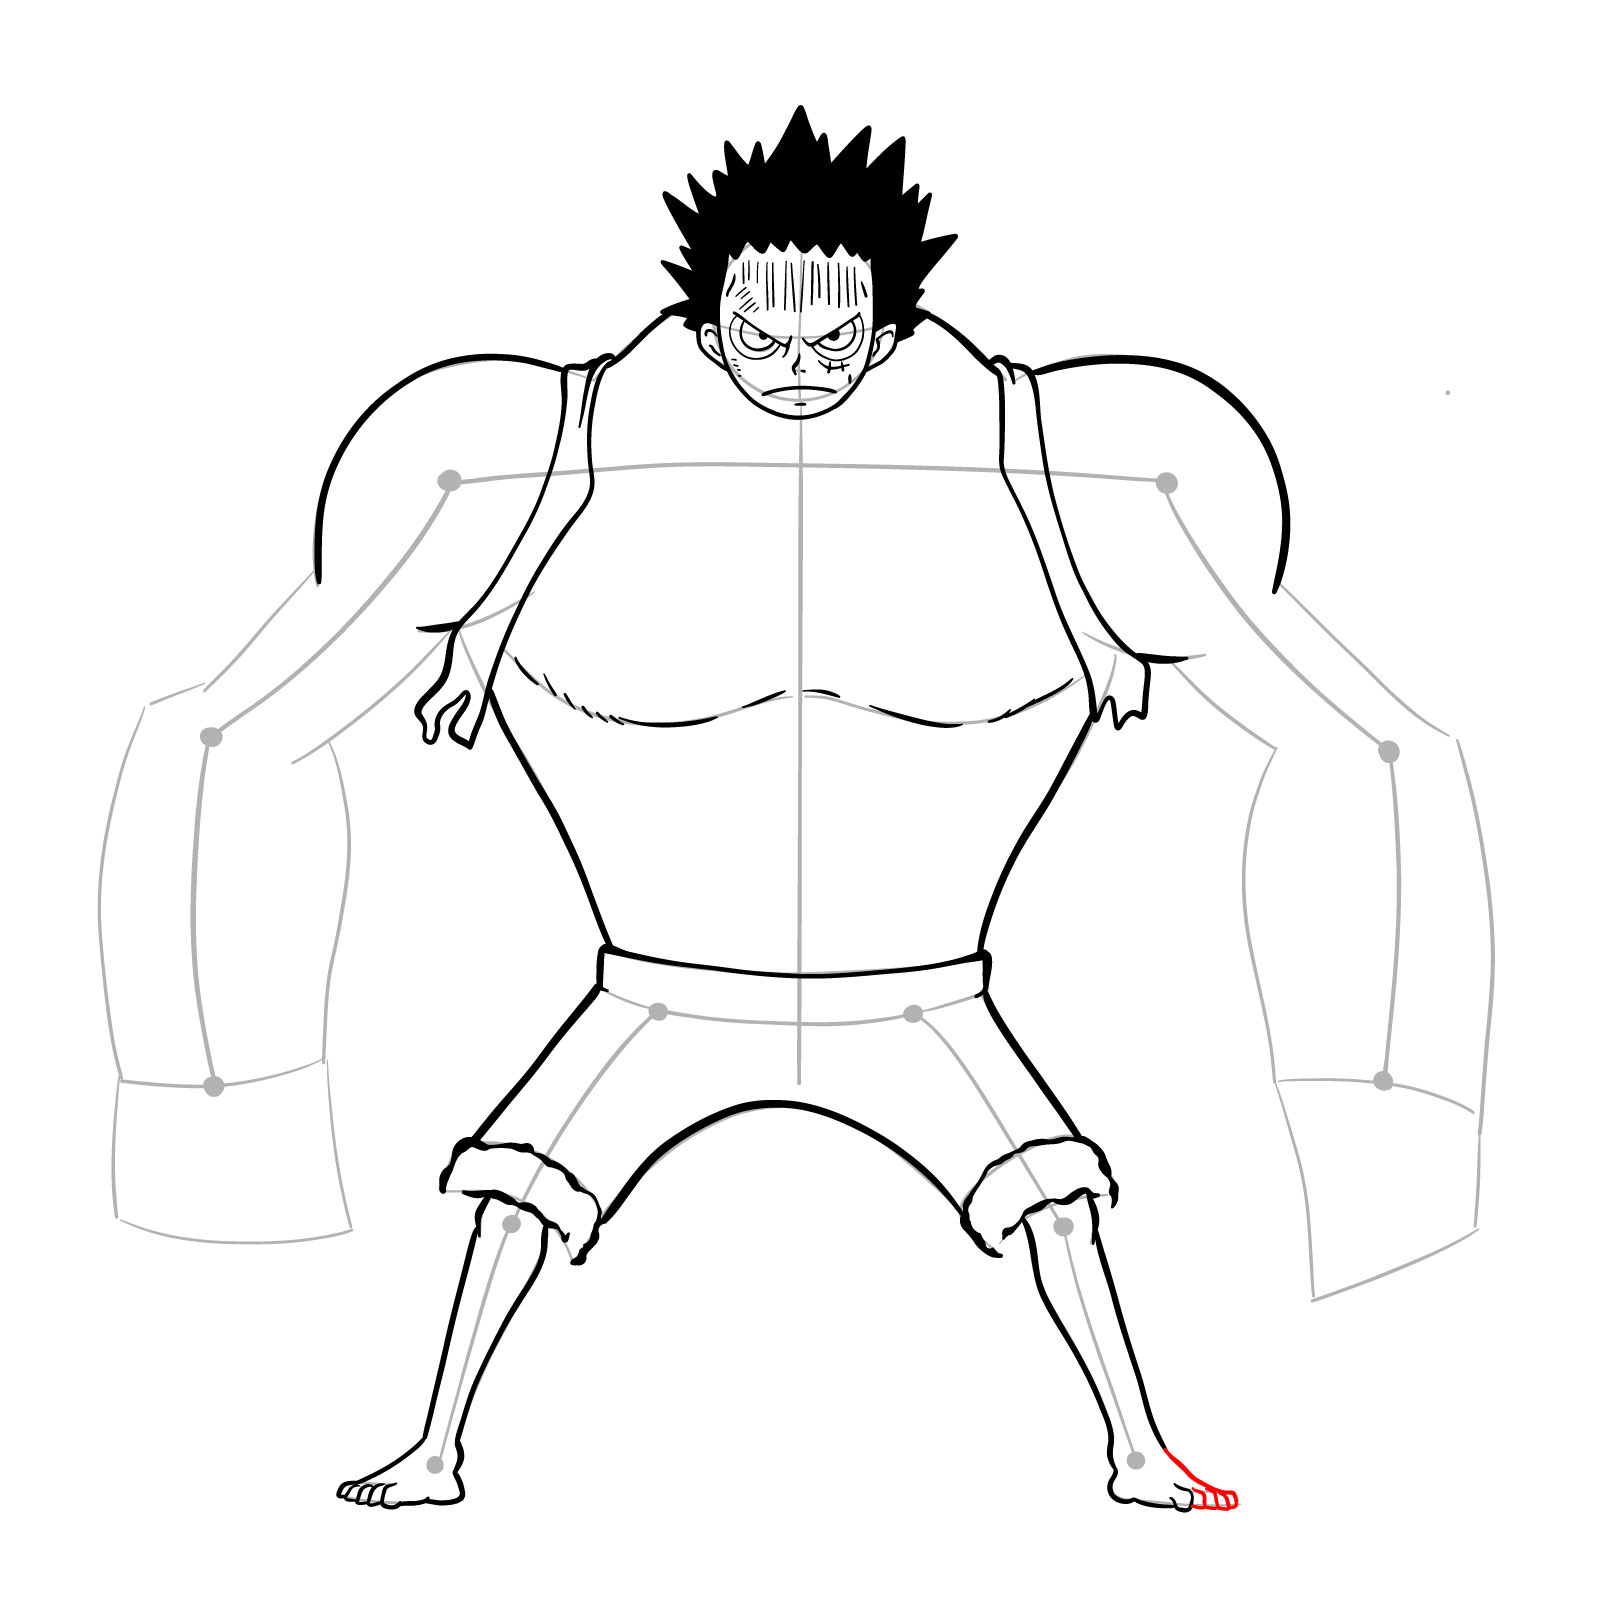
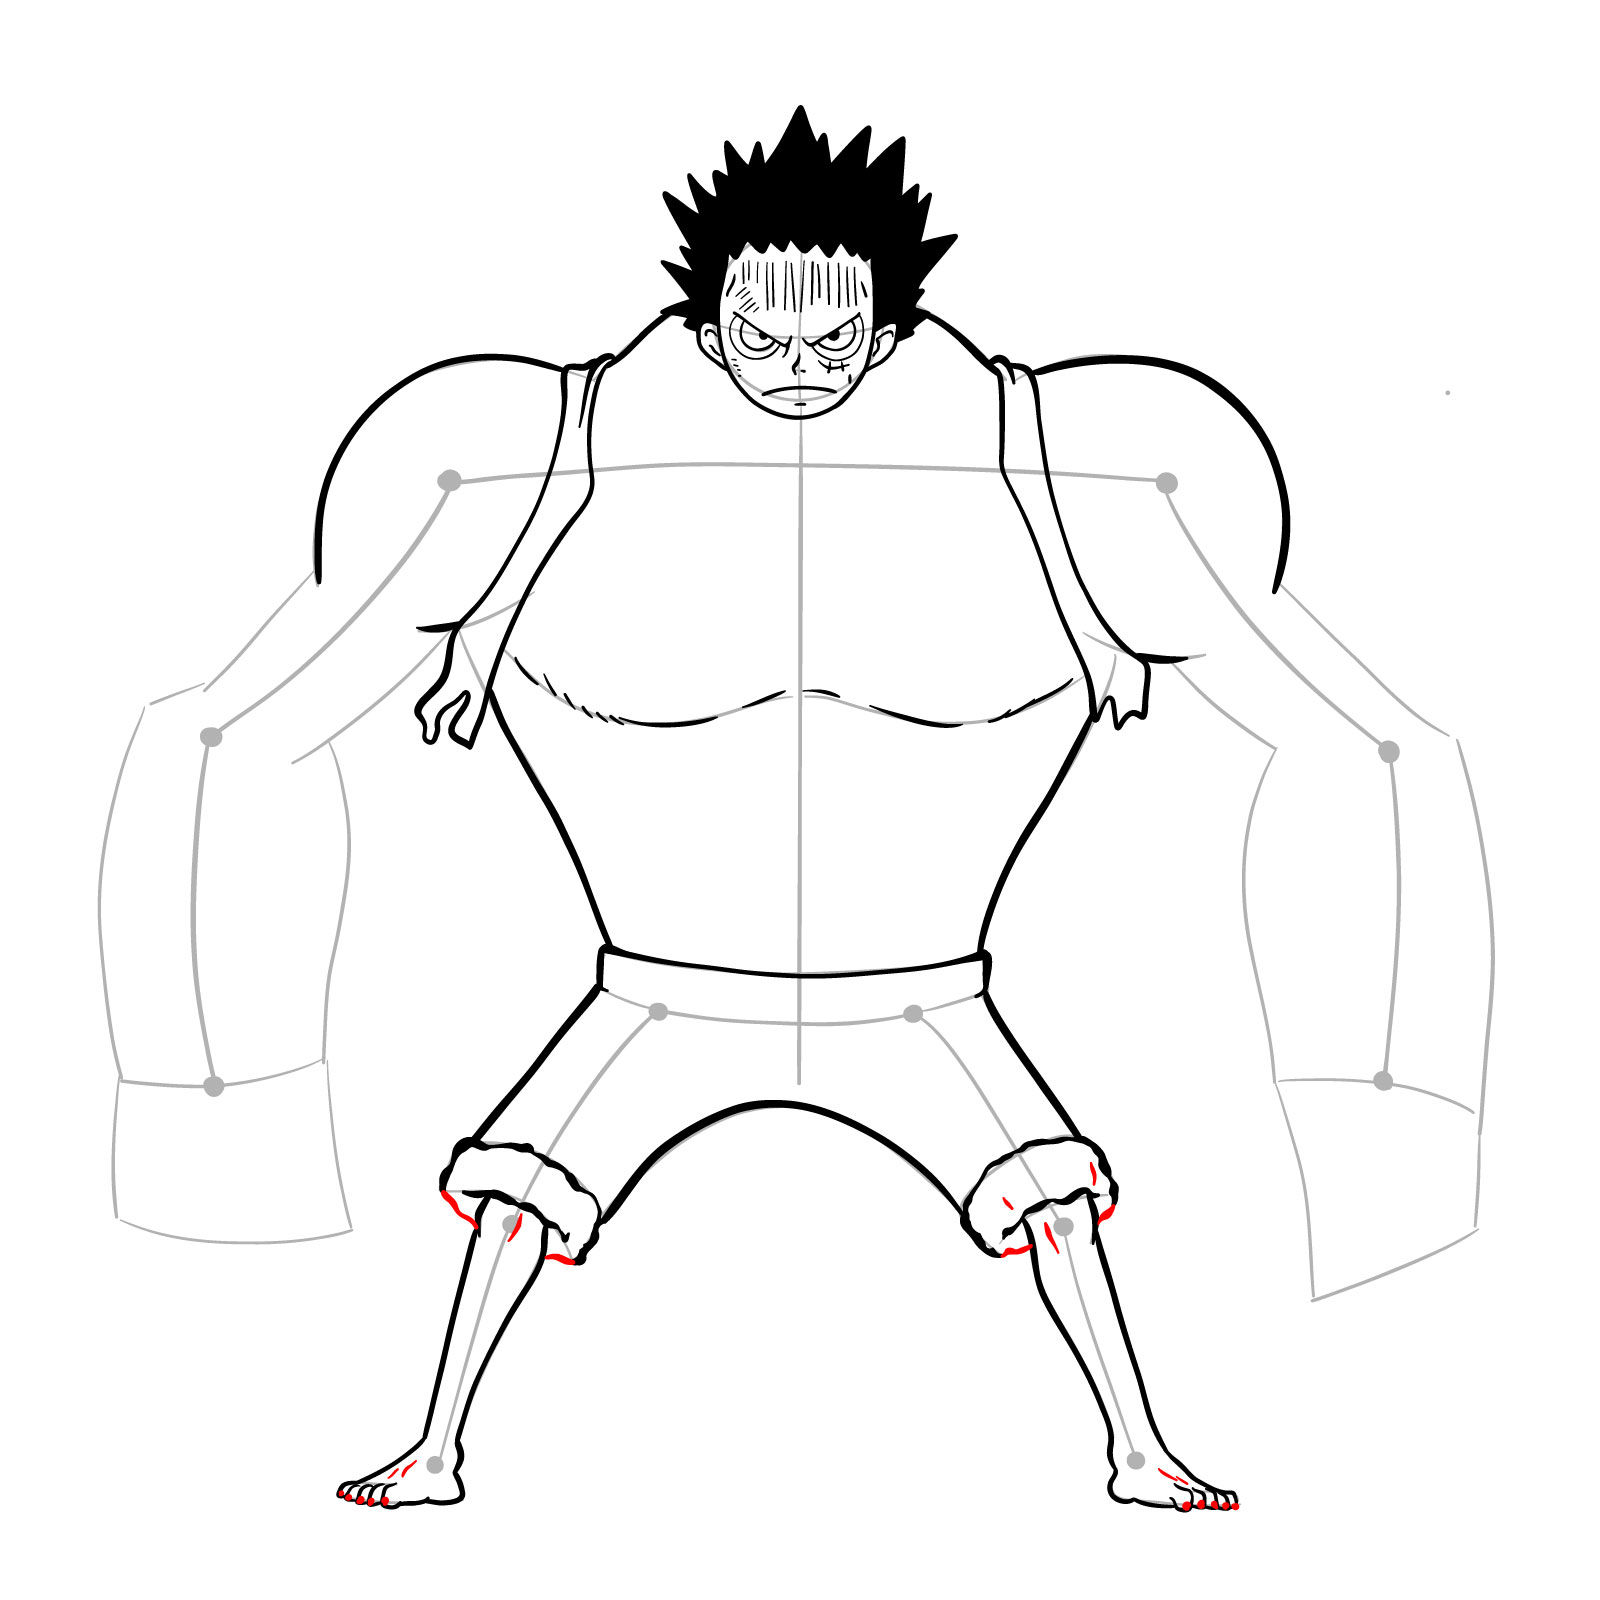
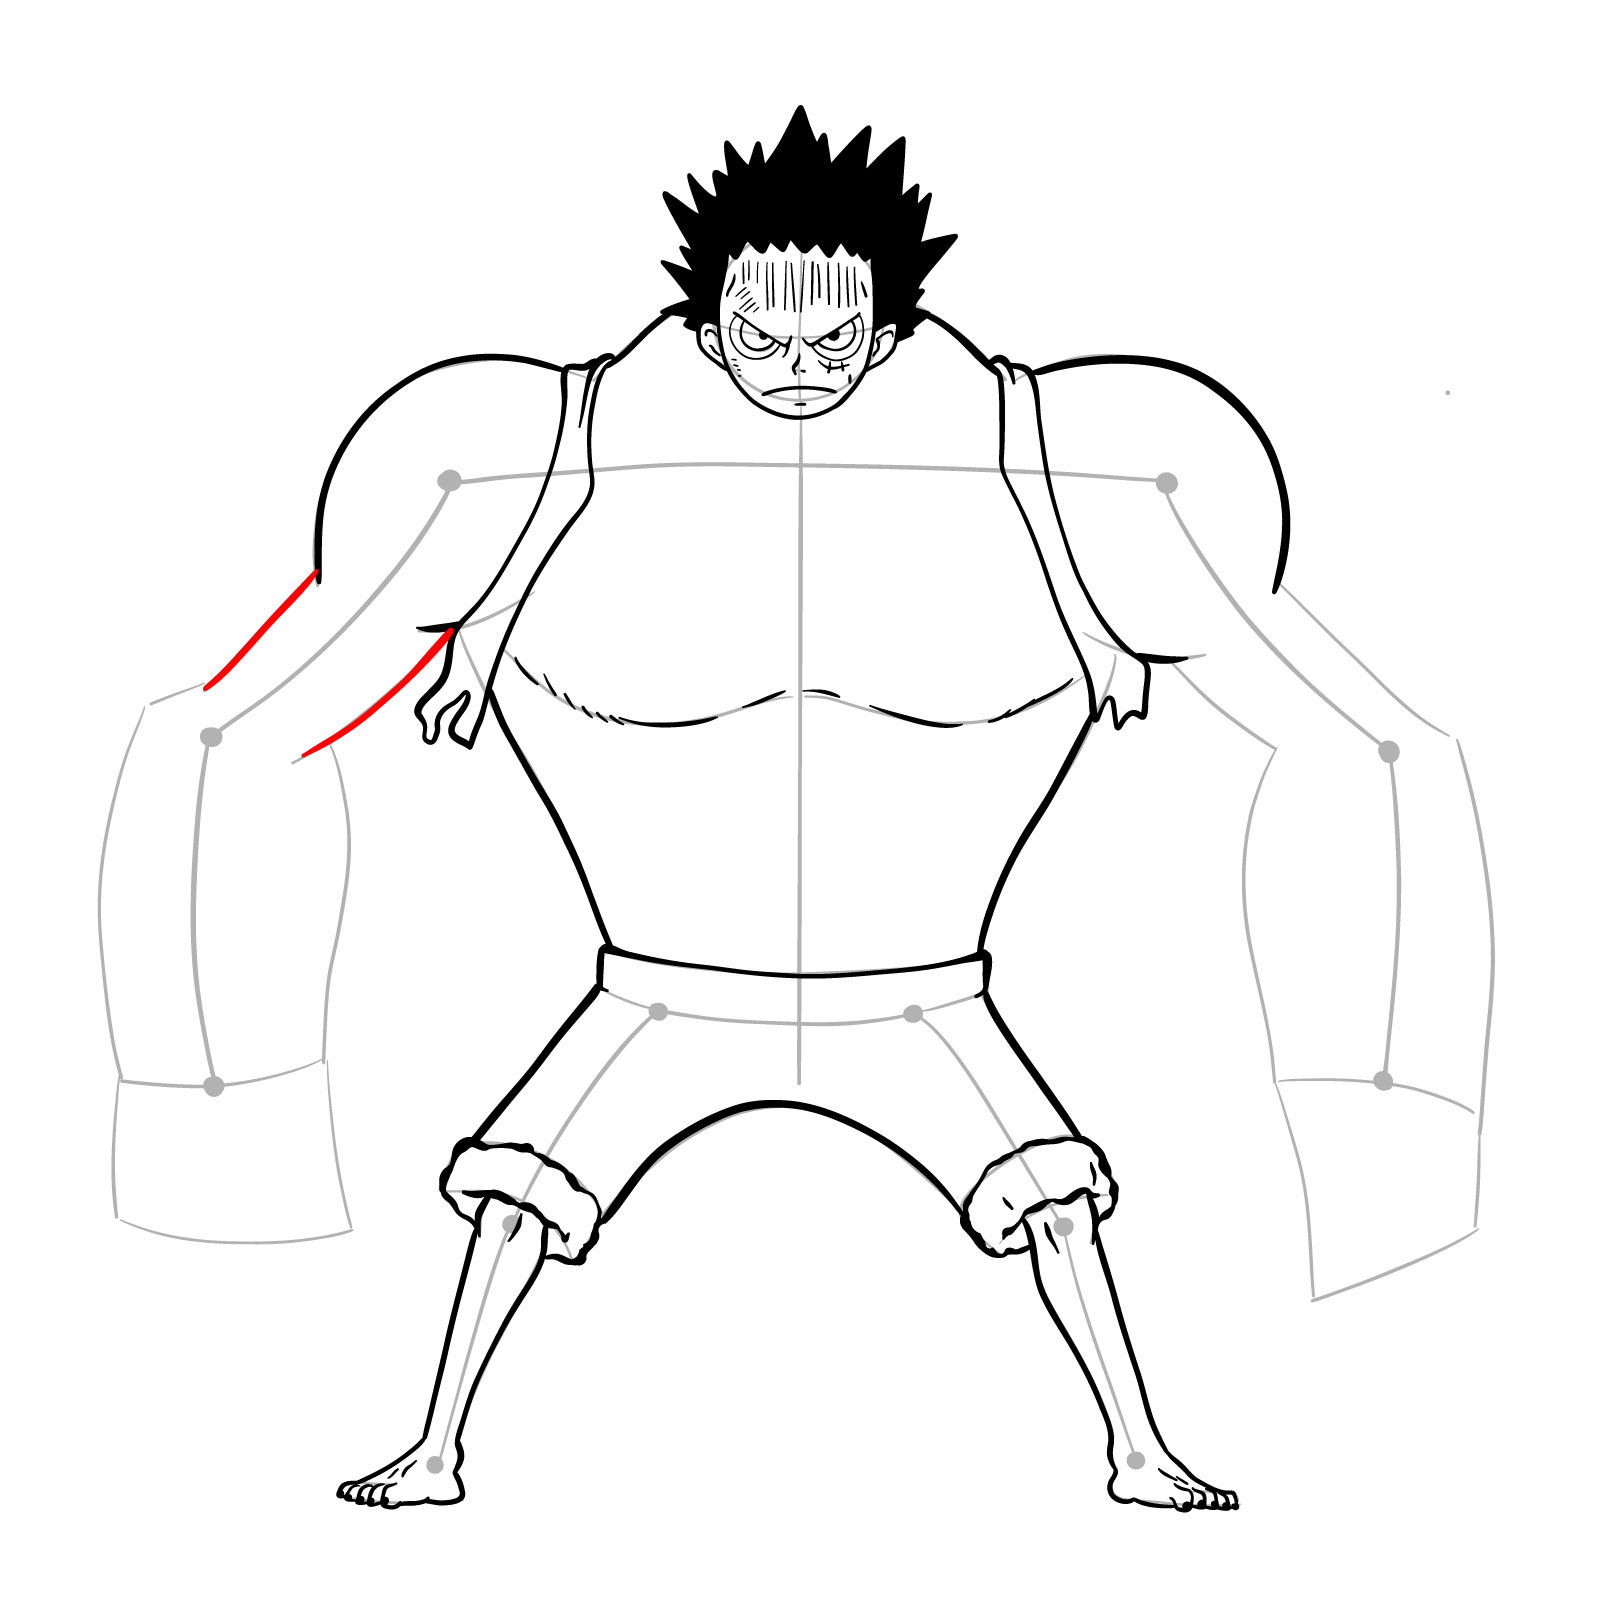
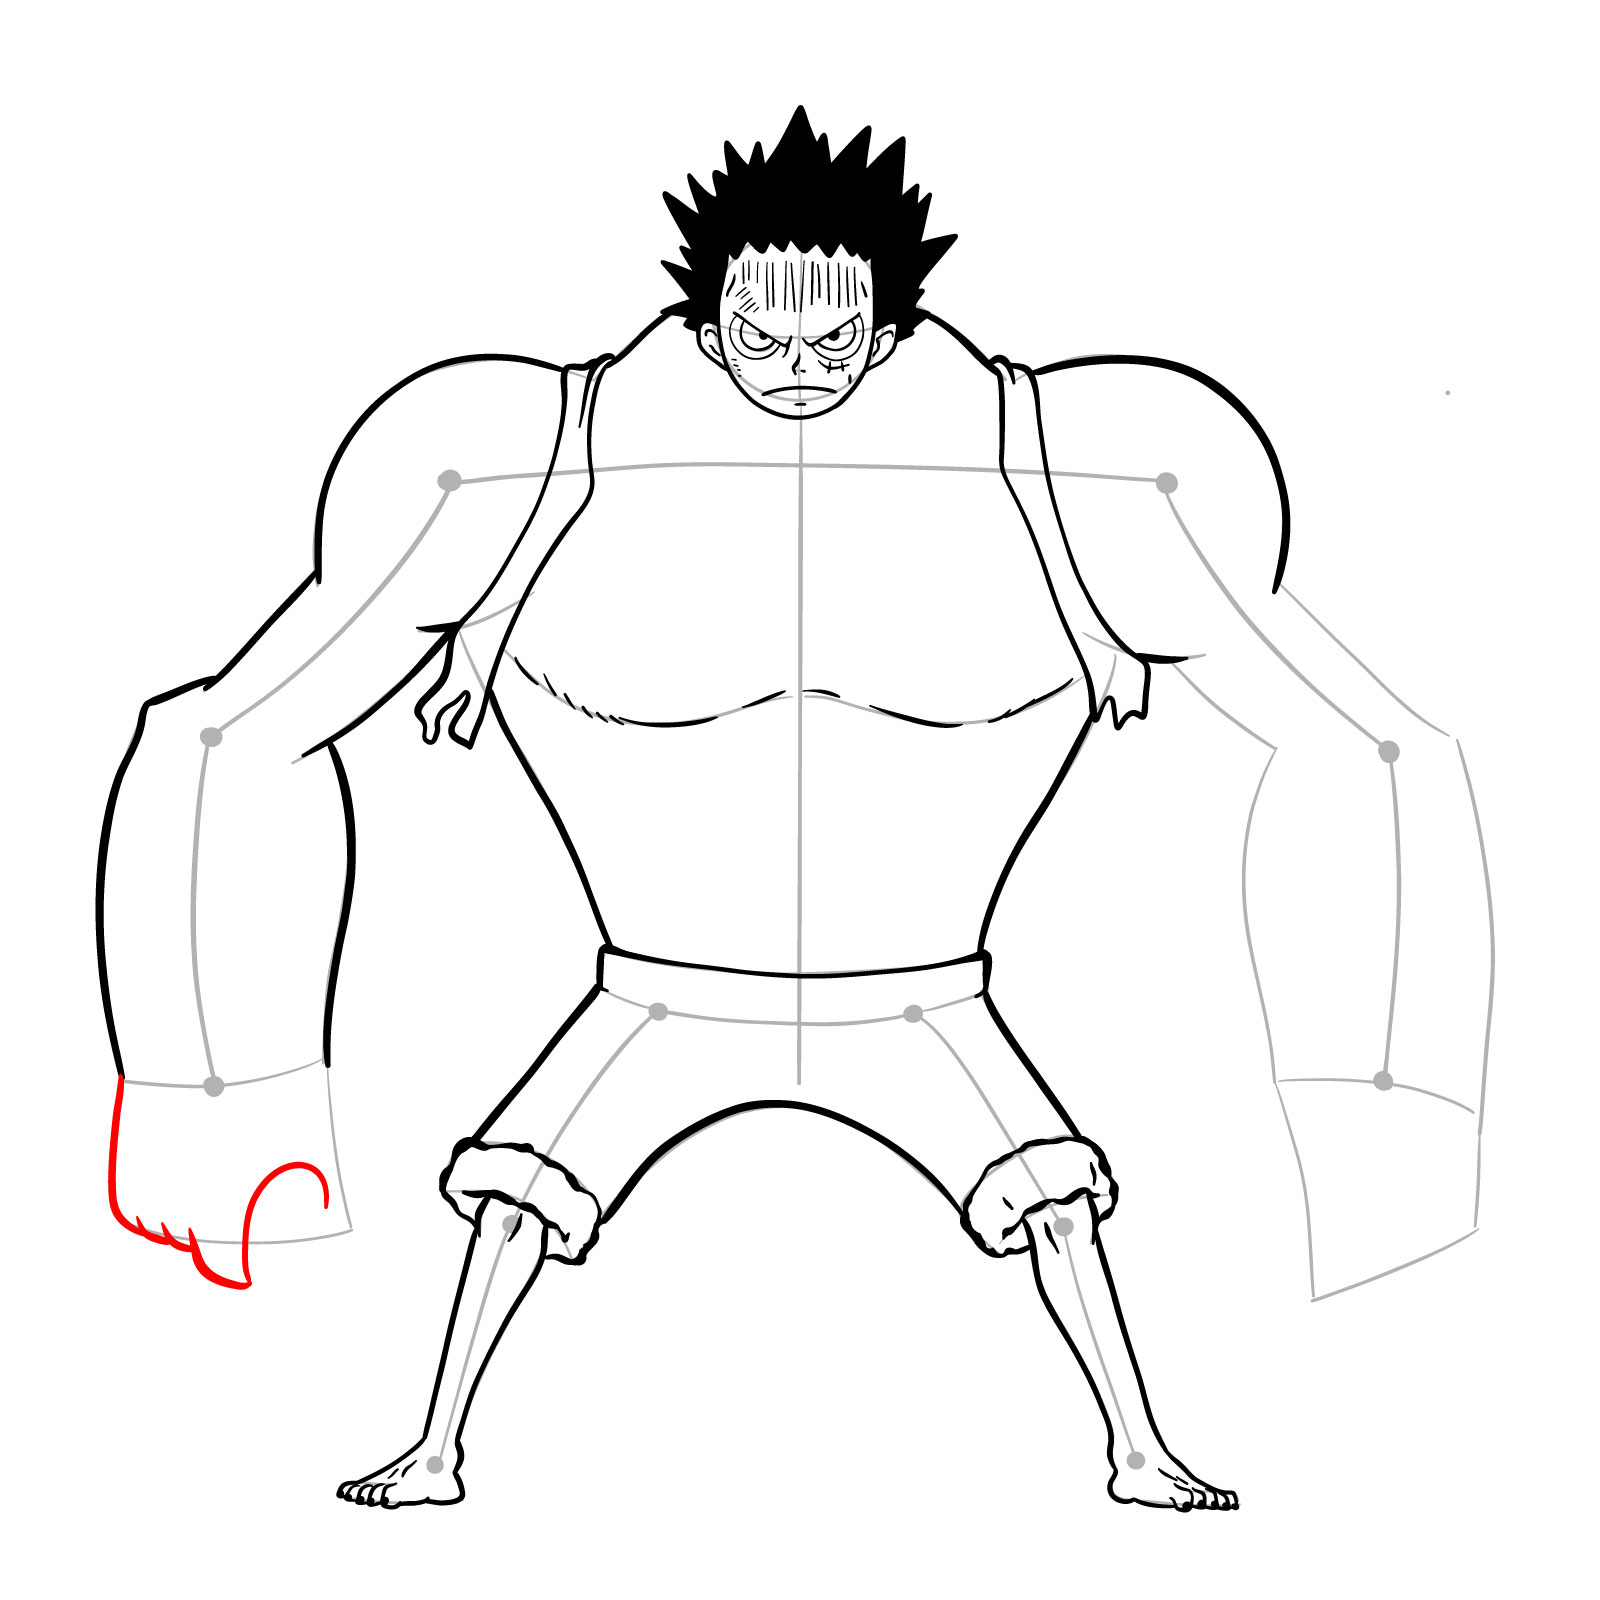
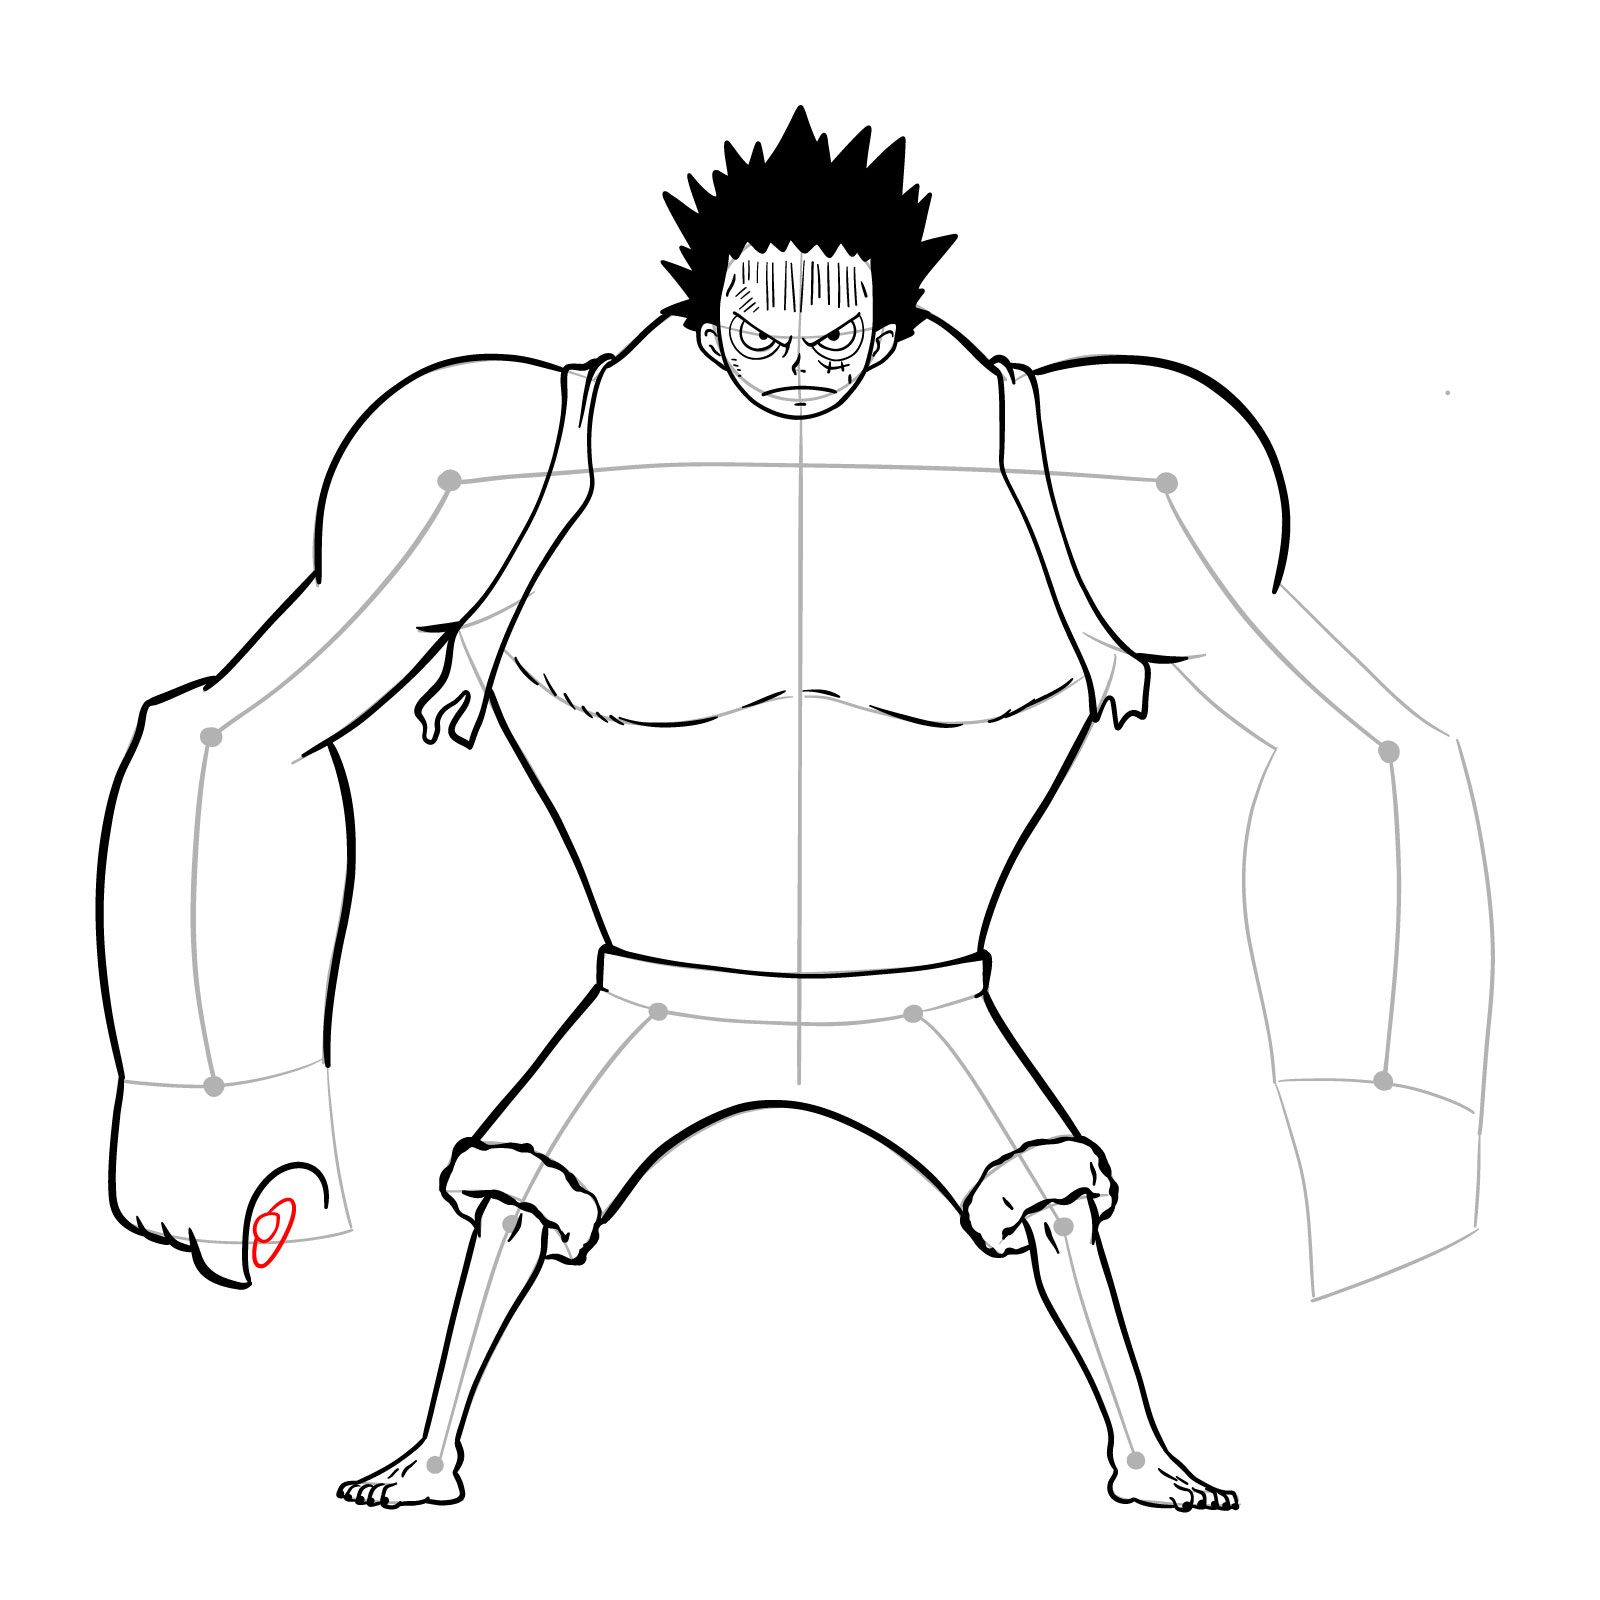
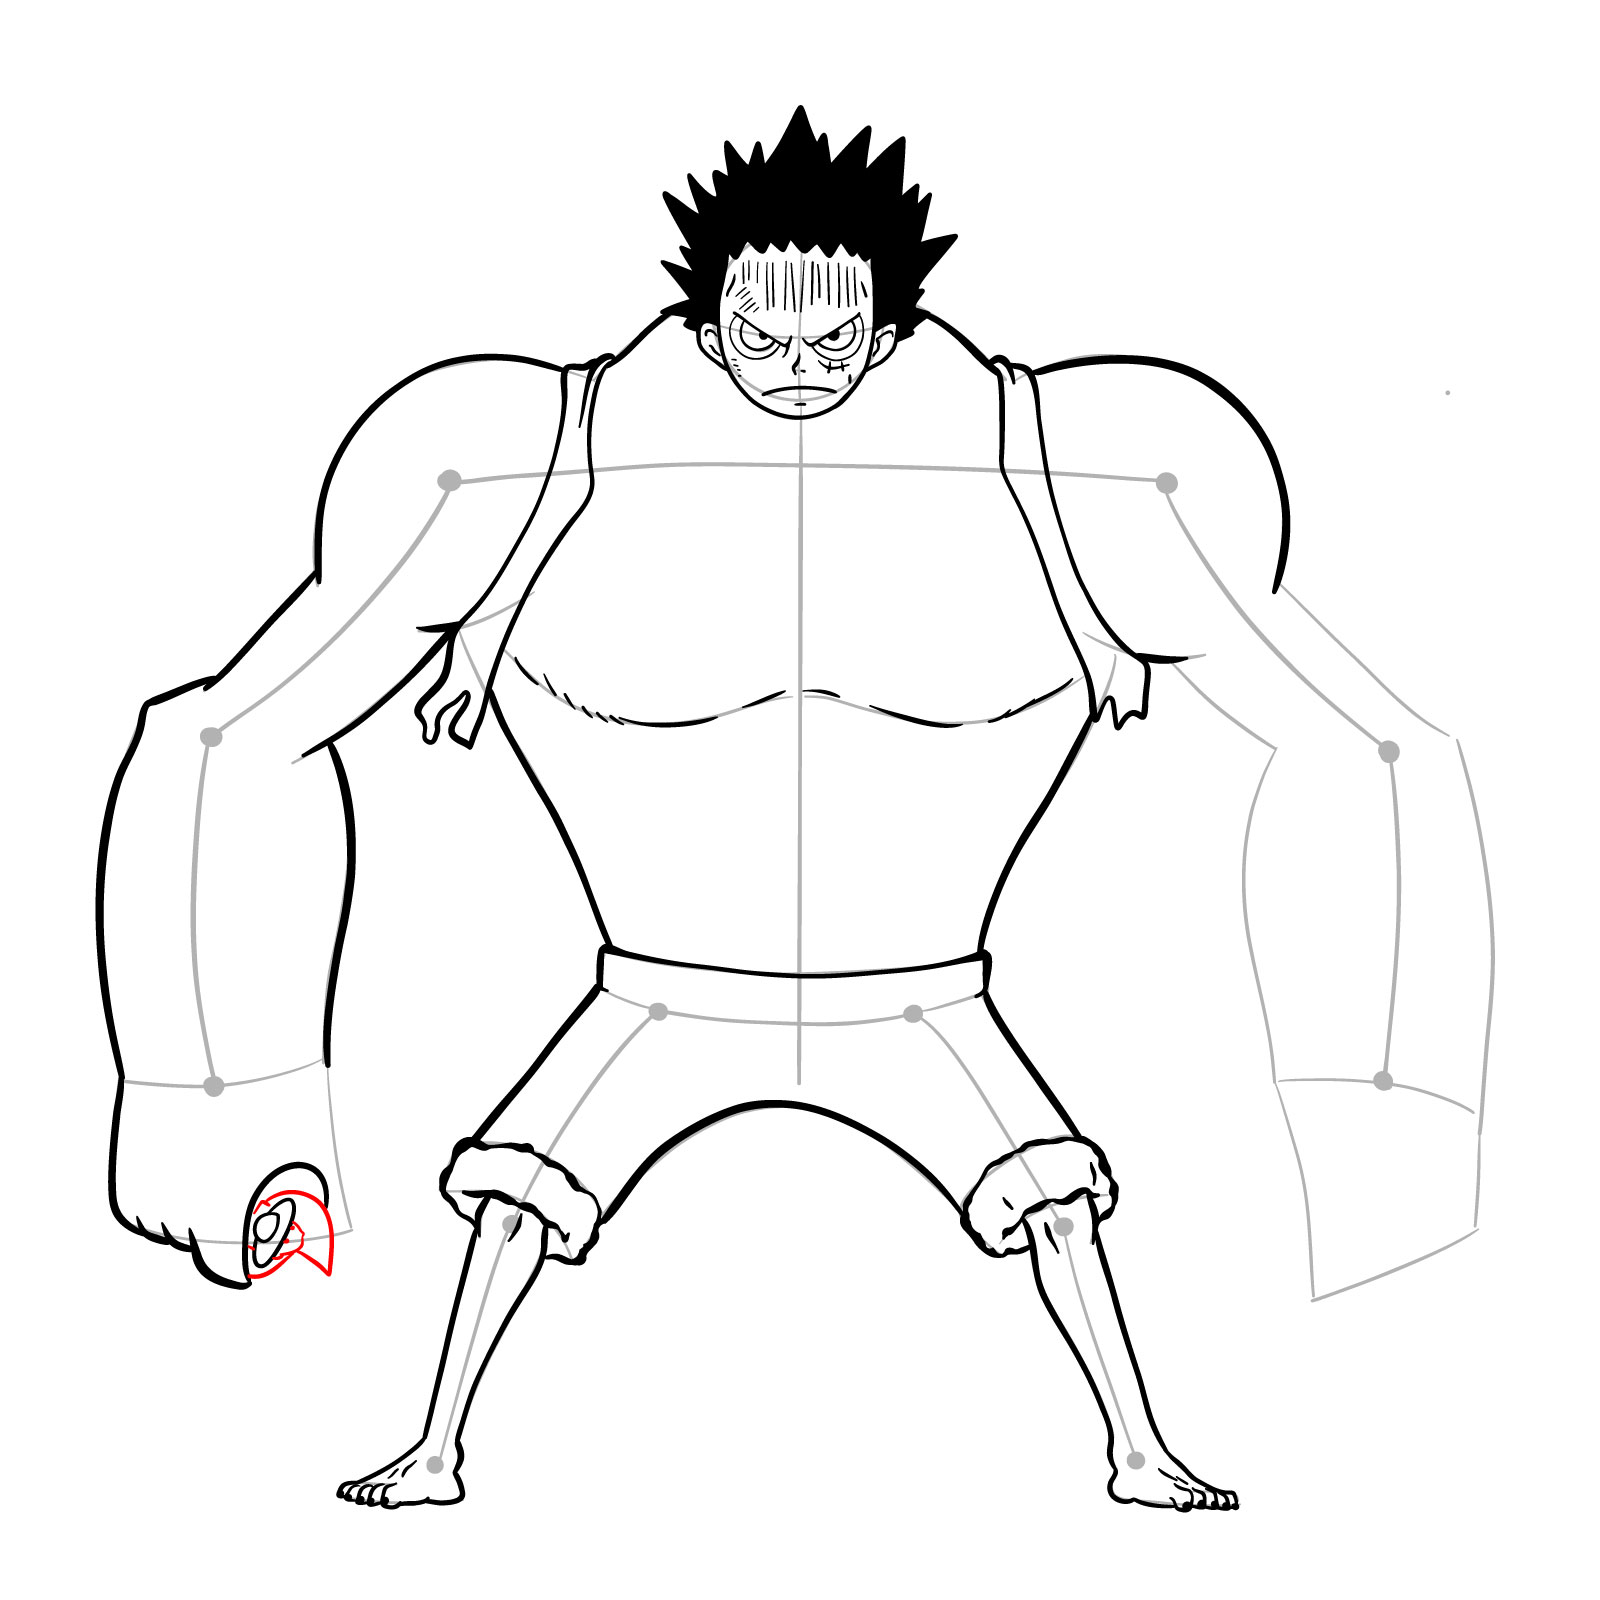
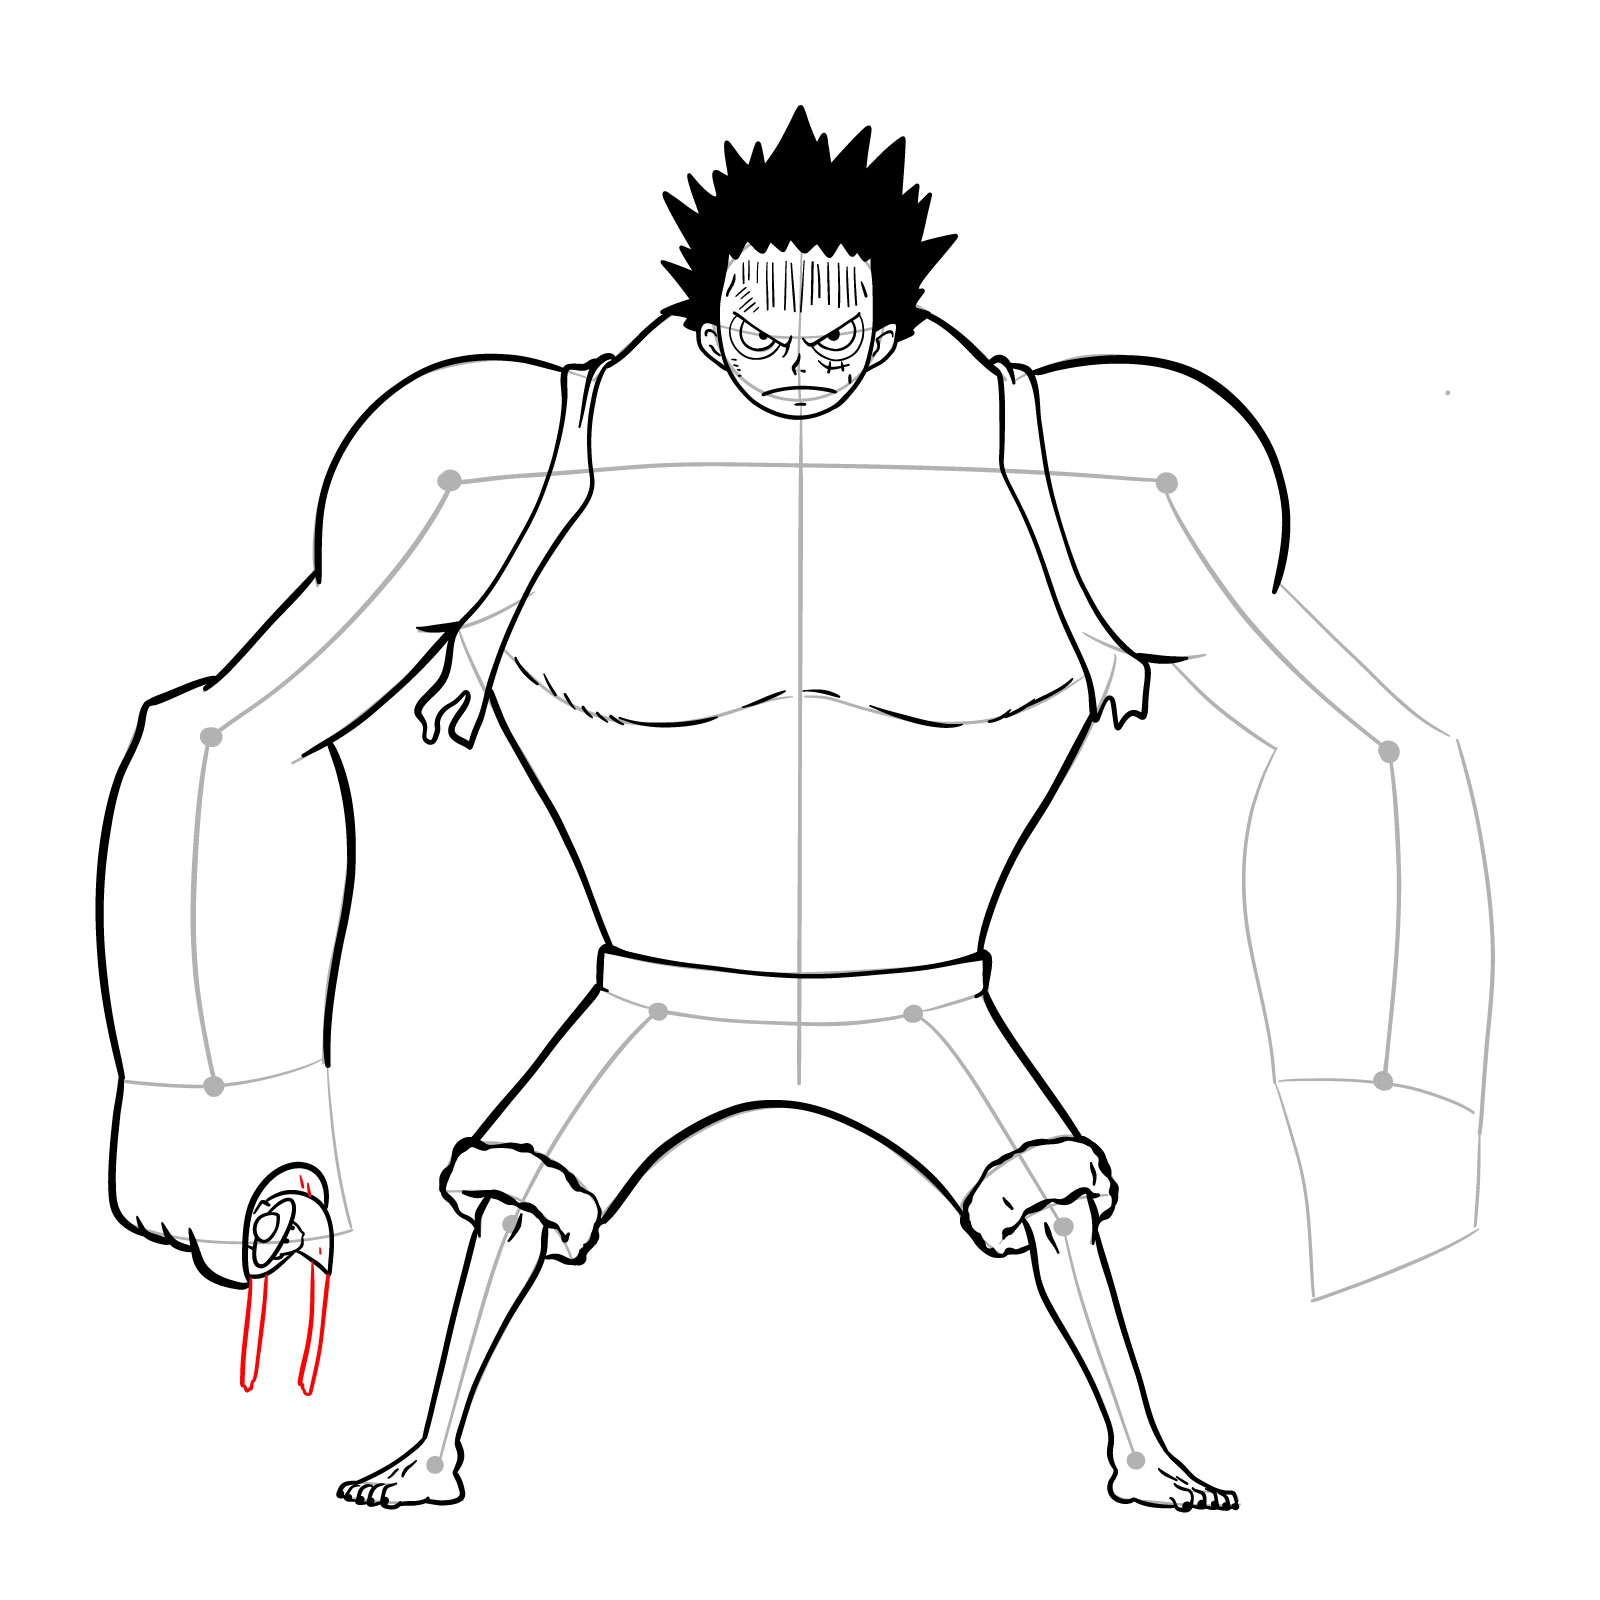
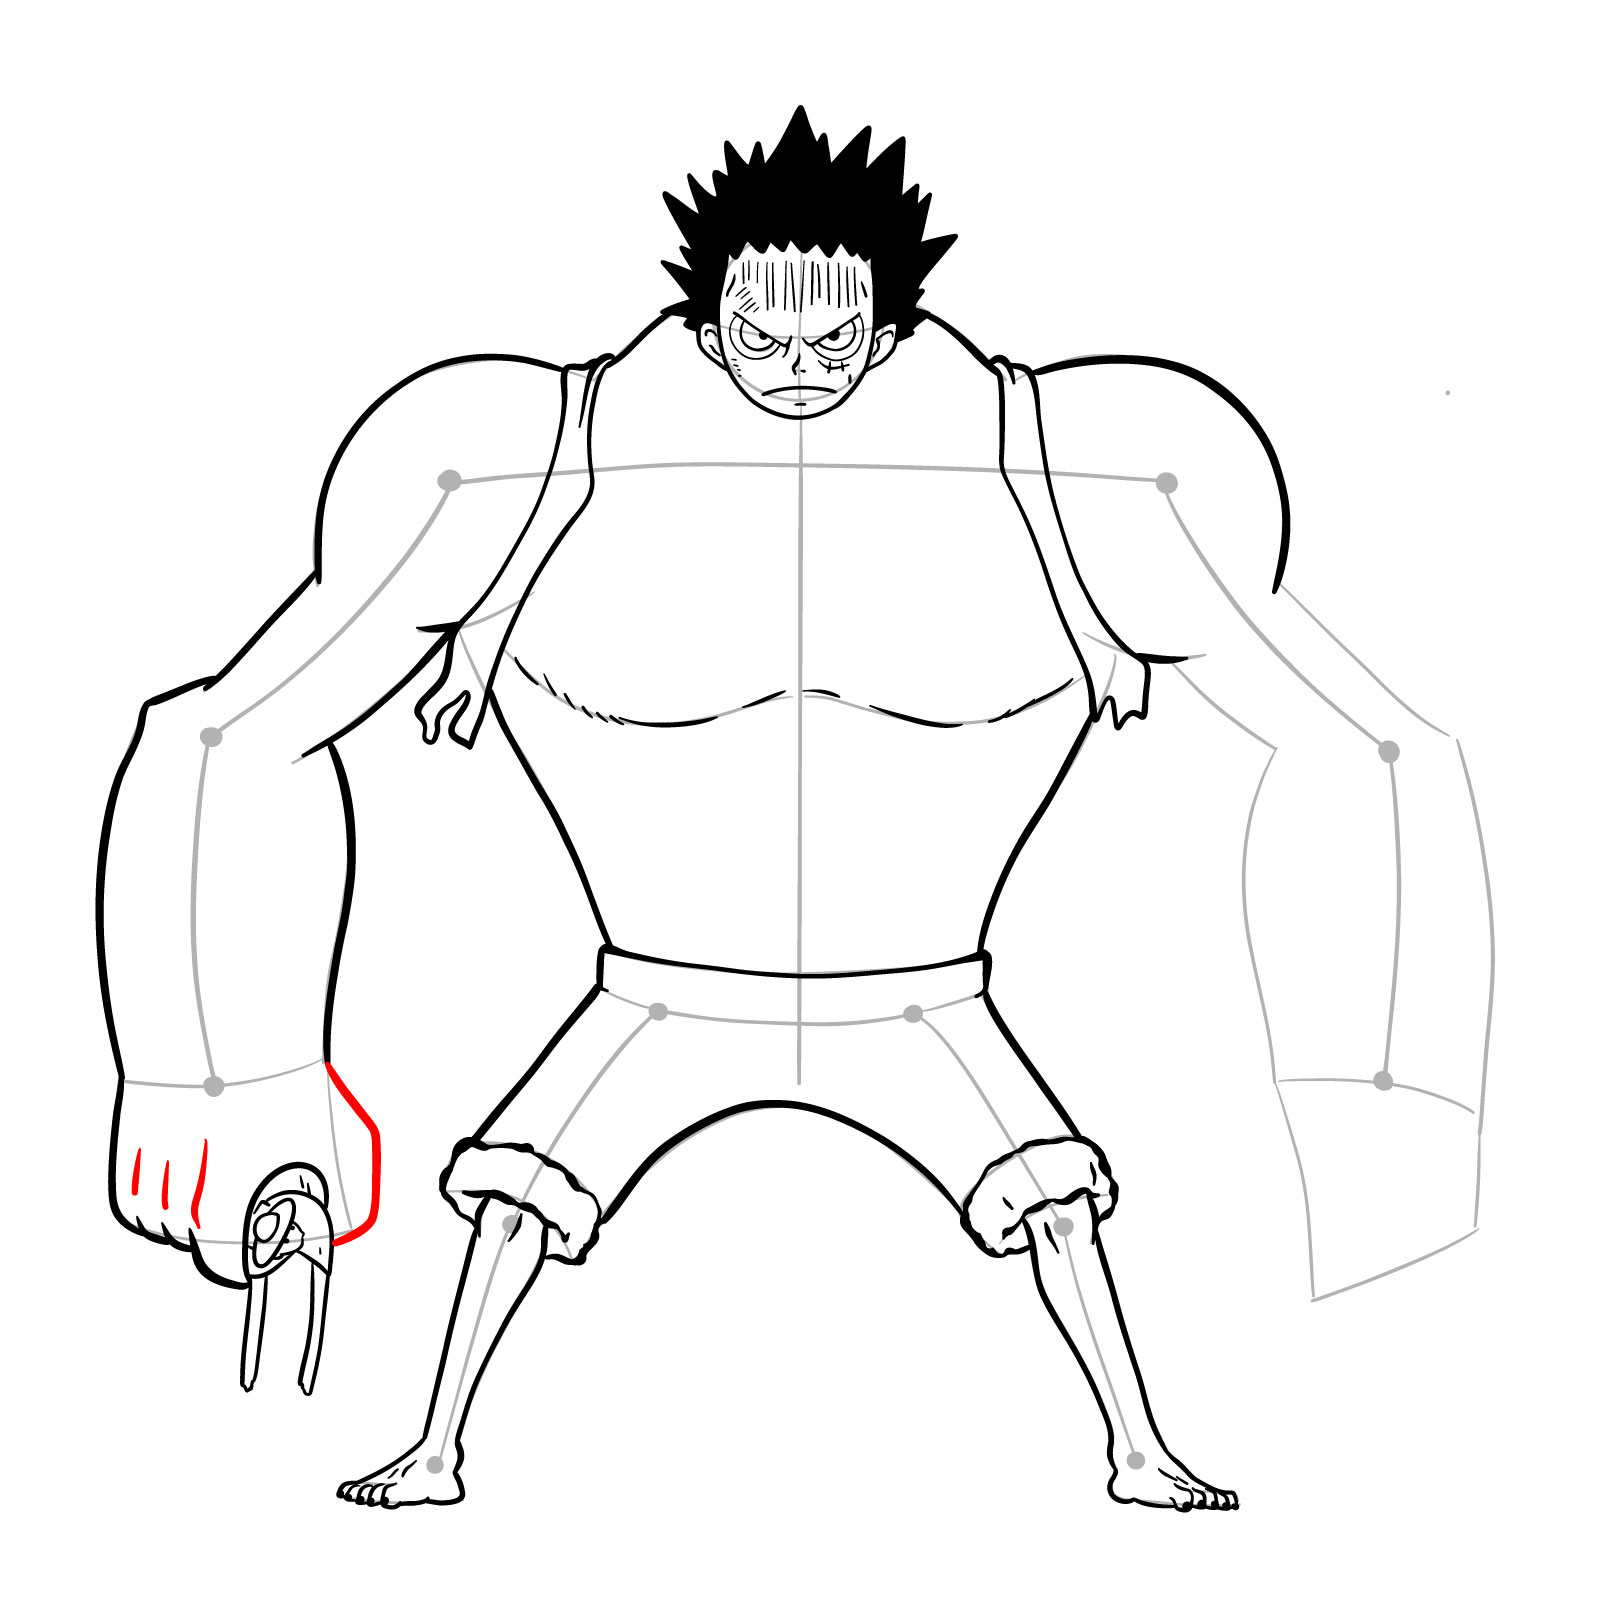
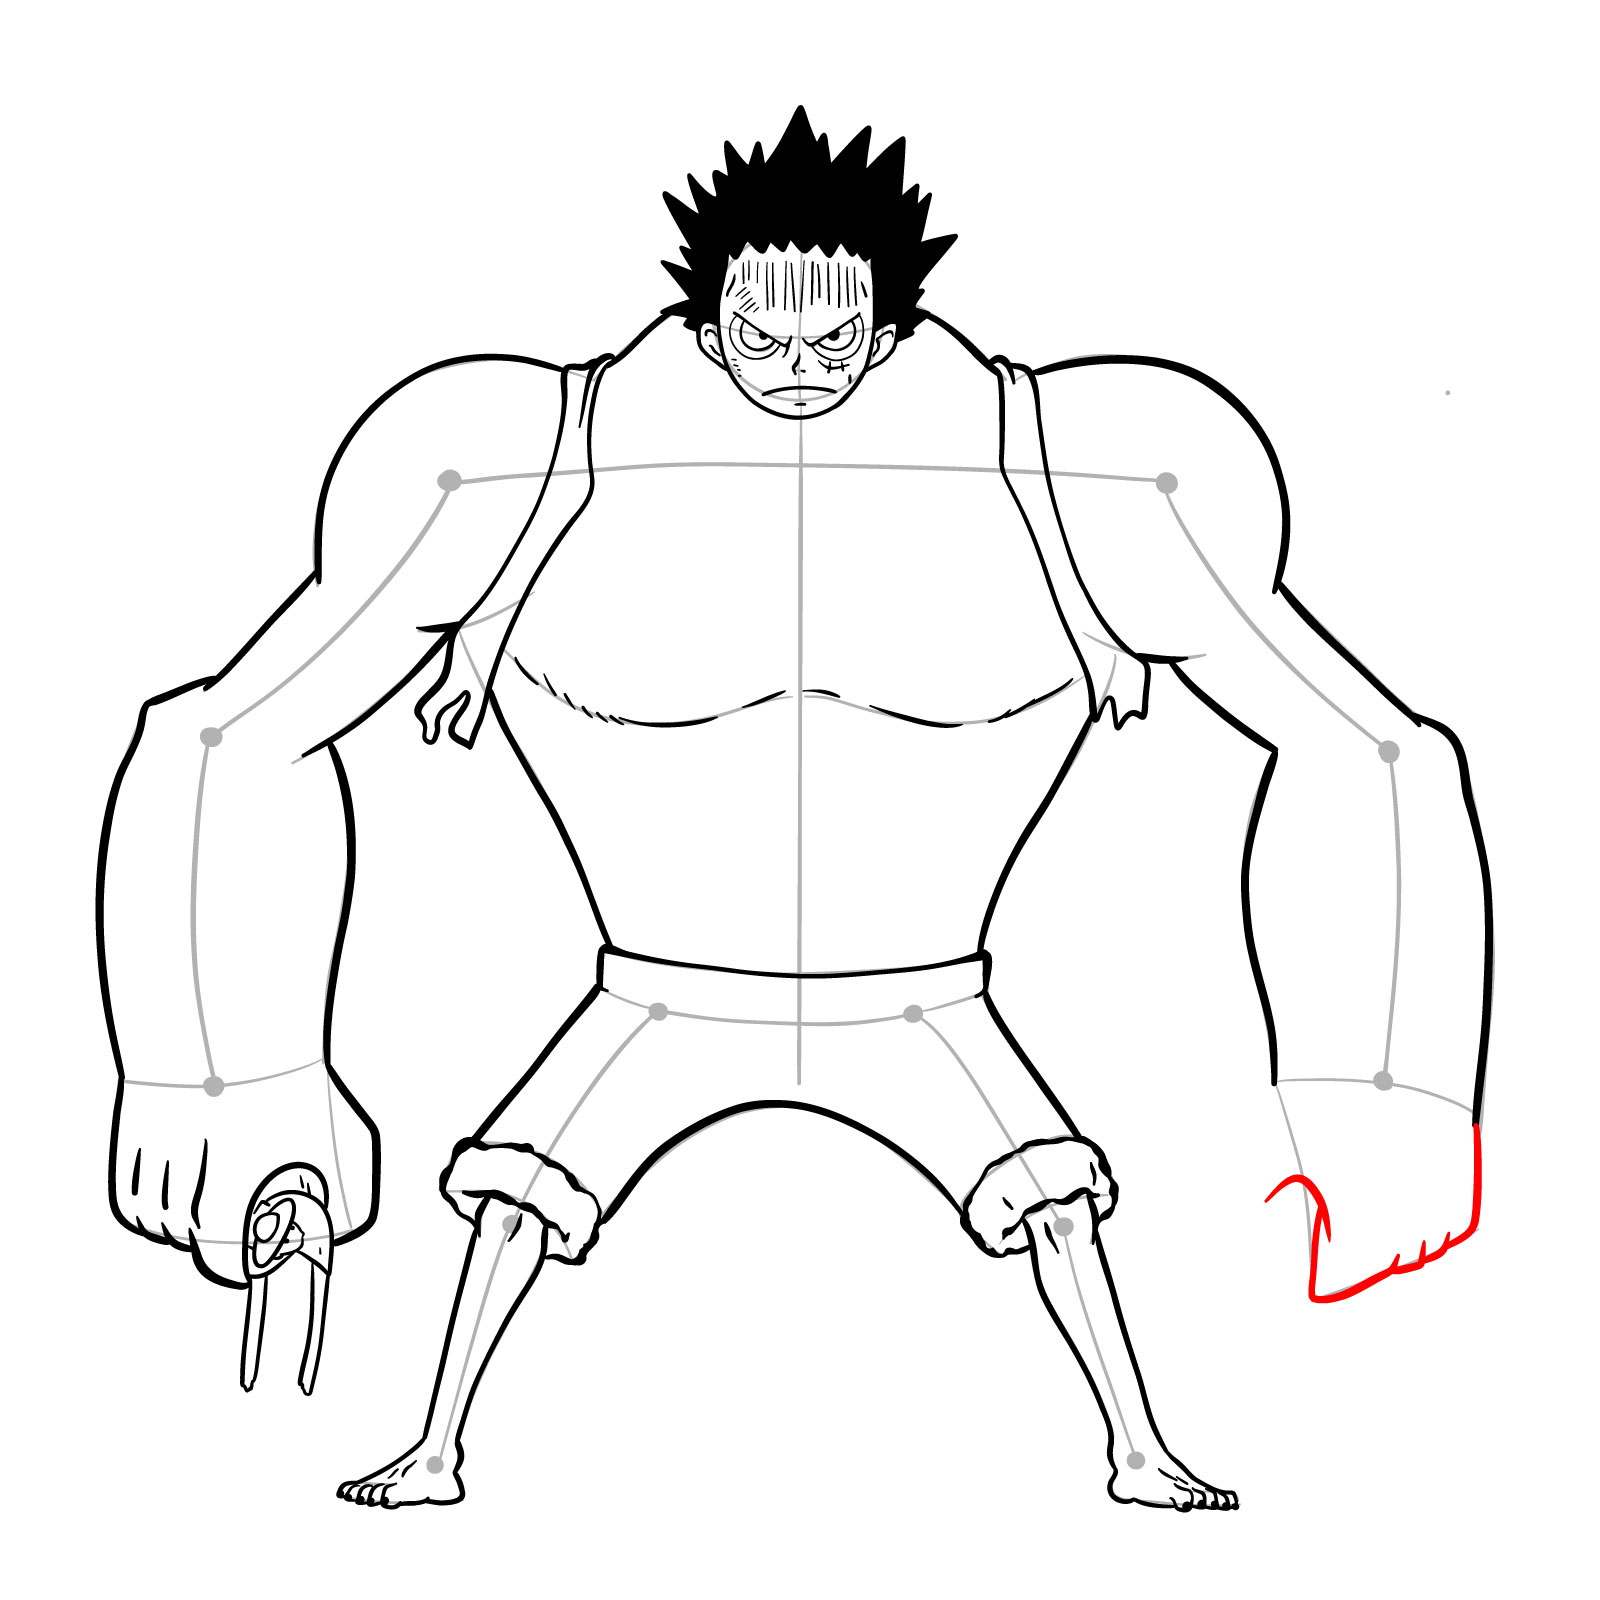
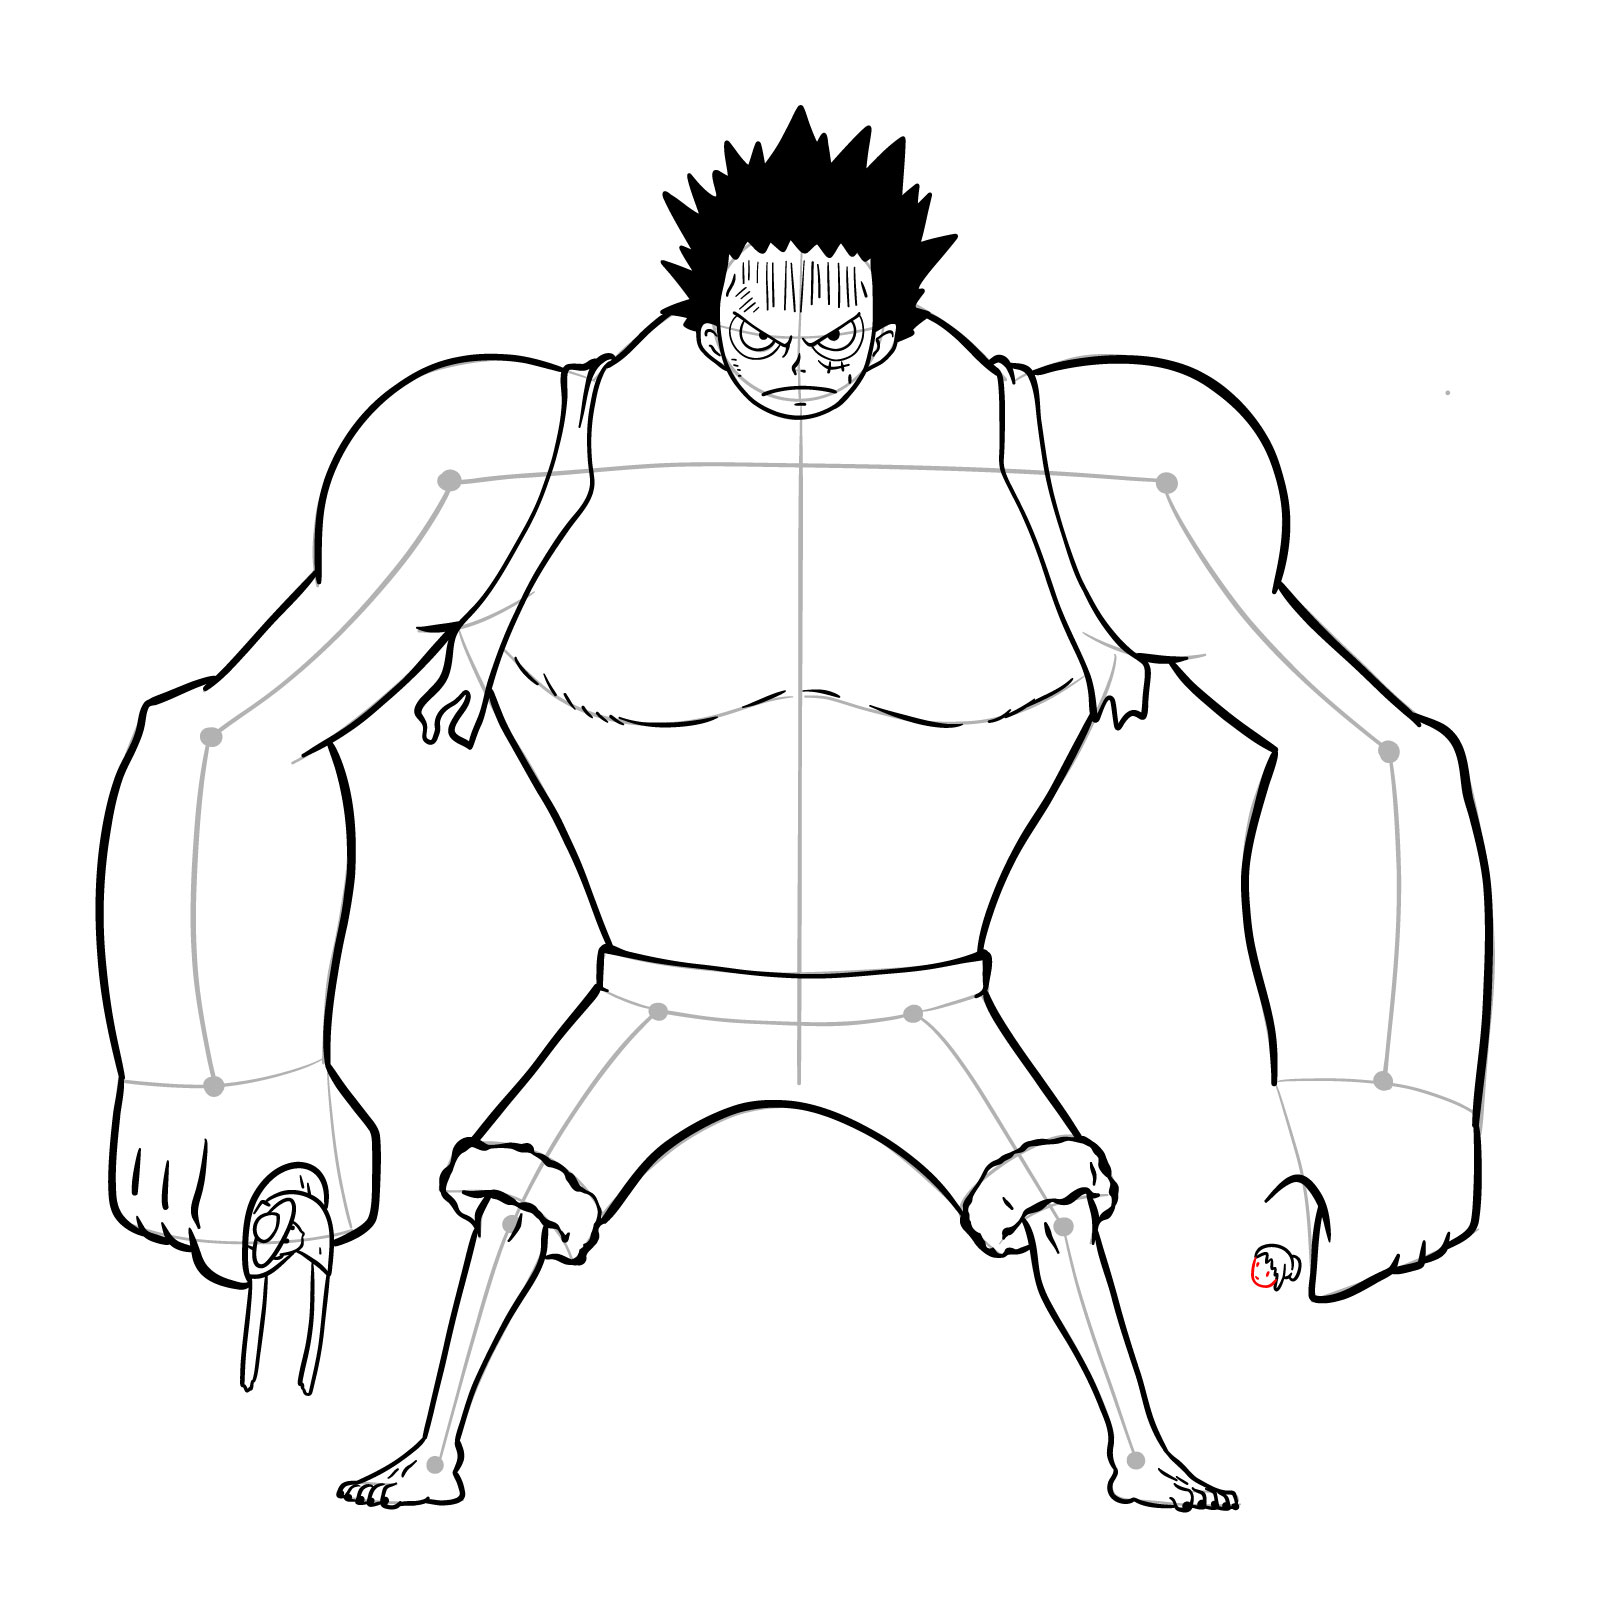
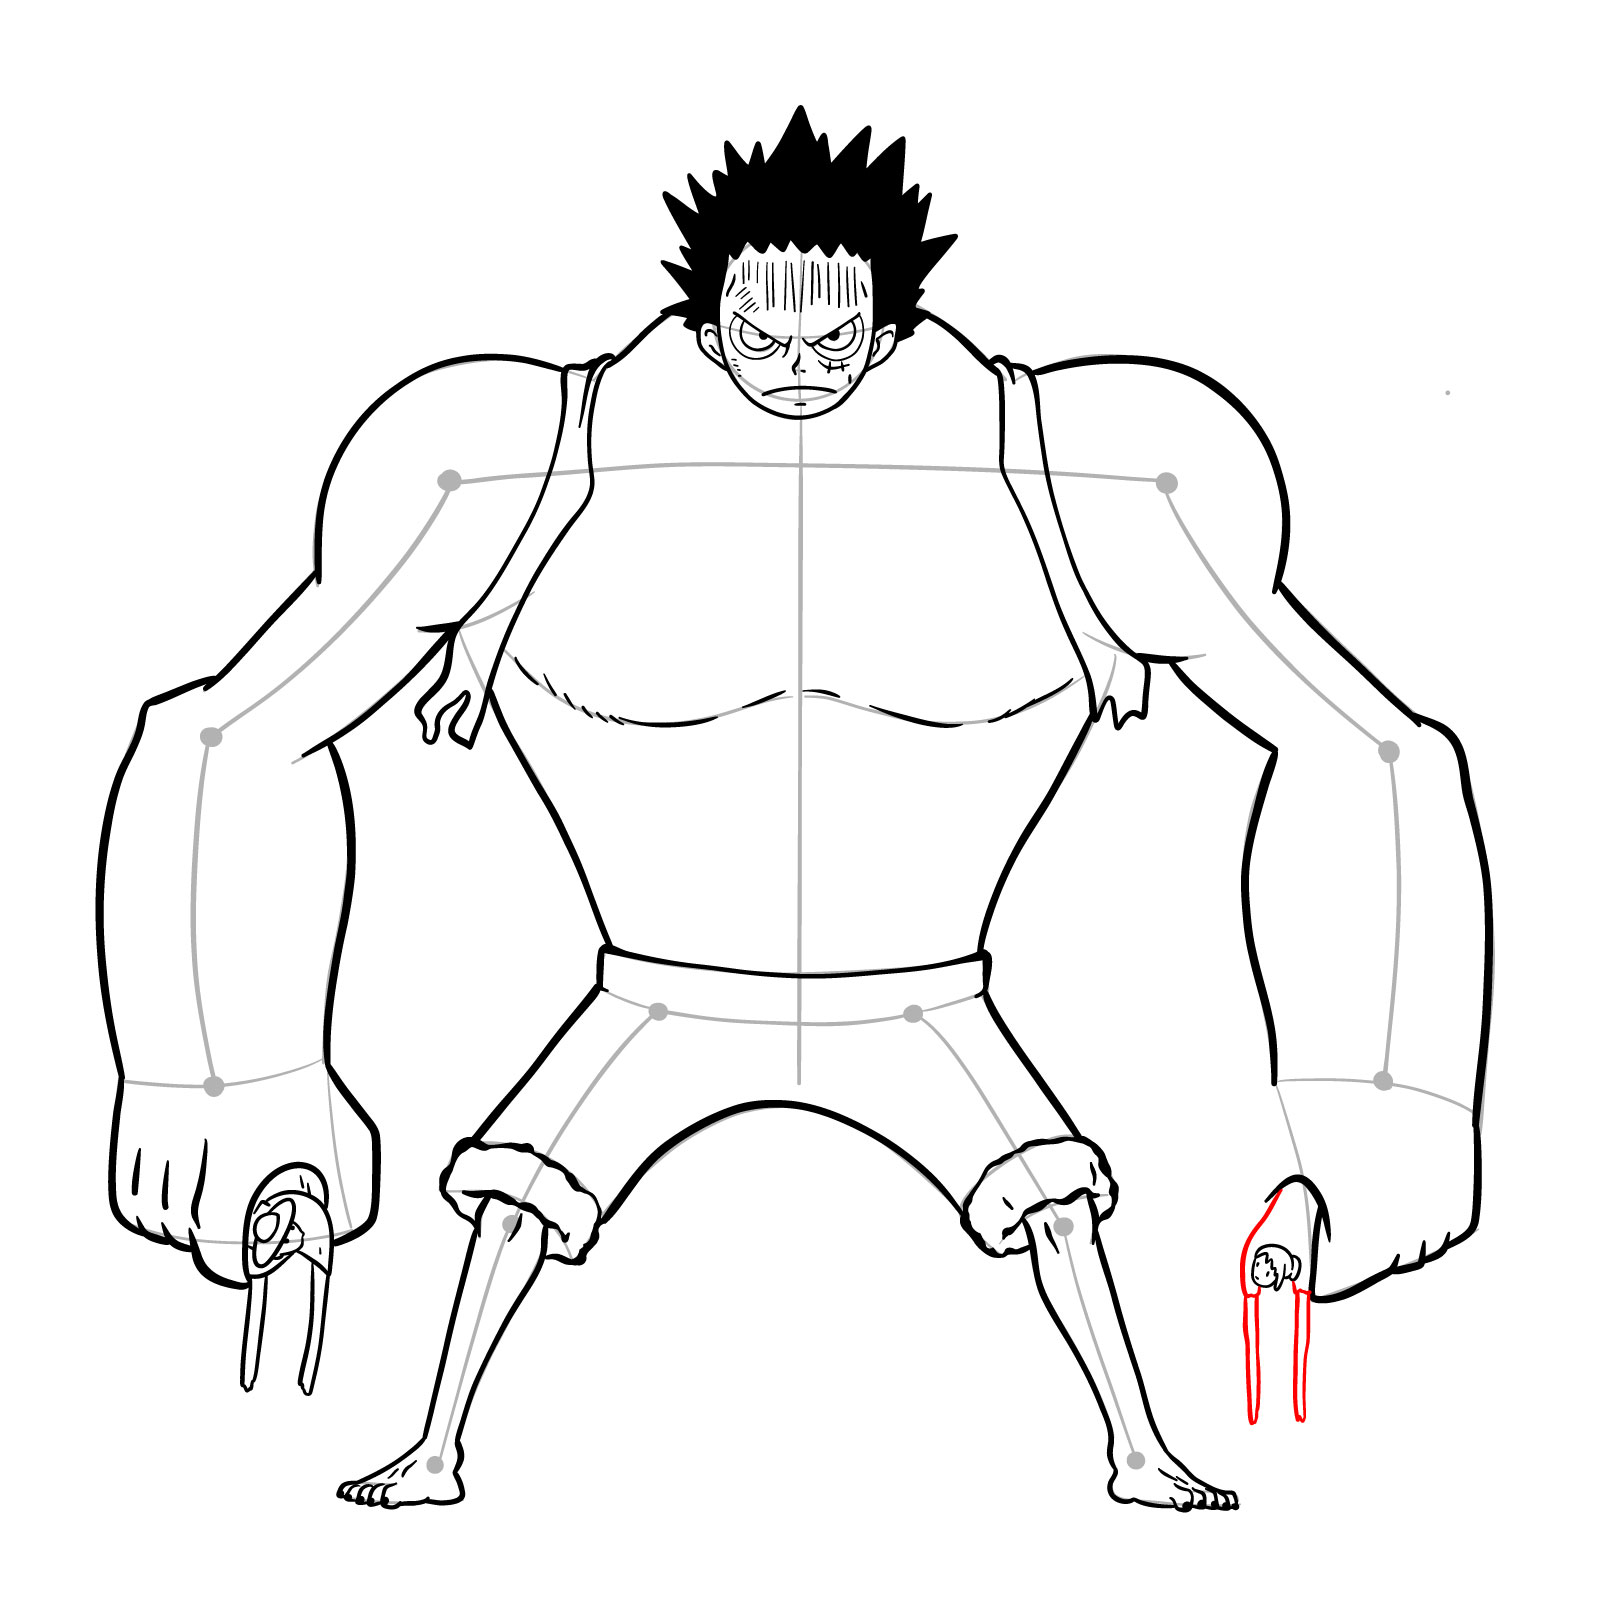
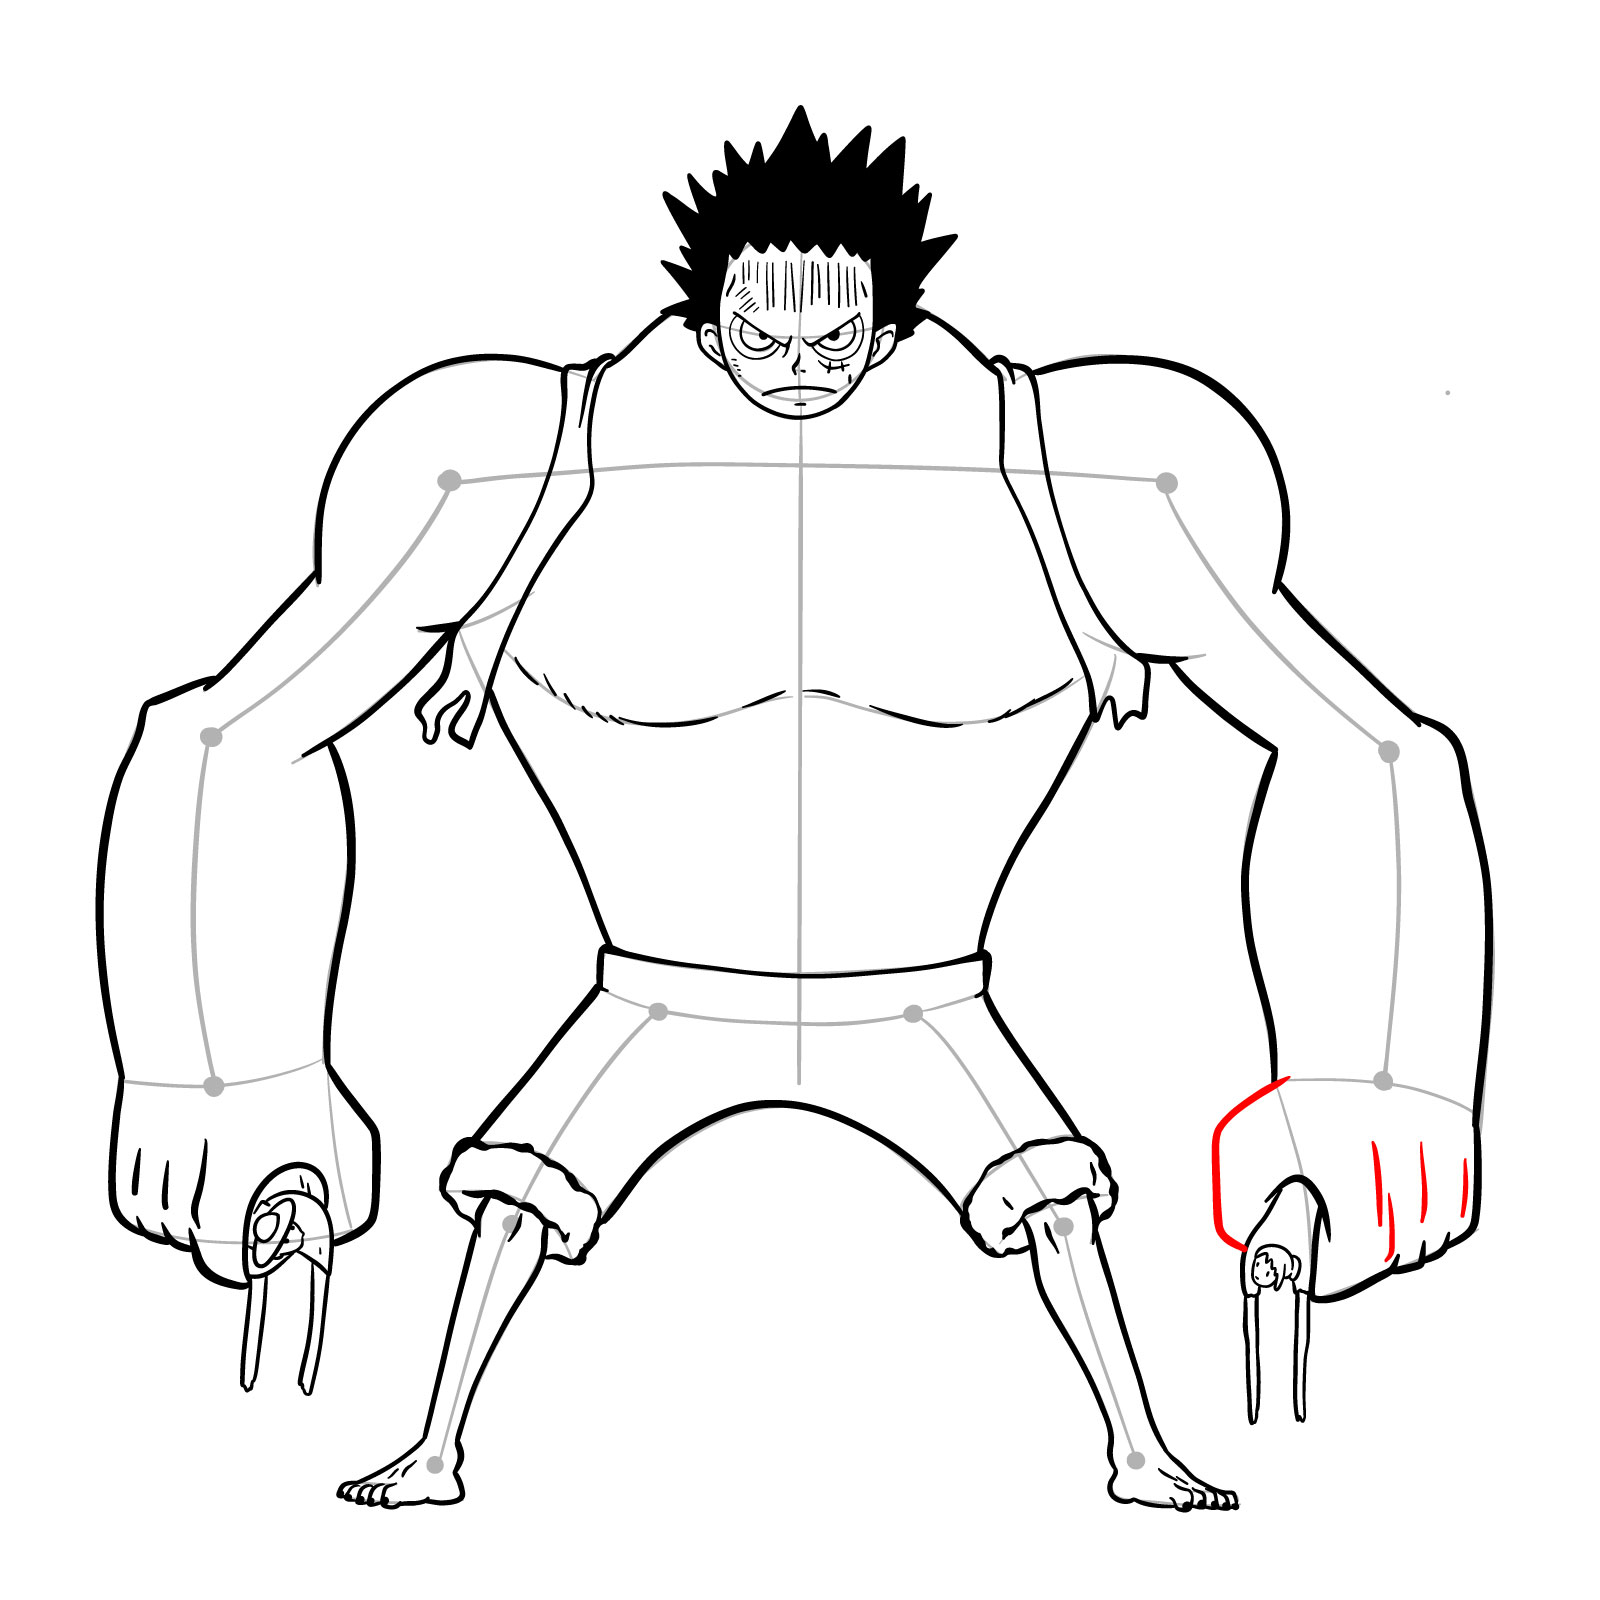
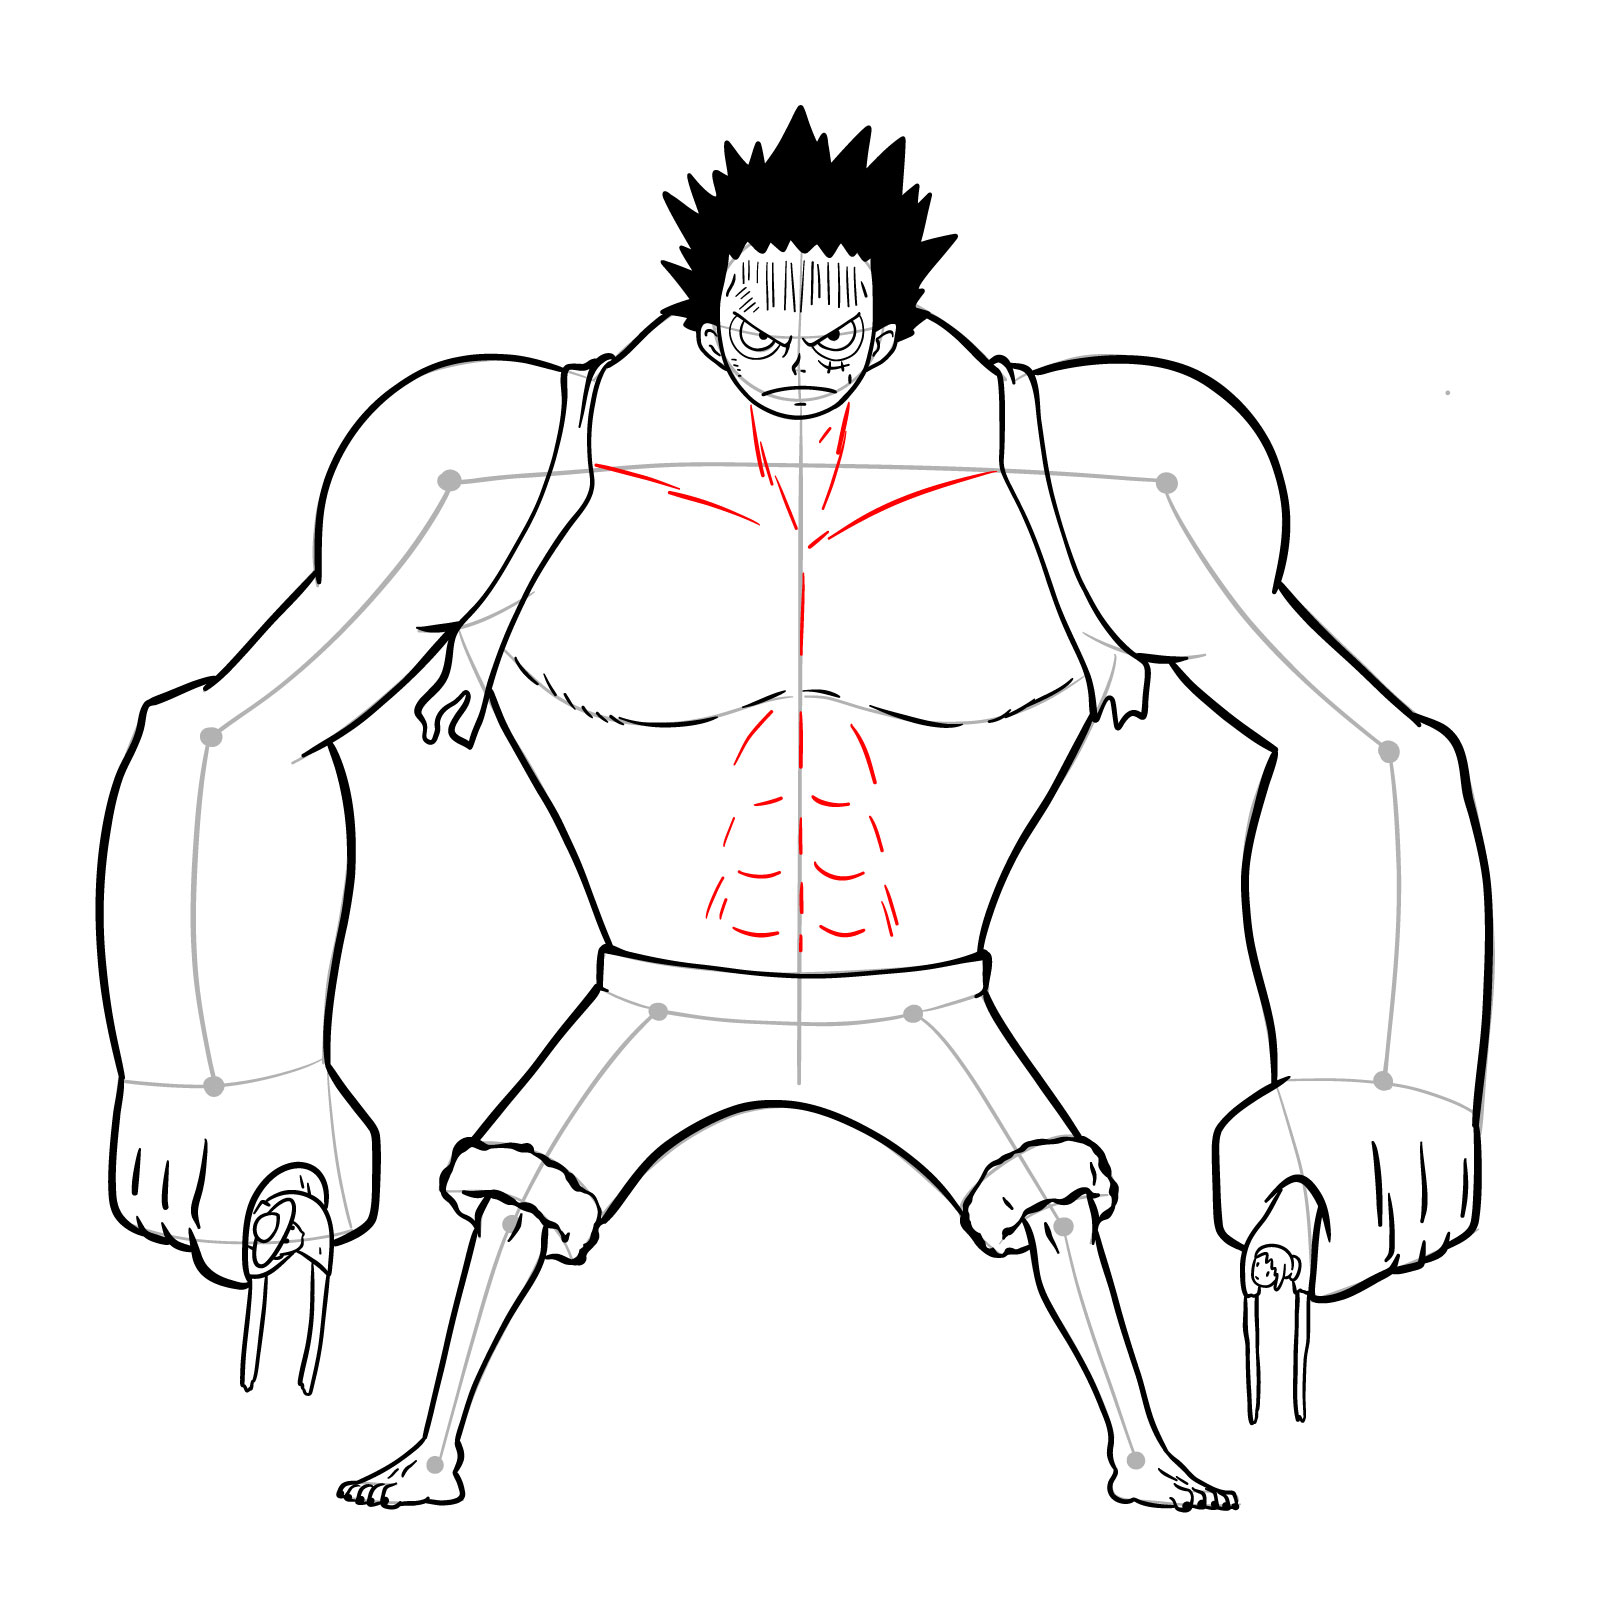
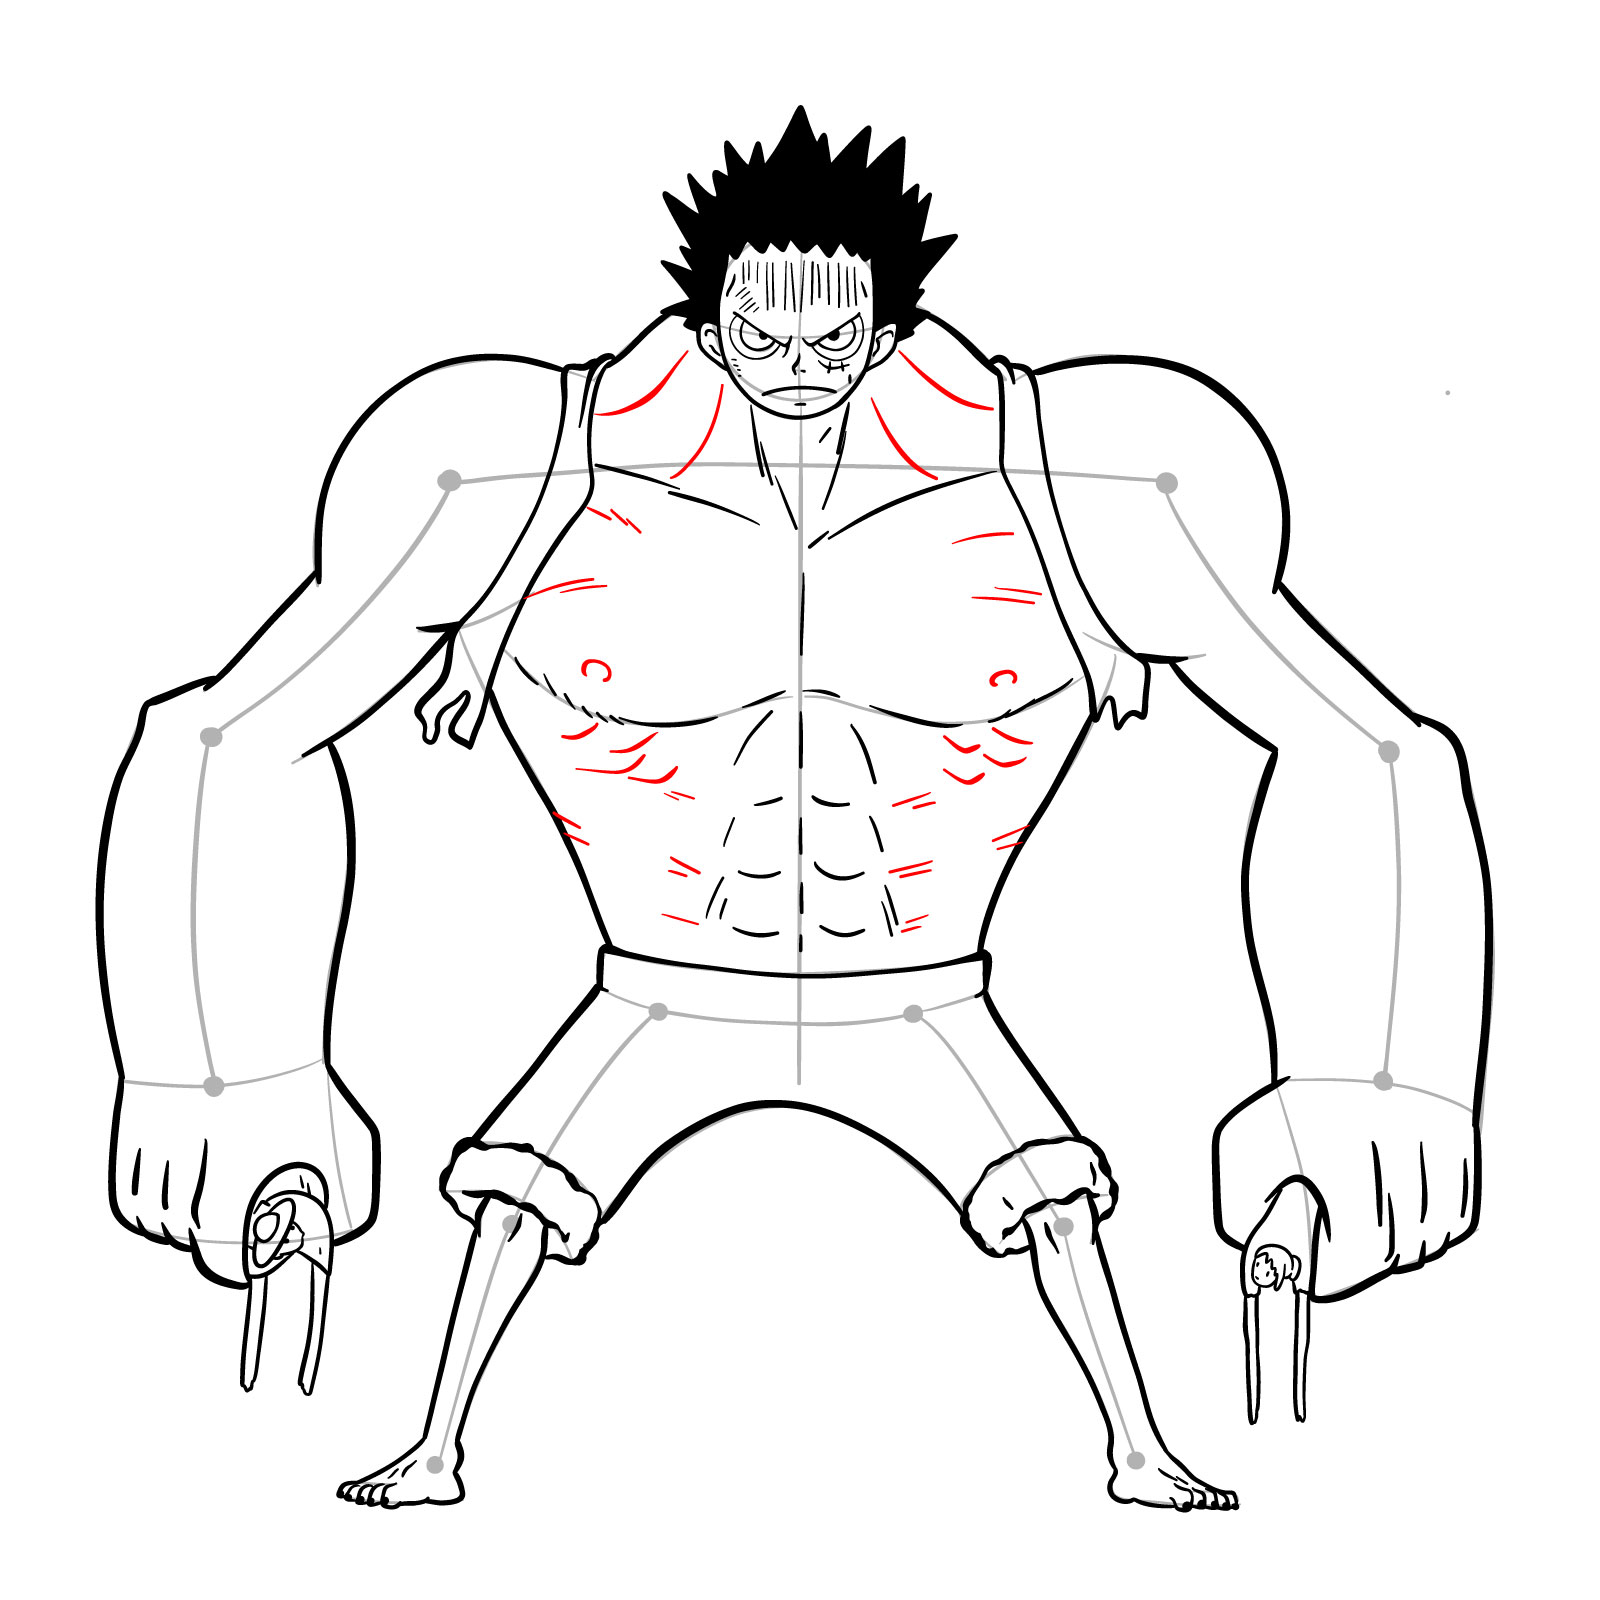
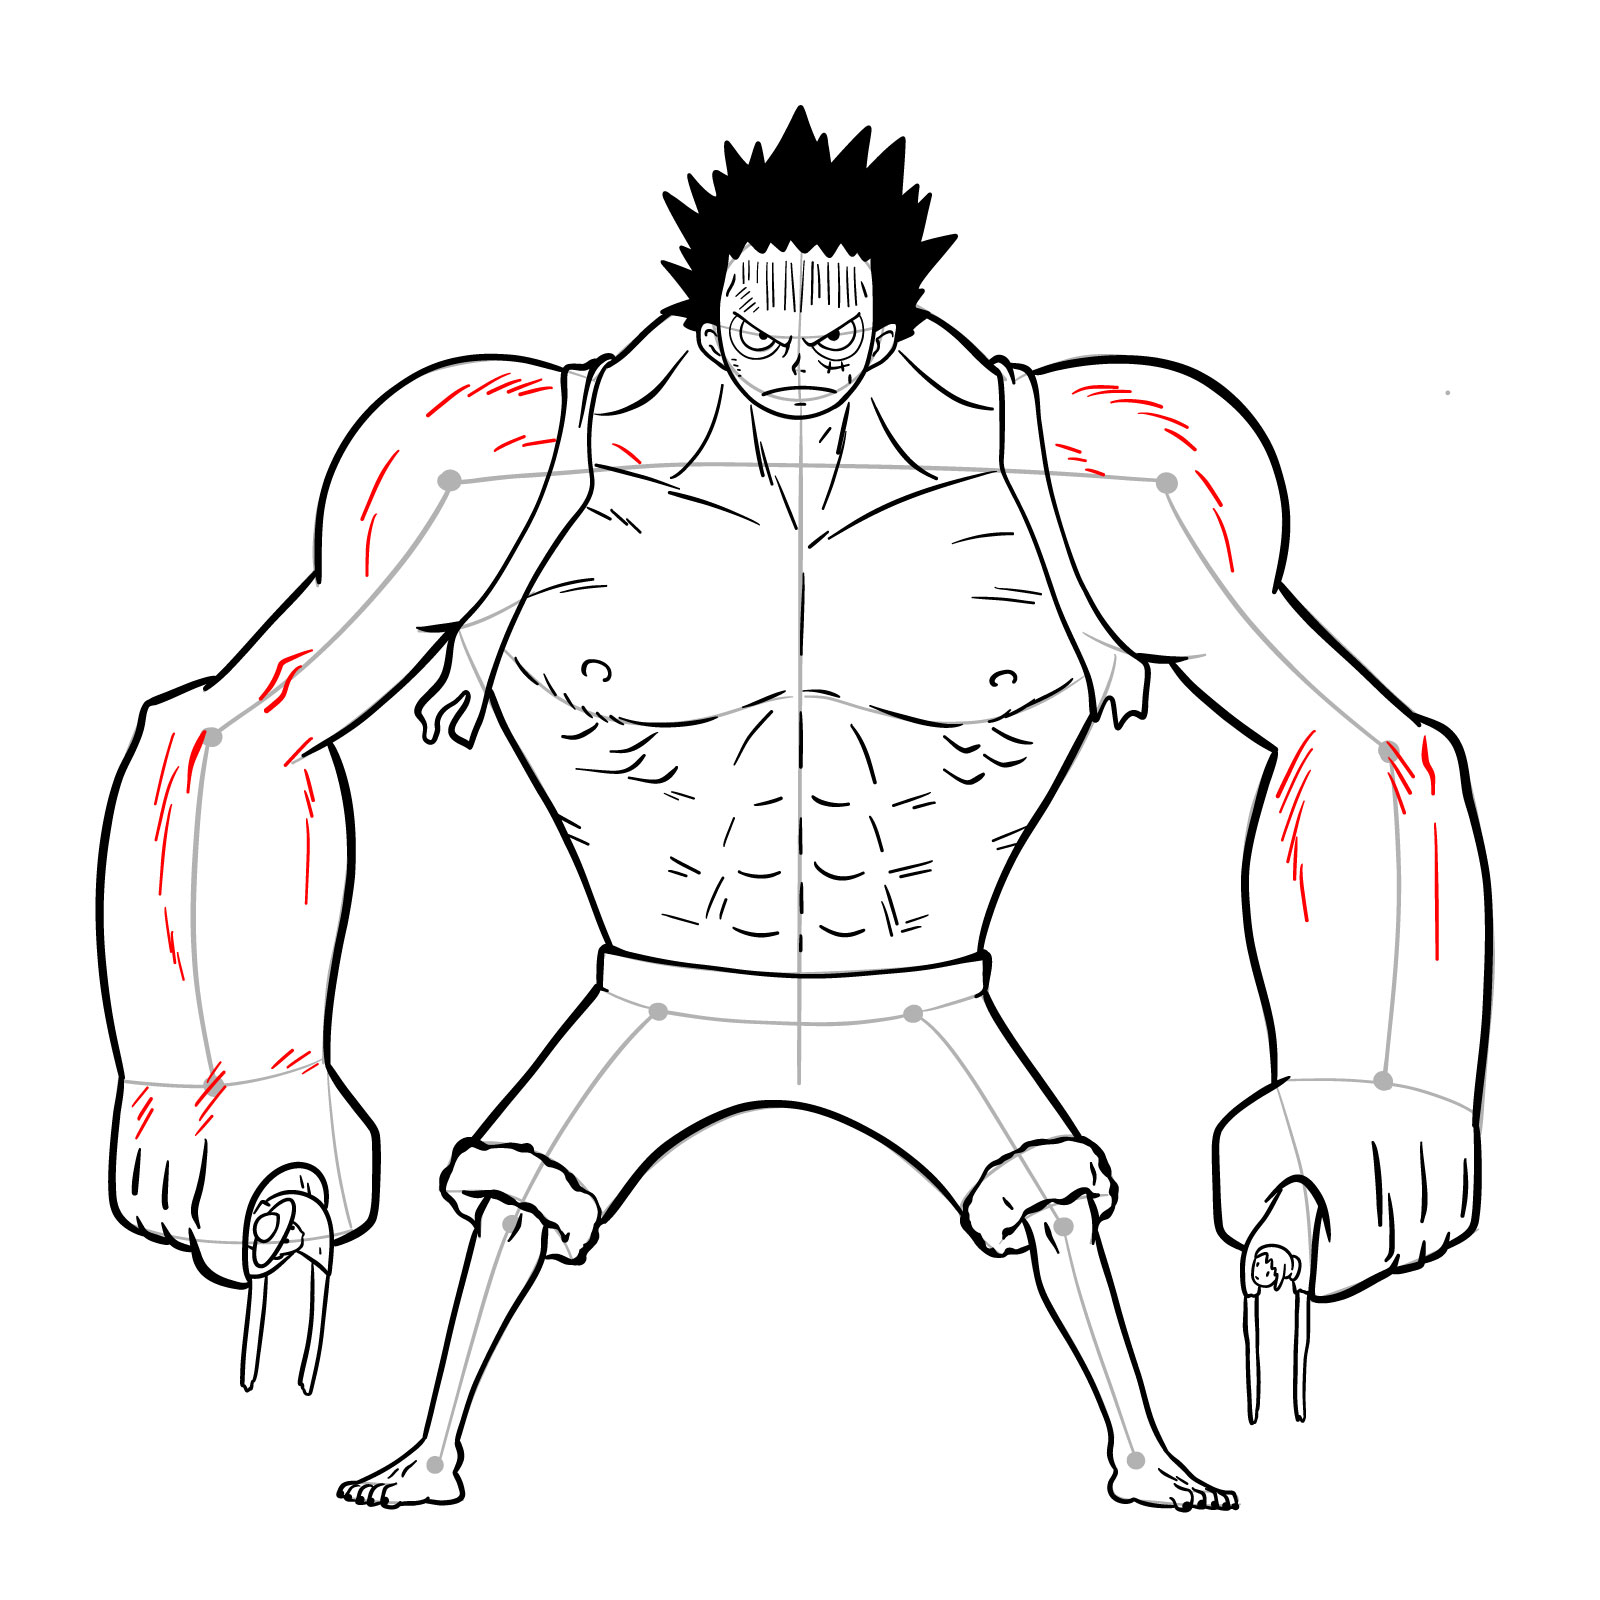
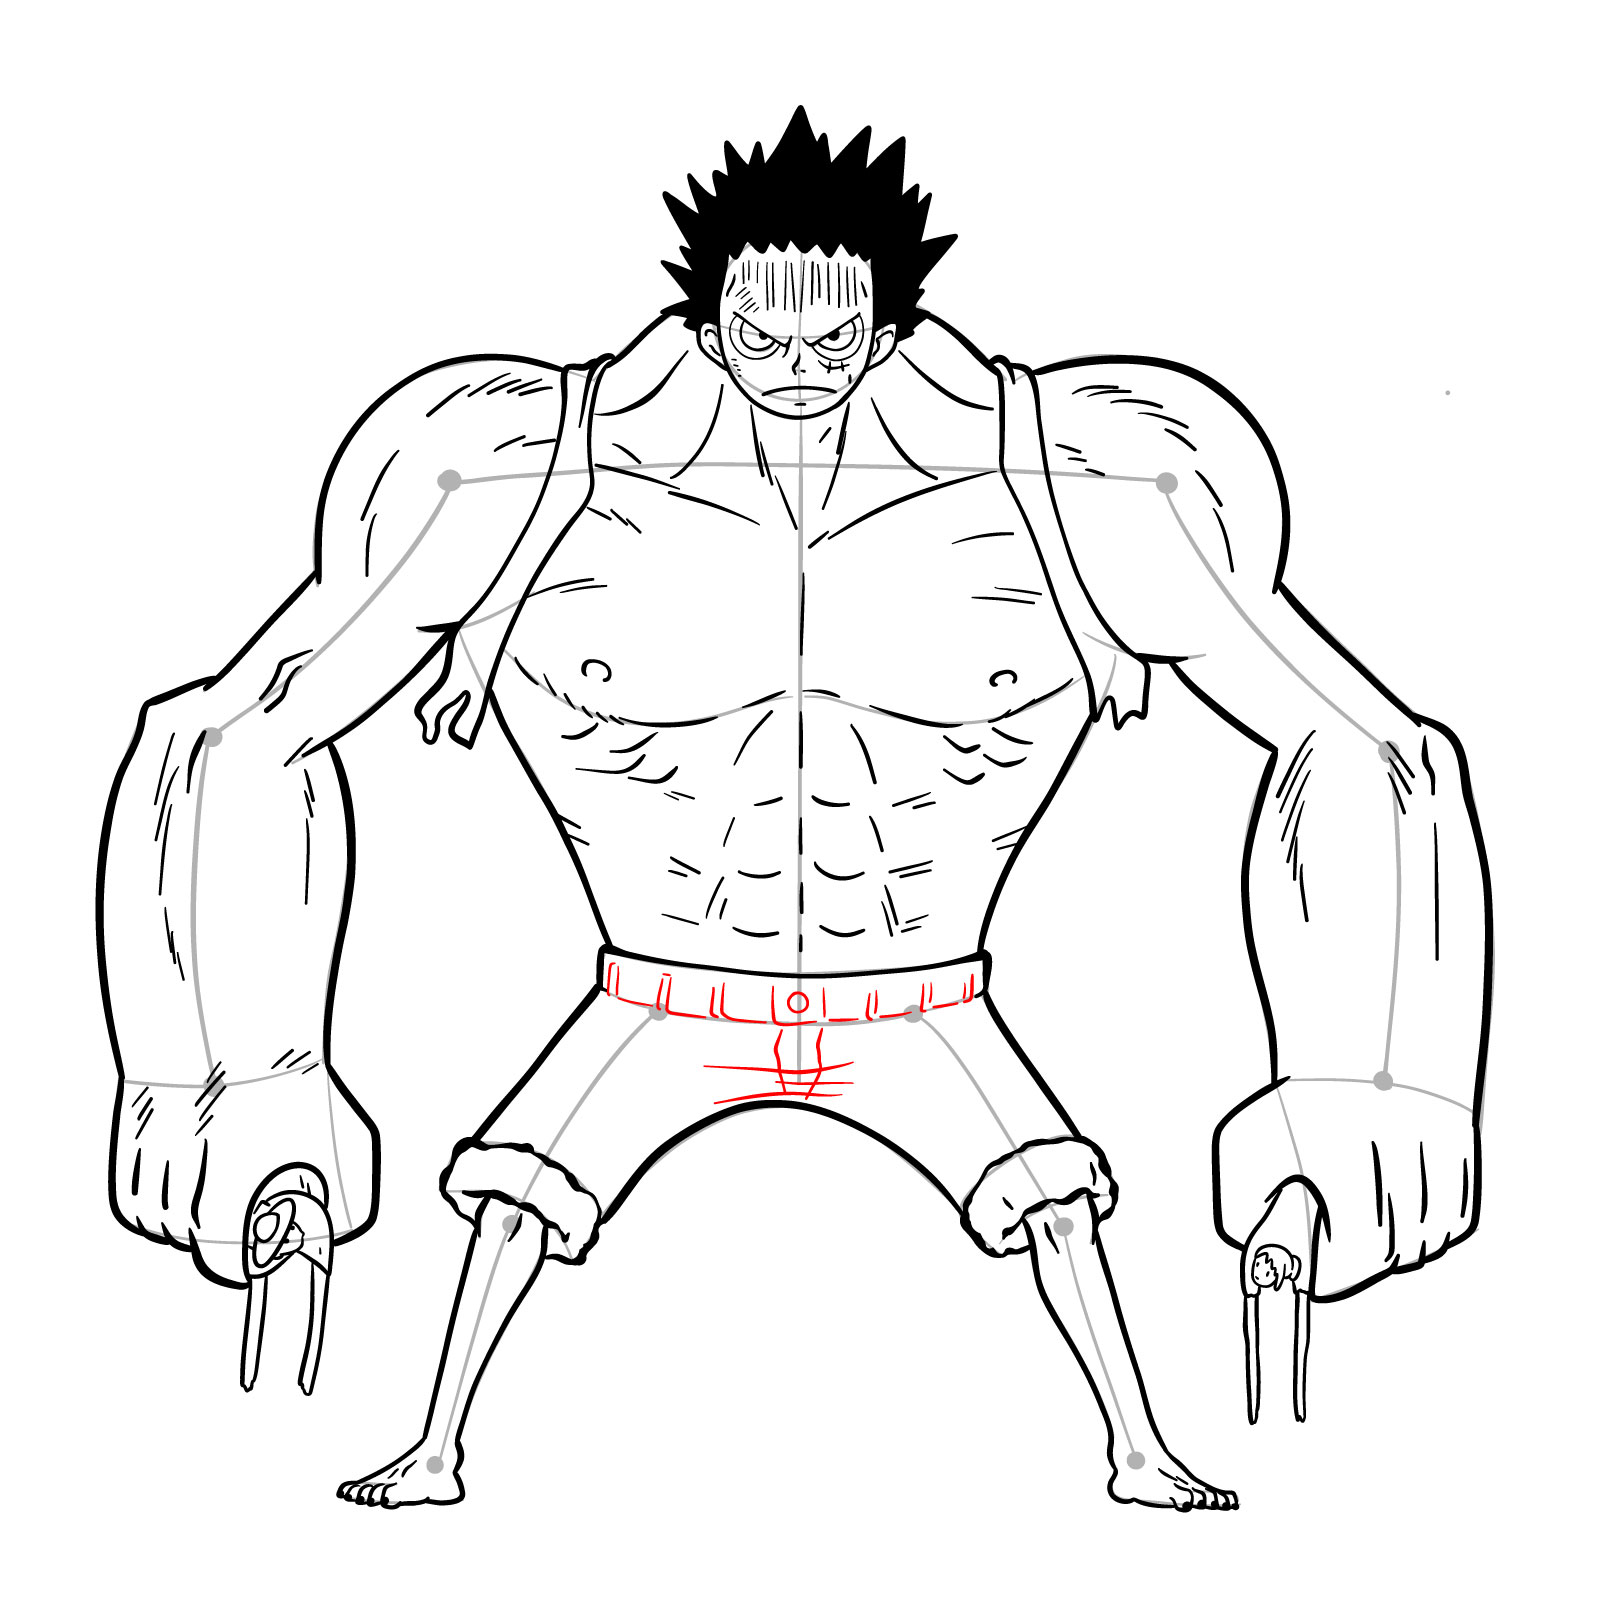
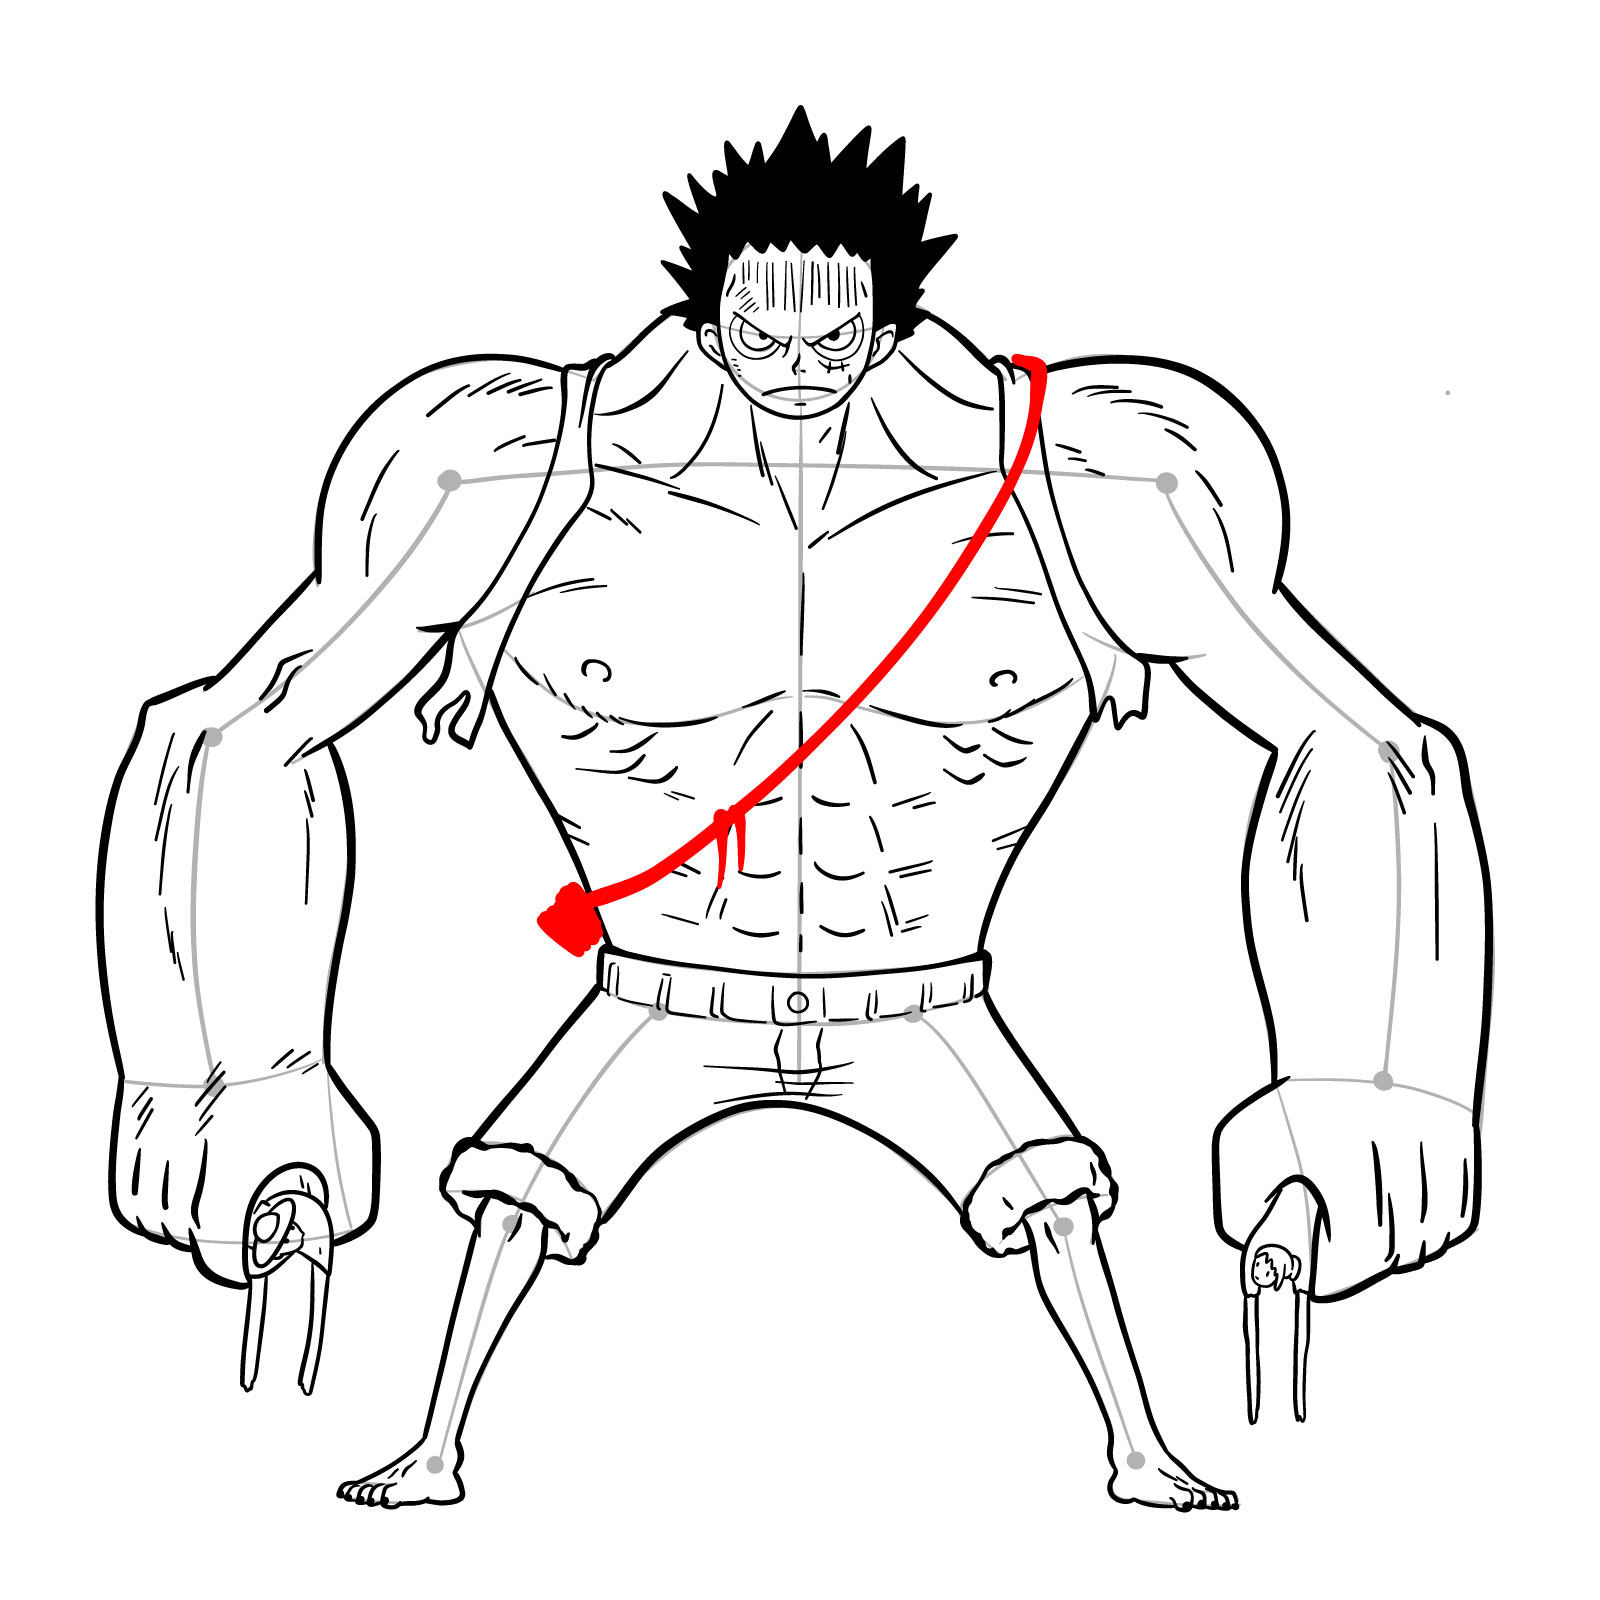
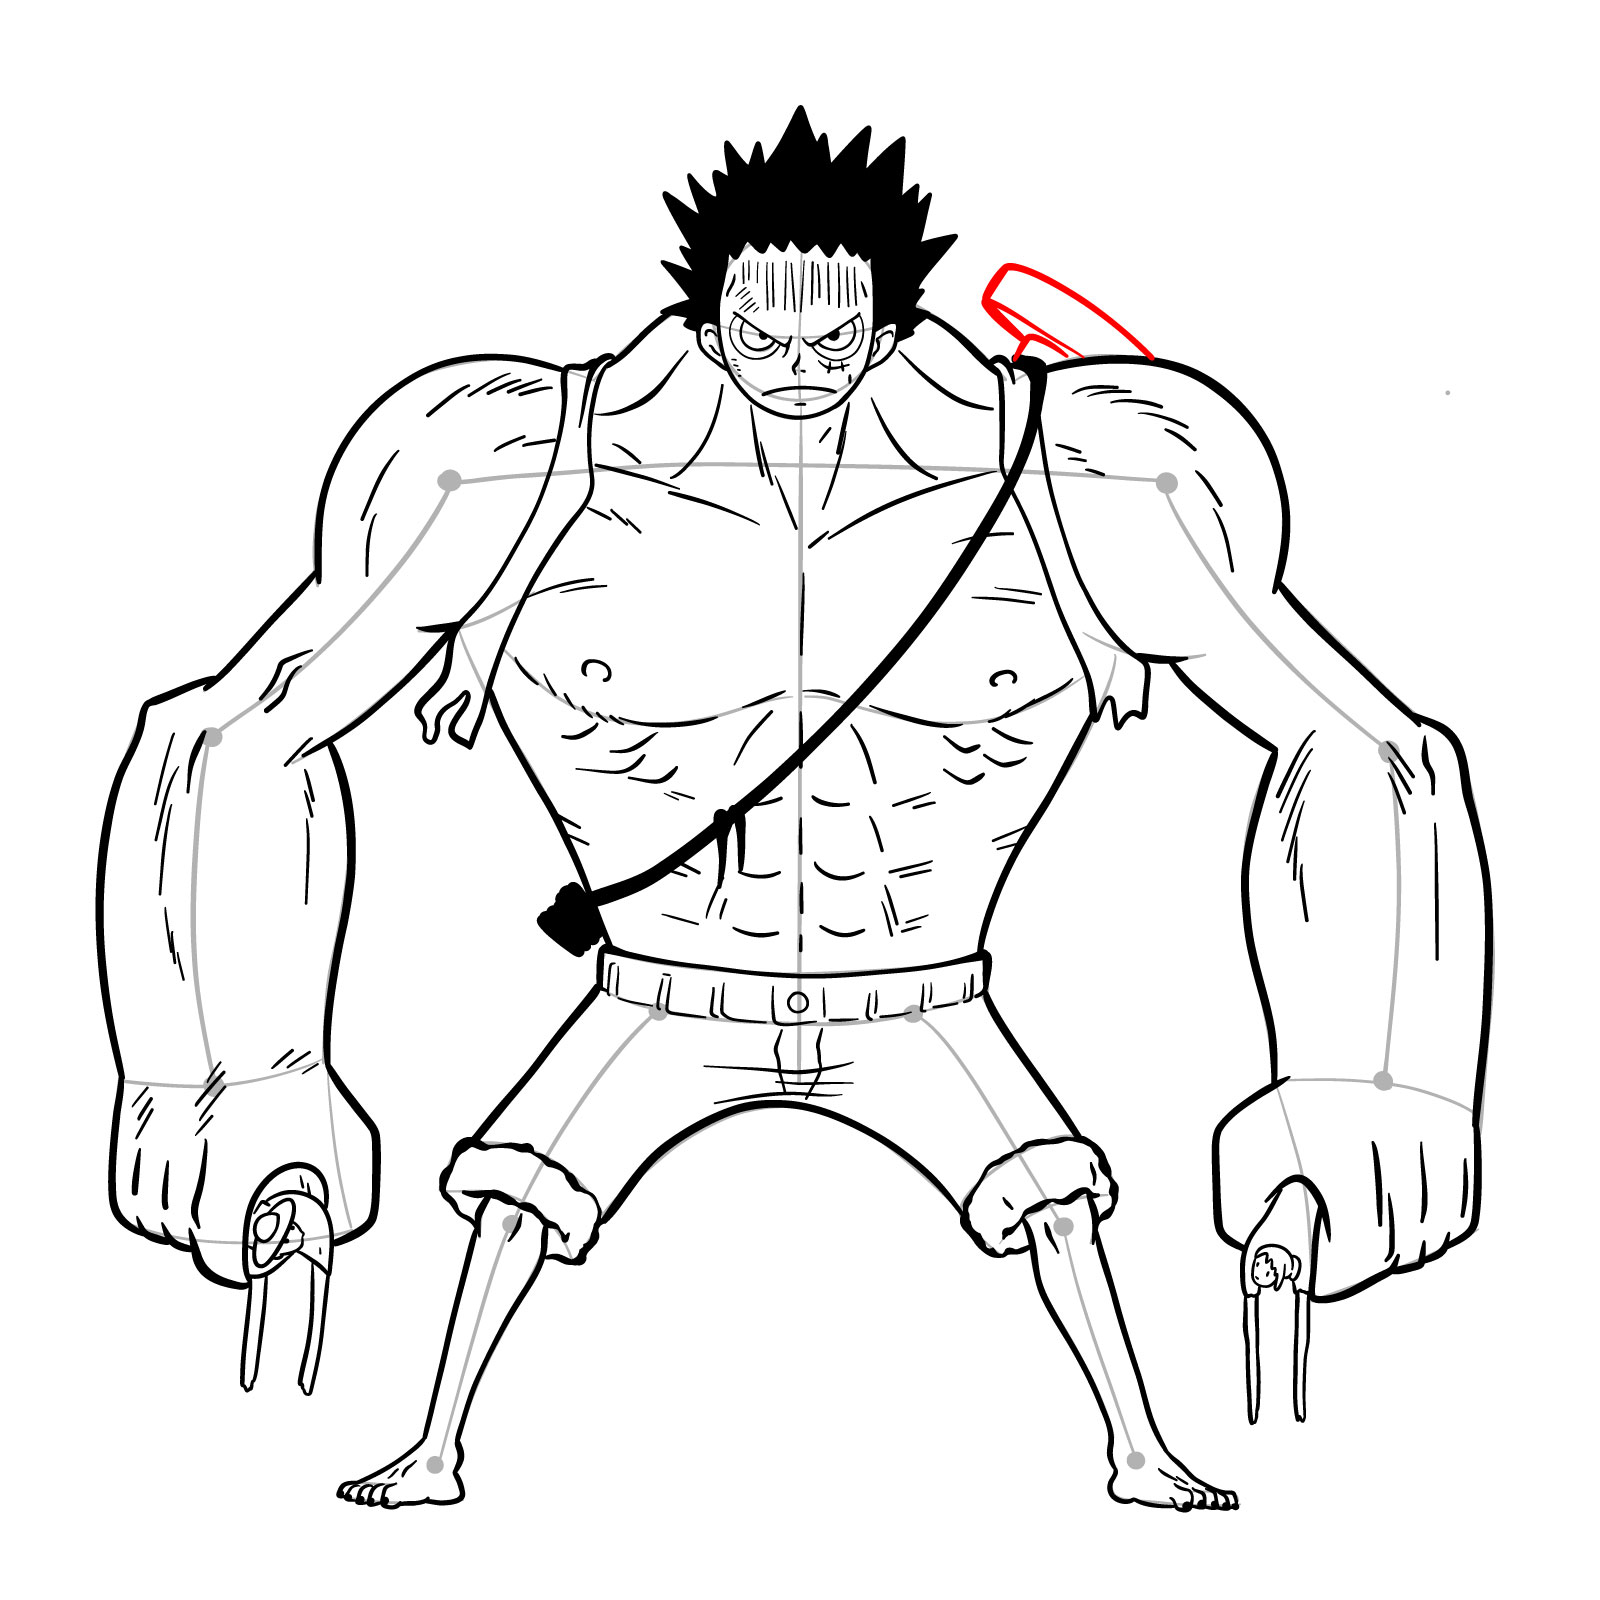
The first step involves creating a solid foundation for your artwork. Use light pencil strokes to sketch the basic structure and proportions of Nightmare Luffy. The red color in the accompanying images signifies the current drawing step, while the grey color represents the underlying sketch, and the black indicates the previously drawn lines. Visualize the colossal form taking shape as you carefully outline the muscular arms, shorter legs, and iconic shorts.


Part 2: Refining the Sketch
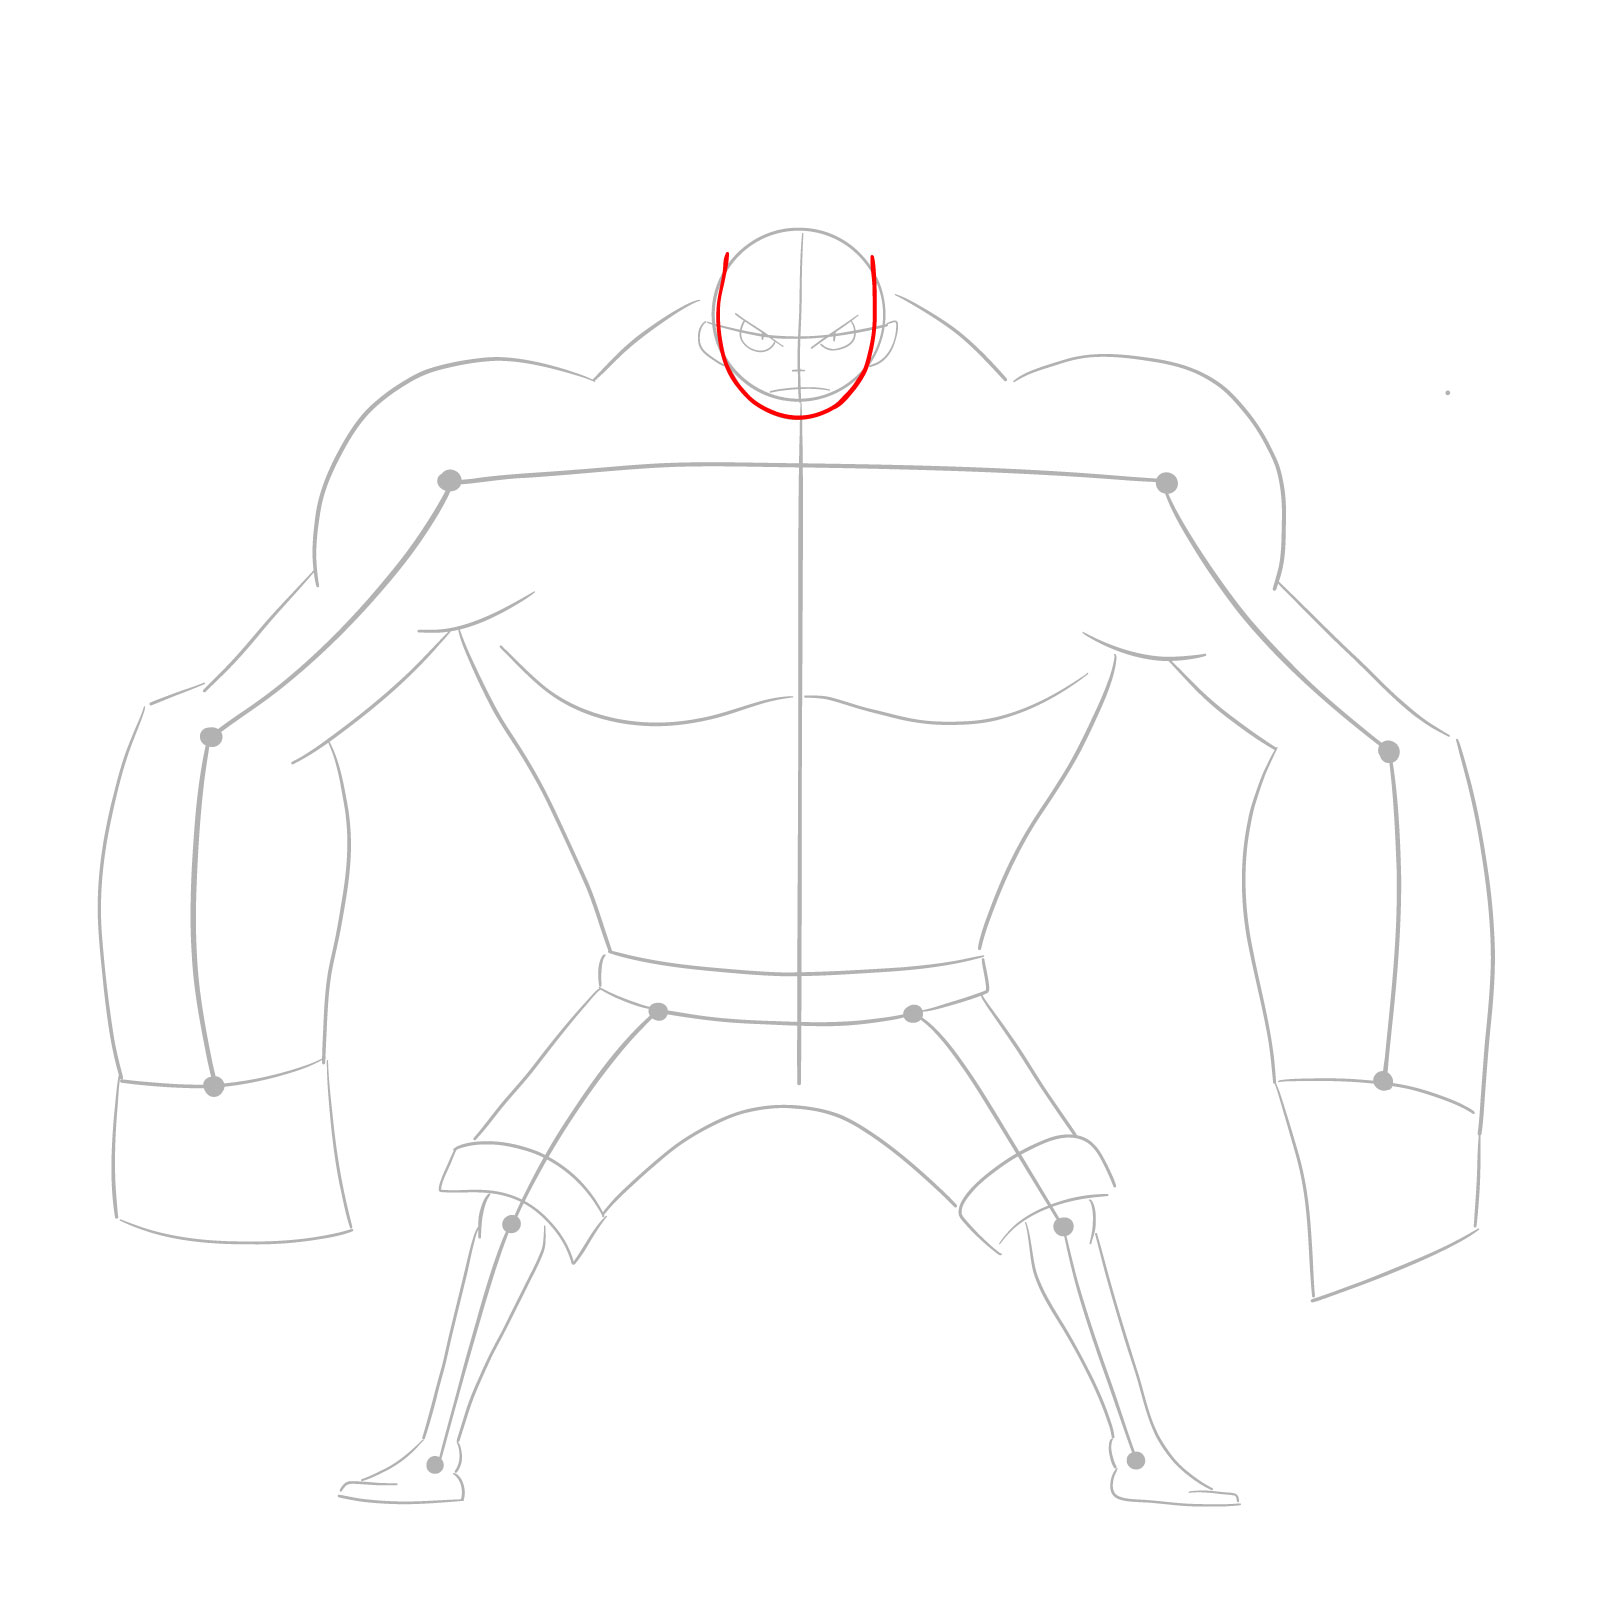
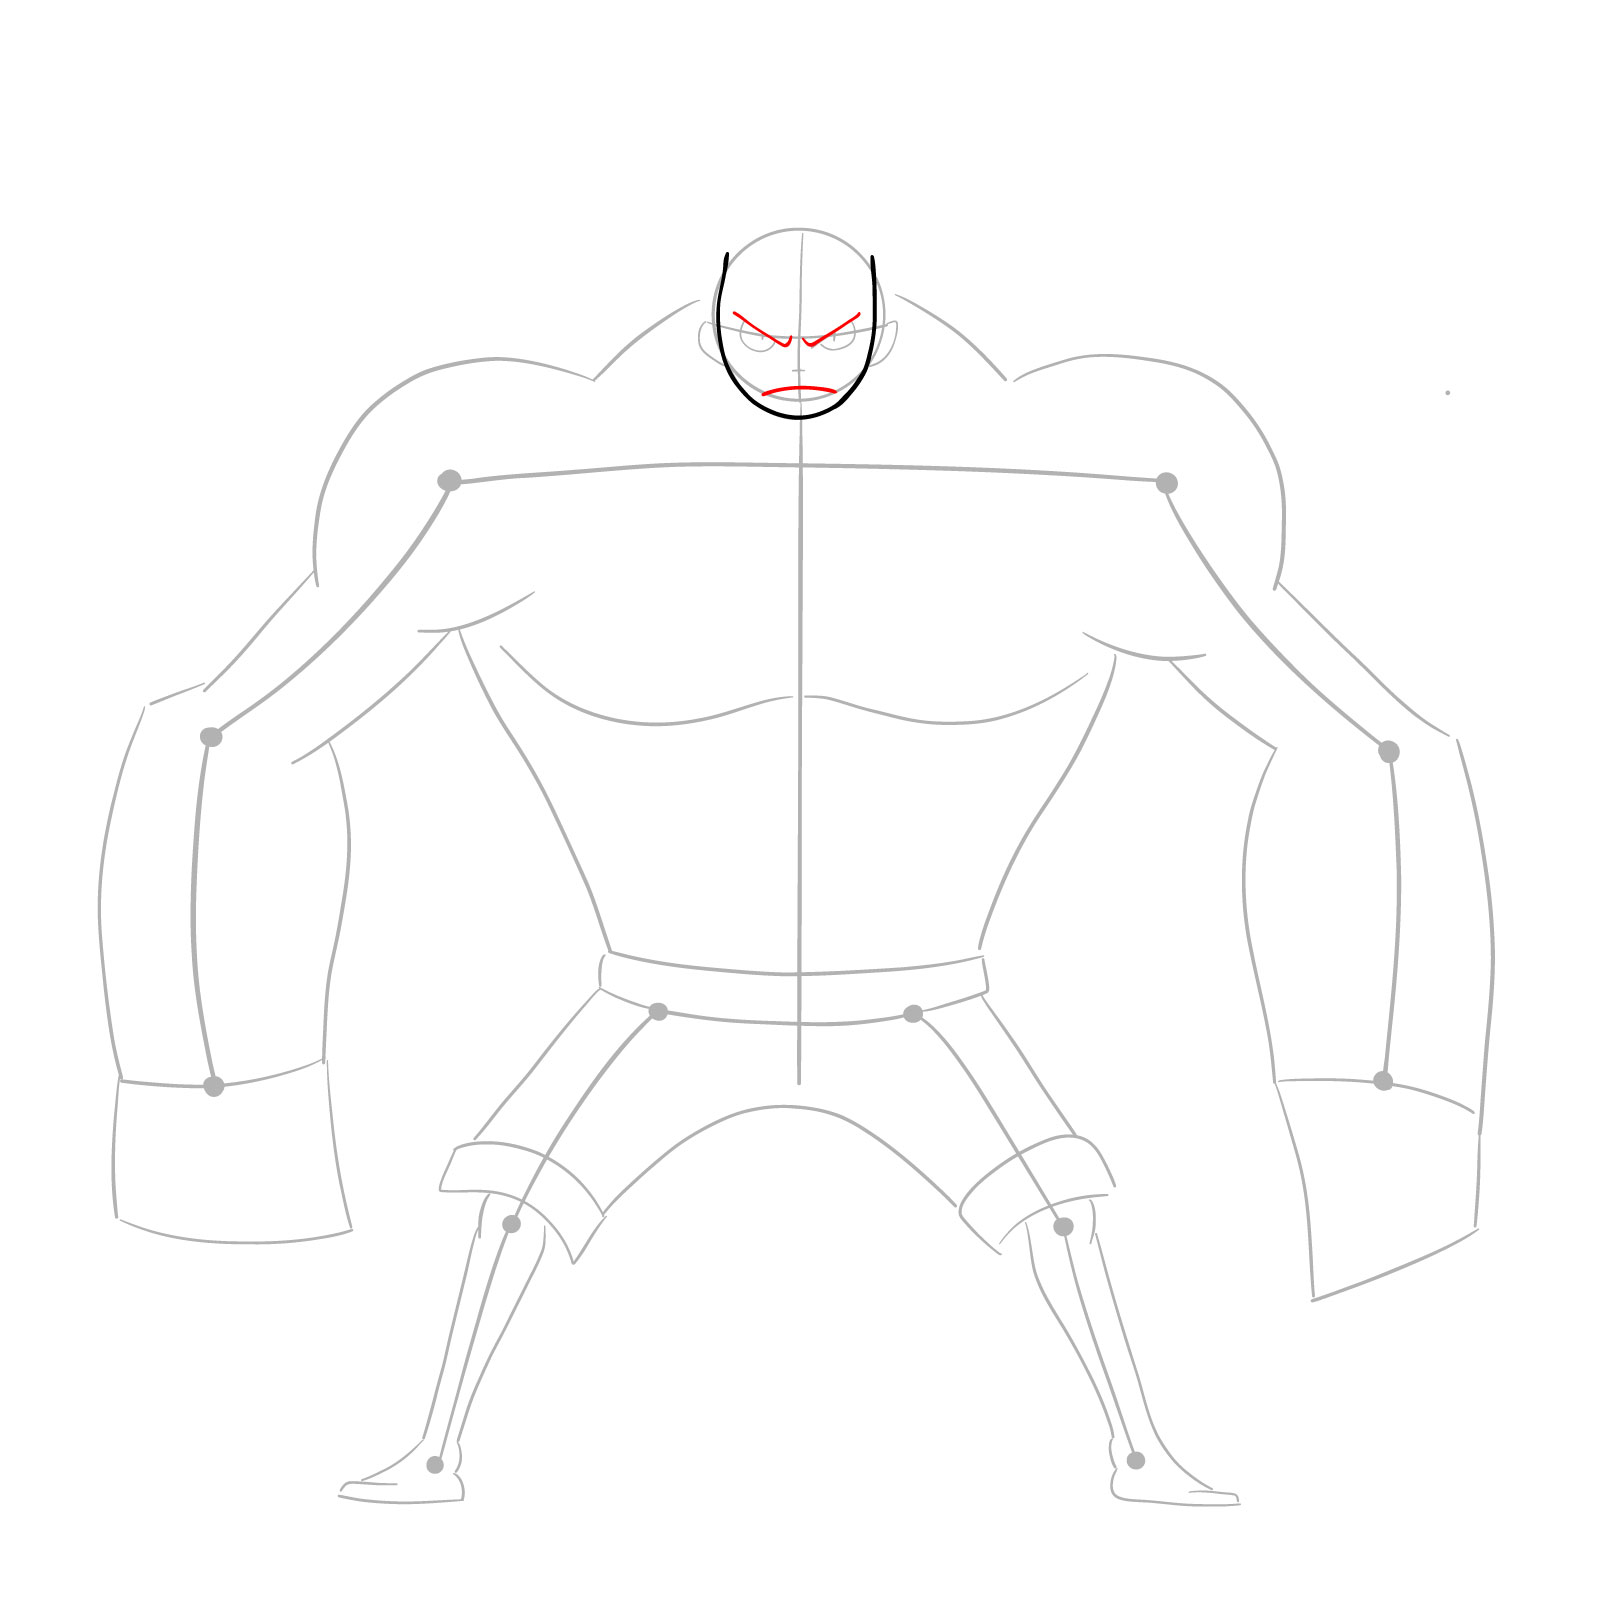
In this stage, we refine the initial sketch and add intricate details to capture Nightmare Luffy’s essence. Pay close attention to the facial features, emphasizing his determined expression. Ensure the proportions align with the character’s colossal form. As you progress, you’ll witness your artwork come to life, bringing you closer to capturing Nightmare Luffy’s powerful presence.
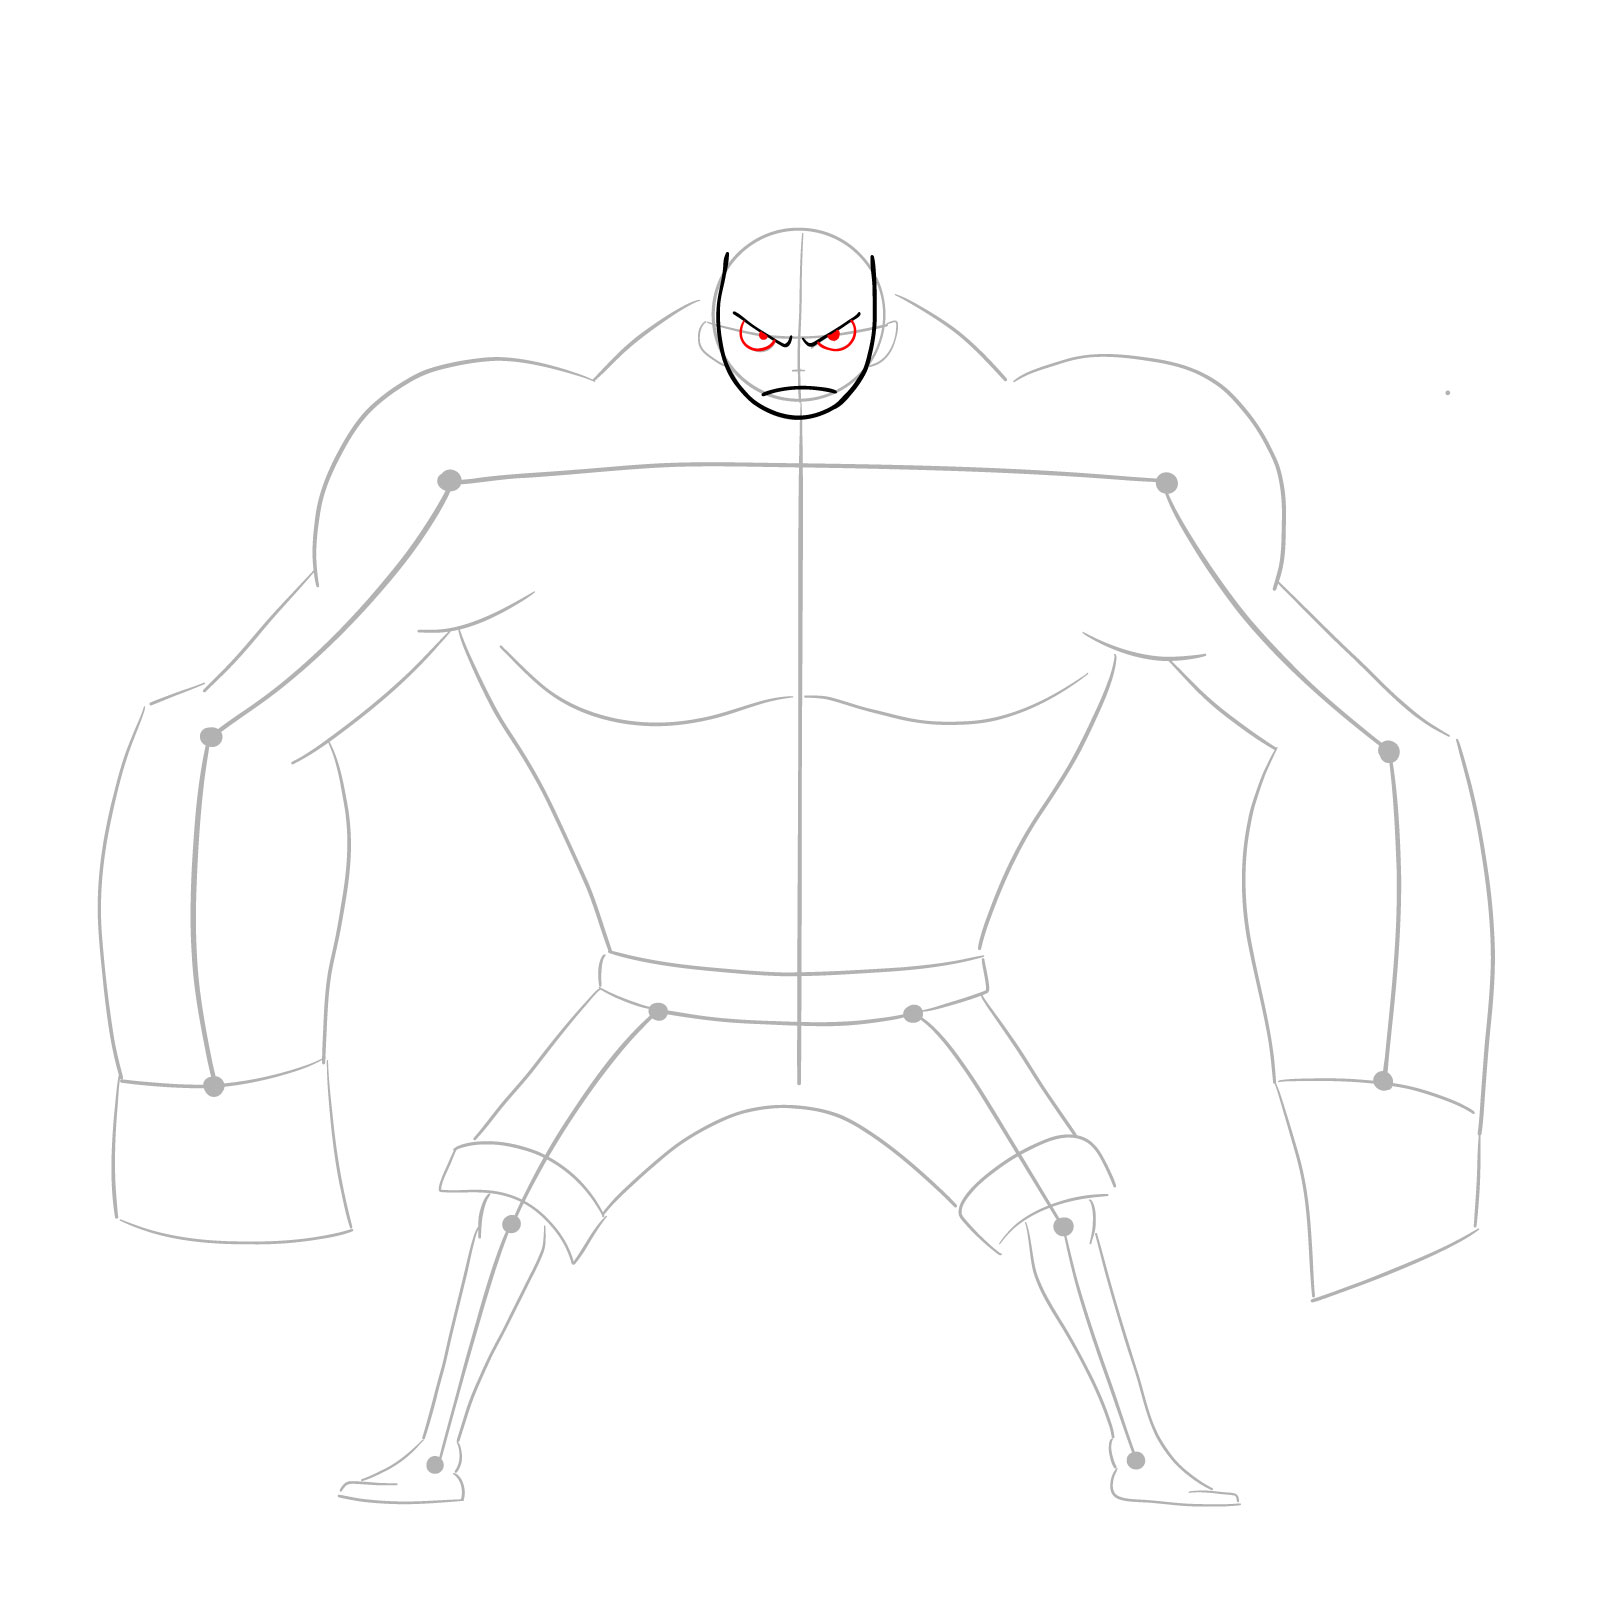
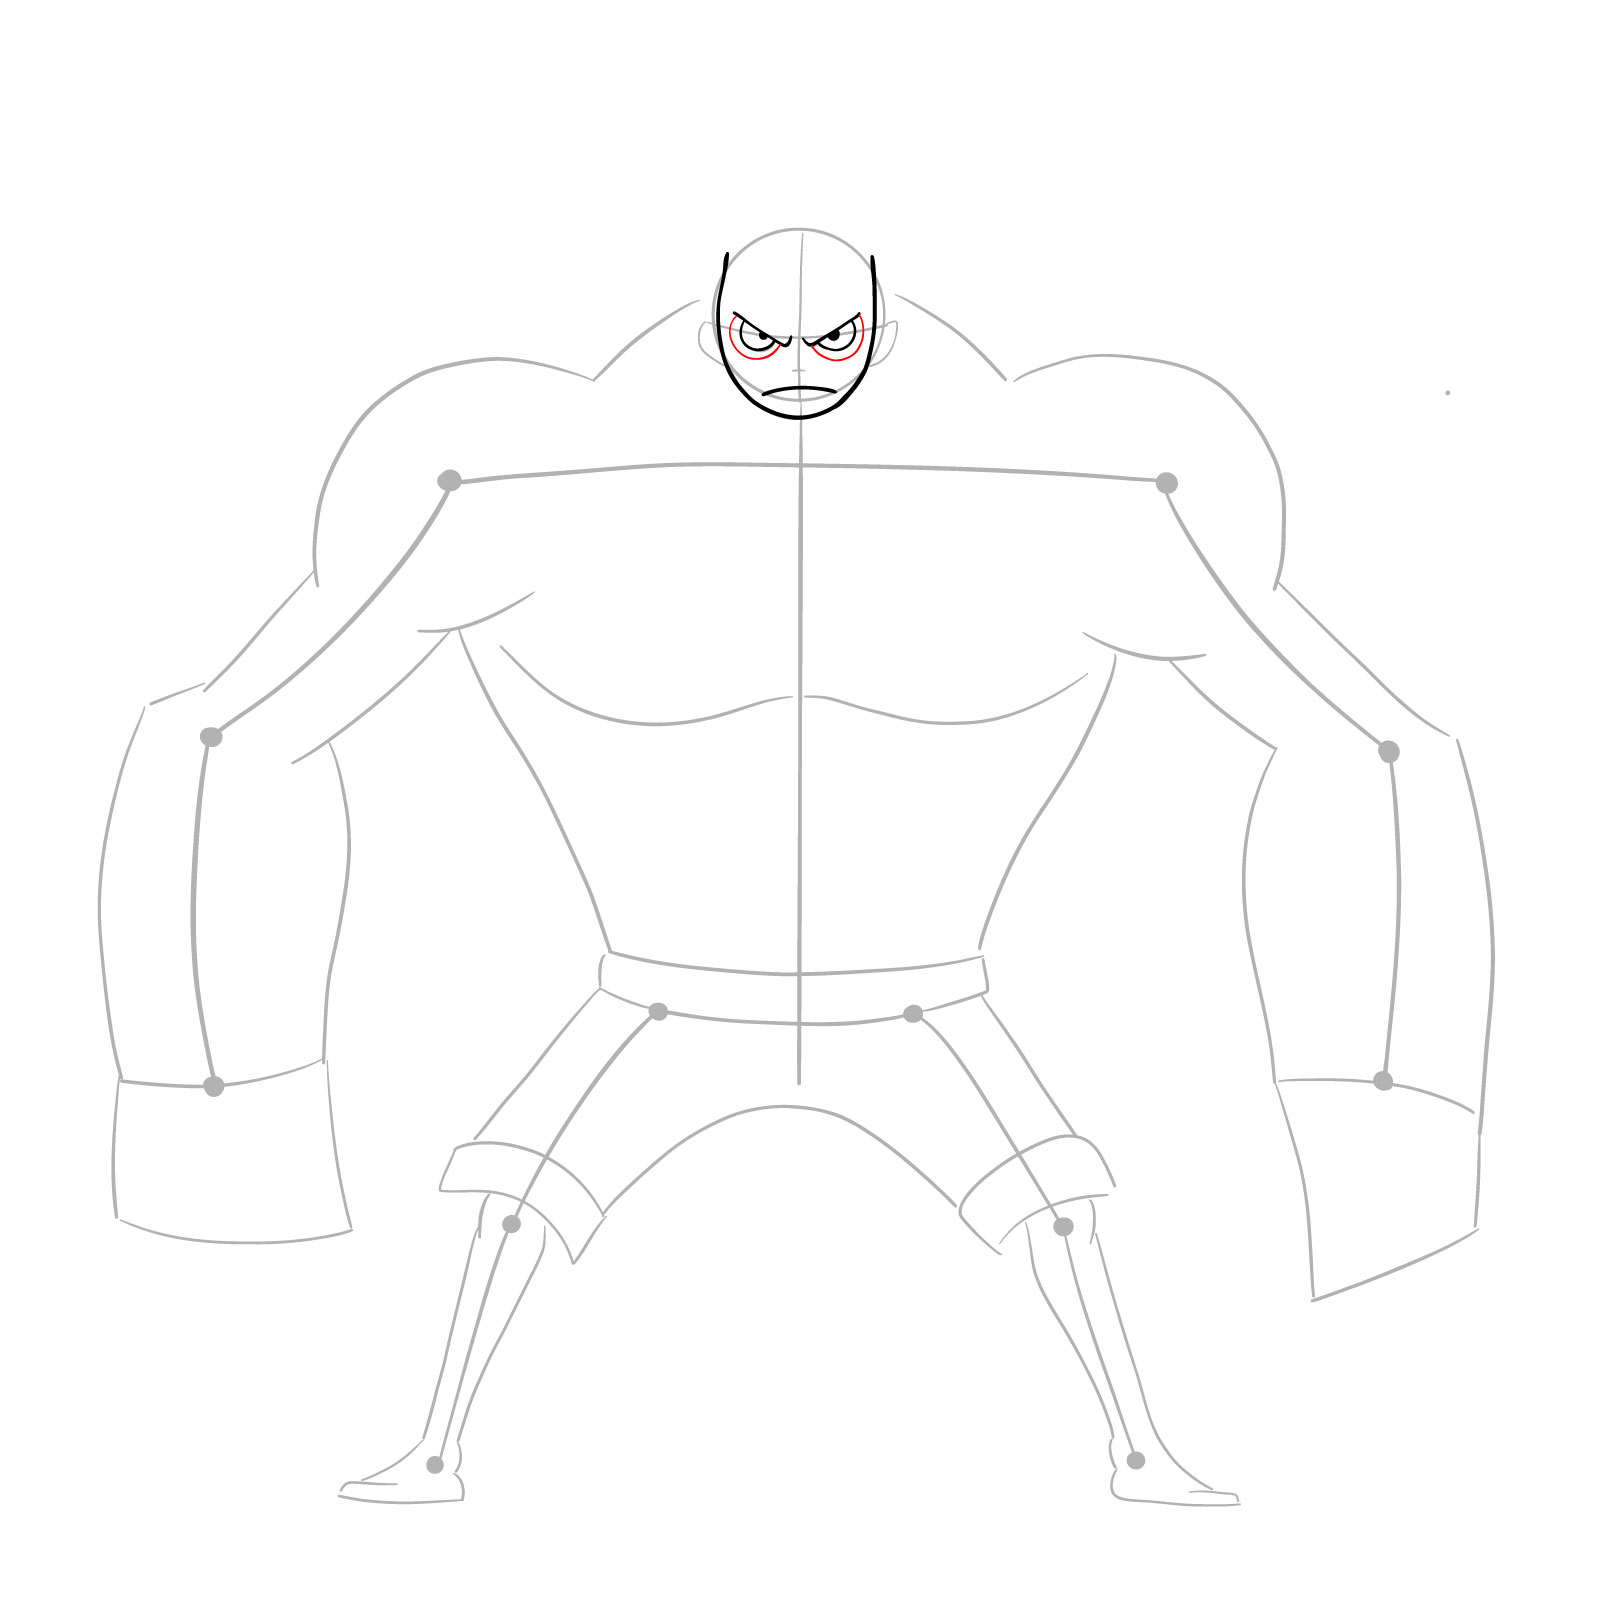


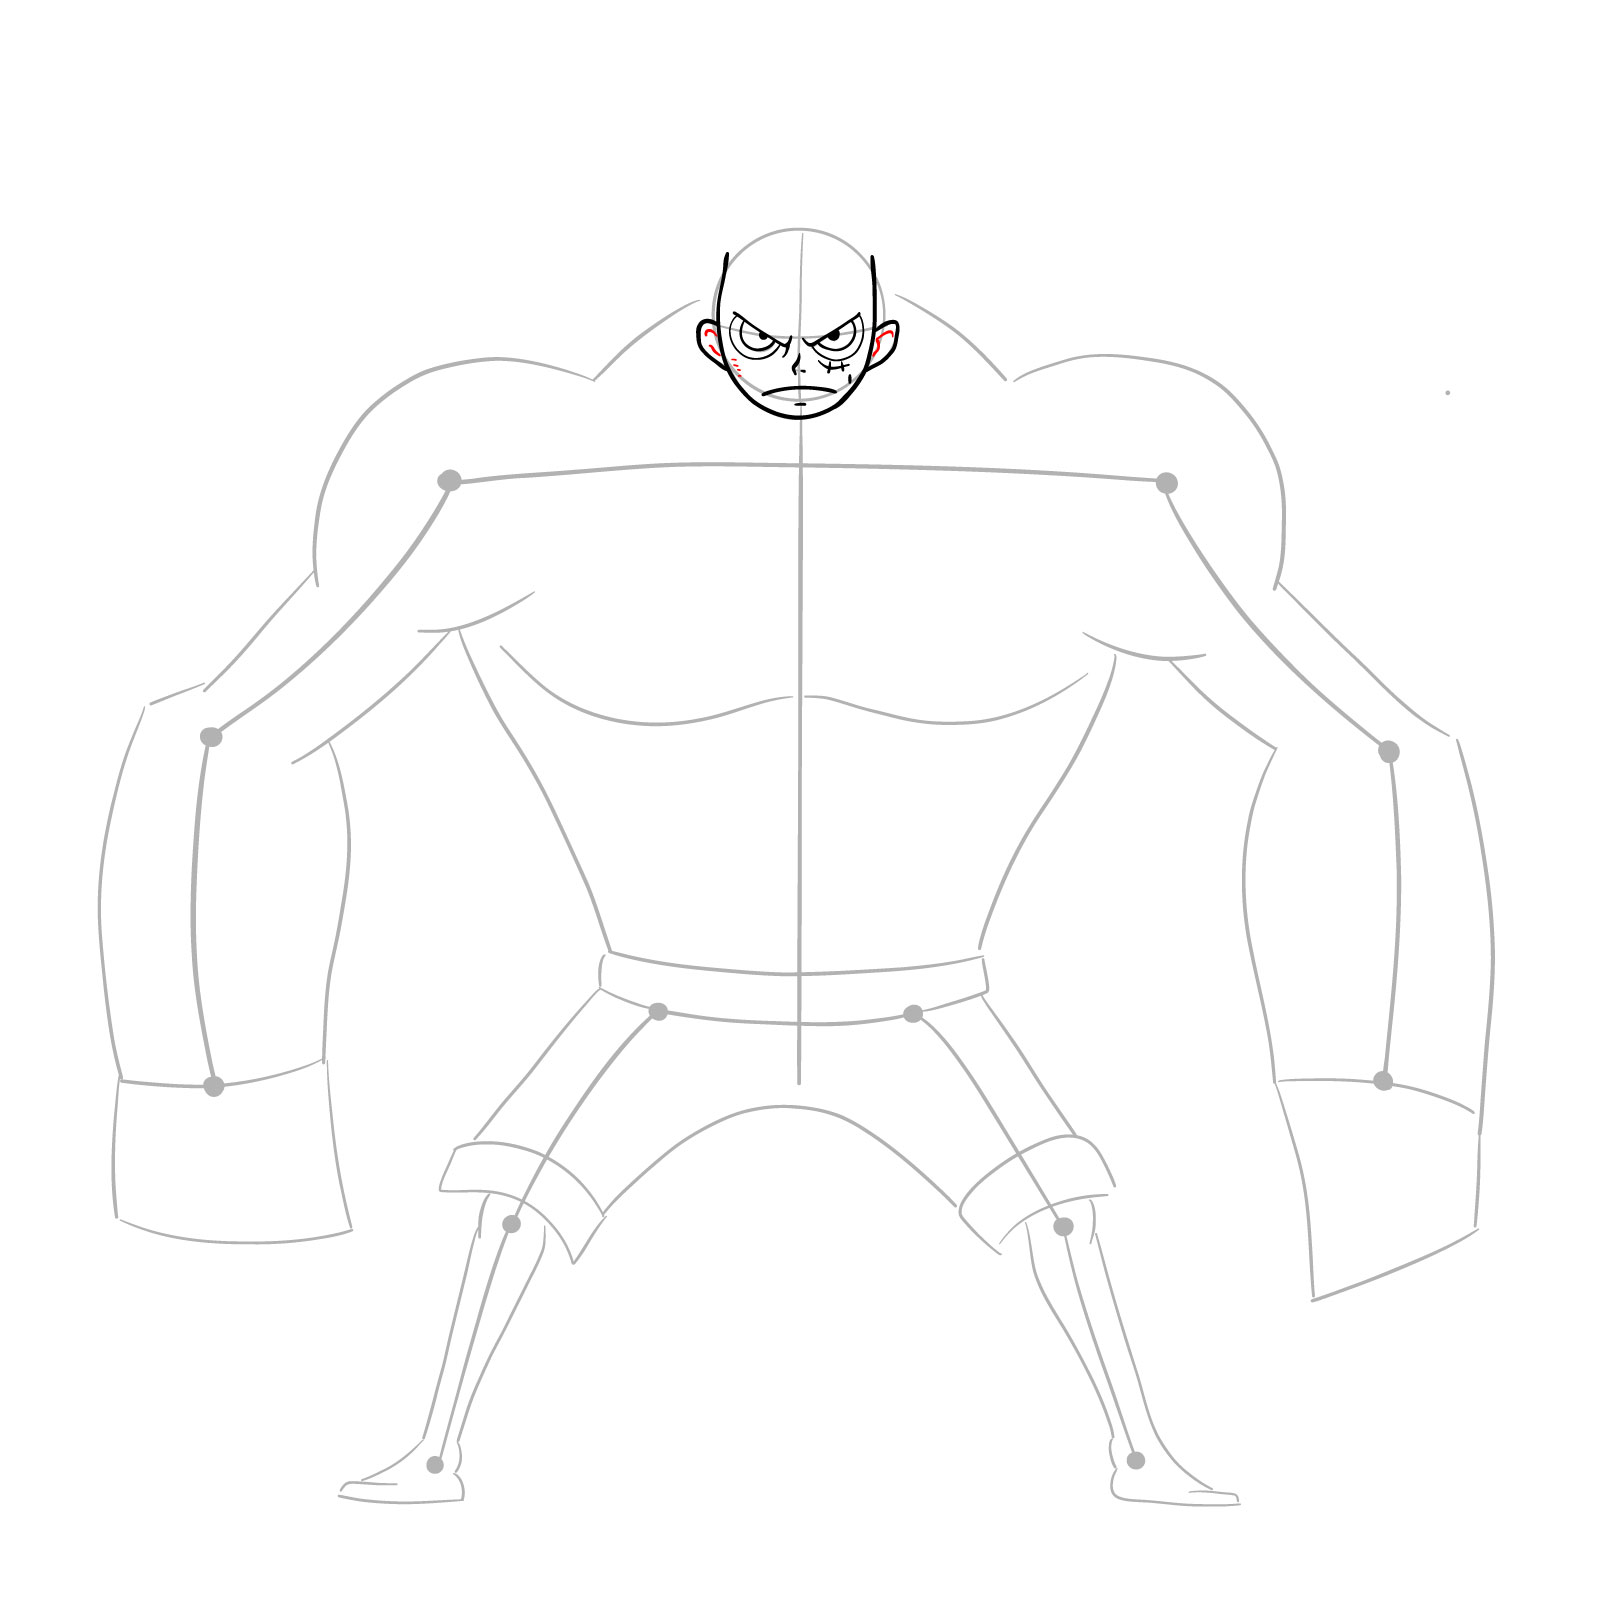
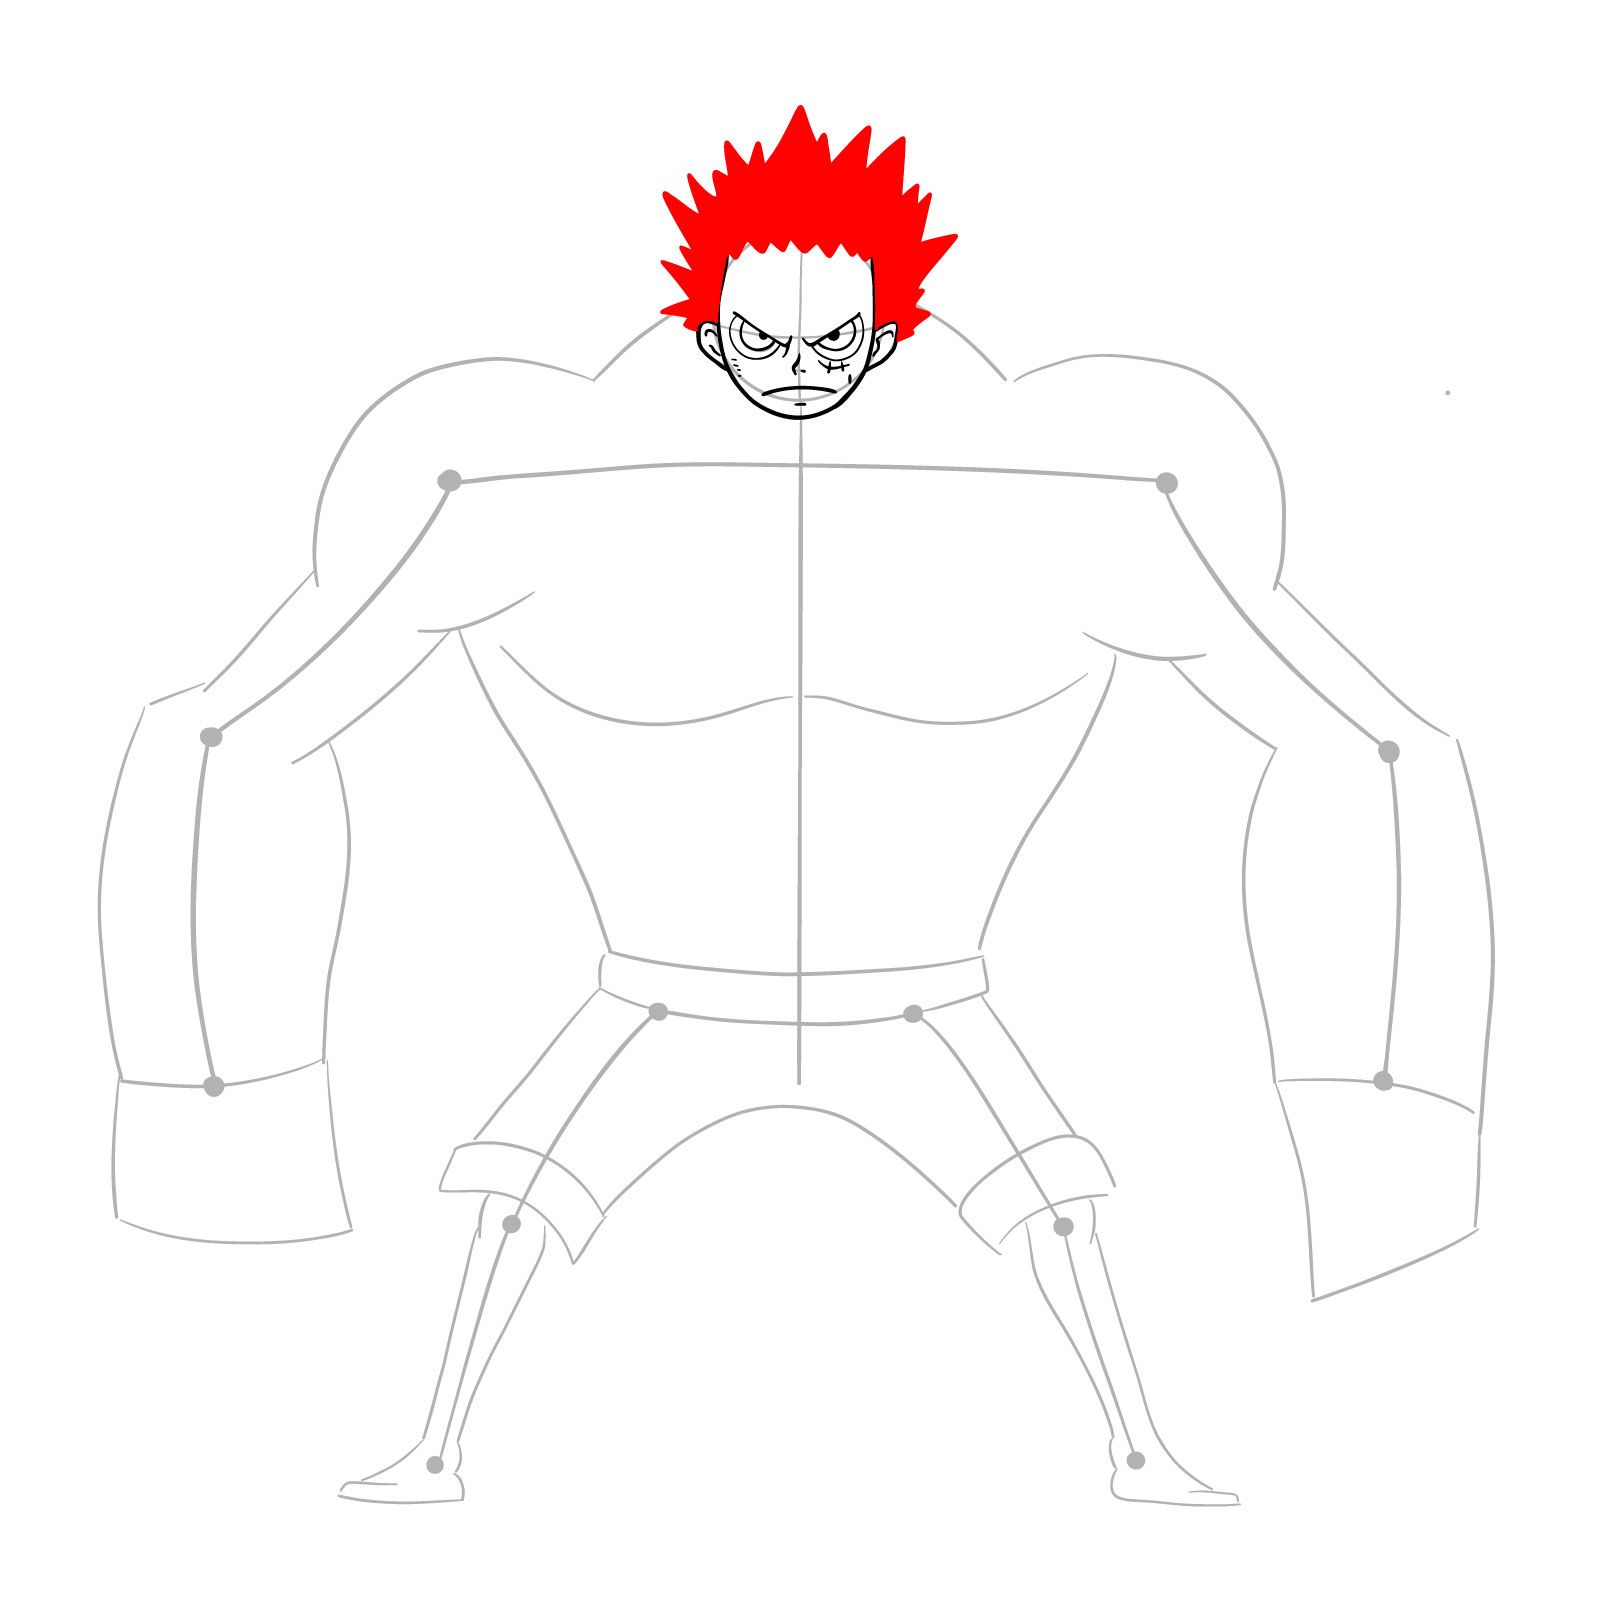





Part 3: Inking
Now, it’s time to ink your drawing, giving it a clean and defined appearance. Outline Nightmare Luffy’s muscular physique, his shorts, and the colossal katana on his back. Use precise strokes to enhance the overall impact of the artwork. Take your time and enjoy the process as you witness your creation gaining depth and definition.
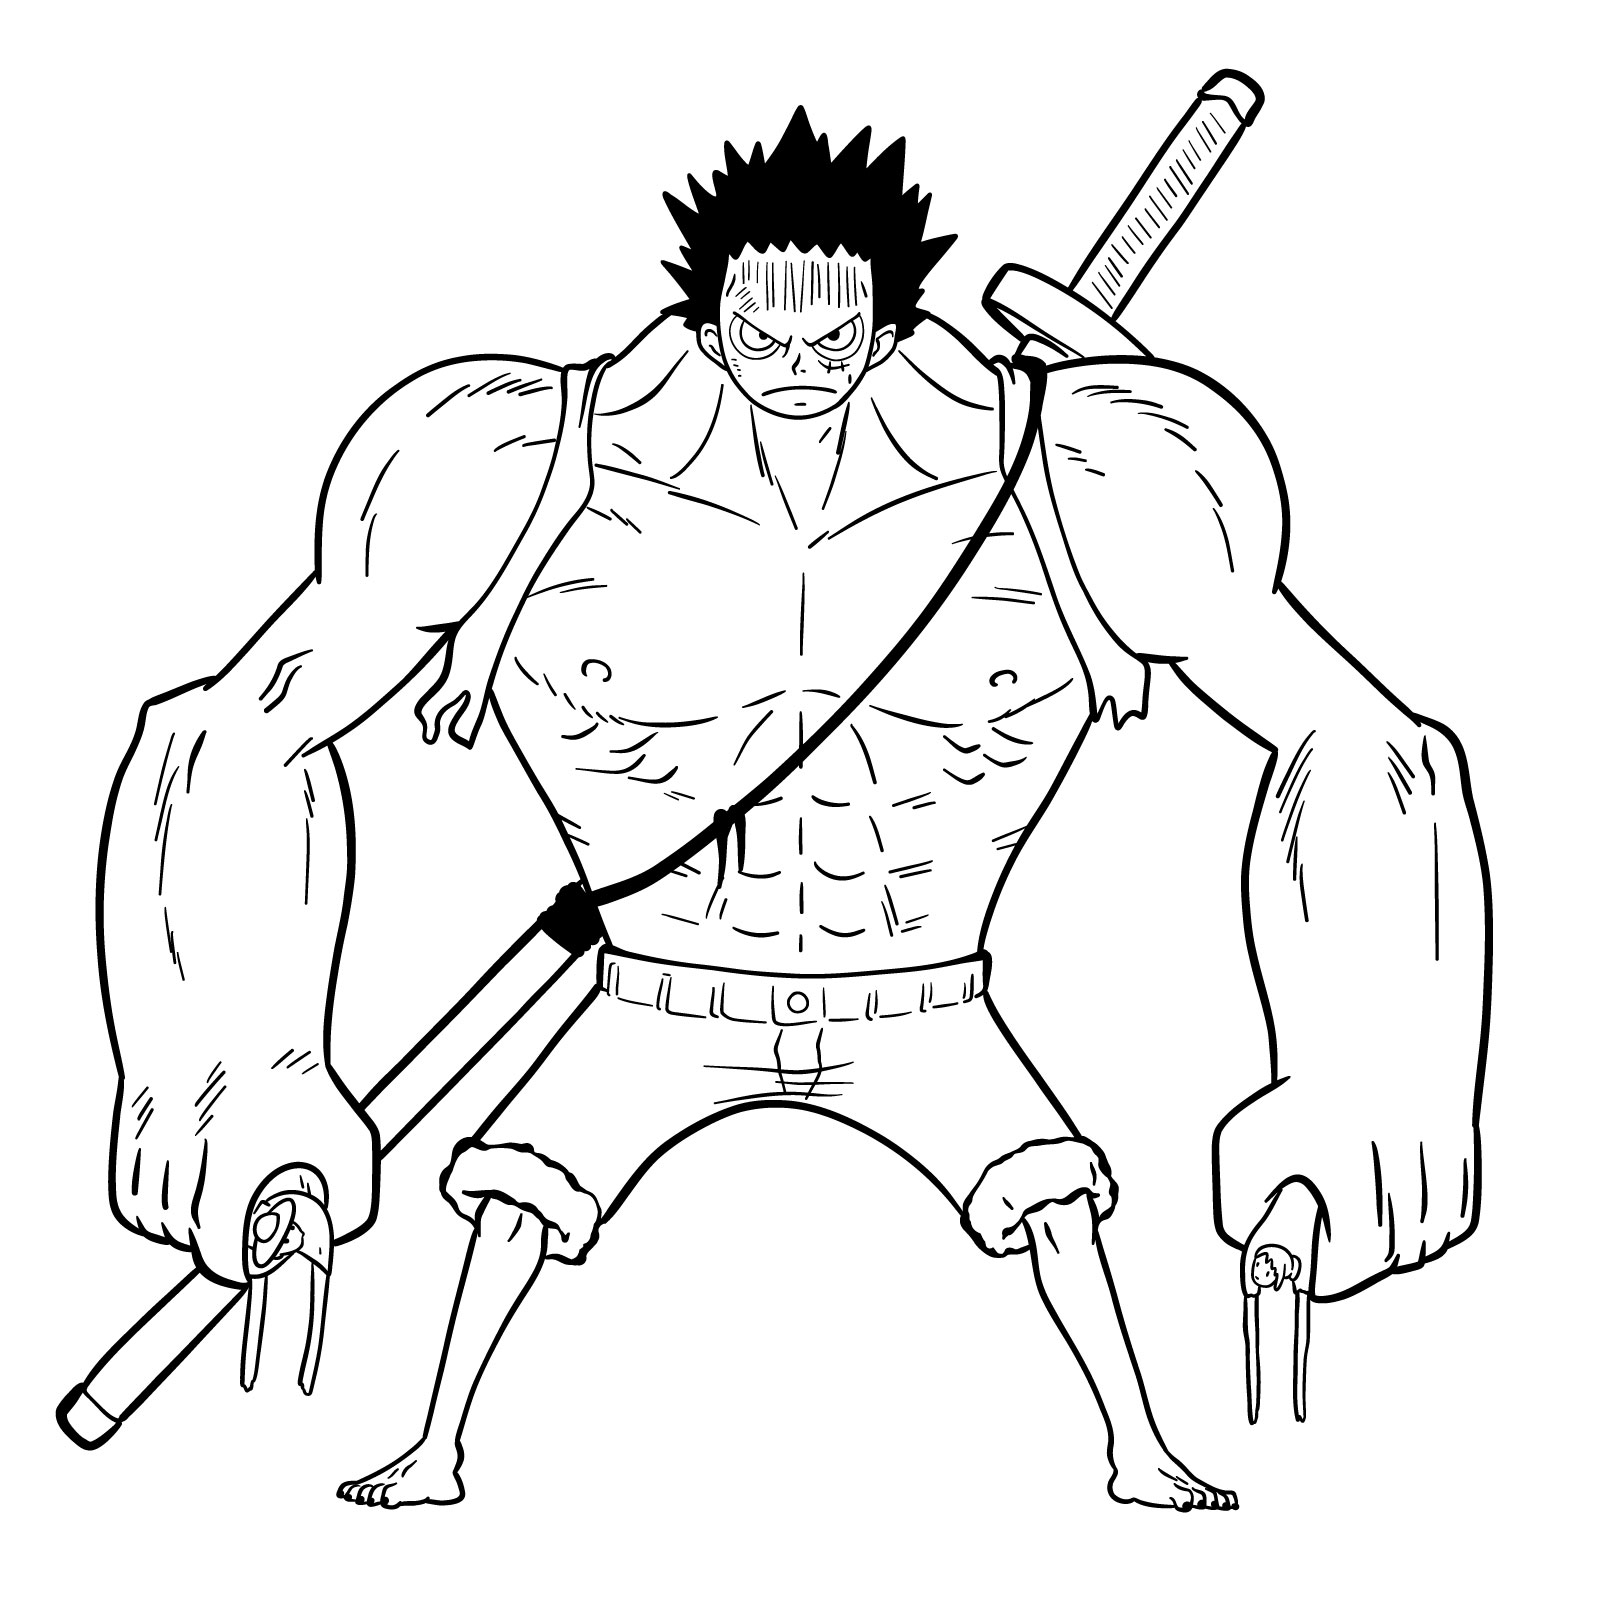
Your first attempt at how to draw Nightmare Luffy might not turn out exactly how you pictured, and honestly, that’s pretty normal with a design this detailed. Save it, try again, and you’ll start to notice real improvement each time. More One Piece guides and other characters get added regularly, so following SketchOk on Pinterest or Facebook is a good way to keep up, and video versions of some guides also show up on the YouTube channel if you prefer watching the process.

Hey Ilnur, are you okay? The website has been quiet for a long time, and I wonder if you’re doing alright.
Hey Drawing-Fan! Thank you so much for your concern and checking in on me. I really appreciate it! 😊 I apologize for the silence on the website lately. Life has been quite hectic for me in the past few weeks, leaving me with no time to work on the website and create new drawings. But don’t worry, I’m doing alright! The good news is that things are starting to settle down now, and I’m excited to get back into the swing of things. So, stay tuned because in just a few days, I’ll be posting some fresh new drawings for you to enjoy! Thank you again for your support and understanding. It means a lot to me!
ok so far i have 3 requests 2 images of Bobobo-bo bo-bobo and 1 of denbo
https://static.wikia.nocookie.net/bobobo/images/2/25/Bo-bobo_Official_Image_3.png/revision/latest?cb=20201029073037https://static.wikia.nocookie.net/bobobo/images/b/b4/Bo-bobo_Official_Image_4.png/revision/latest?cb=20201029073049
https://files.catbox.moe/2yi9hg.png
and yes they are from the anime of Bobobo-bo bo-bobo oh and can u do one of gasser
https://static.wikia.nocookie.net/bobobo/images/c/cf/Gasser.gif/revision/latest?cb=20081213001319
and here’s one of Jelly Jiggler
https://static.wikia.nocookie.net/bobobo/images/a/a2/Image_tennosuke.gif/revision/latest?cb=20200116043027
https://static.wikia.nocookie.net/bobobo/images/9/97/DonPatch.gif/revision/latest?cb=20171229165534
and one of Don Patch u can do the main ones not the side ones ok
https://static.wikia.nocookie.net/bobobo/images/1/1d/Dengakuman.png/revision/latest?cb=20181026172438 and here is one of Dengakuman ok