Home » Anime » Naruto » How to Draw Naruto in Six Paths Senjutsu Mode

How to Draw Naruto in Six Paths Senjutsu Mode

The Naruto series has given us a multitude of breathtaking moments, with one of the peaks being Naruto’s ascension to the Six Paths Senjutsu Mode. If you’ve ever wanted to capture this powerful transformation in a drawing, you’ve landed on the right guide. Whether you’re a seasoned artist or a beginner looking to delve into the world of manga art, this tutorial will guide you through how to draw Naruto in Six Paths Senjutsu Mode.

Key Highlights of Naruto’s Ultimate Transformation

  • Ability to fly, setting him apart from his previous forms.
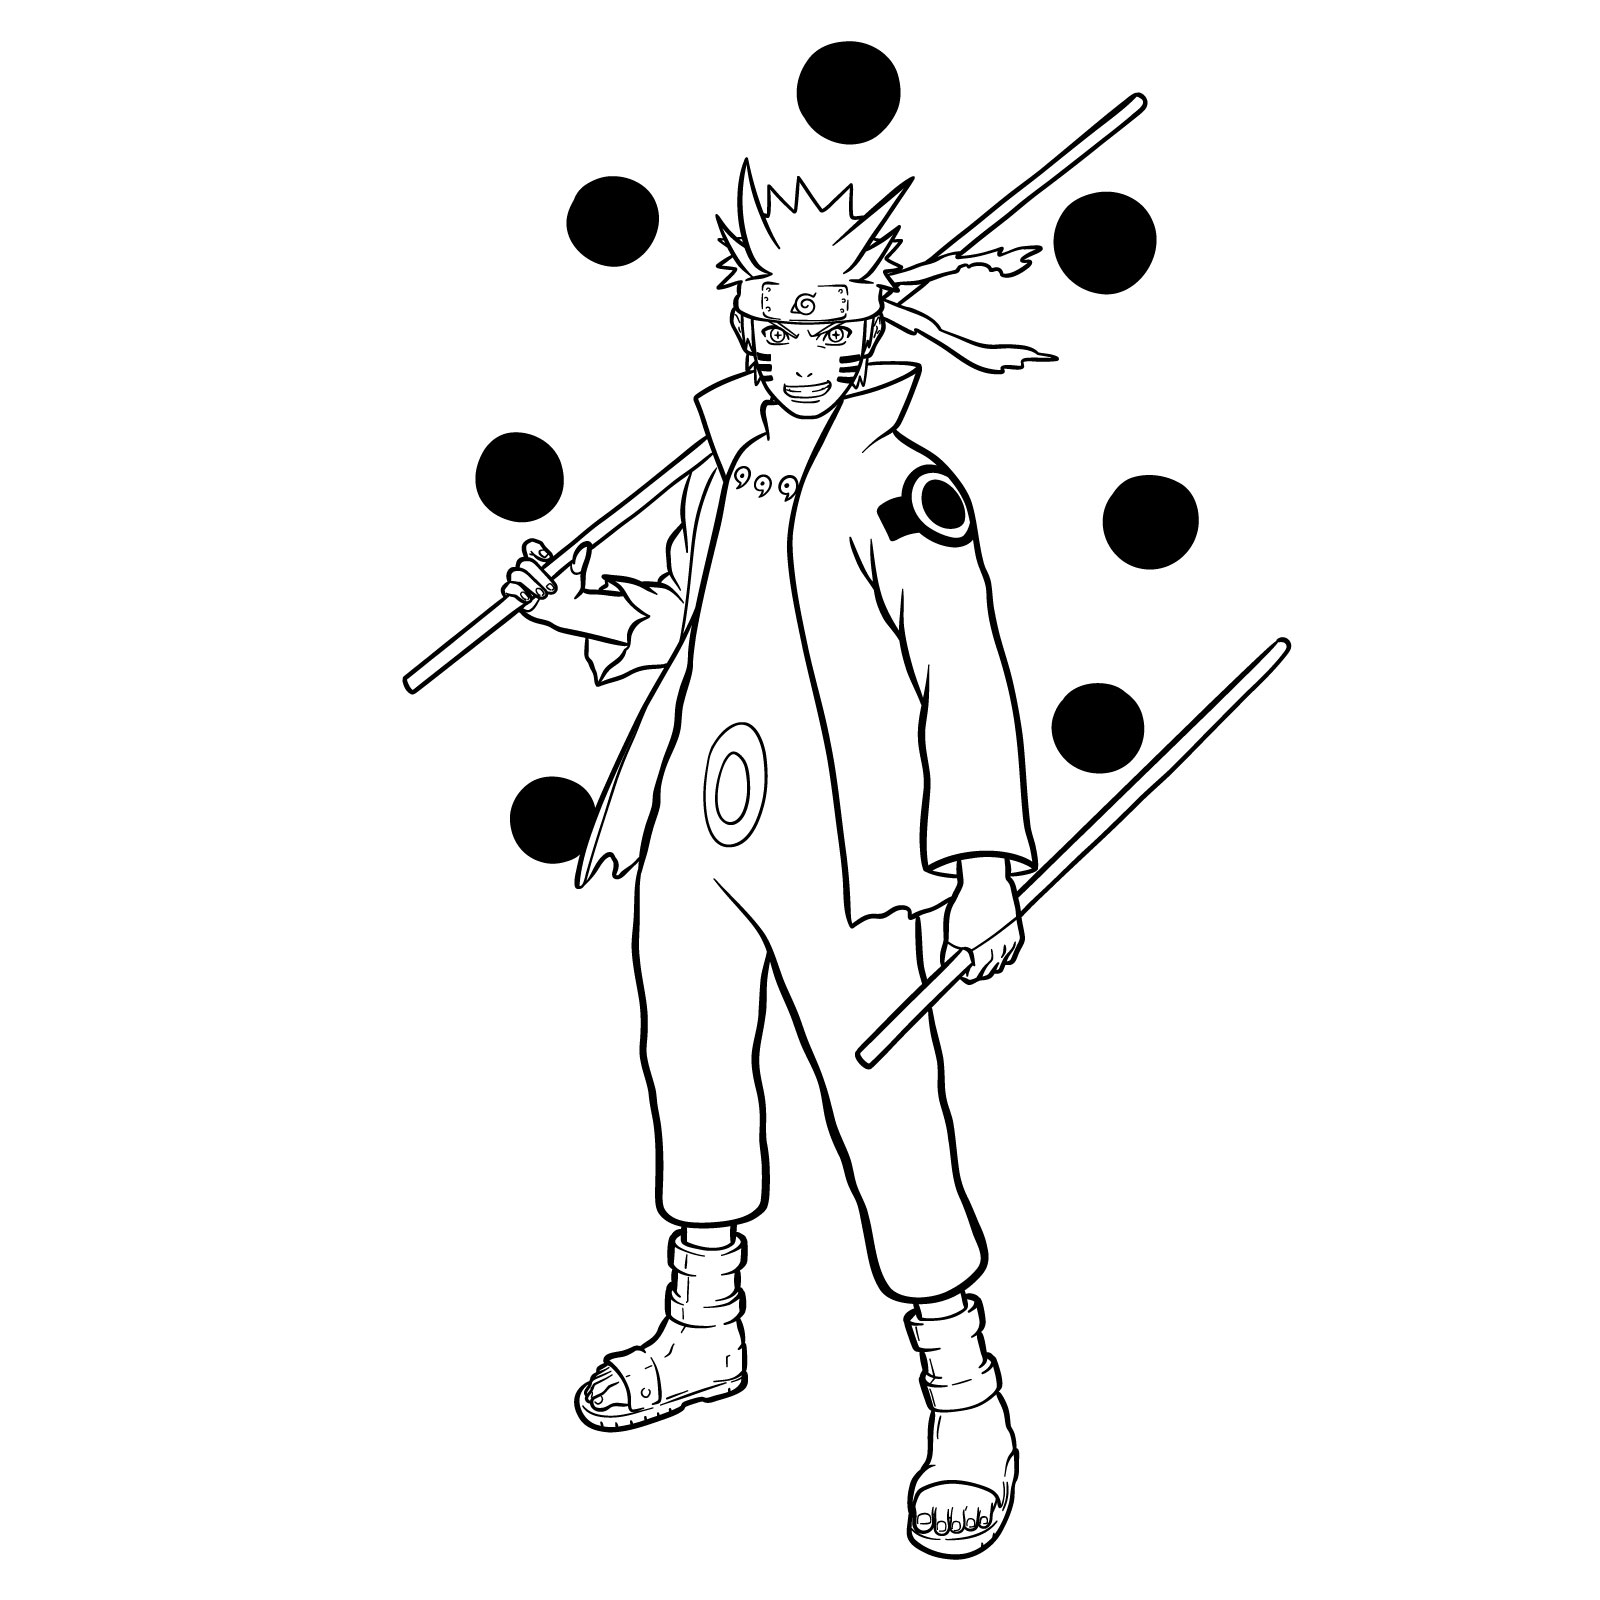
  • Manifestation of up to nine Truth-Seeking Balls, representing a combination of all basic natures (7 in our drawing).
  • Usage of Yin–Yang Release and infusion with the powerful Six Paths Chakra.
  • Ability to mould these balls into various shapes, use them as projectiles, and even create planetoid-destroying Tailed Beast Ball Rasenshurikens.
  • Increased power and control over shadow clones, further amplifying Naruto’s battle prowess.

You might also want to sketch other Naruto forms next. Here’s what SketchOk can offer:

Understanding the Guide’s Color Palette

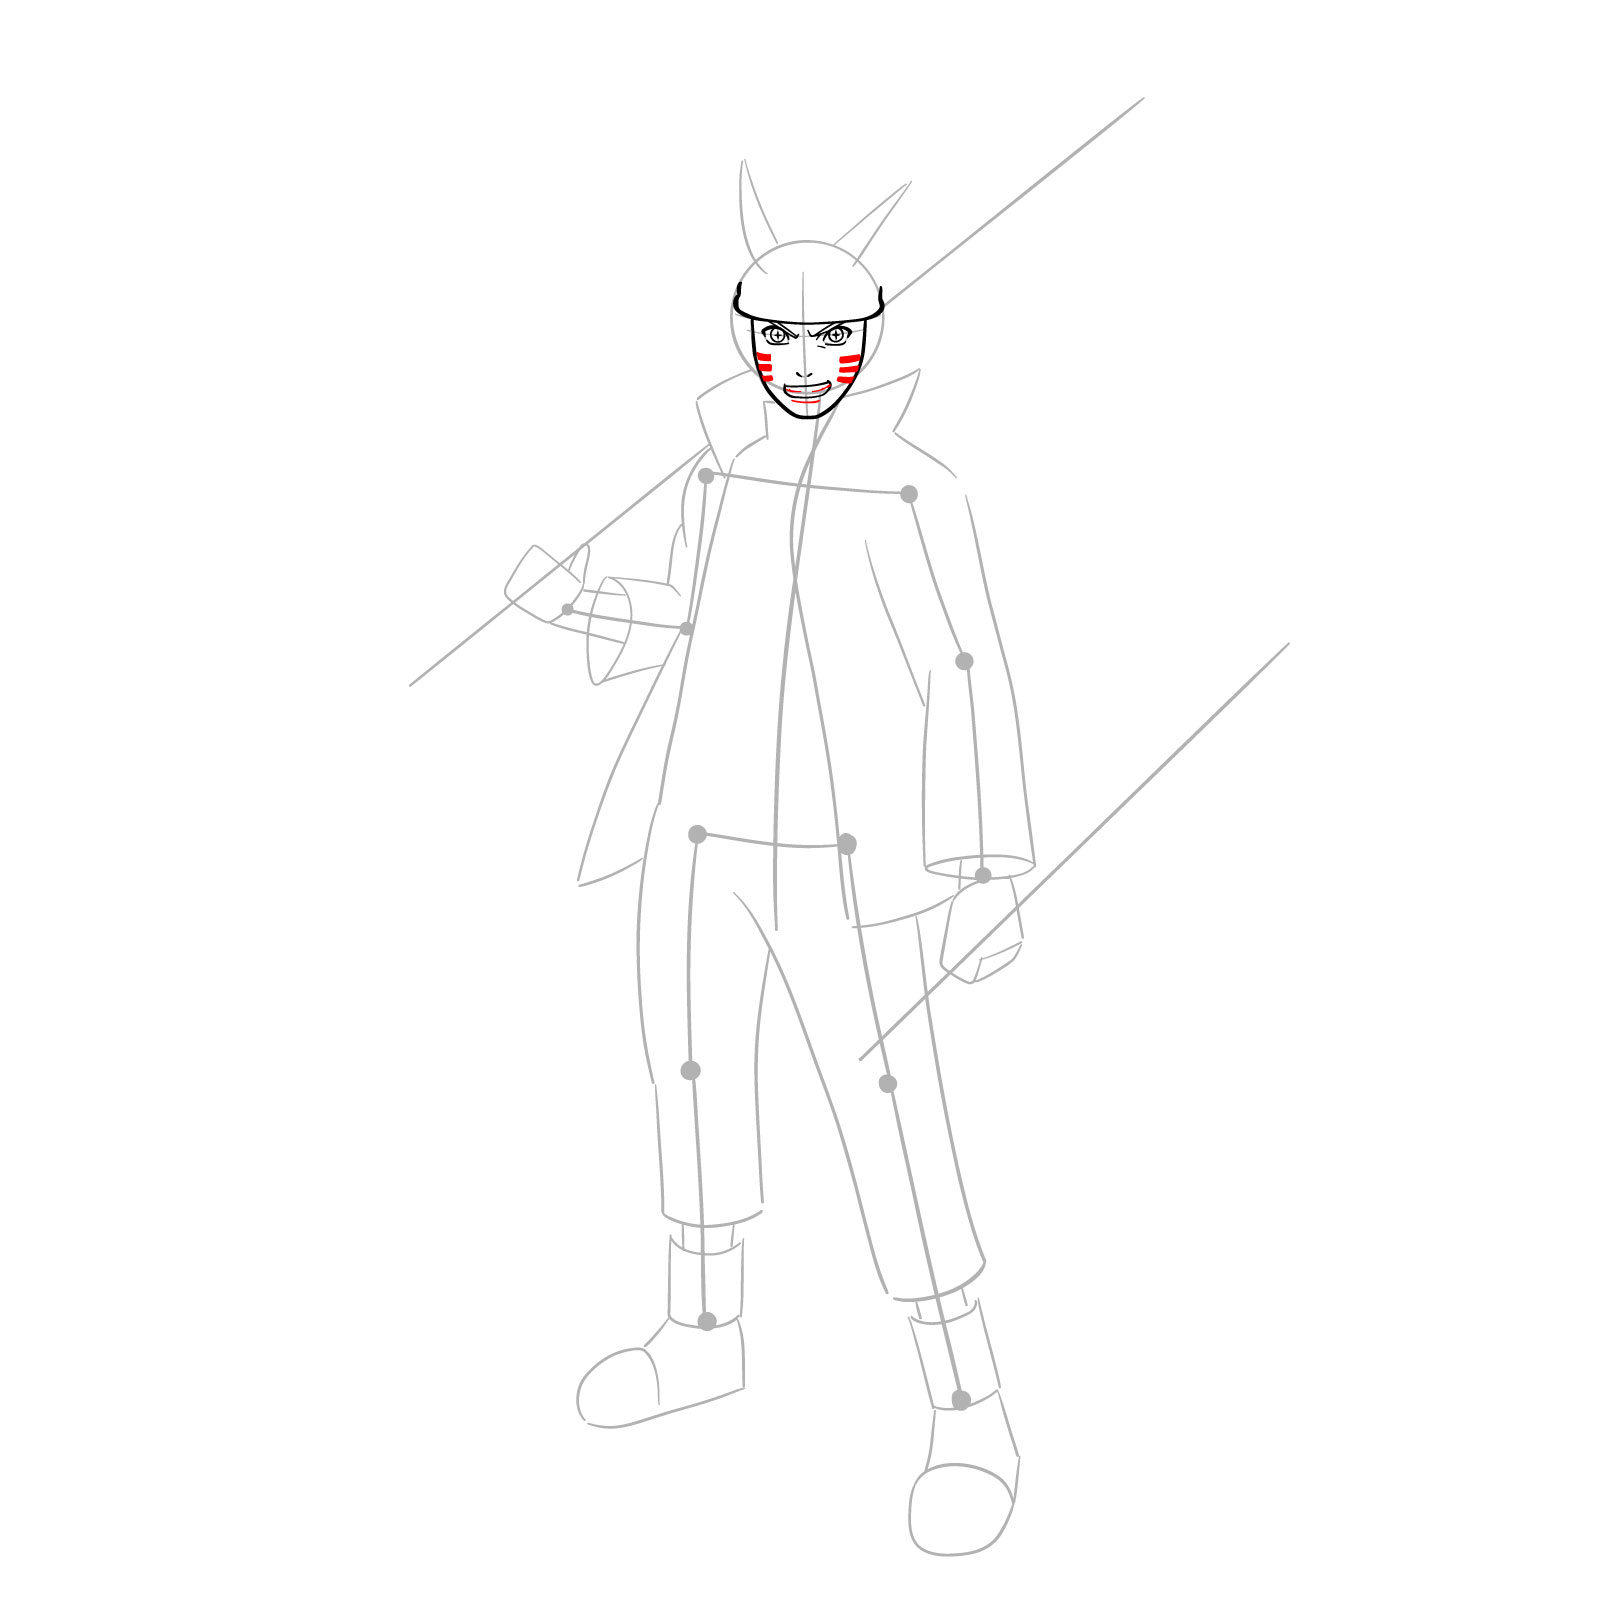
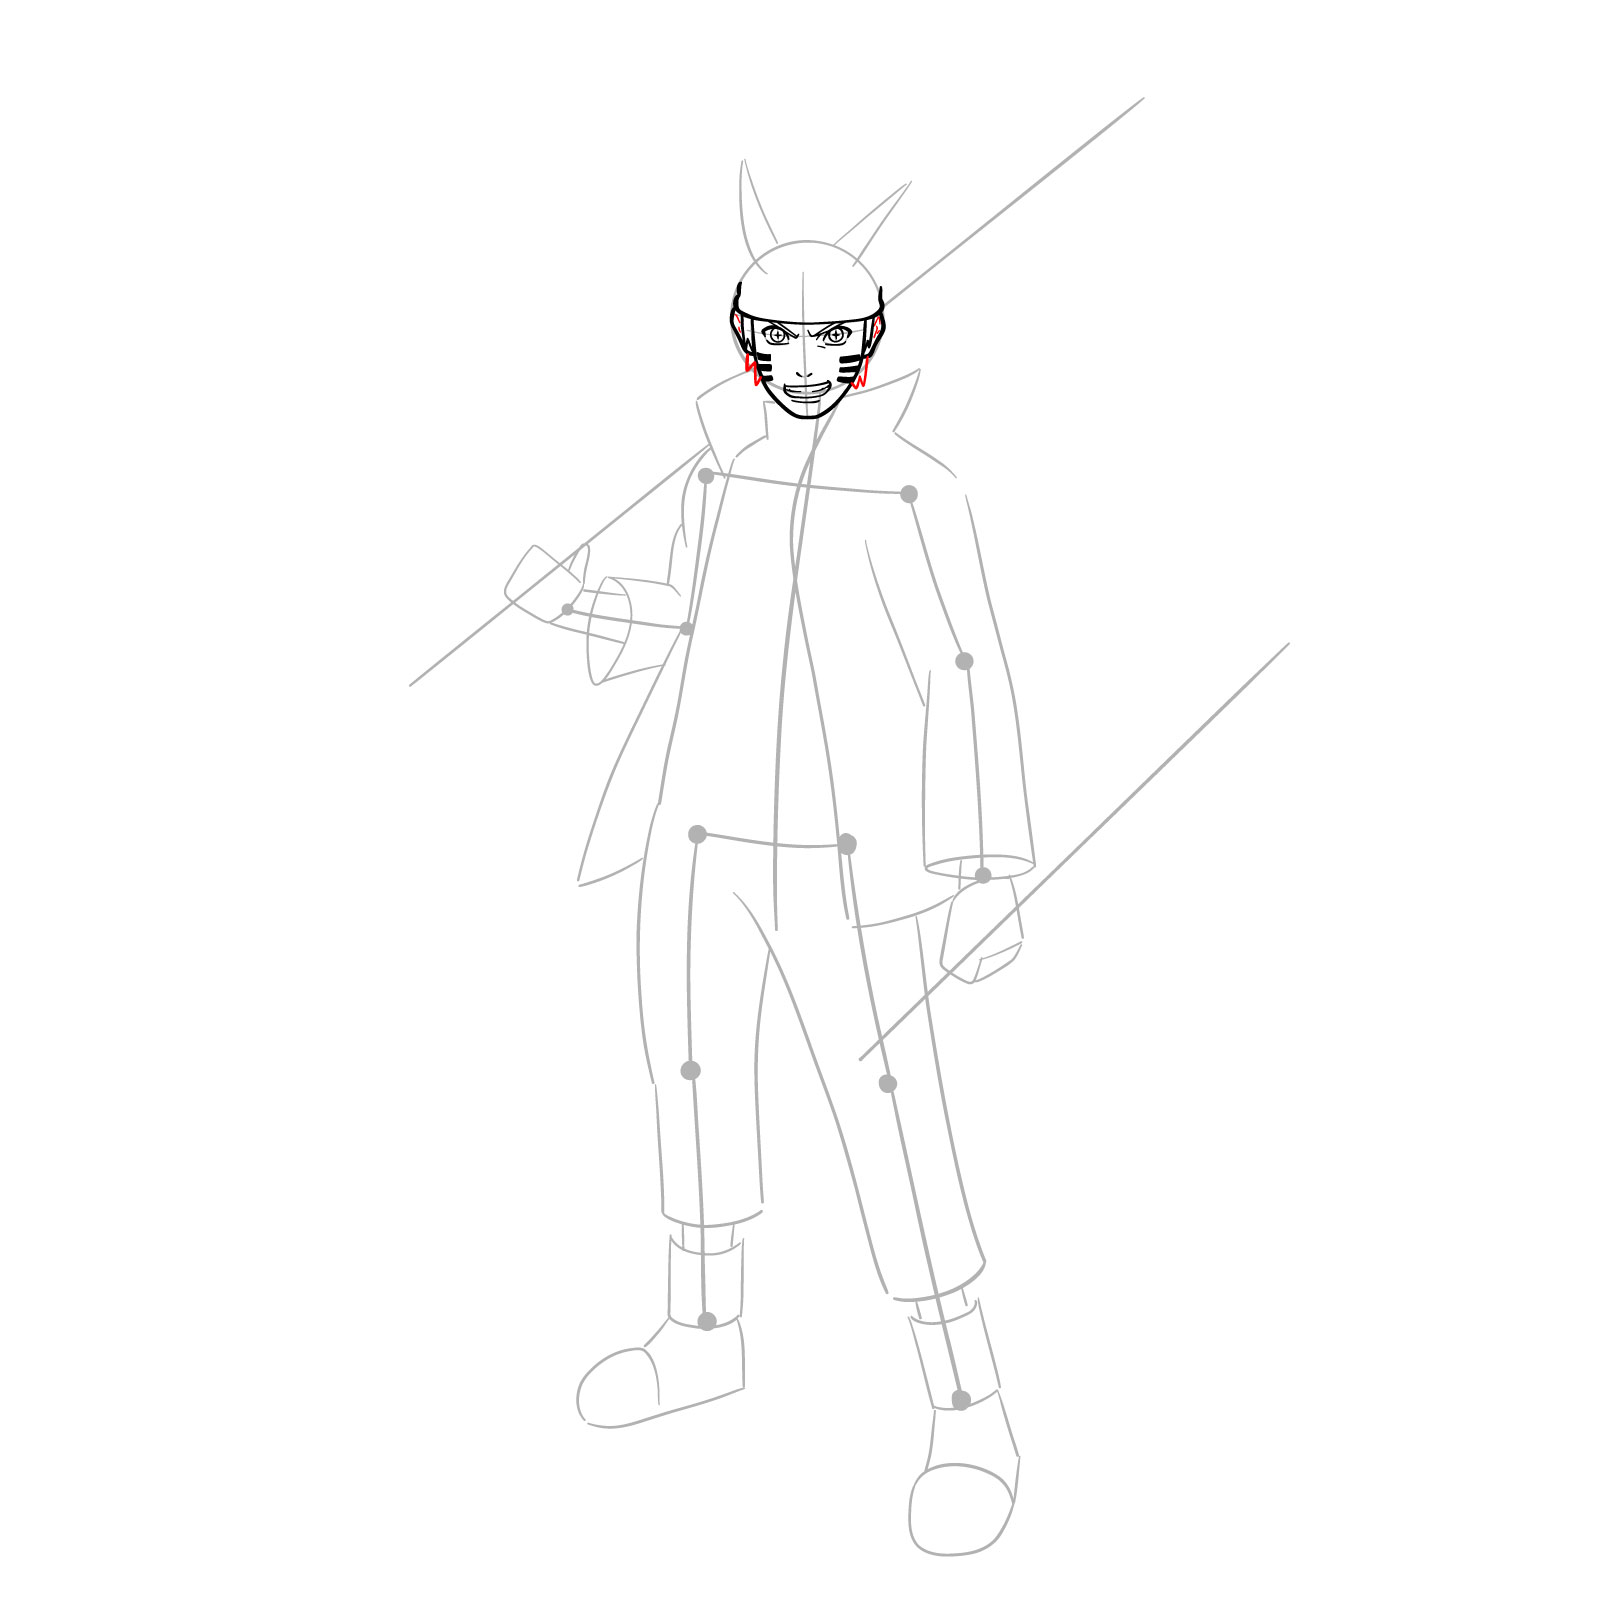
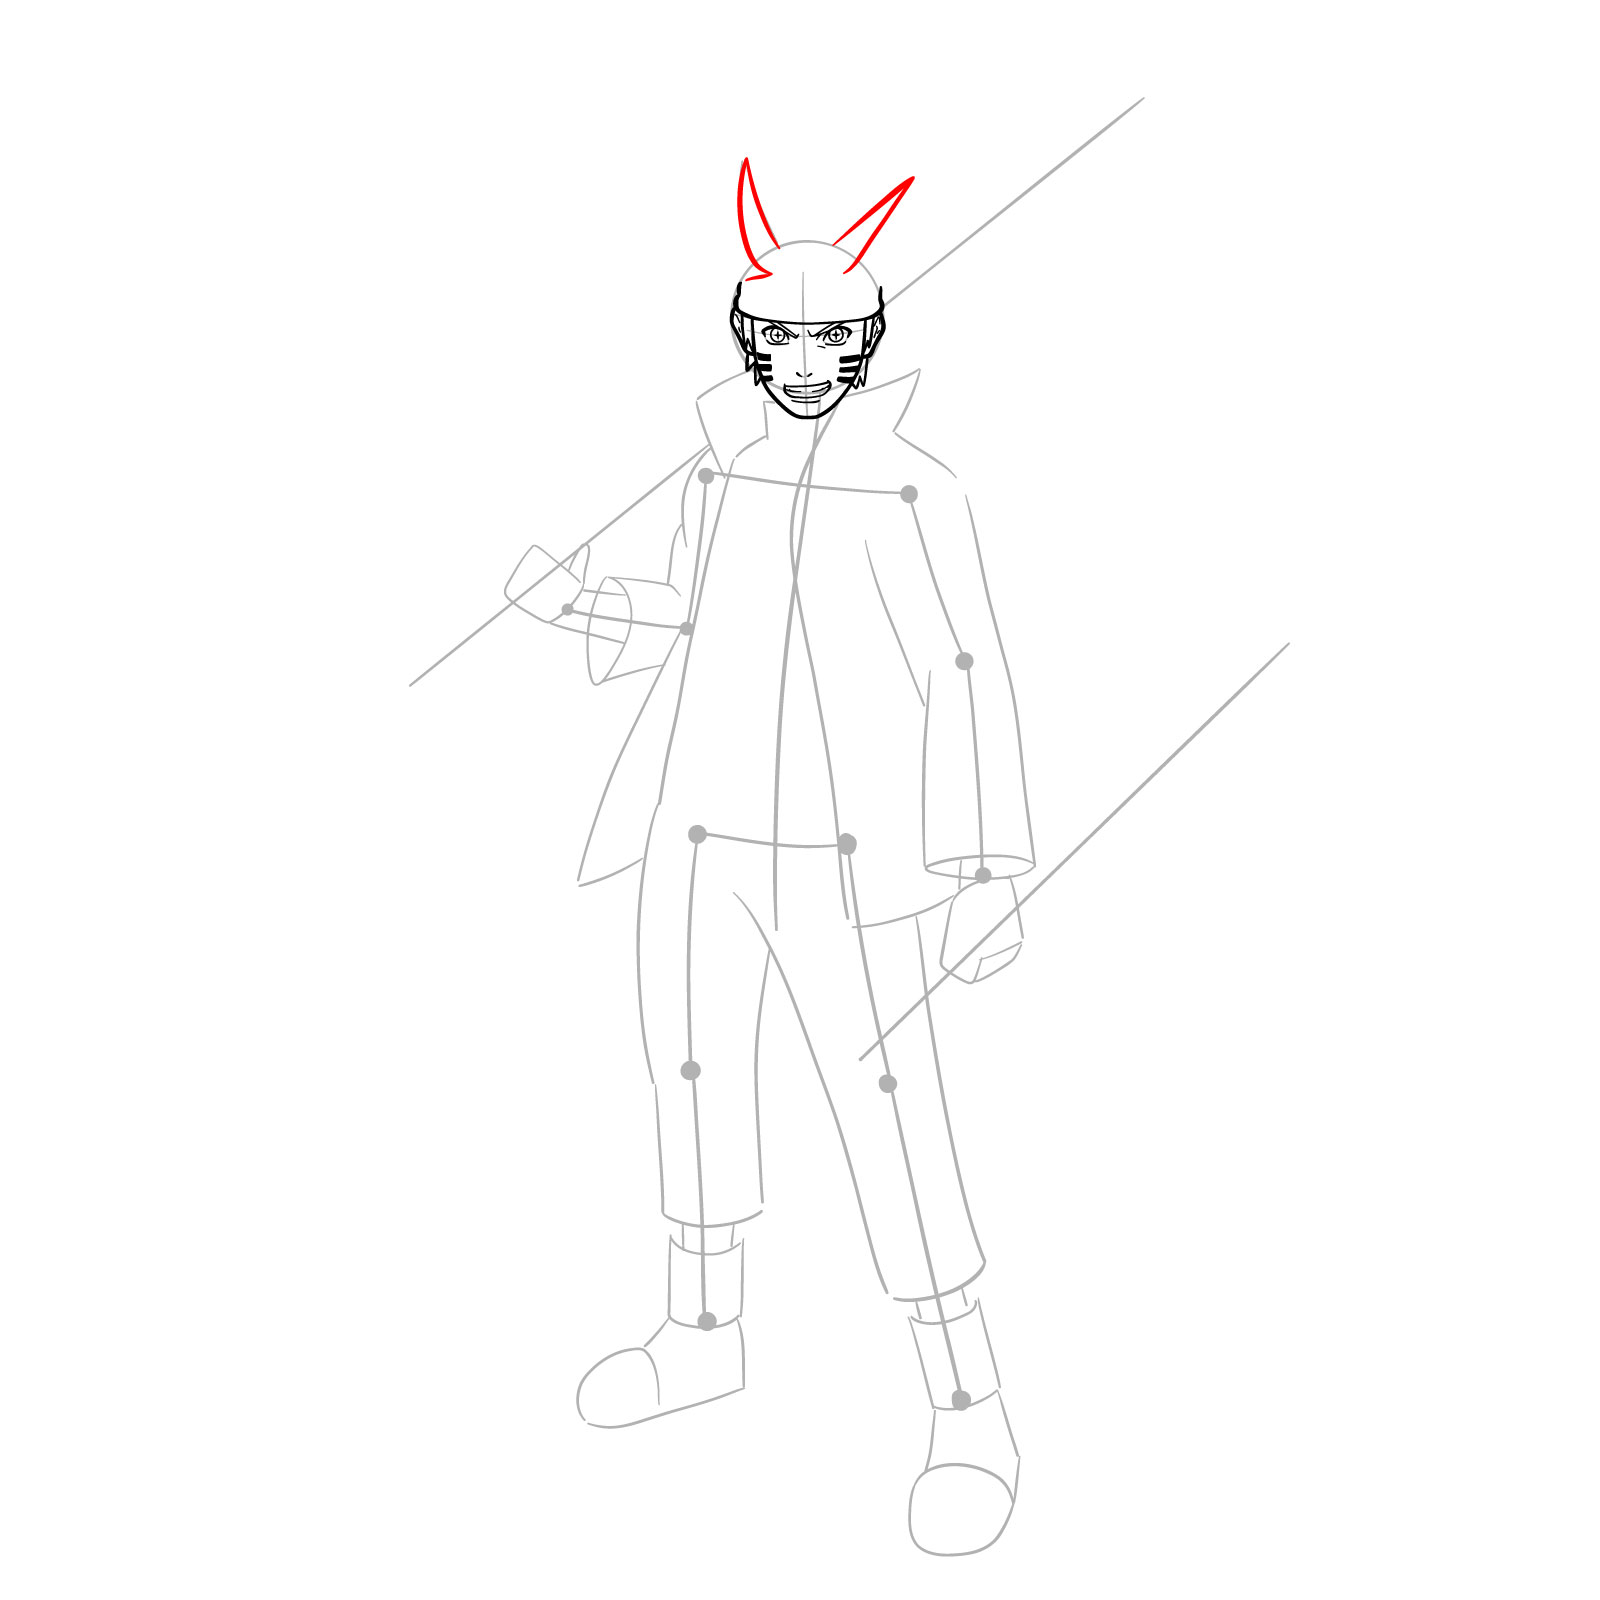
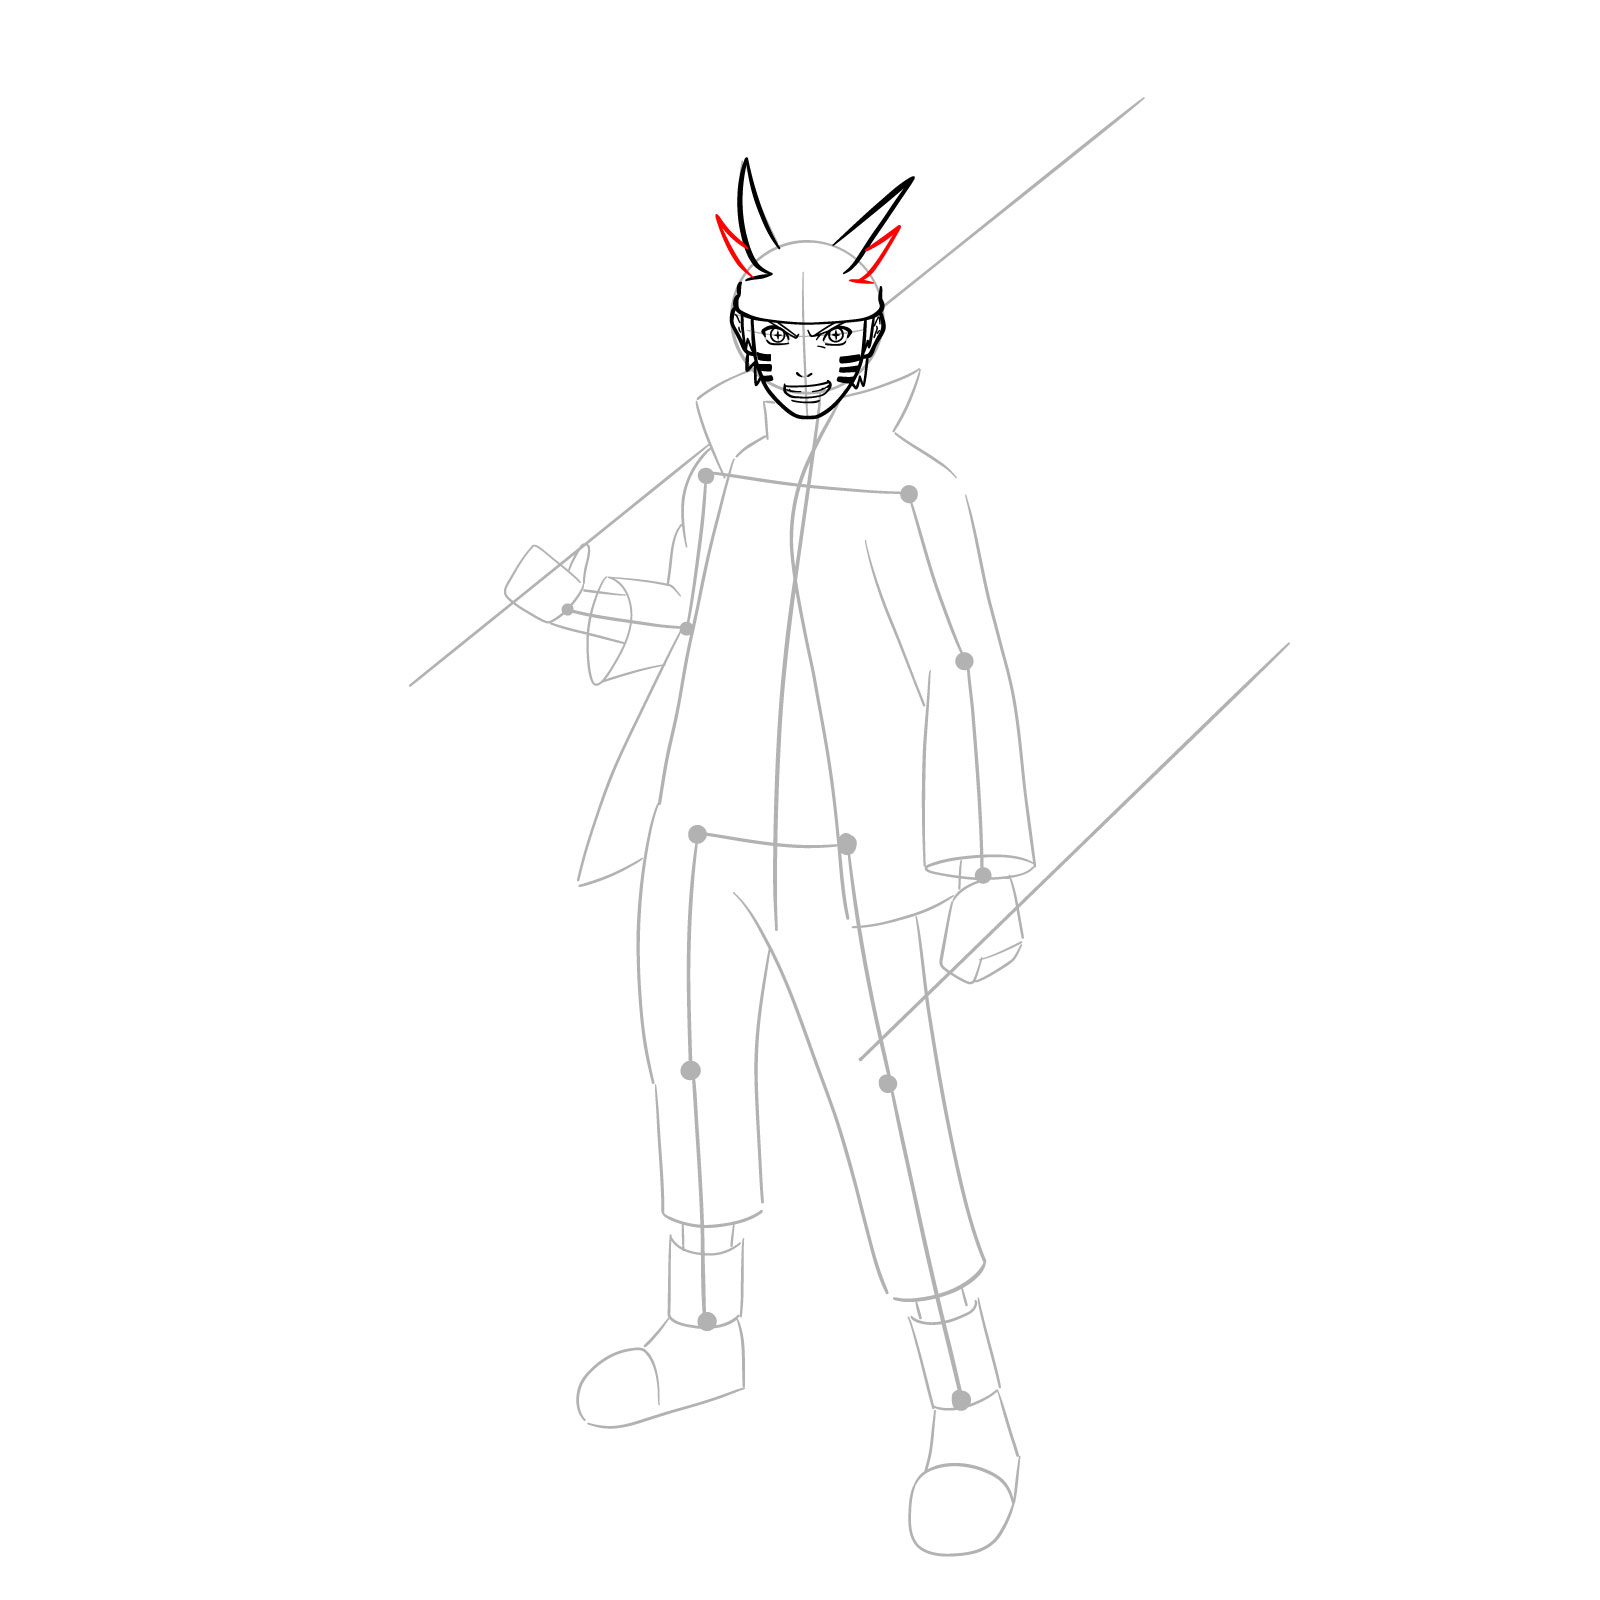
Before we start learning how to draw Naruto in his Six Paths Senjutsu form, let’s take a look what does each color in the images below mean:

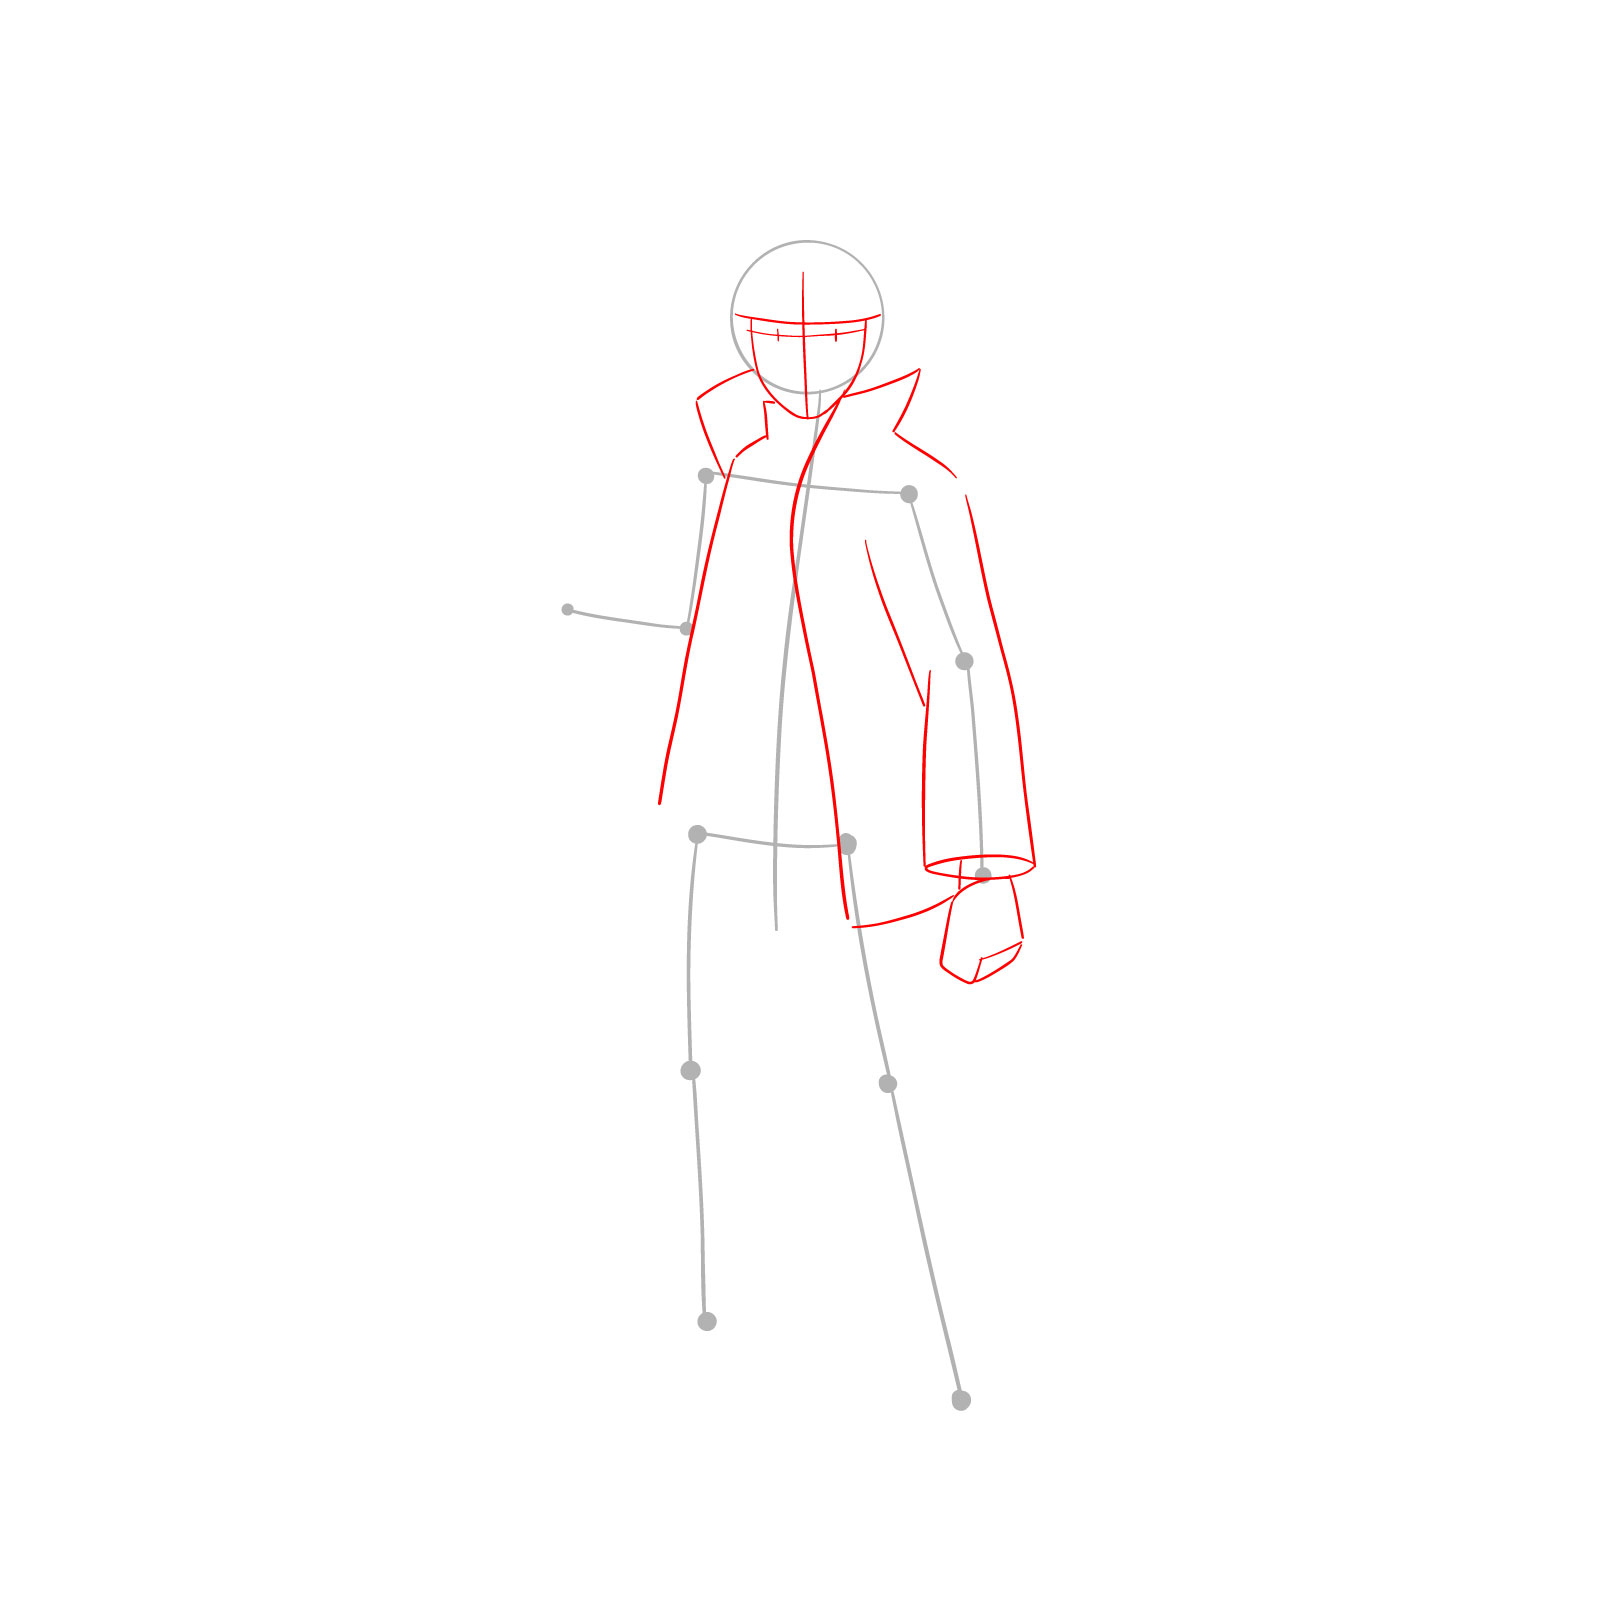
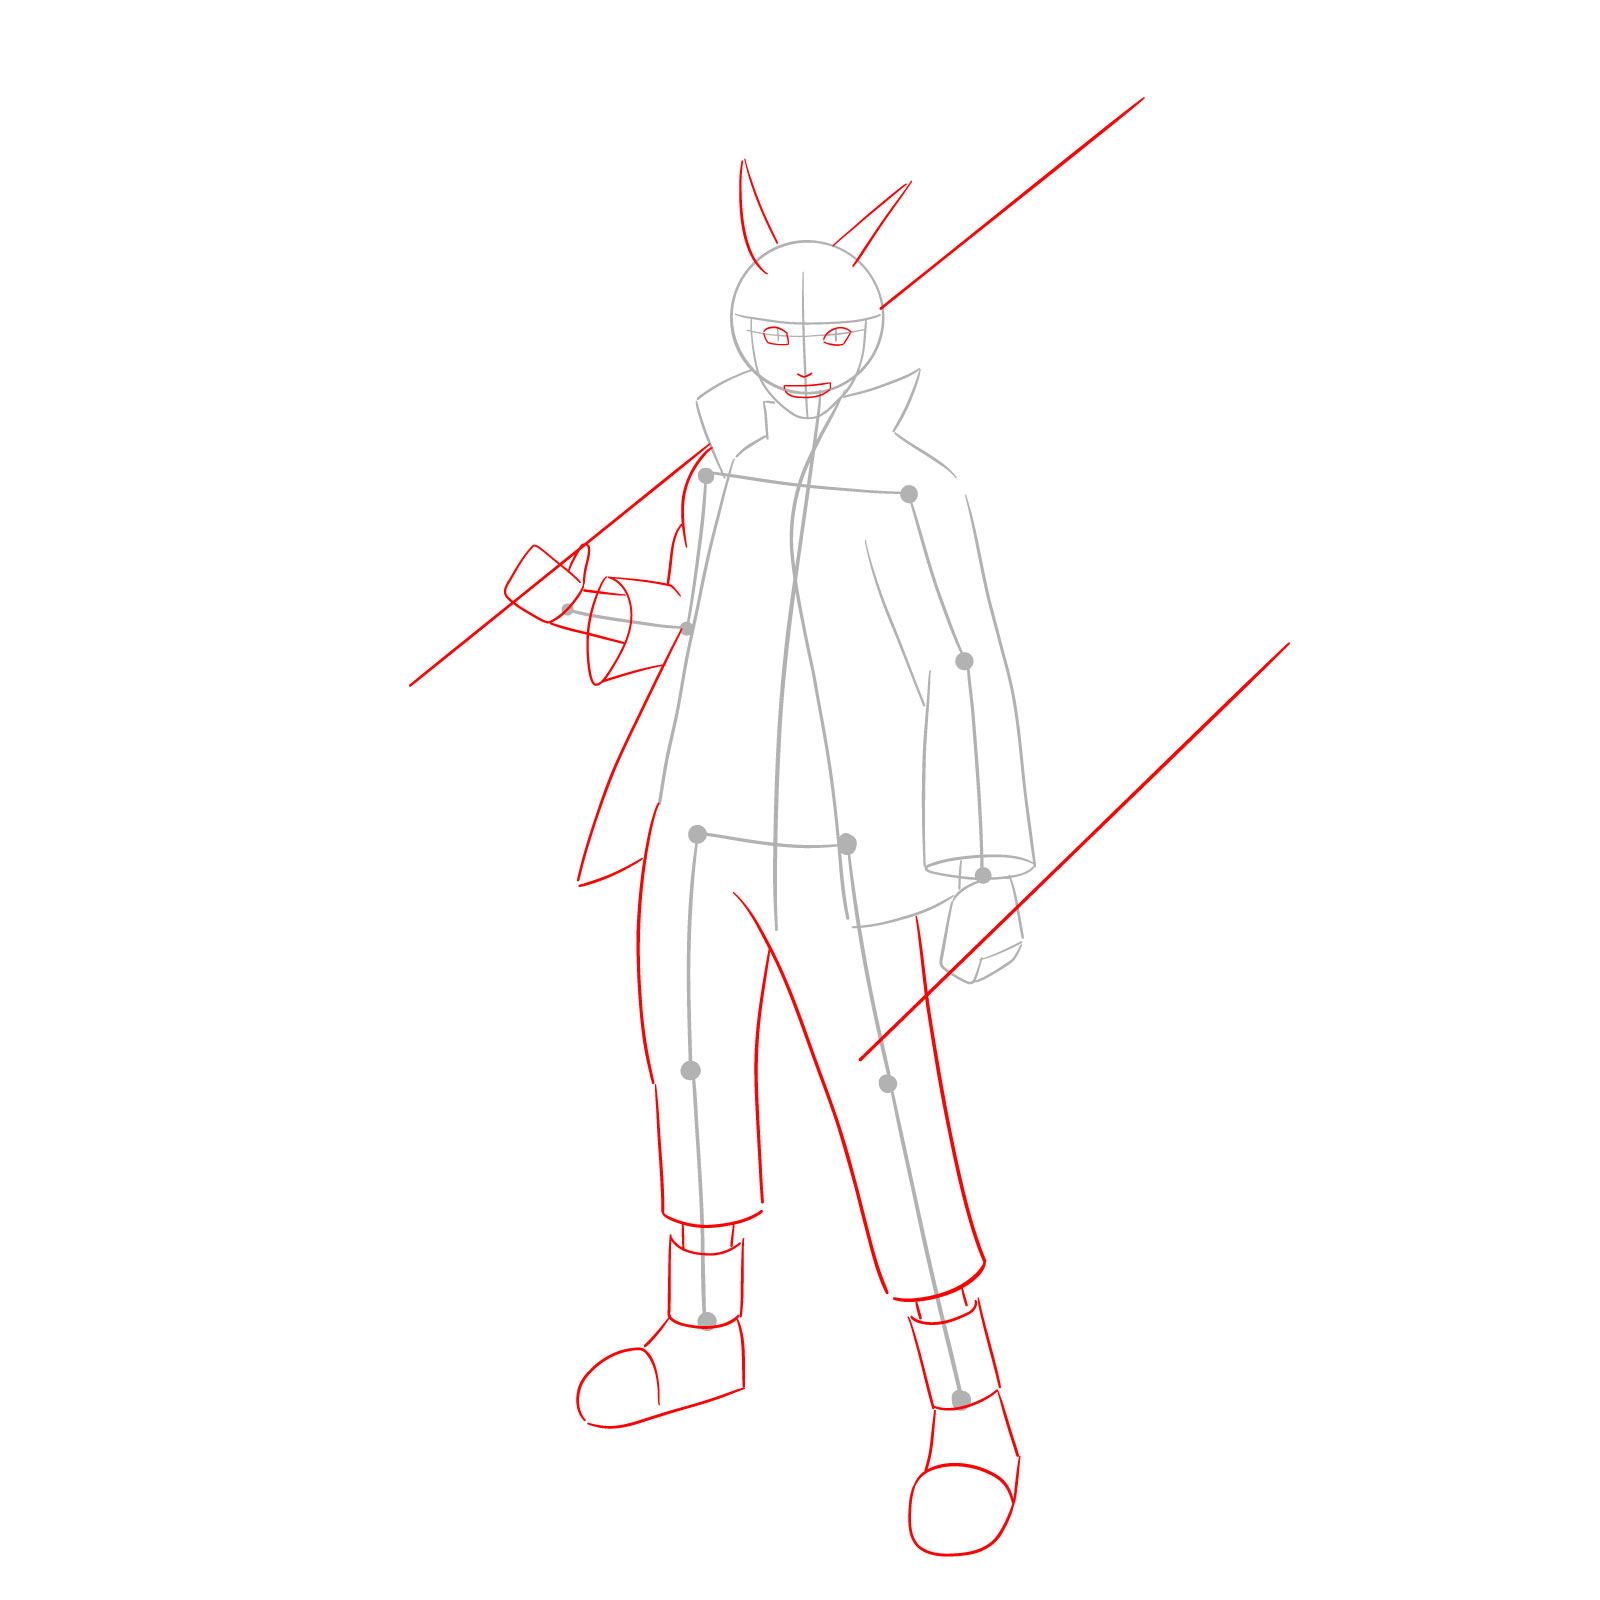
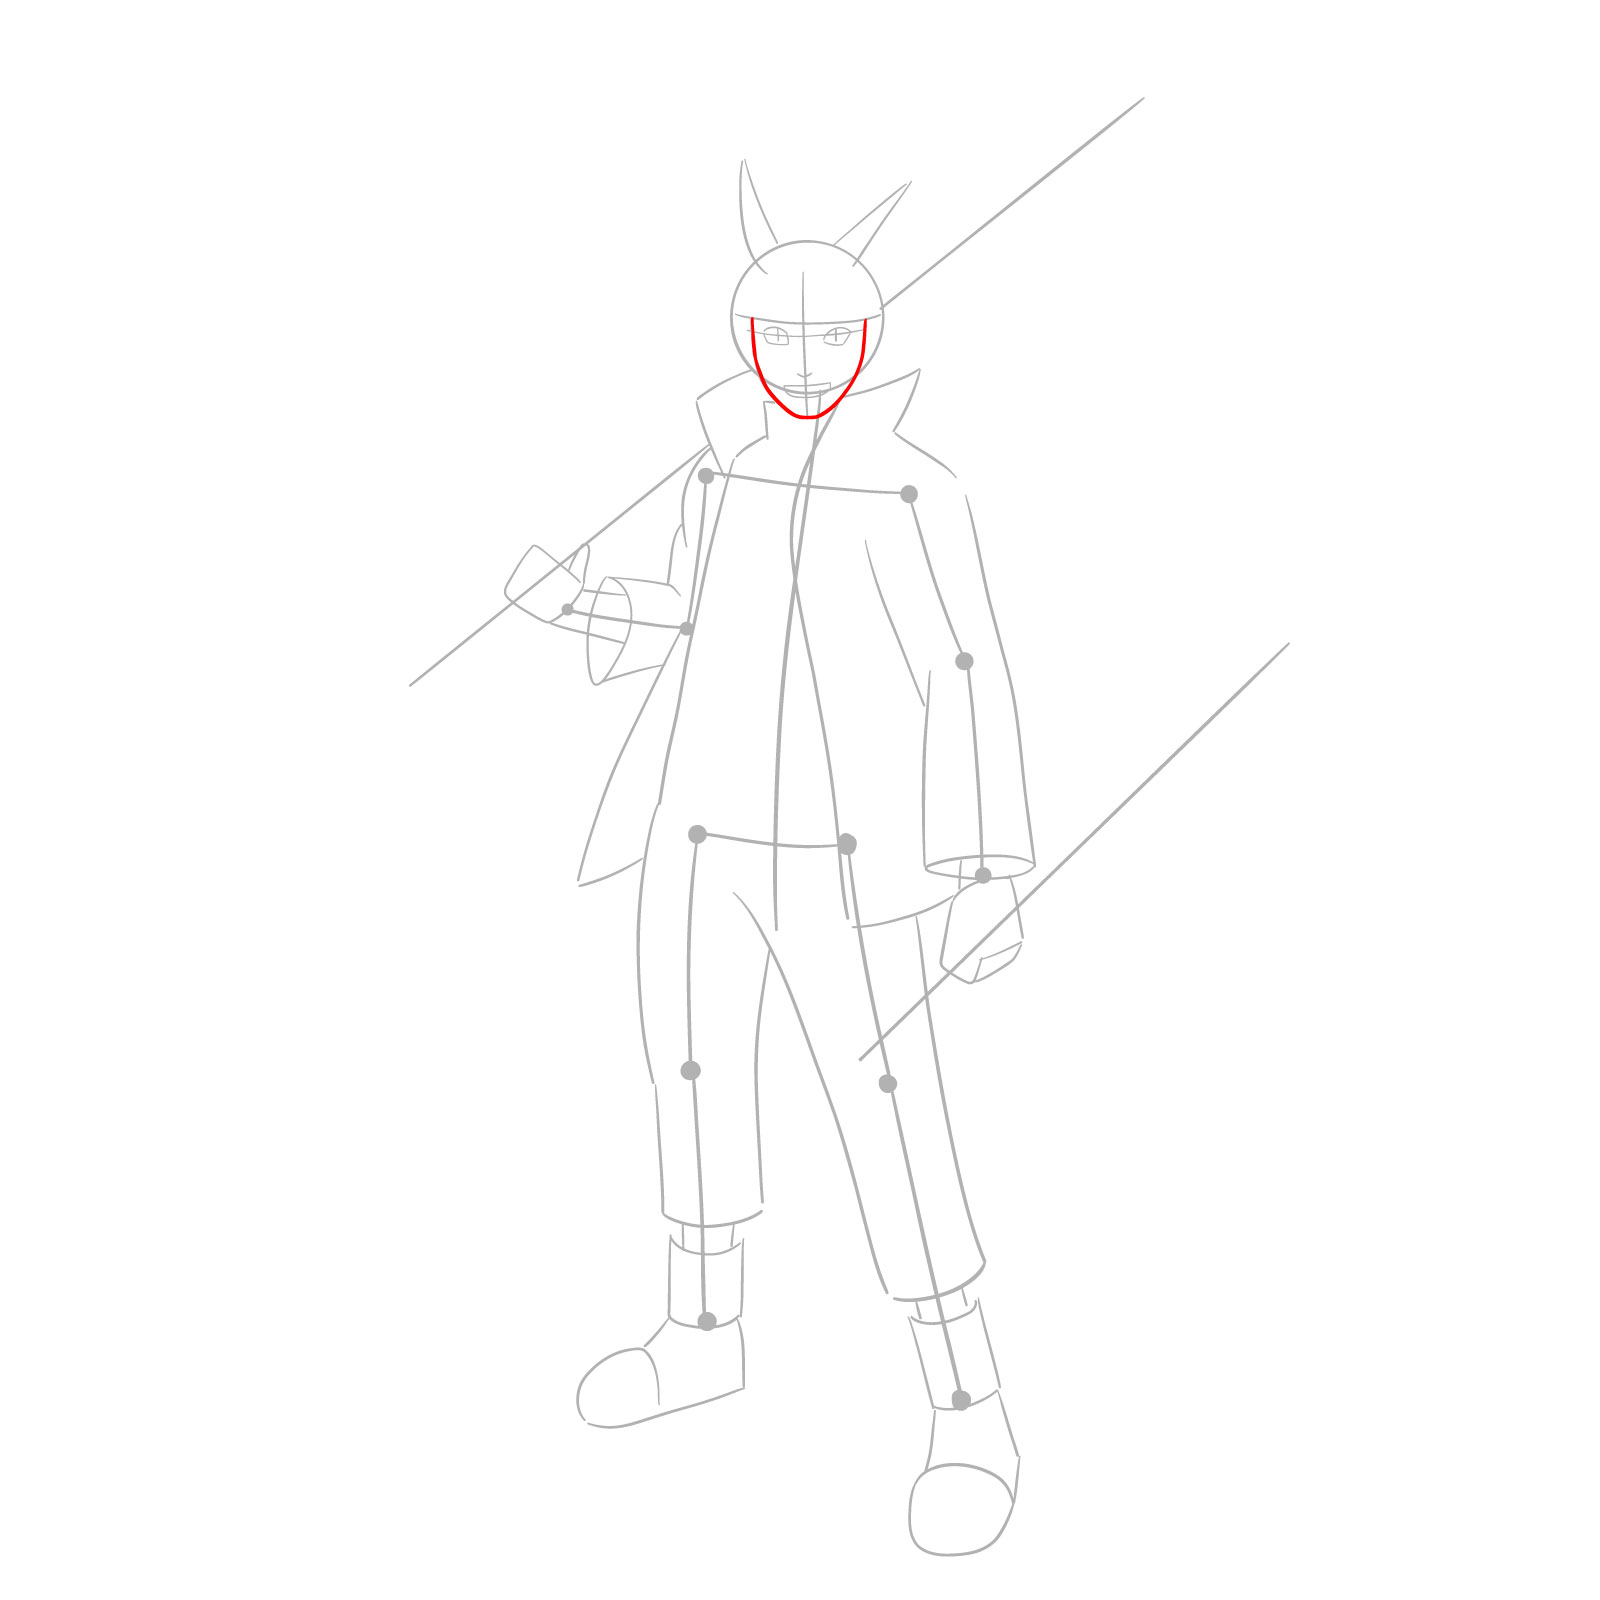
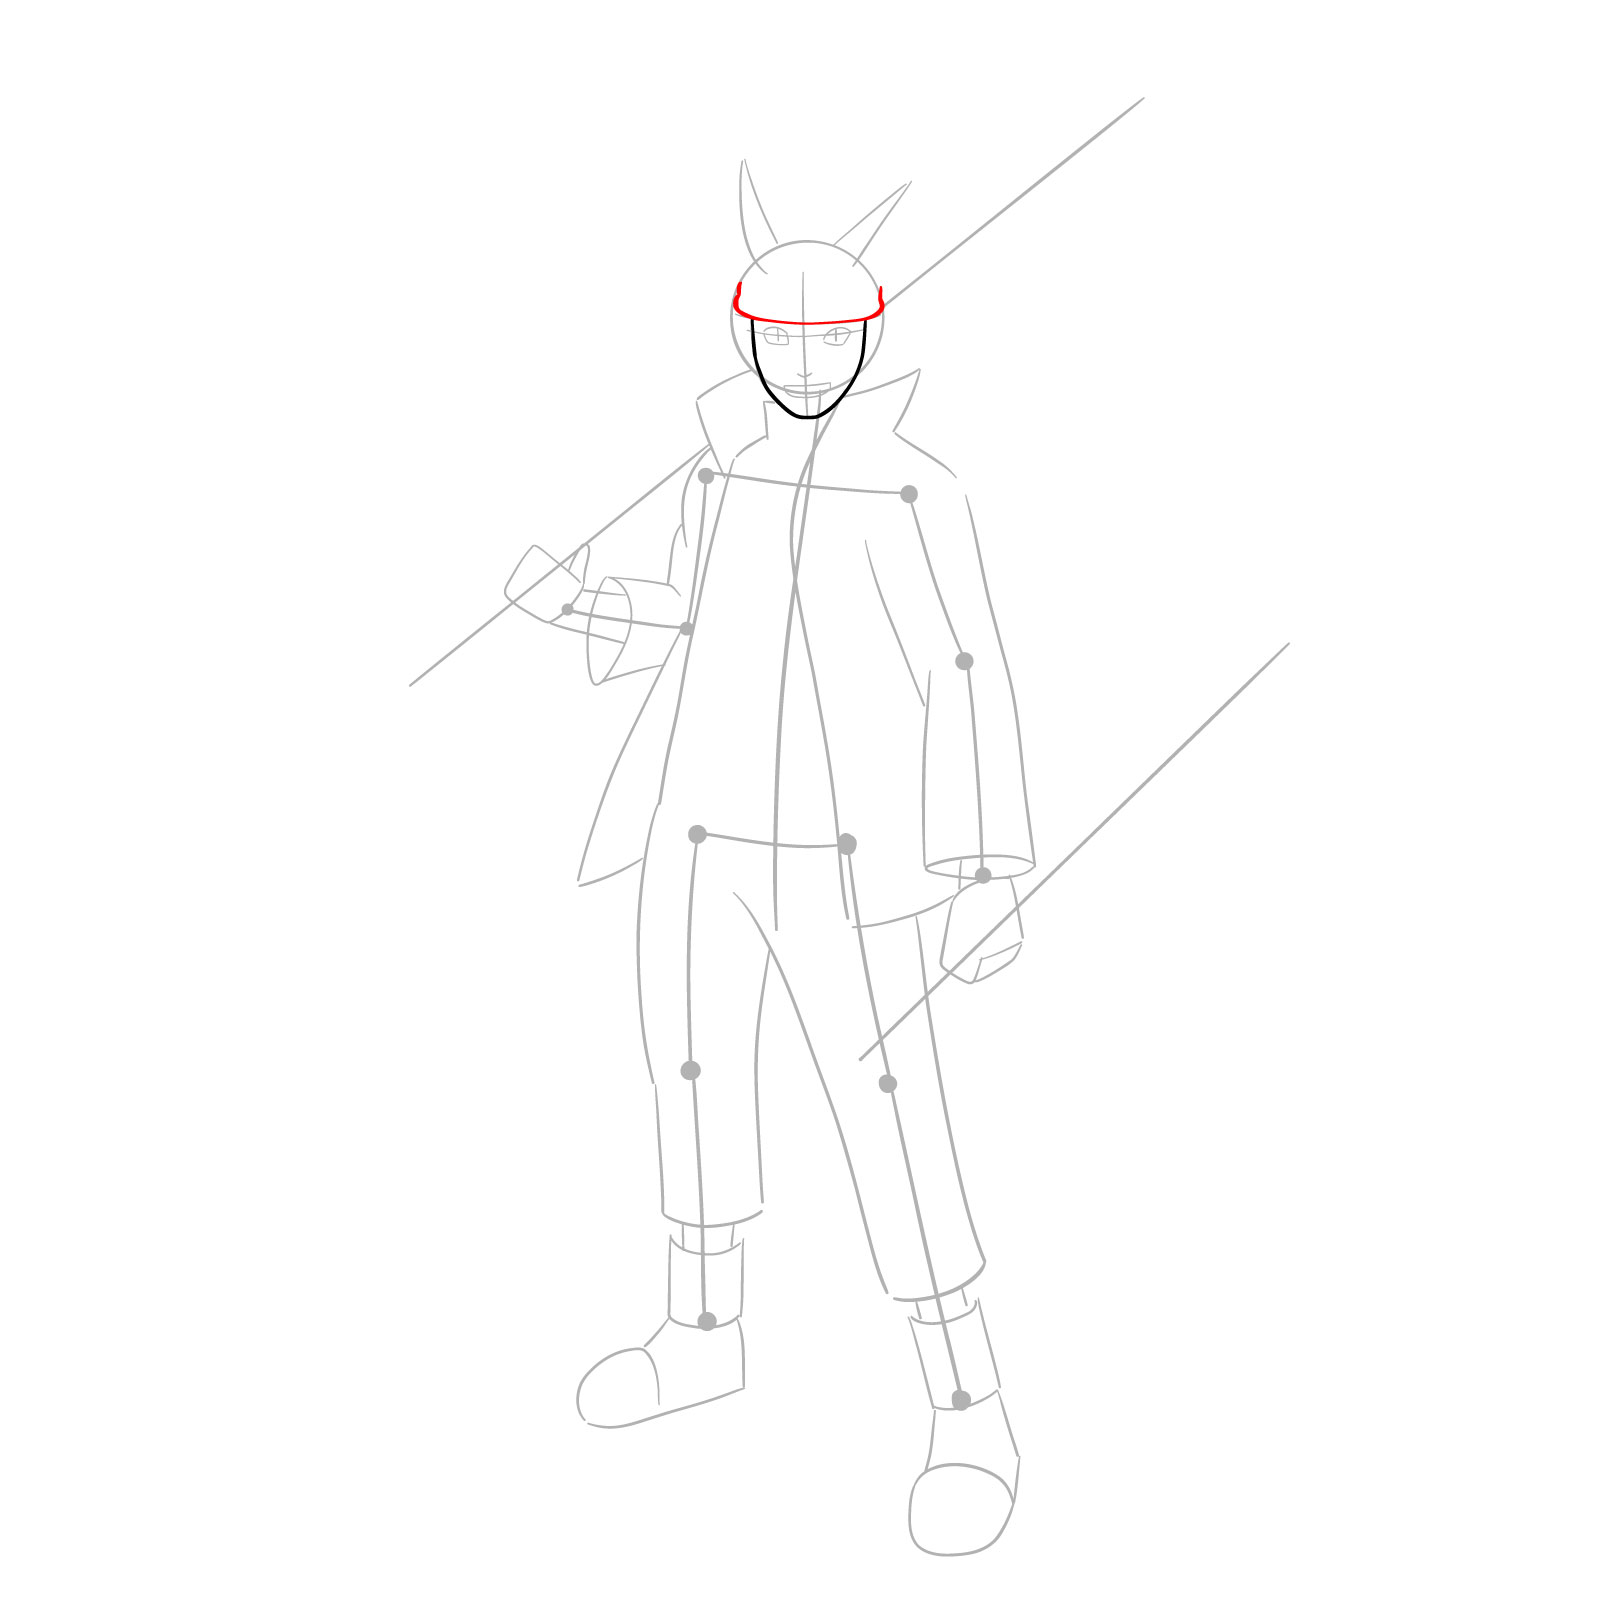
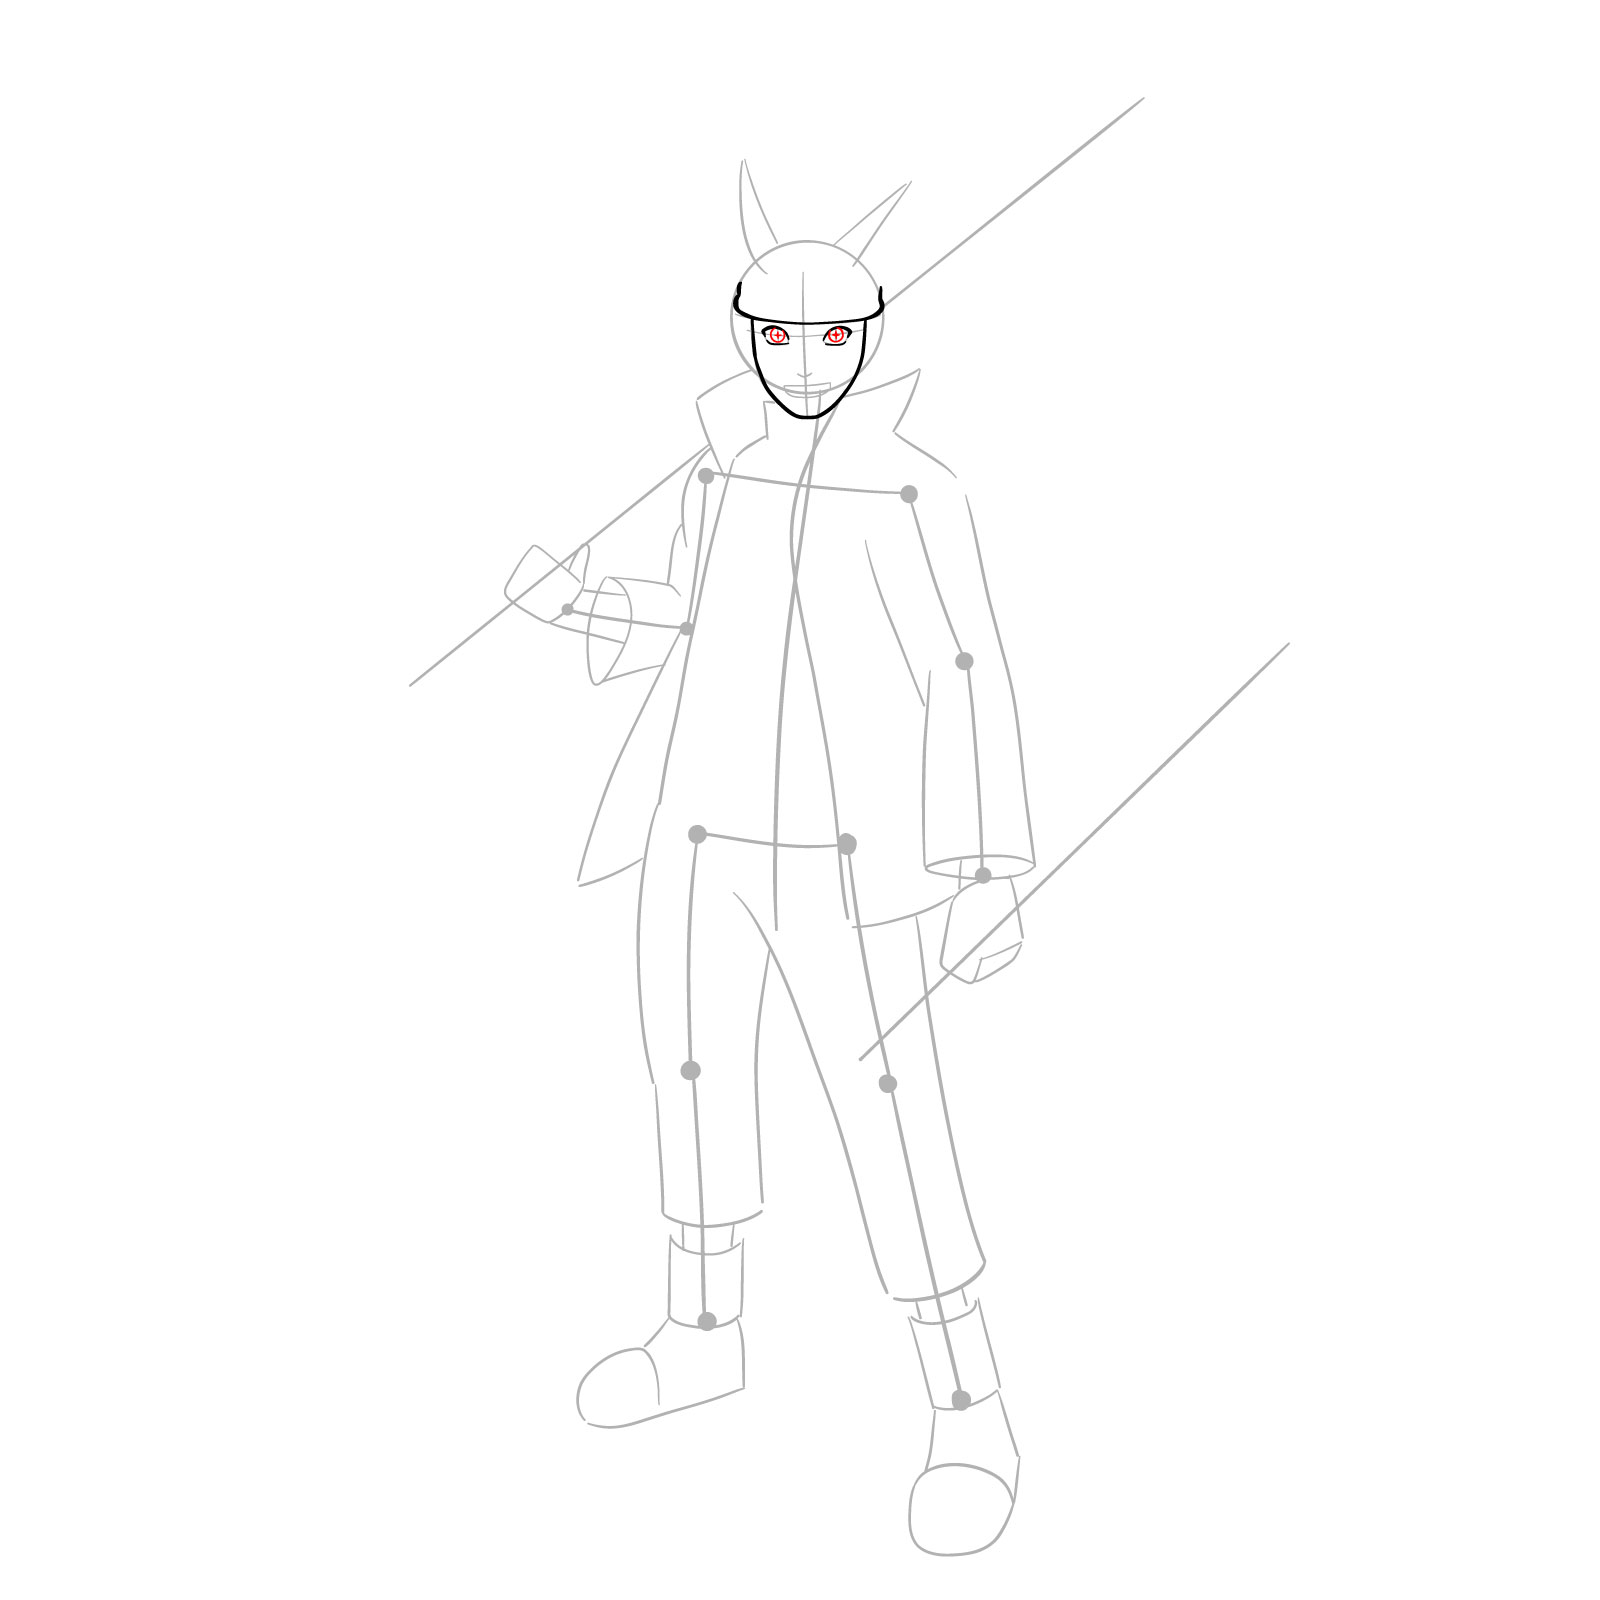
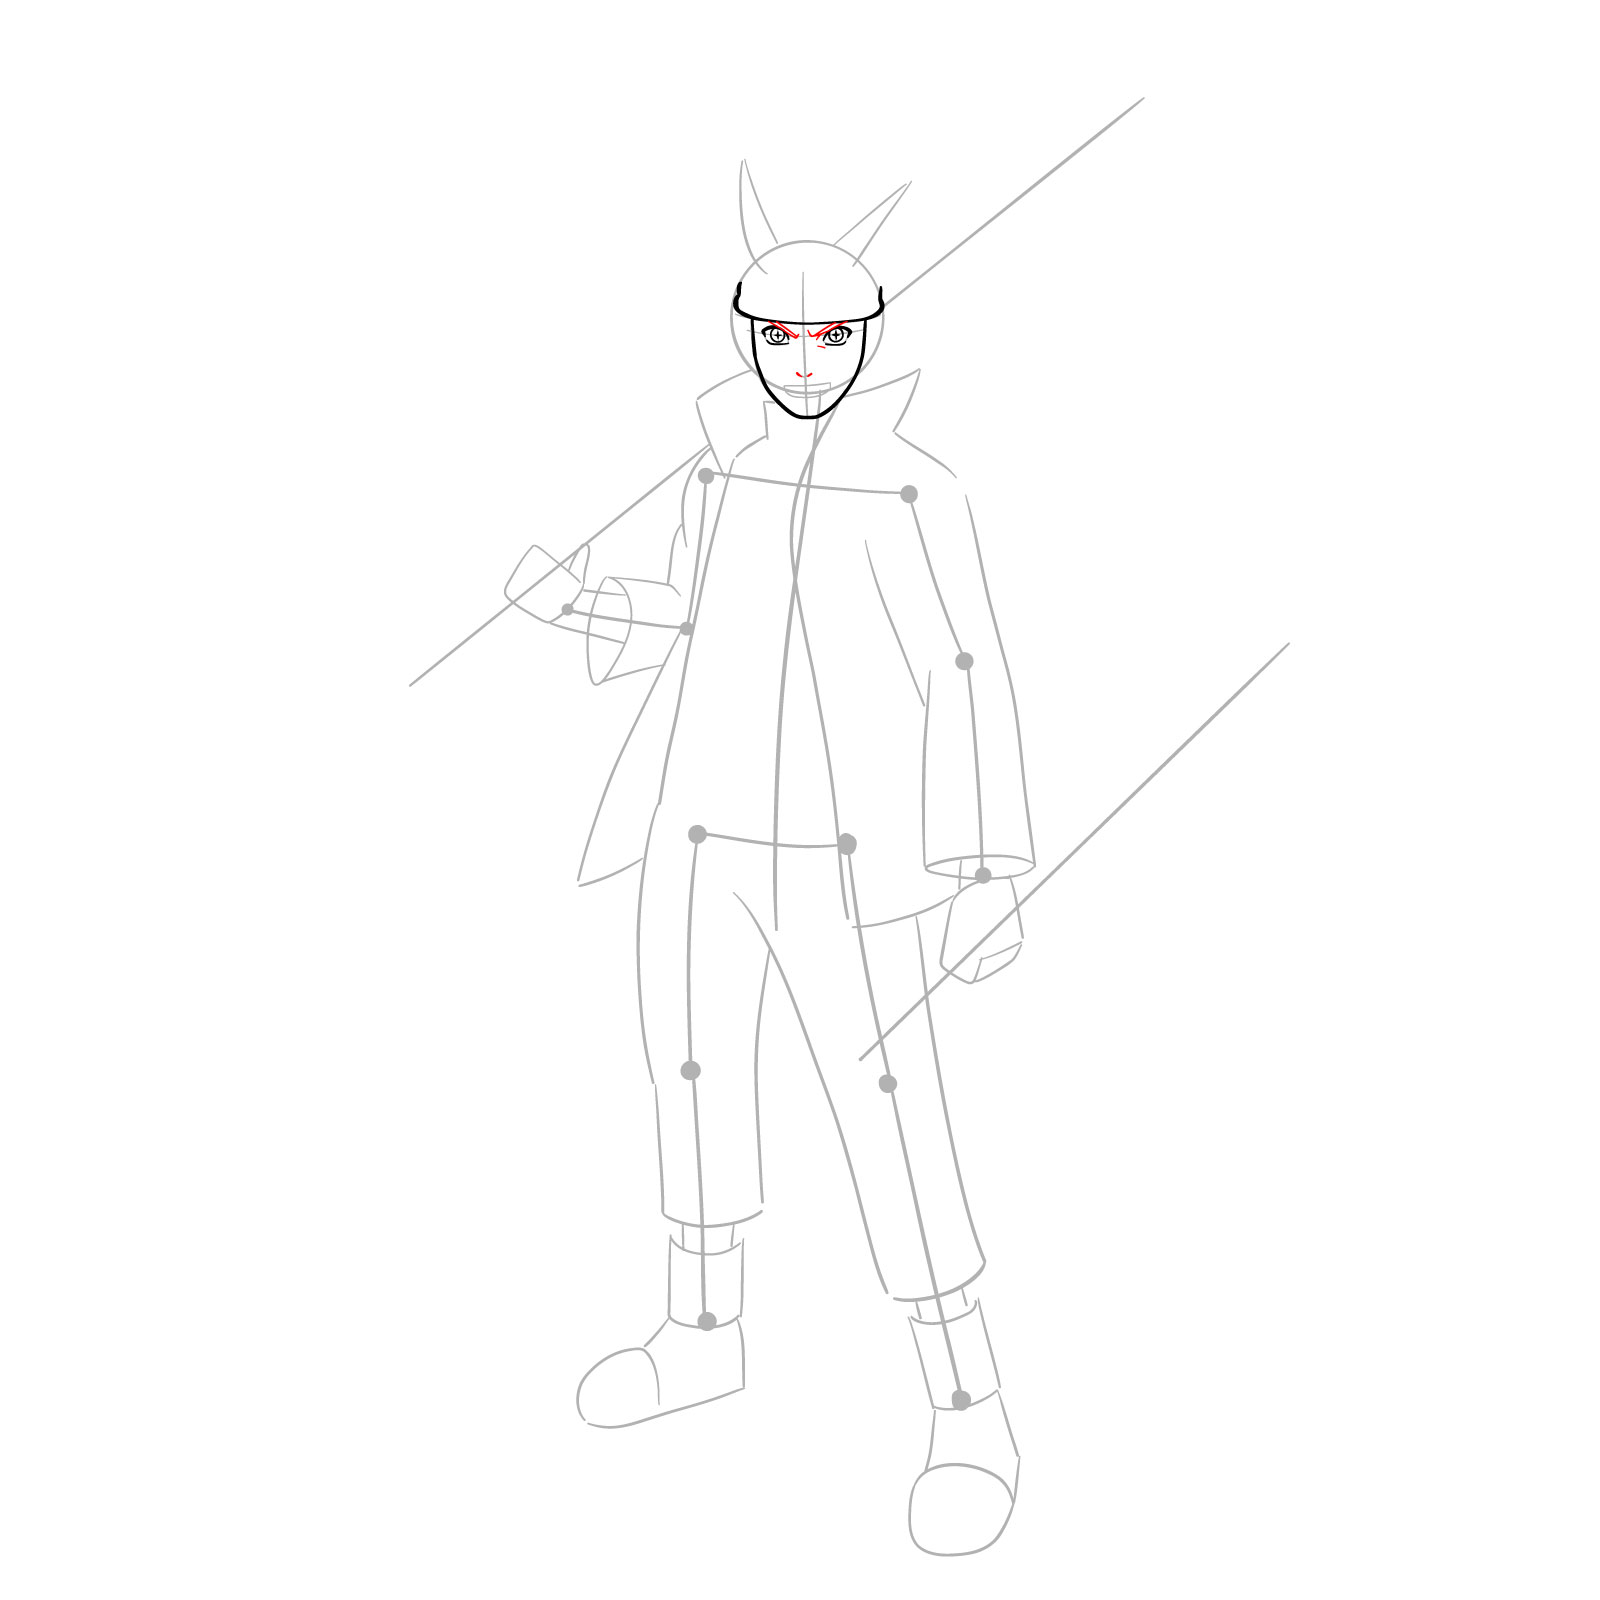
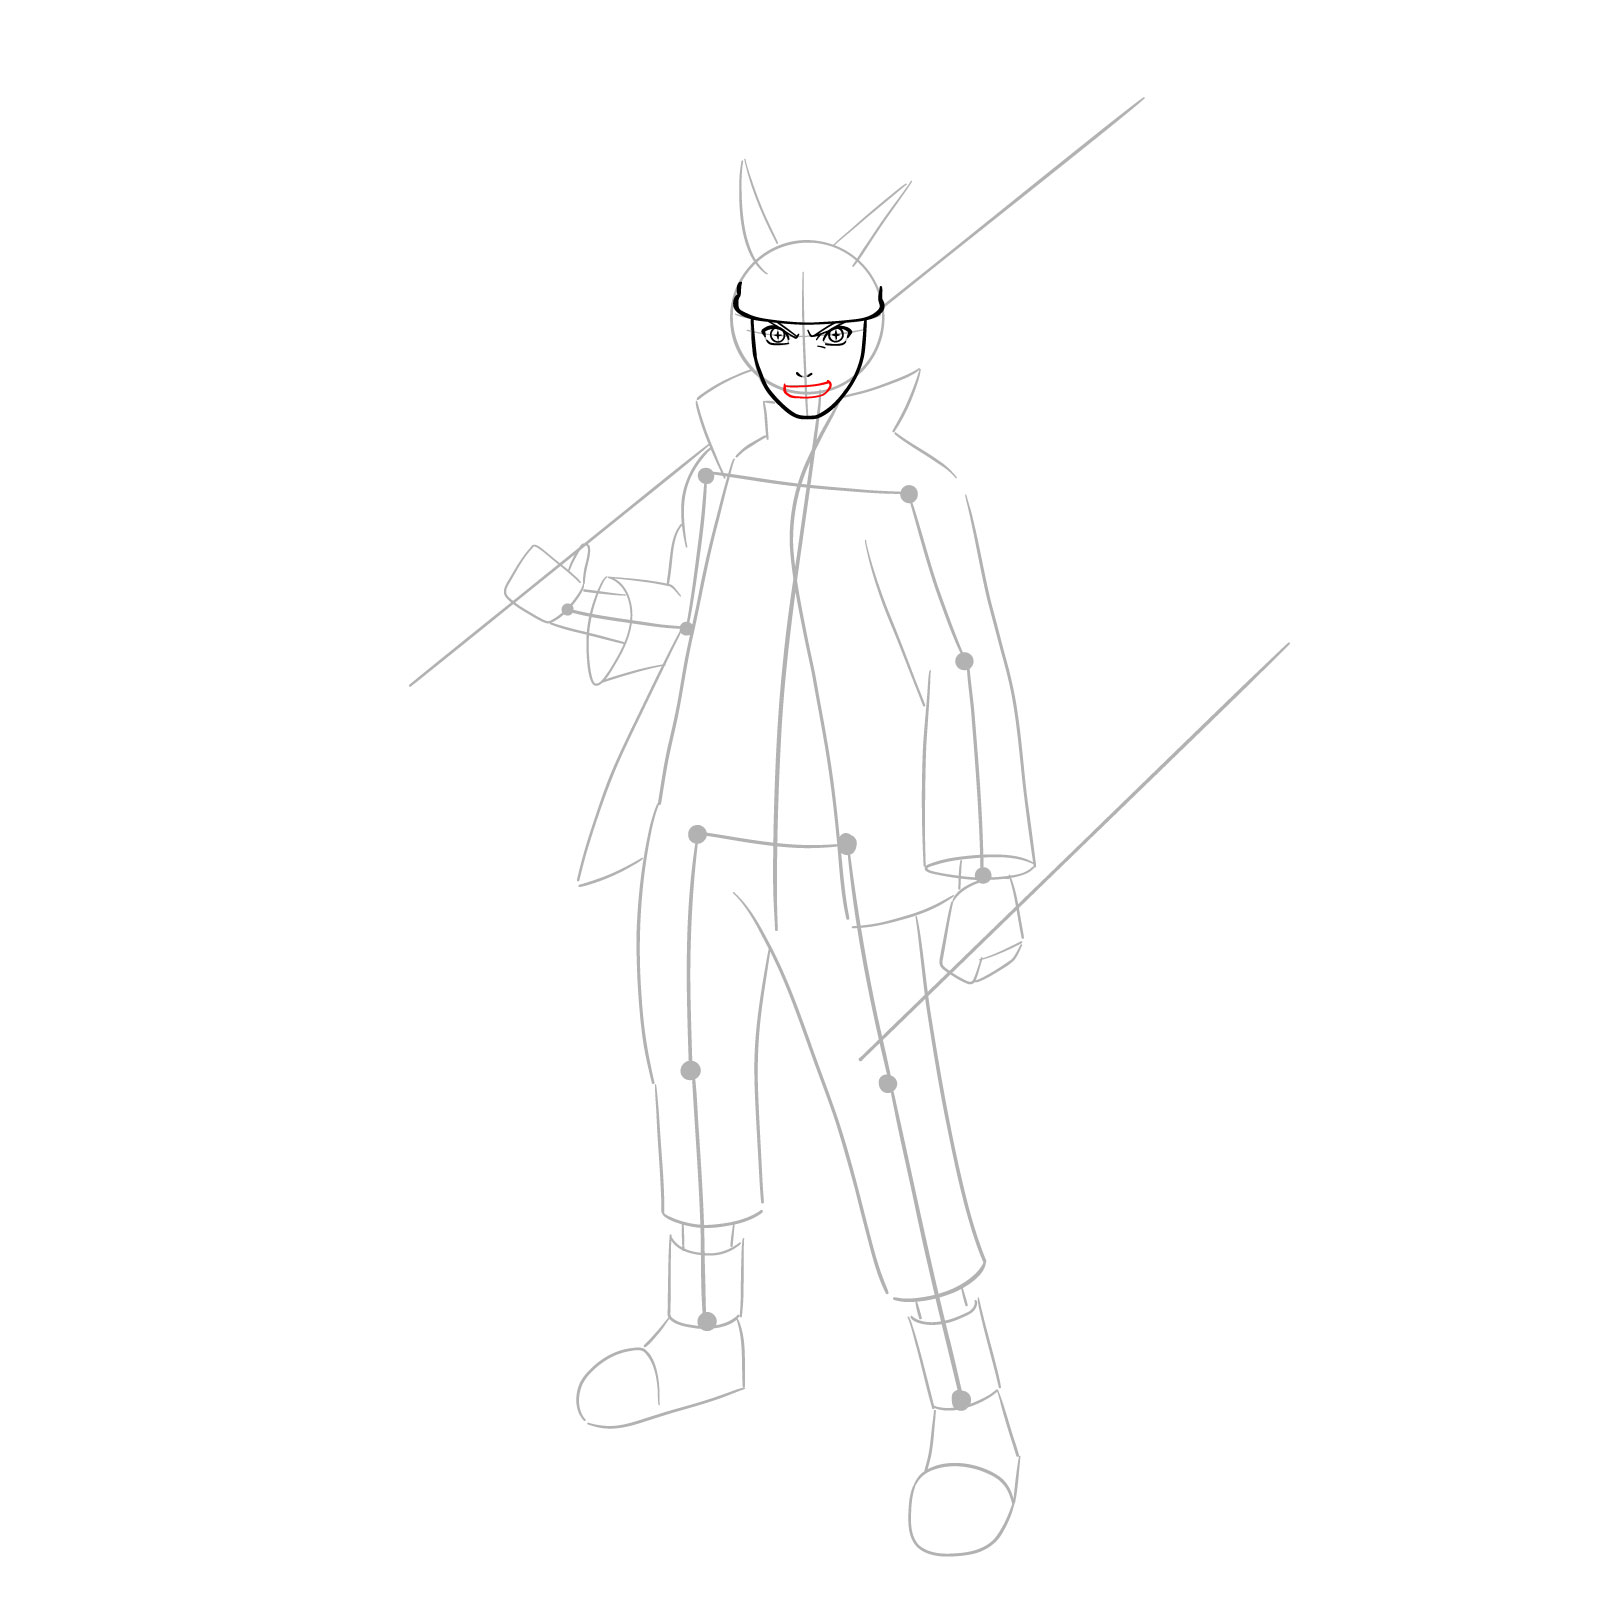
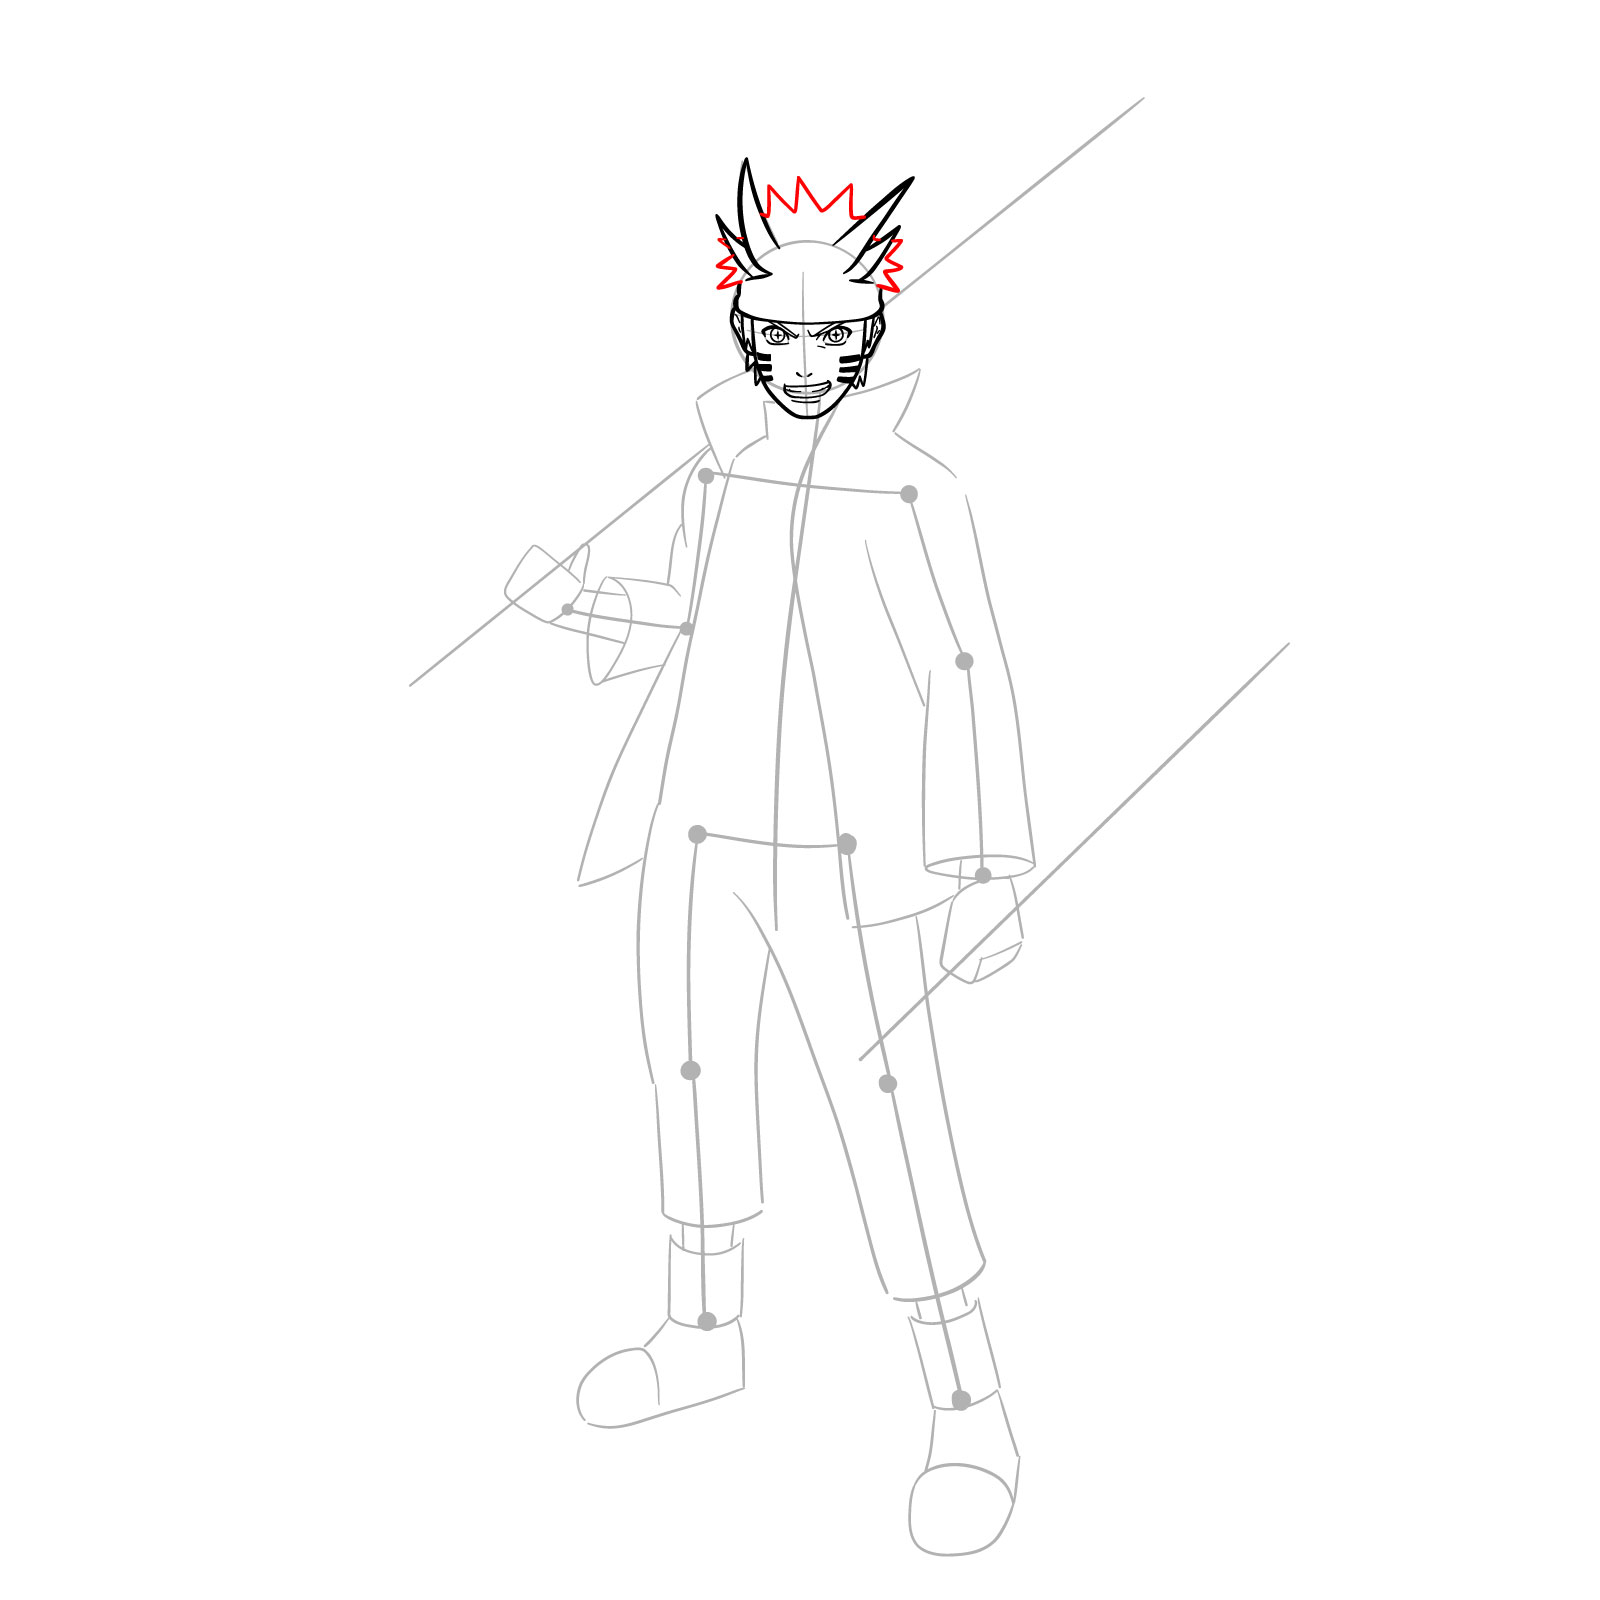
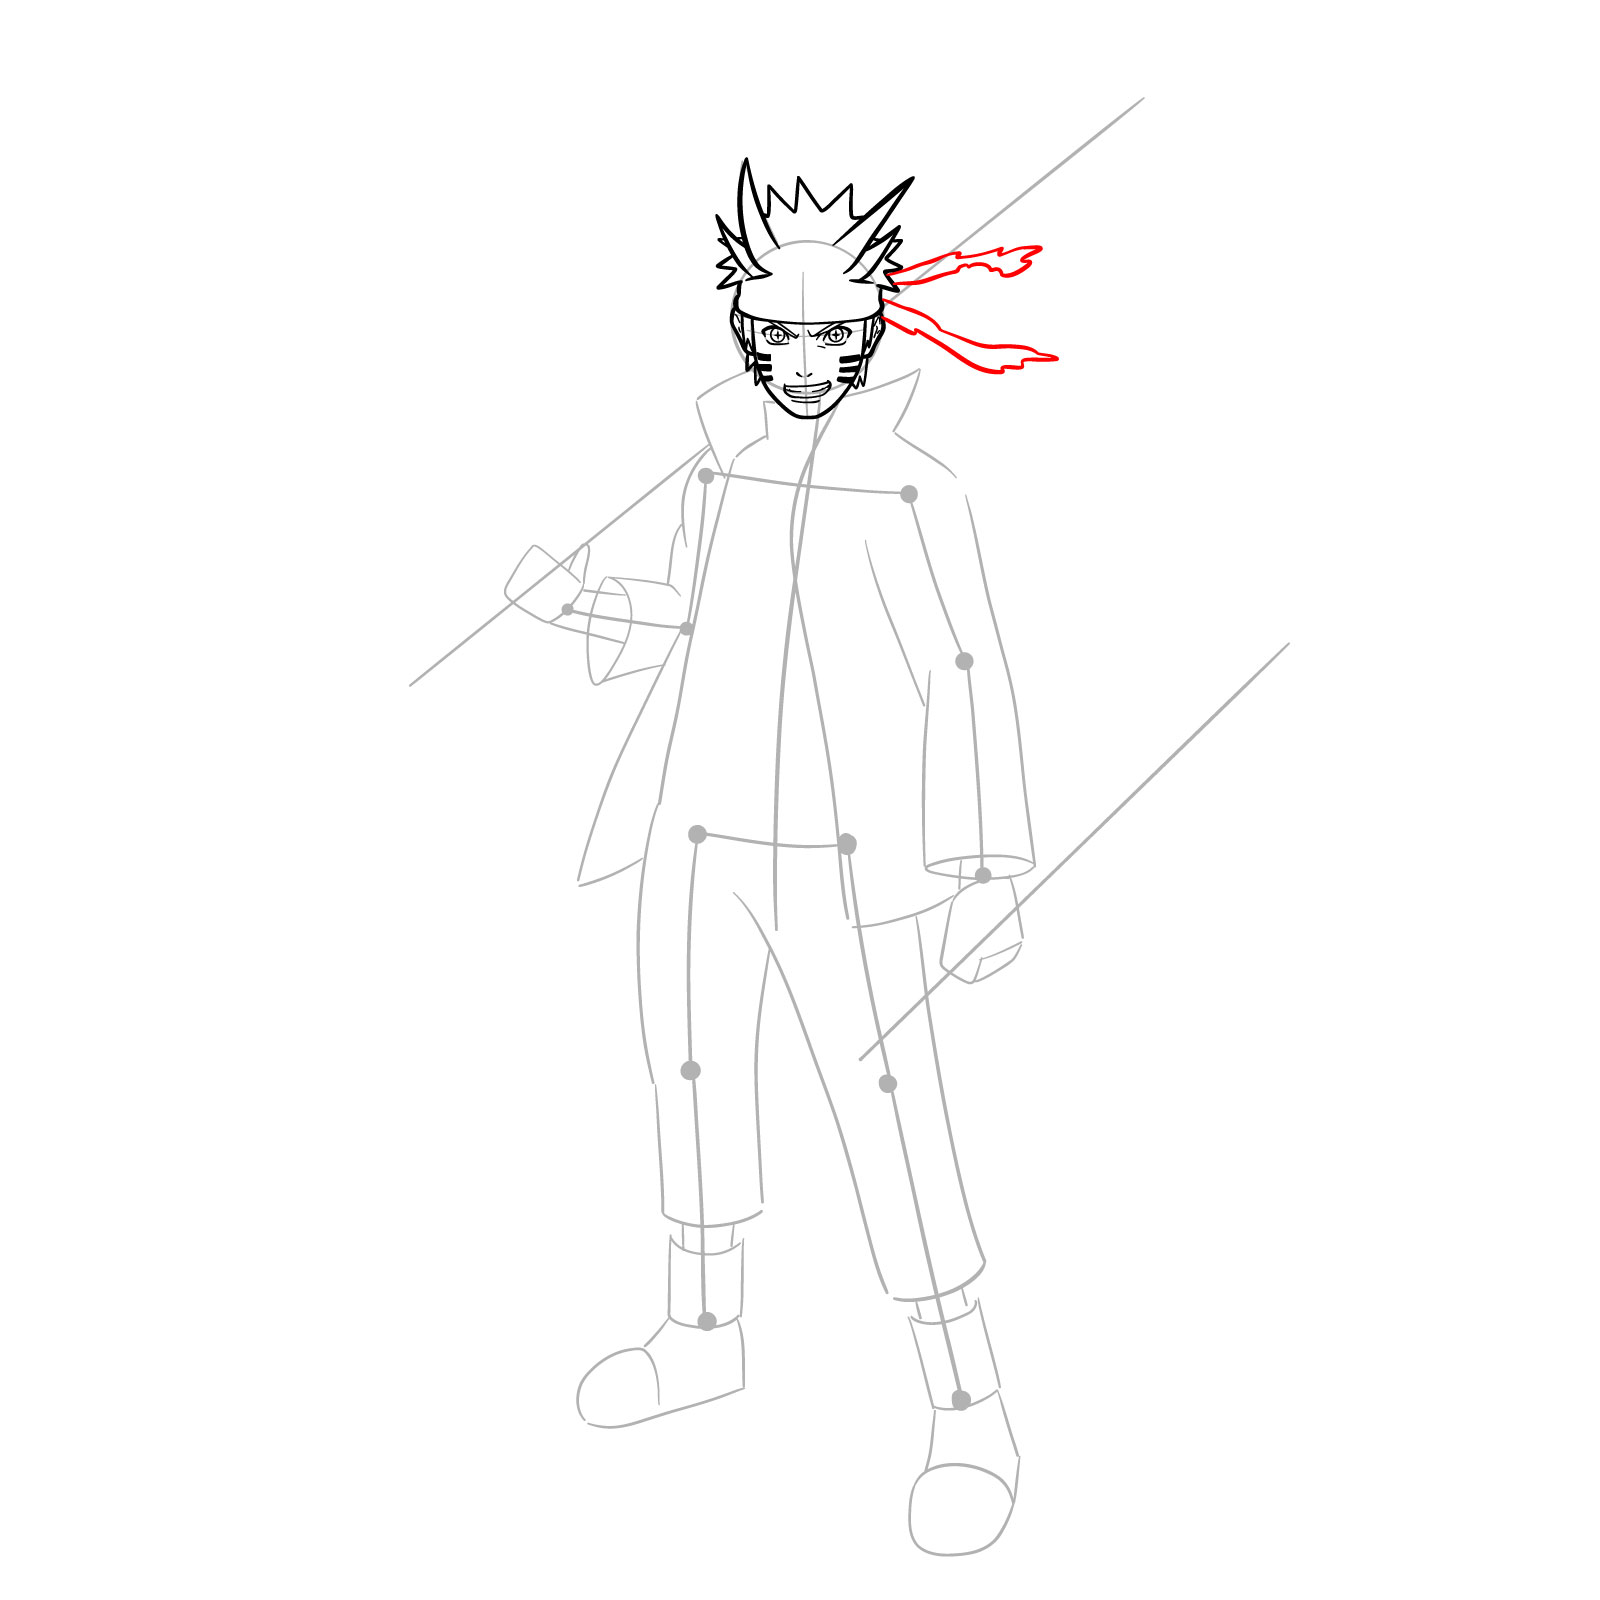
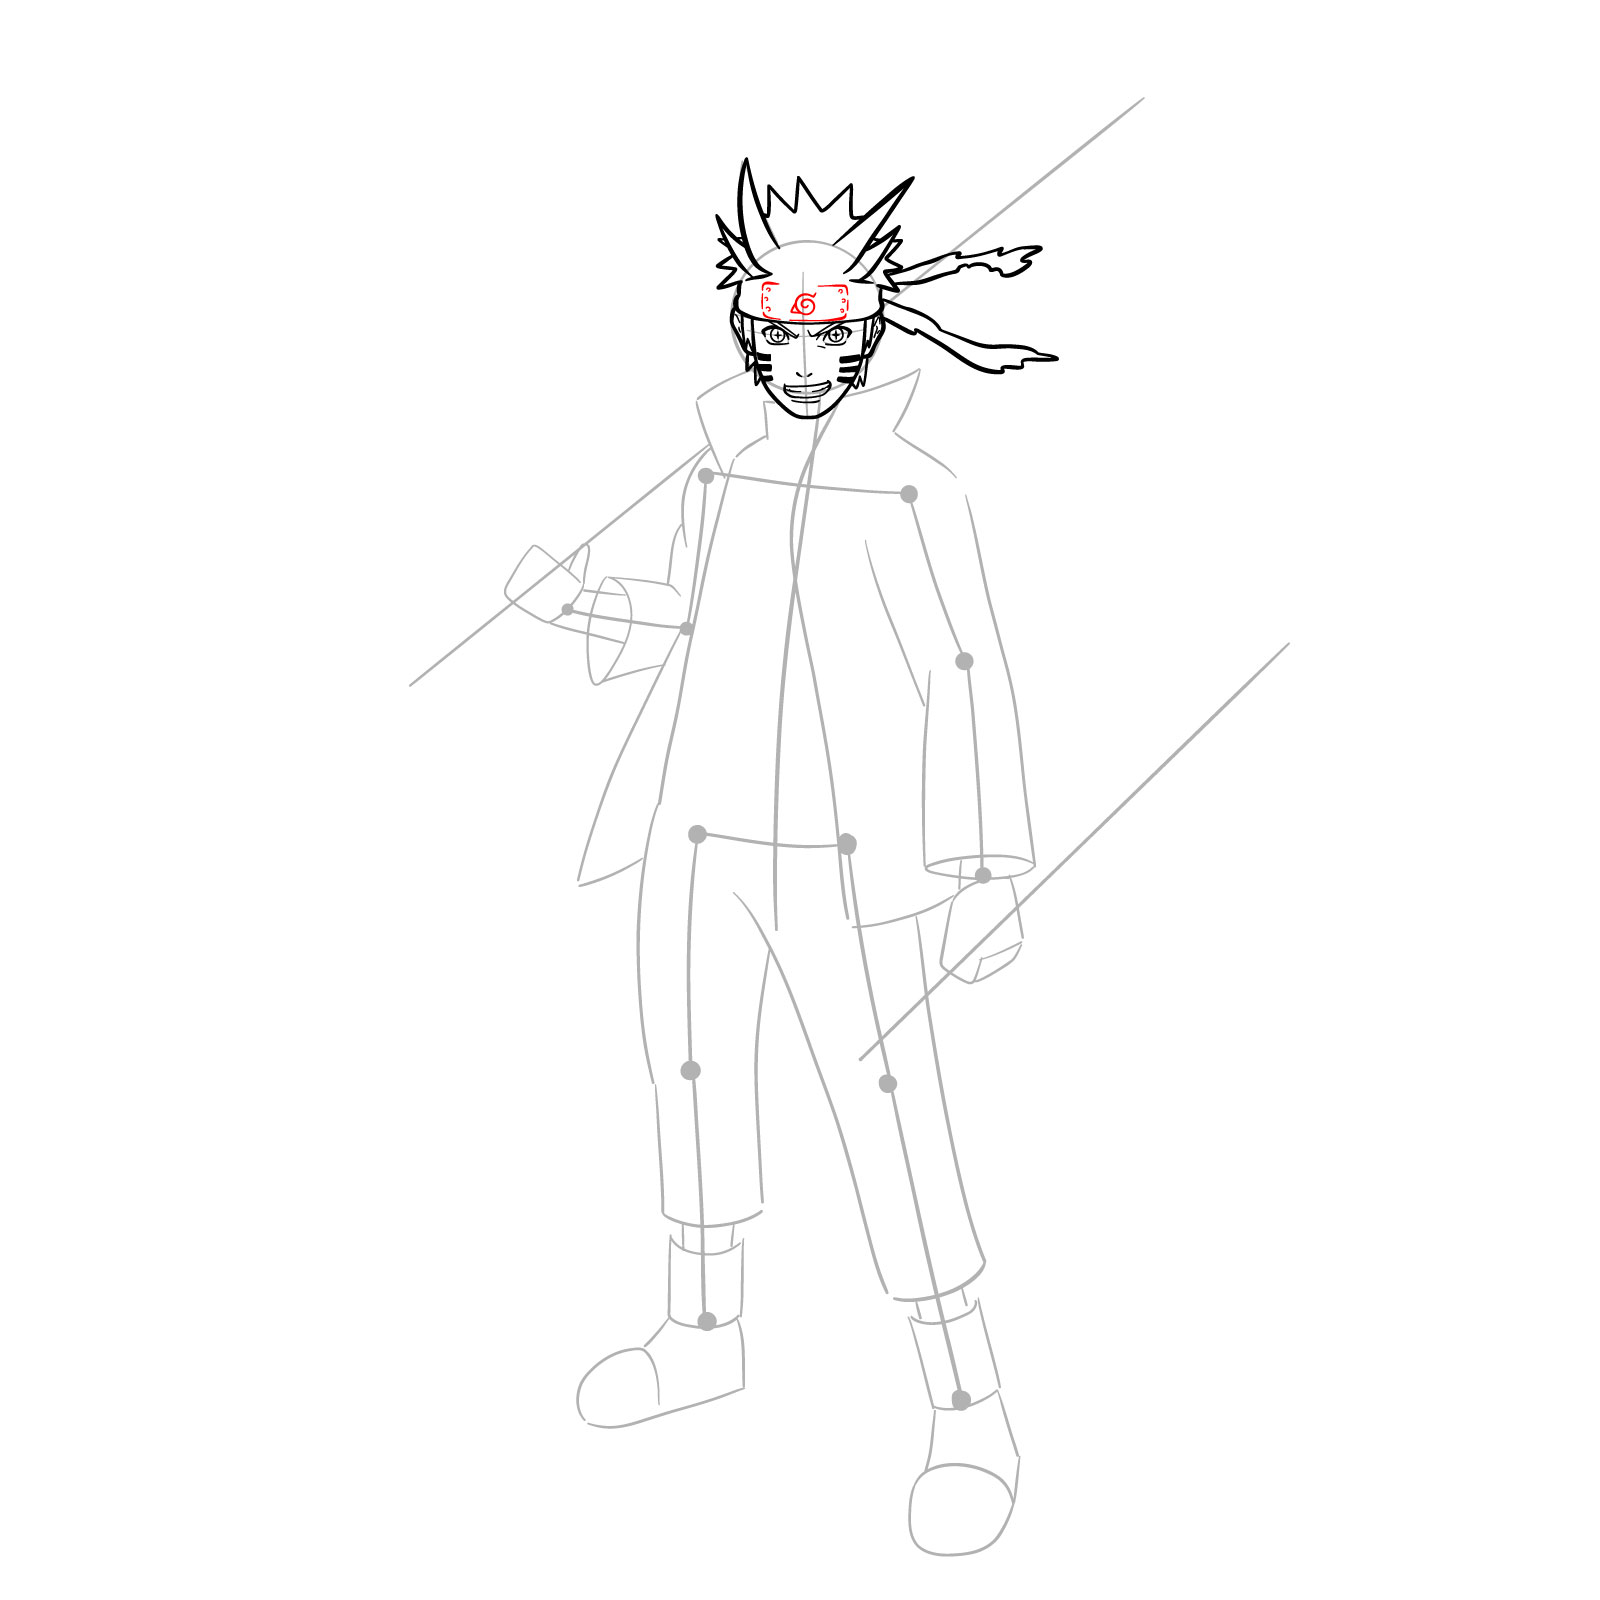
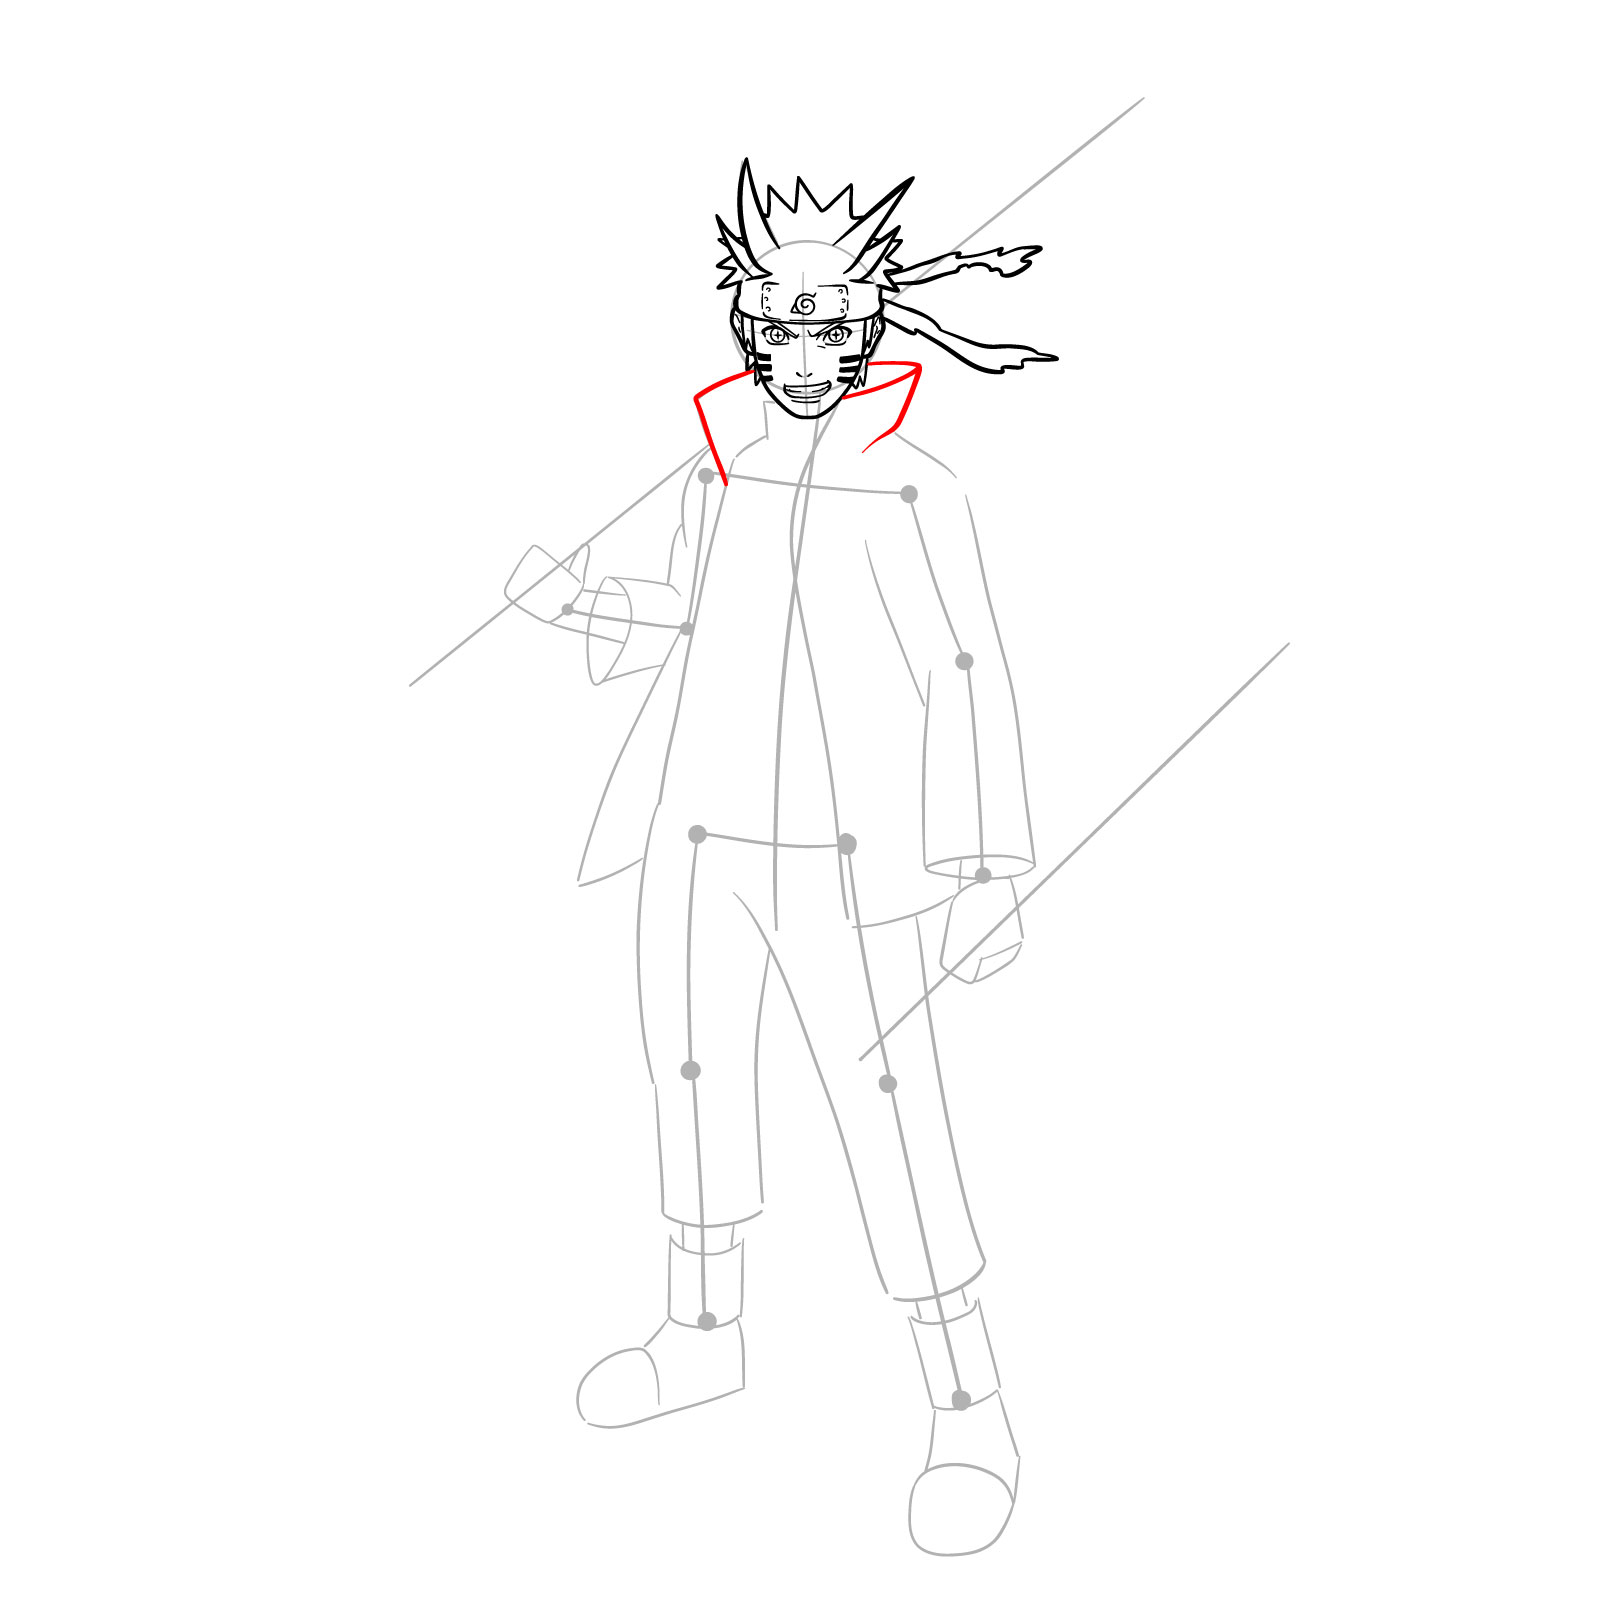
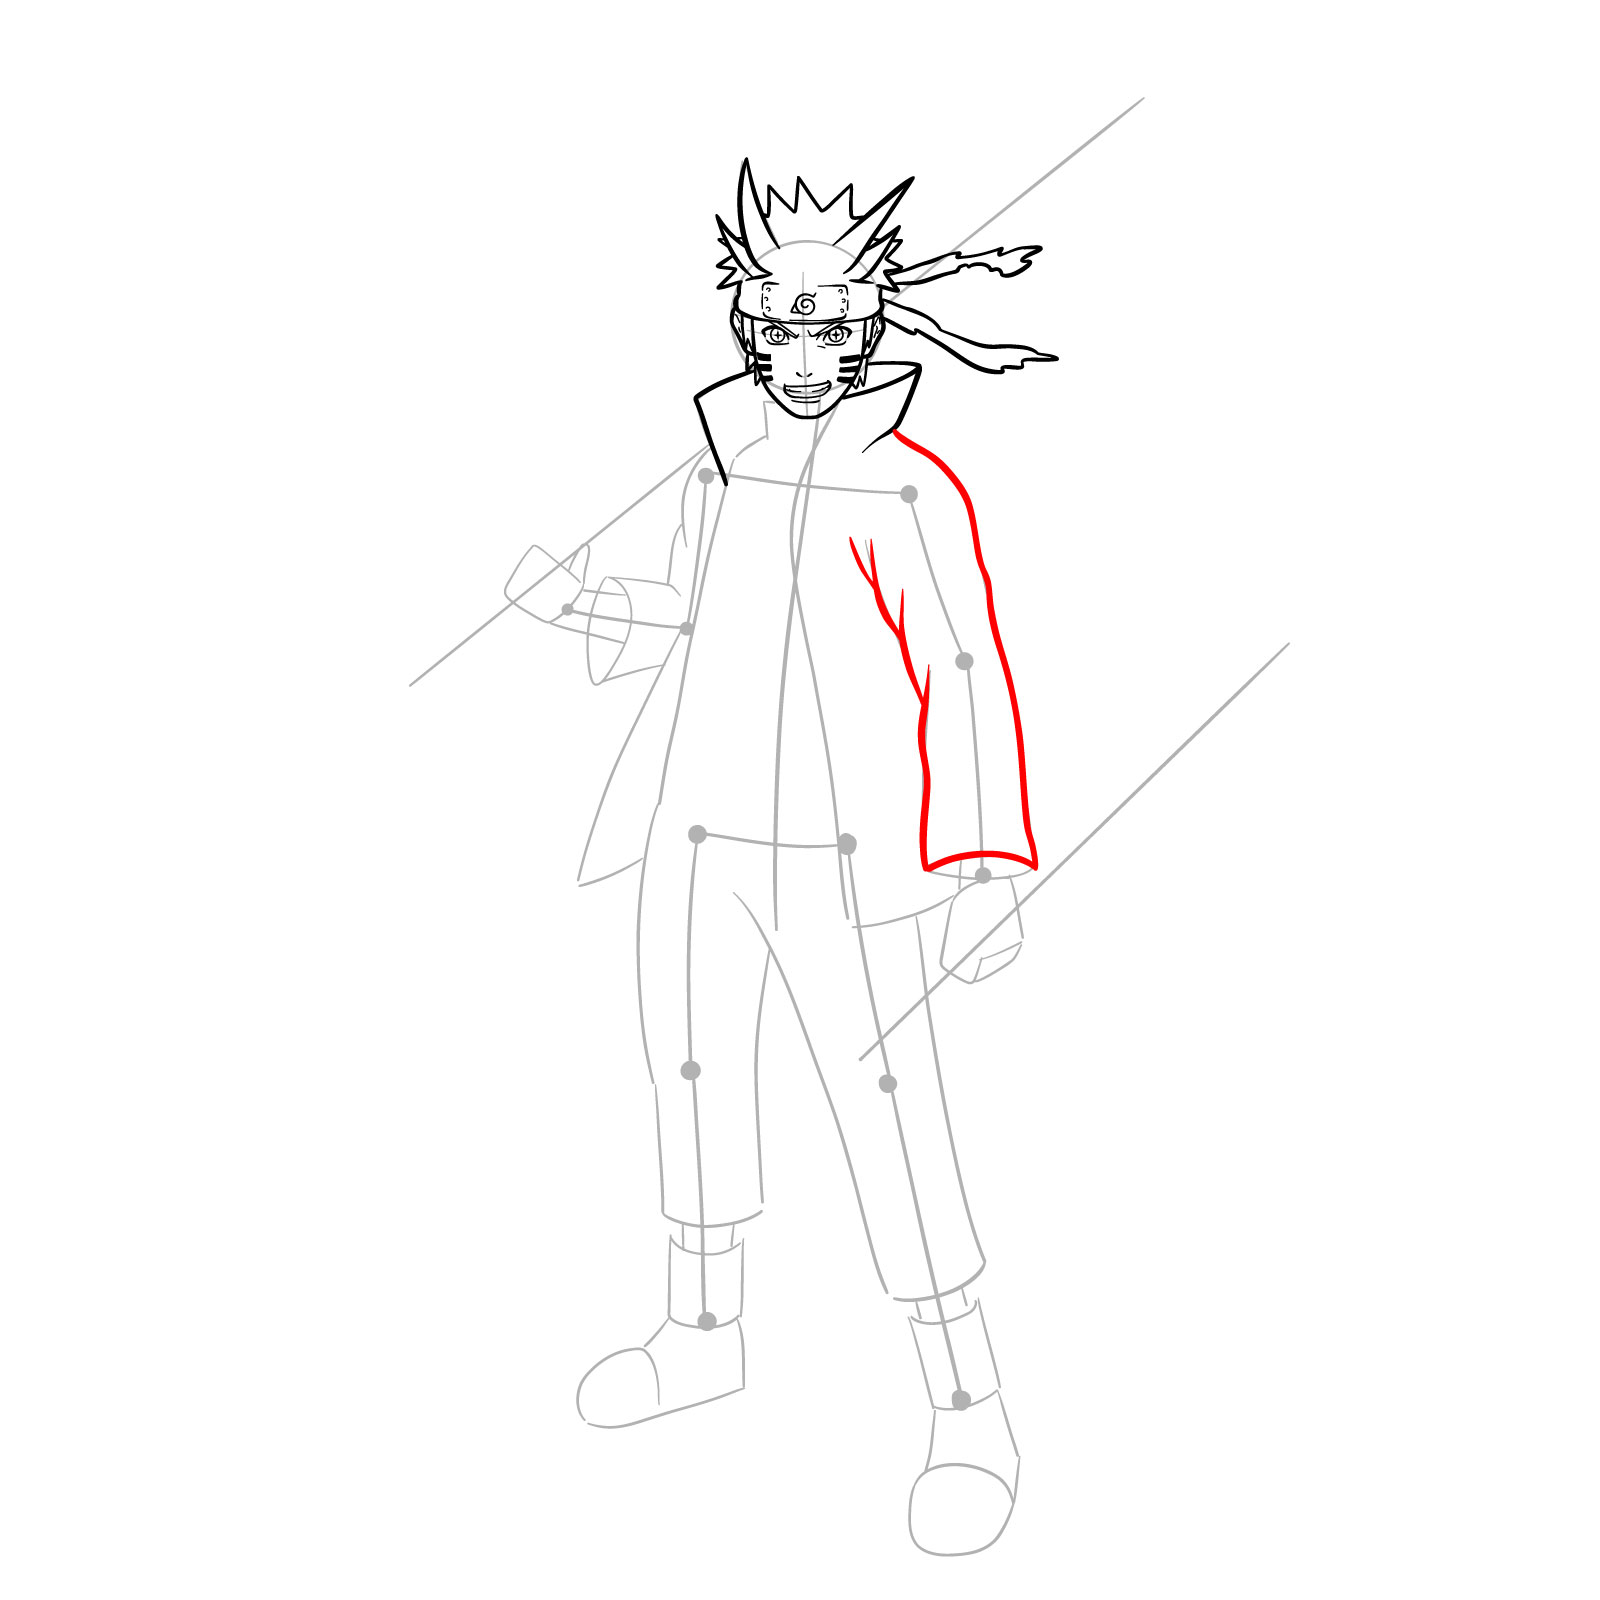
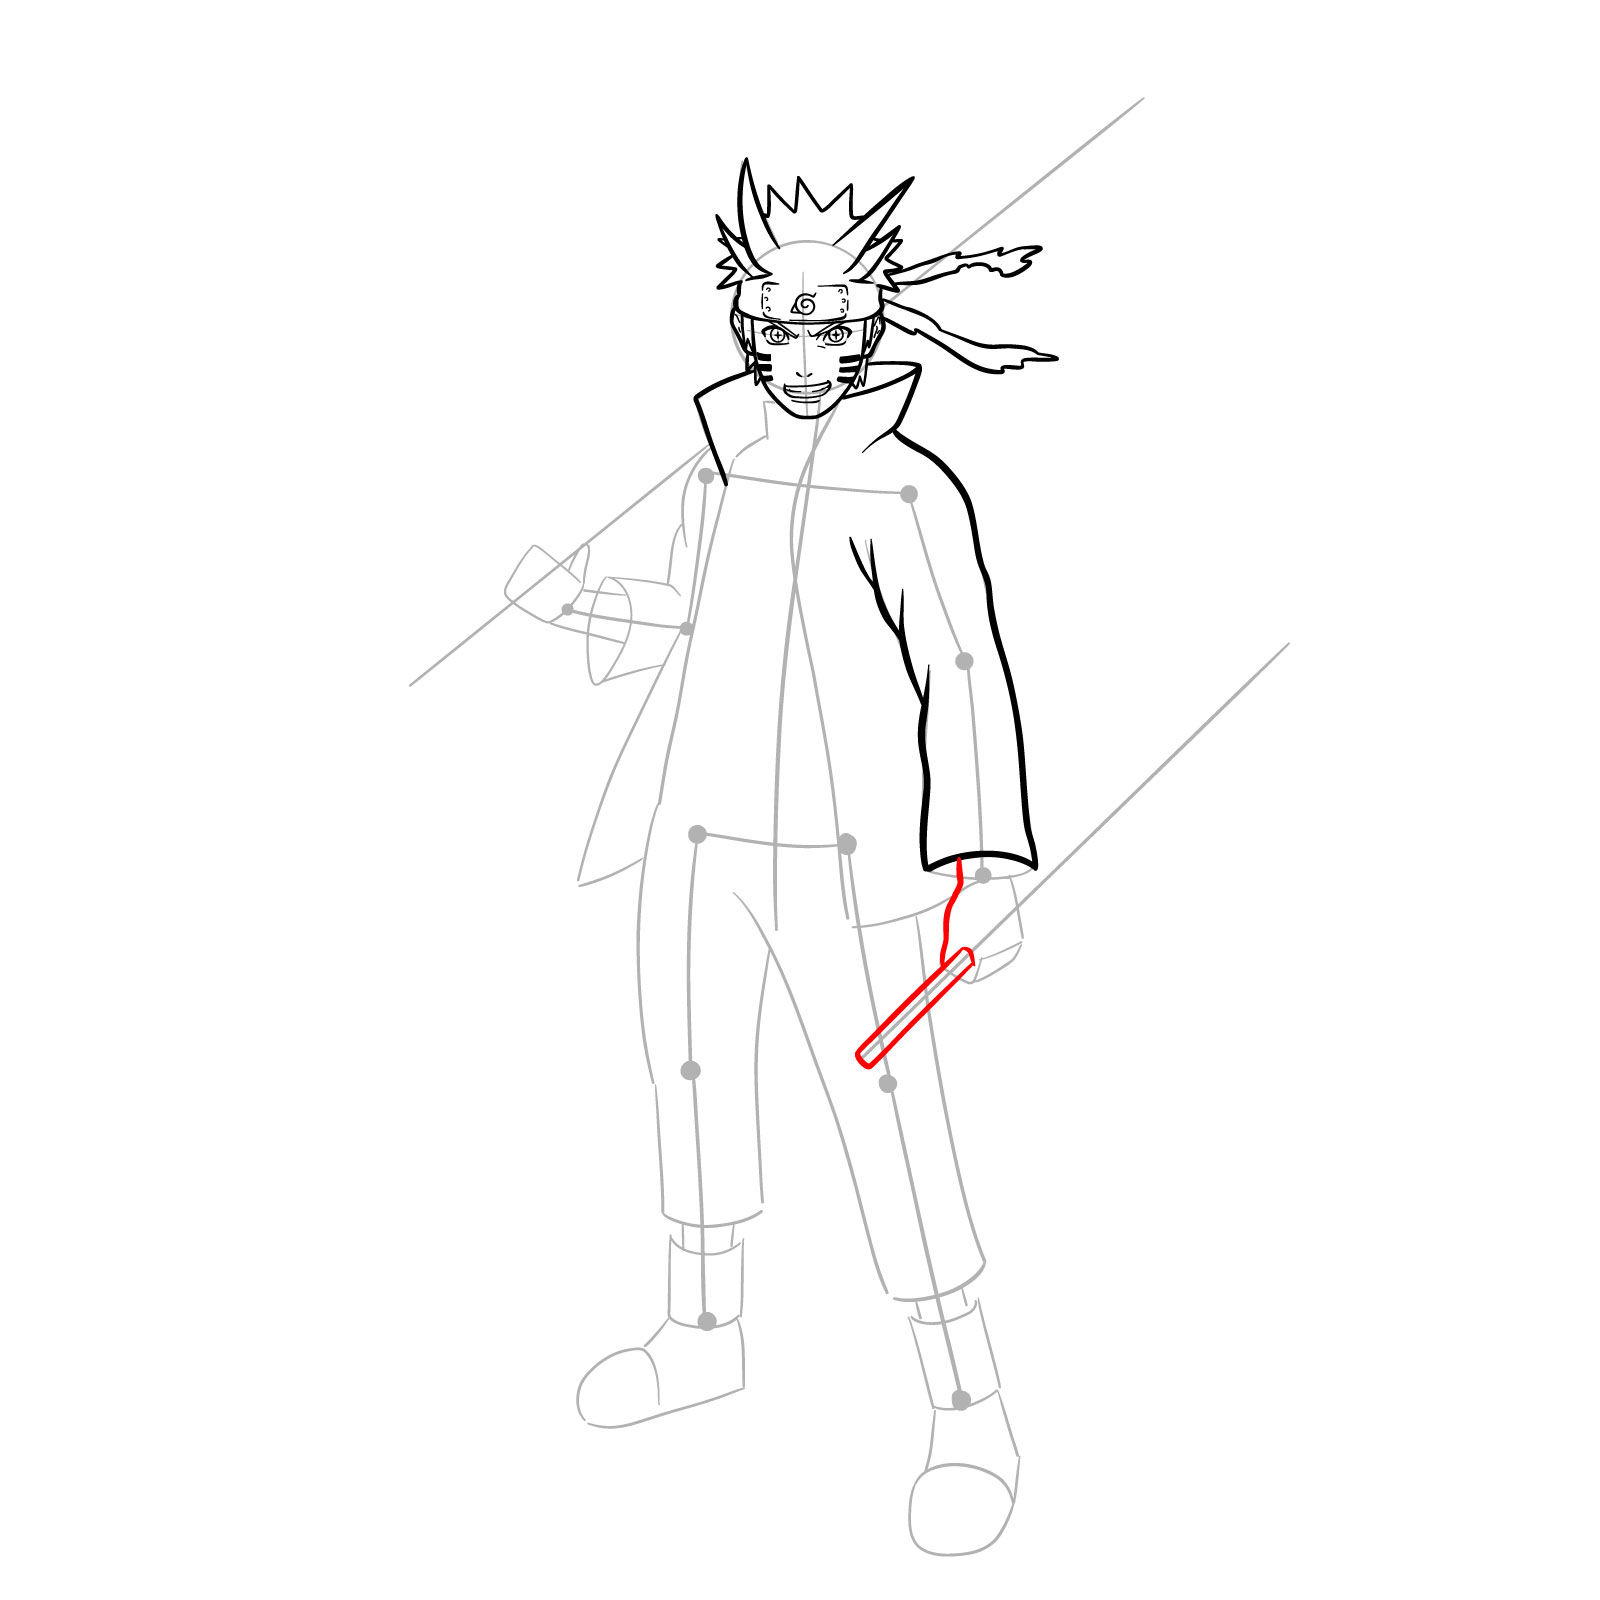
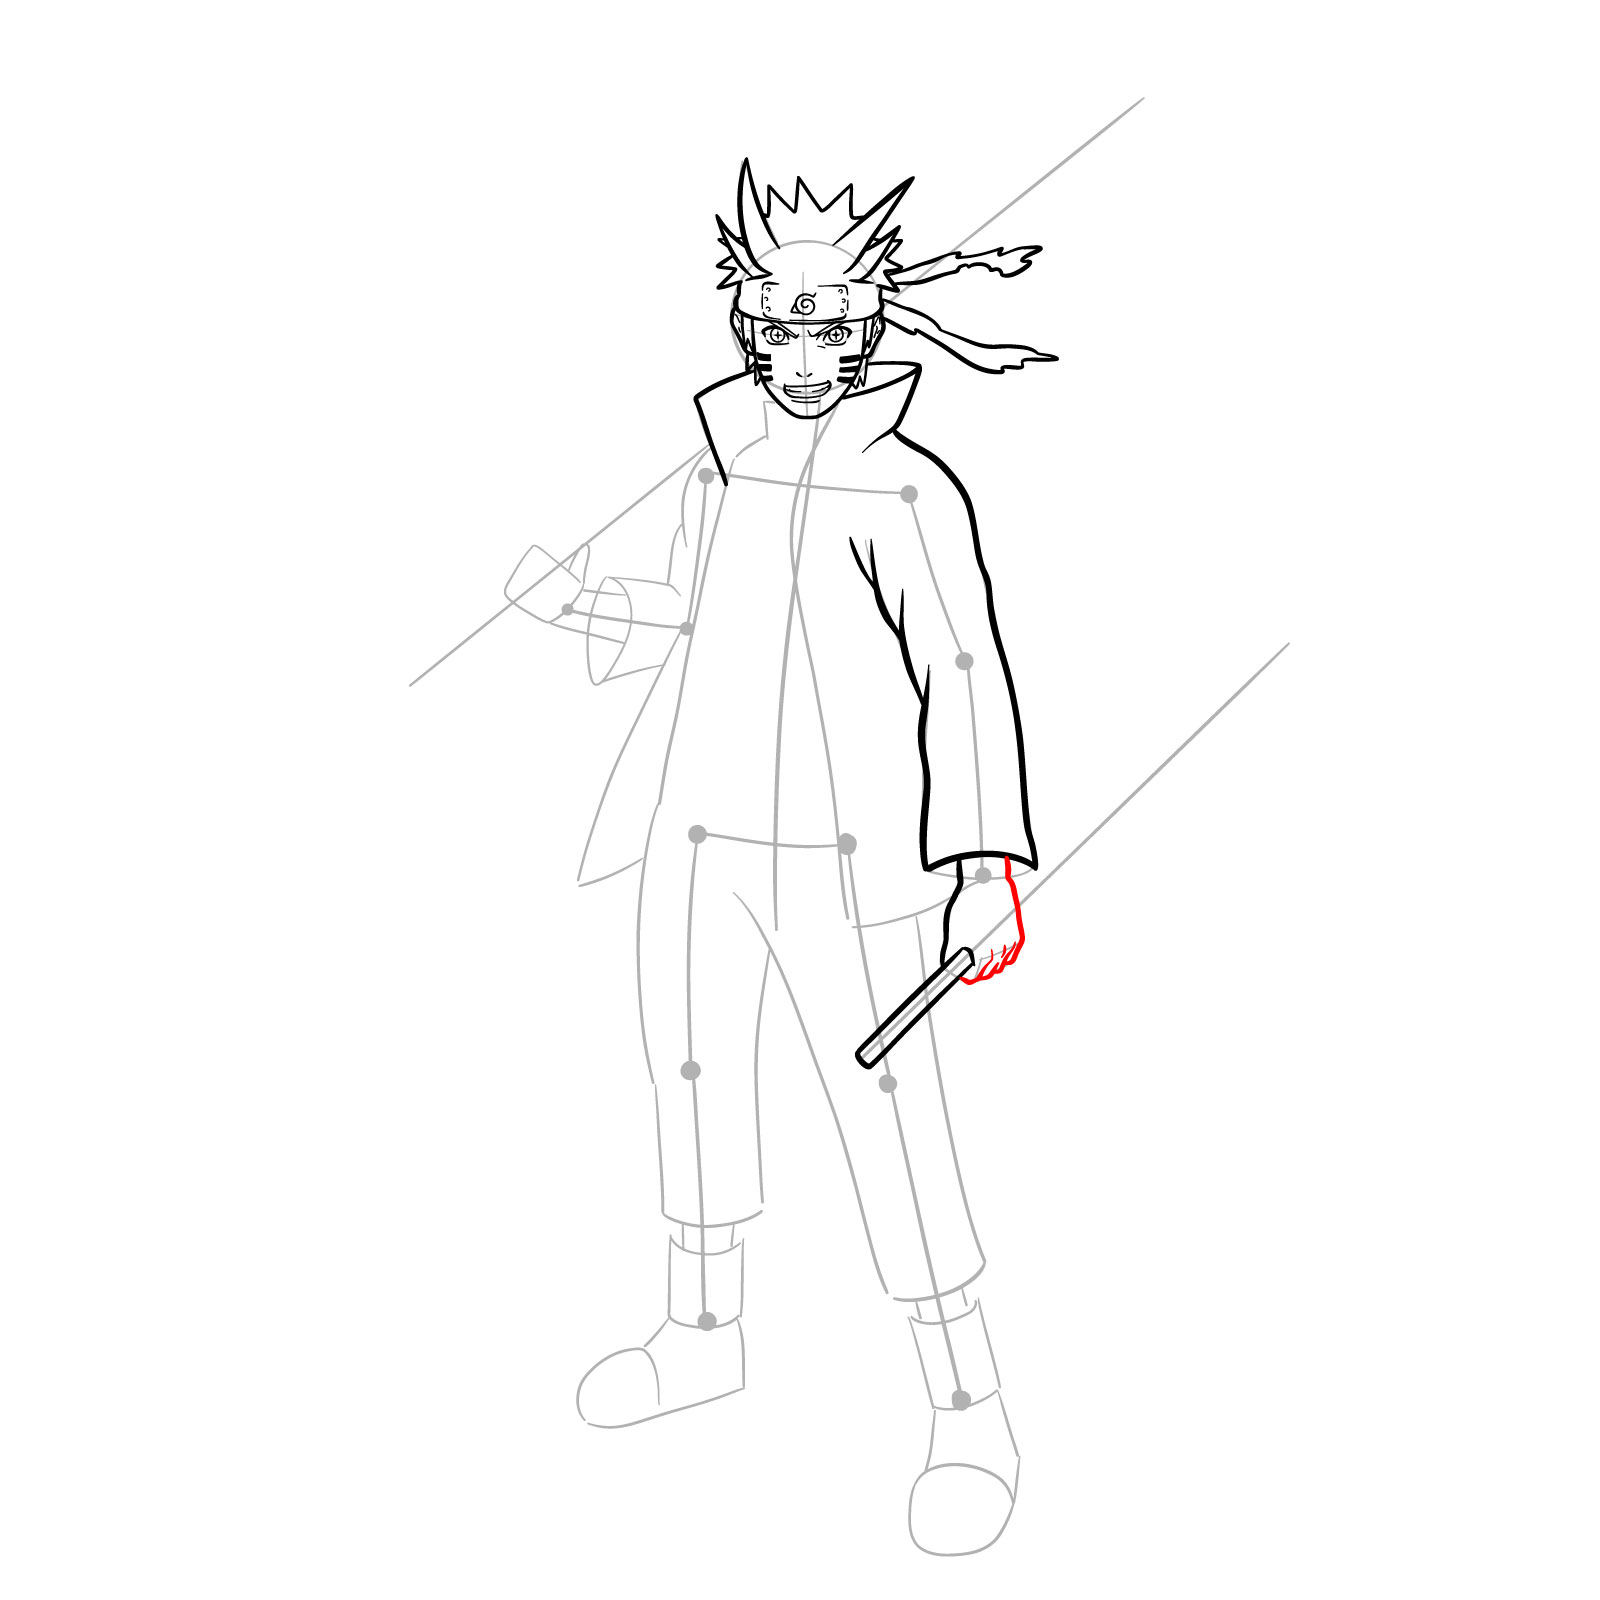
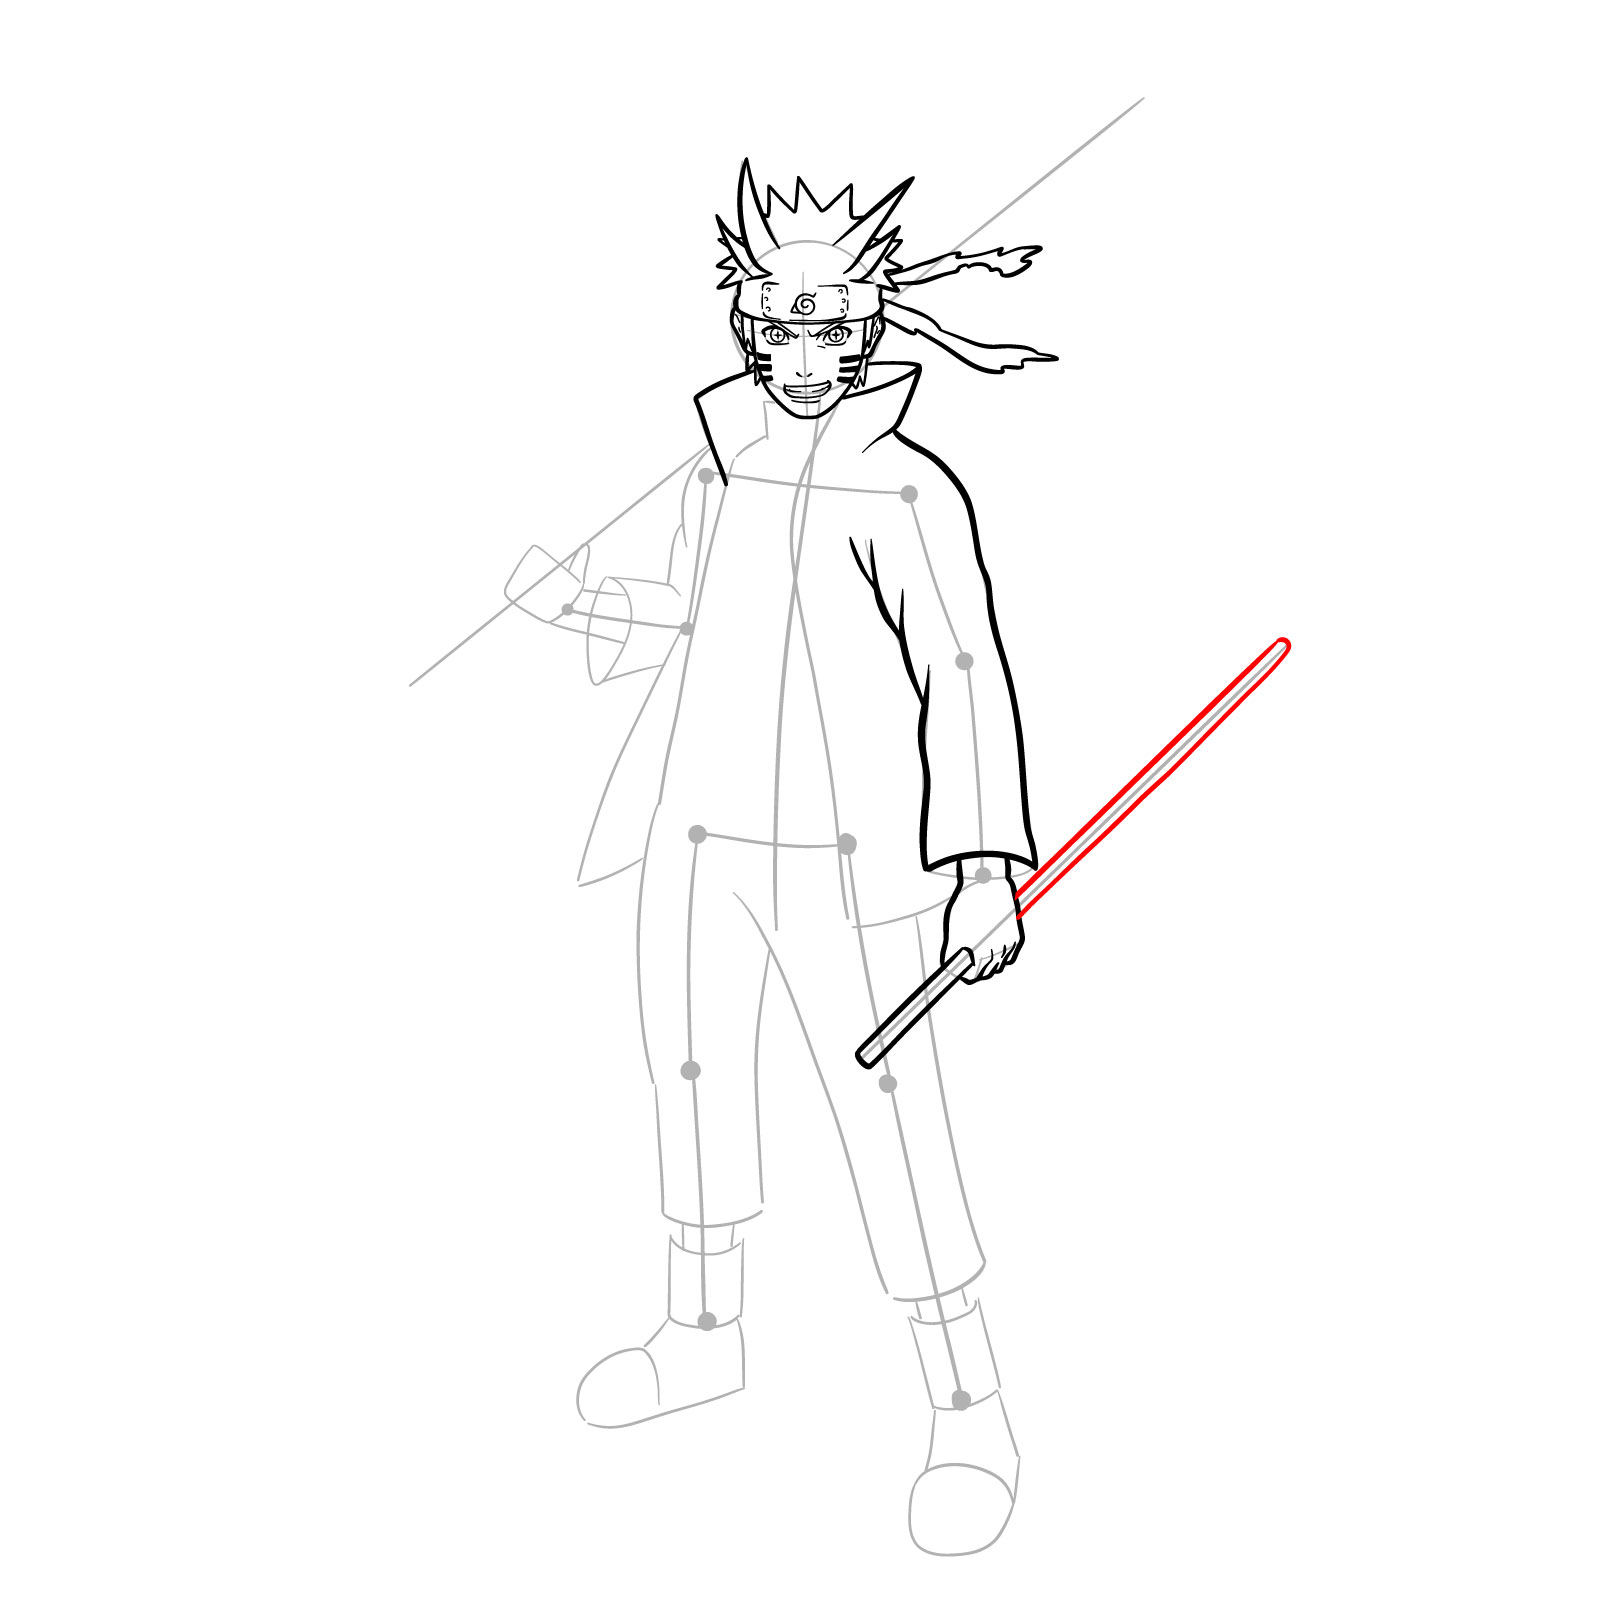
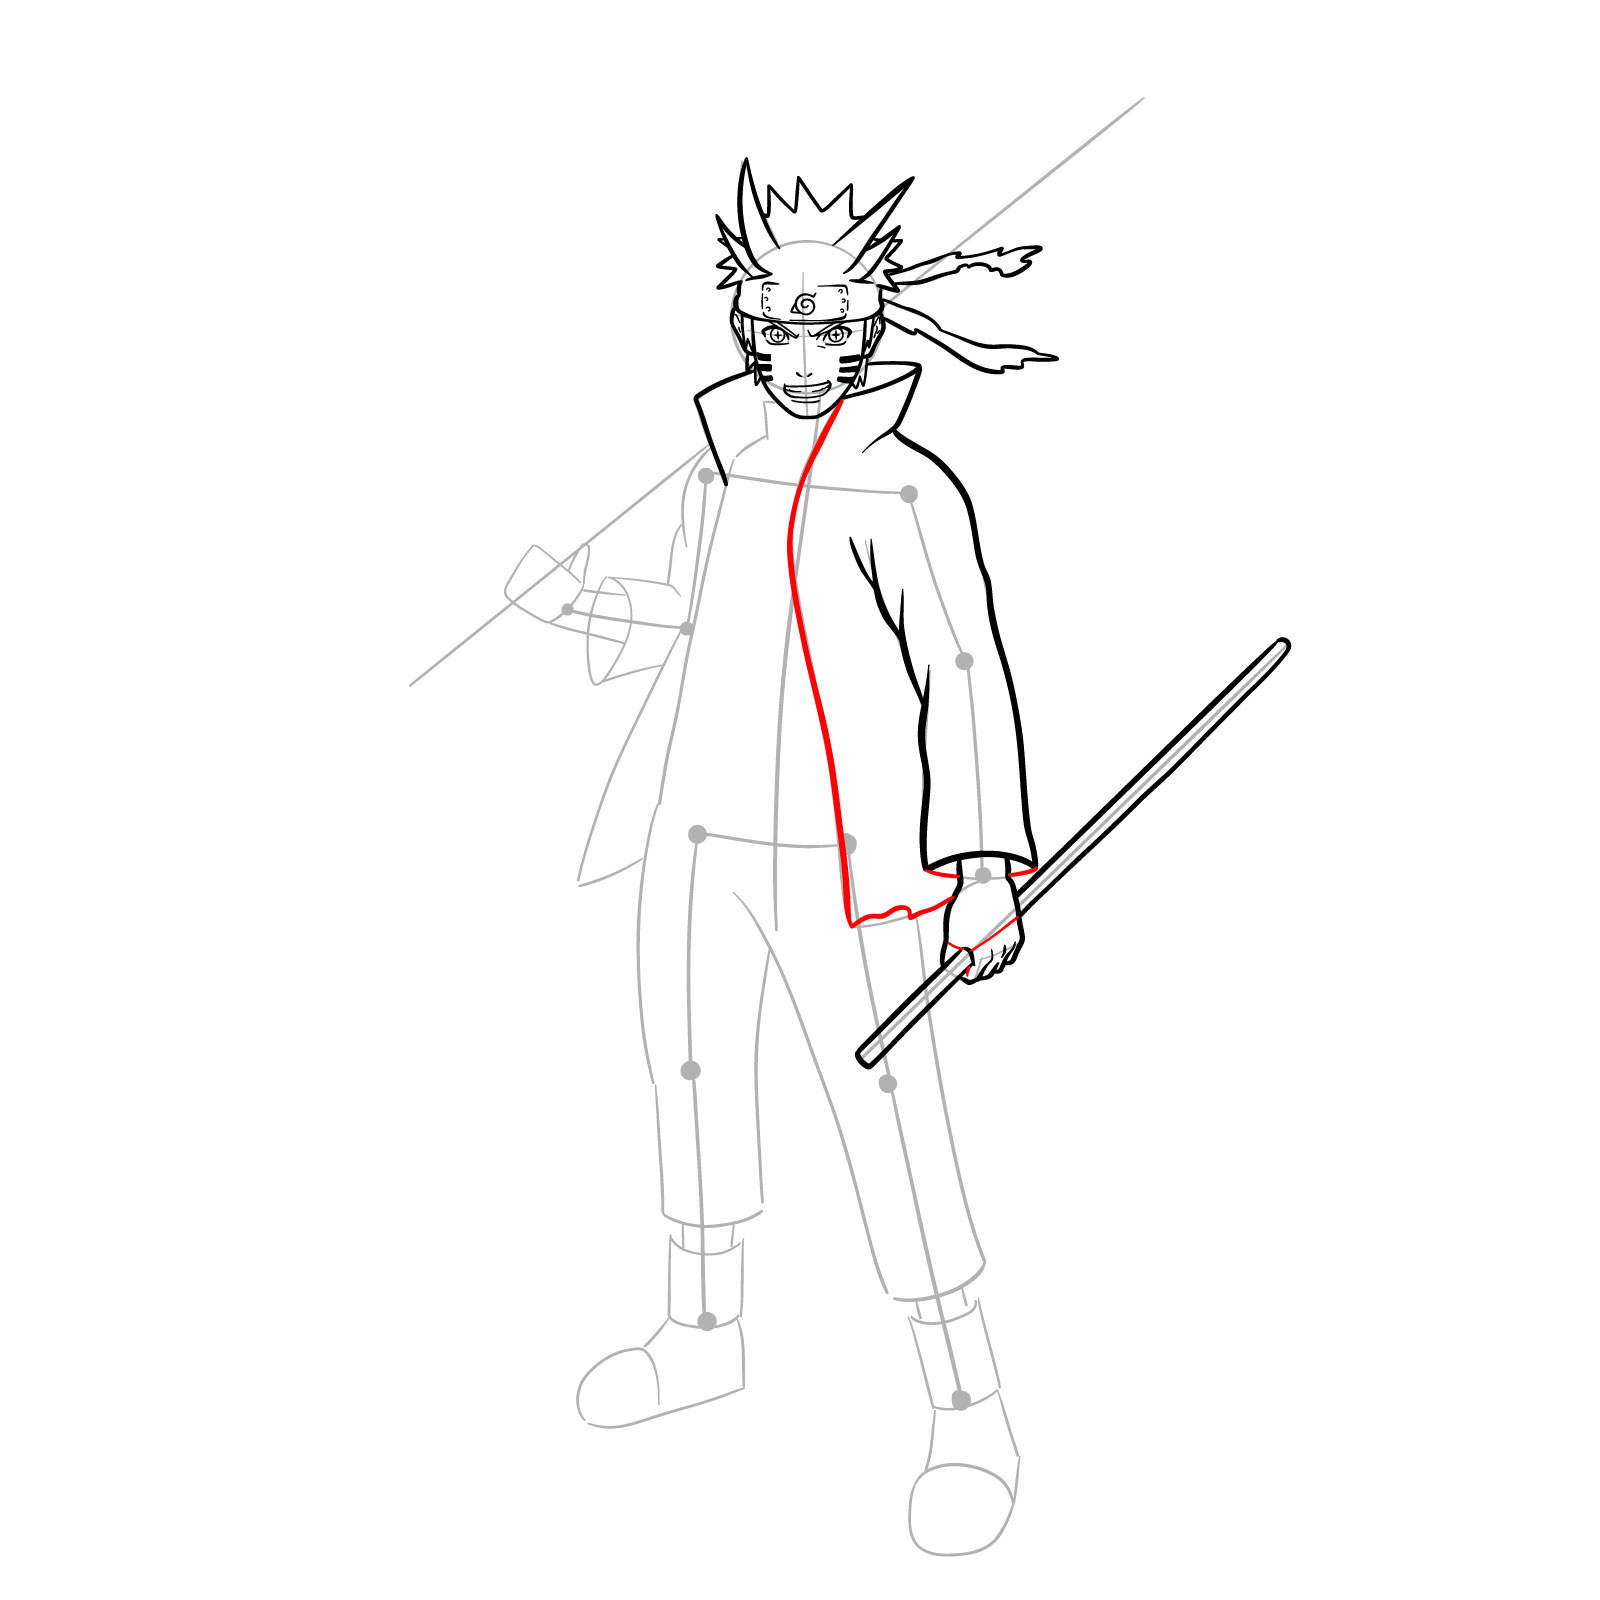
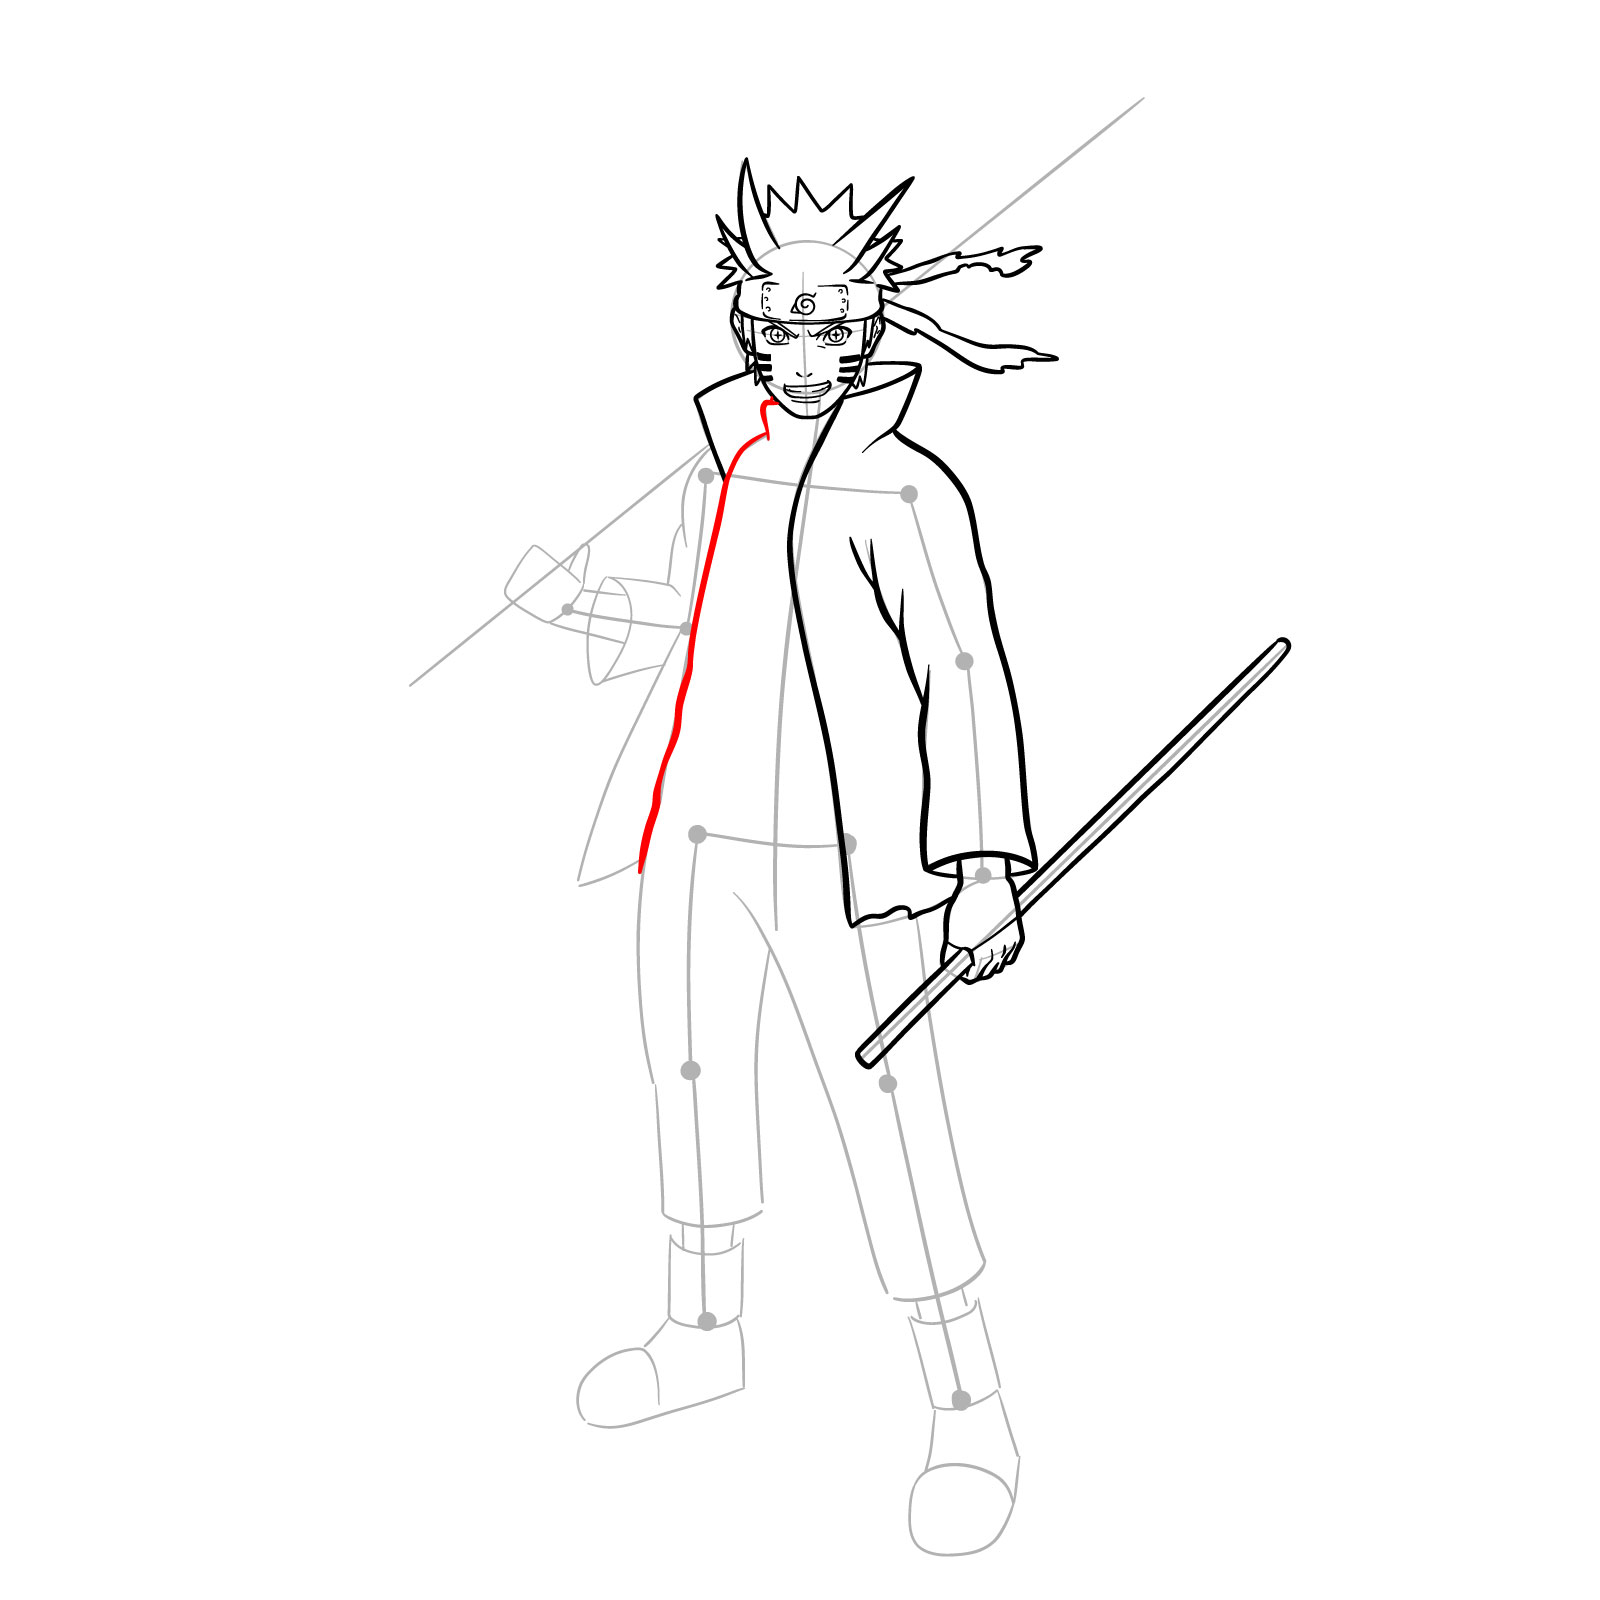
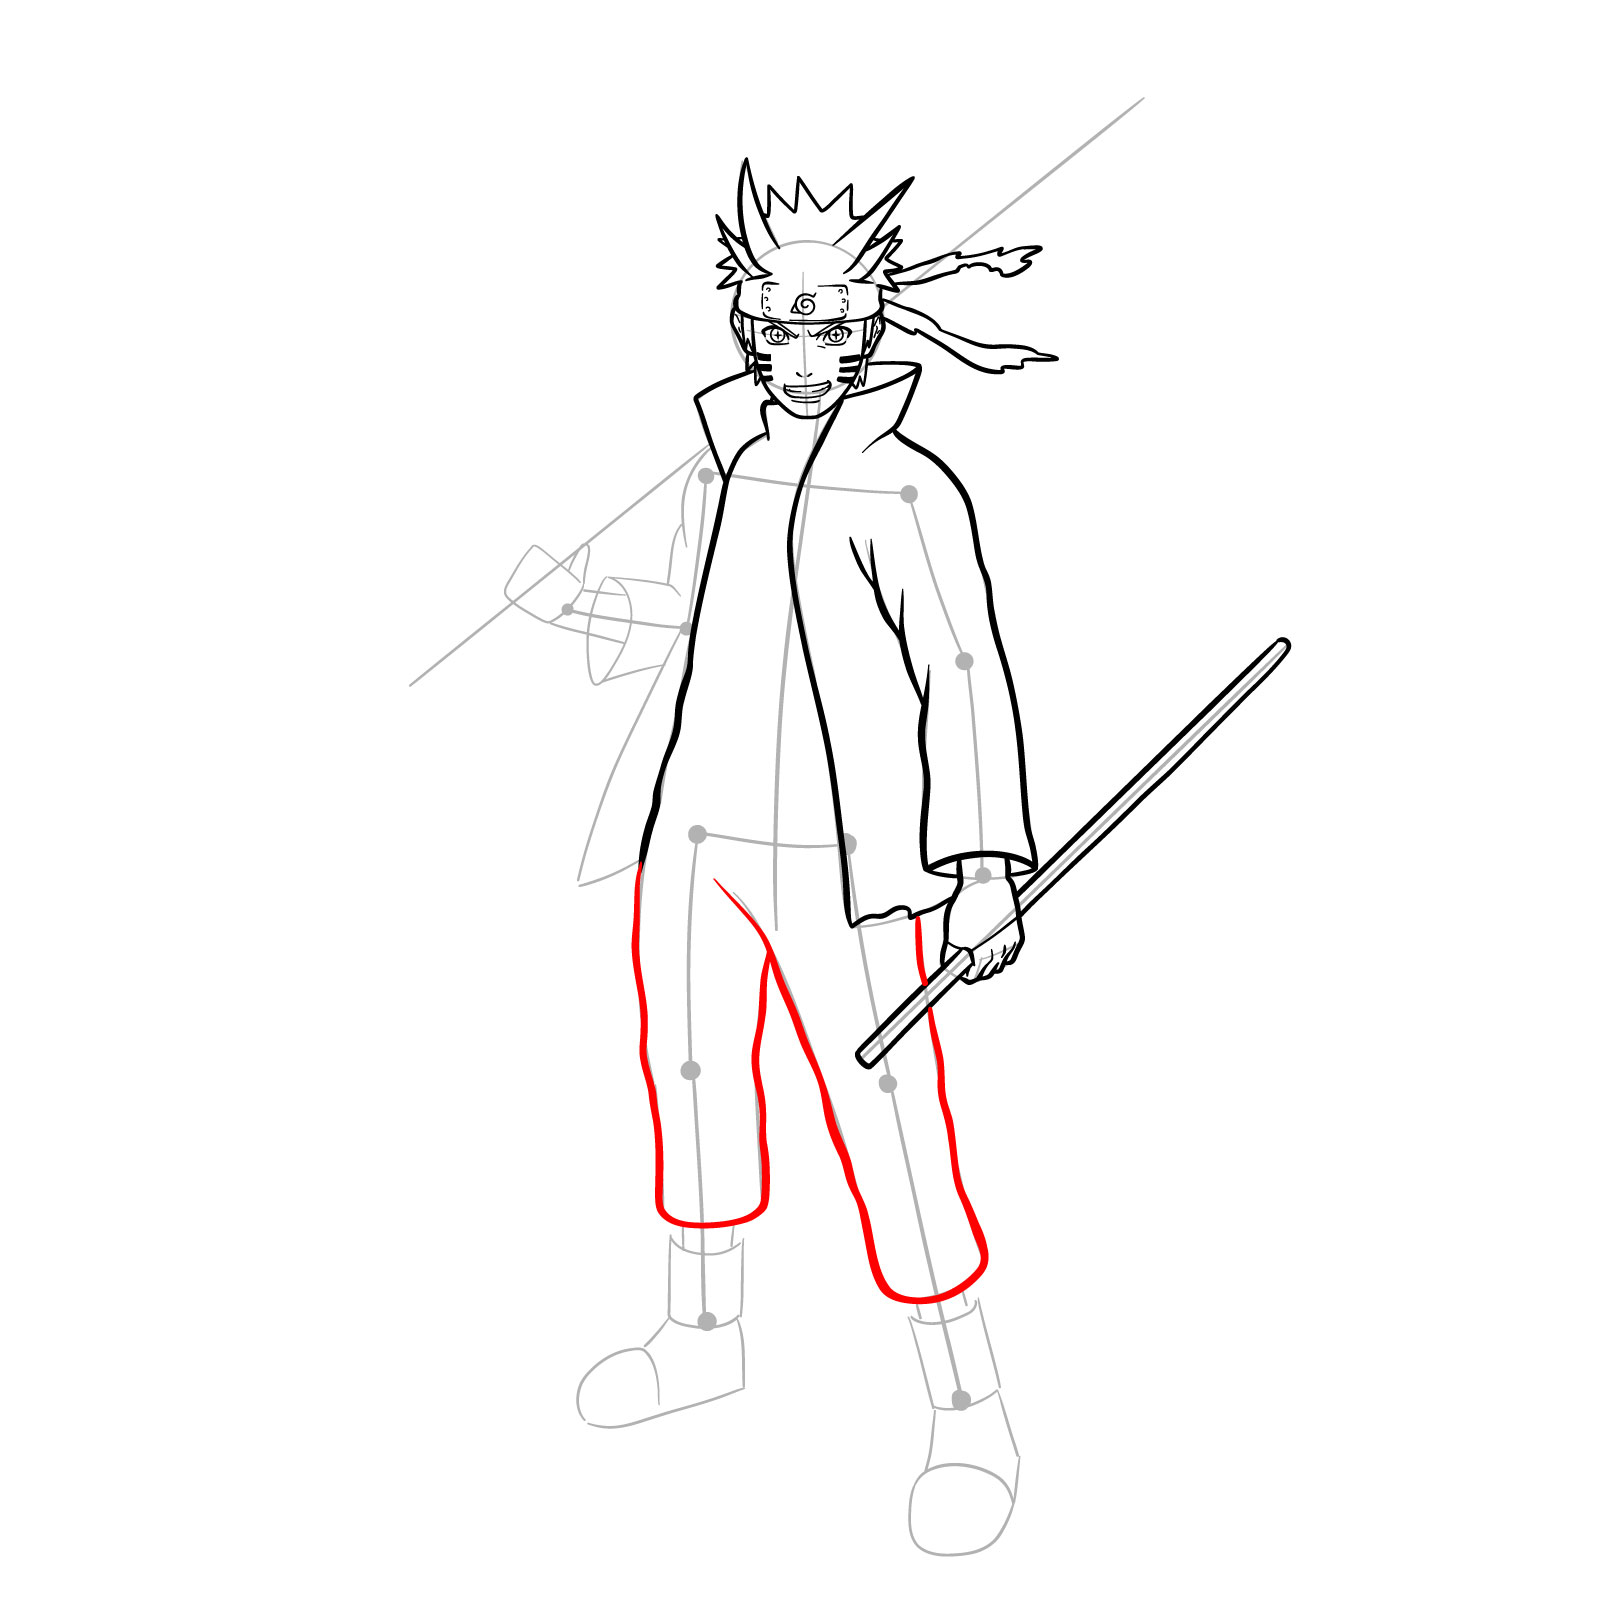
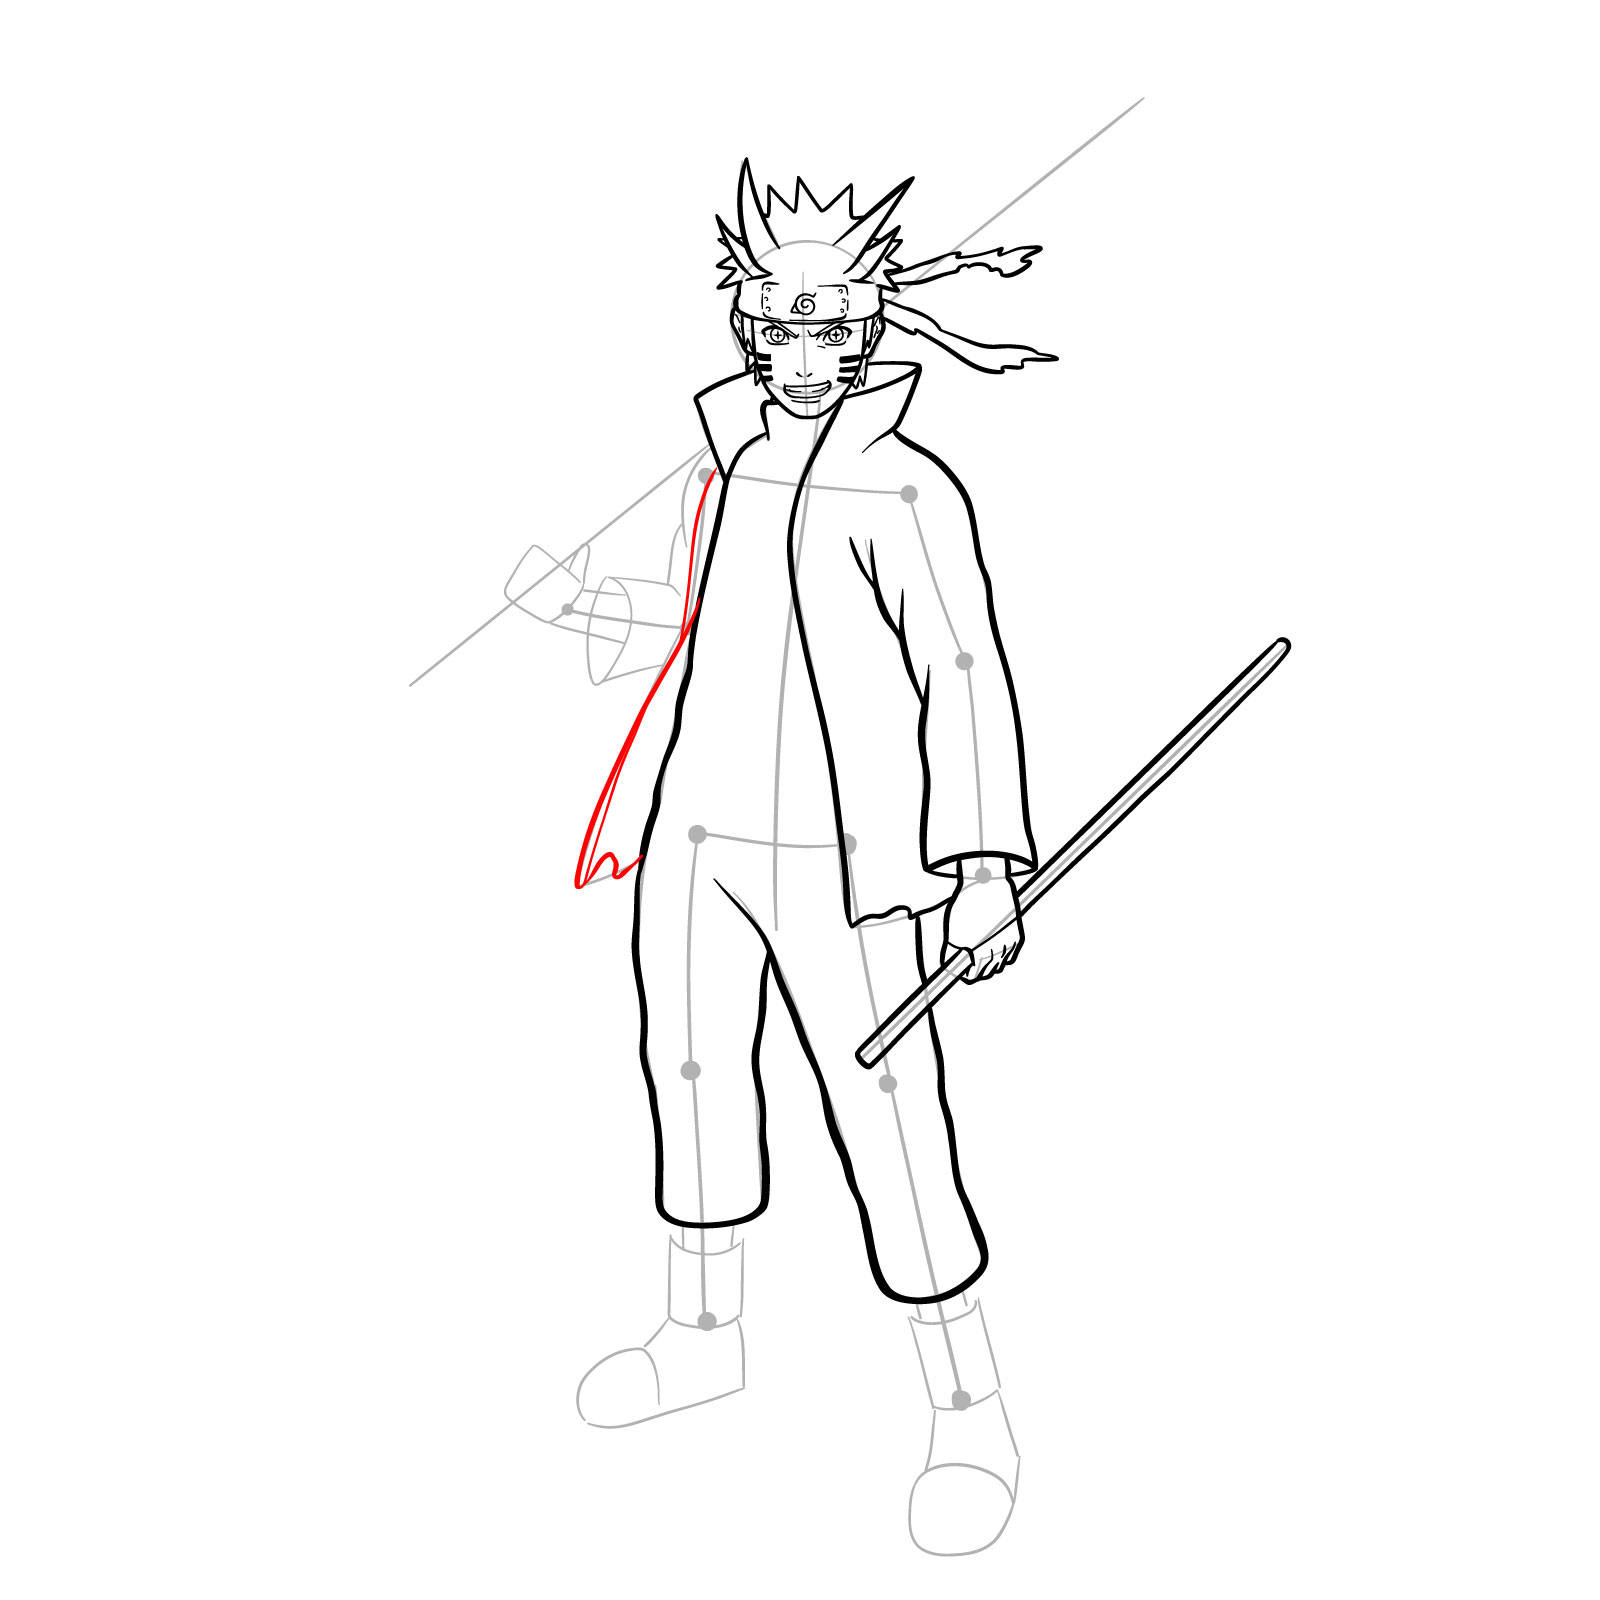
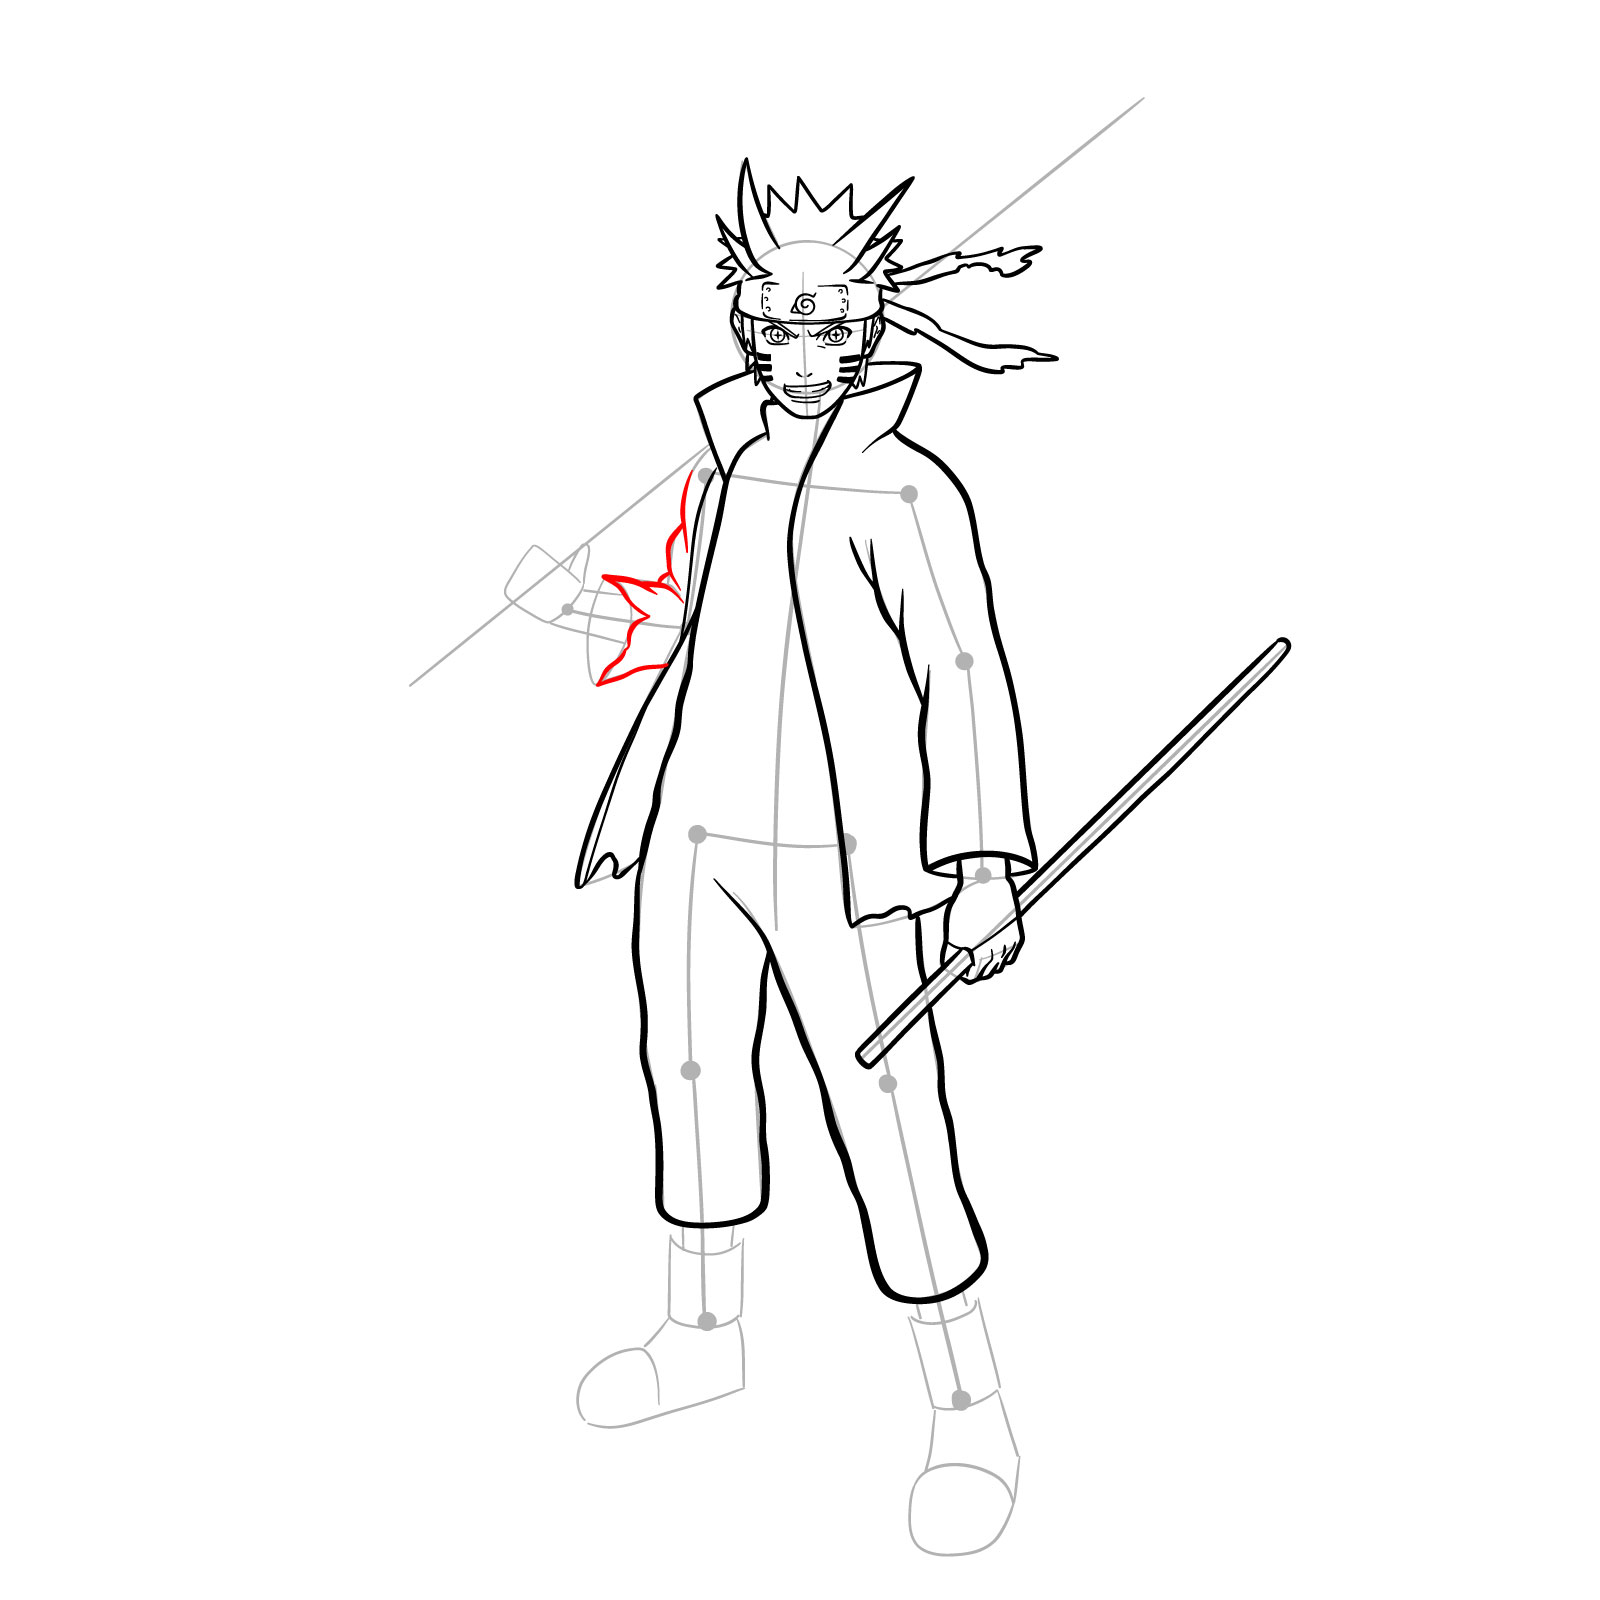
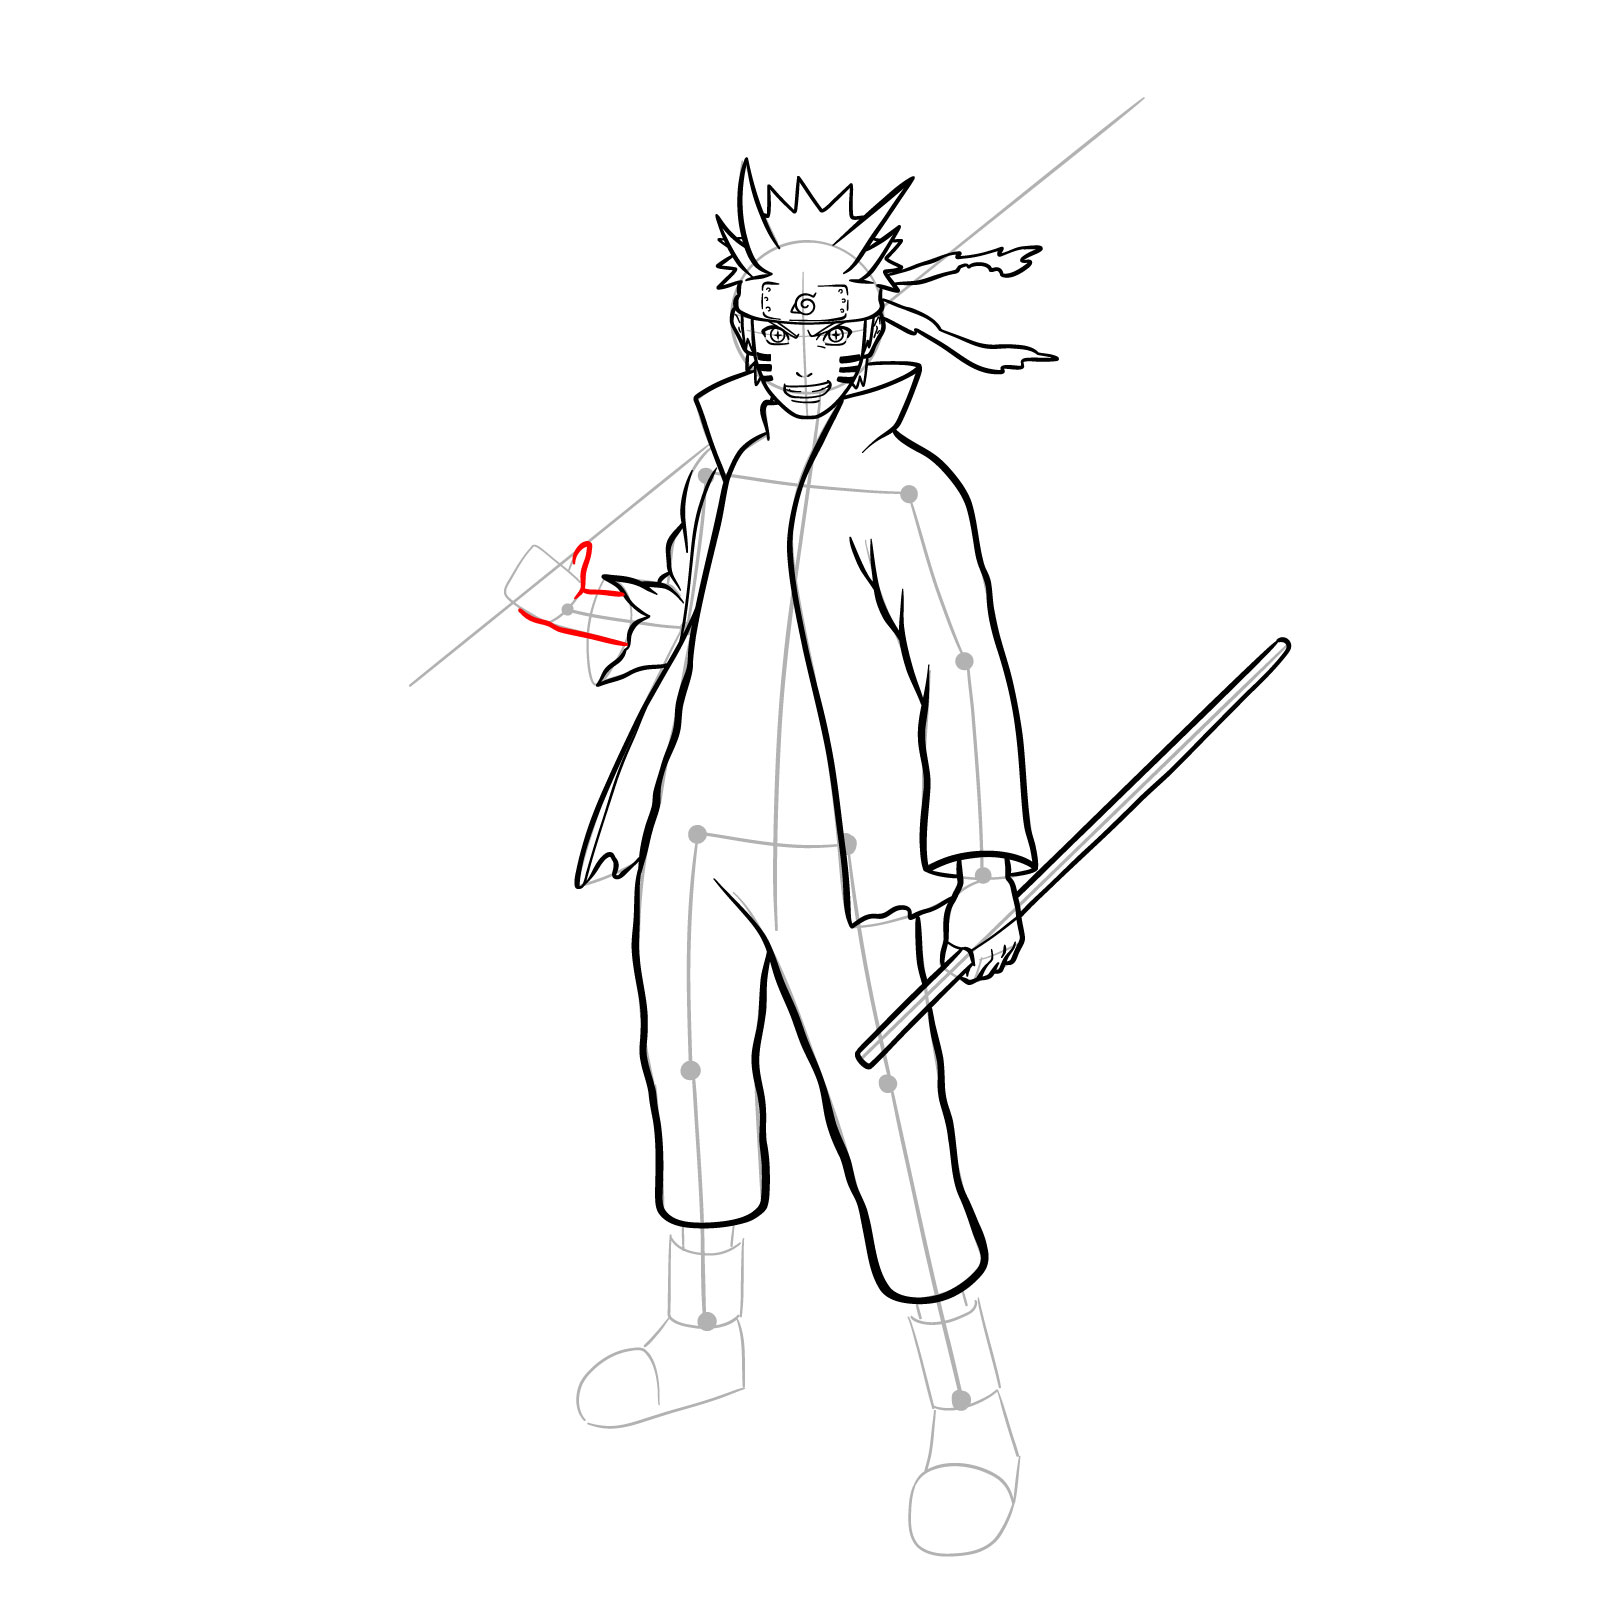
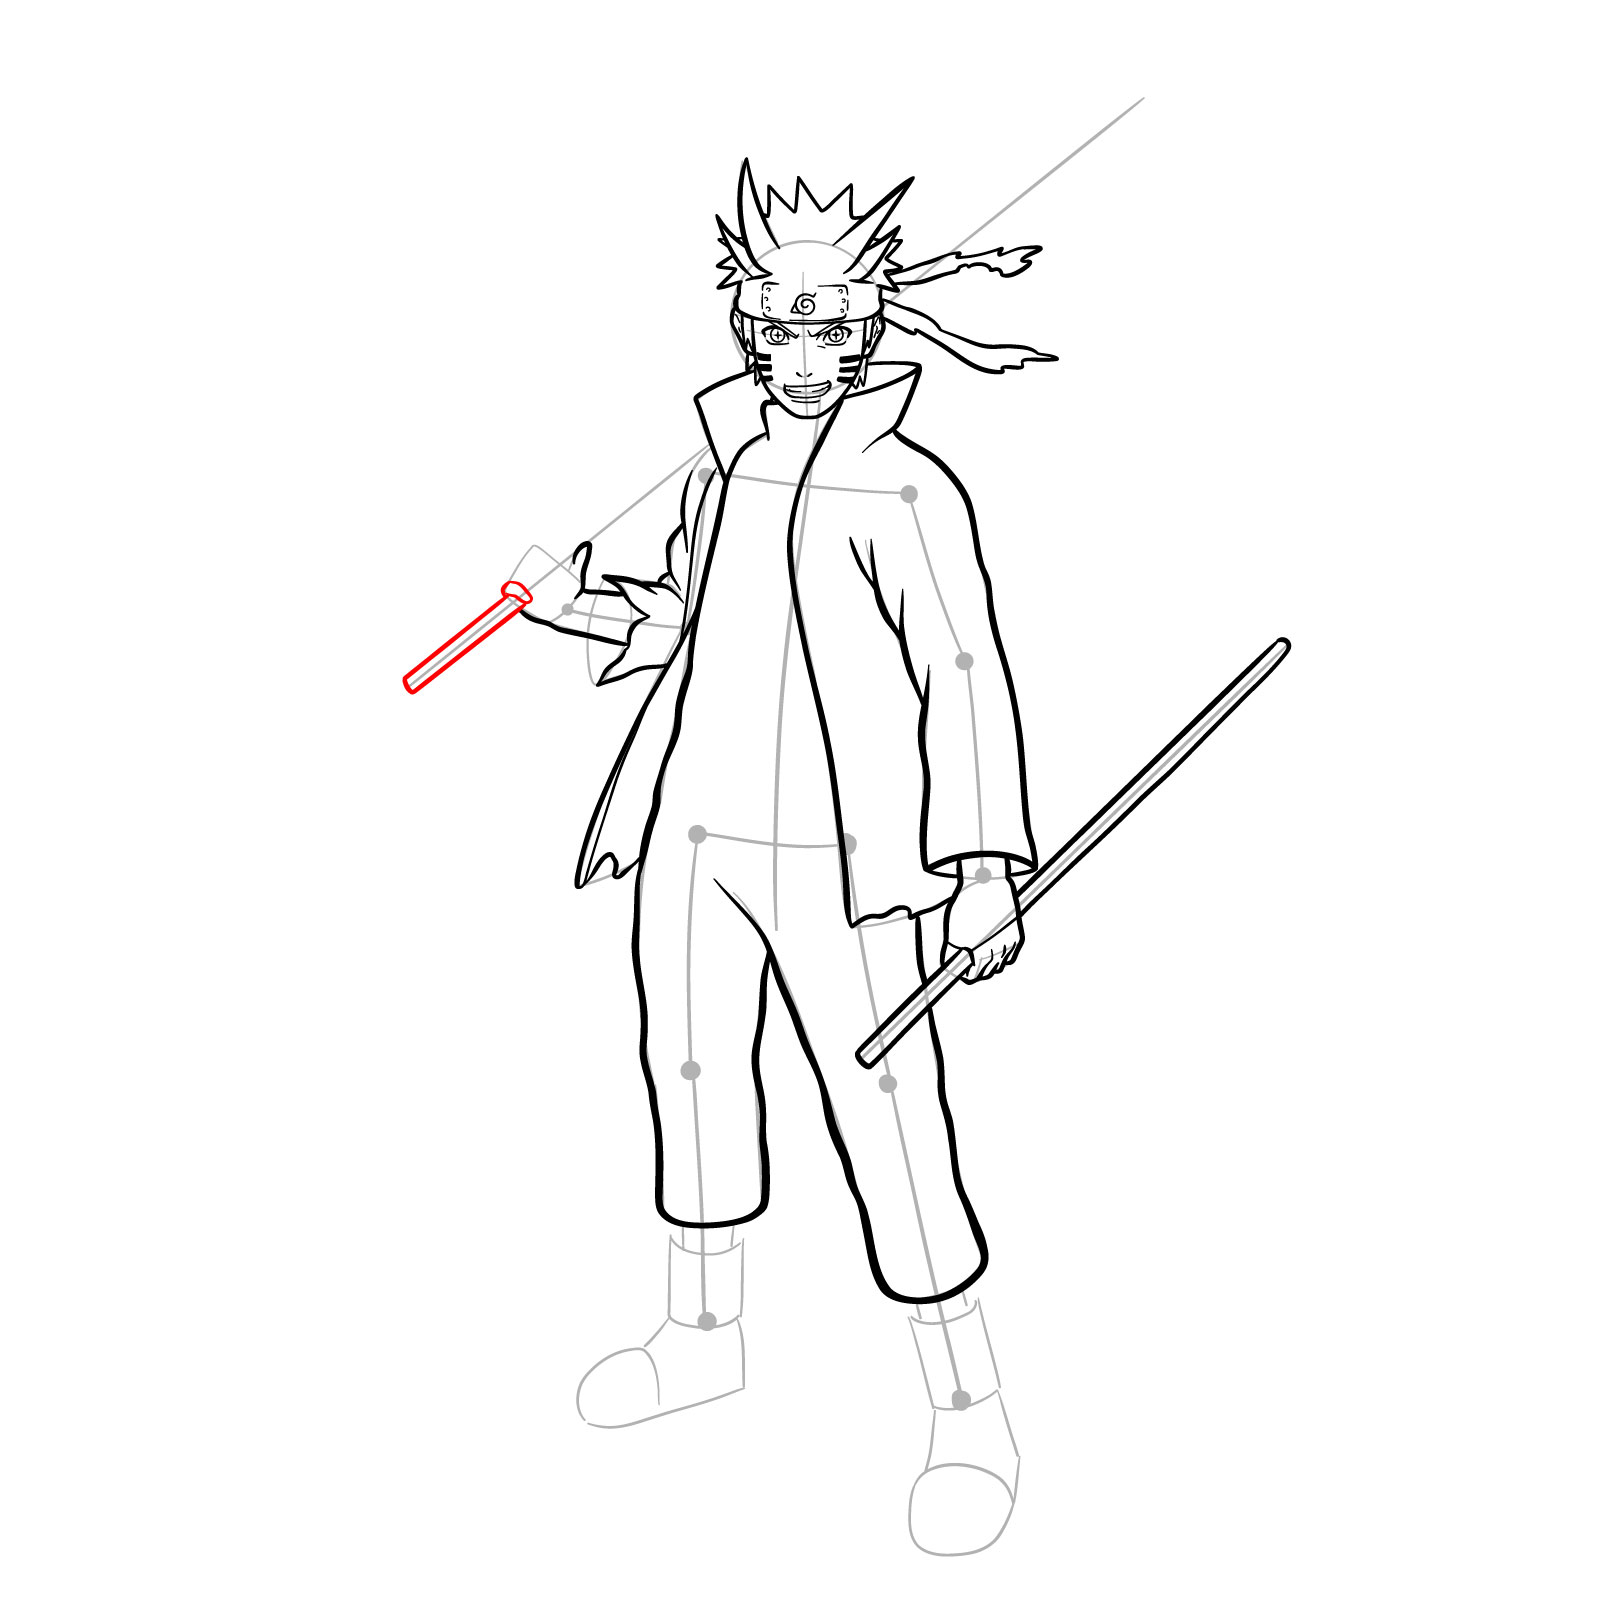
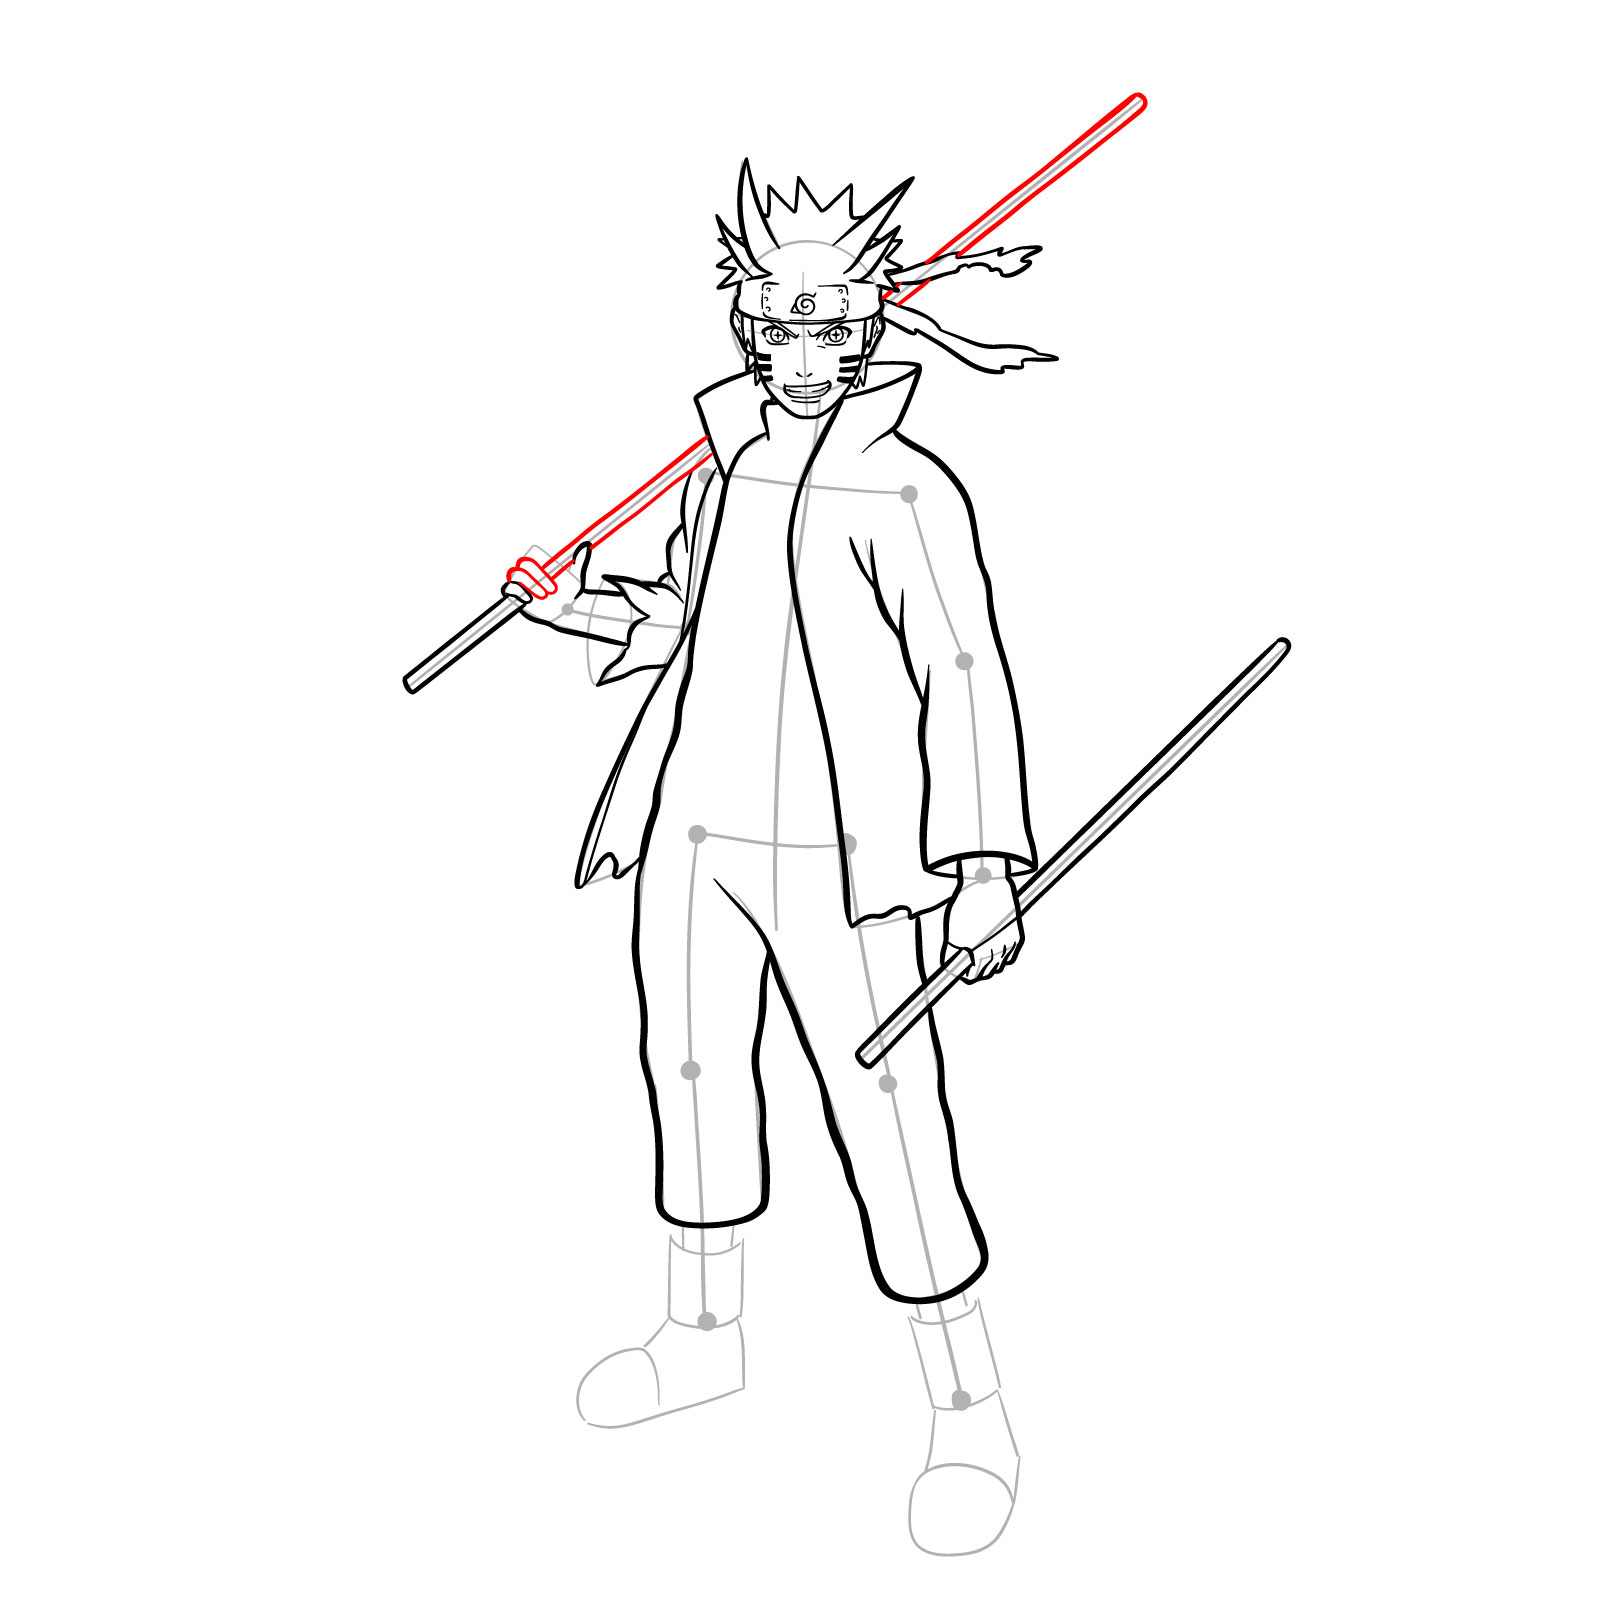
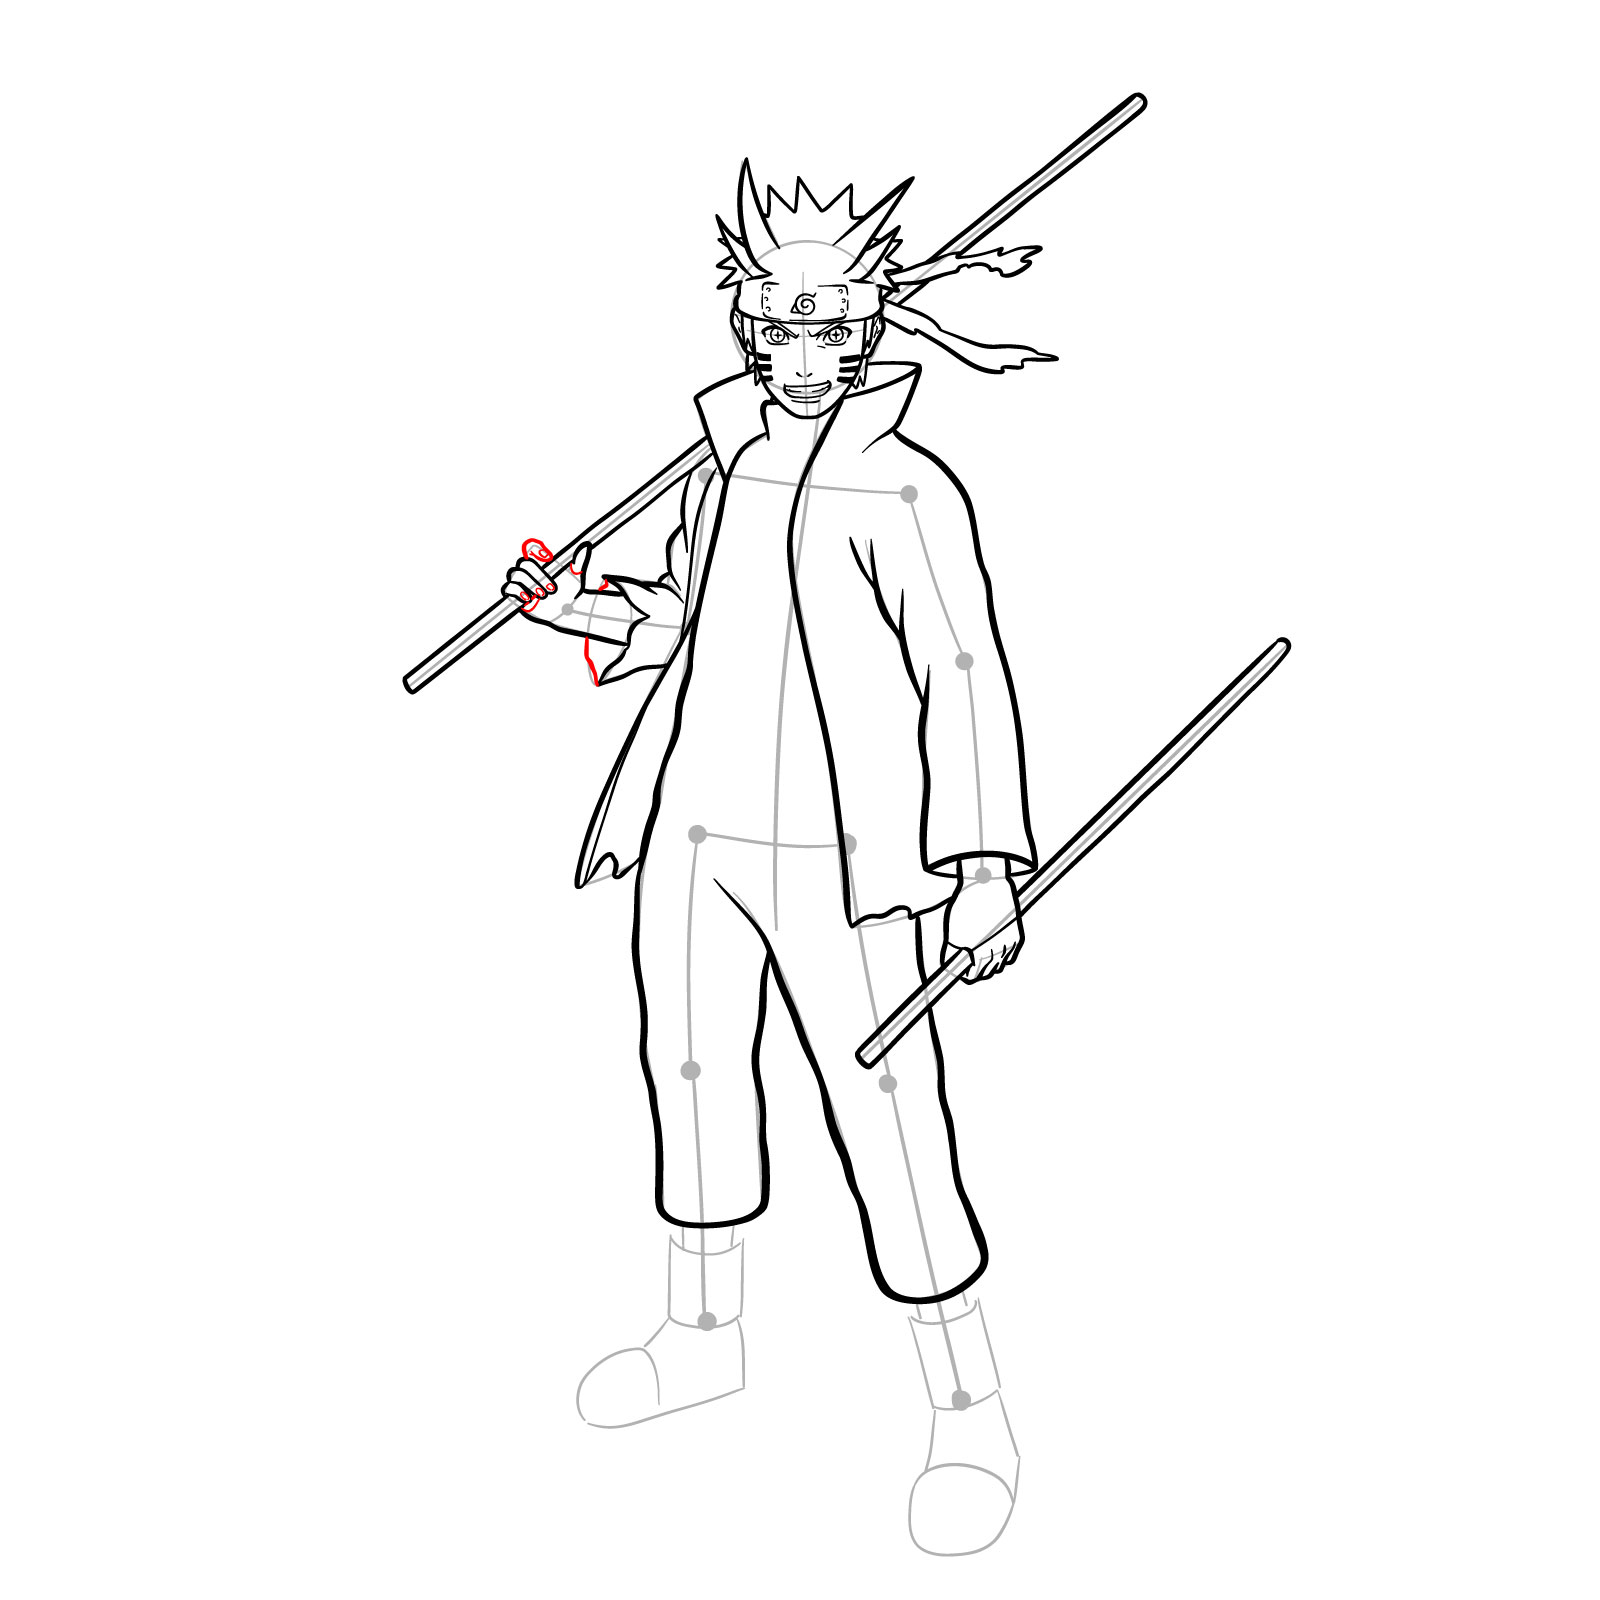
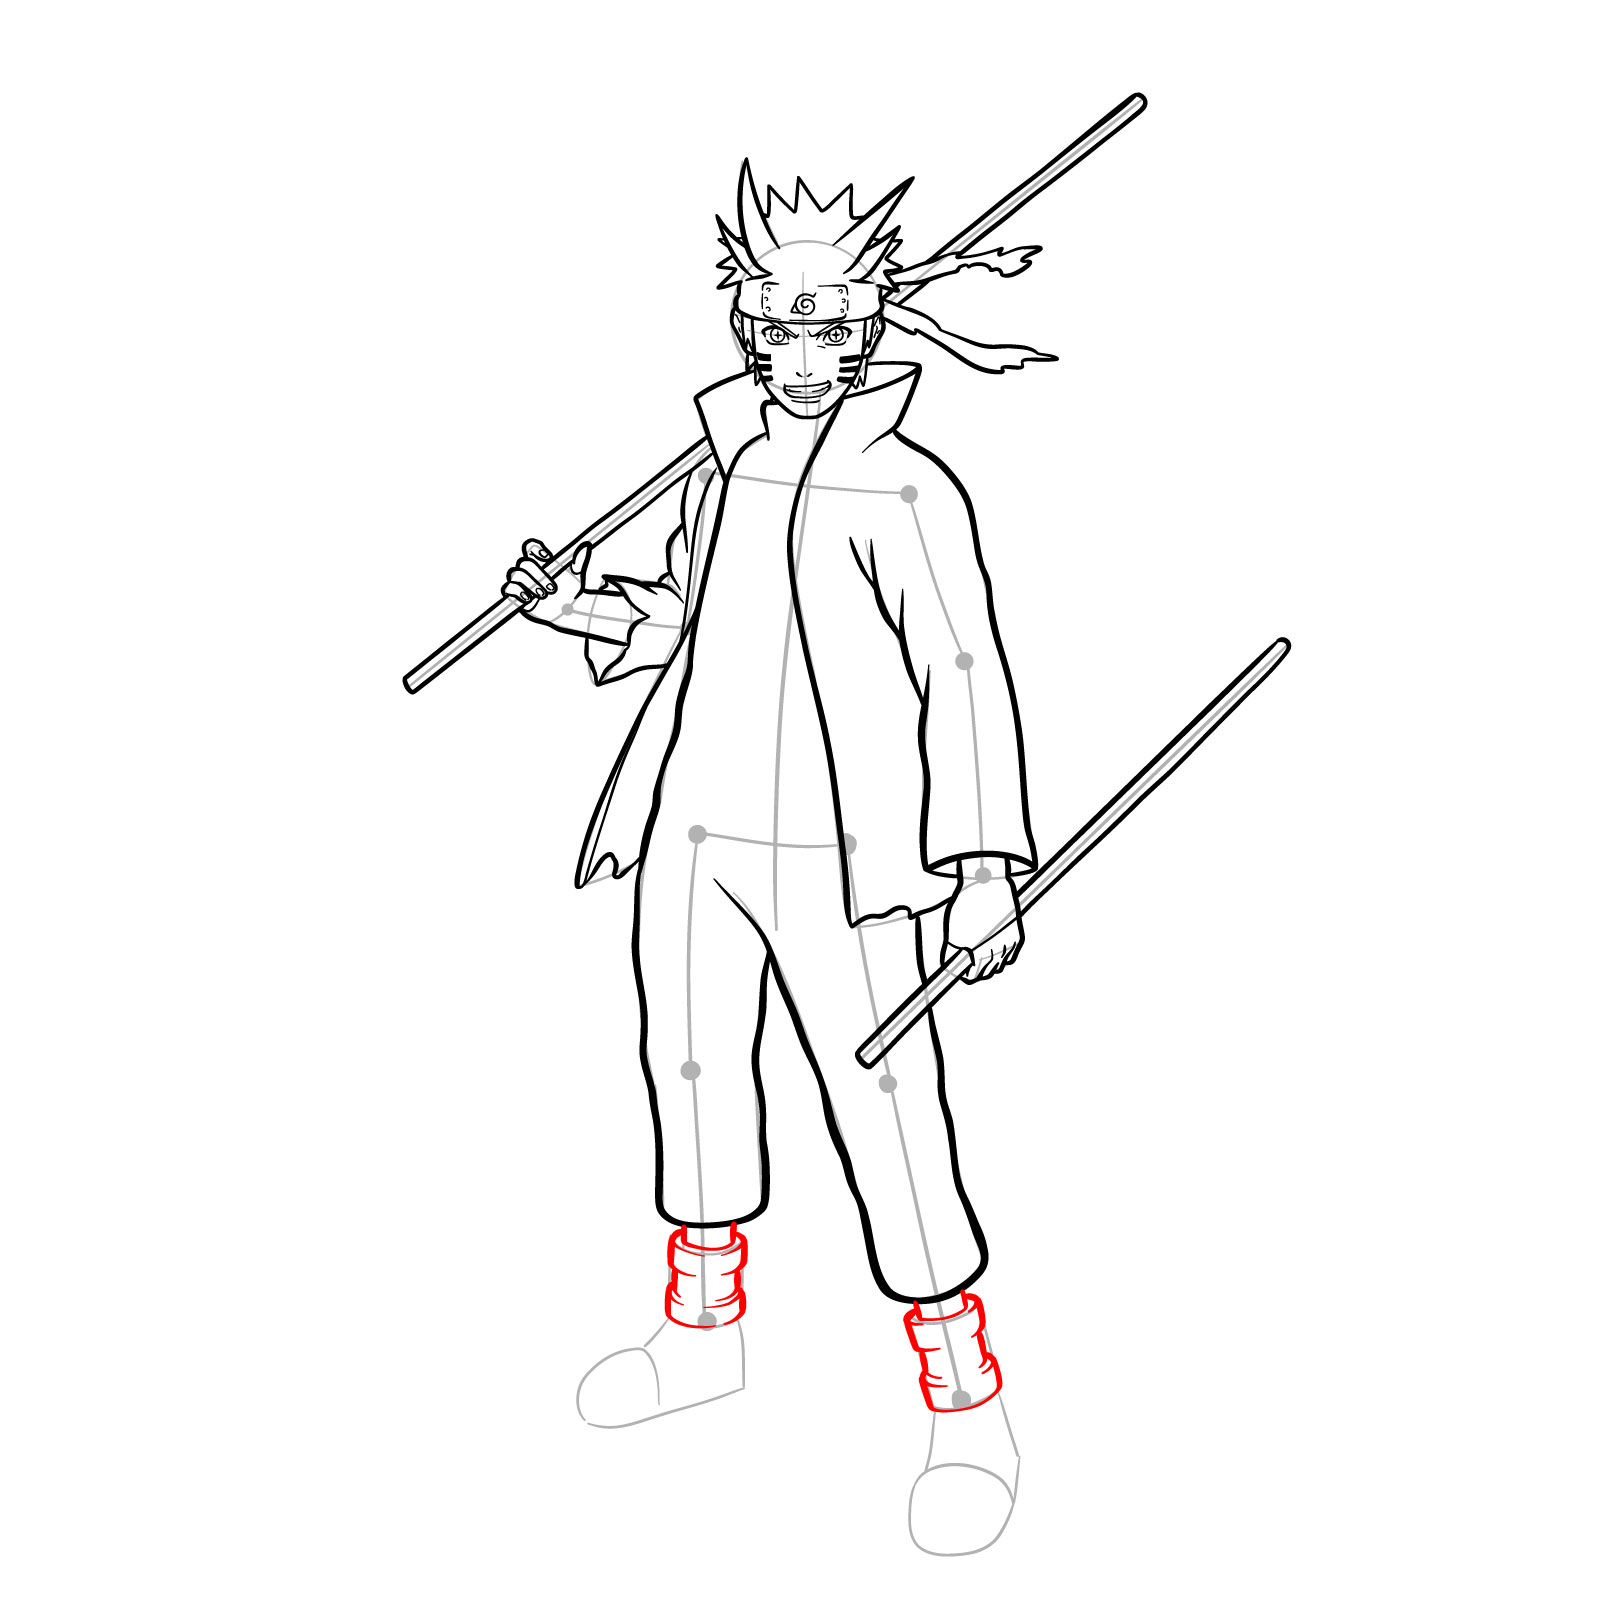
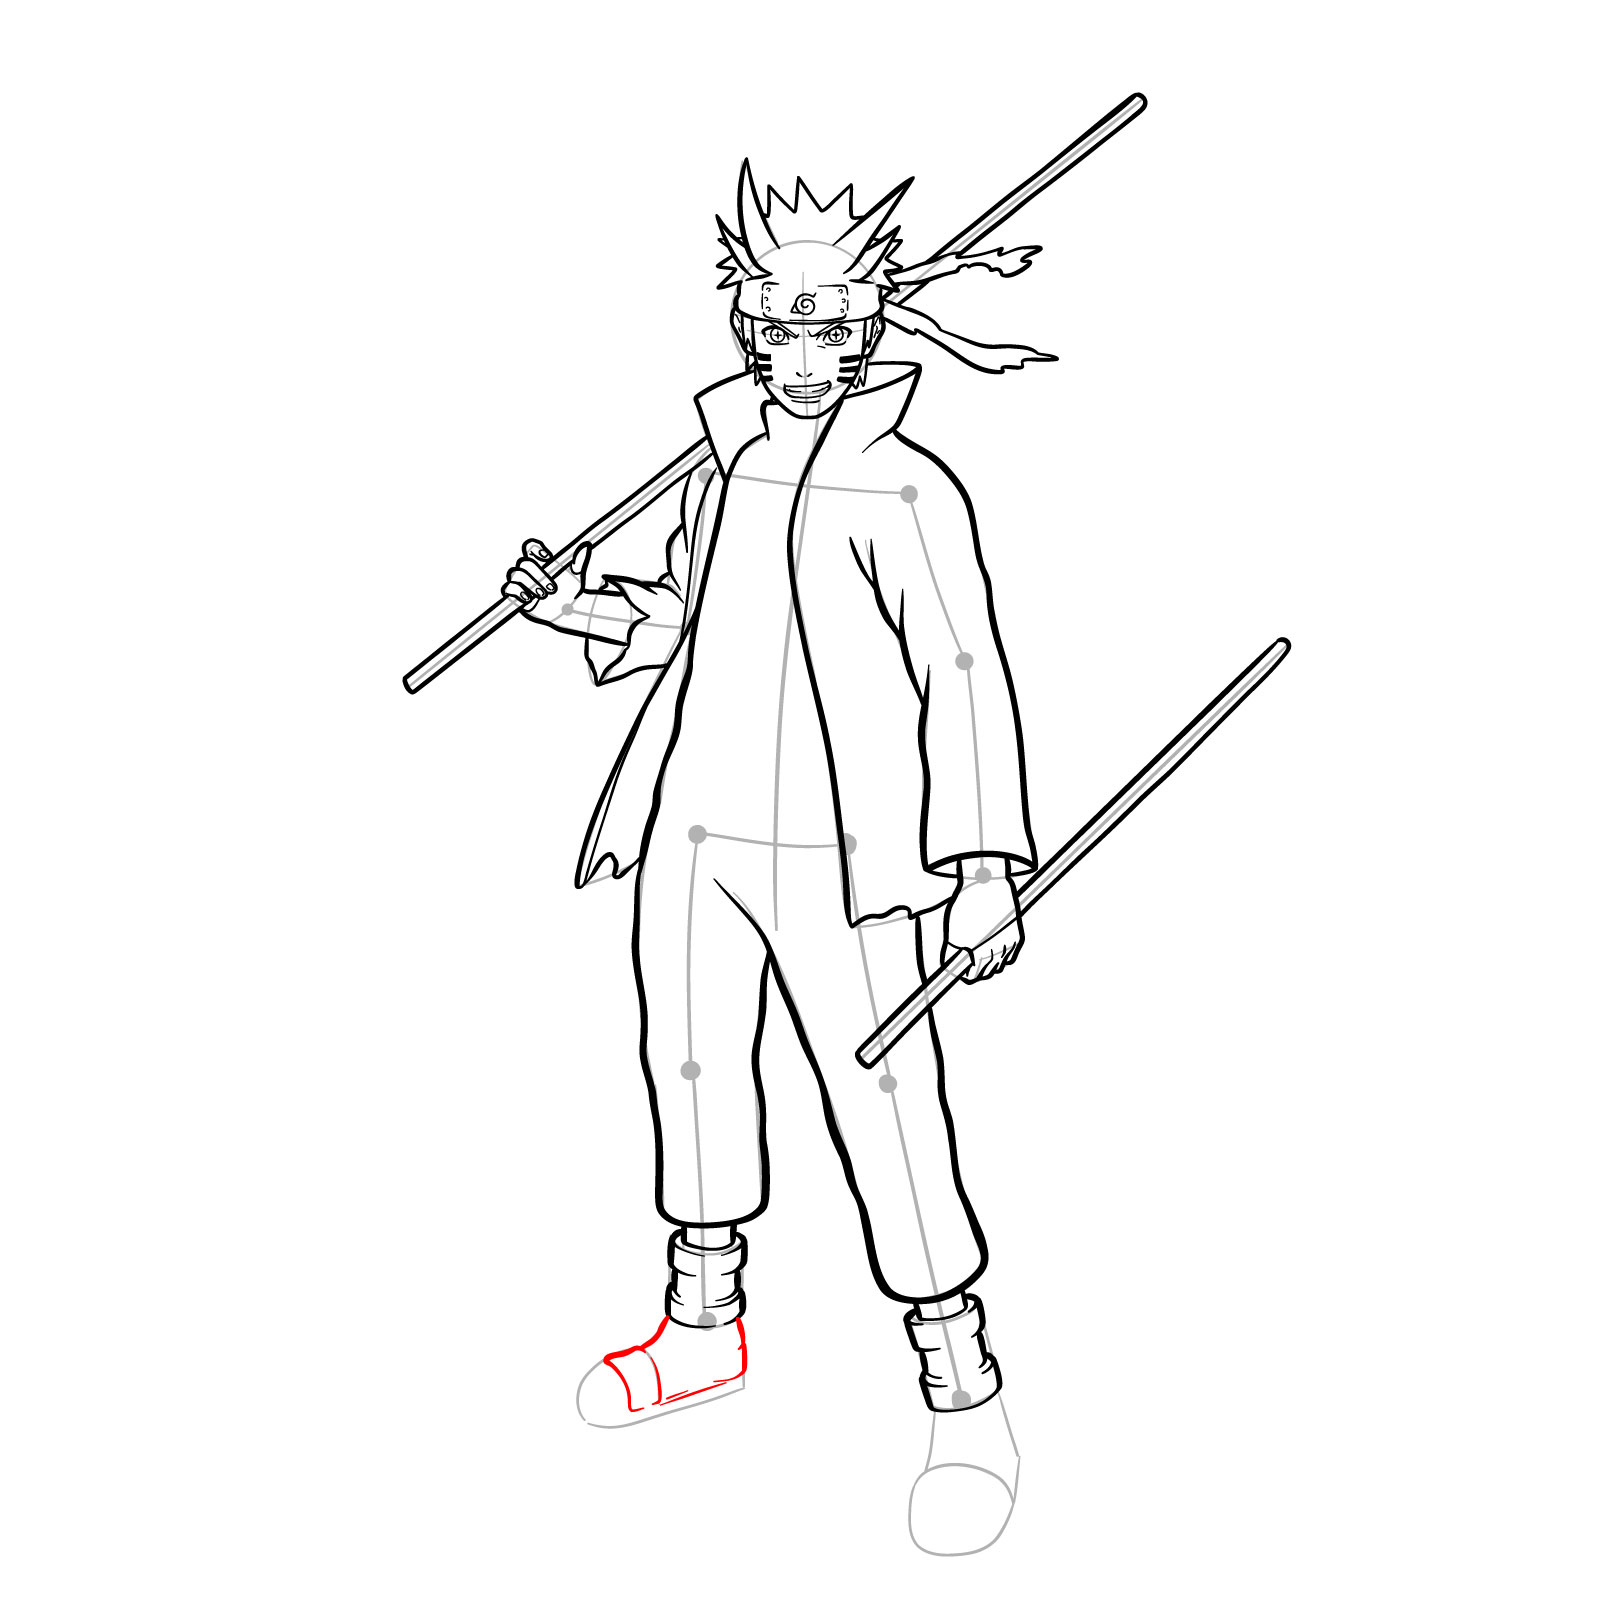
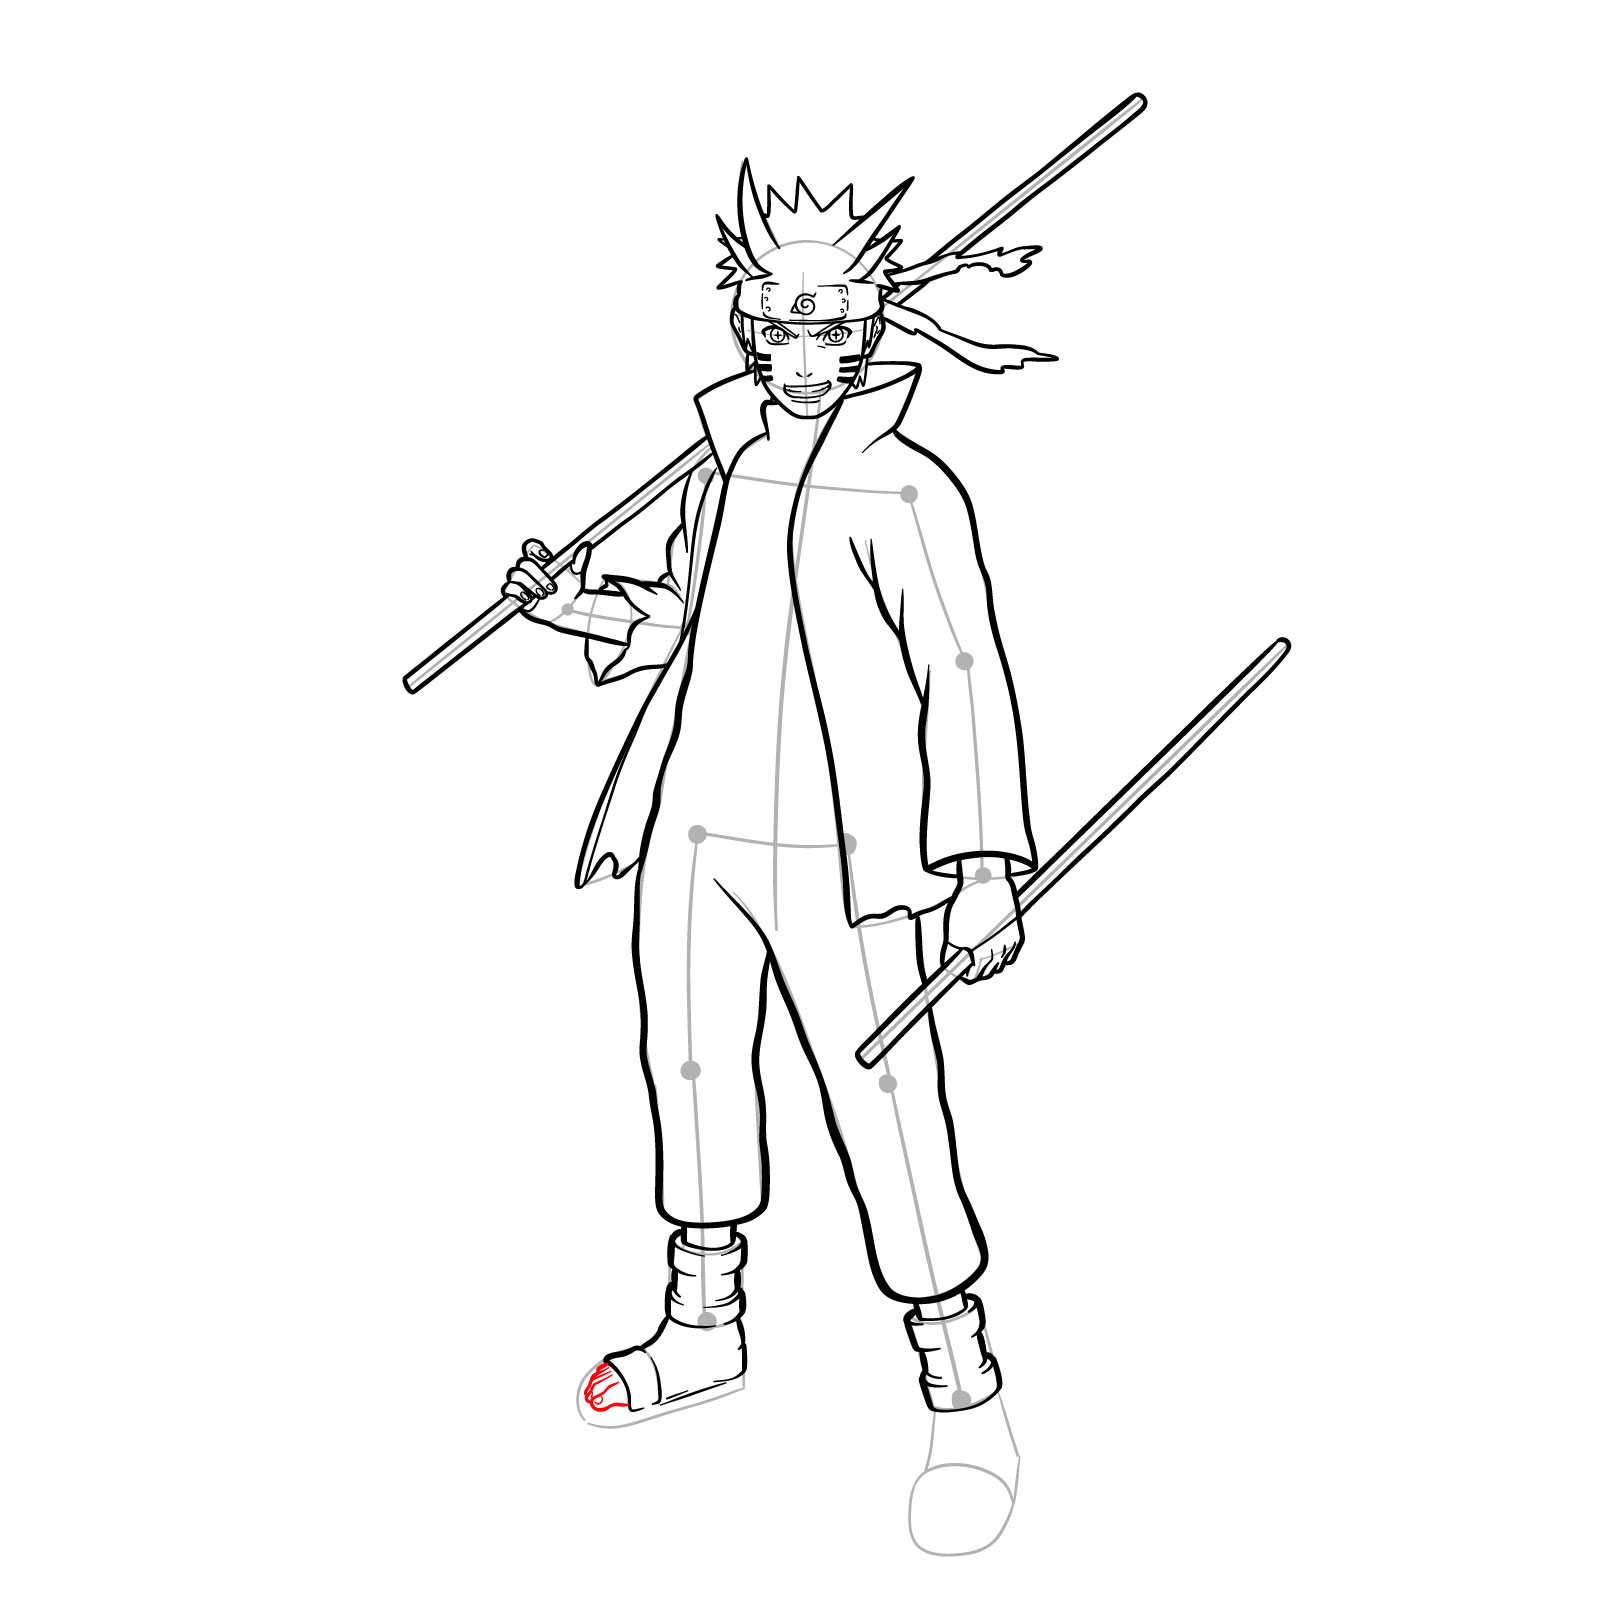
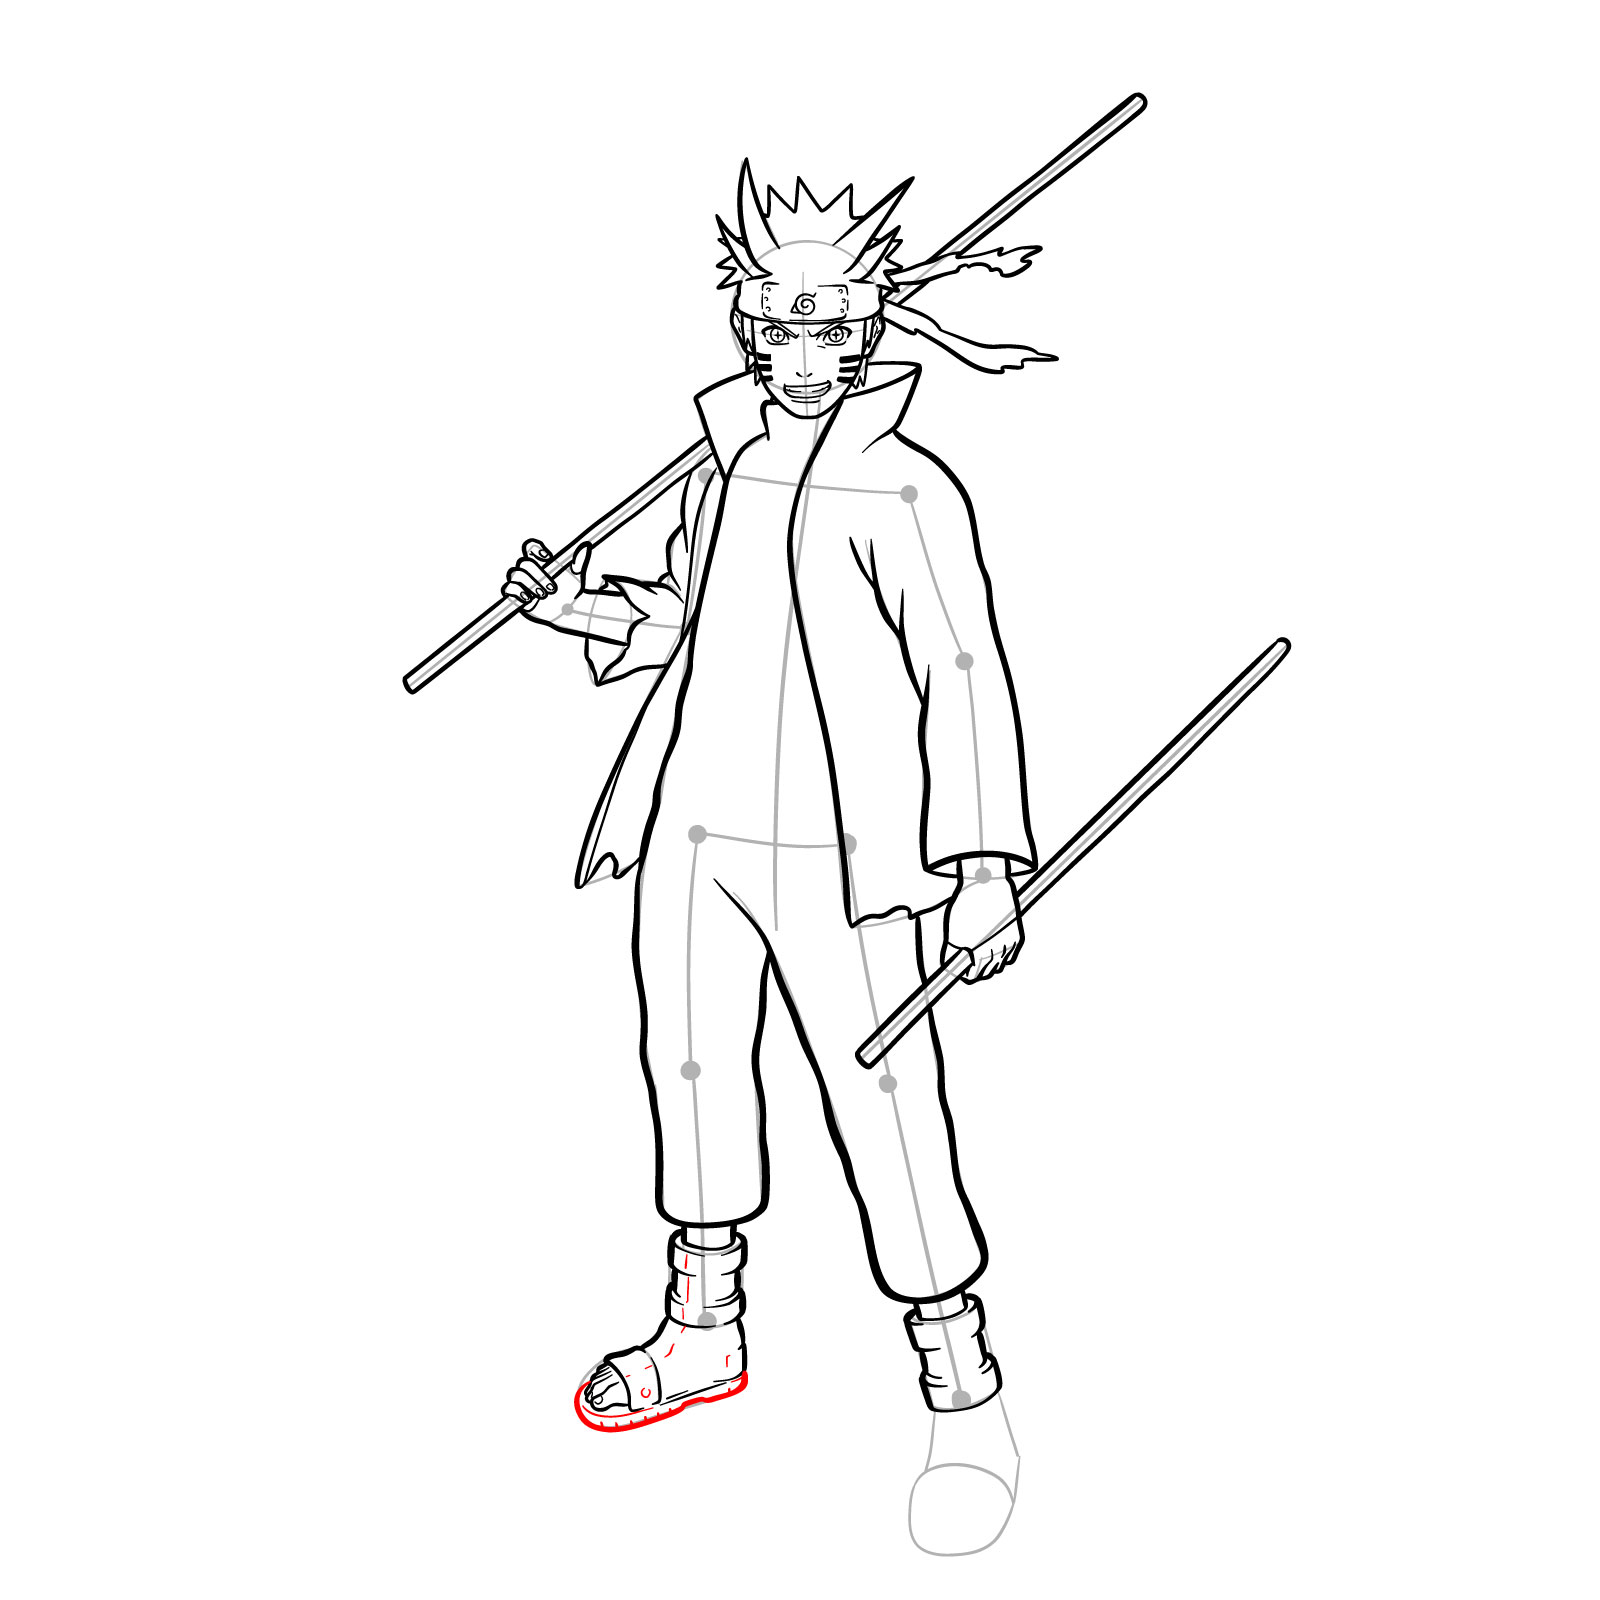
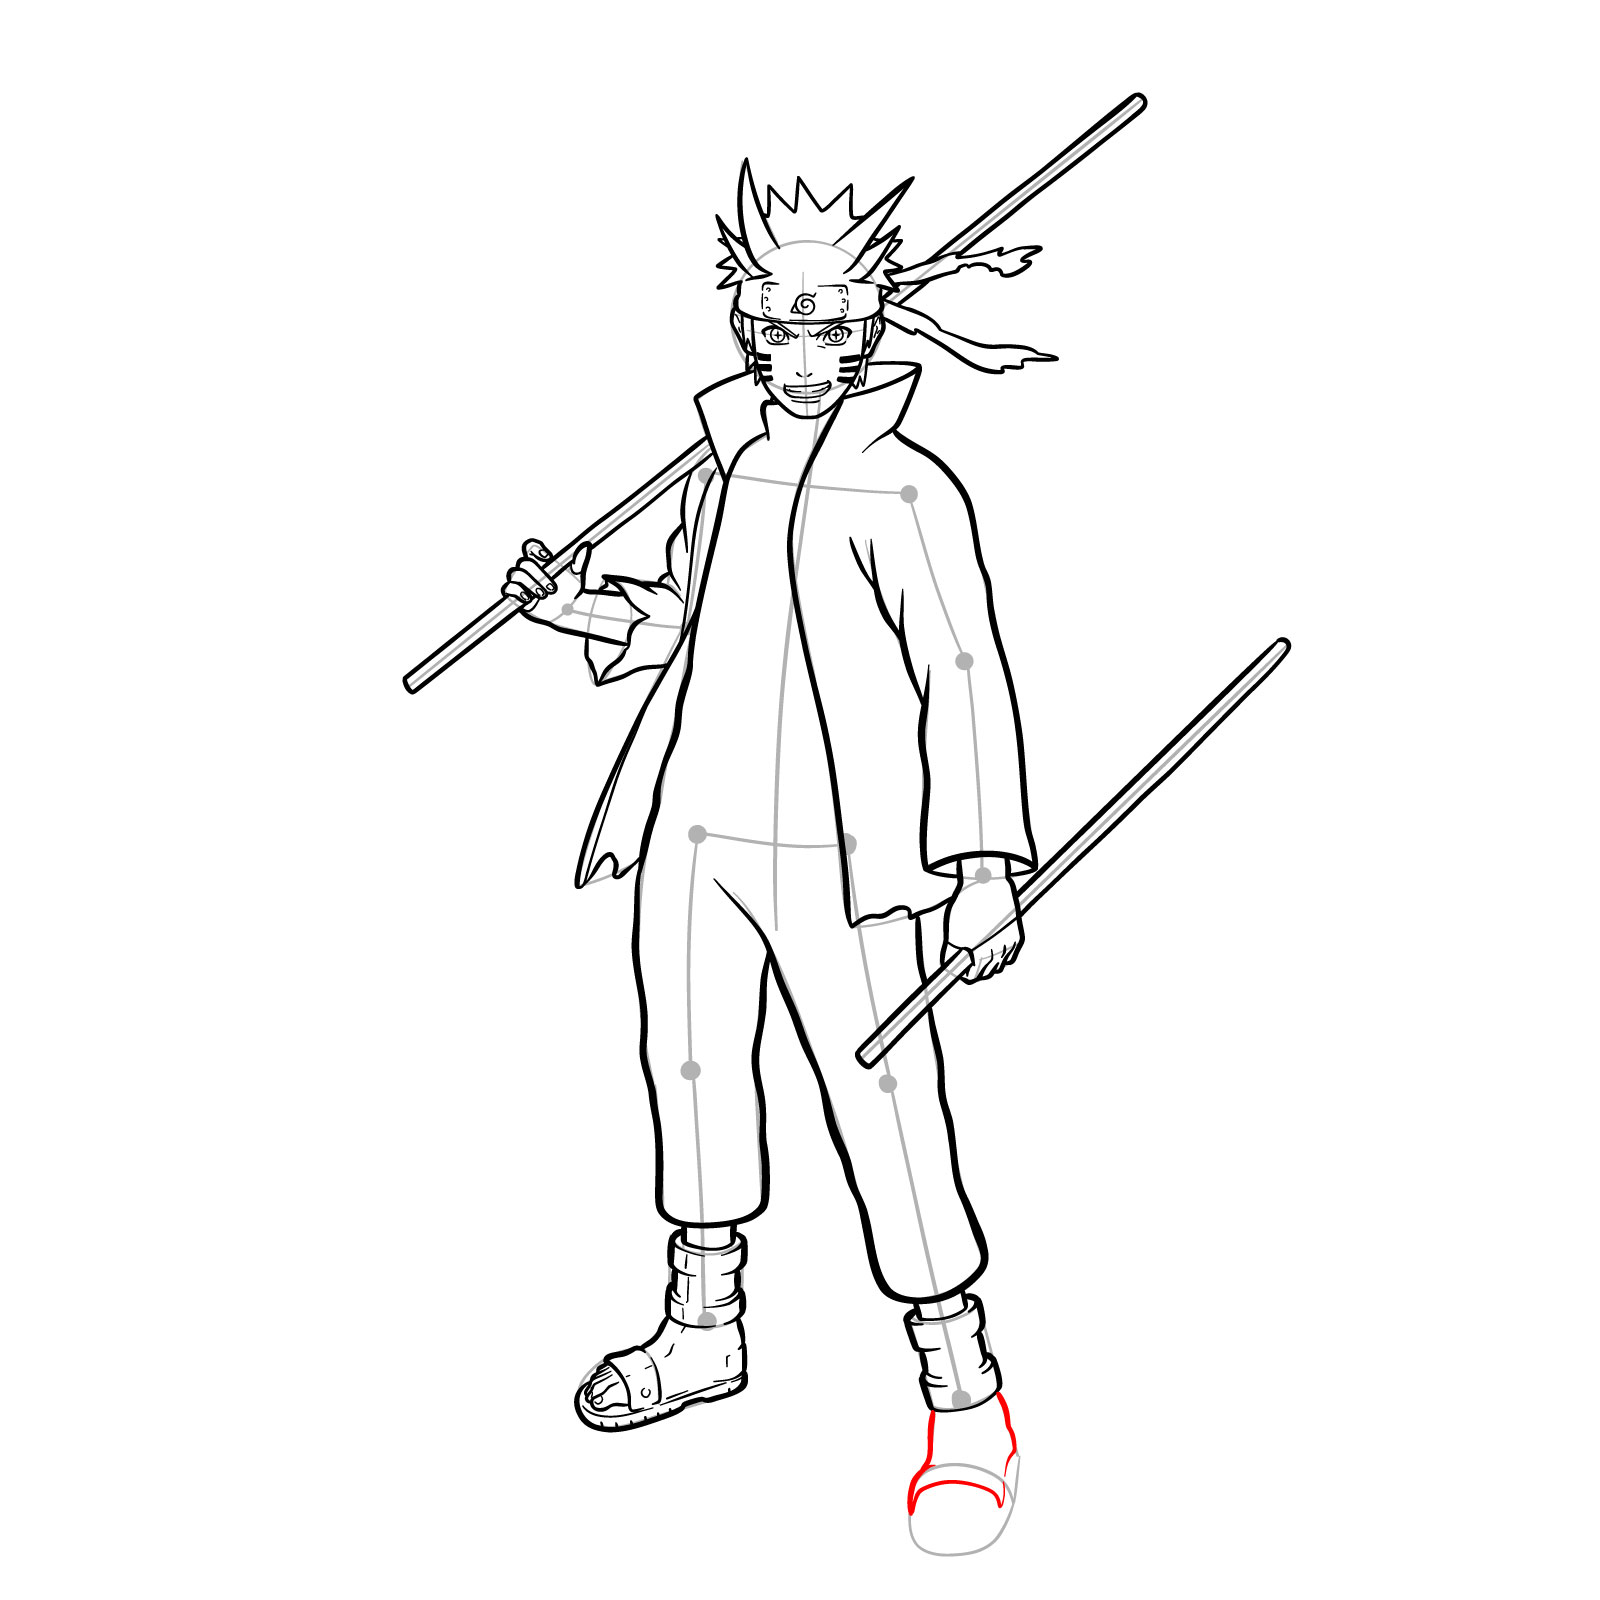
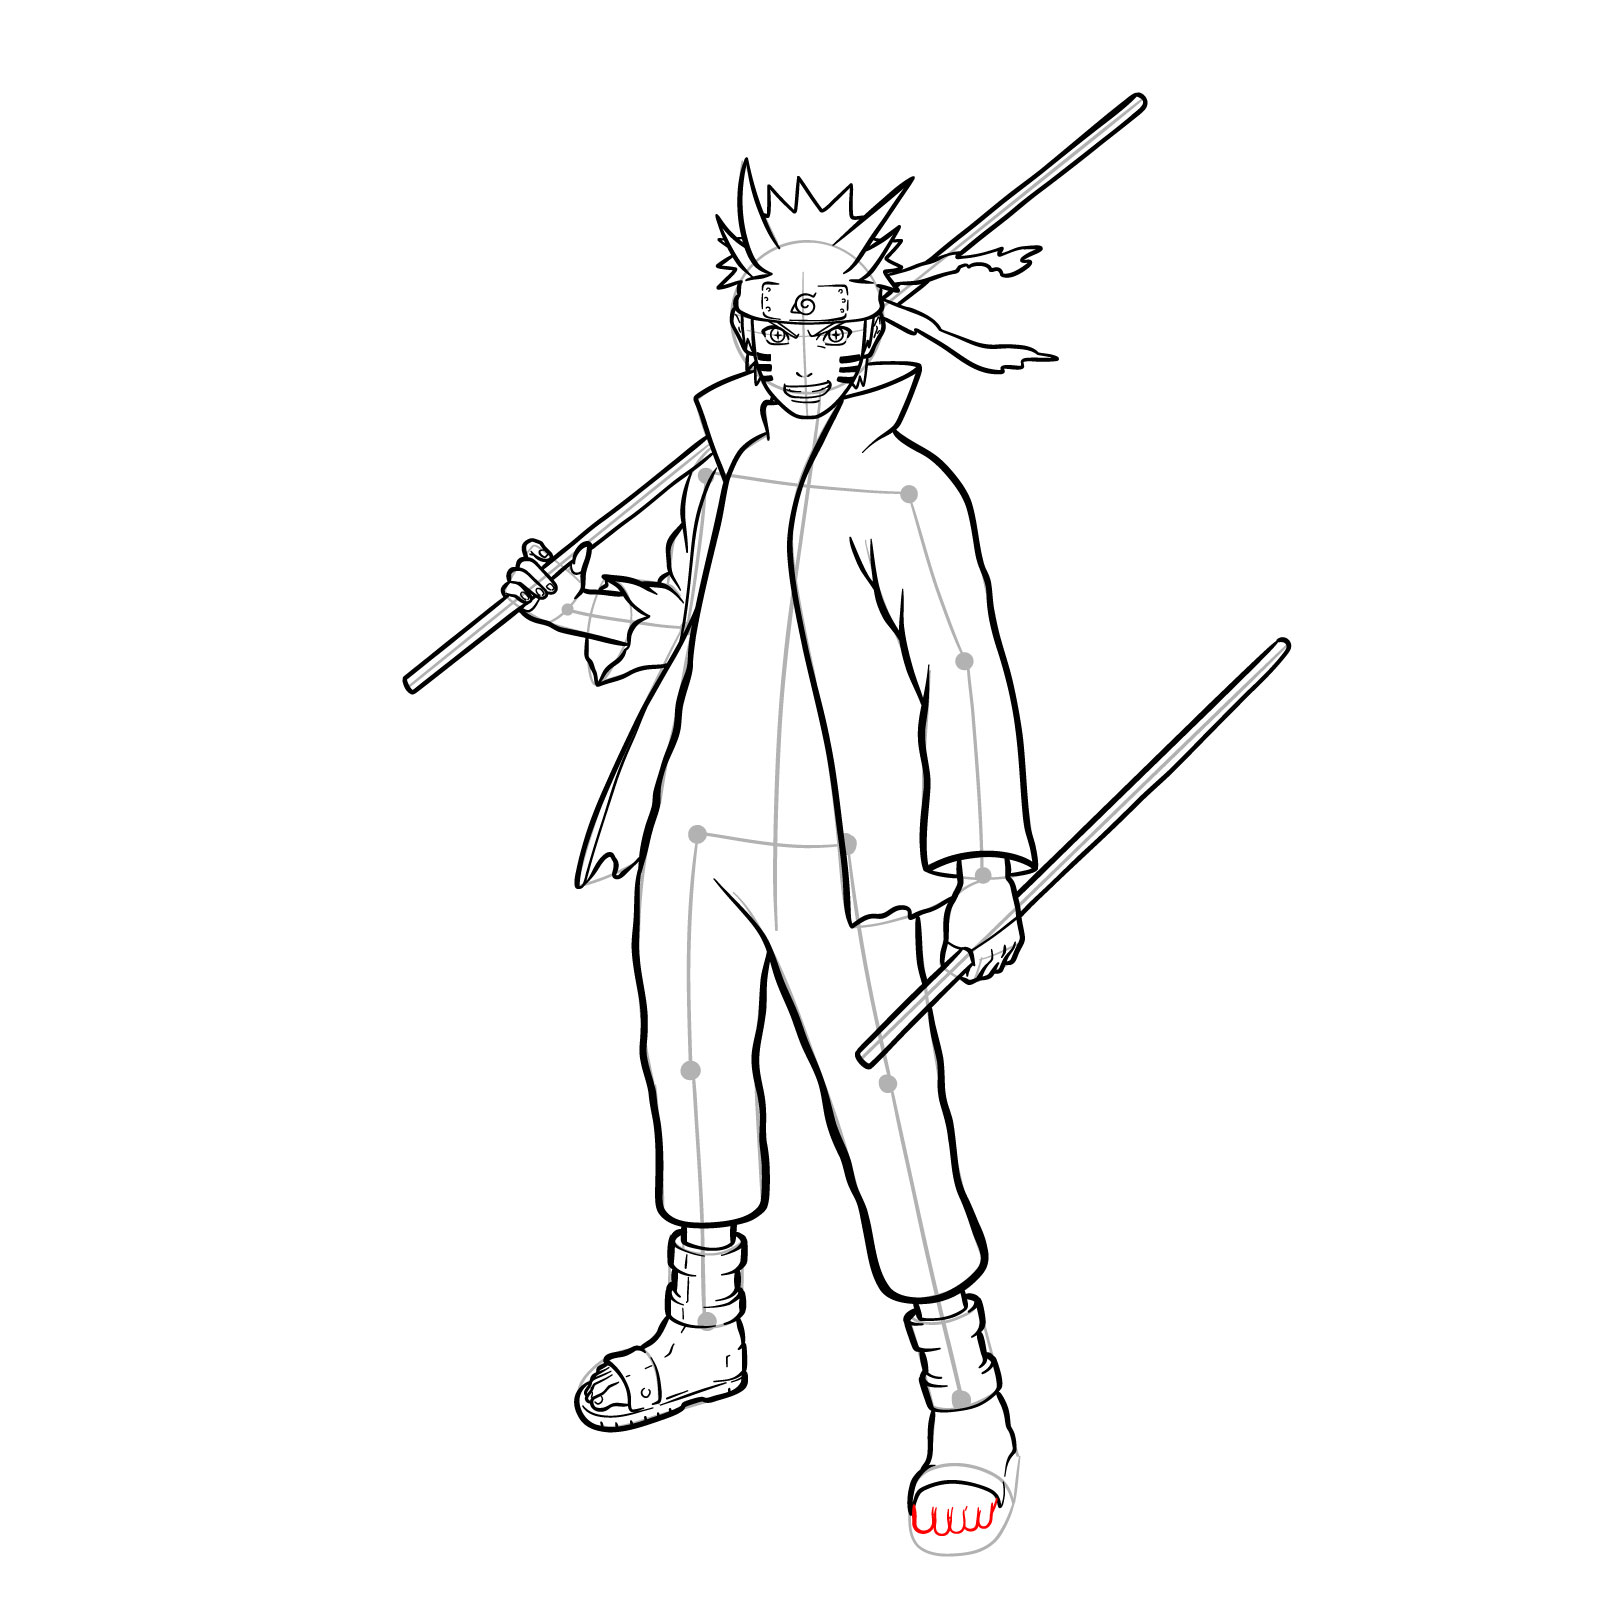
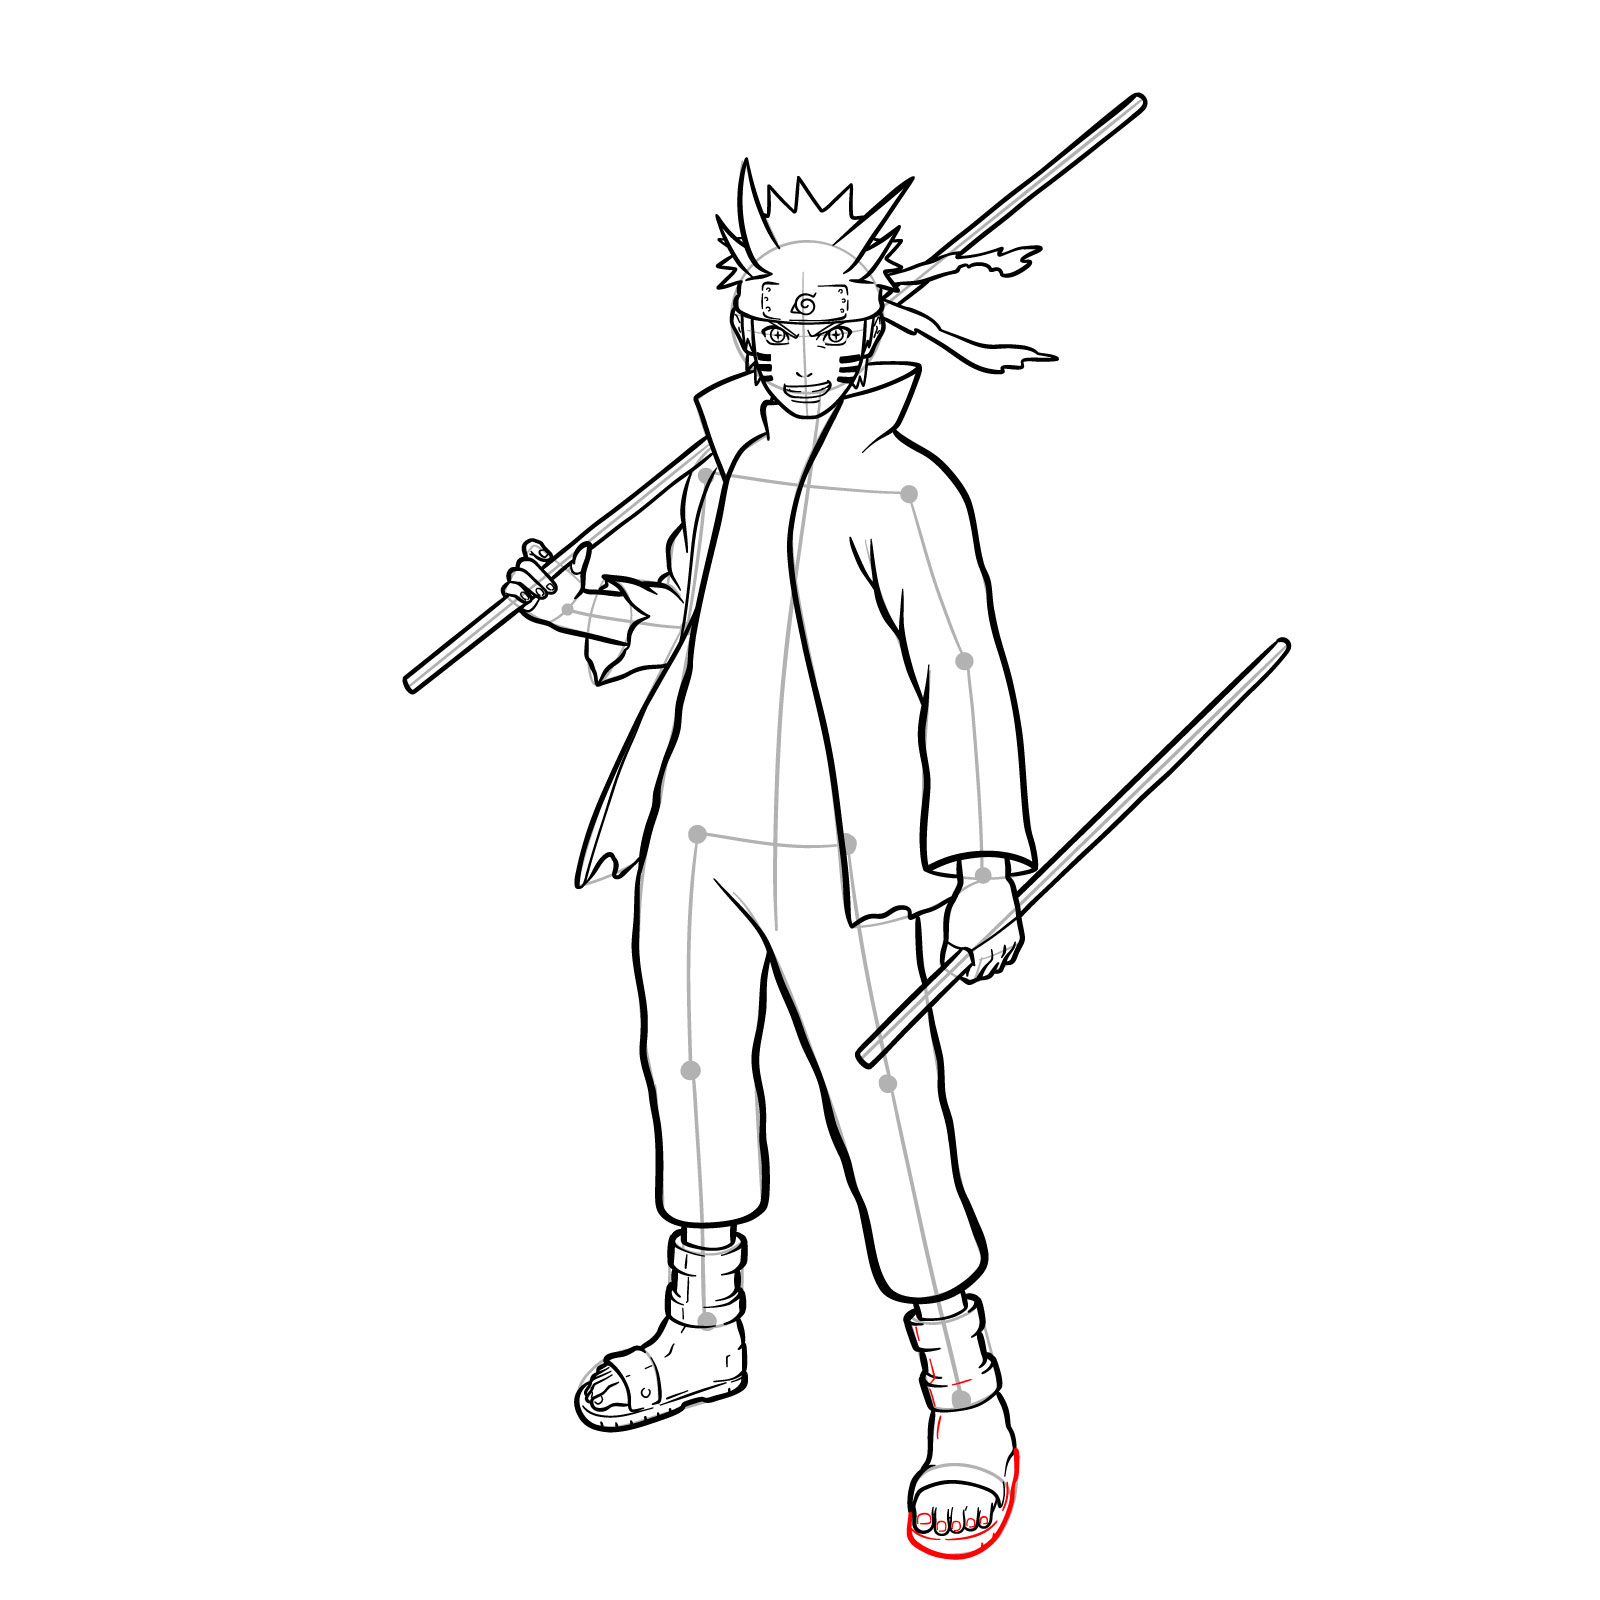
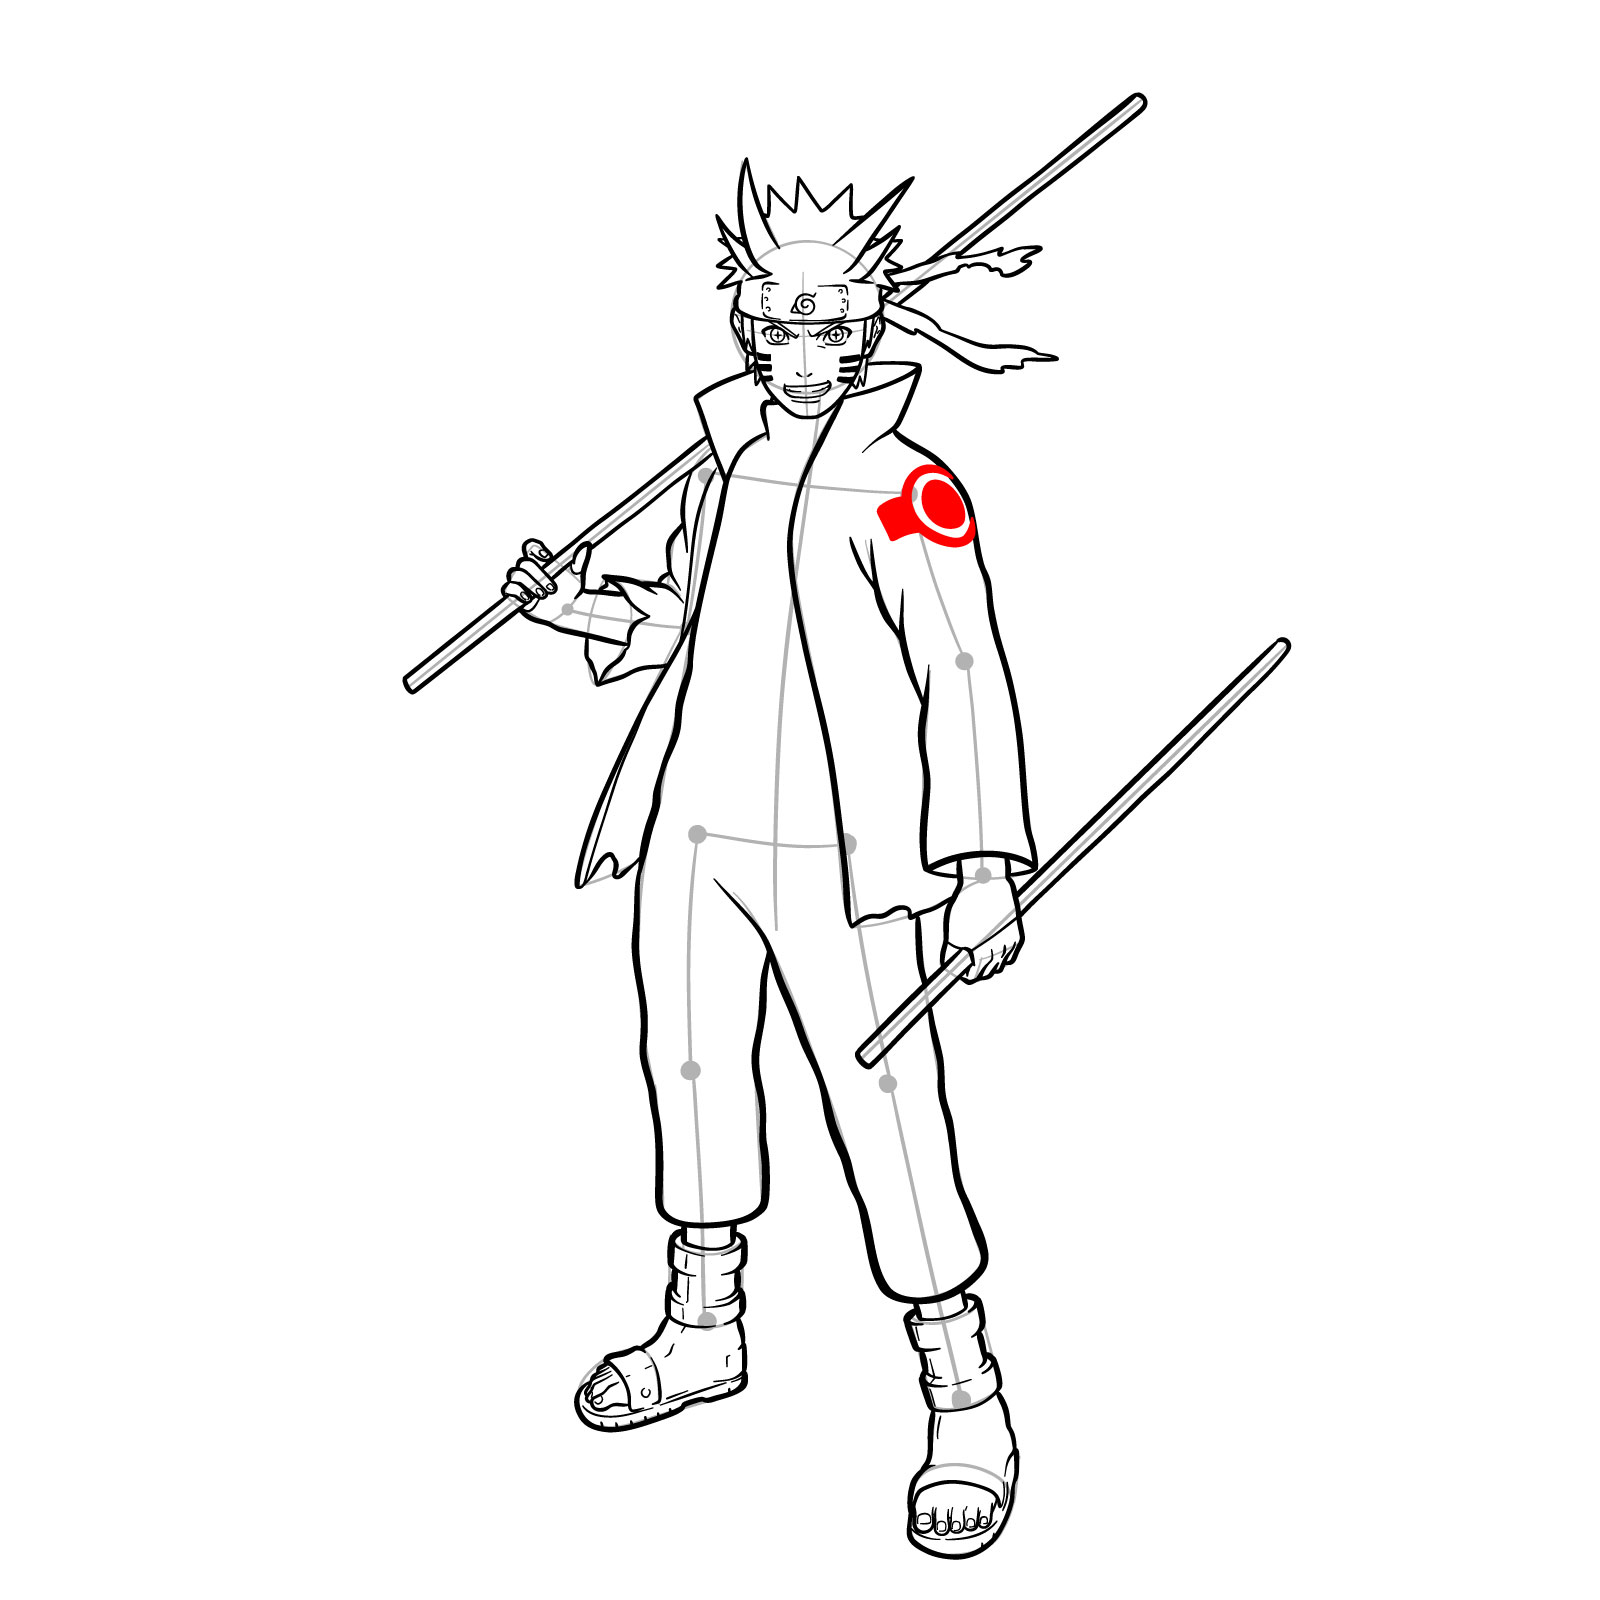
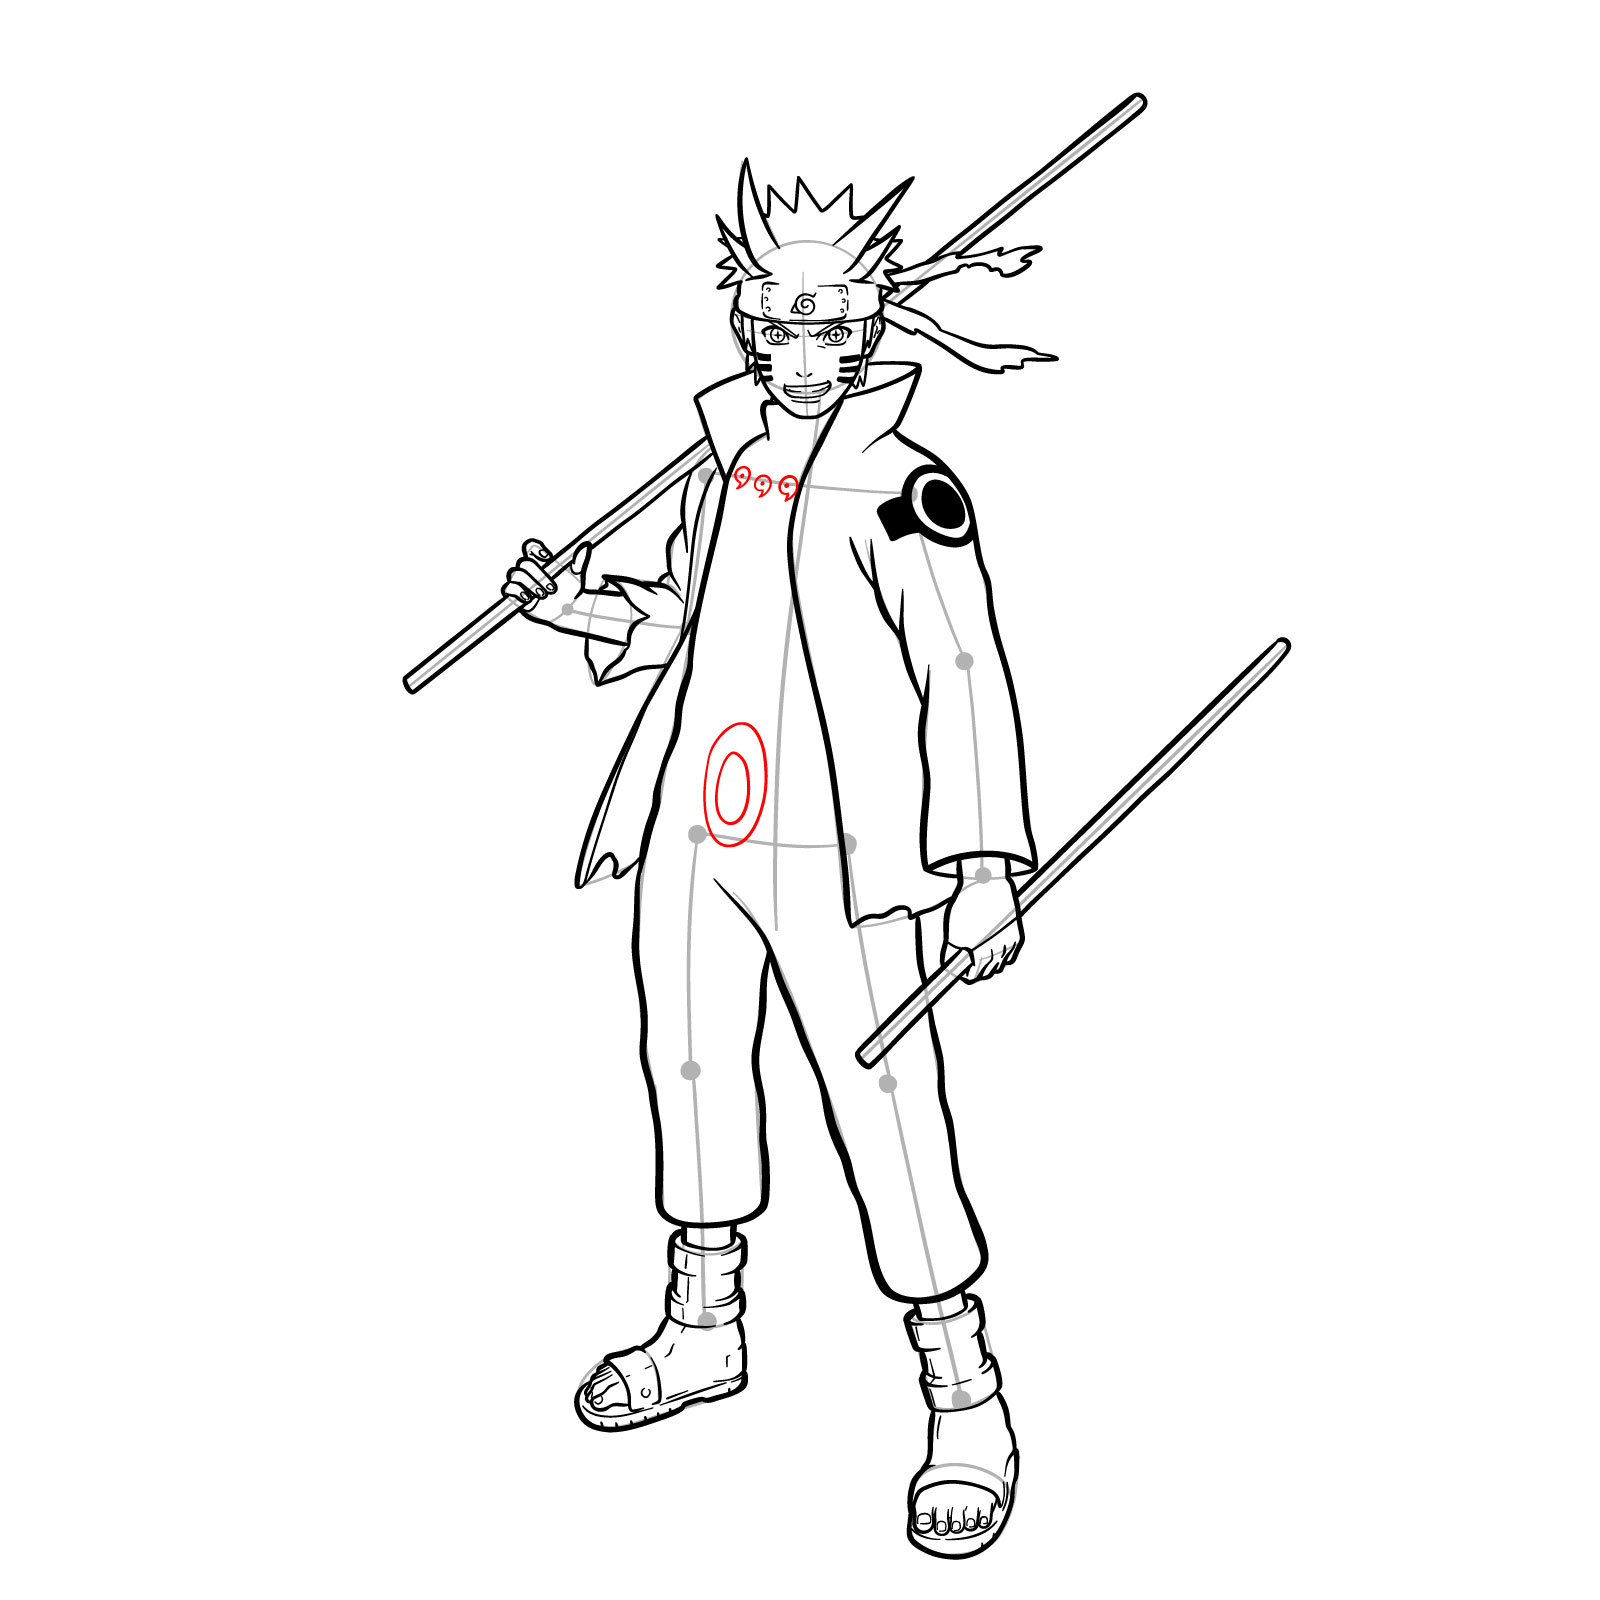
  • Red Color: The active drawing step you should be focusing on.
  • Black Color: Represents lines you have previously drawn.
  • Grey Color: The foundational sketch lines for proportions.

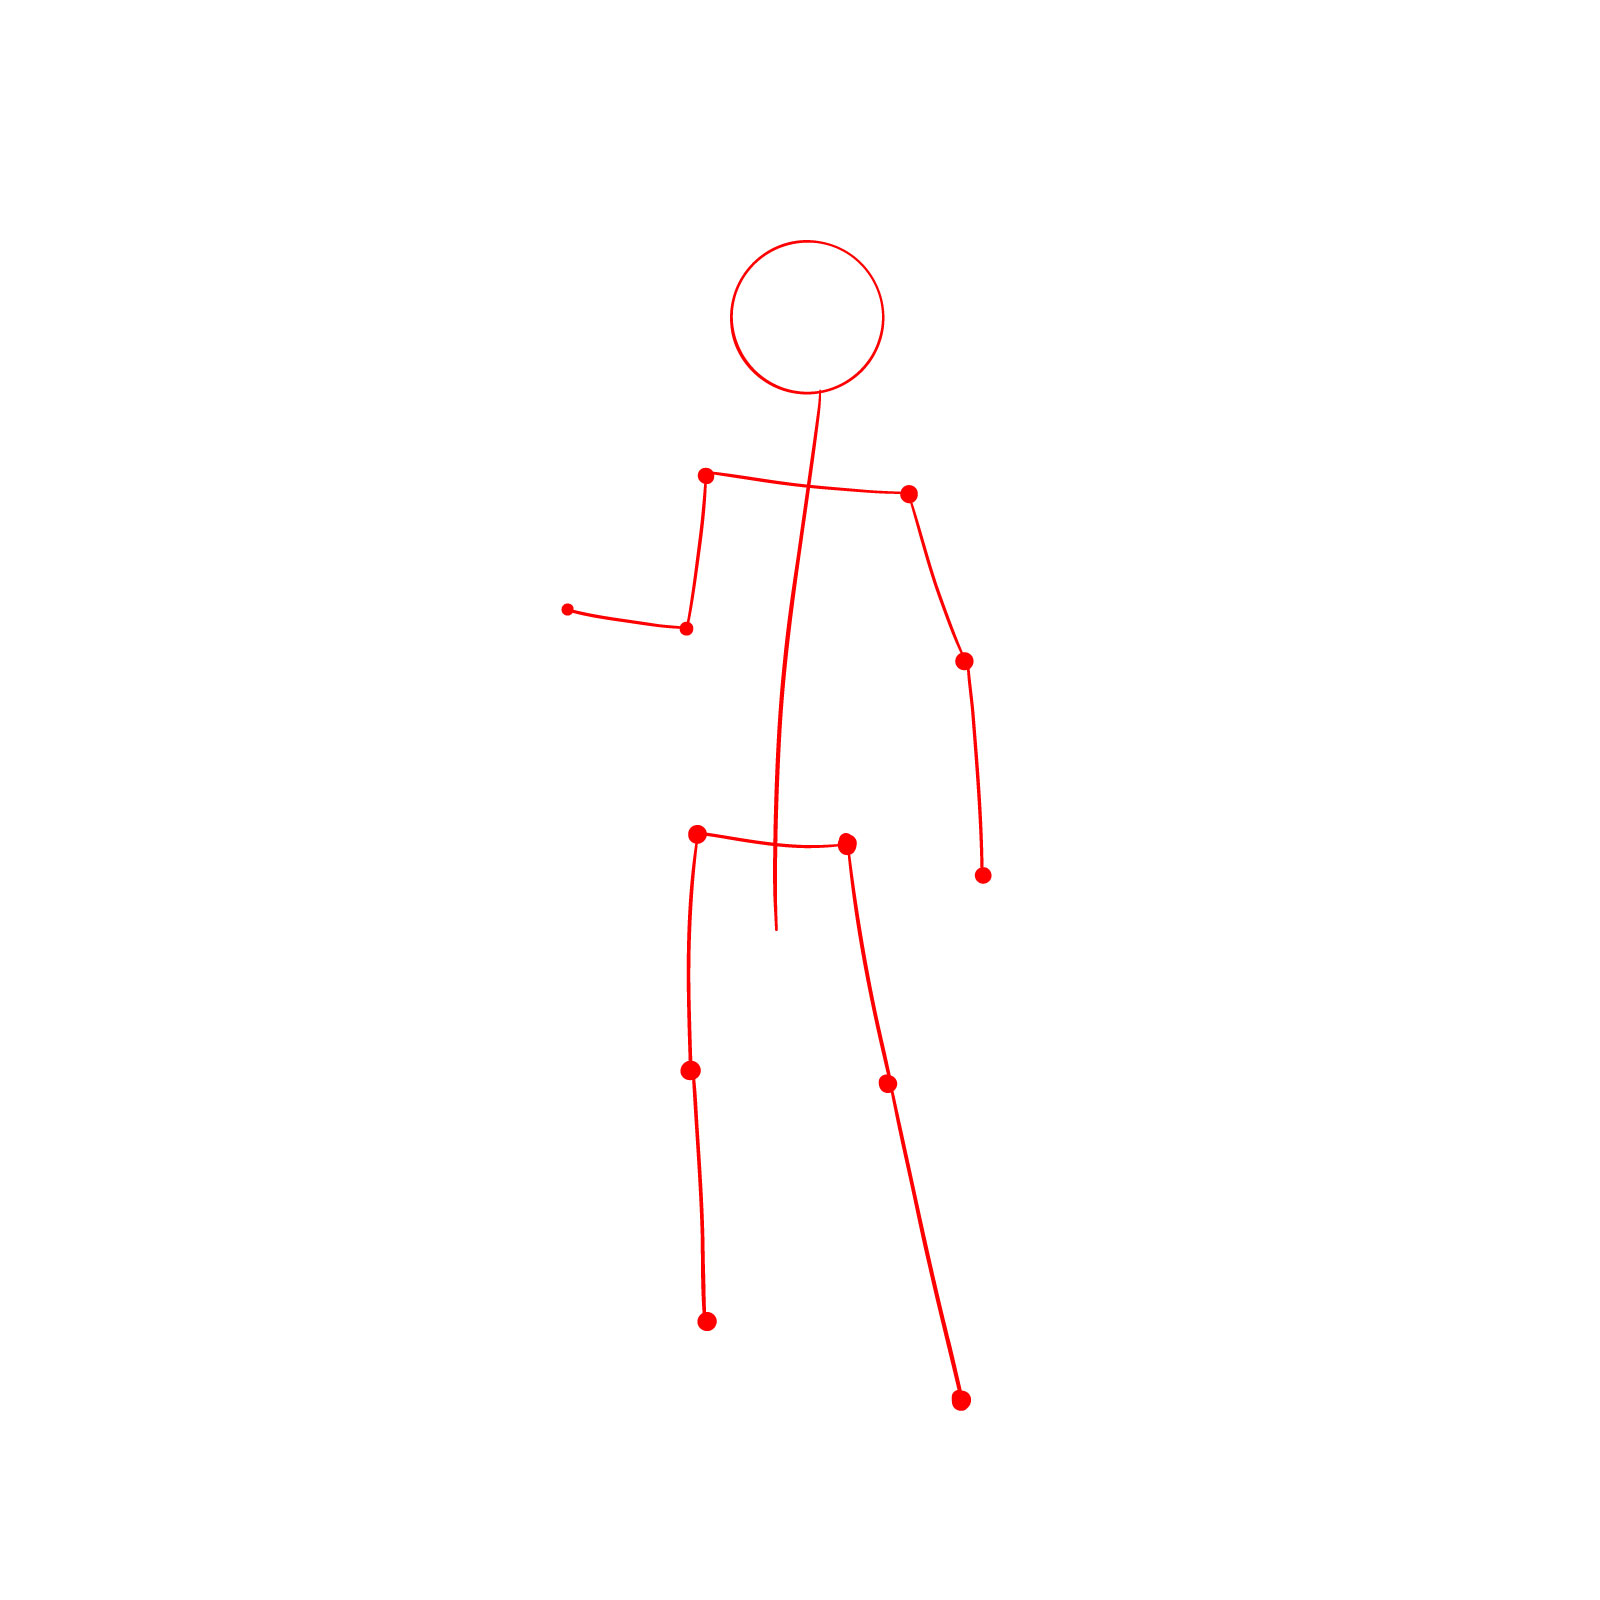
This guide comprises 42 steps, with the initial three dedicated to sketching out the foundational structure. By the end of this process, artists can opt to ink their sketches. It’s crucial to wait for the ink to dry before erasing the pencil lines, ensuring a clean and smudge-free drawing.

Step 01

How to draw Naruto Six Paths Senjutsu Mode - step 01Pin

Step 02

How to draw Naruto Six Paths Senjutsu Mode - step 02Pin

Step 03

How to draw Naruto Six Paths Senjutsu Mode - step 03Pin

Step 04

How to draw Naruto Six Paths Senjutsu Mode - step 04Pin

Step 05

How to draw Naruto Six Paths Senjutsu Mode - step 05Pin

Step 06

How to draw Naruto Six Paths Senjutsu Mode - step 06Pin

Step 07

How to draw Naruto Six Paths Senjutsu Mode - step 07Pin

Step 08

How to draw Naruto Six Paths Senjutsu Mode - step 08Pin

Step 09

How to draw Naruto Six Paths Senjutsu Mode - step 09Pin

Step 10

How to draw Naruto Six Paths Senjutsu Mode - step 10Pin

Step 11

How to draw Naruto Six Paths Senjutsu Mode - step 11Pin

Step 12

How to draw Naruto Six Paths Senjutsu Mode - step 12Pin

Step 13

How to draw Naruto Six Paths Senjutsu Mode - step 13Pin

Step 14

How to draw Naruto Six Paths Senjutsu Mode - step 14Pin

Step 15

How to draw Naruto Six Paths Senjutsu Mode - step 15Pin

Step 16

How to draw Naruto Six Paths Senjutsu Mode - step 16Pin

Step 17

How to draw Naruto Six Paths Senjutsu Mode - step 17Pin

Step 18

How to draw Naruto Six Paths Senjutsu Mode - step 18Pin

Step 19

How to draw Naruto Six Paths Senjutsu Mode - step 19Pin

Step 20

How to draw Naruto Six Paths Senjutsu Mode - step 20Pin

Step 21

How to draw Naruto Six Paths Senjutsu Mode - step 21Pin

Step 22

How to draw Naruto Six Paths Senjutsu Mode - step 22Pin

Step 23

How to draw Naruto Six Paths Senjutsu Mode - step 23Pin

Step 24

How to draw Naruto Six Paths Senjutsu Mode - step 24Pin

Step 25

How to draw Naruto Six Paths Senjutsu Mode - step 25Pin

Step 26

How to draw Naruto Six Paths Senjutsu Mode - step 26Pin

Step 27

How to draw Naruto Six Paths Senjutsu Mode - step 27Pin

Step 28

How to draw Naruto Six Paths Senjutsu Mode - step 28Pin

Step 29

How to draw Naruto Six Paths Senjutsu Mode - step 29Pin

Step 30

How to draw Naruto Six Paths Senjutsu Mode - step 30Pin

Step 31

How to draw Naruto Six Paths Senjutsu Mode - step 31Pin

Step 32

How to draw Naruto Six Paths Senjutsu Mode - step 32Pin

Step 33

How to draw Naruto Six Paths Senjutsu Mode - step 33Pin

Step 34

How to draw Naruto Six Paths Senjutsu Mode - step 34Pin

Step 35

How to draw Naruto Six Paths Senjutsu Mode - step 35Pin

Step 36

How to draw Naruto Six Paths Senjutsu Mode - step 36Pin

Step 37

How to draw Naruto Six Paths Senjutsu Mode - step 37Pin

Step 38

How to draw Naruto Six Paths Senjutsu Mode - step 38Pin

Step 39

How to draw Naruto Six Paths Senjutsu Mode - step 39Pin

Step 40

How to draw Naruto Six Paths Senjutsu Mode - step 40Pin

Step 41

How to draw Naruto Six Paths Senjutsu Mode - step 41Pin

Step 42

How to draw Naruto Six Paths Senjutsu Mode - final stepPin

Frequently Asked Questions

What technique works best for Naruto’s spiky hair?

To capture the essence of Naruto’s spiky hair, start with basic triangular shapes, and then refine them by adding intricate details, stray hair strands, and depth using shading. The key is to maintain its wild and unkempt look, which signifies his rebellious and energetic nature.

How should I approach the intricate patterns of his cloak?

Begin with outlining the cloak’s basic structure. Gradually, add in the intricate patterns, ensuring symmetrical design on both sides. It might help to use references or a grid method for more accuracy, making sure every design stands out.

Any tips for capturing the Truth-Seeking Balls accurately?

Start by sketching perfect circles using a compass or freehand, if you’re comfortable. Next, fill each circle with black color. That’s it.

Now that you’re equipped with the knowledge of how to draw Naruto in Six Paths Senjutsu Mode, it’s time to grab your drawing tools and breathe life into this iconic character. Remember, practice makes perfect, and each drawing will bring you one step closer to mastering this art.

If you found this guide valuable, consider supporting our initiative. By donating, you not only keep the SketchOk project alive but also pave the way for more exciting tutorials. Your contributions allow you to suggest topics for future guides. Also, don’t forget to share this guide on the web, especially on our social media platforms: Facebook, Instagram, and Pinterest. Let’s grow our community of artists together.

Did you like the tutorial?

You can support the author of this website and also suggest your own ideas for new drawings by making a small donation here:

Leave a Comment

5