Last Updated on May 13, 2026
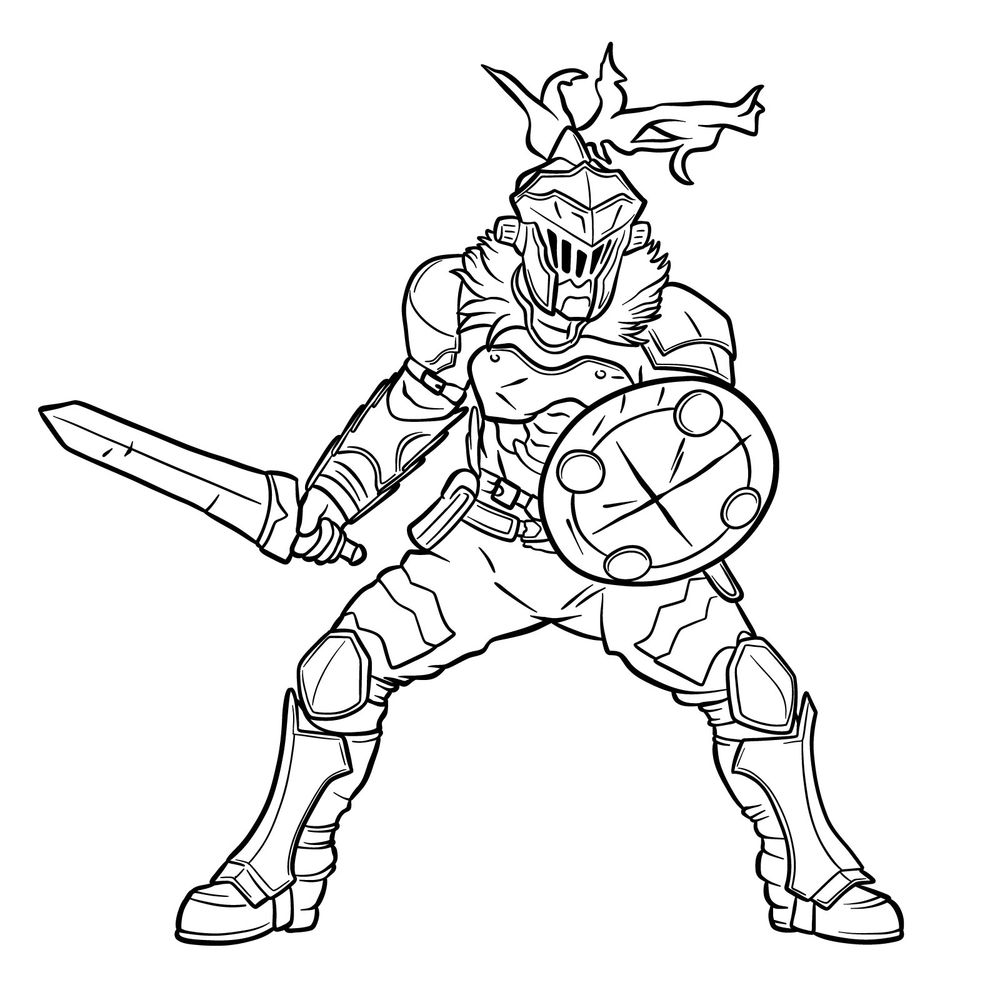
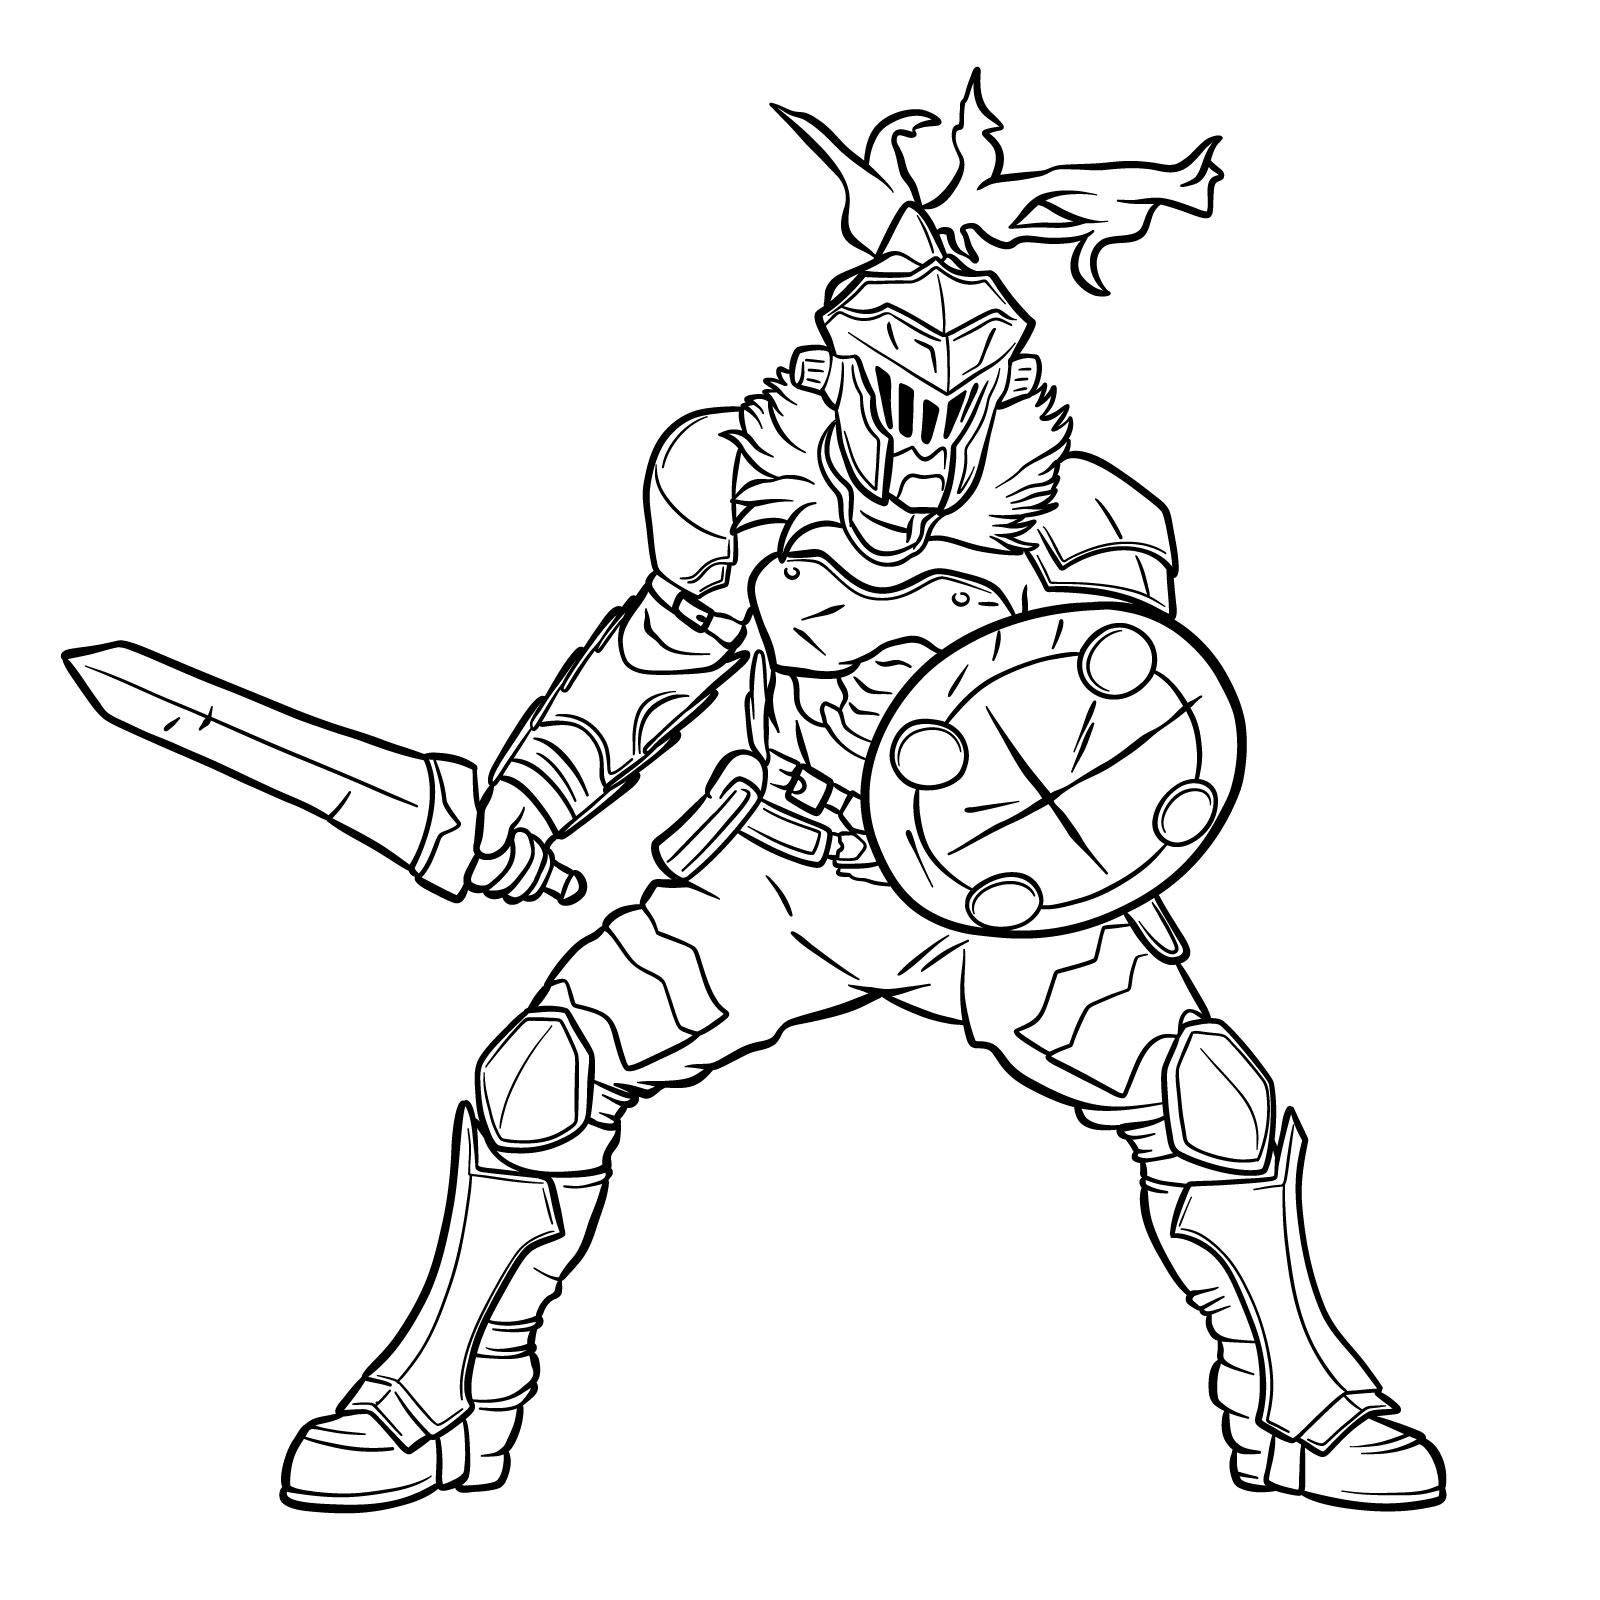
The realm of goblins and adventurers is rich with tales of valor, but one name stands out among them: Goblin Slayer. This silver-ranked Adventurer, known for his peculiar appearance and relentless pursuit of goblins, has captivated the hearts of many. As we venture into the world of artistry, let’s embark on the journey of learning how to draw Goblin Slayer in battle stance.
A Glimpse into Goblin Slayer’s Appearance
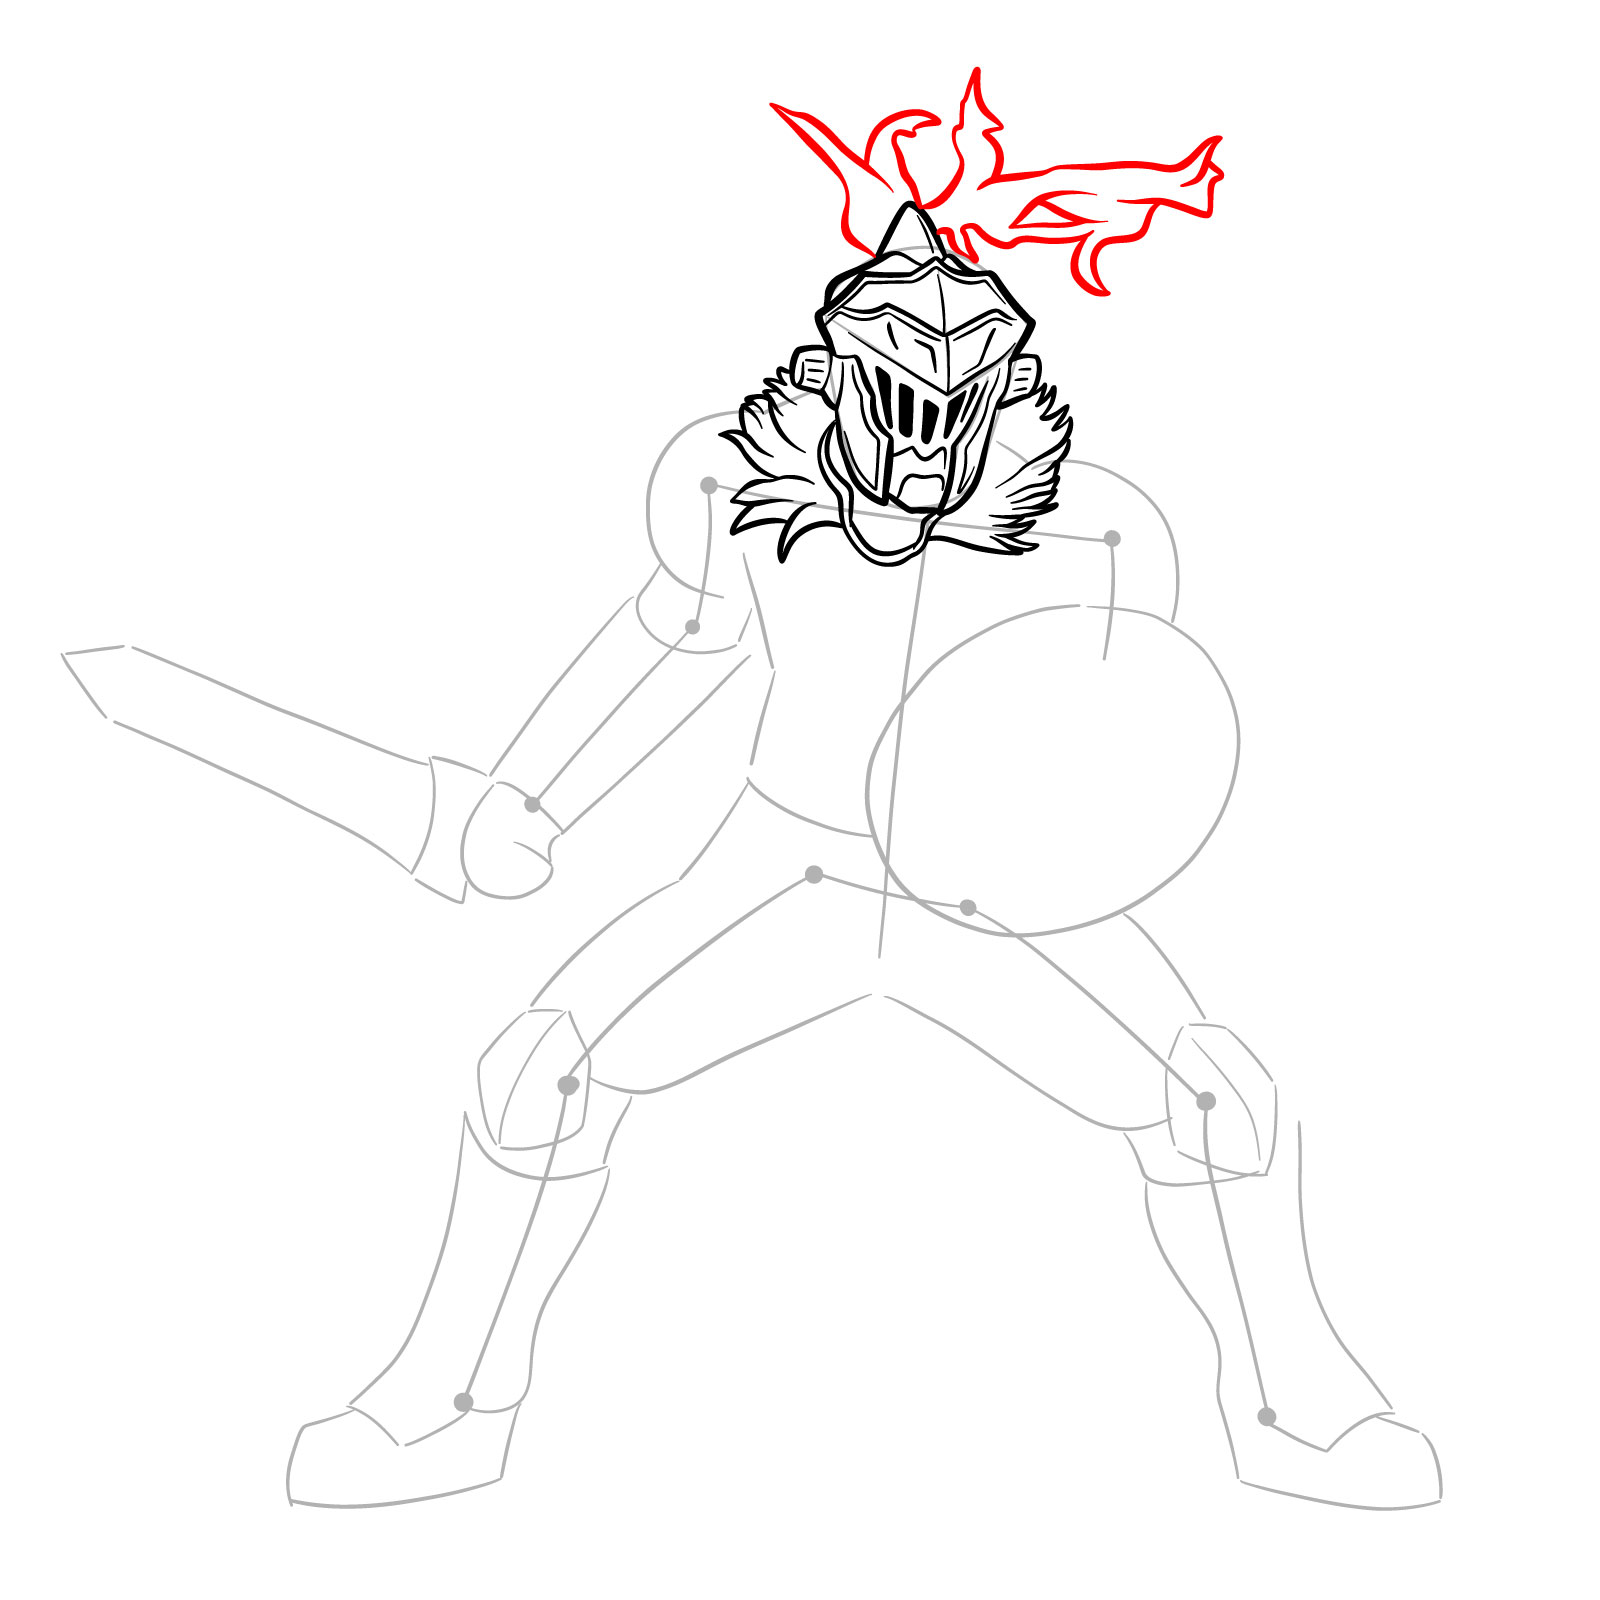
- Signature Armor: Goblin Slayer’s armor, though seemingly unkempt, is a leather ensemble equipped with chain mail underneath. It’s his choice of battle wear, with a unique helmet that used to sport horns, and a red fabric trailing behind it.
- Strategic Neglect: Due to goblins’ acute sense of smell, Goblin Slayer intentionally avoids cleaning his armor. Freshly cleaned armor would emit a strong metal scent, thereby alerting goblins of his presence.
- Mocked Appearance: Many fail to appreciate the practicality behind Goblin Slayer’s chosen appearance, ridiculing him instead. This grimy look, combined with his basic equipment, often leads others to mistake him for an undead.
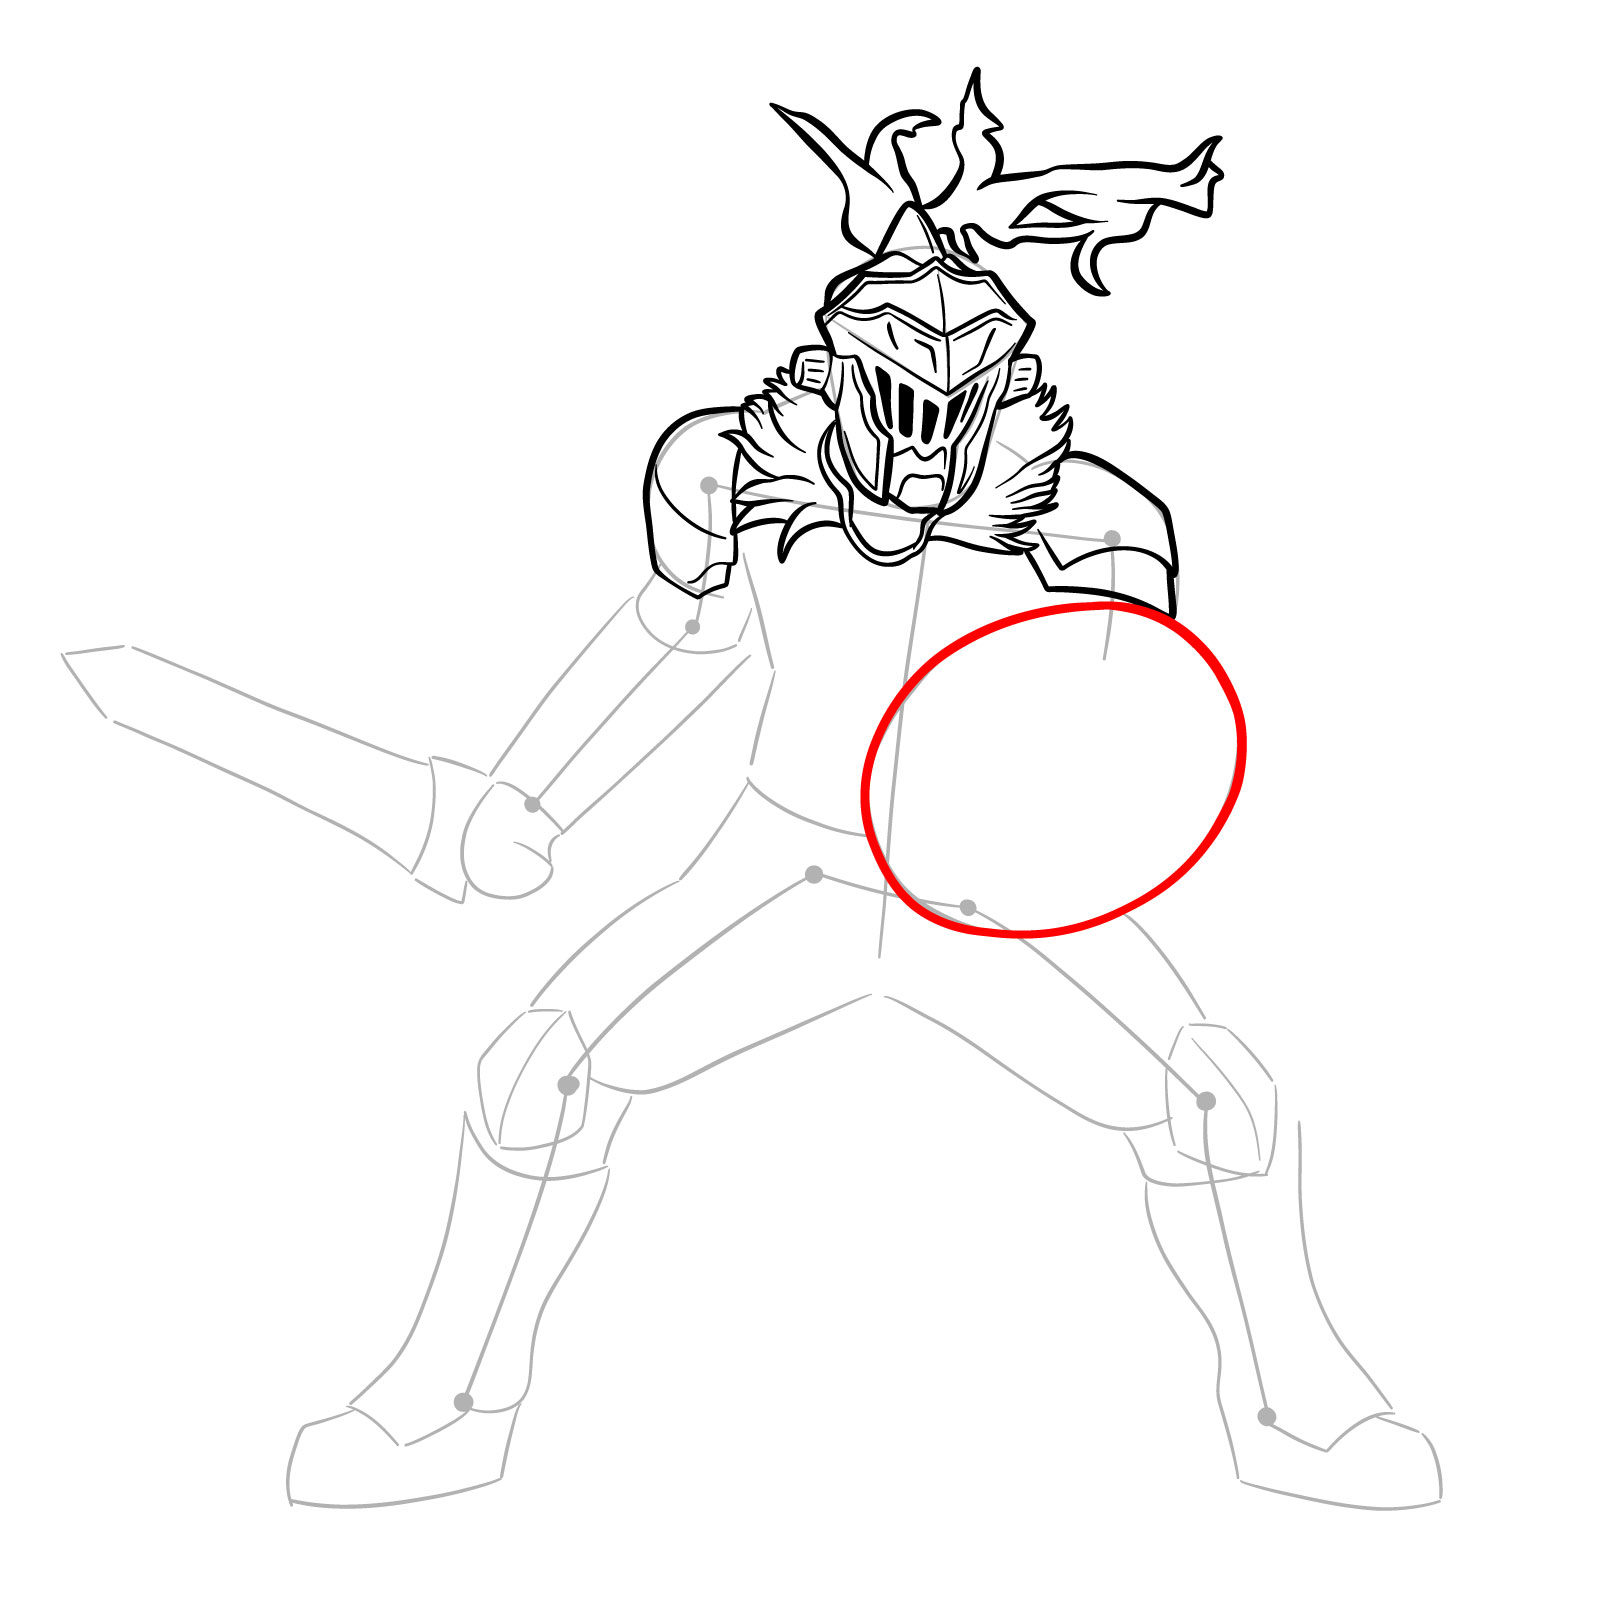
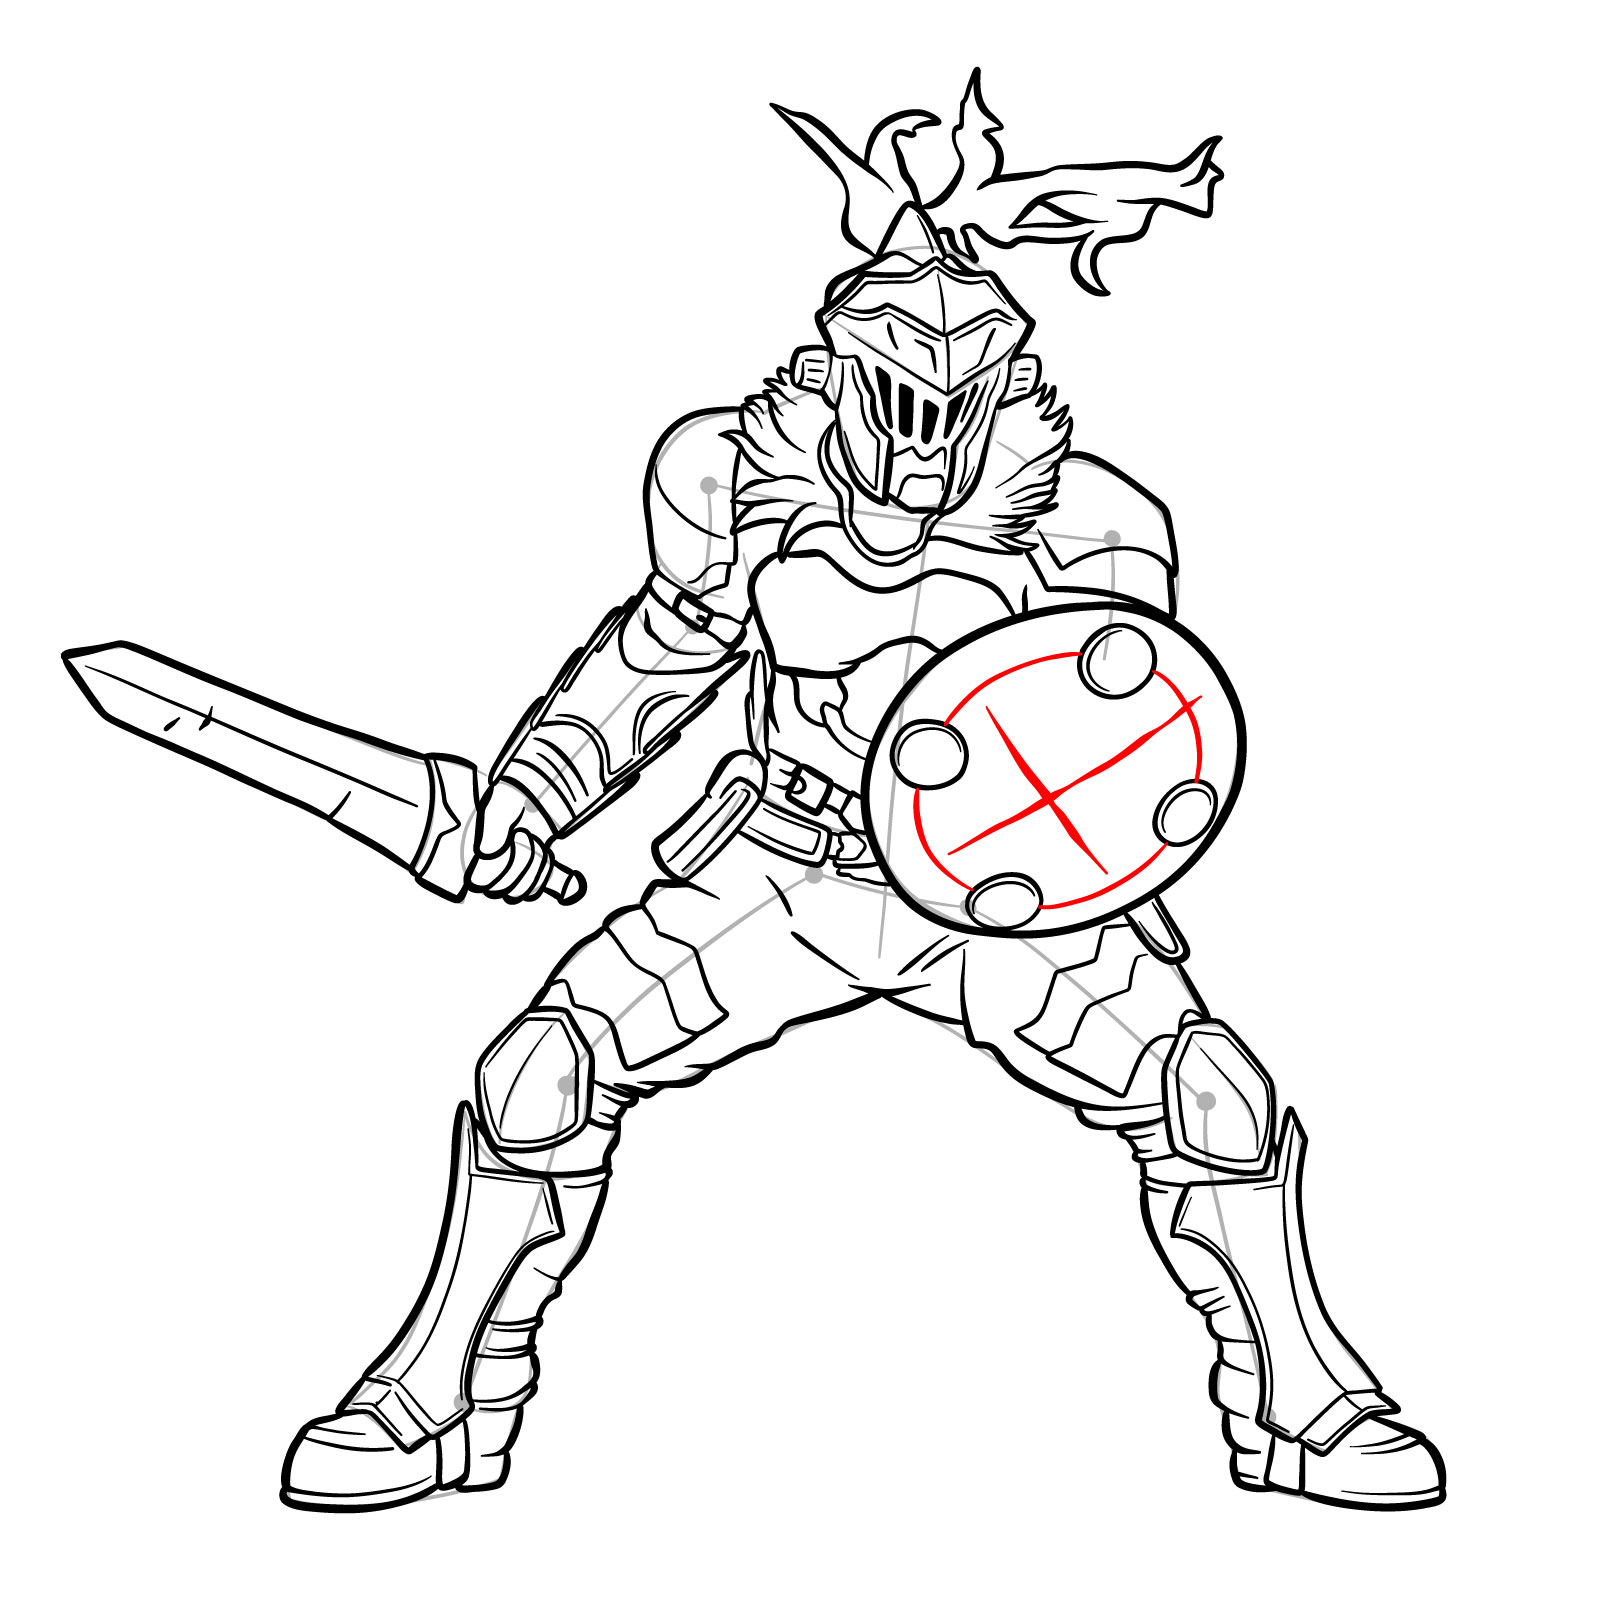
- Weapons Ready: On his right arm holds a versatile, disposable short sword, accompanied by a small round targe on his left arm, which doubles as a cutting weapon.
About This Drawing Guide
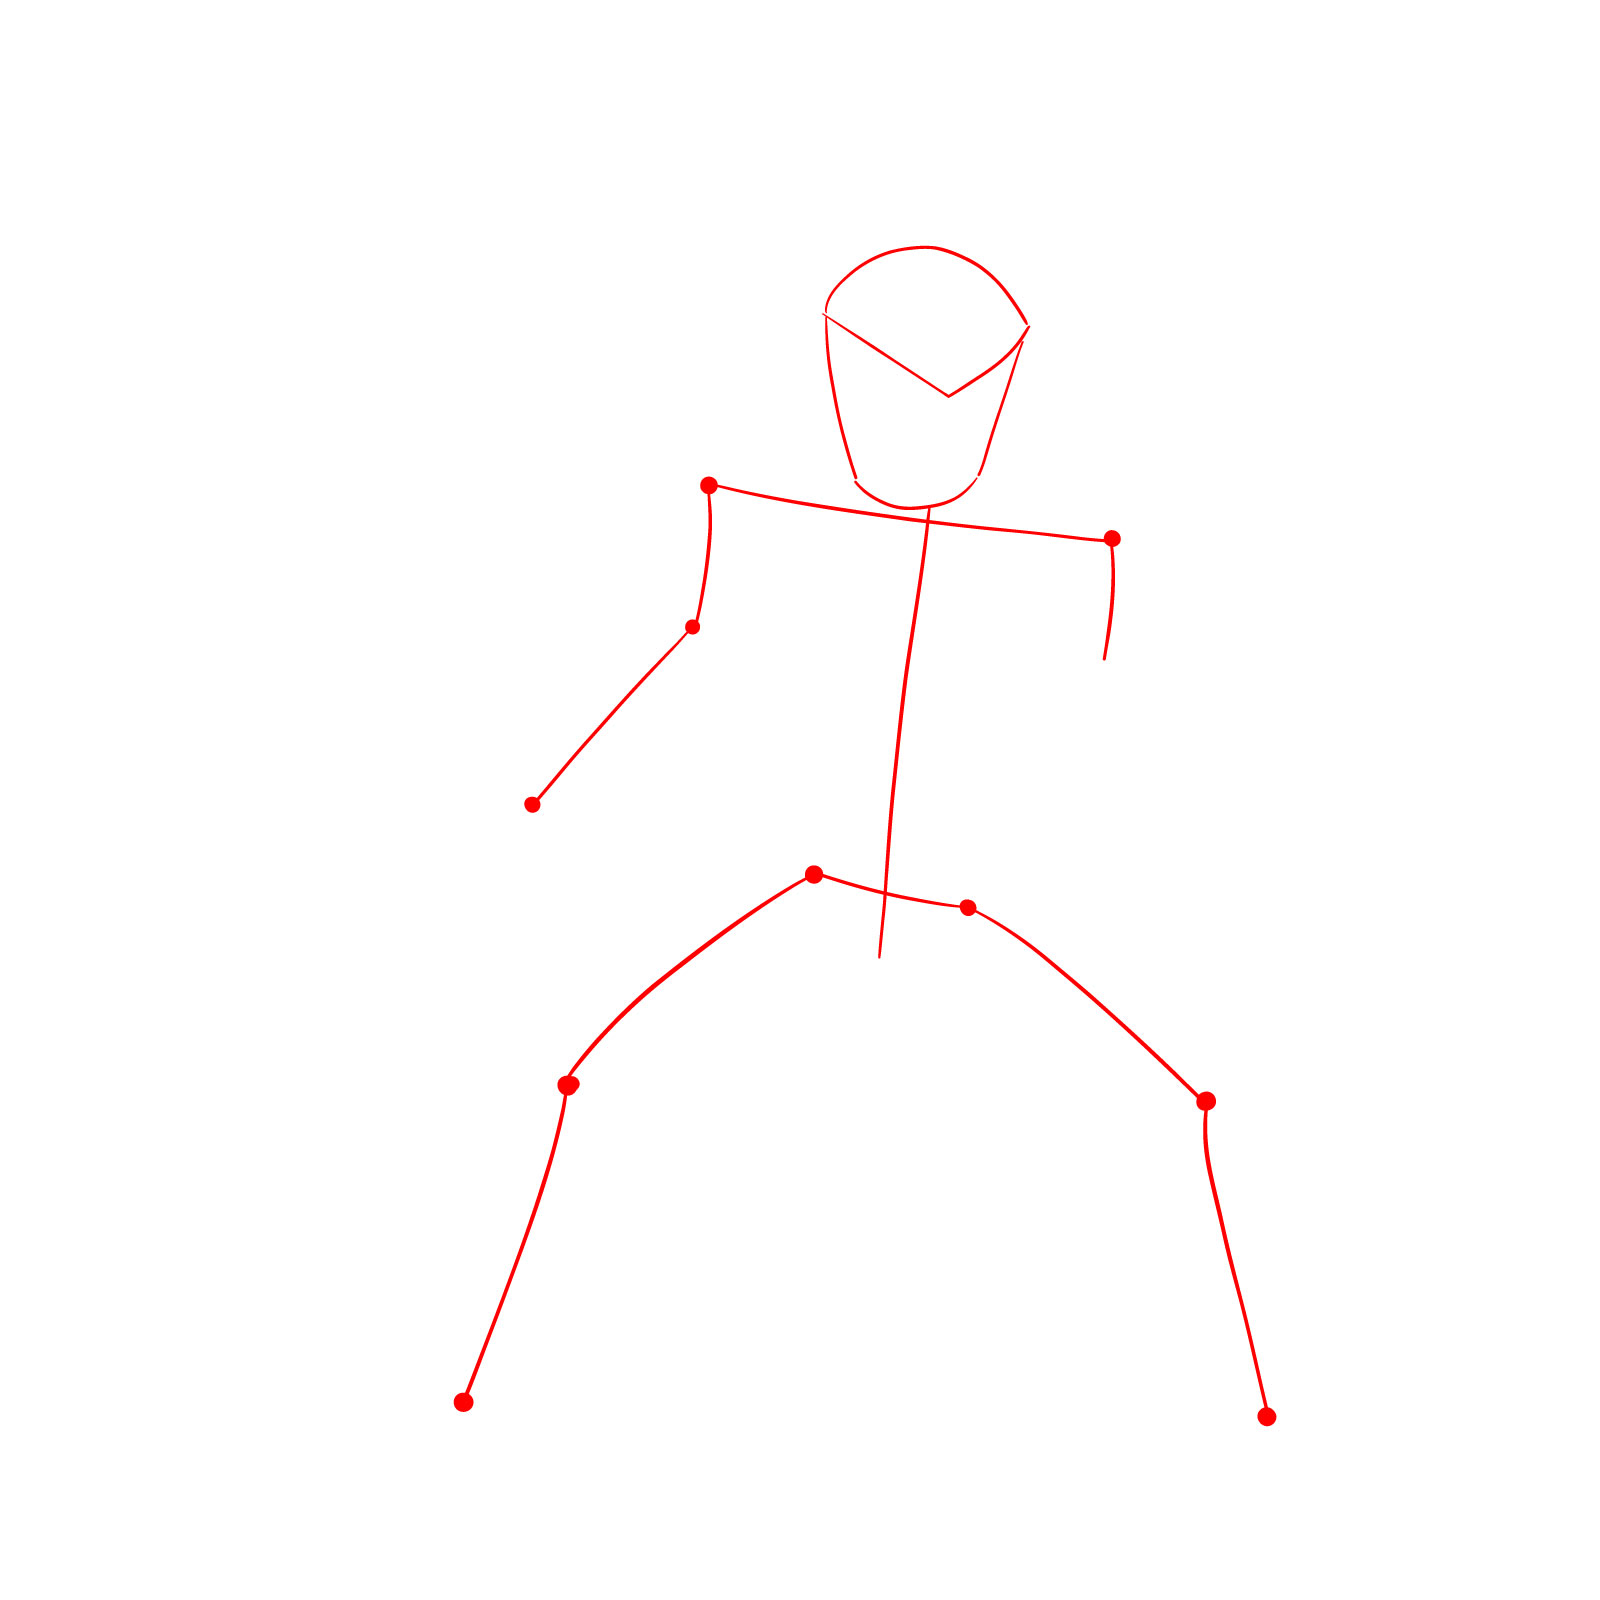
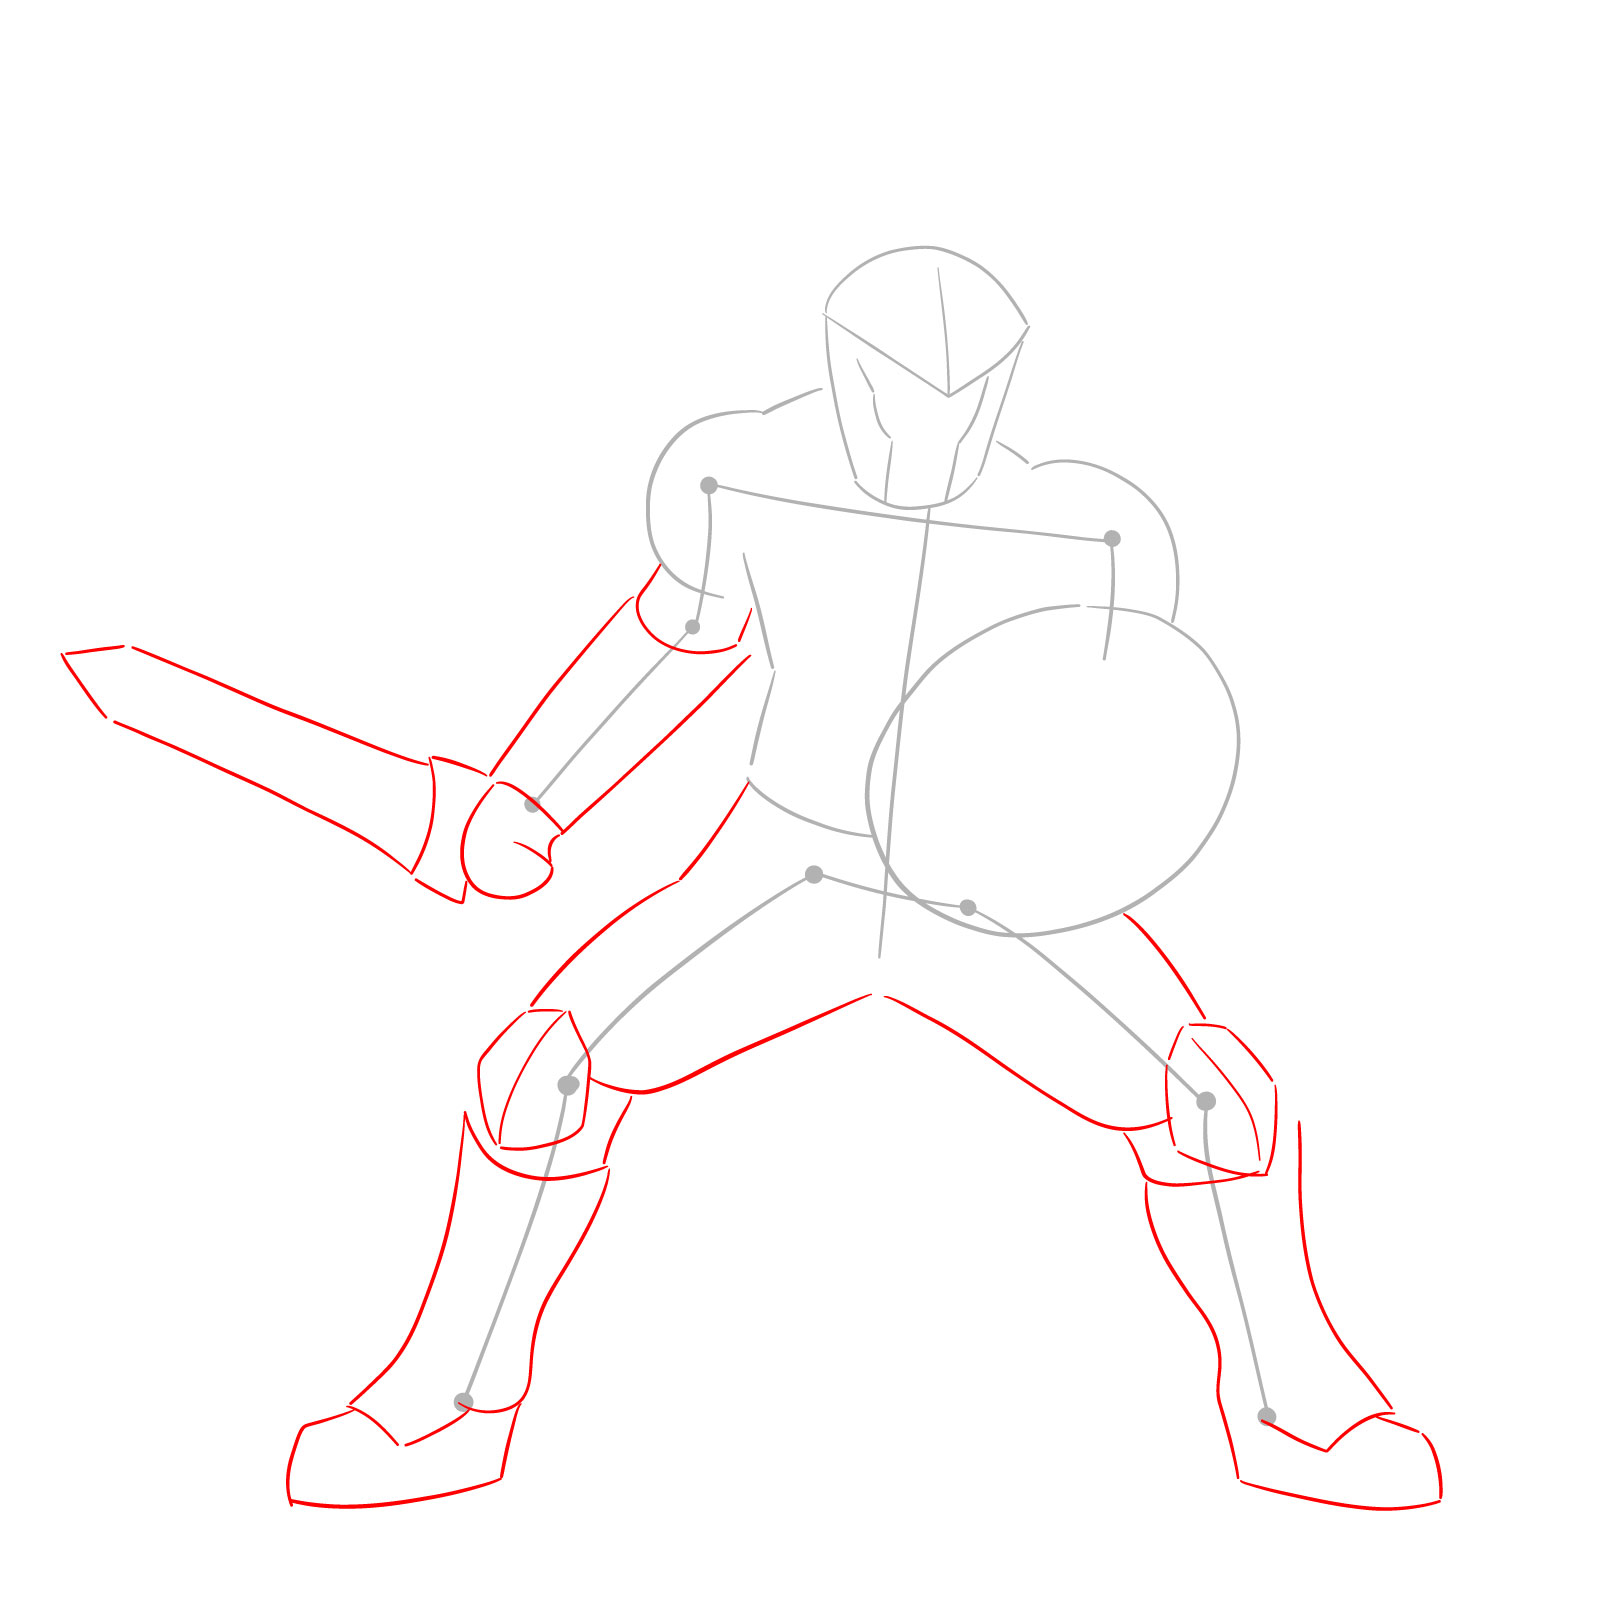
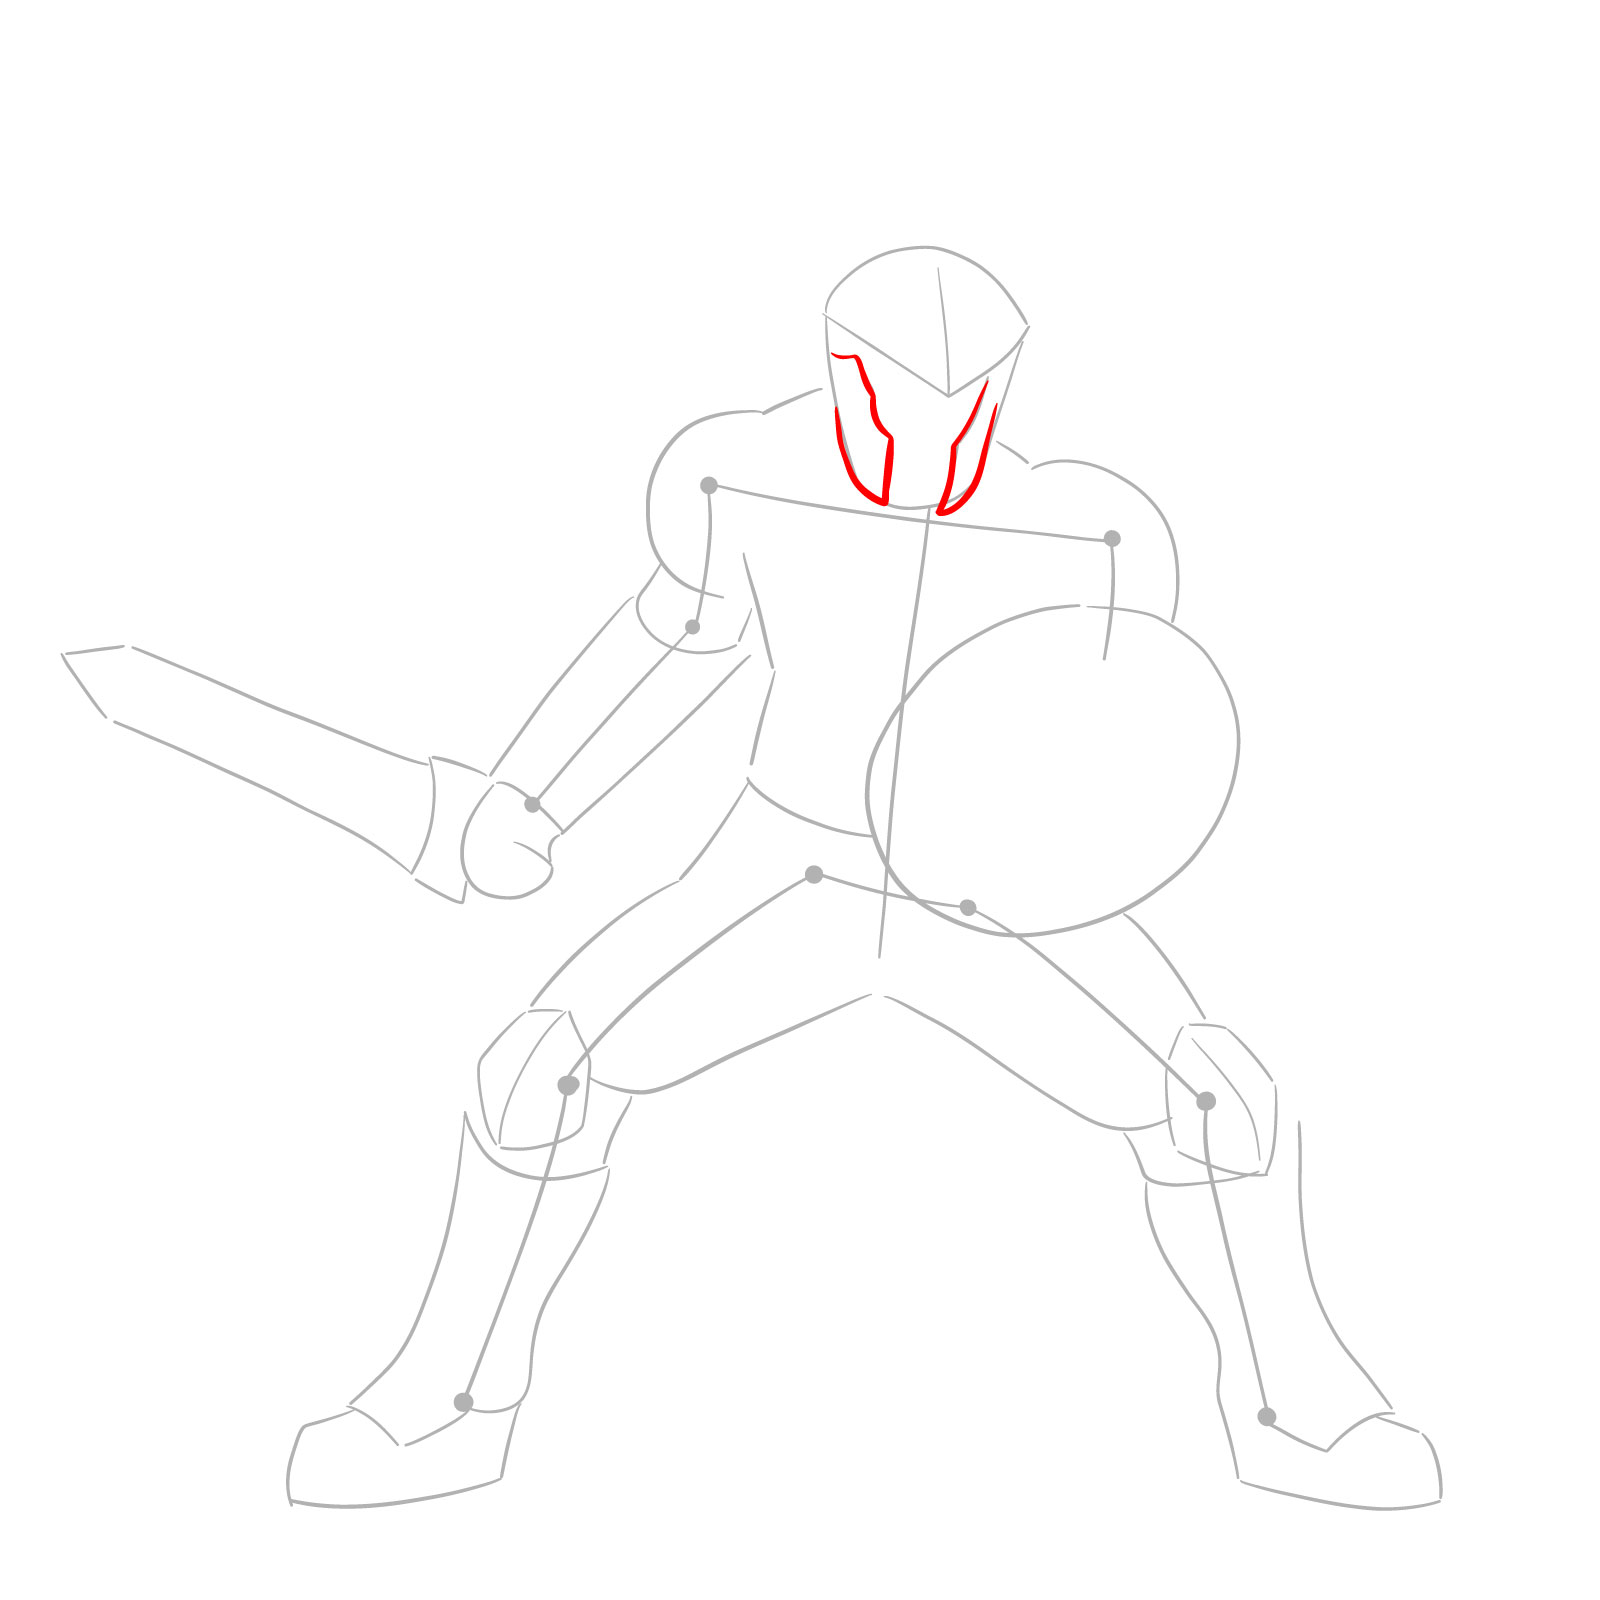
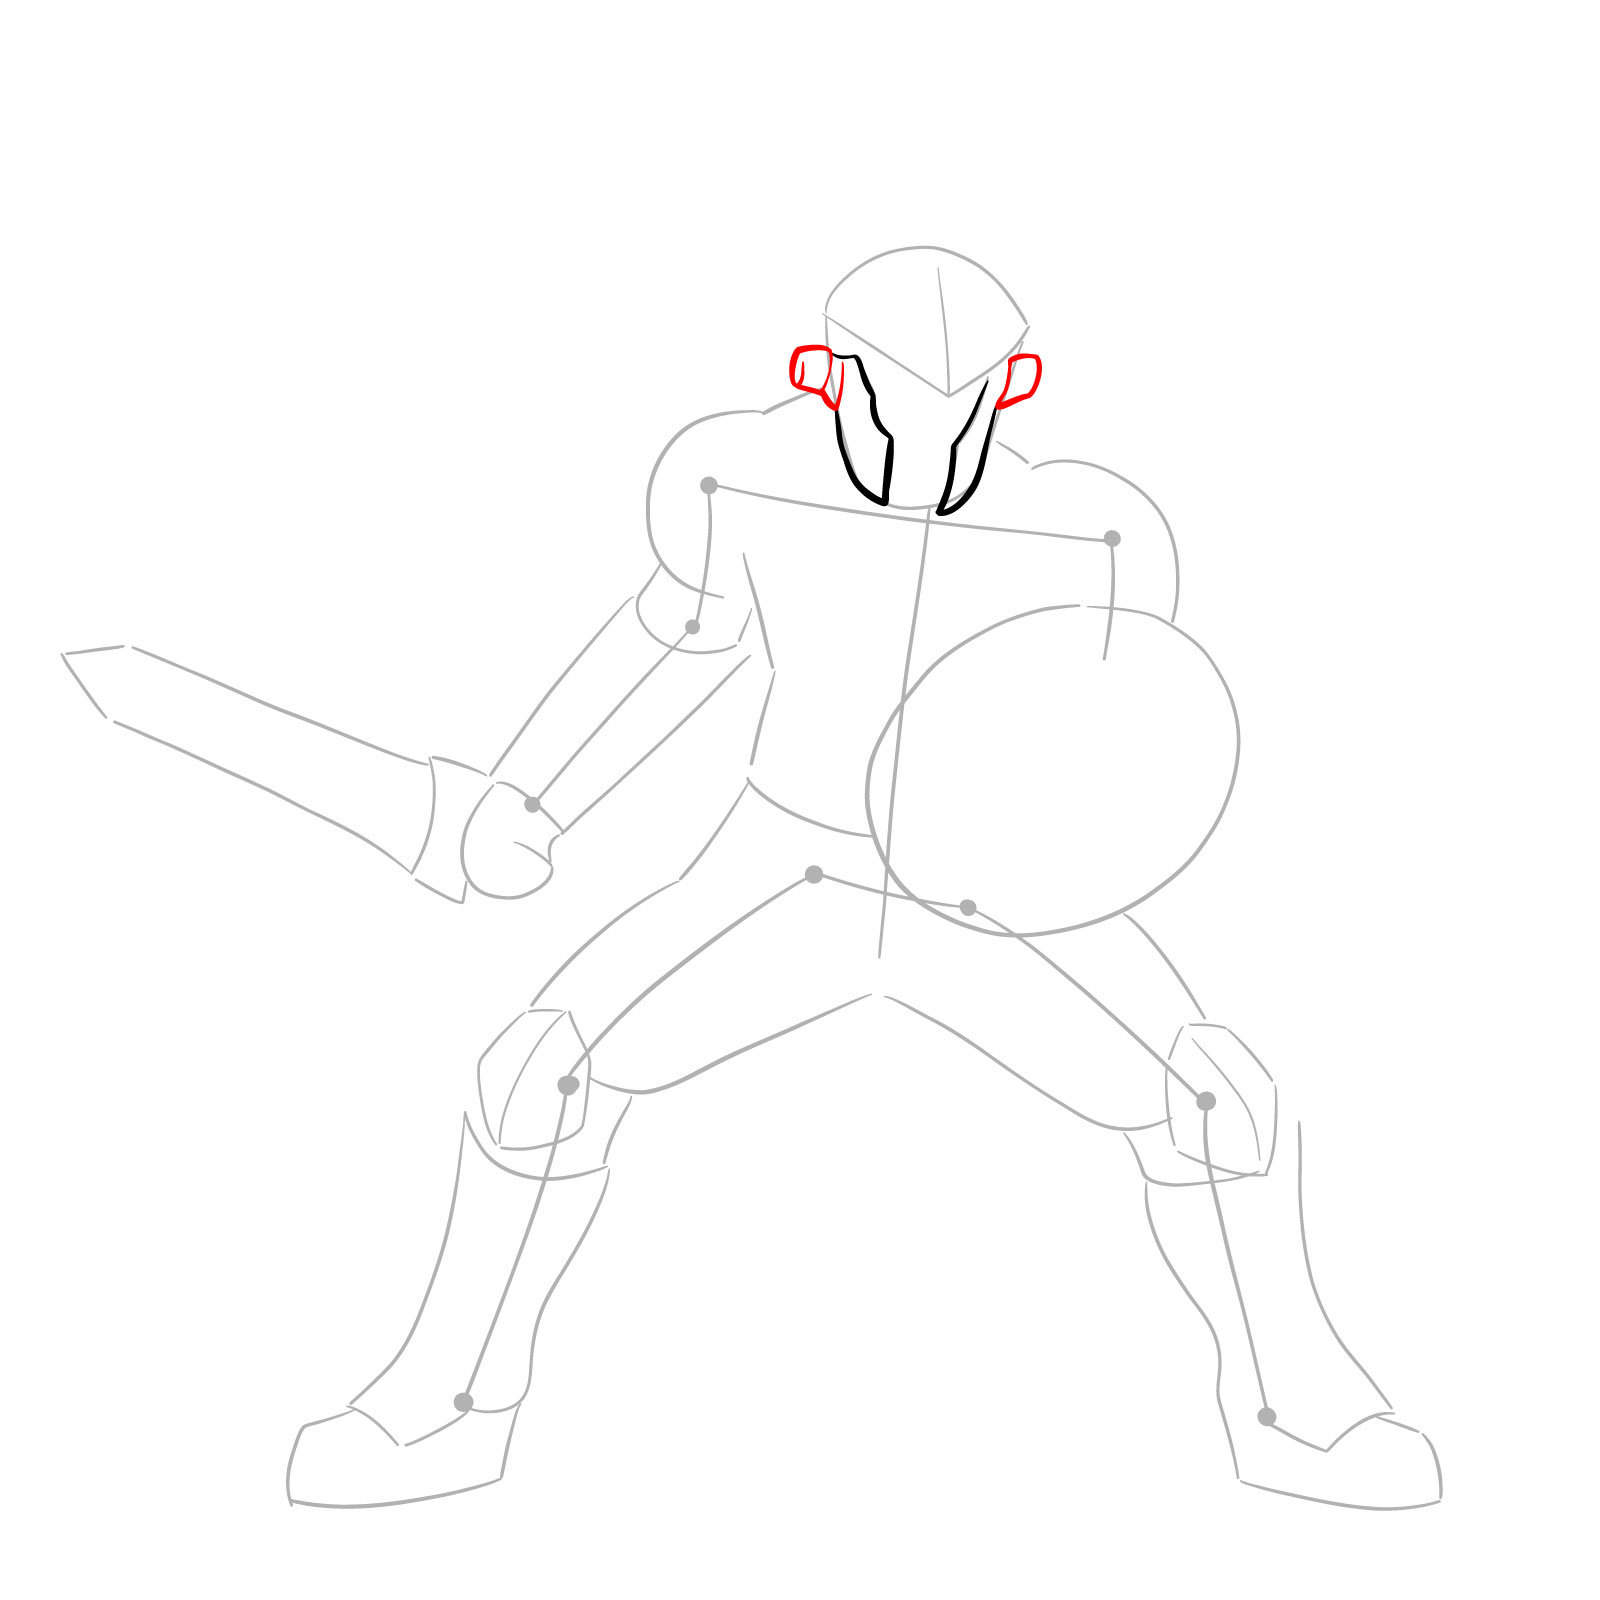
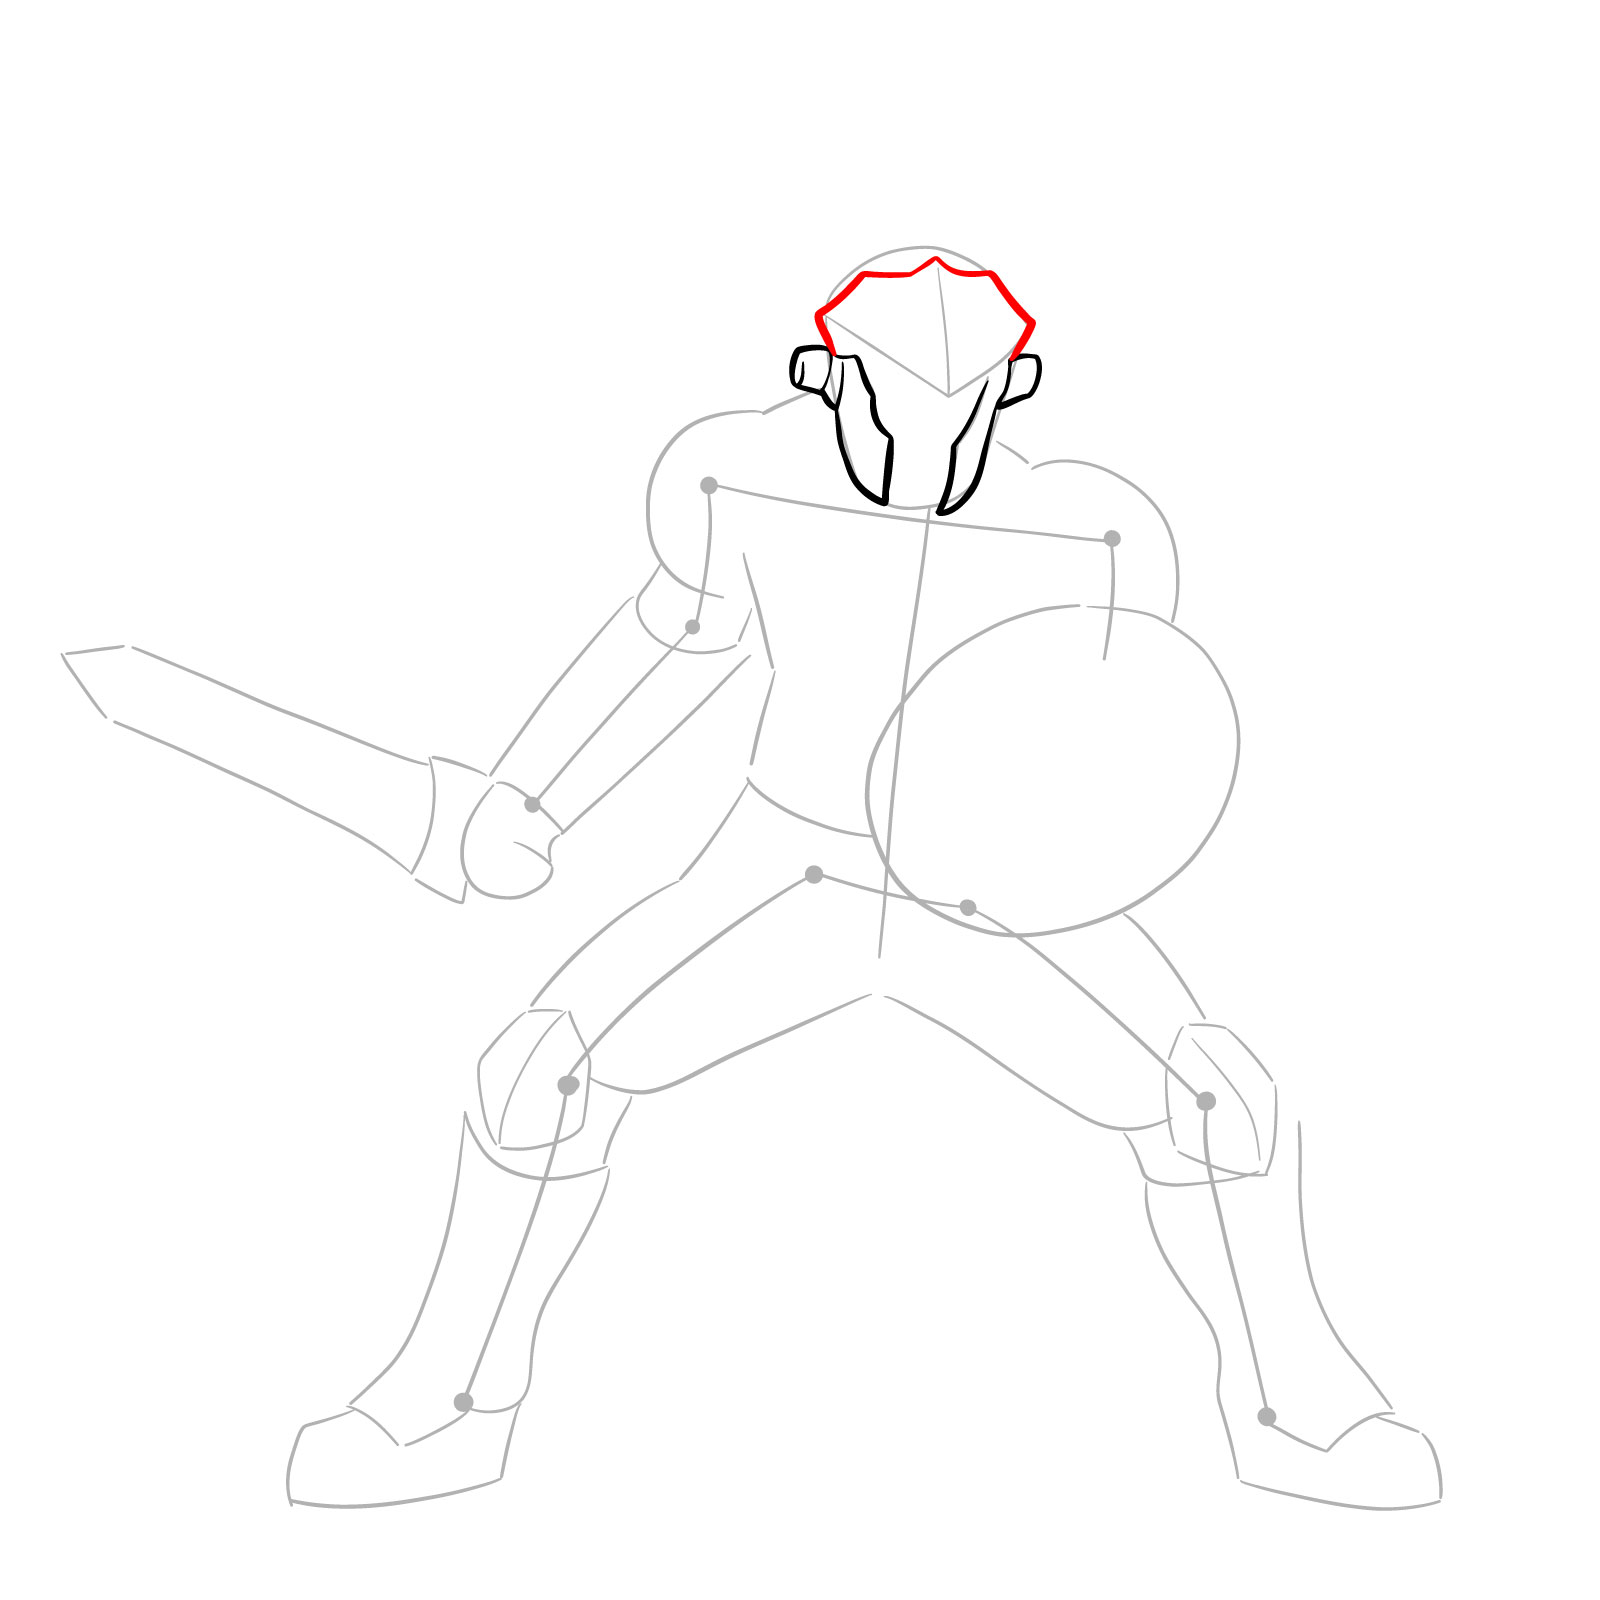
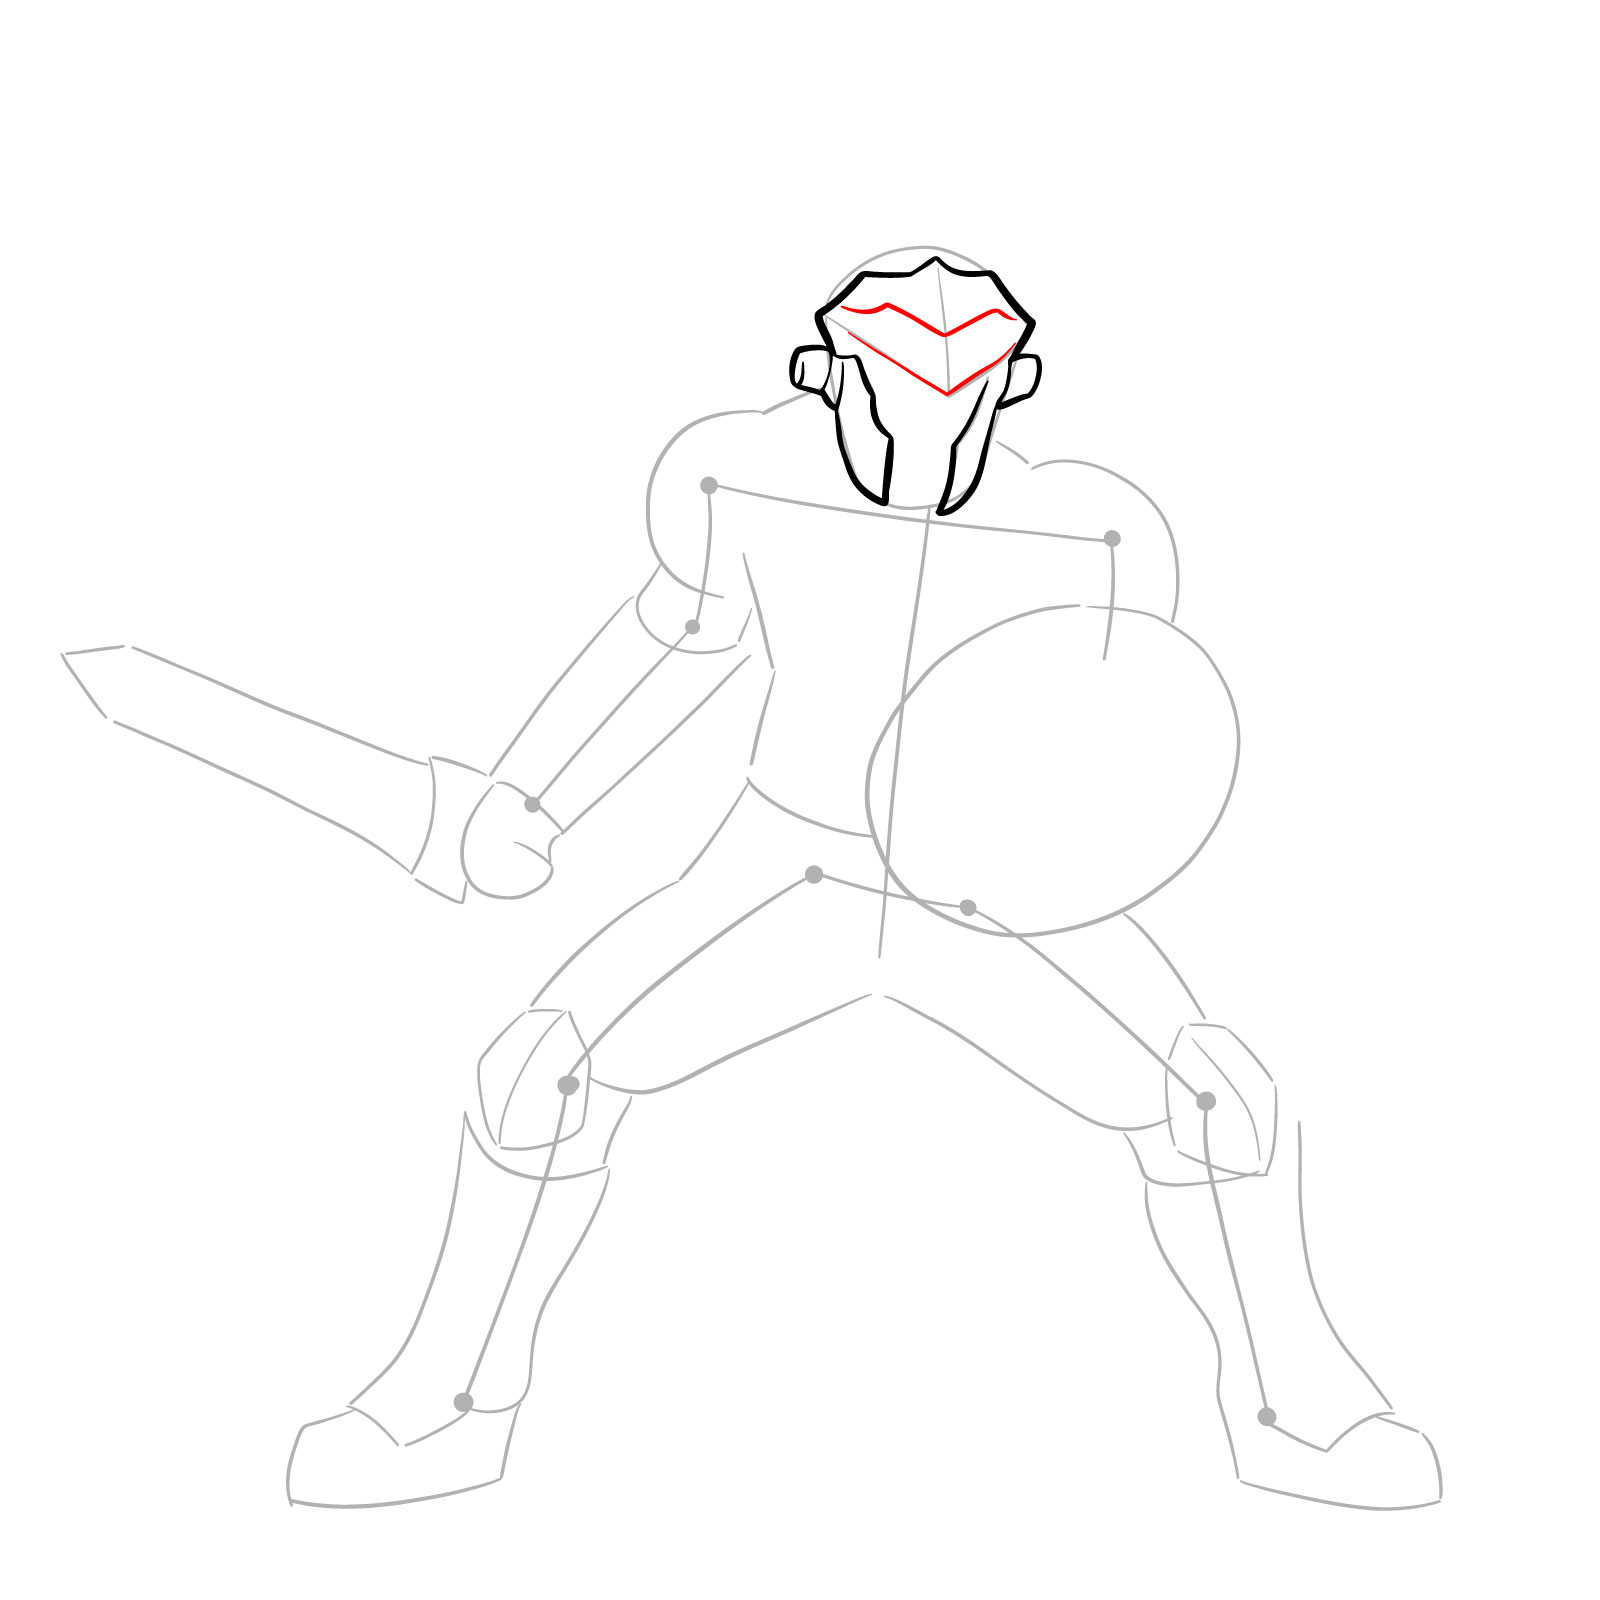
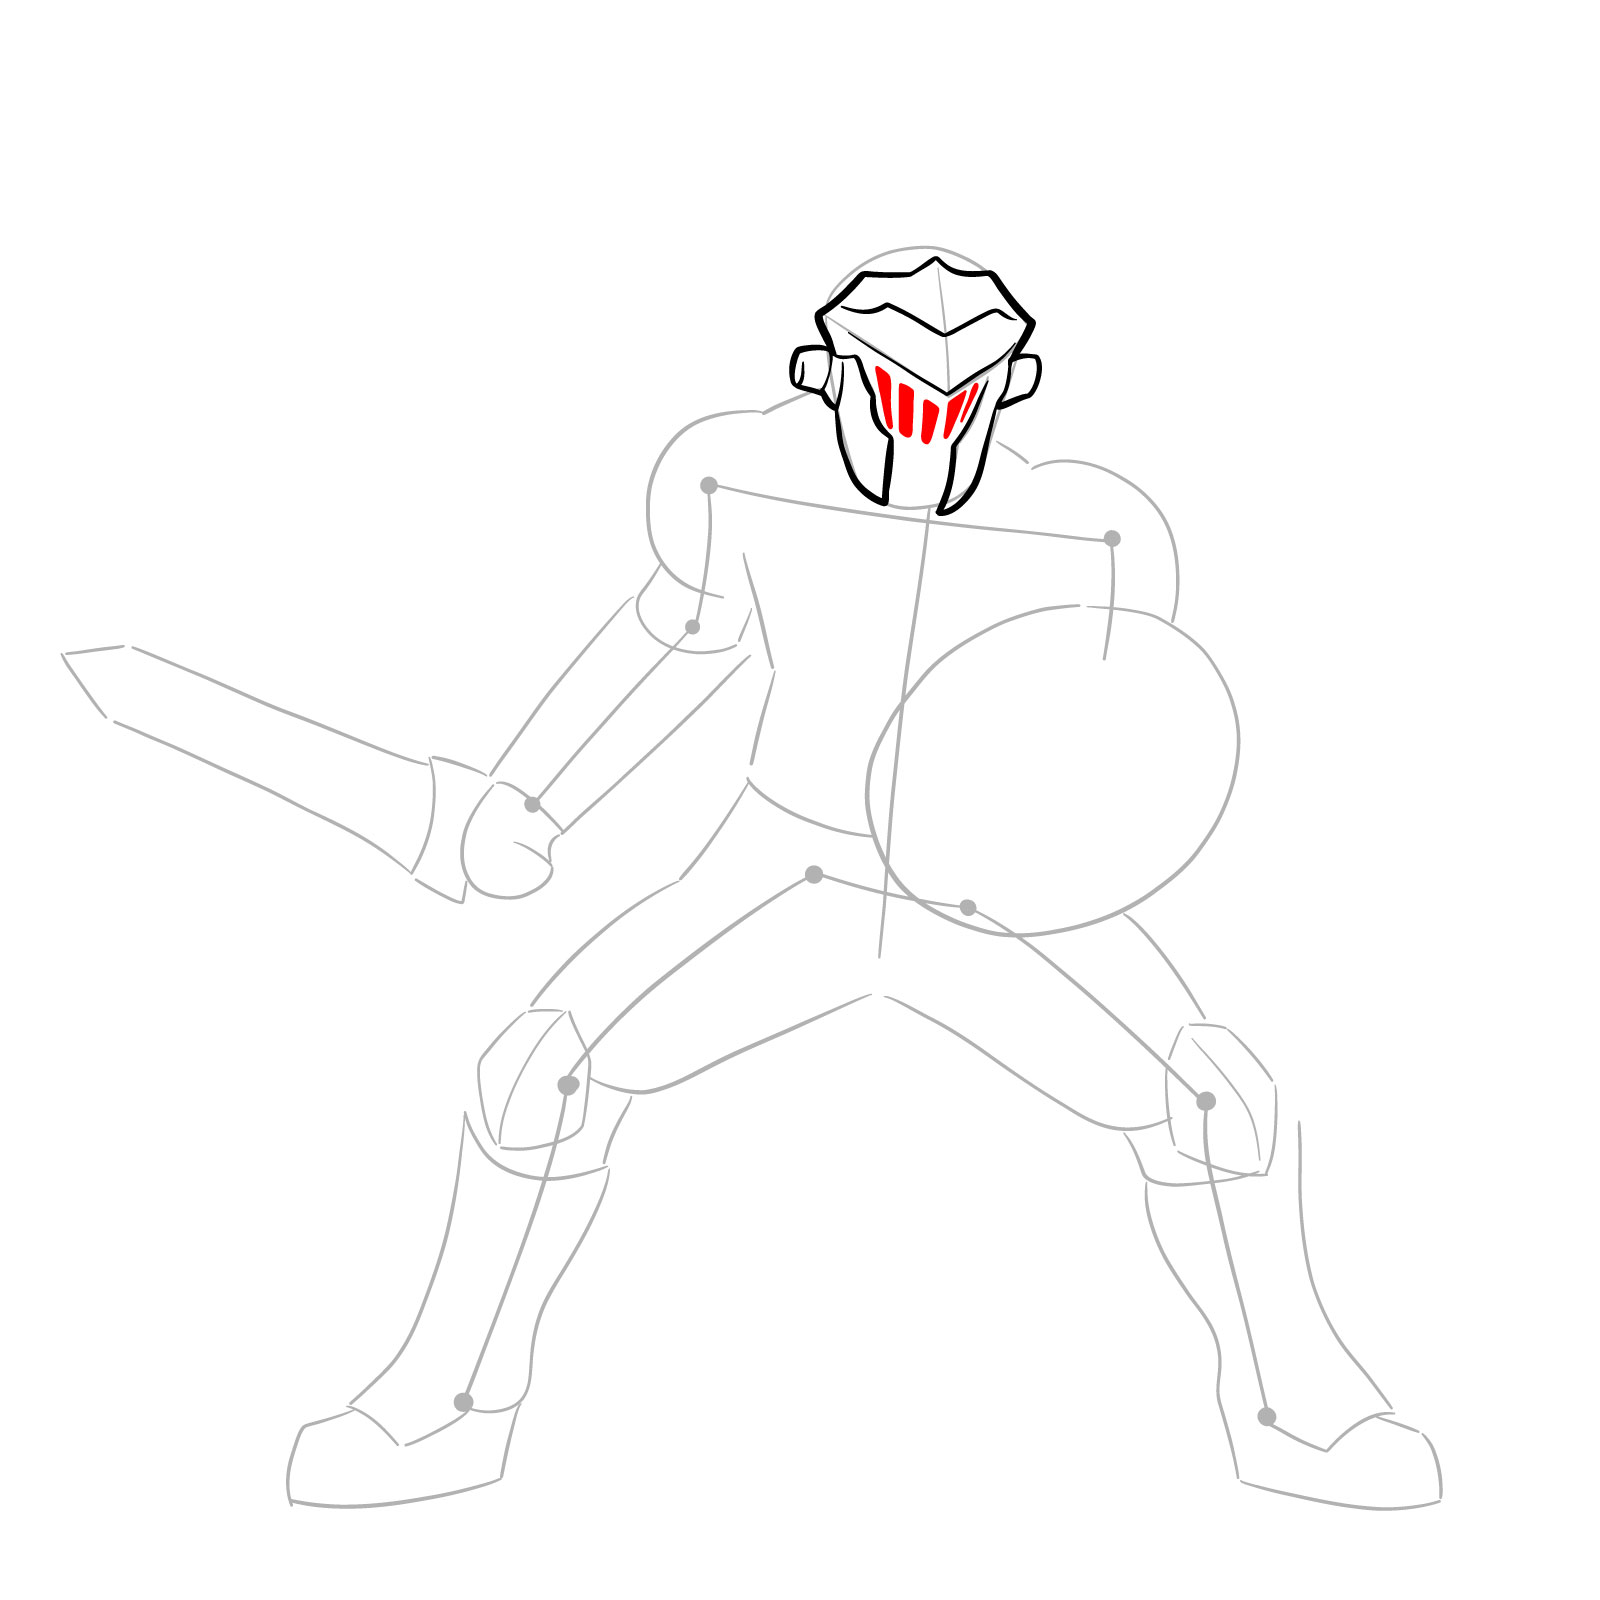
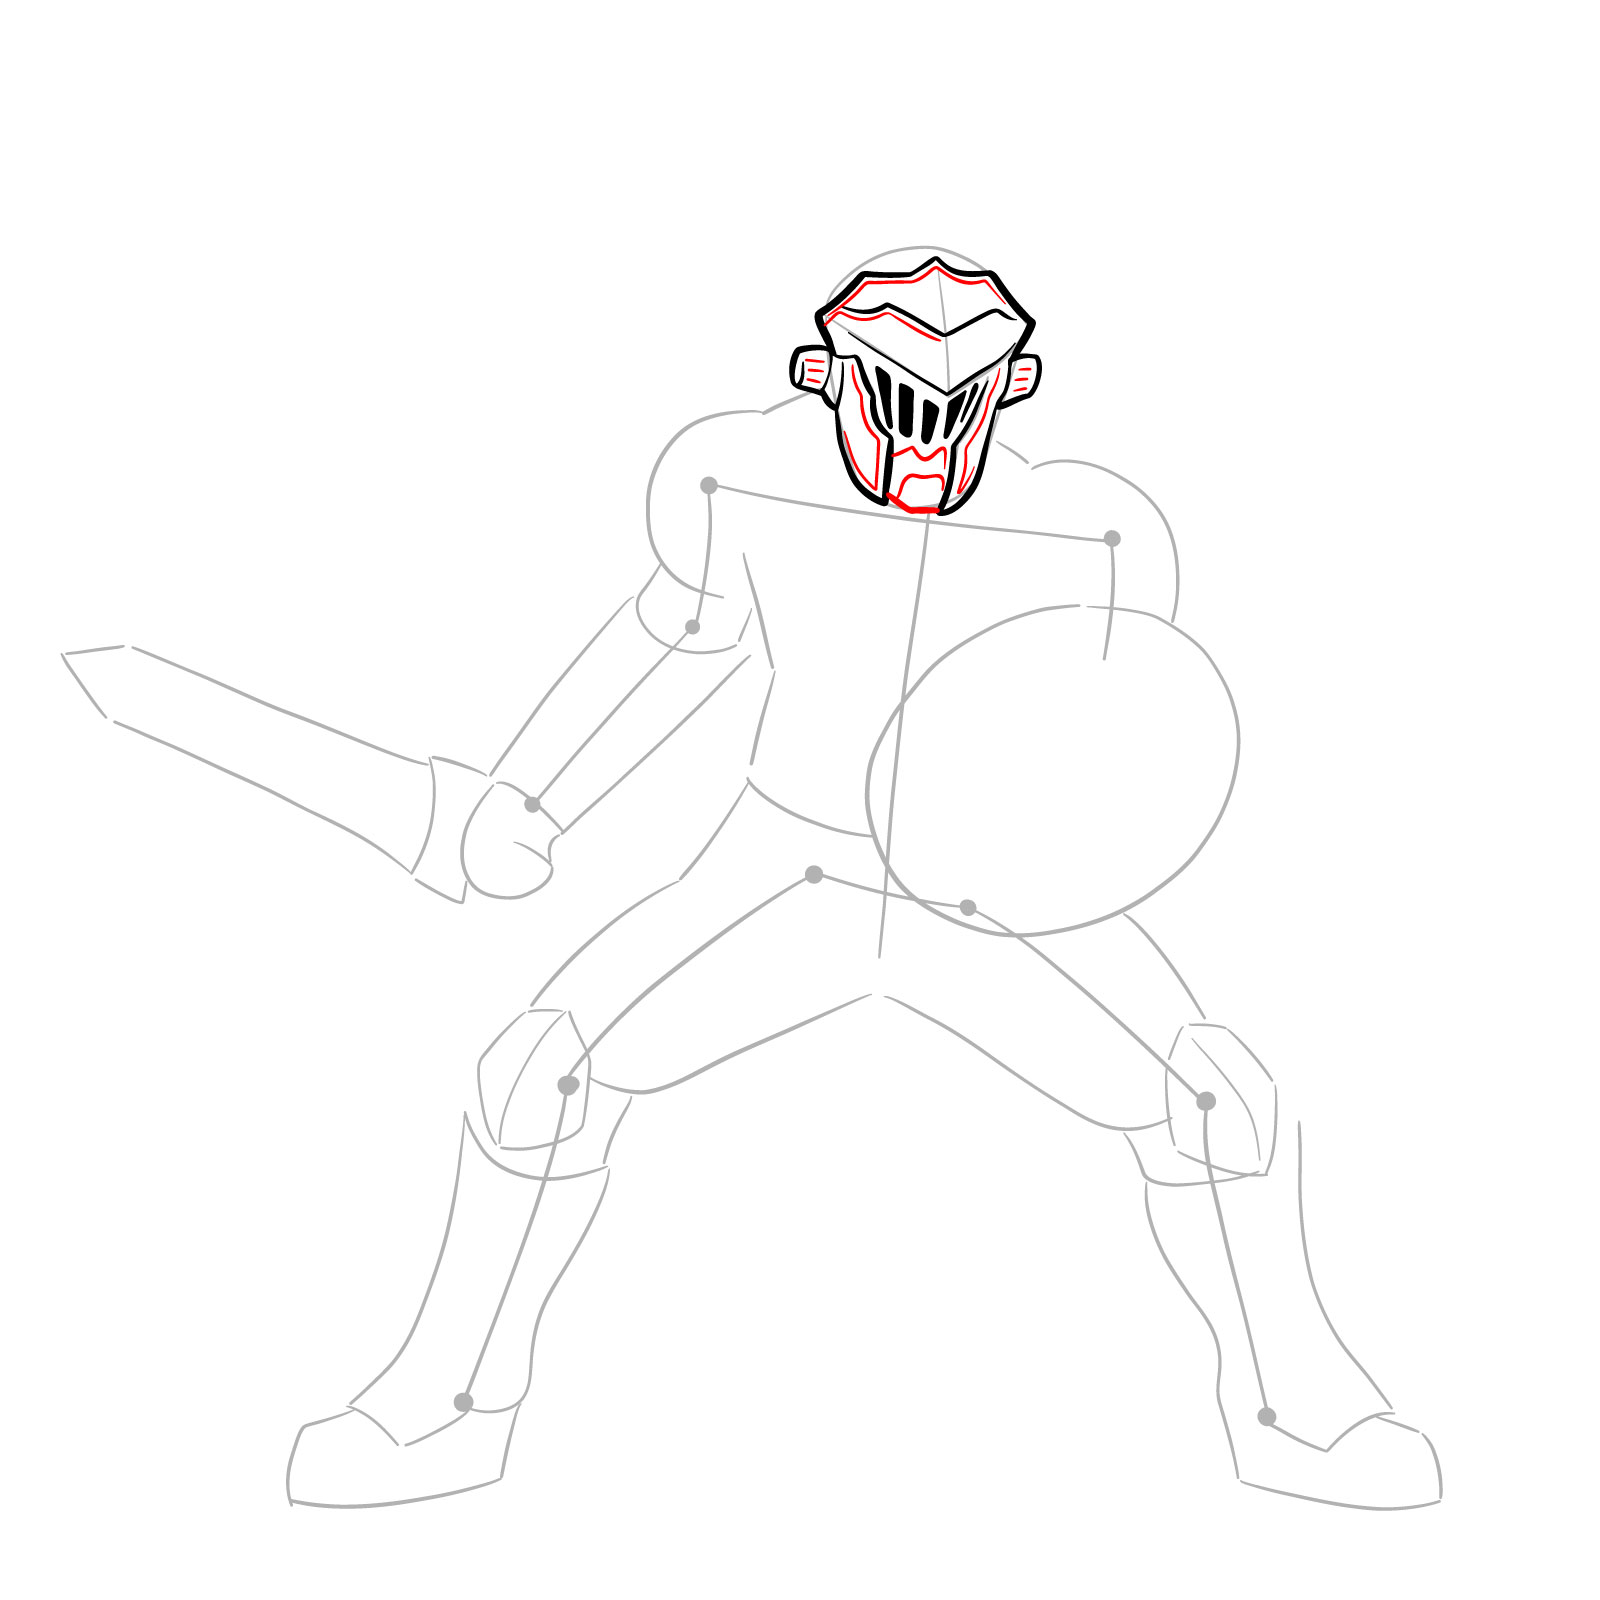
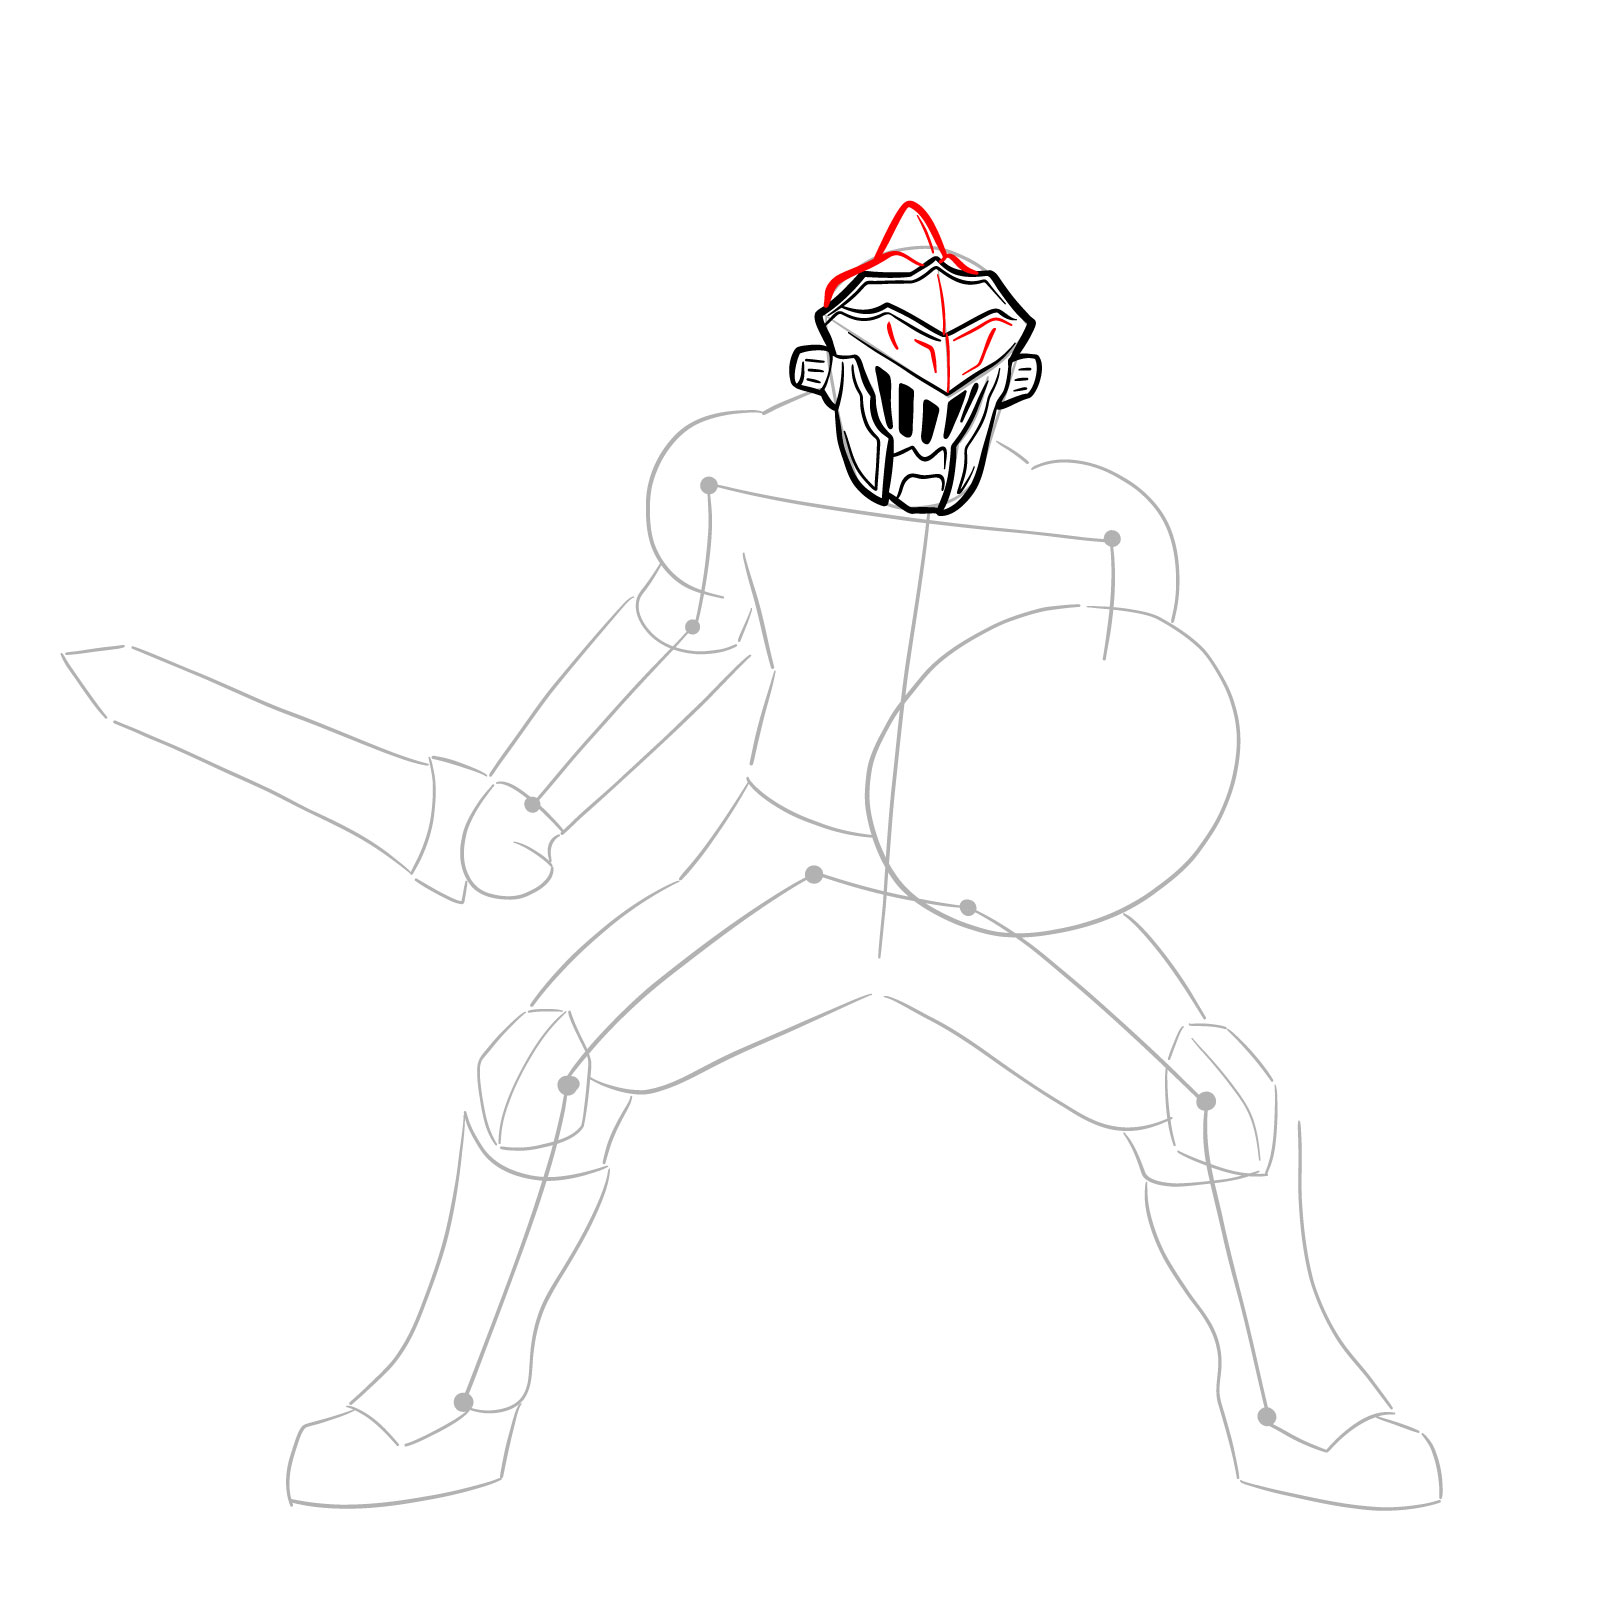
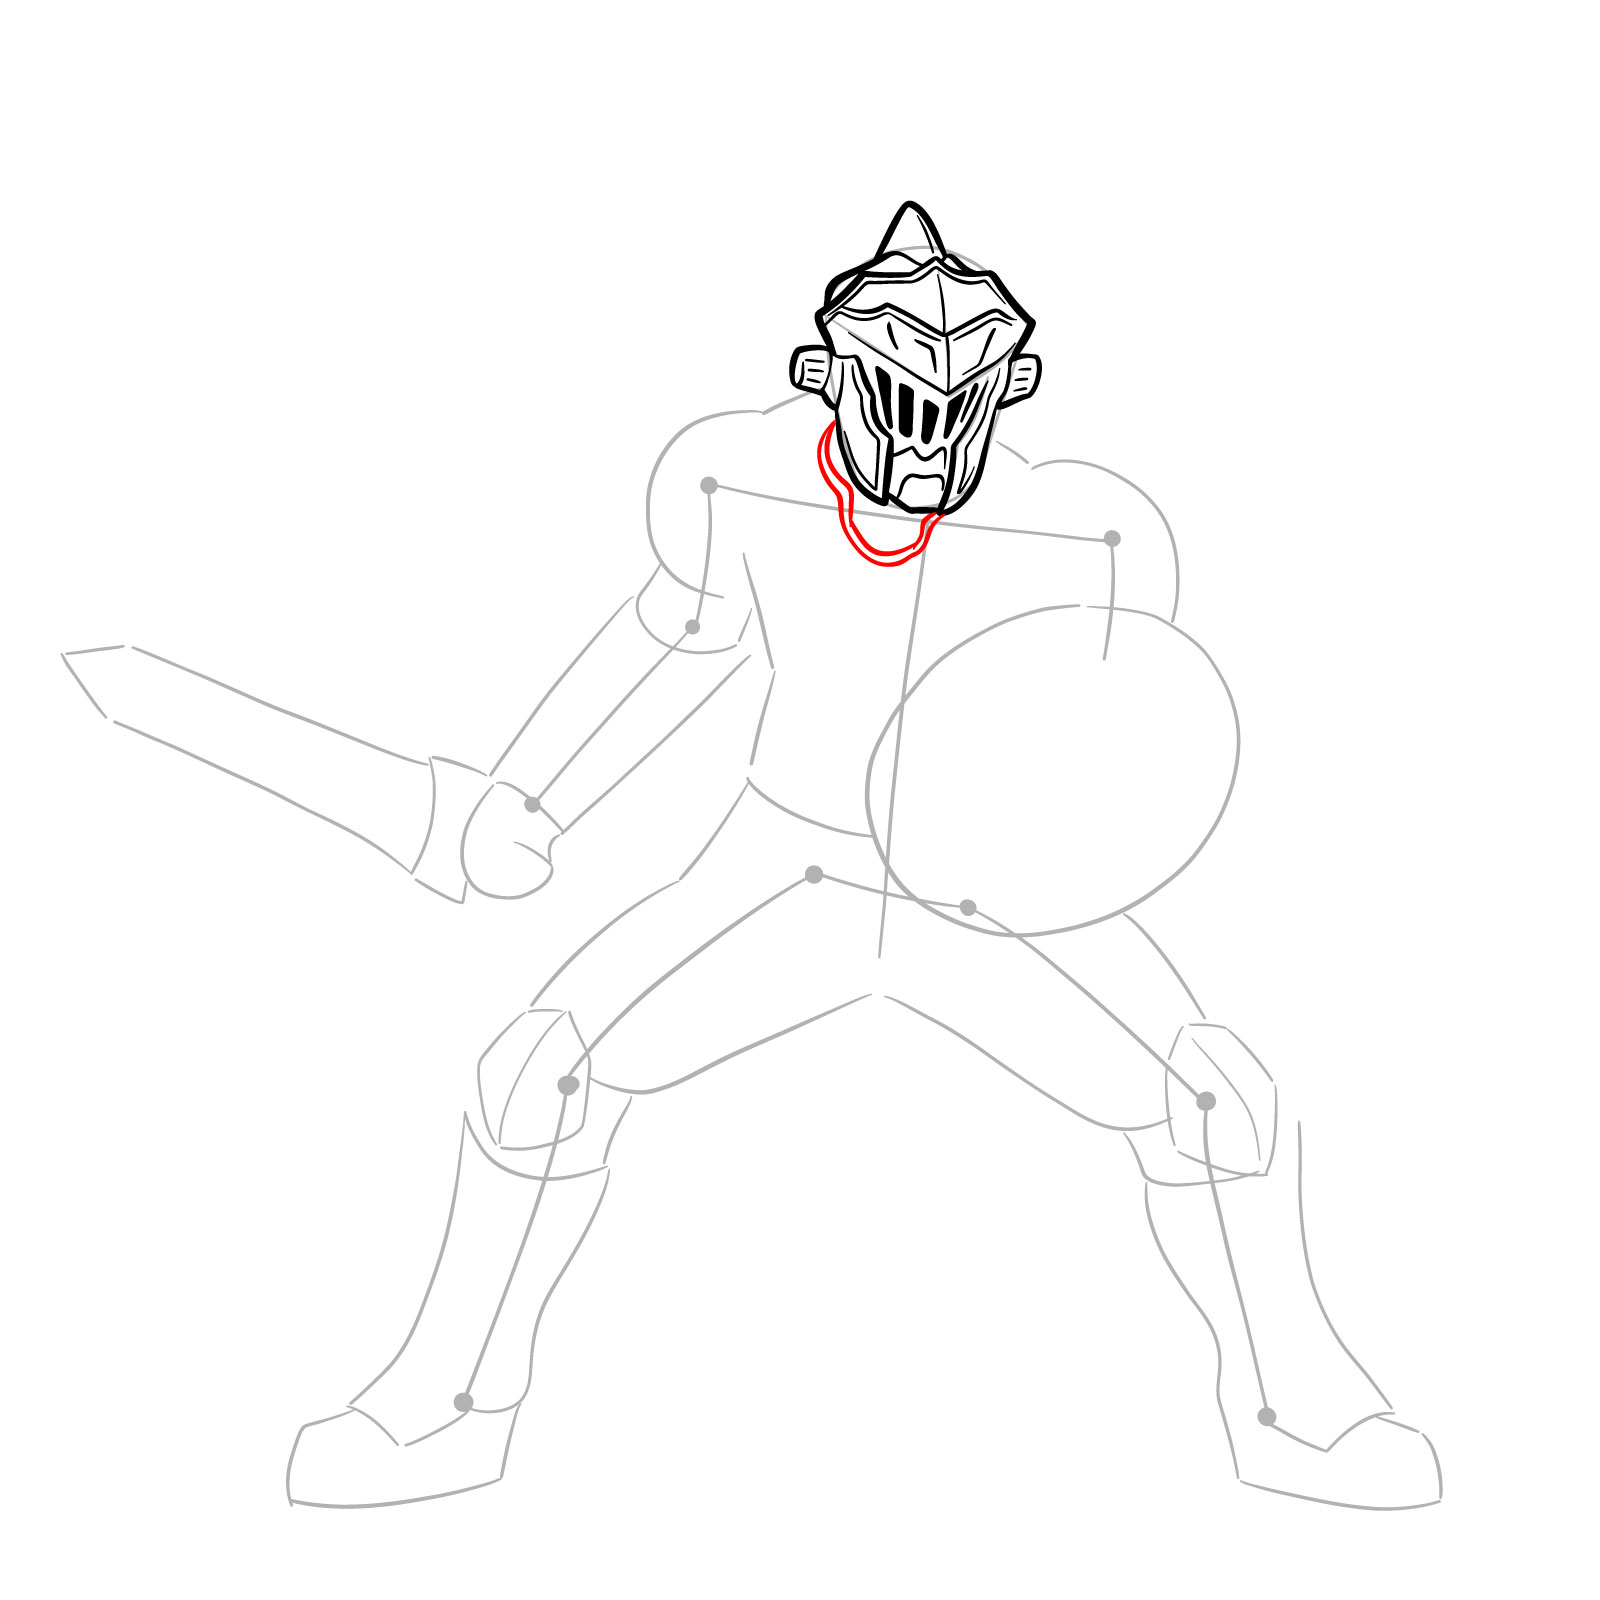
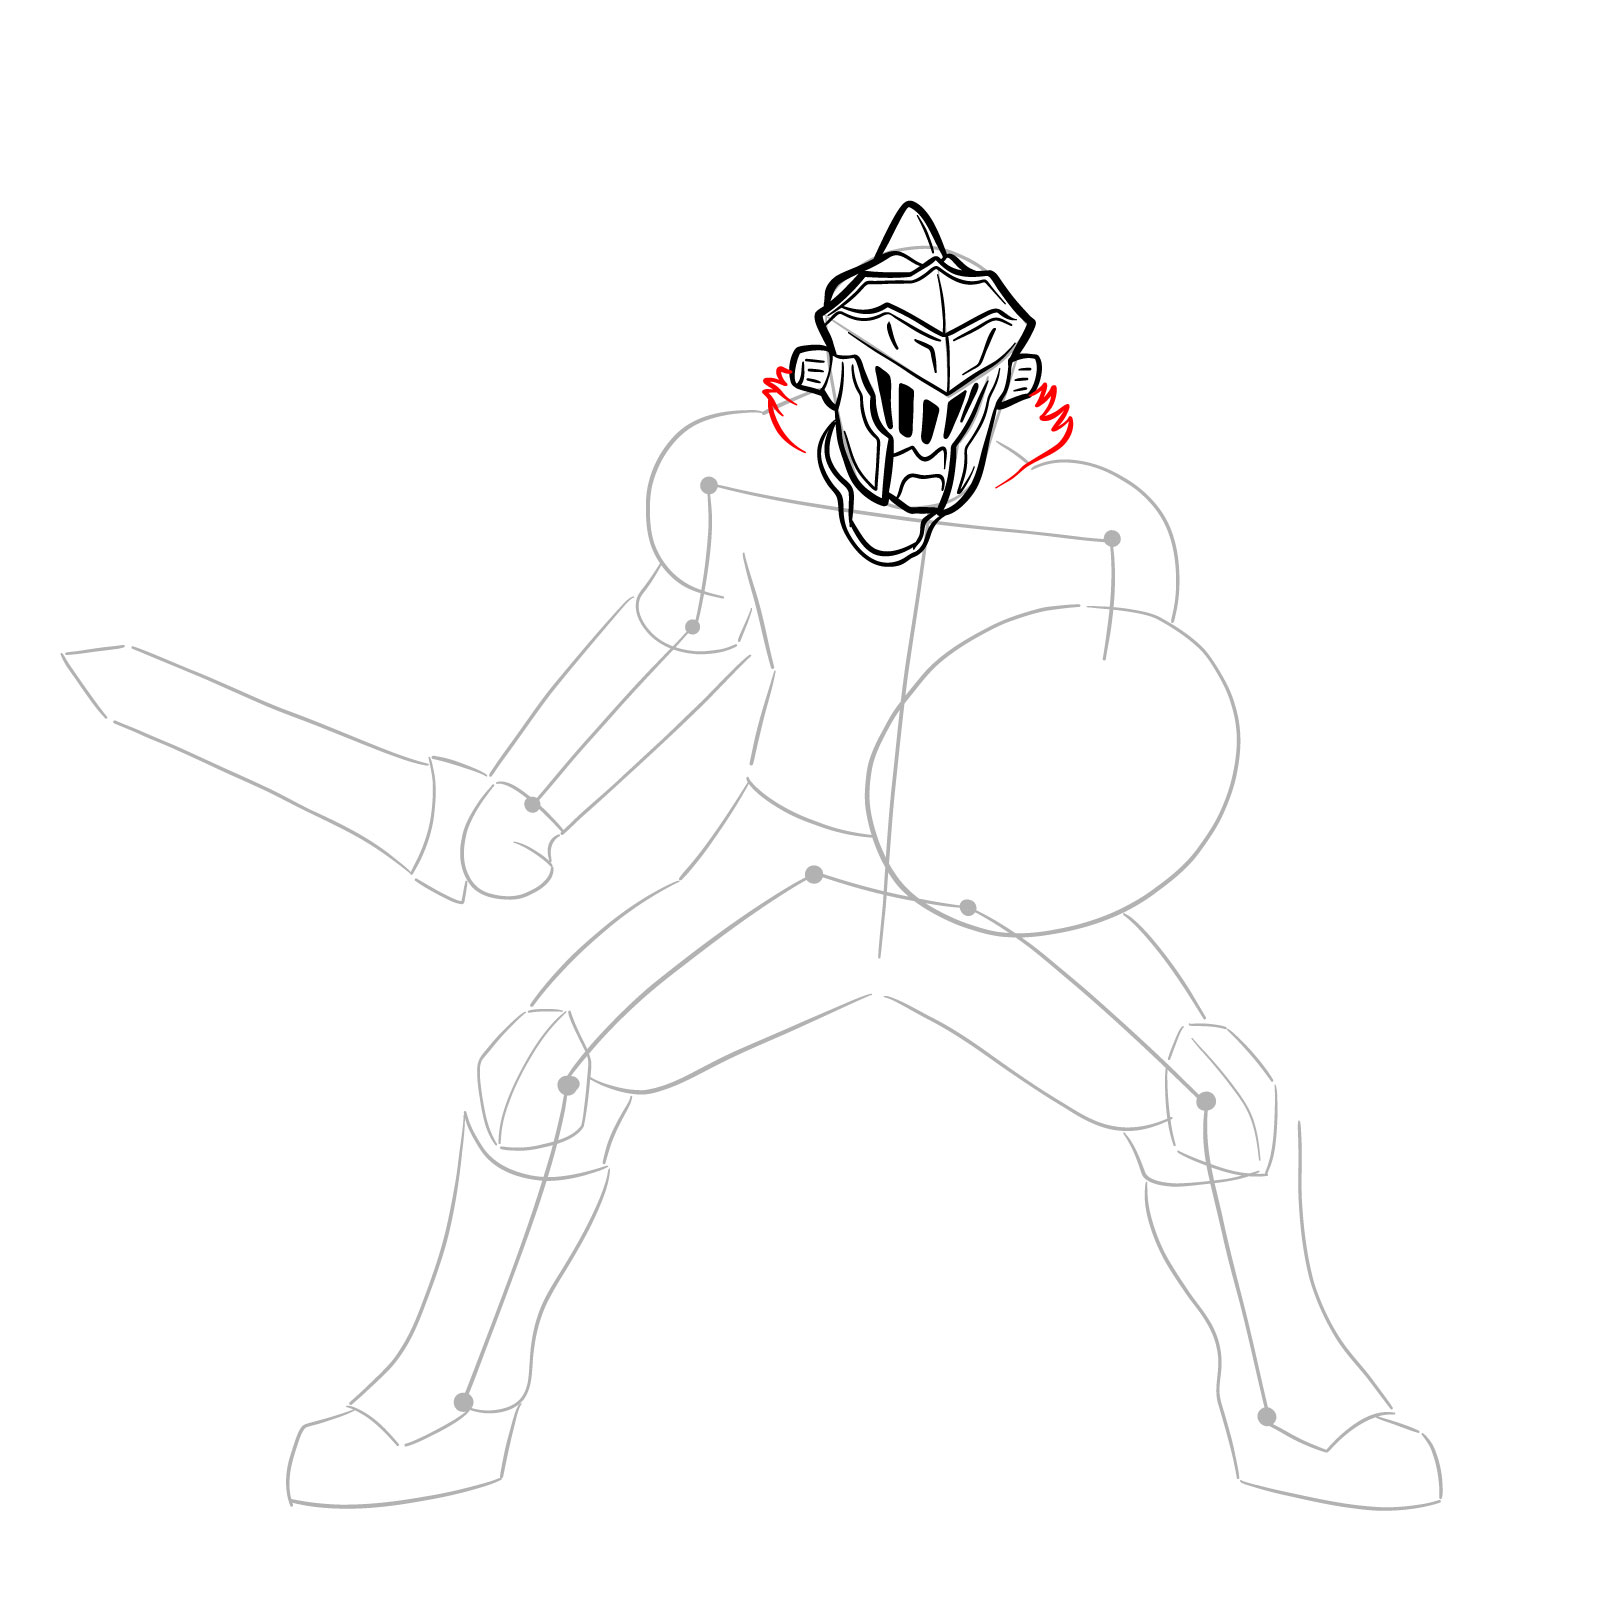
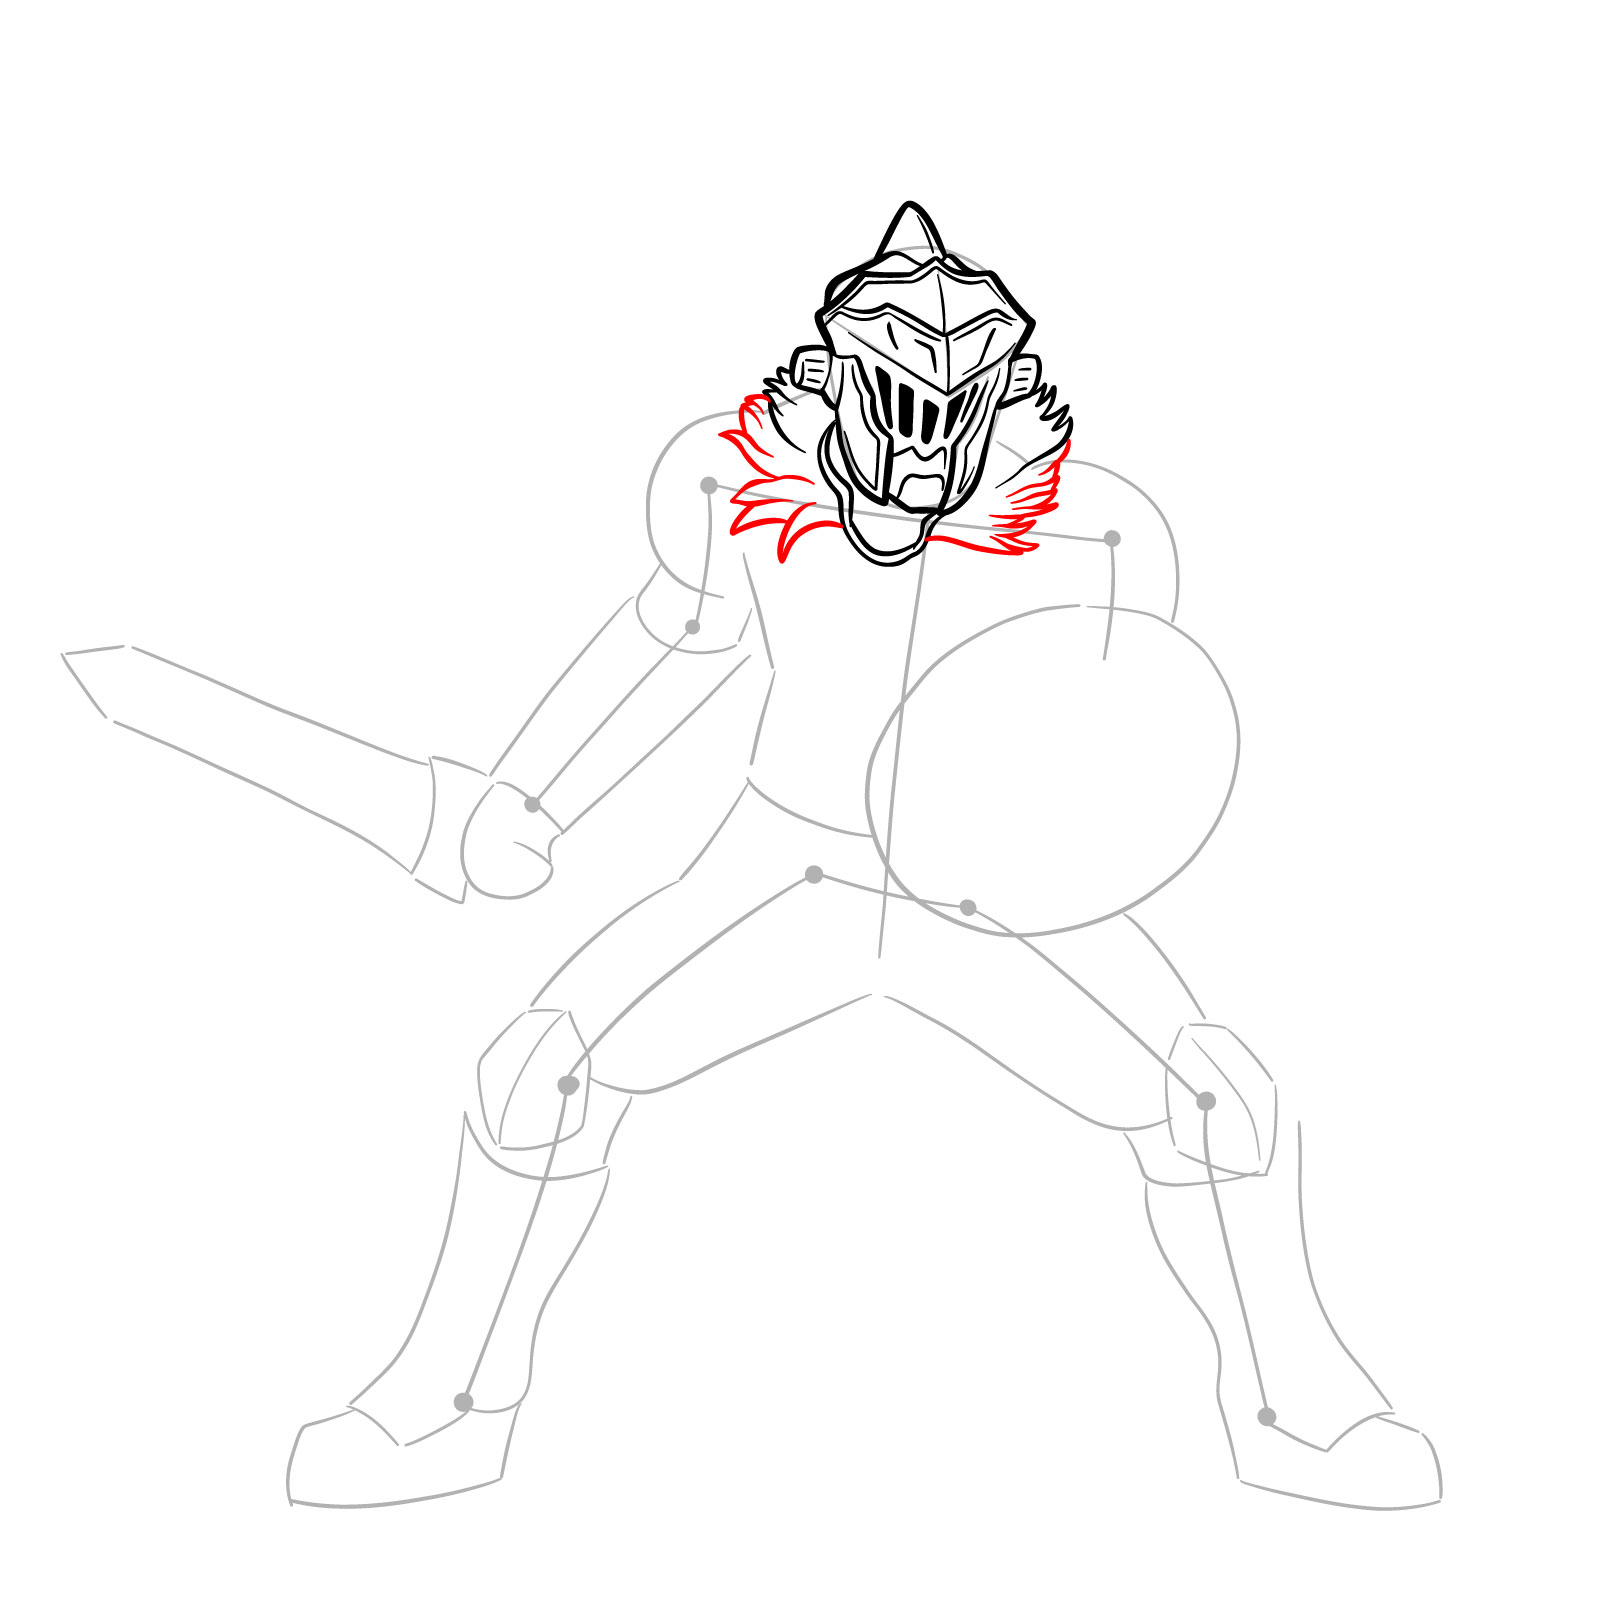
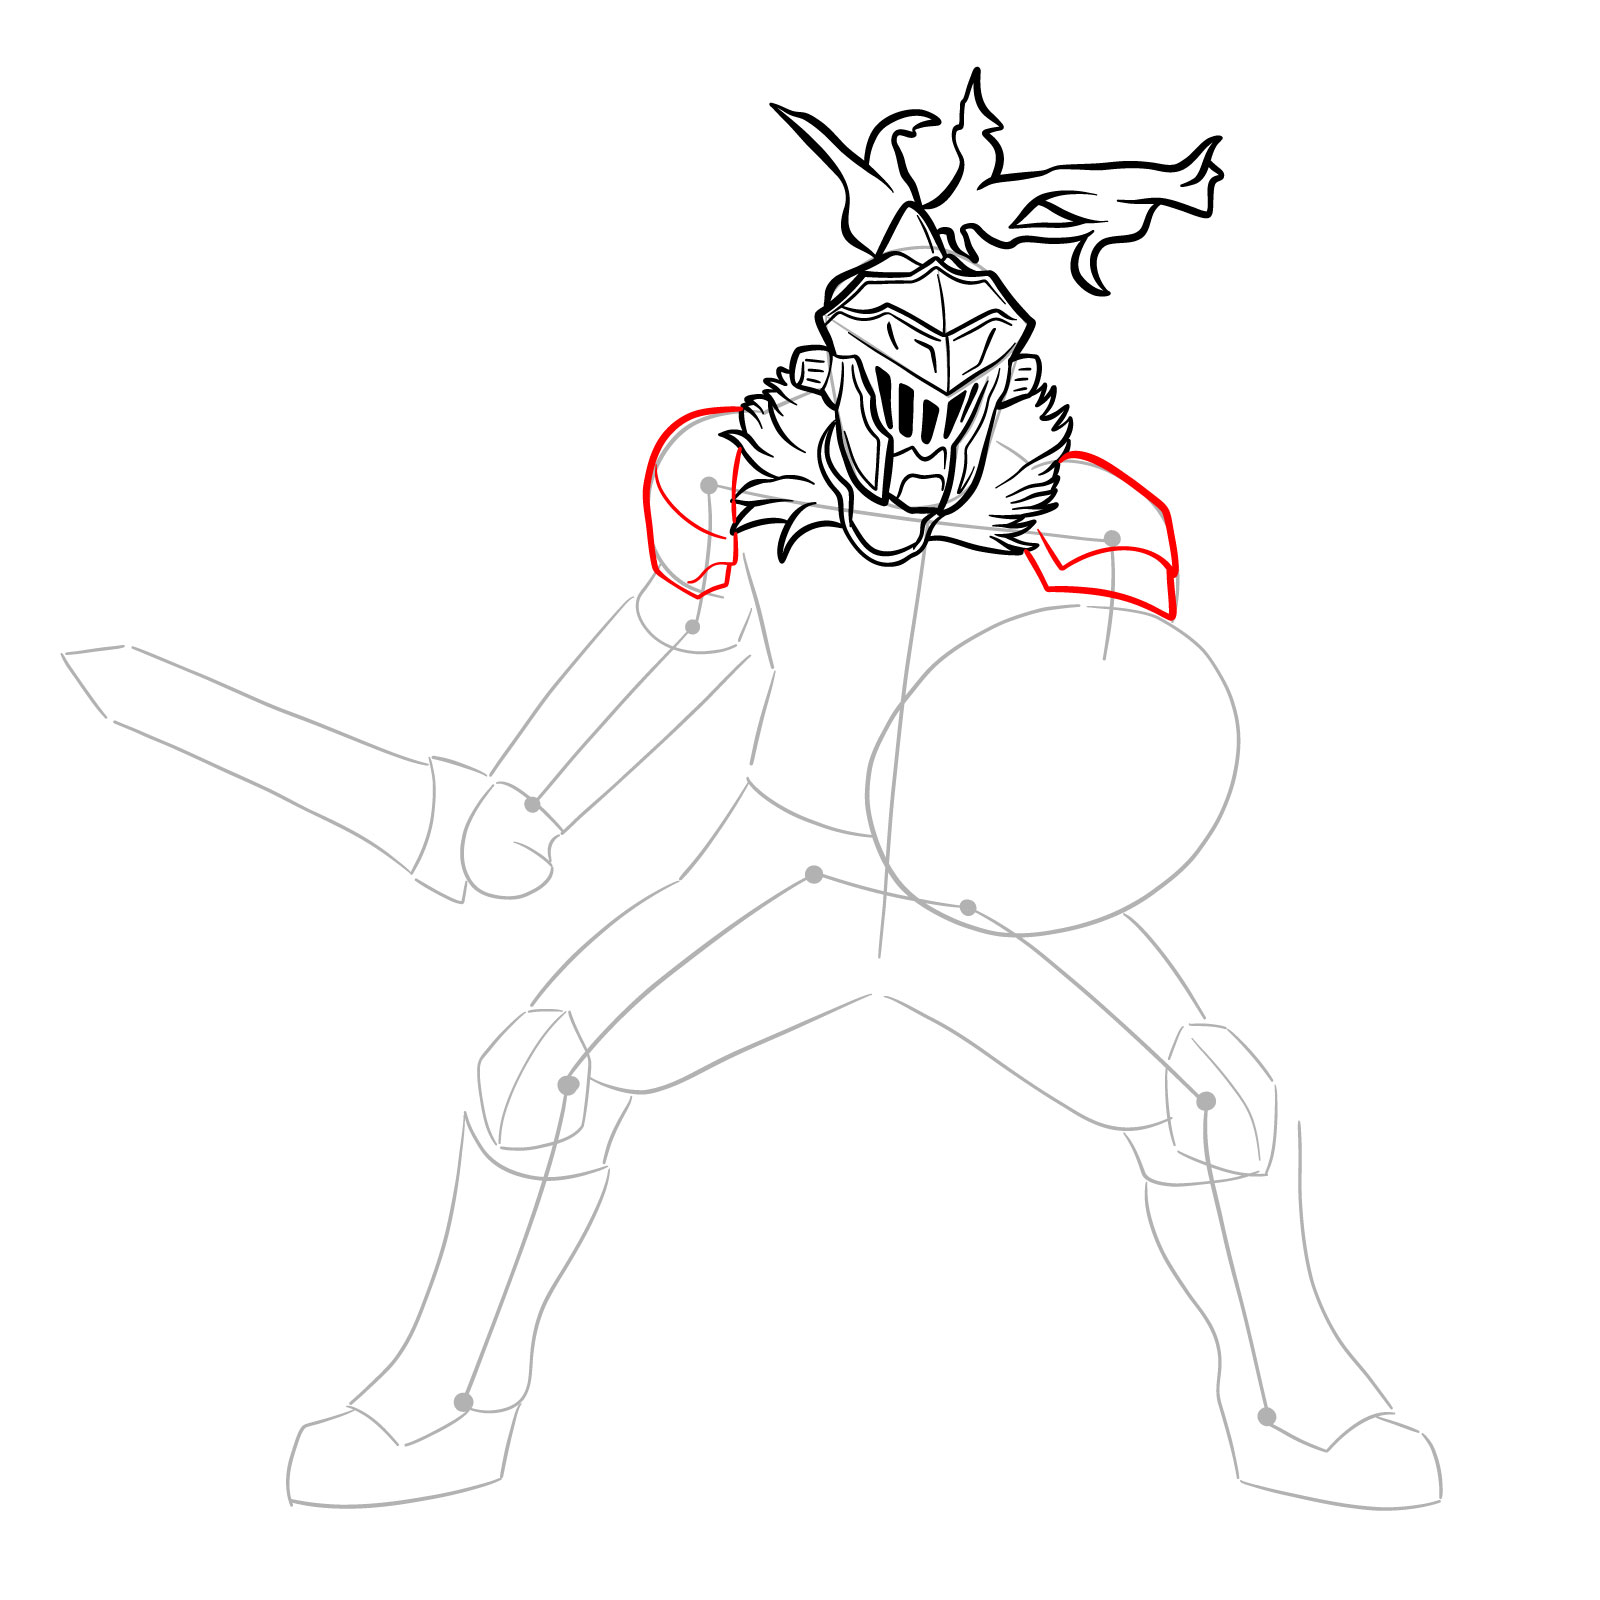
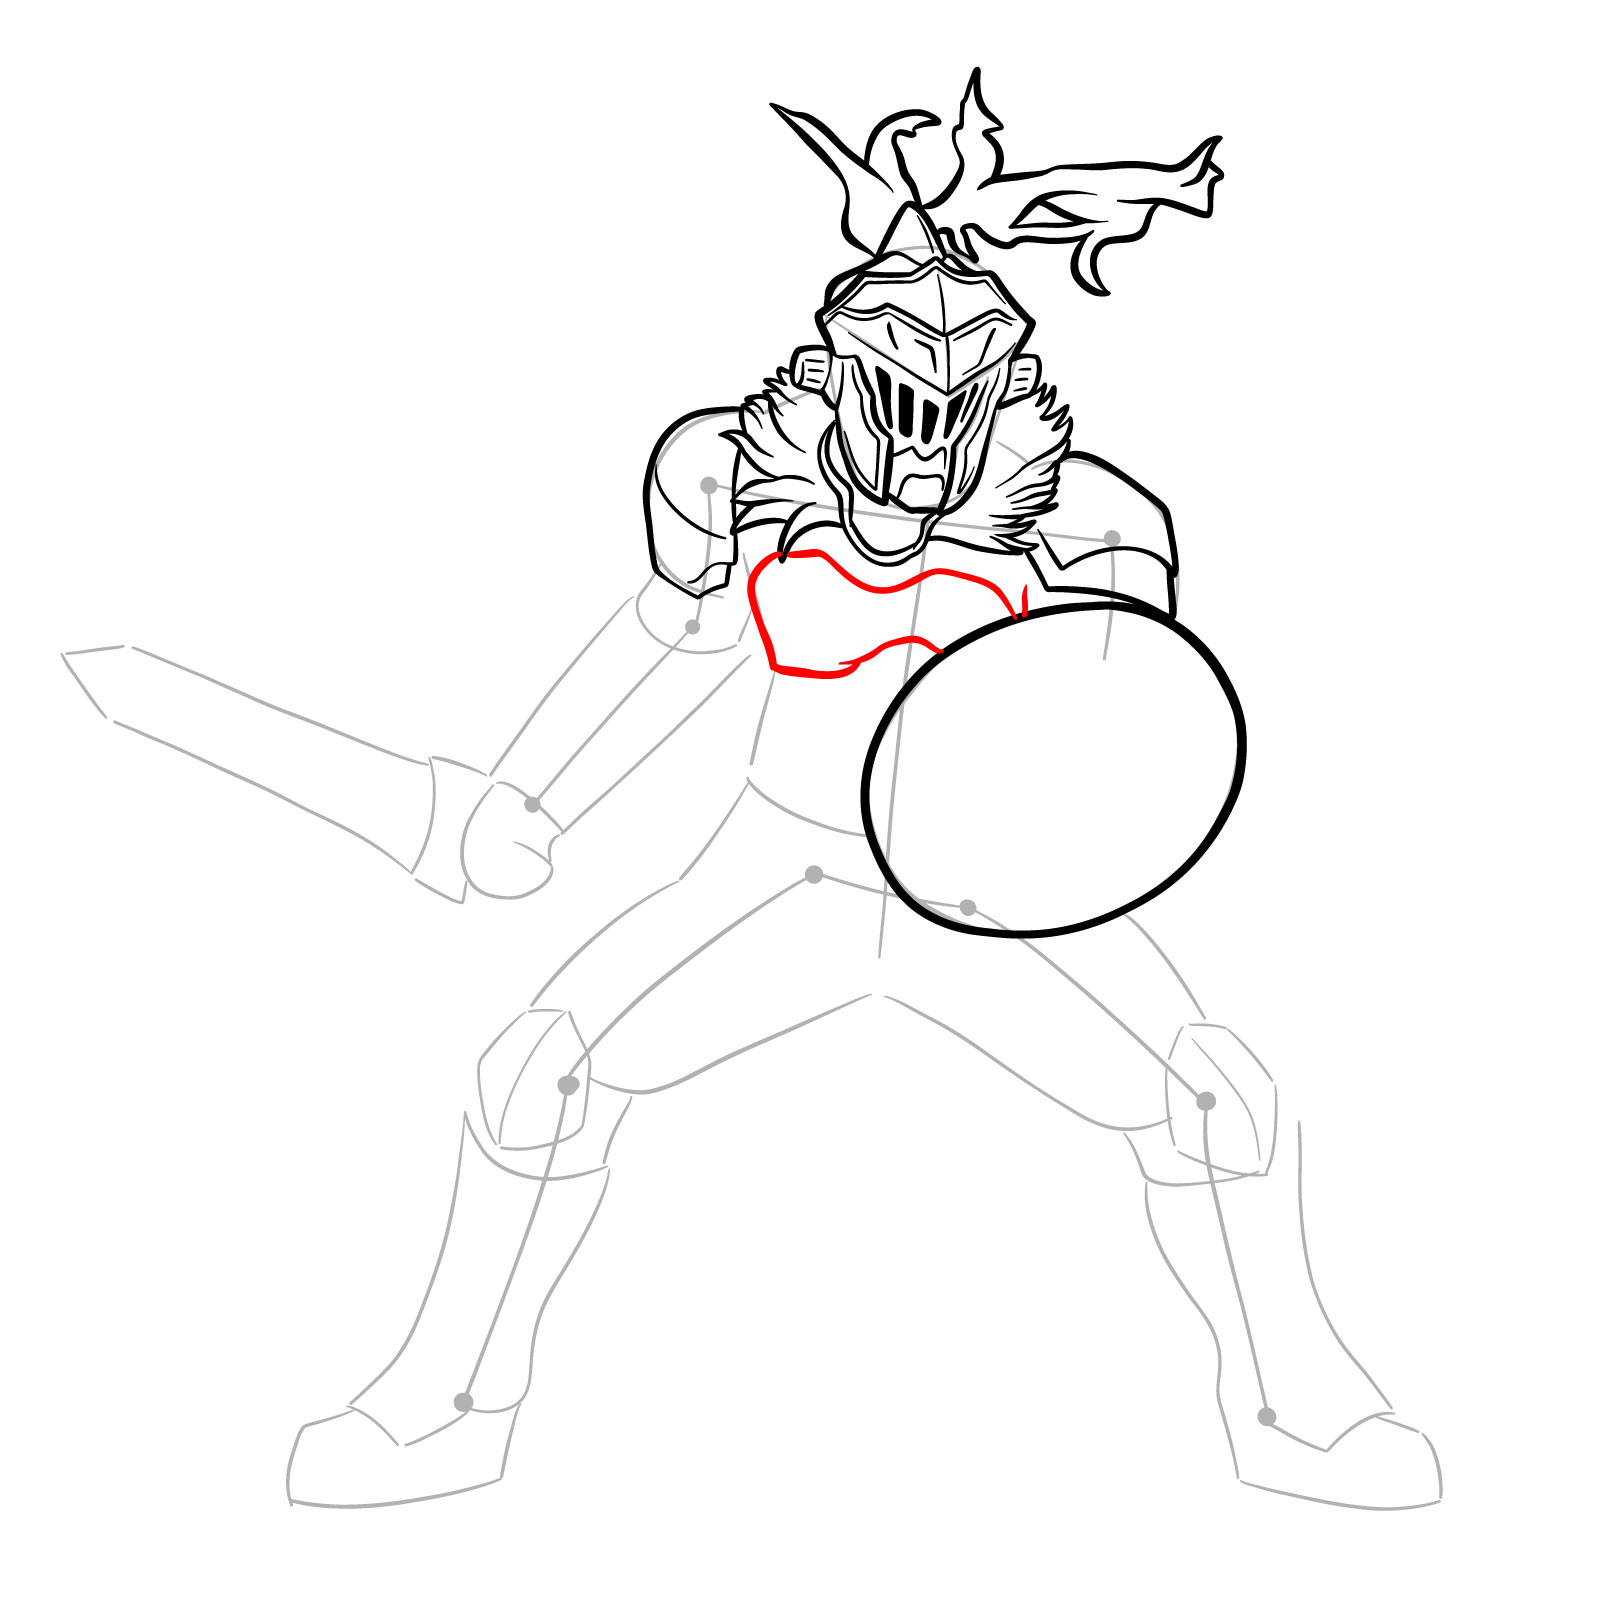
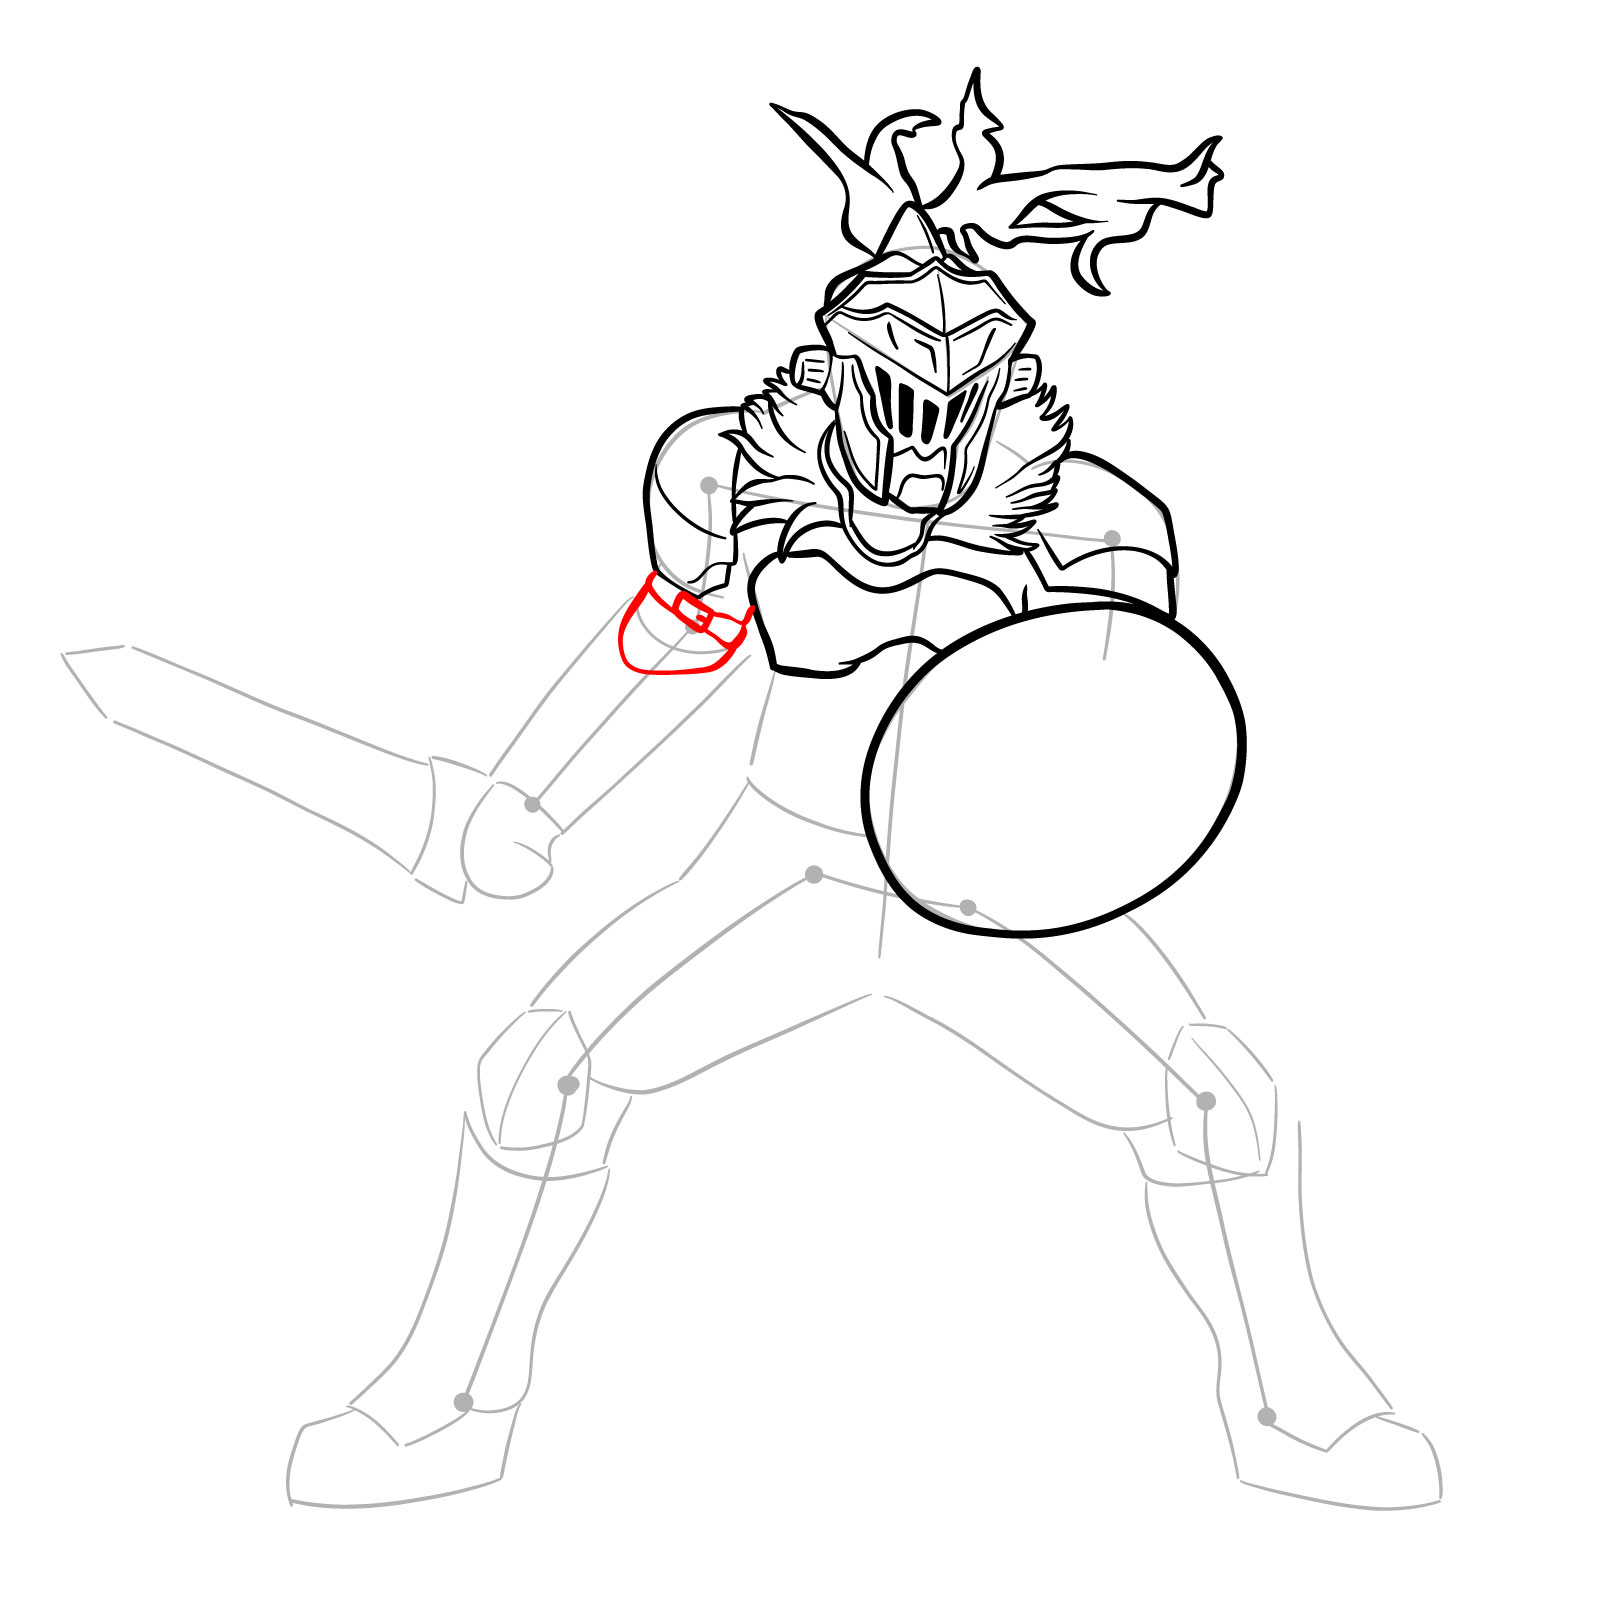
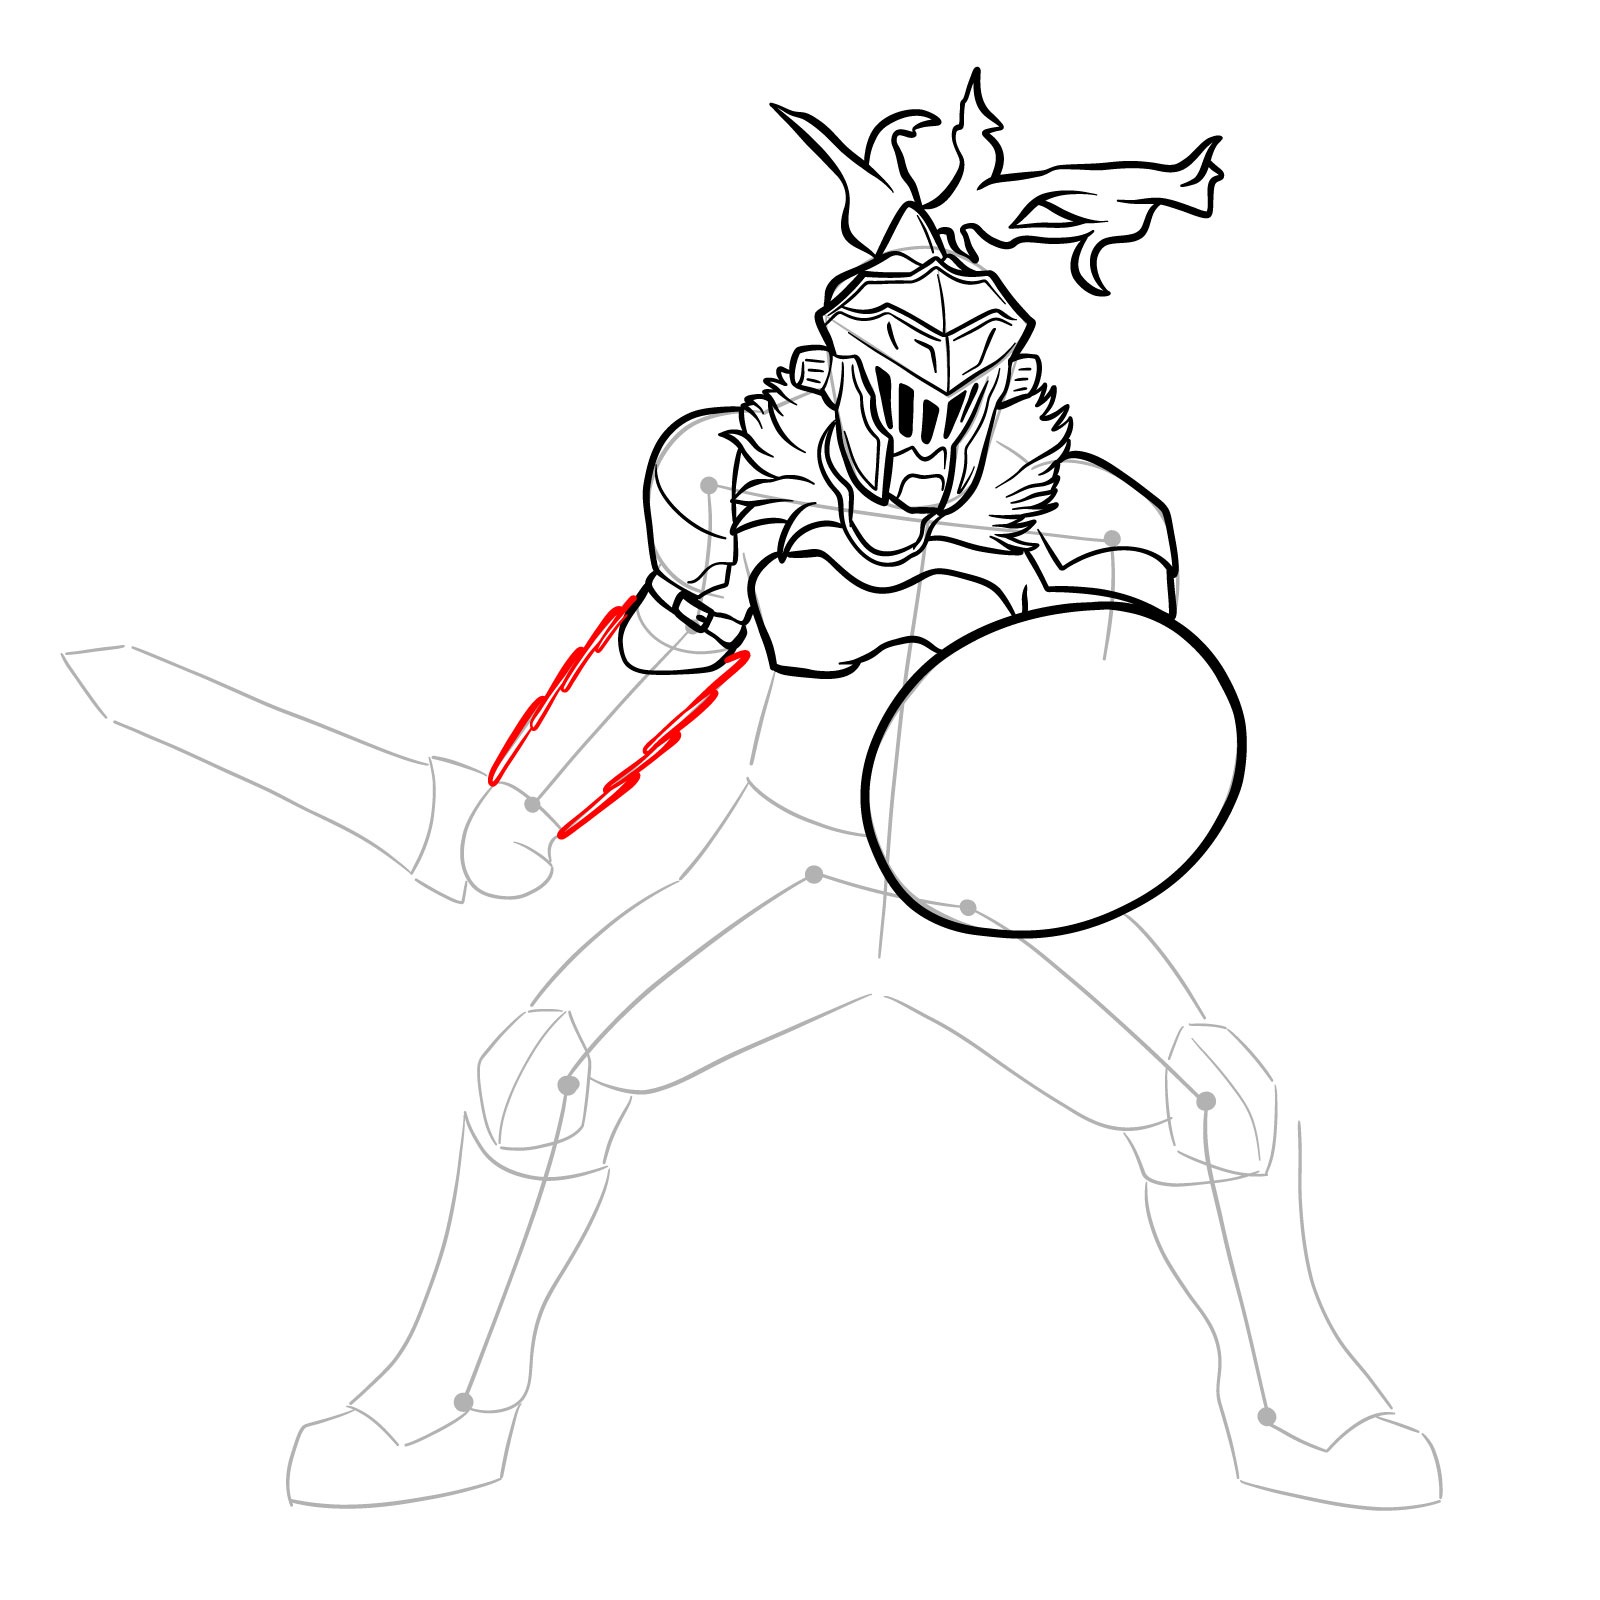
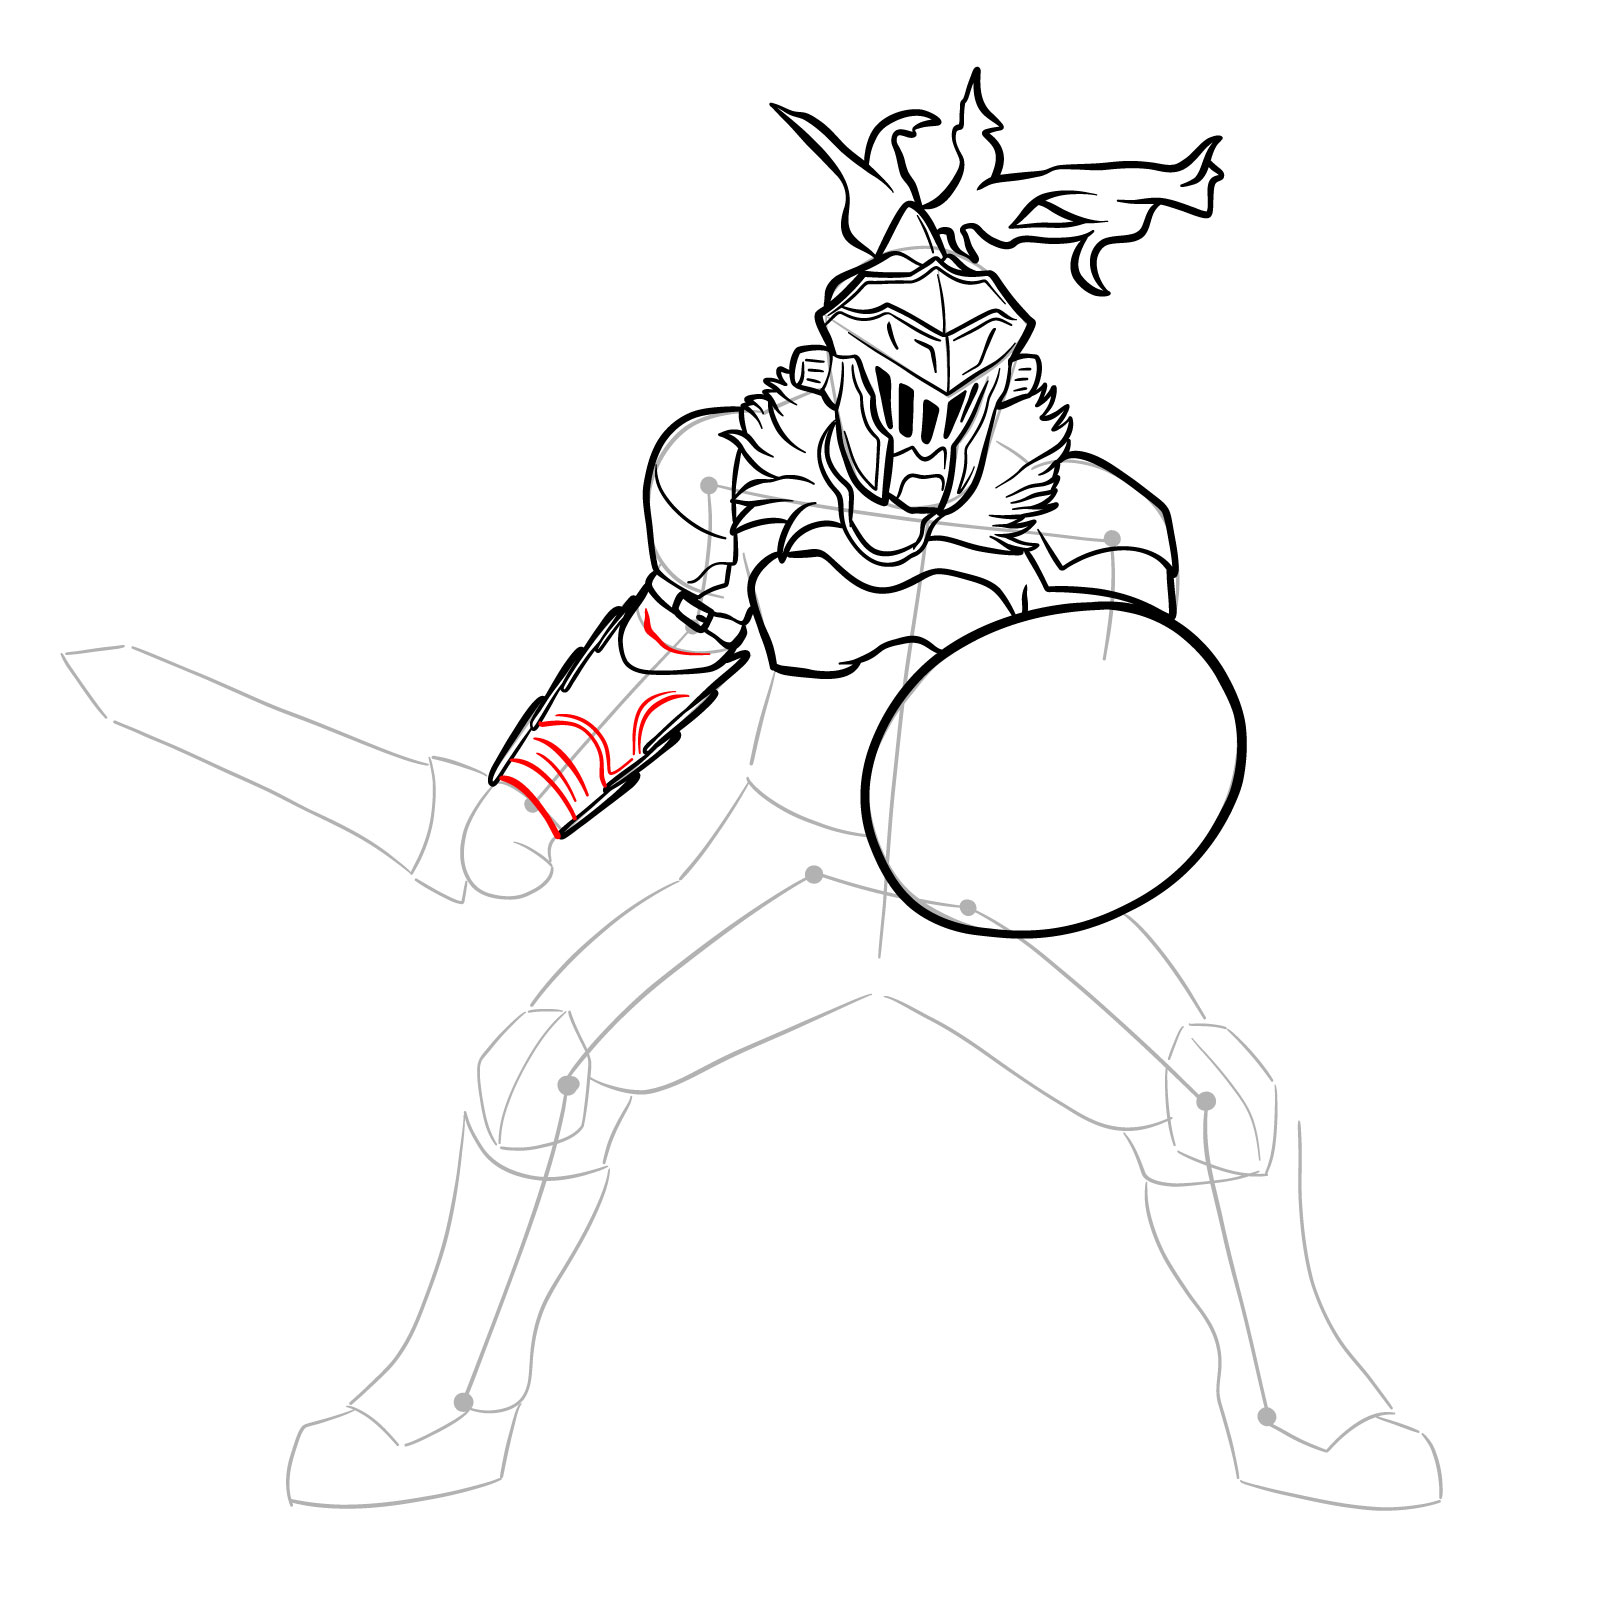
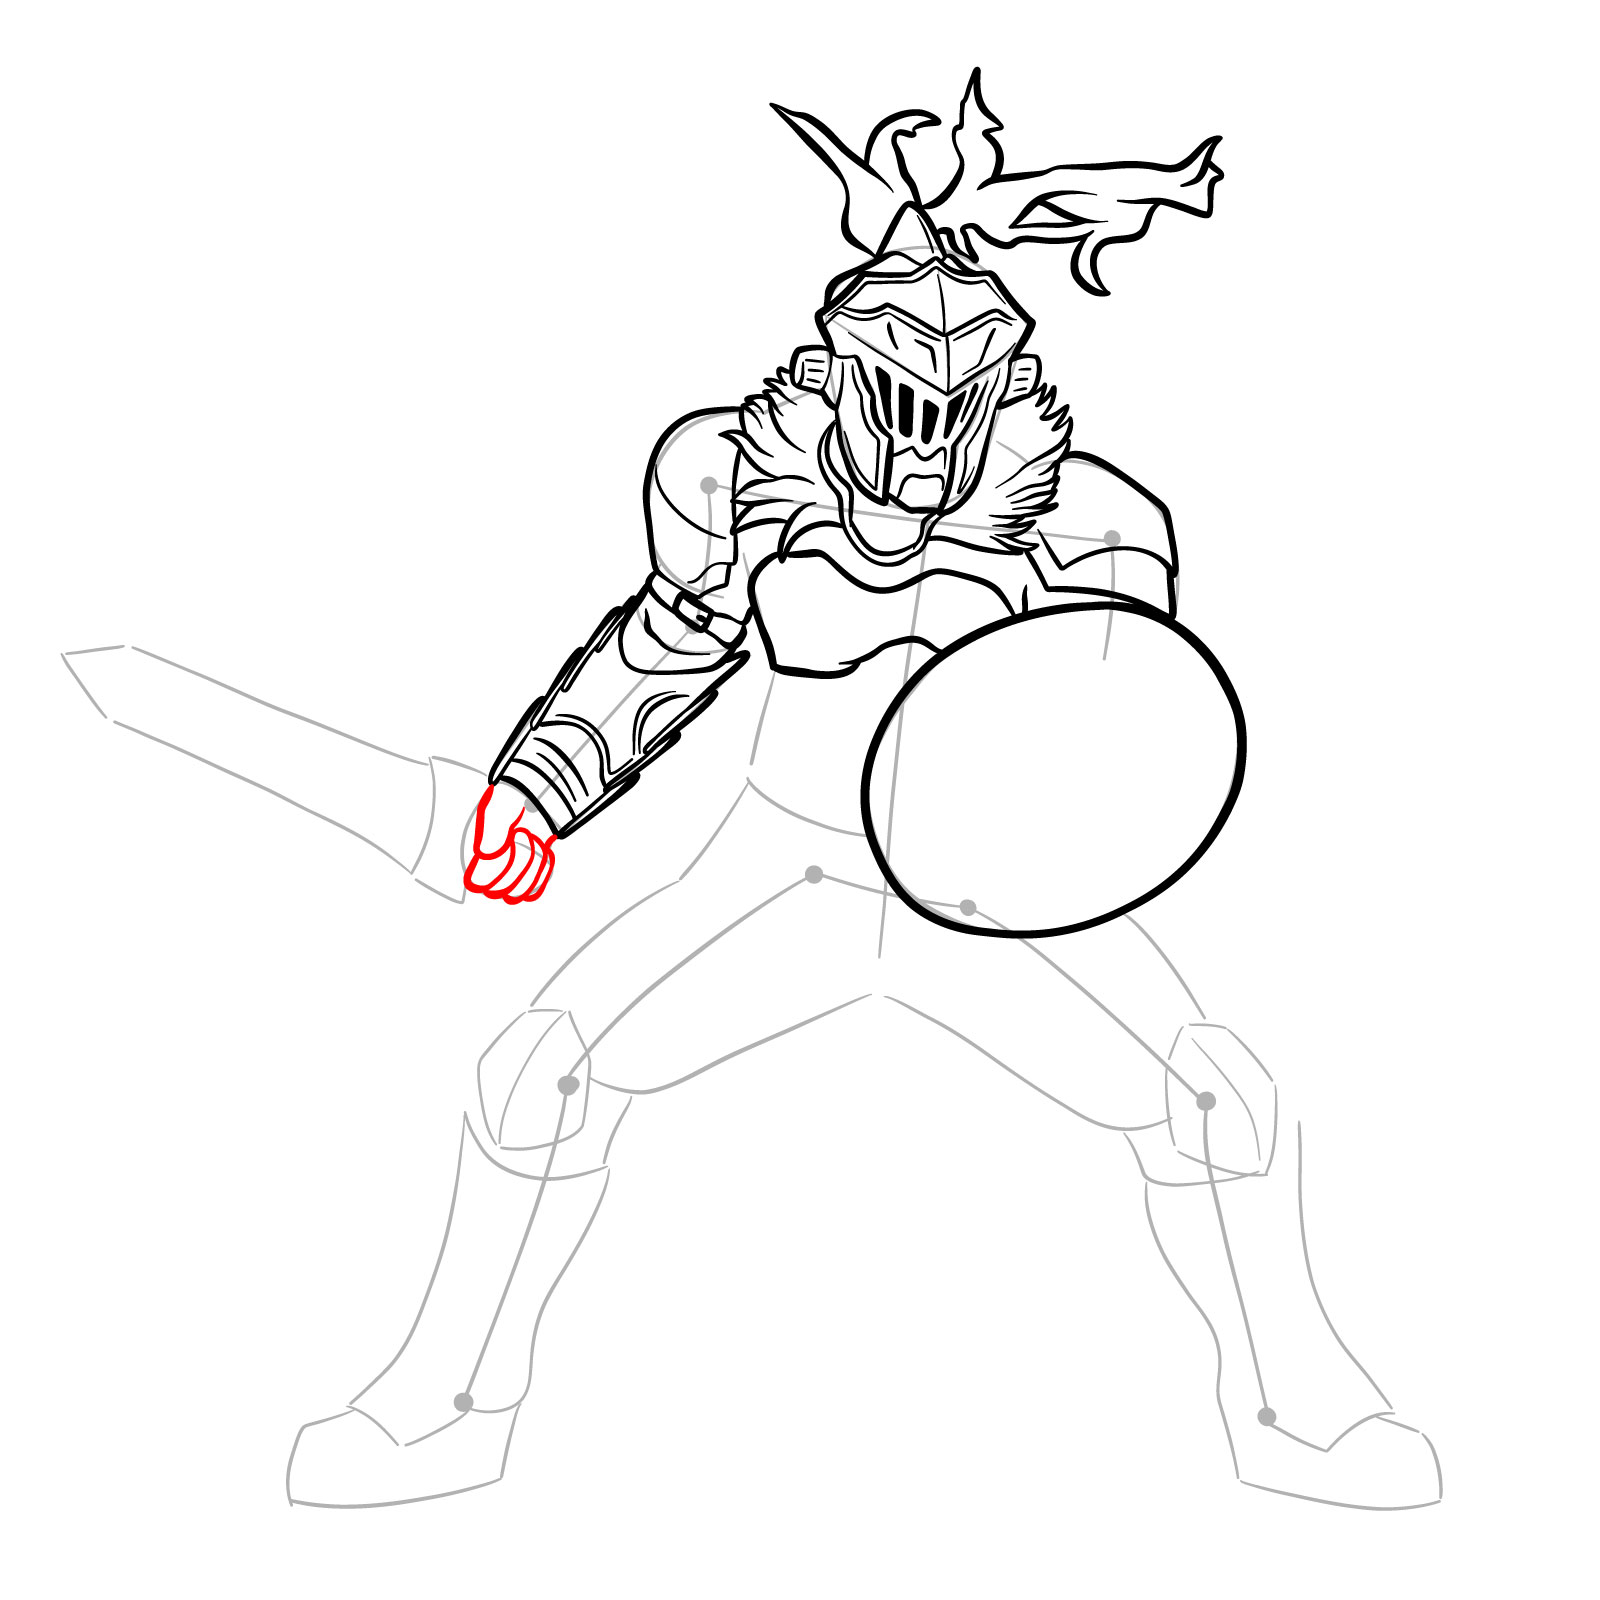
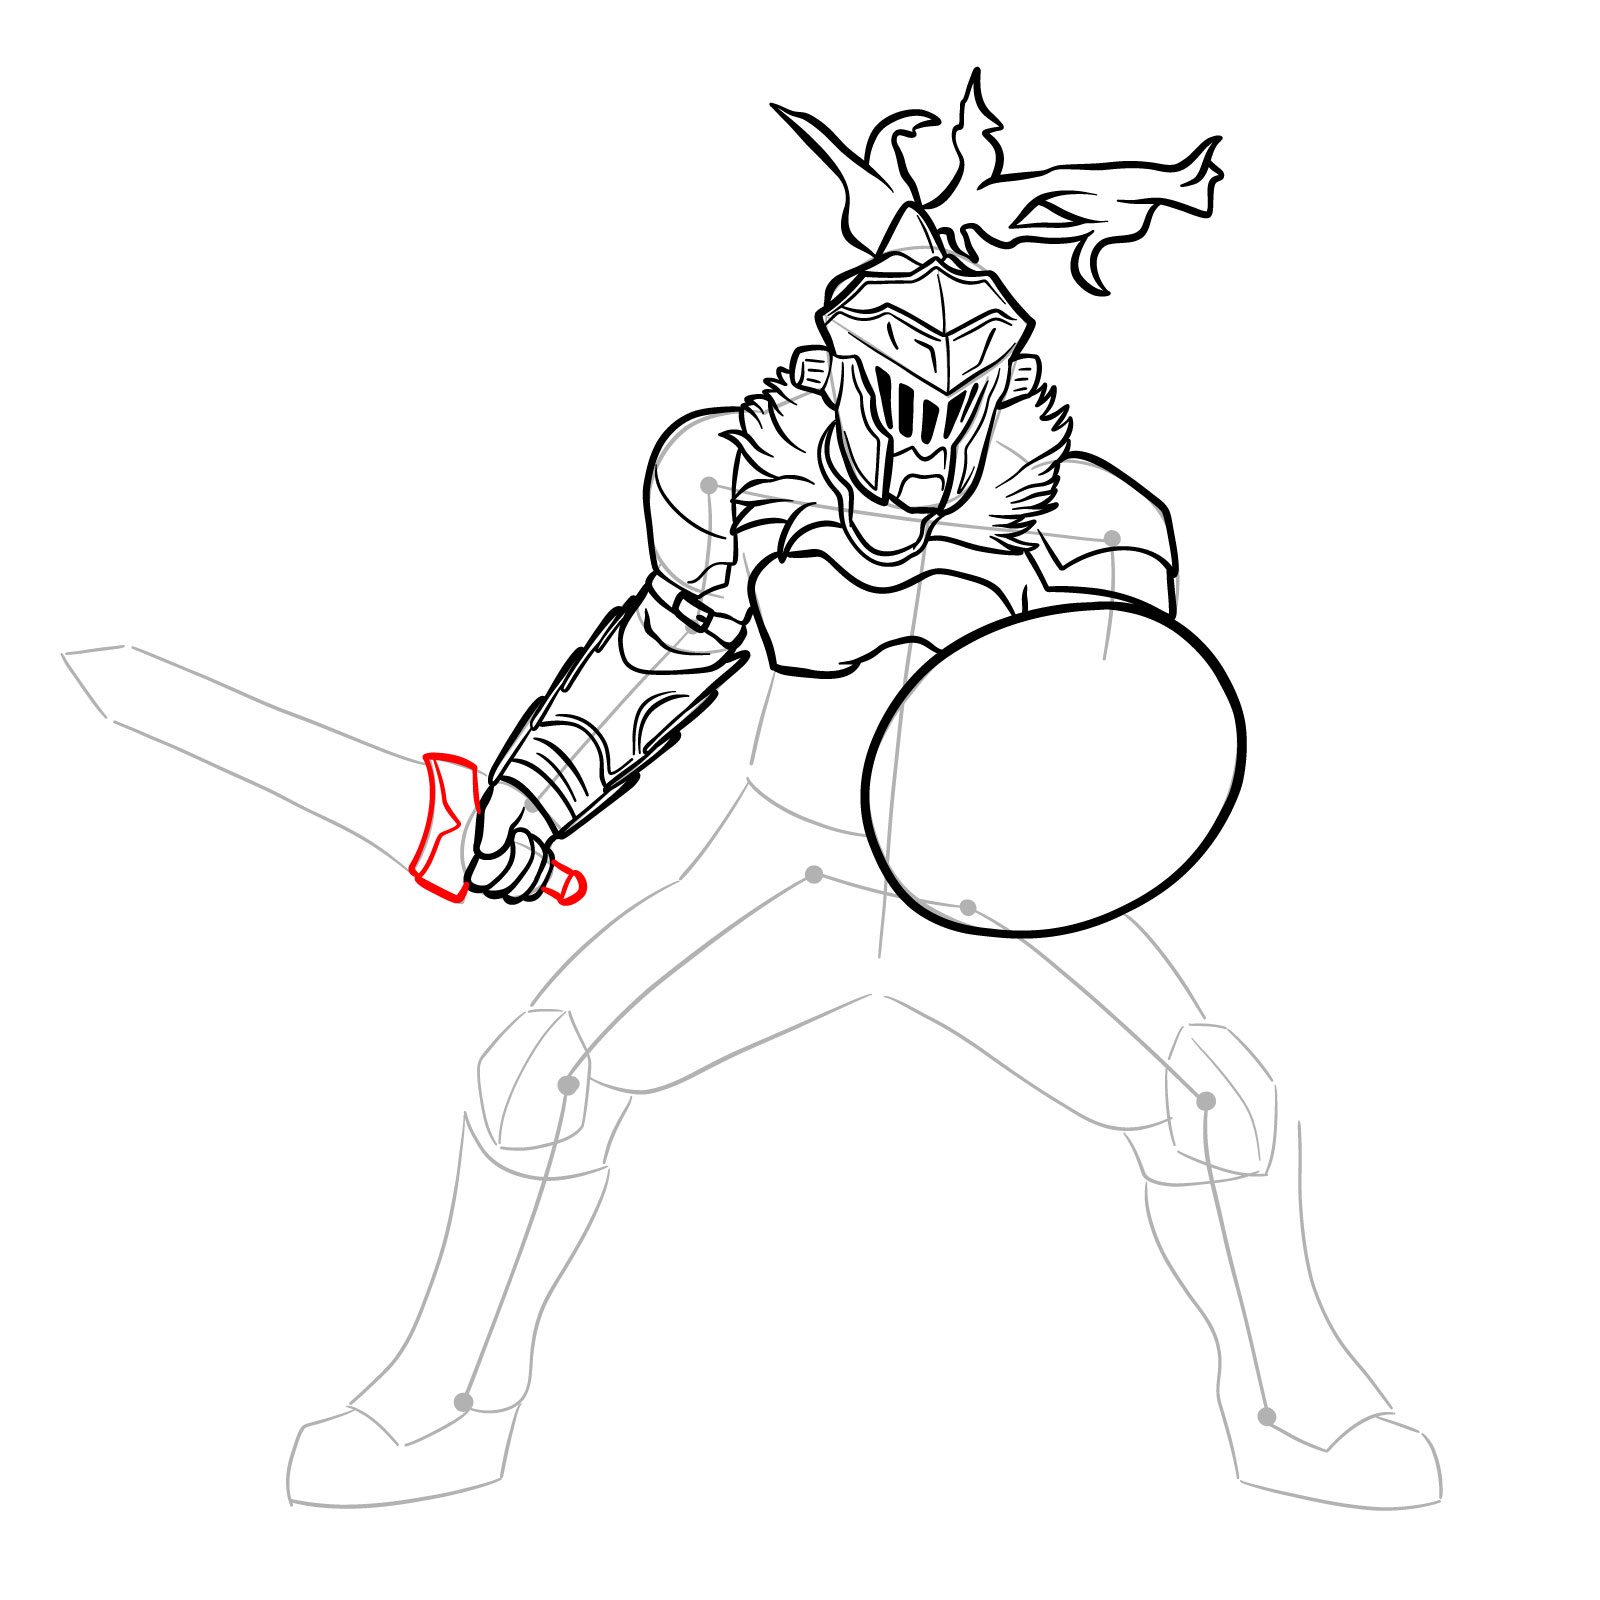
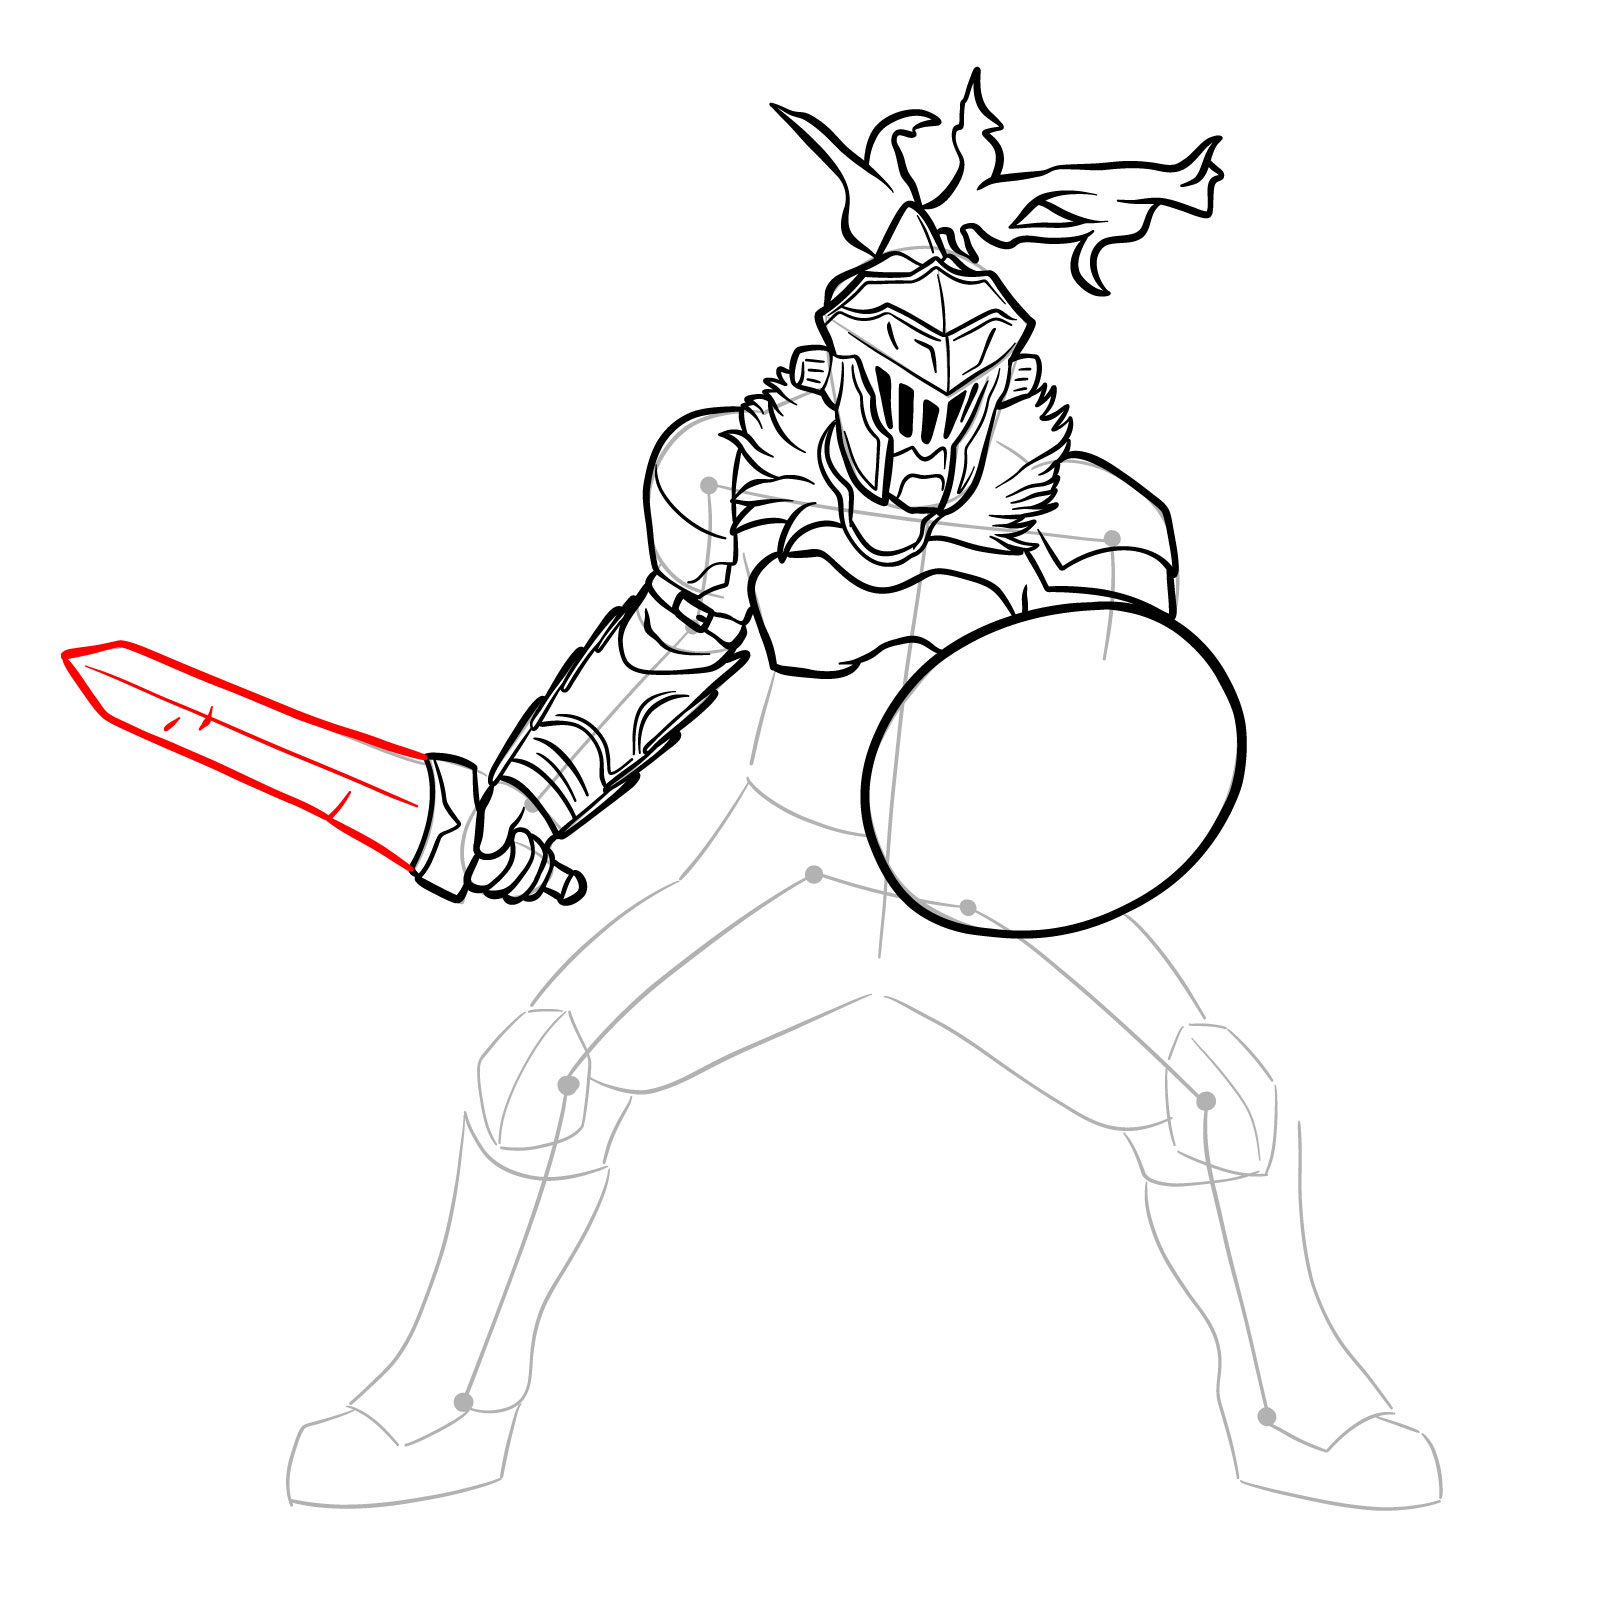
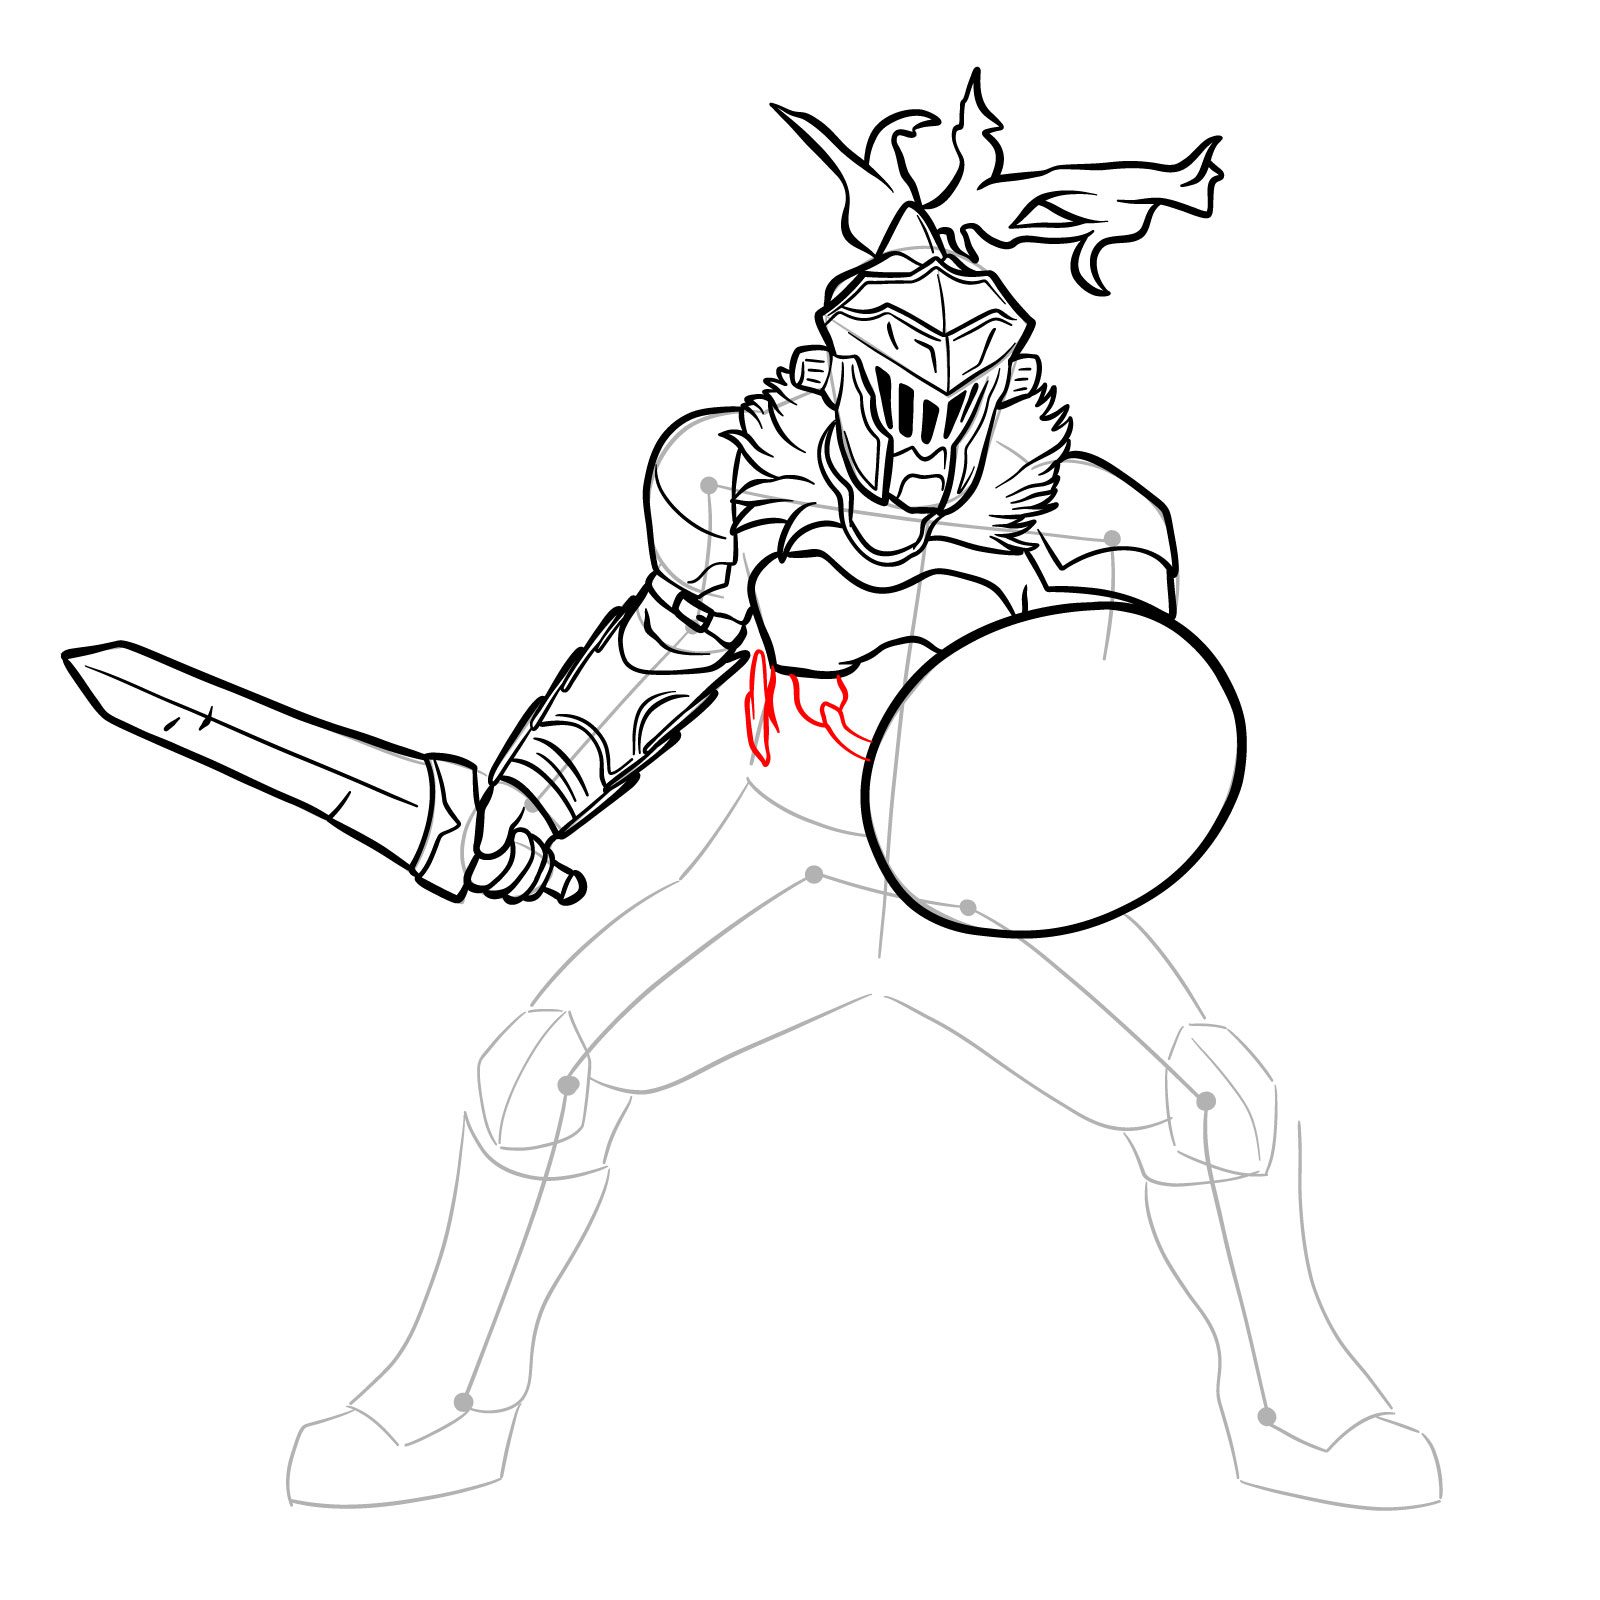
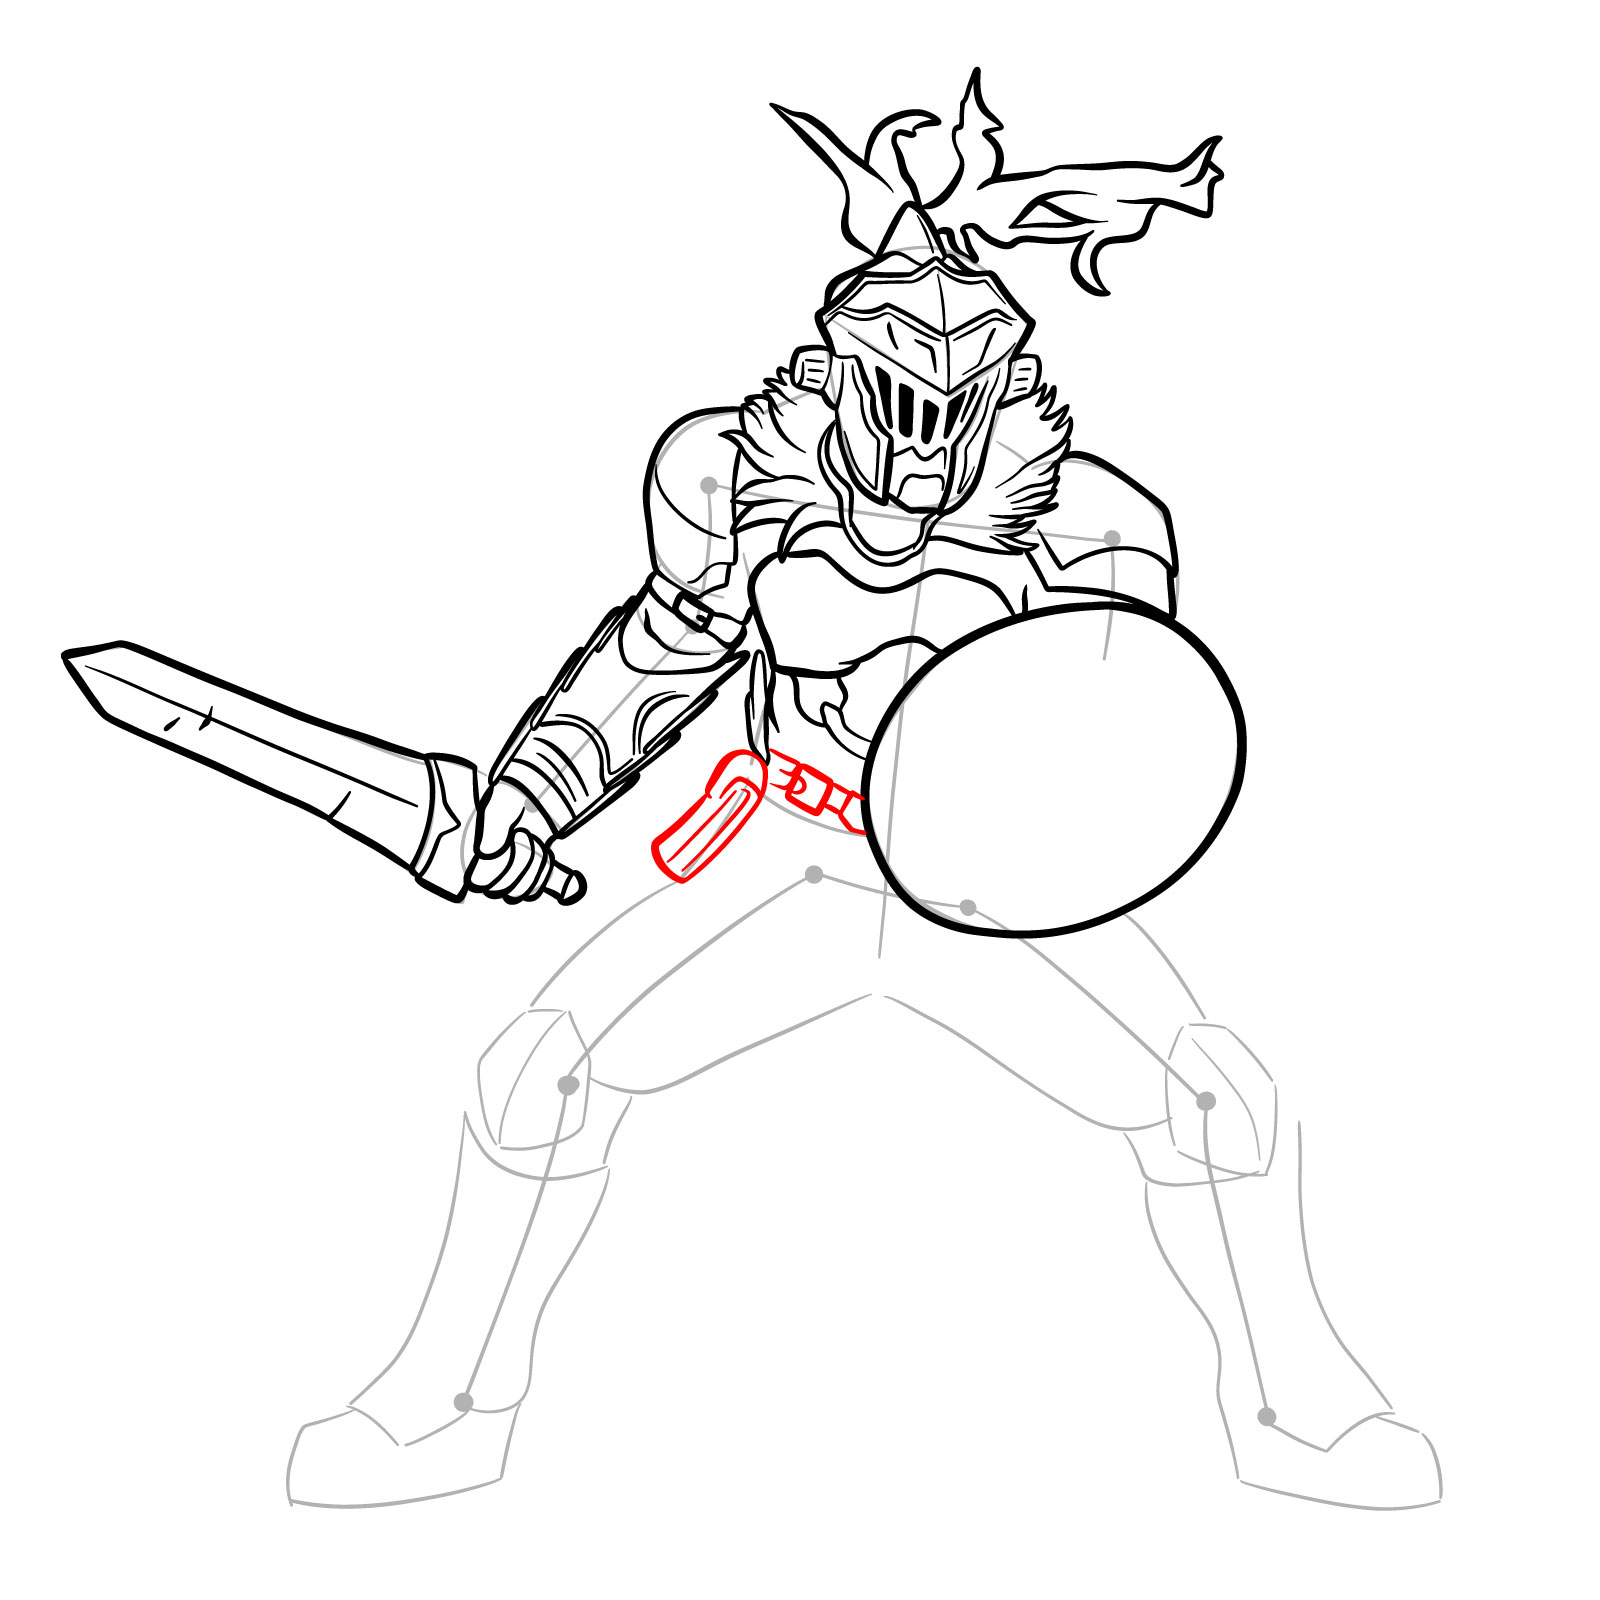
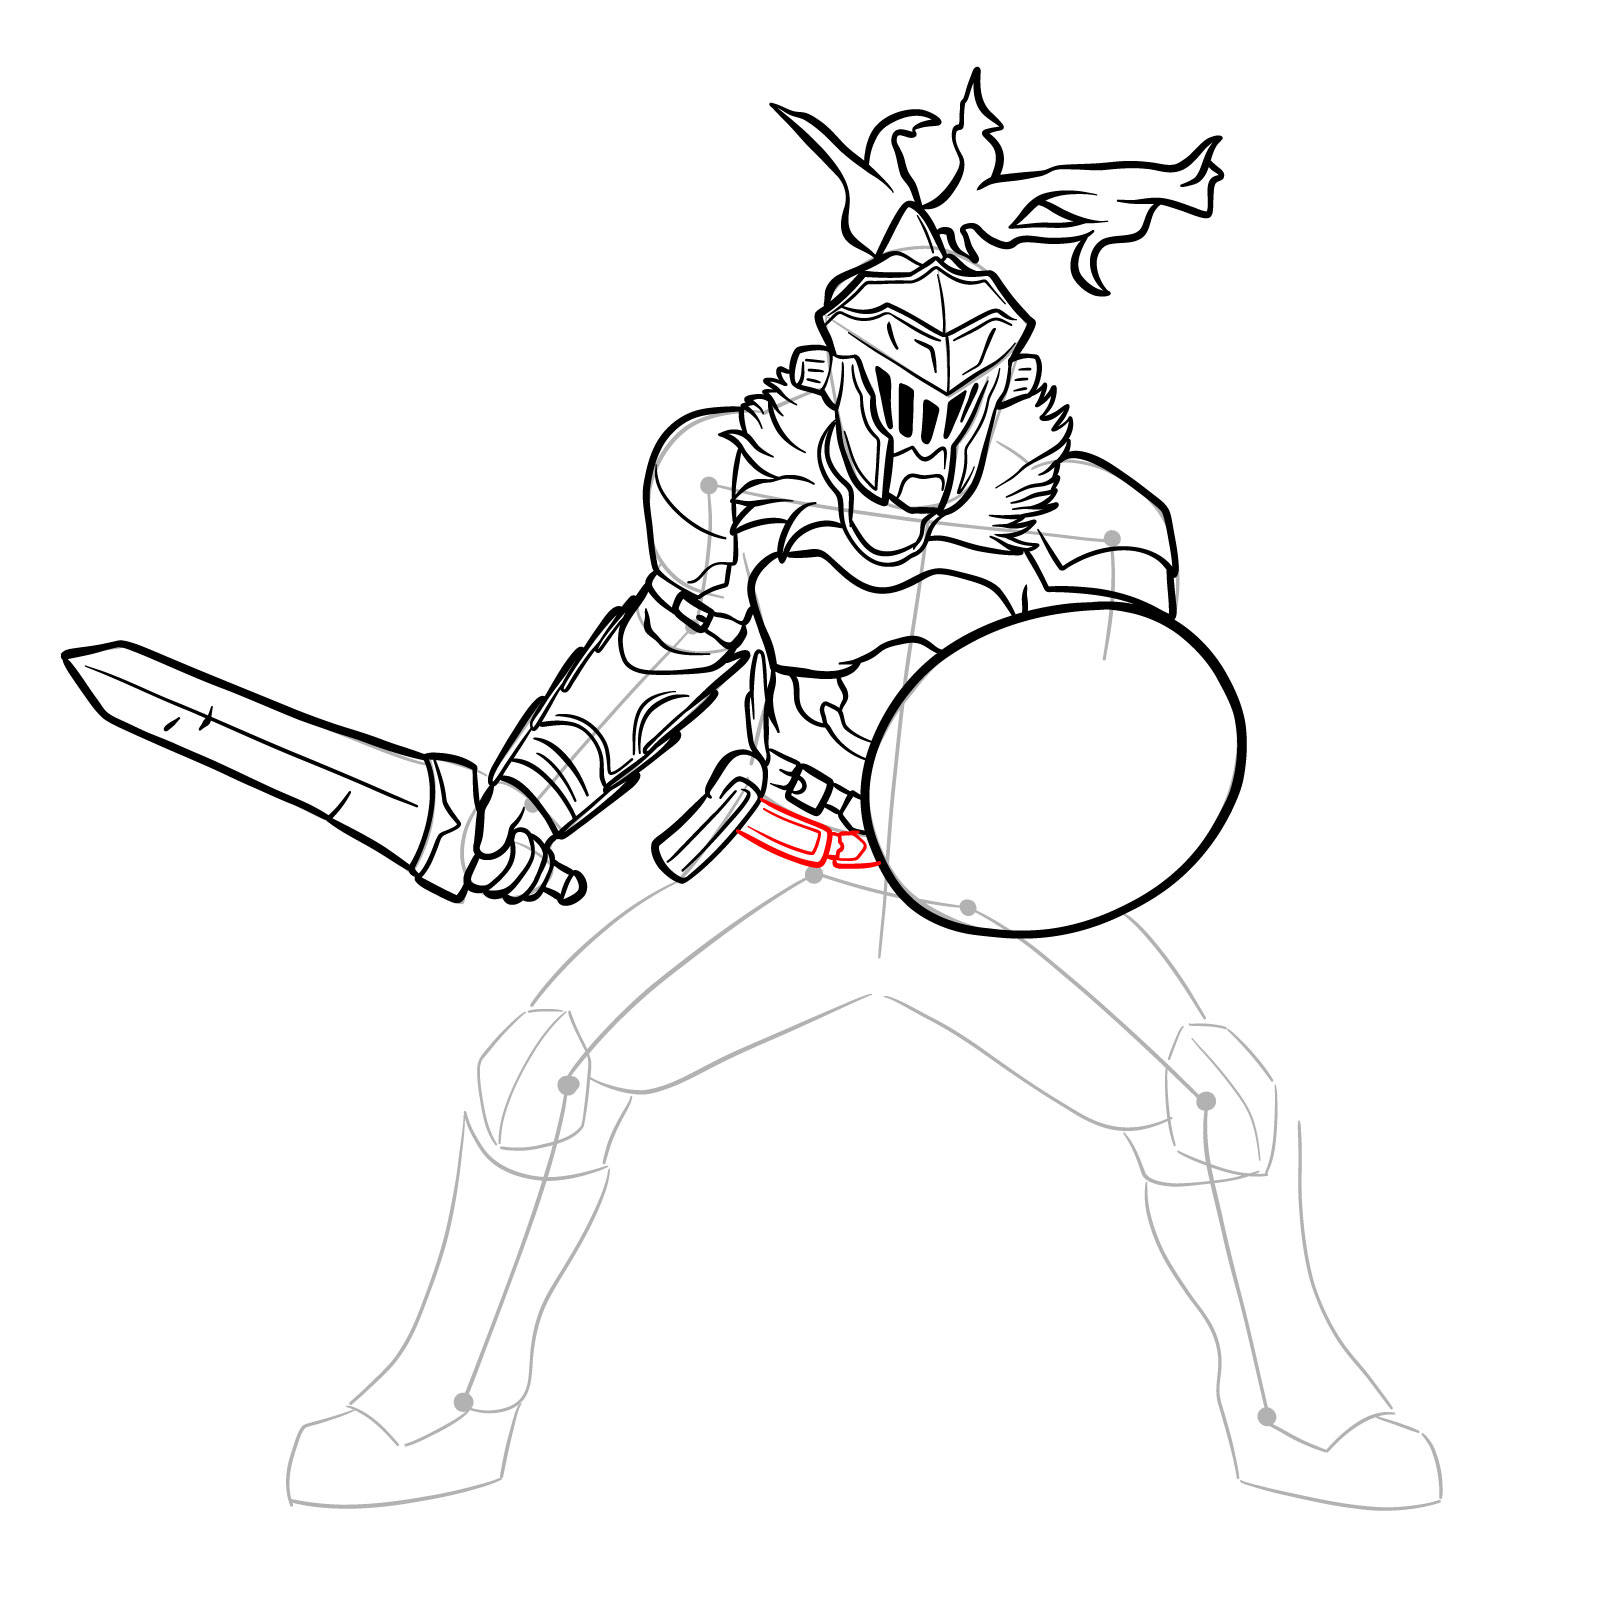
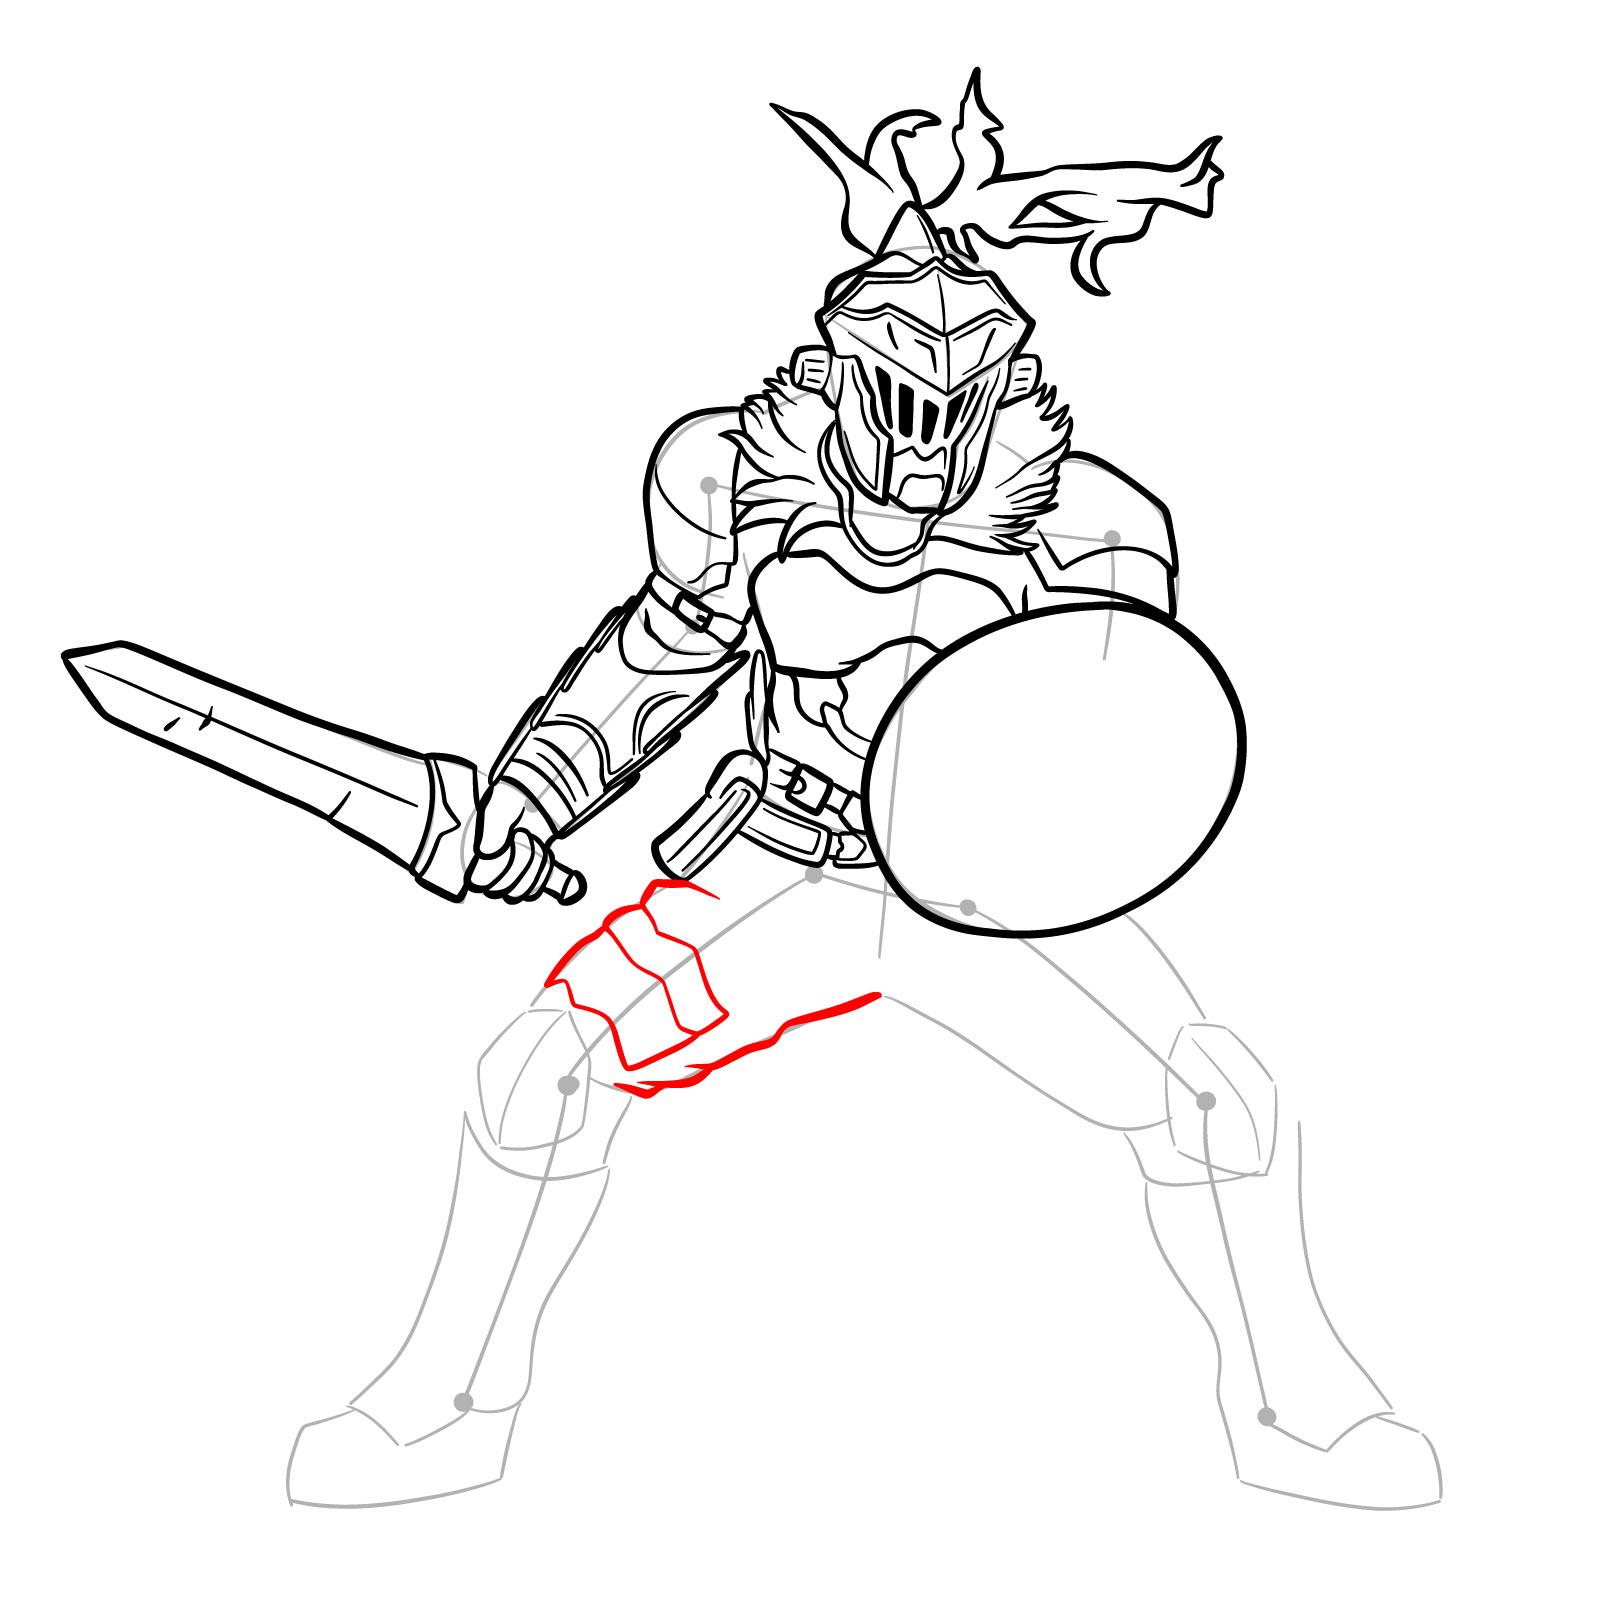
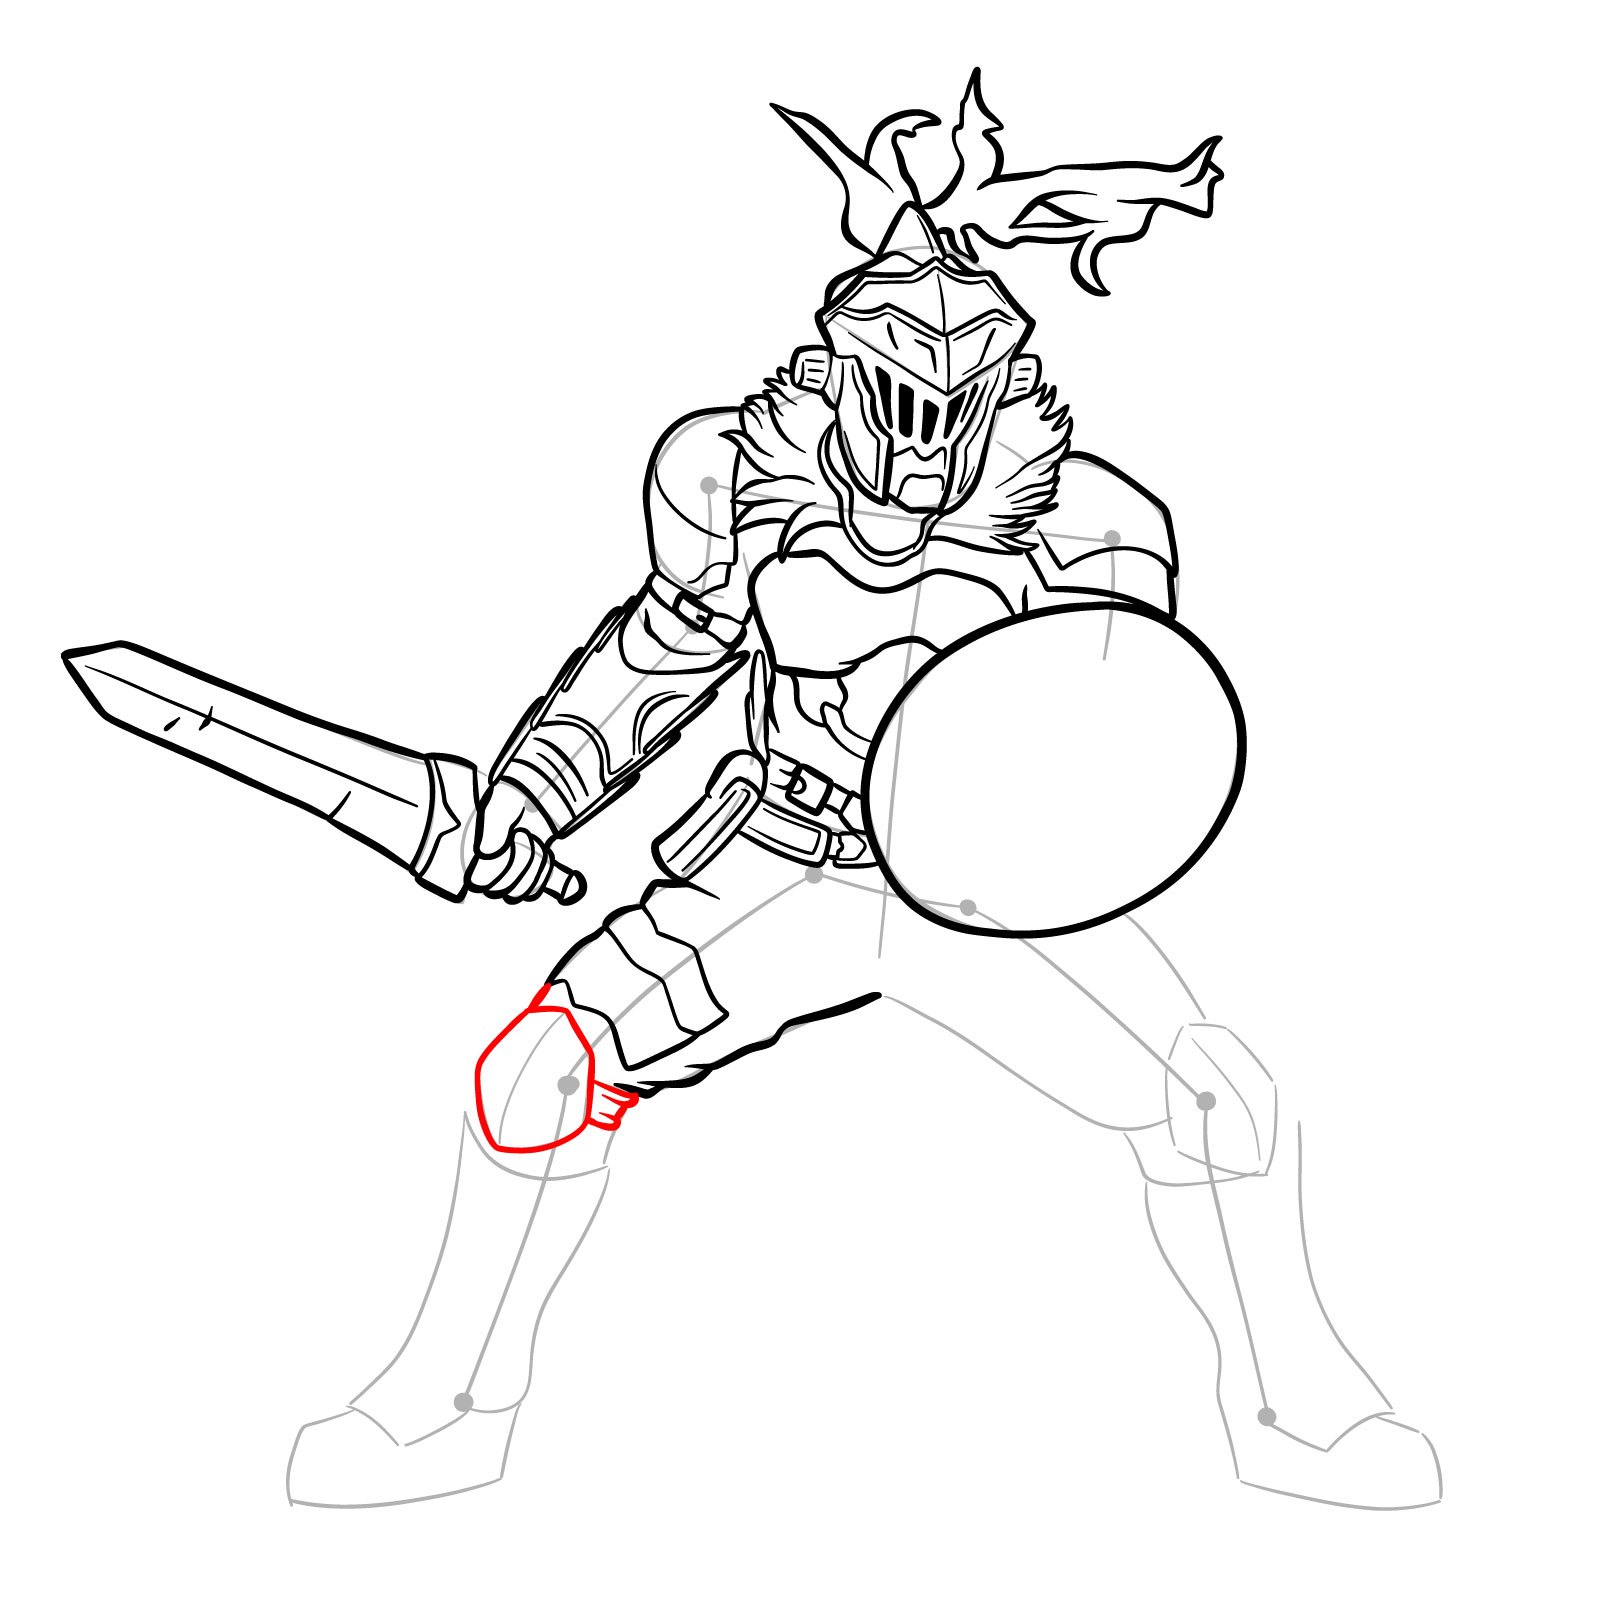
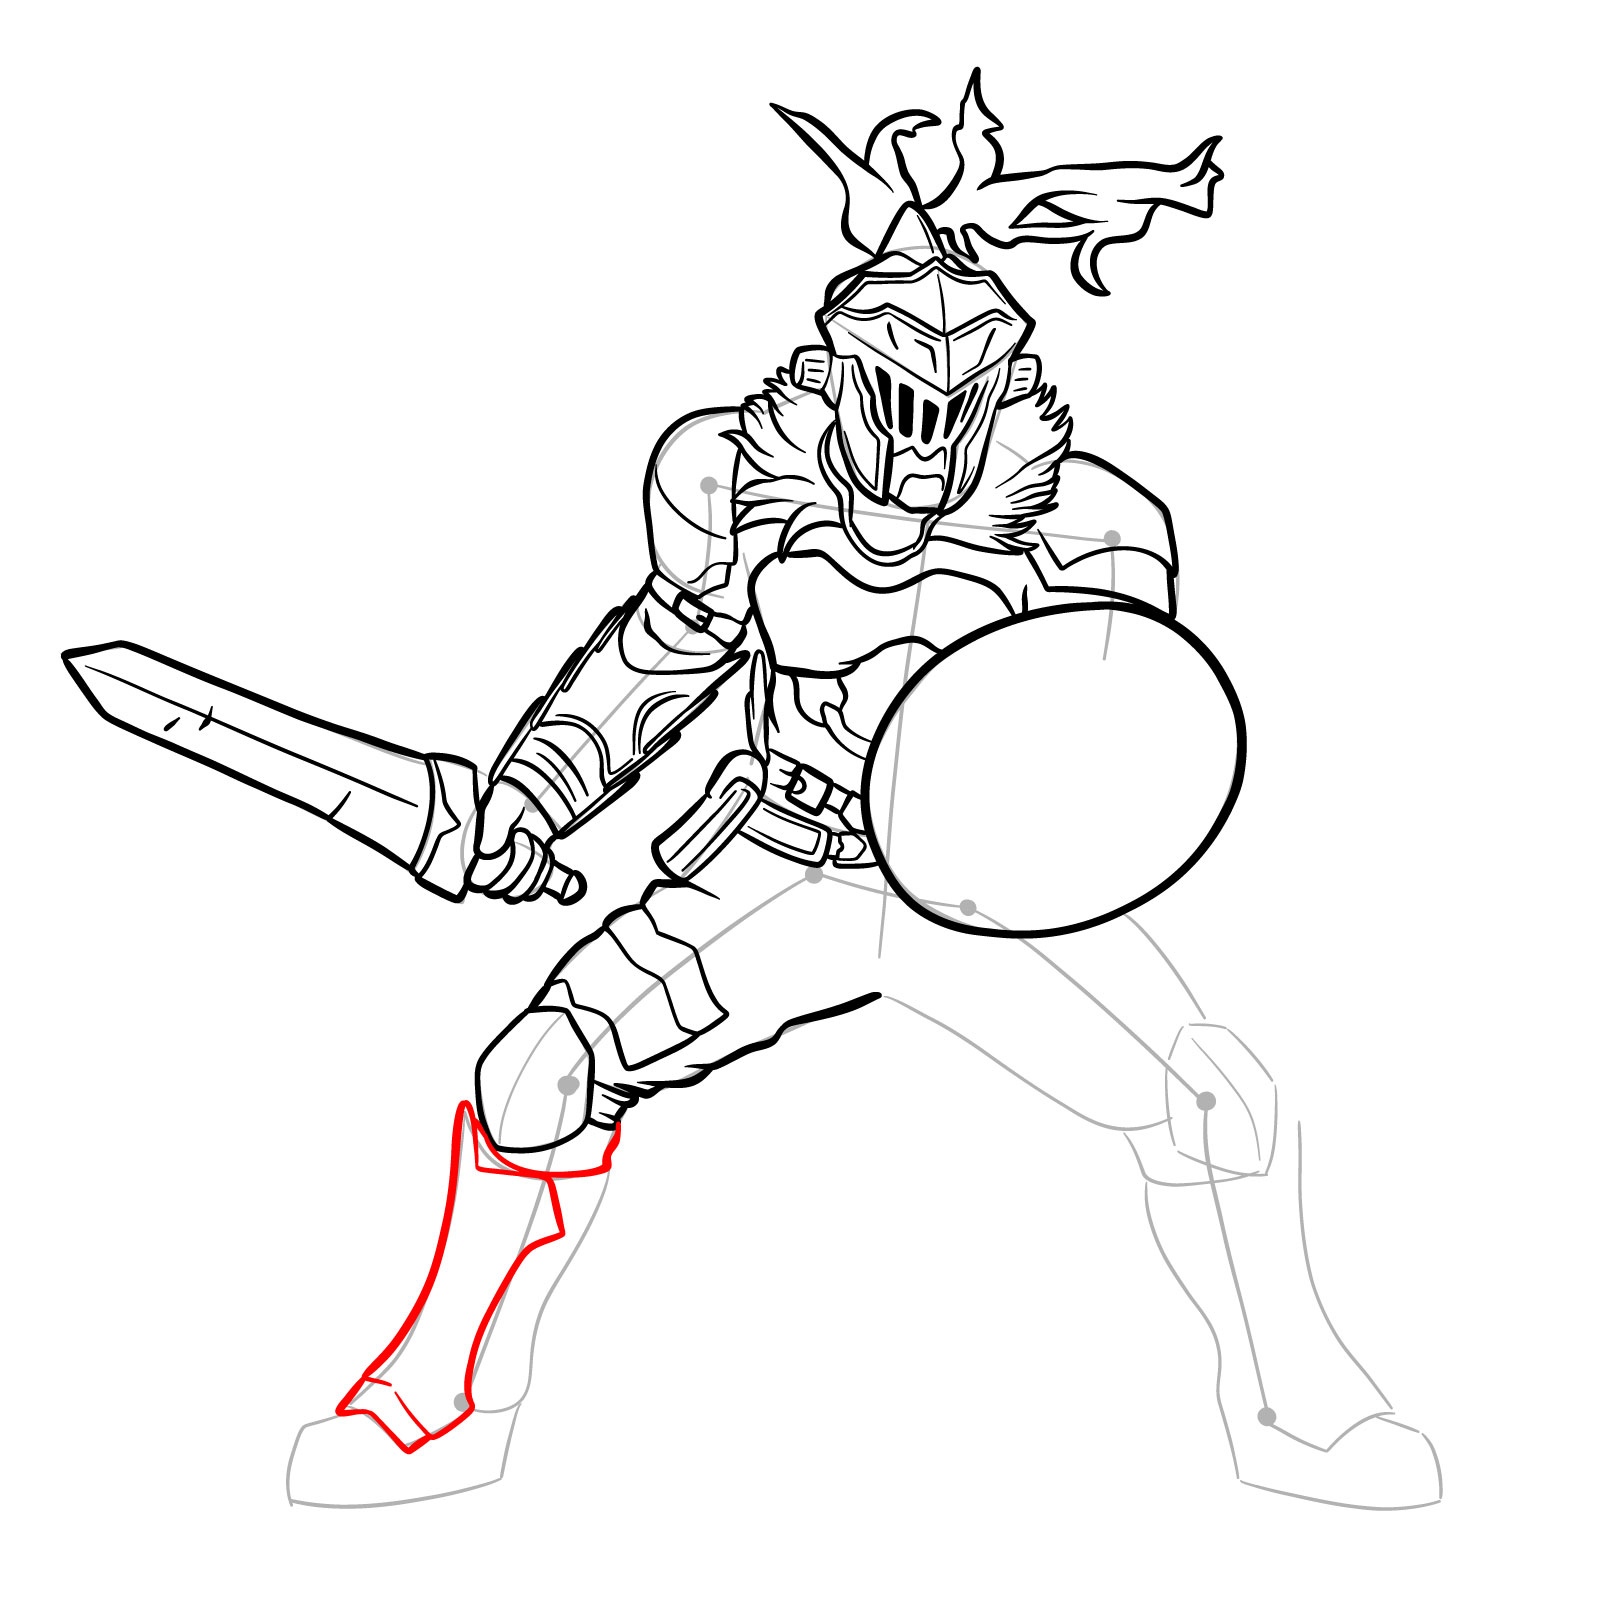
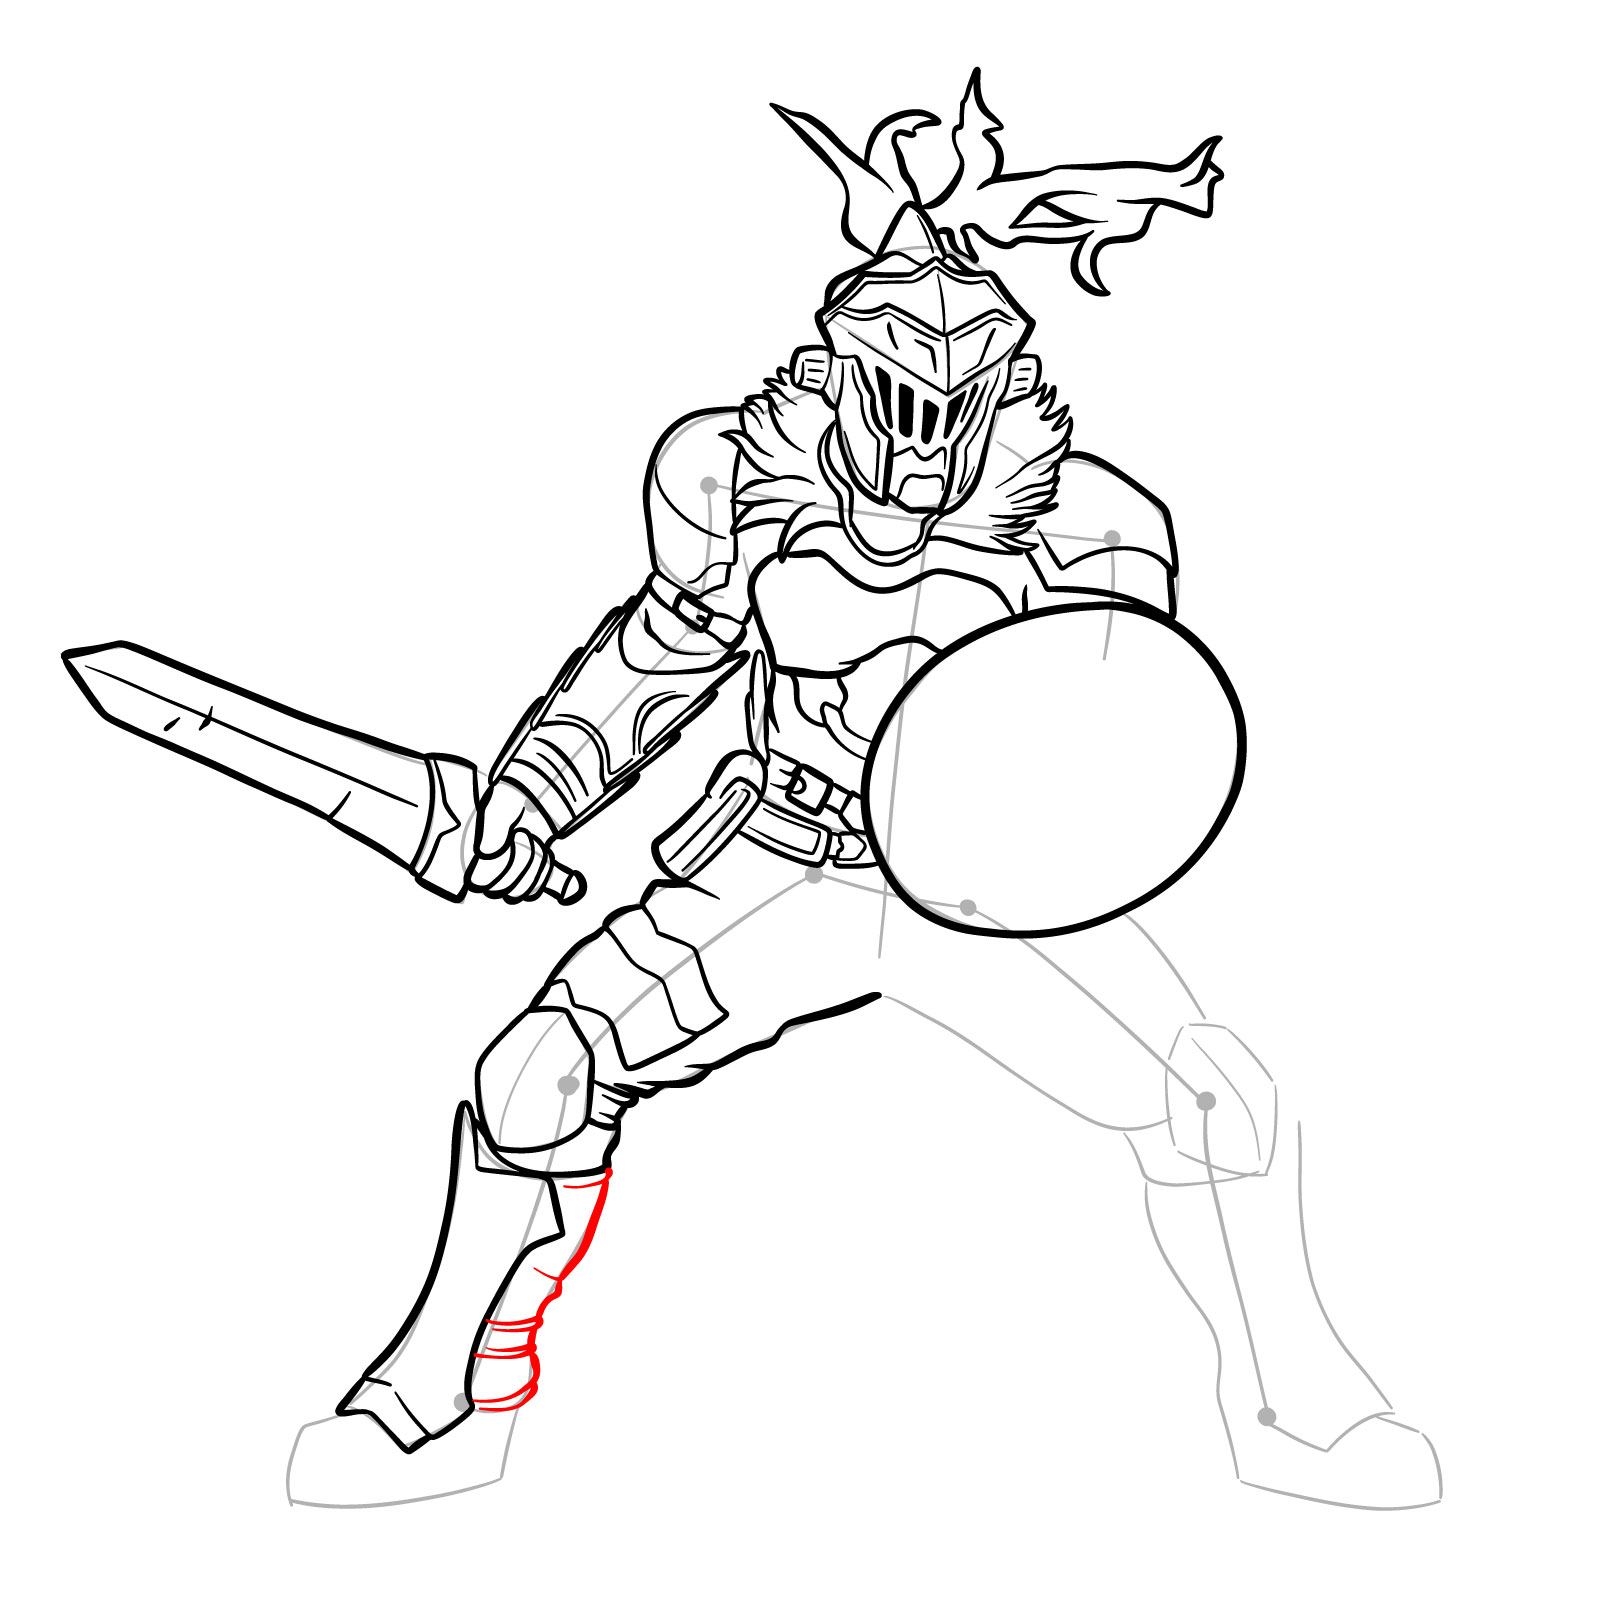
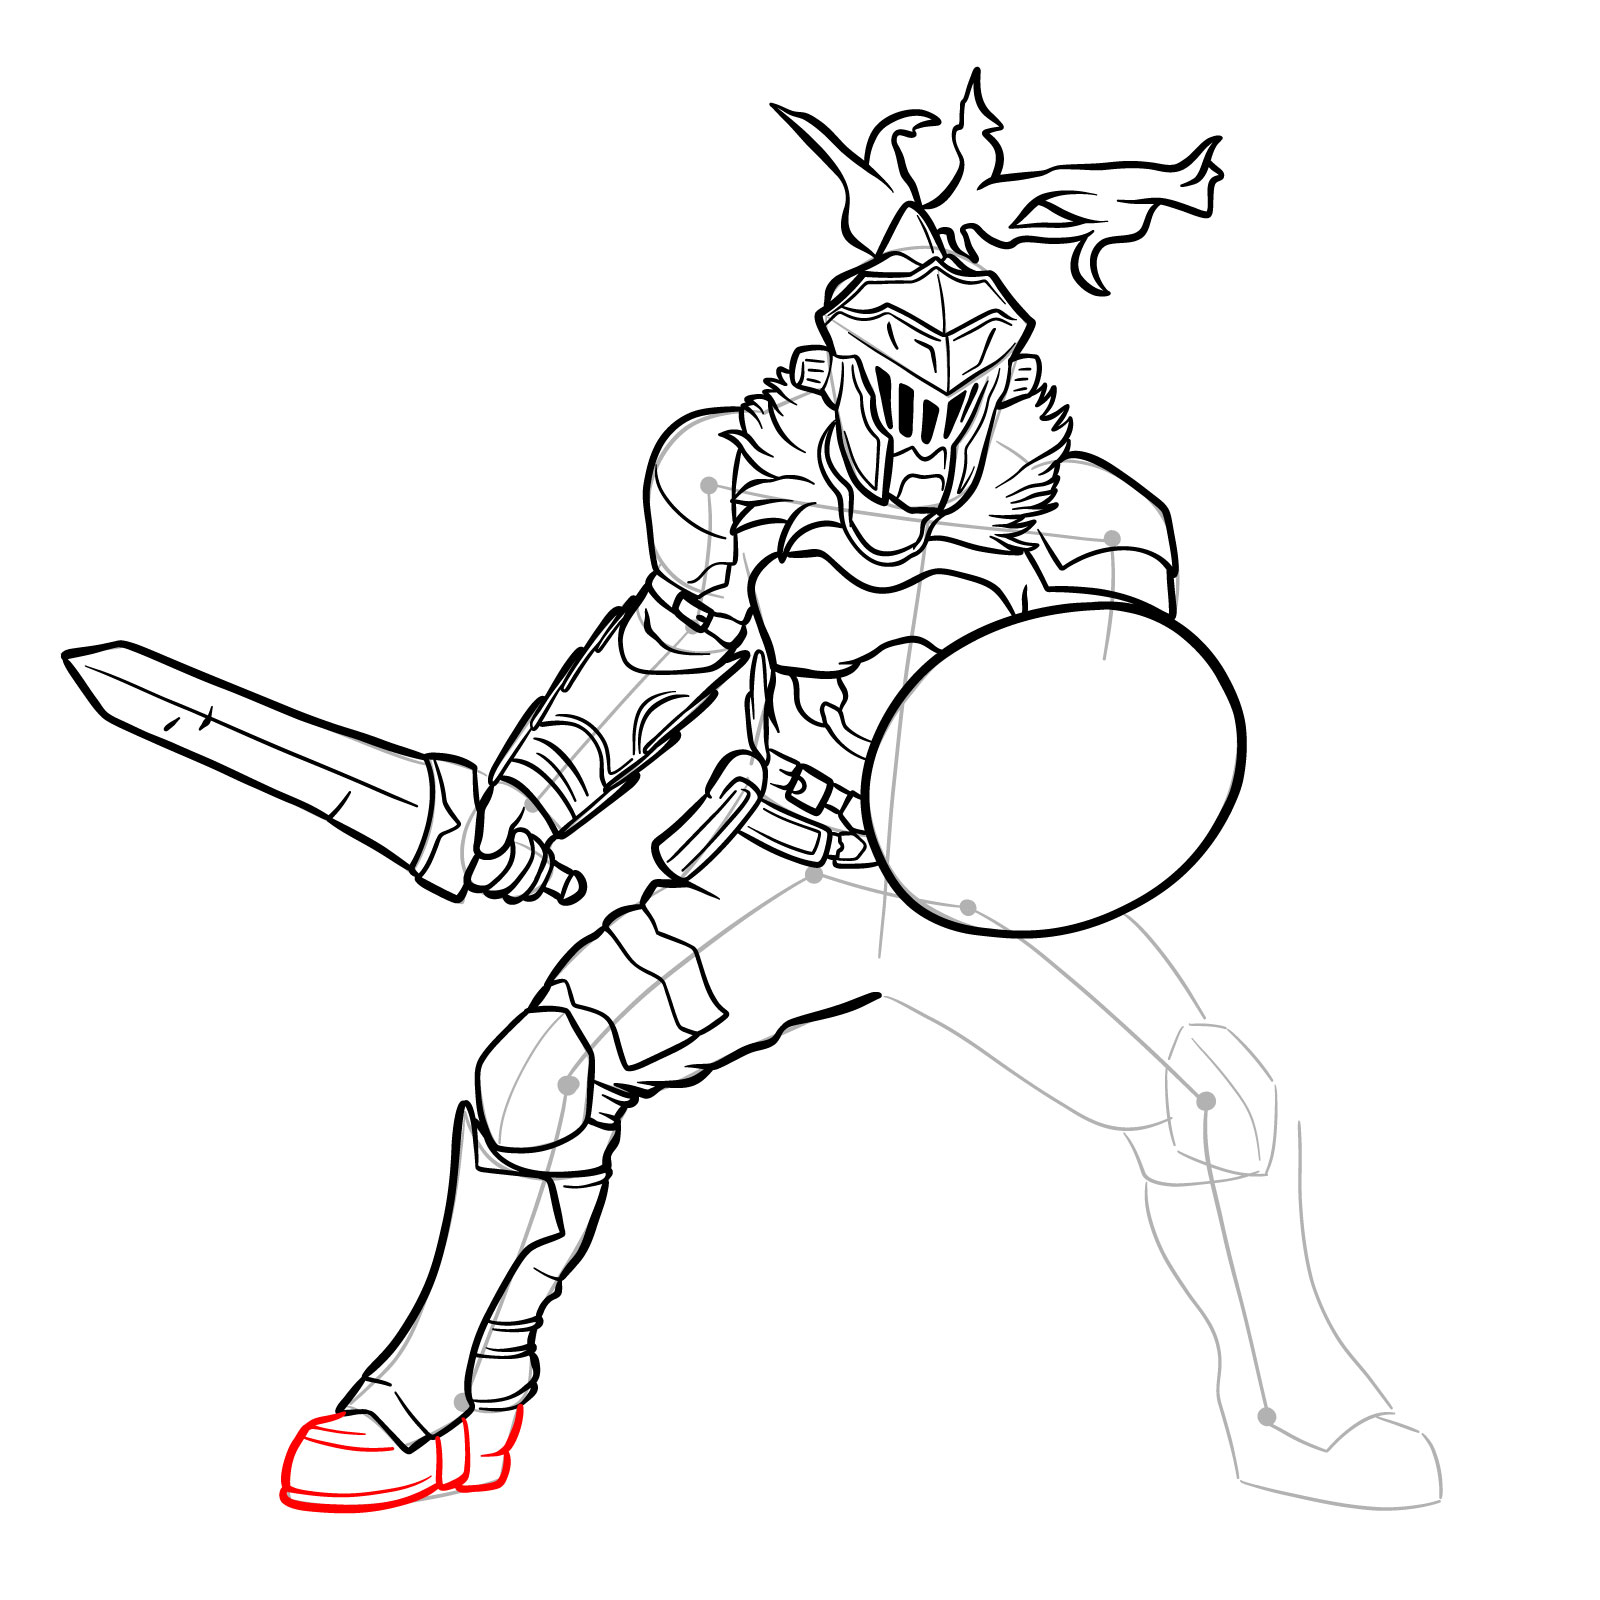
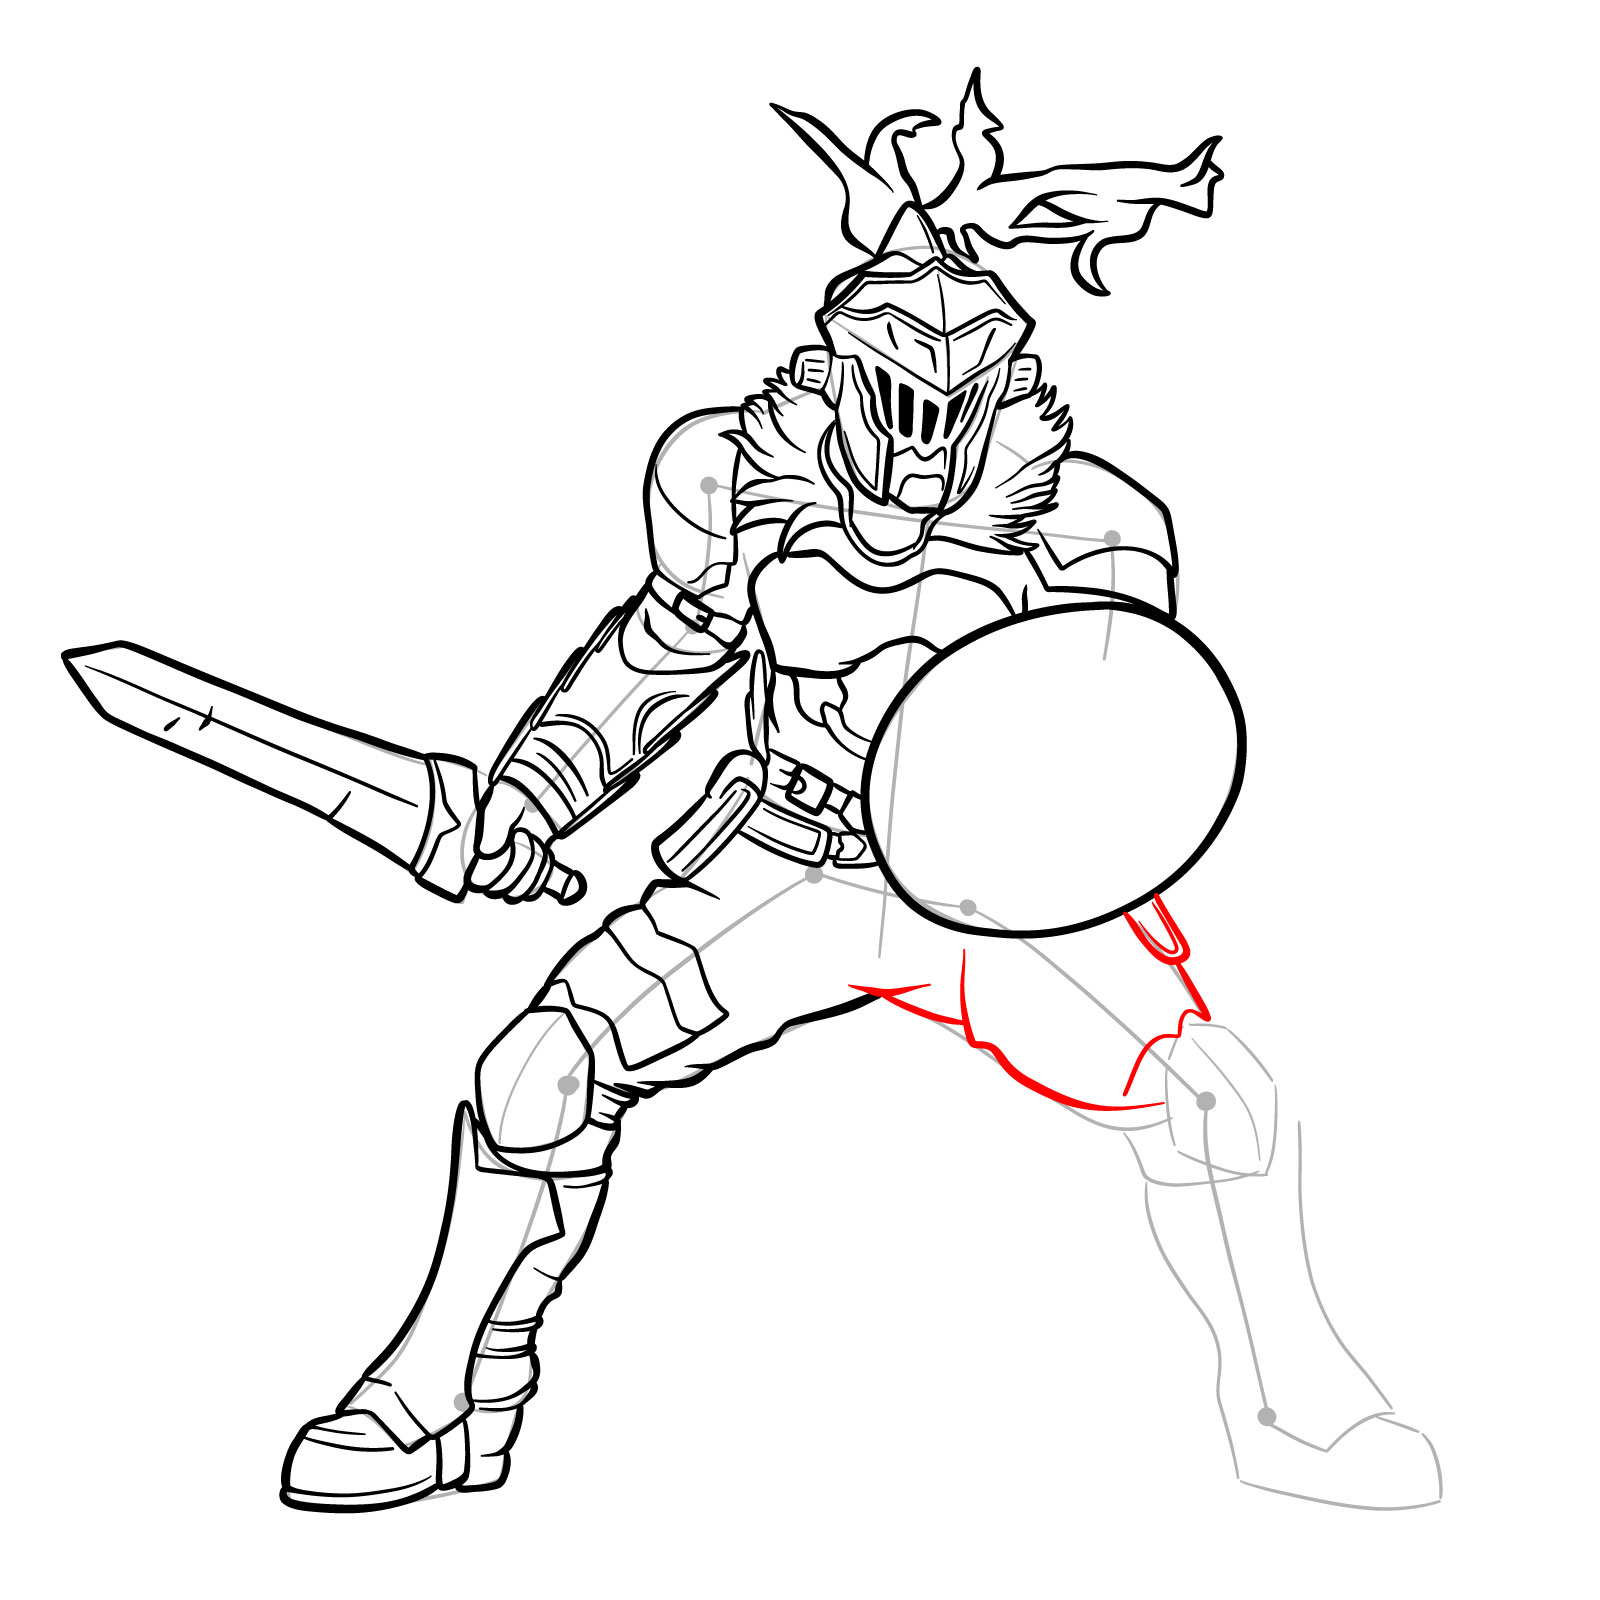
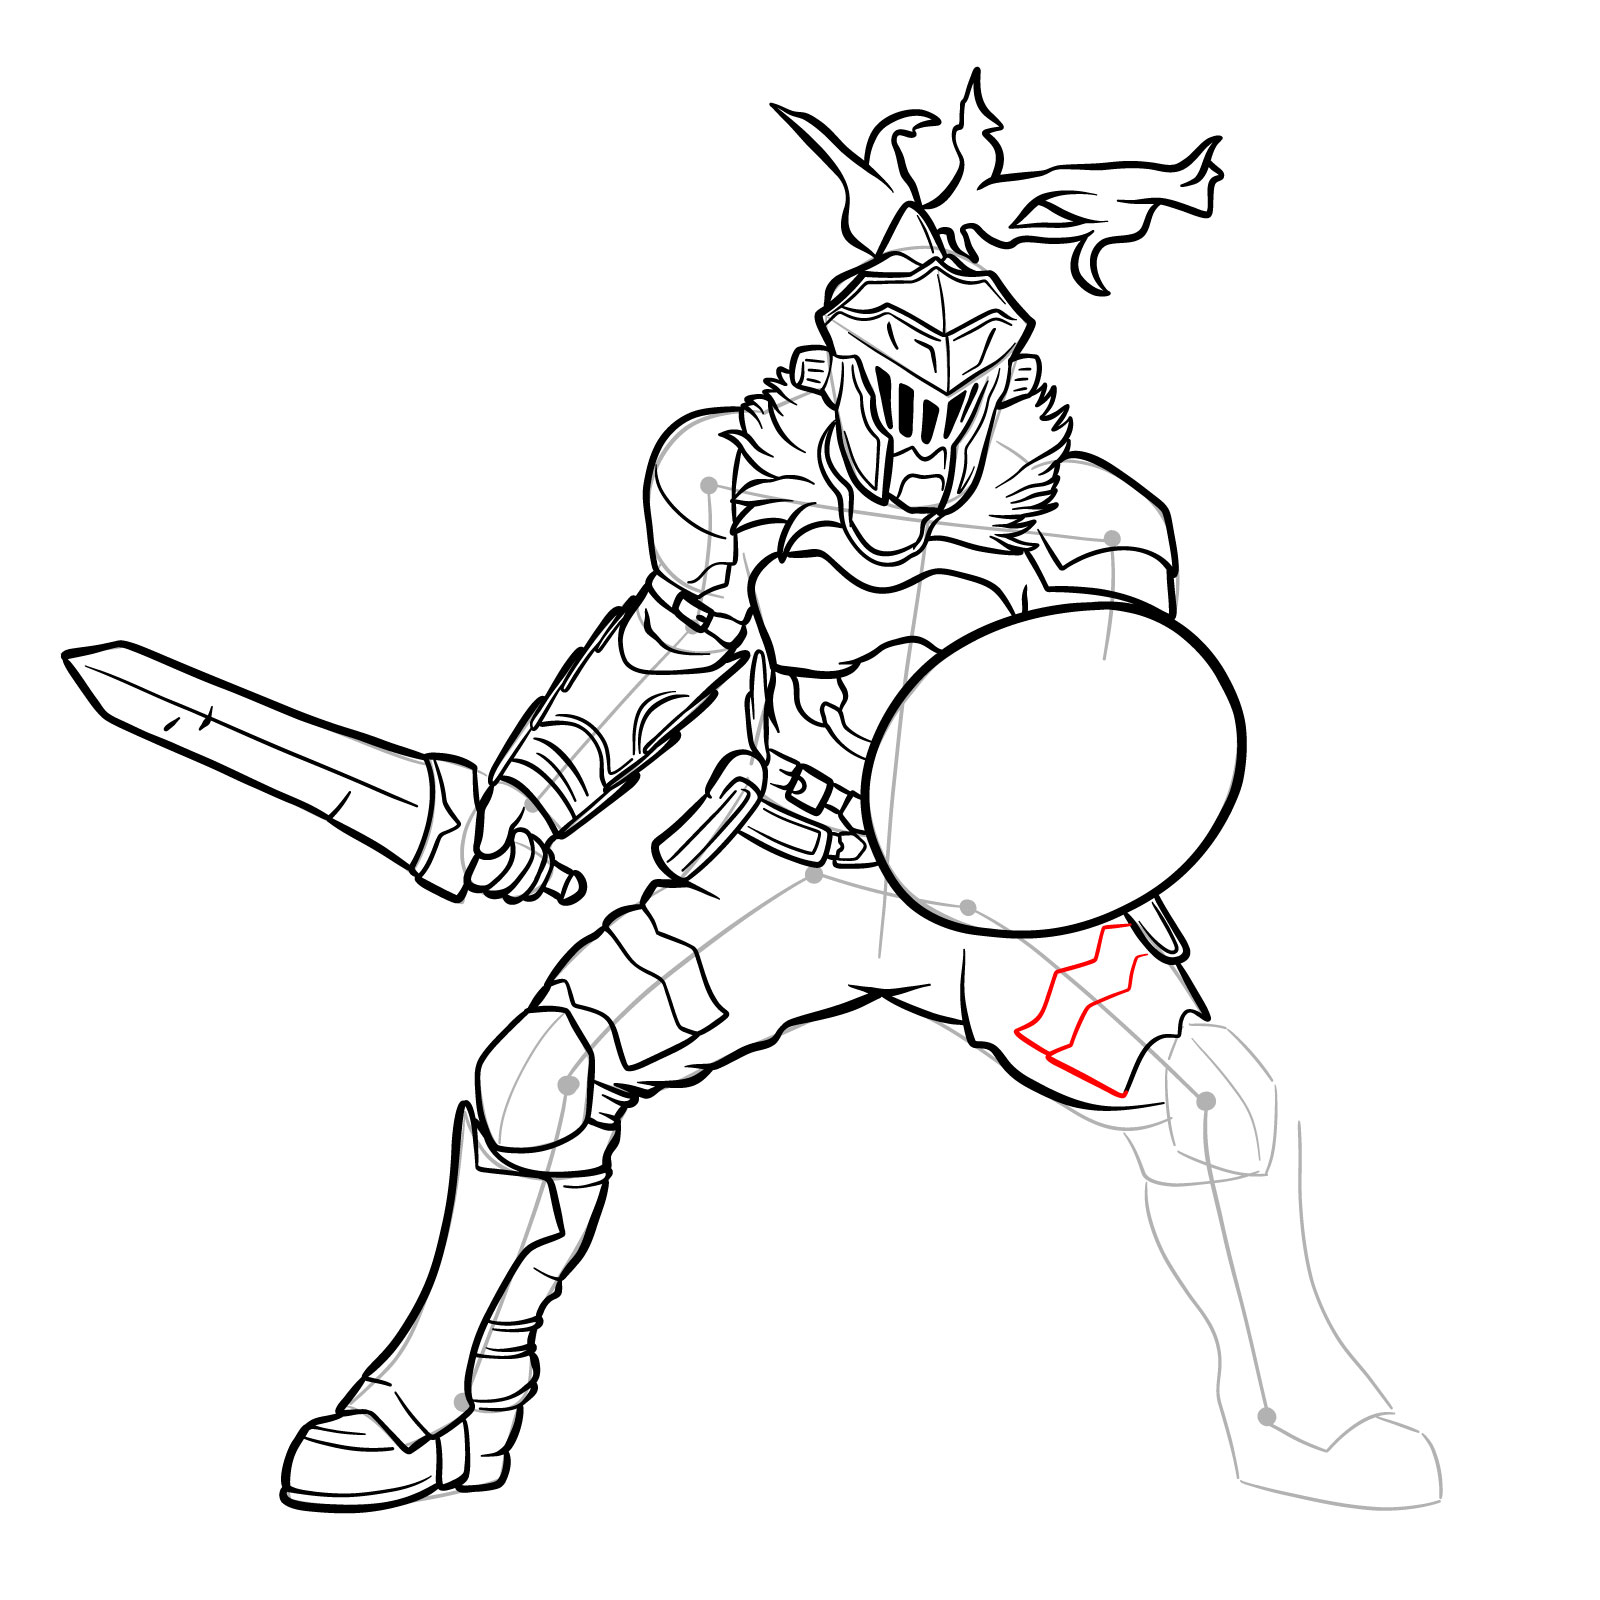
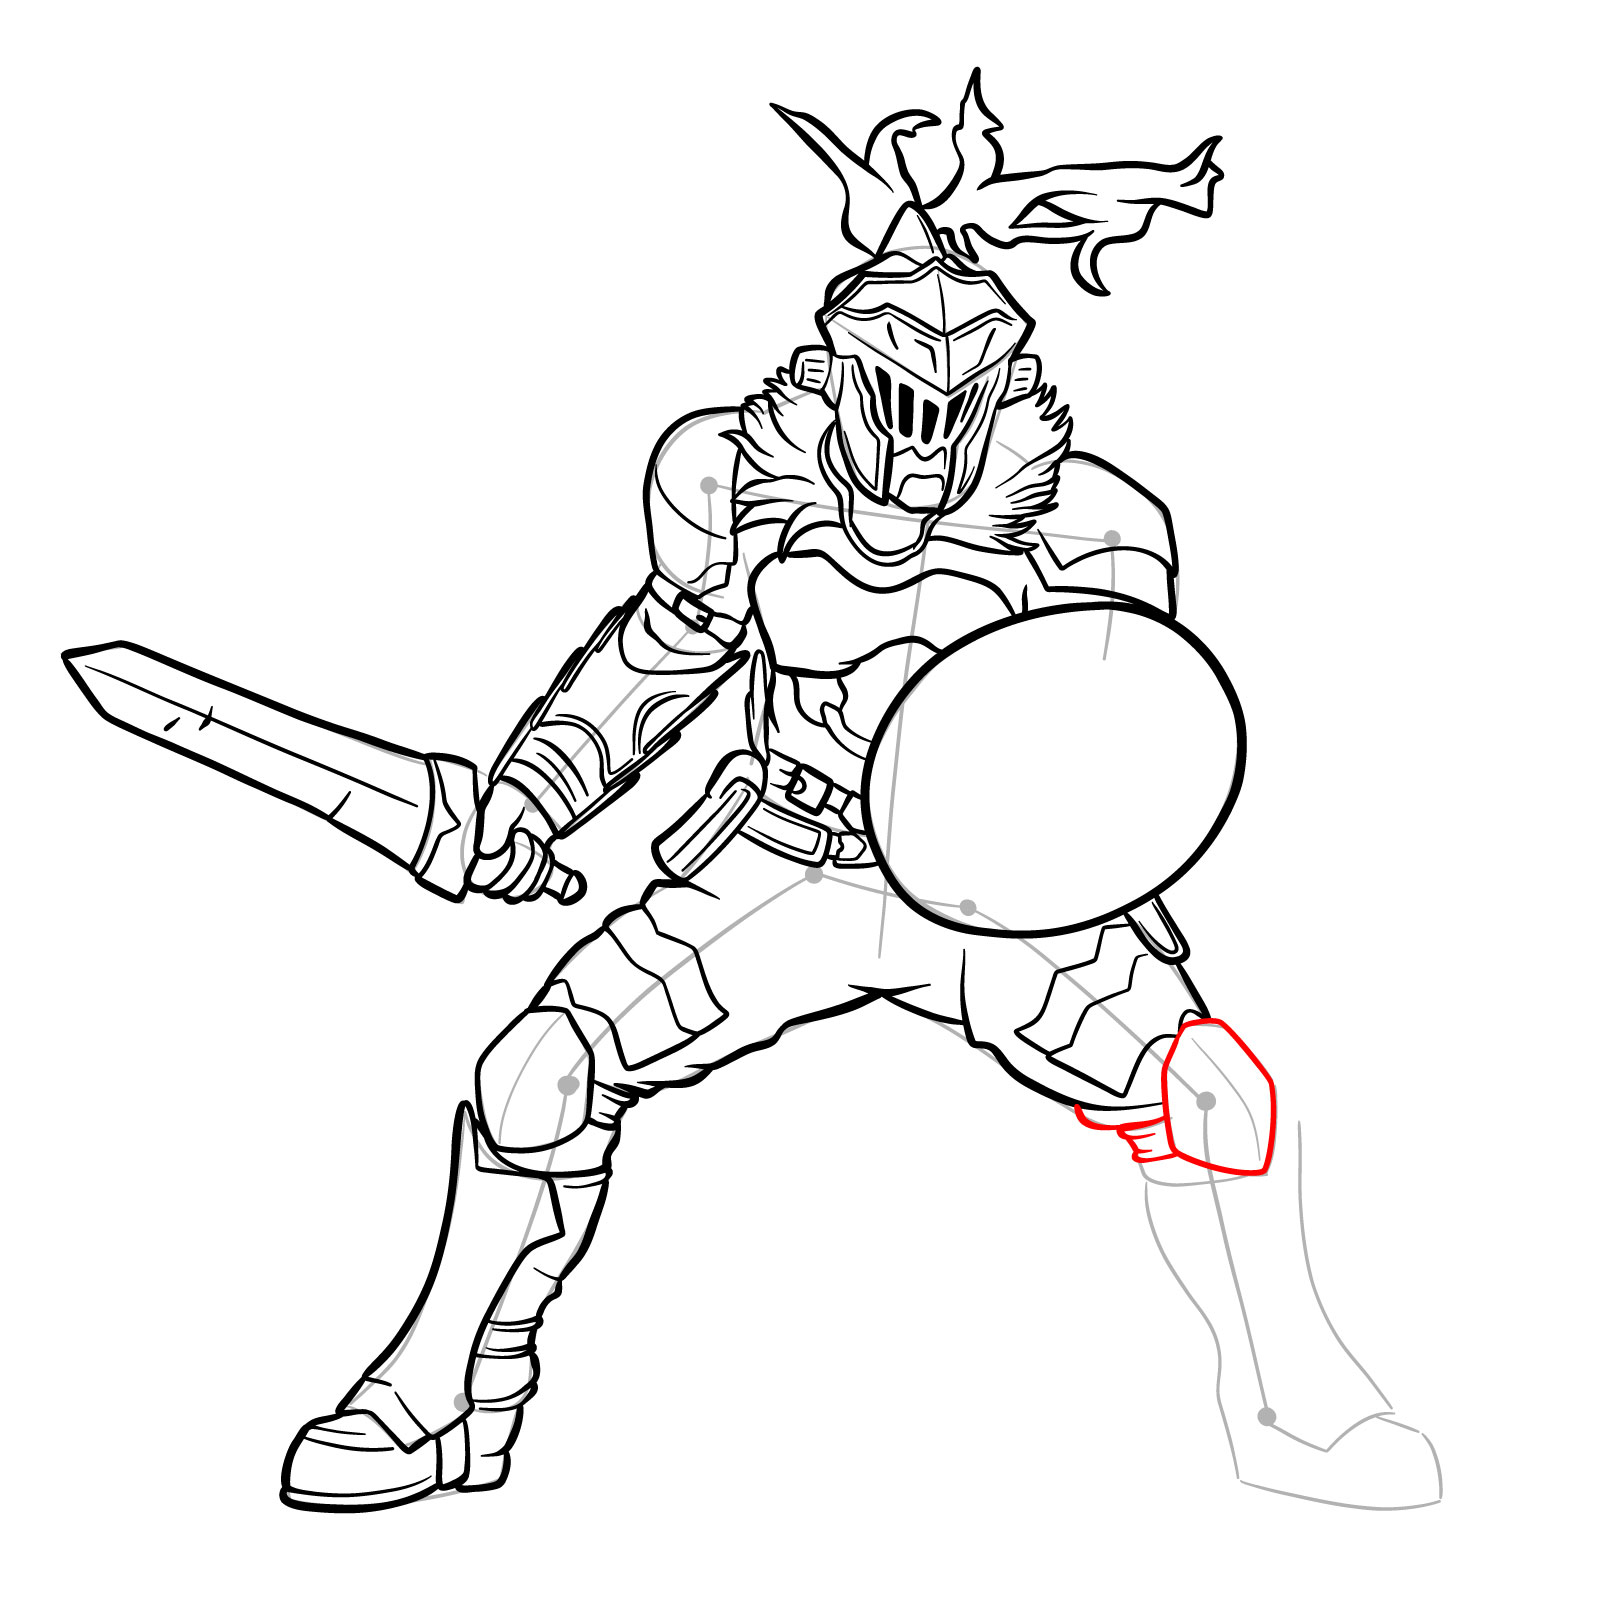
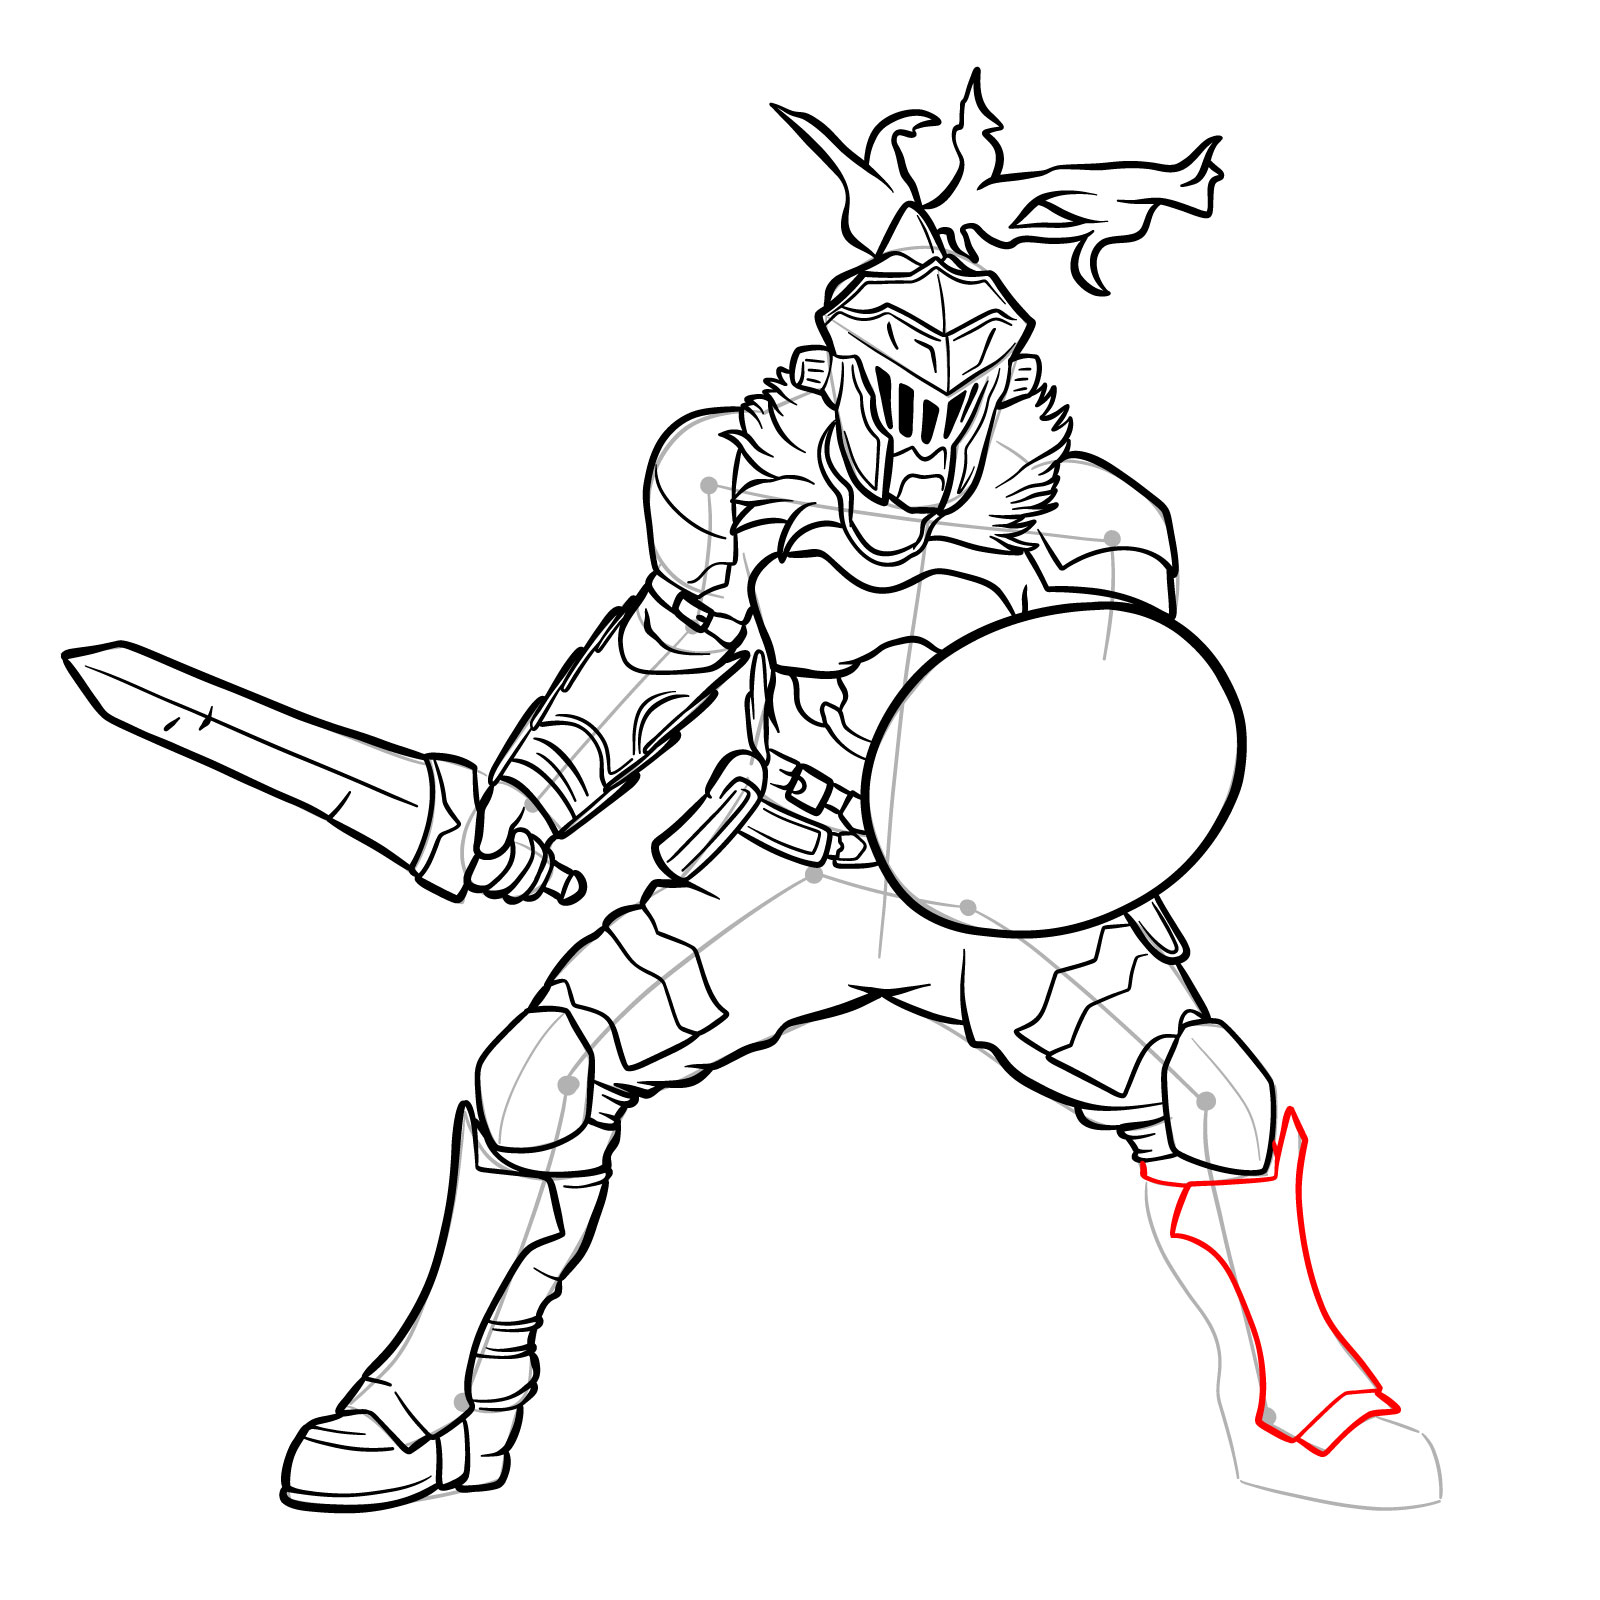
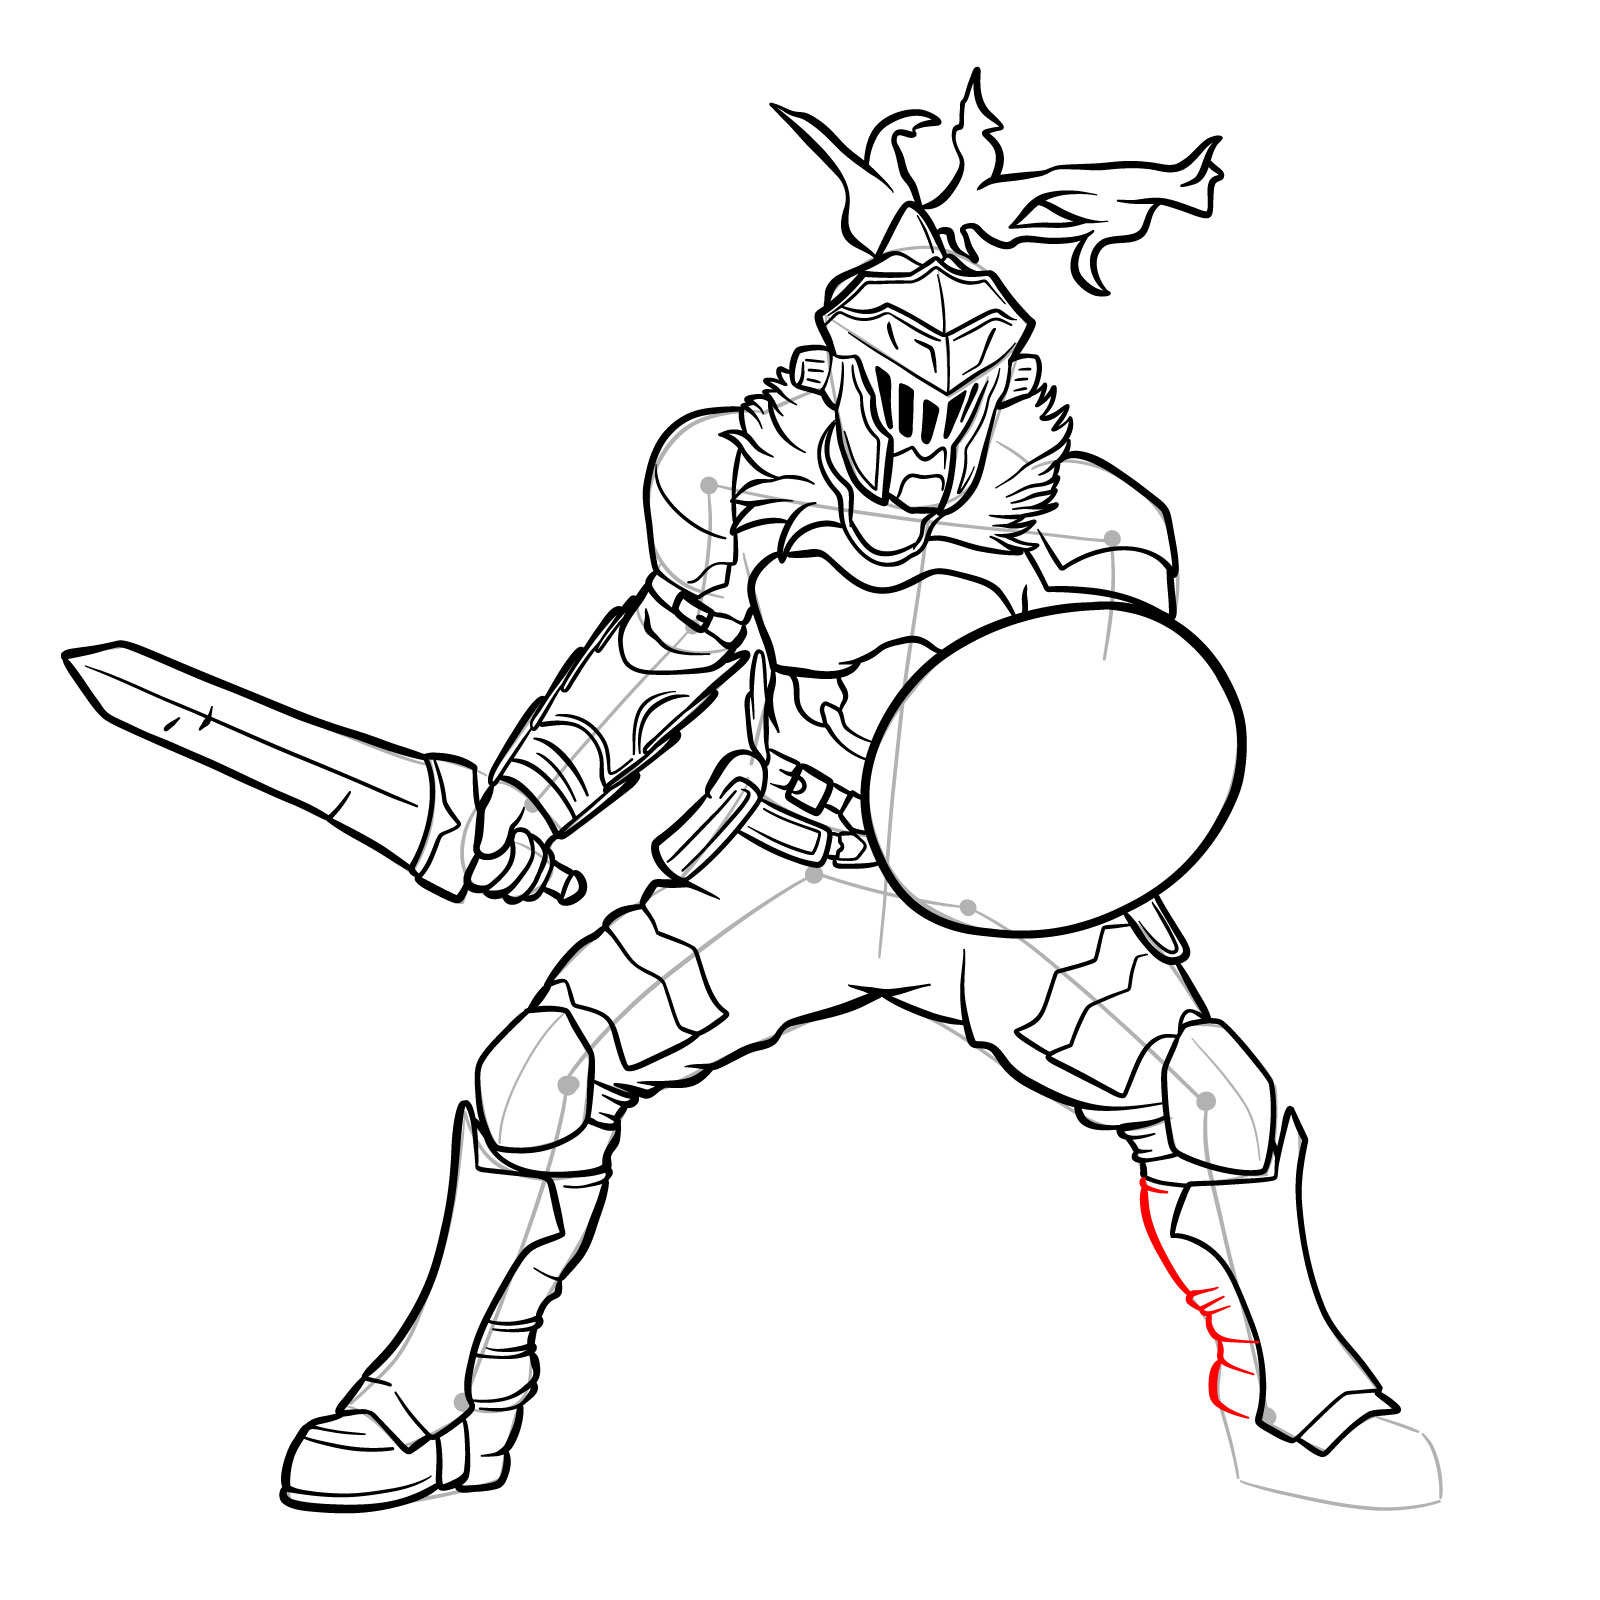
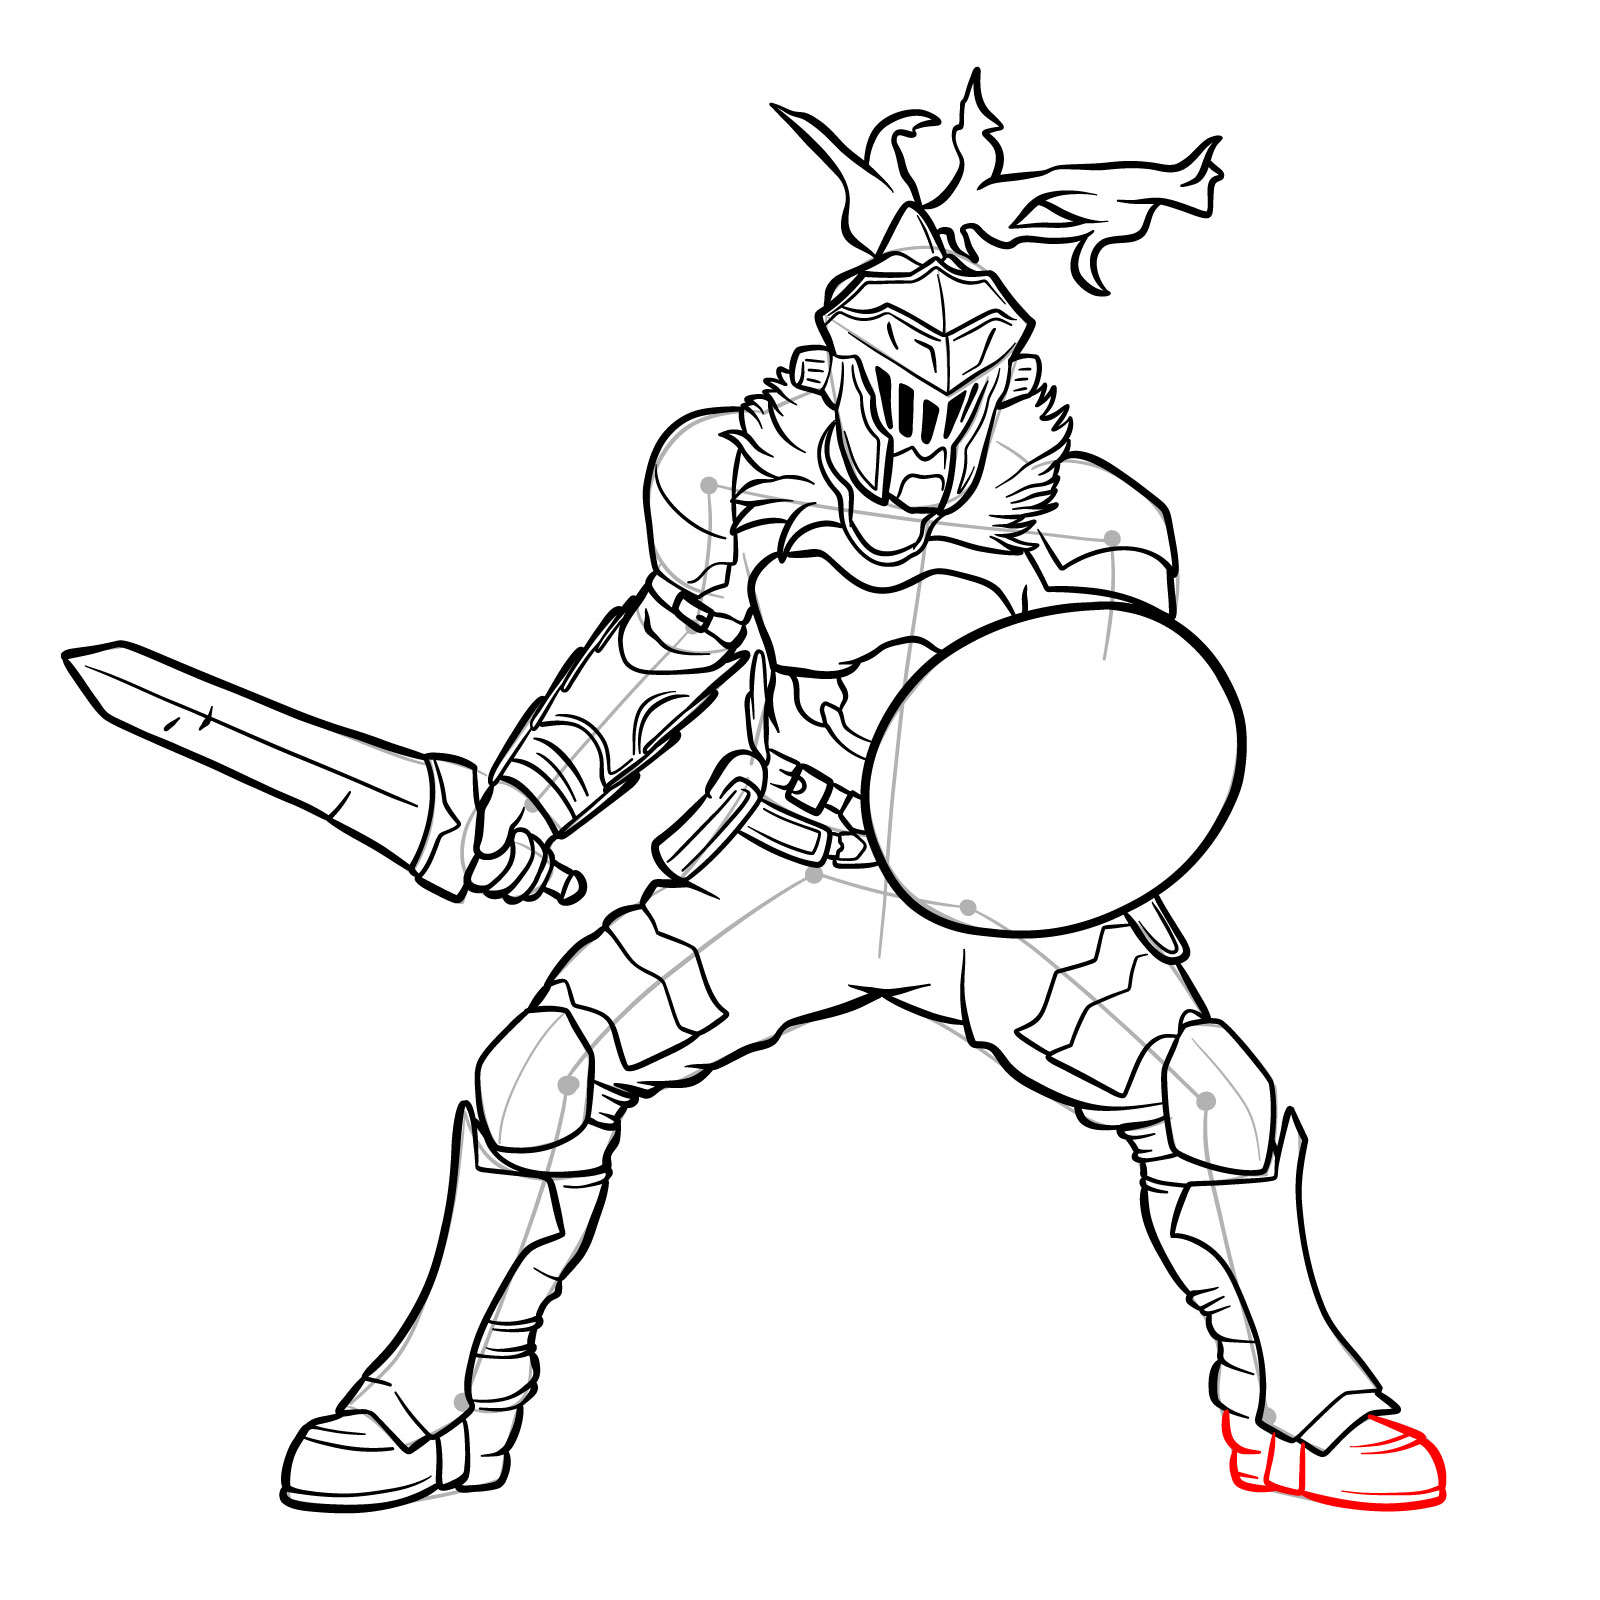
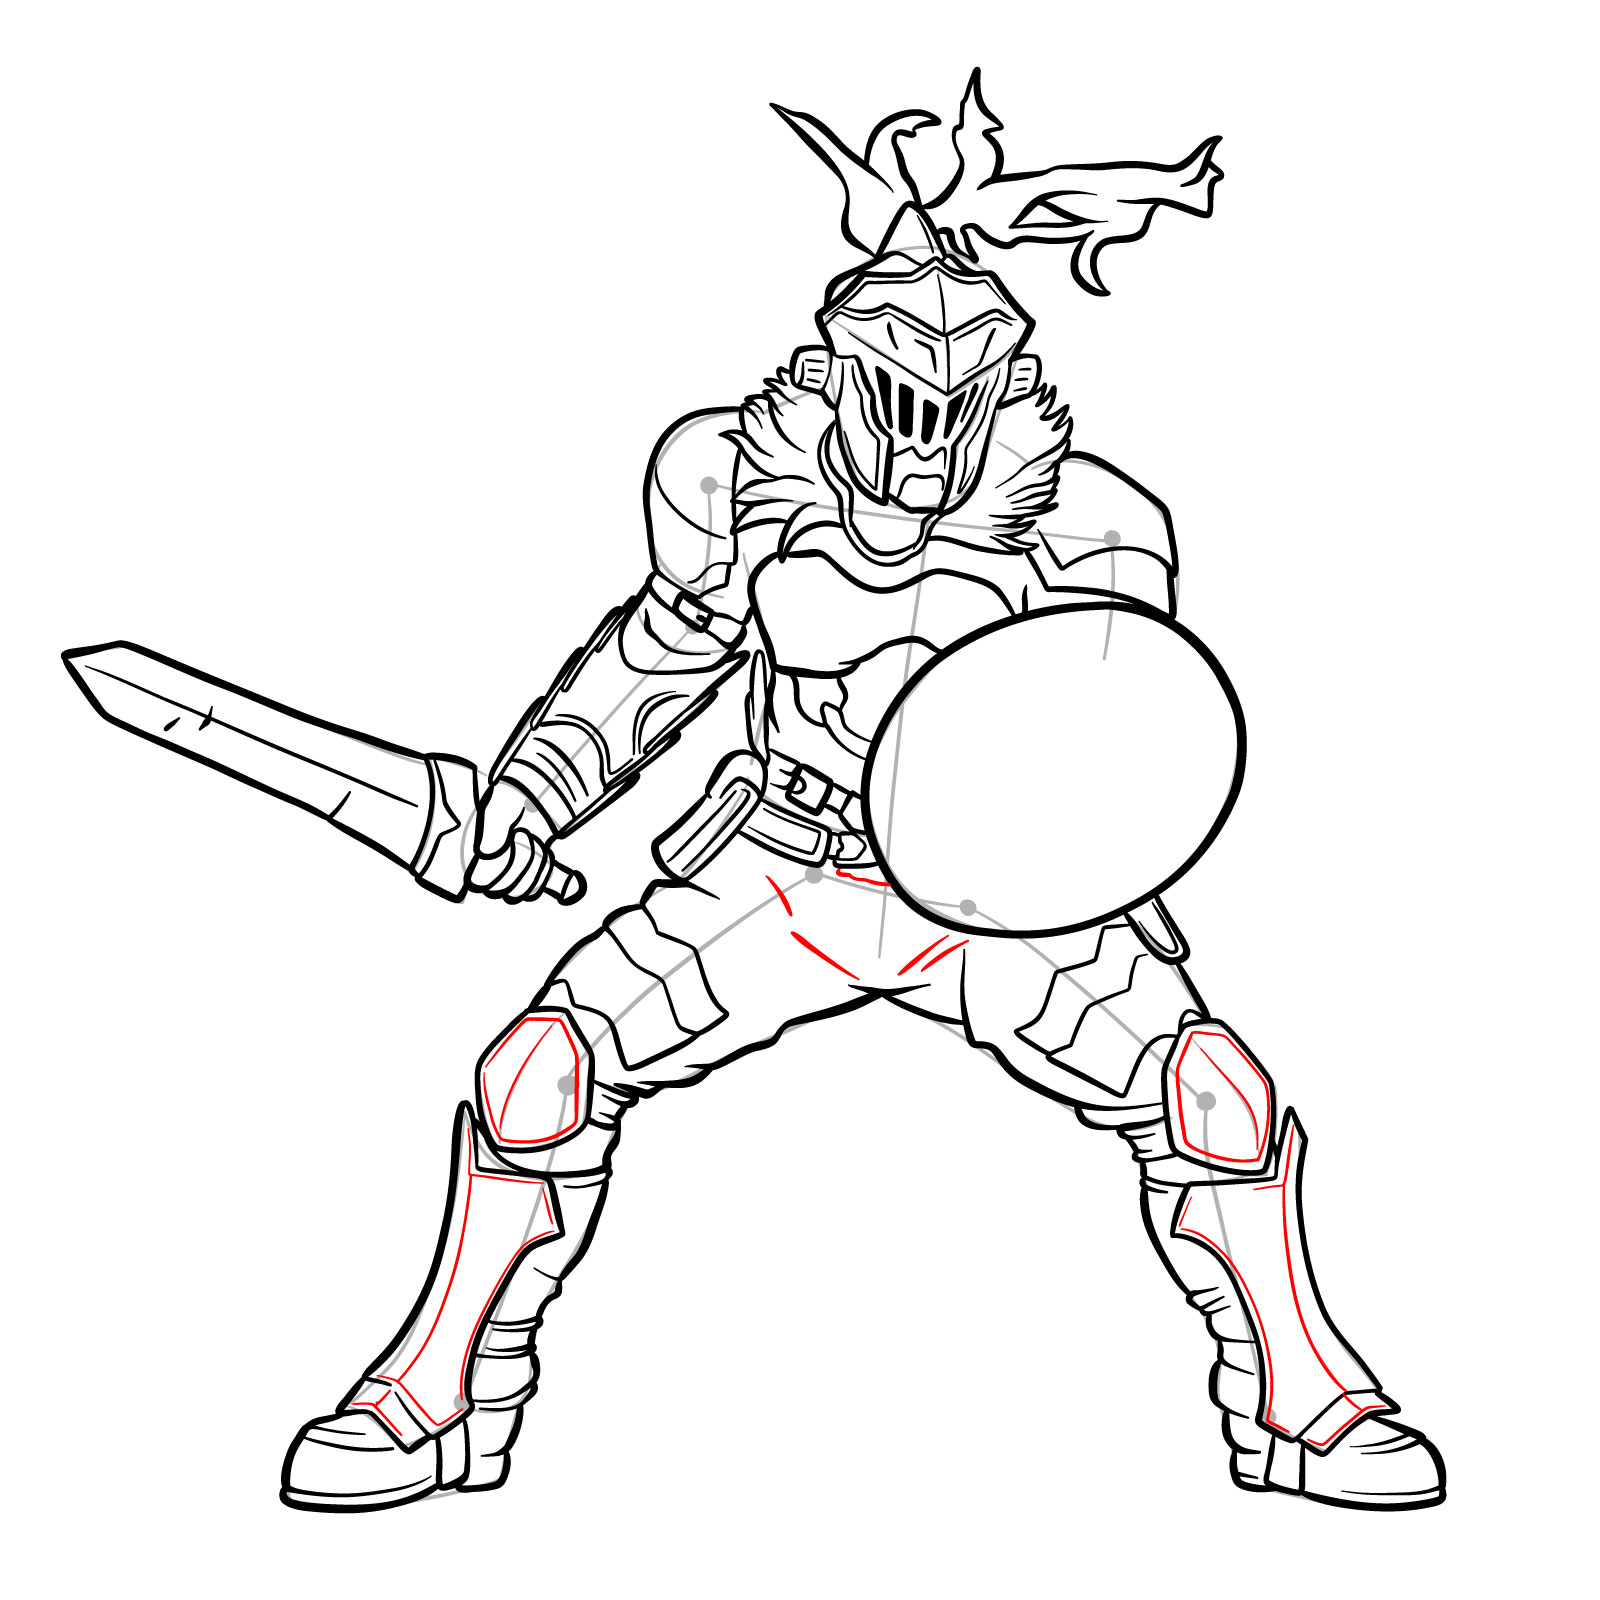
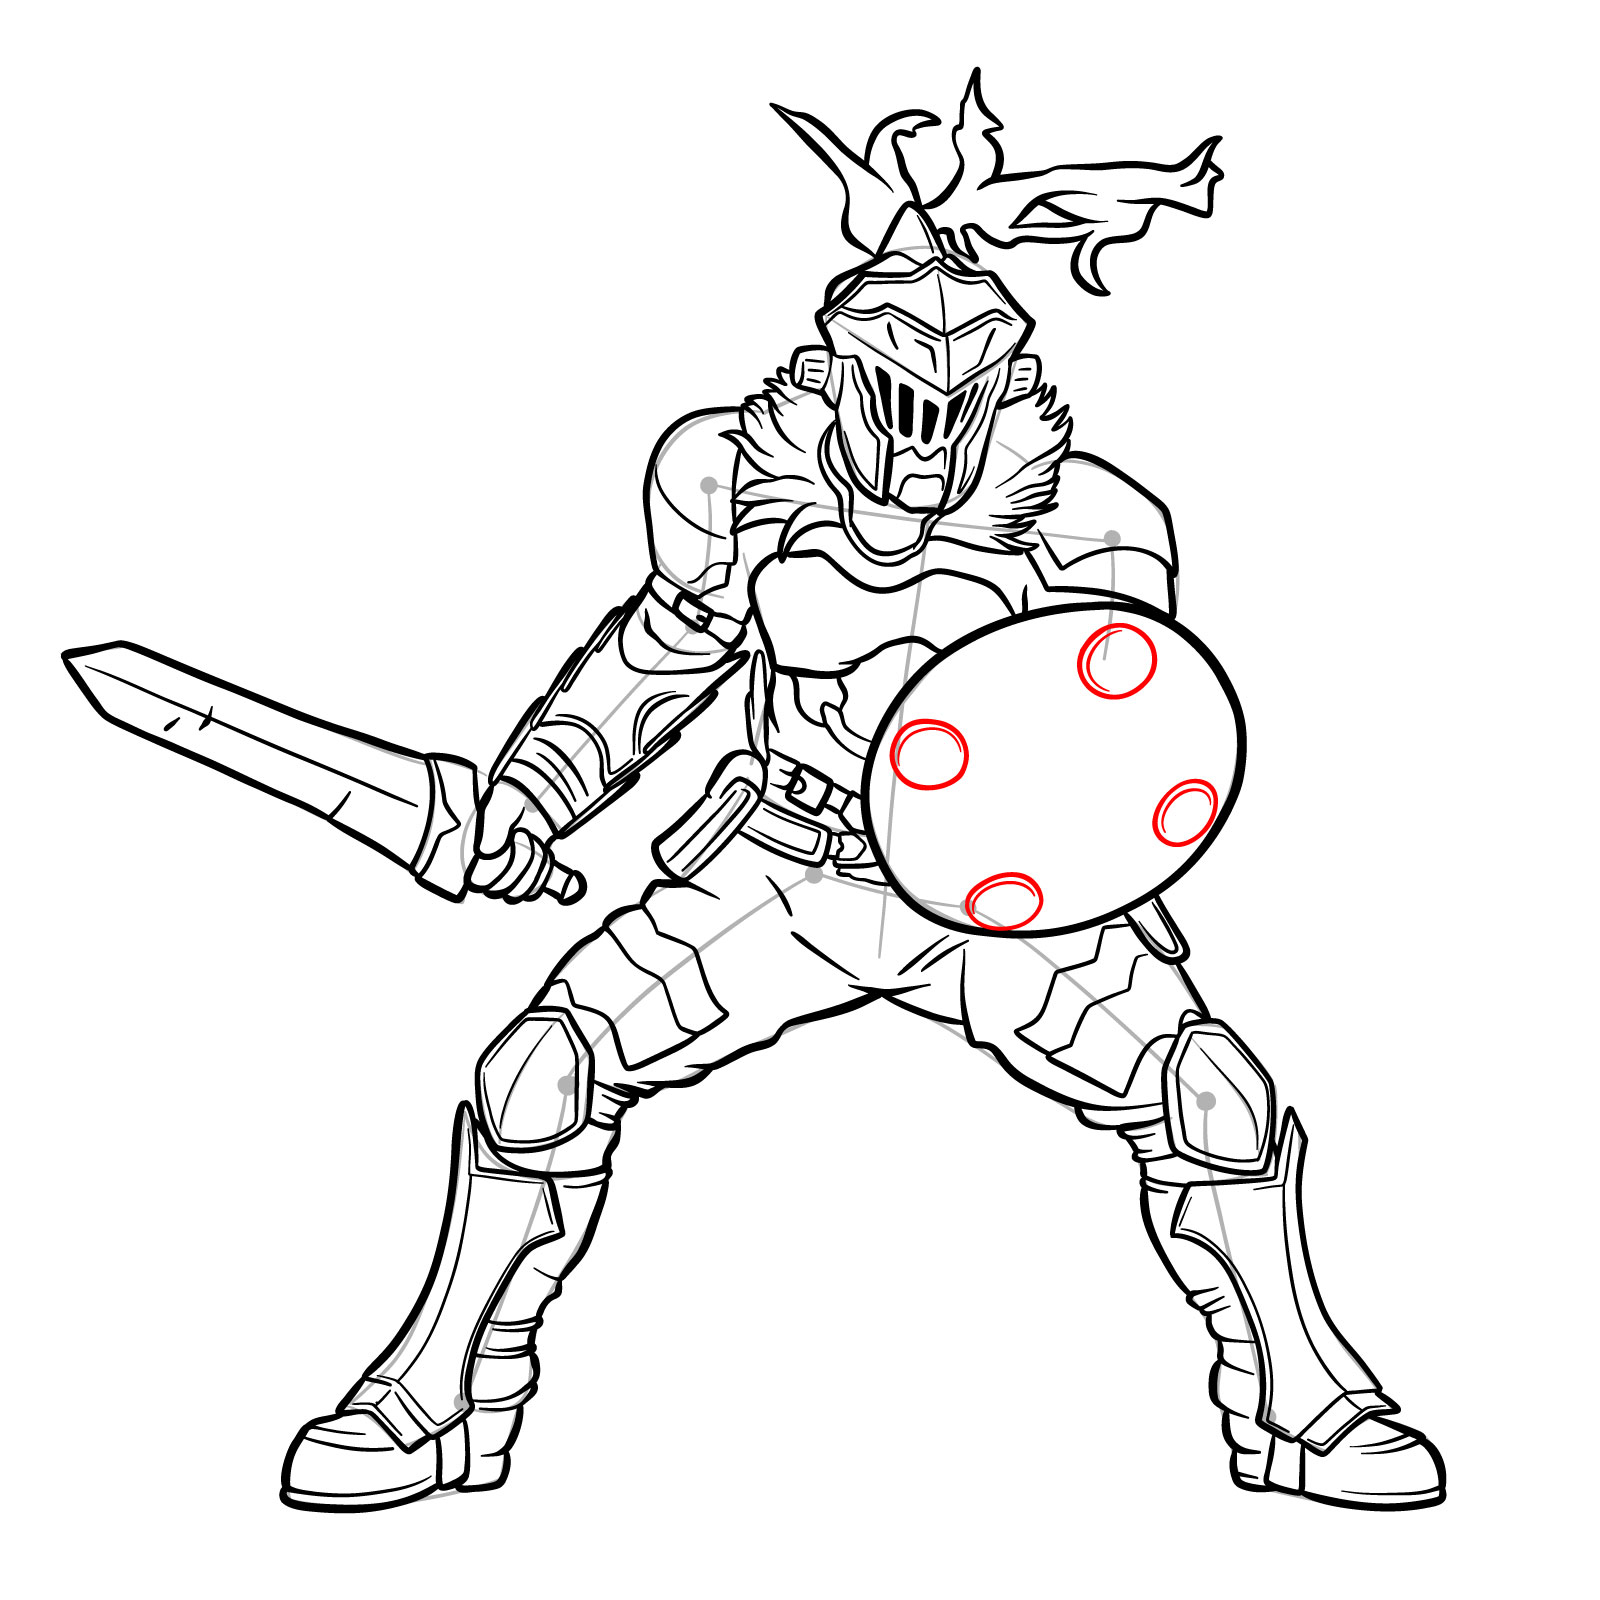
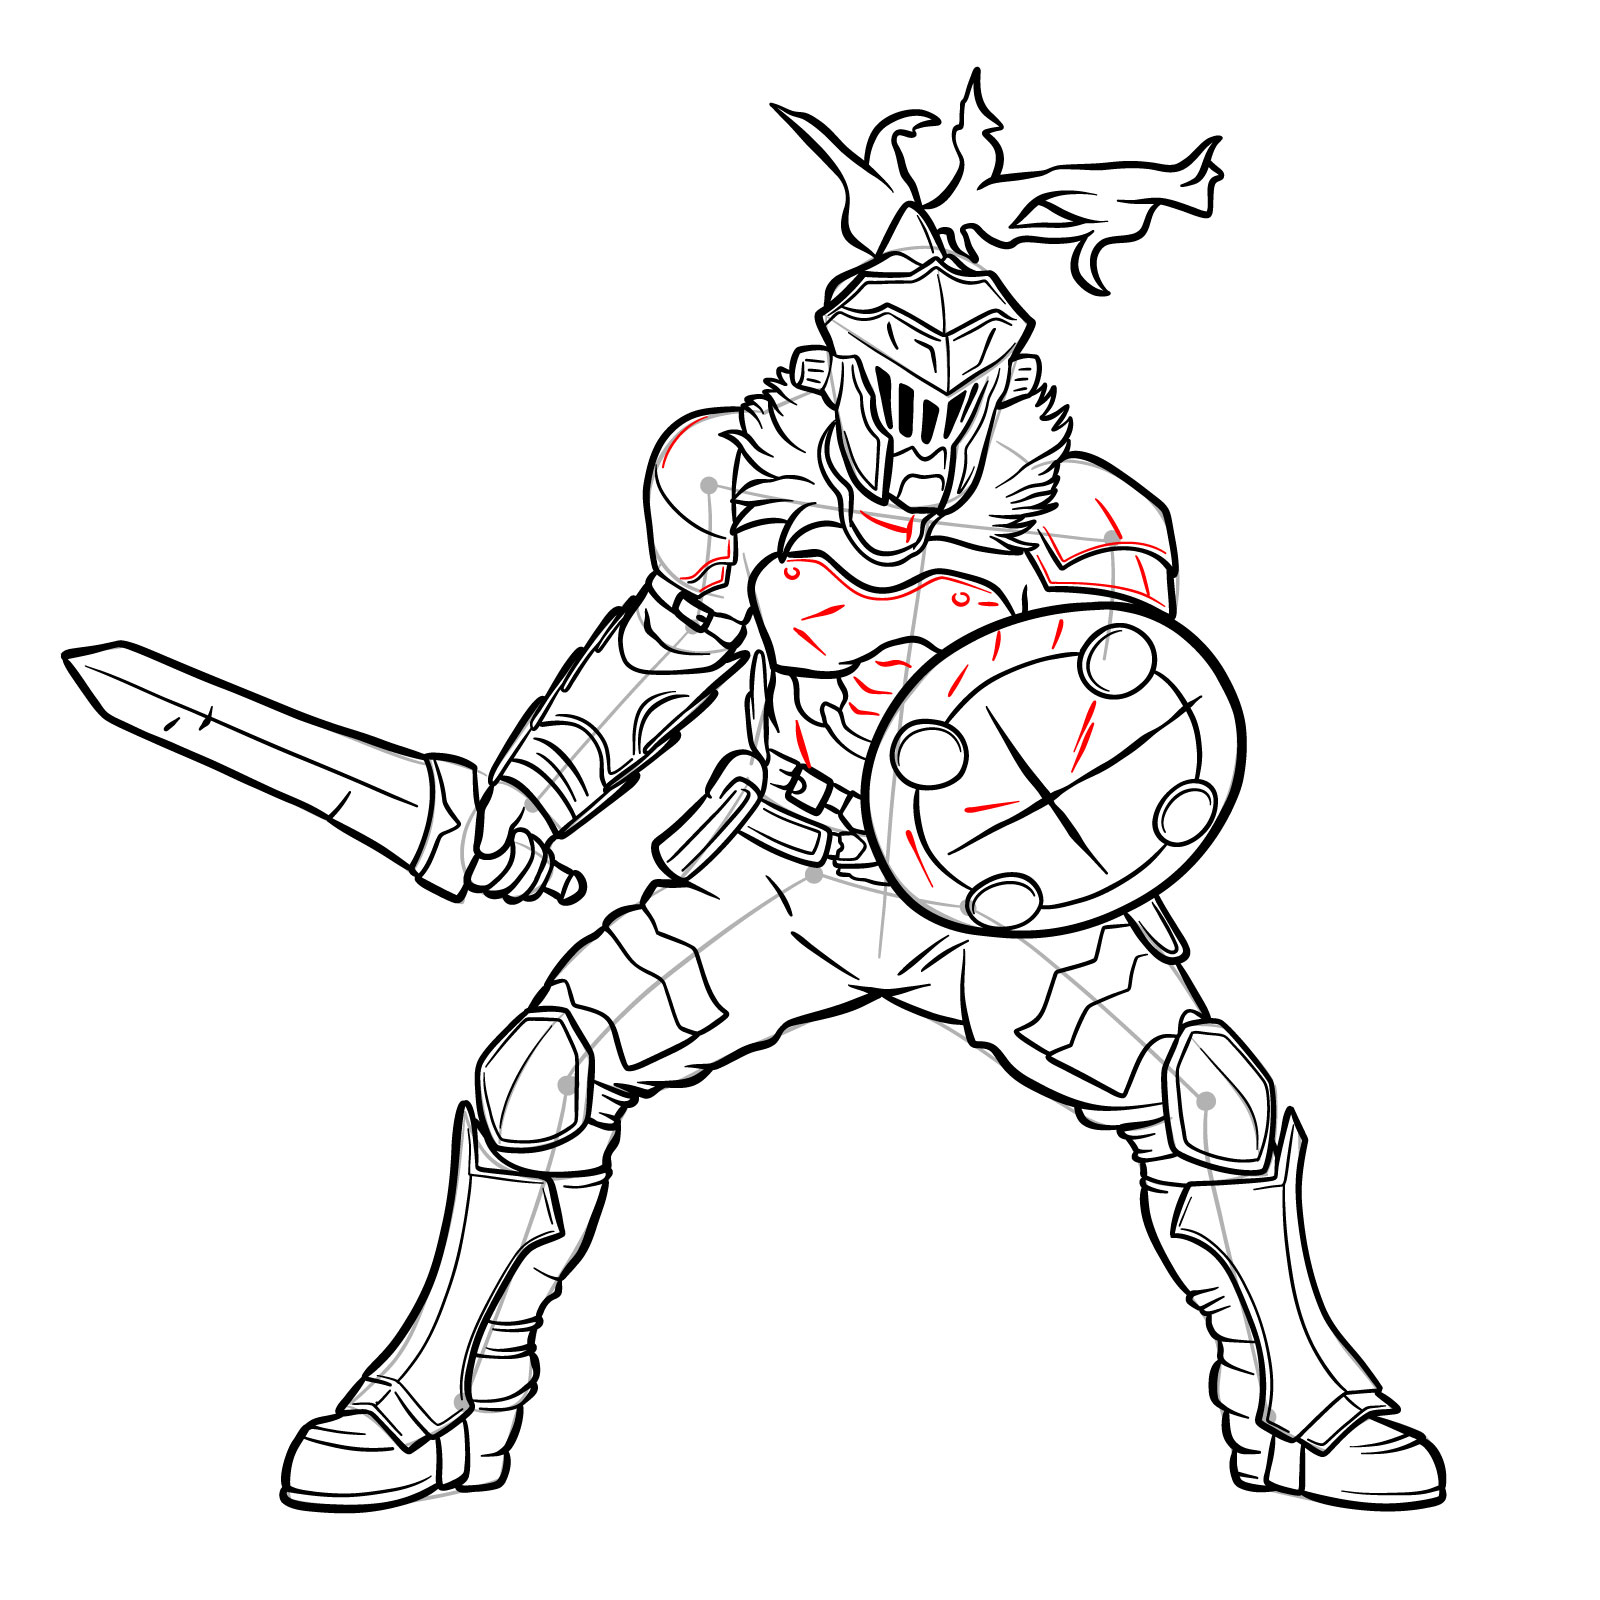
Our guide encompasses a comprehensive 42-step process. The initial three steps focus on setting up the basic proportions sketch, where it’s advisable to use light pencil strokes for better precision. Here’s a breakdown of the color guidelines you’ll encounter:
- Red Color: Highlights the current drawing step.
- Grey Color: Denotes the basic proportion sketch.
- Black Color: Illustrates the lines you’ve previously drawn.
Once you’ve completed the sketch, you can ink it. But remember, patience is key! Ensure the ink dries thoroughly before erasing any underlying pencil marks to achieve a clean finish.

Now that you know how to draw Goblin Slayer in Battle Stance, share your finished piece in the comments of the pinned Pinterest tutorial and see how others tackled that gritty, armored look. Great work getting through this one.
