
Are you a fan of the Naruto series and looking for a way to draw your favorite character in one of his most powerful forms? Look no further! In this tutorial, we will guide you through the process of learning how to draw Naruto in Kurama Mode. By following our step-by-step drawing guide, you’ll be able to create an incredible depiction of him, empowered by the chakra of the Nine-Tails.
The Tale of Naruto and Kurama
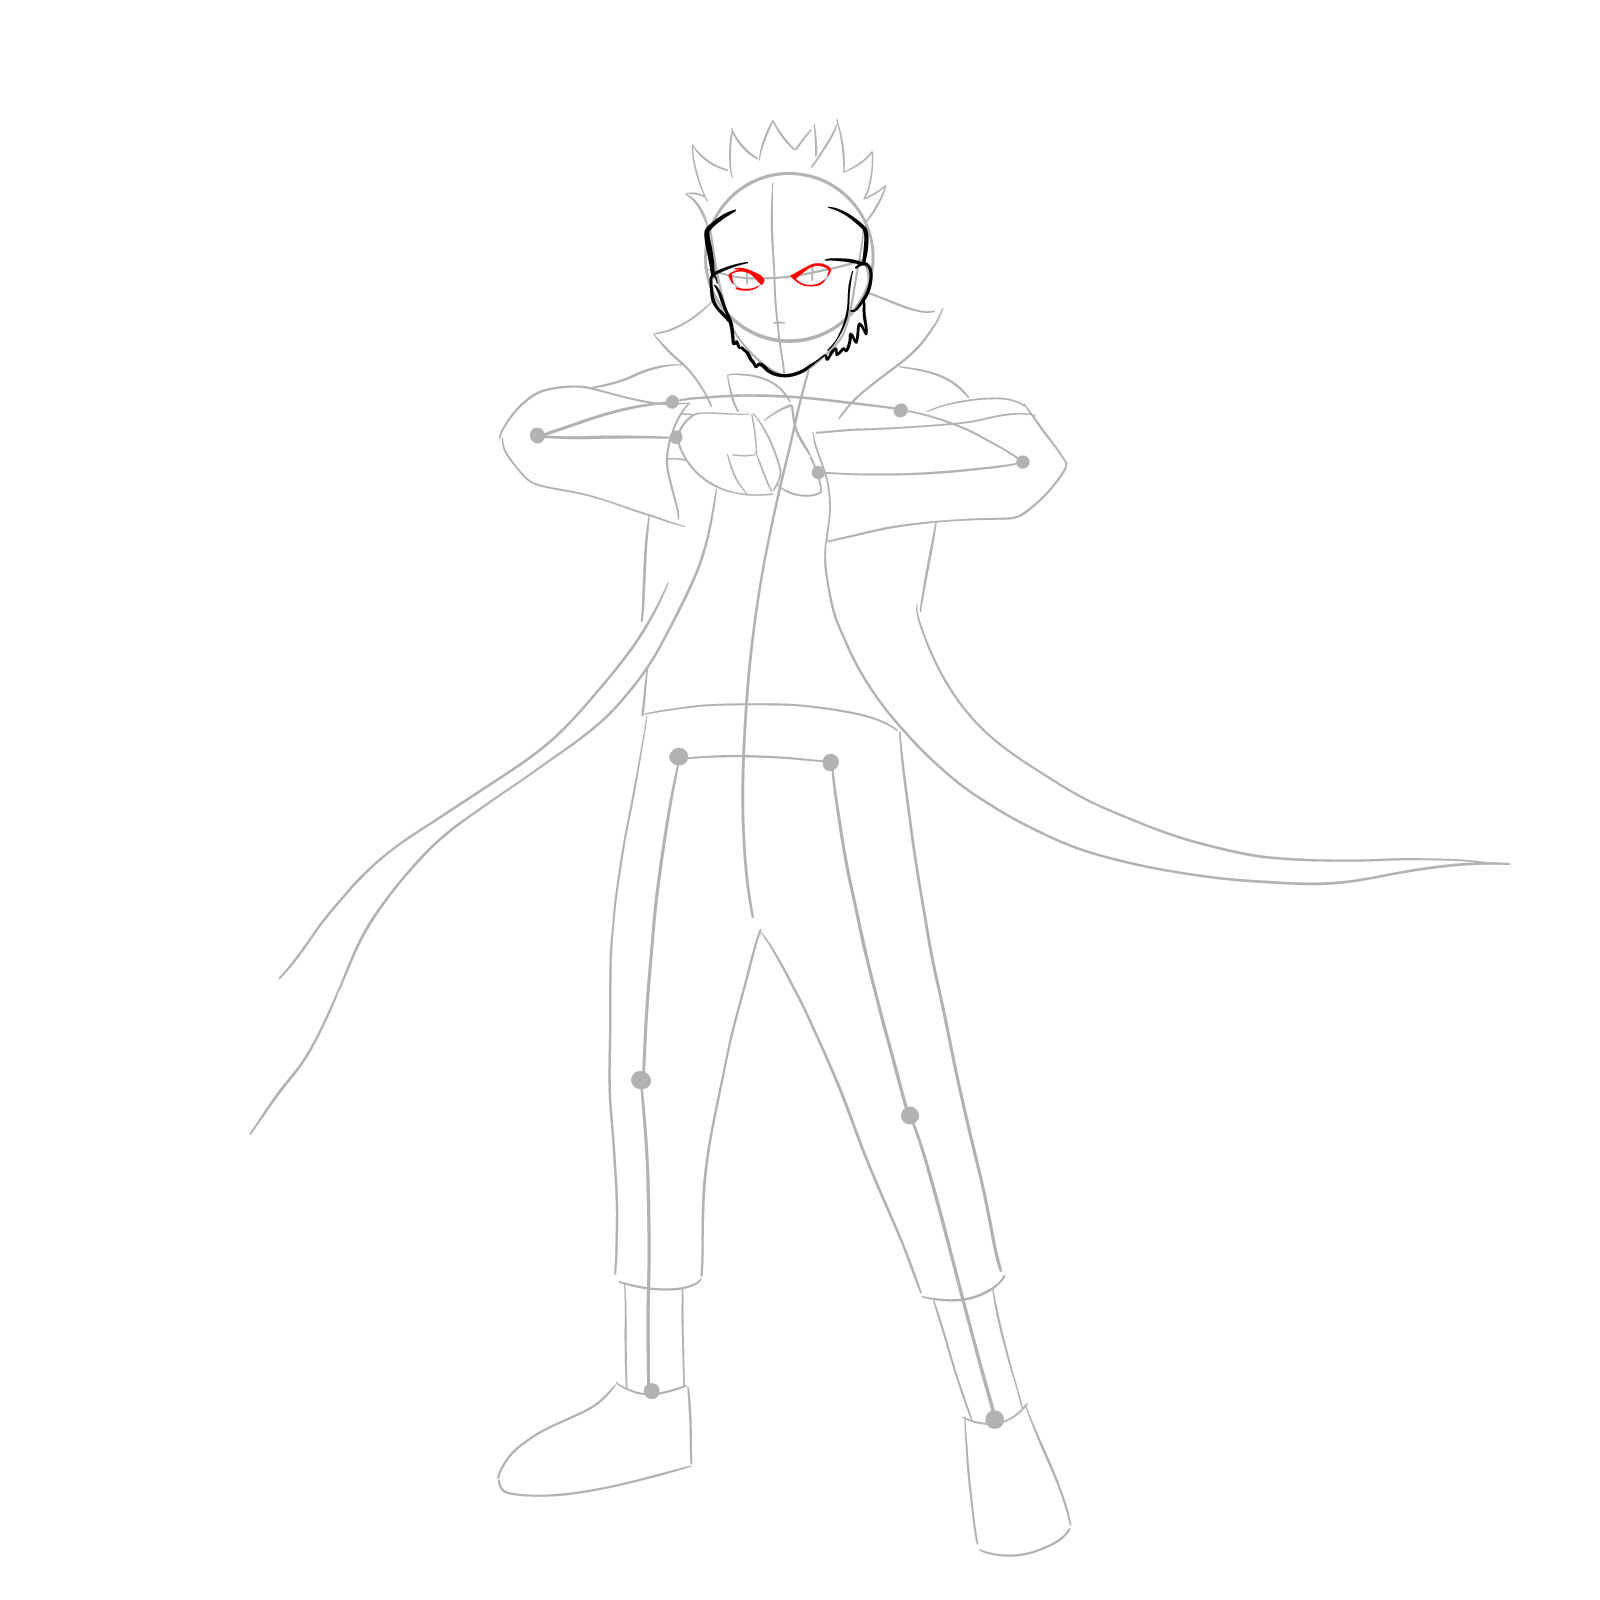
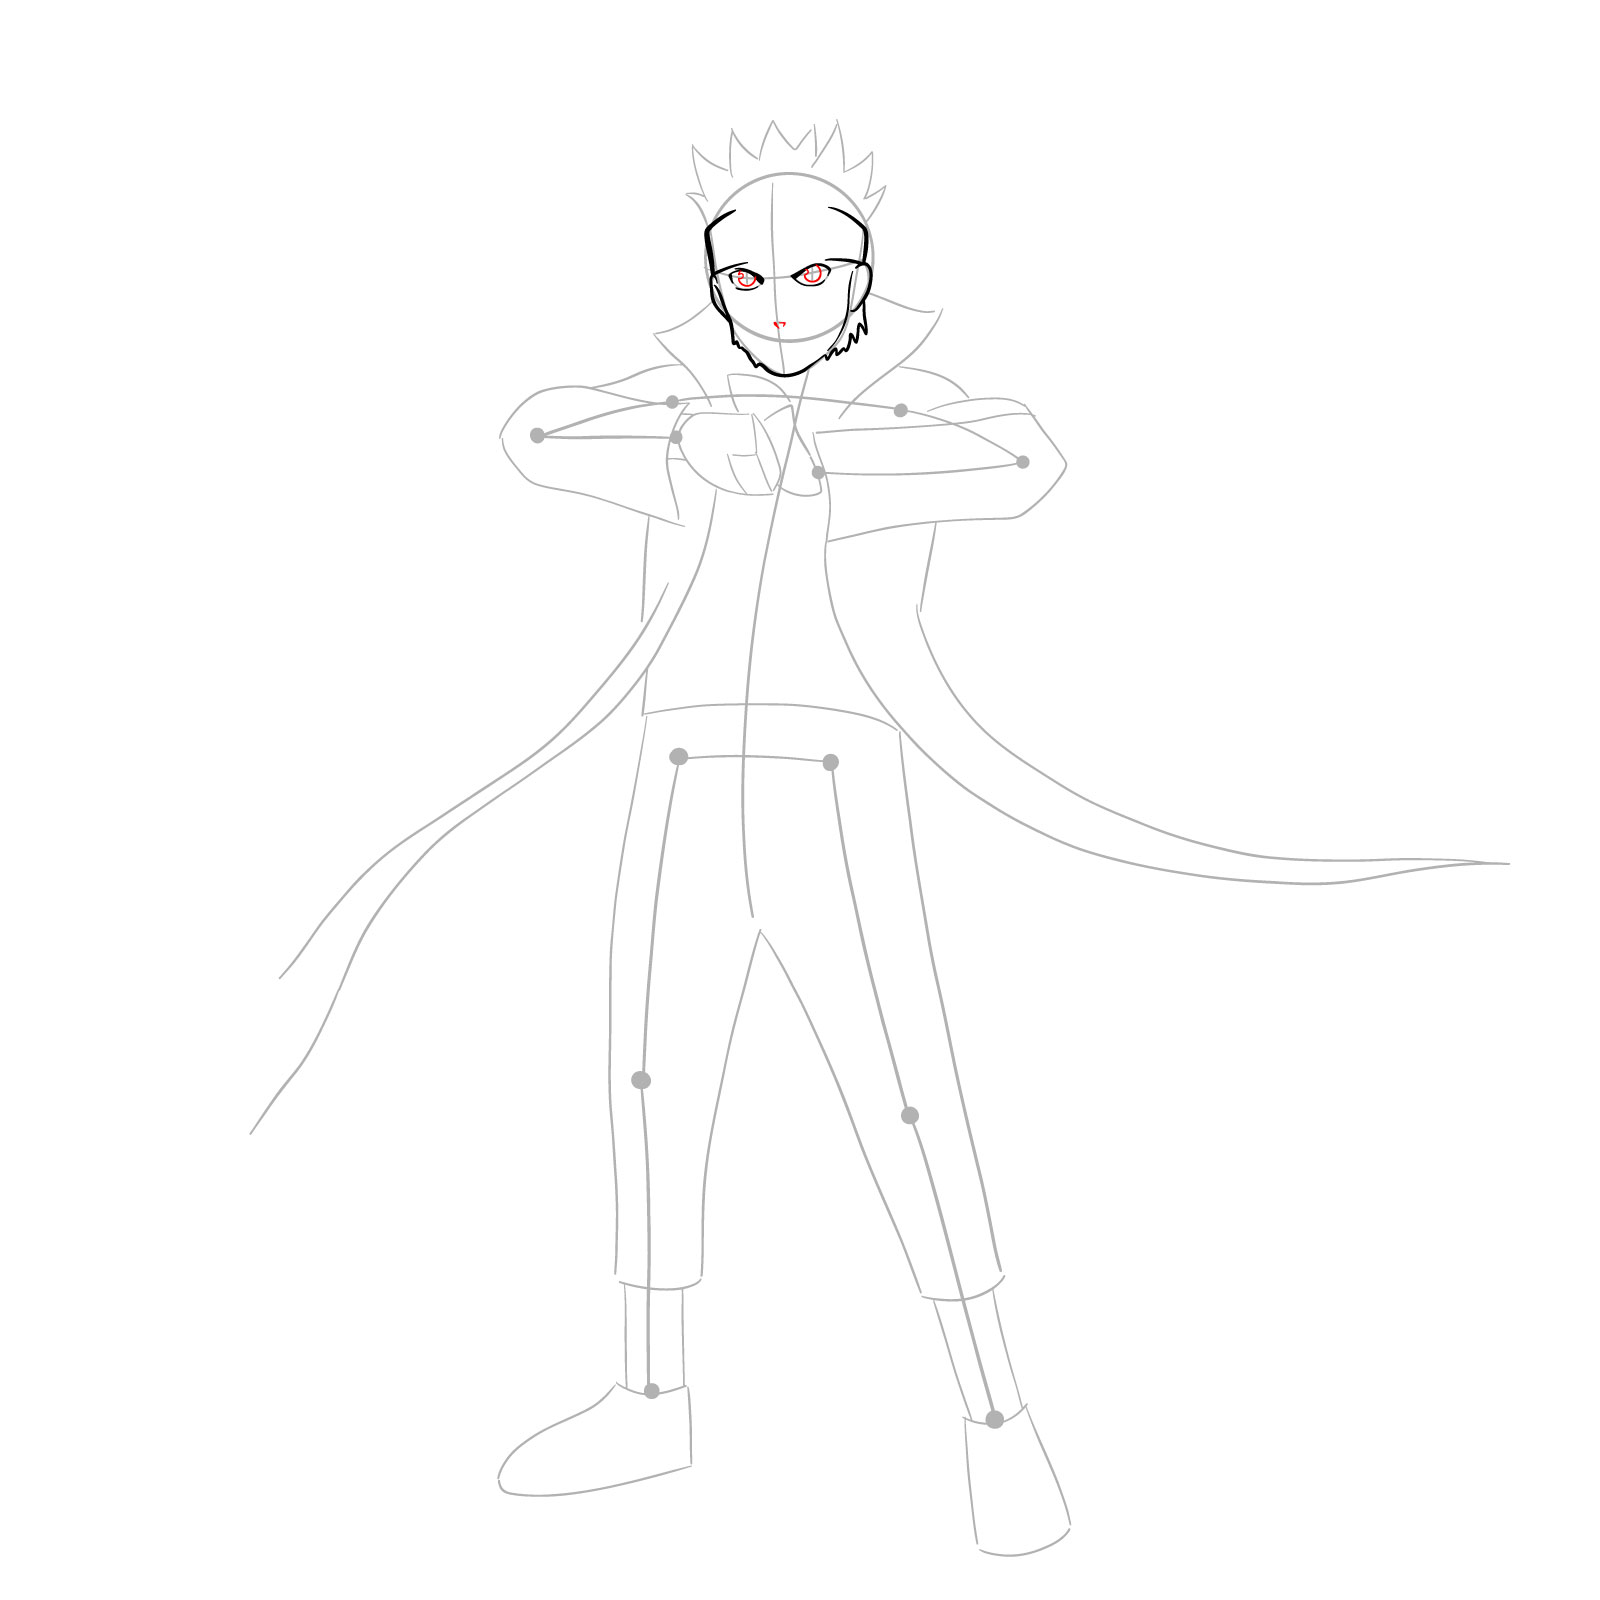
Naruto Uzumaki is the protagonist of the popular manga and anime series, Naruto. Throughout the story, he forms a bond with Kurama, the Nine-Tails fox spirit sealed within him. As their relationship grows, Naruto learns Kurama’s name and gains the ability to enter Kurama Mode, which grants him immense power and a unique appearance. In this form, Naruto’s pupils become slitted, his whisker-like markings thicken, and his chakra shroud resembles a full-length haori, similar to the one worn by his father, Minato Namikaze.
While in Kurama Mode, Naruto can transfer his and Kurama’s chakra to others, granting them enhanced abilities. This powerful form allows Naruto to perform devastating techniques, such as the Tailed Beast Ball, and even partially manifest parts of Kurama’s body when needed.
Now that we’ve delved into the story of Naruto and Kurama, let’s get ready to bring this formidable form to life on paper!
Recommended Tools:
Before we begin our drawing journey, let’s gather the necessary tools to make the process smooth and enjoyable. Although you’re free to use any drawing materials you prefer, we recommend the following:
- Pencils (HB and 2B)
- Eraser
- Sharpener
- Fineliner pens
- Drawing paper
Step-by-Step Guide to Drawing Naruto in Kurama Mode
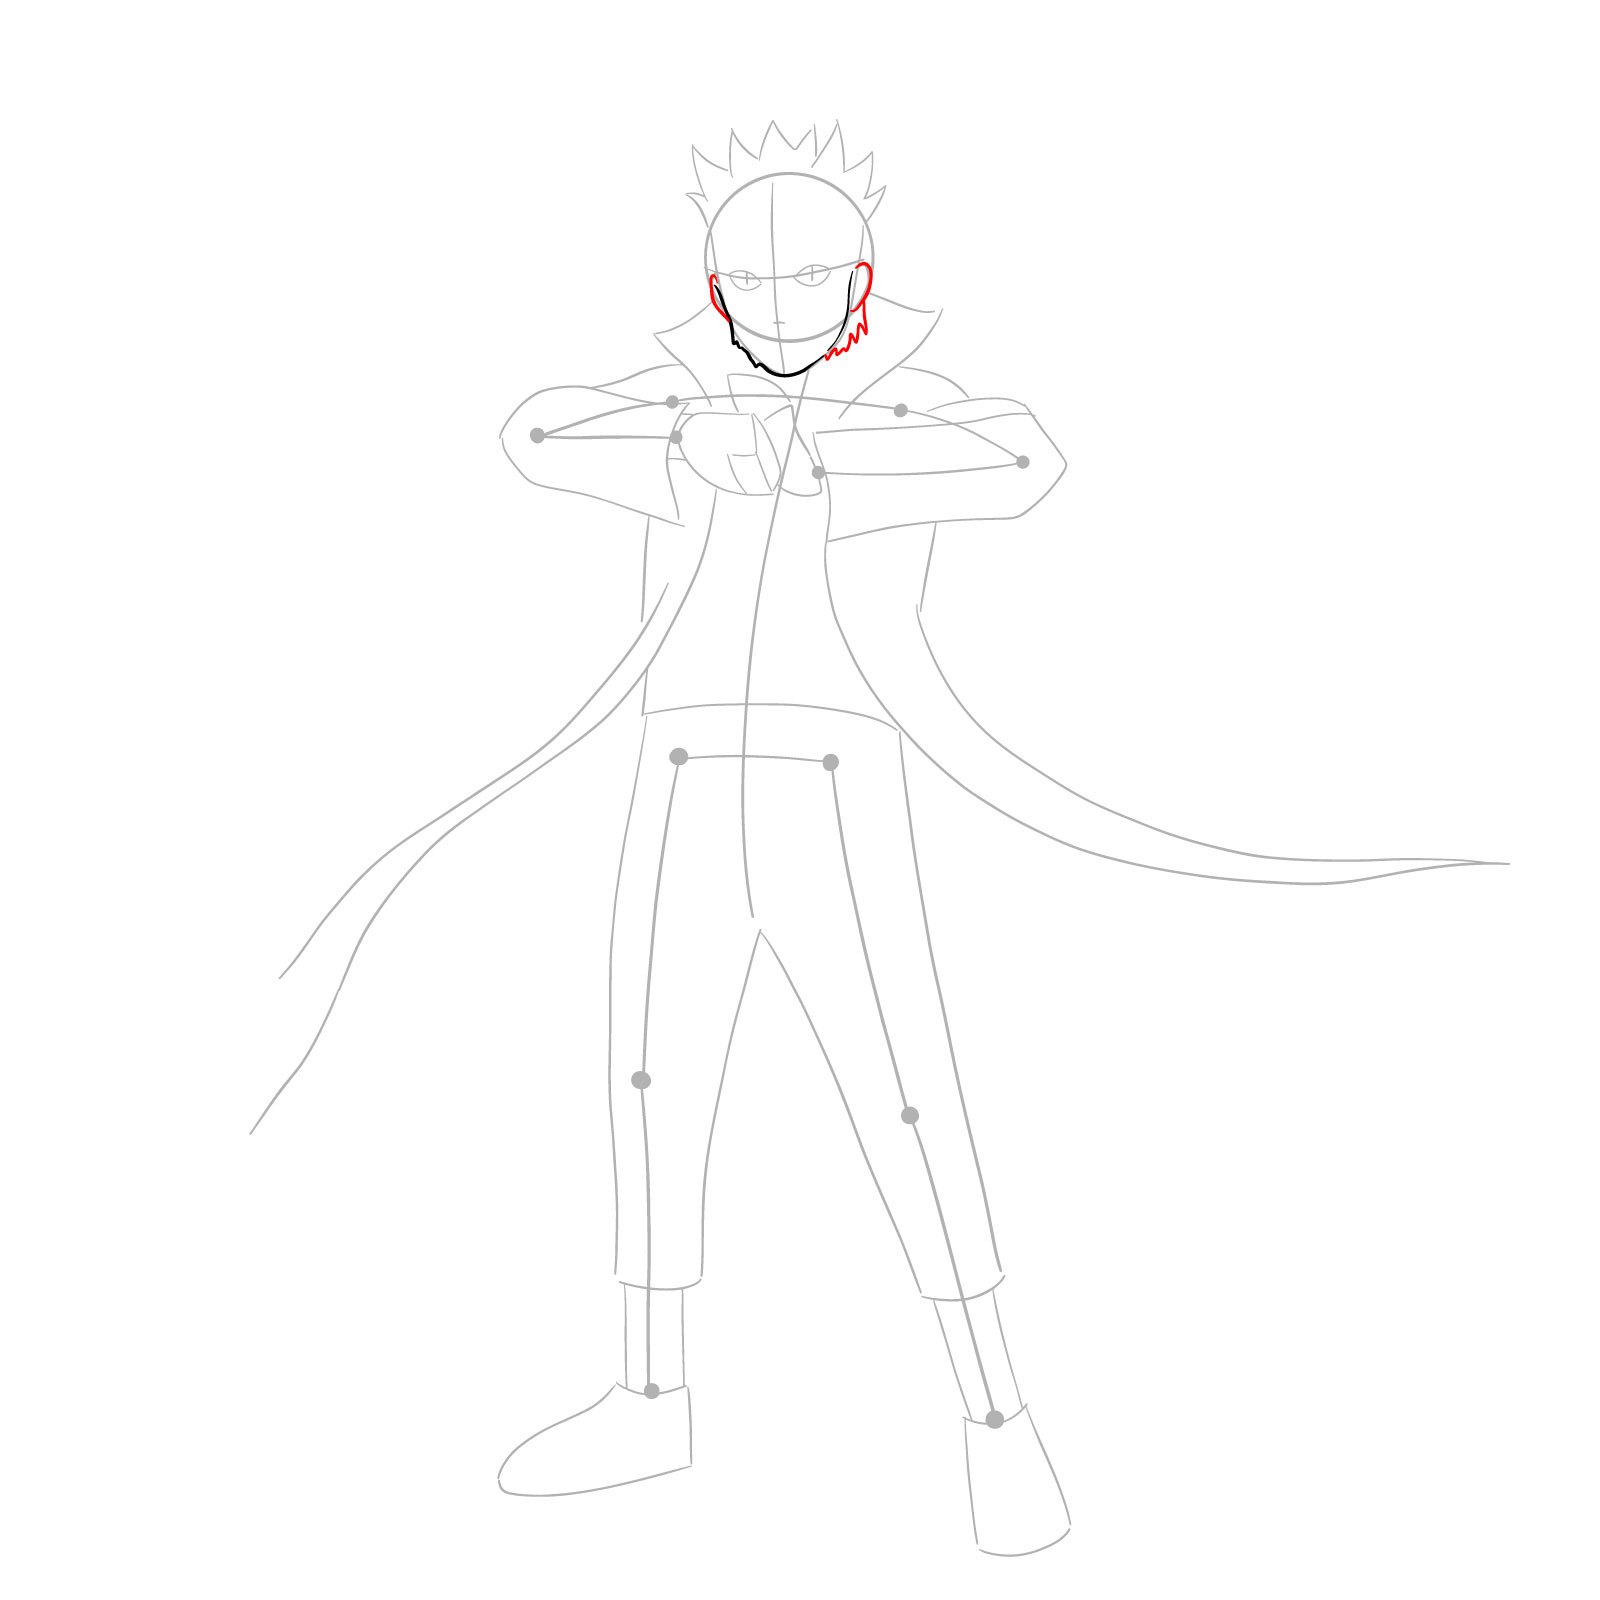
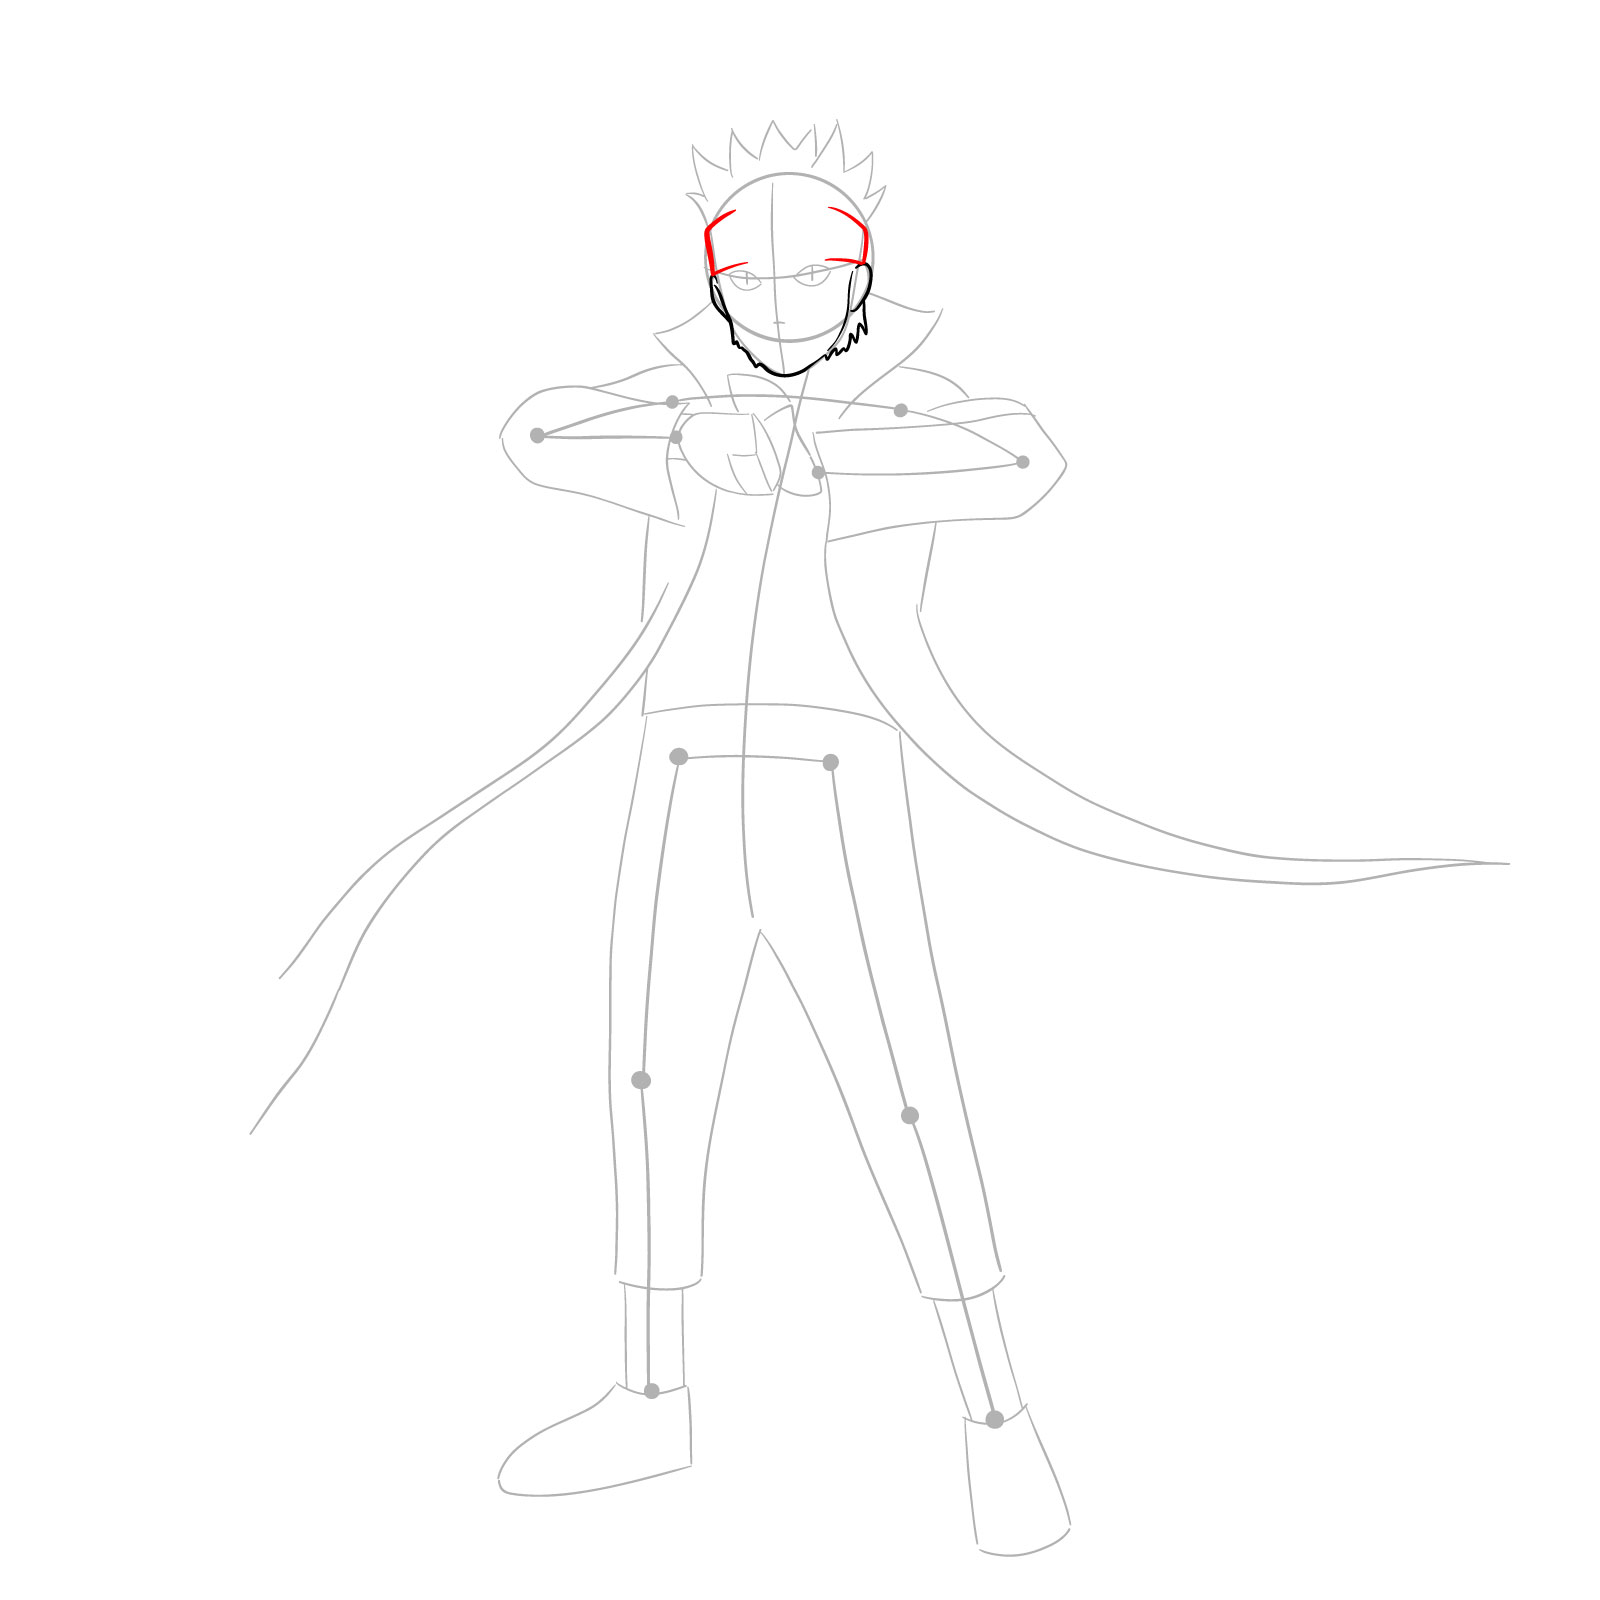
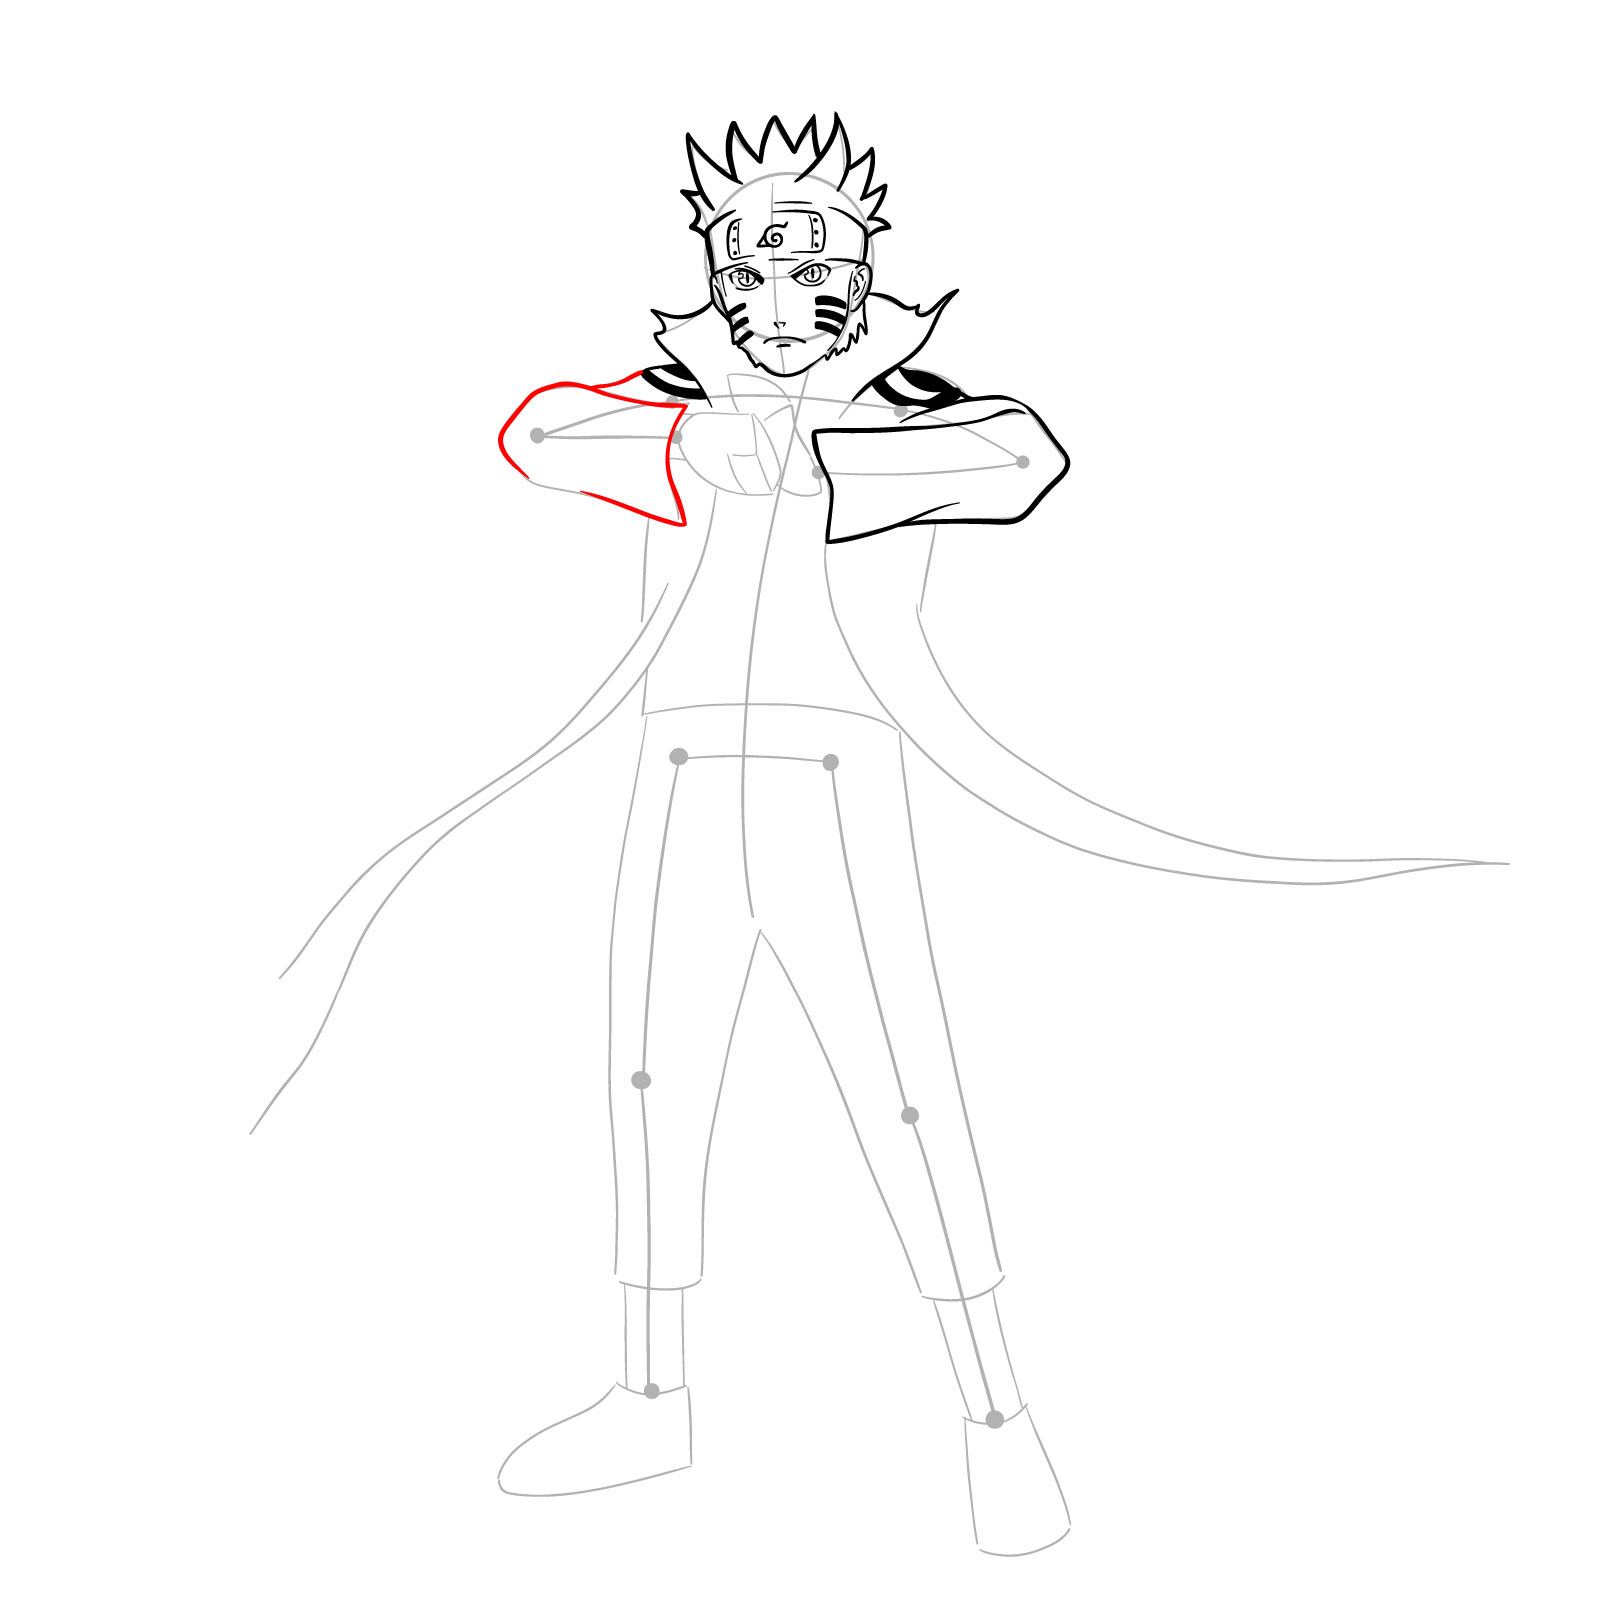
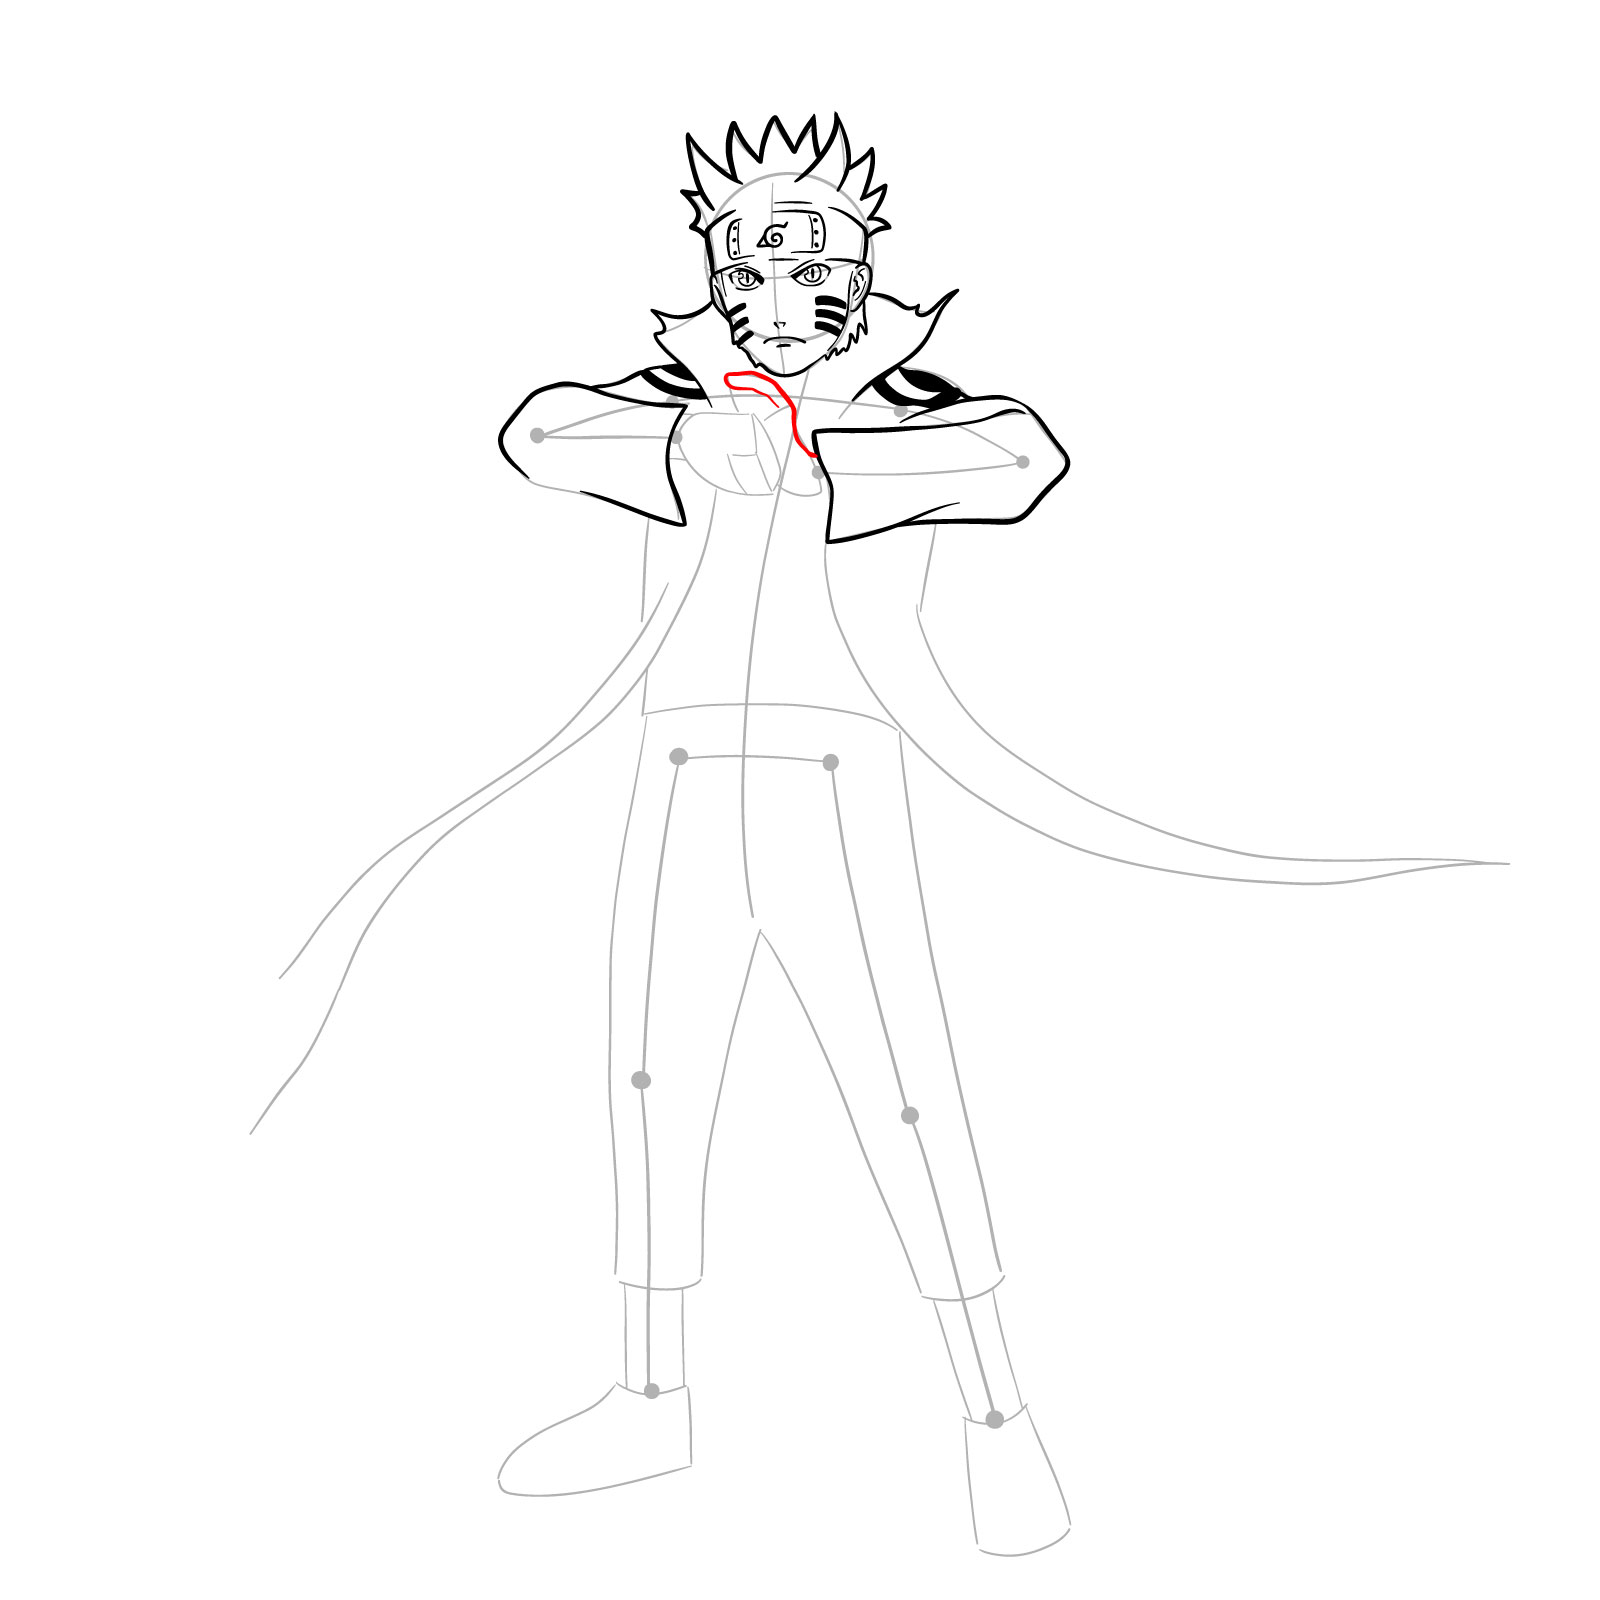
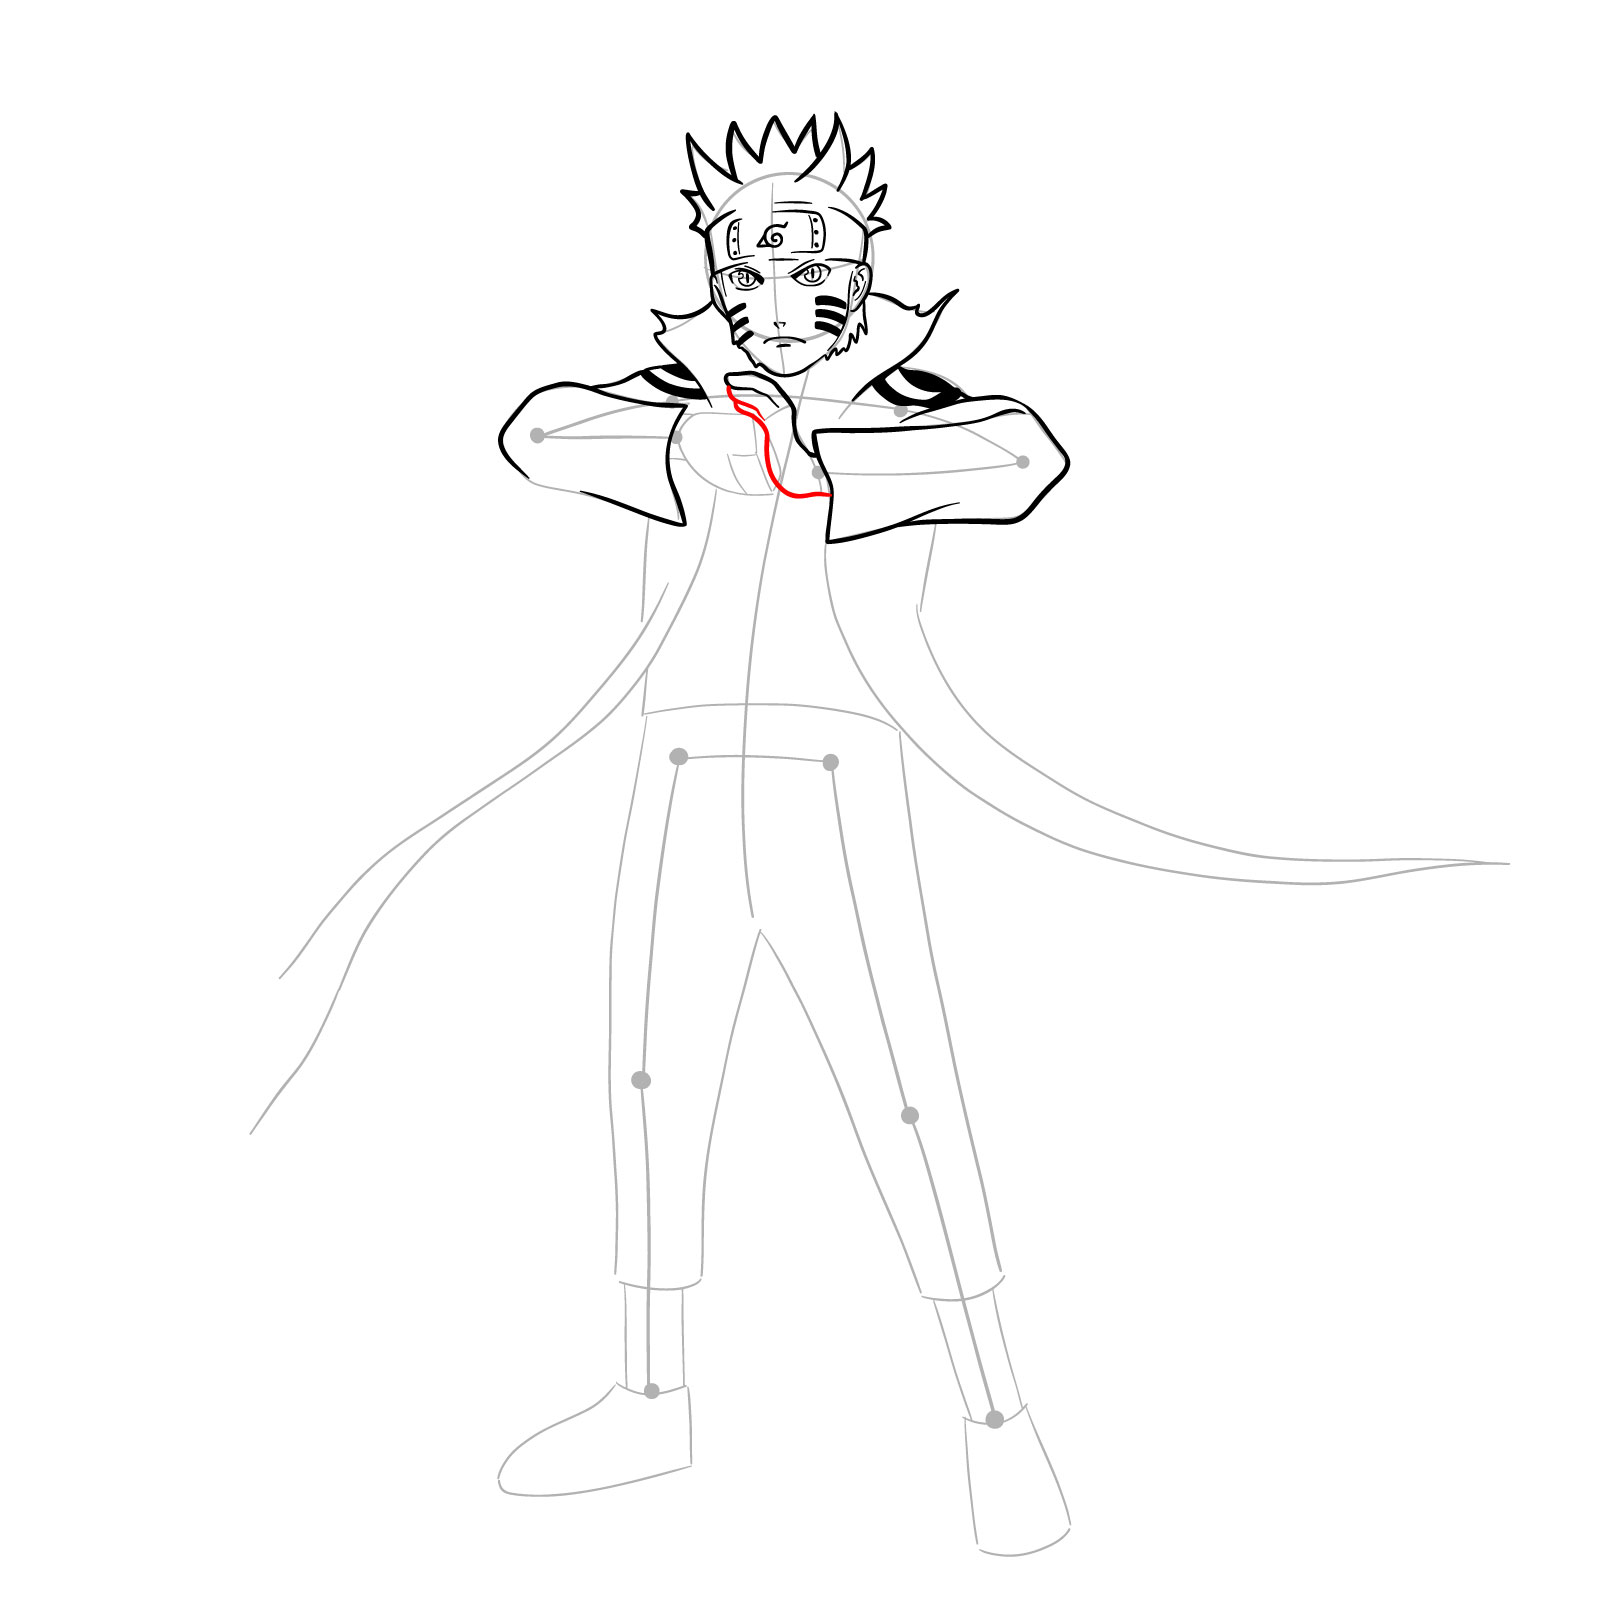
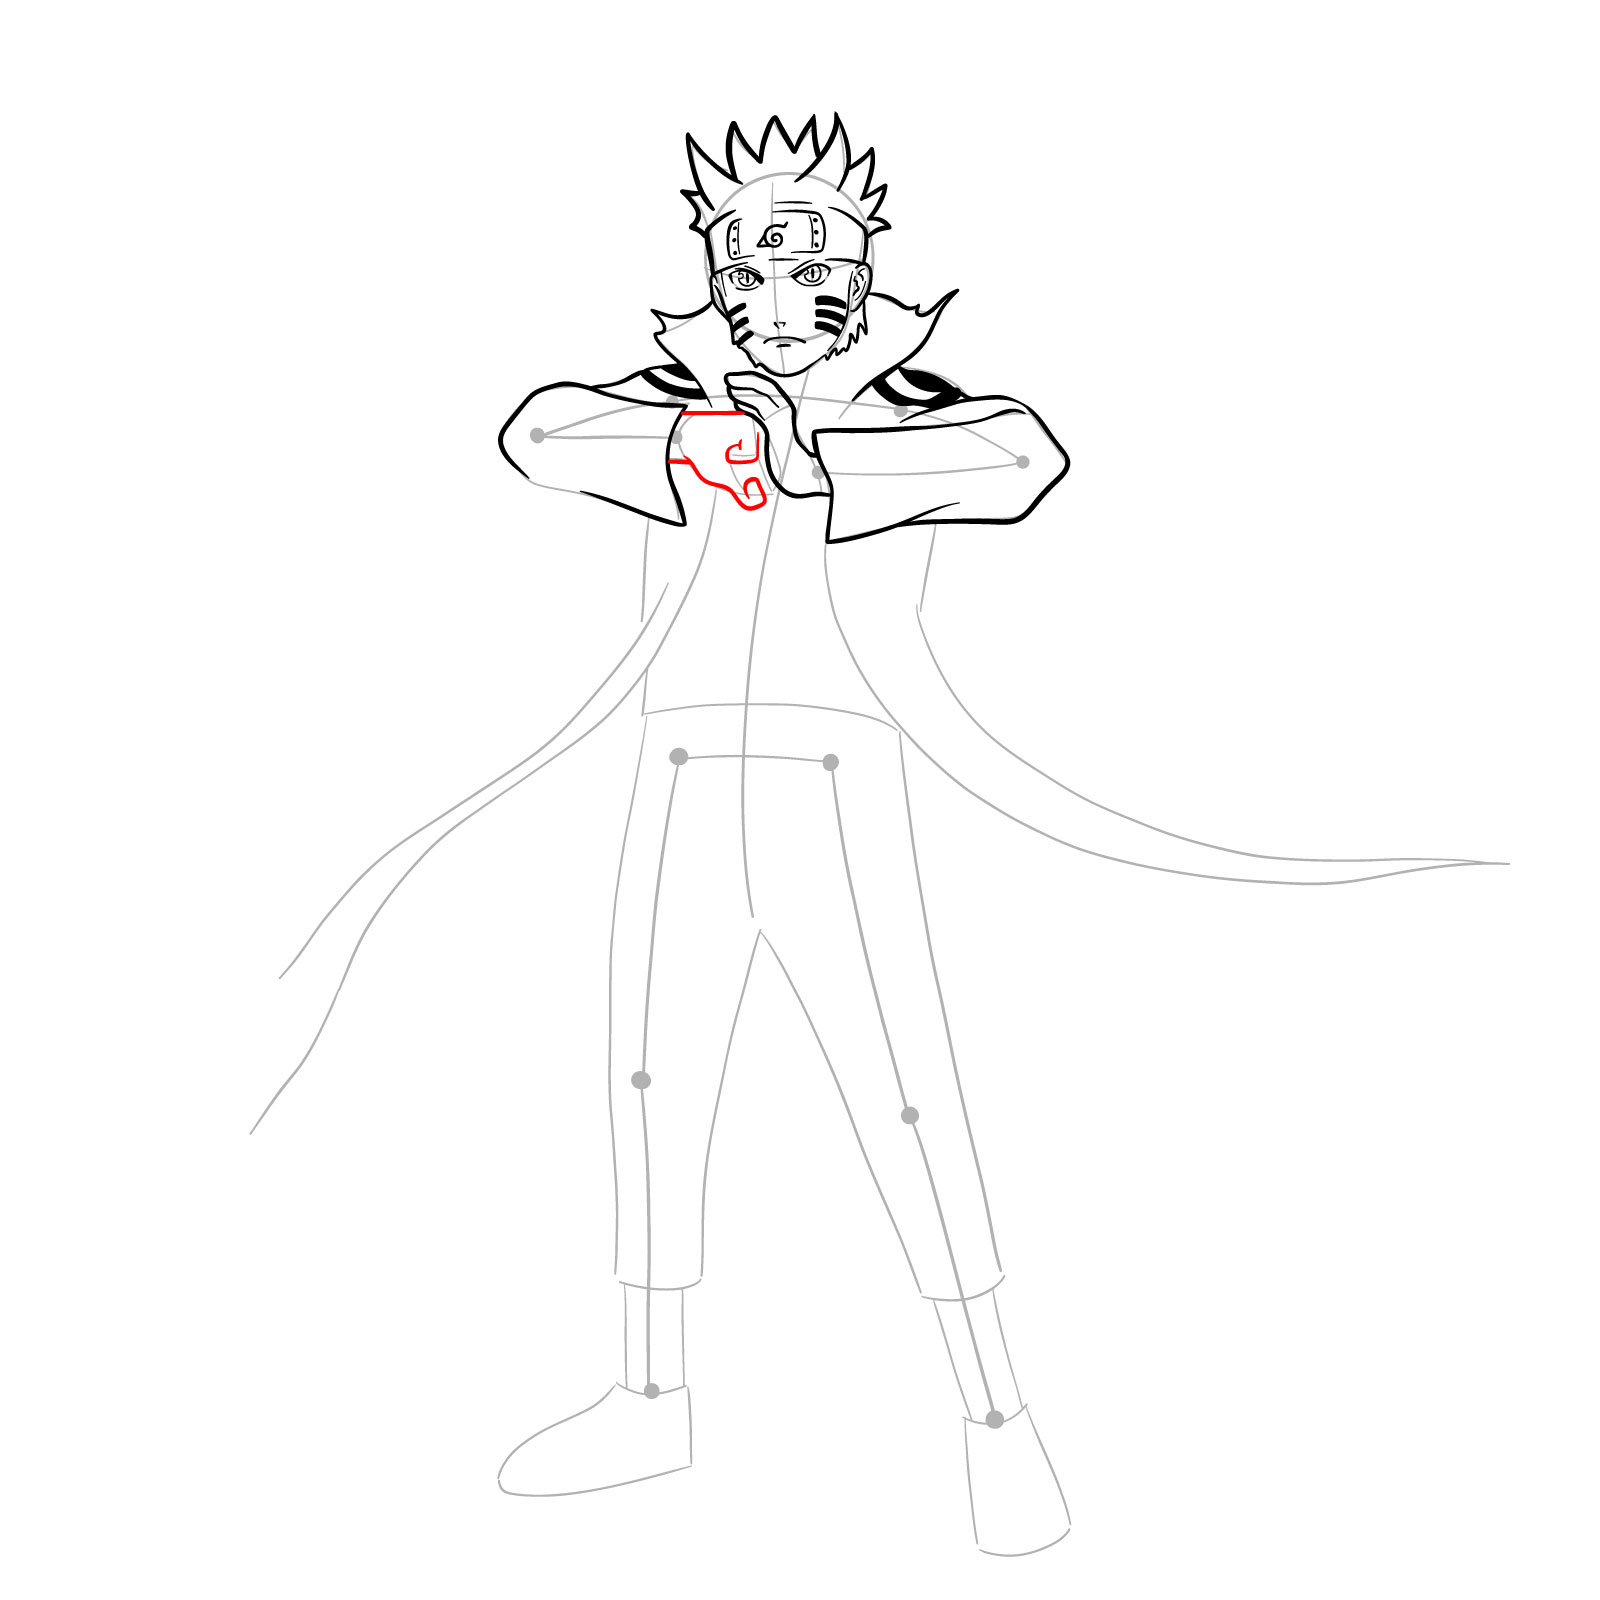
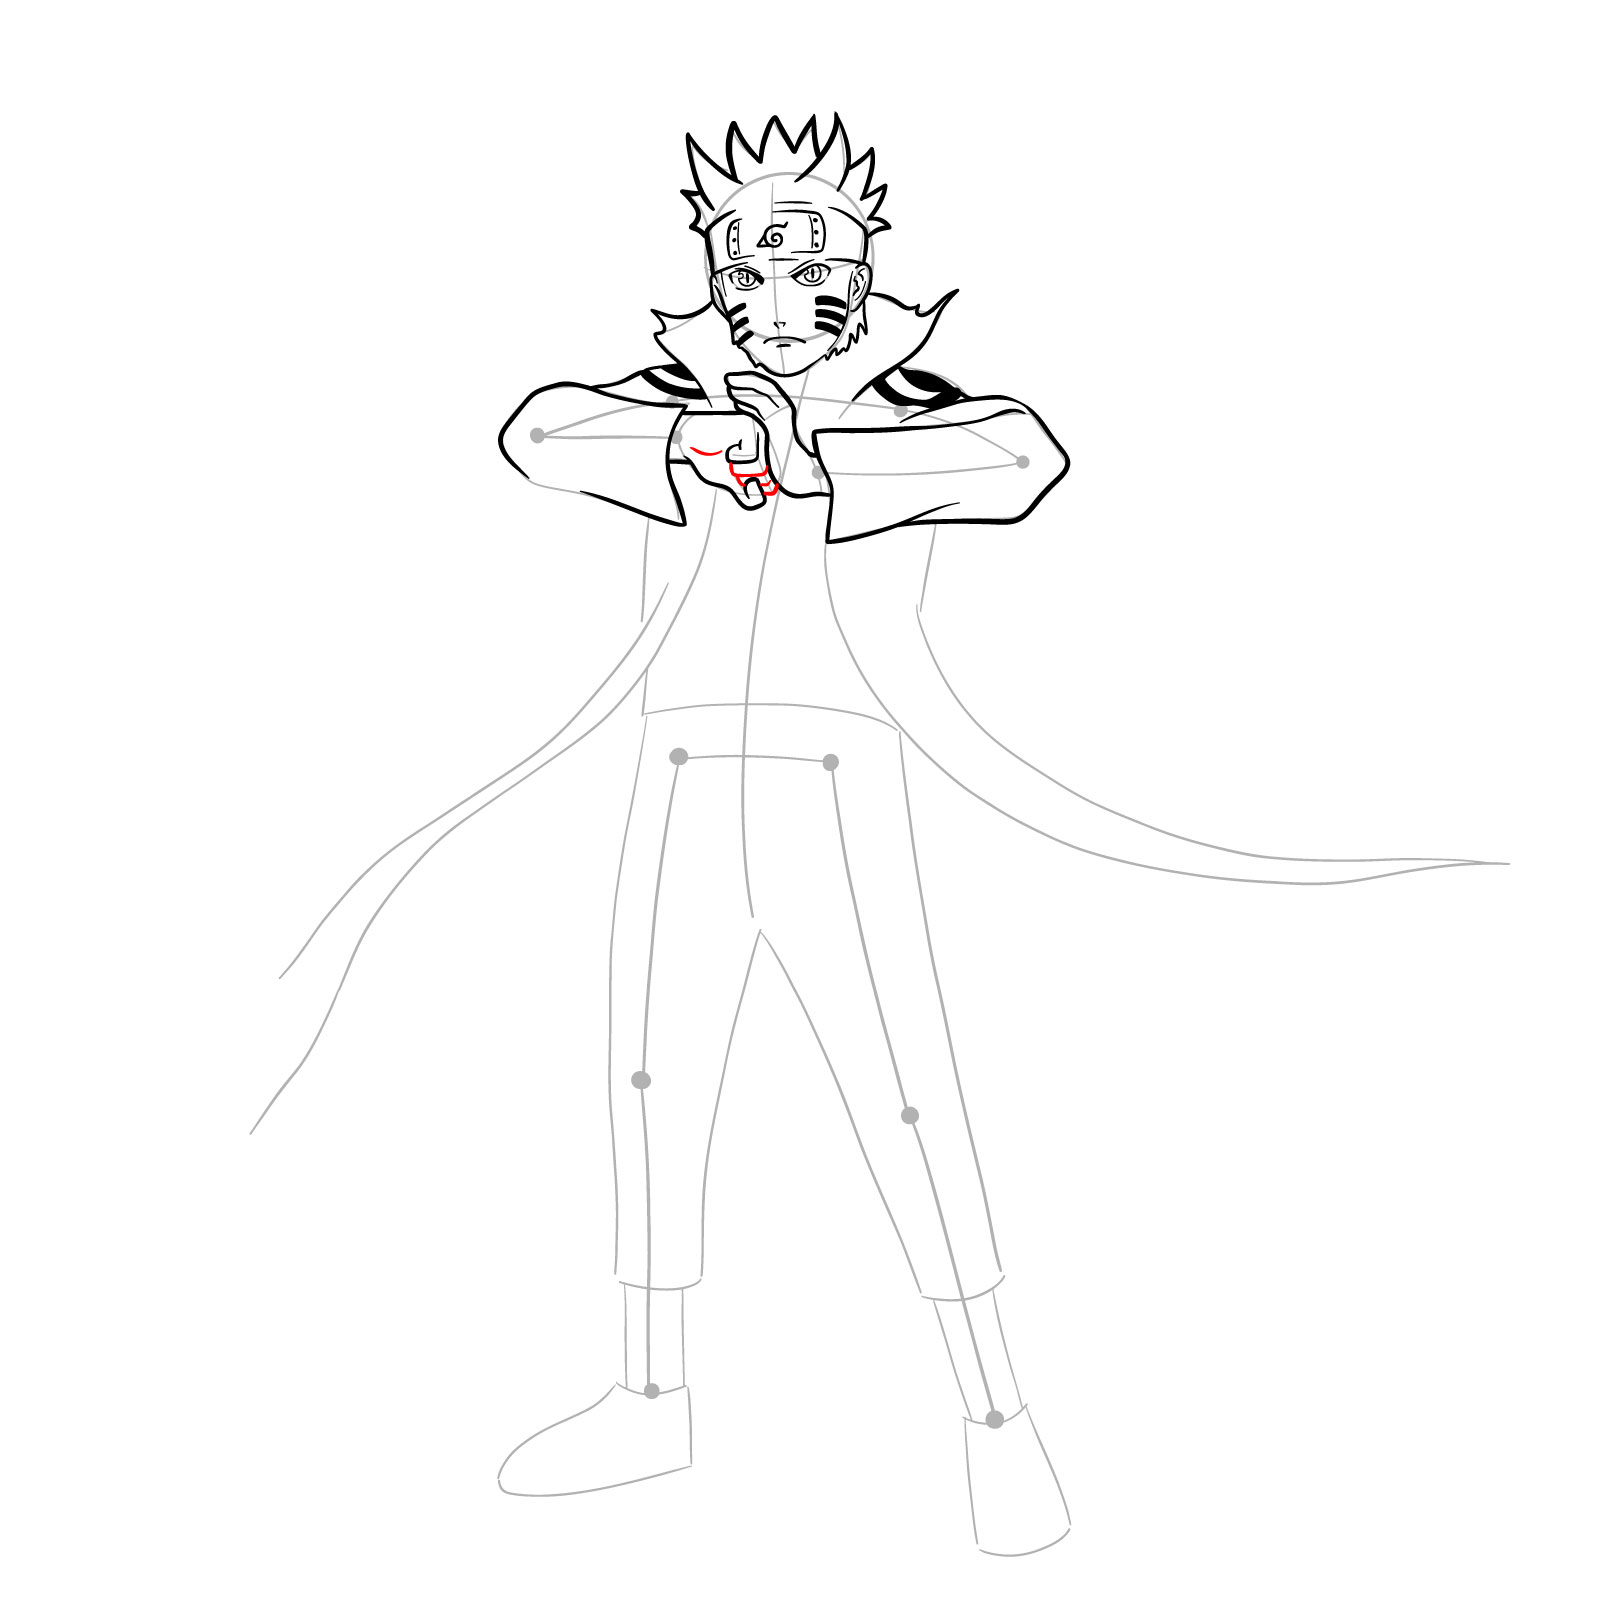
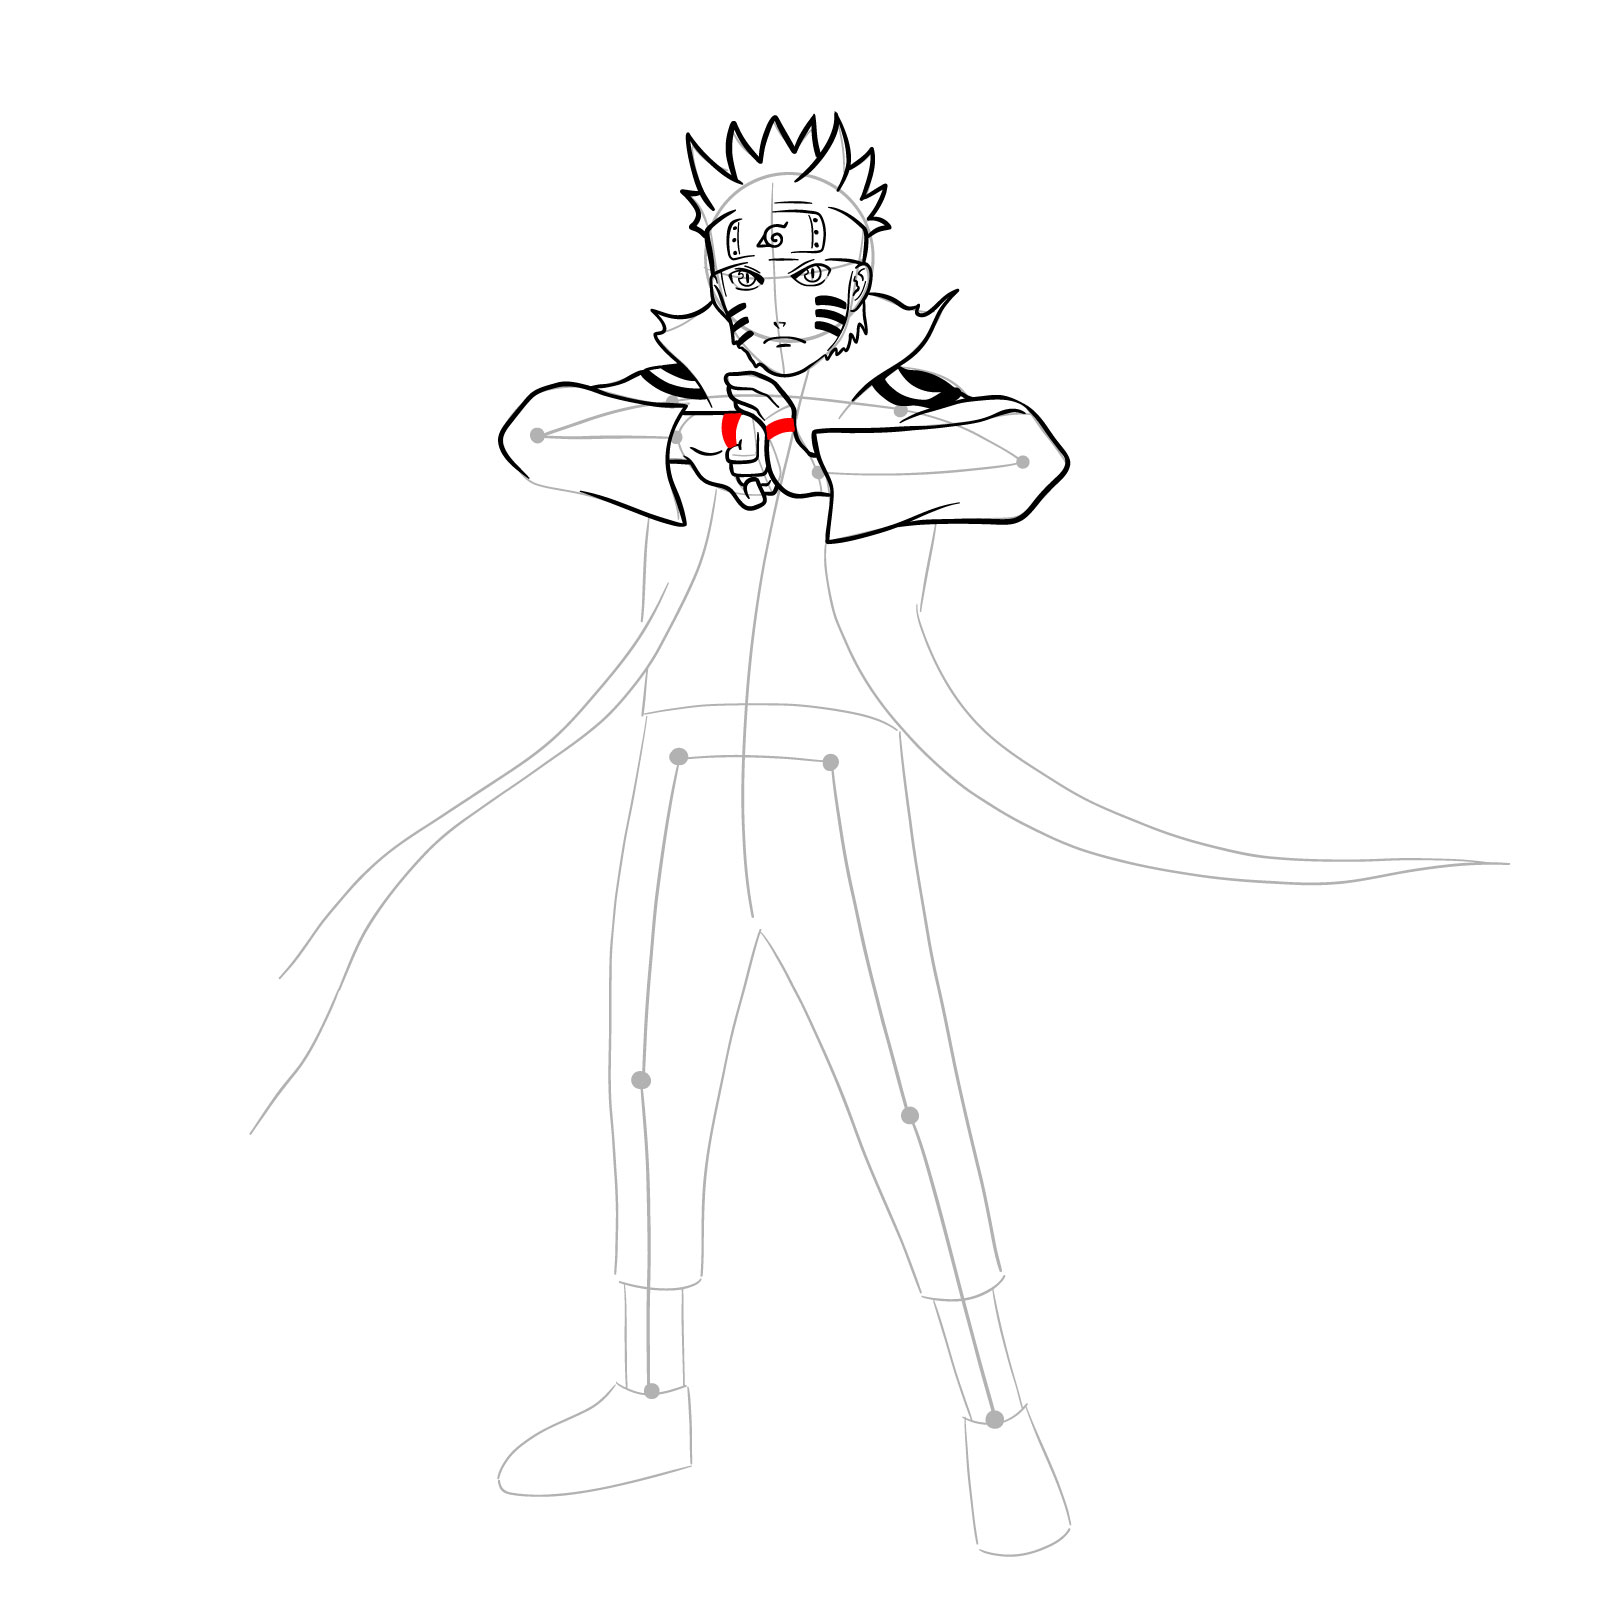
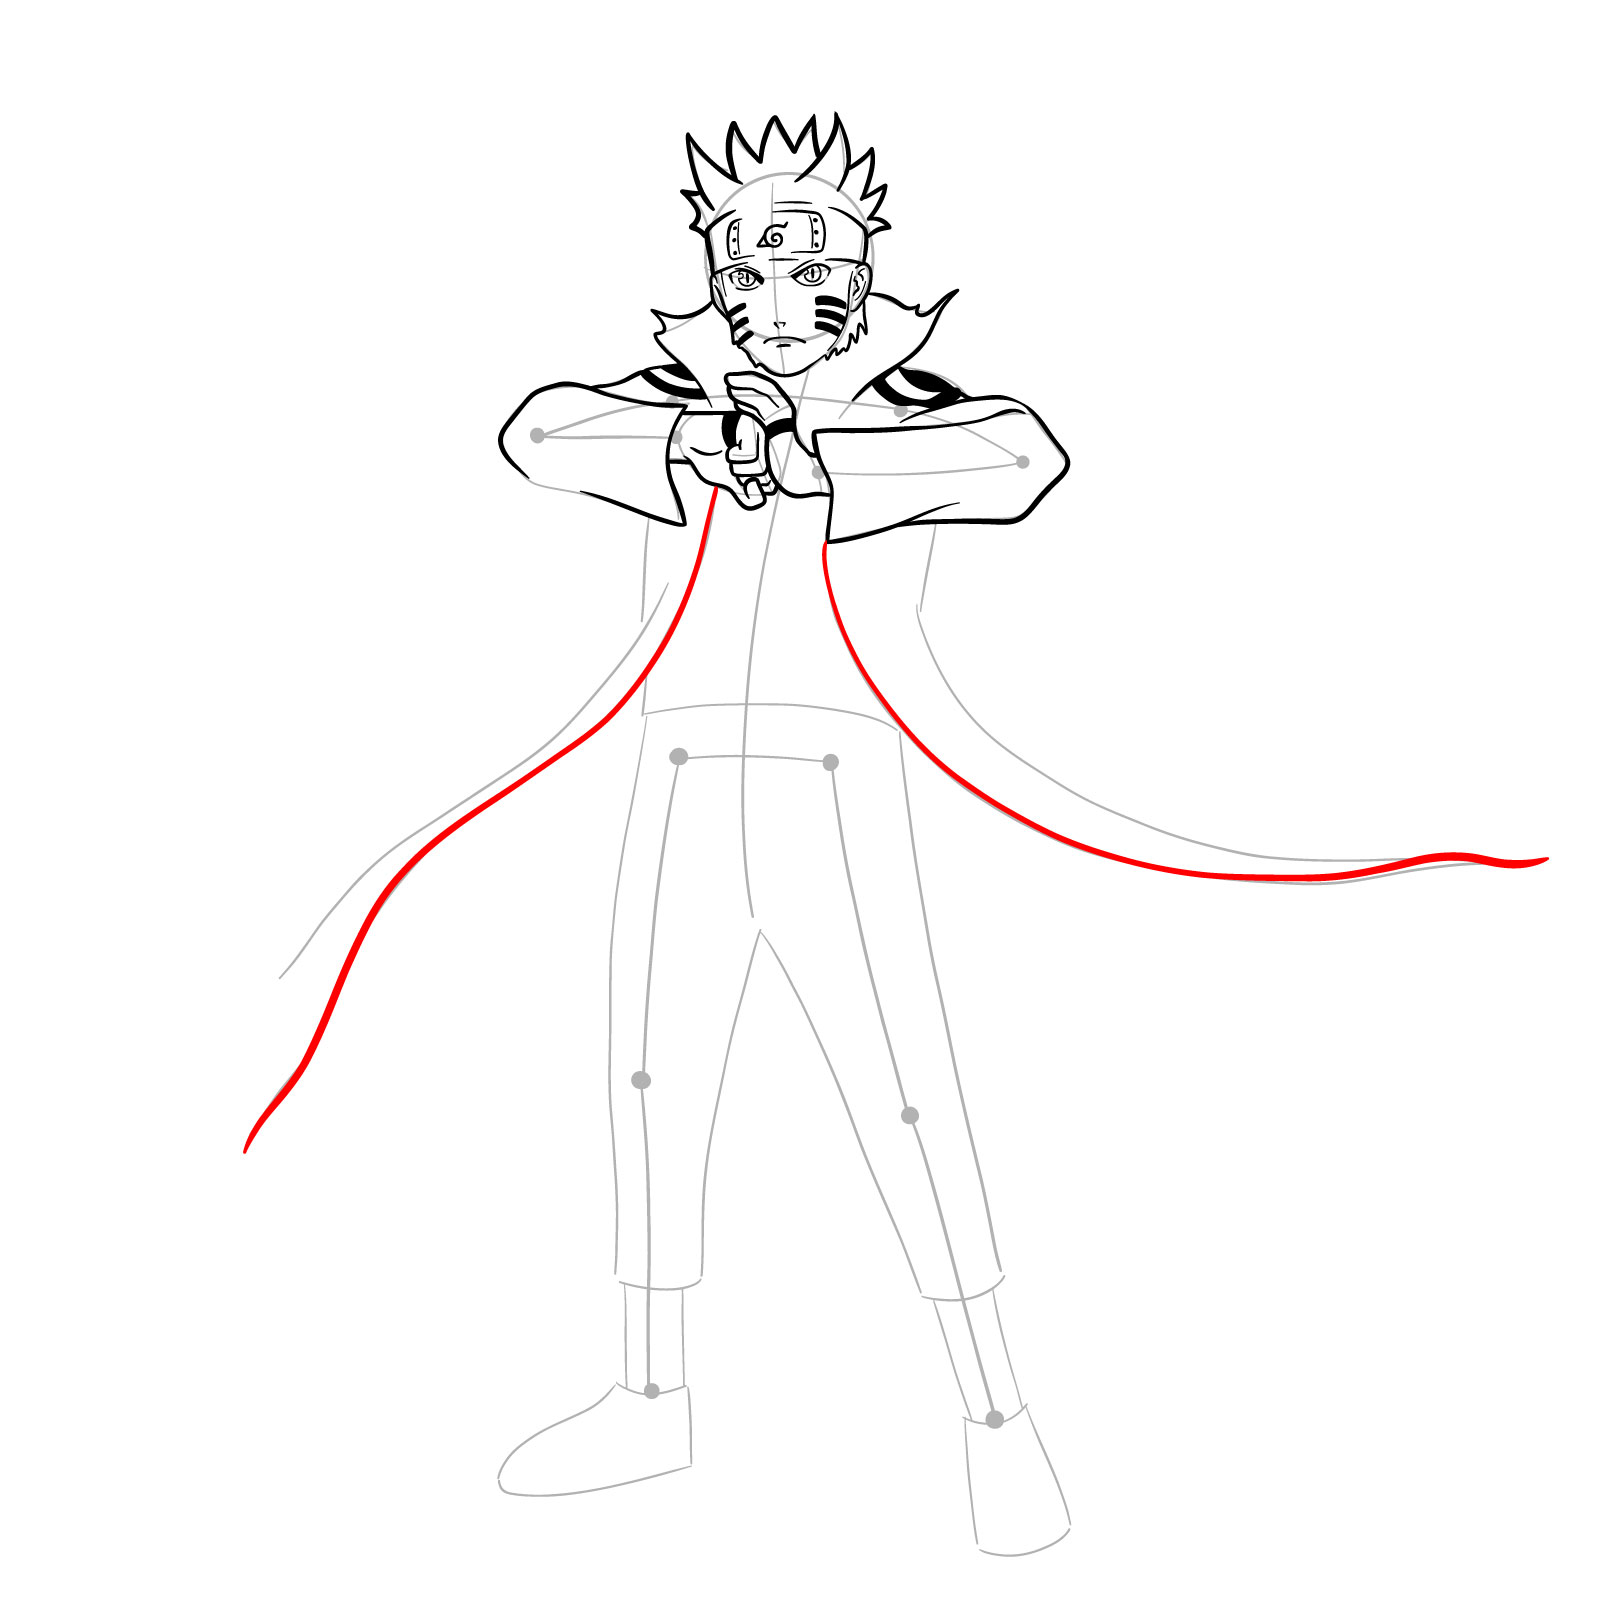
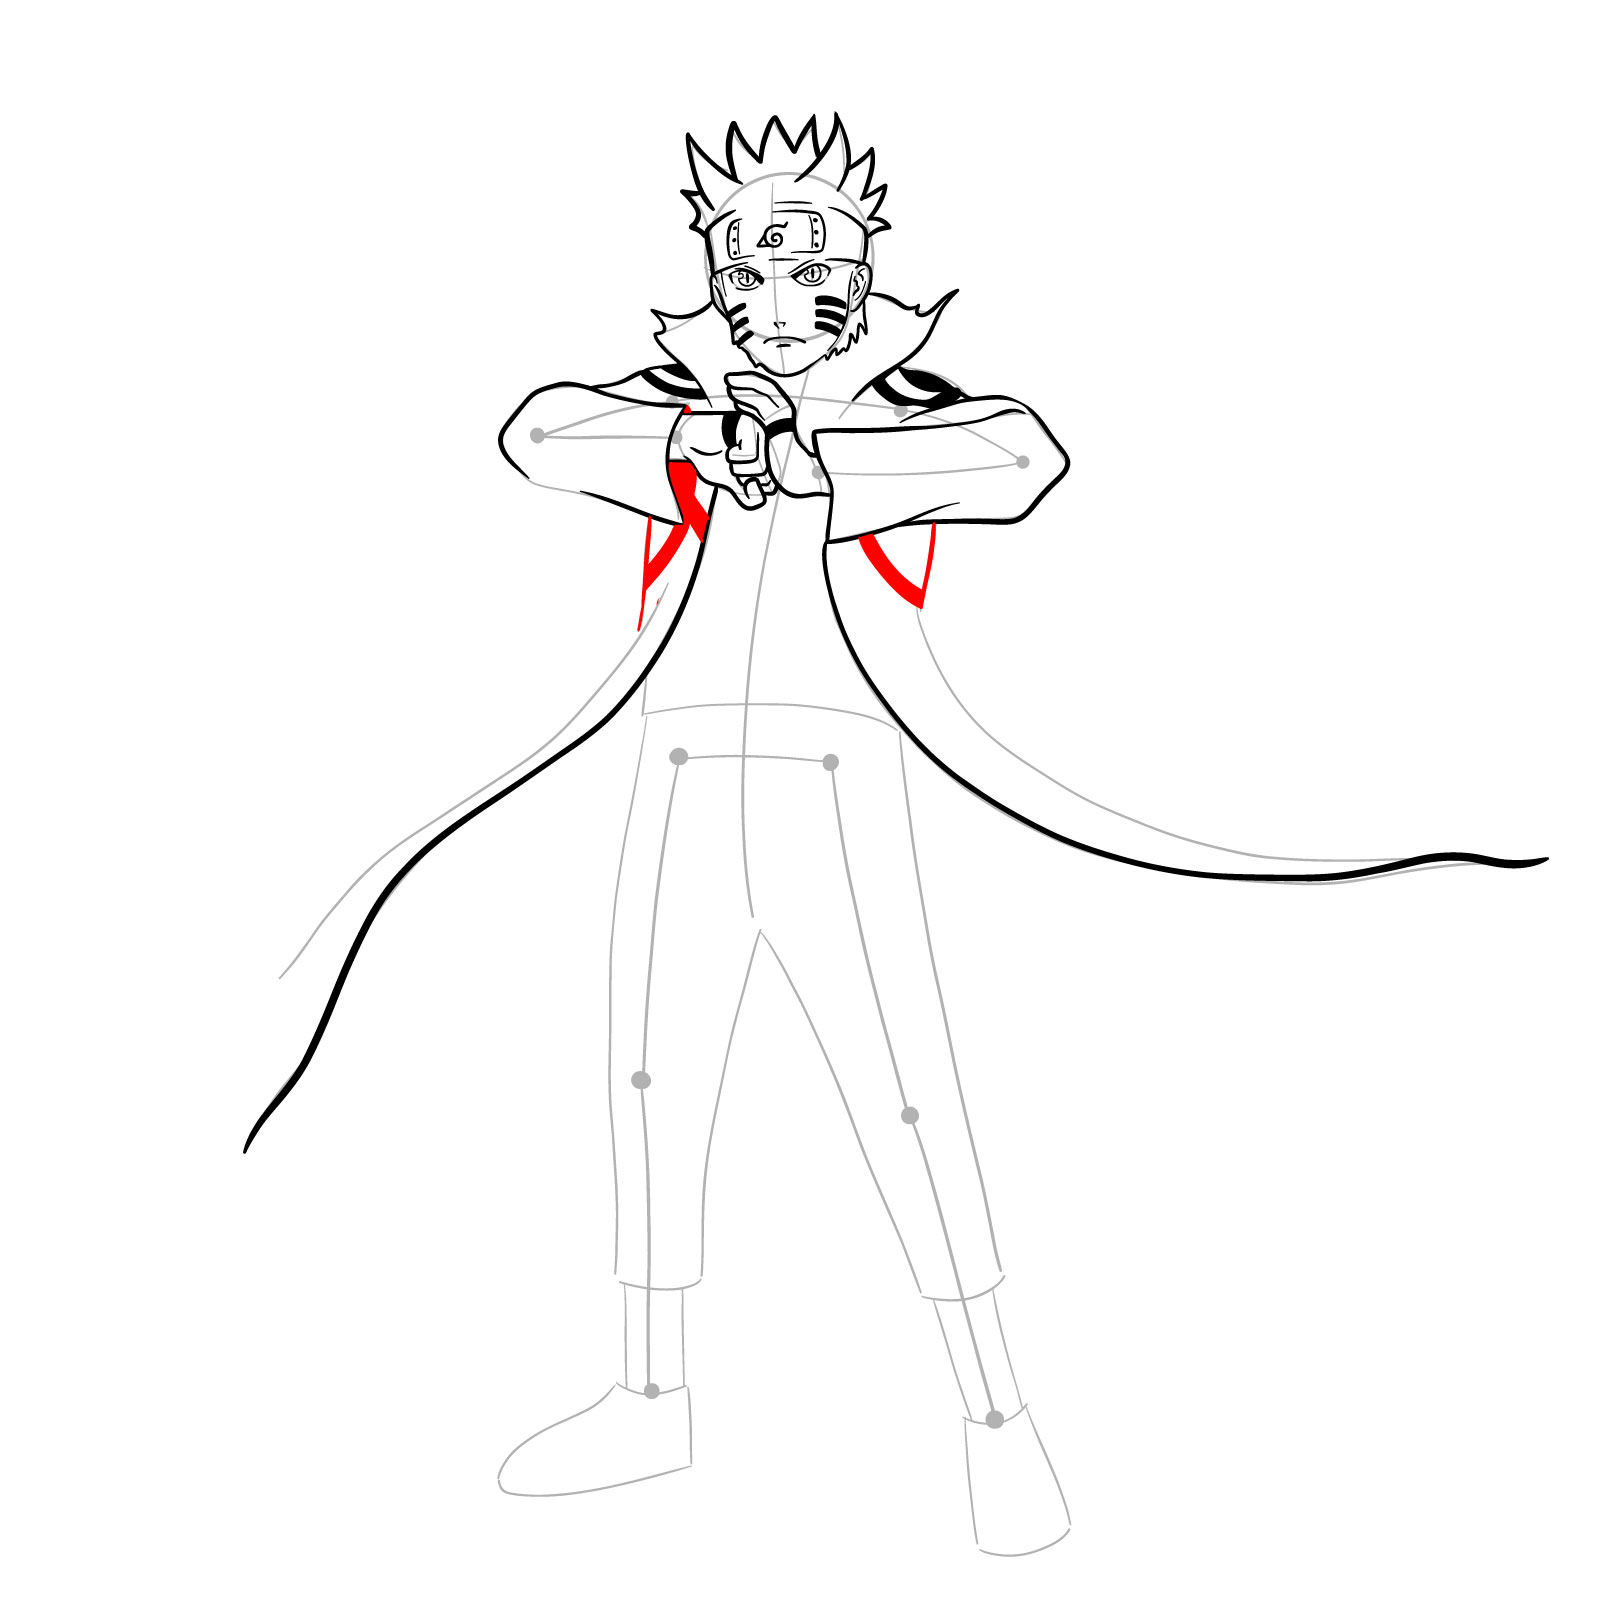
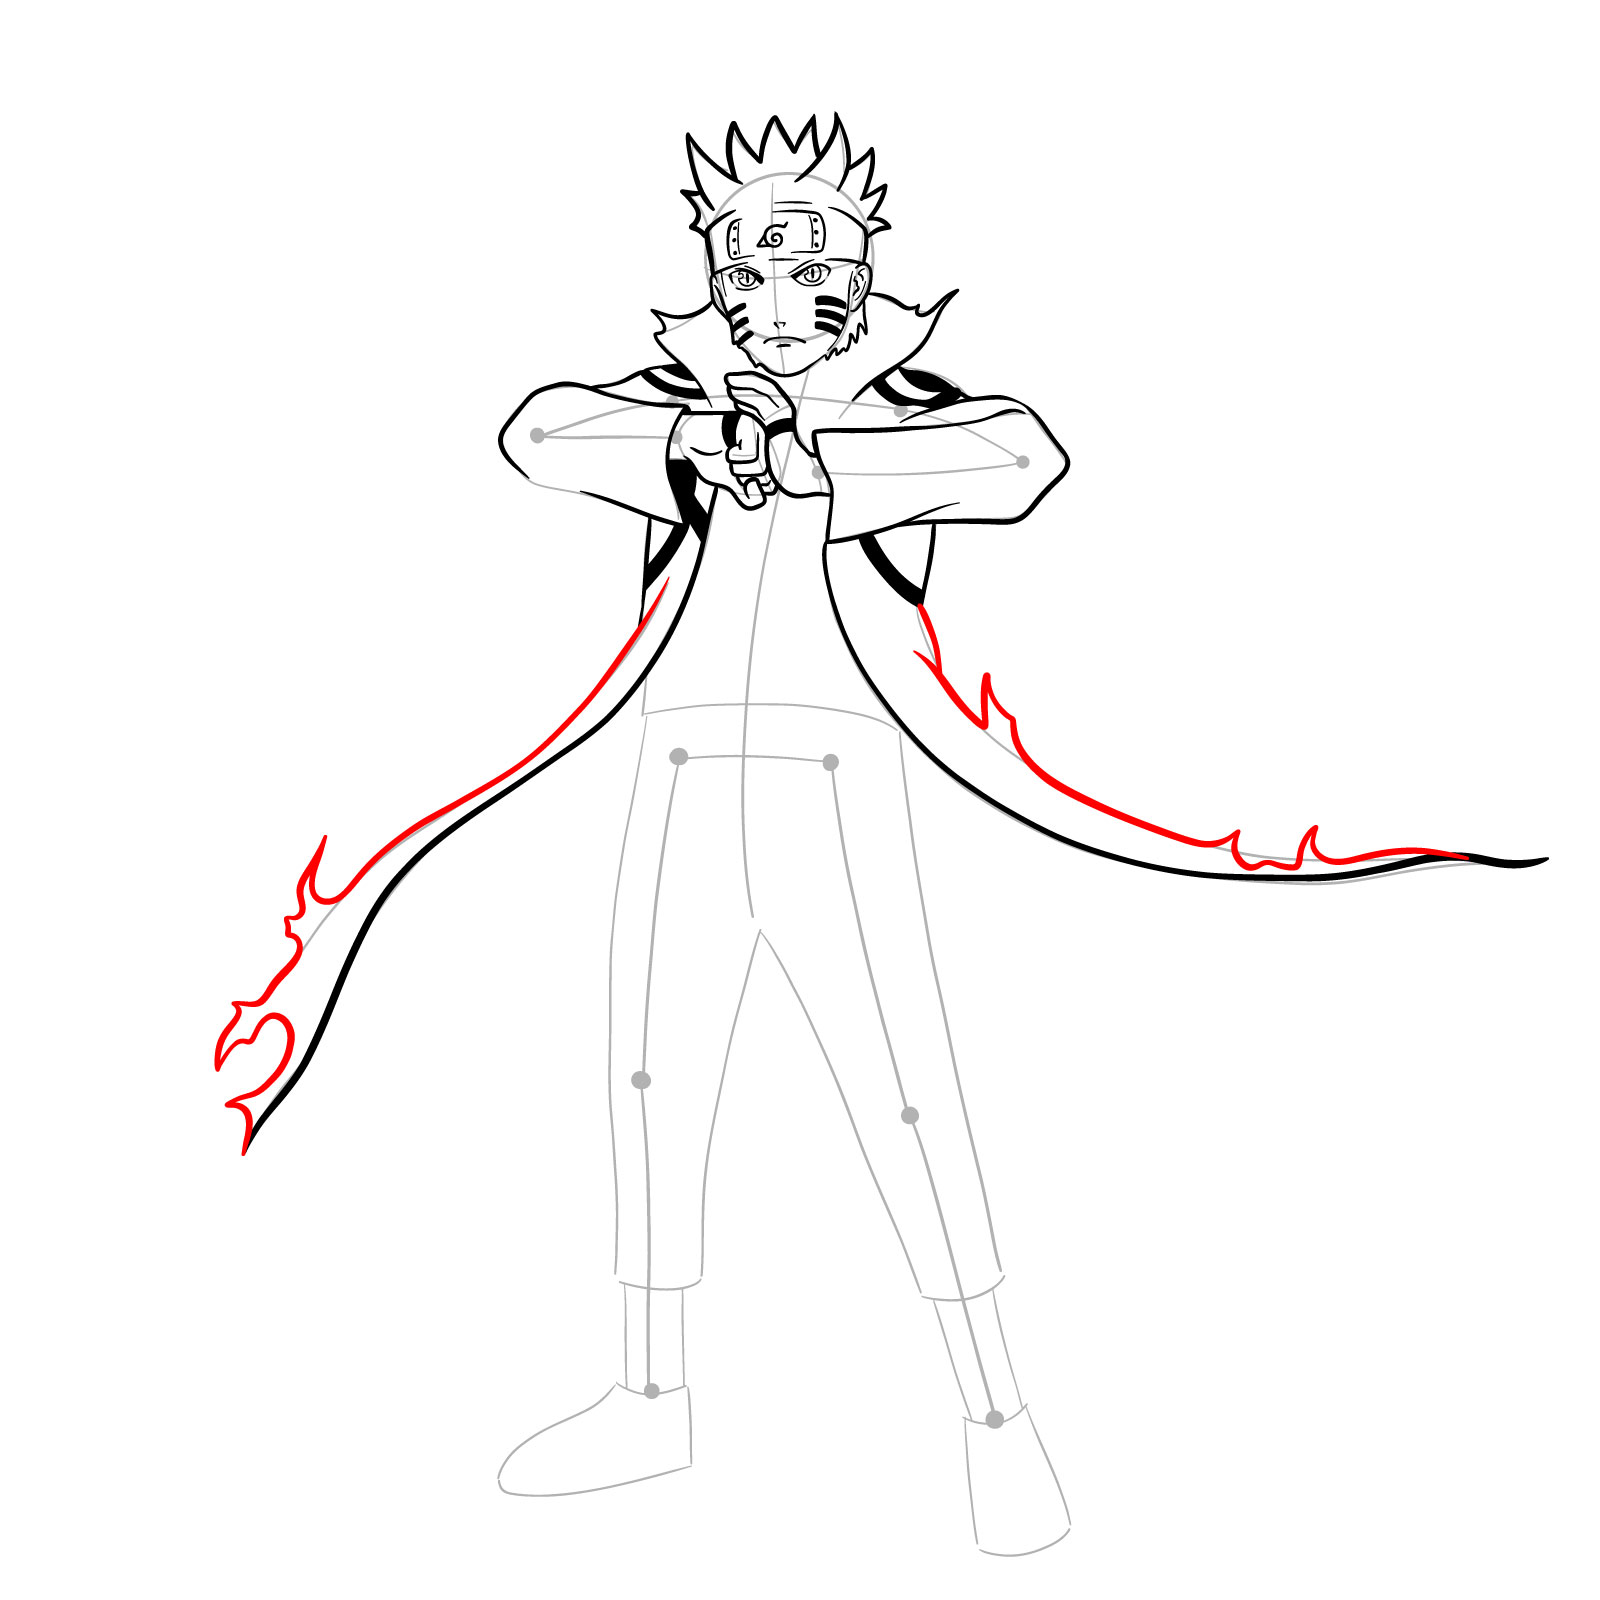
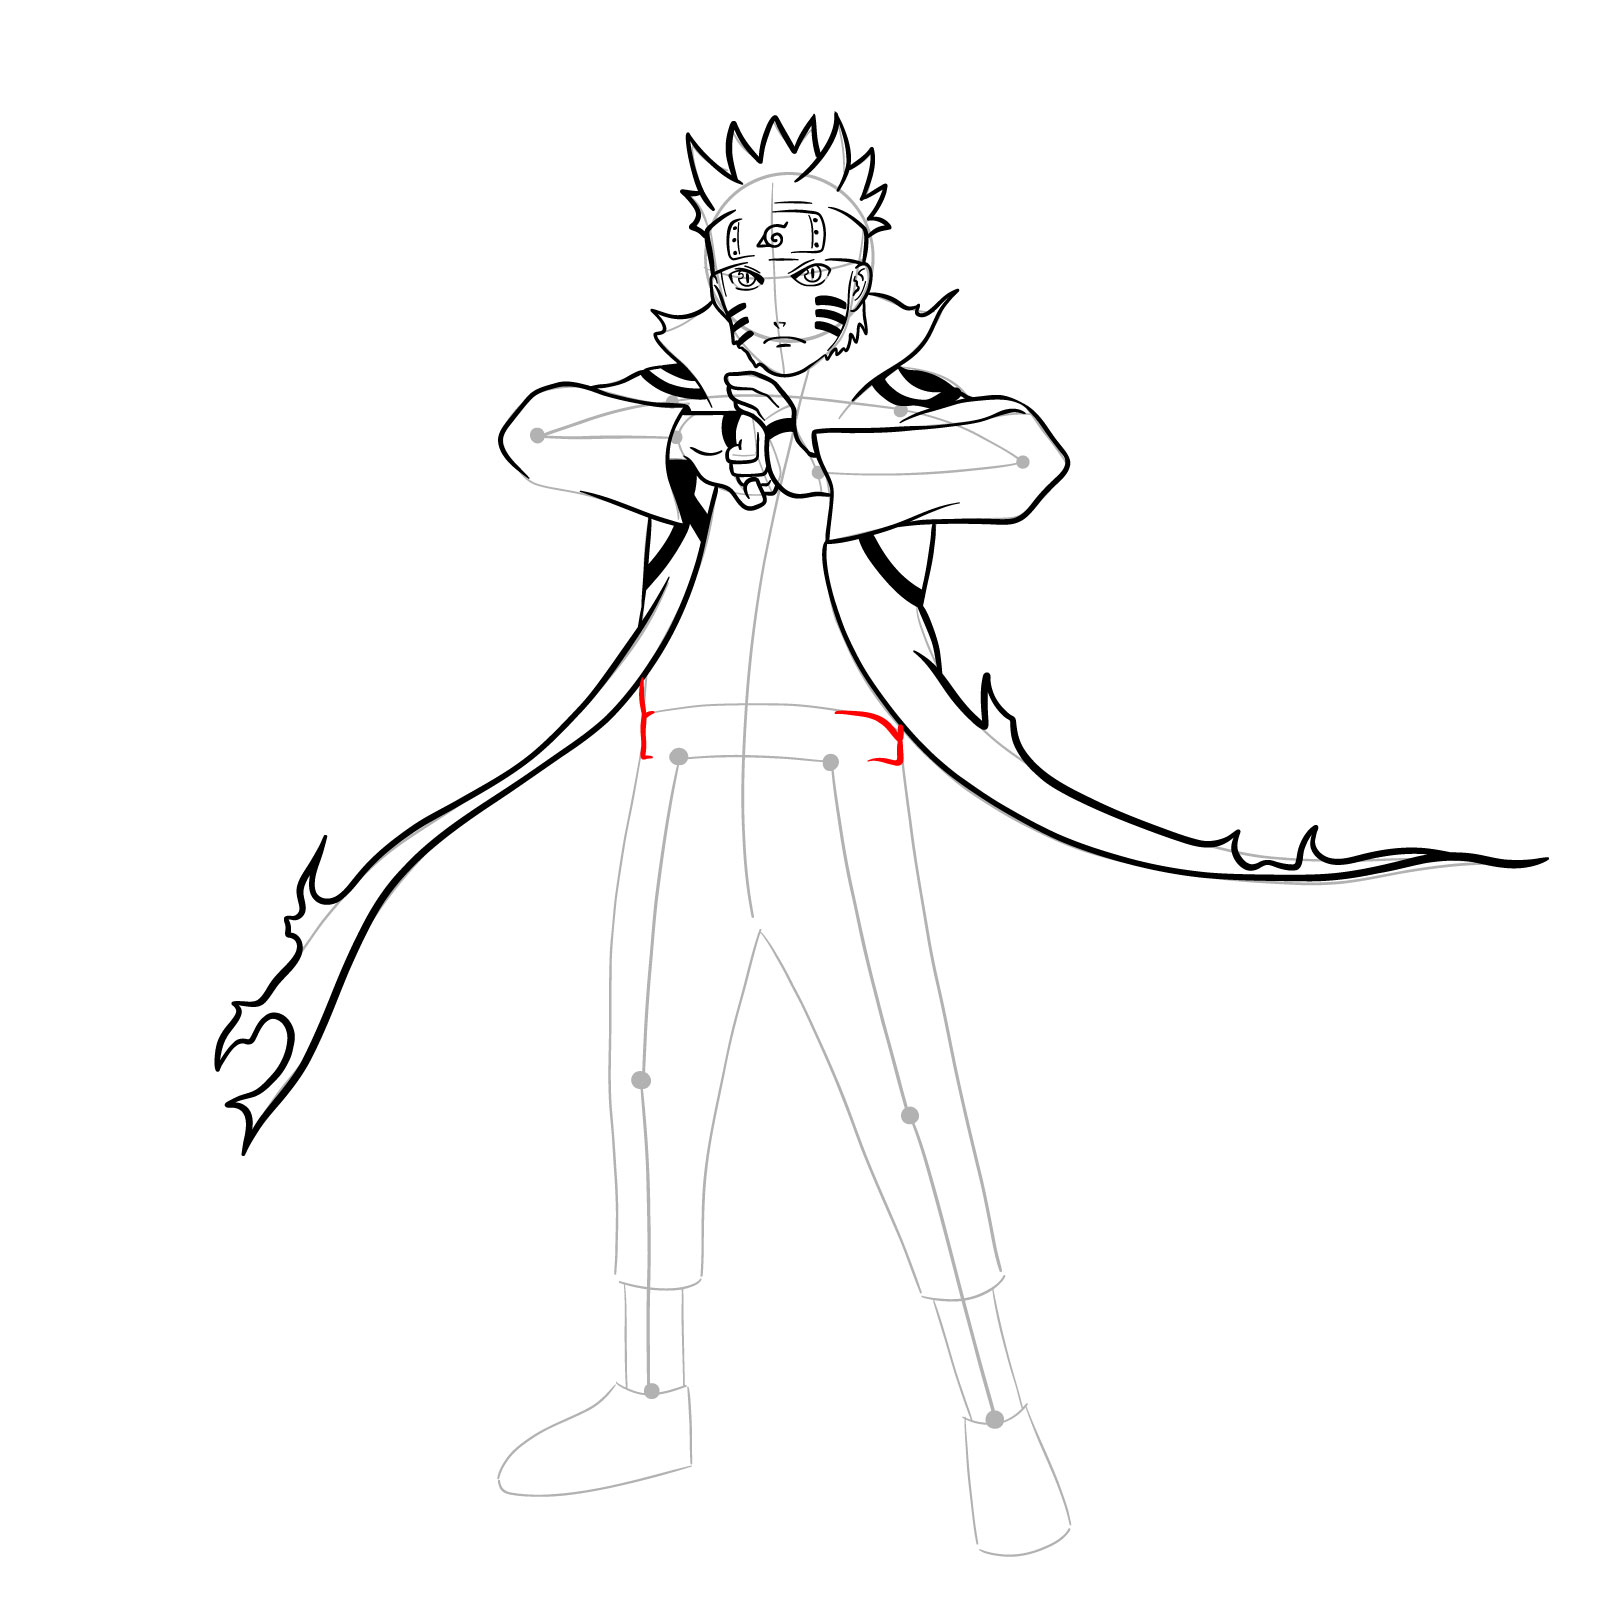
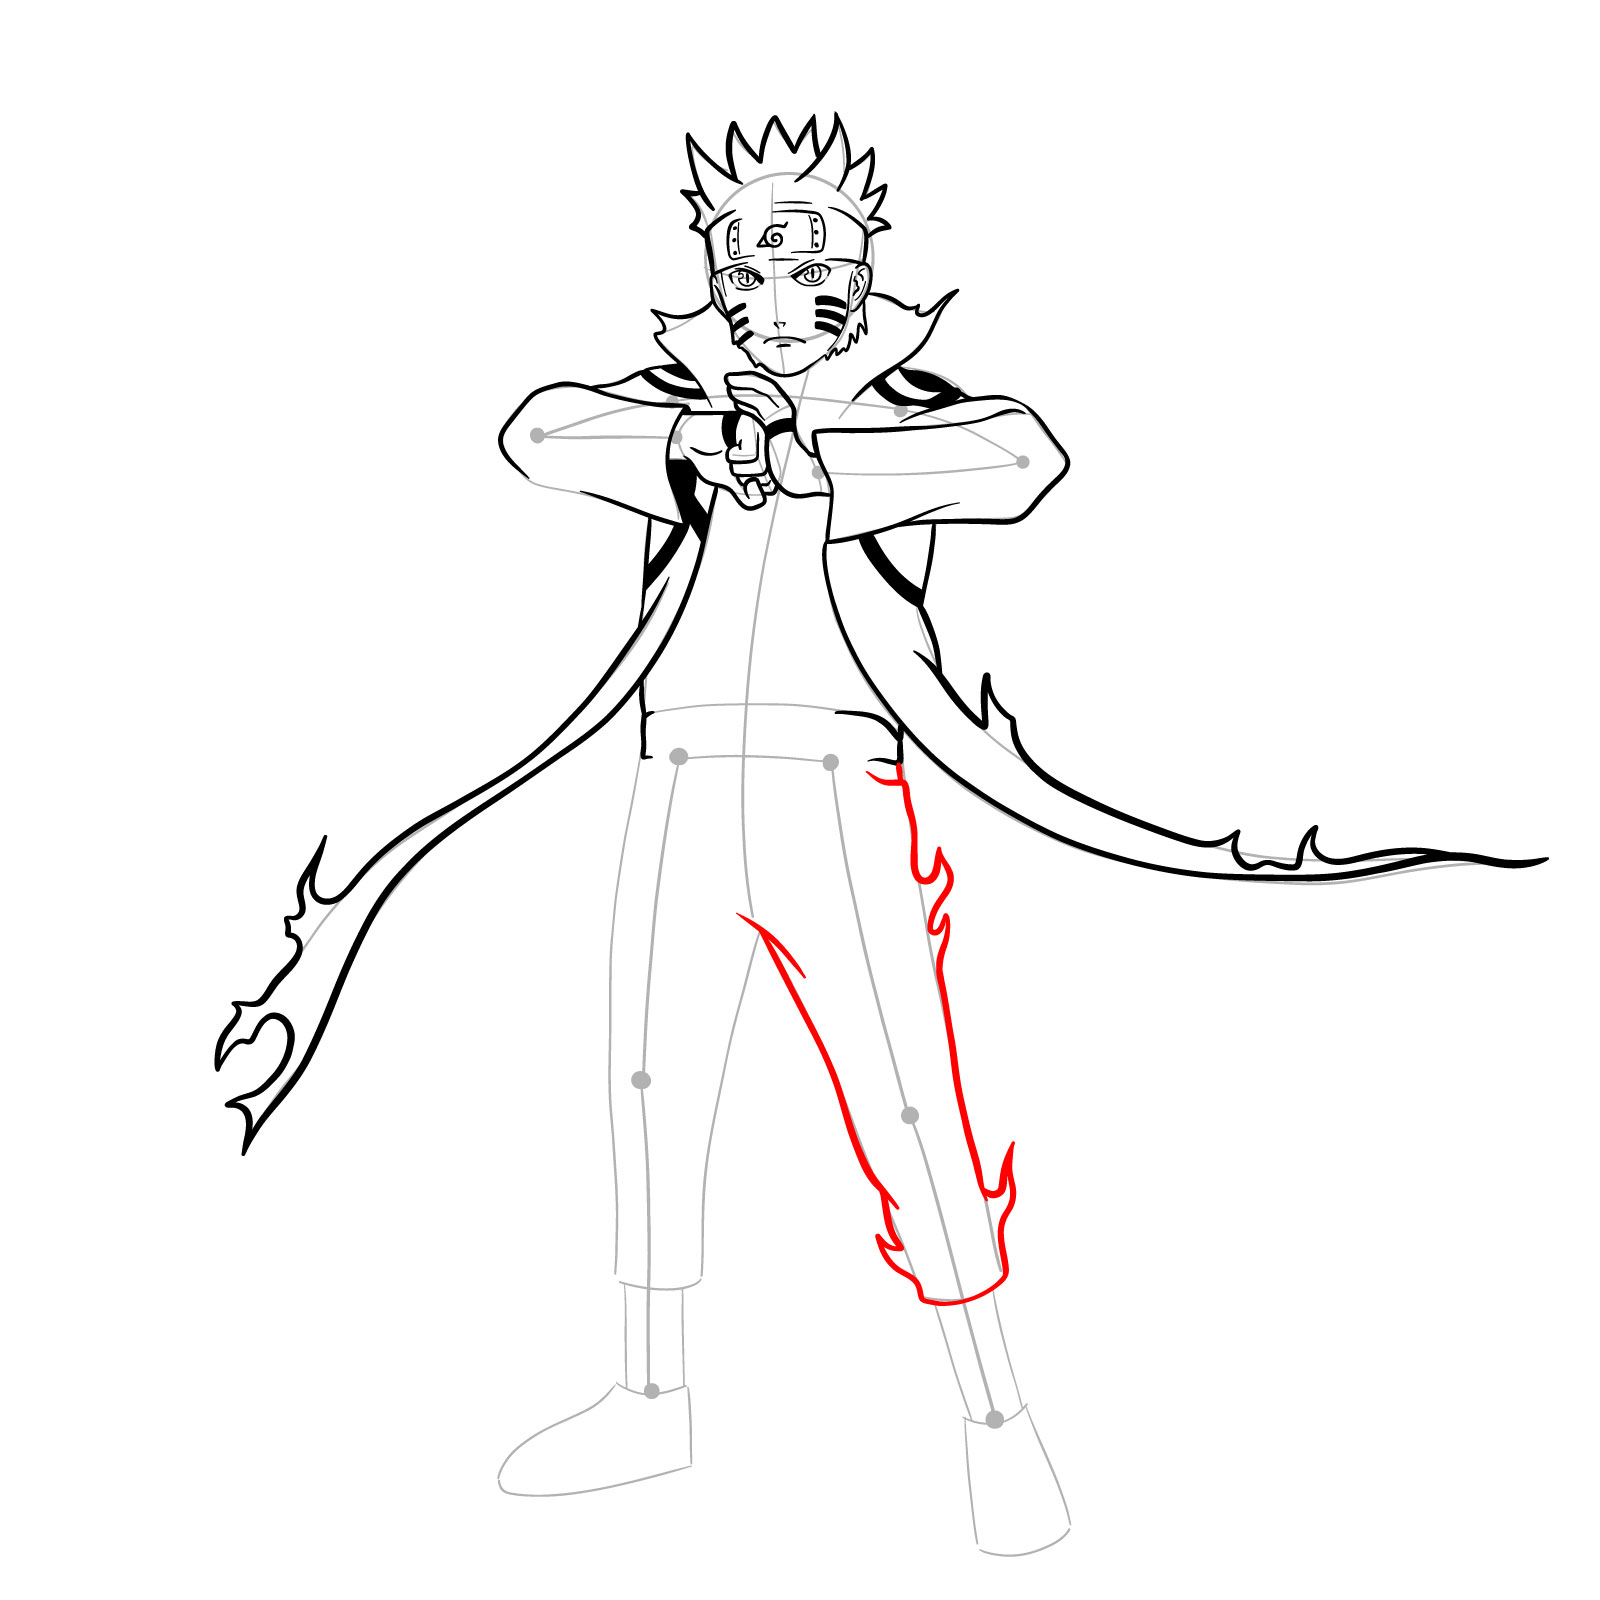
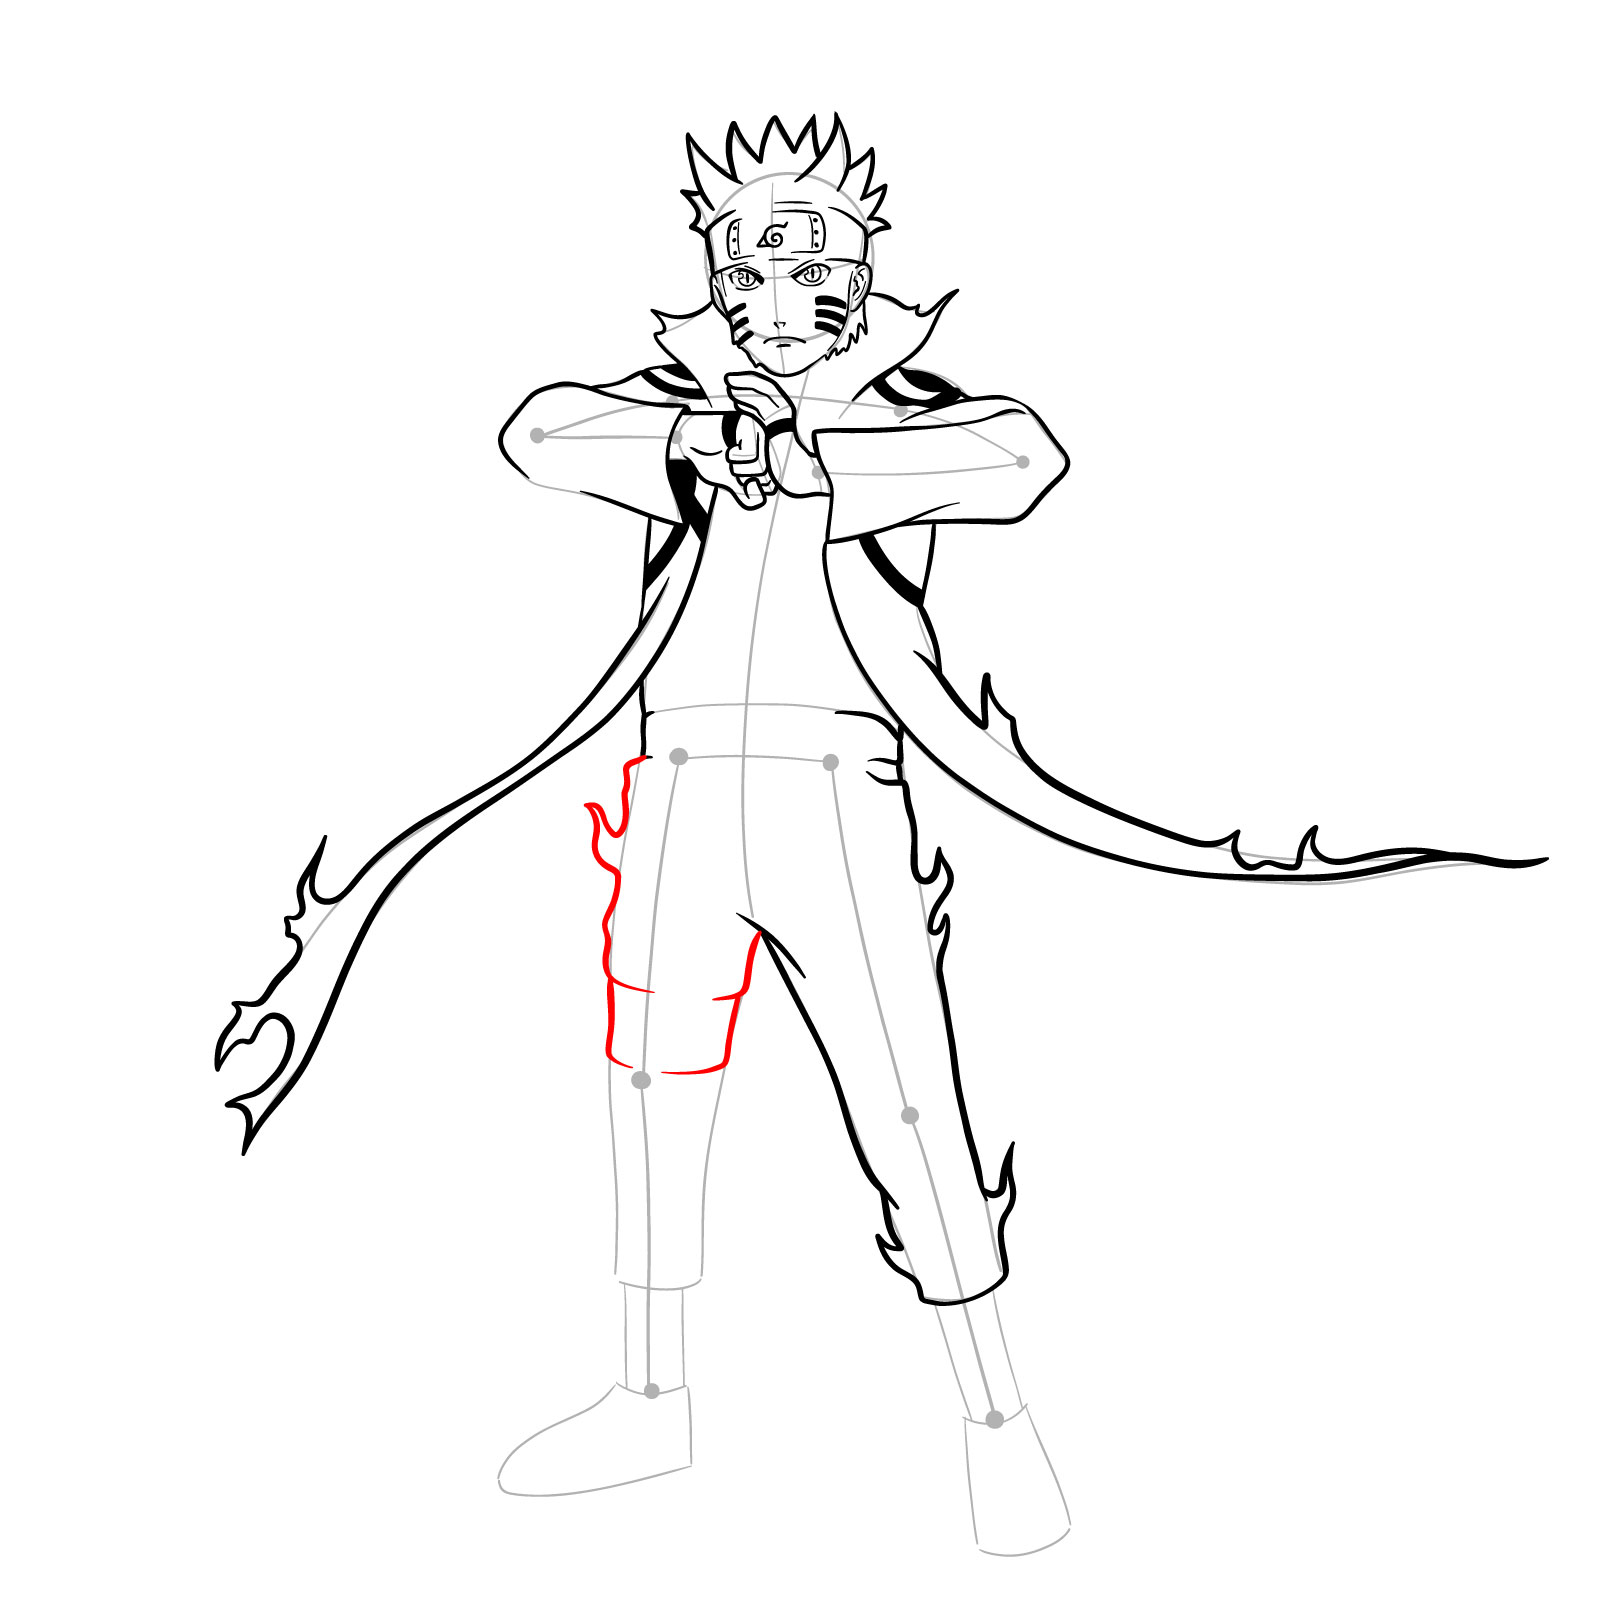
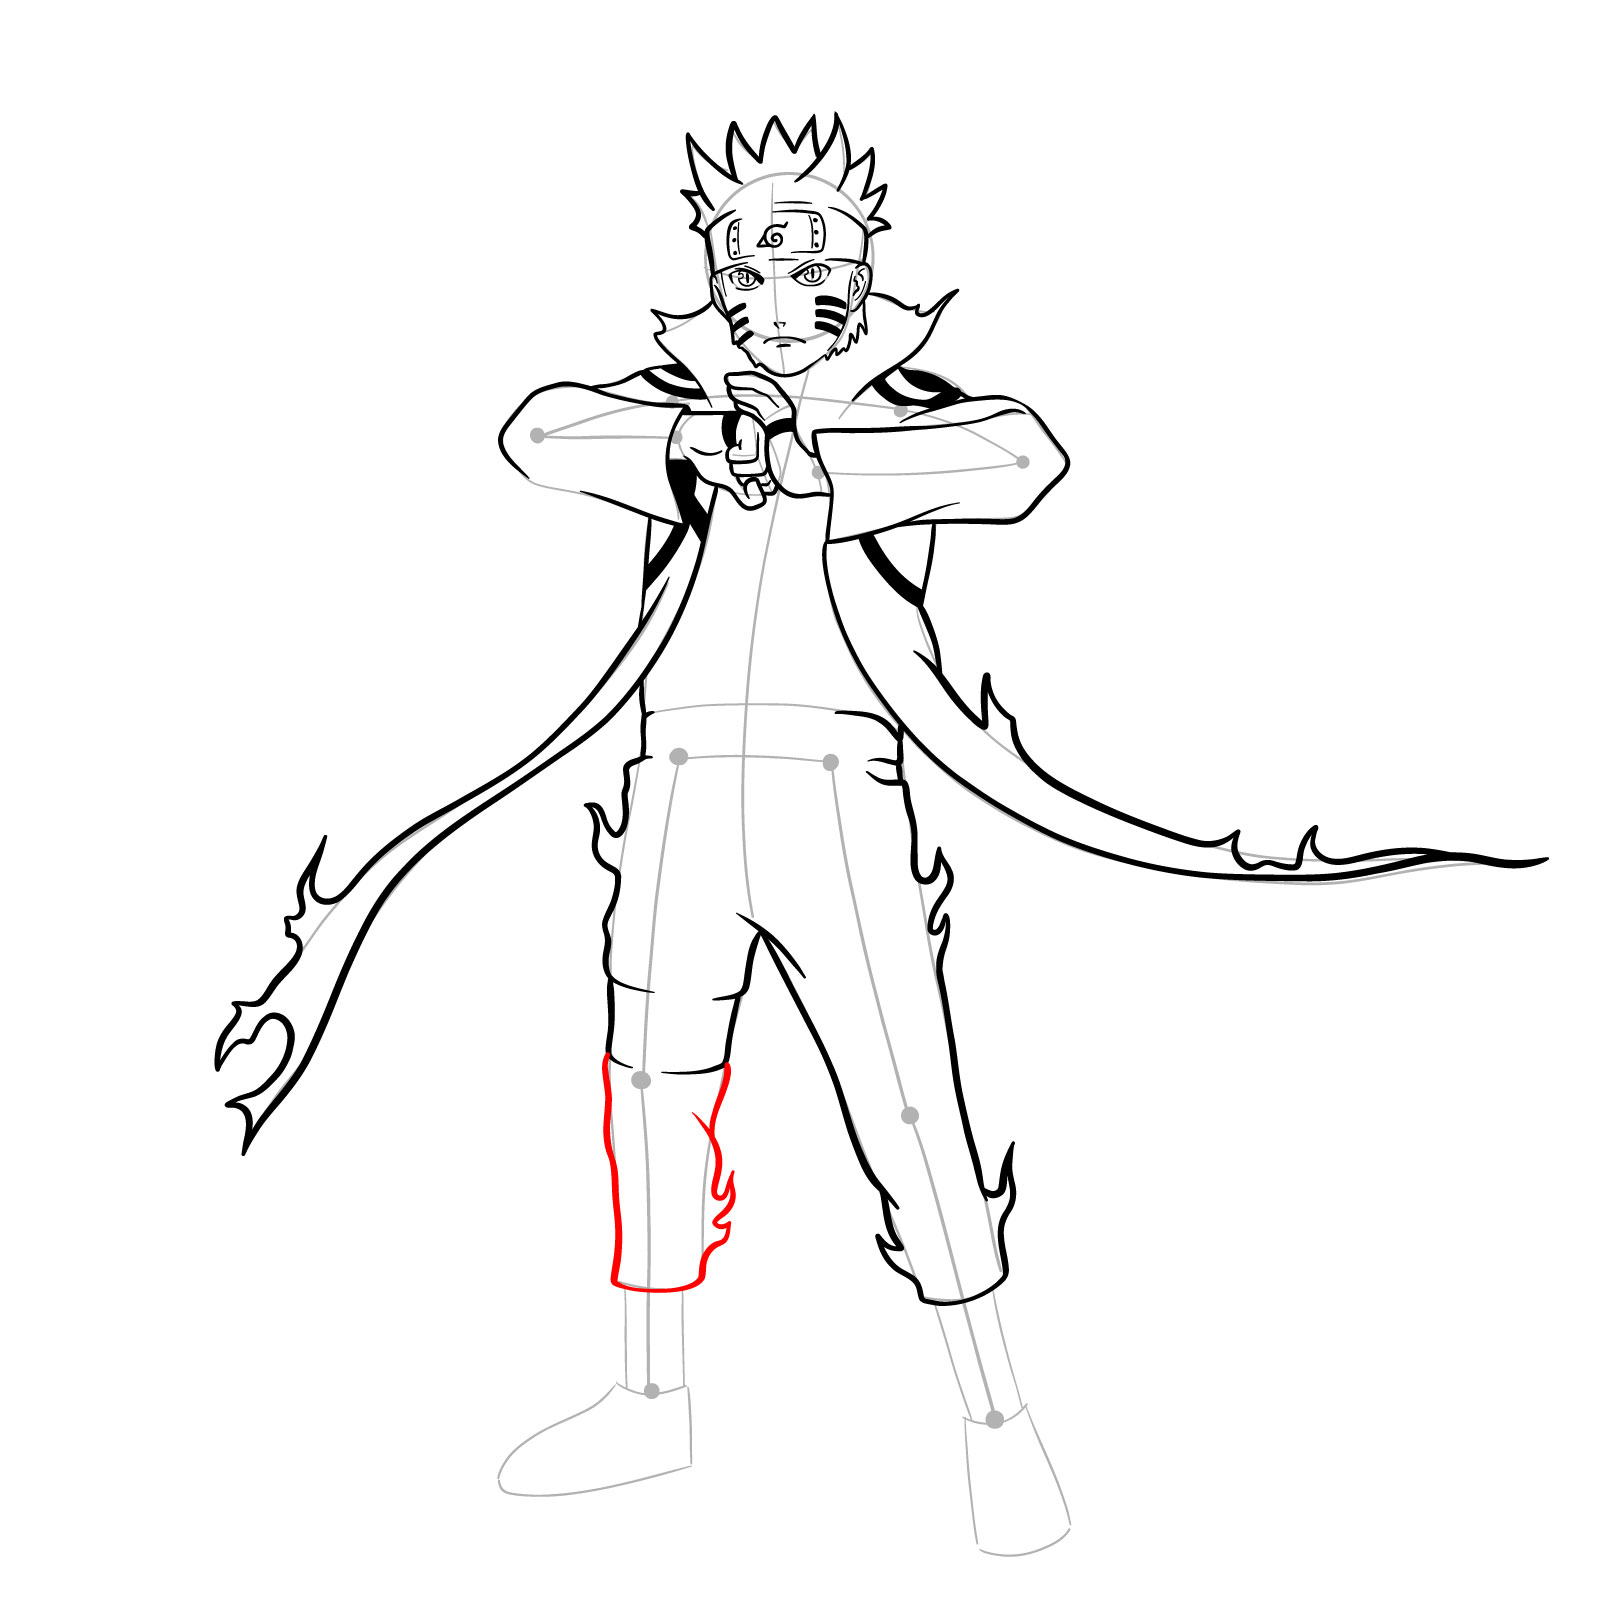
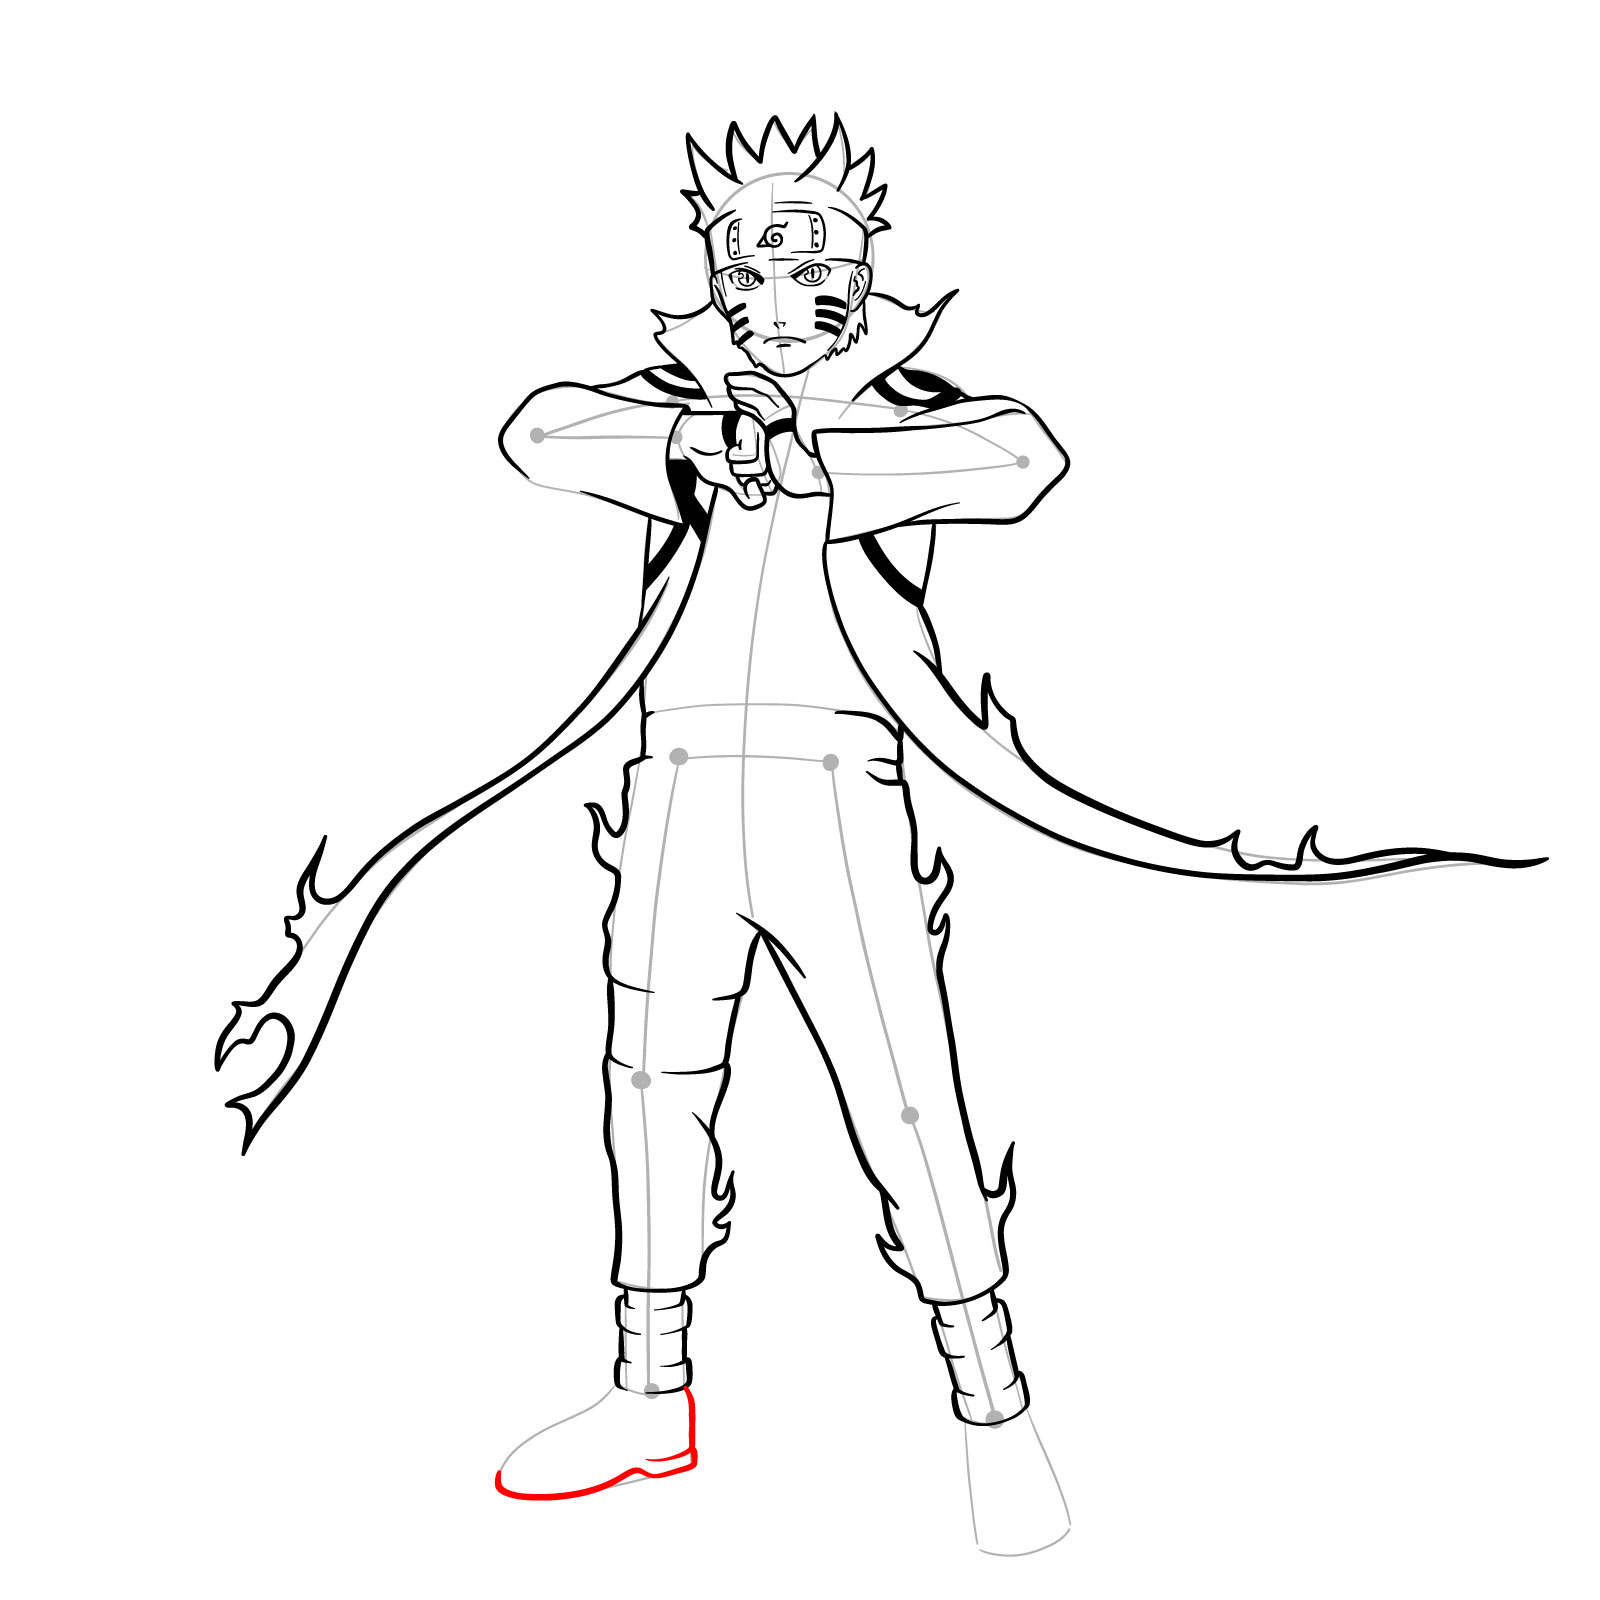
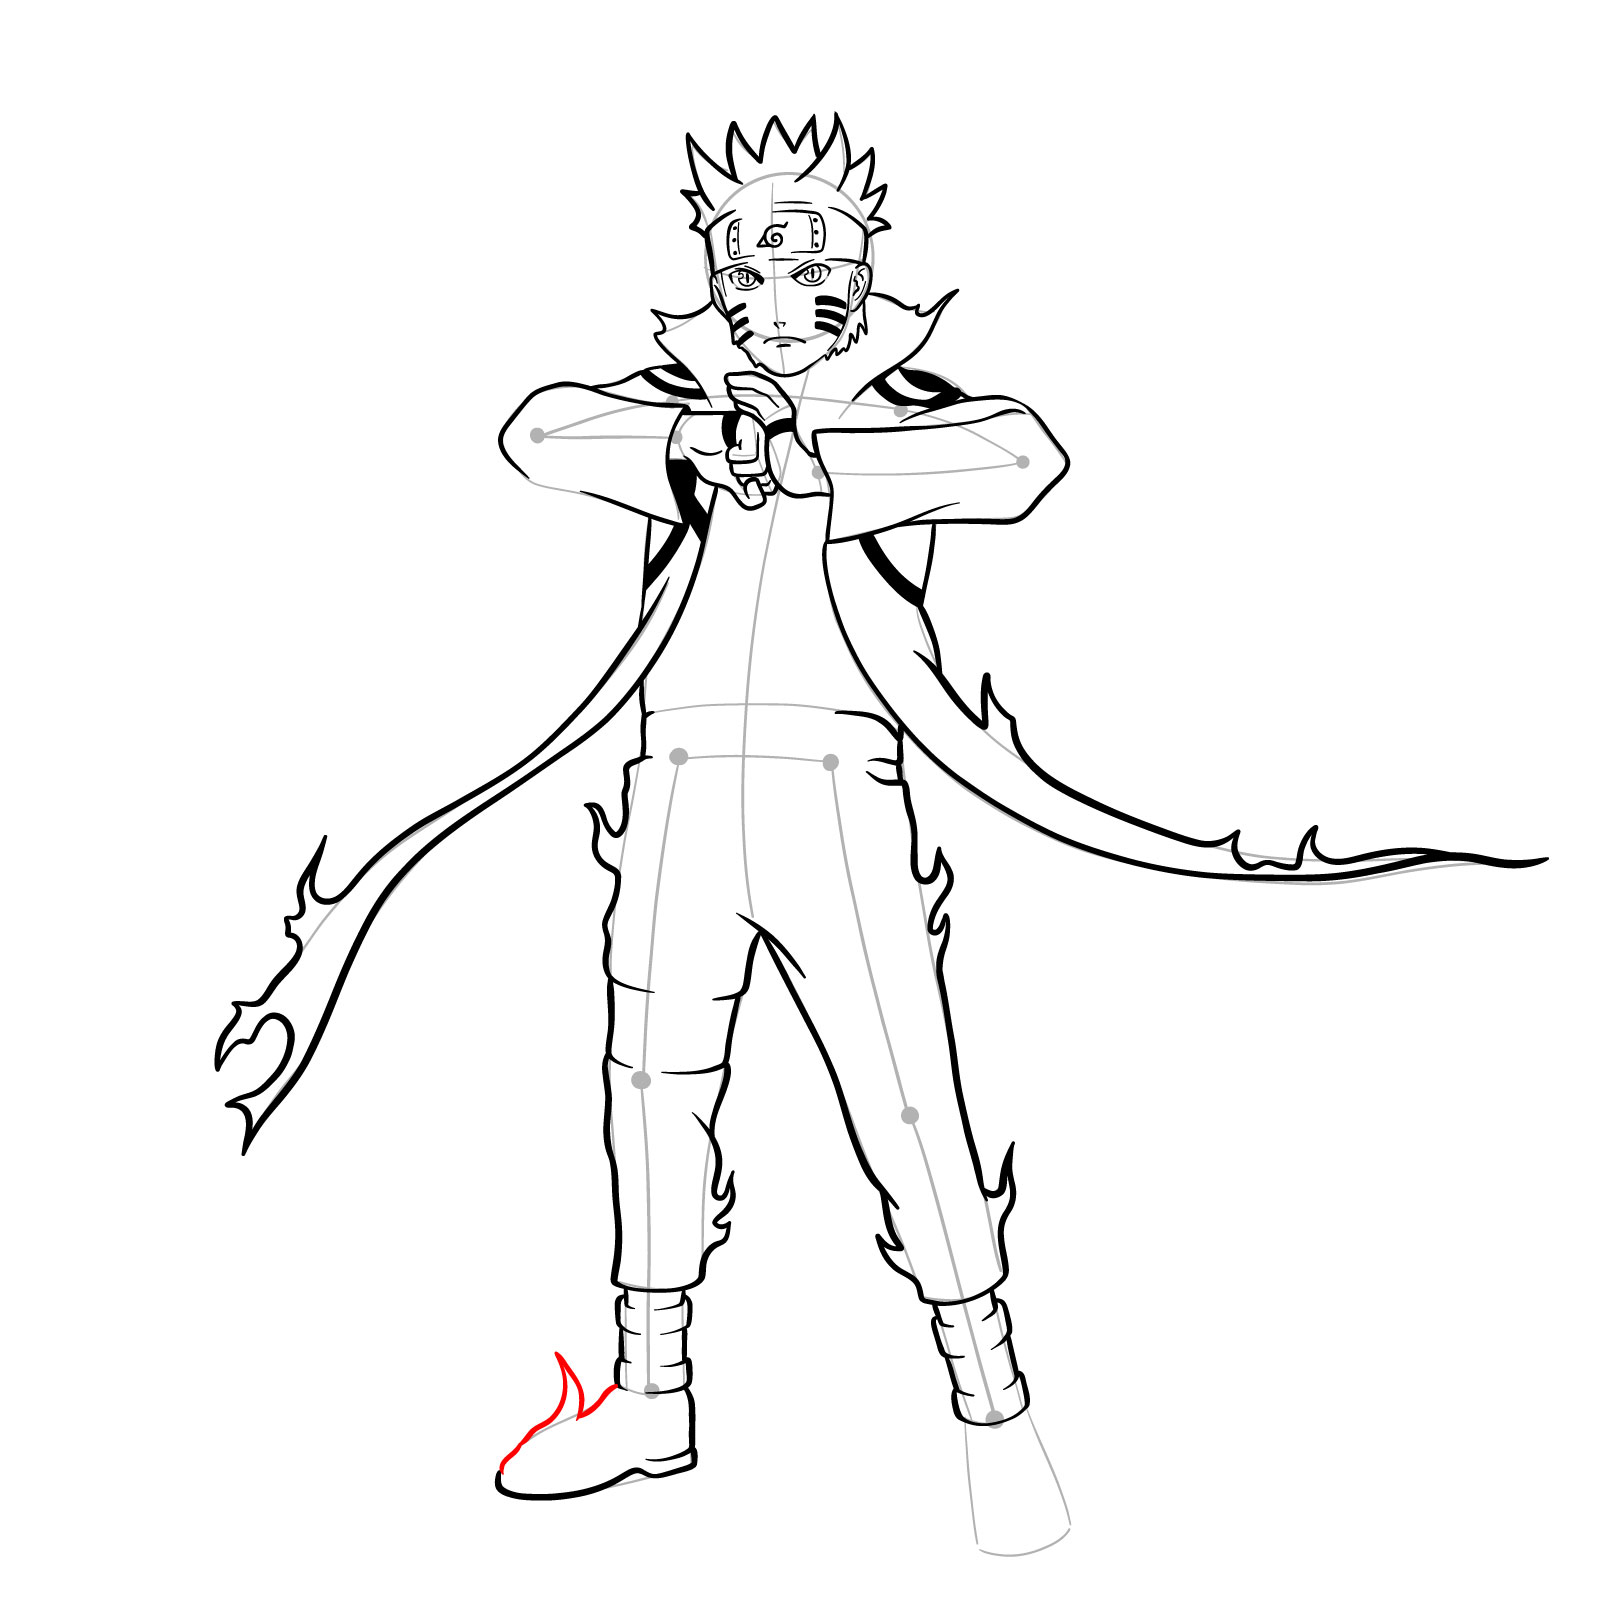
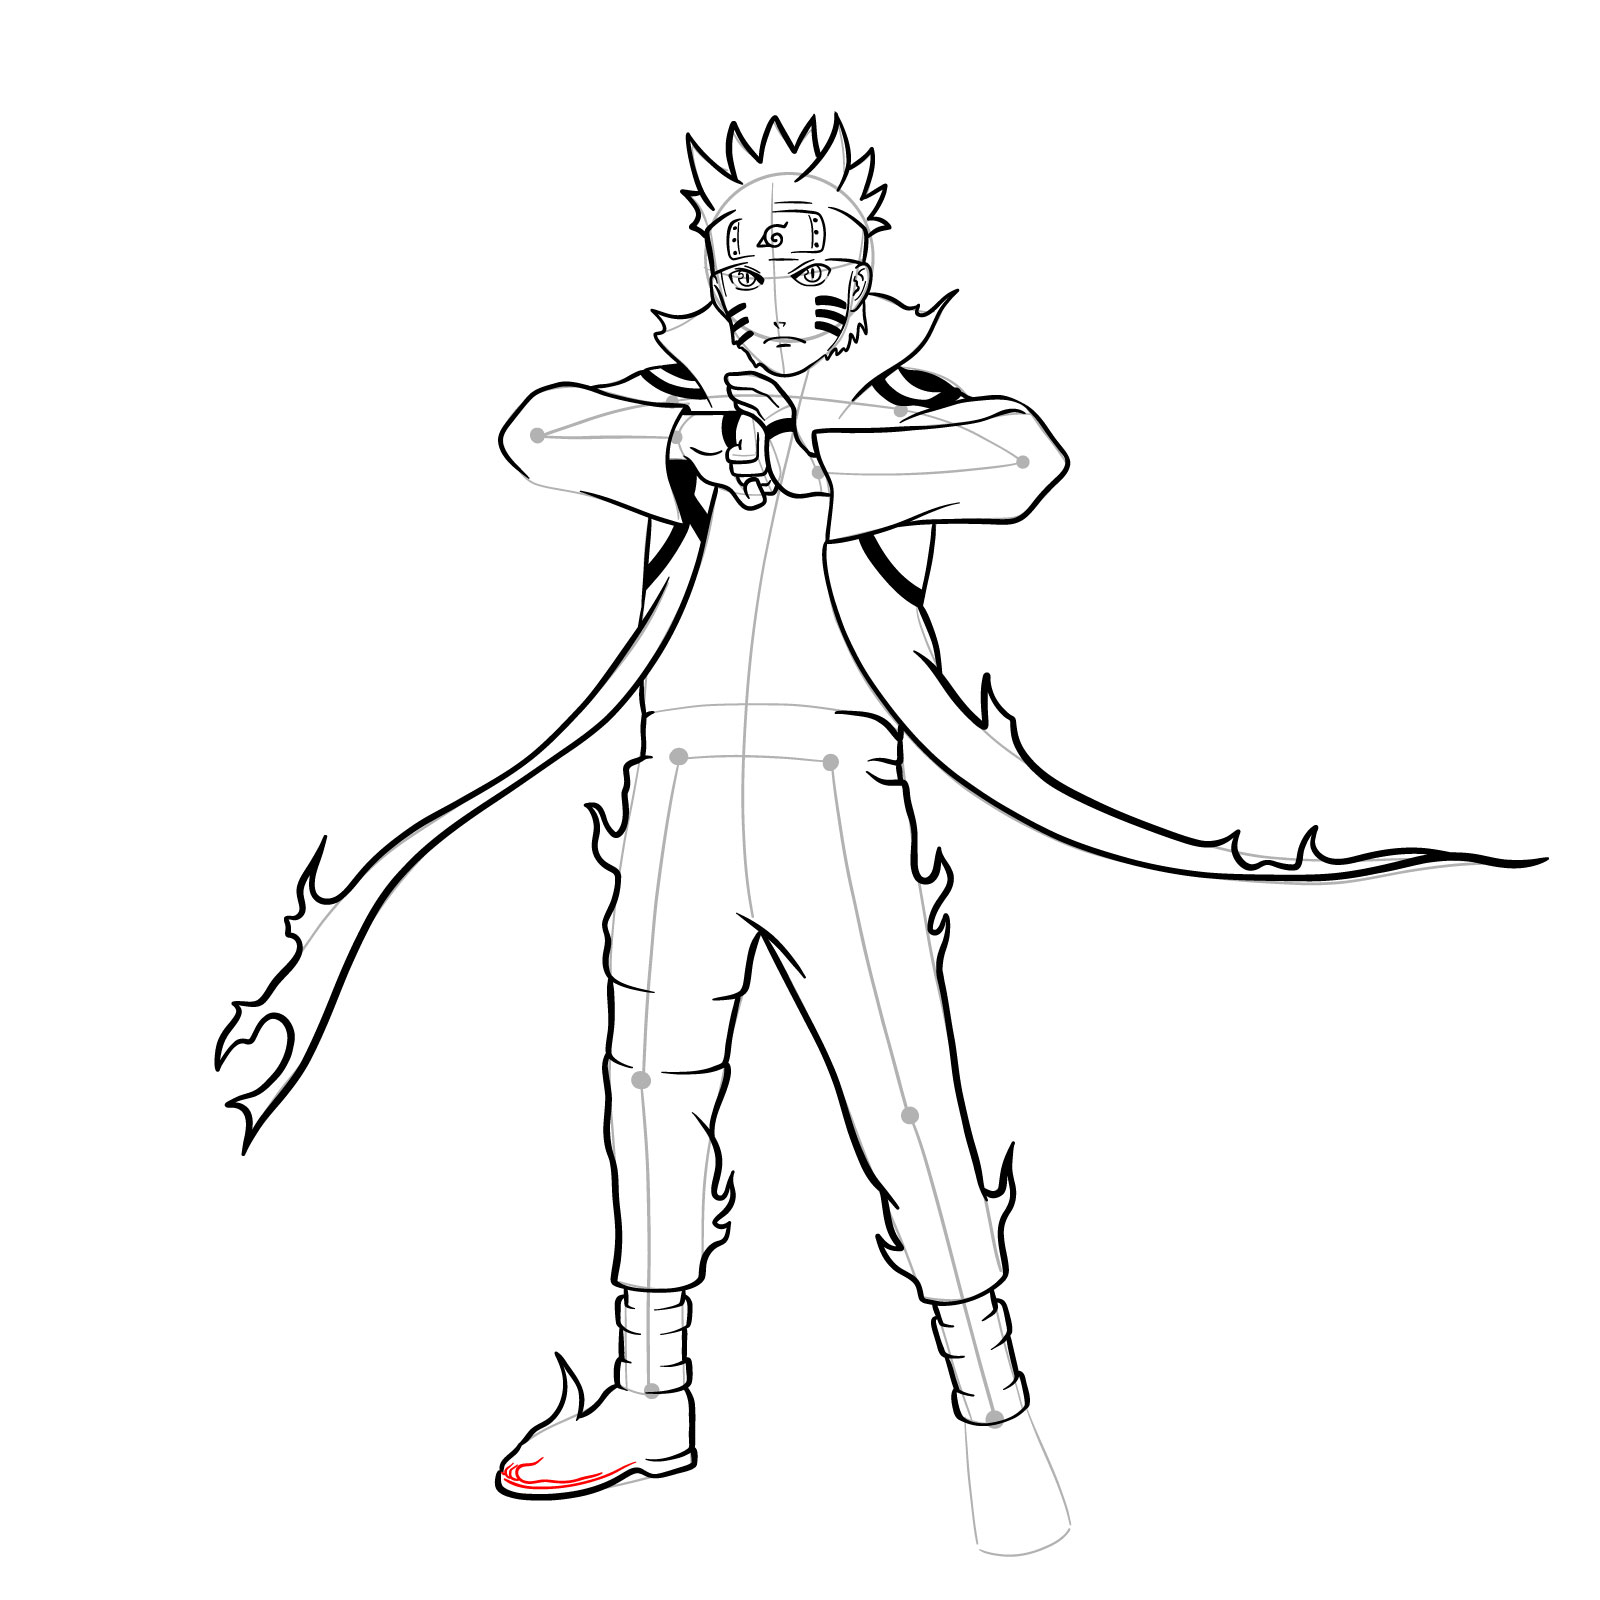
Our detailed, step-by-step guide consists of 44 steps, with each image illustrating the current drawing step in red, the basic proportions sketch in grey, and the previously drawn lines in black. We’ll begin by creating a basic sketch, then move on to sketching the face and hair, followed by the body and finally, inking the drawing.
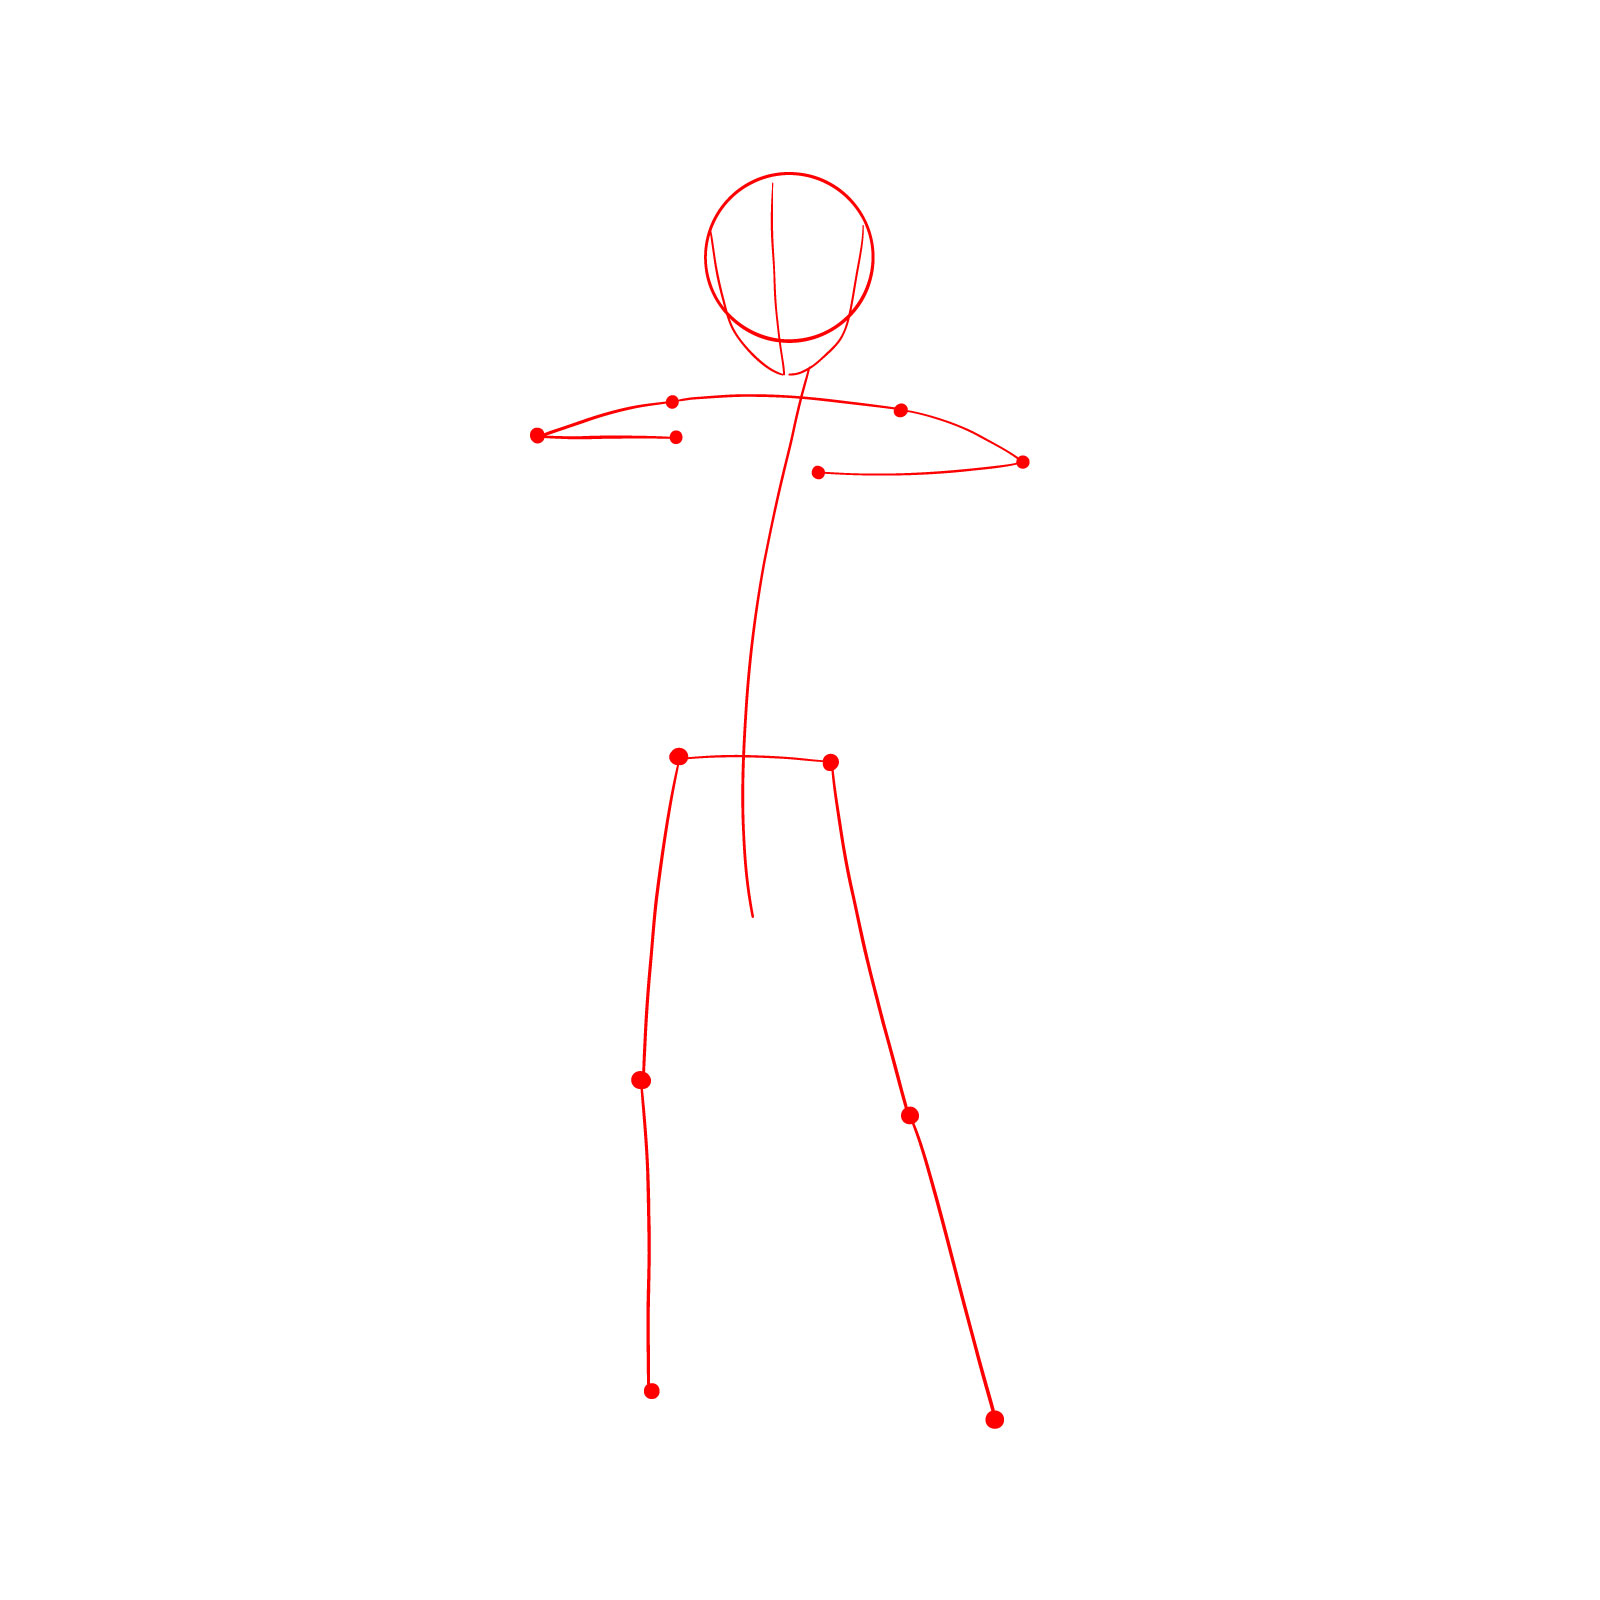
Creating the Basic Sketch
The first three steps involve establishing a basic sketch to capture the overall proportions and pose. Start with a stick figure and gradually build up the shapes and forms of Naruto’s body in Kurama Mode.
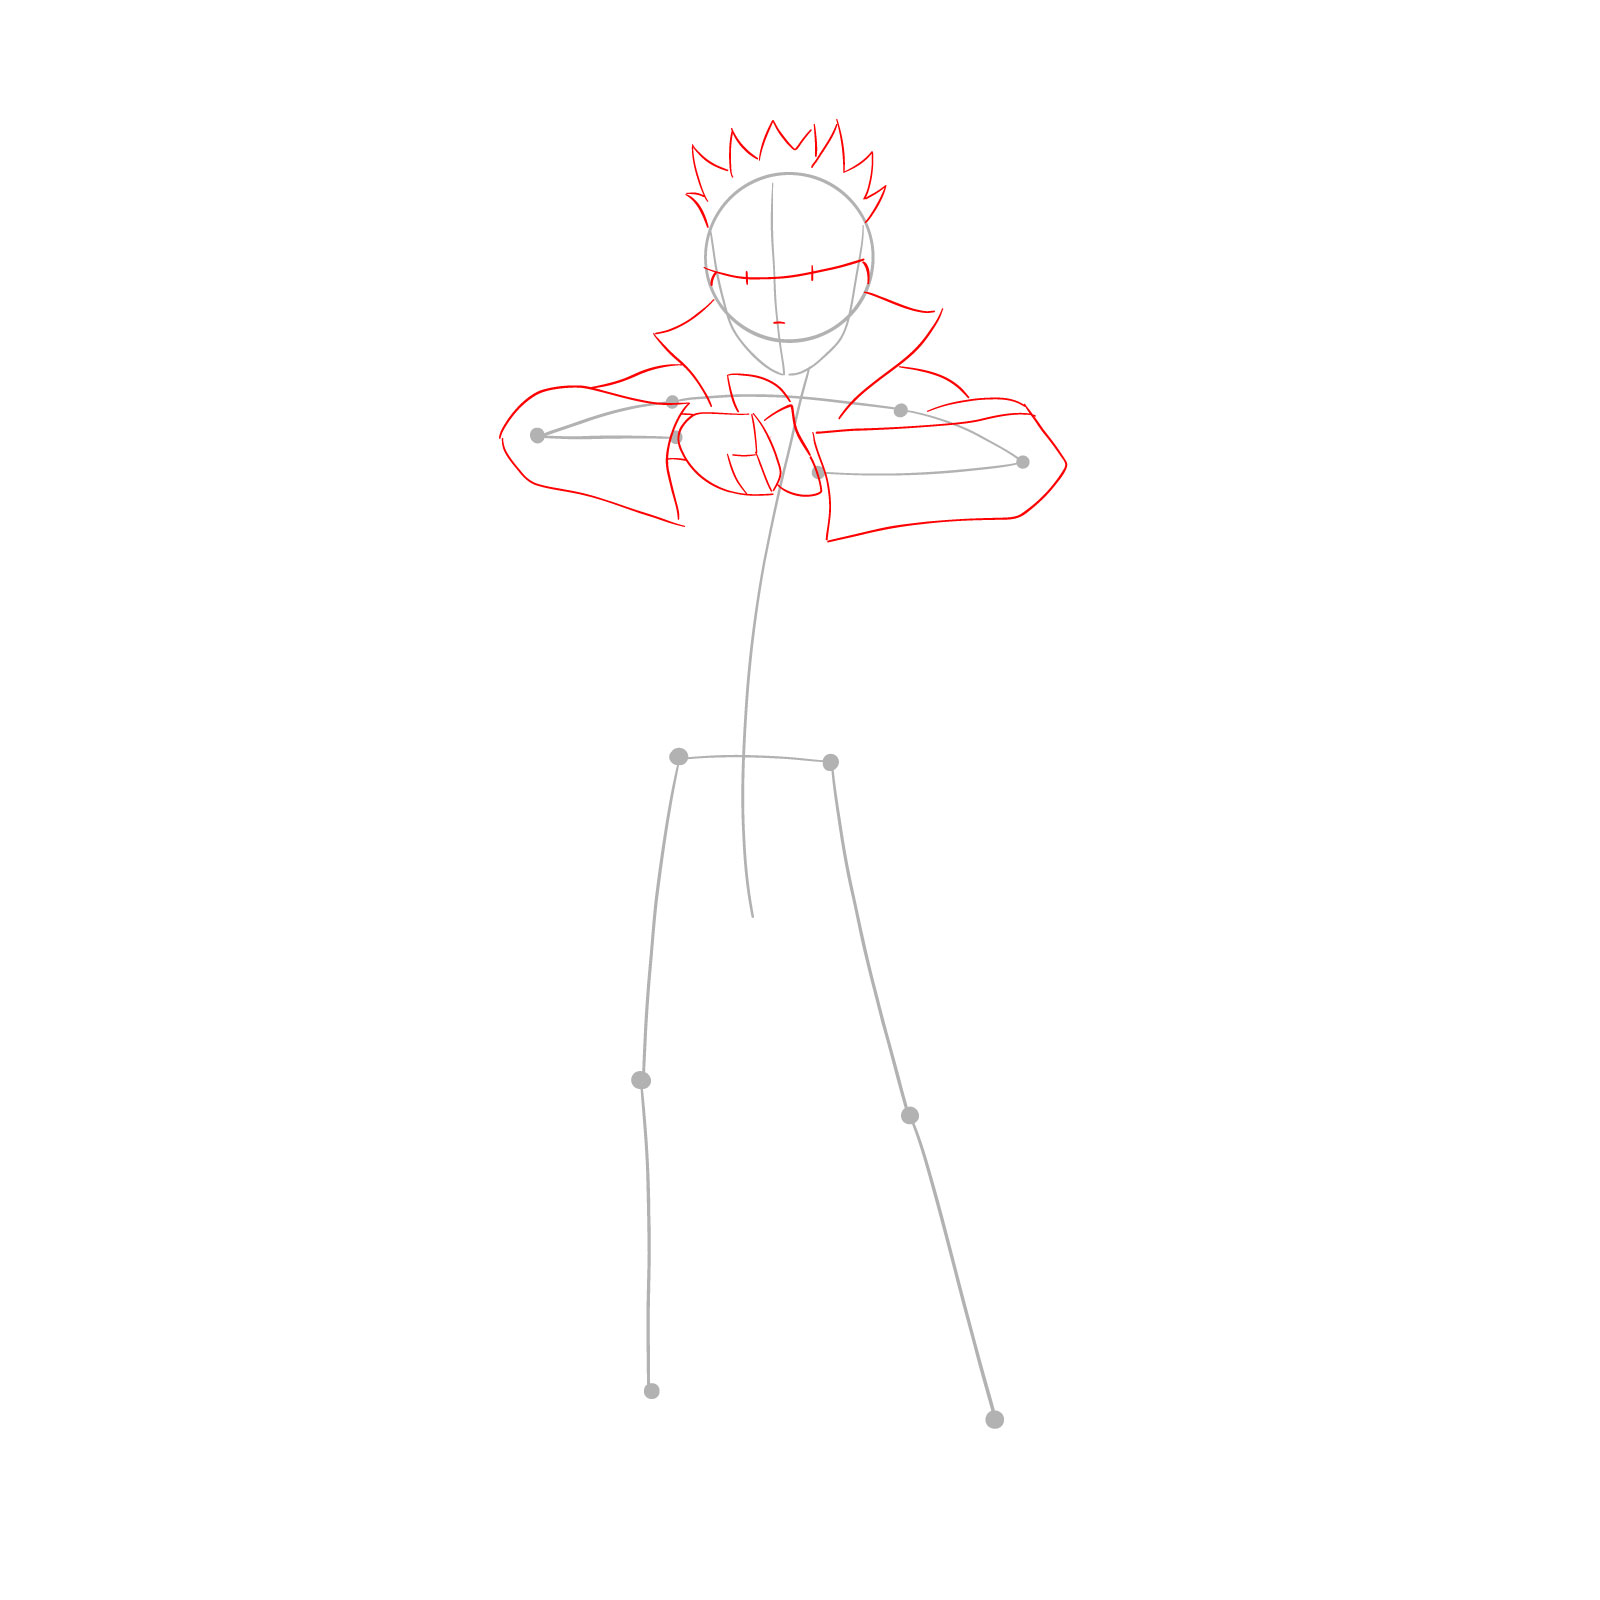
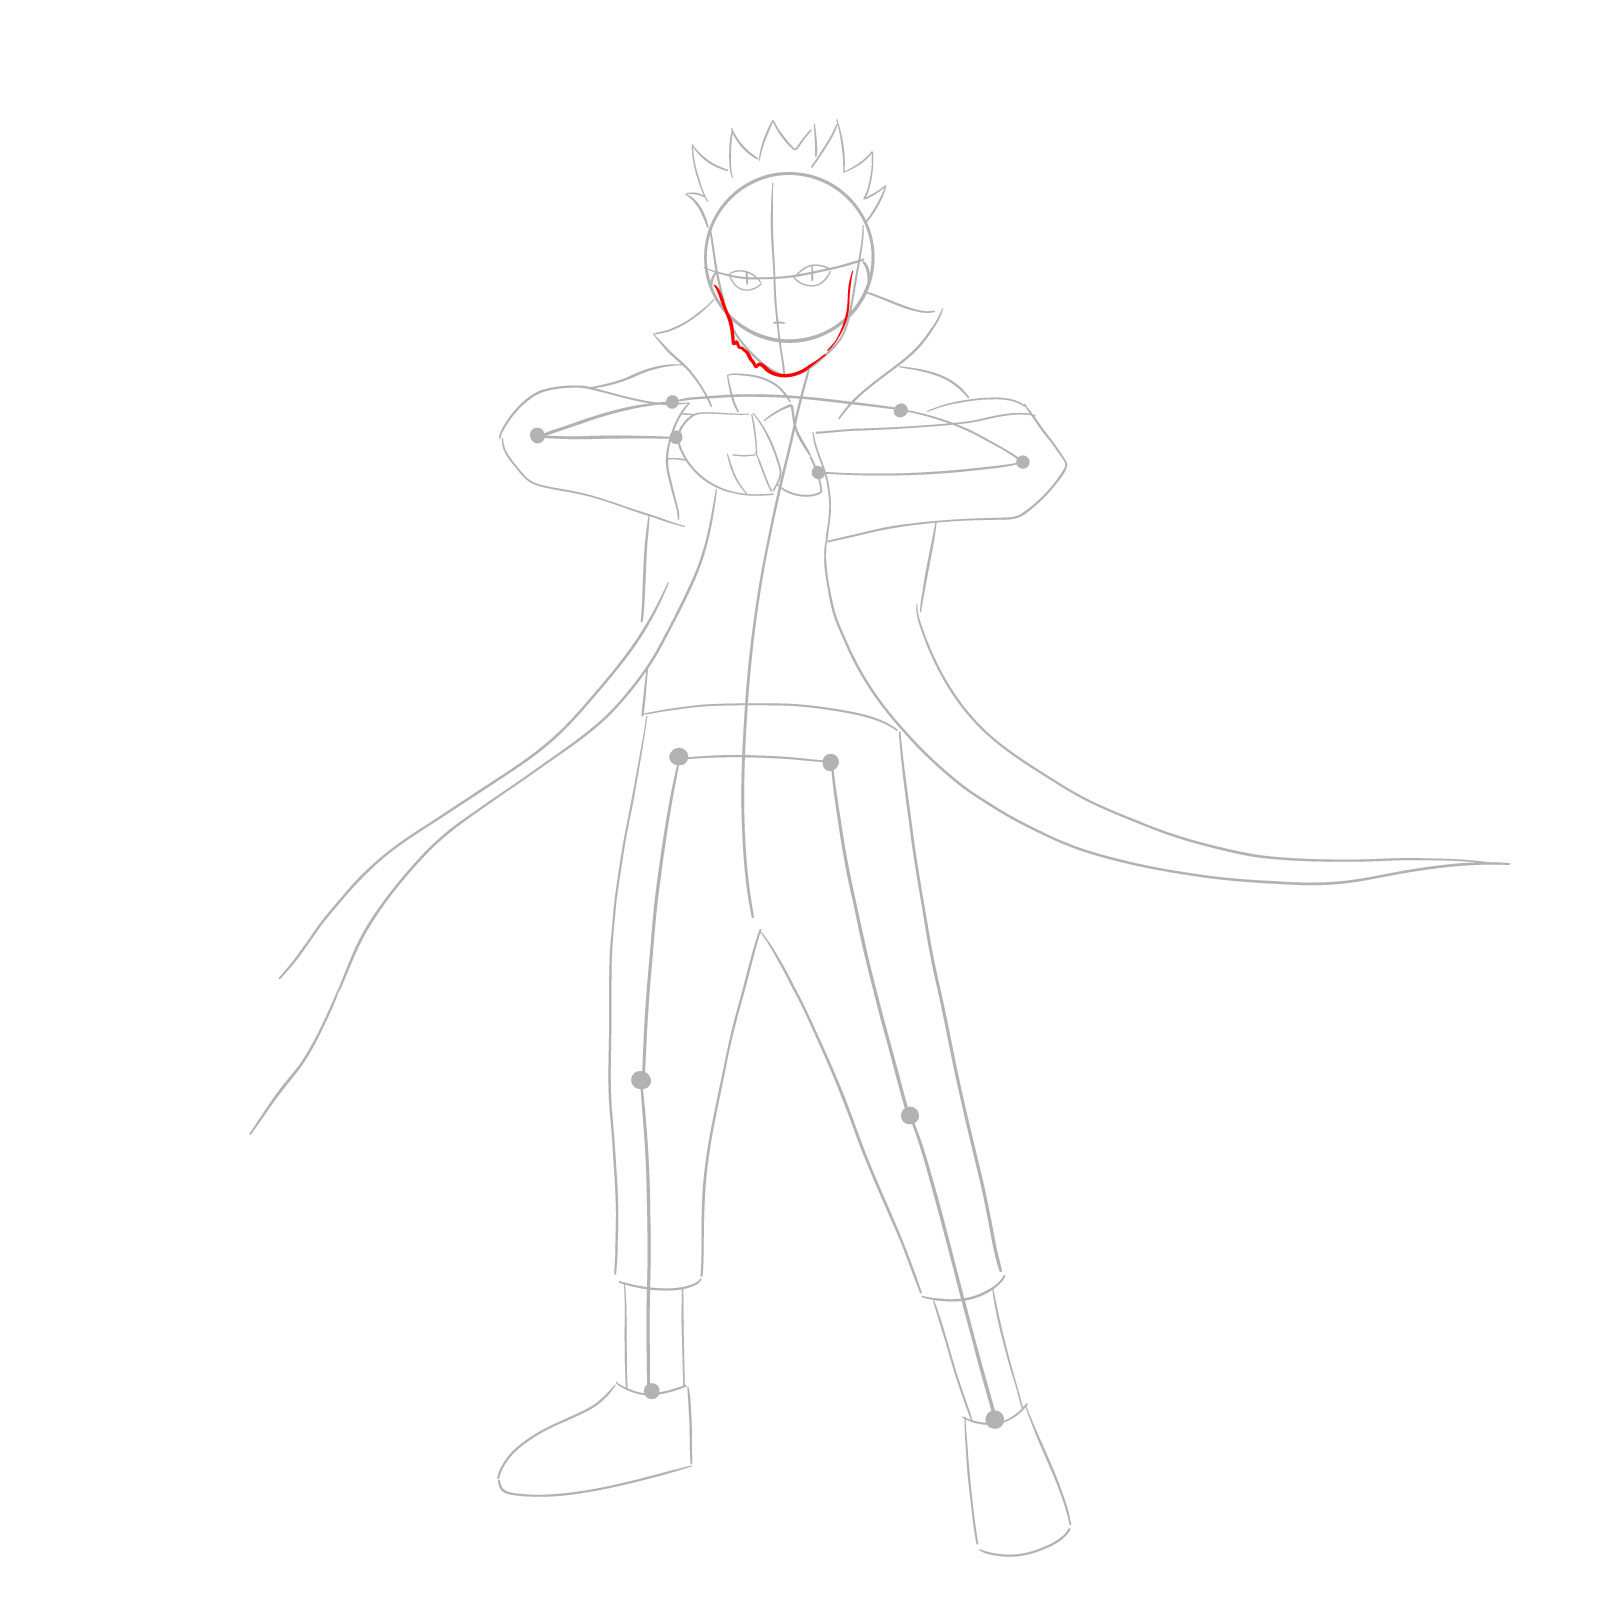
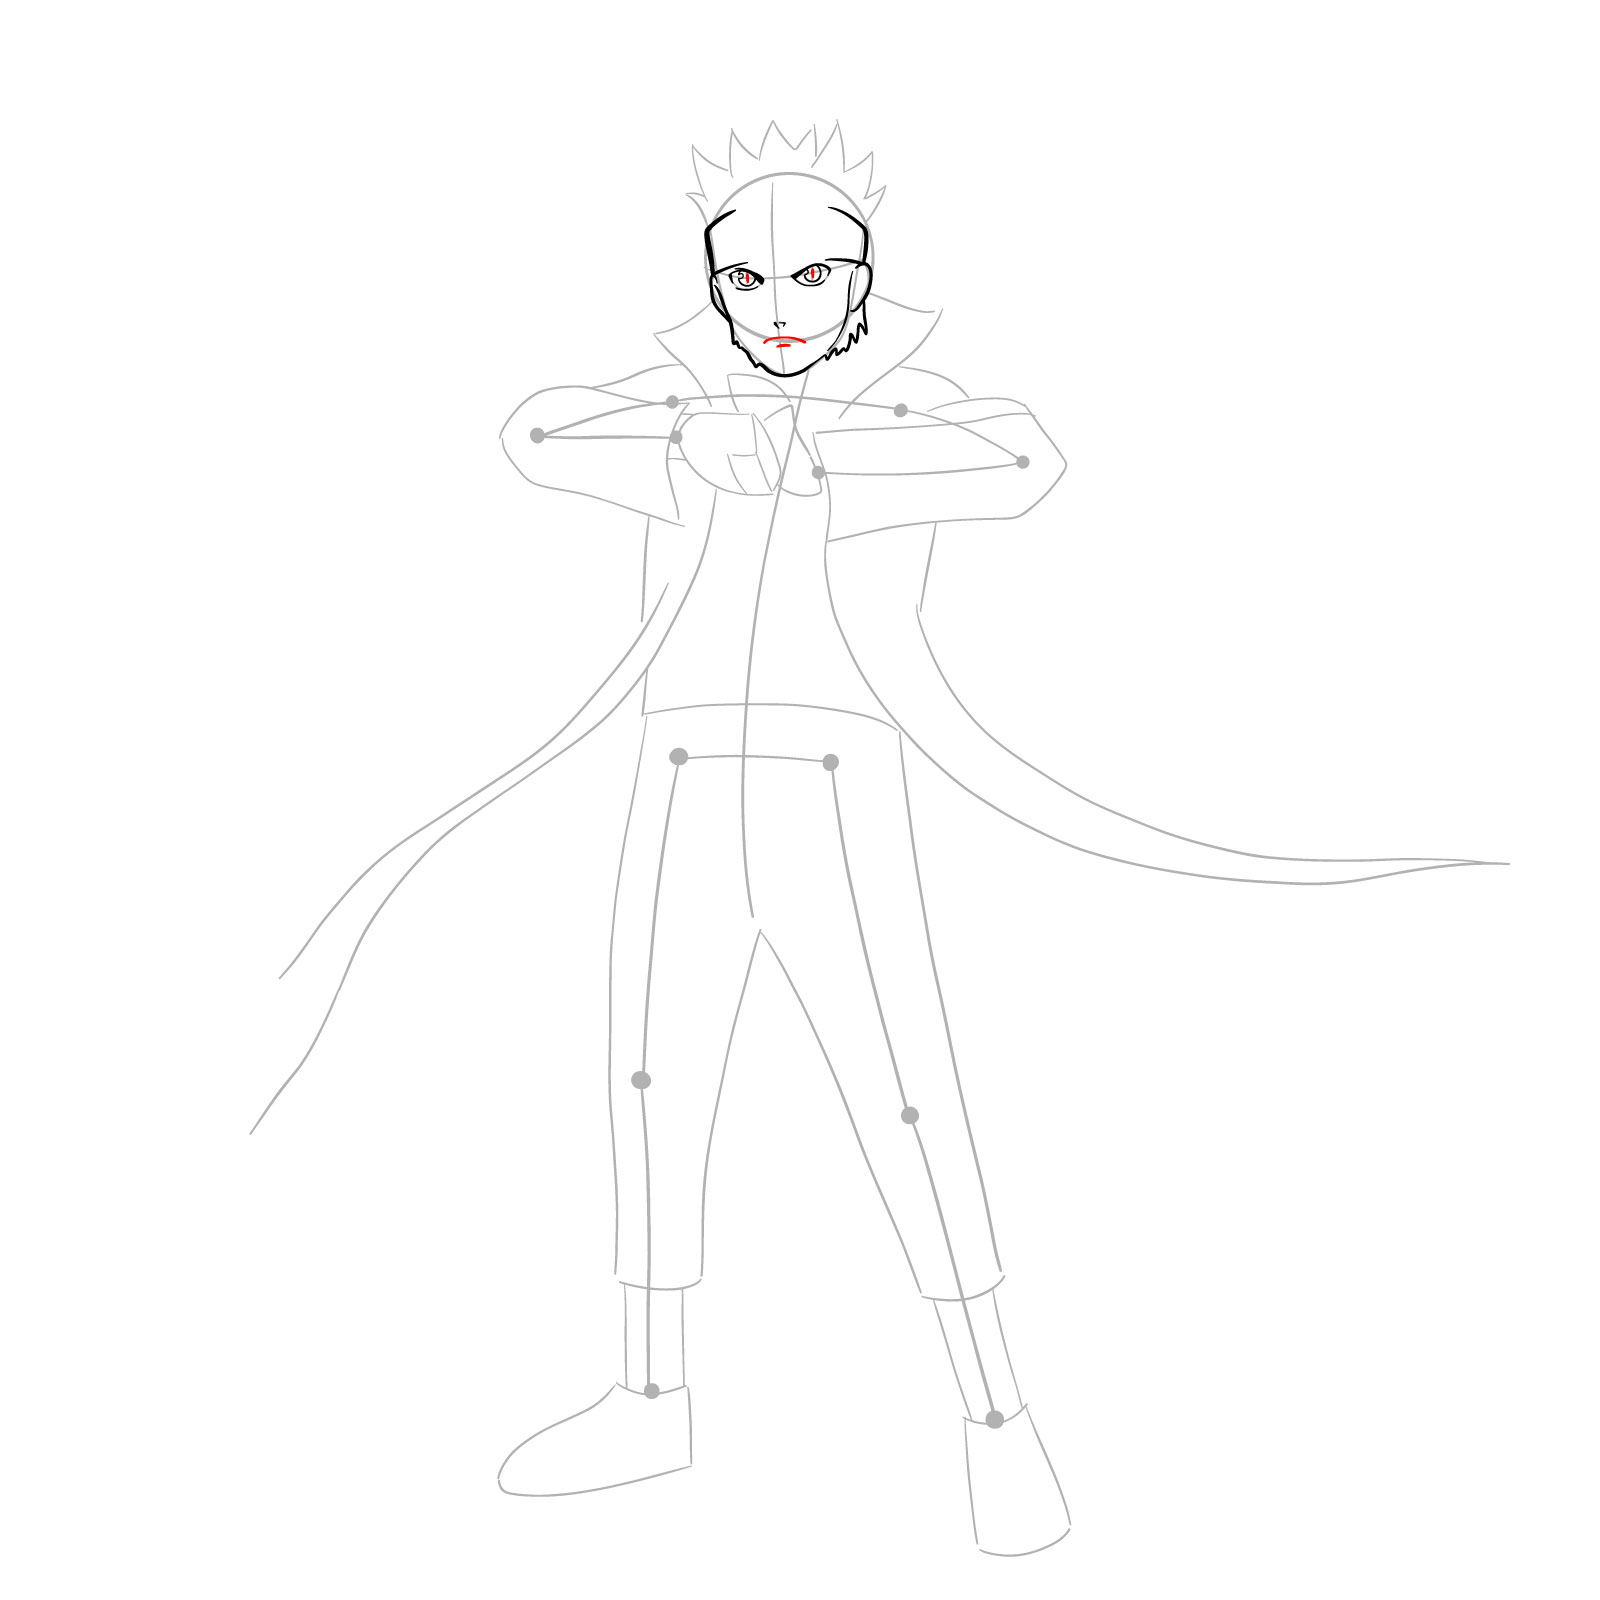
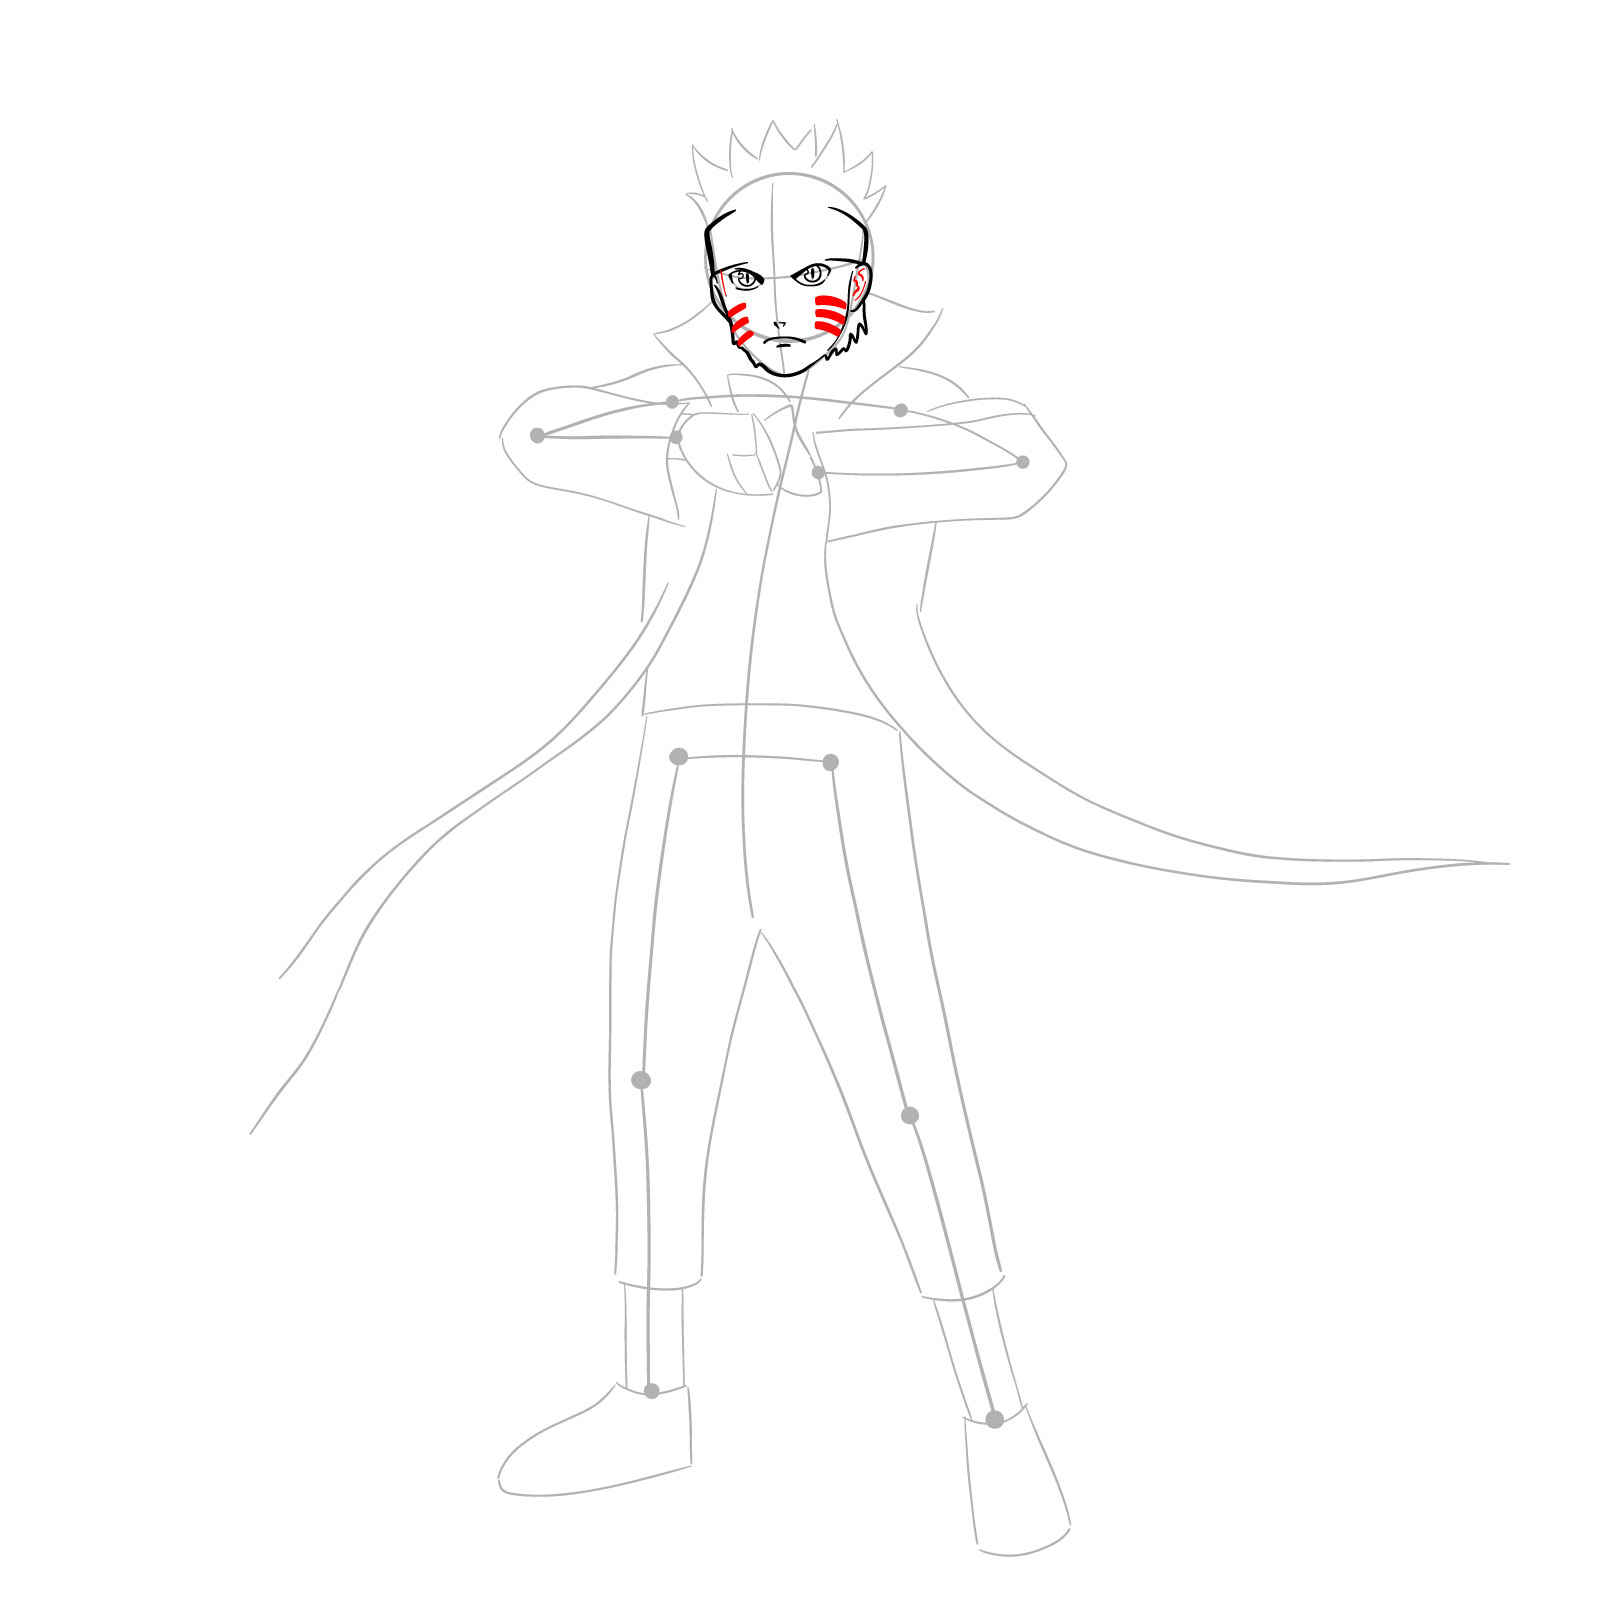
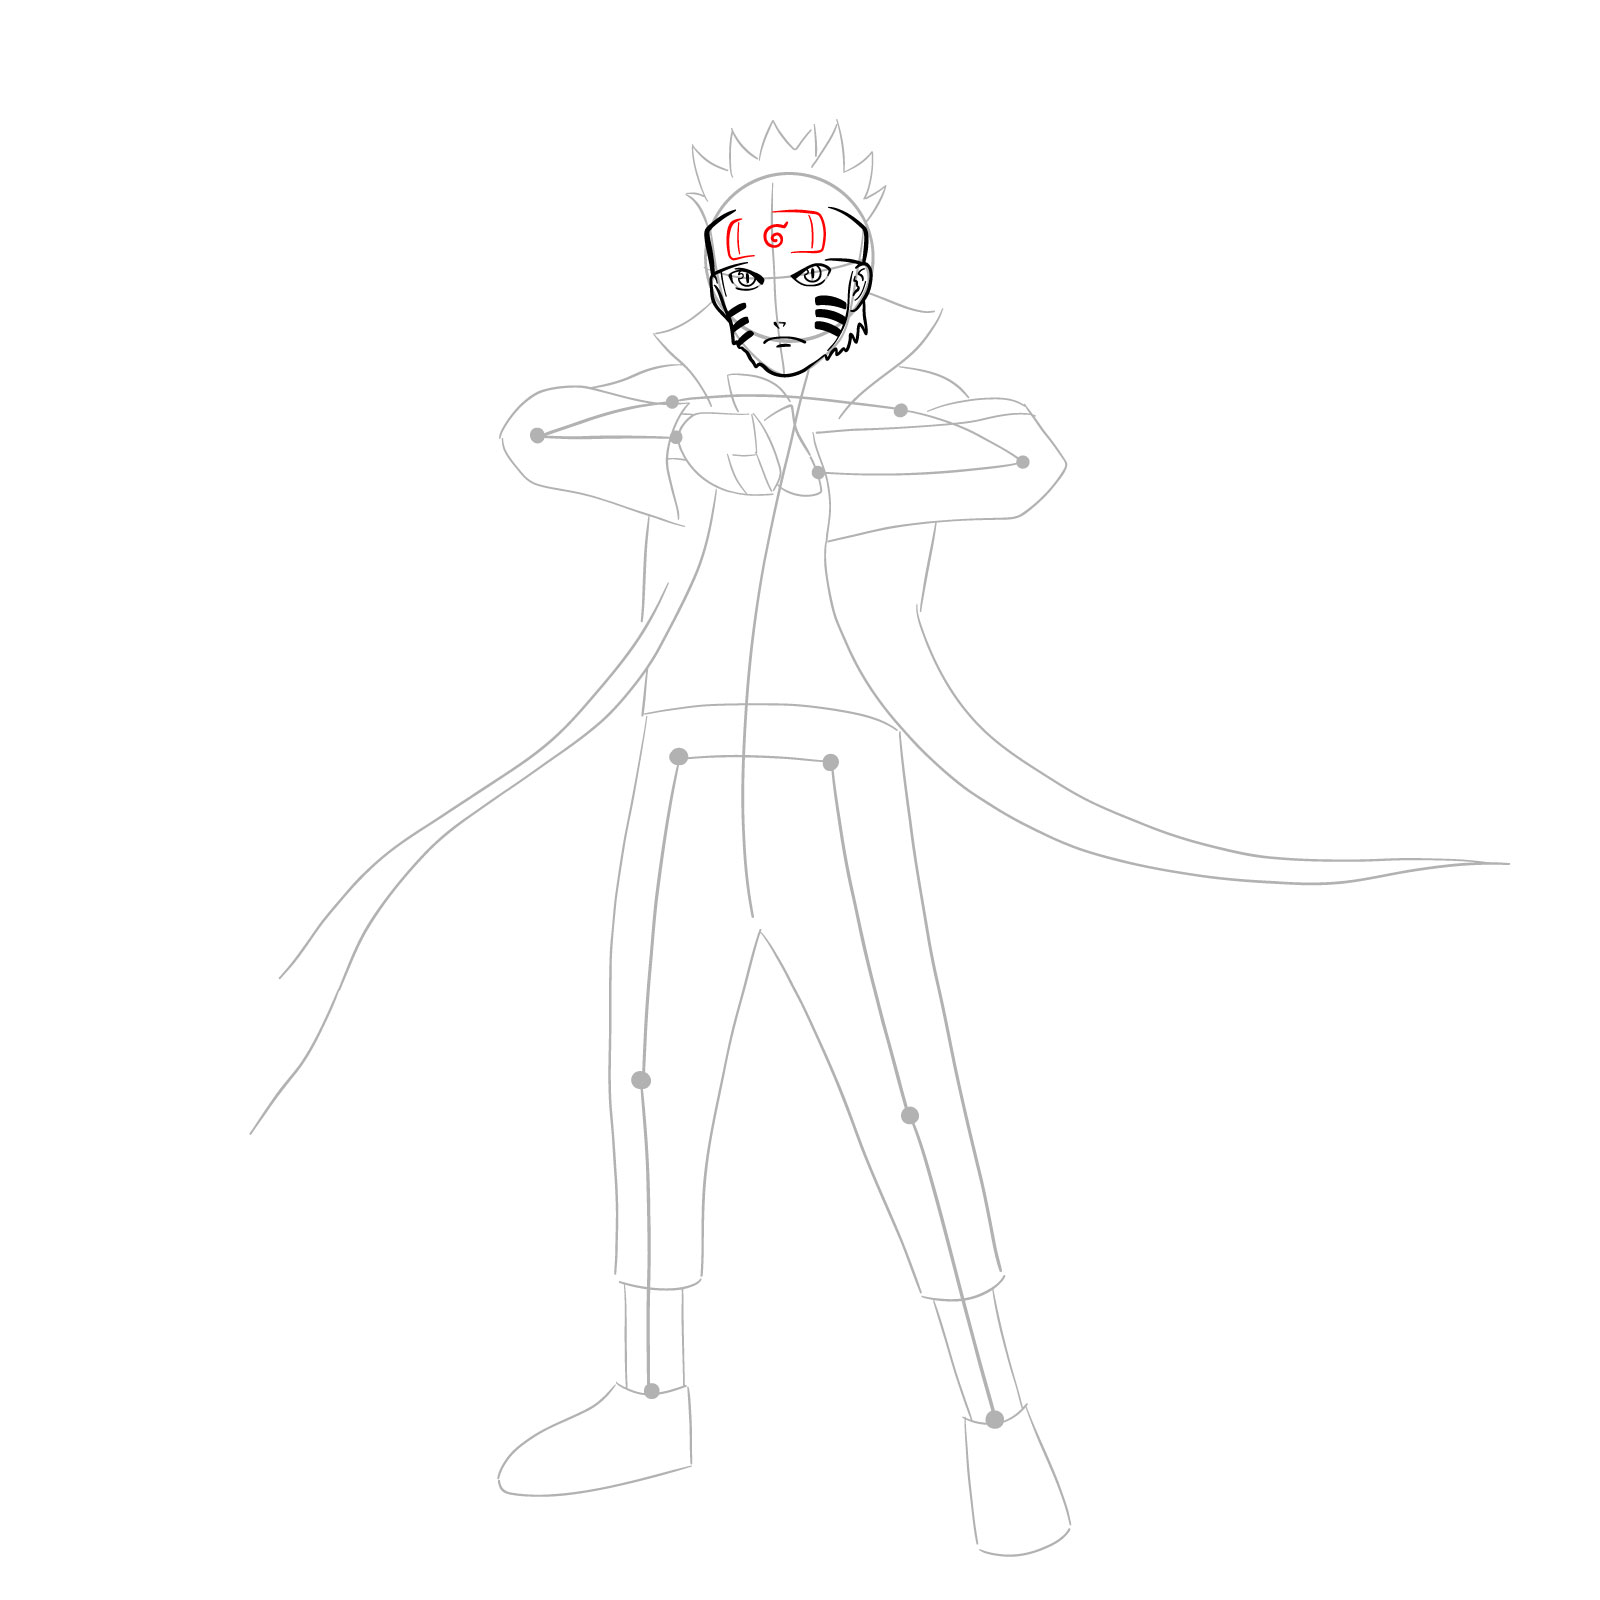
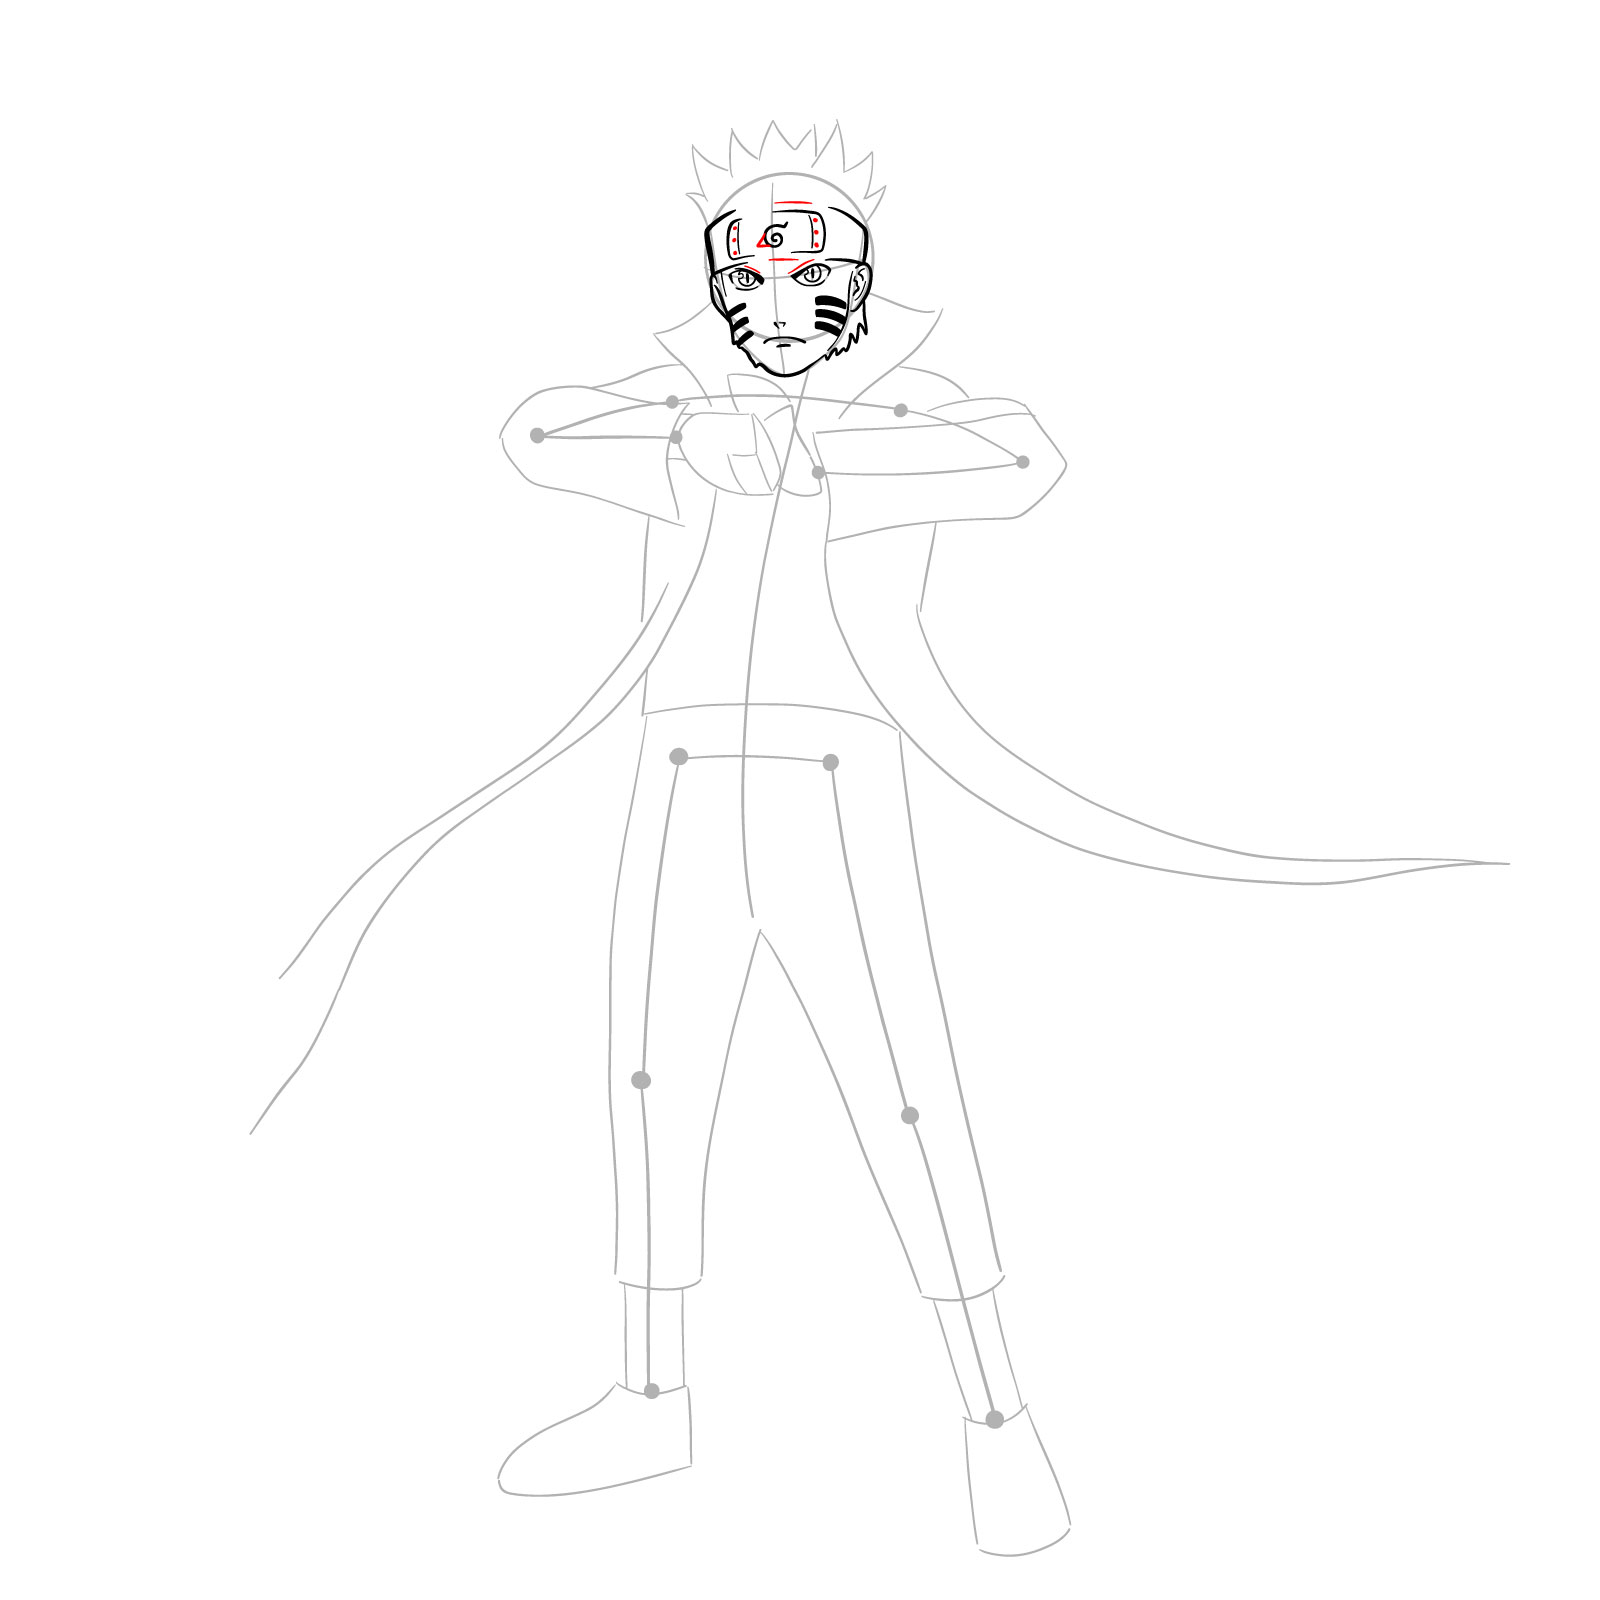
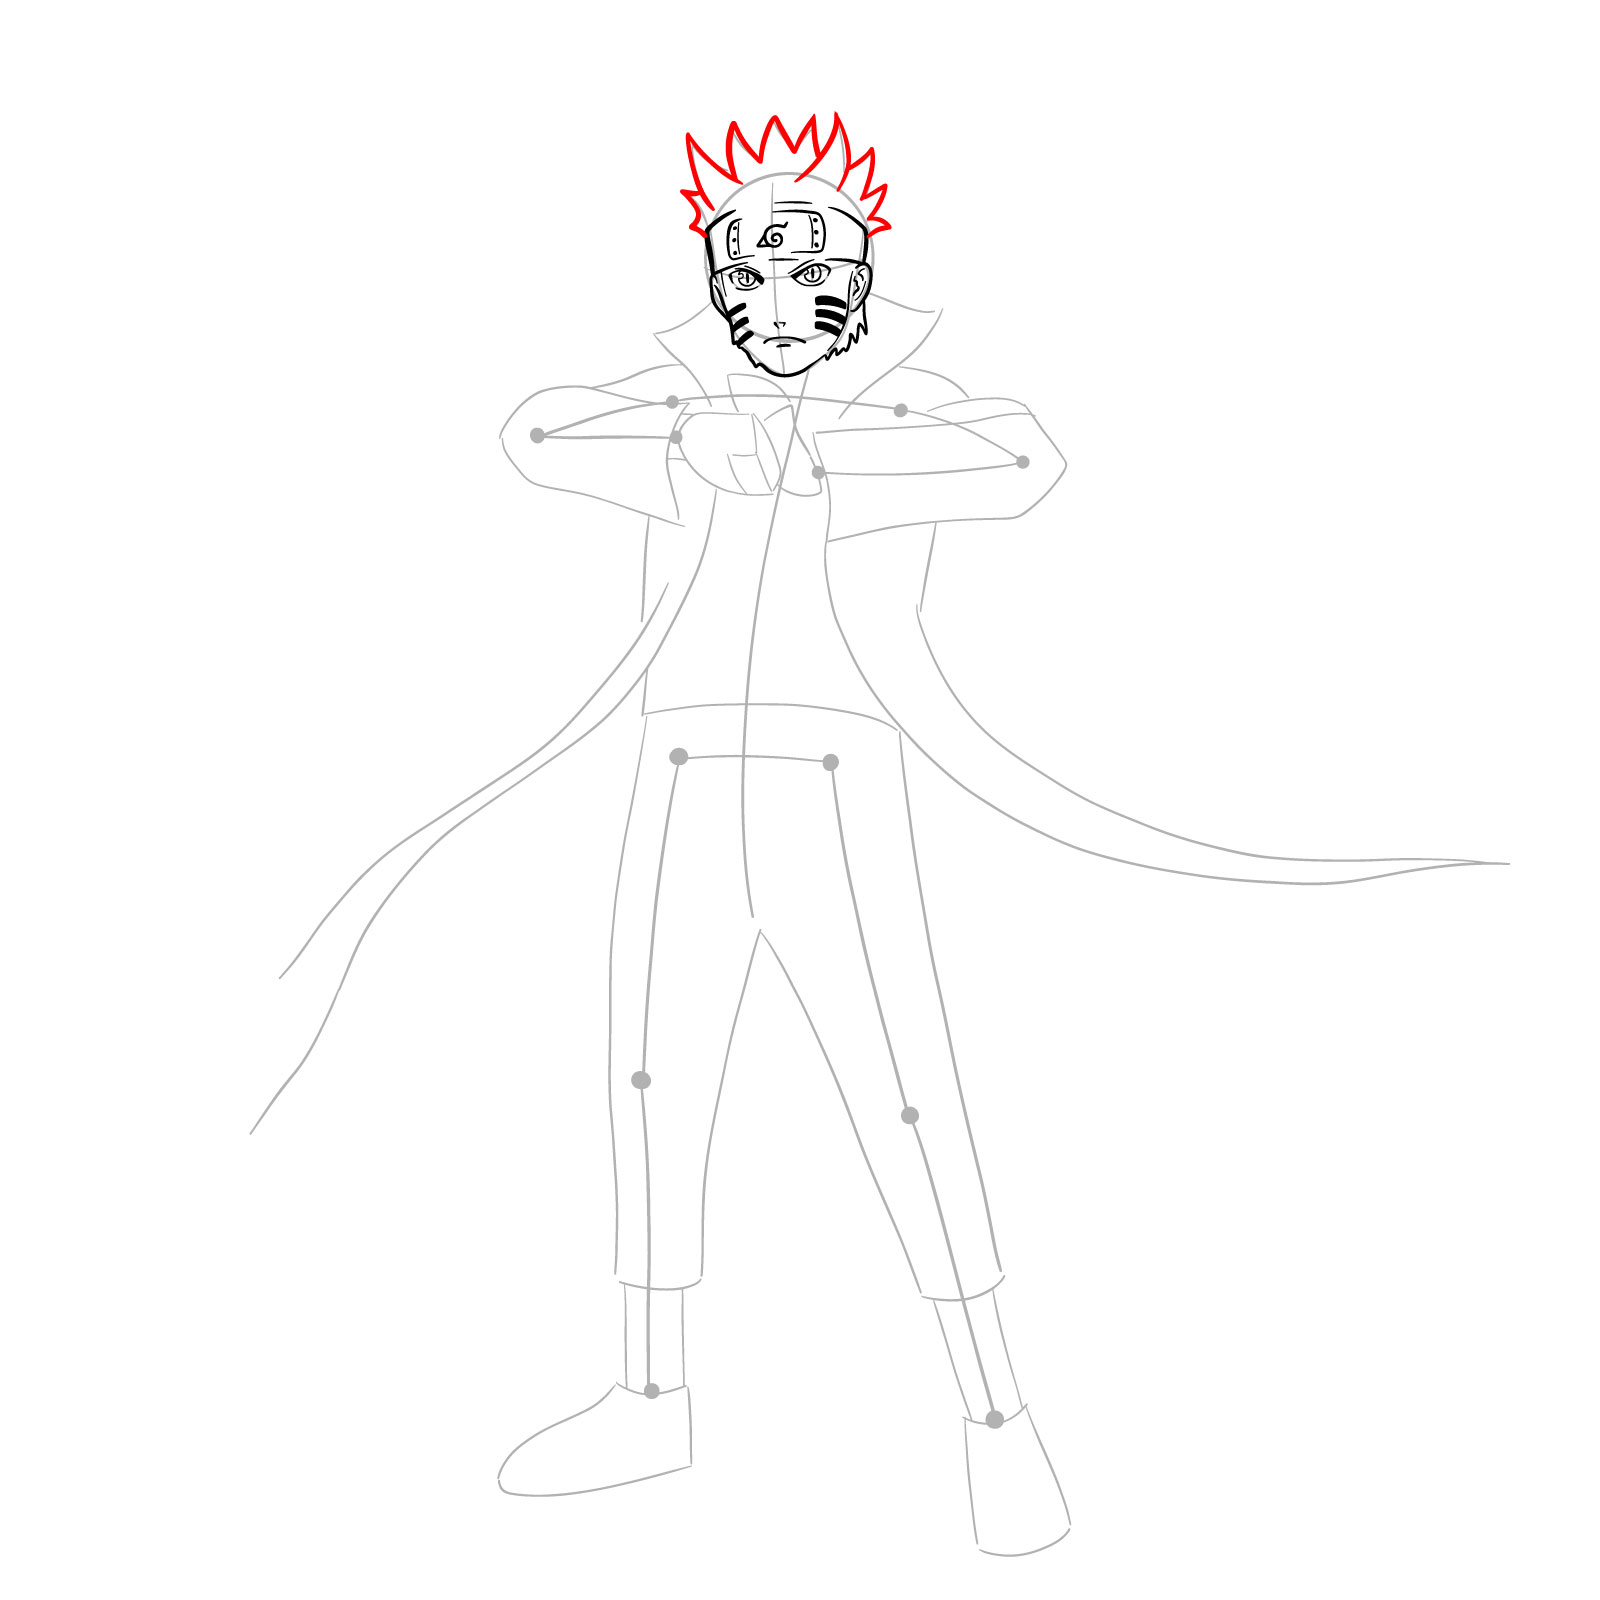
Sketching the Face and Hair
Steps 4 to 13 focus on drawing Naruto’s face, hair, and iconic features, such as his whisker-like markings and slitted pupils.
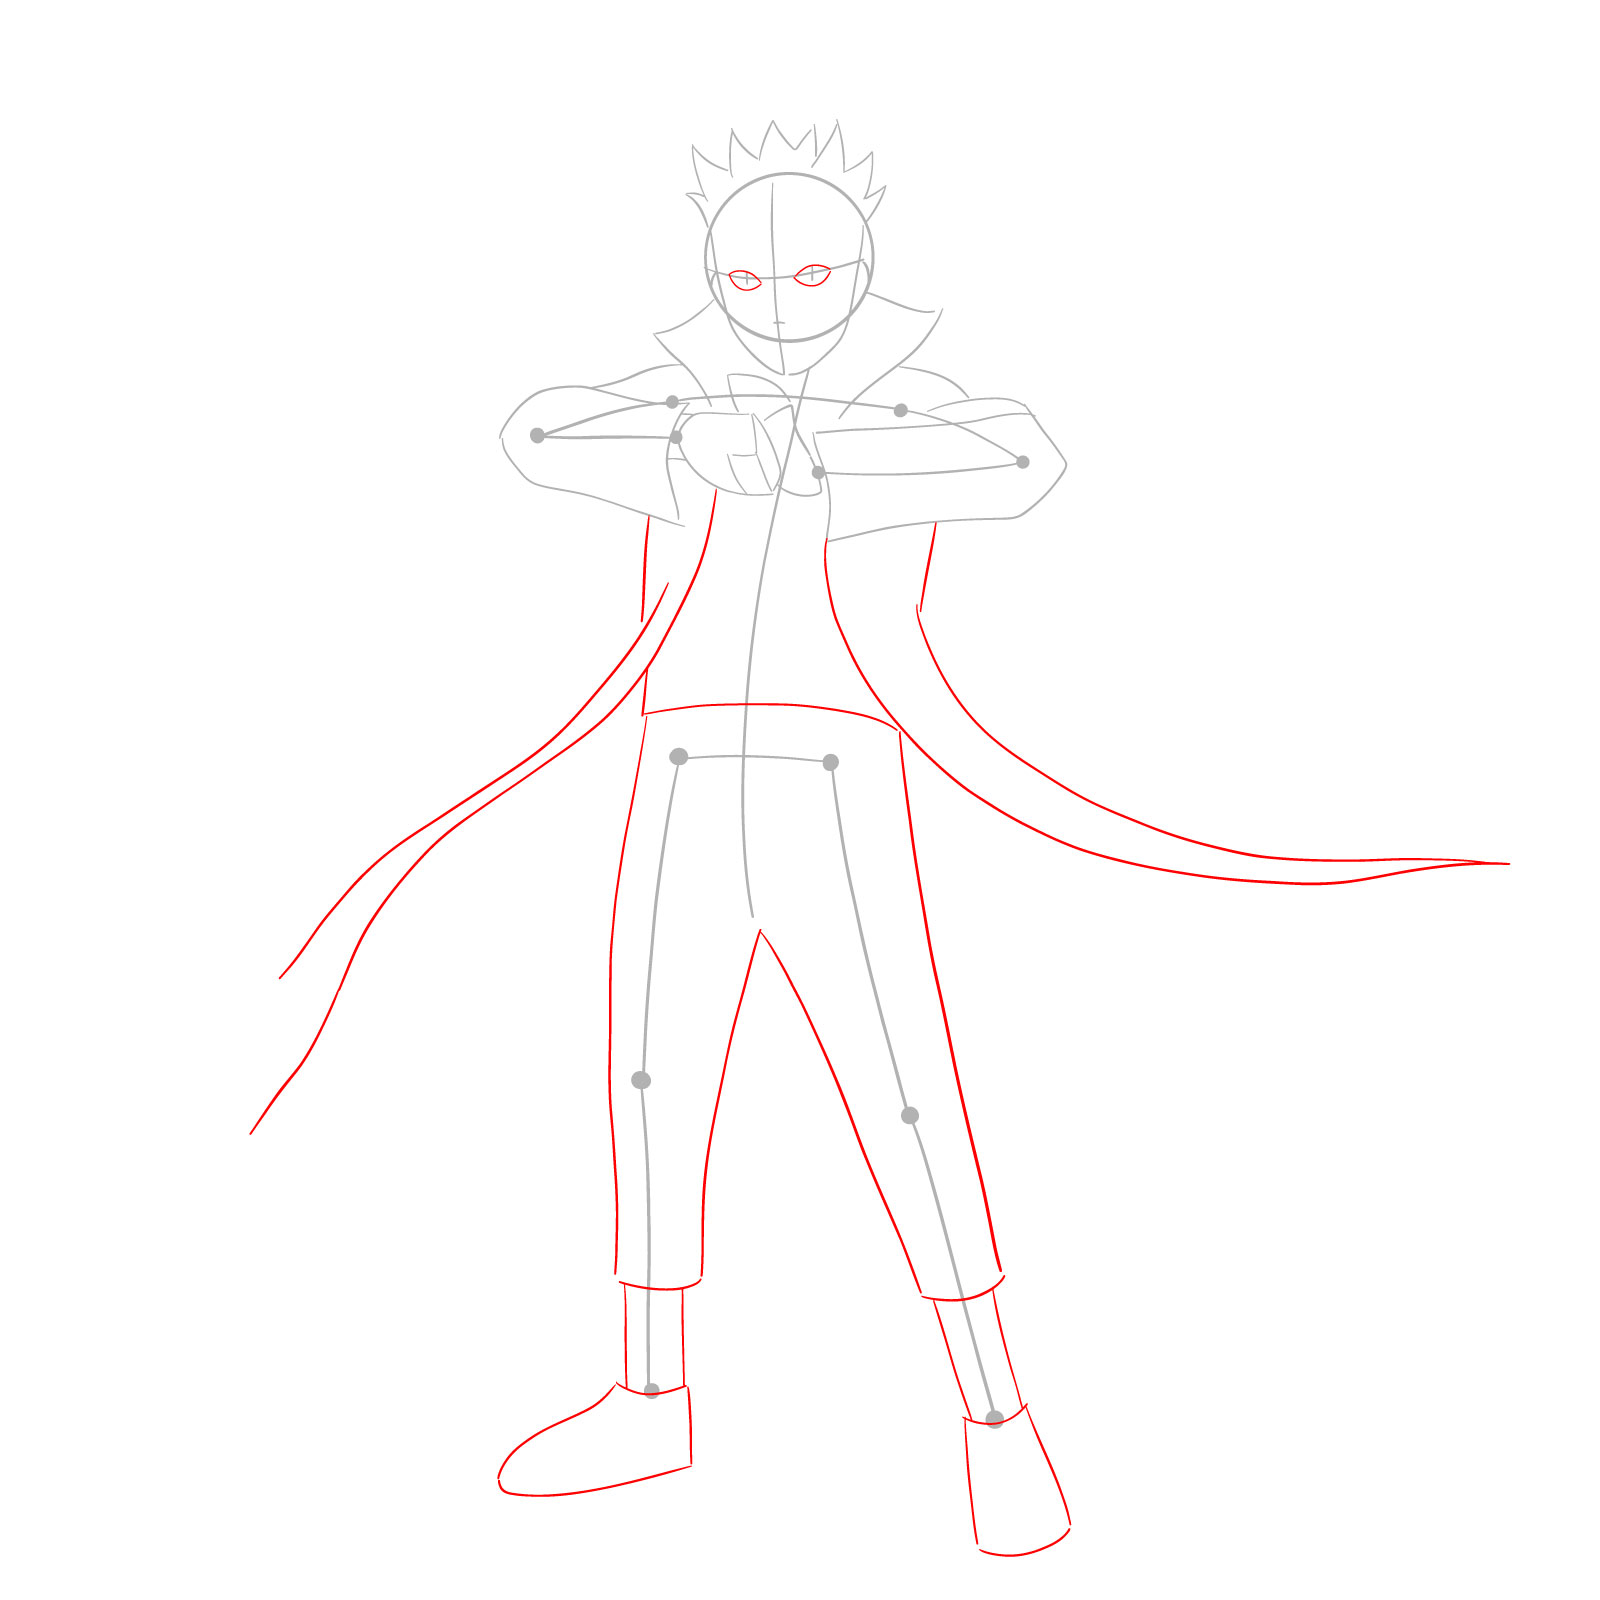
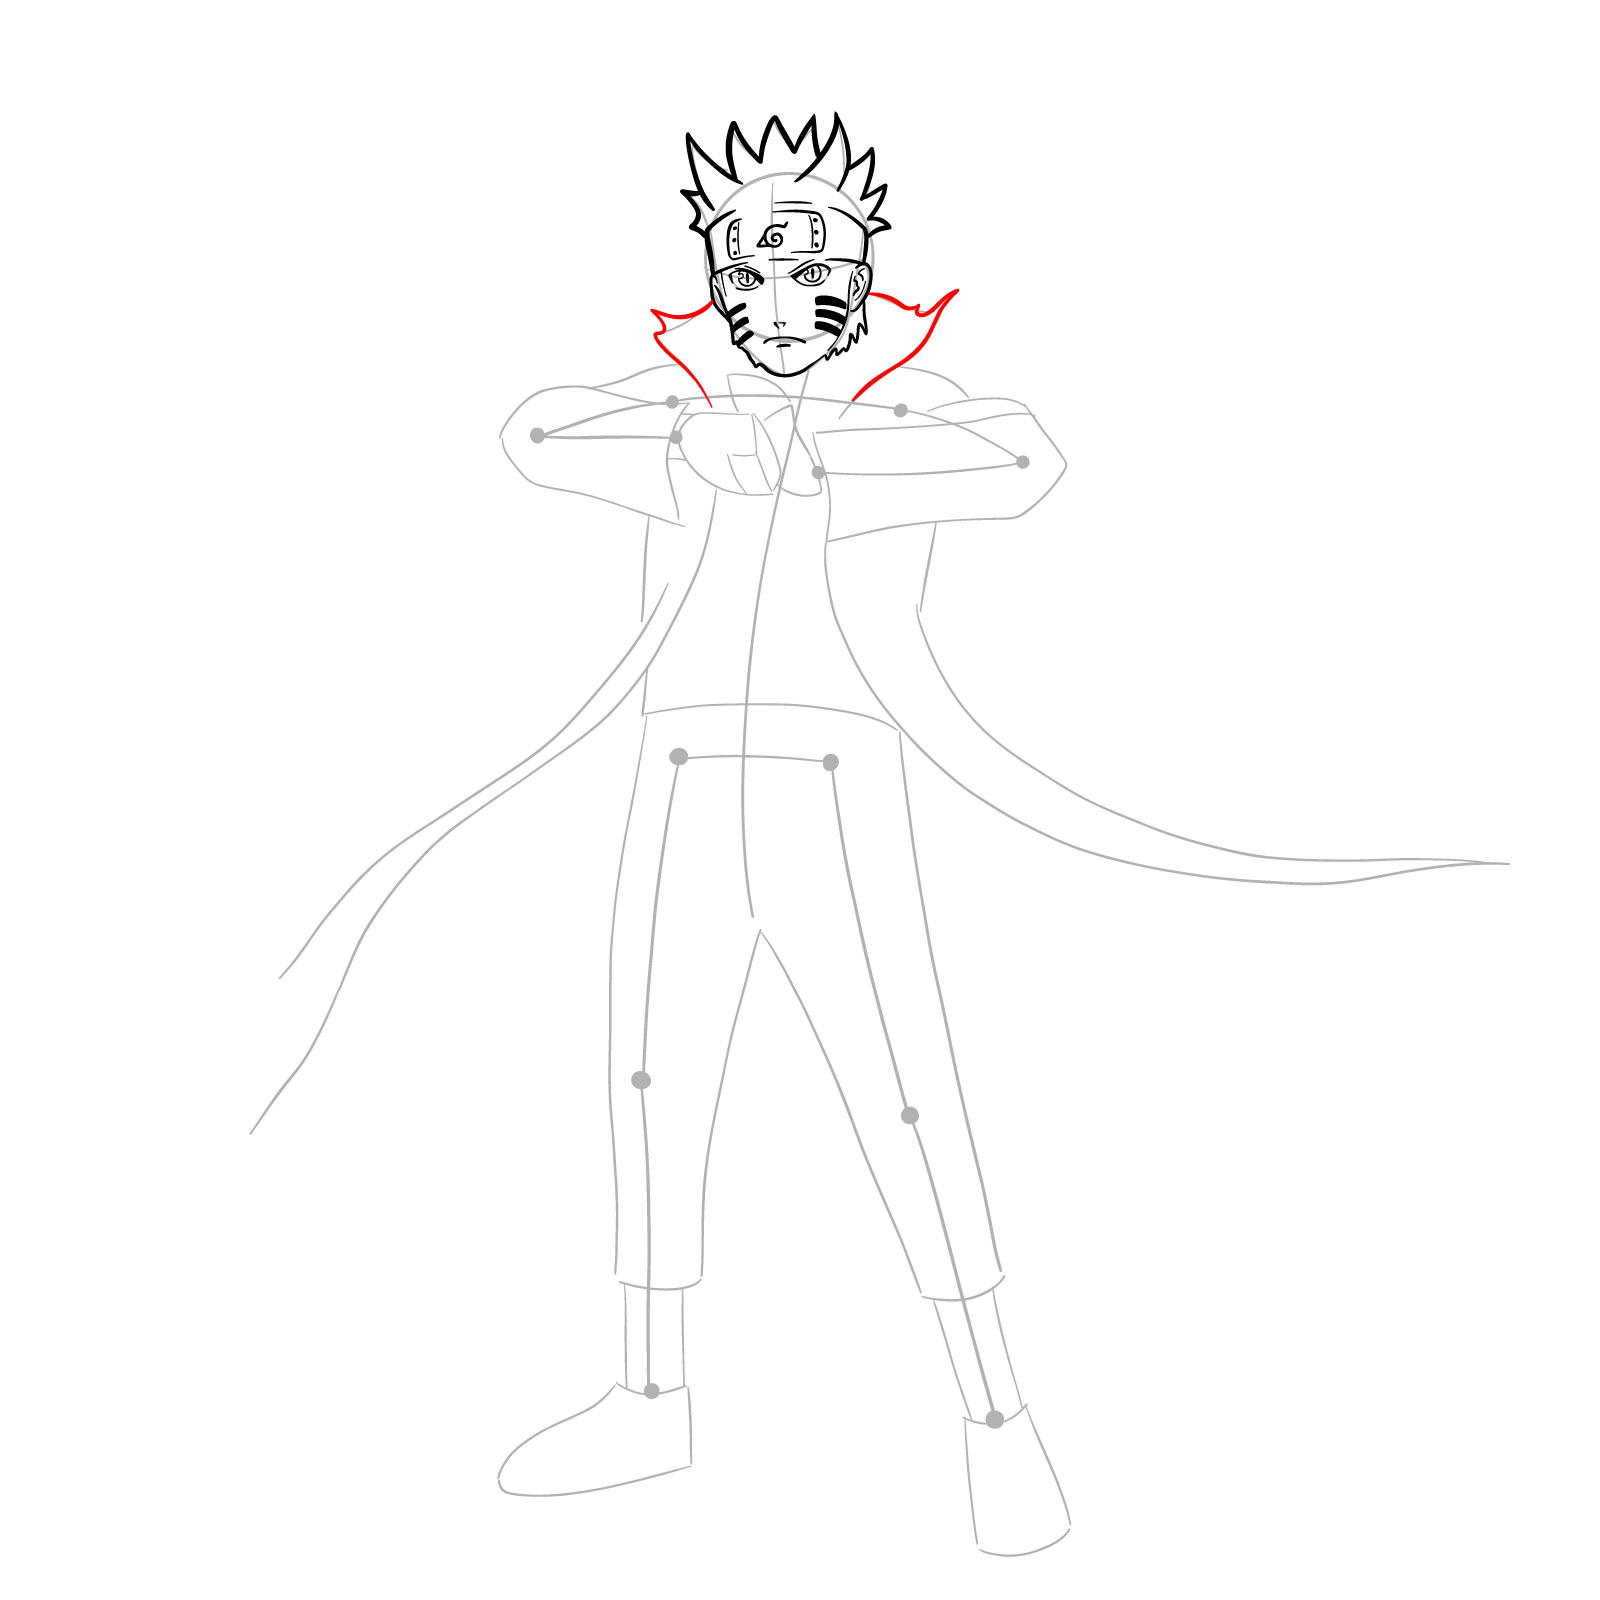
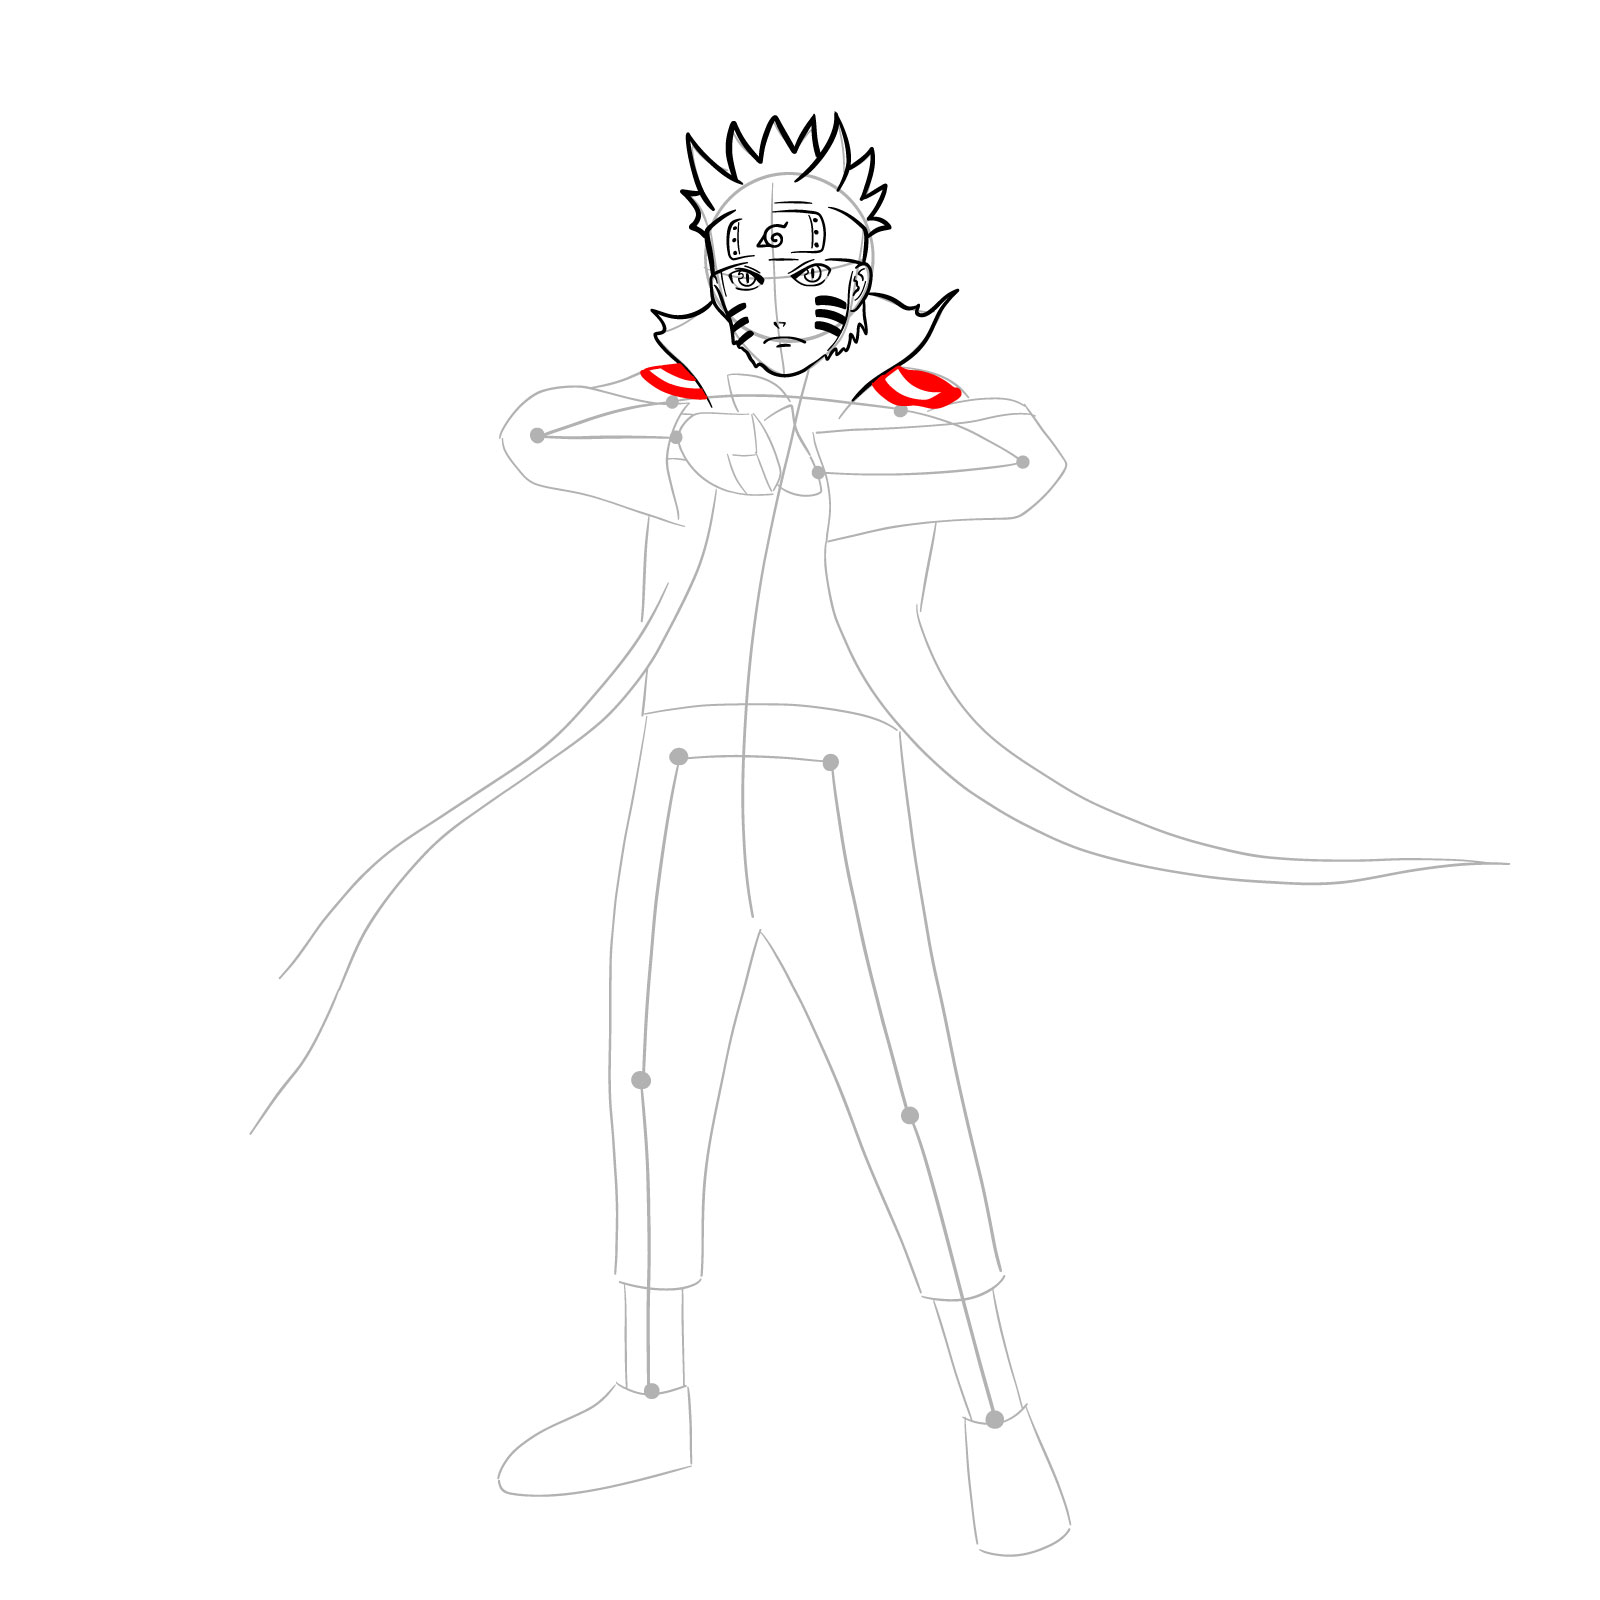
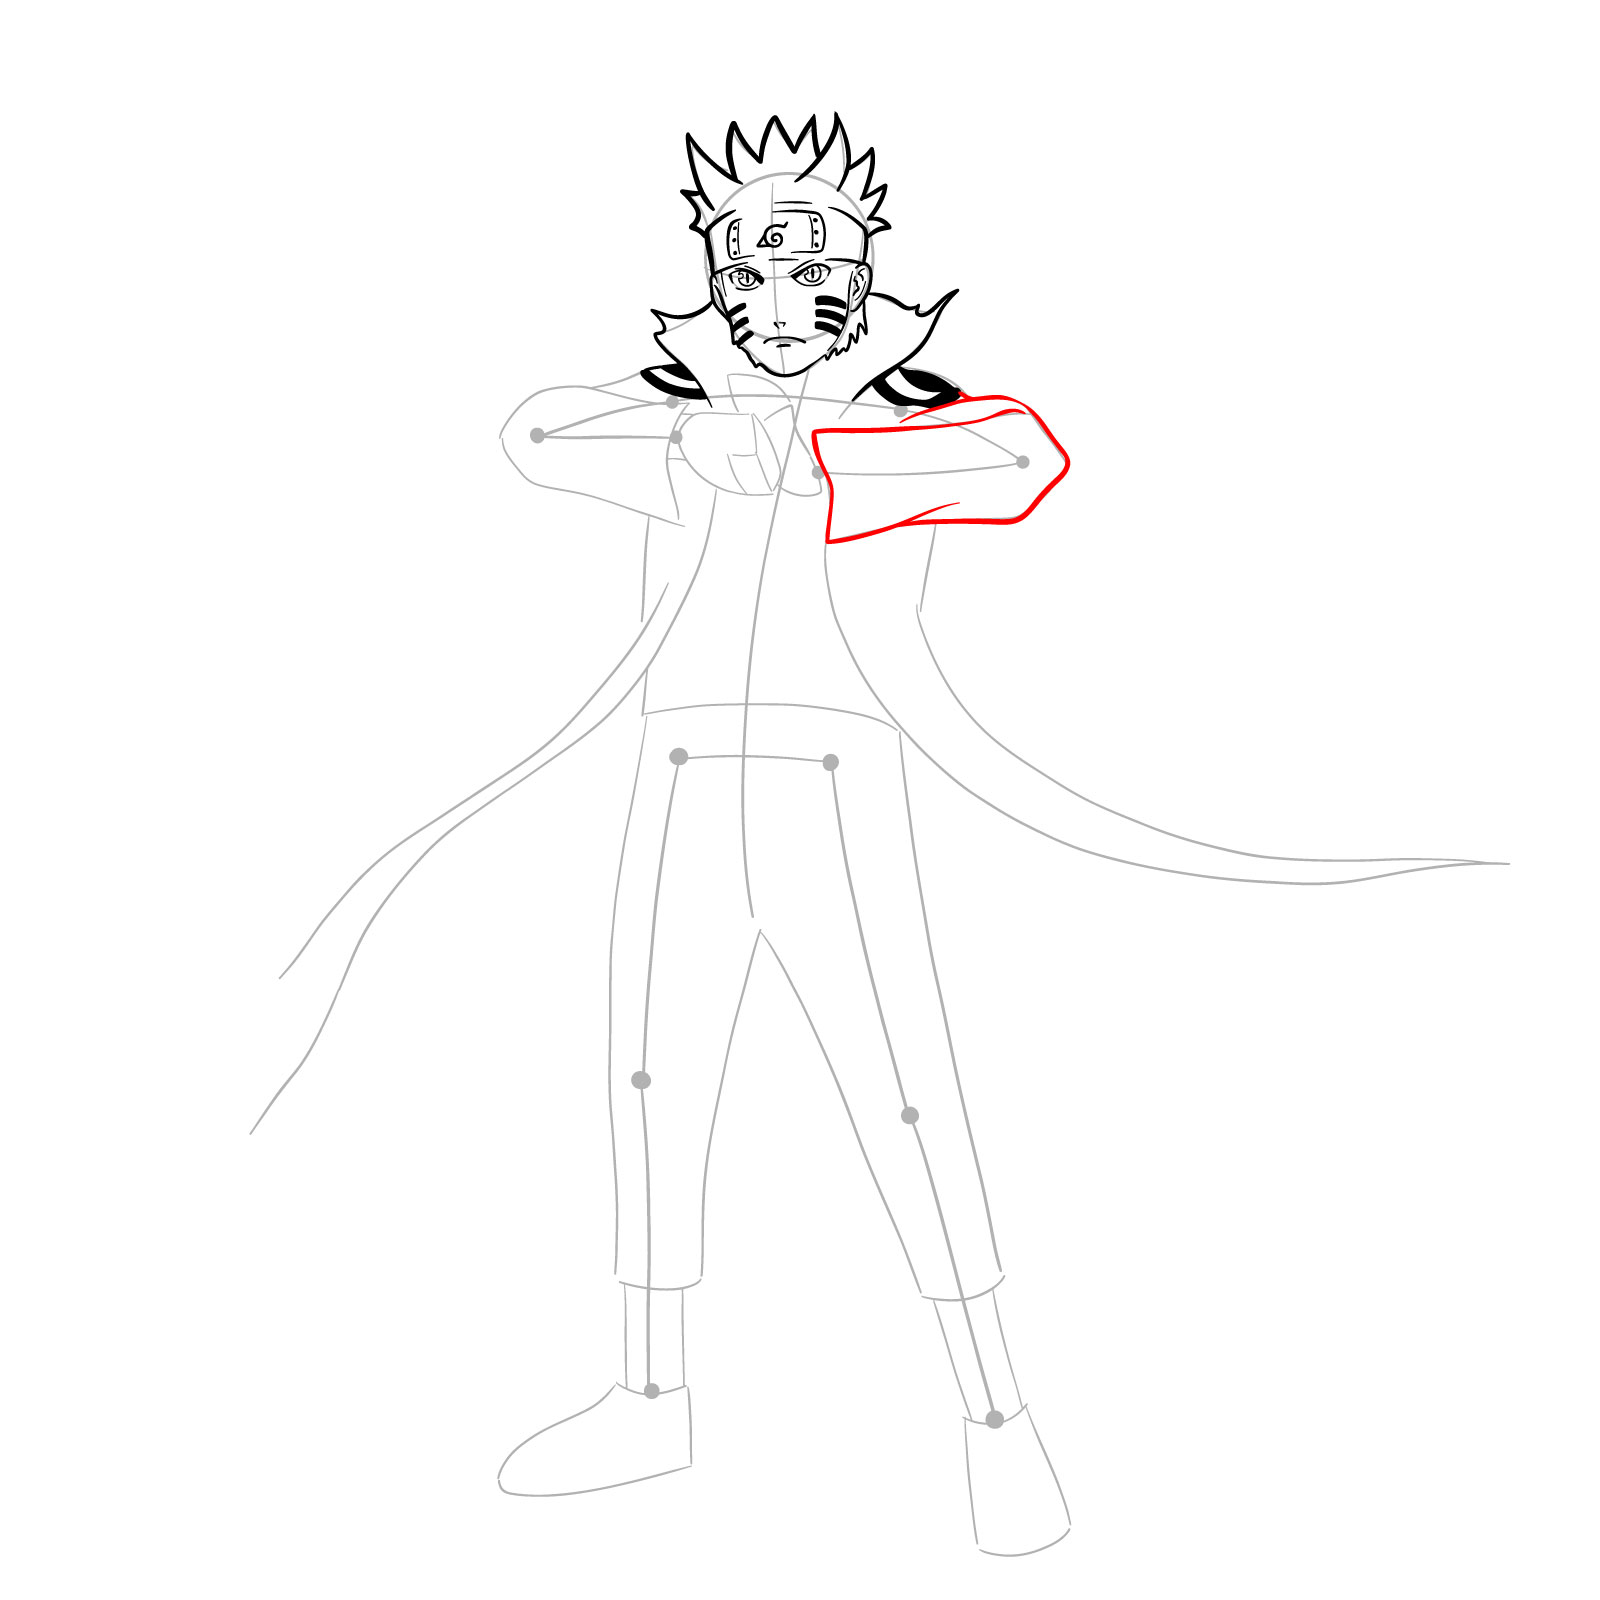
Defining the Body and Attire
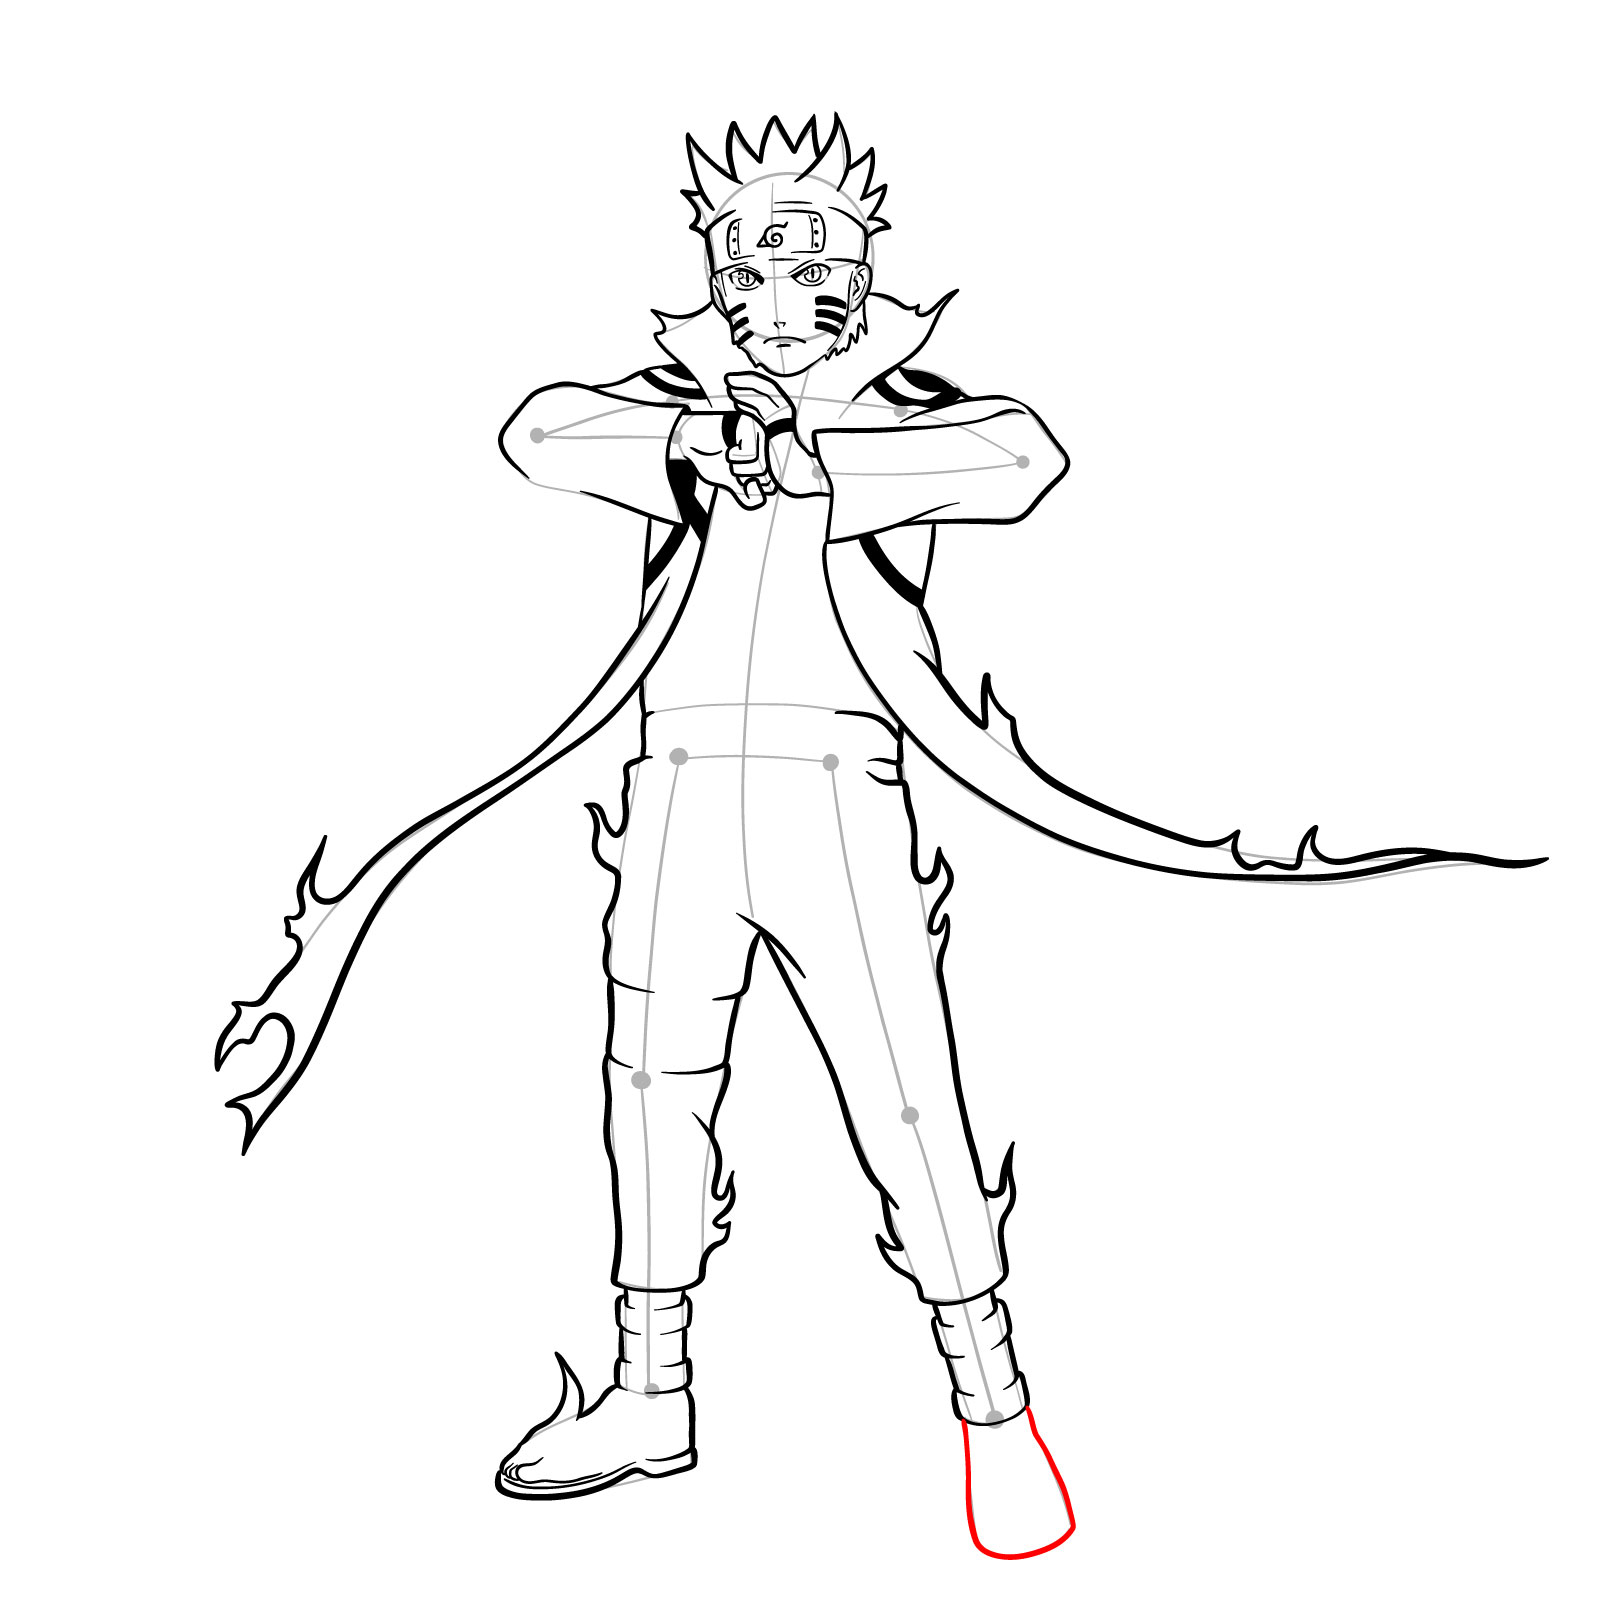
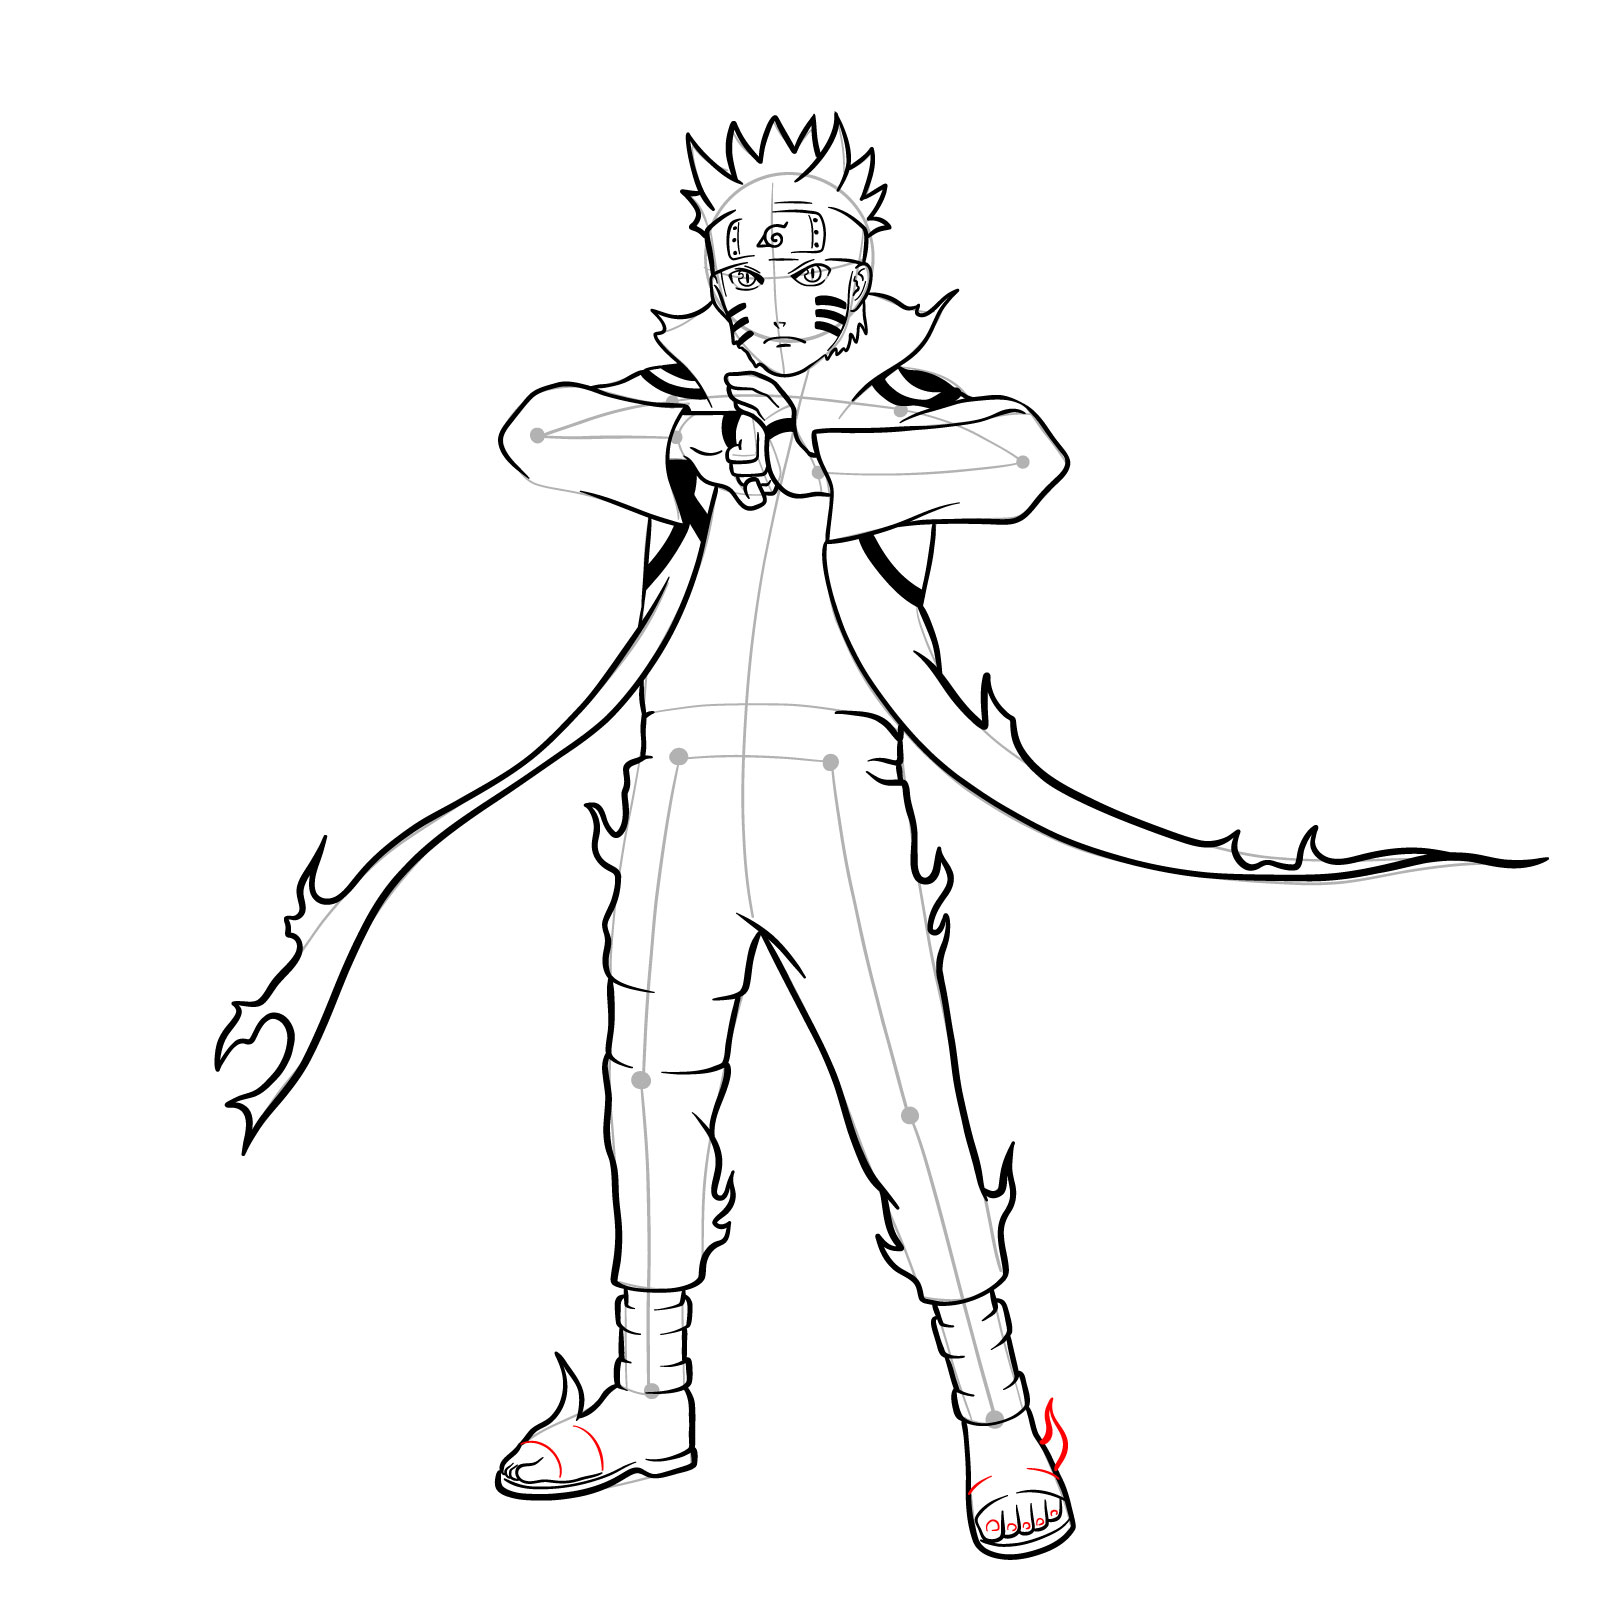
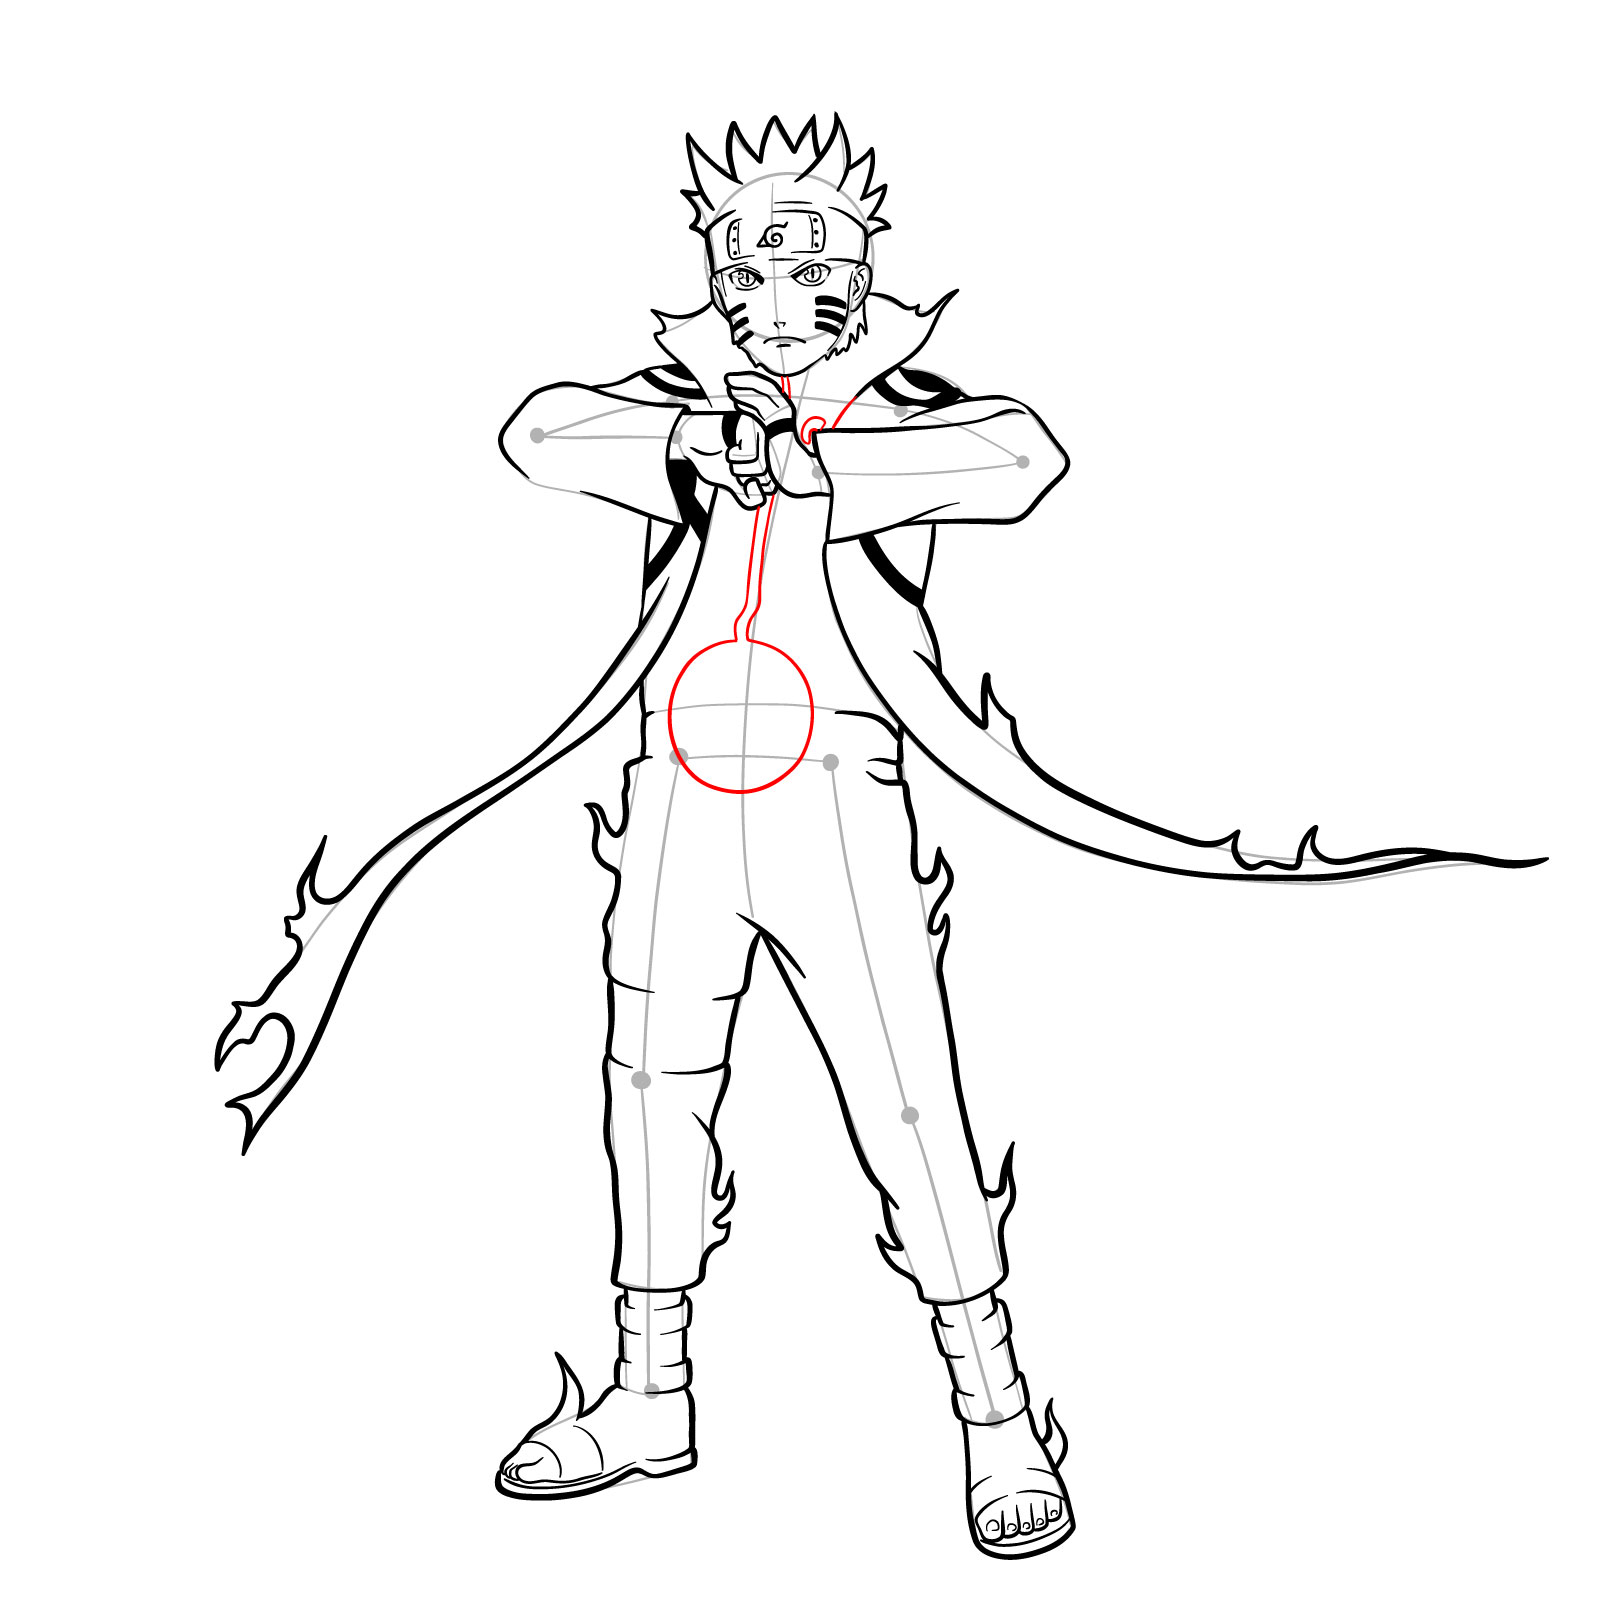
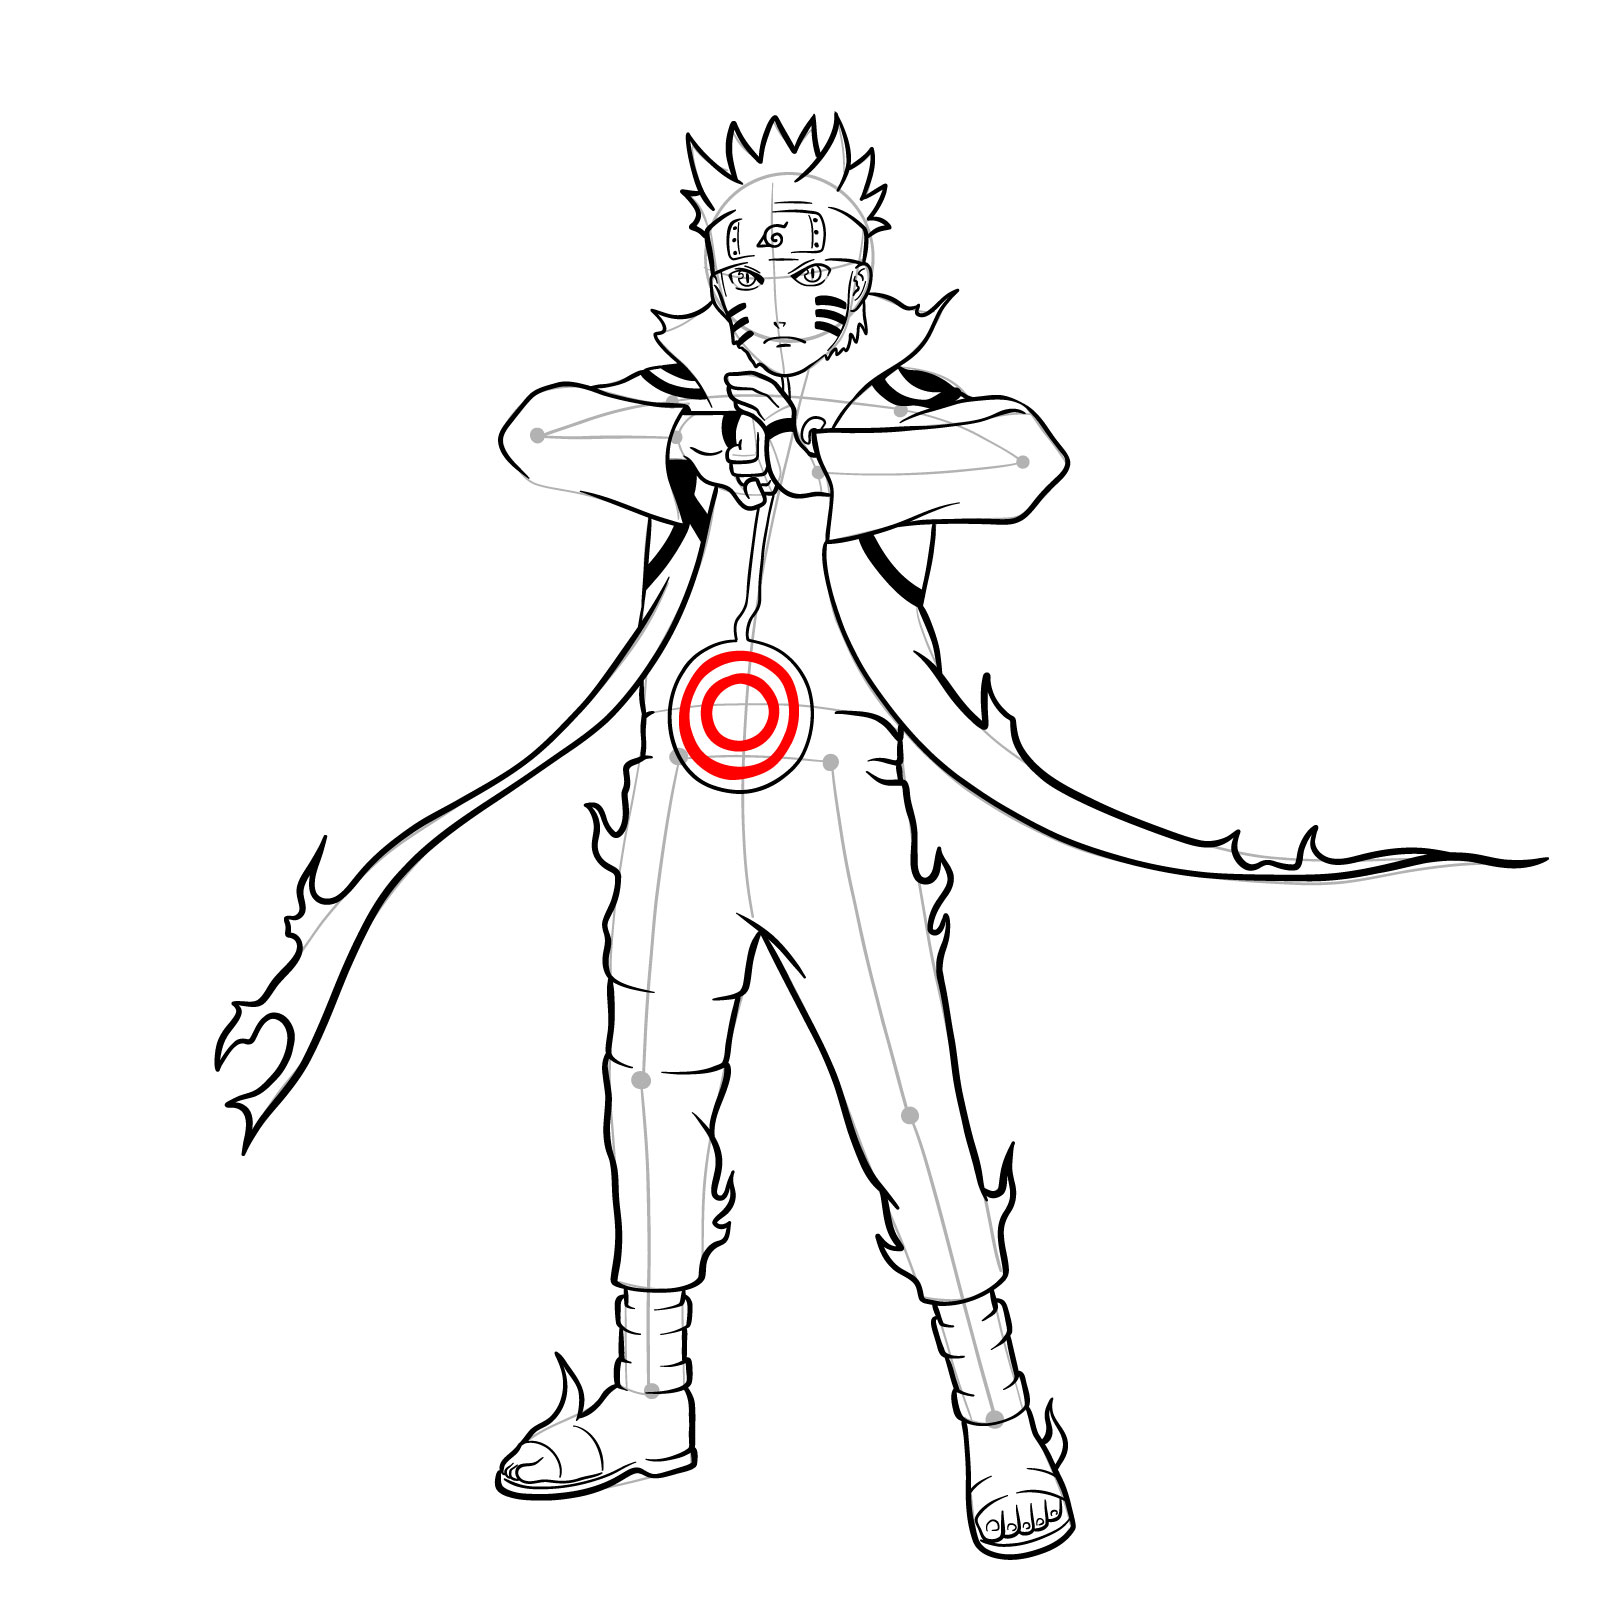
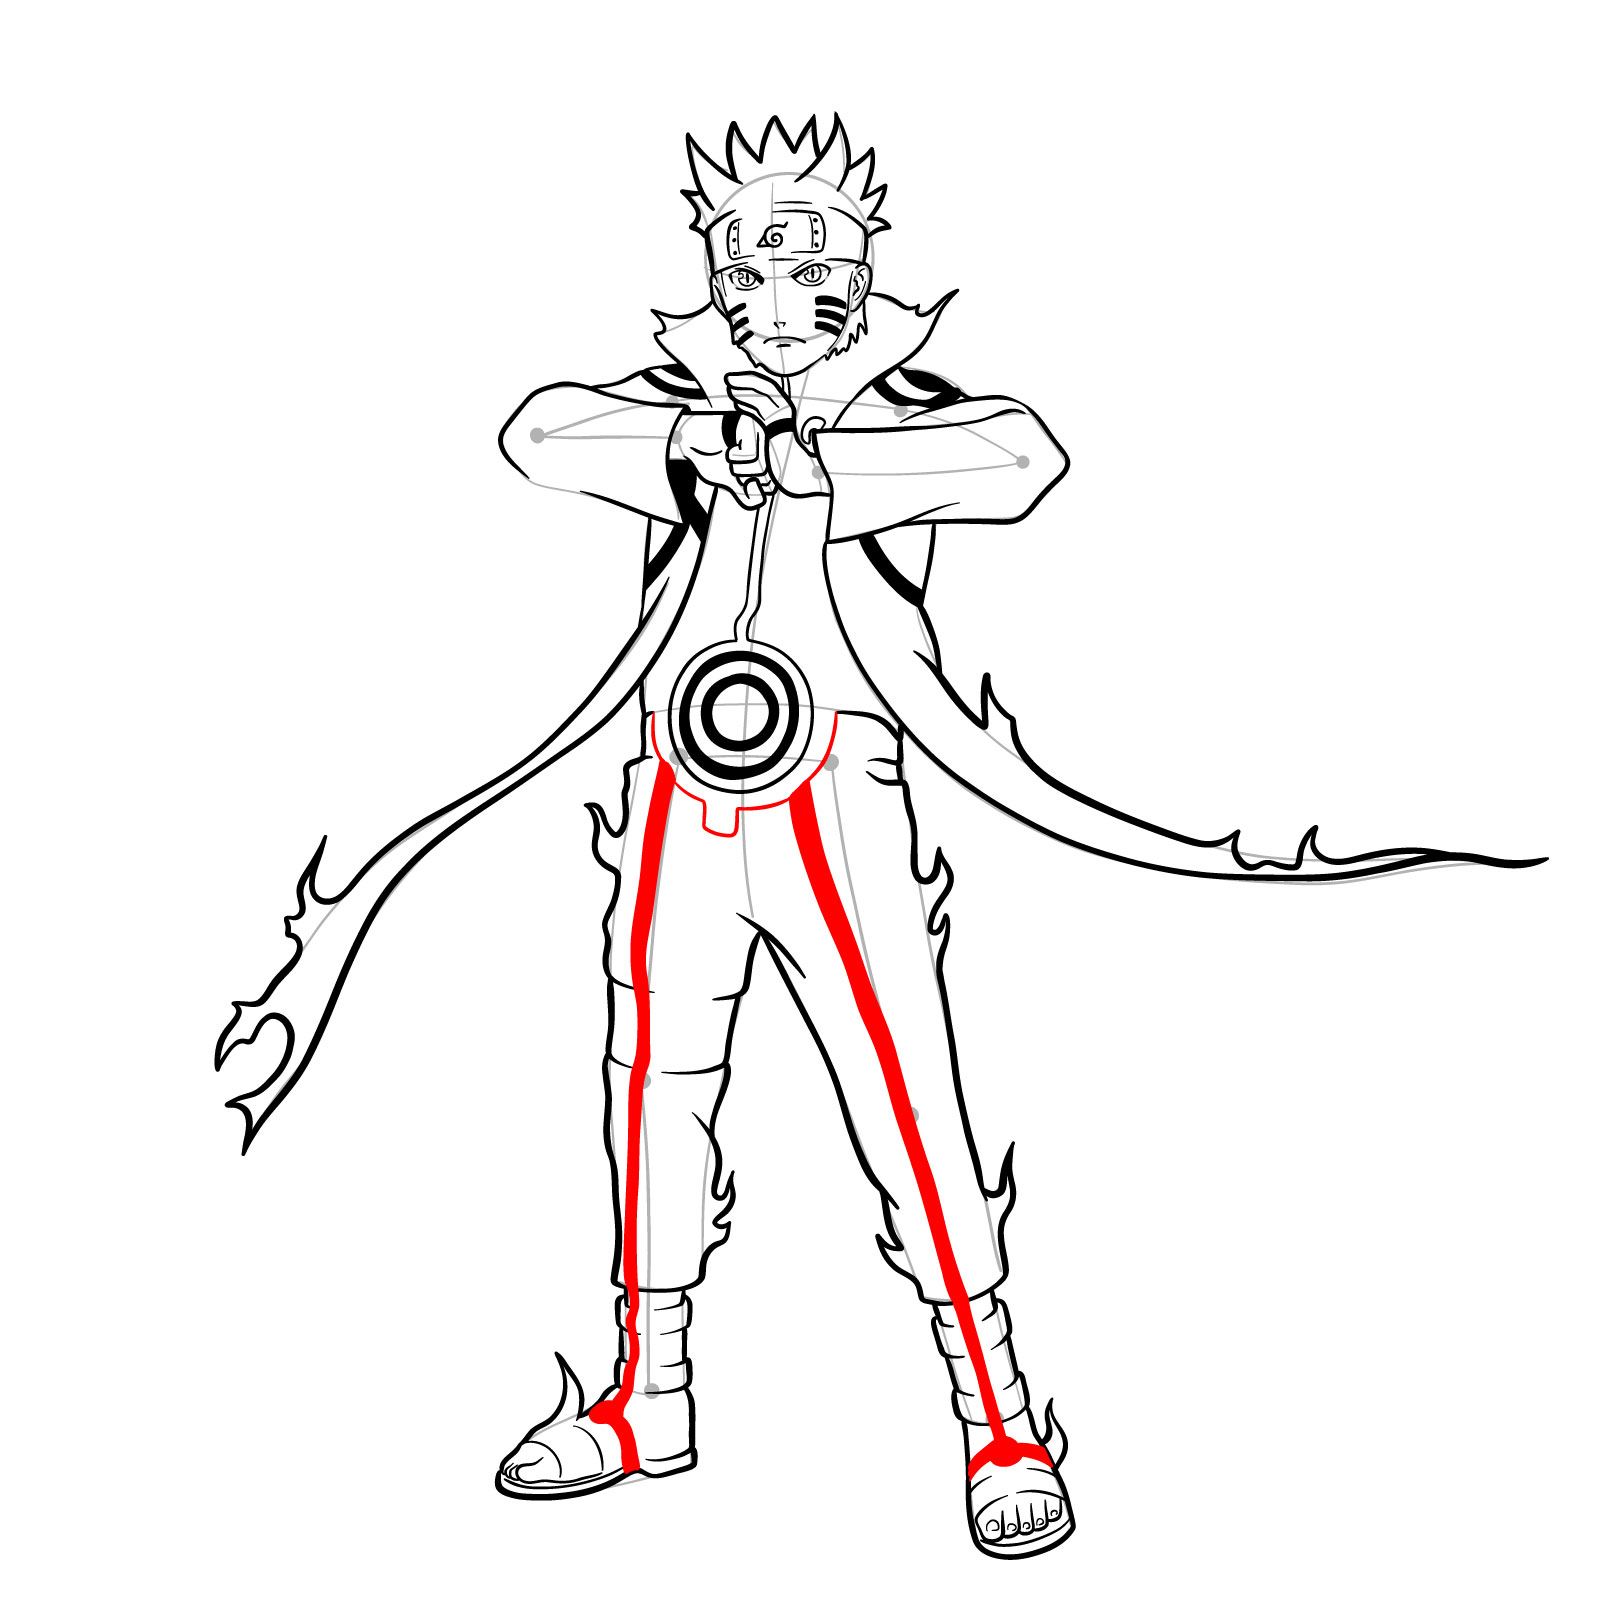
From steps 14 to 25, we’ll concentrate on sketching Naruto’s shoulders, arms, and his flowing cloak. Steps 26 to 36 cover the waist and legs, while steps 37 to 39 add the pattern on his costume.


Finishing Touches and Final Details
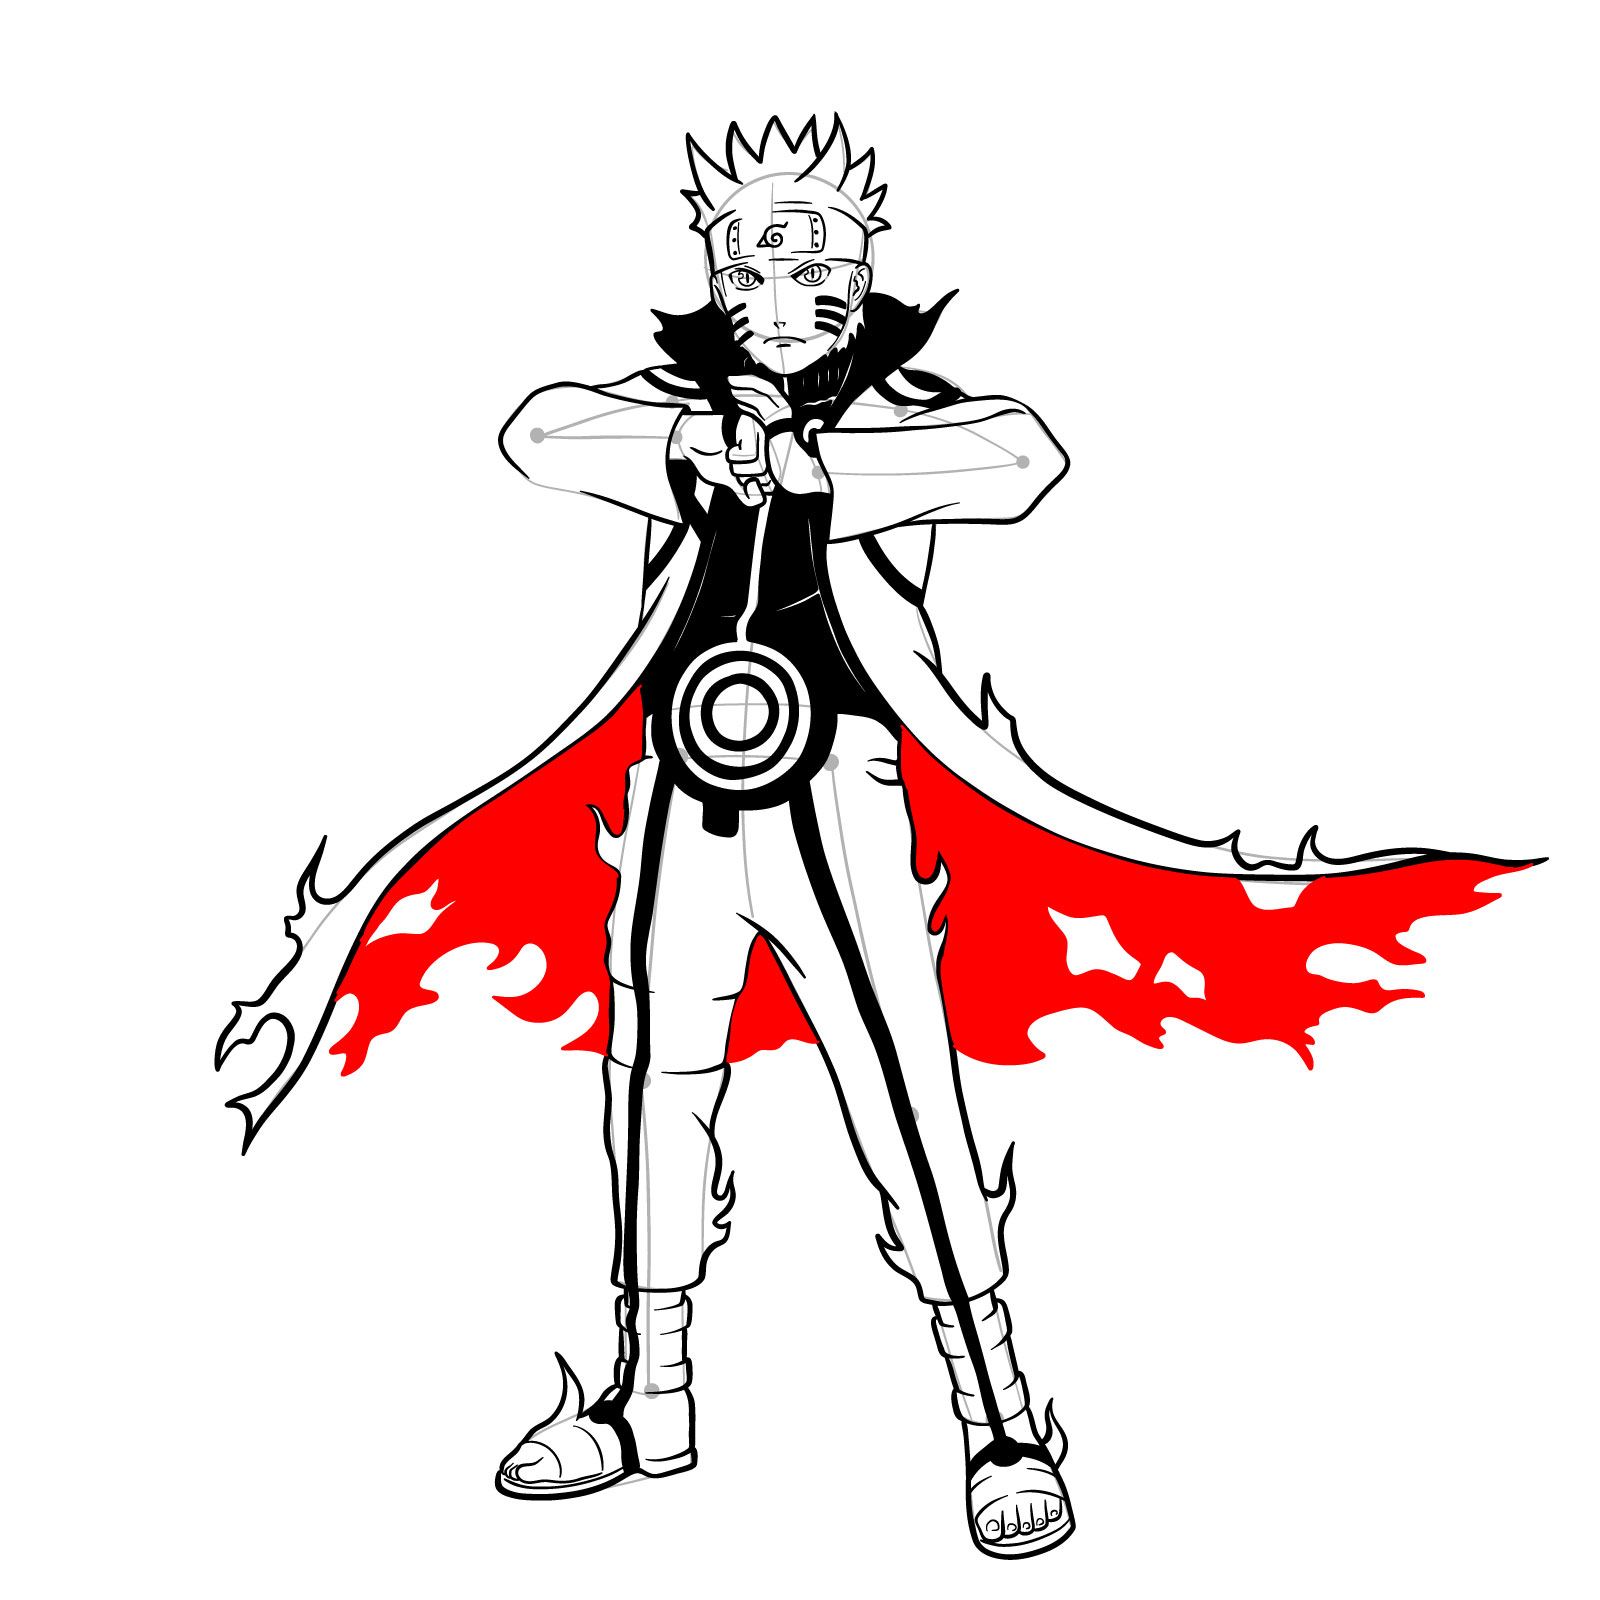
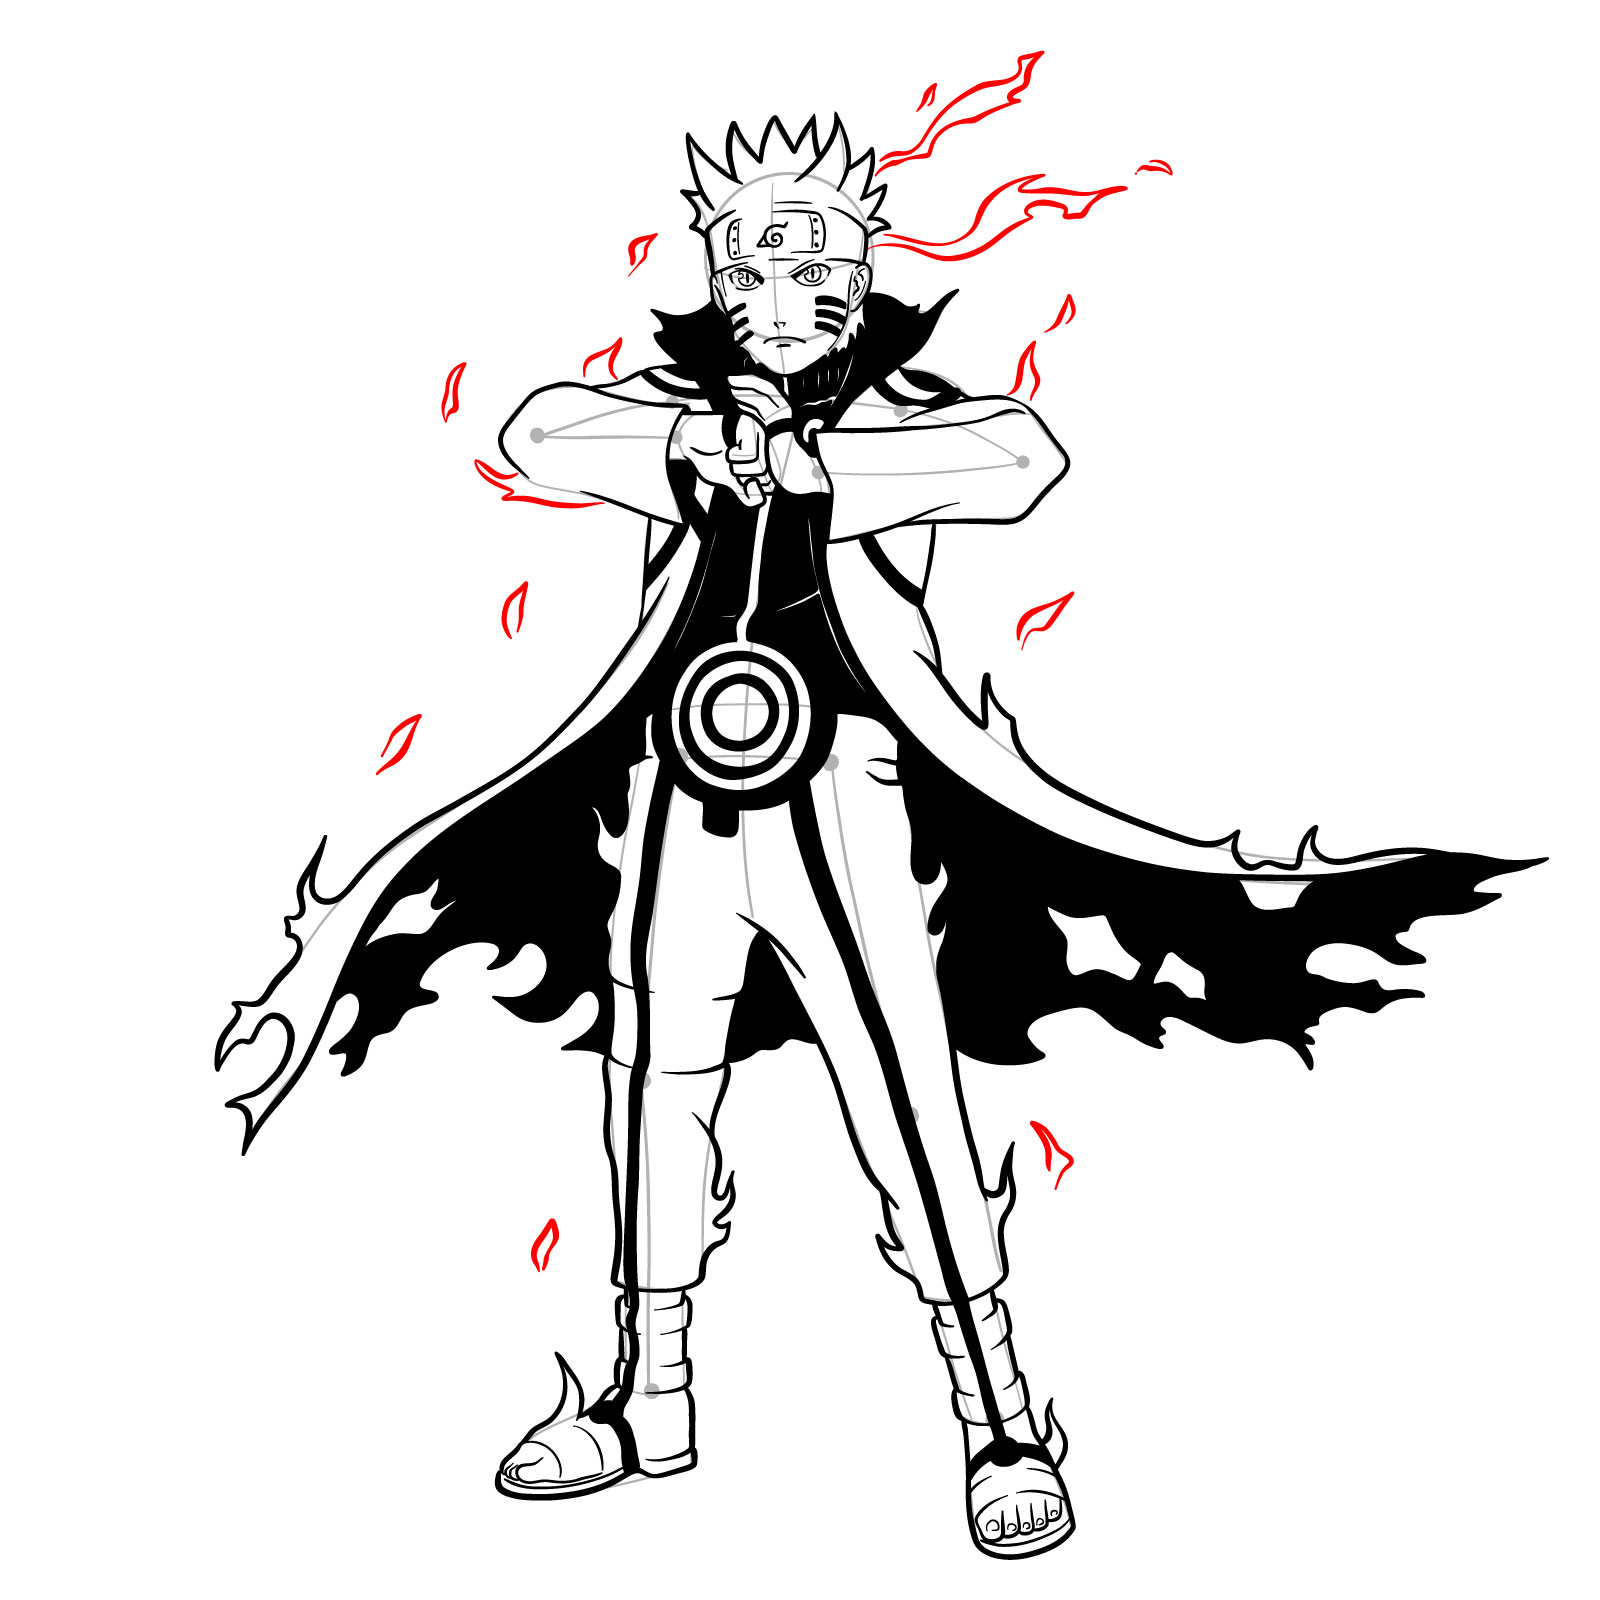
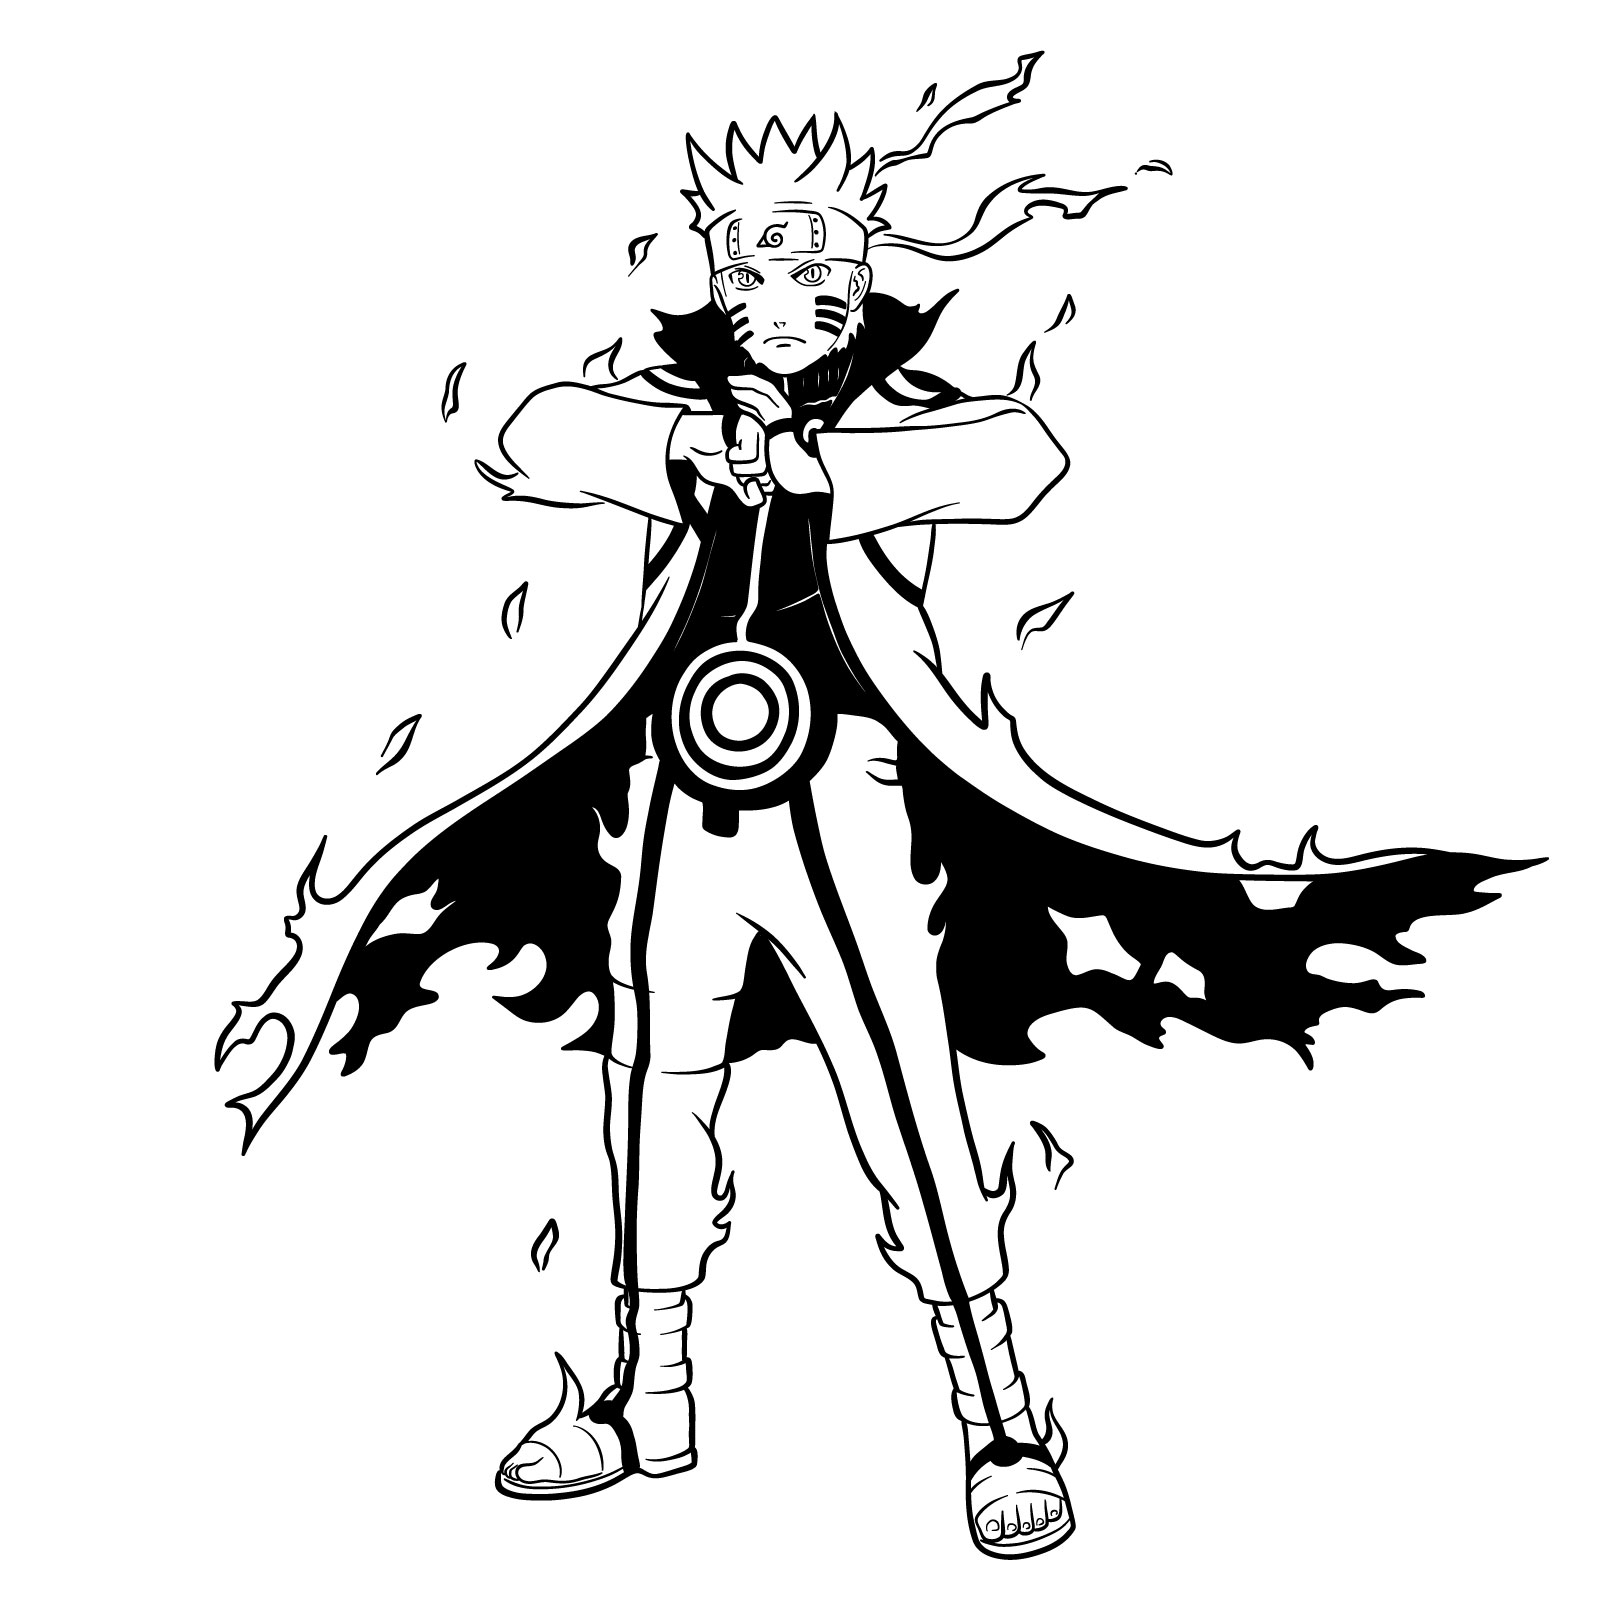
As we approach the final stages of our drawing, steps 40 to 42 involve filling the upper part of Naruto’s body and the inner side of his cloak with black, leaving some blank lines to indicate fabric folds and inner costume elements. In step 43, we’ll add flames around Naruto to emphasize his powerful transformation. Finally, in step 44, ink the sketch and erase the pencil lines to reveal your masterpiece of Naruto in Kurama Mode.


The signup form at the top of the page is the easiest way to stay in the loop, since the weekly digest drops new guides right to your inbox before they get much traffic anywhere else. Now that you know how to draw Naruto in Kurama Mode, it’s worth bookmarking a few of the other character guides on the site to keep practicing that same high-energy style. You can also find video versions of some guides over on the SketchOk YouTube channel if you prefer watching the process.
Hi, Ilnur! The Owl House has ended, and they released some of the characters’ adult designs! Could you draw Amity Blight, Boscha, Luz Noceda, Viney, and Willow Park’s epilogue designs?
https://static.wikia.nocookie.net/the-owl-house/images/9/92/Amity_%28epilogue%29_-_Profile.png/revision/latest?cb=20230424164652
https://static.wikia.nocookie.net/the-owl-house/images/4/43/Boscha_%28epilogue%29_-_Profile.png/revision/latest?cb=20230420075704
https://static.wikia.nocookie.net/the-owl-house/images/a/ab/LuzNocedaEpilogue.png/revision/latest?cb=20230421215642
https://static.wikia.nocookie.net/the-owl-house/images/0/08/Future_Viney.png/revision/latest?cb=20230425190632
https://static.wikia.nocookie.net/the-owl-house/images/b/be/Willow_Epilogue_Side.png/revision/latest?cb=20230504031111
Hi, Drawing Fan. Sure, I will start drawing them soon!
Thank you very much, Ilnur!
Why is the thing so long?