Welcome, aspiring artists! Prepare to embark on an artistic journey as we guide you through a step-by-step drawing tutorial on how to draw Rogue, the mutant superhero from Marvel’s X-Men. Follow our tips and techniques, and you’ll soon create a stunning piece of art featuring this iconic character.
The Power of Rogue: A Mutant’s Journey
Born with the mutant ability to absorb the life force, memories, and powers of others, Rogue’s journey has been filled with both struggle and triumph. Initially a reluctant supervillain, she eventually found her way to the X-Men, where she fought for the greater good alongside her fellow mutants.
Adopted by Mystique and Destiny, Rogue’s character has been shaped by her complex past and relationships. With a signature white streak in her hair and gloves to regulate her powers, her visual appearance is as striking as her story.
Rogue’s popularity has transcended the comic book realm, with appearances in the X-Men film series and various animated adaptations, making her a fan favorite among Marvel enthusiasts.
Recommended Materials and Tools
Before we dive into the tutorial, let’s gather the necessary materials and tools to bring Rogue to life. While you’re free to use your preferred art supplies, we recommend the following:
- Pencils: HB and 2B
- Eraser
- Fineliners or inking pens
- Colored pencils or markers
Embrace Your Inner Mutant: Step-by-Step Rogue Drawing Guide
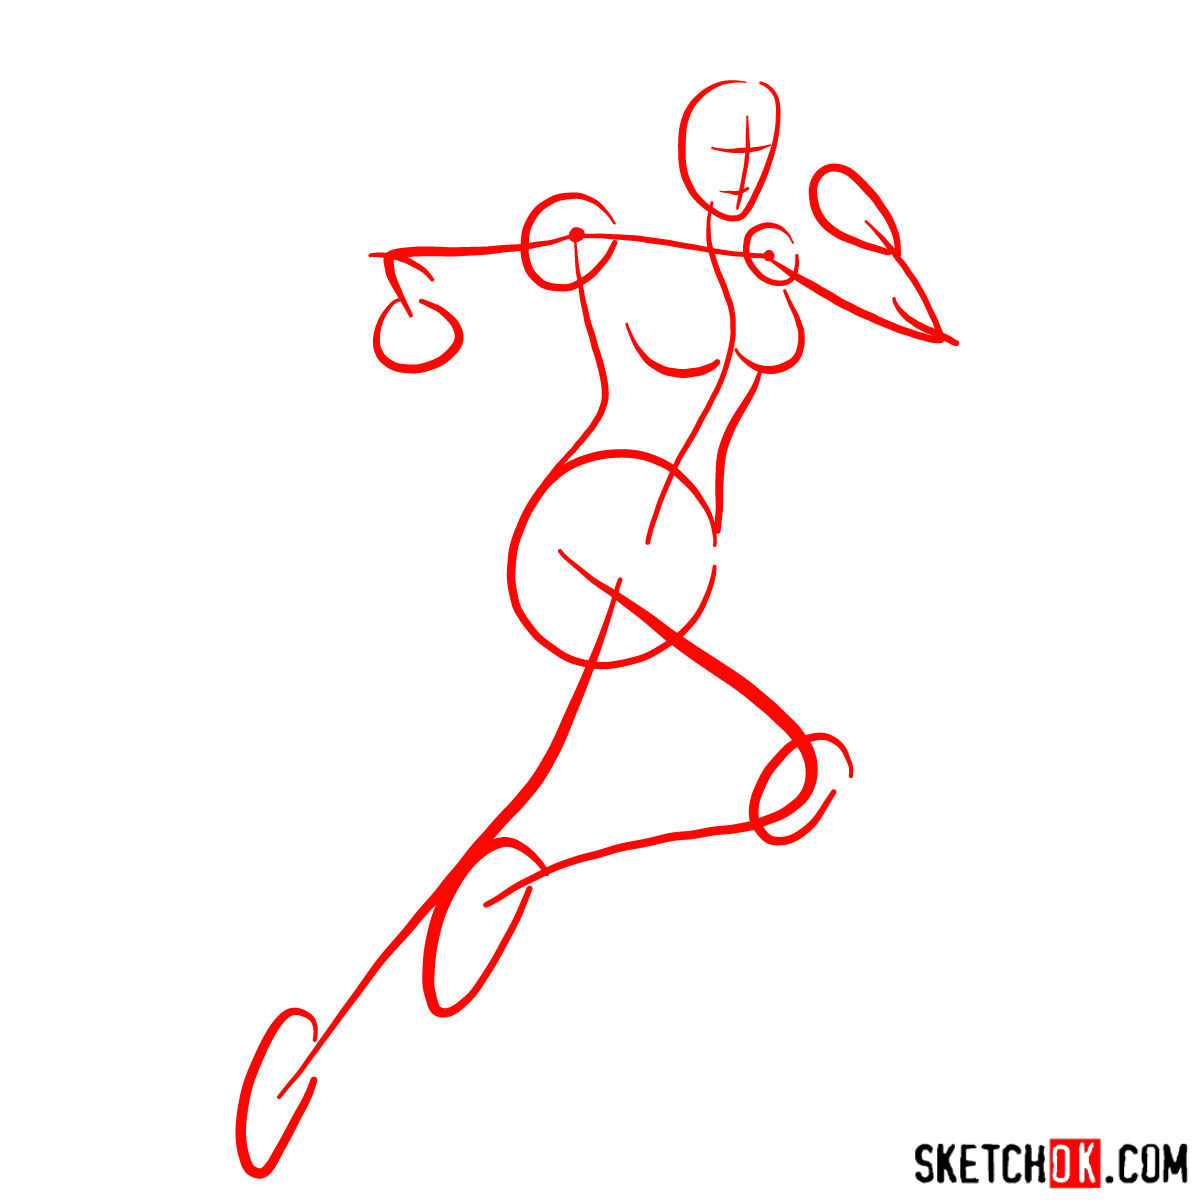
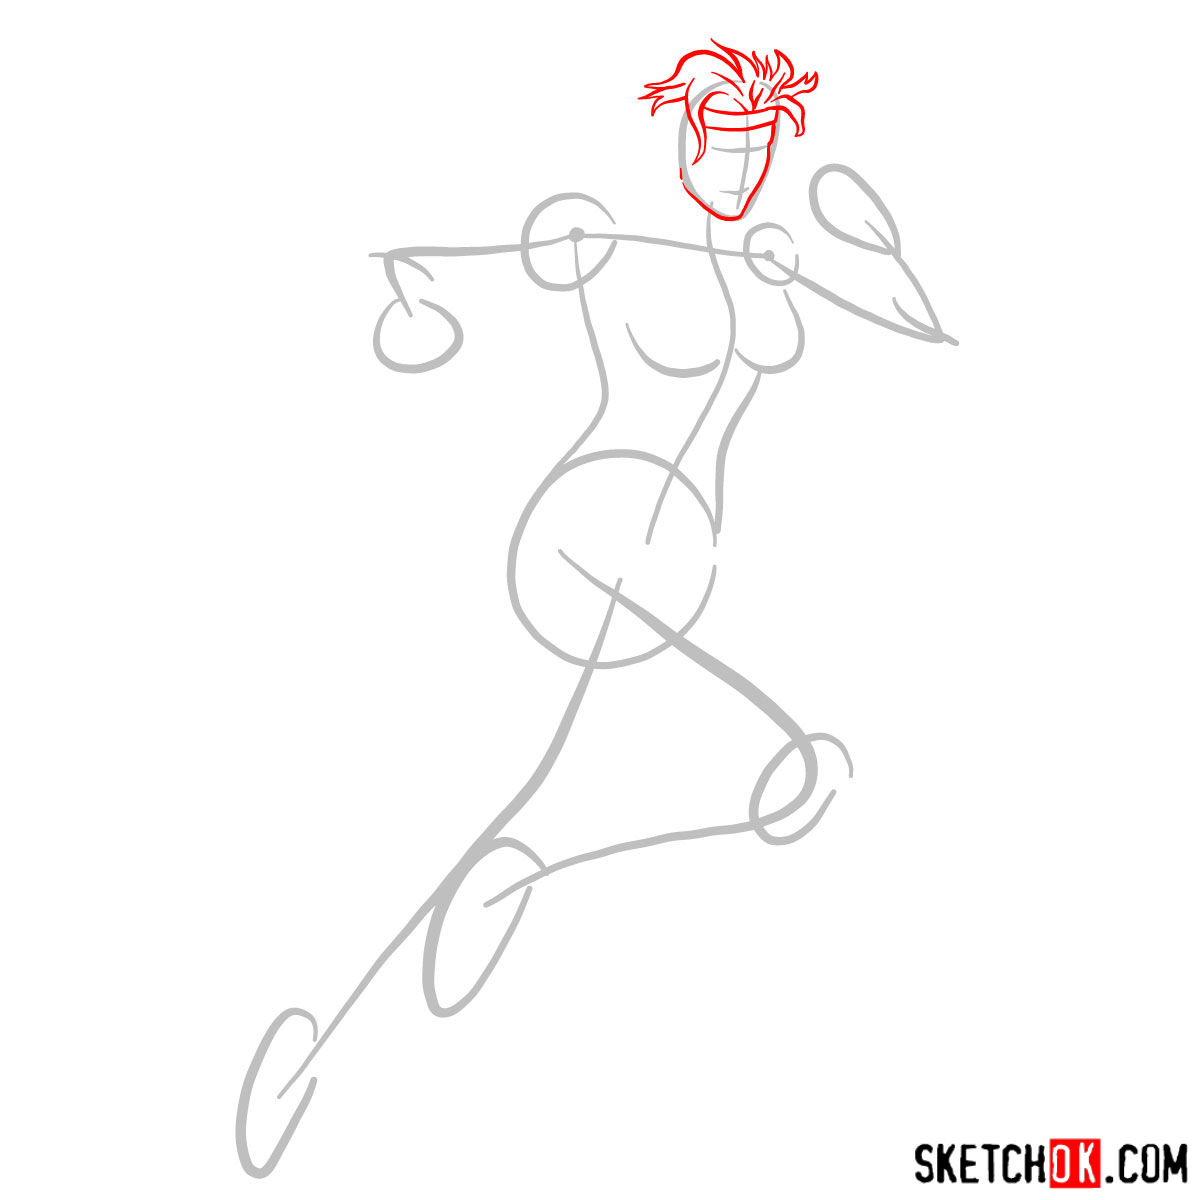
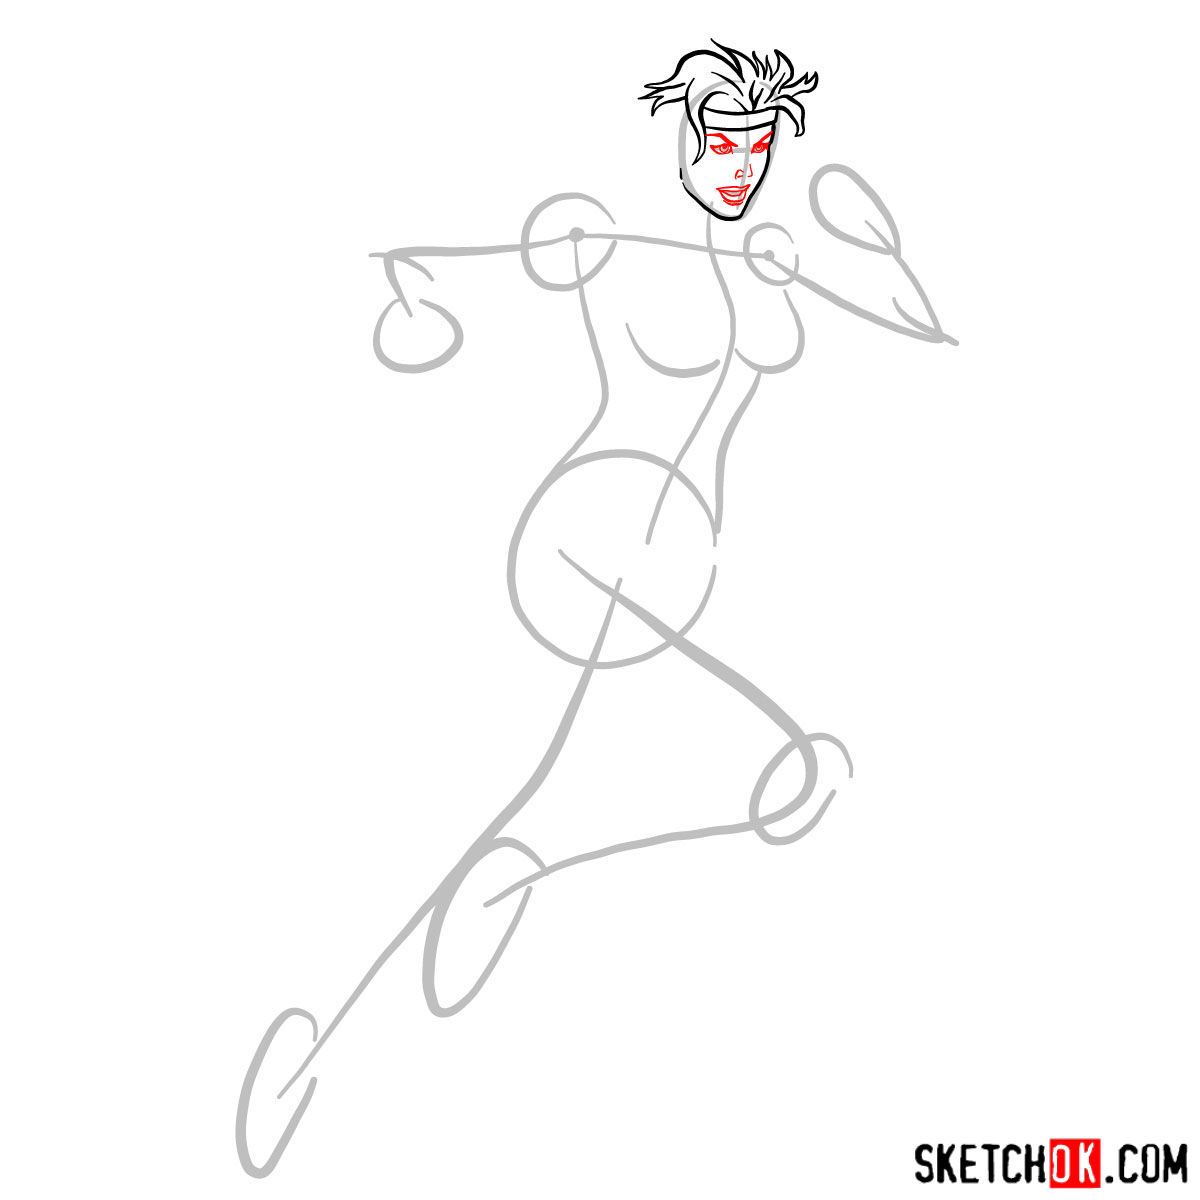
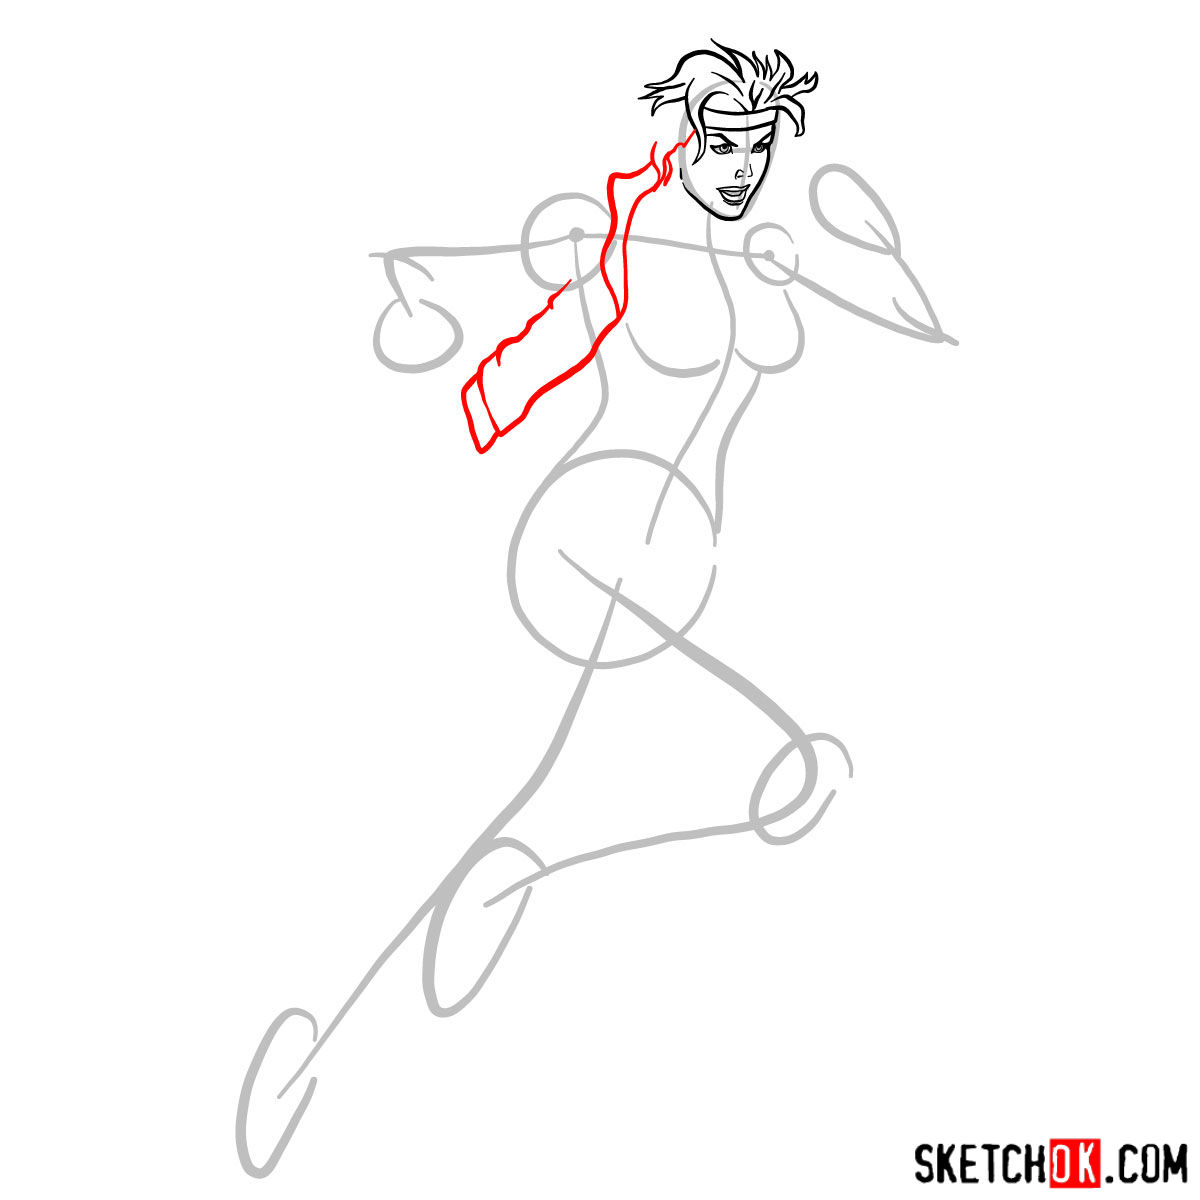
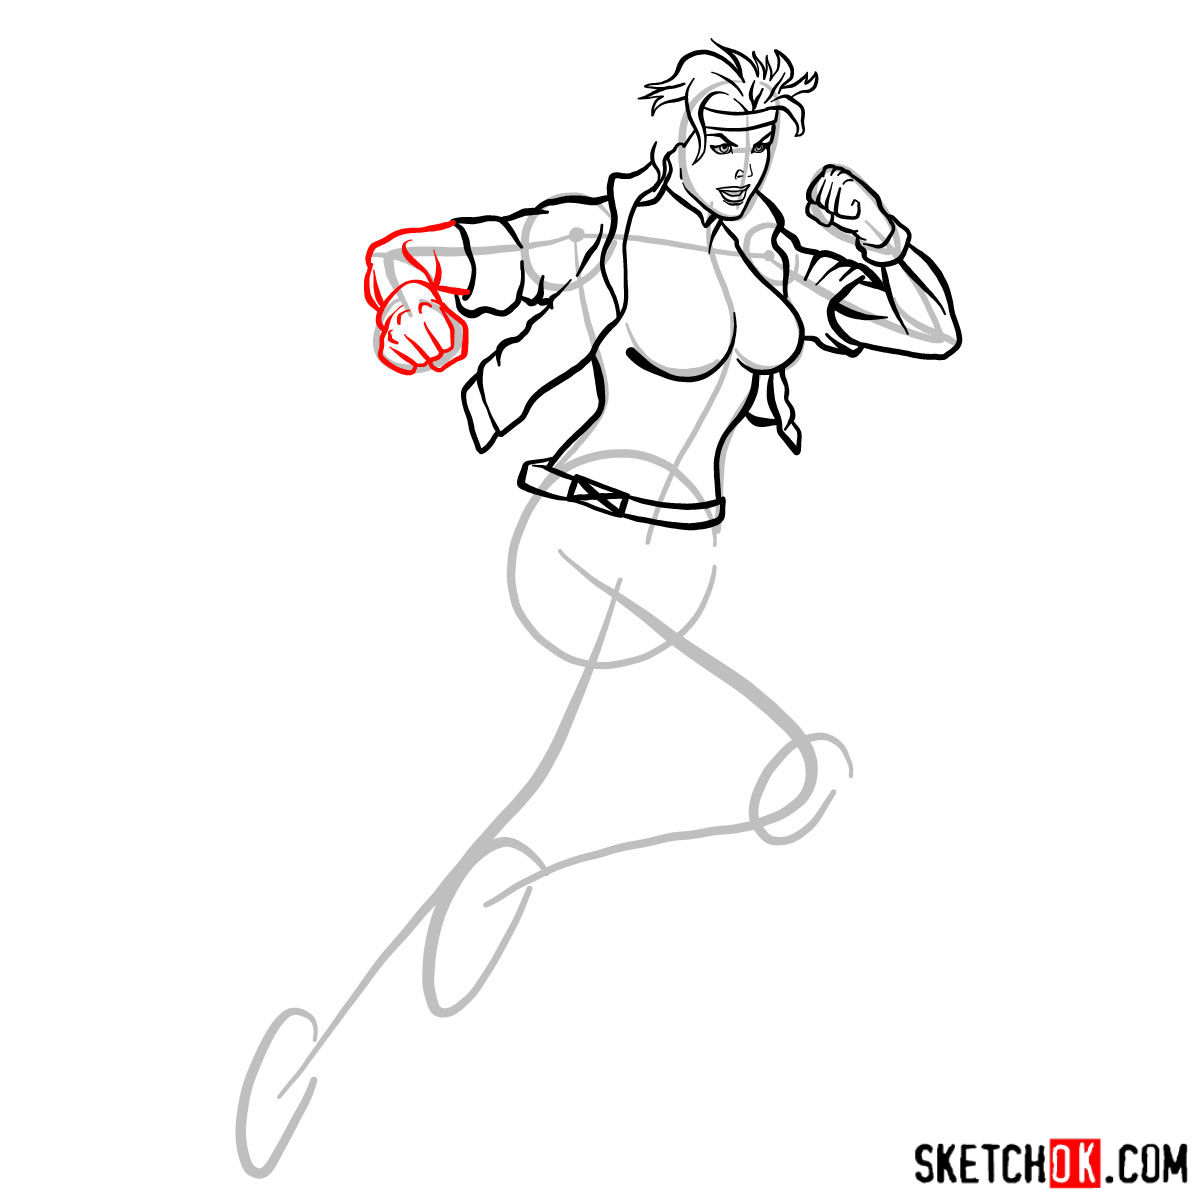
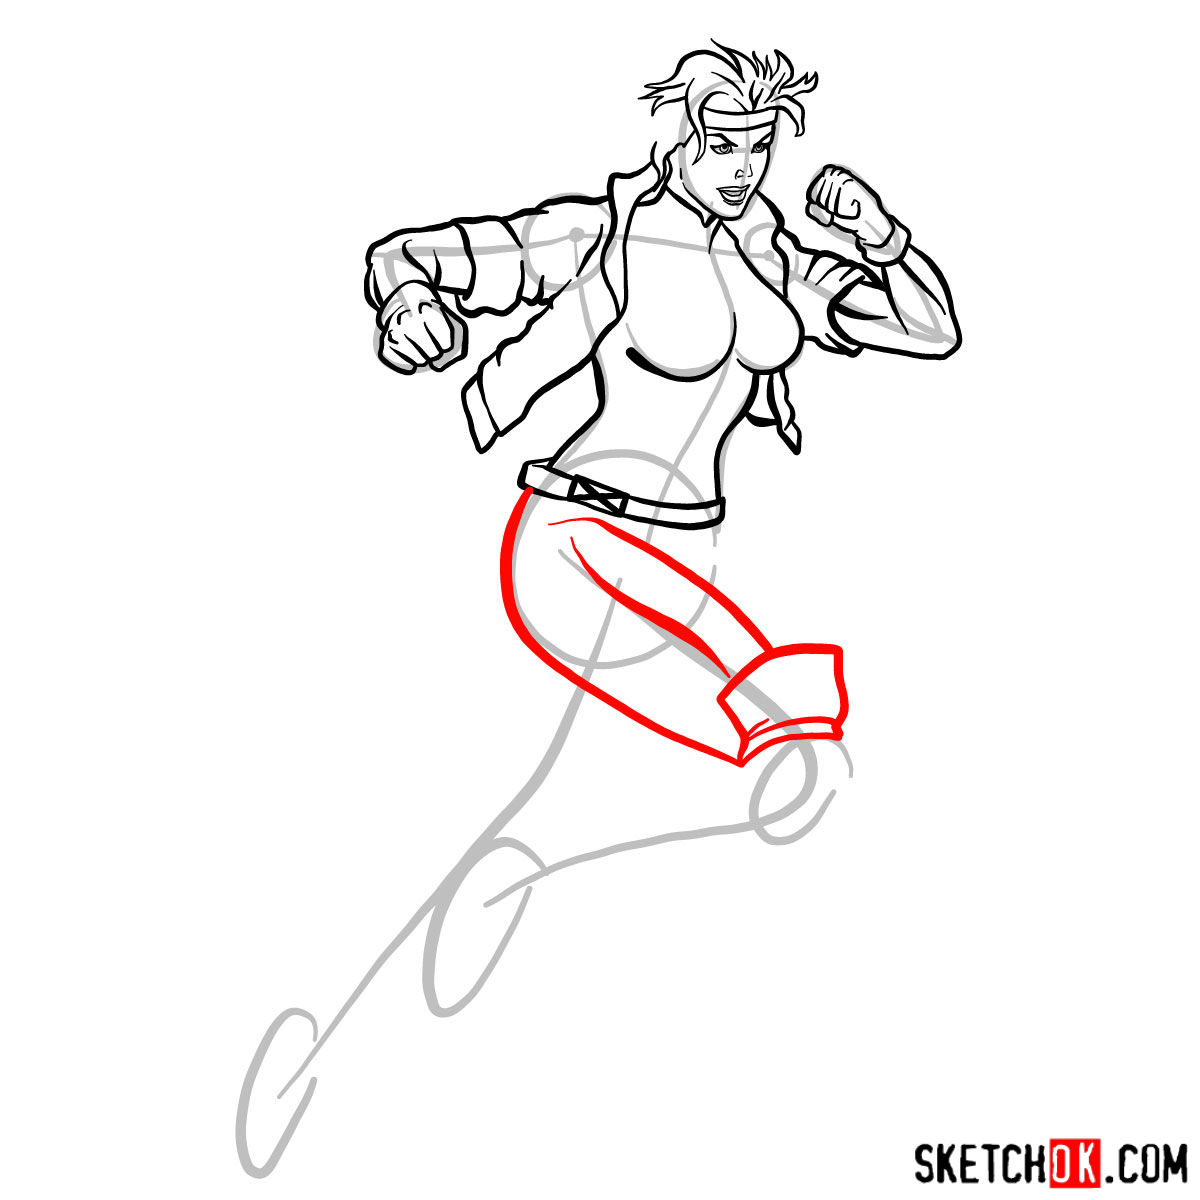
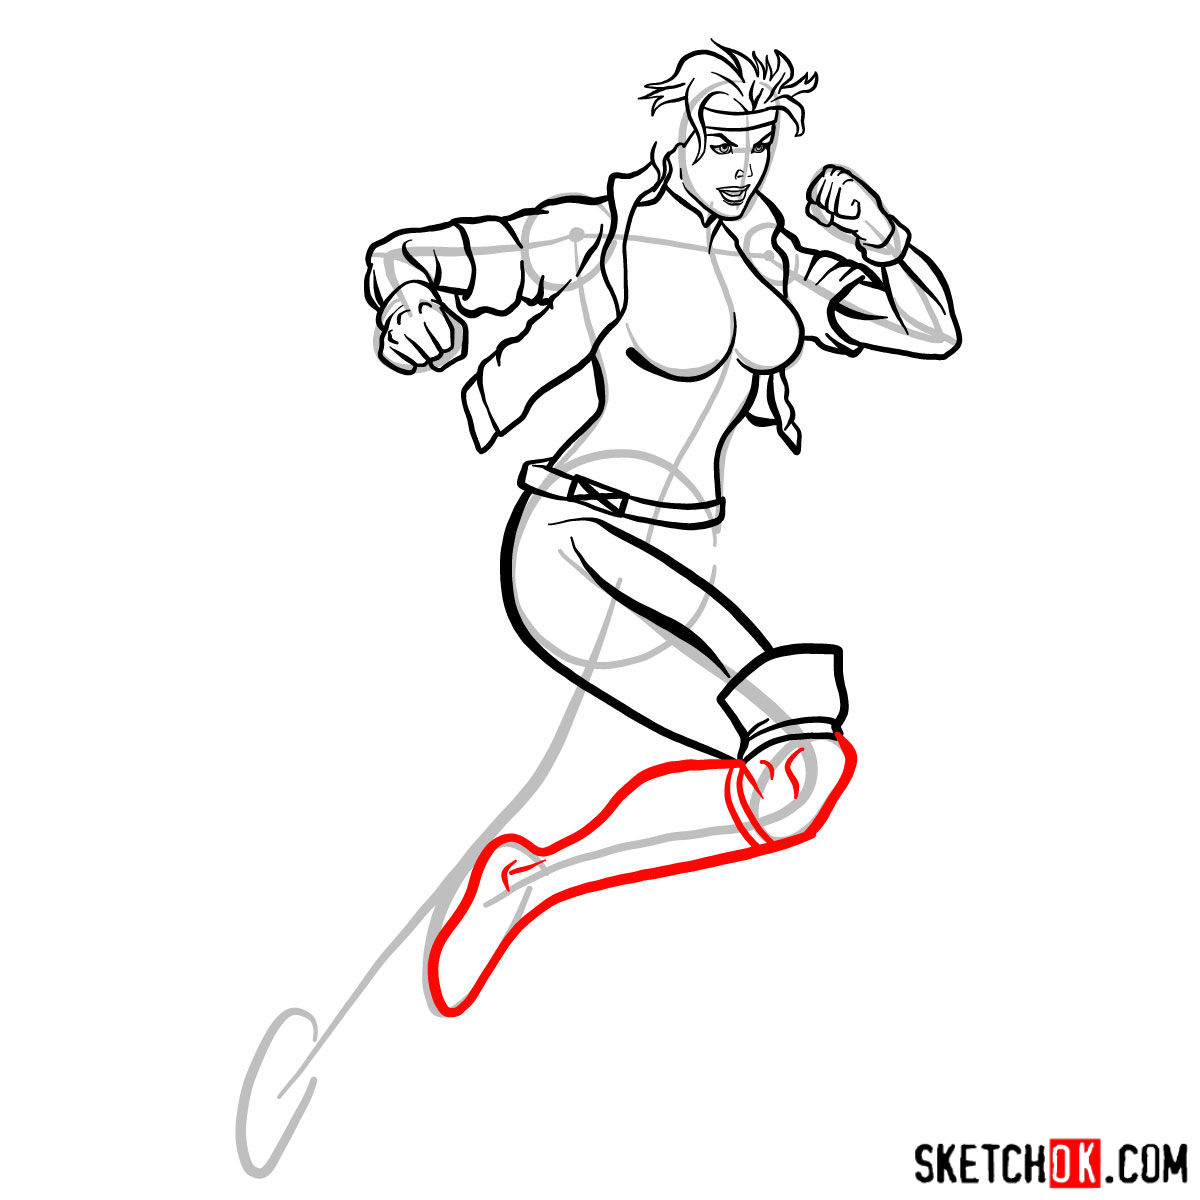
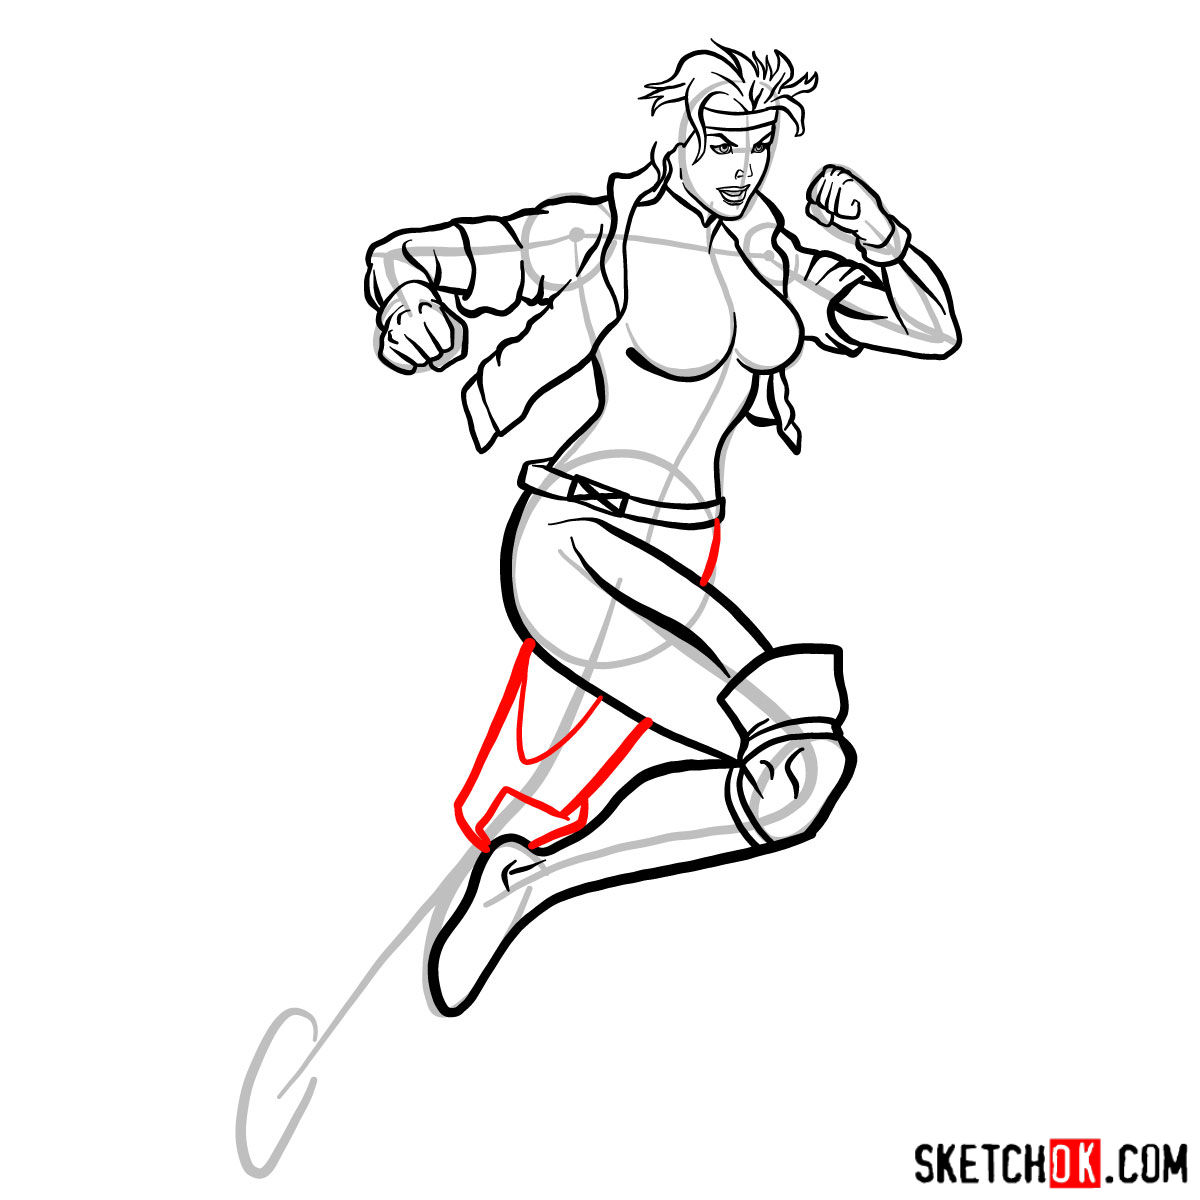
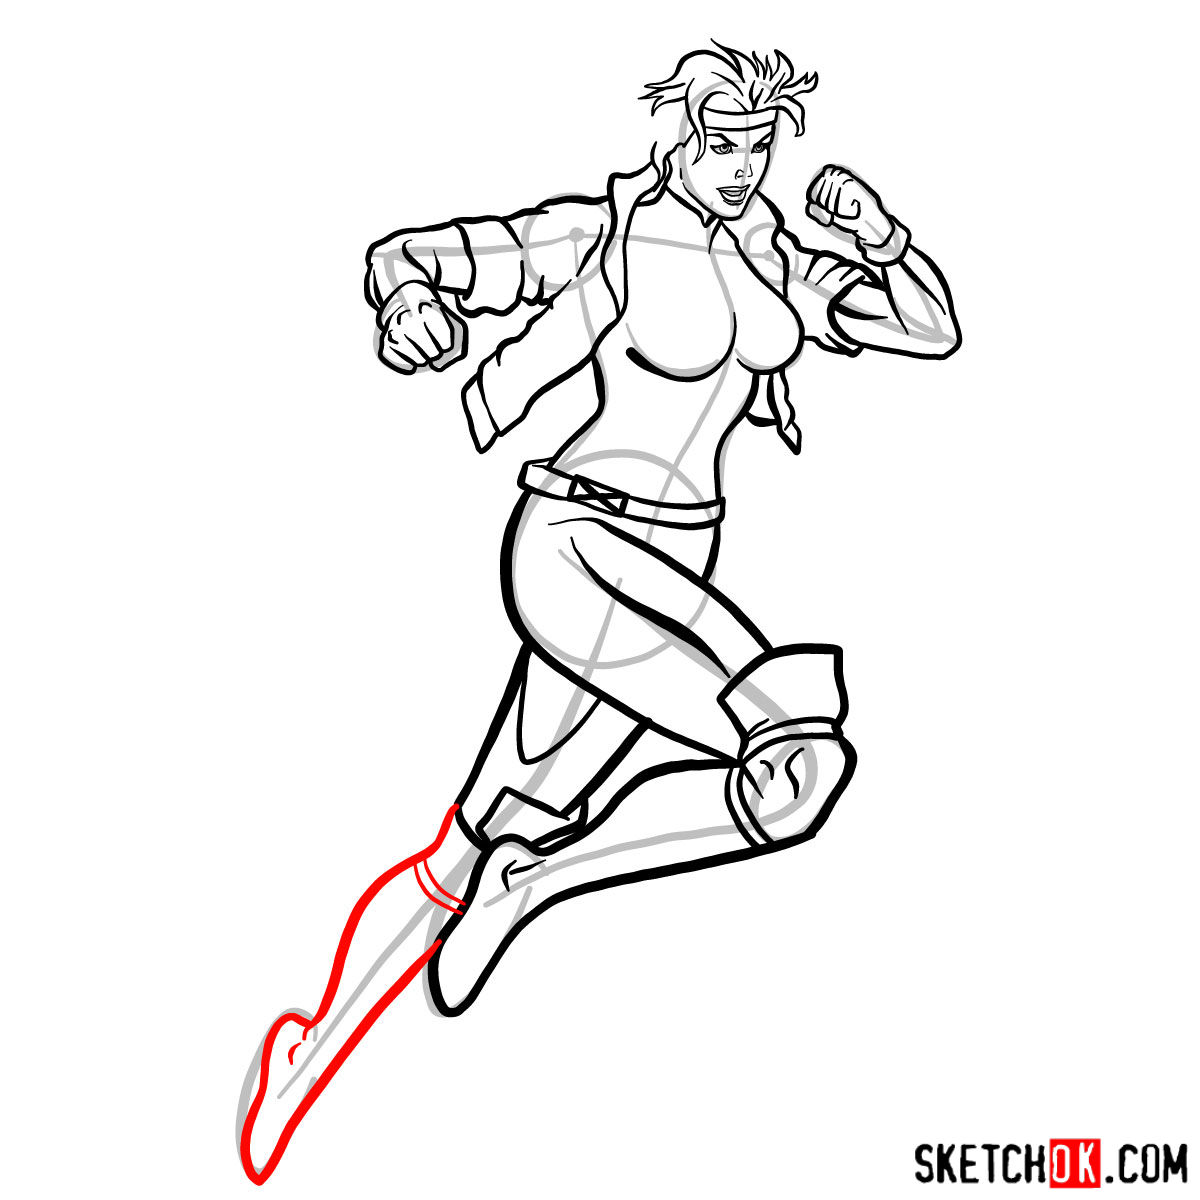
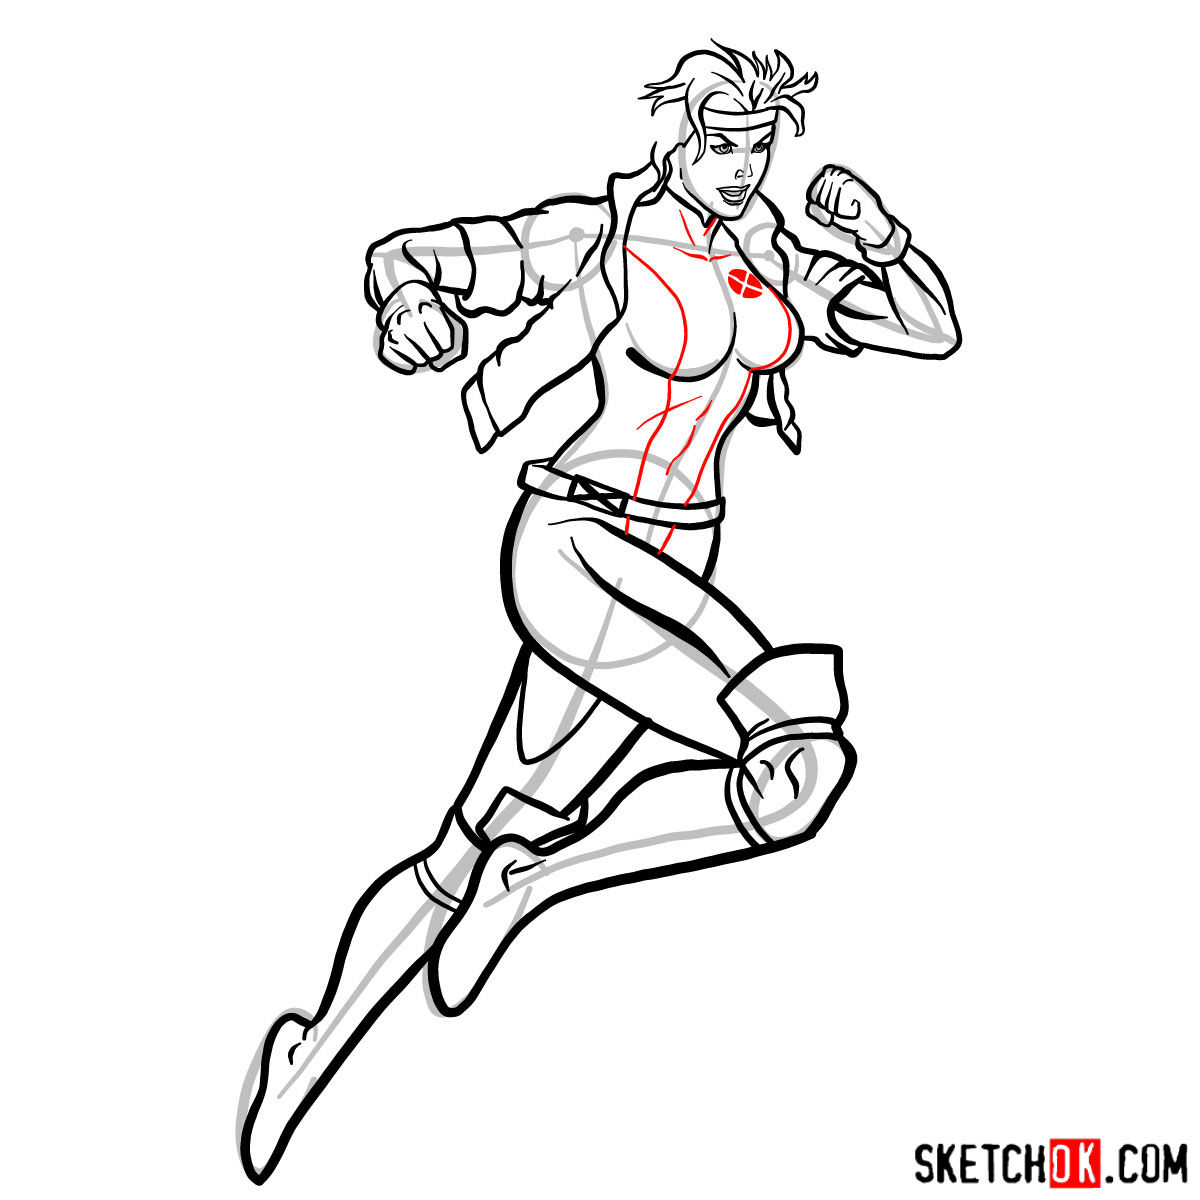
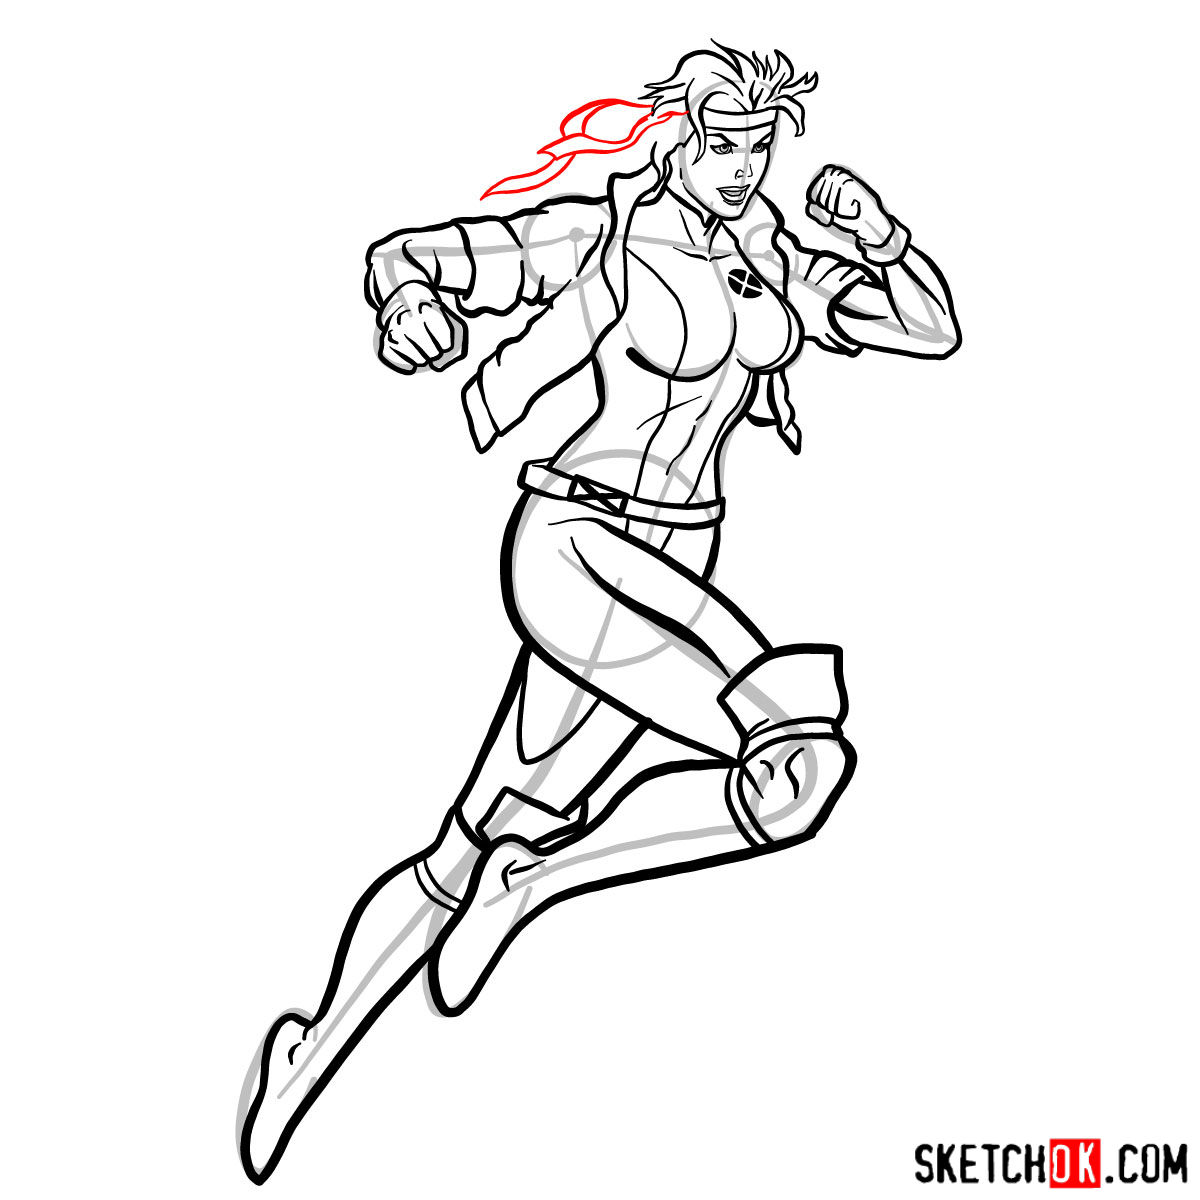
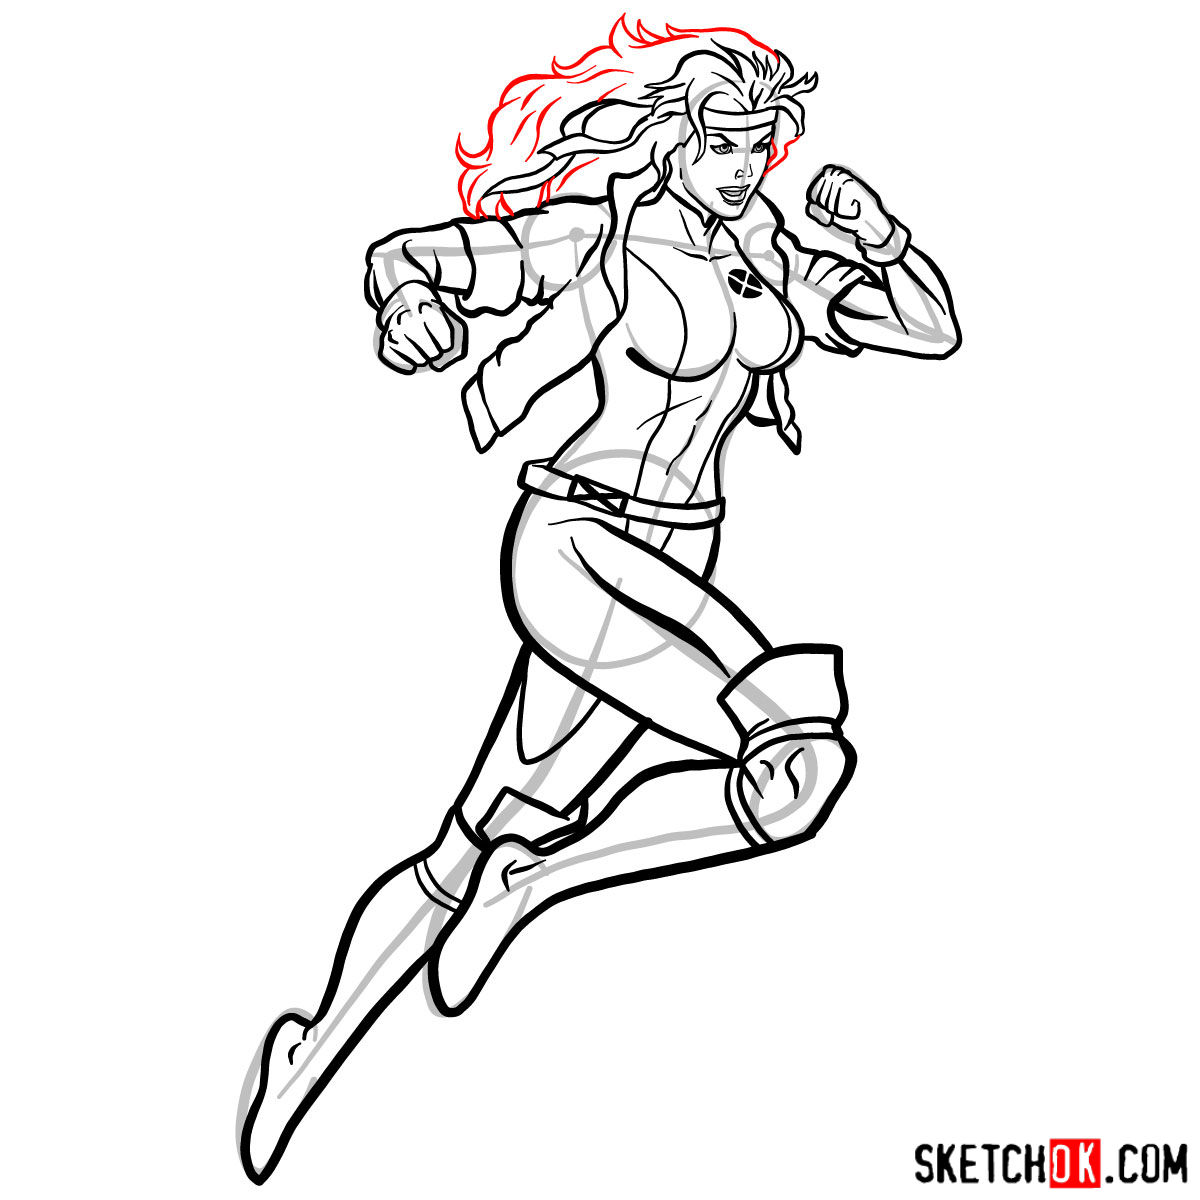
Our drawing tutorial is designed to walk you through the process of creating an amazing Rogue artwork. Pay close attention to the images, which are color-coded to guide you: red represents the current drawing step, grey indicates the basic proportions sketch, and black shows previously drawn lines.
Part 1: Establishing the Foundation
The first step in our tutorial is to create a basic sketch of Rogue’s structure. Using light pencil strokes, lay down the groundwork for her proportions. This stage is crucial in ensuring an accurate representation of the character.
Part 2: Refining Rogue’s Features
With the basic structure in place, it’s time to refine Rogue’s sketch. Focus on adding details to her face, hair, and costume. Make sure to accurately capture her distinct facial expressions and features, such as her white streak of hair and her gloves.
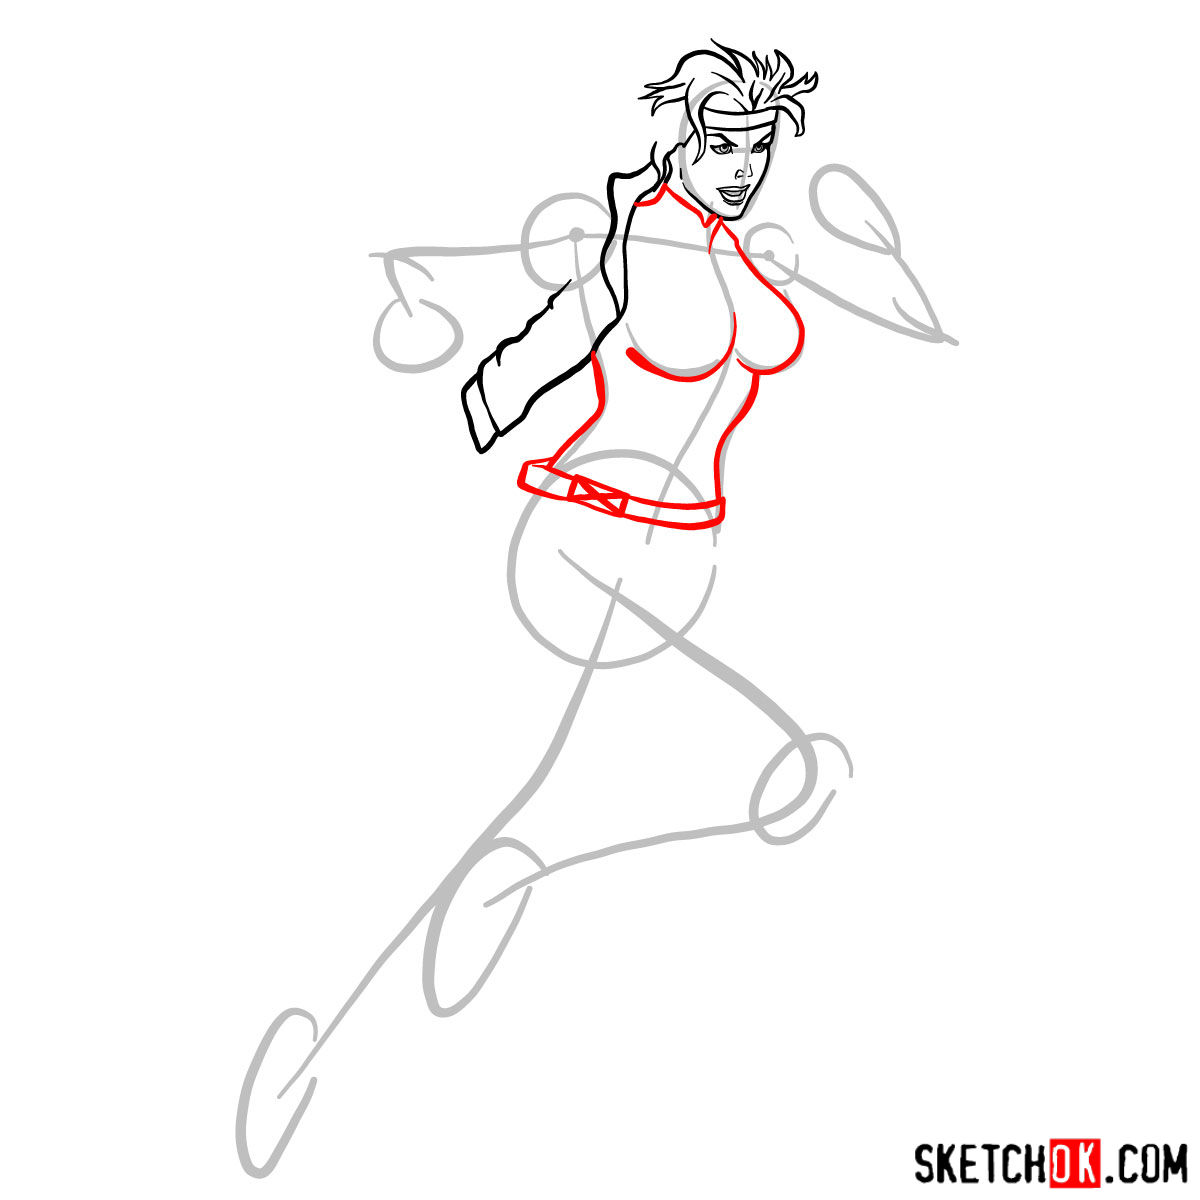
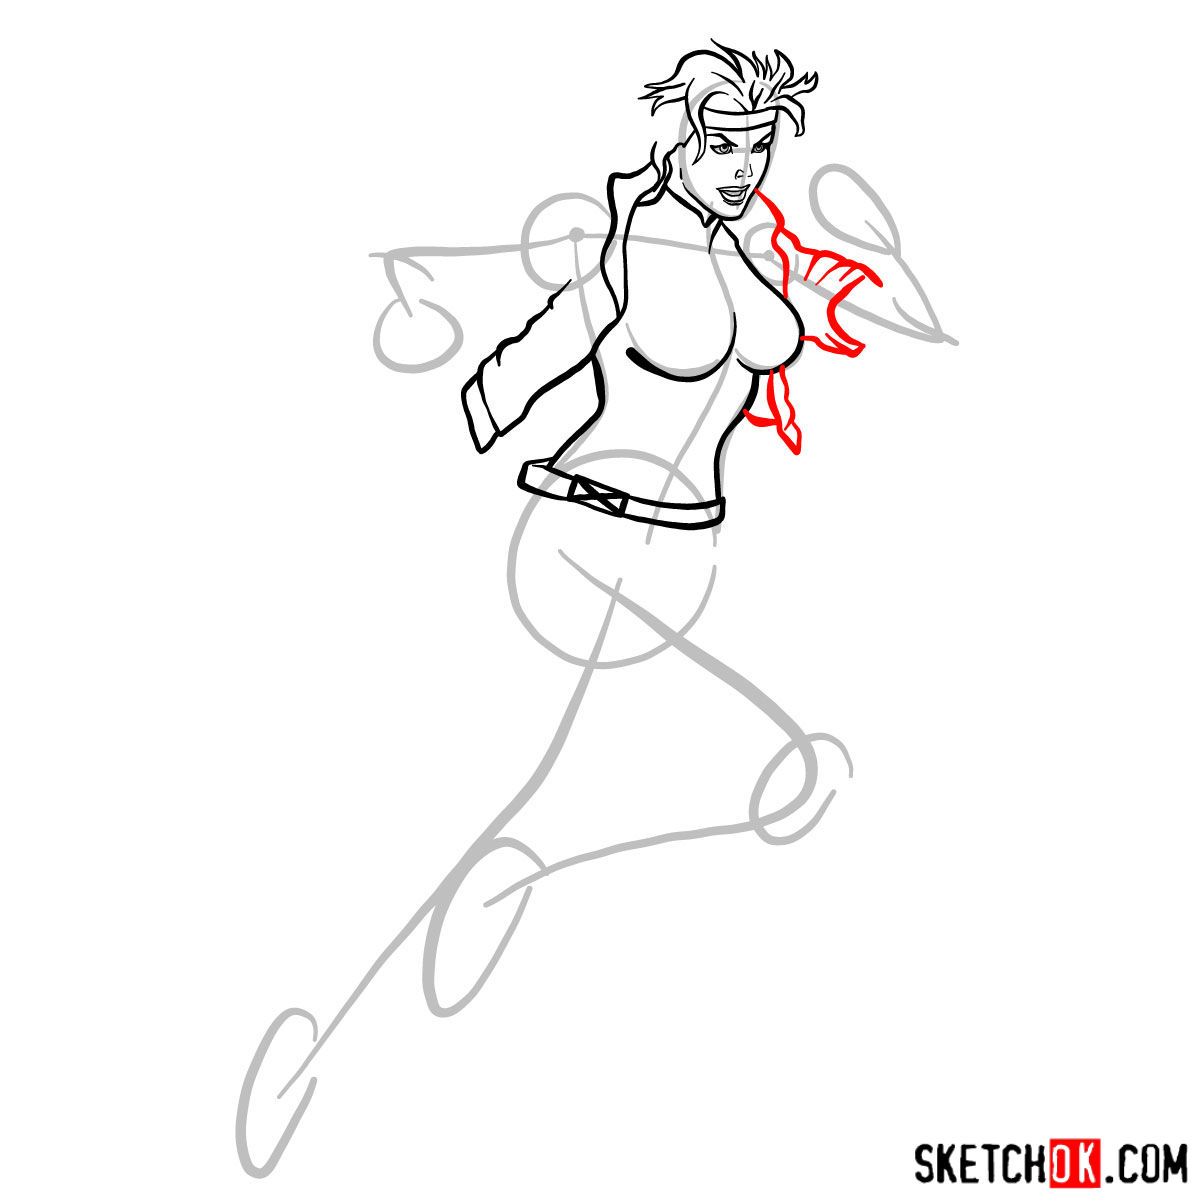
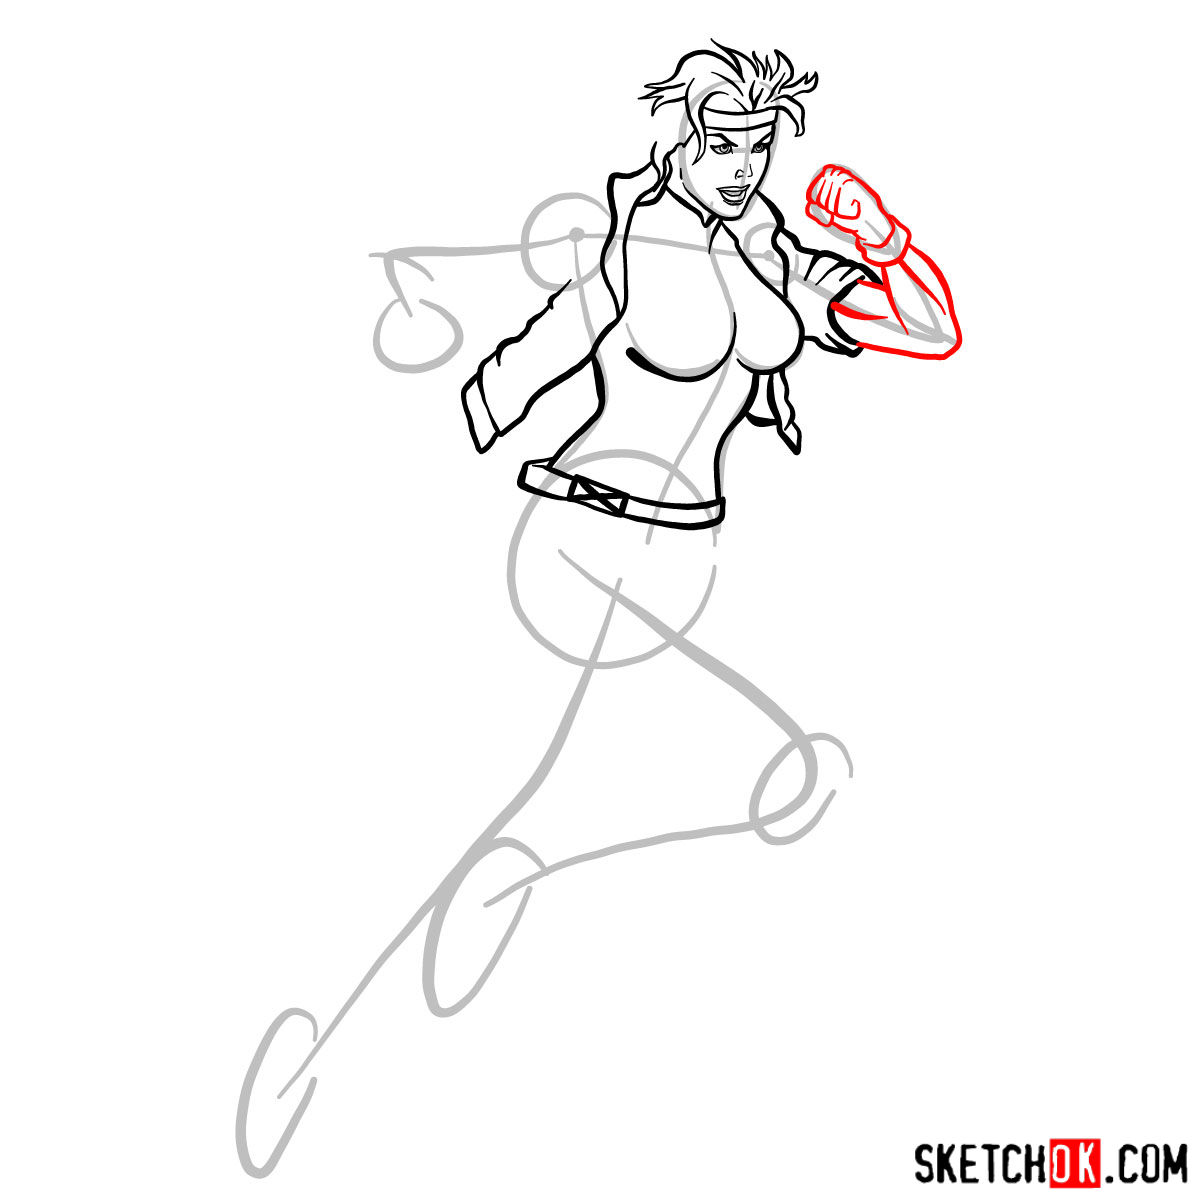
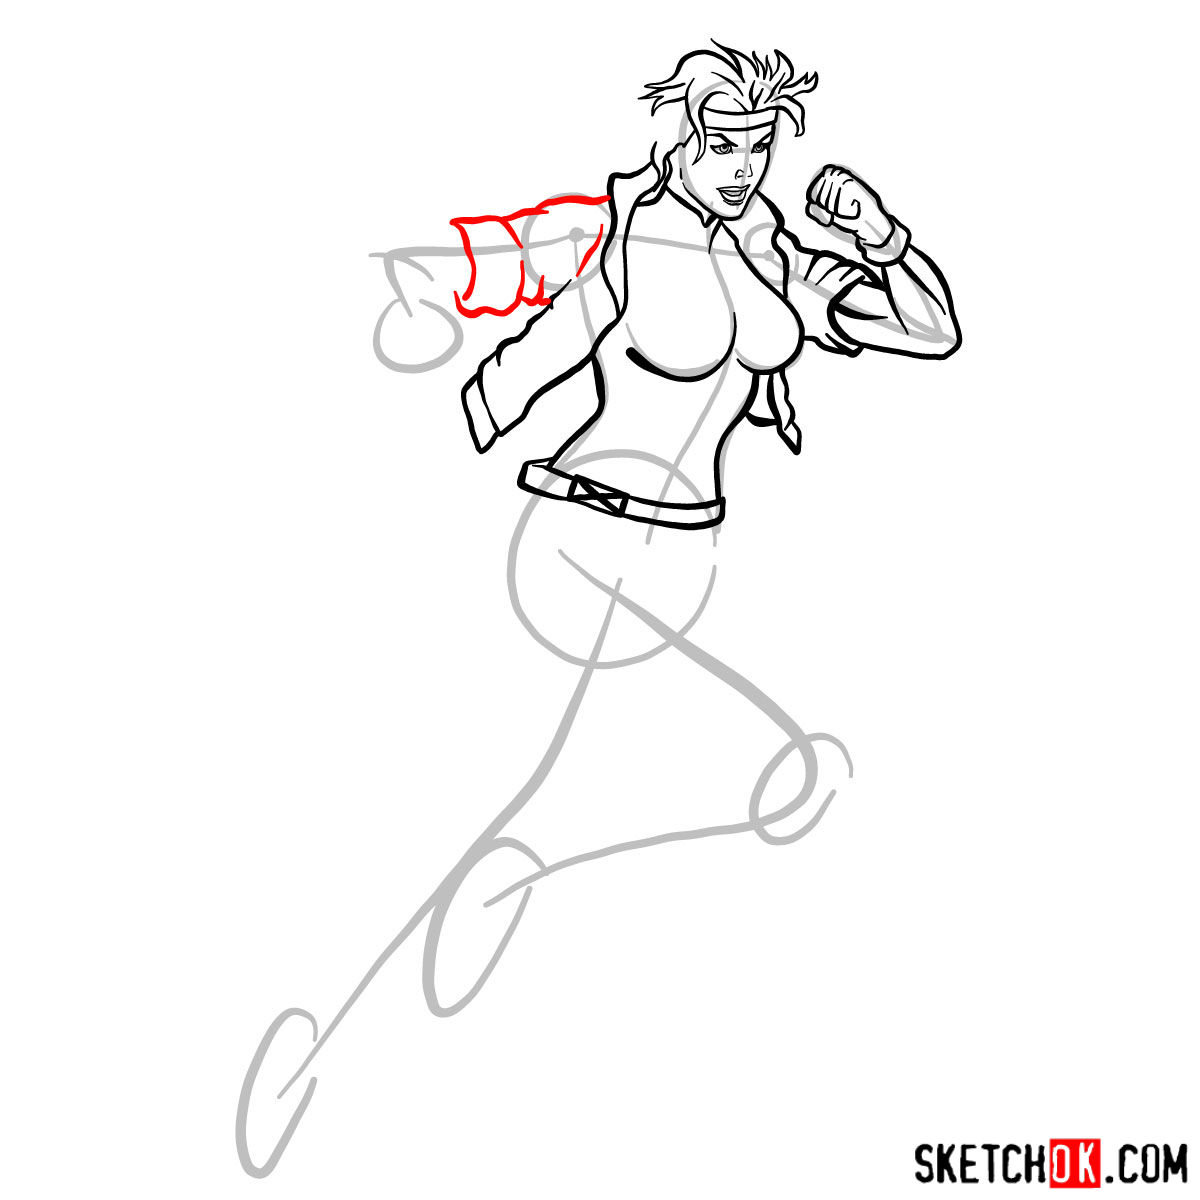
Part 3: Inking
Now that your sketch is refined, begin inking the drawing to add definition and polish. Use fineliners or inking pens to outline Rogue and enhance her details. Allow the ink to dry before proceeding to the next step.
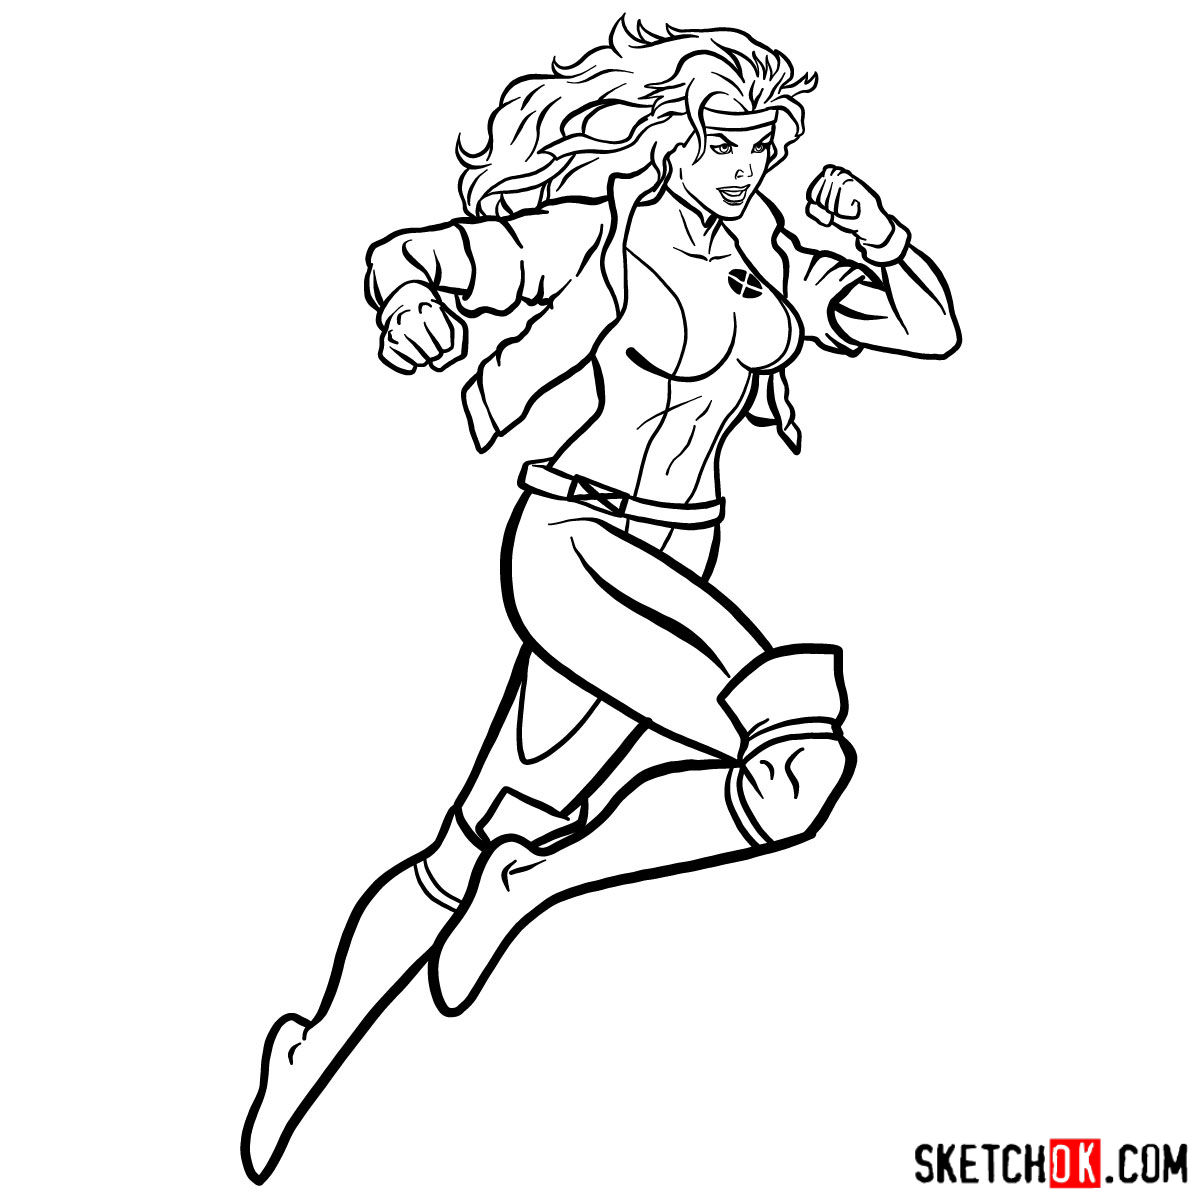
Part 4: Coloring and Shading Rogue
Bring Rogue to life with vibrant colors and dynamic shading. Use colored pencils or markers to fill in her costume and features. Experiment with shading techniques and highlights to create depth and a three-dimensional effect.
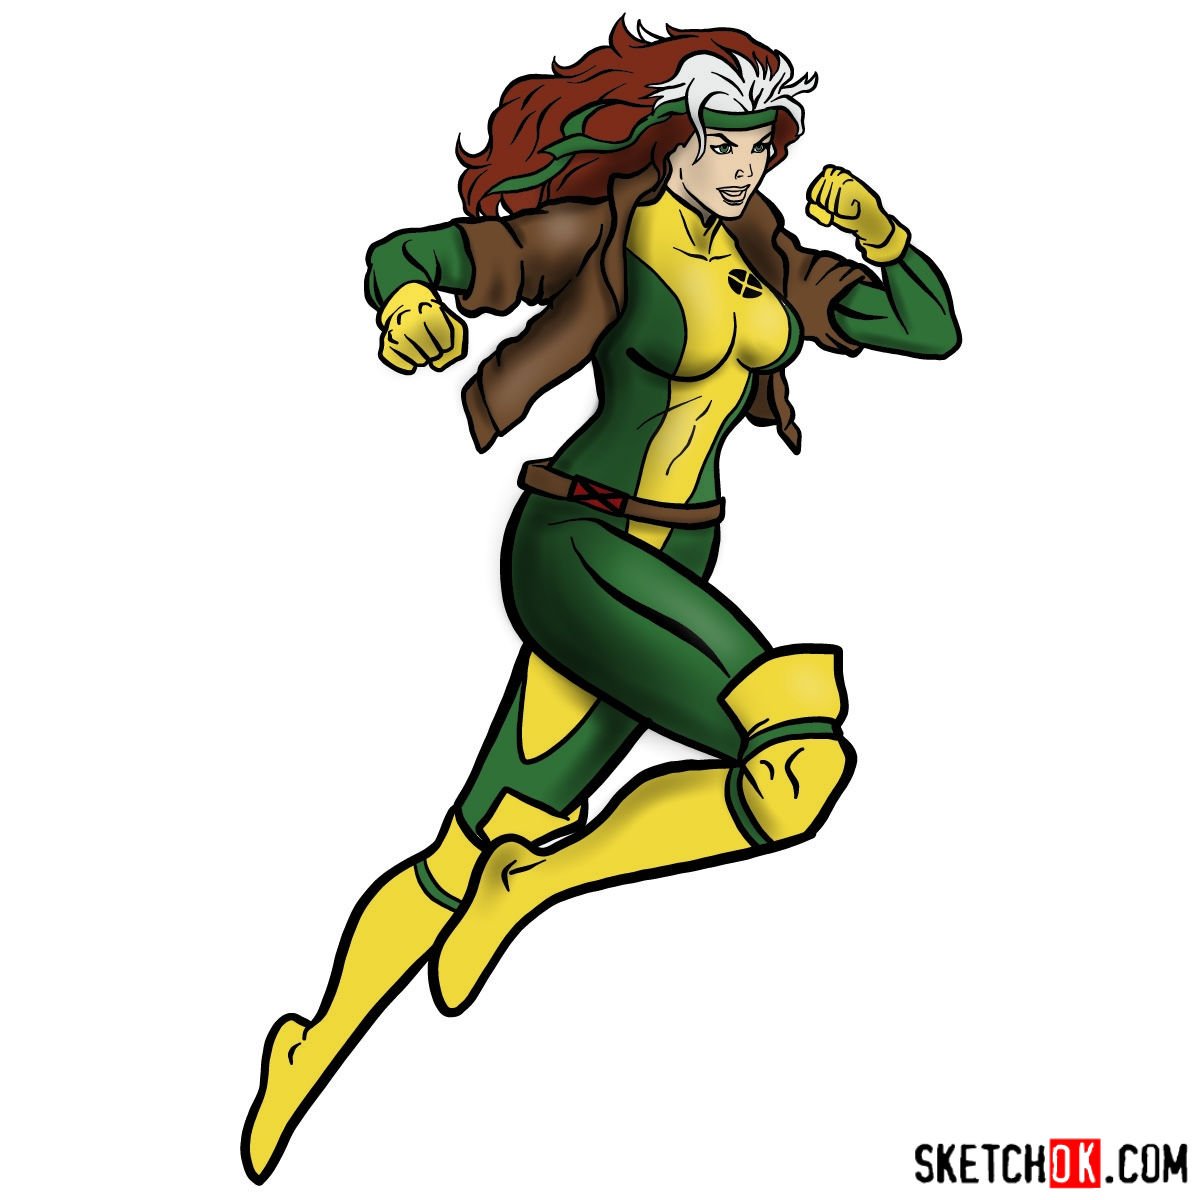
Additional Tips
Now that you’ve successfully drawn Rogue, let’s explore some additional tips and techniques to elevate your artwork:
- Study the anatomy and body language of your character to accurately capture their pose and movement.
- Practice different shading techniques to create depth and realism.
- Experiment with various textures to make your drawing more interesting and detailed.
- Use reference images to ensure the accuracy of your character’s costume and features.
- Develop your personal style by incorporating unique elements and techniques into your drawings.
- Be patient and practice regularly to improve your skills.
- Don’t be afraid to make mistakes – learn from them and grow as an artist.
- Observe other artists’ work and learn from their techniques.
- Try using different art supplies to achieve the best results.
- Share your artwork with others for feedback and support.
Frequently Asked Questions
Q: How can I improve my drawing proportions?
A: To improve your drawing proportions, practice breaking down complex subjects into basic shapes and forms. This will help you understand the underlying structure and make it easier to achieve accurate proportions. Additionally, using a reference image and grid lines can be beneficial when working on proportions.
Q: How can I make my drawings look more realistic?
A: To make your drawings look more realistic, focus on mastering shading techniques, understanding light and shadow, and accurately representing textures. Observing real-life objects and reference images can also help improve the realism of your drawings.
Q: What’s the best way to practice drawing different poses and expressions?
A: The best way to practice drawing different poses and expressions is by using references, such as photos, videos, or even live models. Sketching quick gesture drawings can also help you capture the essence of movement and expression more effectively.
Conclusion: The X-Factor in Your Art
Congratulations on completing your Rogue drawing! Remember, practice makes perfect, so don’t hesitate to revisit this tutorial and draw Rogue, as well as other X-Men characters like Wolverine, Storm, or Cyclops. Keep refining your skills, and soon you’ll have a gallery of impressive superhero art. If you enjoyed this tutorial, please consider supporting me by sharing the link to the guide, checking out other tutorials, or donating on . Happy drawing!