Are you an aspiring artist looking for a fun and rewarding challenge? Look no further! In this tutorial, we’ll teach you how to draw a Mercedes-Benz 300SL Gullwing, a true classic that remains a beloved icon in the automotive world. With our step-by-step guide, you’ll bring this legendary car to life on paper, while also learning valuable drawing techniques to improve your artistic skills. So grab your pencils, and let’s get started!
The Timeless Charm of the Mercedes-Benz 300SL Gullwing
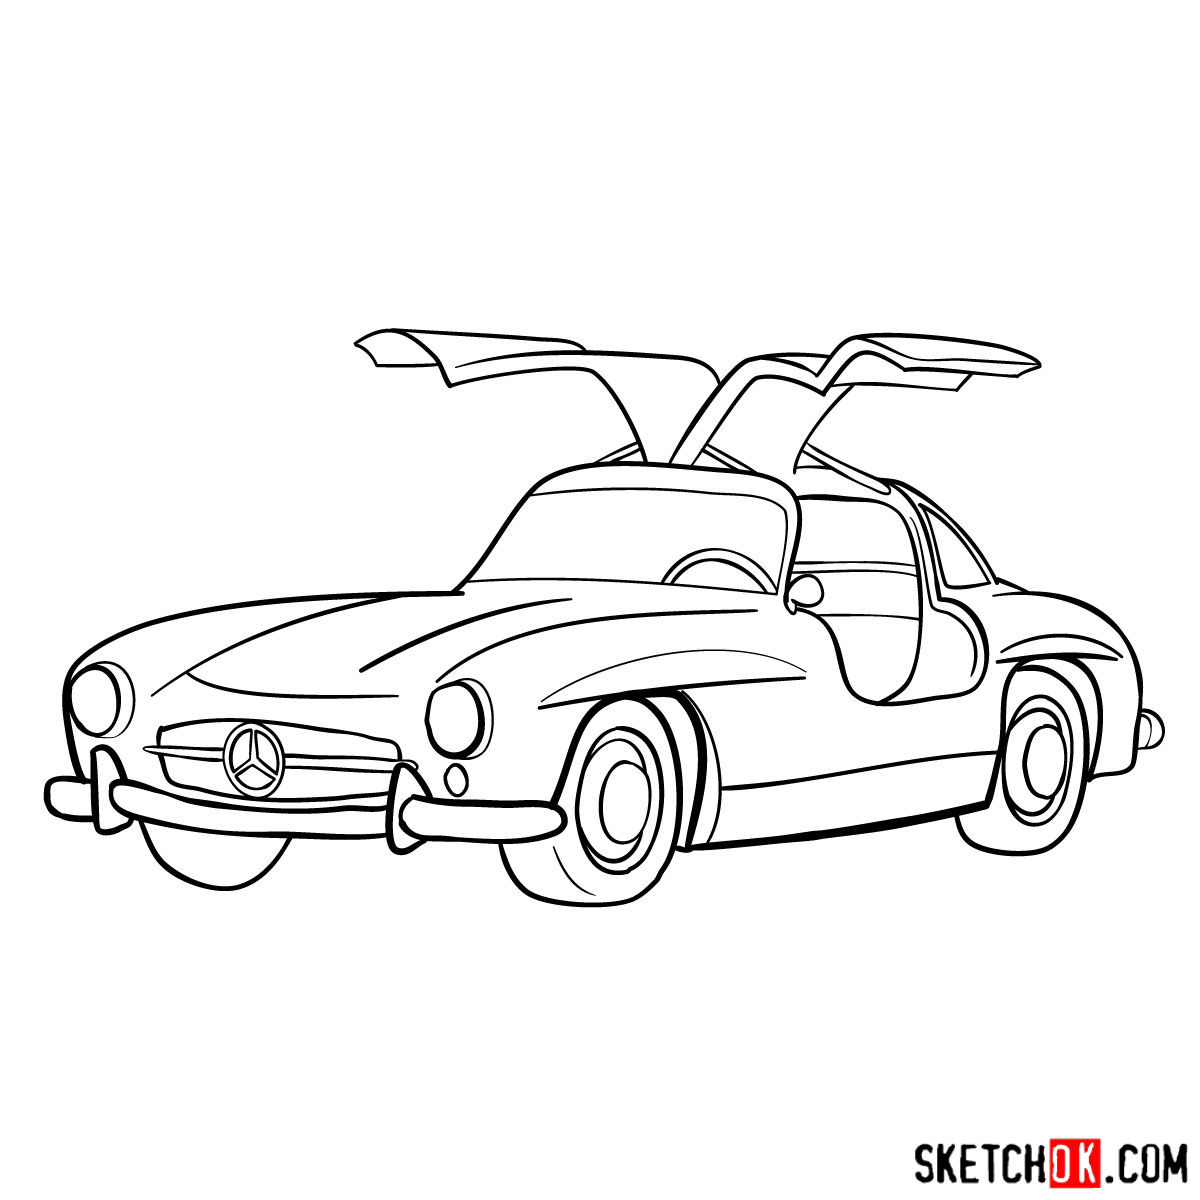
The Mercedes-Benz 300SL Gullwing is not just a car; it’s a symbol of automotive excellence, elegance, and innovation. Introduced in the 1950s, this magnificent machine stole the hearts of car enthusiasts with its groundbreaking design, unmatched performance, and iconic gullwing doors. Its timeless appeal has only grown stronger over the years, making the 300SL Gullwing a perfect subject for artists looking to capture the essence of automotive history on paper.
Gearing Up for Your Artistic Journey
Before we begin, let’s gather the necessary tools and materials to ensure a smooth drawing experience. While you’re free to use any drawing materials you prefer, we recommend starting with a few essentials:
- Sketching pencils (HB, 2B, and 4B)
- Eraser
- Sharpener
- Drawing paper
- Fineliner pens or markers for inking
- Colored pencils or markers for coloring
With your tools at the ready, it’s time to embark on our step-by-step journey to draw the 300SL Gullwing.
Step-by-Step Drawing Guide: Bringing the Gullwing to Life
Our drawing tutorial is divided into four main parts, each designed to build upon the previous one and bring you closer to your artistic masterpiece.
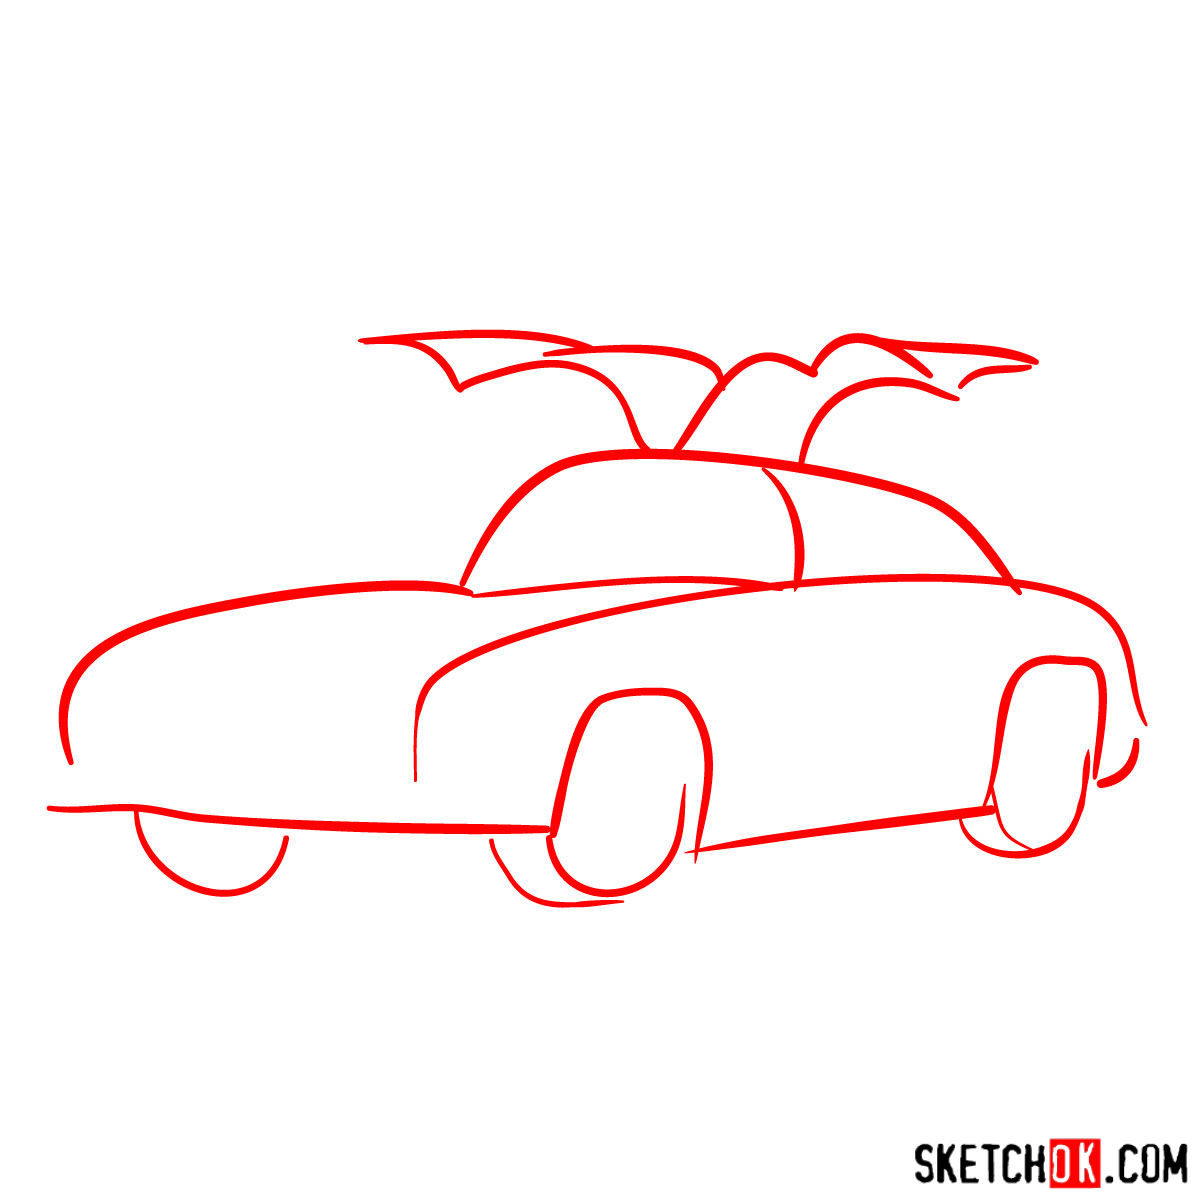
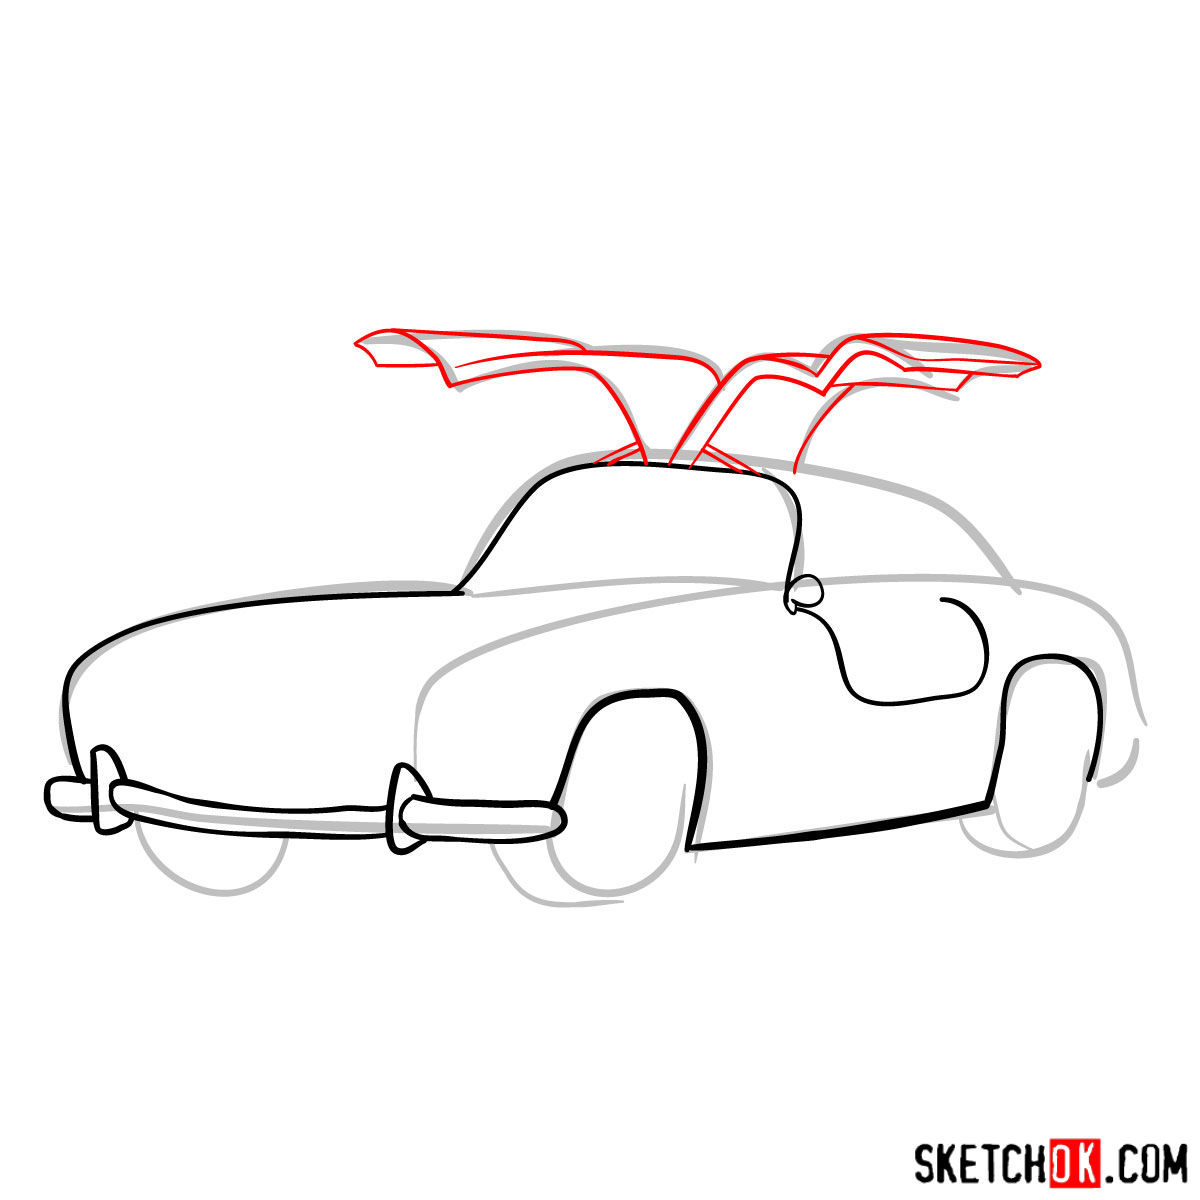
Part 1: Laying the Foundation
The first step in drawing the Mercedes-Benz 300SL Gullwing is to create a basic sketch using light pencil strokes. This foundational sketch will help you establish the car’s proportions and overall structure. Remember, the red color in the tutorial images represents the current step, while the grey color indicates the basic proportions sketch, and the black color shows the progress made so far.
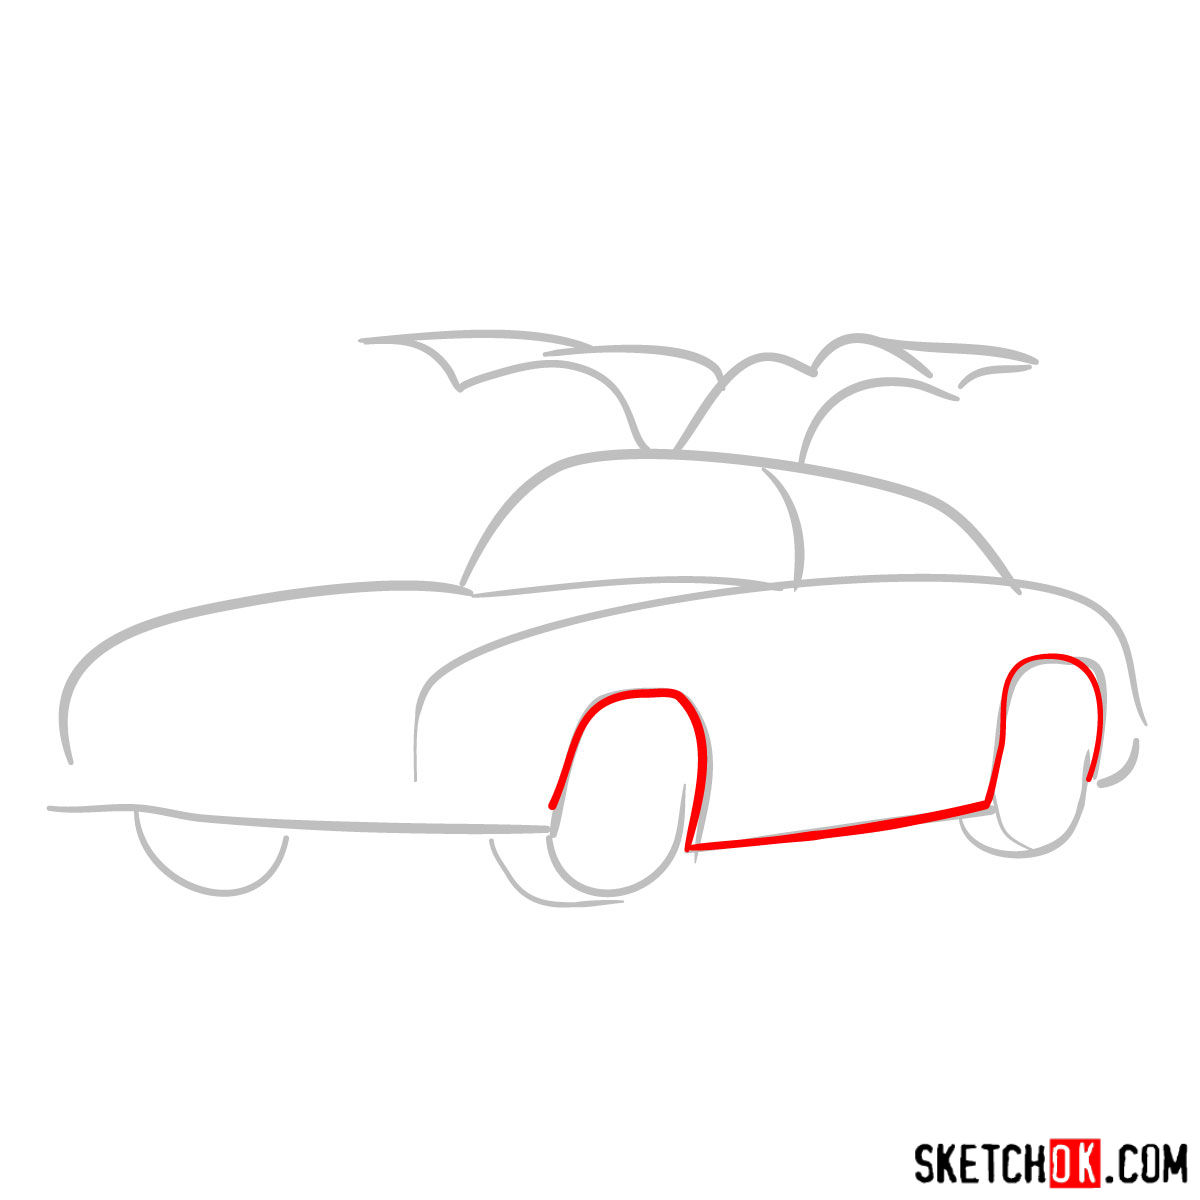
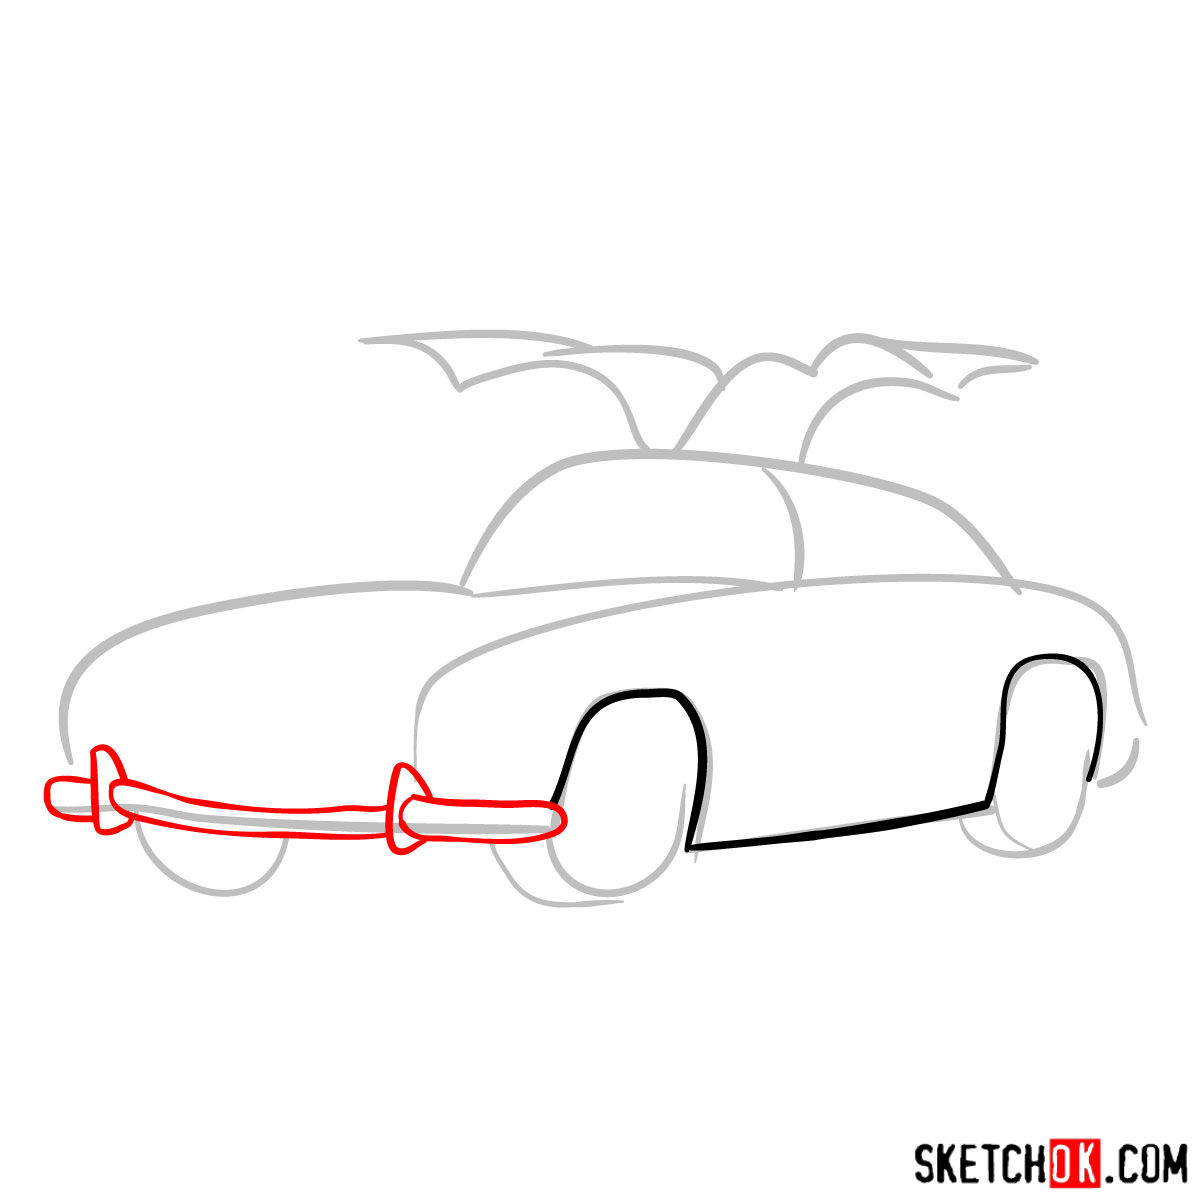
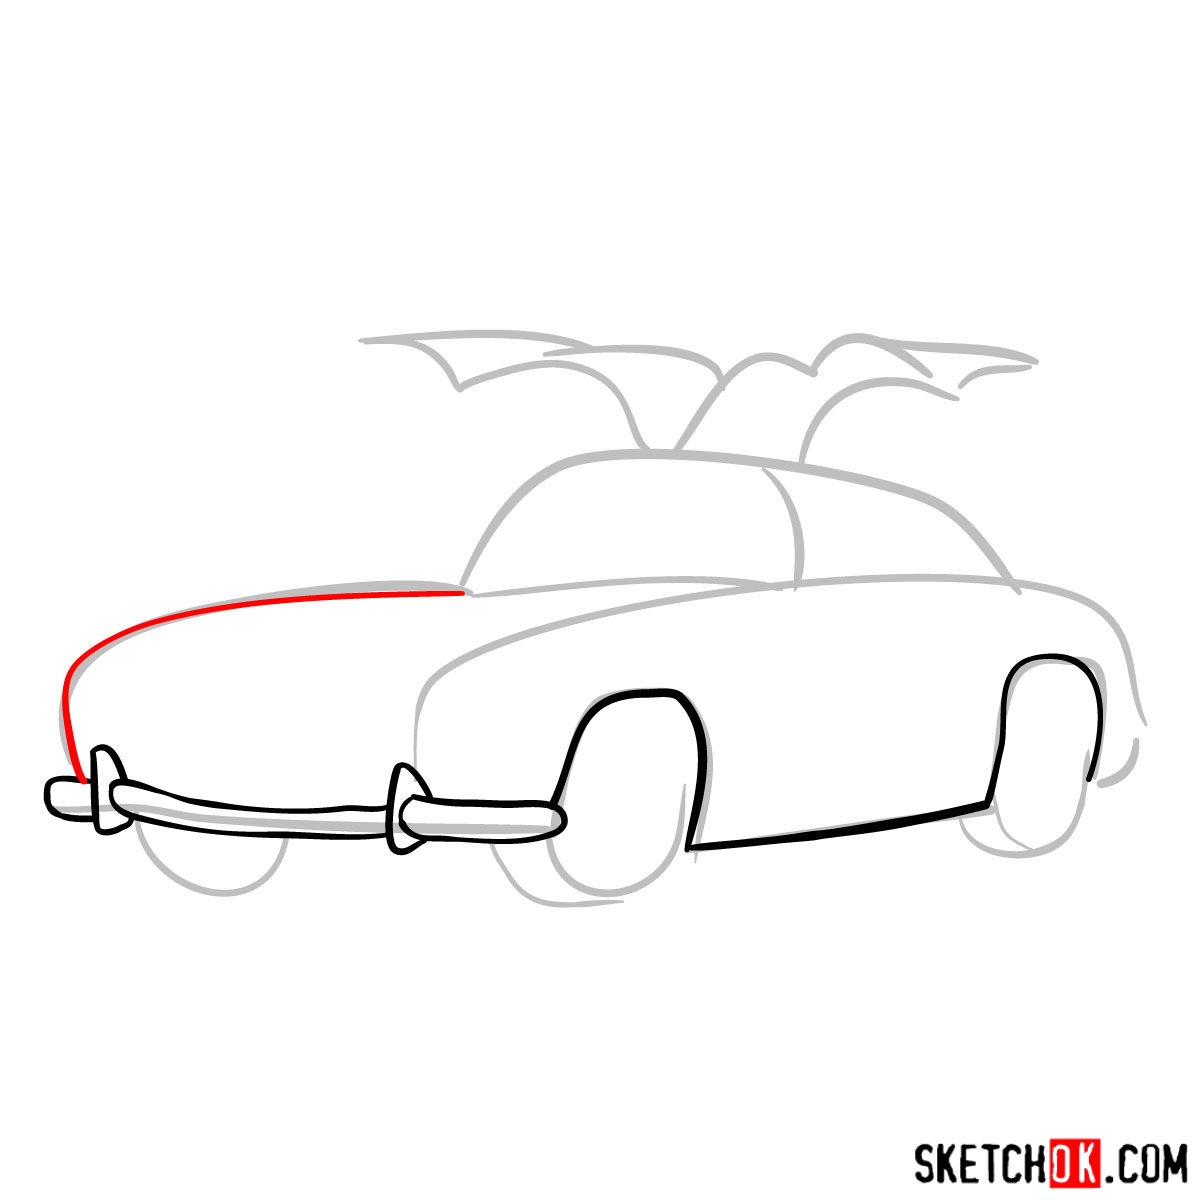
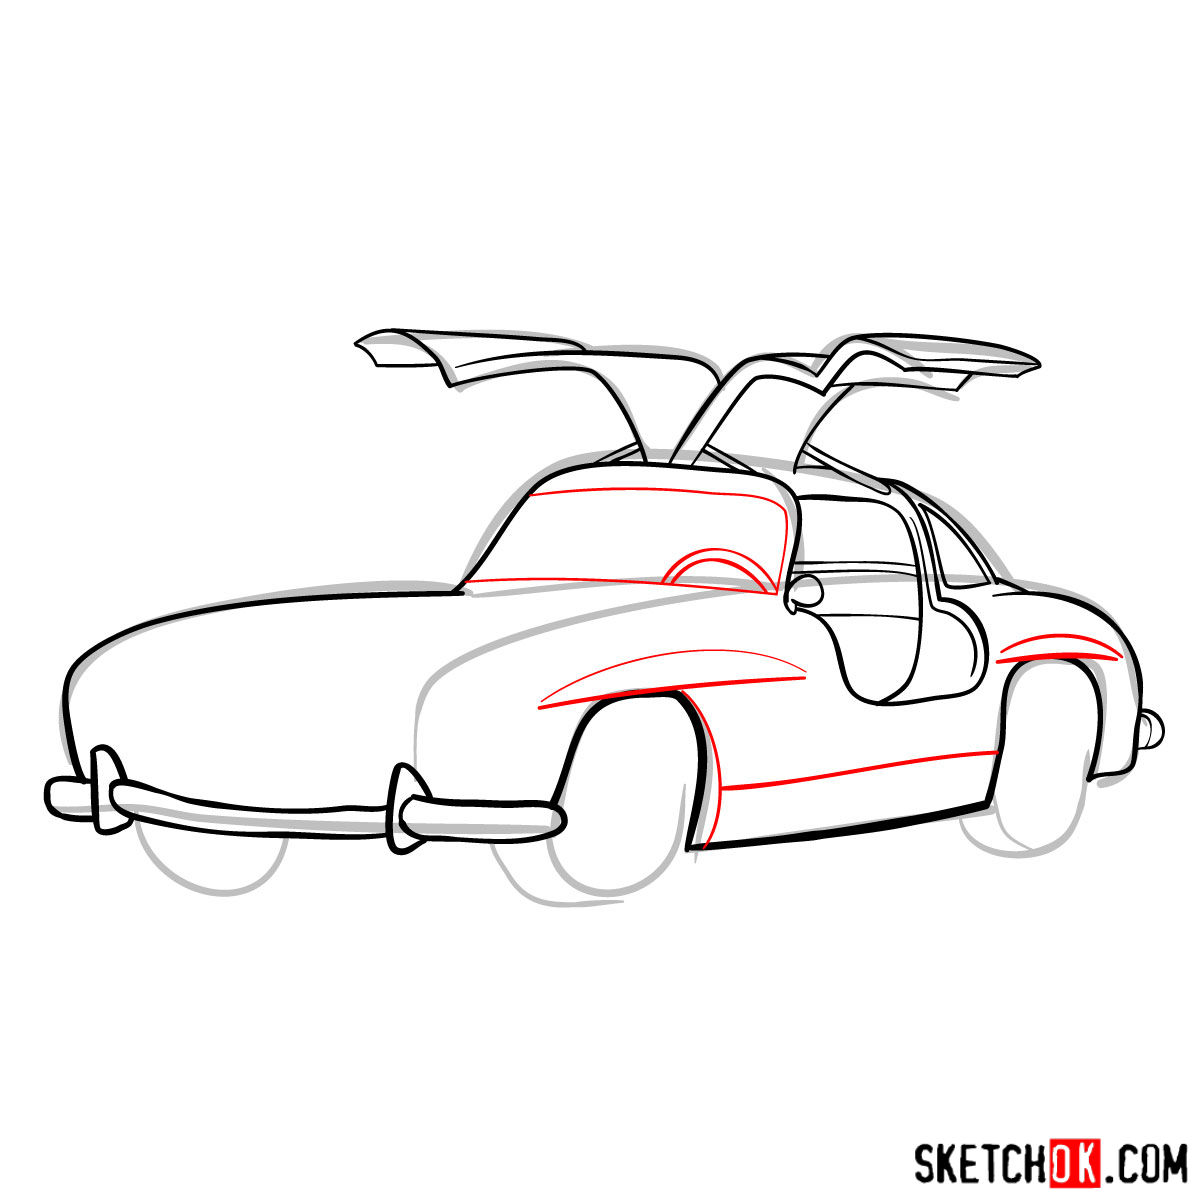
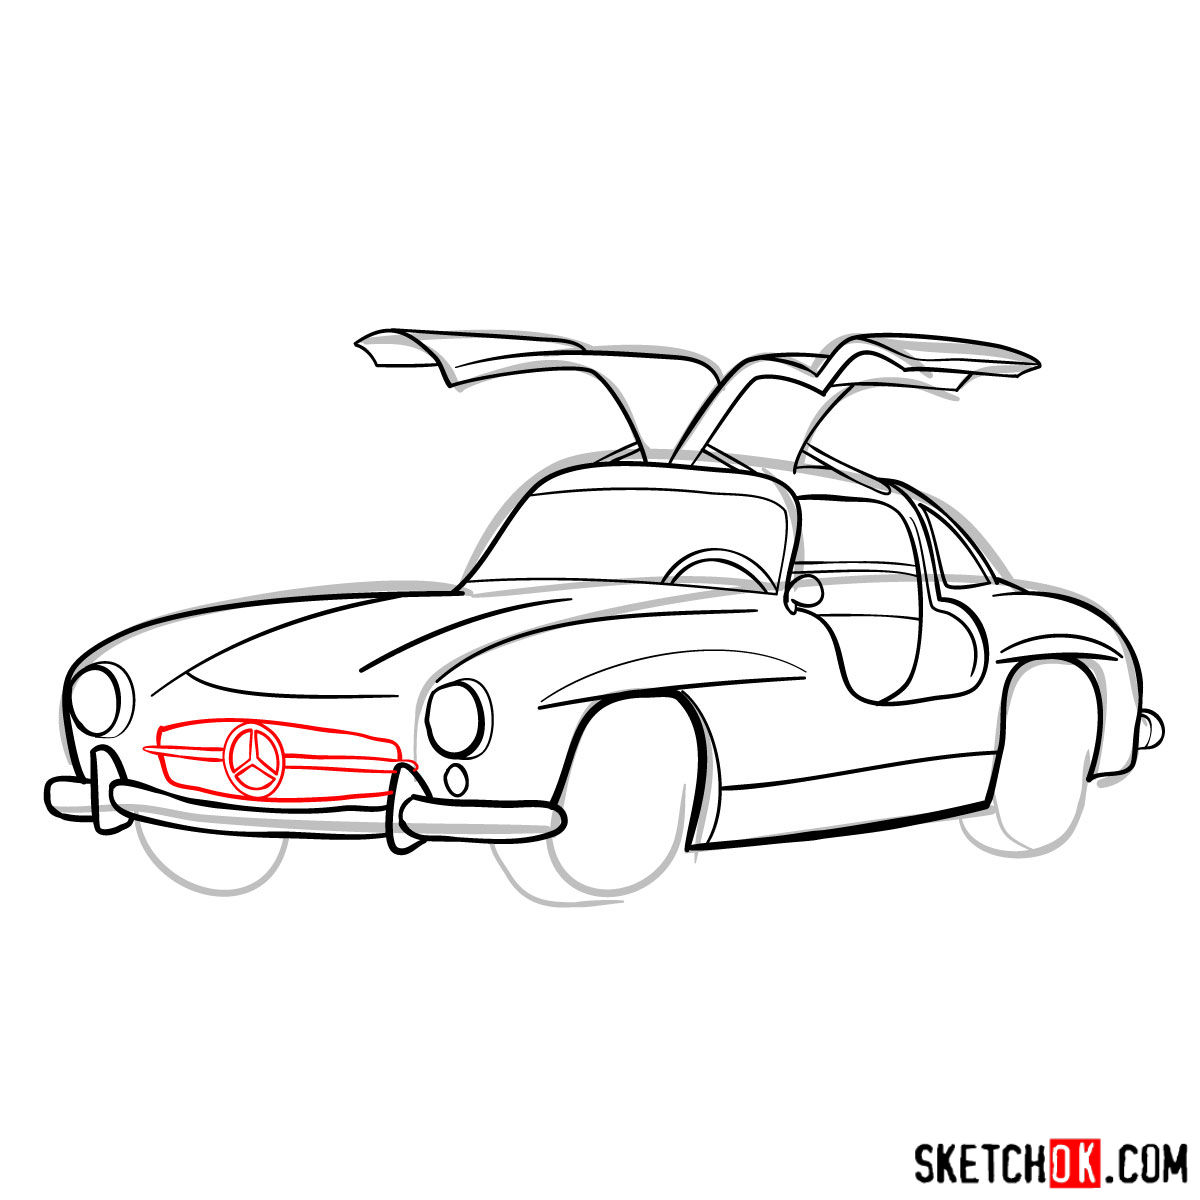
Part 2: Refining the Masterpiece
With the basic sketch in place, it’s time to refine your drawing. In this step, you’ll focus on adding details, such as the car’s distinctive features and contours, while also fine-tuning the proportions to create a more accurate representation of the Mercedes-Benz 300SL Gullwing. Patience is key during this stage, as careful attention to detail will pay off in the final result.


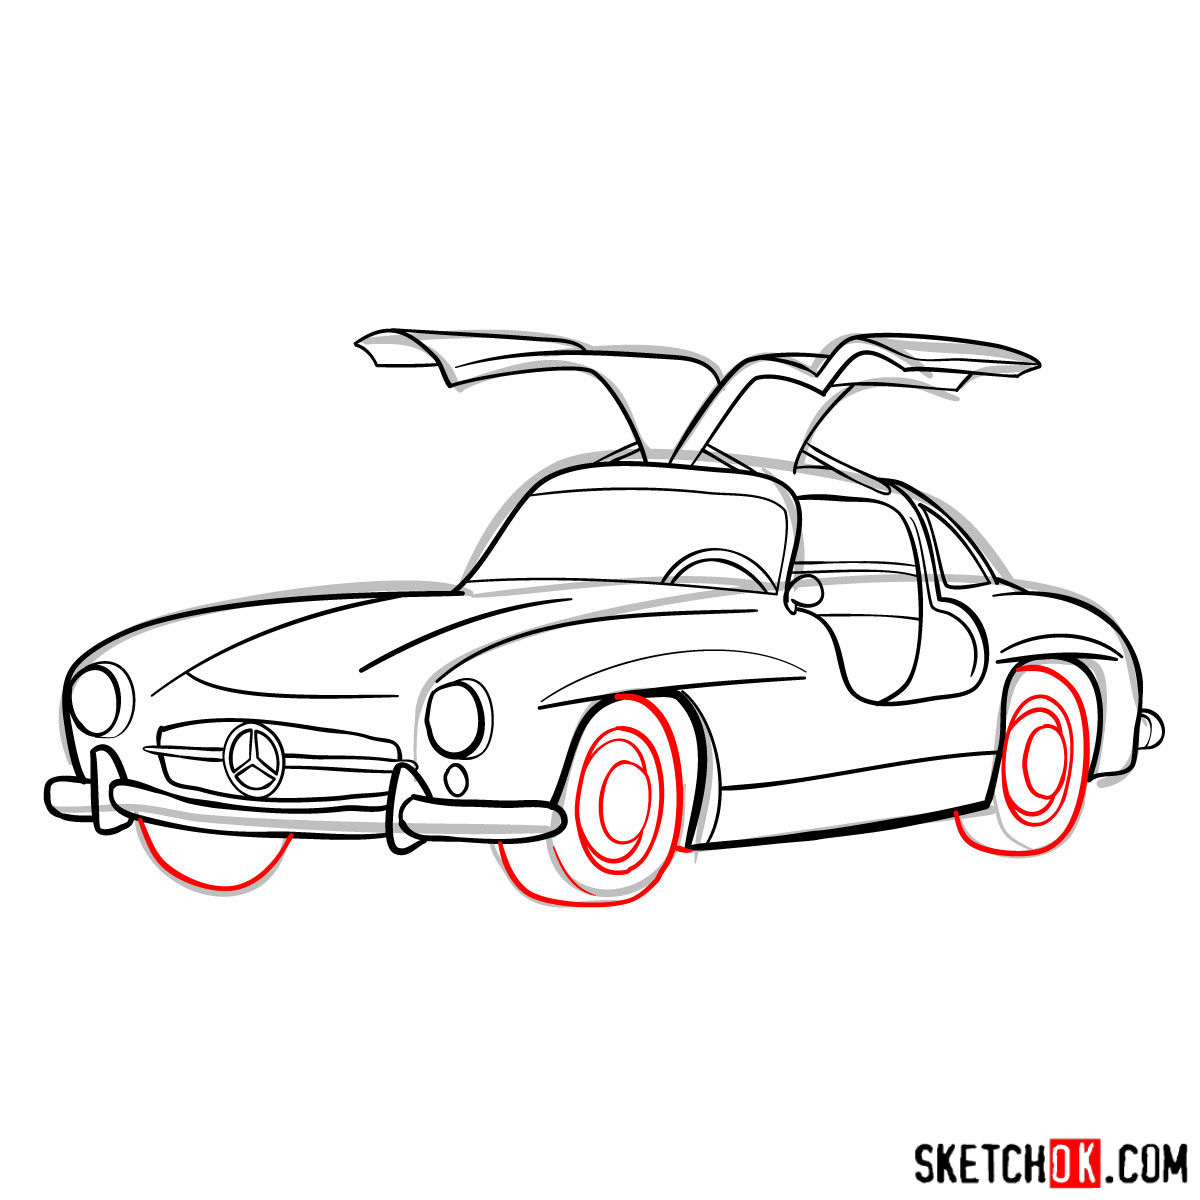
Part 3: Inking the Classic
Once you’re satisfied with your refined sketch, it’s time to break out your fineliner pens or markers and start inking. Carefully trace over your pencil lines, adding definition and clarity to your drawing. Keep a steady hand, and remember to take your time during this step, as the inking process will give your Mercedes-Benz Gullwing drawing its final, polished appearance.
Part 4: Coloring and Shading
The final step in our drawing tutorial is to add color, shading, and highlights to bring your Mercedes-Benz 300SL Gullwing to life. Choose your preferred coloring medium (colored pencils, markers, etc.) and apply colors to your drawing, paying close attention to the shading and highlights that define the car’s unique form and features. Remember, practice makes perfect, so don’t be afraid to experiment and find your own artistic style.

The signup form at the top of the page is the easiest way to stay current with new guides, and a weekly digest will land in your inbox whenever fresh tutorials go up, including more retro cars like the Mercedes-Benz 300SL Gullwing. Now that you know how to draw Mercedes-Benz 300SL Gullwing, it’s worth bookmarking the series if classic automotive shapes are your thing. The SketchOk Pinterest page is also a good spot to share what you drew and see what others have done with the same guide.
can you draw a limbergeni pls. thank u.
Do you mean Lamborghini? If so, here are the drawings you’re looking for – link