
A haunted house is a classic Halloween symbol, filled with spooky charm and eerie details. In this guide, you’ll learn how to draw a haunted house with all the creepy elements that make it perfect for a Halloween night: a towering three-story building, a tombstone in the yard, a jack-o-lantern on the other side, and a full moon with bats flying overhead. Ready to create your own haunted masterpiece? Let’s get started!
Key Features of a Halloween Haunted House
- Three-Story Building: A tall, slightly crooked house gives it an old, abandoned look, perfect for a spooky Halloween scene.
- Creepy Tombstone: A simple tombstone stands near the house, adding to the eerie atmosphere.
- Jack-o-Lantern: A classic jack-o-lantern sits on the other side of the house, glowing with a sinister grin.
- Full Moon: A big, bright full moon lights up the night sky, casting shadows over the haunted house.
- Bats in the Sky: Two bats flutter around the moon, adding a final Halloween touch to the scene.
Once you’ve drawn your haunted house, try adding other spooky elements to your Halloween drawings. You can draw a black cat, a blanket ghost, a witch, or even a creepy graveyard to complete the scene.
About This Drawing Guide
This guide is designed to make drawing a haunted house fun and easy for everyone. We’ll start with basic shapes and add details to bring the haunted house to life (or should we say, to “un-life”). The steps are simple to follow, so whether you’re drawing just for fun or creating something for Halloween, you’ll end up with a spooky scene that’s full of character. Here’s what to expect in the guide:
- Red: This color shows the new lines to focus on in each step.
- Black: These lines represent the details you’ve already drawn in previous steps.
- Grey: These are helpful guidelines to keep your drawing in proportion.
With these easy-to-follow instructions, you’ll have your haunted house ready to scare in no time!
Start by drawing a square for the base of the haunted house. Then, add a rectangle on top of the square, about 1/3 the width of the square, extending slightly above the square. Finish with a triangle on top of the rectangle for the roof.

Draw three vertical lines inside the square to divide each of the 1/3 into halves, creating a symmetrical layout. Then, sketch the shape for the awning starting at the middle of the square. Add two triangles on either side of the square for the side roofs as it is shown in the image. This completes the basic sketch of the haunted house.

Outline the awning from the rough sketch to give it more definition.

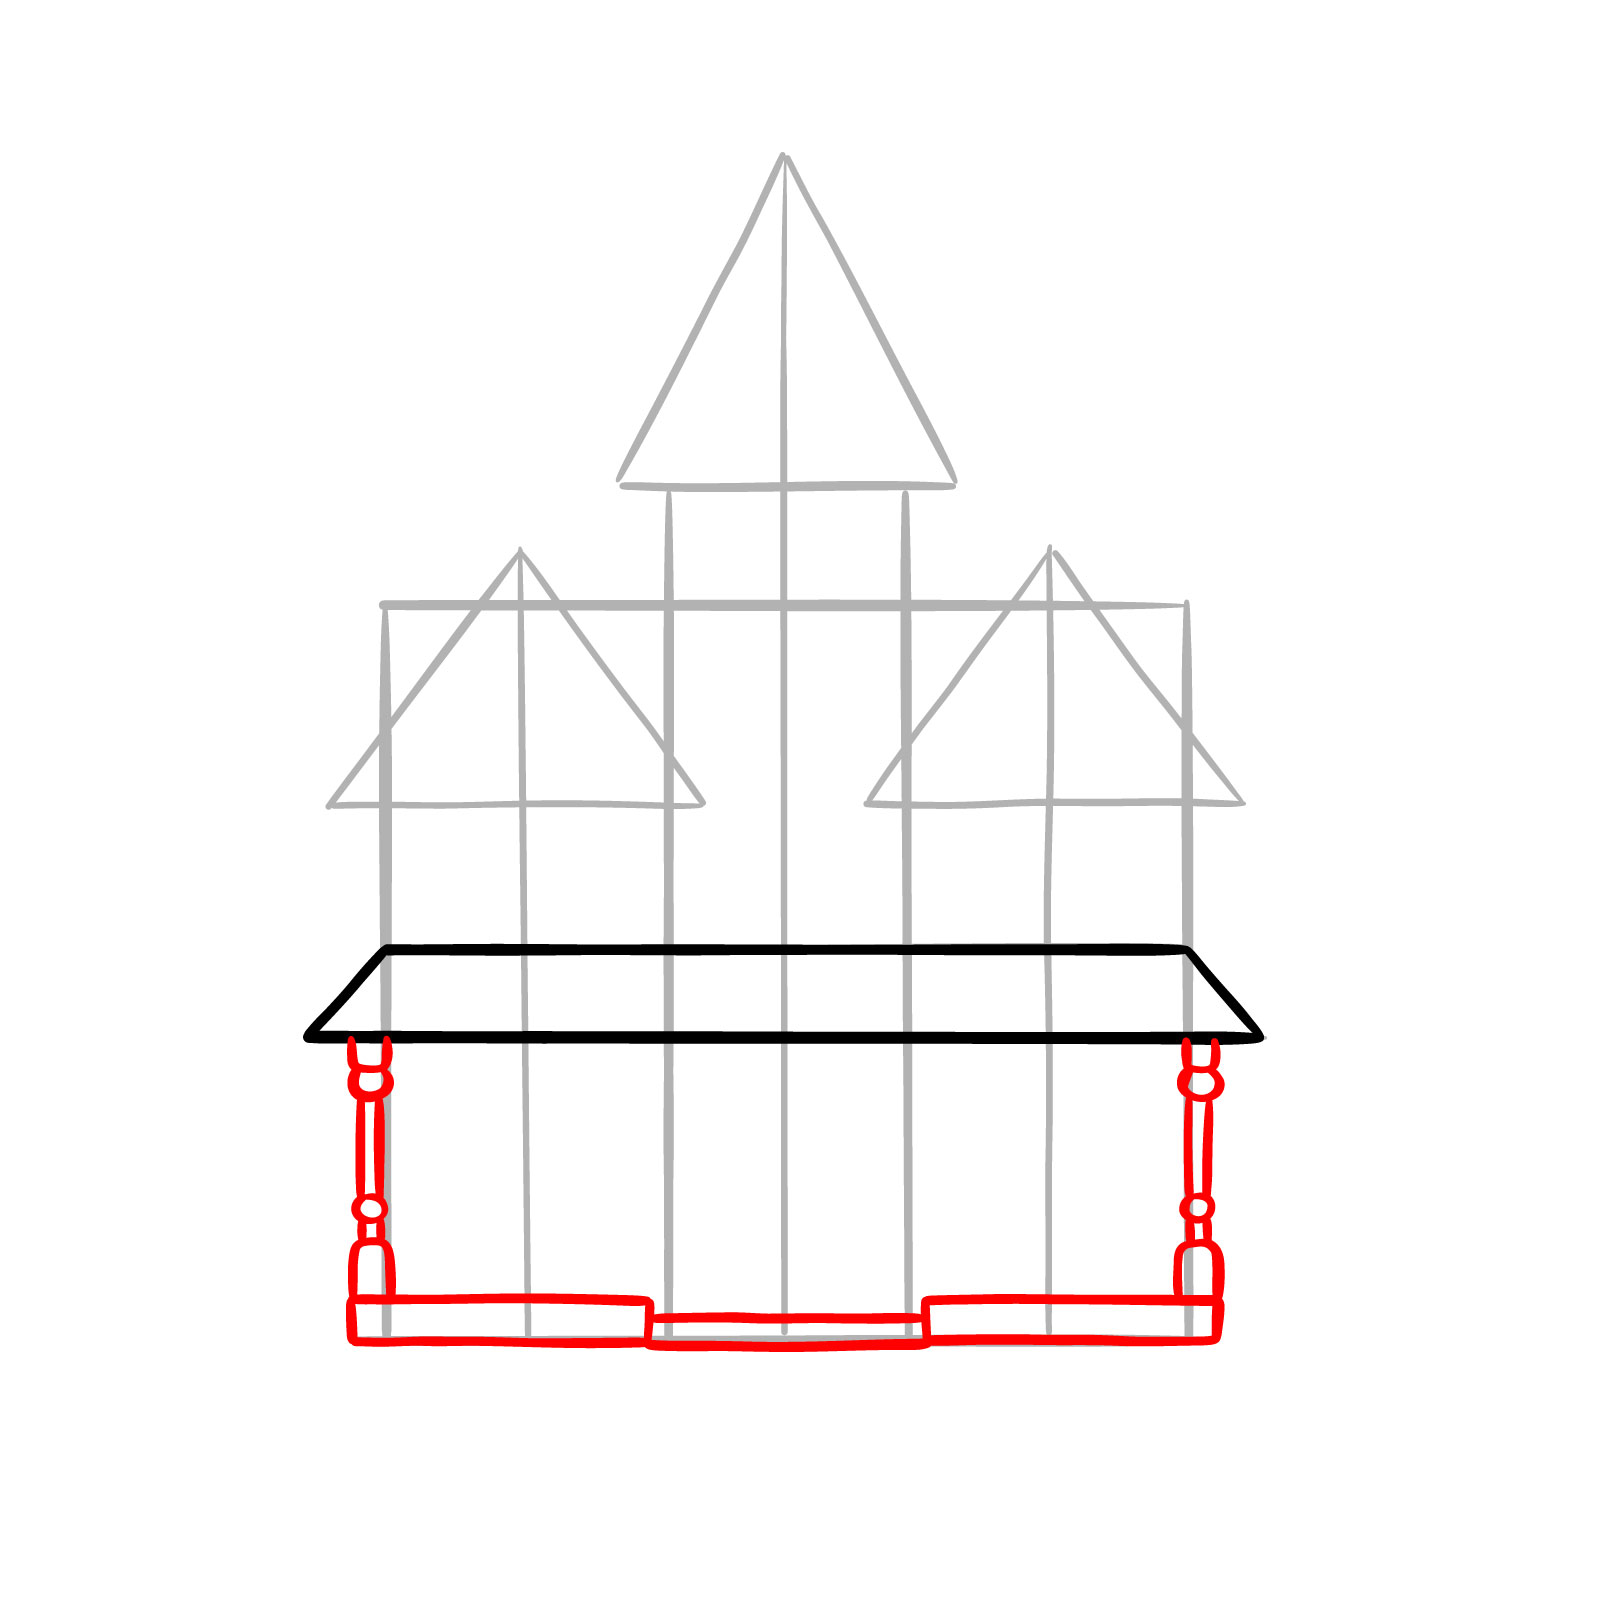
Draw two vertical columns on each side of the awning, extending them down to the base of the house. Add two wide rectangles on either side for the porch base, and a smaller rectangle in the middle for the first stair.
Add two side towers starting from the top of the awning and extending upwards. Draw rectangles on each top of the towers for the roof parts, giving the haunted house its classic multi-level appearance.

Draw the middle tower in the center of the house, matching the rectangular shapes from the side towers. Add a rectangular roof on top of the middle tower to keep the structure balanced.

Start by adding a wide rectangle for the second stair, slightly smaller than the first. Then, sketch the door in the middle of the house. Add small rectangular ledges below each window.

Add the outlines for all the windows on the front of the house. Make sure to place the windows symmetrically on both sides of the structure.

Draw smaller outlines inside the windows to create window panes. Add circles on the roof of the side towers as decorative elements, and draw two circles on the middle tower roof for a circular window.

Add spooky faces inside the decorative elements on the side towers. Then, draw lines to enhance the window details. Finish by sketching four decorative elements on the door.

Outline the chimney on one side of the haunted house. Add the missing roof section between the side triangles and the main tower. Finish the side towers with roof details.

Add small lines across the ground floor to create a textured look. This will give the haunted house an older, more weathered appearance.

Draw lines to add texture to the awning, chimney, and middle triangle roof. Then, sketch a picket fence on both sides of the house to enclose the yard.
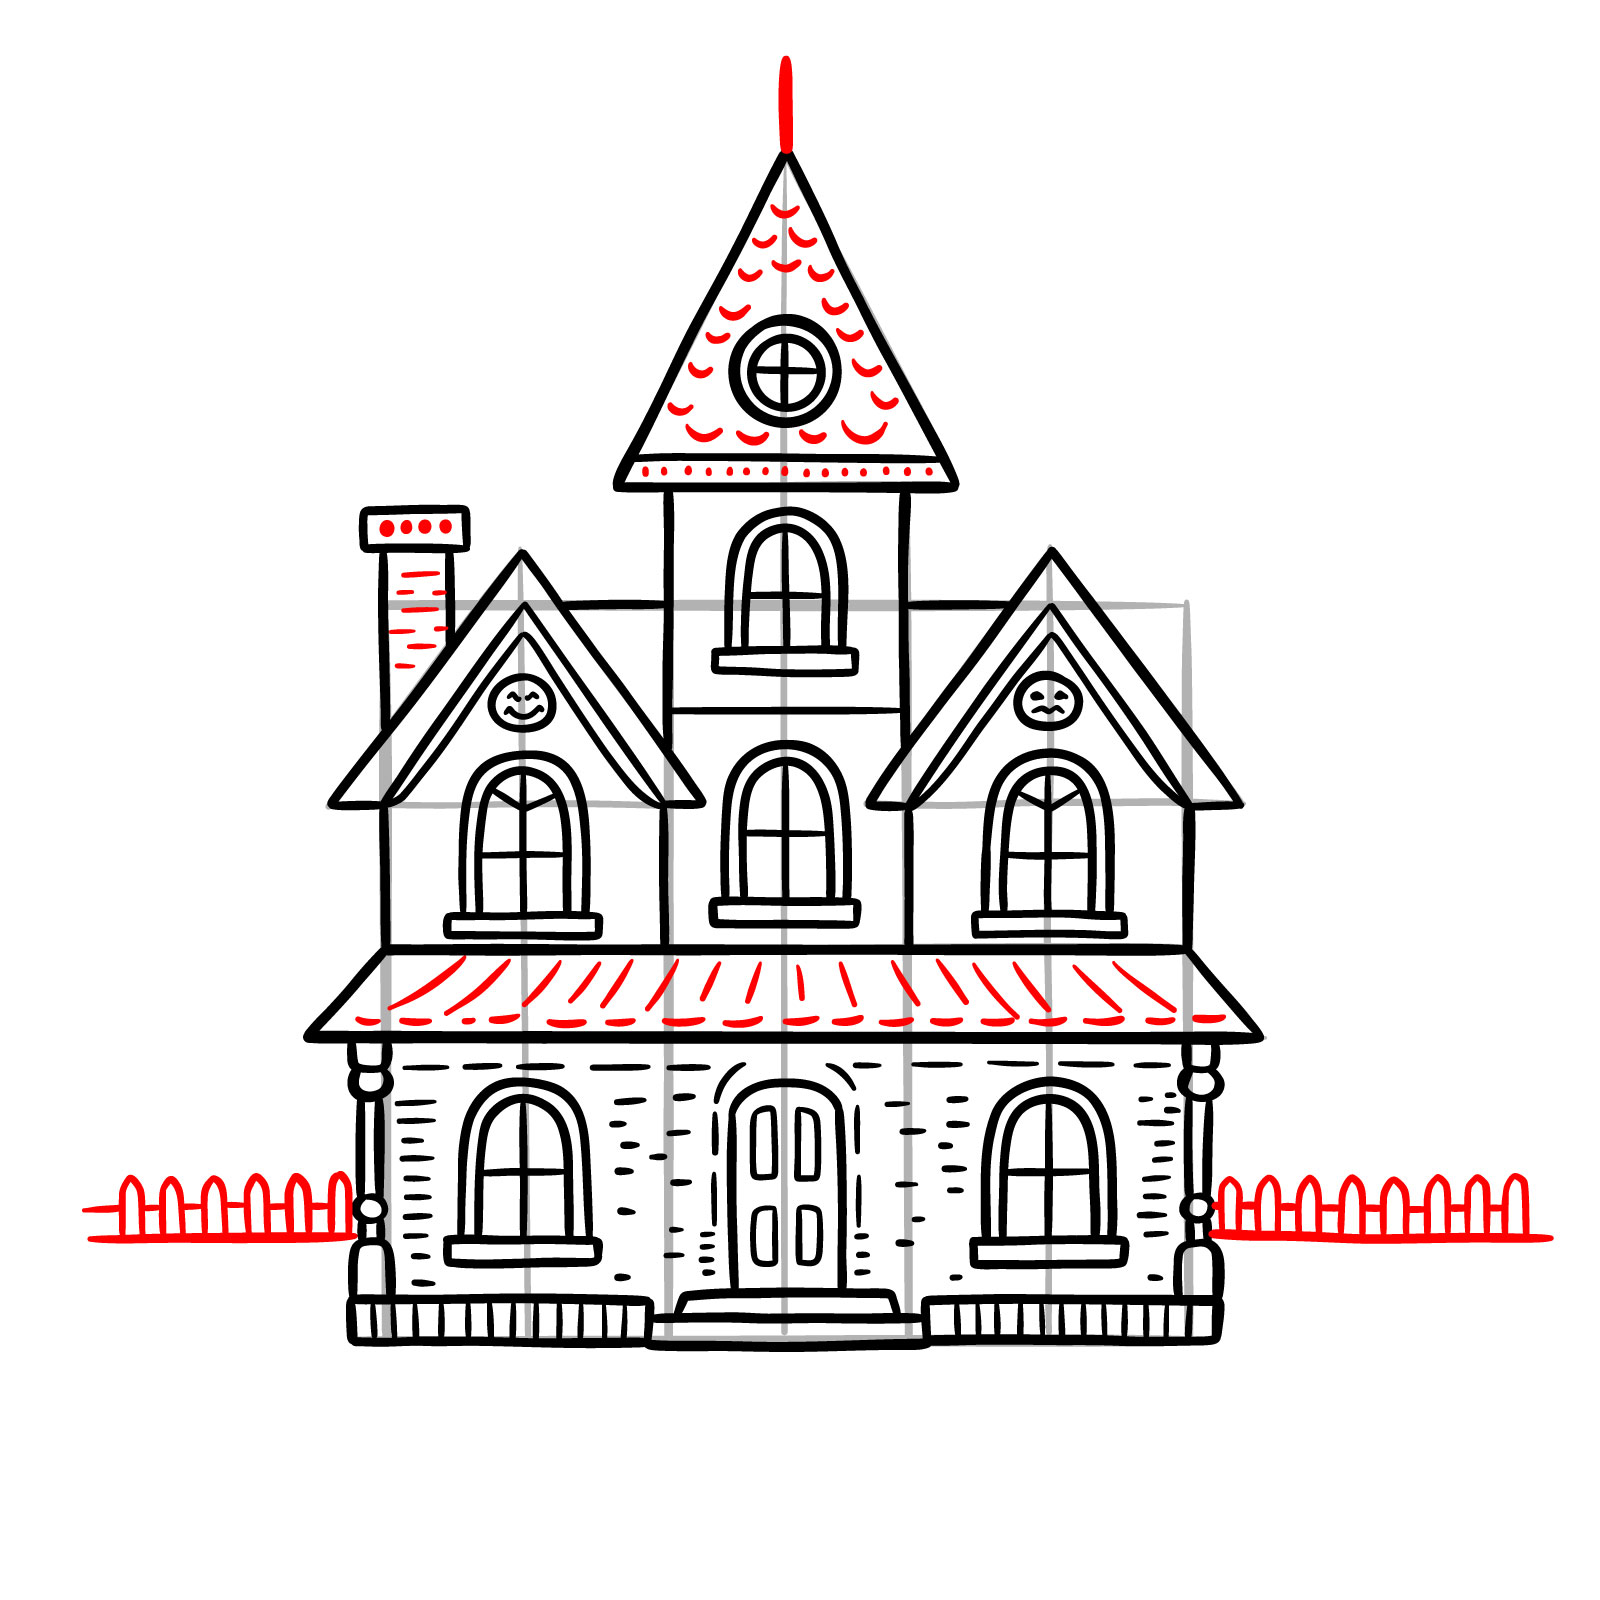
Optionally, add a circle in the sky for the full moon. Draw simple body outlines for the bats. Then, sketch a path leading up to the house and add some patches of grass where the tombstone and jack-o-lantern will be placed.

Draw the wings, eyes, and fanged mouths on the bats to complete them. On the right side of the house, sketch the jack-o-lantern, and on the left side, draw the tombstone for a classic Halloween scene.

Review the entire drawing and erase any basic sketch lines. Fix any mistakes you notice and clean up the lines. Optionally, ink the drawing to finalize it.

You can use this final step as a reference for adding color to your haunted house drawing. You can use typical Halloween colors like dark purples, oranges, and blacks to bring the haunted scene to life.
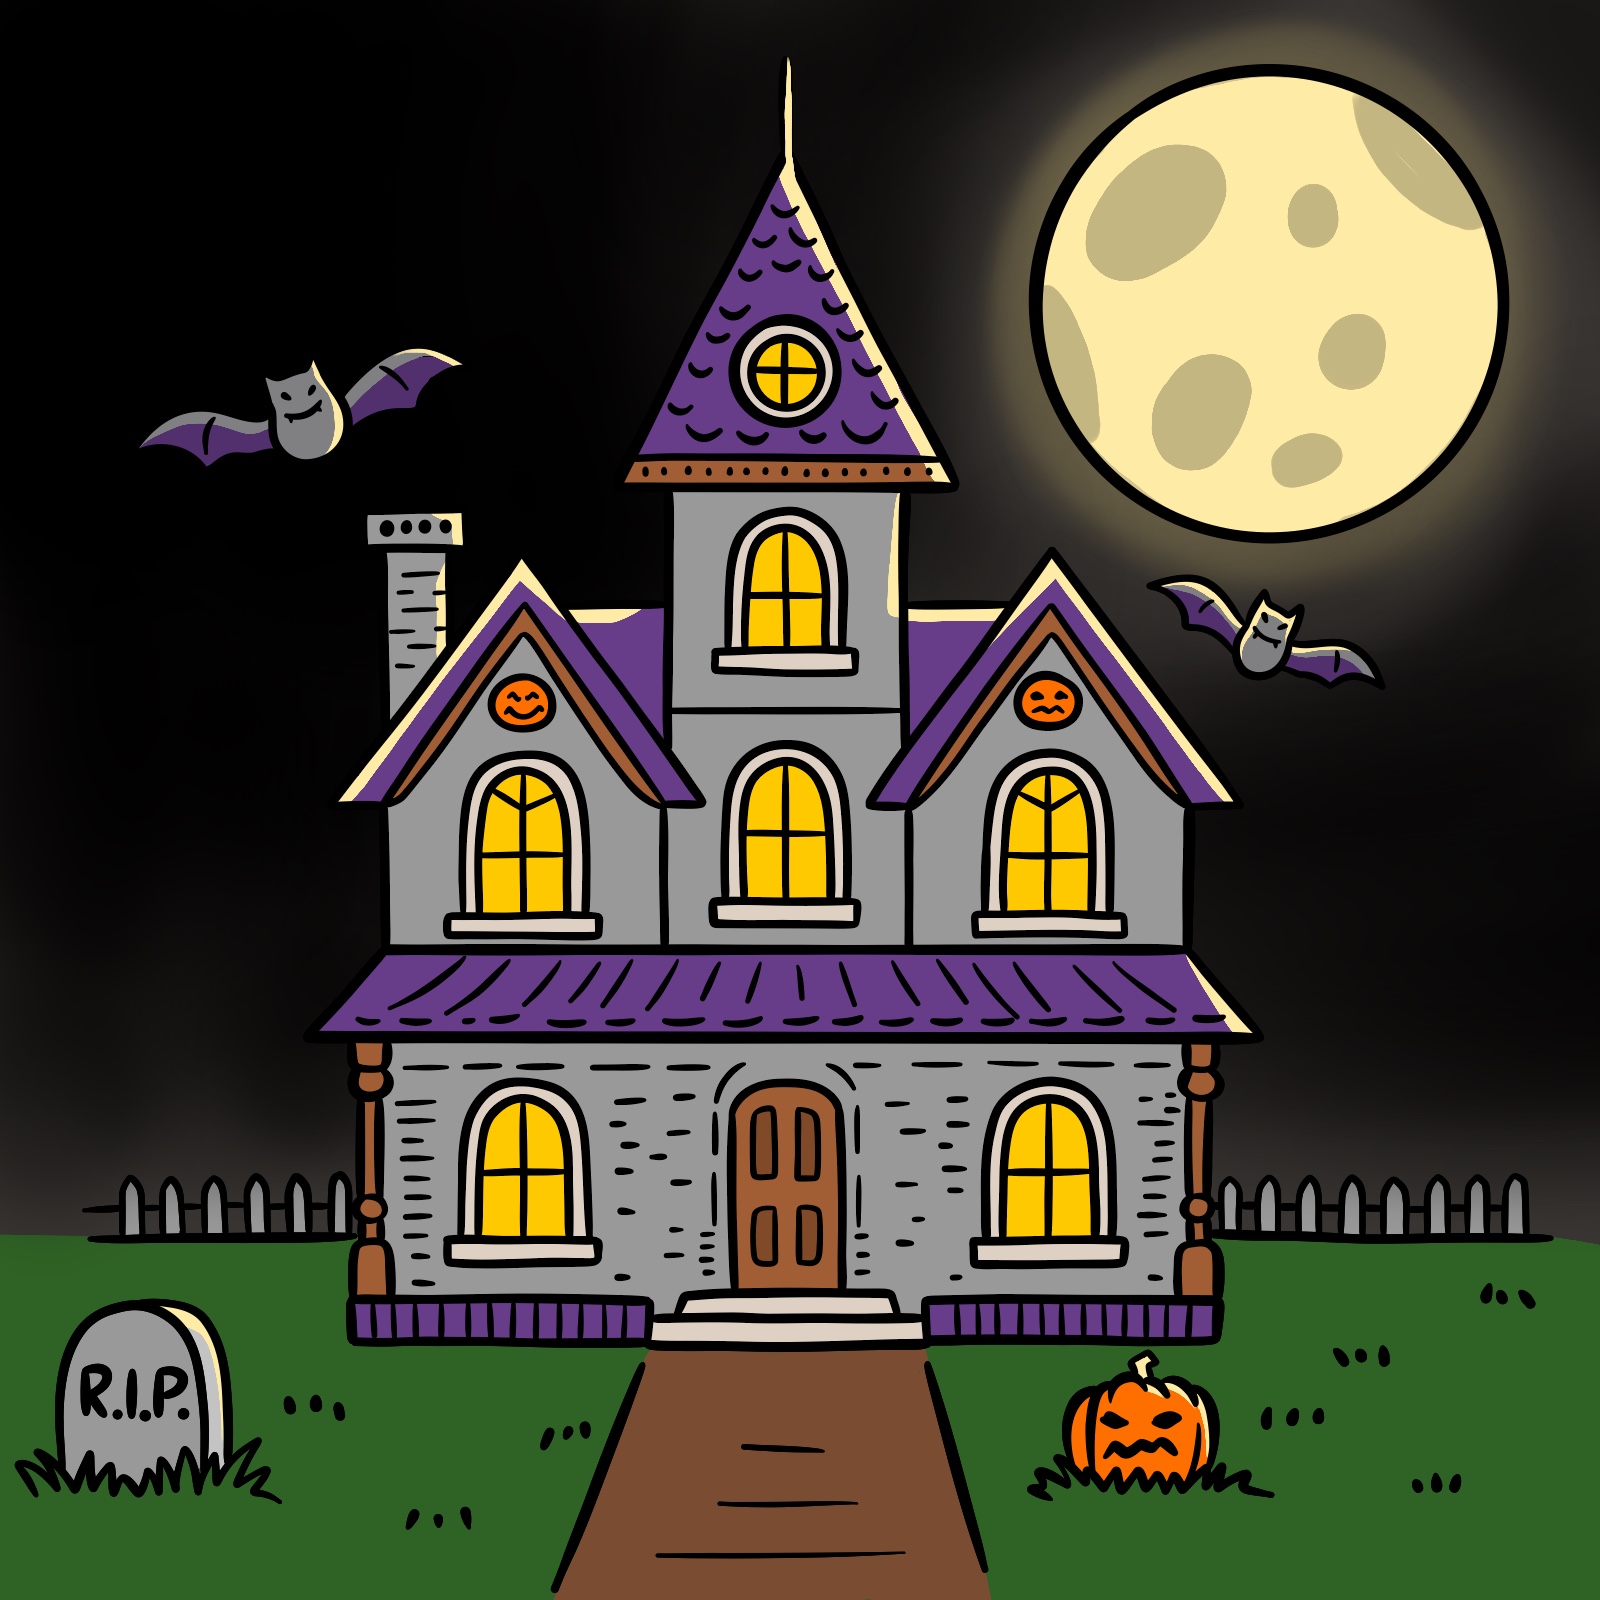
After completing your haunted house, take a look at the details. Make sure the windows placed just right, the full moon looks like a cookie, and the jack-o-lantern has that eerie look. Erase any remaining pencil marks and refine the lines if needed to make the haunted house stand out. If you want to take it further, add some mist or spooky trees in the background to make the scene even scarier! If you enjoyed this guide, check out my other tutorials for drawing Halloween-themed characters like Halloween Disney Princesses, a Ghostface, Homer Simpson as Dracula, and more. Don’t forget to follow me on social media for new guides, and if you’d like to support my work, consider donating on Buy me a Coffee (link below). Your support helps me continue creating fun, free tutorials for all to enjoy!
If you’d like to support my work, you can donate here. Thanks for your support, and happy drawing!
This drawing is tough