Home » Cartoon Characters » Lackadaisy » Strike a Chord: Learn How to Draw Rocky Rickaby Playing the Violin

Strike a Chord: Learn How to Draw Rocky Rickaby Playing the Violin

Get ready to embrace your artistic journey as you learn how to draw Rocky Rickaby playing the violin, the main protagonist of the Lackadaisy series. This step-by-step drawing tutorial will guide you through the process of creating a stunning representation of this charming character, while providing you with useful tips and techniques to enhance your artwork. So grab your drawing tools and let’s get started!

Character Profile: Rocky Rickaby and His Musical Passion

Roark “Rocky” Rickaby is a talented violinist and a member of the Lackadaisy crew. Born in St. Louis, Missouri, he learned to play the violin at a young age and eventually became a part of Zib’s band. Throughout his life, Rocky has had many adventures, from working on a railroad to joining a circus as a roustabout. Despite the challenges he faced, Rocky’s passion for music remained strong, making him a perfect subject for our drawing tutorial.

Rocky’s appearance is as unique as his story, with distinctive facial features and an animated expression that captures his energetic personality. Drawing this charismatic character will not only sharpen your artistic skills but also immerse you in the fascinating world of Lackadaisy.

As you embark on this artistic journey, you may also want to explore other Lackadaisy characters such as Mitzi May, Viktor Vasko, and Mordecai Heller to expand your drawing repertoire.

Recommended Drawing Tools and Materials

Before we dive into the drawing process, gather the following tools and materials:

  • Pencils (HB, 2B, and 4B)
  • Eraser
  • Pencil sharpener
  • Sketching paper
  • Fineliner pens or ink
  • Colored pencils or markers (optional)

Remember, these recommendations are merely suggestions, and you are free to use any tools you prefer.

Create Your Rocky Rickaby Masterpiece: A Step-by-Step Guide

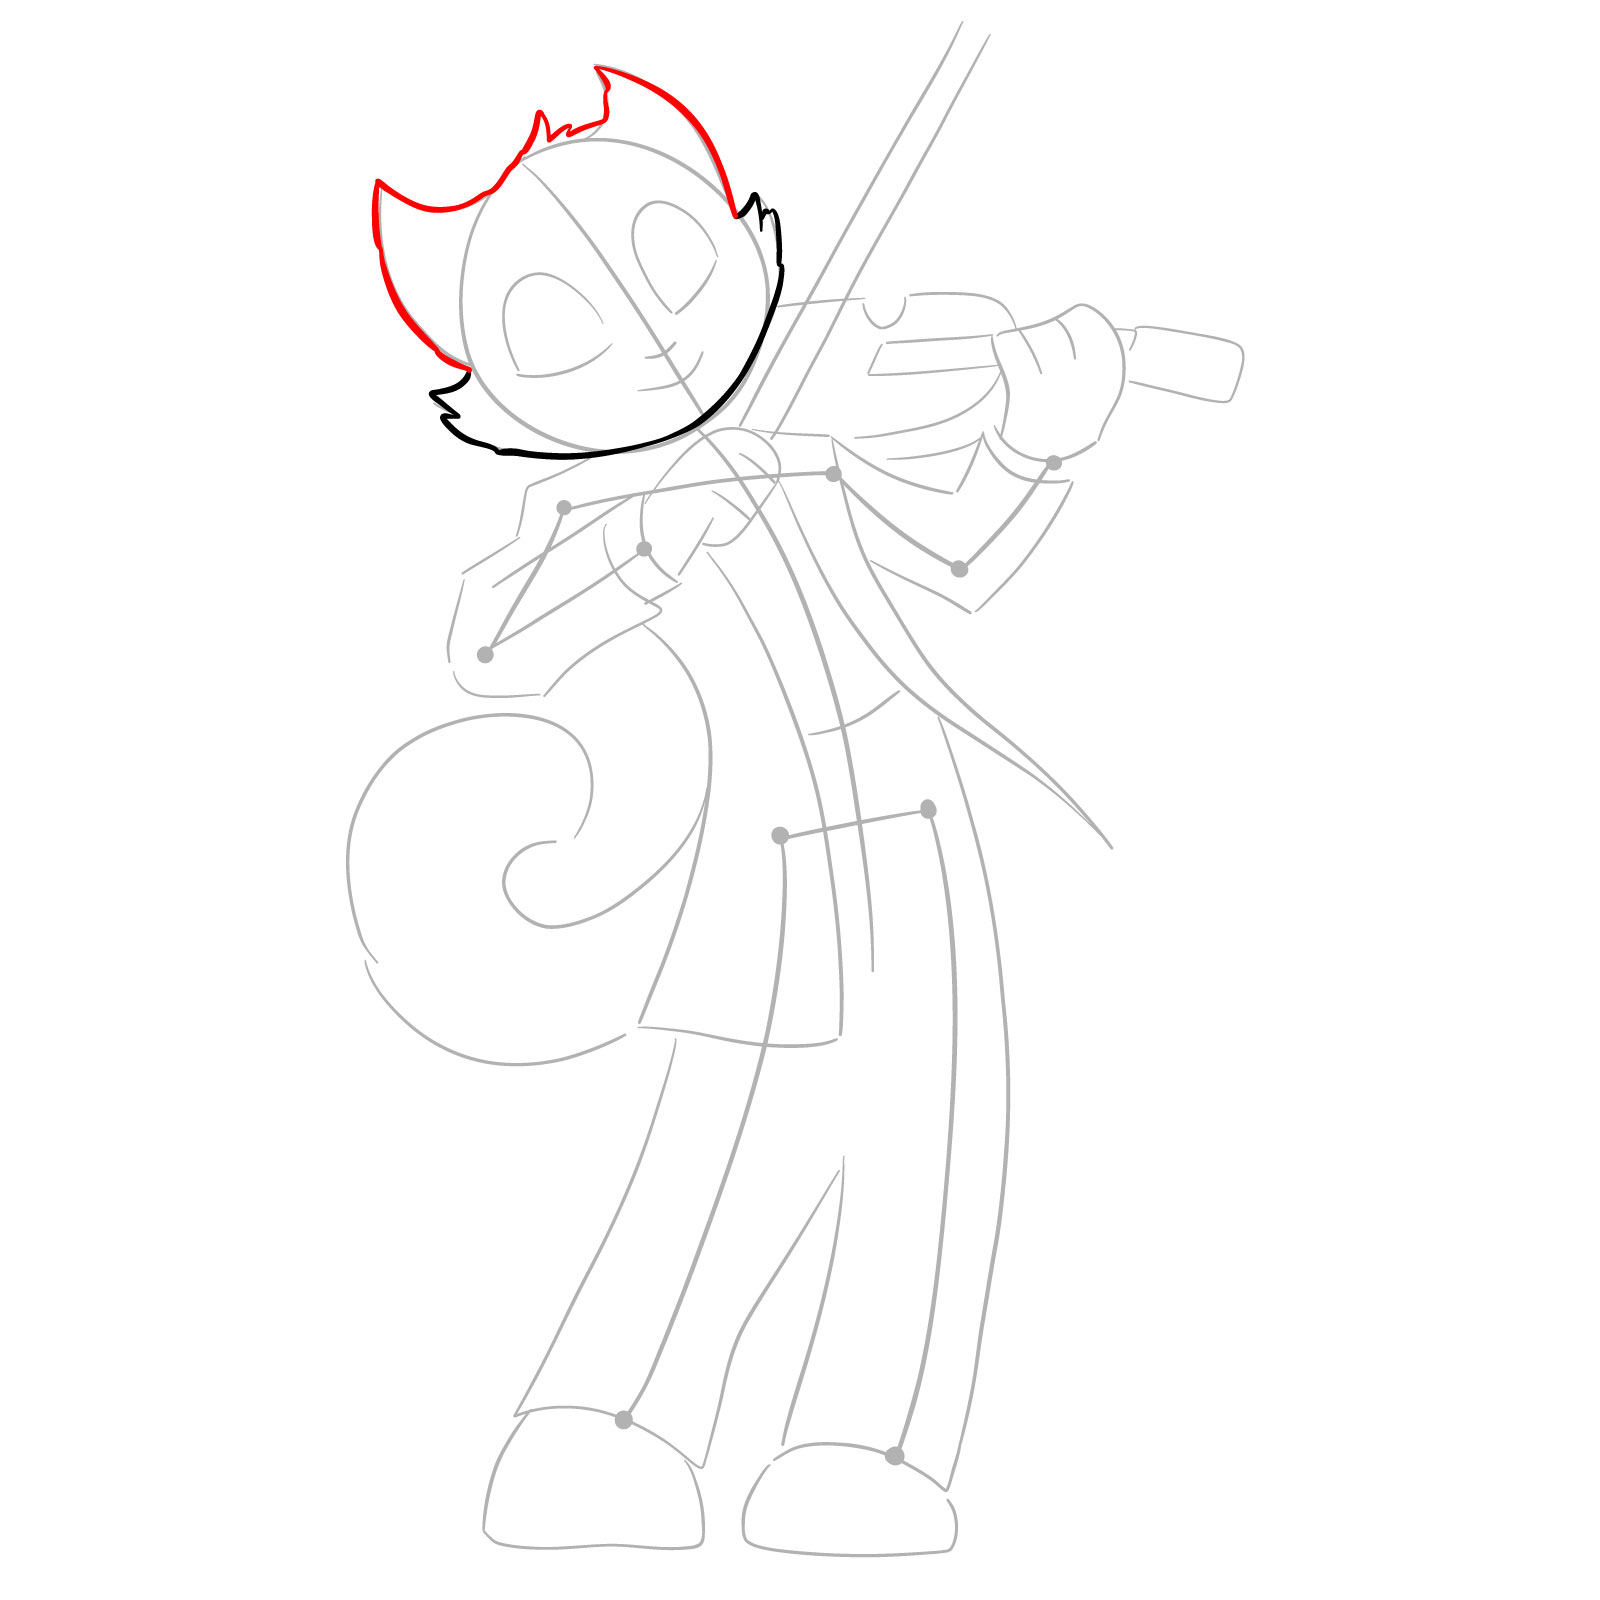
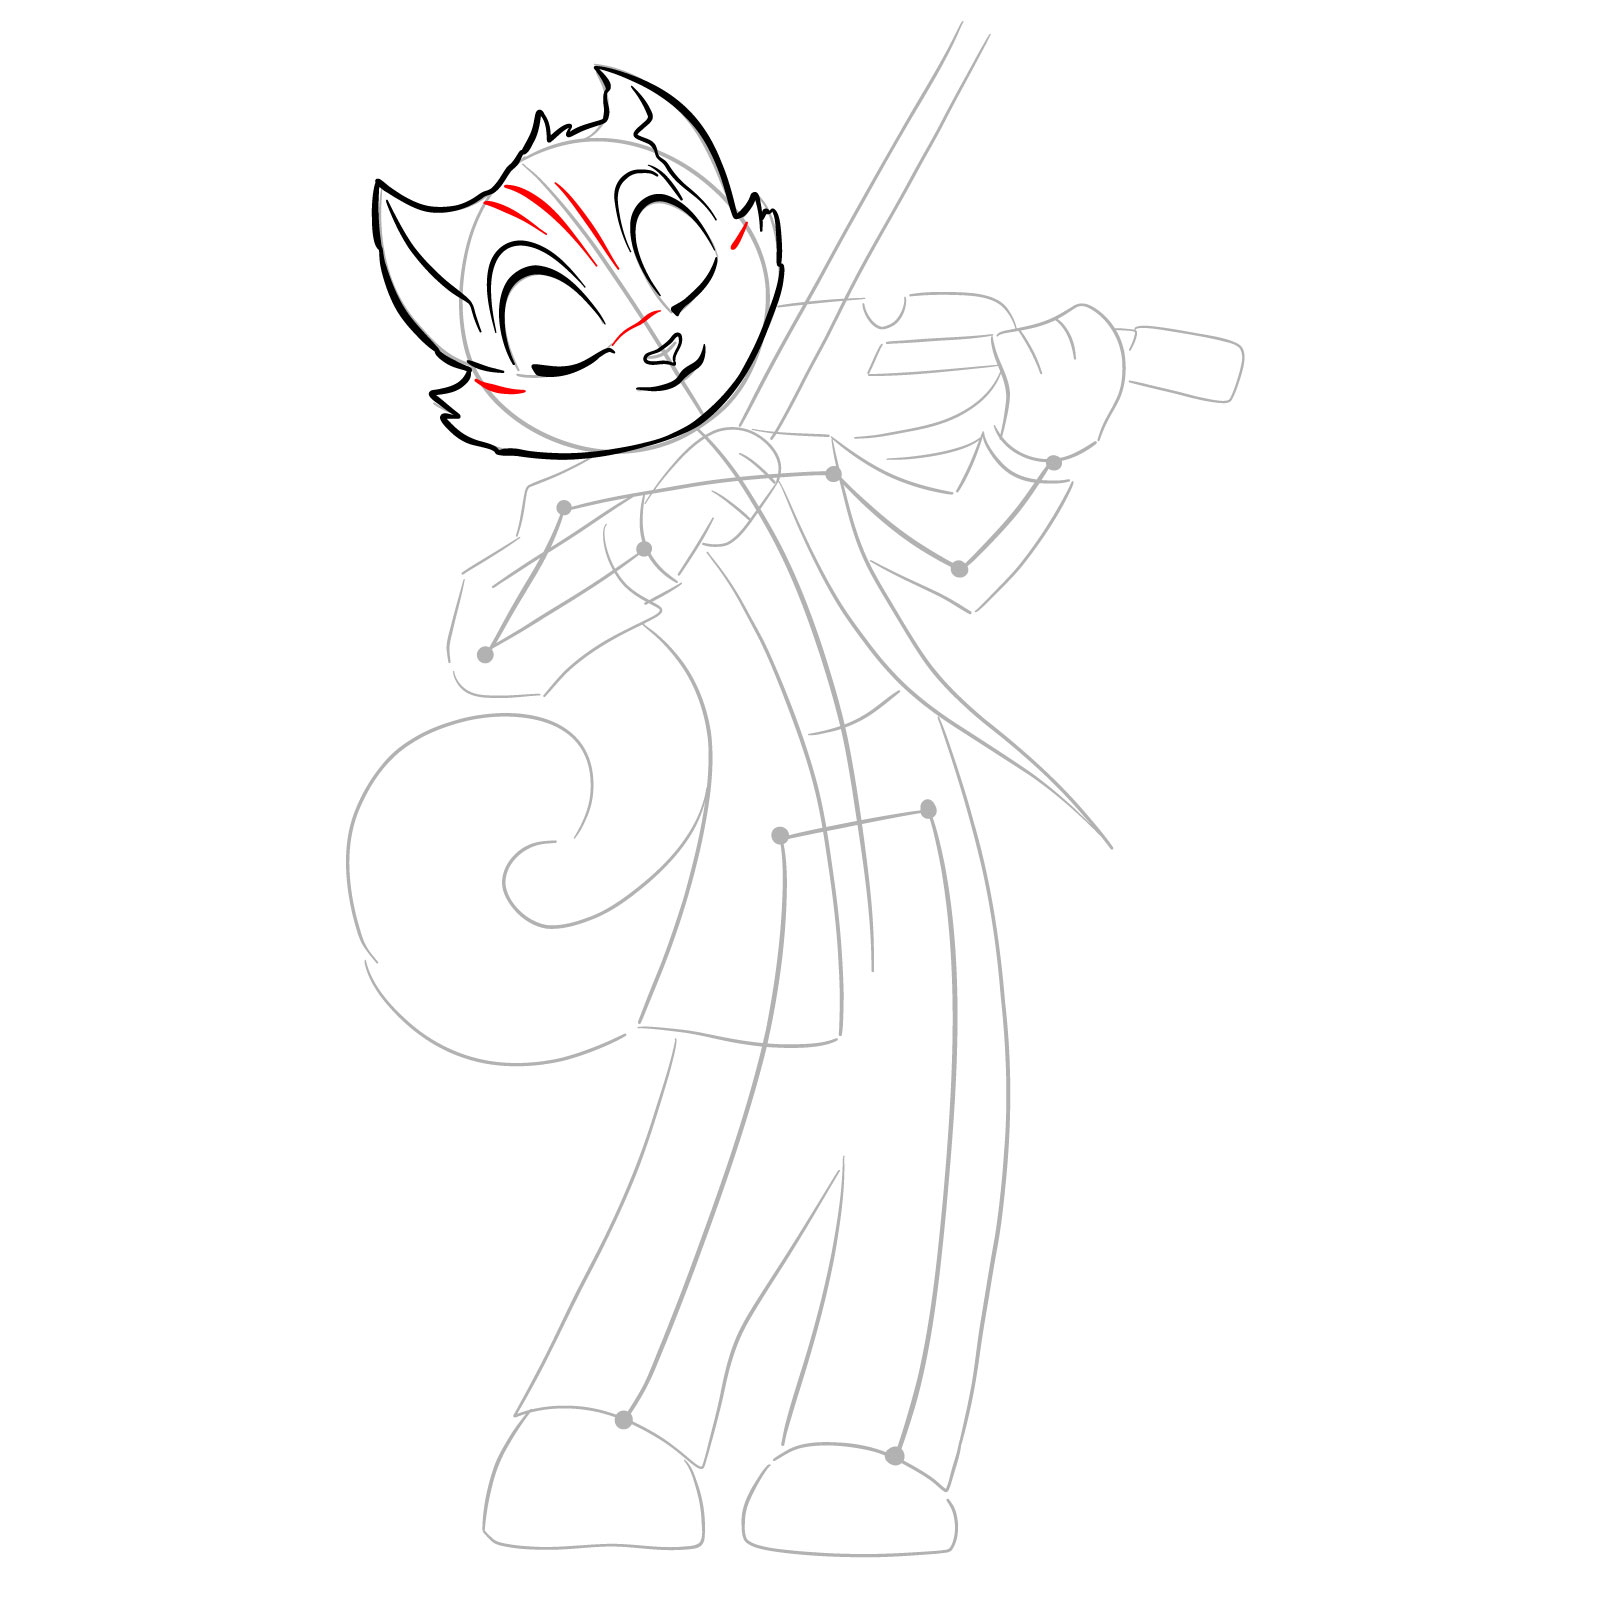
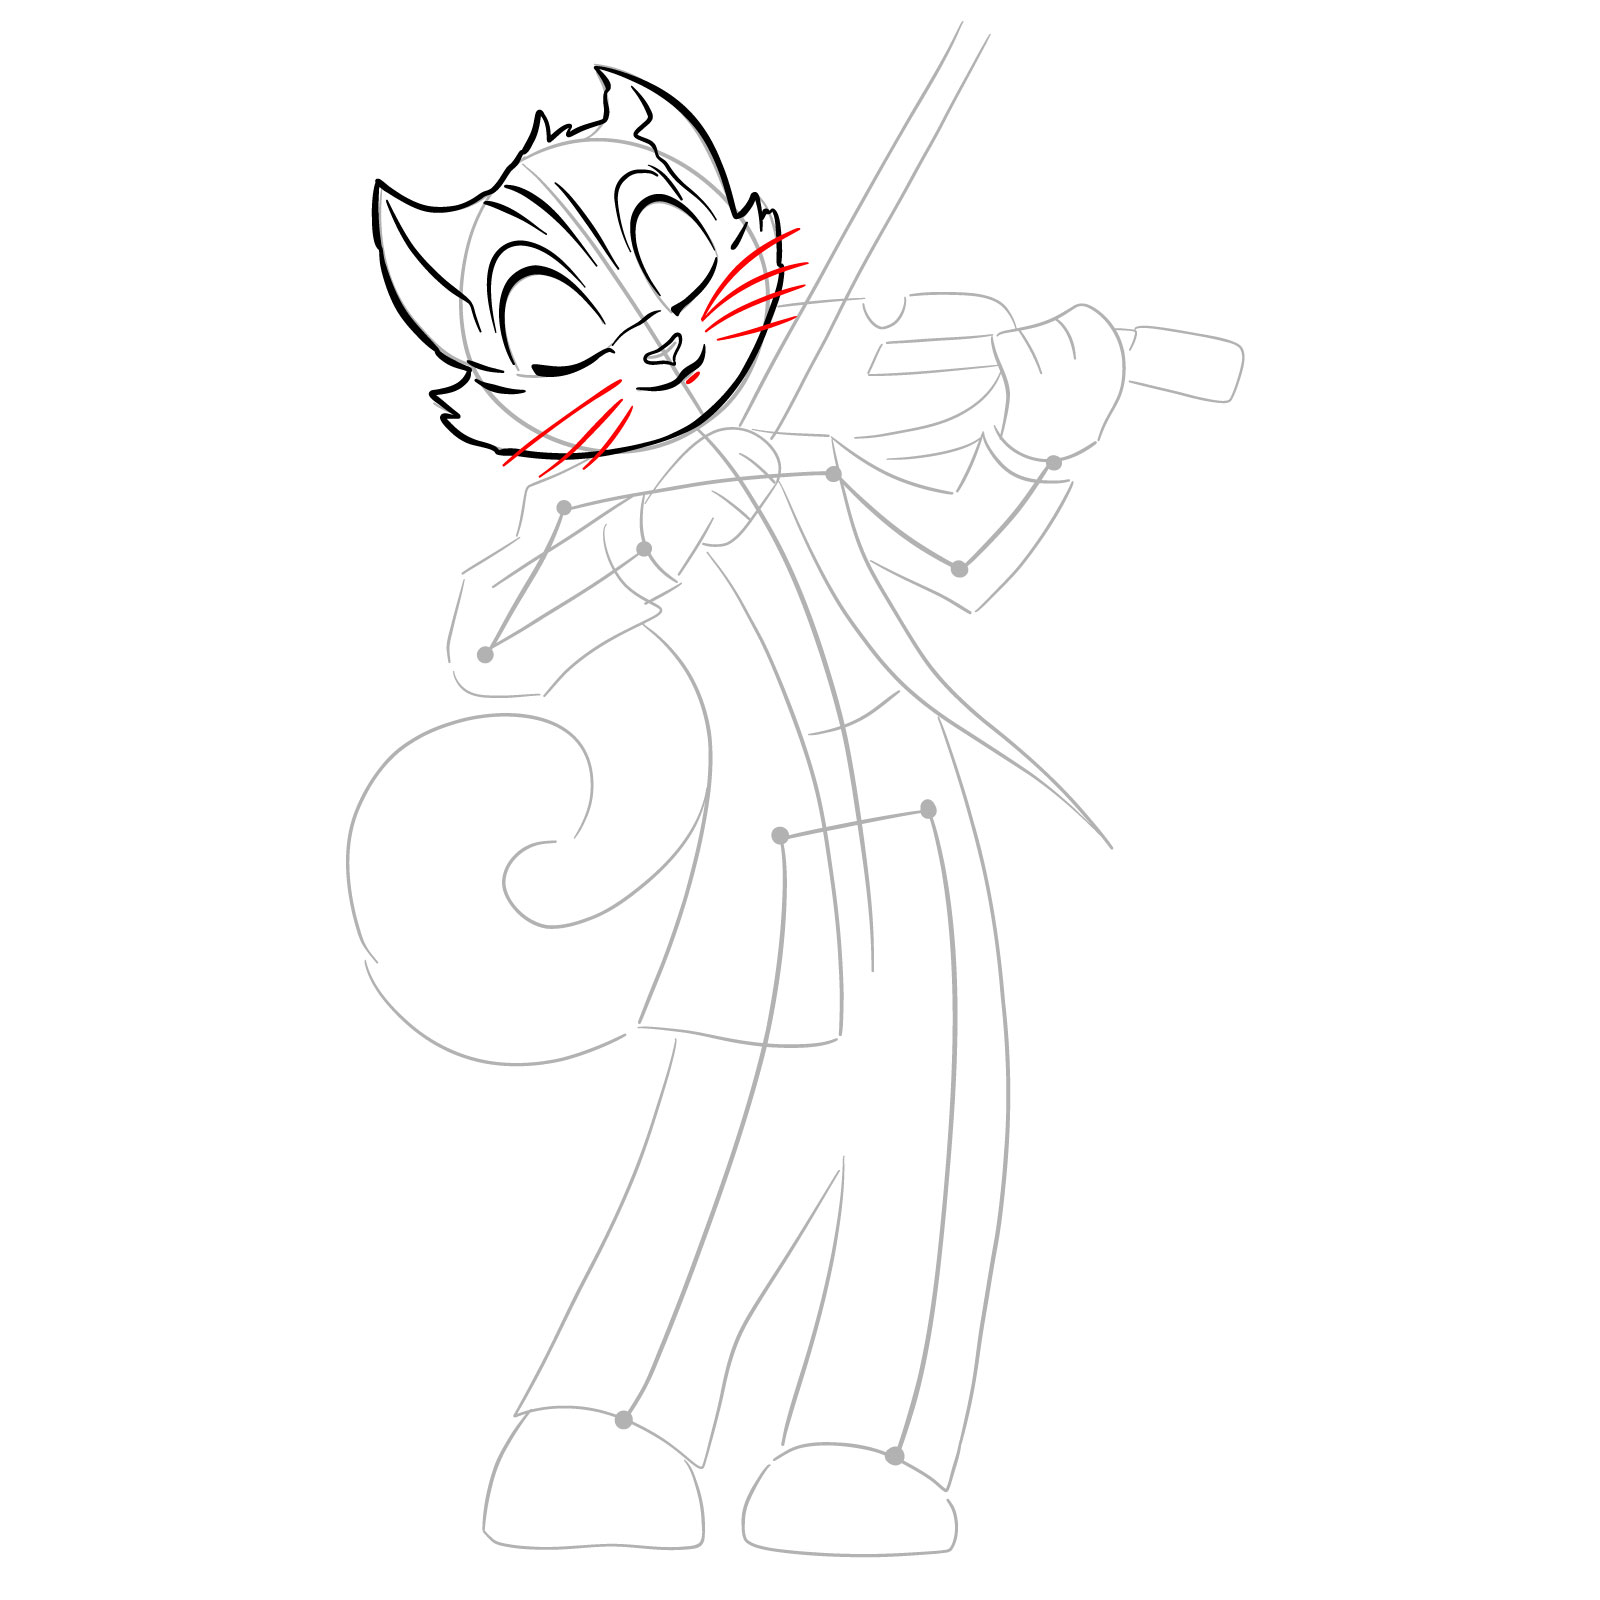
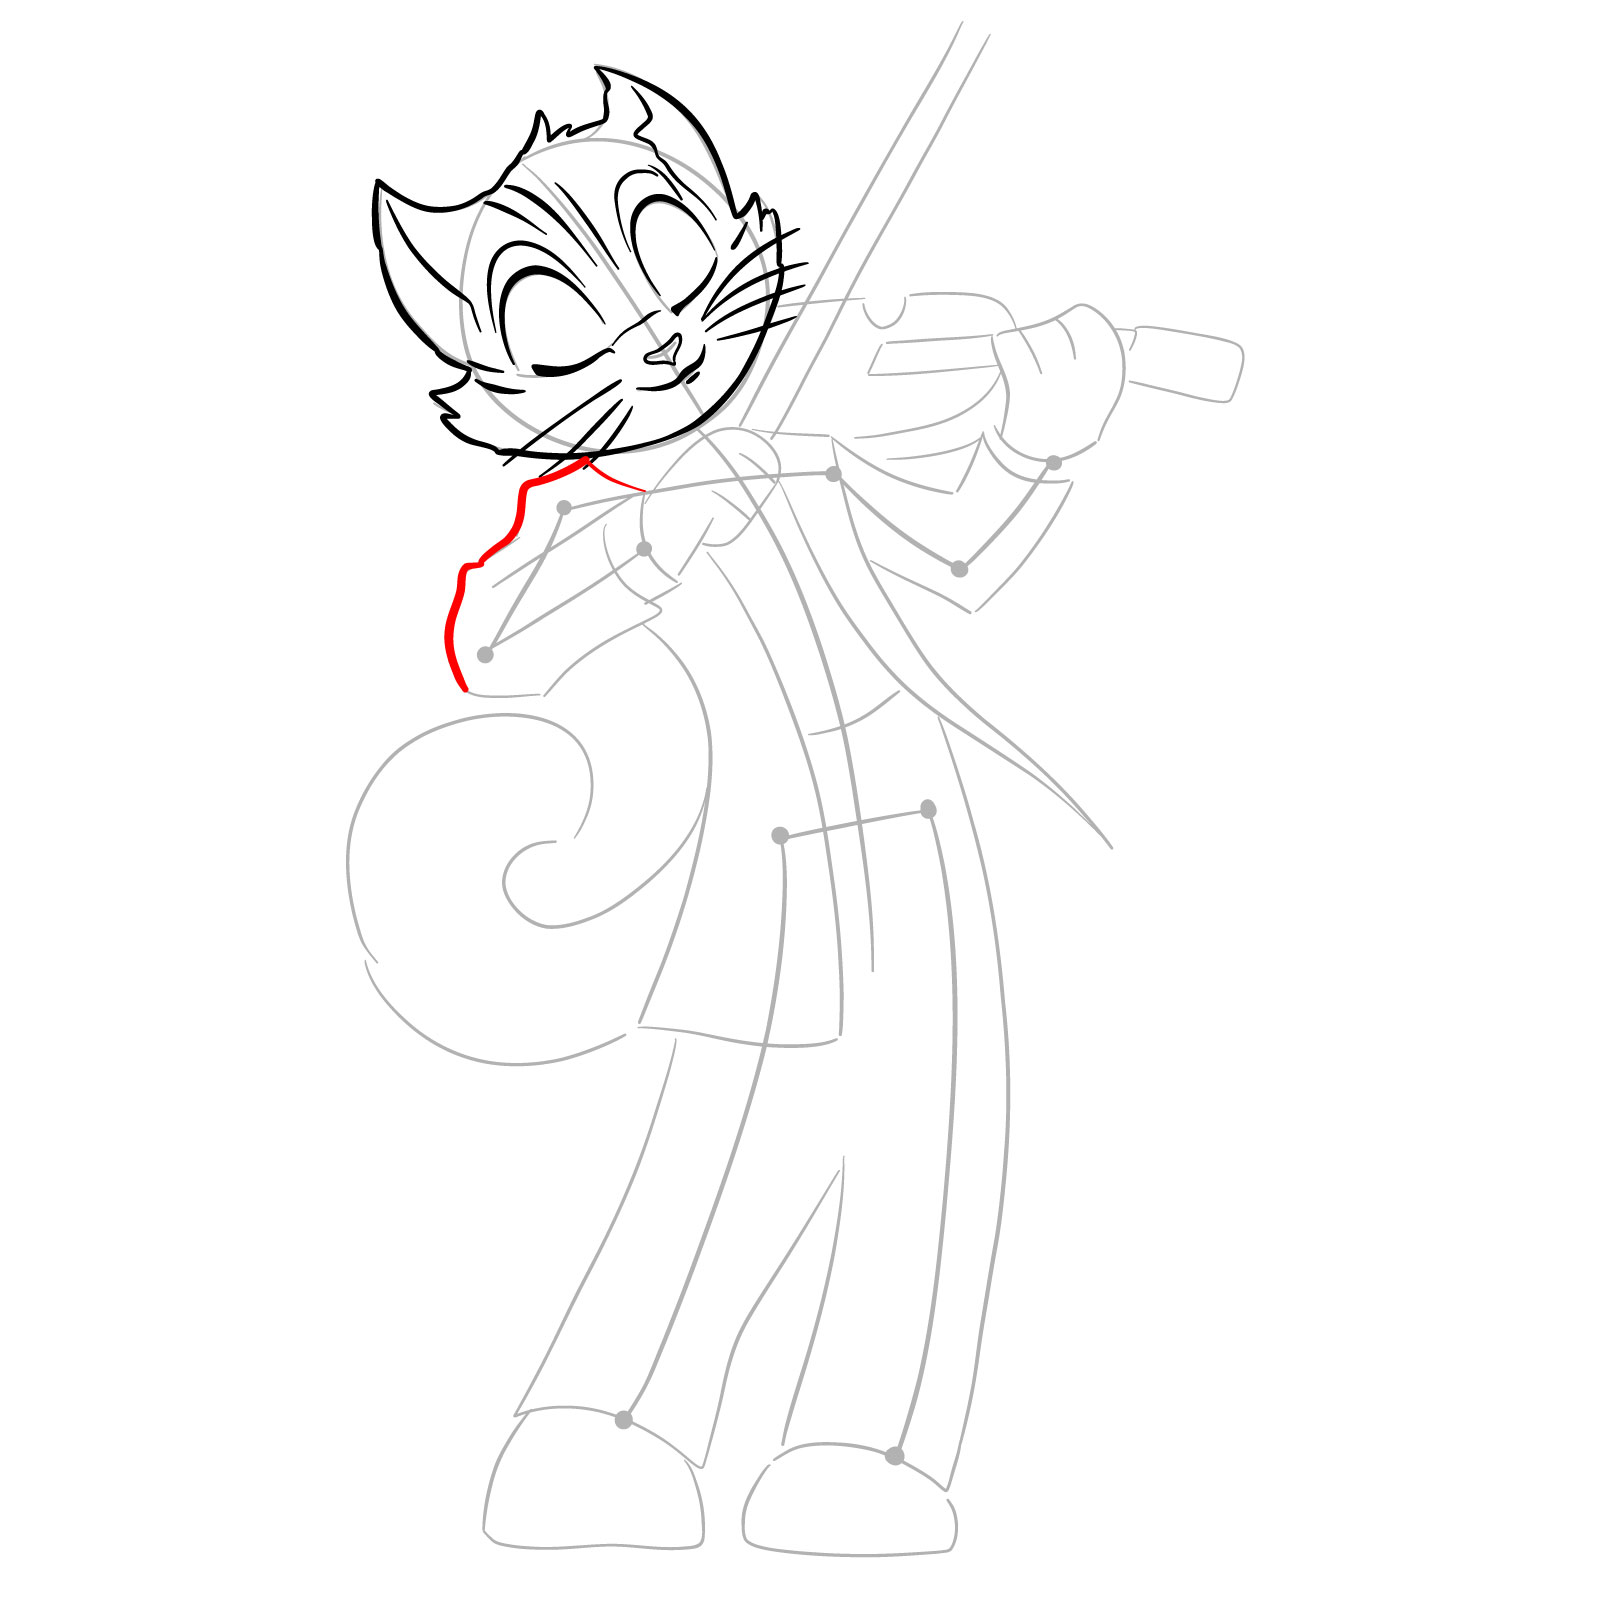
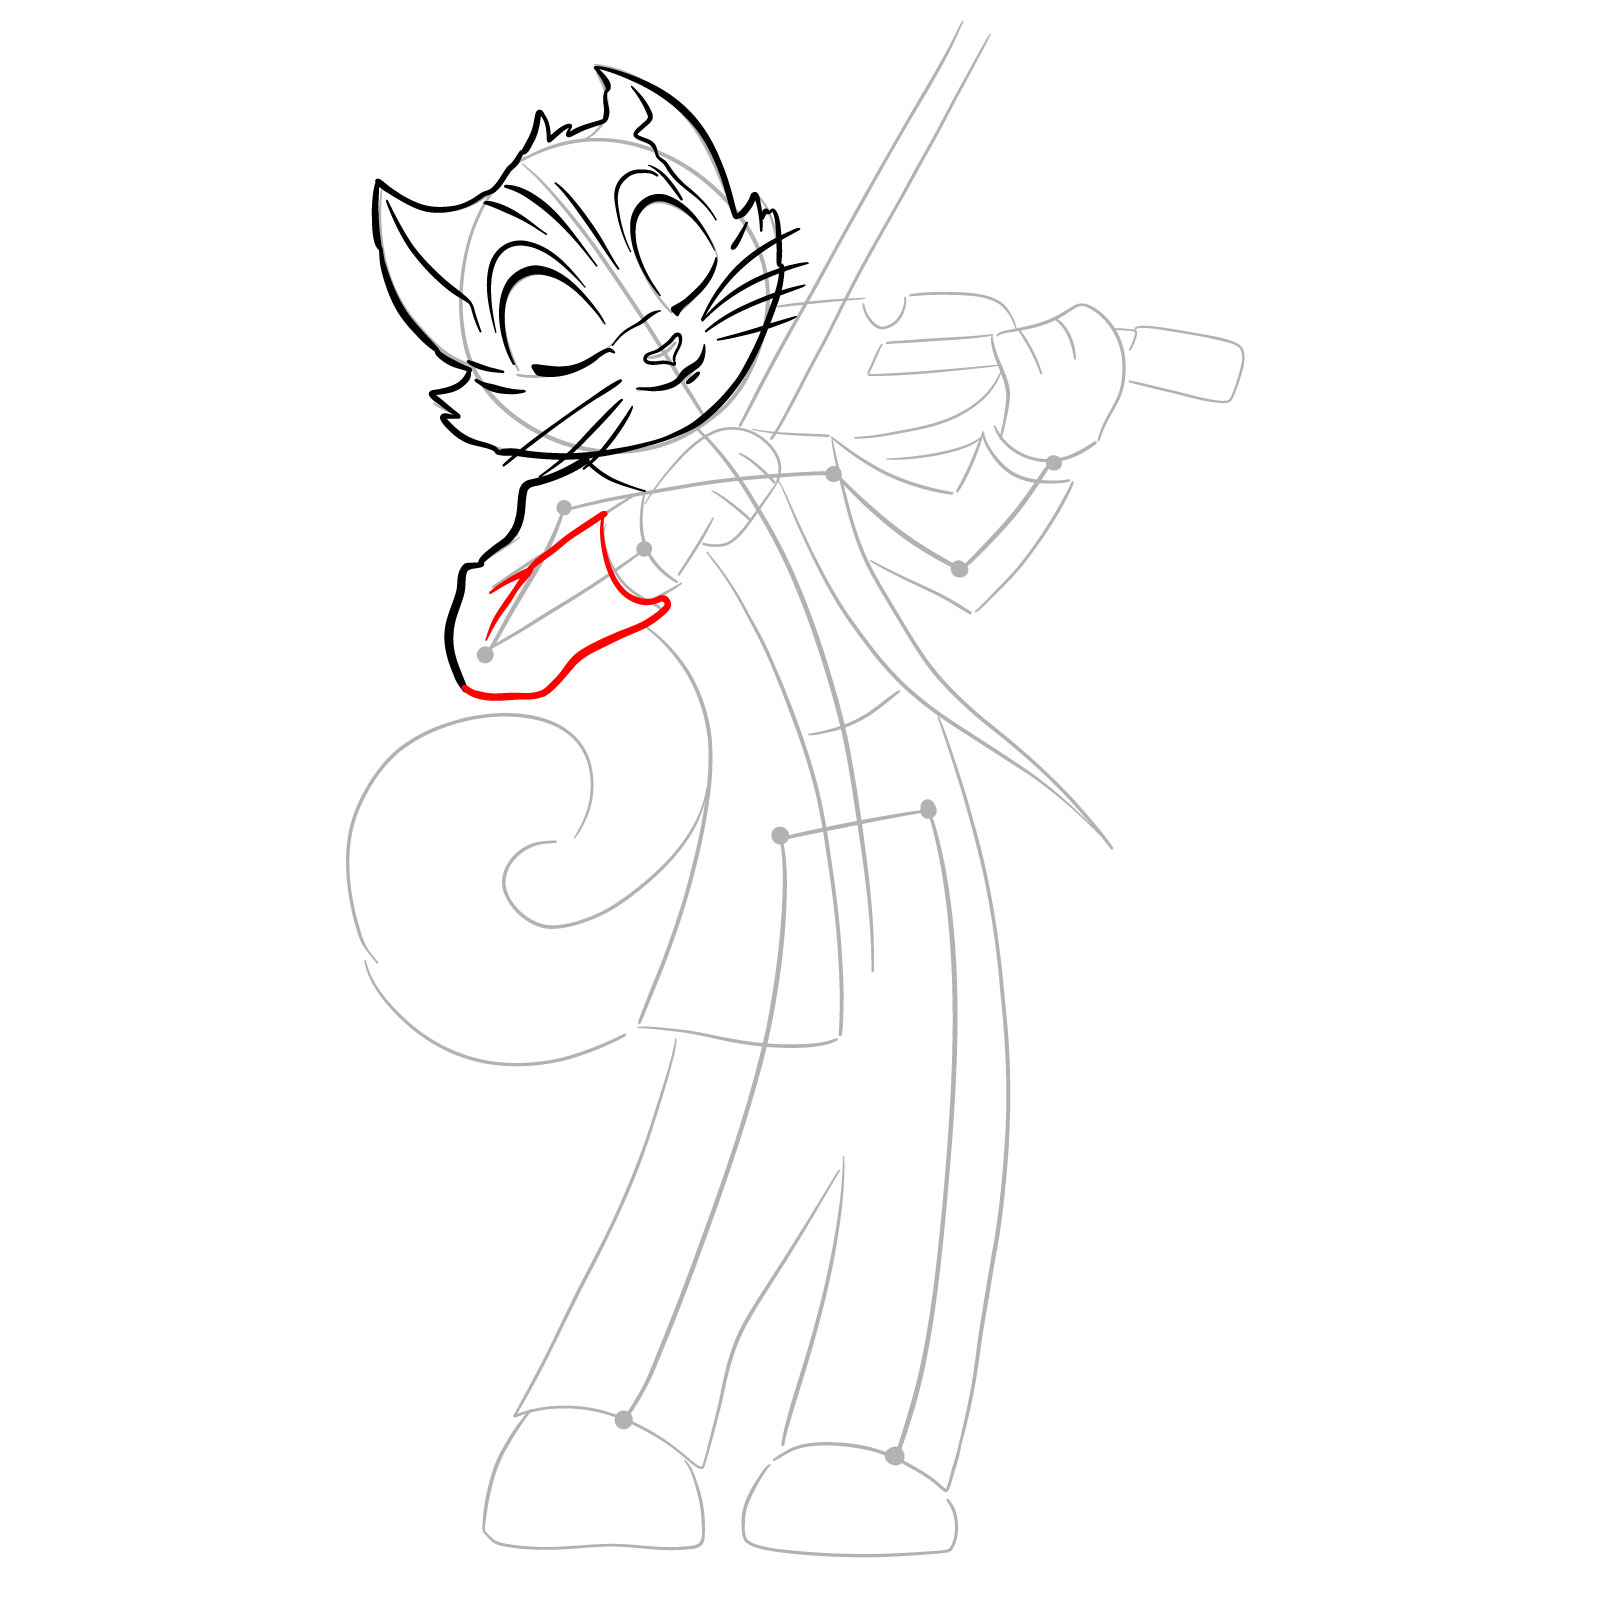
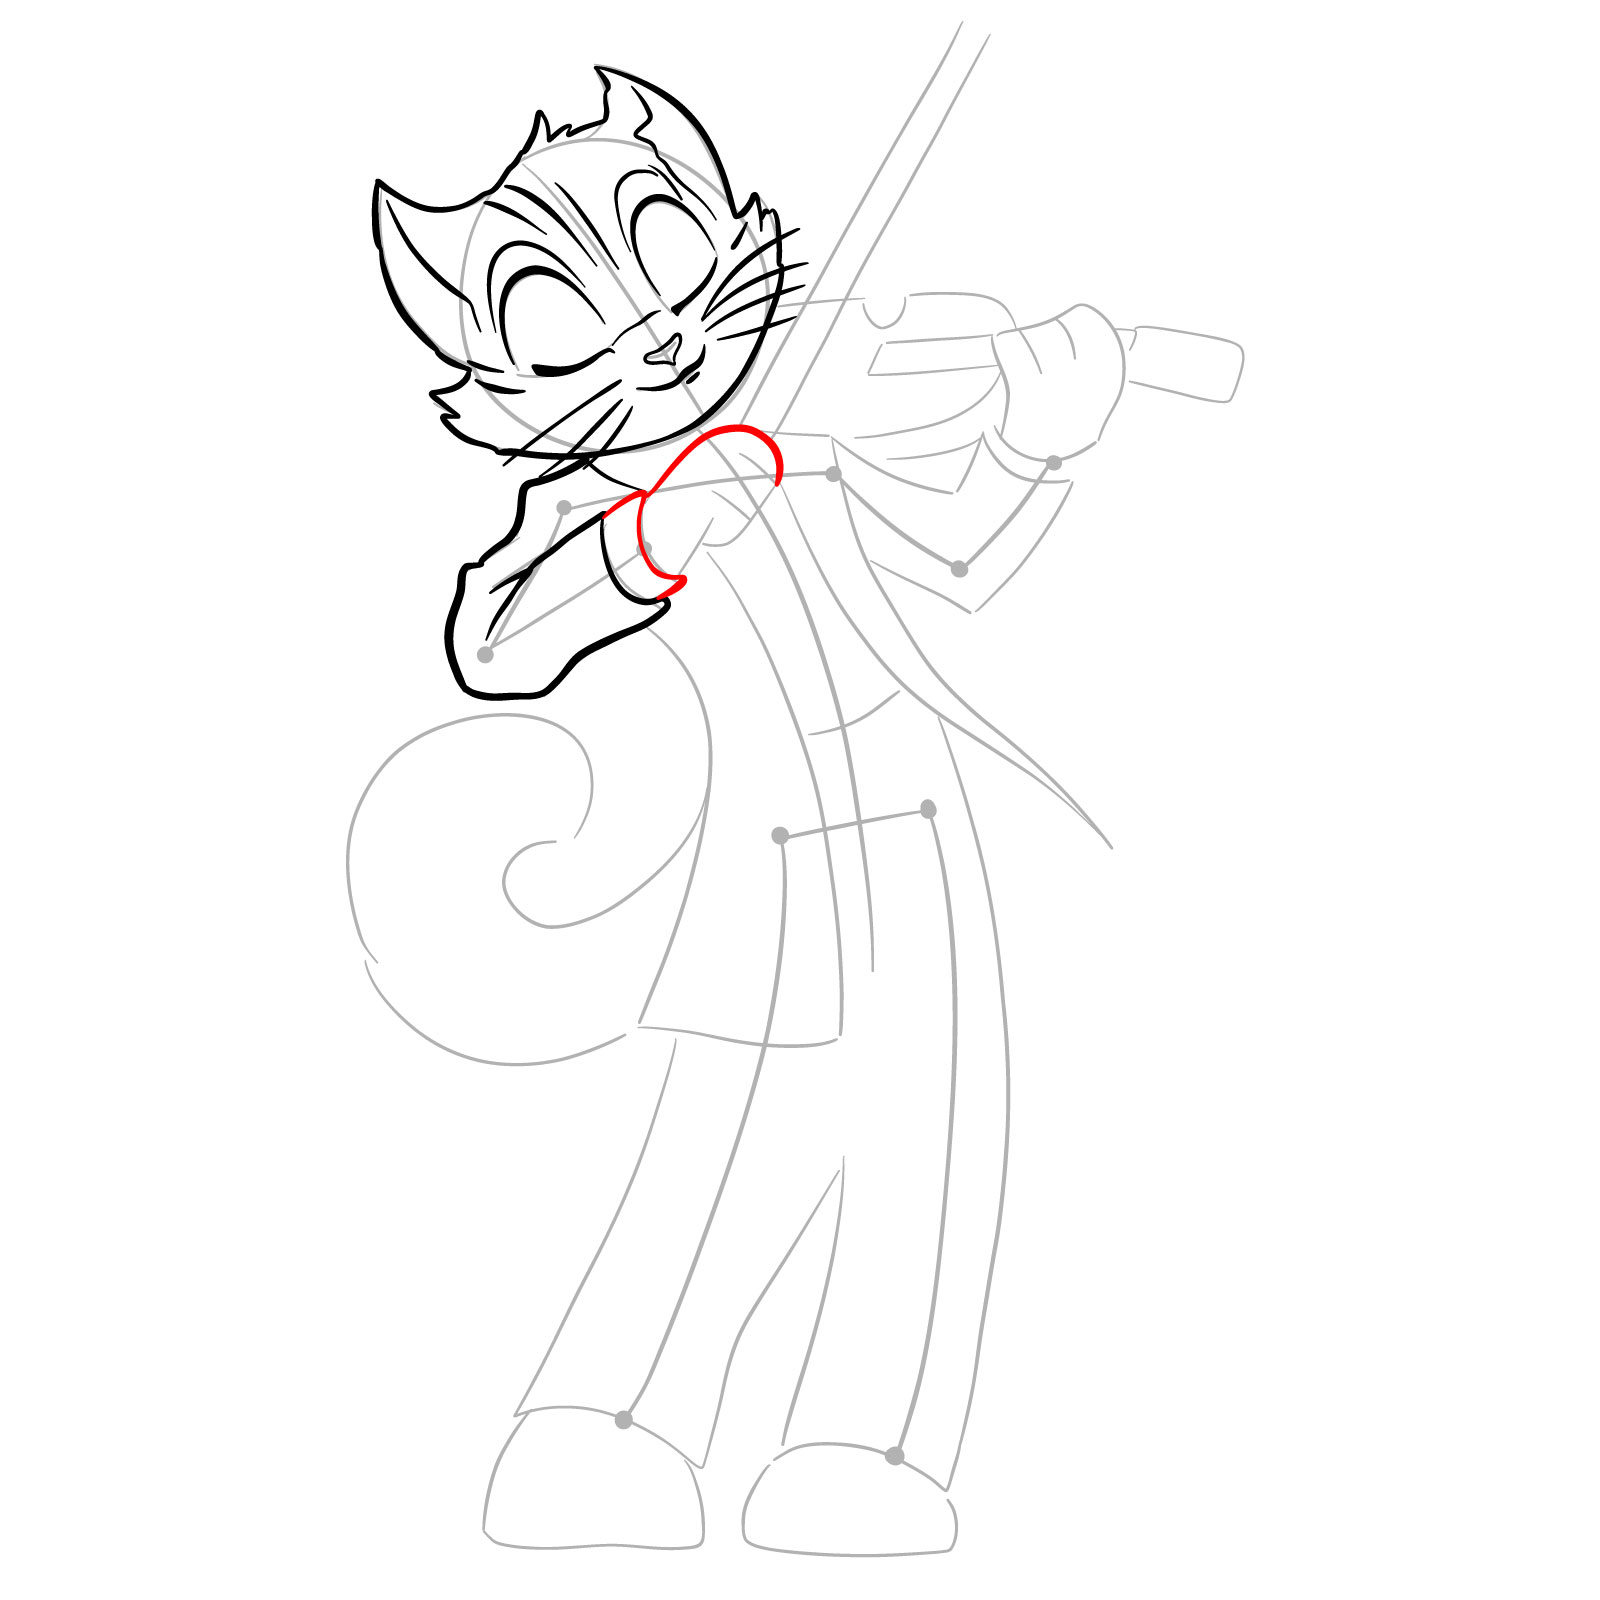
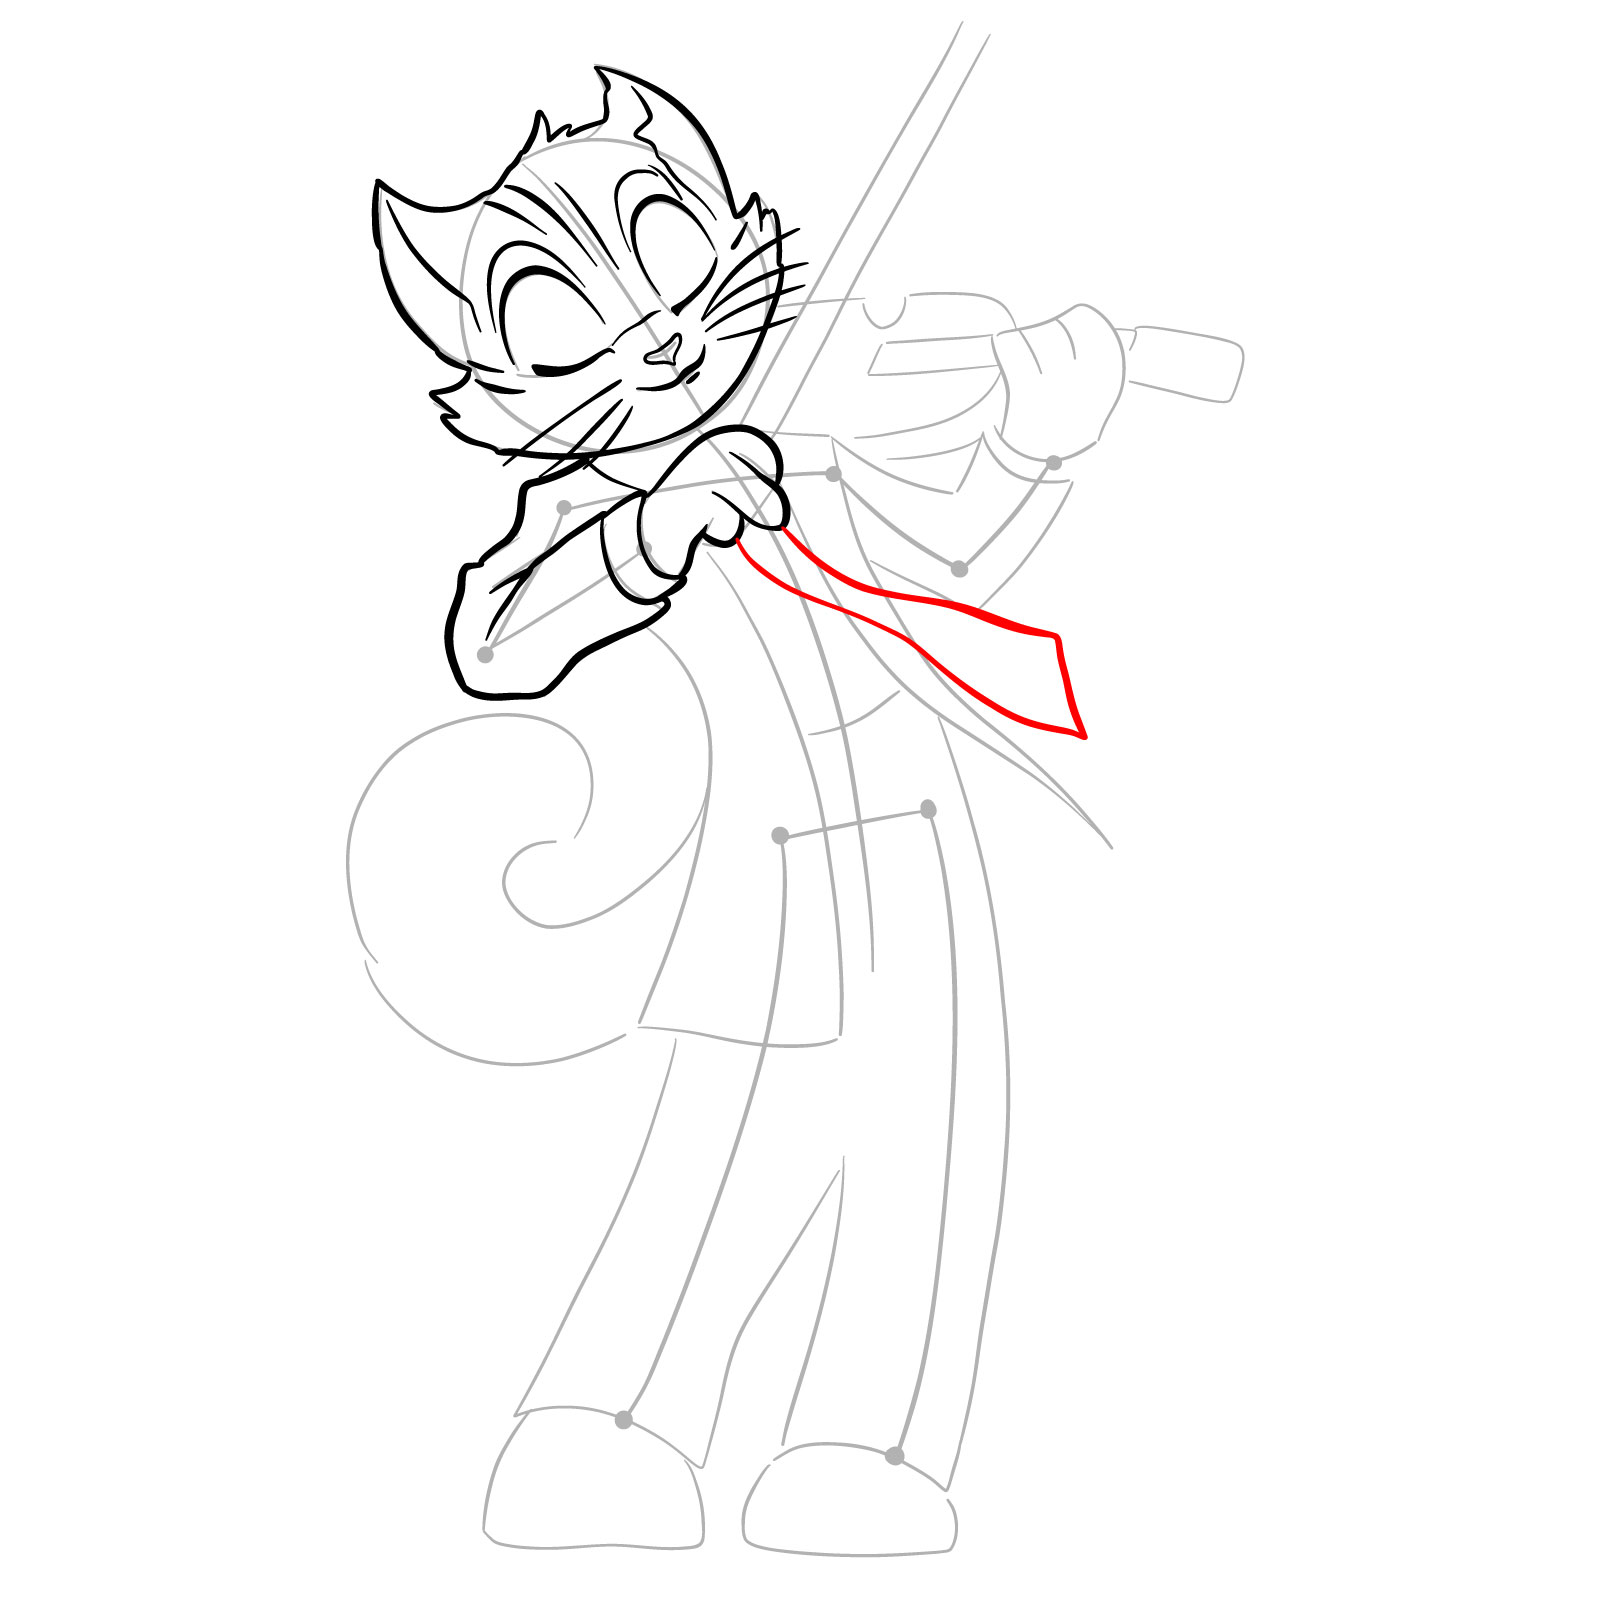
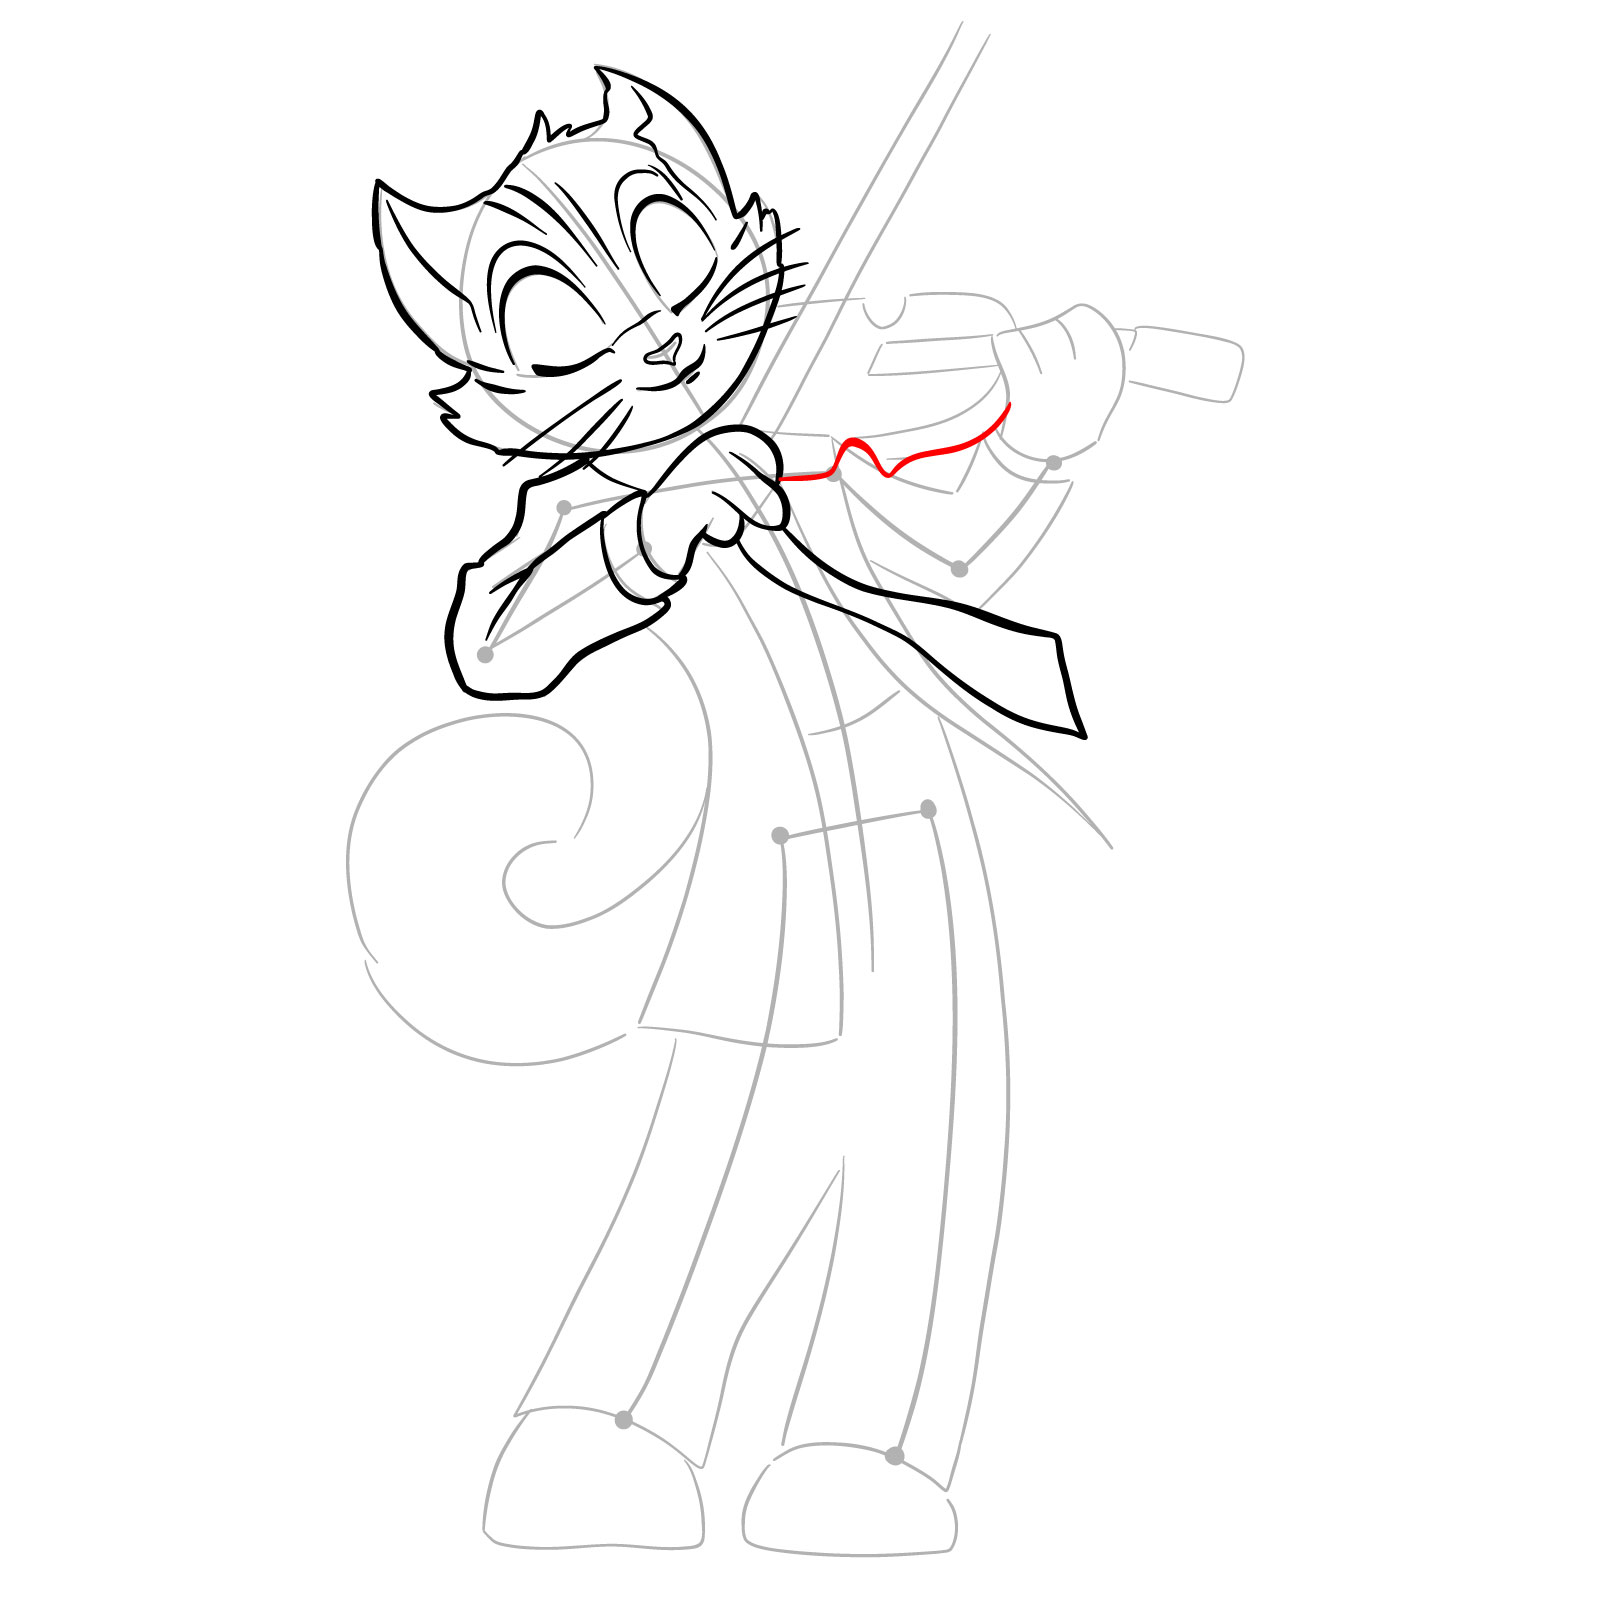
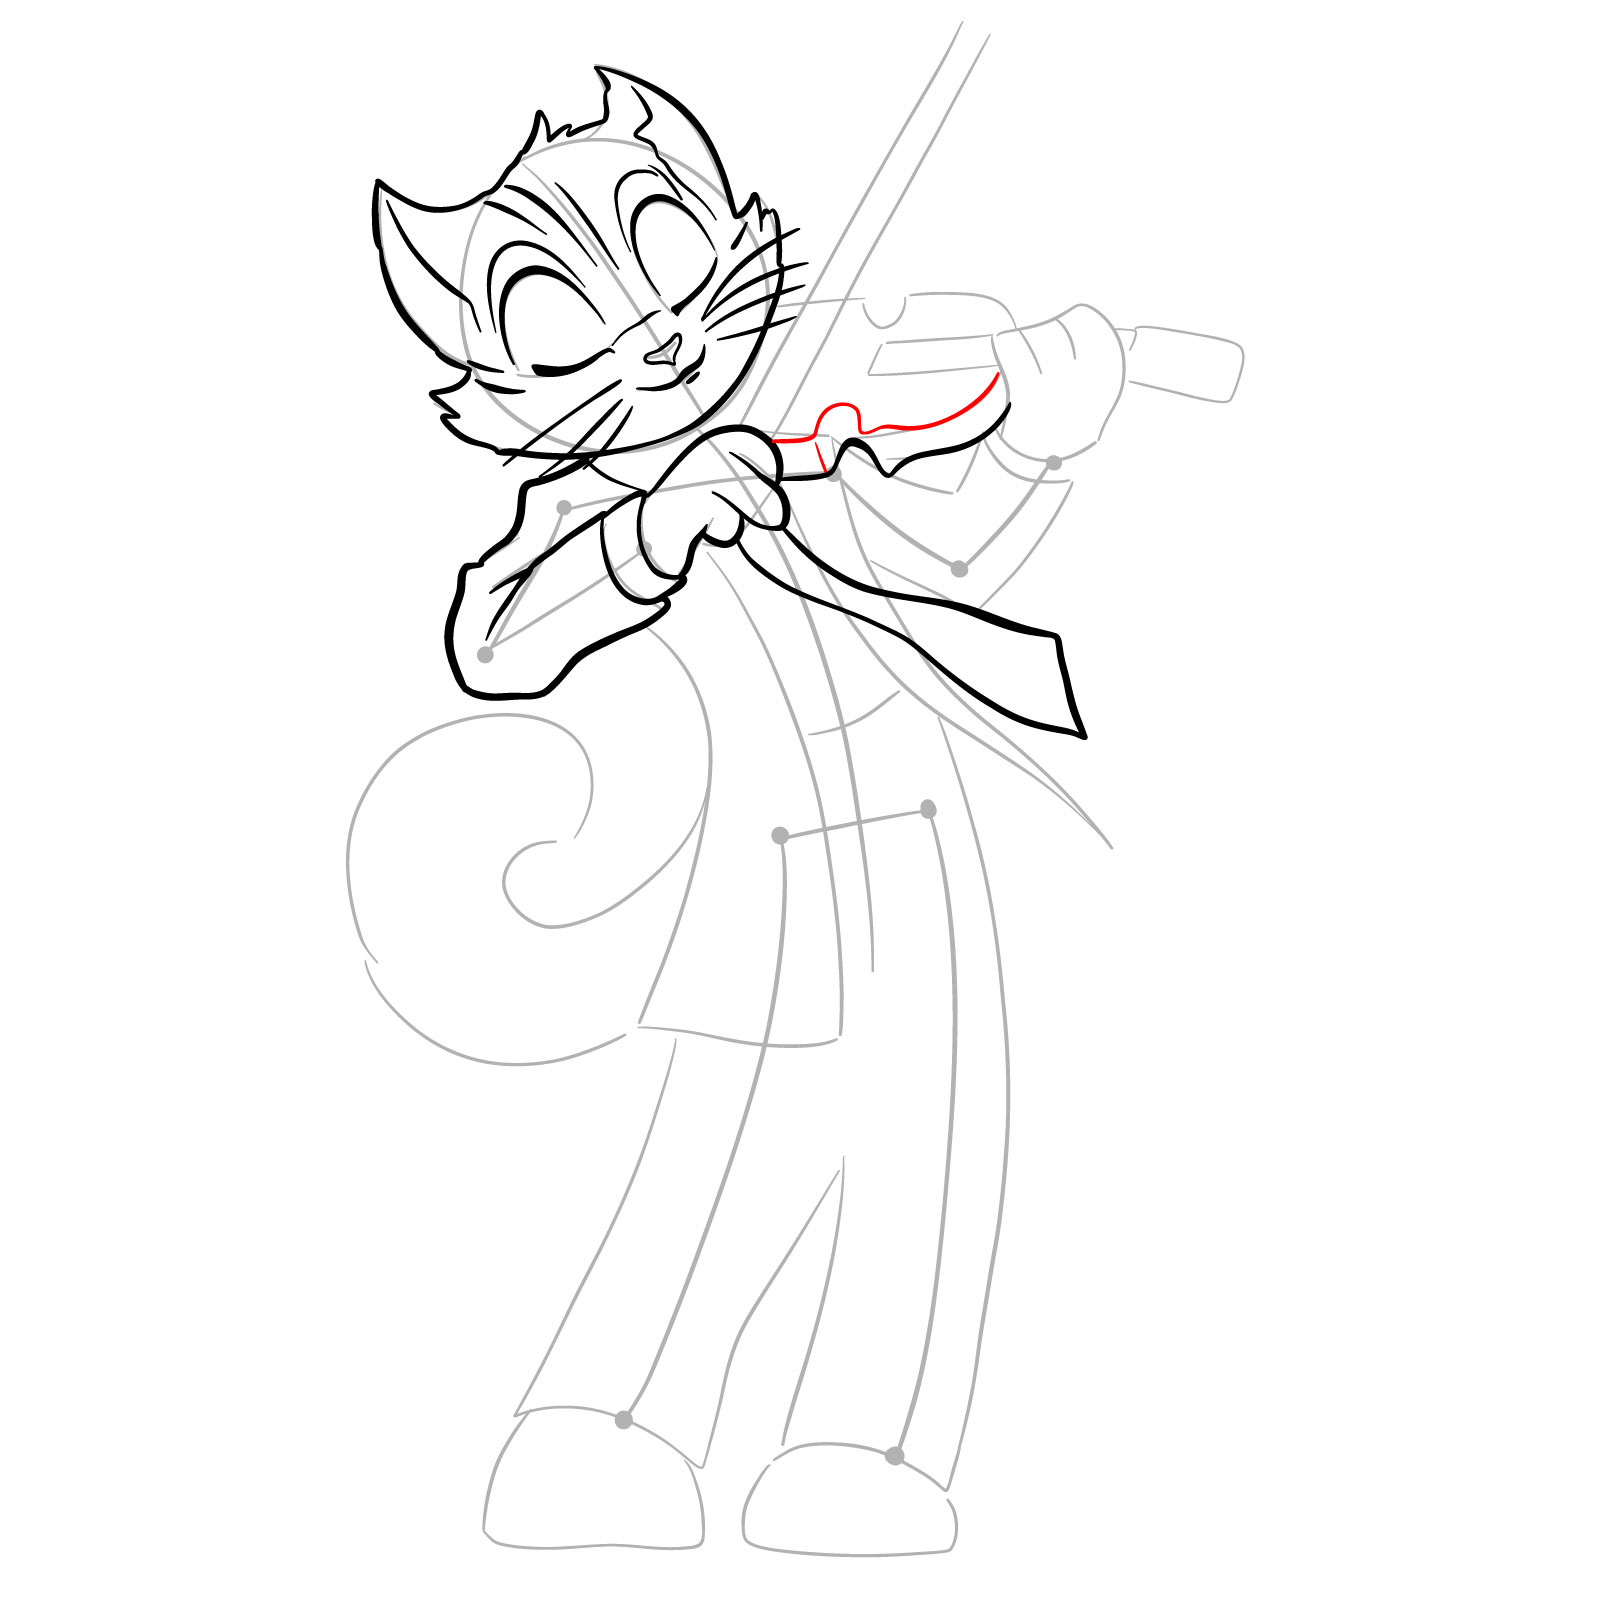
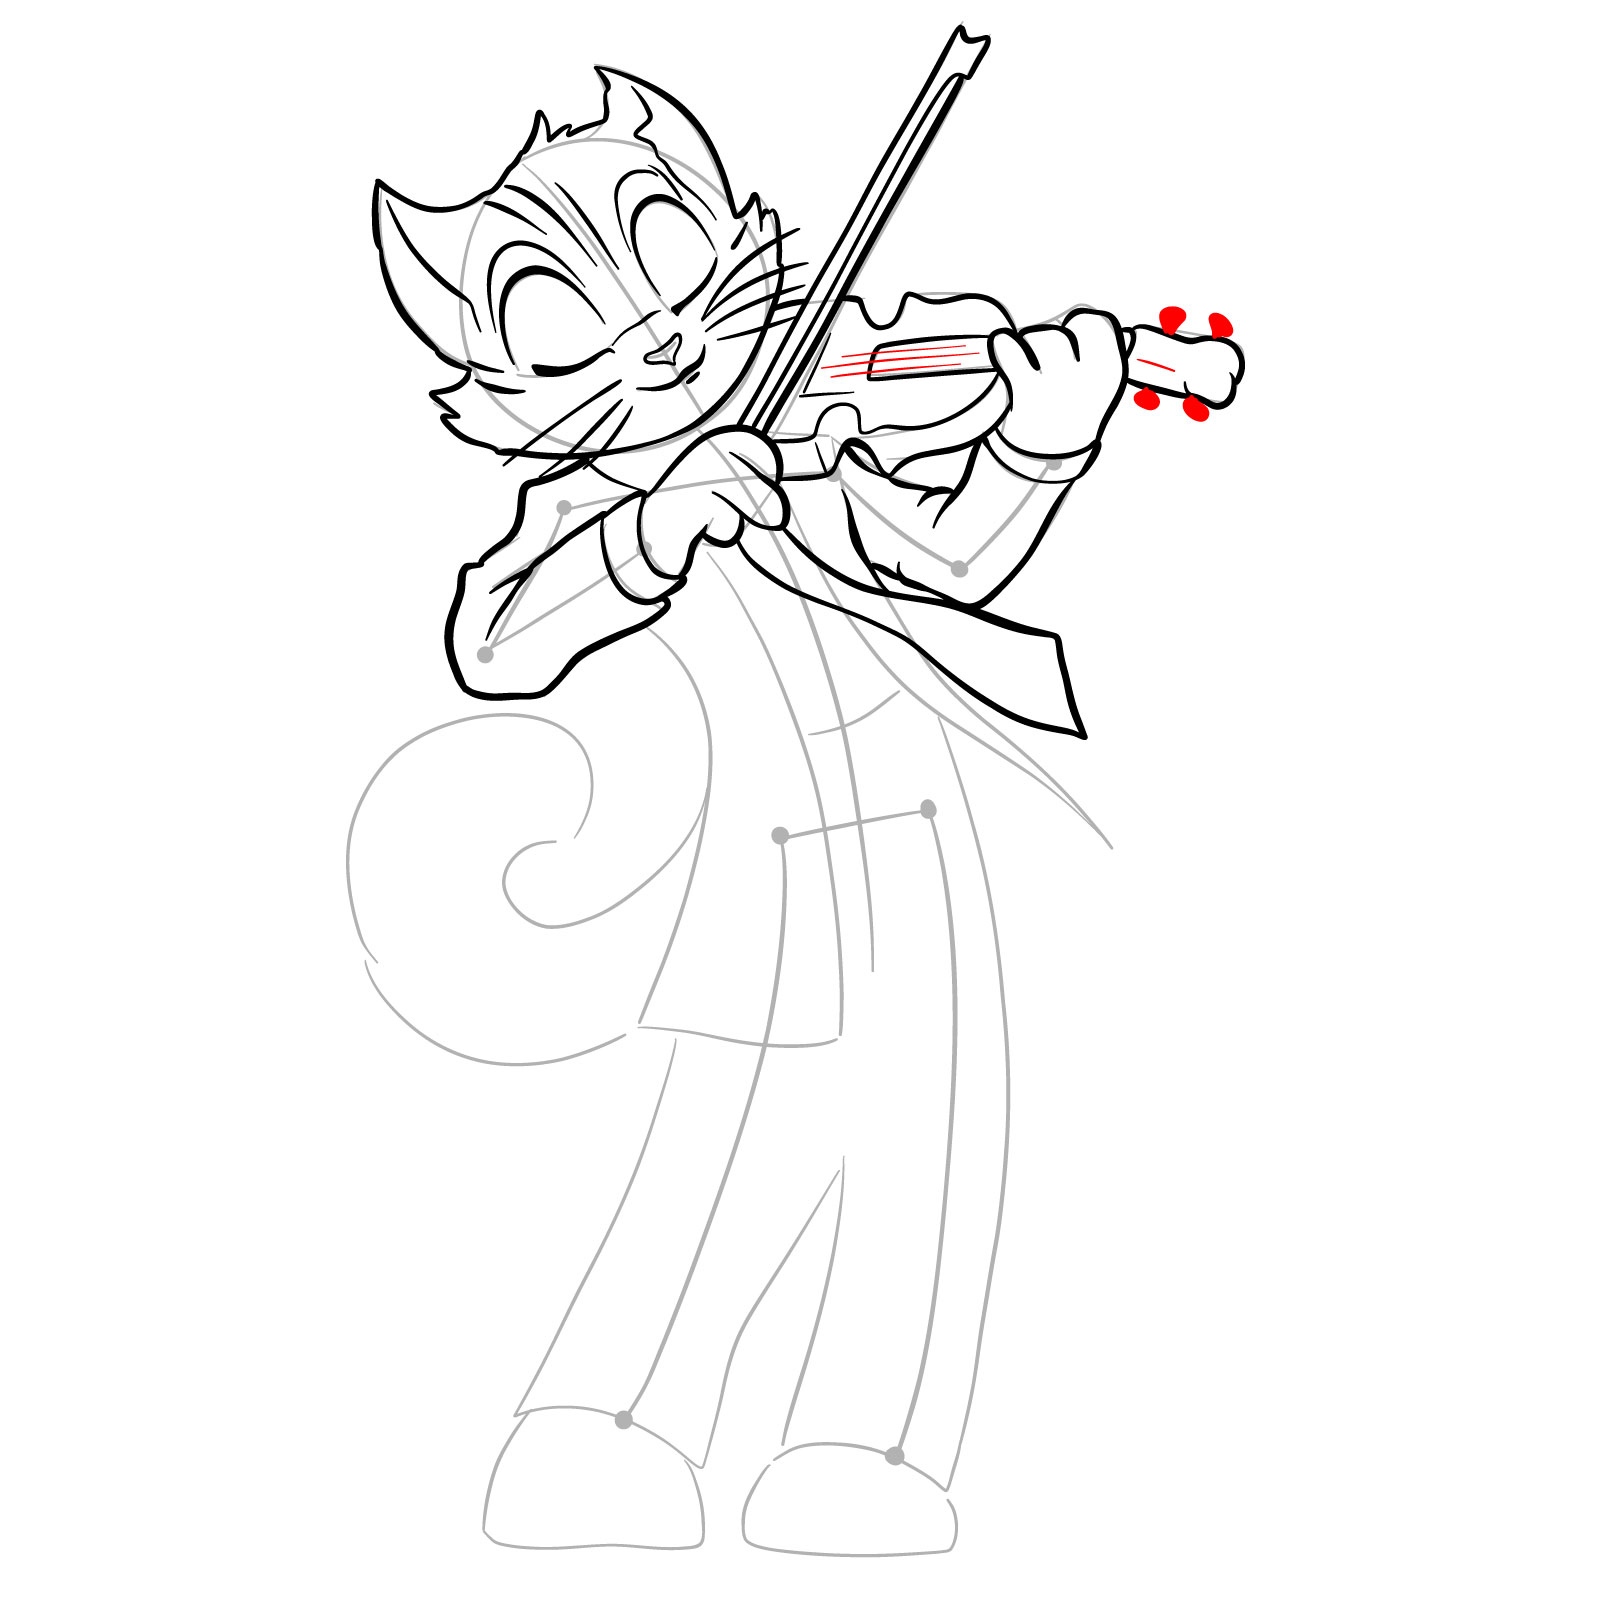
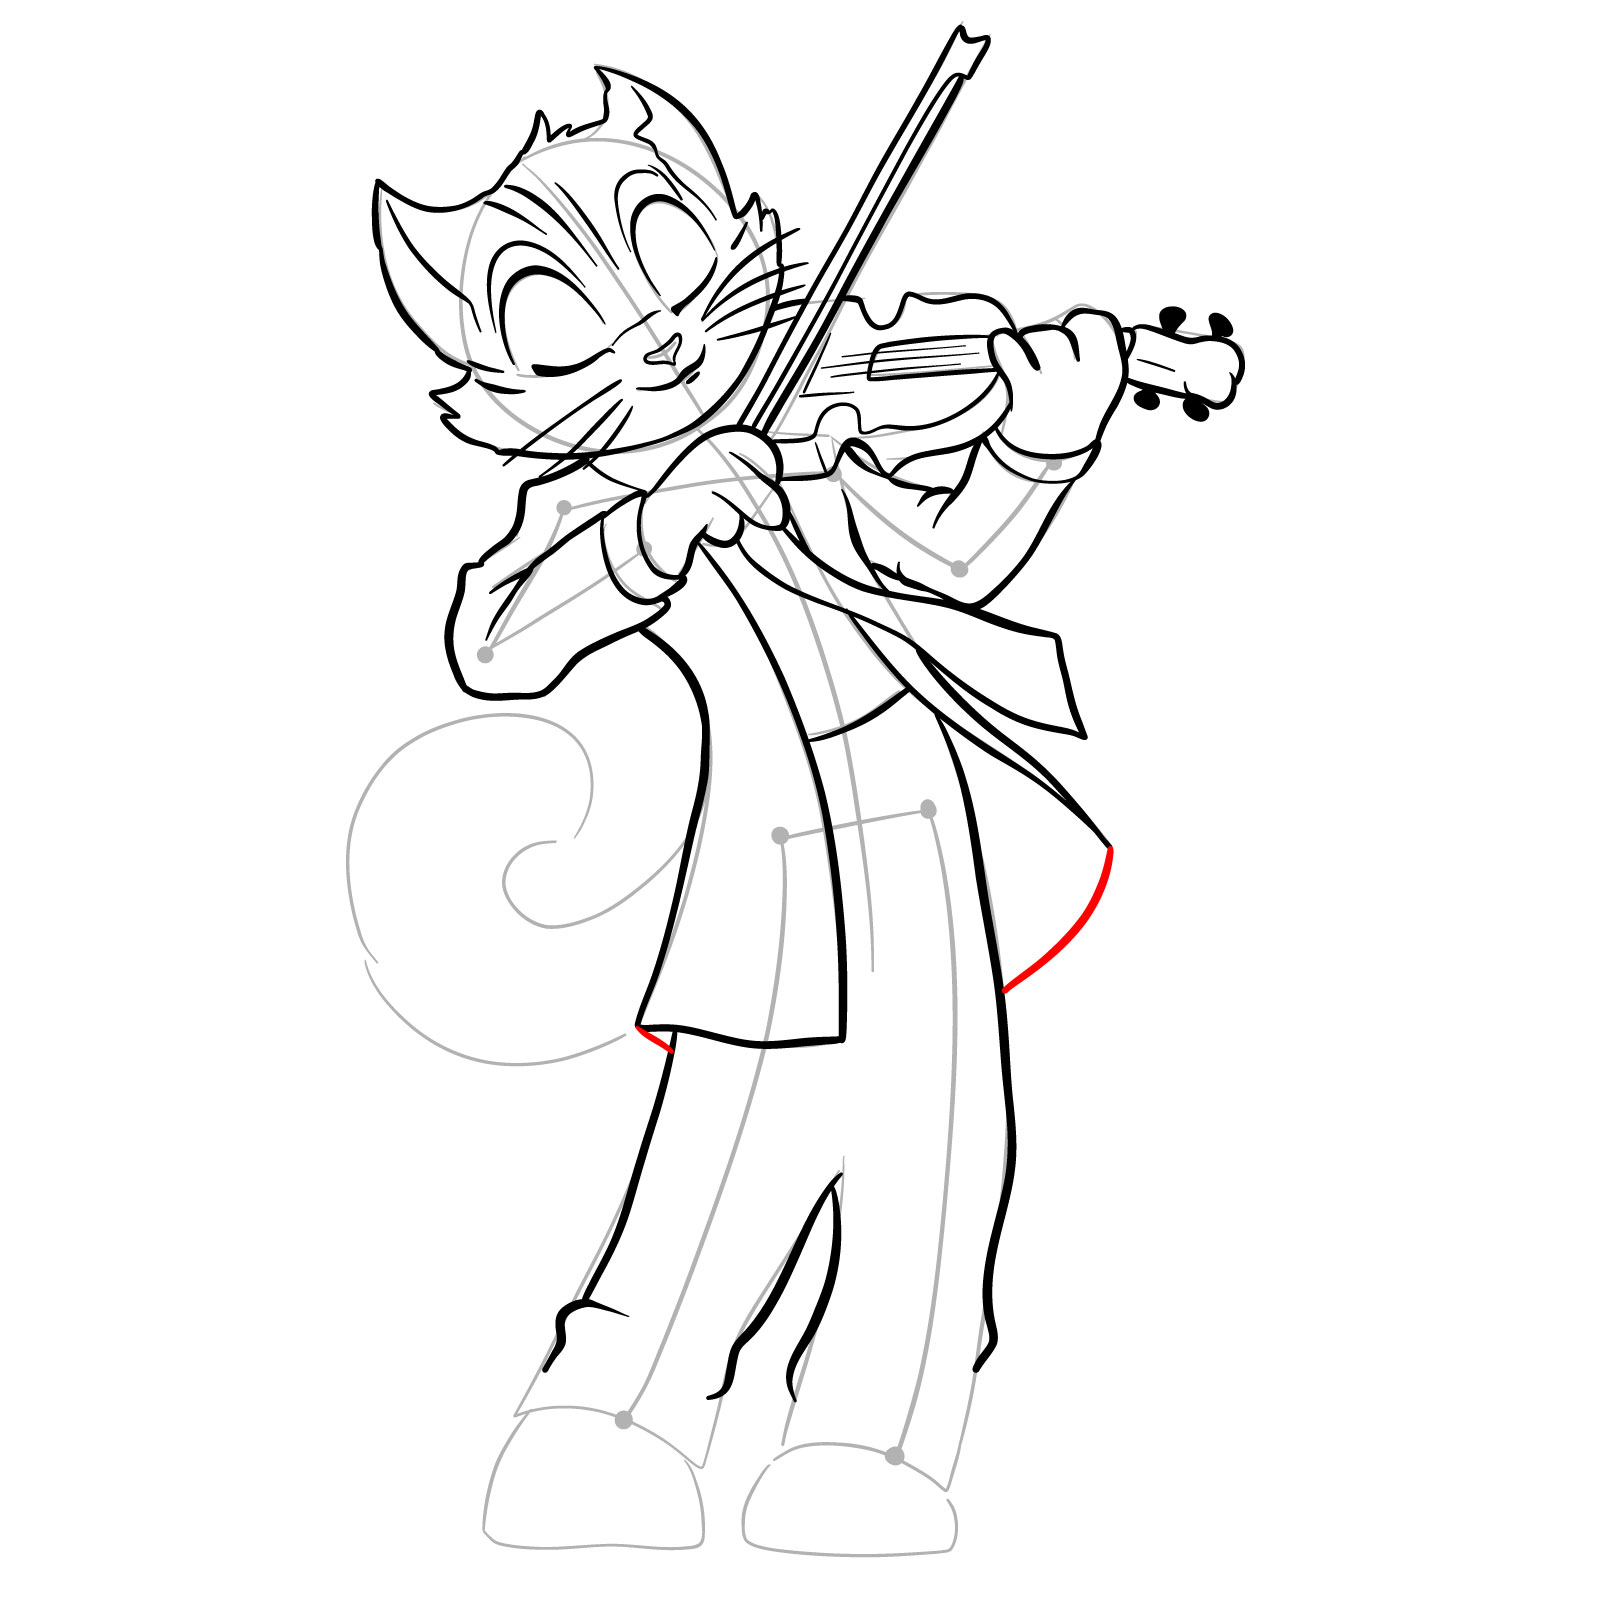
Our drawing tutorial consists of three main parts, each focusing on a different aspect of the drawing process. The first three images will guide you through the initial sketching phase, where you will use light pencil strokes to create a basic structure for proportions. In all the images, red represents the current drawing step, grey signifies the basic proportions sketch, and black shows the previously drawn lines.

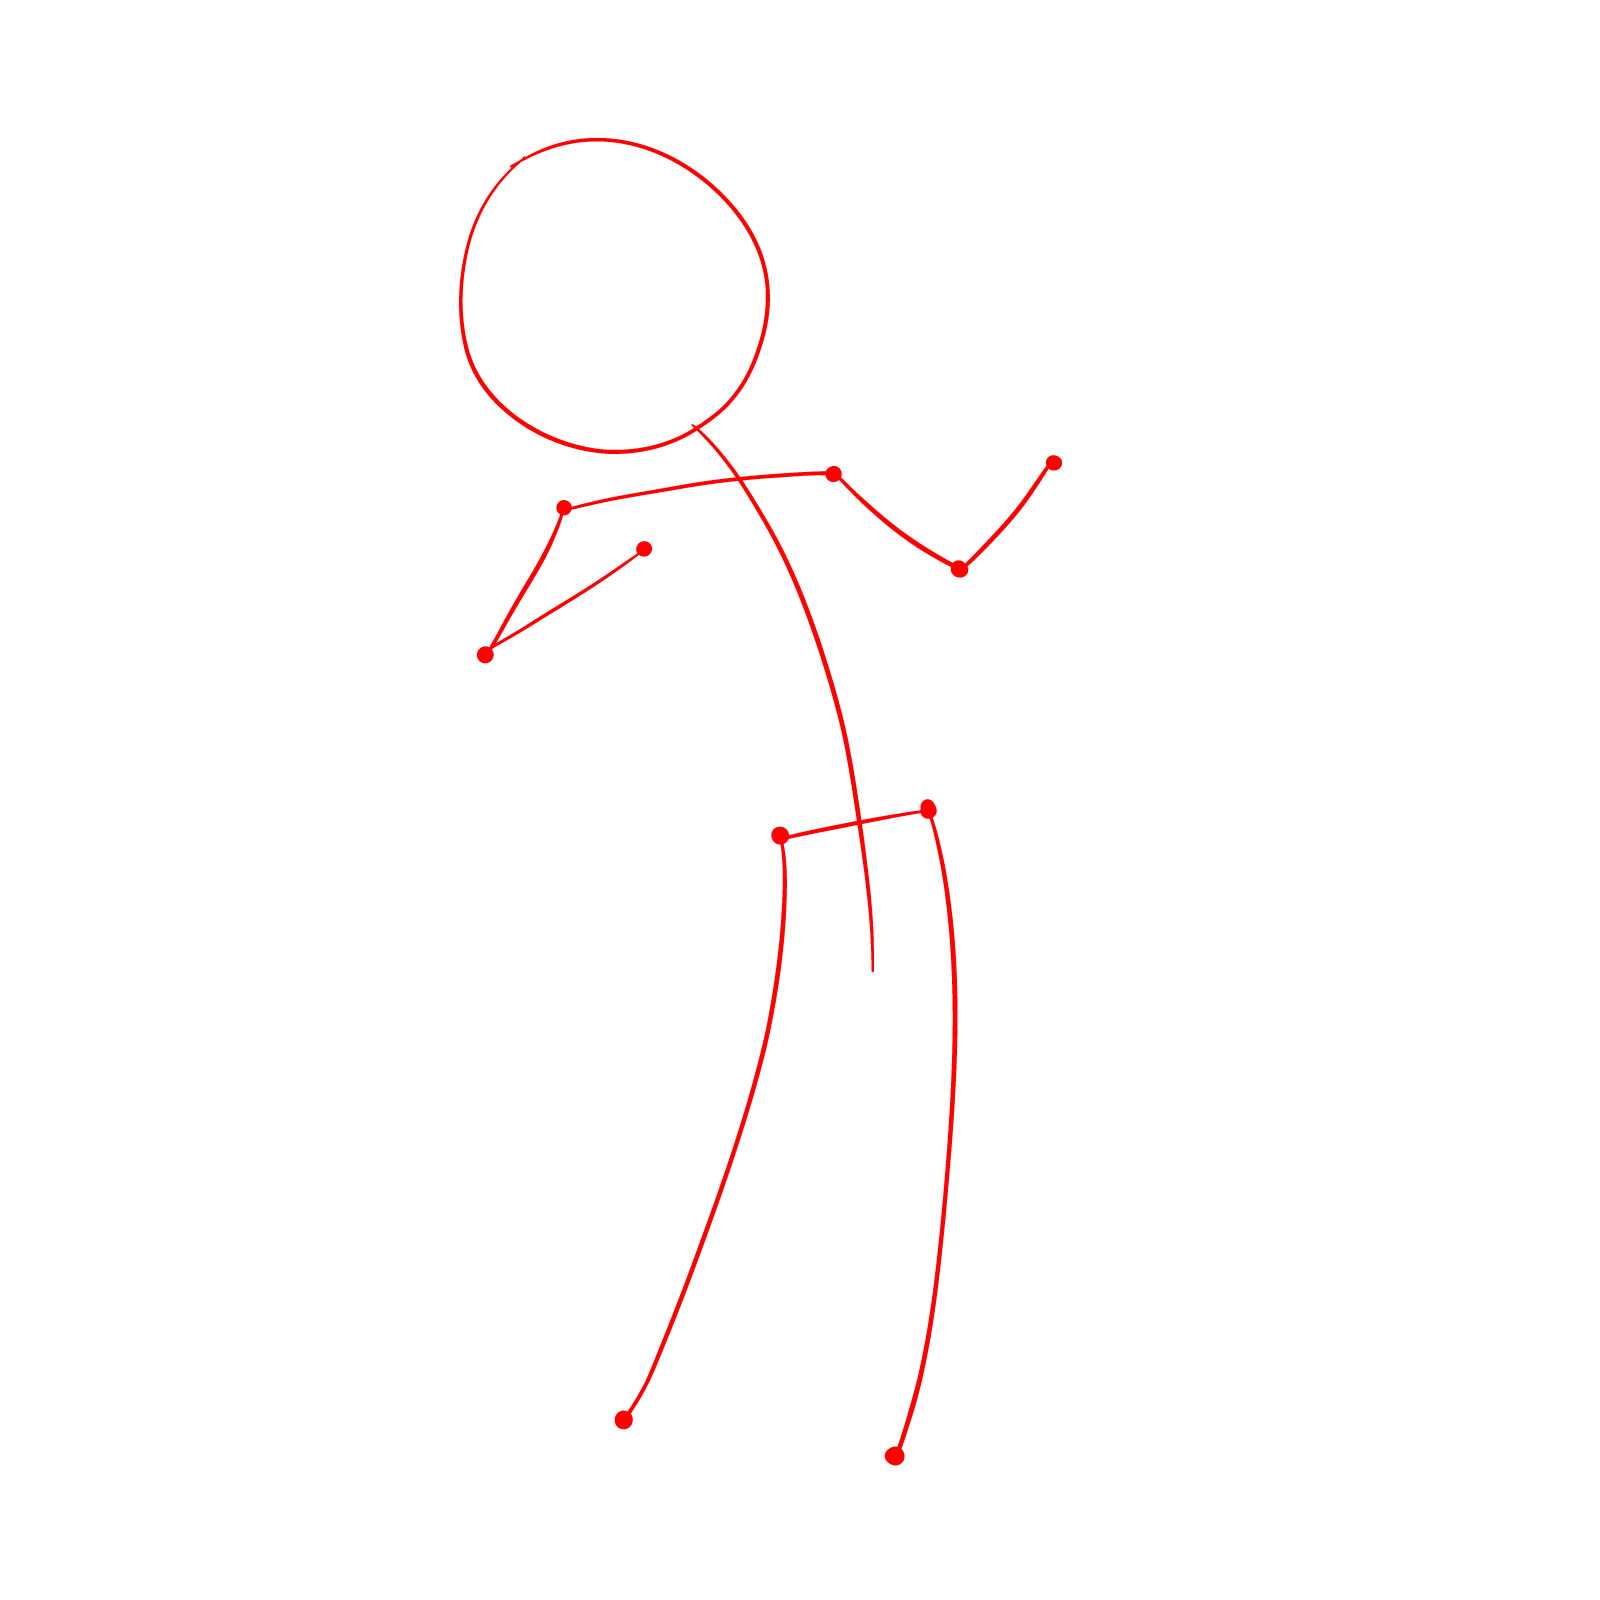
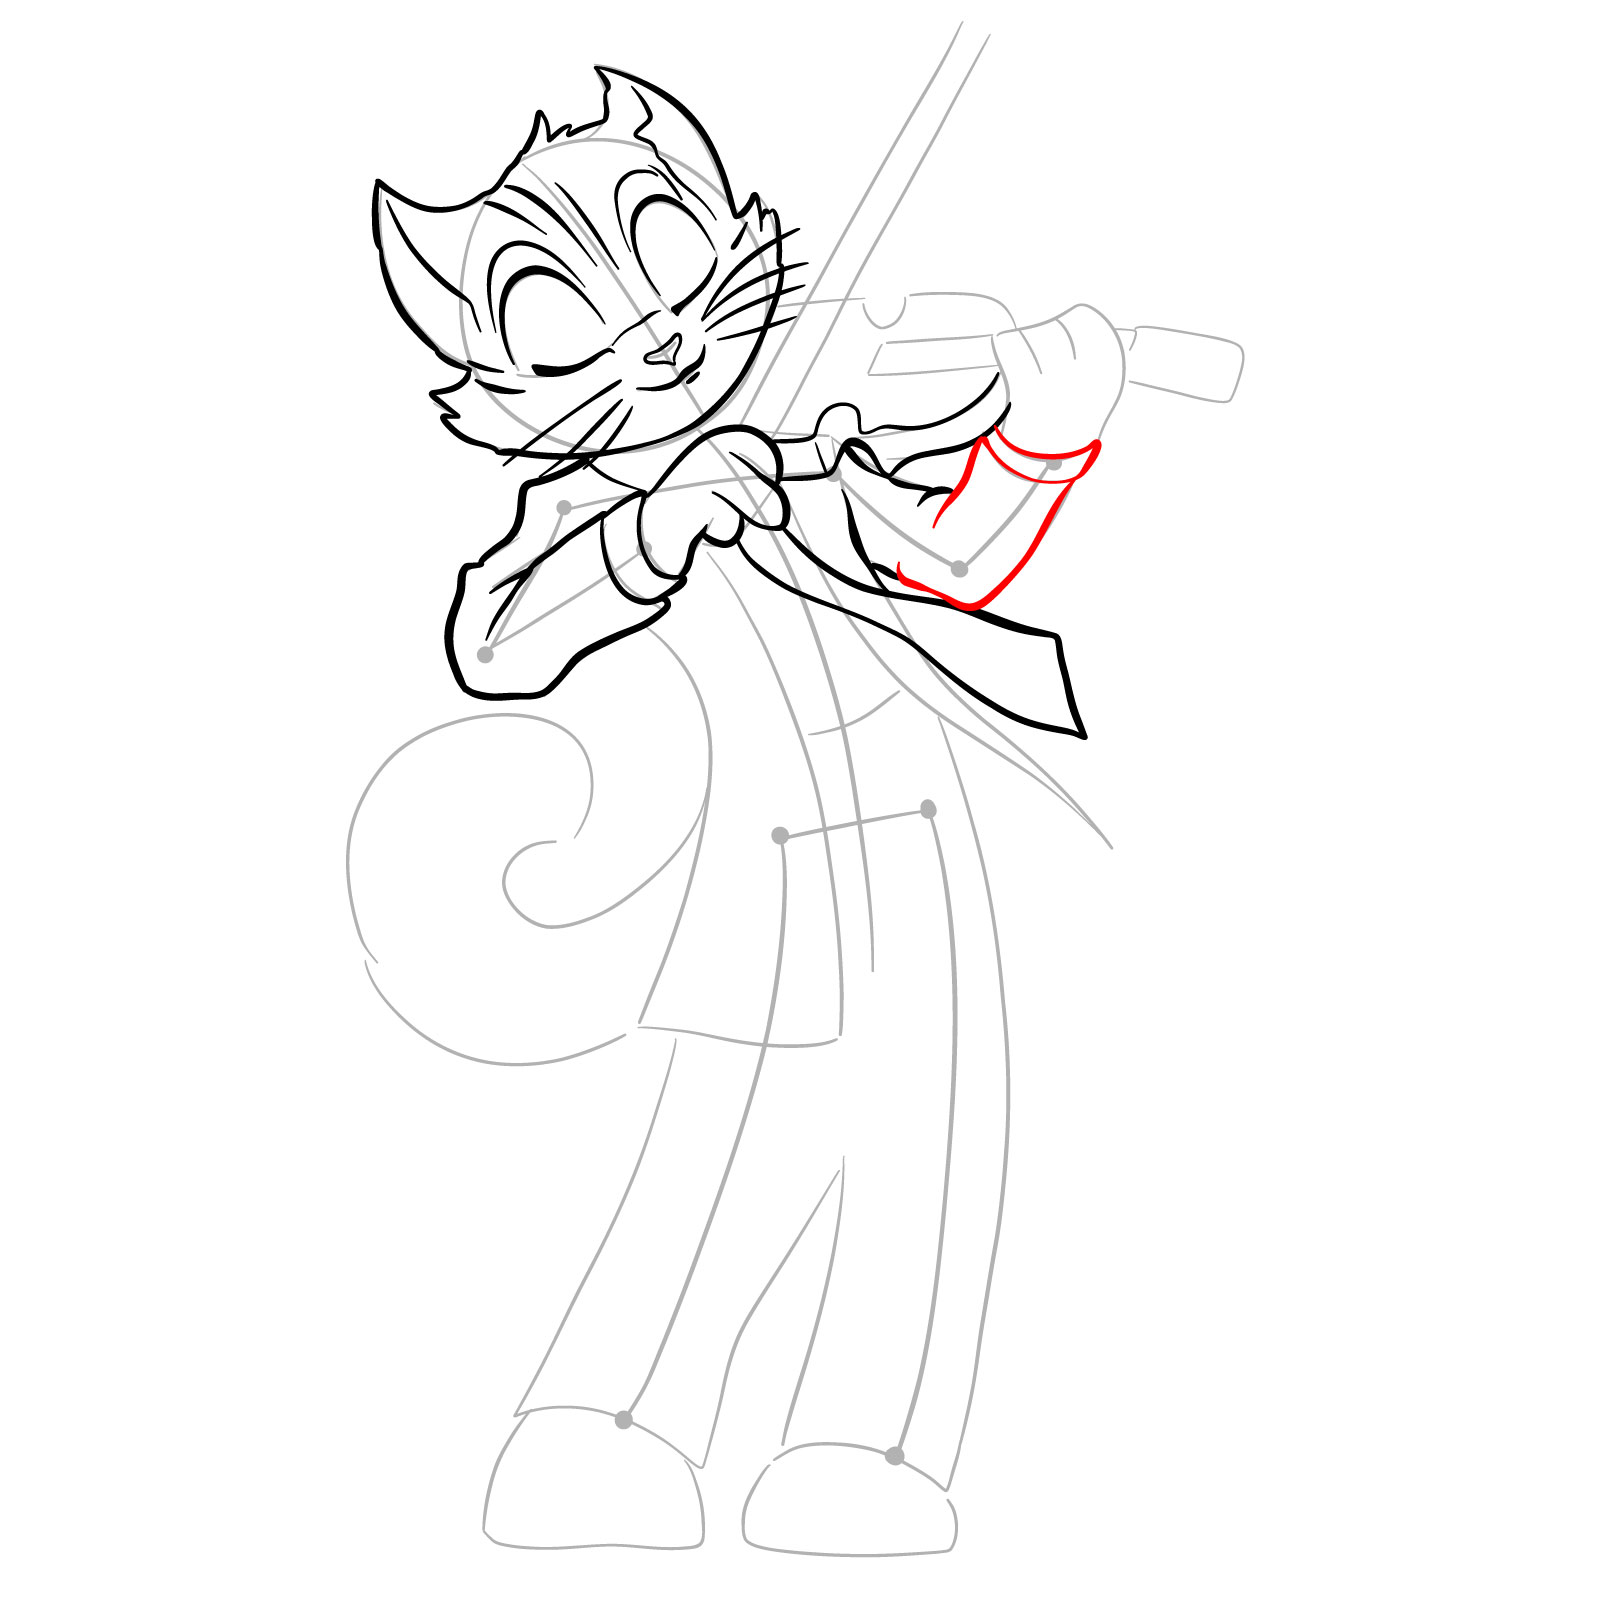
Part 1: Establishing the Basic Sketch

Begin by lightly sketching Rocky Rickaby’s basic structure, including his pose and the violin. This stage helps you establish the correct proportions and sets the foundation for your drawing.

Step 01

How to draw Rocky Rickaby playing the violin - step 01Pin

Step 02

How to draw Rocky Rickaby playing the violin - step 02Pin

Step 03

How to draw Rocky Rickaby playing the violin - step 03Pin

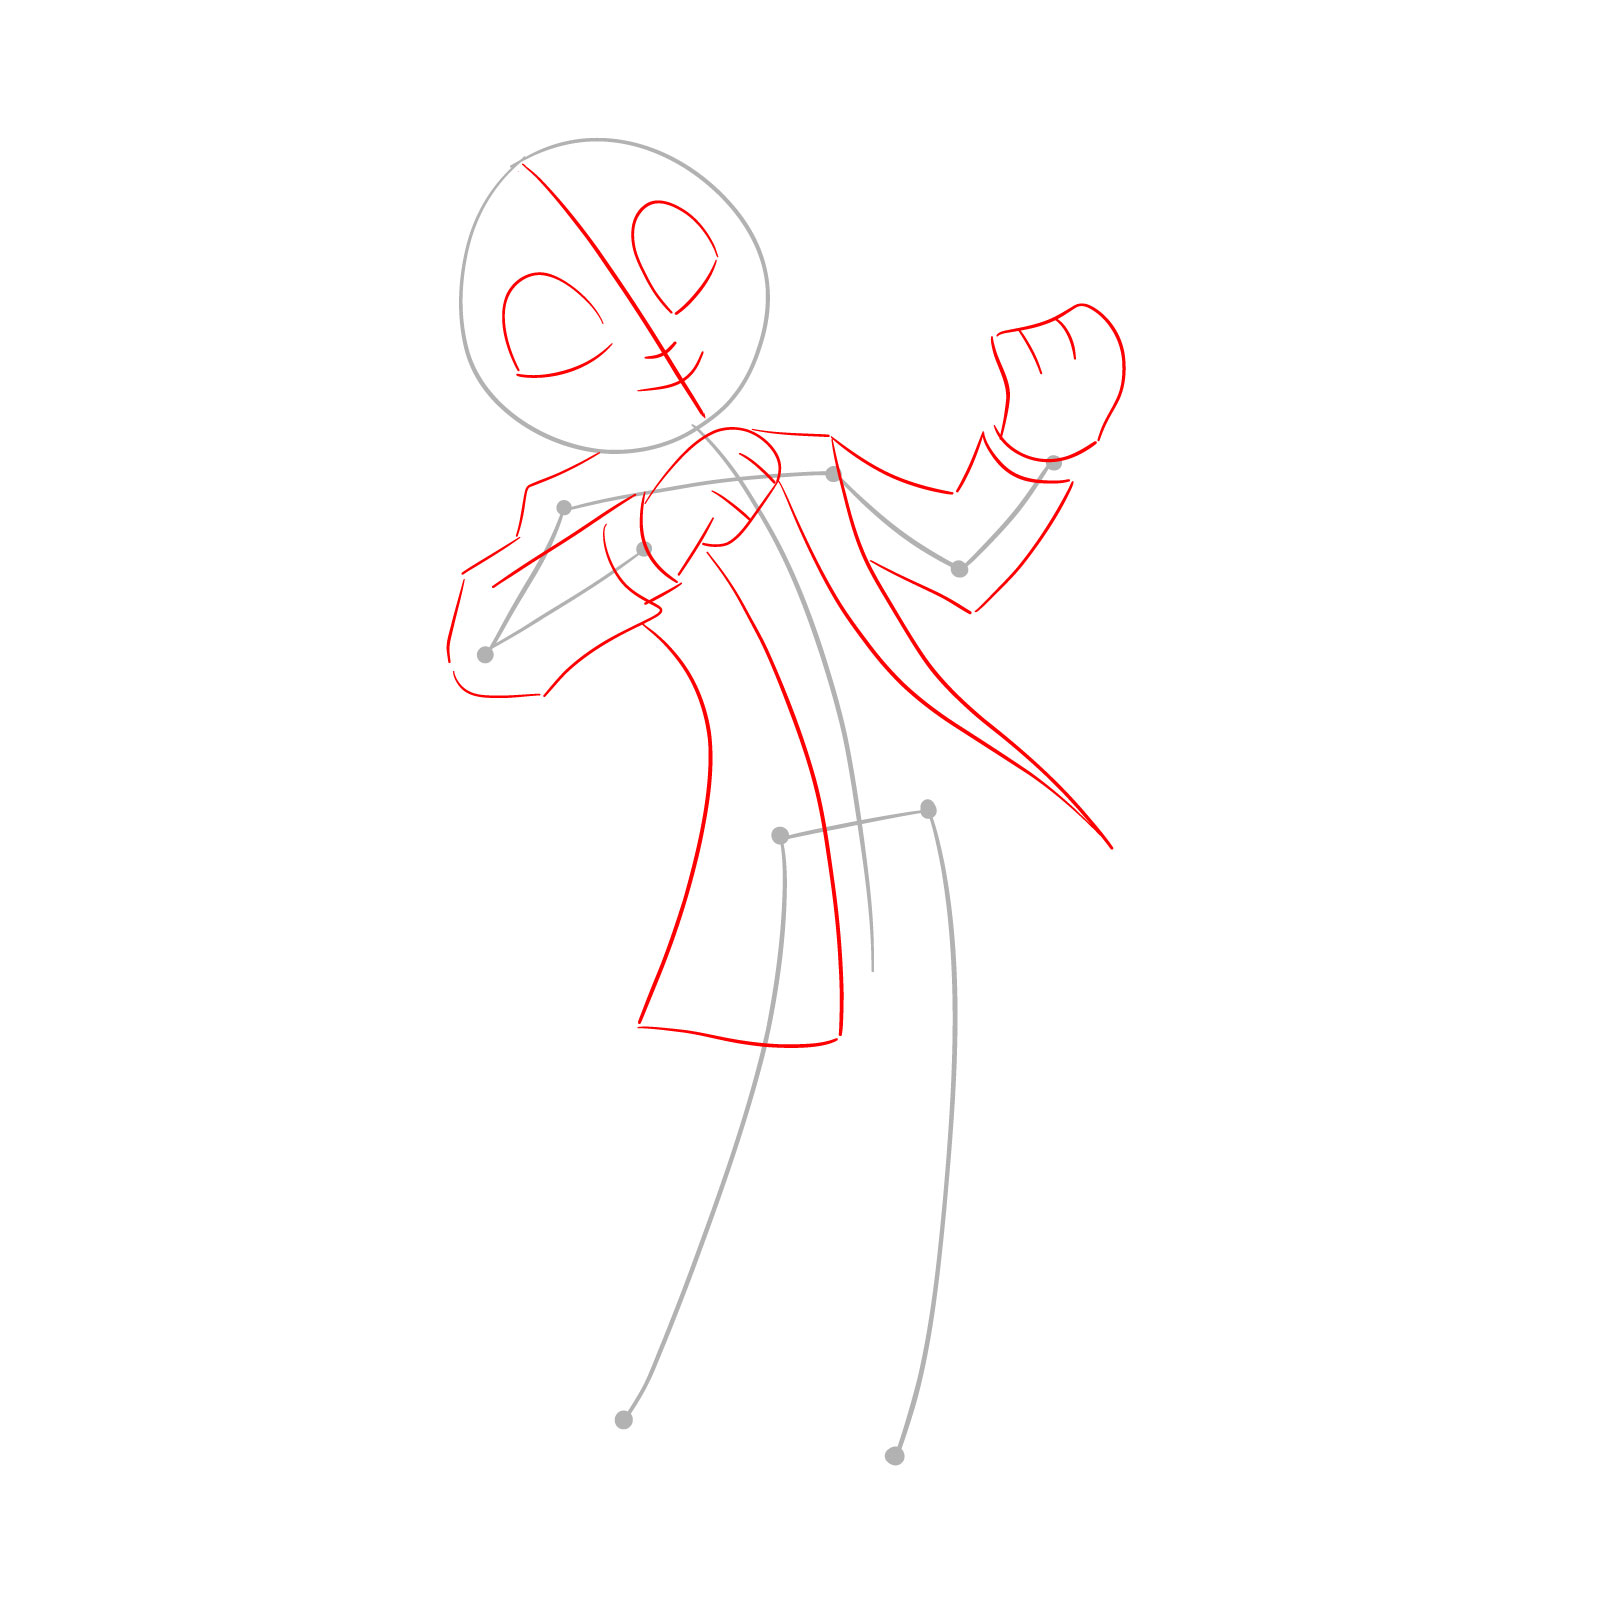
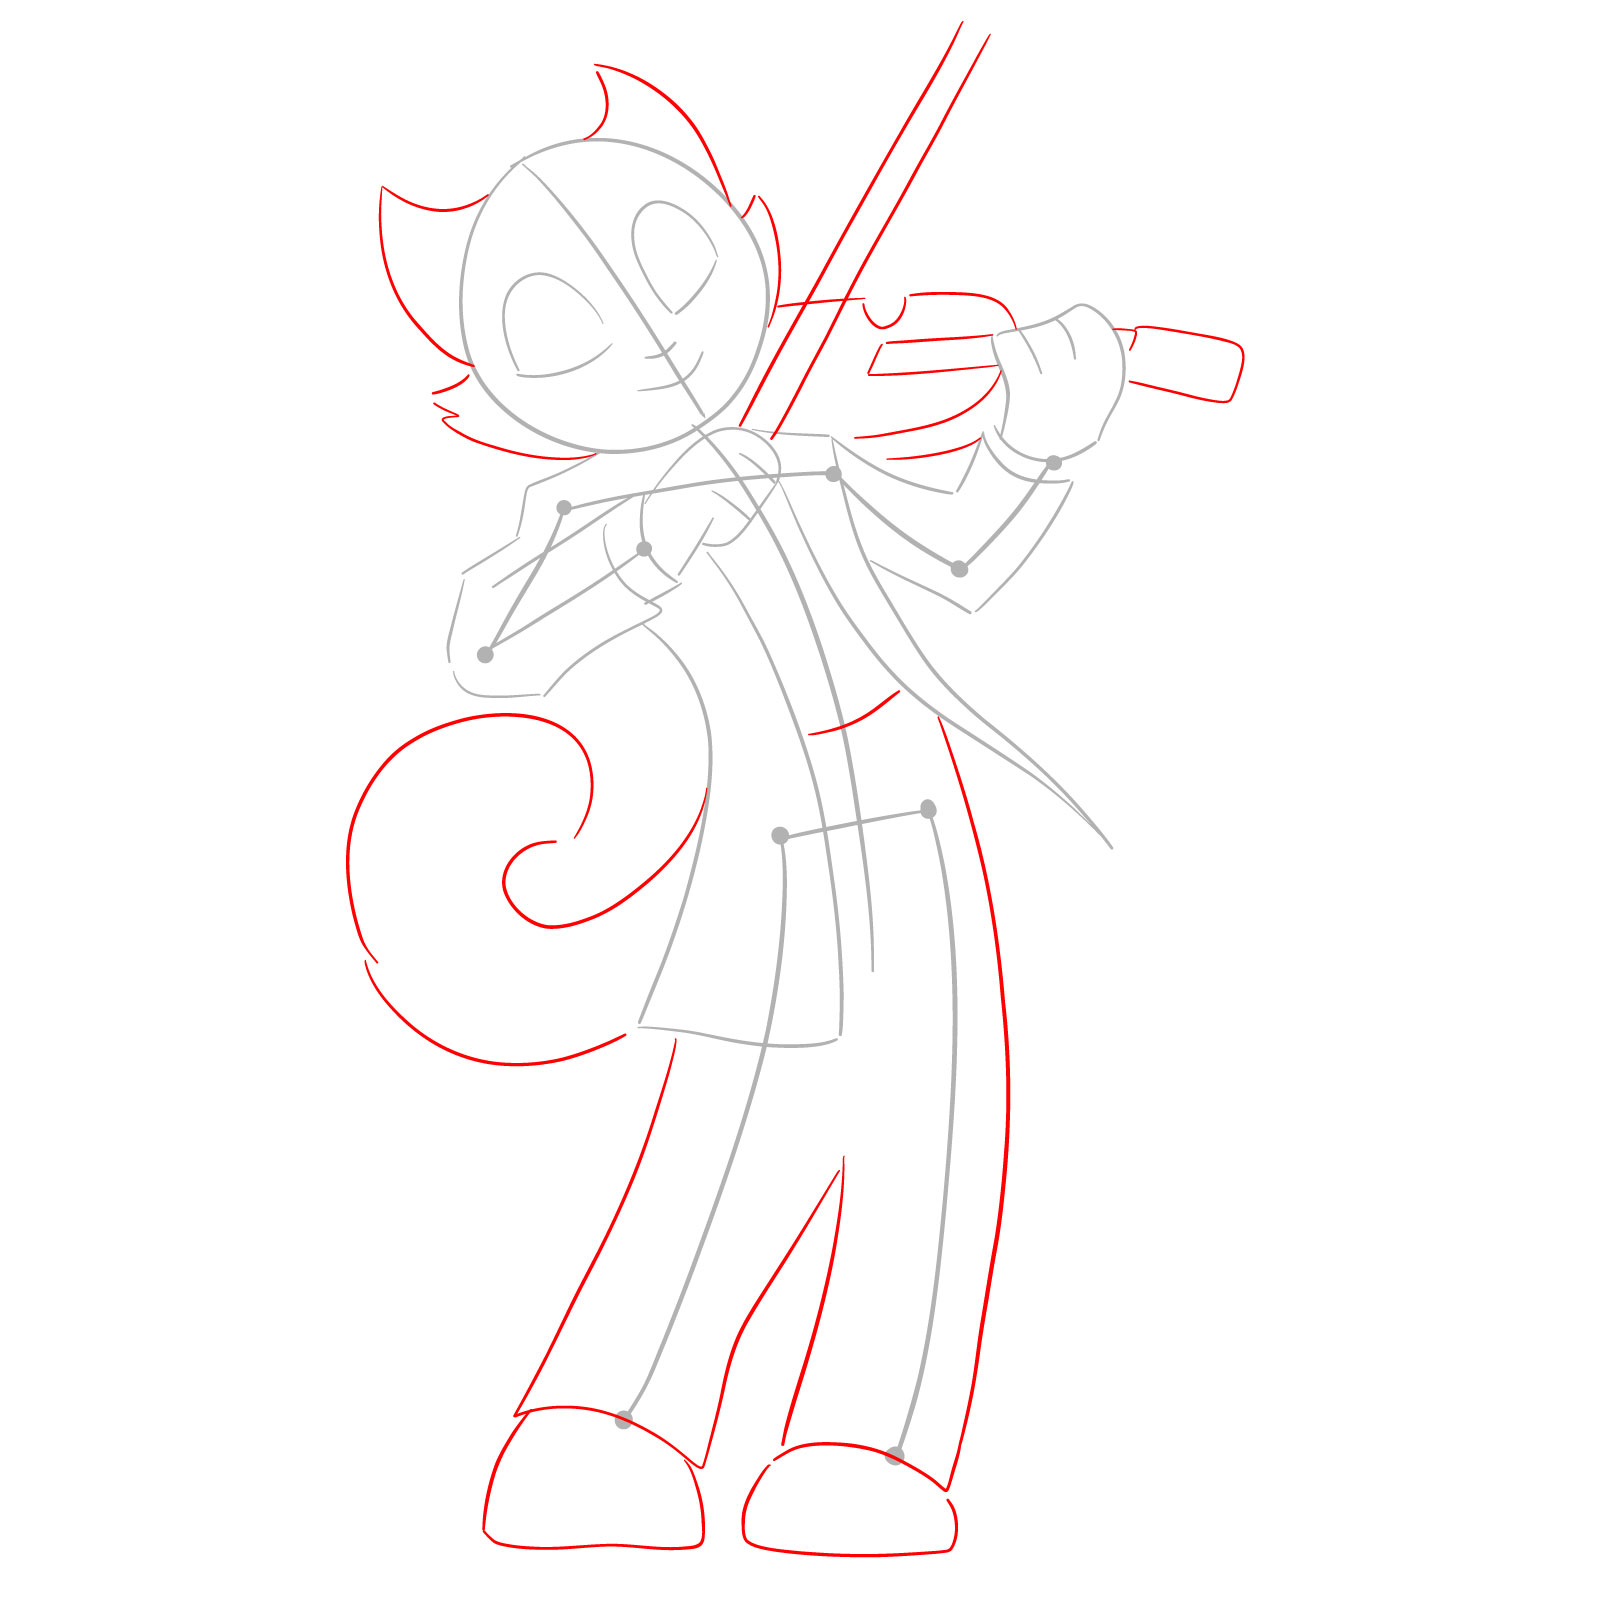
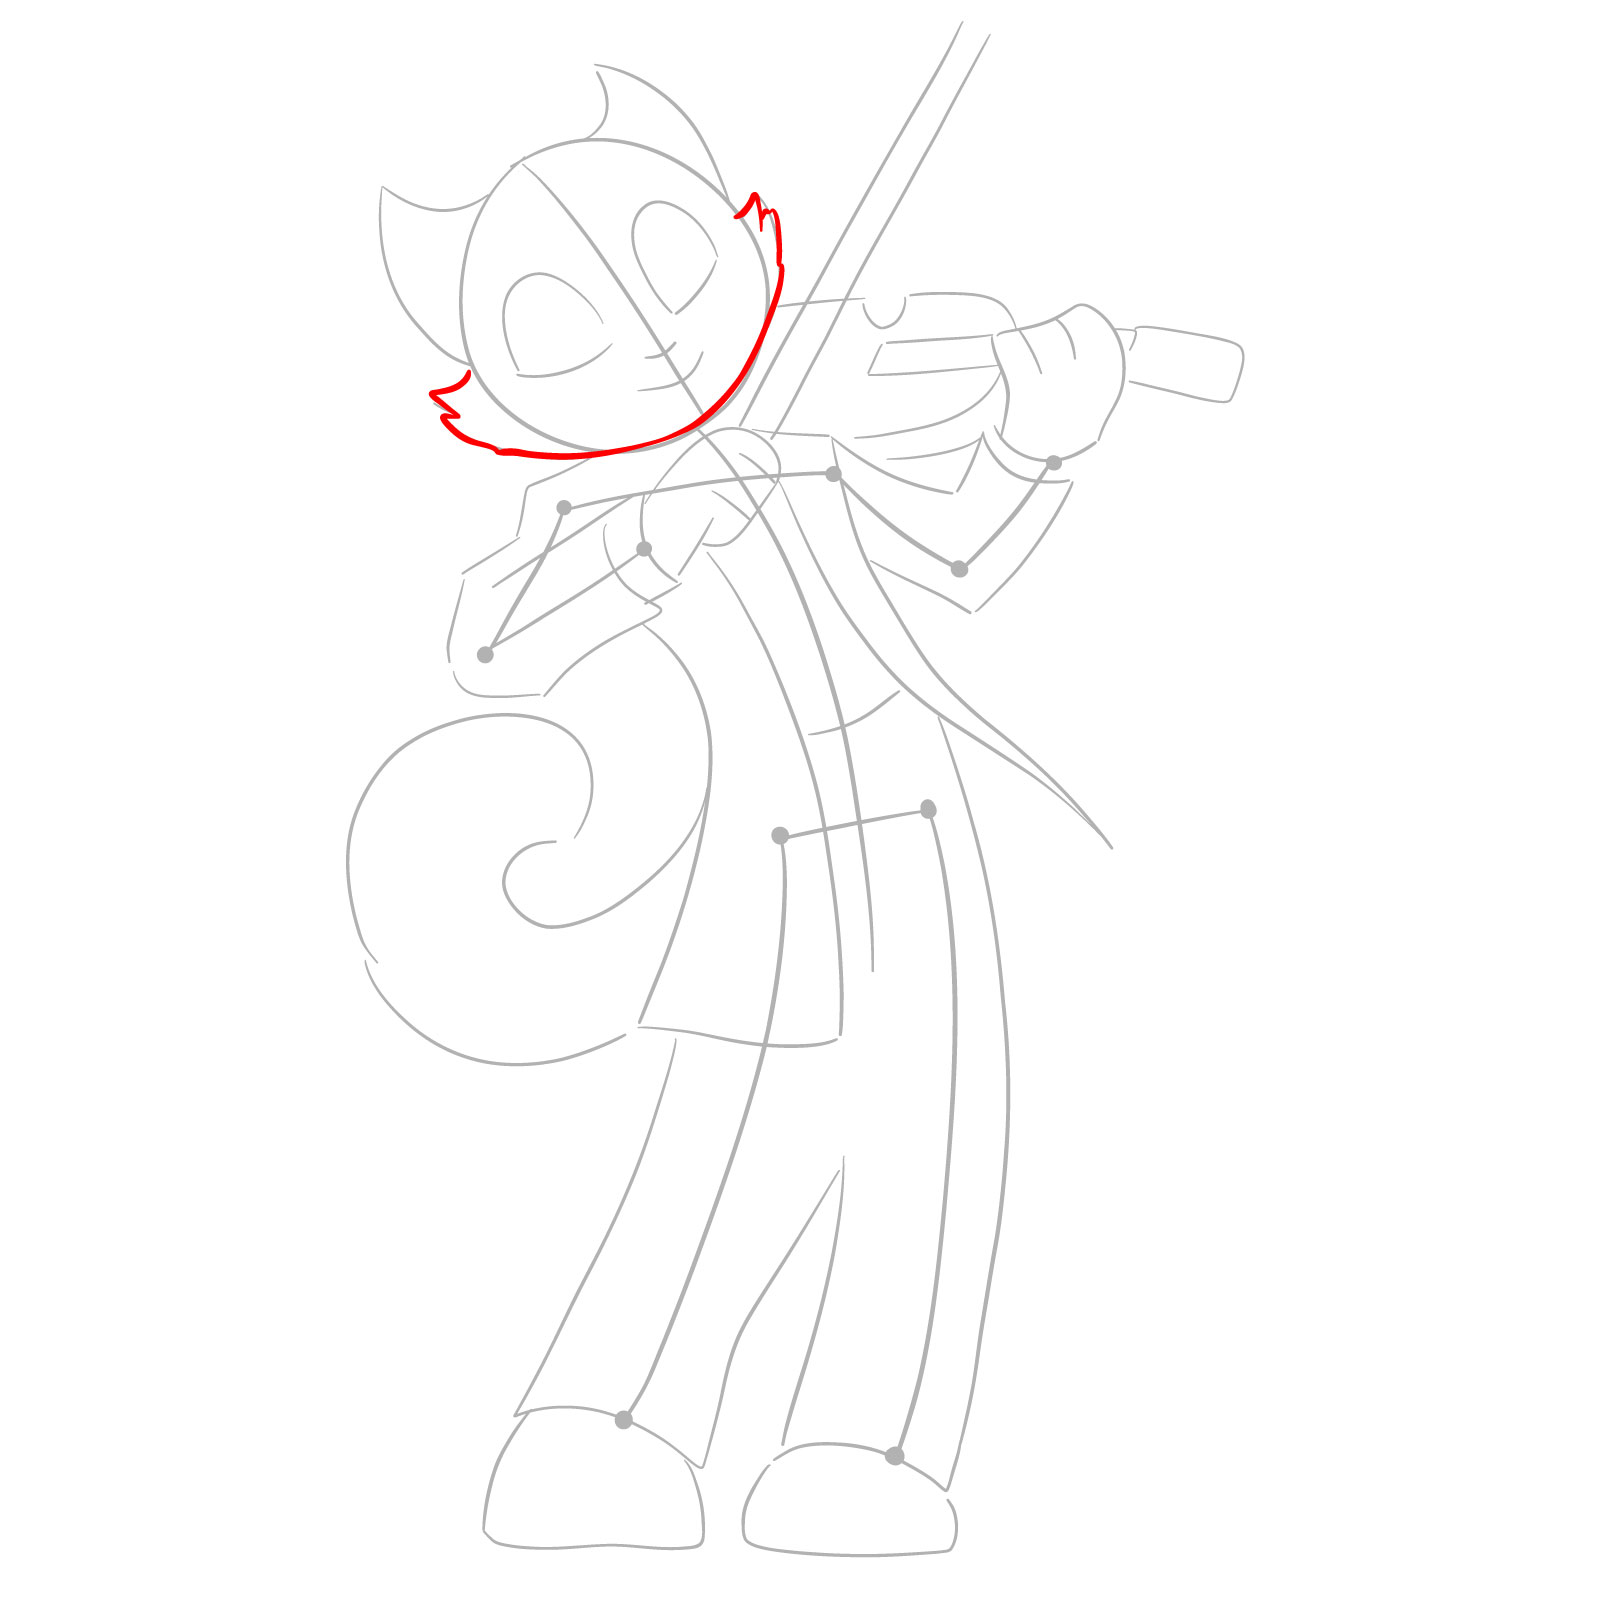
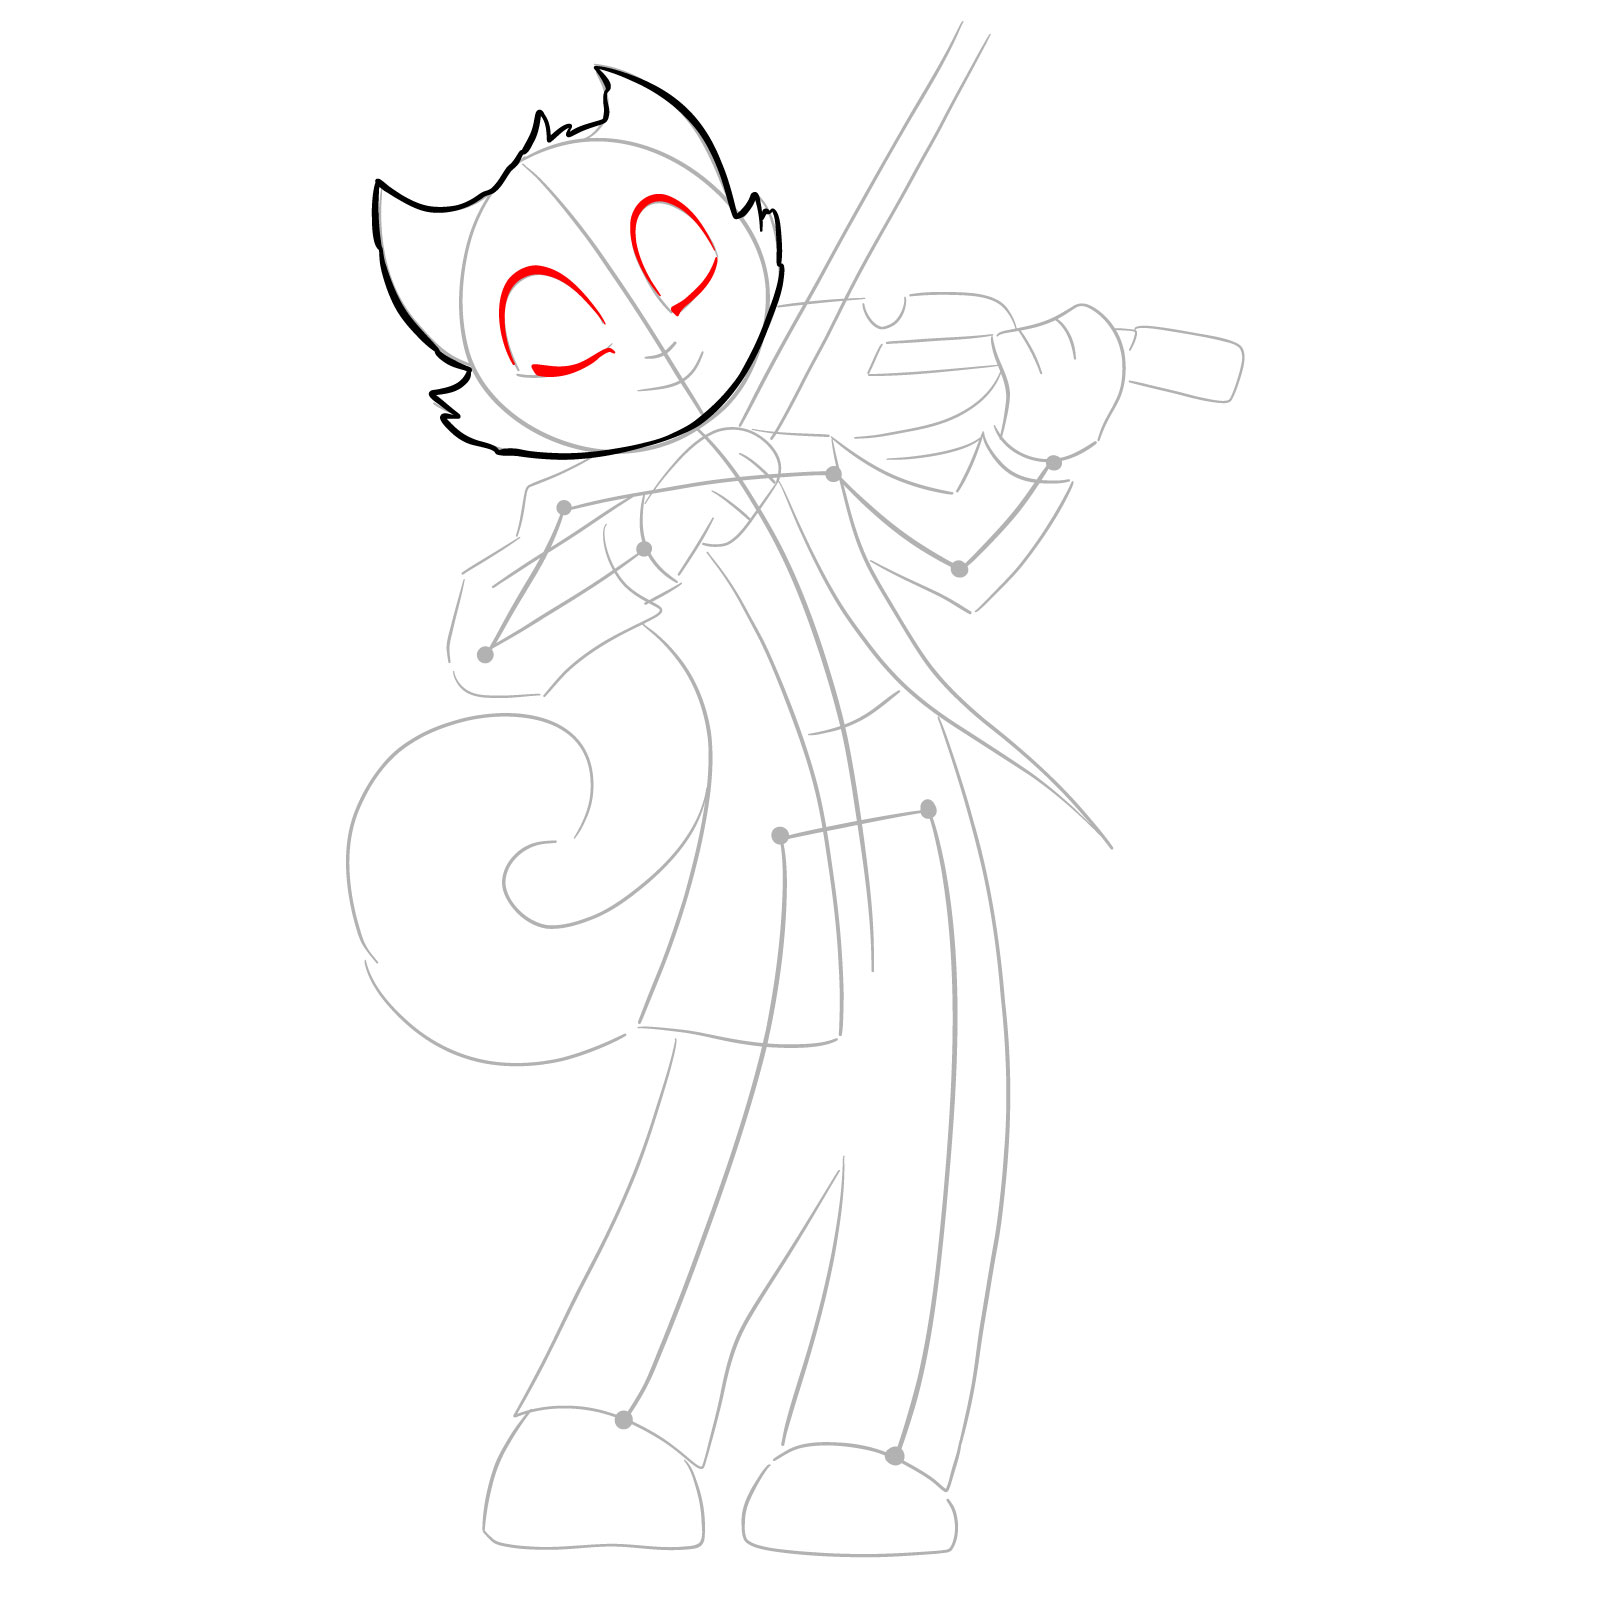
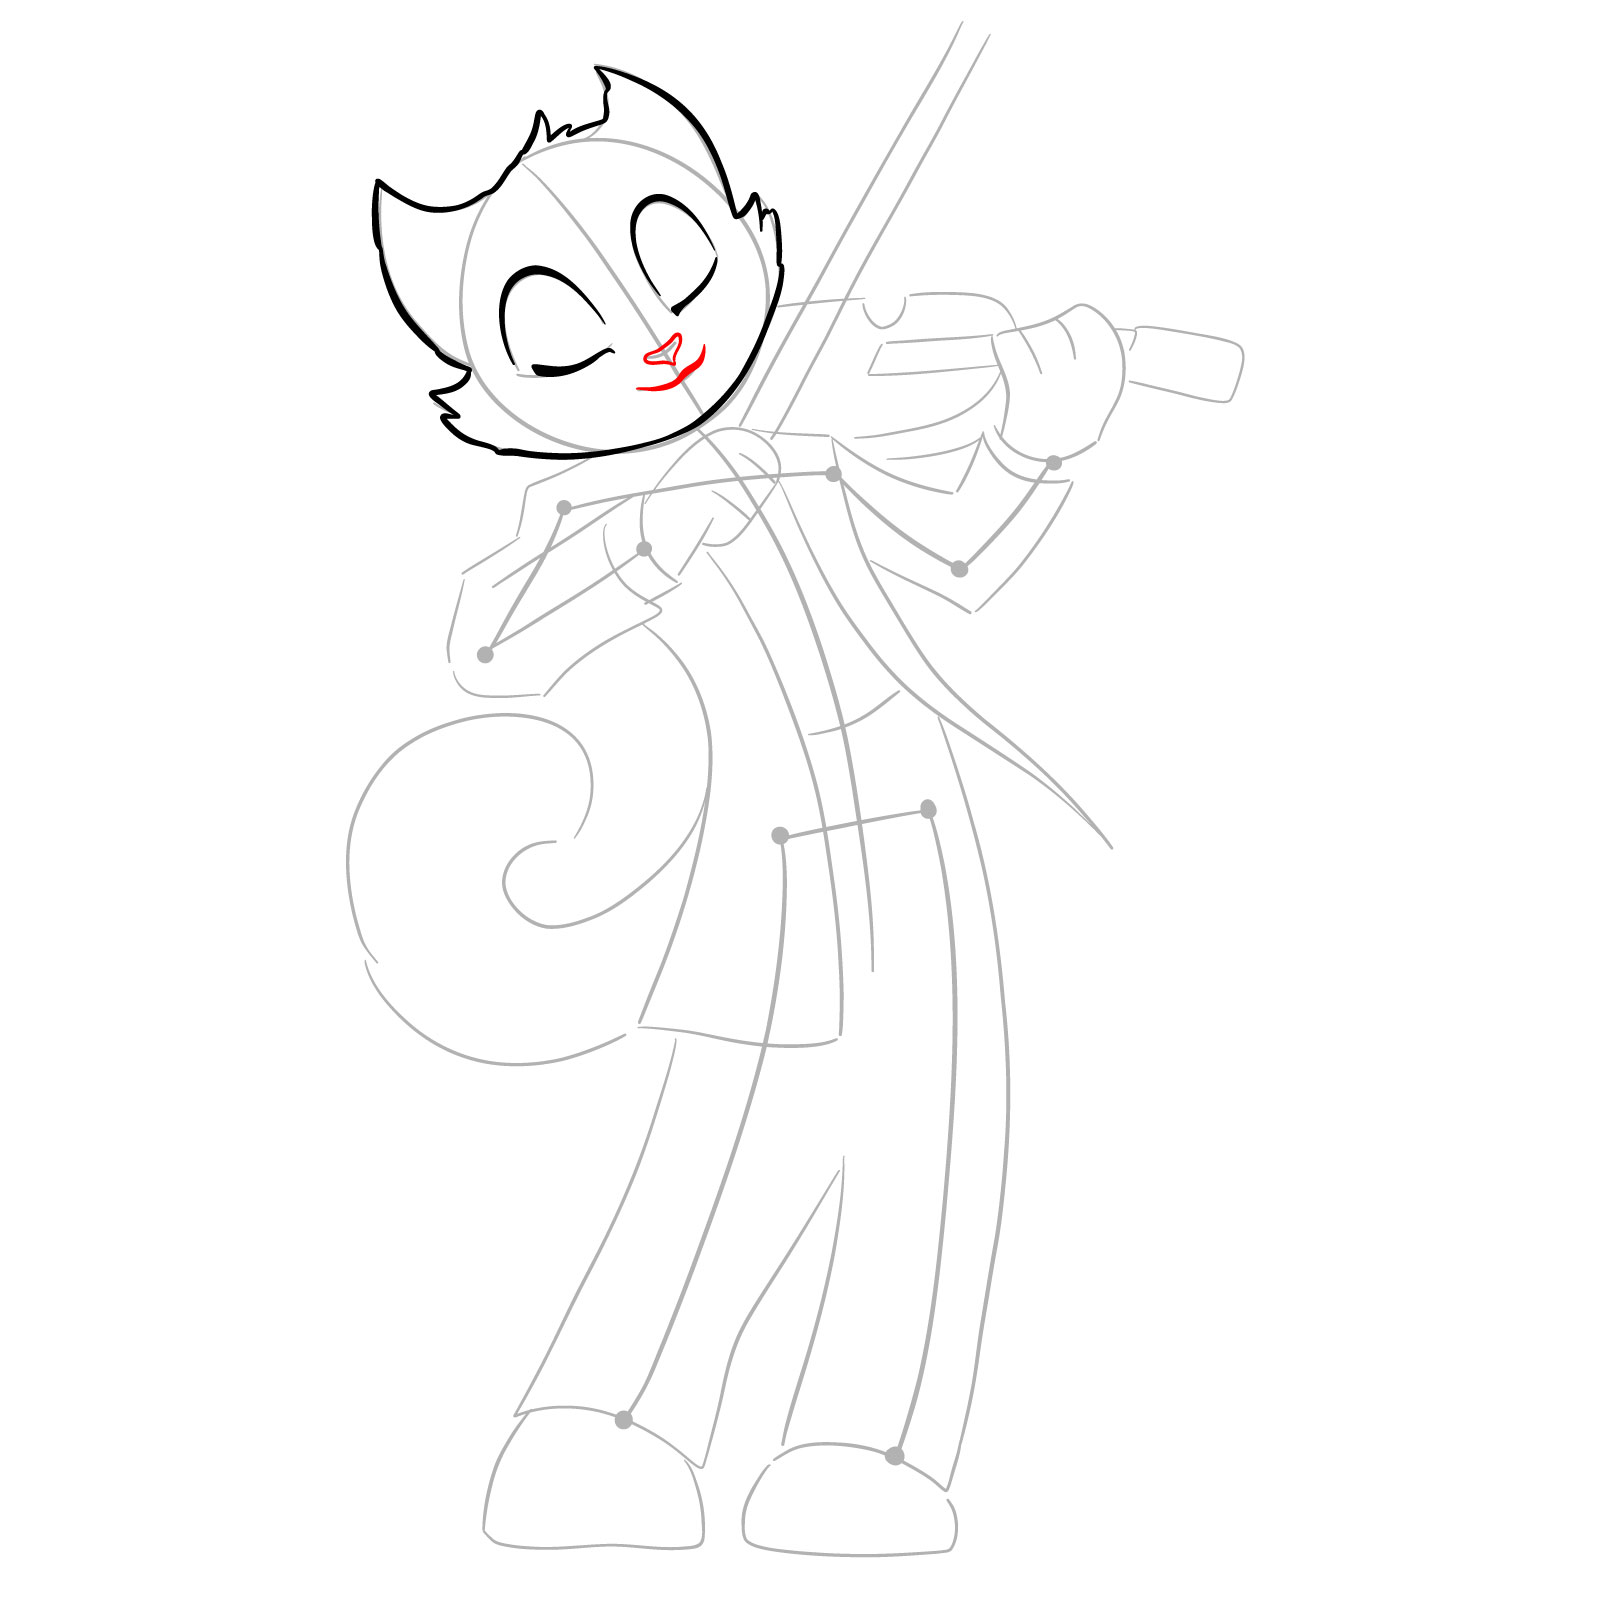
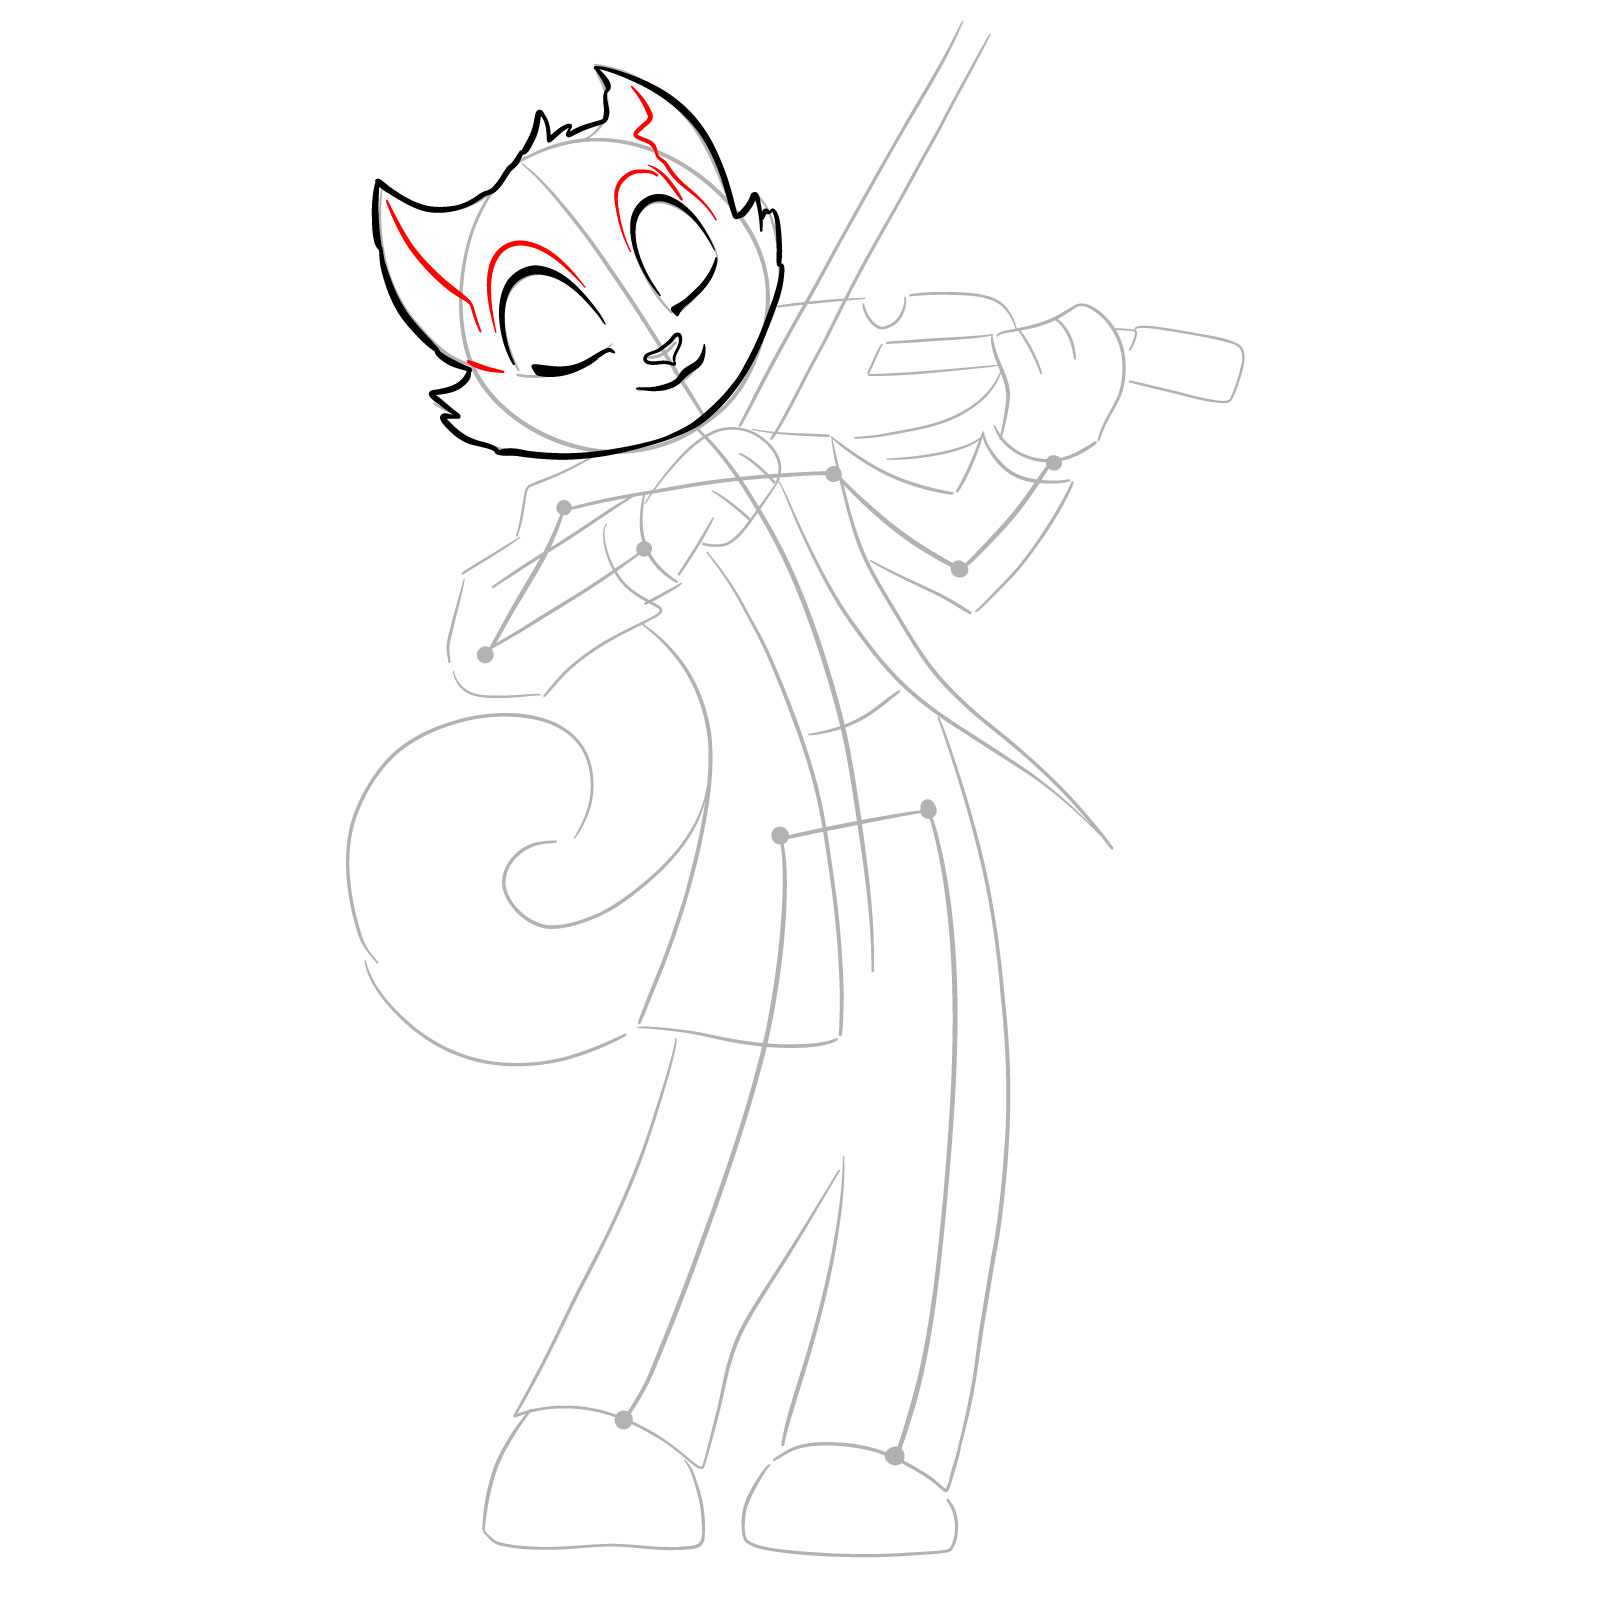
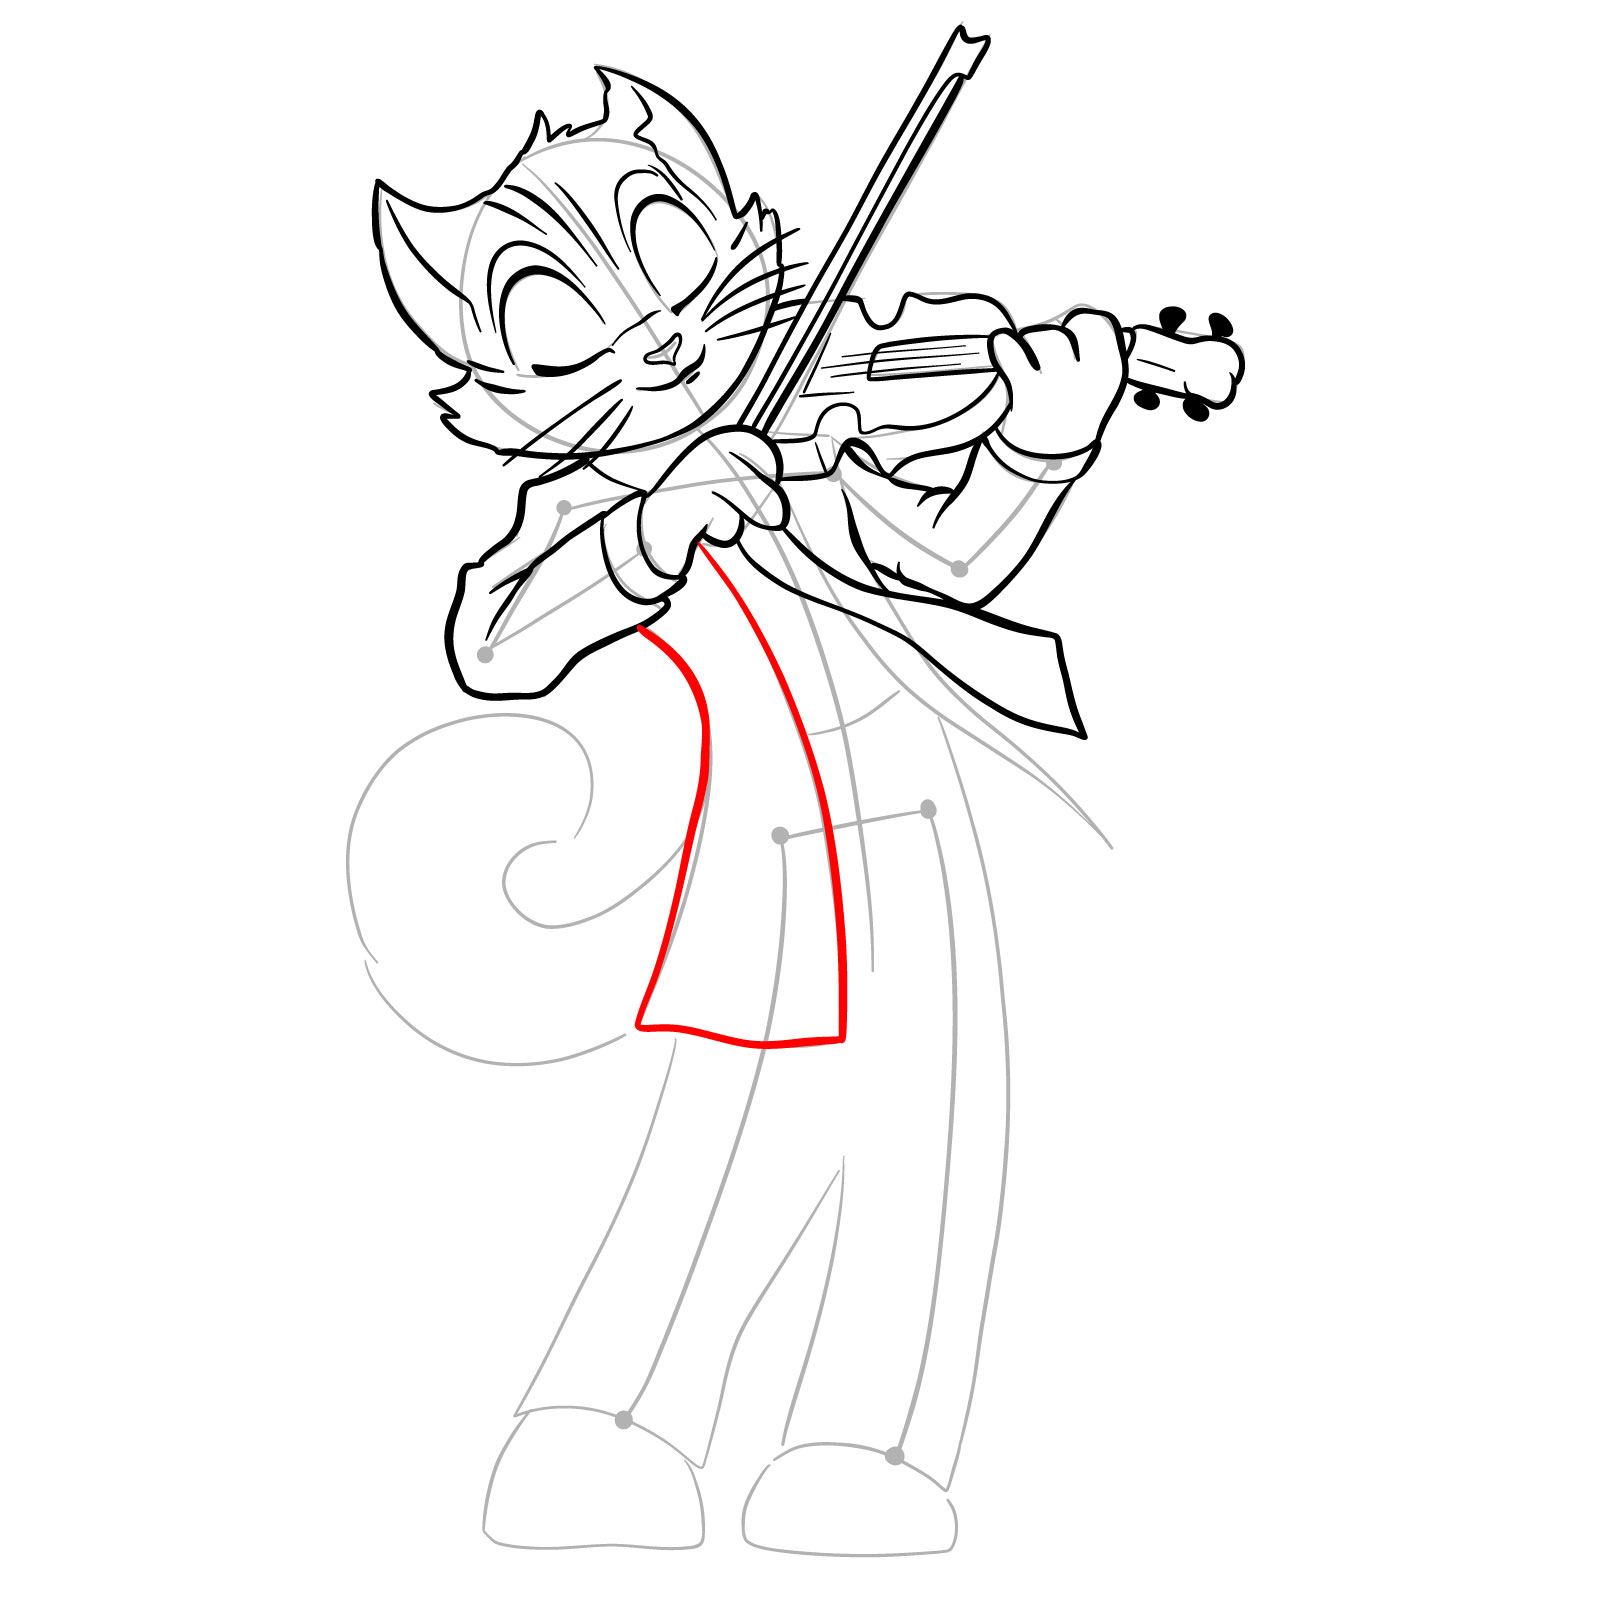
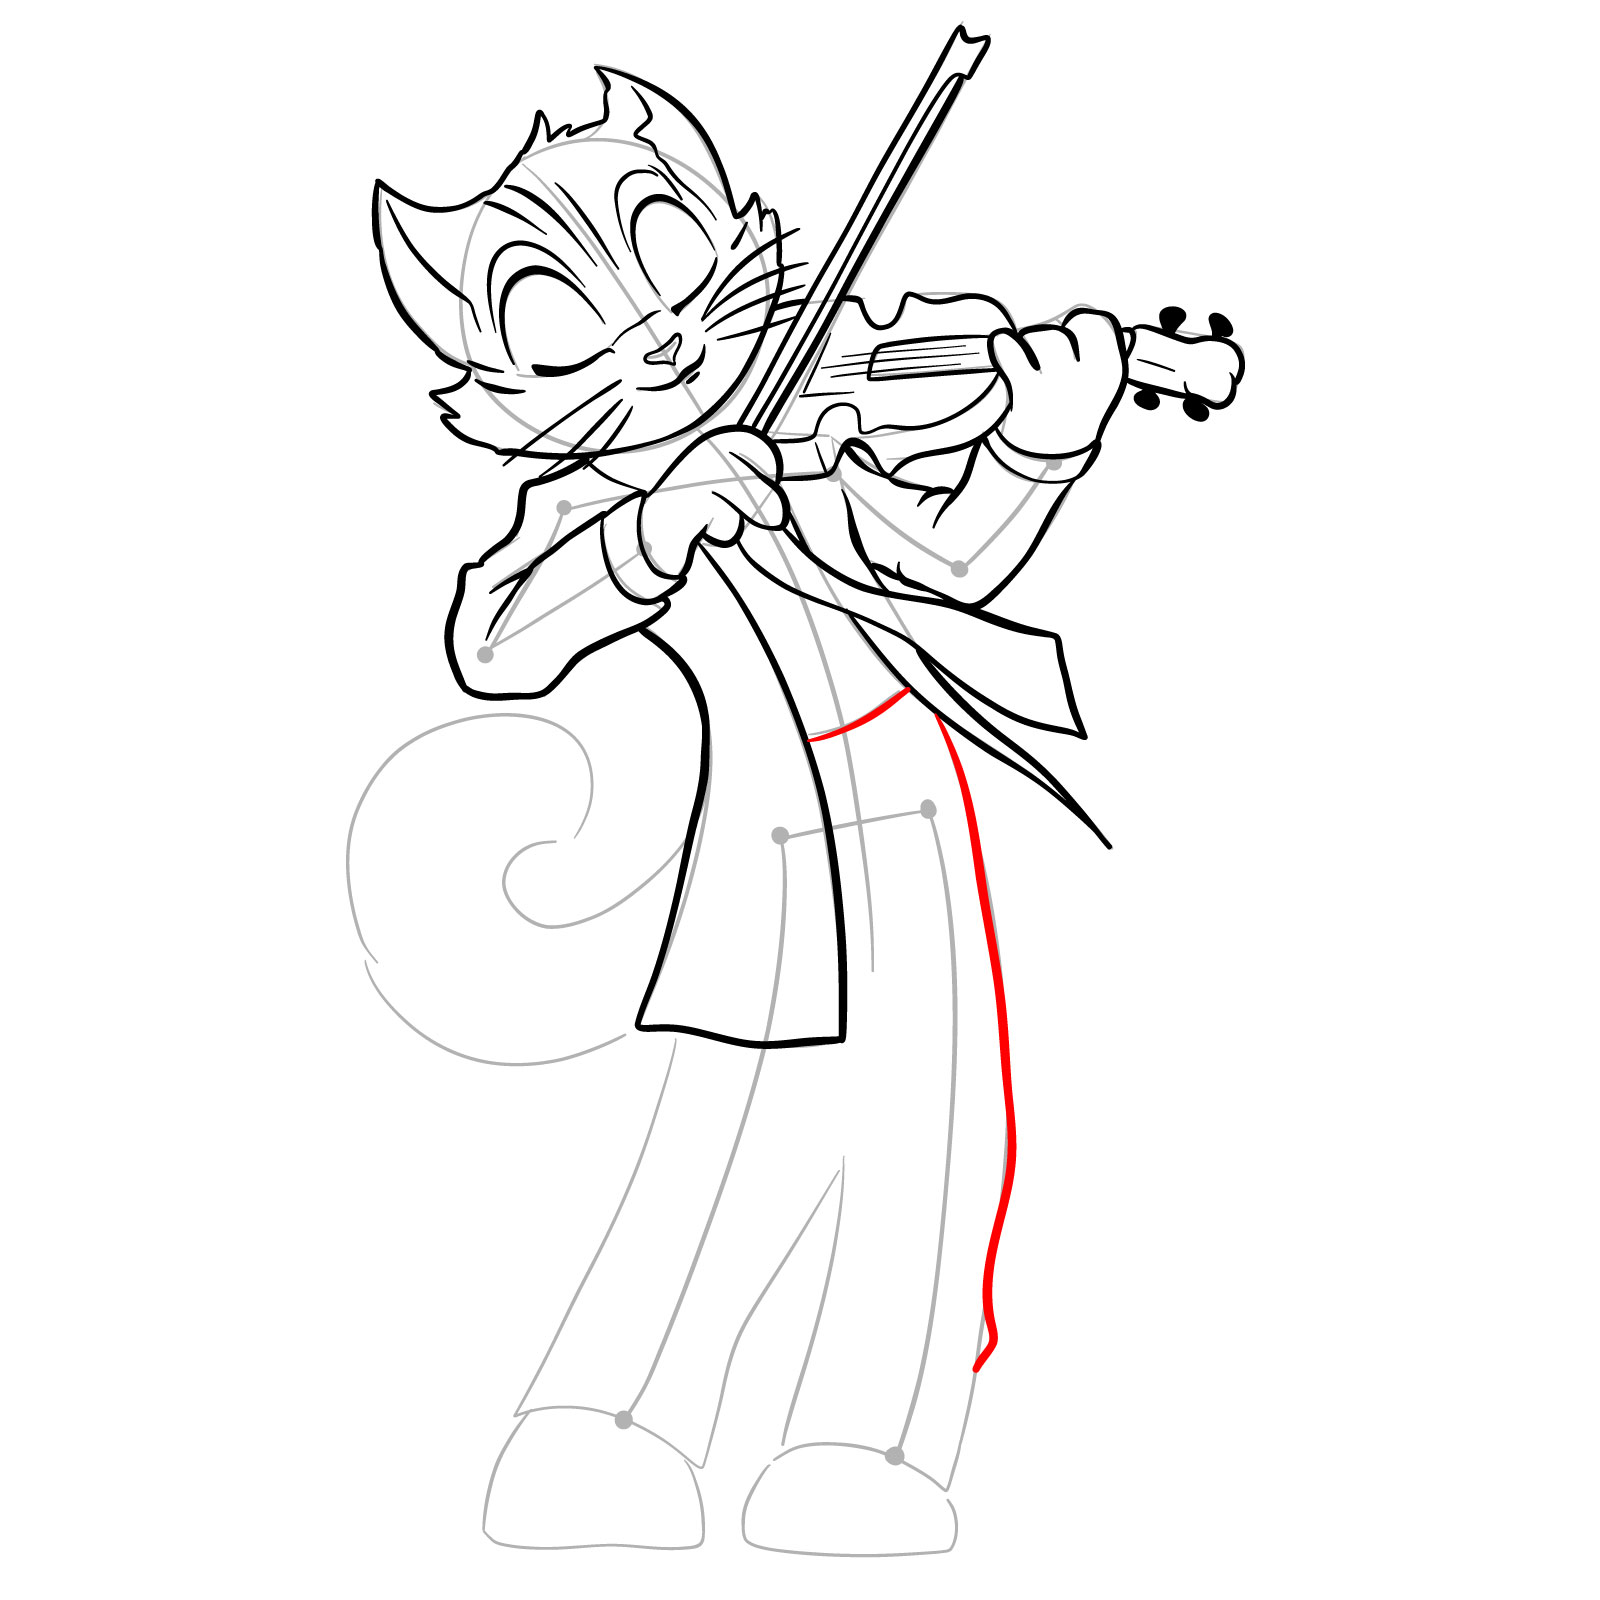
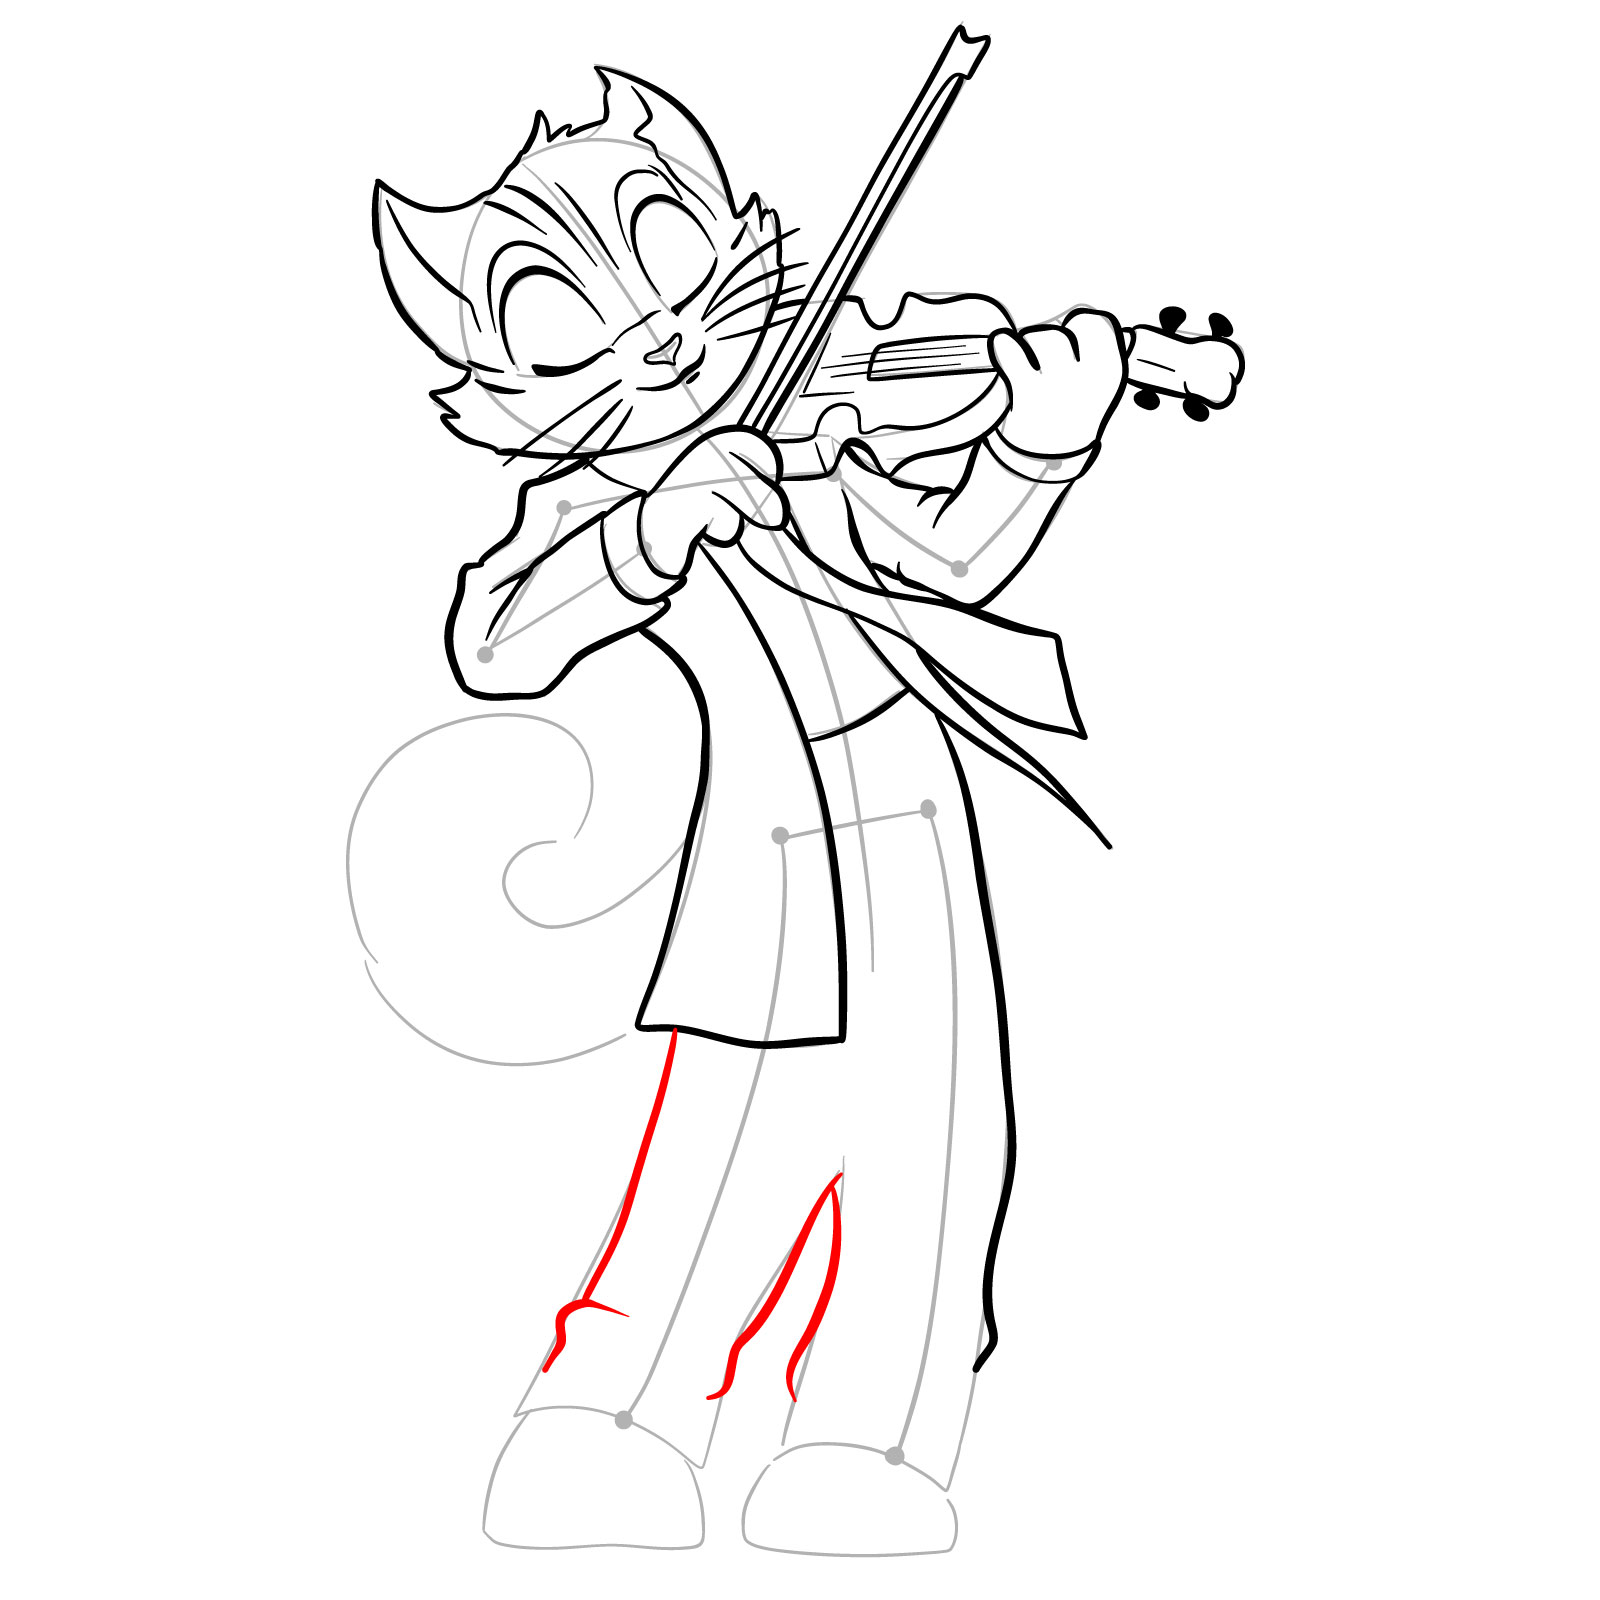
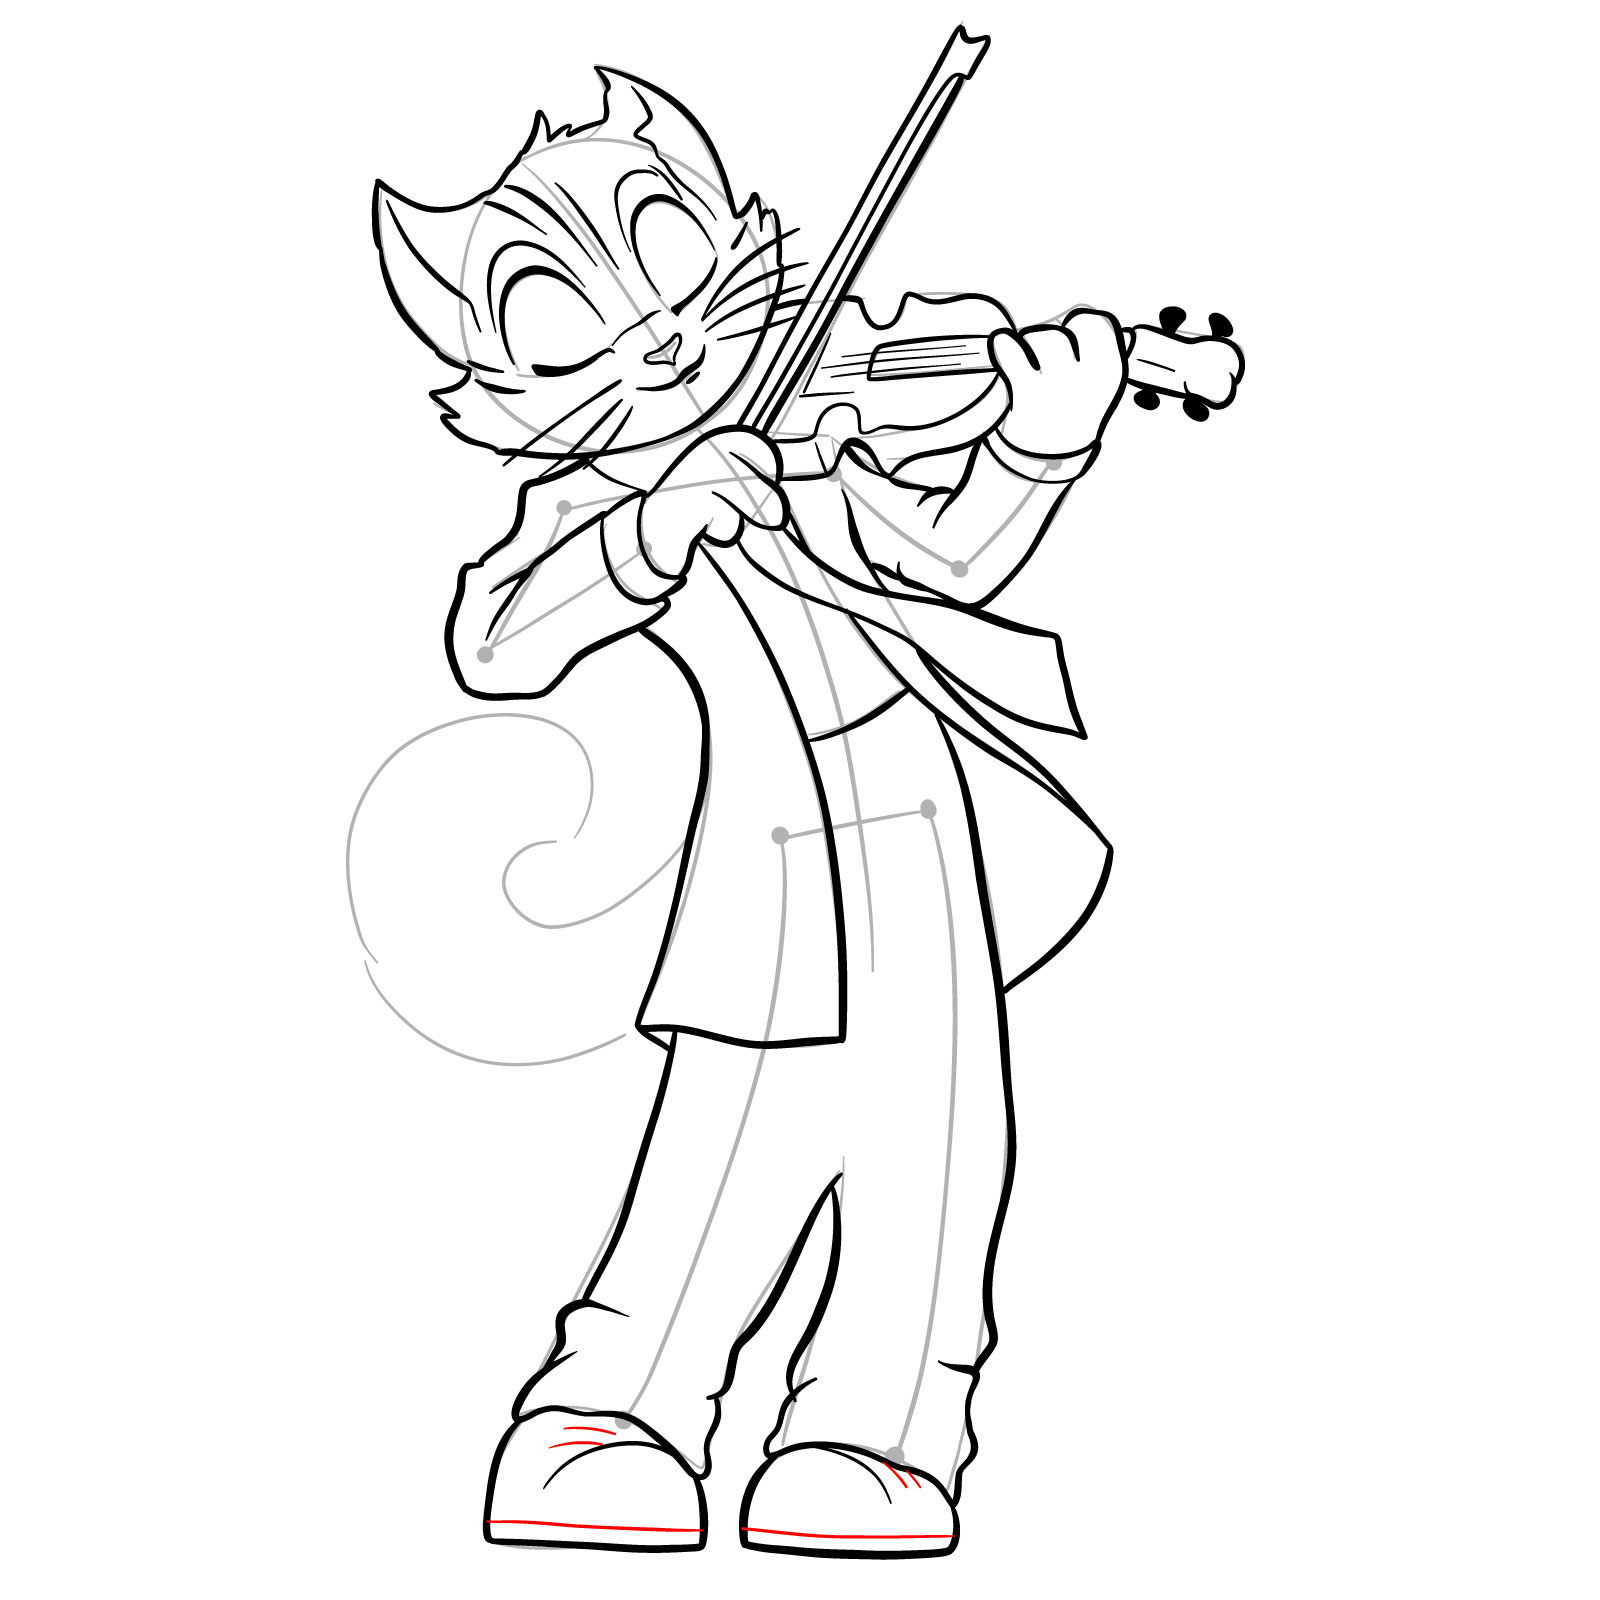
Part 2: Refining the Sketch

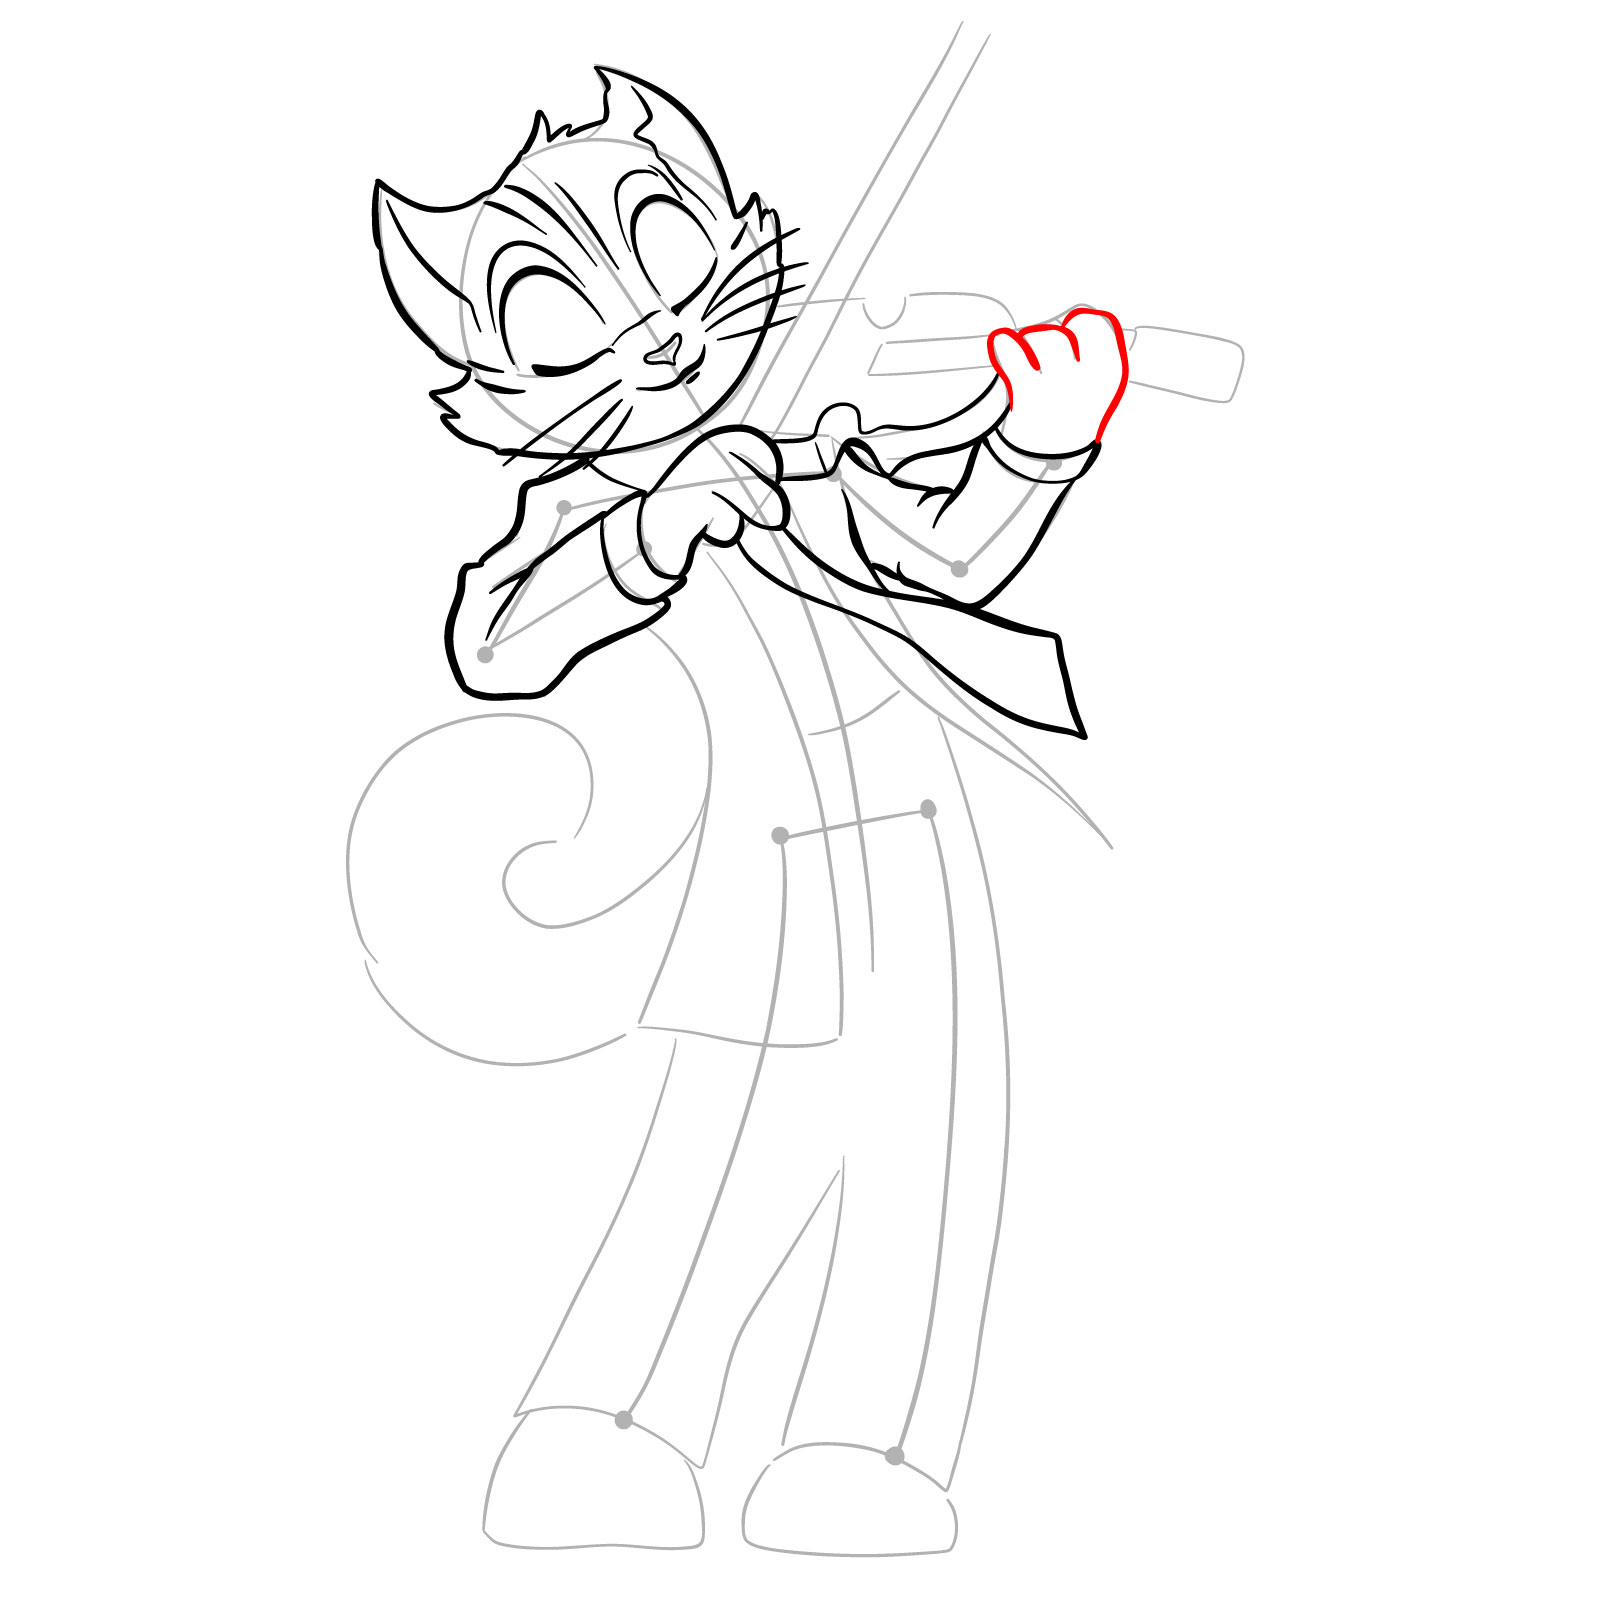
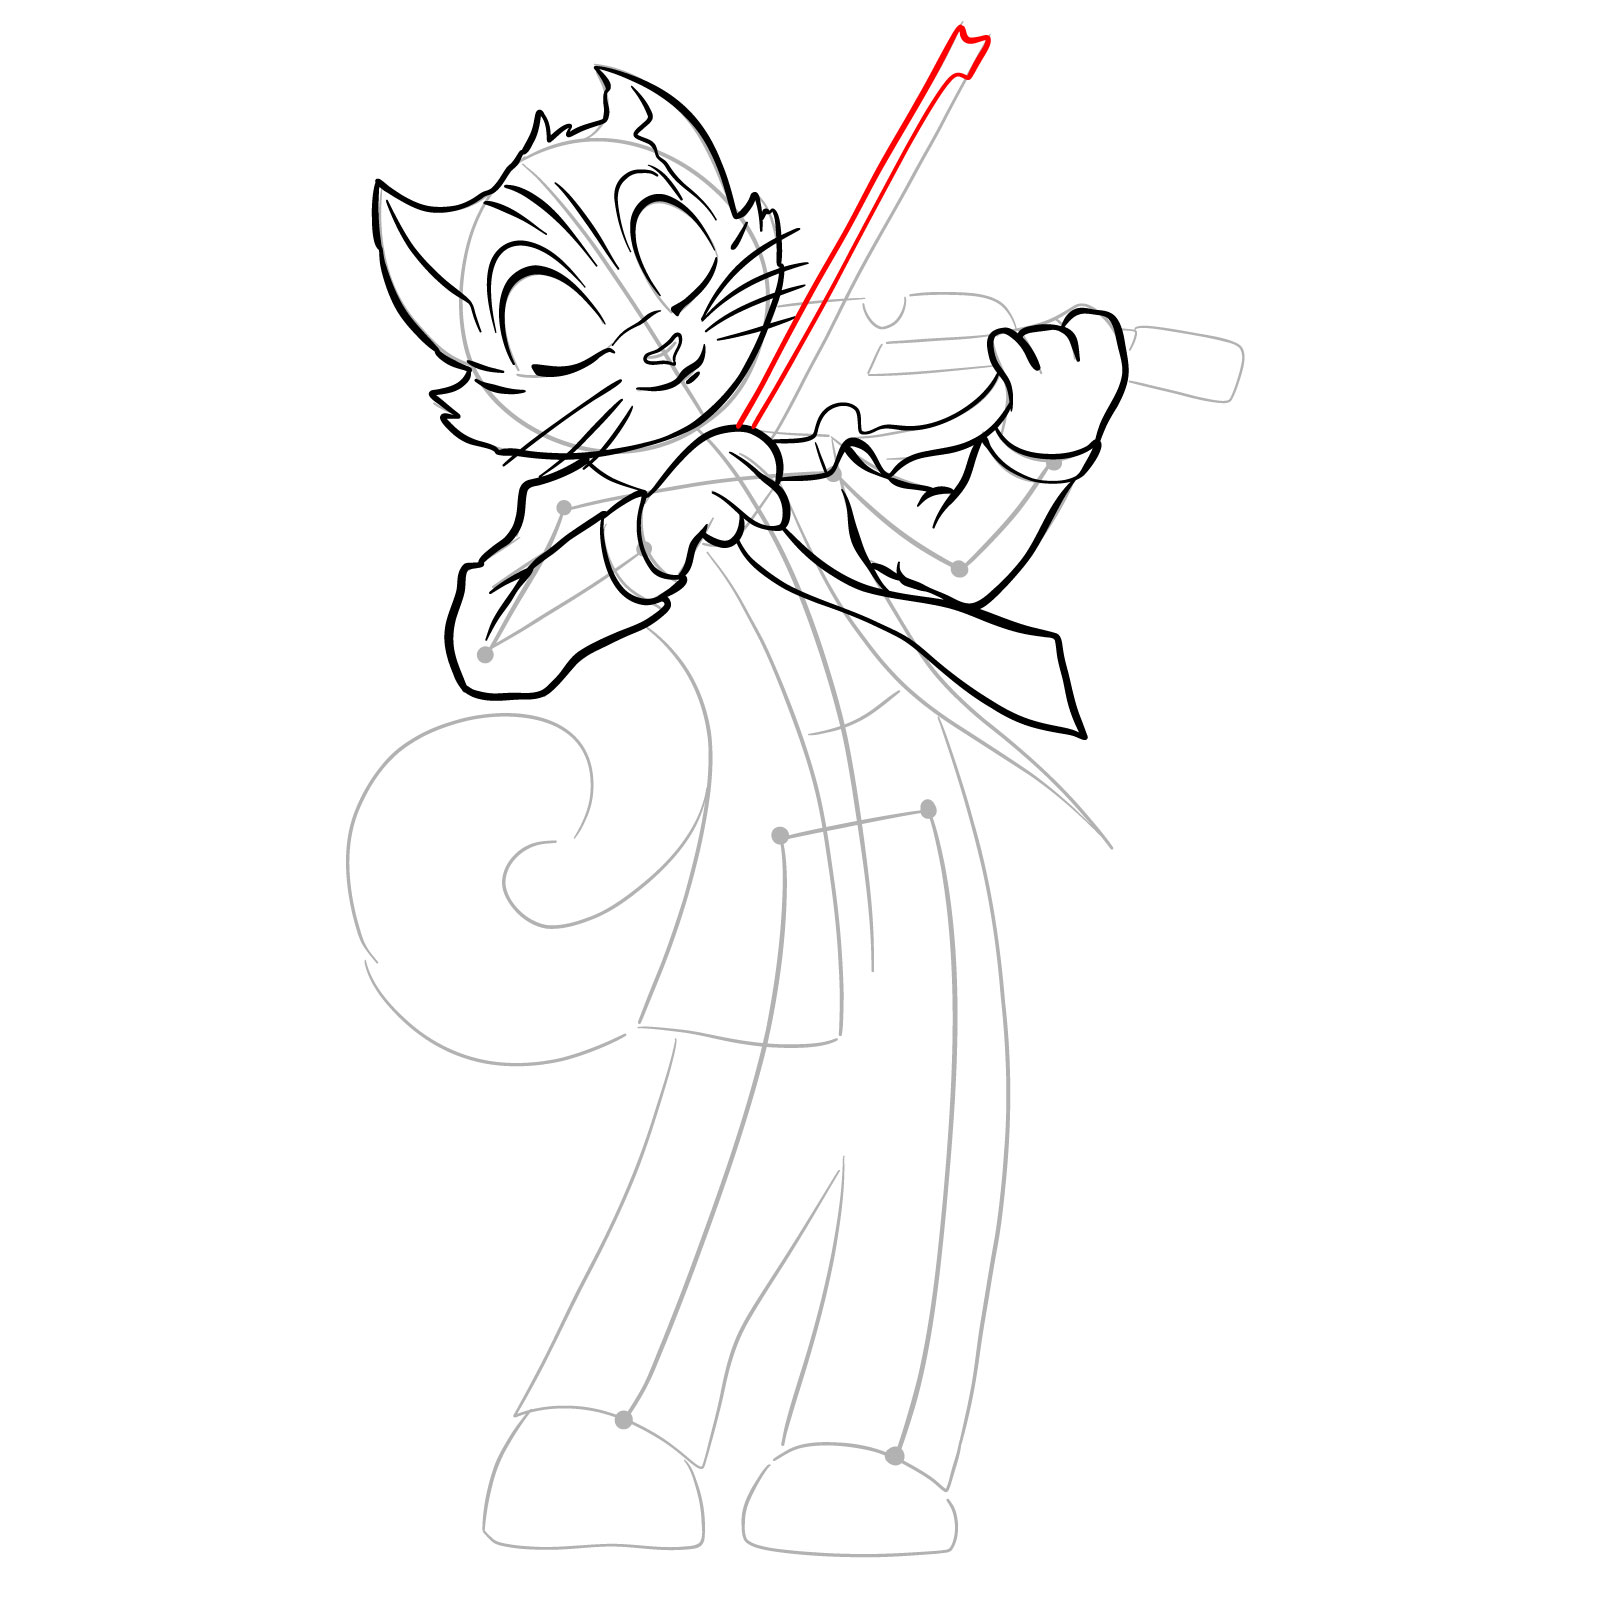
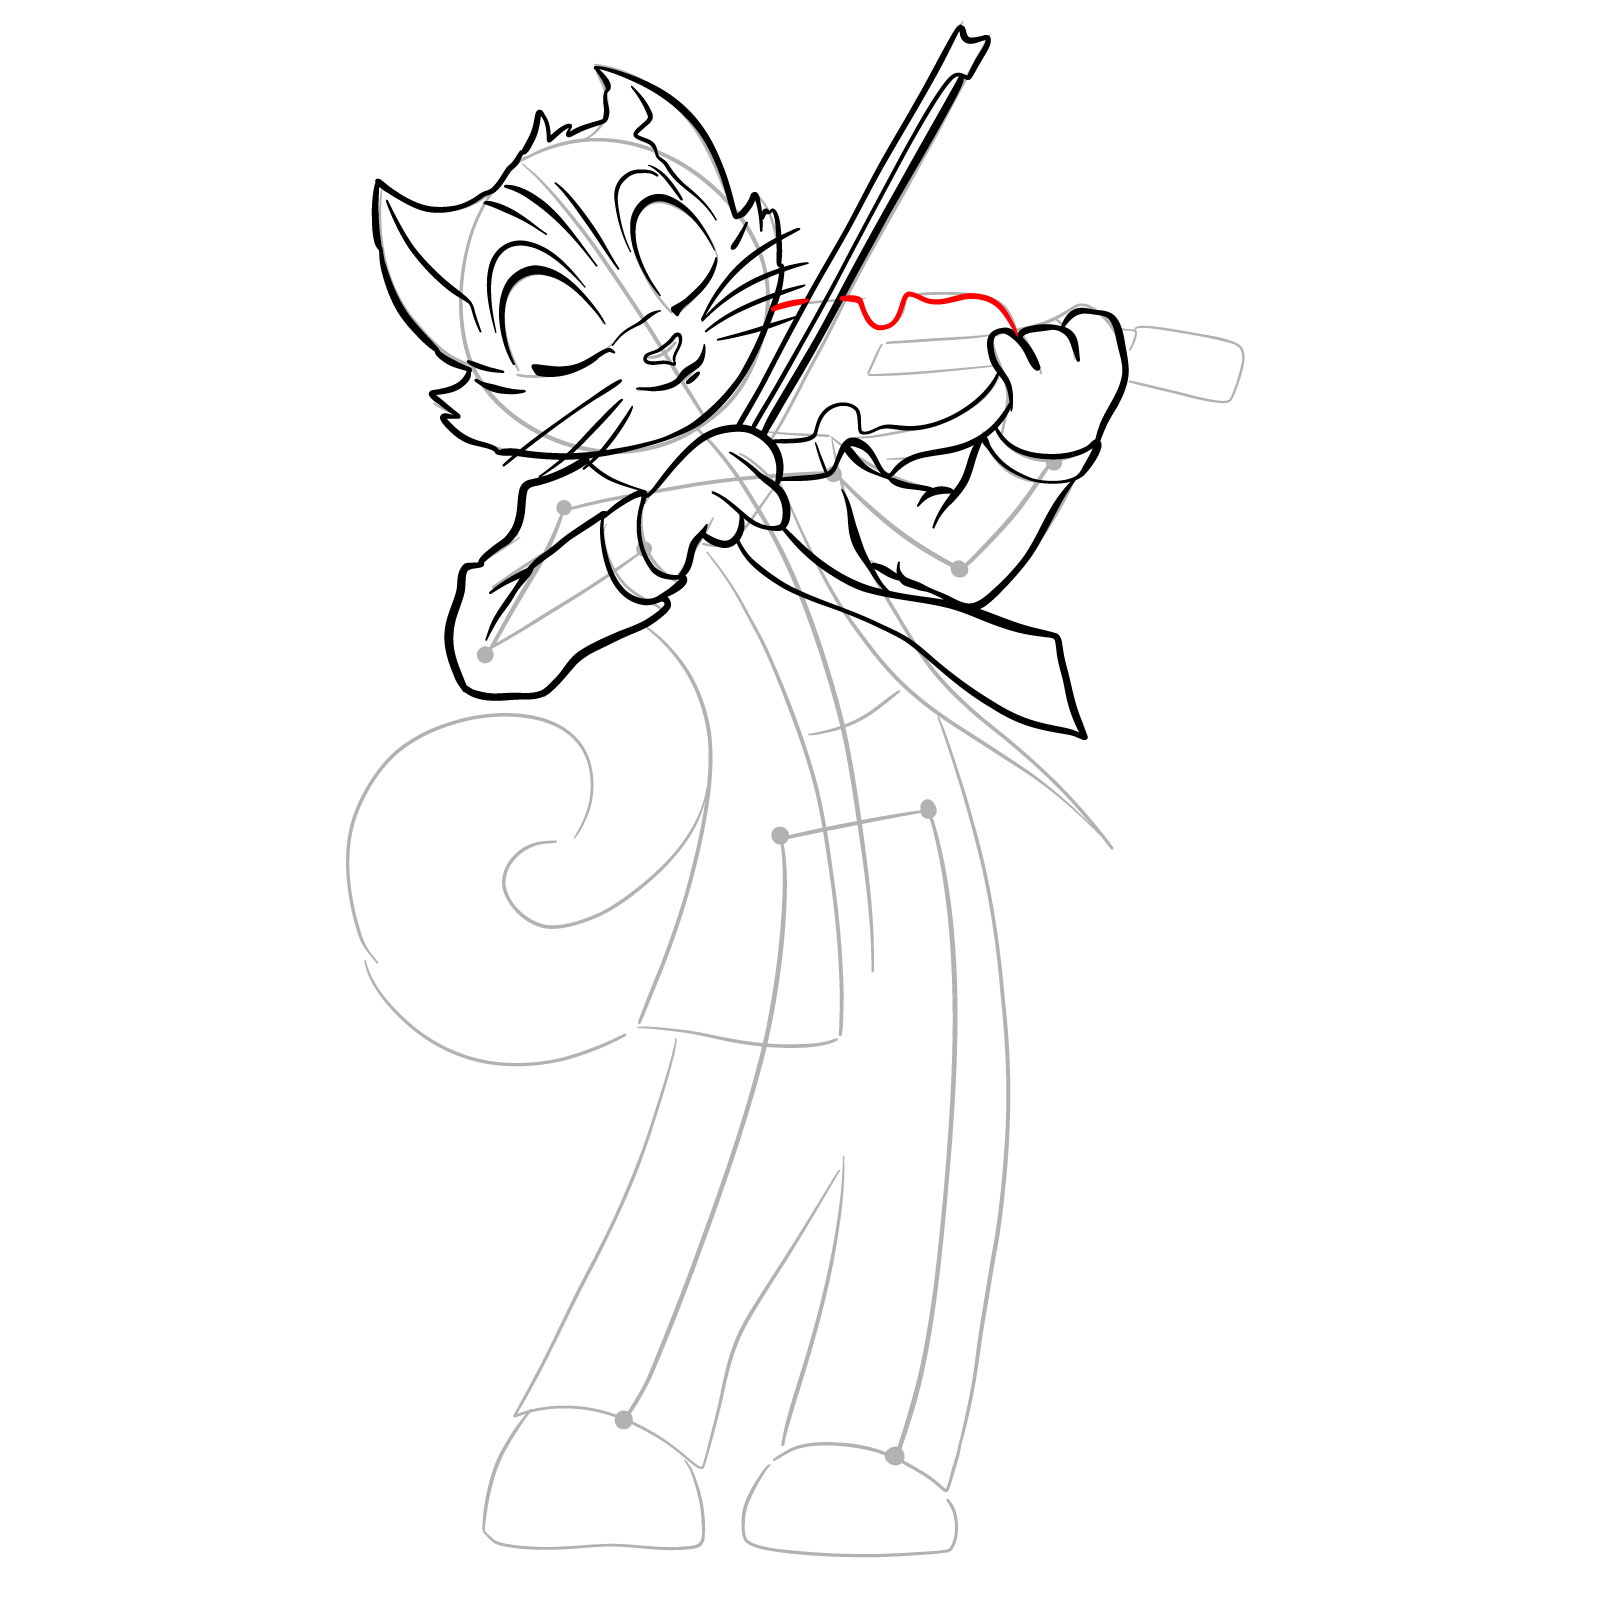
Once you have the basic structure in place, start refining your sketch by adding details to Rocky’s face, fur, clothing, and the violin. Pay close attention to his unique facial features and expressive posture while he enjoys playing the violin.

Step 04

How to draw Rocky Rickaby playing the violin - step 04Pin

Step 05

How to draw Rocky Rickaby playing the violin - step 05Pin

Step 06

How to draw Rocky Rickaby playing the violin - step 06Pin

Step 07

How to draw Rocky Rickaby playing the violin - step 07Pin

Step 08

How to draw Rocky Rickaby playing the violin - step 08Pin

Step 09

How to draw Rocky Rickaby playing the violin - step 09Pin

Step 10

How to draw Rocky Rickaby playing the violin - step 10Pin

Step 11

How to draw Rocky Rickaby playing the violin - step 11Pin

Step 12

How to draw Rocky Rickaby playing the violin - step 12Pin

Step 13

How to draw Rocky Rickaby playing the violin - step 13Pin

Step 14

How to draw Rocky Rickaby playing the violin - step 14Pin

Step 15

How to draw Rocky Rickaby playing the violin - step 15Pin

Step 16

How to draw Rocky Rickaby playing the violin - step 16Pin

Step 17

How to draw Rocky Rickaby playing the violin - step 17Pin

Step 18

How to draw Rocky Rickaby playing the violin - step 18Pin

Step 19

How to draw Rocky Rickaby playing the violin - step 19Pin

Step 20

How to draw Rocky Rickaby playing the violin - step 20Pin

Step 21

How to draw Rocky Rickaby playing the violin - step 21Pin

Step 22

How to draw Rocky Rickaby playing the violin - step 22Pin

Step 23

How to draw Rocky Rickaby playing the violin - step 23Pin

Step 24

How to draw Rocky Rickaby playing the violin - step 24Pin

Step 25

How to draw Rocky Rickaby playing the violin - step 25Pin

Step 26

How to draw Rocky Rickaby playing the violin - step 26Pin

Step 27

How to draw Rocky Rickaby playing the violin - step 27Pin

Step 28

How to draw Rocky Rickaby playing the violin - step 28Pin

Step 29

How to draw Rocky Rickaby playing the violin - step 29Pin

Step 30

How to draw Rocky Rickaby playing the violin - step 30Pin

Step 31

How to draw Rocky Rickaby playing the violin - step 31Pin

Step 32

How to draw Rocky Rickaby playing the violin - step 32Pin

Step 33

How to draw Rocky Rickaby playing the violin - step 33Pin

Step 34

How to draw Rocky Rickaby playing the violin - step 34Pin

Part 3: Inking Your Masterpiece

With your sketch refined, it’s time to ink your drawing. Carefully outline your sketch using fineliner pens or ink, making sure to emphasize the key features of Rocky Rickaby and the violin. Remember to let the ink dry before proceeding to the next step and erasing the pencil lines.

Step 35

How to draw Rocky Rickaby playing the violin - final stepPin

Top Tips and Techniques for Capturing Rocky’s Essence

Beyond the step-by-step guide, here are ten additional tips and techniques to help you create an impressive drawing of Rocky Rickaby playing the violin:

  1. Study Rocky’s facial features and expressions closely to capture his personality.
  2. Pay attention to the details in his clothing, hair, and the violin.
  3. Use light pencil strokes for the initial sketch to make it easier to erase and refine.
  4. Experiment with different shading techniques to add depth and dimension to your drawing.
  5. Focus on capturing the movement and energy of Rocky playing the violin.
  6. Use reference images of violinists to help with accuracy and posture.
  7. Practice drawing different facial expressions to make your character more dynamic.
  8. Take your time with the inking process, ensuring clean and smooth lines.
  9. Consider using a color palette inspired by the Lackadaisy series for a cohesive look.
  10. Don’t be afraid to make mistakes – they are an essential part of the learning process.

Frequently Asked Questions

Q: How can I make my drawing of Rocky Rickaby more realistic?

A: To make your drawing more realistic, pay close attention to the proportions, details, and shading. Study Rocky’s facial features, clothing, and the violin, and use reference images to help with accuracy. Additionally, practice different shading techniques to add depth and dimension to your drawing.

Q: How do I avoid smudging my drawing when inking or shading?

A: To prevent smudging, place a sheet of clean paper or a tissue beneath your drawing hand as you work. This will create a barrier between your hand and the drawing surface, reducing the likelihood of smudging. Additionally, allow ink to dry fully before proceeding with coloring or shading.

Now that you know how to draw Rocky Rickaby playing the violin, it’s time to unleash your inner artist and create your masterpiece! Remember to practice, be patient, and enjoy the process. And don’t forget to share your artwork with friends, family, and fellow artists. If you found this tutorial helpful, consider supporting our content by sharing the link to the guide or checking out our other tutorials. You can also show your appreciation by donating to our “Buy Me a Coffee” page here.

Did you like the tutorial?

You can support the author of this website and also suggest your own ideas for new drawings by making a small donation here:

Leave a Comment

4