Last Updated on May 14, 2026
Welcome to this exciting drawing tutorial where you’ll learn how to draw the face of Kirito, the beloved protagonist from Sword Art Online. Whether you’re a seasoned artist or just starting your artistic journey, this step-by-step guide will help you capture the unique facial features and personality of the Black Swordsman.
Appearance and Story: Unveiling Kirito’s Essence
Before we delve into the drawing process, let’s take a closer look at Kirito’s appearance and the story behind his character. Kirito, whose real name is Kirigaya Kazuto, is a skilled swordsman and a survivor of the virtual reality MMORPG Sword Art Online. With his iconic dark-colored clothing and dual-wielding technique, he earned the nickname “Black Swordsman.” Throughout his adventures, Kirito showcases determination, resilience, and unwavering courage, making him a beloved character among fans. By understanding his appearance and story, you’ll be better equipped to portray his essence in your artwork.
To draw inspiration and explore various interpretations, it’s worth mentioning a few other similar characters with distinct appearances and relationships, such as Asuna, Kirito’s partner in Sword Art Online; Sinon, a skilled sniper from Gun Gale Online; and Suguha, his loyal sister. Each of these characters contributes to Kirito’s journey, adding depth and complexity to his story.
Materials and Tools: Gear Up for Your Artistic Adventure
Before we begin, let’s gather the necessary materials and tools to bring your drawing to life. Here’s a list of recommended supplies:
- Pencils: HB, 2B, and 4B
- Drawing paper or sketchbook
- Eraser: Soft and kneaded
- Ink Pens or fineliners
- Colored pencils, markers, etc.
Please note that these are recommended materials, and you’re free to use any other art supplies that you’re comfortable with. Now that you’re equipped let’s dive into the step-by-step process of learning how to draw the face of Kirito.
Step-by-Step Drawing Guide: Unveiling Kirito’s Face
Creating a detailed drawing of Kirito’s face involves several key steps. Throughout the process, we’ll utilize a combination of light pencil strokes to establish the basic structure. The images will serve as your visual reference. Let’s get started!
Part 1: Basic Sketch – Laying the Foundation
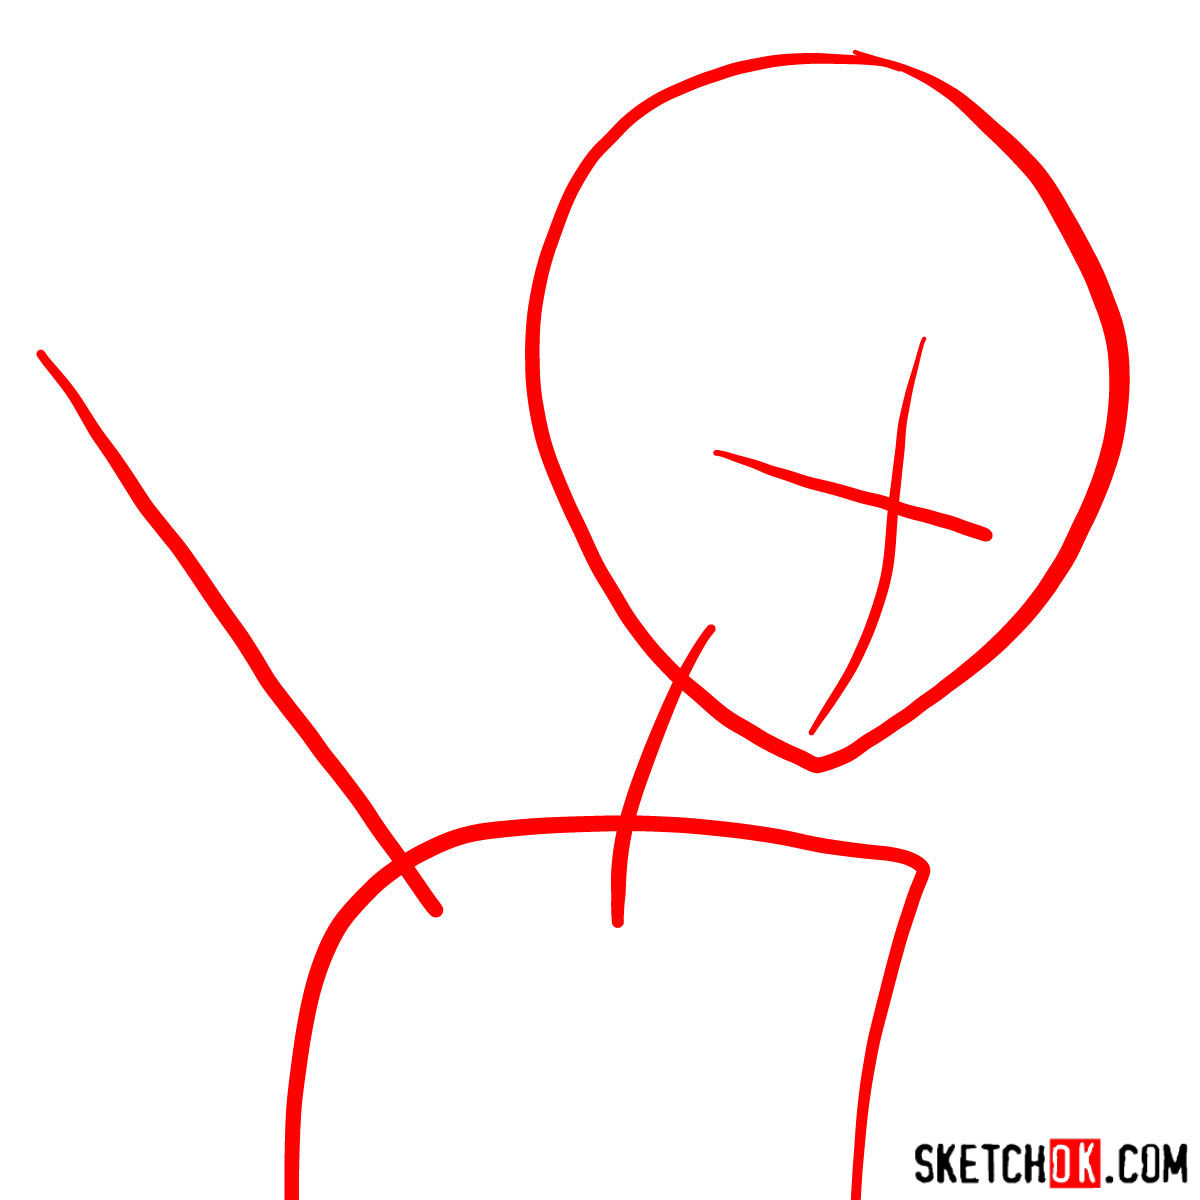
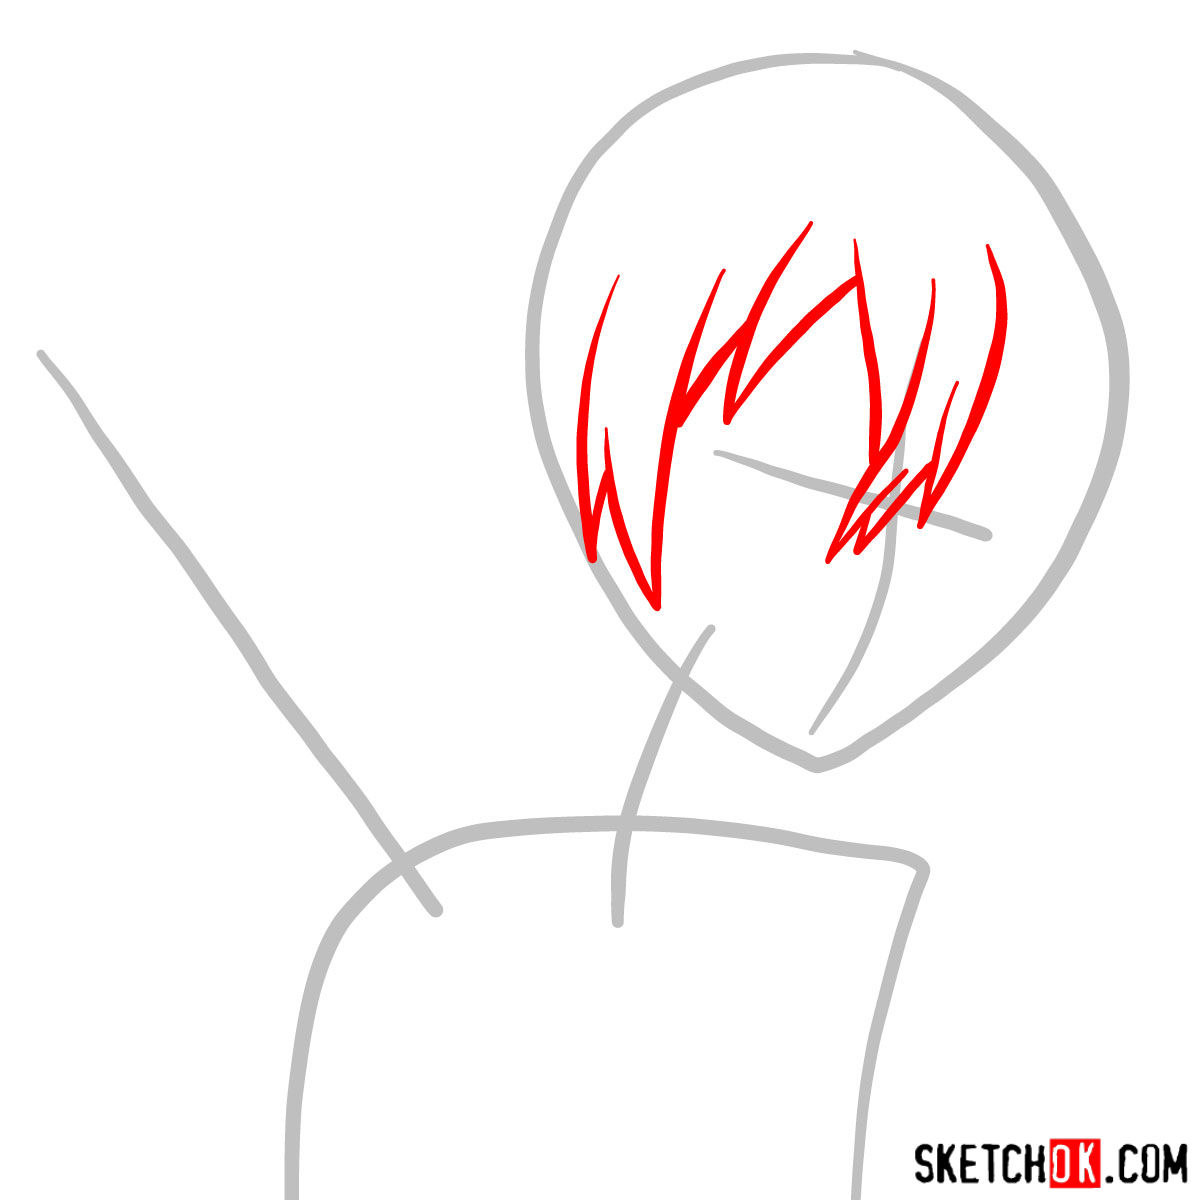
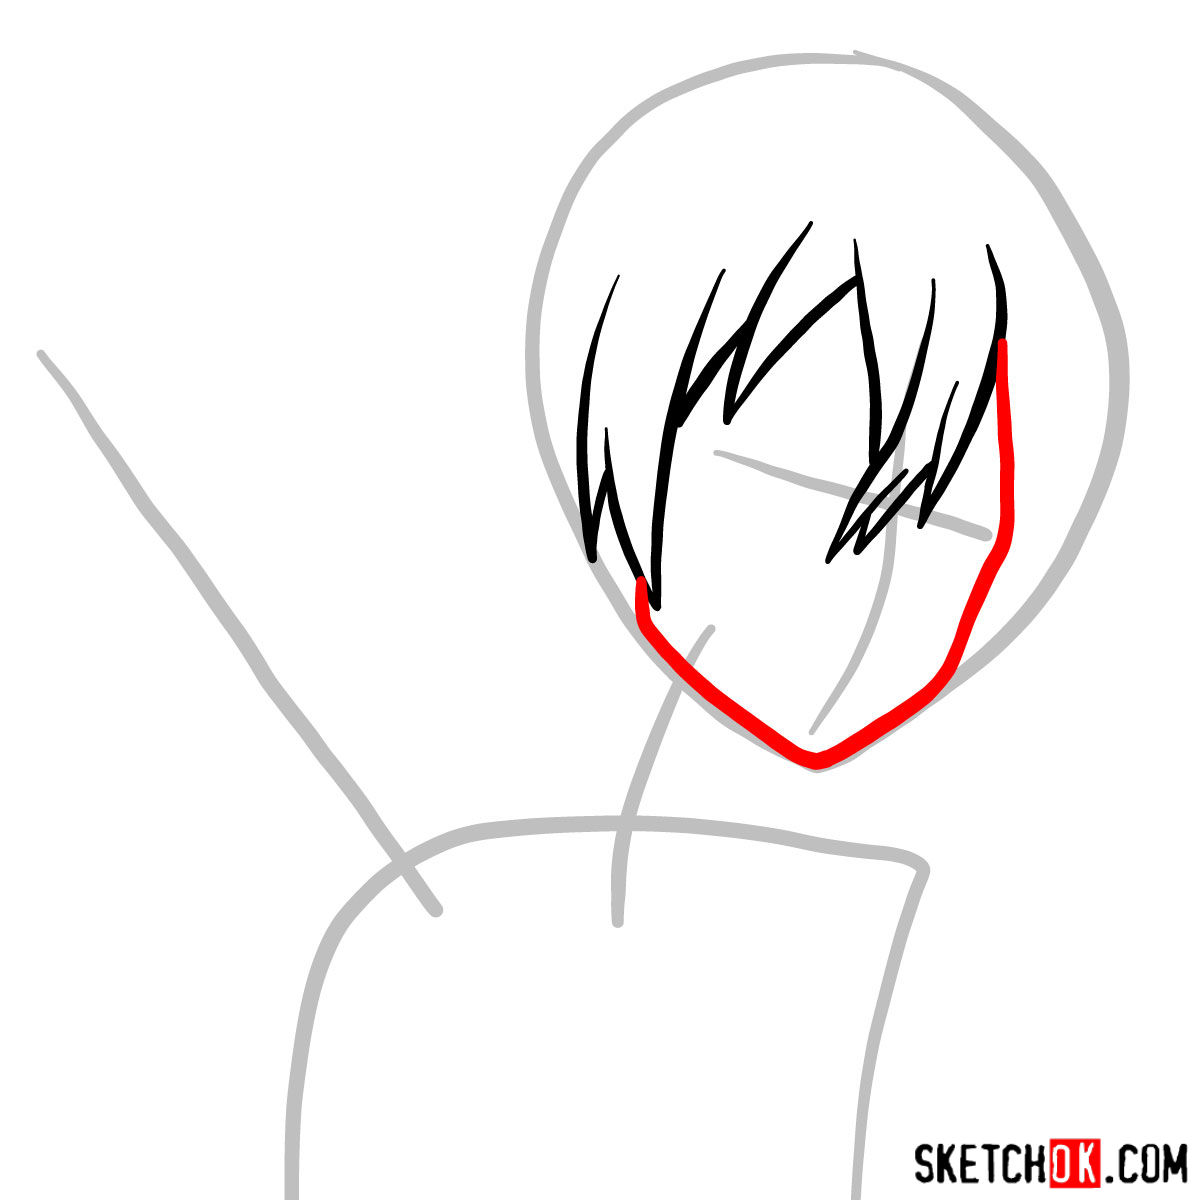
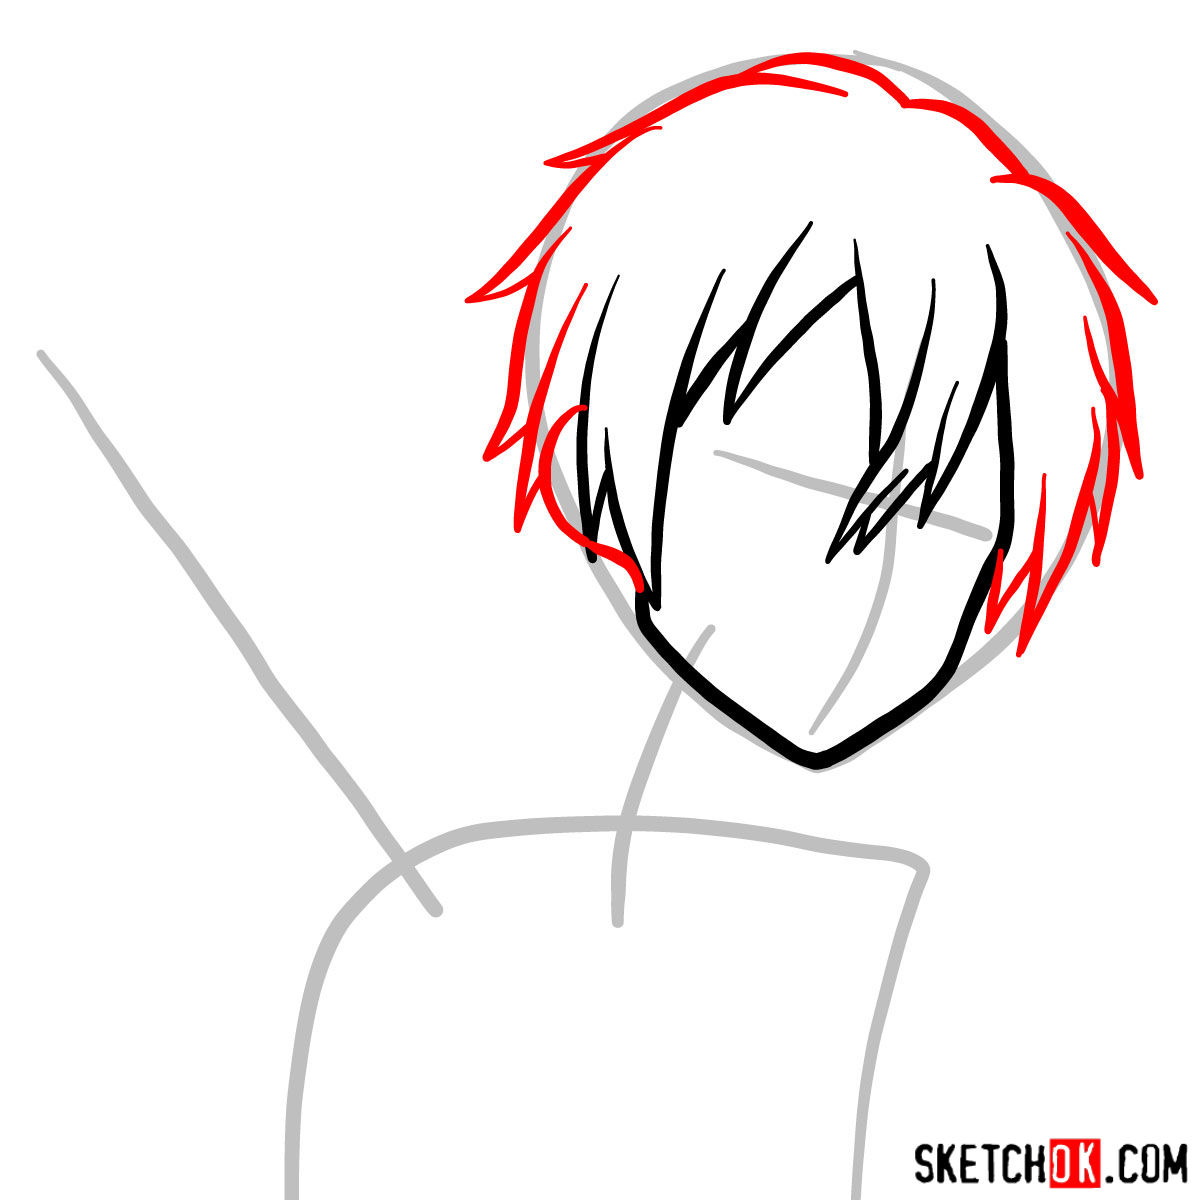
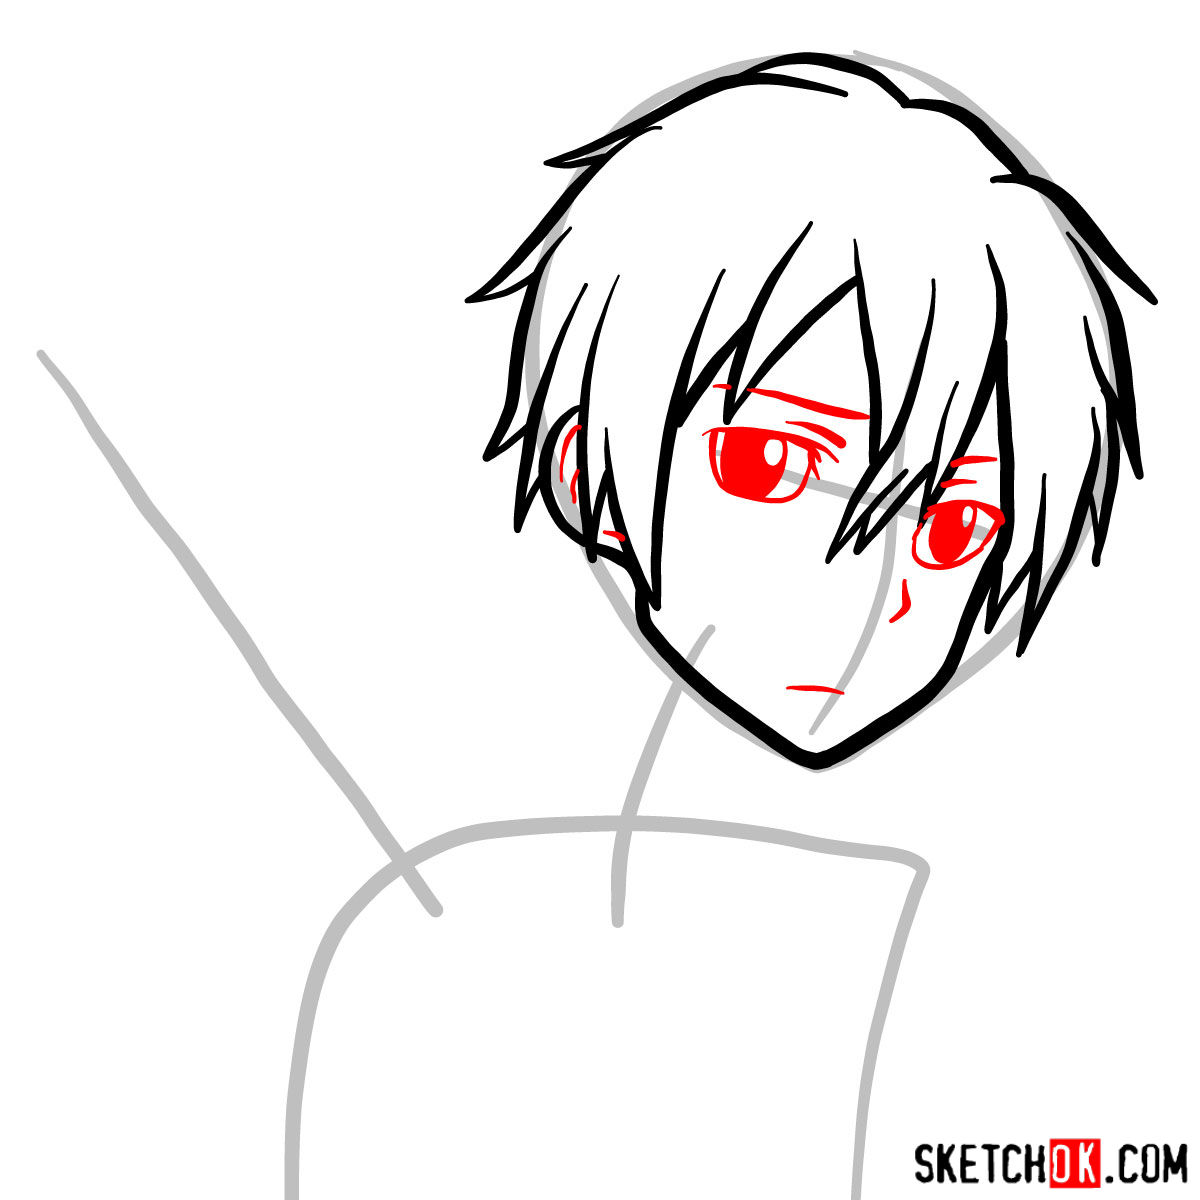
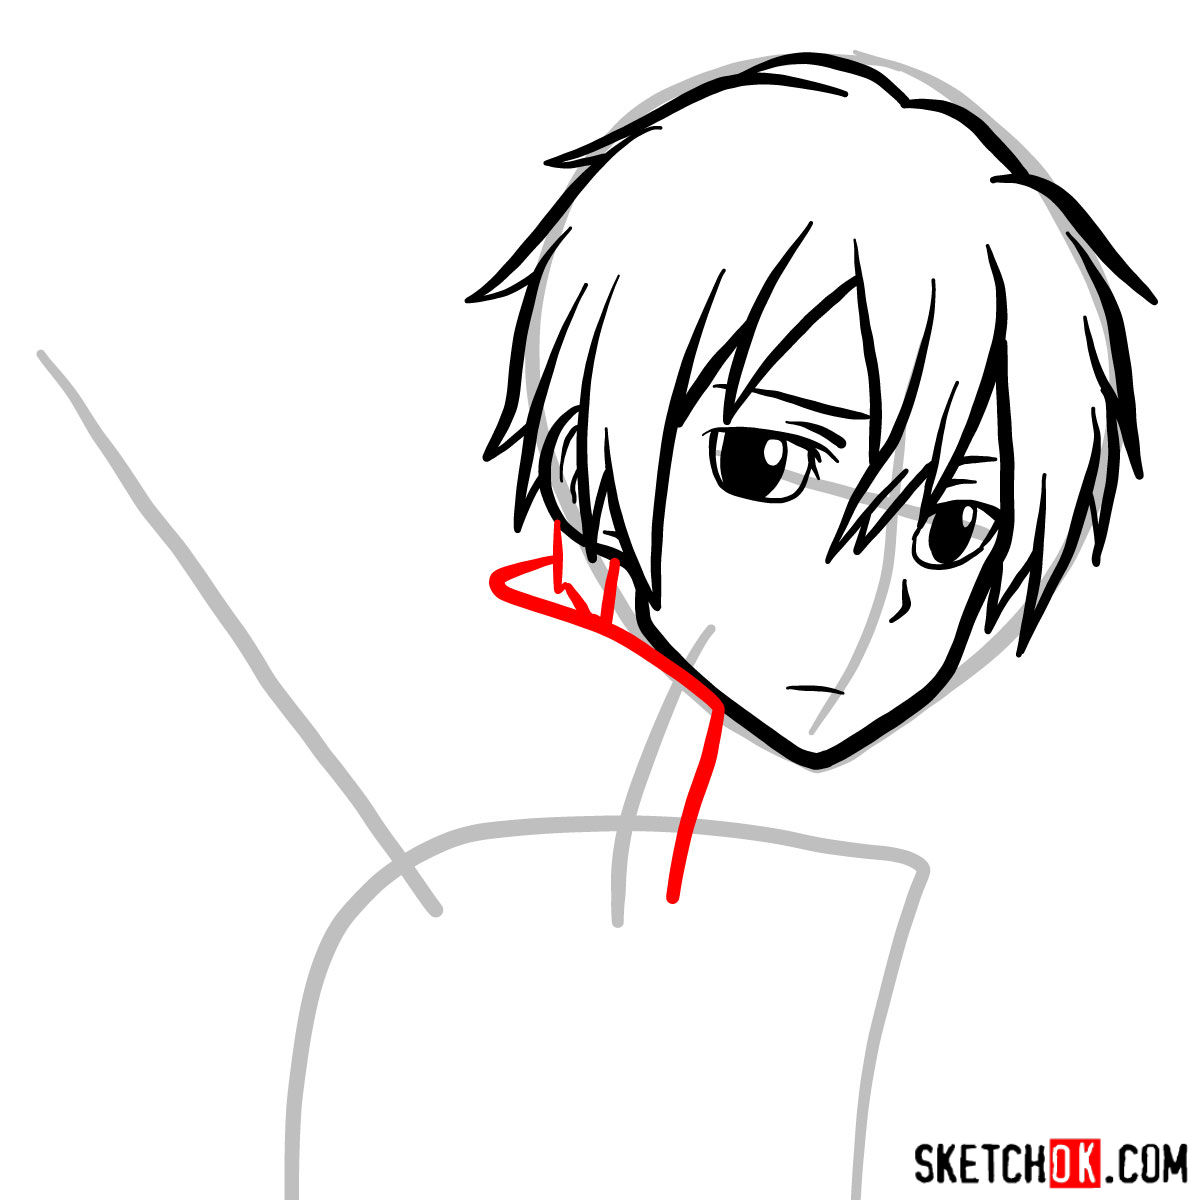
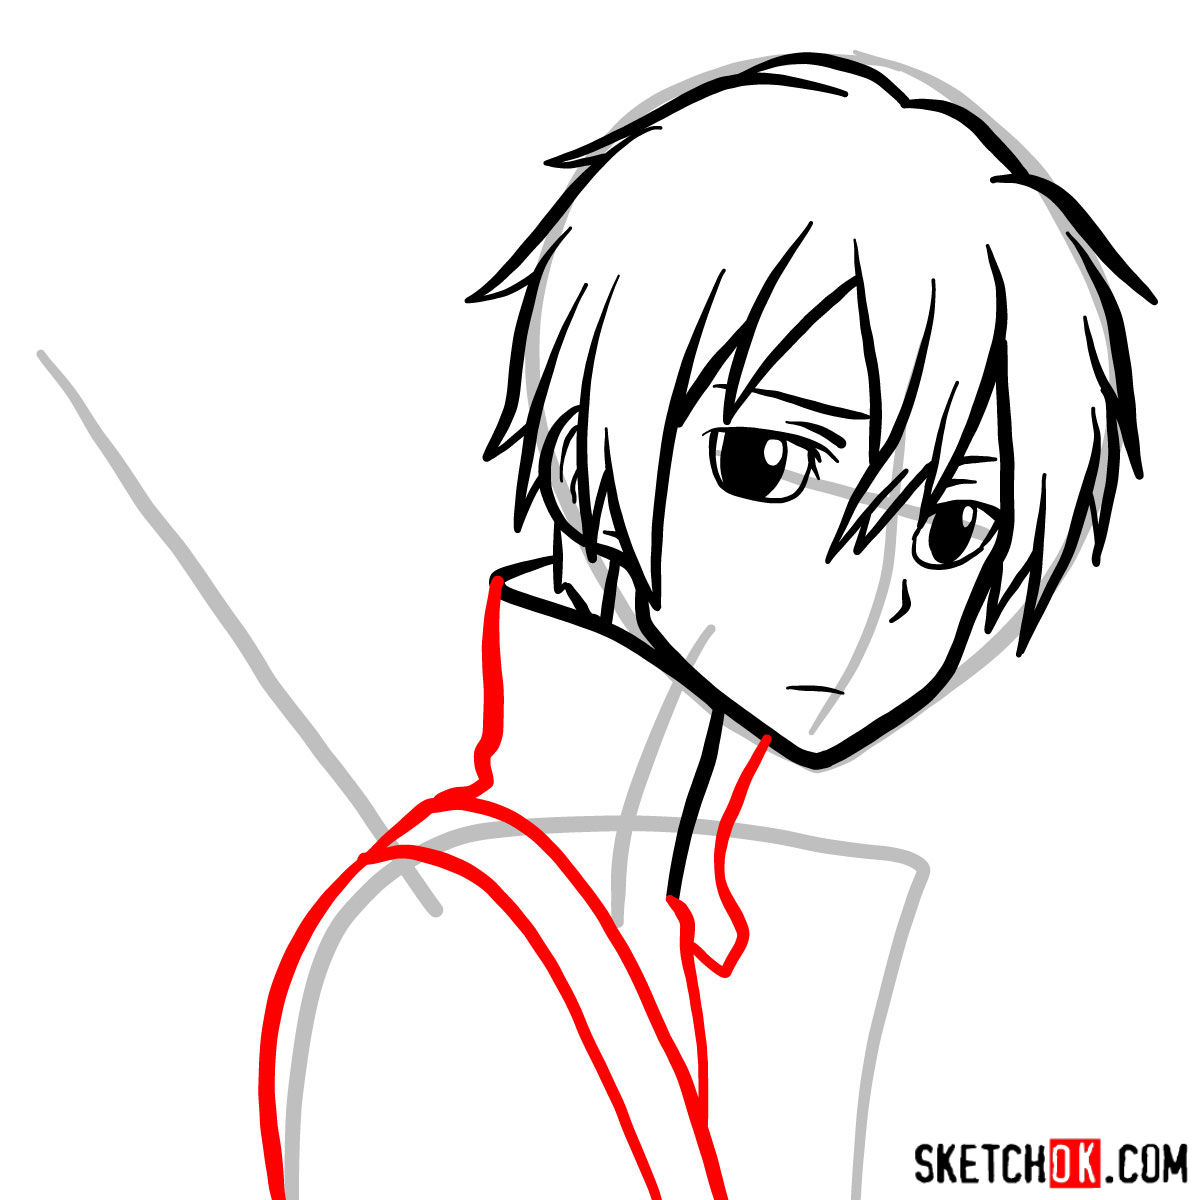
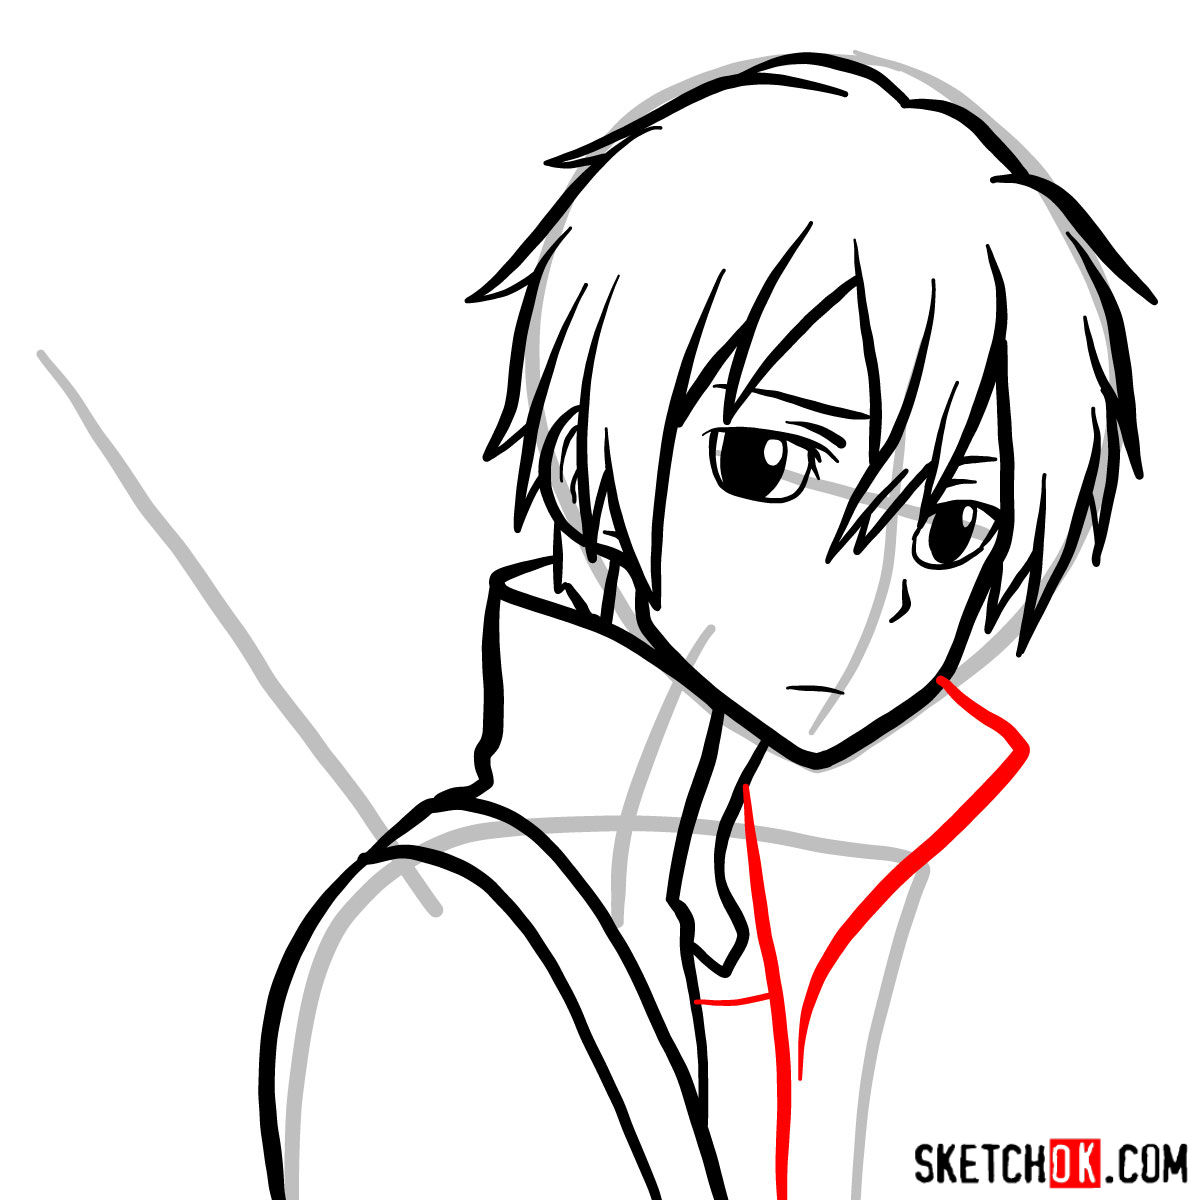
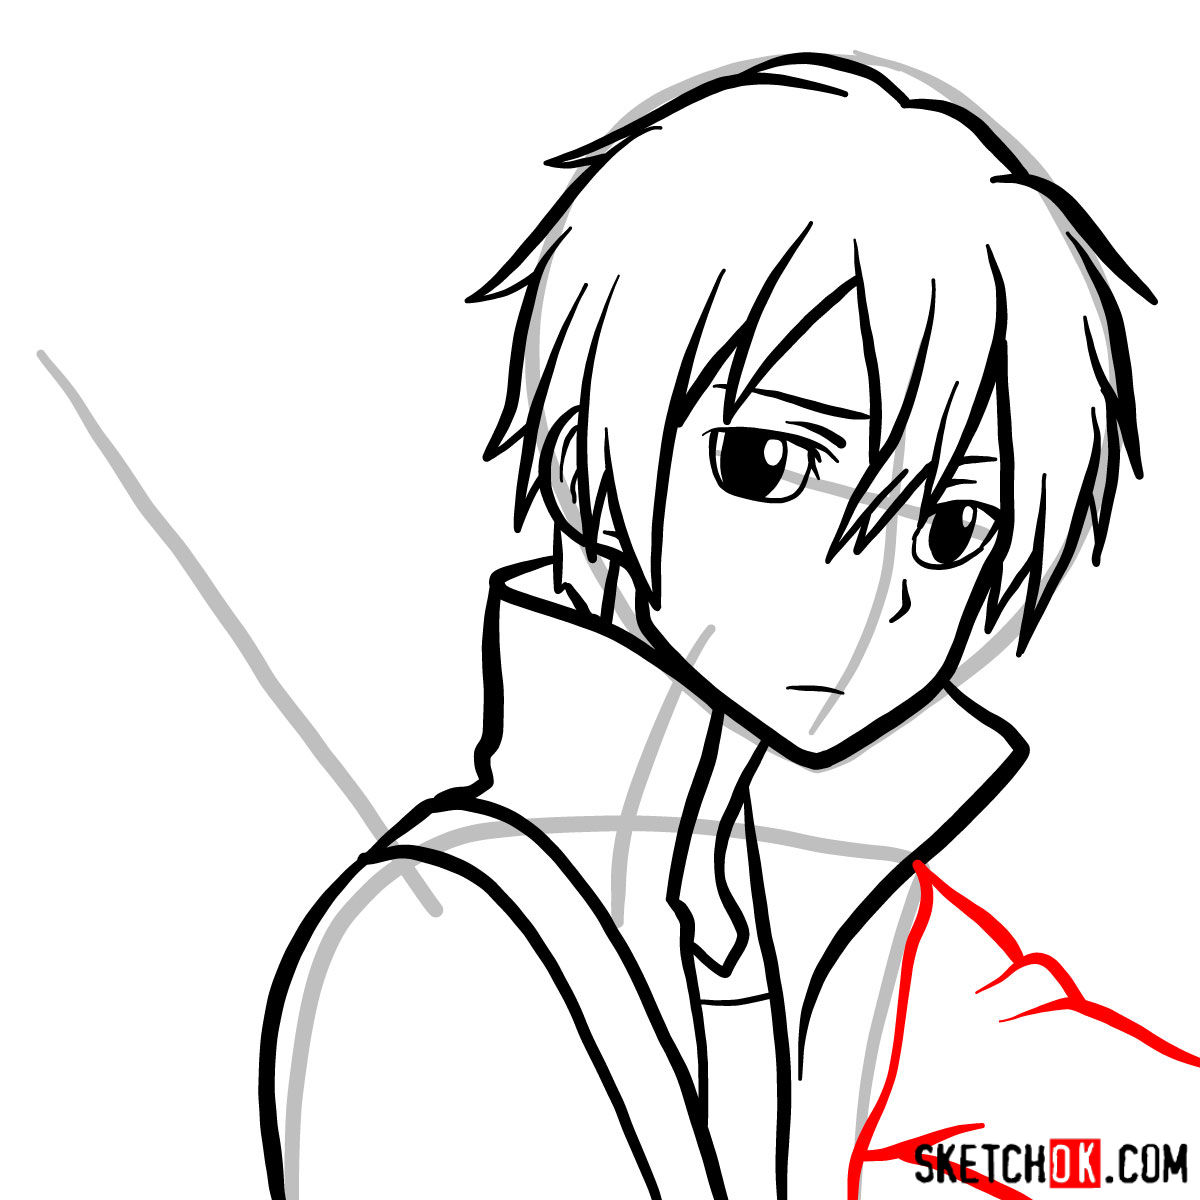
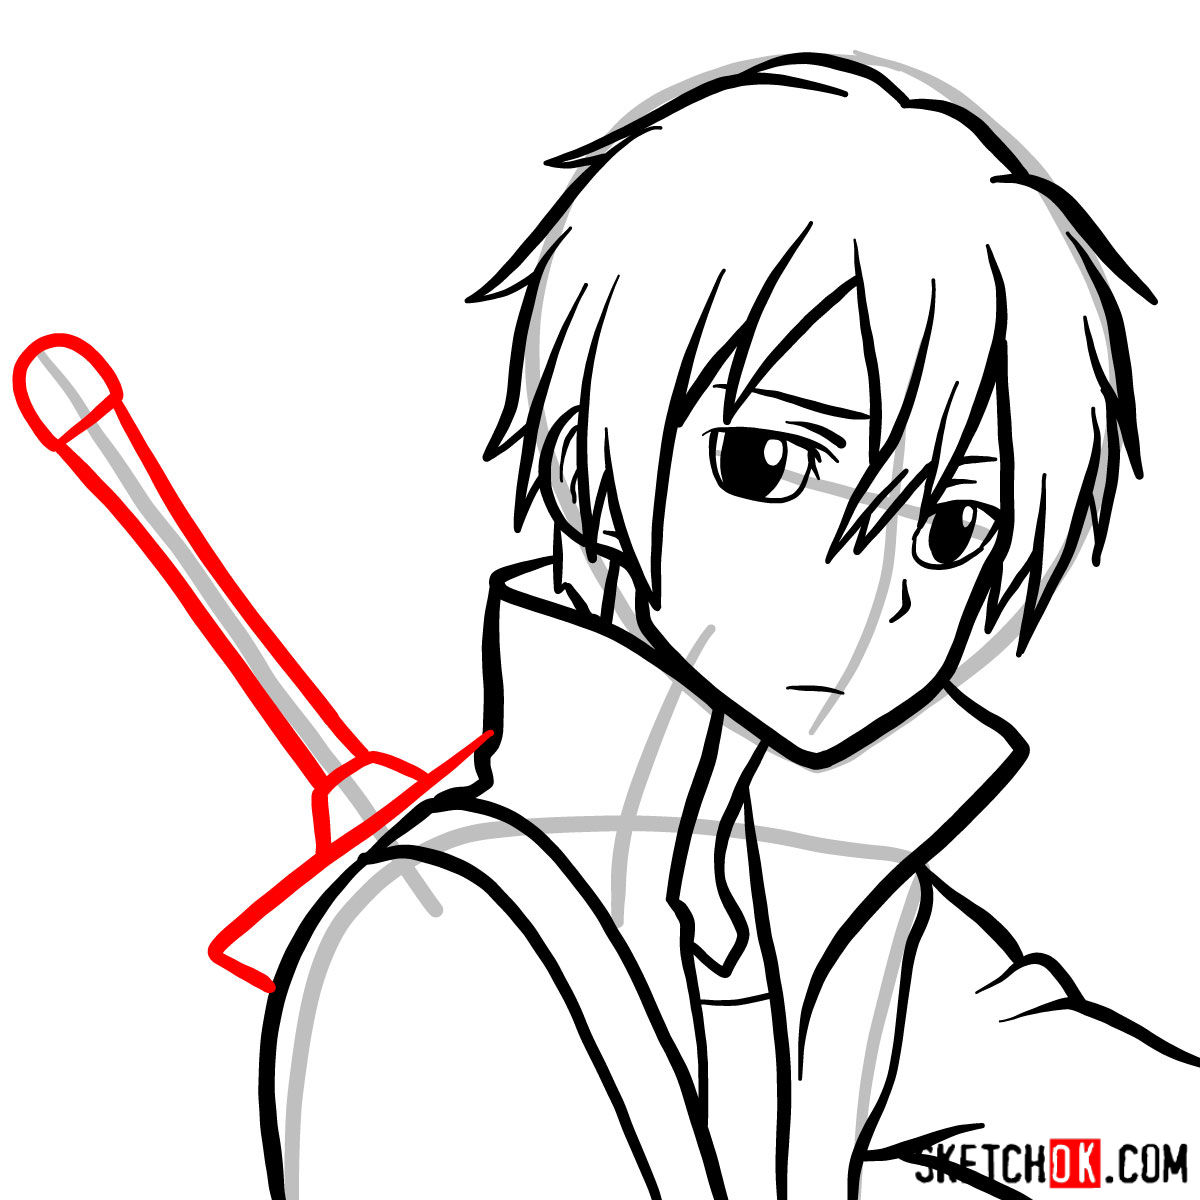
Begin by creating a basic structure of the sketch to establish the proportions. Use light pencil strokes to outline the shape of his head and placement of facial features.. Remember, the red color in the image indicates the current drawing step. Starting from step 2, you’ll notice the grey color which represents the basic proportions sketch, and the black color will show the previously drawn lines.
Part 2: Refining the Sketch – Adding Details and Proportions
In this stage, focus on refining the basic sketch by adding more details to Kirito’s face. Pay close attention to his characteristic hairstyle, facial expressions, and the intricate elements of his eyes. Gradually develop the proportions and features with light pencil strokes, ensuring accuracy and capturing the essence of his character.
Part 3: Inking – Outlining and Final Touches
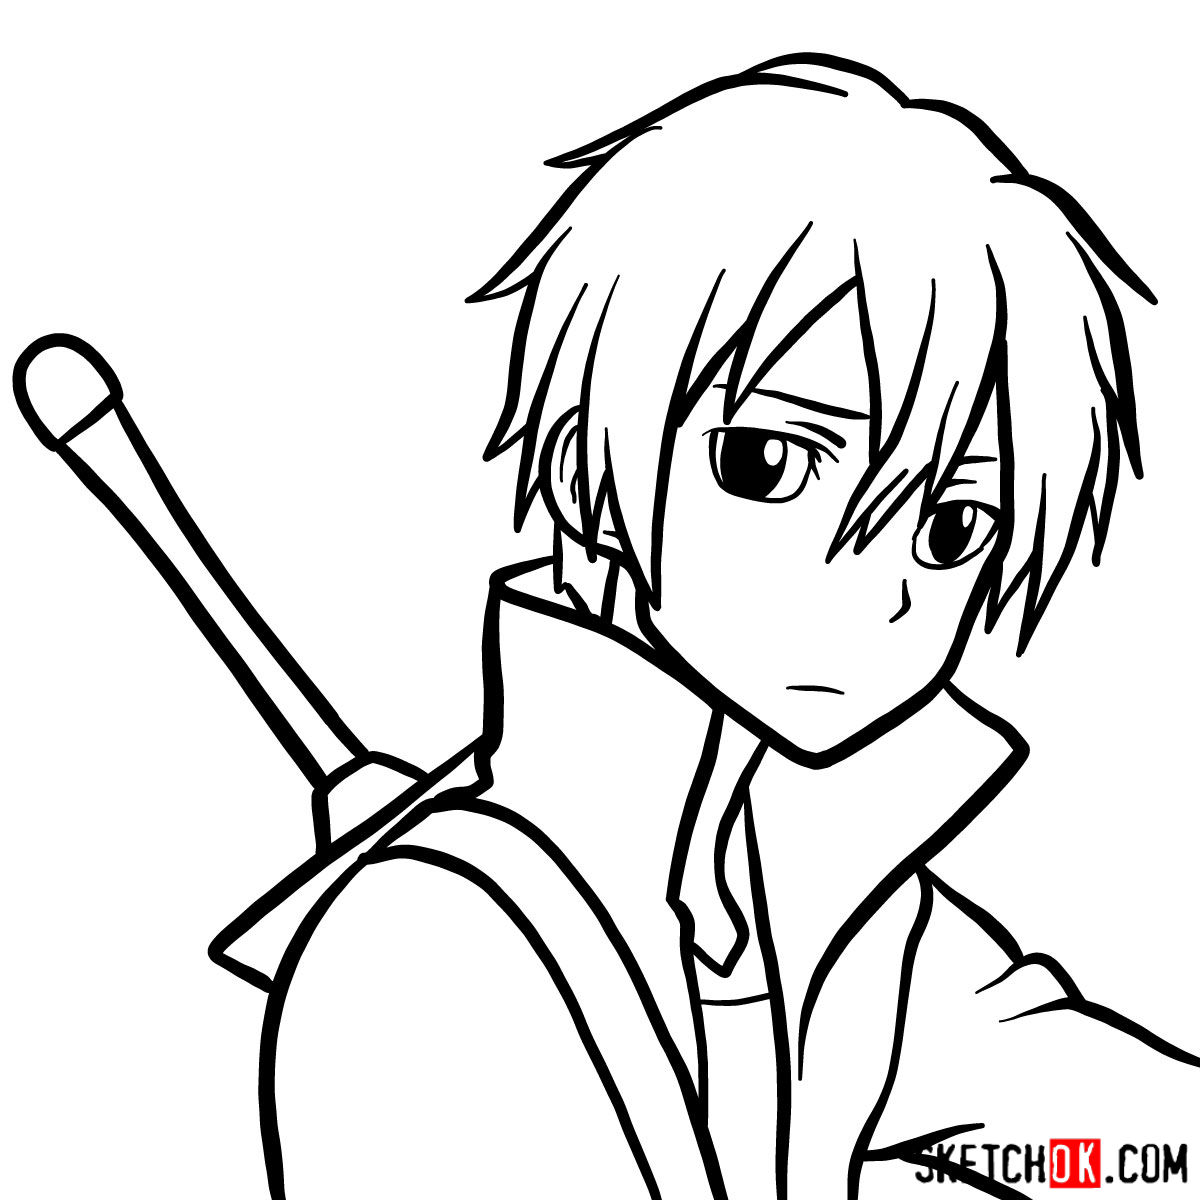
Once you’re satisfied with the refined sketch, it’s time to ink your drawing. Using a fine pen or marker, carefully trace over the essential lines to create clean and bold outlines. Pay attention to the intricate details, such as the strands of hair and the expressions in Kirito’s eyes. After outlining, erase the underlying pencil marks to reveal your finished inked drawing.
Part 4: Coloring and Shading – Bringing Kirito to Life
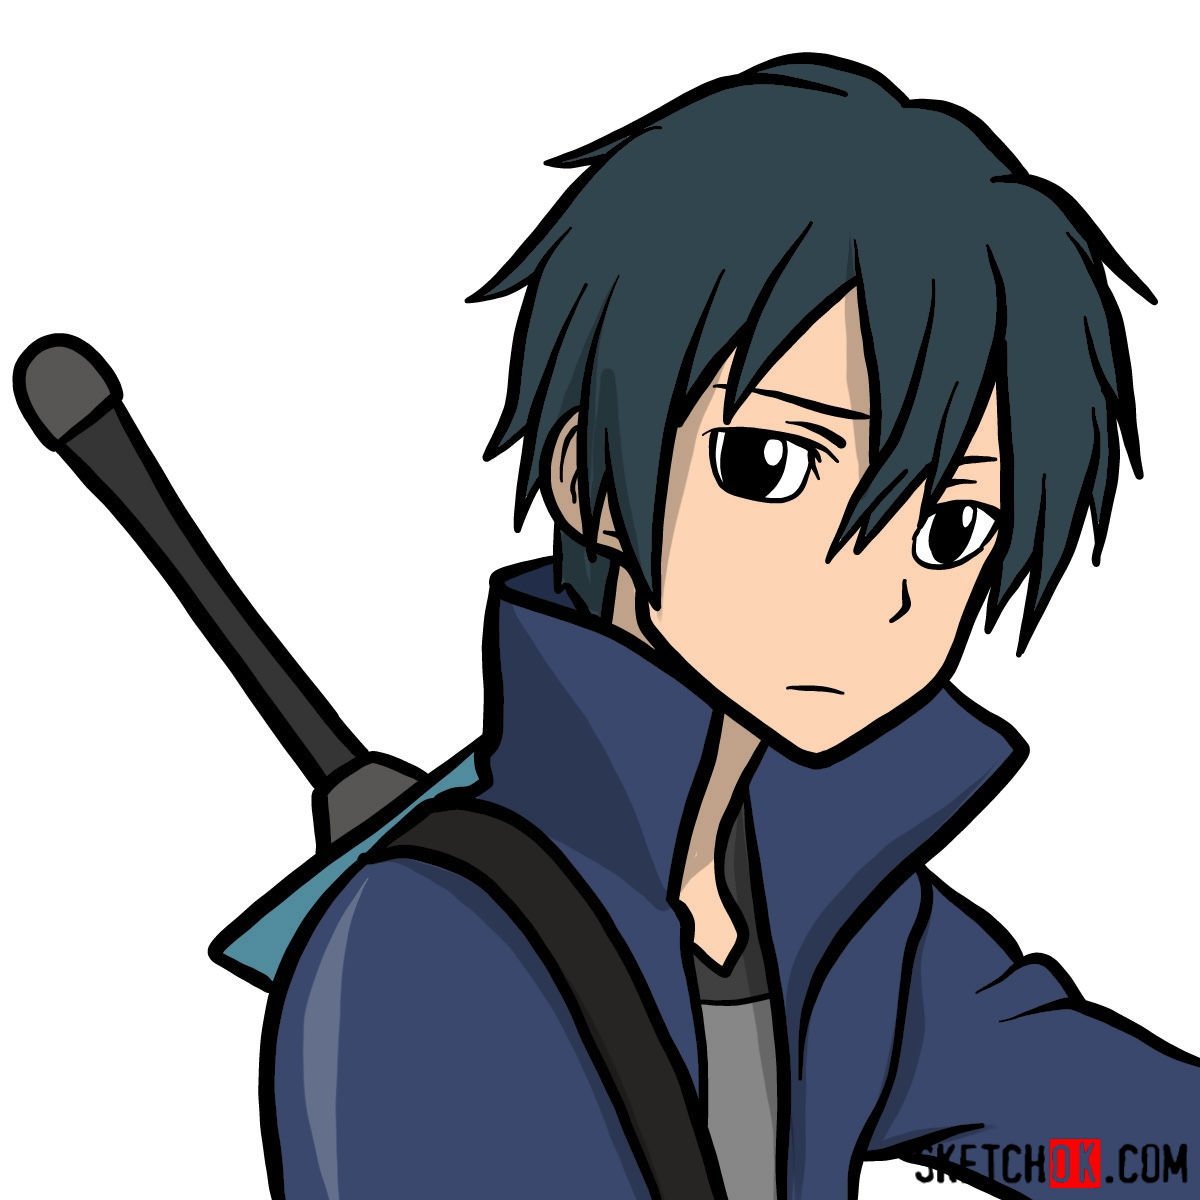
Now comes the exciting part—coloring and shading! Select your desired color palette and bring Kirito’s face to life with vibrant hues. Add depth and dimension by shading the different areas of his face, considering the light source and creating subtle variations. Experiment with blending techniques and highlights to add realism and capture the essence of Kirito’s character.
The best way to stay current with new guides is the weekly email signup sitting at the top of this page, so go ahead and drop your address in there if you want fresh tutorials delivered straight to you. Now that you know how to draw Kirito’s portrait, you can keep practicing and maybe work your way through other SAO characters too. The SketchOk Pinterest page is also worth a look, since that’s where people share their finished drawings in the comments.
