Welcome, budding artists and Pokémon enthusiasts alike! Today, we embark on an electrifying adventure of drawing one of the most iconic faces in the world of Pokémon, Pikachu. But this isn’t just any Pikachu – we’re going to capture Pikachu in a moment of pure joy, who’s energetic personality and adorable features have captivated audiences worldwide, making it an excellent subject for our artistic exploration.
This yellow creature is famous for its plump, rounded silhouette, expressive eyes, and cheeky smile – the epitome of cute! However, translating Pikachu’s characteristics onto paper poses unique challenges. Capturing the delicate balance between Pikachu’s simplistic form and animated expressions requires careful attention and a delicate hand. From the curve of Pikachu’s joy-filled eyes to the shaping of its electric cheeks and iconic, pointy ears, each aspect contributes to bringing this beloved Pokémon to life.
Don’t forget about Pikachu’s adorable, soft body and its distinguishing lightning bolt tail. Every detail adds to the joyous demeanor we’re aiming to depict.
I Choose You, Pikachu: Mastering Your Pokémon Drawing with Our Guide
Are you ready to start your journey to drawing a jubilant Pikachu? Our guide will lead you through a 10-step process that is color-coded for your convenience:
Red Color: Marks the current drawing step, guiding your hand as you bring Pikachu to life.
Black Color: Reminds you of your previous steps, like a breadcrumb trail of your progress.
Grey Color: Depicts the basic sketch, providing you with a structural map to build your masterpiece.
The first step of our guide focuses on sketching the basic structure. Light pencil strokes are recommended for this early stage to allow for adjustments as you go. And while Pikachu is the star of this tutorial, consider including its best buddy Ash Ketchum, or perhaps a rival Pokémon like Mew or Dragonite, to add a fun, dynamic element to your artwork.
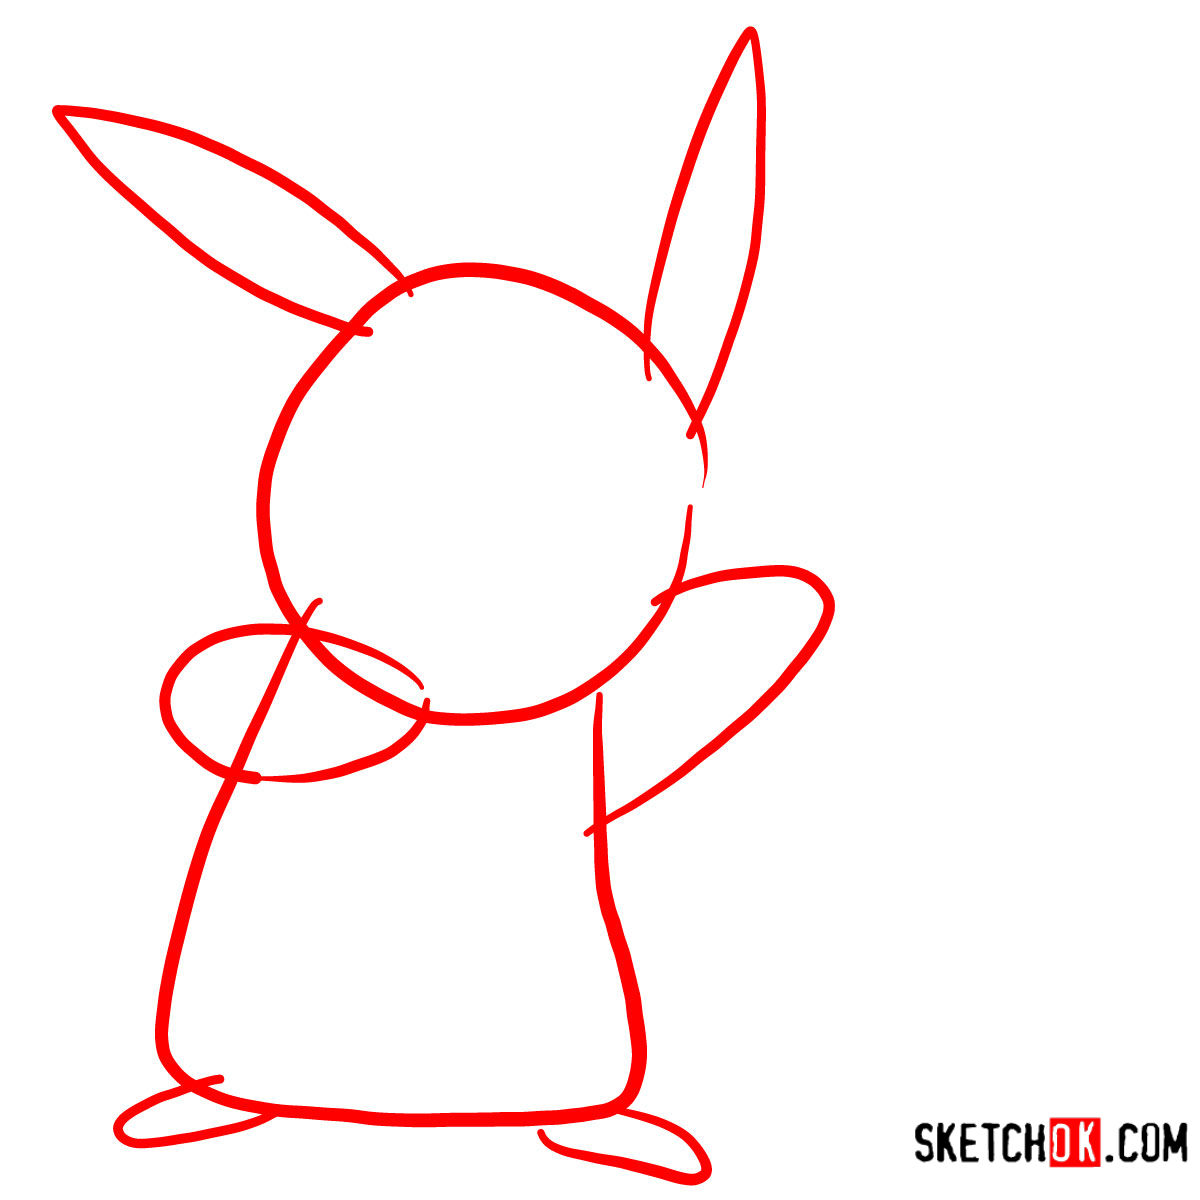
Step 01 – Begin your Pikachu drawing with a basic rough outline, marking out the proportions for Pikachu’s body, head, arms, legs, and ears. This step lays the foundation for the entire drawing.
Initial Sketch for the Pikachu Drawing
Step 02 – In this phase of the drawing, give a clearer shape to Pikachu’s right arm, ensuring it aligns well with the initial sketch and maintains Pikachu’s recognizable rounded form
Detailing Pikachu’s Right Arm
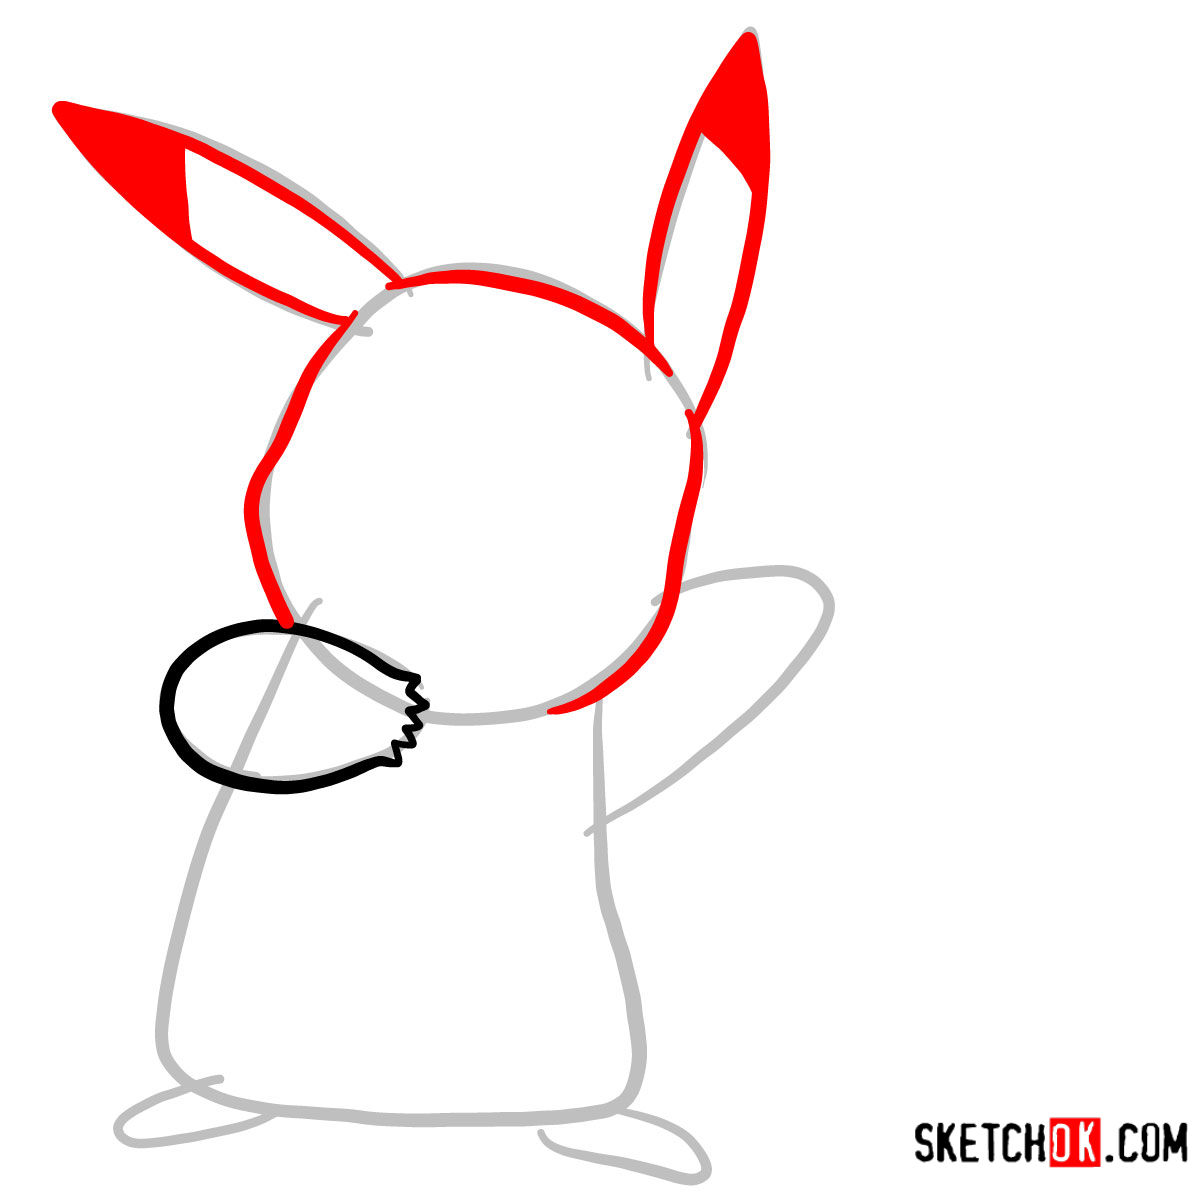
Step 03 – Progressing further, focus on the head and the iconic ears of Pikachu. Outline them distinctly, making sure to fill in the tips of the ears with black for that signature Pikachu look.
Shaping Pikachu’s Head and Ears
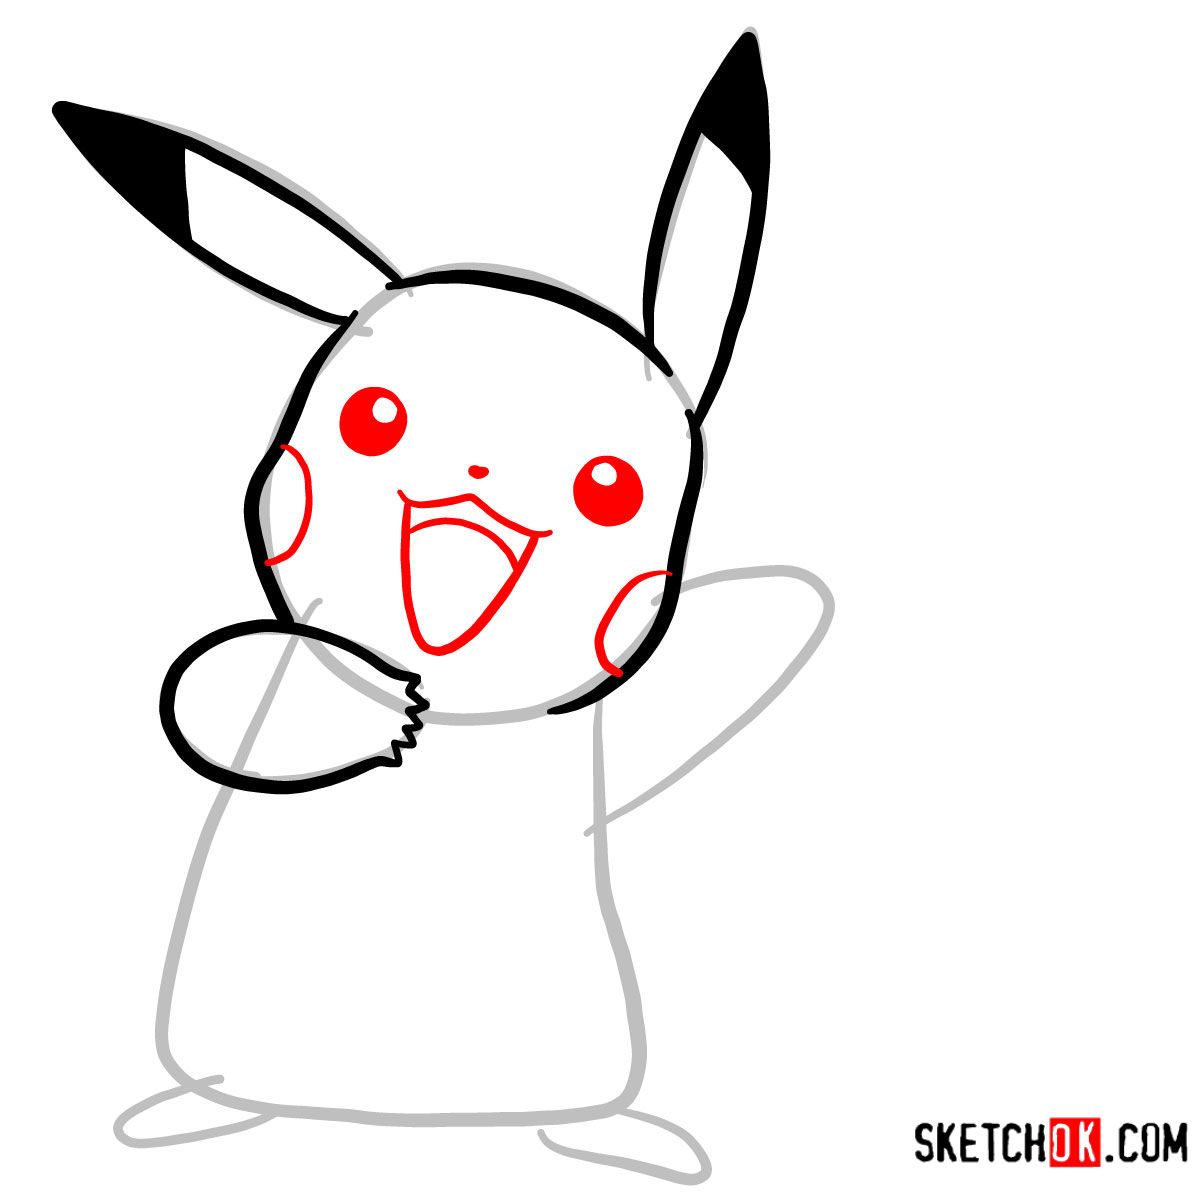
Step 04 – The essence of your Pikachu drawing comes alive in this step. Detail the facial features by drawing eyes filled with black, leaving small circles for the shiny highlights. Add a tiny nose, those characteristic red cheeks, and an open mouth to give the Pokemon his joyful and playful expression.
Adding Facial Features to Pikachu Drawing
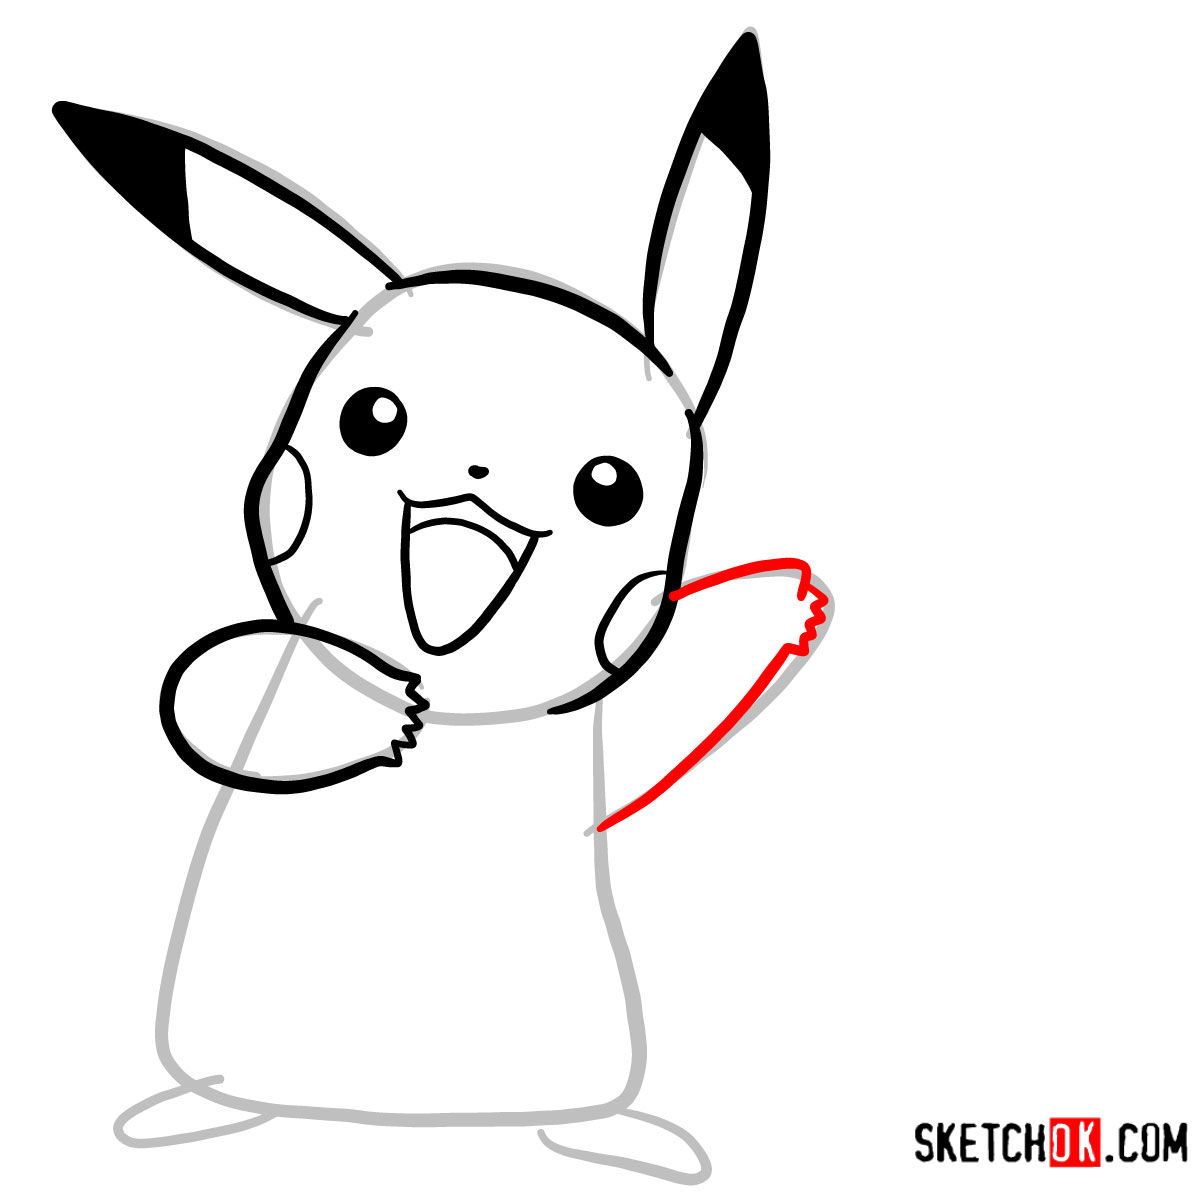
Step 05 – Continue by shaping the left arm. Ensure it mirrors the right arm in thickness and curvature in its form.
Crafting Pikachu’s Left Arm
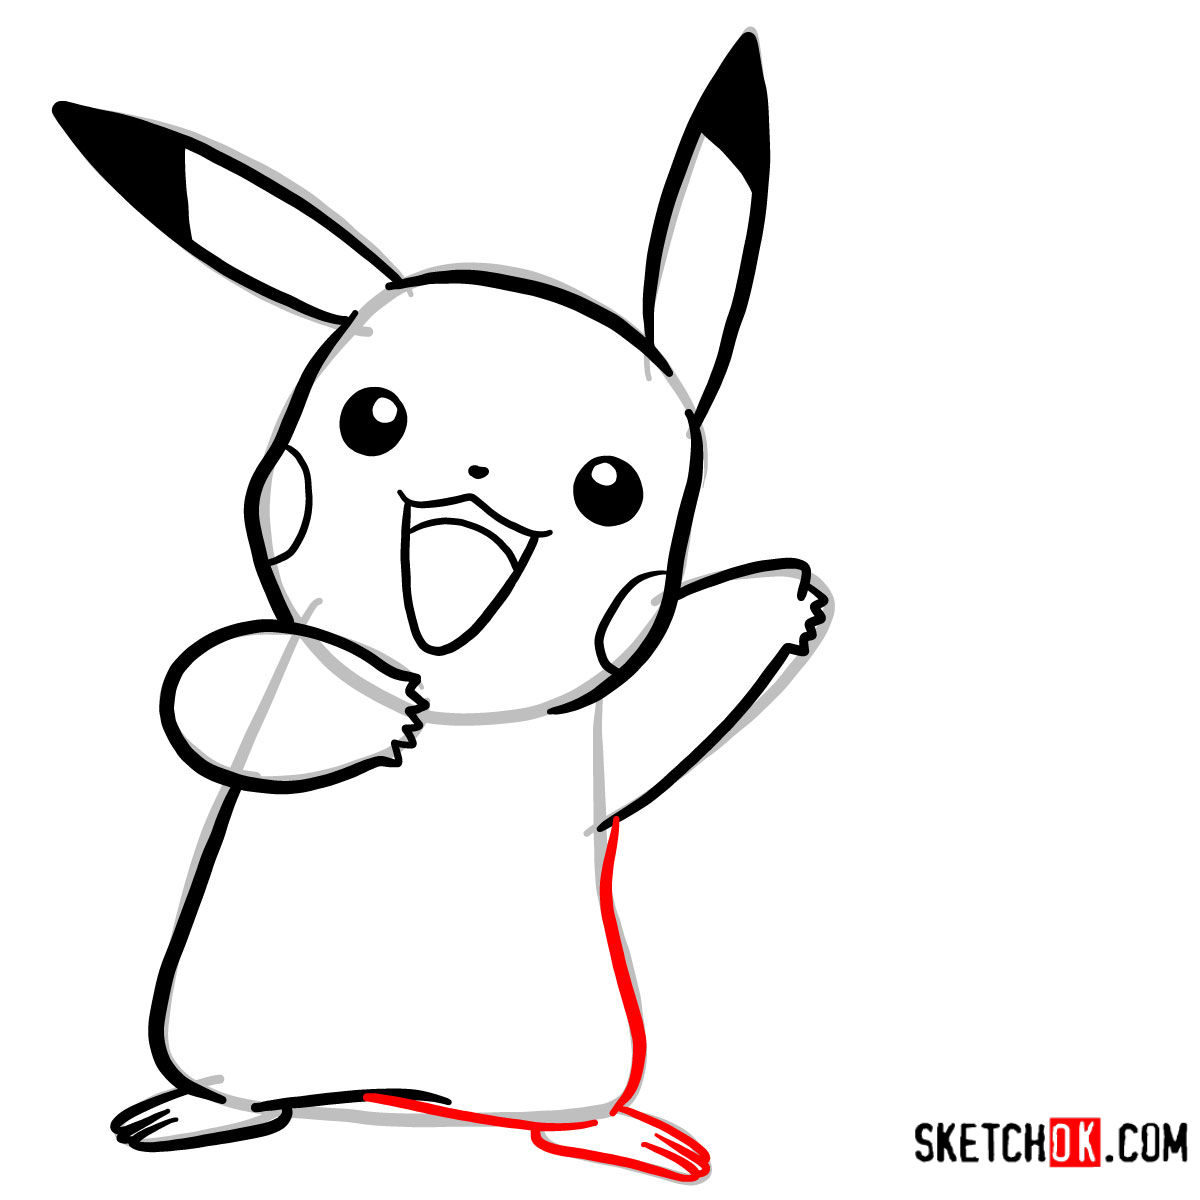
Step 06 – Delve deeper into the details by outlining the right side and bottom portion of Pikachu’s body. Additionally, give definition to Pikachu’s right foot, making sure to capture its rounded, stubby shape.
Defining Pikachu’s Right Side and Foot
Step 07 – For a balanced drawing, outline the remaining bottom part and left side of his body. Also, sketch the left foot similar to the right one for consistency.
Shaping Pikachu’s Left Side and Foot
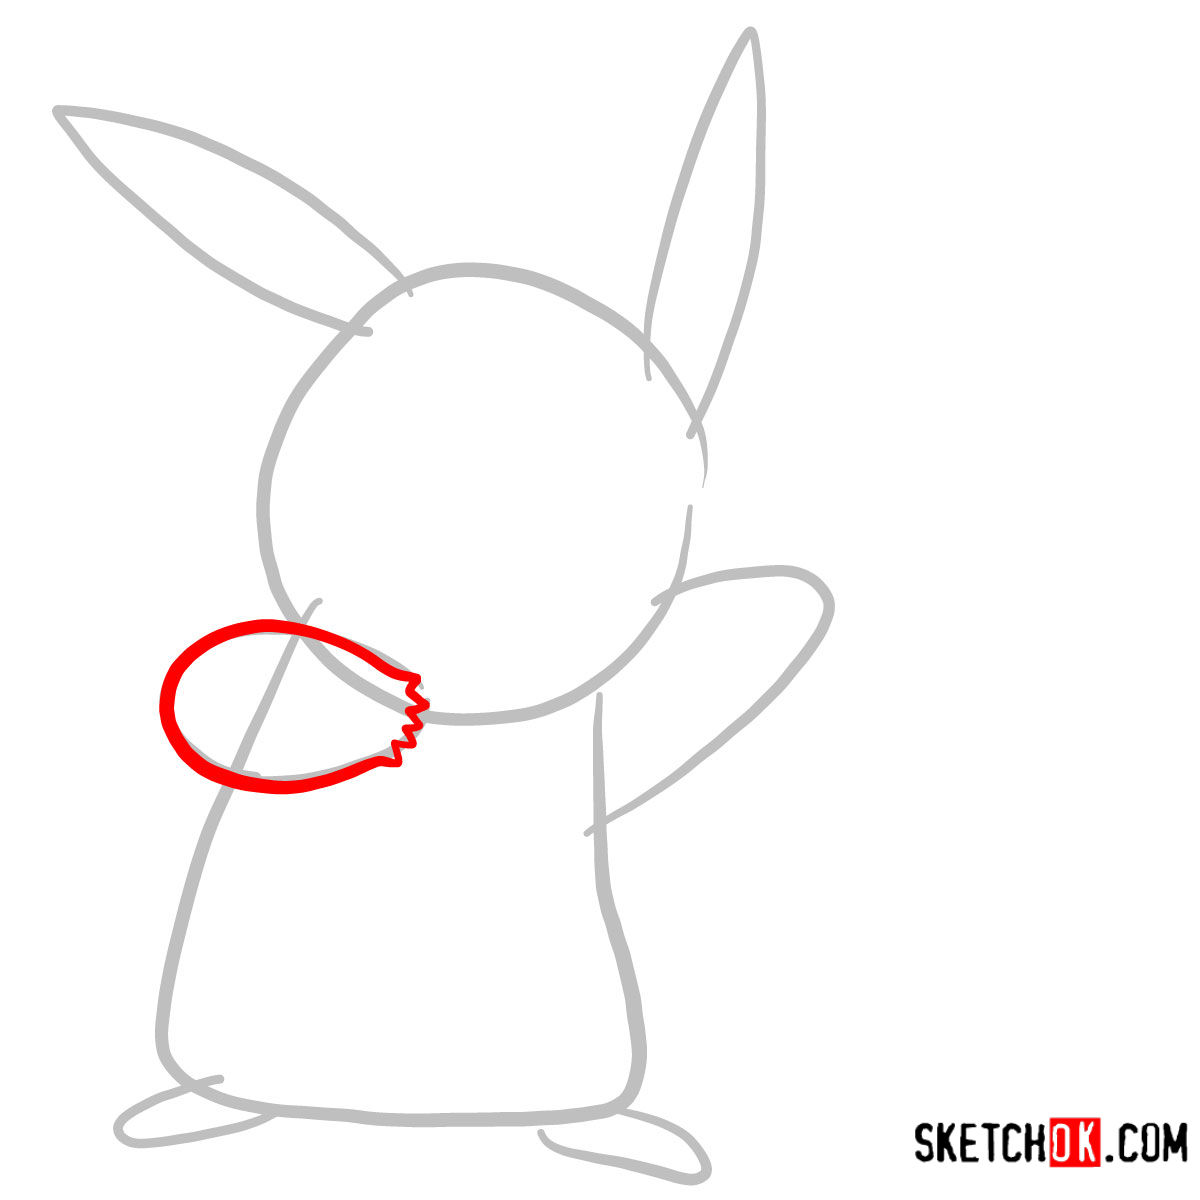
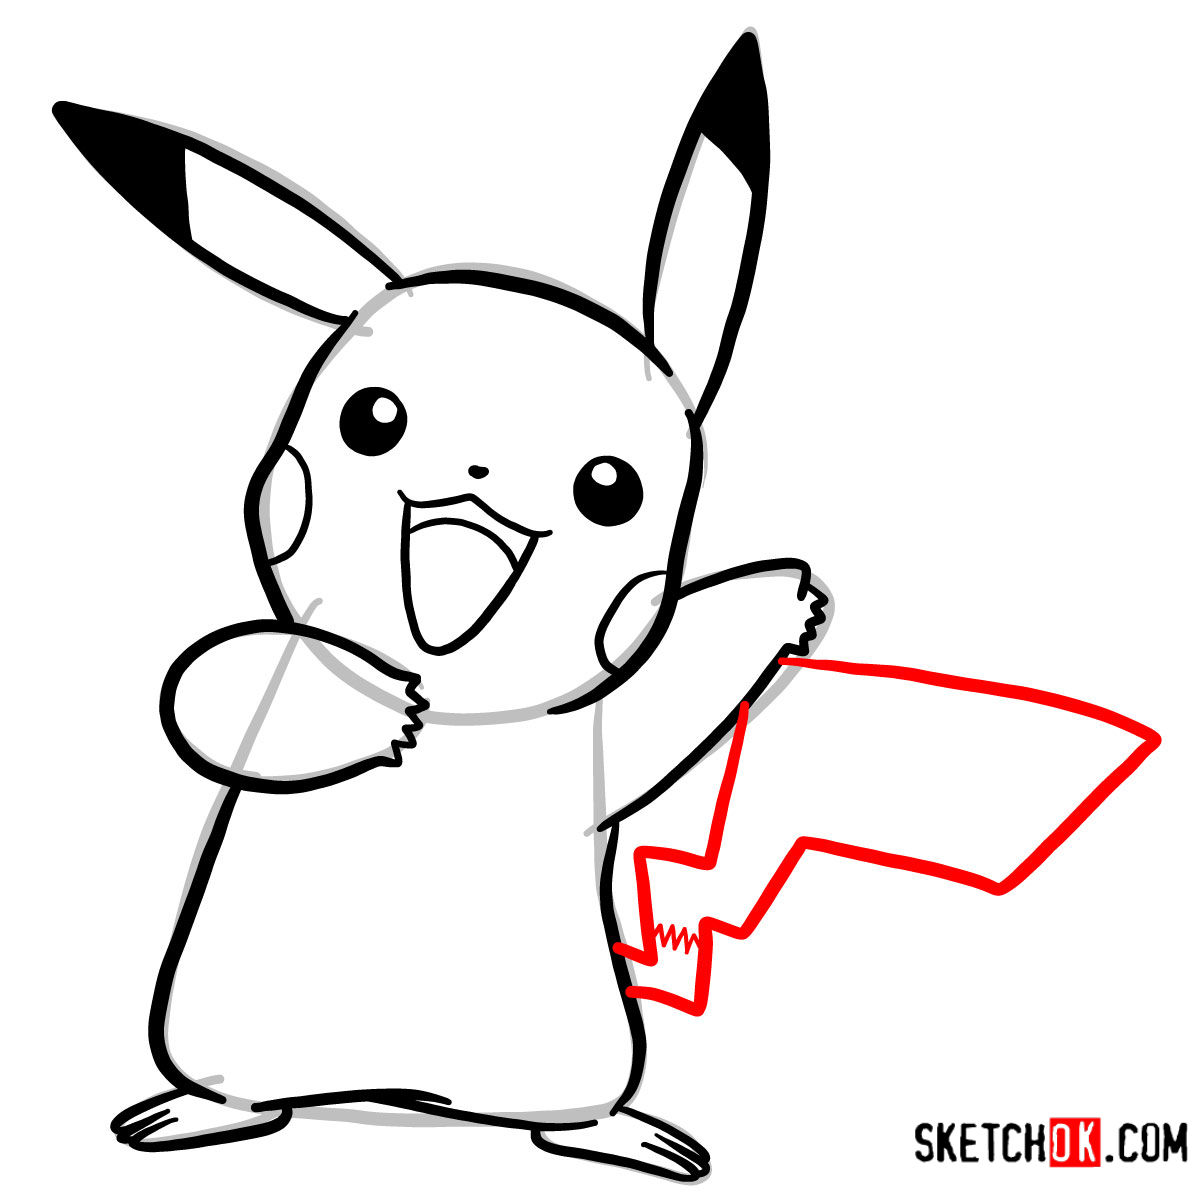
Step 08 – The next vital element in your Pikachu drawing is the tail. Sketch Pikachu’s iconic, lightning bolt-shaped tail that stretches from the back. Ensure it’s angular and sharp, capturing Pikachu’s energetic spirit.
Adding Pikachu’s Iconic Tail
Step 09 – With your sketch in place, take a moment to review the drawing. Refine any areas that may need adjustments, such as smoothening out curves or correcting proportions. Once satisfied, use an ink pen to trace over the pencil lines to give the drawing a clean, polished look. Be sure to erase any leftover pencil marks or unnecessary lines for a neat appearance.
Finalizing the Pikachu Sketch
Step 10 – Now comes the exciting part – adding color to your Pikachu drawing! Start with Pikachu’s signature yellow body. Ensure it’s a consistent shade, paying attention to areas that might need lighter or darker tones for depth. Highlight Pikachu’s rosy red cheeks, a key feature of this beloved character. Use different shades of yellow and brown for shading, especially around the arms, legs, and face, to give the drawing a three-dimensional look. Don’t forget to color the mouth, and give the tail its characteristic red base.
Coloring Pikachu
Electrifying Conclusion: Wrapping up Your Pikachu Drawing
Your Pikachu artwork is now complete! Feel free to experiment with backgrounds or additional elements to further enhance the drawing. Remember, art is all about expression and creativity, so let your imagination run wild!
Don’t keep your masterpiece to yourself – share your creation with our community on Facebook, Instagram, and Pinterest. By sharing your work, you inspire others and become part of a global community of artists. Thank you for your continued support and participation in the SketchOk community. Remember to keep practicing, keep exploring, and most importantly, keep having fun with your art. Until our next drawing adventure, happy sketching!
Disclaimer: All original artworks and photos used as references for the creation of these drawing tutorials are the property of their respective owners. If your work has been featured without proper credit, please kindly leave a comment below, and the issue will be promptly addressed. We greatly appreciate your exceptional art. Thank you.
Did you like the tutorial?
You can support the author of this website and also suggest your own ideas for new drawings by making a small donation here: