Last Updated on May 13, 2026
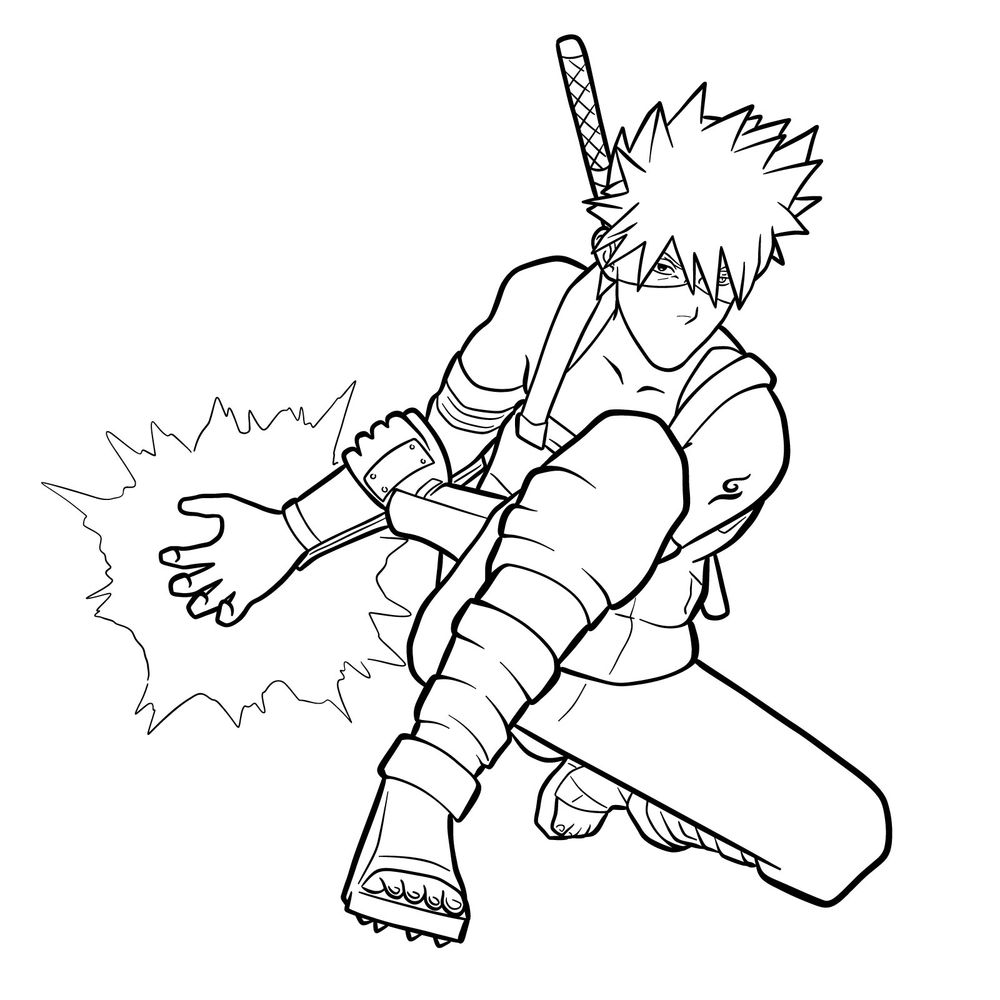
Are you a fan of the popular game Clash of Ninja Revolution and fascinated by the enigmatic character Kakashi Hatake? Get ready to learn how to draw Kakashi and bring him to life on your sketchpad with our detailed drawing guide! In this tutorial, we will guide you step-by-step, empowering you to master the art of sketching your favourite character and capture his dynamic pose and iconic appearance.
Mastering Kakashi’s Appearance
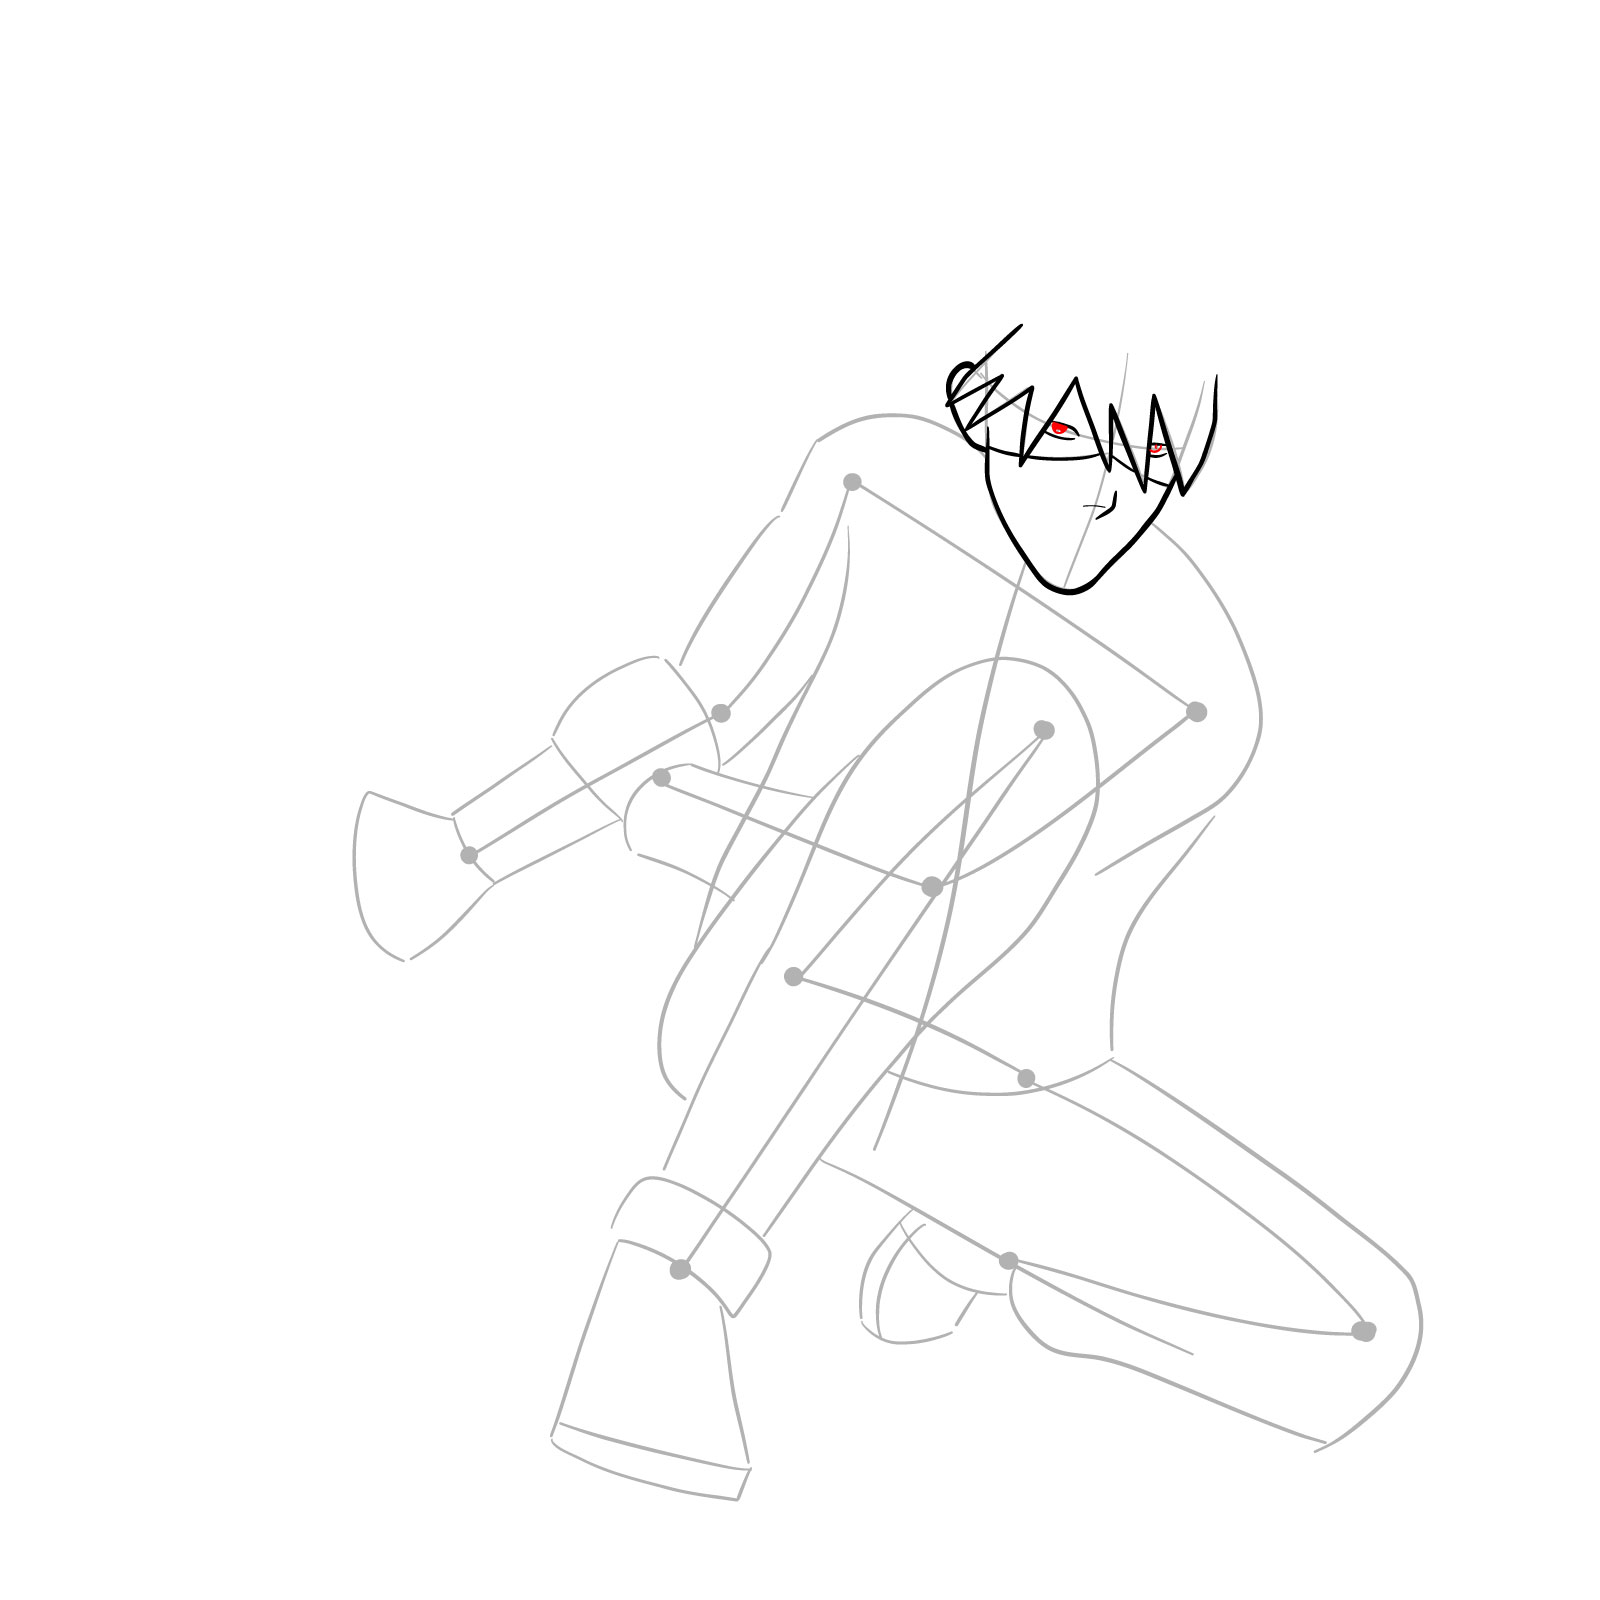
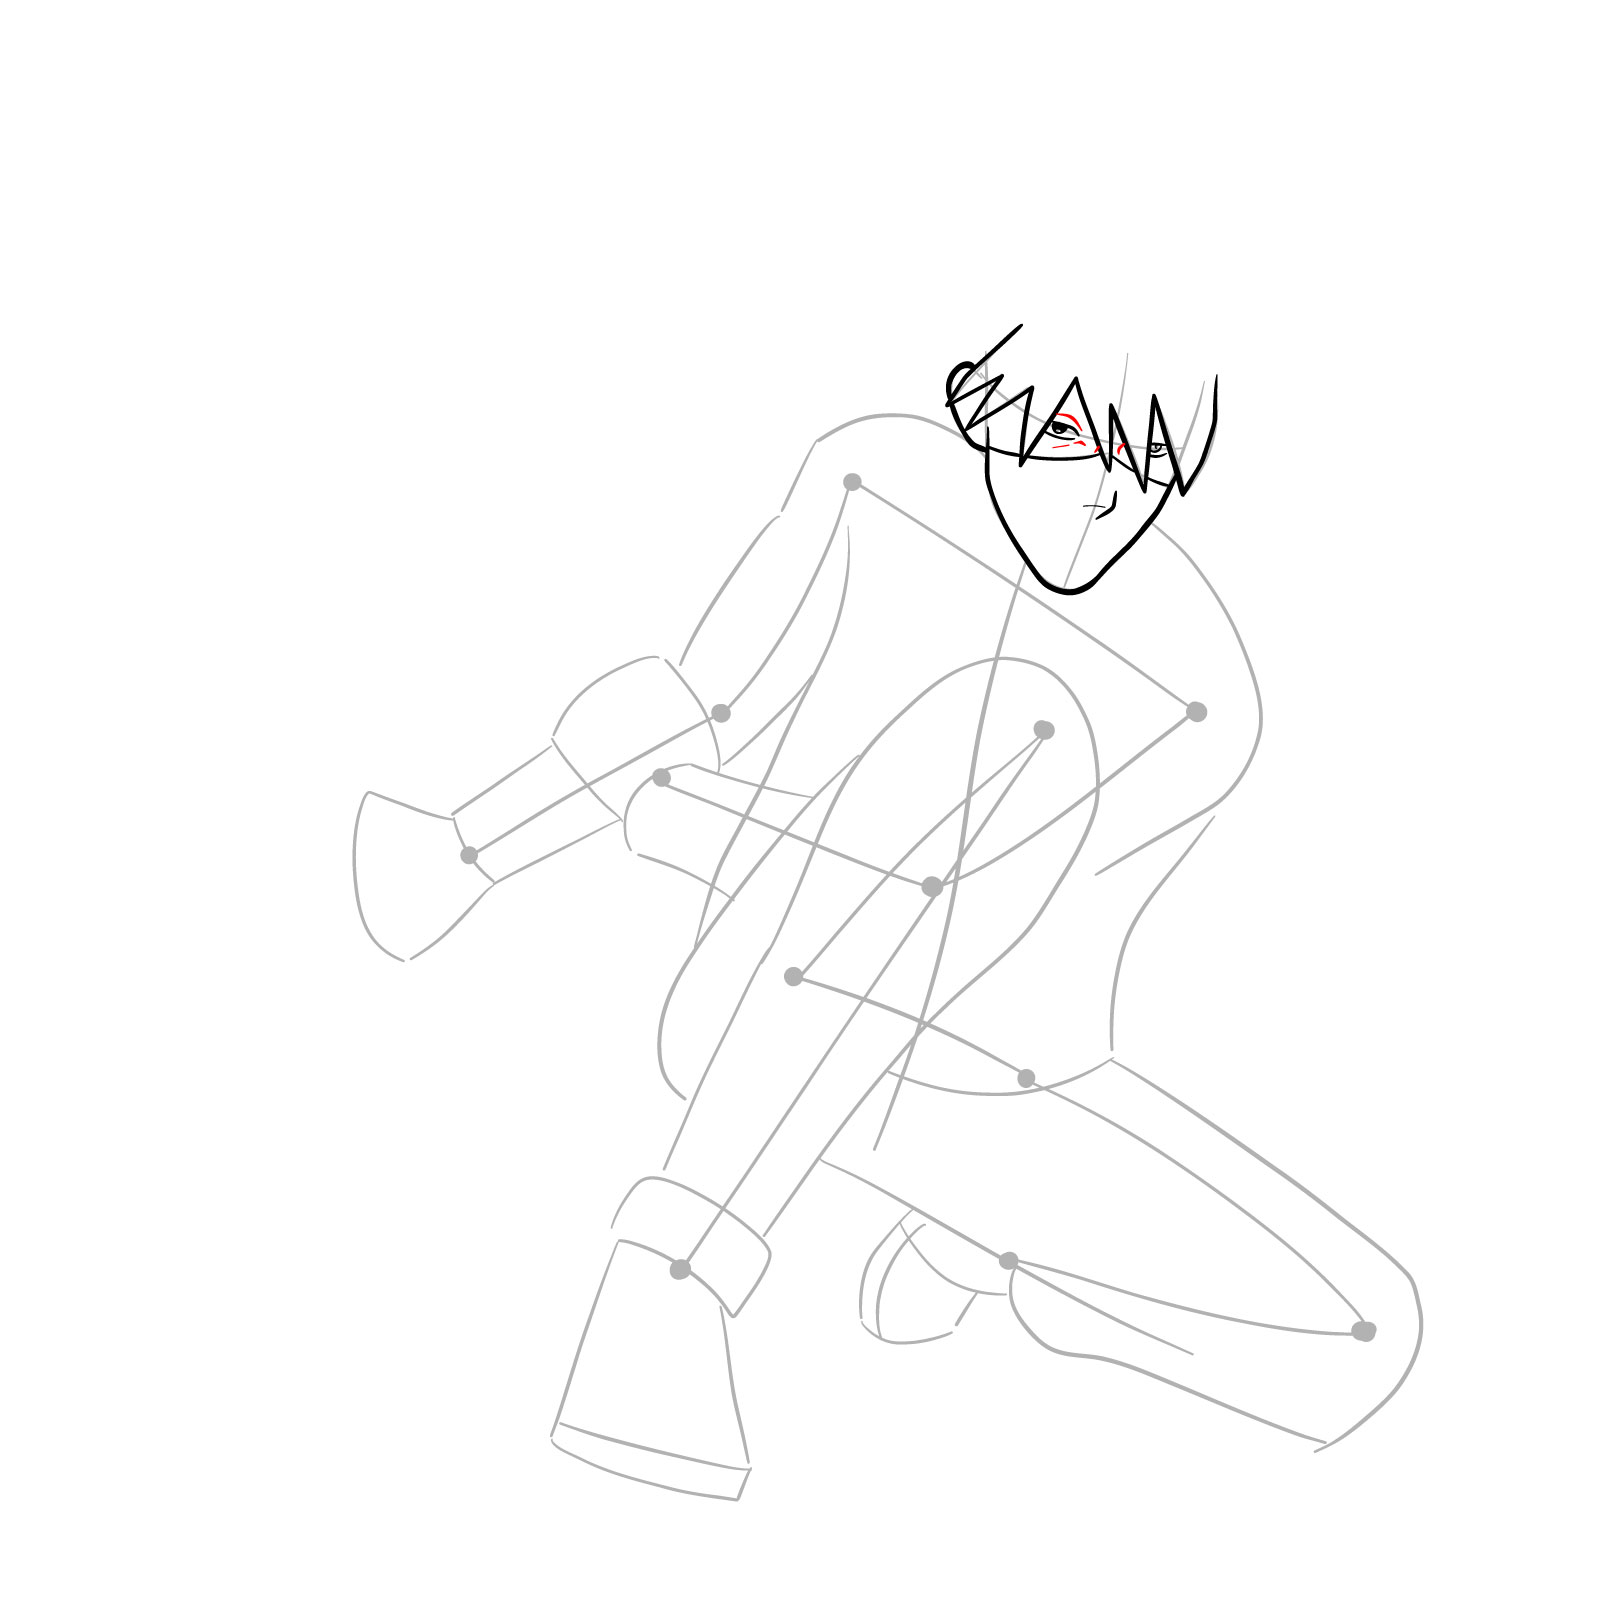
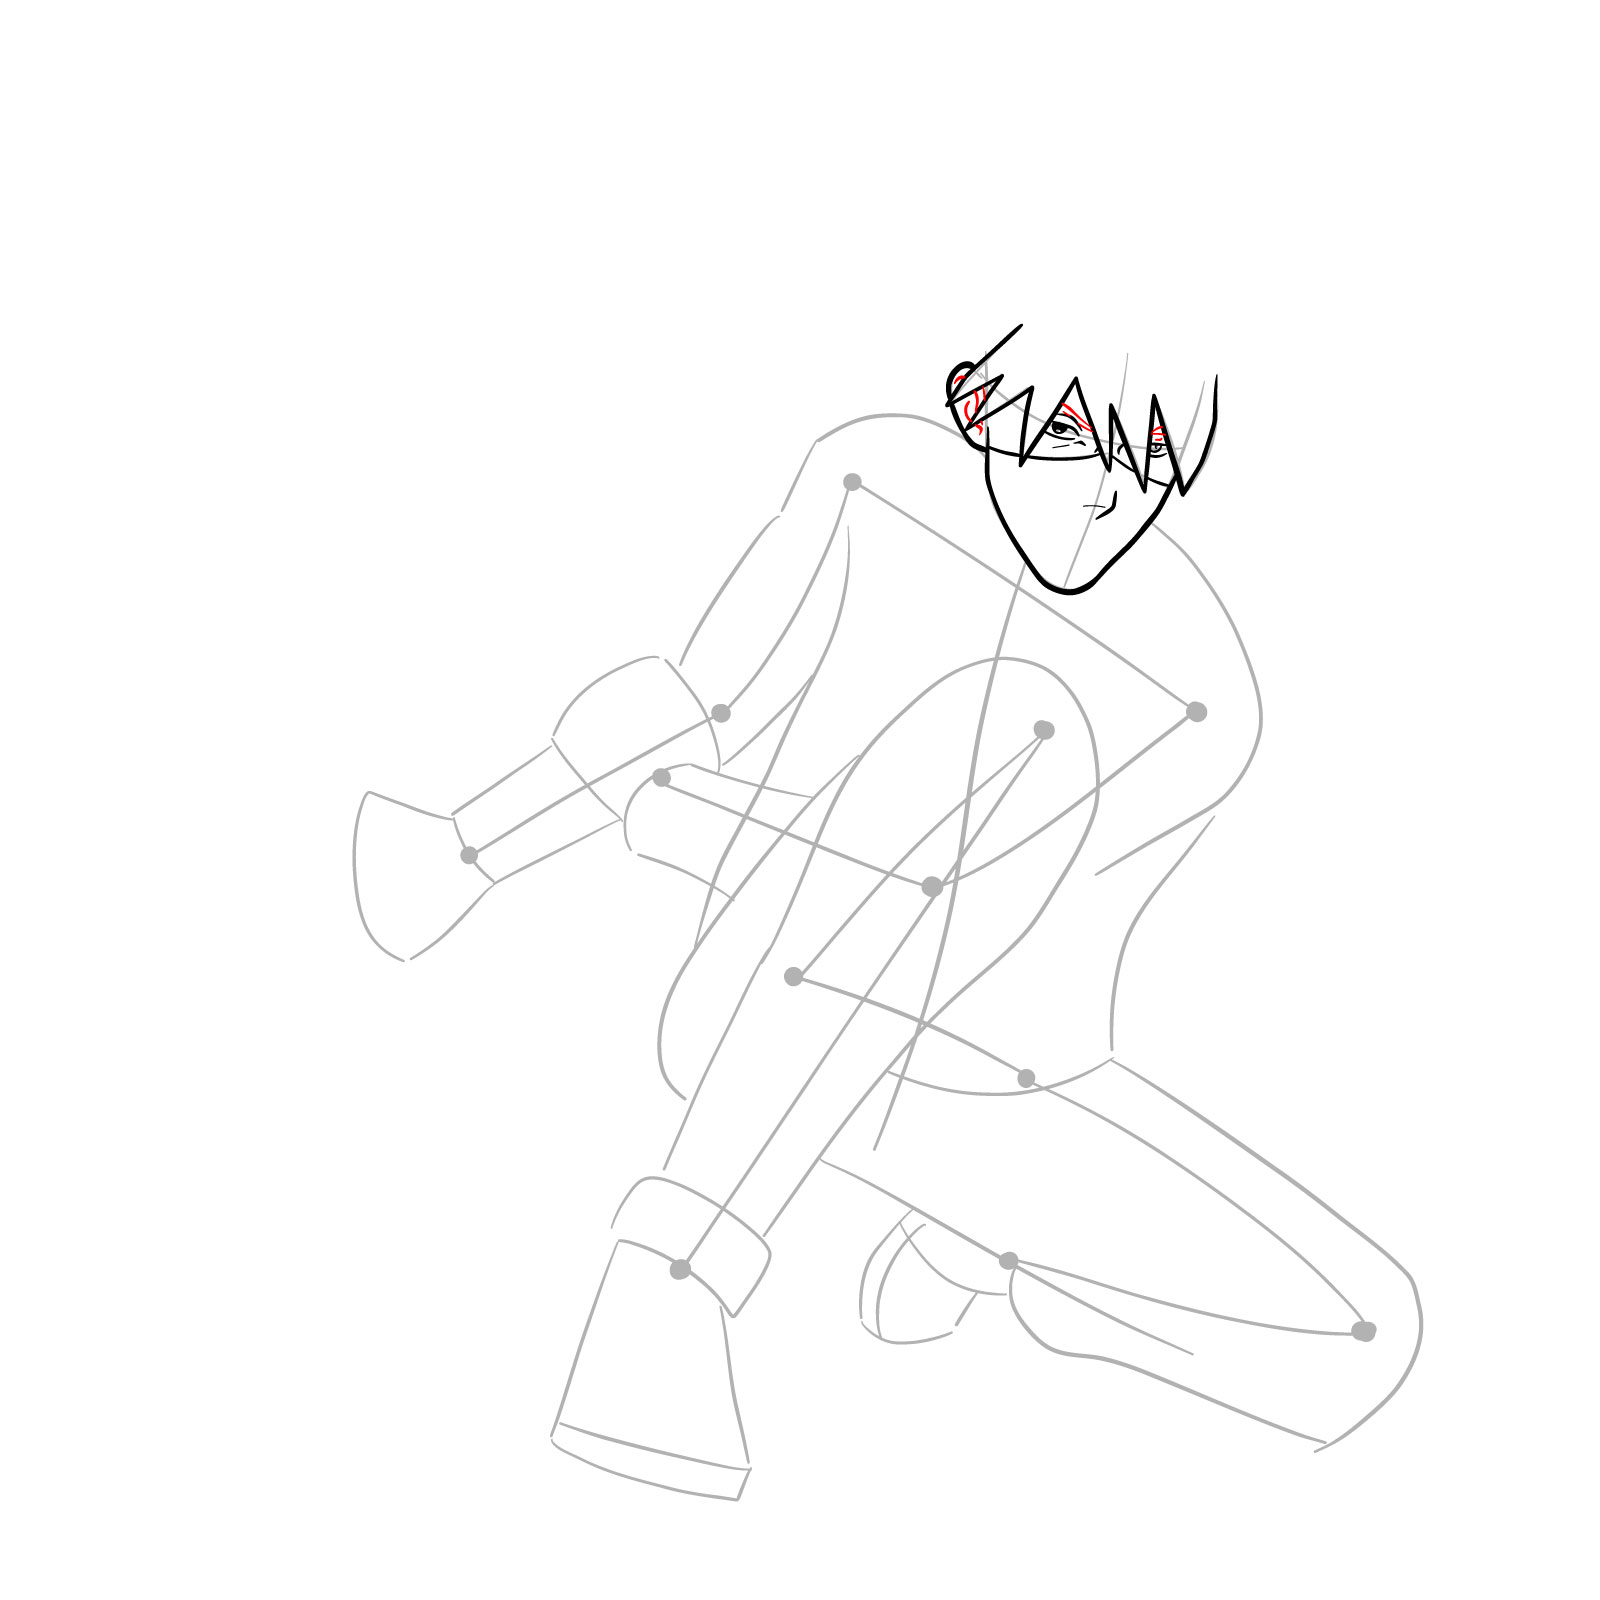
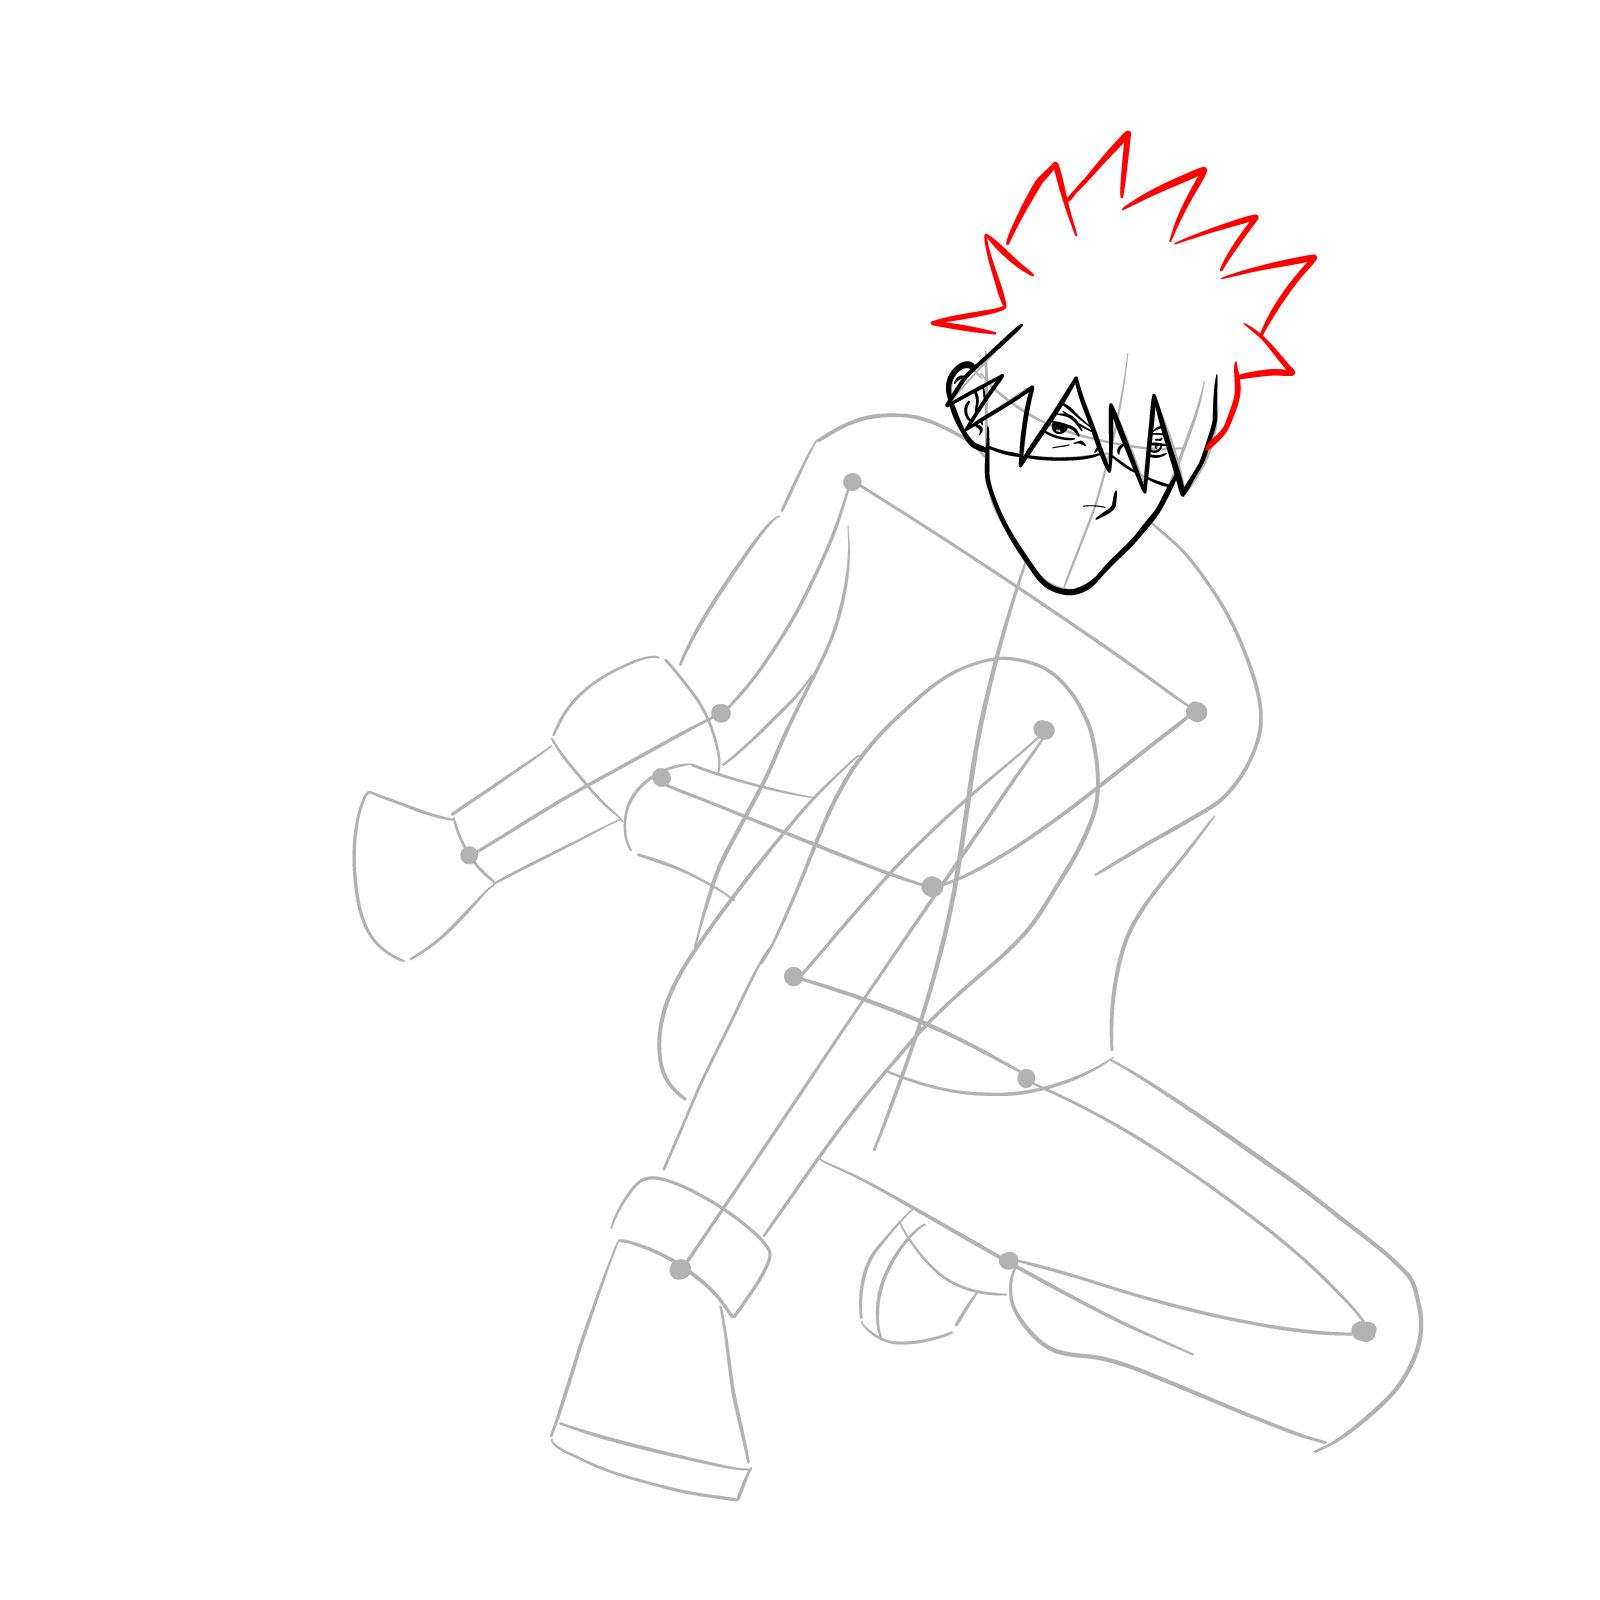
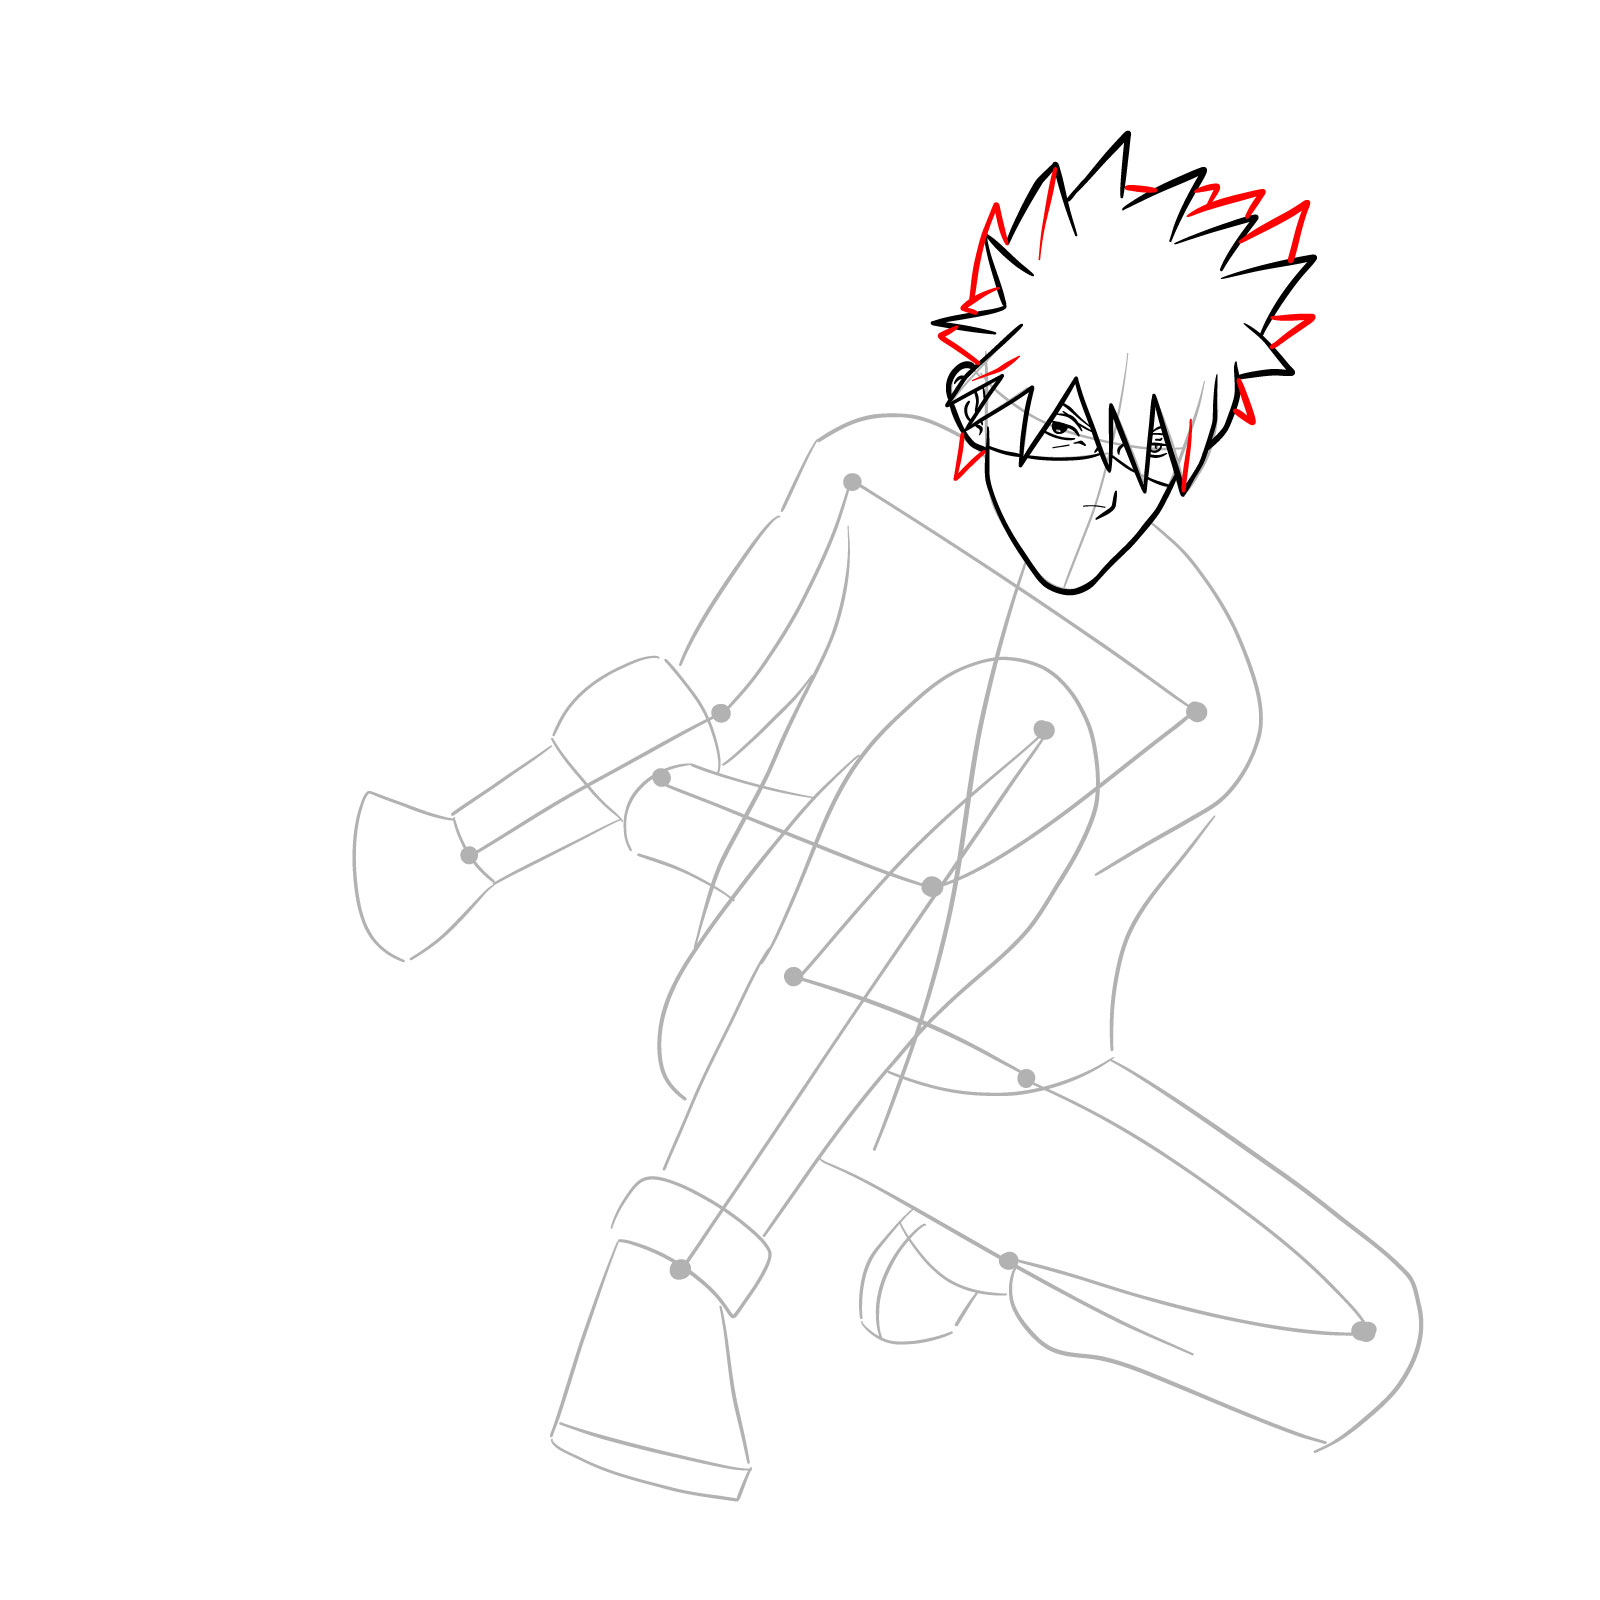
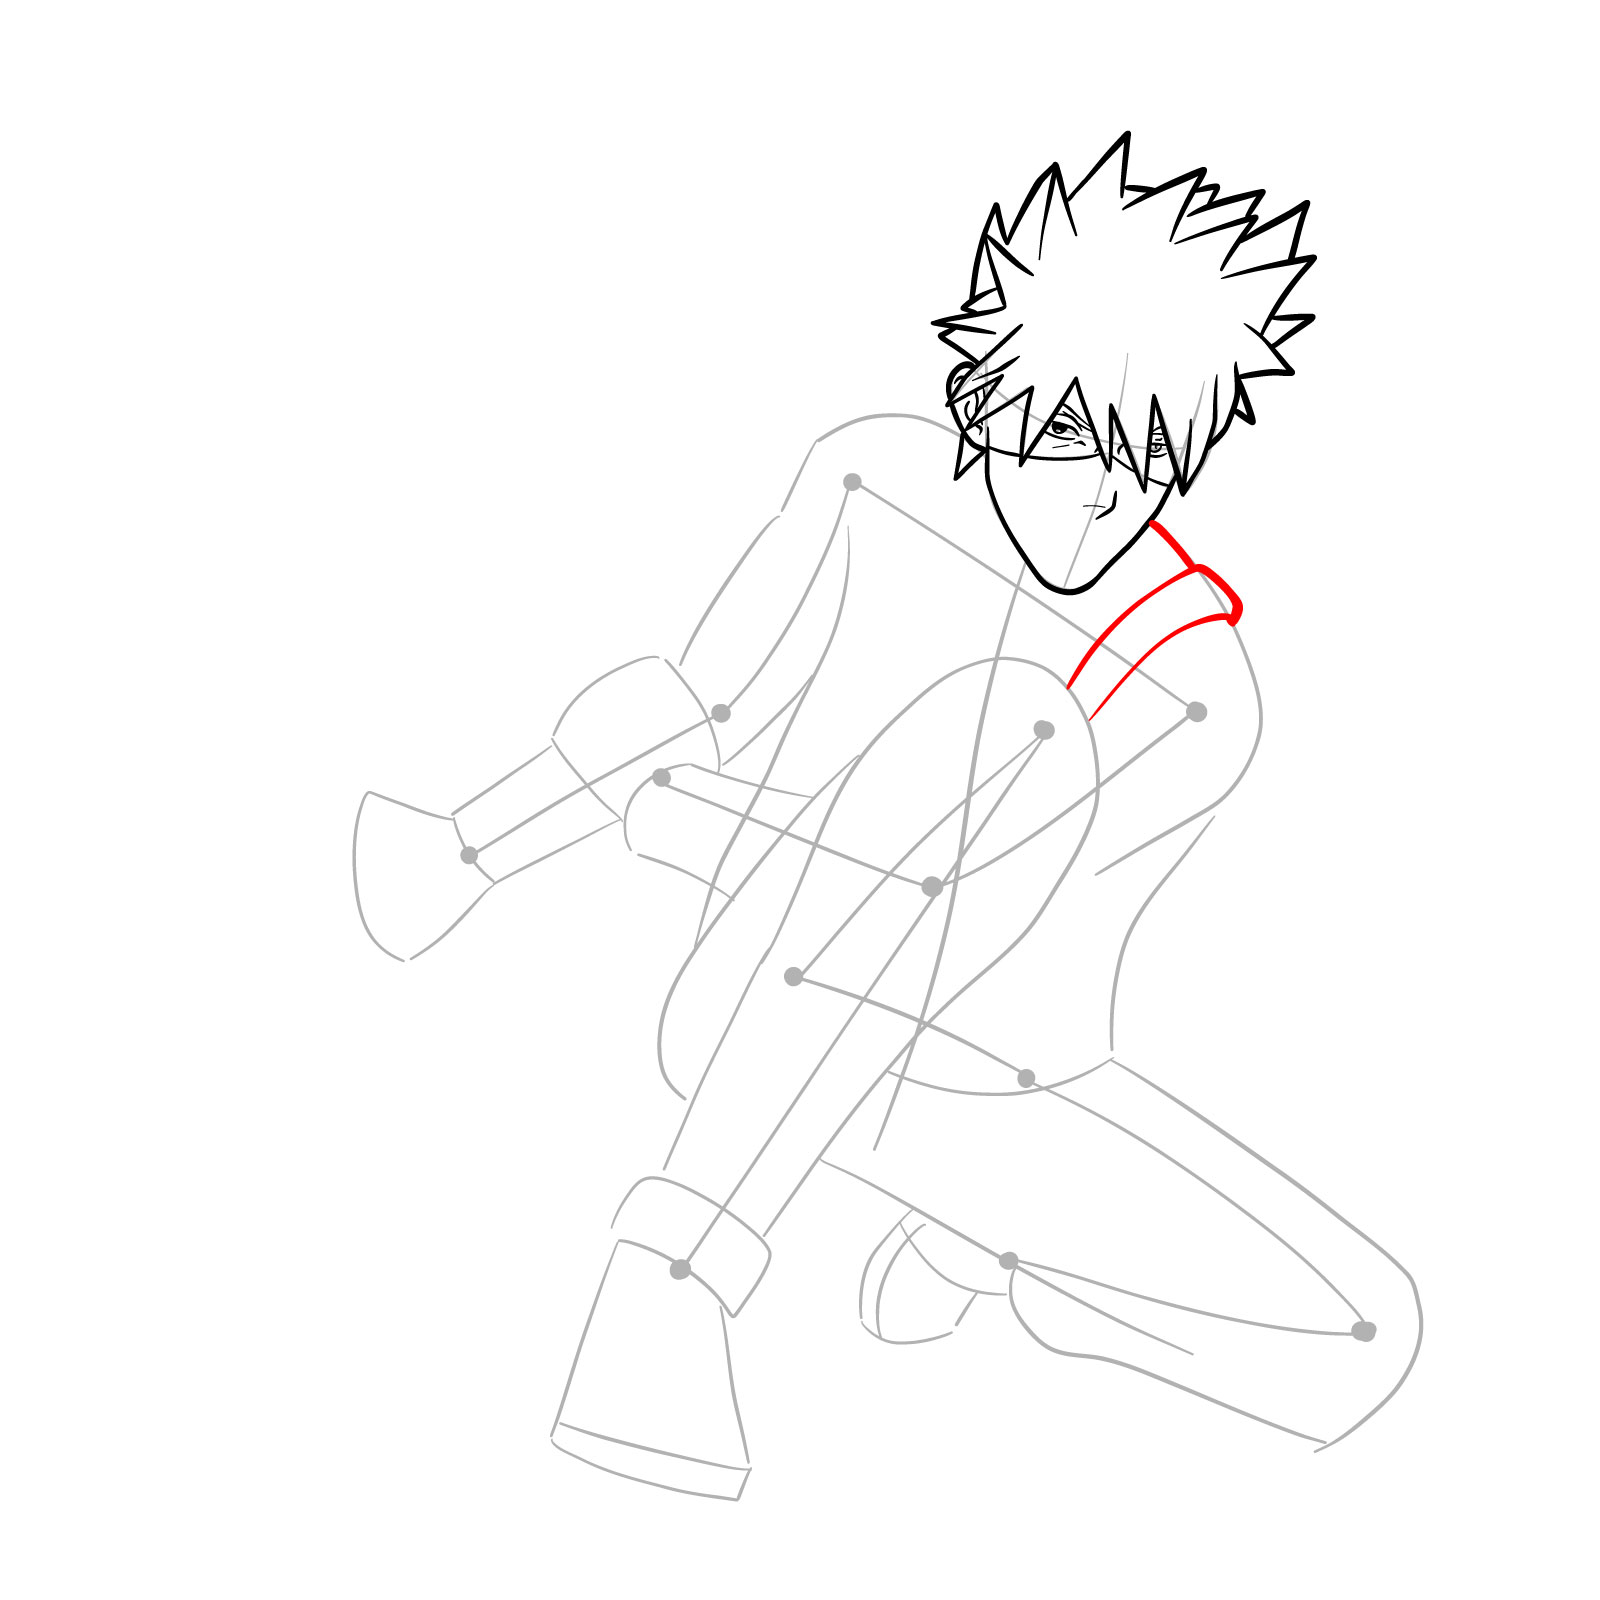
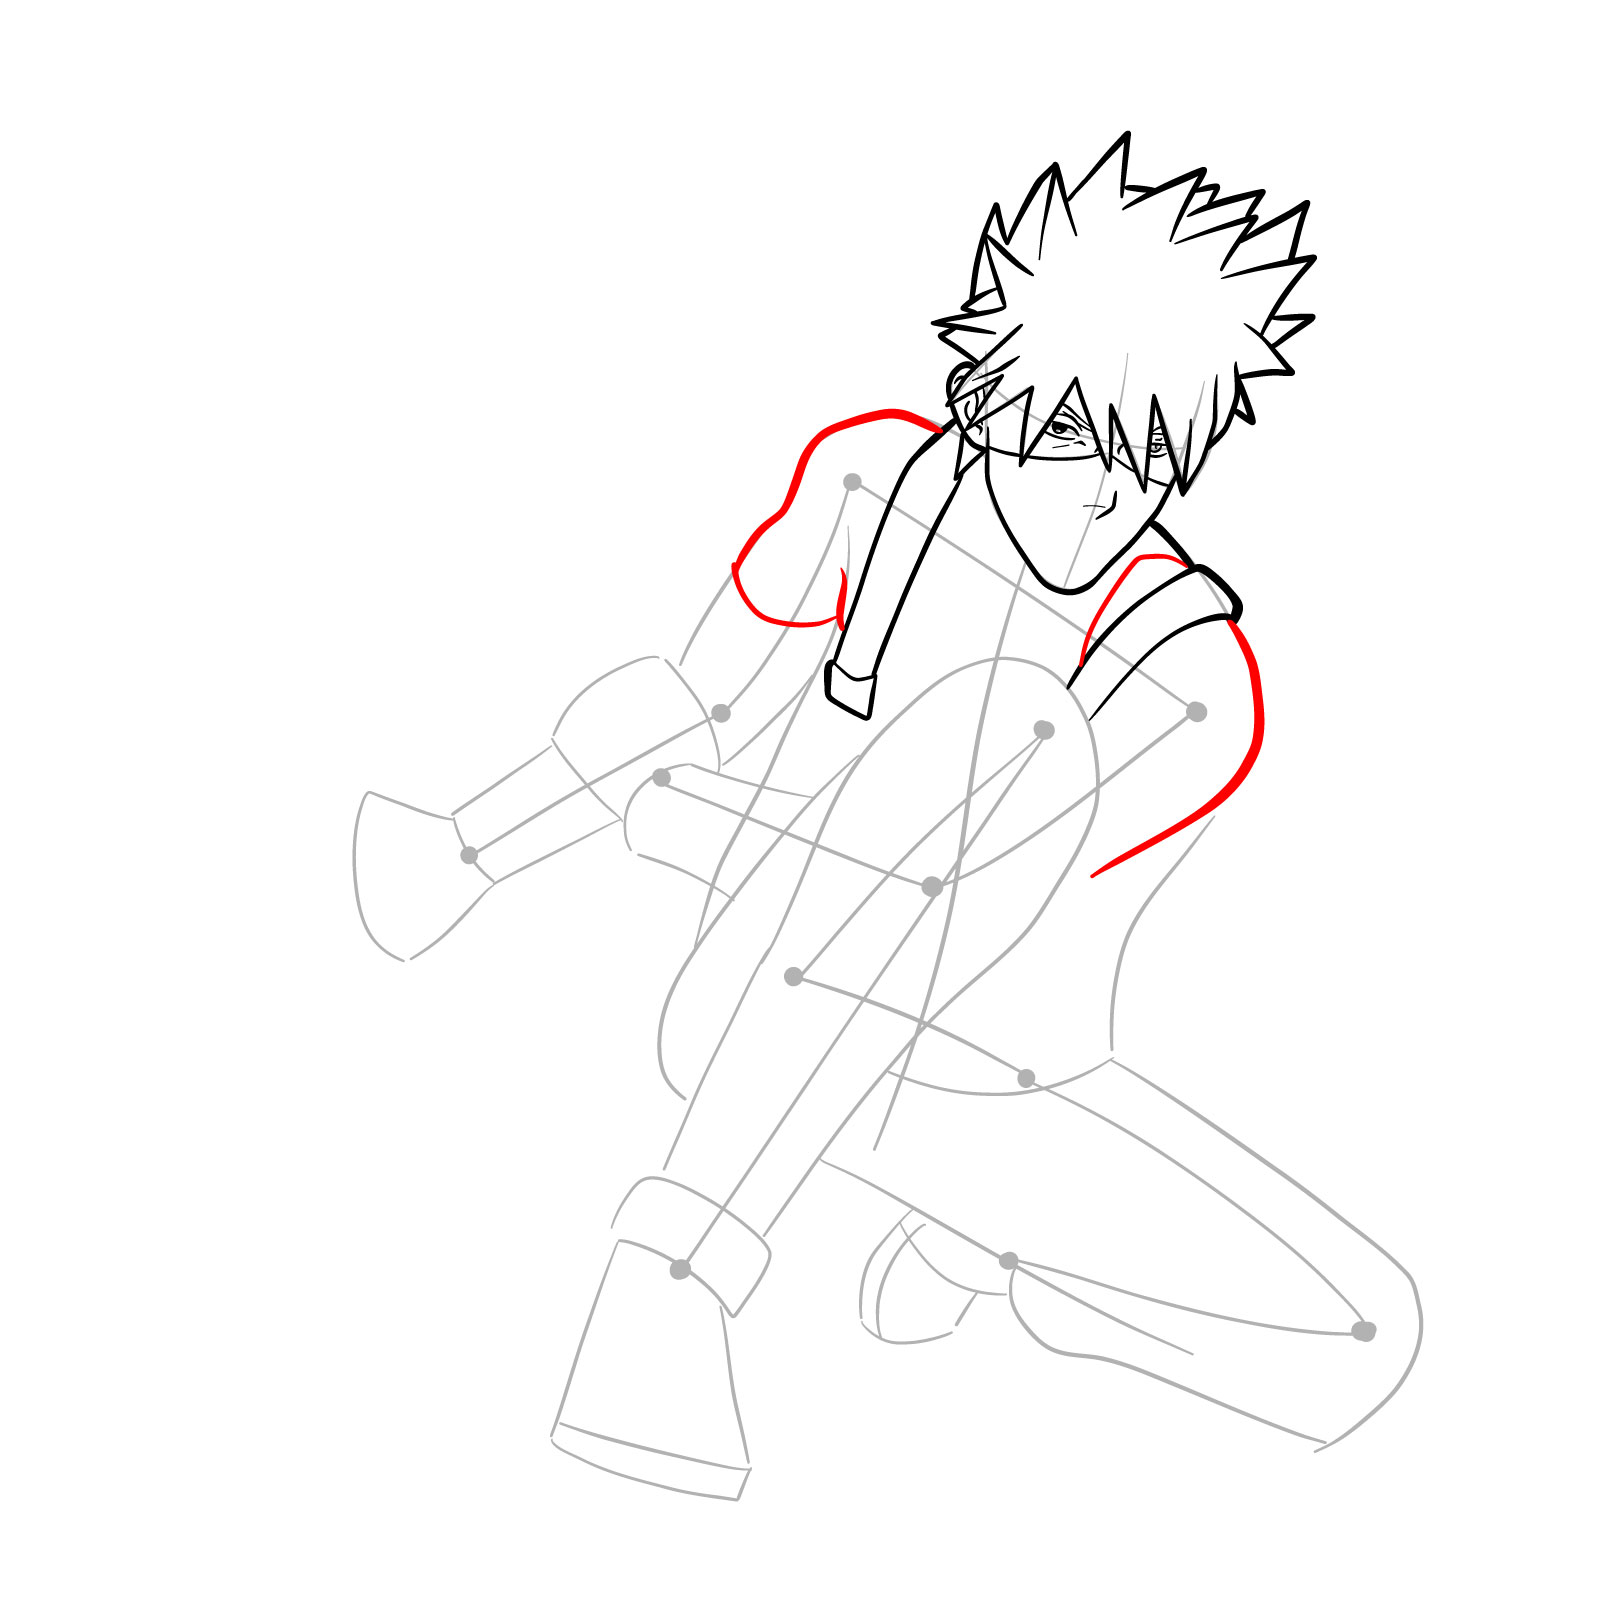
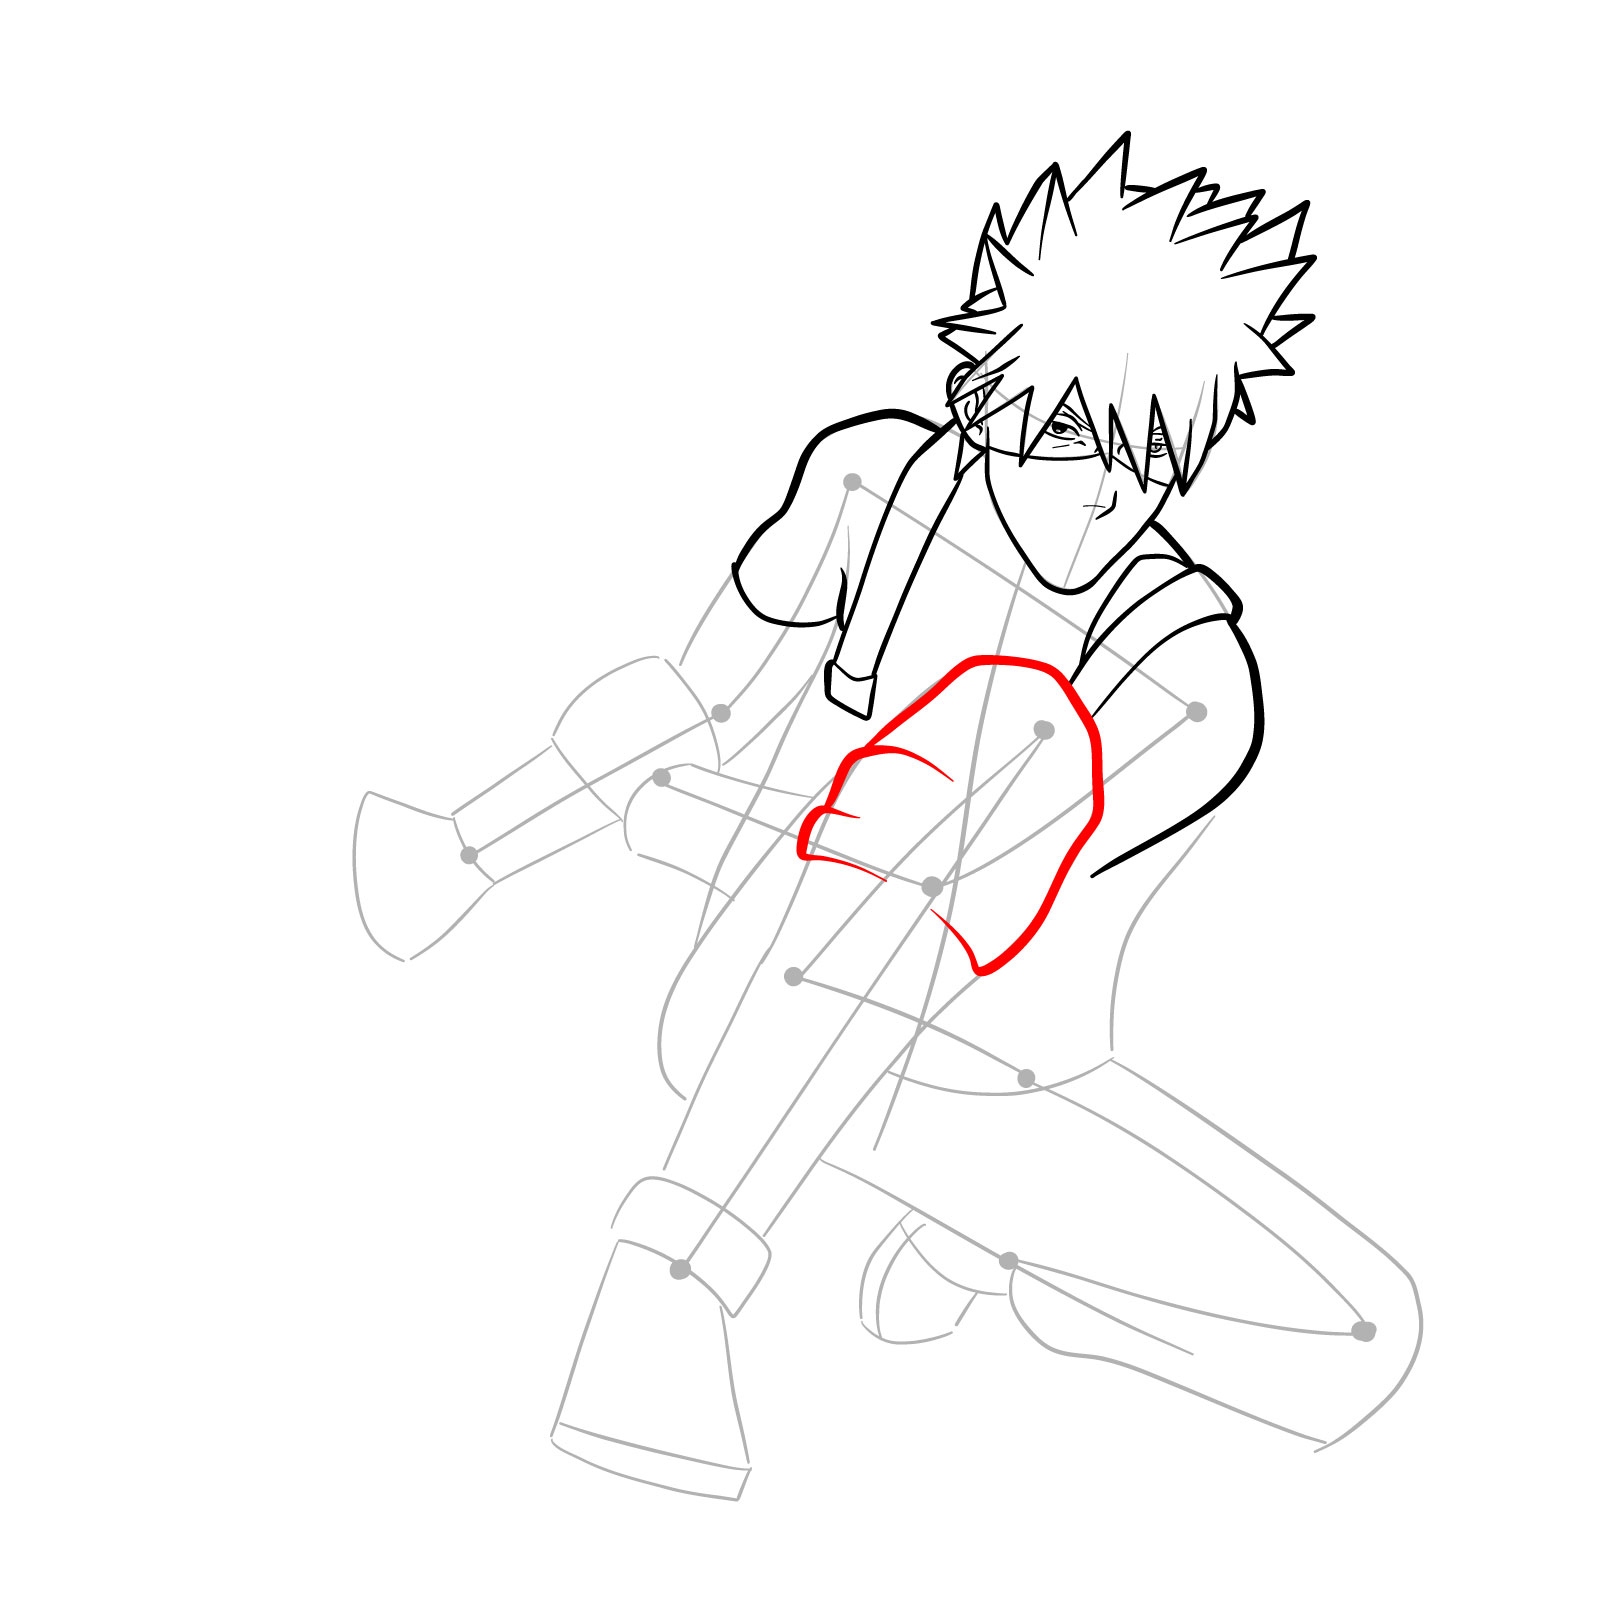
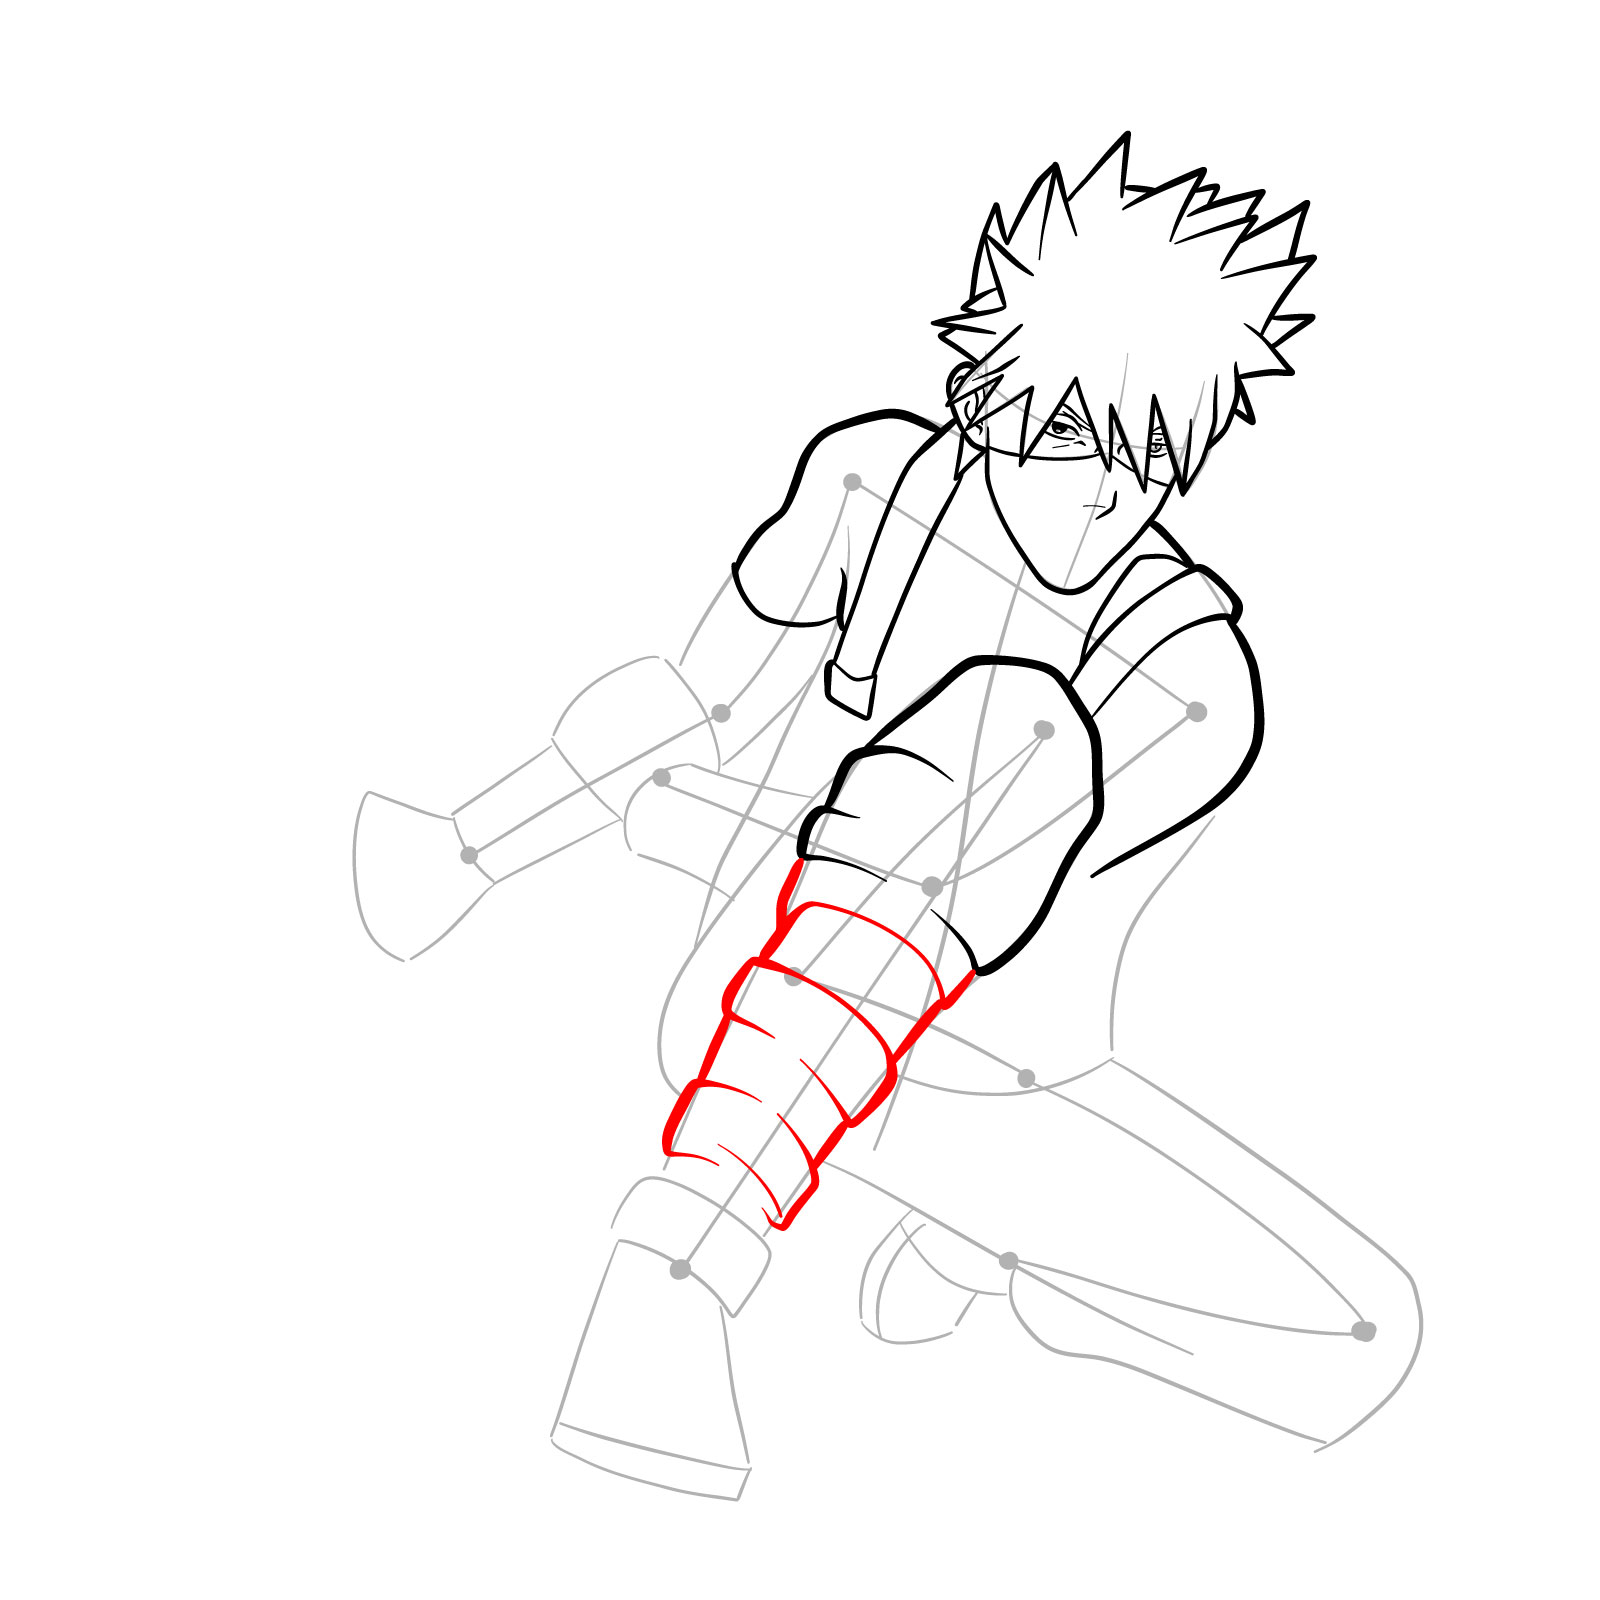
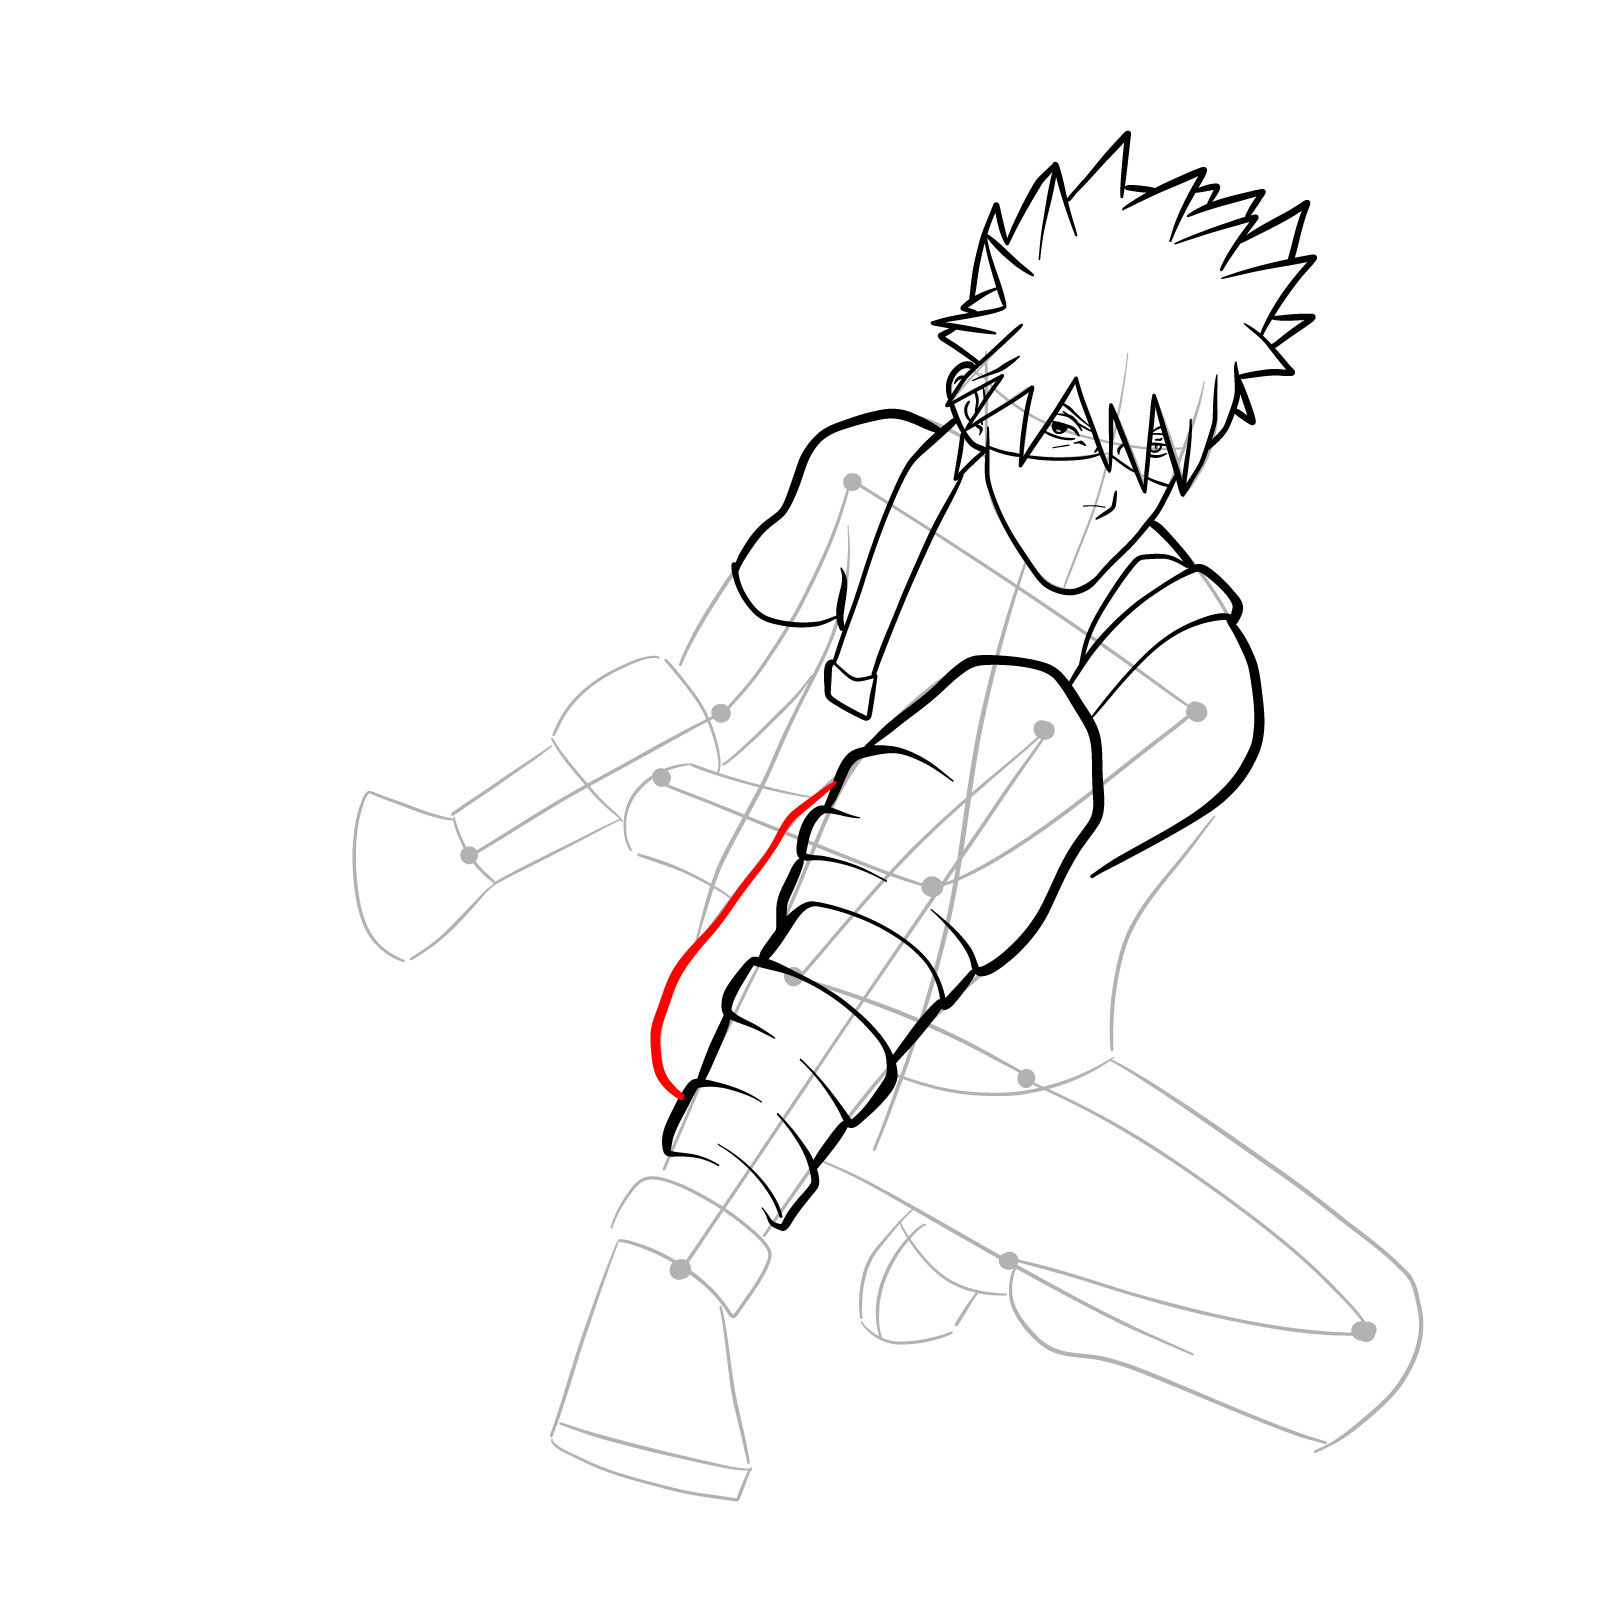
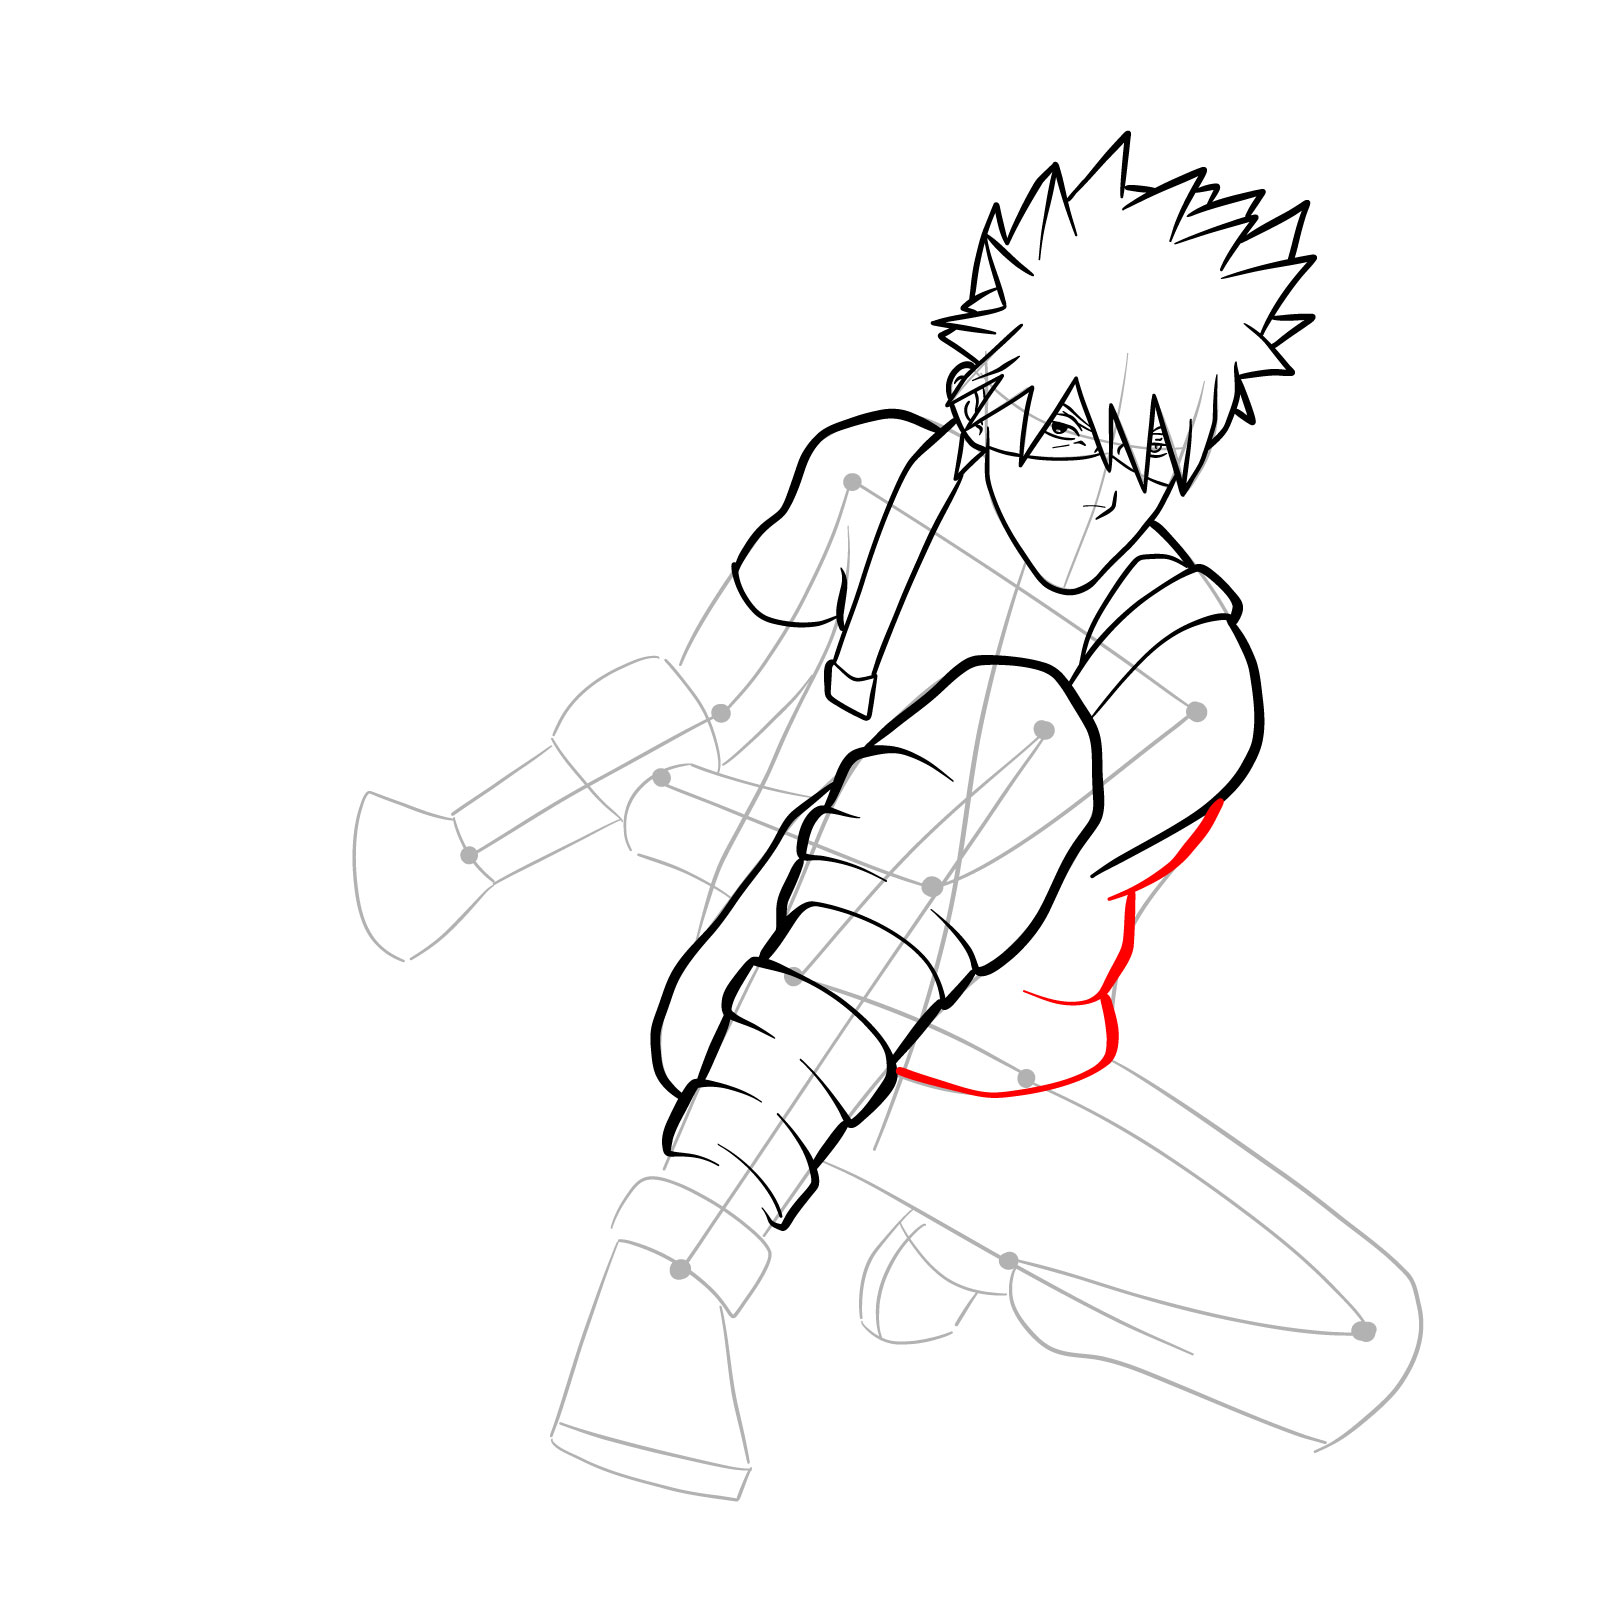
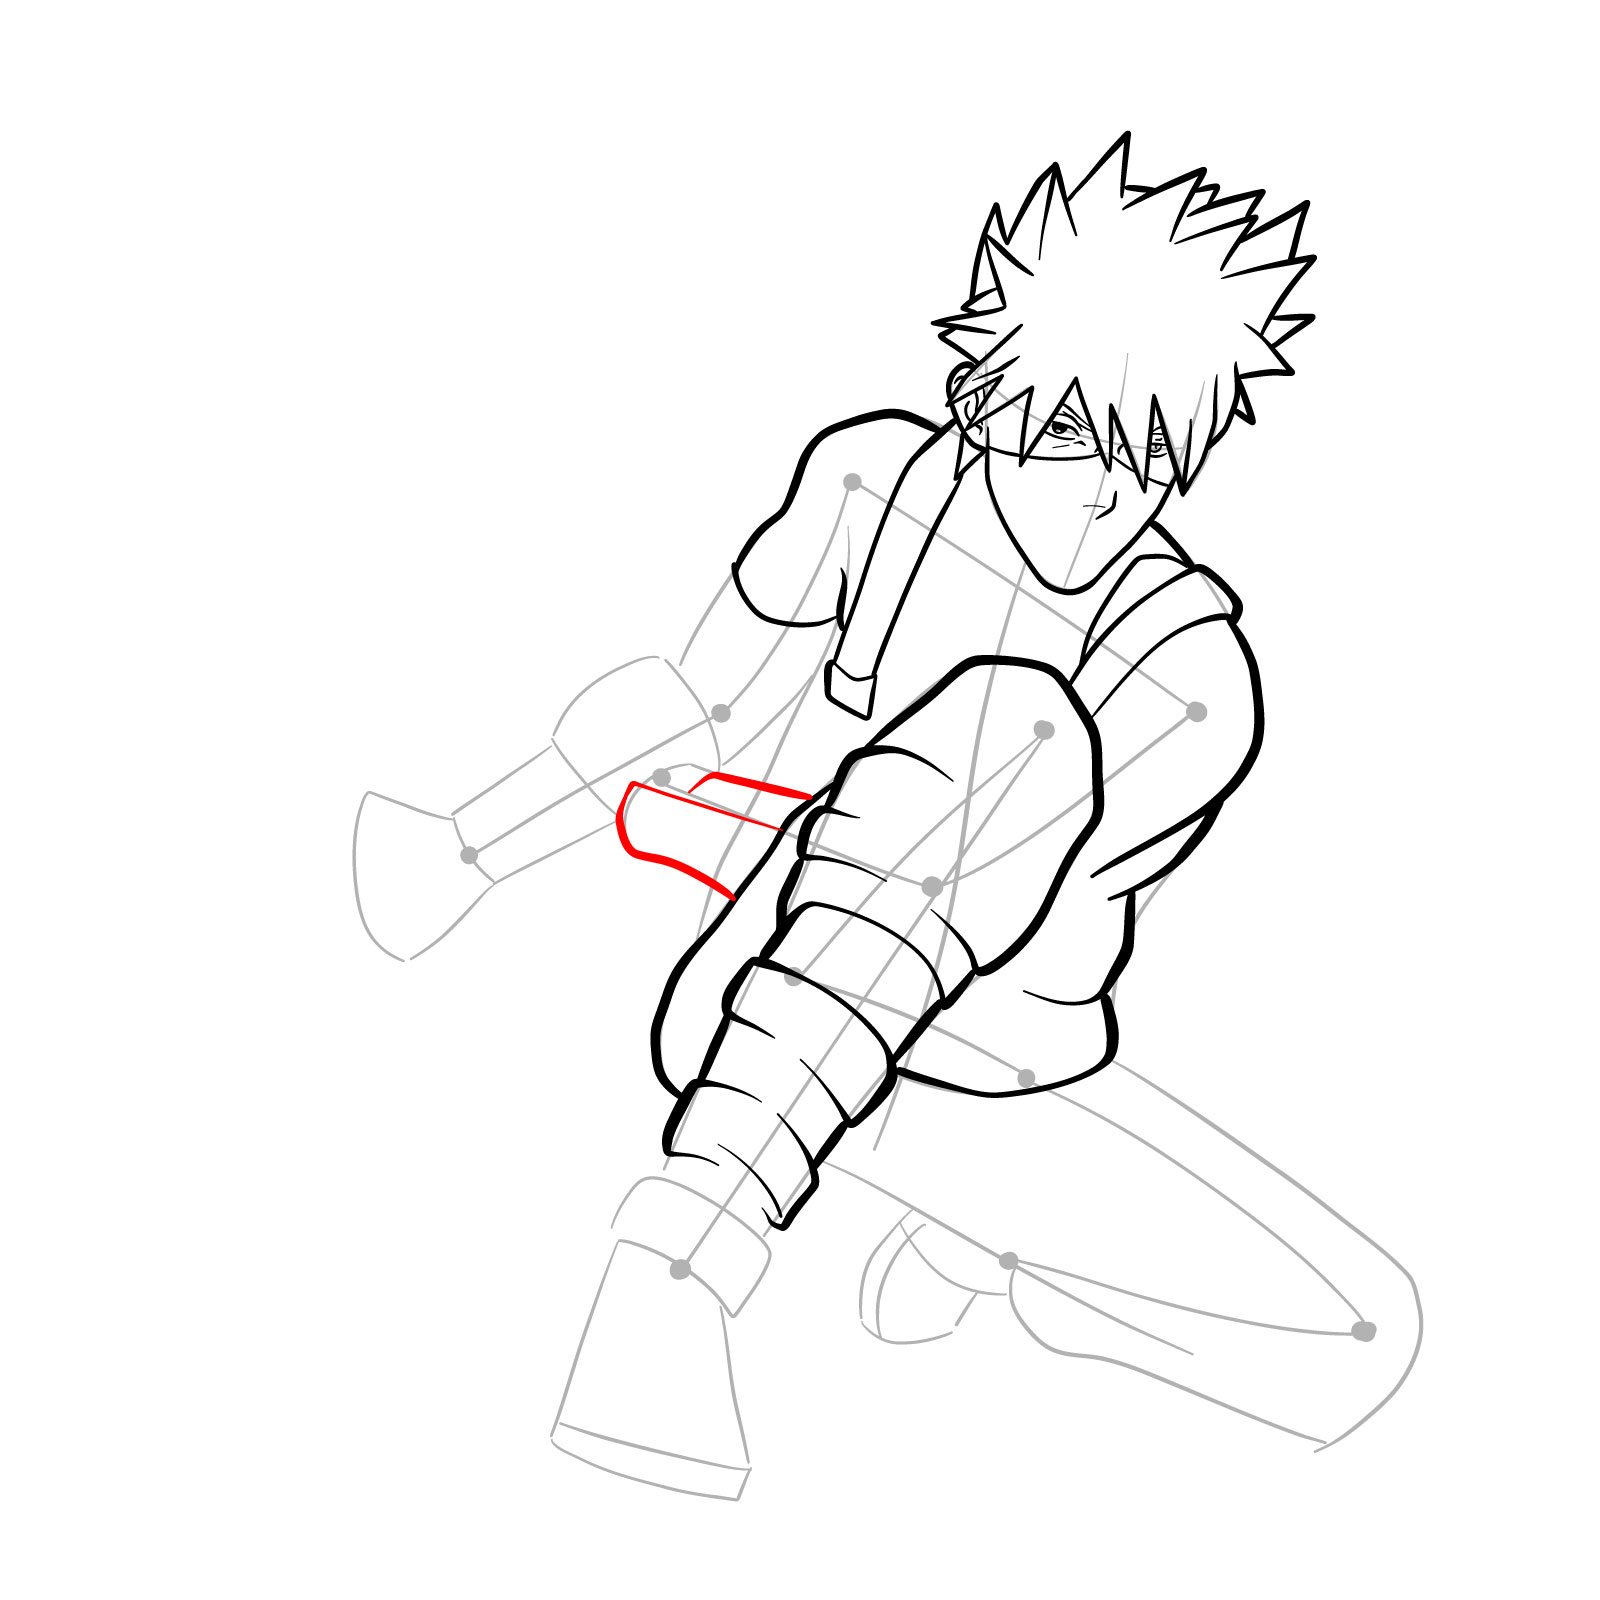
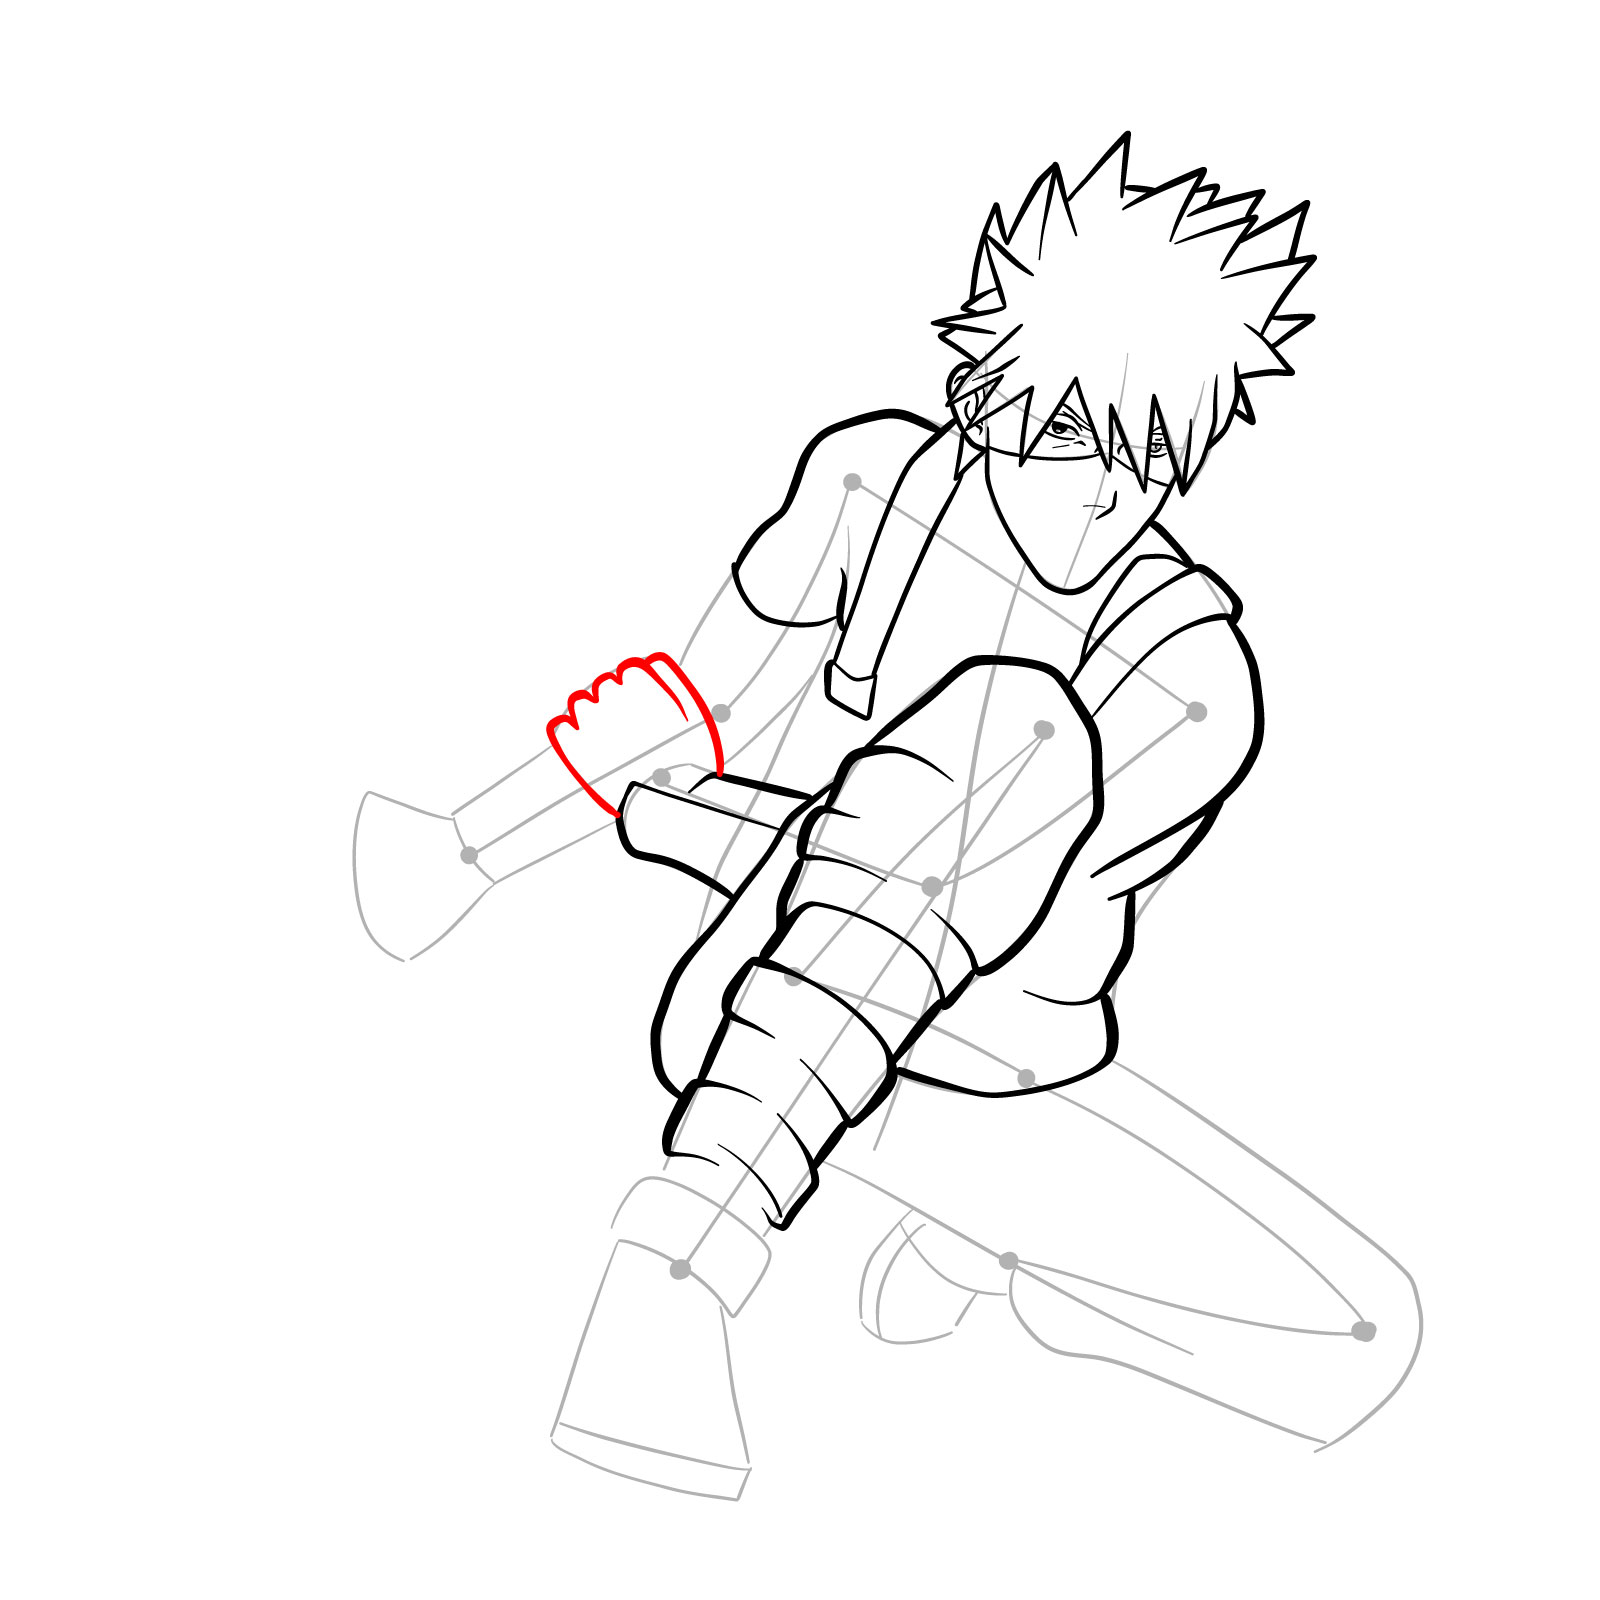
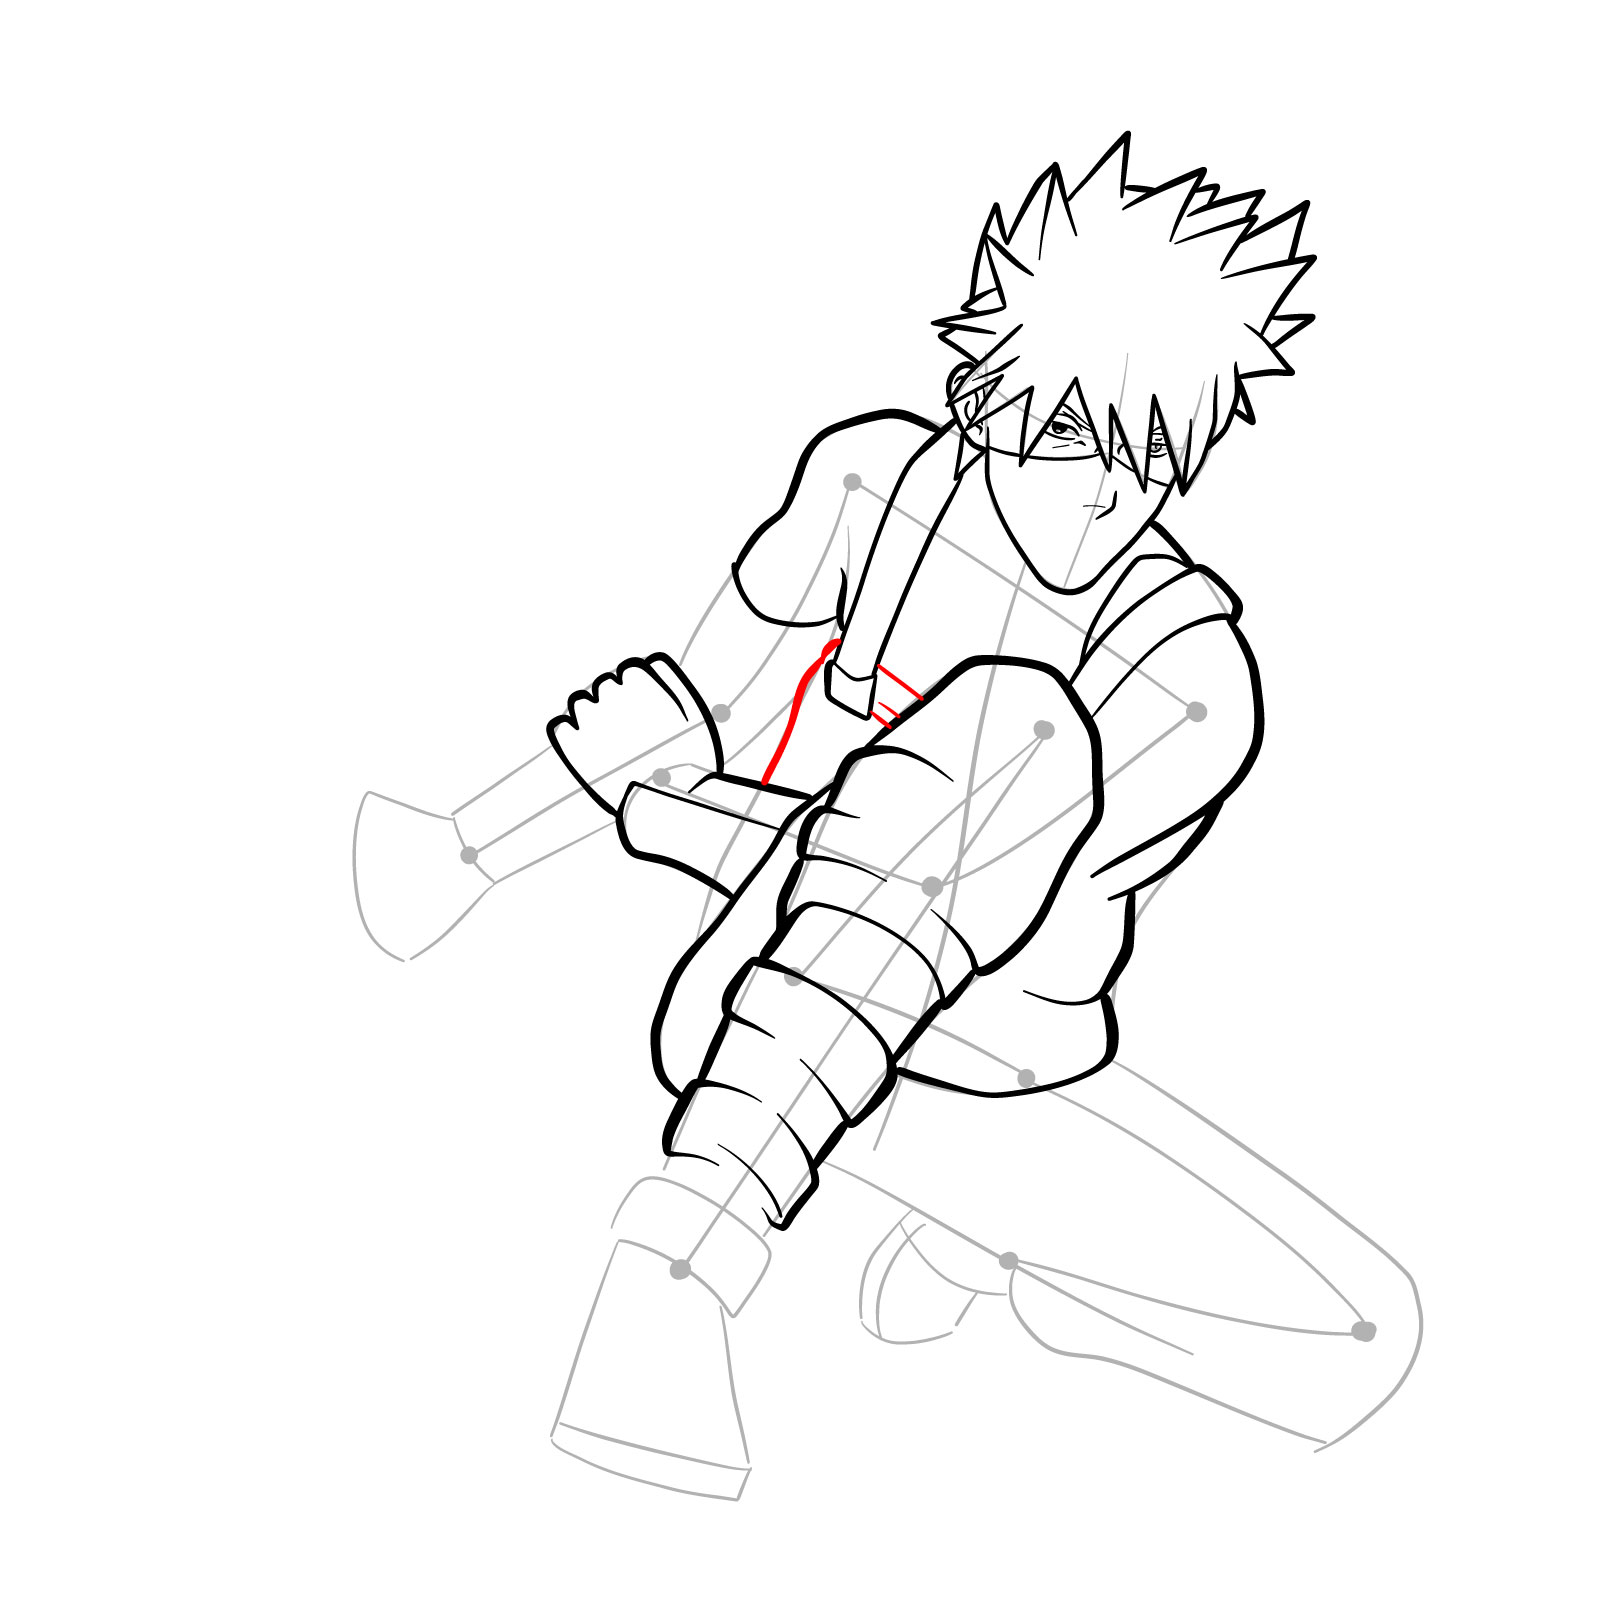
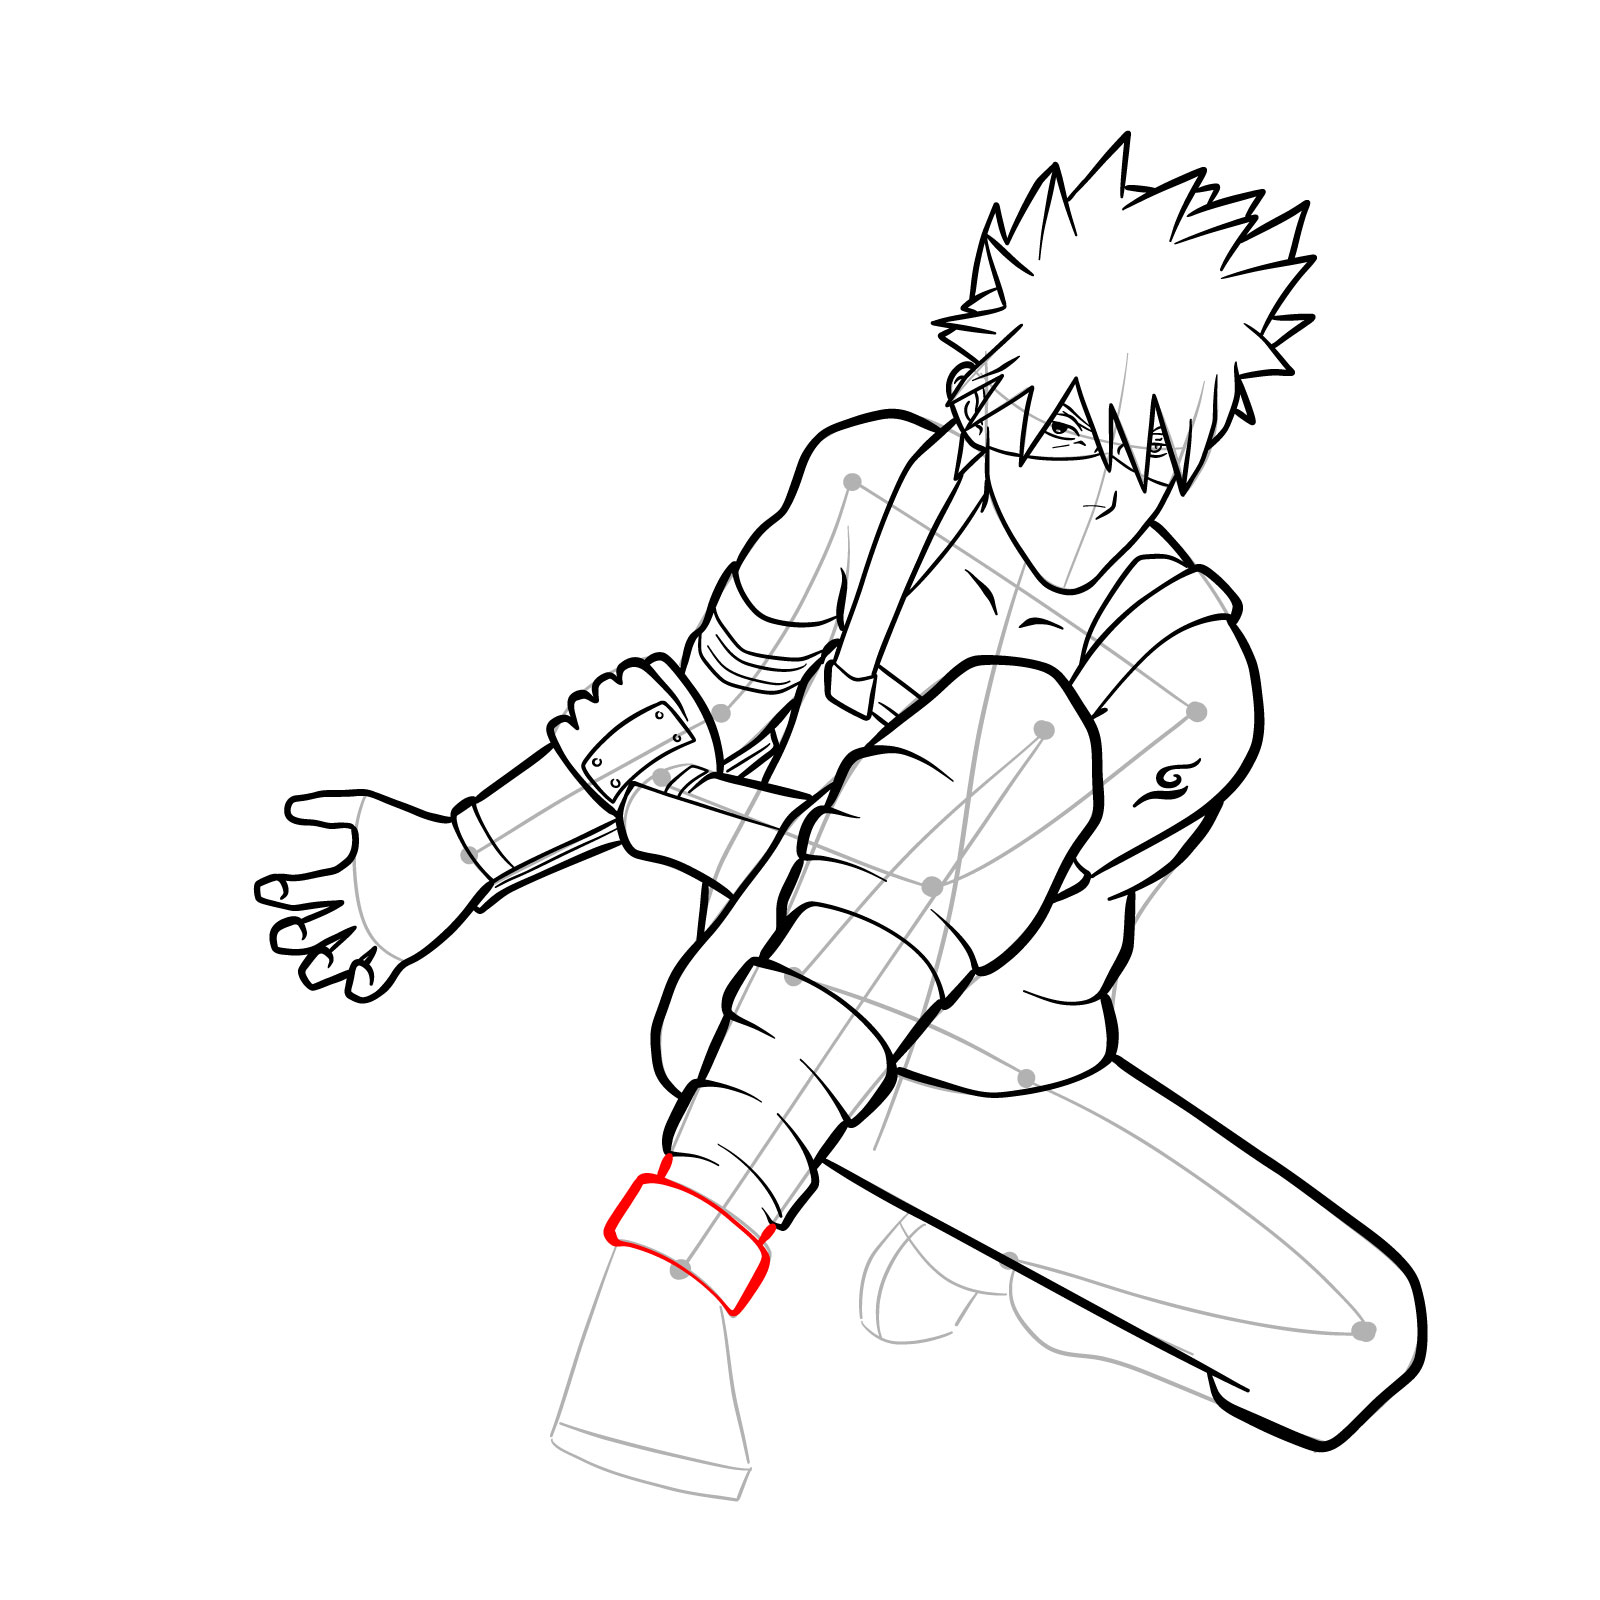
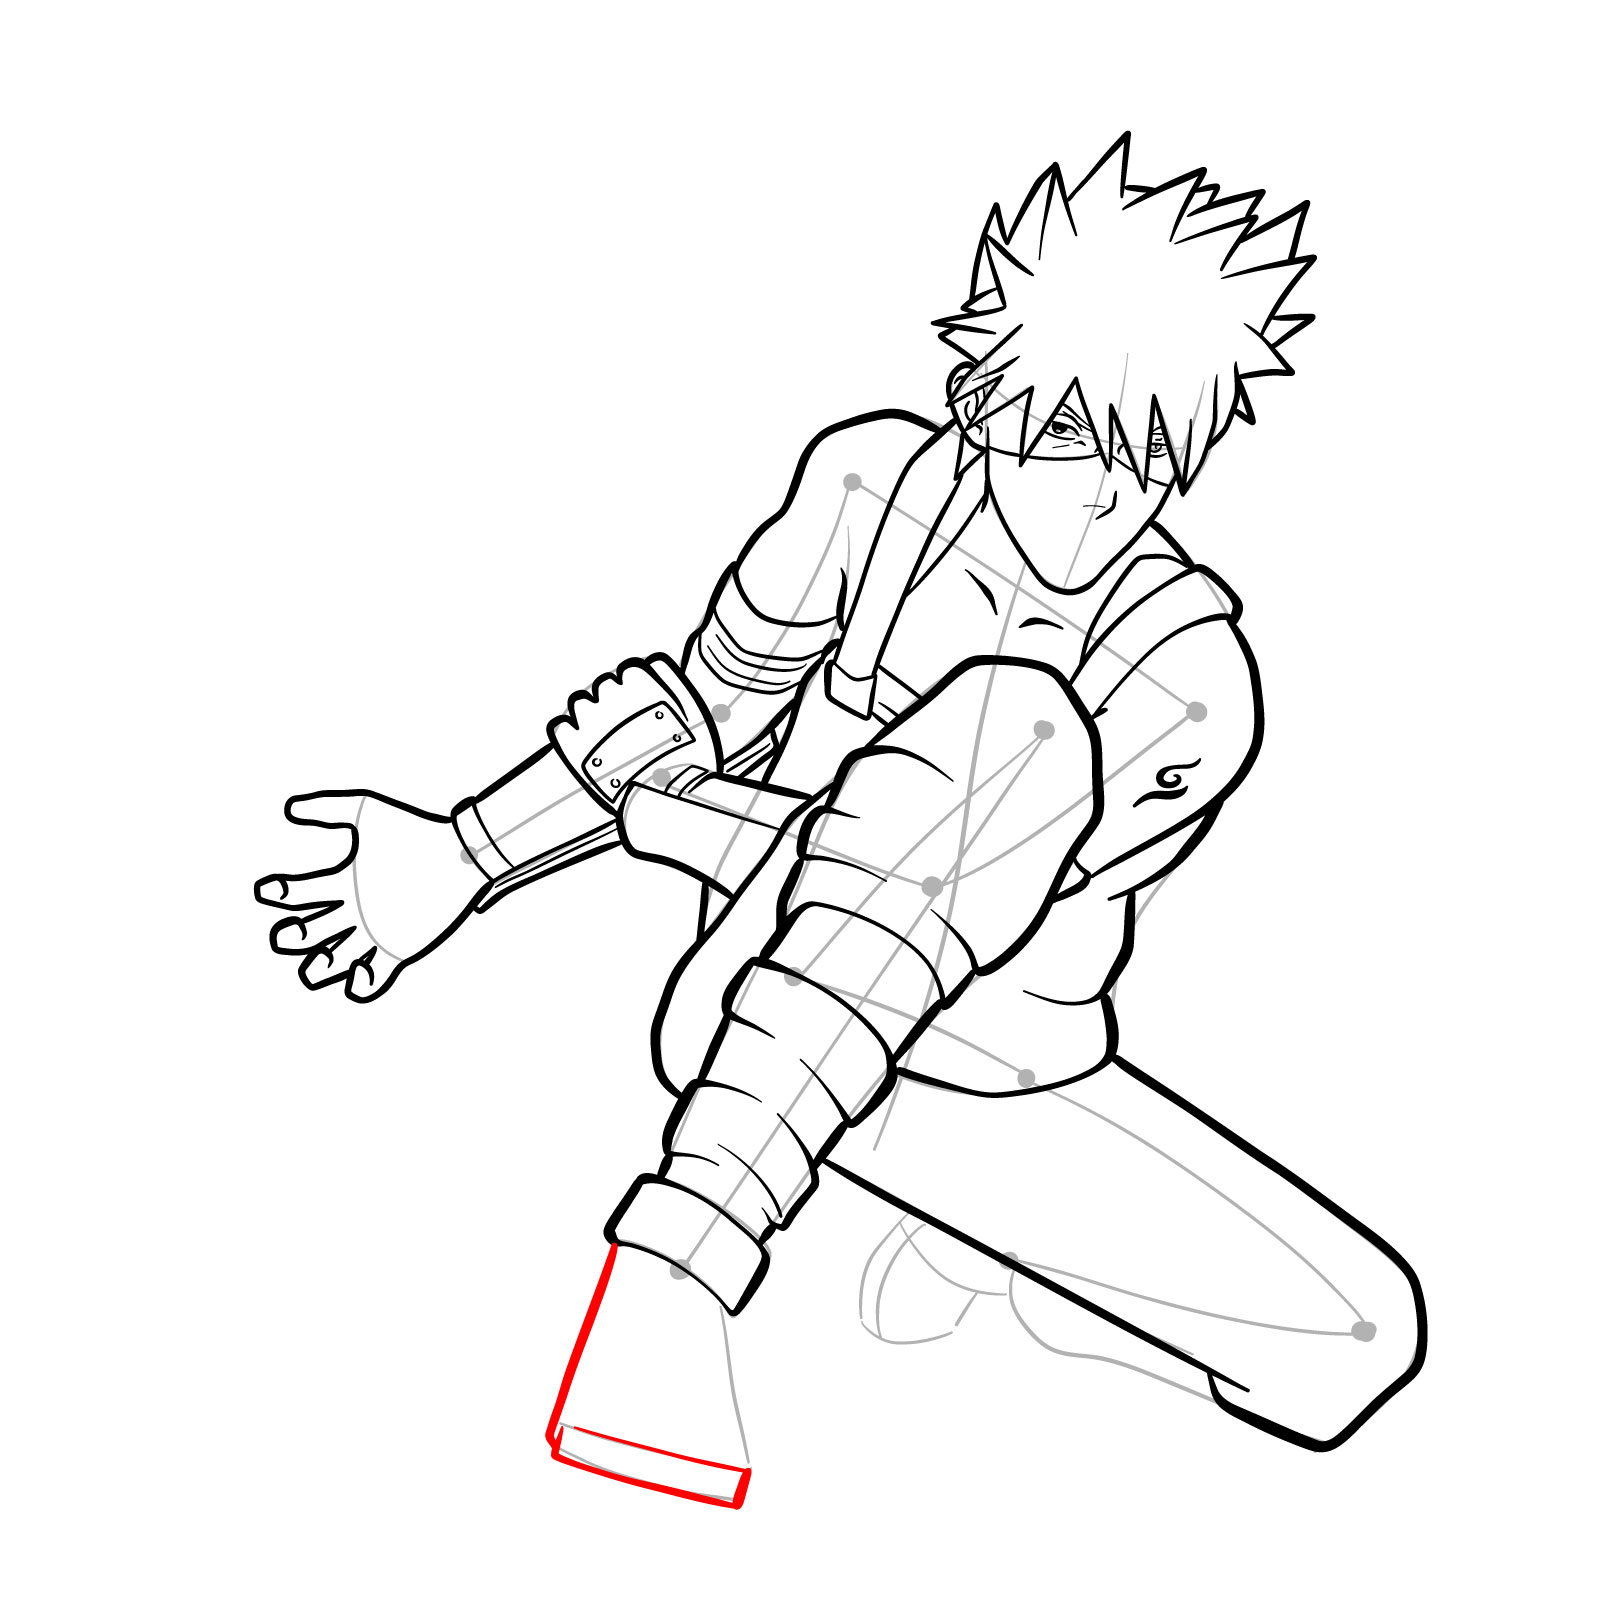
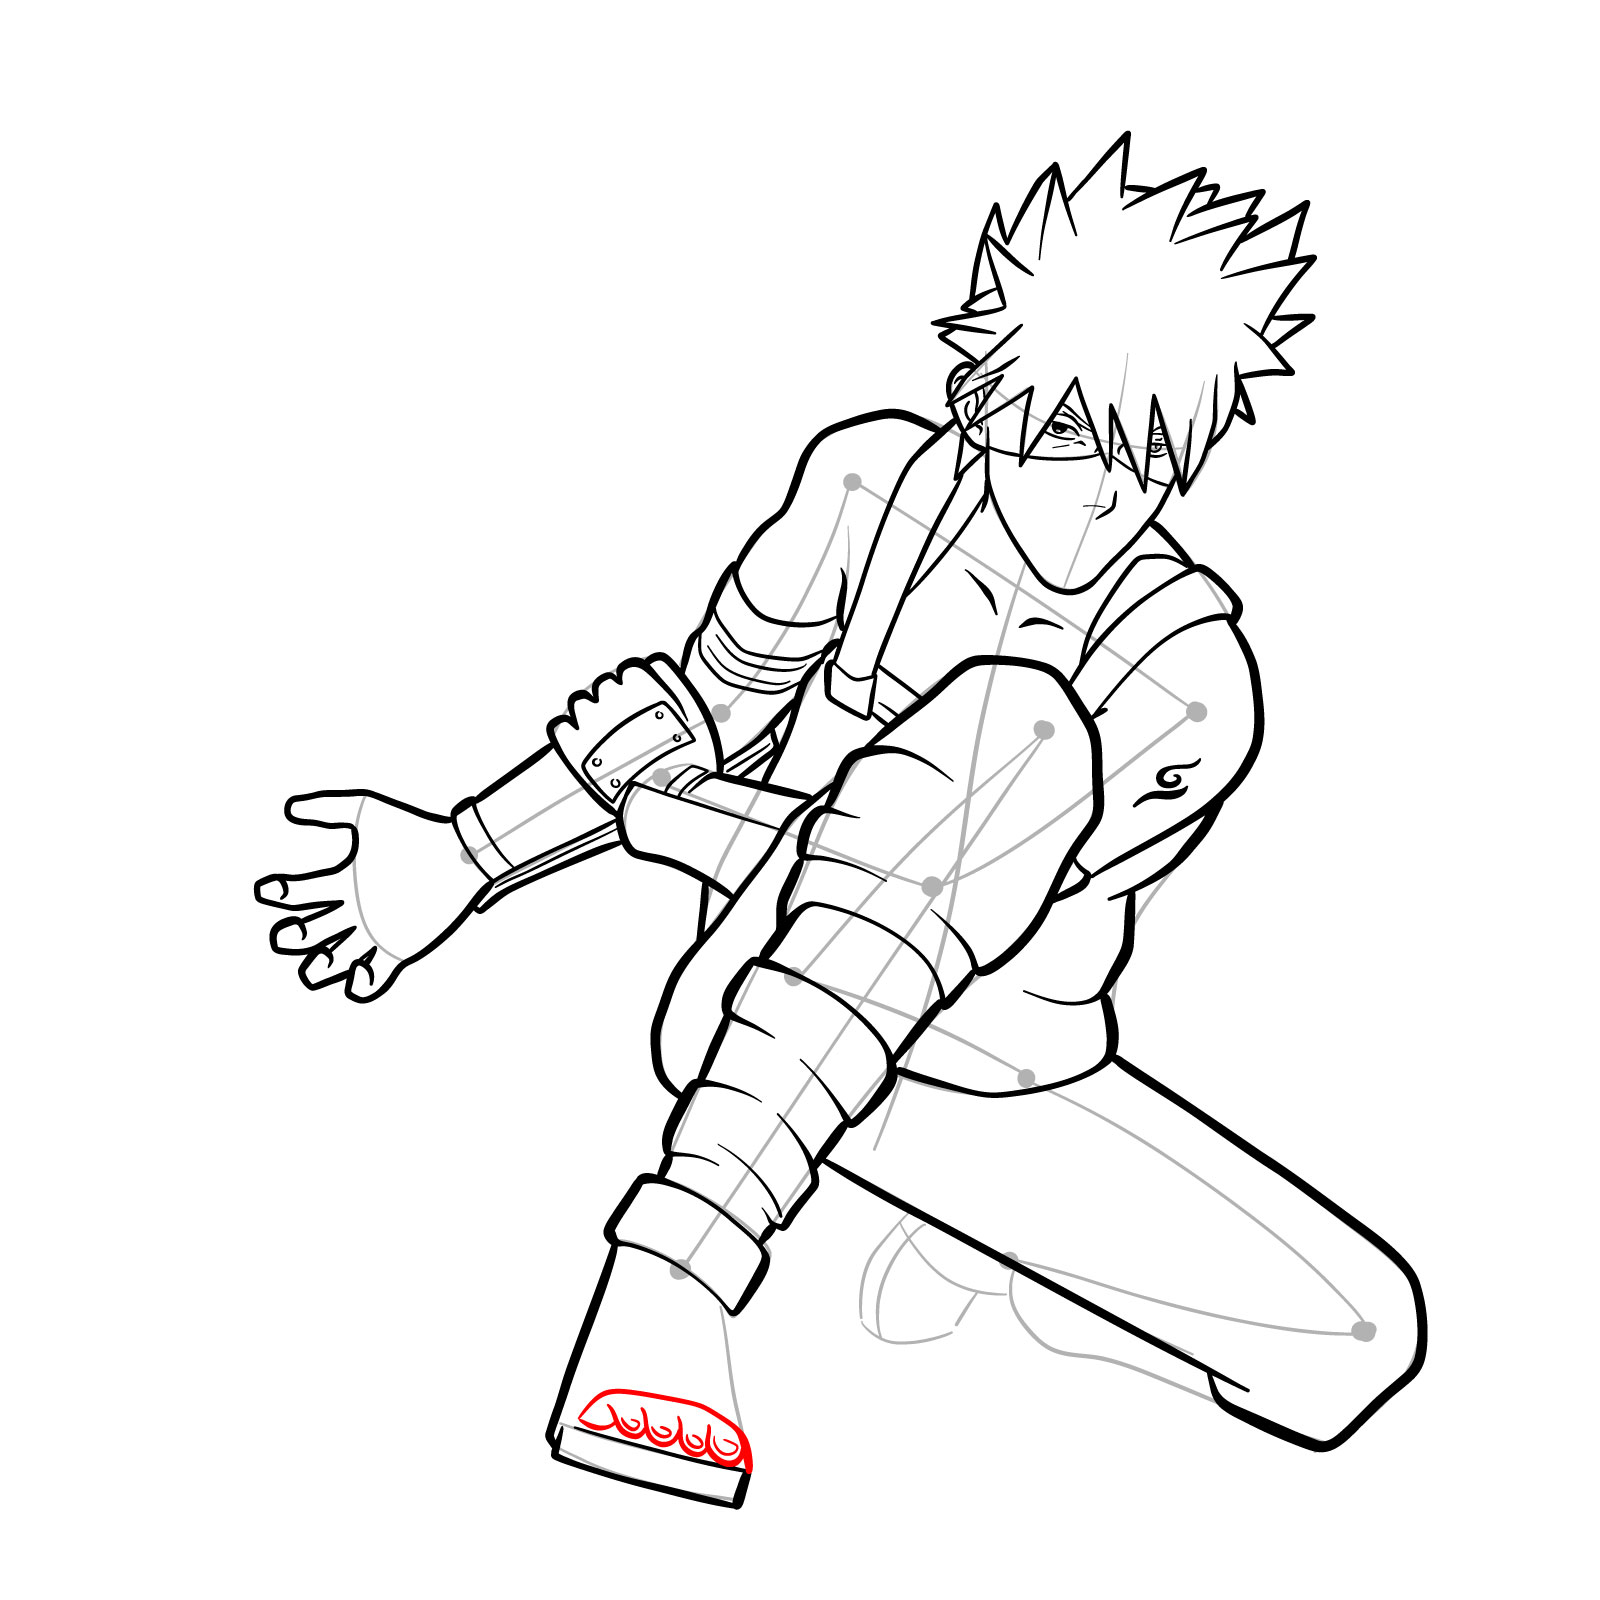
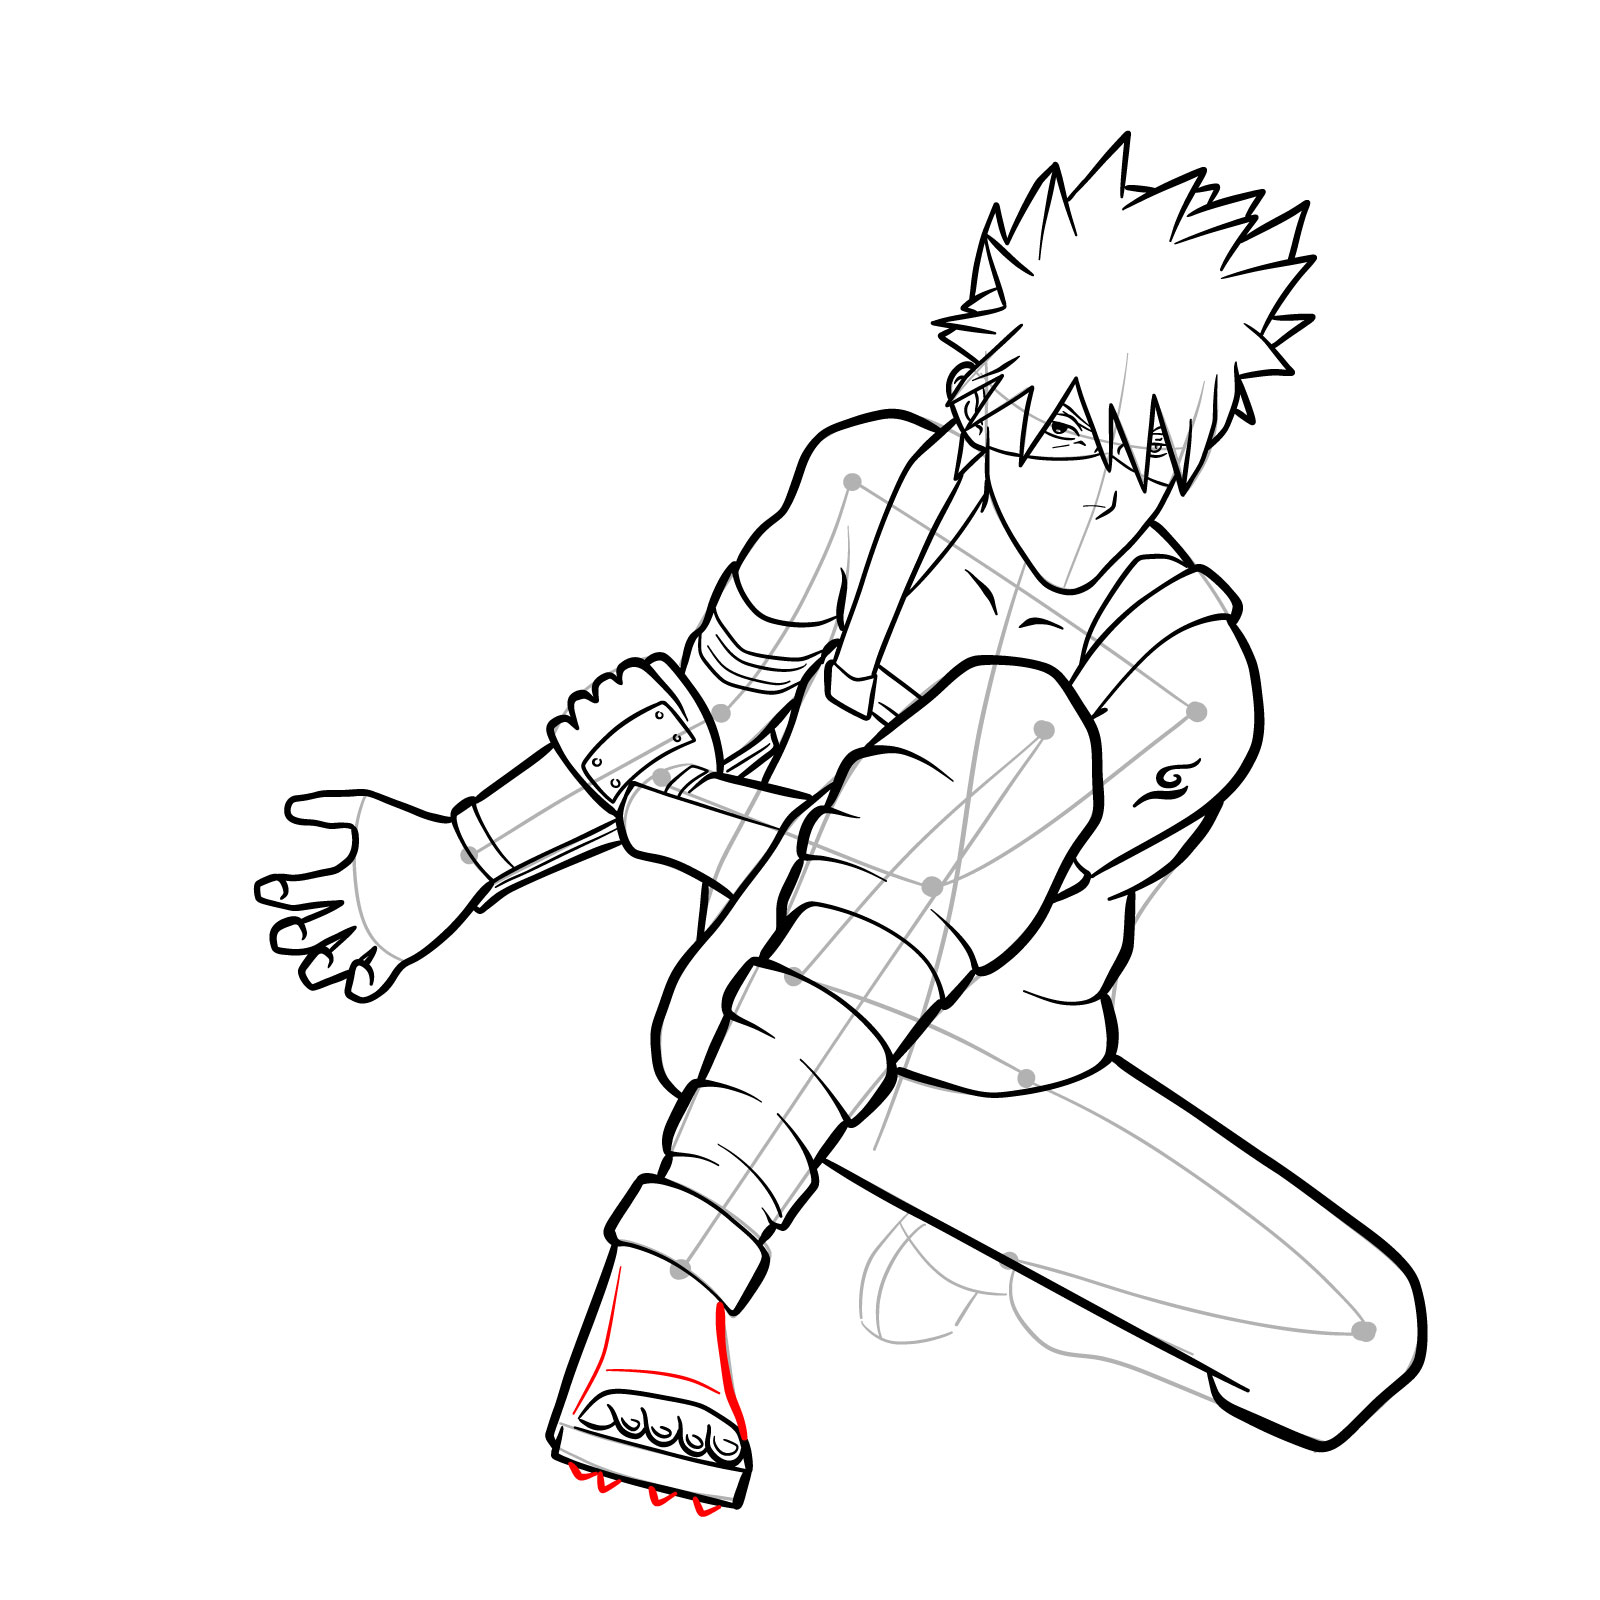
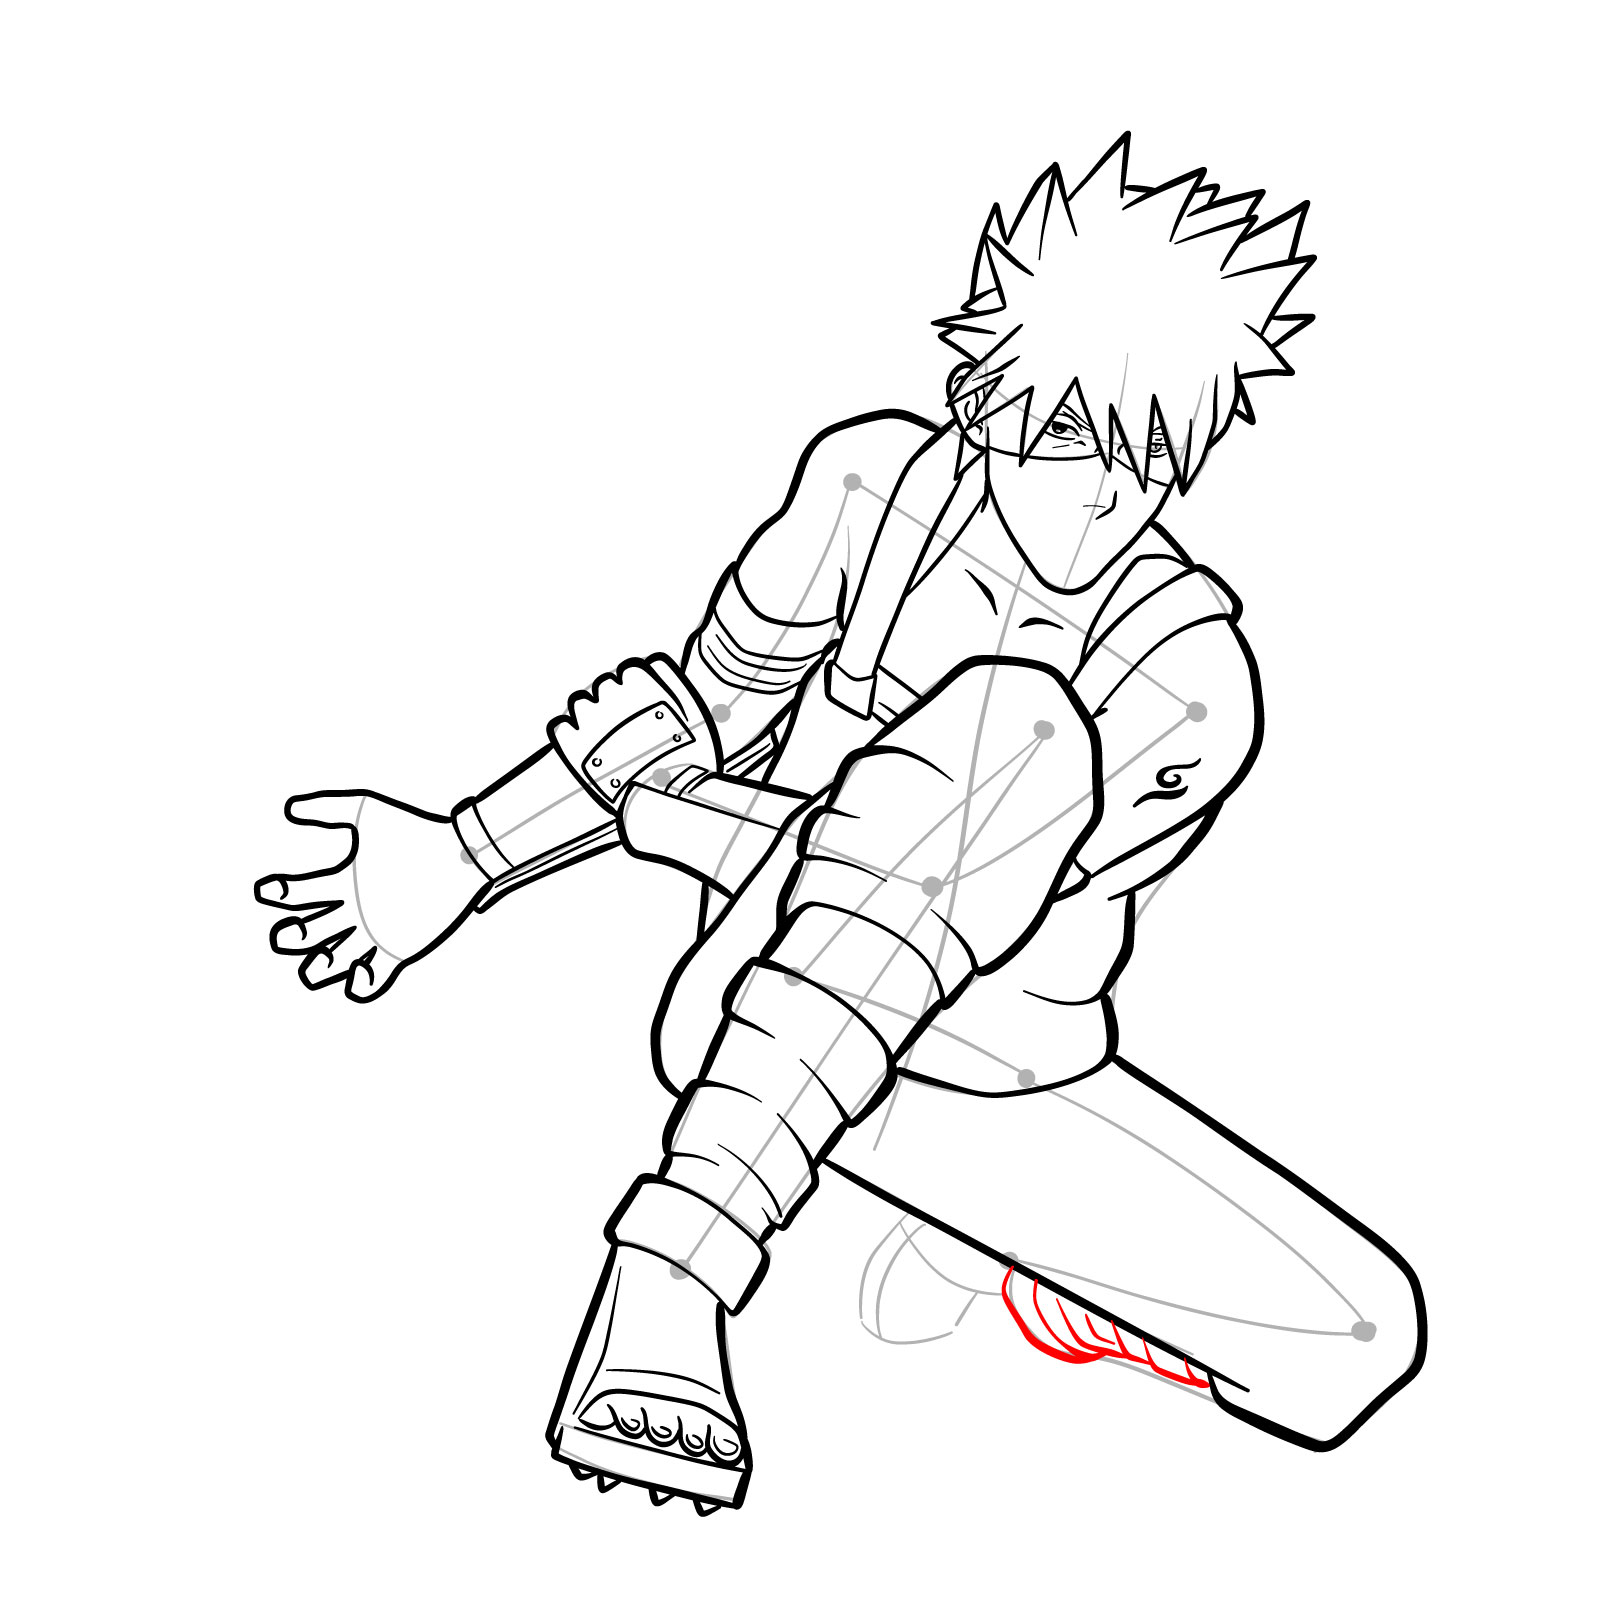
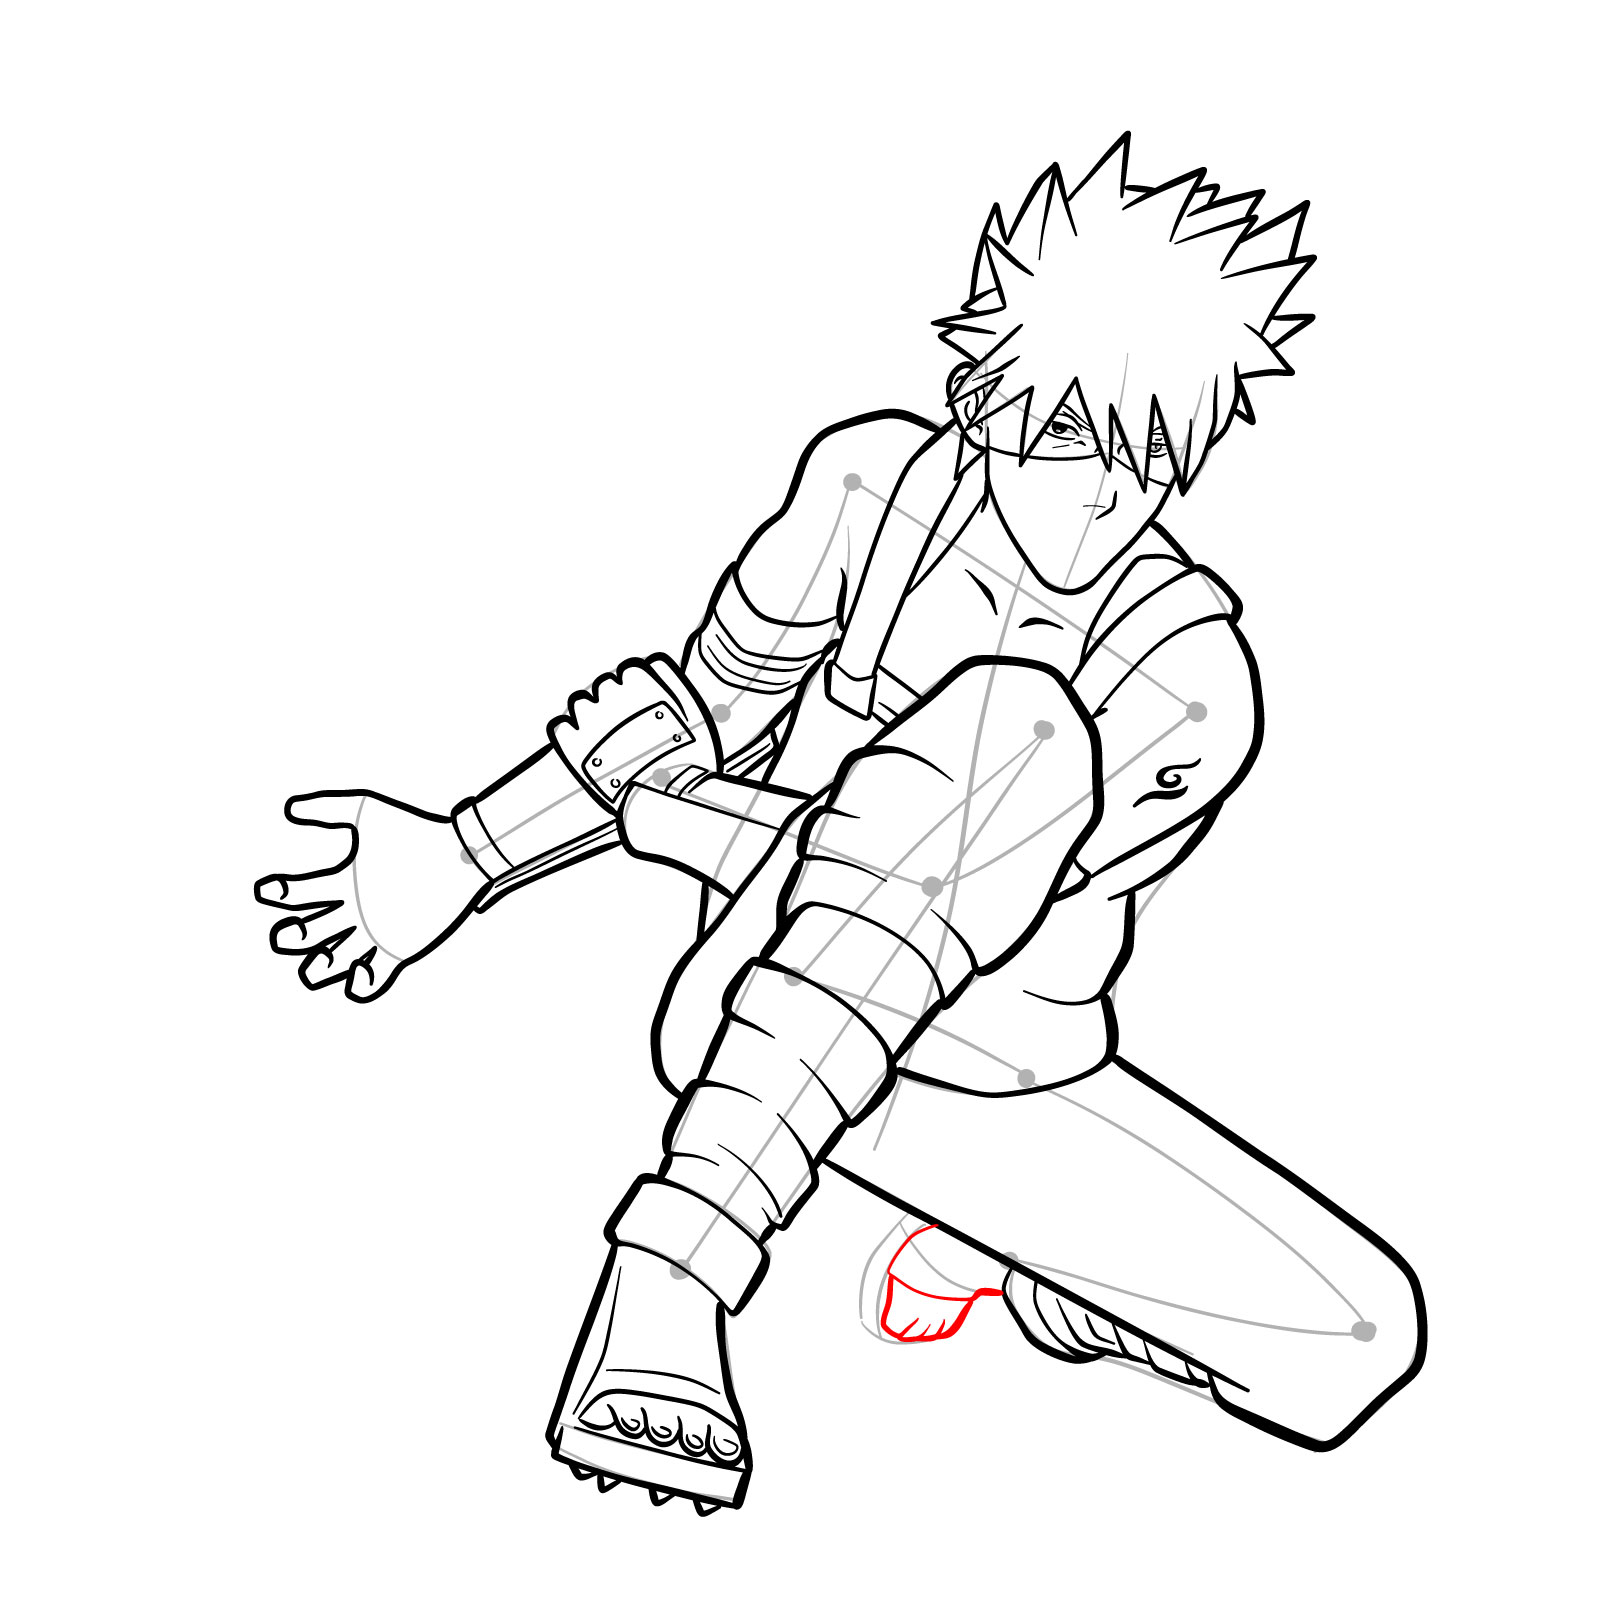
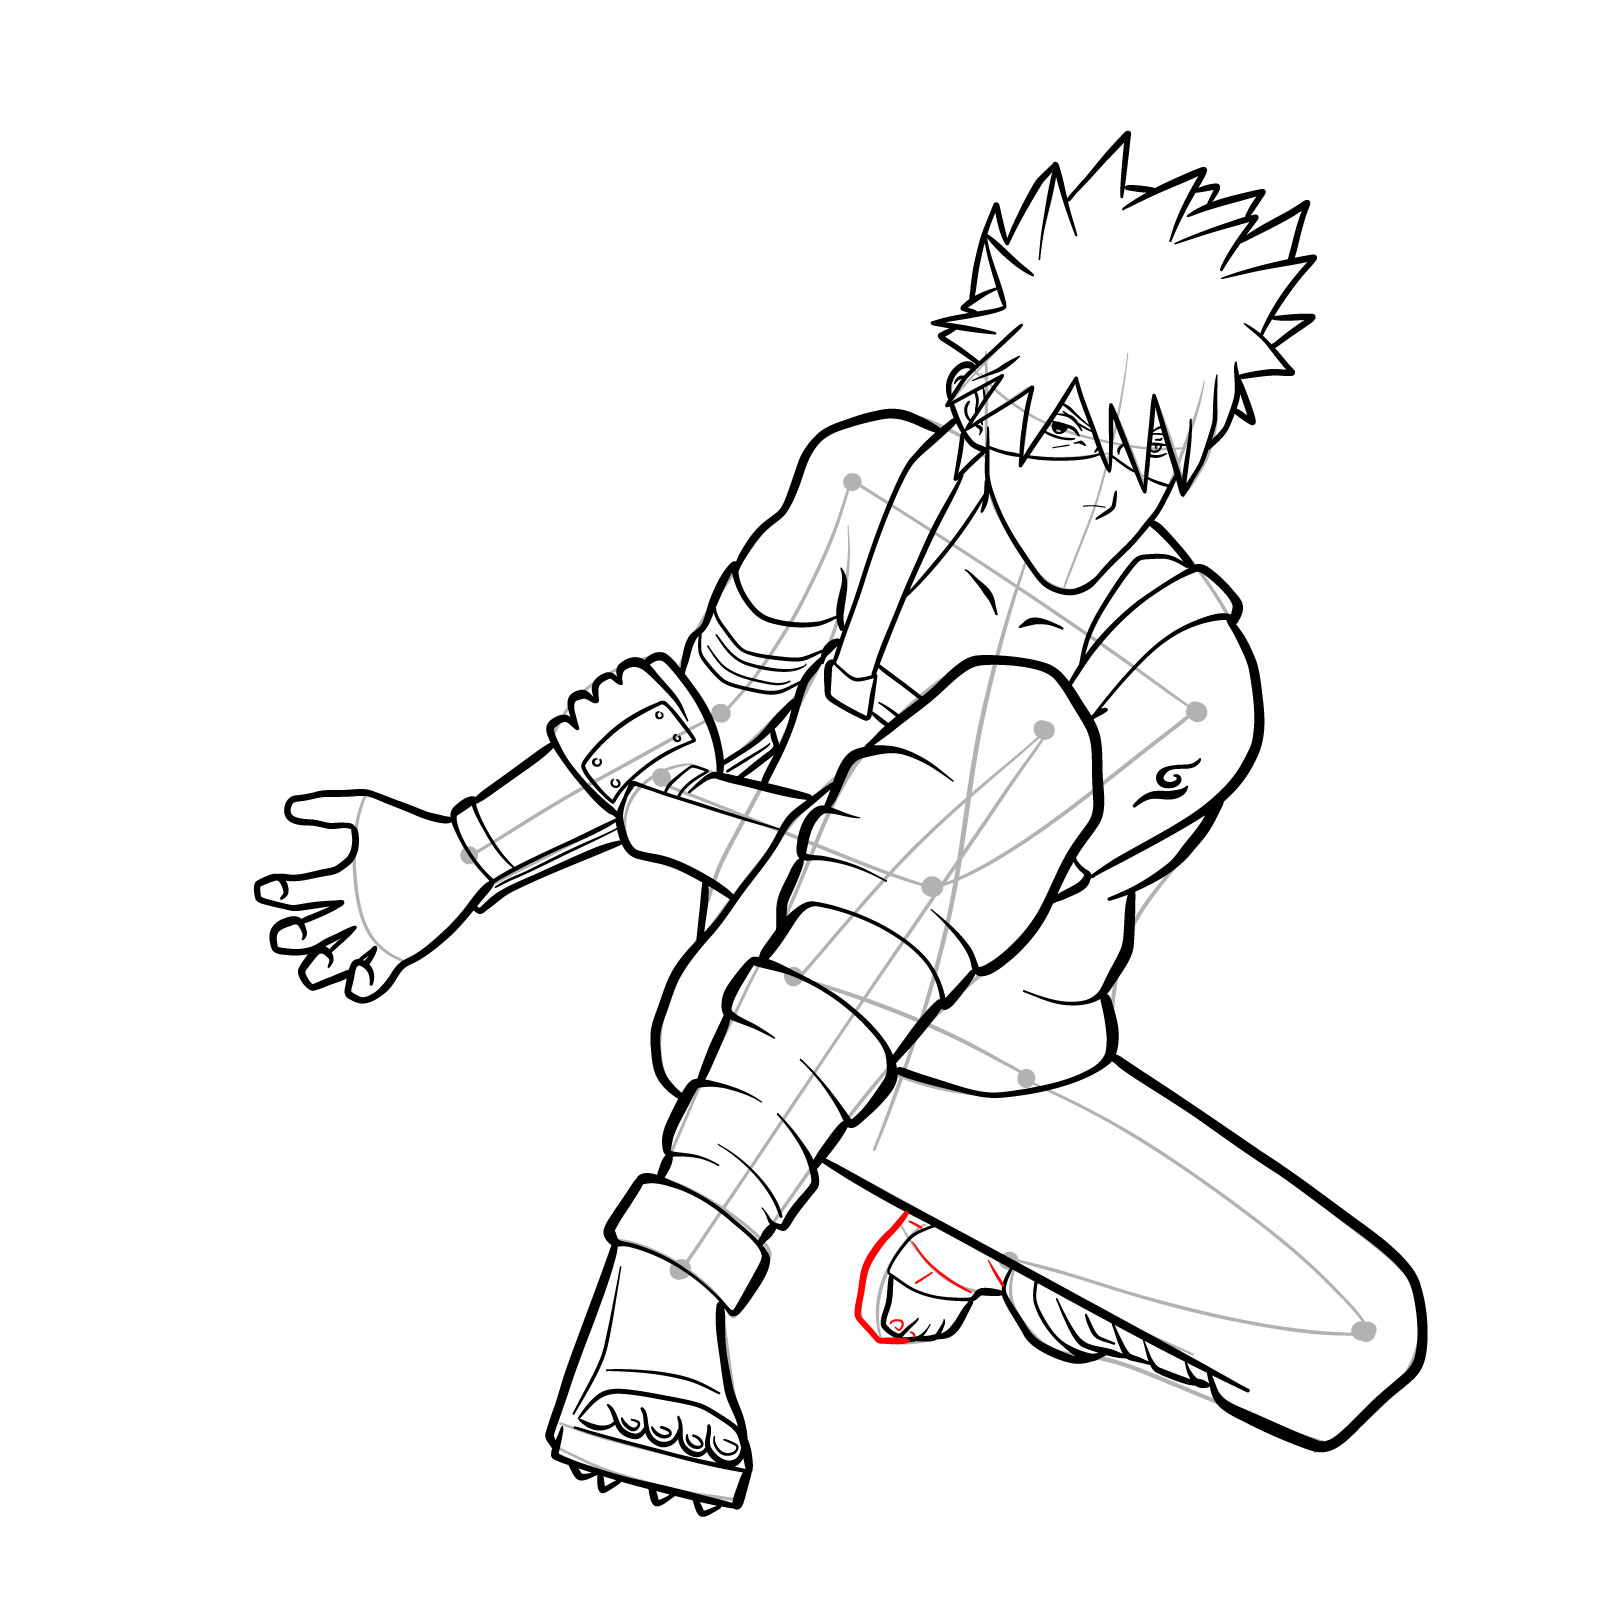
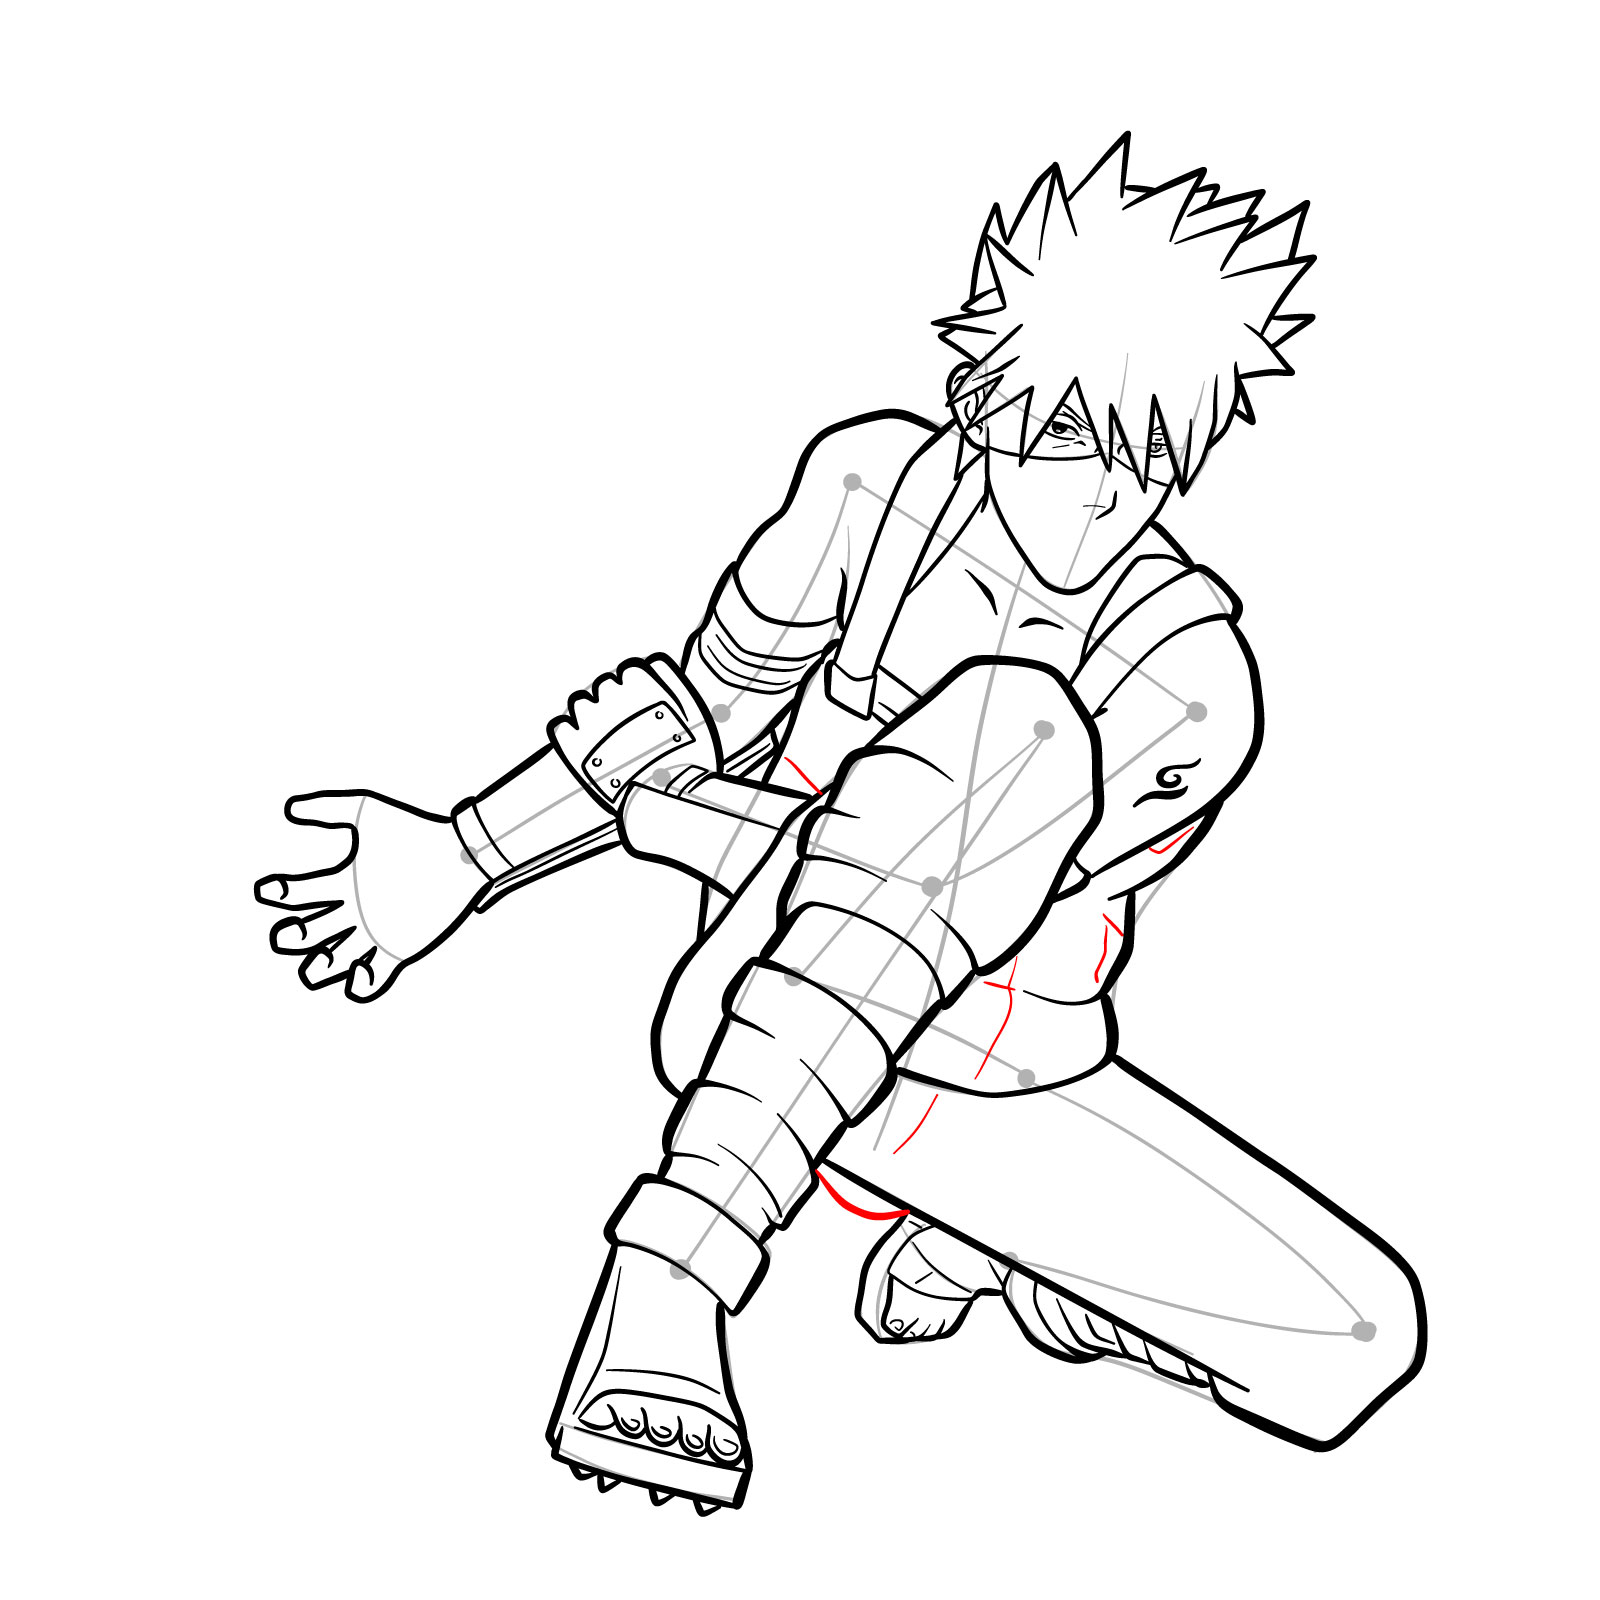
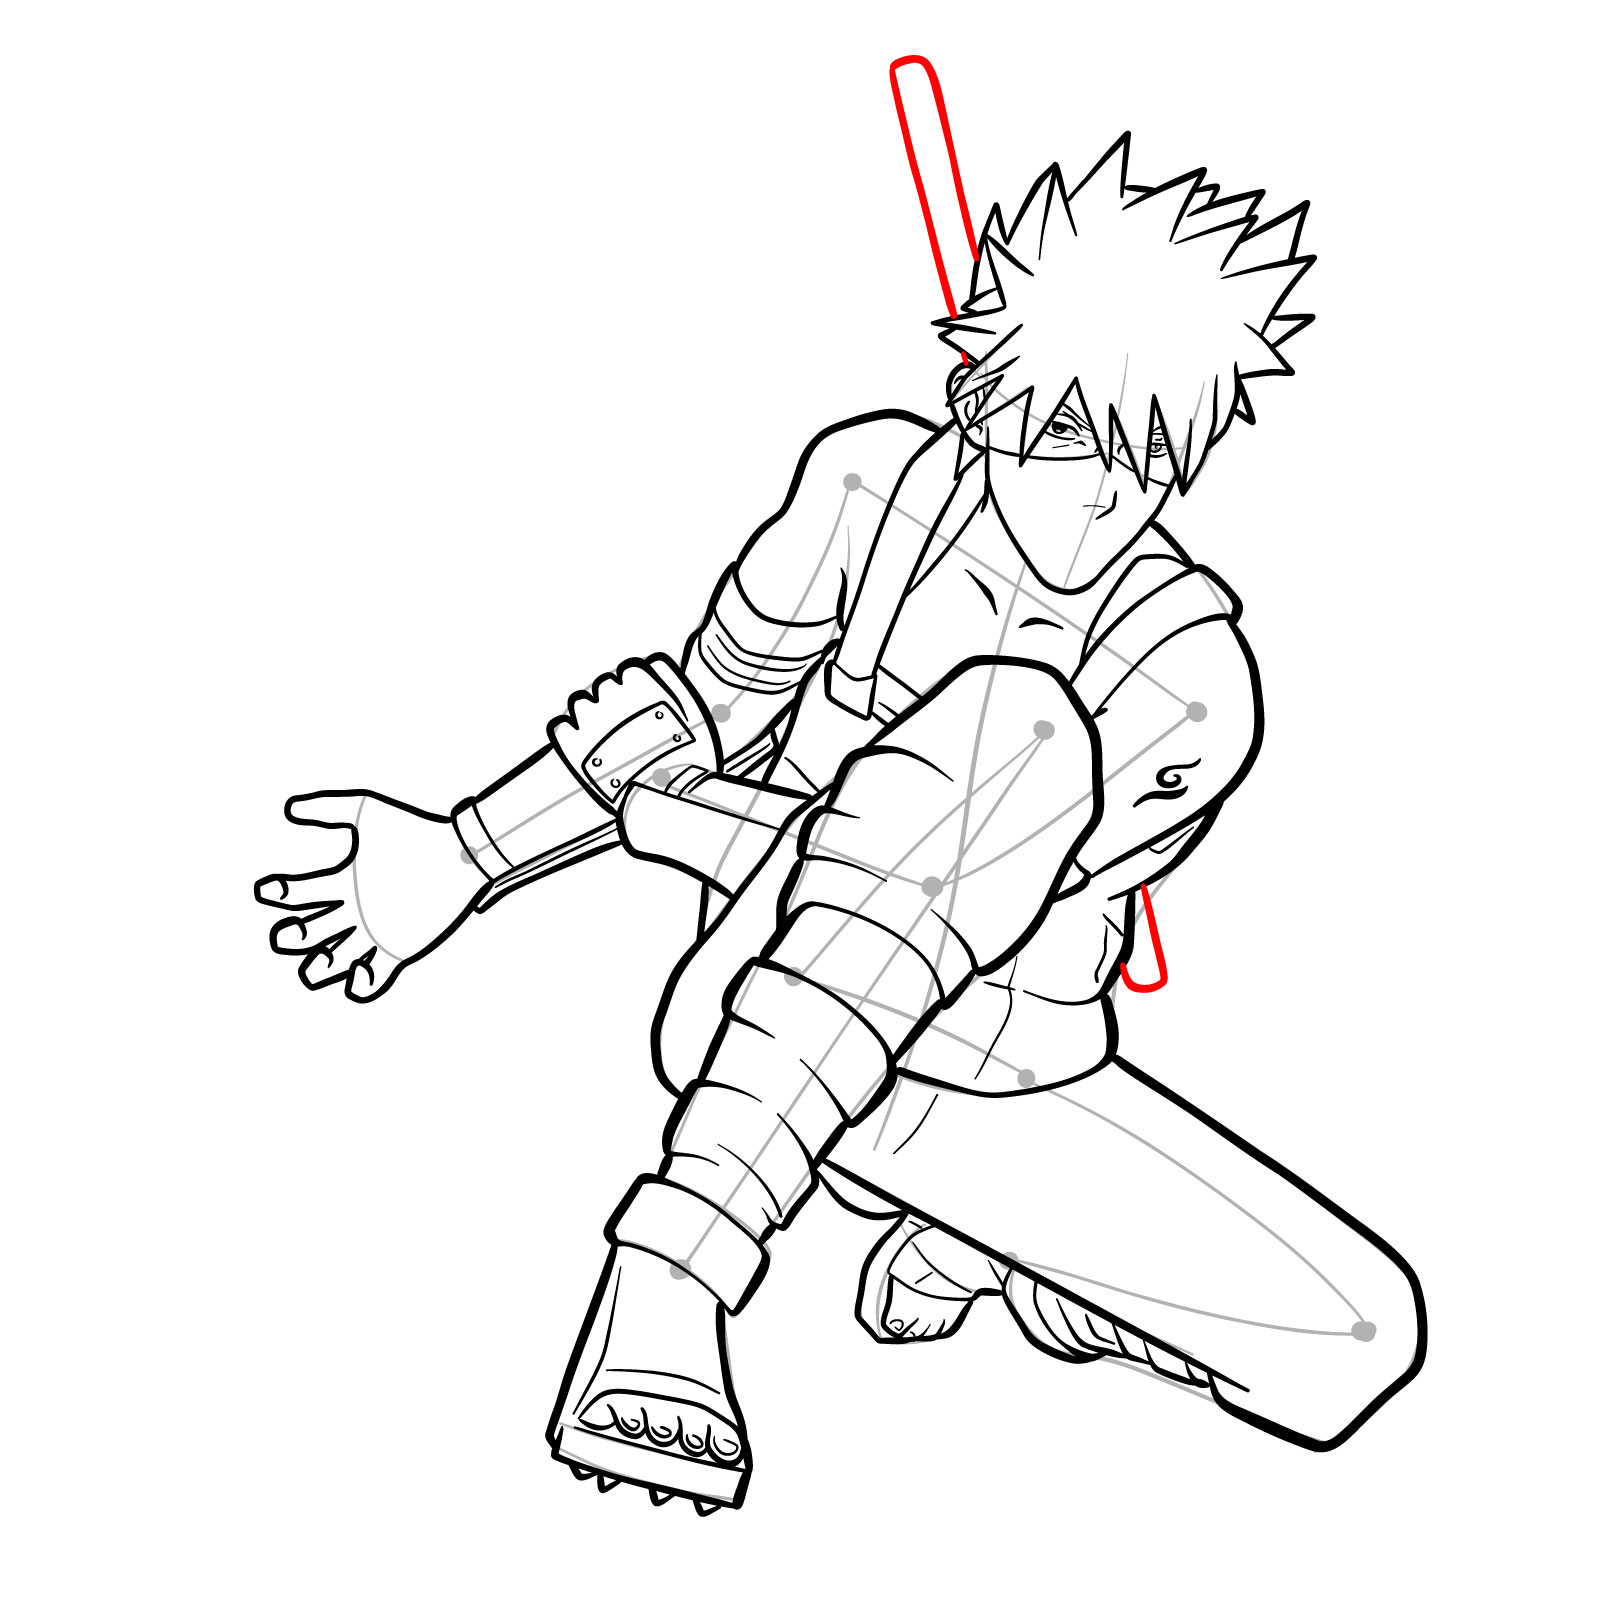
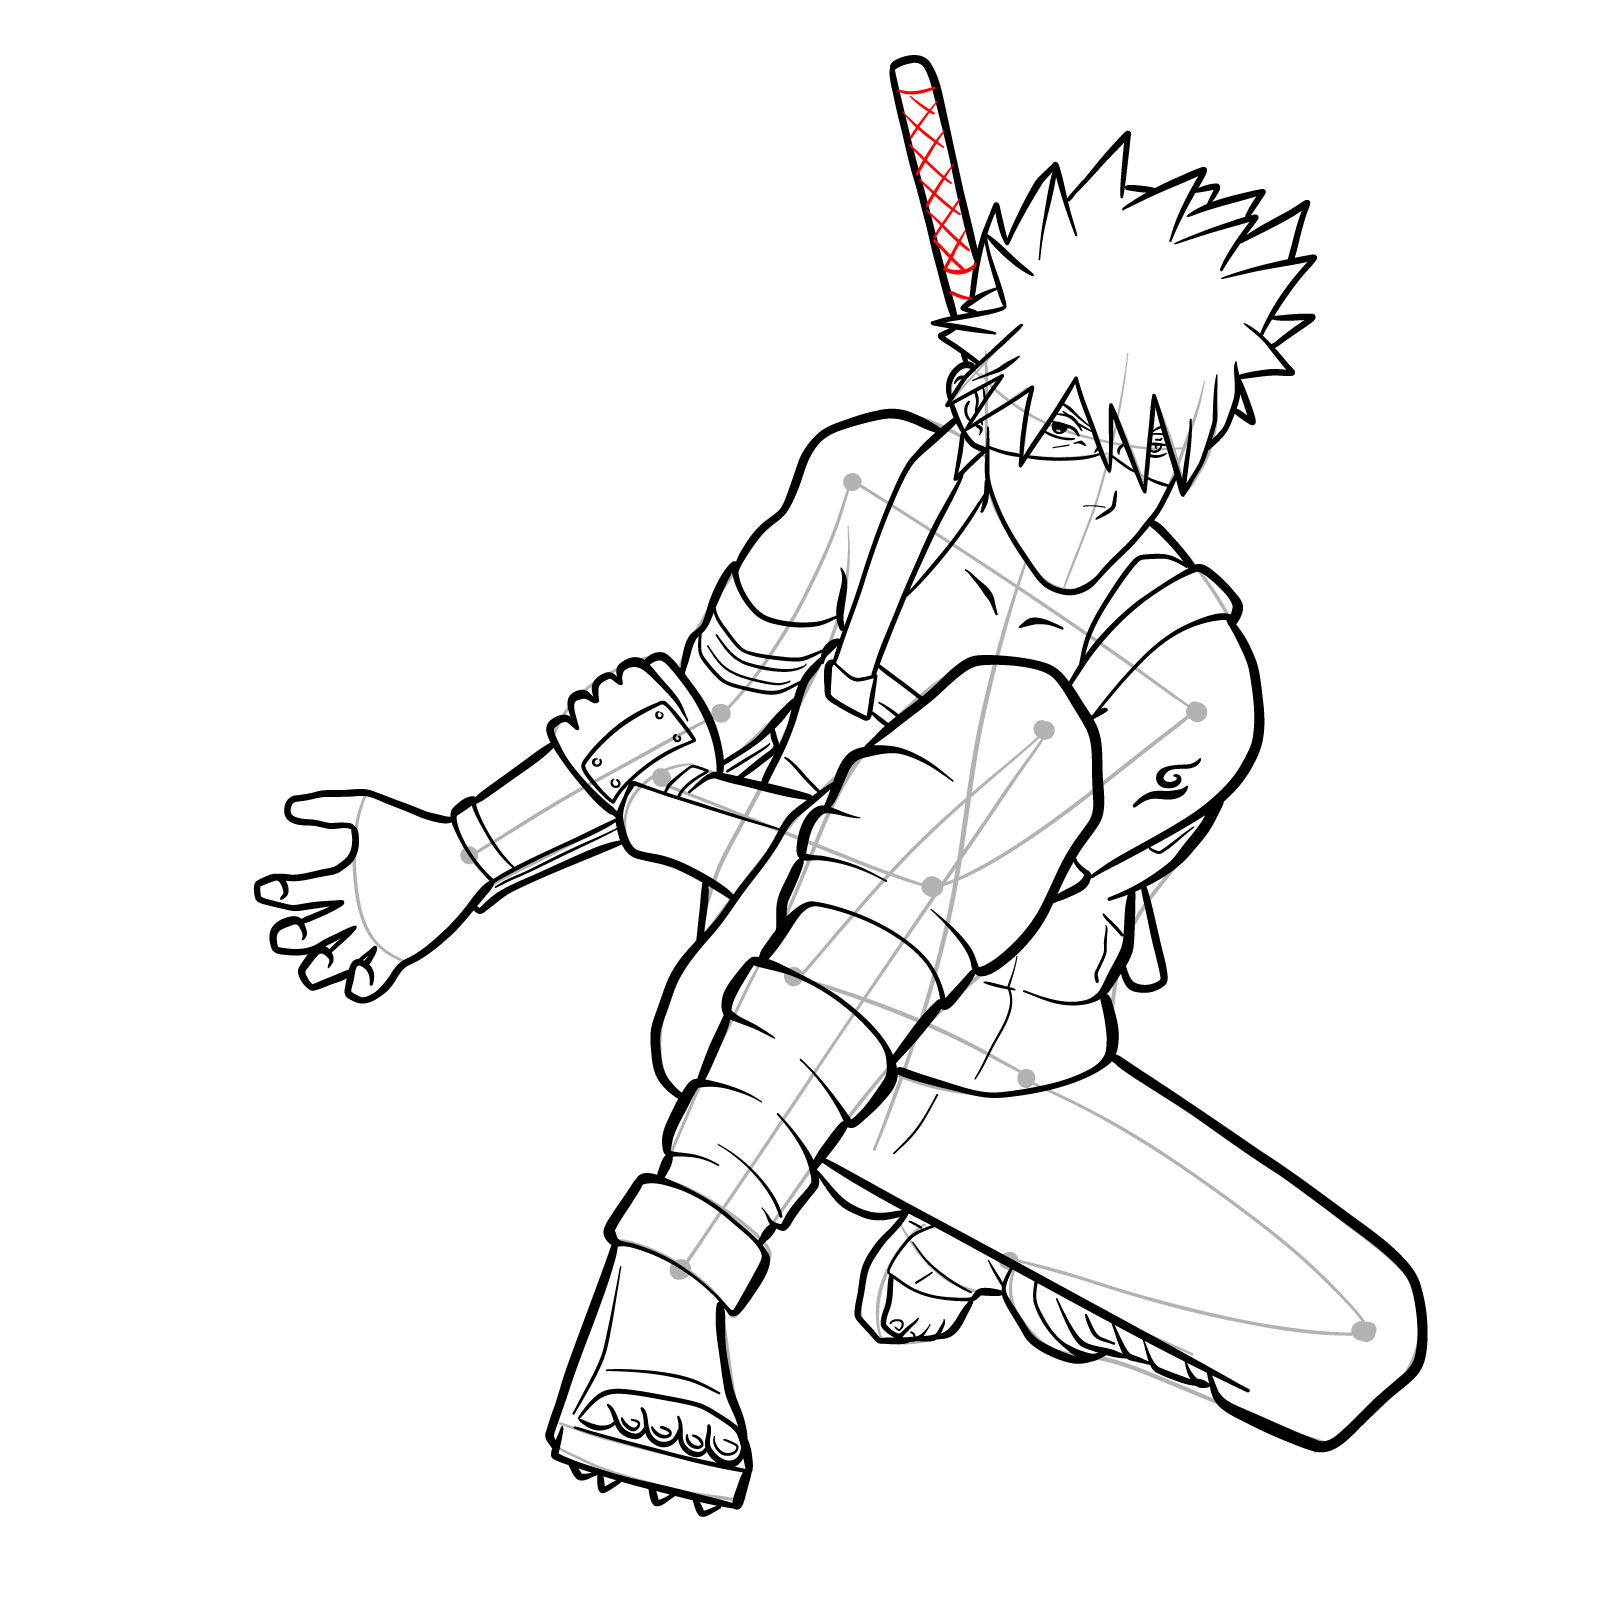
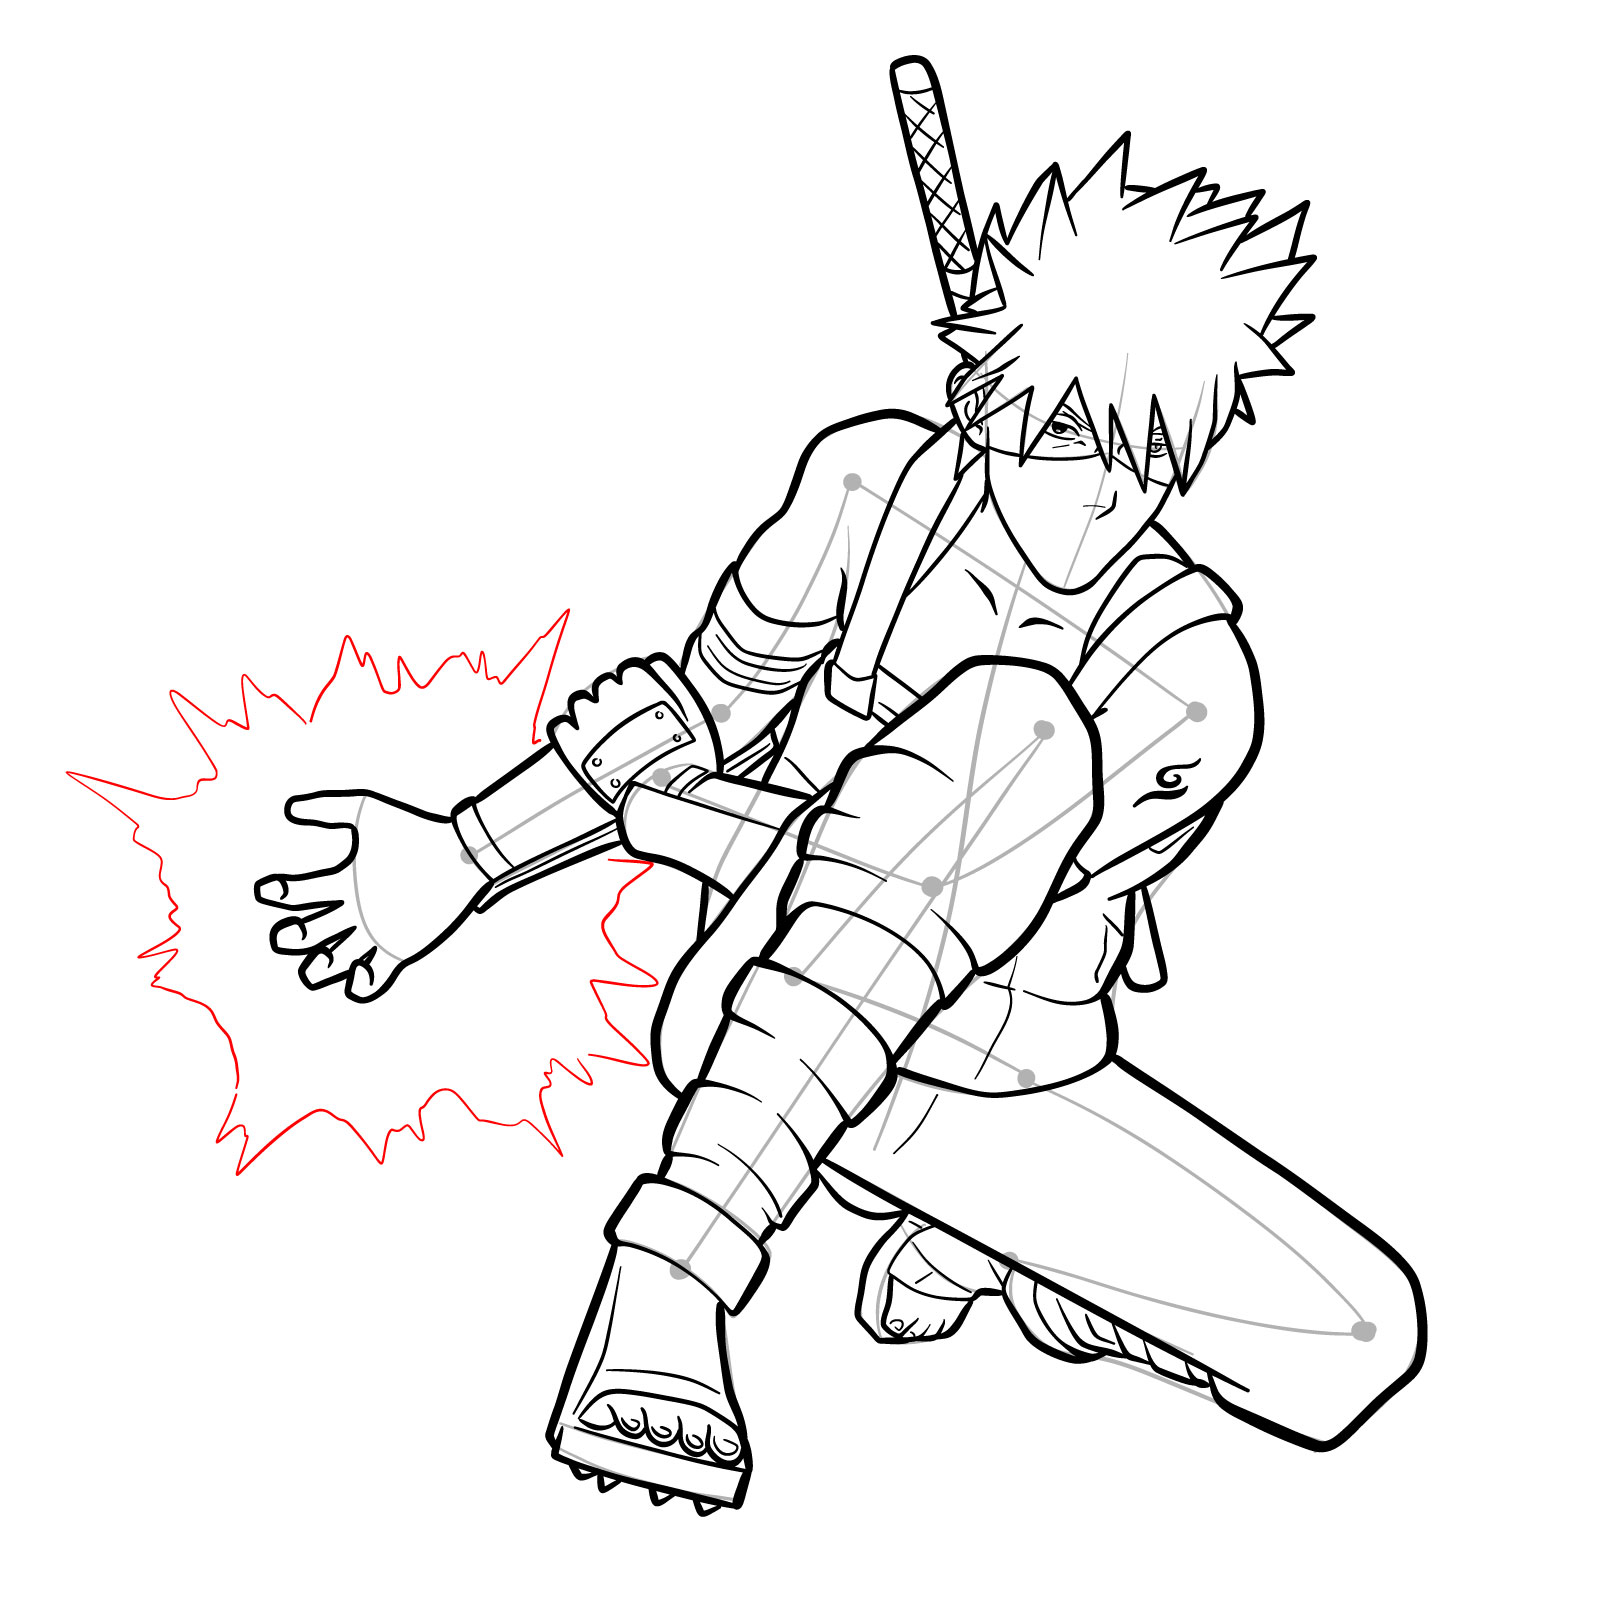
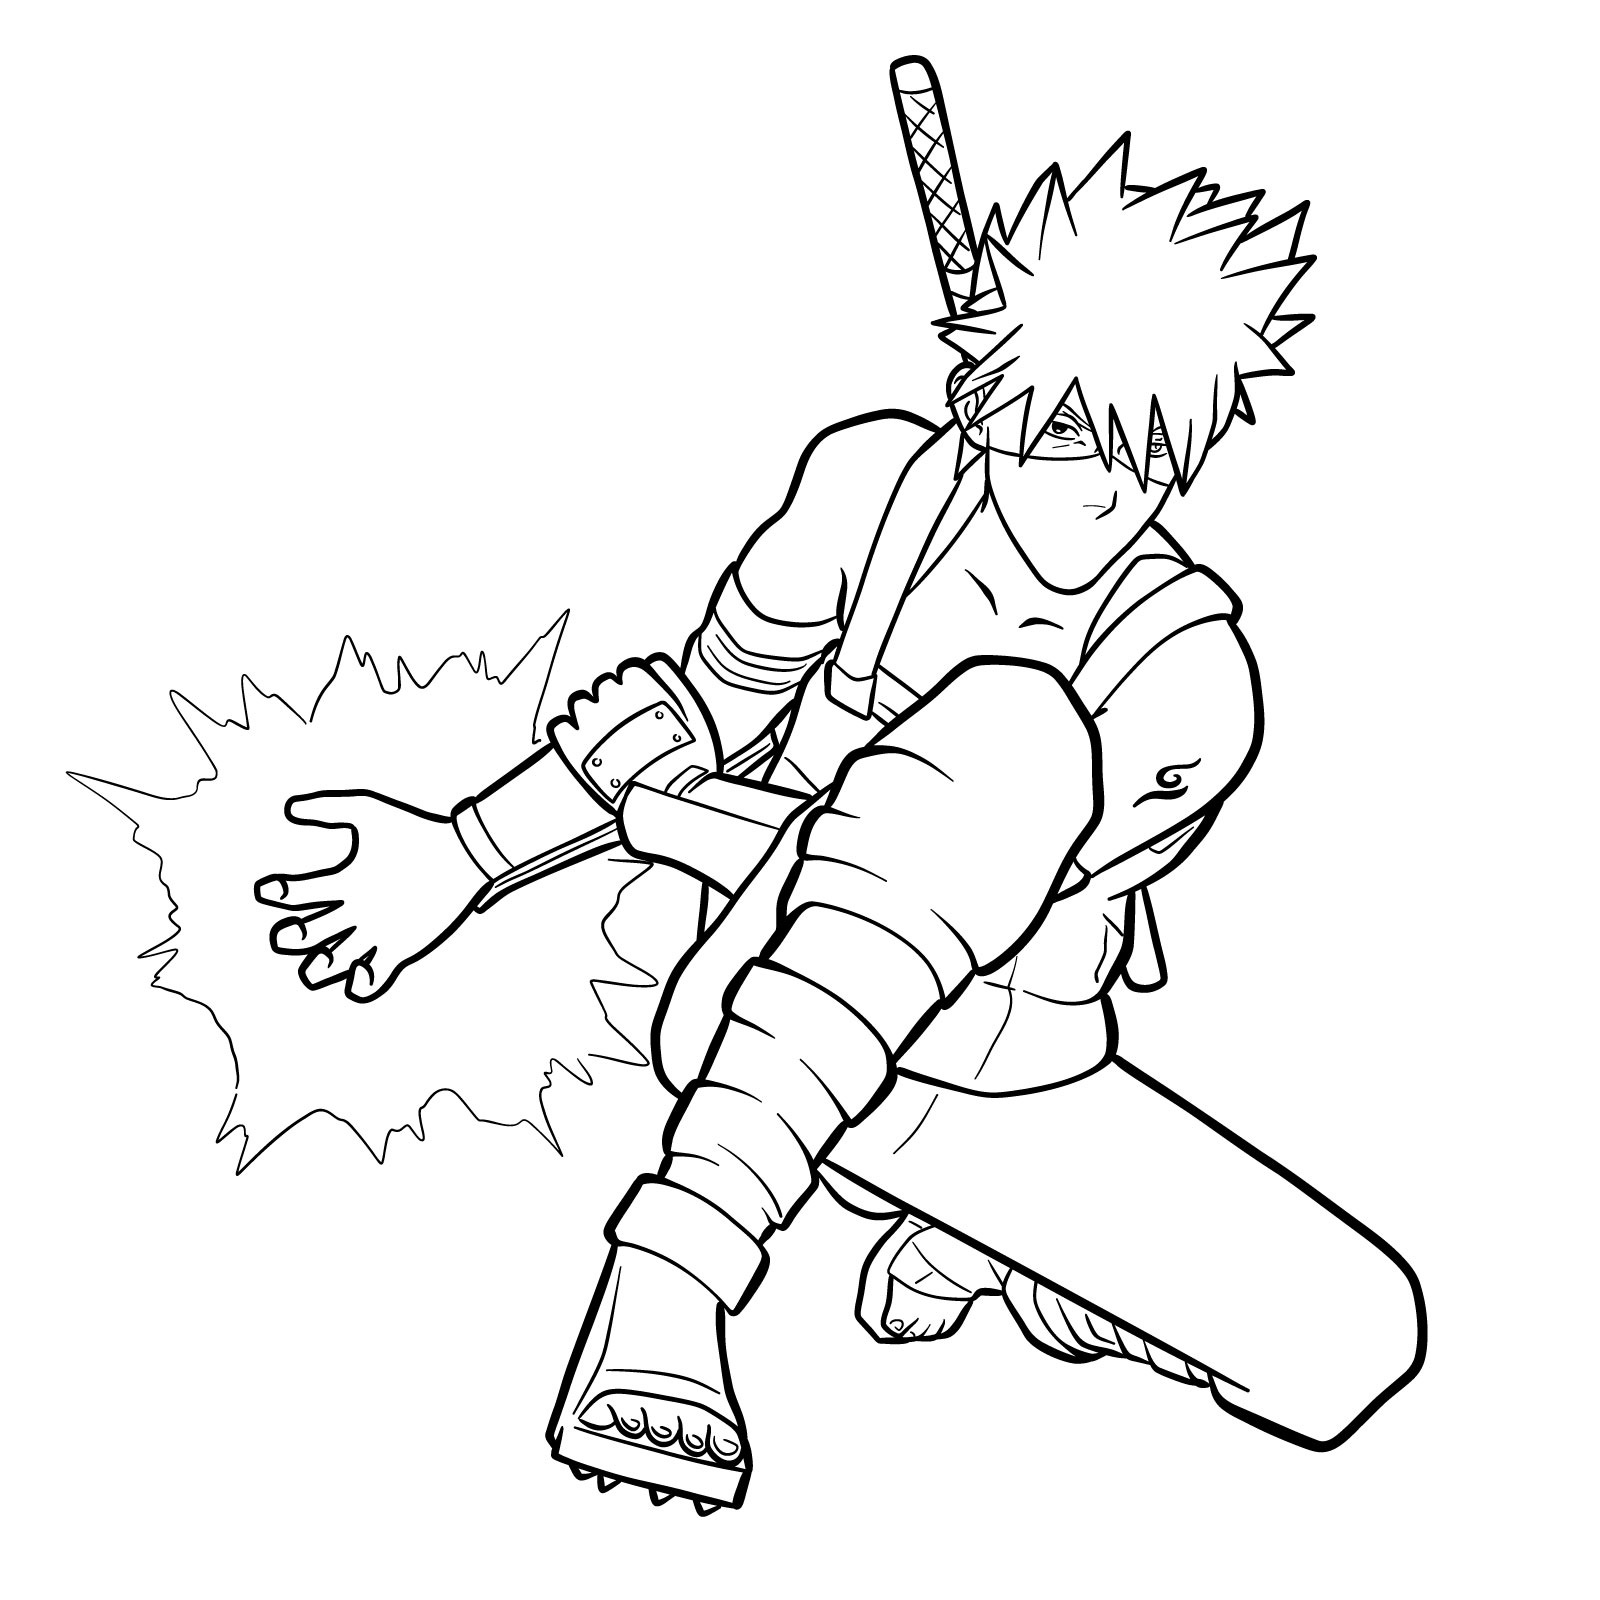
Kakashi Hatake is known for his unique appearance in Clash of Ninja Revolution. With our instructions, you’ll learn how to recreate his powerful stance as he stands on one knee, collecting power in his right hand. Unlike his traditional headband-covered face, Kakashi in this game reveals both of his eyes, adding an extra layer of intrigue to his character design. We’ll guide you through the process of capturing every detail, ensuring your drawing is accurate and captivating.
The Drawing Guide: Unleashing Your Creativity
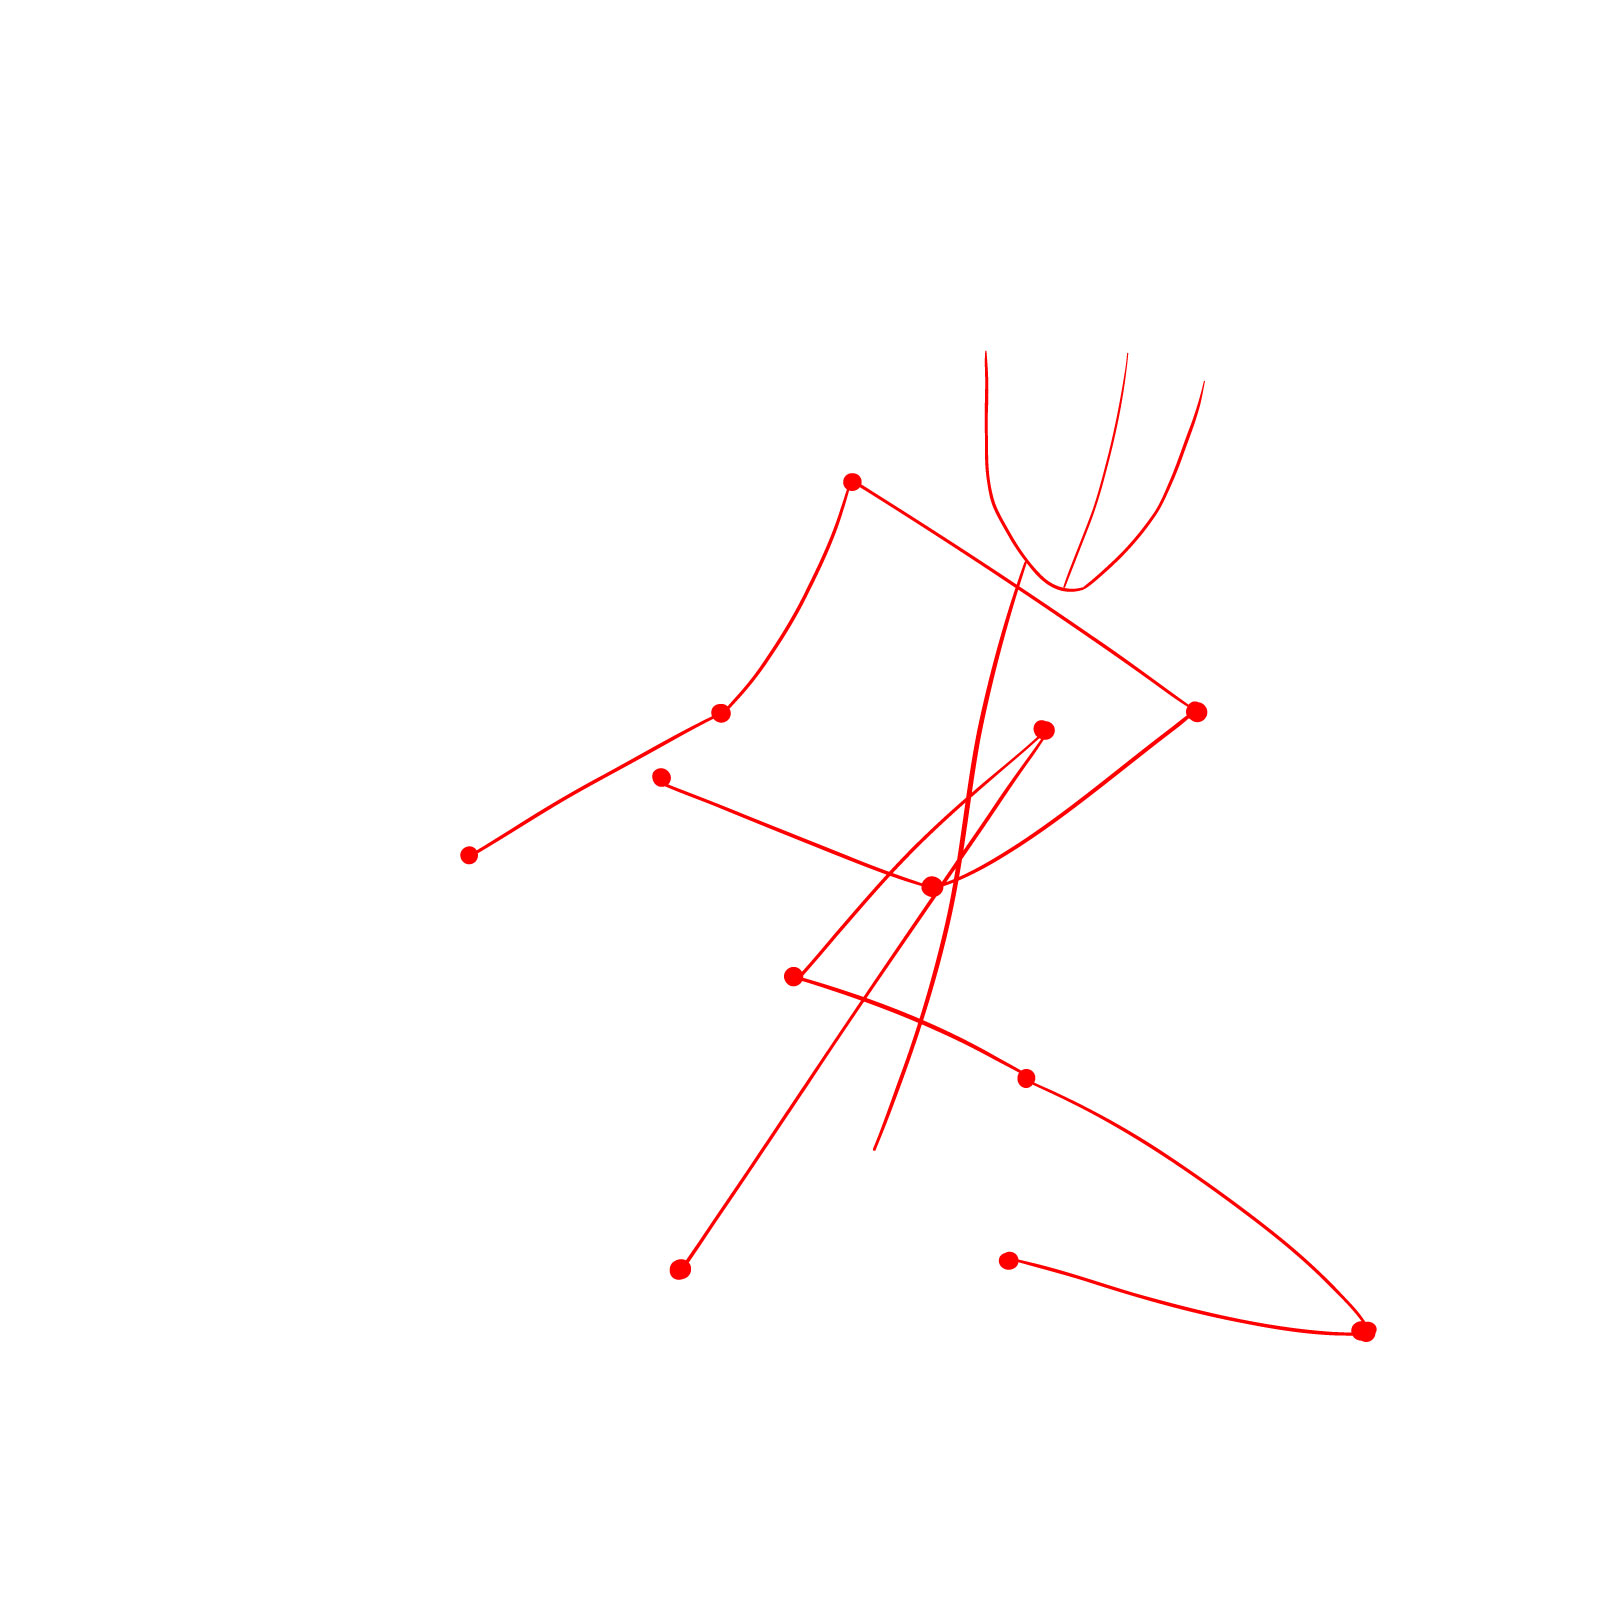
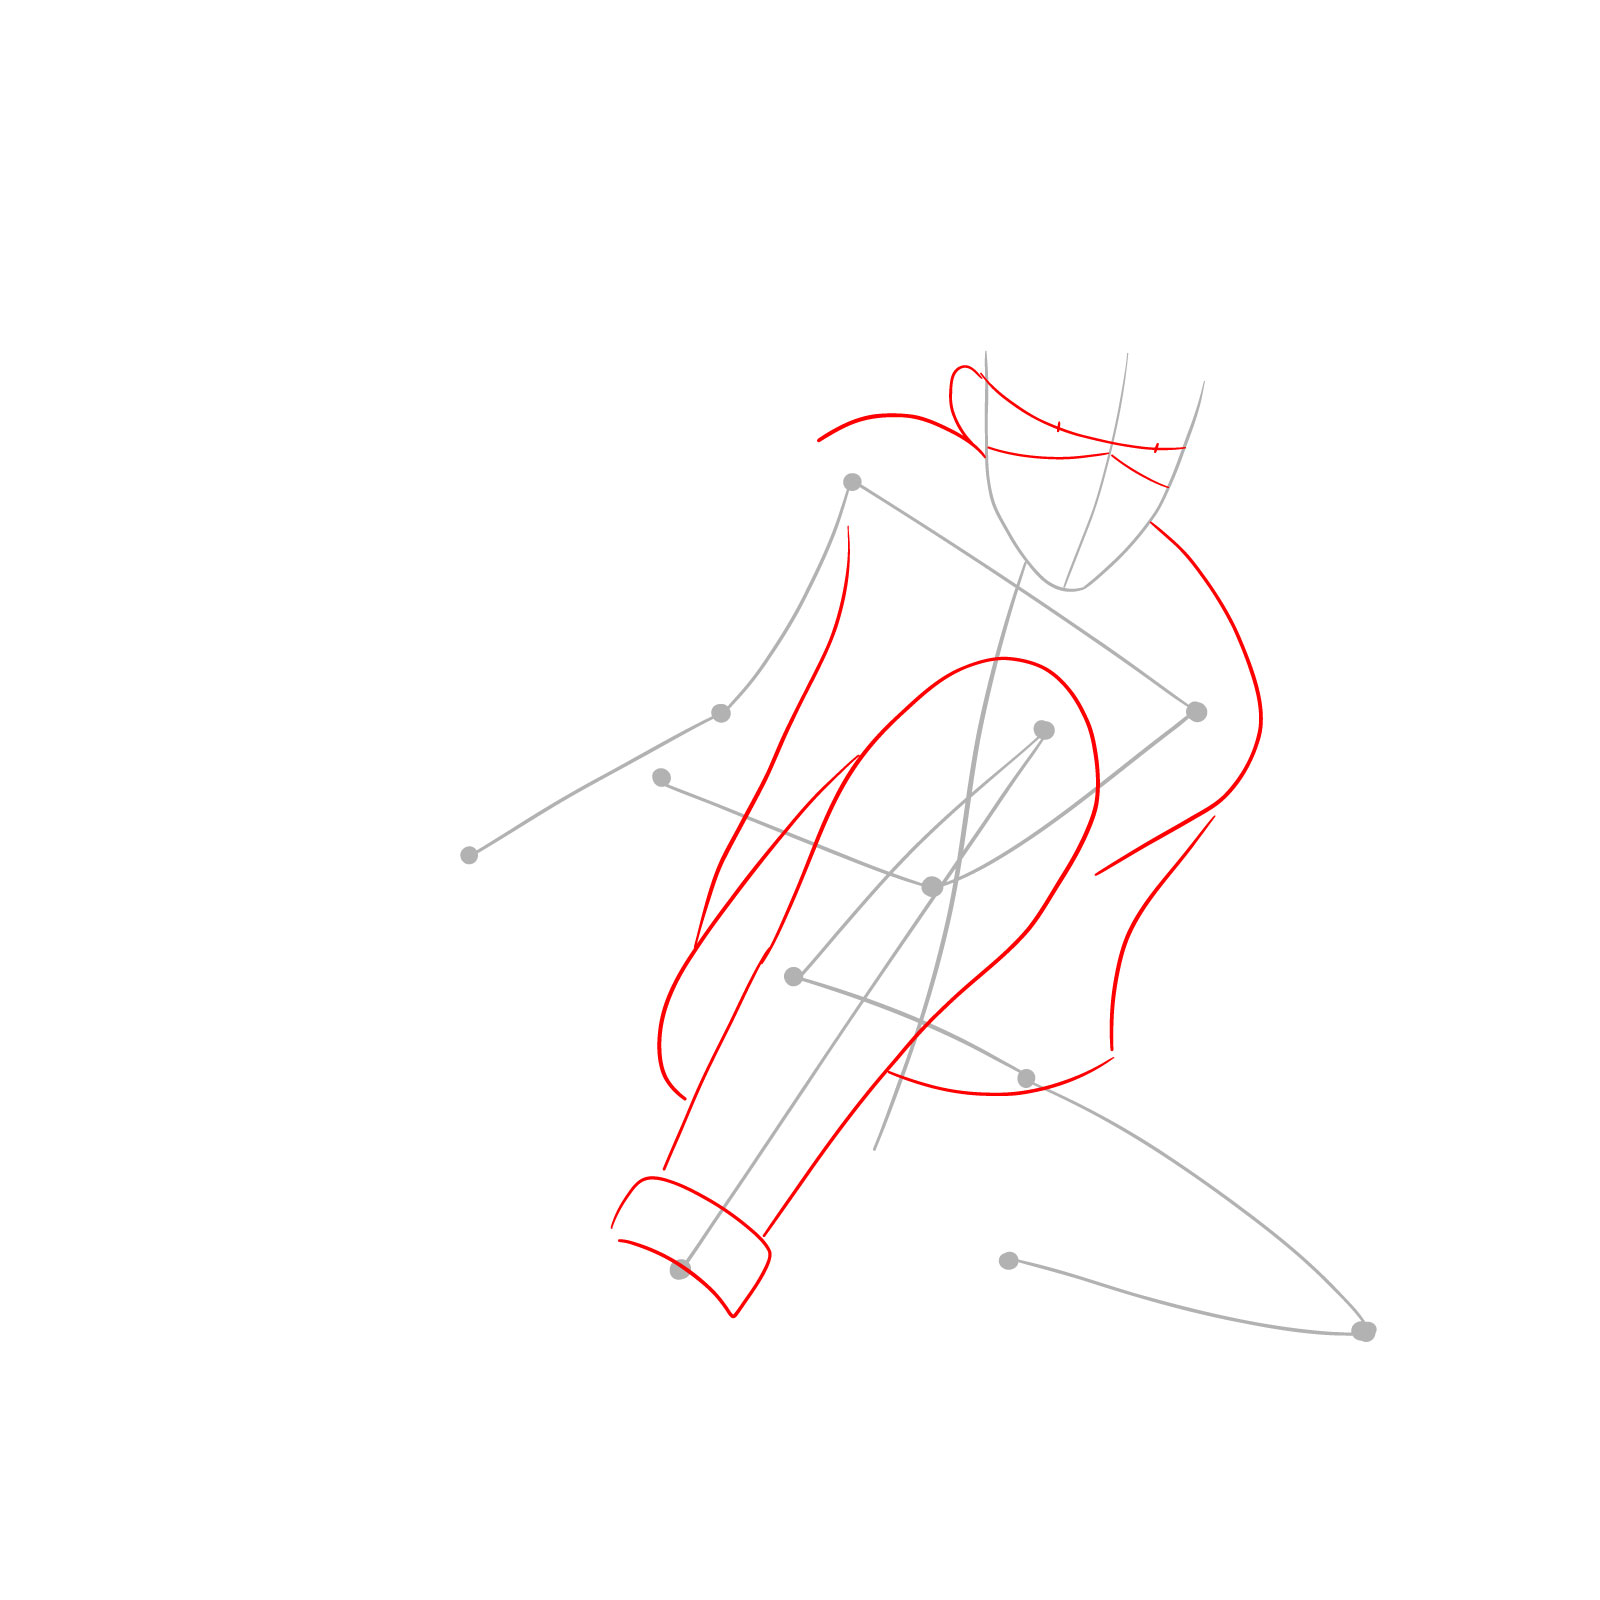
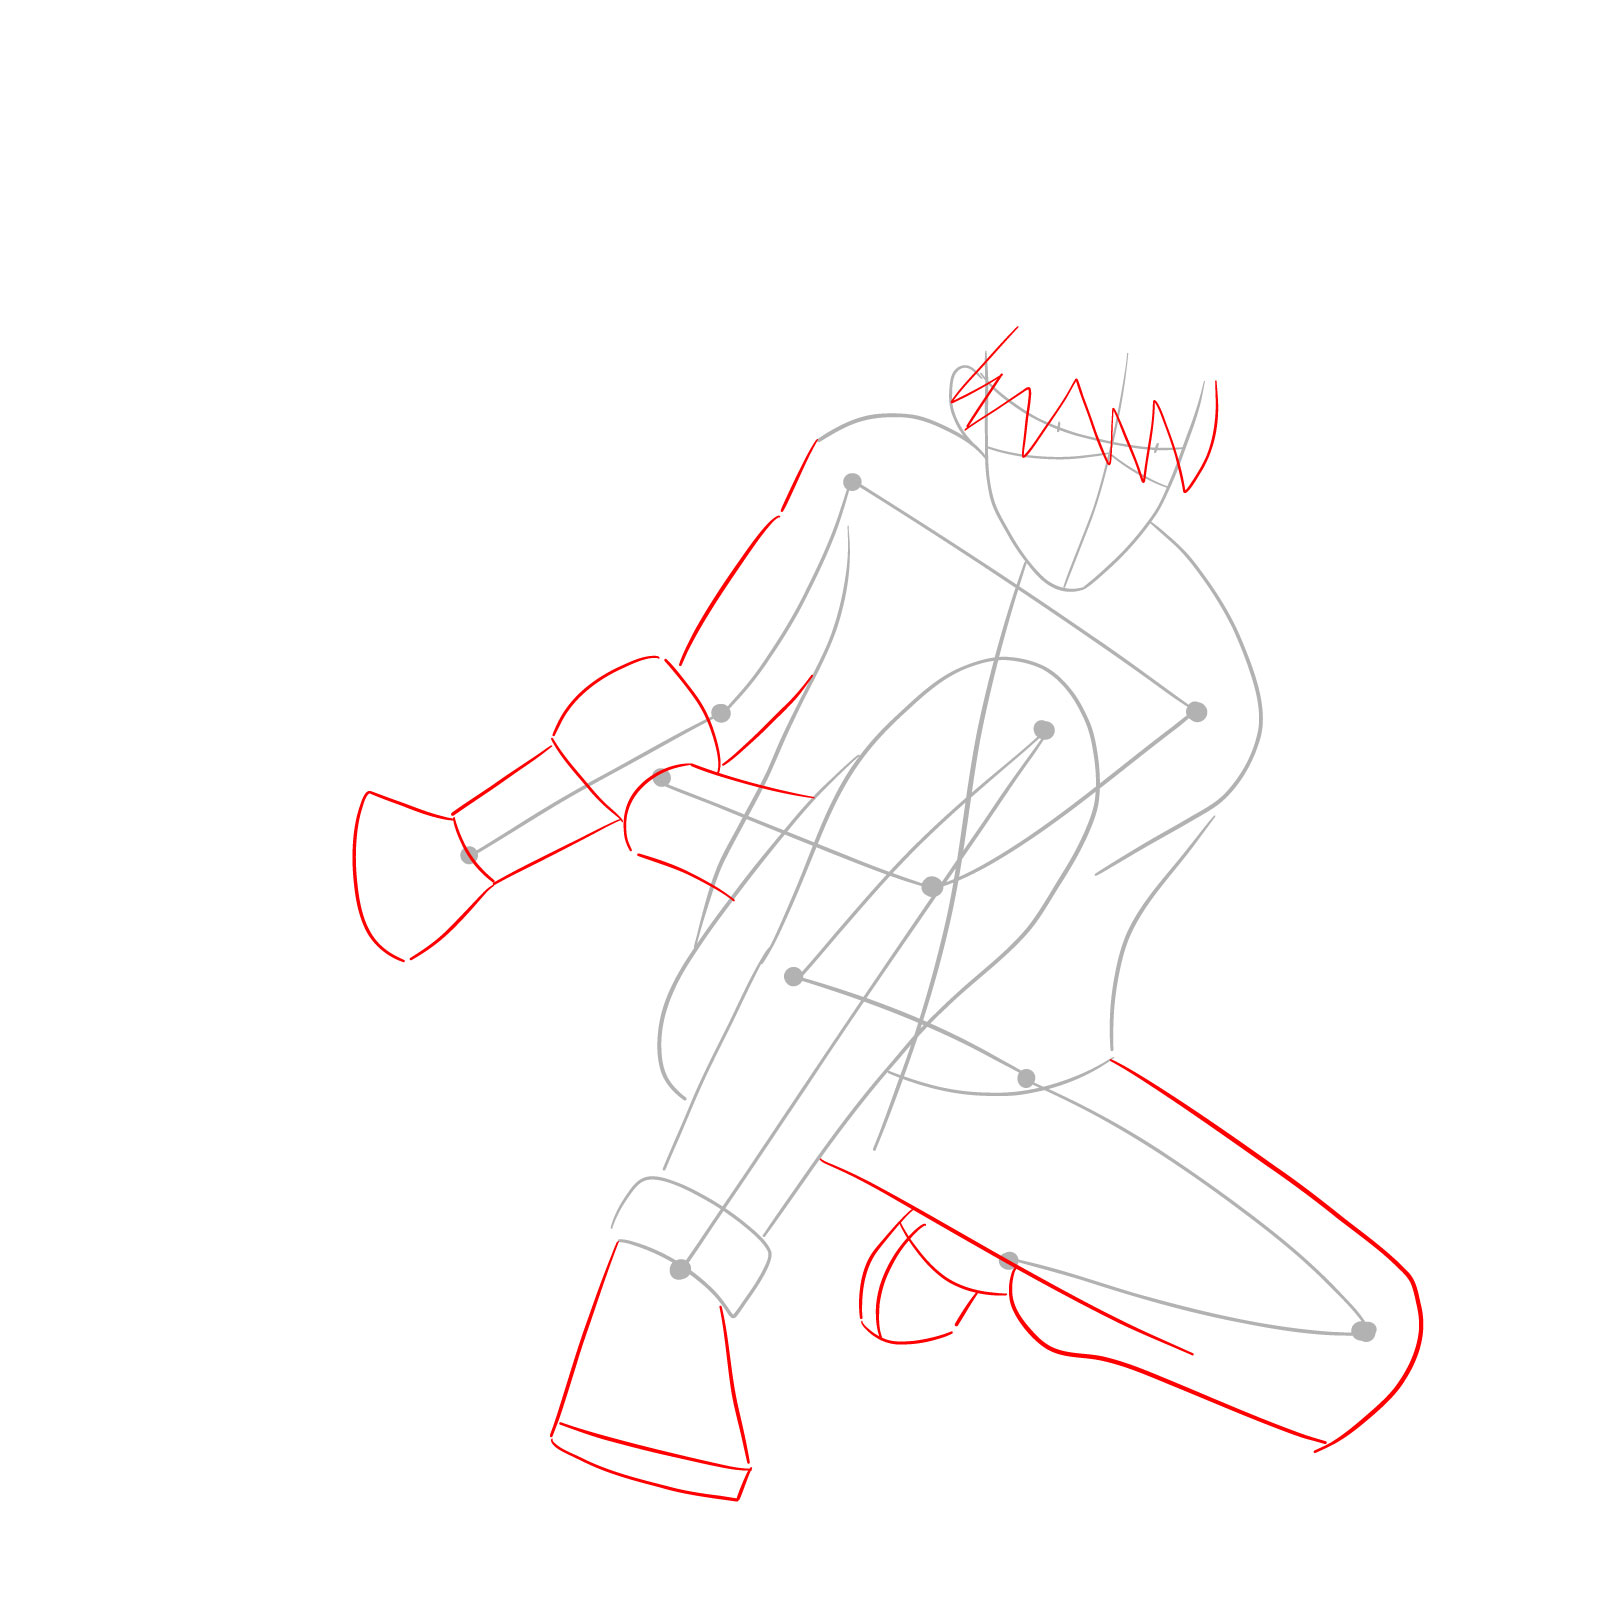
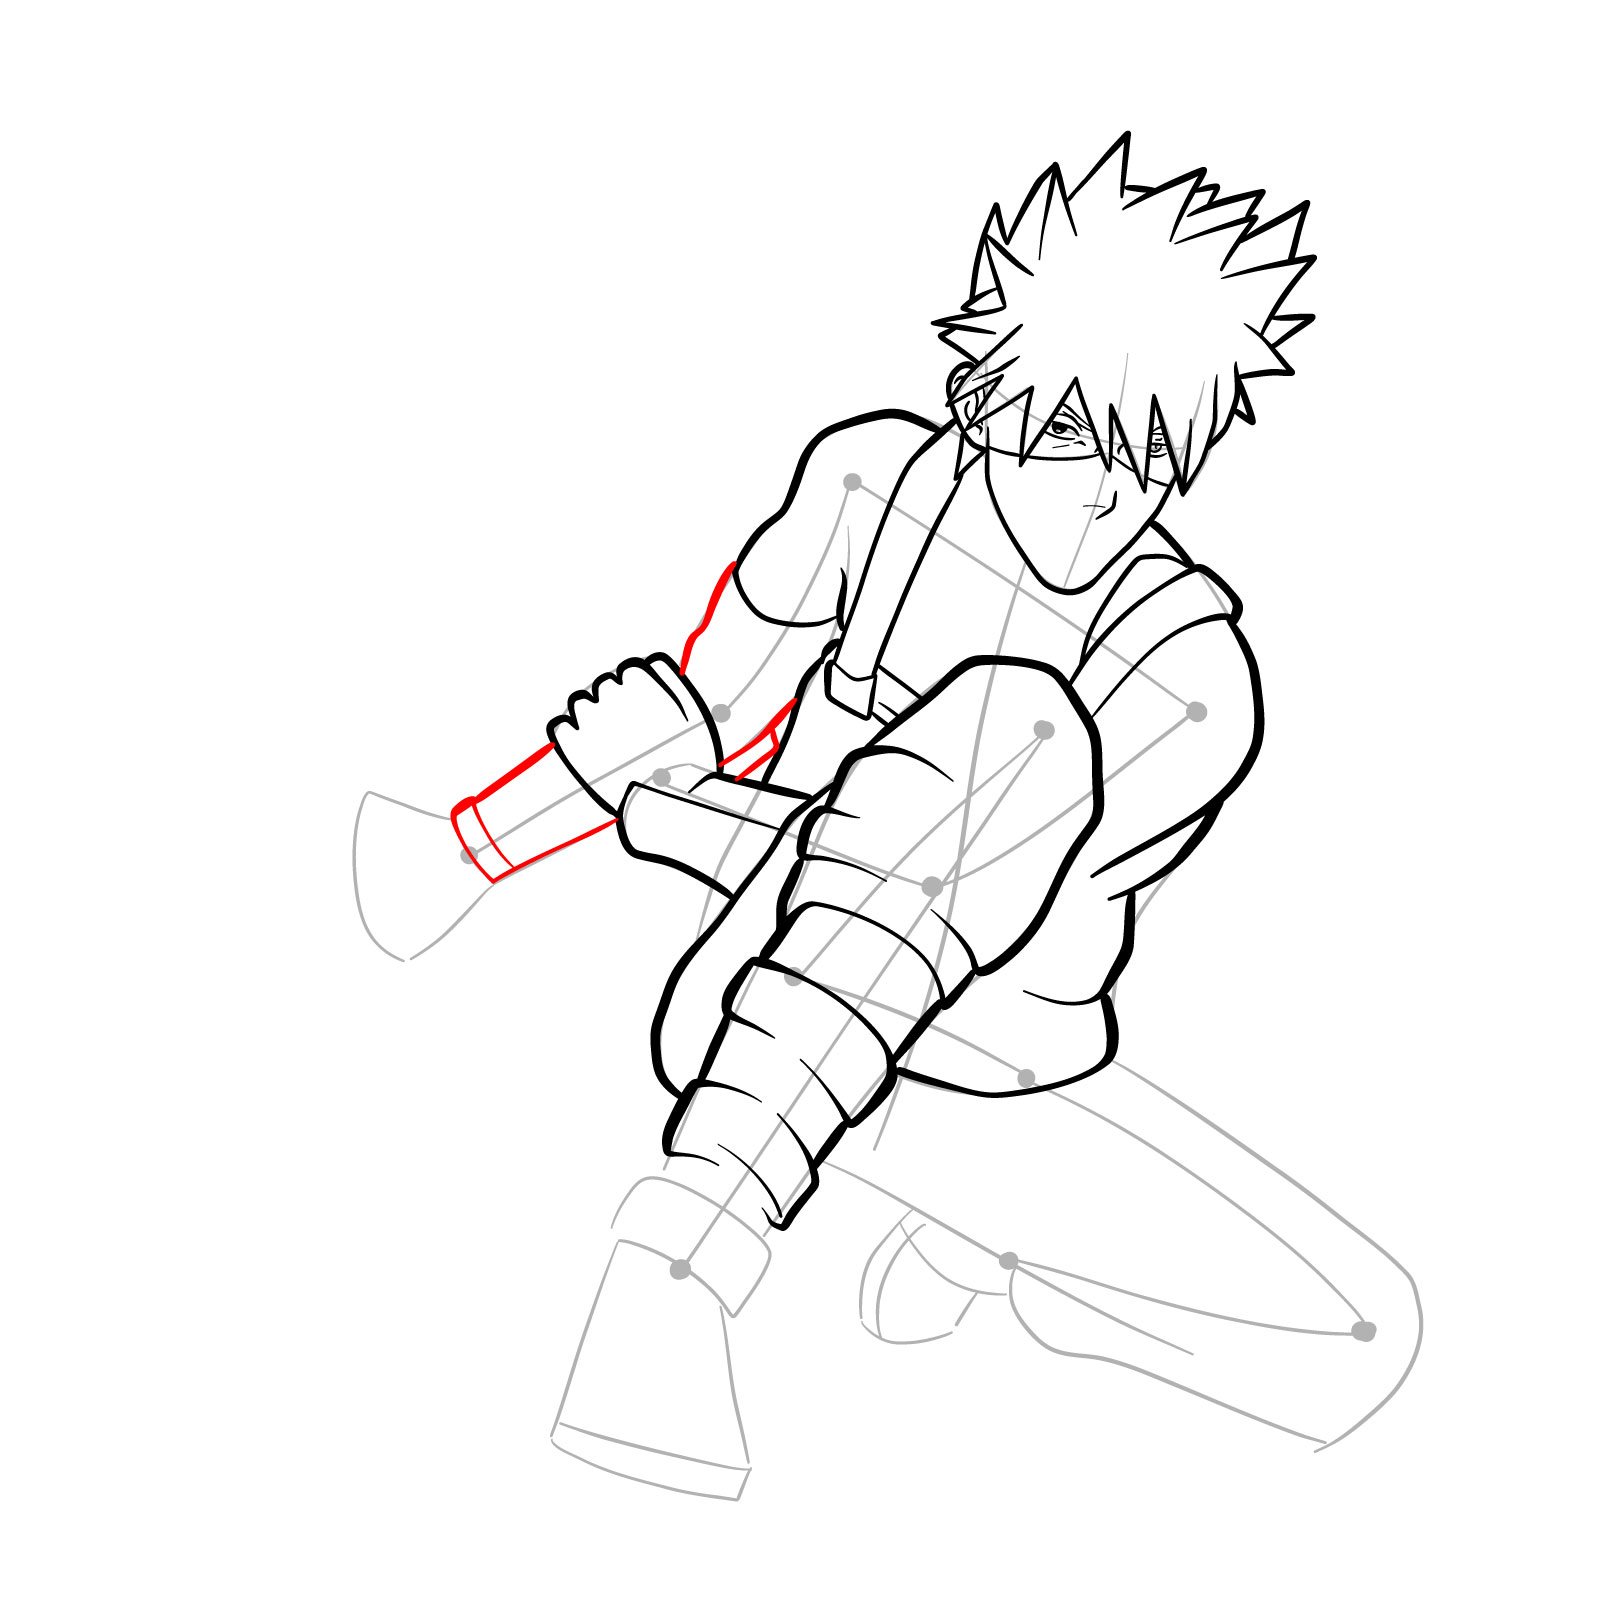
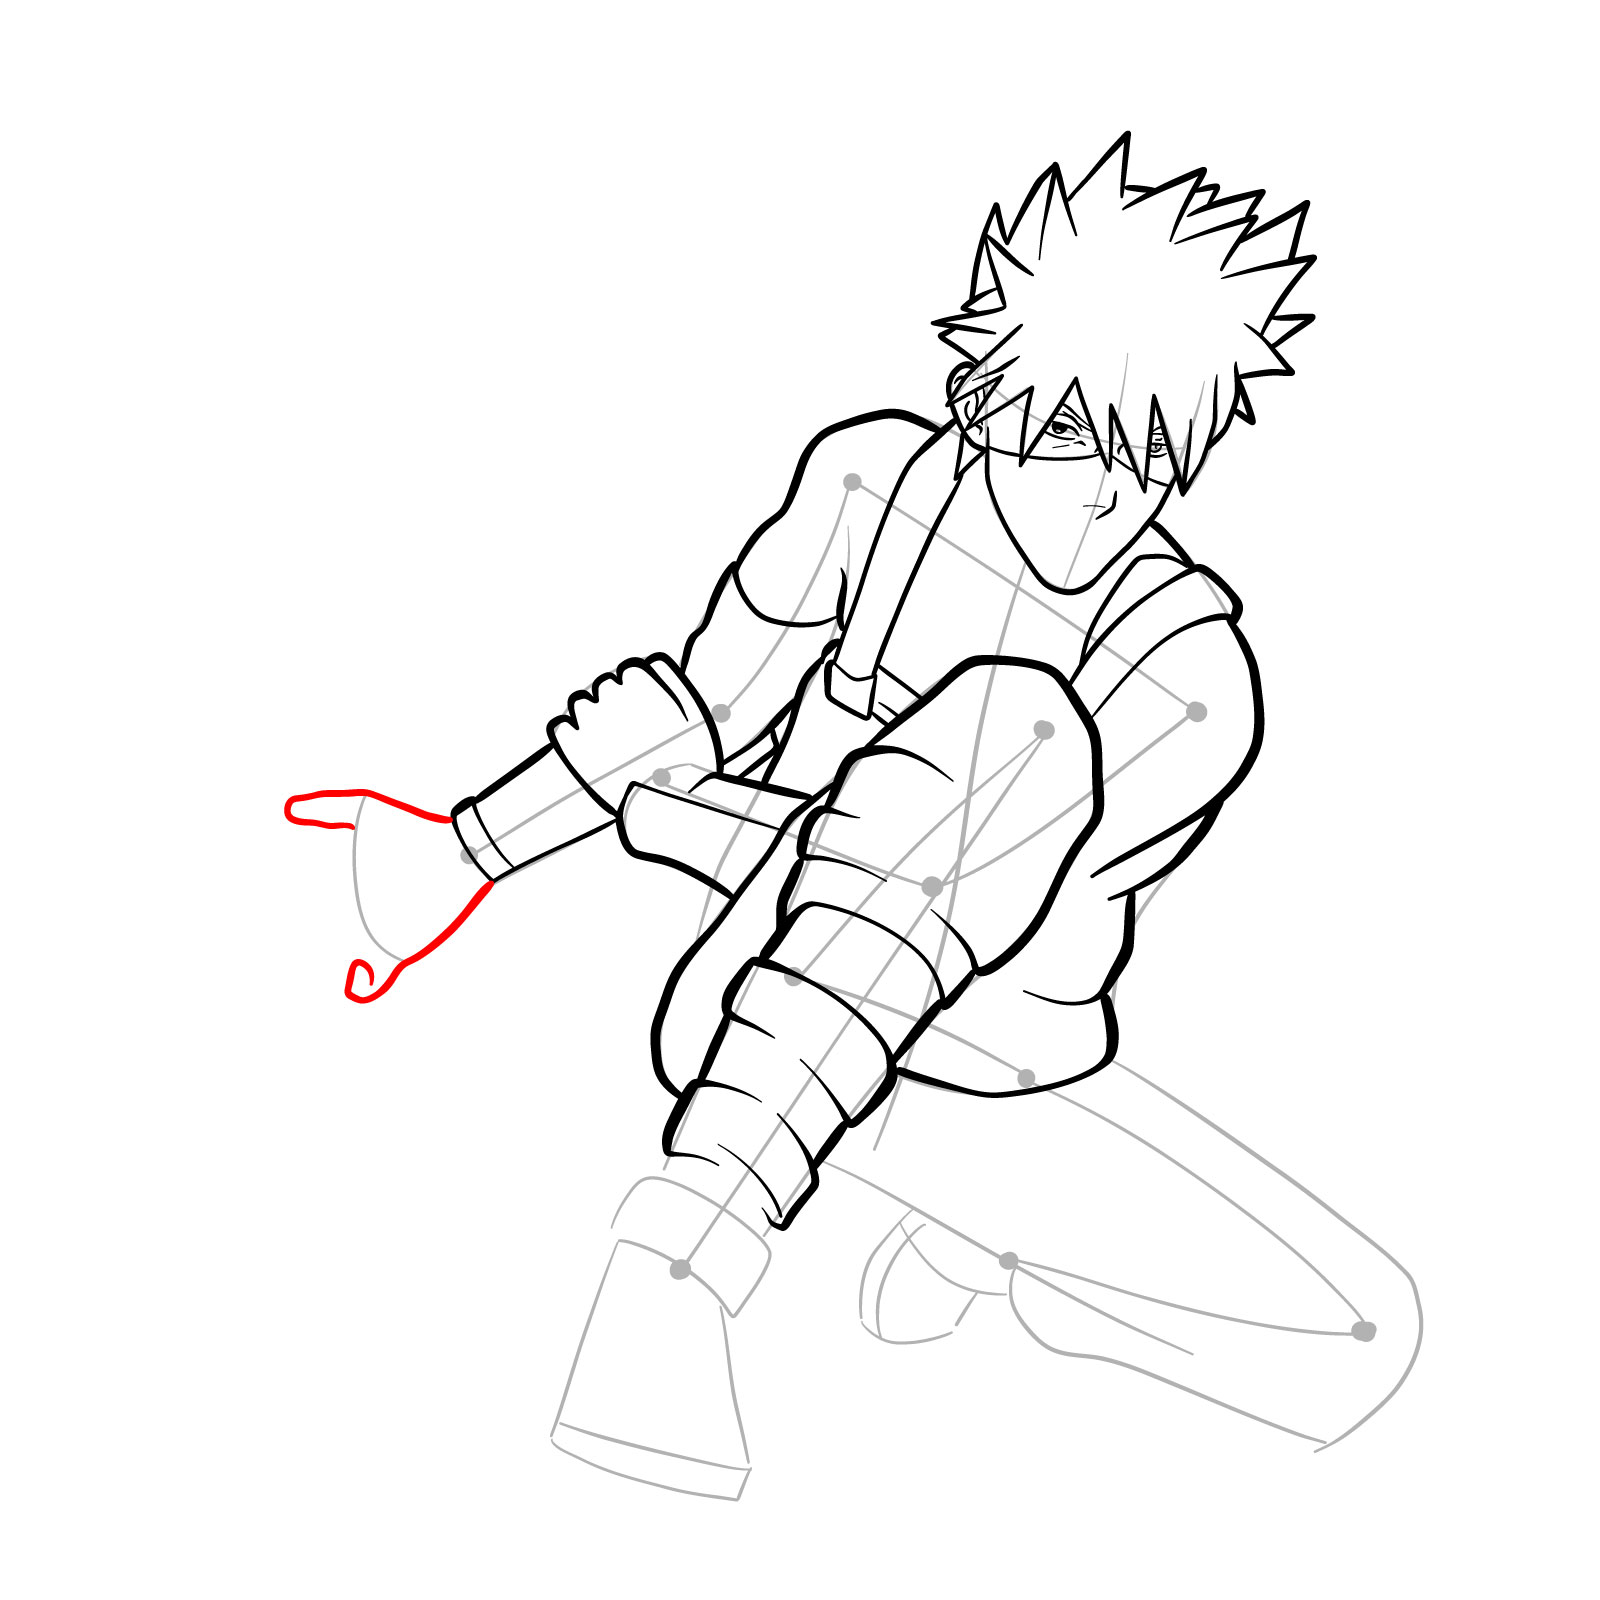
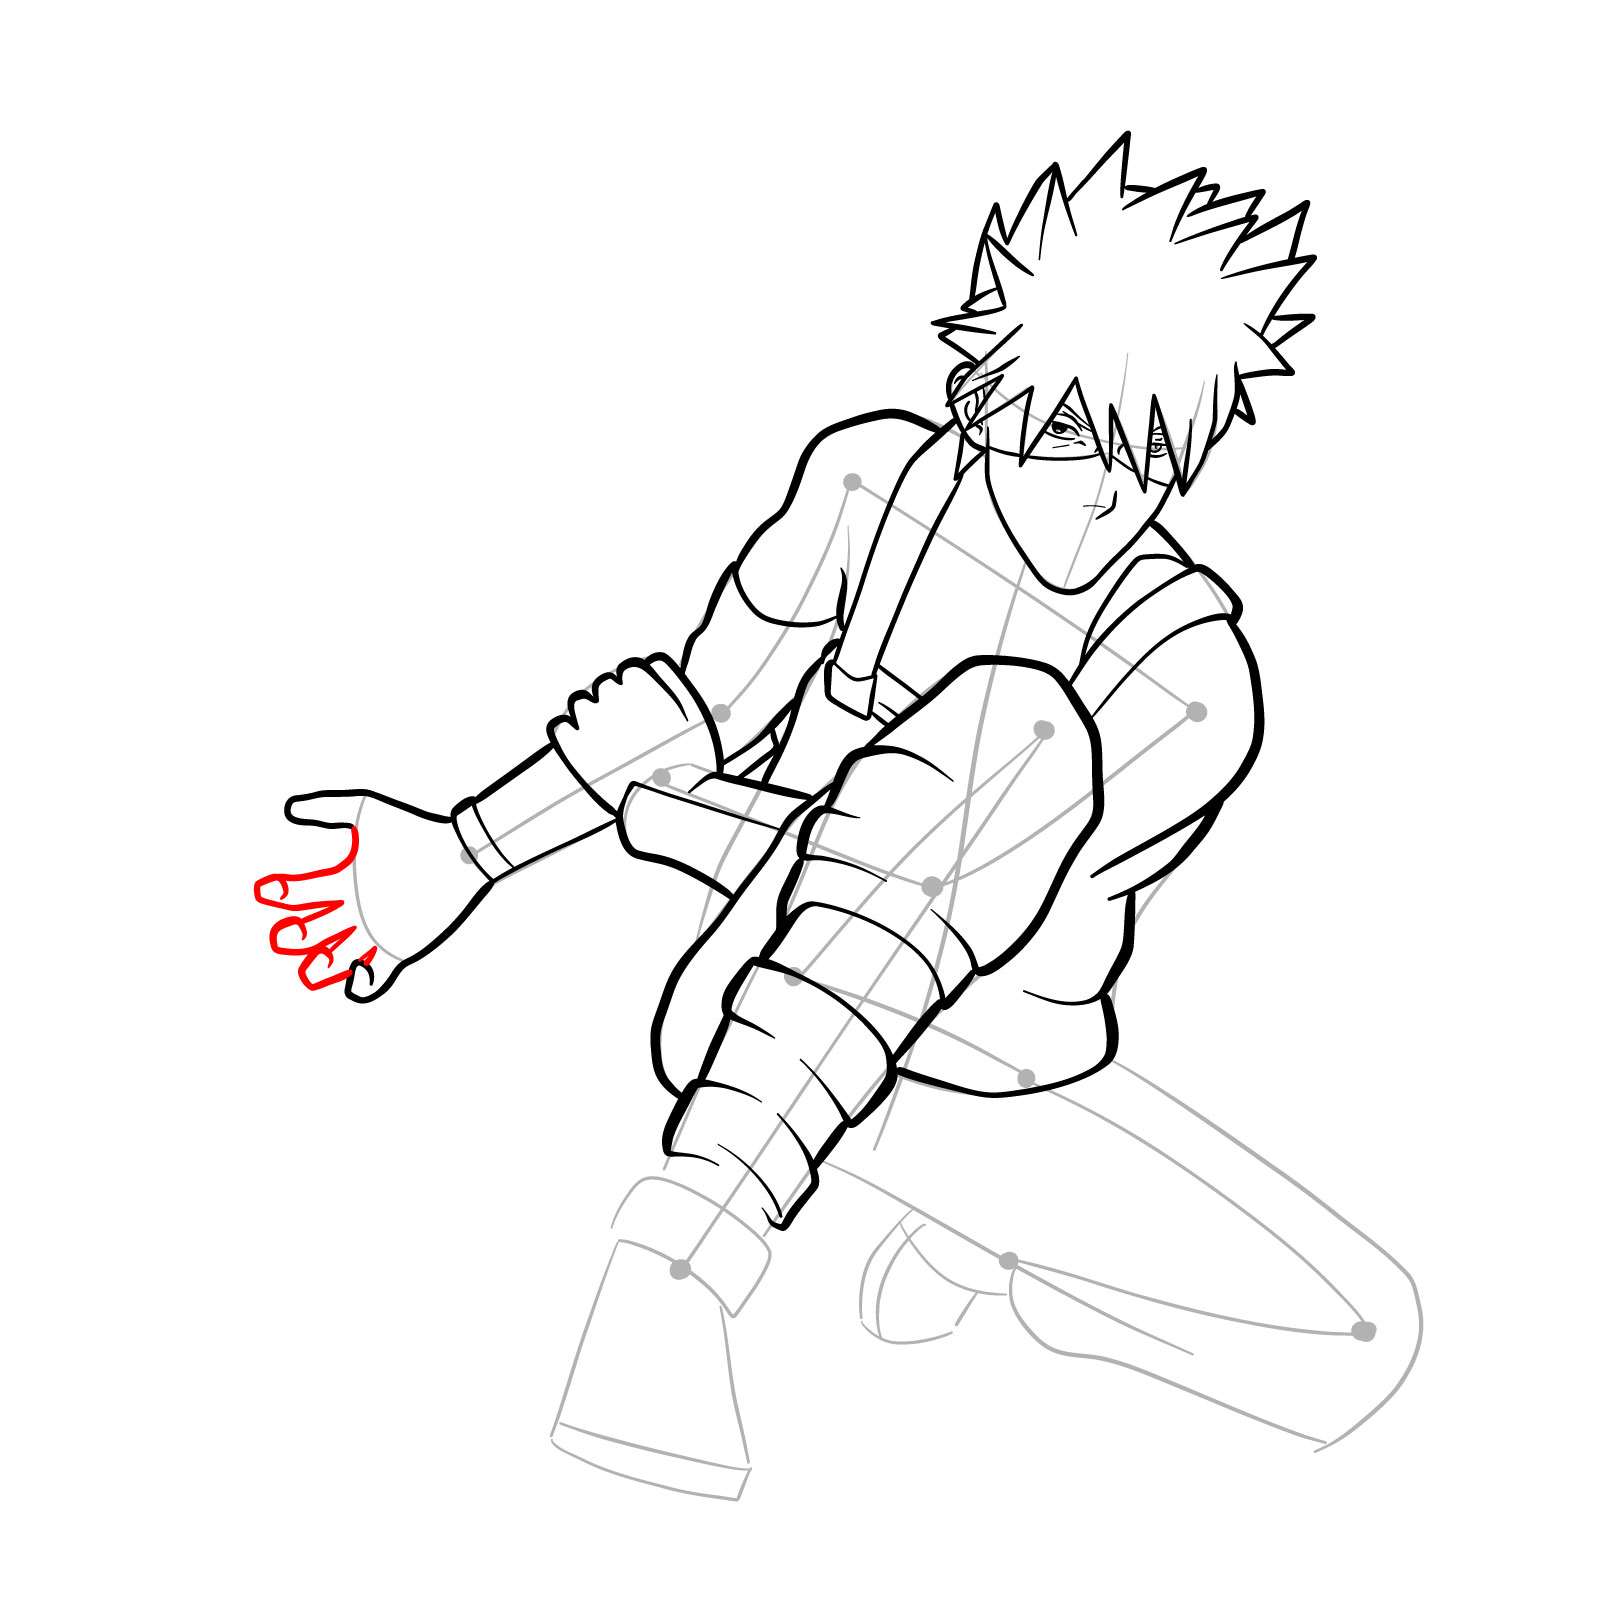
Our drawing guide for Kakashi from Clash of Ninja Revolution is here to help you unleash your artistic skills and bring this iconic character to life. With a step-by-step approach, we’ll guide you through each stage of the drawing process, from creating a basic sketch to adding intricate details. Let’s dive in and explore the color-coded journey to artistic mastery!
Color Scheme: Simplifying the Process
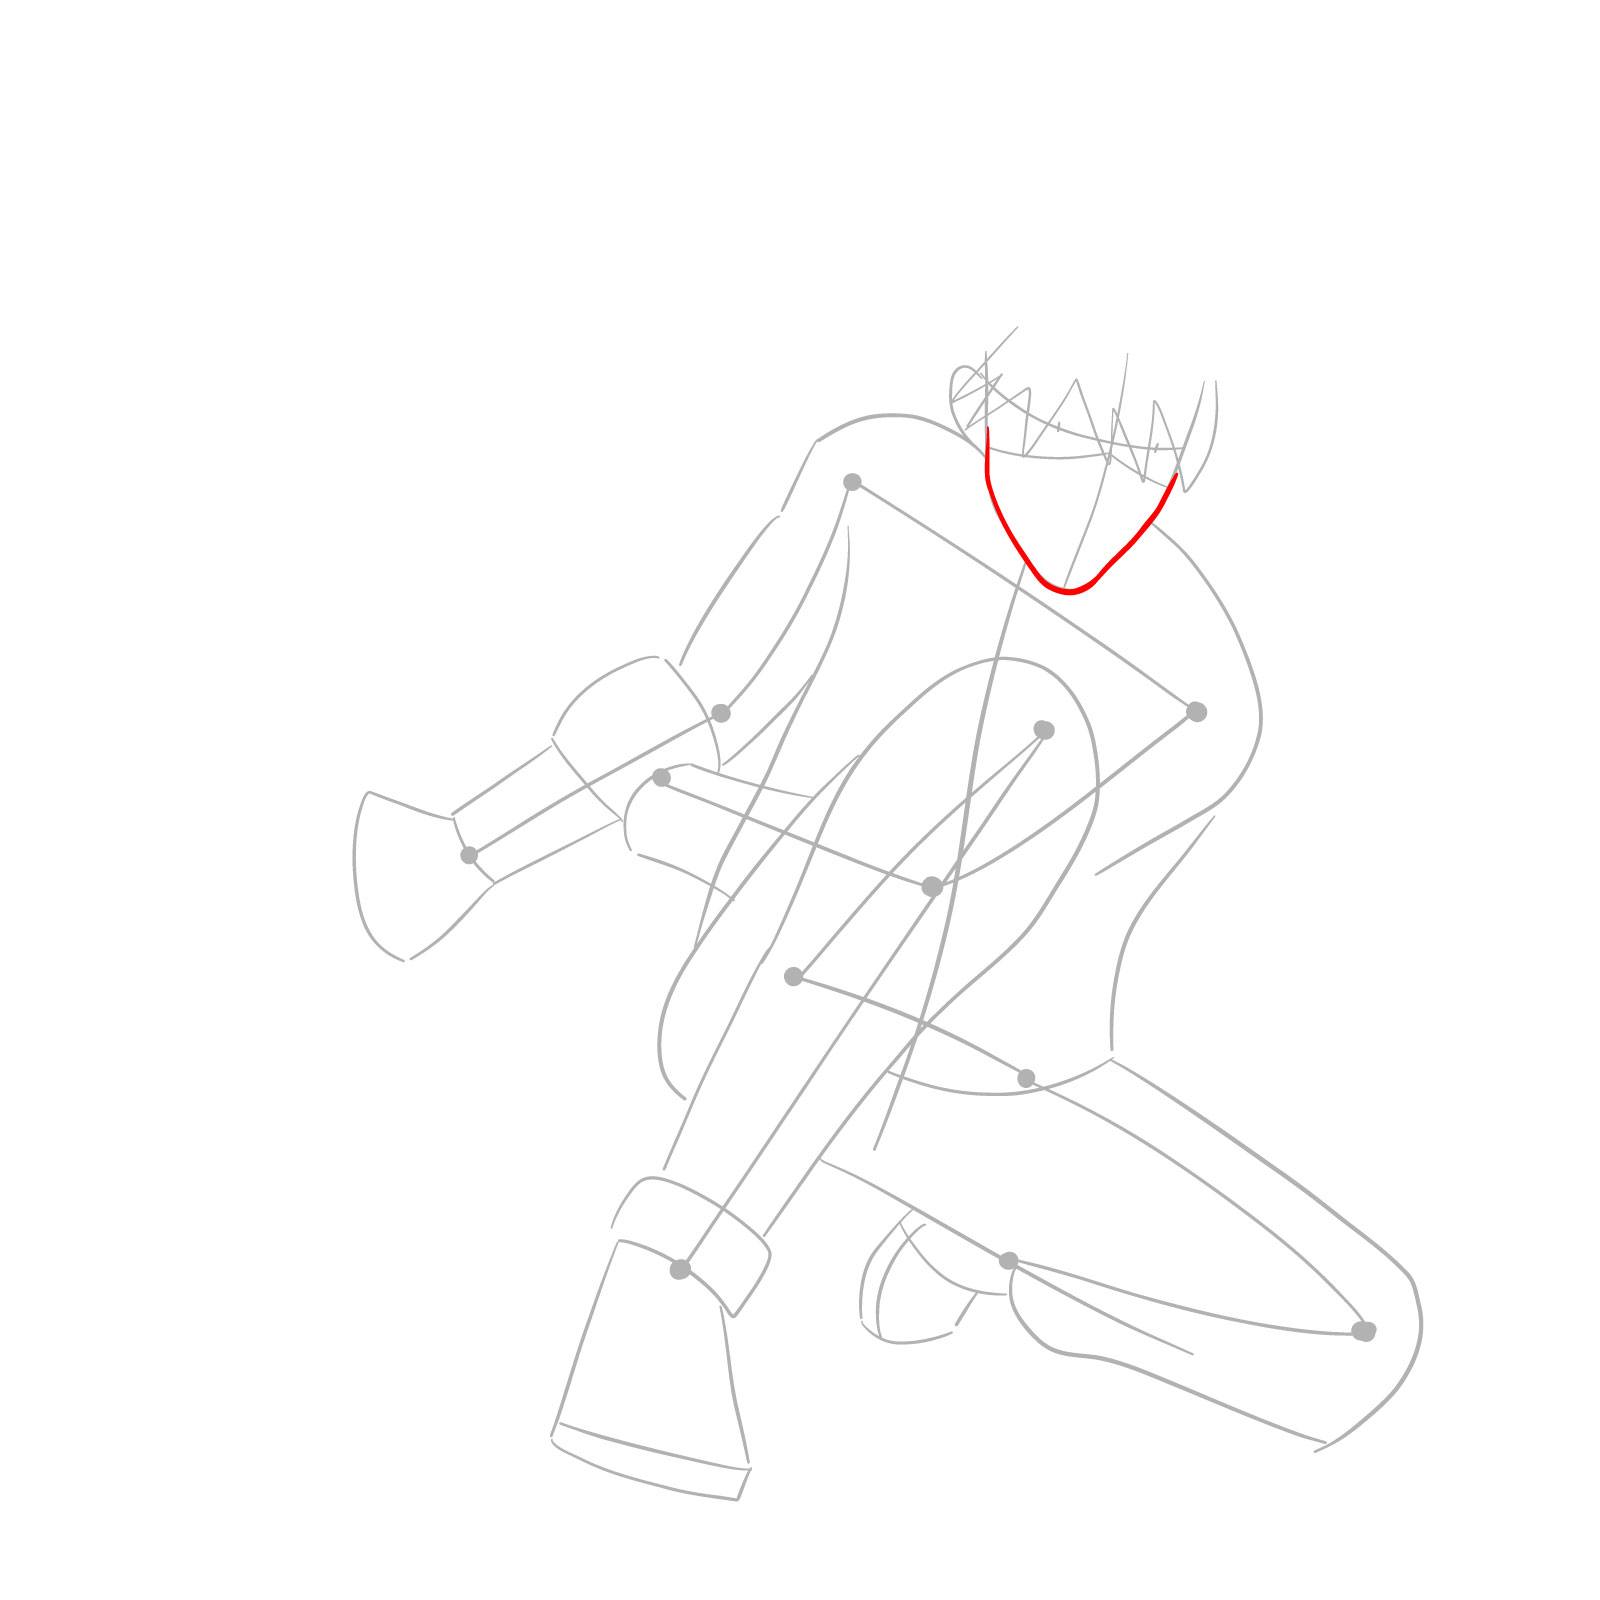
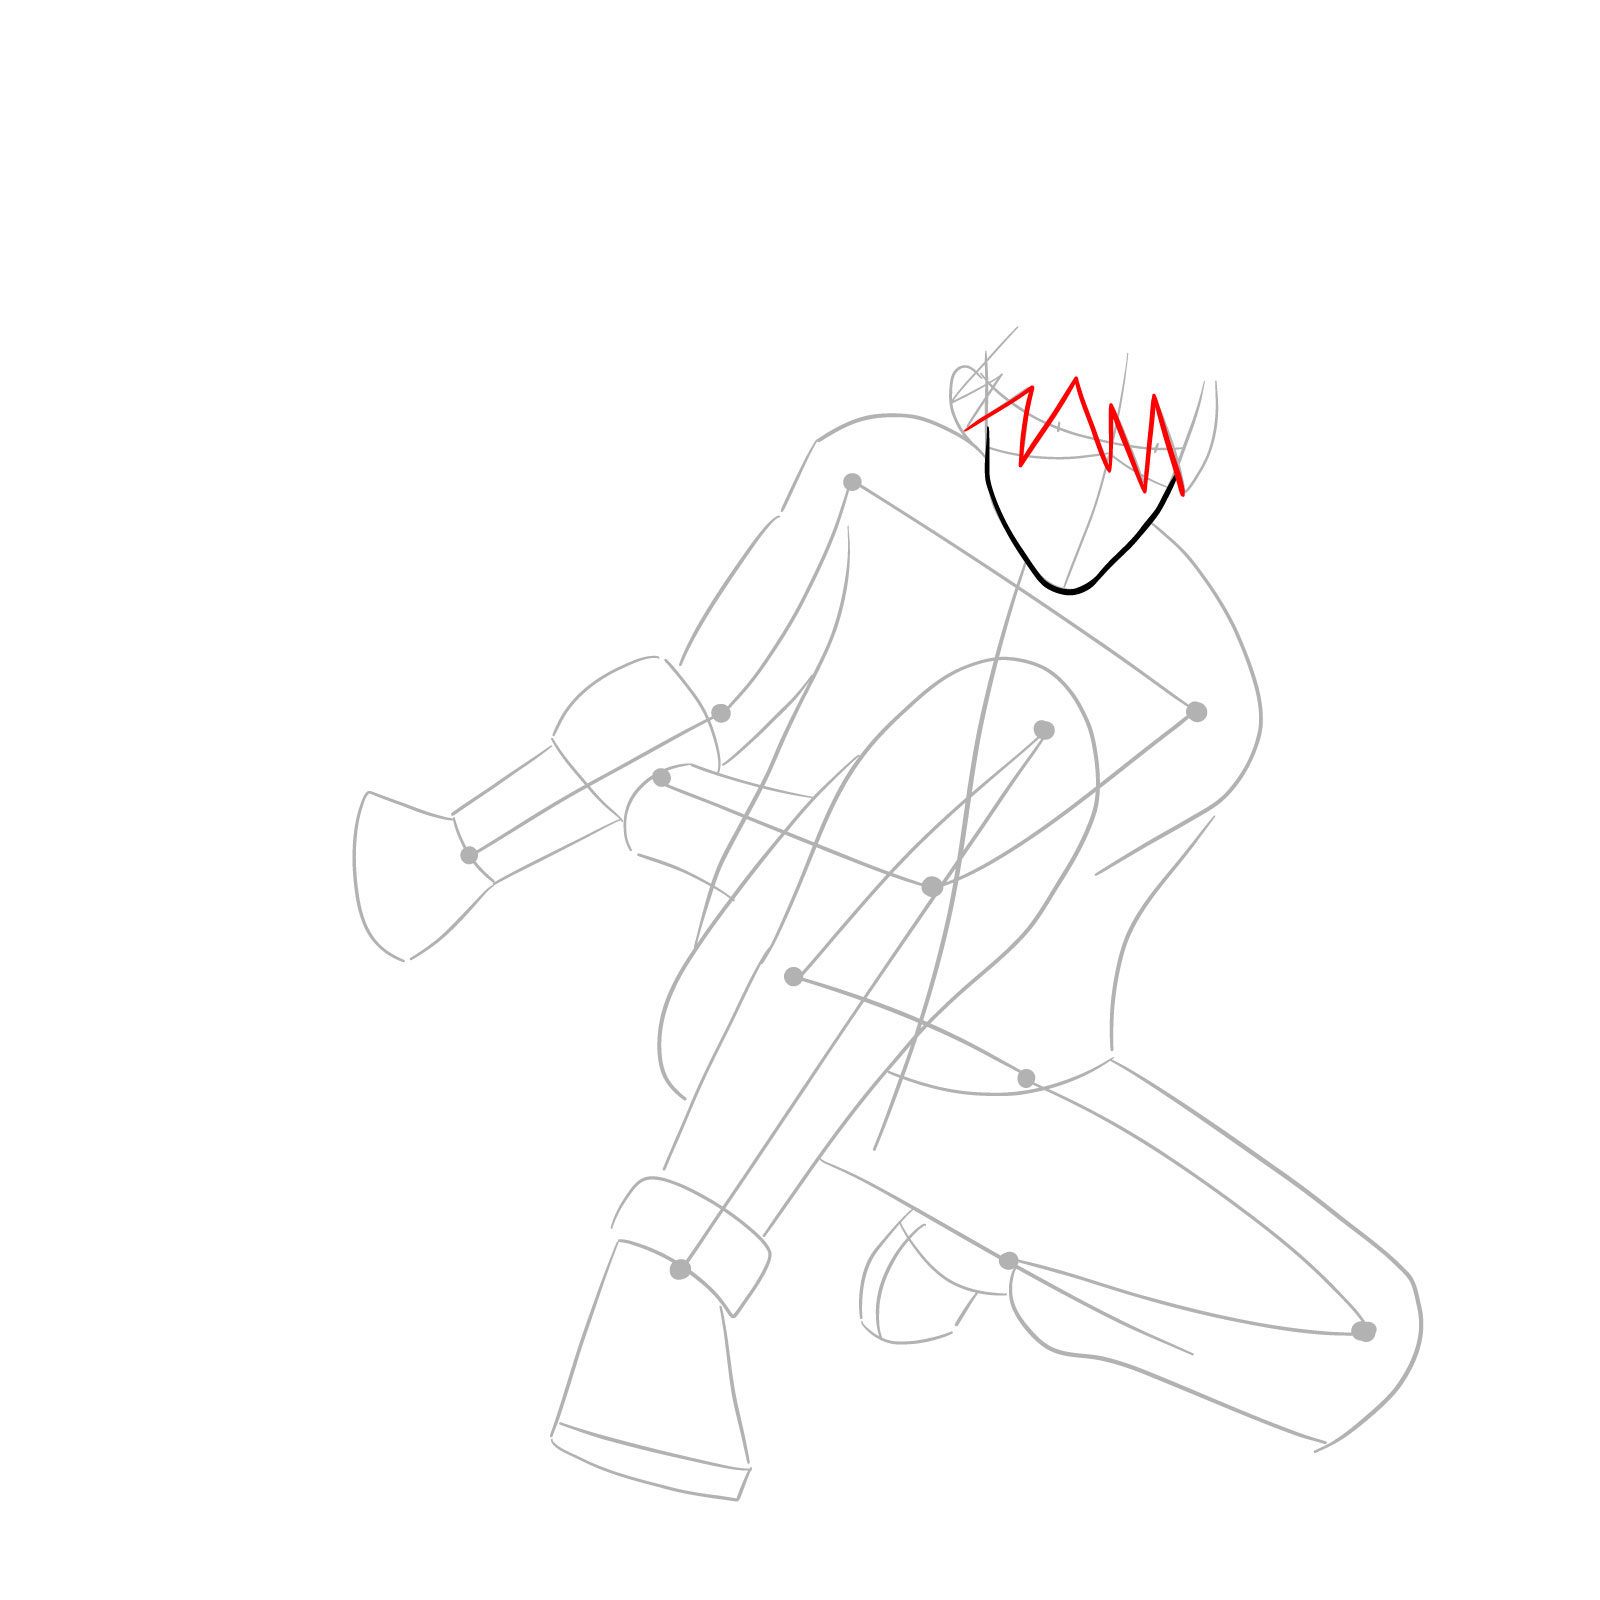
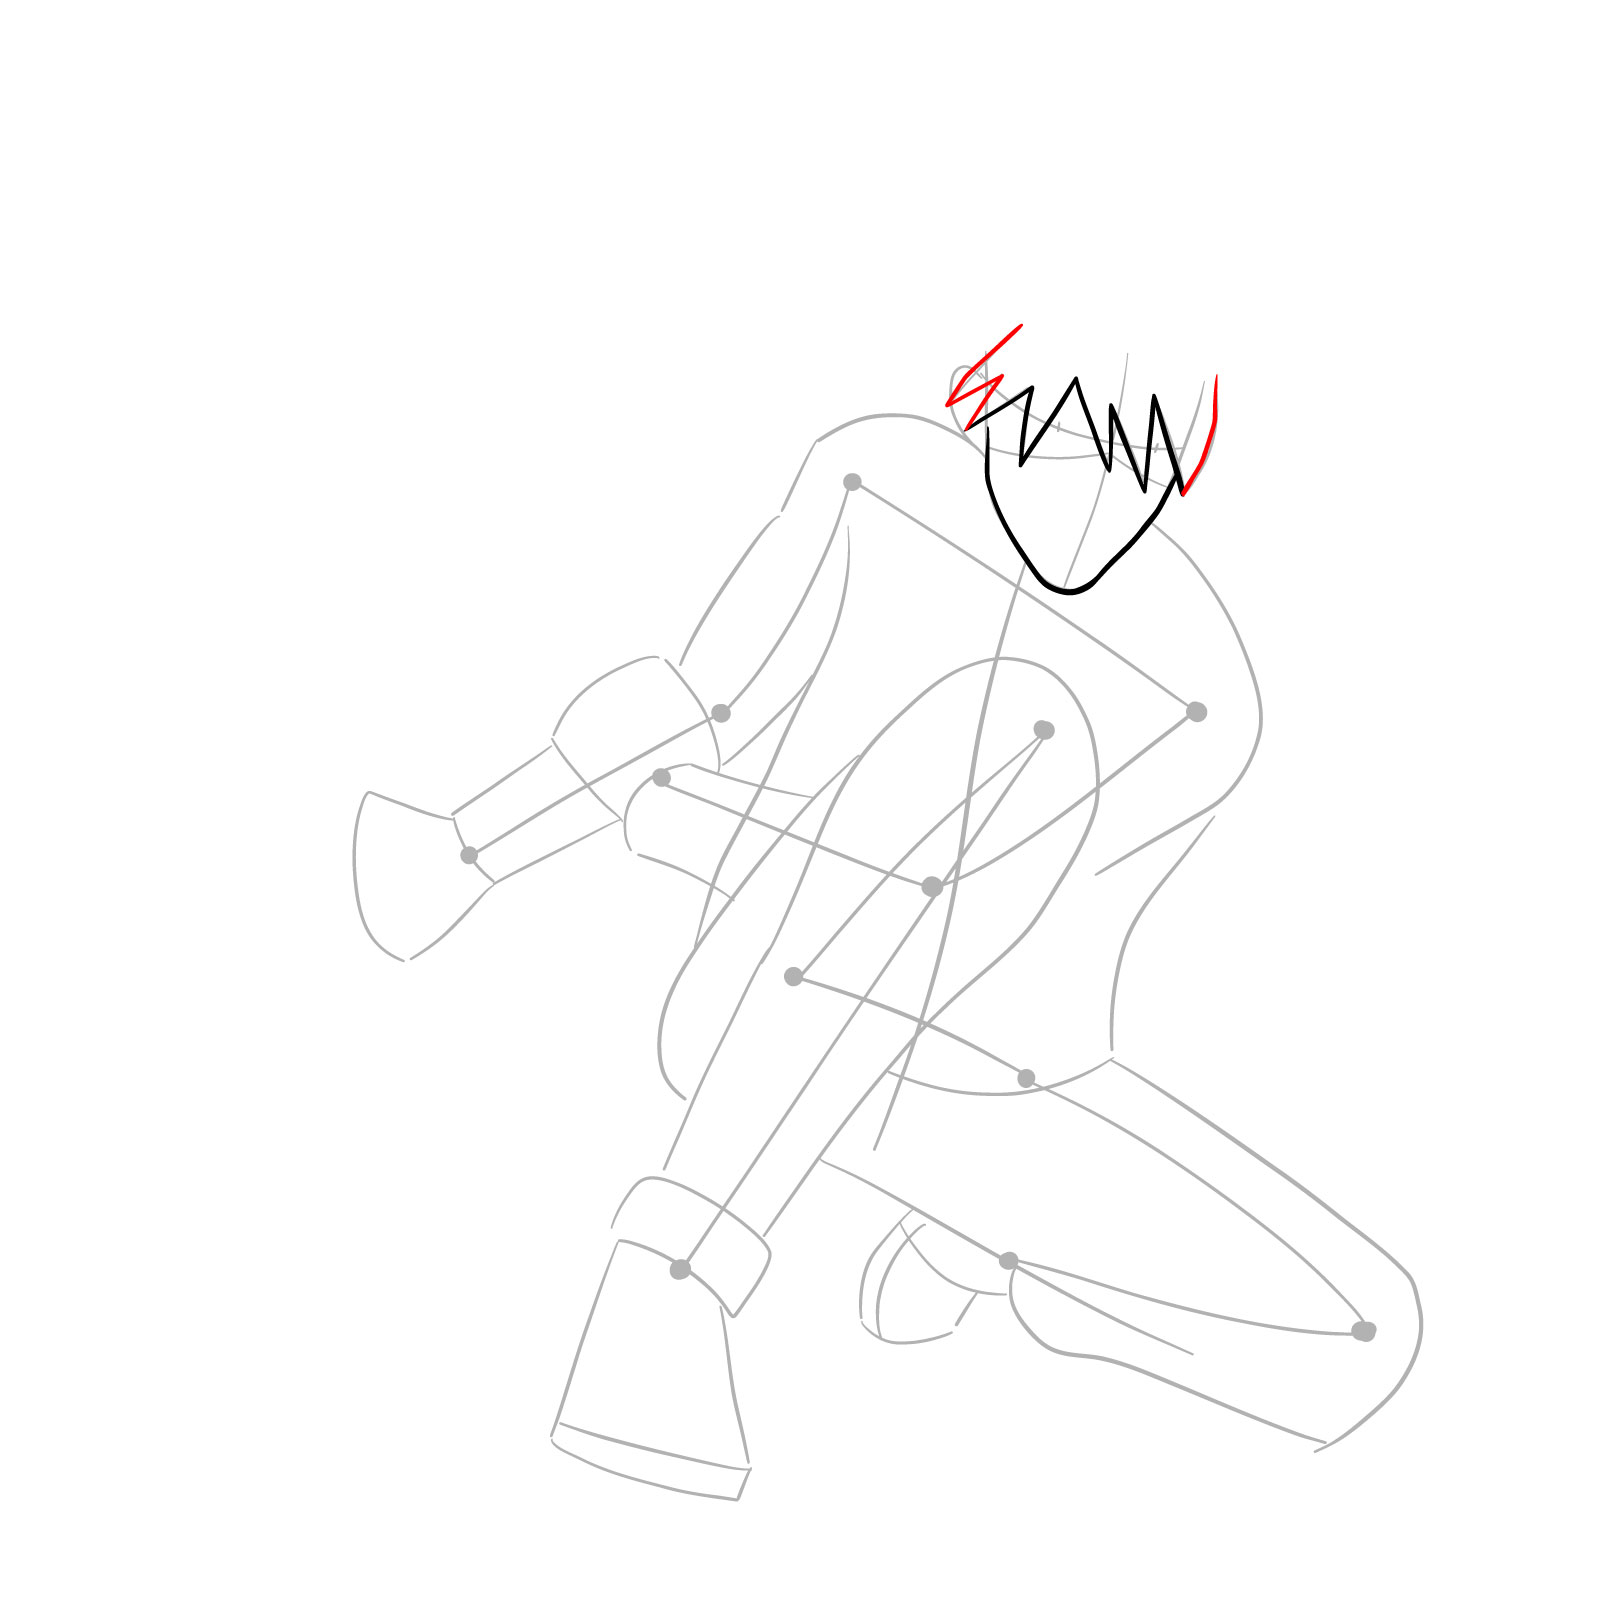
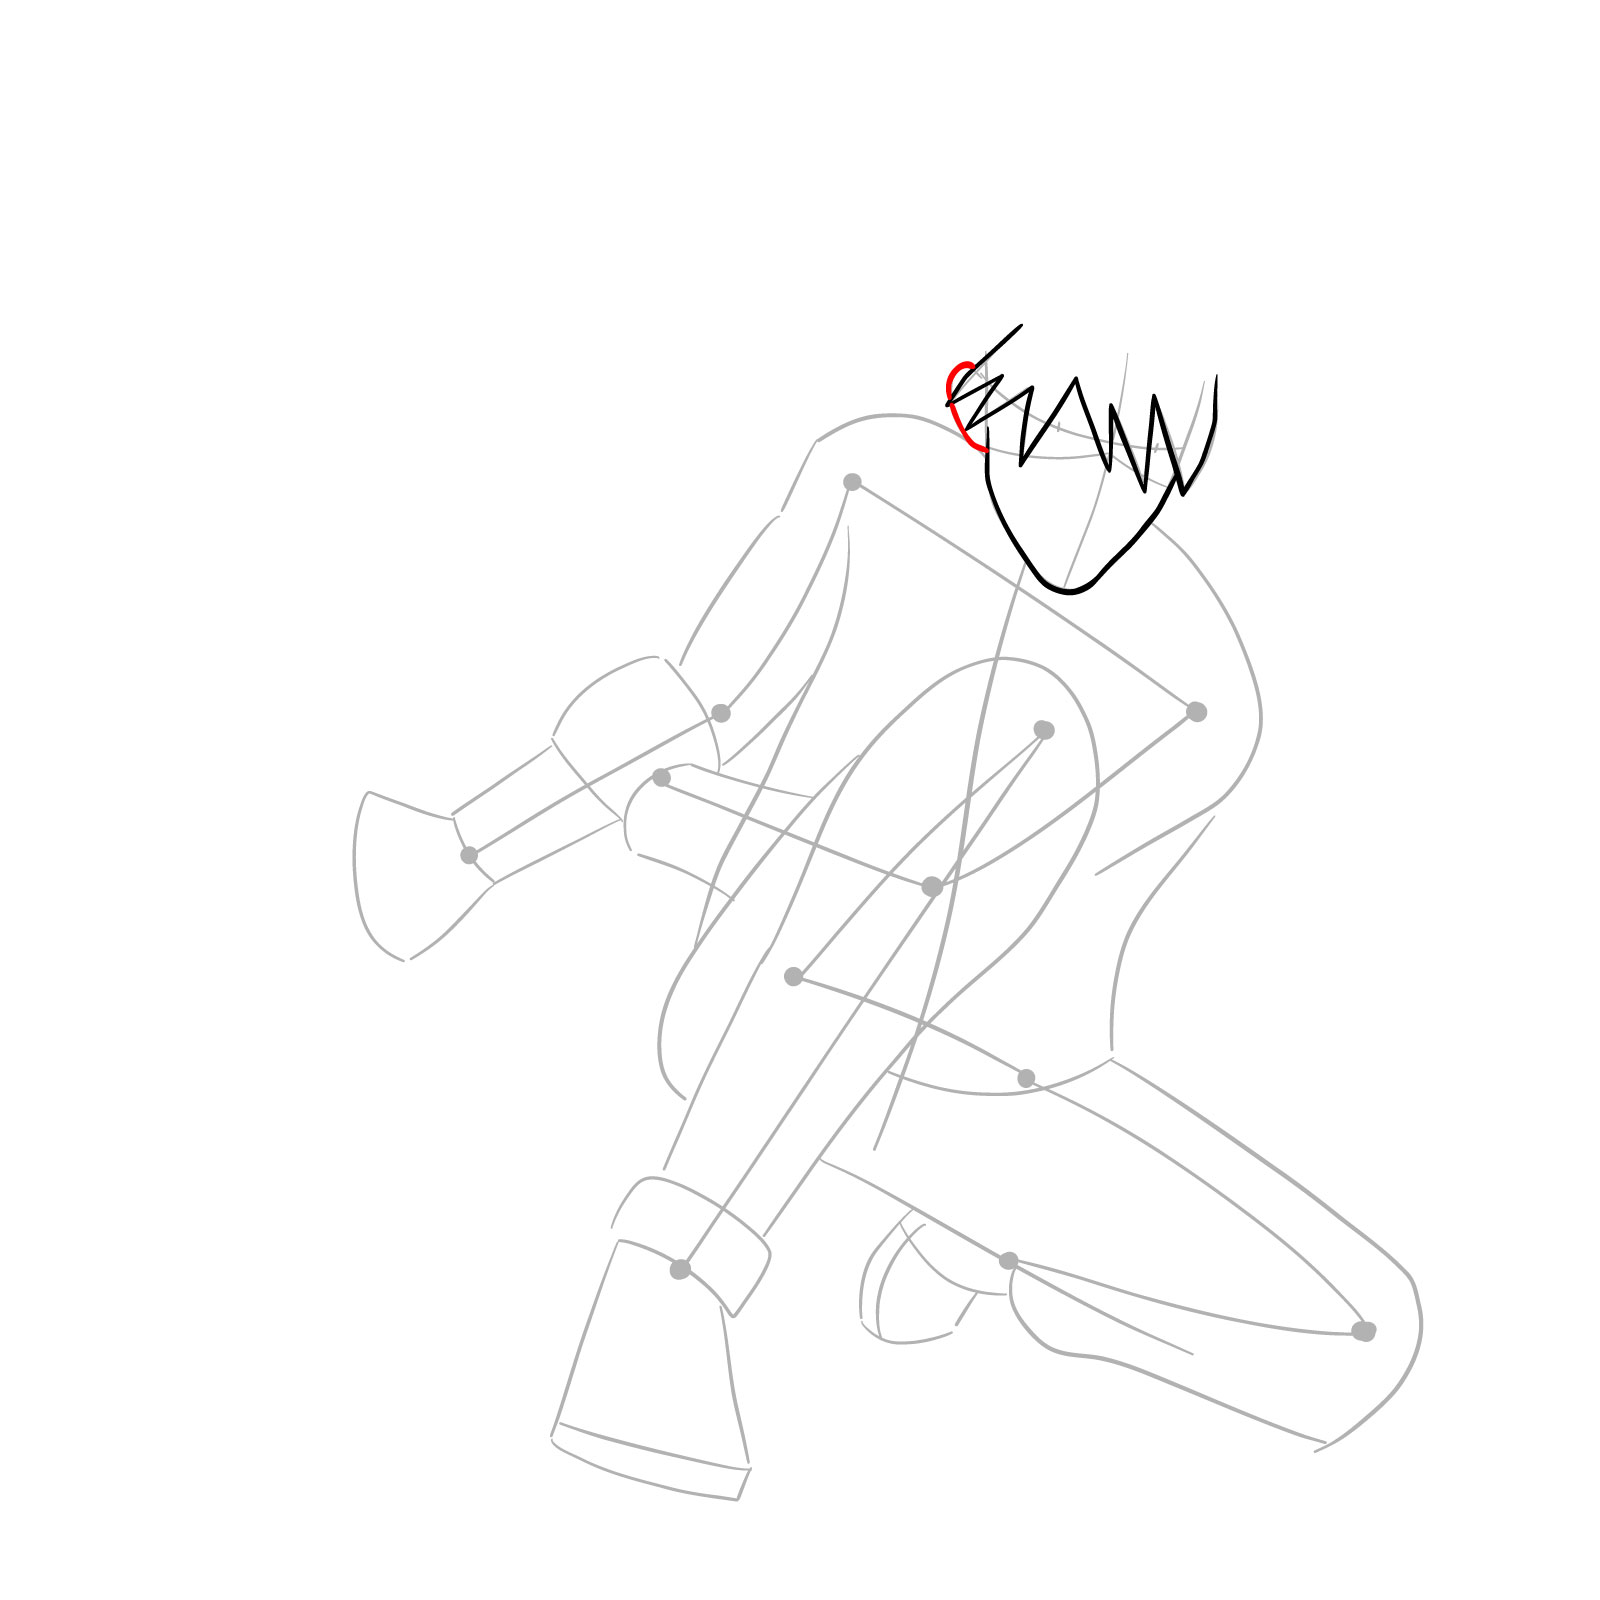
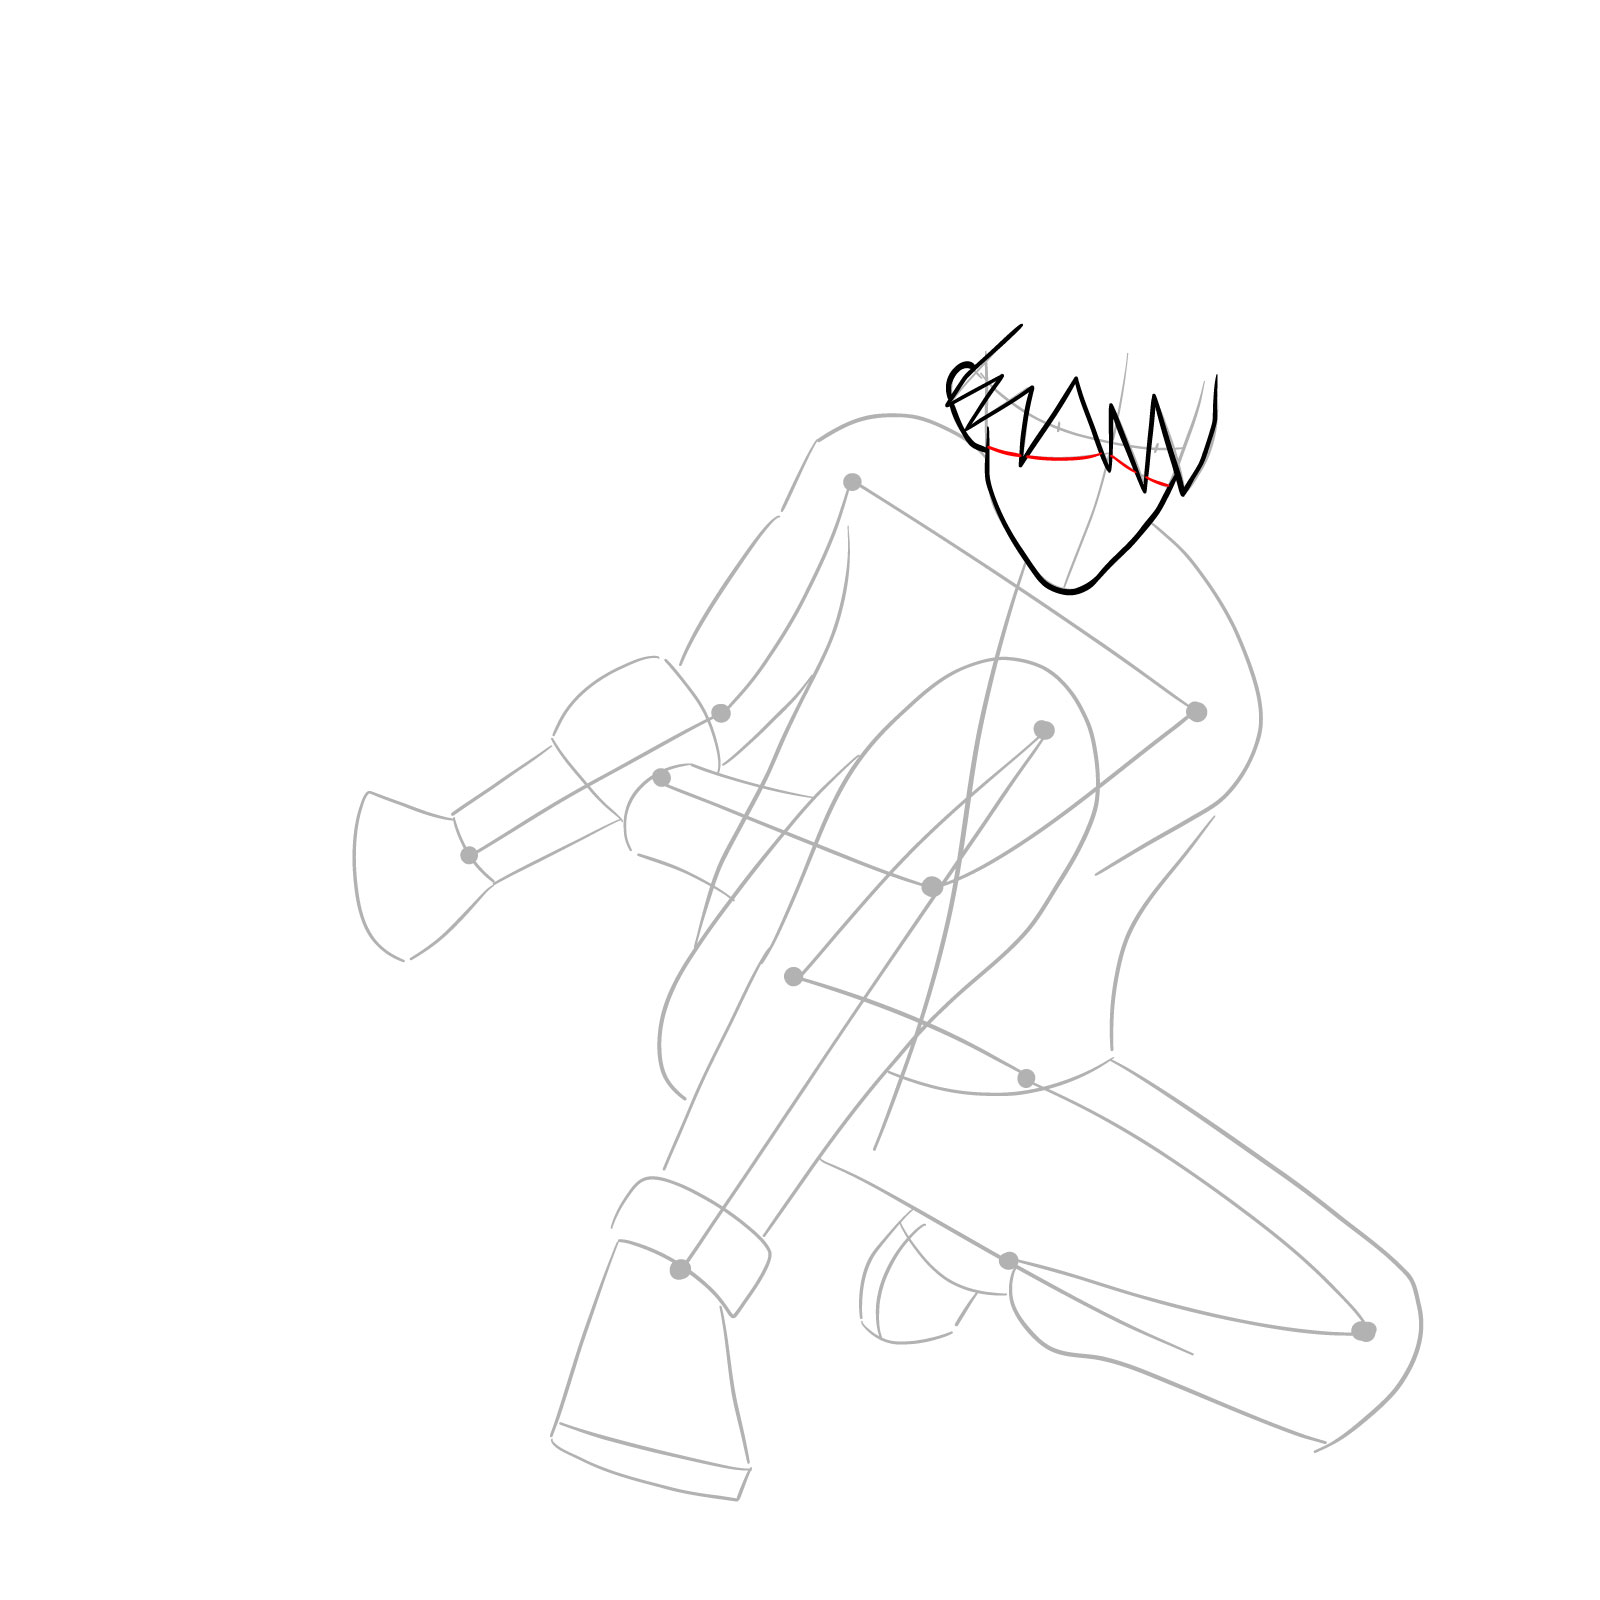
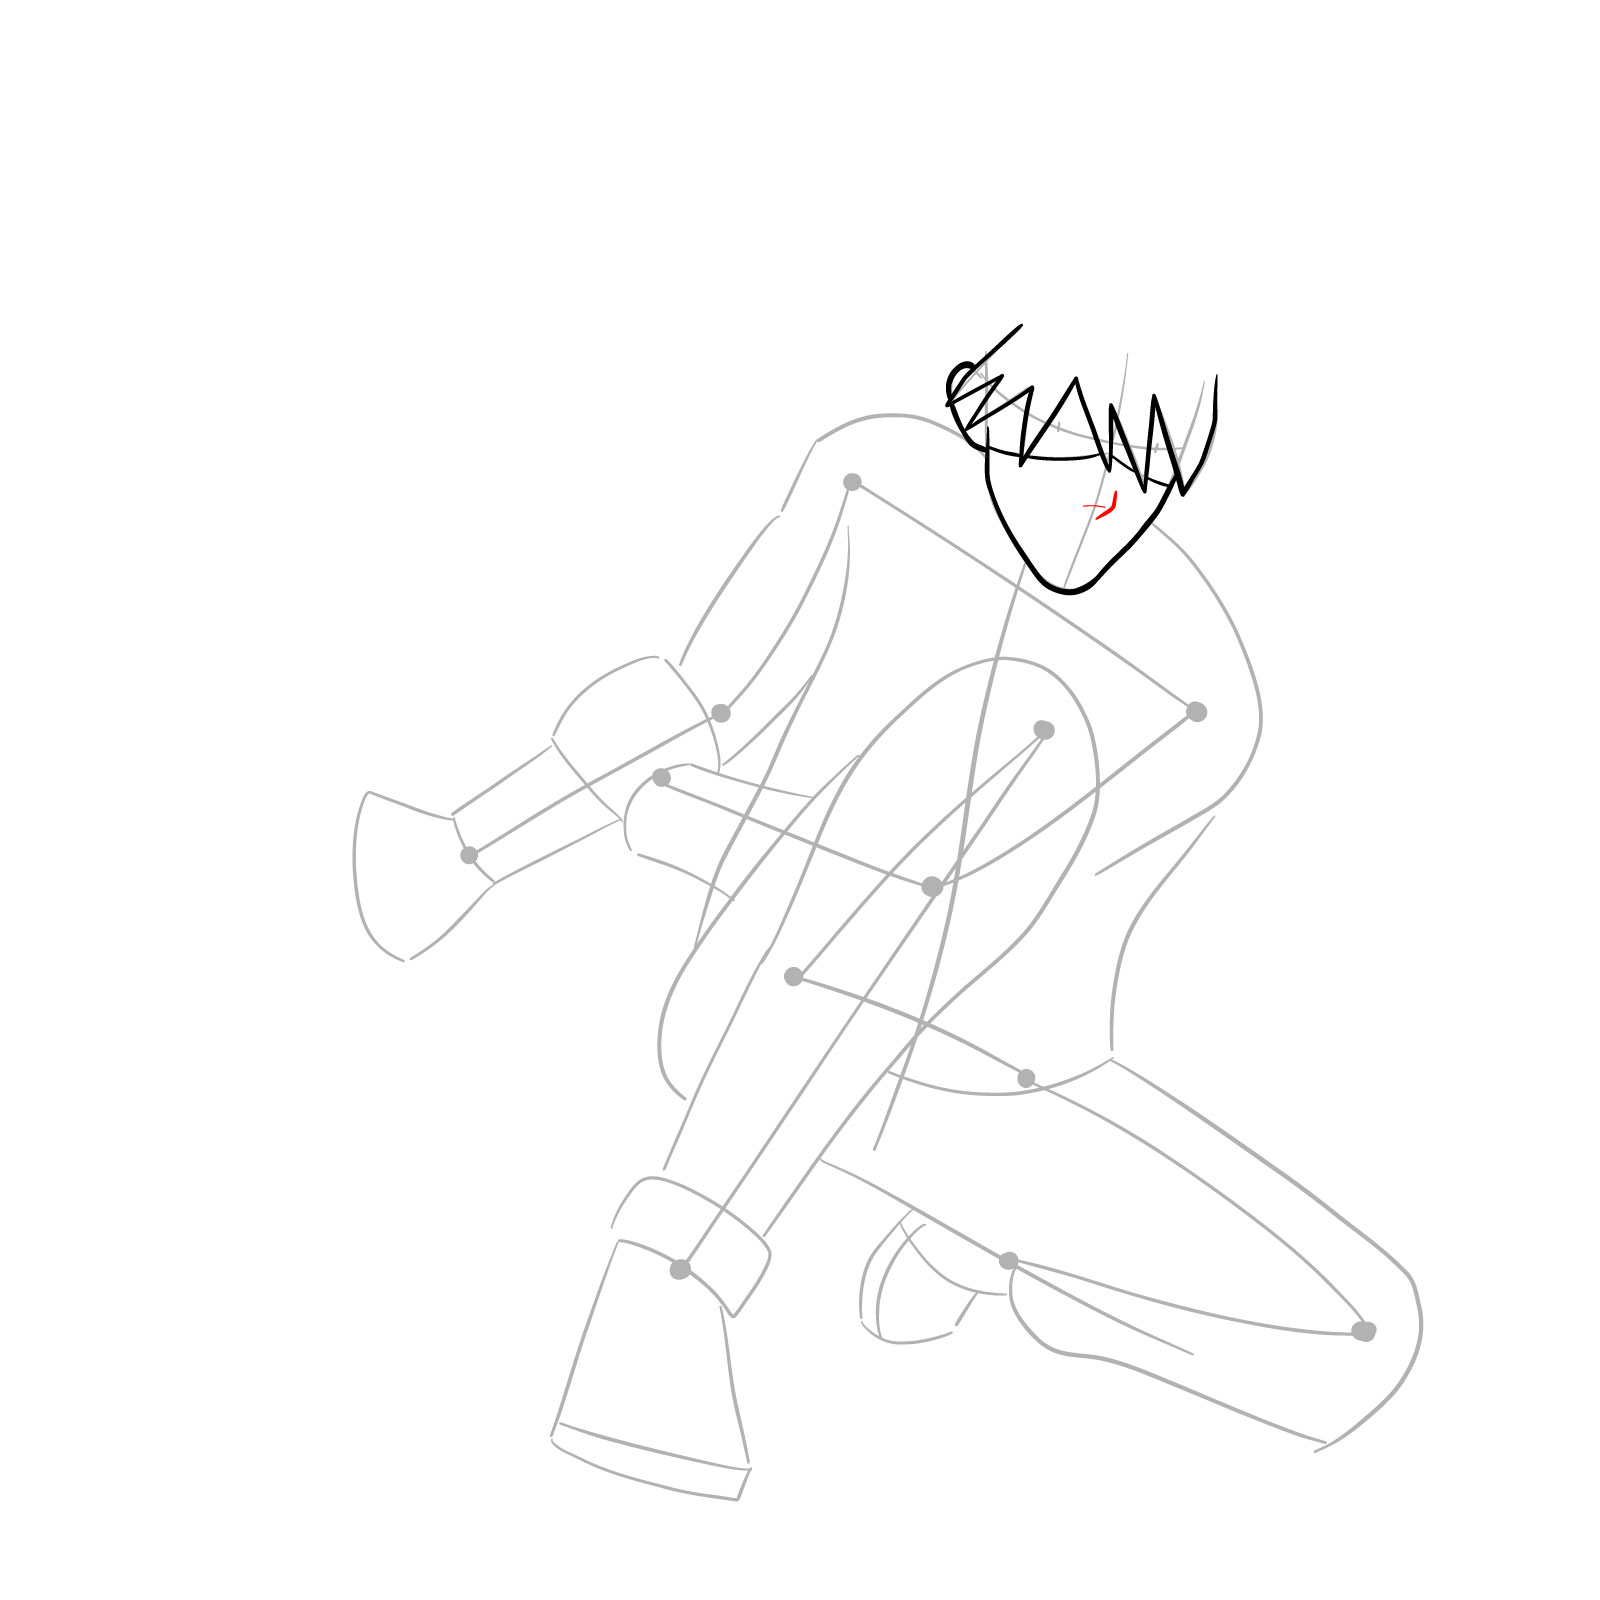
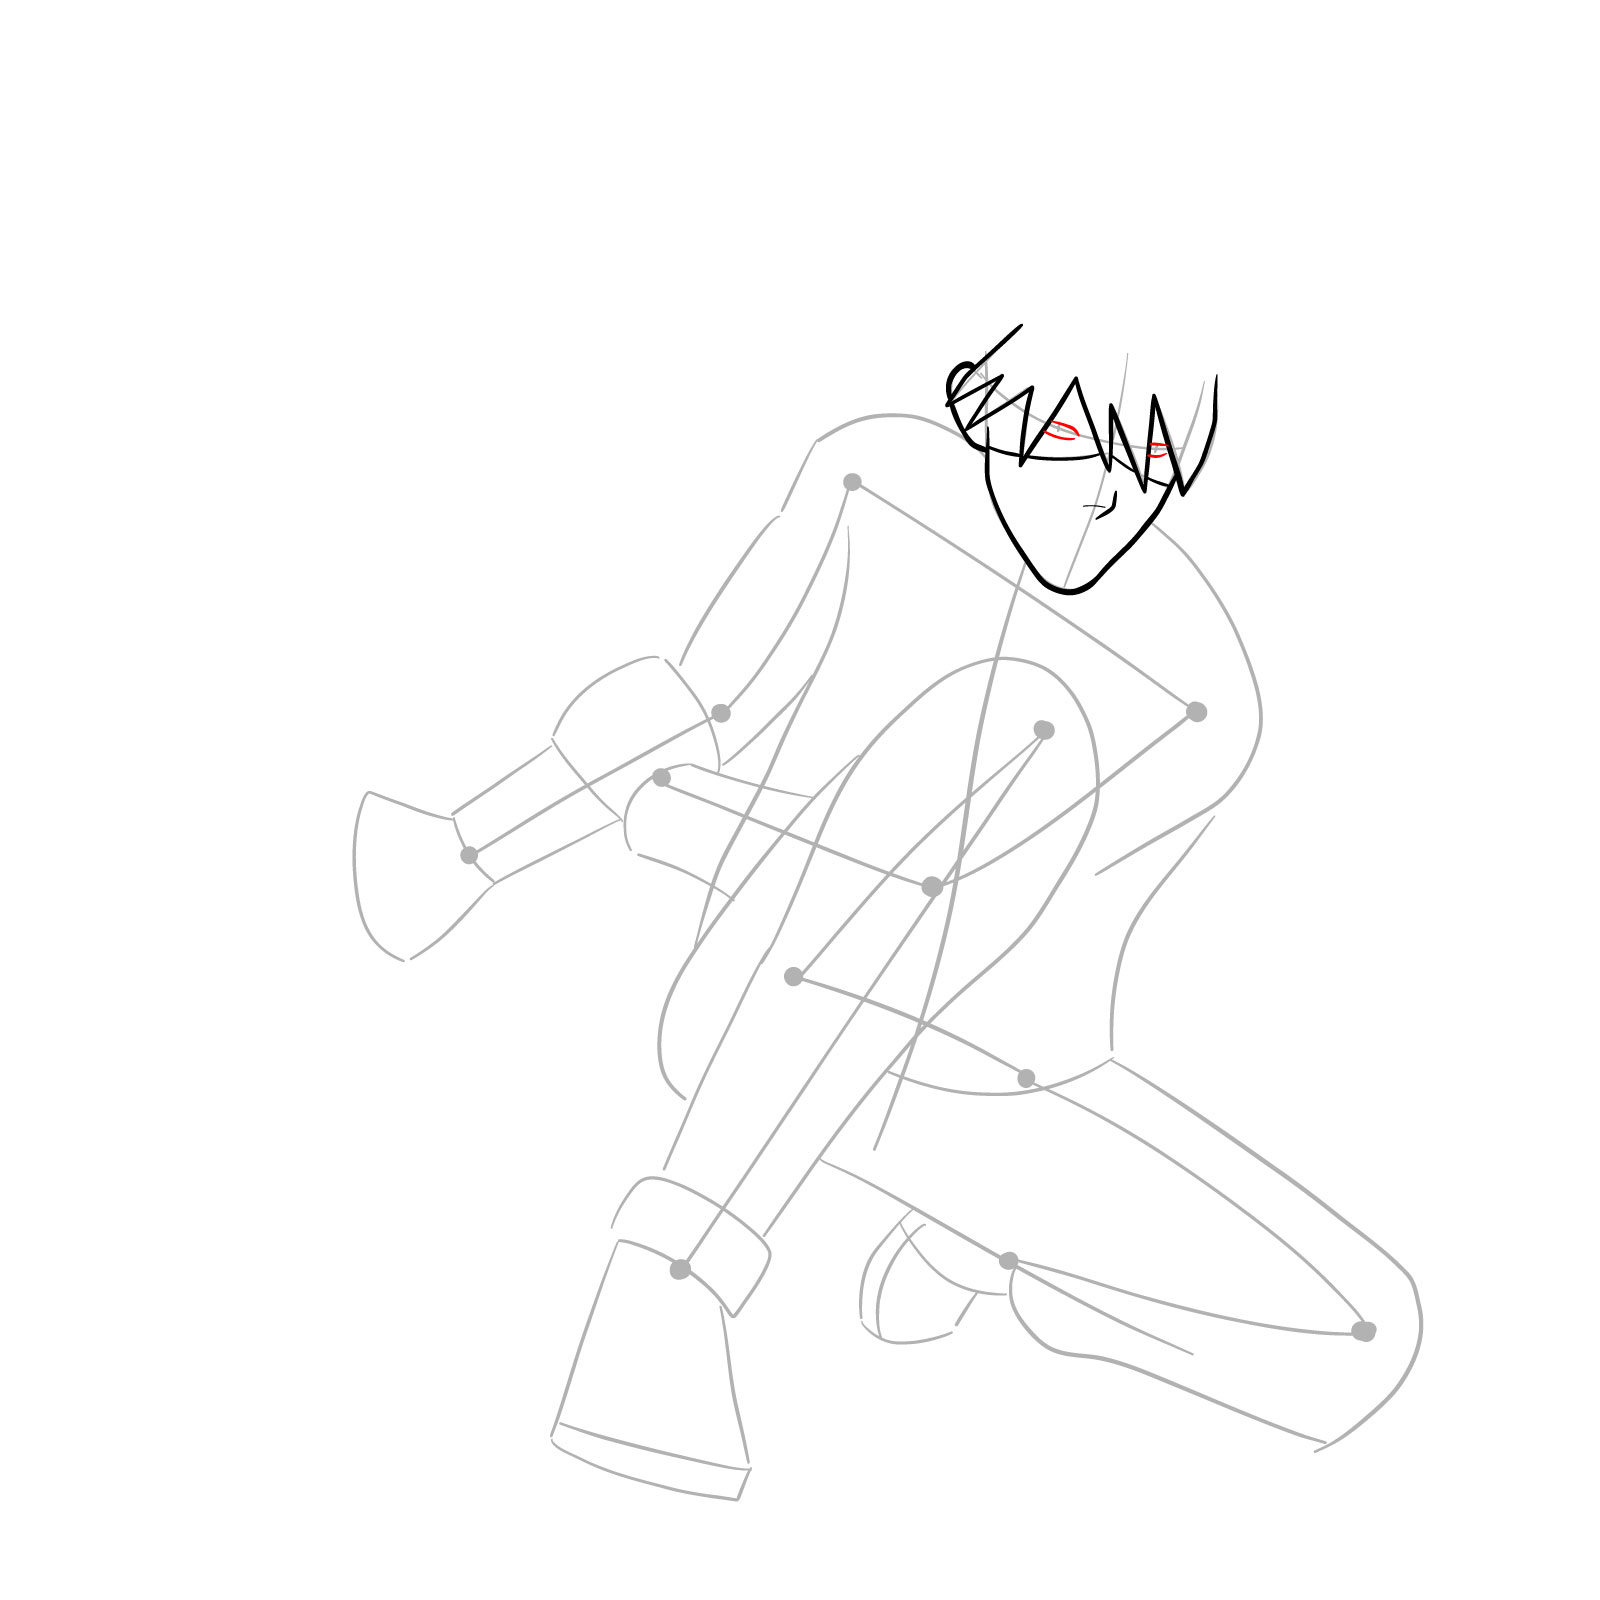
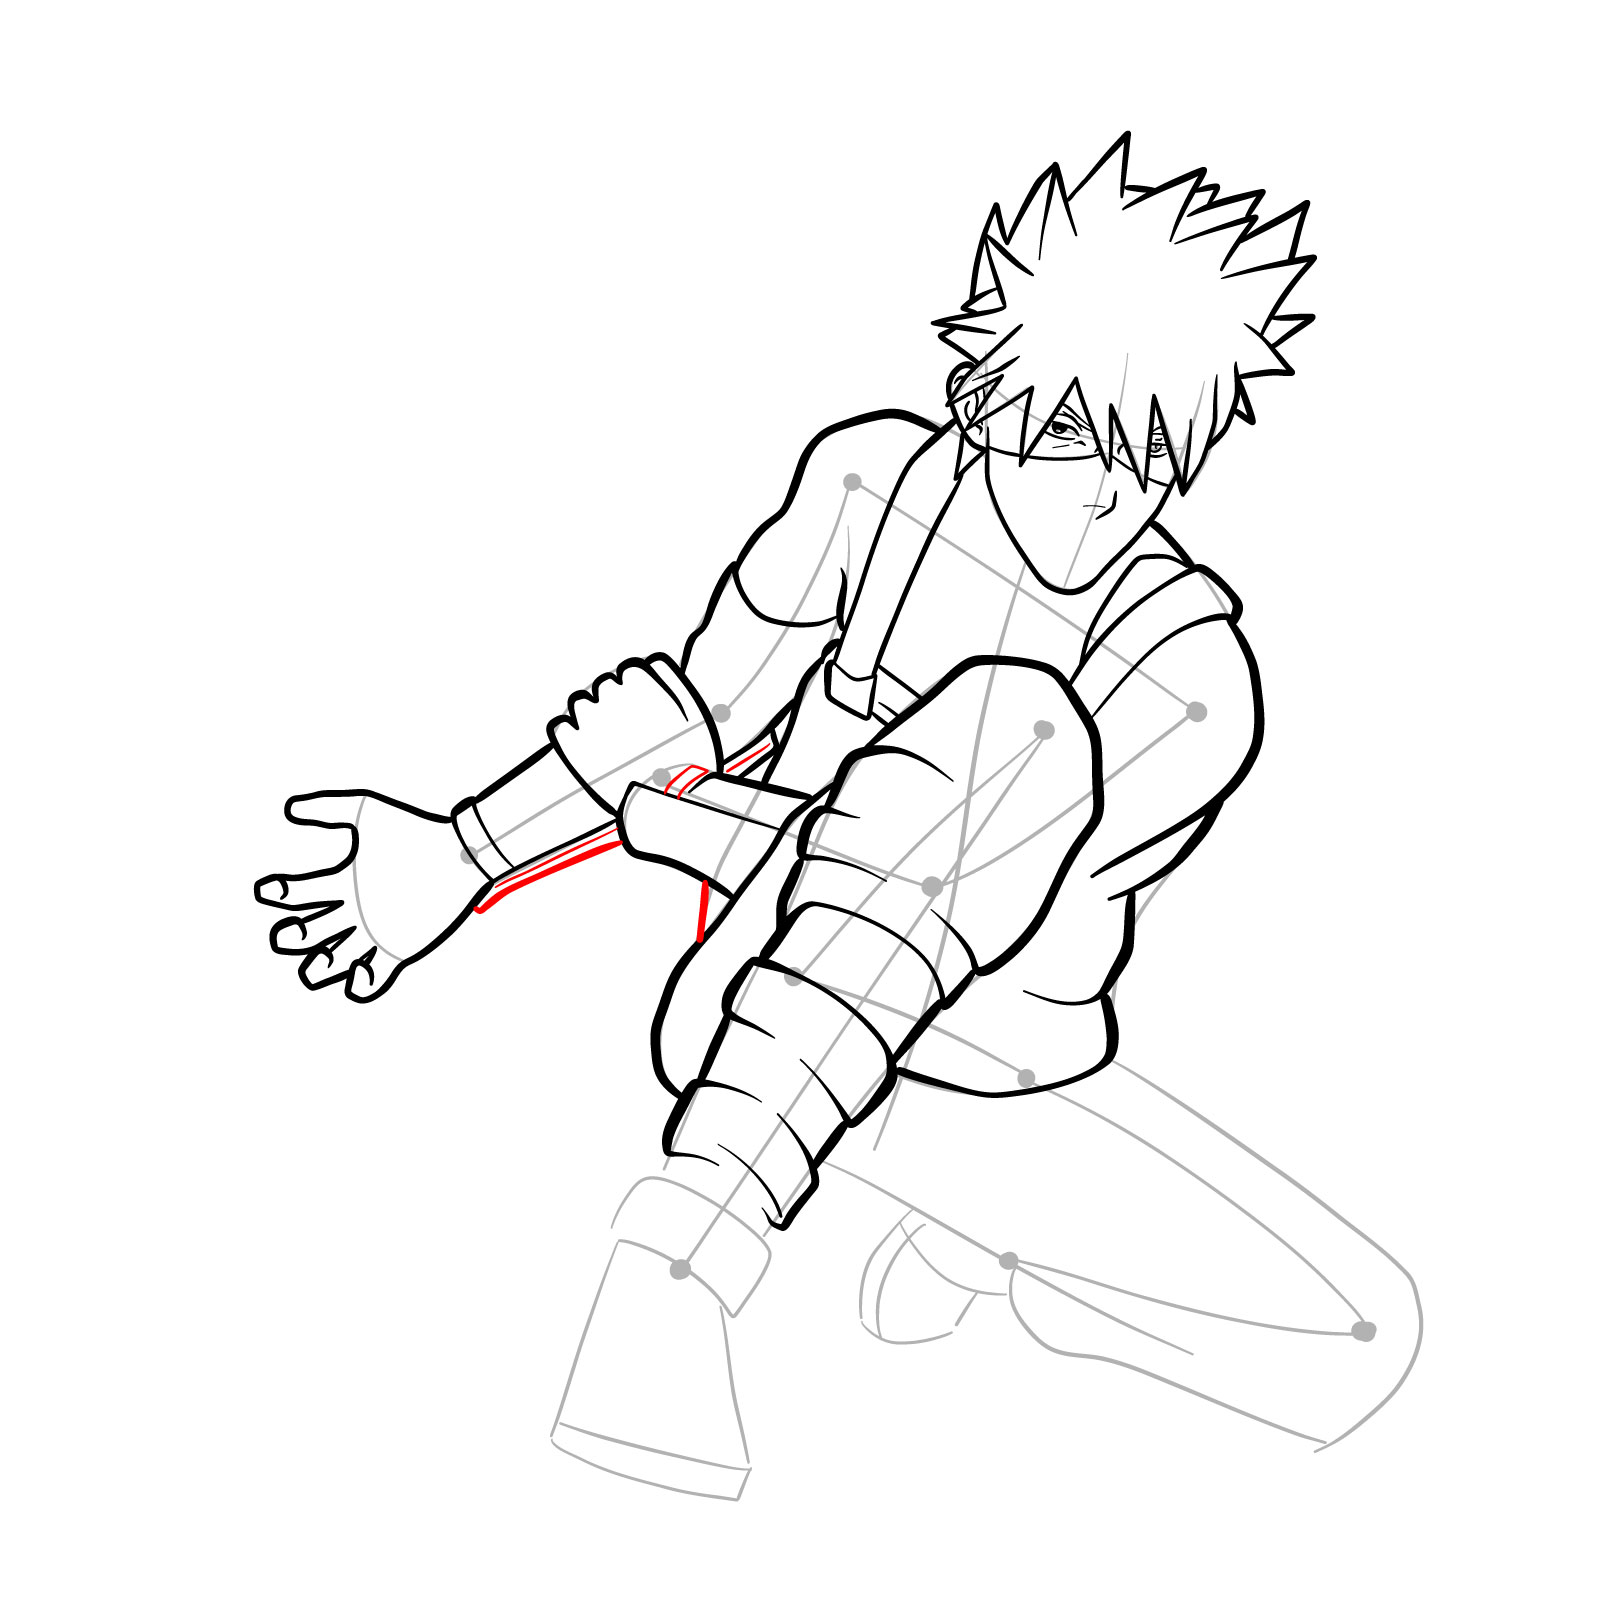
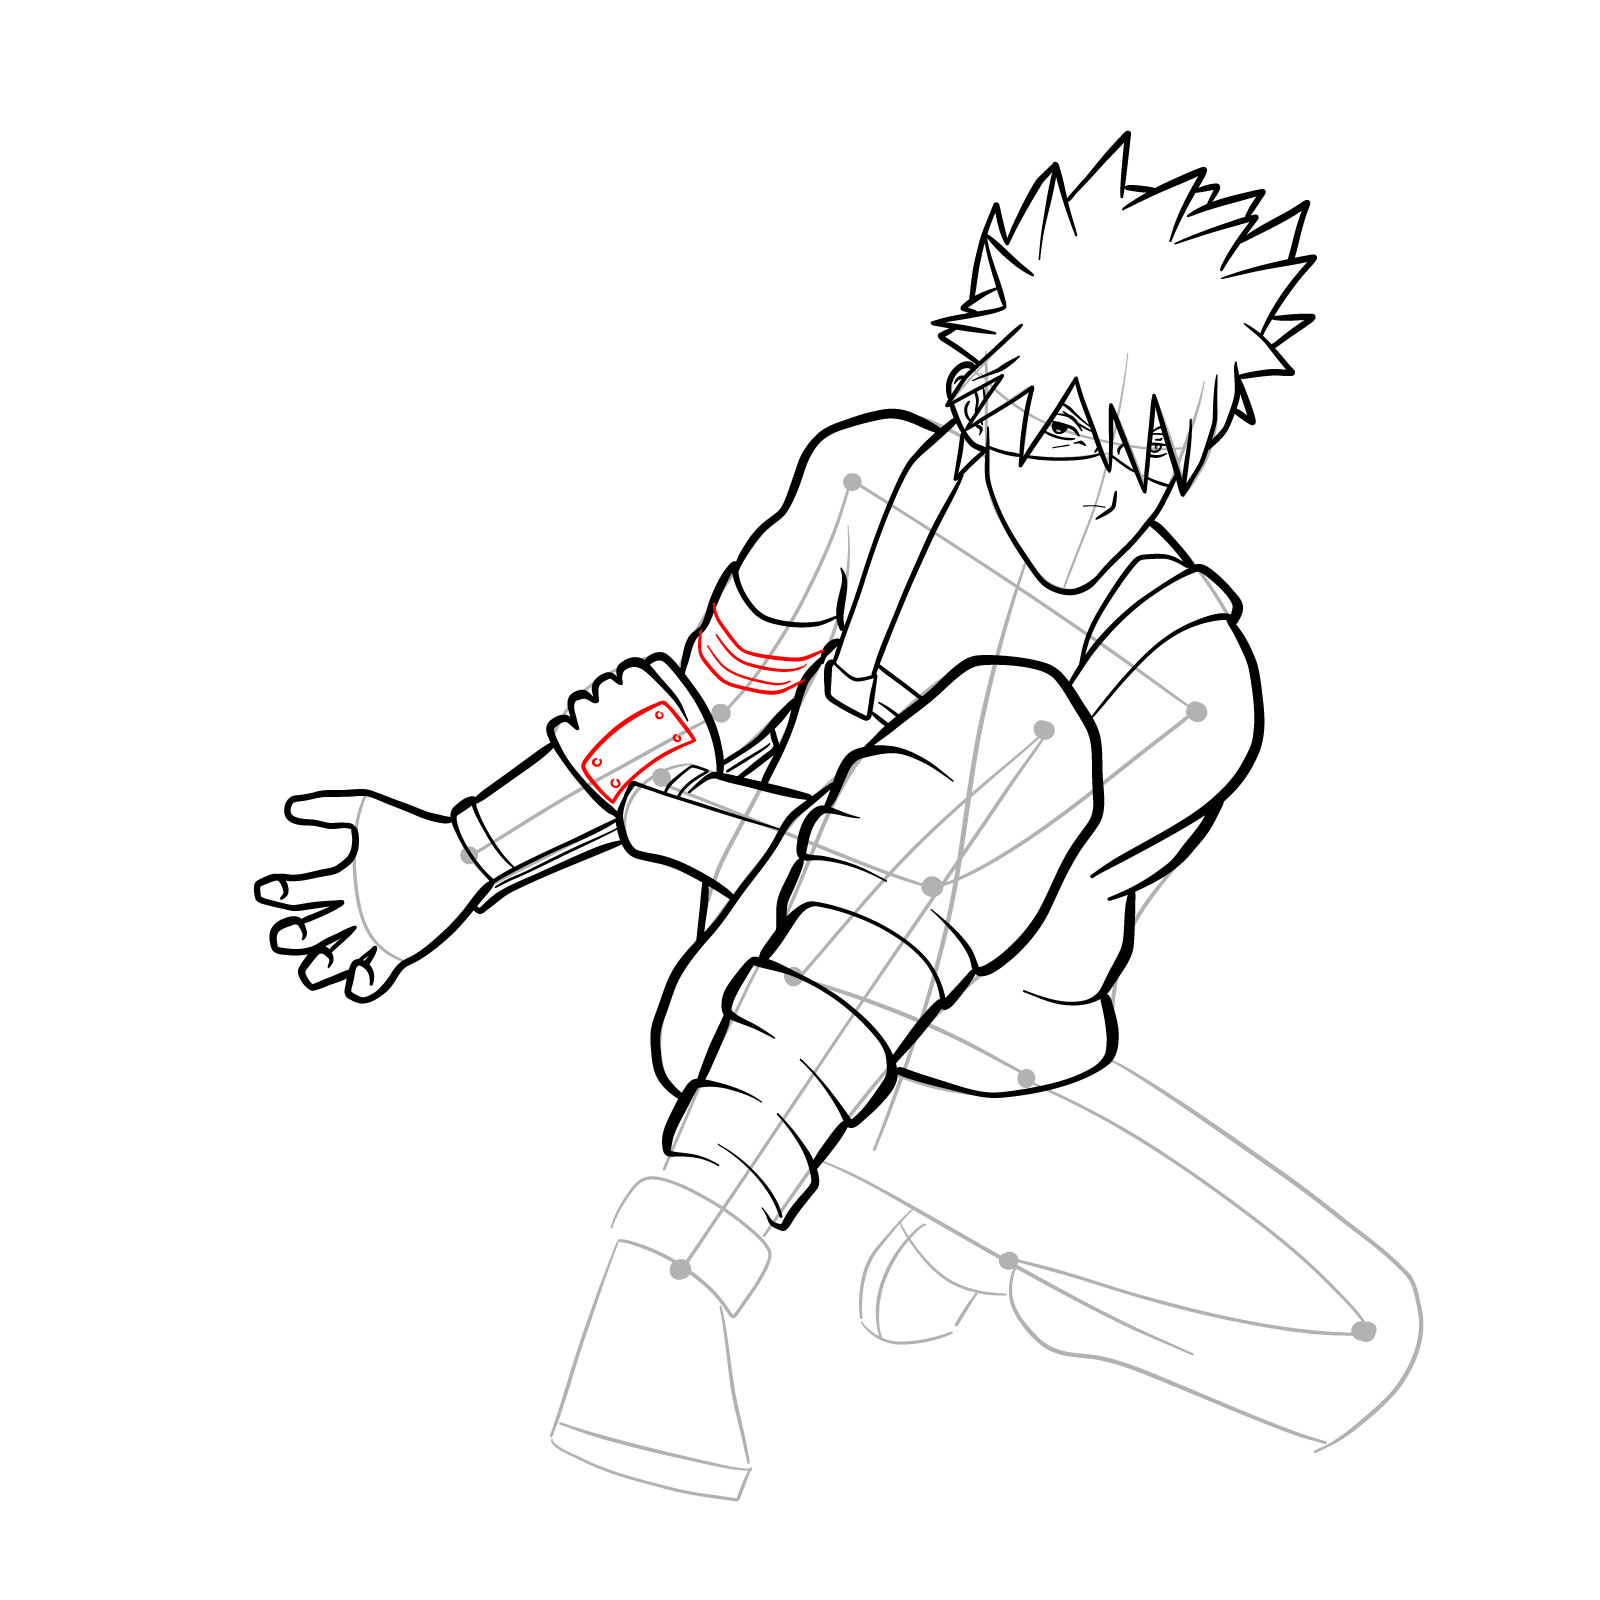
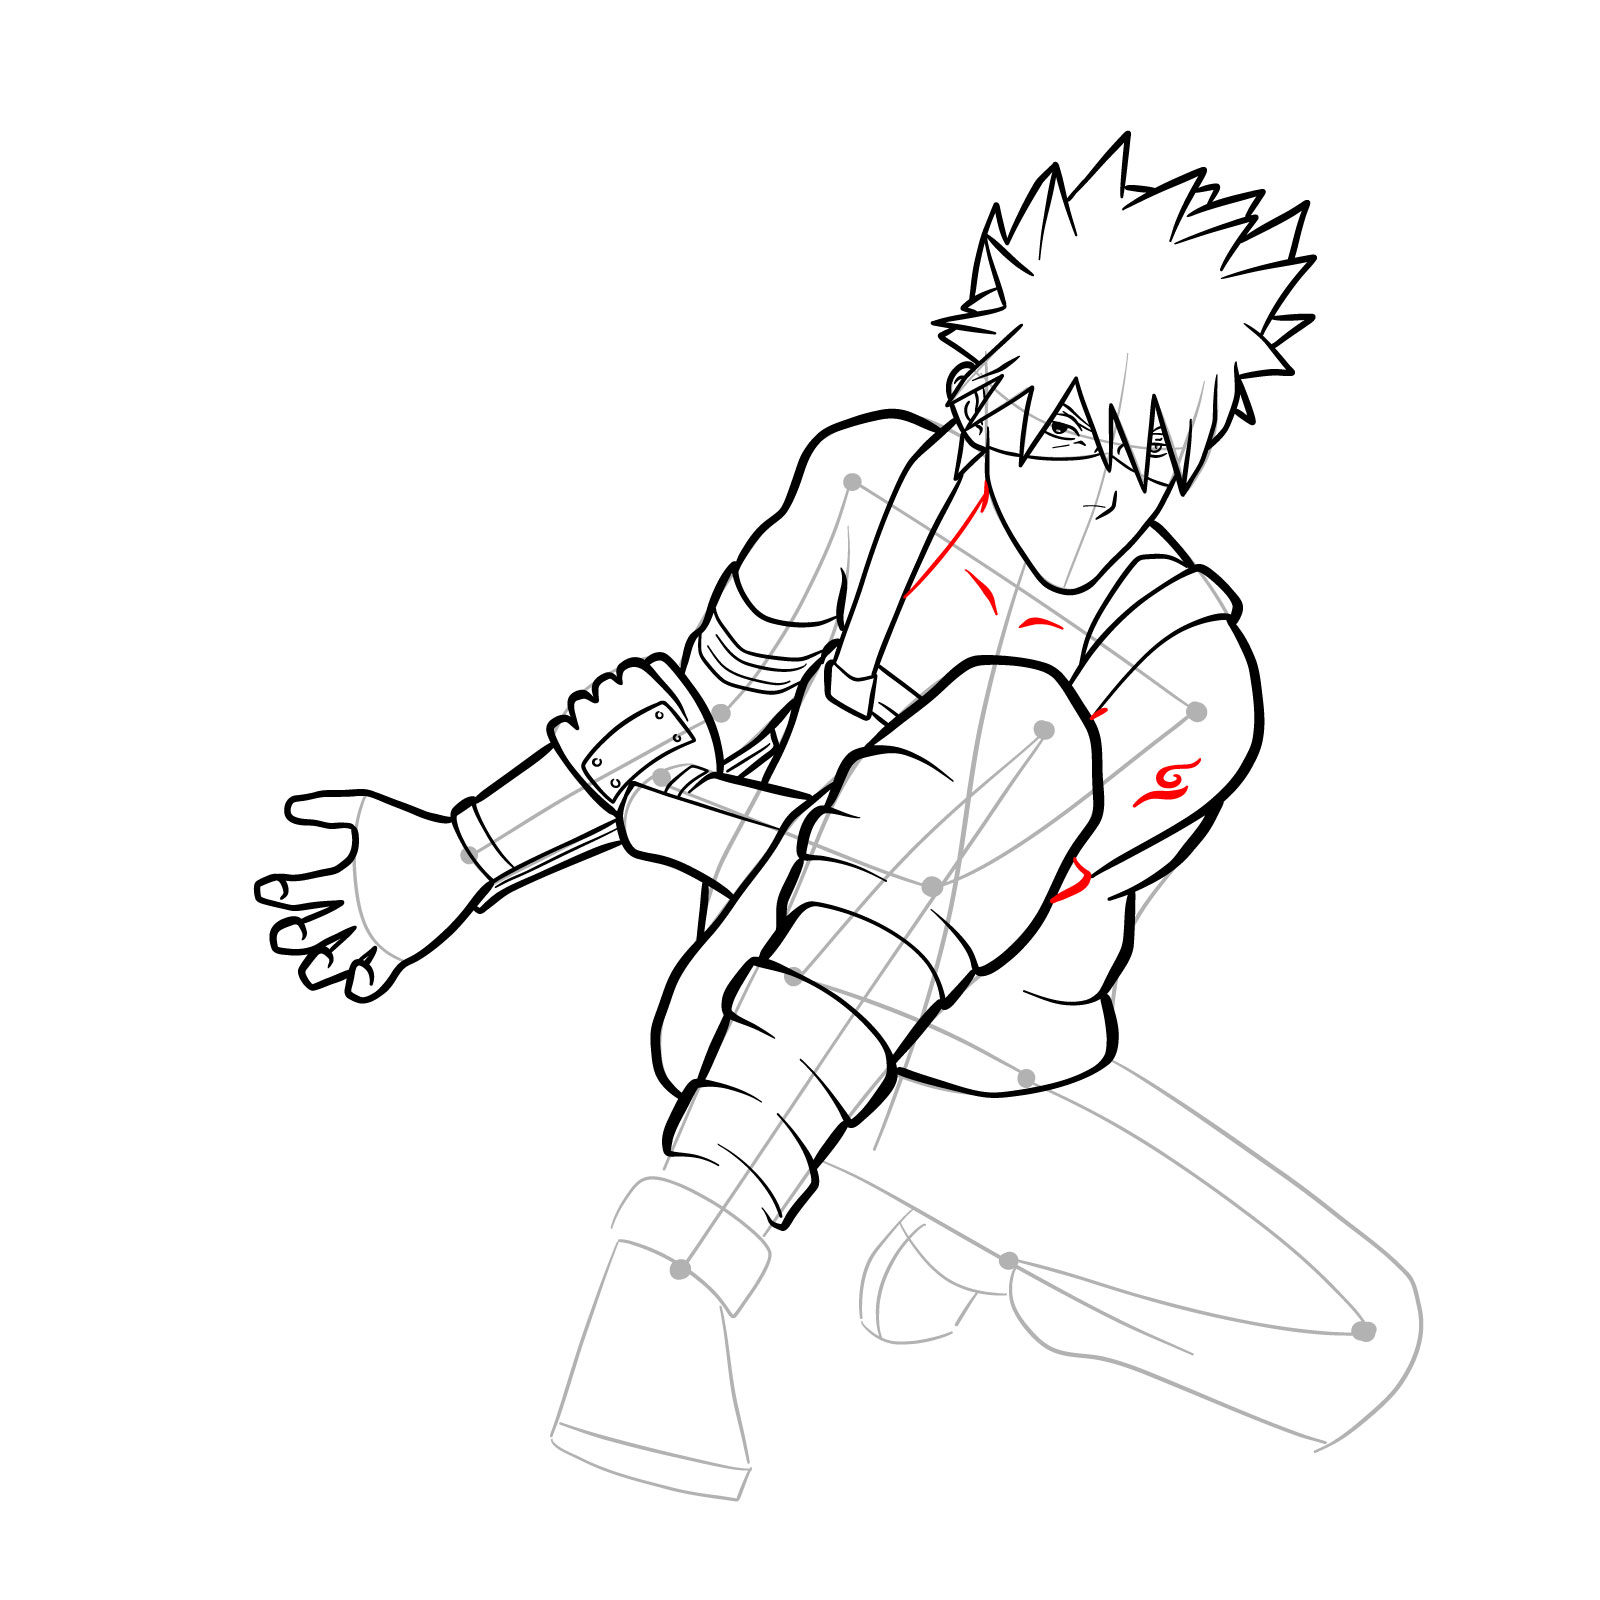
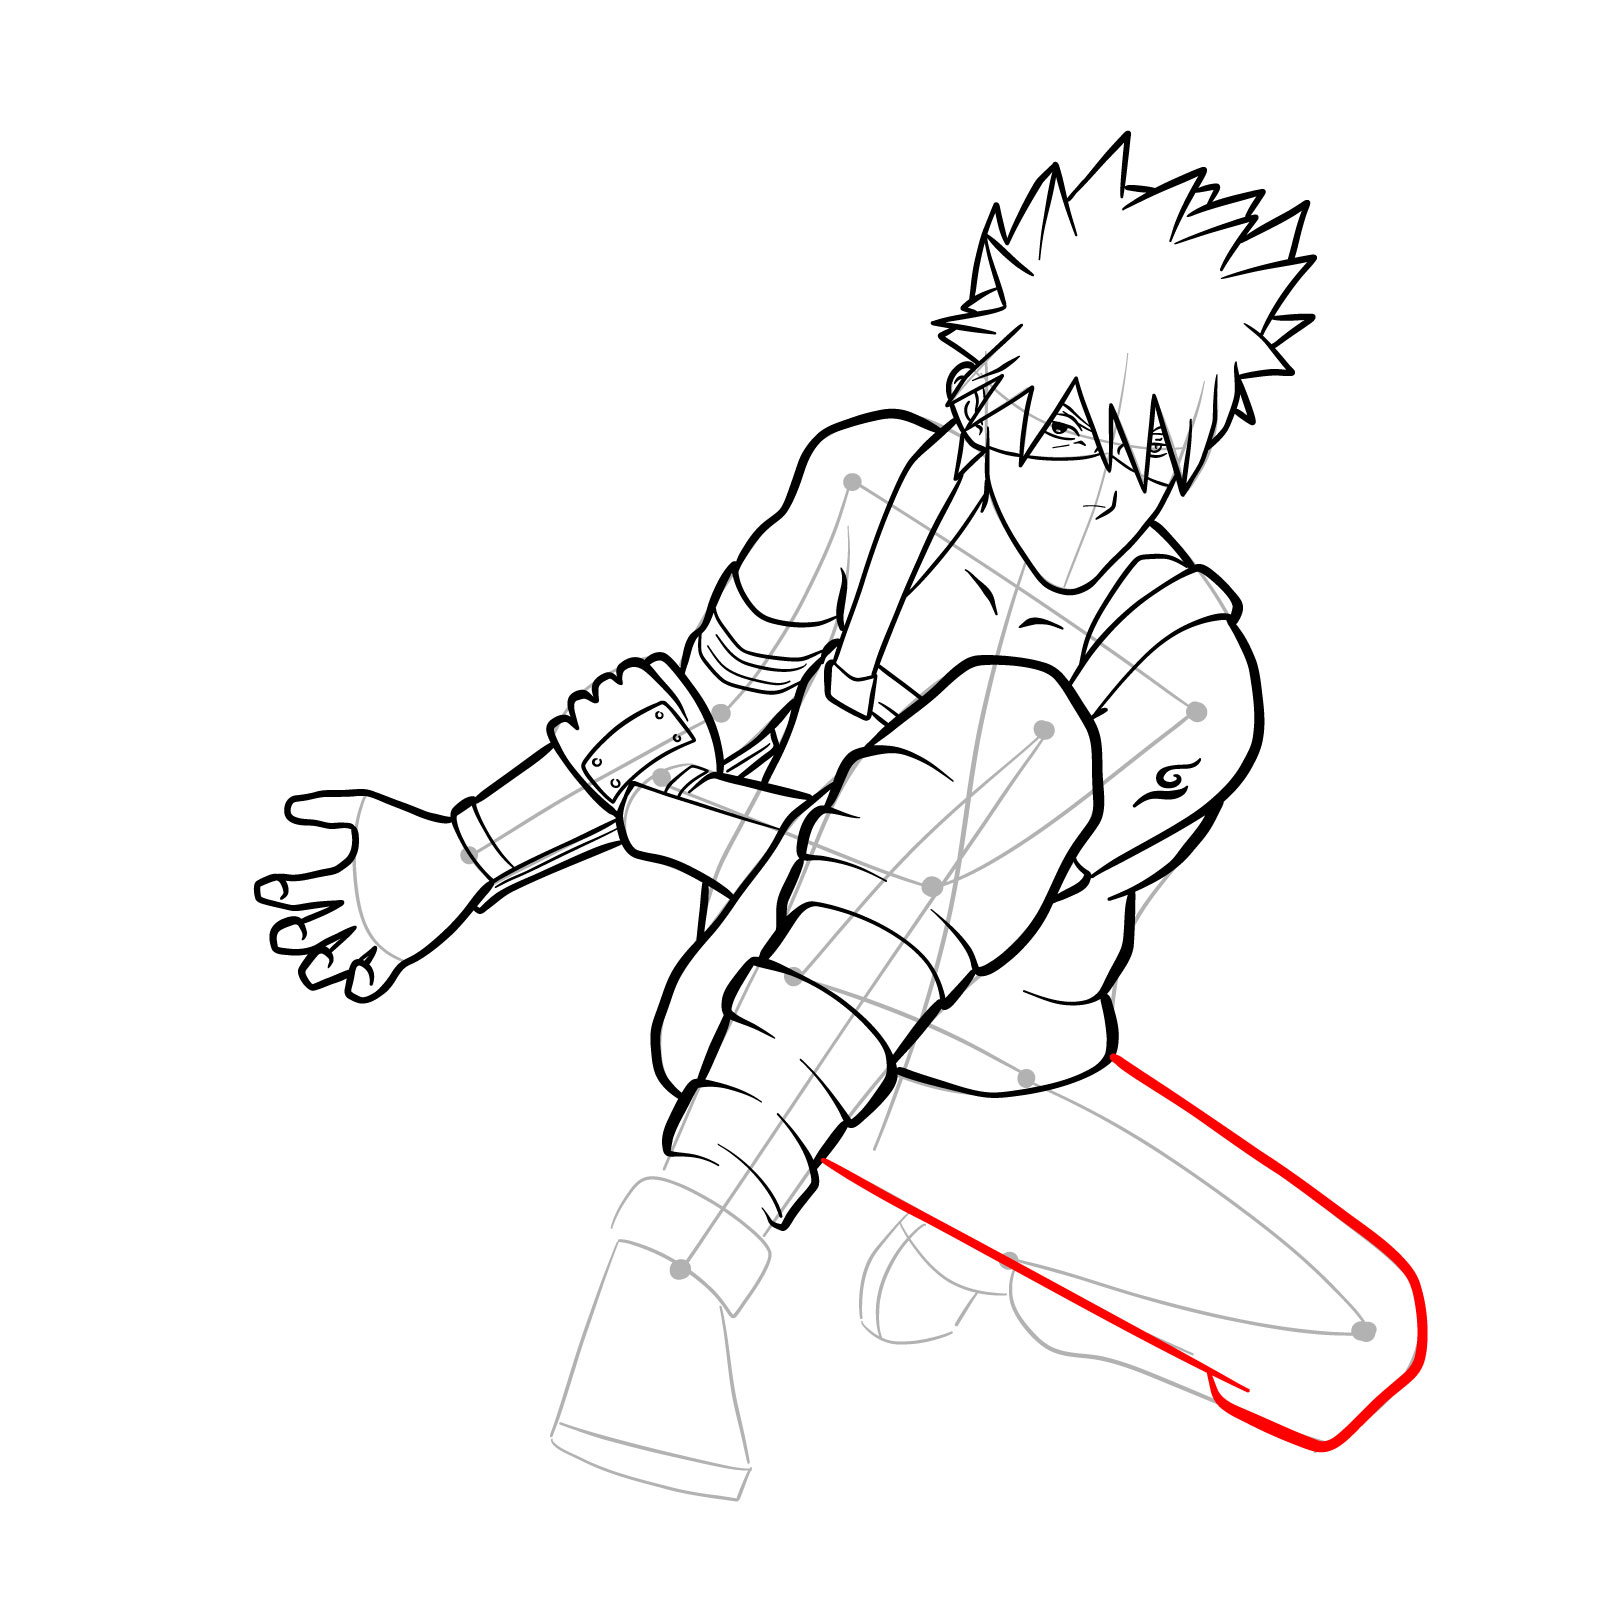
We understand that creating a masterpiece can sometimes feel overwhelming. That’s why our drawing guide utilizes a color scheme to simplify the process and make it more accessible for artists of all levels. Here’s a breakdown of the color-coded steps:
- Red: The current step you should focus on.
- Black: Previously drawn lines or elements.
- Grey: The basic sketch created in the first three steps.
This color scheme provides a visual roadmap, allowing you to easily navigate through the guide and understand which elements to focus on at each stage.
Step-by-Step Progression
To ensure your success, our drawing guide is divided into 44 detailed steps. In the initial three steps, we will be creating a basic sketch that establishes the foundation of your drawing. From there, each subsequent step will introduce new details and intricacies, helping you bring Kakashi to life on paper.
Inking Your Creation
Once you’ve completed all the steps and are satisfied with your drawing, you may choose to take it a step further by inking your artwork. In this final step, you can outline your drawing with ink, adding depth and definition to your masterpiece. Don’t forget to erase any remaining traces of the basic sketch to unveil the full glory of your artwork!

Now that you know how to draw Kakashi from Naruto, the best next step is just practicing until his lazy posture and signature mask start feeling natural on paper. If you prefer watching someone draw rather than reading steps, the SketchOk YouTube channel regularly uploads drawing videos that might help reinforce what you learned here. And when you finish your version of Kakashi, the pinned tutorial post on Pinterest is a great spot to drop your drawing in the comments and see what others have come up with.
