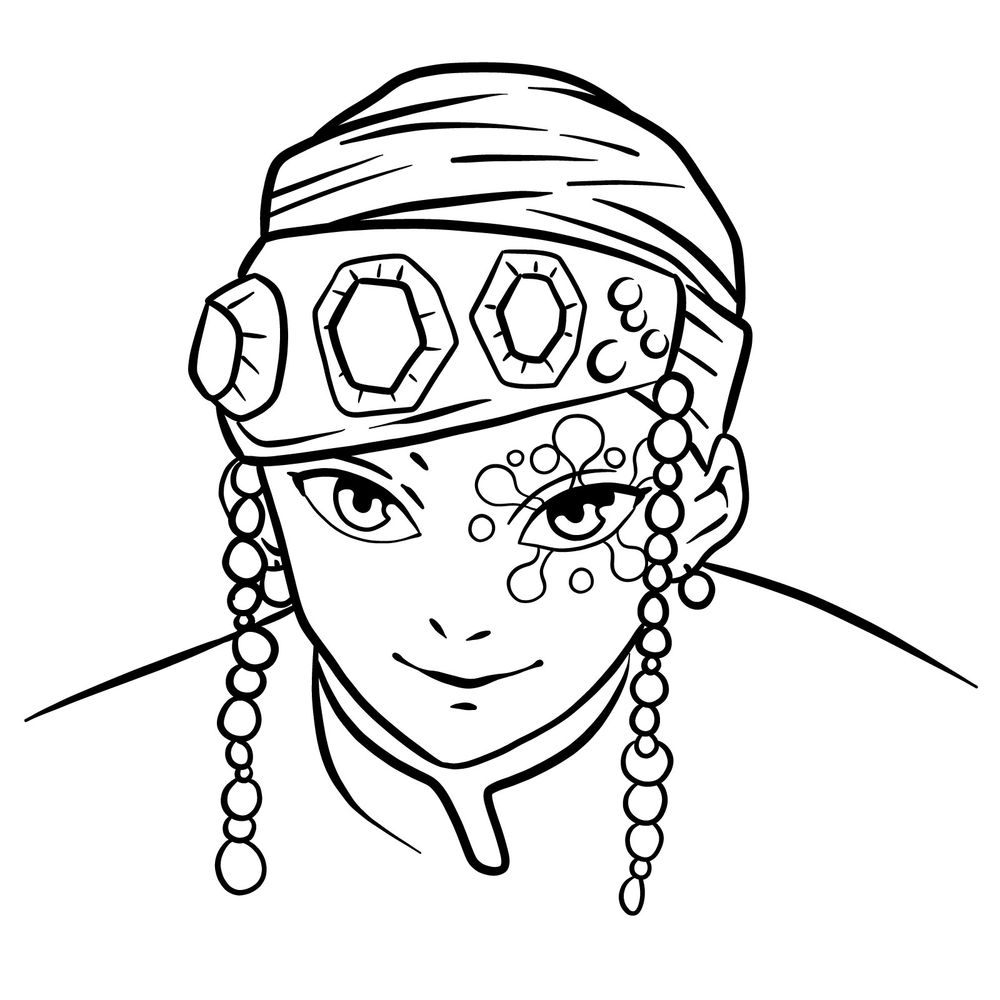
Welcome to this step-by-step guide on how to draw the face of Lord Tengen from Demon Slayer: Kimetsu no Yaiba. In this tutorial, we will explore the techniques and details necessary to recreate Tengen’s unique appearance. From his striking white hair and maroon eyes to his flamboyant head-wrap, we will guide you through each step, enabling you to bring this eccentric character to life on paper.
Tengen’s Appearance and Focus Points:
Lord Tengen, also known as Tengen Uzui, is a fascinating character in Demon Slayer: Kimetsu no Yaiba. As the former Sound Hashira, his appearance is as flamboyant as his personality. When drawing Lord Tengen’s face, there are several key features to pay attention to:
- White Hair: Lord Tengen’s distinctive white hair, uneven in length with shorter clumps arching between his eyes and on either side of his face, adds to his unique charm.
- Maroon Eyes: His thin, slanting maroon eyes with long eyelashes give him a captivating gaze that conveys his complex emotions.
- Head-wrap and Headdress: Lord Tengen’s head-wrap, adorned with a large gray headband and gemstones, along with chains of smaller gems framing his face, are essential elements that contribute to his flamboyant appearance.
While drawing Lord Tengen’s face, it can be helpful to reference other characters with similar features, such as Tanjiro Kamado and Kyojuro Rengoku. This allows for a better understanding of the distinct characteristics and proportions that define Lord Tengen’s face.
Drawing Guide: Color Schema and Step Breakdown
When following the drawing guide for Lord Tengen’s face, it is important to understand the color schema used to represent different stages of the drawing process. The color scheme aids in distinguishing between the current drawing step, the basic proportions sketch, and the previously drawn lines. Here’s a breakdown of the guide’s color schema:
- Red Color: The red color in the image indicates the current drawing step. It highlights the specific details or areas you should focus on during that particular stage.
- Grey Color: The grey color represents the basic proportions sketch. It serves as the initial framework, helping you establish the overall shape and placement of Lord Tengen’s facial features.
- Black Color: The black color in the image signifies the previously drawn lines.
The drawing guide consists of 24 steps in total, each building upon the previous one to gradually bring Lord Tengen’s face to life. The first two steps involve creating the basic sketch of the face, laying the groundwork for further refinement and detailing.
By following the color schema and carefully progressing through each step, you can effectively capture the essence of Lord Tengen’s face and achieve a faithful representation of this charismatic character.


My Personal Appeal: Join the Journey and Support Our Art
As an artist and creator, I am passionate about sharing drawing guides that bring beloved characters to life. Lord Tengen’s face is a captivating subject that offers a unique challenge and an opportunity to showcase your artistic skills.
Creating these drawing guides takes time, effort, and resources. That’s why I kindly ask for your support in keeping this initiative alive. Your generous donations will enable me to continue providing free high-quality tutorials and expand our reach to inspire more aspiring artists.
In addition to donating, there are other ways you can contribute to our community. Share the link to this drawing guide with your friends, family, and fellow art enthusiasts. Help us reach a wider audience, fostering a supportive network of passionate creators.
I also invite you to connect with us on social media. Follow us on Facebook, Instagram, and Pinterest to stay updated on our latest tutorials, art inspiration, and community events. By joining our social media platforms, you become part of a vibrant community where artists can share their work, learn from one another, and celebrate their creative journeys.
Together, we can nurture and empower the artist within each of us. Your support means the world to me. Thank you for your generosity, and let’s continue to spread the joy of art!
