In this tutorial, we’ll make a spooky haunted house drawing with some eerie details like ghosts, a black cat, crows, and a tombstone. This is the second haunted house drawing, and it’s shabby and more eerie than the first one, featuring cracks, a skeleton in a hood standing ominously on the balcony, and additional spooky elements. If you want to capture a creepy Halloween mood, this guide is perfect for you.
About the Haunted House Drawing
This haunted house has some special features that make it stand out as the perfect subject for a Halloween drawing:
A skeleton in a hood stands eerily on the balcony.
Cracked and crumbling walls, adding to the abandoned, spooky atmosphere.
A black cat sits on the roof, keeping a watchful eye over the scene.
Crows perch on a dead tree, further emphasizing the creepy, haunted vibe.
Two ghosts float around the house, one rising from a chimney, the other looming in the air.
A lonely tombstone sits in the front yard, completing the haunted setting.
This is an ideal drawing for those looking to create a more detailed haunted house scene, perfect for Halloween or spooky-themed artwork.
About the Guide
This guide is designed to help you with each step of the process. The color system used in the guide helps to keep things clear:
Red Color: Indicates the current step that you should be focusing on.
Black Color: Shows the lines that you have already drawn in the previous steps.
Follow along with each step carefully, and don’t rush through the rough sketching phase. Keep your pencil strokes light until you’re satisfied with the overall sketch before moving on to adding details.
Take your time, and enjoy the process of creating a haunted masterpiece!
Step 1: Draw a few slightly curved lines to form the uneven ground in front of the house.
Step 2: Add two uneven vertical lines to represent the walls of the first floor.
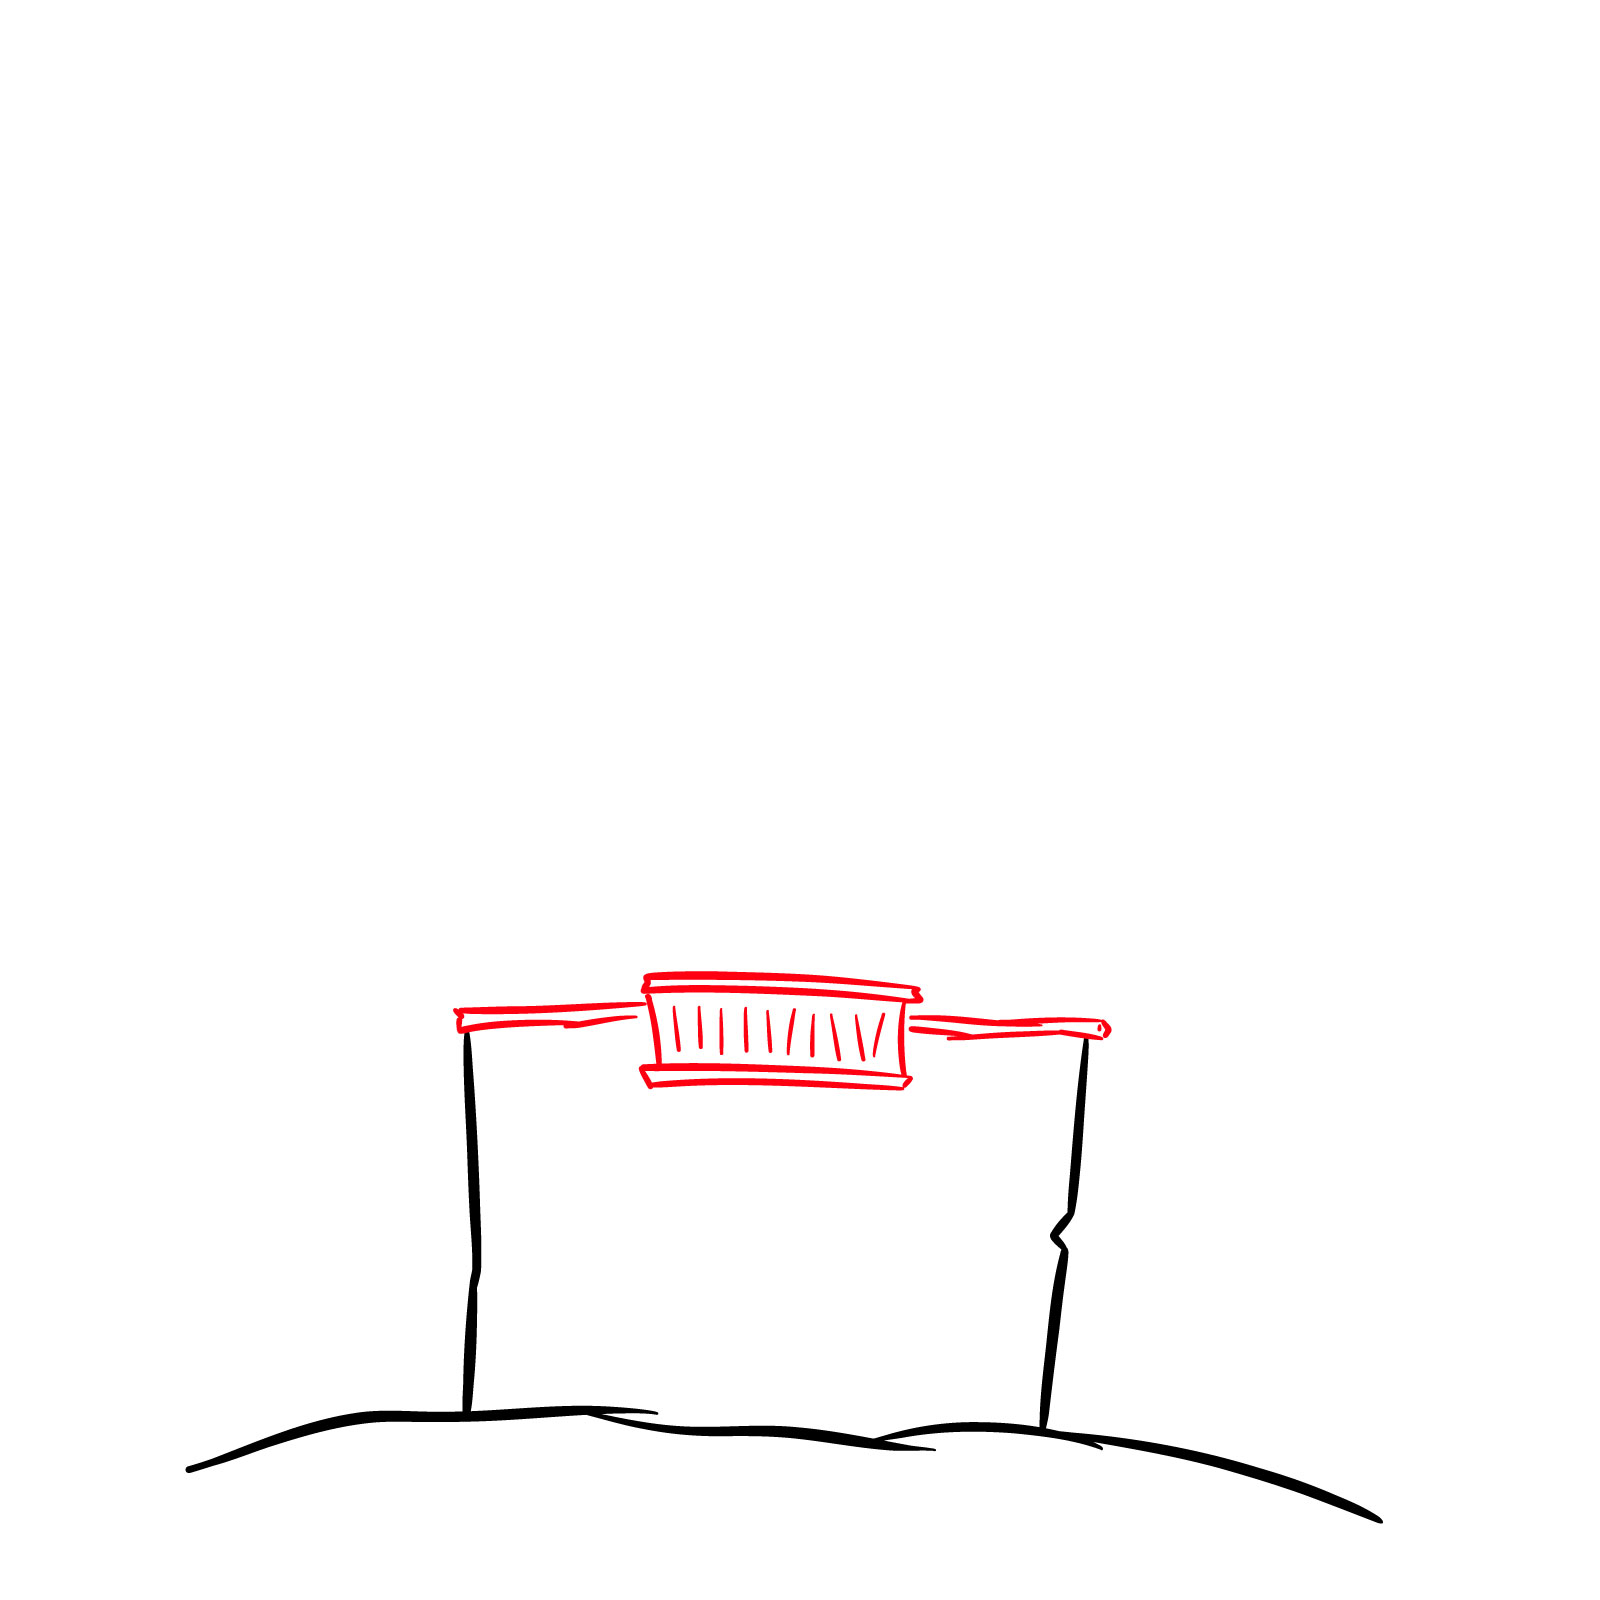
Step 3: Add horizontal lines between the first and second floors, and sketch a simple balcony in the center of the house.
Step 4: Sketch two more uneven vertical lines above the first ones from step 2 to form the walls of the second floor. Add two more lines, slightly longer, above the balcony to show the extended part of the second floor.
Step 5: Draw the attic part above the balcony with a triangular, uneven roof to make it look old and creepy.
Step 6: Sketch the crooked and uneven roof above the second floor, keeping the roofline irregular for a shabby look.
Step 7: Add a small chimney on the left side of the roof, a small side attic part of the building on the right side, and a tower above the main roof with a triangular roof behind it.
Step 8: Sketch a rectangle for the doorstep, draw the main door of the house, and add a small simple decorative feature above the door.
Step 9: Add four crooked, uneven window shapes to the building, giving it a broken-down appearance.
Step 10: Draw open doors on the balcony and a rectangular attic window above the balcony.
Step 11: Add crossed lines inside the windows and balcony doors for extra detail. Draw additional lines around the main four windows to give them some volume. Optionally, sketch a sign hanging on the door where “Trick? Treat?” will be written.
Step 12: If you added the sign, write “Trick? Treat?” on it or choose your own phrase. Add cracks on the facade of the house to give it a rundown appearance.
Step 13: Let’s add some Halloween elements now, like a ghost. Add the outline of a ghost emerging from the chimney, its face resembling Ghostface from the Scream movie.
Step 14: Draw a black cat in a classic Halloween pose, standing on the opposite side of the roof. Fill the cat with black, leaving its eyes blank.
Step 15: Sketch a tombstone on the right side of the building, adding grass at its base and a cross above it to give it a graveyard look.
Step 16: Add a second ghost floating above the tombstone, making it look like it’s hovering in the air.
Step 17: Draw a simple dried-up tree with a hollow in it on the left side of the building.
Step 18: Crows and a Skeleton. Add two crow silhouettes perched on the tree branches, and sketch the outline of a skeleton wearing a hood, possibly resembling a Grim Reaper, on the balcony.
Step 19: Add details to the skeleton by sketching its skull and bony hands.
Step 20: Sketch a simple fence around the sides of the building to create a barrier – the final detail in our haunted house scene.
Step 21: Review your drawing, clean any marks, and fix any issues. Optionally, ink the sketch for a more polished look.
Step 22: You can use any colors you like to personalize your haunted house scene.
Don't Miss New Tutorials! Follow SketchOk
I publish new step-by-step drawing guides every single day. Follow on your favorite platform so you never miss a tutorial. Thousands of artists are already drawing along and I can't wait you to join in!
On my Patreon you can grab unique hand-made coloring pages: each one drawn by me personally. Every purchase directly supports the creation of new drawing tutorials. It's the best way to practice your skills, keep the site going, and get something truly original at the same time.
If this guide helped you, please consider supporting my work by buying me a coffee! Your support helps me create more tutorials like this one: Buy me a Coffee.
Disclaimer: All original artworks and photos used as references for the creation of these drawing tutorials are the property of their respective owners. If your work has been featured without proper credit, please kindly leave a comment below, and the issue will be promptly addressed. We greatly appreciate your exceptional art. Thank you.
2 thoughts on “Let’s Draw a Haunted House with Ghosts, a Black Cat, and a Tombstone”
Love this! It’s beautiful. Do you recommend using chalk pastels to fill in with color? And should students sketch on white or black paper?
Hi Carol! Thank you so much for your comment and feedback!
Yes, I think using chalk pastels will make it easier to fill in the scene and blend the colors smoothly.
As for the paper, most of the guides on the website are based on a simple approach – sketching on white paper, since it’s the most common and accessible option.
But that doesn’t mean you can’t experiment! Using other backgrounds, like toned or black paper, can give the artwork a completely different vibe and visual feel.


Love this! It’s beautiful. Do you recommend using chalk pastels to fill in with color? And should students sketch on white or black paper?
Thank you!
Hi Carol! Thank you so much for your comment and feedback!
Yes, I think using chalk pastels will make it easier to fill in the scene and blend the colors smoothly.
As for the paper, most of the guides on the website are based on a simple approach – sketching on white paper, since it’s the most common and accessible option.
But that doesn’t mean you can’t experiment! Using other backgrounds, like toned or black paper, can give the artwork a completely different vibe and visual feel.