Baymax, the lovable healthcare robot from the heart of San Fransokyo, has captivated the hearts of many with his dedication, wit, and inflatable charm. But how do you translate such a unique character onto paper? In this guide, you’ll learn how to draw Baymax, ensuring that every pencil stroke captures the essence of this Big Hero 6 icon.
Baymax’s Distinctive Features
Before we delve into the drawing guide, it’s essential to understand the character’s distinctive features that make Baymax stand out:
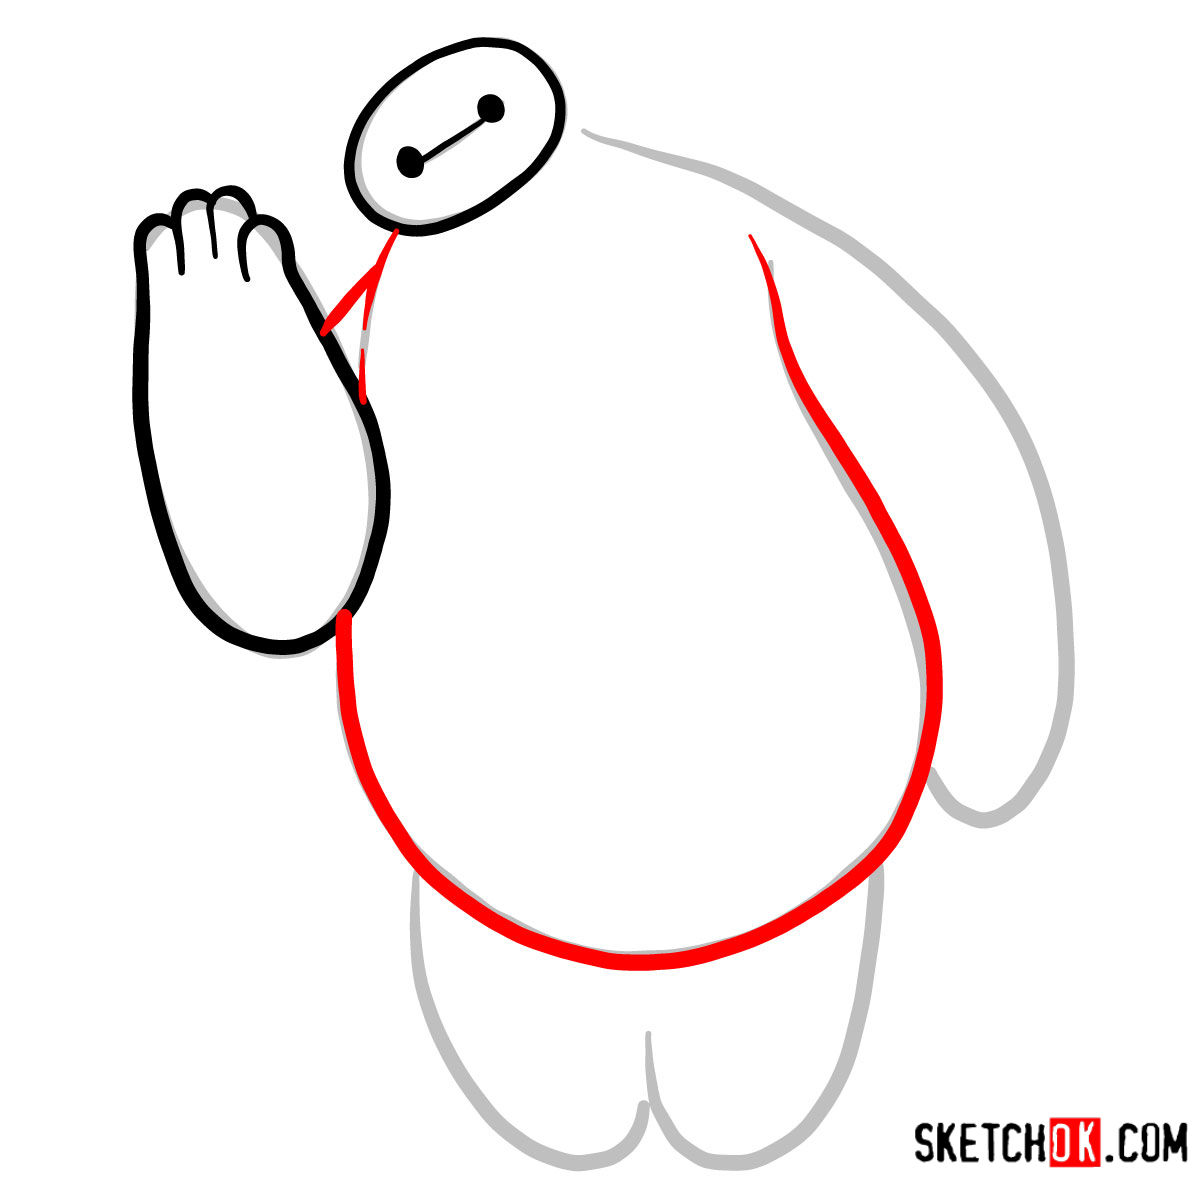
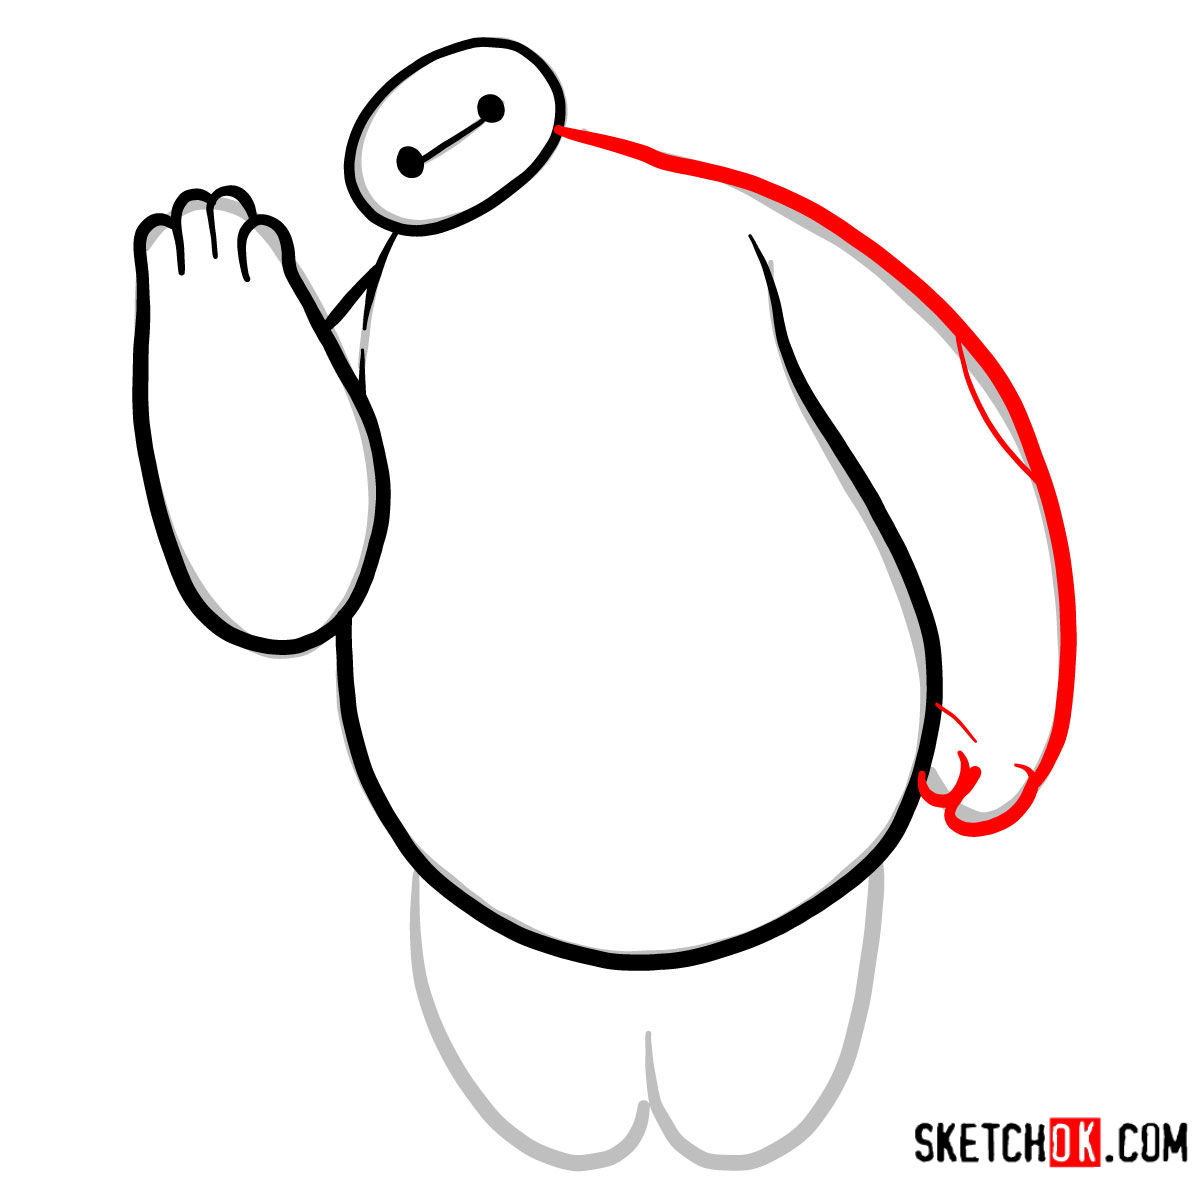
- The soft and rounded appearance resembling a big marshmallow.
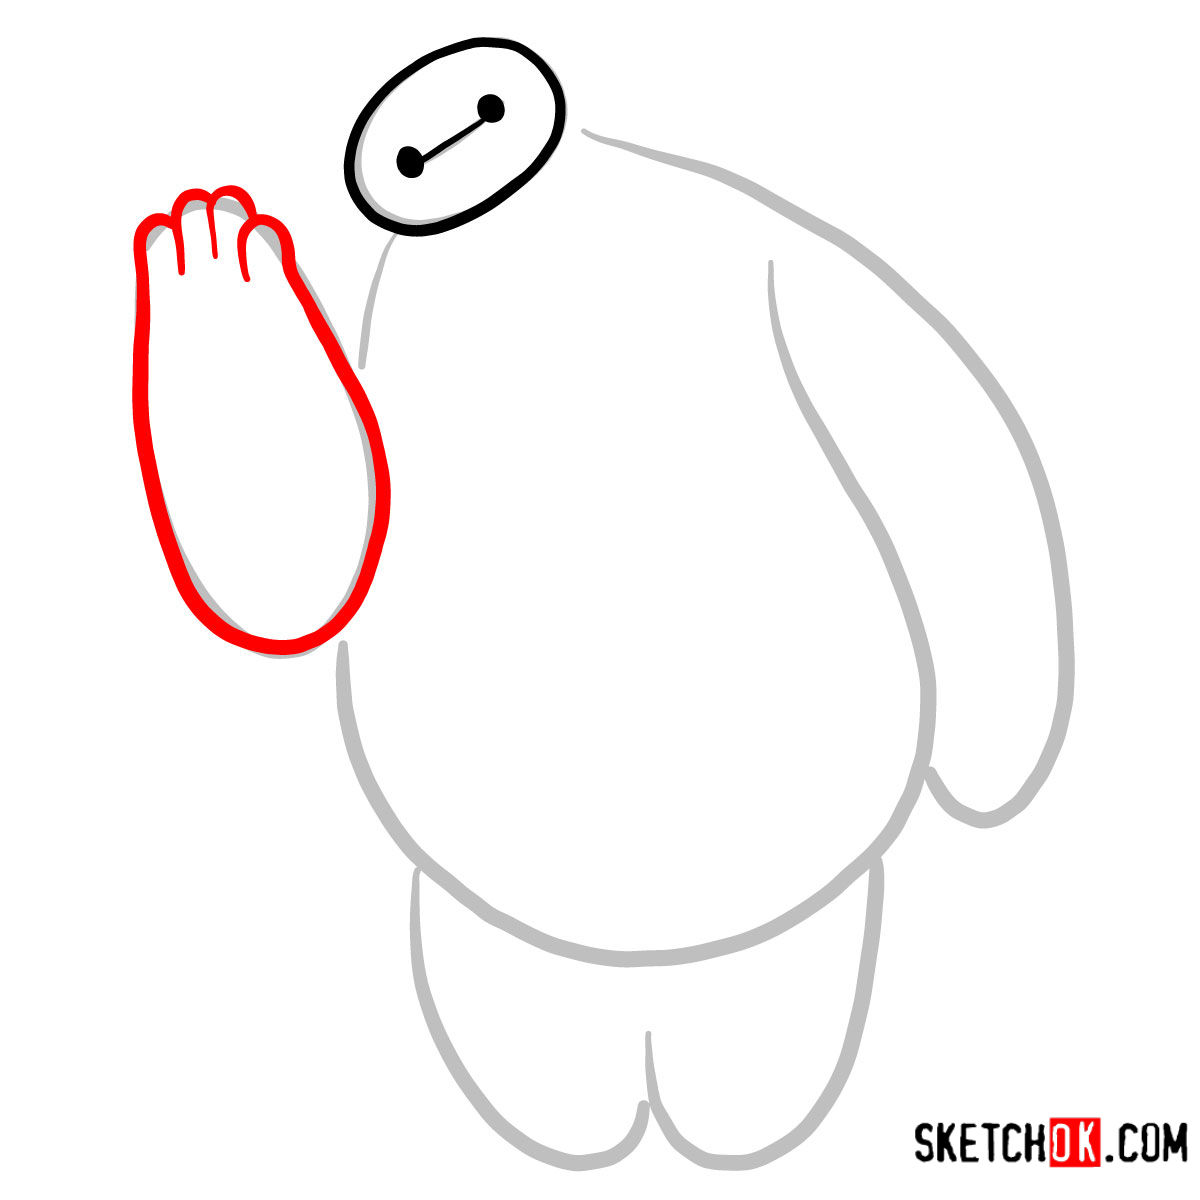
- A simplistic face with two hyperspectral camera eyes and a linear mouth.
- An inflatable vinyl material exterior with a more intricate inner skeleton.
If you’re looking to expand your drawing, consider including other notable Big Hero 6 members like Hiro or Honey Lemon to add dynamic action to your sketch!
About the Drawing Guide
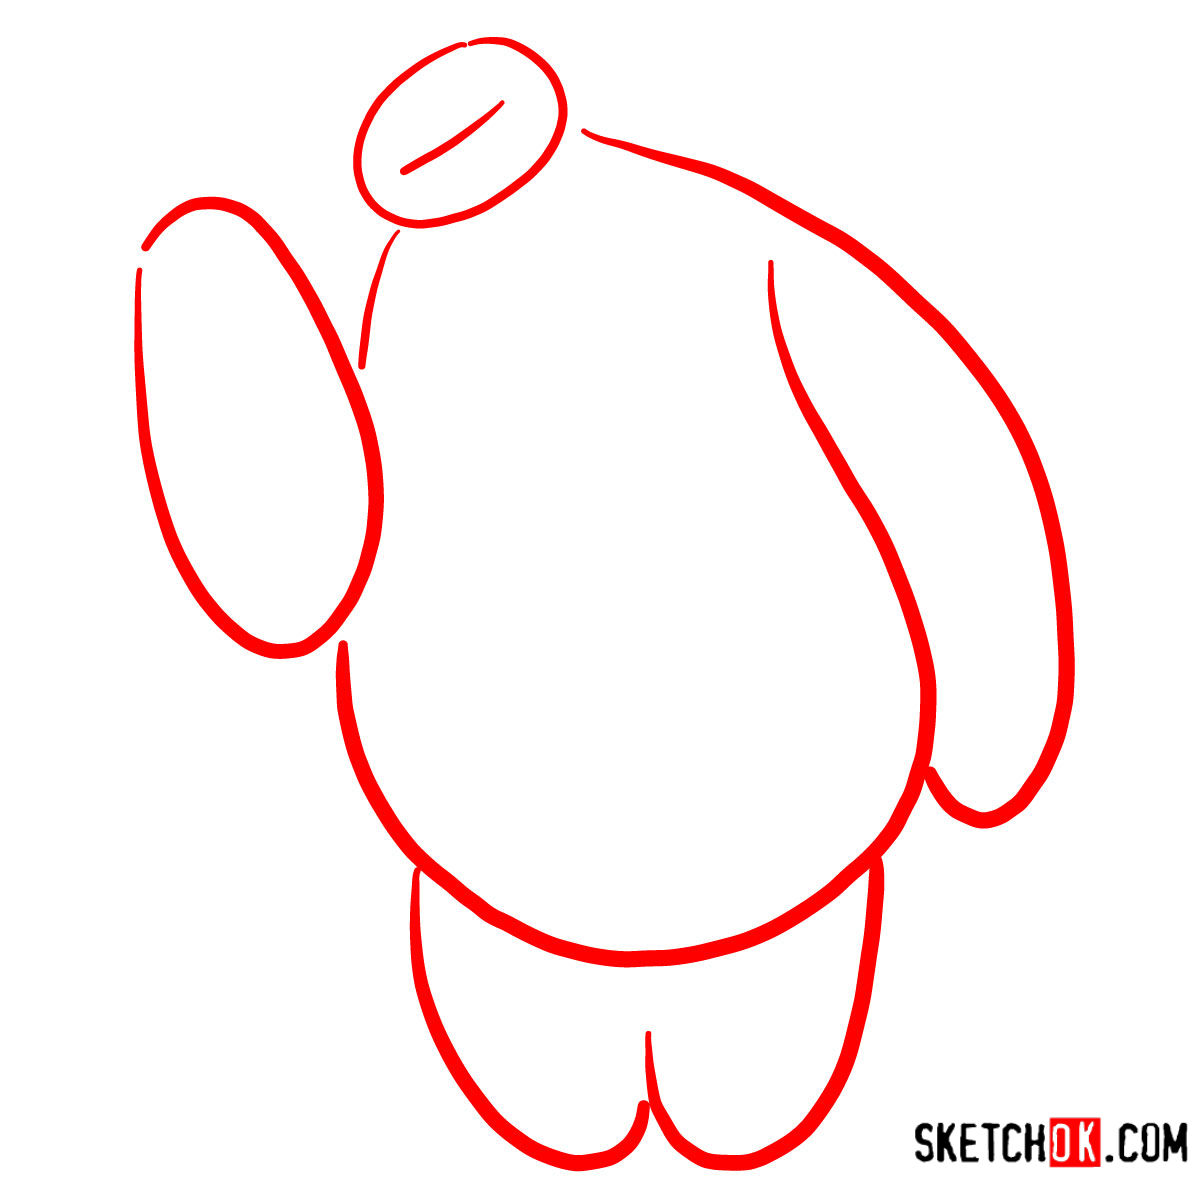
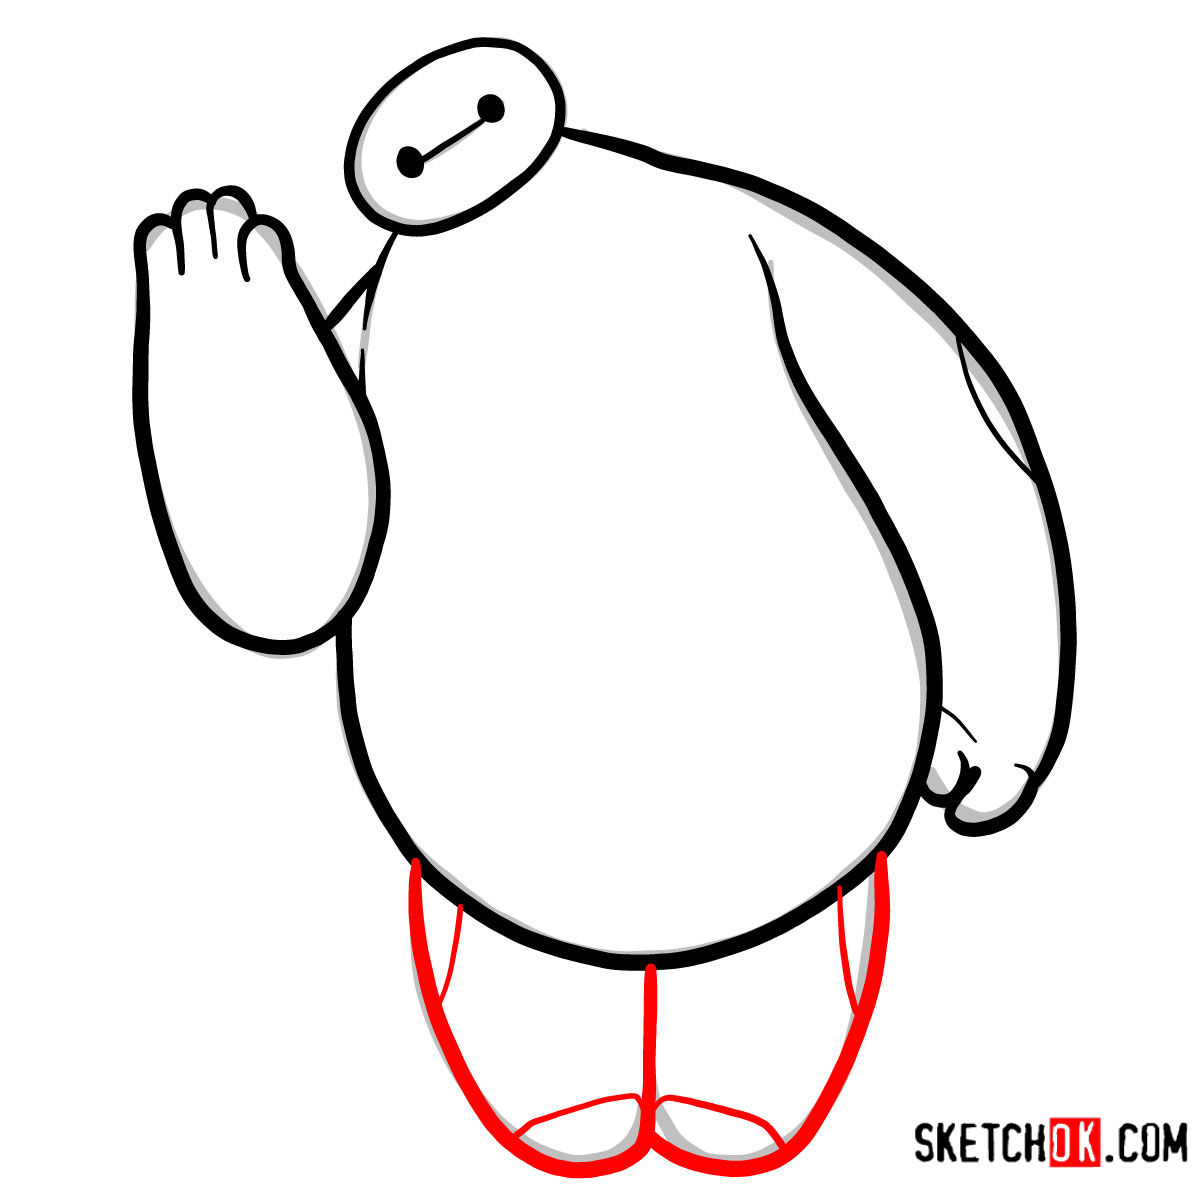
This step-by-step guide consists of 7 stages to help you capture Baymax’s charisma. Here’s how our color-coded guide works:
- Red Color: Indicates the current step in your drawing journey.
- Black Color: Highlights the lines drawn in the previous stages.
- Grey Color: Represents the basic sketch to maintain proportion throughout the process.
The initial steps focus on laying out the basic proportions with light pencil strokes. By the end of the guide, you have the option to ink your sketch. Just remember to wait until the ink dries thoroughly before gently erasing the underlying pencil sketch to avoid smudging.


That’s all there is to learning how to draw Baymax waving, and honestly he’s one of the more fun characters to sketch once you get his rounded shapes down. If you want to show off your finished version, drop it in the comments on the Pinterest pinned post for this guide.