Drawing anime characters can be a delightful experience, especially when it comes to iconic figures like Naruto. With this guide, we’ll delve into the steps to draw Naruto in his Baryon Mode, a transformation that showcases his unparalleled power and unique design. The step-by-step instructions, supported by high-quality images, will ensure your Naruto drawing captures the essence of this legendary mode.
Naruto in Baryon Mode: Key Features
Spiky hair that stands on its ends, giving an appearance of fox ears.
Thicker whisker markings with a unique curving pattern.
Dark pigments around his eyes that stretch up towards his fox-like ears.
Kurama’s signature red-slit eyes.
Darkened clothing with a chakra cape, showcasing a black swirl in the center.
Distinct orange chakra tails flowing from the cape.
Sketching Tips for Capturing Naruto’s Essence
When beginning your Naruto drawing, it’s essential to focus on the base structure. Starting with a simple stick figure can provide a solid foundation. Pay close attention to Naruto’s unique features, especially in Baryon Mode, as they are vital for capturing the character’s essence.
Understanding the Drawing Guide
This guide is crafted with precision, consisting of 35 clear steps demonstrated through high-quality images. Each image represents a progressive step in the drawing process, ensuring that as you move from one to the next, Naruto’s Baryon Mode gradually takes shape.
Guide’s Color Coding System
Our guide uses a specific color-coding system to make your drawing journey smooth:
Red Color: Represents the current step in the drawing process.
Black Color: Shows lines from previous steps.
Grey Color: Depicts the initial sketching phase.
The Drawing Approach
The guide’s initial step emphasizes creating a basic sketch, akin to a stick figure. This is crucial as it establishes the character’s proportion. Steps 2 and 3 revolve around crafting a rough sketch, mapping out Naruto’s head, body, and outfit details. As you progress through the steps, the focus shifts towards refining the sketch and adding intricate details. Lastly, for those looking to ink their drawing, ensure the ink dries thoroughly before erasing the pencil lines to prevent smudging.
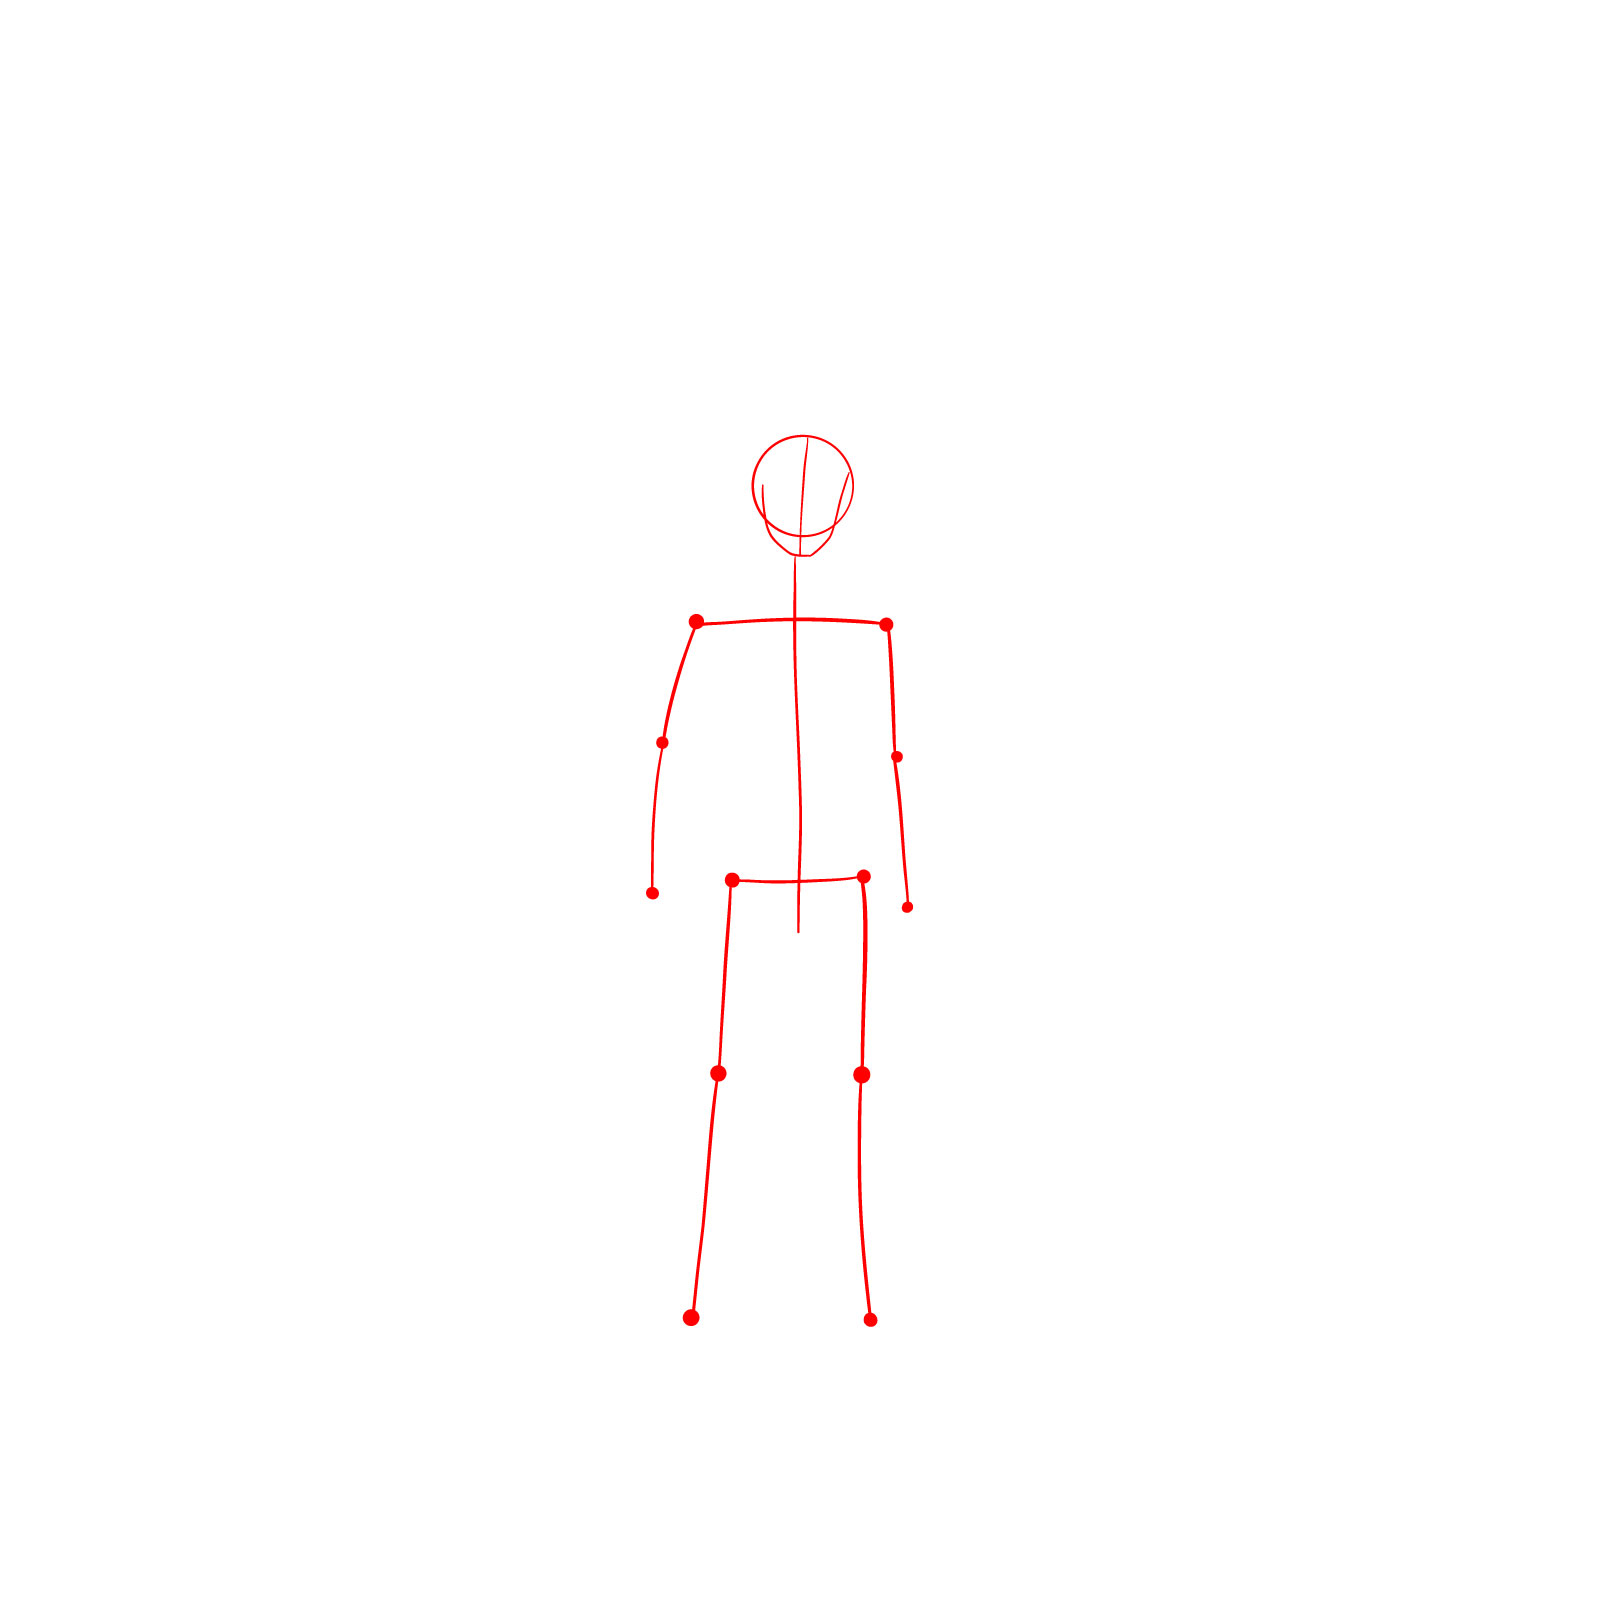
Step 01 – To start your Naruto drawing in Baryon Mode, begin by sketching the shape of the head. This should comprise a circle with an added form for the chin. Below the head, draft a basic stick figure. This provides a foundational structure for Naruto’s posture and ensures accurate proportions for the subsequent steps
Initial structure of the Naruto drawing: head shape and stick figure
Step 02 – Continuing with the basic sketch, create a rough outline for the cape. The cape should flow from the shoulders, billowing outward. This will add dynamism to the figure and set the stage for detailing in later steps
Introduction of Naruto’s distinctive cape
Step 03 – Further refine your drawing by marking out the locations of his facial features. Using light lines, indicate the positions of the eyes, nose, and mouth. Additionally, sketch rough outlines of his torso, arms, and legs to establish the overall proportions and posture
Proportional mapping of Naruto’s features and body
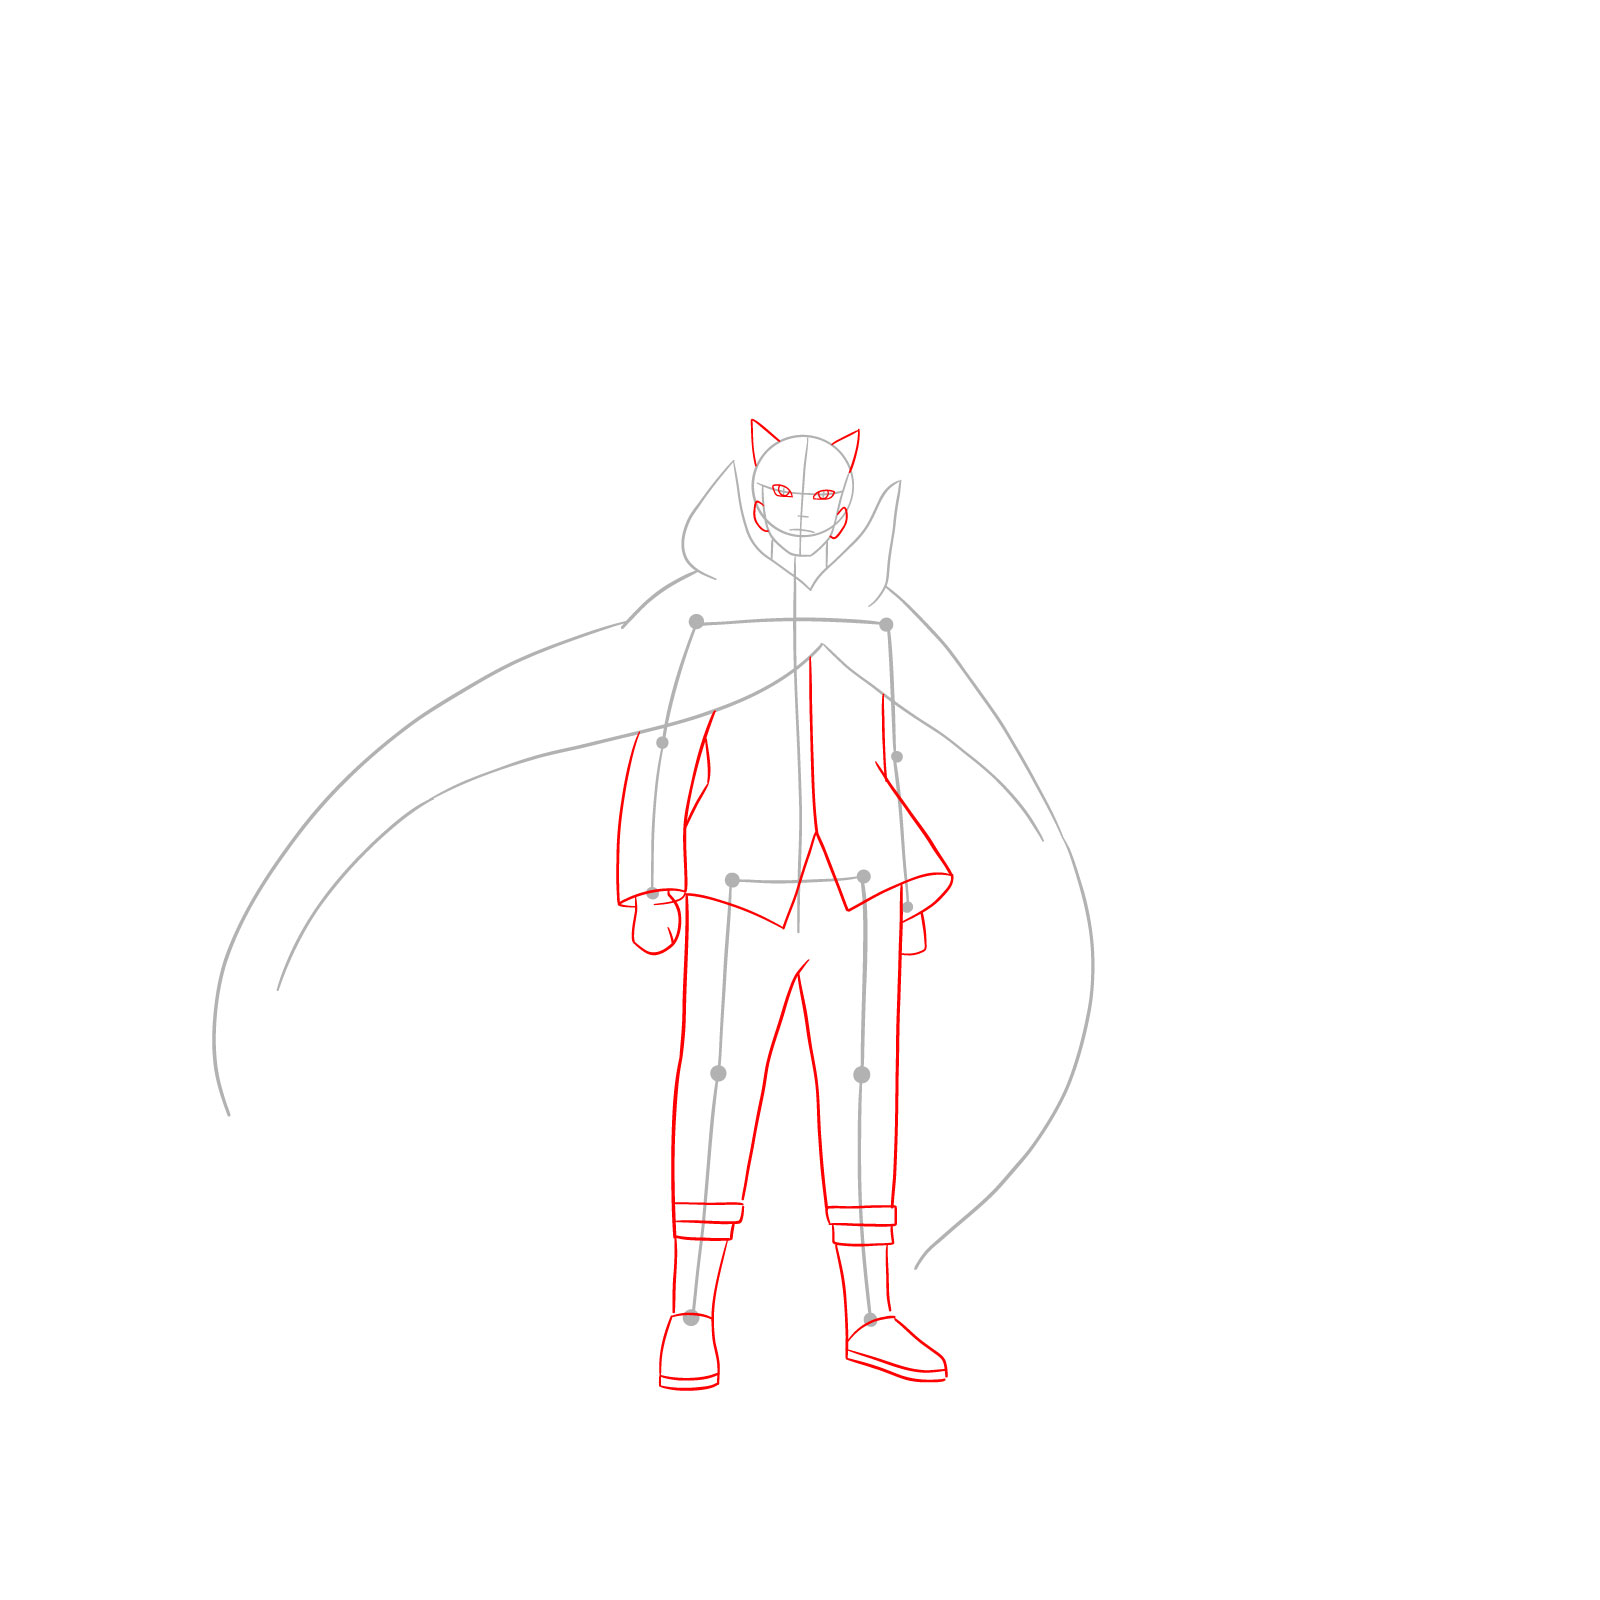
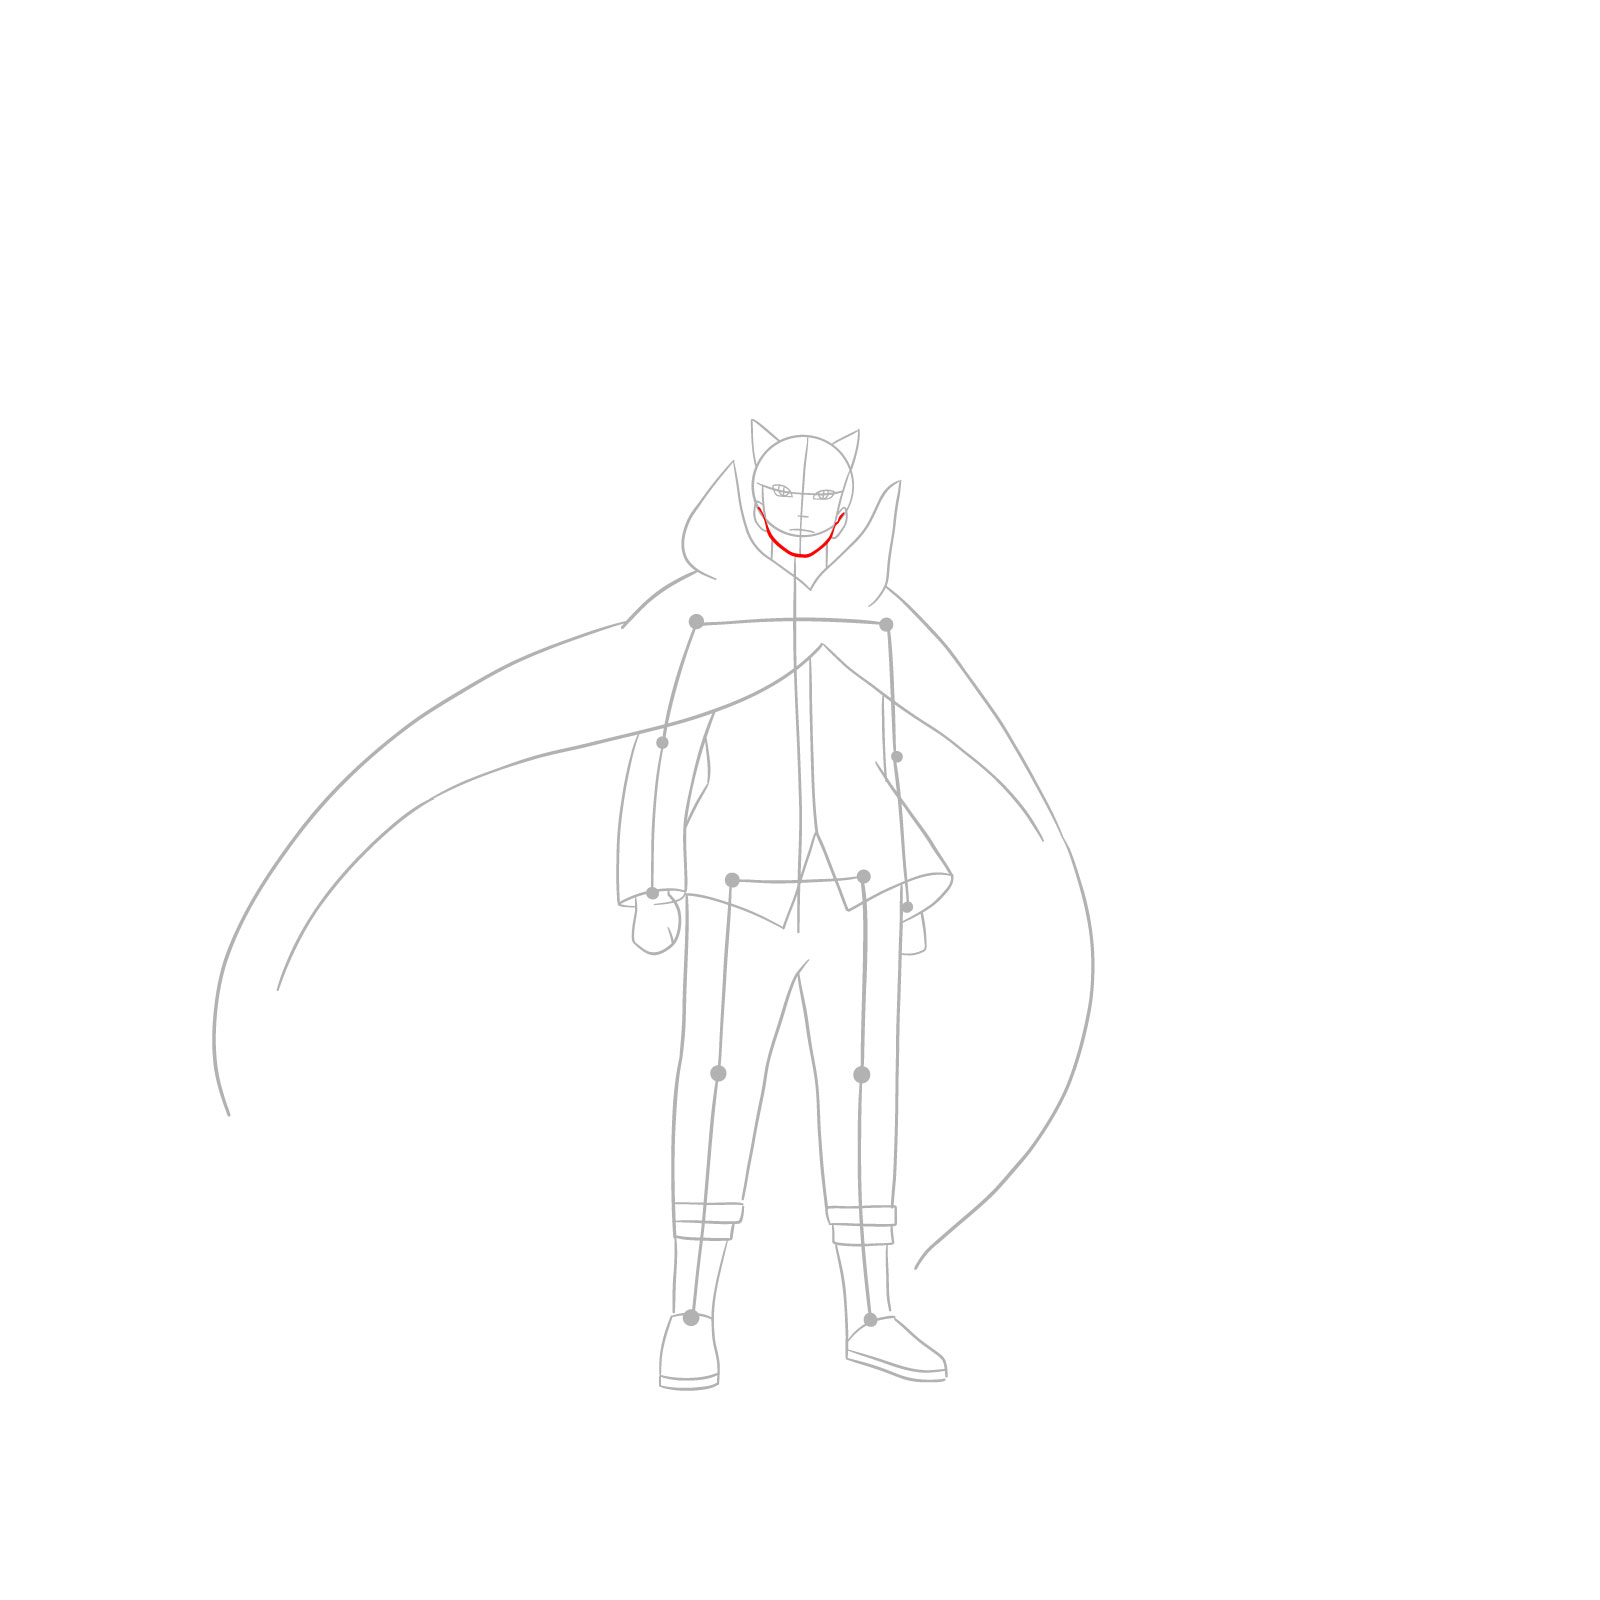
Step 04 – Delve into more specific details of Naruto’s face. Sharpen the outline of the chin, ensuring it aligns well with the initial shape you drew for the head
Detailed chin outline for Naruto
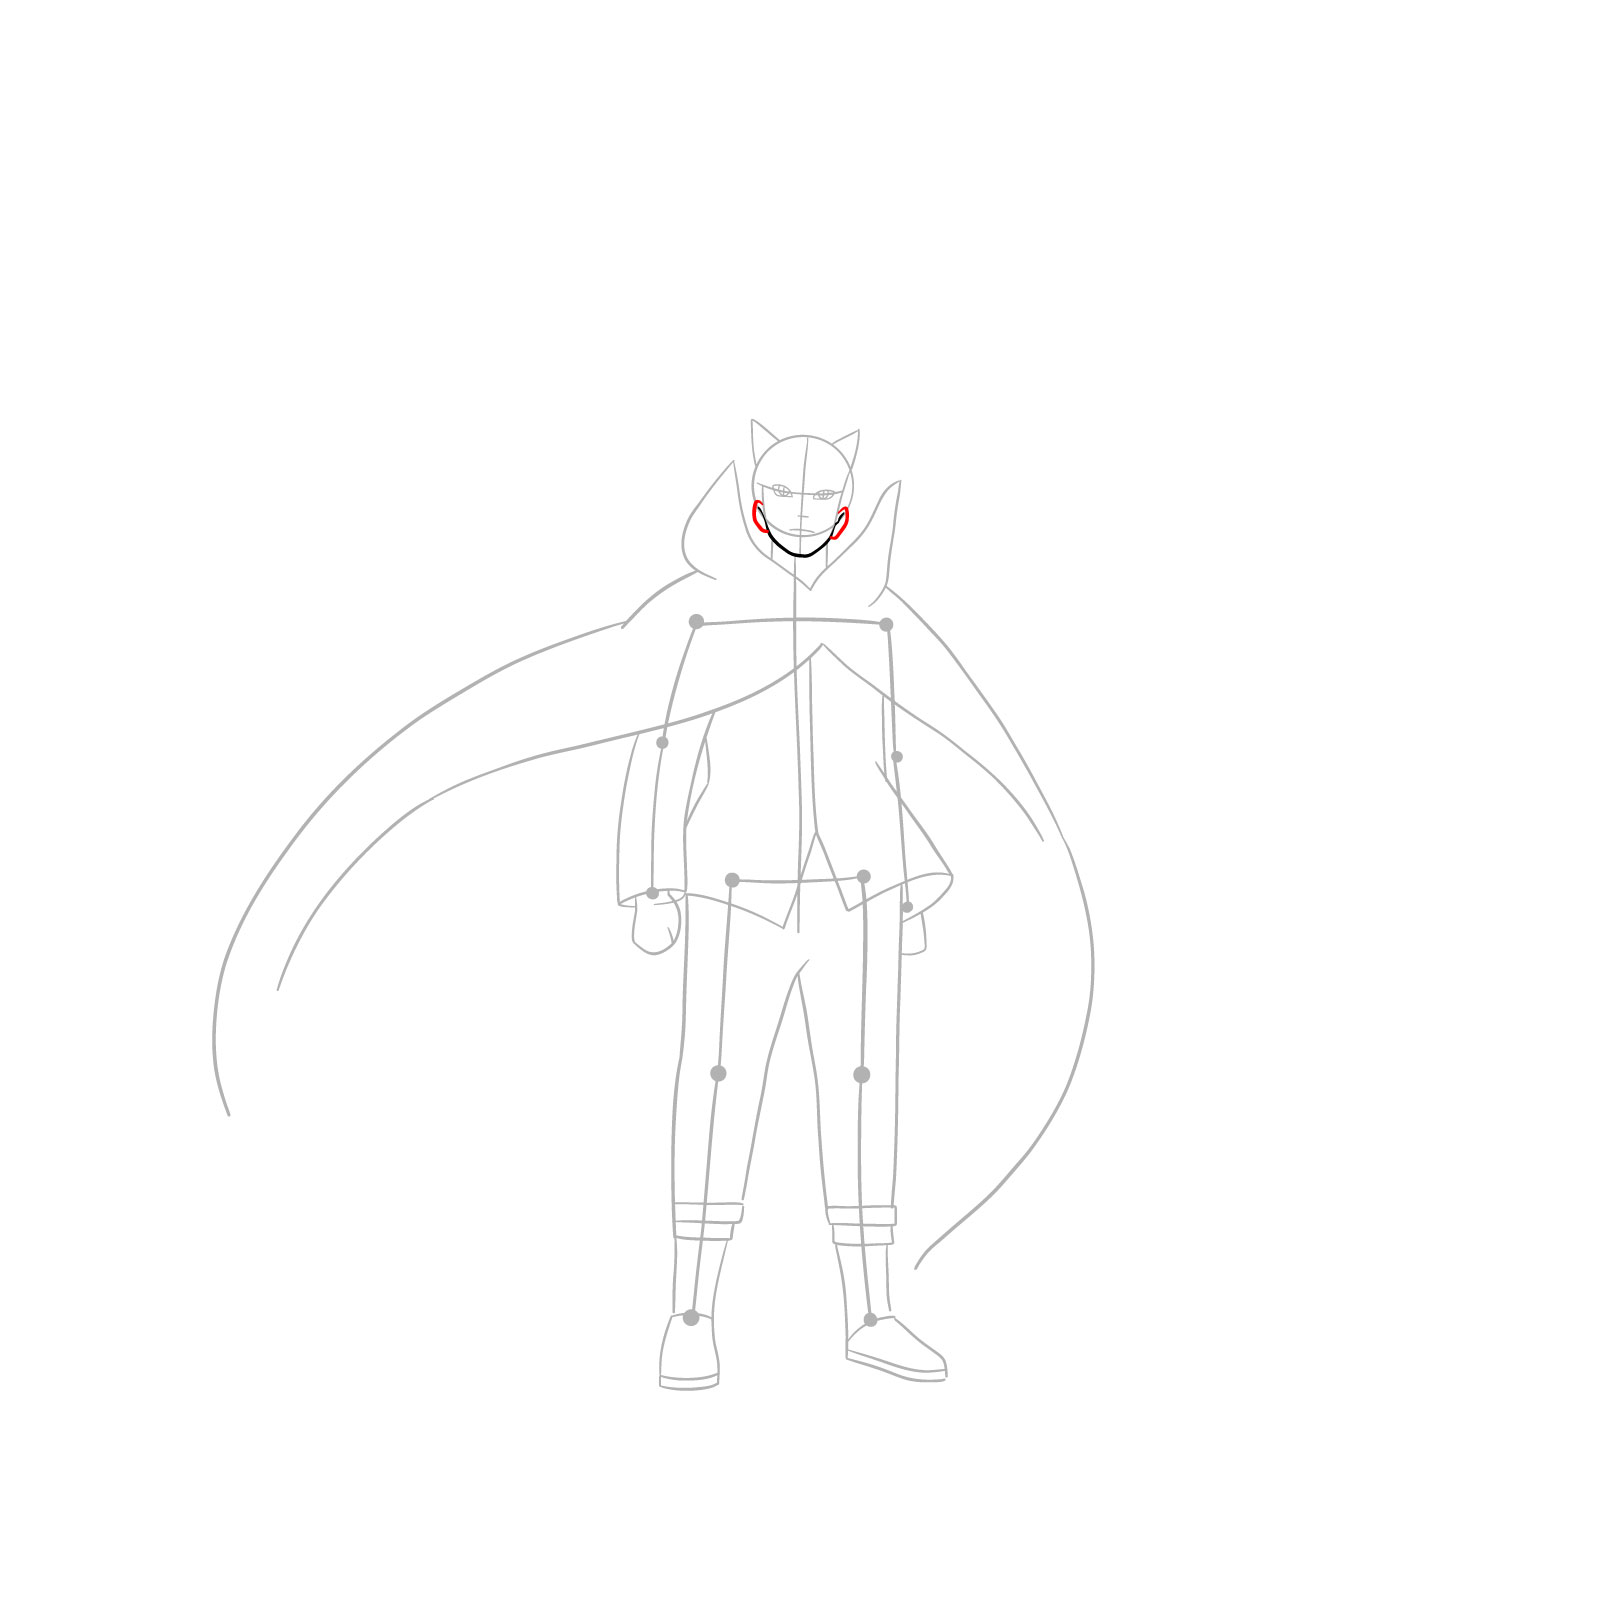
Step 05 – In this step, focus on sketching Naruto’s ears. They should be aligned with the eyes and mouth, rounding slightly at the top and becoming narrower towards the bottom
Naruto’s ears sketched
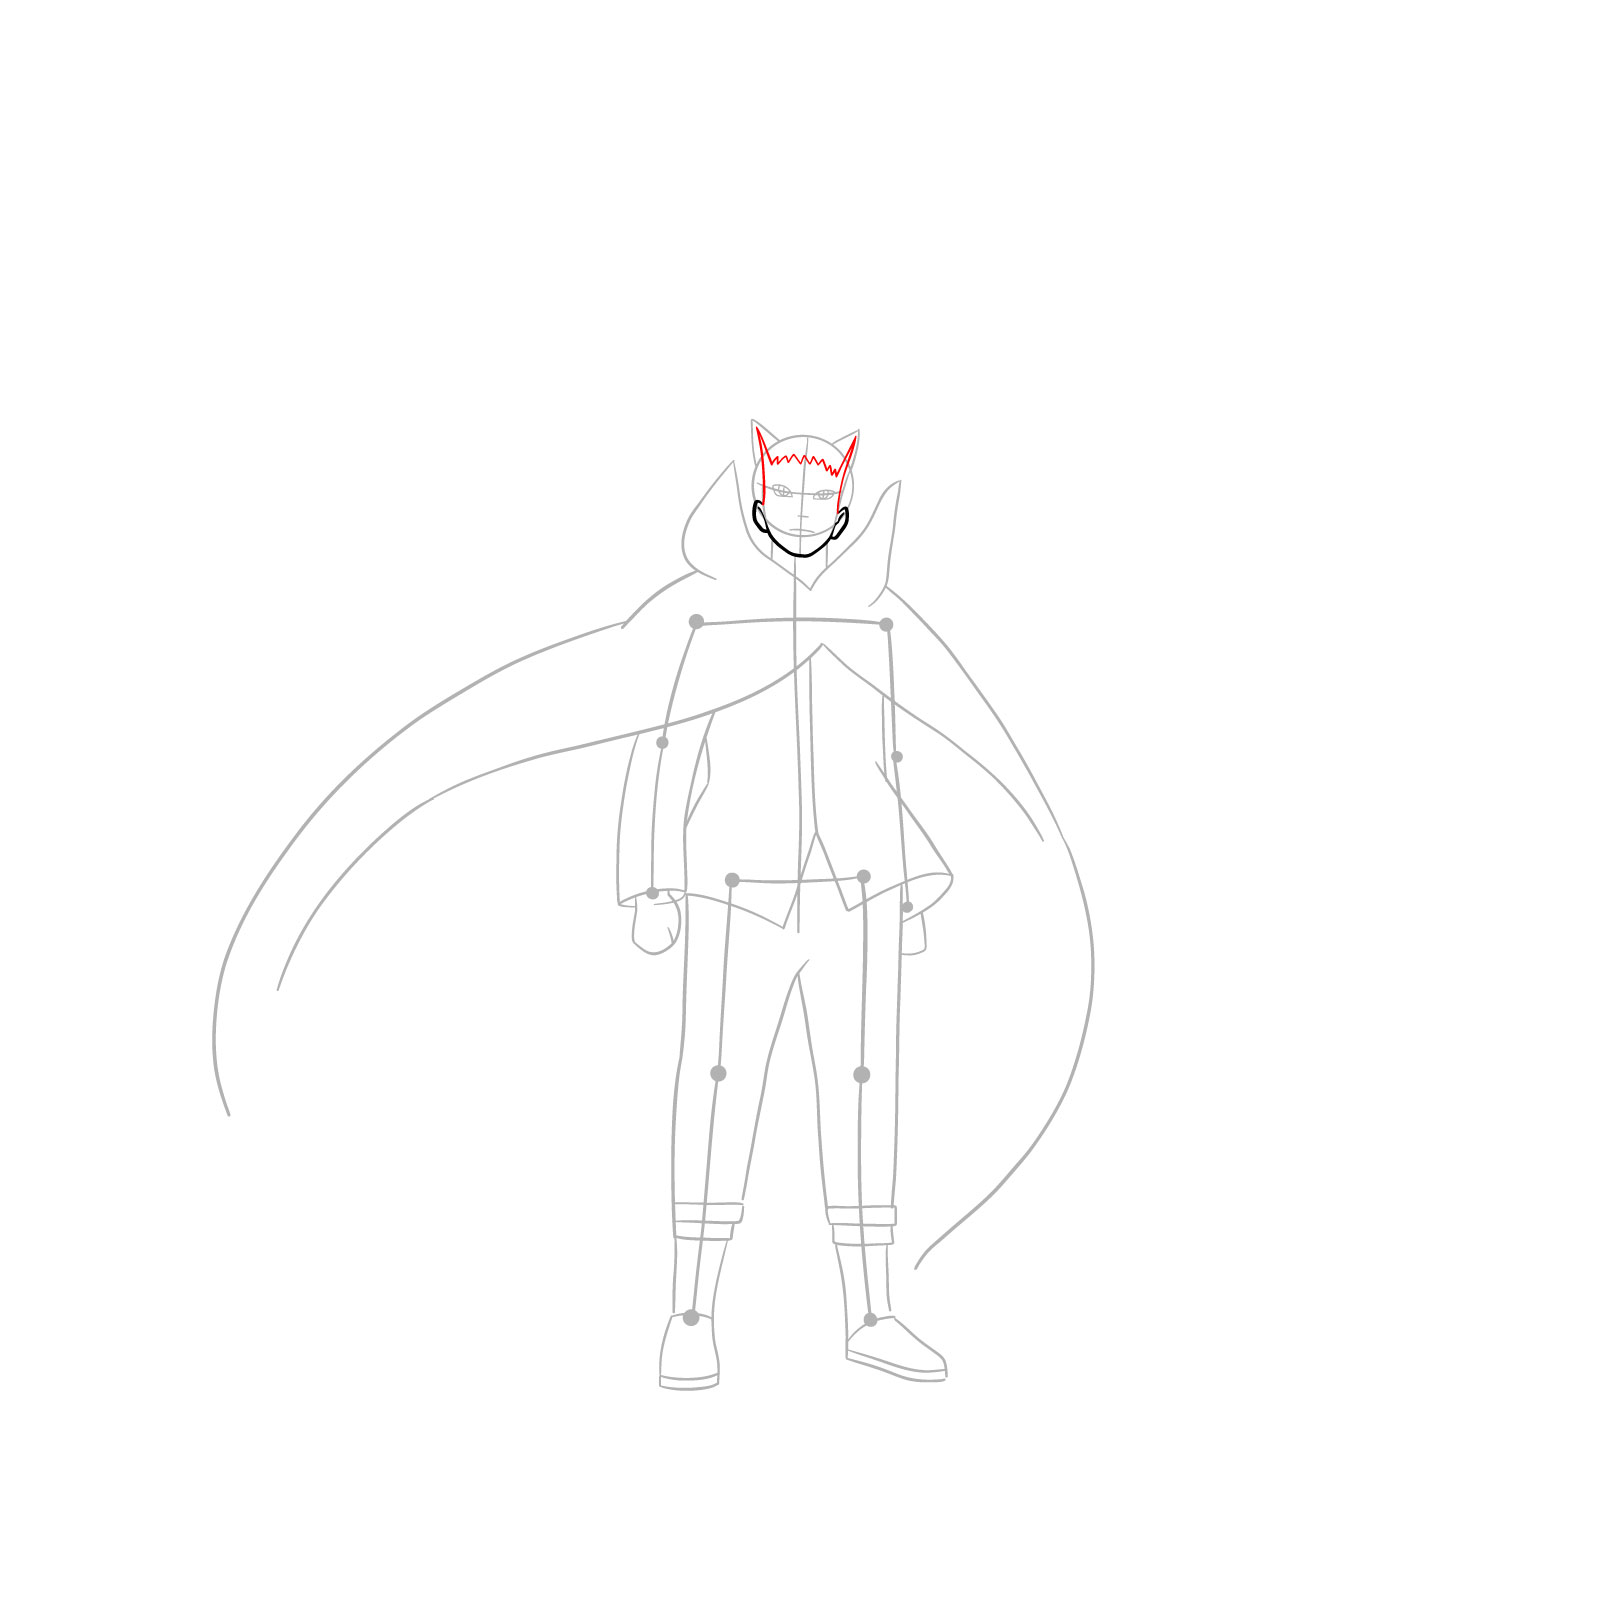
Step 06 – Start defining Naruto’s Baryon Mode distinctive spiky hairstyle. Draw the inner lines for the spikes of his hair, ensuring they are jagged and dynamic. Also, outline the forehead hairline which rises slightly in the center
Emphasizing the formation of his characteristic spiky hair
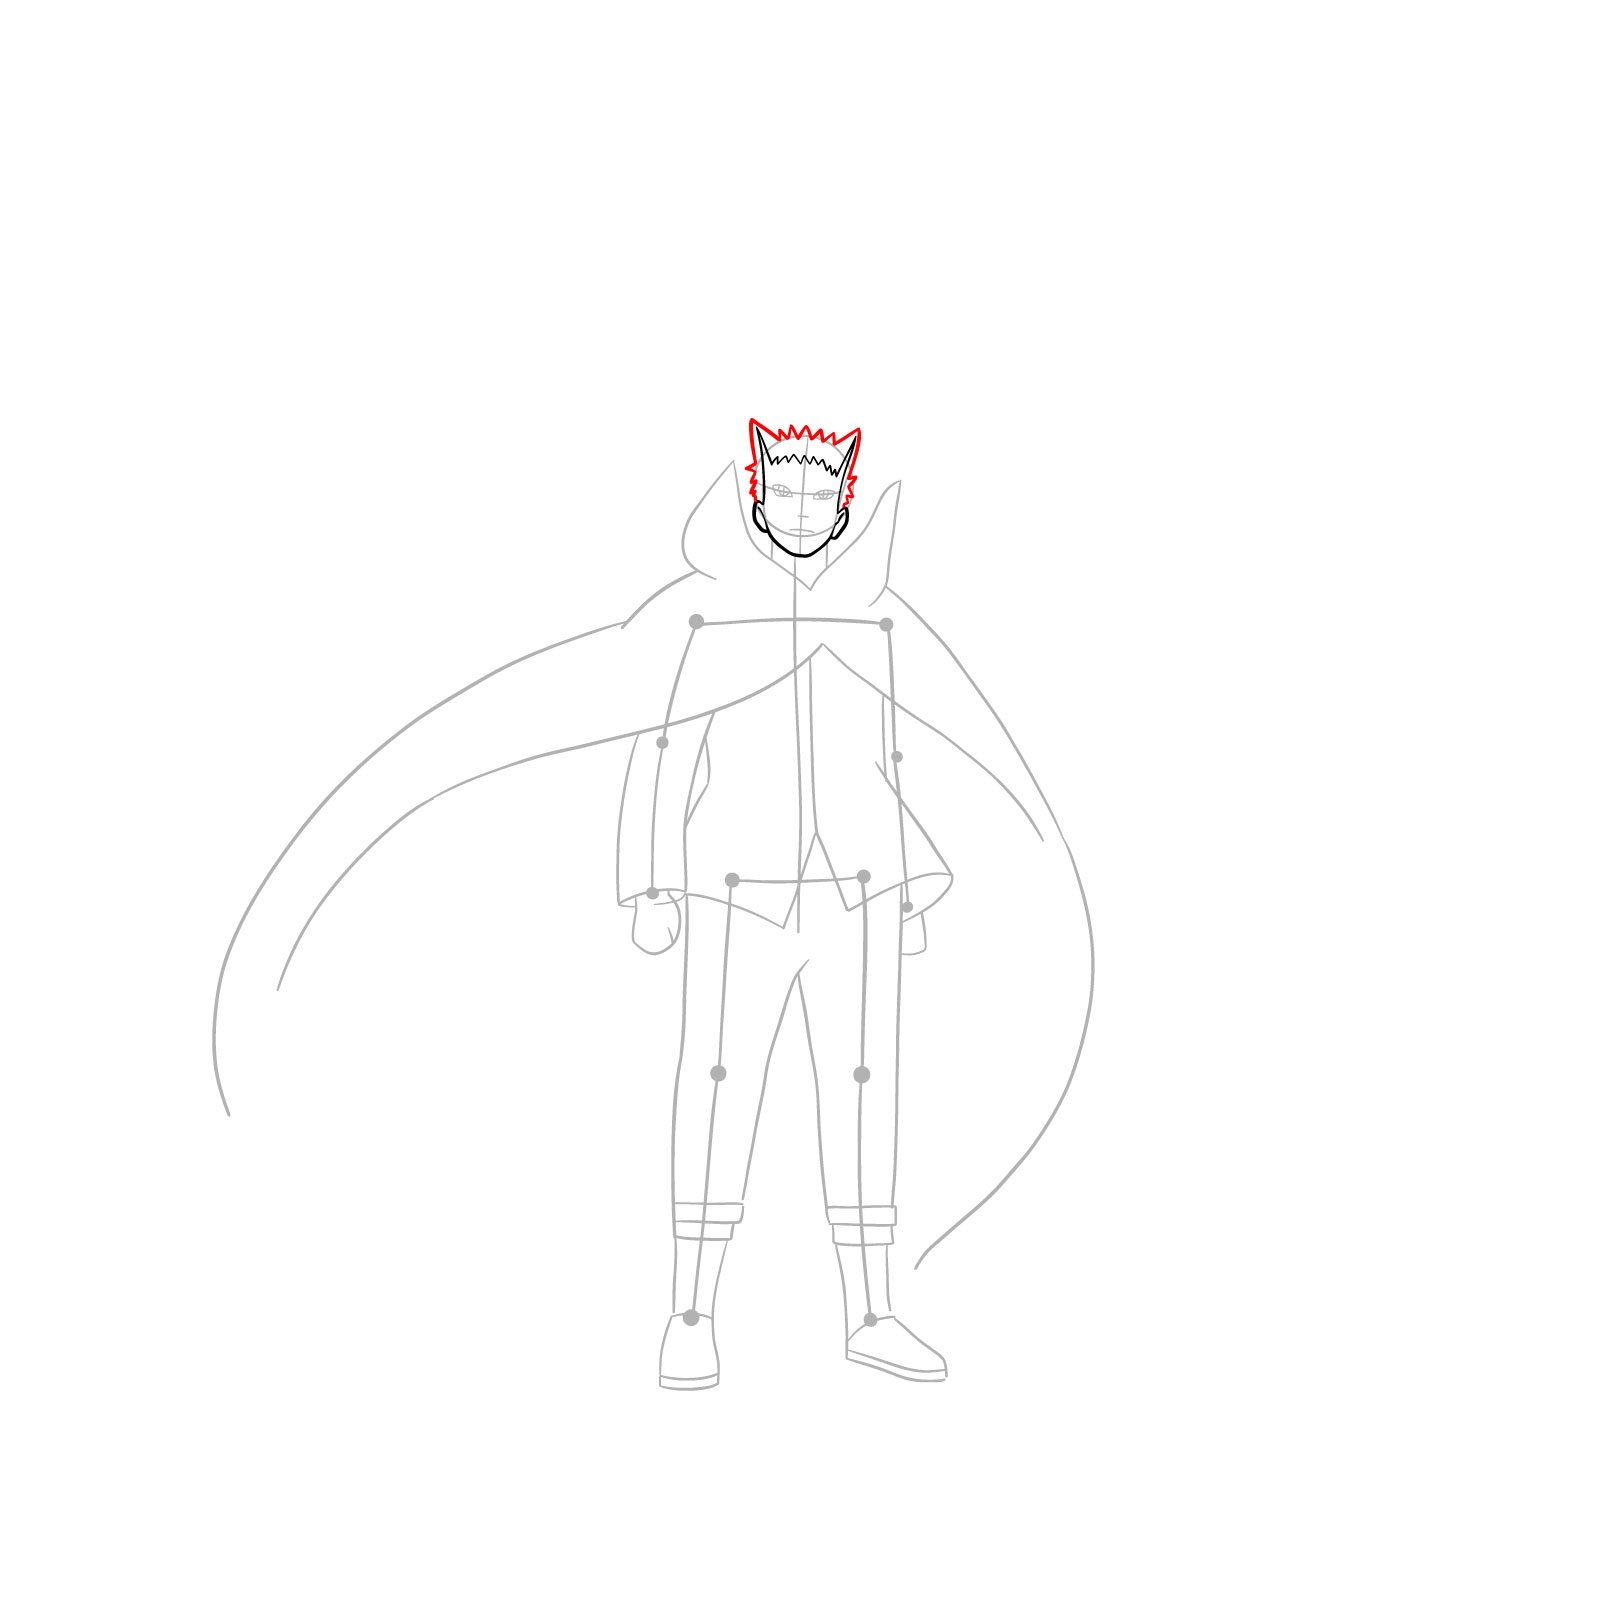
Step 07 – Continue from the previous step to finalize the shape of Naruto’s hair. The spikes should be varying in size and direction, with some being more prominent than others, capturing the energy and dynamism of his character
Naruto drawing showcasing the completed spiky hairstyle
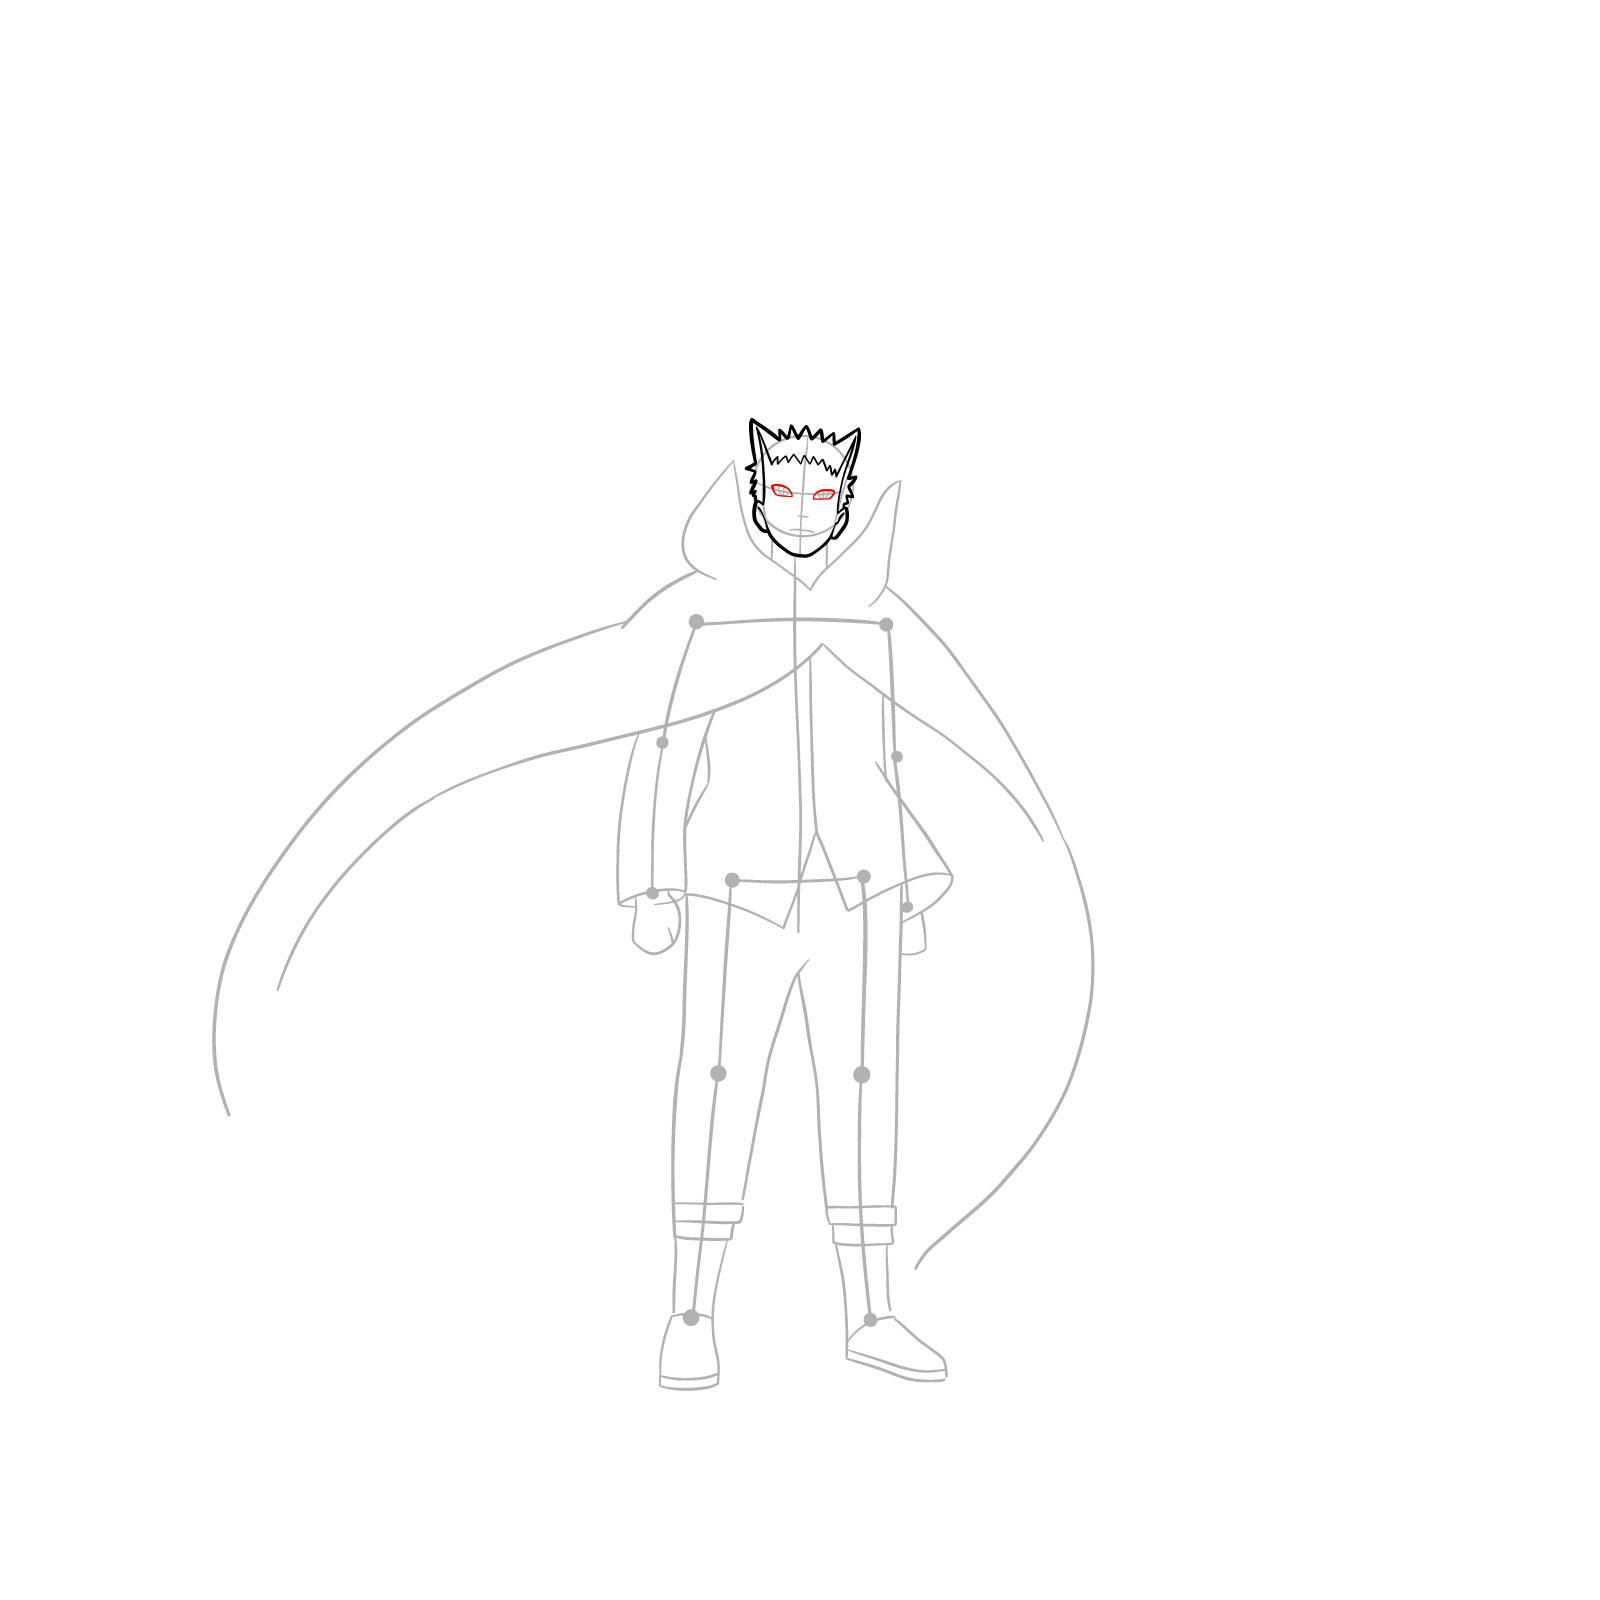
Step 08 – Turn your attention to Naruto’s eyes. They are an essential aspect of his character and expression. Outline the eyes ensuring they are symmetrical, almond-shaped, and convey intensity
Naruto’s eyes outlined
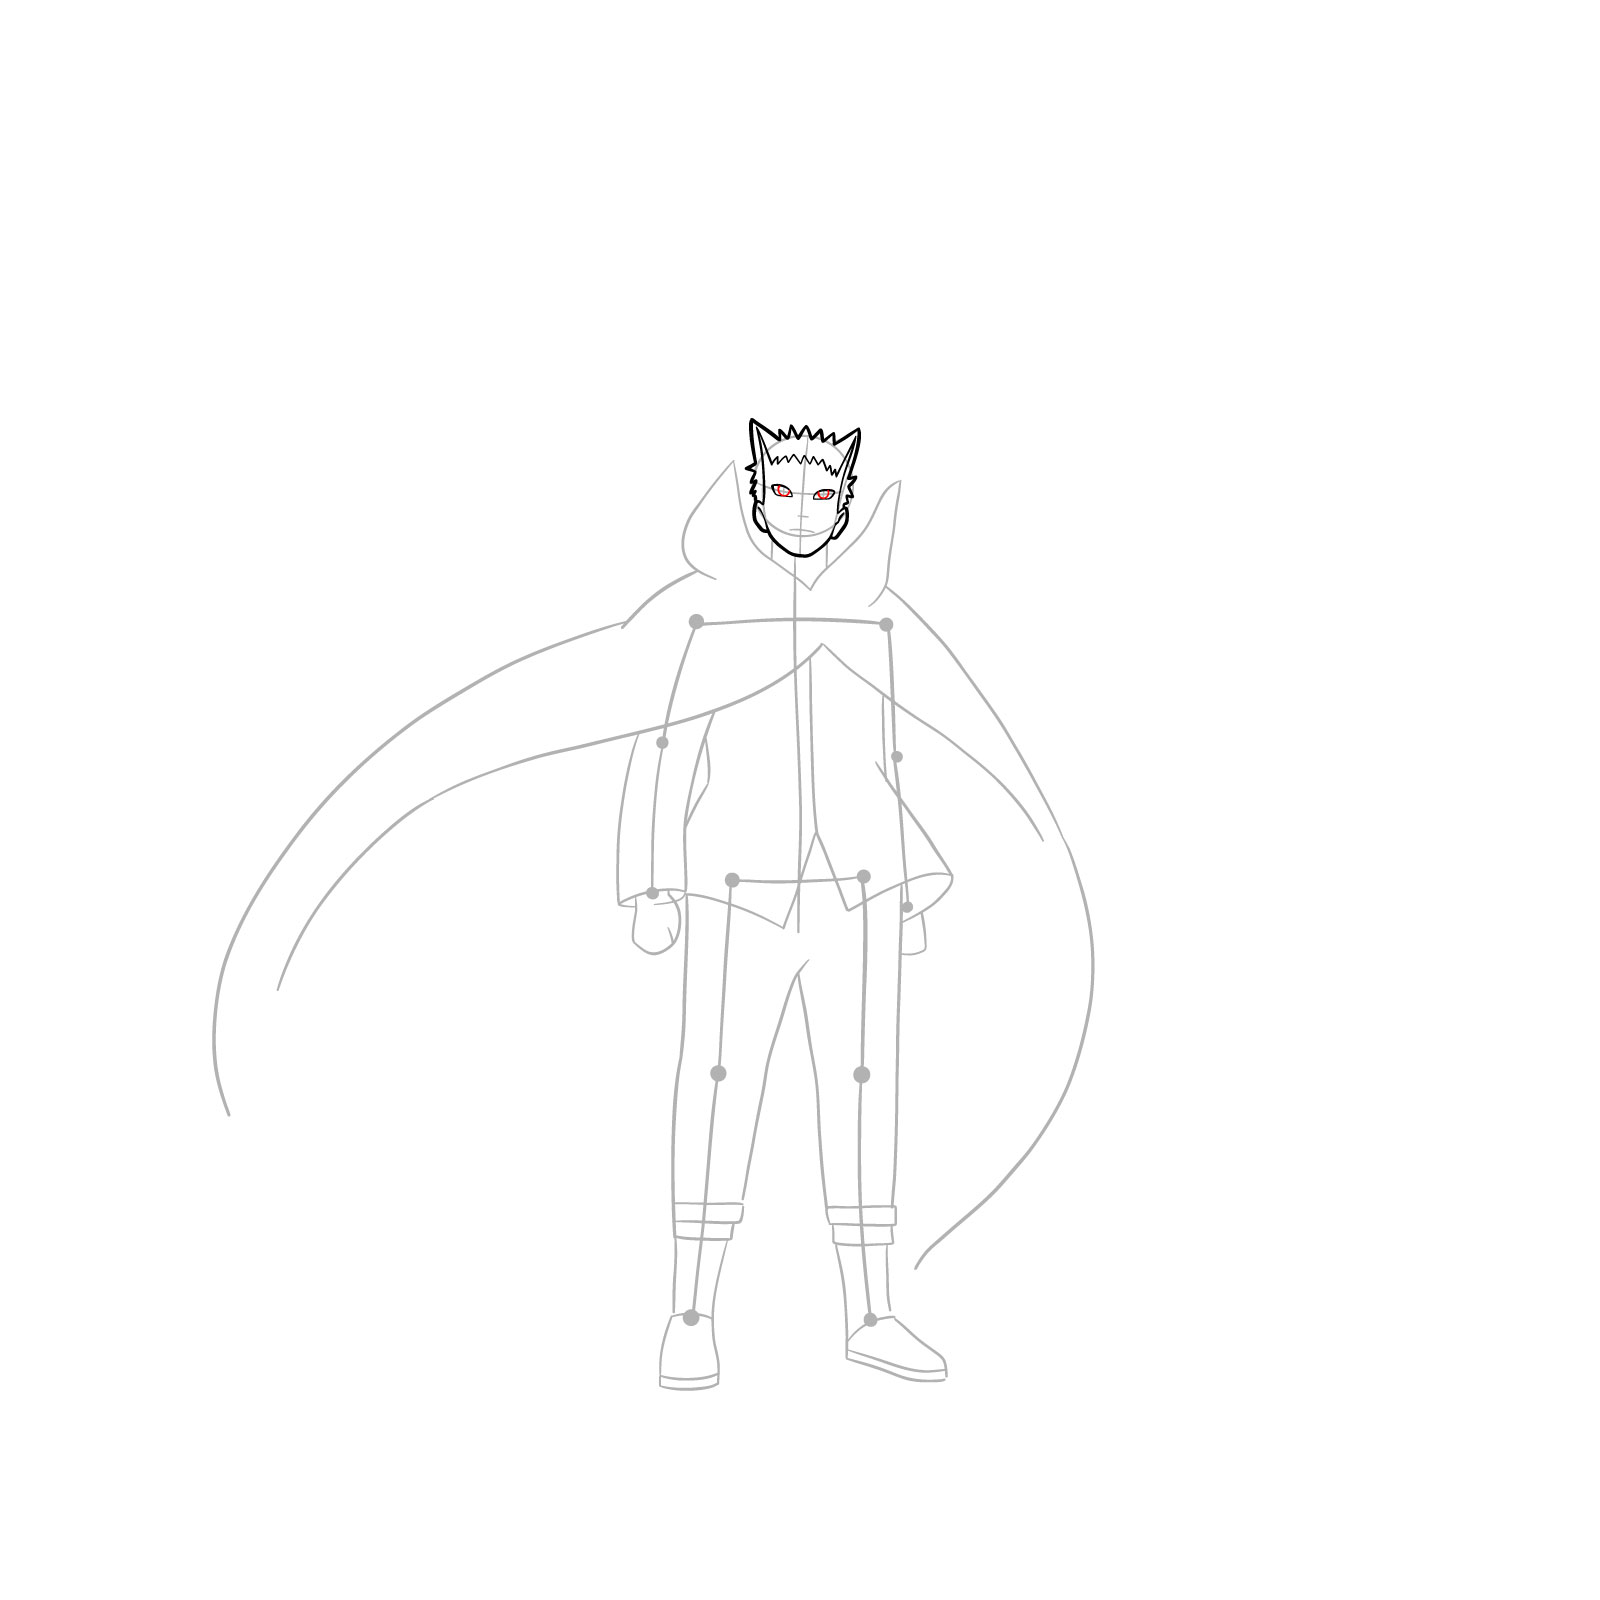
Step 09 – The character now has defined eyeballs within the previously drawn eye outlines
Drawing Eyeballs
Step 10 – In this step, Naruto’s facial features are further refined with the addition of pupils within the eyeballs, eyebrows above the eyes, a nose in the center of the face, a mouth below the nose, and detailed inner lines for the ears
Adding Pupils, Brows, Nose, Mouth, and Ear Details
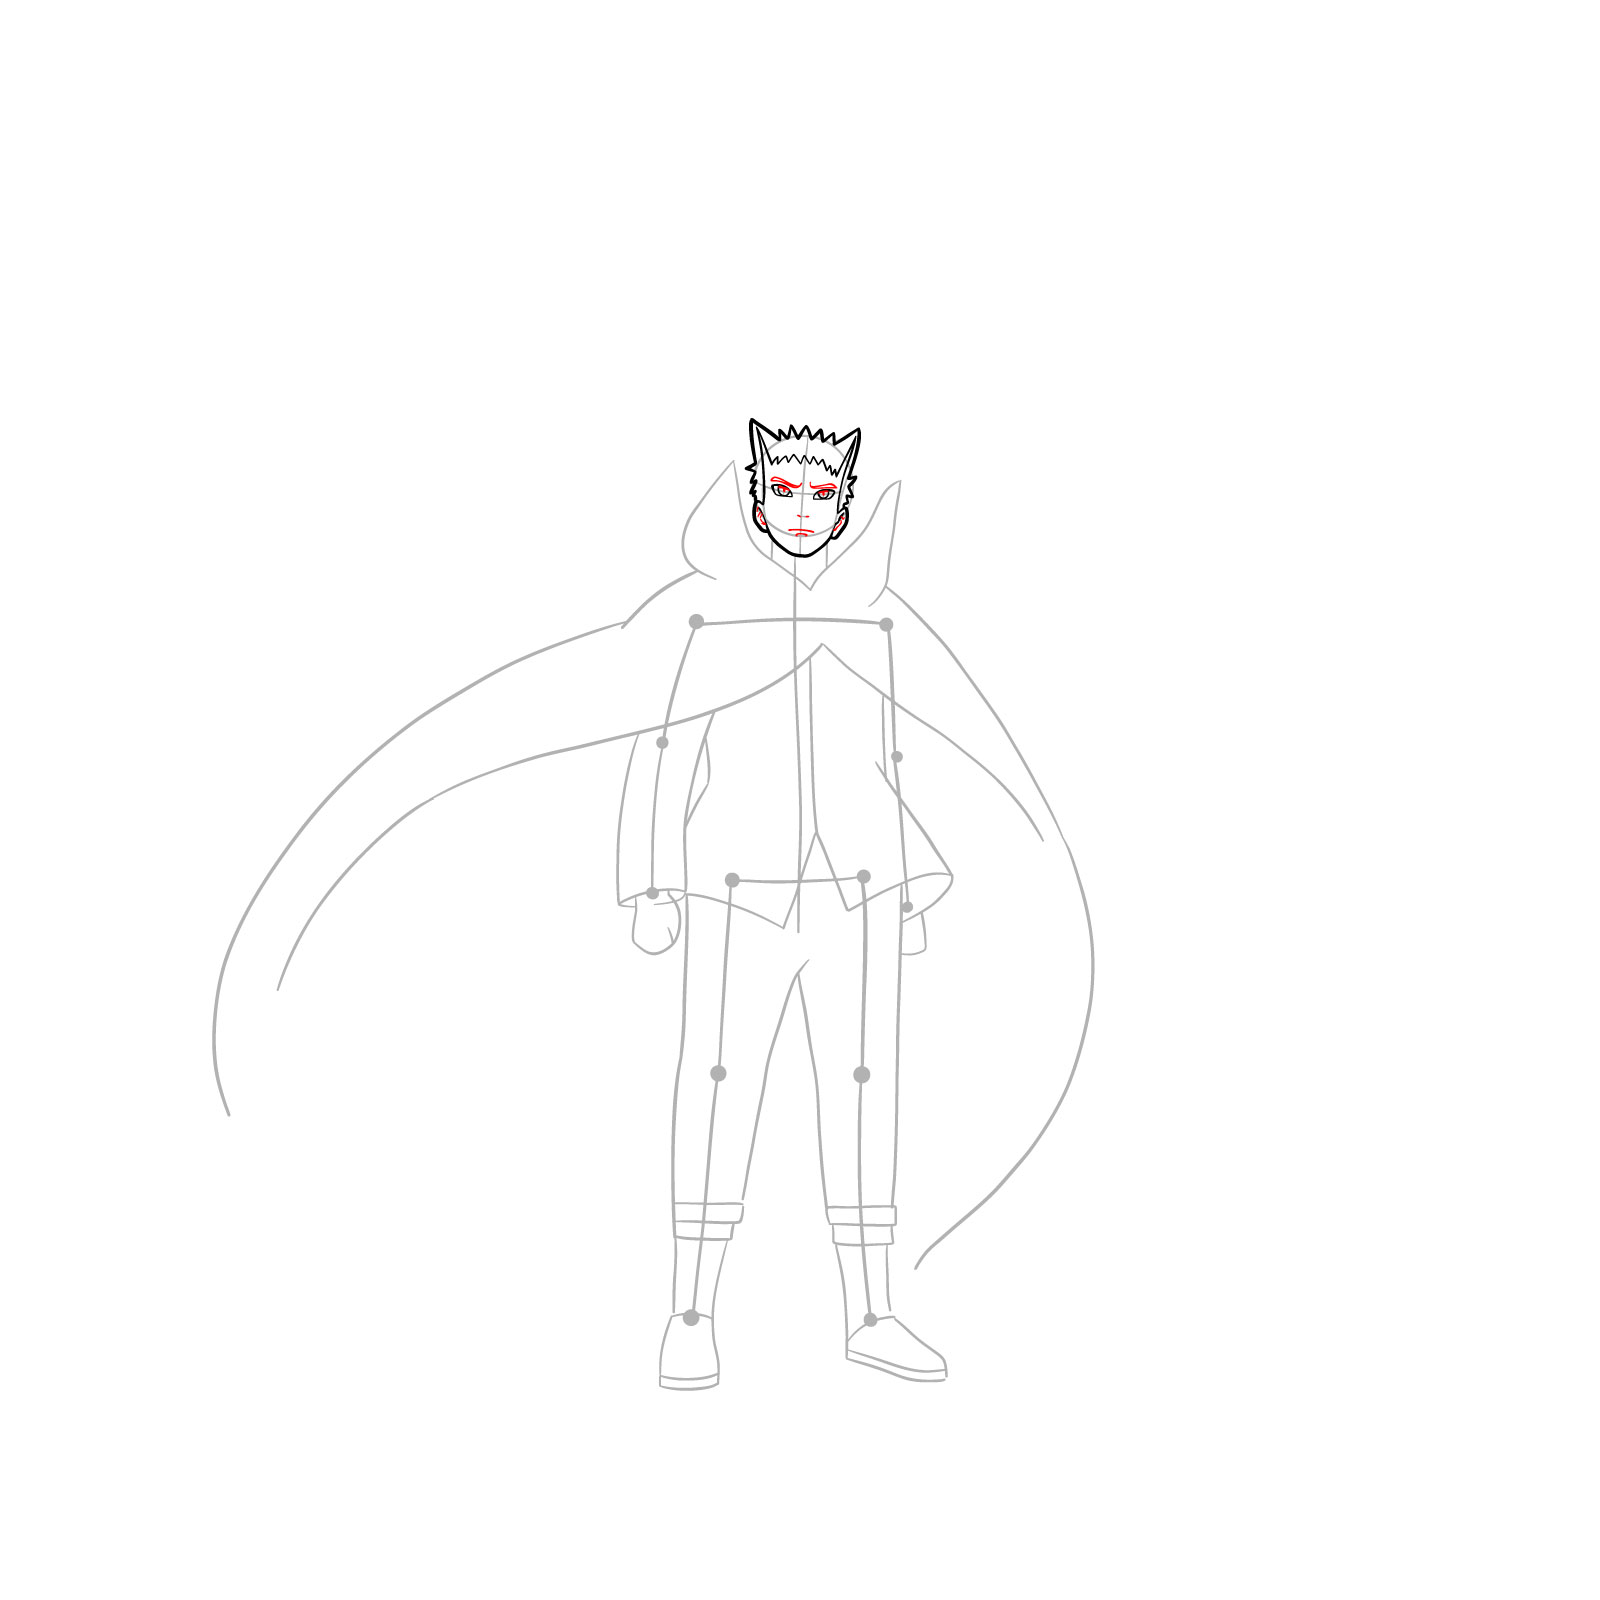
Step 11 – A unique Baryon Mode pattern now frames the his’s eyes. This pattern extends upwards, merging with spikes on the sides of his face
Drawing the Eye-Framing Pattern
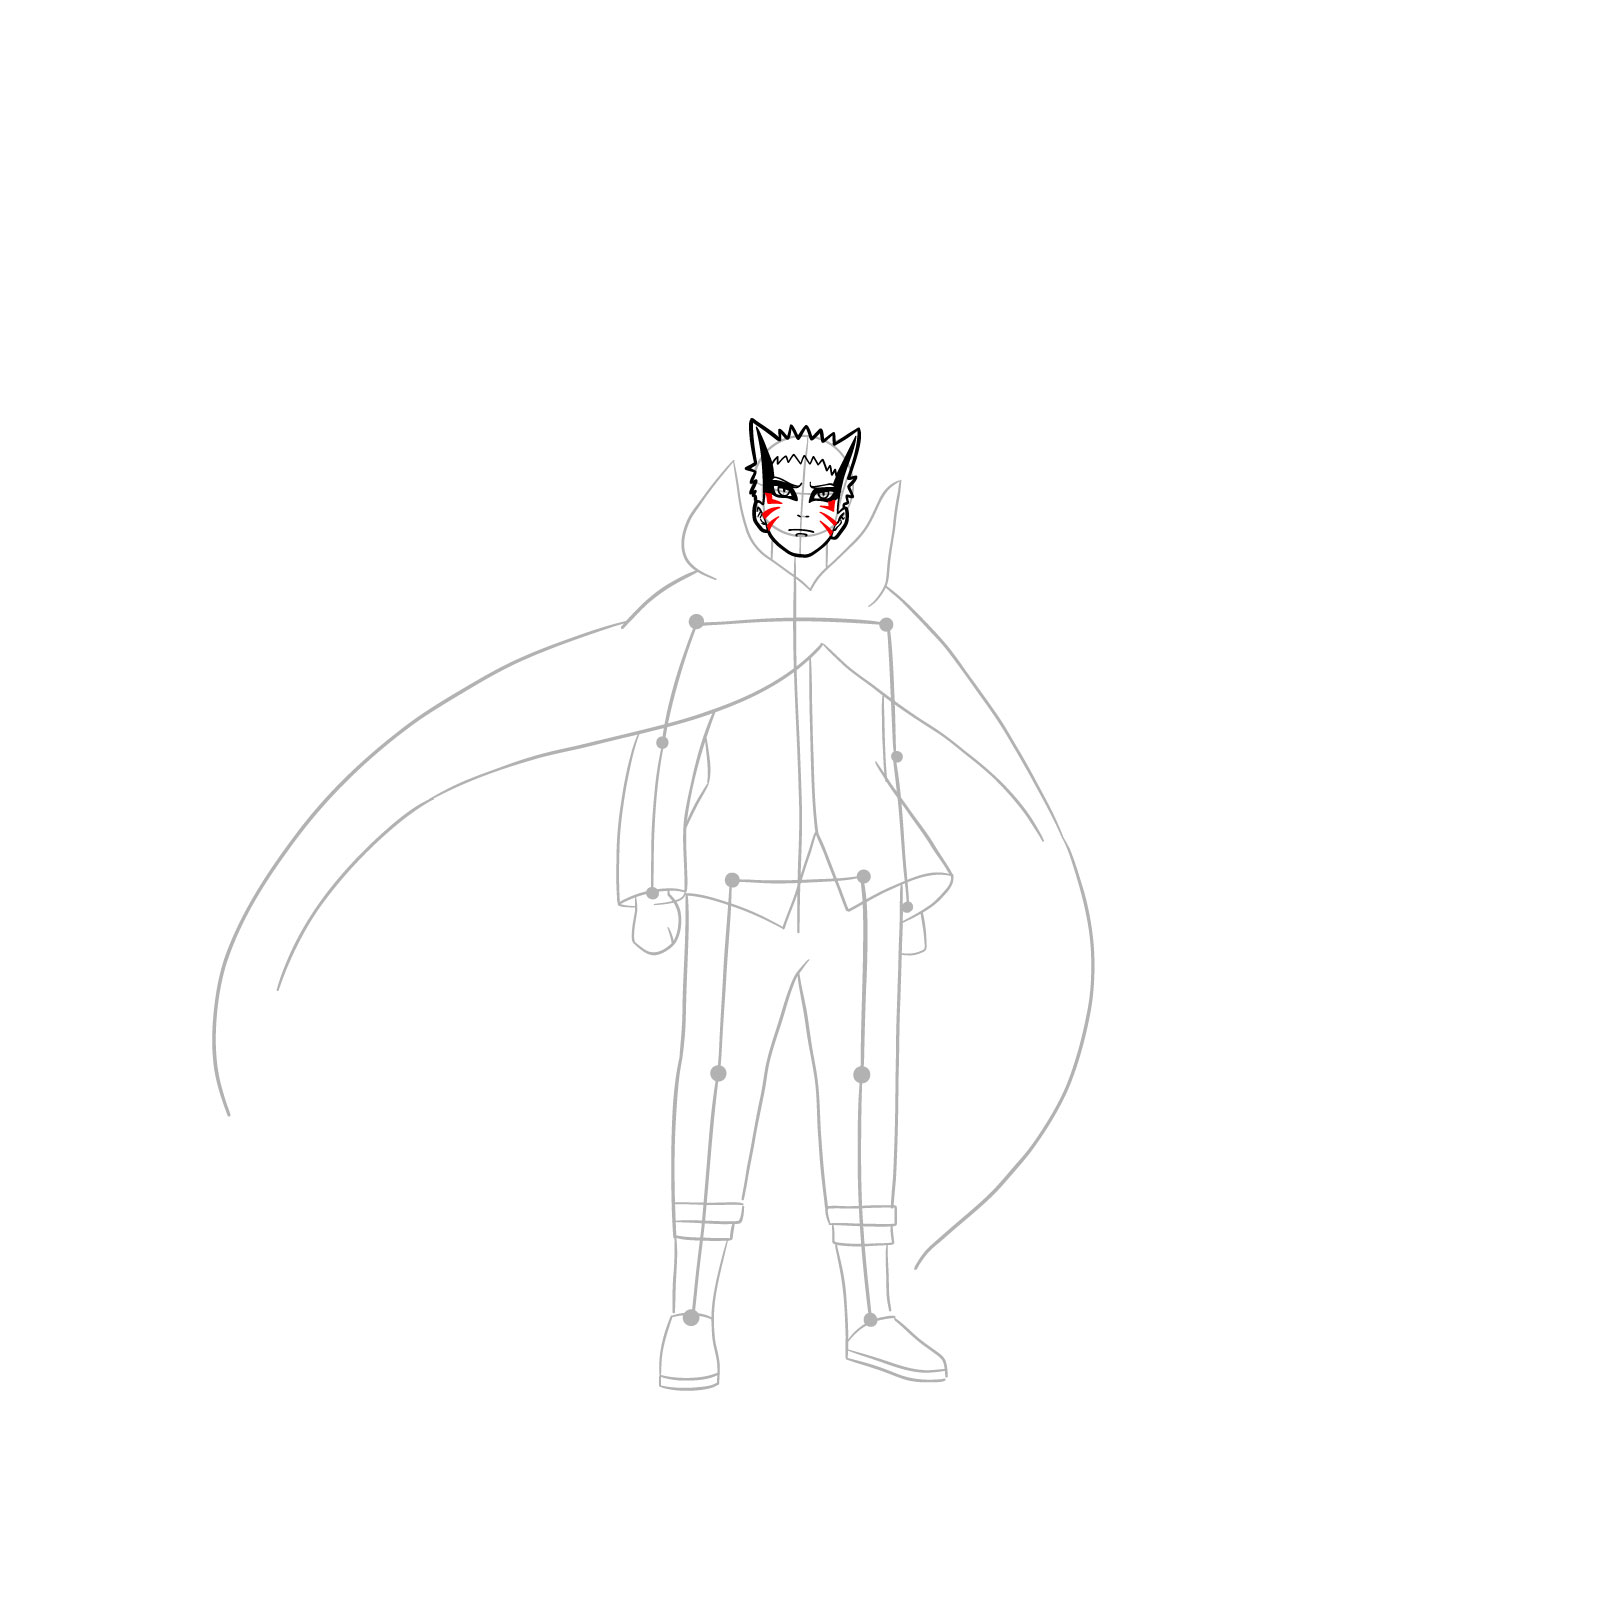
Step 12 – The face is now adorned with Naruto’s famous whisker-like markings on both cheeks, further enhancing the distinct look
Adding Facial Whisker-Like Markings
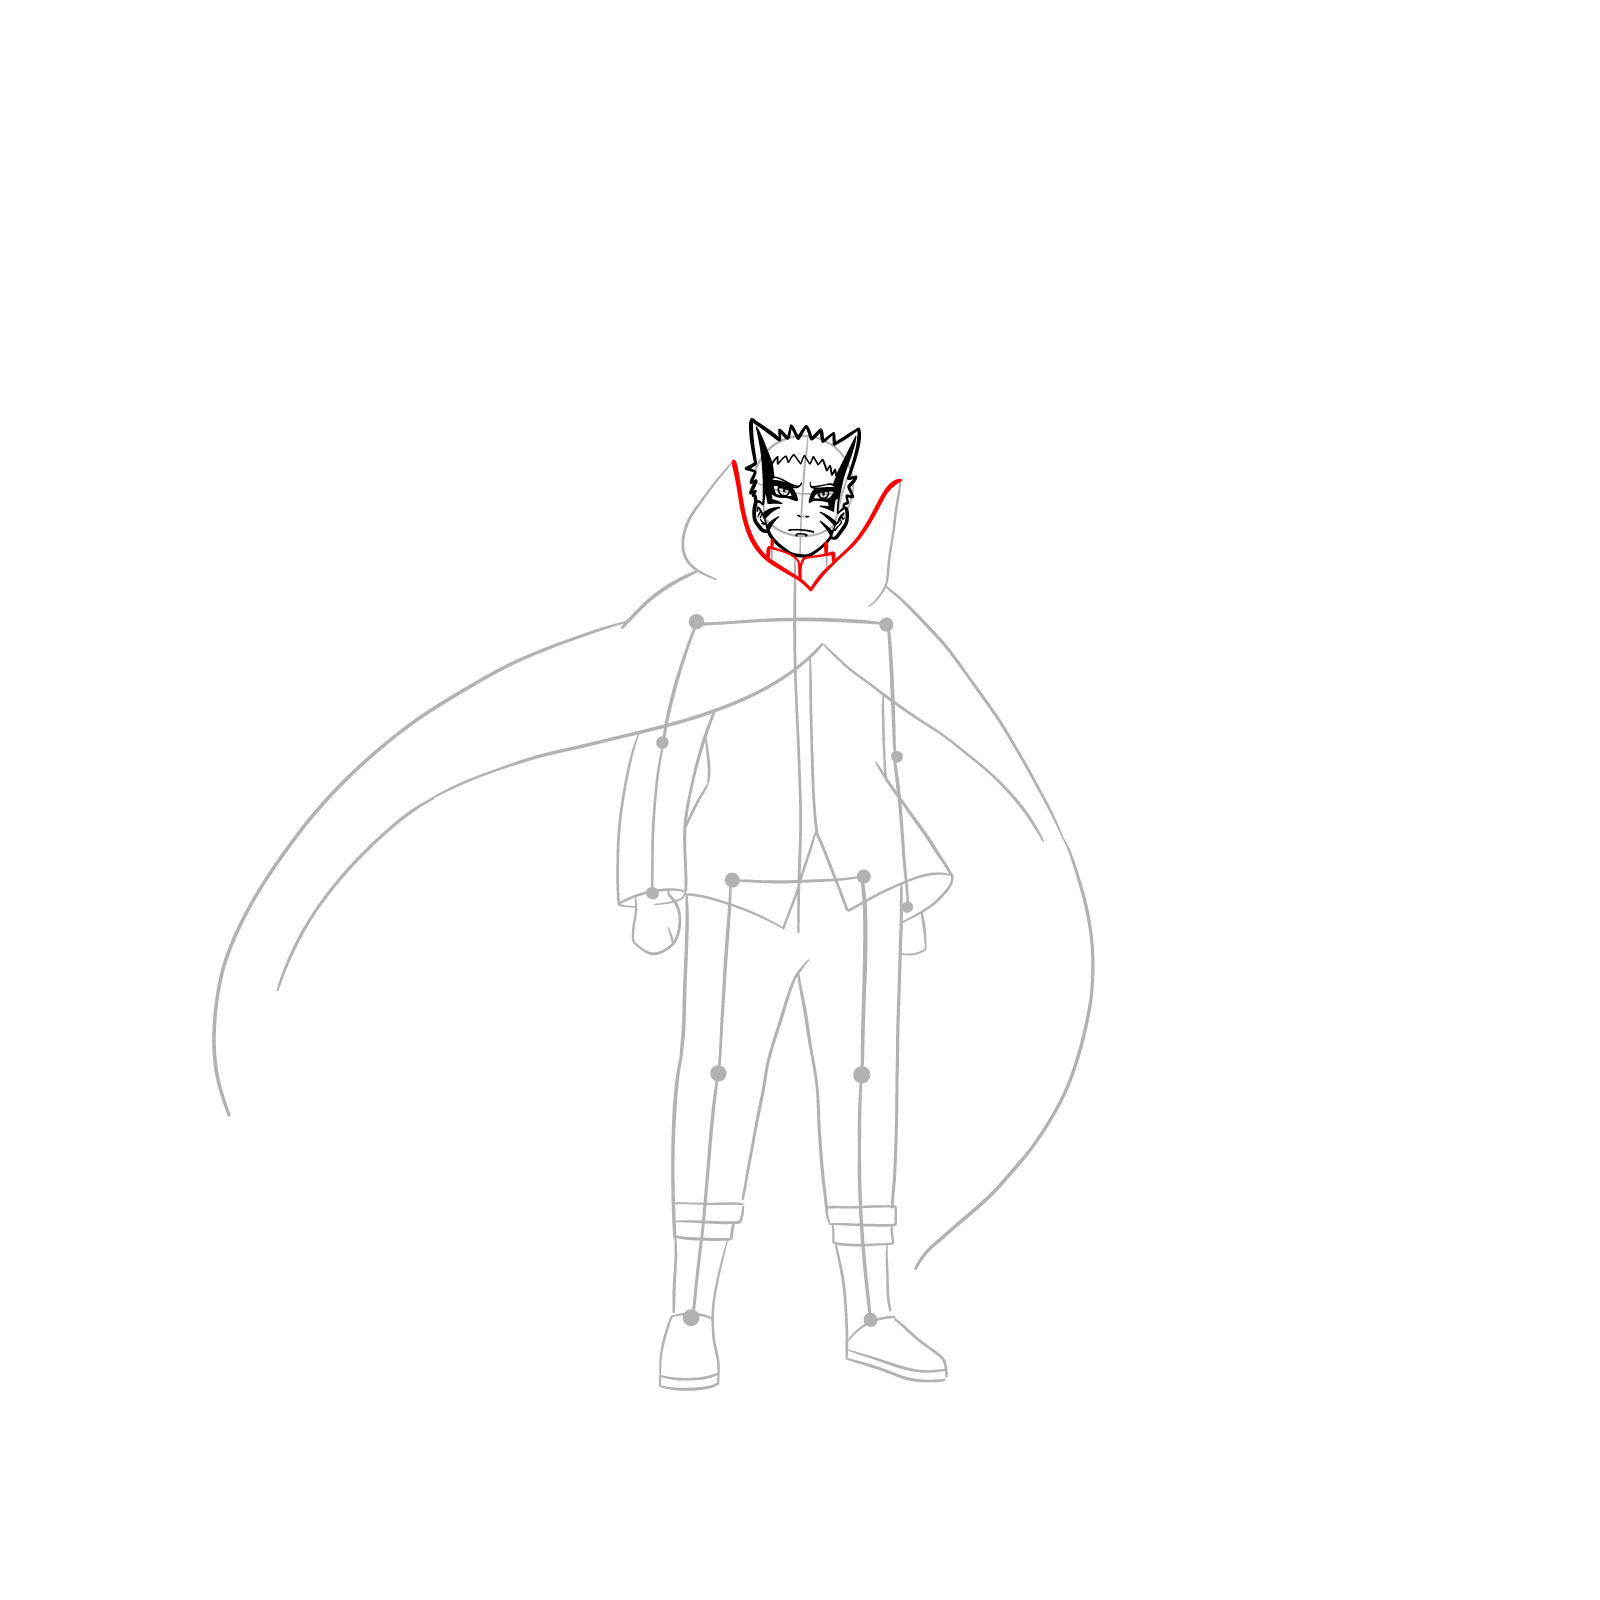
Step 13 – In this step, we’ll begin by sketching out the neck which provides the foundational structure for the collar. This is followed by drawing the initial details of the high collar of the cape. The lines should be smooth, highlighting the flow and structure of the neck and collars
Drawing the neck, collar, and starting the cape
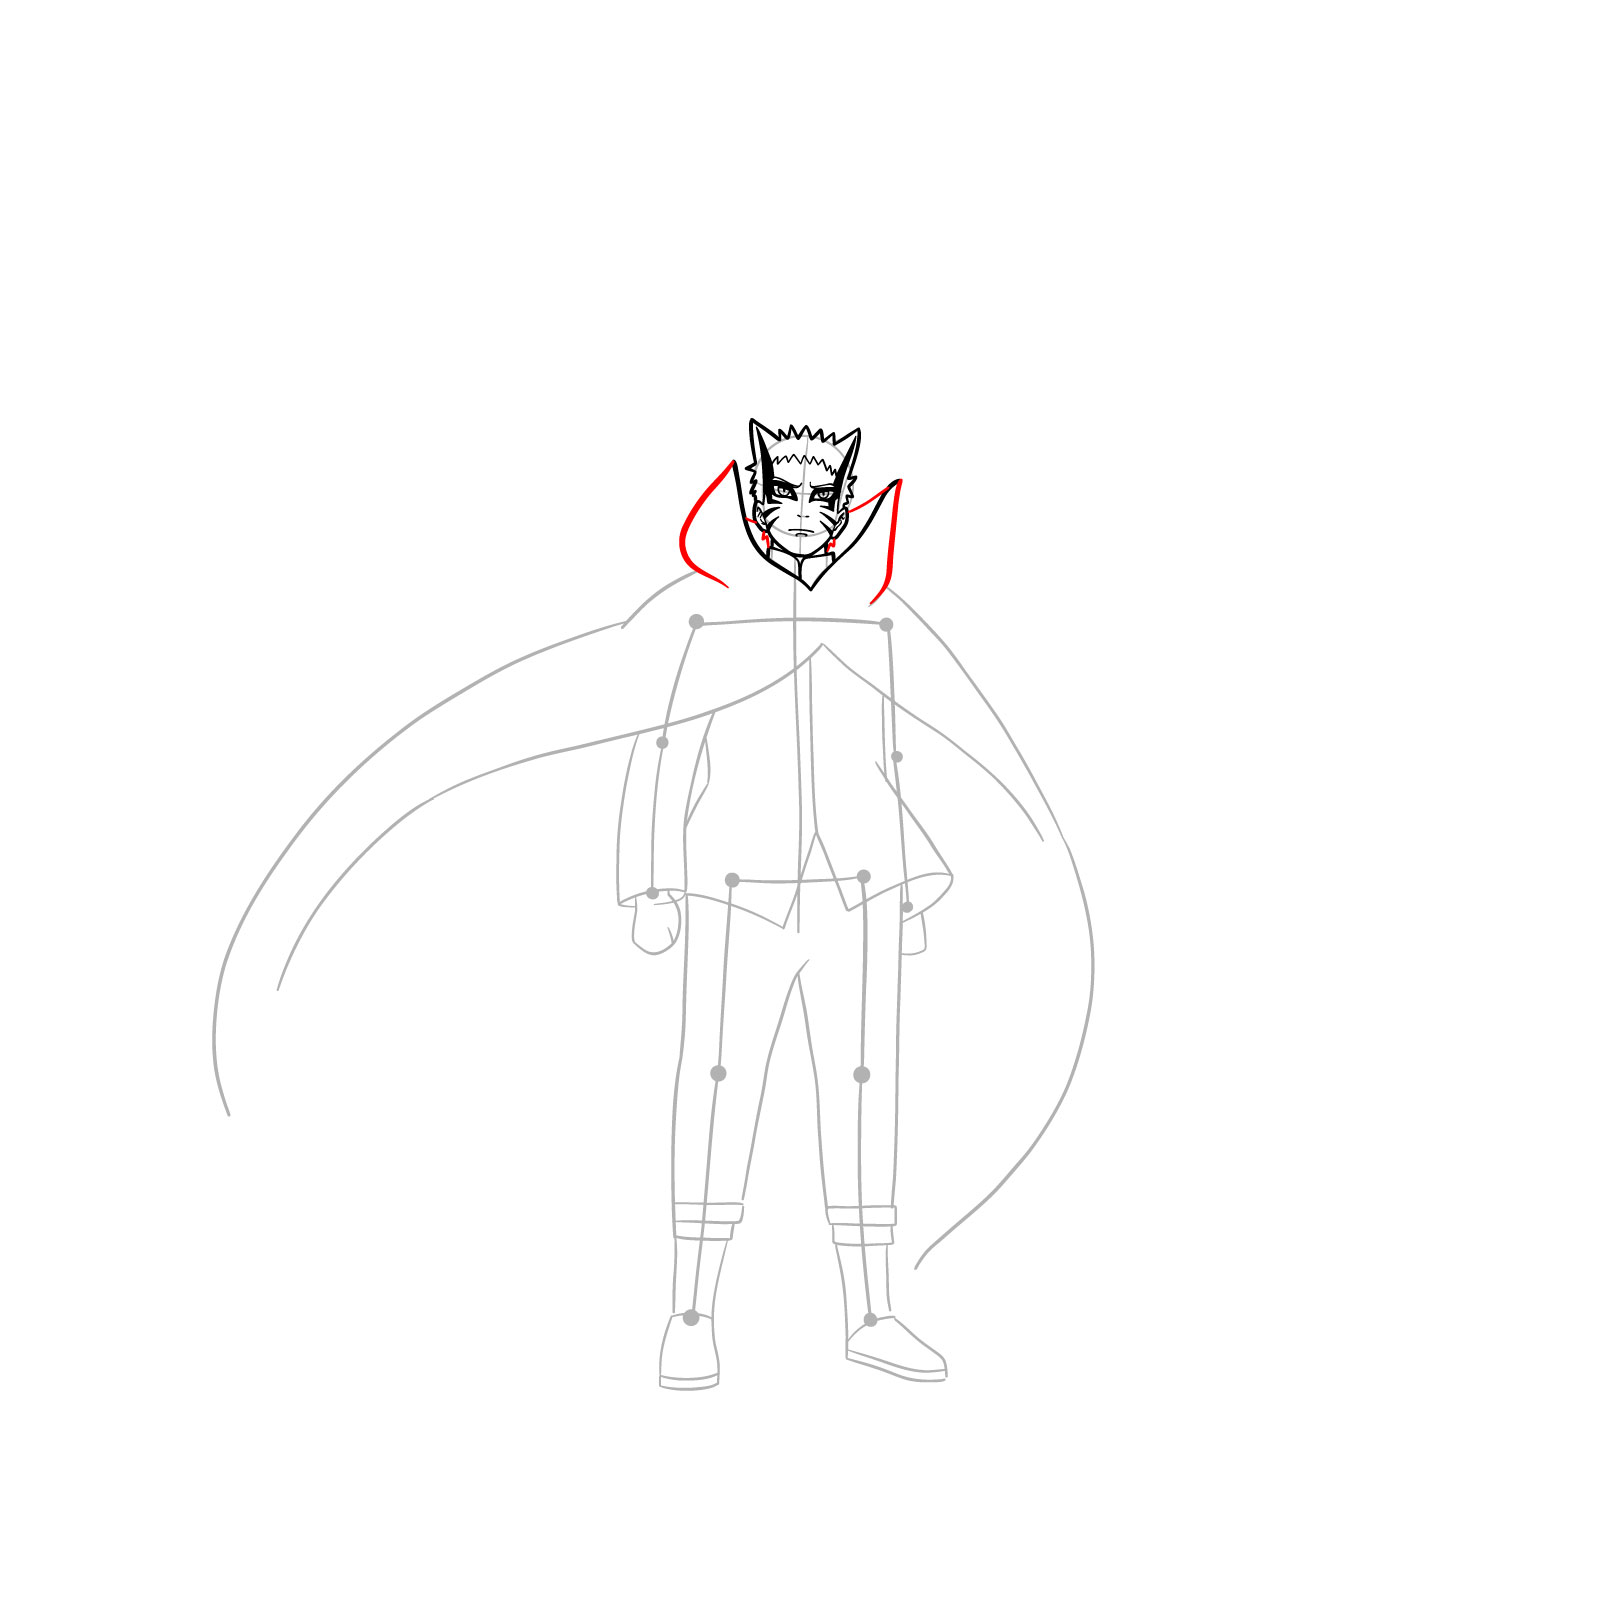
Step 14 – Now, let’s move onto completing the high collar, ensuring that it wraps around Naruto’s neck seamlessly. After this, add in the strands of hair that are visible near the neck. These hair details give a more realistic look and add depth to the character’s overall appearance
Finalizing the collar and adding hair details
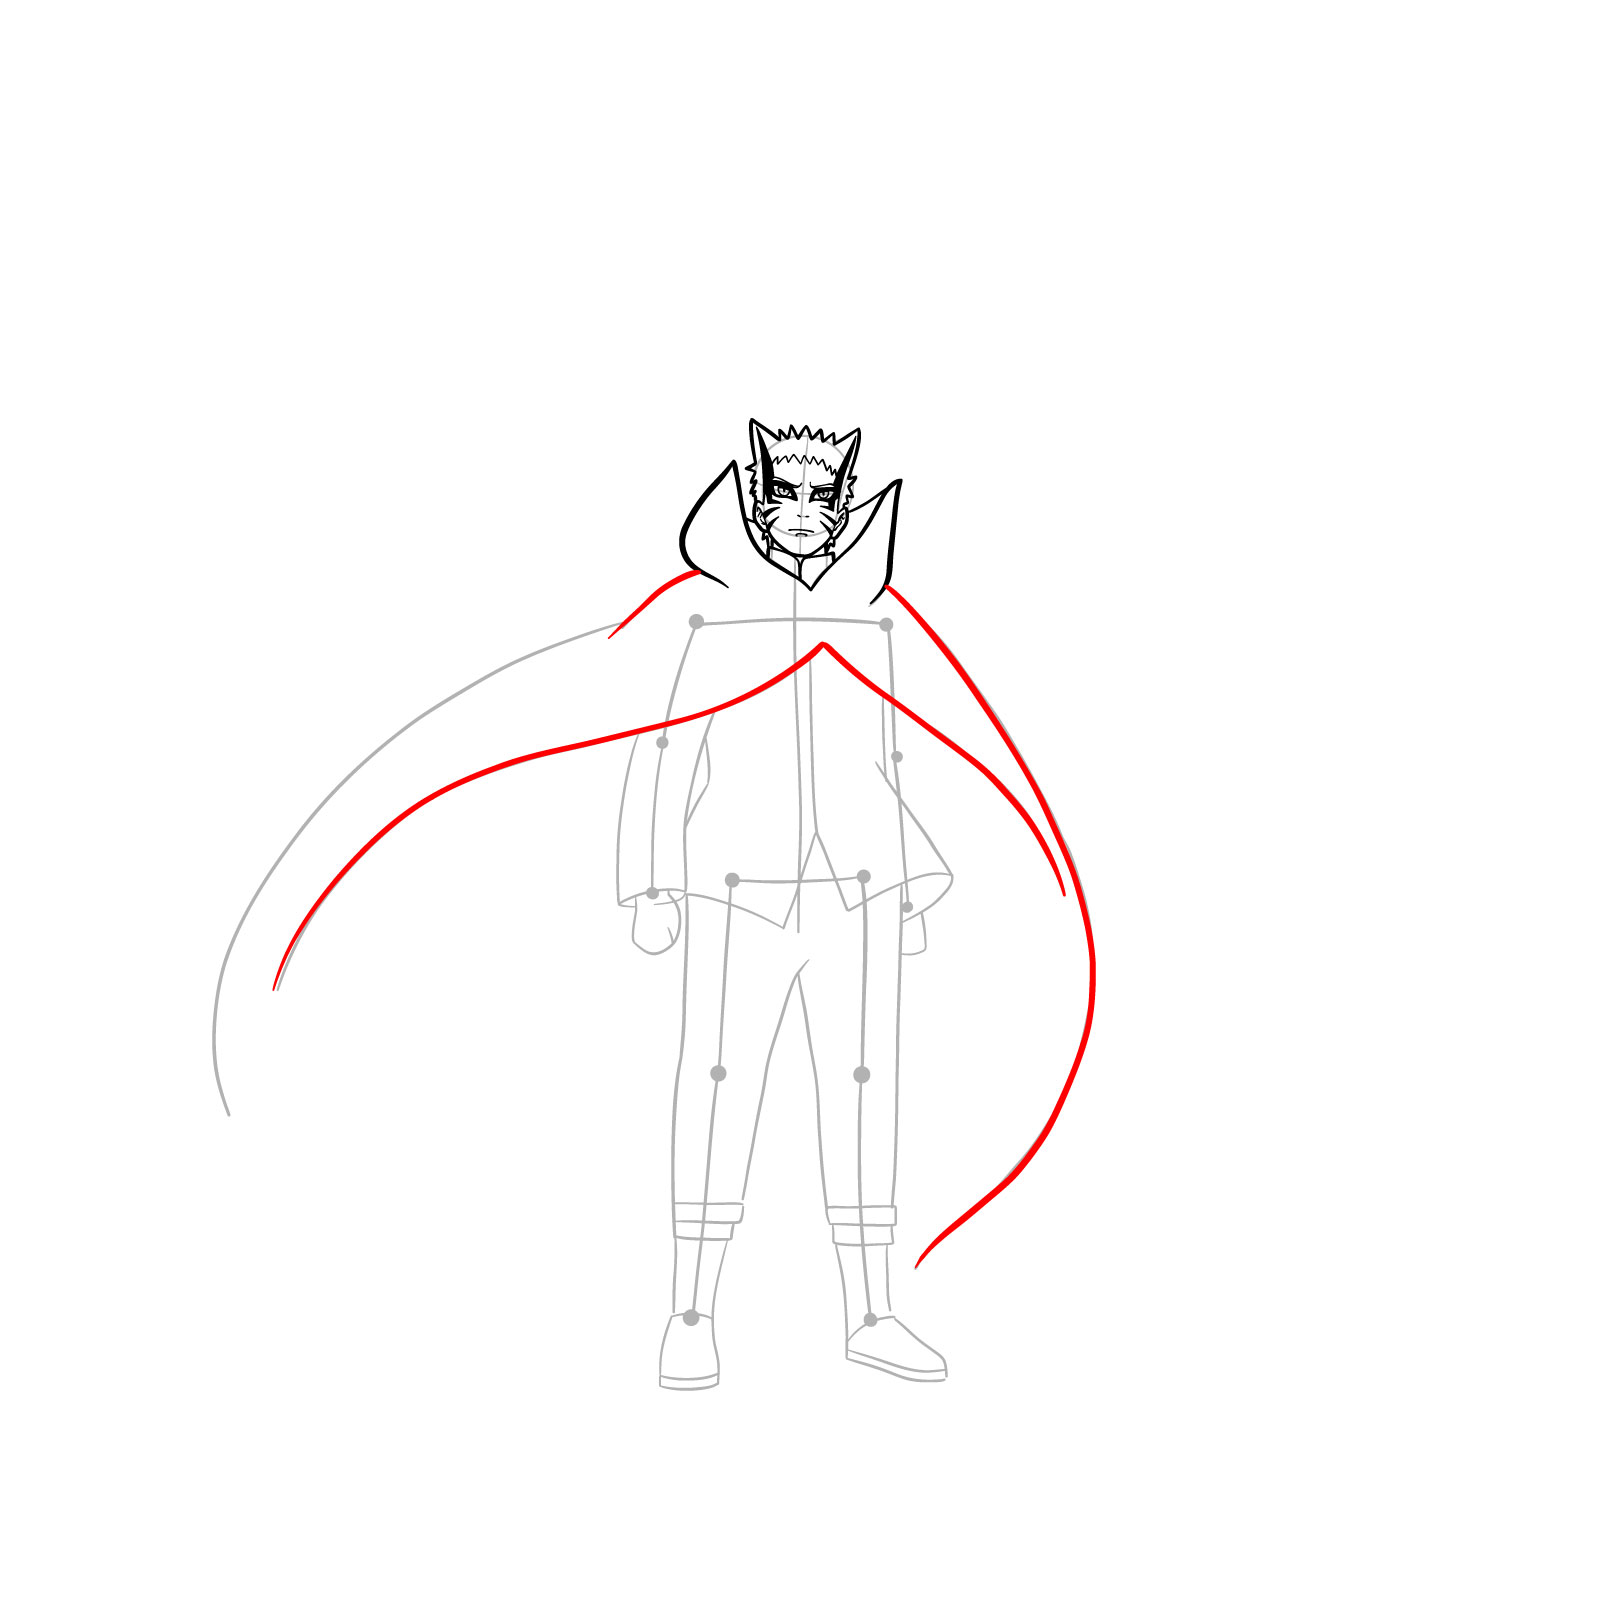
Step 15 – This step is all about the dynamic and flowing nature of the cape. Extend the lines from the high collar, capturing the essence of a billowing cape. Use long, sweeping lines to highlight the movement and fluidity of the cape, making it appear as though it’s fluttering in the wind
Extending the cape
Step 16 – In this stage, focus on the jacket’s right sleeve. Ensure the proportions are accurate in relation to the rest of the body. Detail the folds and creases to give the sleeve a natural, cloth-like appearance. The sleeve should complement the overall attire and flow with the rest of the Baryon Mode’s design
Sketching the right sleeve
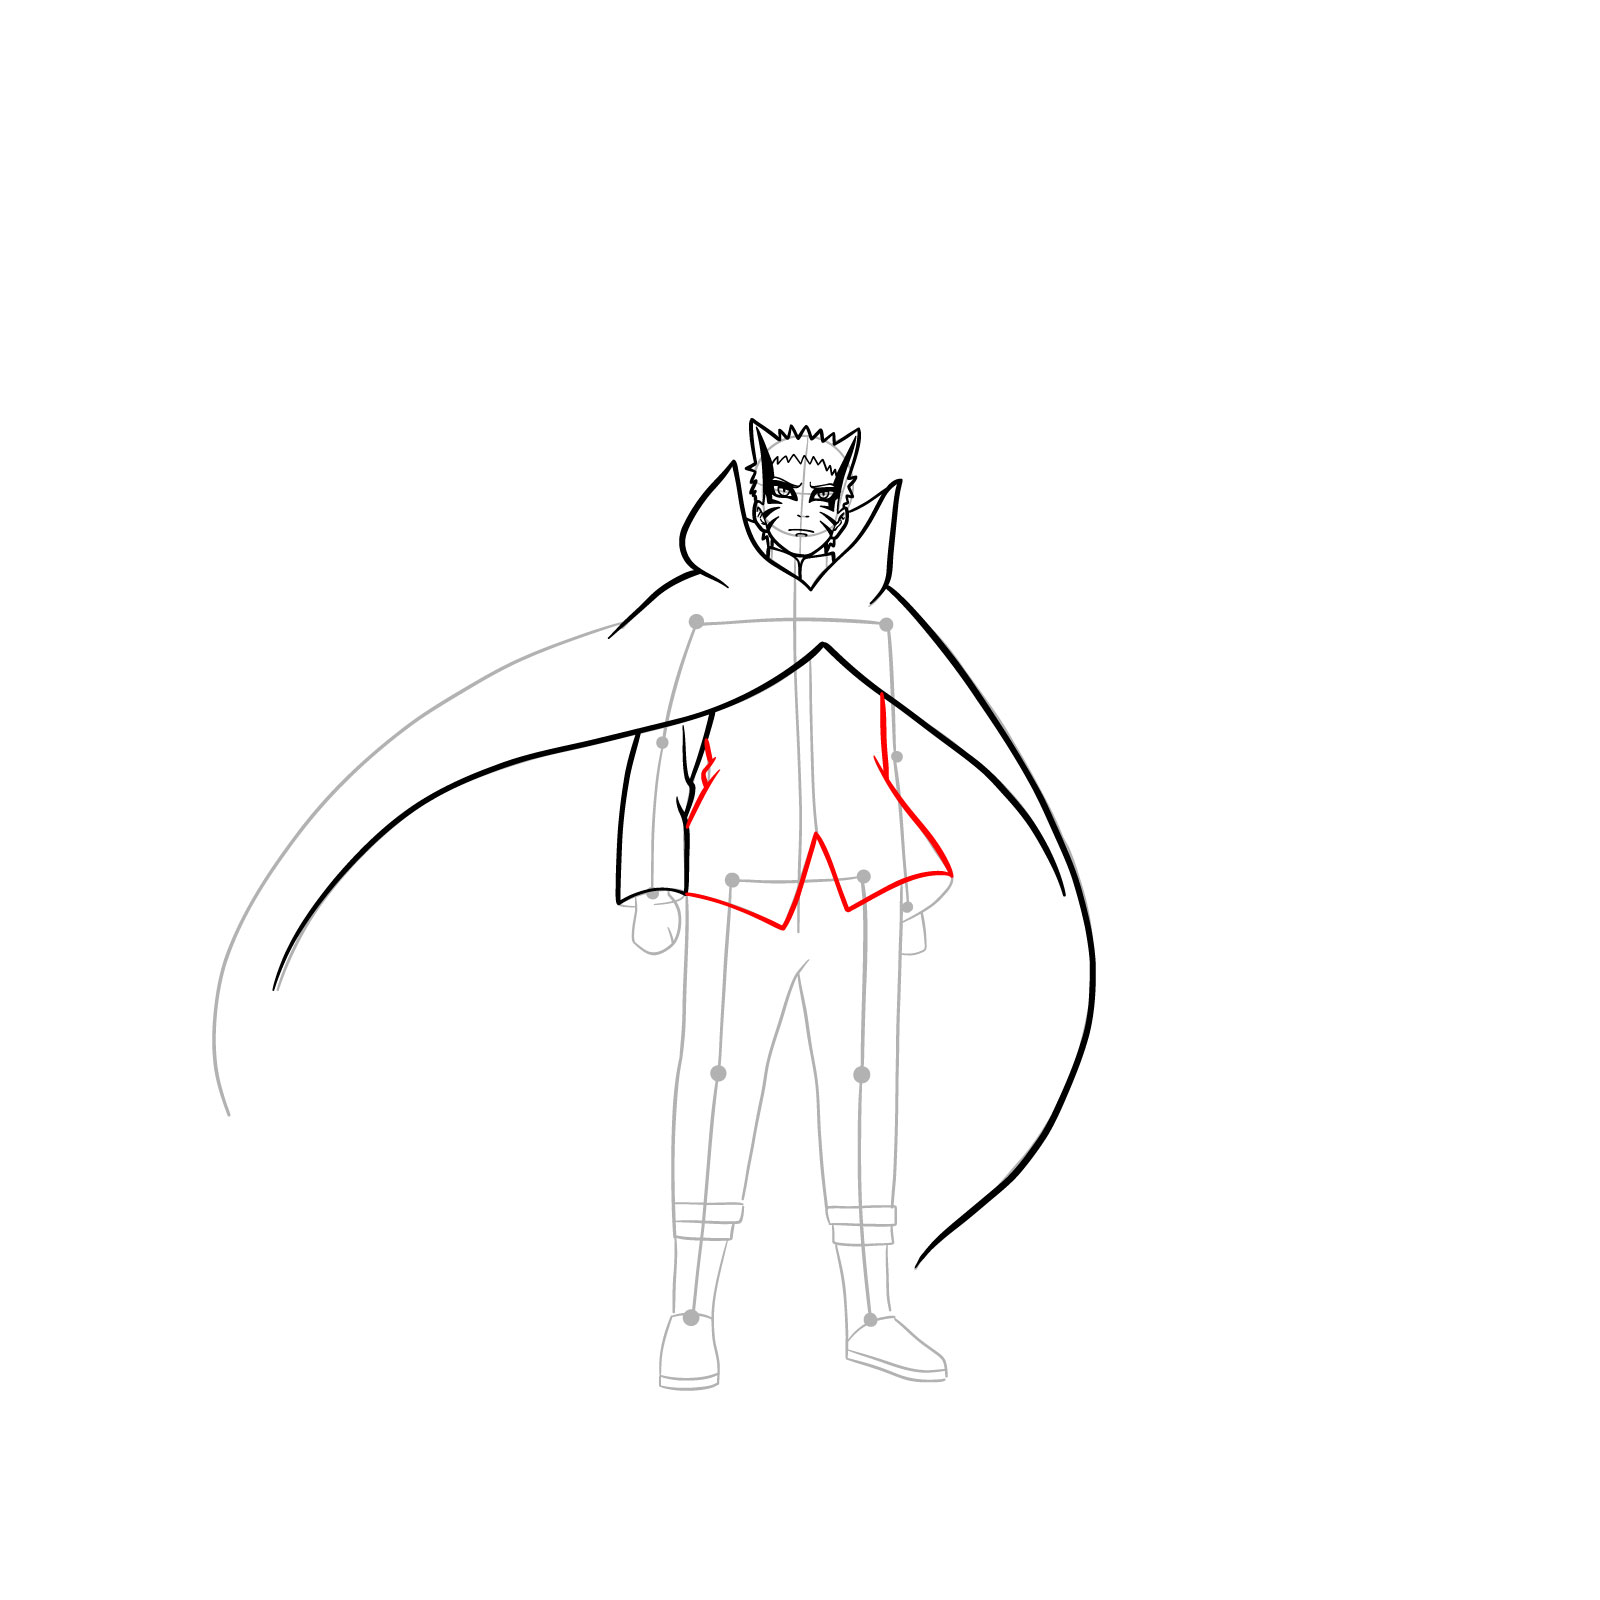
Step 17 – In this step, let’s sketch the jacket. The red lines emphasize the jagged edges and the structure of it, giving Naruto’s attire a more defined look
Drawing Naruto’s jacket
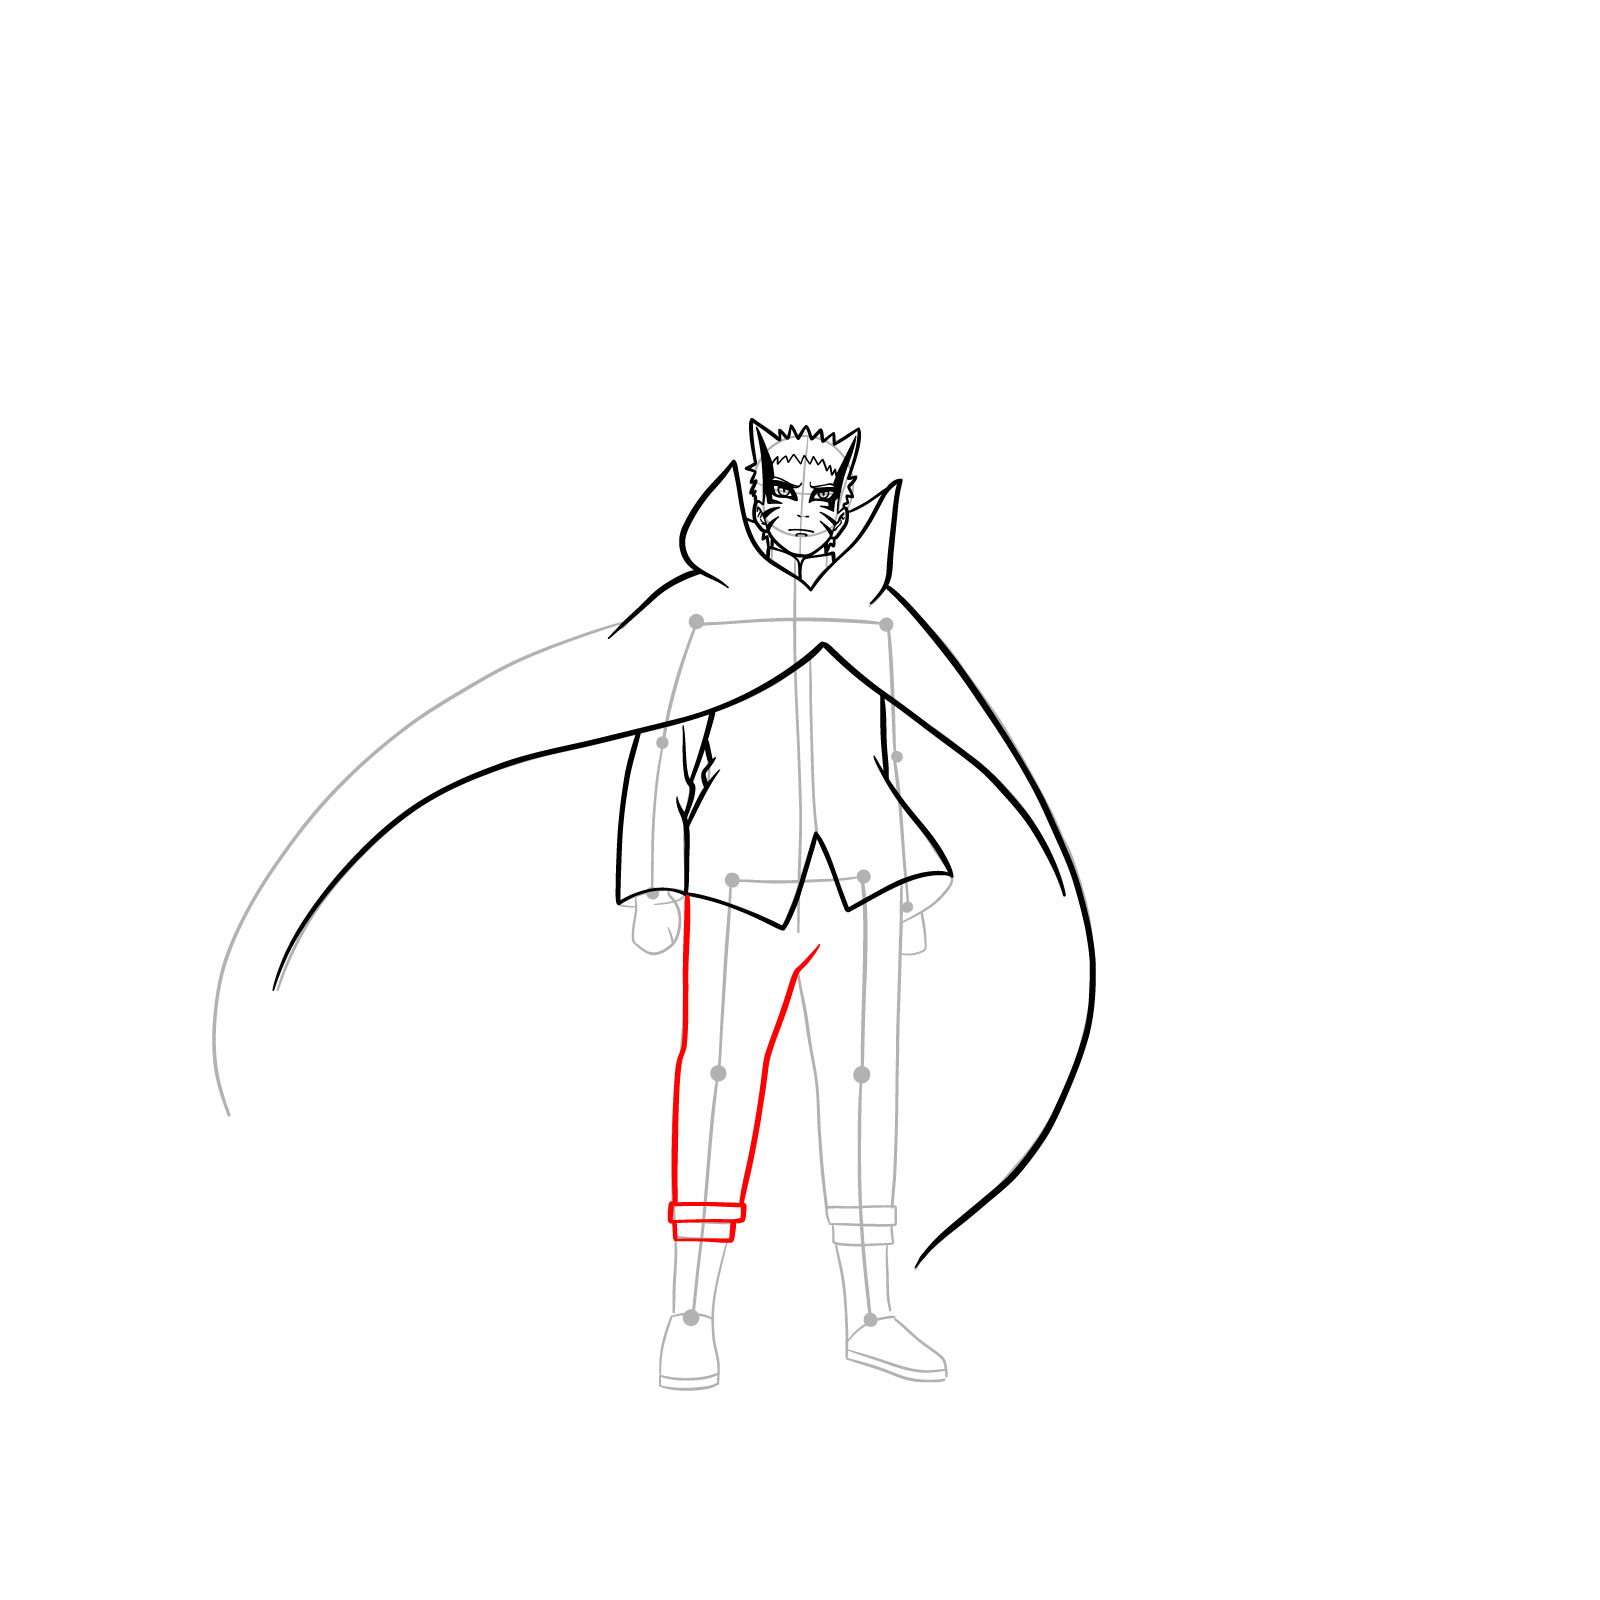
Step 18 – Now, let’s start sketching his legs. The red lines guide the shaping and contouring of the right leg
Detailing the right leg
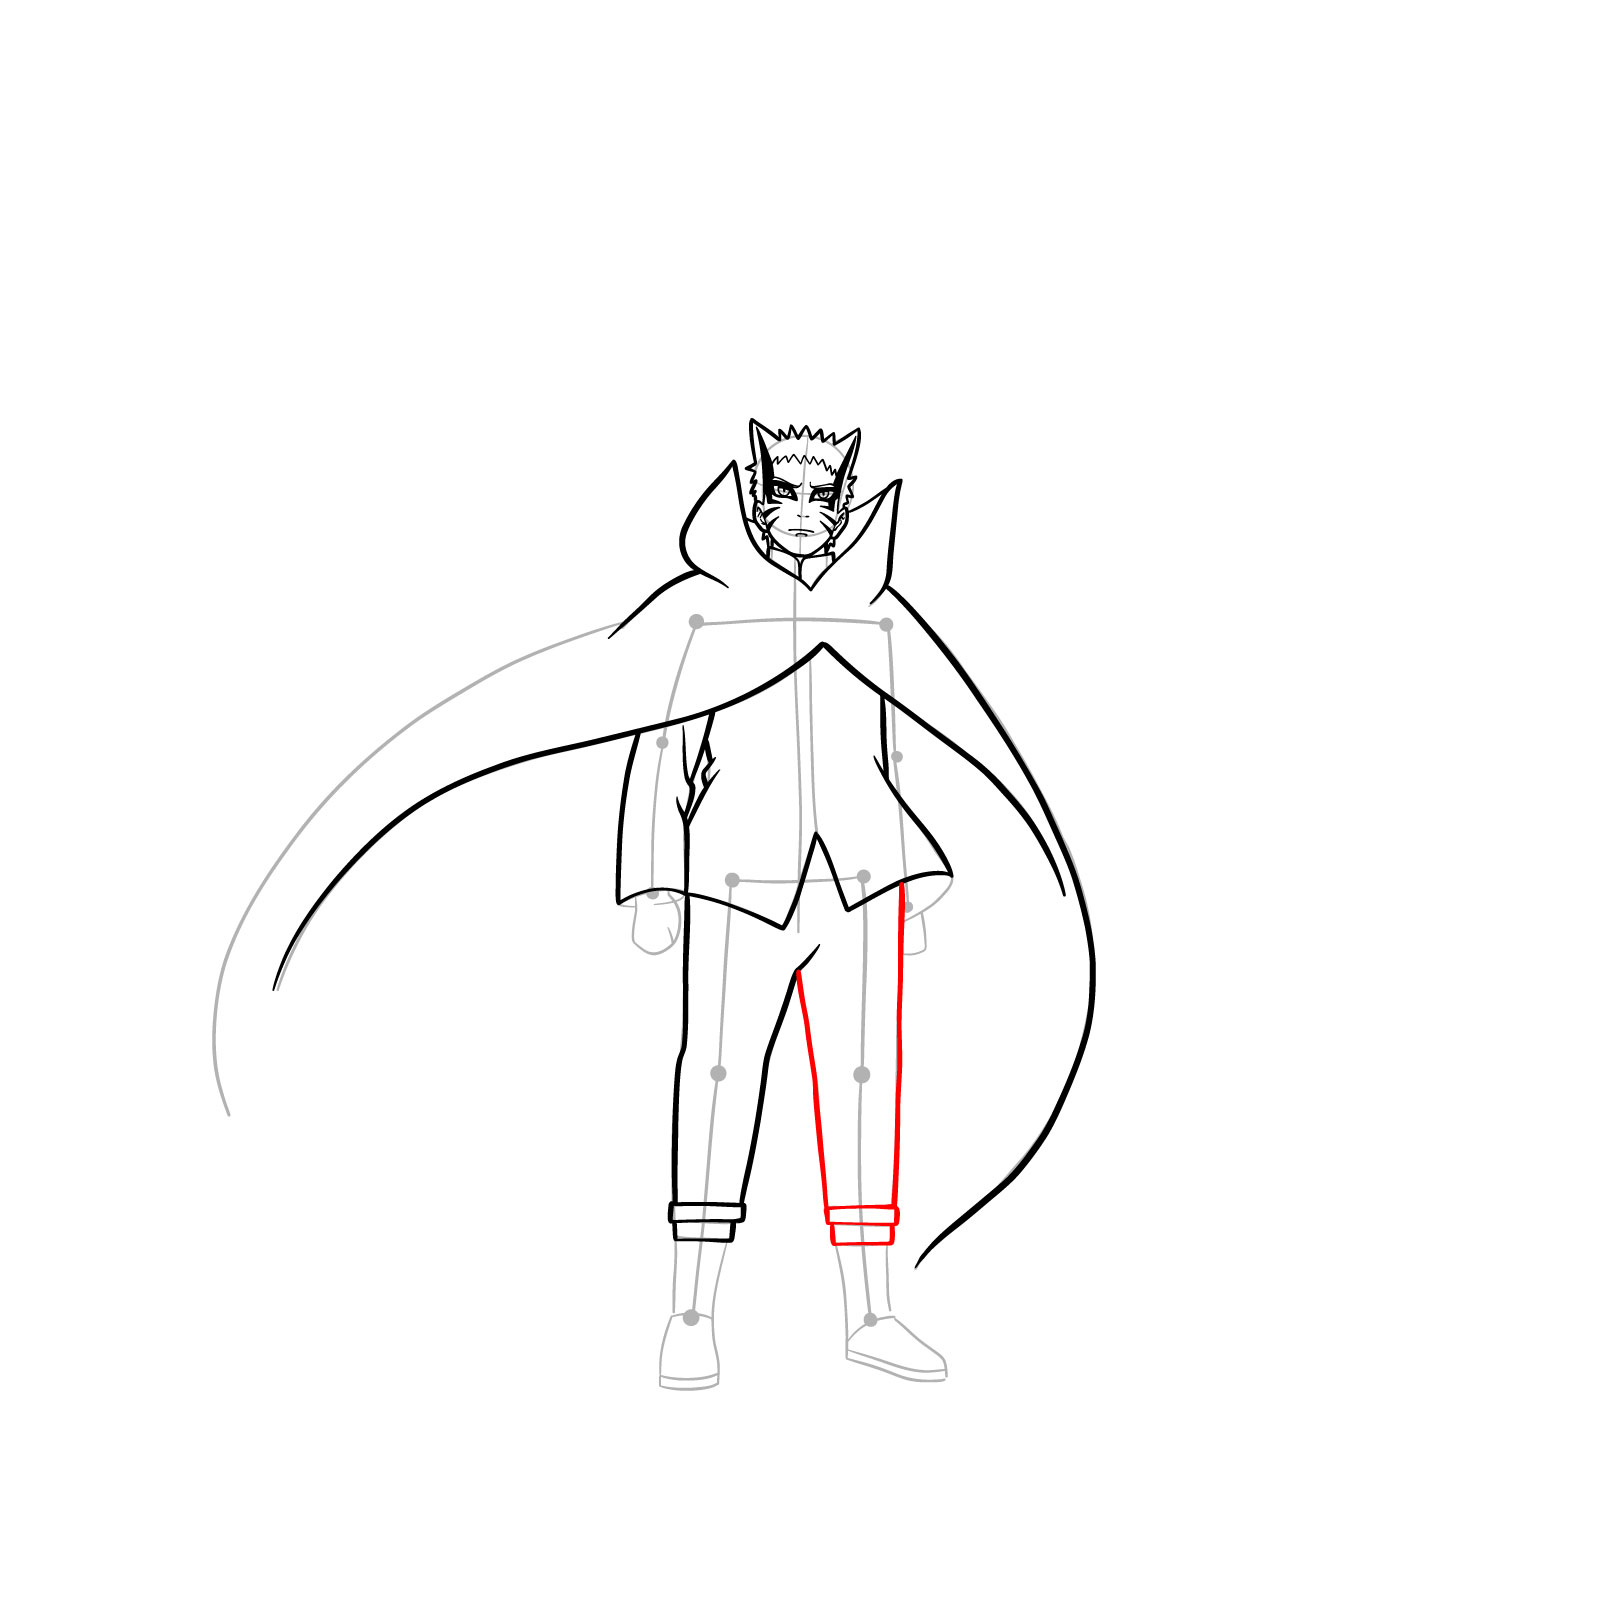
Step 19 – Capture the left leg as it shown in the image
Sketching the left leg
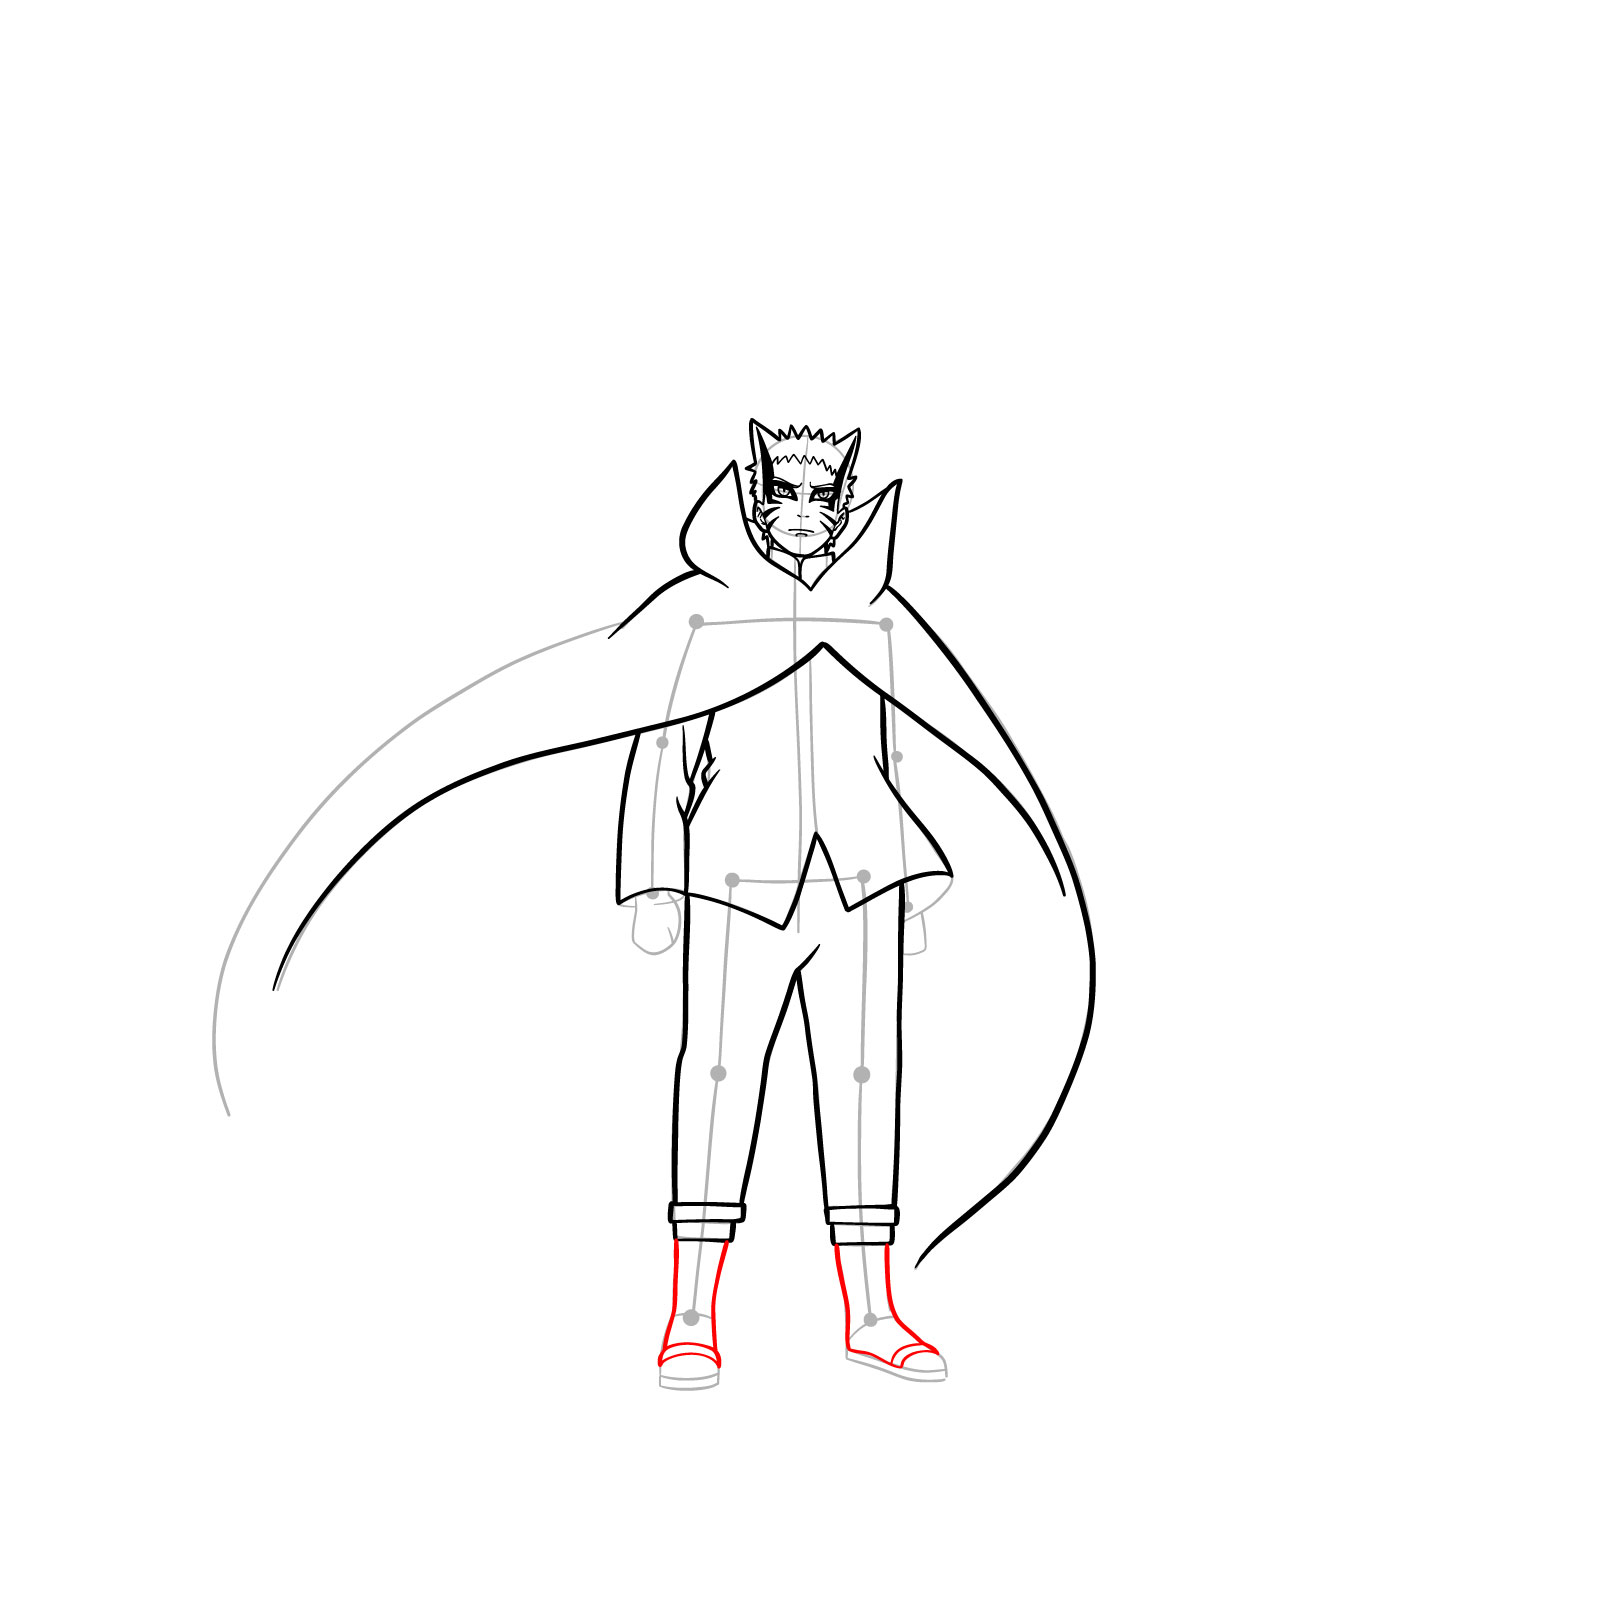
Step 20 – Let’s move to the lower parts of the legs and the band detailing on his slippers
Drawing the lower legs and slippers’ band
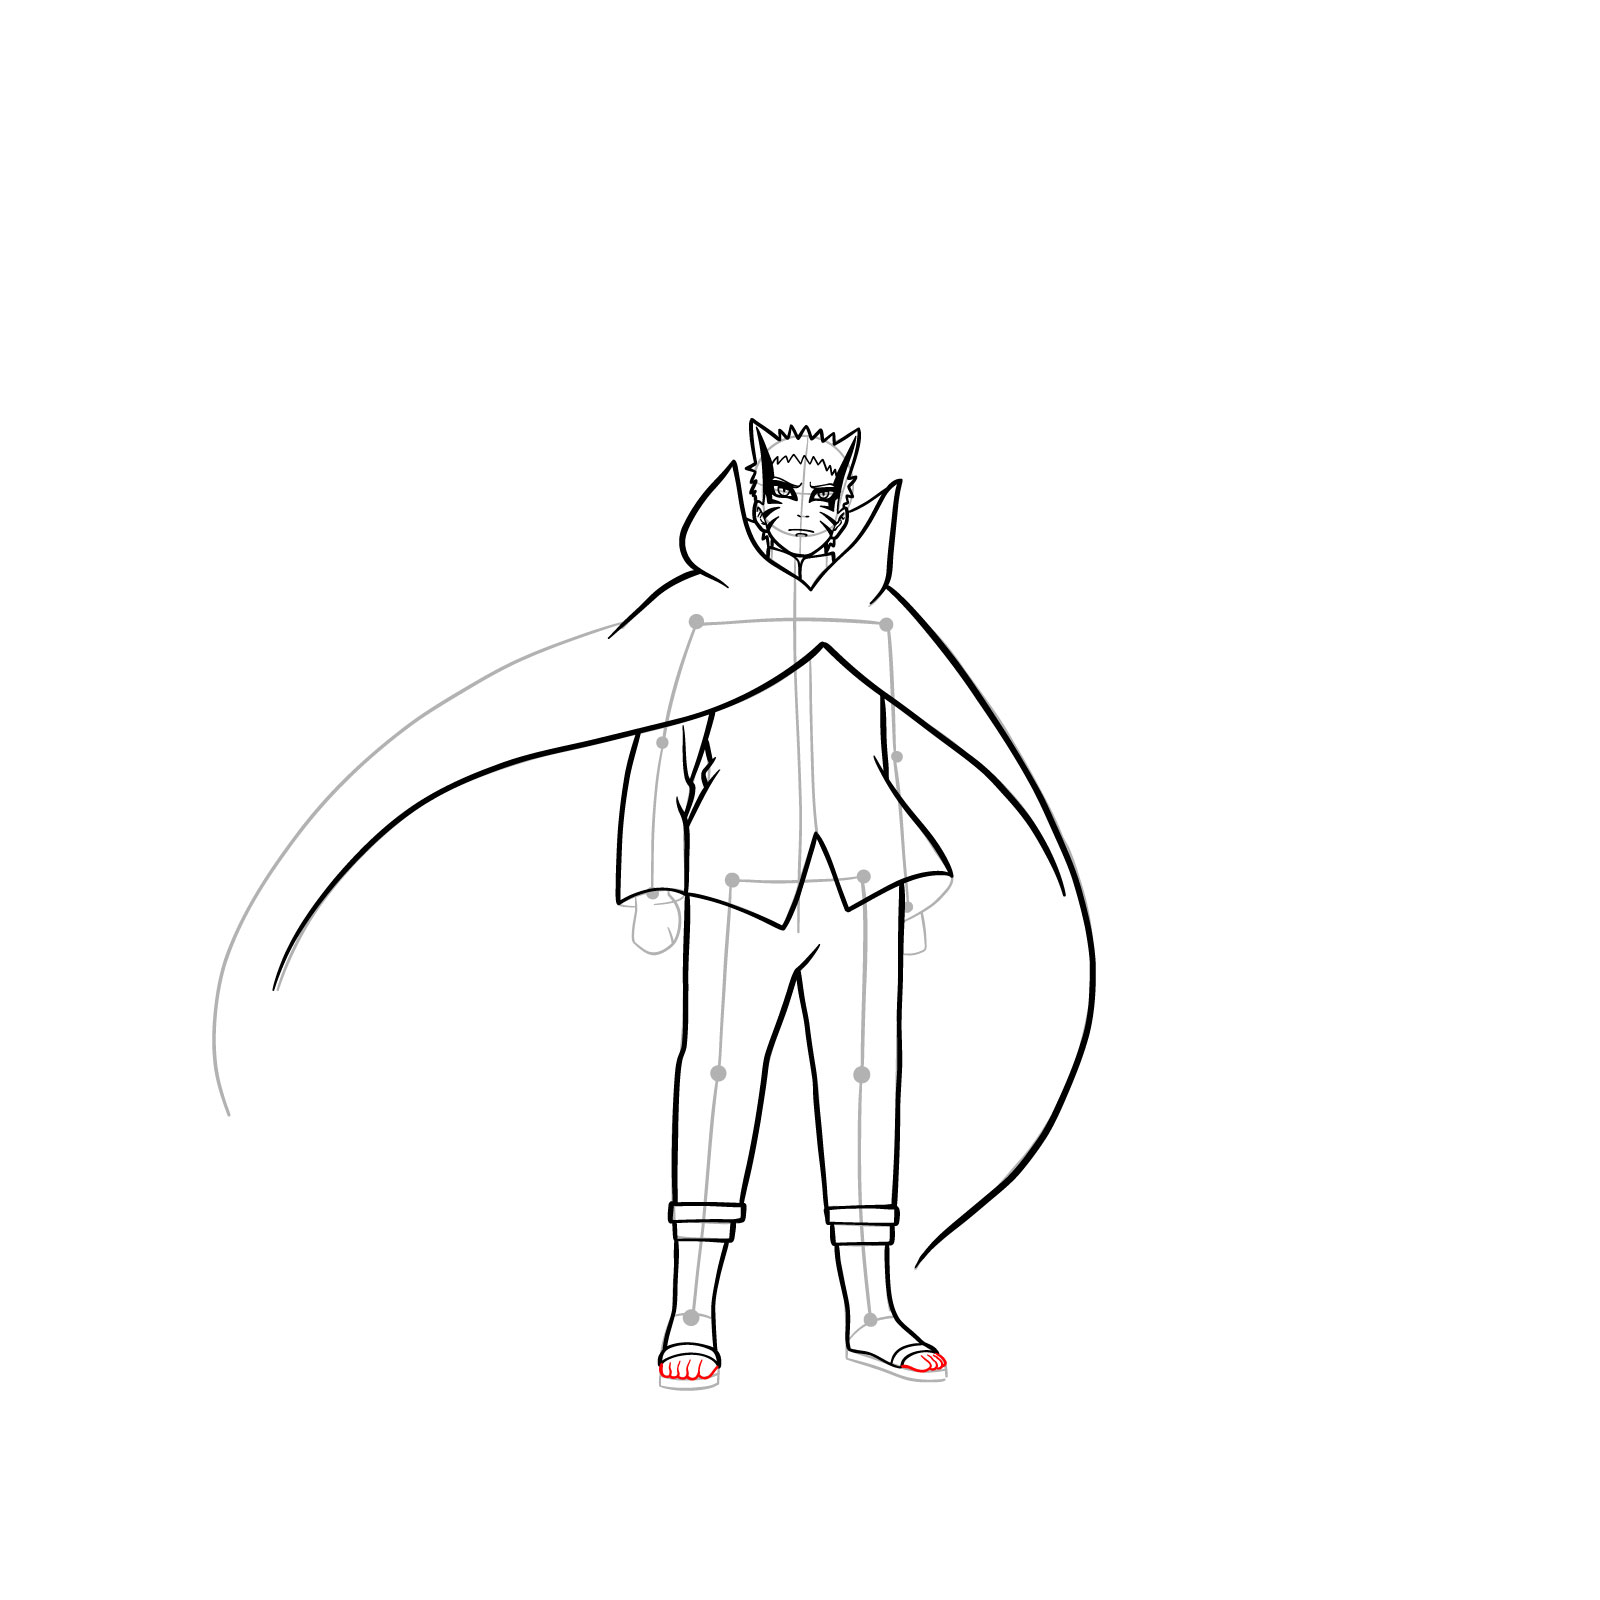
Step 21 – Begin by sketching out the toes on both feet. Ensure each toe is distinct and proportionate to the rest of the foot
Drawing the toes
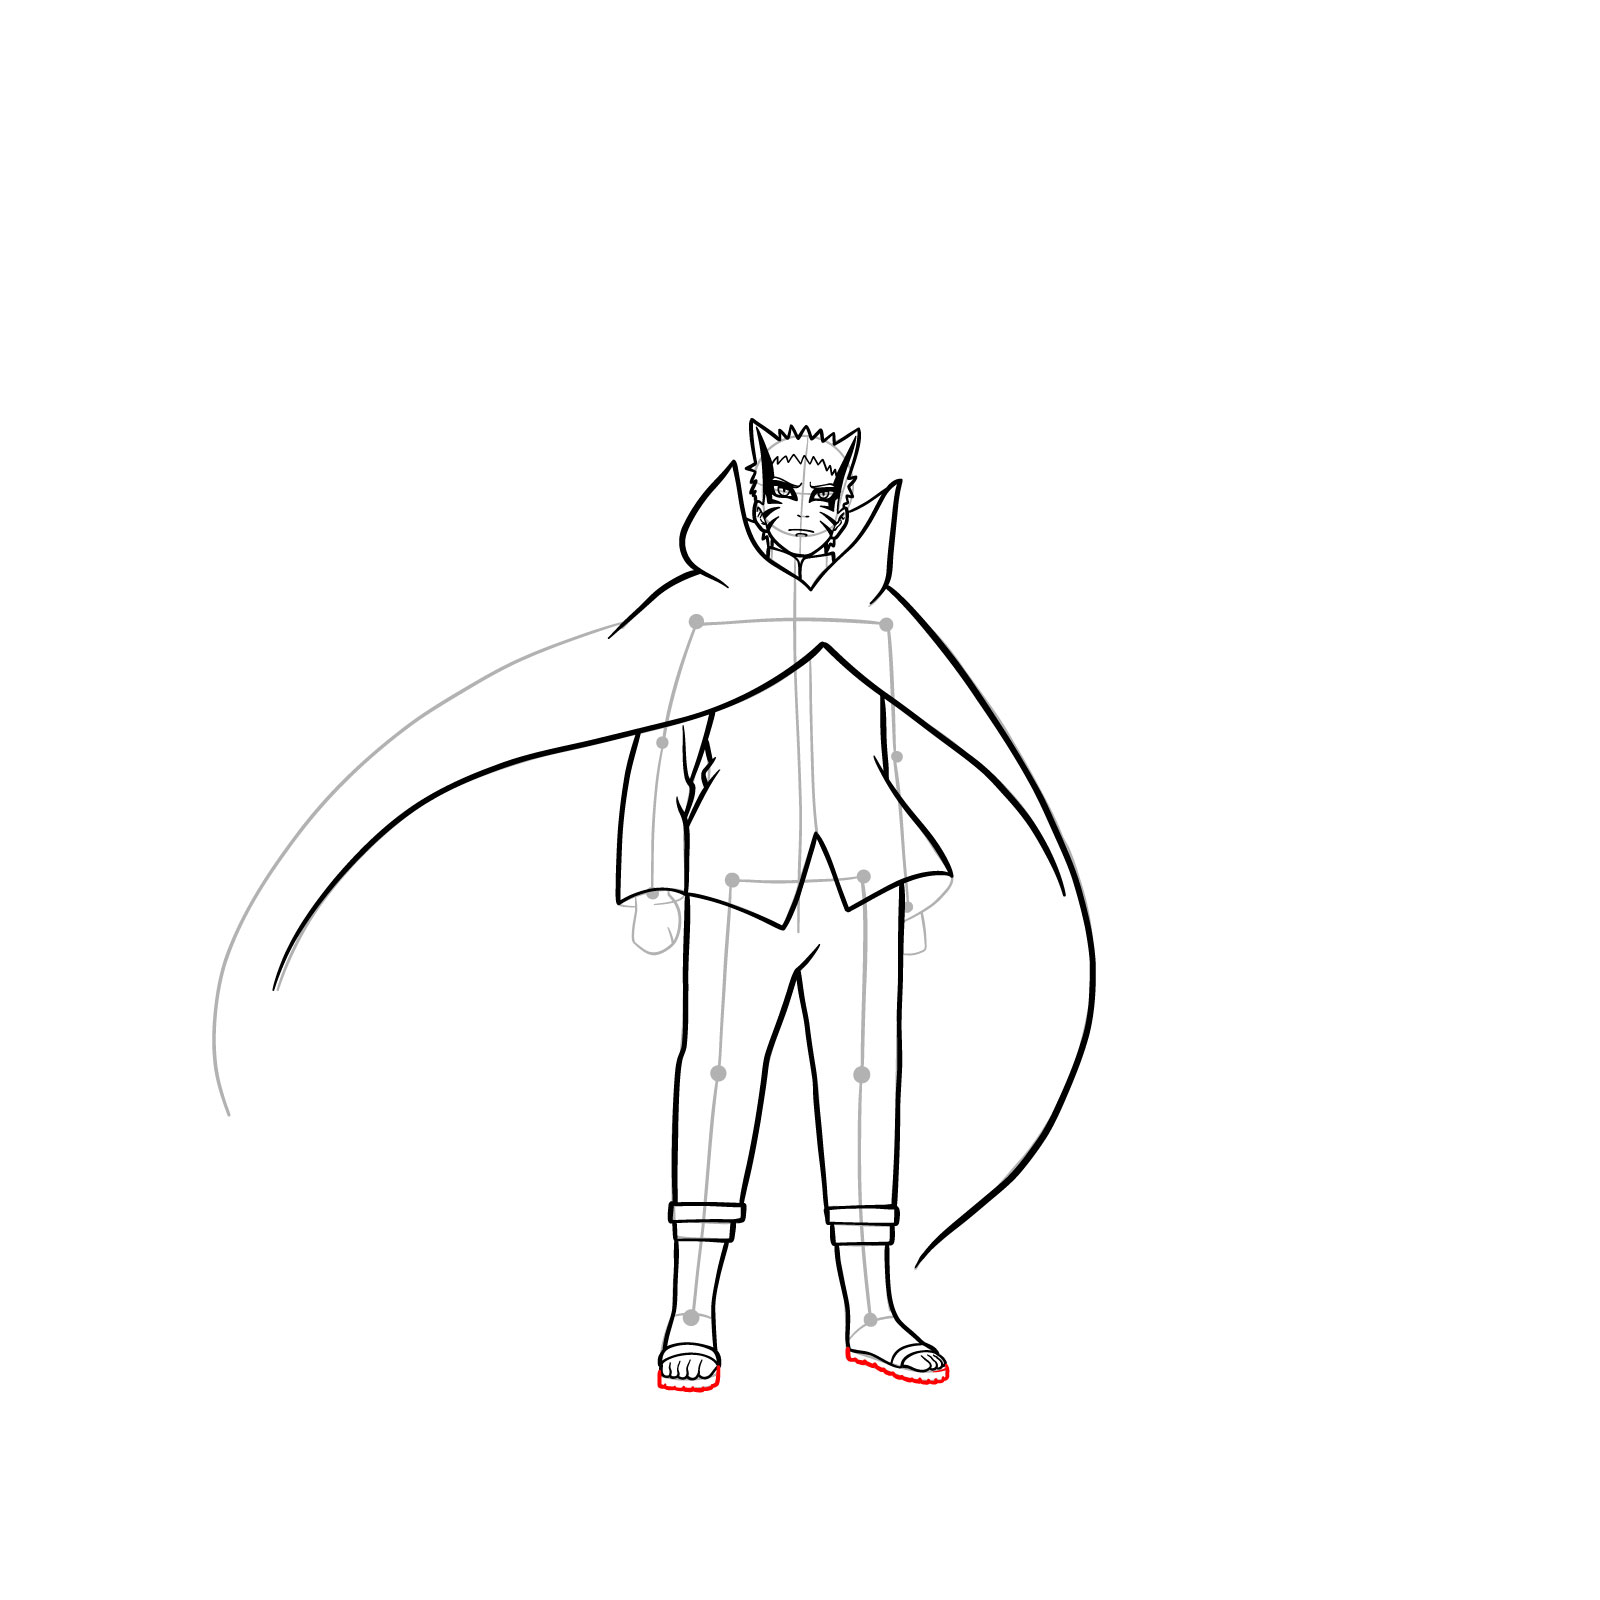
Step 22 – Proceed to illustrate the soles of the slippers. Ensure the soles align with the contours of the feet, giving the footwear a grounded appearance
Drawing the soles of the slippers
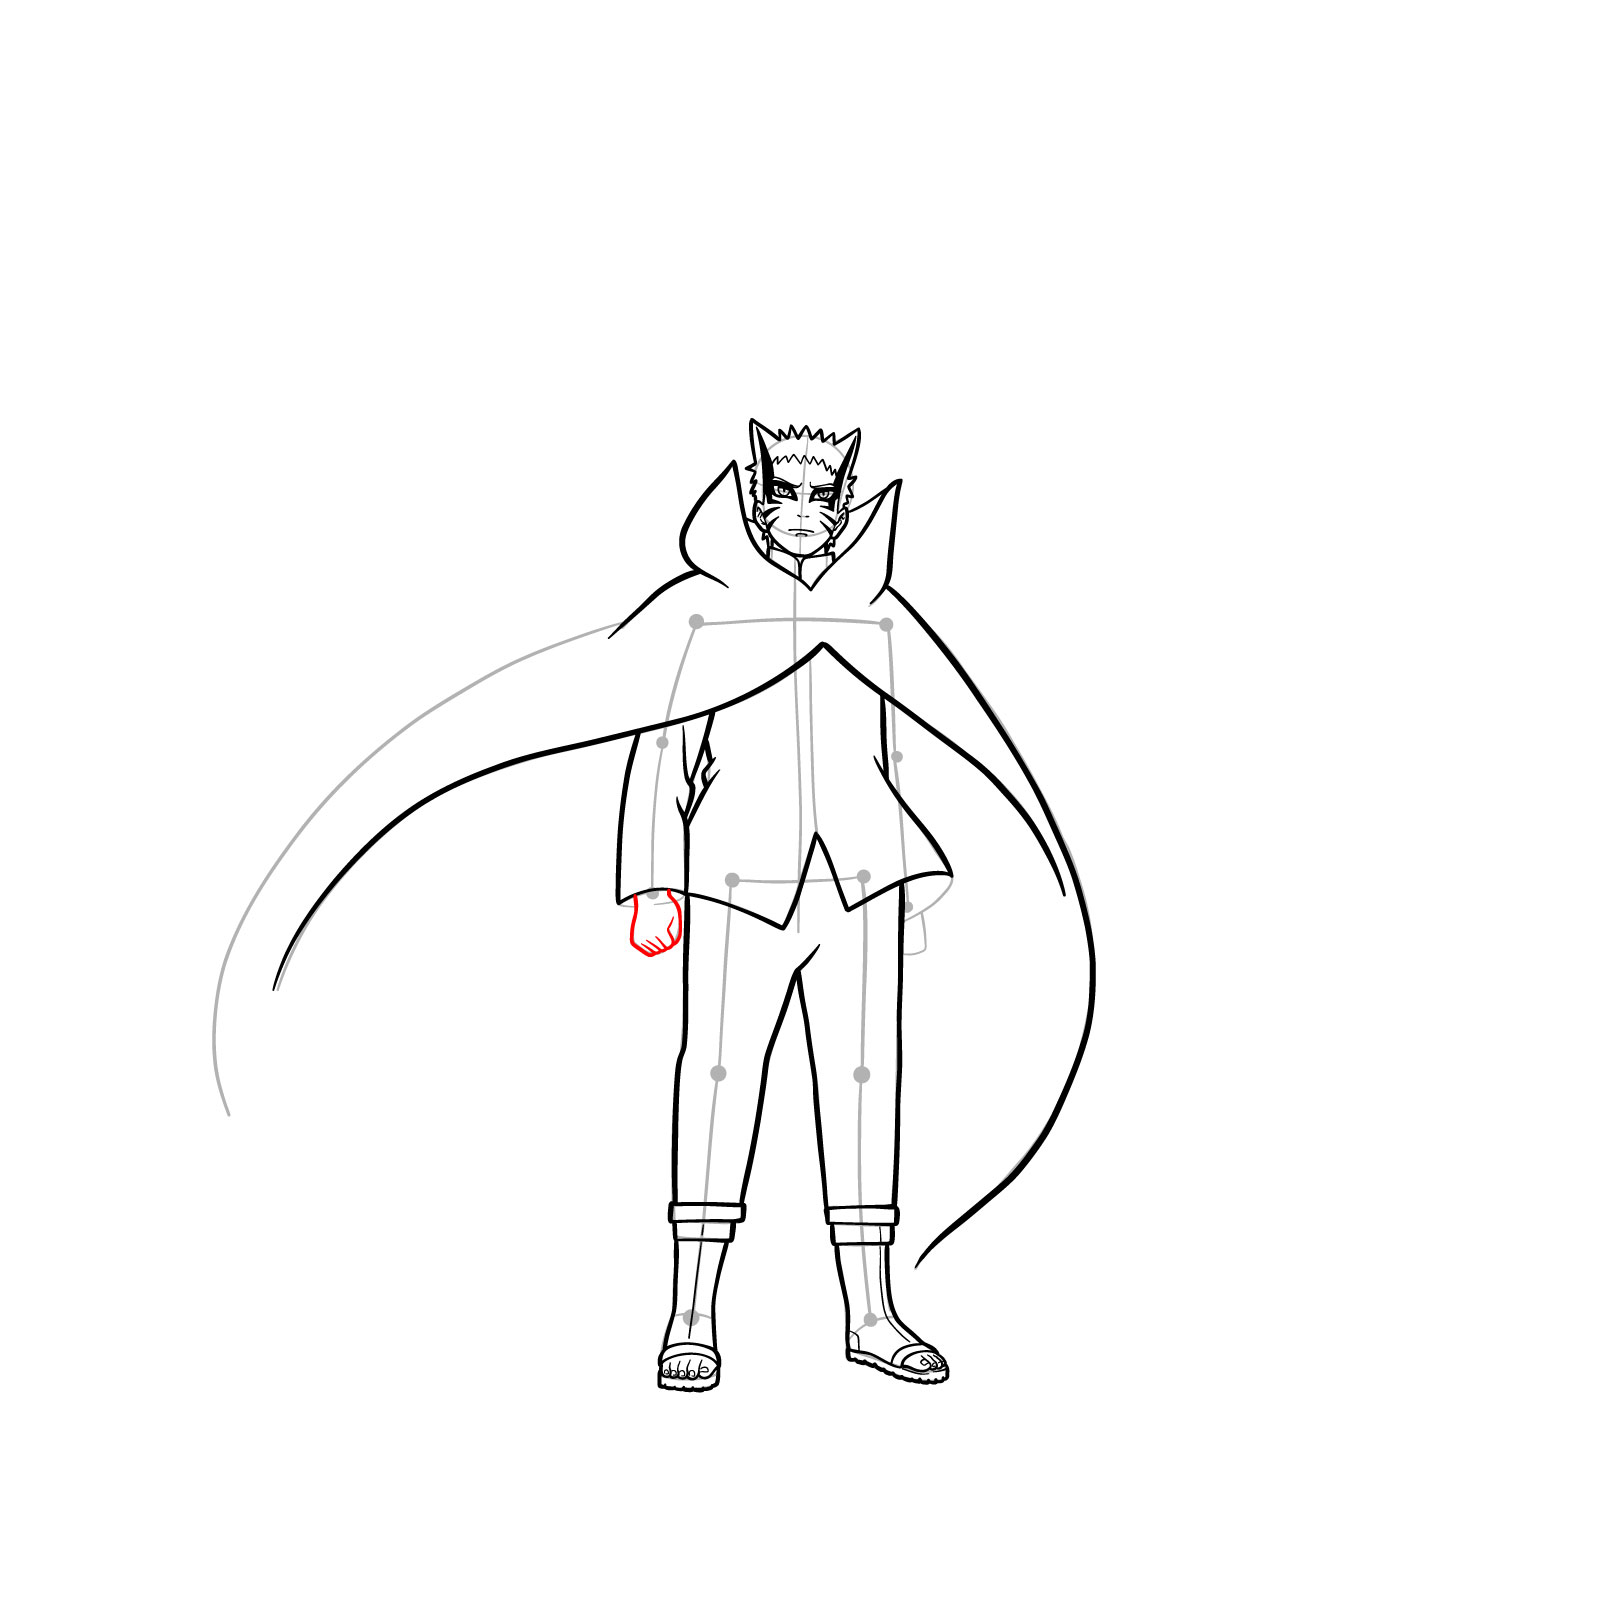
Step 23 – Enhance the footwear with missing details. Additionally, add small nails to each toe, ensuring they’re evenly spaced and proportionate
Detailing the footwear and adding nails to toes
Step 24 – Move to the right side and sketch out Naruto’s hand clenched into a fist. Pay attention to the alignment of knuckles and the curvature of the fingers to give the fist a realistic and tight appearance
Drawing the right hand in a fist
Step 25 – Begin by sketching the left sleeve of Naruto’s attire. The sleeve should be in proportion to his arm, maintaining consistency with his overall design. Additionally, detail the bottom left section of his jacket, ensuring that it aligns seamlessly with the rest of his attire
Outlining the left sleeve and jacket’s bottom left
Step 26 – Focus on Naruto’s left hand, sketching it as a clenched fist. Ensure the fingers are appropriately placed, reflecting a natural grip
Sketching Naruto’s left fist
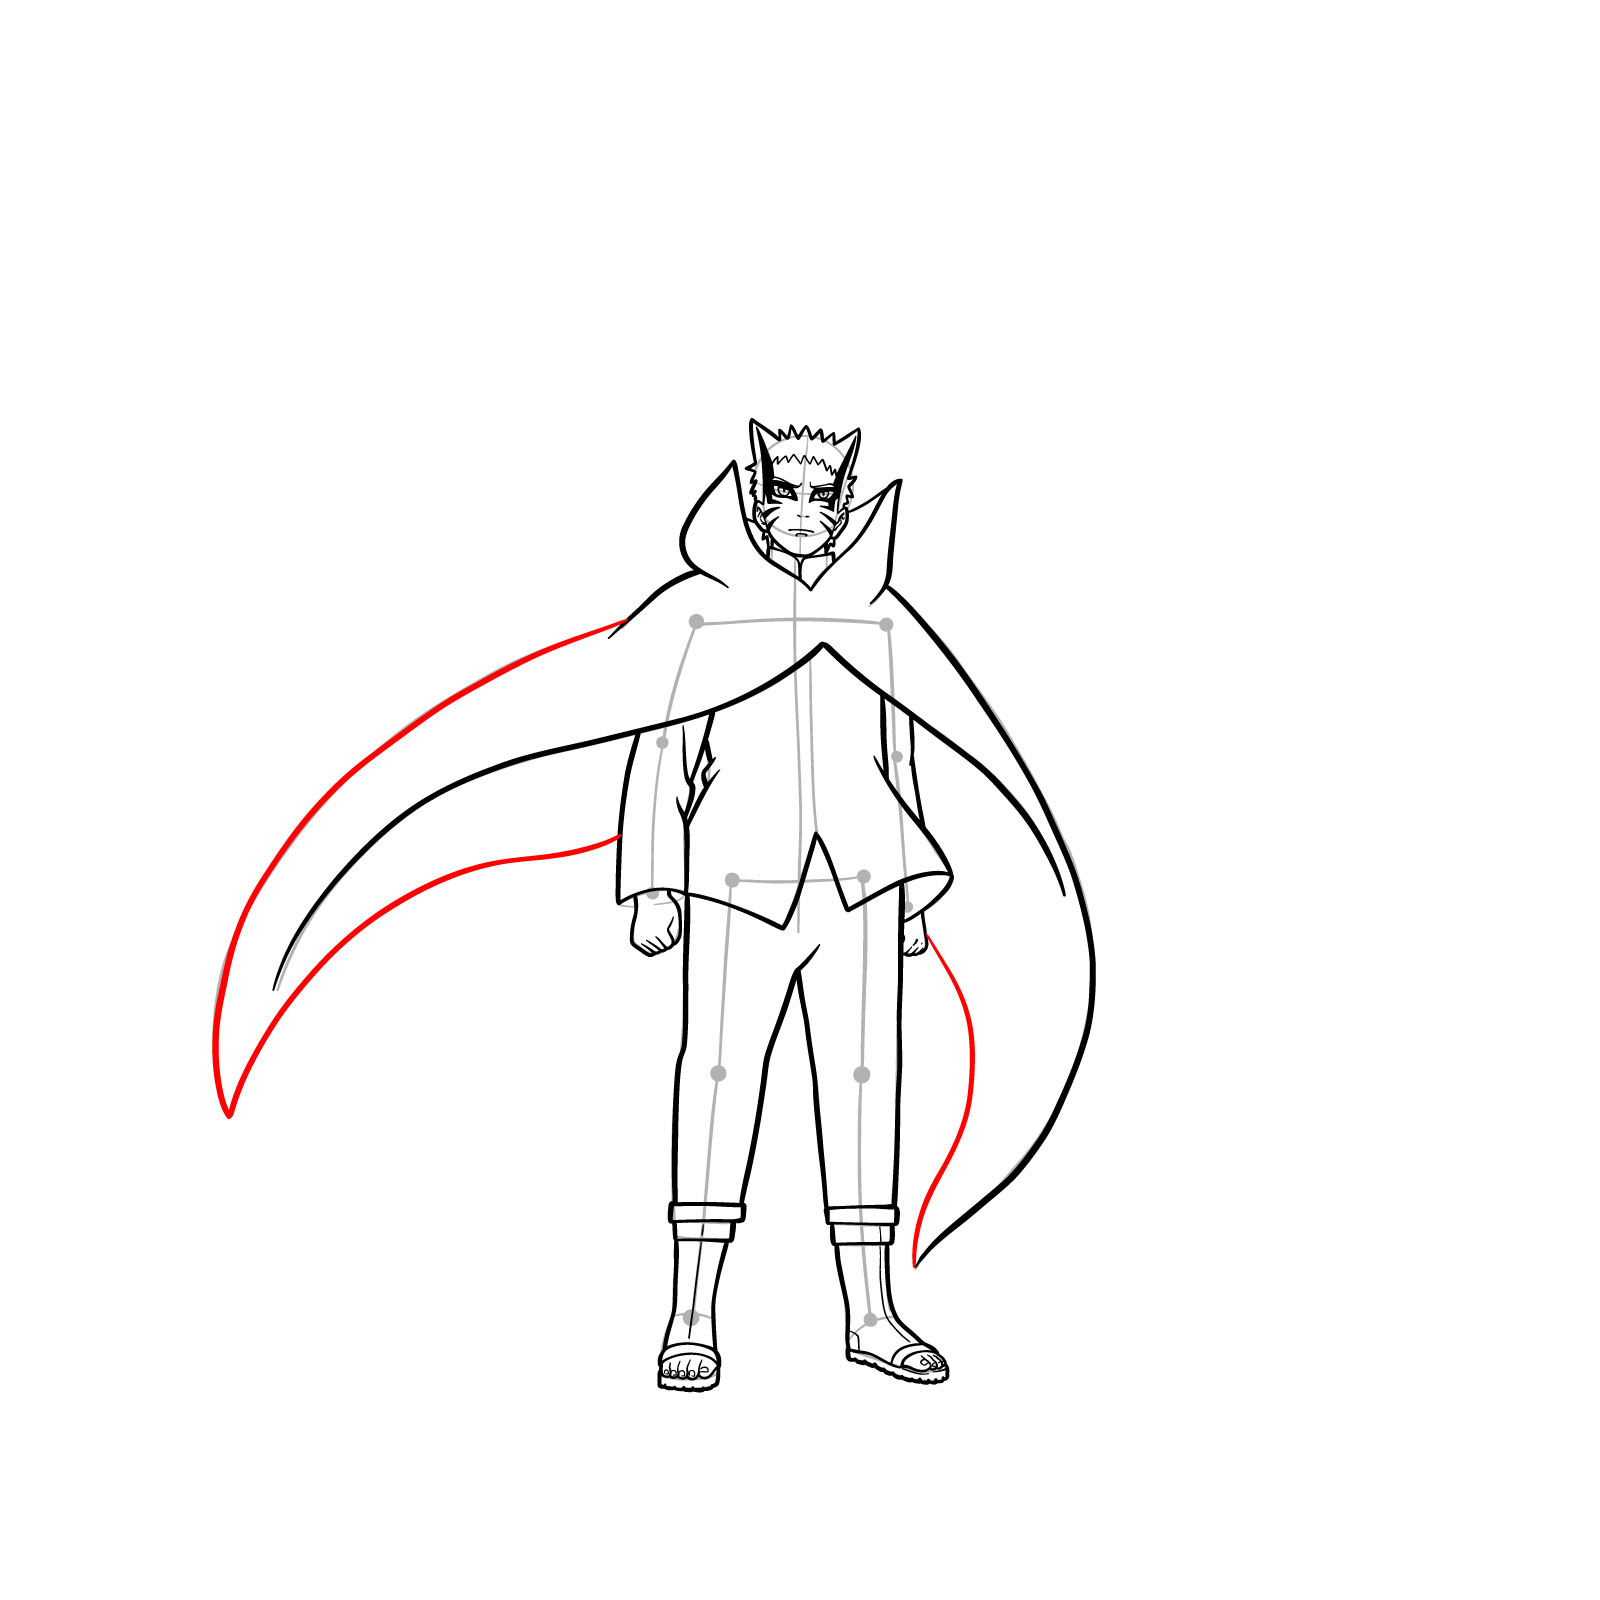
Step 27 – Emphasize the dynamic nature of Naruto’s Baryon Mode by extending his cloak to resemble two flowing tails. These tails should flow naturally, capturing the movement and vigor of the mode. Consider the cloak’s flow direction and its interaction with Naruto’s stance to create a sense of motion
Extending the cloak with two flowing tails
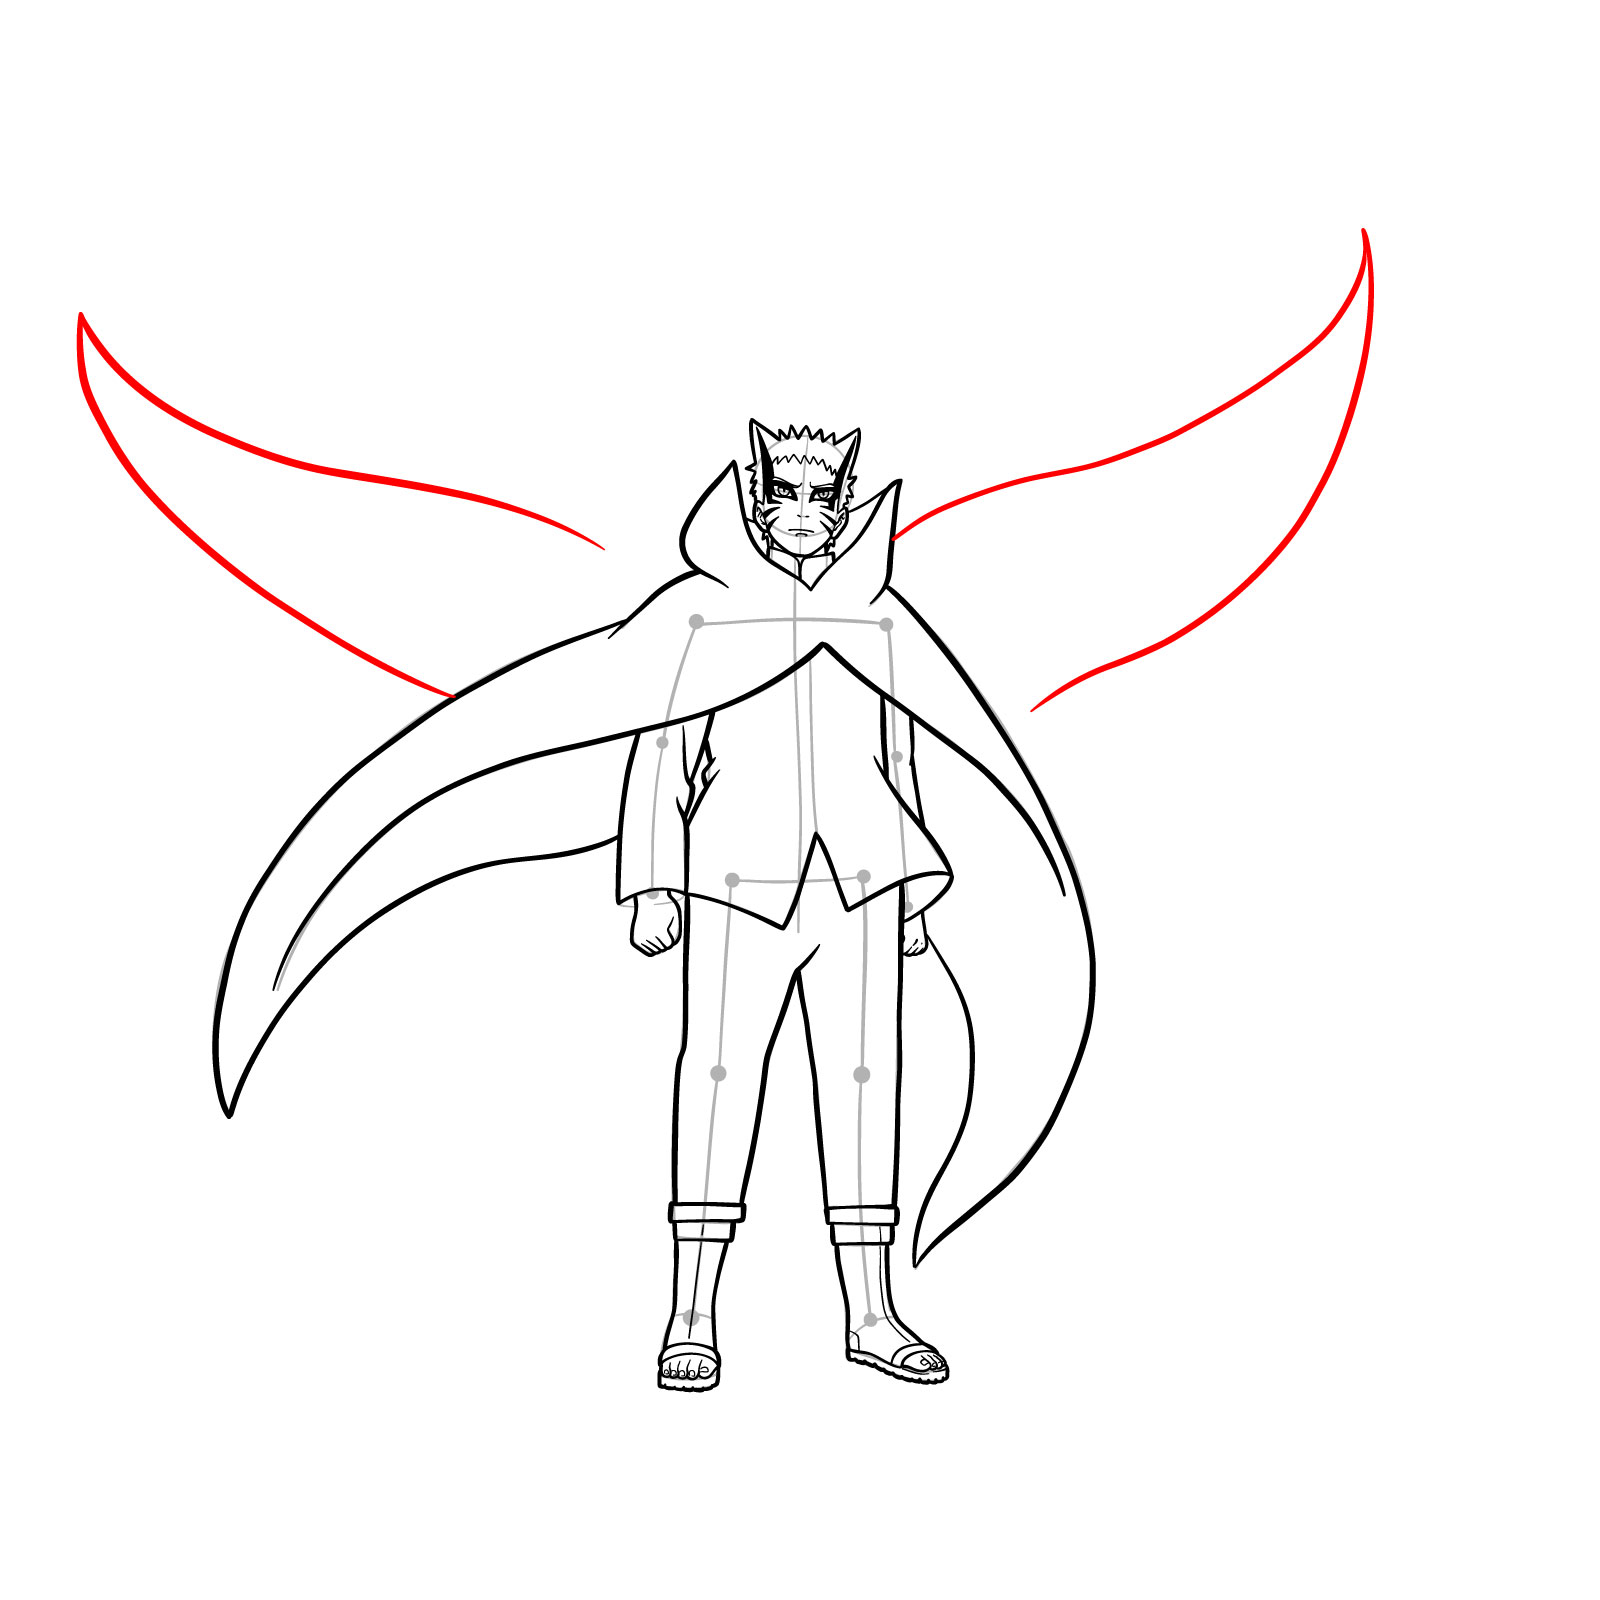
Step 28 – Continue the momentum of the previous step by adding another pair of tails to Naruto’s cloak. These tails should complement the initial set, further enhancing the dynamic and fluid nature of his Baryon Mode
Adding another pair of cloak tails
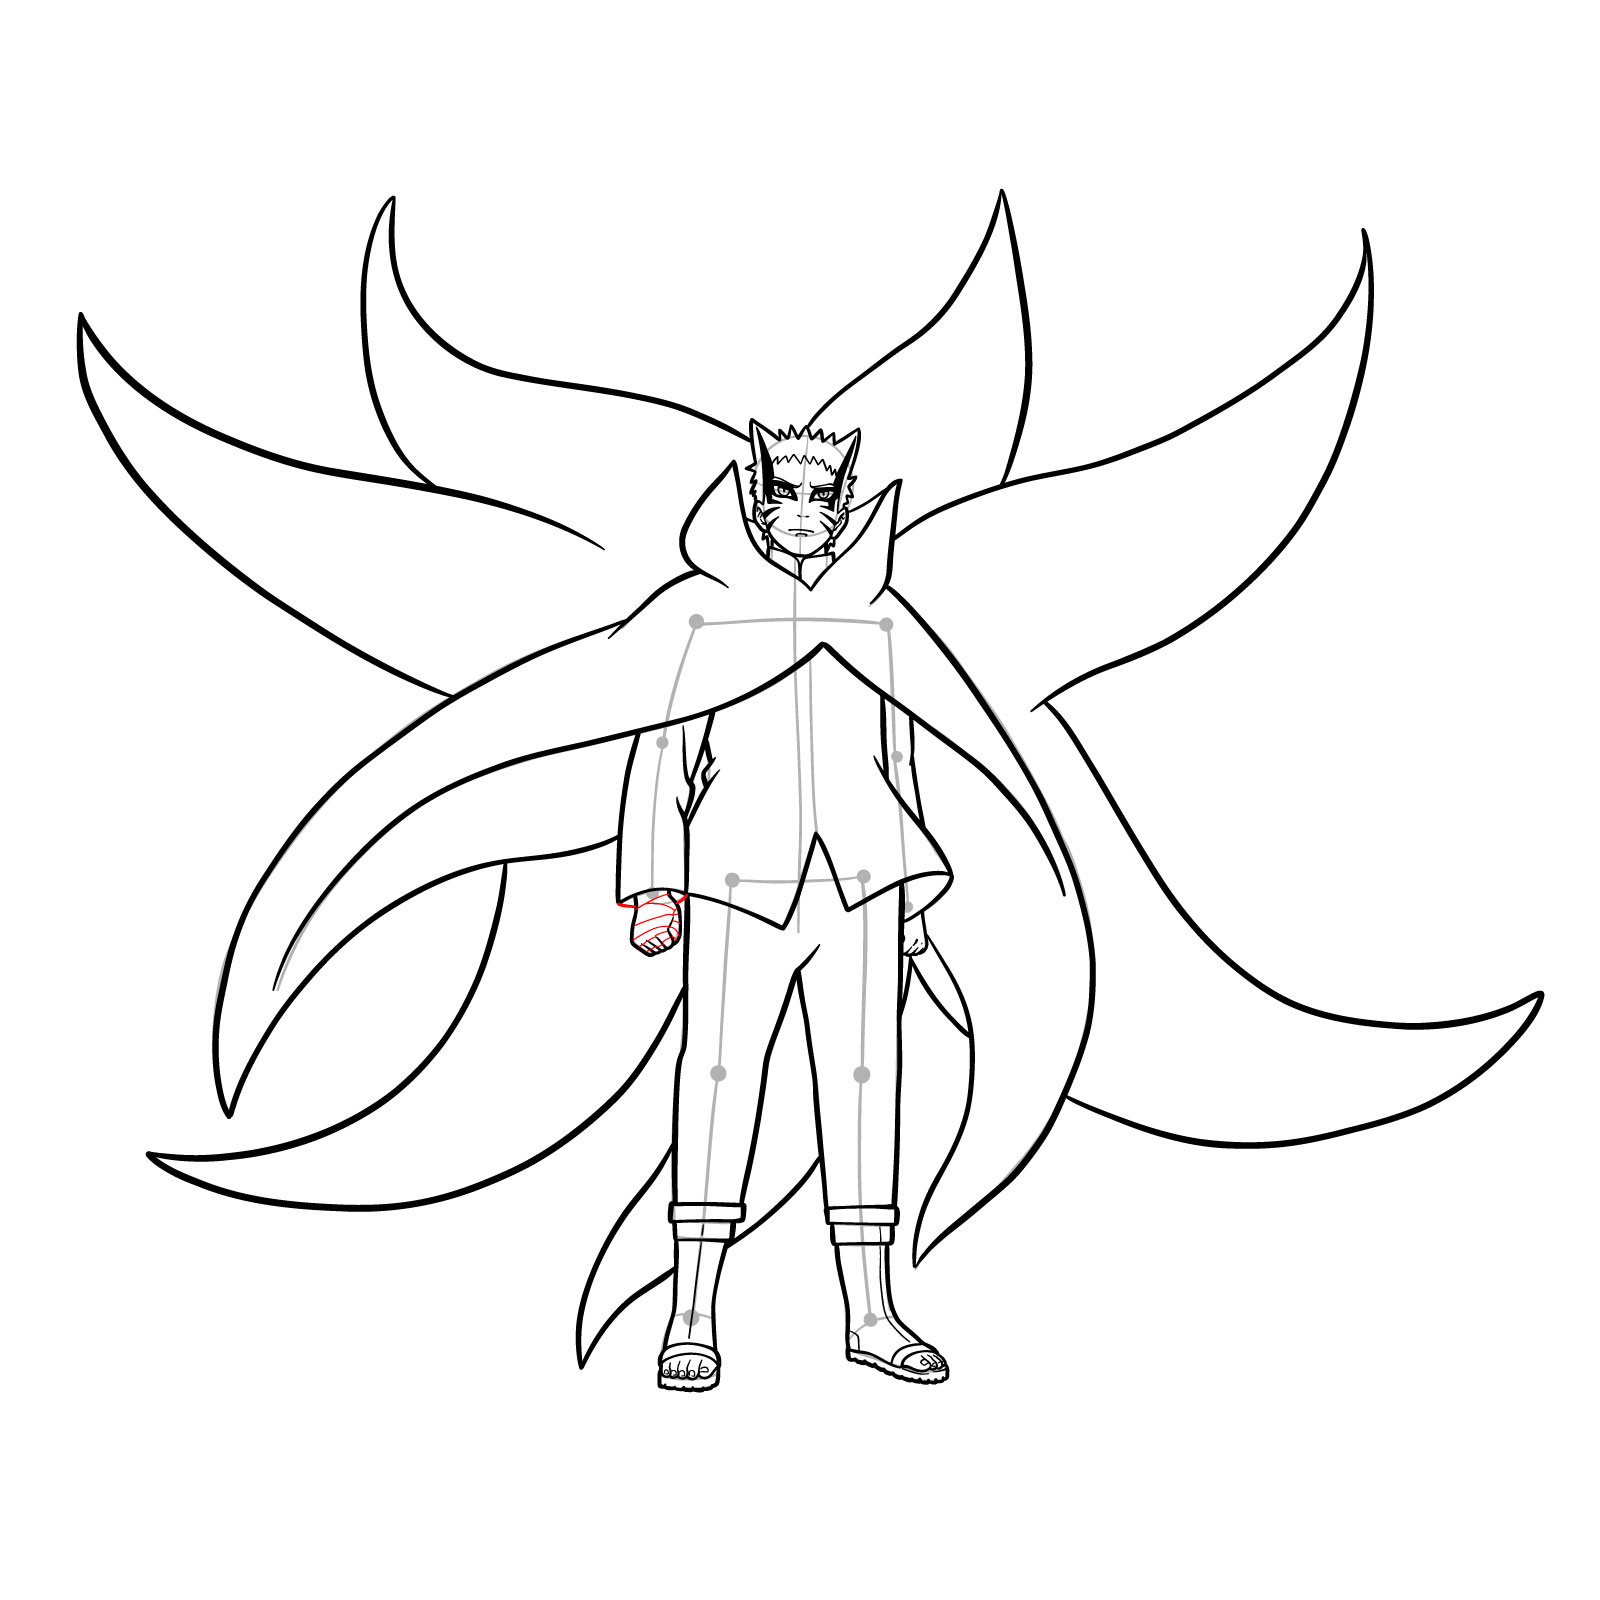
Step 29 – Draw two more cape tails flowing upwards and three additional ones flowing downwards
Enhancing Naruto’s baryon mode cape
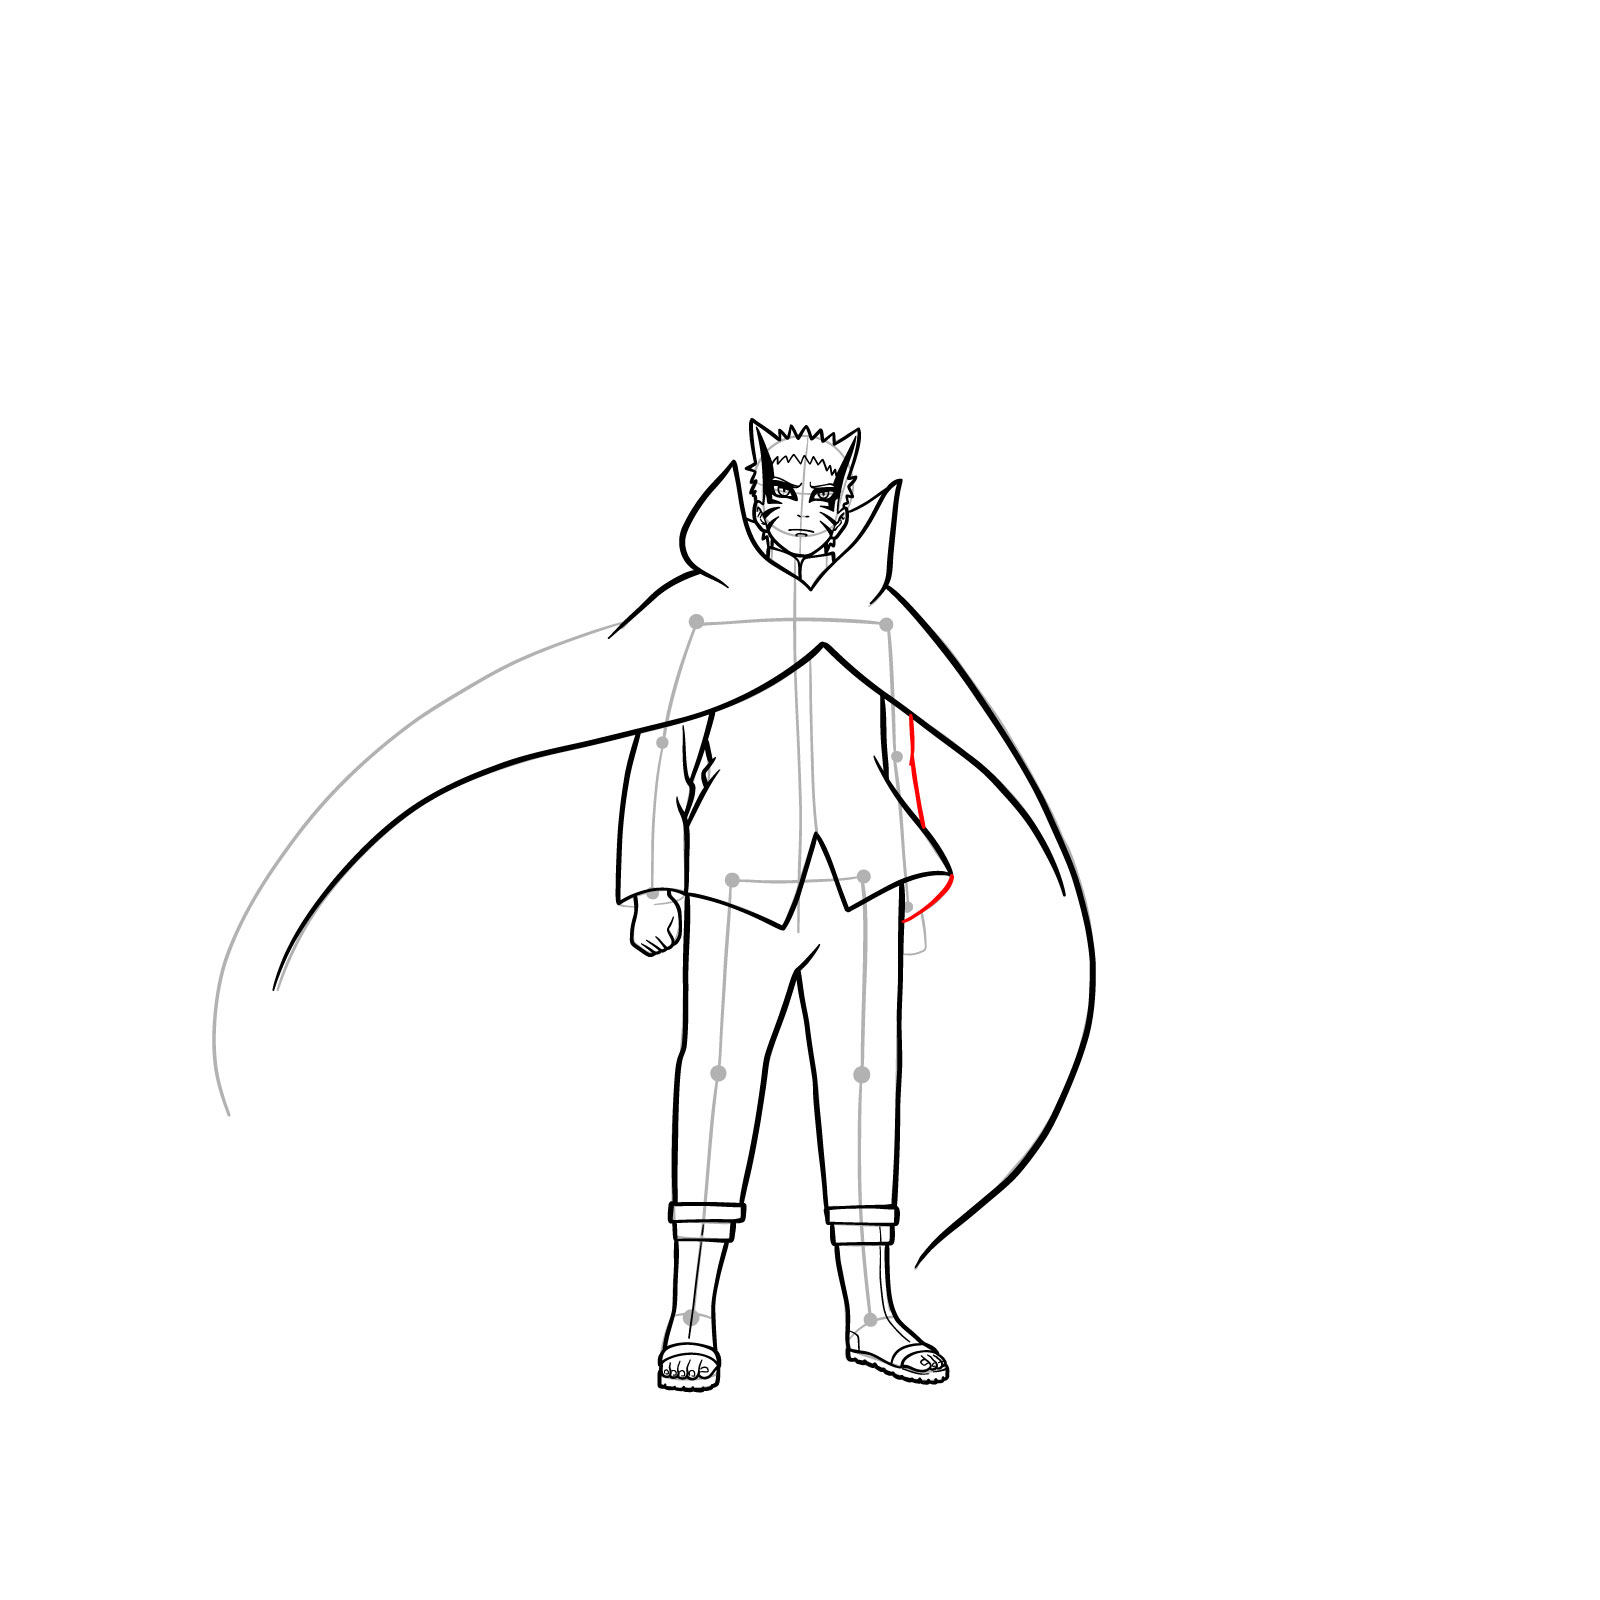
Step 30 – Sketch the bandages wrapping around Naruto’s right hand. Ensure they crisscross around the hand to create a layered look
Adding details to Naruto’s right hand
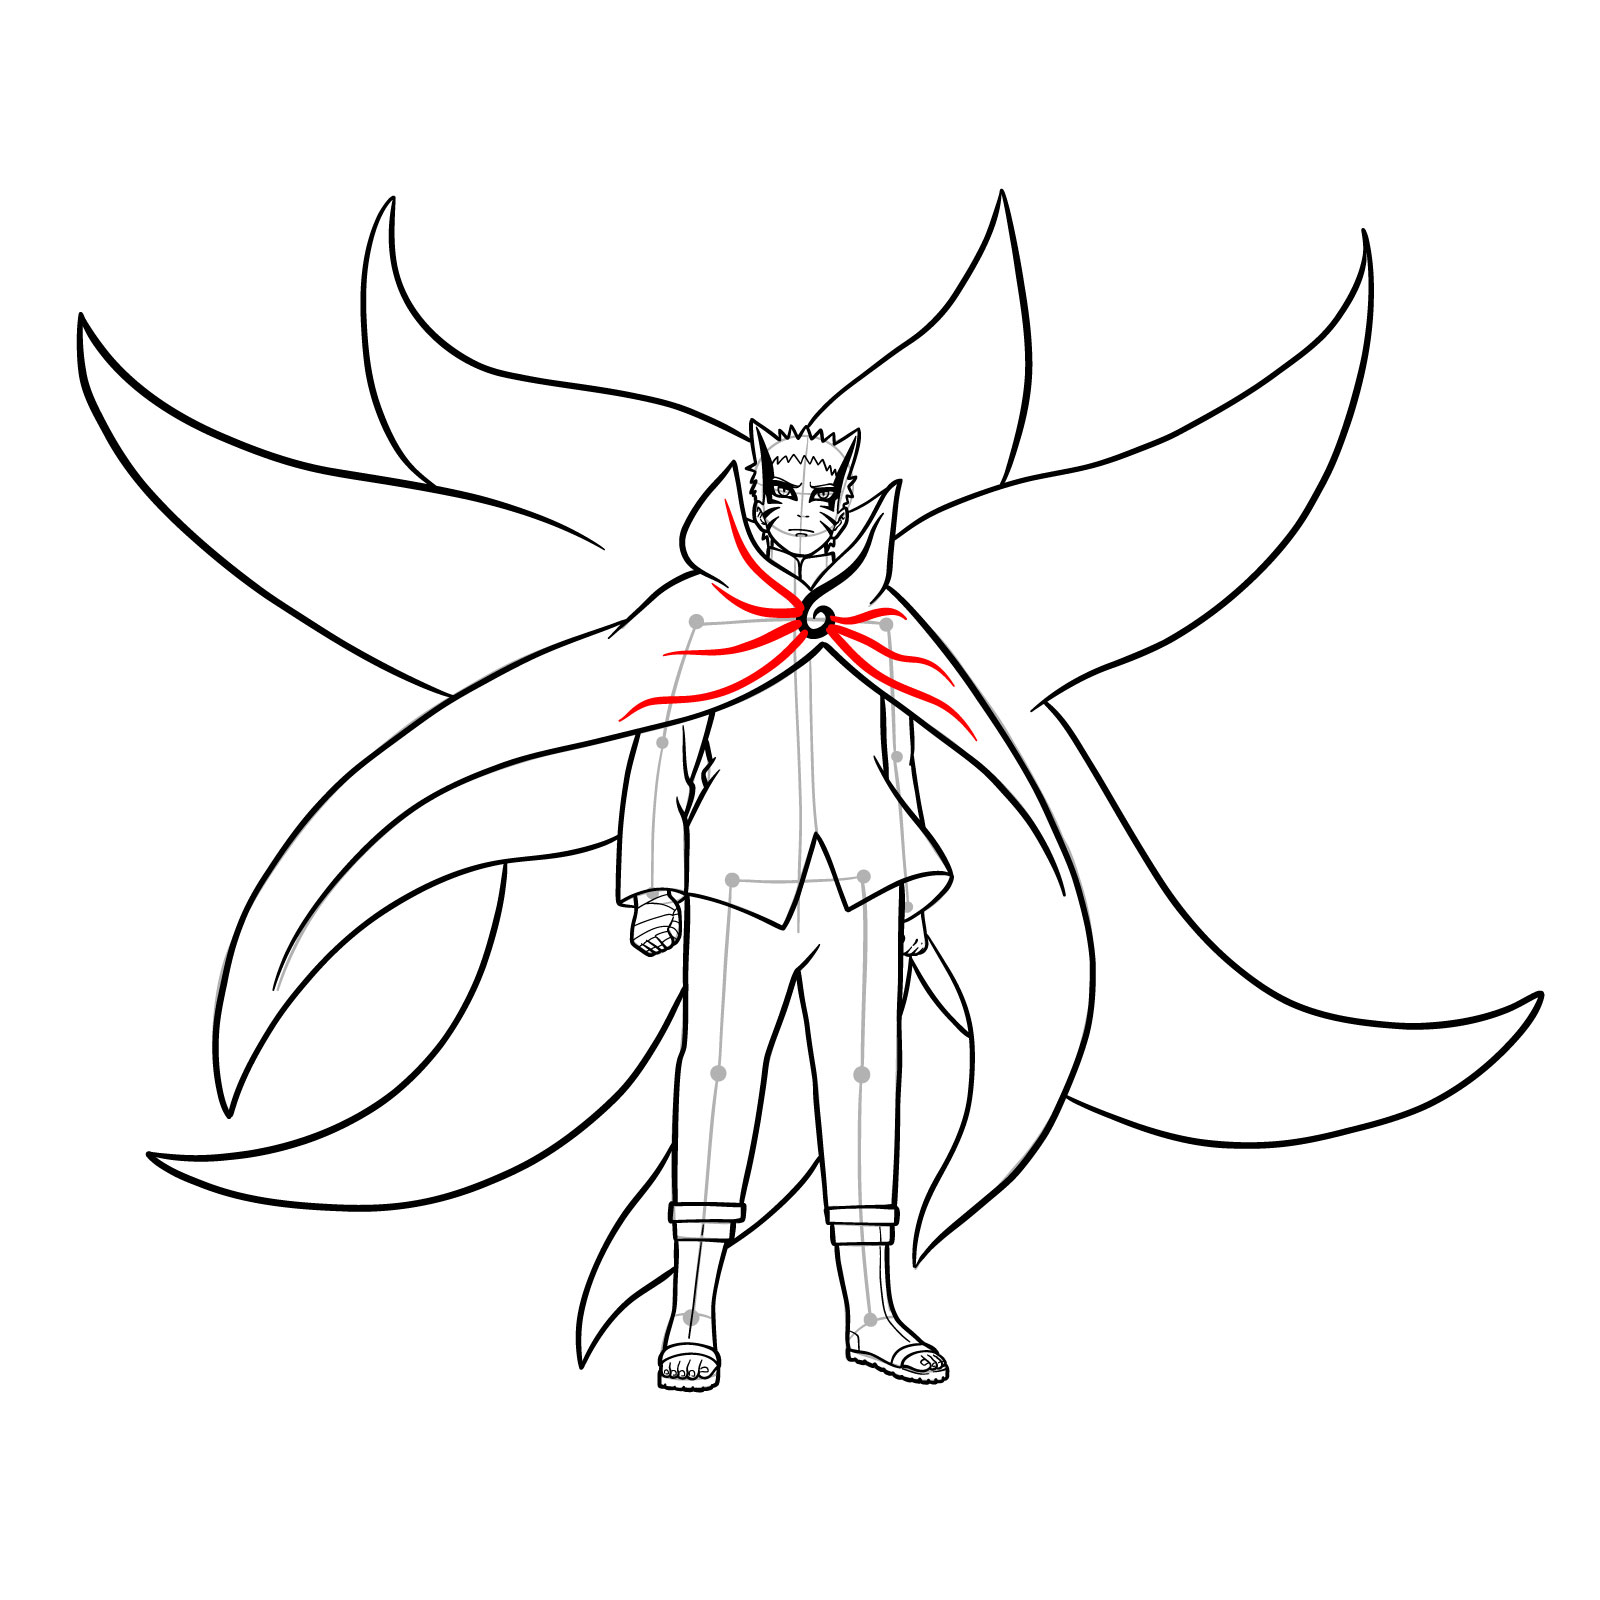
Step 31 – Begin drawing the pattern on Naruto’s cape, starting with the central part of the swirl
Initiating Naruto’s cape pattern
Step 32 – Embellish the cape by sketching flame-like patterns. This enhances the design, giving it the signature fiery appearance of Baryon Mode
Adding flames to Naruto’s cape
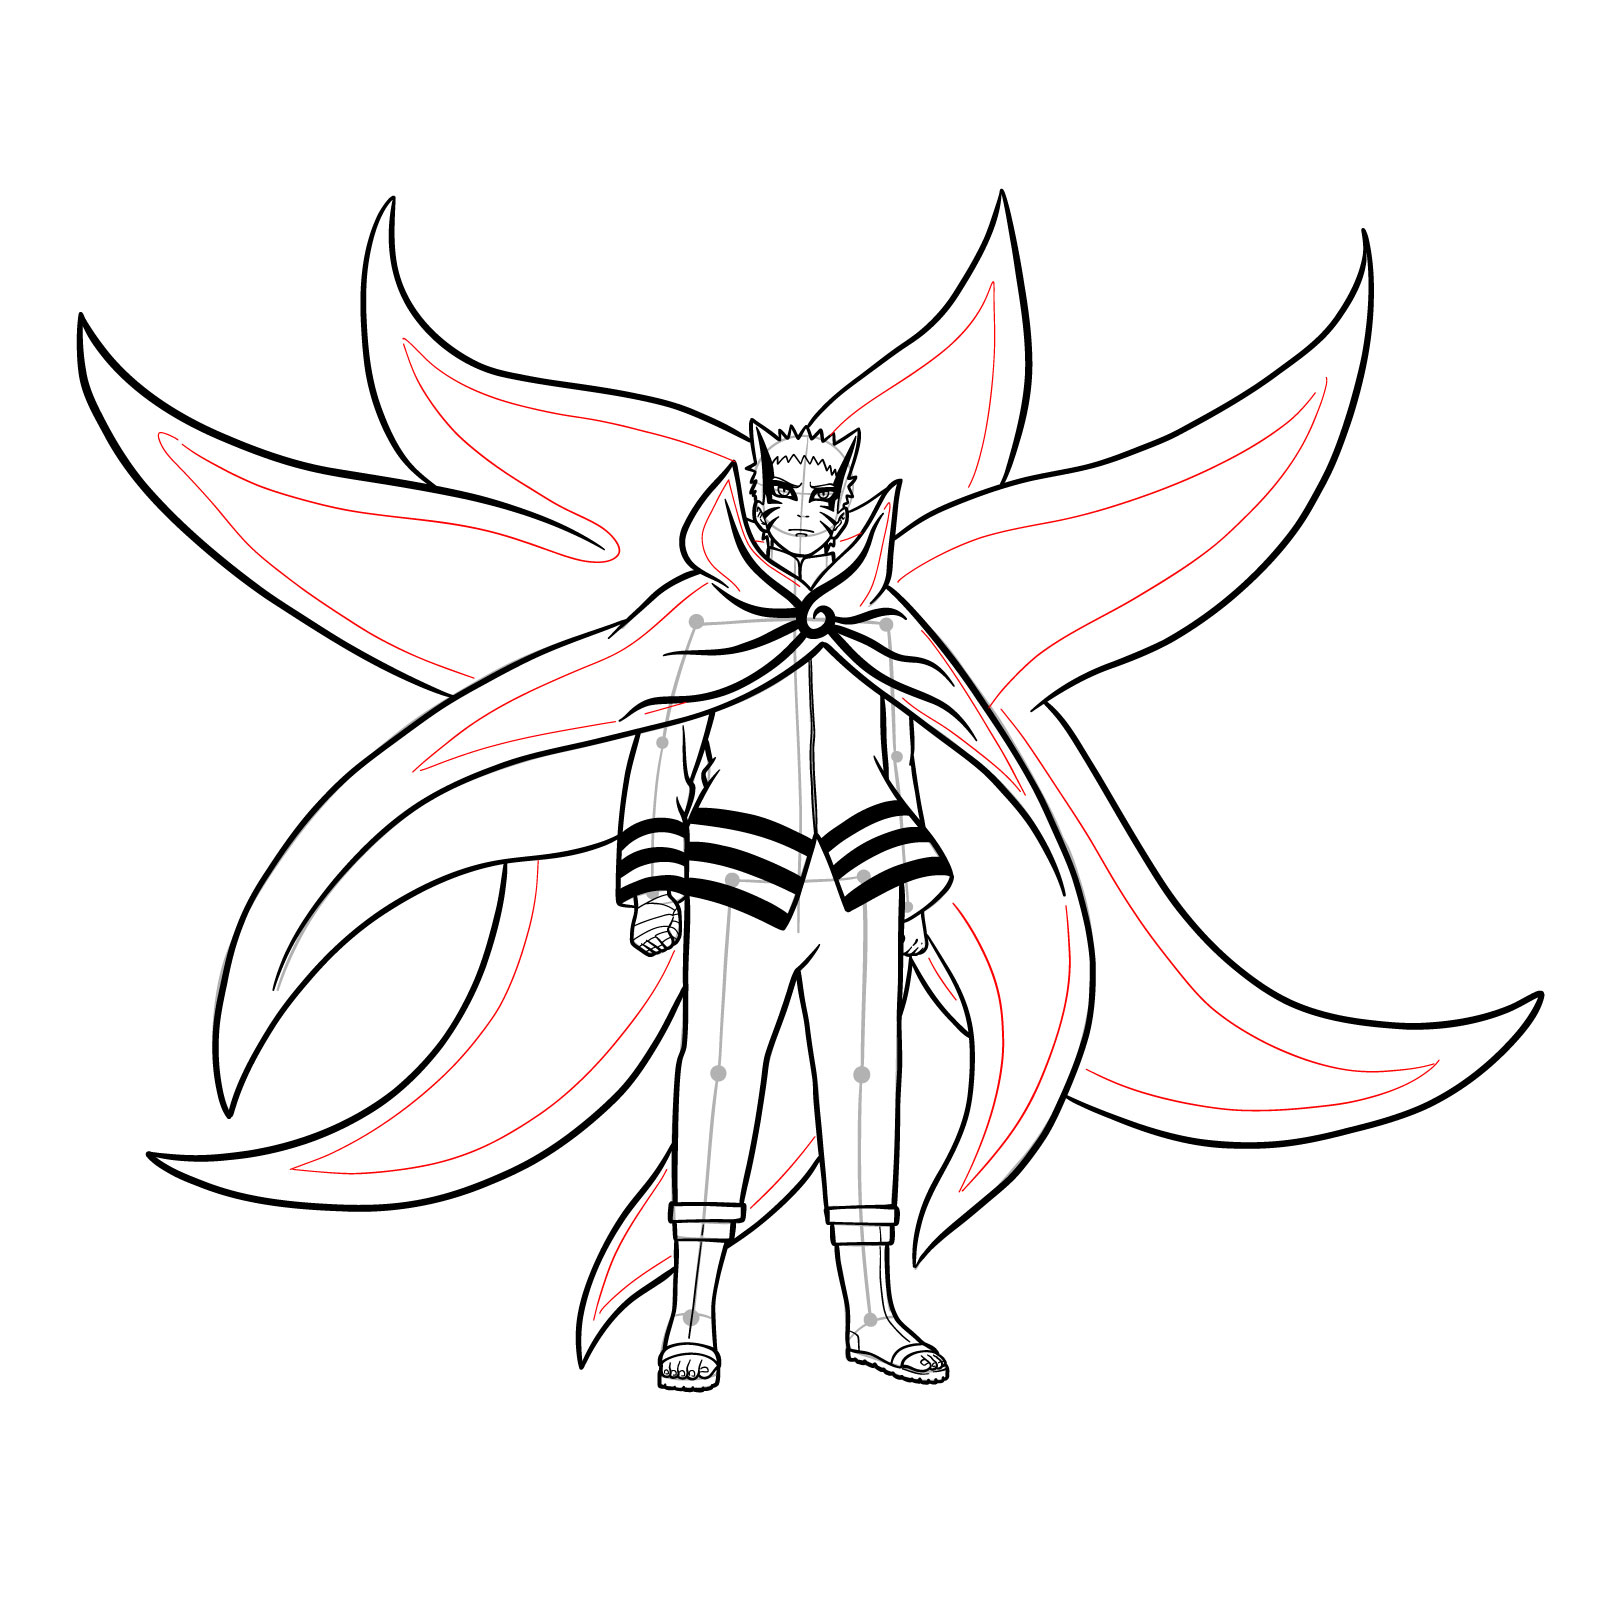
Step 33 – Begin by drawing a central line down the front of Naruto’s jacket, suggesting a zipper. Following this, add stripe patterns across the jacket, emphasizing the design
Detailing Naruto’s jacket
Step 34 – Focus on Naruto’s cape tails. Add frame-like lines around the edges of each tail
Adding frame lines to Naruto’s cape
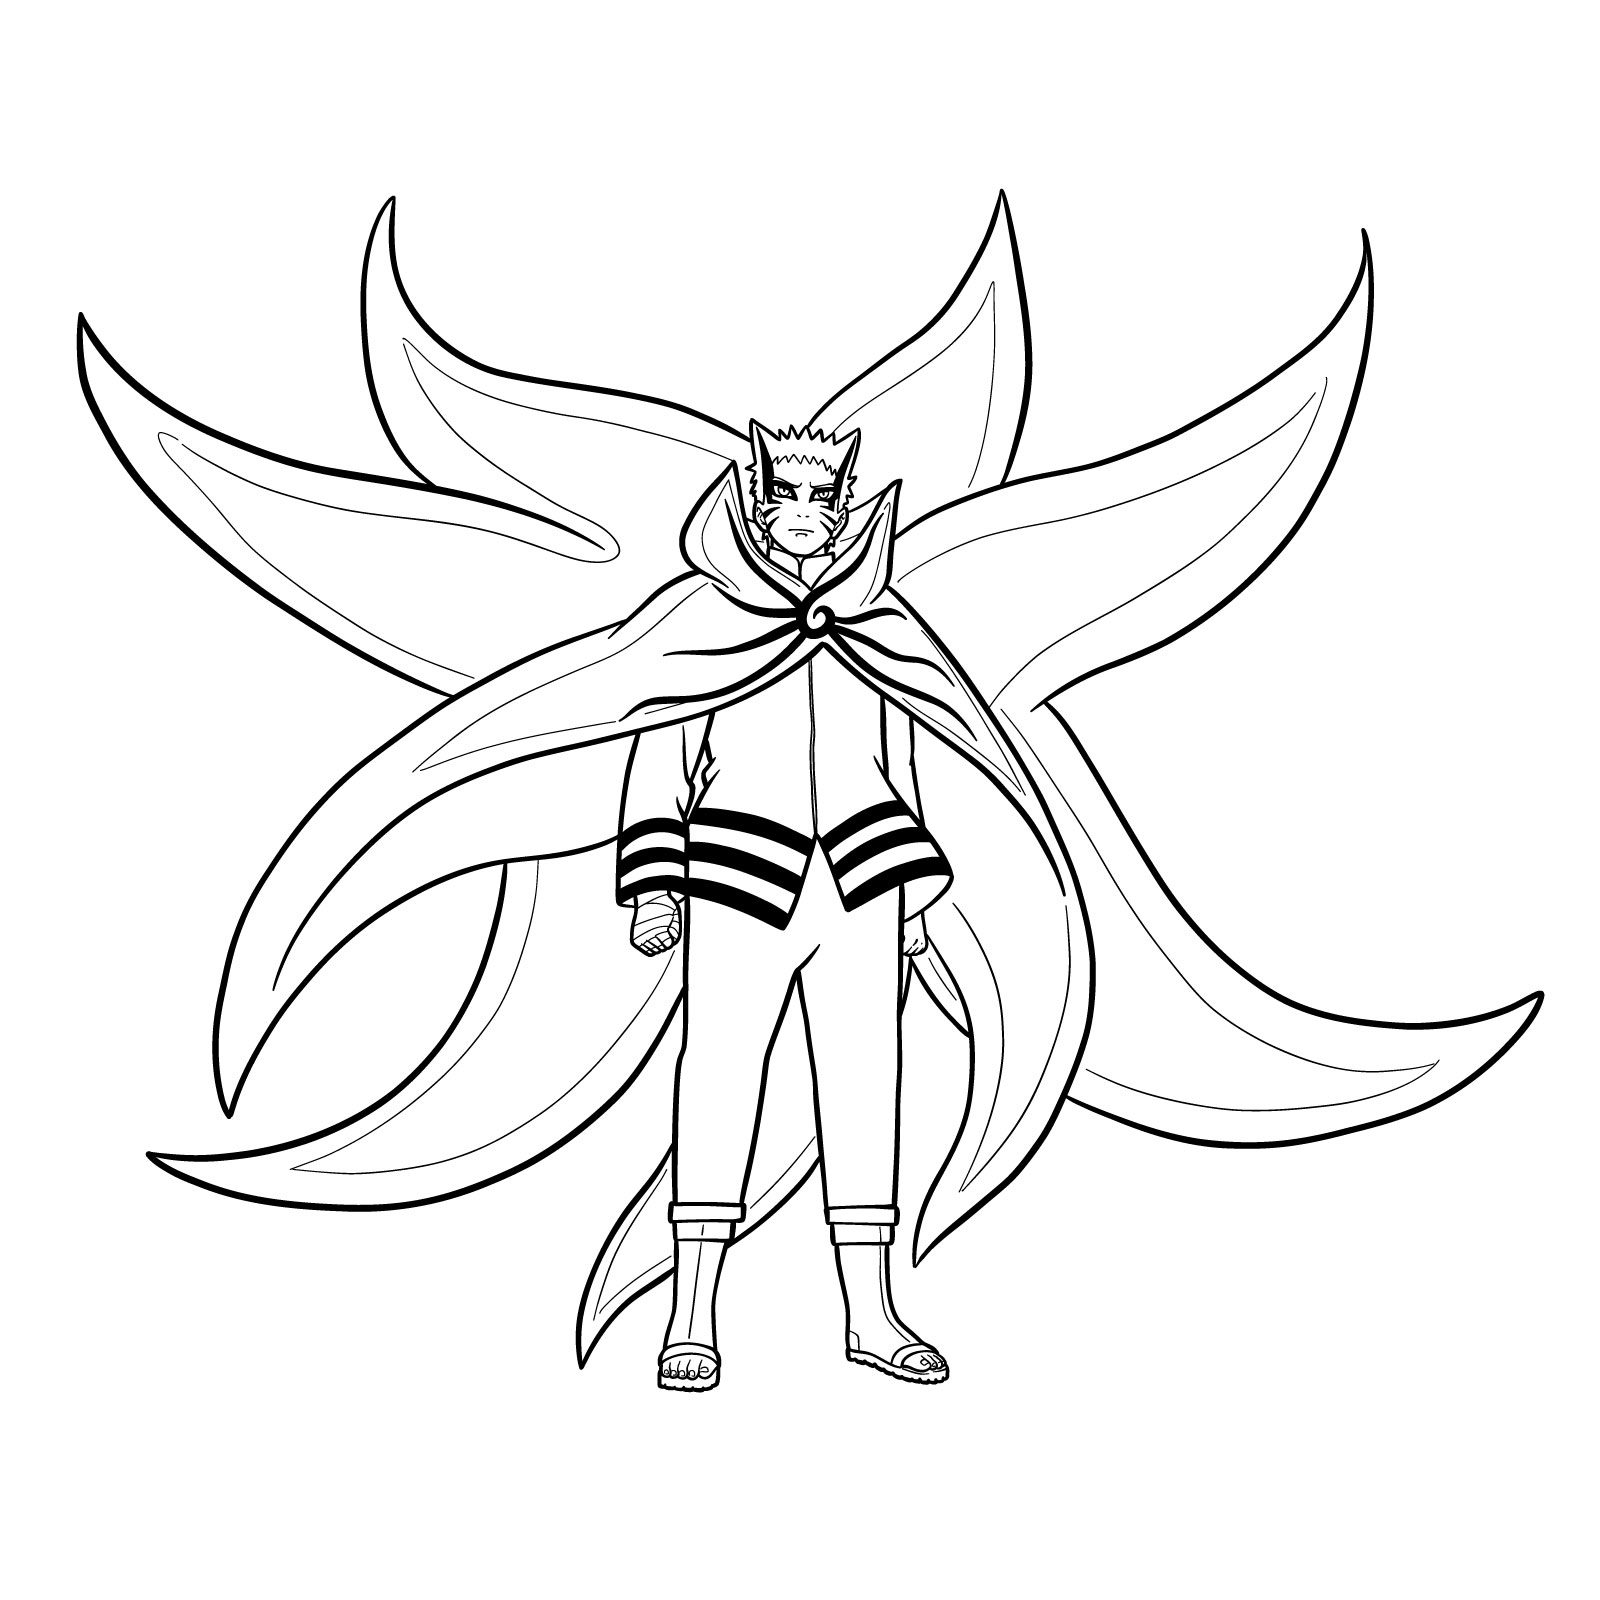
Step 35 – At this point, you should have a finished drawing of Naruto. You can now proceed to ink over your sketch. Once the ink is dry, gently erase any remaining pencil lines. Your finished artwork is now ready to be colored, or you can download this image and use it as a coloring page
Don't Miss New Tutorials! Follow SketchOk
I publish new step-by-step drawing guides every single day. Follow on your favorite platform so you never miss a tutorial. Thousands of artists are already drawing along and I can't wait you to join in!
On my Patreon you can grab unique hand-made coloring pages: each one drawn by me personally. Every purchase directly supports the creation of new drawing tutorials. It's the best way to practice your skills, keep the site going, and get something truly original at the same time.
Baryon Mode is more than just a visual transformation. It’s a fusion of Naruto’s and Kurama’s chakra, producing a new energy type. This energy boosts Naruto’s abilities, making him a formidable force. However, it’s essential to remember that while this mode grants immense power, it also poses significant risks to both Naruto and Kurama. Keeping these aspects in mind can add depth to your Naruto drawing, showcasing not just his appearance but also the emotions and power he embodies.
Conclusion: Drawing Naruto in His Mighty Baryon Mode
I hope this guide assists you in your journey to perfect the art of drawing Naruto in his Baryon Mode. With dedication and practice, you’ll be creating sketches that truly capture the essence and power of this transformation. For the updates, ensure to subscribe and follow us on our social media platforms:
Vector illustrator and the creator of Sketchok.com and TheHowToDraw.com. I publish free step-by-step drawing tutorials to help people of all levels learn to draw.
Disclaimer: This is a non-commercial, fan-made educational site. All characters belong to their respective owners. We are not affiliated with any rights holders.
Read full Disclaimer
1 thought on “How to Draw Naruto in Baryon Mode”
Bro the drawing was so good that I got 10/10 rating


Bro the drawing was so good that I got 10/10 rating