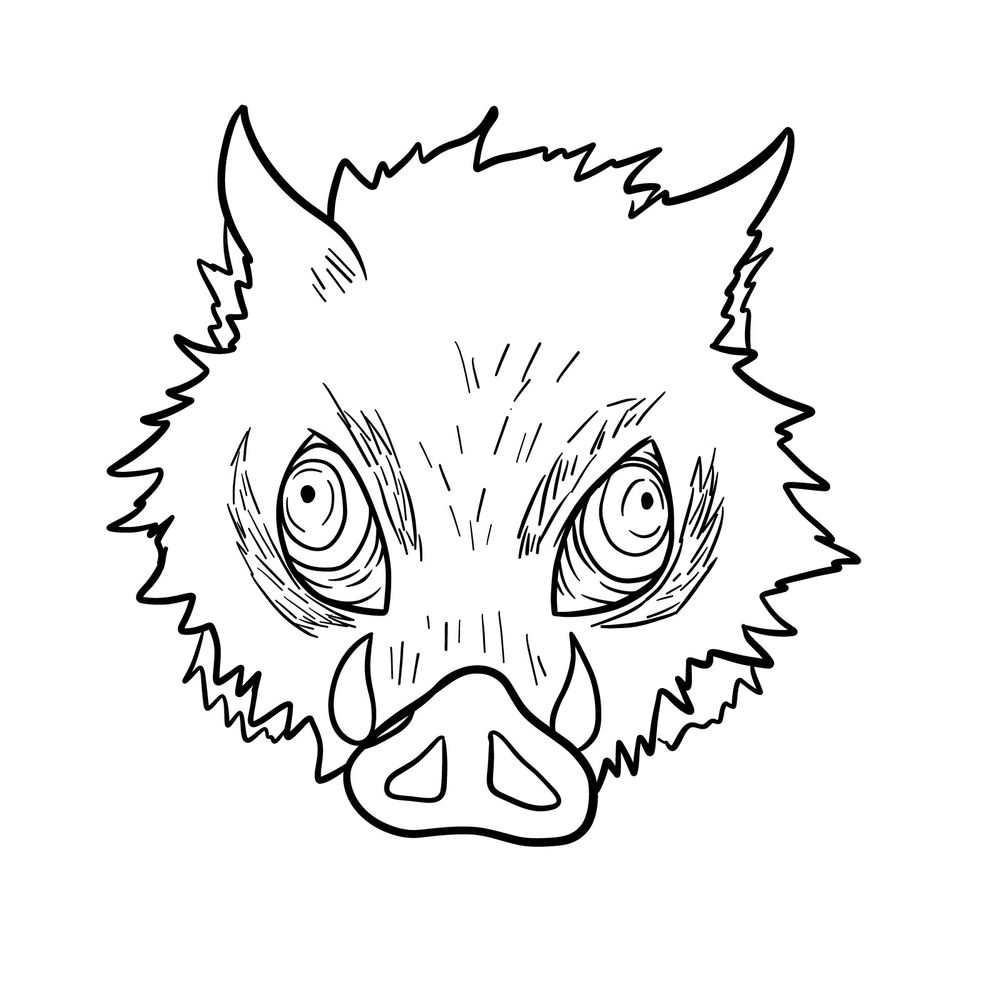
Are you a fan of Inosuke Hashibira from Demon Slayer: Kimetsu no Yaiba? If you’ve been captivated by his wild and fierce demeanor, then you’ll definitely want to learn how to draw his iconic Roar Mask. In this step-by-step drawing guide, we’ll break down the process and help you bring the mask to life on paper.
The Roar Mask: Capturing Inosuke’s Wild Spirit
When drawing Inosuke Hashibira’s Roar Mask, it’s essential to capture the raw and untamed nature that defines his character. The mask itself is a striking representation of Inosuke’s fierce and combative personality. Here are some focus points to consider when drawing the Roar Mask:
- Shape and Structure: Pay close attention to the overall shape of the mask. It has a distinct boar-like appearance, with prominent snout, sharp tusks, and hollowed-out eye sockets. Emphasize the rugged and weathered texture of the mask to convey its battle-worn nature.
- Facial Expressions: Inosuke’s Roar Mask reflects his mood and emotions. Experiment with different variations to depict the intensity and ferocity of his expressions. The mask should convey his wild spirit and untamed energy.
- Attention to Detail: The modified eyes of the mask are a crucial feature. Inosuke has altered them to allow him to see while wearing it. Focus on capturing the unique design which provide a glimpse into Inosuke’s intense gaze.
Inosuke Hashibira, with his wild appearance, is a dynamic character within the Demon Slayer universe. Raised by boars in the mountains, Inosuke has a primal connection to nature and embodies a relentless determination to prove himself as a powerful Demon Slayer. Despite his brash and abrasive nature, he forms a unique bond with Tanjiro, Nezuko, and Zenitsu, becoming an integral part of their journey to defeat the demons and protect humanity.
The Drawing Guide: Understanding the Process
Embarking on the journey of drawing Inosuke’s Roar Mask requires careful guidance and attention to detail. This drawing guide is designed to help you bring this iconic mask to life. Here’s what you can expect:
Color Scheme: The color scheme of the guide plays a crucial role in the process.
- Red: The red color is used to highlight the current drawing step. It signifies the specific areas or details you should focus on at each stage of the drawing process.
- Black: The black color represents the previously drawn lines. It helps you visualize the progress of the drawing by showing the lines that have already been completed.
- Grey: The grey color is used to depict the basic proportions sketch. It serves as the foundation for the drawing, capturing the overall shape and placement of the mask.
Step-by-Step Process: The guide consists of 18 steps in total, carefully crafted to break down the drawing process into manageable stages. The first two steps focus on creating a basic rough sketch, establishing the foundation of the mask’s structure. As you progress through the guide, each step will build upon the previous one, gradually refining the details and bringing the Roar Mask to life.


As we conclude this guide on how to draw Inosuke’s Roar Mask, I hope you feel inspired and ready to embark on your artistic journey. Remember, art is a powerful form of self-expression, and this guide has equipped you with the knowledge and techniques to create a stunning representation of this iconic mask.
By donating to support SketchOk, sharing the link to this guide, or following us on social media (Instagram, Facebook, Pinterest), you can help me continue to provide valuable resources and guides like this one. Your contribution will enable me to reach and inspire more aspiring artists around the world.
So, whether you choose to donate, share the link, or connect with us on social media, your support means the world to me. Together, let’s foster a community of passionate artists who continuously strive to push their creative boundaries and bring their artistic visions to life.
Thank you for joining me on this artistic adventure, and I look forward to seeing your incredible artwork inspired by Inosuke’s Roar Mask!
Stay creative and keep drawing!

how do you make it look better, bro me and my friend’s drawings looked nothing like the tutorial. Any tips to make it better? 😛
Hey! There’s really no secret to it—just keep practicing, and each time it’ll get a bit easier! Try focusing on one step at a time, and don’t worry if it’s not perfect right away. A few more tries, and you’ll see a big difference.