Welcome to the world of Chainsaw Man where we’ll tackle the task of bringing Denji to life through our sketches. In this guide, we’re not settling for just one angle; you’ll learn how to draw Chainsaw Man in both a dynamic 3/4 view, decked out in his Devil Hunter uniform, and a bold front view with his shirt unbuttoned, revealing the raw power beneath. With careful instruction and an eye for detail, you’ll master the art of depicting this character in his most memorable forms. So sharpen your pencils, it’s time to dive into the gritty details of Chainsaw Man’s design.
To bring Denji as Chainsaw Man to life, we’ll be following the structured guides. Each step is visually defined to progress the drawing from a basic form to a complete illustration. Here’s what each color in the images signifies:
Red Color: Marks the action lines for the current step, guiding you on what to draw next.
Black Color: Shows the cumulative lines from all previous steps, helping you keep track of your progress.
Grey Color: Represents the initial sketch, providing a blueprint for your drawing.
Starting with a stick figure and a basic proportions sketch, you will outline Denji’s shape and stance. As you advance through the guide, new lines in red will shape his form and attire, while the black lines confirm what you’ve already accomplished. In the same fashion, we’ve built up Denji from the Anime series poster, creating depth and character with each new layer. Similar methods have been used in our Makima drawing guide, as well as the guides for Reze and Power, each with its own unique set of challenges and stylistic nuances.
The final stage for each guide is optional and involves inking your drawing. This step requires a steady hand and patience, as the ink must dry completely to avoid smudging. Once dry, you can carefully erase the pencil lines underneath, which reveals a clean, polished illustration of Denji as Chainsaw Man, ready to impress any fan of the series.
How to Draw Denji as Chainsaw Man in 3/4 View
Chainsaw Man 3/4 view drawing – the result
In the first guide, we will explore the dynamic posture of Denji as Chainsaw Man in a 3/4 view. This angle offers a compelling look at the character, highlighting his aggressive stance and readiness for battle. The first three steps involve creating a stick figure to establish the posture and basic proportions of the character, followed by refining the sketch into a more detailed silhouette.
The drawing begins with Denji poised in action, his body turned in a 3/4 perspective that showcases his movement and the mechanical details of the chainsaw limbs. His left leg is drawn stepping forward, giving a sense of forward momentum, while his right leg supports his weight from behind. The arms are bent at the elbows, with chainsaws extending from his hands, emphasizing his transformation into Chainsaw Man. His attire is casual yet battle-ready, consisting of a shirt with rolled-up sleeves and loose-fitting pants, alluding to his dual life as a Devil Hunter and an average young man. The overall pose captures the essence of Denji’s fierce spirit and the intense energy of his chainsaw-wielding alter ego.
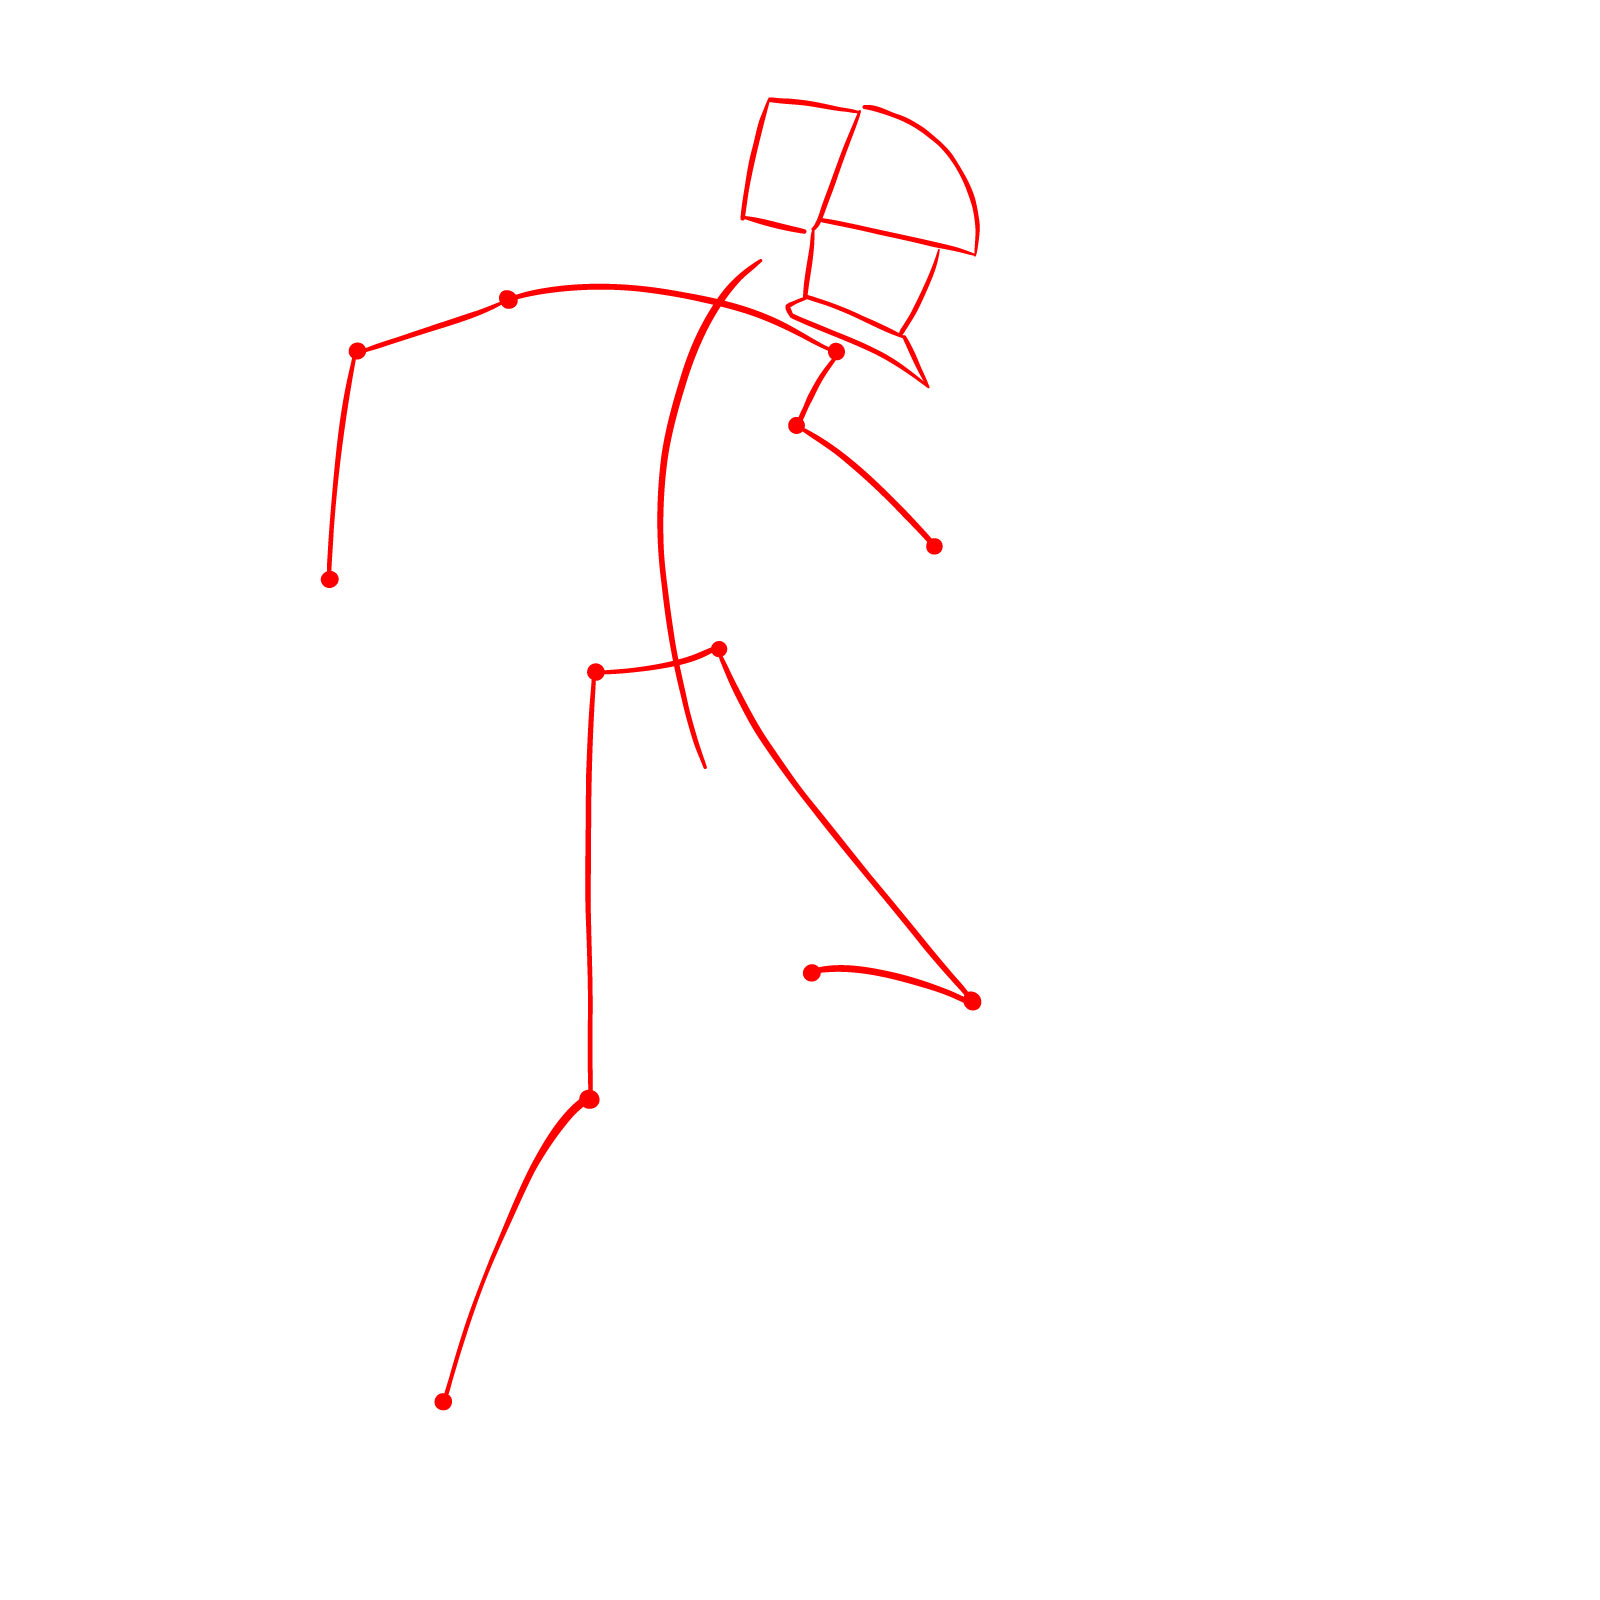
Step 01 – In the first step, we will construct a stick figure for Chainsaw Man, starting with the basic shapes for the head and a central spine line. Add dots for the shoulders, elbows, knees, legs and hand joints, and sketch lines to represent the arms and legs positioning
Constructing the foundational stick figure for Chainsaw Man
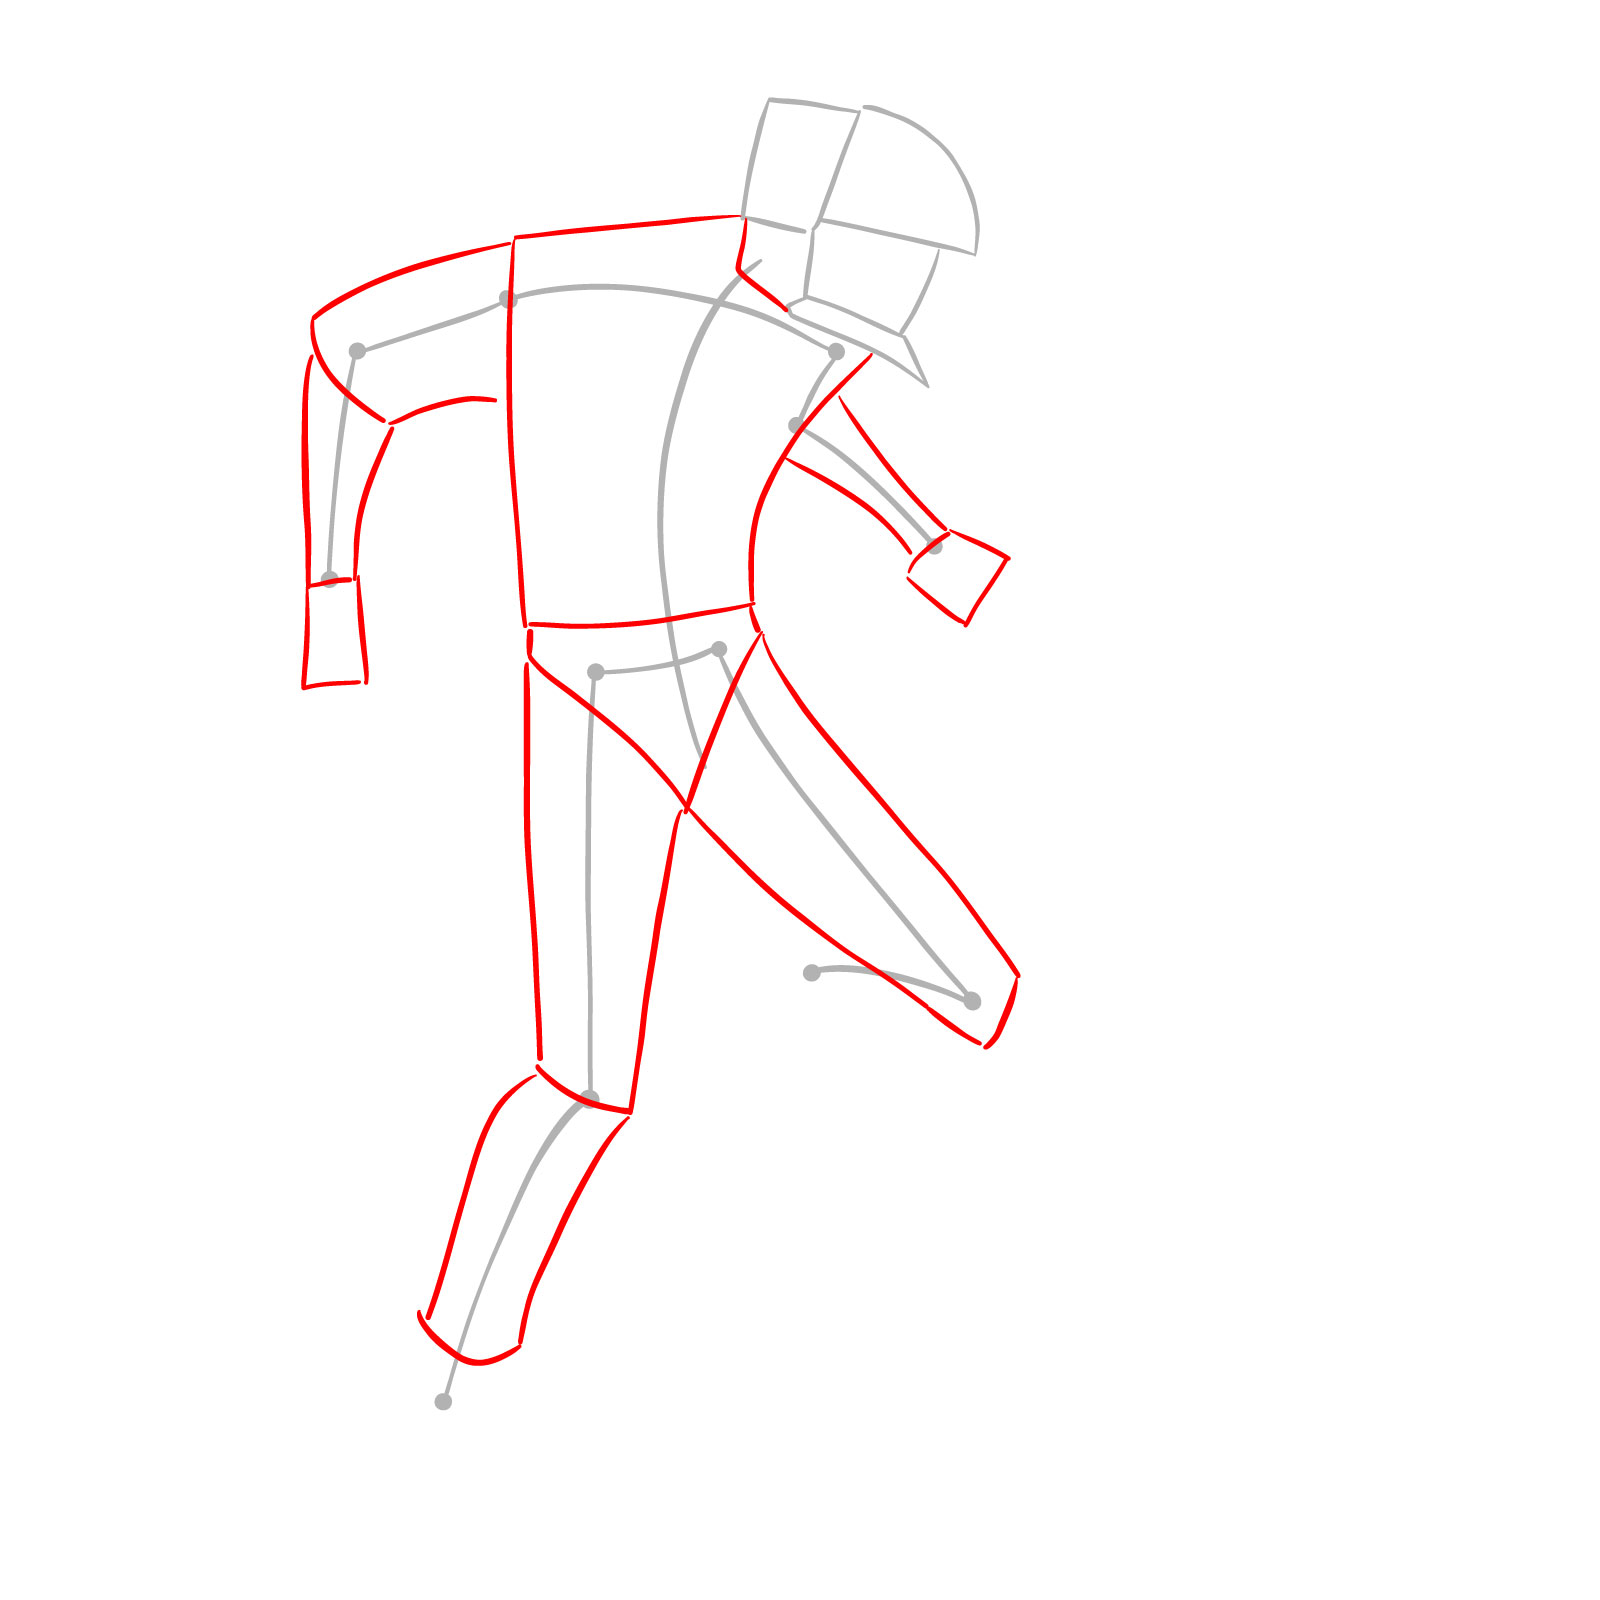
Step 02 – Now we need to flesh out the body, sketching the basic shapes that define Chainsaw Man’s structure. Draw the torso and limbs with broader shapes to represent the chest, arms, and legs, ensuring to capture the dynamic posture of the character
Outlining the basic shapes for Chainsaw Man’s body proportions
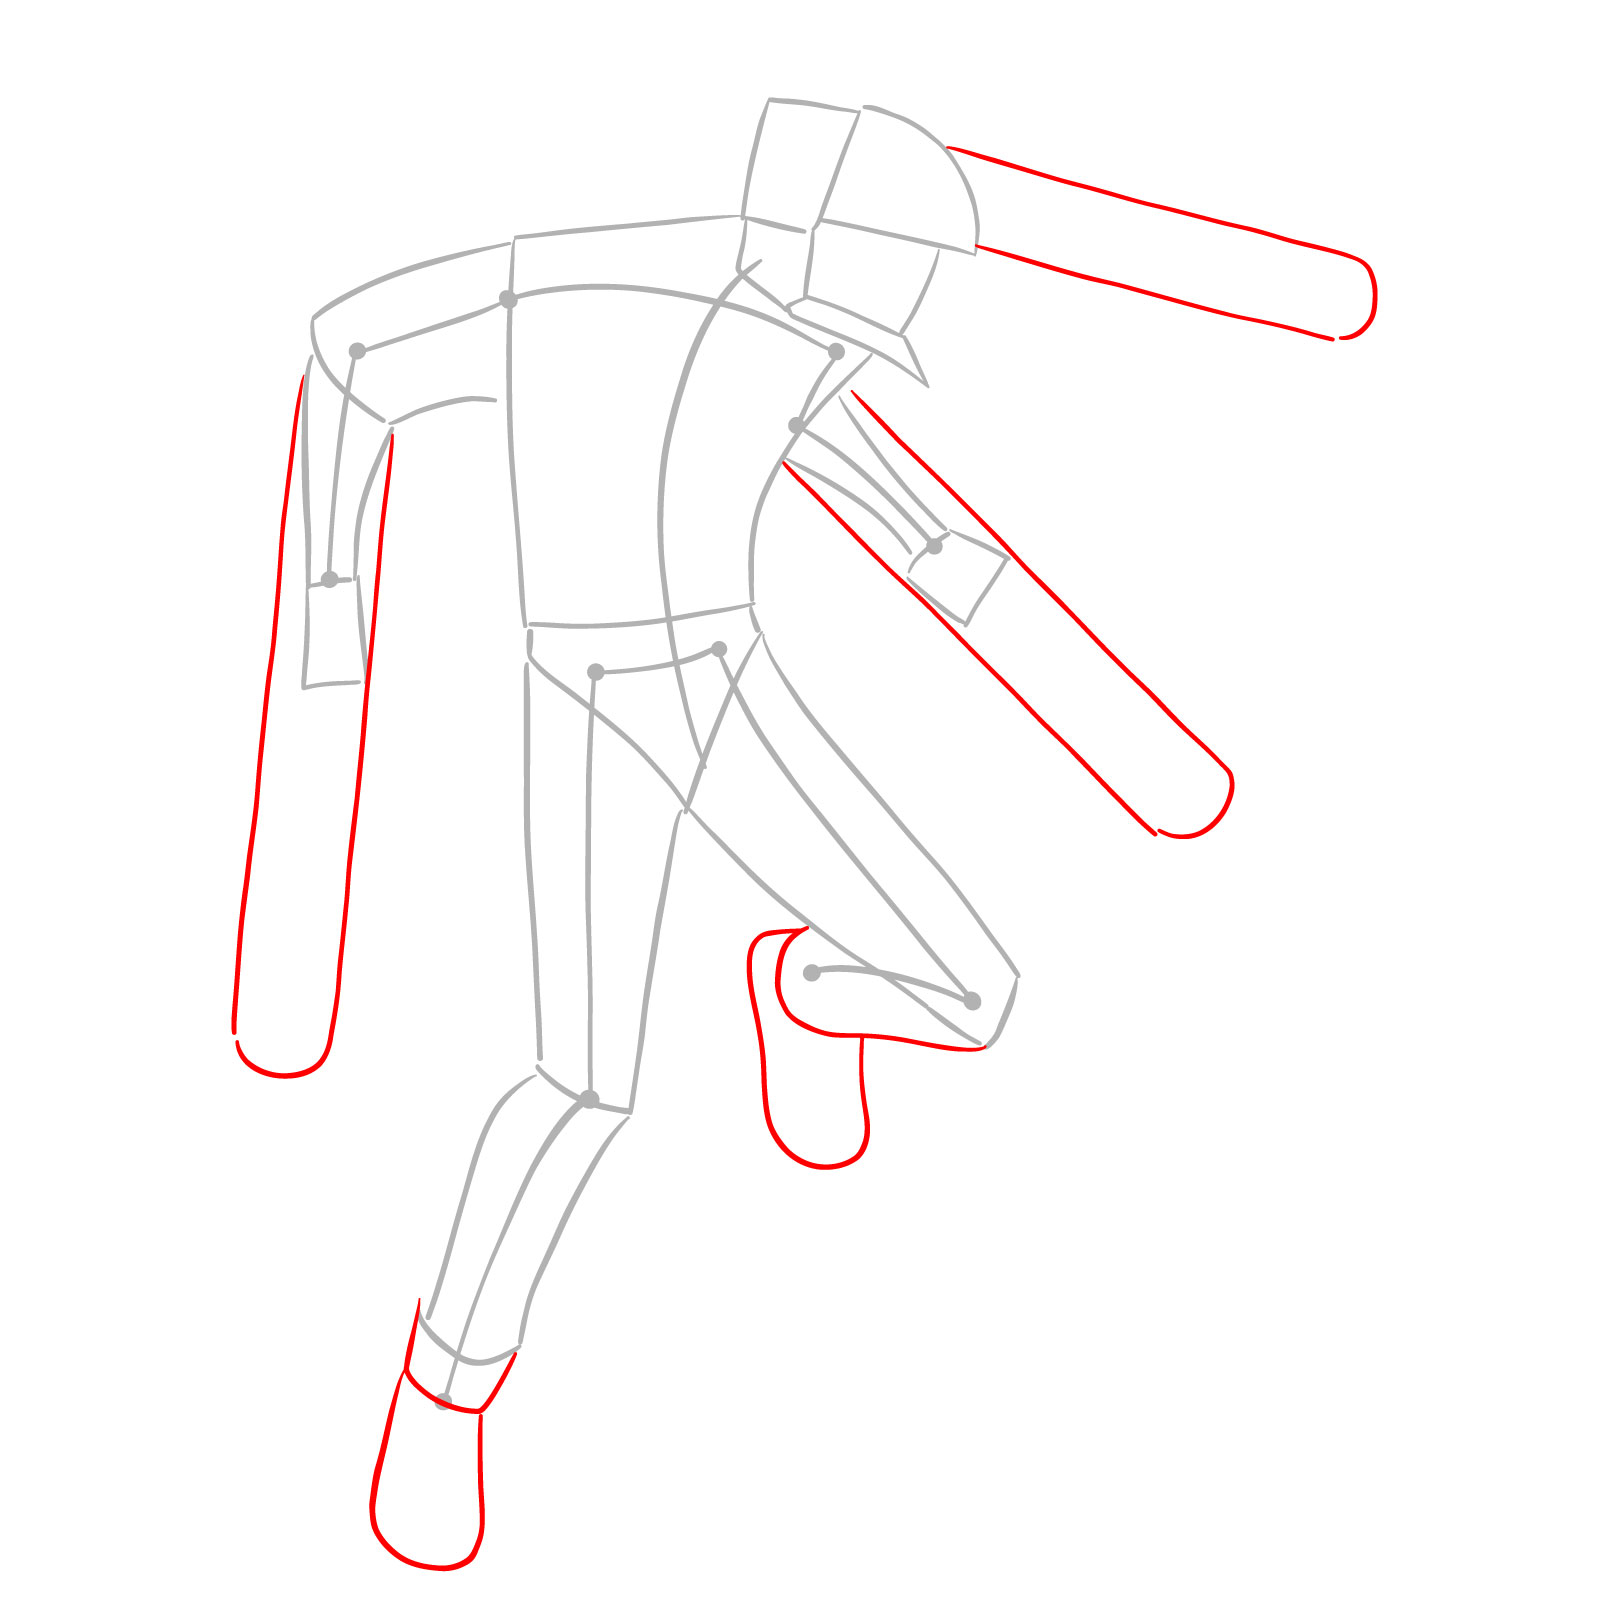
Step 03 – Let’s position the chainsaw blades. For the hands, draw elongated shapes extending from the arms ending with rounded tips. Add similar shape protruding from the head to represent the chainsaw blades, ensuring they are in proportion with the body. Then, let’s finish the basic structure by adding shapes for his sneakers.
Adding the chainsaw blades to Chainsaw Man’s hands and head
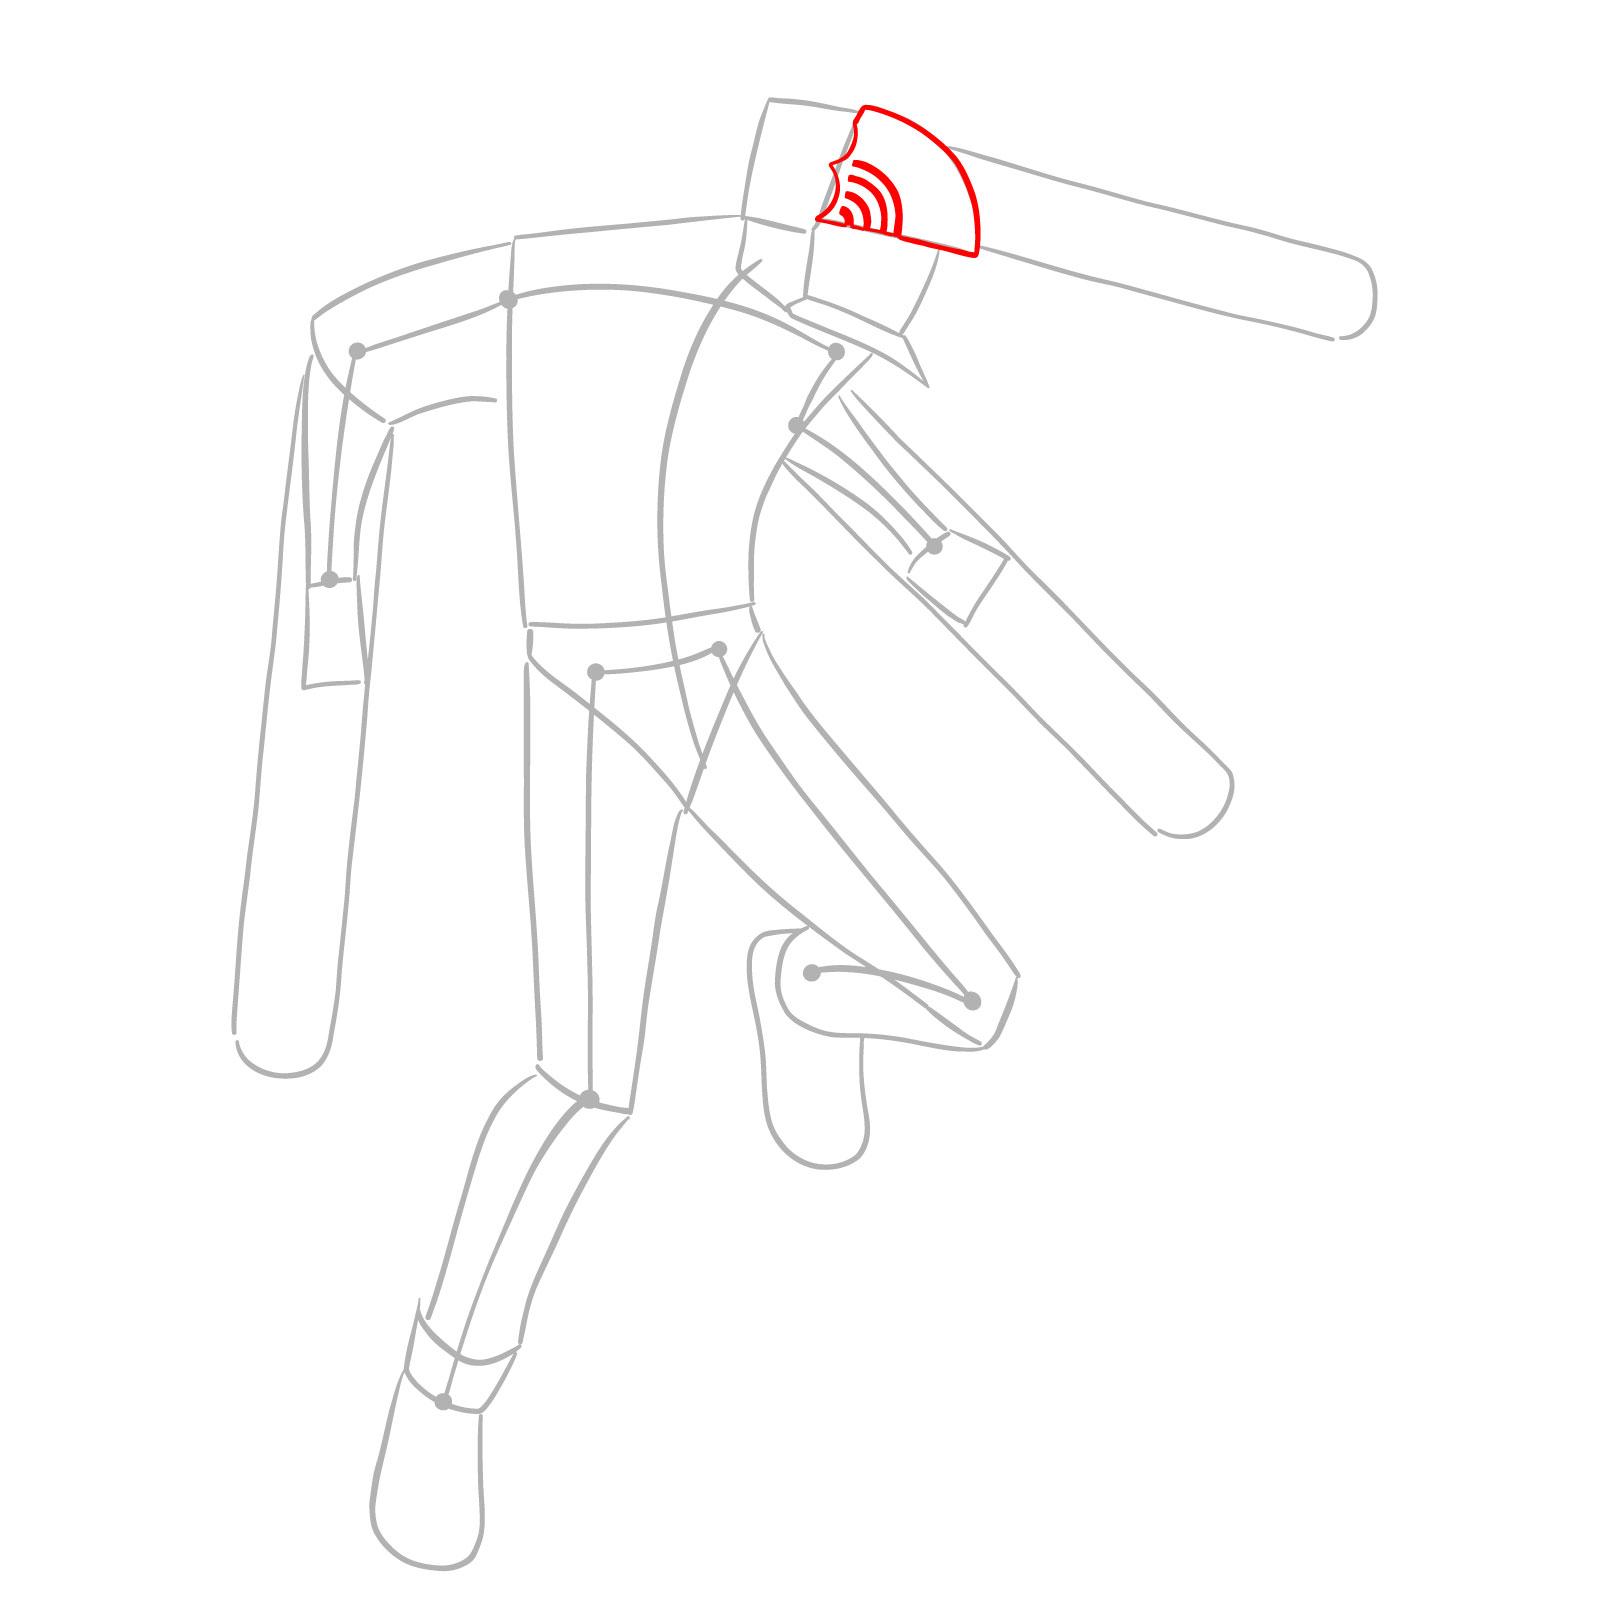
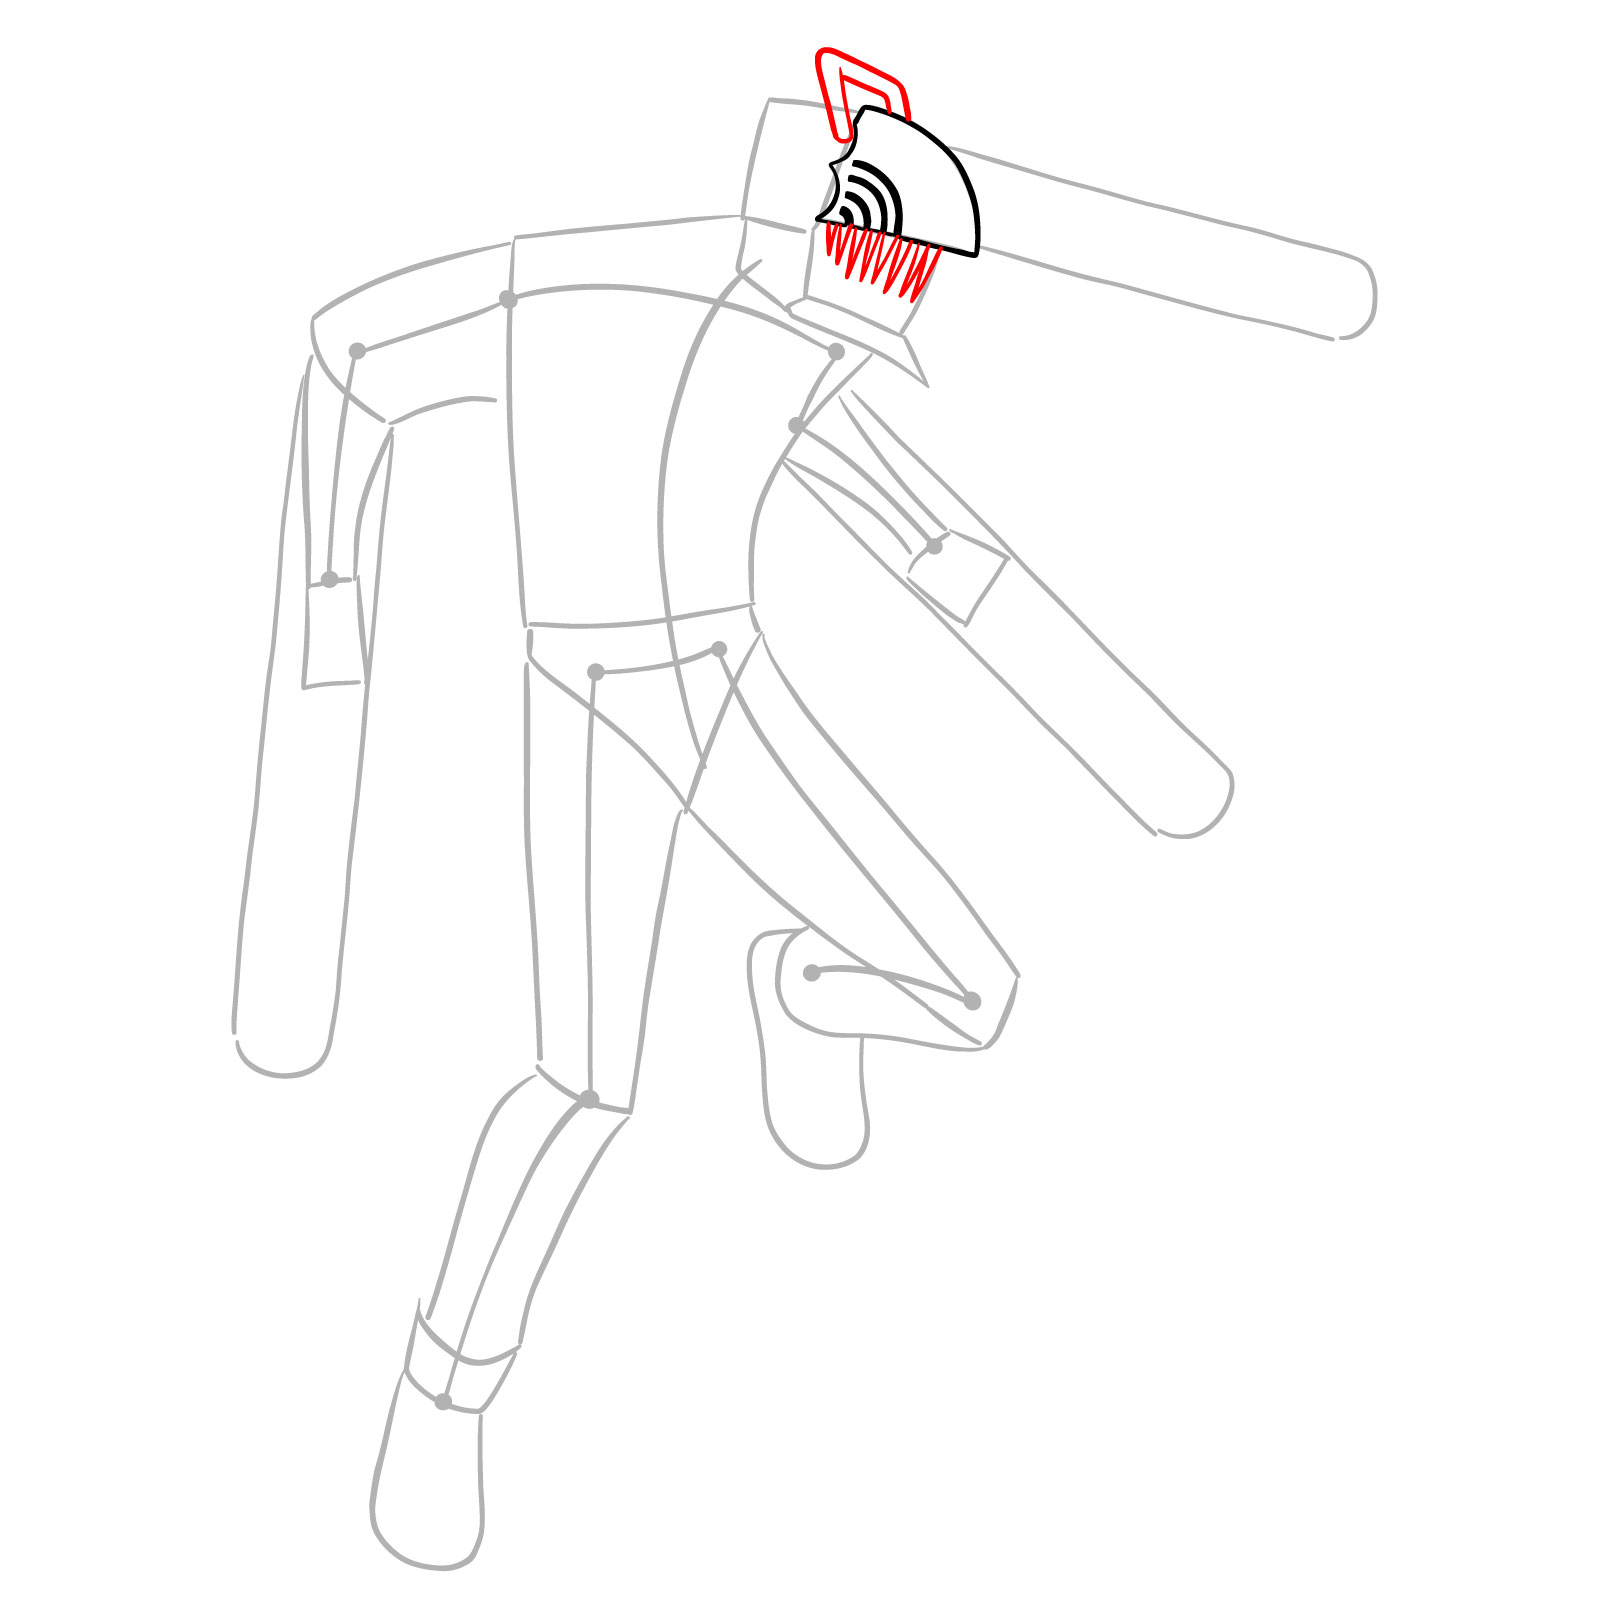
Step 04 – Focus on the upper part of Chainsaw Man’s head. Sketch the forehead portion with attention to the curvature and angle, add curved lines at the bottom for the airing slots
Detailing the upper part of Chainsaw Man’s head
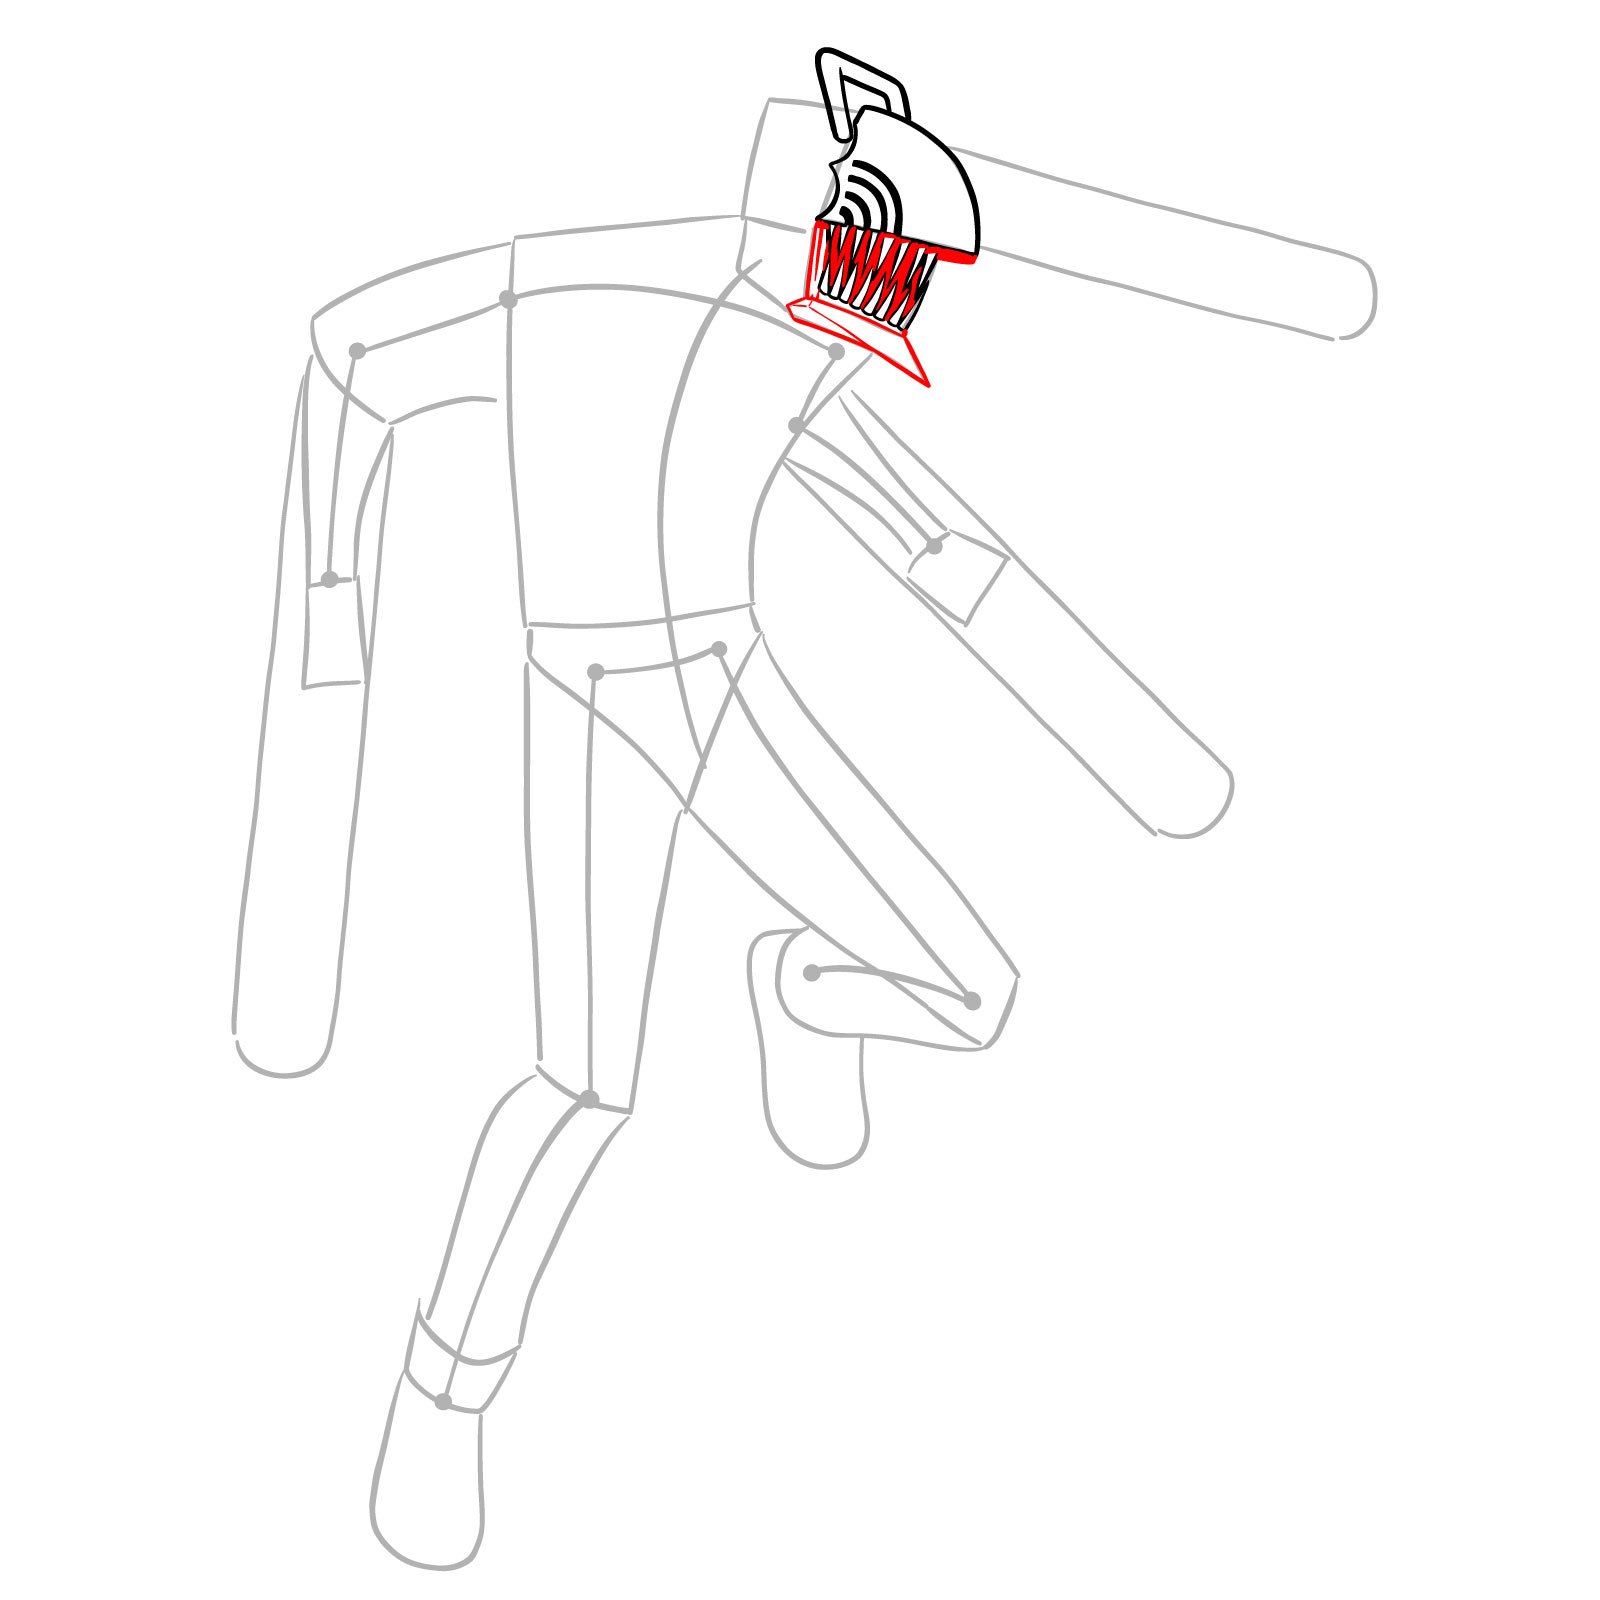
Step 05 – Now let’s sketch his upper row of teeth; draw a series of pointed shapes along the lower edge of the shape we drew in the previous step. Add a small rectangle on the top to represent the handle of the chainsaw, ensuring it aligns correctly with the blade
Sketching Chainsaw Man’s upper teeth and chainsaw handle
Step 06 – Next, add the lower row of teeth. Mirror the upper teeth with a similar set of pointed shapes, creating the effect of a closed saw mouth
Drawing the lower row of teeth for Chainsaw Man
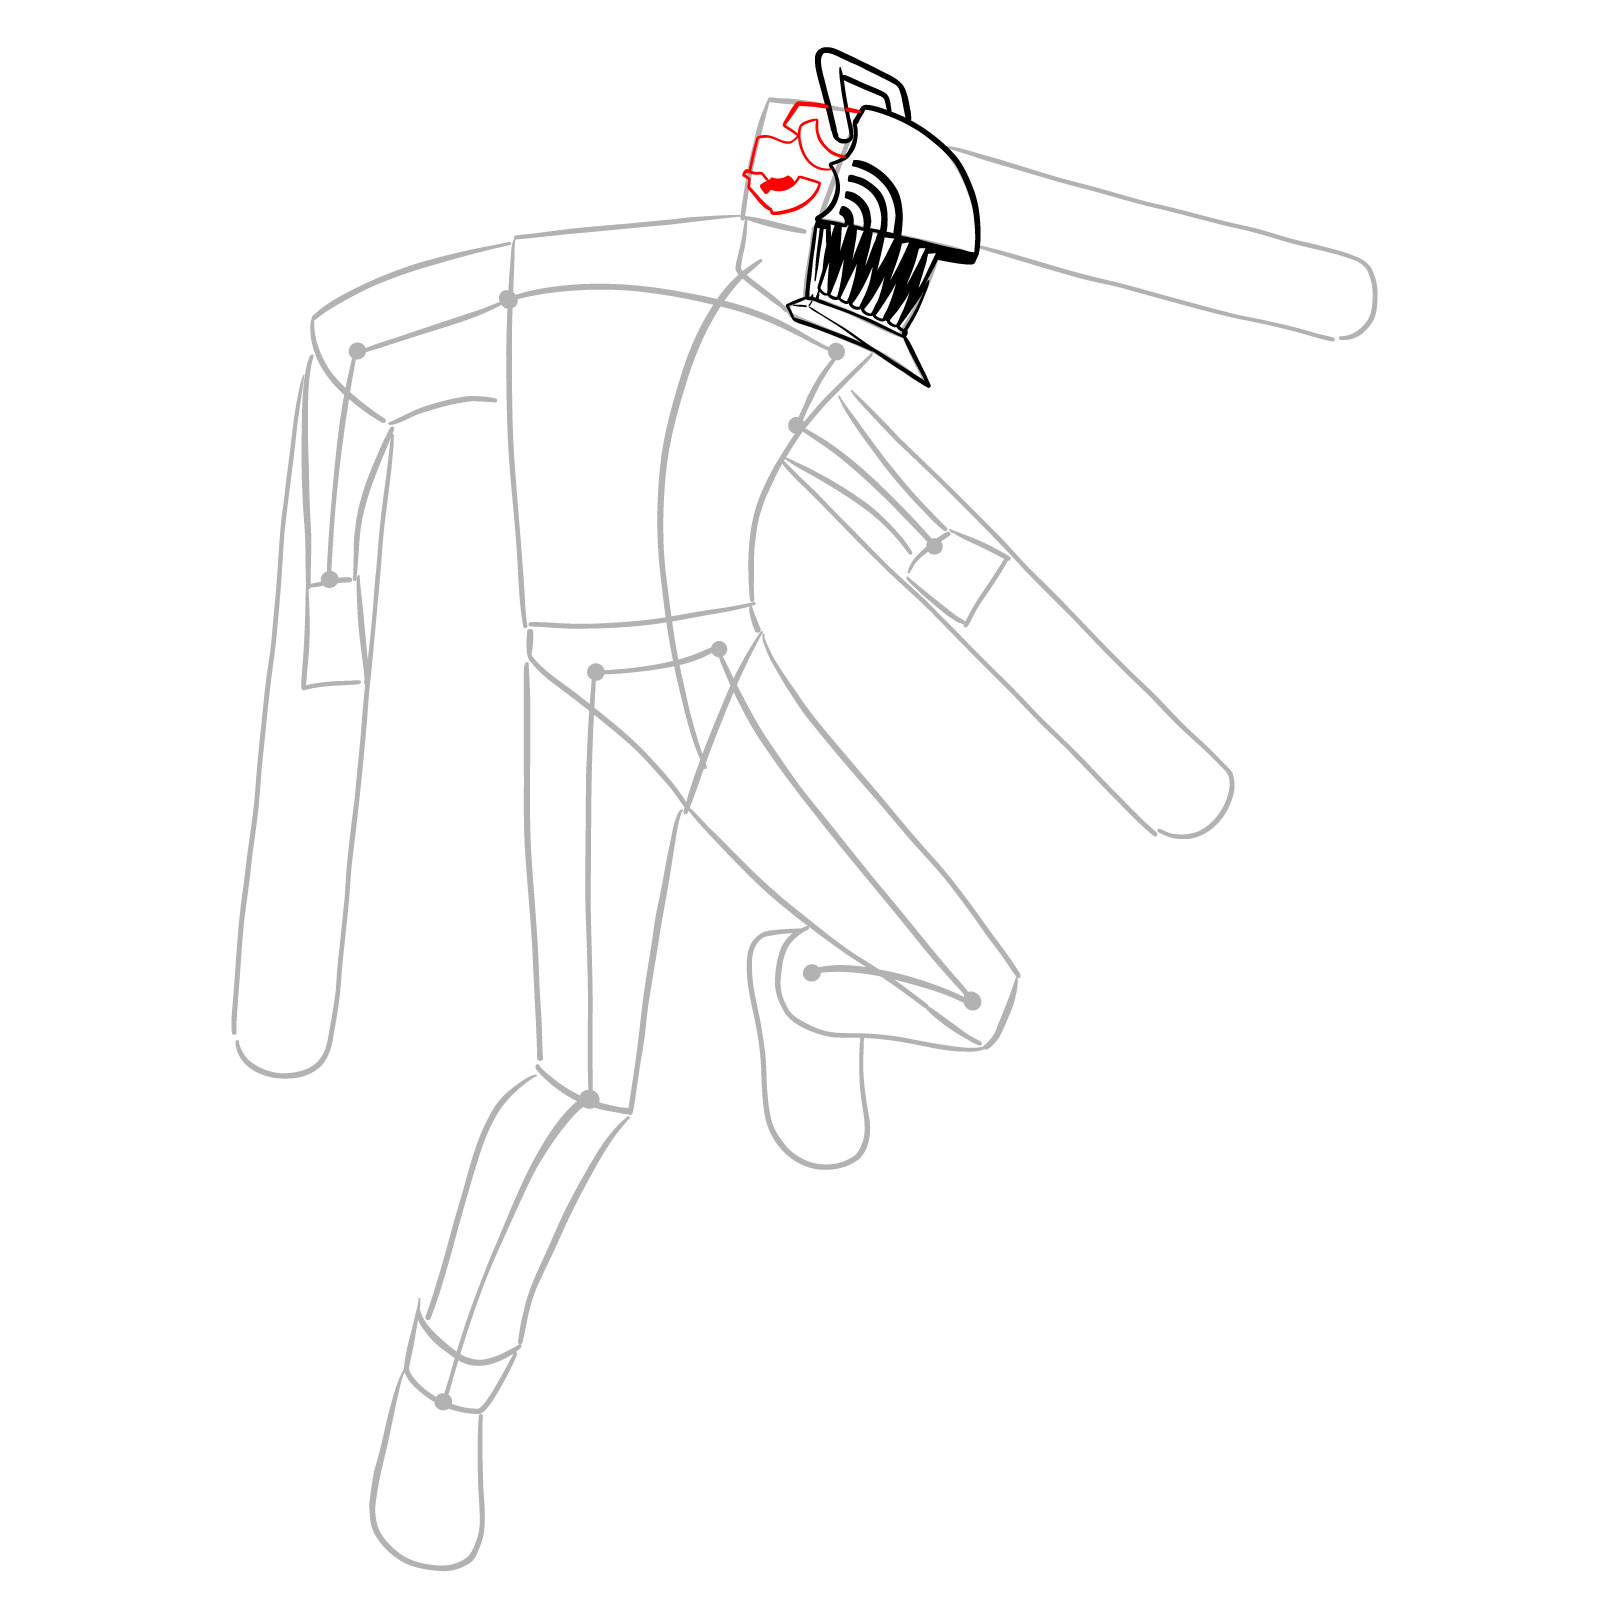
Step 07 – Fill in the space between the teeth with black to emphasize the depth. Sketch the chin below the teeth to round off the lower part of the head, giving it a finished look
Finalizing the chainsaw teeth and adding the chin detail
Step 08 – Let’s start detailing the back part of the head. Add lines to represent different parts of the chainsaw, further define the head’s structure, ensuring that these details complement the overall head shape and the previously drawn chainsaw elements
Detailing the back portion of Chainsaw Man’s head
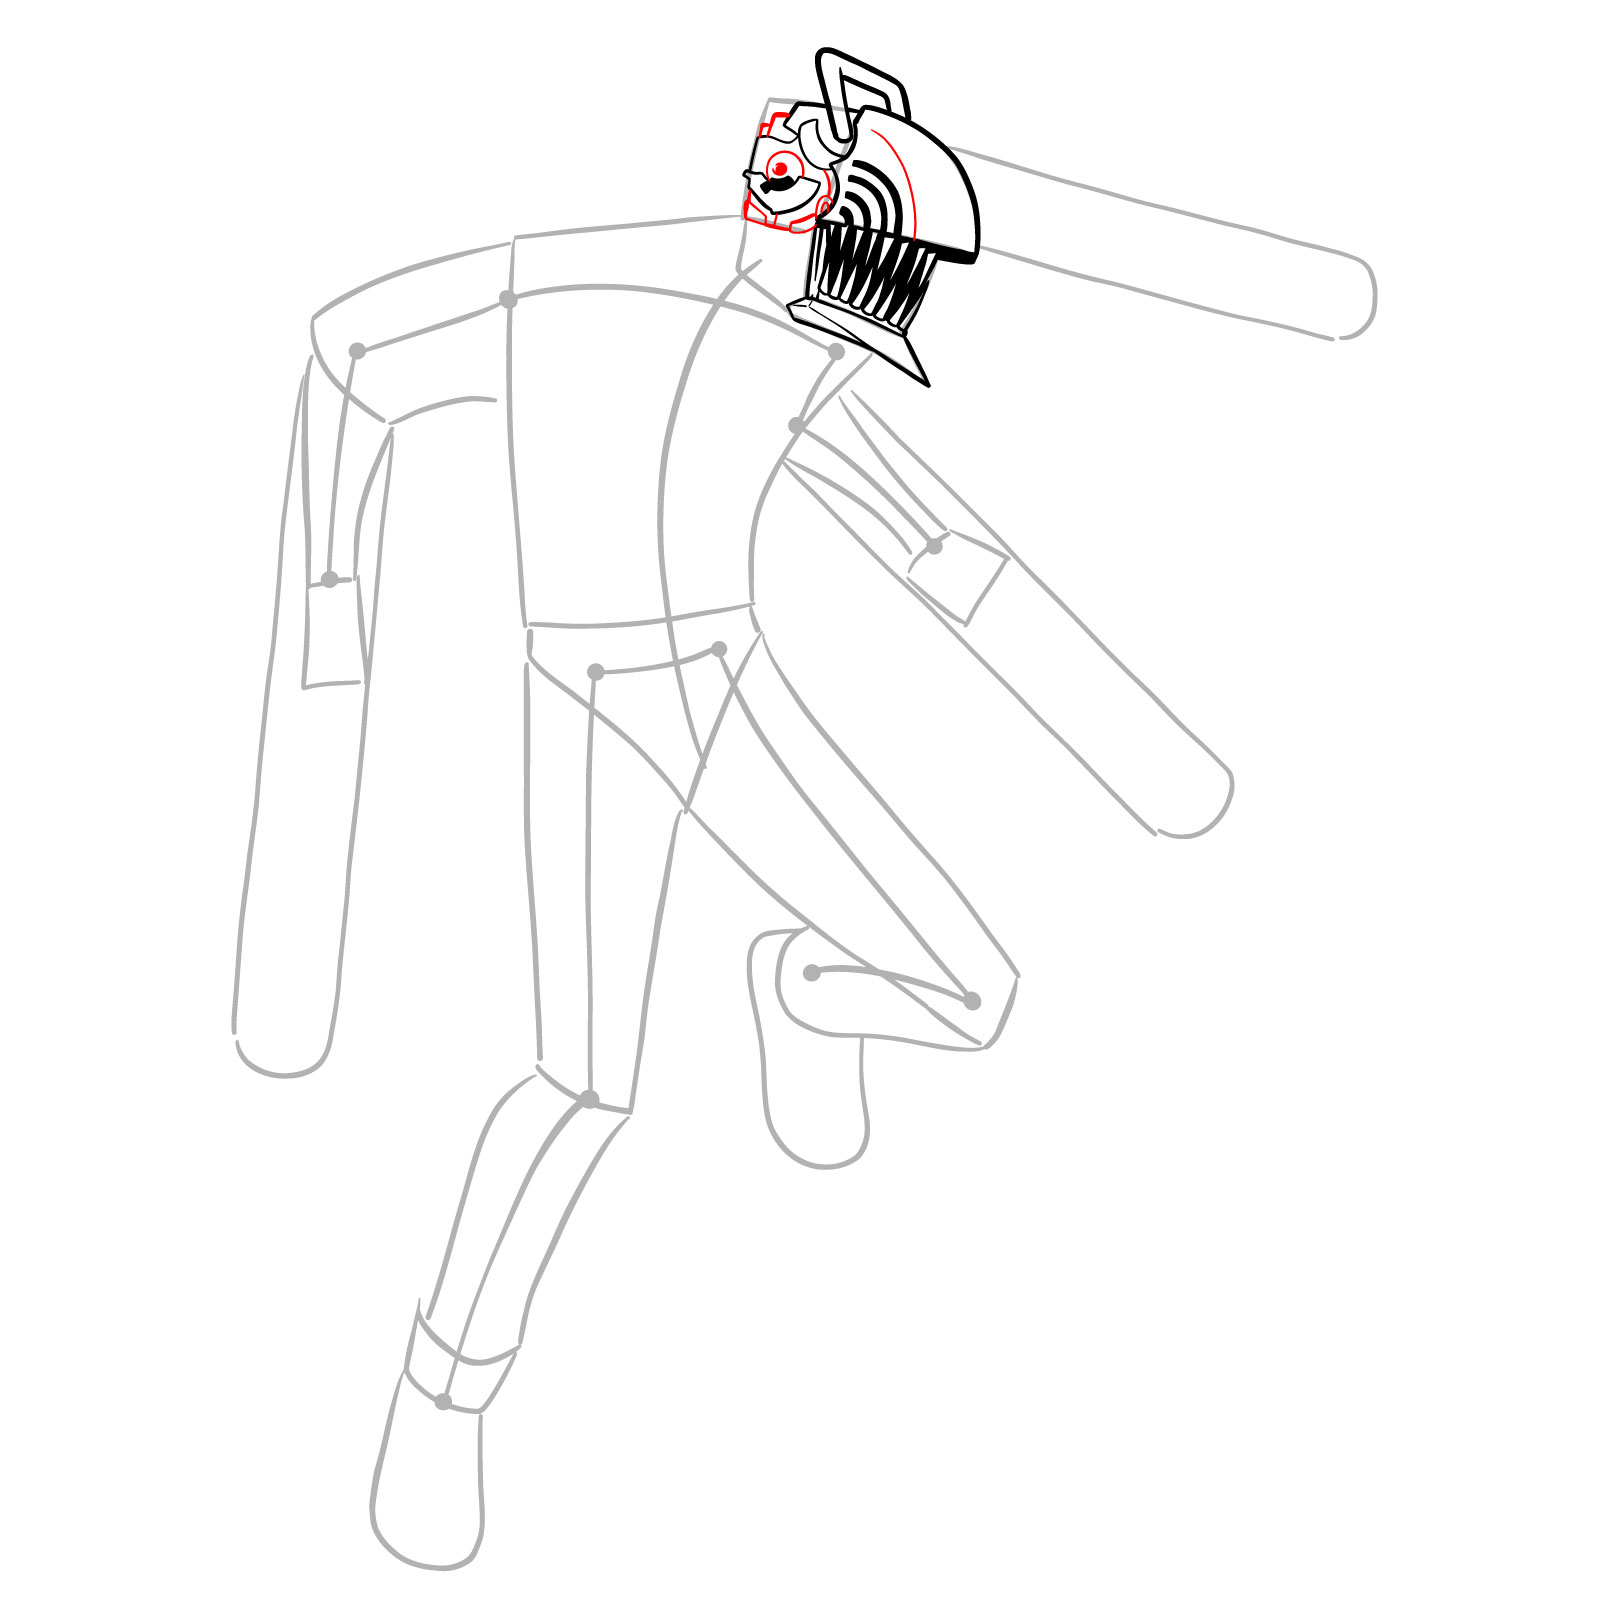
Step 09 – In this step, we will continue adding details to the upper part of the head. Sketch the helmet-like lines that follow the contour of the head, outlining the structure and enhancing the chainsaw motif
Enhancing the upper head details of Chainsaw Man
Step 10 – Now let’s sketch the back part of the head and the cheekbone. Outline the rear handle, add definition to the side of the face, and indicate the cheekbone with a curved line to emphasize the facial structure
Detailing the back of the head and the cheekbone of Chainsaw Man
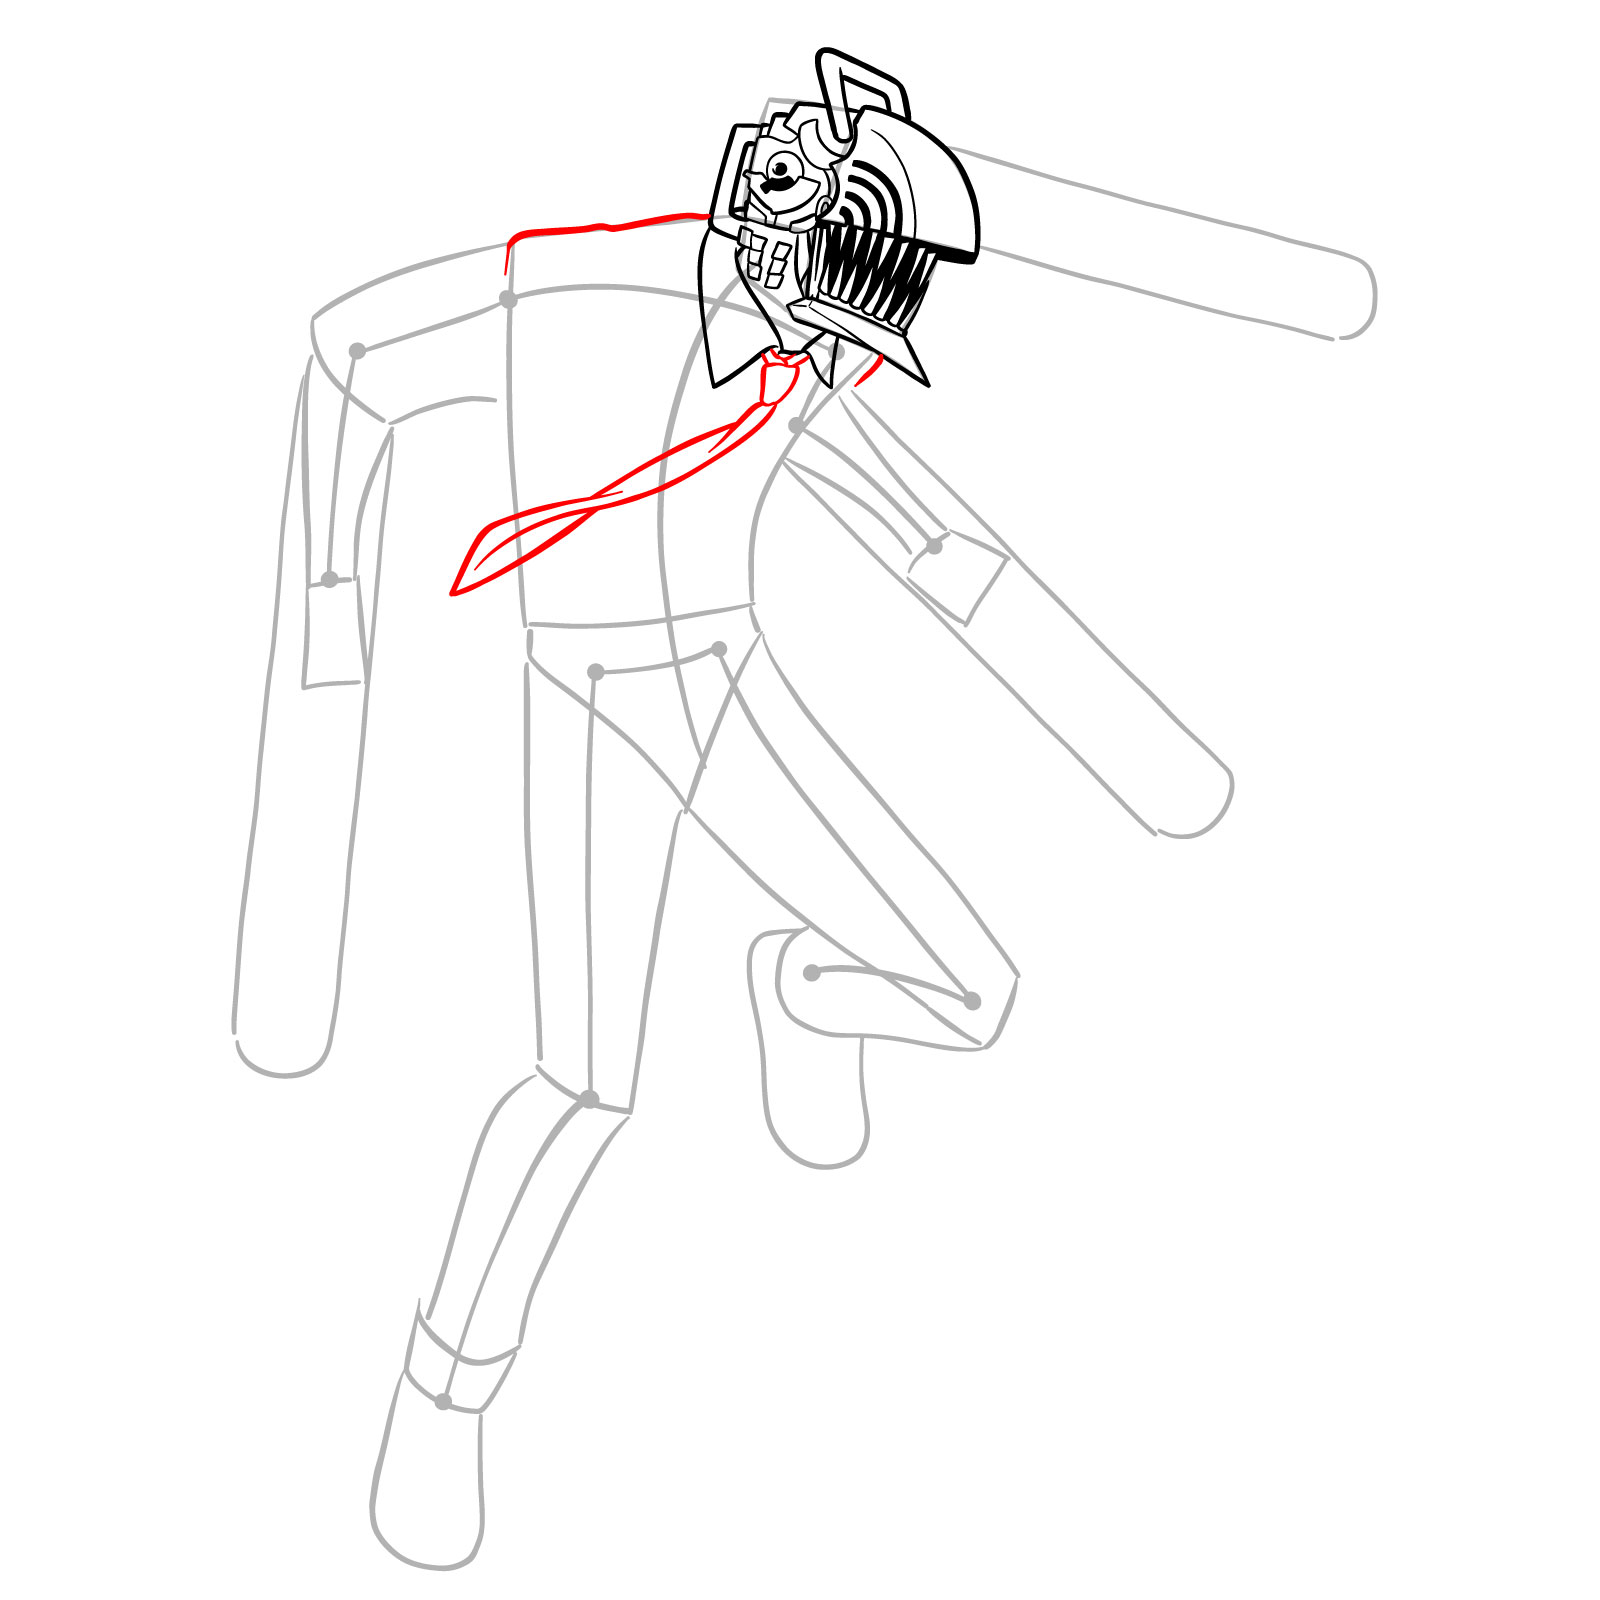
Step 11 – Moving down to the body – sketch his shirt collar. Add the collar of the shirt with a V-shape at the base of the neck, ensuring it looks natural and proportionate to the head
Adding the neck and shirt collar
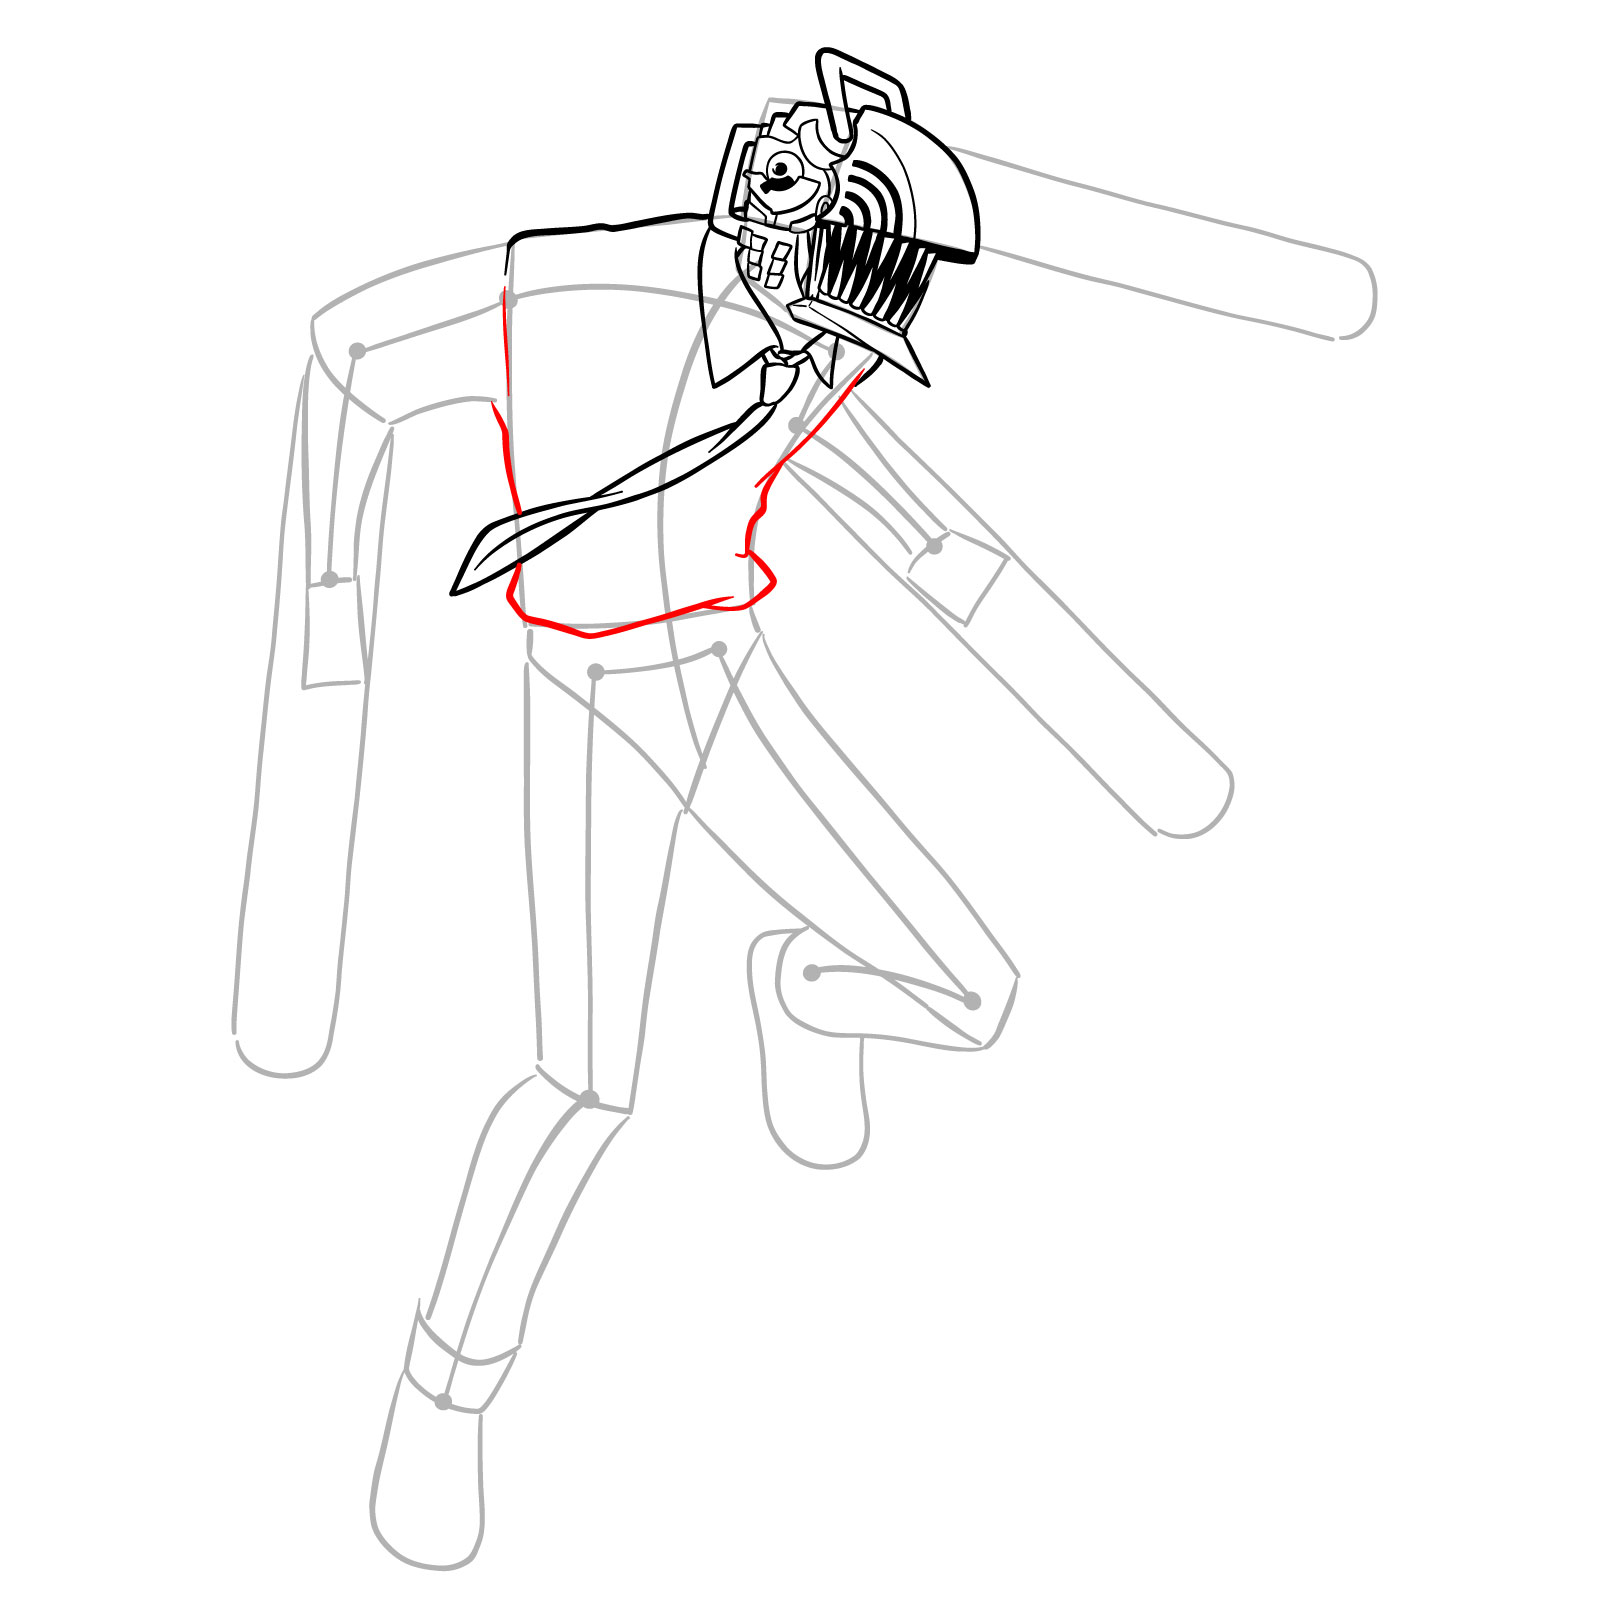
Step 12 – In this final step, focus on the shoulders and tie. Add broad lines to form the shoulders, ensuring they align with the body’s posture. Draw the tie in the center of the collar, waving to the side, completing the character’s attire
Sketching Chainsaw Man’s shoulders and adding the tie
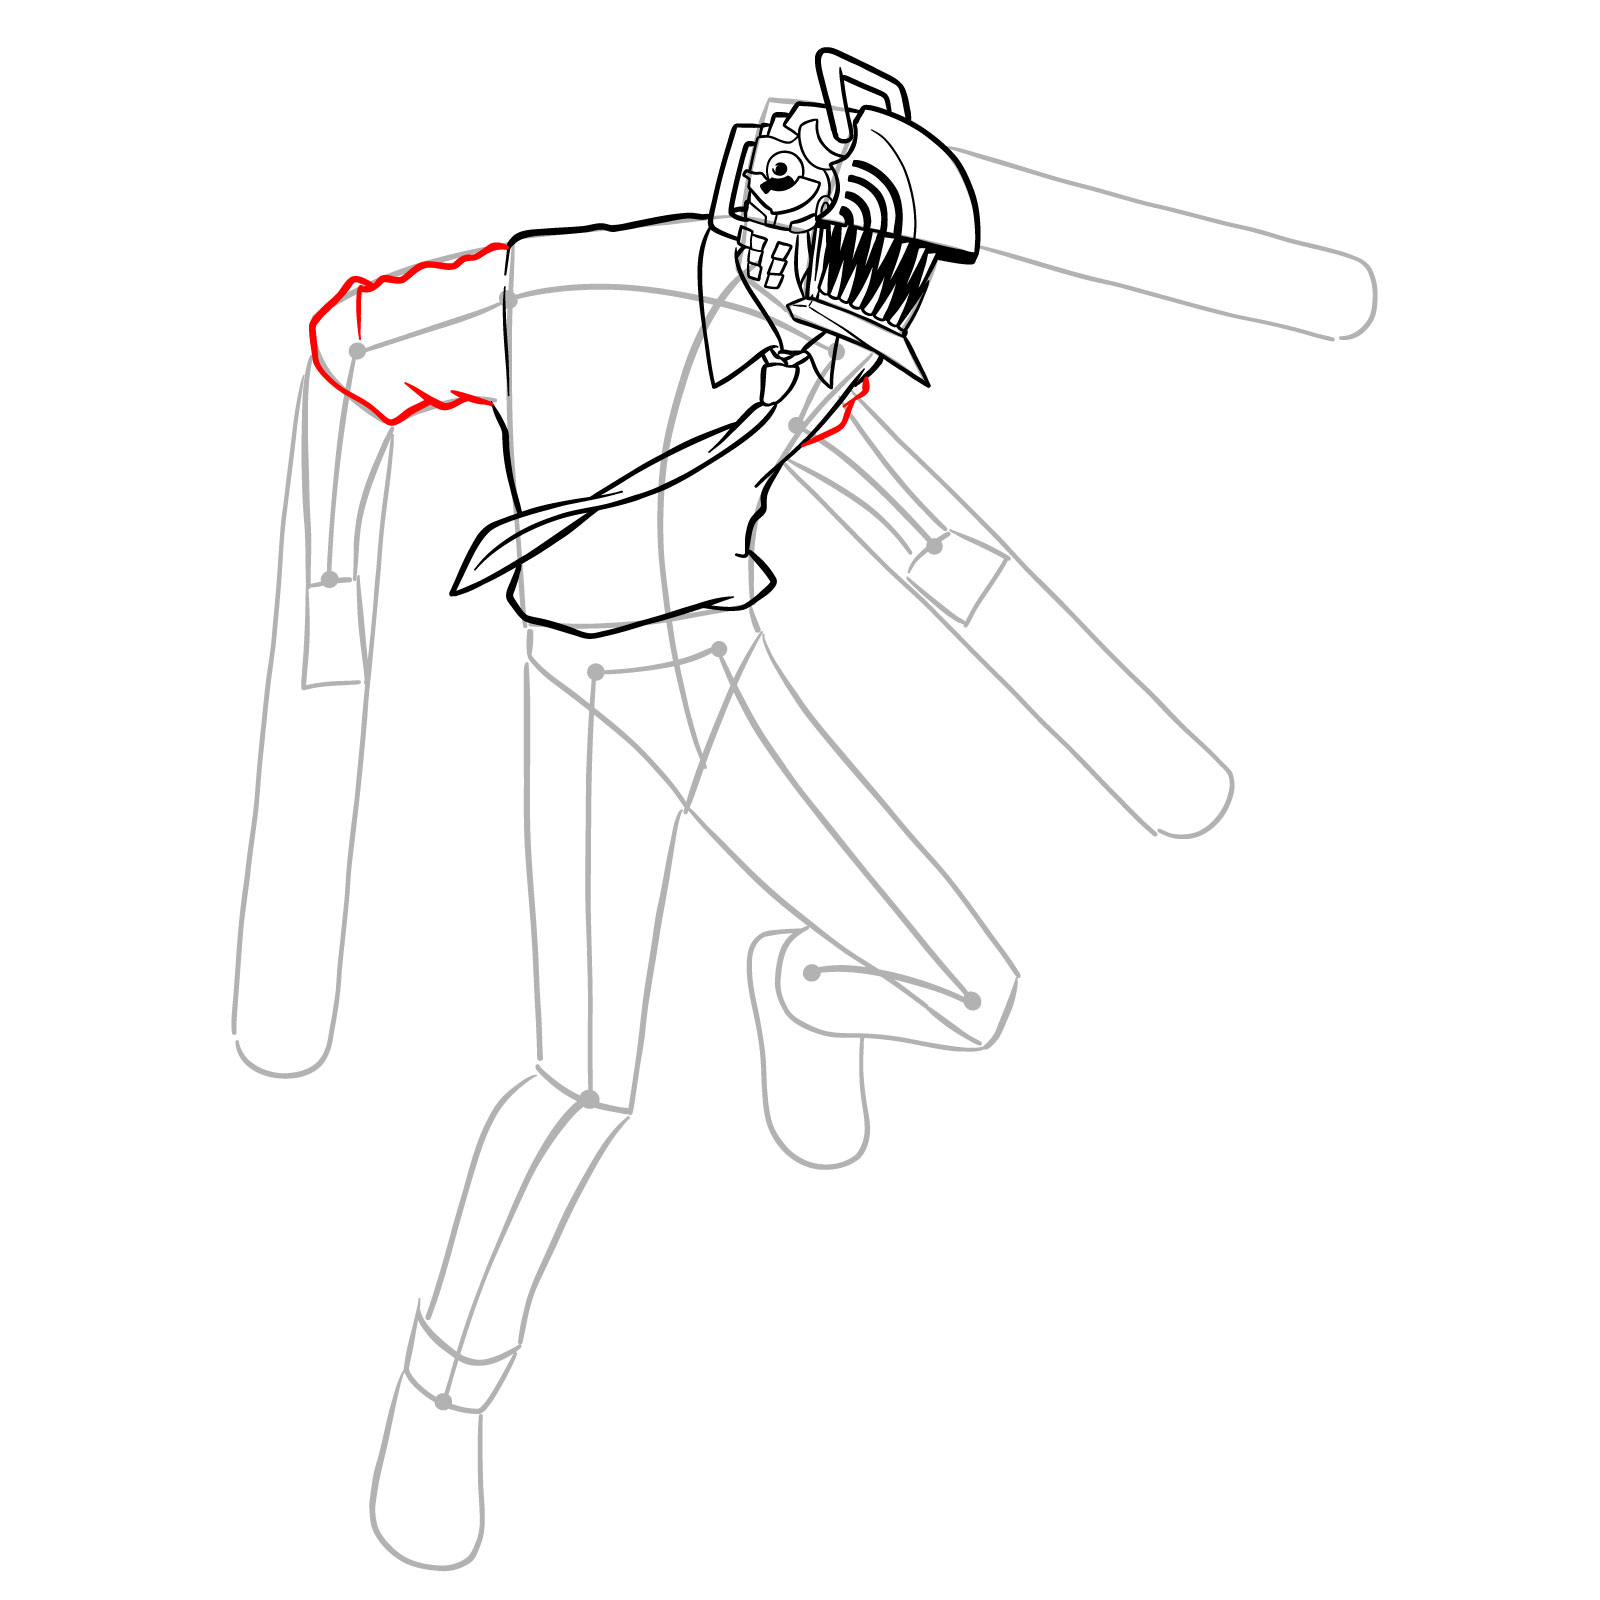
Step 13 – For this step, outline the torso by sketching the shirt body. Draw the contours of the shirt, ensuring it drapes naturally over the torso, following the movement and form suggested by the underlying figure
Outlining the torso and shirt of Chainsaw Man
Step 14 – Now, let’s add the sleeves to the shirt. Sketch the sleeves hanging from the shoulder line, adding folds to suggest the fabric’s movement and the character’s dynamic pose
Sketching the shirt sleeves for Chainsaw Man
Step 15 – In this step, we add the hands. Since chainsaws extend from the middle of the hands, sketch only the three visible fingers on each hand, positioned as if the accumulate all the anger of the transformation
Adding the hands with visible fingers to Chainsaw Man
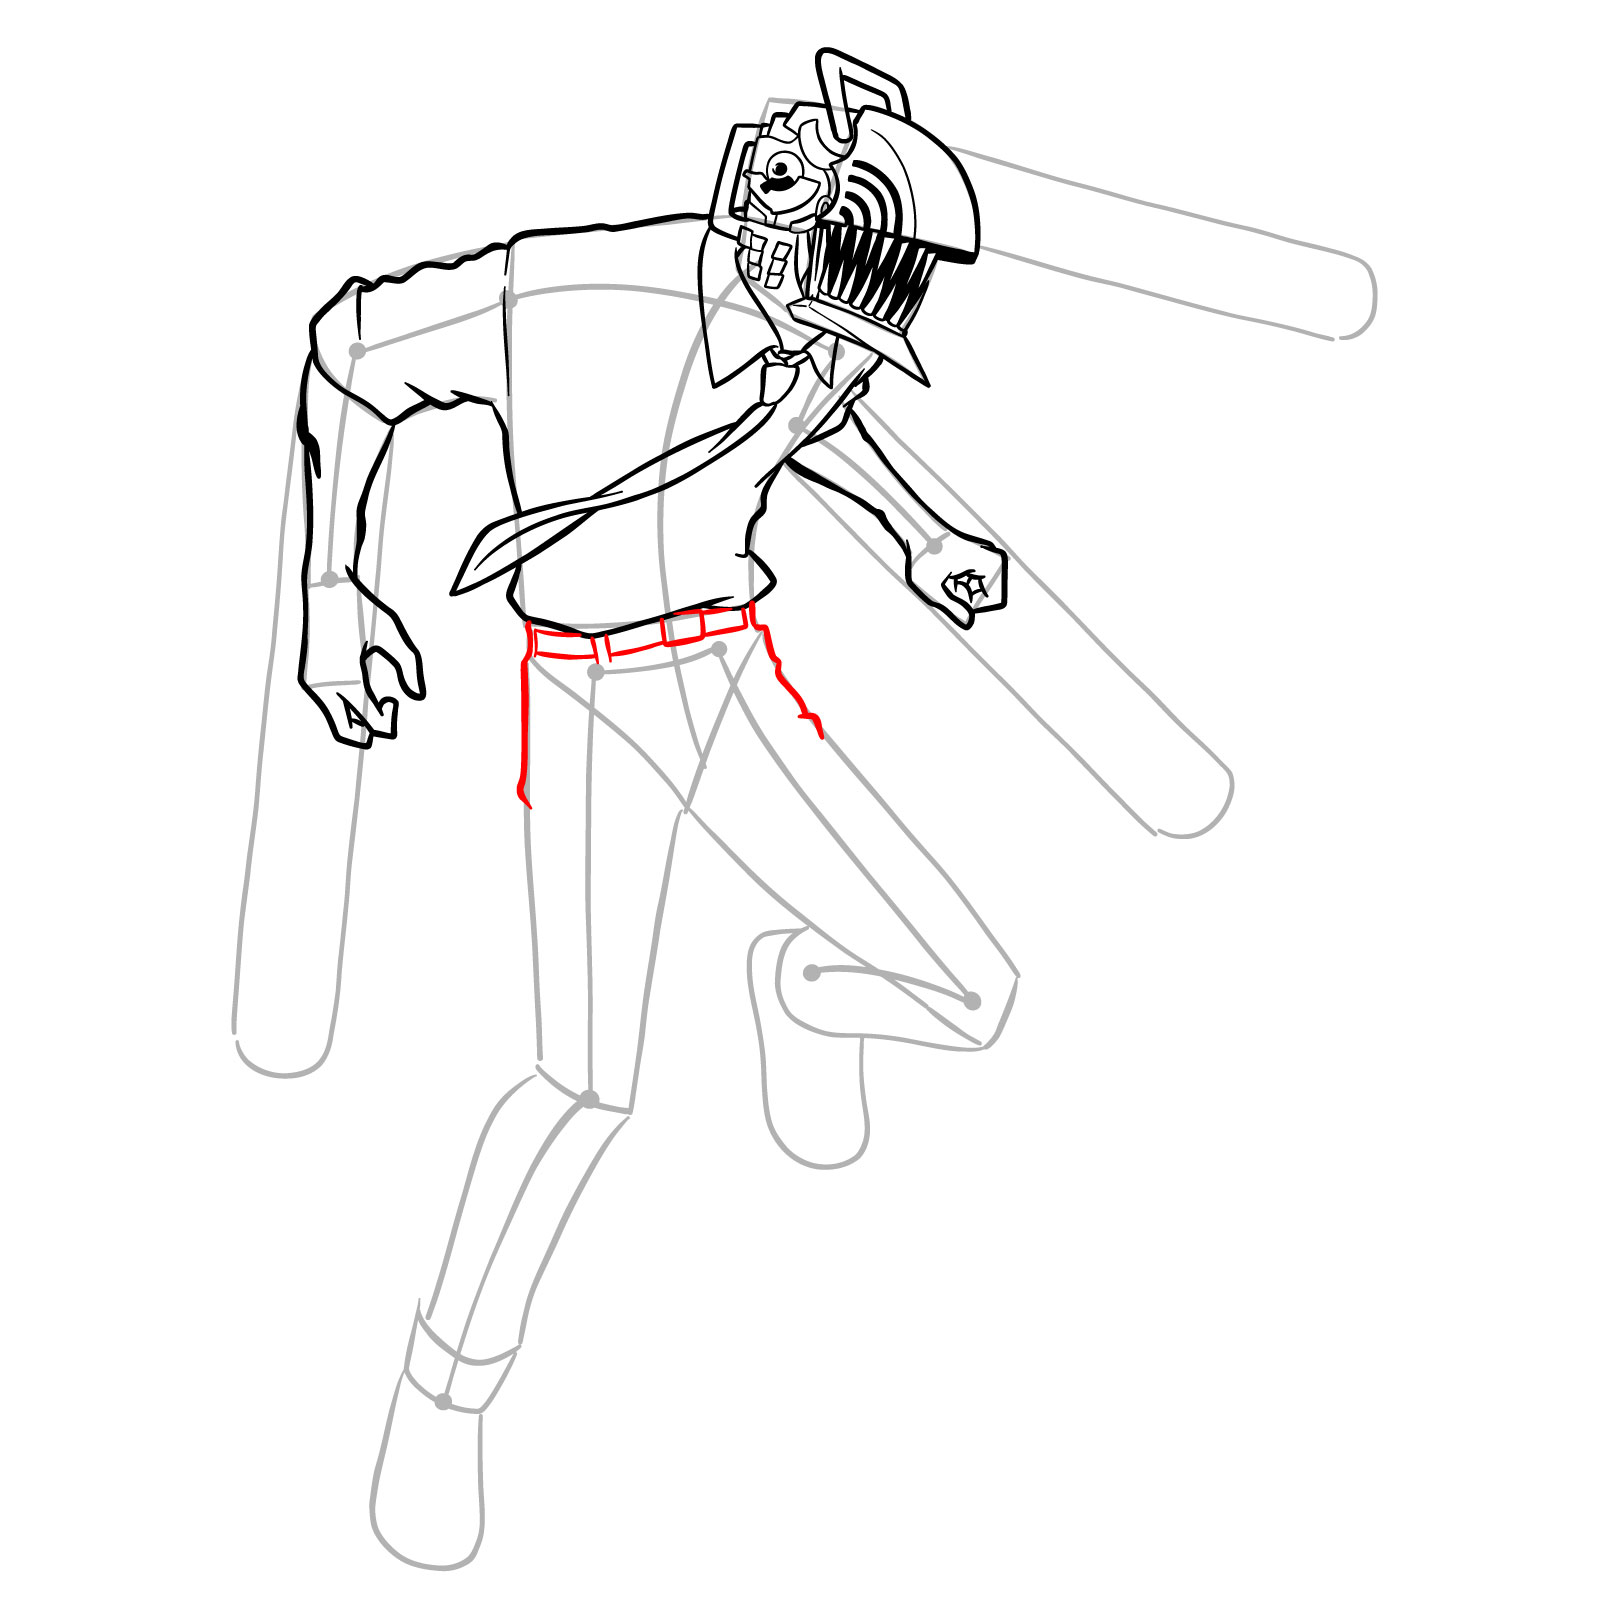
Step 16 – We will leave small details to the final part of the guide. For now, let’s move to the pants and add the belt and the upper part of the pants
Adding the belt and detailing the upper pants of Chainsaw Man
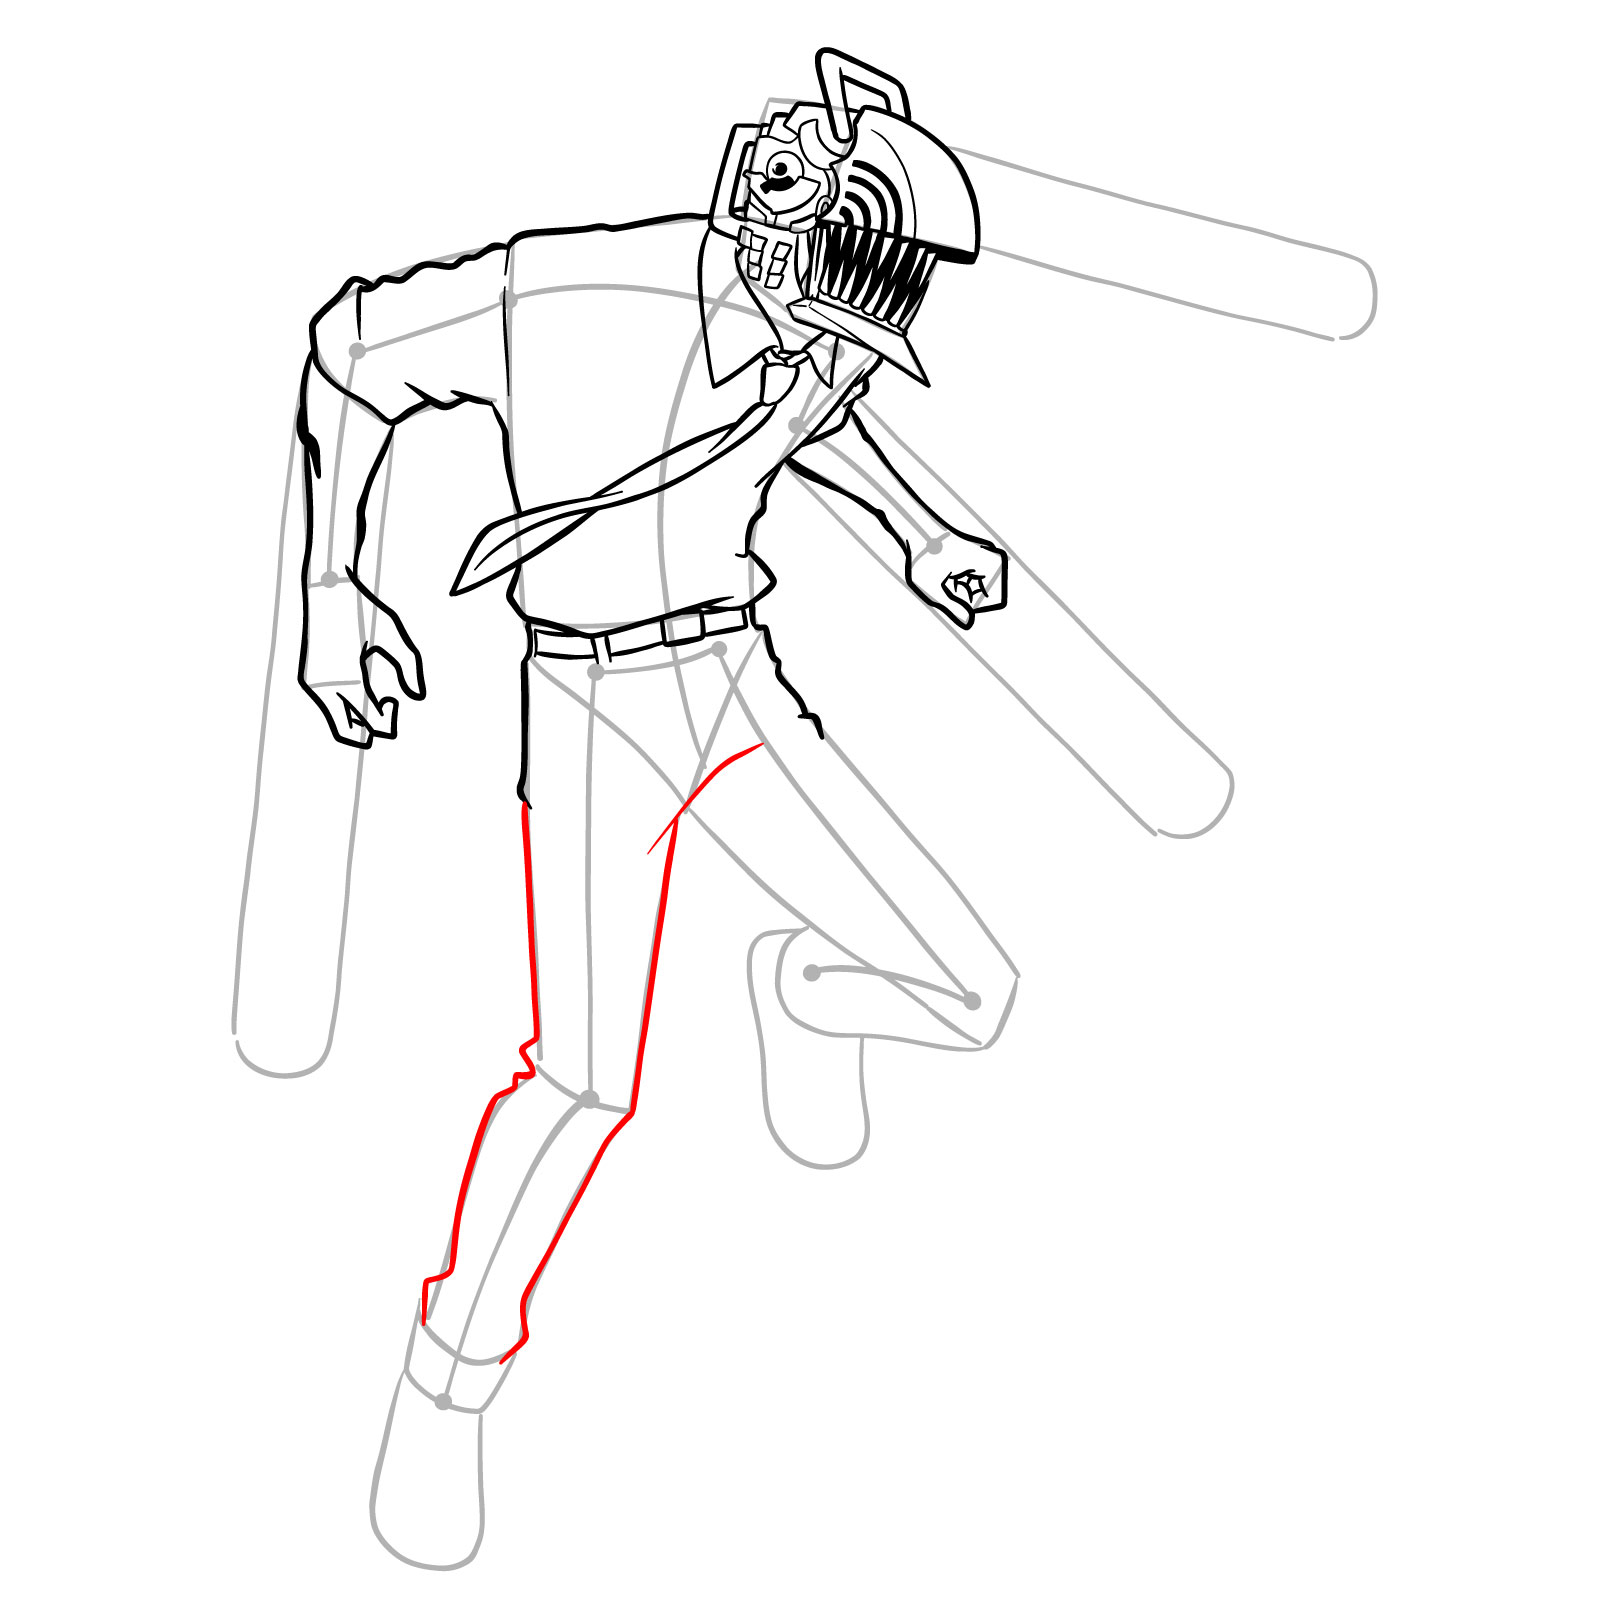
Step 17 – In this step, we will sketch the right leg. Outline the shape of the leg from the lines we drew in step 16 down to the ankle, adding creases to represent the fabric of the pants, and ensure the leg has a natural stance in line with the body’s posture
Sketching the details of Chainsaw Man’s right leg
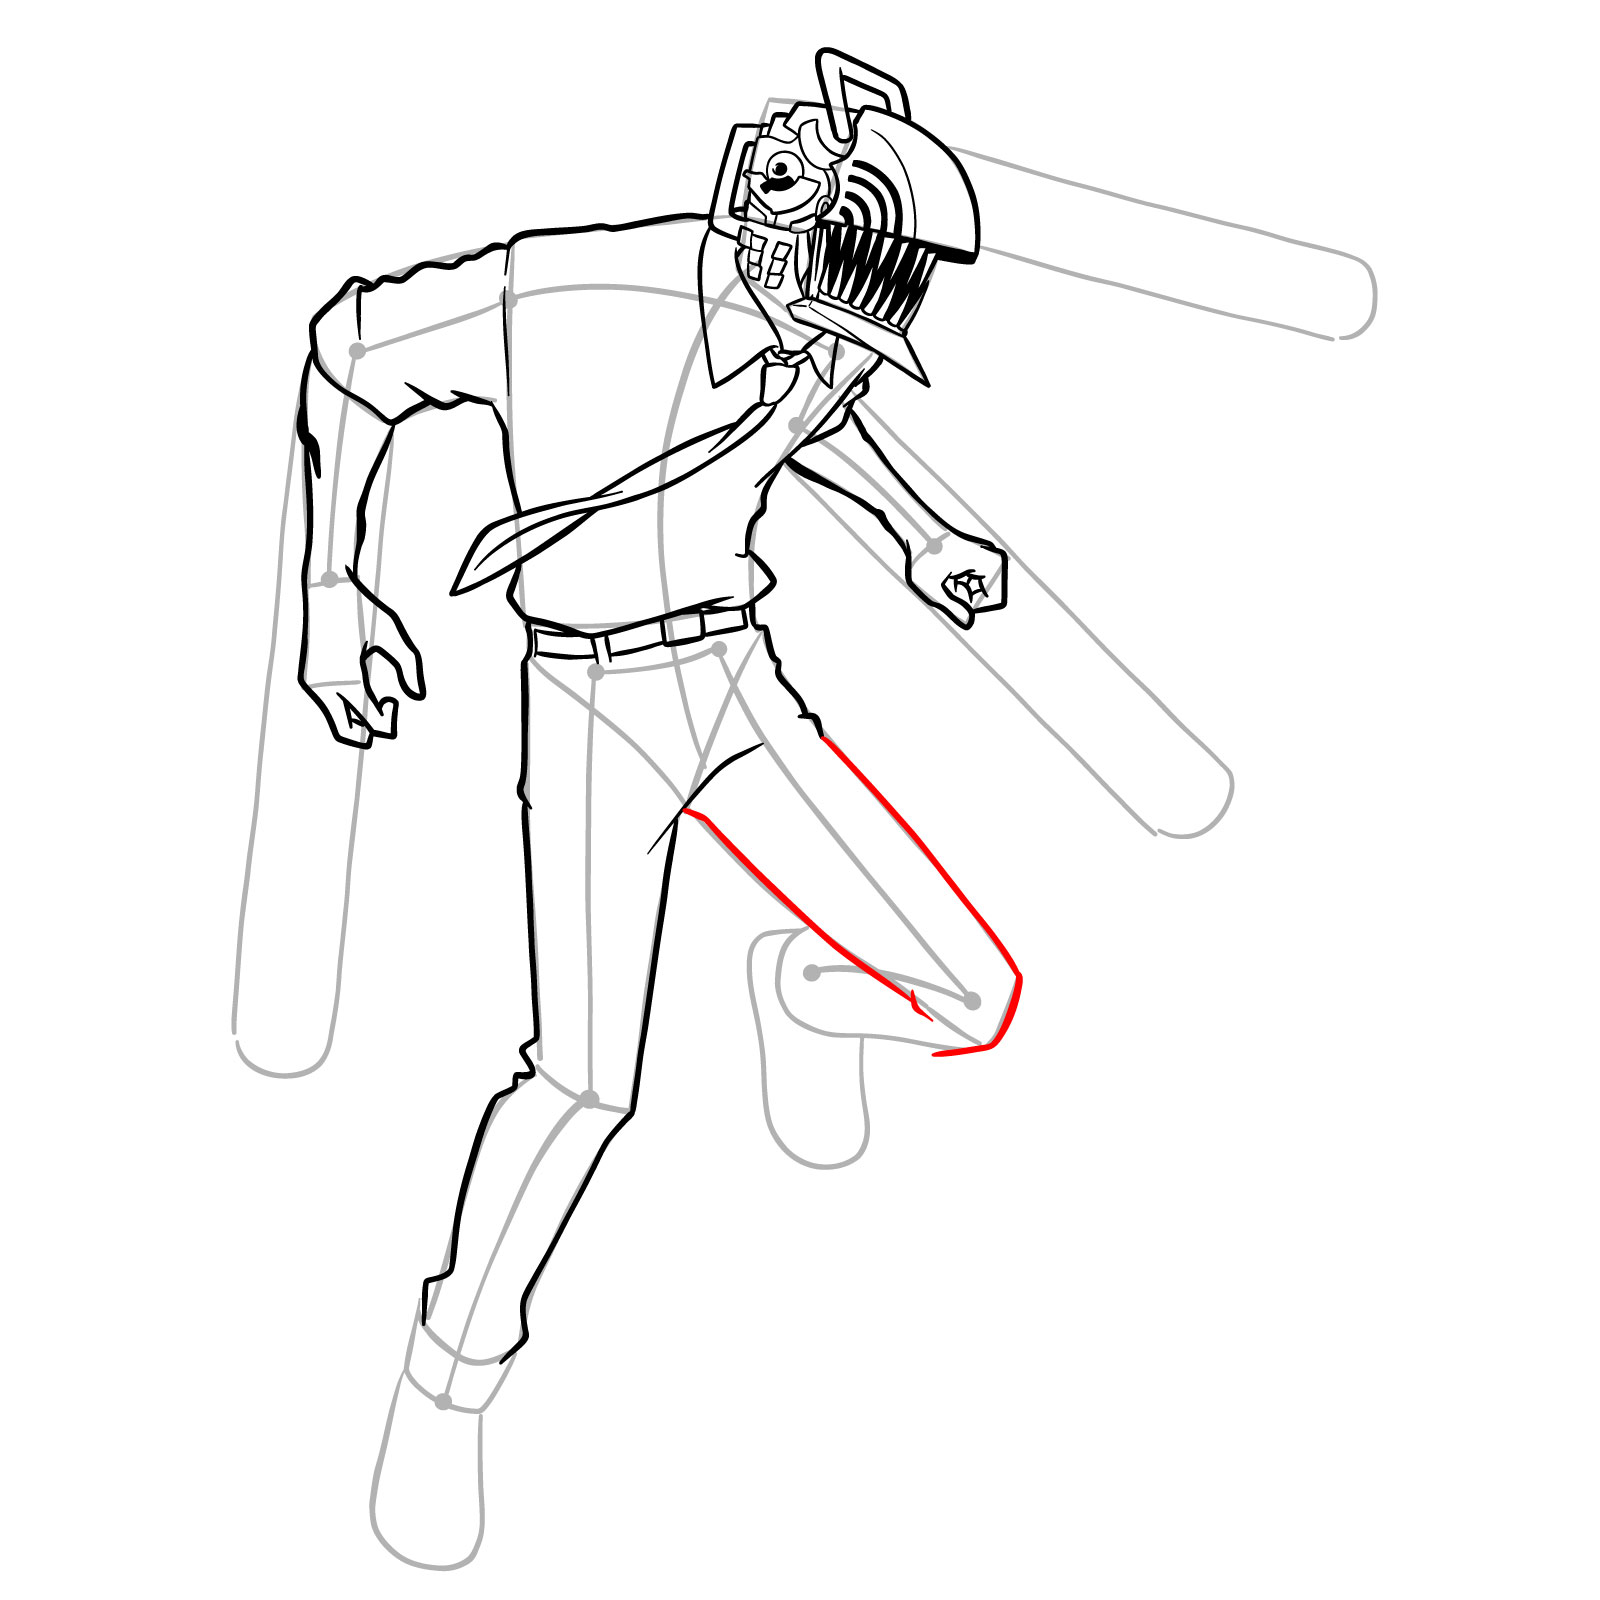
Step 18 – Now, let’s outline the left leg up to the knee. Draw the thigh and knee with a bent shape to capture the movement, adding the folds in the pants to suggest the leg’s bending and fabric tension
Outlining the upper part of Chainsaw Man’s left leg
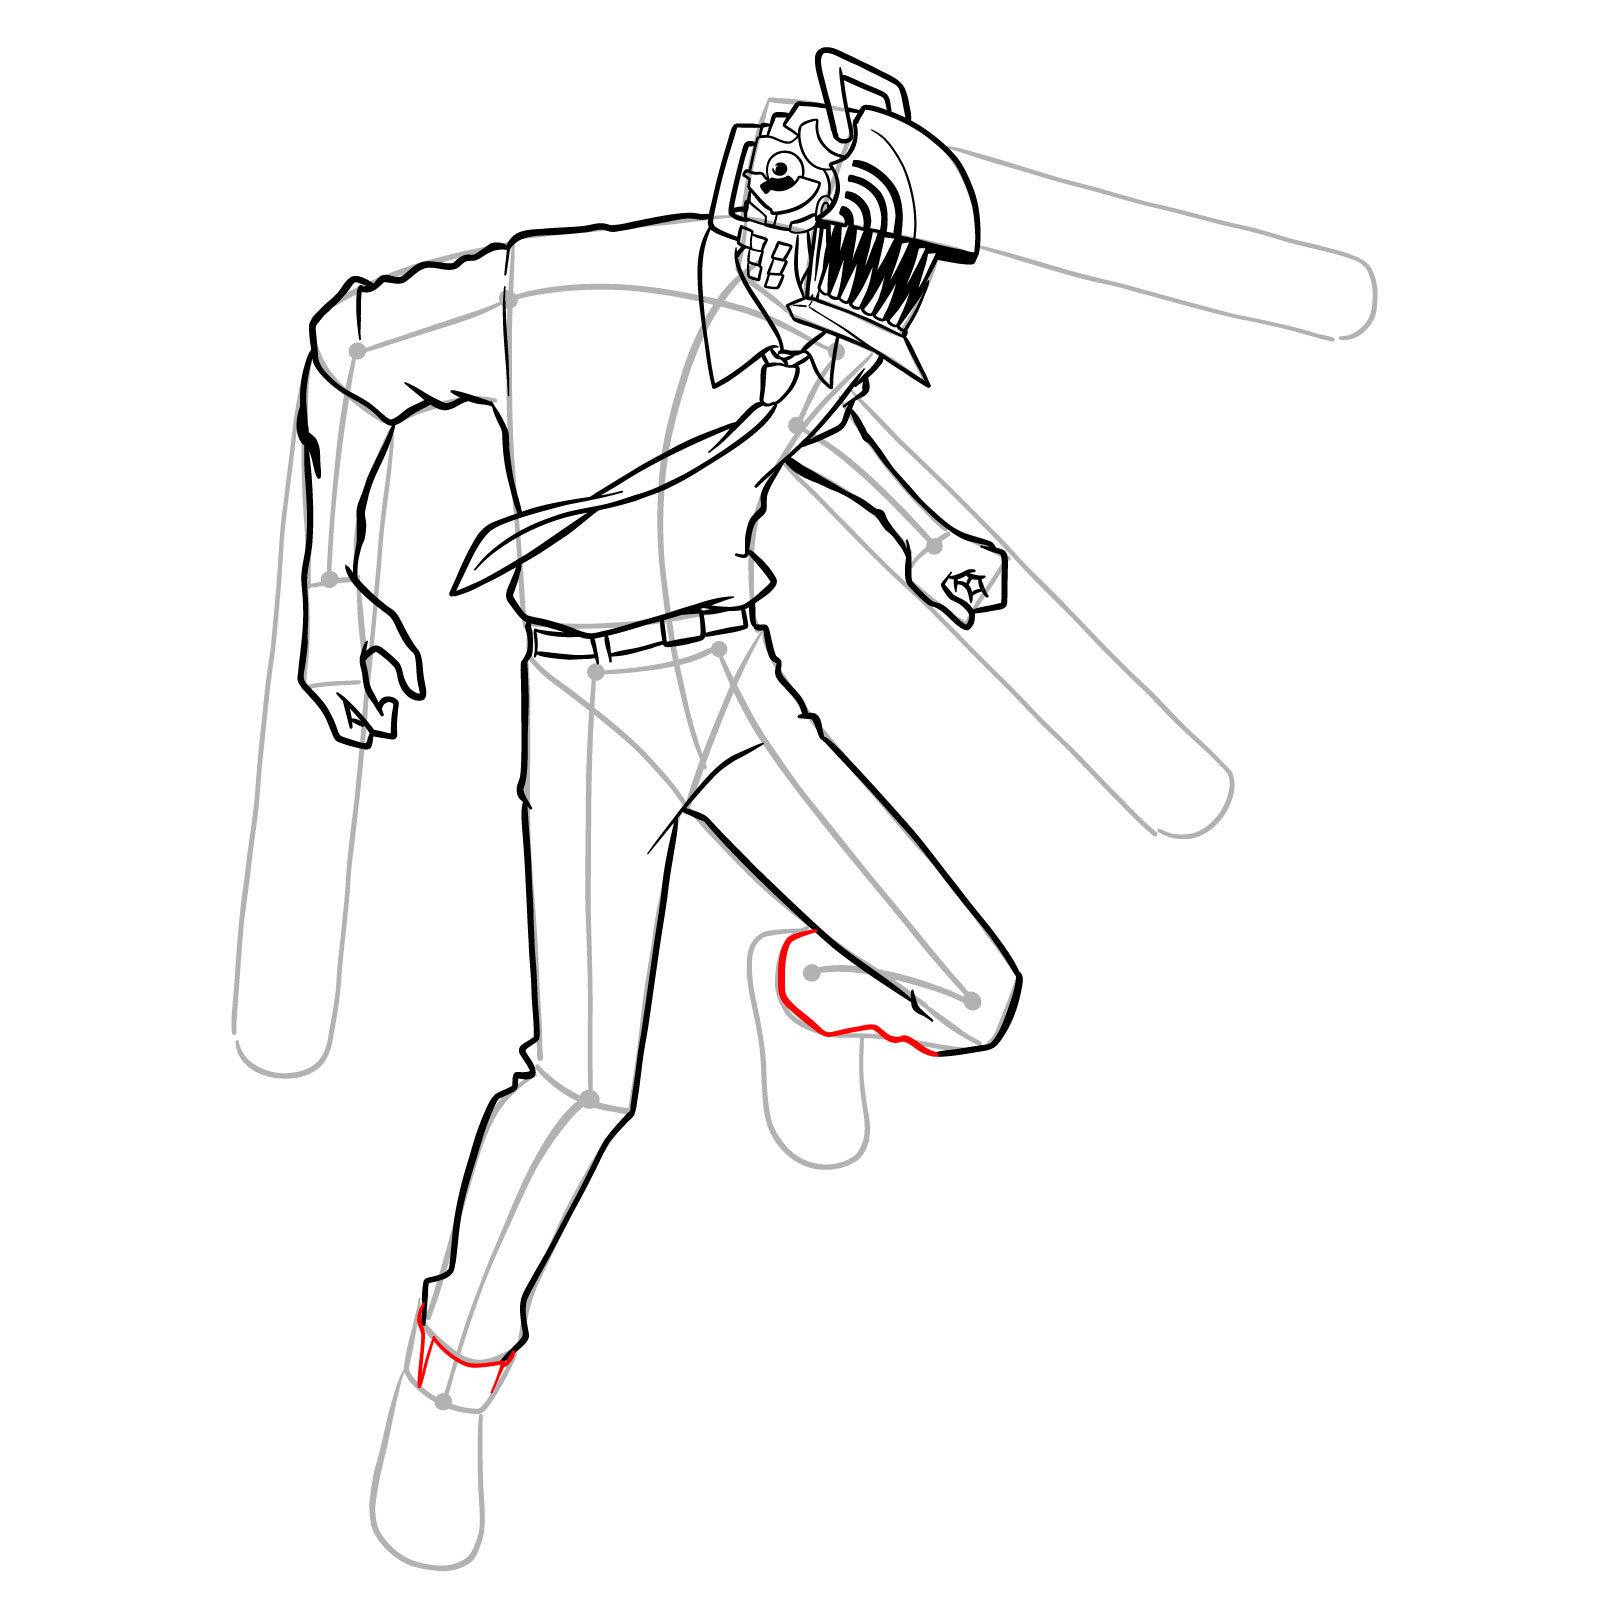
Step 19 – Outline the remaining part of the pants on both legs. Continue the lines down from the knee to the ankle for the left leg. For the right one, add the upper part of his sneaker
Completing the outline of Chainsaw Man’s pants
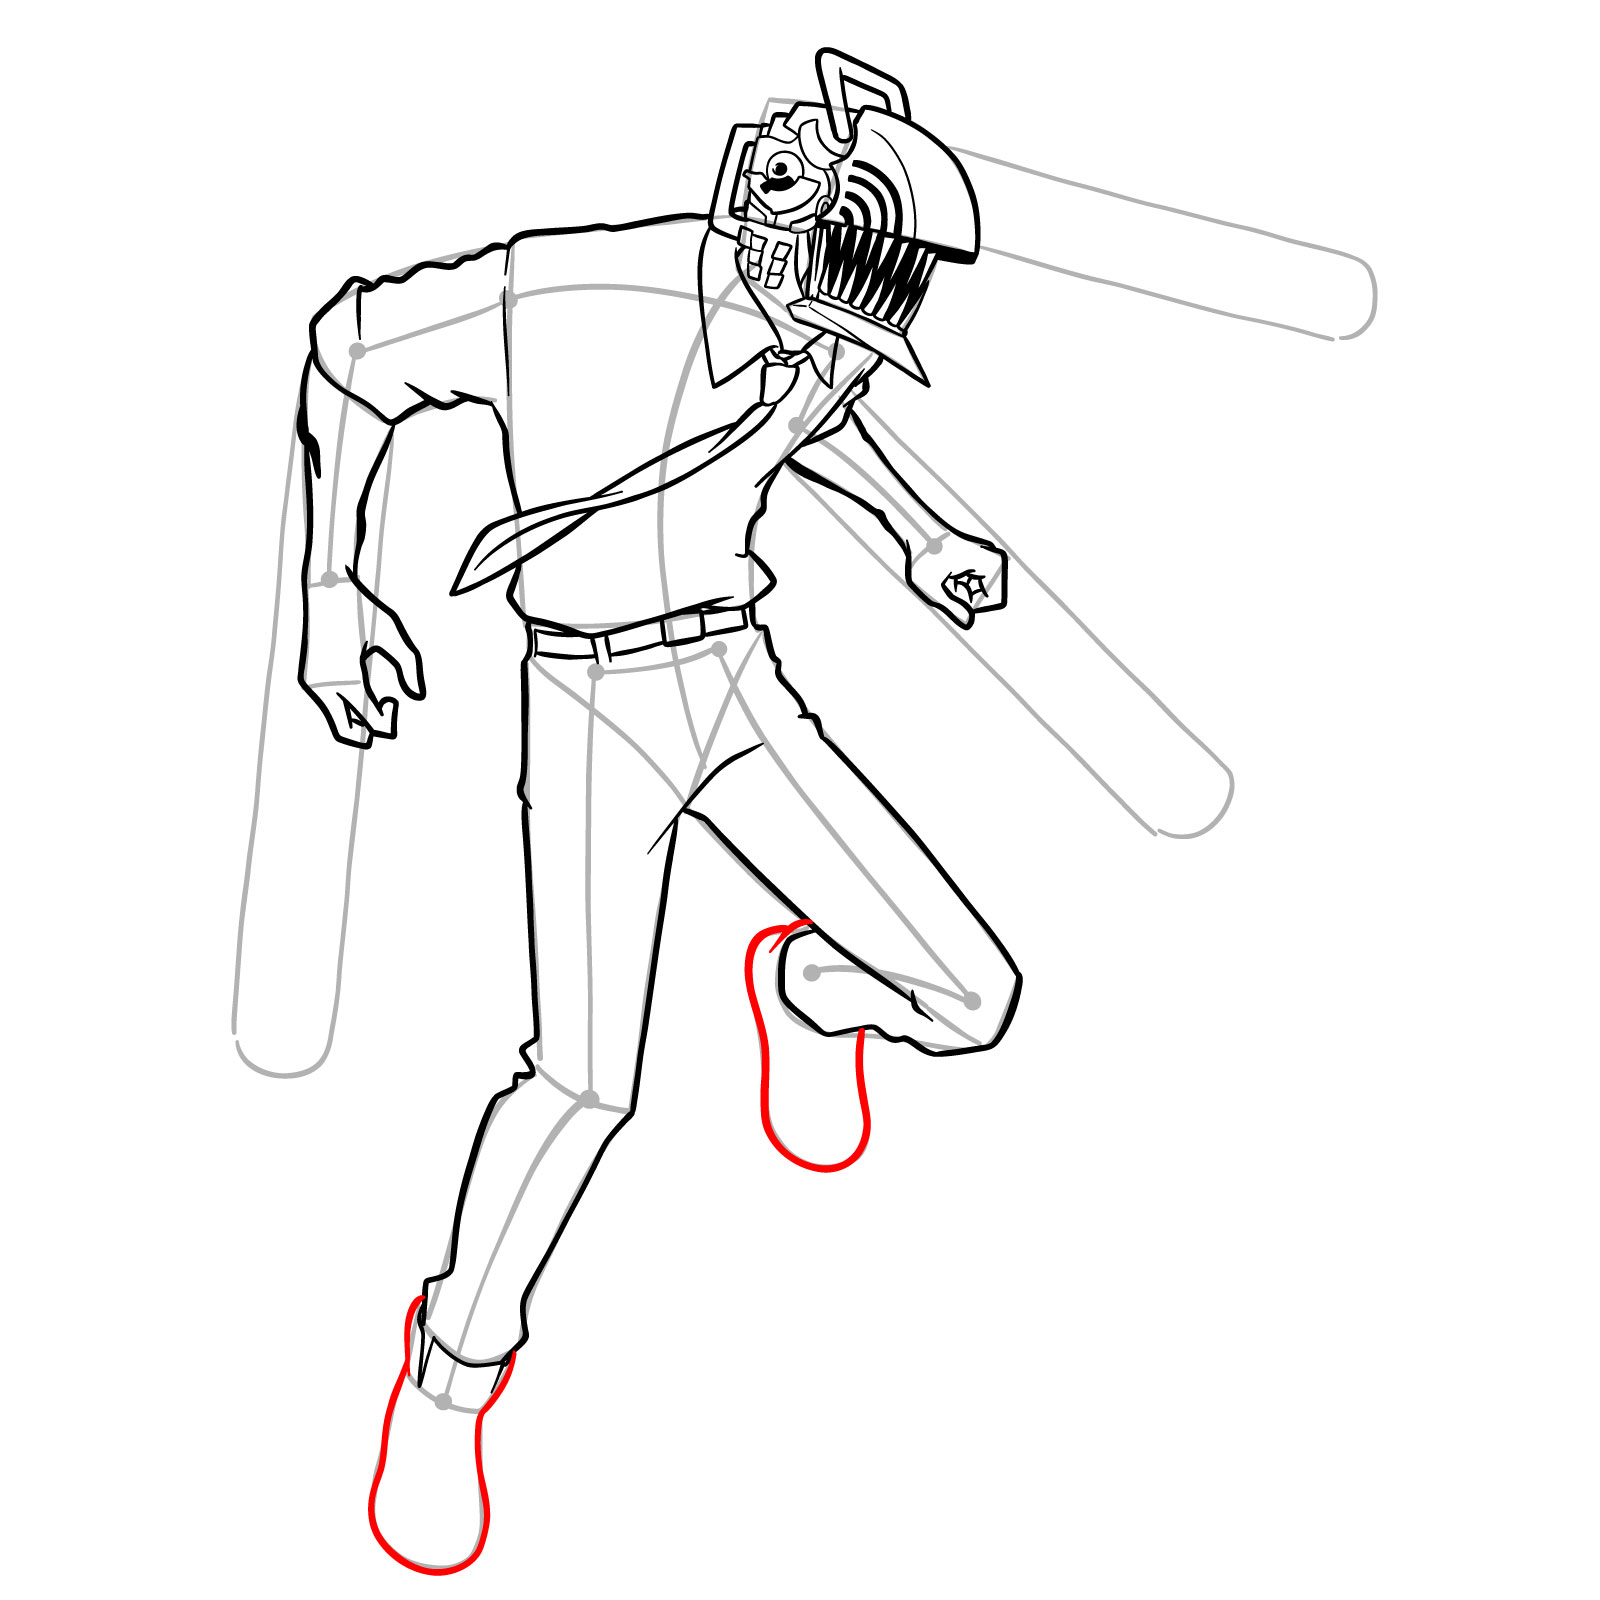
Step 20 – Now, let’s outline the sneakers. Draw the base shape of the shoes, ensuring they look proportionate to the legs
Outlining the sneakers of Chainsaw Man
Step 21 – In this step, we focus on the sneakers’ patterns
Adding detailed patterns to Chainsaw Man’s sneakers
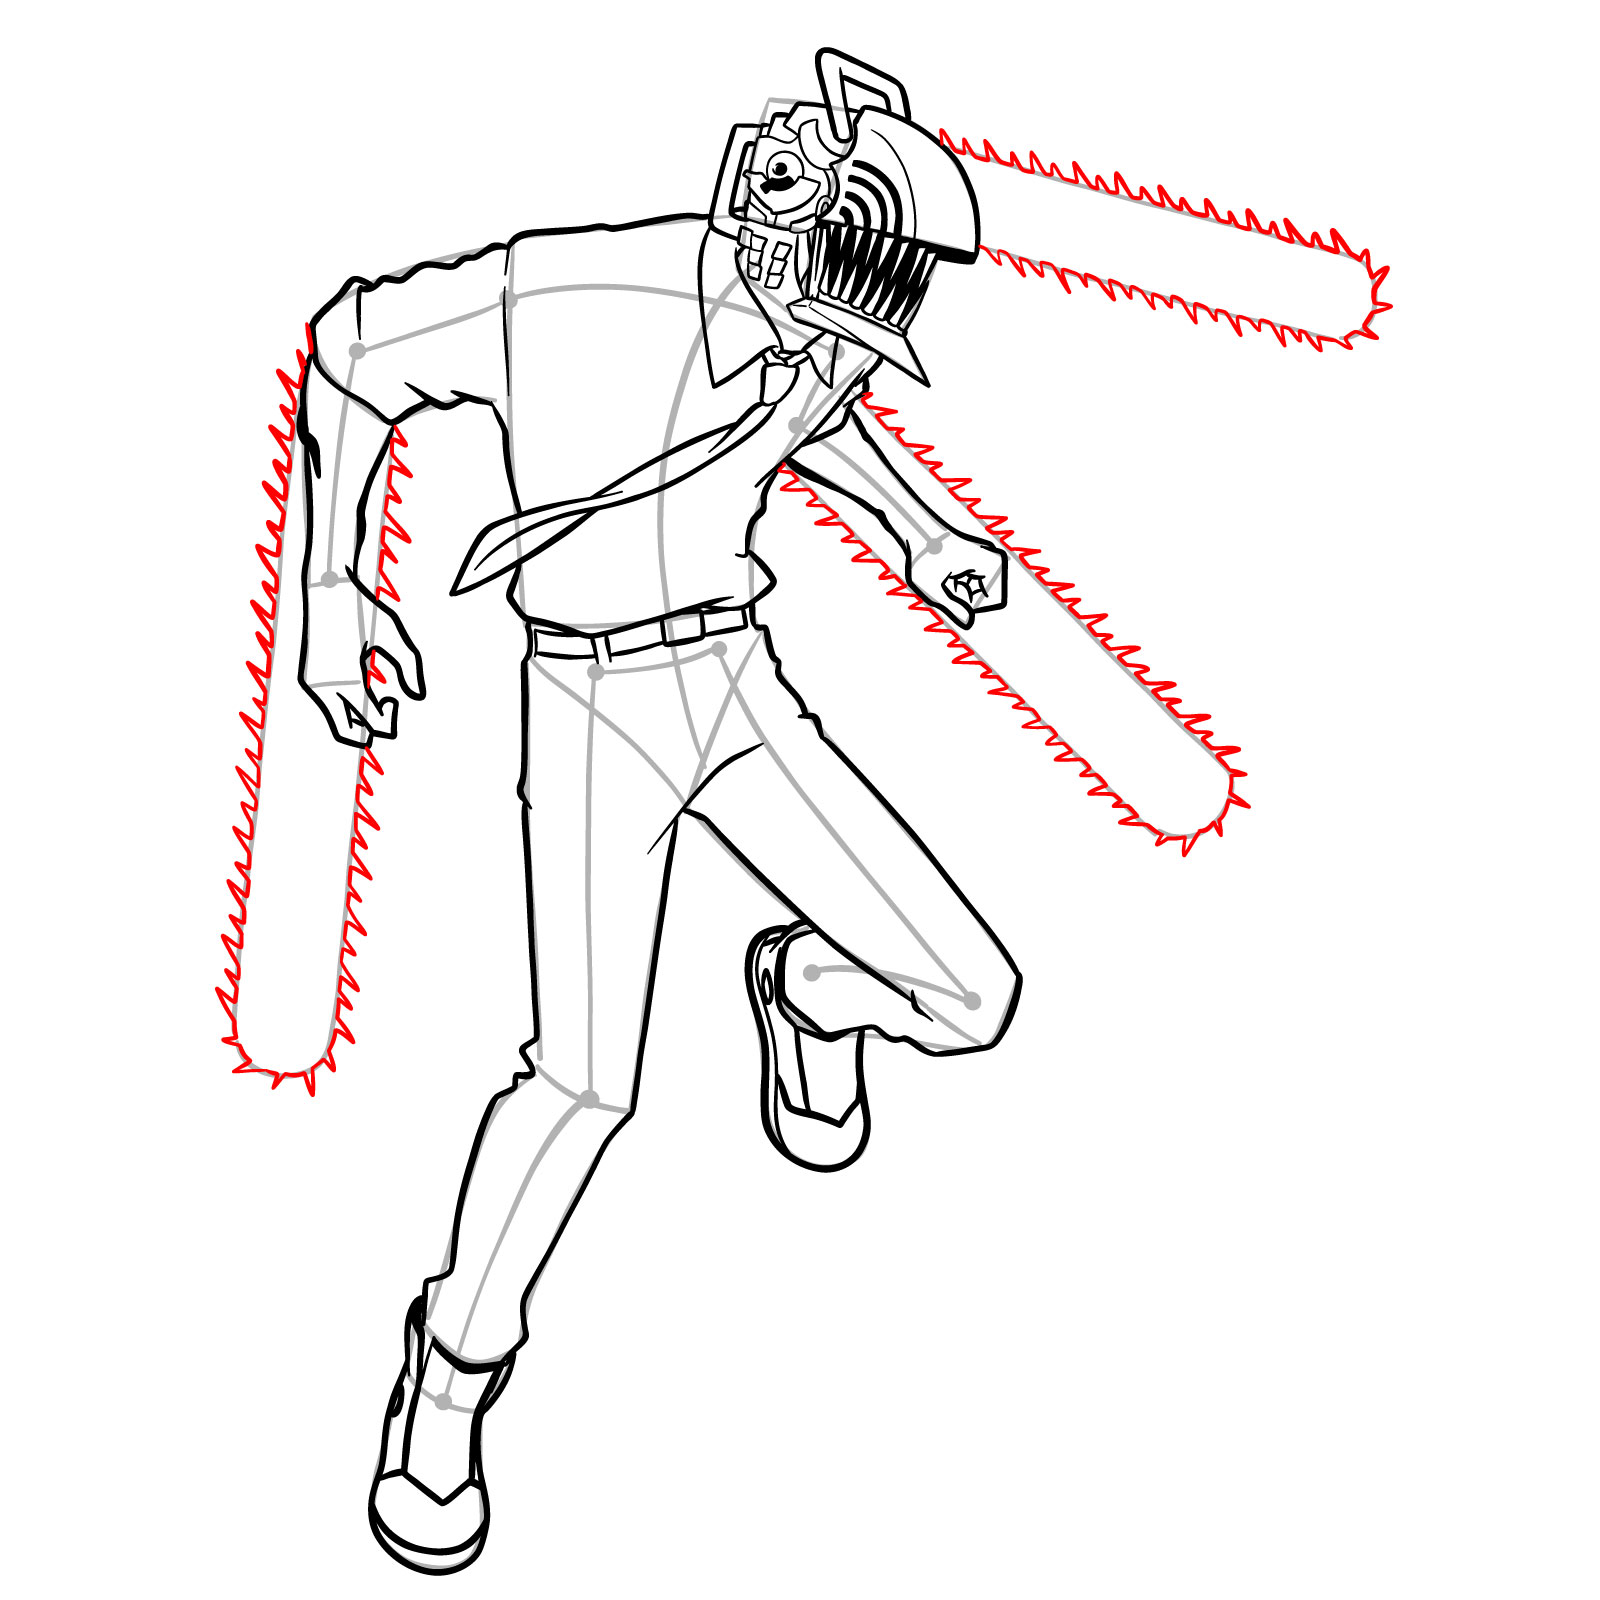
Step 22 – Now, it’s time to add the chainsaw blades. Draw long, serrated blades extending from the hands and the head, giving Chainsaw Man his signature weaponized look. Pay attention to the saw teeth pattern – first a small one, then a big one
Attaching chainsaw blades to Chainsaw Man’s arms and head
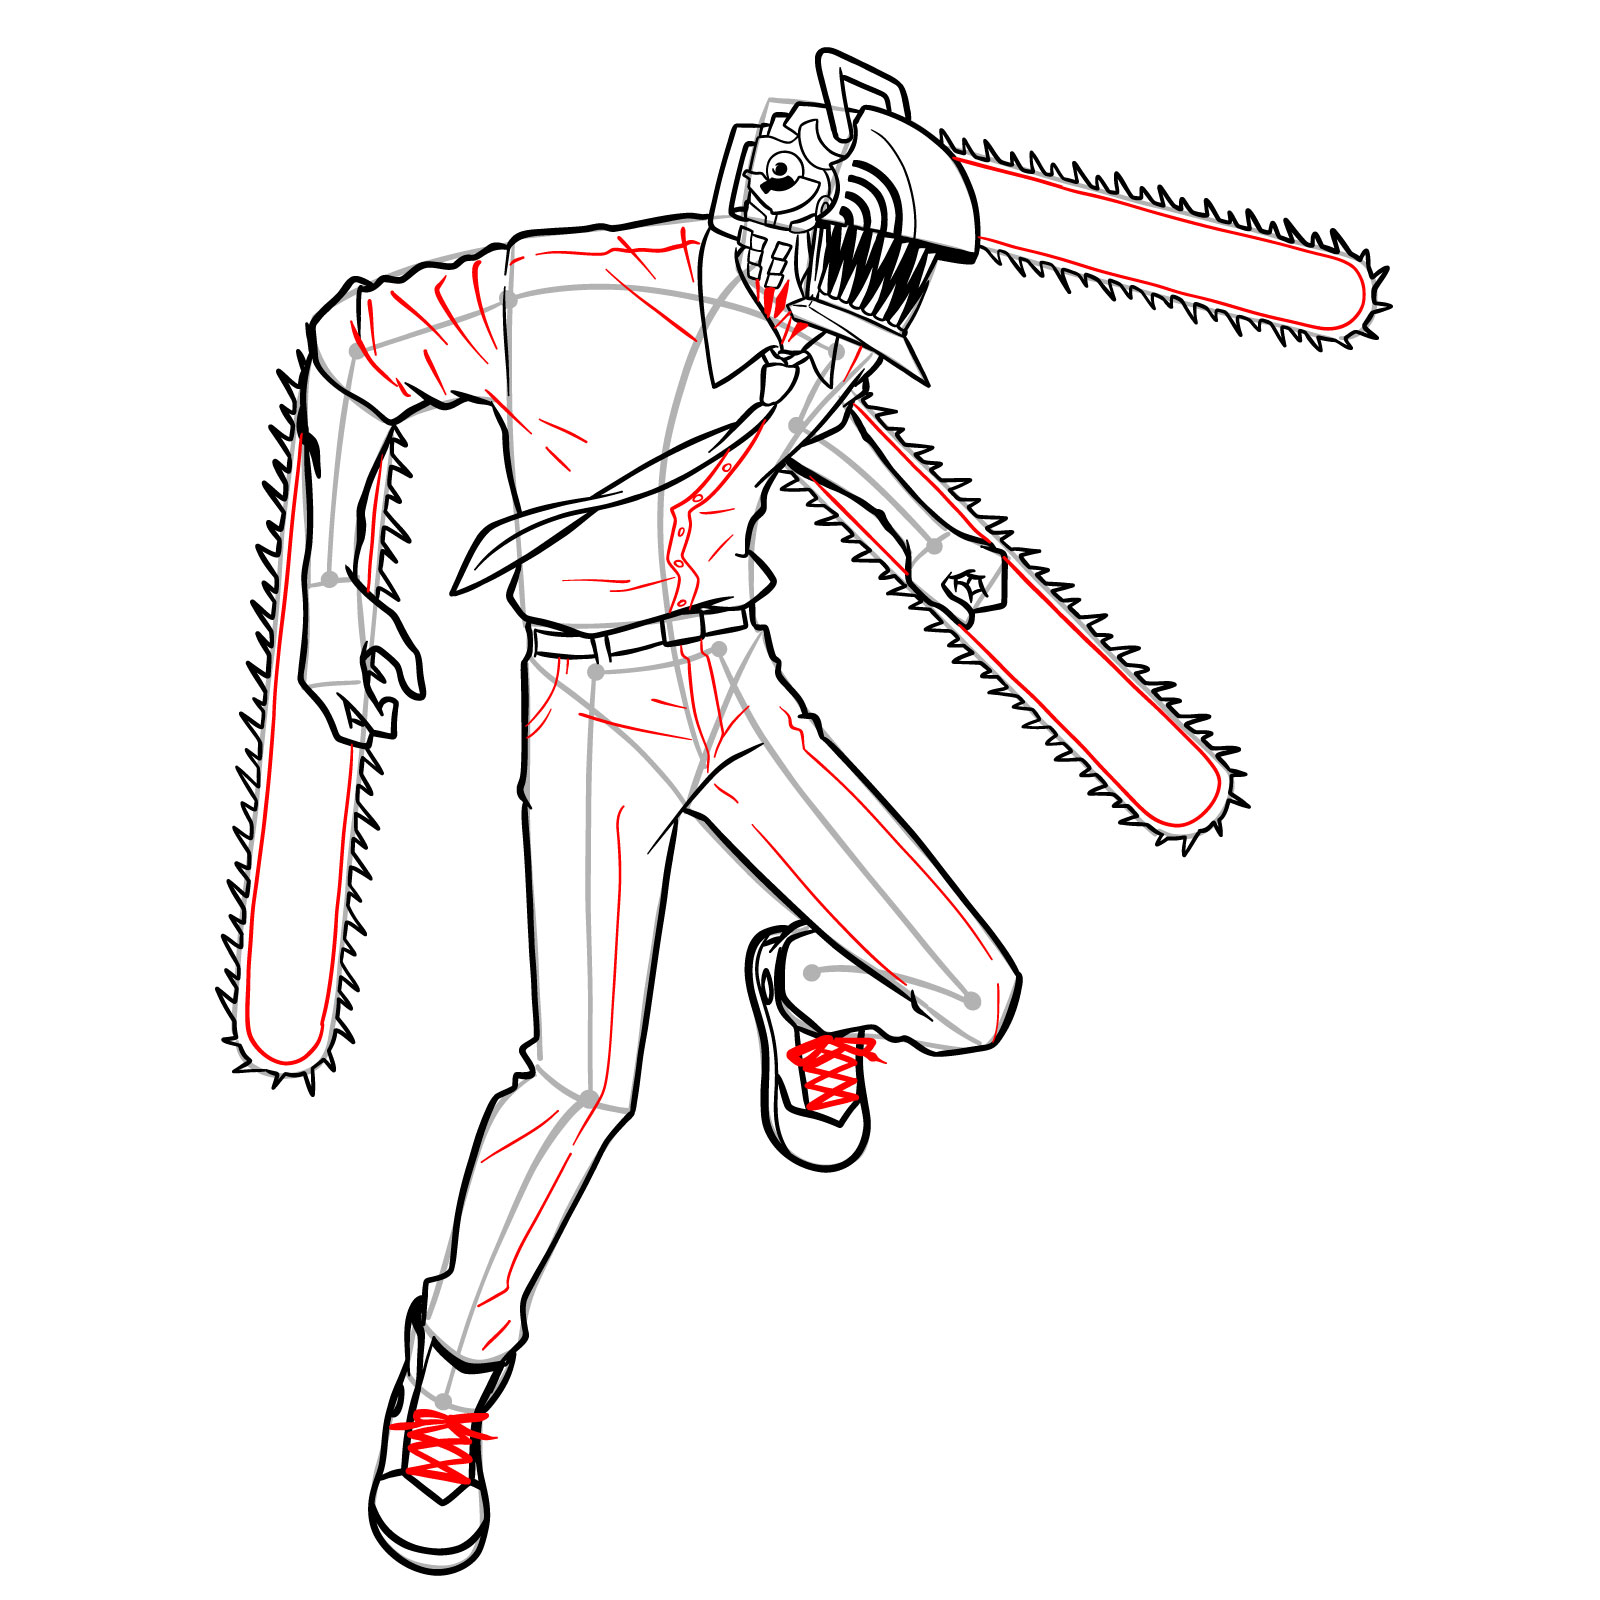
Step 23 – Now, let’s add the remaining details. Sketch the inner lines for the chainsaws to indicate their dimensionality (these lines are a bit smaller than the ones we sketched for the base), add the laces on the shoes, and refine the neck details. Include folds and creases on the pants and shirt to convey movement and fabric texture
Finalizing the details on Chainsaw Man’s chainsaws, footwear, and attire
Step 24 – The drawing of Chainsaw Man is now complete. Each element from the blades to the creases in his clothes contributes to a sense of motion and intensity. This guide on how to draw Chainsaw Man 3/4 view has led us through each step carefully, resulting in a detailed, action-packed illustration of the iconic character
The completed drawing of Chainsaw Man, ready for action
Drawing Chainsaw Man in a Frontal Stance
The Finished Chainsaw Man Full Body Drawing – Front View
Transitioning to the second guide, we focus on illustrating Chainsaw Man from a front view in 30 steps, a depiction that showcases his raw power and the unleashed ferocity of his chainsaw features. This frontal perspective presents Denji’s transformation with an unbuttoned shirt, suggesting a release of his restrained human side to embrace the full might of his devilish form.
The illustration captures Chainsaw Man standing squarely facing the viewer, with chainsaw blades extending from his arms and head, projecting a menacing and unstoppable force. His unbuttoned shirt reveals a toned torso, hinting at the strength that lies beneath, while his stance is wide and grounded, reflecting his readiness to confront any challenge head-on. The sneakers add a touch of his humanity, grounding the supernatural figure in the reality of his teen persona. This front view is particularly impactful, inviting the viewer to confront Chainsaw Man’s duality and the intensity of his character.
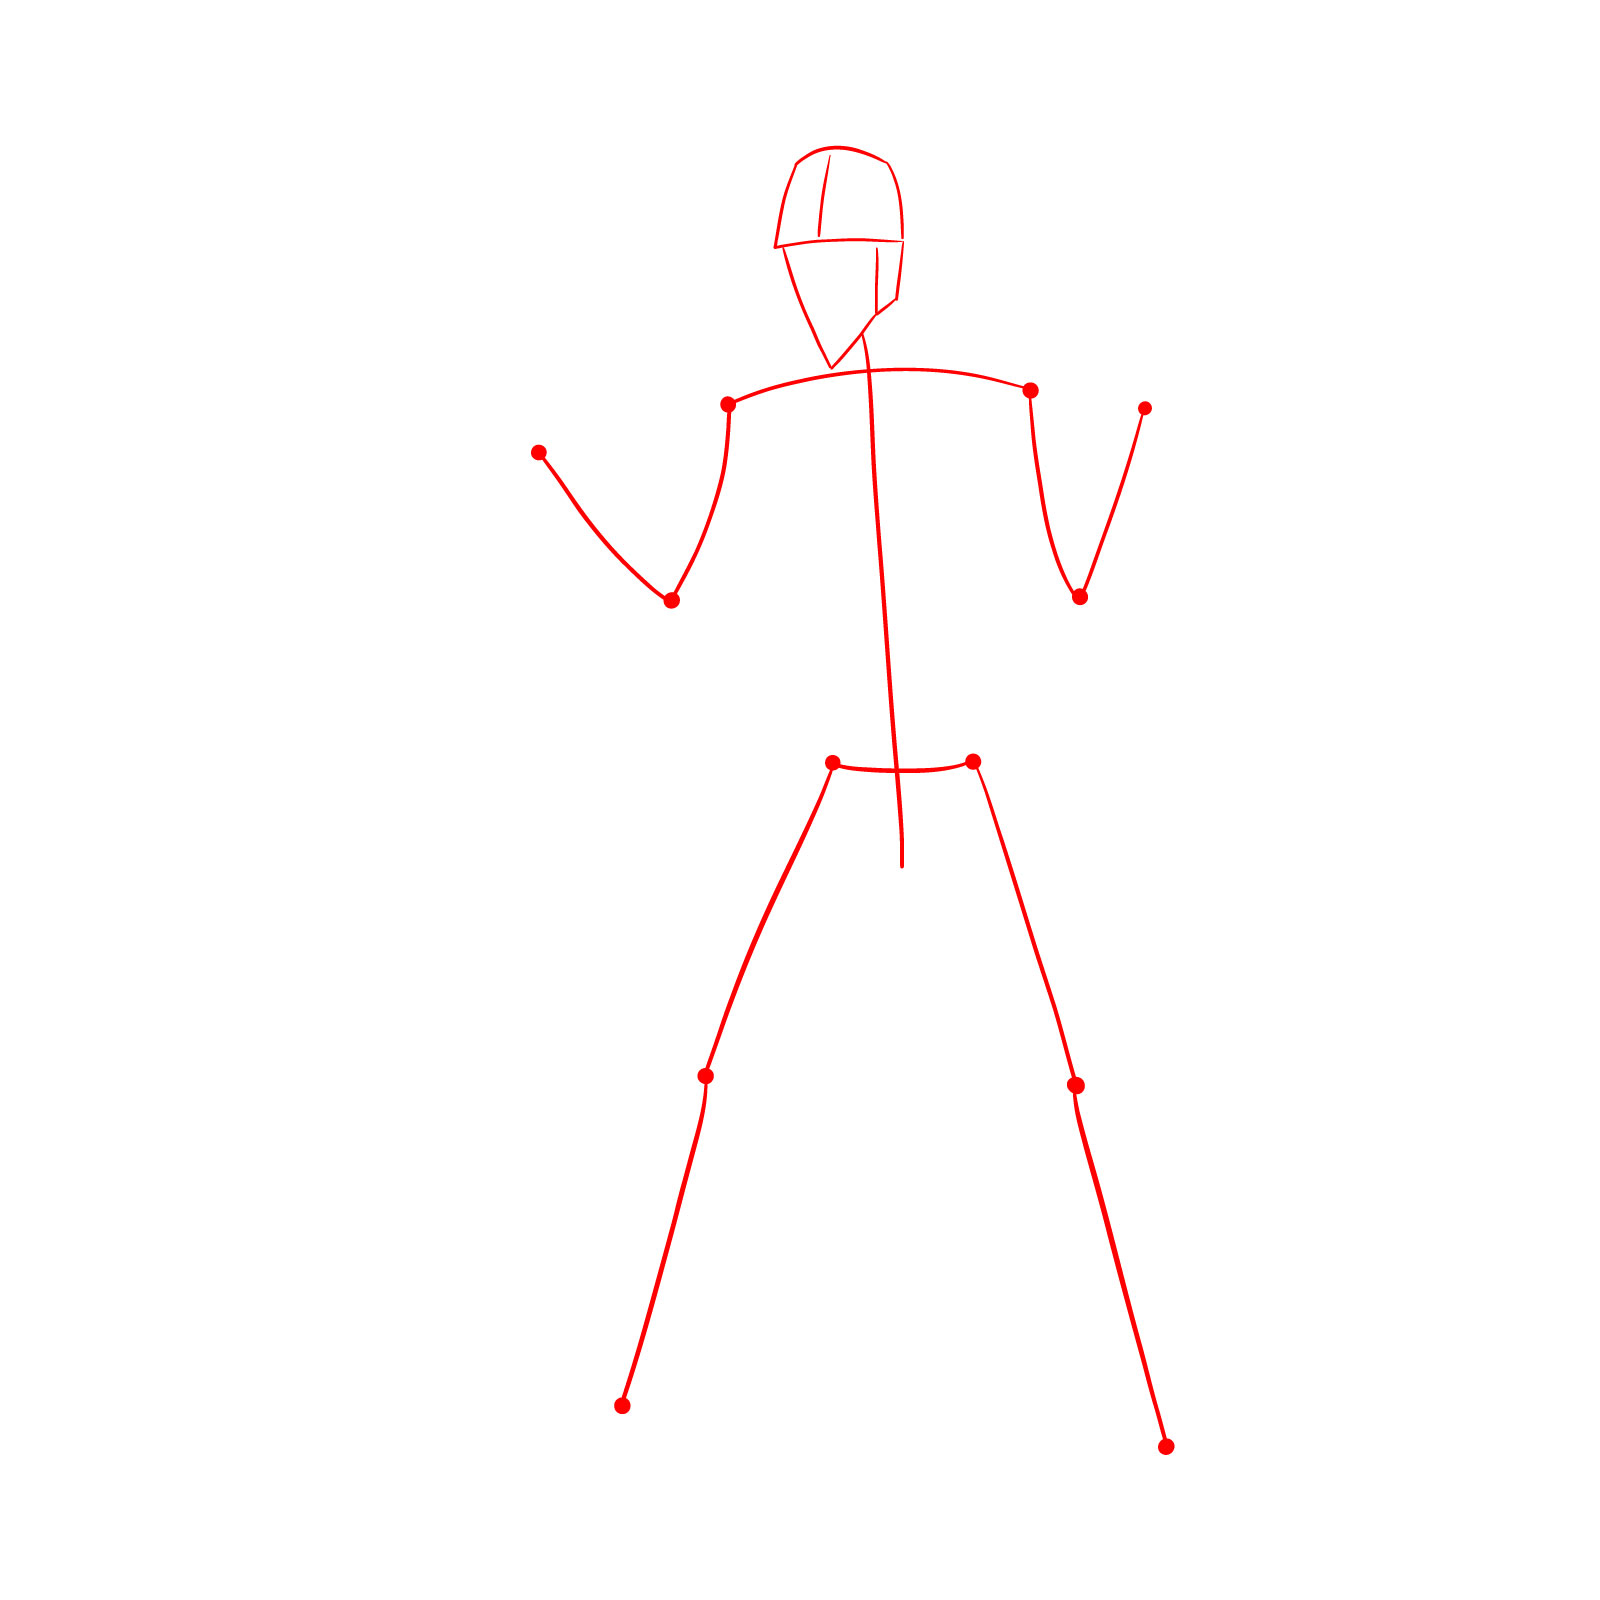
Step 01 – In the first step, we will lay the foundation for our Chainsaw Man front view full body drawing with a stick figure. Sketch a vertical line for the body’s axis, simple head shapes at the top, and lines for the arms and legs with points for the joints
Starting the Chainsaw Man drawing with a simple stick figure
Step 02 – This time we need to add basic shapes to our Chainsaw Man sketch. Outline a simple torso shape, lines for the legs, and shorter ones for the arms, ensuring they’re in proportion to the head and the body
Establishing the basic forms for Chainsaw Man’s body
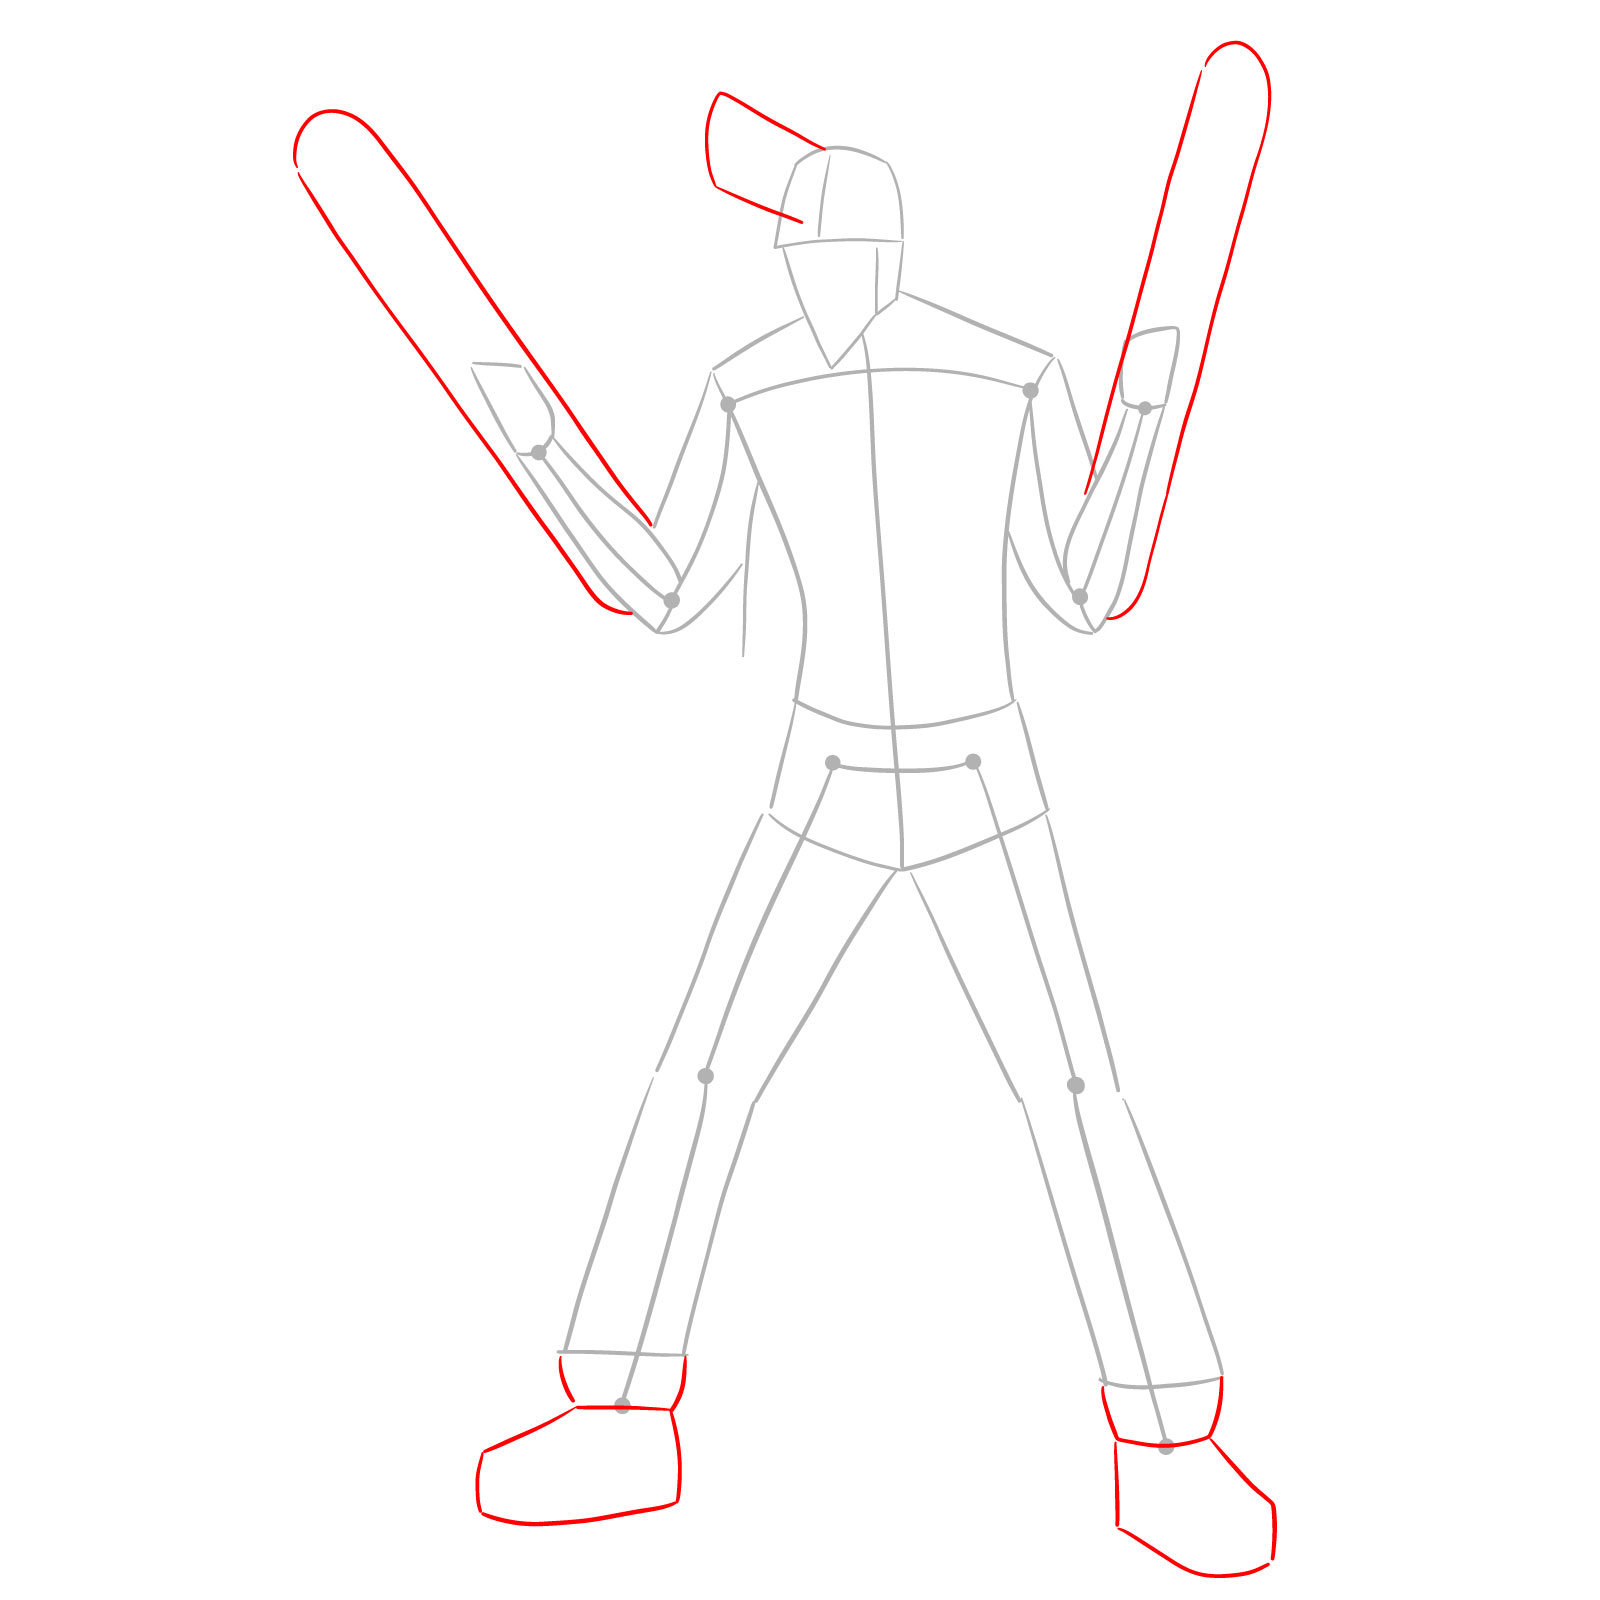
Step 03 – Now let’s sketch the placement of Chainsaw Man’s chainsaw blades and his sneakers. Draw elongated shapes where the blades will be and rough shapes for the sneakers to establish their position
Mapping out the chainsaw blades and sneakers on Chainsaw Man
Step 04 – In this step, we start detailing the head by drawing part of its side. Outline the section of the head where the chainsaw blade will emerge, providing a sense of depth and perspective to the drawing
Beginning to detail the head of Chainsaw Man
Step 05 – In this step of our Chainsaw Man drawing, extend the chainsaw from the head. Draw an inner line within the basic head shape to create the chainsaw’s main body, and add some ‘blood mess’ at the base for a dramatic effect
Detailing the chainsaw extension from Chainsaw Man’s head
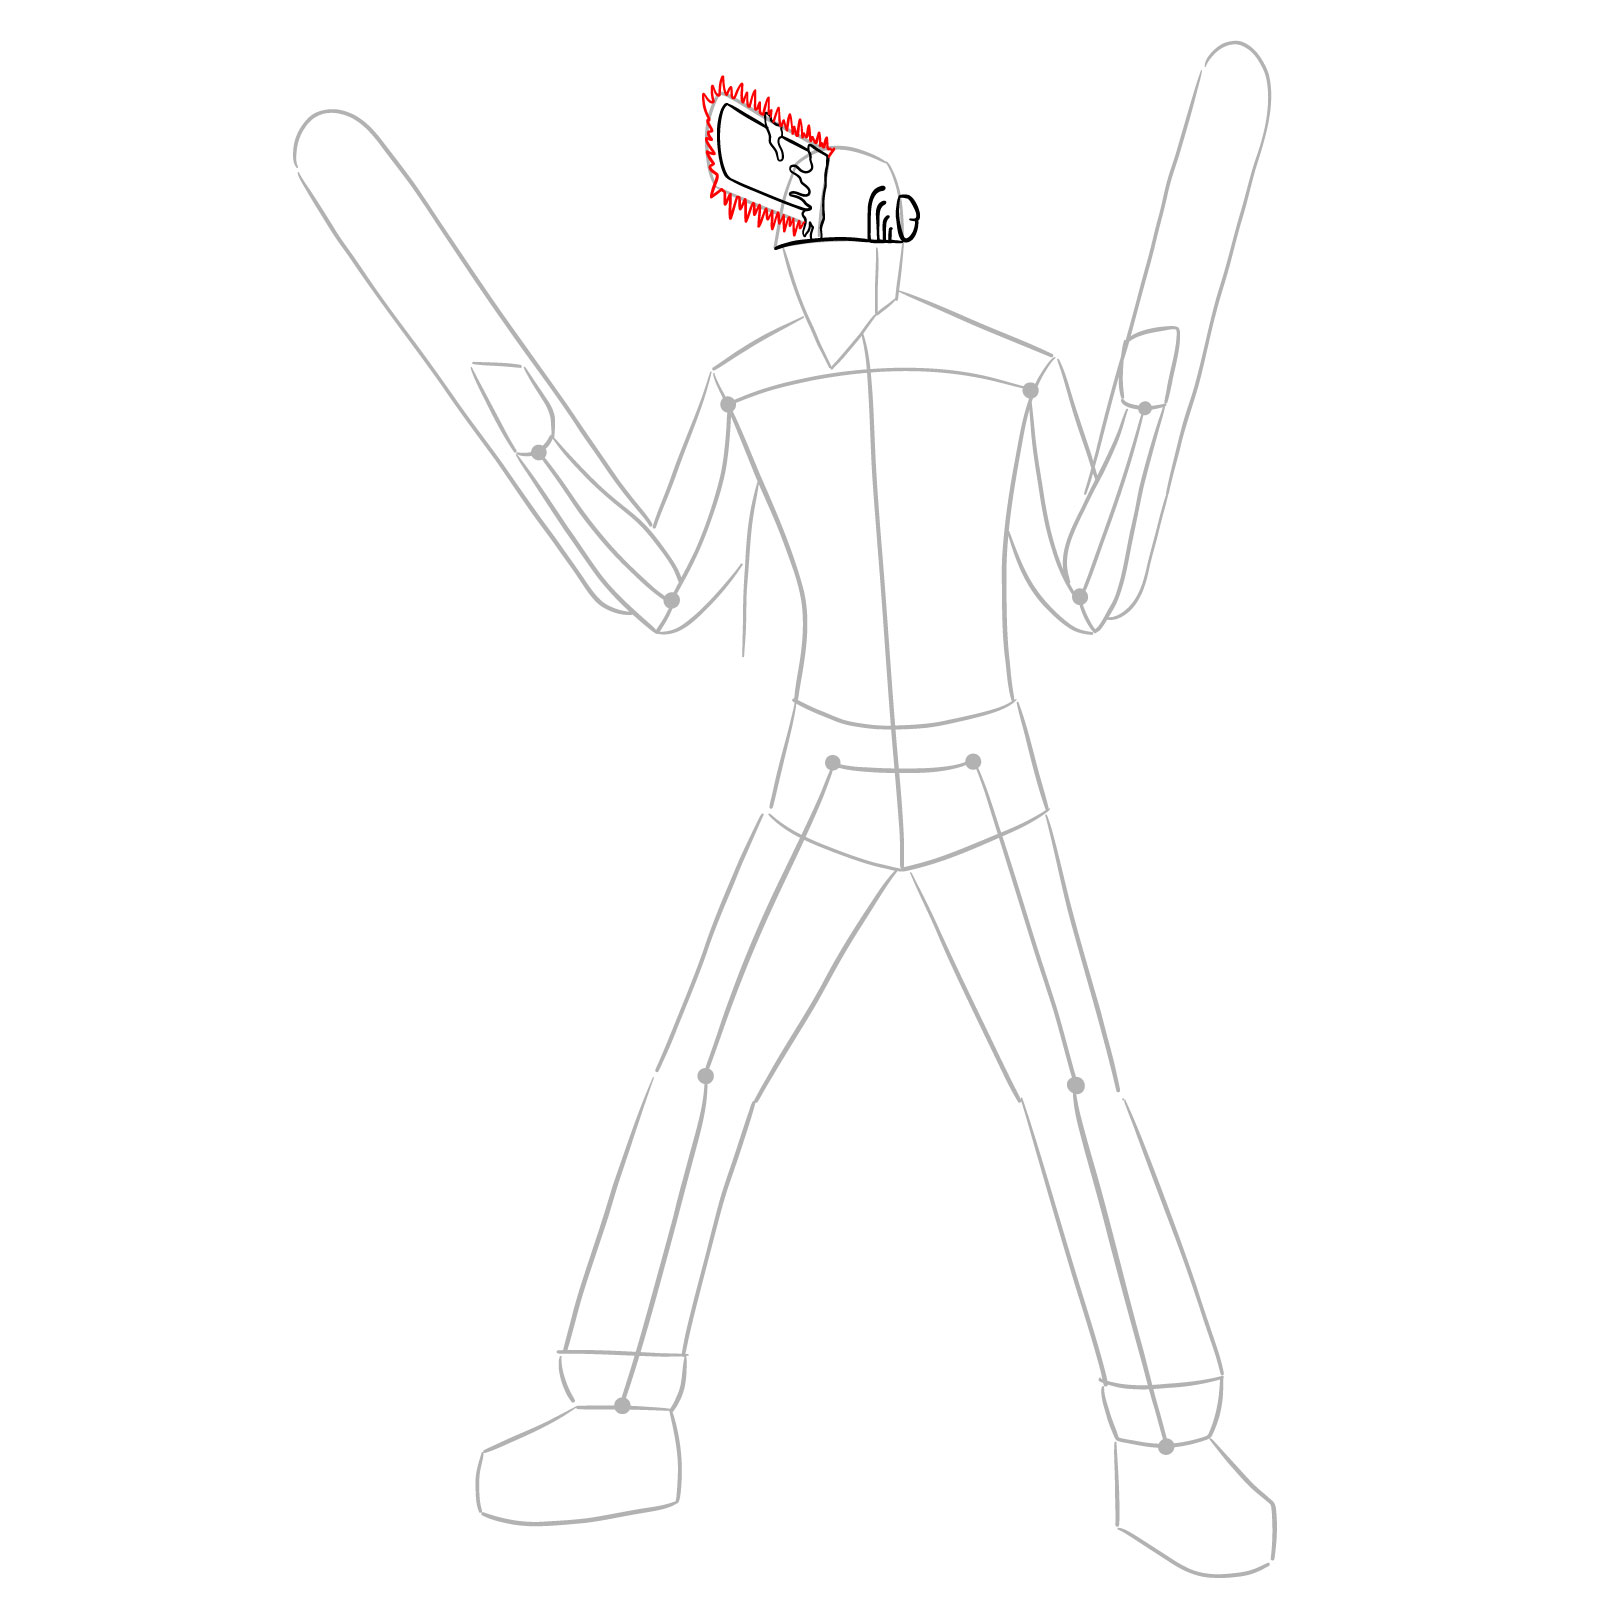
Step 06 – Now let’s add the chainsaw blades. The pattern is alternating small and big teeth. Carefully sketch this pattern along the edge of the chainsaw blade protruding from the head to establish its lethal appearance
Creating the chainsaw blade’s teeth on Chainsaw Man’s head
Step 07 – For this step, sketch the top of Chainsaw Man’s head and add the chainsaw handle. Outline the upper part of the head, ensuring it curves naturally, and draw the handle detail to complete the chainsaw’s structure
Illustrating the top of the head and the chainsaw handle for Chainsaw Man
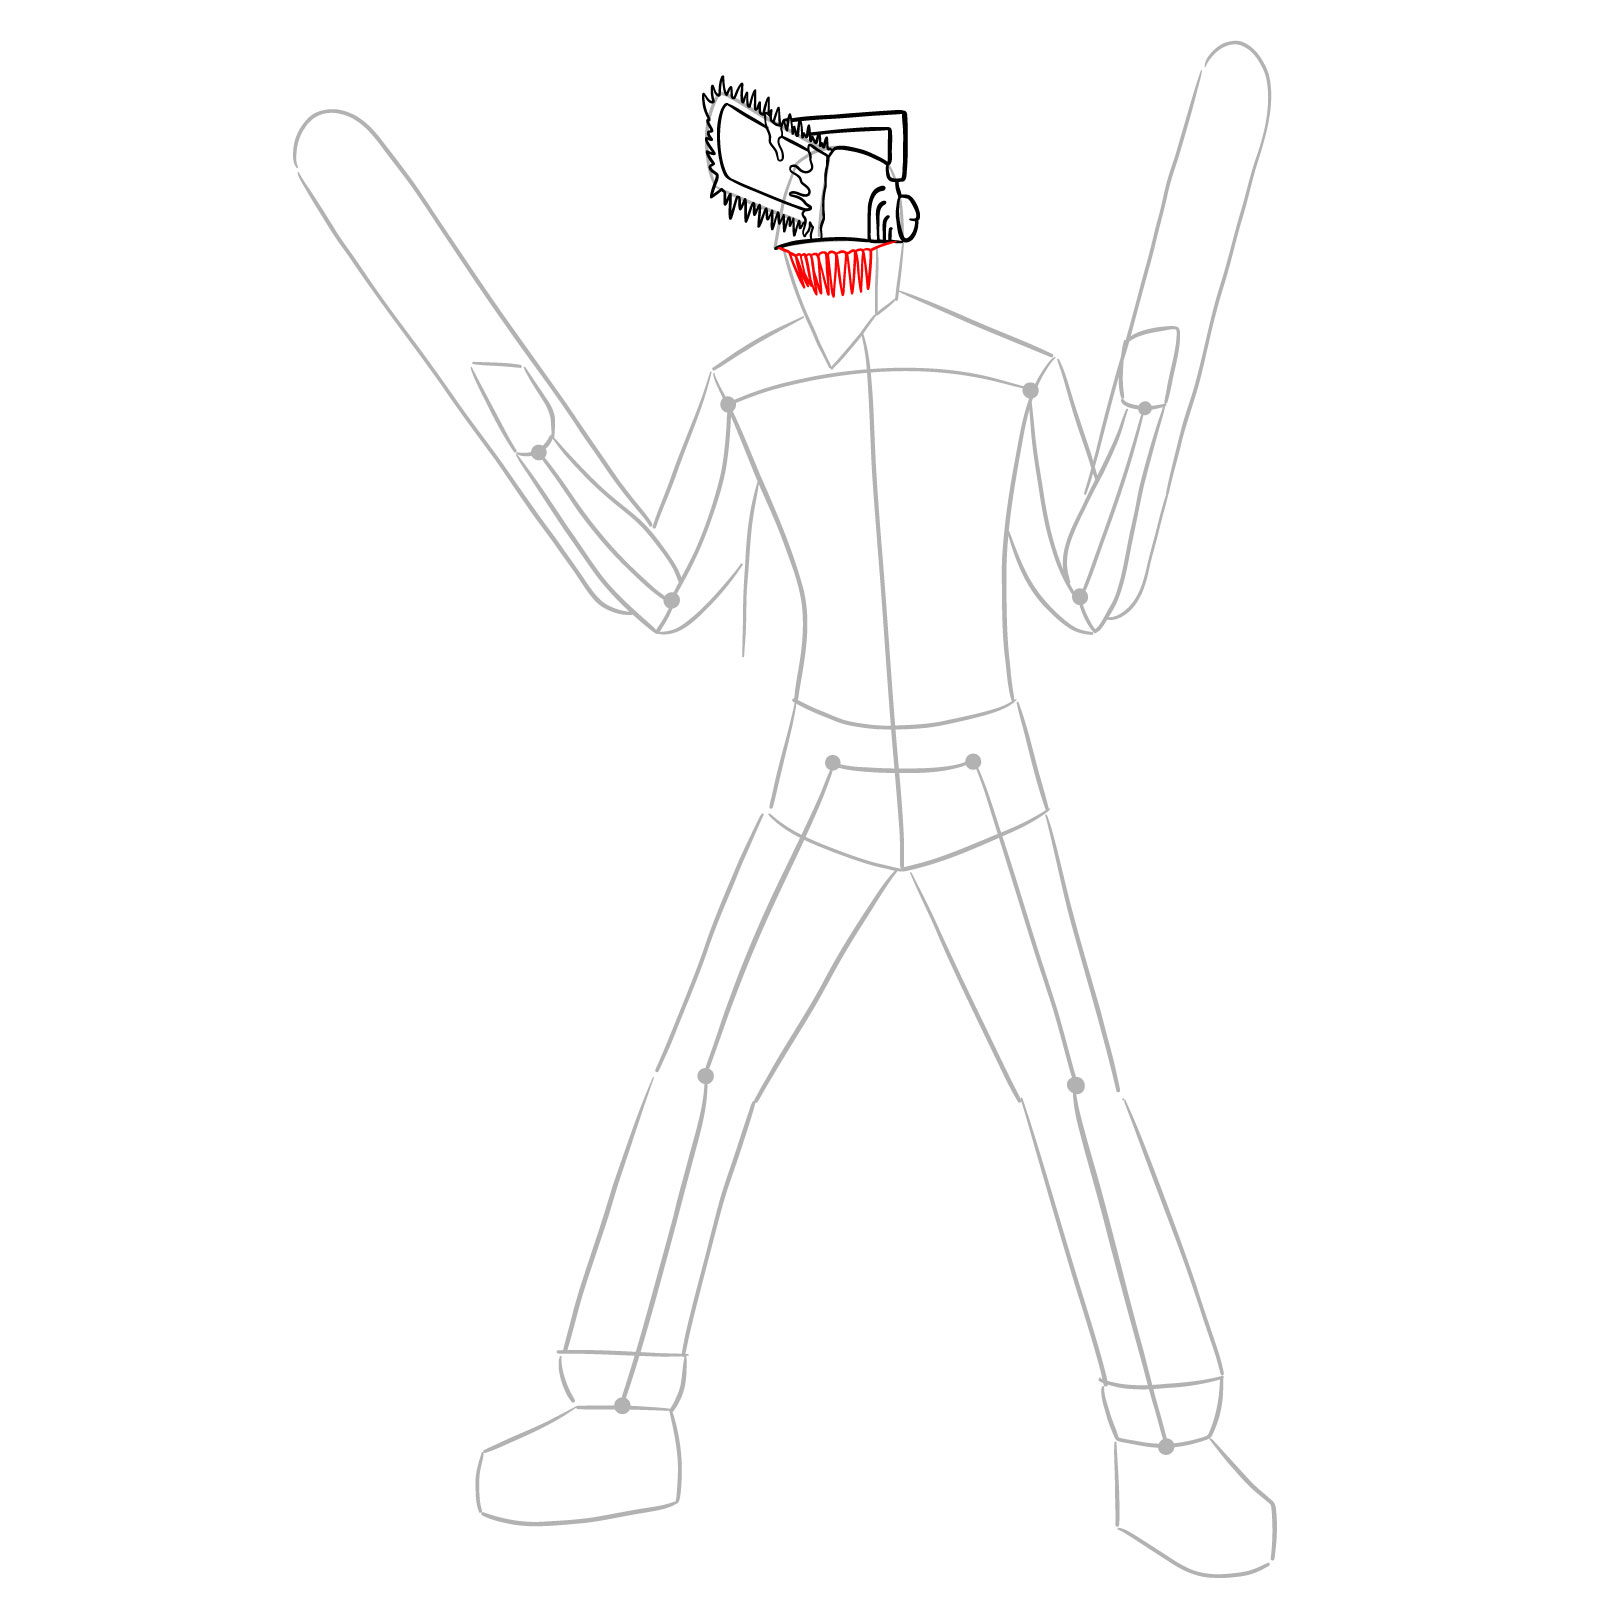
Step 08 – Sketch the upper row of teeth. Each tooth should be sharp and defined, contributing to the menacing look of the Chainsaw Man’s weaponized head
Sketching the upper teeth of Chainsaw Man’s chainsaw head
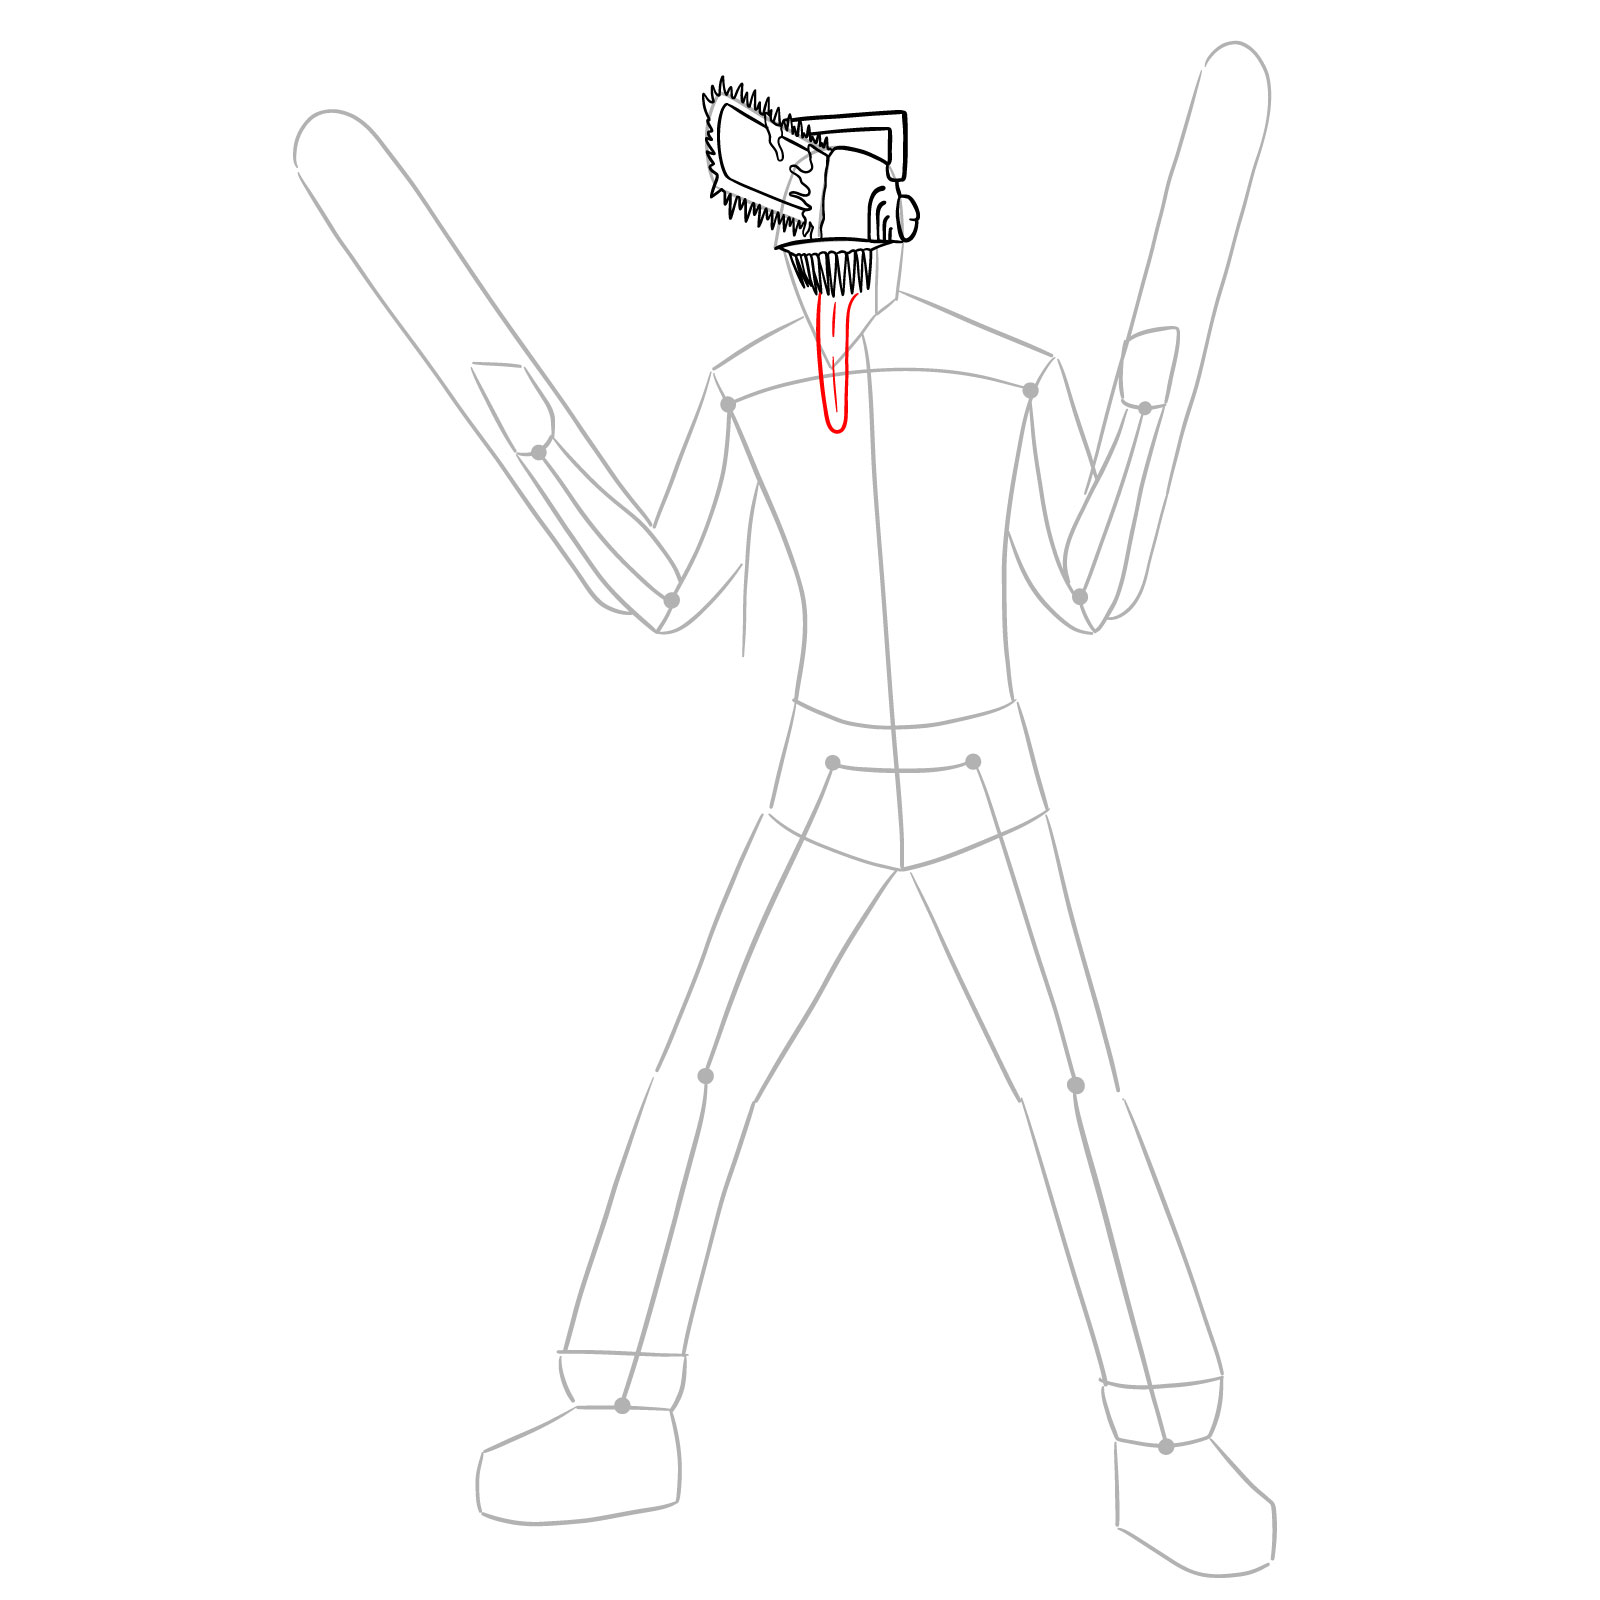
Step 09 – Let’s draw a long tongue extending from the mouth of Chainsaw Man. Start from the middle of the upper row of teeth and let it drape down naturally, adding a wavy line to indicate its length
Drawing the elongated tongue of Chainsaw Man
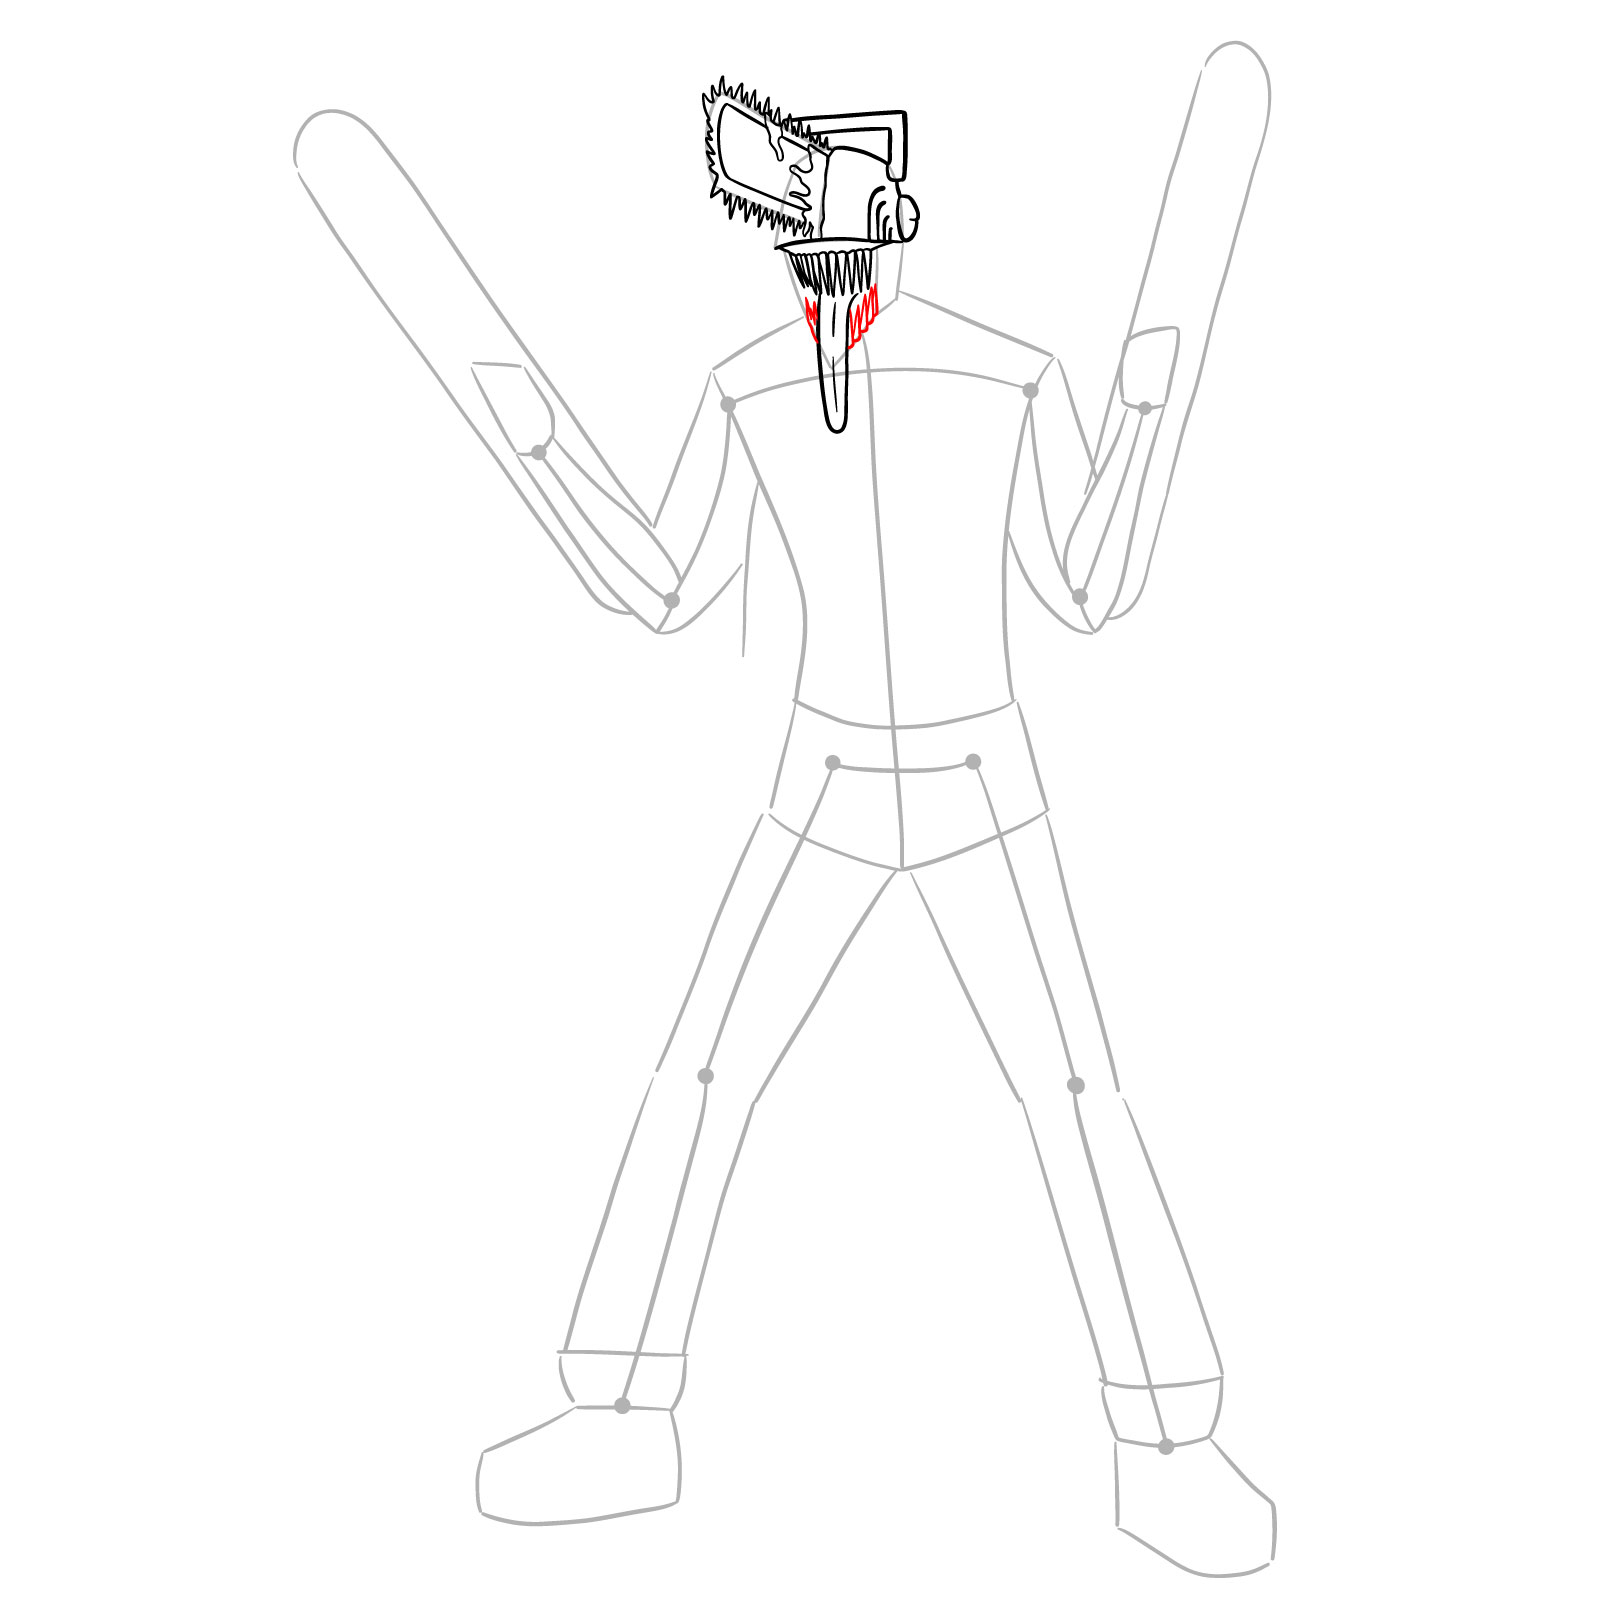
Step 10 – Now, let’s add the bottom row of teeth. Sketch each tooth carefully, alternating between small and large sizes for variety, to match the pattern of the top teeth already drawn
Sketching the bottom teeth of Chainsaw Man’s head
Step 11 – In this drawing step for Chainsaw Man, fill the gap between the teeth with black color to emphasize the mouth’s depth. Also, detail the side and rear parts of the head, ensuring to outline the jawline and the back of the head for a complete look
Filling the gaps between the teeth and adding head details to Chainsaw Man
Step 12 – Finally, add the bottom jaw and chin to Chainsaw Man’s head. Draw these features with attention to the character’s facial structure, ensuring the chin is prominent and the jawline is well-defined
Finalizing the head with the addition of the bottom jaw and chin
Step 13 – Begin to draw the unbuttoned shirt on Chainsaw Man, outlining the flaps and the open front. This creates the basis for the character’s rugged outfit
Beginning the detailing of the unbuttoned shirt on the character’s torso
Step 14 – Now let’s add the shoulder and sketch one side of the unbuttoned shirt, ensuring to capture the flow and folds of the fabric as it sits on the character’s frame
Sketching the shoulder and one side of the unbuttoned shirt on Chainsaw Man
Step 15 – For this step, draw a portion of the left arm and its sleeve
Adding the left arm and sleeve to the Chainsaw Man drawing
Step 16 – Complete this stage by adding the hand with two visible fingers on this side of the chainsaw. This detail is crucial for illustrating how Chainsaw Man’s chainsaws extend from his hands, a key feature of the character
Detailing the hand and two visible fingers on the side of Chainsaw Man’s chainsaw
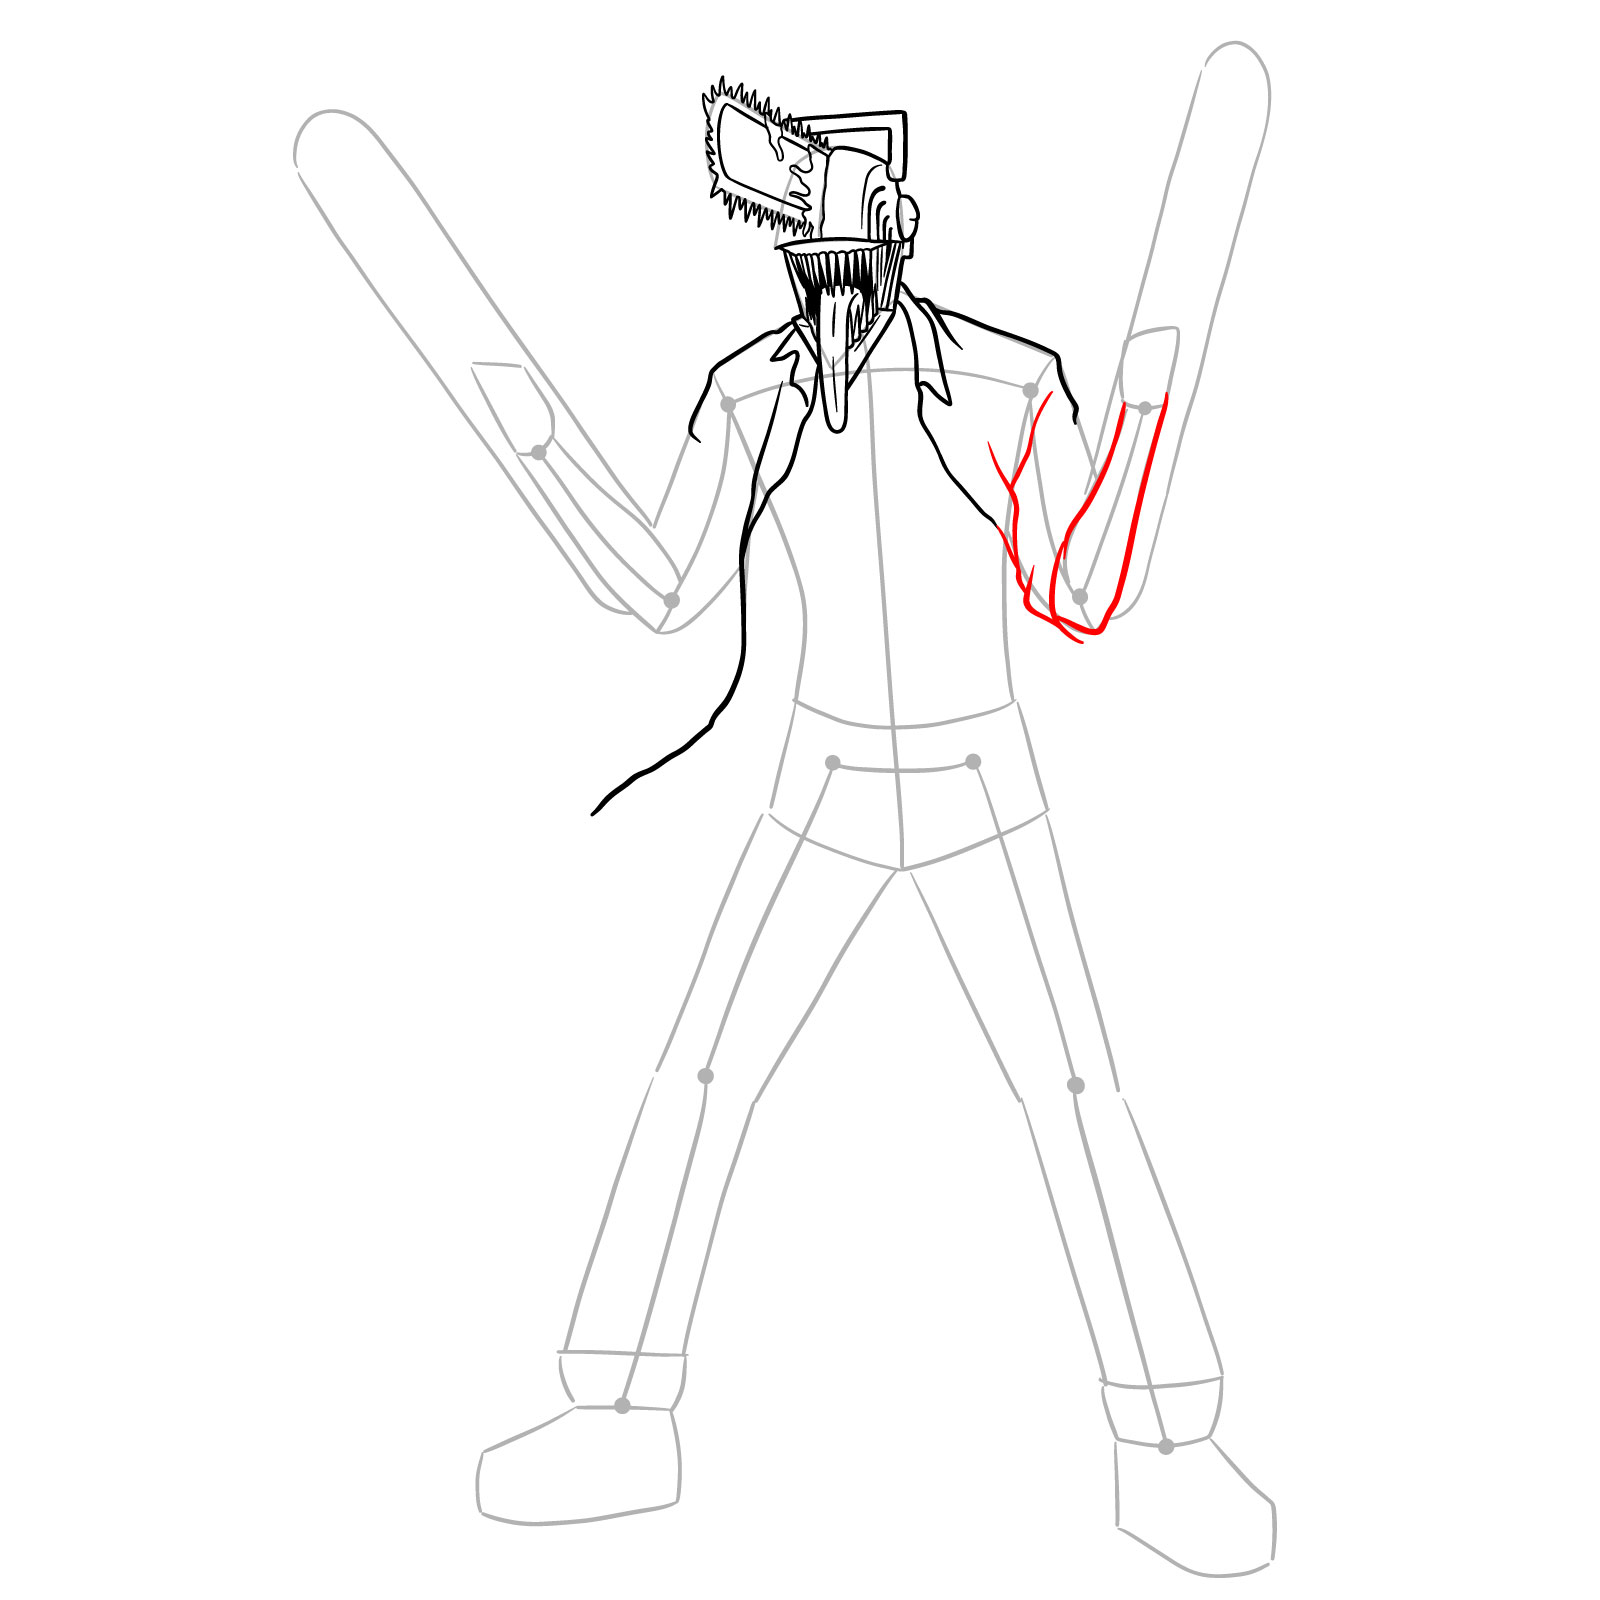
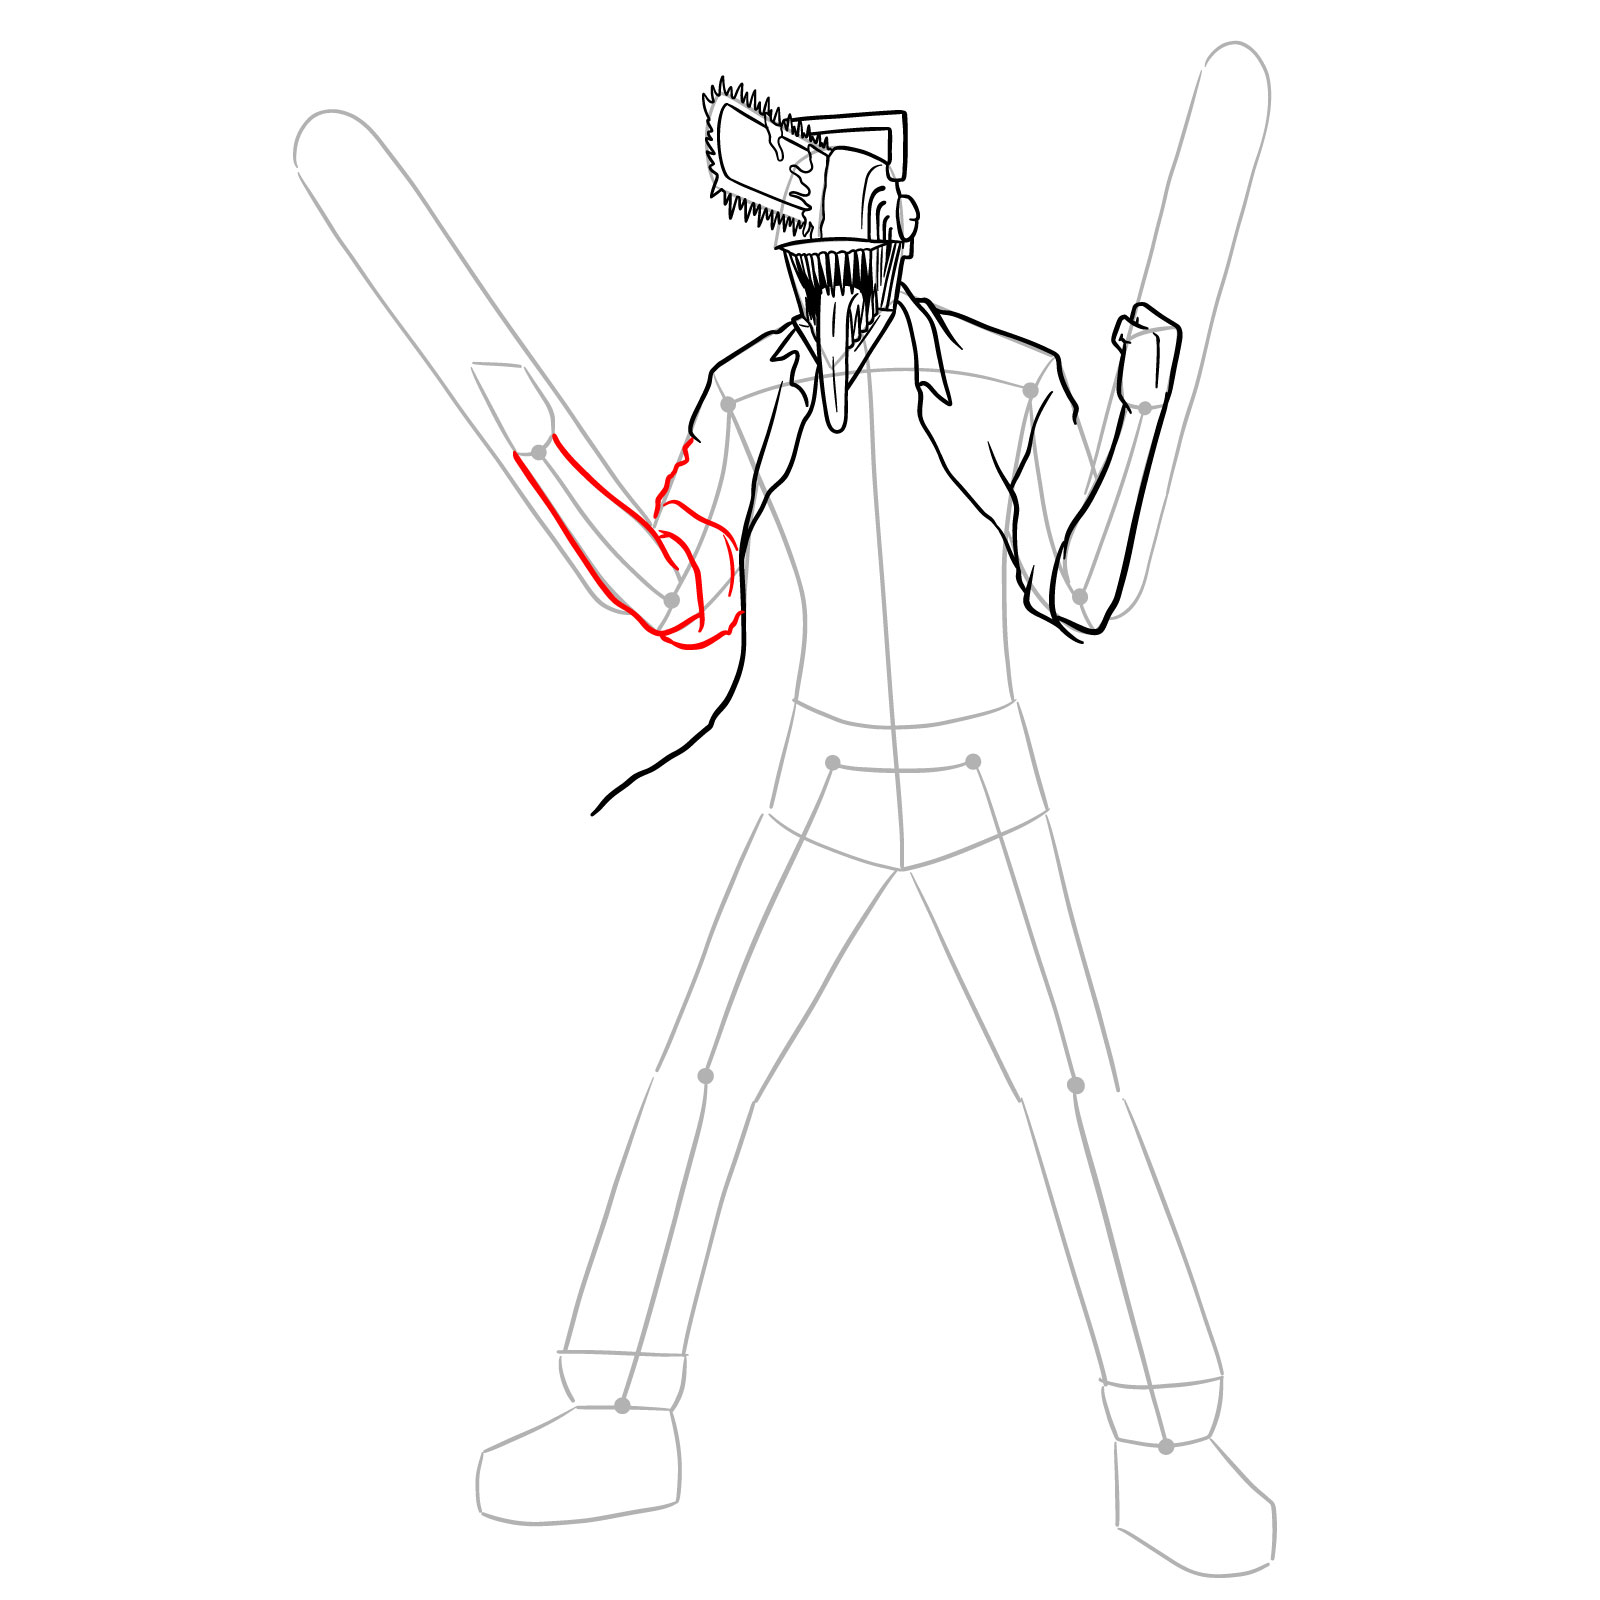
Step 17 – Now let’s focus on Chainsaw Man’s attire by sketching the right sleeve, ensuring it appears consistent with the movement of his arm raised and bent at the elbow
Drawing Chainsaw Man’s right sleeve and arm
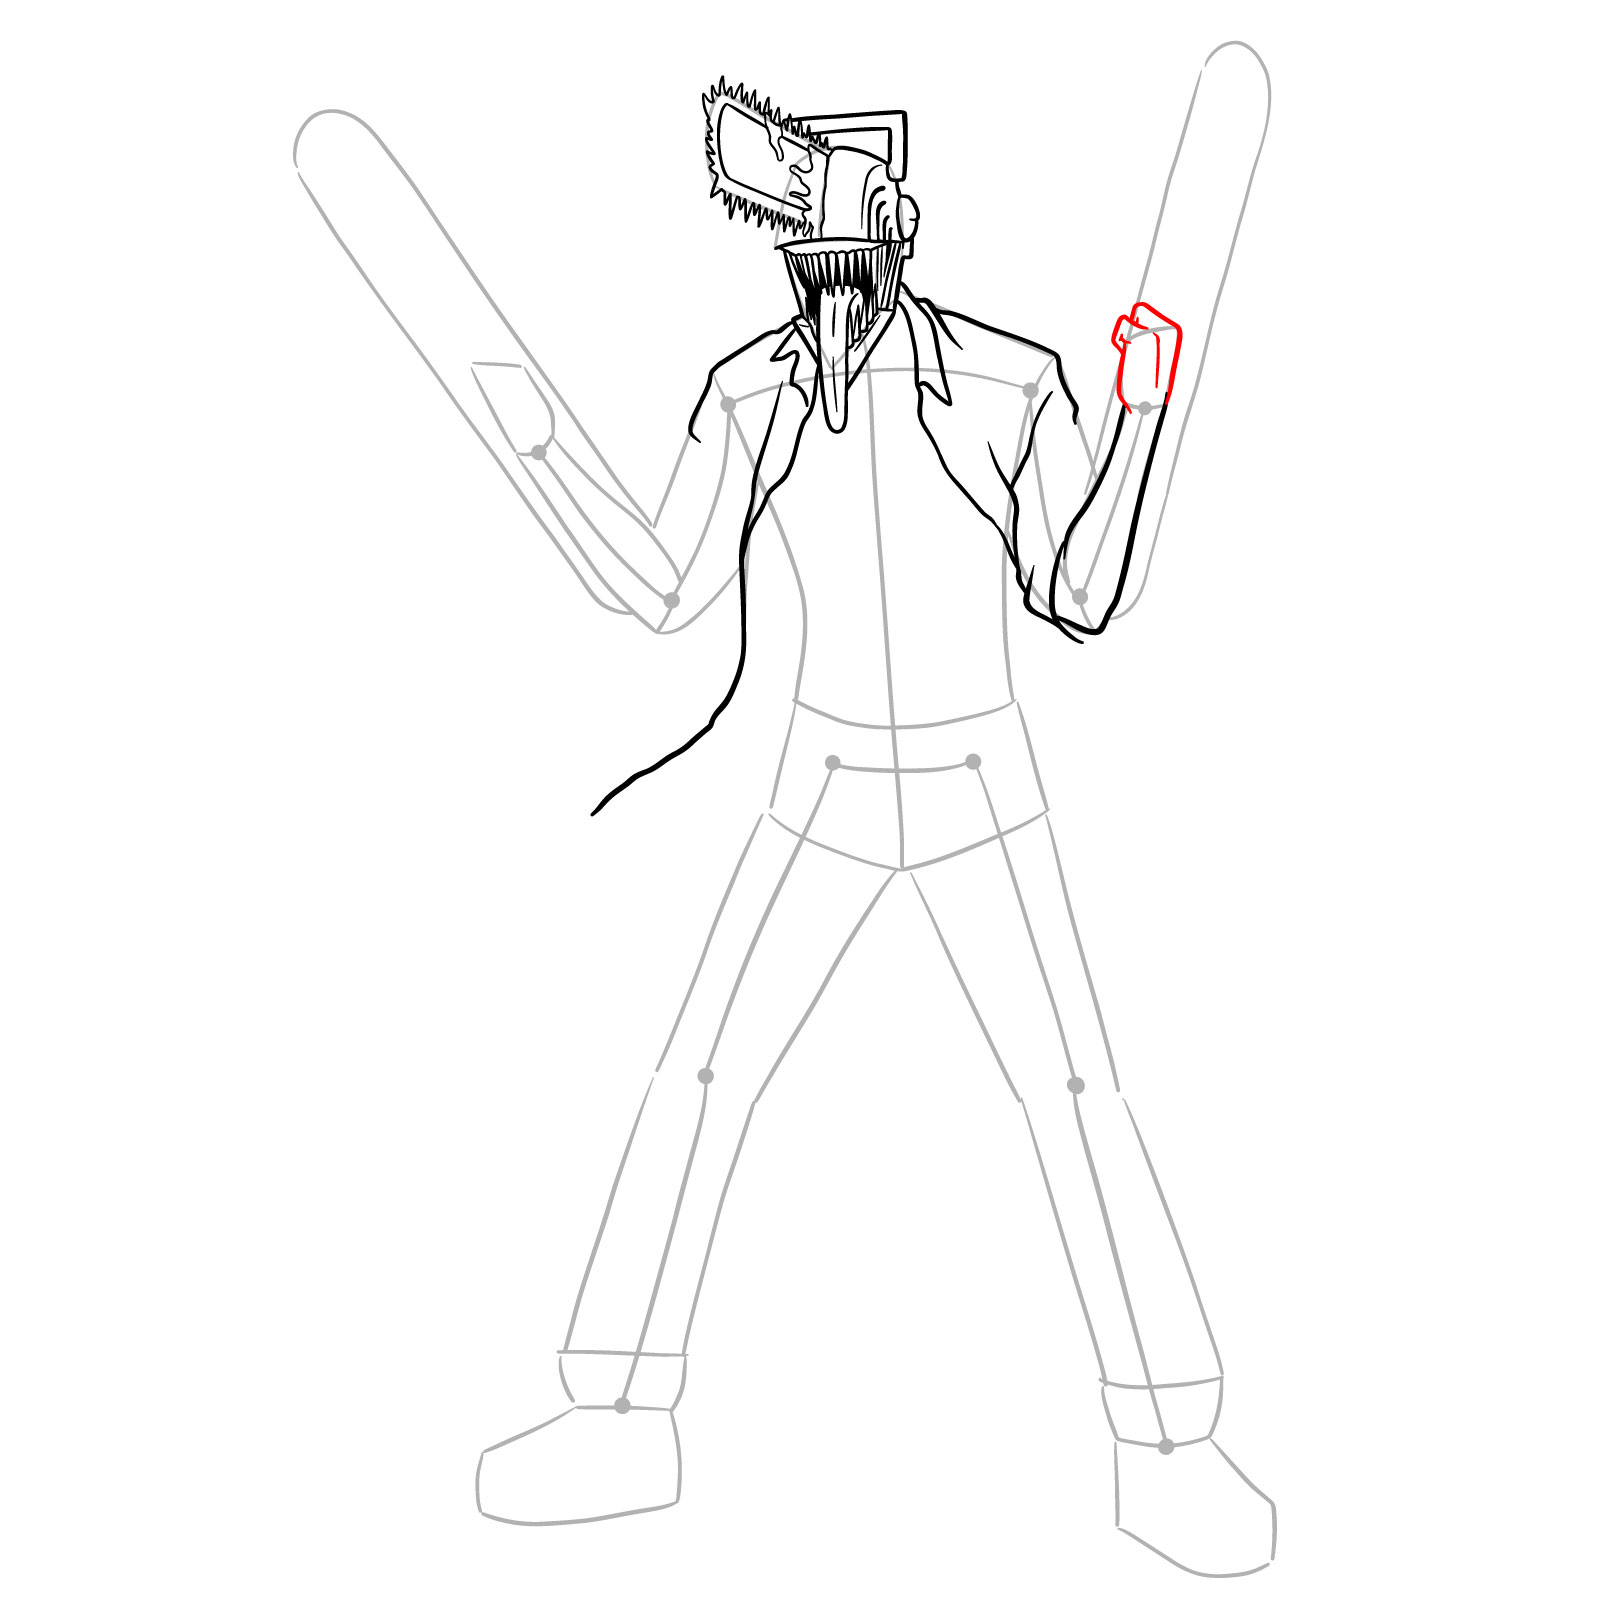
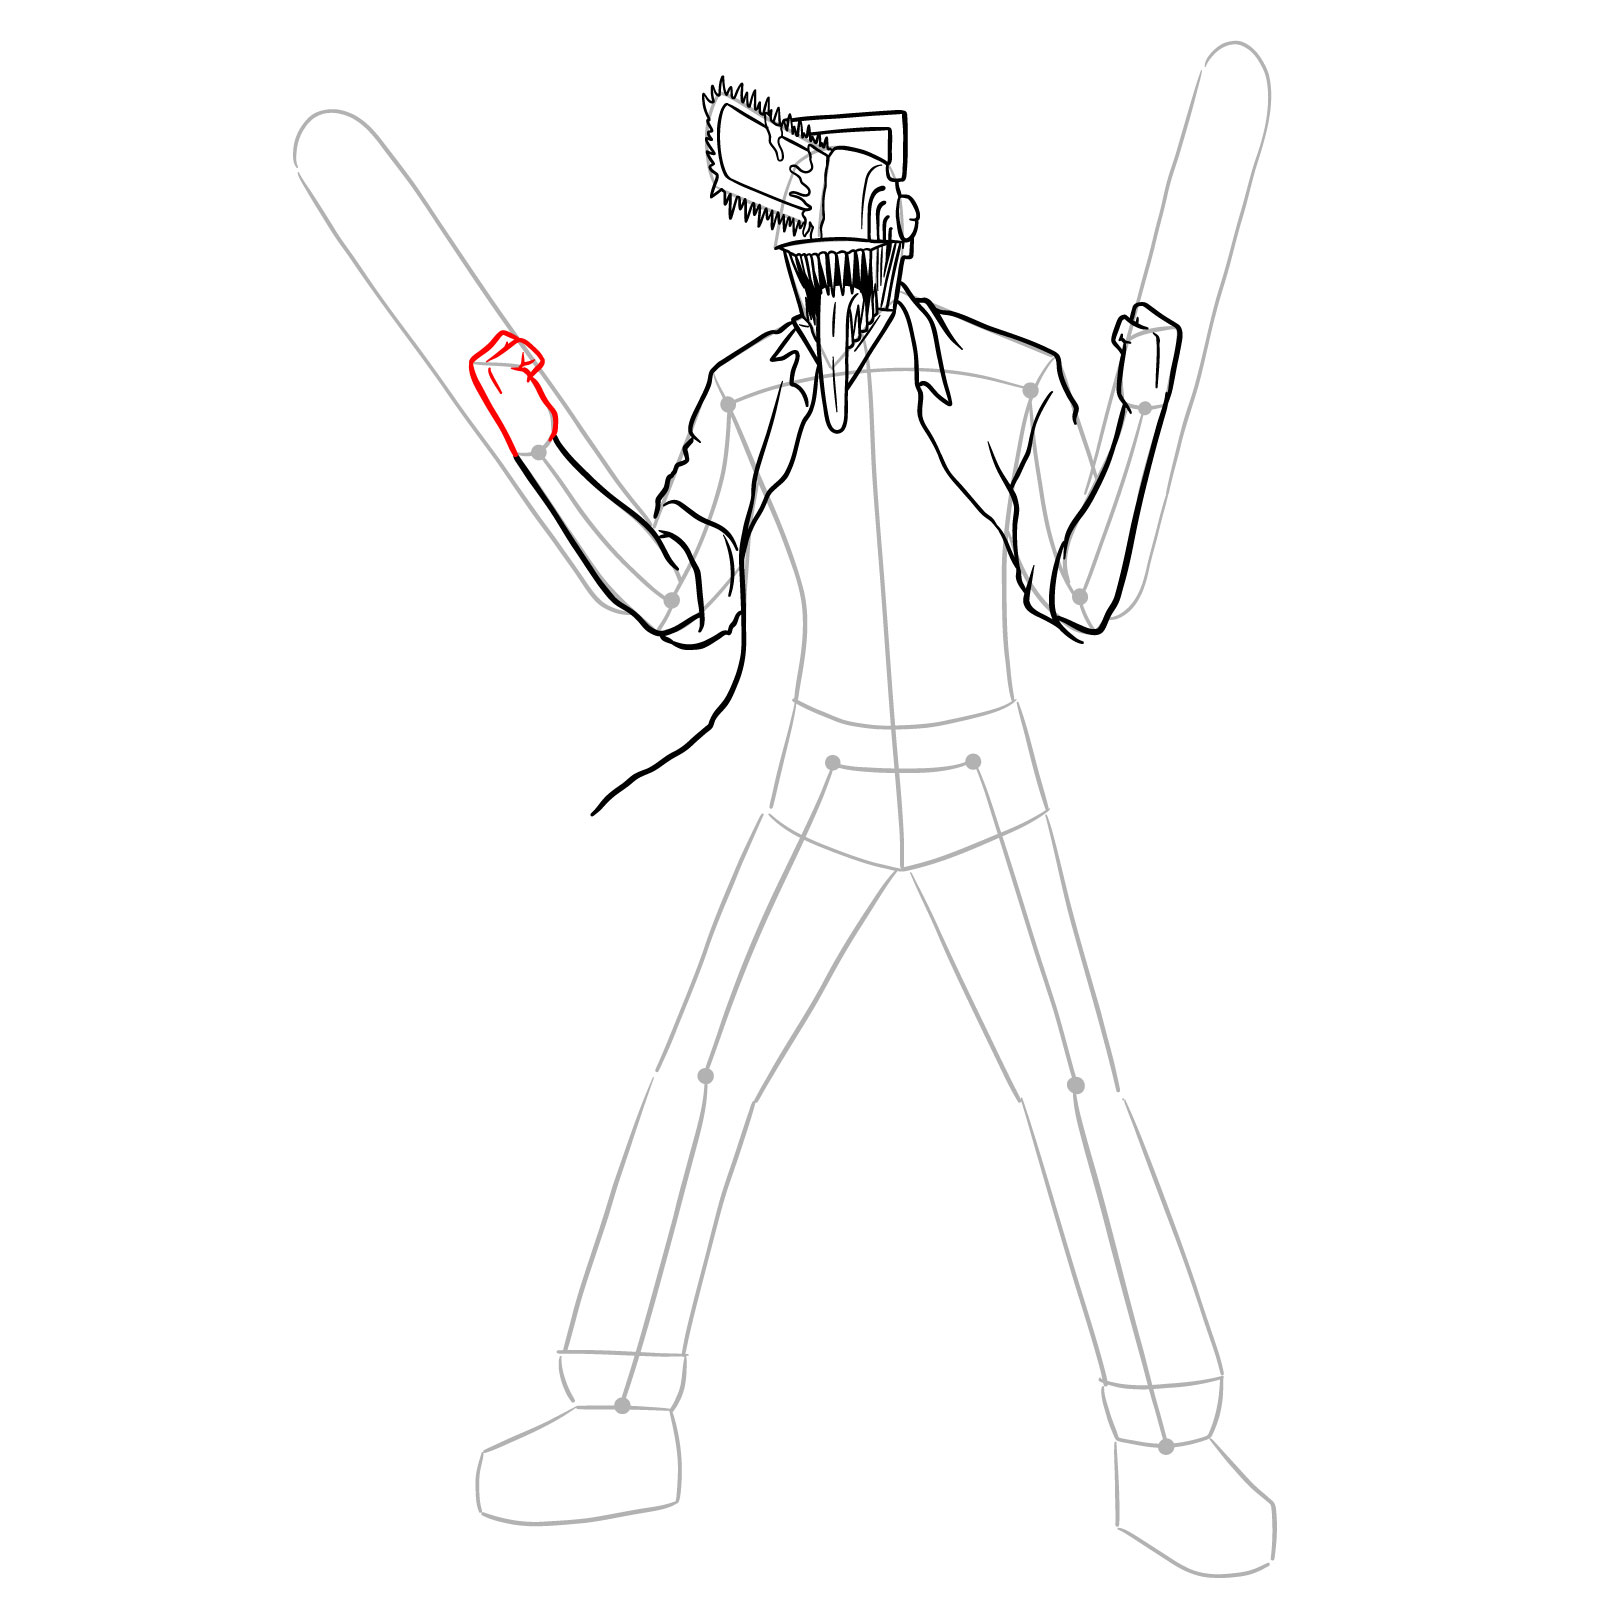
Step 18 – Here we add Chainsaw Man’s right hand. Again, drawing two fingers that are visible and separated
Detailing Chainsaw Man’s right hand and fingers
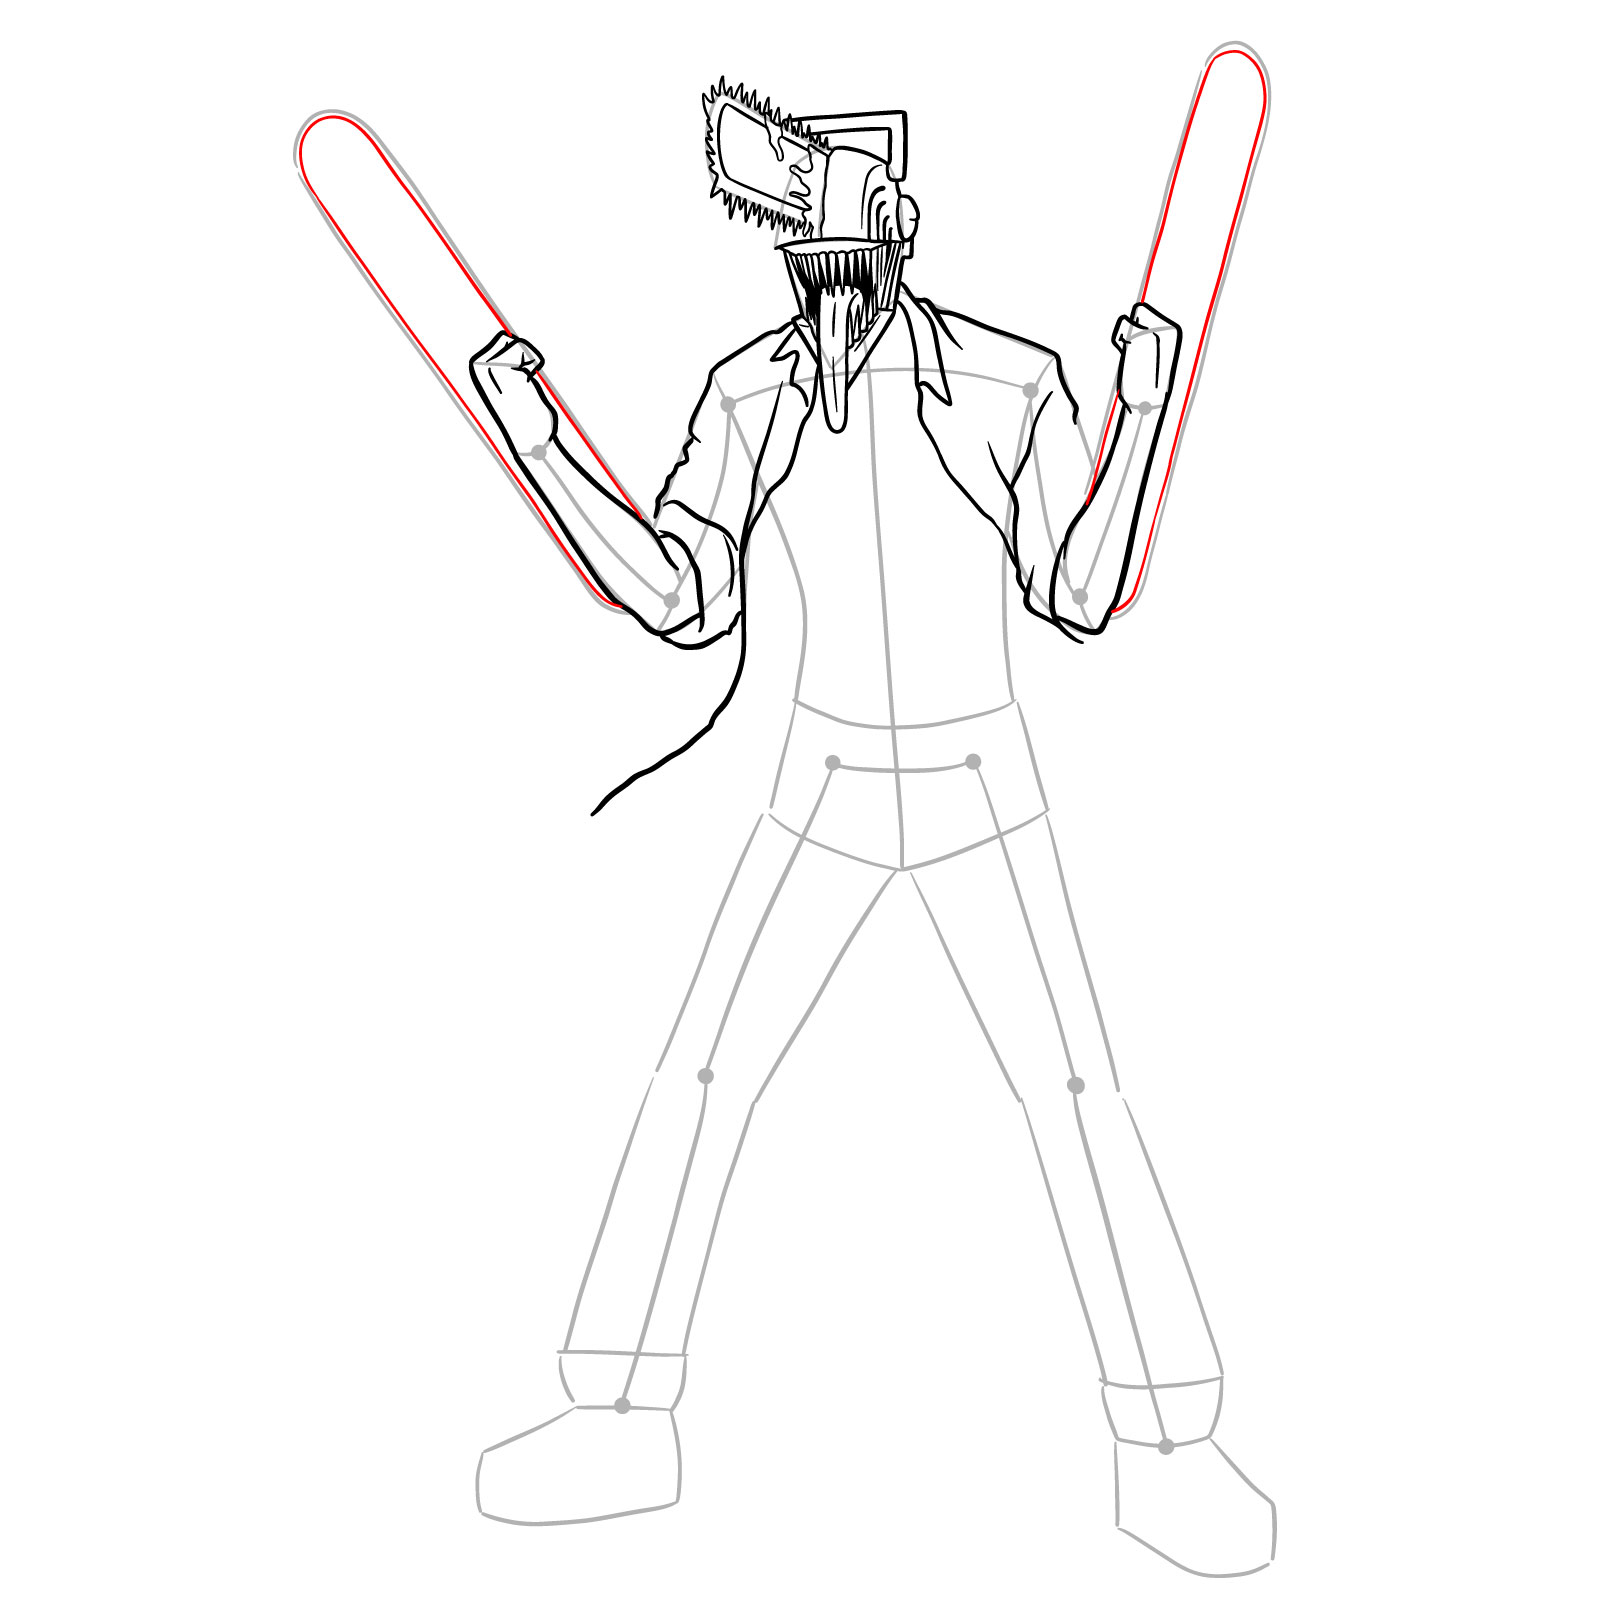
Step 19 – This time we need to add depth to Chainsaw Man’s weapons by sketching the inner lines of the chainsaws, slightly inset from the outer edge we drew as the base to give the blades dimension
Sketching the inner lines of Chainsaw Man’s hand chainsaws
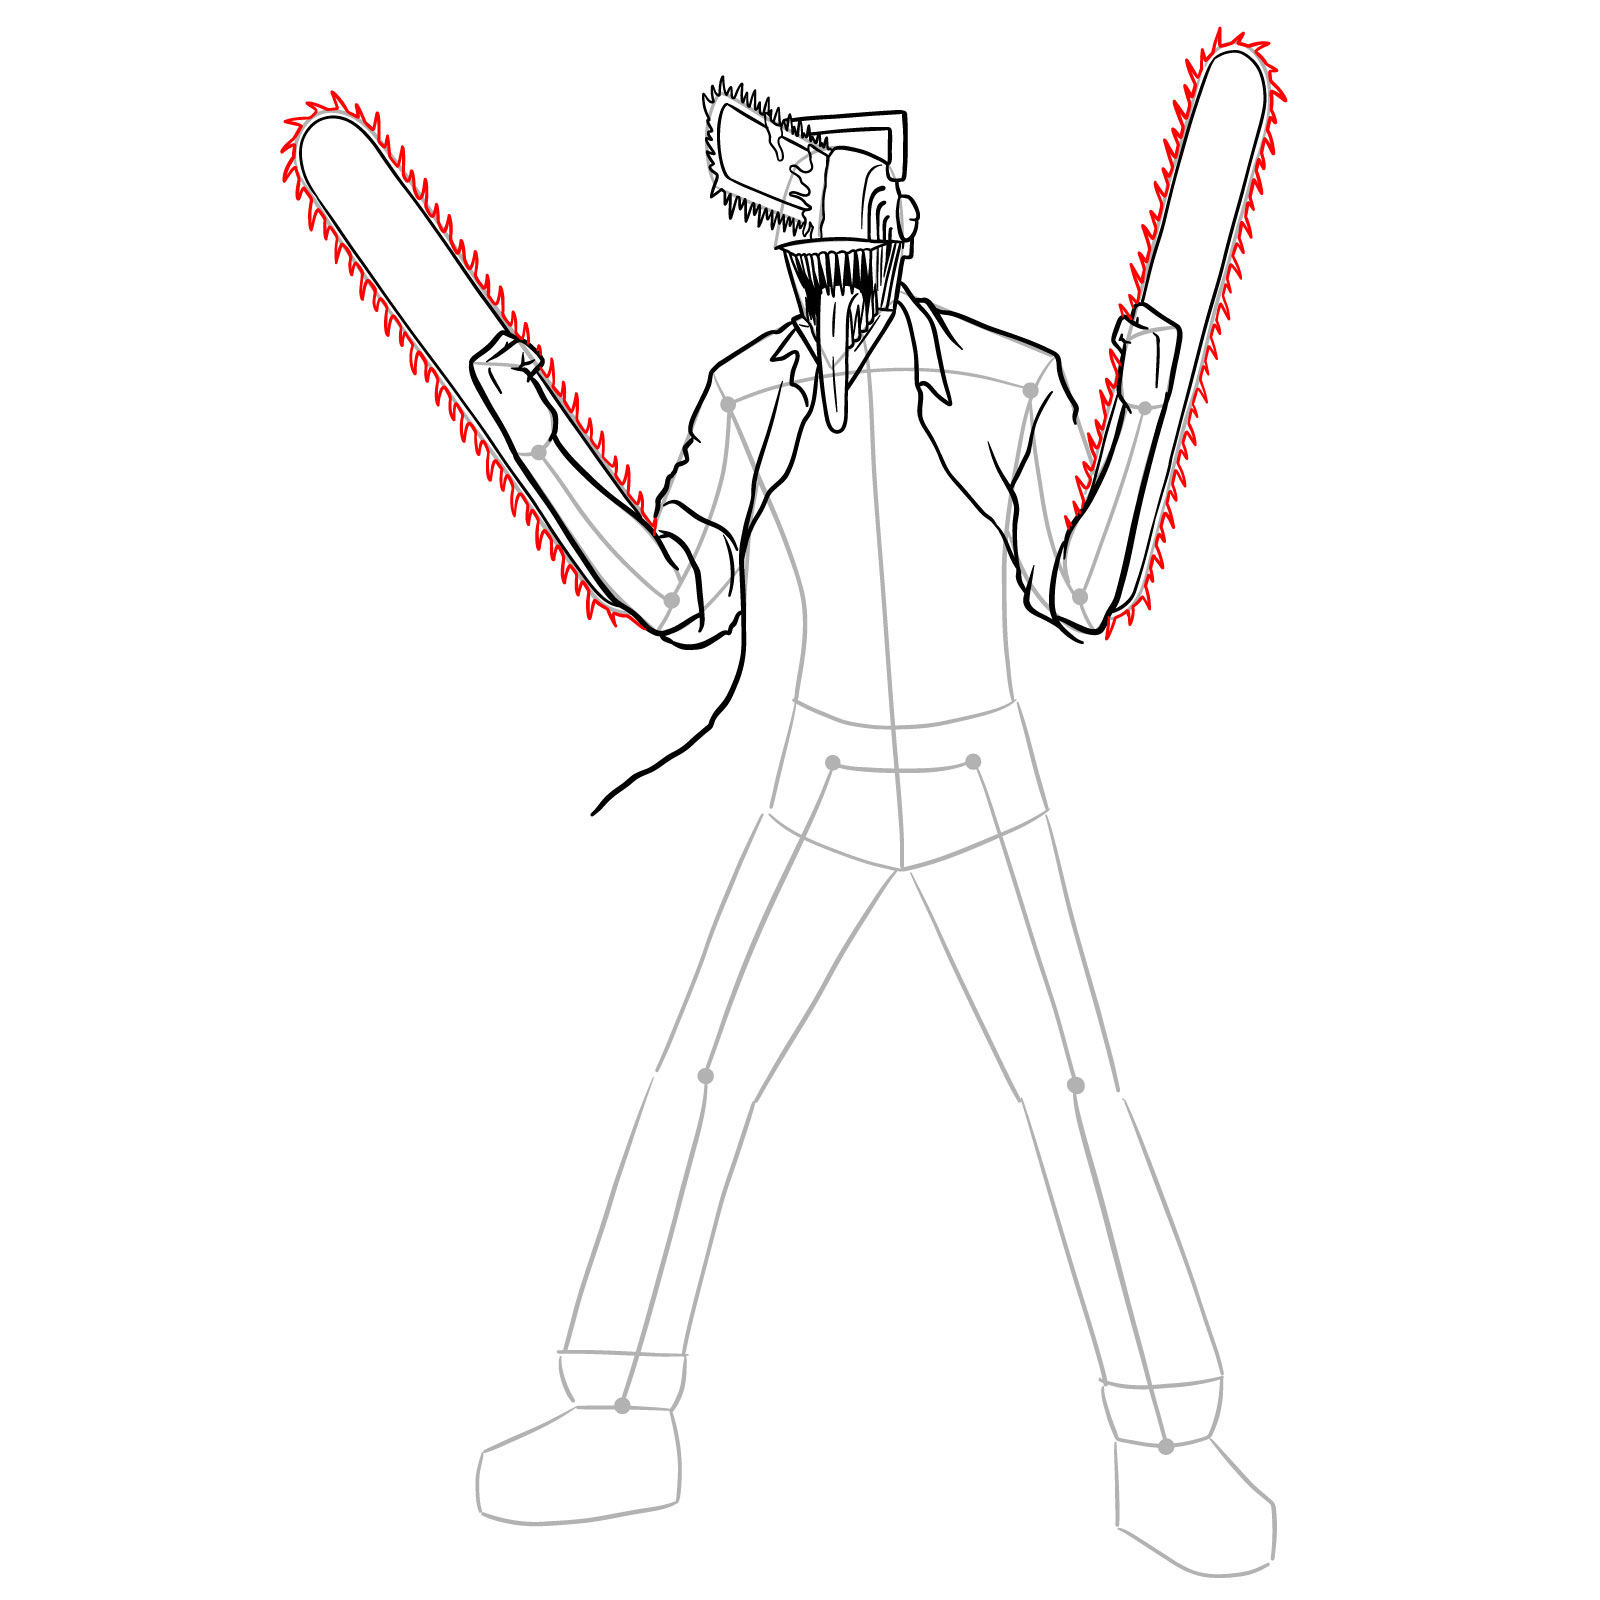
Step 20 – Now let’s give the chainsaws their menacing edge by drawing the teeth, alternating between small and large along the length of the blade, to complete Chainsaw Man’s signature weapon
Drawing the teeth of Chainsaw Man’s chainsaw blades
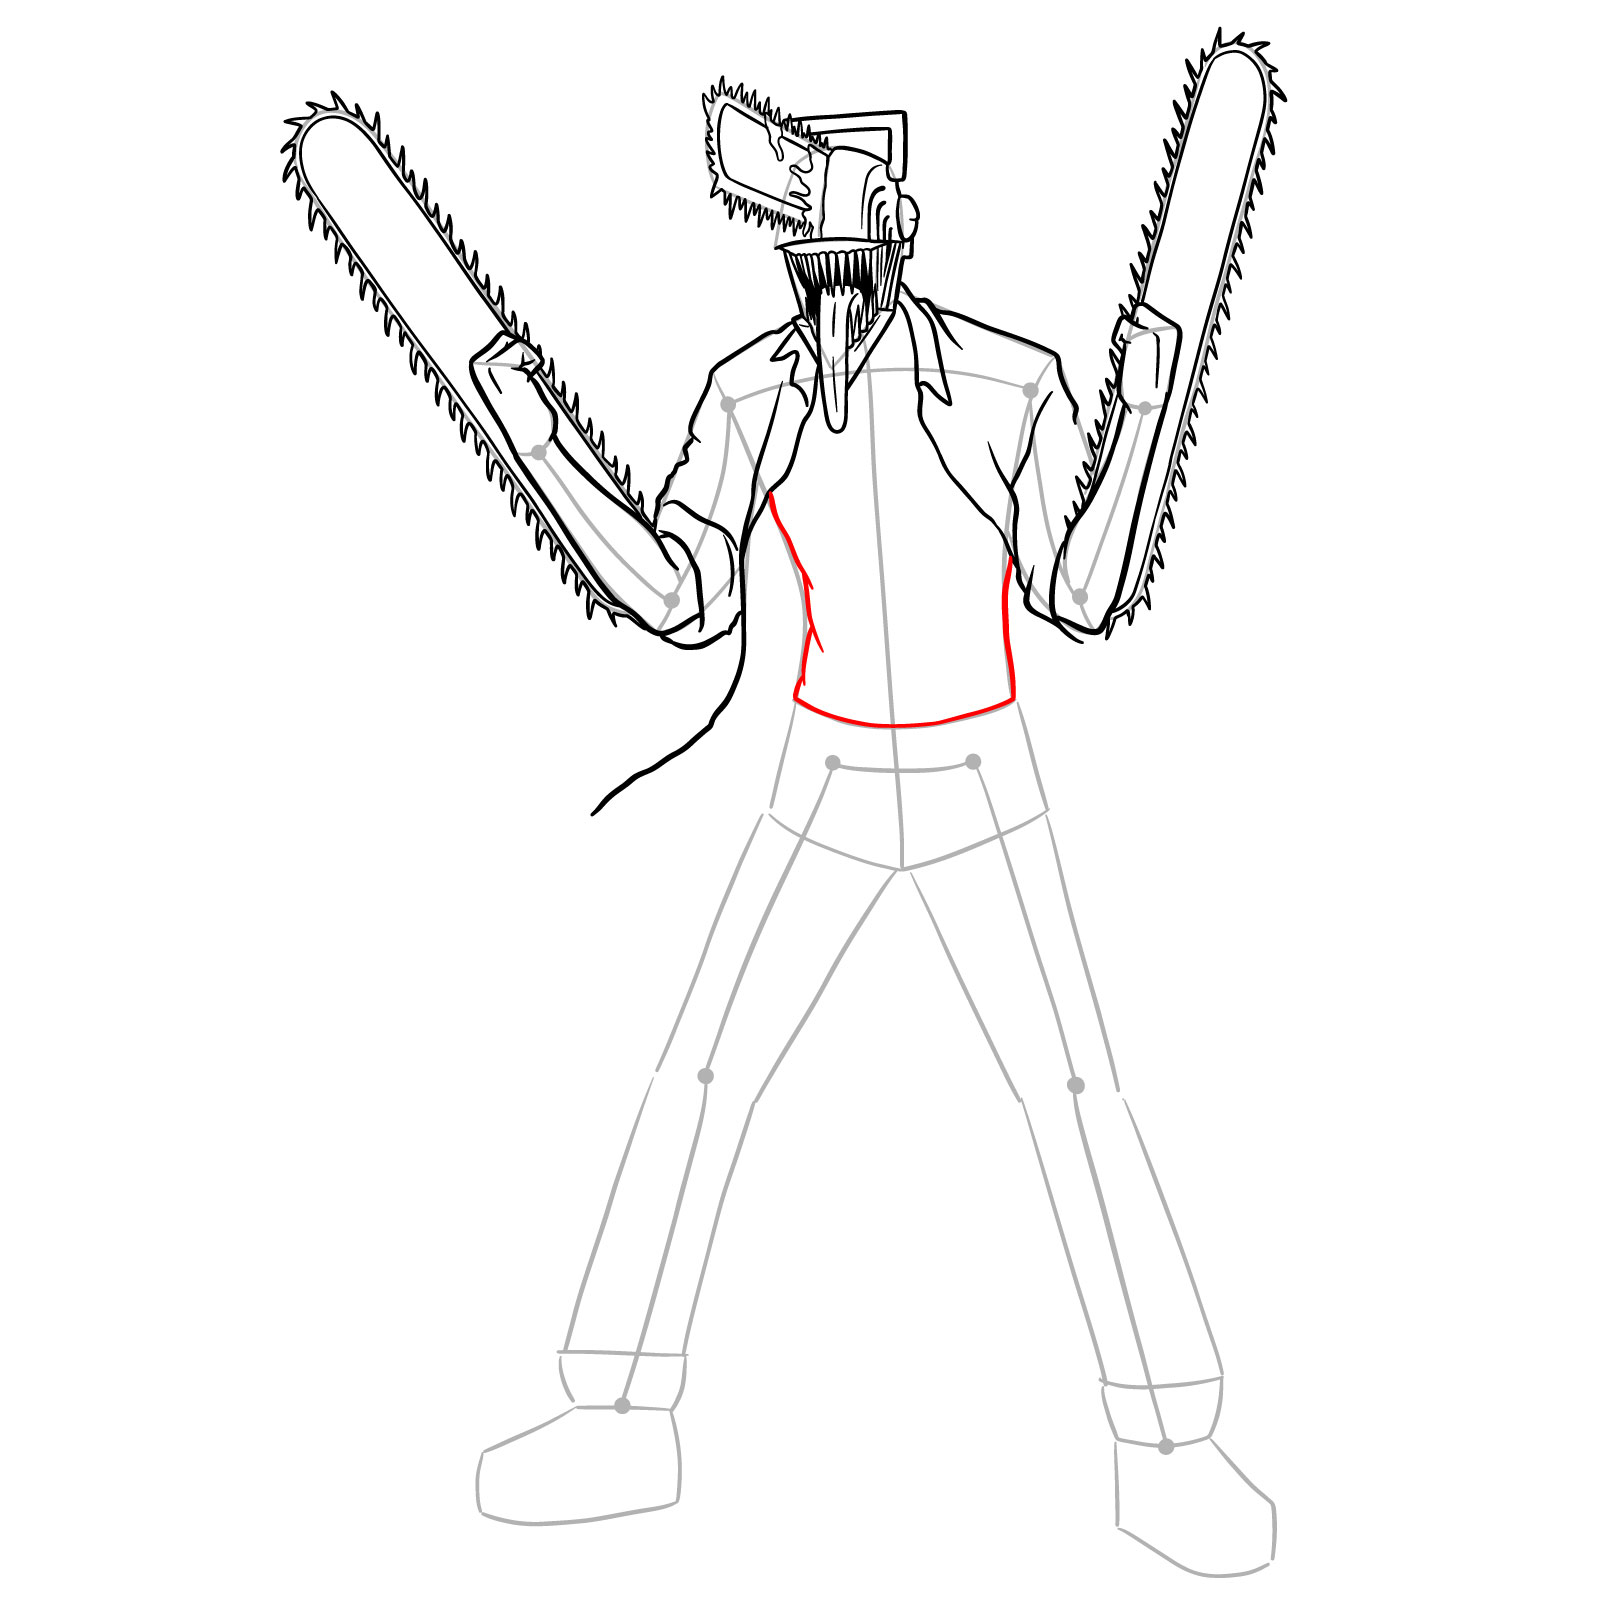
Step 21 – Focus on drawing the outline of Chainsaw Man’s torso down to where the pants begin. Ensure that the transition from the upper body to the lower body is seamless
Chainsaw Man drawing progress highlighting the torso and waist outline
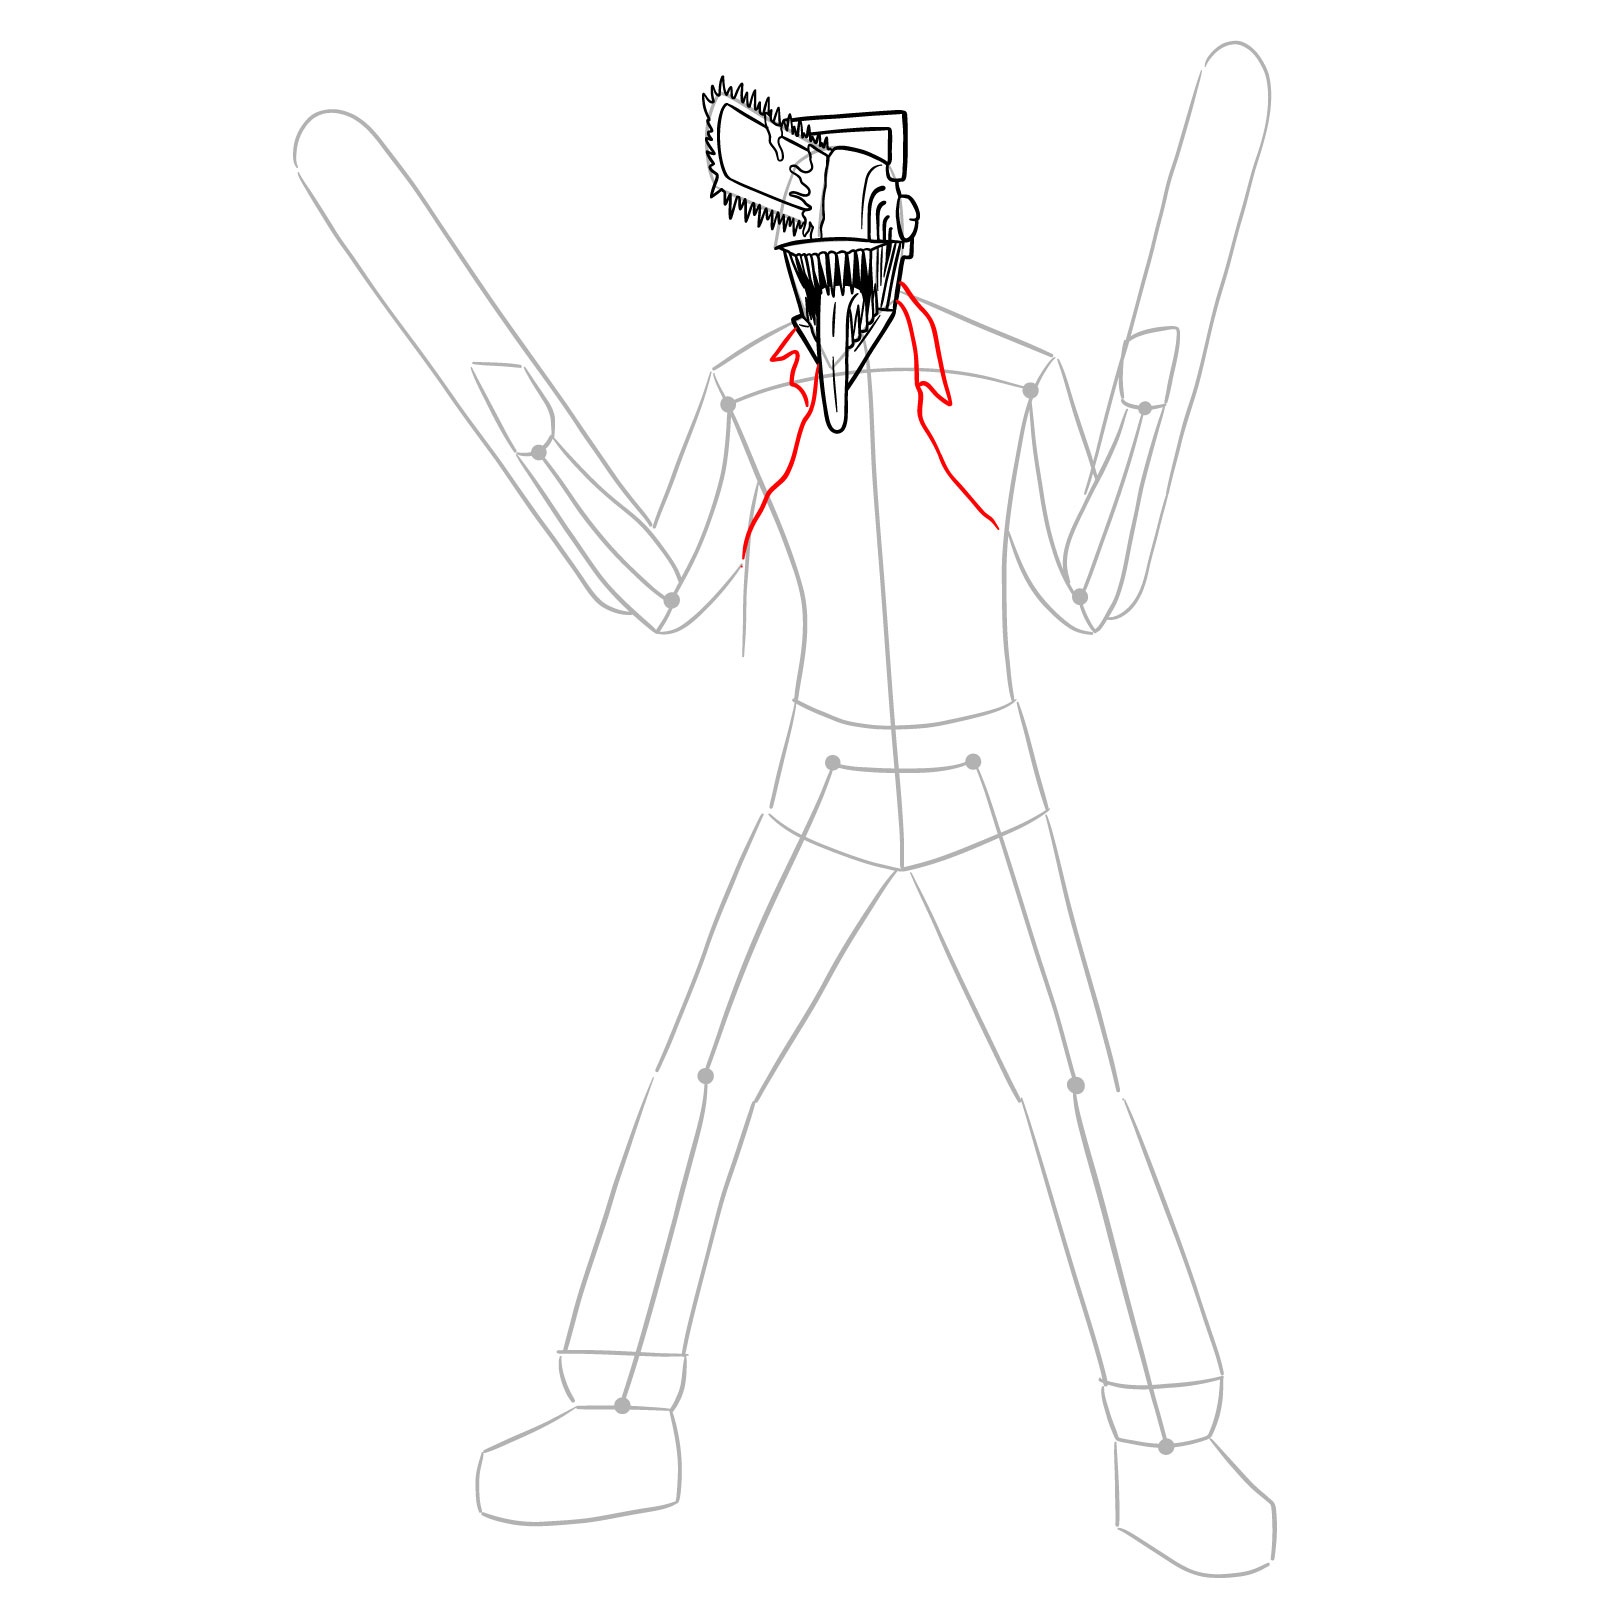
Step 22 – Now let’s sketch the detailed structure of Chainsaw Man’s neck, including the wires and mechanical details. Then, add the details of his torso. Additionally, draw the chainsaw starter handle, positioned in the middle of his chest
Illustrating the finer details of Chainsaw Man’s neck and the central chainsaw starter handle
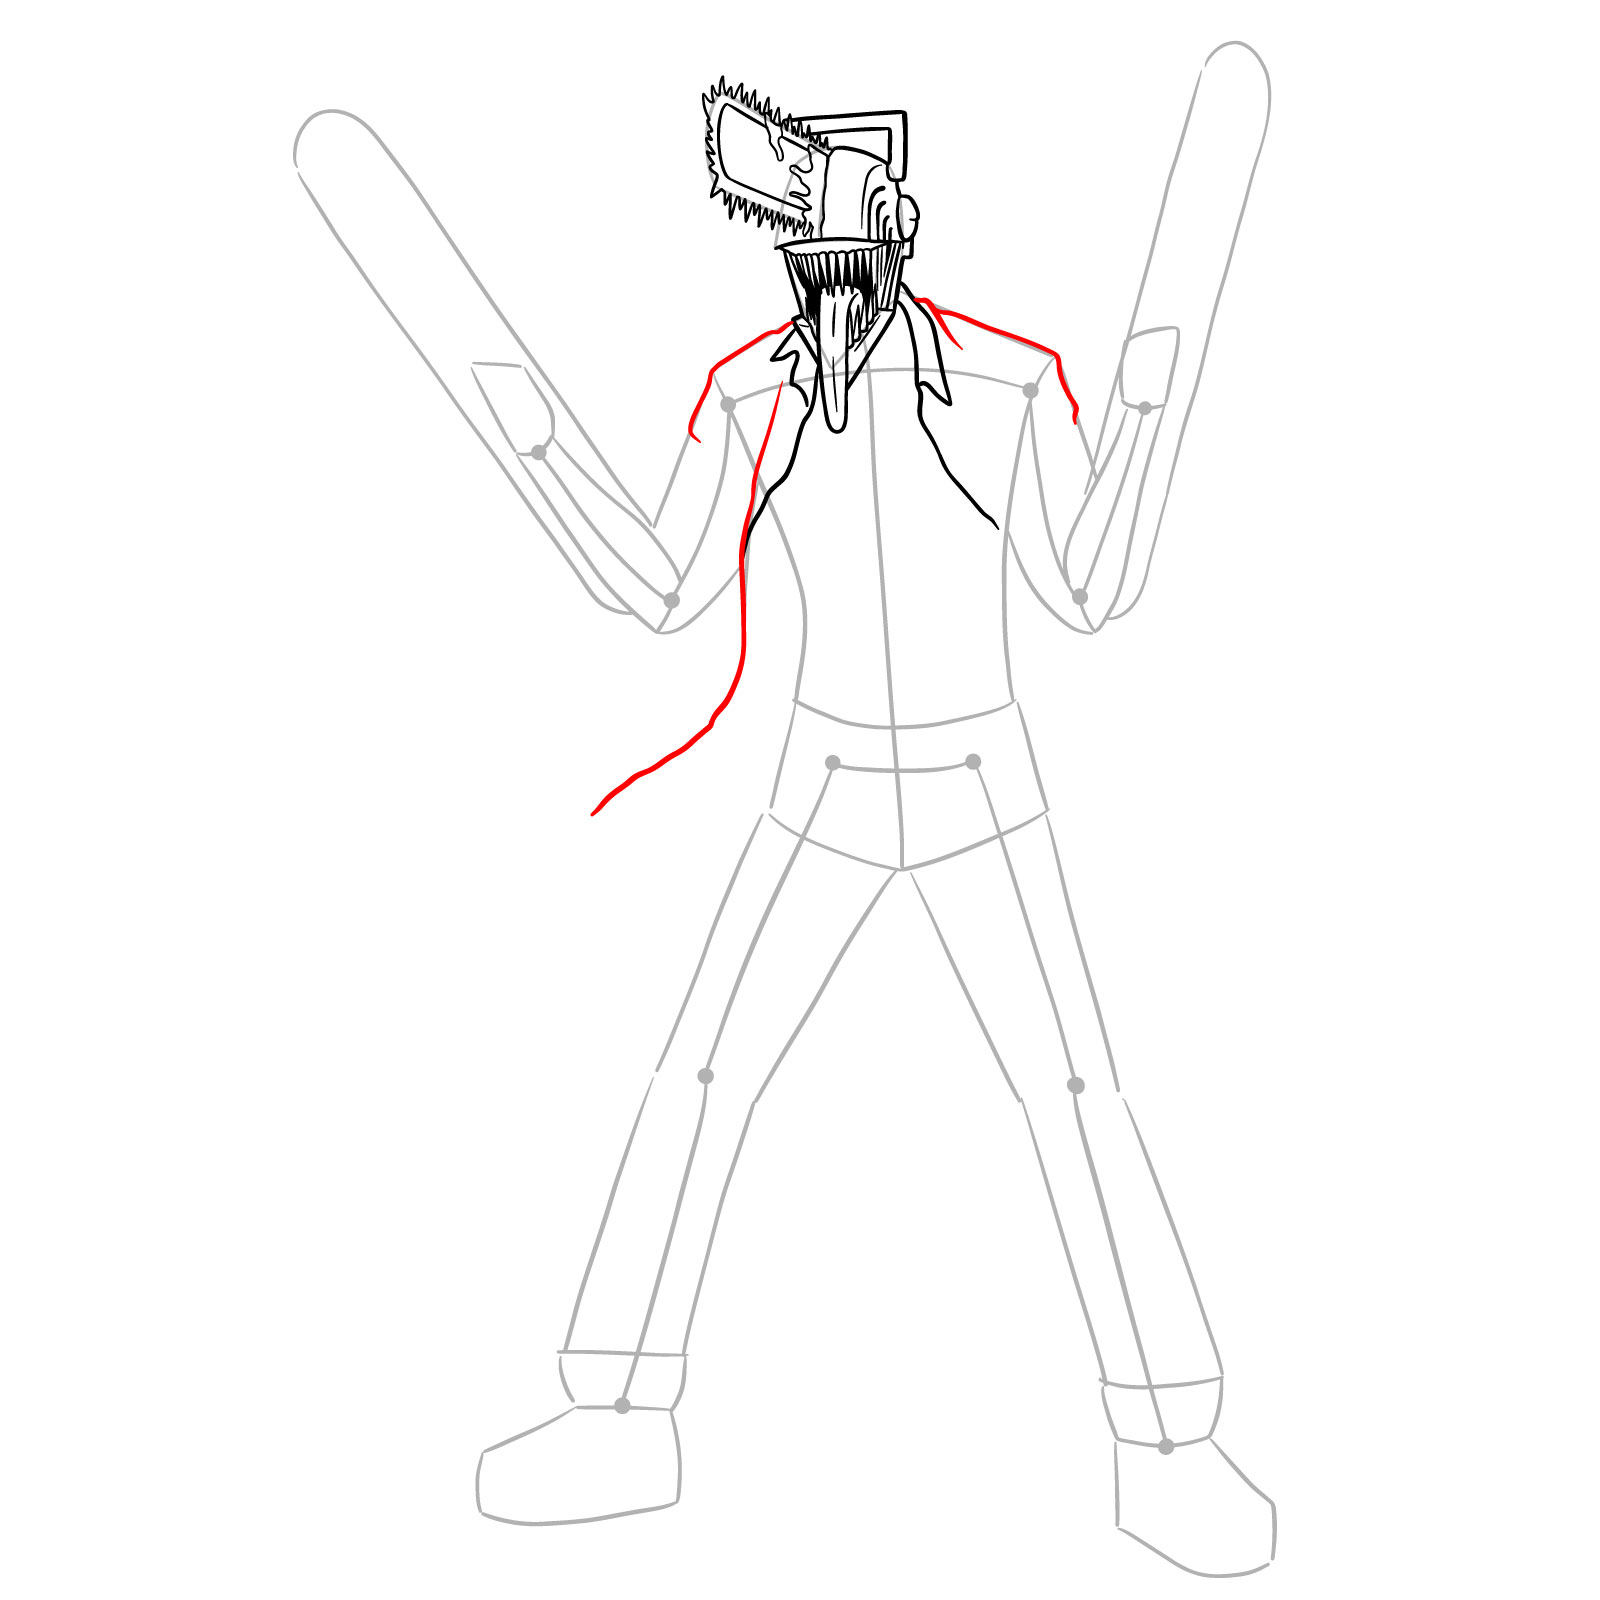
Step 23 – In this step, it’s time to add dynamics to Chainsaw Man’s clothing by sketching the wavy sides of his unbuttoned shirt. This gives a sense of movement and adds a rugged texture to his outfit
Refining Chainsaw Man’s appearance with the addition of wavy shirt sides
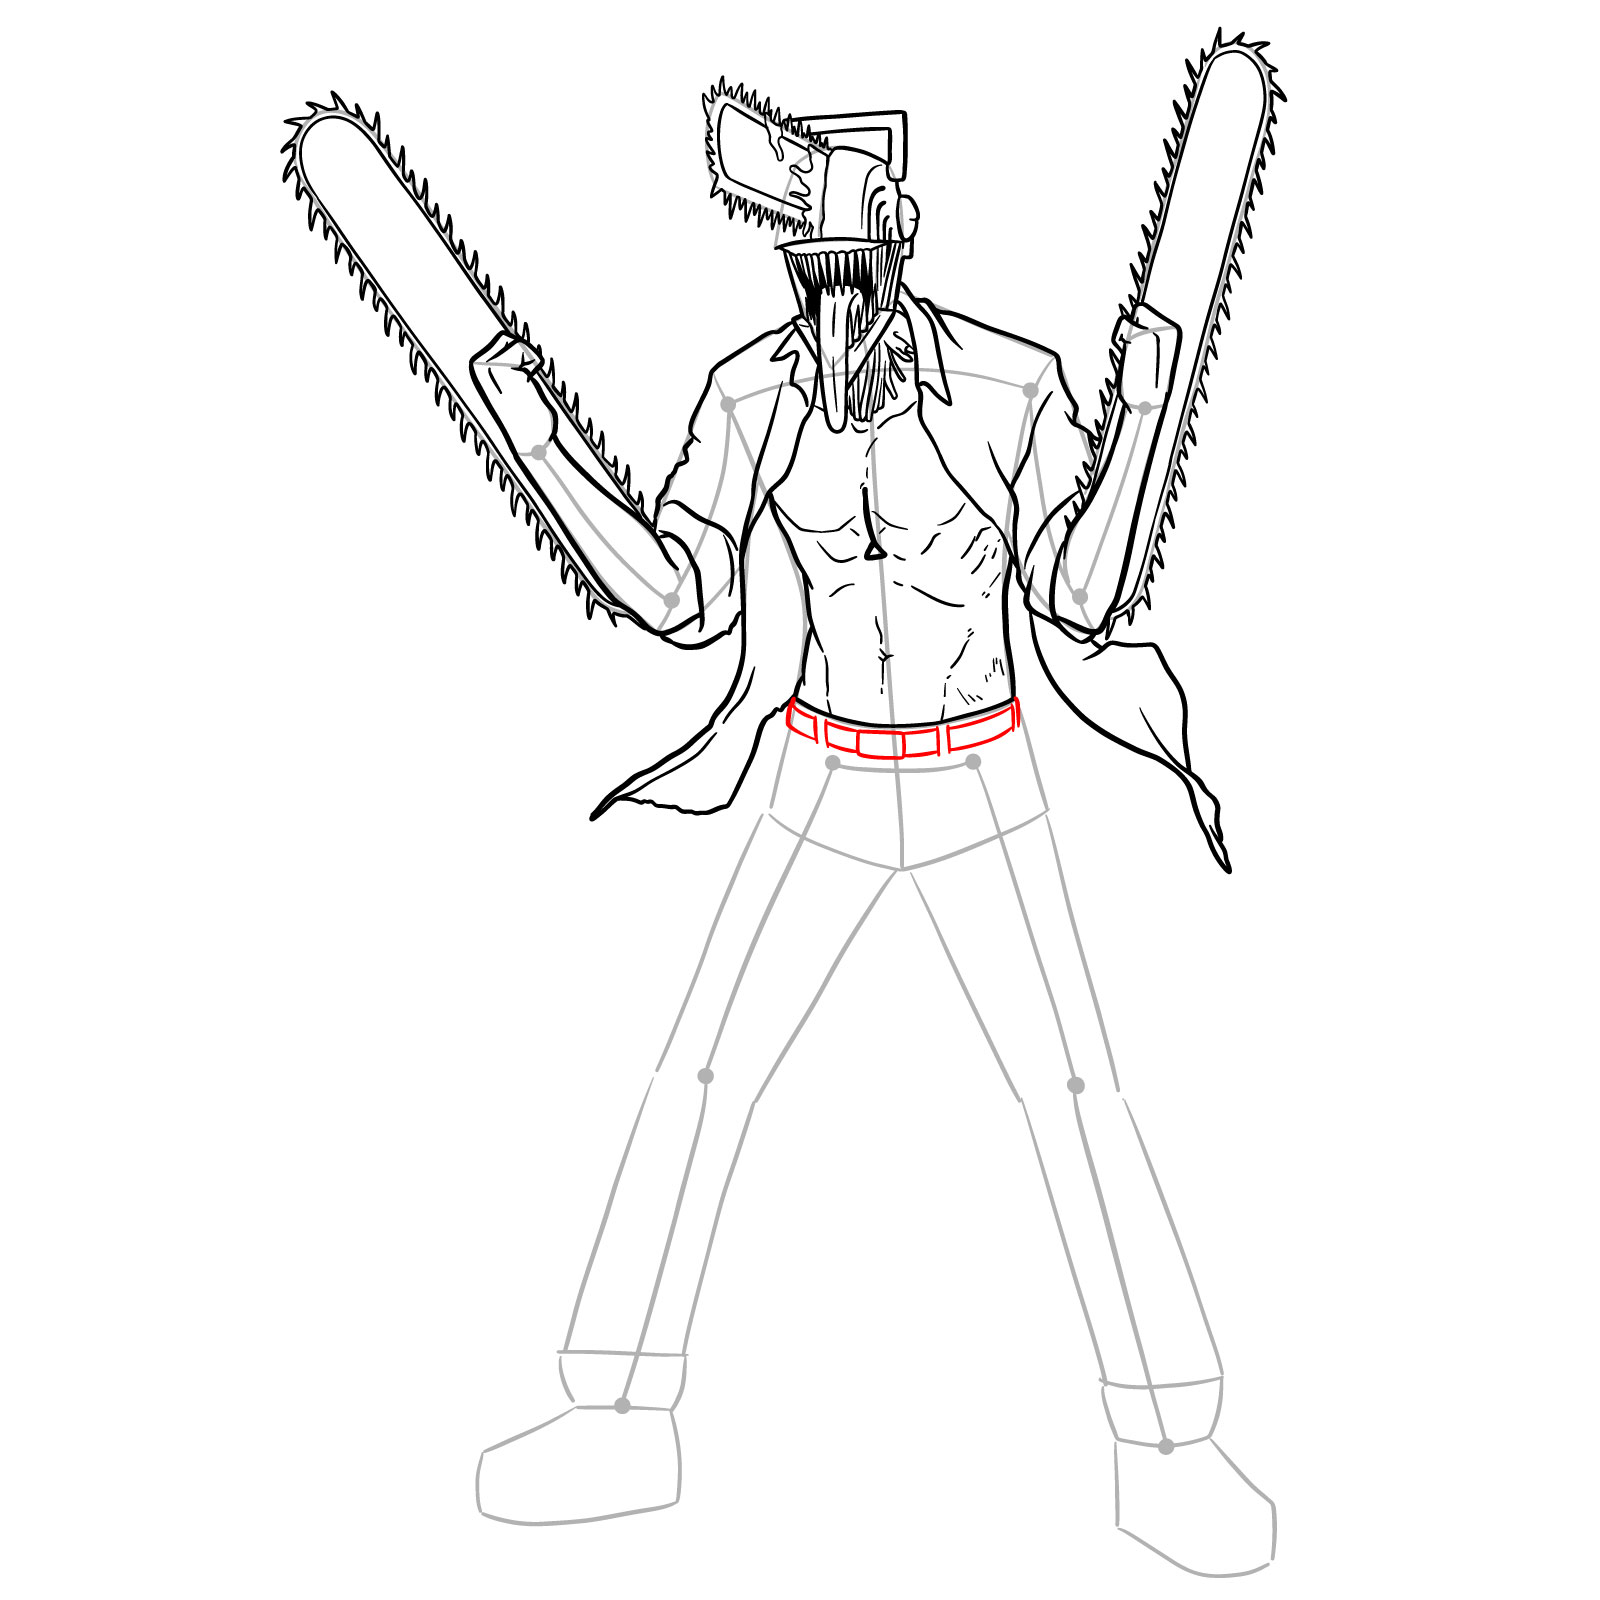
Step 24 – Moving to the bottom part, draw Denji’s belt, paying attention to the buckle and the loops. Ensure that the belt sits naturally on the waistline
Completing the Chainsaw Man sketch with a detailed belt
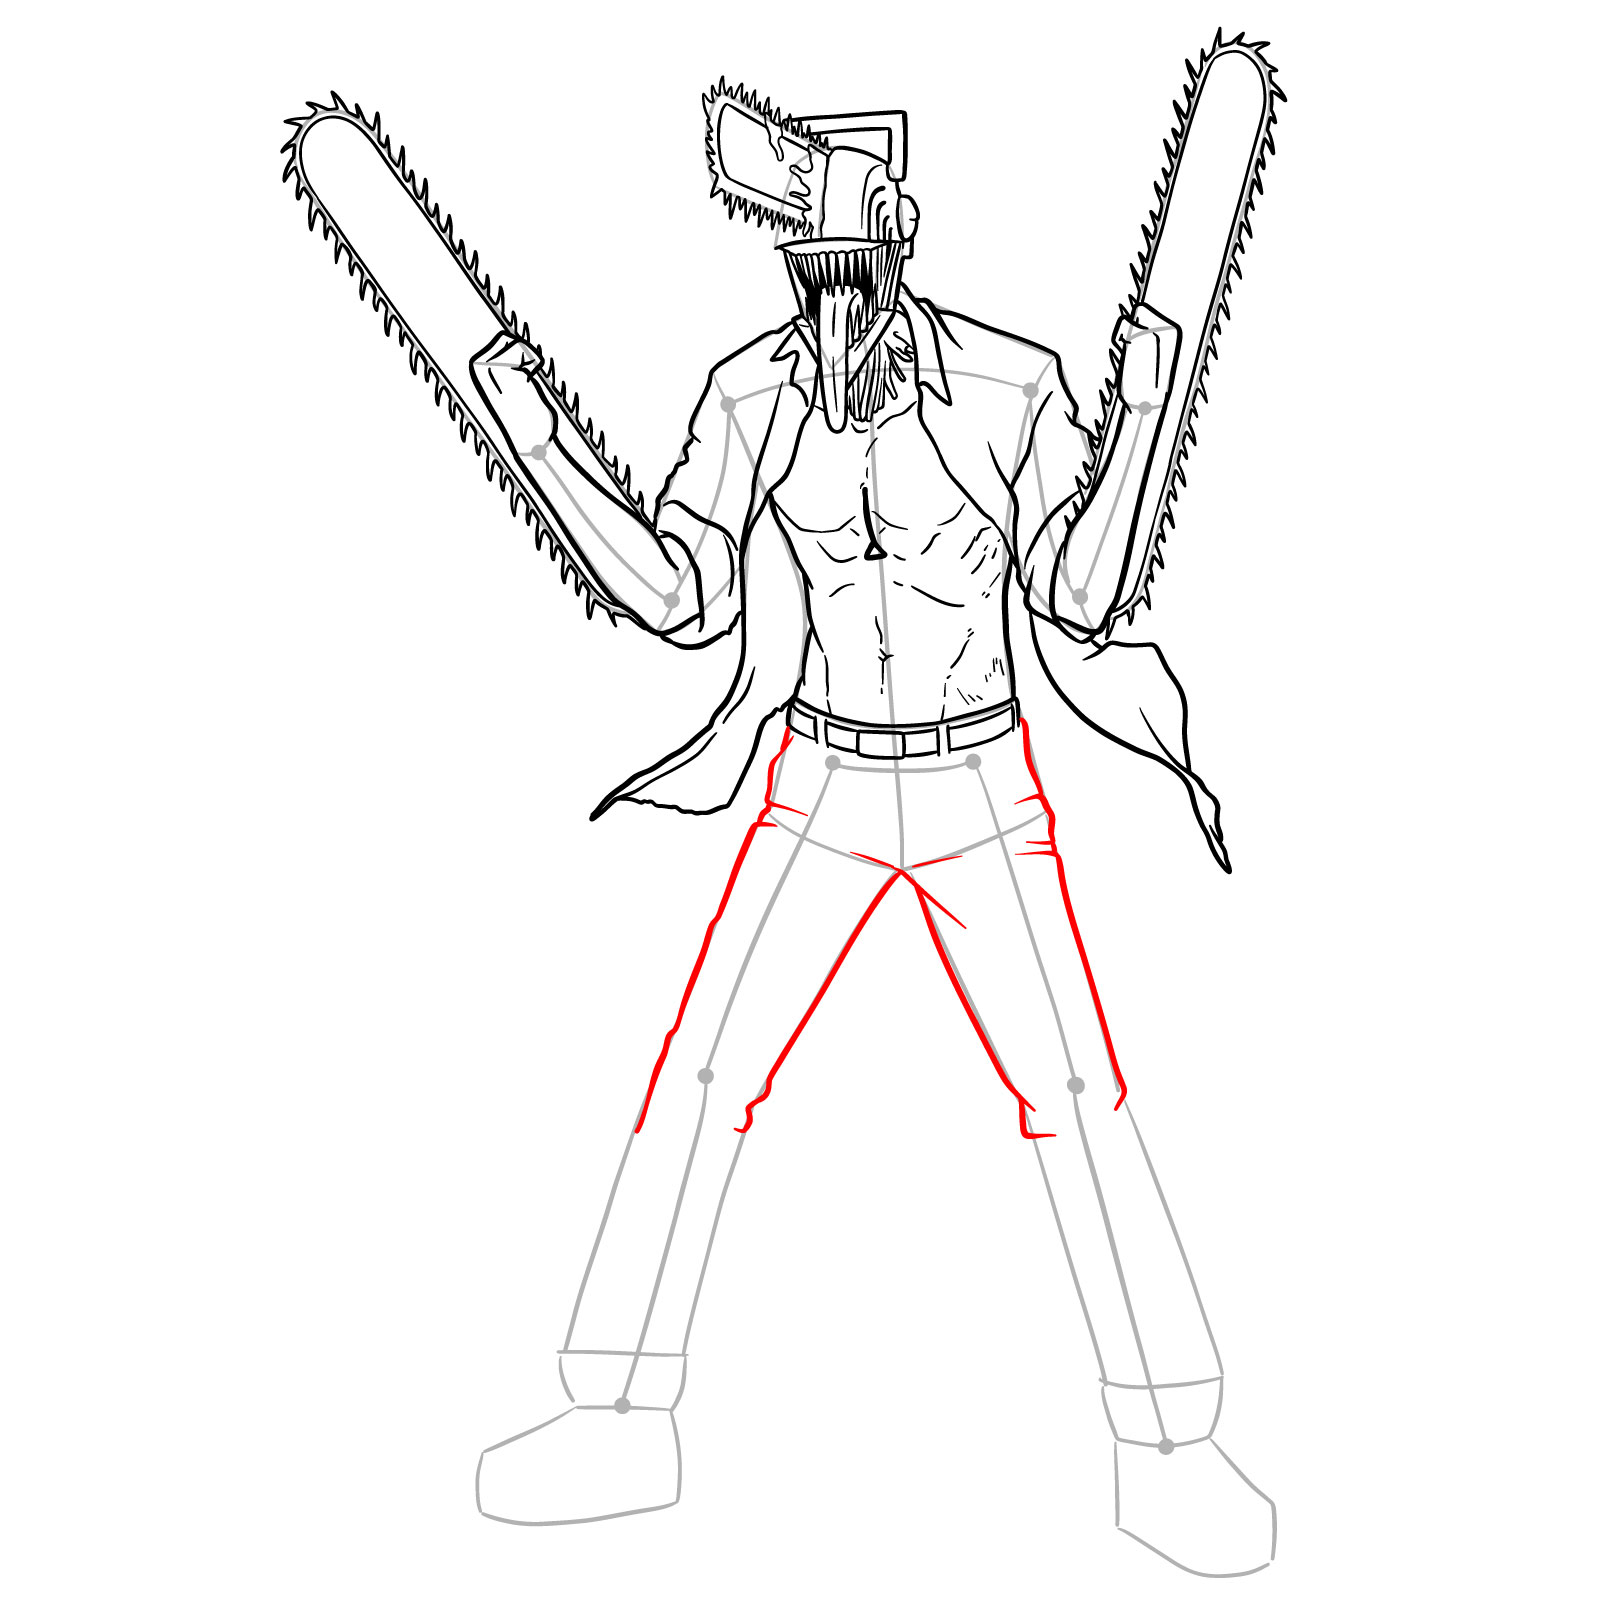
Step 25 – Outline Chainsaw Man’s pants from the waist down to the knees
Drawing the pants to the knees
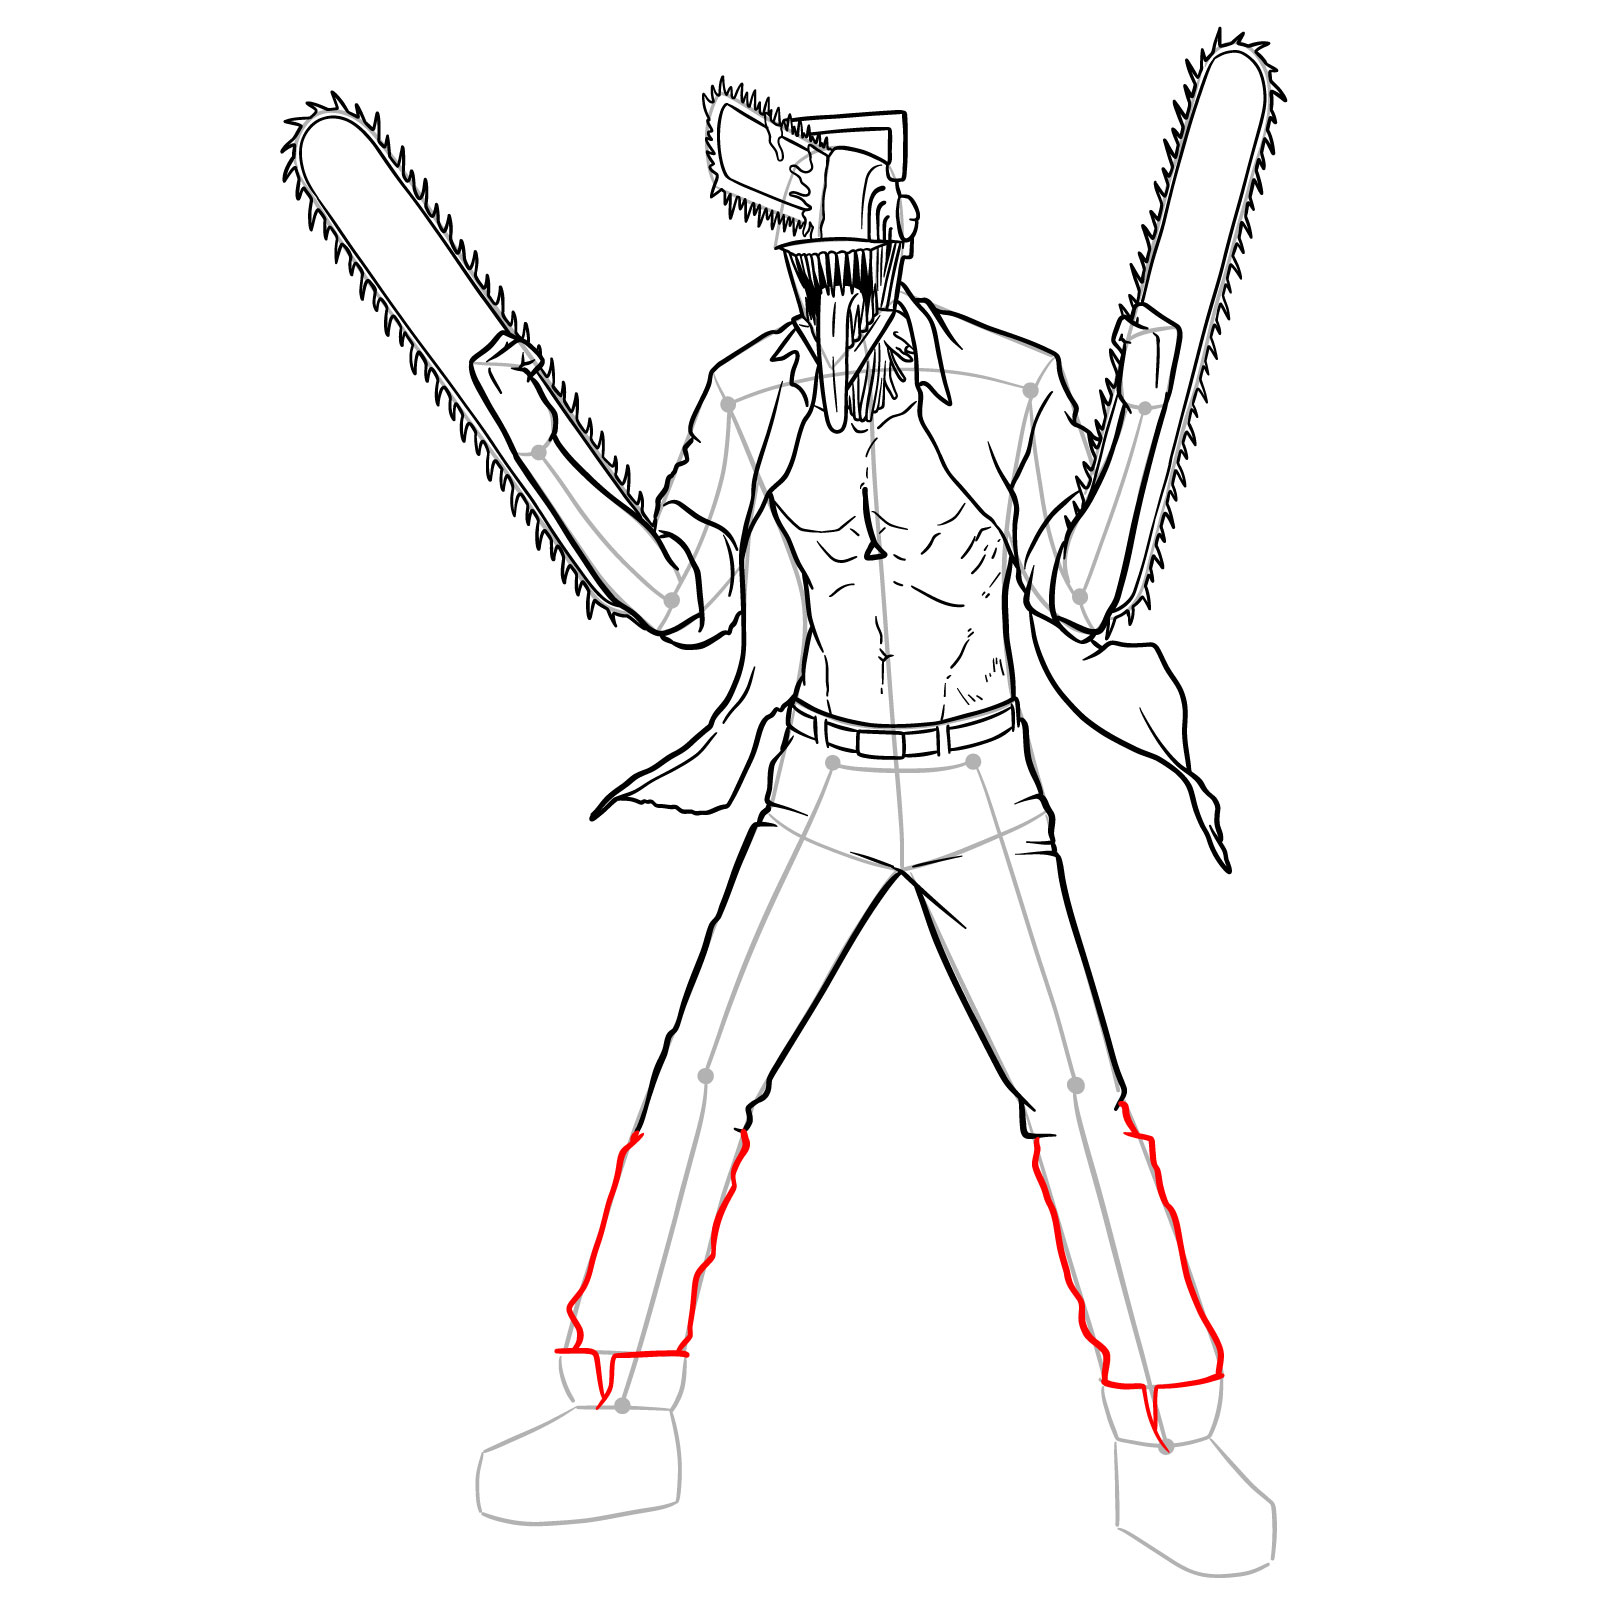
Step 26 – Now let’s extend the pants from the knees down to the ankles, paying attention to the natural flow of the fabric. Also start sketching the upper part of the sneakers to establish the footwear shape
Extending the pants and starting the sneakers
Step 27 – Outline the sneakers, paying attention to the basic shapes of those. Add the lace knots to suggest the tied laces
Detailing the sneakers with lace knots
Step 28 – In this drawing step, add detailed patterns and laces to Chainsaw Man’s sneakers, which adds realism and depth to the footwear
Adding patterns and laces to the sneakers
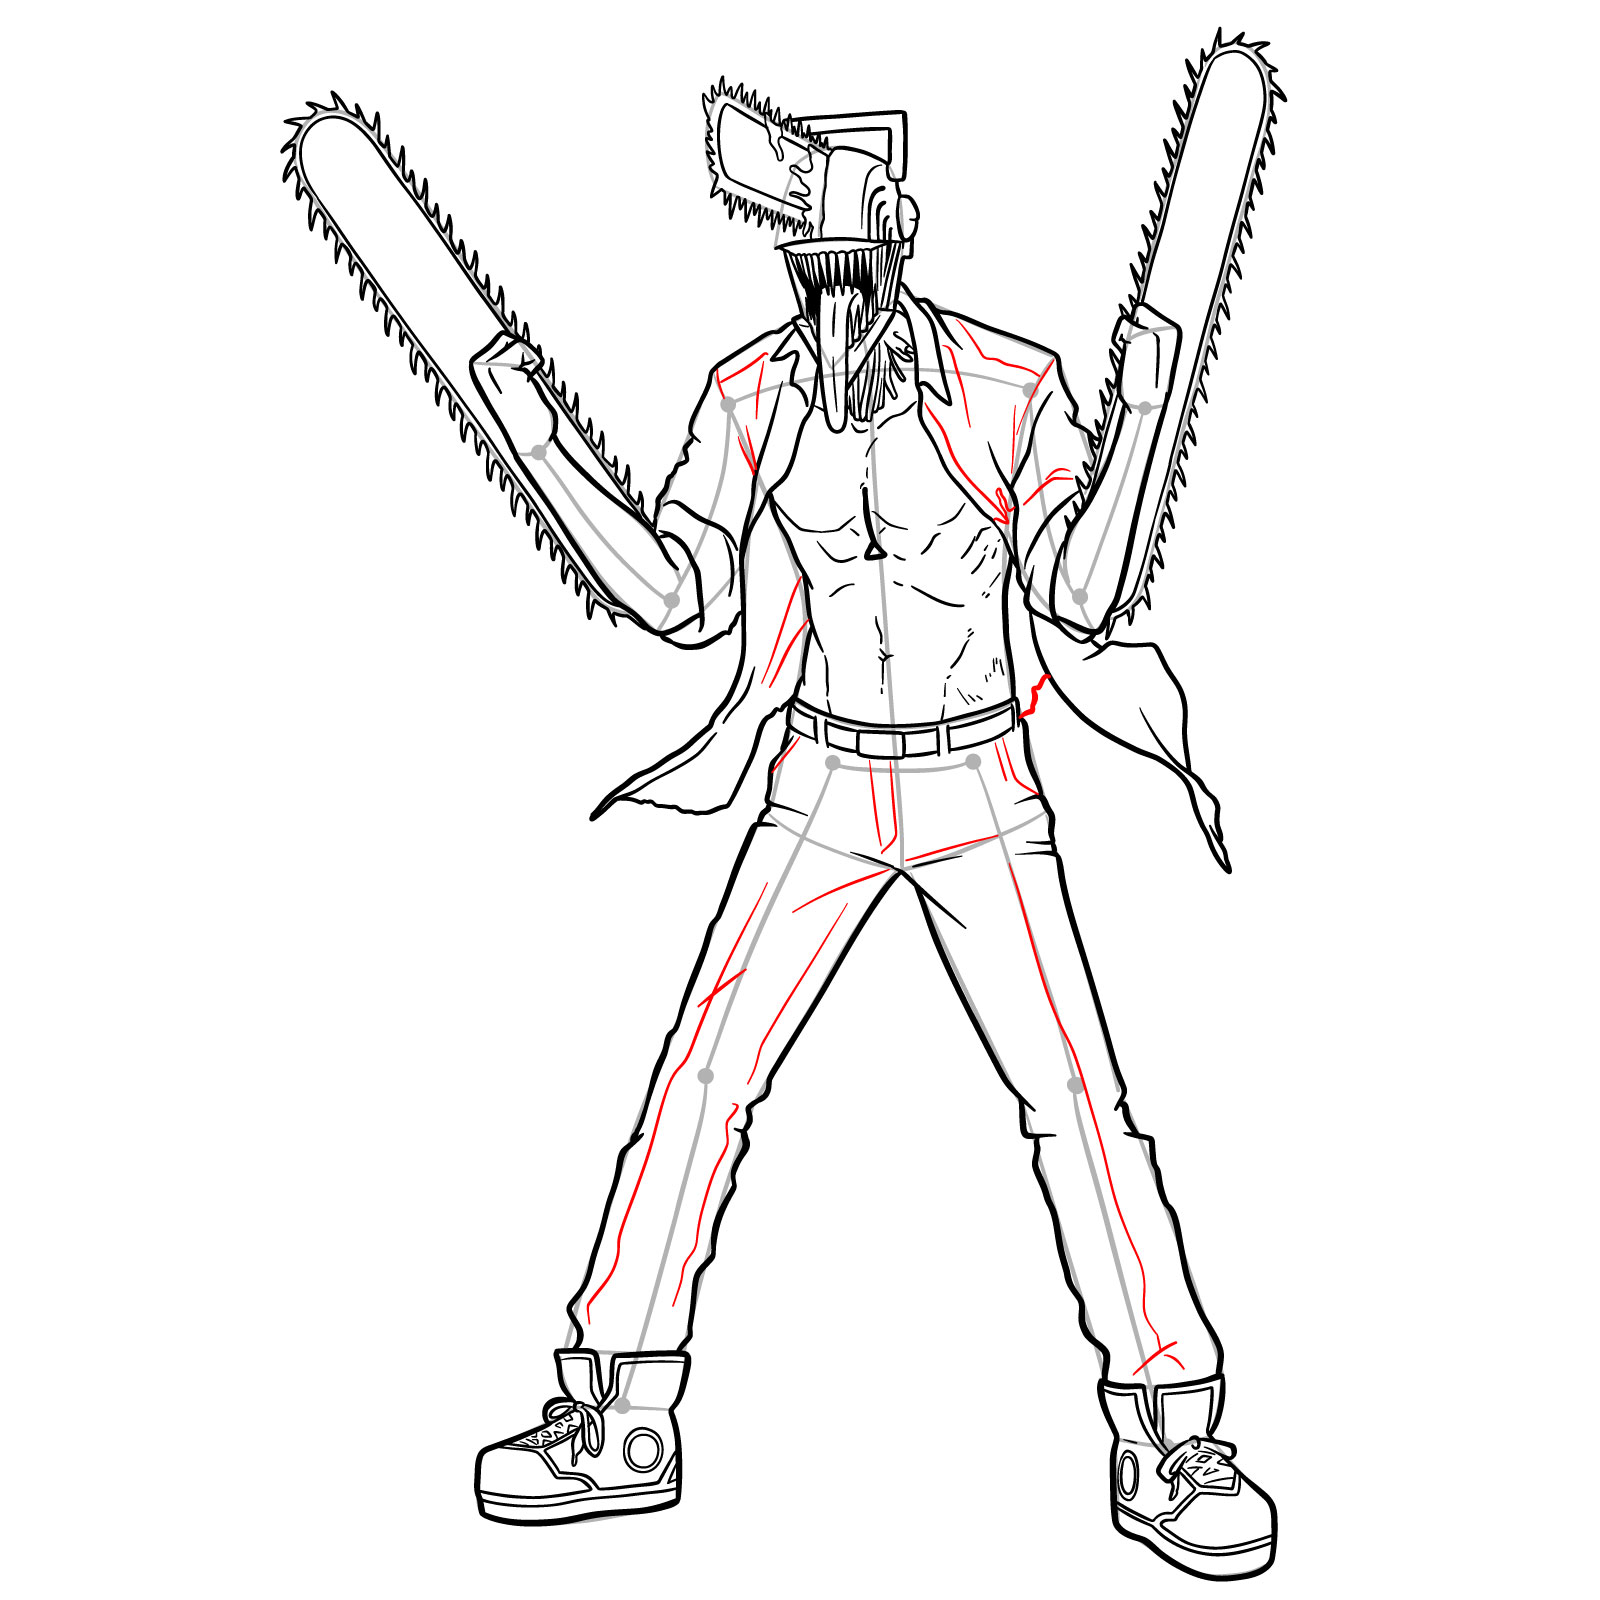
Step 29 – Now let’s add the finer details, such as creases and folds, to the pants and shirt
Adding details to the clothing
Step 30 – For the final step, review the entire drawing, adding any missing details to Chainsaw Man. Carefully erase the basic sketch from the first 3 steps. As now you’ve learned how to draw Chainsaw Man, consider inking your drawing to make it stand out. If you decide to do so, wait for ink to dry completely and then erase all the pencil lines and marks. It will make your drawing look polished and ready for coloring
Don't Miss New Tutorials! Follow SketchOk
I publish new step-by-step drawing guides every single day. Follow on your favorite platform so you never miss a tutorial. Thousands of artists are already drawing along and I can't wait you to join in!
On my Patreon you can grab unique hand-made coloring pages: each one drawn by me personally. Every purchase directly supports the creation of new drawing tutorials. It's the best way to practice your skills, keep the site going, and get something truly original at the same time.
We’ve covered a lot today, and I’m proud of the strides we’ve made in learning how to draw Denji as Chainsaw Man. From capturing his dynamic 3/4 view to tackling the bold front view, these guides are designed to enhance your drawing skills and bring this formidable character to life. I always enjoy sharing these moments of creation with you and look forward to our next drawing session.
Don’t miss out on any updates or new guides! Follow SketchOk on our social media channels:
Vector illustrator and the creator of Sketchok.com and TheHowToDraw.com. I publish free step-by-step drawing tutorials to help people of all levels learn to draw.
Disclaimer: This is a non-commercial, fan-made educational site. All characters belong to their respective owners. We are not affiliated with any rights holders.
Read full Disclaimer