Hello everyone, today I’m here with another guide on how to draw the face of Rukia Kuchiki, a beloved character from the Bleach series. This tutorial is designed to help artists of all skill levels capture her unique features accurately.
Rukia’s Appearance
Rukia Kuchiki is known for her light skin, purple eyes, and black hair with strands hanging between her eyes. Pay attention to these defining features.
Her hair evolved over the series, ranging from a short bob to a longer style. The attached drawing shows her with a bob haircut.
Rukia often wears a standard shihakushō, which is a common Shinigami attire, but for this drawing, focus on her facial features.
This tutorial is structured as a series of images, each representing a step in the drawing process. By following these steps sequentially, you’ll gradually bring Rukia’s face to life.
Red Color: Indicates the current step to focus on.
Black Color: Shows the lines drawn in previous steps.
Grey Color: Represents the basic sketch.
The guide consists of 9 steps, starting with a basic sketch. In the final stage, you have the option to ink the sketch. After the ink dries, gently erase the pencil marks for a clean, professional look.
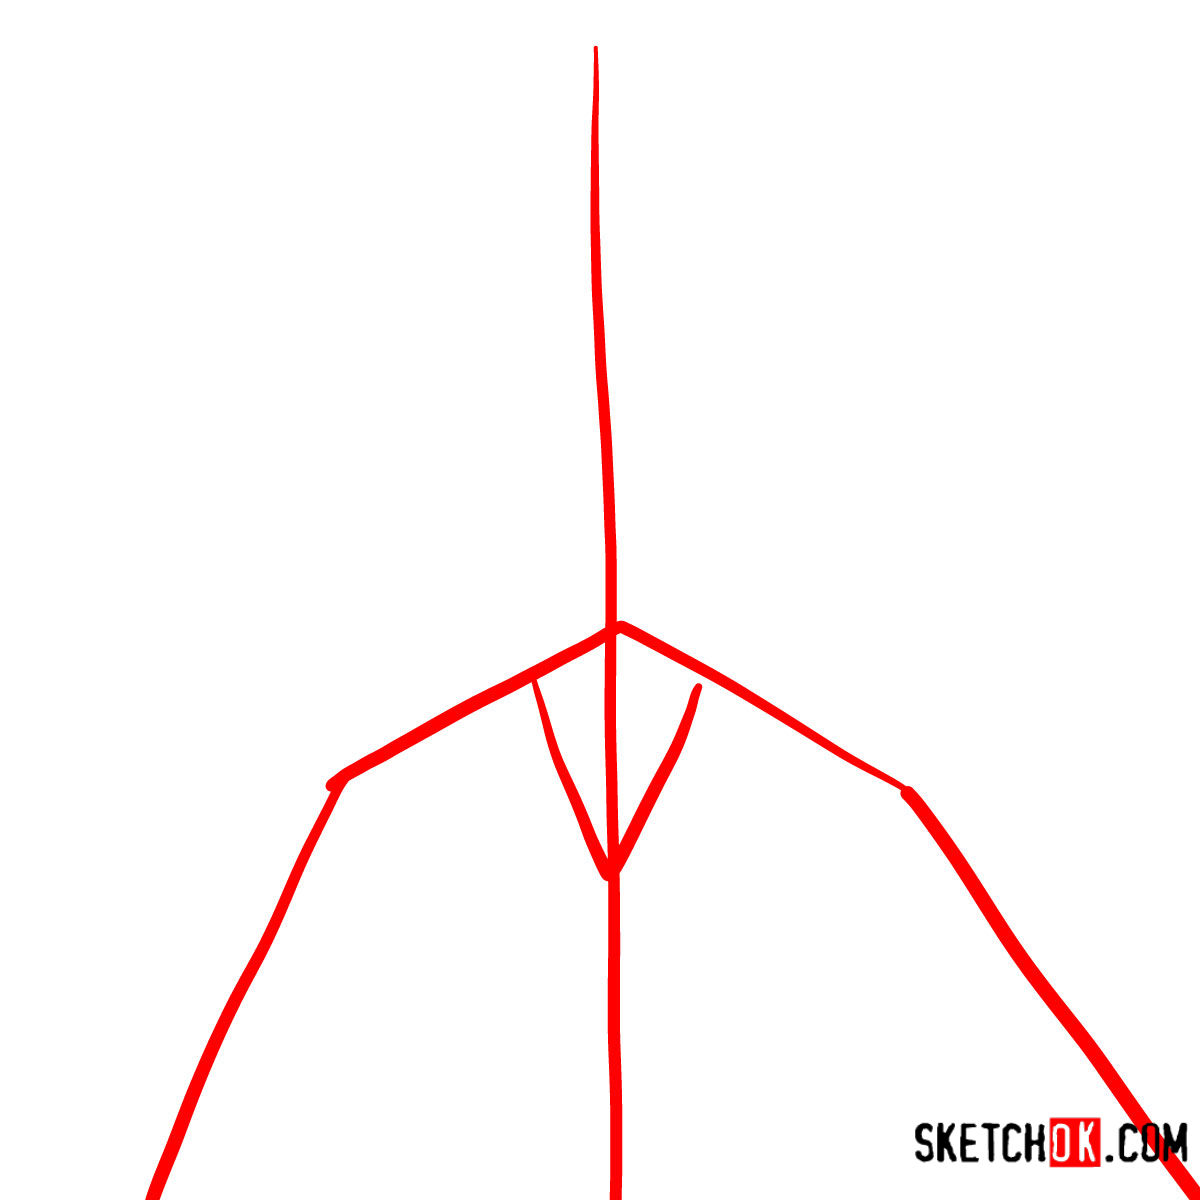
Step 01 – Start by sketching a straight vertical line to establish the base of the face and upper body. Then, draw two lines from the middle of that line to represent the shoulders. This forms the basic structure for Rukia Kuchiki’s shoulders
Beginning the drawing of Rukia Kuchiki’s face with basic outlines
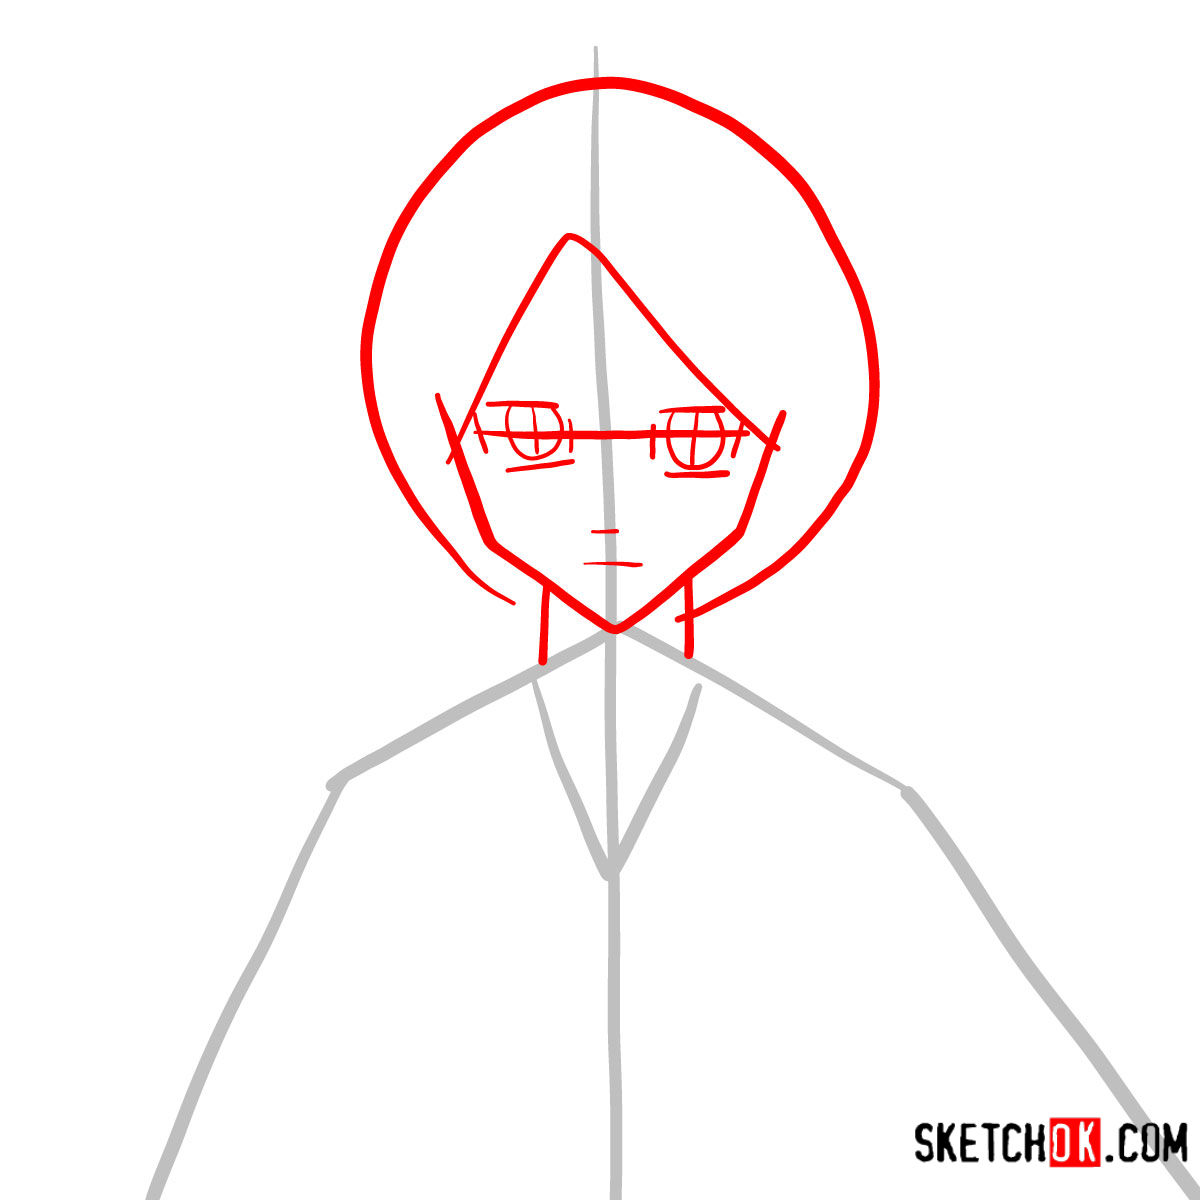
Step 02 – Draw an inverted egg shape for the head, ensuring it intersects with the horizontal line for proper alignment. Add a horizontal line in the center to act as a guide for eyes. Place her eyes, nose and mouth shapes. Then sketch the neck, connecting to the shoulders
Shaping the head and neck for Rukia Kuchiki’s face drawing
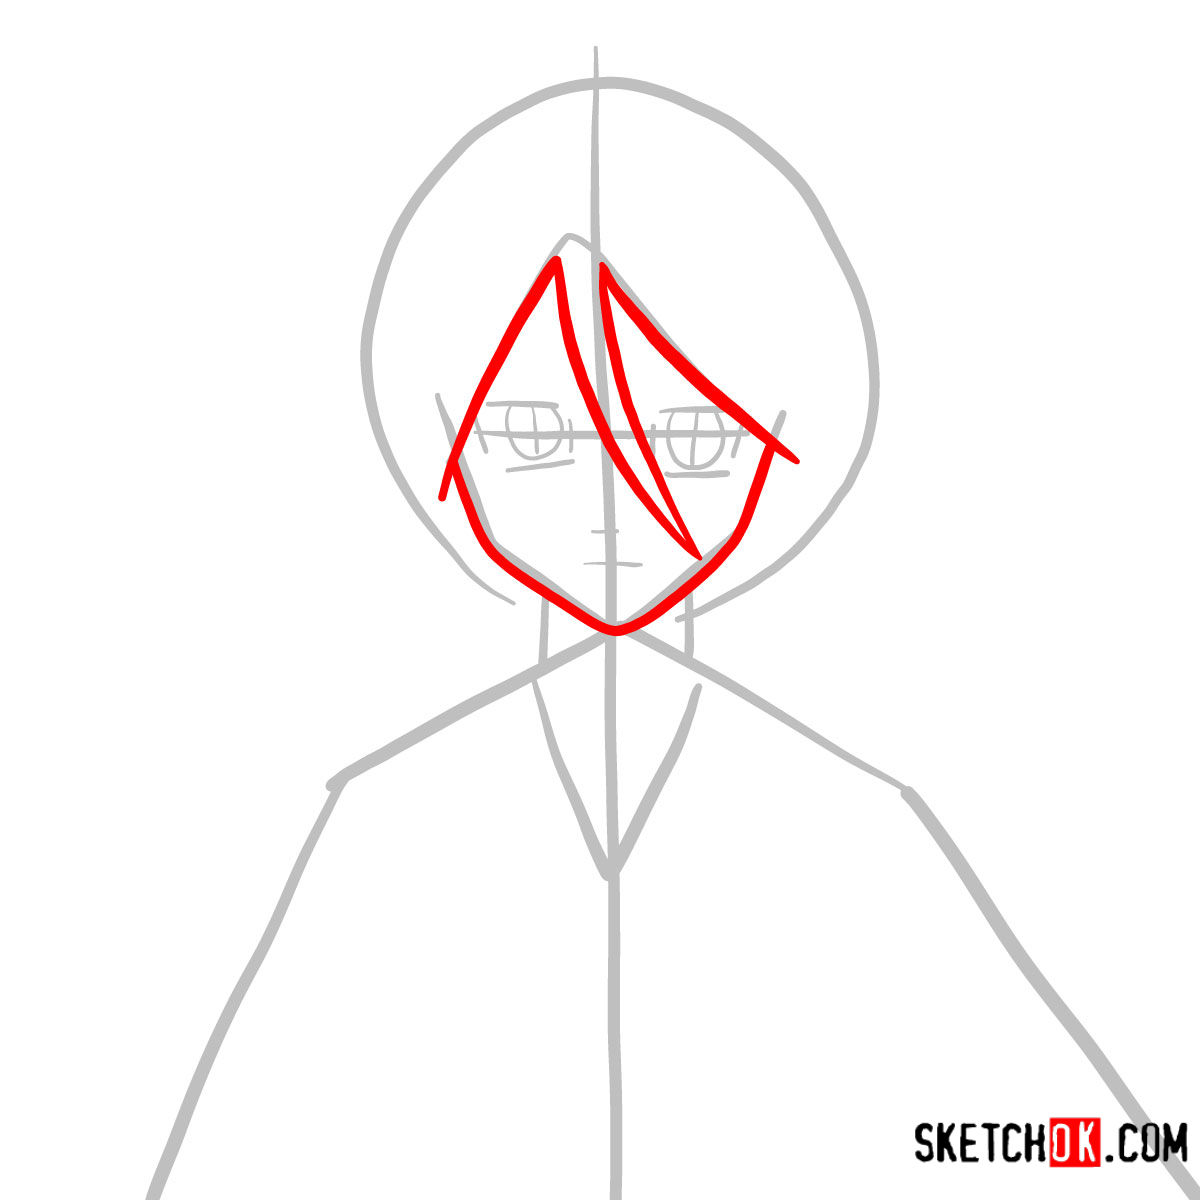
Step 03 – Outline the hairline and frame of the face, starting from the top of the head and curving around to where the jaw will be. Sketch the fringe by drawing lines that create a broken outline along the forehead
Outlining the face frame and fringe in the drawing of Rukia Kuchiki’s face
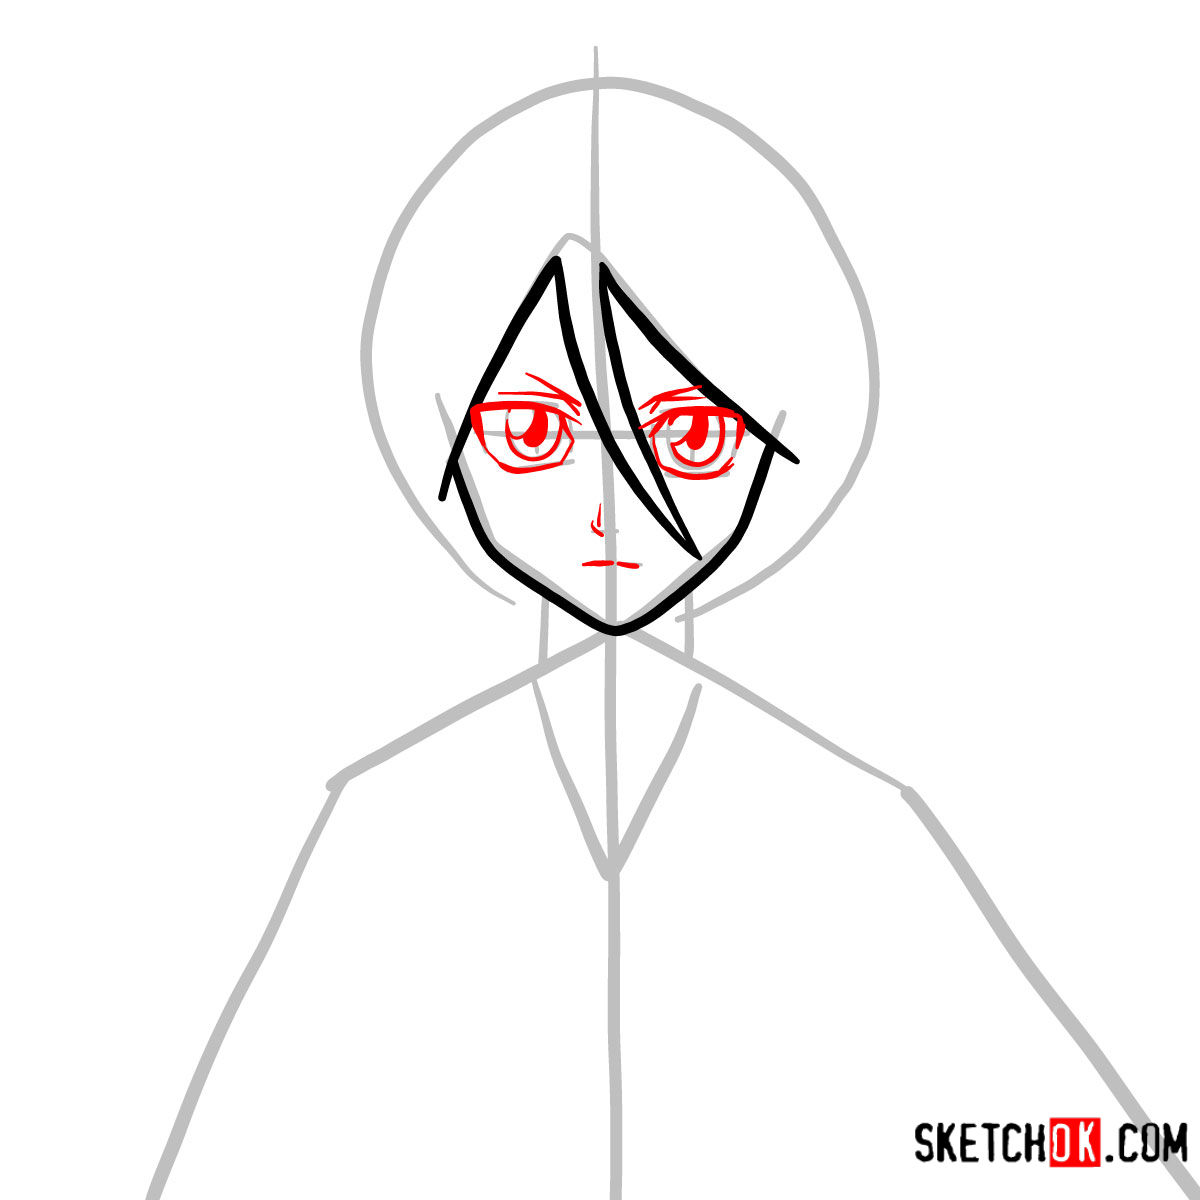
Step 04 – Within the guides, draw two large eyes with upper and lower eyelids, making sure they are symmetrical. Add small ovals inside for pupils. Sketch simple lines for the nose and a small mouth below it to capture Rukia’s expression
Drawing detailed facial features on Rukia Kuchiki’s face
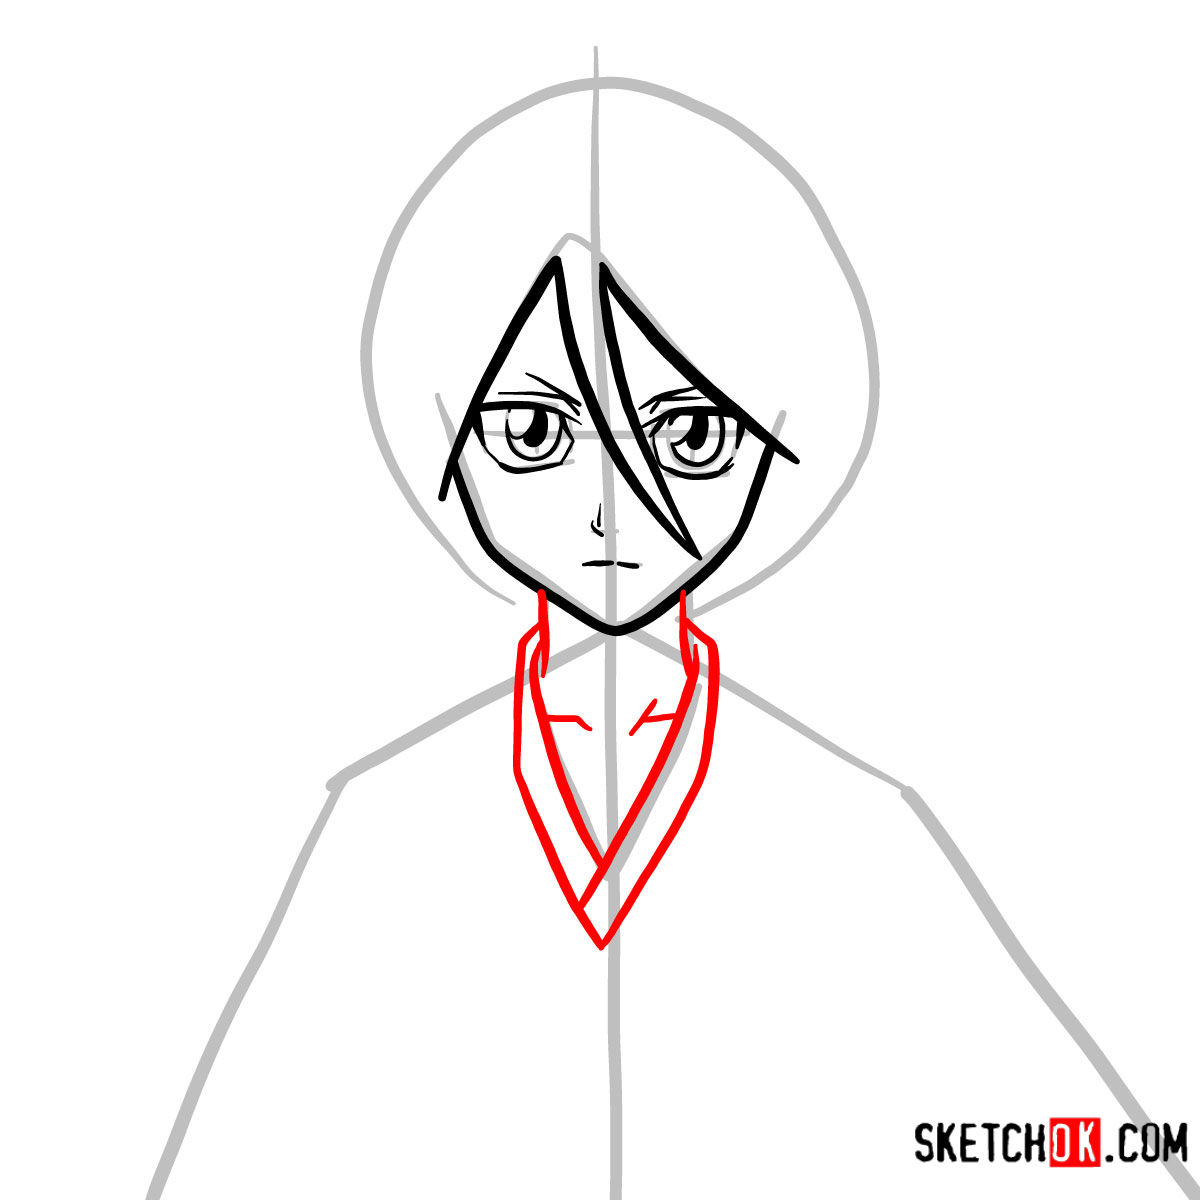
Step 05 – Draw two lines extending down from the jaw to form the neck. Outline the collar of her outfit, starting from the base of the neck and flowing outward to the edges of the shoulders
Adding the neck and collar details to the Rukia Kuchiki face sketch
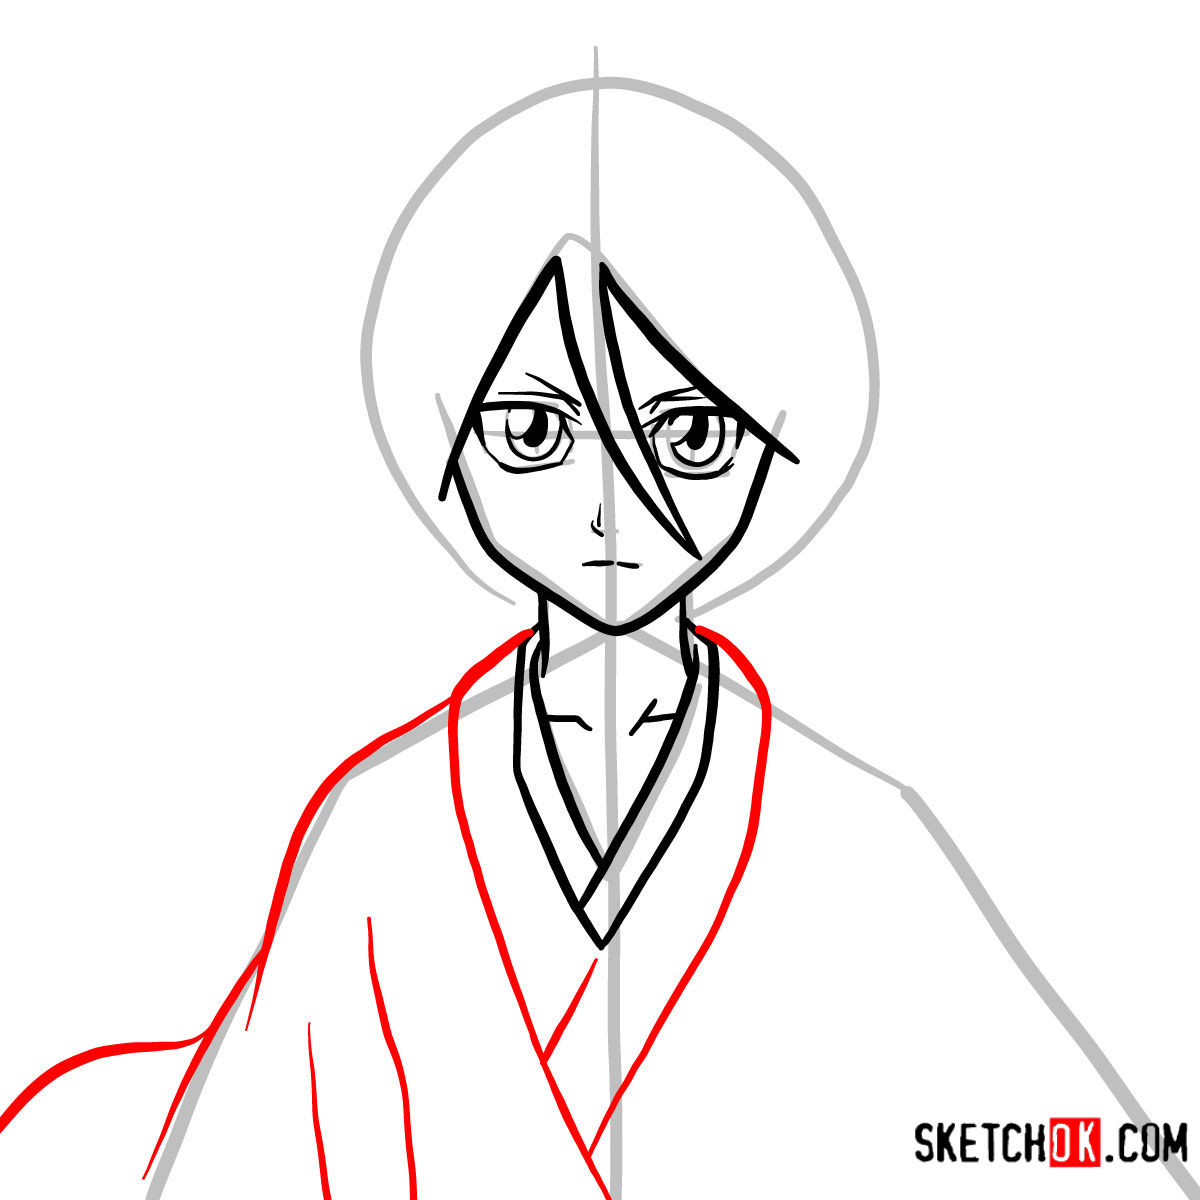
Step 06 – Detail her collar and the right side of the kimono, showing the fold and overlap of the kimono fabric. Ensure it wraps naturally over the shoulder, adding the necessary folds to suggest fabric tension
Illustrating the right collar and shoulder of Rukia Kuchiki’s kimono
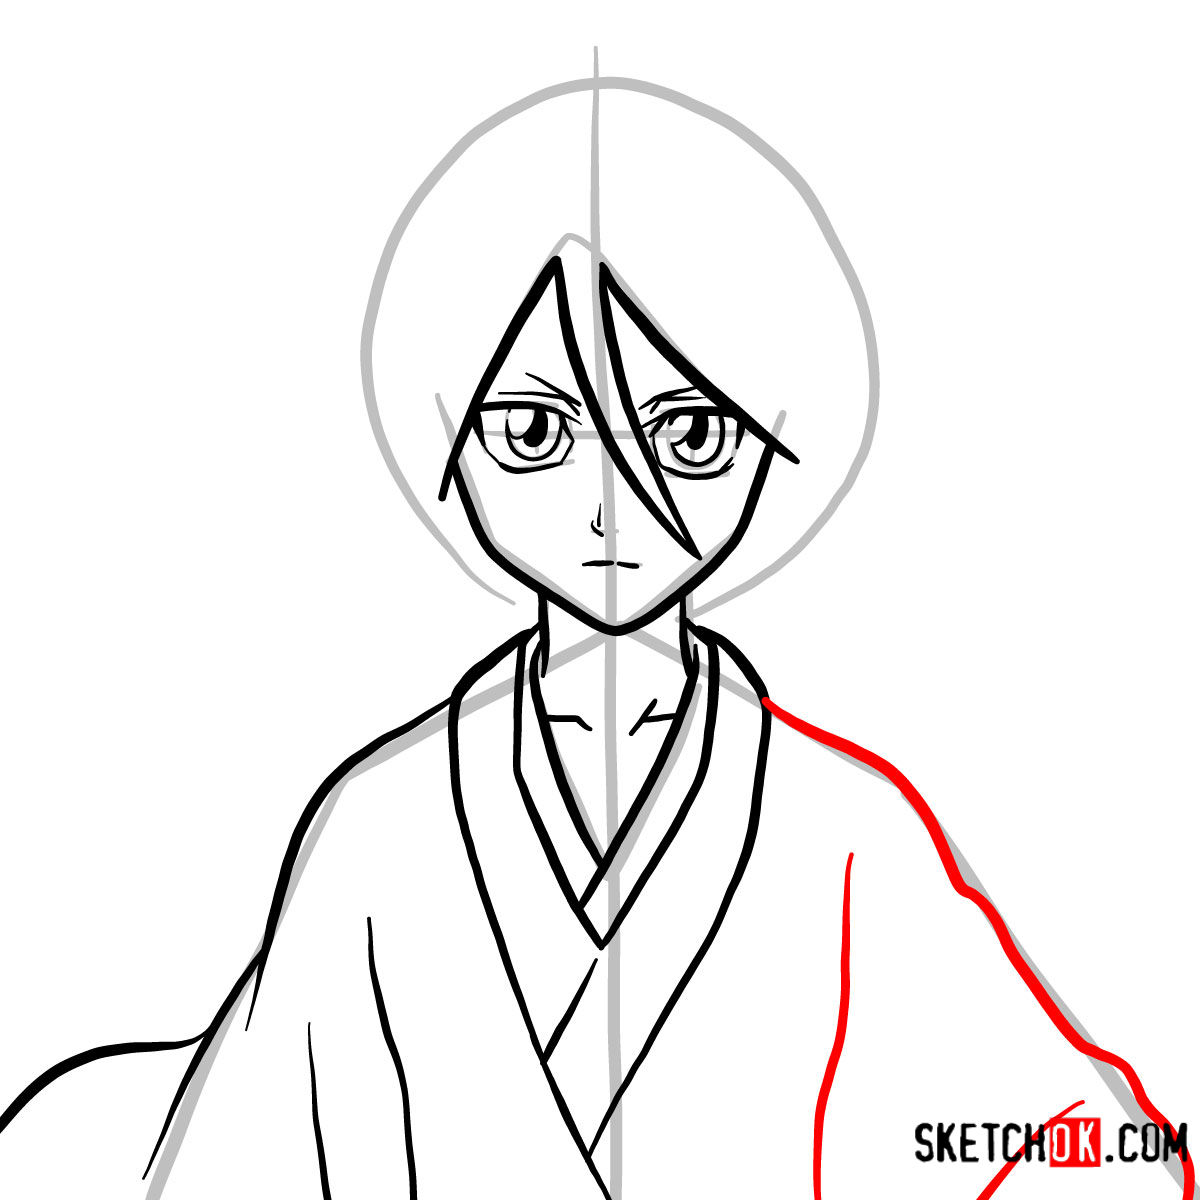
Step 07 – Mirror the details of the right collar on the left, maintaining symmetry. Sketch the outline of the sleeve hanging from the left shoulder, adding creases to depict the fabric draping
Finalizing the left shoulder and sleeve of Rukia Kuchiki’s kimono
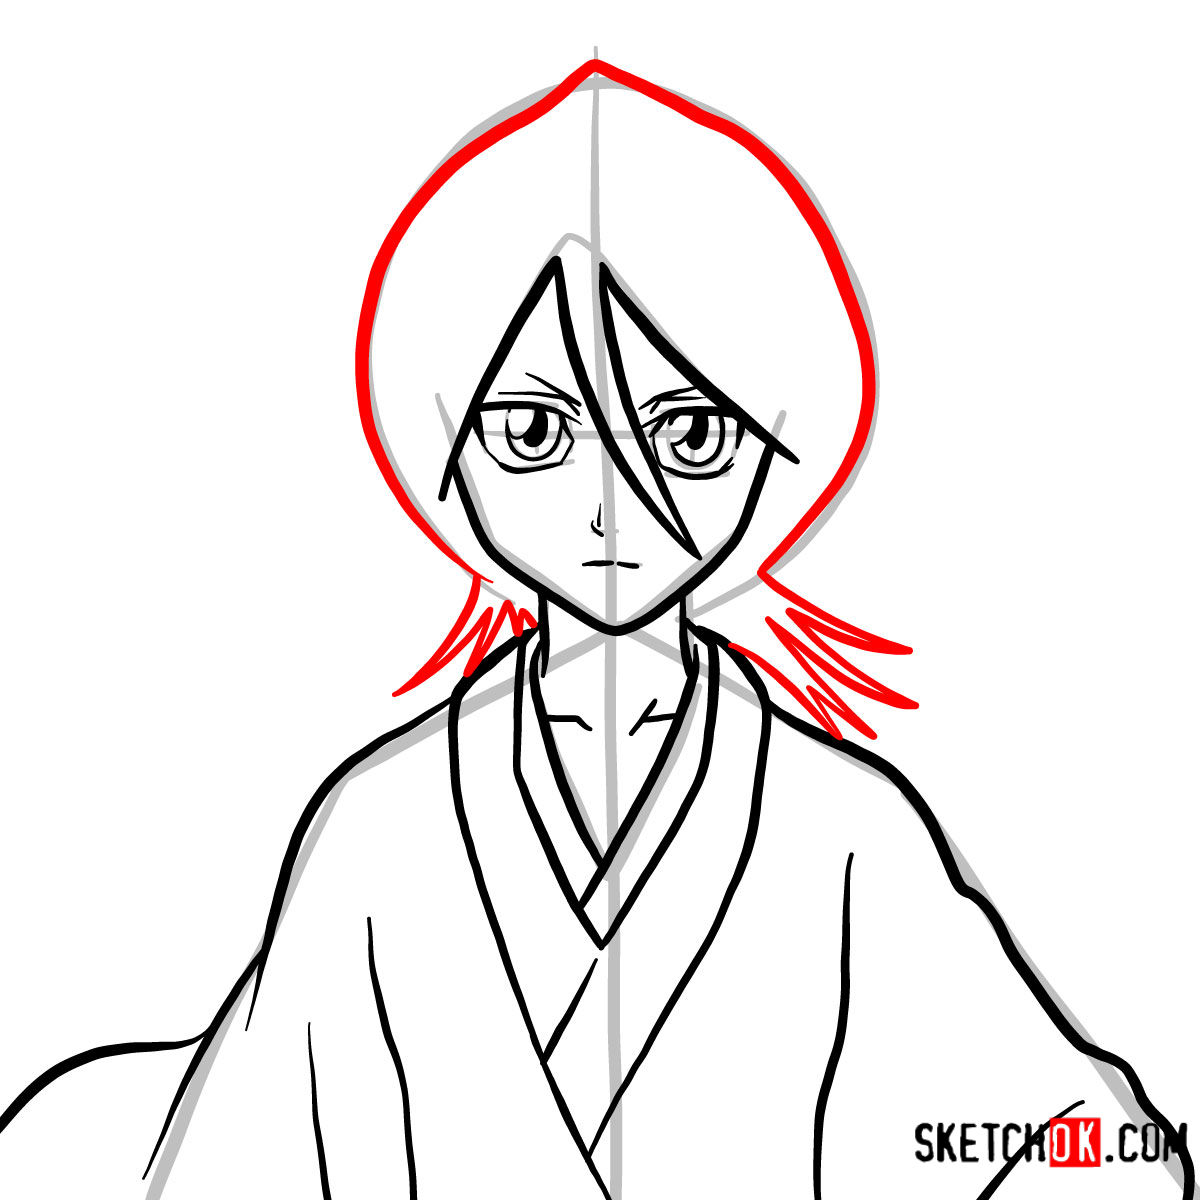
Step 08 – Flesh out Rukia Kuchiki’s hairstyle by drawing strands of hair falling behind the shoulders and framing the head. Ensure that the hair follows the shape of the head and flows naturally
Crafting the hairstyle in the step-by-step guide of Rukia Kuchiki’s face
Step 09 – With all the details in place, your drawing of Rukia Kuchiki’s face is complete. You can now choose to ink your sketch using a fine liner to give it a clean, finished look. Once the ink is dry, gently erase any remaining pencil lines to reveal your artwork. This final step brings clarity and definition to your drawing. Congratulations, now you know how to draw Rukia Kuchiki’s face
The completed guide on how to draw Rukia Kuchiki’s face
Conclusion
Thank you for following our guide on how to draw Rukia Kuchiki’s face. Remember, practice is key to mastering any drawing technique. For more tutorials and updates, follow SketchOk on our social media channels.
Disclaimer: All original artworks and photos used as references for the creation of these drawing tutorials are the property of their respective owners. If your work has been featured without proper credit, please kindly leave a comment below, and the issue will be promptly addressed. We greatly appreciate your exceptional art. Thank you.
Did you like the tutorial?
You can support the author of this website and also suggest your own ideas for new drawings by making a small donation here:
1 thought on “Learn How to Draw Rukia Kuchiki’s Face with Simple Steps”

can u do killua from hunter x hunter