Hello there, art enthusiast! Whether you’ve always wanted to sketch roses but didn’t know where to start, or you’re looking to refine your skills with more intricate details, you’ve come to the perfect place. This set of “How to Draw Roses” guides, complete with 8 step-by-step drawing tutorials, is designed to turn your floral doodles into blooming masterpieces.
In this series, we’ll start off with six easy-to-follow guides that will introduce you to the joy of drawing roses in a simple yet stylish way. These initial guides are perfect for beginners or those looking for quick and delightful rose sketches. As you breeze through these, you’ll gain the confidence to tackle more complex structures.
As we progress to the final two guides, we’ll delve into the nuanced world of realistic rose and rosebud drawings. With close attention to natural form, these guides are structured to provide a slightly more challenging yet thoroughly rewarding experience.
Color Coding for Clarity
Each guide is visually captured with high-quality images, a total of 97 hand-drawn steps across all tutorials, ensuring clarity and precision in instruction. And here’s the fun part: every guide uses a clever color-coding system to make your learning process as smooth as a petal. The current step you’re on is highlighted in vibrant red, while the completed steps fade into black, providing a clear roadmap of your progress.
So, grab your sketch pad and let’s start learning how to draw roses, from the whimsical simplicity of stylized roses to the rich complexity of lifelike blooms. Ready to see your skills blossom? Let’s get started!
Drawing Guide #1: Stylized Rose in Side View
The First Rose We Will Start With
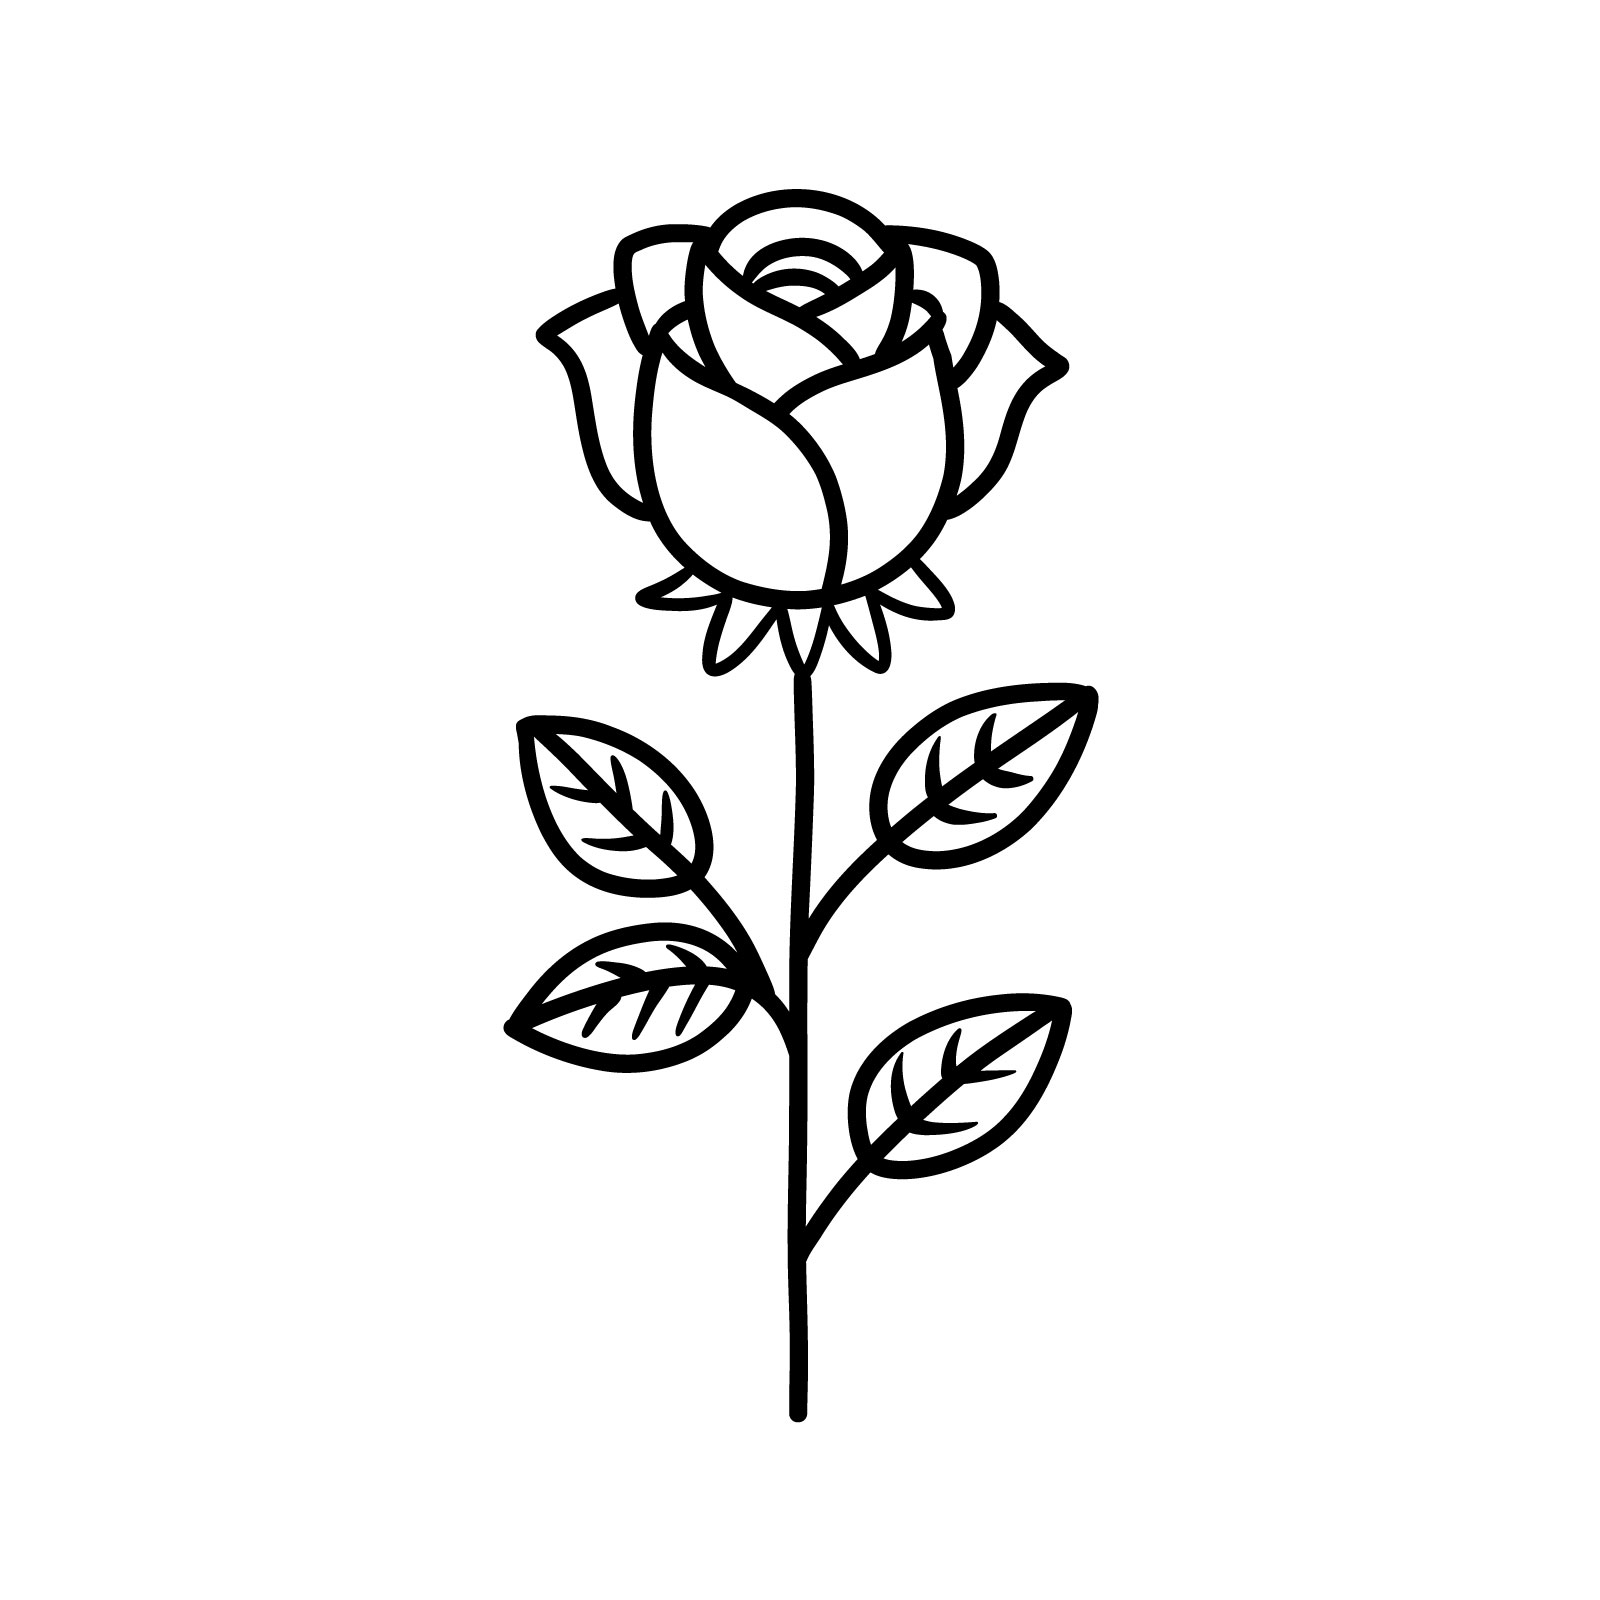
Embark on your artistic journey with the simplest of blooms in our first tutorial, “Stylized Rose in Side View”. This guide is tailored for ease and simplicity, inviting beginners to confidently start their drawing experience. With a straightforward side view, it captures the essence of a rose’s beauty without delving into intricate details. The design includes a central rose figure complemented by four simple leaves, creating a balanced composition that’s easy to follow. Each stroke is designed to be replicated effortlessly, making it ideal for those seeking a guide which shows how to draw a rose and provides an easy approach. Whether you’re a budding artist or simply looking for a creative pastime, this guide offers a satisfying and achievable project that promises a beautiful result with just a few steps.
Step 01 – Begin your stylized rose drawing with a basic U shape. This acts like the foundation of a wine glass and forms the base of your rose. Keep your strokes light and smooth as this is just the starting point of our floral creation
Starting the Stylized Rose with a Simple U Shape
Step 02 – Now, let’s add character to our rose. Add two curved lines from the tips of the U shape downwards, curving back in slightly at the top. These will become the first petals of your stylized rose drawing, giving it a natural and soft look
Adding Curves to Shape the First Petals
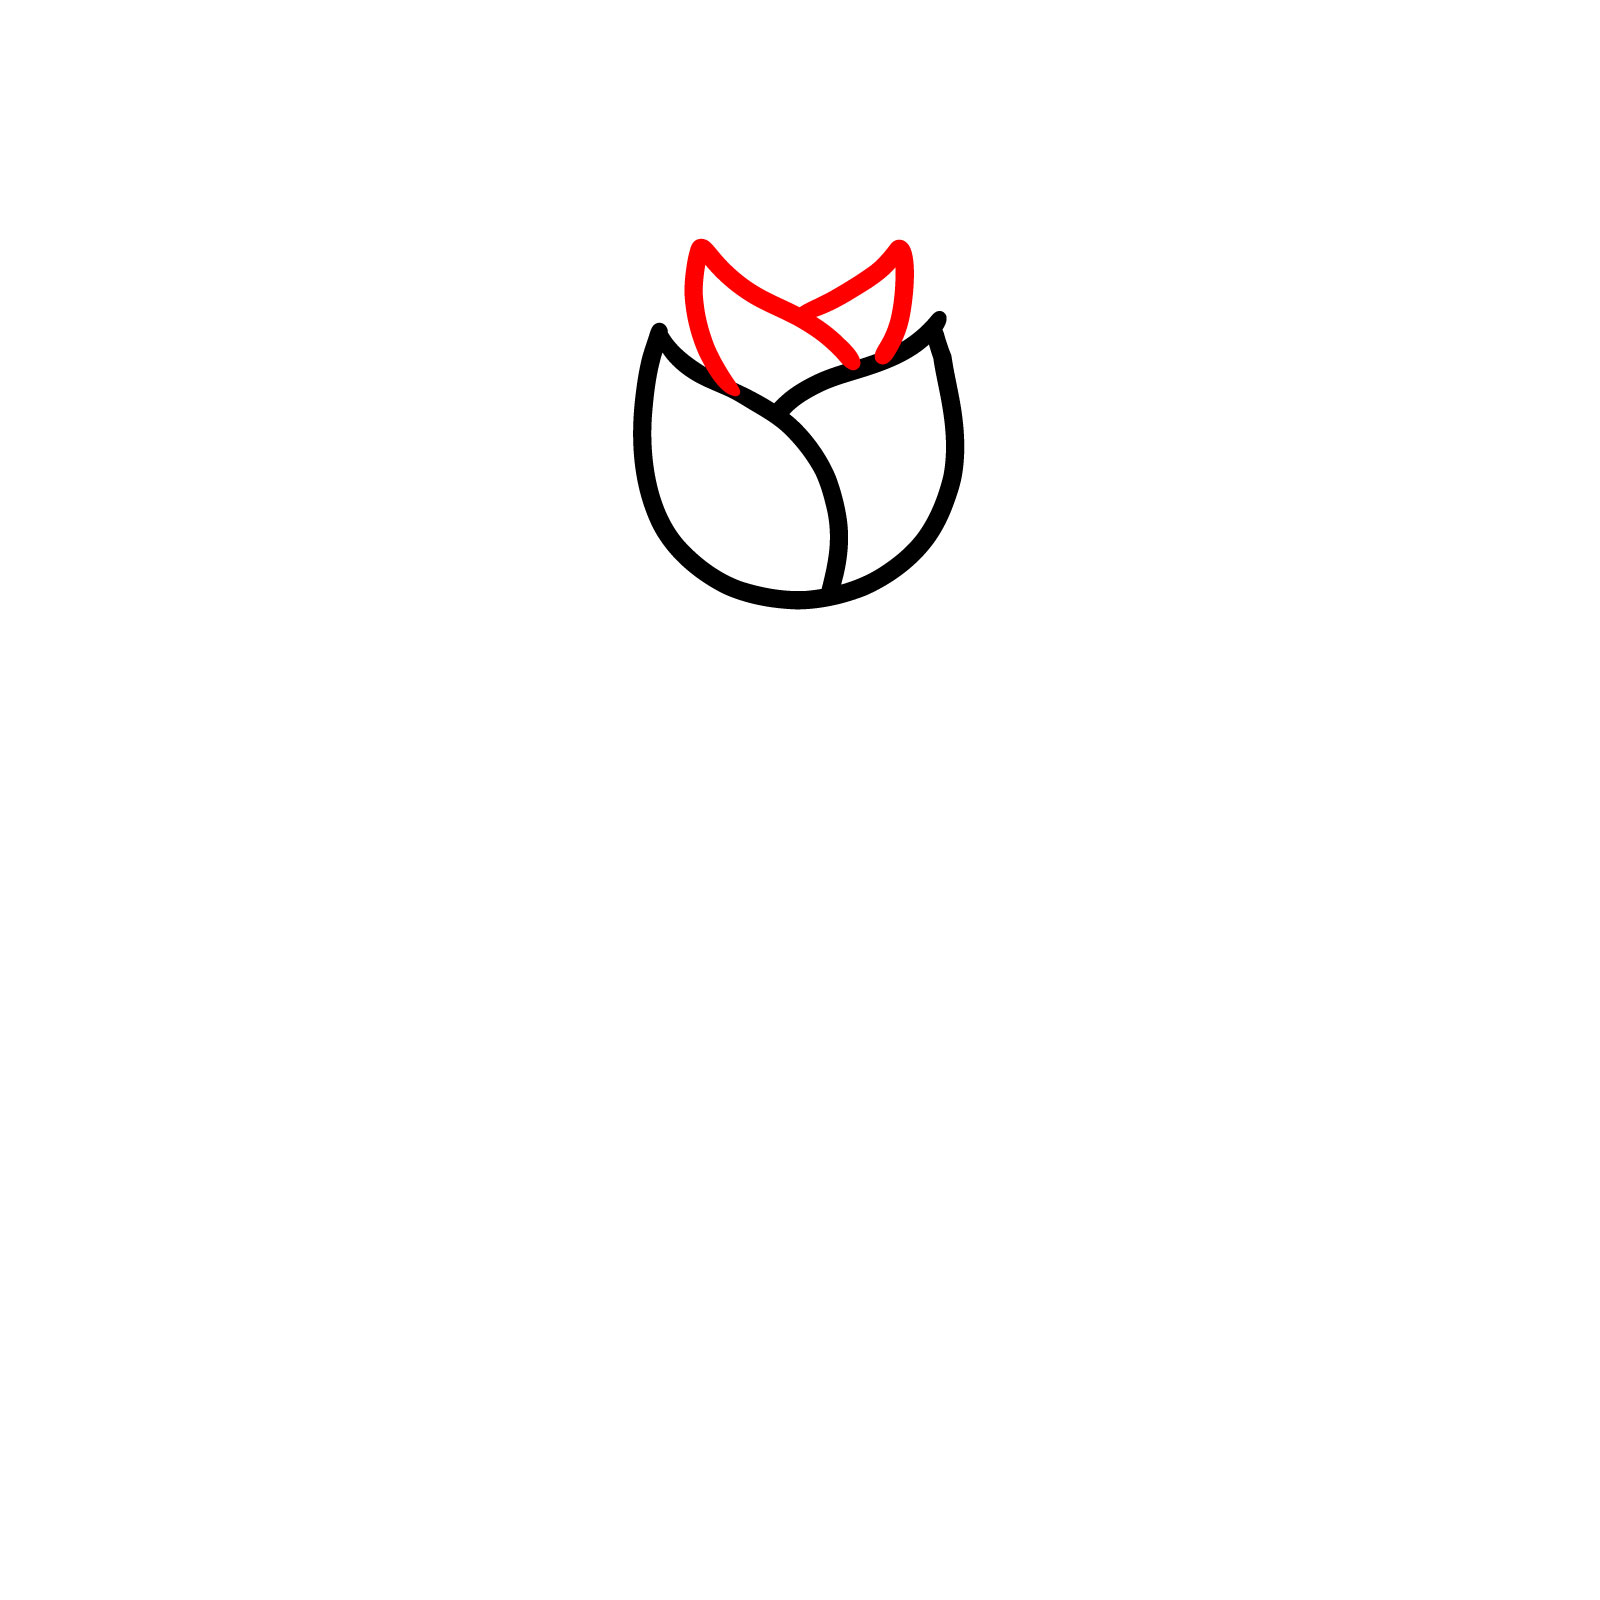
Step 03 – It’s time to let our rose blossom. Sketch two more petals at the top, framing the space above our initial U shape. These new additions create a sense of depth and fullness to the flower’s blooming form in your rose drawing
Blossoming Top Petals of Our Stylized Rose
Step 04 – With the basic petal structure in place, let’s refine our rose. Smooth out the sharp points to round off the petal shapes, giving a gentle and more realistic contour to each petal, enhancing the overall flow of your stylized rose drawing
Refining the Rose with Rounded Petal Shapes
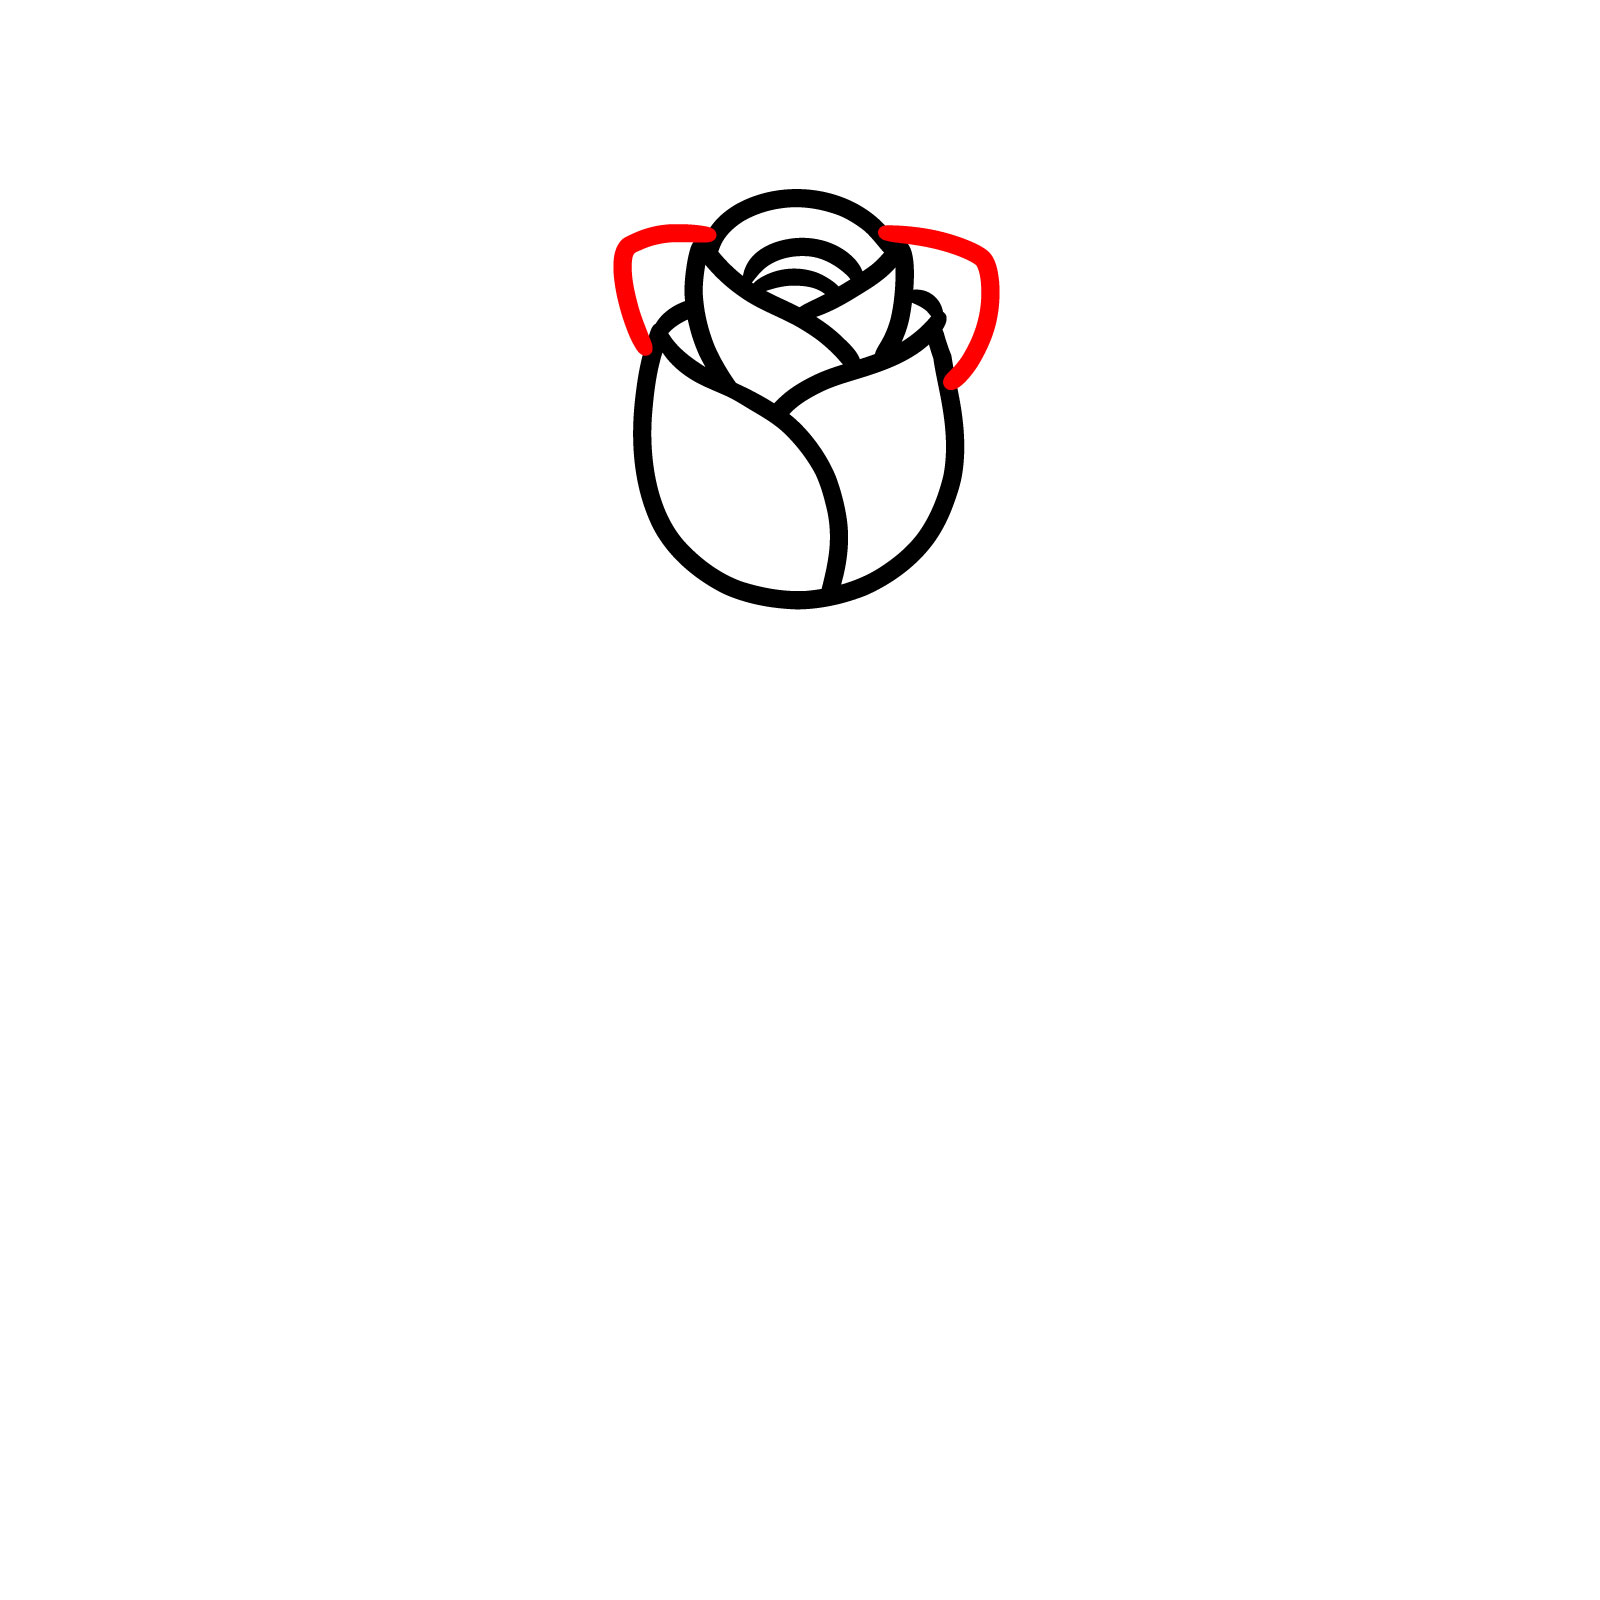
Step 05 – Let’s give our rose a little more flair by adding two side petals. These petals should hug the sides of our rose’s bud, giving it that full, blooming effect. Imagine the petals are like little arms reaching out for a cozy embrace
Expanding the Rose with Side Petals
Step 06 – Now, it’s time to go big! Add two larger petals to each side to really make our rose bloom. Then, sketch a small base at the bottom of the bud to anchor our flower. It’s like we’re setting it on a tiny pedestal, showing it off to the world
Creating a Fuller Blossom and Defining the Rose’s Base
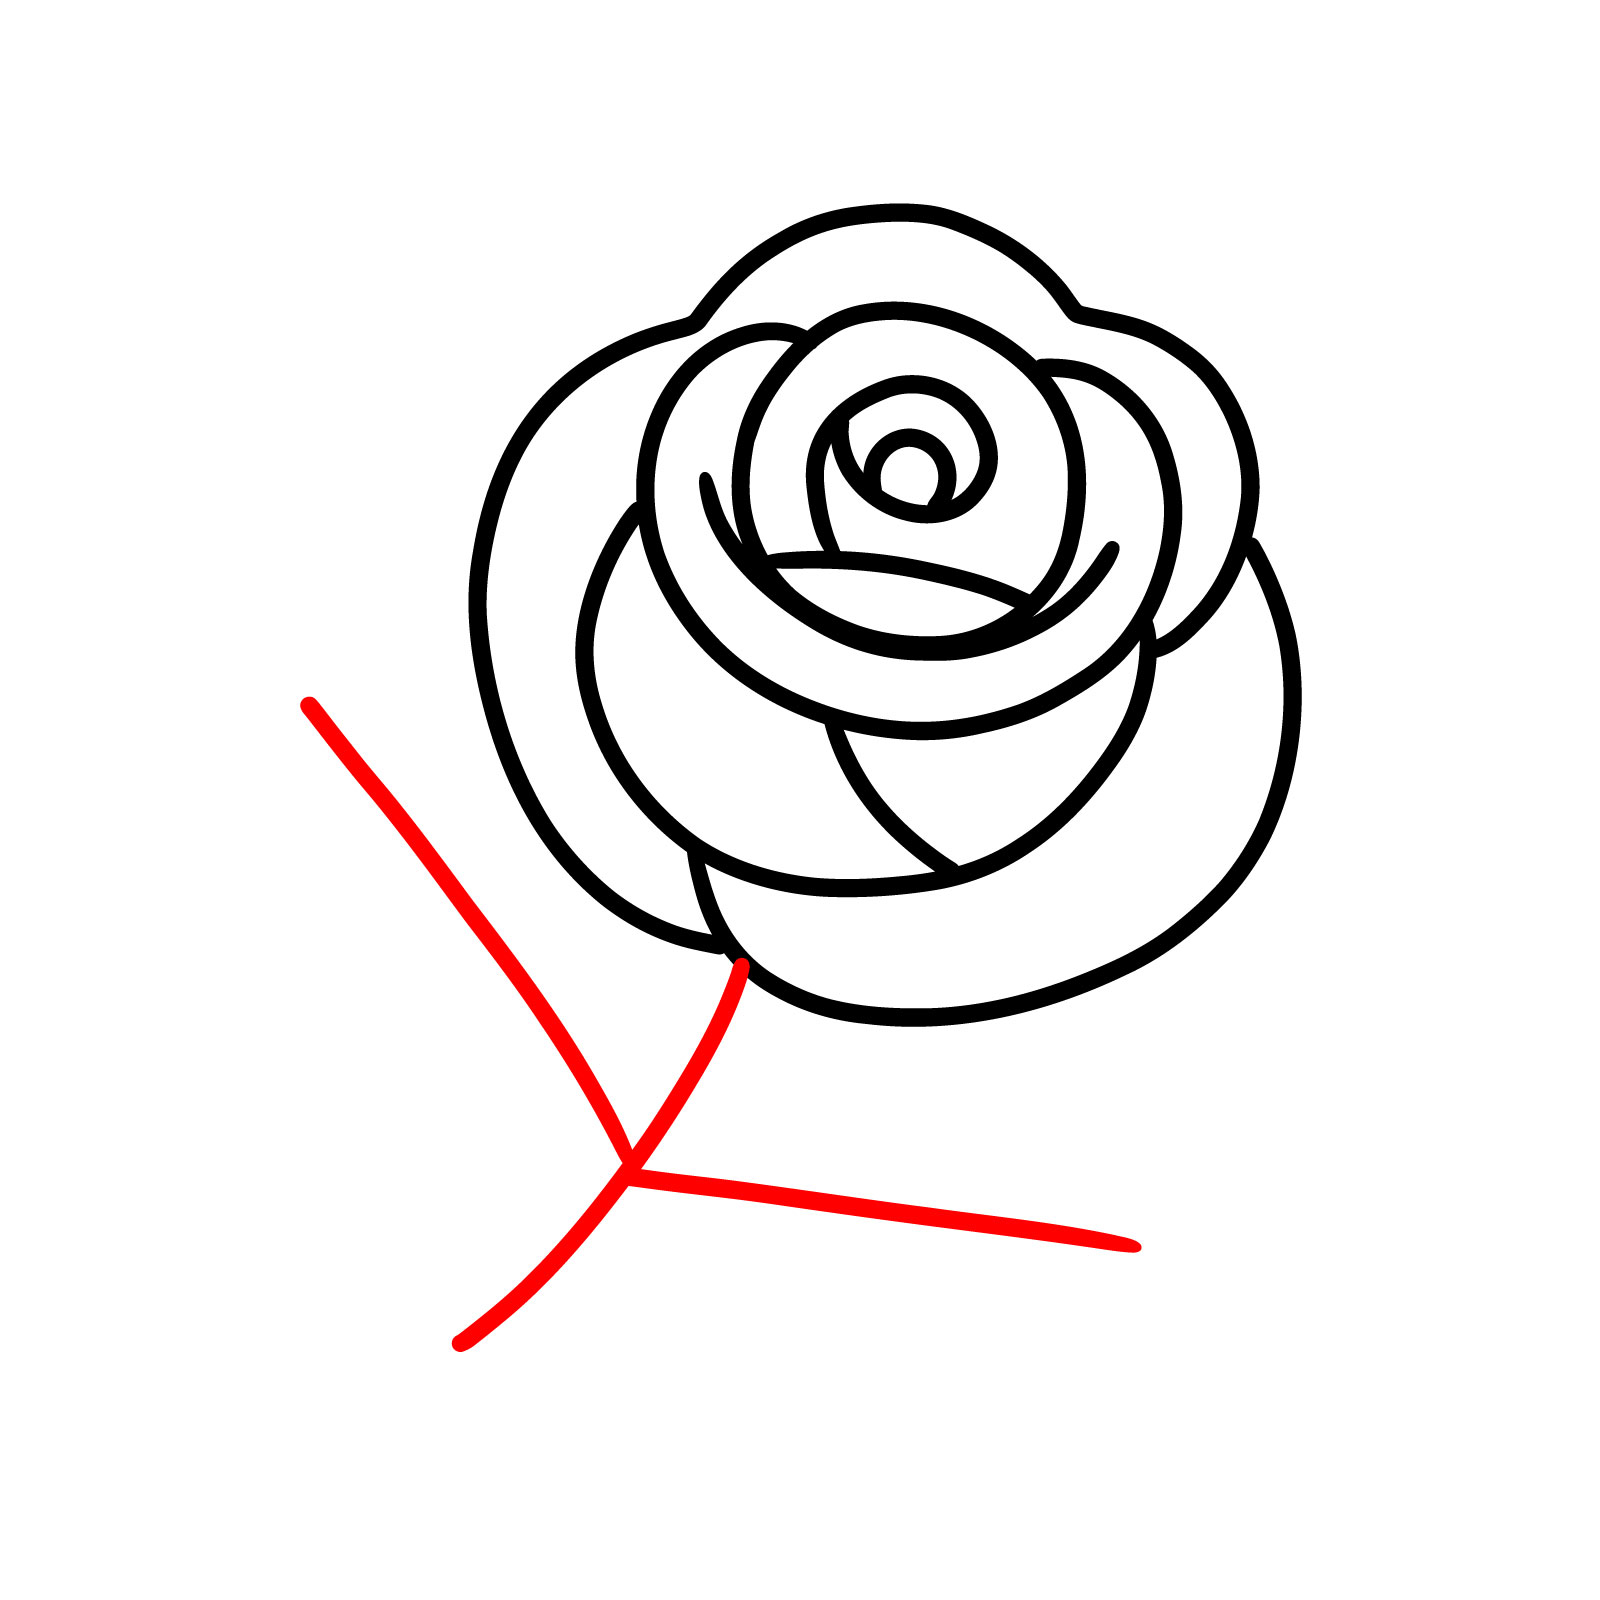
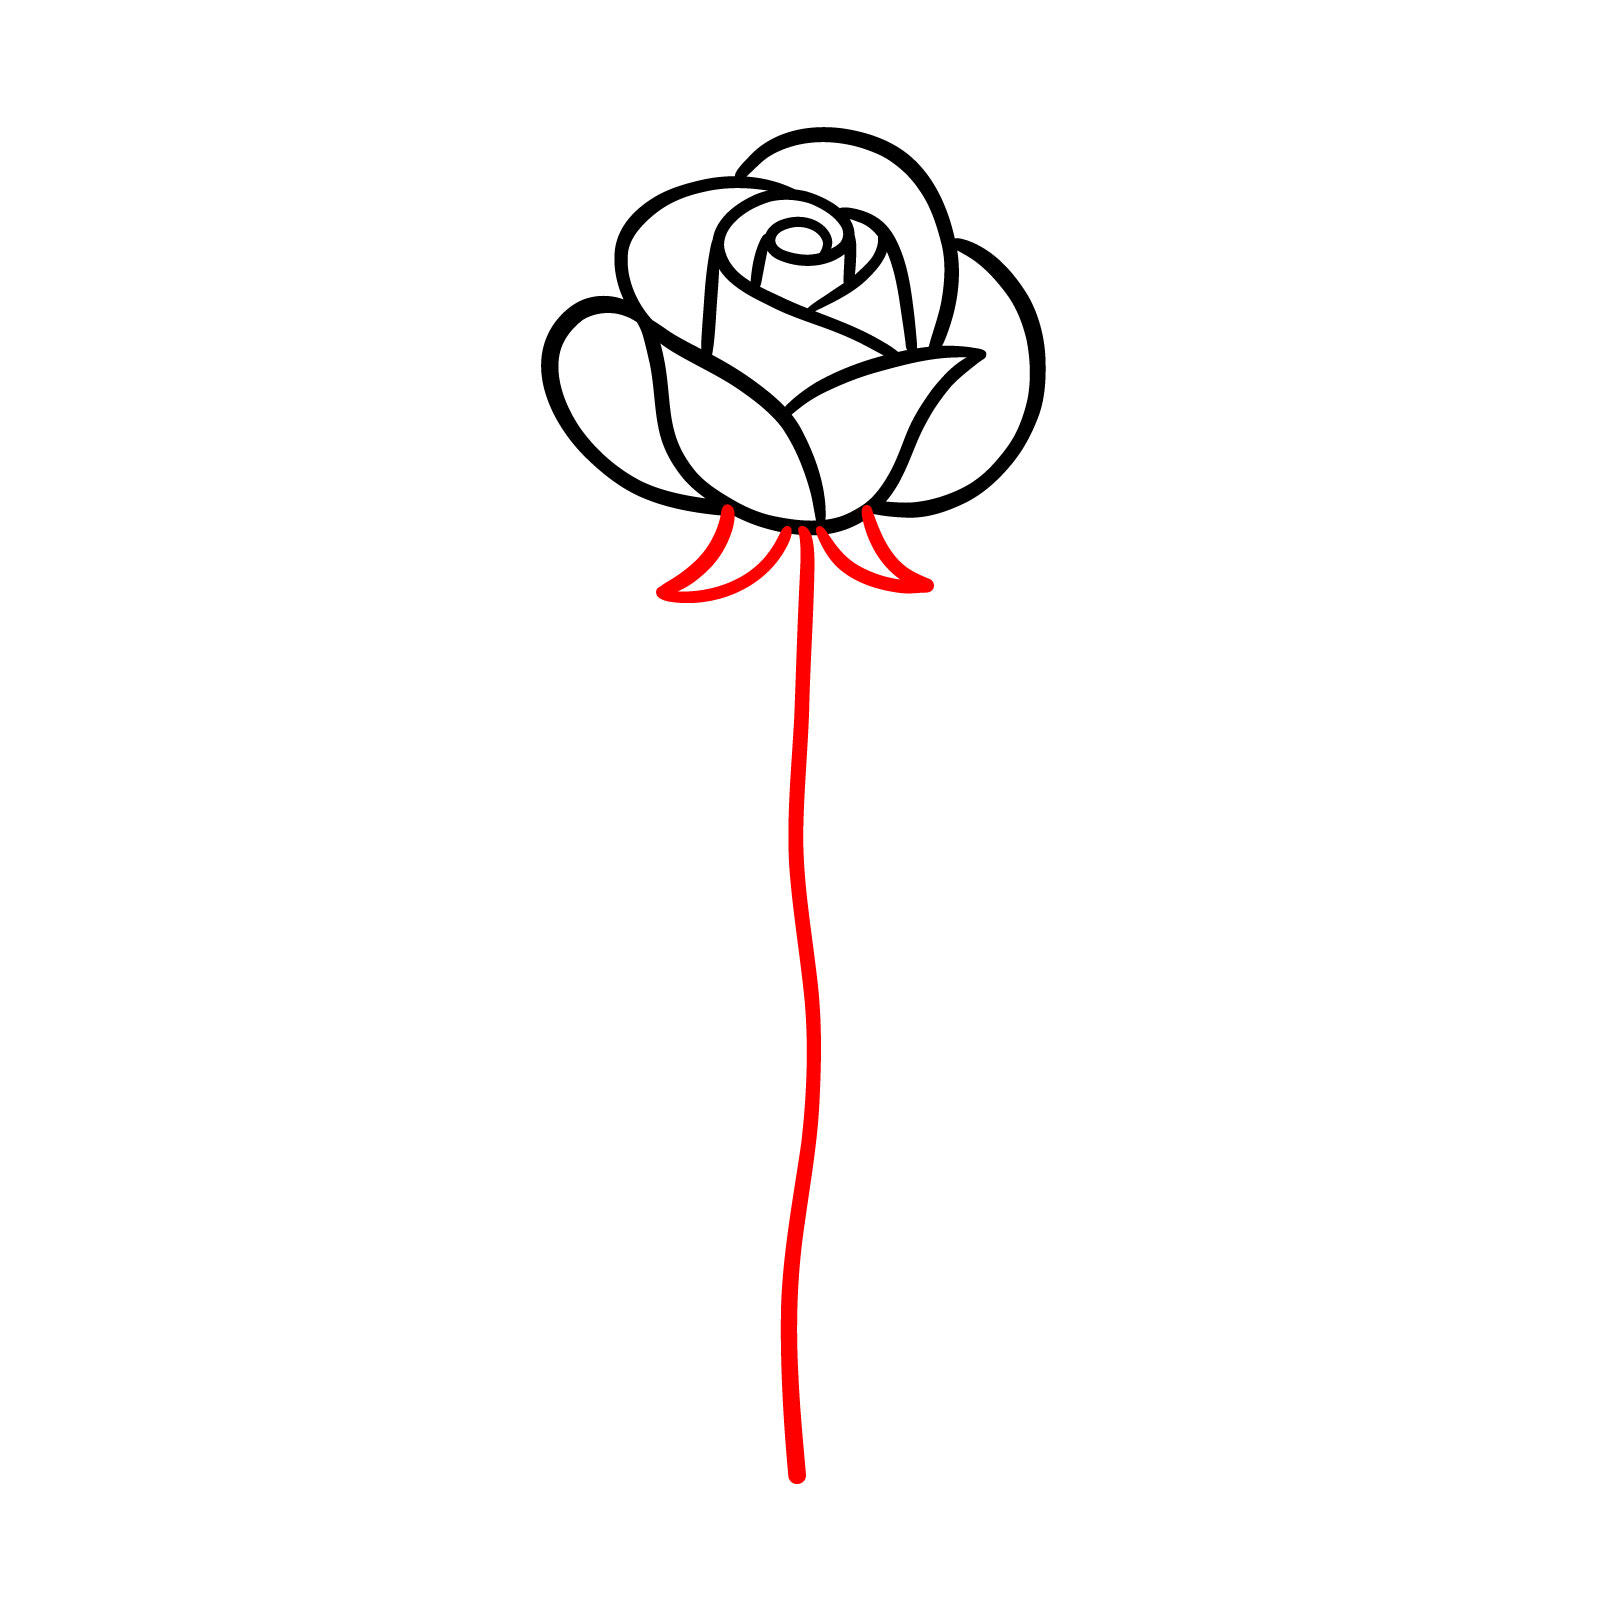
Step 07 – Our rose needs to stand tall, right? Draw a straight line down from the base of the bud for the stem. This is the backbone of our rose, quite literally, so make it as long or short as you like. It’s the stem that’ll support all the beauty above
Drawing the Stem of Our Stylized Rose
Step 08 – No rose is complete without its leaves. Add four lines jutting out from the stem where our leaves will soon sprout
Outlining the Lines on the Rose’s Stem
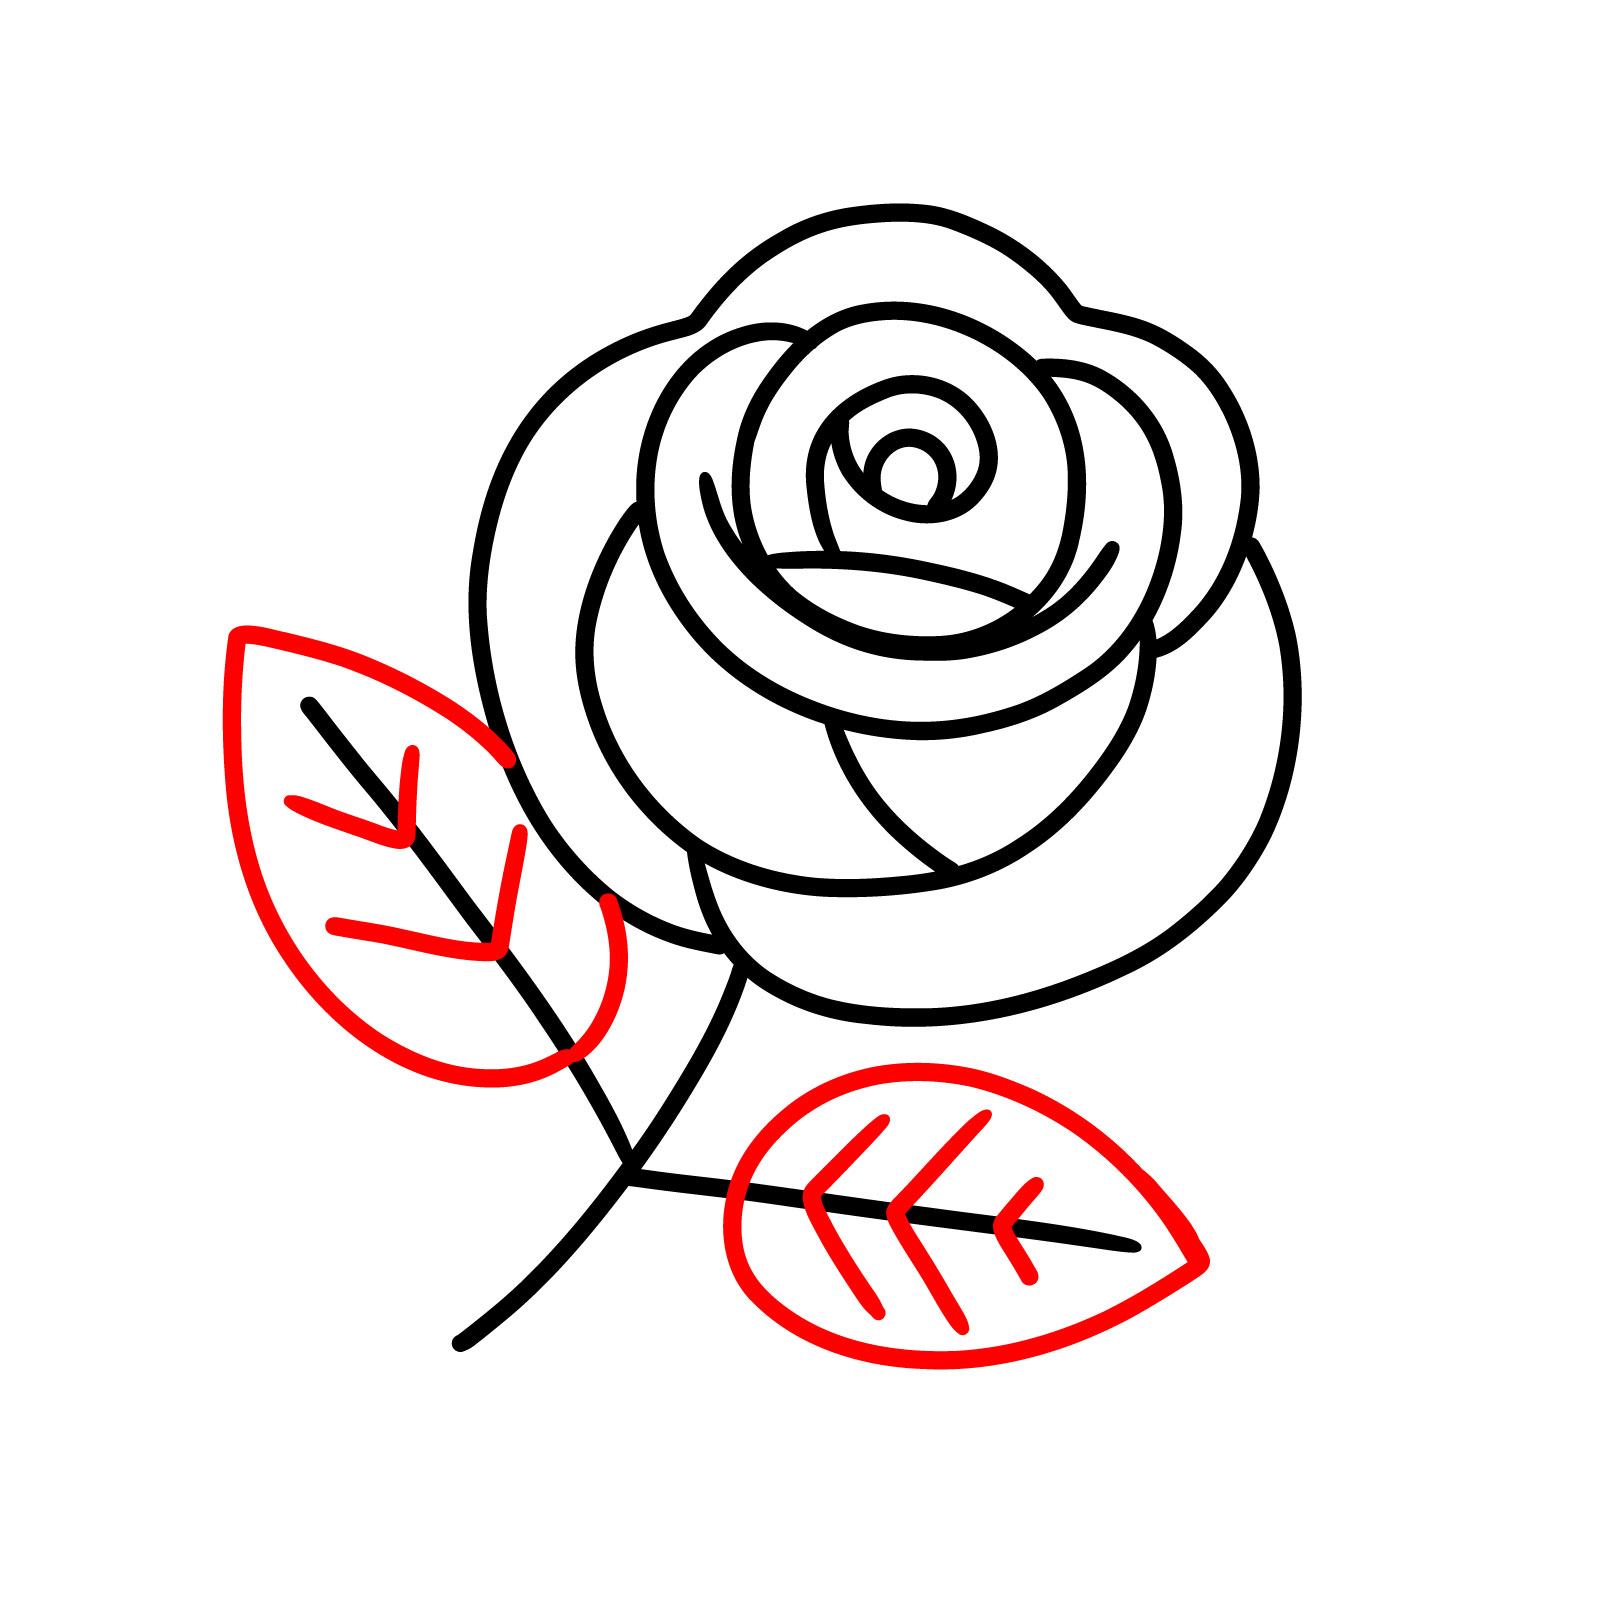
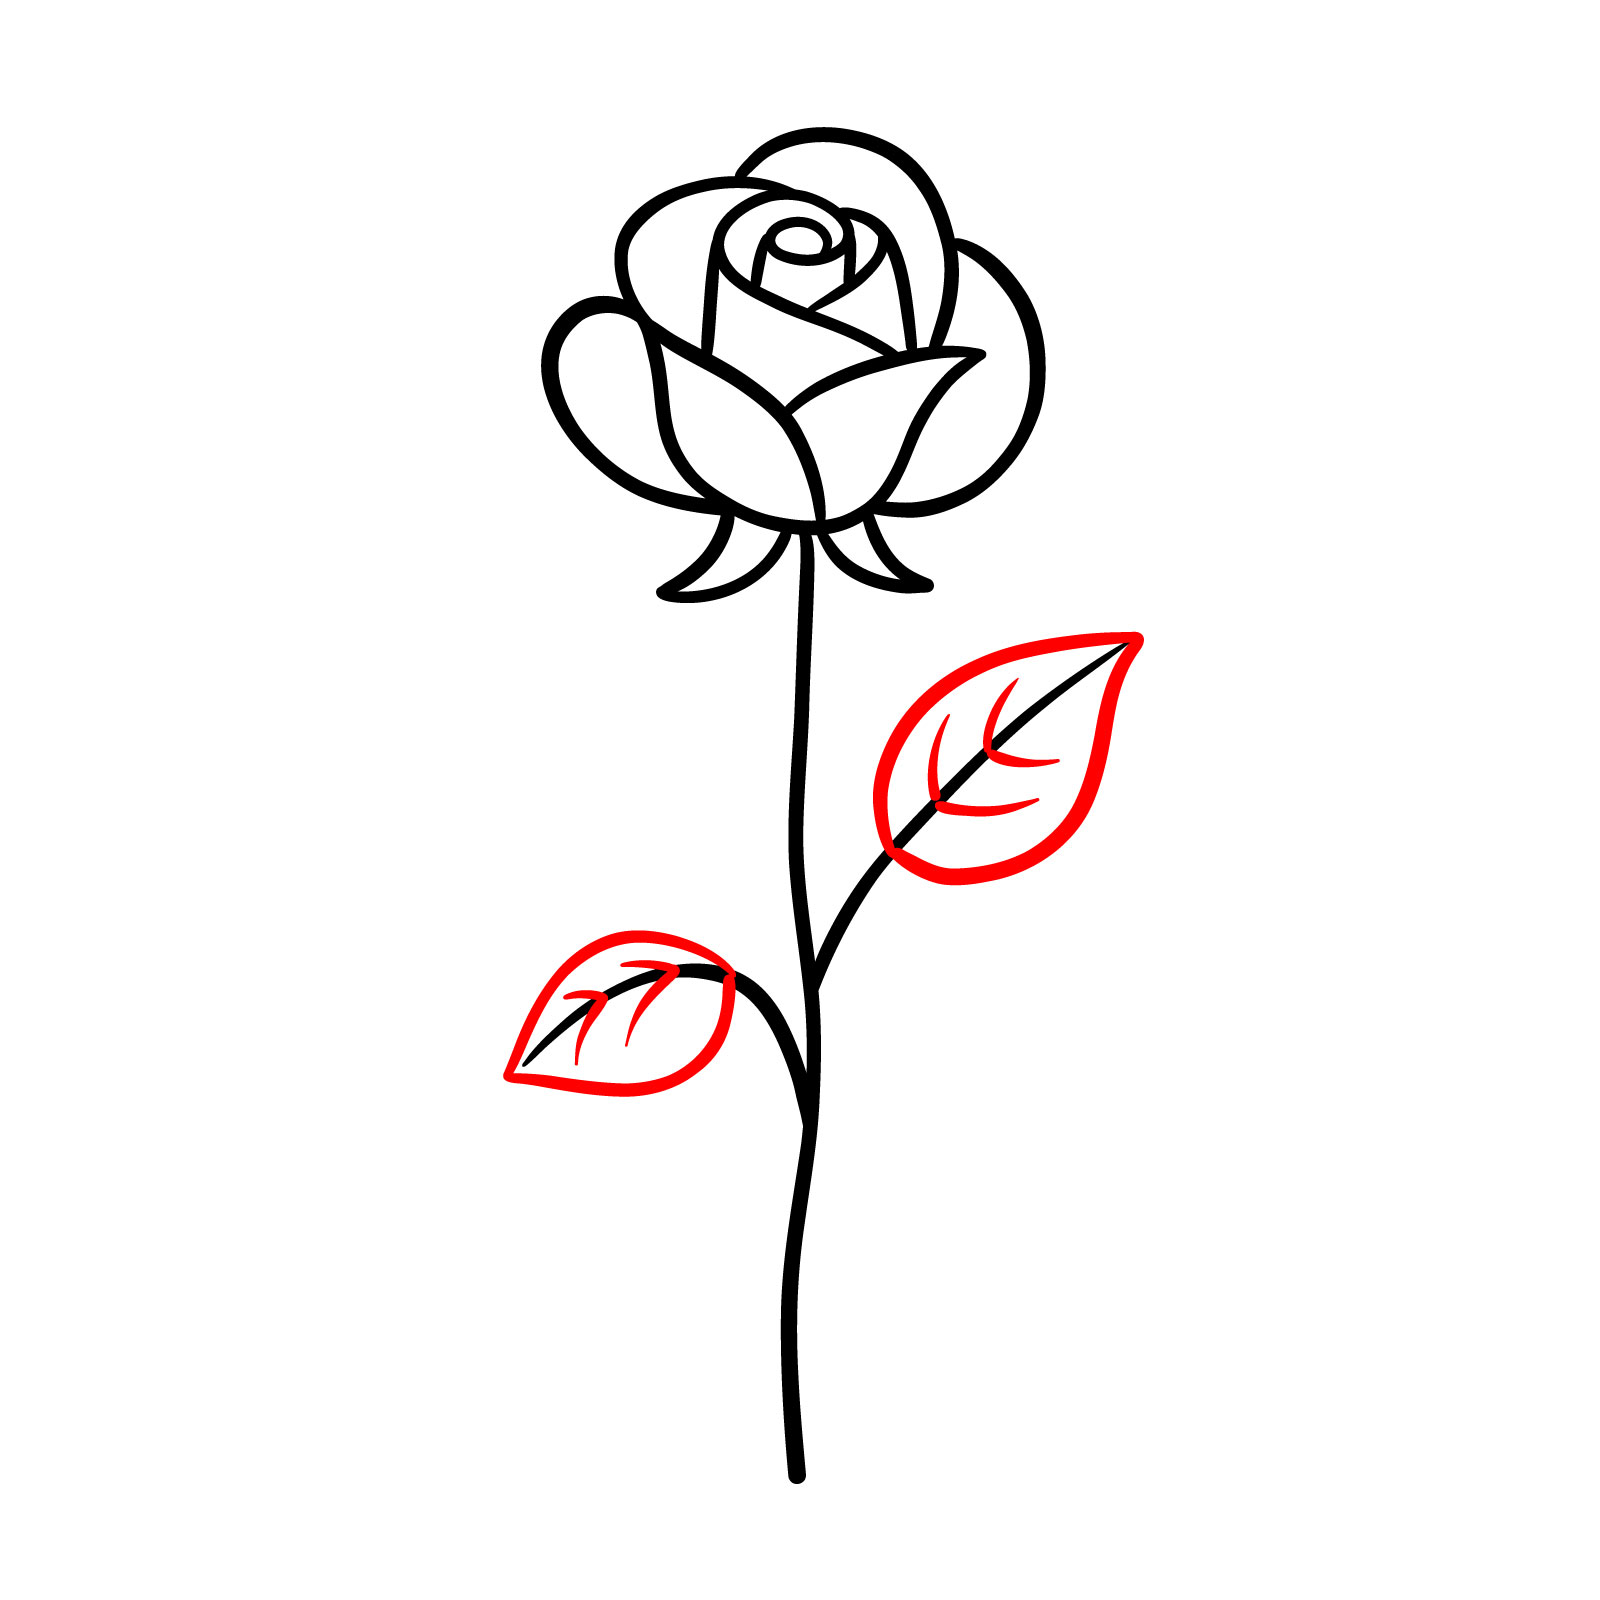
Step 09 – With our rose looking gorgeous, let’s sketch out the outlines of the leaves on the stem
Sketching the Leaves of Our Rose
Step 10 – Now, it’s all about the details. Inside each leaf, draw a few lines to represent the veins, giving them that realistic touch. This step brings our leaves to life, making our rose look like it’s growing right before our eyes
Detailing the Leaves
Step 11 – And there we have it – our first completed rose! With every line and detail, you’ve learned how to draw a rose that’s both simple and beautiful. This is just the start, though. We’ve got seven more to go, each with its own charm and style. Can’t wait to see where our pencils take us next
The Final Flourish on Our Stylized Rose
Drawing Guide #2: Easy Rose Drawing in Top View
Our Second Easy Rose Drawing Guide
The second tutorial in the “How to Draw Roses” series offers a delightful perspective that’s as appealing as it is simple to master. This guide presents a rose in full bloom, viewed from the top, allowing the artist to explore the circular symmetry of its petals. The inclusion of a stem and two simplified leaves adds a touch of realism, while the roundness of the bud embodies the rose’s iconic form. It’s an excellent step up for those who have mastered the side view and are looking to expand their skills in depicting roses from various angles.
Step 01 – Kick off your rose drawing with a plain circle. This will be the guide for the petals that we’re going to add around, so it doesn’t have to be perfect – think of it as the cozy center of the flower
Beginning with a Simple Circle for Our Second Rose
Step 02 – Right underneath our circle, let’s add a stretched U shape for another petal, and then flip that U and place it on top. It’s like drawing a little nest for our rose to sit in
Laying the Foundation for the Rose Bud
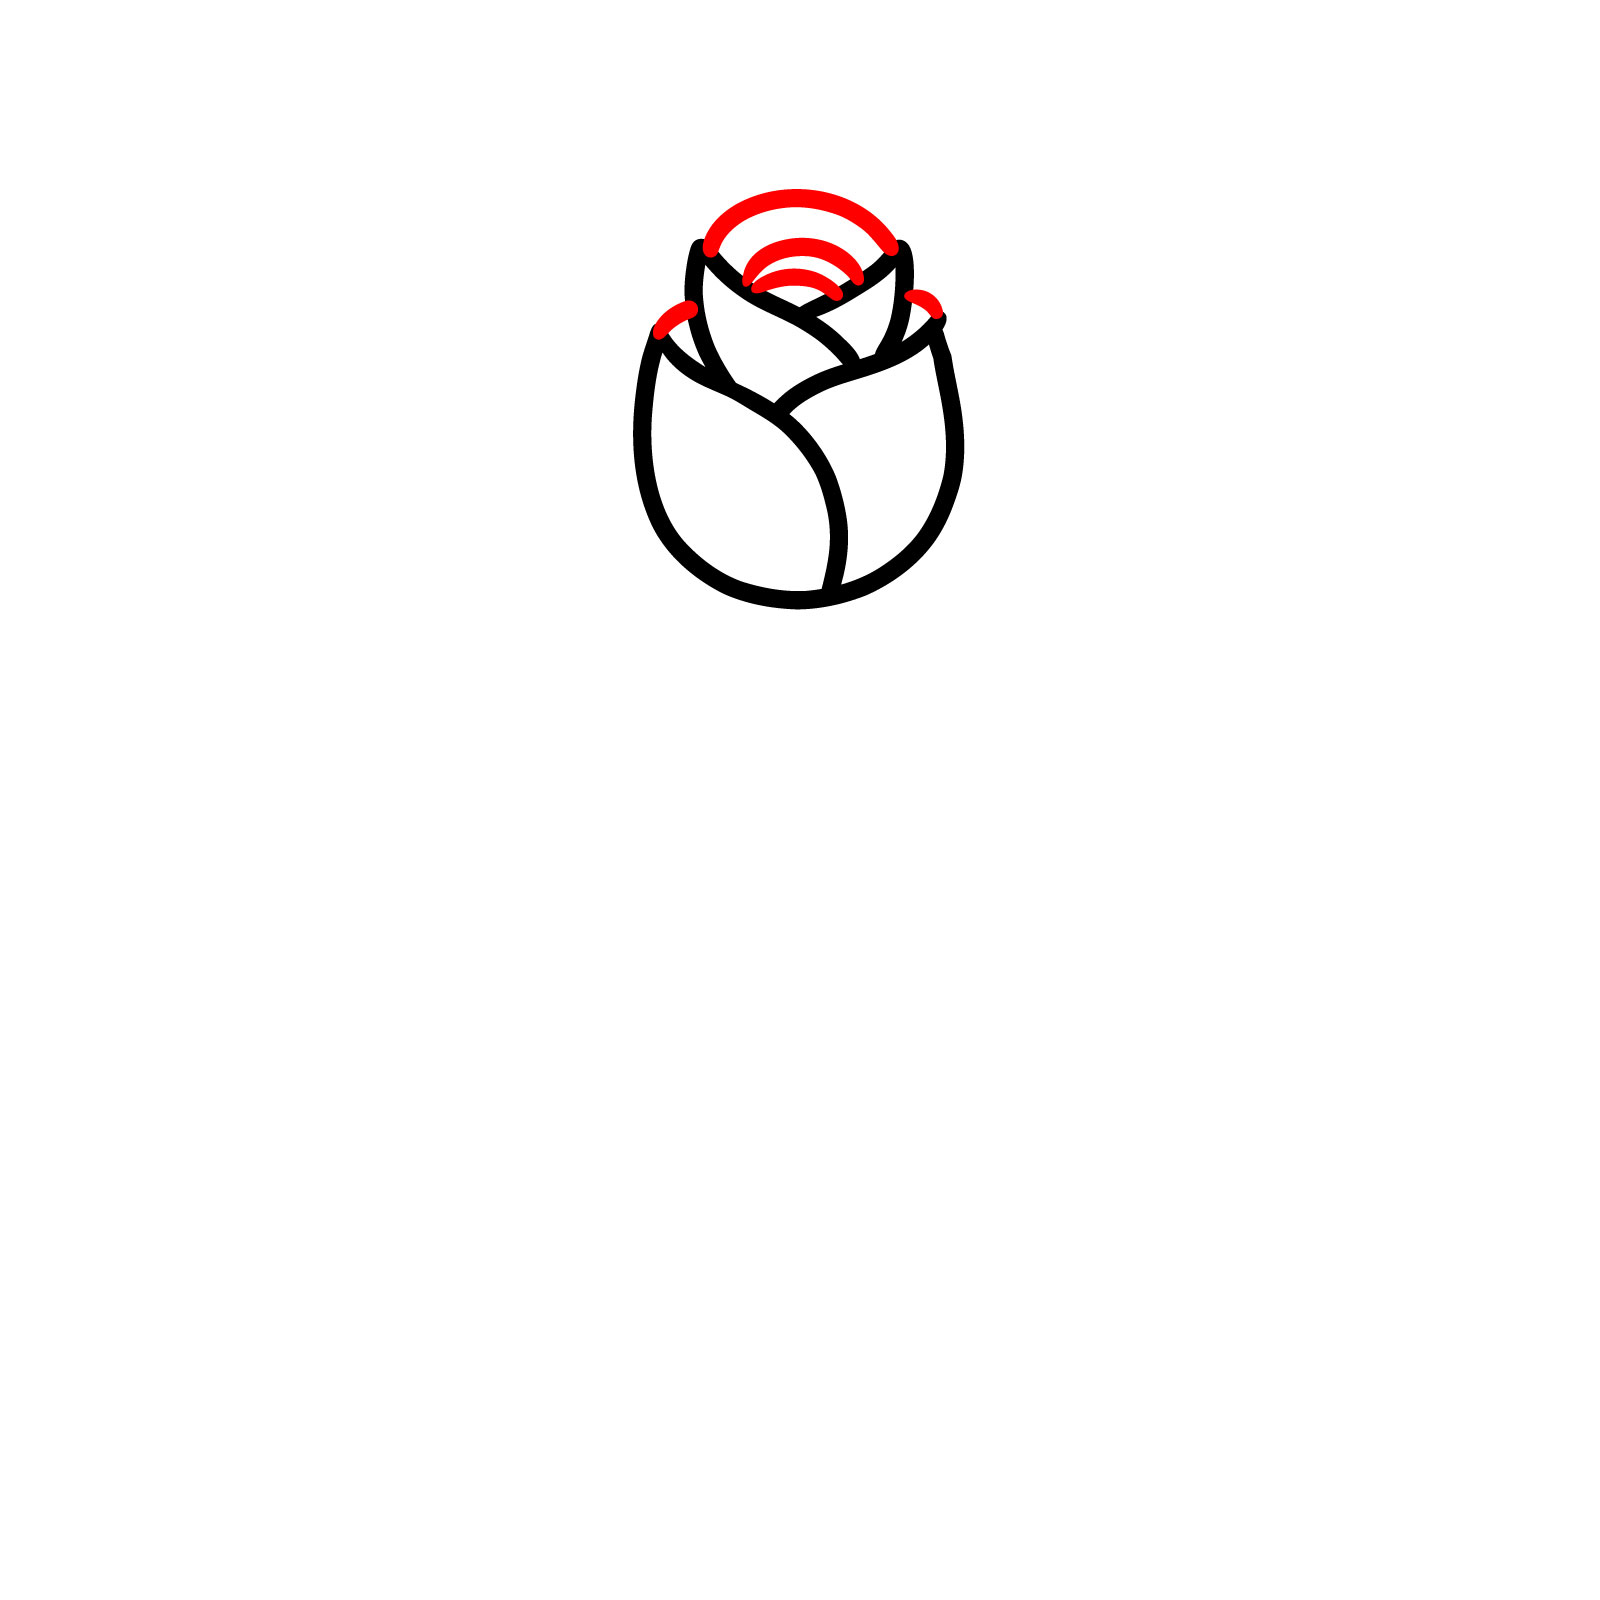
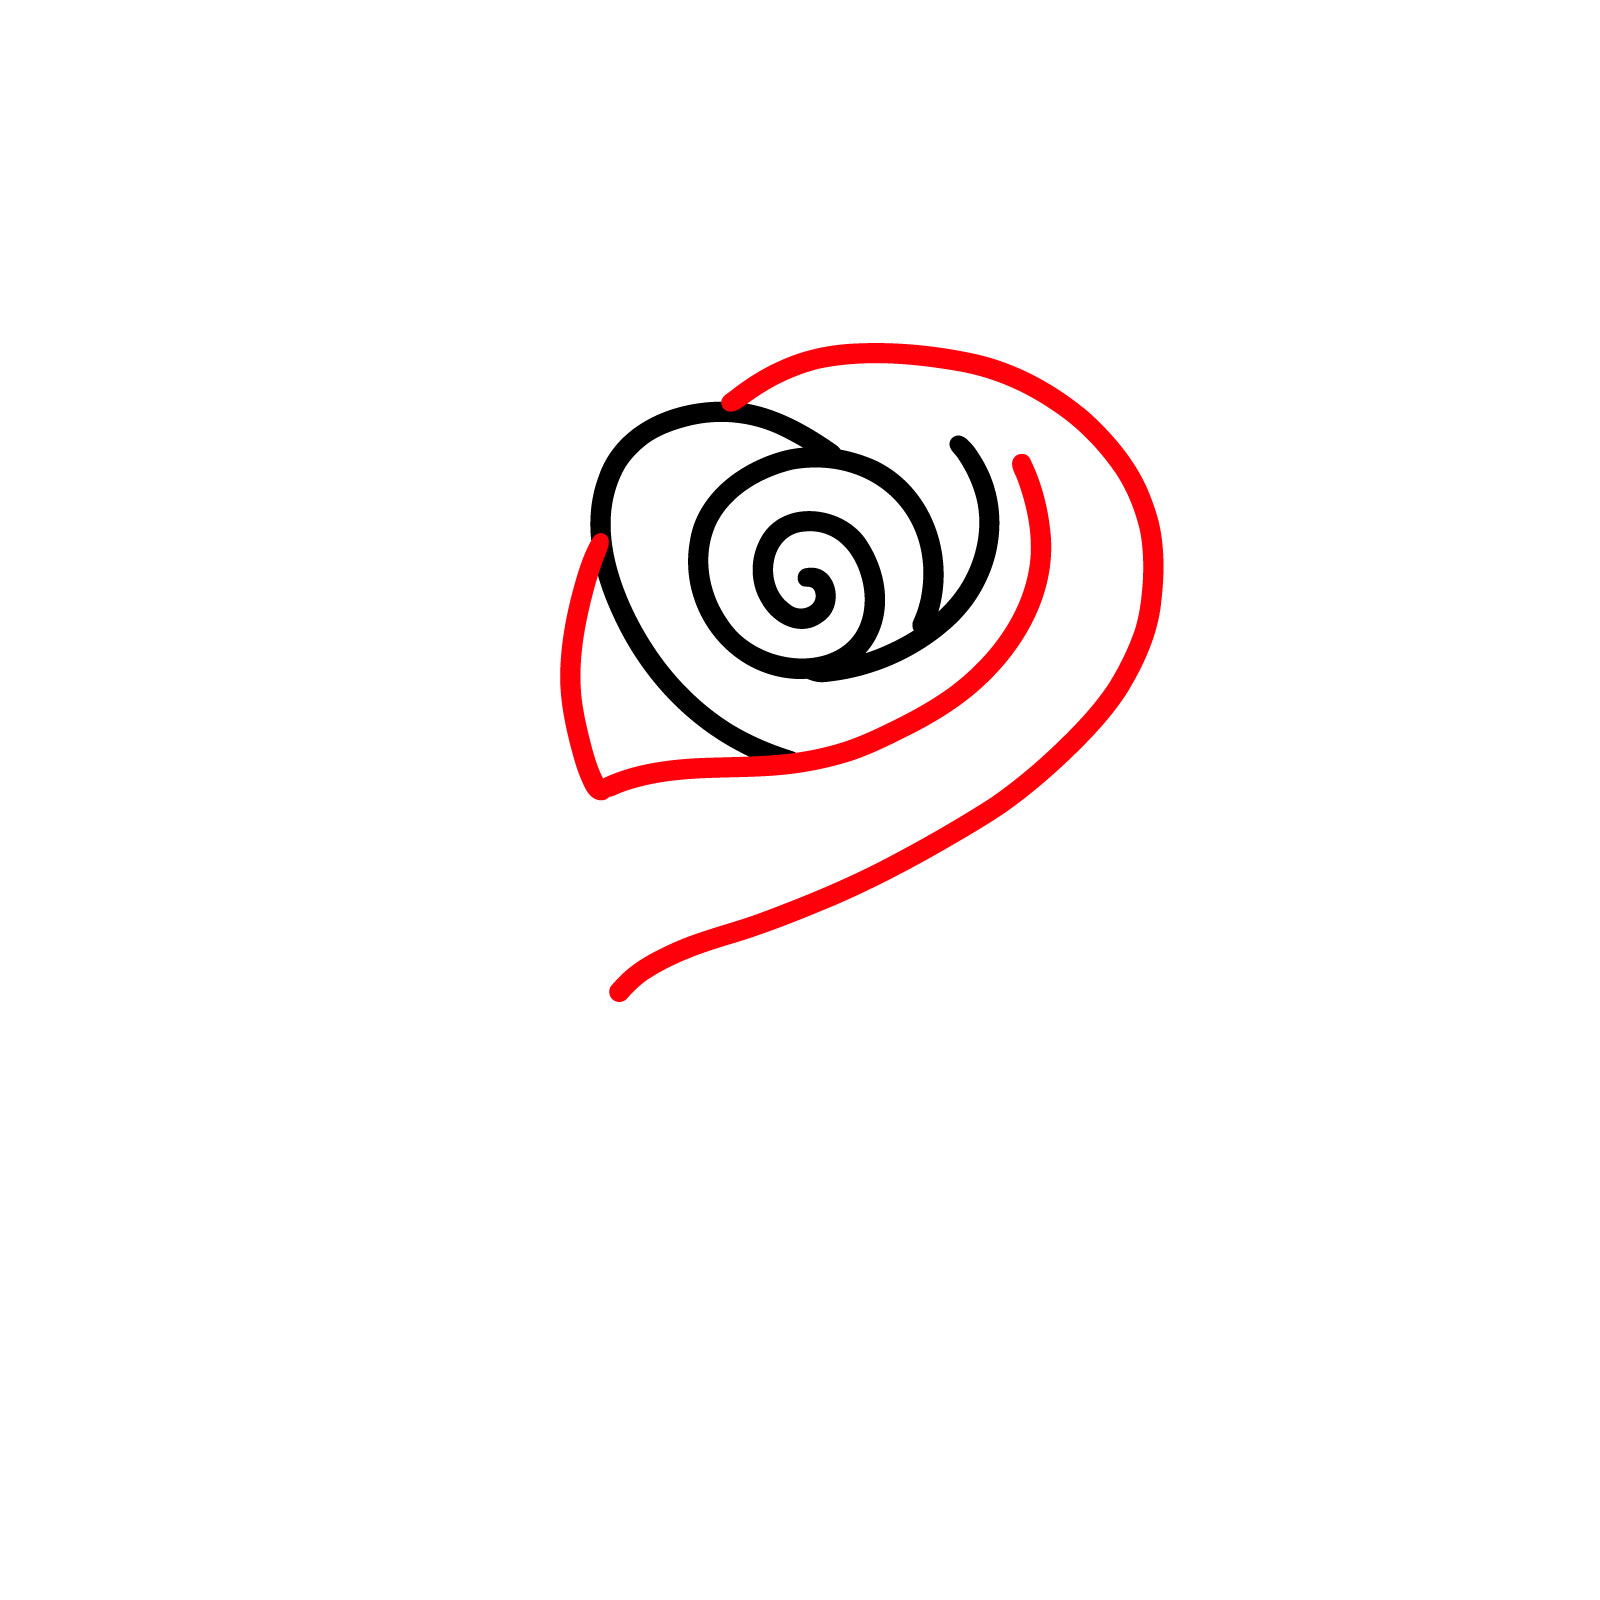
Step 03 – Inside the circle, we’ll sketch a small swirl. Imagine stirring a spoon in the middle of a bowl. This swirl is the beginning of our rose’s intricate center
Spiraling Into the Rose’s Center
Step 04 – Now, let’s draw a tiny circle inside the swirl for depth and a petal wrapping the bud from three sides. This petal is going to help us build up the layers of our rose
Shaping the Inner Petal of the Rose
Step 05 – Time to add another layer to our rose! Sketch a U-shaped curve beneath the bud. This petal is like a soft hug from below, supporting the delicate swirls we’ve drawn above
Expanding the Rose with Another Petal
Step 06 – Let’s build our rose’s bloom with more petals
Encircling the Center with More Petals
Step 07 – We’re nearly there! Add the final petal to complete the outer layer of our rose. It’s like putting the last piece in a puzzle, finishing the beautiful bud we’ve been creating
Perfecting the Rose with the Final Petal
Step 08 – Our rose needs a stem, right? Draw a line extending down from the flower. This is the rose’s backbone, its support, giving it strength and elegance as it stands tall. Draw additional lines on the sides of it to place leaves in the next step
Drawing the Stem to Support Our Rose
Step 09 – Now, draw two leaves sprouting from the stem, complete with vein lines for a touch of detail. It’s as easy as adding a few strokes to bring out that authentic leafy texture, giving life to our step-by-step rose drawing
Crafting the Leaves for Our Rose
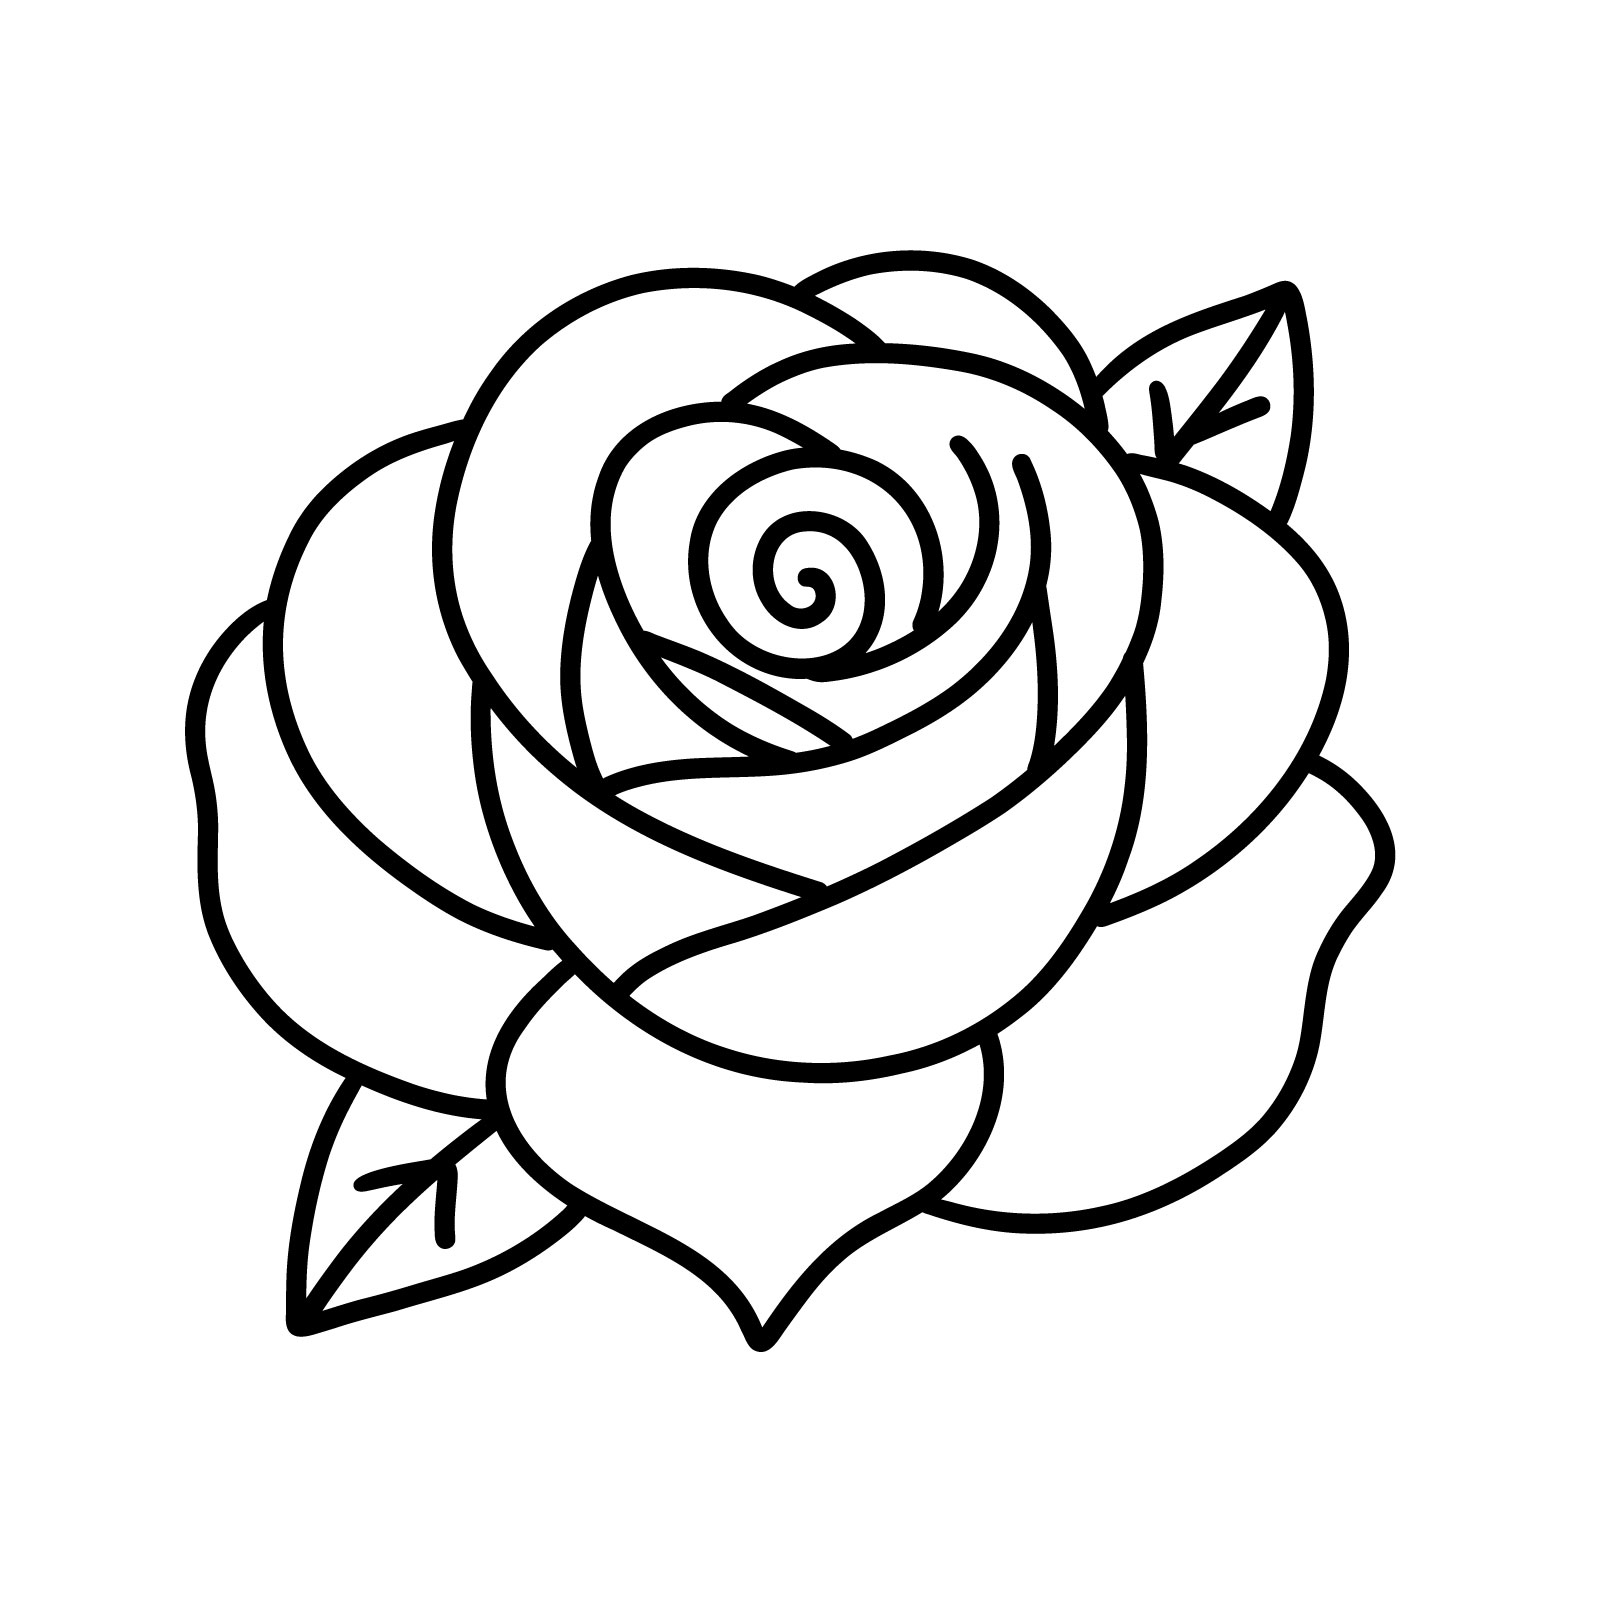
Step 10 – And just like that, you’ve finished the second guide on how to draw a rose! With these easy steps, you’ve created a bloom that looks like it’s ready to be picked. Give yourself a pat on the back for mastering this step-by-step guide with such grace and ease.
Our Second Completed Rose Drawing
Drawing Guide #3: Simple Tea Rose Illustration
Our Third Finished Rose Drawing
In the third guide, we delve into the charming simplicity of the beloved tea rose. With its prominent bud dominating the composition, this drawing emphasizes the delicate yet substantial nature of the rose’s blossom. The thin, short stem, a mere elegant line, is adorned with two leaves that balance the visual weight of the large bud. Added to this are two thorns, bringing a touch of authenticity and edge to the drawing. This 13-step guide is designed for ease and clarity, ensuring that even beginners can achieve a graceful representation of a tea rose with minimal complexity.
Step 01 – To start our rose with sharper petals, sketch a lemon-like shape. This will create a dynamic edge for the petals, different from the smooth, rounded ones we’ve done before
Beginning Our Rose with a Sharp Outline
Step 02 – Inside the lemon shape, draw an oval for the center of the bud. Then, add a stretched U shape beneath it. These will be the inner layers of our rose, giving it depth and form
Shaping the Bud of Our Rose
Step 03 – For the heart of our rose, place a small circle inside the oval. Then draw vertical lines down from the sides of the lemon shape and the oval, giving our bud a form
Defining the Bud’s Center
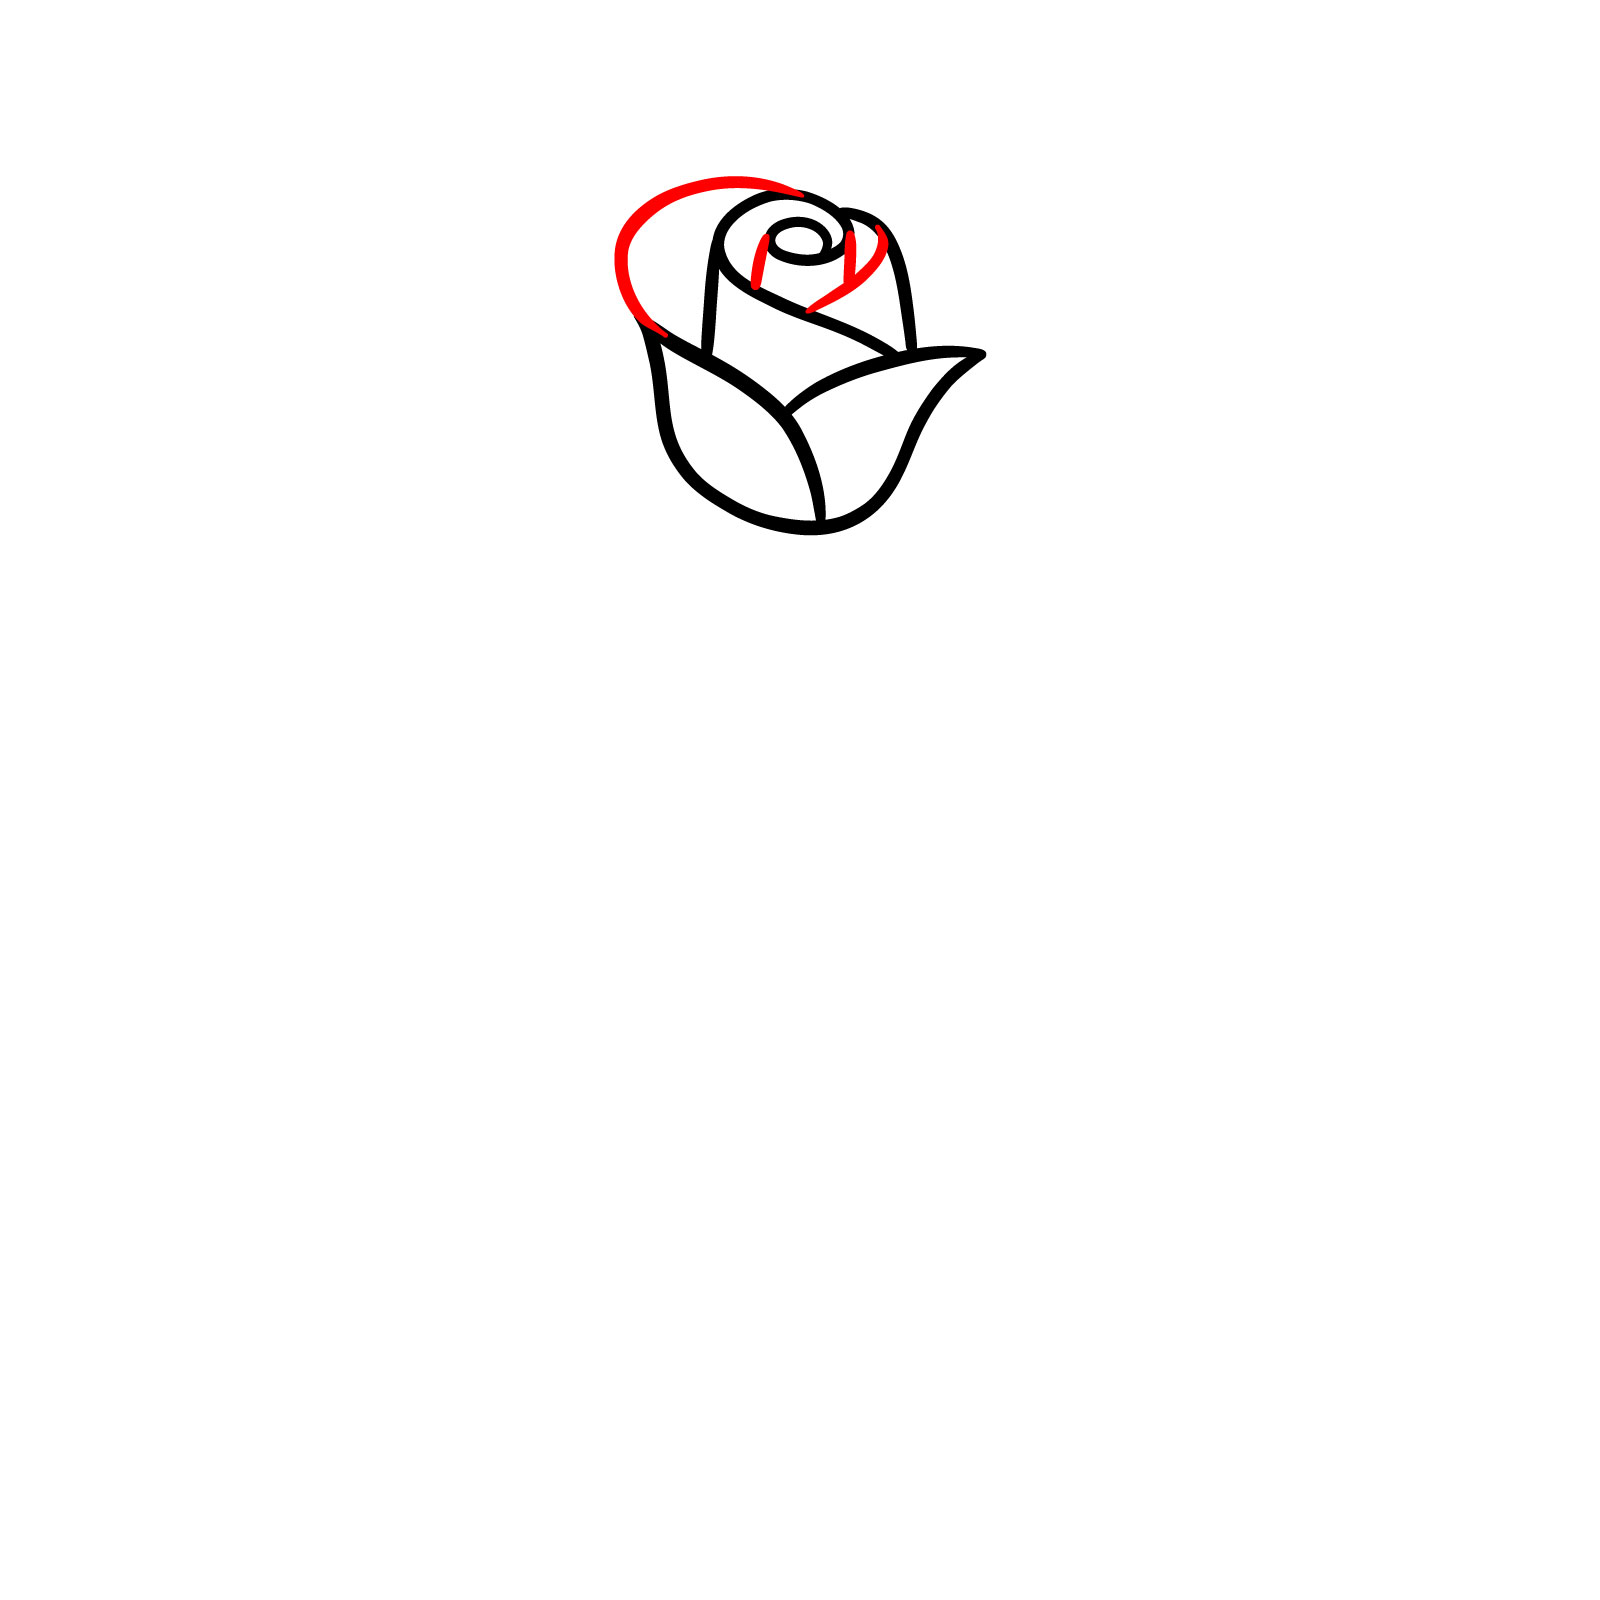
Step 04 – Now, let’s expand our rose by adding a curved, heart-shaped outline around the bud. This will form the first of the outer petals, giving our rose a sharp yet elegant appearance
Creating the Outer Petals
Step 05 – As we continue learning how to draw a rose, add a petal with distinct sharp edges to the right side of the bud. This petal should stand out with its defined corners, giving our rose a unique character
Crafting a Sharp-Edged Petal
Step 06 – Keep the momentum going by adding a base for more outer petals
Shaping the Rose’s Outer Petals
Step 07 – Continue by sketching more sharp petals
Enhancing the Rose with Additional Petals
Step 08 – Now, let’s balance our rose by adding a petal on the left side that mirrors the shape we drew in step 6. This symmetry brings harmony to the design as we still draw the simplified rose
Balancing the Rose with Symmetrical Petals
Step 09 – Finish off the petals by refining their shapes. Each petal contributes to the layered complexity of our rose, making the drawing come alive with dimension
Completing the Petals of Our Rose
Step 10 – Draw a simple line down from the base of the petals to form the stem. This slender column supports the beauty of the bloom above, giving our rose drawing a grounded look. Add 2 slightly curved lines on it’s sides for the leaves base
Extending the Rose with a Stem
Step 11 – Place two leaves to the lines we draw earlier
Adding Leaves to the Rose’s Stem
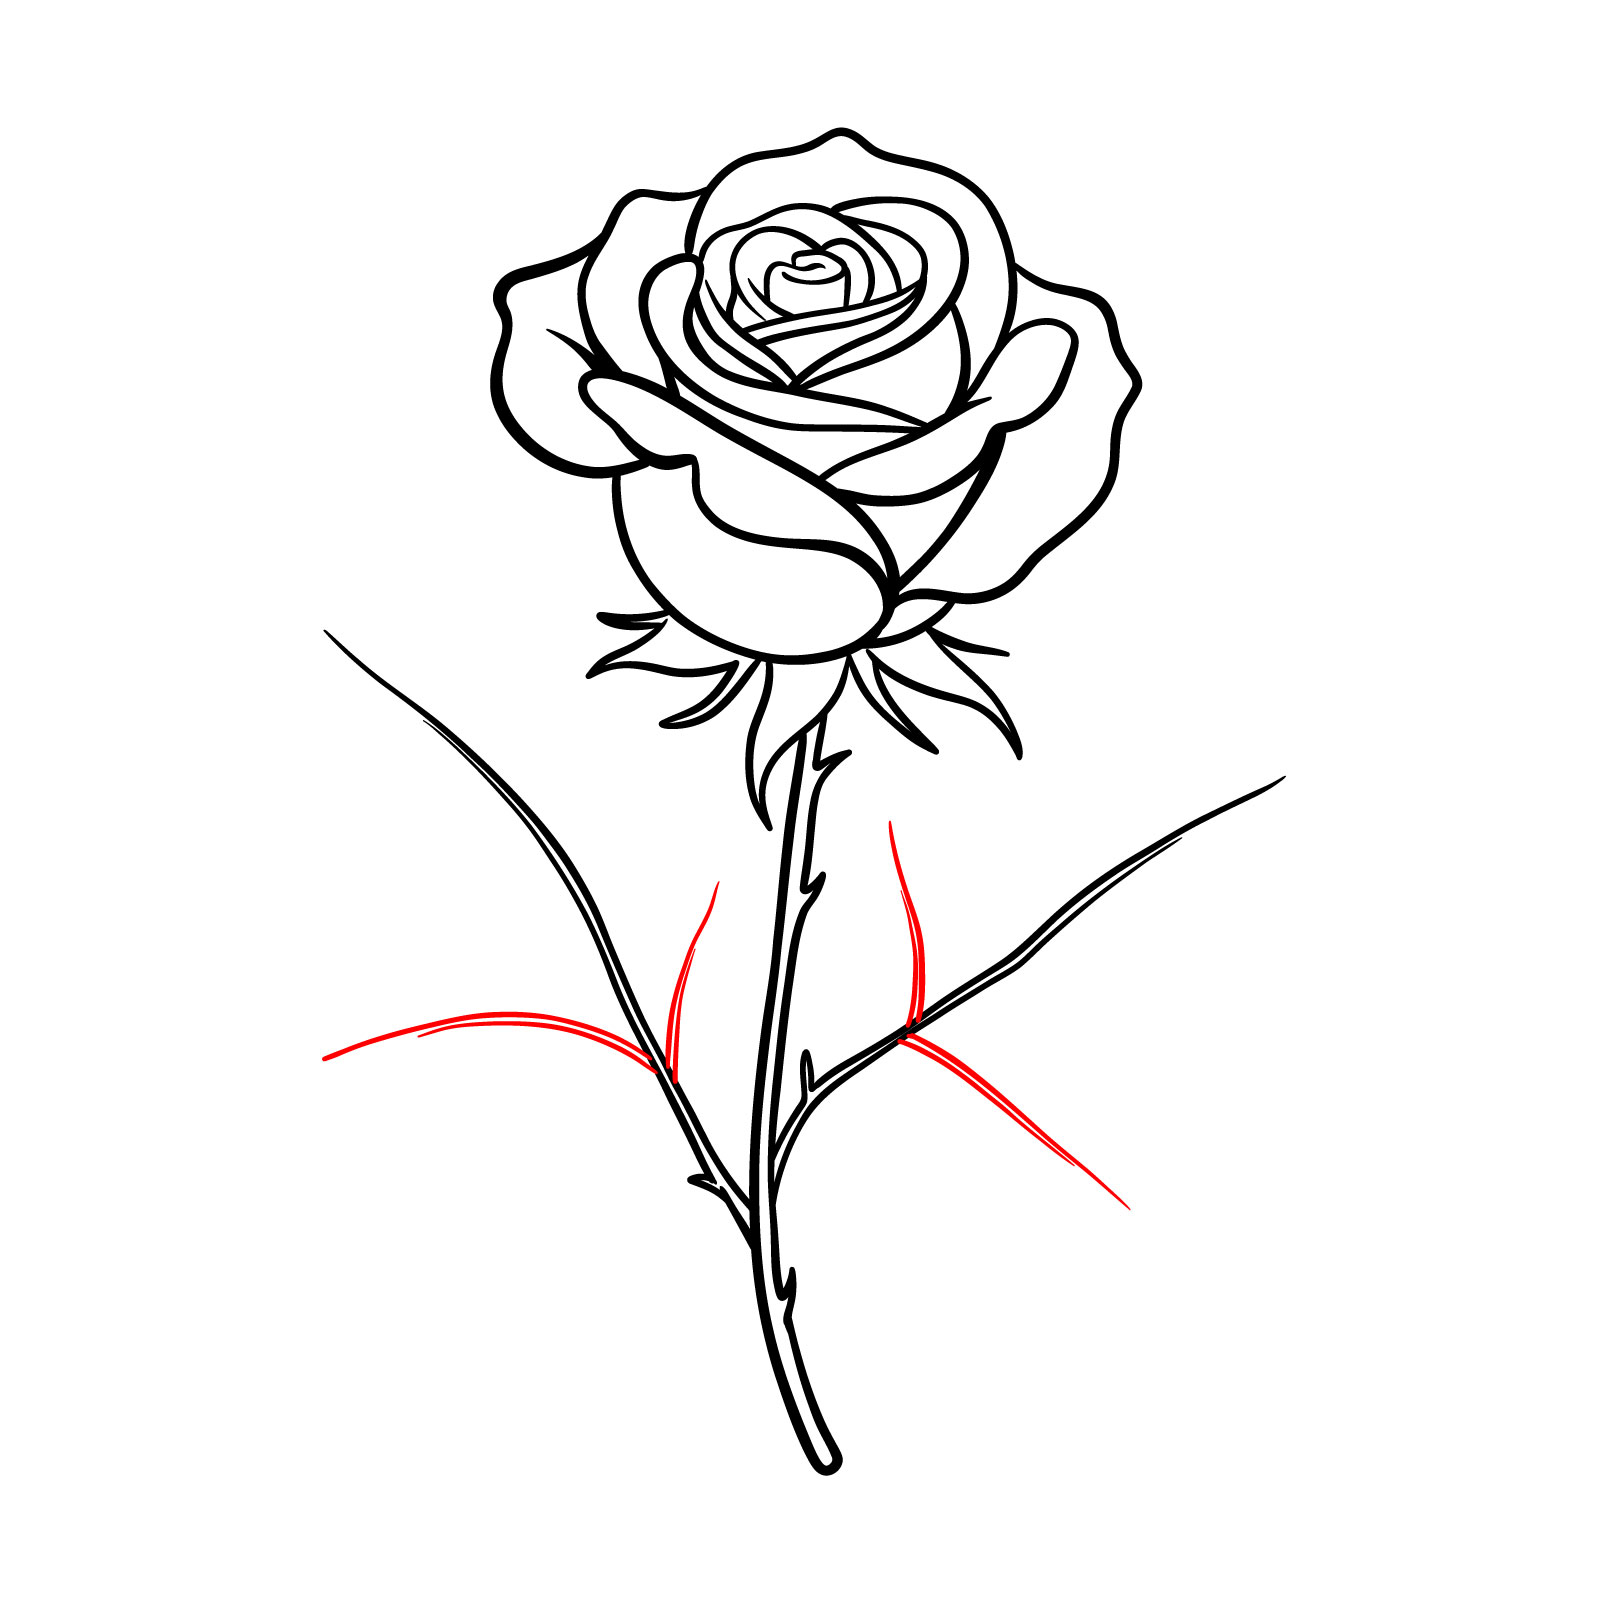
Step 12 – Sketch in the veins on the leaves and add a few thorns to the stem for a realistic touch. These details bring an authentic feel to our drawing, making it not just a rose but your rose
Bringing Details to the Leaves and Stem
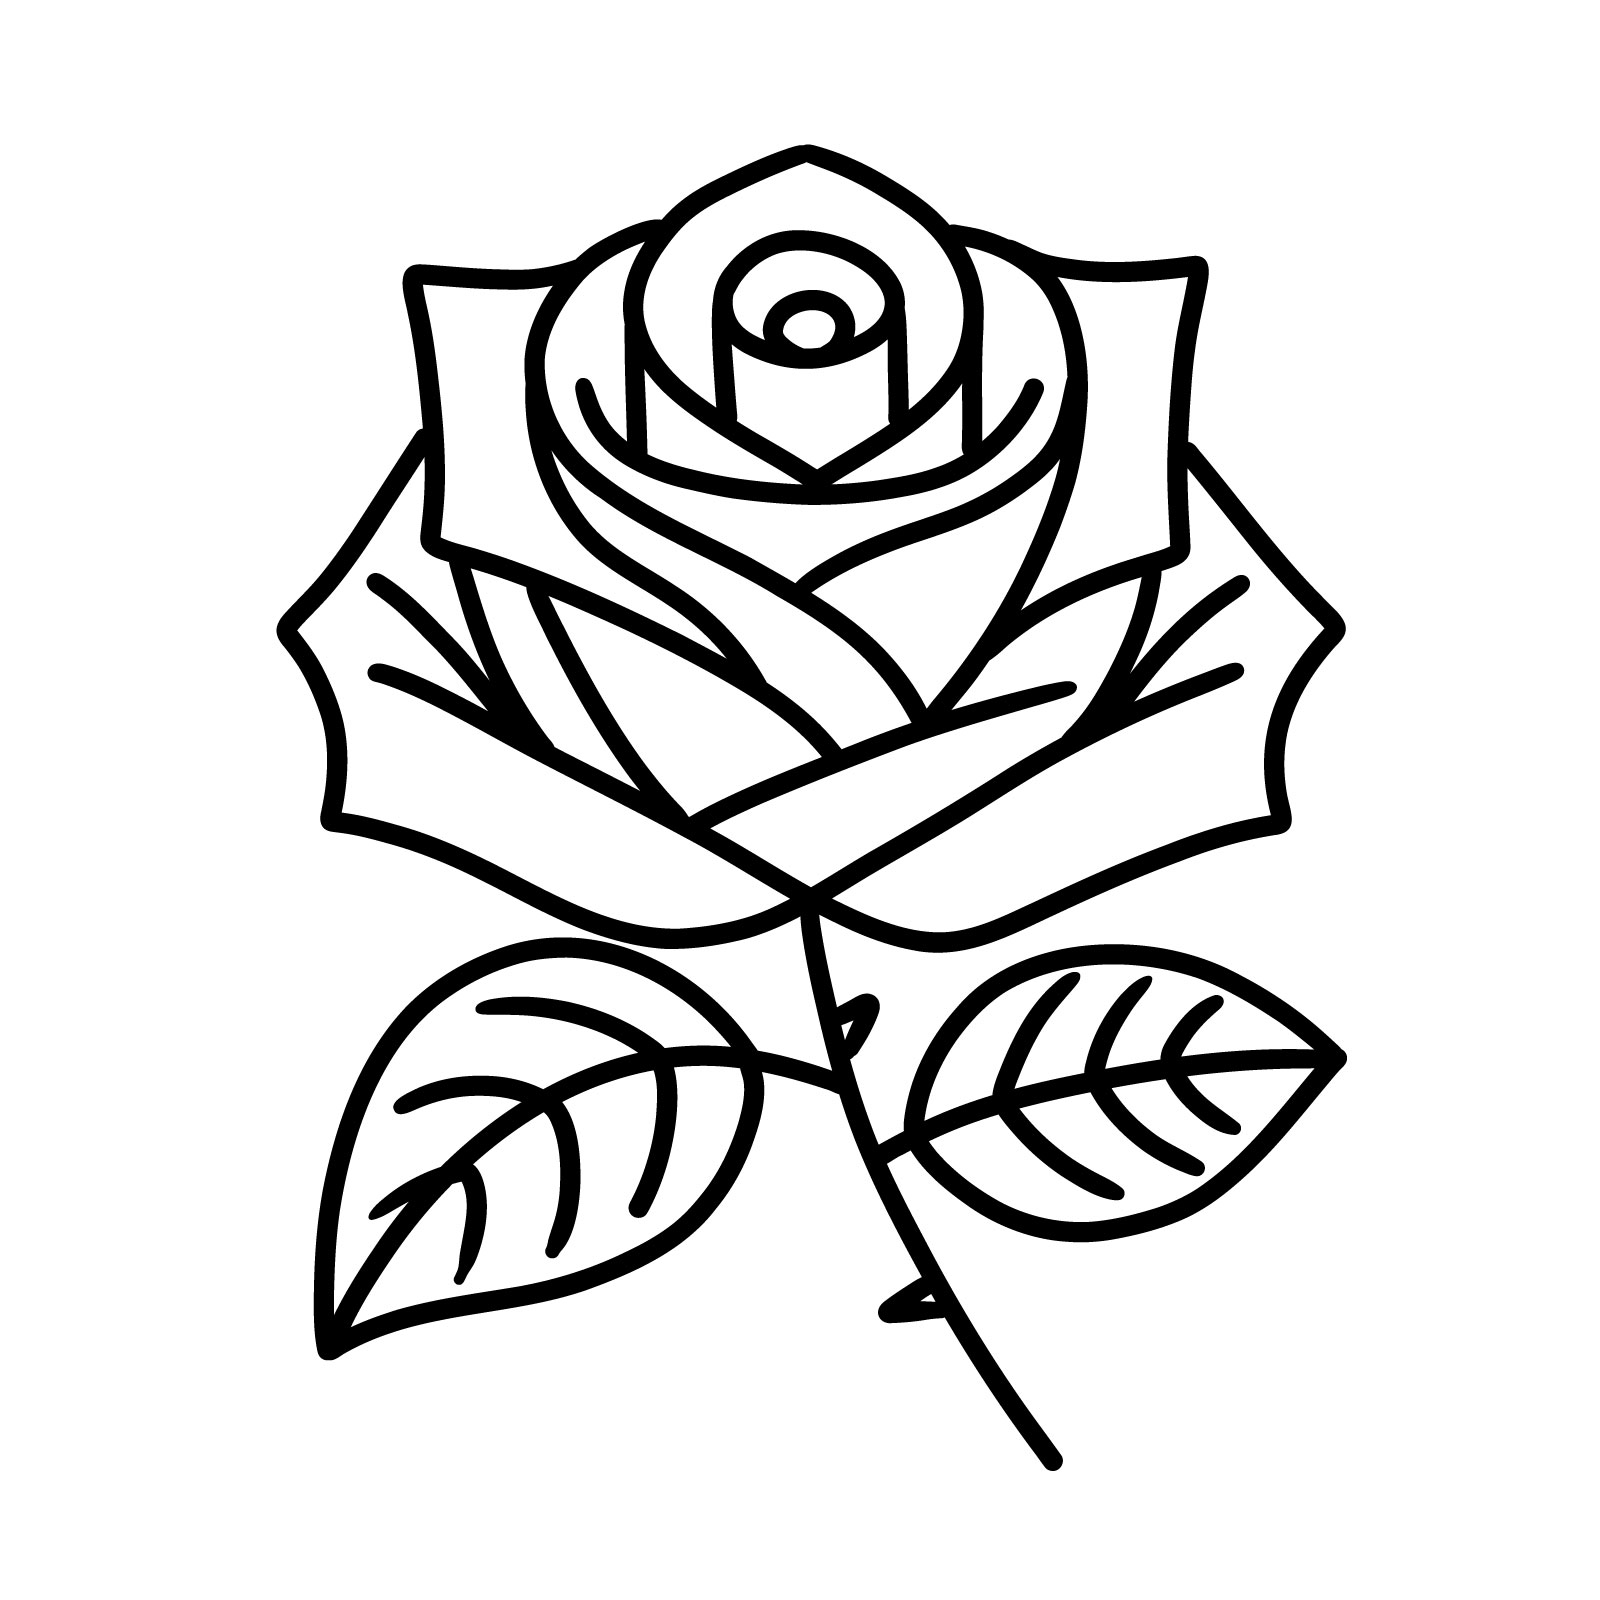
Step 13 – With the final details in place, our third easy rose drawing guide is complete, with five more to explore
Our Third Finished Rose Drawing
Drawing Guide #4: Easy Geometric Rose Design
The Fourth Rose We’ll Draw
This approach simplifies the rose into essential forms and lines, perfect for those who appreciate the interplay of shape and space. The rose emerges from a series of soft, curving lines that interconnect to form a stylized bloom, reminiscent of the elegant yet mathematical beauty found in nature. With only two leaves to complement the structure, the design retains its clarity and ease. This line-drawing breaks the process down into 9 straightforward steps, making it accessible for all skill levels. The guide is especially suited for learners who favor a visual style that marries the organic with the geometric, resulting in a rose that’s both easy to draw and pleasing to the artistic eye.
Step 01 – Start your fourth (which is still pretty easy) rose drawing with a gentle squeeze to form an inverted teardrop shape. This is the blueprint for our bud, setting the stage for a slightly symmetrical and geometrically styled rose
Beginning the Rose Bud with a Simple Shape
Step 02 – Within our teardrop, draw a circle to define the bud’s center. Add a curved line within it to show the bud’s layered structure
Detailing the Rose Bud
Step 03 – Start shaping the bud by sketching curved vertical lines that follow down to the outer petals. These lines will help us create the illusion of the bud’s delicate fold as it prepares to open
Shaping the Rose Bud
Step 04 – Add outer petals to our bud, ensuring they meet gracefully at the base. Continue these lines down to form a single, central line, which will become the stem. This step-by-step method simplifies the complexity of a rose into approachable shapes and lines
Forming the Outer Petals and Stem
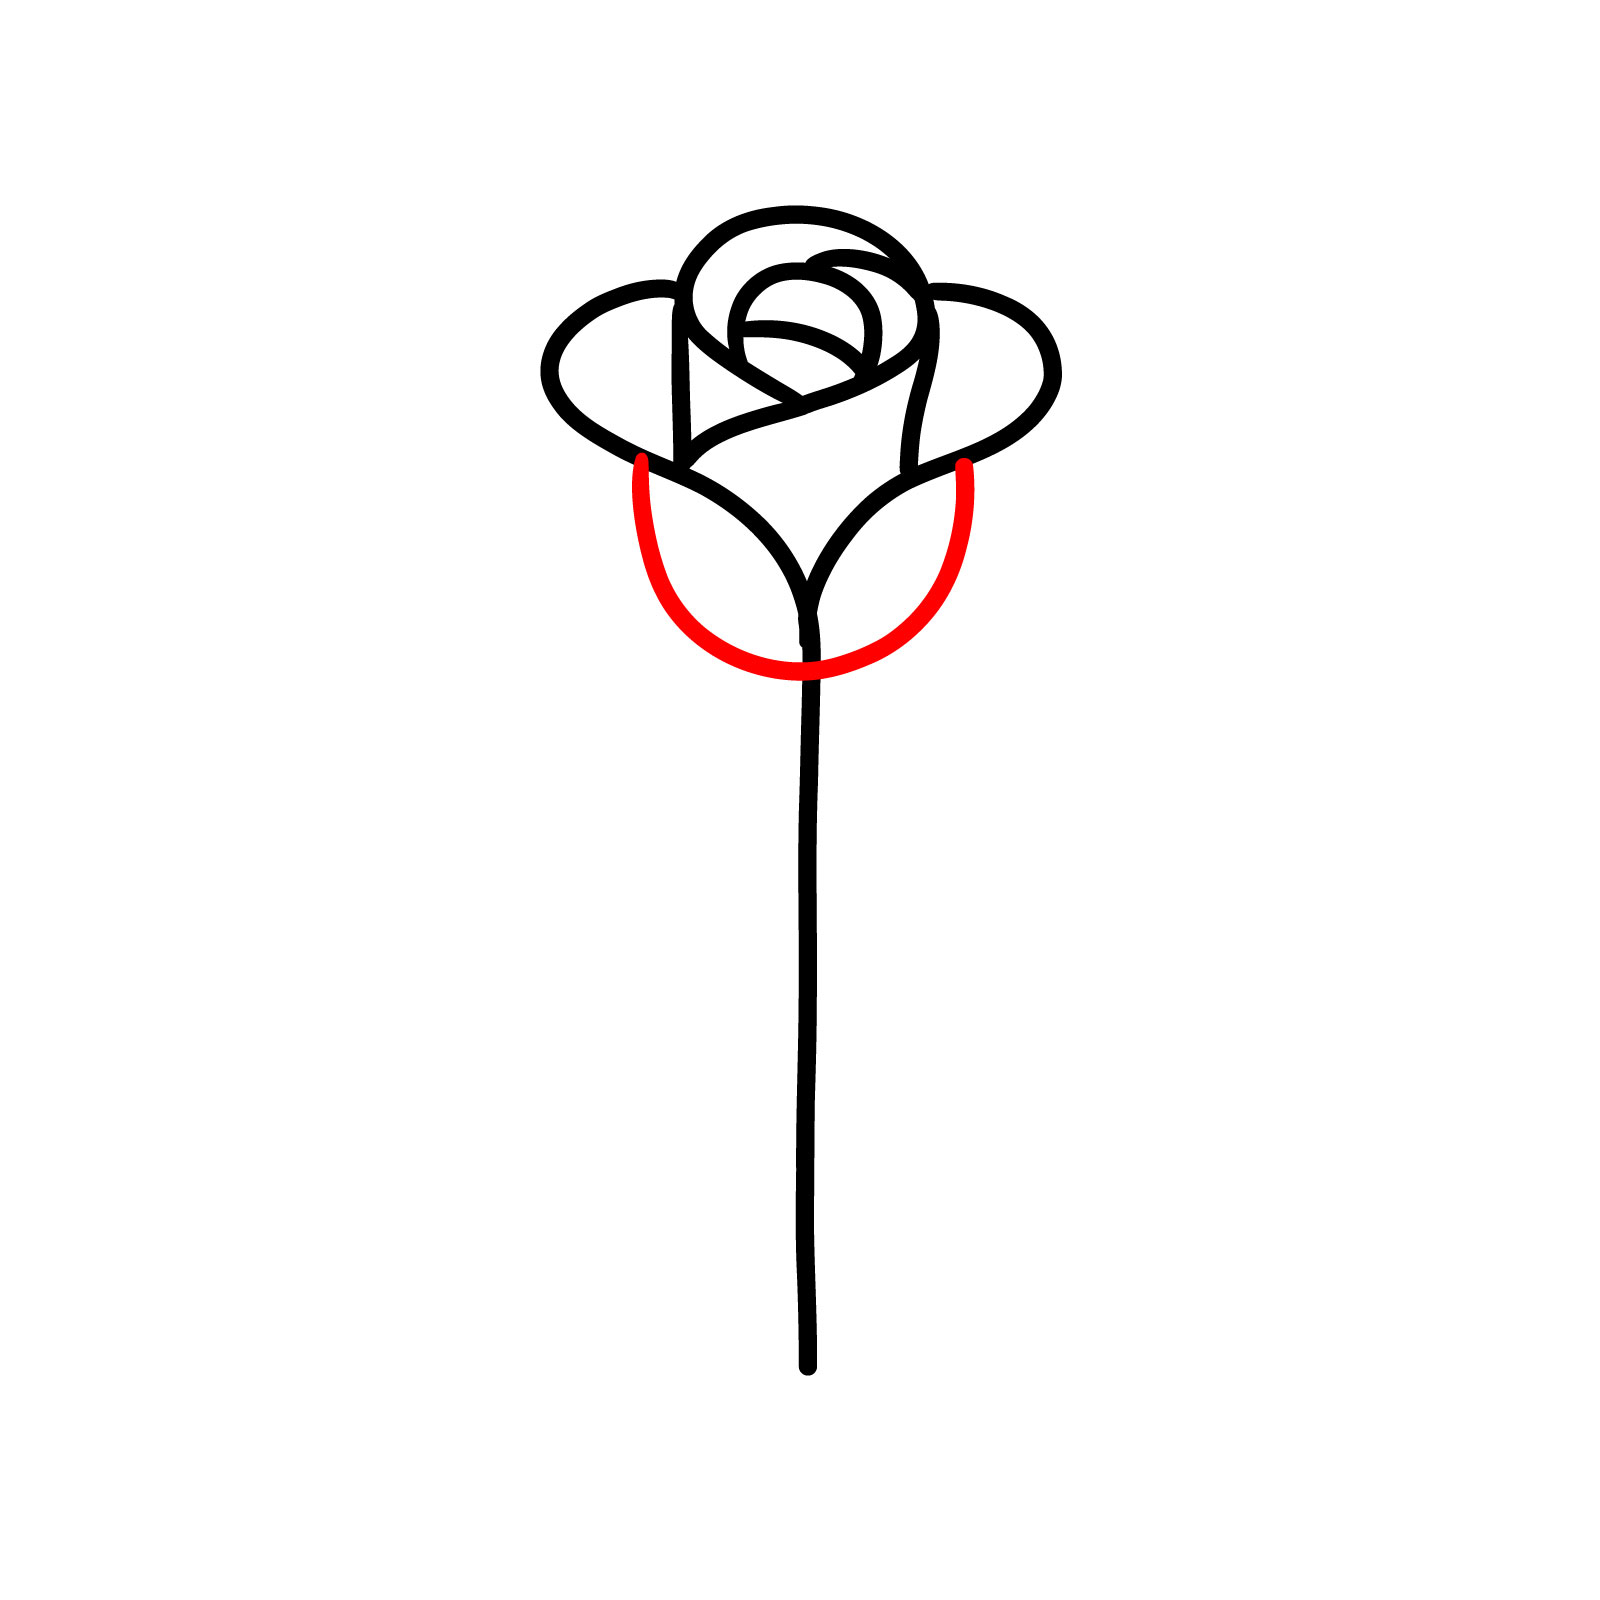
Step 05 – Now, add a U shape at the bottom of your rosebud. This serves as the foundation for the lower petals, adding volume and a base to our geometric rose
Establishing the Base of the Rose
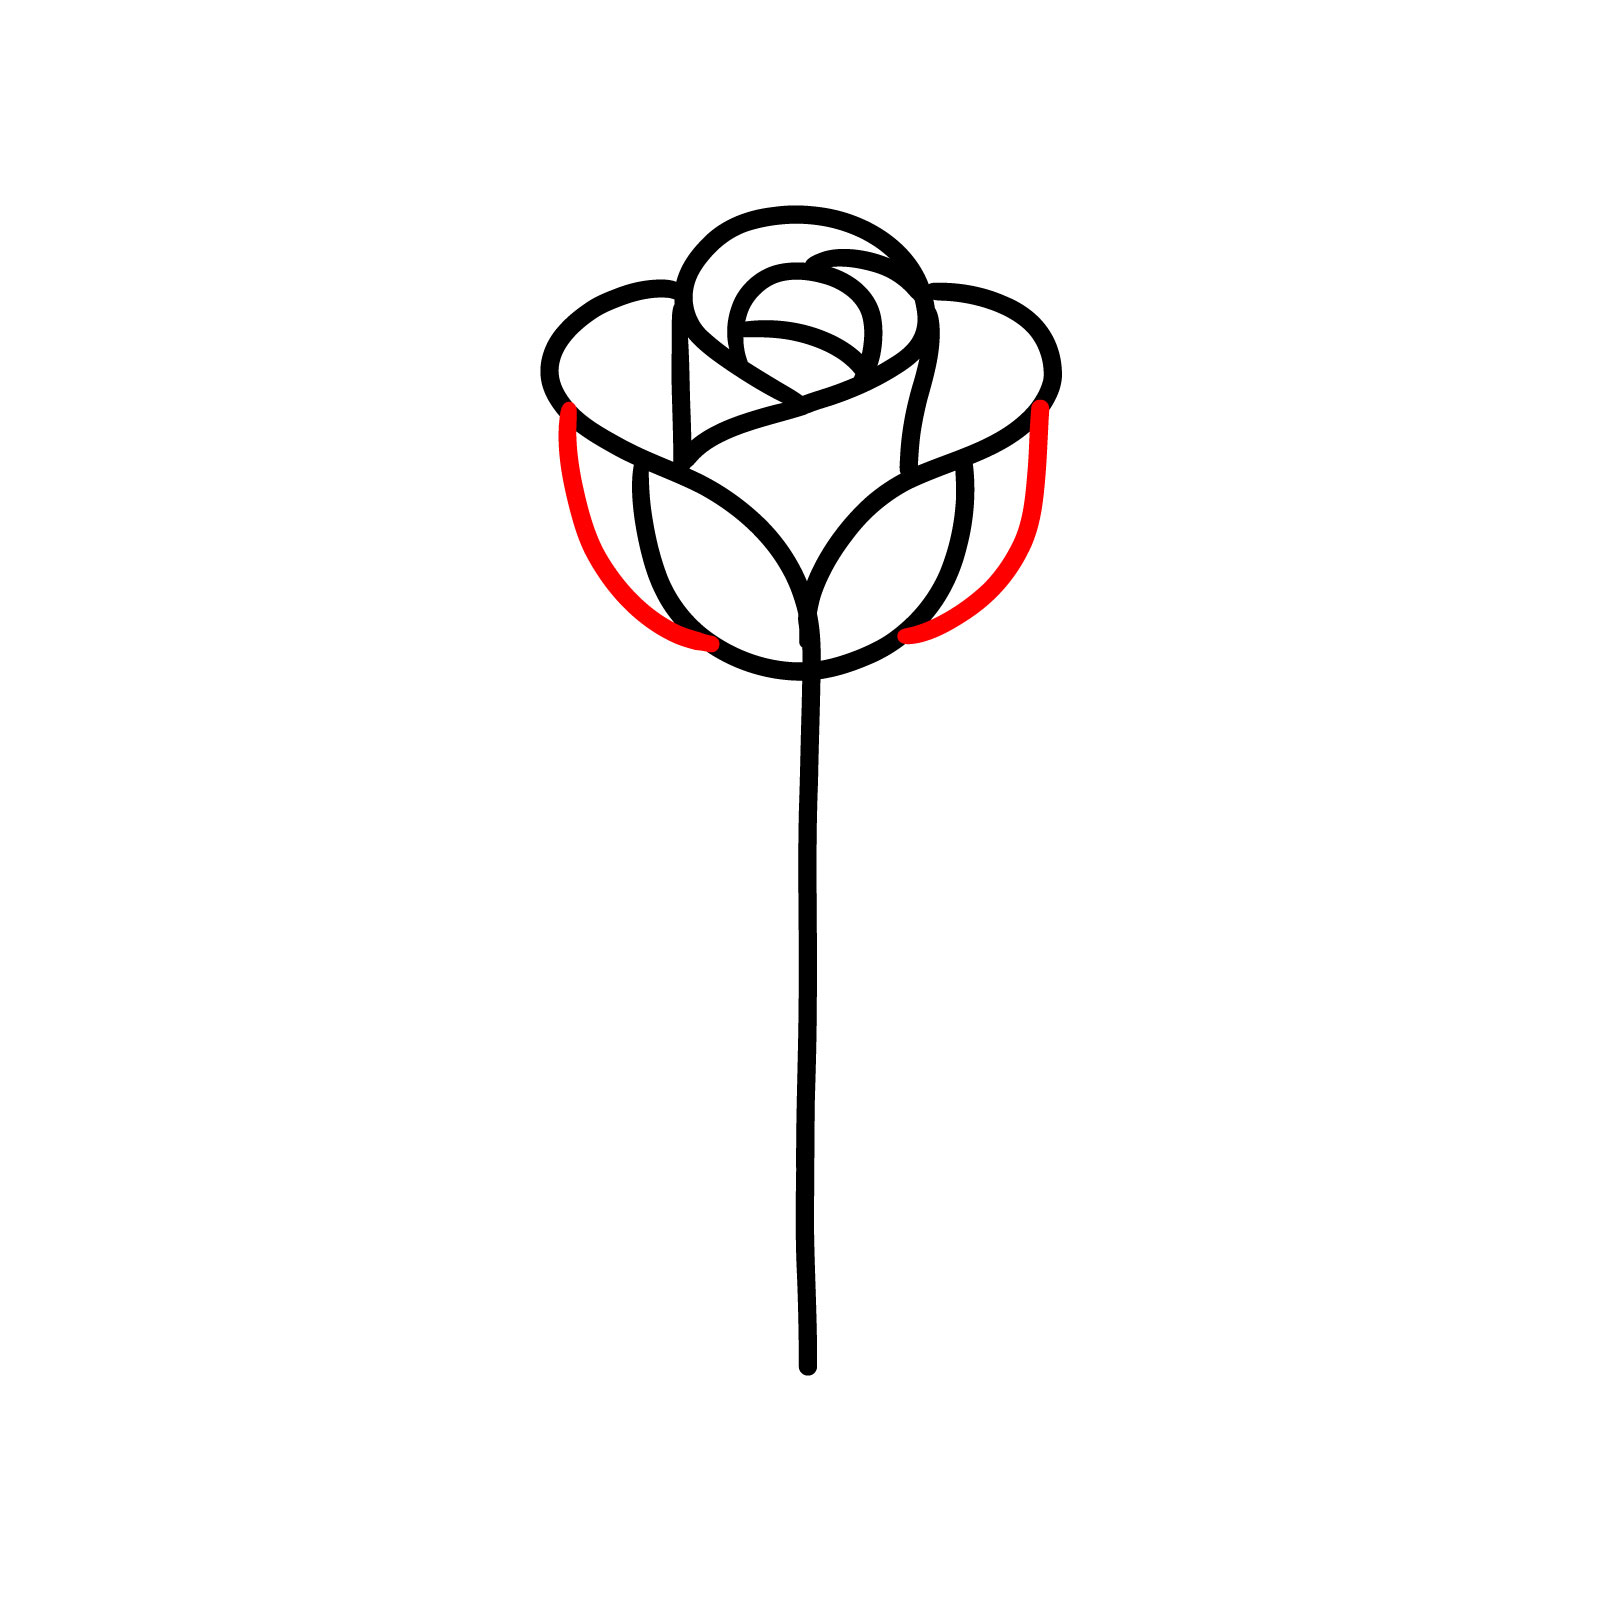
Step 06 – Sketch curved lines connecting to our U-shaped base to illustrate the side petals. These lines enhance the form of the rose, giving it a fuller appearance
Shaping the Side Petals
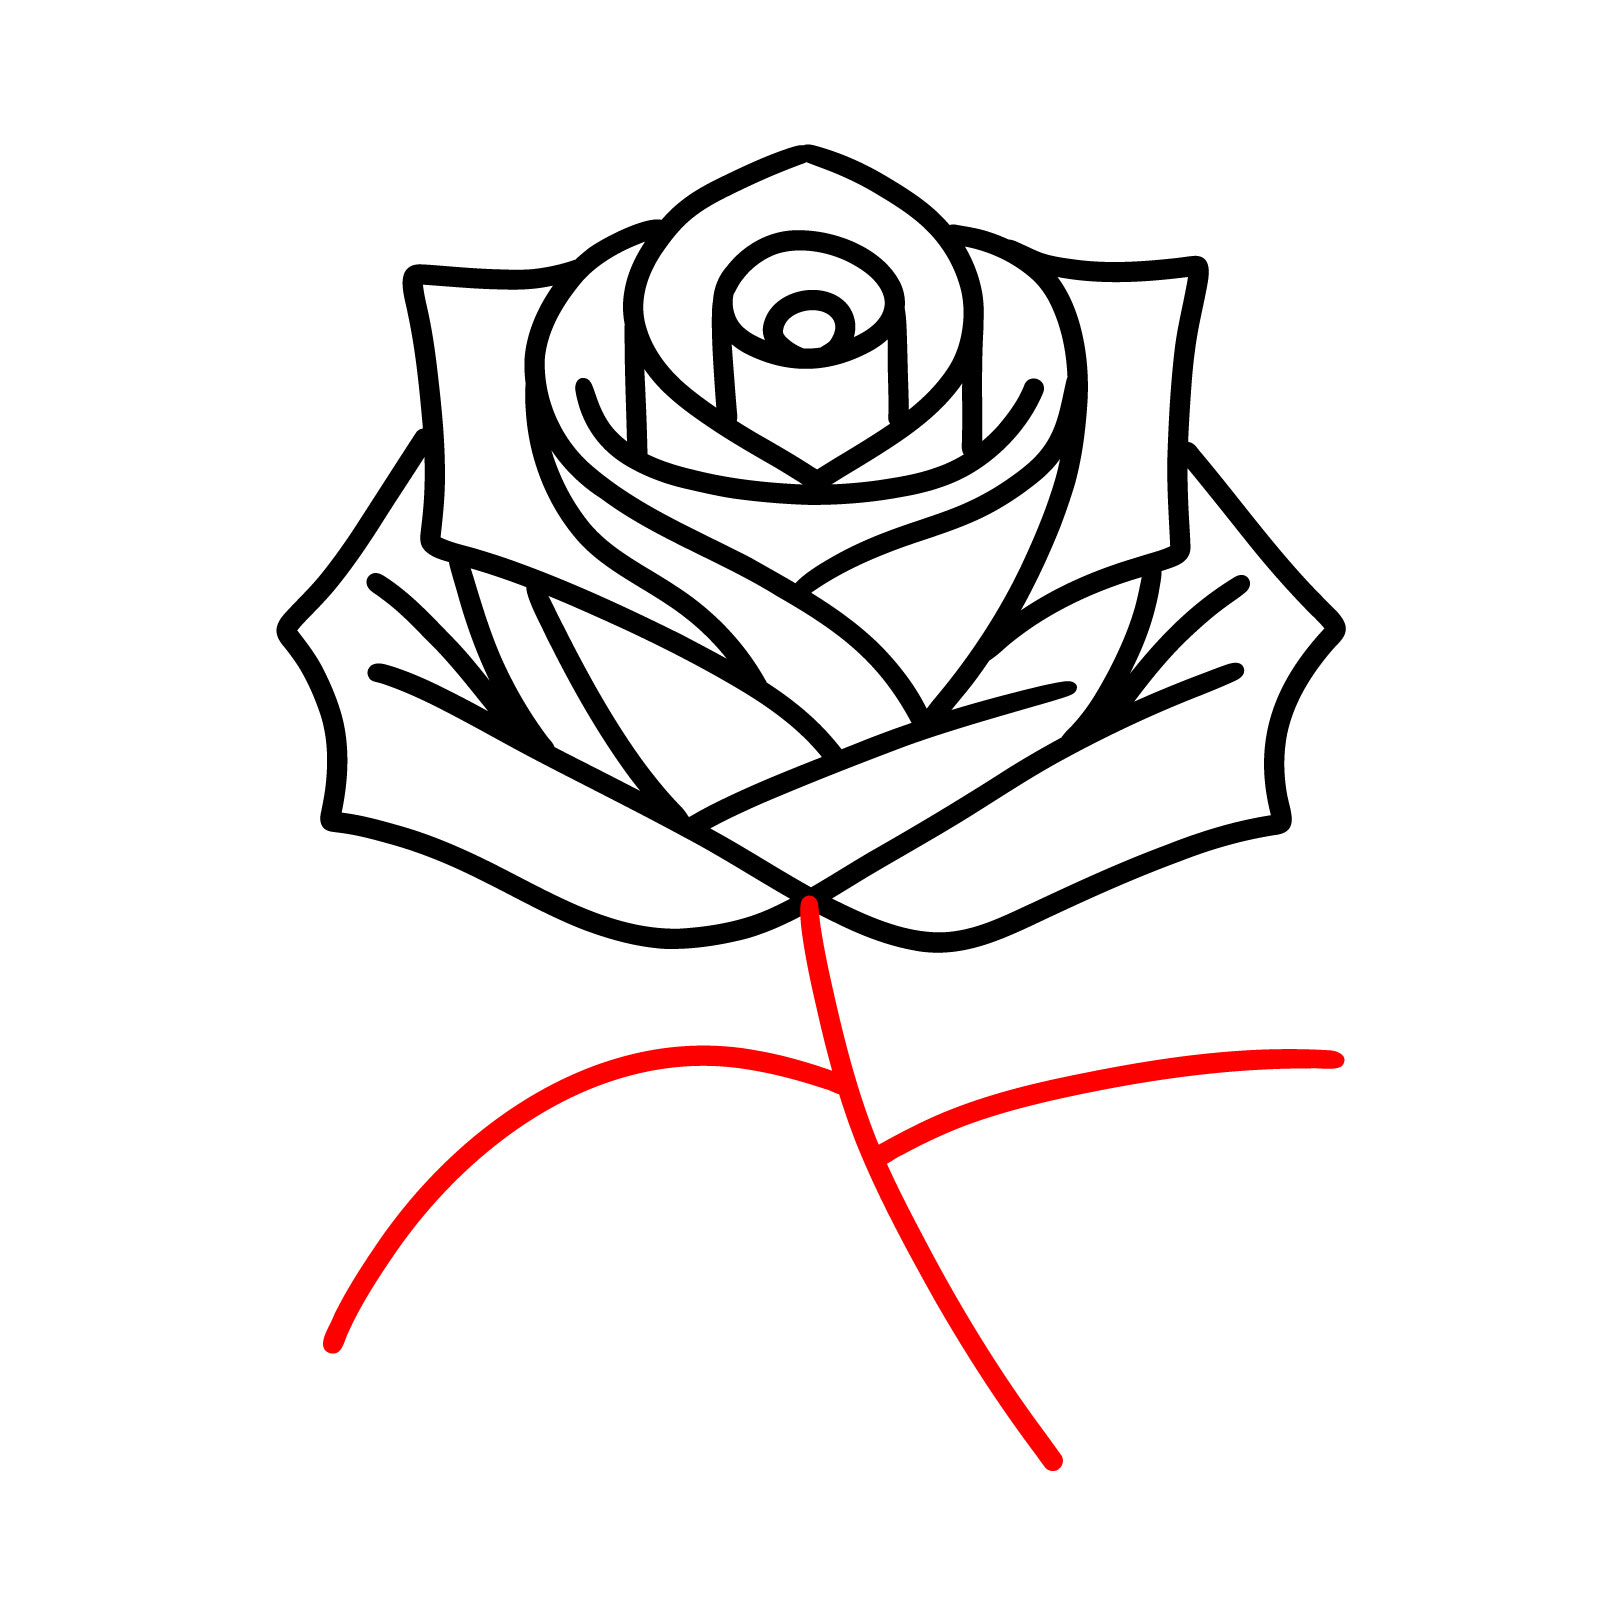
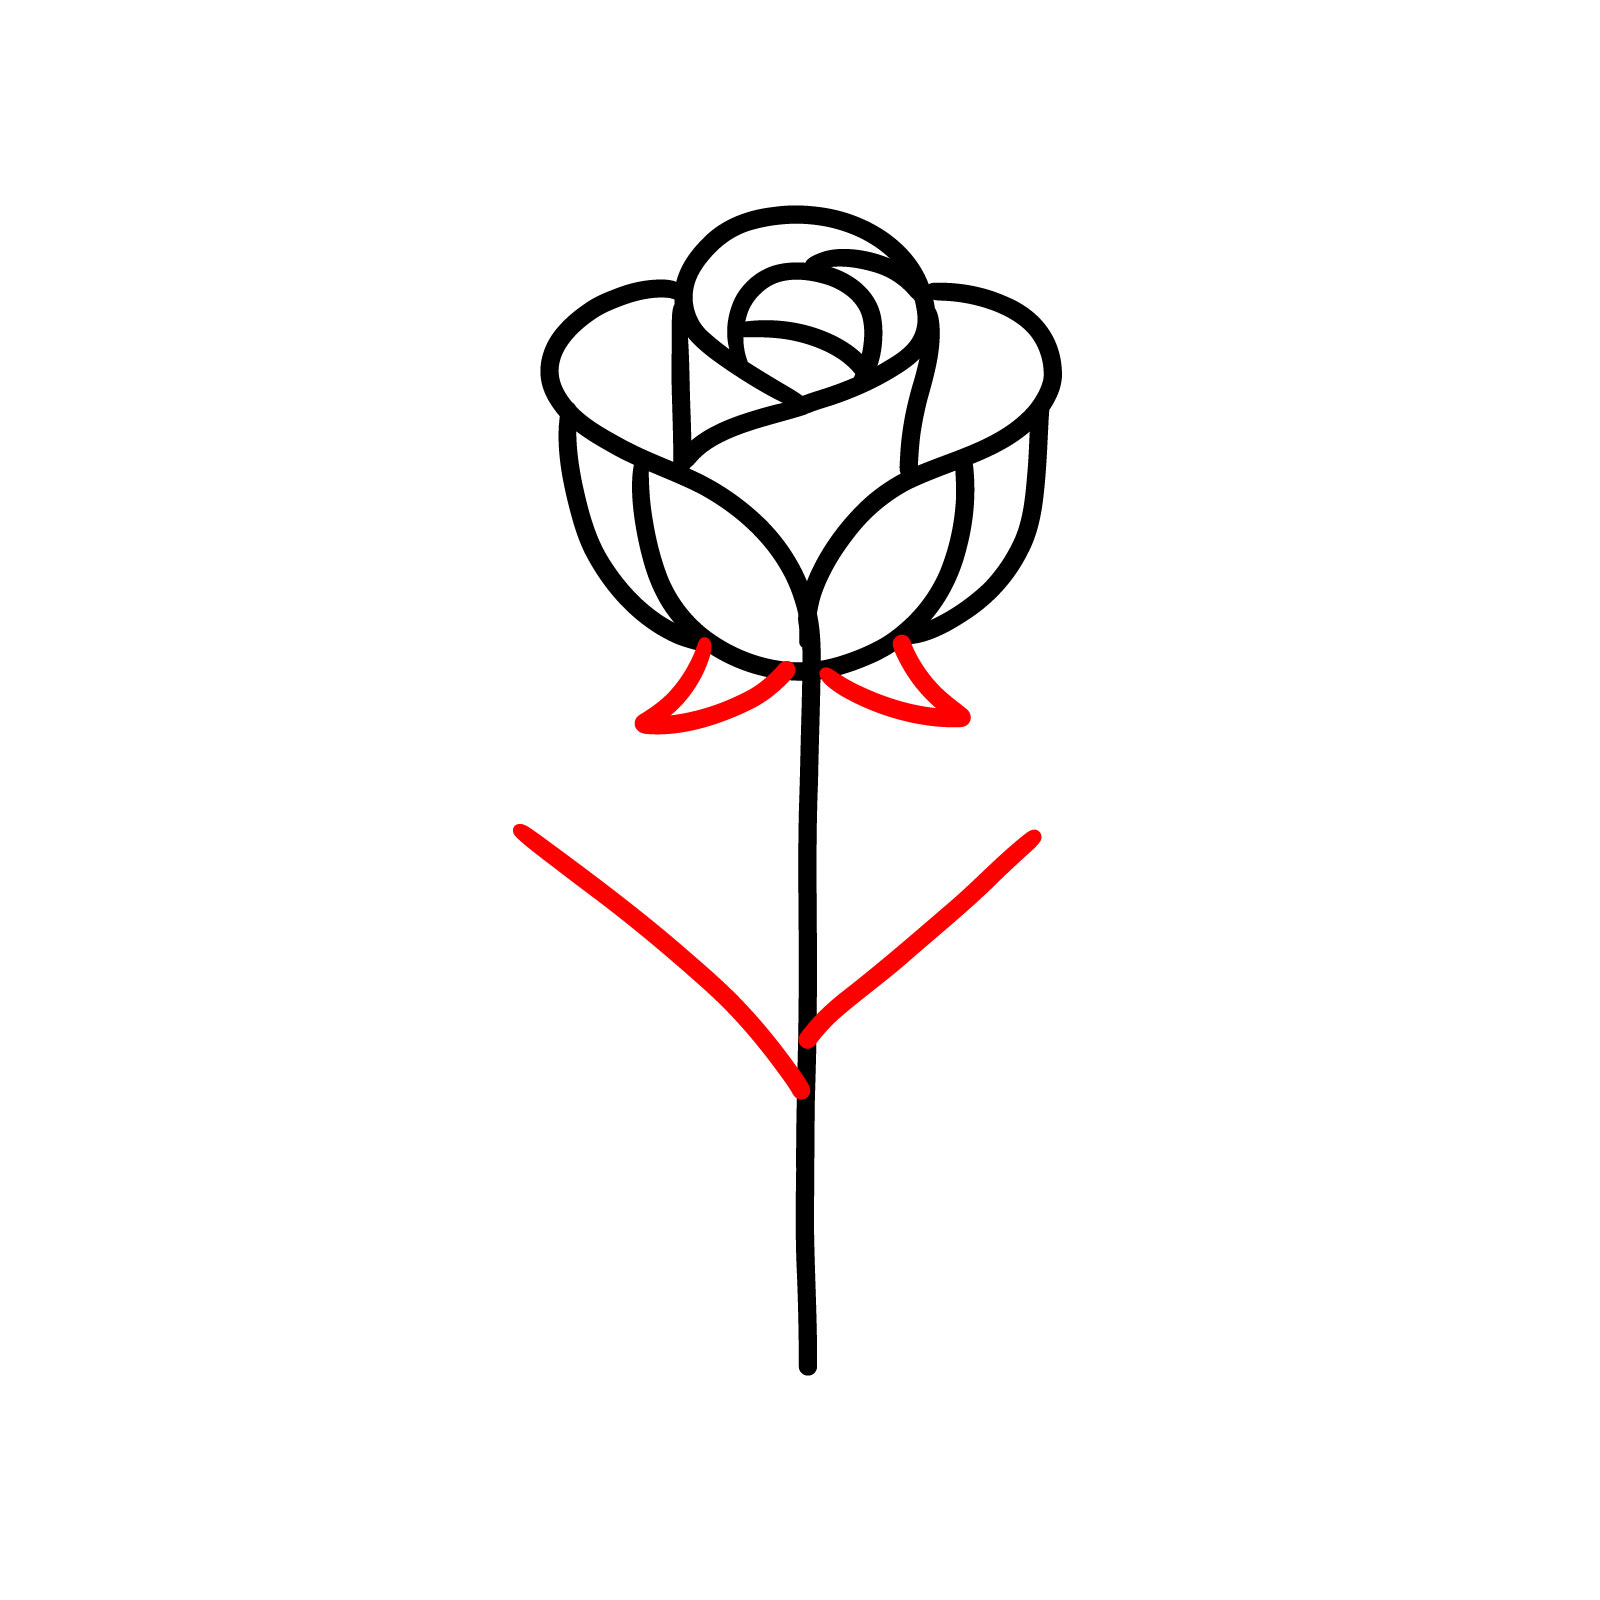
Step 07 – Define the base of the rosebud and then extend two lines from the stem sides, marking the spots where leaves will soon emerge. This step guides us in constructing a balanced rose
Preparing for Leaf Placement
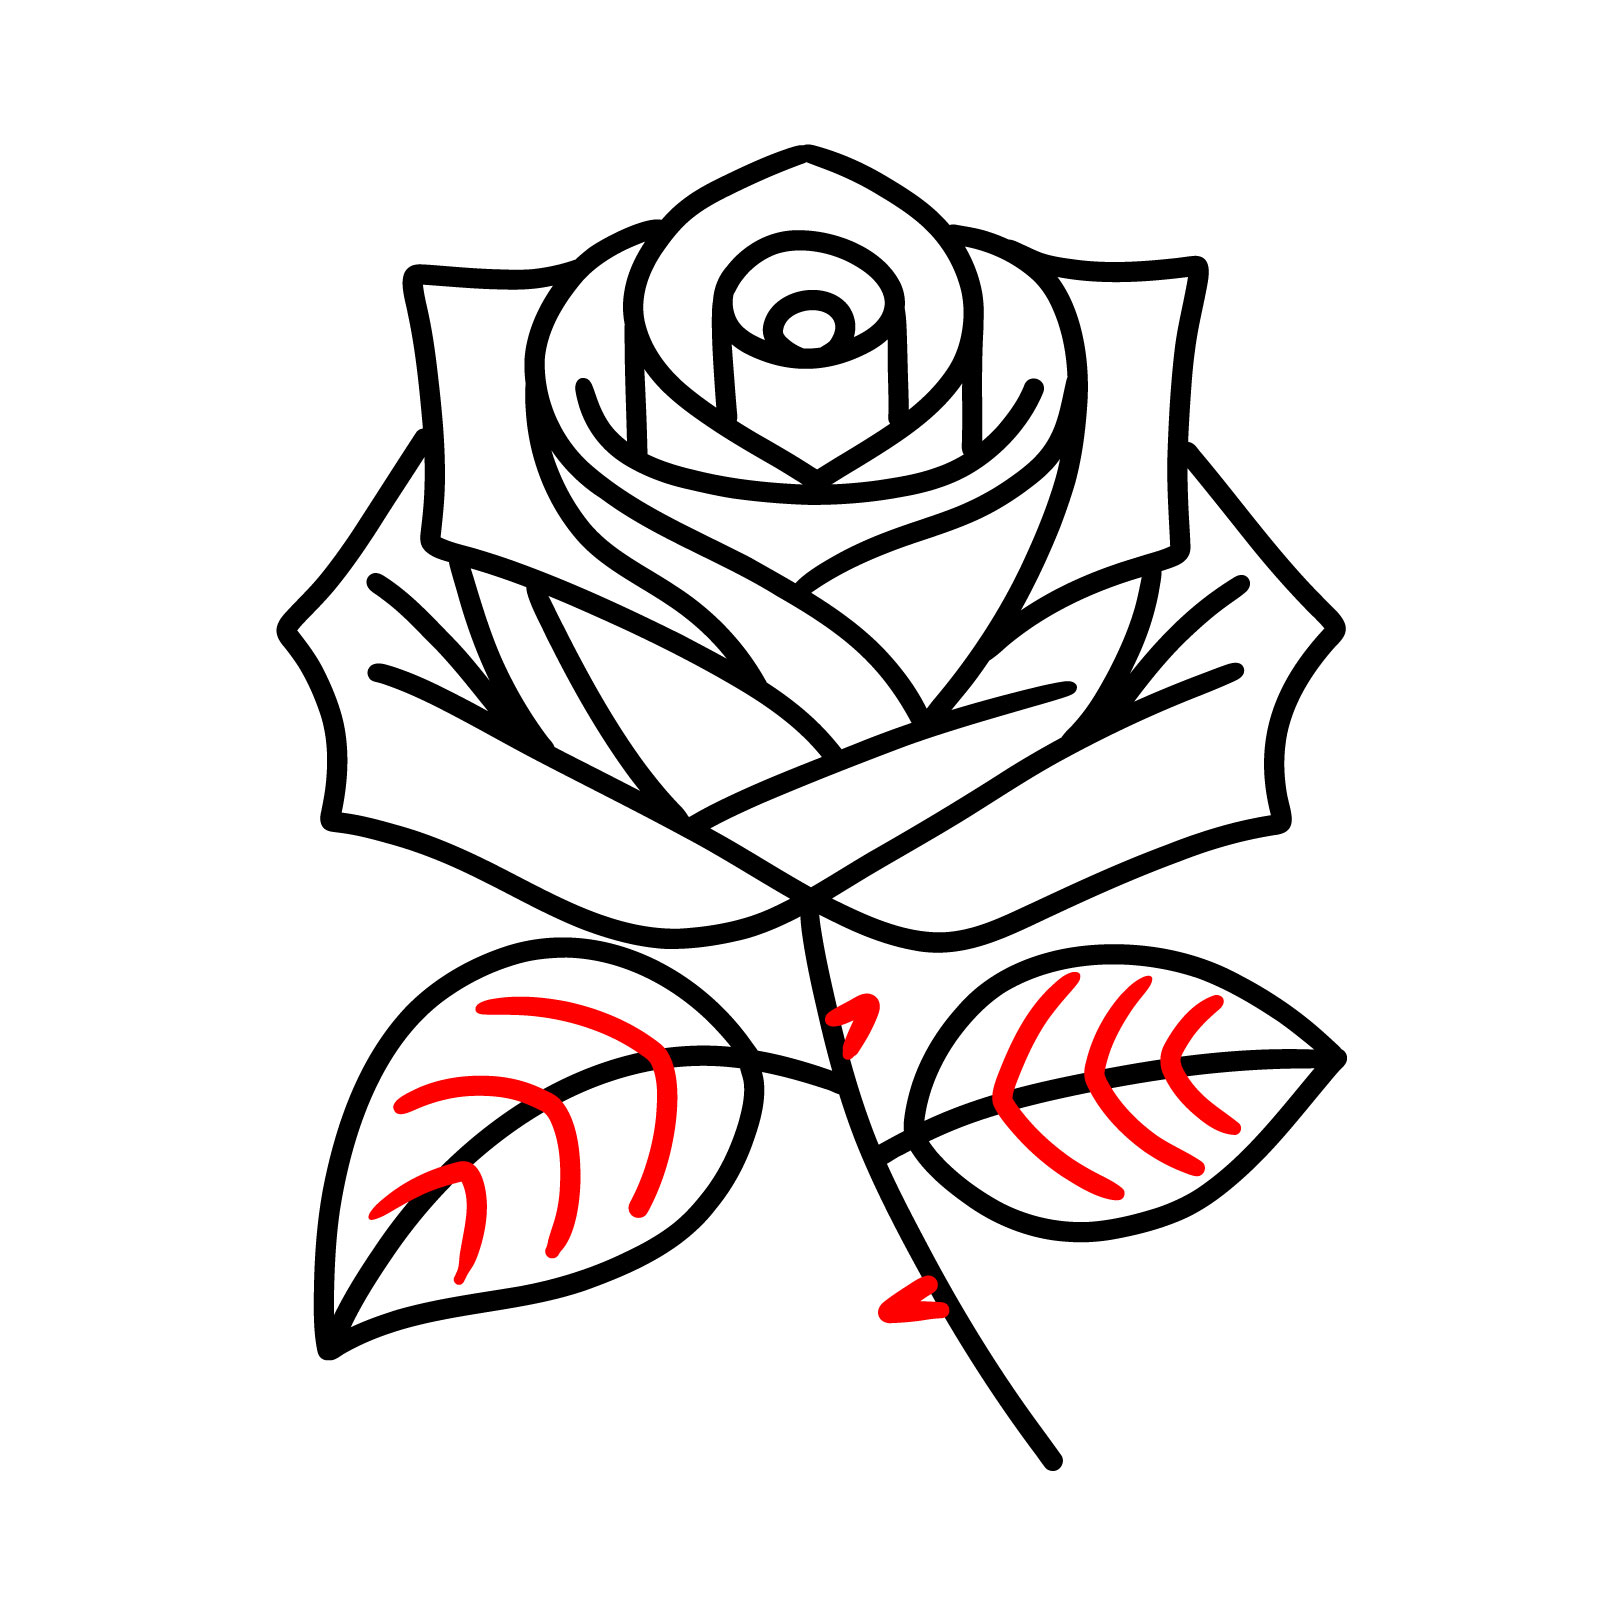
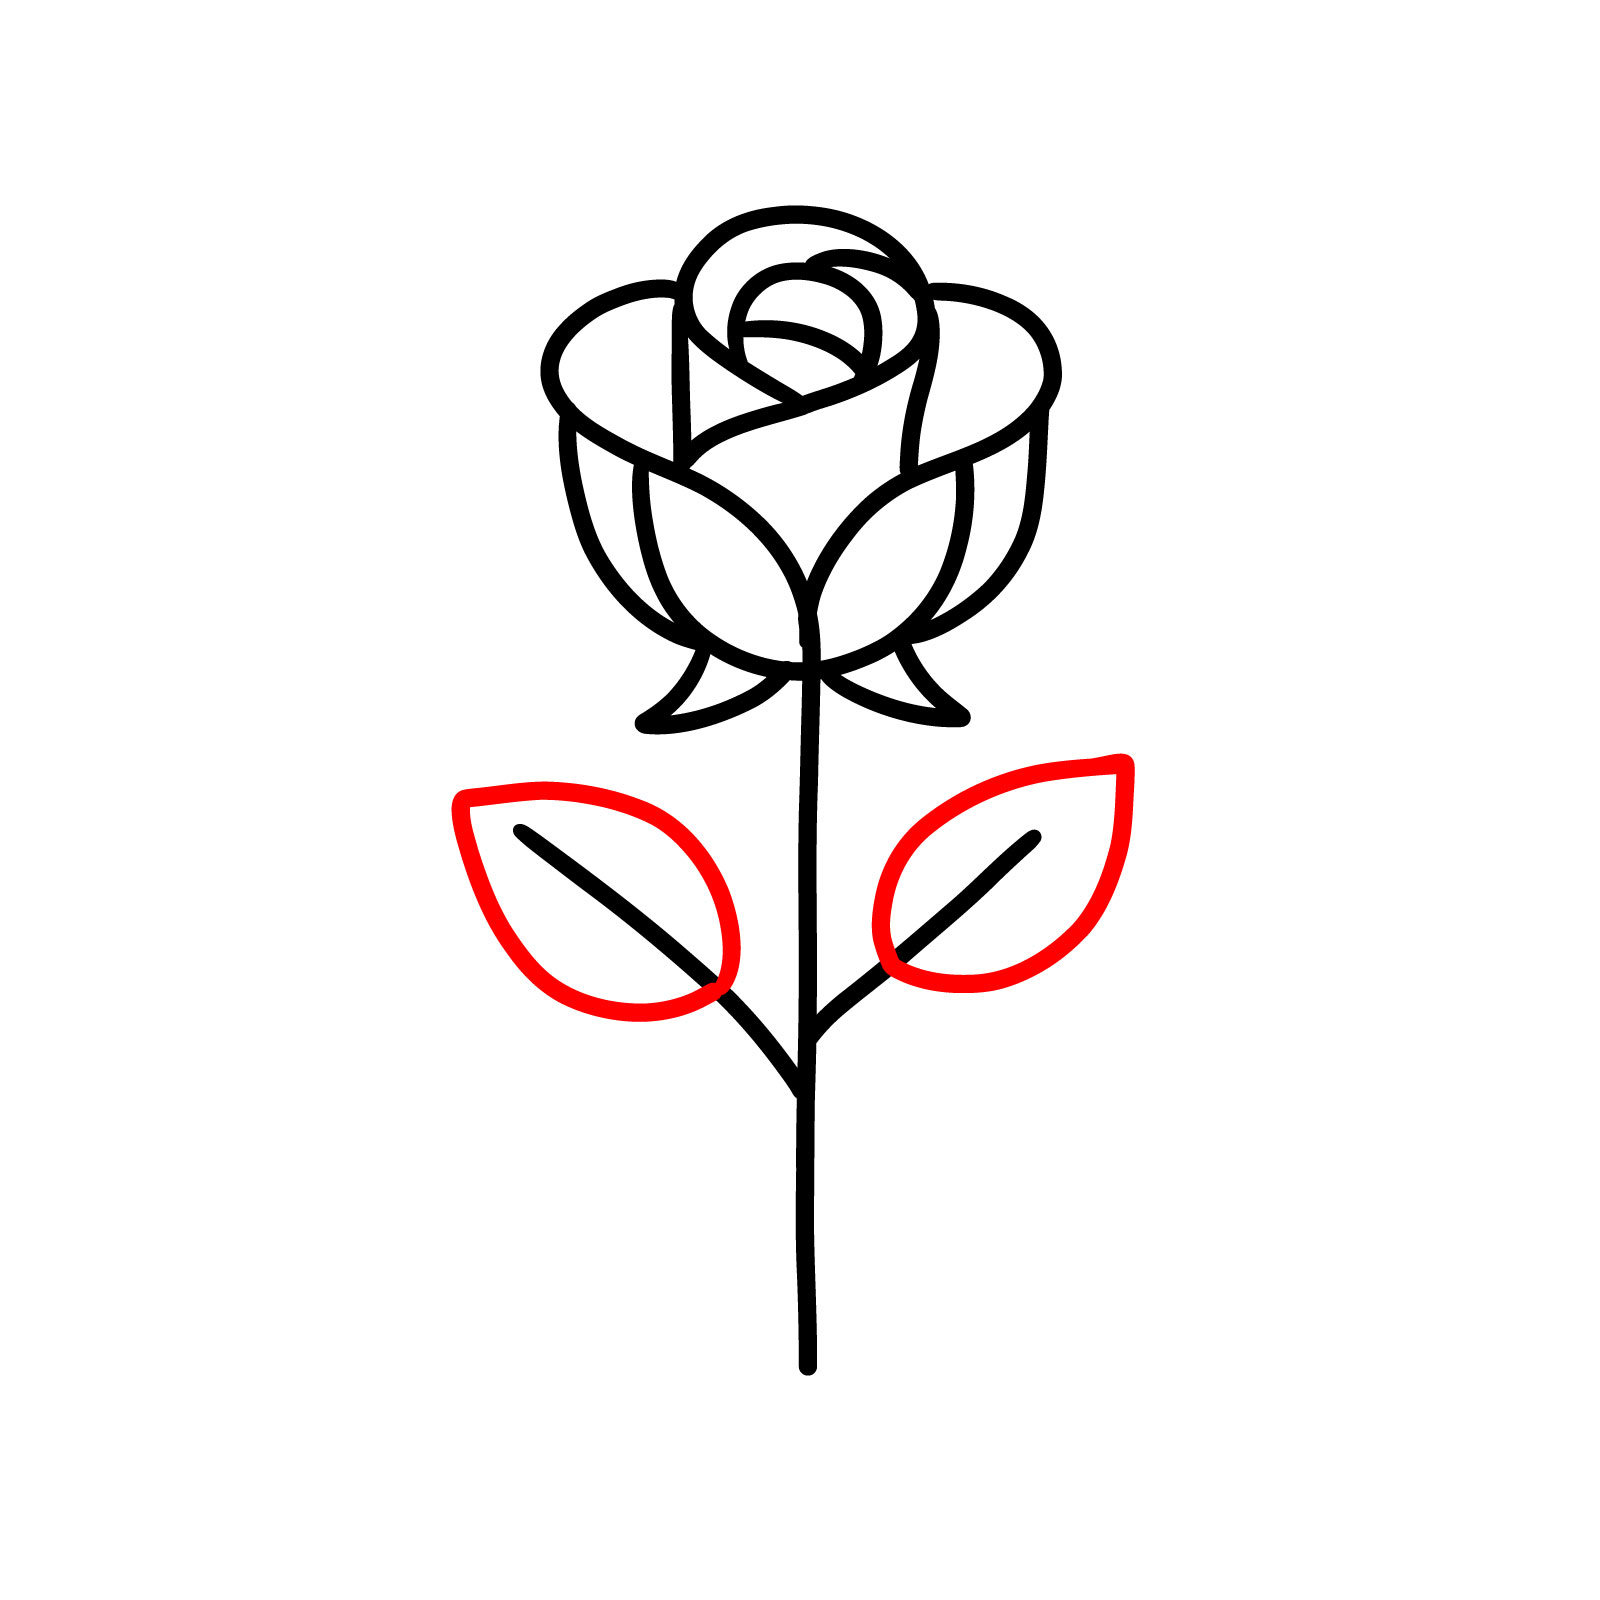
Step 08 – With smooth strokes, draw the outlines for leaves on the stem, giving your rose a complete look. These leaves are the final touch before our rose comes to full bloom
Outlining the Leaves
Step 09 – Your fourth rose drawing is now complete, with every petal, leaf, and thorn in place. This easy and symmetrical approach lays the groundwork for moving towards more detailed and realistic roses in our next guides
The Completed Geometrical Rose
Drawing Guide #5: Simplified Realistic Rose
The Fifth Rose Drawing Guide
The fifth guide on how to draw a rose offers a harmonious blend of ease and authenticity. This guide invites you to capture the rose’s essence with more organic lines and forms, creating a balance between simplicity and naturalism. In just 10 well-structured steps, you’ll learn to craft a rose that boasts a realistic appearance while remaining approachable for artists at any level. Each step is designed to build upon the last, gradually adding layers without overwhelming complexity.
Step 01 – Begin your easy rose drawing by sketching a gentle U-shaped curve with tips slightly curved outside. This will form the base of your rosebud, providing a foundation for the petals
Starting the Rosebud
Step 02 – Add two curved lines from each tip of the U shape, converging slightly above the base to outline the first petals of your rose
Shaping the Petals
Step 03 – At the center where the petal lines converge, draw a small spiral. This will be the innermost part of the rosebud, giving the impression of tightly wound petals at the heart of the flower
Center Spiral of the Rosebud
Step 04 – From the sides of the spiral, draw two short lines extending downwards, following the curvature of the U shape. These lines represent the inner petals
Defining the Rosebud’s Center
Step 05 – In this step, you’ll refine the rosebud by adding details to the petals, giving them a more defined and natural form. Visualize how the petals overlap and carve out their individual shapes
Detailing the Rosebud
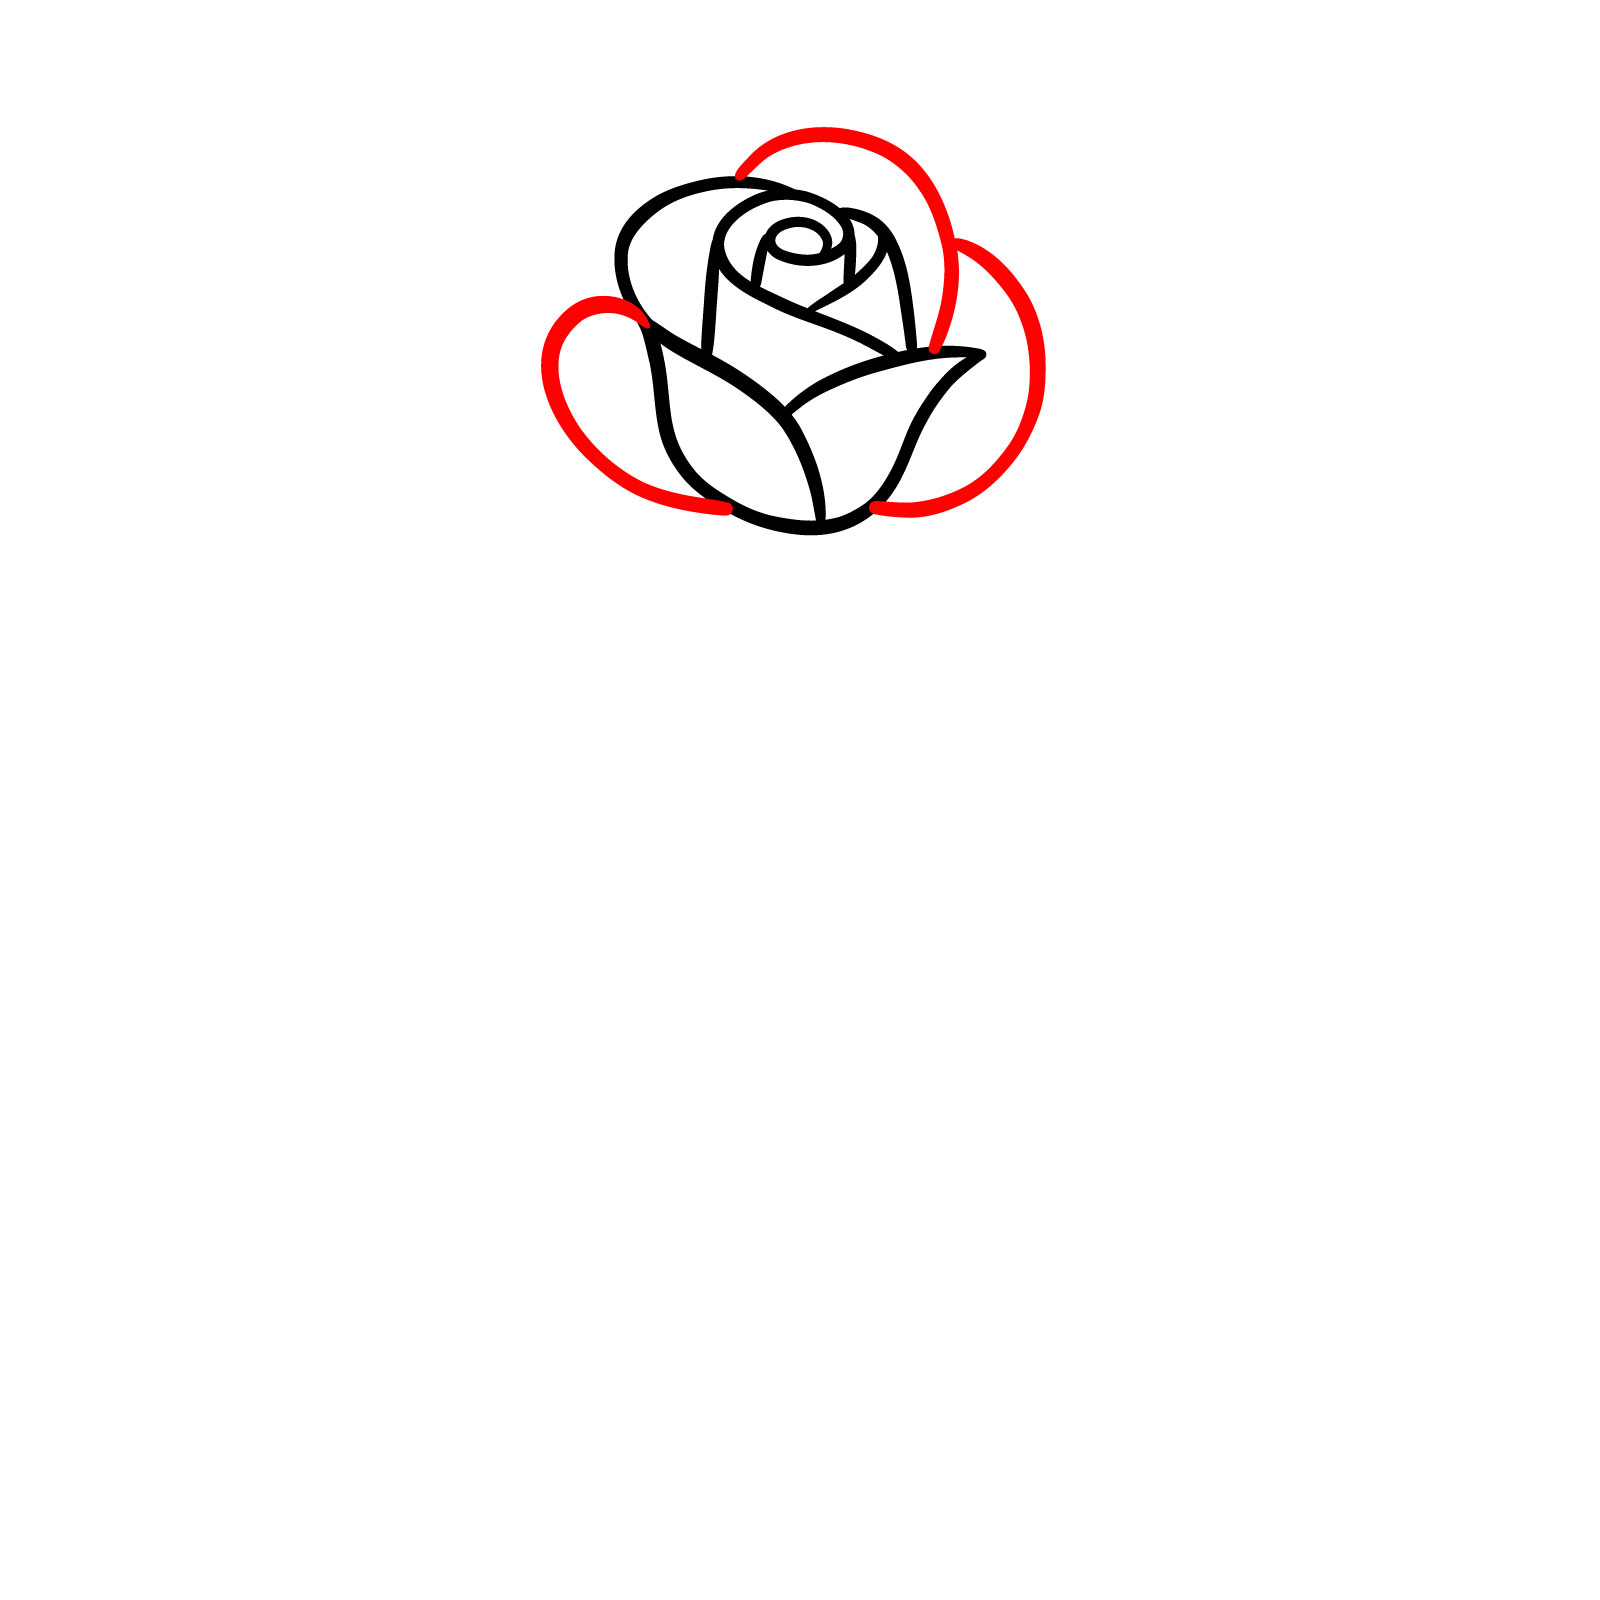
Step 06 – Now, draw three final petals encircling the detailed rosebud. These should be broader and more pronounced to represent the outer layers that are typically more open
Finalizing the Petals
Step 07 – Extend a long, slender stem from the base of the rosebud, flanked by two small leaf shapes at the very top. This forms the beginning of the rose’s foliage
Adding the Stem and Base Leaves
Step 08 – With two gentle curves on each side of the stem, indicate where the main leaves will be positioned. These lines serve as guides for the next step
Preparing for Leaf Placement
Step 09 – Outline the full shape of the leaves based on your previous indications and add vein details inside them for a lifelike appearance
Leaf Definition and Veins
Step 10 – Your rose drawing is now complete with all the details in place. You have a fully formed rose with petals, stem, and leaves, ready to be admired
Completed Easy Rose Drawing
Drawing Guide #6: Easy Rosebud Sketch
Easy Rosebud Drawing
The sixth rose drawing guide designed to gently introduce you to the art of rosebud drawing with a charming top side view perspective. This guide simplifies the intricate structure of a rosebud into a friendly spiral with soft, curving lines that capture the essence of its delicate form. Peek at the partially visible leaves that cradle the bud, adding a touch of natural grace. Within just 9 straightforward steps, you’ll see your rosebud bloom on the page, perfect for those looking to create lovely botanical sketches without the complexity
Step 01 – Begin your rosebud drawing by sketching a small, tight spiral in the center. This will form the core of your rosebud, giving it a natural and organic look. Think of it as the heart of your flower, from which everything else will grow
Starting the Rosebud with a Spiral
Step 02 – From the top and bottom of your spiral, draw two curved lines outward. These lines will start to suggest the petals unfolding from the central spiral. Allow the lines to flow naturally, as this will add to the rosebud’s realistic form
Extending the Petals
Step 03 – Now, add a shape that resembles an eye but extends into a graceful swan-neck curve from the top of the spiral, sweeping down. This line will define the outer petal and add depth to your rosebud
Shaping the Rosebud
Step 04 – Now, draw a wine glass (or U) shape below the one we made in the previous step. This will serve as the lower part of the rosebud, completing its basic structure. This outline will help to balance the rosebud and provide a foundation for the leaves that will be added later
Forming the Base of the Rosebud
Step 05 – Now, it’s time to focus on detailing the petals. Draw gentle curves within the rosebud’s structure to create the illusion of overlapping petals. These lines will add volume and depth, making the rosebud appear fuller and more dimensional
Adding Petal Details
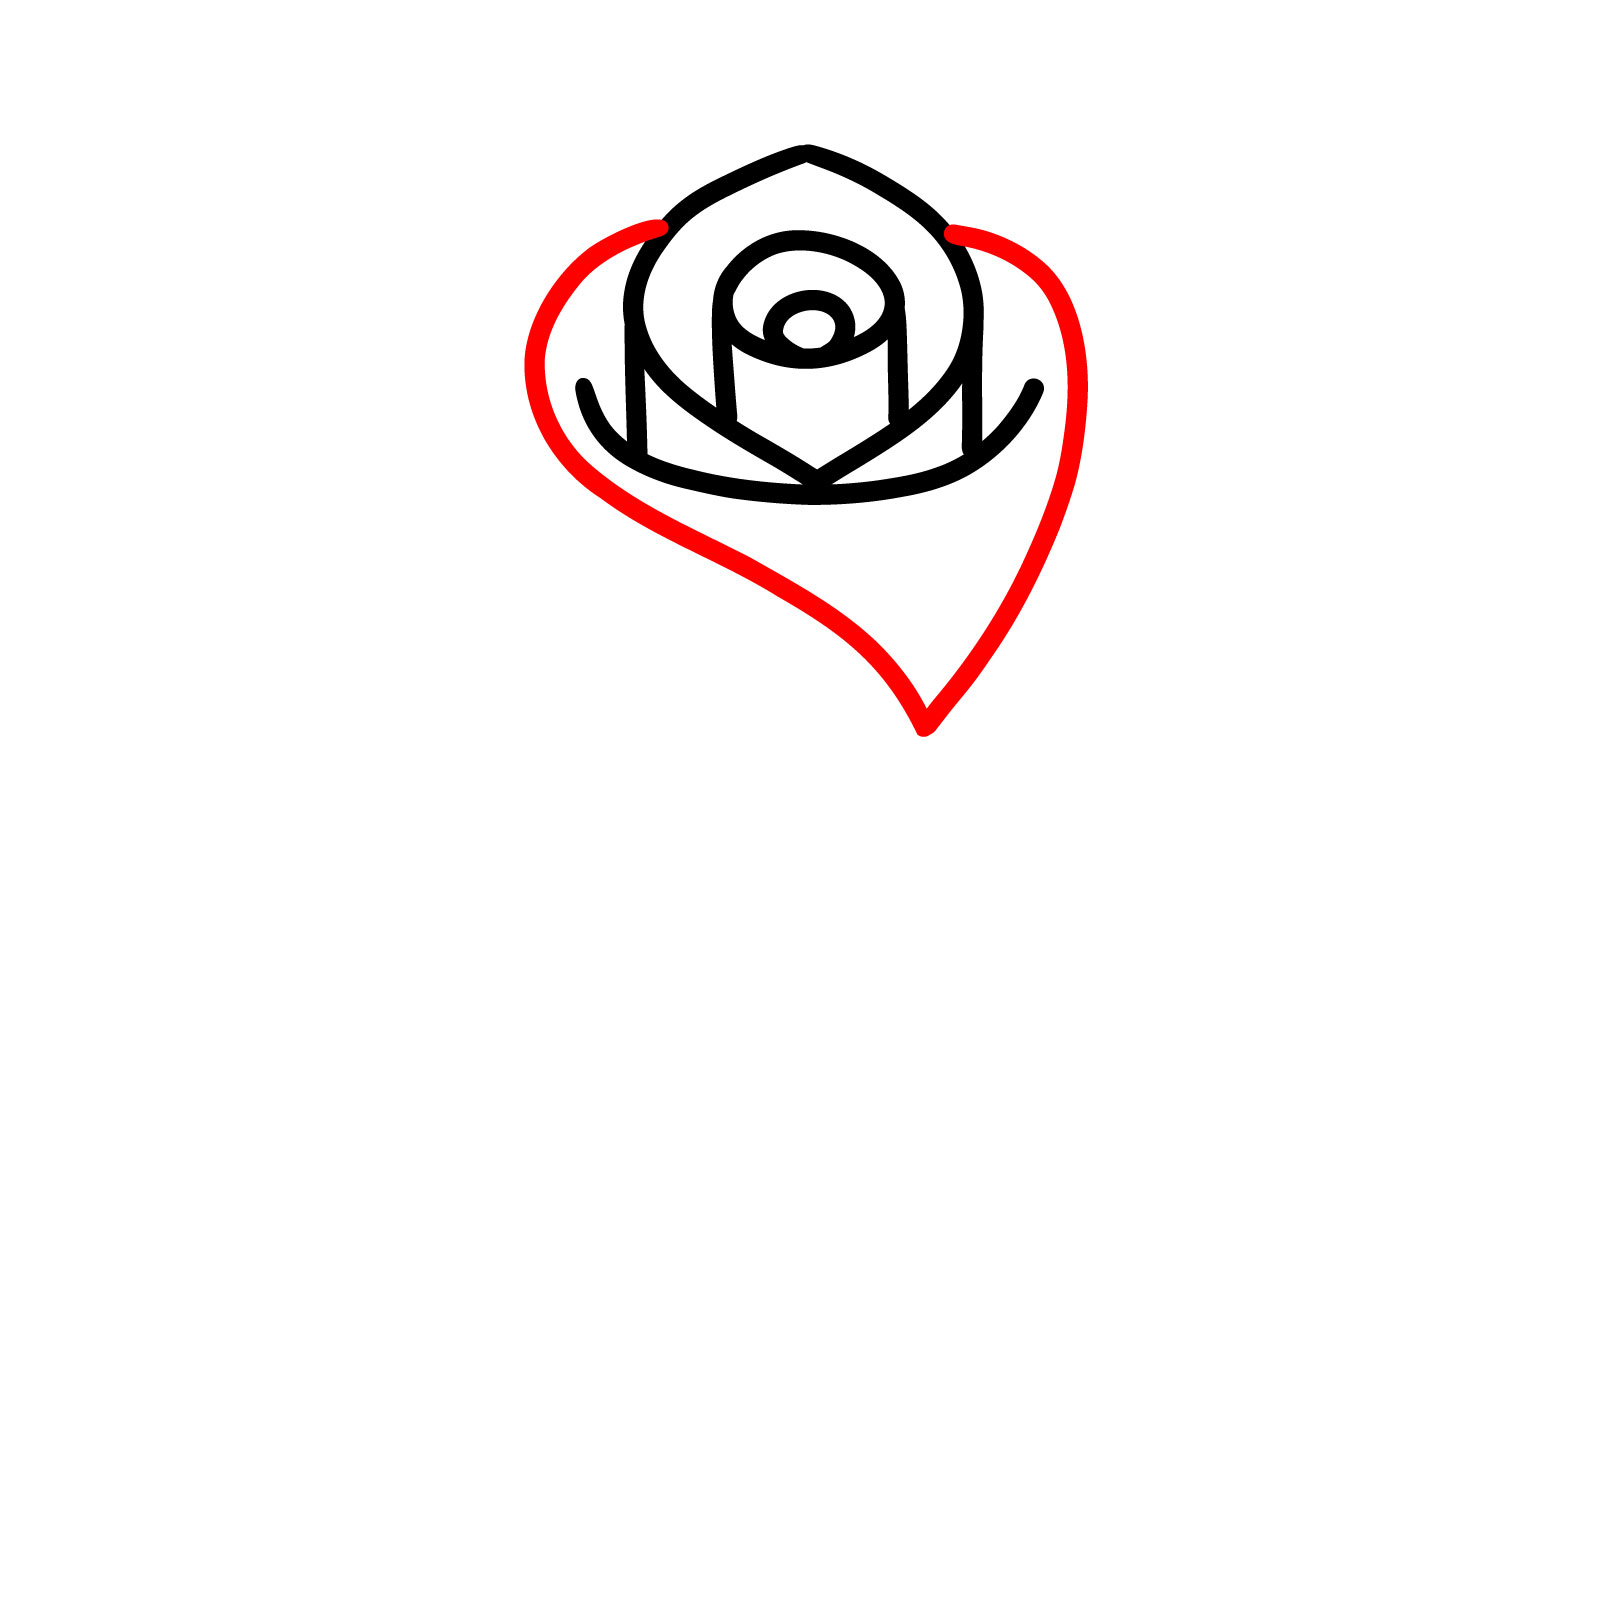
Step 06 – Begin adding three large, outer petals around the sides and bottom of your rosebud. These should be drawn with smooth, flowing lines to mimic the natural curvature of rose petals, enhancing the overall shape of your flower
Expanding the Petal Arrangement
Step 07 – Add three more petals to fill in any gaps, ensuring a balanced and lush appearance. These petals should be slightly larger than the inner ones, giving a sense of growth and bloom to the rosebud
Finalizing the Petal Layout
Step 08 – Draw two leaf shapes emerging from beneath the bud. Sketch them with pointed tips and a bit of a curve to represent the natural position of leaves on a rose stem
Drawing the Leaves
Step 09 – Your rosebud drawing is now complete. Examine your work to make sure all elements are in harmony, making any necessary adjustments to the curves and shapes of the petals and leaves to ensure a natural, easy look. Congratulations on learning how to draw a rosebud. The next two guides are a little bit more complex, but if you managed to finish this and all the previous ones, it will be an easy task for you!
Our Rosebud is Now Finished
Drawing Guide #7: Realistic Rose Drawing (Advanced)
Realistic Rose Drawing Guide
Dive into the next guide, which, despite its advanced tag, remains an approachable challenge for any budding artist. Don’t let the label intimidate you; this guide is a natural progression from simple outlines to the rich detail and organic lines that bring a rose to life. Take a little more time to appreciate the intricacies, from a stem natural form and sprouts authentic-looking thorns to the jagged leaves that add texture and depth. The rosebud unfurls with layers that mimic nature’s own design. Spread across 19 comprehensive steps, this guide is here to help you easily master drawing more complex roses.
Step 01 – To begin your realistic rose, draw a curved shape akin to a butterfly wing. This will form the first petal, setting a delicate and organic foundation for your rose
Starting the rose with a single petal outline
Step 02 – Next to the first shape, draw another similar curved line, mirroring the first to create the second petal
Adding a second petal to the rose
Step 03 – Now, add a third petal by drawing a line that starts from the existing petal edges, curves outward and then inward, creating an interlocking form that adds depth to the bloom
The rose begins to bloom with a third petal
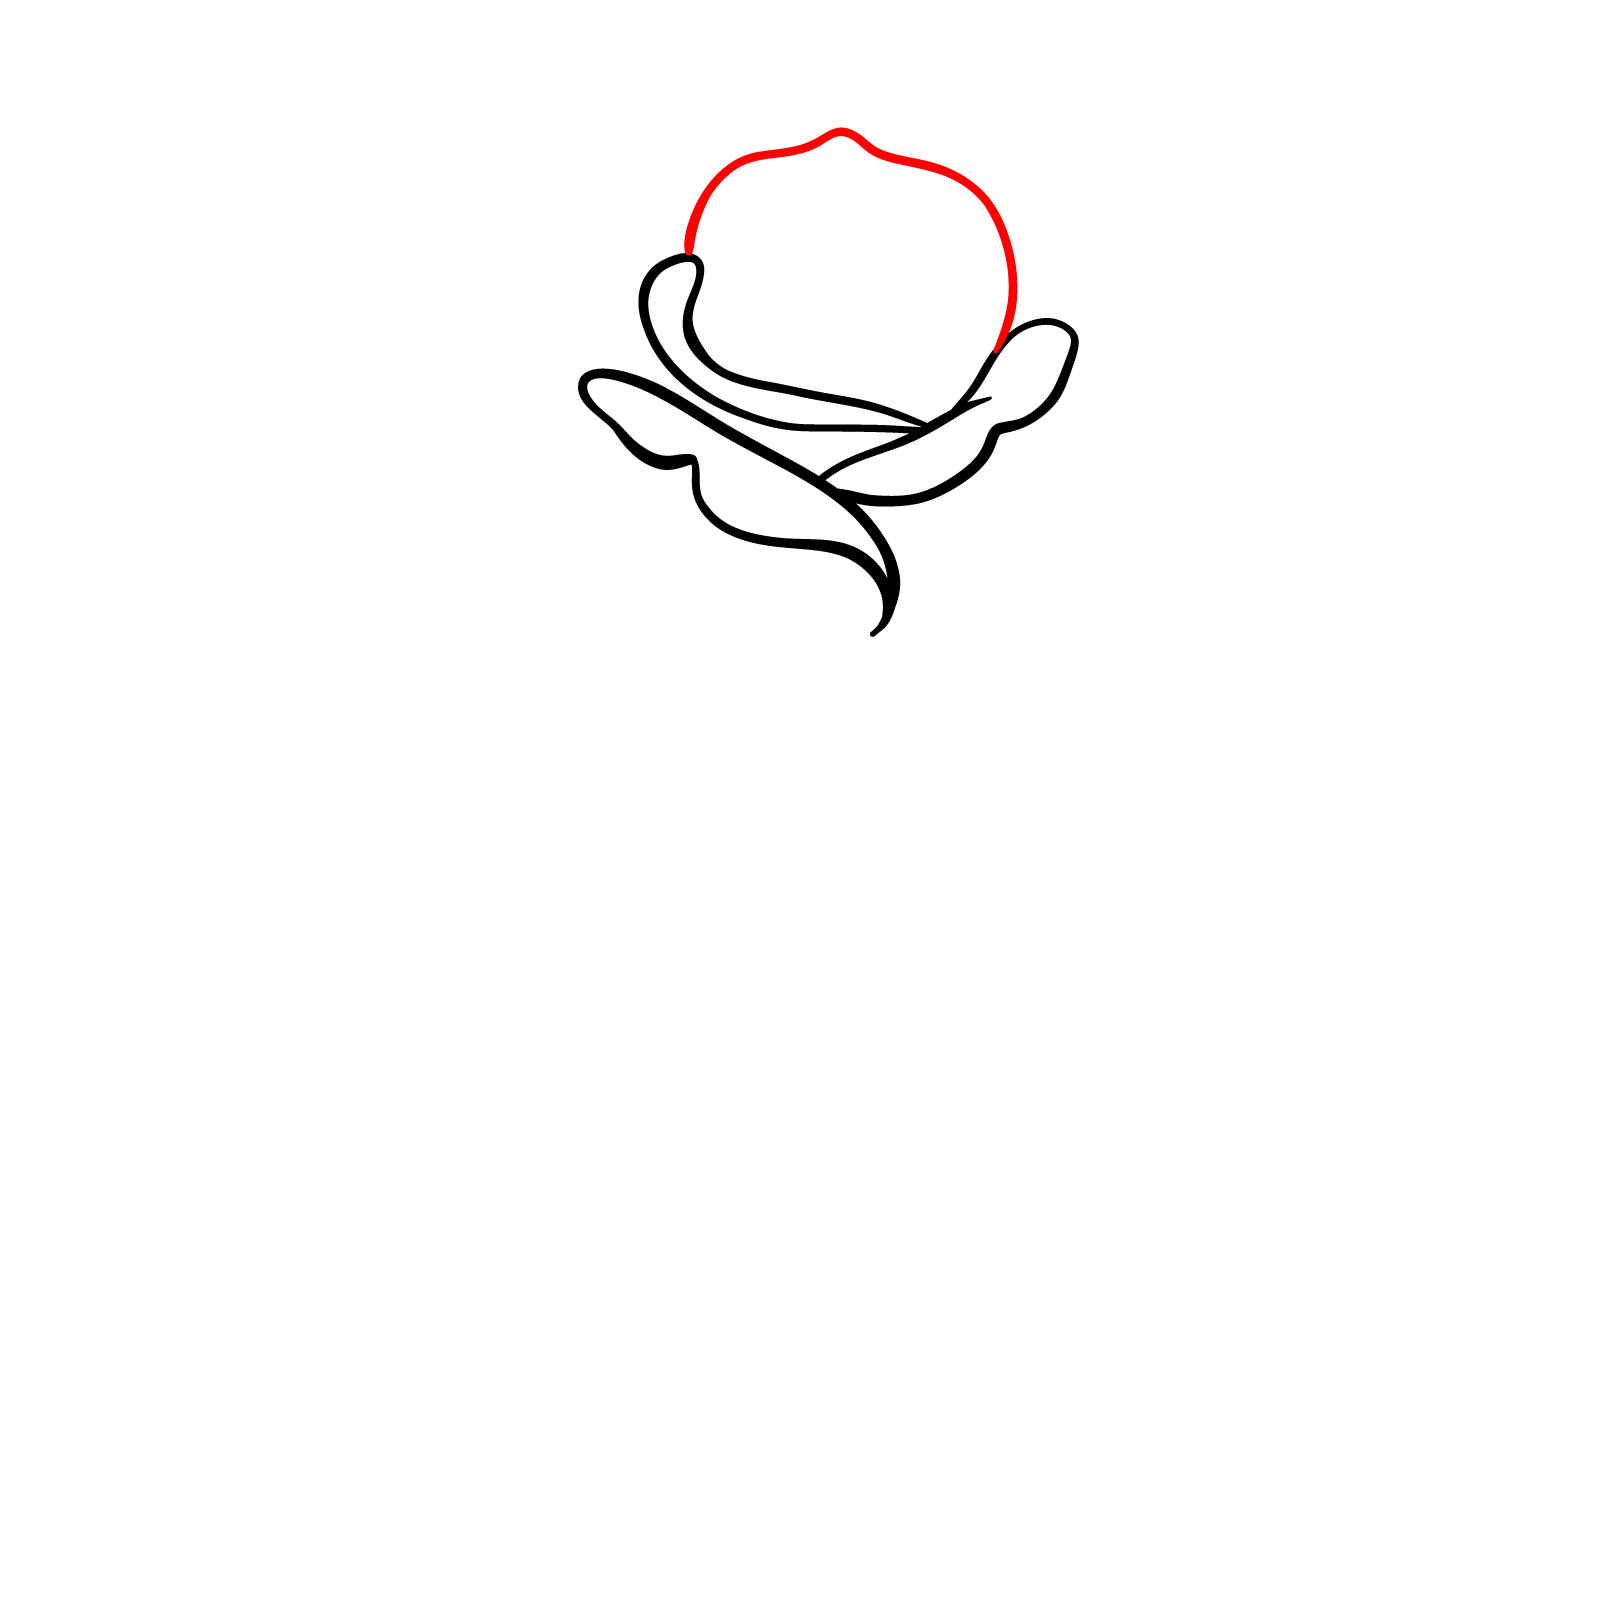
Step 04 – For the fourth step, add an upper petal by sketching a shape above the central petal. This shape should curve smoothly and dip down slightly to mimic the natural fold of a petal
Shaping the upper portion of the rose
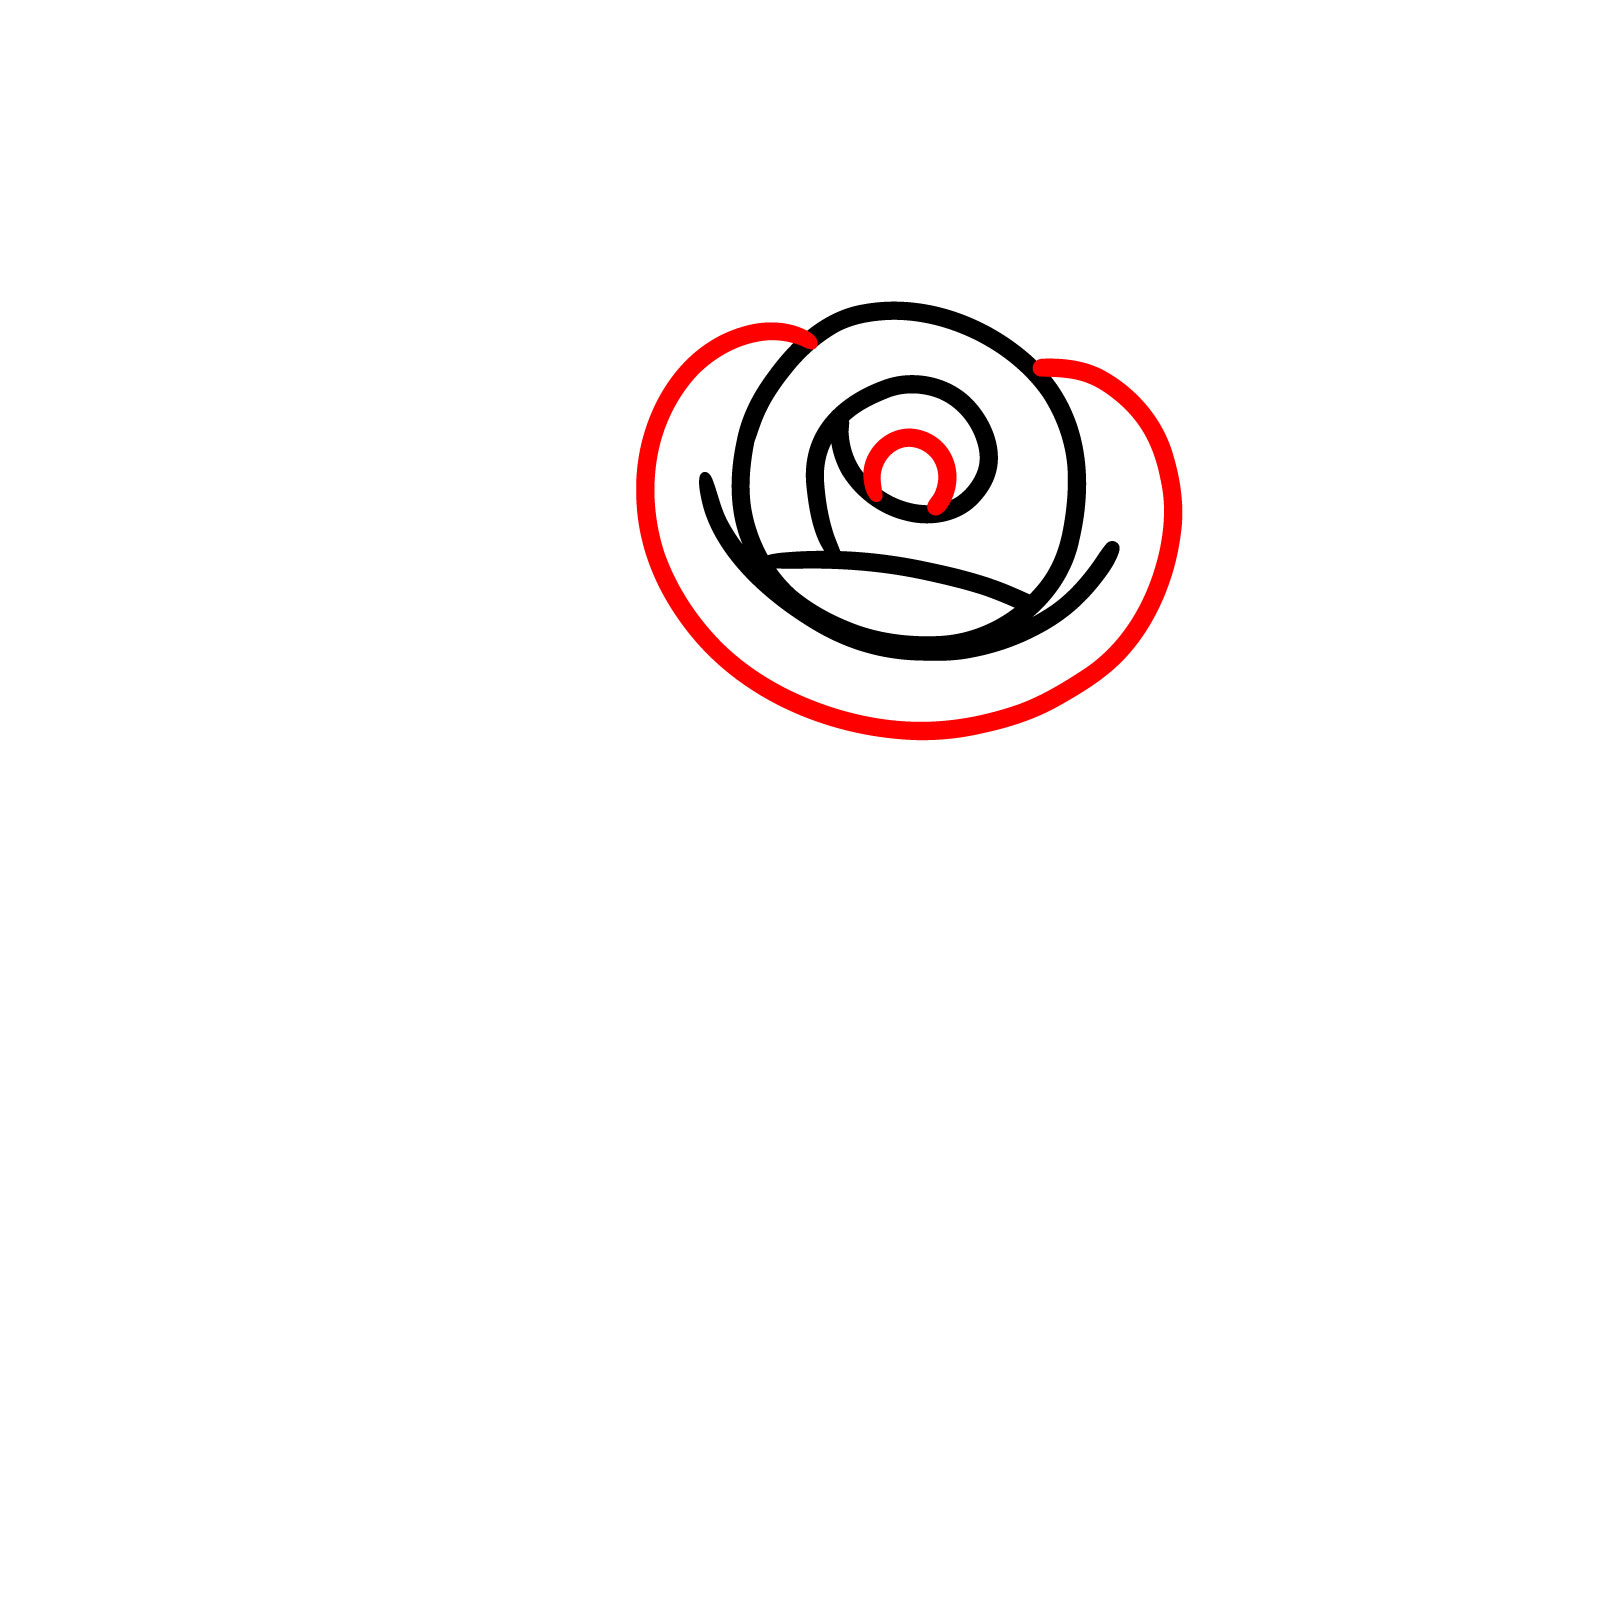
Step 05 – Focus on the rose’s center, drawing lines that add intricate detail and shape to the central petal, giving it a more three-dimensional and lifelike appearance
Defining the heart of the rose
Step 06 – Continue the rose’s formation by deepening the curves around the bud’s center. This step brings a natural depth, highlighting the rose’s delicate folds
Sculpting the rosebud’s core
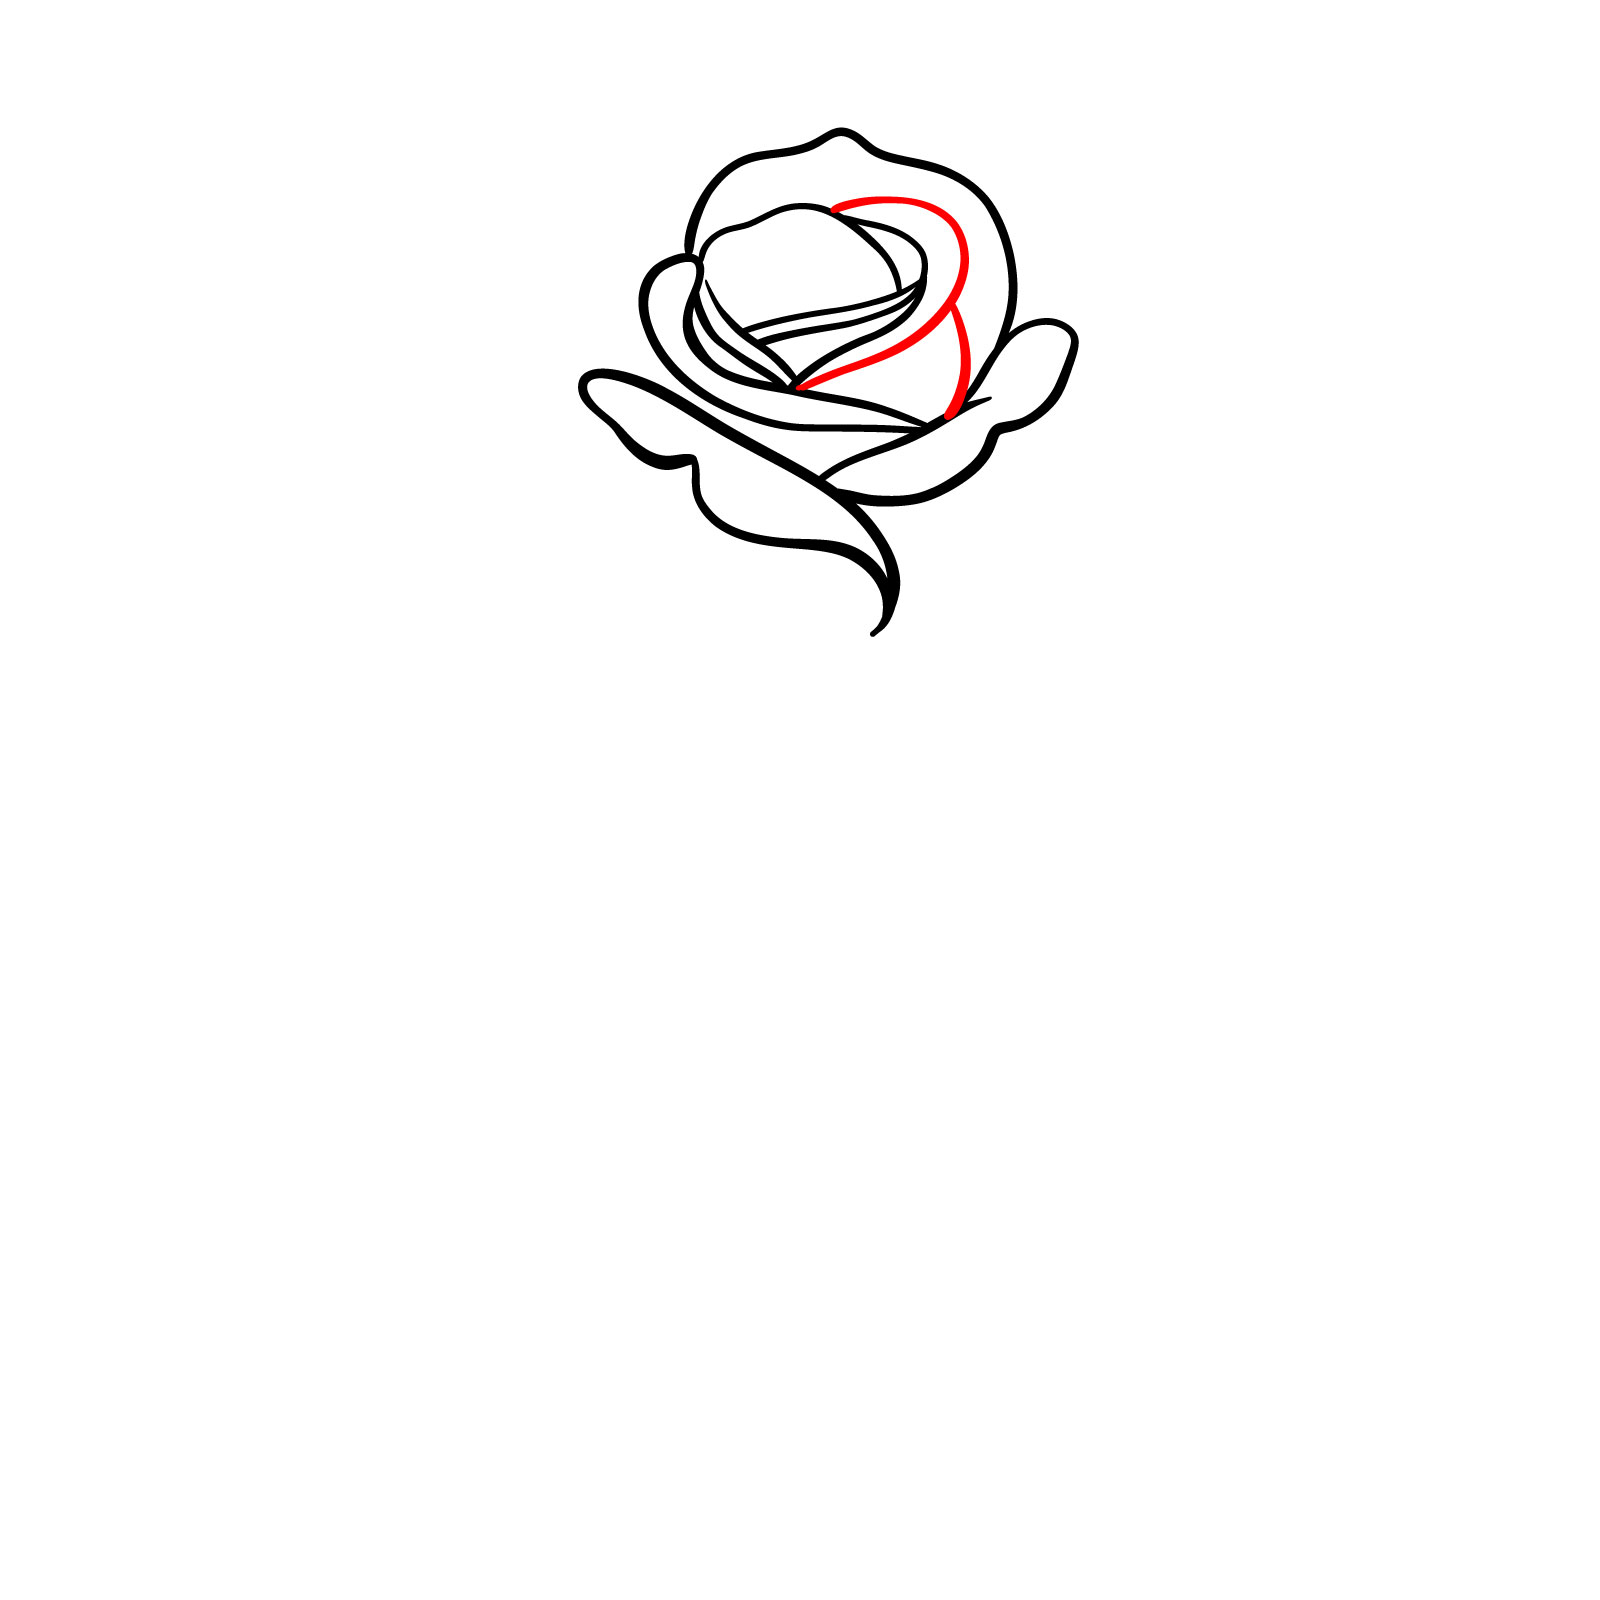
Step 07 – Extend the form of your rose by adding a petal on the right side. This petal should curve outward and then tuck back toward the center, emulating the way a real petal wraps the flower
Expanding the bloom
Step 08 – For the smallest and most intricate petals at the rose’s heart, sketch gentle lines that suggest the tender closing of the bud. These are the petals that will give your rose a realistic touch
Finalizing the central bloom
Step 09 – In this step, you’ll encase the heart of the rose, drawing lines that wrap around the central petals. It’s like giving the rose a gentle hug with each stroke, finalizing the inner sanctum where the petals come to a close
Enclosing the rose’s heart
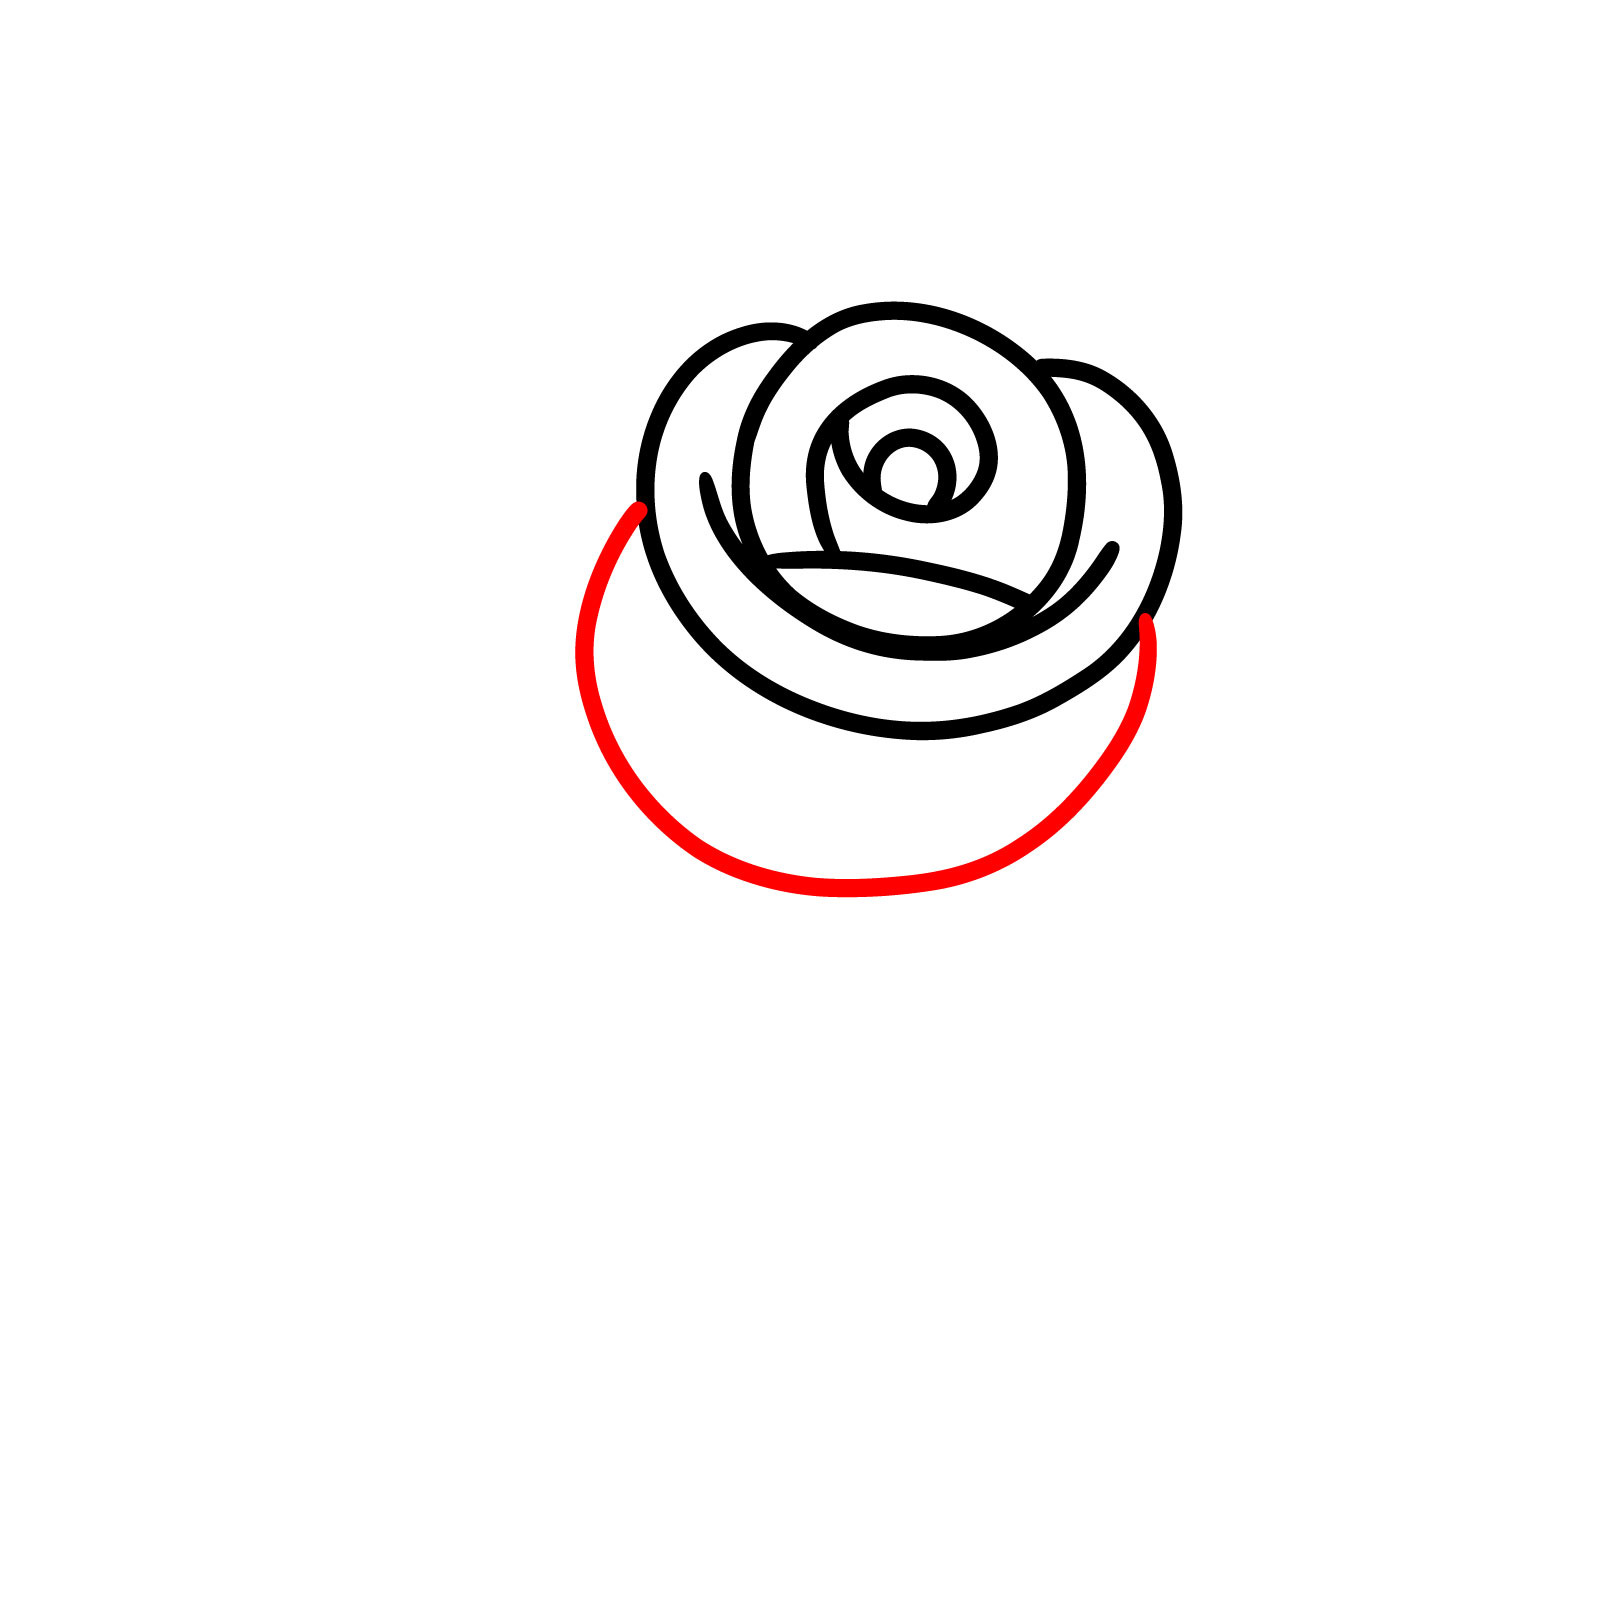
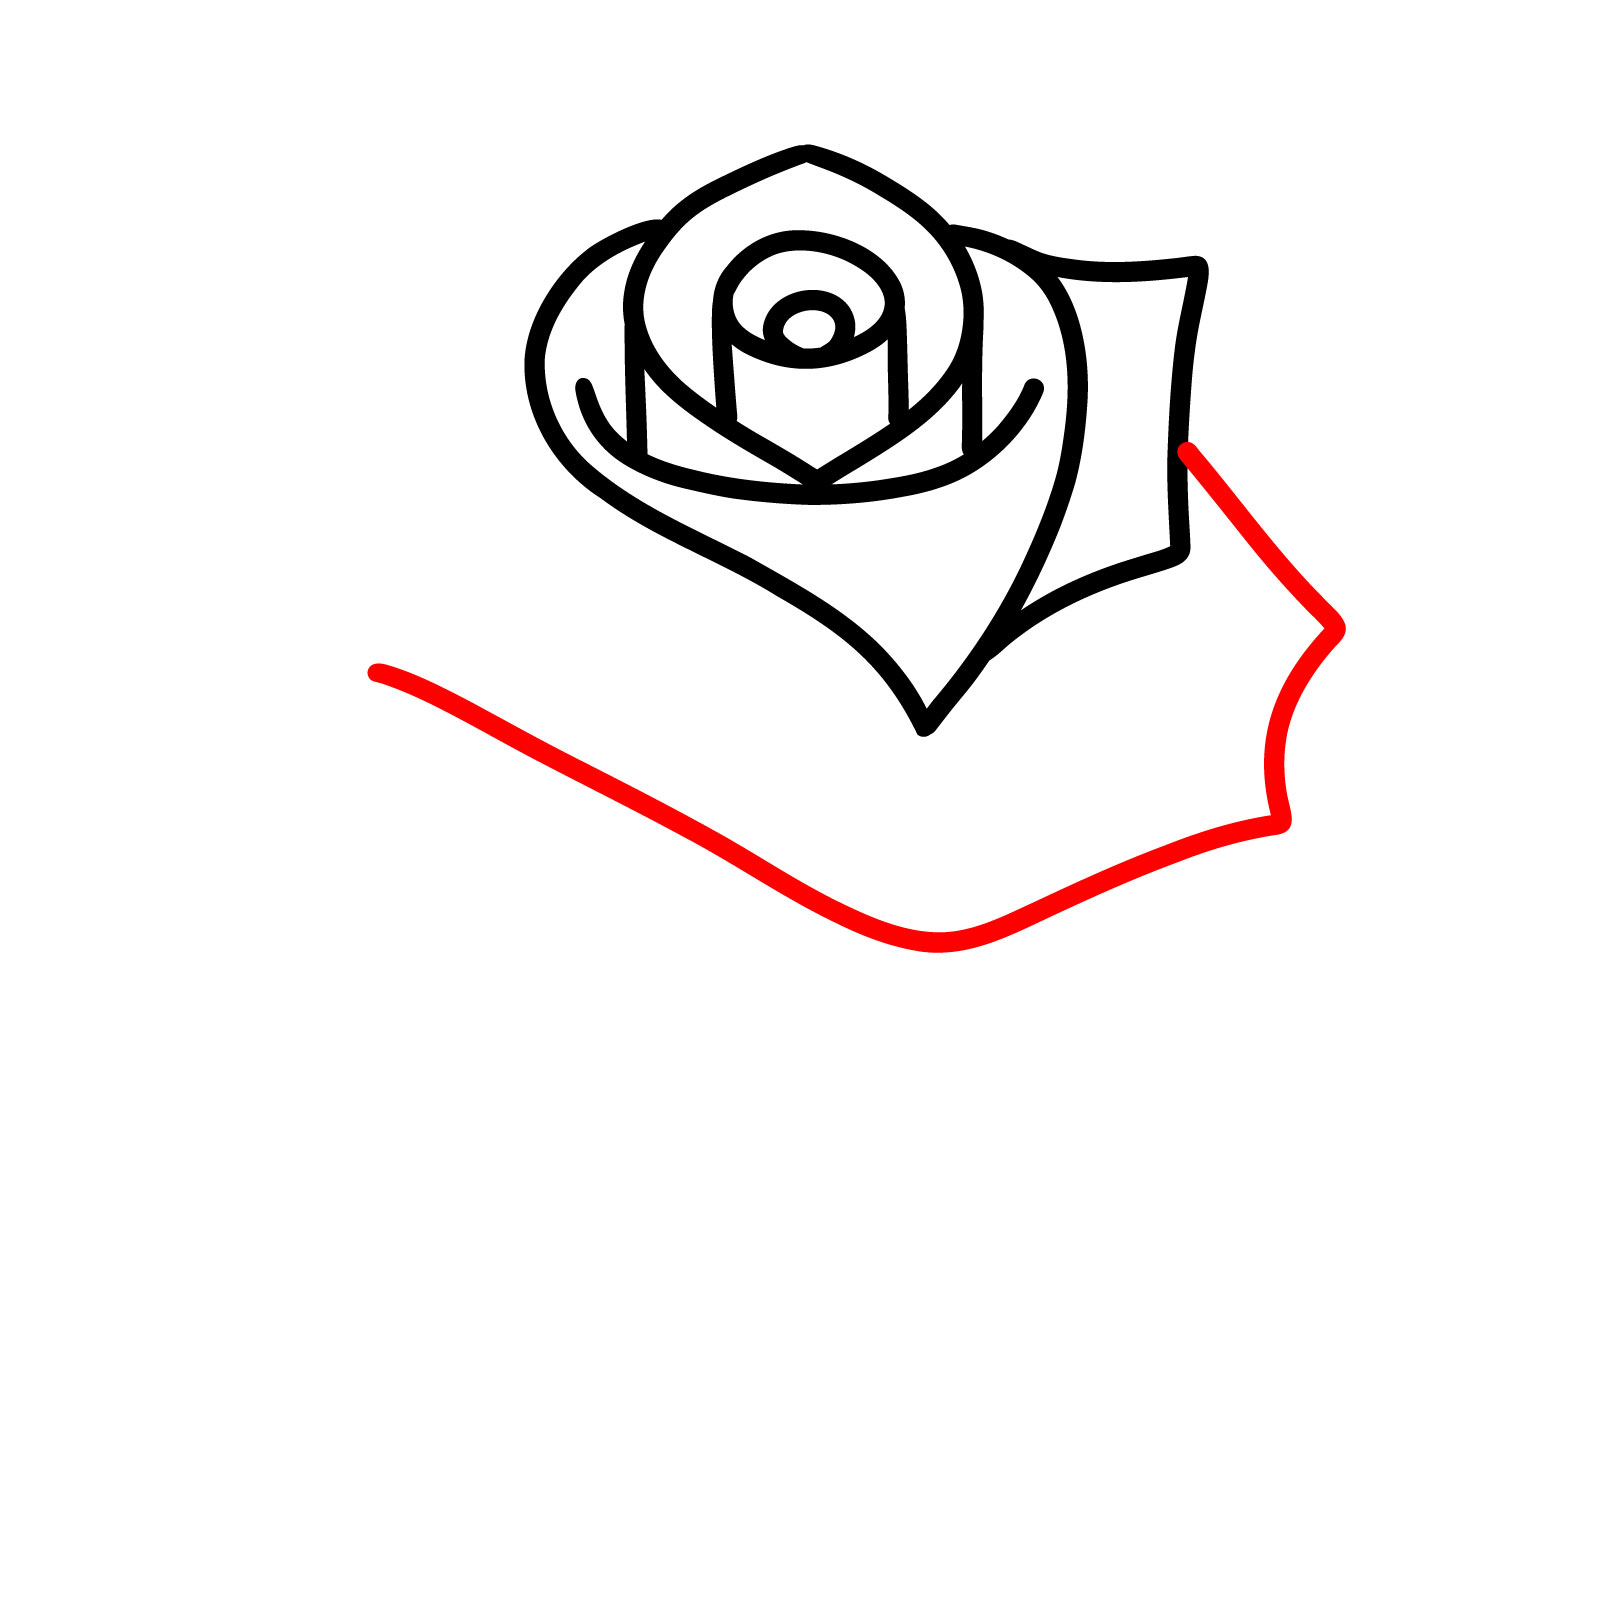
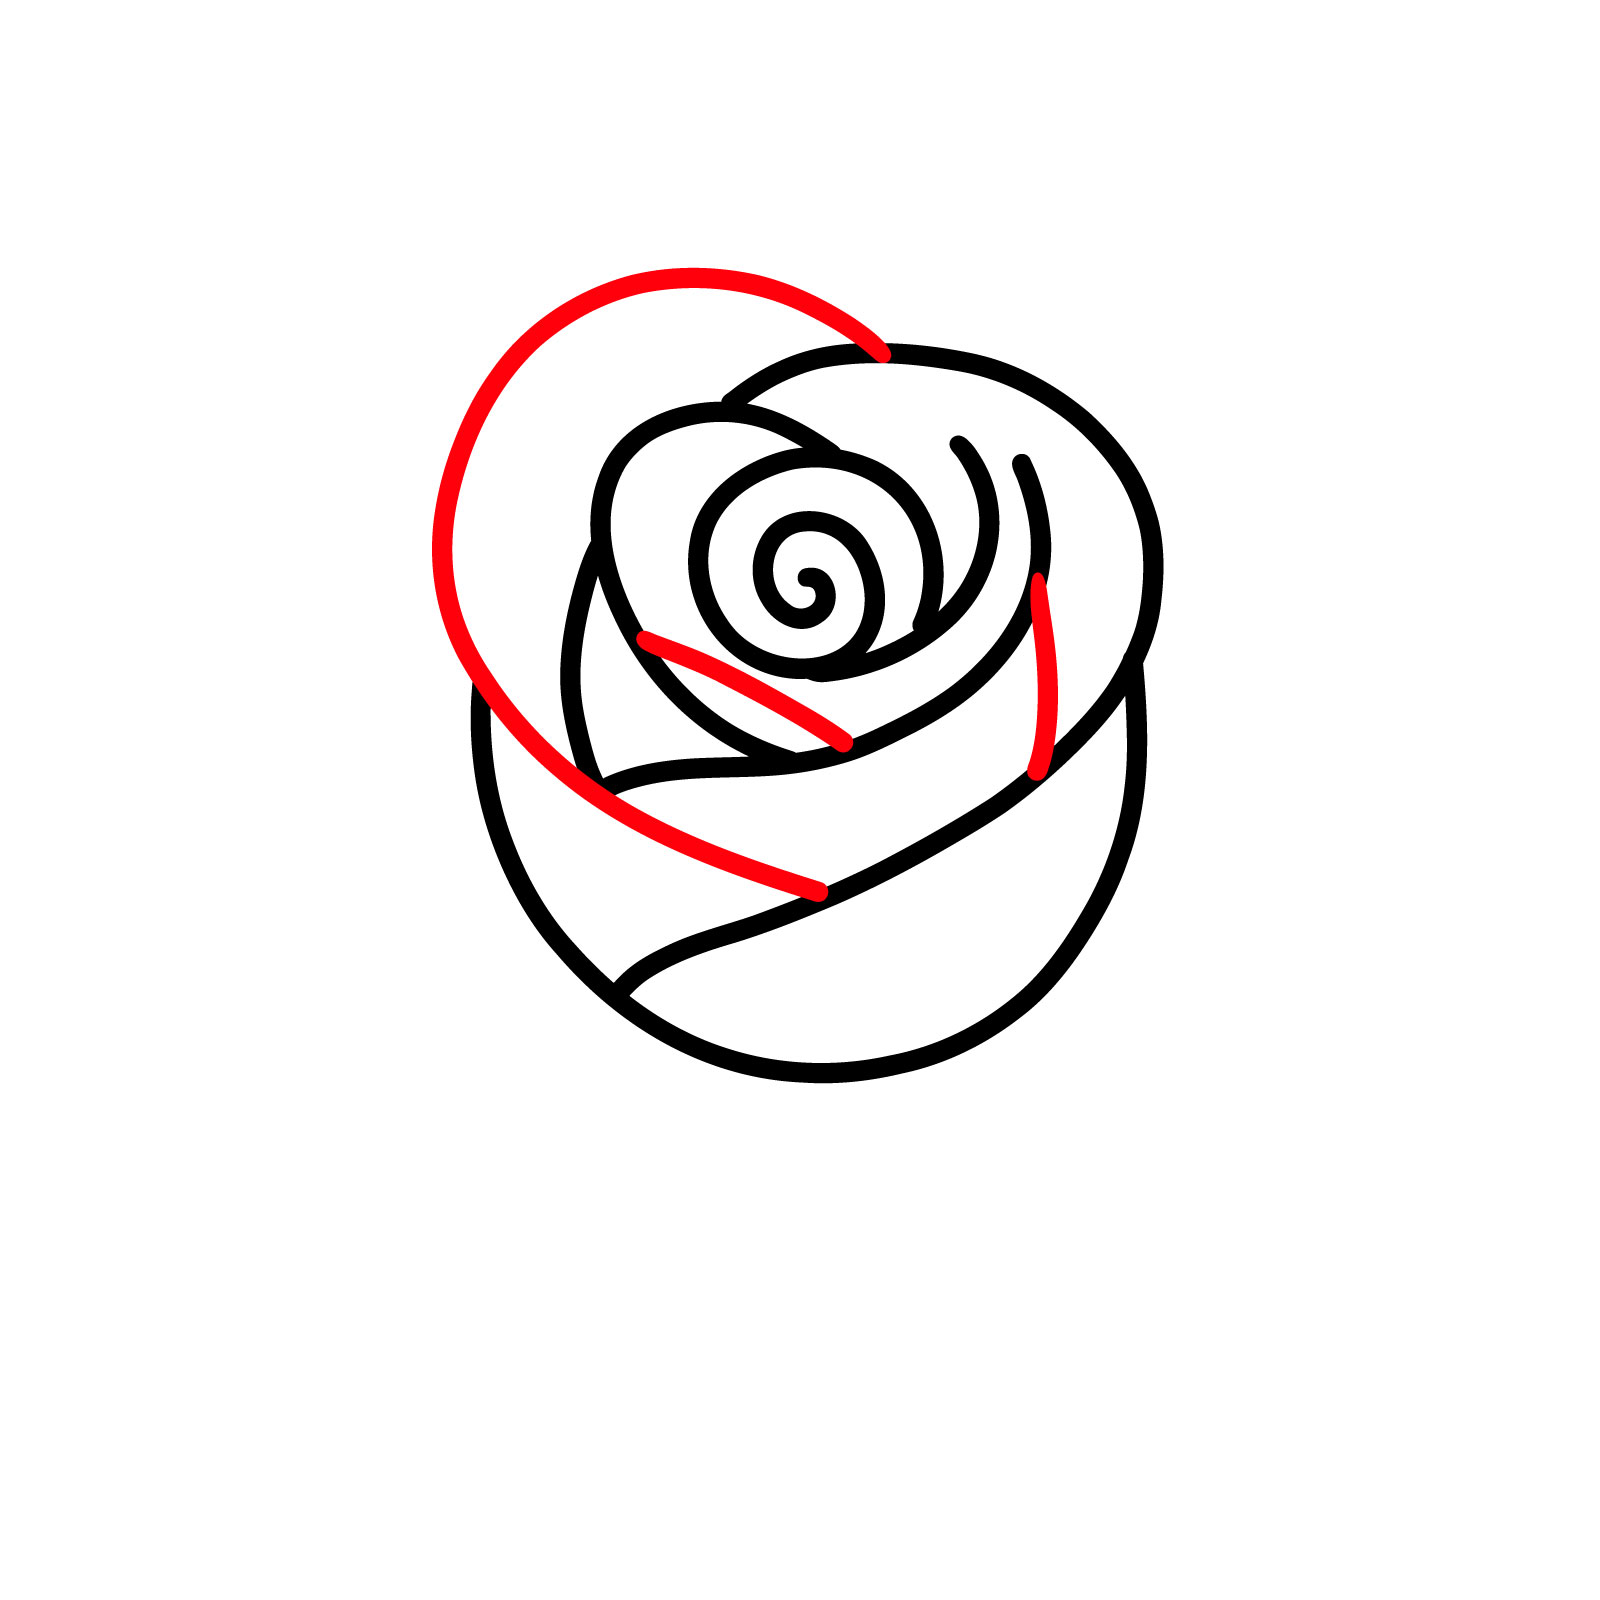
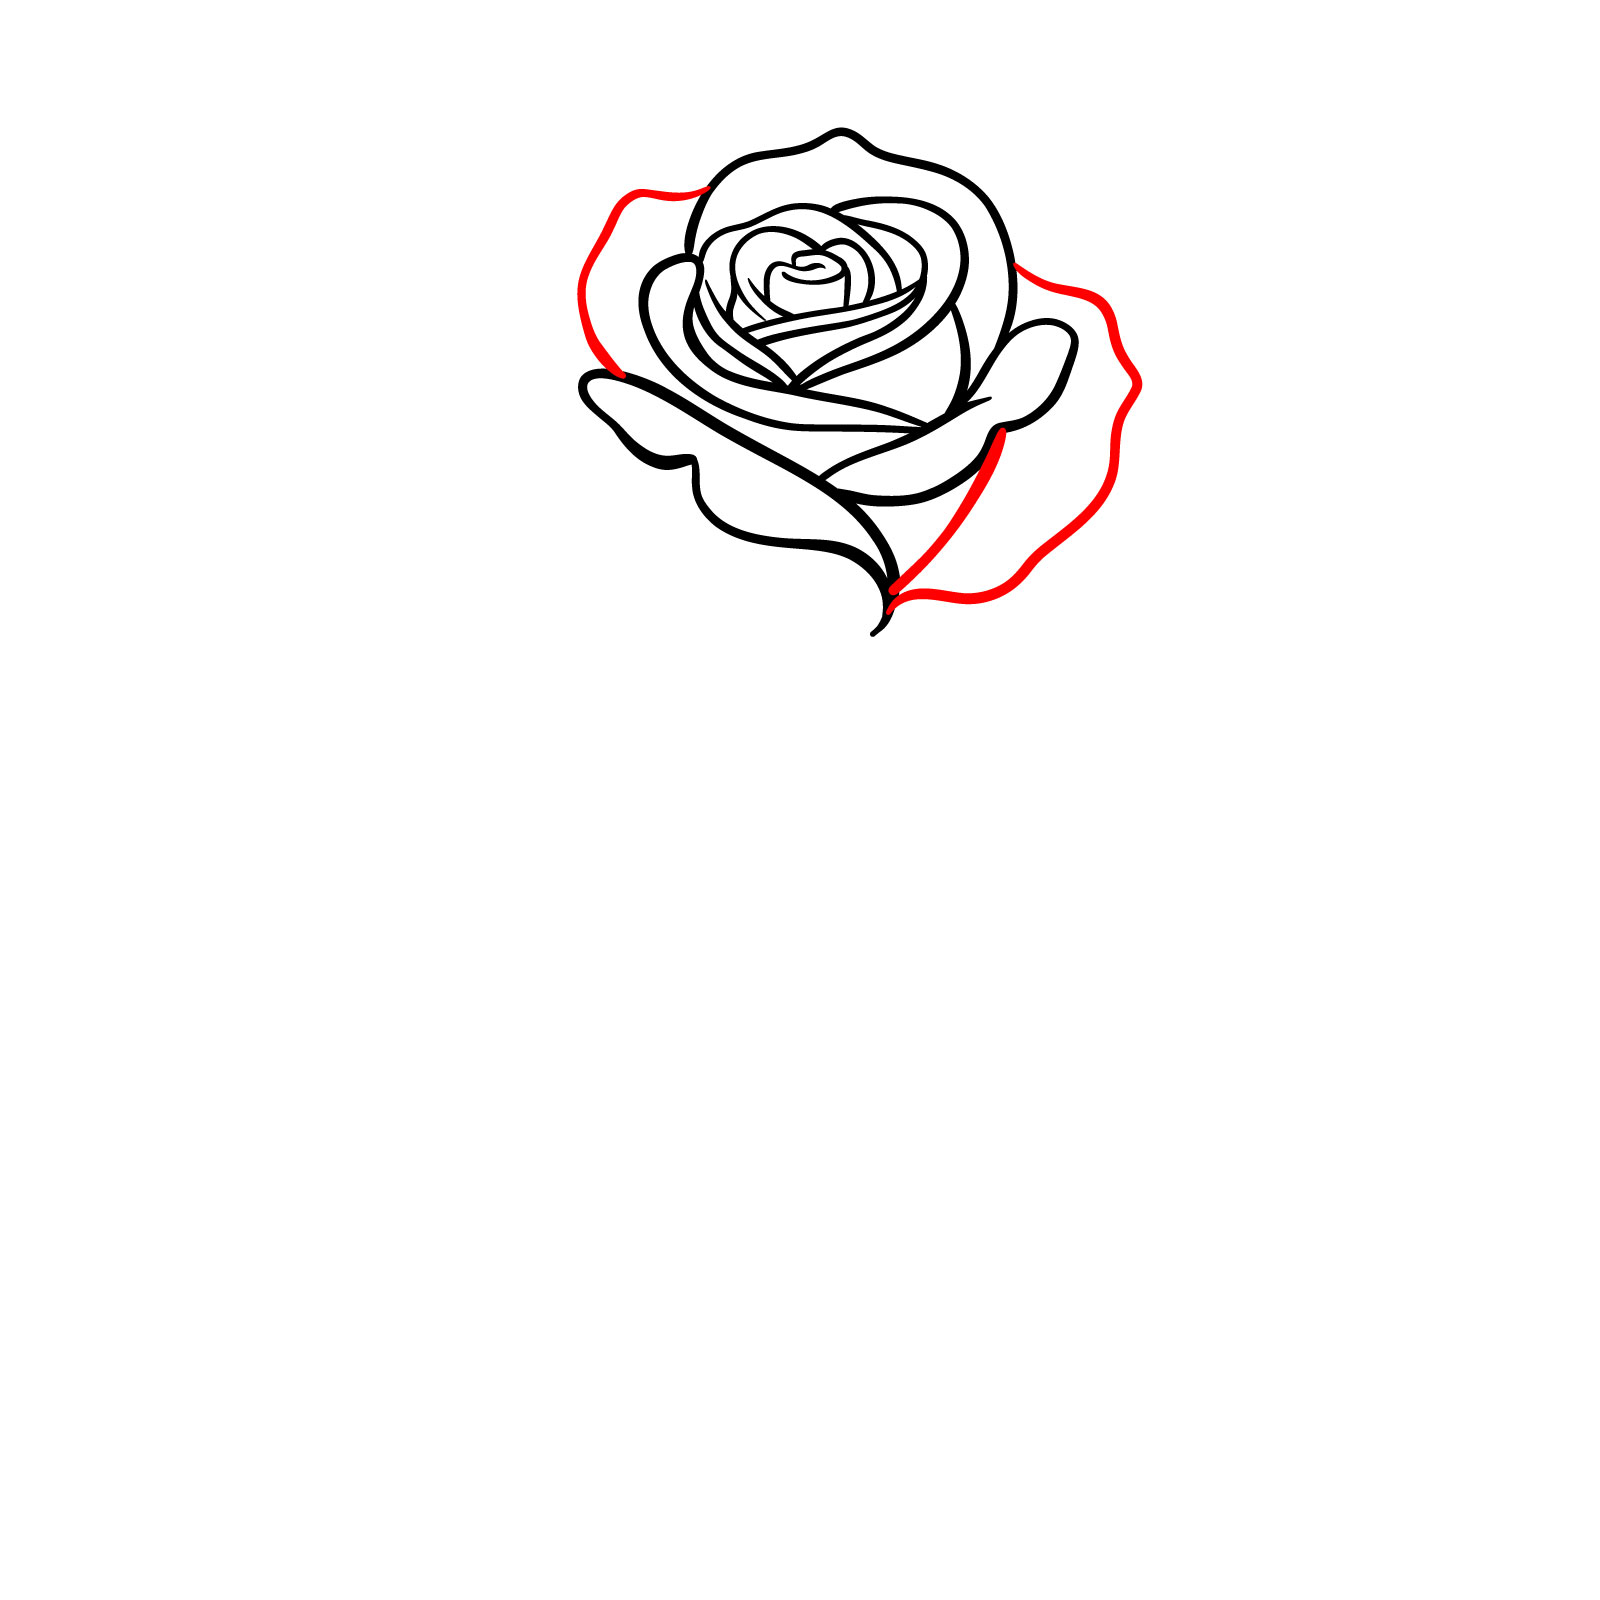
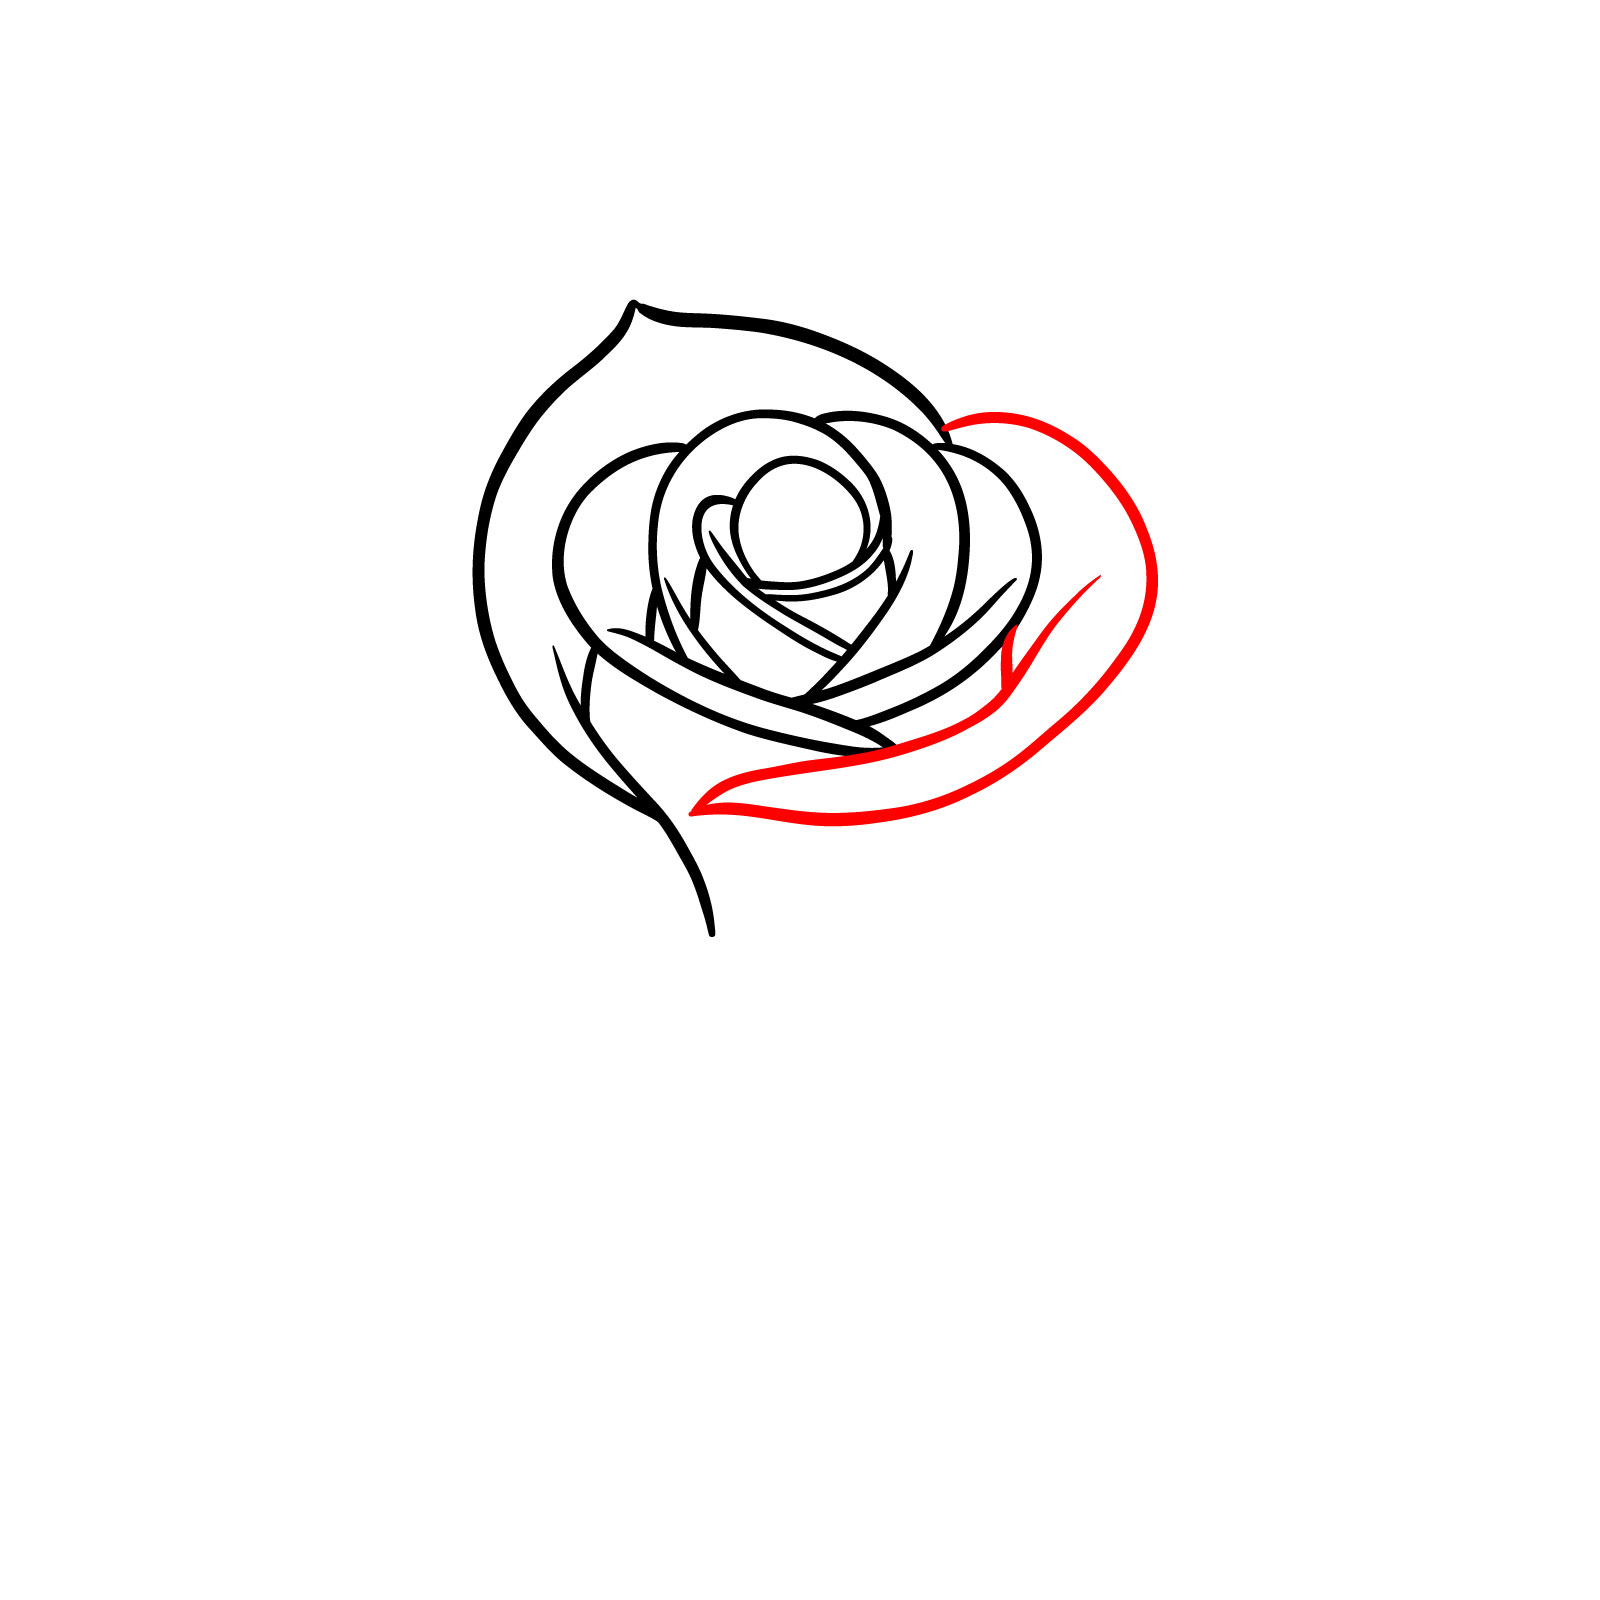
Step 10 – Now, let’s shape the rose’s form. Add two expansive petals to frame the bud—one to the right and another to the left. These petals will give your rose a fuller appearance
Expanding the rose’s embrace
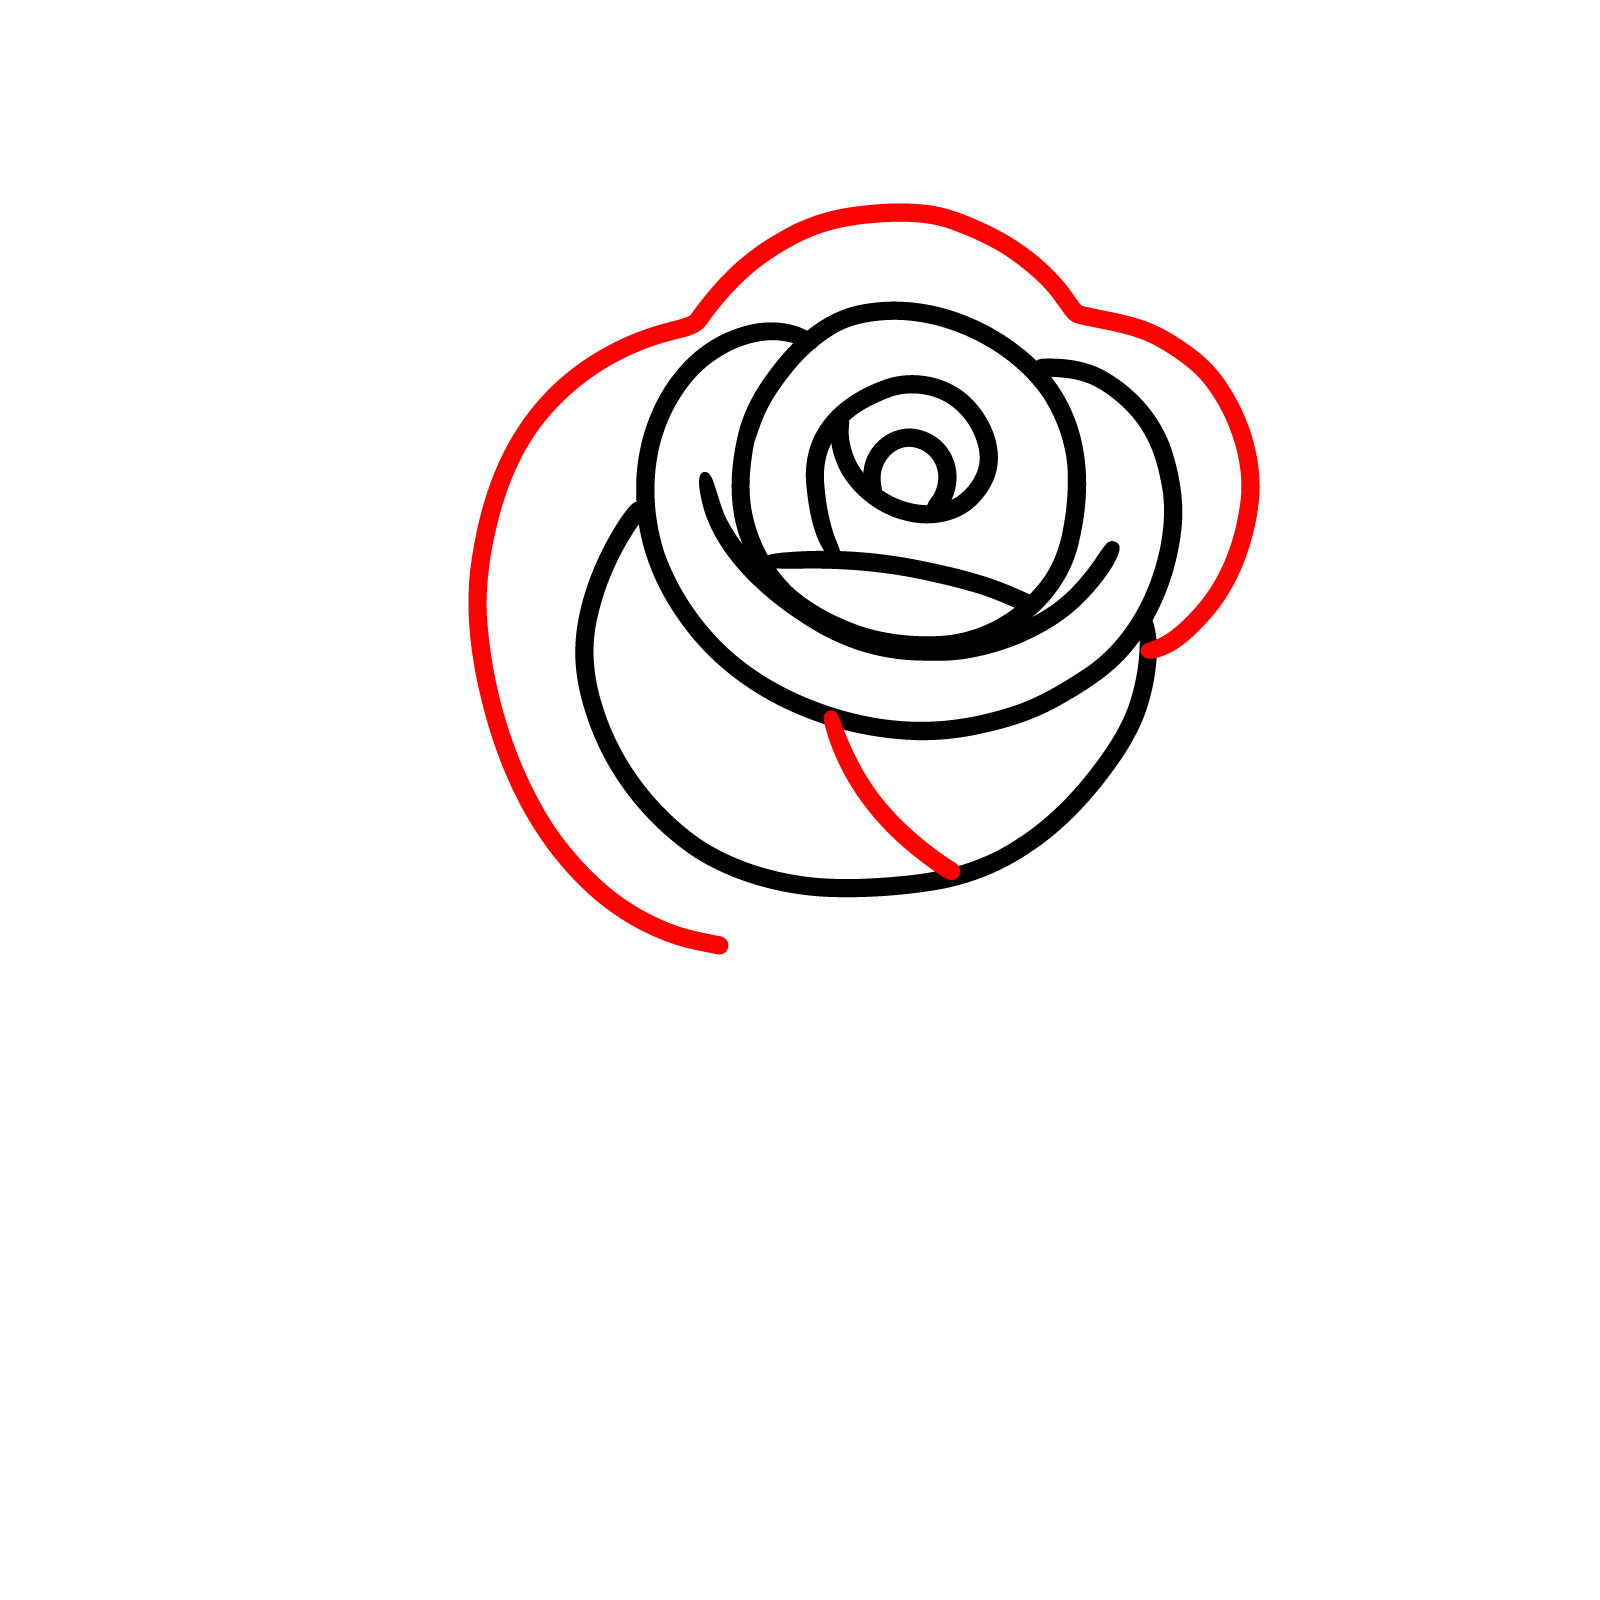
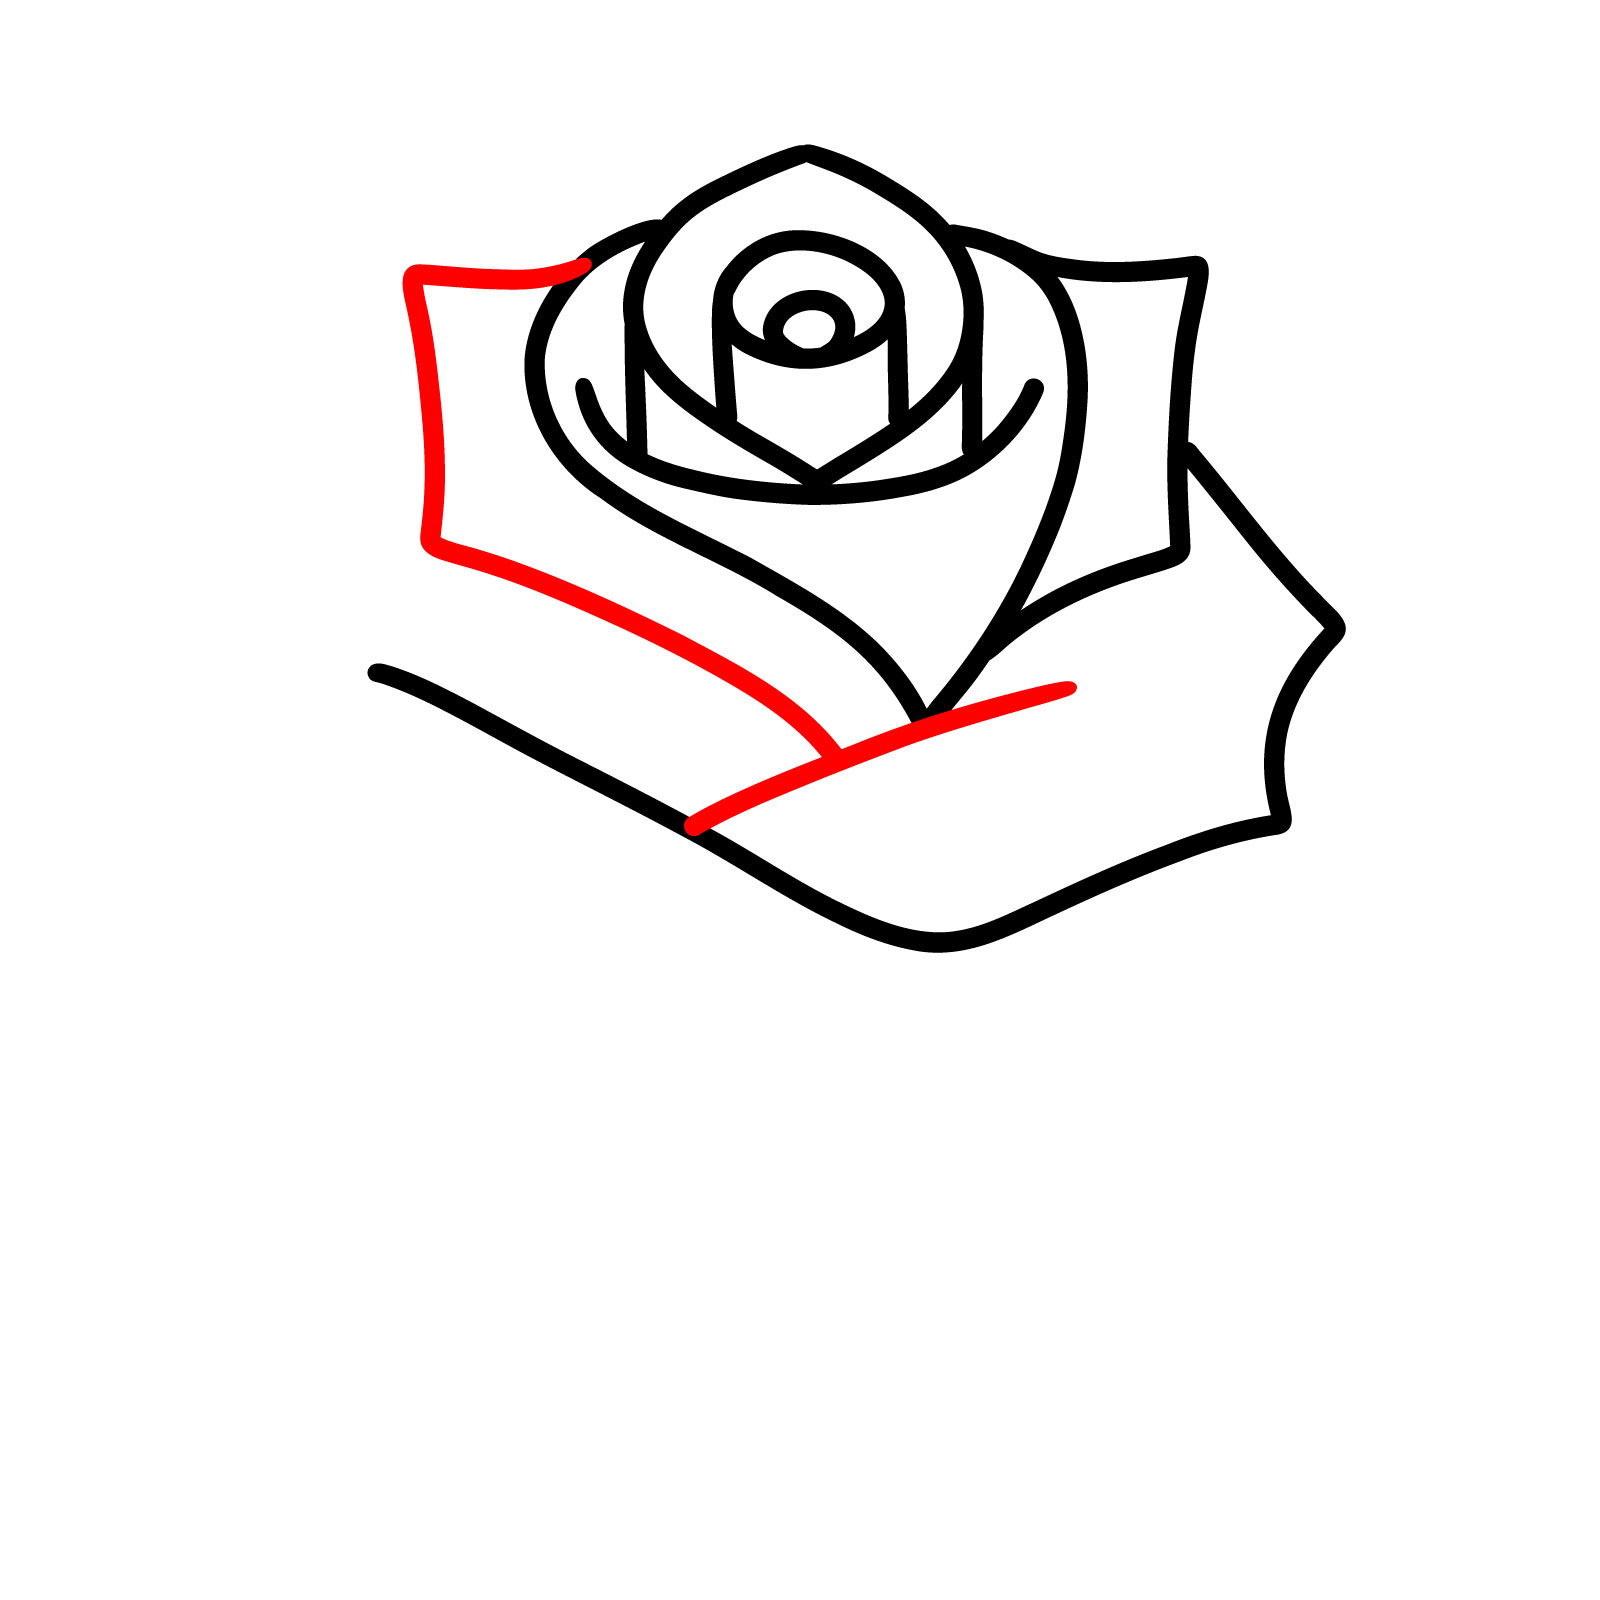
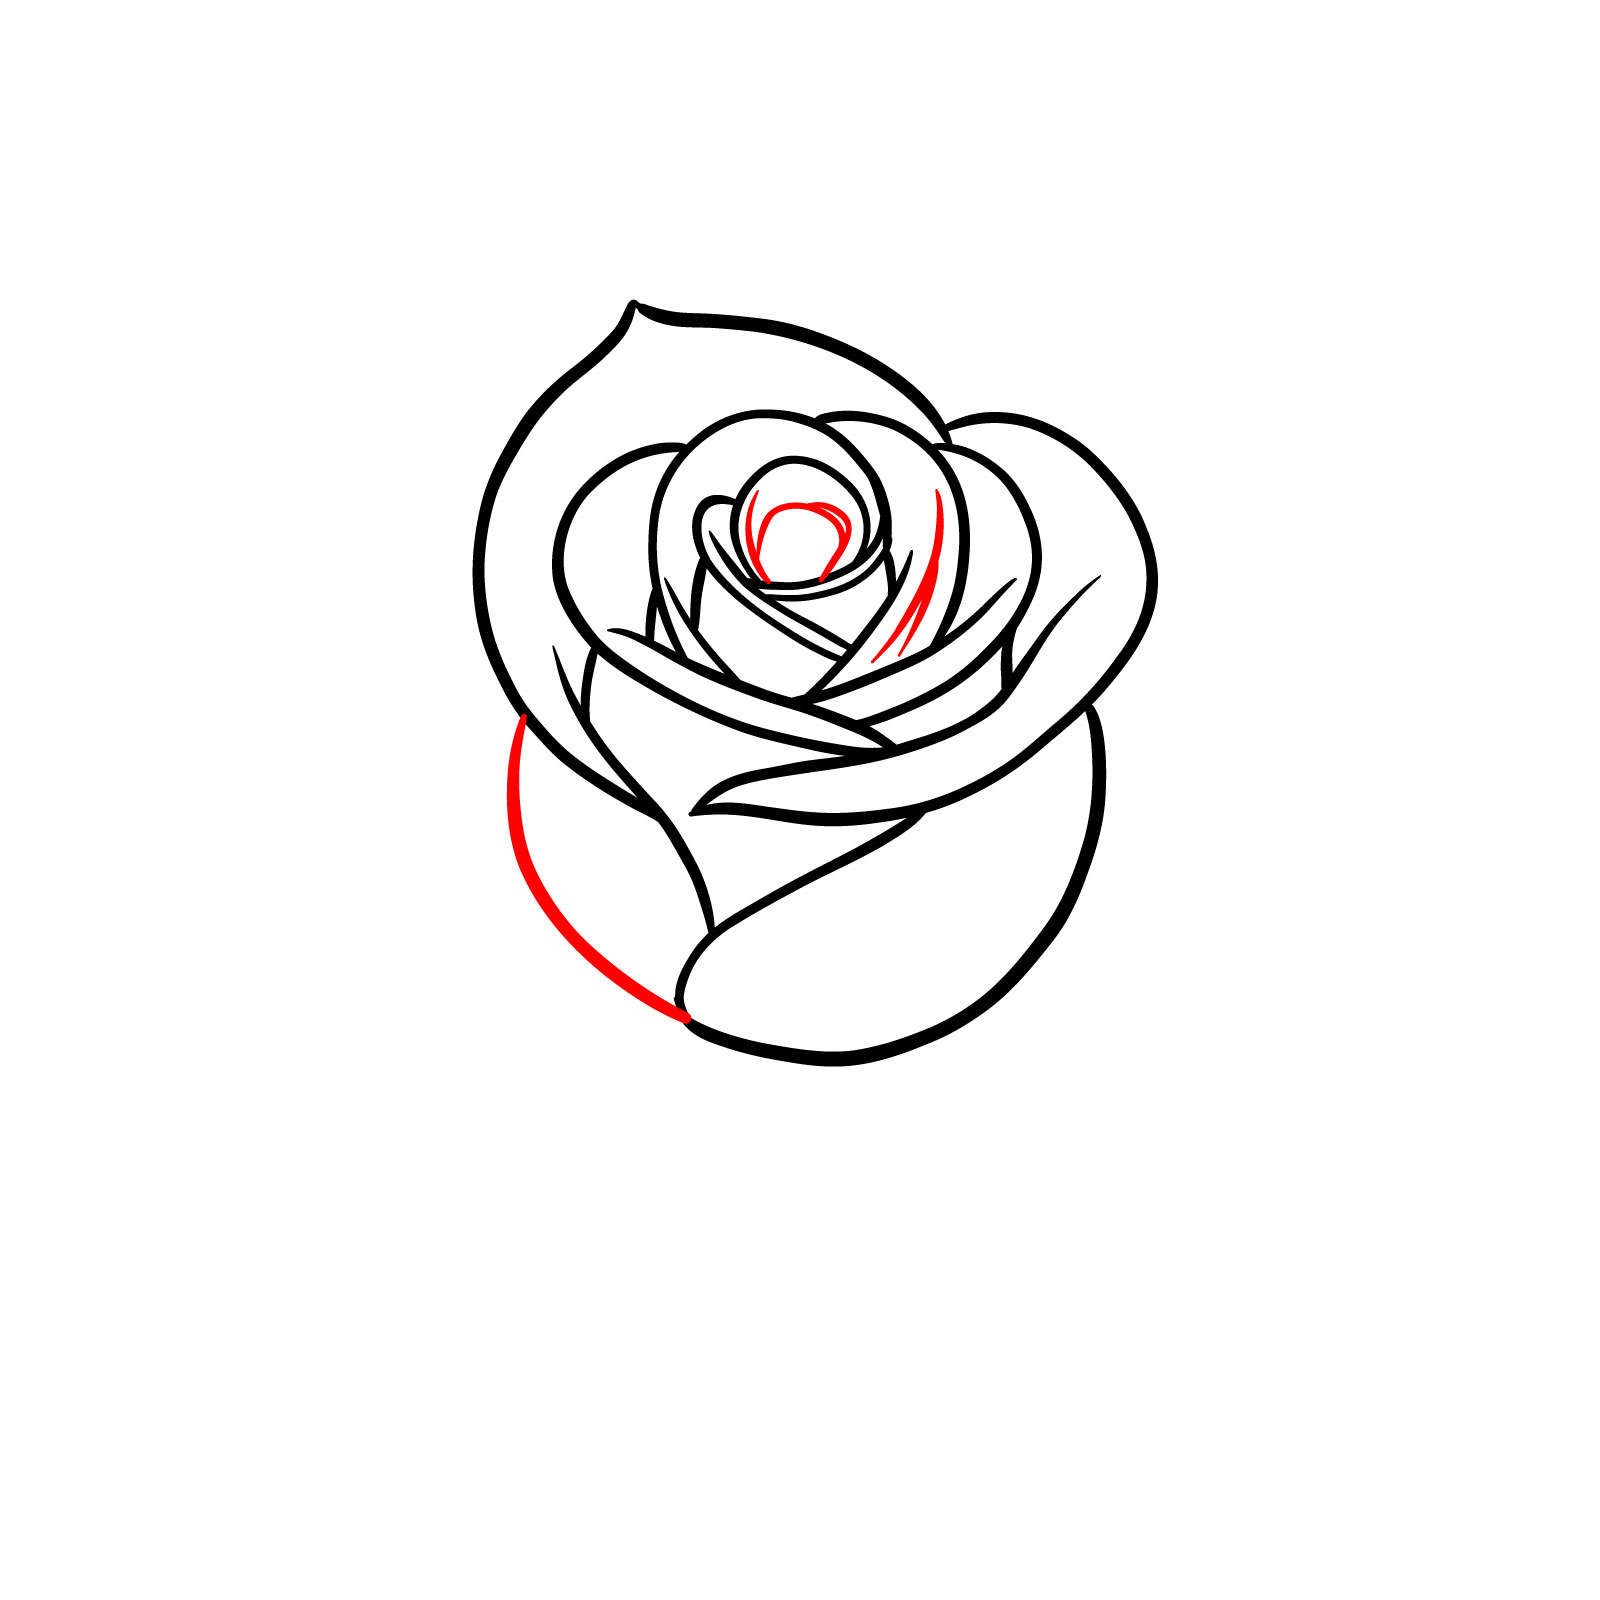
Step 11 – Add another petal on the left side to create a natural asymmetry and balance, giving your rose drawing a more organic feel
Adding balance to the bloom
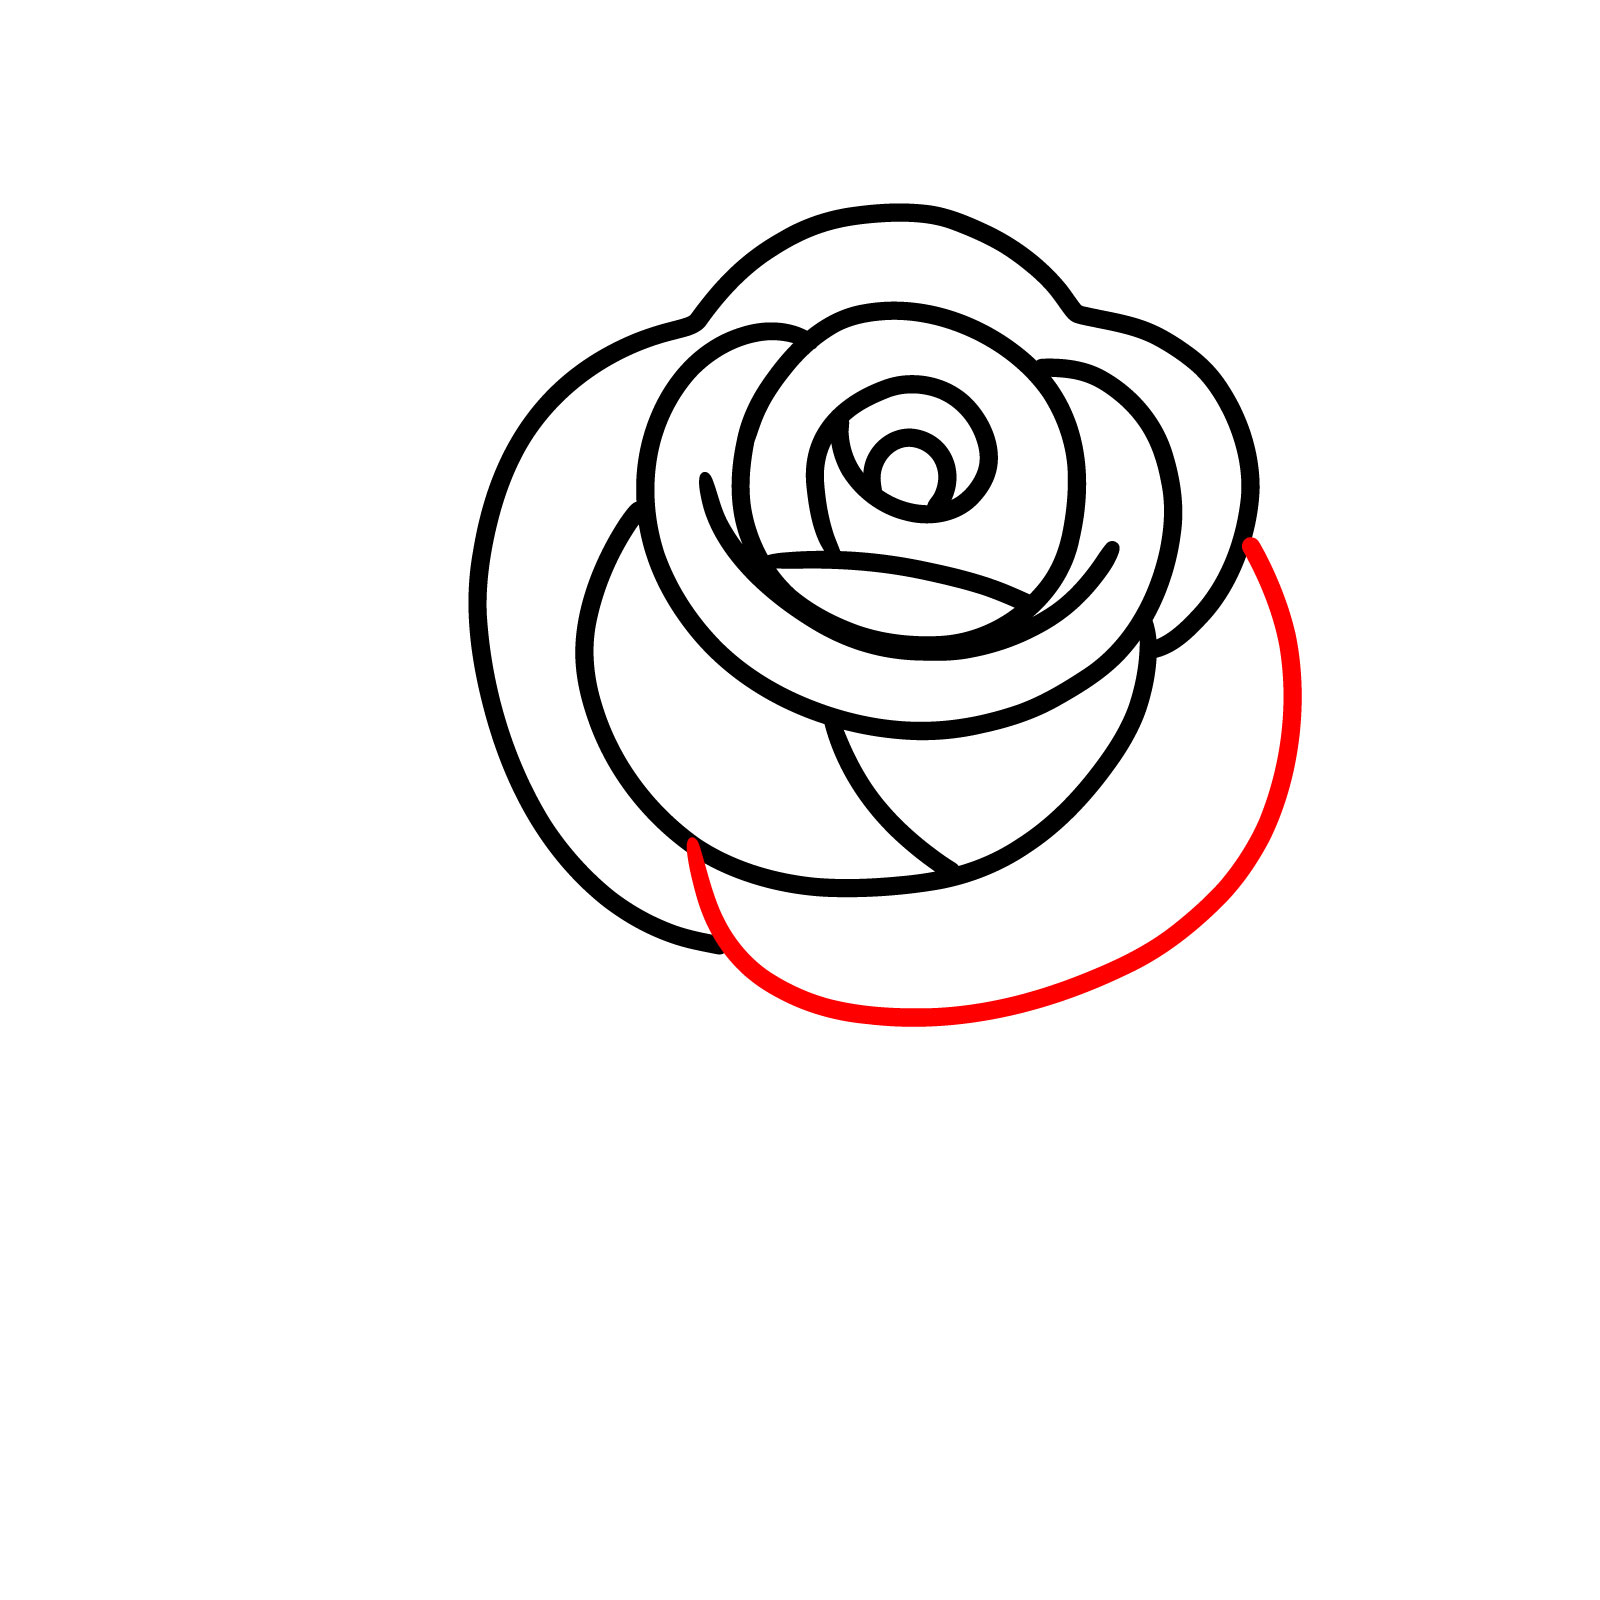
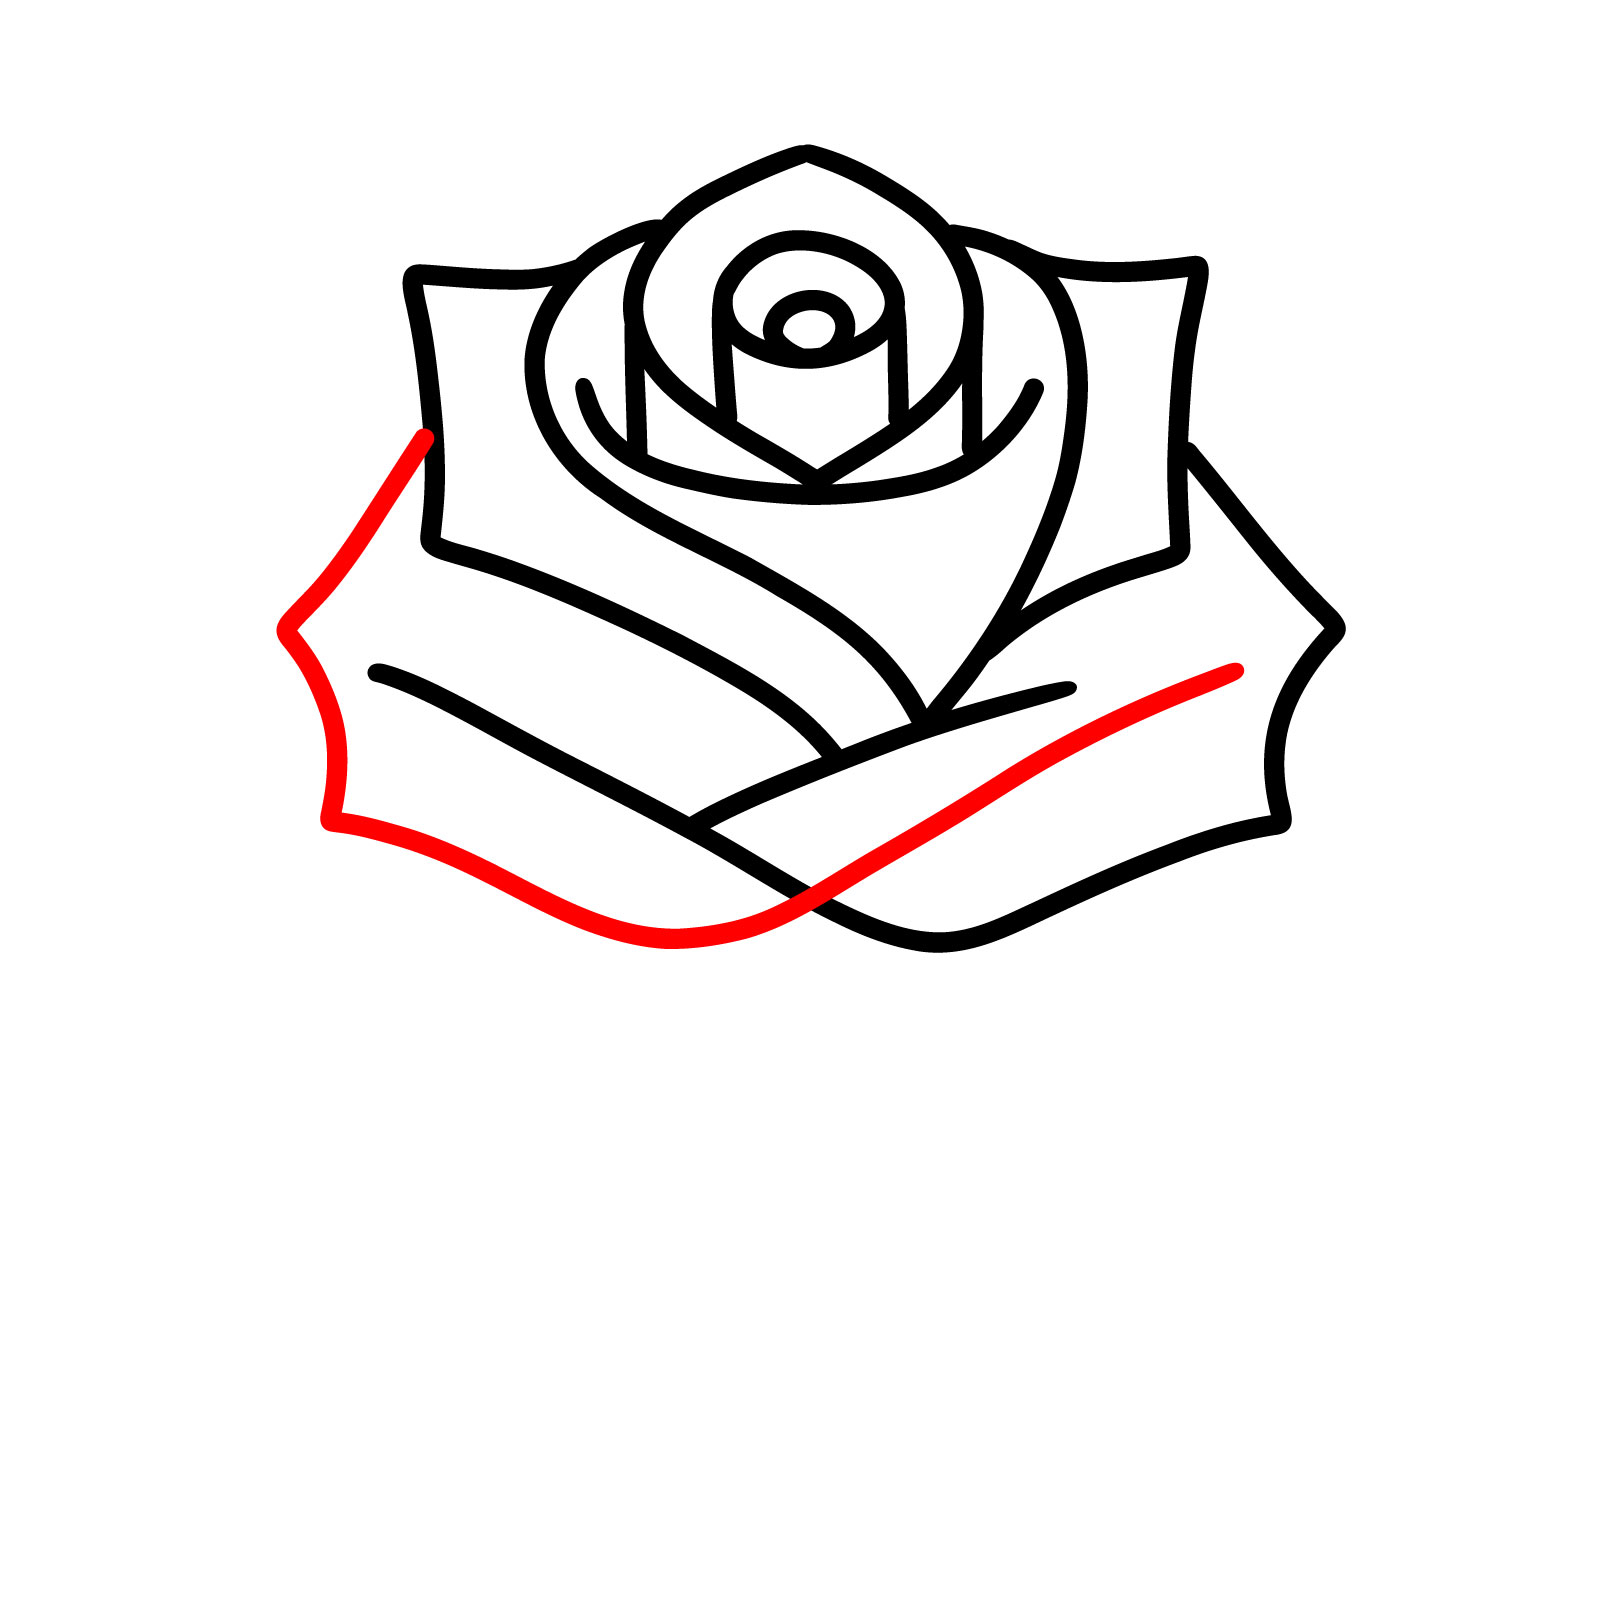
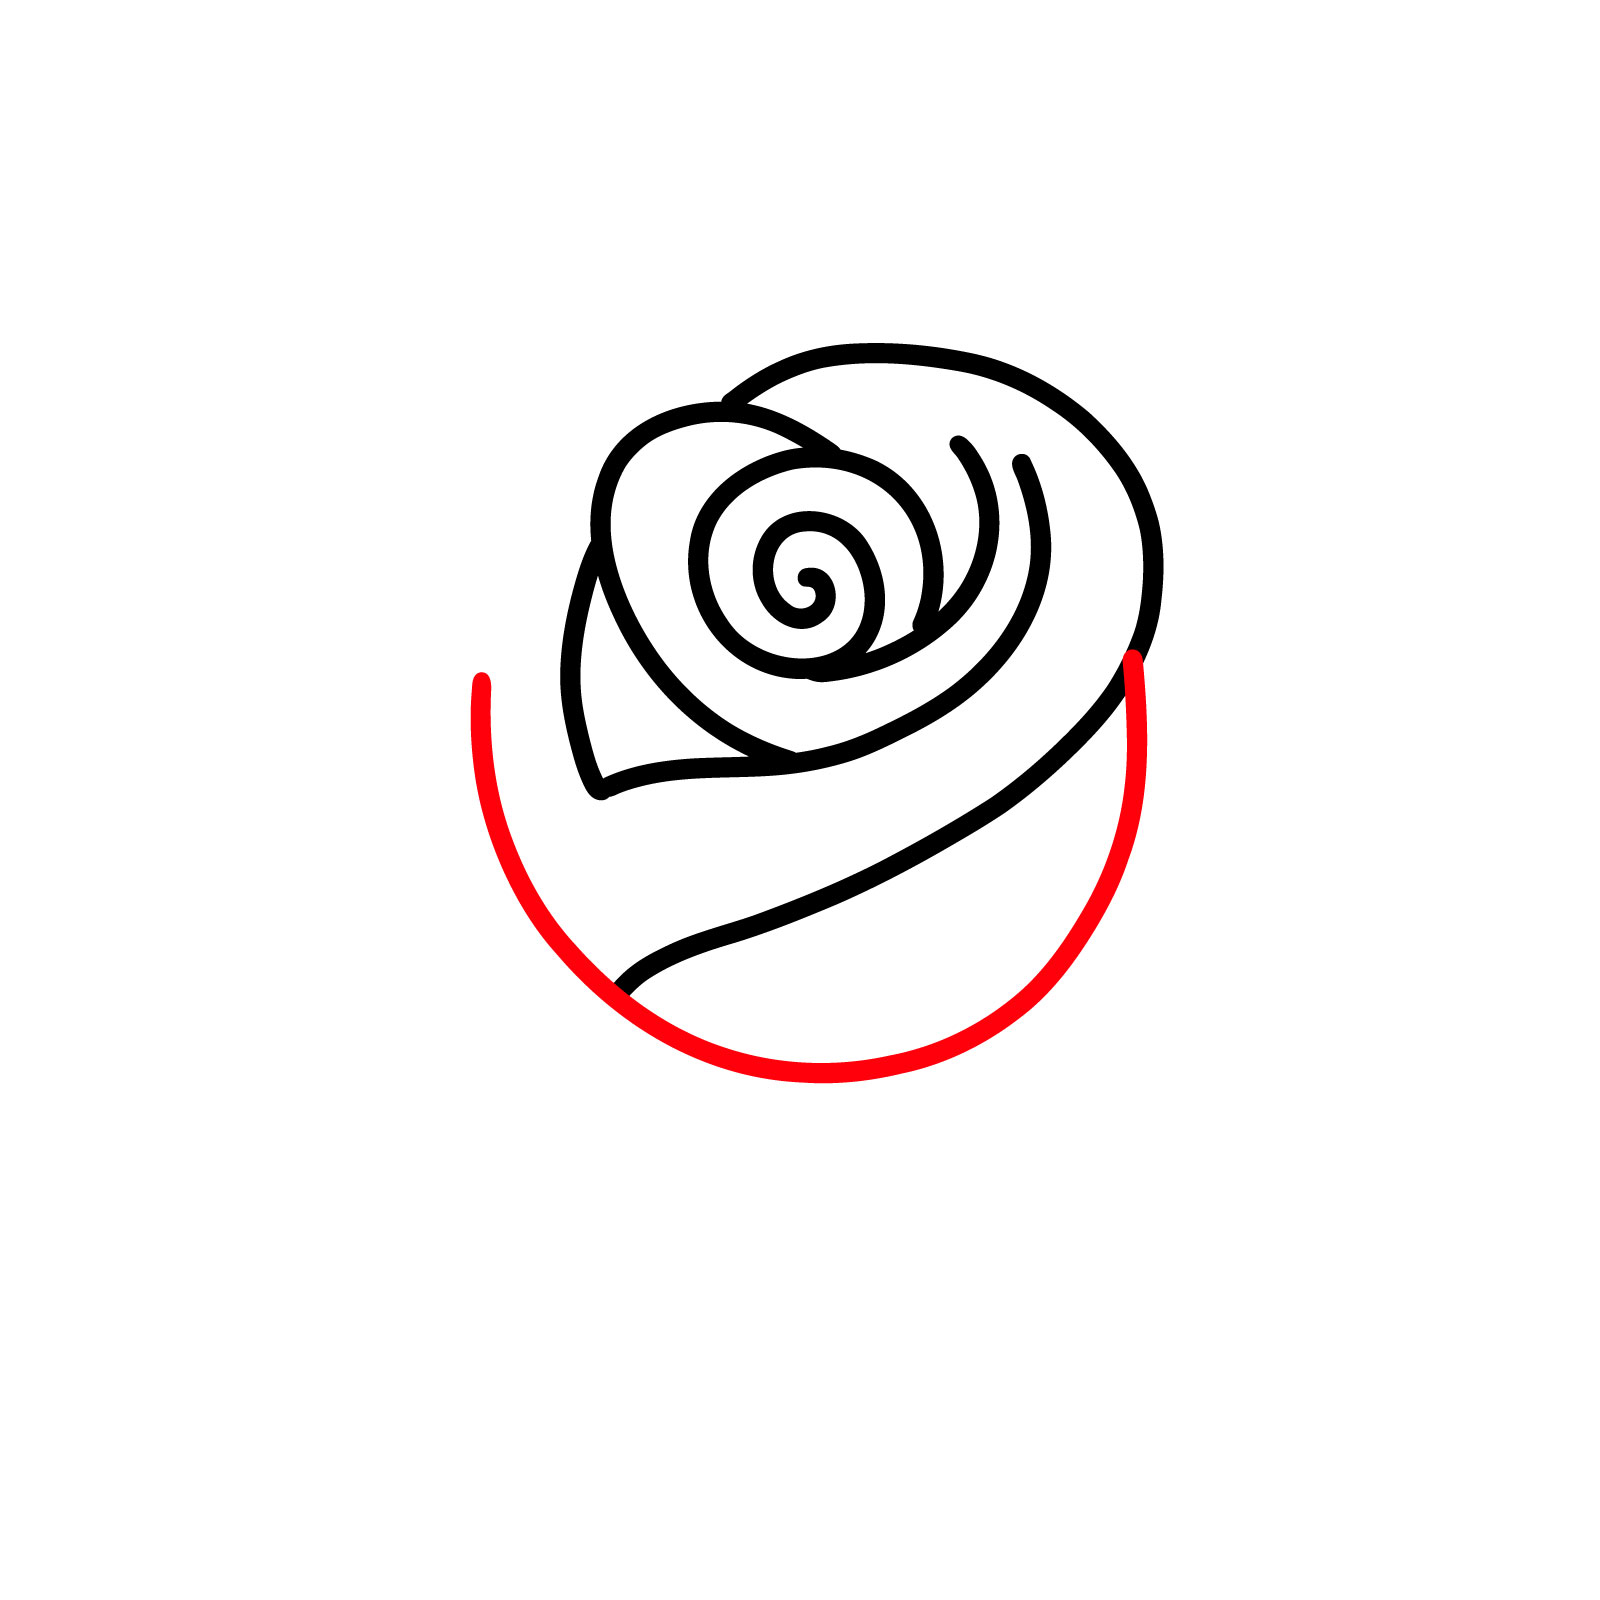
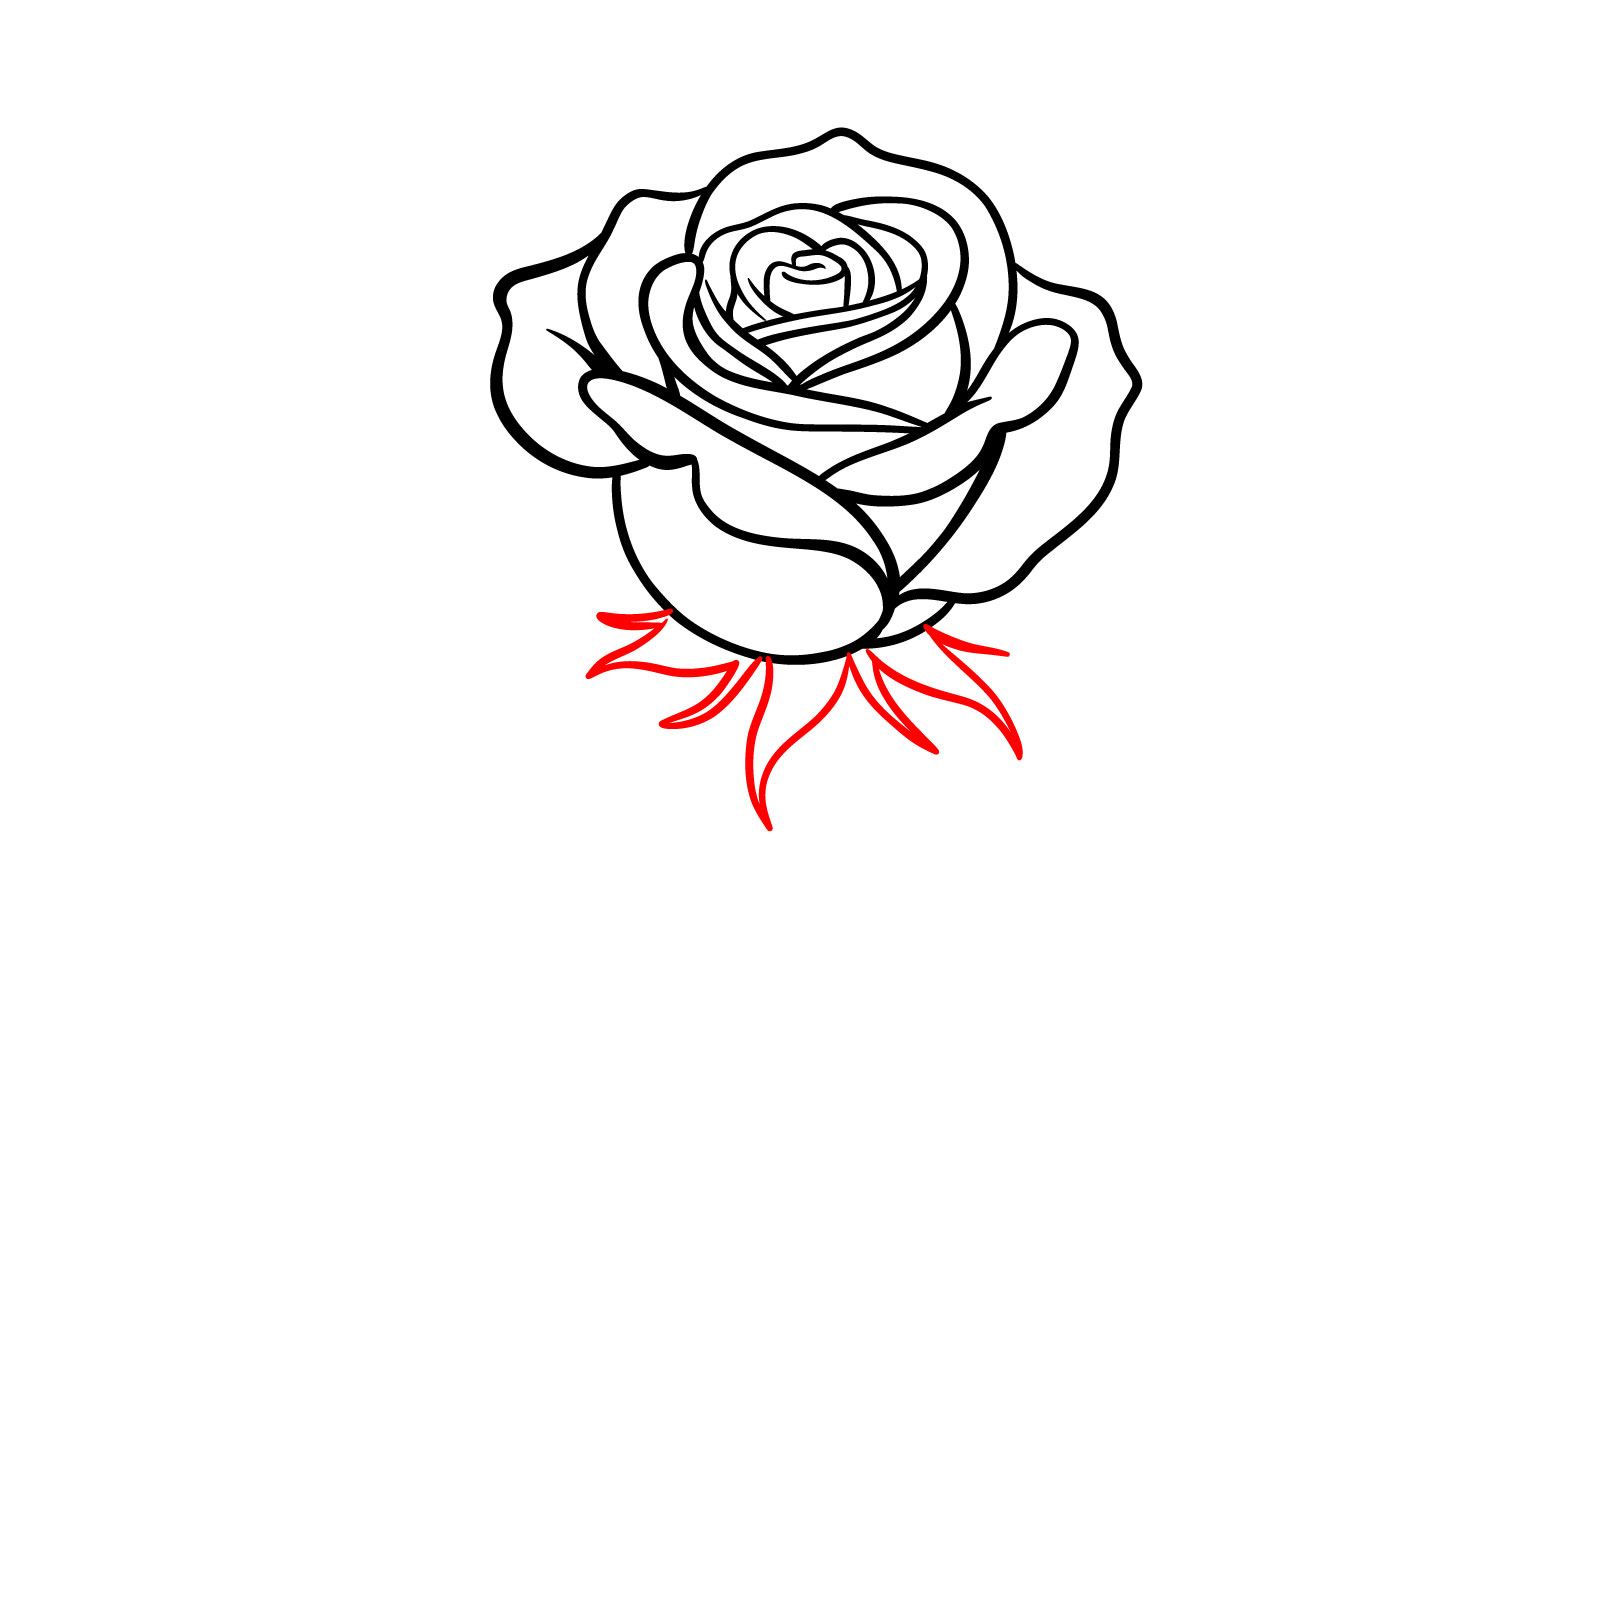
Step 12 – At the base of your rose, sketch in the foundational petals. These curved lines will support the rest of the rose visually and structurally, rounding out the bloom’s overall shape
Laying the foundation petals
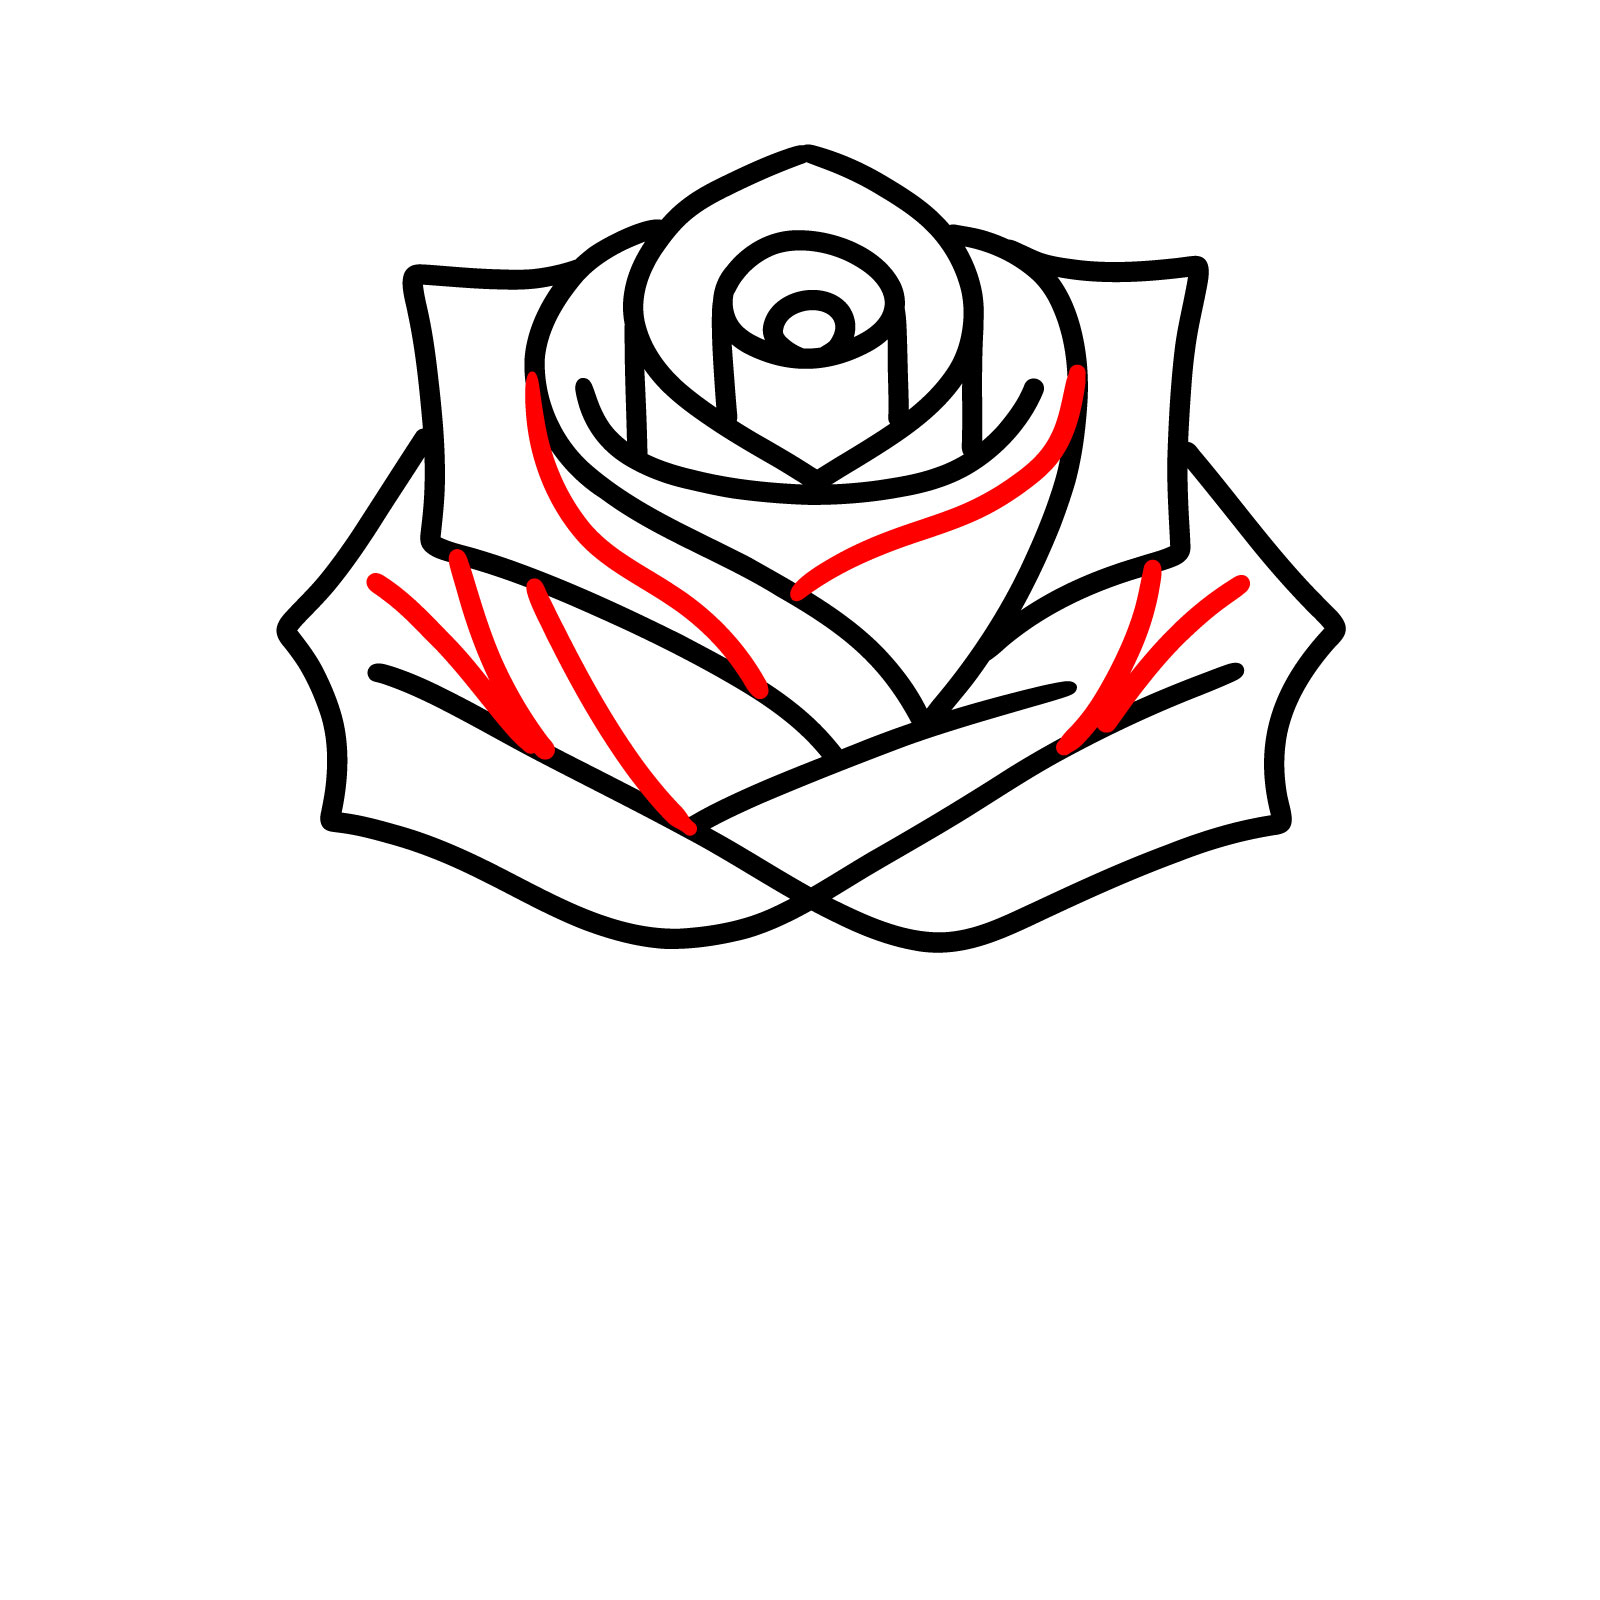
Step 13 – Begin by sketching the base of your rose
Constructing the rose’s base
Step 14 – Draw the stem, ensuring it’s not just a straight line (like it was in the previous simplier drawings above) but has the natural undulations of a real stem. Add three thorns, placing them strategically to balance the stem visually and to remind us that beauty often has its defenses
Defining the rose’s stem
Step 15 – On the sides of the stem, sketch in small twigs to create additional detail. These should be delicate and sparing, just enough to give your rose a lifelike complexity
Adding complexity to the stem
Step 16 – Now, add even smaller twigs branching off the ones you drew in step 15. These fine details will make your rose stem look more authentic and intricate, enhancing your realistic rose drawing.
Refining the rose’s foliage
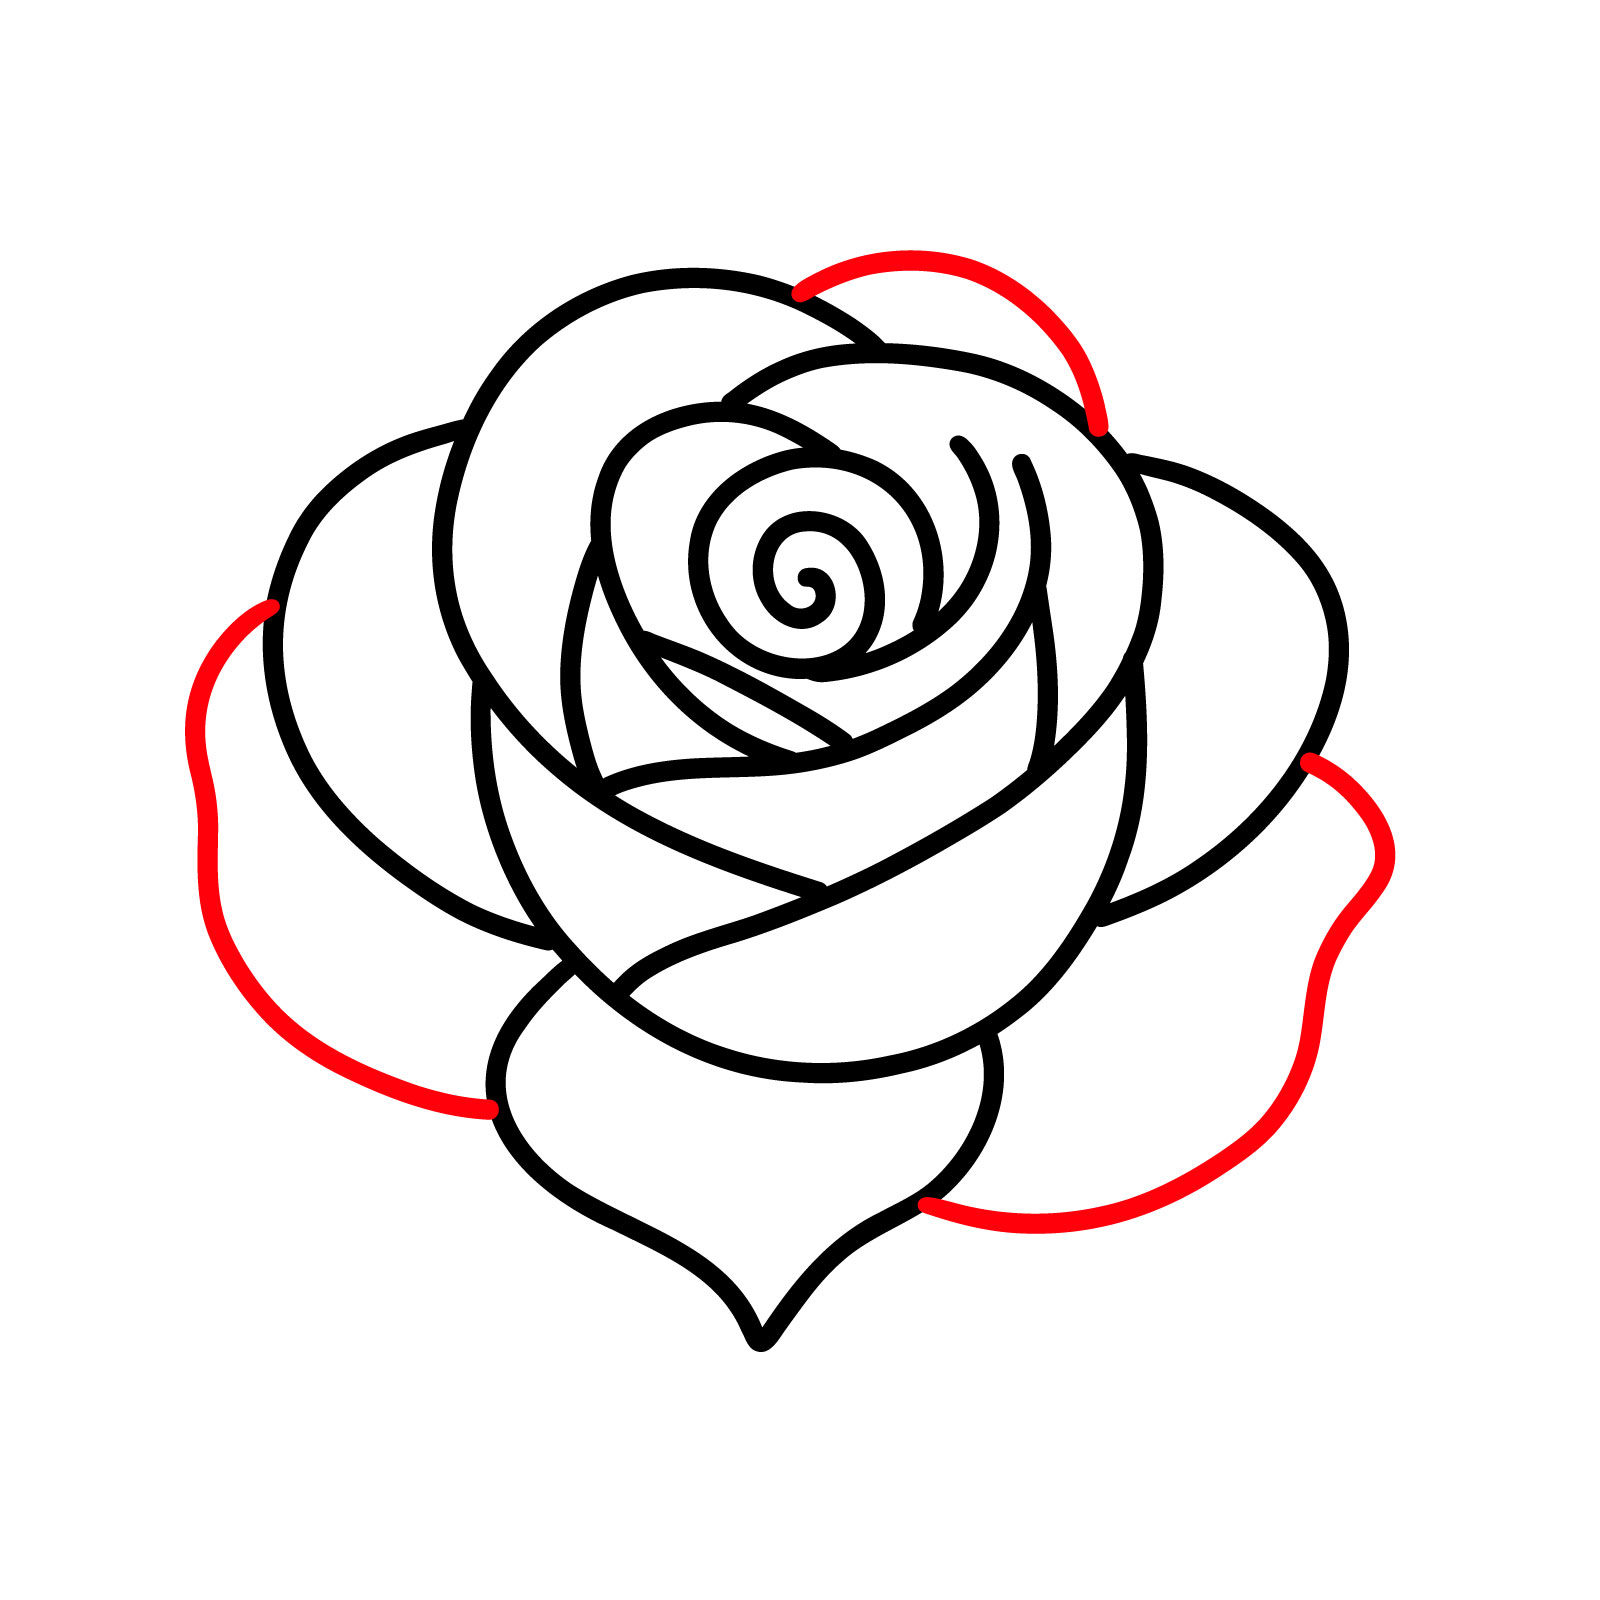
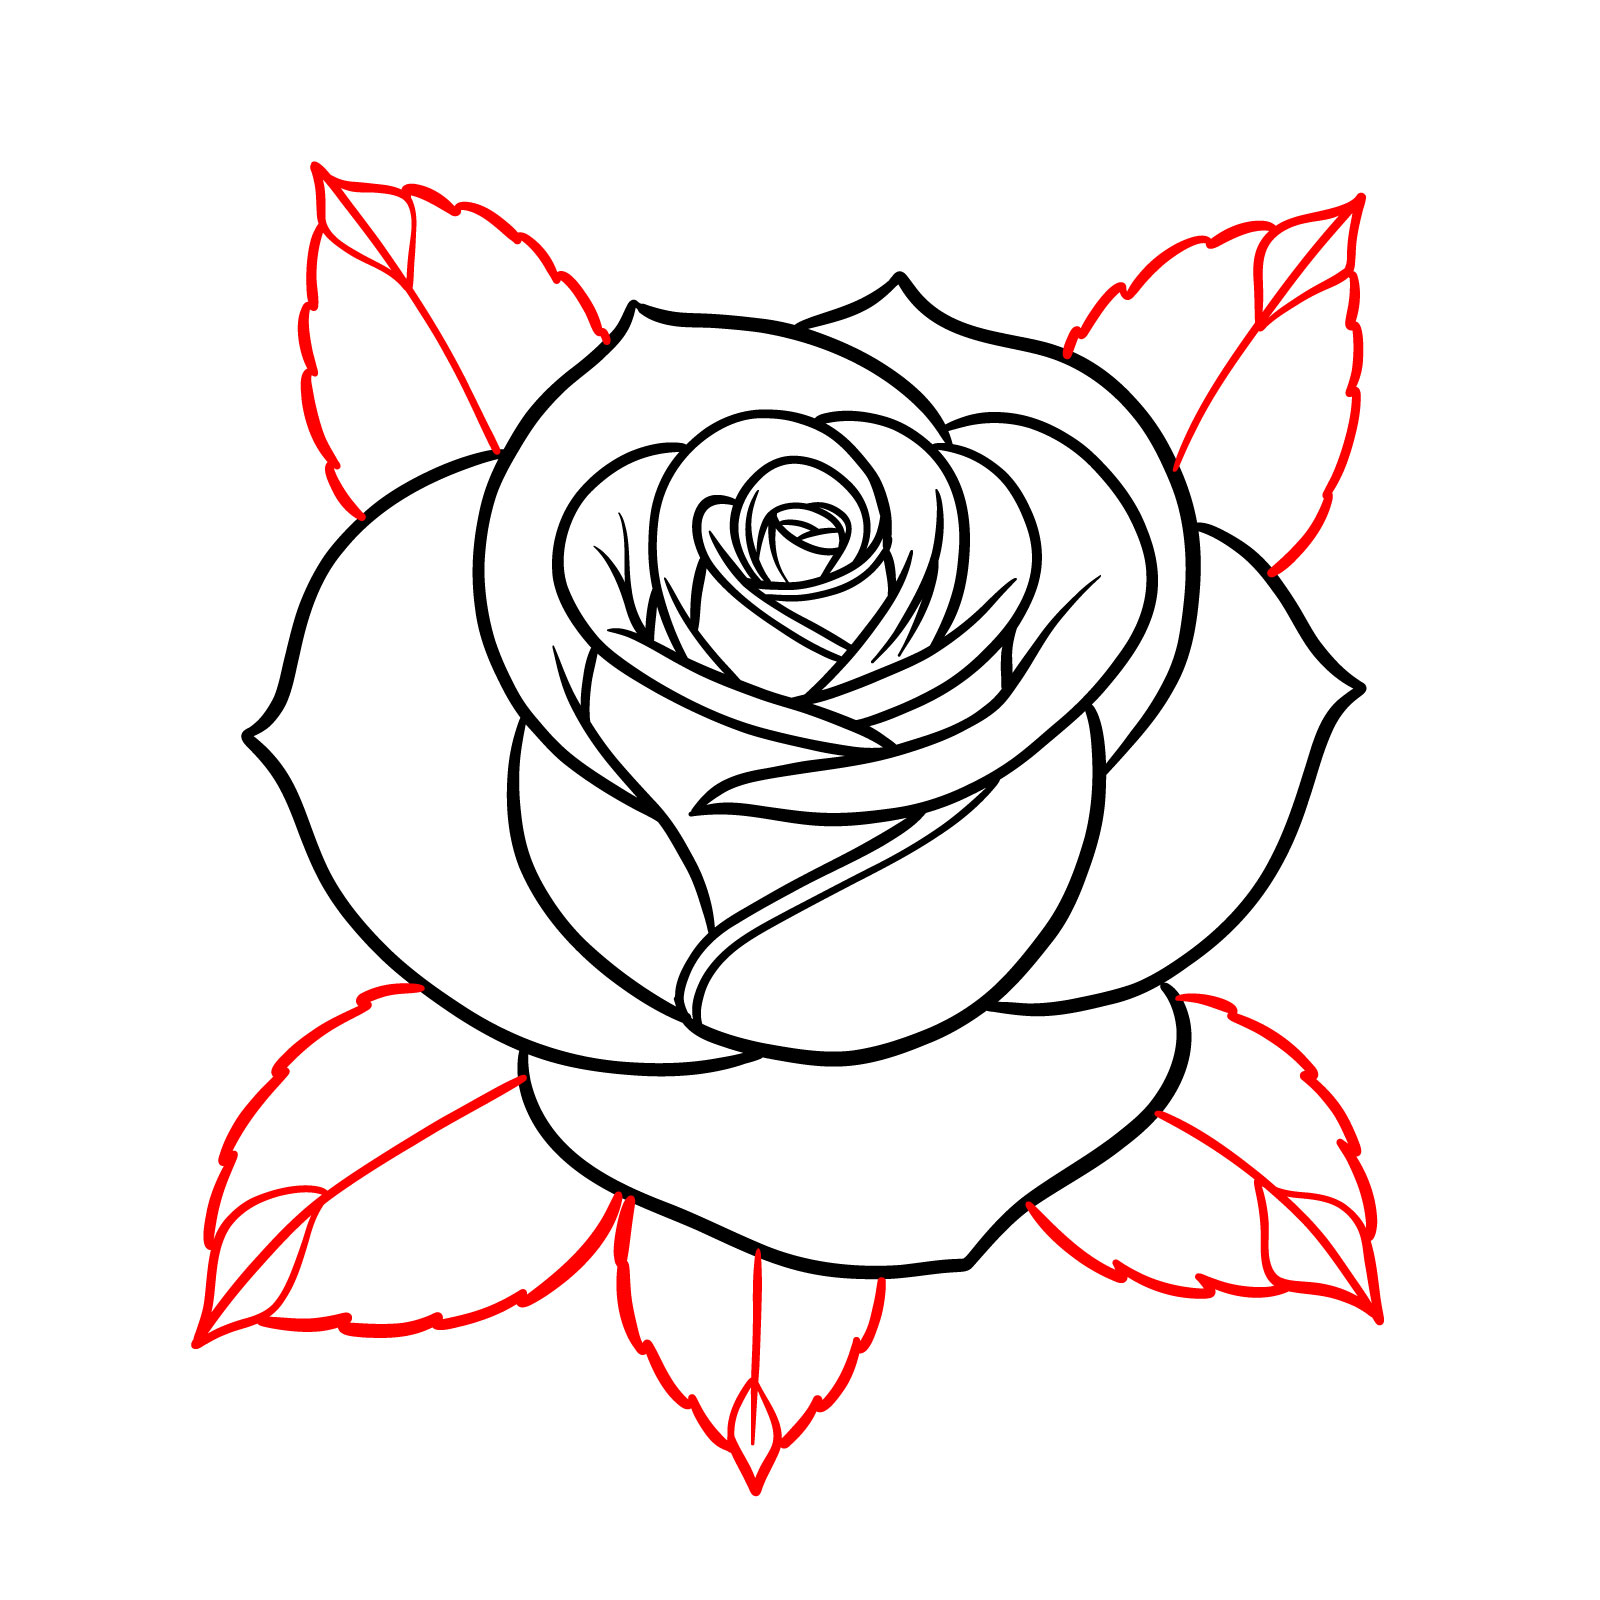
Step 17 – In this step, we’ll be outlining the leaves with jagged edges to form their distinctive shape
Sketching Rose Leaves
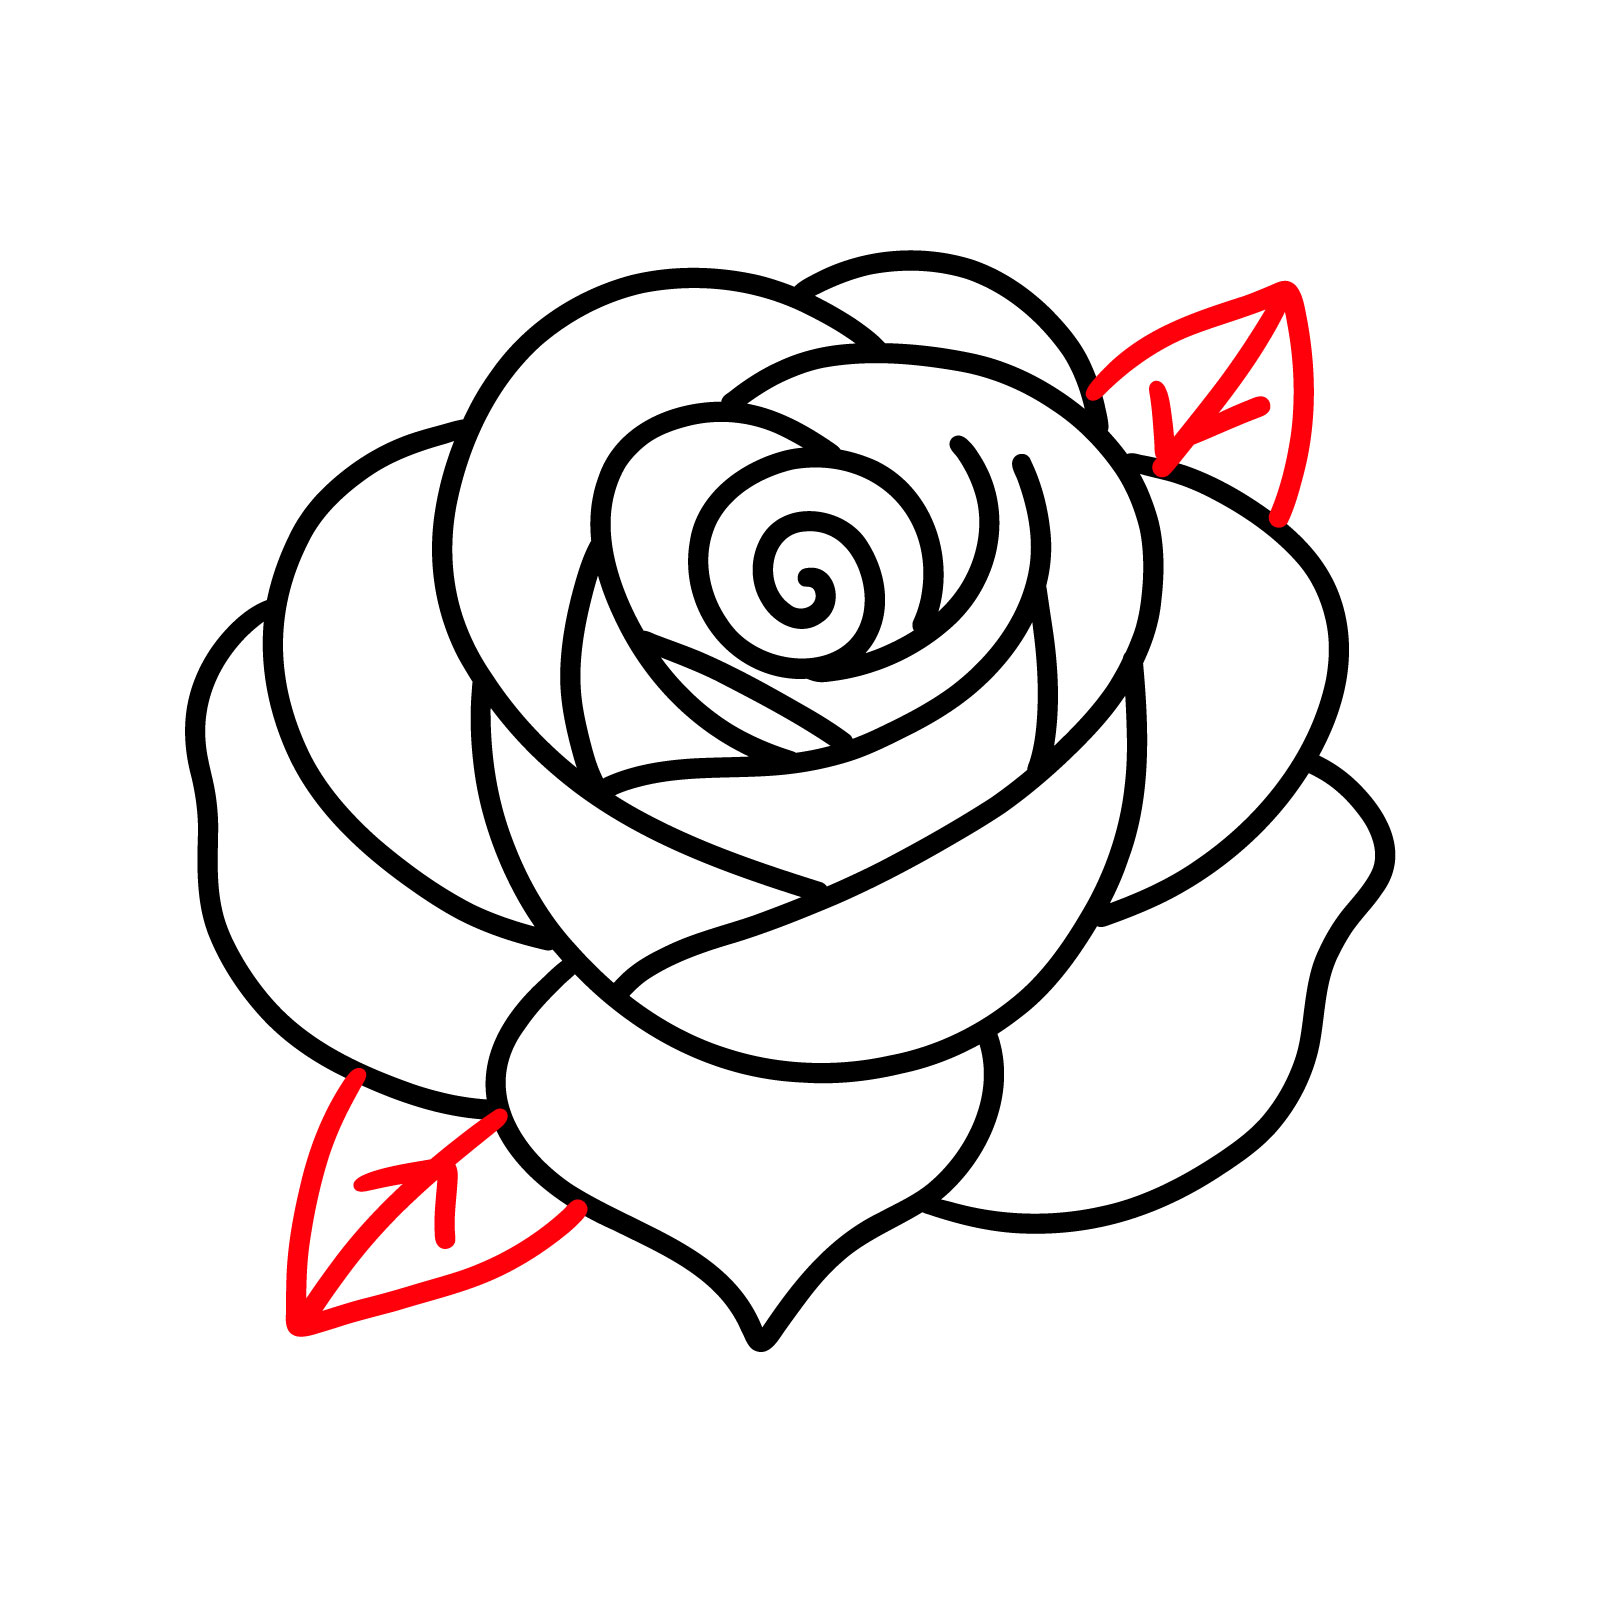
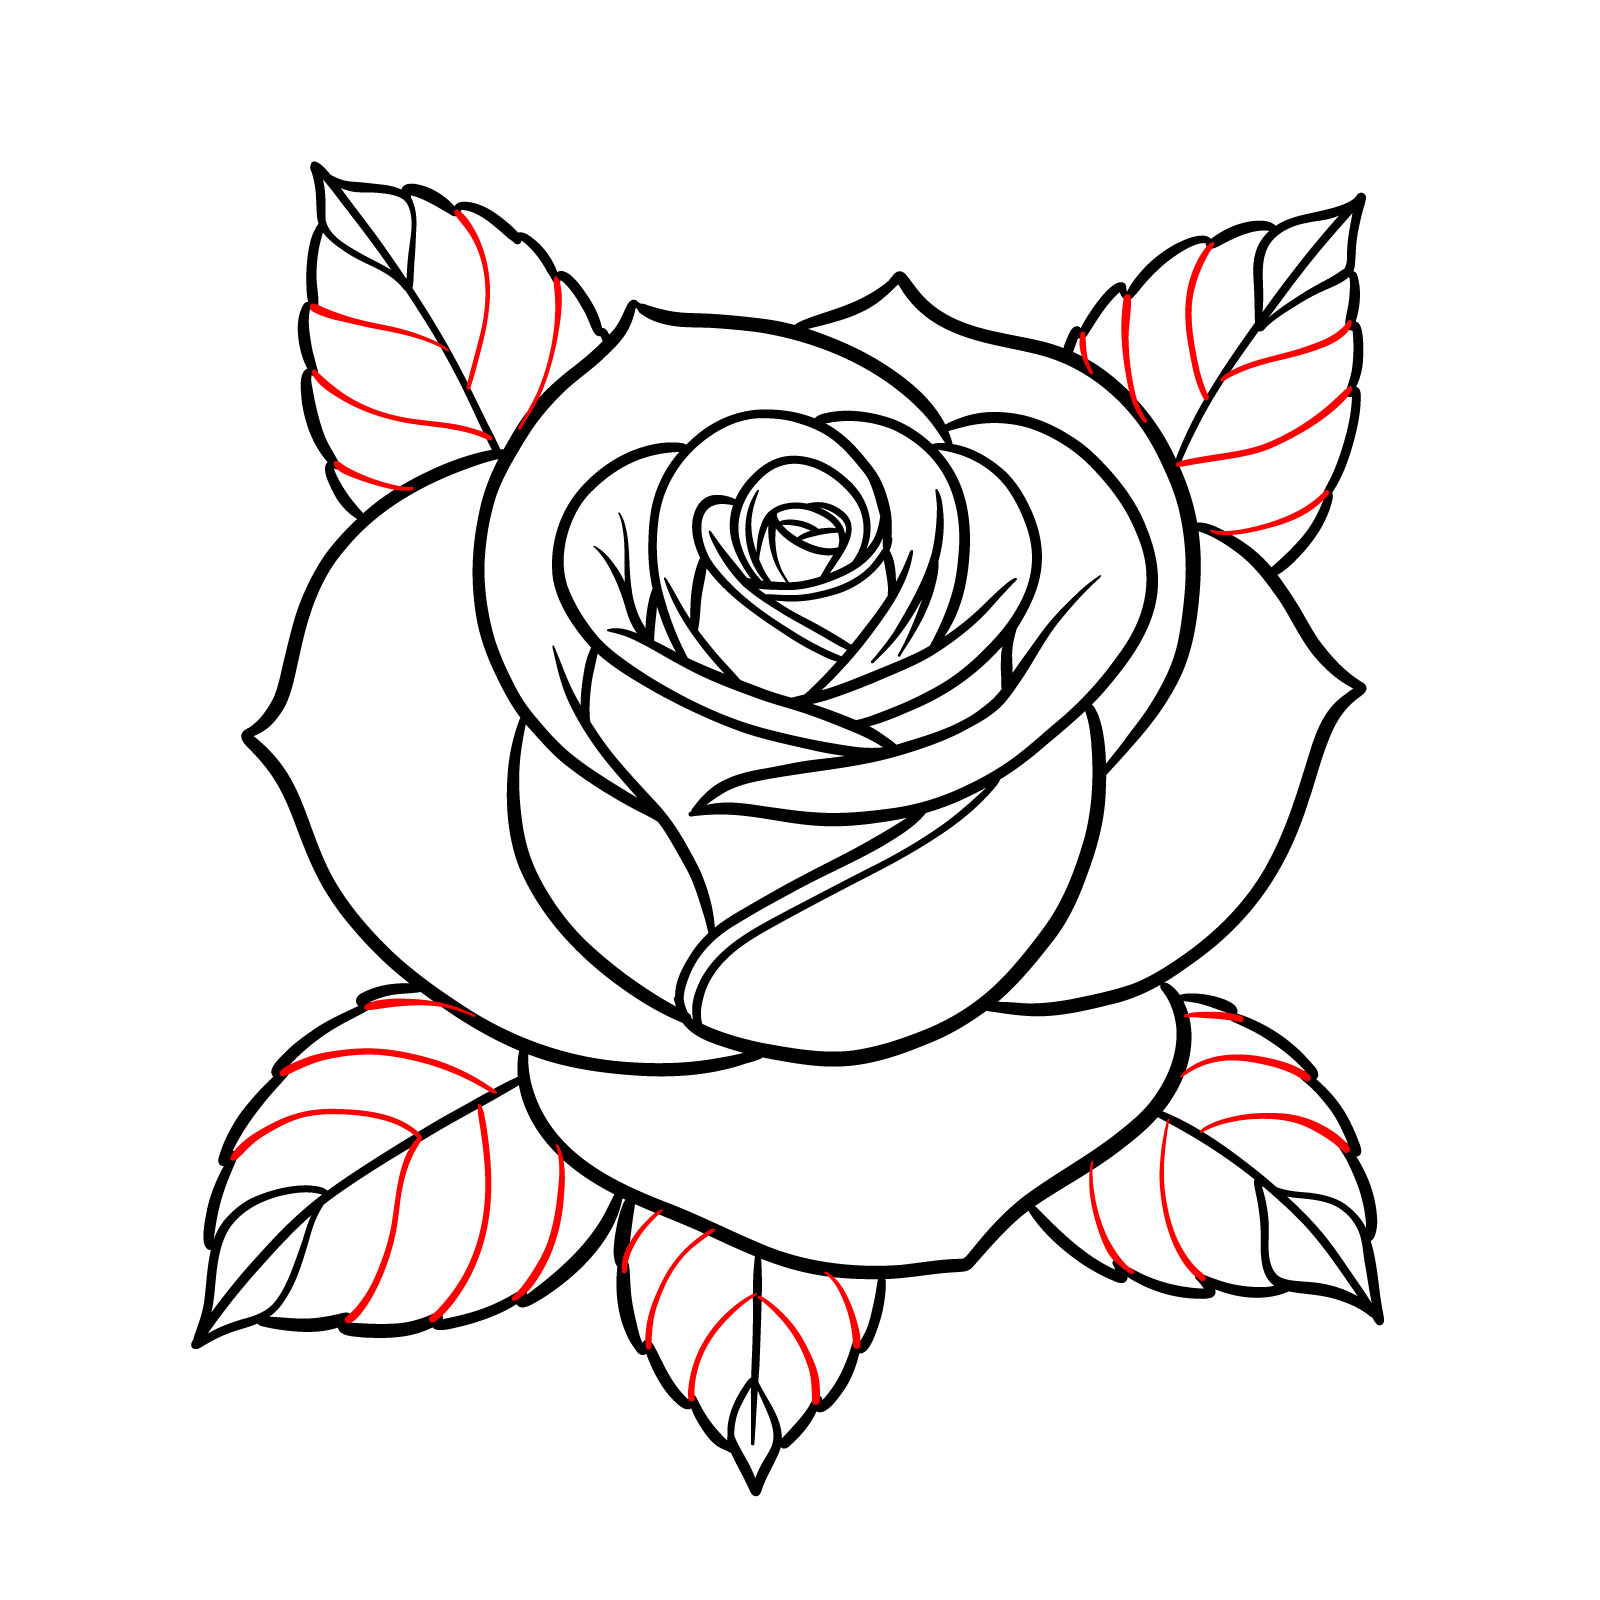
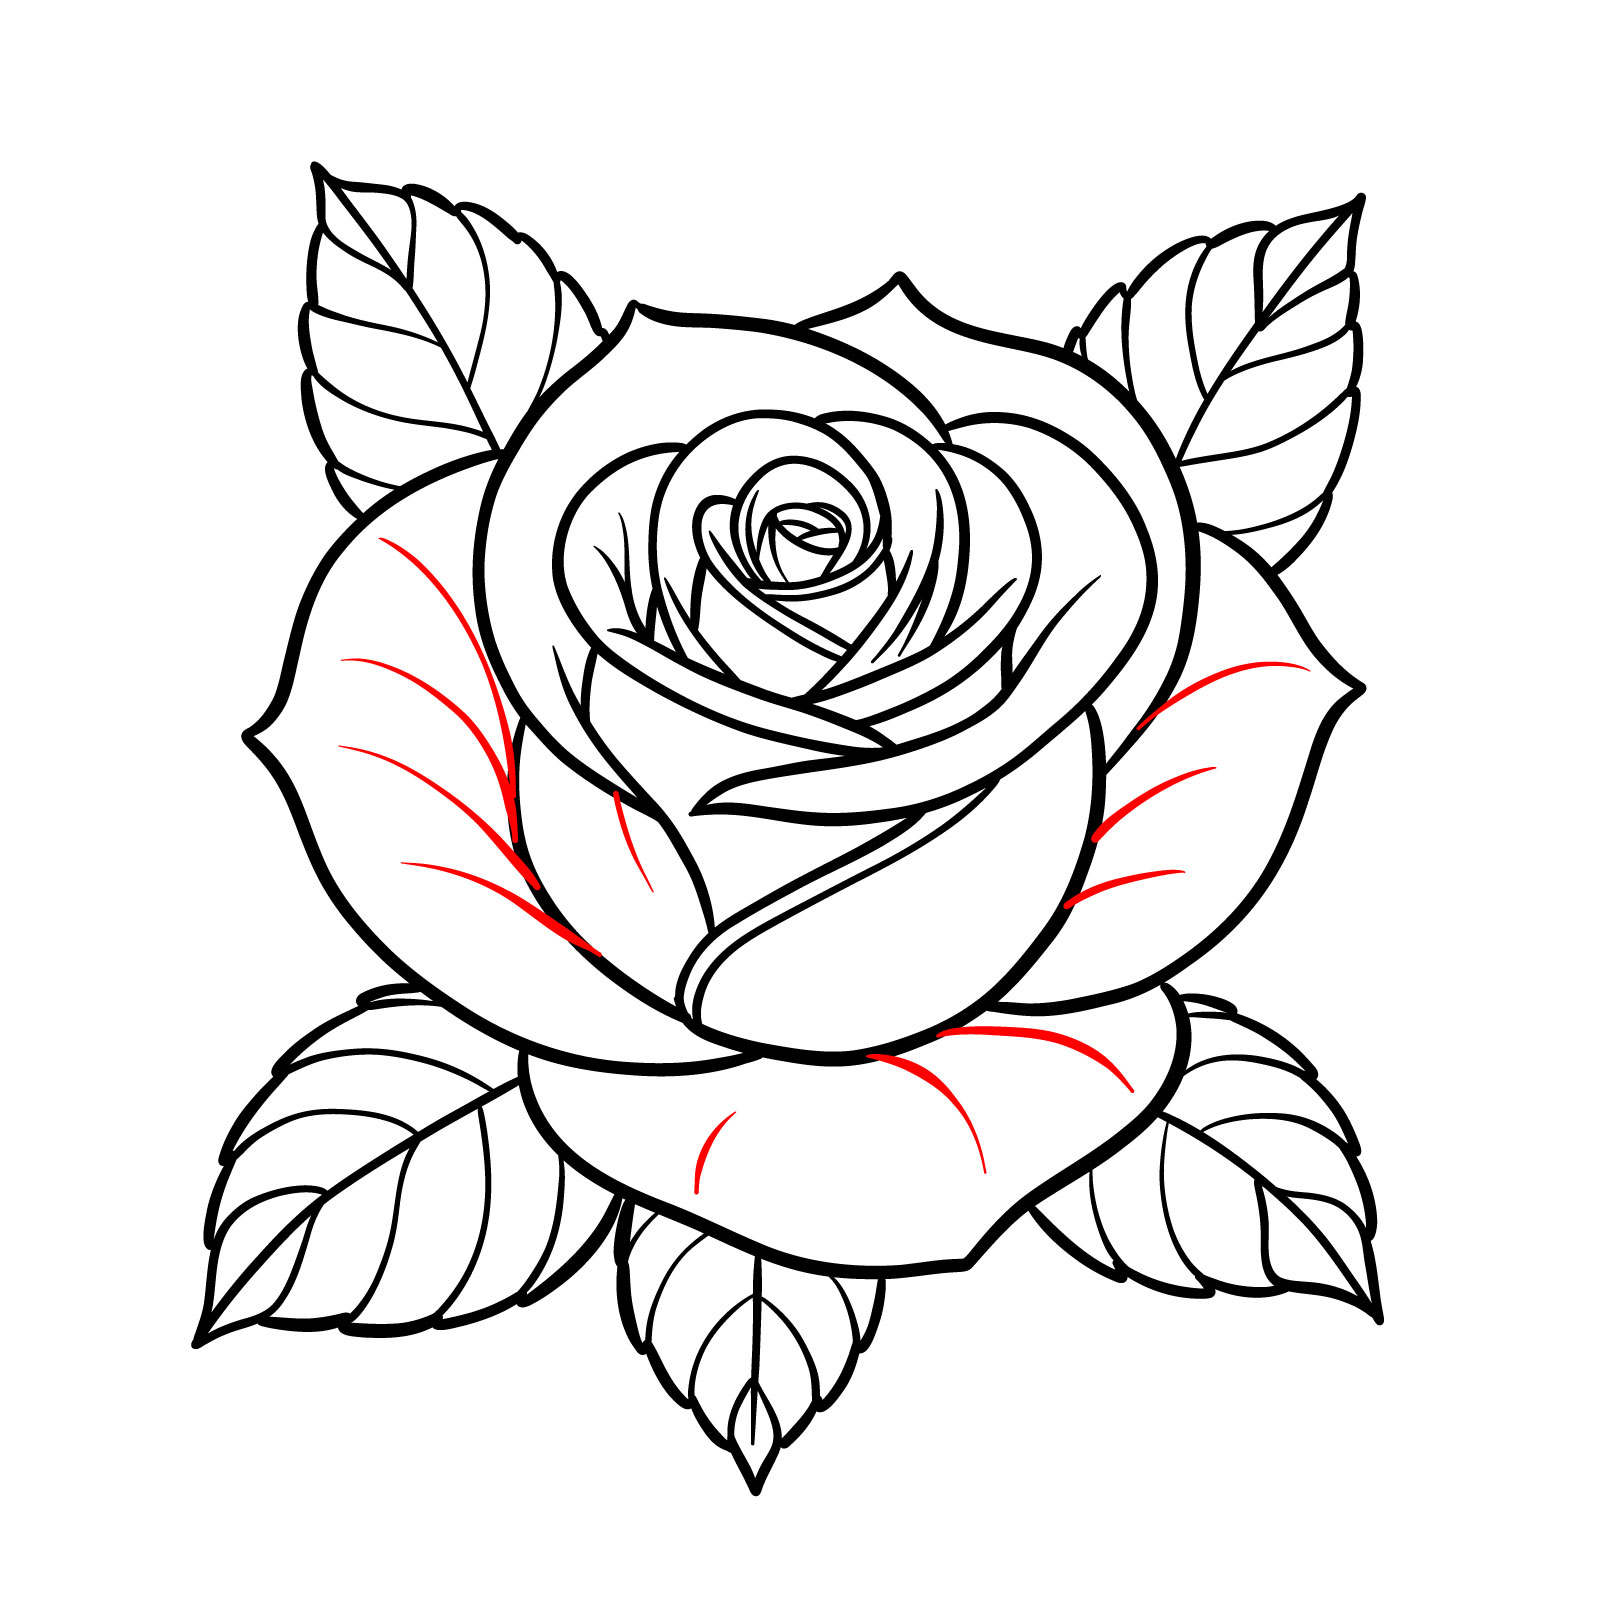
Step 18 – Now, add the finer details such as the veins to each leaf, giving them life and dimension. Incorporate gentle curves to suggest the natural folding and creasing of the leaves, a vital part of an easy realistic rose drawing
Detailing the Leaves
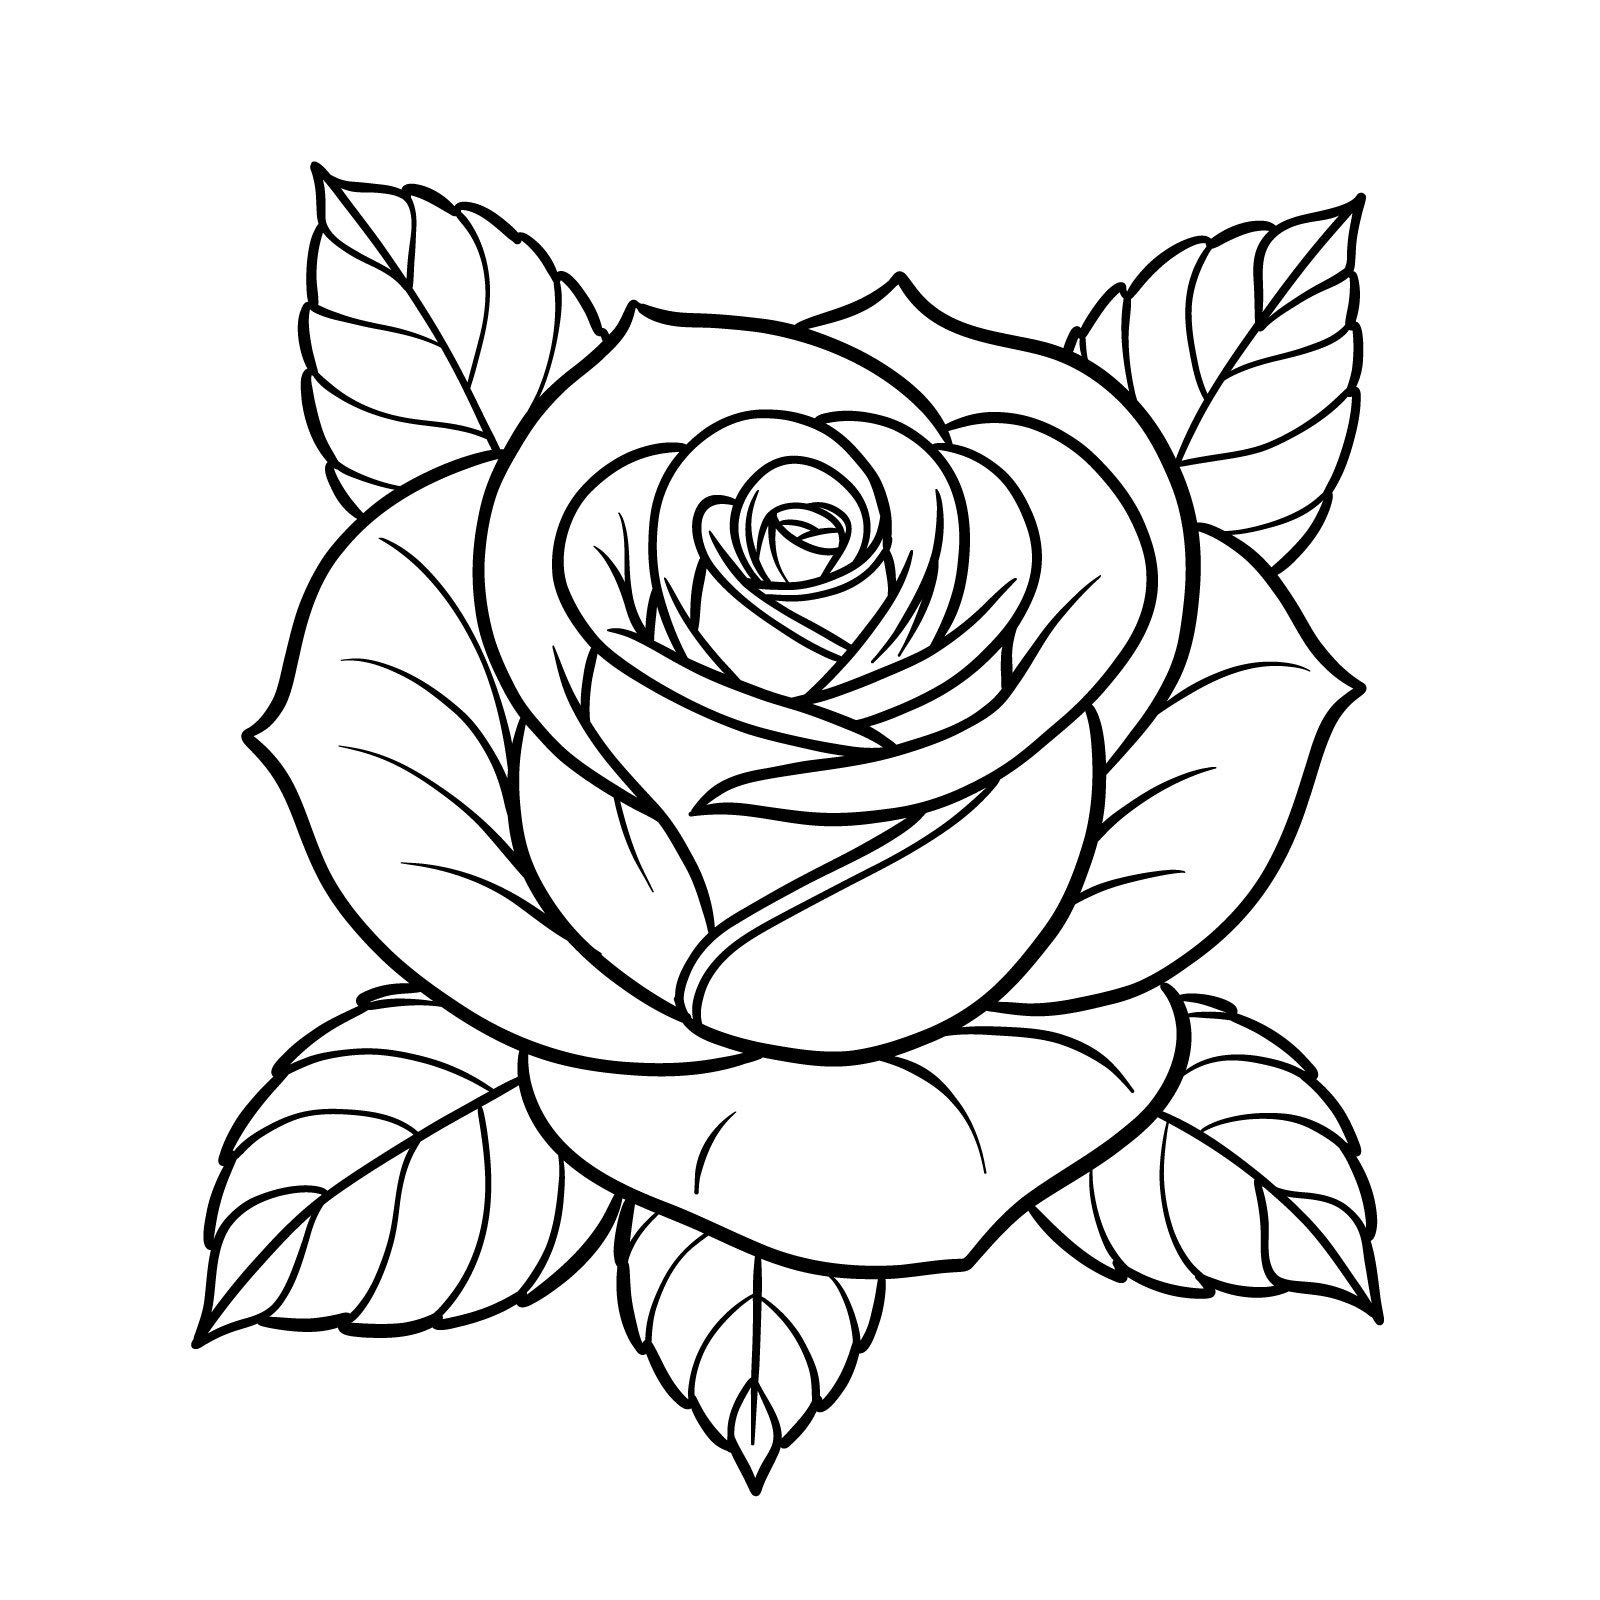
Step 19 – With all the elements in place, your realistic rose comes to life. The detailed veins and edges of the leaves complement the intricate petals above, resulting in a finished and realistic depiction of nature’s beauty
Finalizing the Realistic Rose – End of the 7th Guide
Welcome to the final stretch with the 8th guide of the how to draw roses series. Don’t be daunted by its complexity; it’s merely a step up from the initial tutorials, perfect for those who’ve enjoyed the journey so far and are eager for a bit more depth. This guide showcases a rosebud poised and ready to bloom, accompanied by five detailed, jagged leaves that add a touch of wild charm to the composition. Spread over 16 steps, each one is crafted to guide you gently through the process, ensuring that what may seem intricate at first becomes clear and achievable. Let’s nurture this bud together, and watch as your skills and confidence flourish.
Step 01 – To begin our realistic rosebud drawing, sketch a small circle for the core and add a gentle curve below it. This marks the bud’s center and foundation for the petals
Starting the Rosebud’s Core
Step 02 – Around the initial circle, draw the first layer of petals
Sketching the Outer Petal Layer
Step 03 – Define the shapes of the outer petals, giving attention to their layered arrangement
Defining Petal Shapes
Step 04 – Refine the heart of the rosebud by adjusting the surrounding petals for a more delicate and intricate look
Refining the Rosebud’s Heart
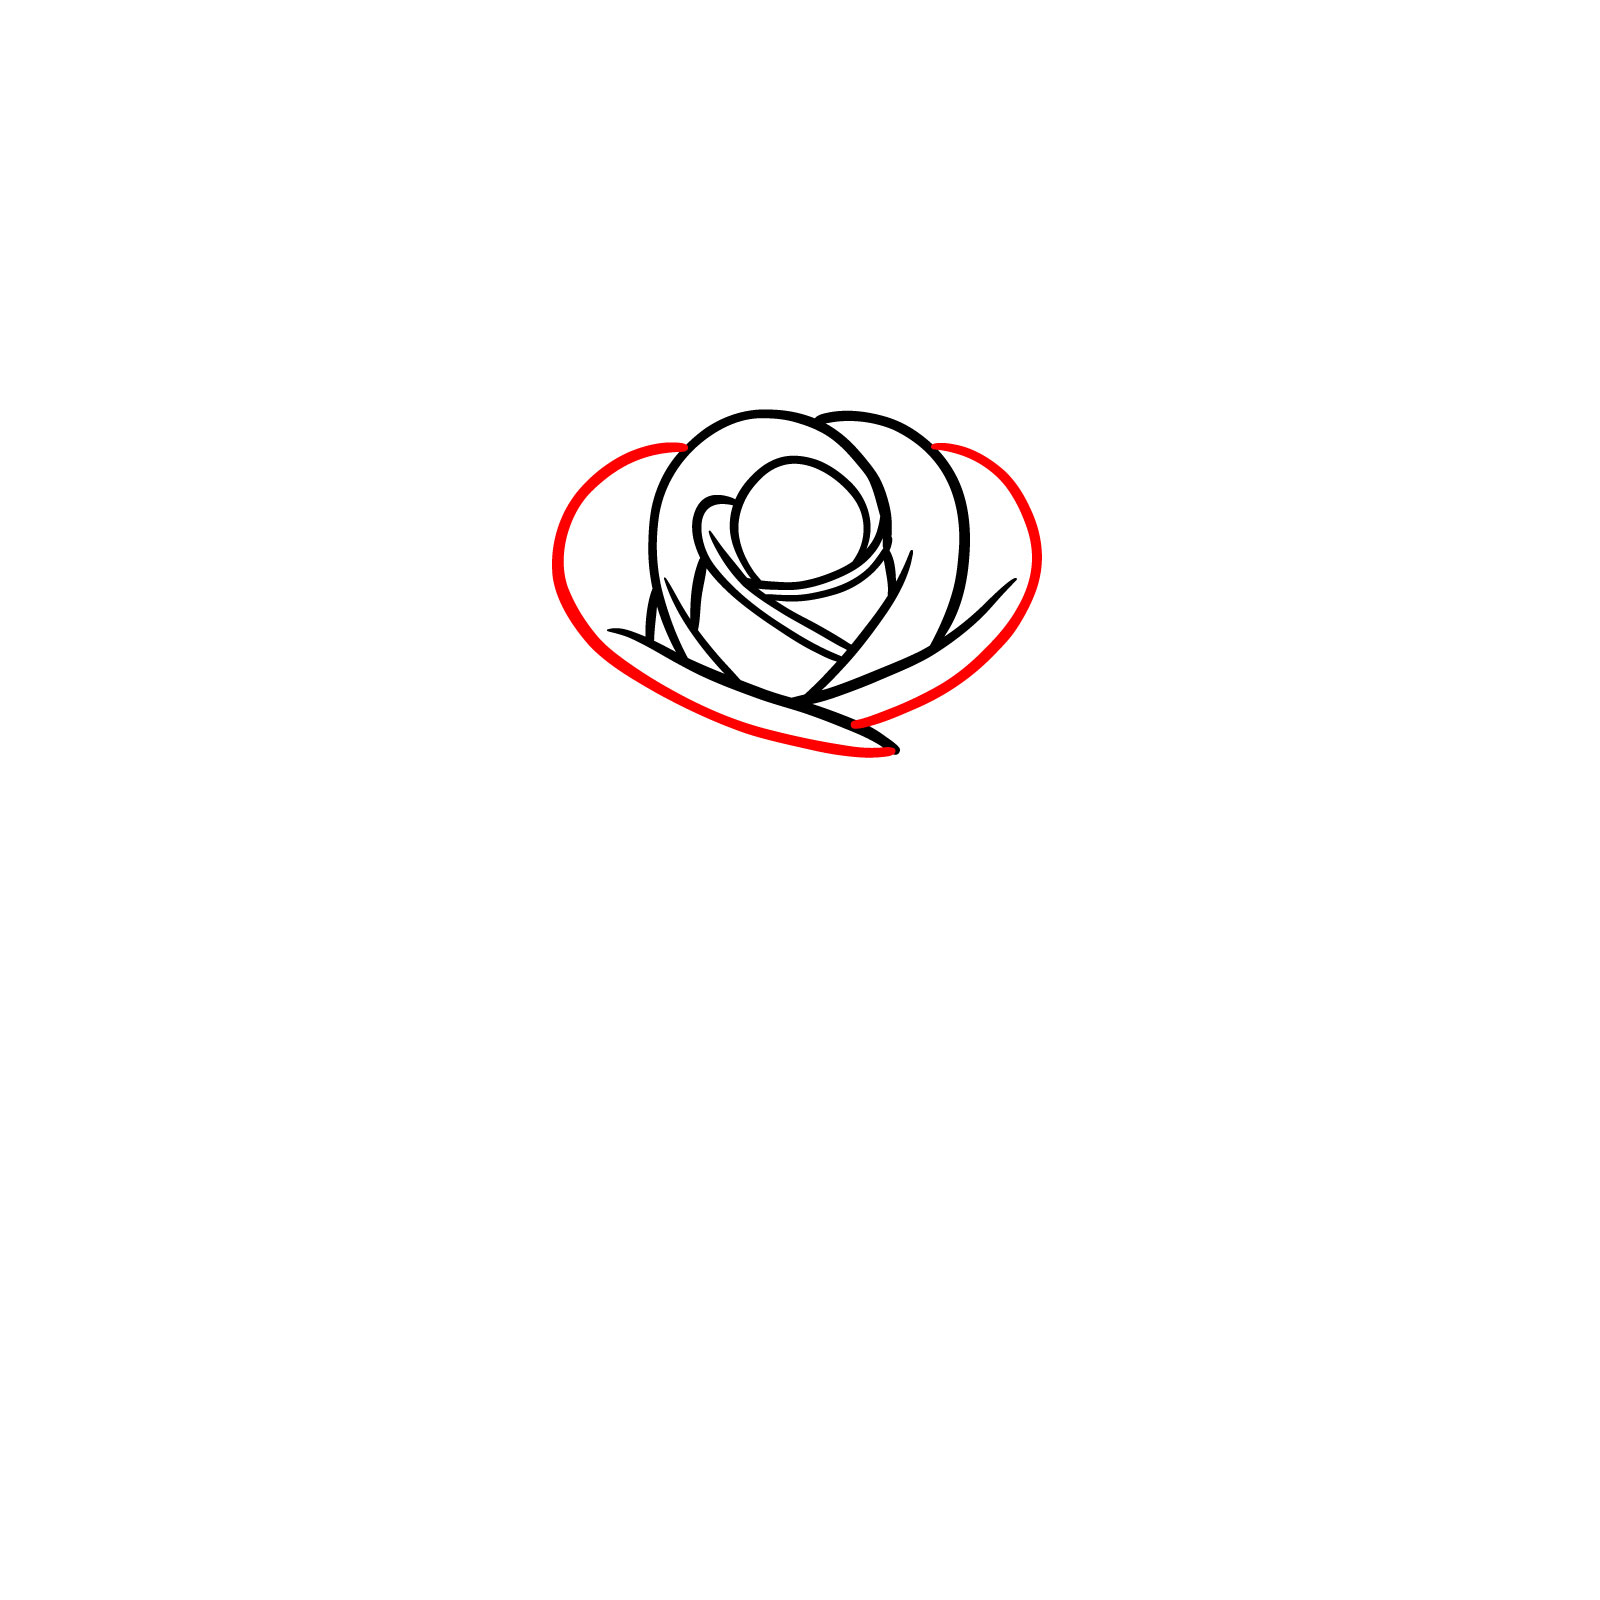
Step 05 – Draw two petals on the sides of the rosebud (making a heart-like shape) to create a broader, more open look. This step is essential in developing the realistic rosebud drawing, adding dimension and a natural feel
Sketching the Outer Petals
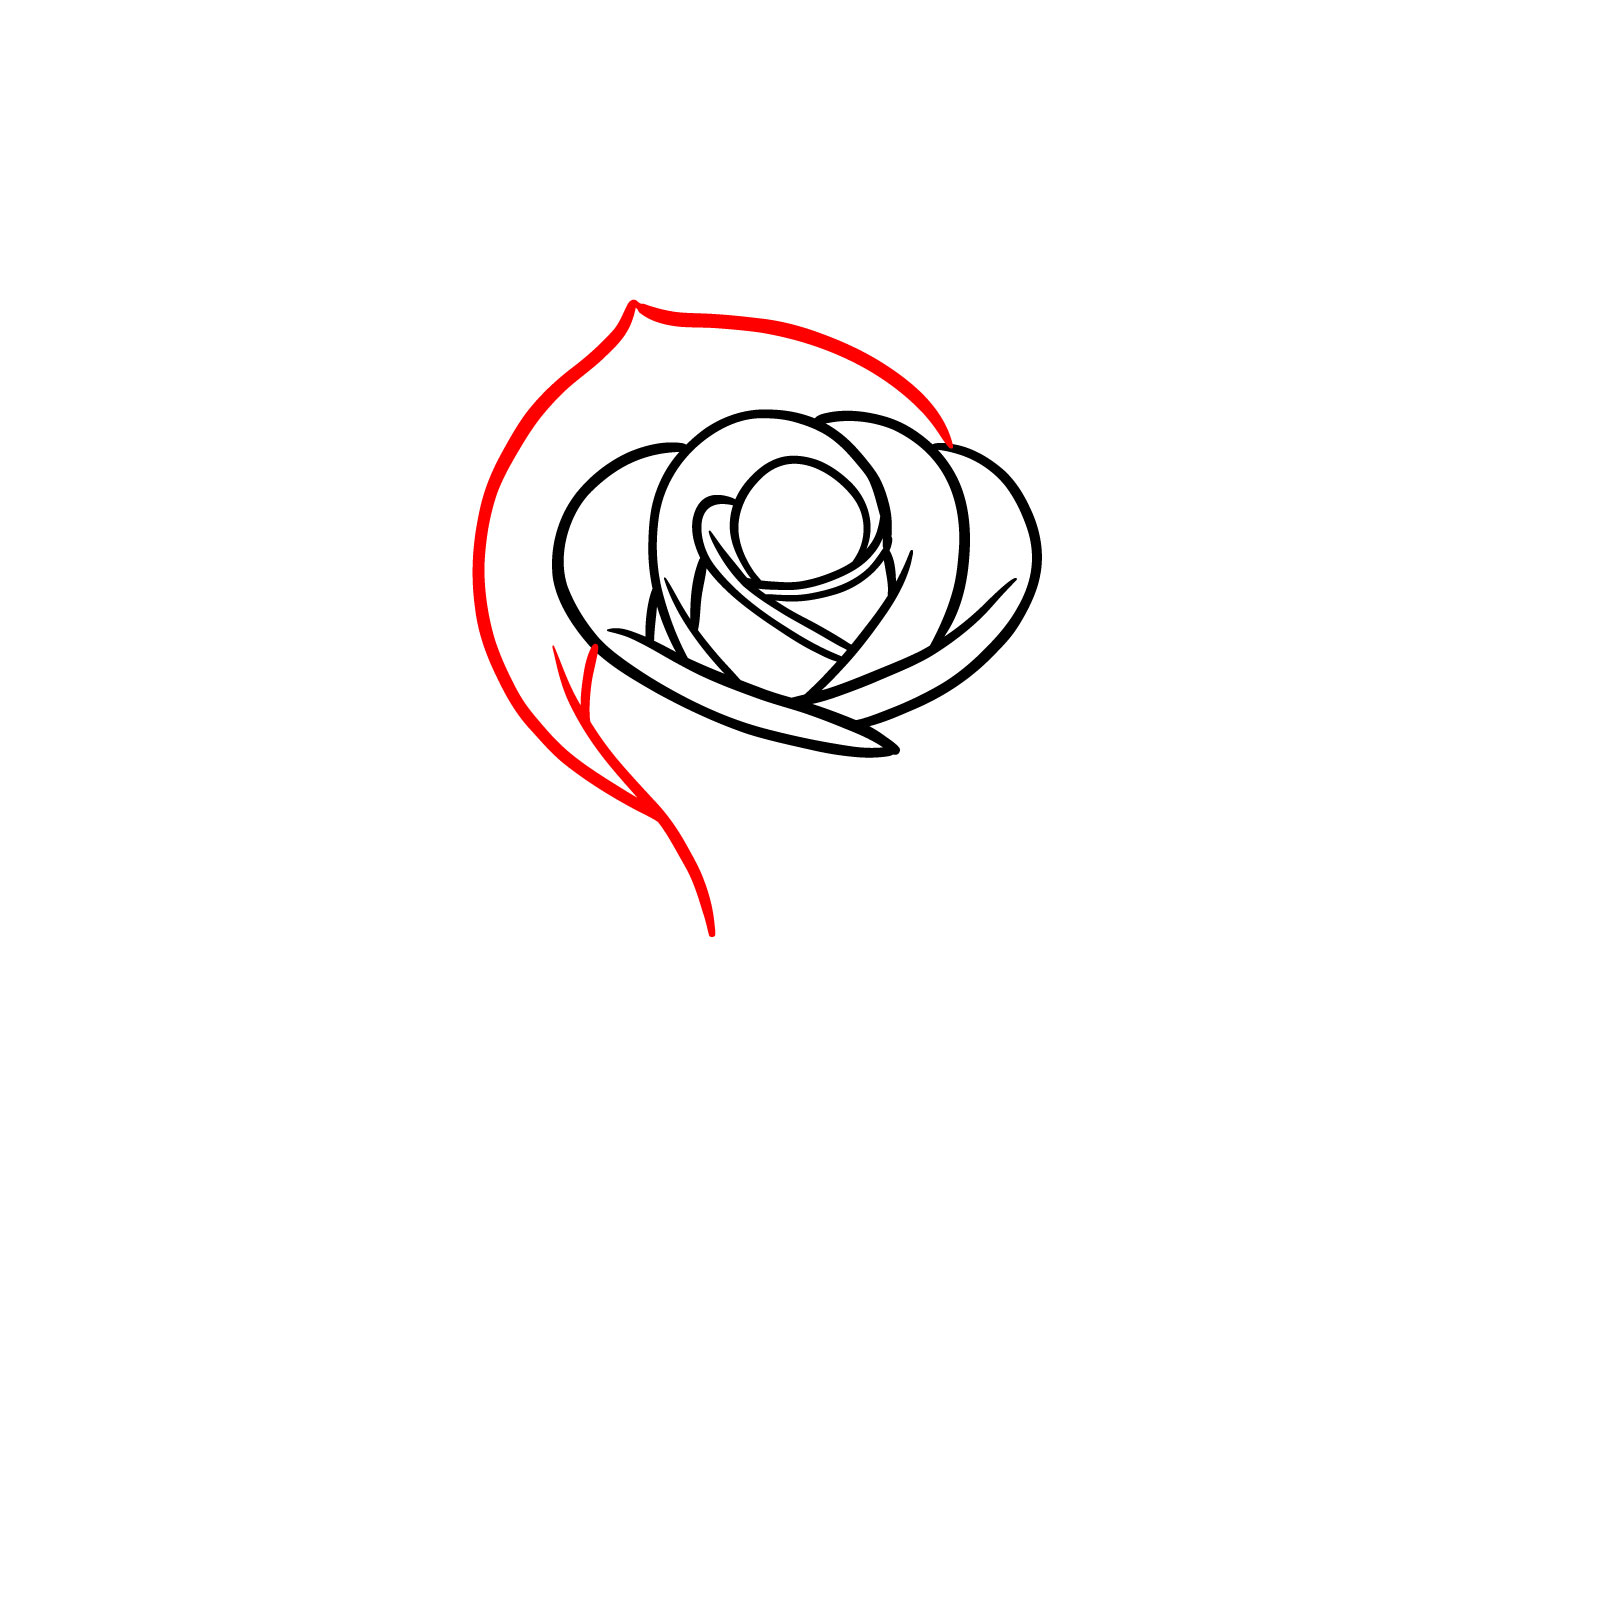
Step 06 – Add another petal to the top-left side and start outlining the flower’s base
Shaping the Flower’s Base
Step 07 – Sketch a petal on the right side to balance the rosebud’s form. Each petal should be drawn with consideration of the rose’s overall symmetry and fluidity
Balancing with a Right Petal
Step 08 – Draw one more petal below the right side to accentuate the layered look. This step in the realistic rosebud drawing introduces depth to the bloom
Adding to the Petal Layers
Step 09 – Finish the base of the bud with a curved line and refine the details in the center petals, providing a polished look to the heart of the rose
Finalizing the Bud’s Base
Step 10 – Conclude sketching the bud’s petals by adding subtle details. This enhances the petal textures and contributes to the realistic rosebud drawing
Detailing the Petals
Step 11 – Illustrate two open petals below the rosebud, unfurling to the left and upward. This step showcases the rose’s progression from bud to bloom
Extending the Bloom
Step 12 – Draw two more open petals at the bottom and right, keeping in mind their layered structure. This adds to the realistic depiction of the rose’s natural growth pattern
Expanding the Petal Layers
Step 13 – Begin the leaves beneath the rosebud, adding two at the top and three at the bottom with central veins and tip details
Drafting the Foliage
Step 14 – Sketch the remaining leaf veins to mimic the true-to-life patterns found in rose foliage. This intricacy is key in a realistic rosebud drawing
Veining the Leaves
Step 15 – Incorporate creases to the opened petals and finalize the sketch, focusing on the fine details that bring the rosebud to life
Perfecting the Petals
Step 16 – Our rosebud drawing is now complete, with each petal and leaf carefully detailed to present a stunning and realistic depiction of a rosebud
Don't Miss New Tutorials! Follow SketchOk
I publish new step-by-step drawing guides every single day. Follow on your favorite platform so you never miss a tutorial. Thousands of artists are already drawing along and I can't wait you to join in!
On my Patreon you can grab unique hand-made coloring pages: each one drawn by me personally. Every purchase directly supports the creation of new drawing tutorials. It's the best way to practice your skills, keep the site going, and get something truly original at the same time.
These tutorials on how to draw roses is more than just a set of guides; it’s a celebration of artistic growth and the beauty of roses. By the end of this series, you’ll not only have a portfolio of beautiful blooms but also a deeper understanding of the artistry behind drawing them. So, grab your pencils, and let’s bring the garden to your canvas, one petal at a time.
Vector illustrator and the creator of Sketchok.com and TheHowToDraw.com. I publish free step-by-step drawing tutorials to help people of all levels learn to draw.
Disclaimer: This is a non-commercial, fan-made educational site. All characters belong to their respective owners. We are not affiliated with any rights holders.
Read full Disclaimer
2 thoughts on “How to Draw Roses: 8 Easy Step-by-Step Guides in 1”


Can you show us how to draw a water lily?
Sure, I will make a similar post on how to draw water lilies