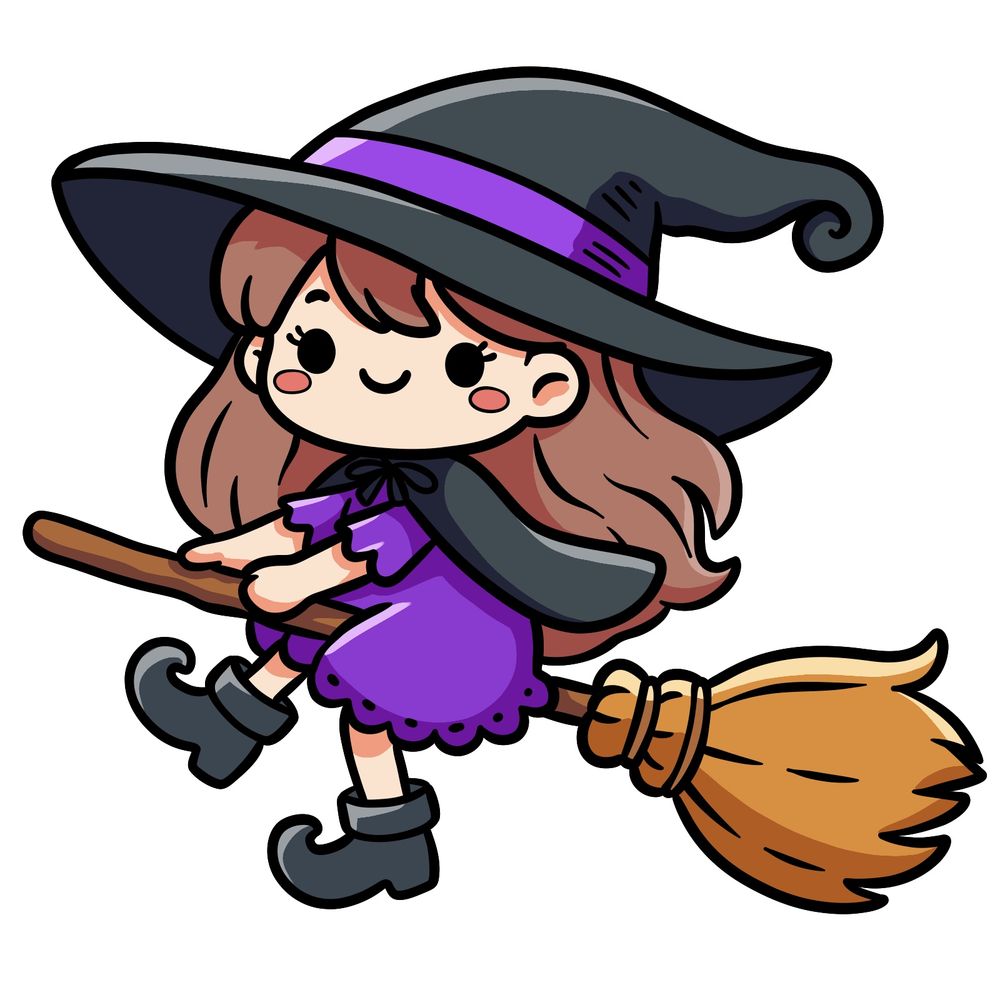
Get ready to draw the cutest witch you’ve ever seen flying on her broomstick! In this guide, I’ll show you step by step how to sketch an adorable chibi-style witch. She’s not your typical scary Halloween witch — this one’s all charm and magic. Perfect for anyone looking to add a fun, whimsical character to their Halloween drawings!
A Chibi Witch on a Broomstick: What to Focus on:
- Big Witch Hat: Her oversized witch hat adds to the cute factor, making her head look even bigger and more adorable.
- Round, Sweet Face: With big eyes and rosy cheeks, this witch has a happy, innocent look.
- Flowing Hair: Her wavy hair flows behind her as she flies on her broom.
- Flying Broomstick: The broomstick is an important part of the drawing, helping the witch soar through the Halloween night sky.
- Chibi Proportions: Her short legs and tiny boots make this witch extra cute, with exaggerated proportions that fit the chibi style.
Once you’ve finished drawing this flying witch, you can try adding other spooky Halloween elements to your artwork. How about sketching a black cat, a blanket ghost, a zombie, or even a haunted house to complete the scene?
Witch on a Broomstick Drawing Guide
This guide is designed to make drawing this cute witch easy and enjoyable. We’ll start with the hat curve and build up the details step by step. Each stage focuses on a specific part of the character, making it simple to follow, even if you’re a beginner. The chibi style we’re using exaggerates the witch’s head and makes her features even more fun to draw. So, grab your pencil and get ready for a magical drawing session!
- Red: New lines to focus on for each step will be highlighted in red.
- Black: These are the lines you’ve already drawn in previous steps.
By the end of this guide, you’ll have an adorable witch flying through the Halloween sky, ready for any magical adventure!
Start by drawing the curve of the witch’s large hat.

Draw the witch’s fringe (bangs) visible below the hat’s curve.

Outline the shape of the witch’s face and one ear. This helps start defining her chibi-style features.

Add the second ear and draw two filled-in circles for her big, chibi-style eyes. Then, add a small curve for the smiling mouth.

Draw small horizontal ovals for the witch’s rosy cheeks. Add two eyelashes on each eye, and draw a line for one visible eyebrow and inner ear details.

Start drawing the top part of the witch’s hat, curving it slightly to match the chibi style. Then, draw the small tie for her cloak, right below her chin.

Draw the rest of the hat, adding its full shape with a whimsical curve.

Add the part of the cloak that is closer to us, along with the sleeve of her dress extending from the cloak. This sets up the positioning for her arms.

Draw her first hand emerging from the sleeve, gripping where the broomstick will be placed later.

Draw the second sleeve and hand, holding the broomstick with her thumb visible while the other fingers are behind the stick. Sketch a short line of the broomstick between the two hands.

Extend the broomstick down past her hands, and draw it toward the knee area of her dress.

Sketch the shape of her dress, flowing out in a rounded, chibi-style design. Make sure to keep the dress slightly exaggerated for the cute look.

Continue sketching the broomstick down to where the broom will connect to the stick, adding the detailed part where they meet.

Complete the broom by sketching its straw-like end, making sure to add flowing lines to give it a dynamic, wind-swept appearance.

Draw her legs, adding the top parts of her boots (with the cuffs or folded-over tops) just below the hem of her dress.

Sketch her boots, making them slightly oversized and curved at the toes, matching the chibi style of the witch.

Draw the witch’s flowing hair, completing the wavy lines to show movement as she flies on her broomstick.

Add the finishing details: outline the edge of the hat, add a ribbon to the hat, draw lines in her hair, small dots to the bottom of her dress, and some texture lines to the broomstick for a more complete look.

After completing your chibi witch, review your drawing for any small details you may want to fix. Make sure her broomstick looks balanced and her witch hat has that playful curve. If you’re happy with everything, erase any pencil marks and optionally ink your drawing to make it bold. Adding a moon or stars in the background could give the scene more Halloween atmosphere!

Use this final colored version of the cute witch as a reference for adding colors to your drawing. You can go for typical Halloween colors like purple for her dress, black for the hat, and orange for the broomstick.

Be sure to check out my other Halloween tutorials. If you enjoyed this guide, you can follow me on social media for updates and tutorials, and feel free to support my work by donating—every bit helps me keep creating these fun drawing guides for you!
If you’d like to support my work, you can donate here. Thanks for flying through this tutorial with me, and happy Halloween!
