Learning how to draw fairies can be a delightful journey into the world of fantasy art. Fairies, with their ethereal charm and enchanting details, offer a unique canvas for artists to explore their creativity. In this tutorial, we will explore six different fairy drawings, each varying in style and complexity. From a simple fairy ideal for beginners to an anime-inspired fairy for those seeking a challenge, this tutorial is designed to cater to a range of skill levels. Whether you’re a novice artist or an experienced illustrator, these step-by-step guides will help you master the art of fairy drawings. Let’s embark on this artistic adventure and bring these whimsical beings to life on paper.
Understanding the Structure of the Drawing Guides
In crafting these fairy drawing guides, I’ve focused on a methodical, step-by-step approach, ensuring clarity and ease for artists of all levels. Each guide is composed of a series of high-quality images, with each image representing a distinct step in the drawing process.
To make the process intuitive and user-friendly, I’ve incorporated color guides within these images (like I did in most of the guides here, on SketchOk). This approach will guide you through each step:
Red Color: Indicates the current step to focus on. This color highlights the new lines or elements you should be adding to your drawing at this particular stage.
Black Color: Represents the lines and elements you’ve already drawn in previous steps. This helps in keeping track of your progress and understanding how the current step integrates with the work you’ve done so far.
Grey Color: Shows the basic sketch or the underlying structure of the fairy. This is particularly important for understanding the proportions and positioning of different elements in your drawing.
Each guide designed to lead you from a blank canvas to a complete fairy drawing. To streamline the learning process, the first five guides begin directly with detailed sketching from the first step, omitting a basic rough sketch. This is because these guides are simpler and more straightforward. However, for the final guide – the anime fairy, which is more intricate and detailed – I’ve included a basic rough sketch as the starting point. This approach ensures a solid foundation, particularly crucial for capturing the nuanced details inherent in anime-style drawings.
As we transition from the overview to the practical aspect of drawing fairies, it’s important to remember that each step in these guides is crafted to build upon the previous one, forming a cohesive and comprehensive path to achieving your artistic vision. With dedication and practice, you’ll find that the intricate world of fairies isn’t just a realm of fantasy, but a canvas for your creativity. So, gather your drawing tools and let your imagination take flight as we delve into the first guide: the Simple Fairy.
1. Simple Fairy – Beginner Level
The Result
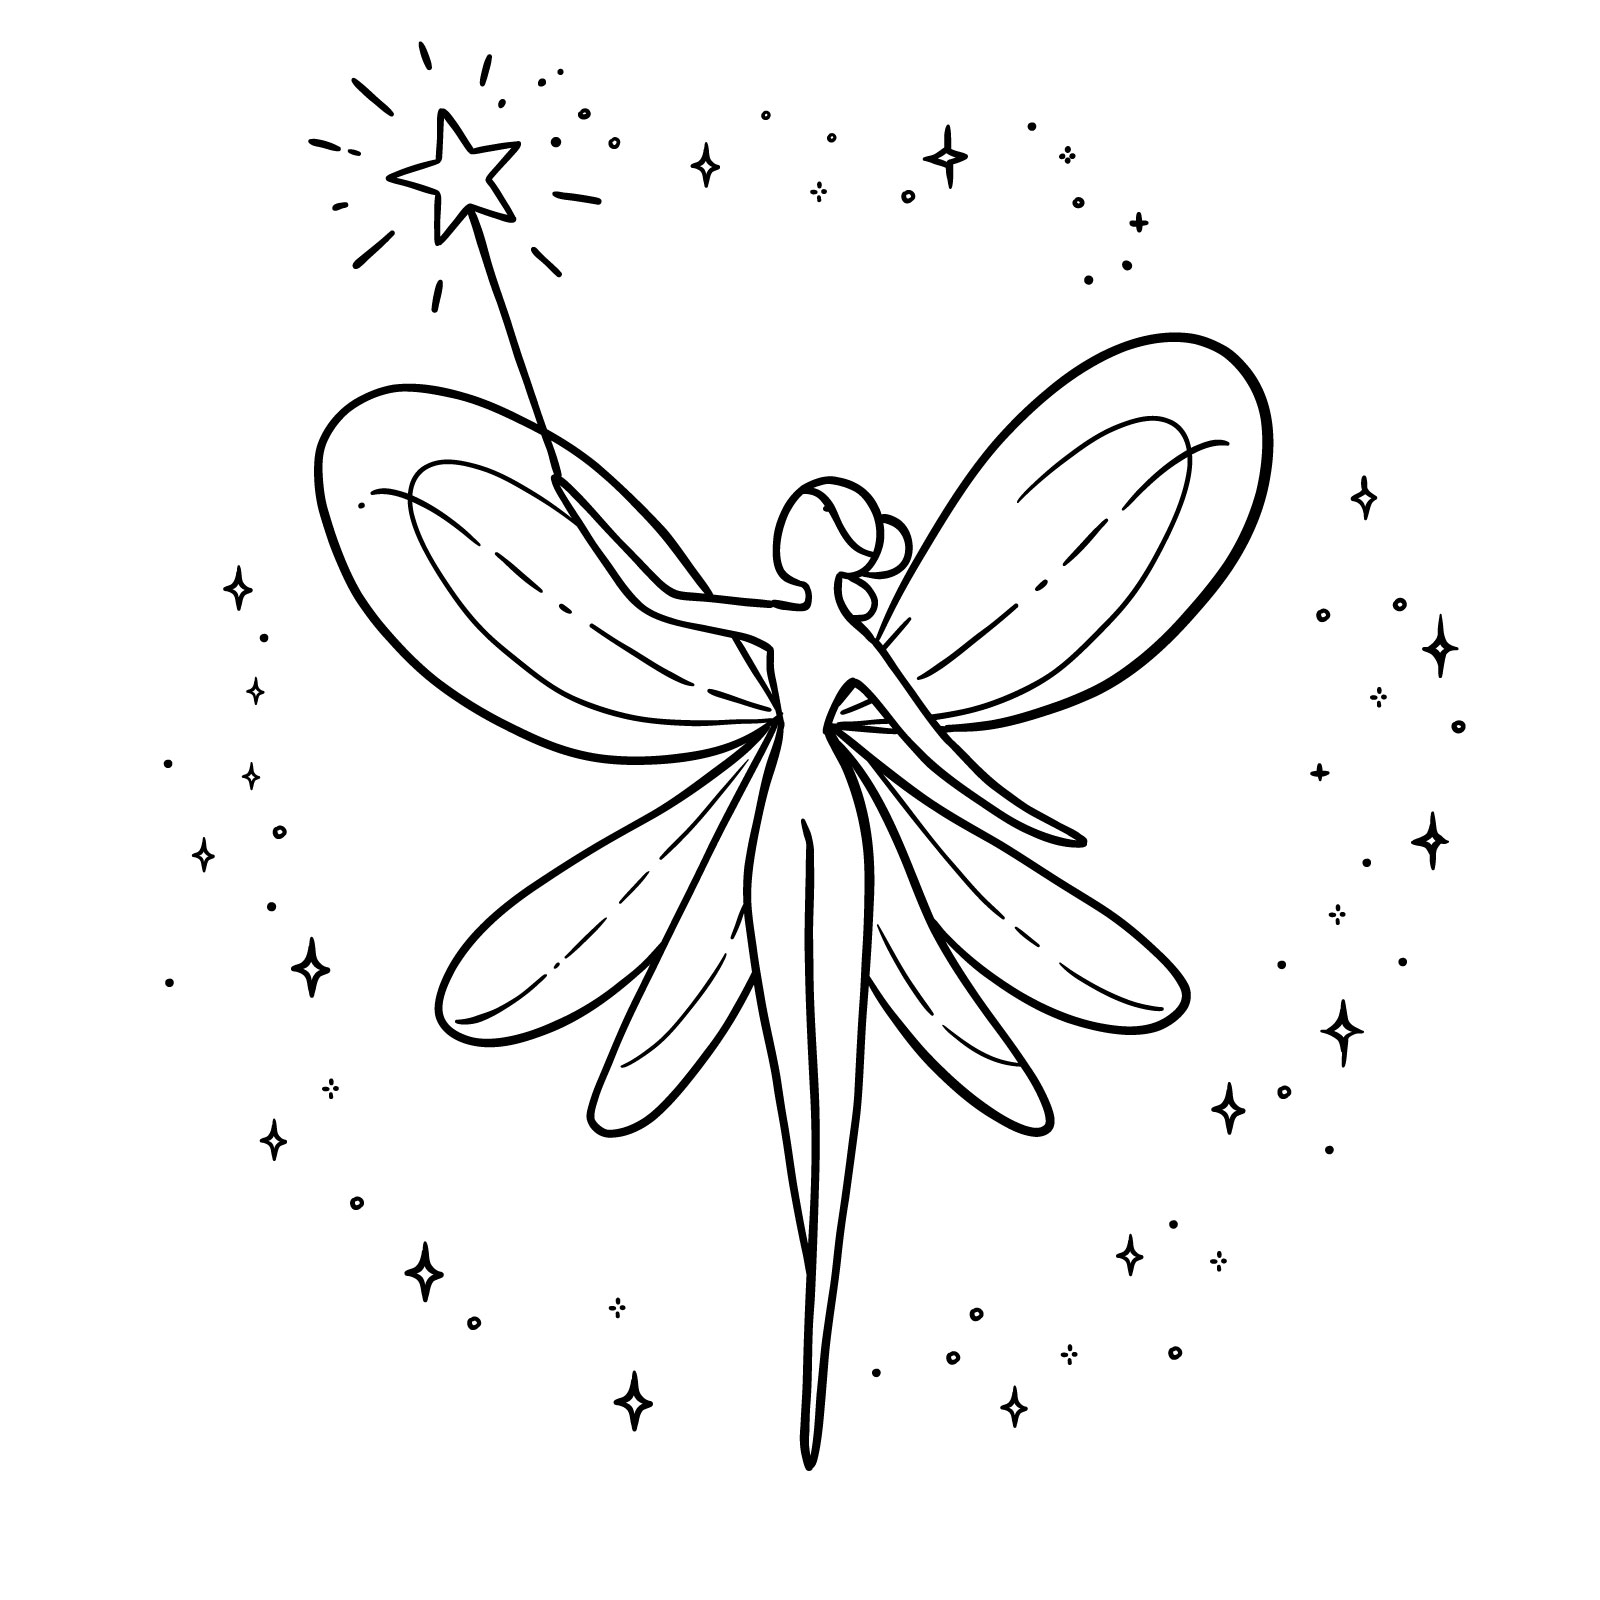
The first guide in our series is designed to introduce you to the whimsical art of fairy drawings through a simple, yet charming, fairy figure. The finished drawing showcases a slender fairy with delicate wings, holding a star-tipped wand amidst a sprinkle of stardust. This image is ideal for beginners, with clear lines and minimalistic details that make it easy to follow along.
Step 01 – Begin your fairy drawing with a simple outline of the head. Draw a small, slightly elongated circle to represent the head’s shape. This will serve as the foundation for the fairy’s face and hair. Keep your lines light, as this will allow for easier adjustments in the subsequent steps.
Starting with the head
Step 02 – Next, add volume to the head by sketching the hair.
Sketching the hair
Step 03 – For the third step, draw two short lines descending from the head to form the neck. Then, outline the shoulders with a slight slope, and sketch the upper torso. These lines should be soft and subtle, conveying the delicate structure of your fairy’s body.
Defining the upper body
Step 04 – The arms of our fairy are simple and elegant at the same time. Try to maintain the slender and slightly elongated arm and connect the two parts of her body from the previous step.
Drawing the arms
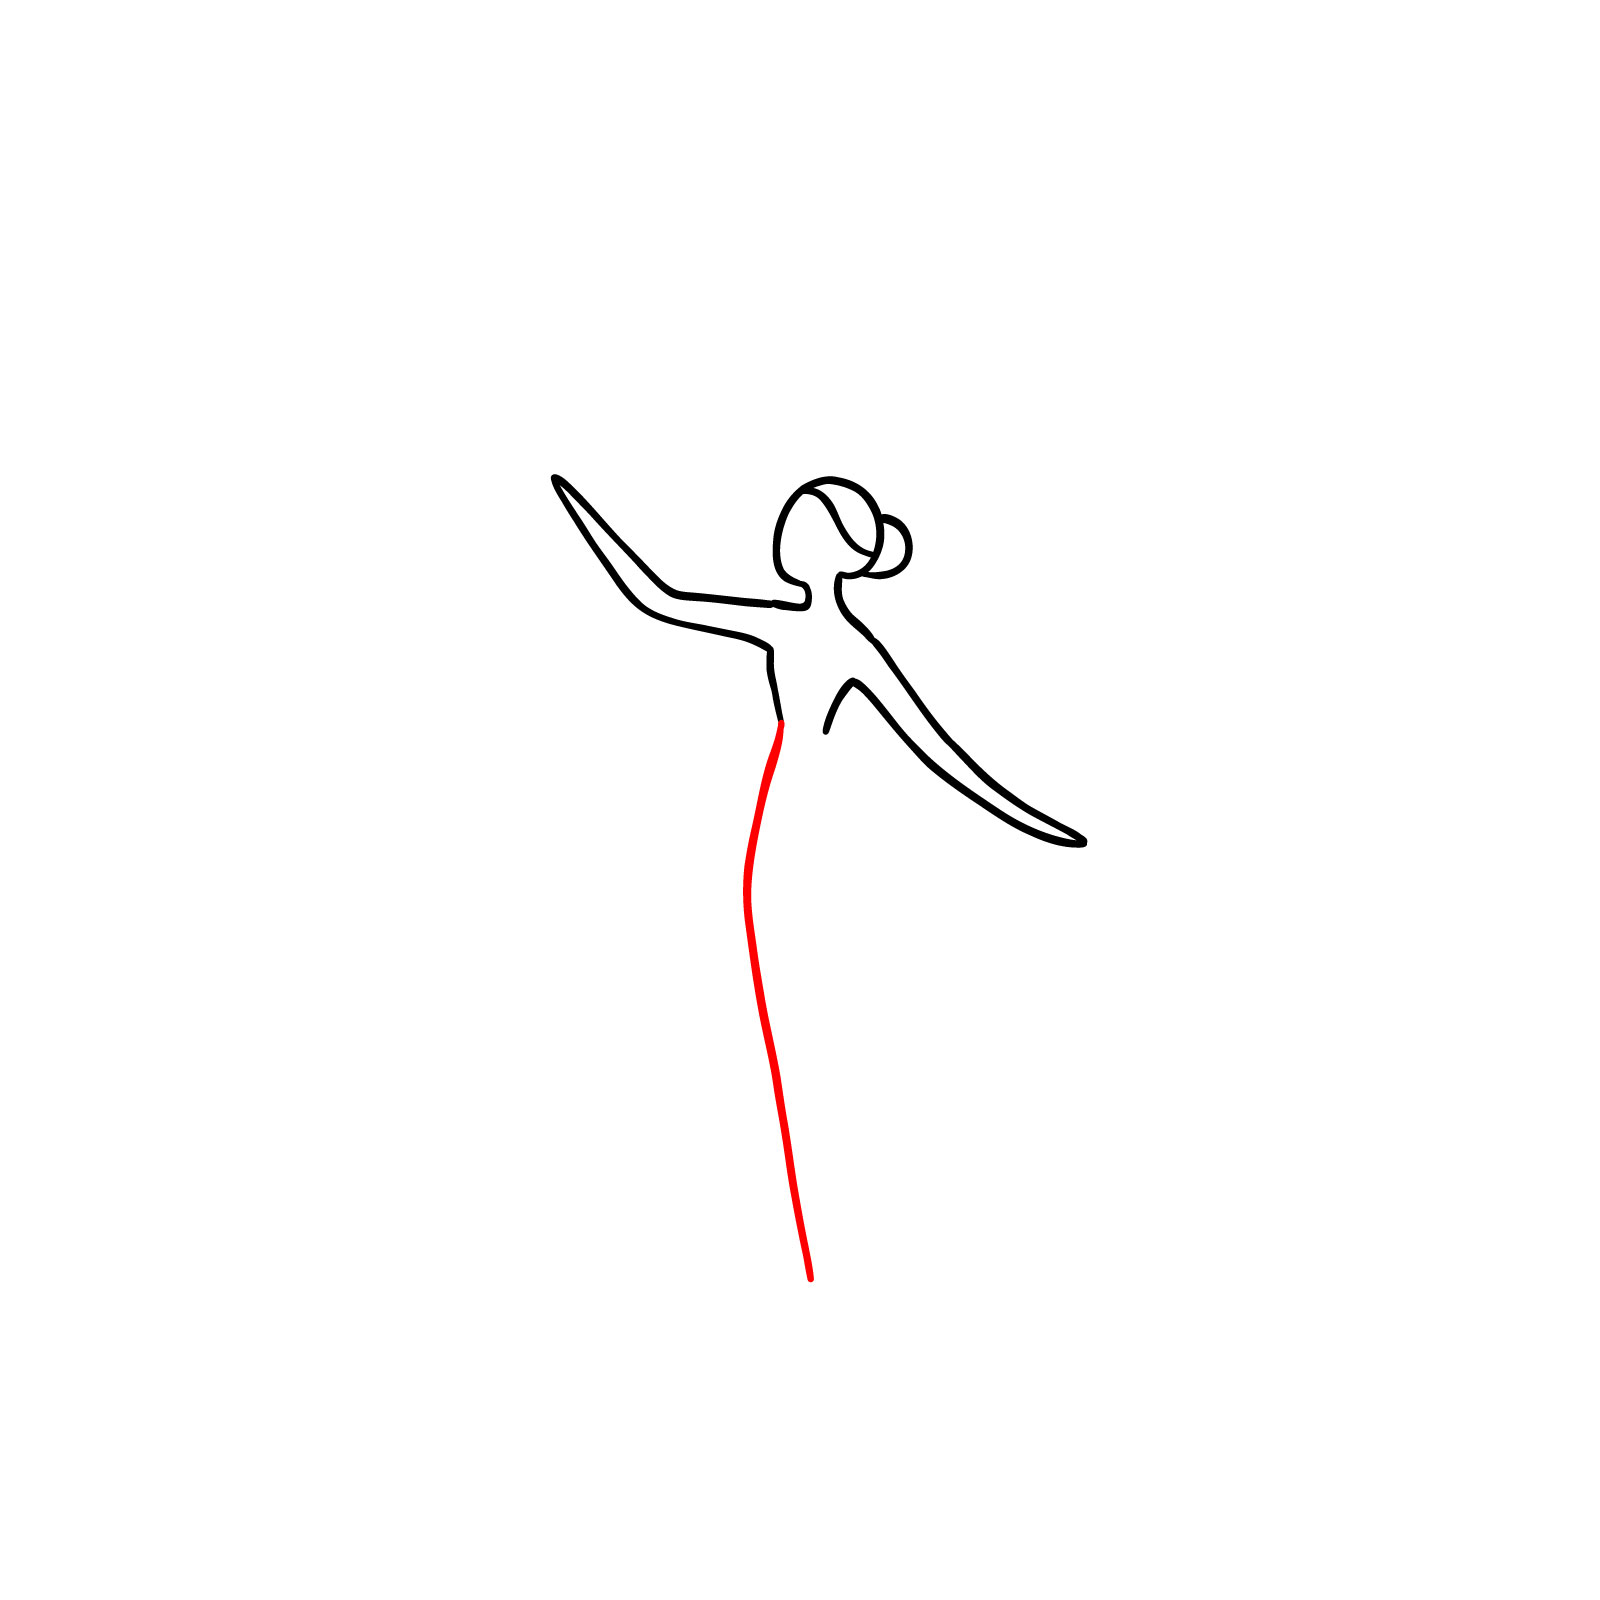
Step 05 – For this step in the guide on how to draw a simple fairy, sketch a smooth, curved line extending downward from the torso for her first leg. Imagine a vertical line that goes in the center of her body (or put a ruler to divide the body into two approximately equal parts). The leg should end as it reaches that center line.
Outlining the first leg
Step 06 – Now, sketch the second leg, which is longer and hides the first leg behind it.
Adding the second leg
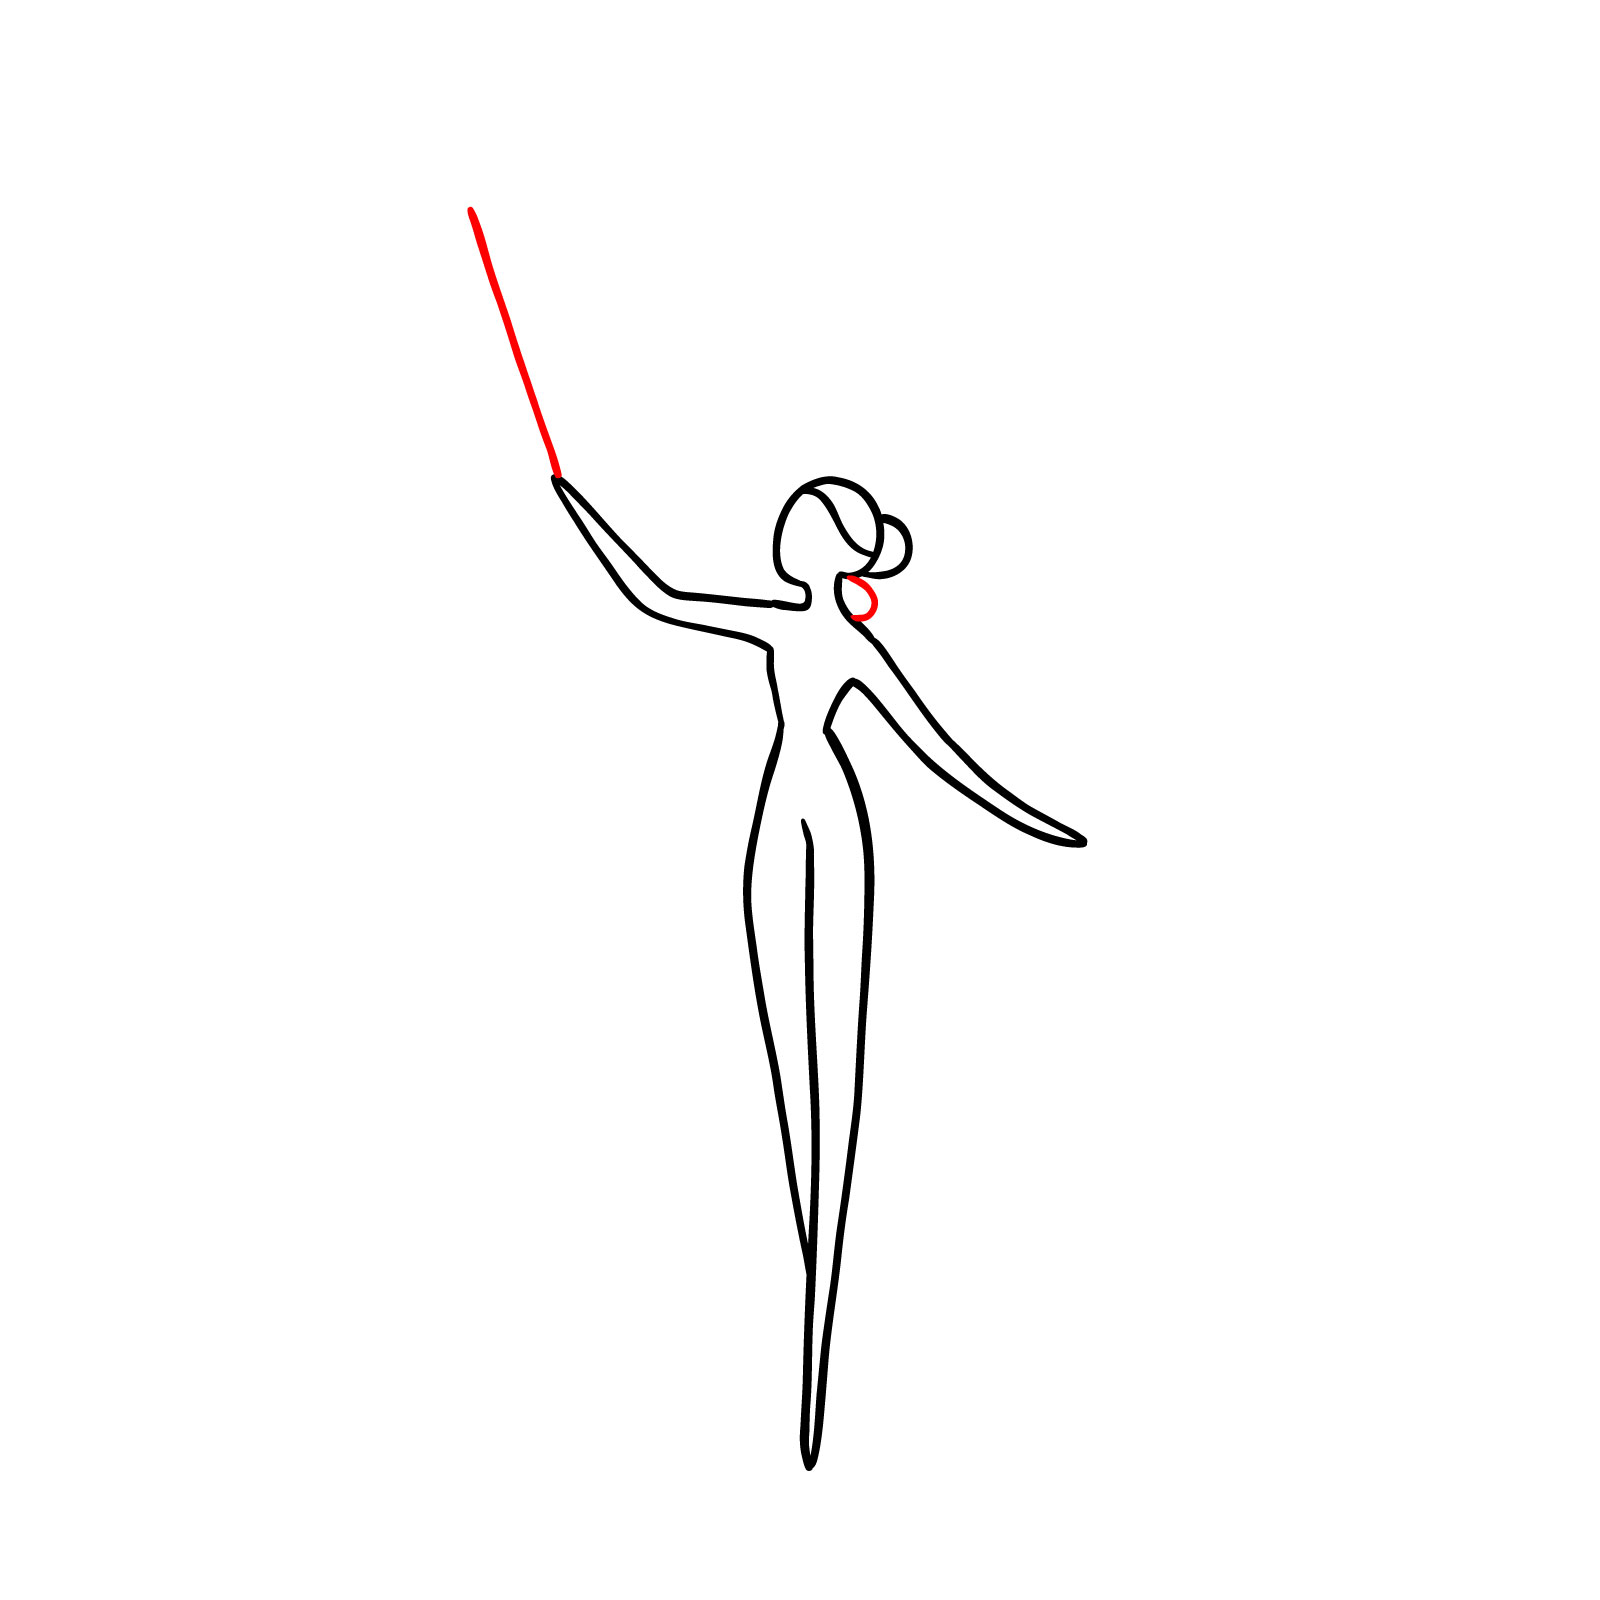
Step 07 – As I see it now, you’d better skip the hair drawing at this step, as it doesn’t look like it was intended 🙂 Let’s do the wand instead – sketch a thin, long stick in one hand to represent the fairy’s magical wand.
Refining the hair and adding the wand
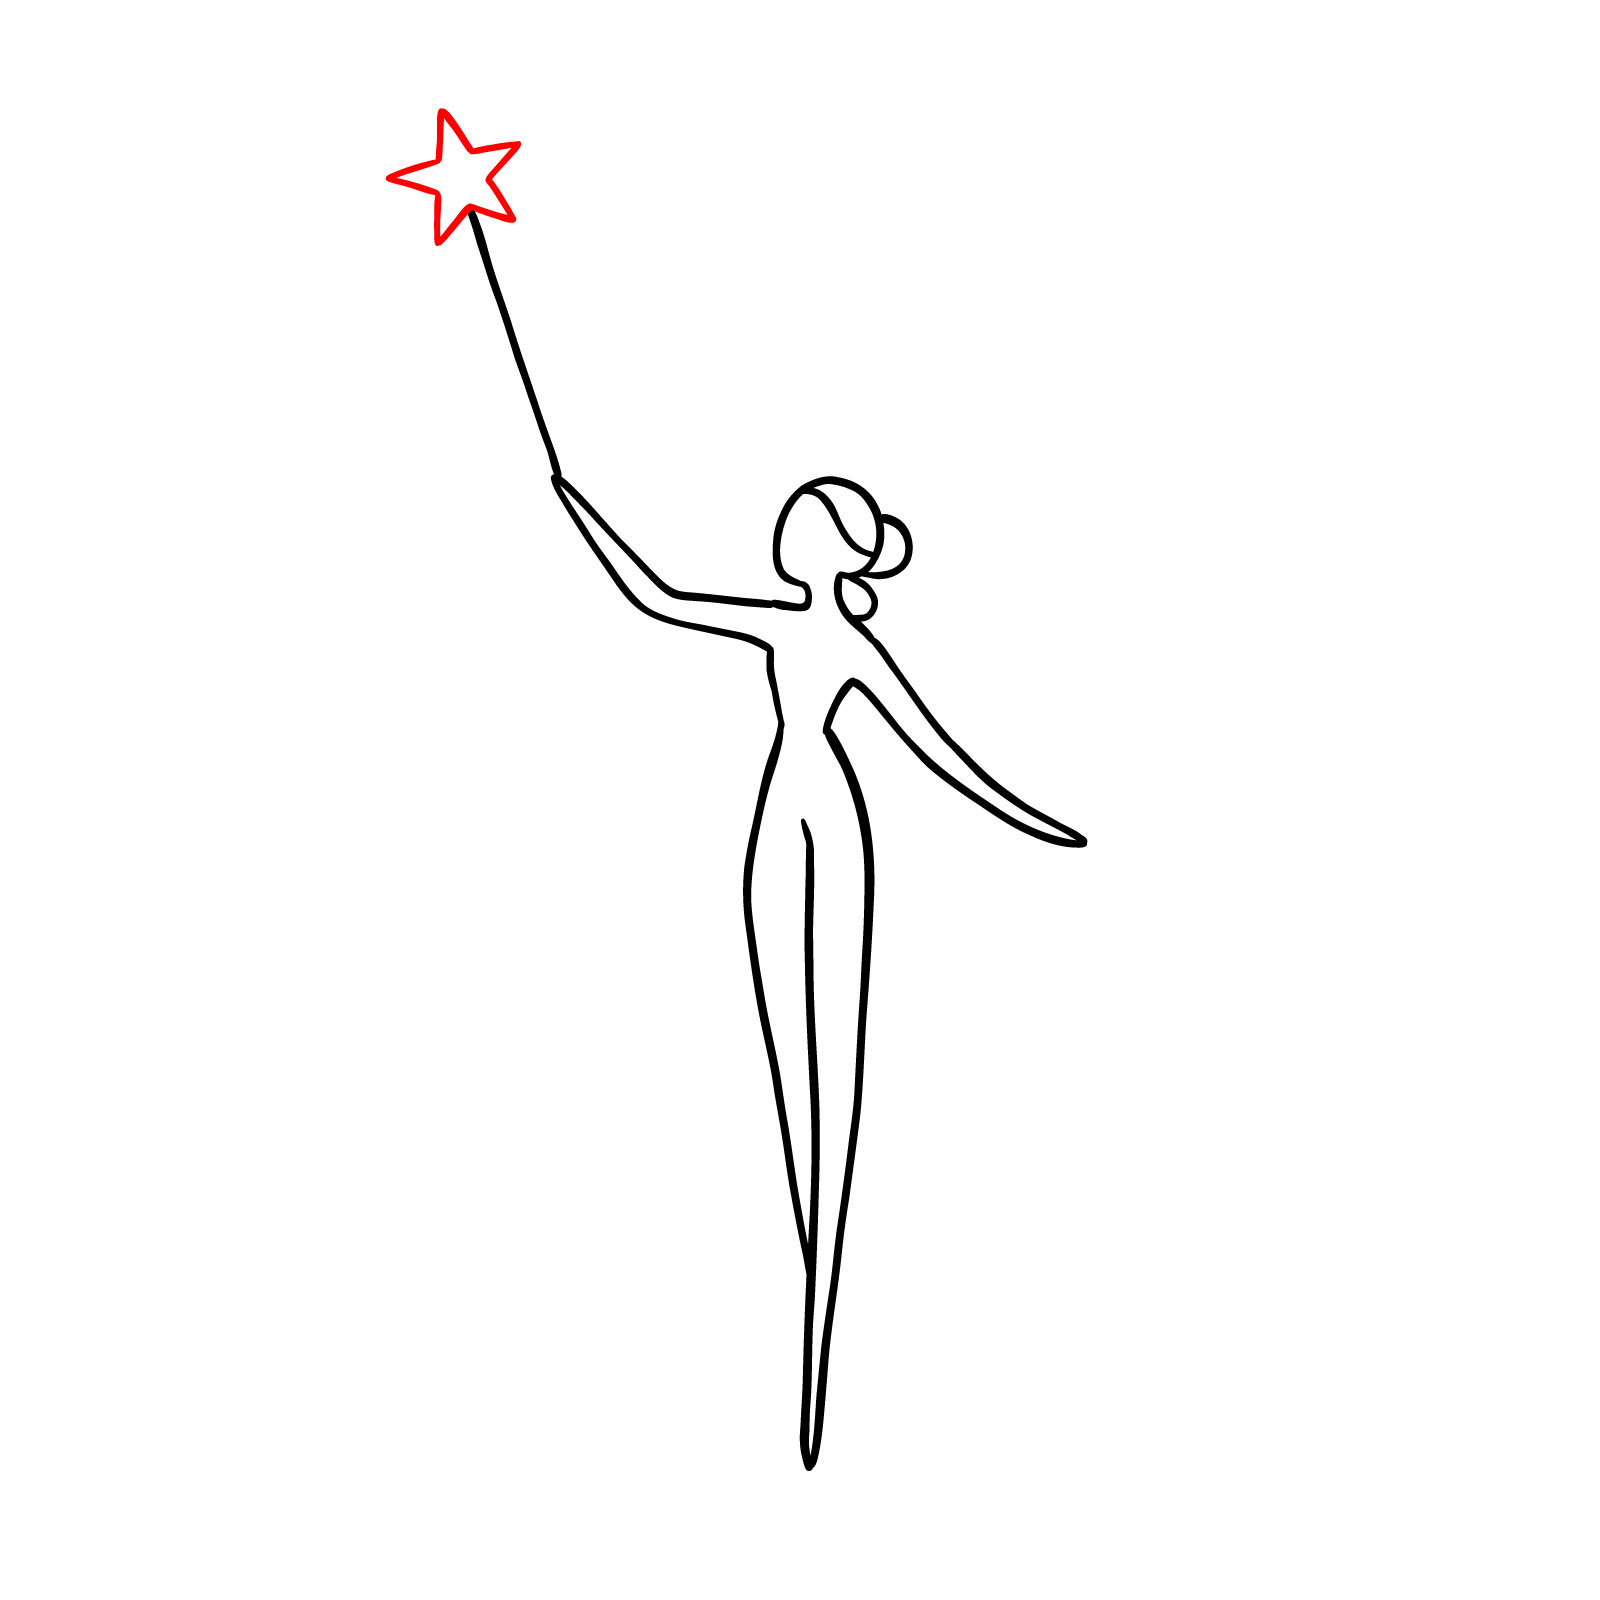
Step 08 – The magic comes alive as you cap the wand with a star. Draw a classic five-point star at the tip of the wand. With this addition, your fairy’s magical attribute is now highlighted, capturing the essence of her enchanting nature
Completing the wand with a star
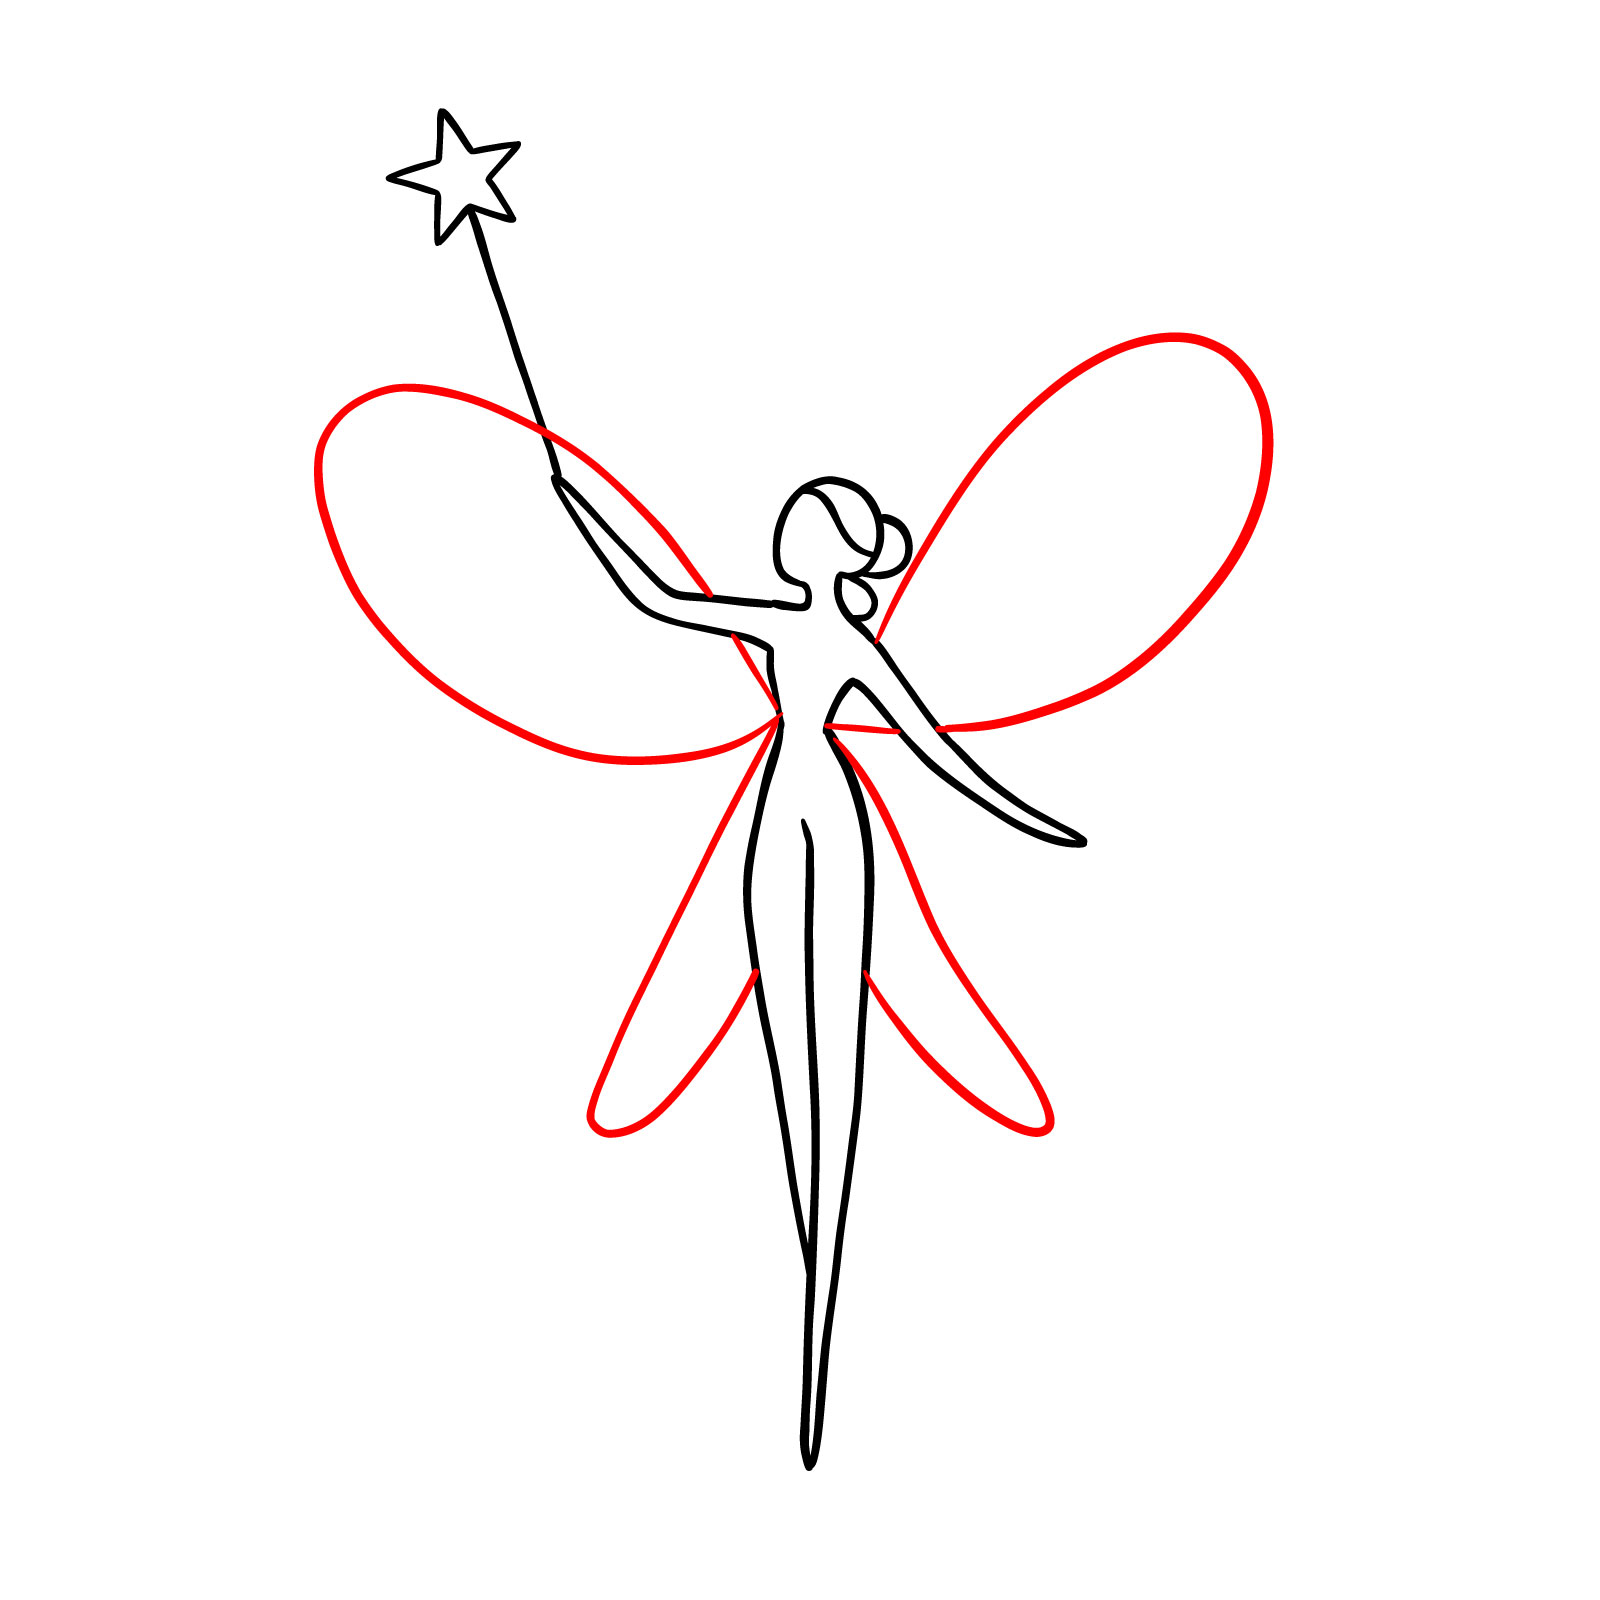
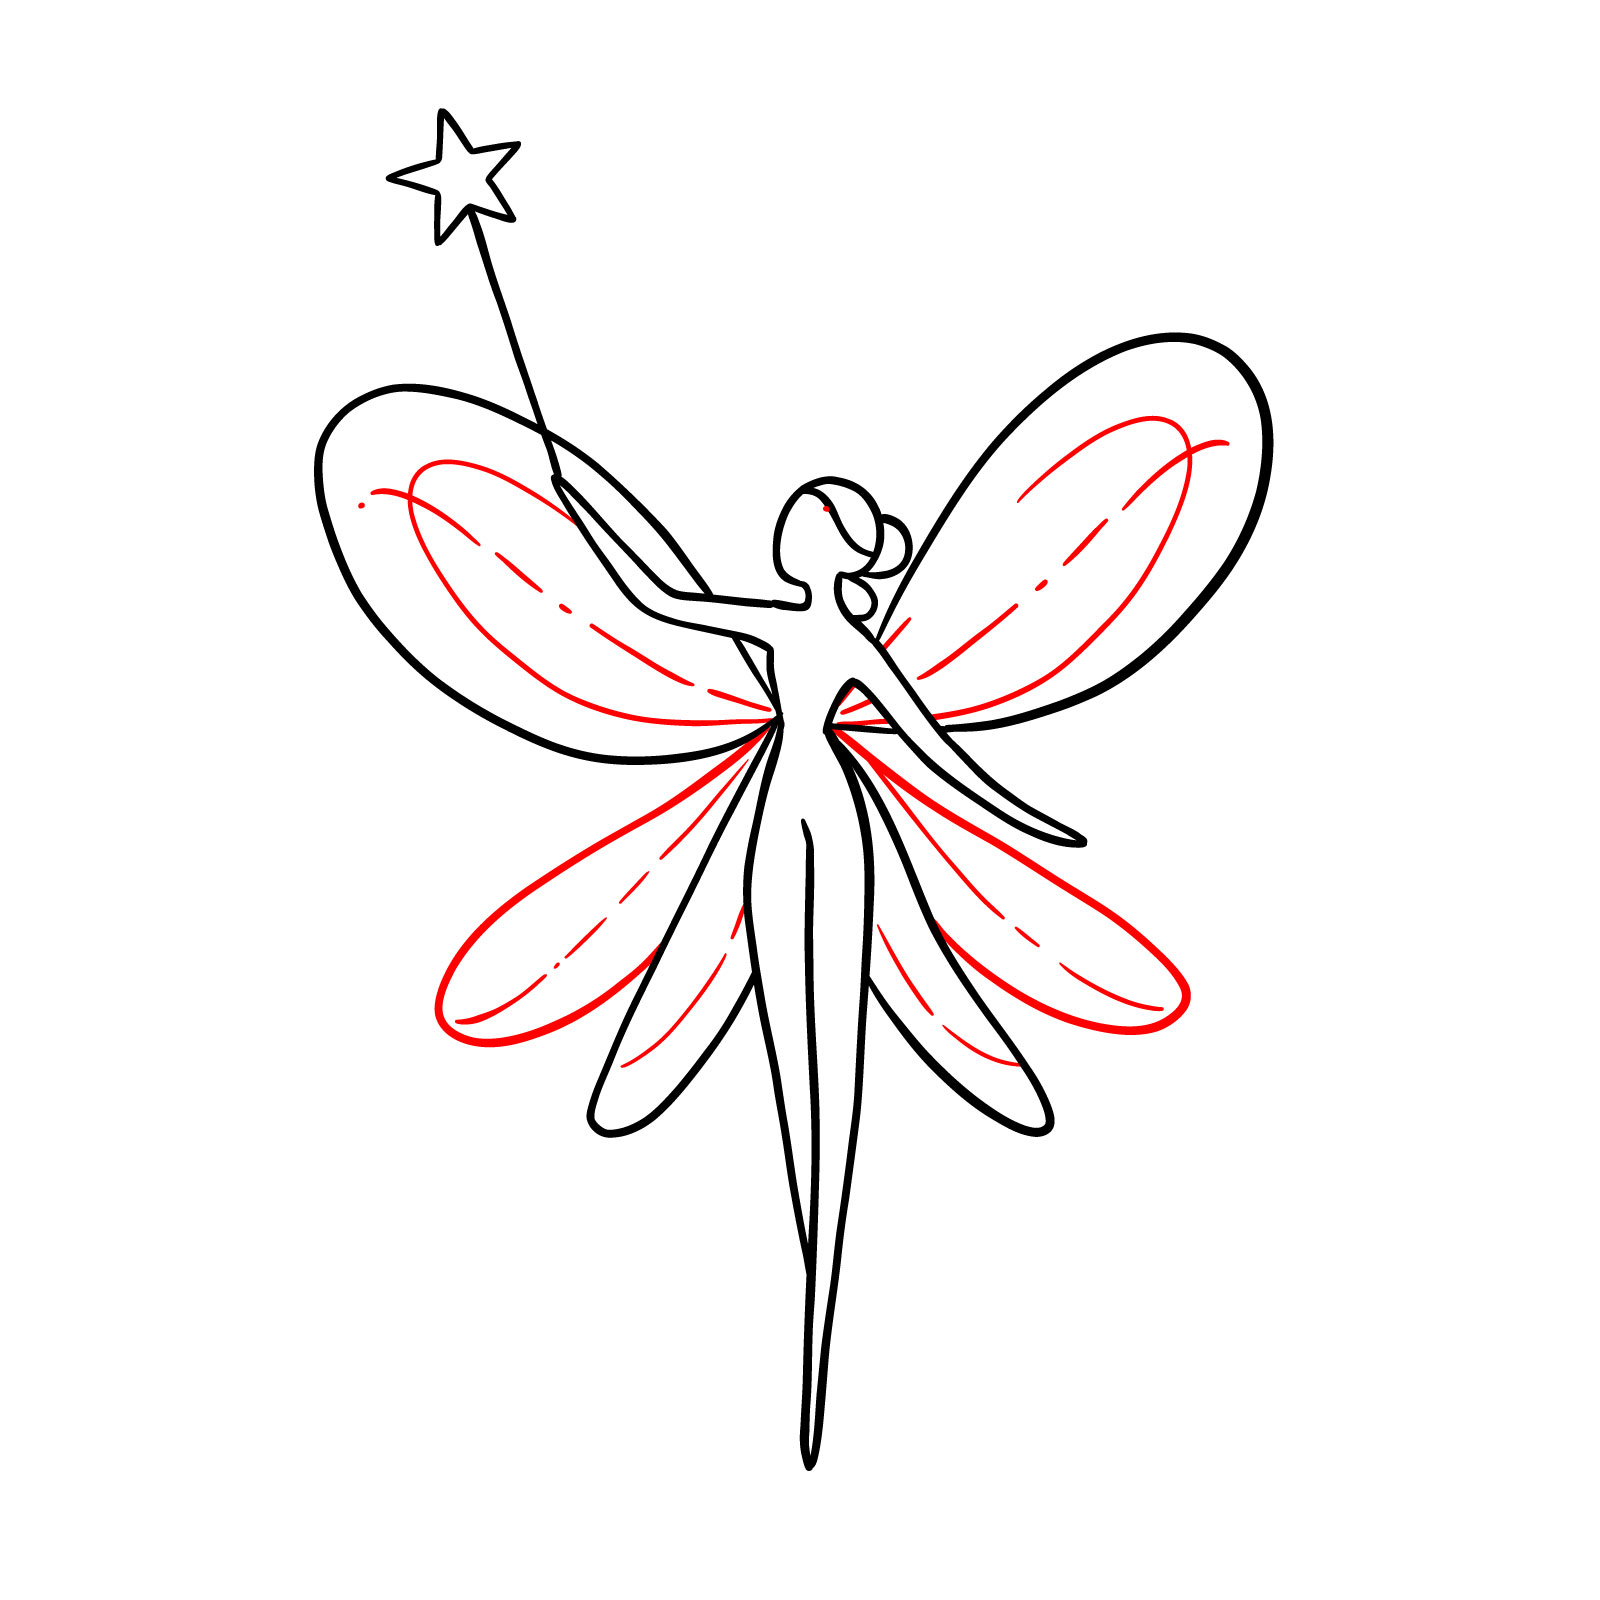
Step 09 – Time to add a touch of fantasy by drawing your fairy’s wings. Sketch two broad, gently curving shapes on either side of her body to create the top pair of wings, then add two smaller wings below.
Drawing the wings
Step 10 – Fairies are often depicted with multiple wings, so let’s sketch an additional pair between the first. Add fine lines within the wings to represent the delicate patterns and textures typical of fairy wings
Detailing the wings with patterns
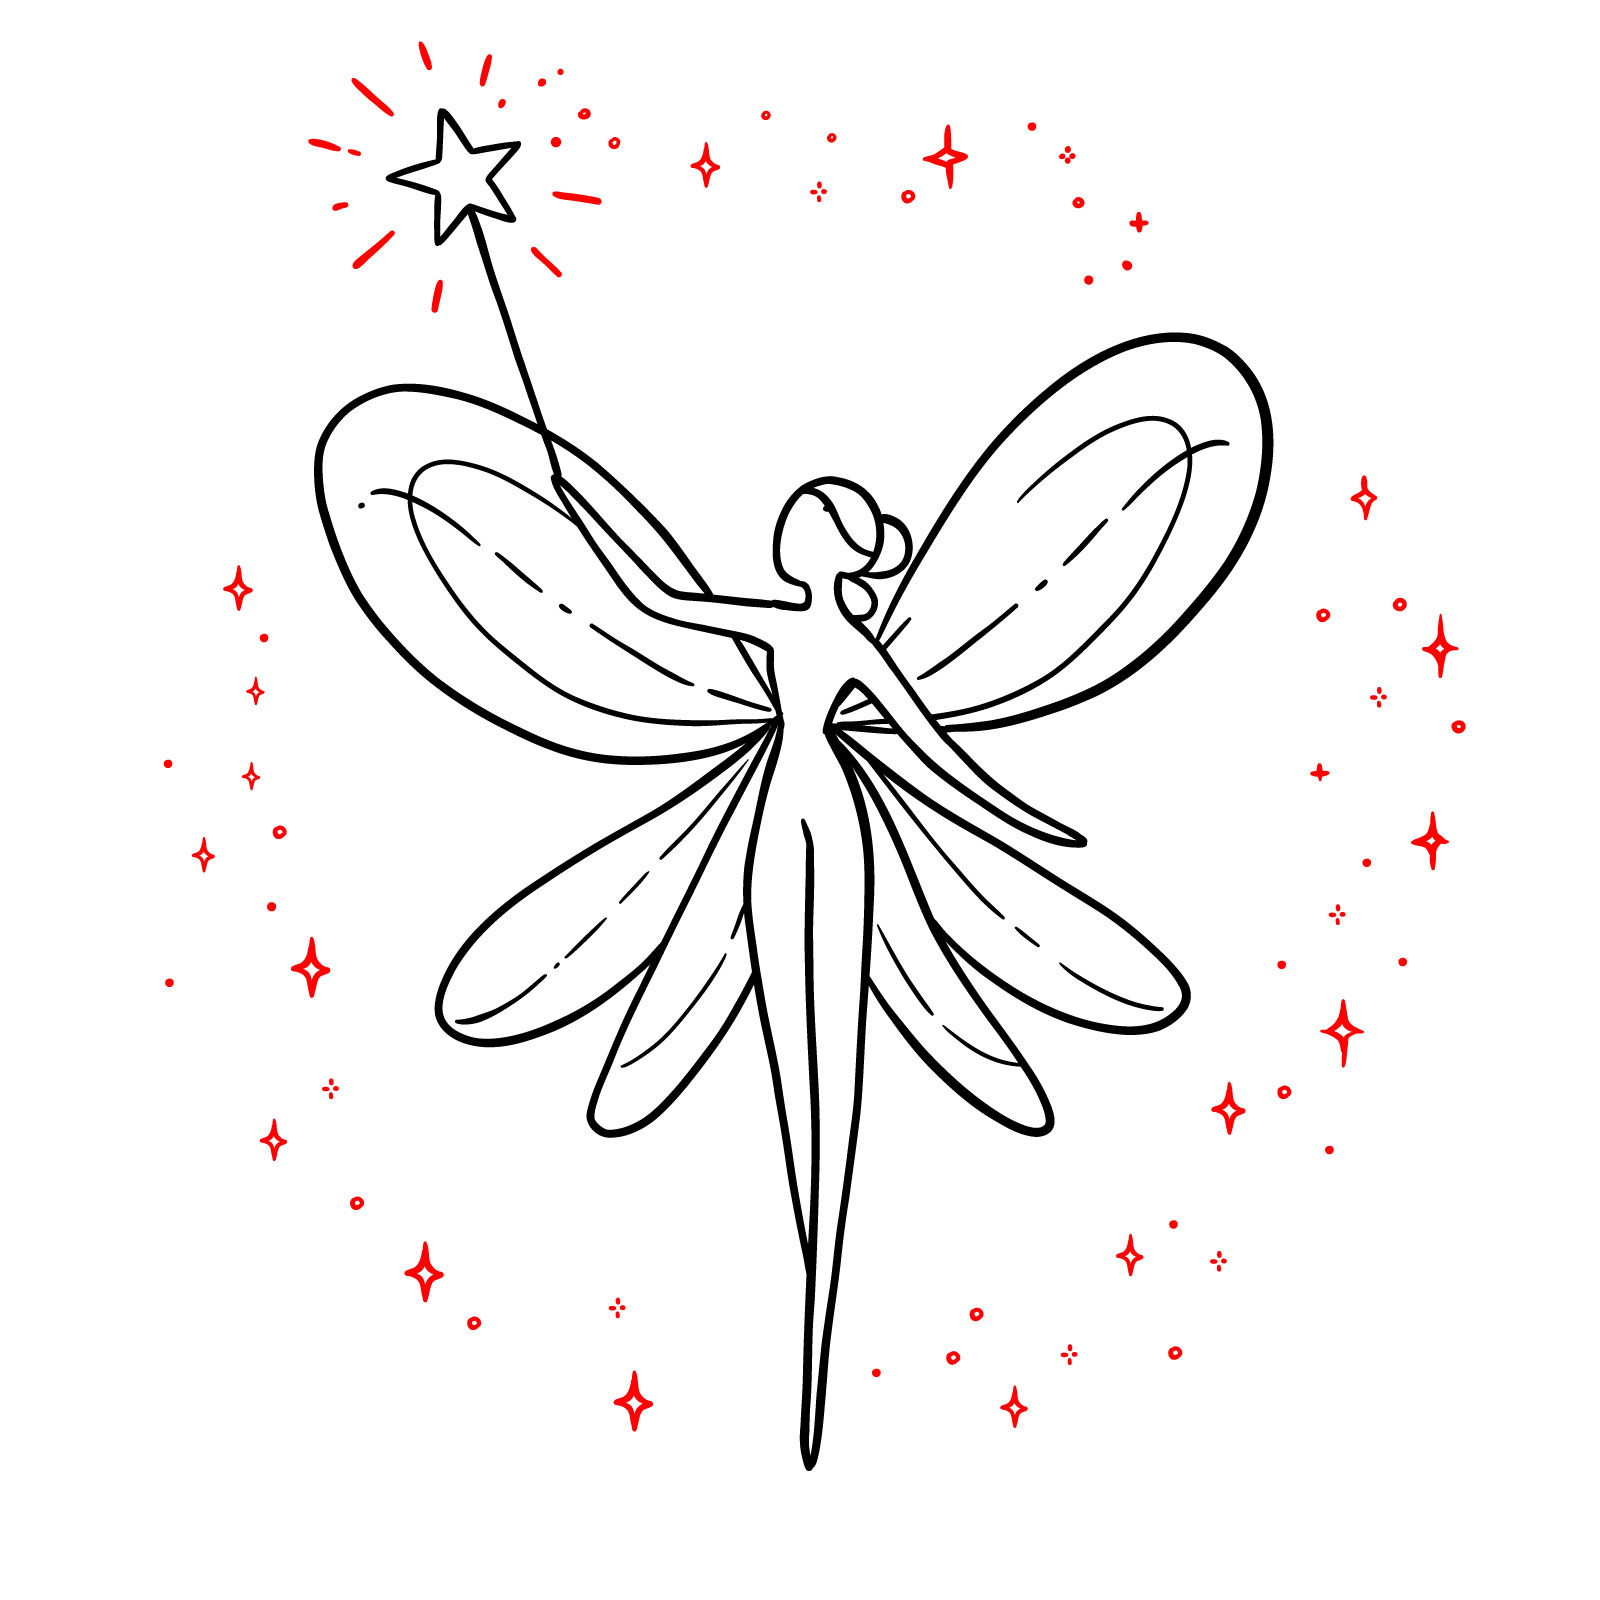
Step 11 – Optionally, add for some fairy magic. Scatter tiny dots, stars, and sparkles around your fairy to create an aura of magic. These details are small but mighty, bringing your drawing to life with a whimsical charm
Adding magical sparkles
Step 12 – Here we are at the last step of how to draw a simple fairy guide. Your drawing is now complete, with each element harmonizing to form an enchanting fairy. This easy fairy drawing is available for download to be used as a coloring page, perfect for those who prefer to color than to sketch.
The completed simple fairy sketch
2. Cute Fairy Sitting on a Leaf – Easy Drawing Guide
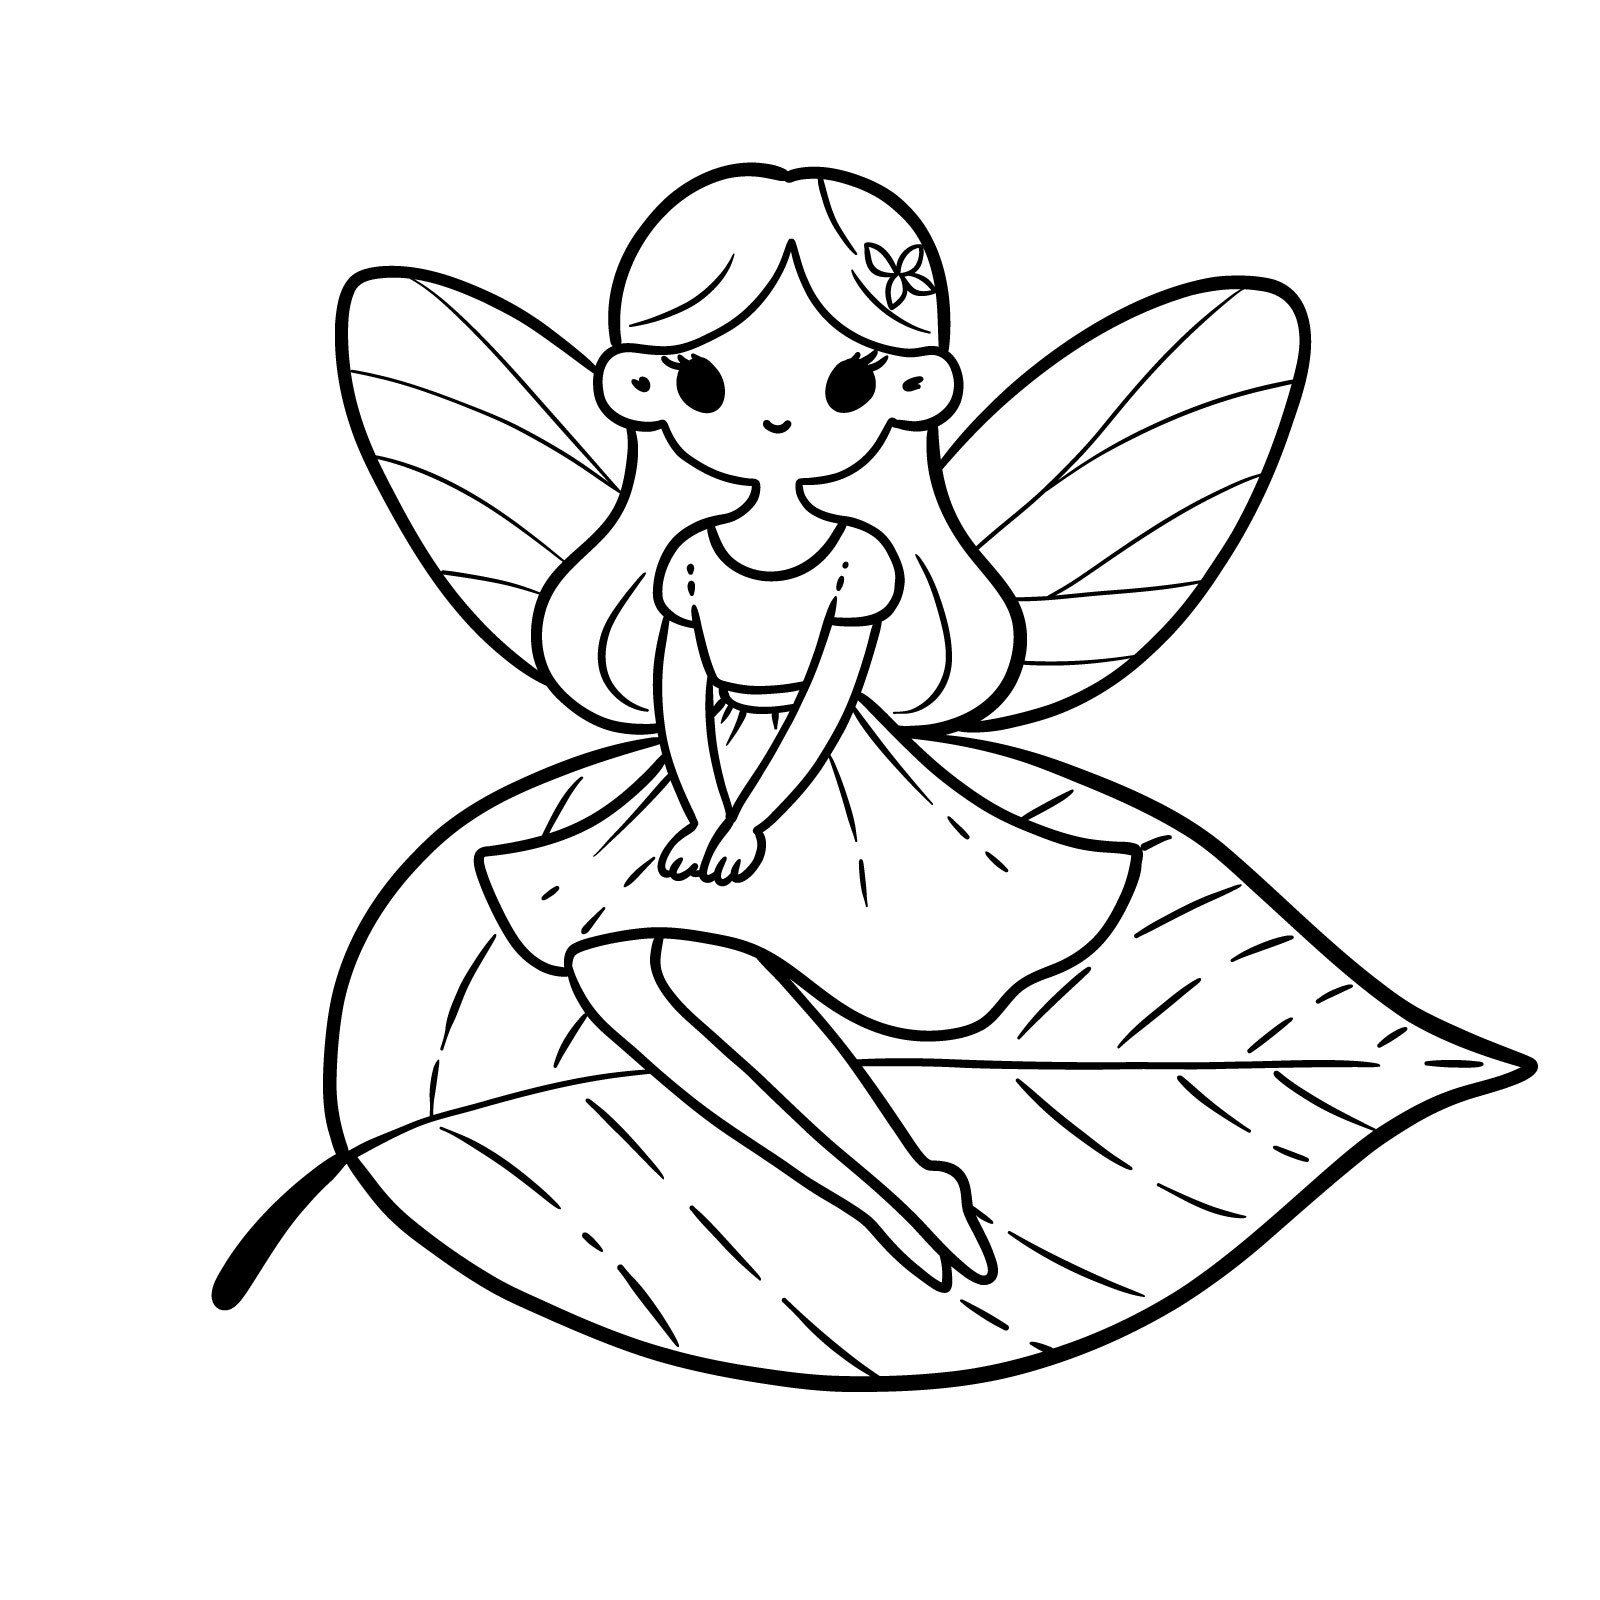
The result
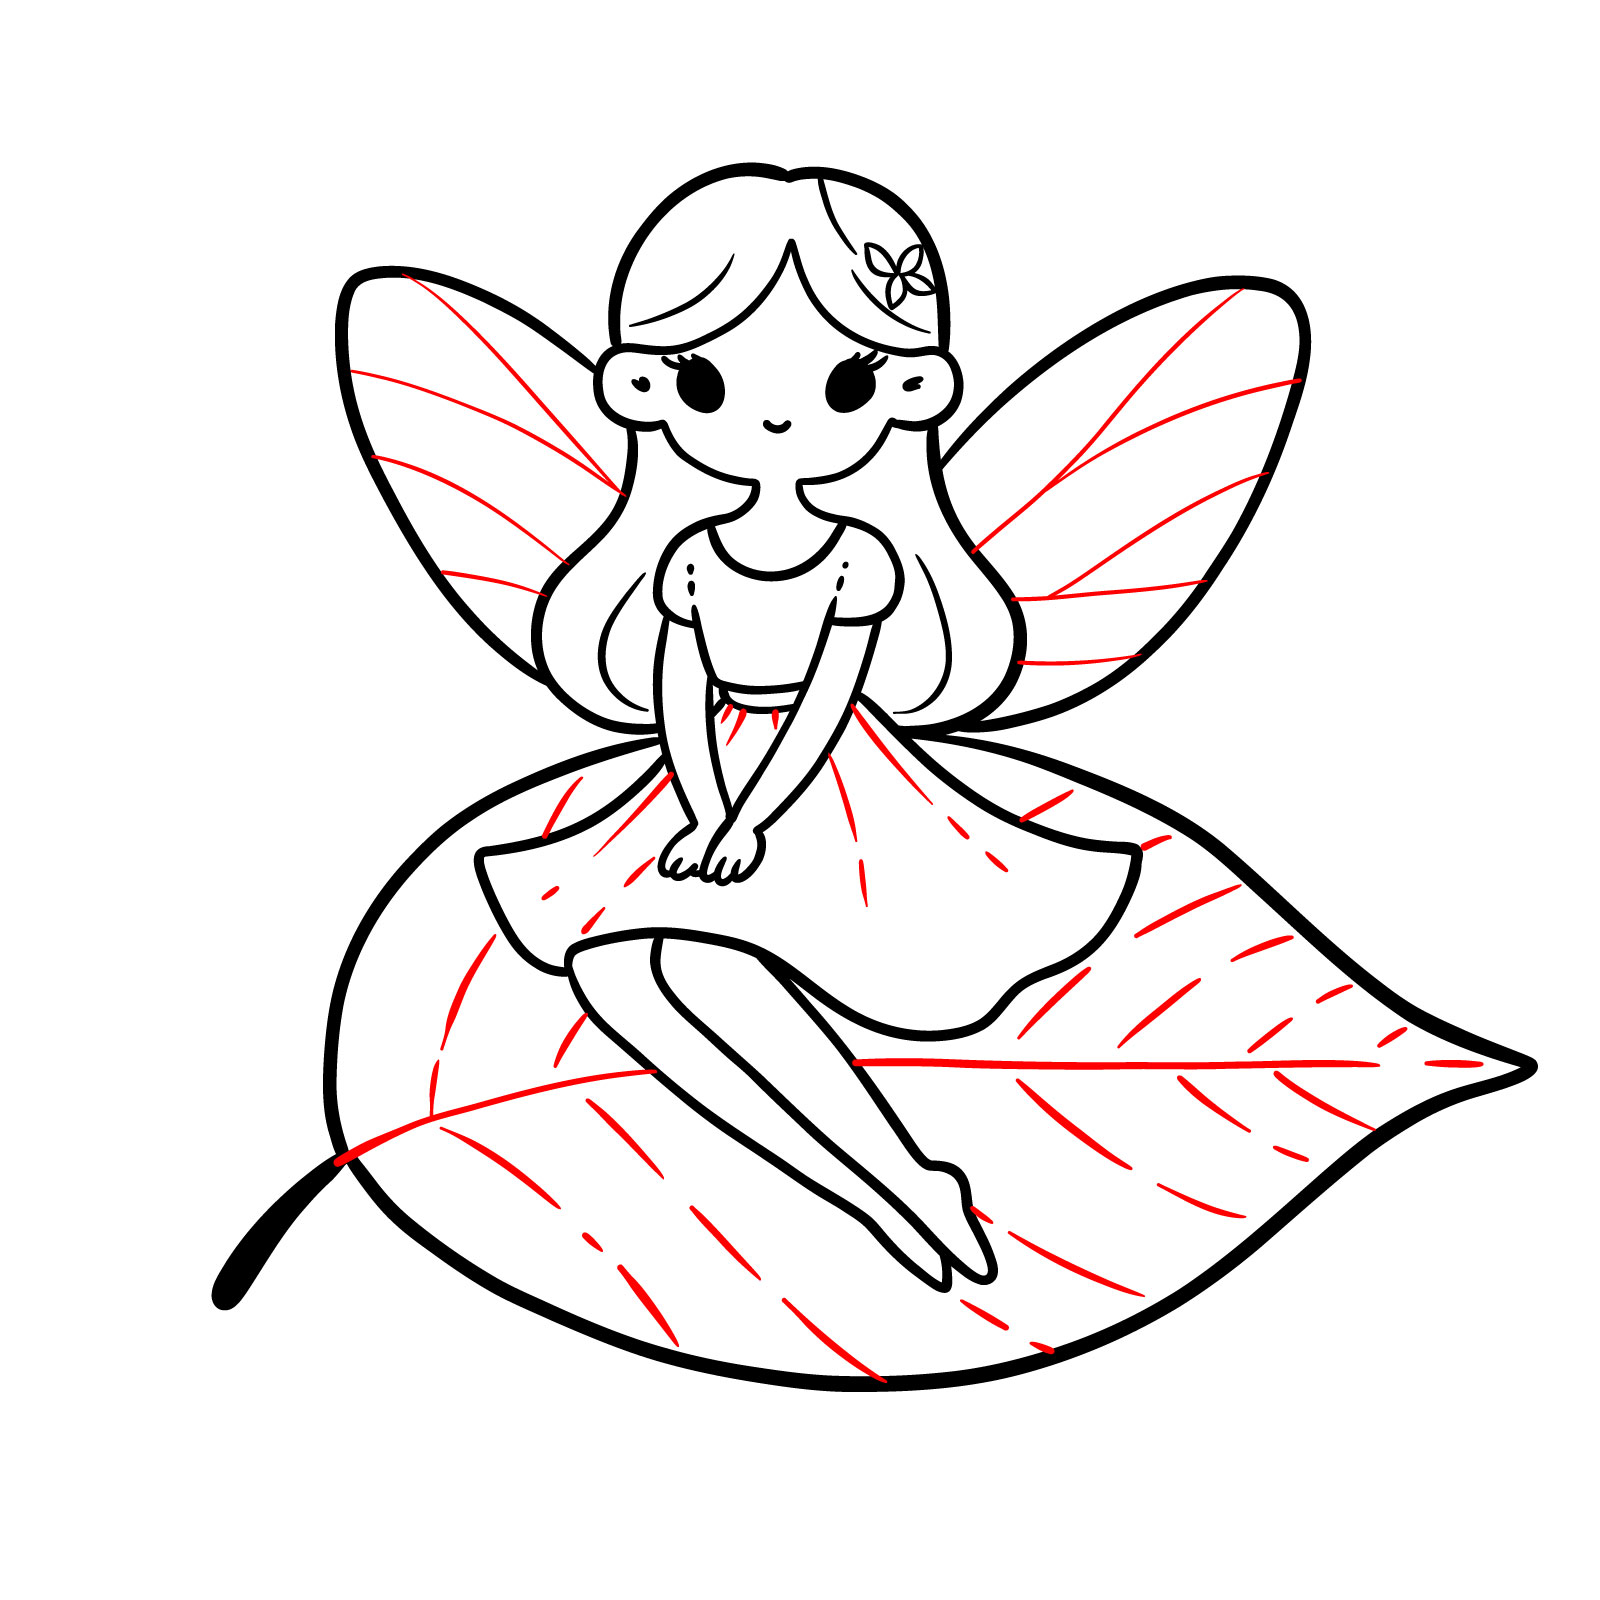
Elevating our drawing skills, the second guide focuses on a cute fairy perched gracefully on a leaf. The drawing captures the fairy in a serene moment, her delicate wings unfurled behind her, as she sits atop a large leaf, which serves as her whimsical throne. With her hair gently cascading down her shoulders and her eyes cast in a dreamy gaze, this guide will delve into the details that bring such a serene scene to life.
This guide will challenge you to pay attention to the subtleties of expression and posture, enhancing your ability to convey emotion and serenity through your artwork. Ready your pencils, for we are about to explore the intricate blend of nature and fantasy, learning how to draw a fairy in a pose that is as natural as it is enchanting.
Step 01 – Begin with a simple outline for the fairy’s face frame, which will form the base of her features. Draw a shape that resembles the top of a heart (inverted) to represent the hairline
Drawing the outline of the fairy’s face
Step 02 – Now it’s time to add volume to the fairy’s hair. Start from the top of the face frame and create a rounded shape above it for the fairy’s hairstyle
Sketching the fairy’s hairstyle
Step 03 – Add two oval shapes within the face frame for the eyes, ensuring they are positioned symmetrically and convey the desired emotion. Fill them with black color (or any other on your choice)
Addings the fairy’s eyes
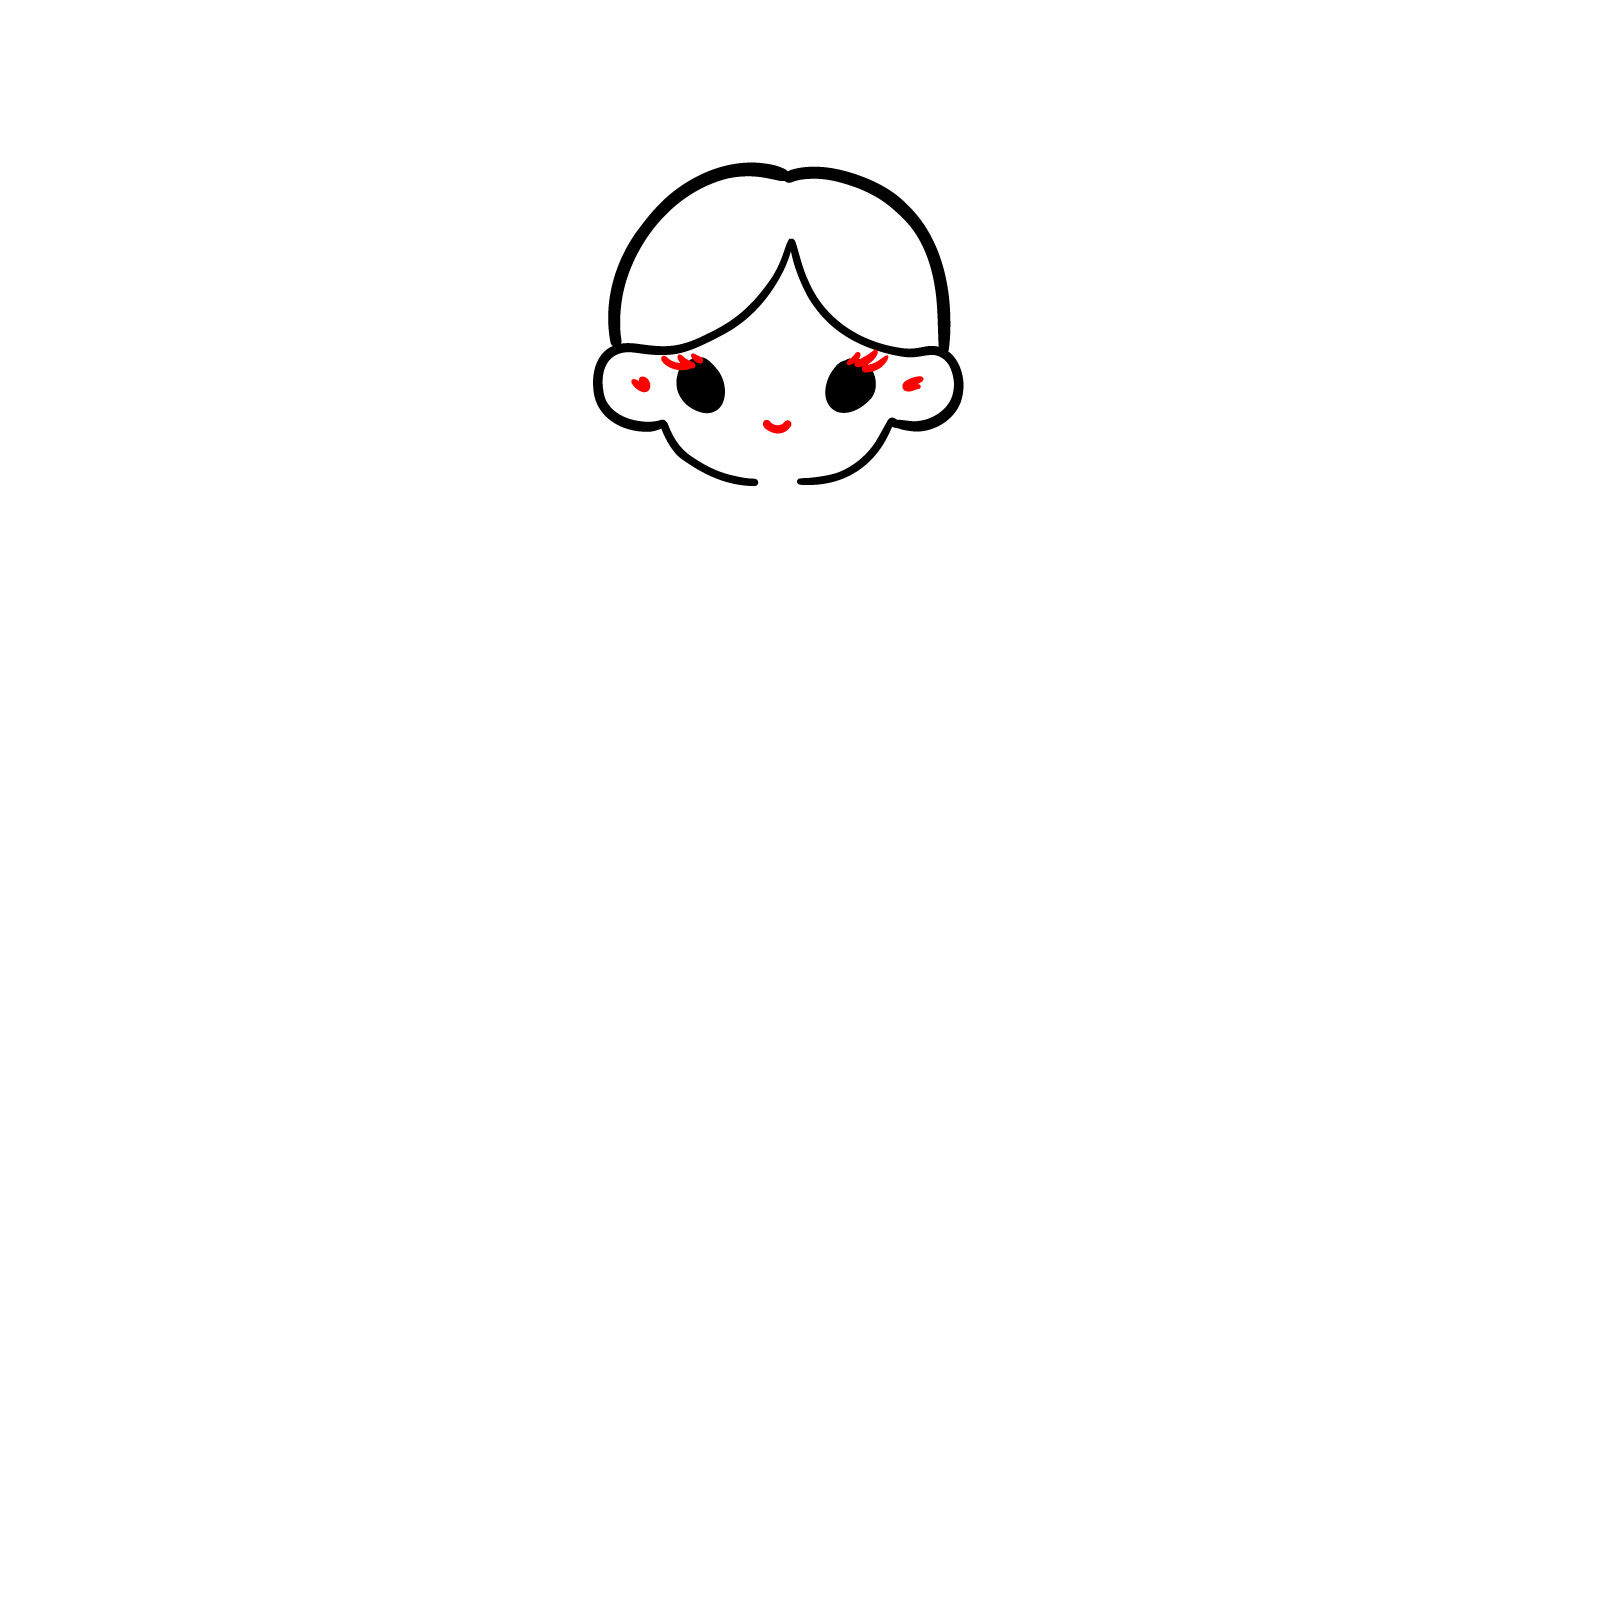
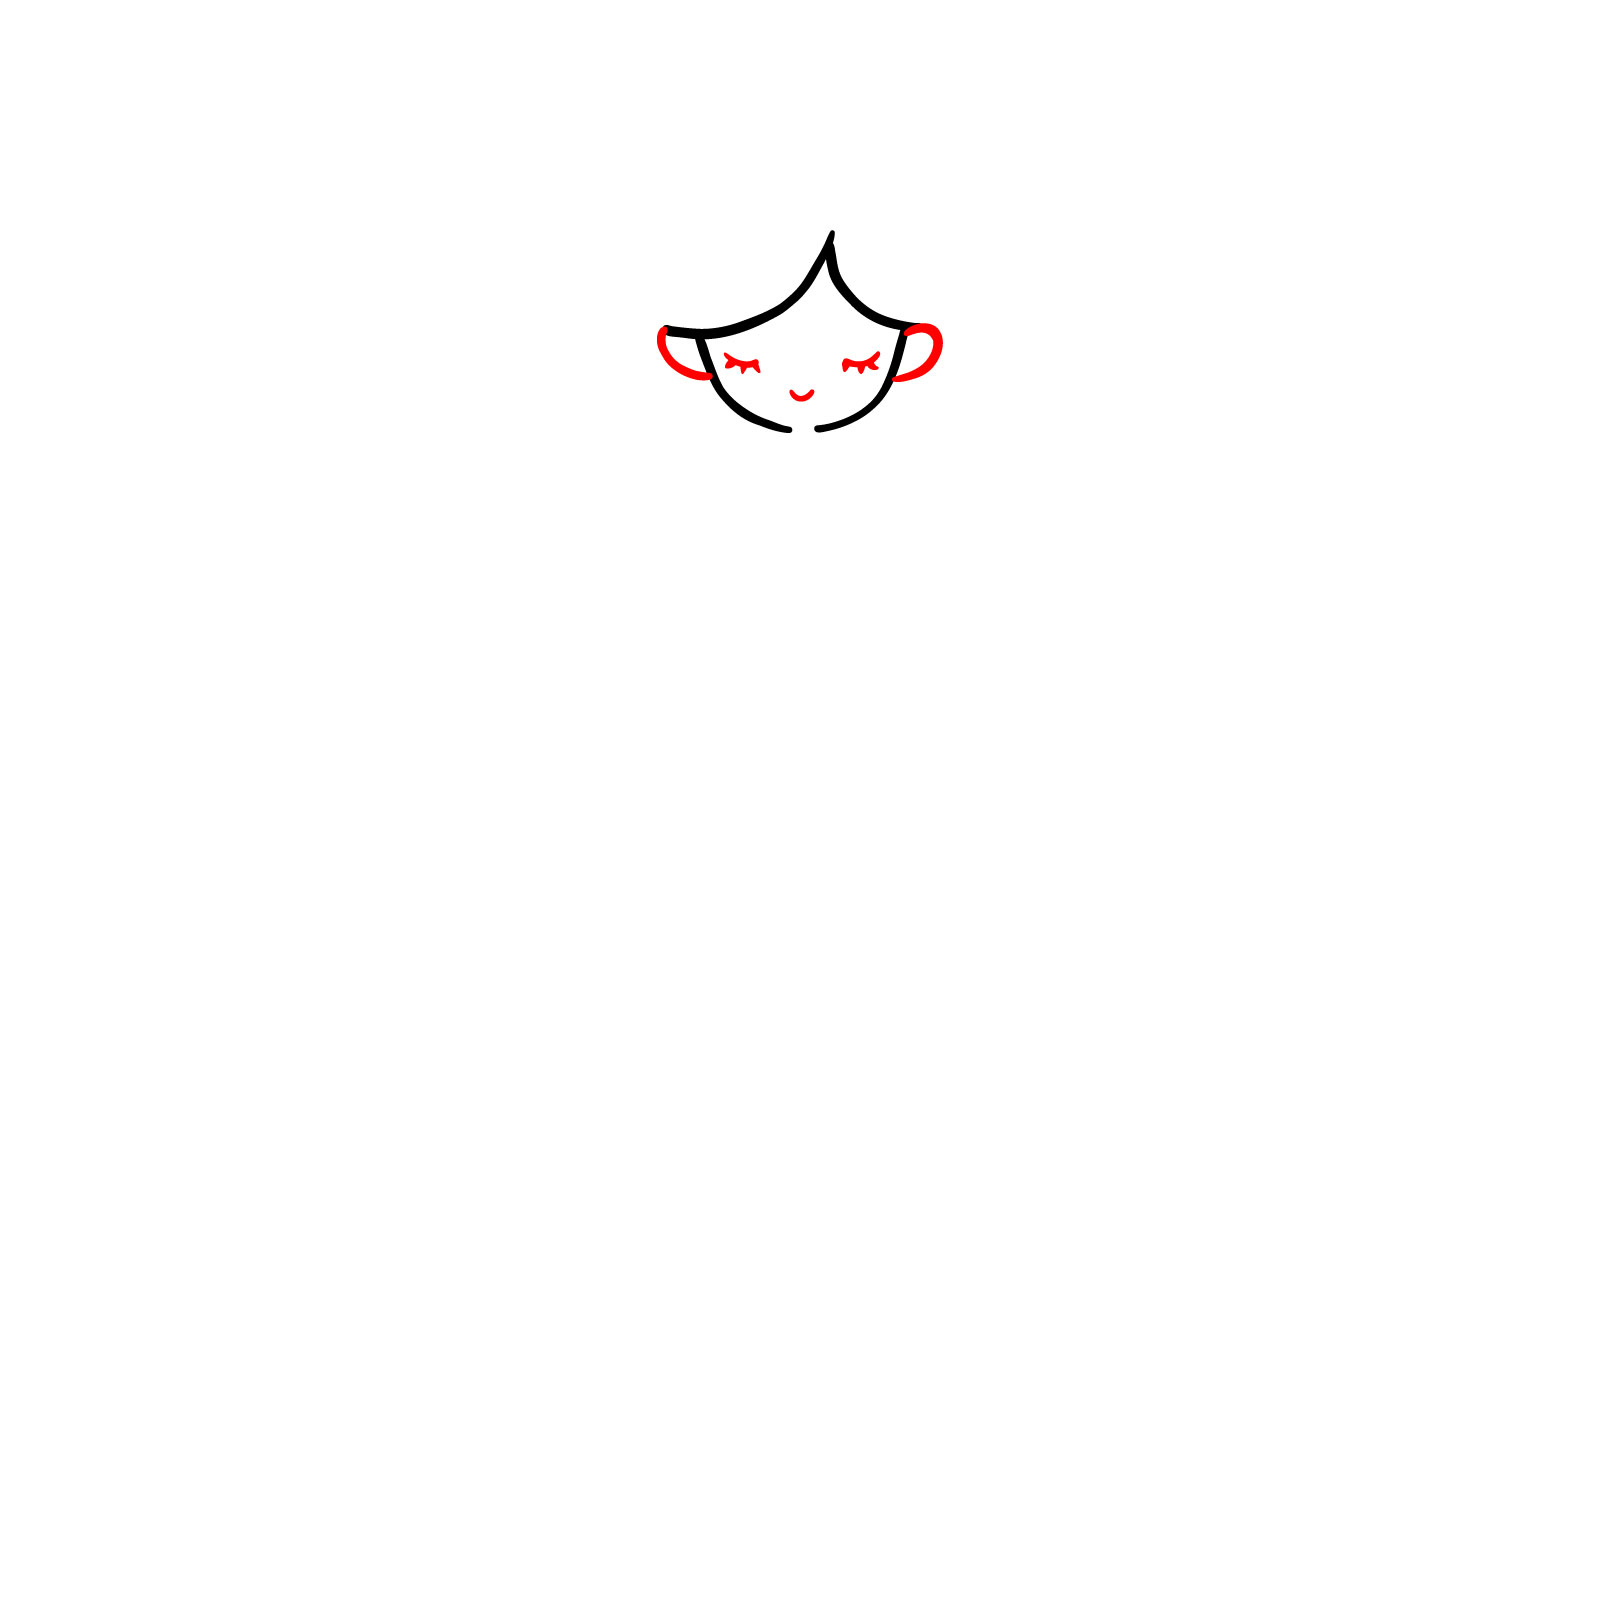
Step 04 – Finalize the face by adding eyelashes with delicate strokes, small lines for the ears, and a tiny curve for the mouth
Detailing the fairy’s facial features
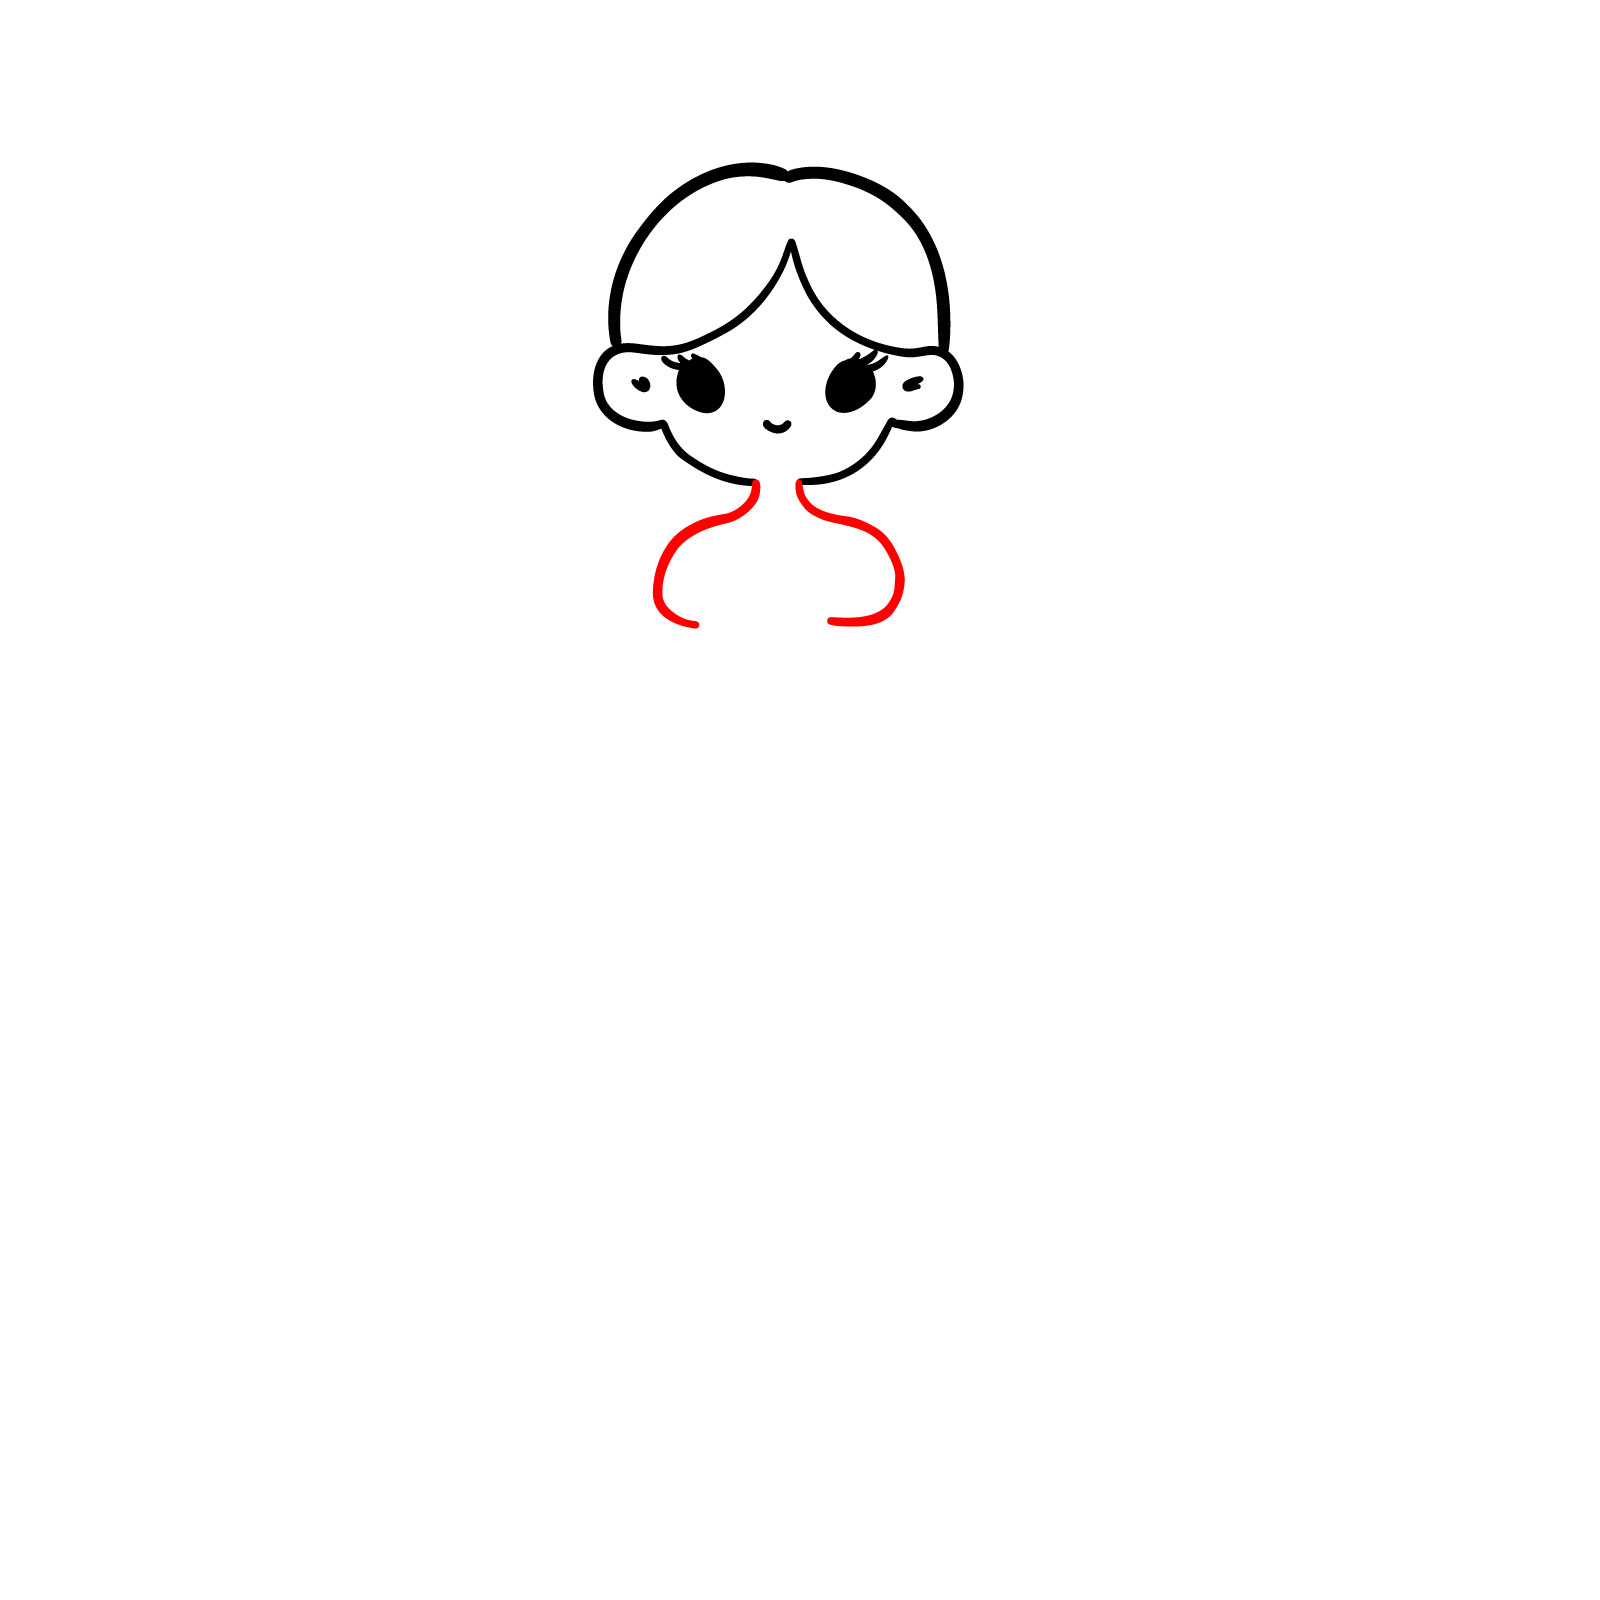
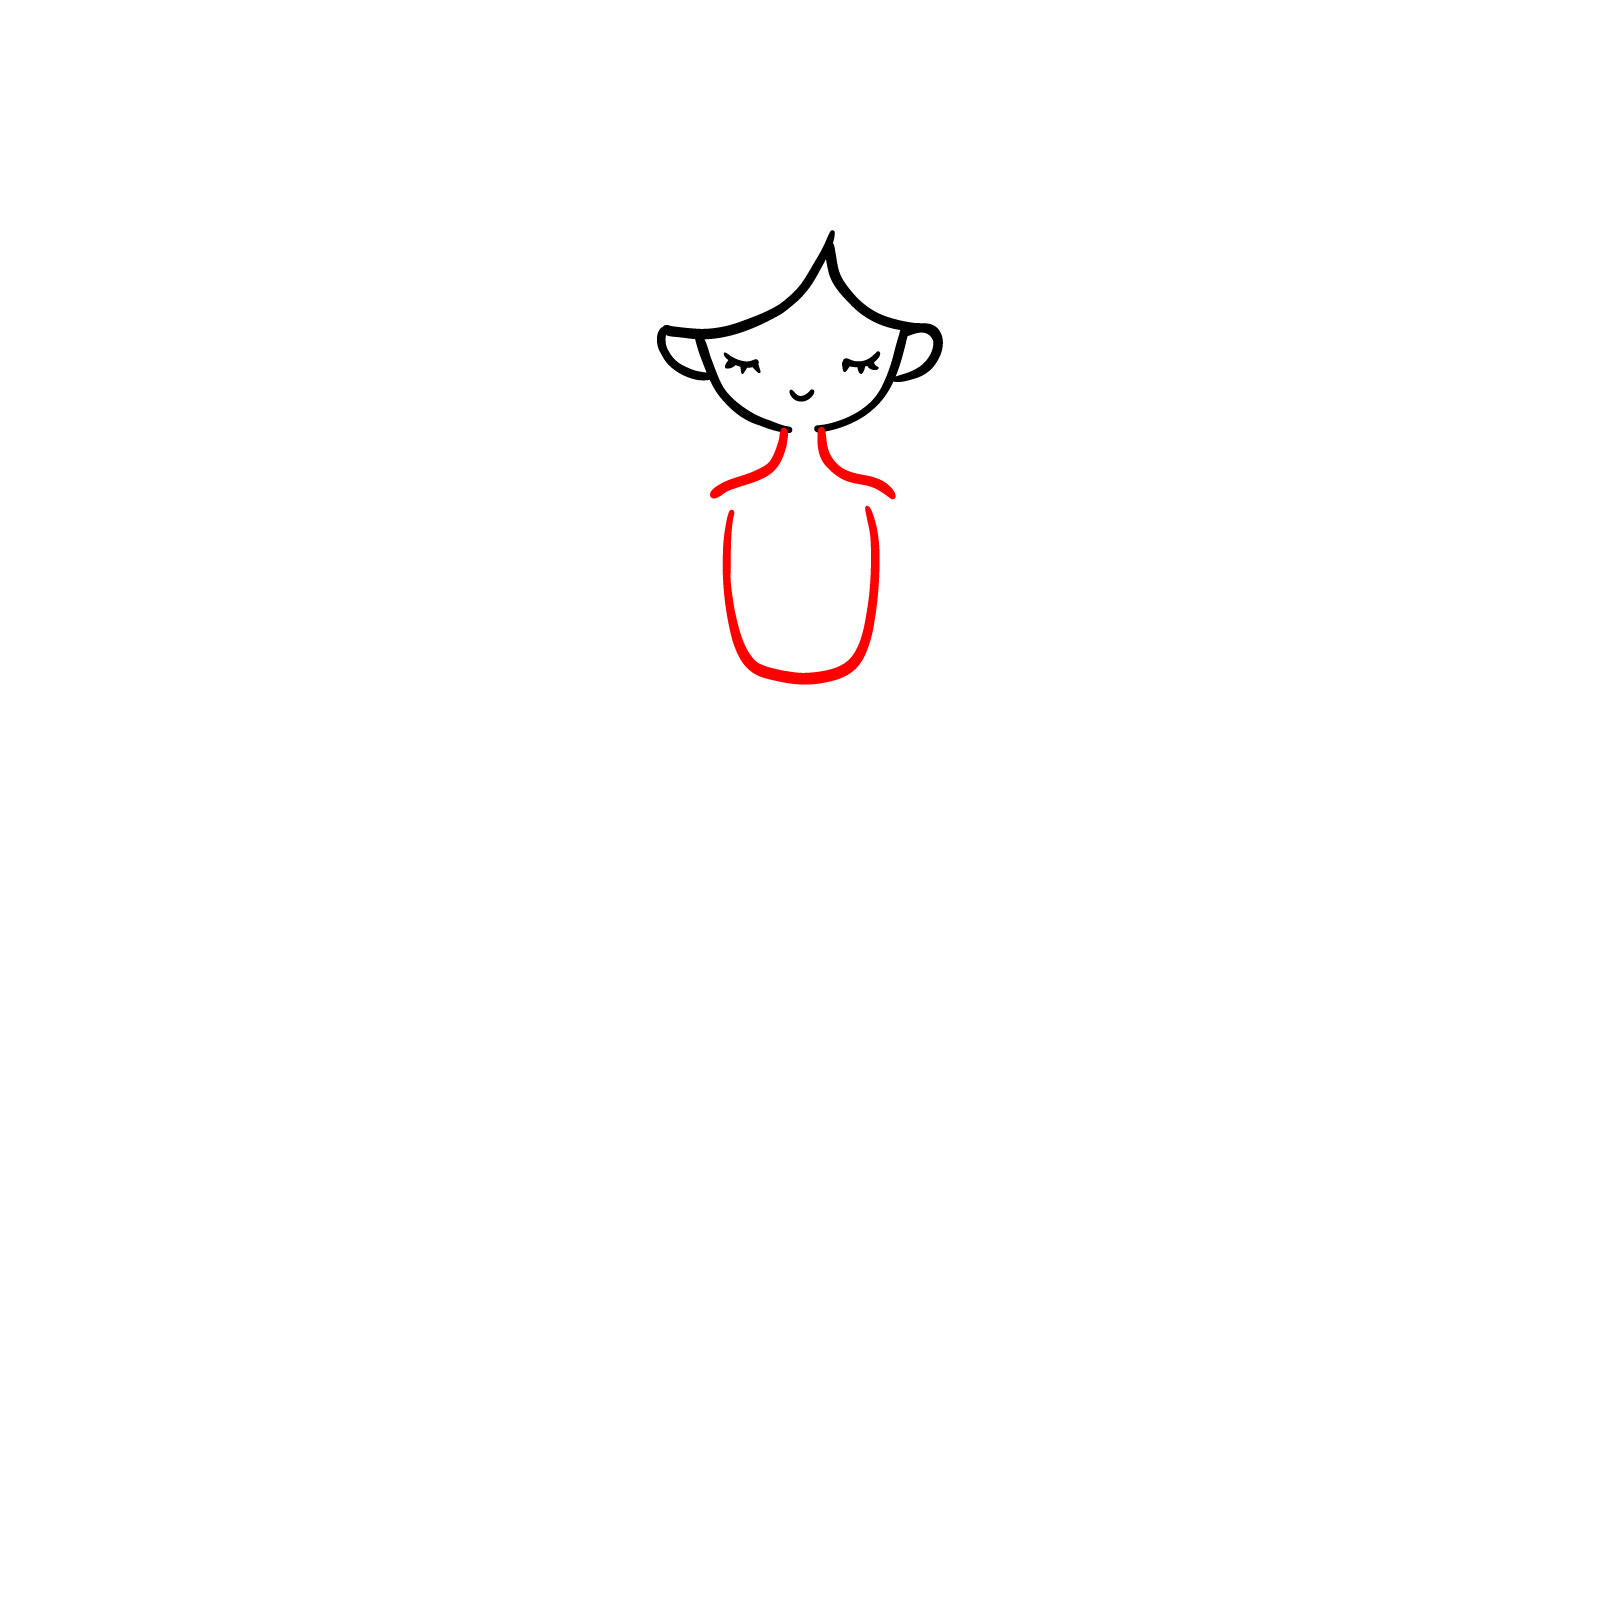
Step 05 – For this step, draw the shoulders with a soft curve to connect with the head, setting the stage for the upper body. This creates the top of the fairy’s dress and defines her posture
Shaping the shoulders and upper body
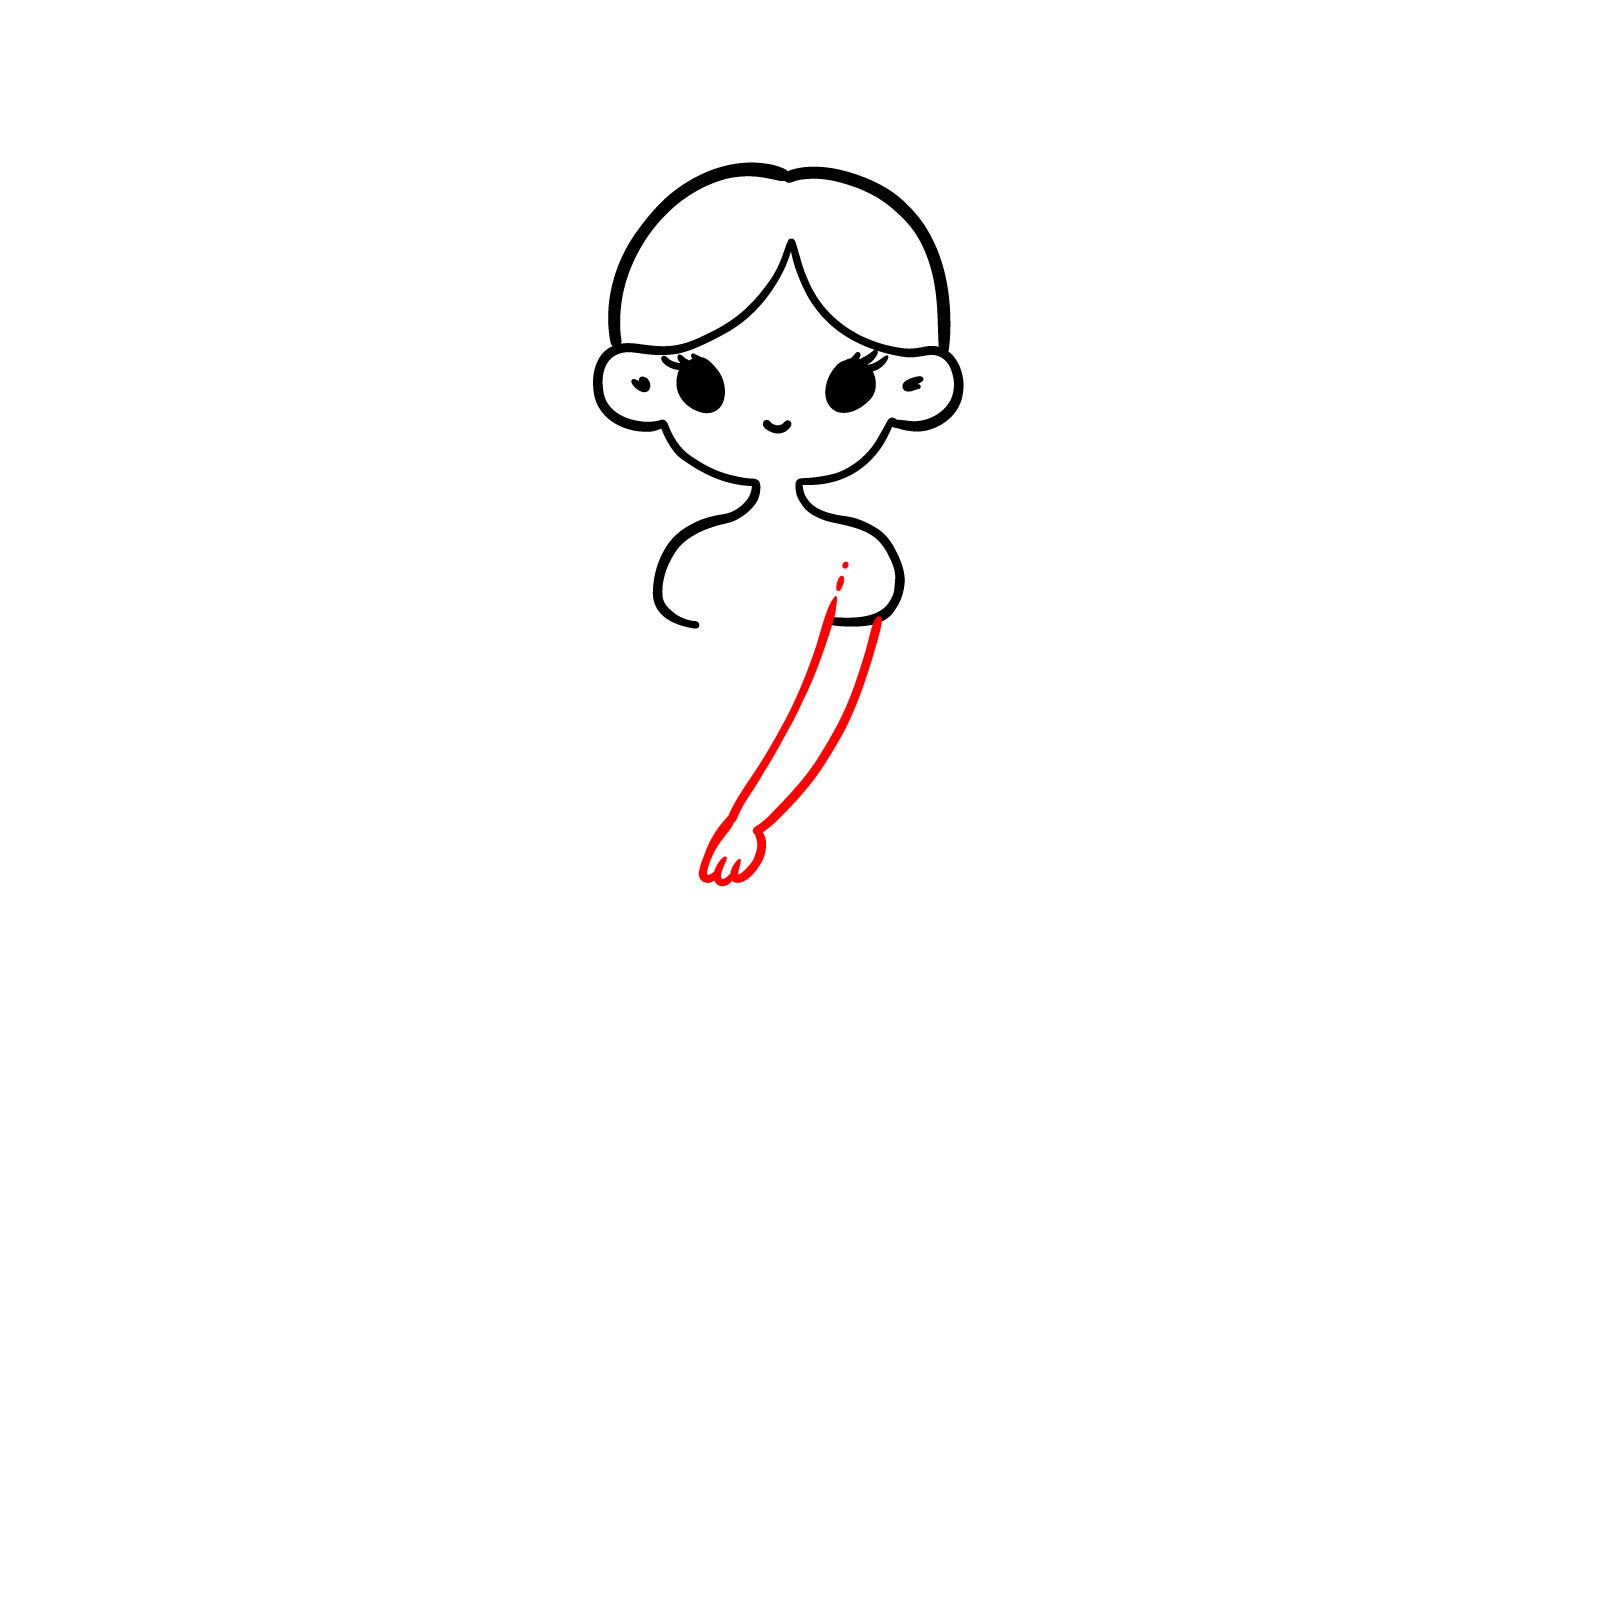
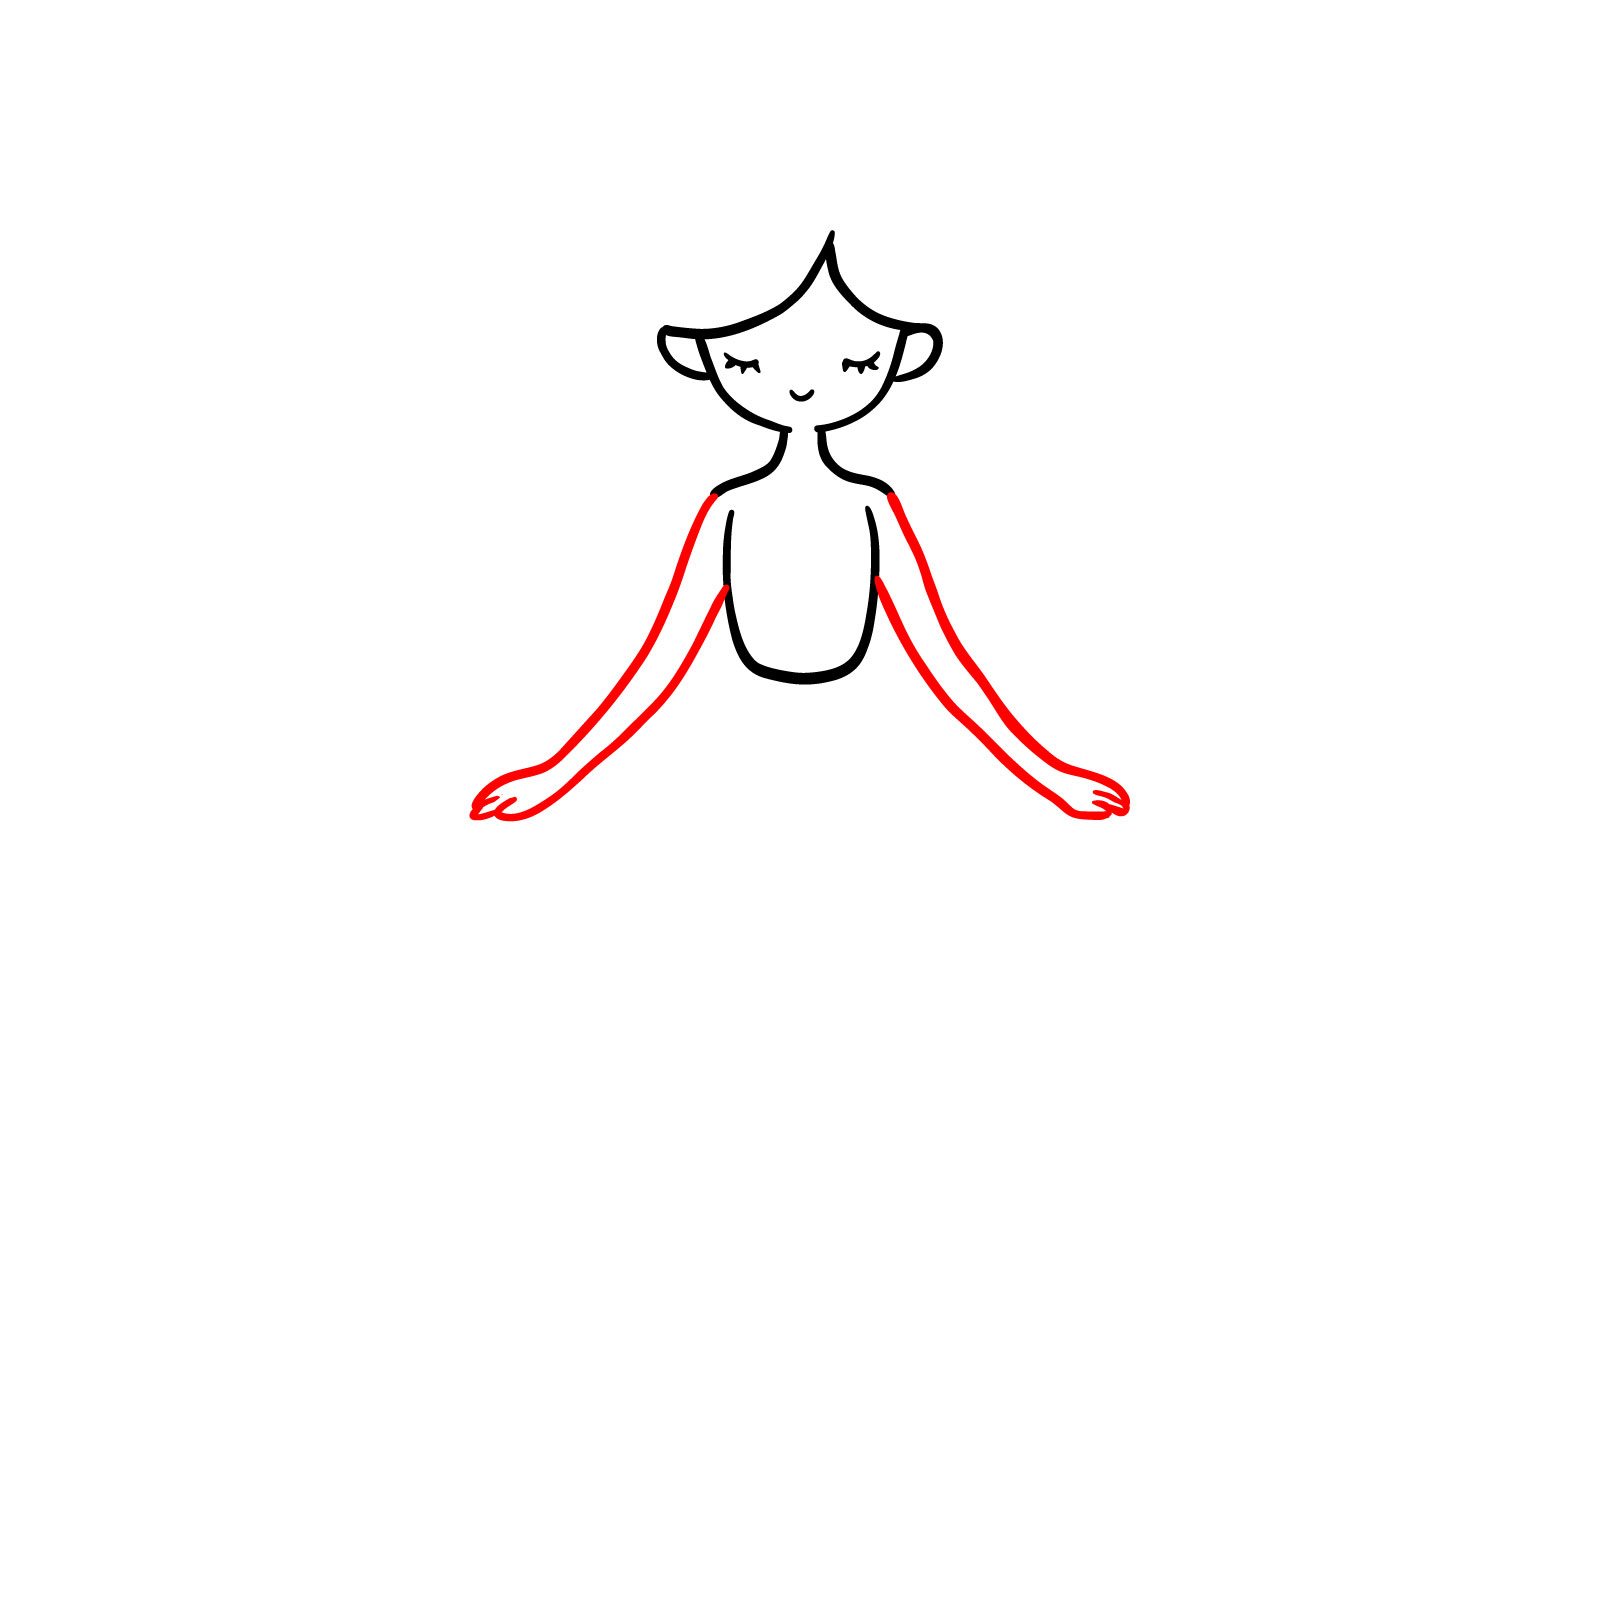
Step 06 – Extend a line from the left shoulder to form the fairy’s left arm, ending with a small rounded shape for the hand with just three fingers
Drawing the left arm and hand
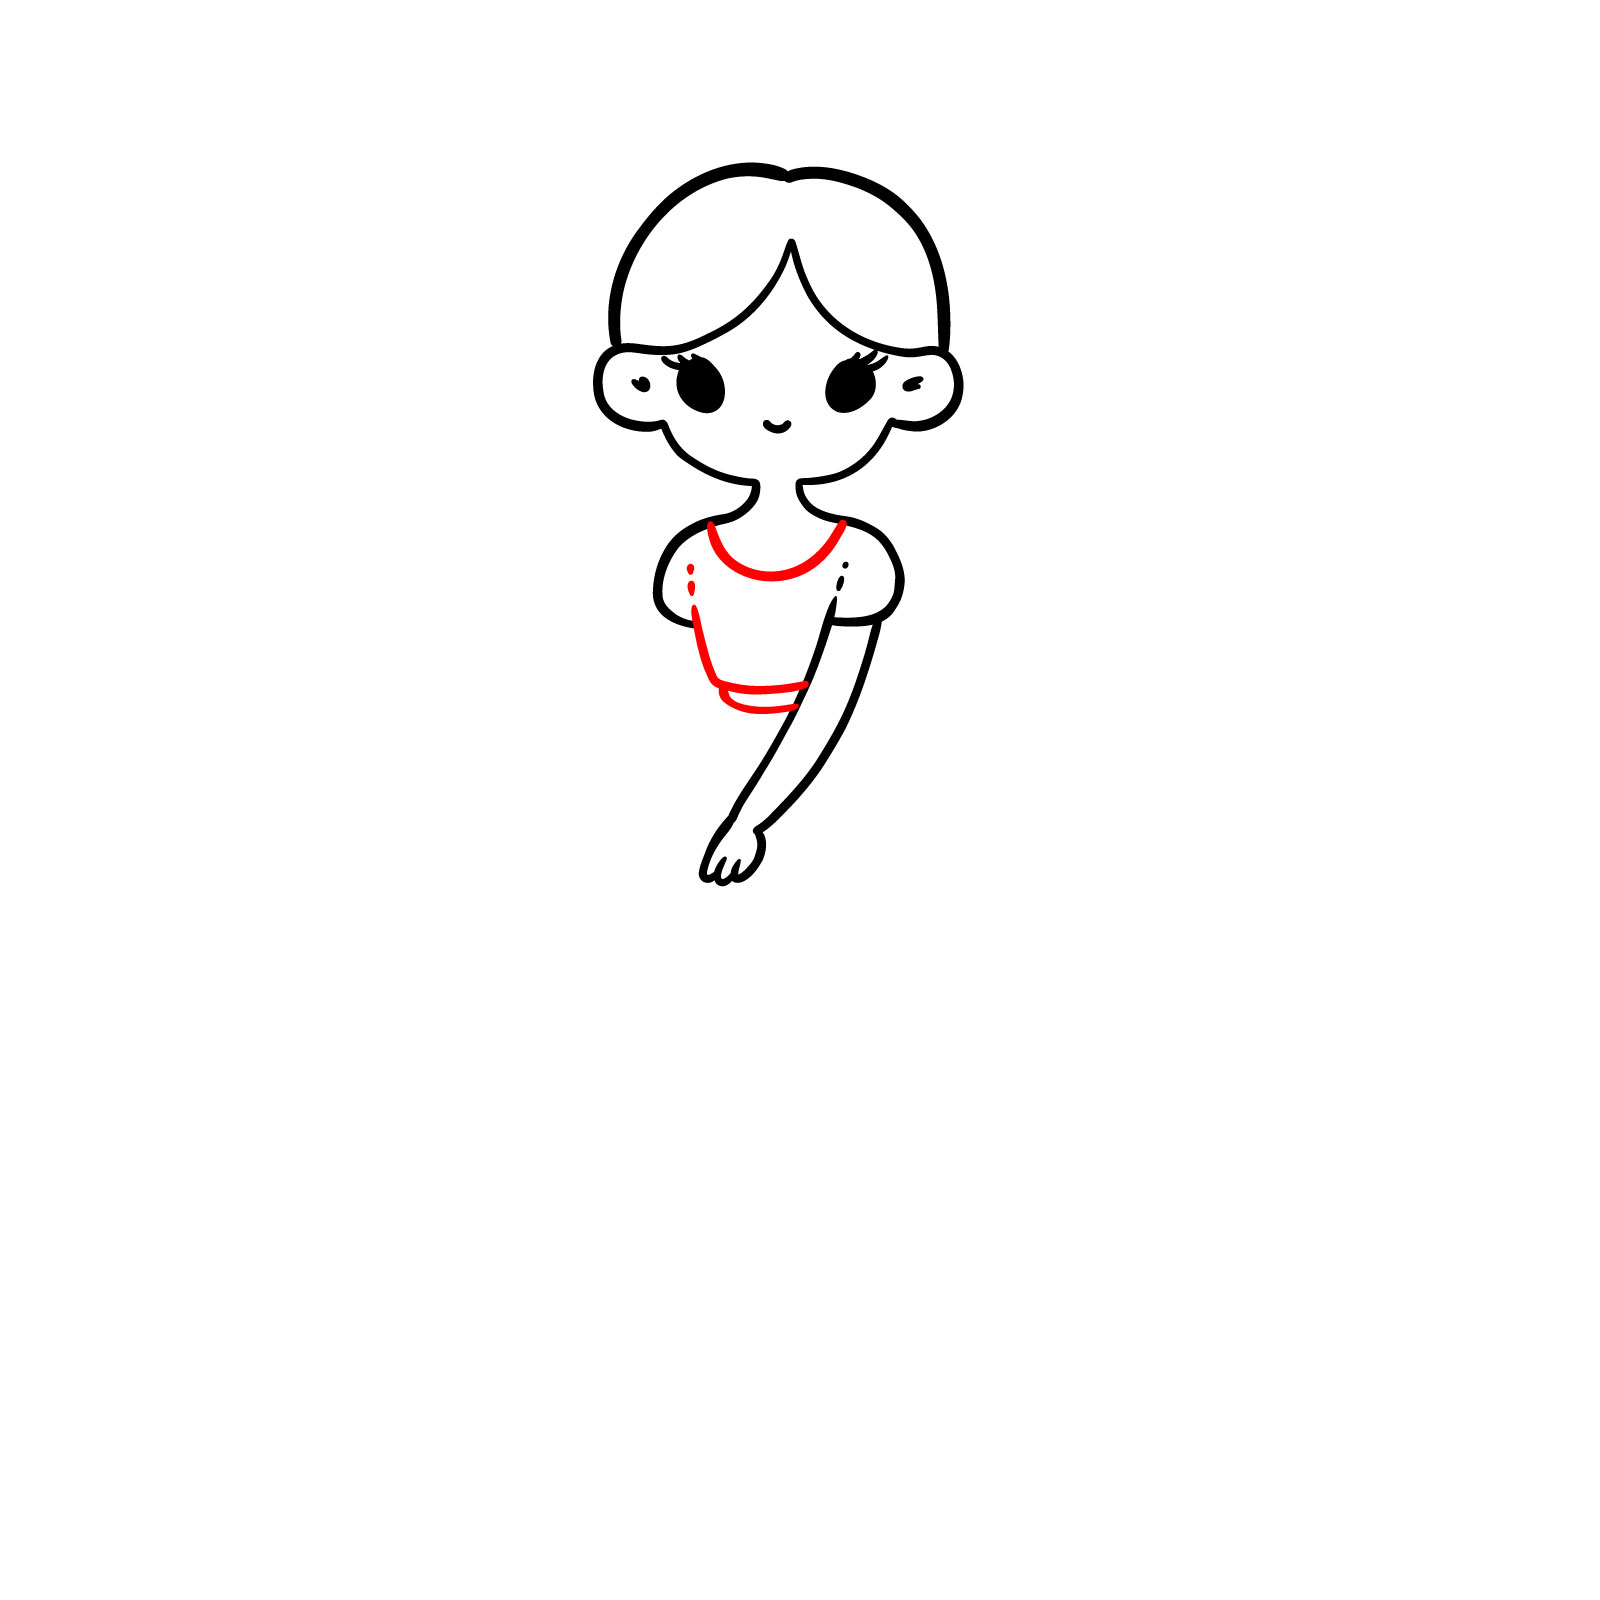
Step 07 – Now, add the upper part of the dress. Sketch a curved line across the chest to indicate the collar, ensuring it drapes naturally on her shoulders
Adding the dress and collar
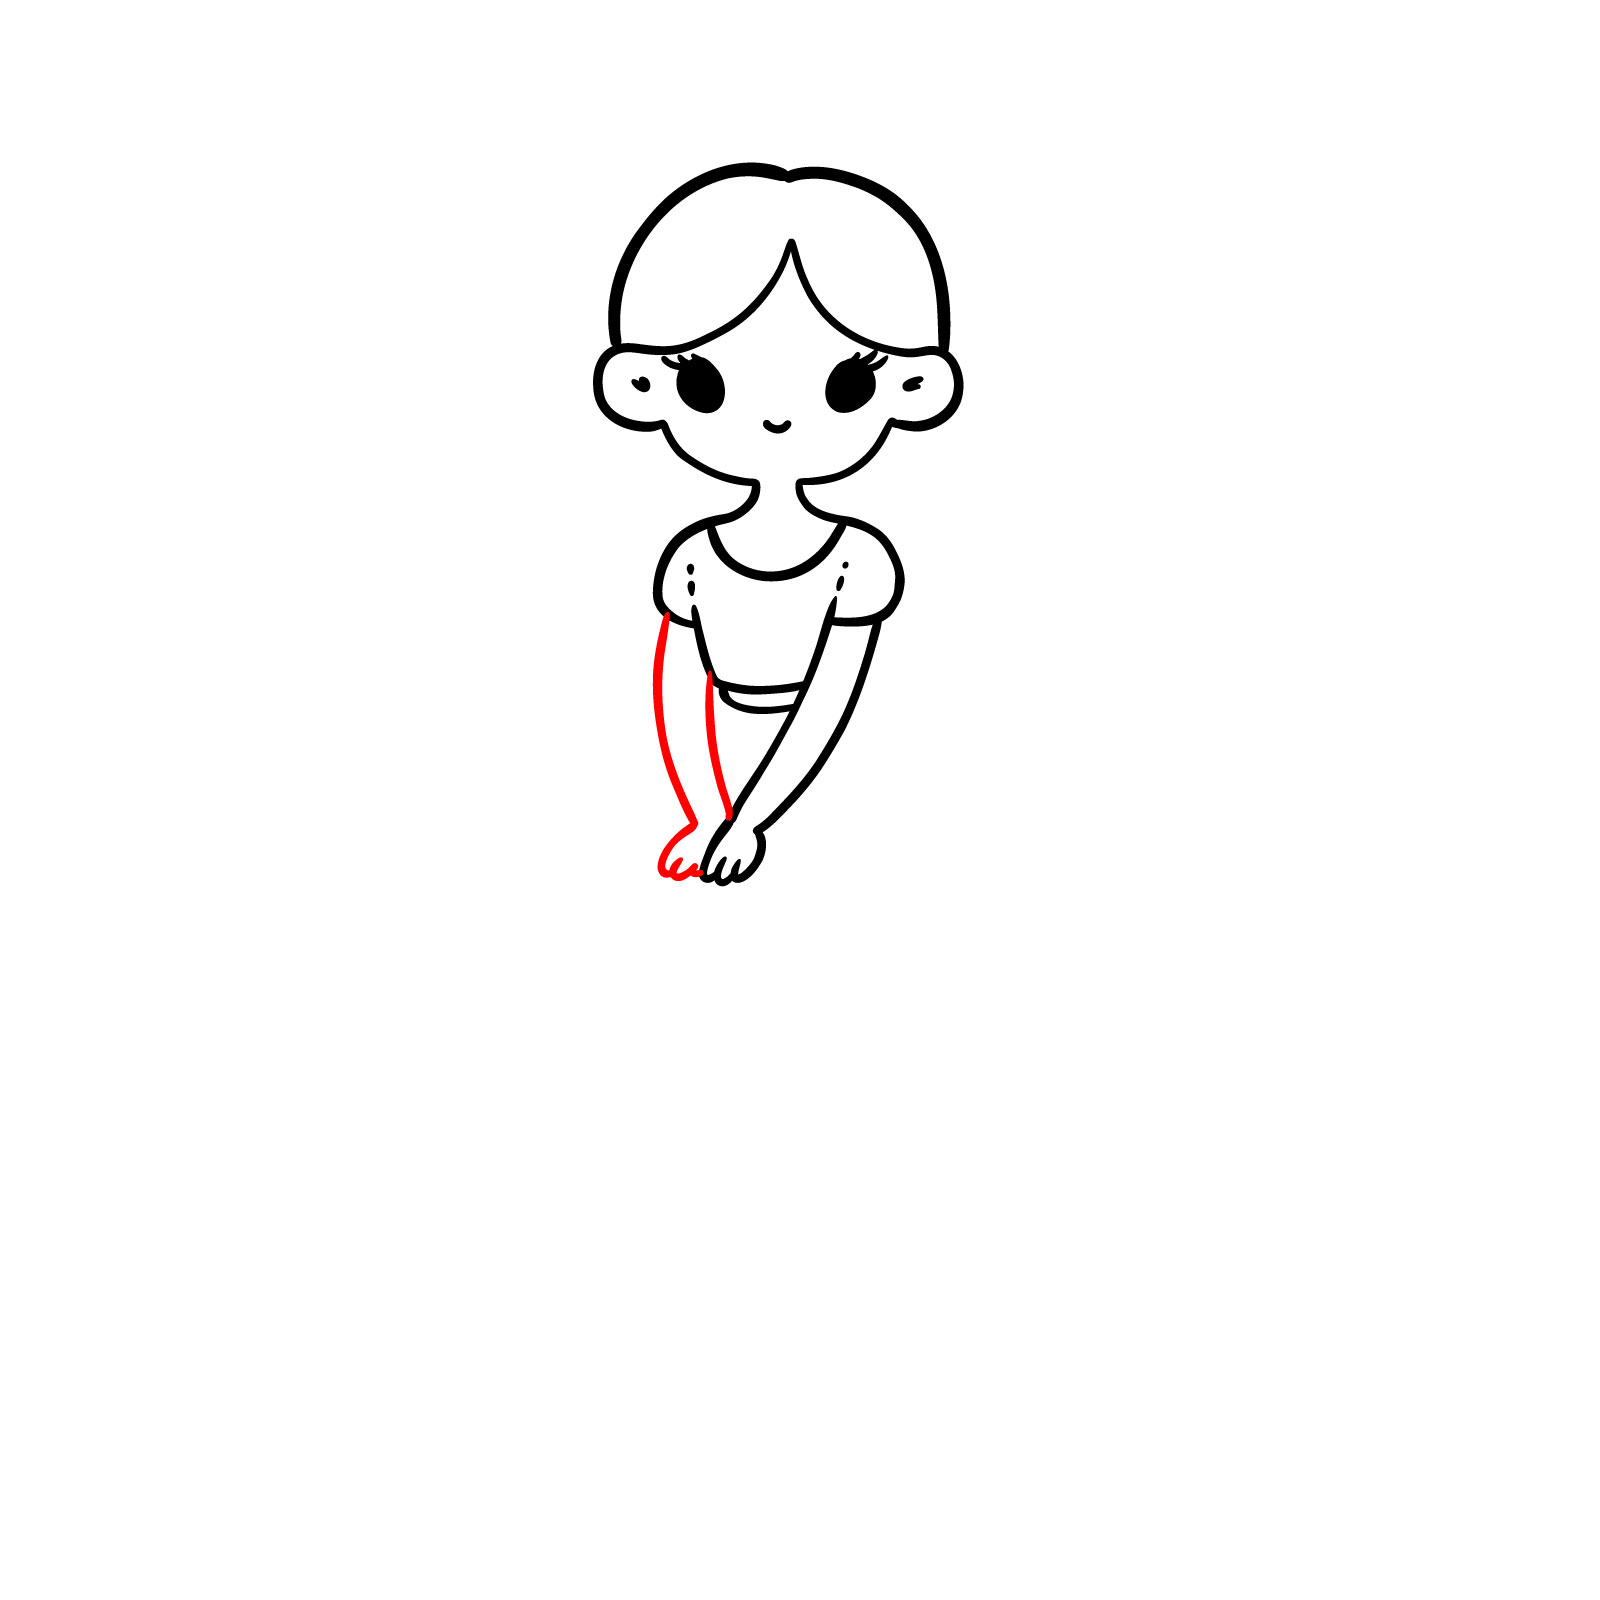
Step 08 – Finally, draw the fairy’s right hand. Pay attention that it is slightly covered with her other hand
Sketching the right hand
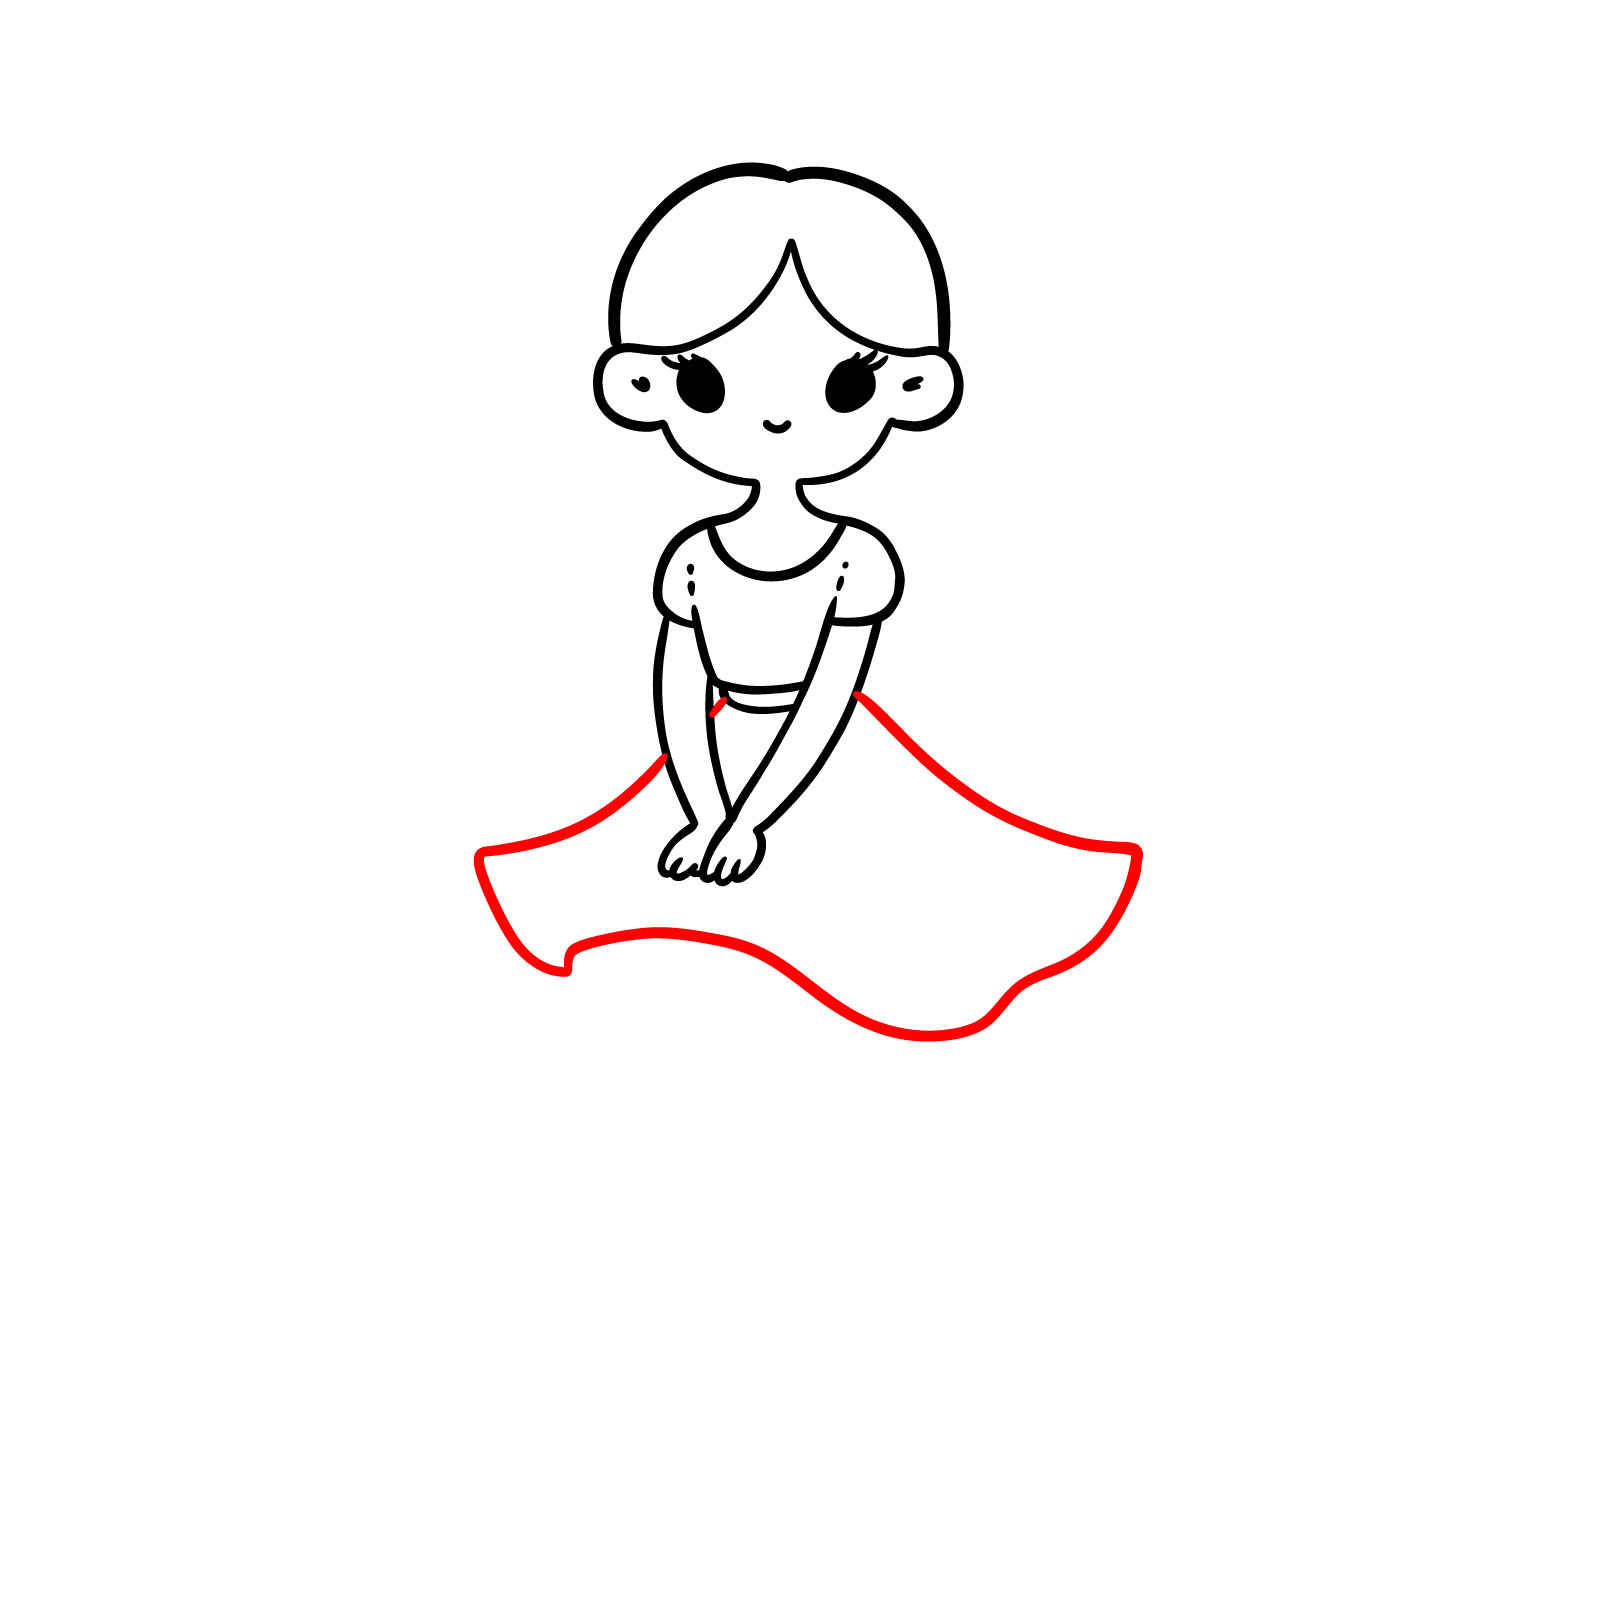
Step 09 – Begin the skirt by drawing a wide, flowing shape that dips down from her waist, creating the look of fabric draping over her legs as she sits. This will form the base of her seated posture on the leaf
Drawing the fairy’s skirt
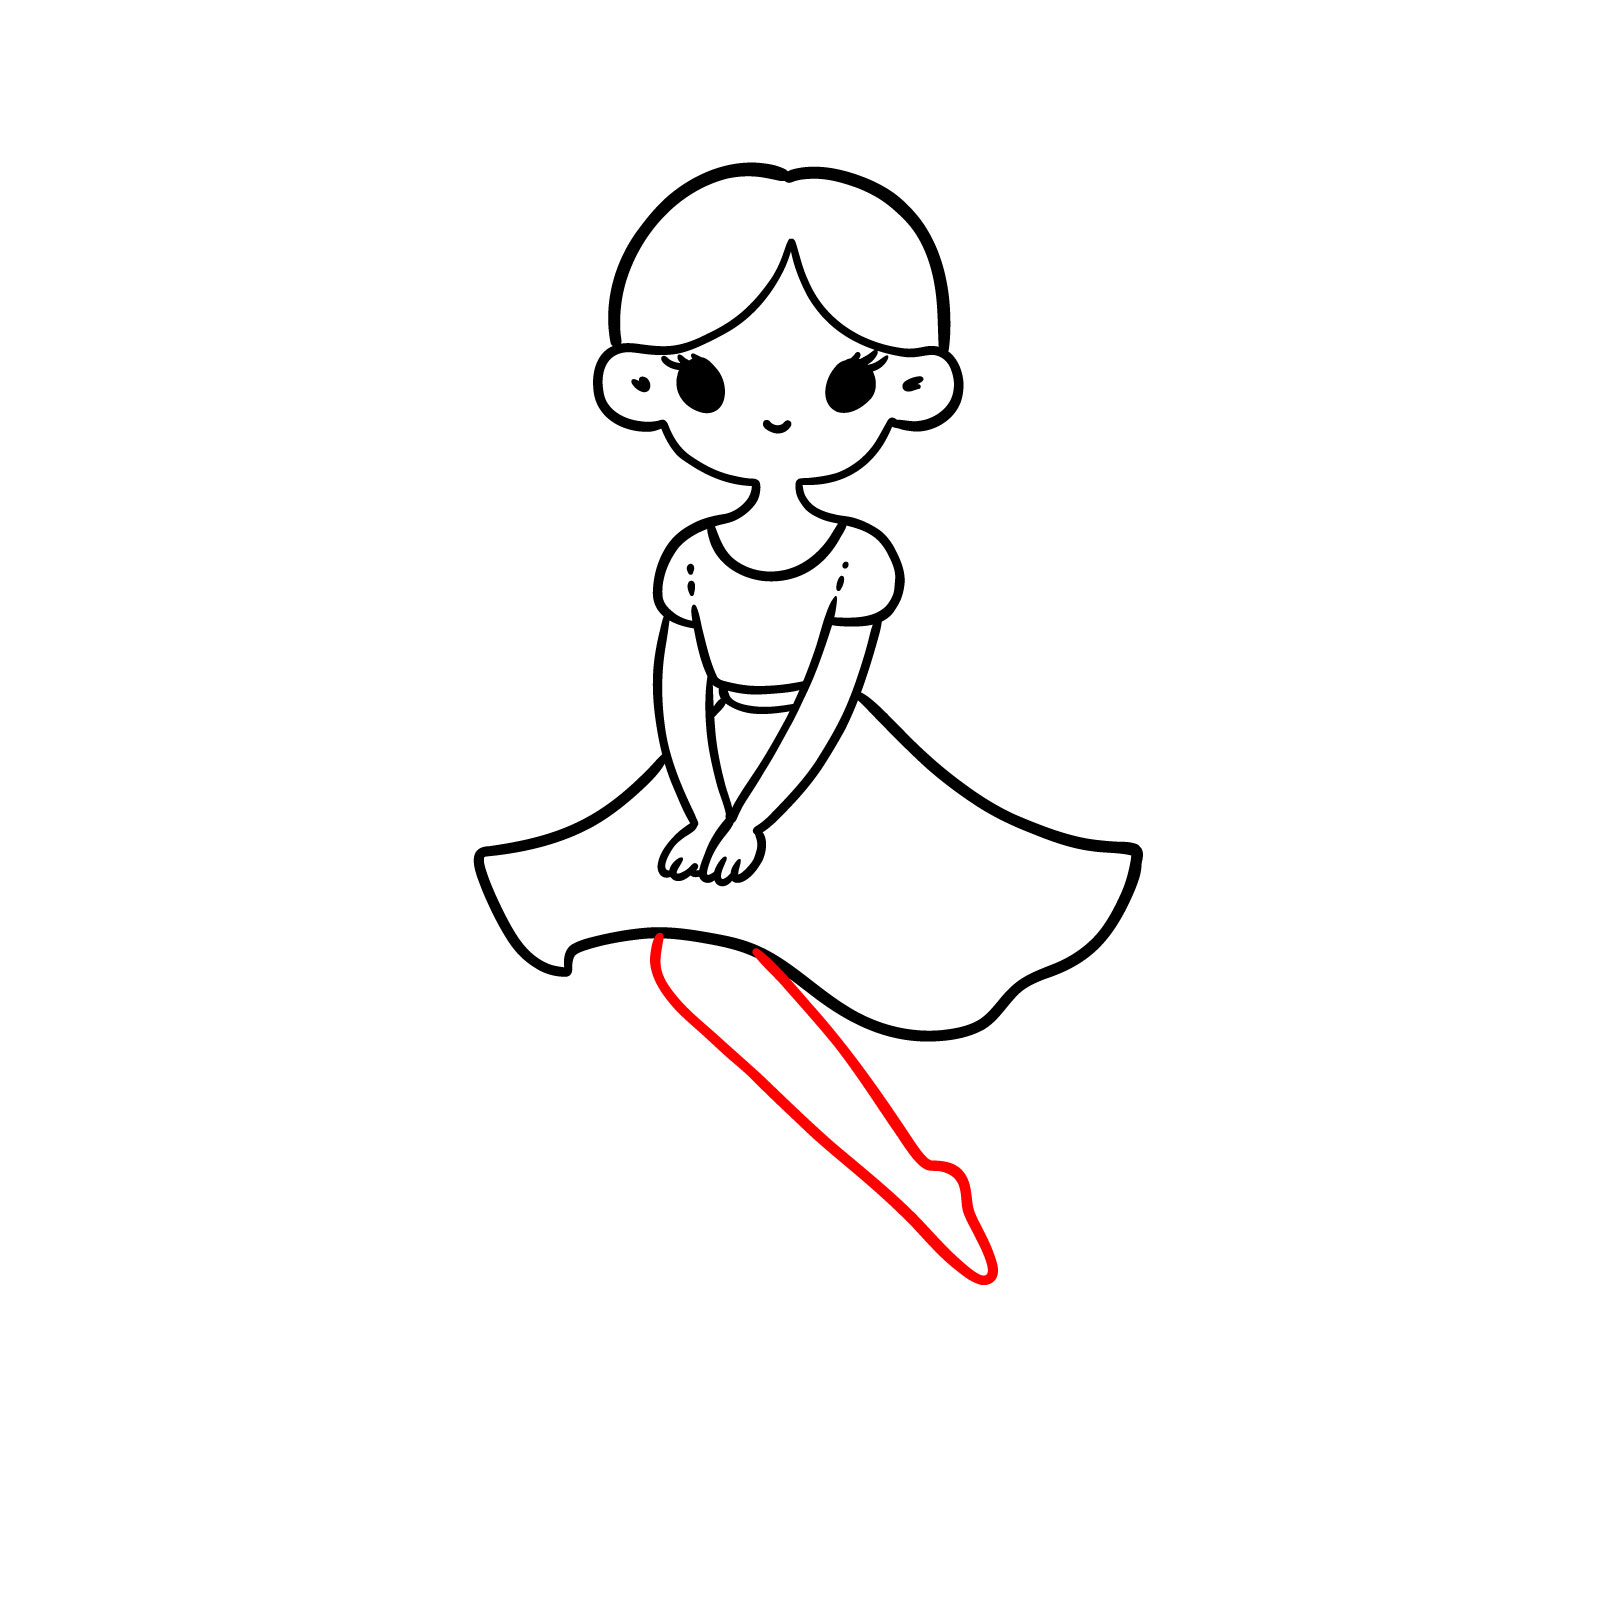
Step 10 – From under the skirt, draw the left leg extending outward, with a gentle curve to show the relaxed nature of her pose. Pay attention to the proportion of the leg to ensure it looks balanced with her body
Outlining the left leg
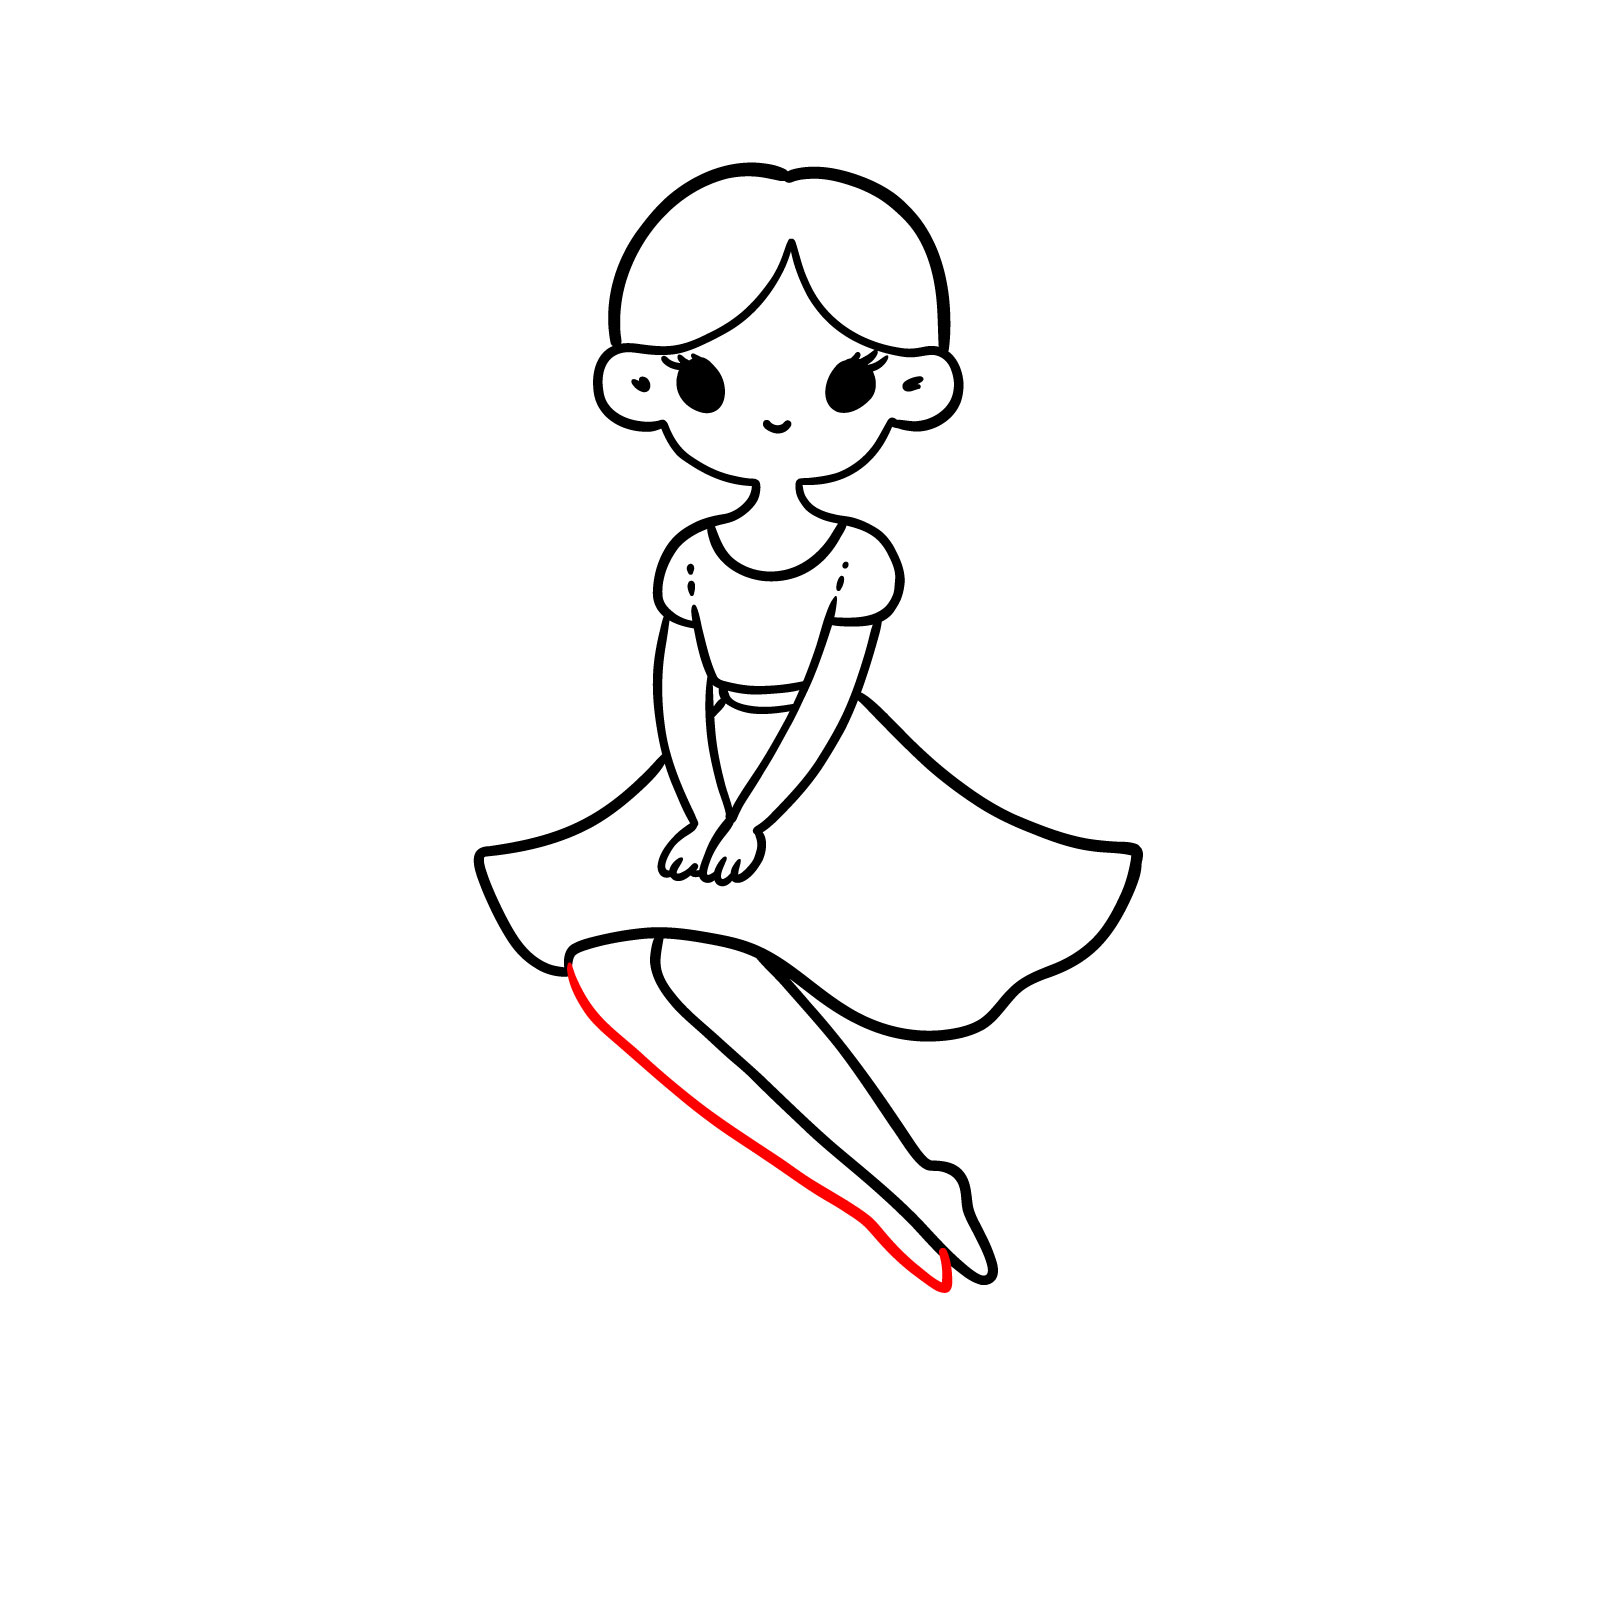
Step 11 – Now add the right leg. As with the hands, her right leg goes slightly behind her left leg
Adding the right leg
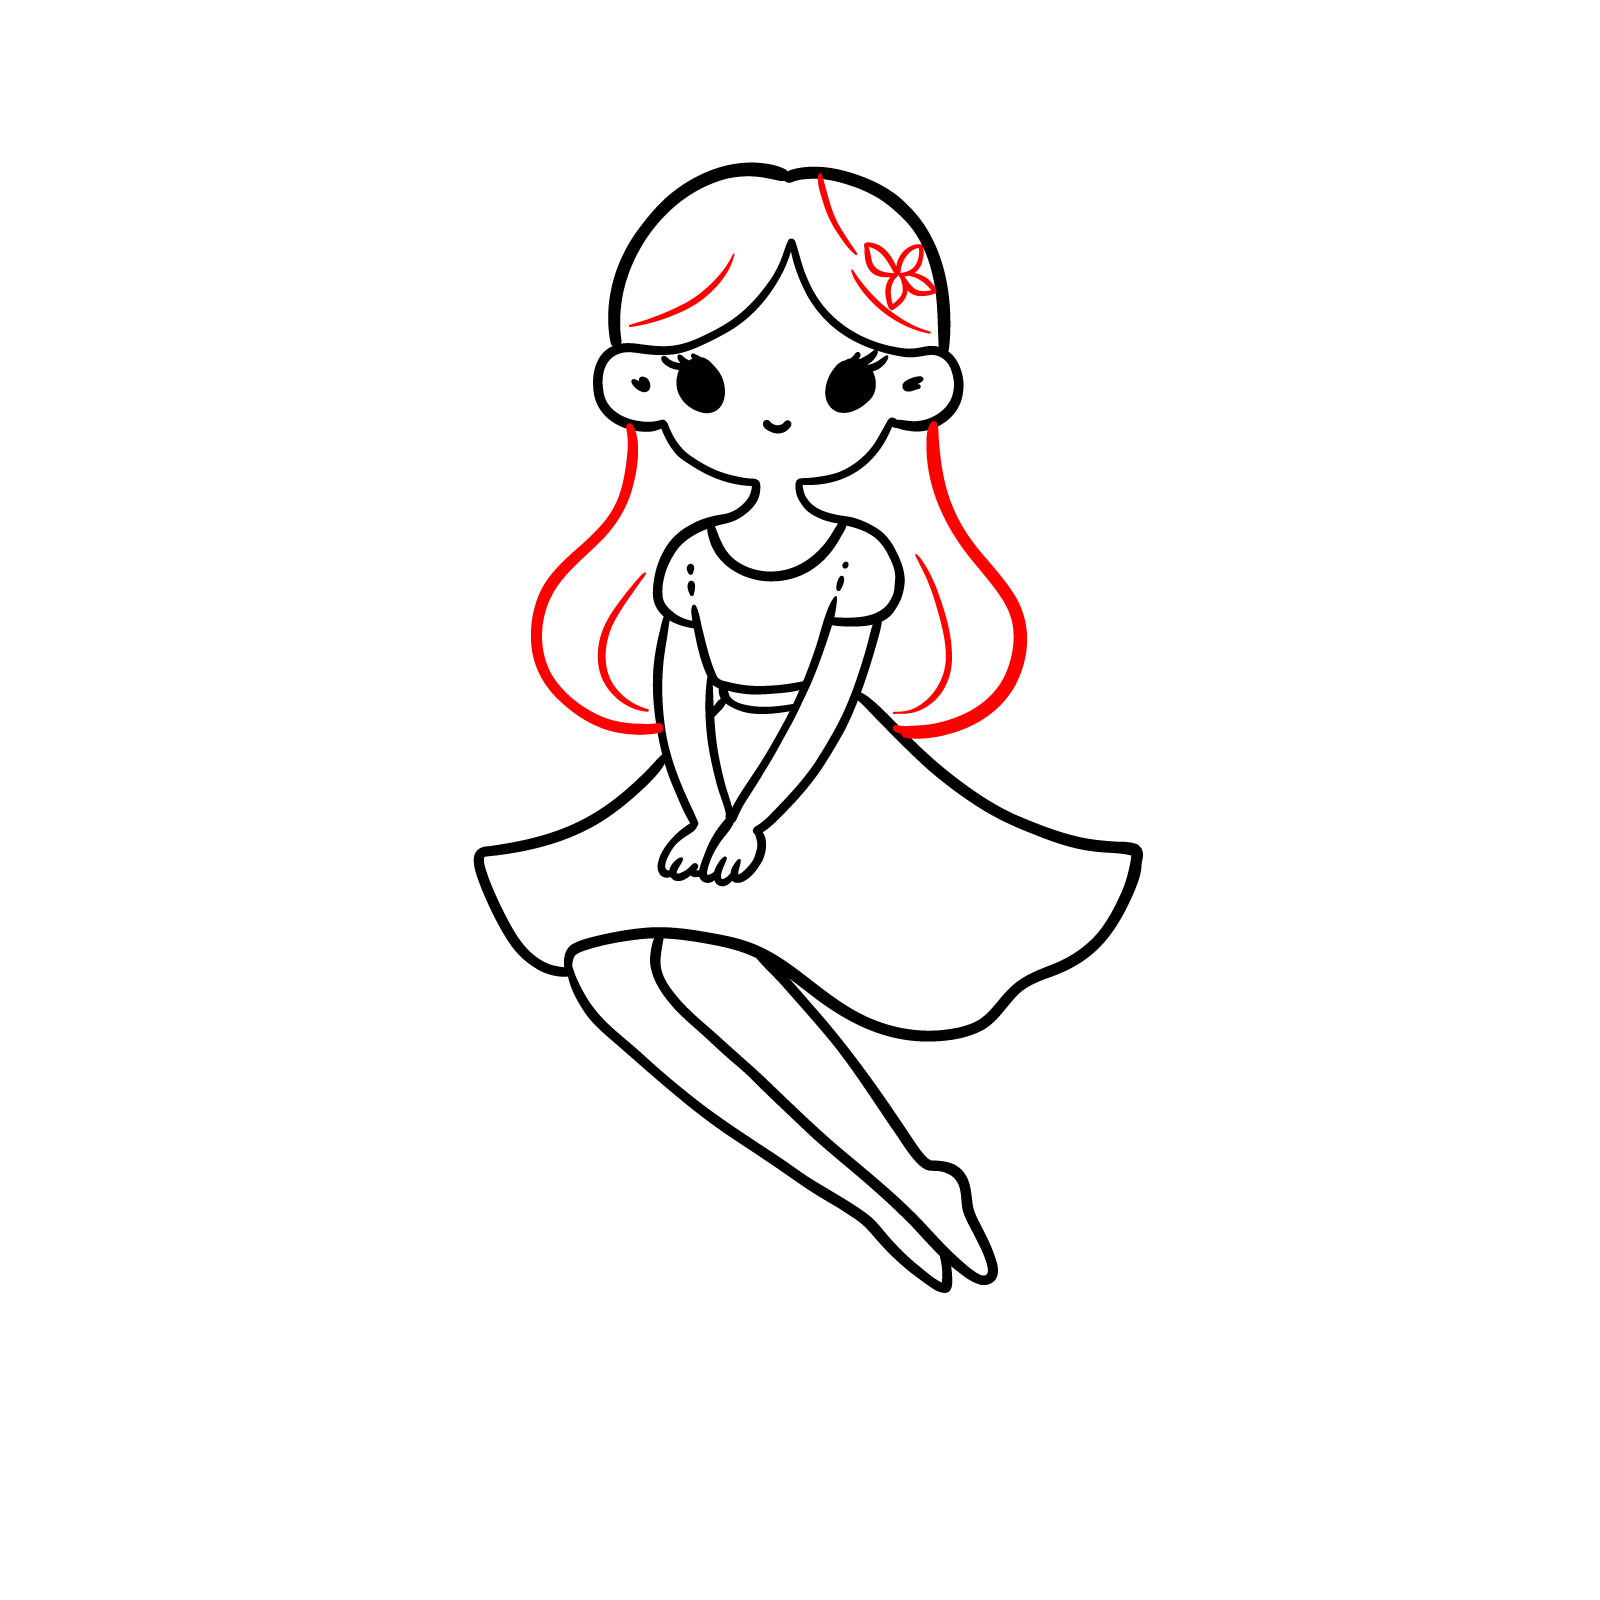
Step 12 – Finish off your fairy with flowing hair on both sides of her head, adding a simple flower pin for a whimsical touch. The hair should look soft and natural, cascading down her shoulders and framing her face beautifully
Finalizing with hair details and a flower pin
Step 13 – Draw the outline of the leaf, curving beneath the fairy, to establish her perch. Then, sketch the two wings with soft, rounded edges behind her, ensuring they echo the gentle nature of our fairy
Outlining the leaf seat and fairy wings
Step 14 – It’s time to add texture and detail. Illustrate the leaf’s veins and add patterns to the fairy’s wings. These details will bring depth and life to your fairy and her natural surroundings
Adding details to the skirt, leaf, and wings
Step 15 – Your fairy drawing is complete, showcasing a serene moment as she rests on a leaf. For those who prefer coloring, this image can serve as a beautiful coloring page, allowing you to bring your own color and creativity to the peaceful scene you’ve learned to draw
The completed fairy on a leaf drawing
3. Stylized Fairy – Beginner Level
Cartoon style fairy
The third guide introduces you to a stylized fairy (or maybe a cartoon fairy), depicted in a poised and elegant stance. The illustration captures the fairy in a frontal pose, her dress billowing out in a classic bell shape, with delicate lines suggesting the soft folds of fabric.
Her wings are spread wide, detailed with vein-like patterns that add a sense of realism to her ethereal form. This guide will take you through the nuances of creating a fairy’s attire and the subtle grace in her facial features. Prepare your drawing tools to capture the delicate fusion of style and fantasy in this still beginer-level fairy drawing.
Step 01 – Begin your fairy drawing by creating the hairline. This will serve as a guide for the forehead and the hair. Draw a gentle curved line that peaks to represent where the hair will part. This marks the first step in bringing your stylized cartoon fairy to life
Starting the fairy’s hair with a simple arch
Step 02 – Once the hairline is in place, it’s time to outline the fairy’s face. Add two curved lines descending from the hairline to form the cheeks and chin. These lines should be symmetrical and meet at a small distance below
Shaping the face of your stylized cartoon fairy.
Step 03 – With the face frame set, add the fairy’s ears with small curves on each side. Sketch the eyes as closed, with long lashes to add a dreamy expression, and a simple smile to convey happiness
Detailing the fairy’s facial features
Step 0 – Extend lines from the chin down to form the neck. Then, draw gentle curves outward for the shoulders and form the upper part of the body
Defining the fairy’s upper body
Step 05 – Draw two long, graceful arms. The lines should taper slightly as they reach the fairy’s hands. The fingers should be simple and only three of them are visible for each hand
Sketching the fairy’s arms and delicate hands
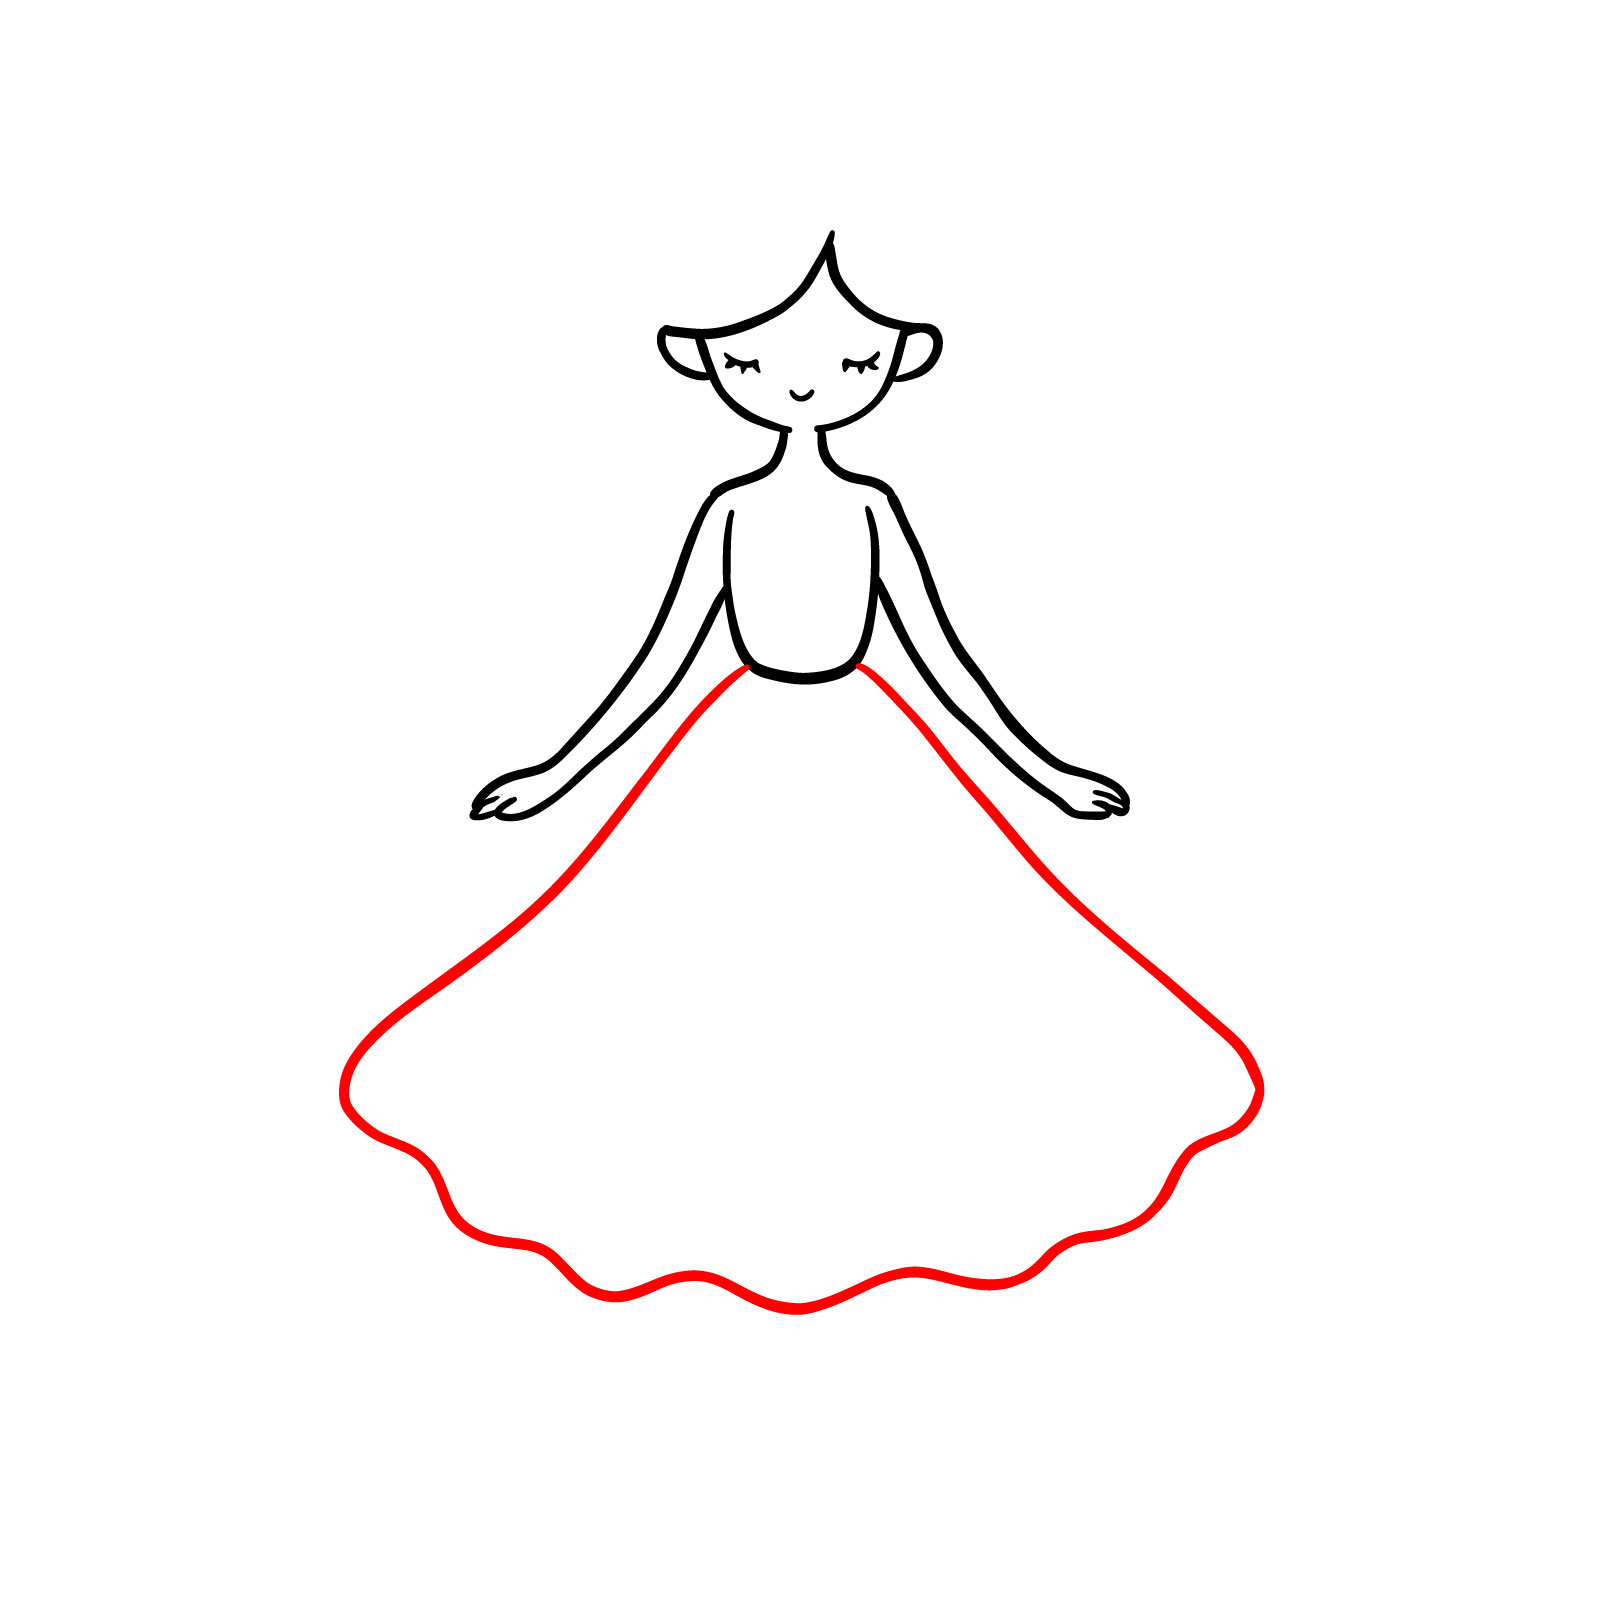
Step 06 – From the bottom of the torso, sketch a wide, bell-shaped form with wavy bottom to represent the fairy’s skirt
Creating the flowy skirt of the fairy
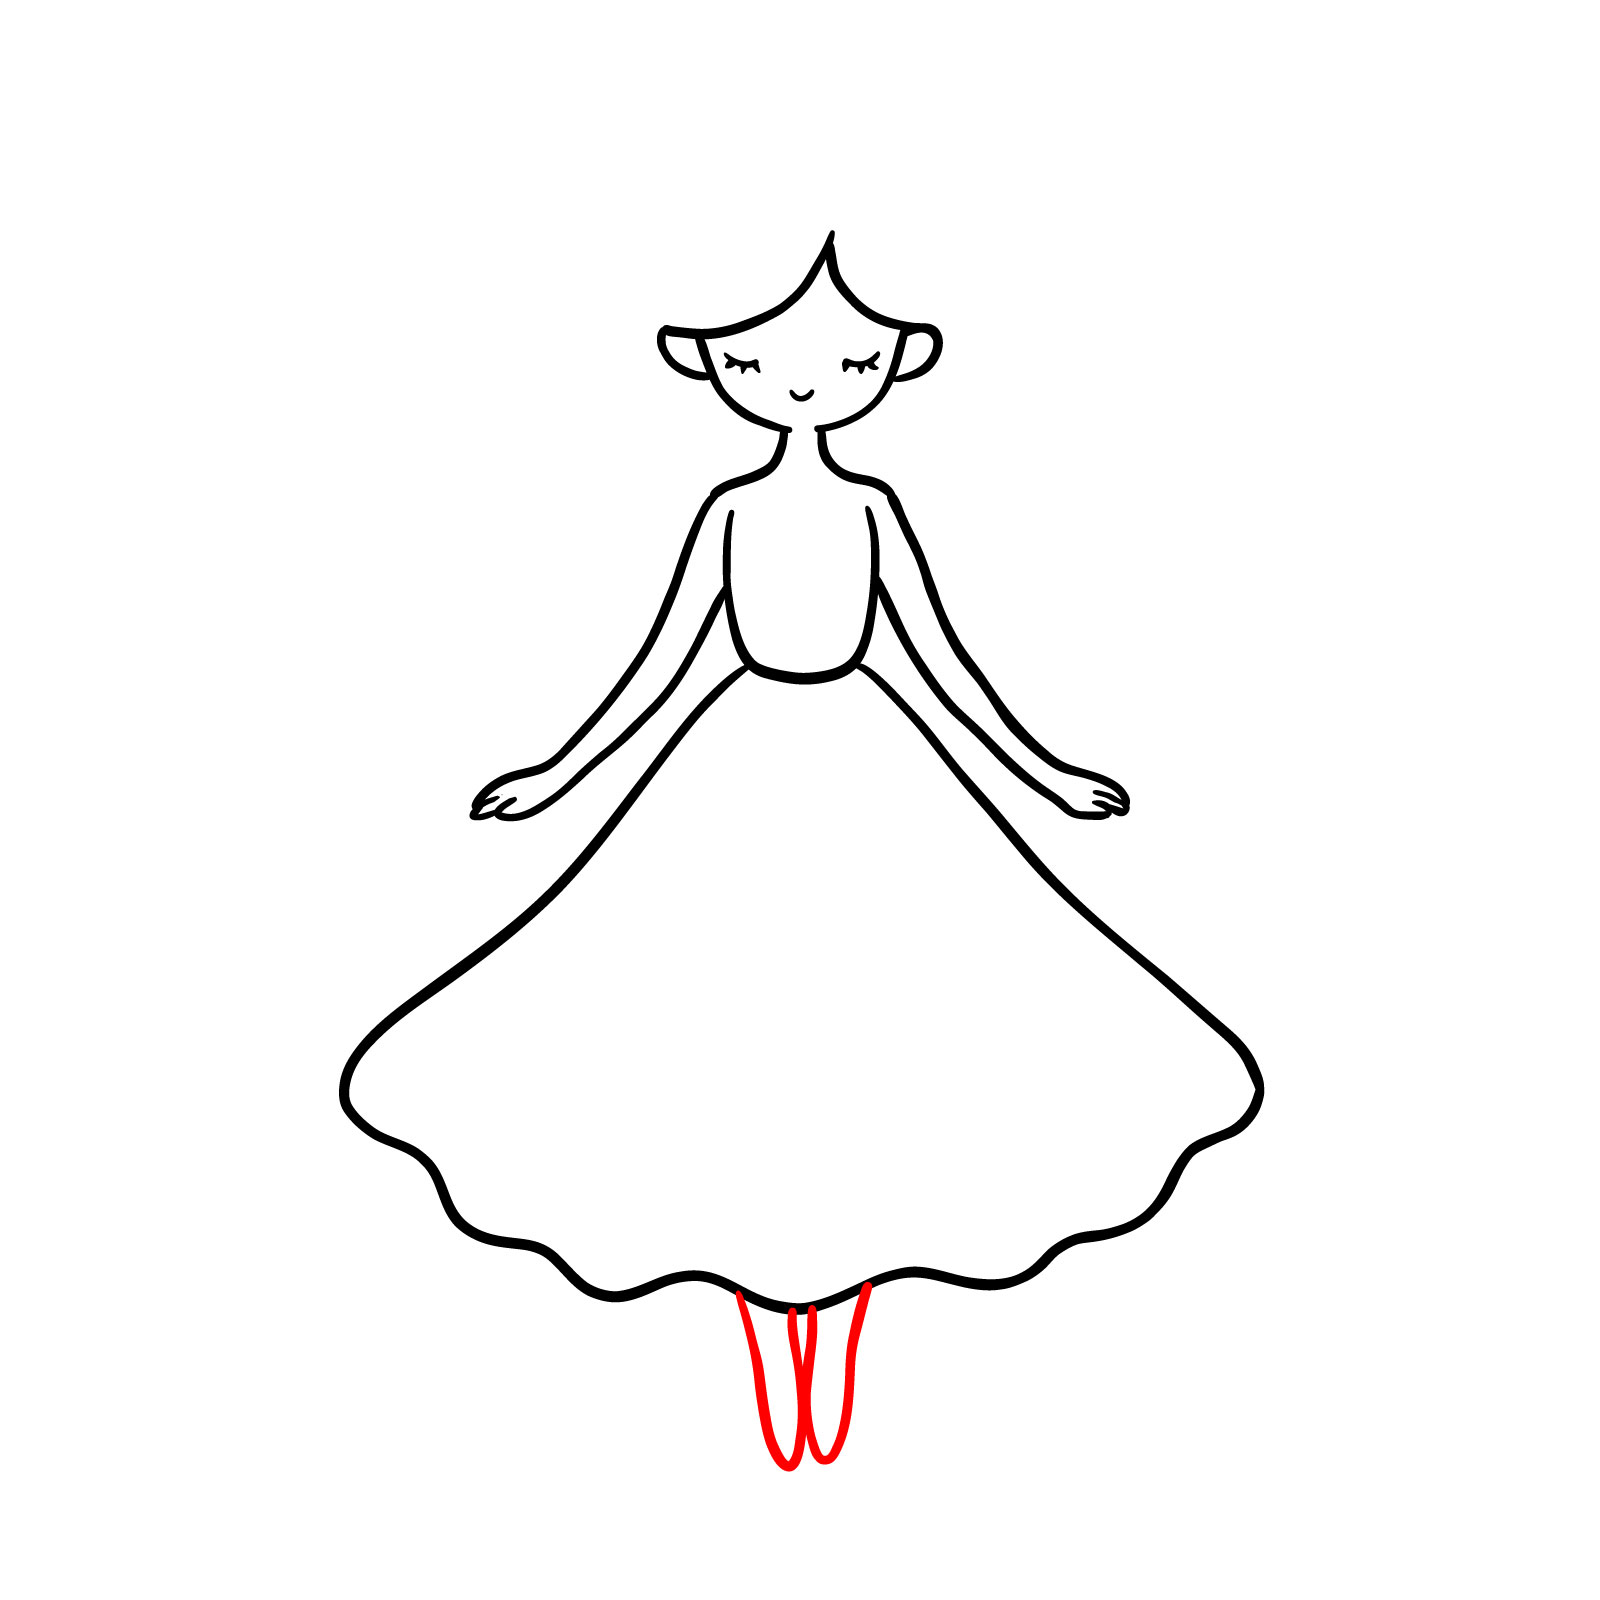
Step 07 – Underneath the skirt, draw two simple forms to represent the legs. These should converge into pointed tips, much like a classic fairy illustration, suggesting the fairy is either floating or standing on tiptoes. This detail maintains the stylized cartoon feel of the character
Defining the fairy’s legs
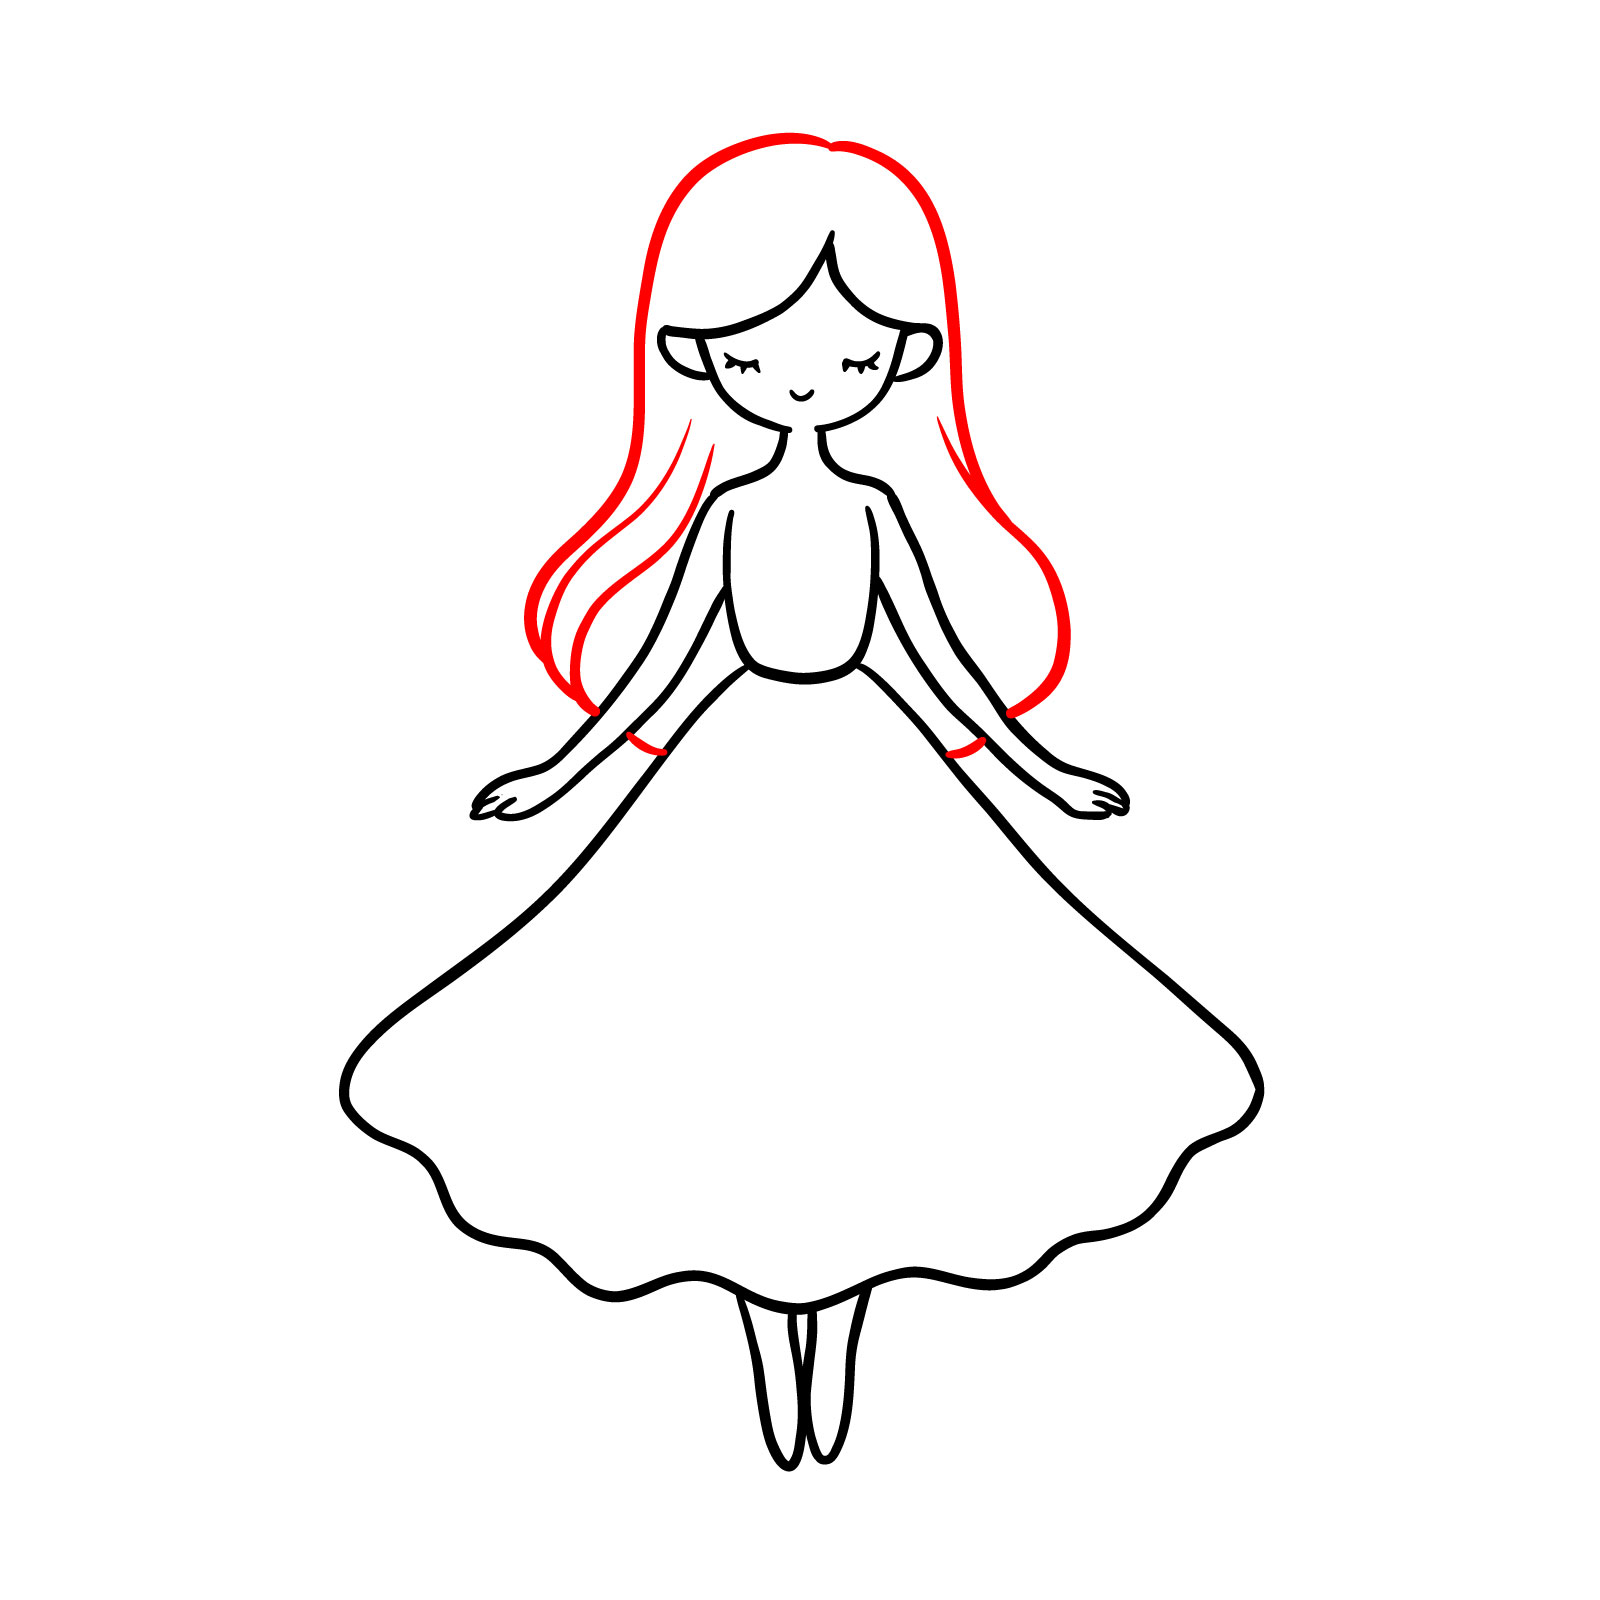
Step 08 – Finally, add volume to the fairy’s hair by drawing long, wavy lines starting from the top of the head and flowing down past the shoulders. This will create a sense of movement and life, completing your fairy drawing with a flourish that captures the free spirit of these mystical beings
Completing the fairy with cascading hair
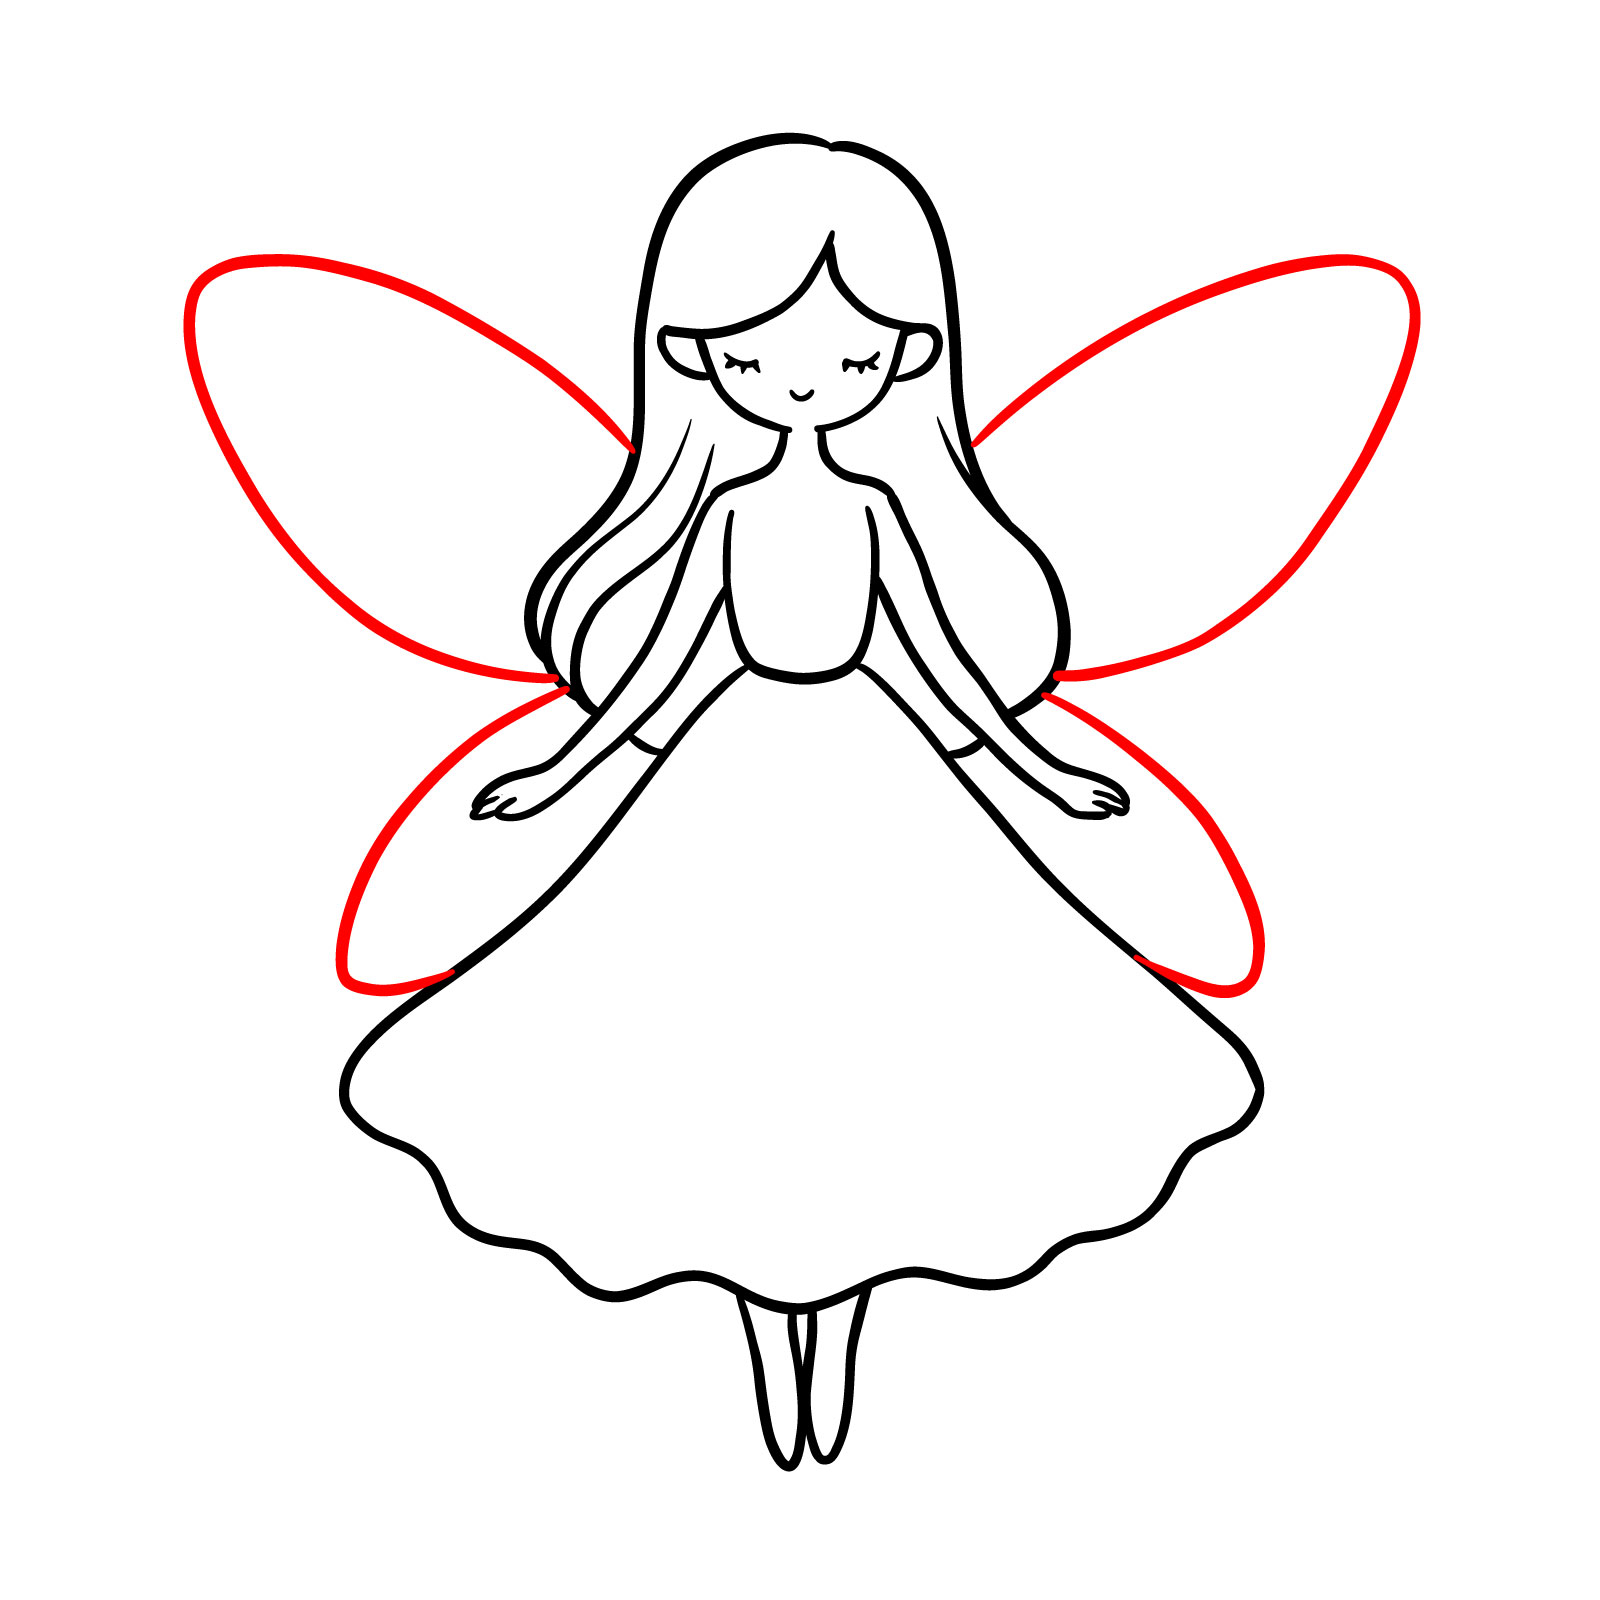
Step 09 – To give your fairy the gift of flight, draw two large wings extending from the back on both sides. The wings should be symmetrical with a slightly pointed tip, resembling those of a butterfly
Adding wings to bring the fairy to life
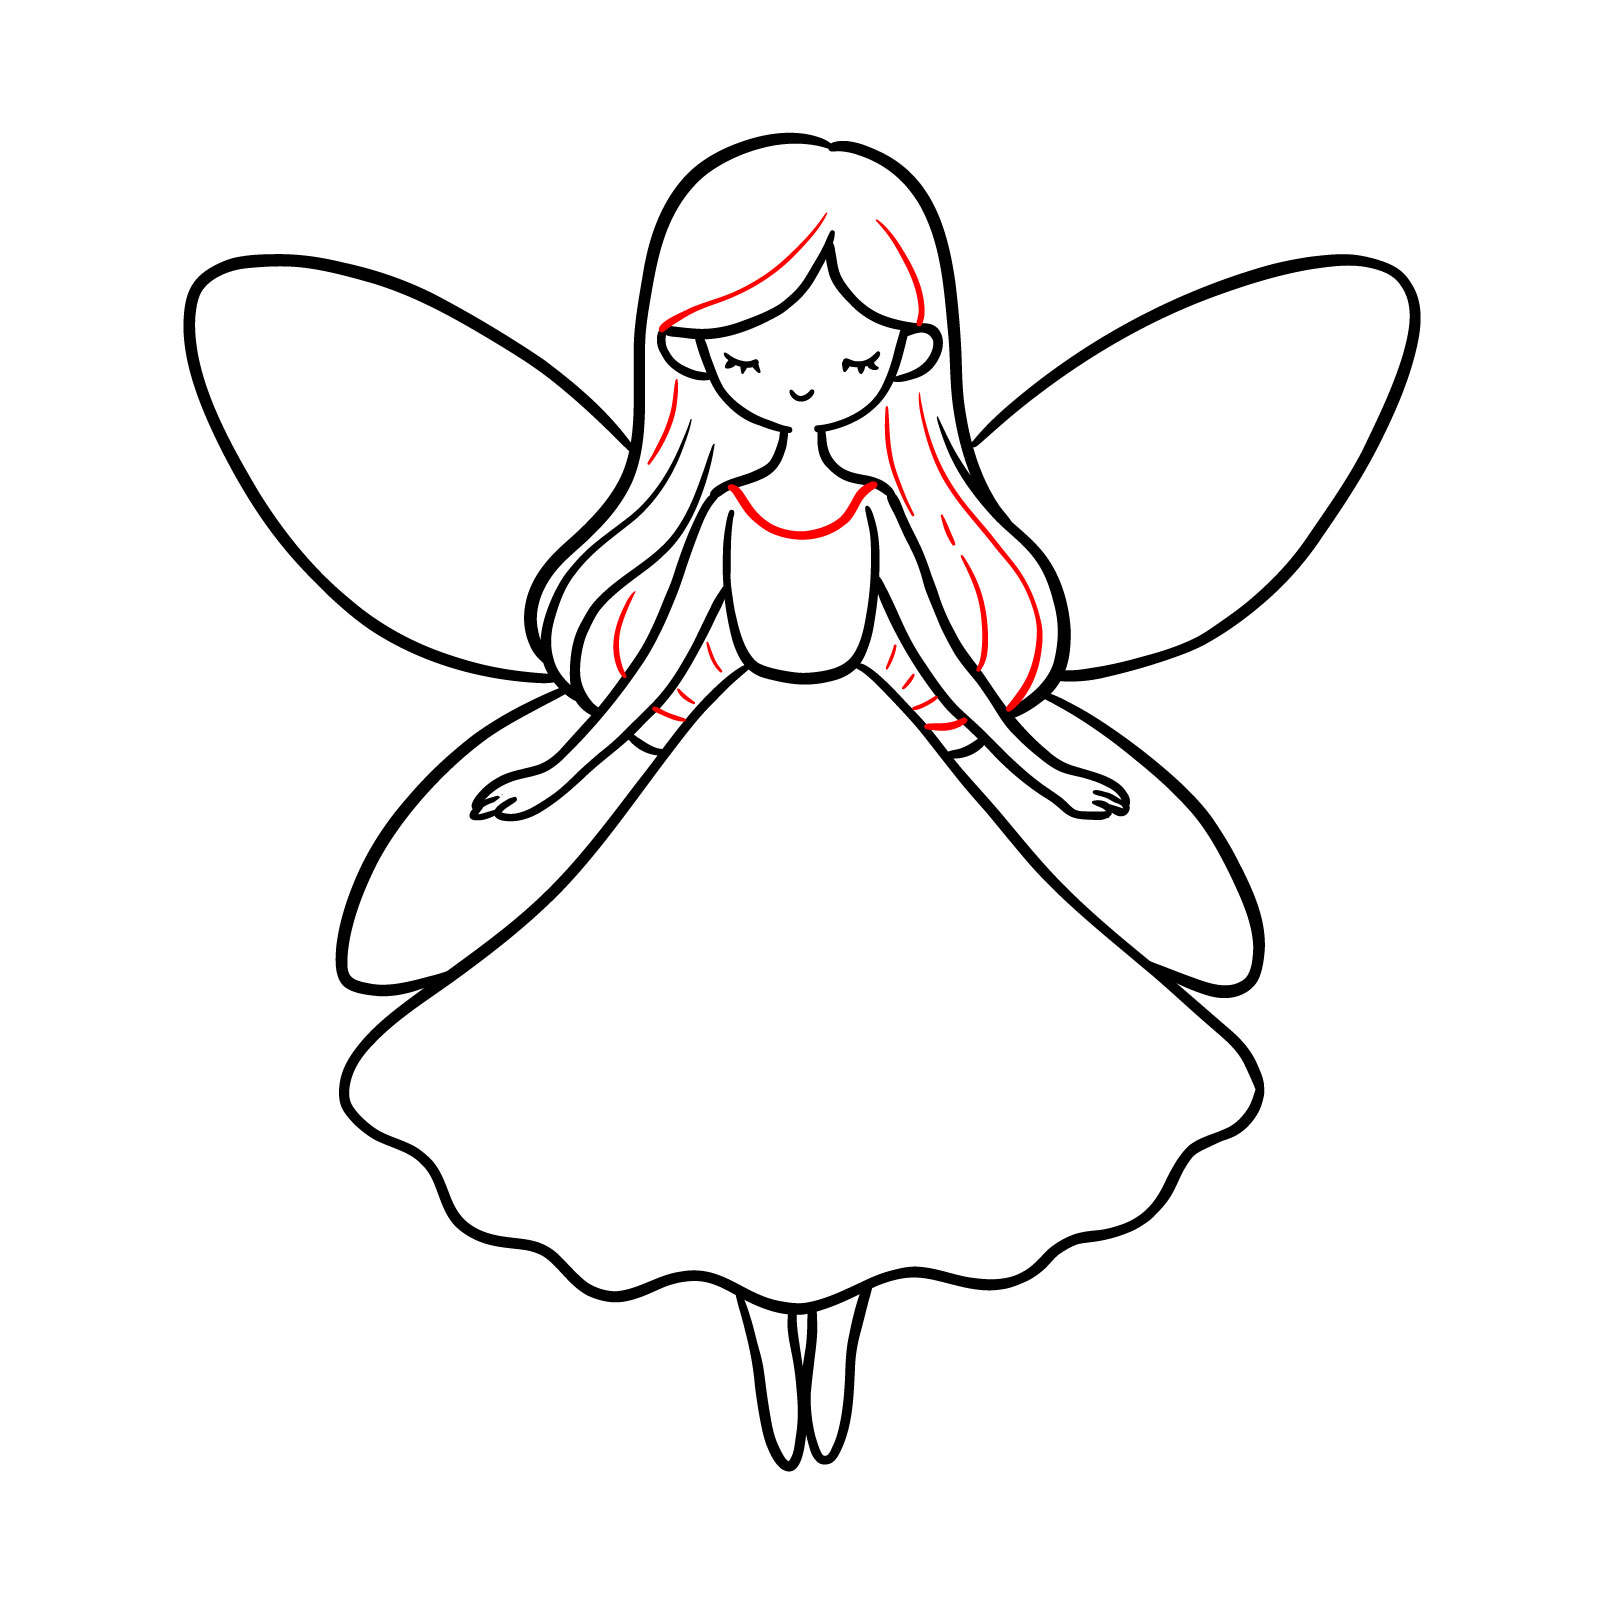
Step 10 – Enhance the fairy’s hair with additional lines to suggest volume and flow. Then, sketch a simple collar on the dress
Refining the fairy’s hair and adding dress details
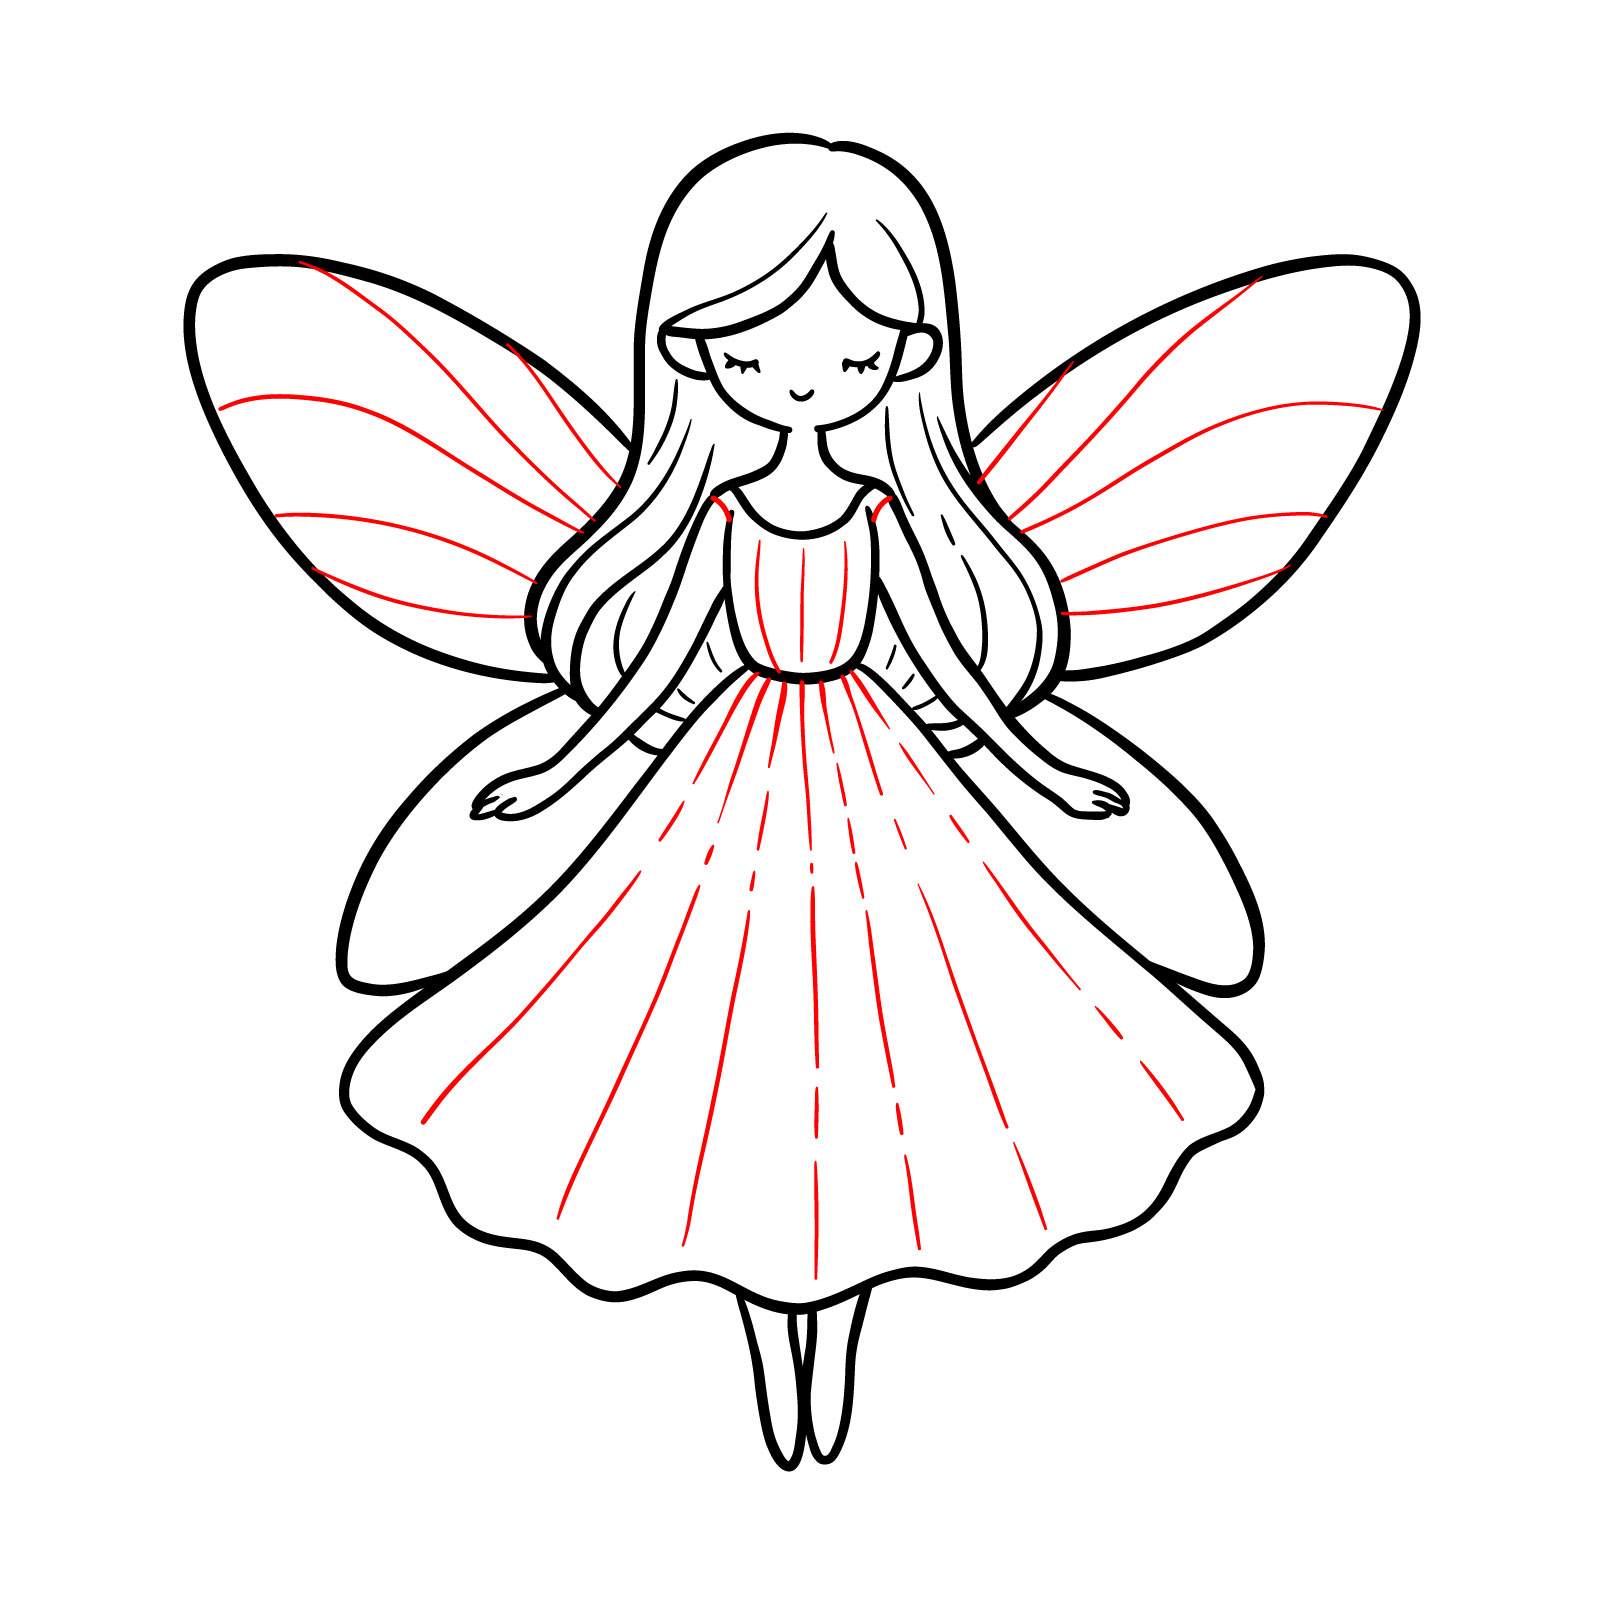
Step 11 – Bring dimension to the fairy’s dress by drawing lines to represent folds, giving the impression of fabric movement. Also, add a pattern to the upper part of the wings
Creating folds in the dress and decorative patterns on the wings
Step 12 – Finish the wings by adding a pattern to the lower sections
Completing the wings with a lower pattern
Step 13 – Your fairy drawing is now complete. Adjust any final details and erase unnecessary lines to clean up your artwork. This fairy drawing can also serve as a coloring page. Enjoy adding colors to bring your creation to vibrant life, or leave it as a delicate line art
The finished fairy drawing, ready for final touches
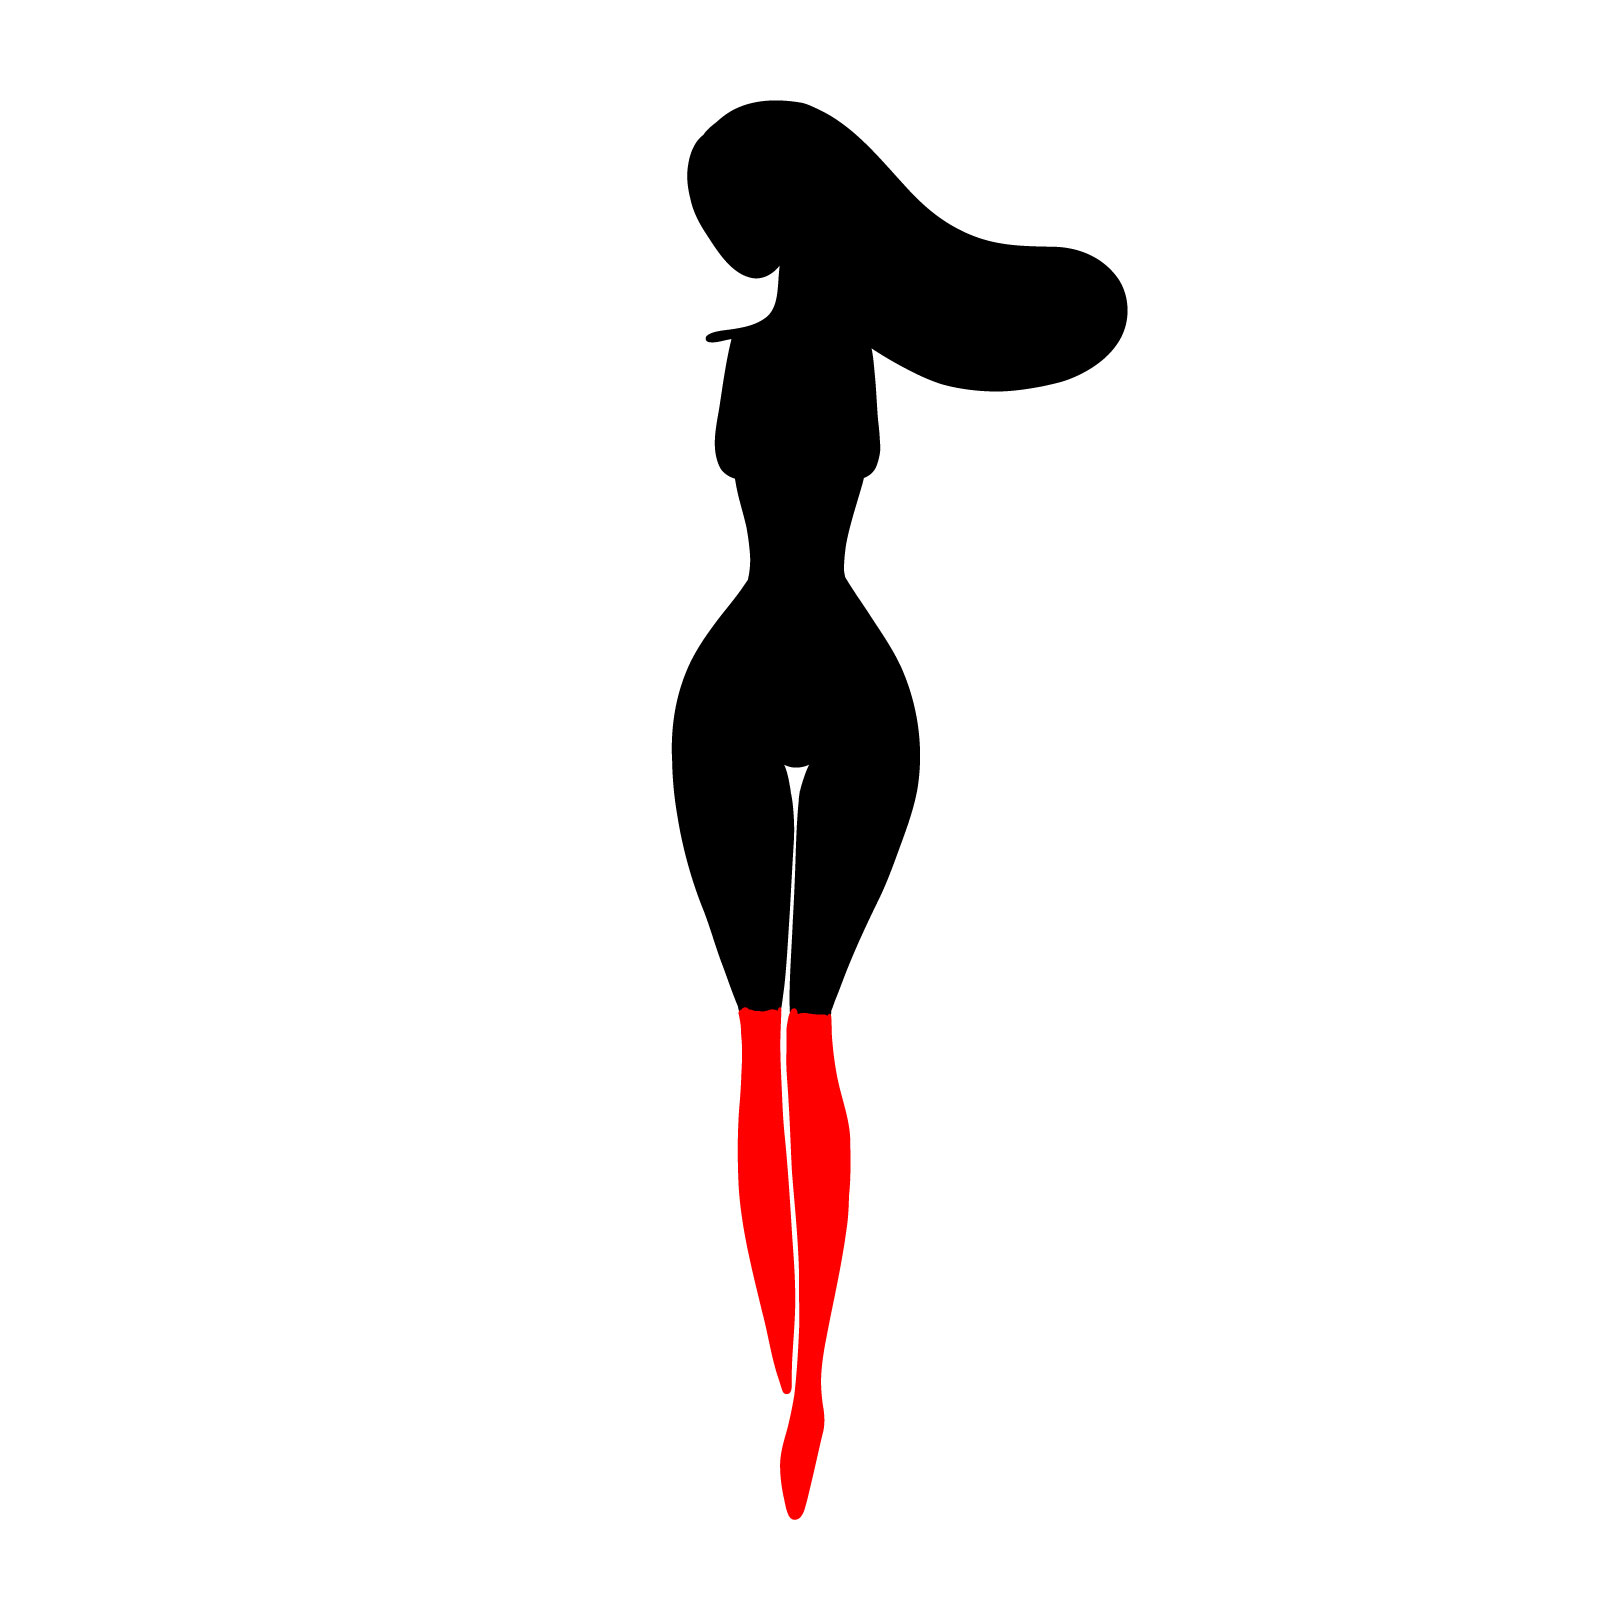
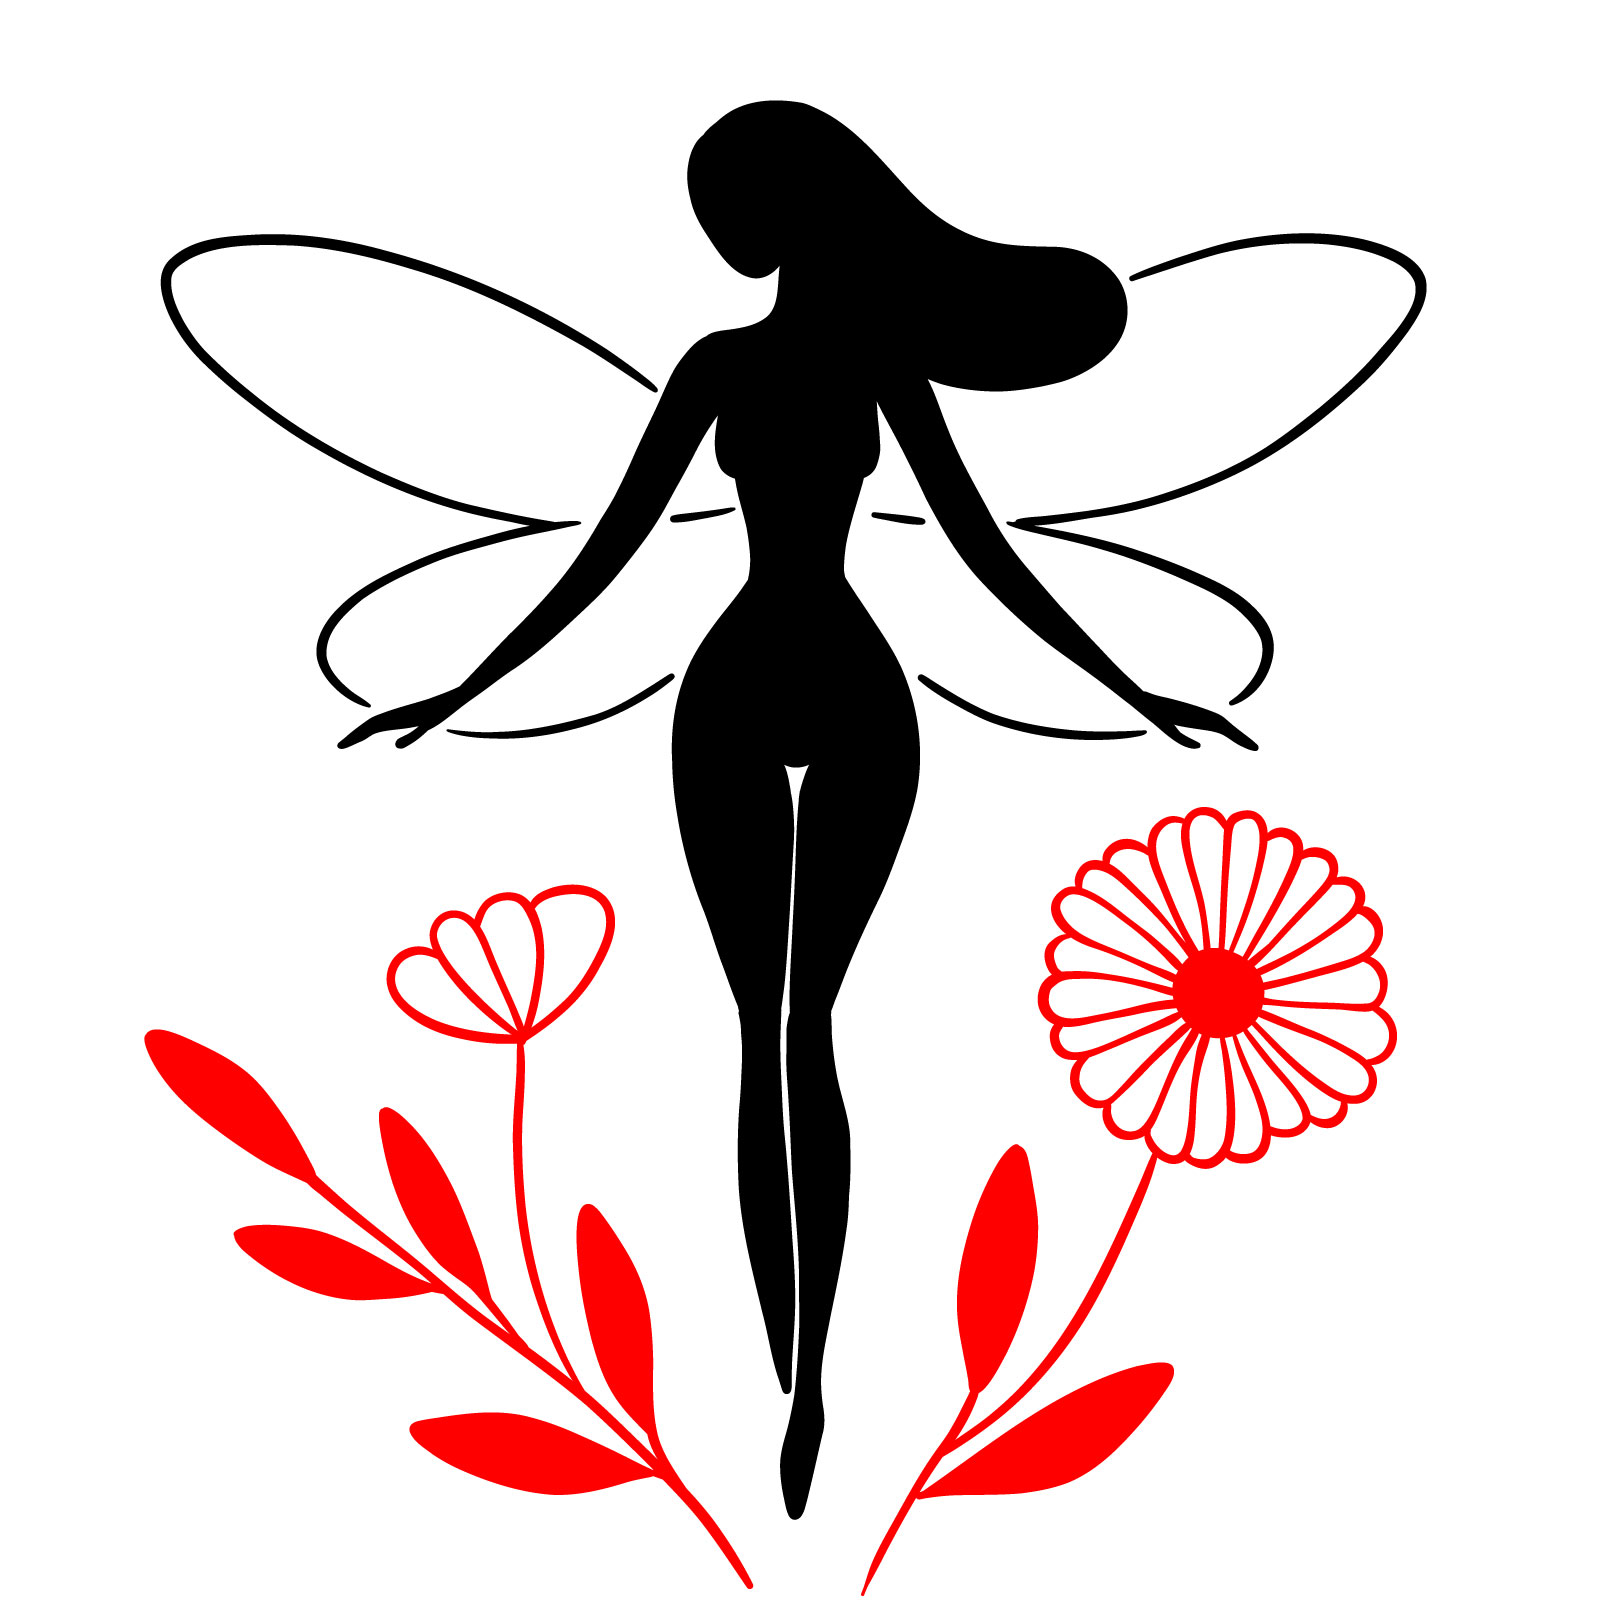
4. Silhouette of a Fairy – Still Pretty Easy
The result of a Fairy Silhouette drawing guide
In this fourth guide, we will hone our technique by mastering the silhouette of a fairy. The provided image presents a striking contrast of the fairy’s figure against a backdrop of nature’s simplicity. With wings outspread and a stance that speaks of quiet confidence, this silhouette transcends the need for detail with its bold simplicity. The fairy stands amidst a selection of flowers, which adds a touch of elegance and a connection to the natural world.
This exercise encourages you to focus on the balance and rhythm in the lines that define the fairy’s form. It is an opportunity to engage with the fundamentals of shape and space, crafting a piece that is both mysterious and expressive.
Step 01 – Begin your silhouette by drawing an oval shape to represent the head of the fairy. This will serve as the anchor for the rest of the silhouette and should be proportionate to the body size you intend to create
Forming the foundation of the silhouette with the head
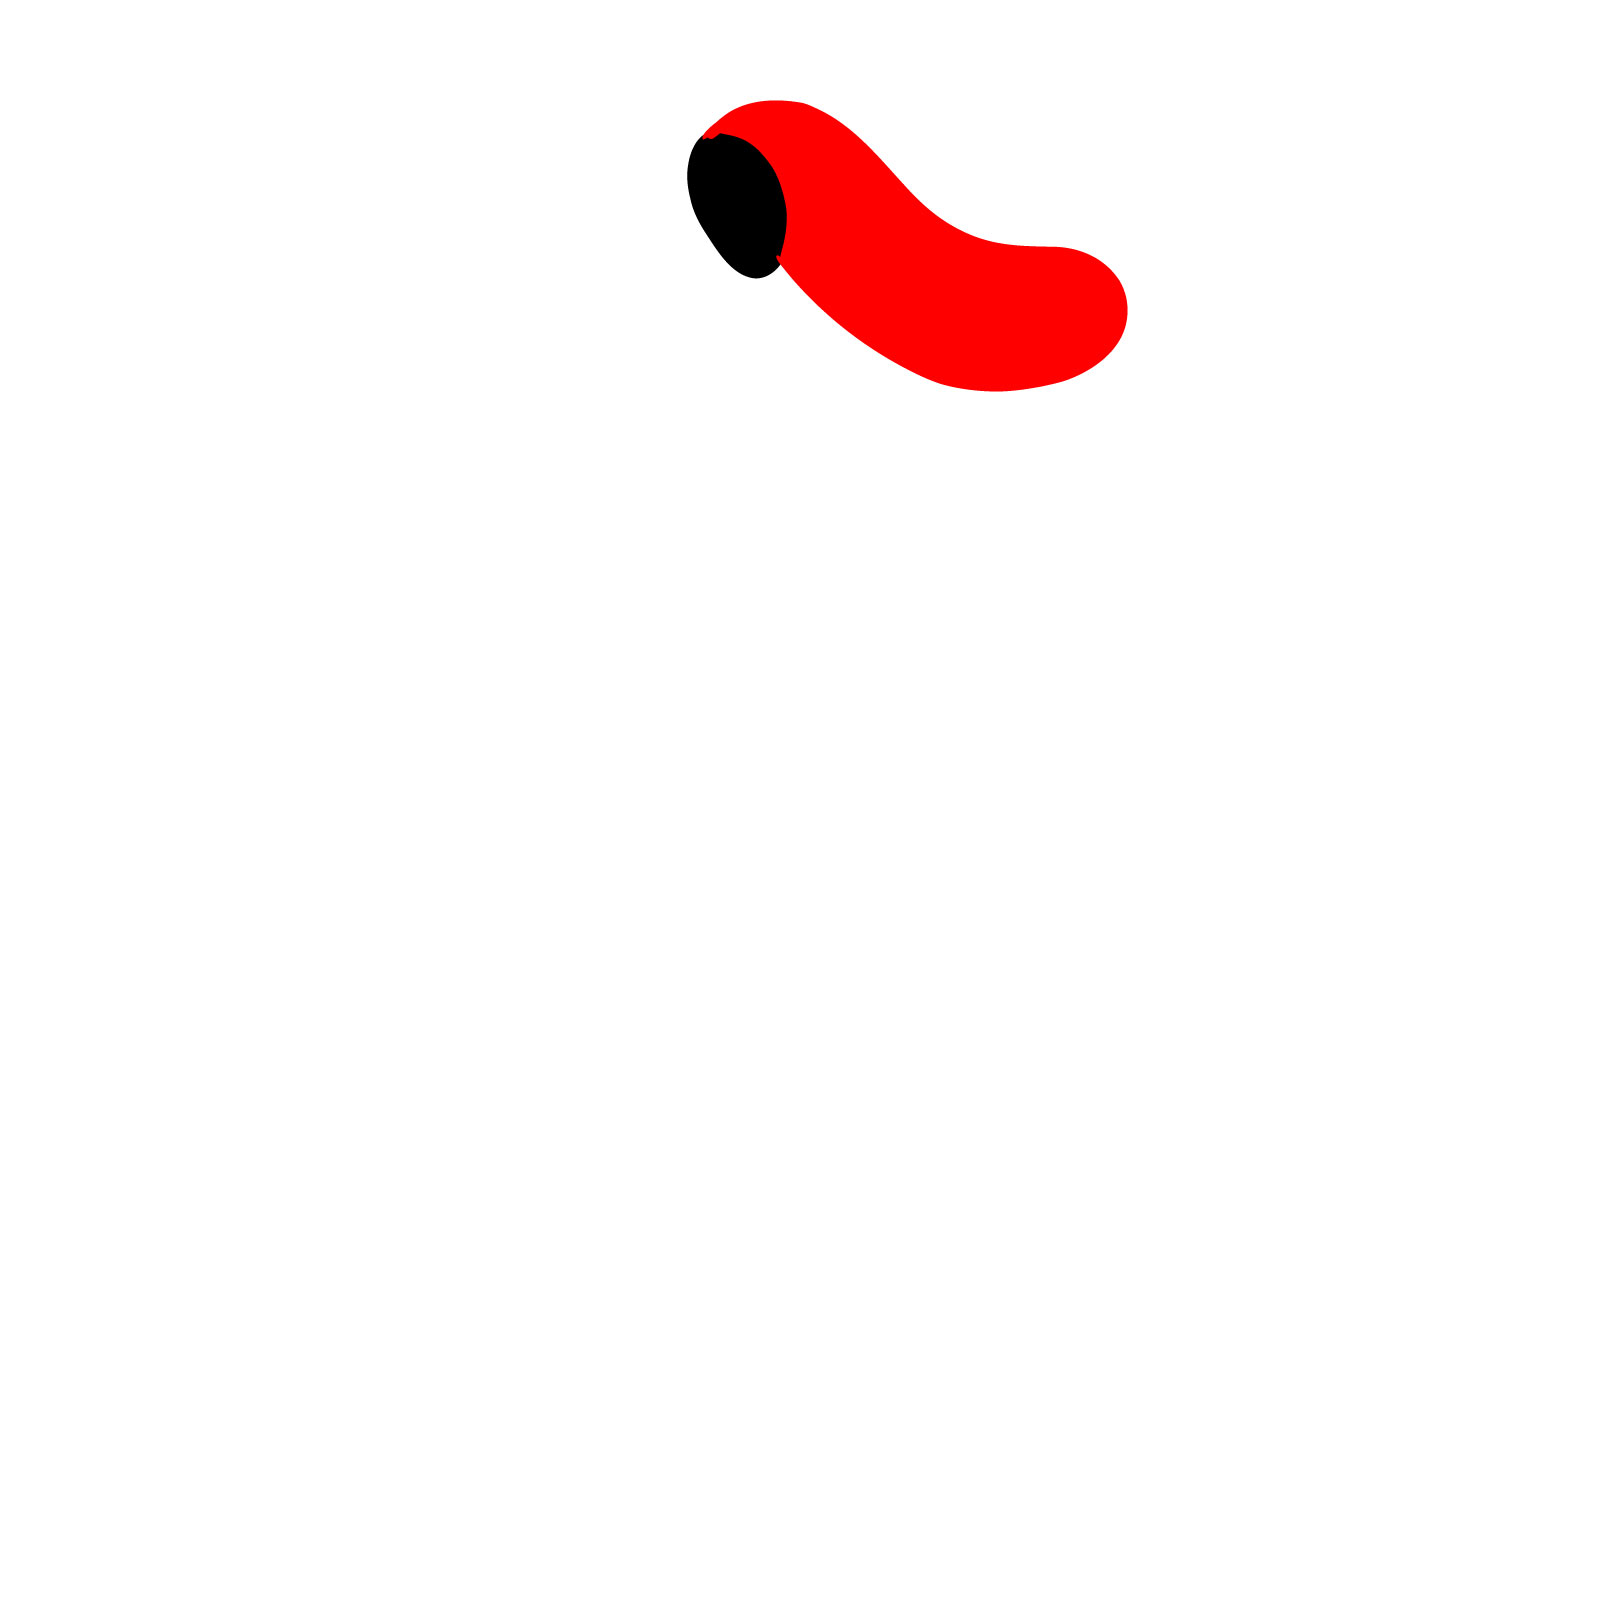
Step 02 – Next, add a flowing shape to the top of the head to indicate the hair. Consider the direction of the hair as it will affect the movement and feel of the silhouette. This shape should have a natural, organic flow to it, reminiscent of hair blowing in a gentle breeze
Adding a flowing hair to the fairy’s head
Step 03 – Continue by connecting the head to a shape that will form the neck and upper torso. The lines should be smooth and elegant, tapering slightly to suggest the fairy’s slender form. Pay attention to the curvature of the lines to maintain a feminine and graceful figure
Sketching the neck and upper body of the fairy
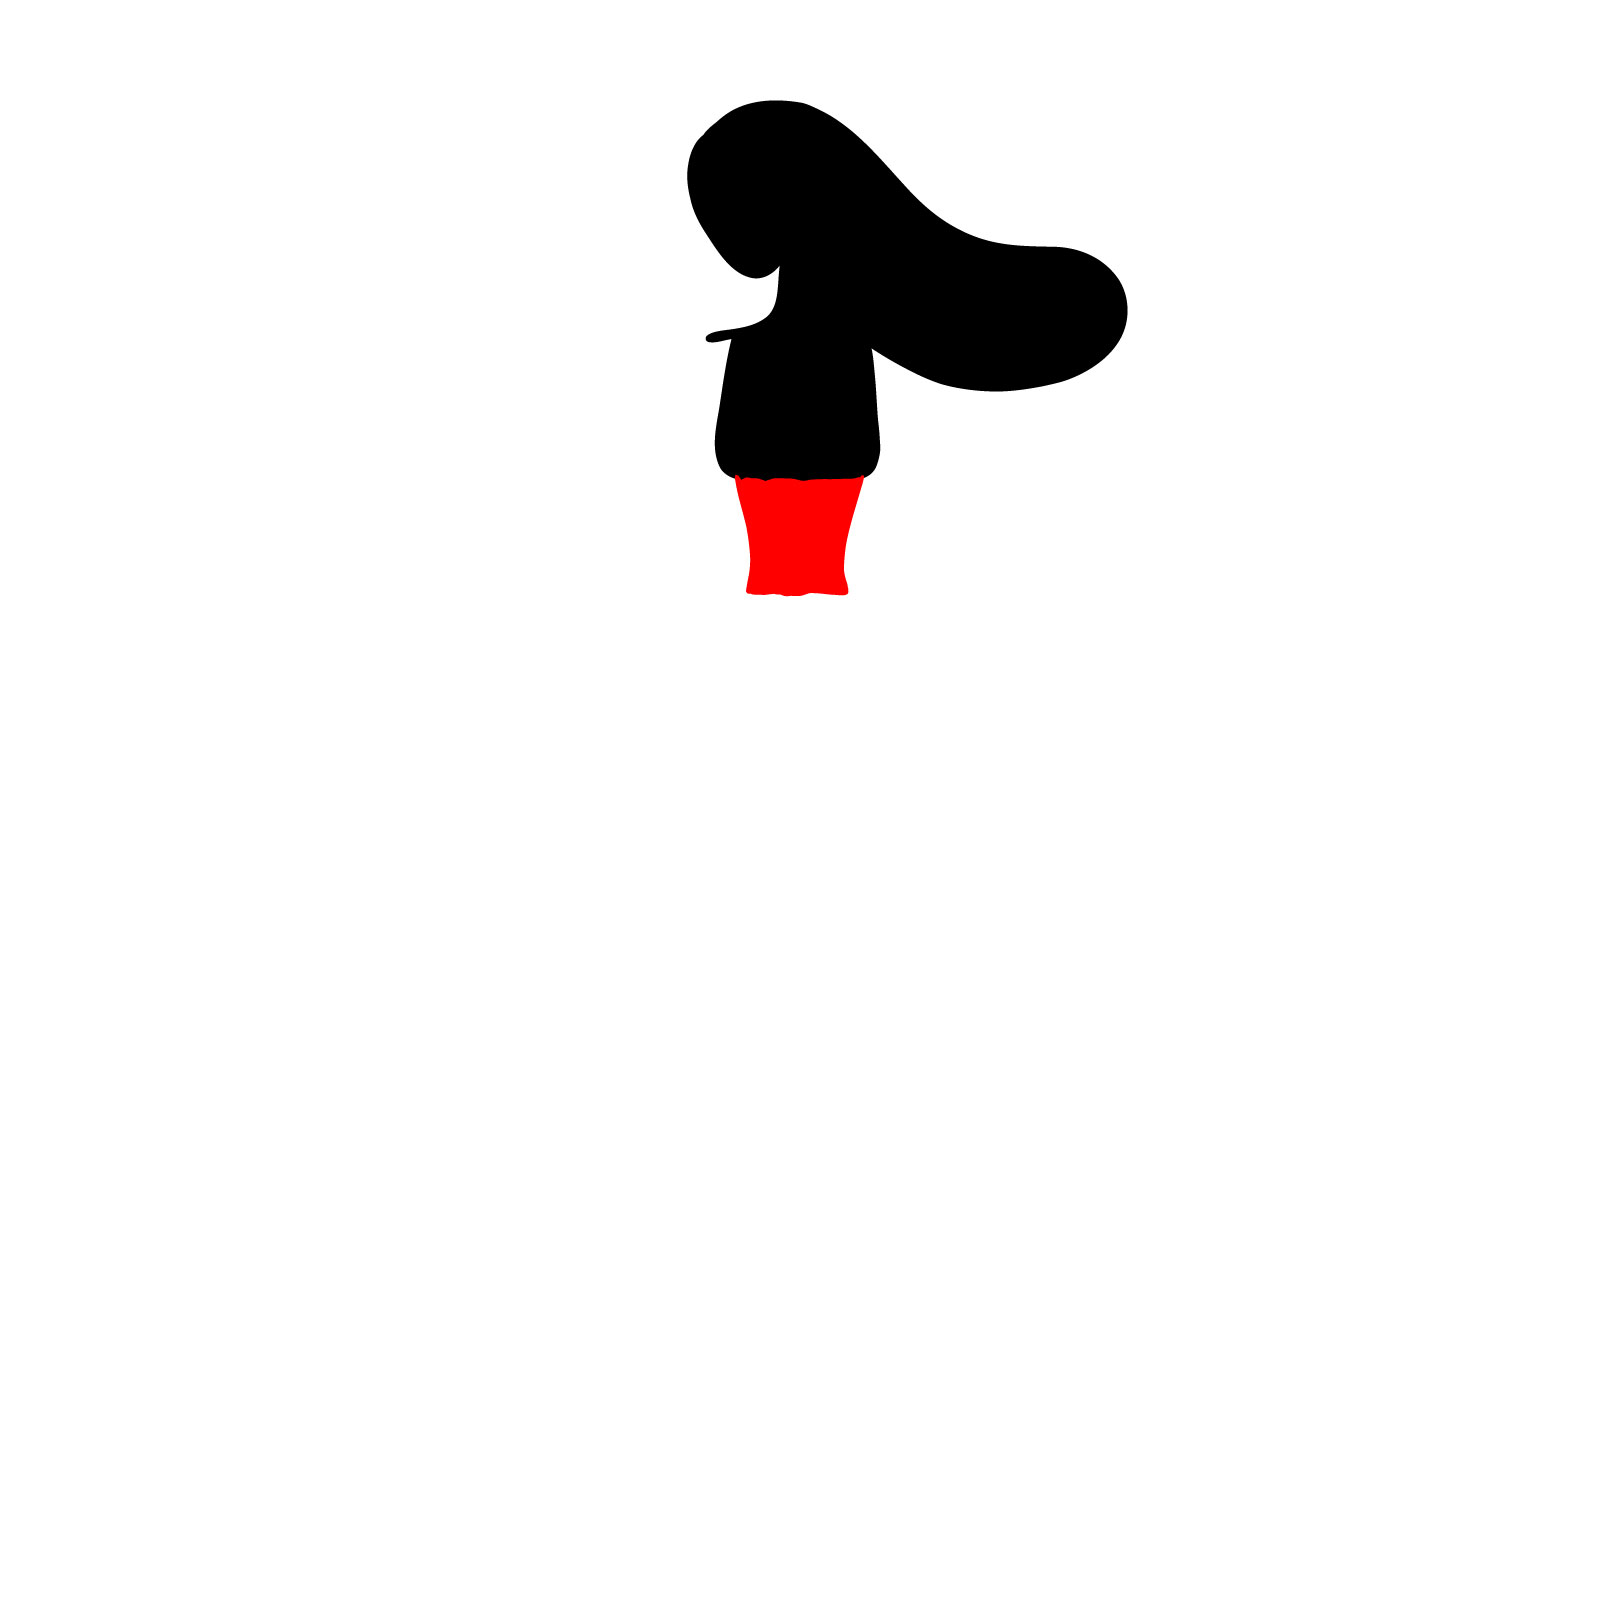
Step 04 – Finish this stage by defining the waist. The waist should be the narrowest part of the silhouette, providing a sense of delicacy and balance to the figure. Ensure that the transition from the upper torso to the waist is seamless and maintains the overall fluidity of the silhouette’s form
Sculpting the waist of the fairy silhouette
Step 05 – To create the lower body, draw a form that captures the pelvis and hips. This area should be fuller and rounded to balance the silhouette and give it a grounded appearance. The lines should smoothly transition from the waist to create a seamless body form
Shaping the lower body of the fairy silhouette
Step 06 – Extend the lines from the hips to form the legs, tapering down to slender points
Crafting the elongated legs of the fairy silhouette
Step 07 – From the shoulders, draw the arms with a slight bend at the elbows, ending with an indication of thumbs to suggest the beginning of hands. The arms should be slender
Drawing the arms and beginning of hands for the fairy
Step 08 – Finish the silhouette by adding the hands. They should be simple yet expressive, perhaps with a slight flare at the ends to imply the fingers
Finalizing the fairy silhouette with hands
Step 09 – Draw two pairs of wings on the back of the fairy to endow her with the classic attribute of these ethereal beings. The wings should be symmetrical
Illustrating the magical wings of the fairy
Step 10 – Optionally, you can add floral elements at the base of the drawing to establish a connection between the fairy and the natural world. The flowers should be simple yet recognizable, with varying shapes and sizes to create a visually pleasing and balanced composition
Connecting the fairy with nature through floral additions
Step 11 – Your fairy silhouette is now complete. This finished drawing captures the enchanting essence of a fairy in a stylized form. Learning how to draw fairies in silhouette form allows for a focus on the fluidity of lines and the interplay between figure and background, creating an artwork that is both mysterious and inviting
The complete silhouette of a fairy, harmonized with nature
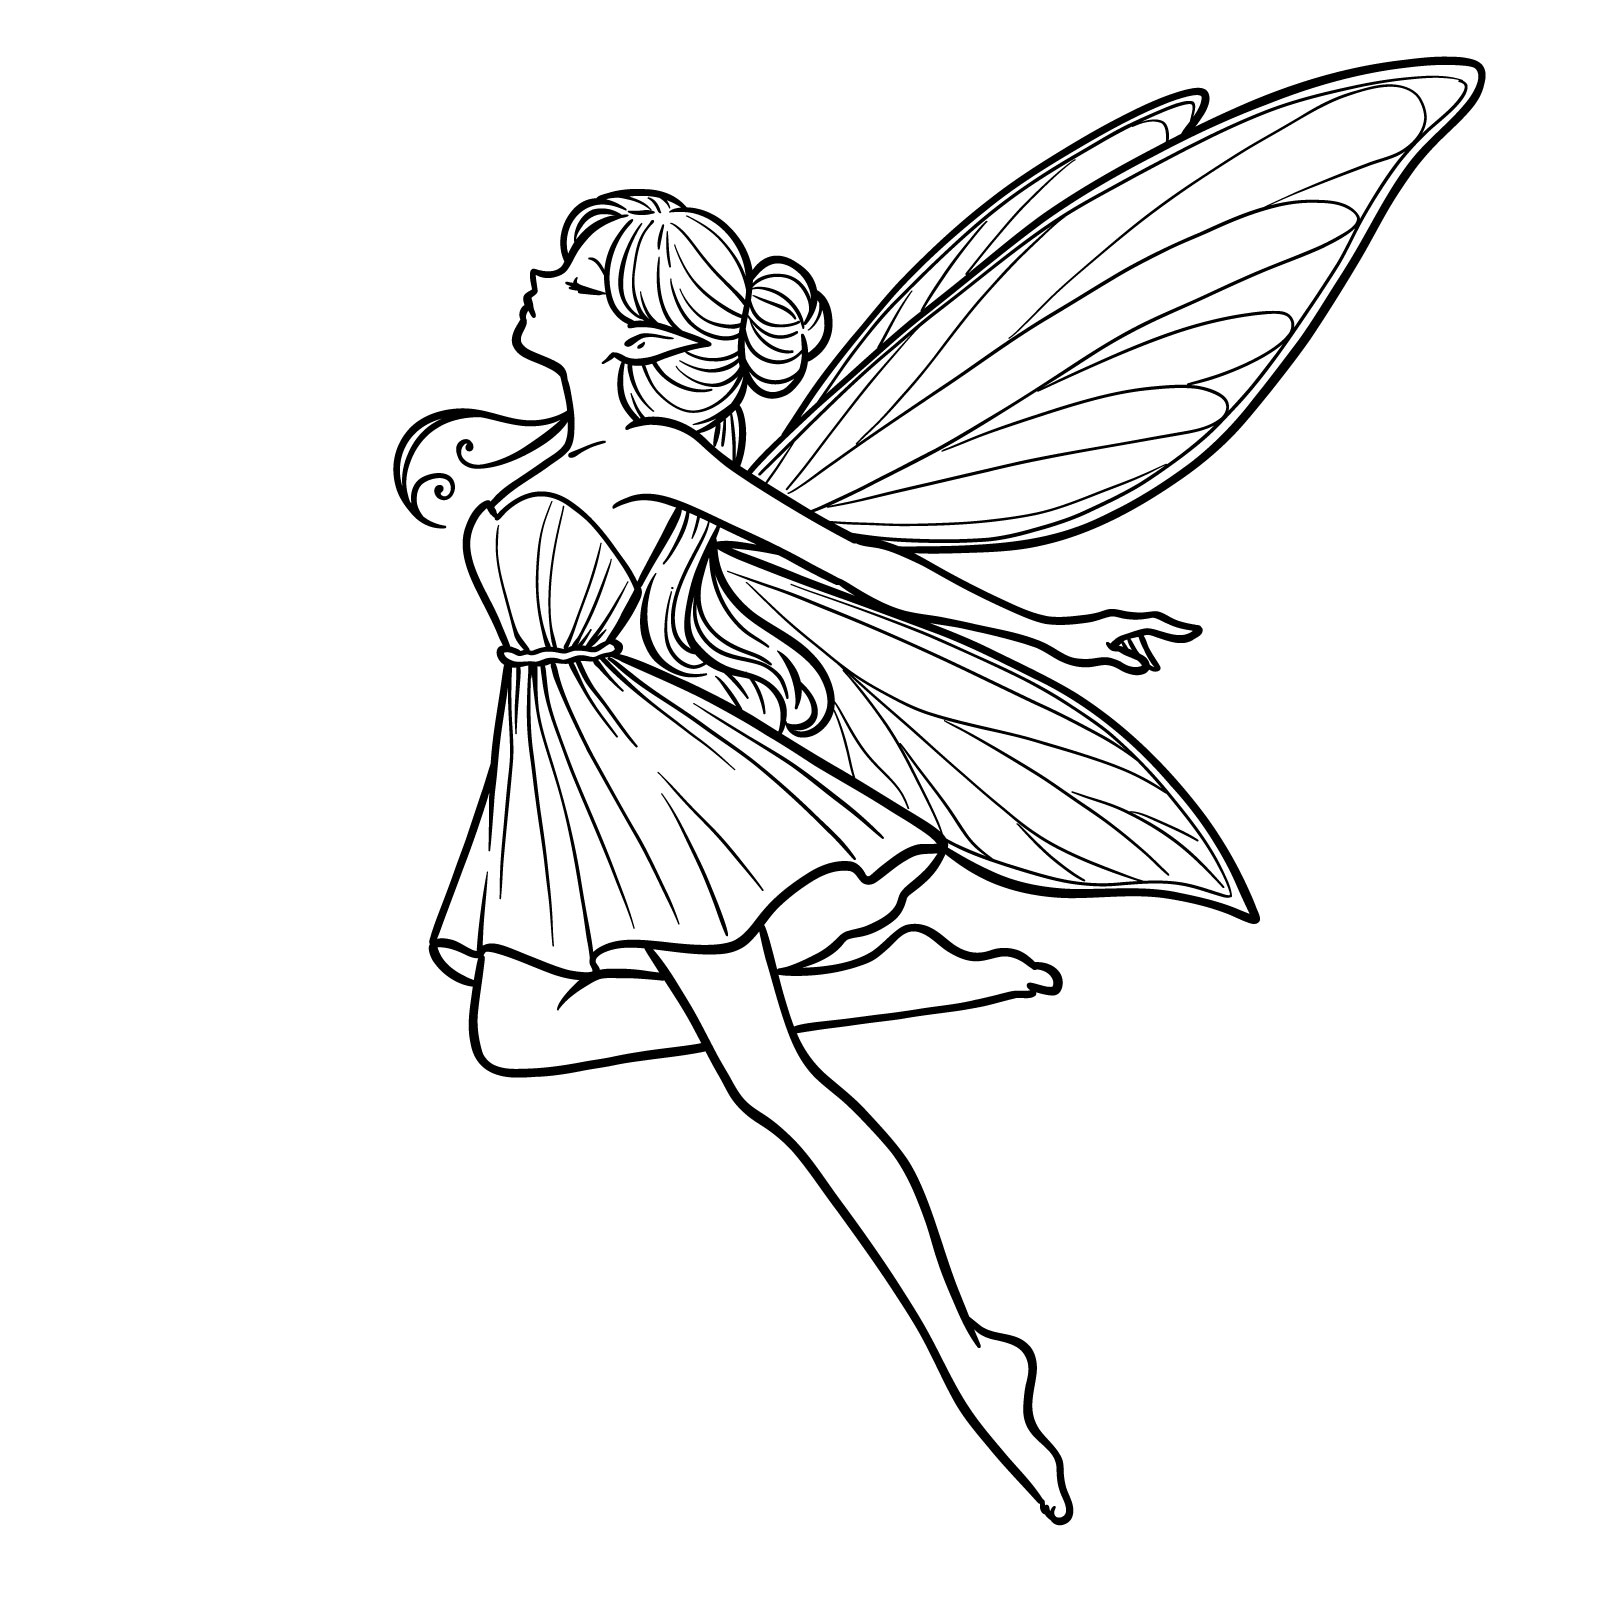
5. Realistic Fairy – Intermediate
Our realistic fairy – finished drawing
The fifth guide is devoted to a more realistic fairy. This drawing captures the intricate details that breathe life into the subject, from the texture of her wings to the flow of her dress. The fairy is depicted in mid-flight, with her wings elegantly spread and her dress fluttering, echoing the grace of her movement. Her hair is styled in an updo, adding a sophisticated touch to her ethereal form.
Prepare your pencils to capture the sheer beauty of a realistic fairy in motion.
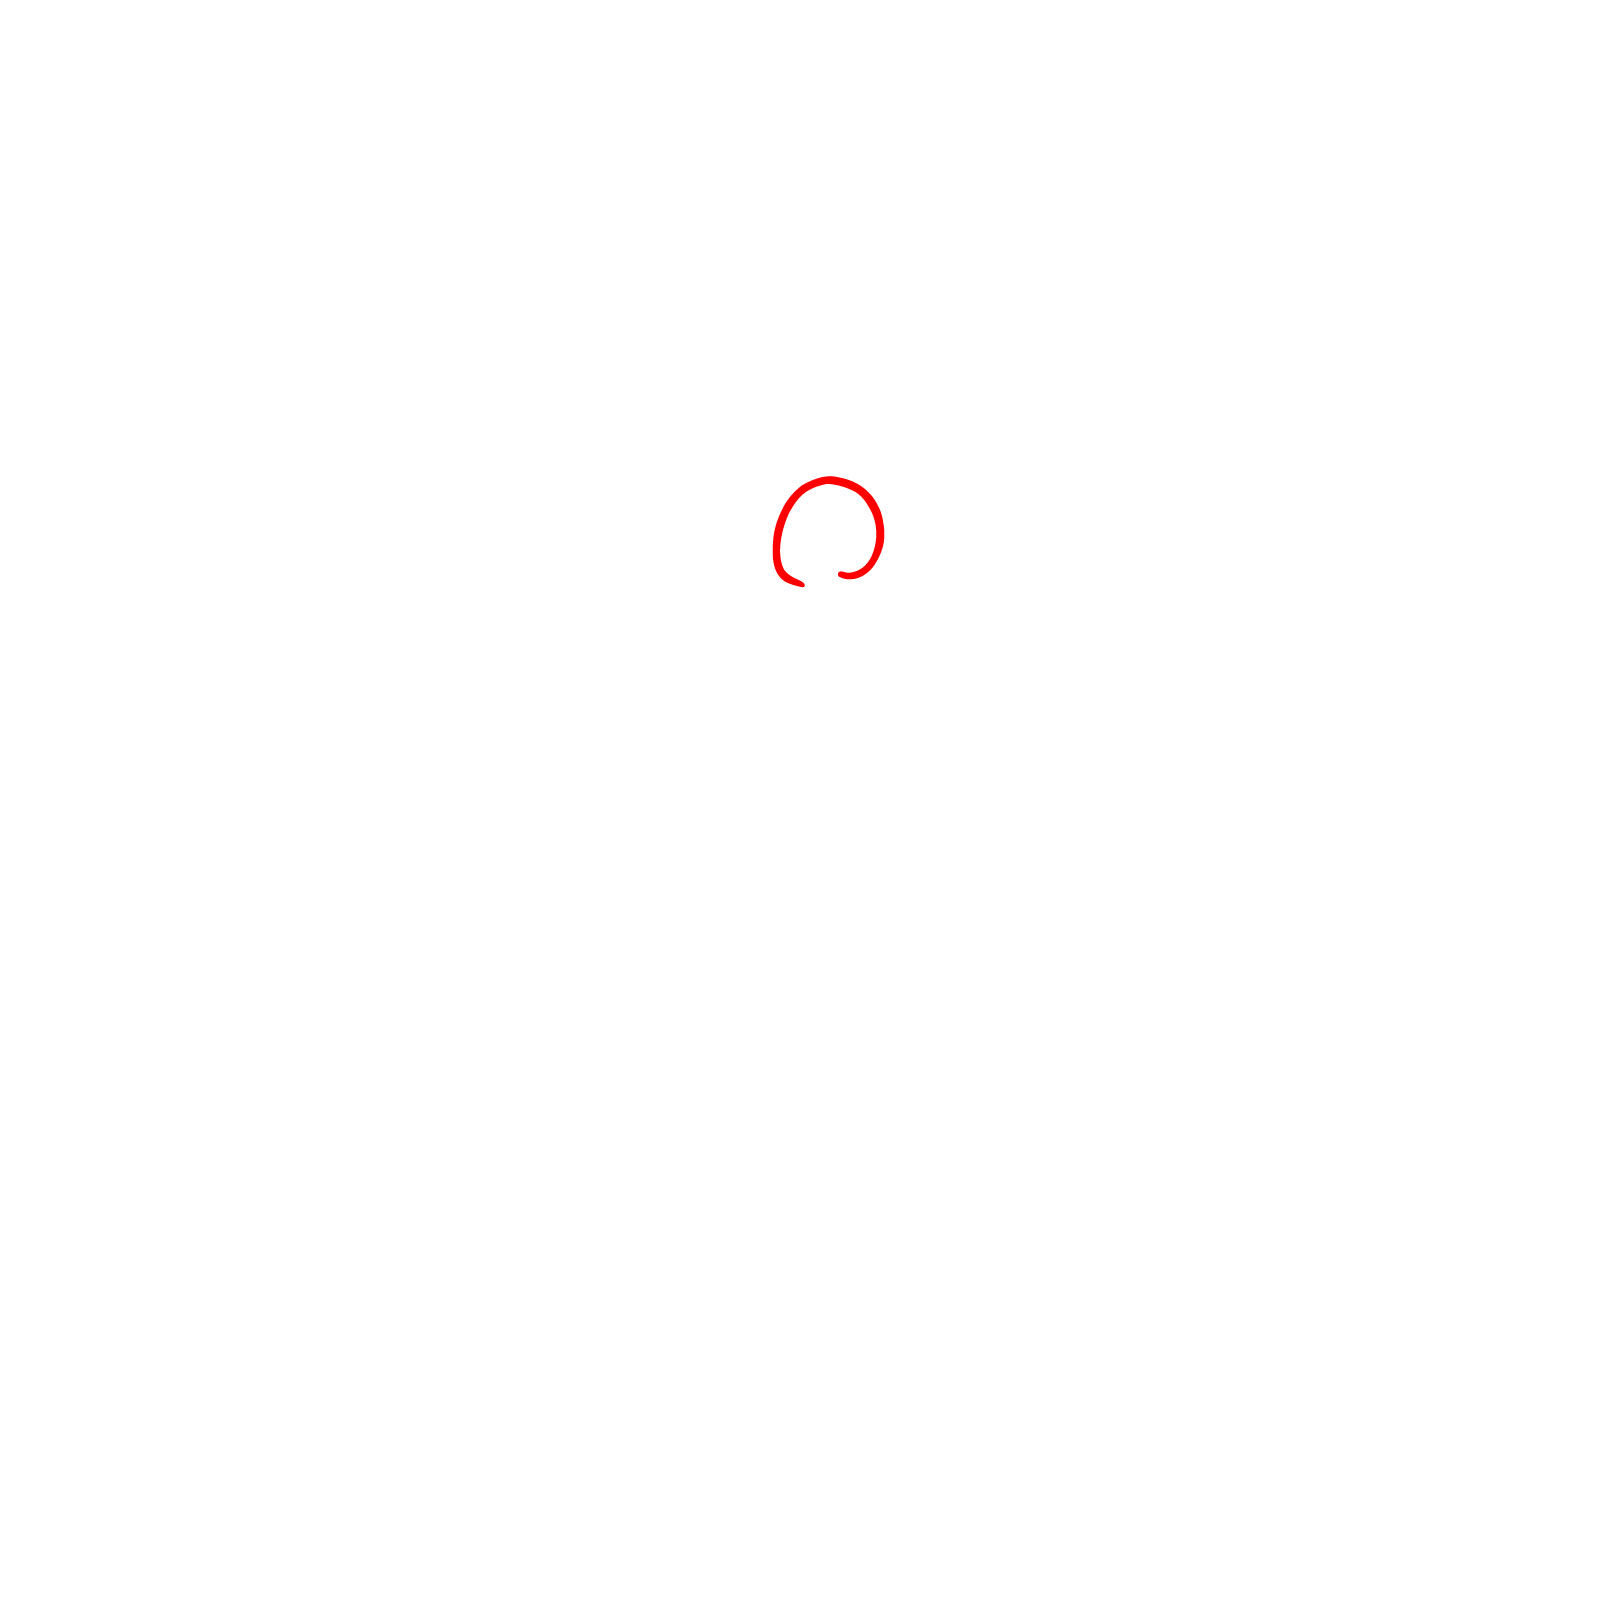
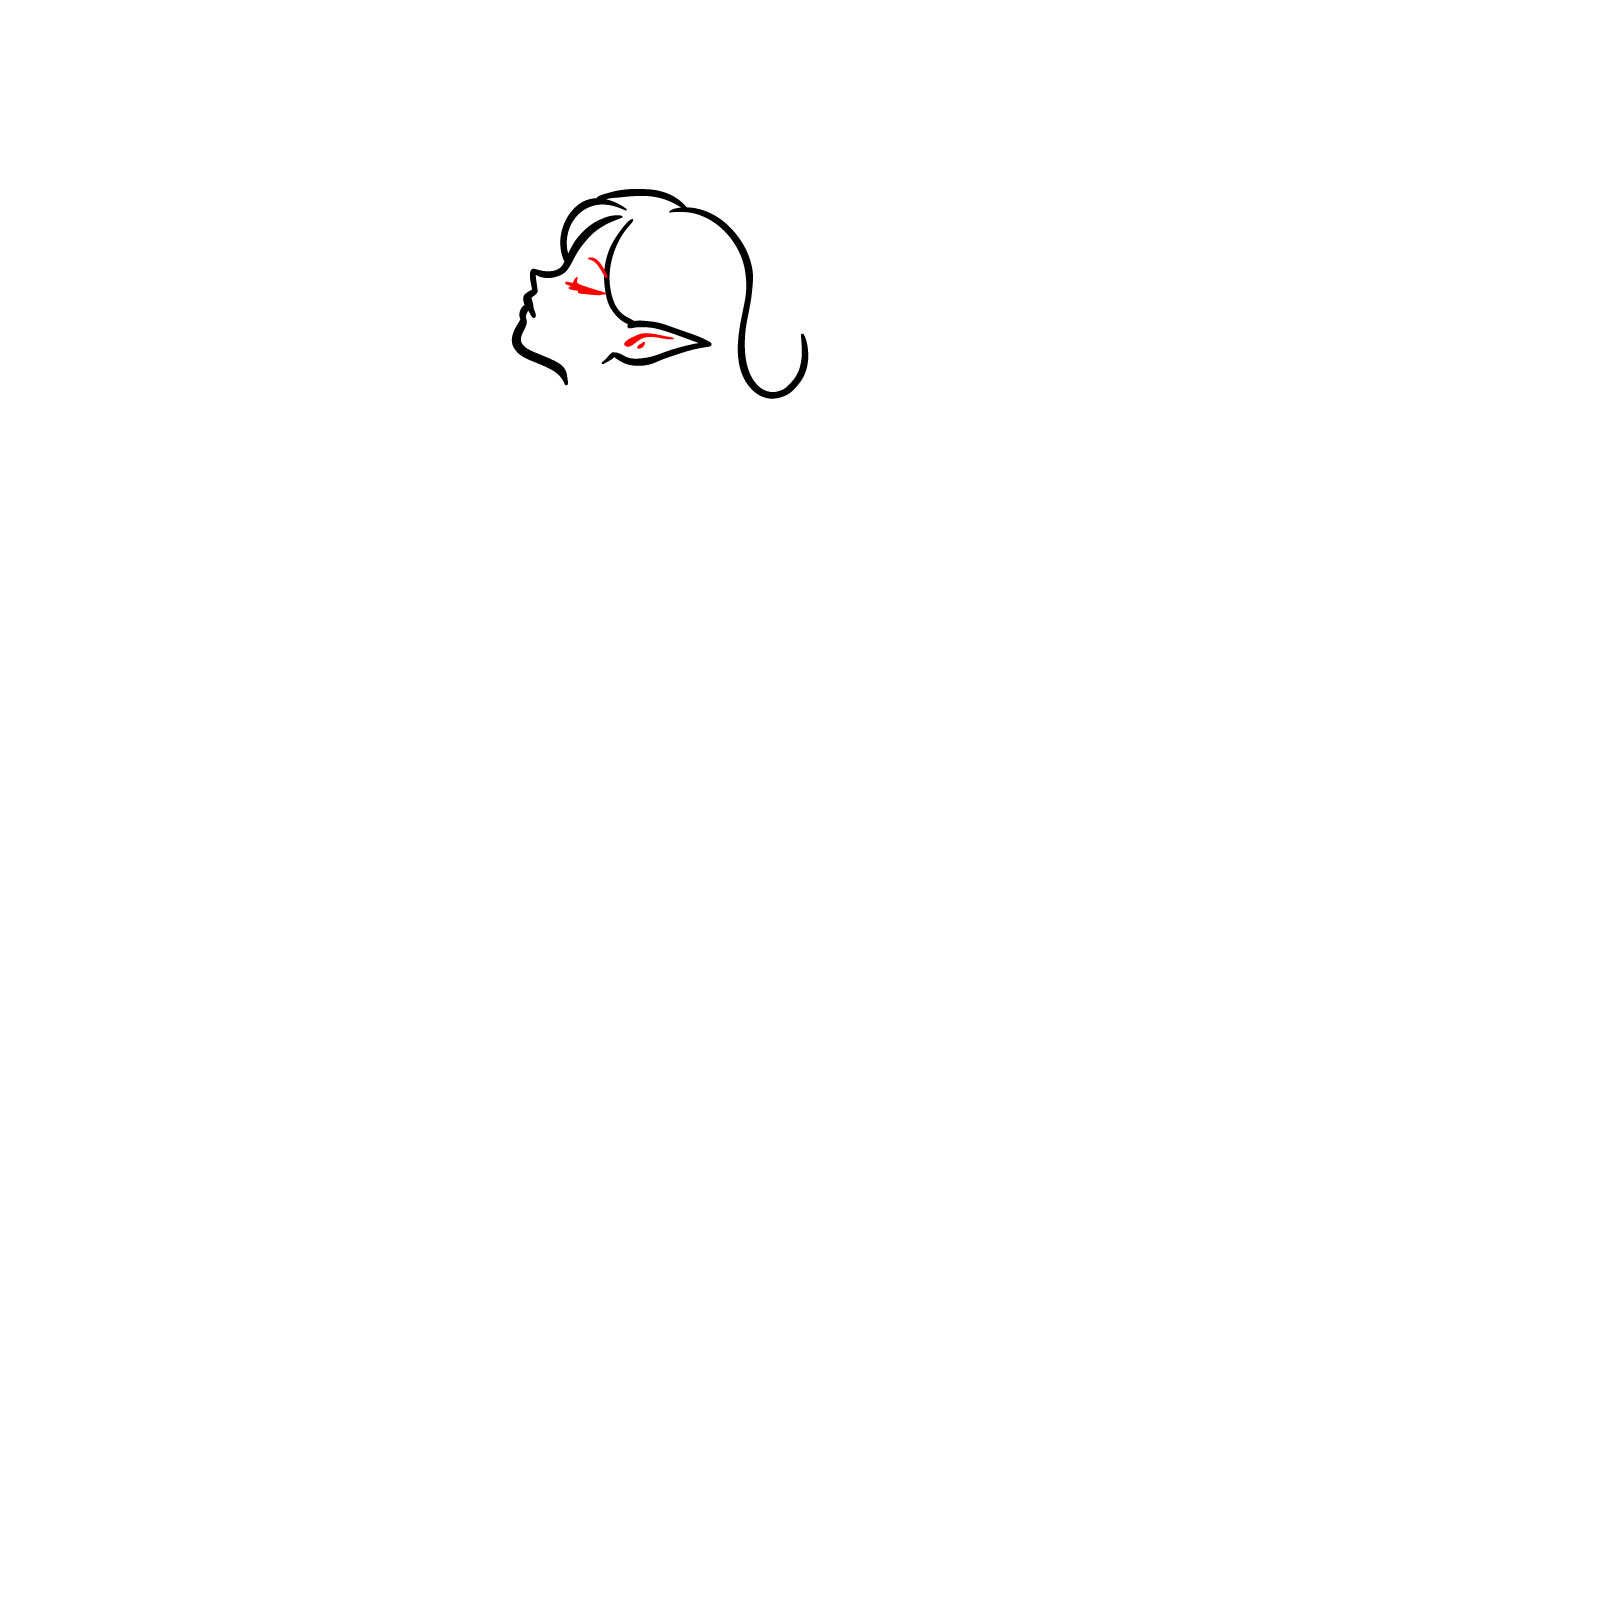
Step 01 – Begin by sketching the outline of the face, paying attention to the jawline, mouth, nose and forehead to capture the fairy’s delicate features. Include the pointed shape of the ear, ensuring it aligns with the face for a realistic portrayal
Starting with the fairy’s facial outline
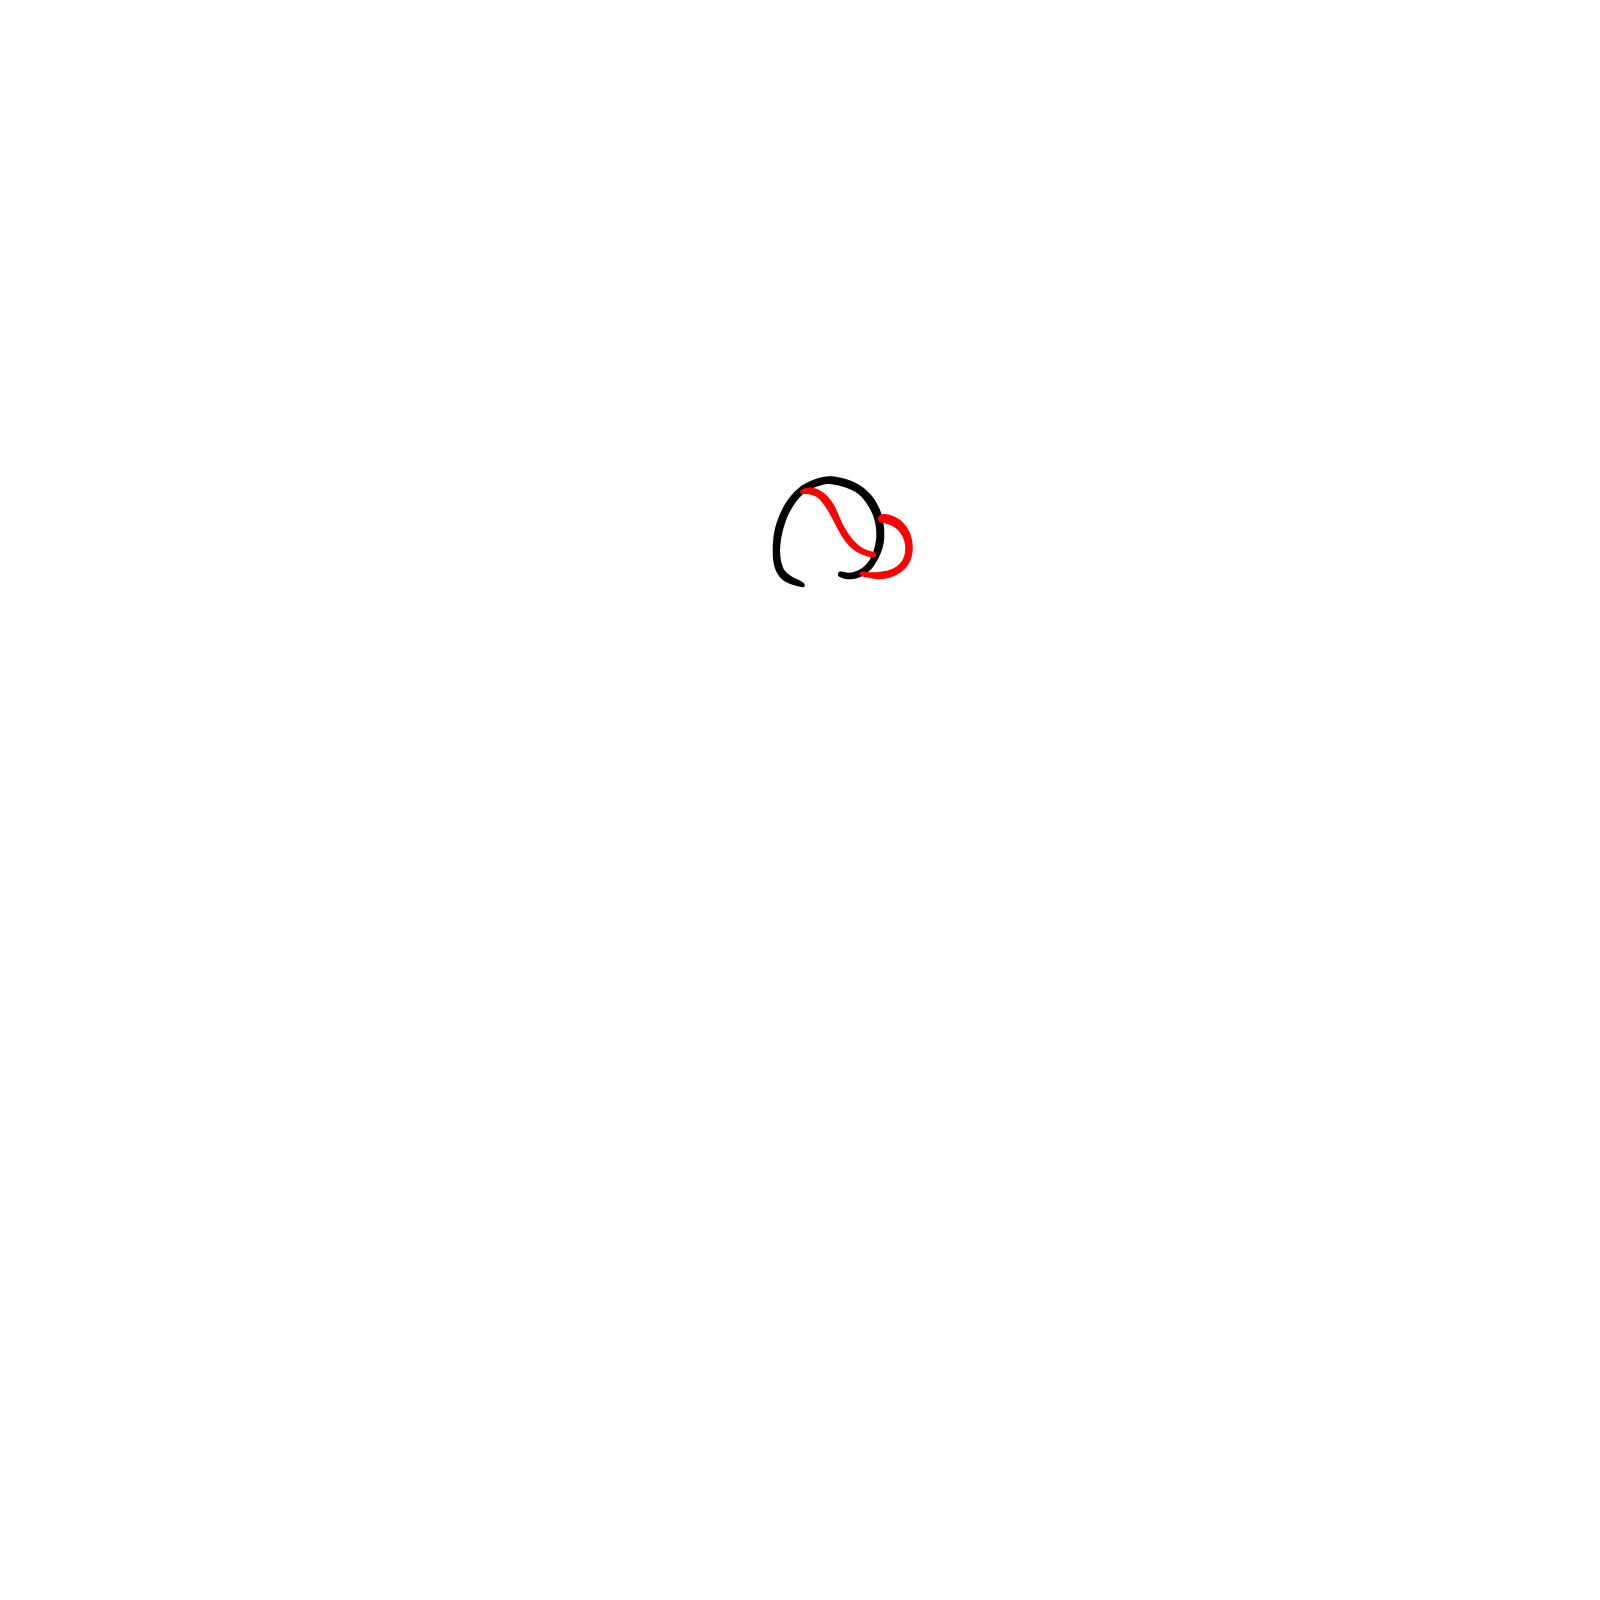
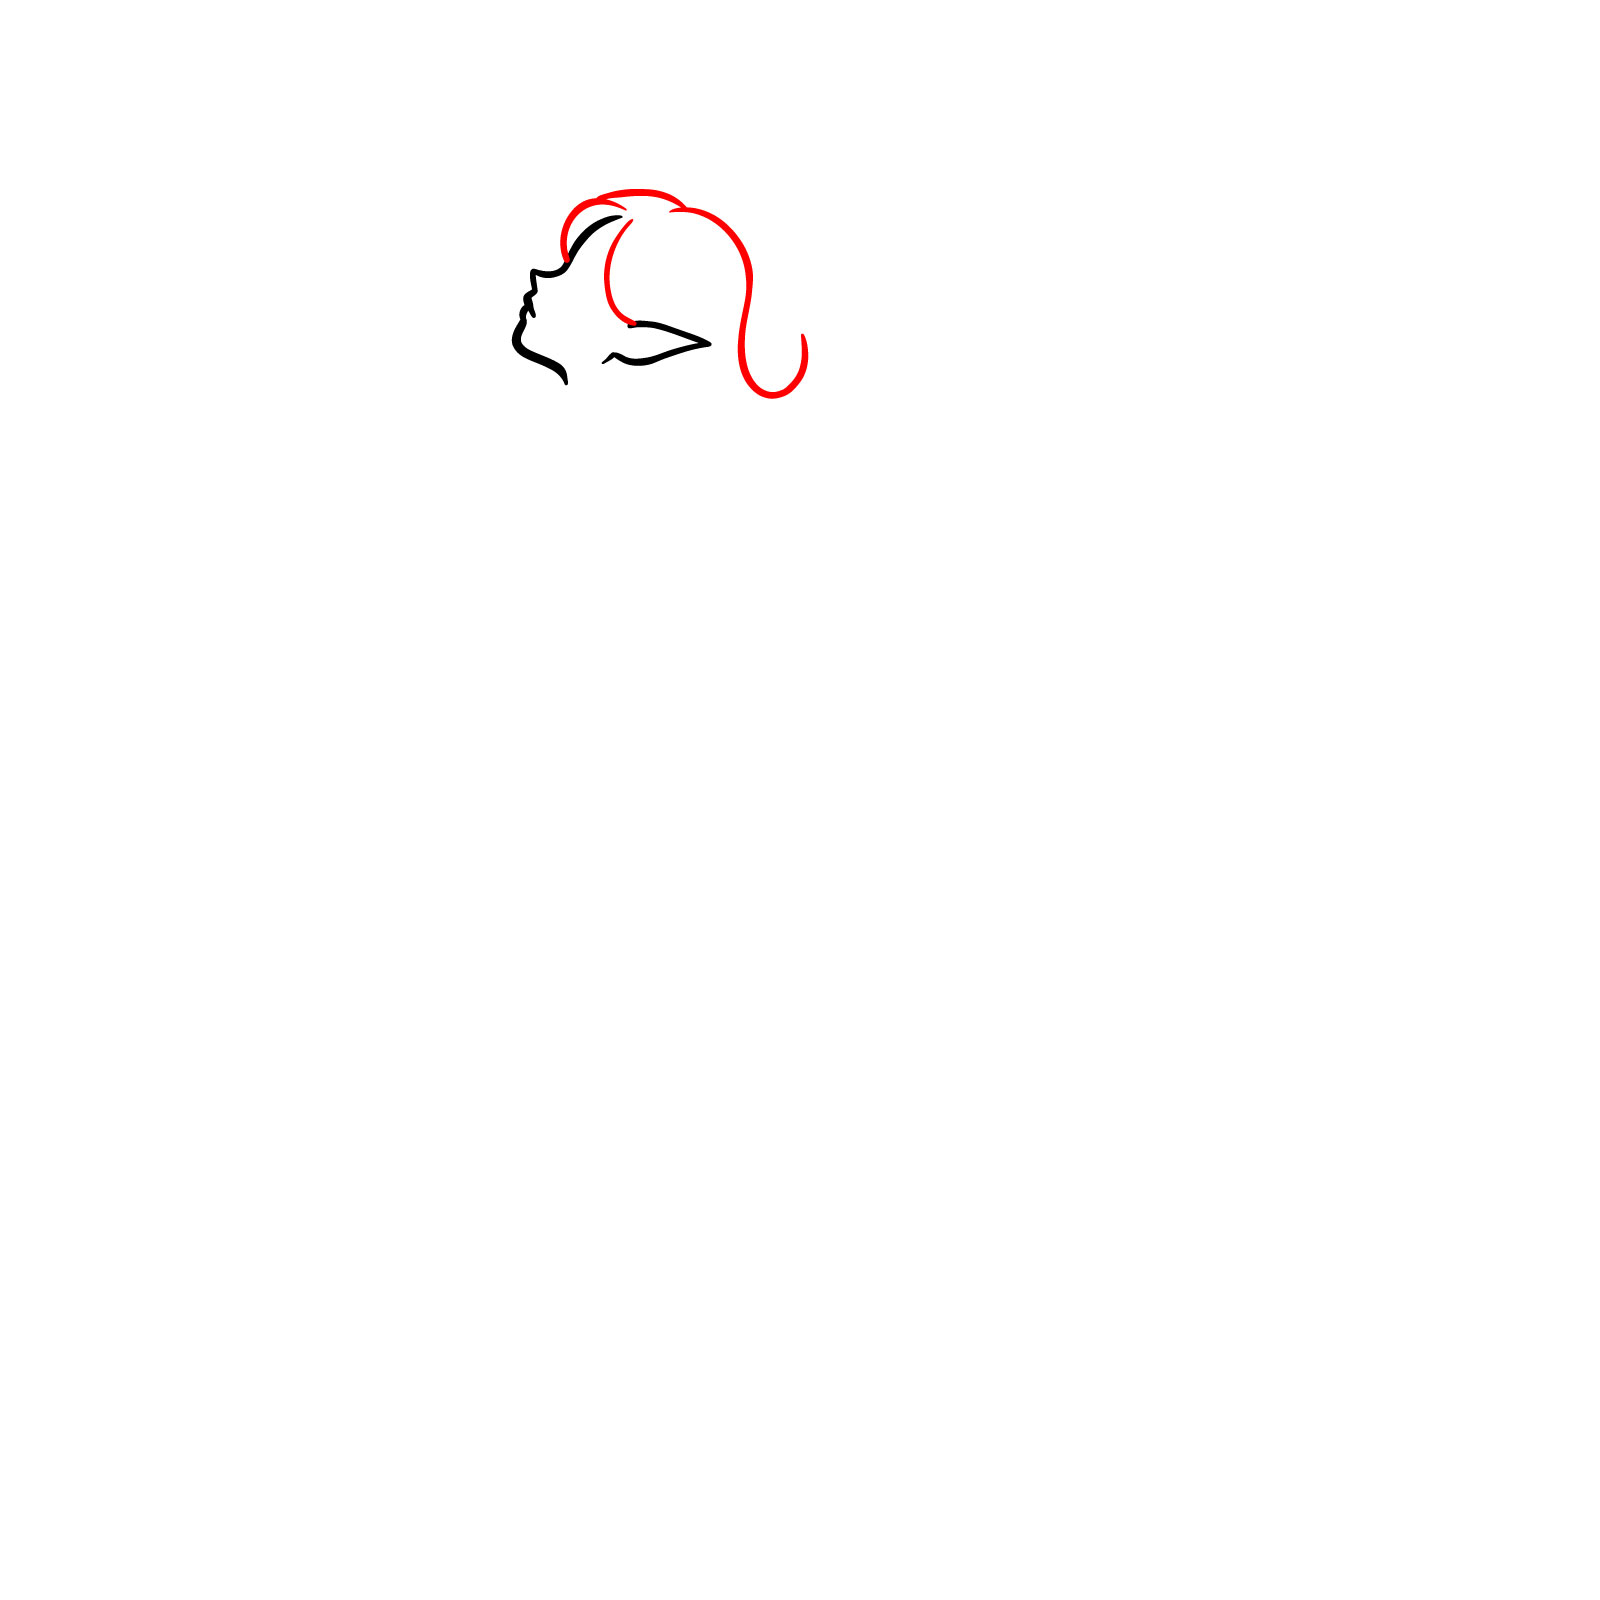
Step 02 – Continue by drawing the basic outlines for the hair. Start from the top of the head, creating smooth curves that suggest the volume and style of the hair. This sets the foundation for more detailed work on the hairstyle
Creating the basic shape for the fairy’s hair
Step 03 – With the outline set, refine the eyes with gentle curves for the eyelashes and add eyebrows to give expression to the face. Detail the inner ear at this stage as well
Defining the fairy’s facial expressions
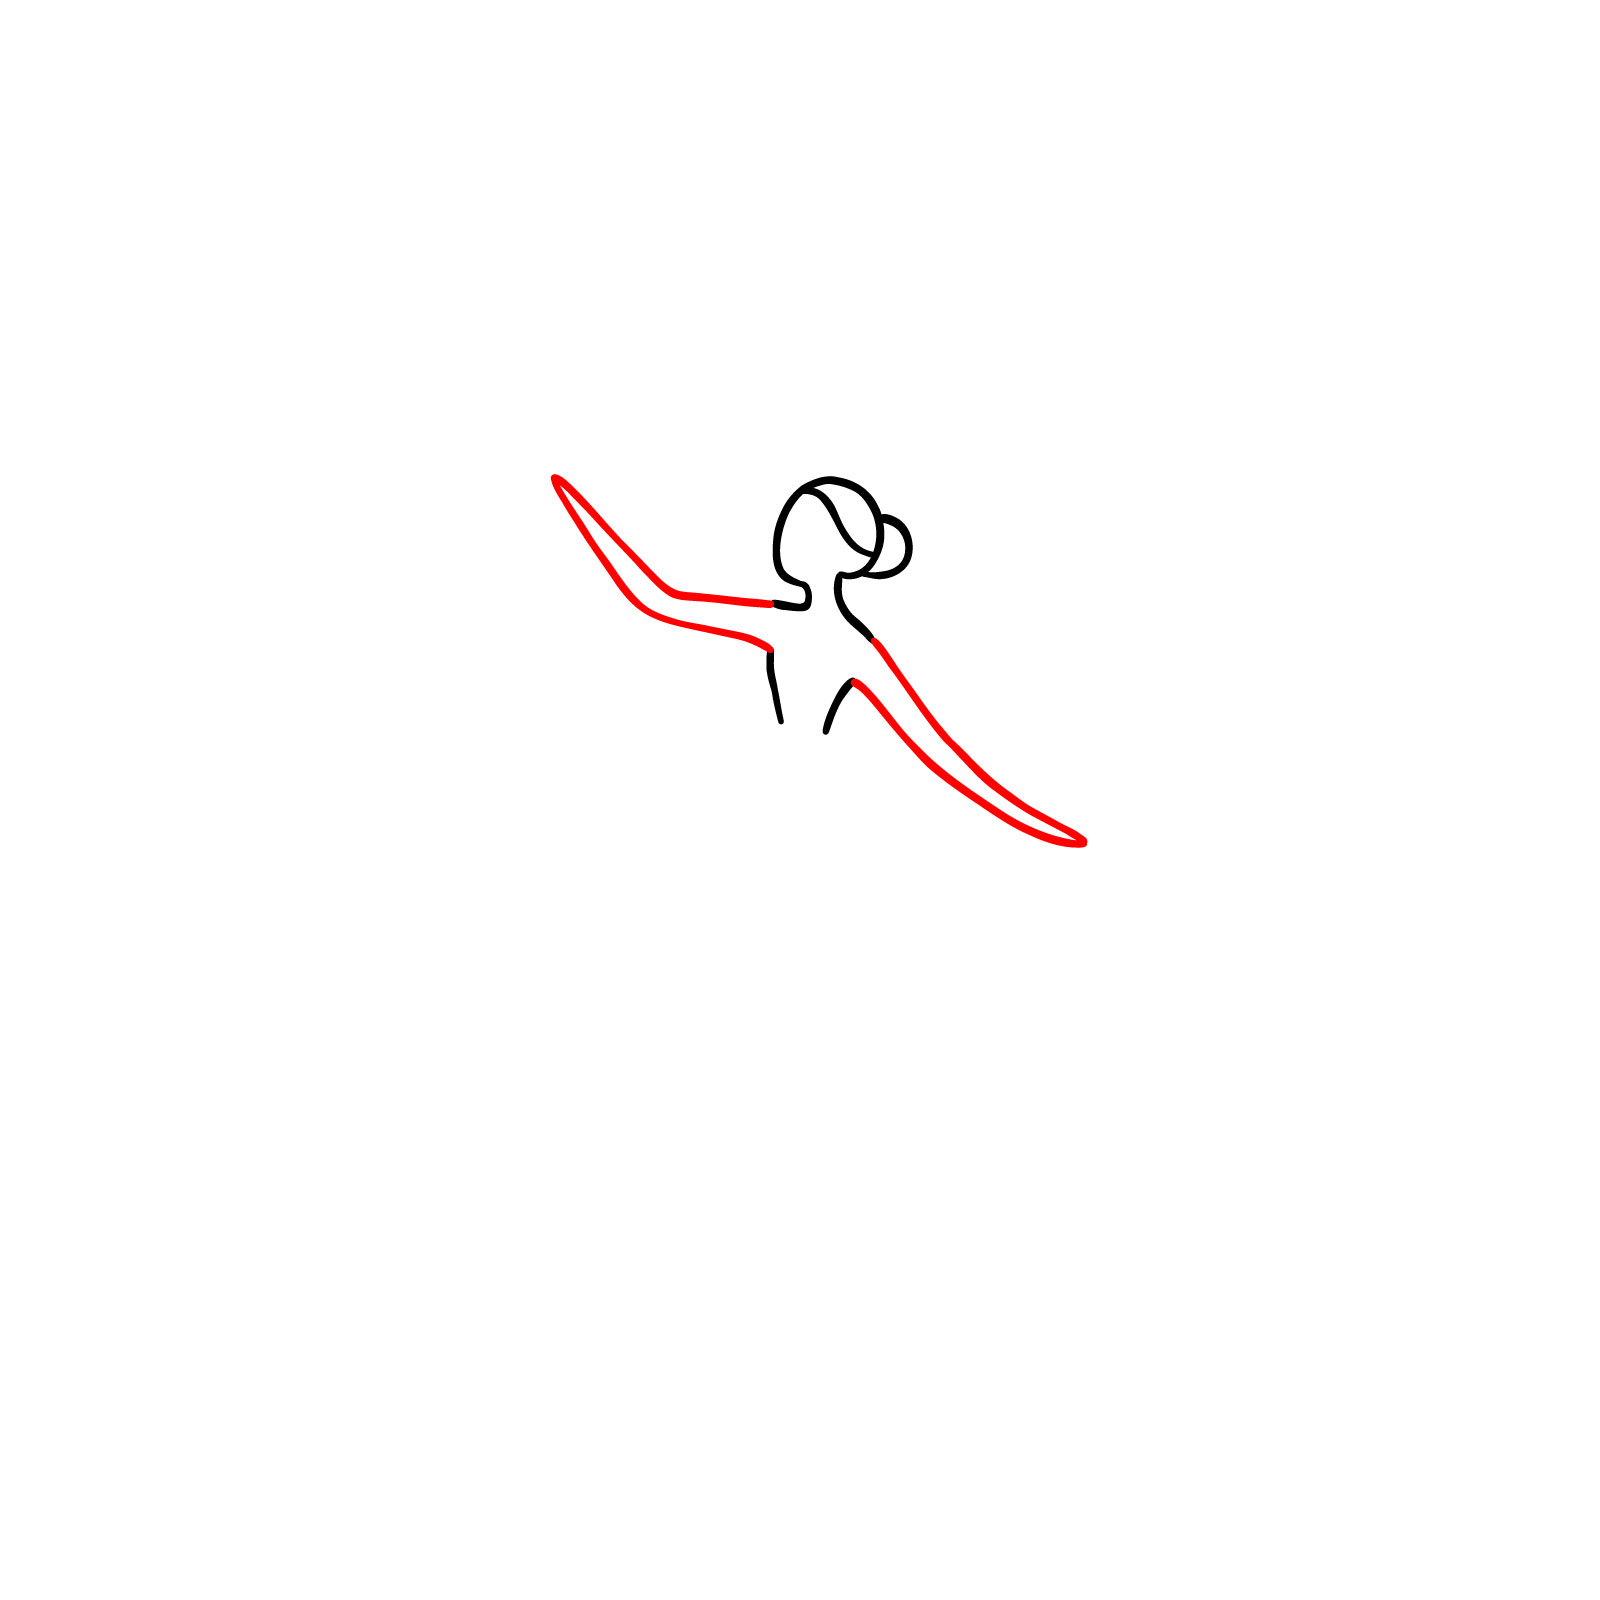
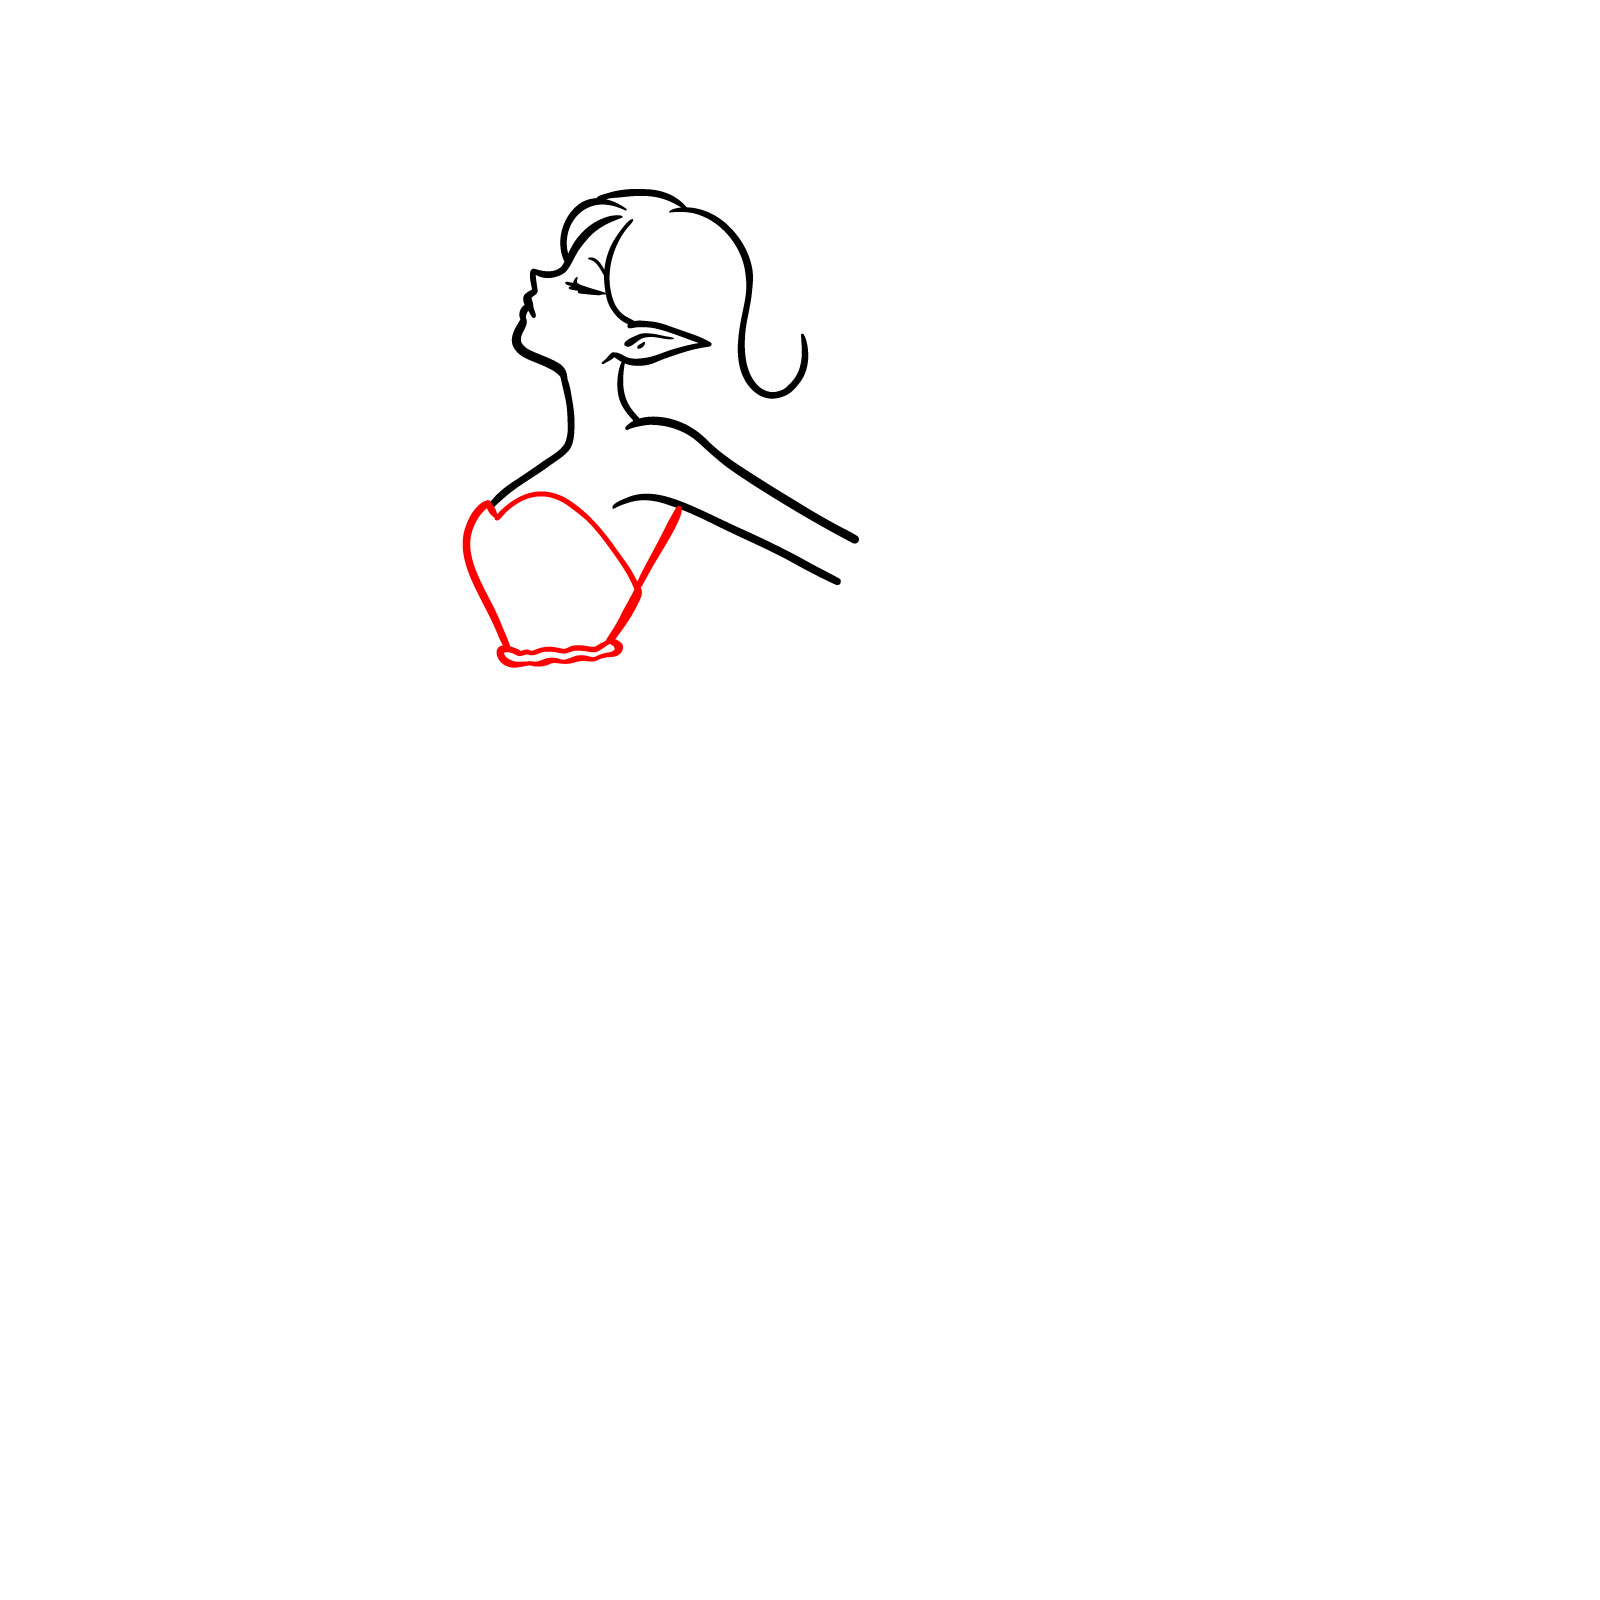
Step 04 – Draw the neck leading down to the shoulders and upper chest, outlining the contours of the body. Sketch the beginnings of her left arm, capturing the posture and poise of the fairy. This forms the basis for her body and will be built upon in the following steps
Drawing the upper body of the fairy
Step 05 – Sketch the upper body of the fairy, from the lines we made in the previous step down to the waist, detailing the shape of the torso. Add the top portion of the dress, giving it a fitted appearance that flares out slightly at the waist, preparing for the addition of the skirt
Outlining the fairy’s torso and beginning the dress
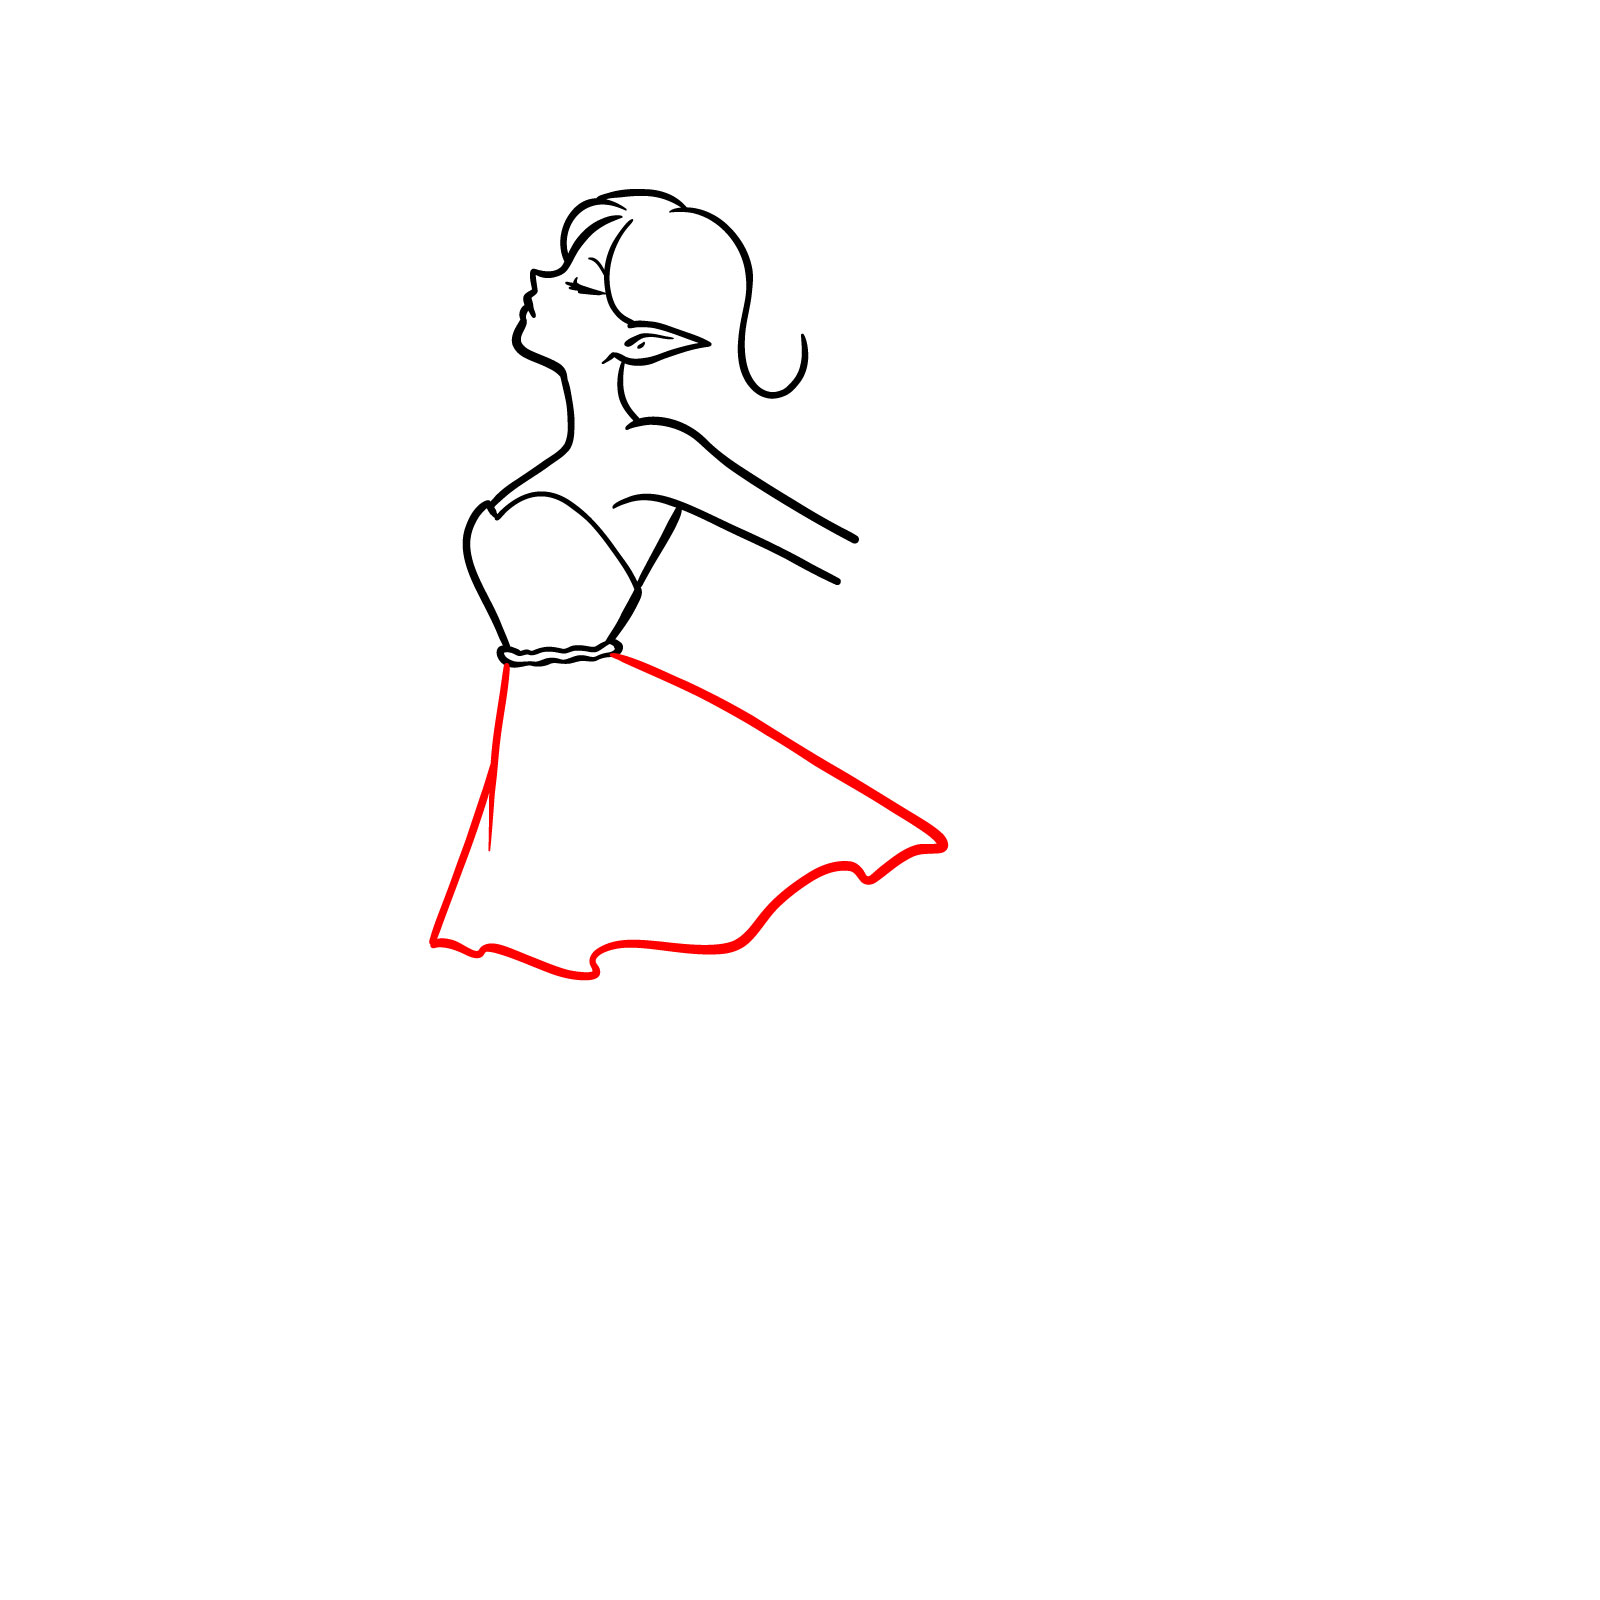
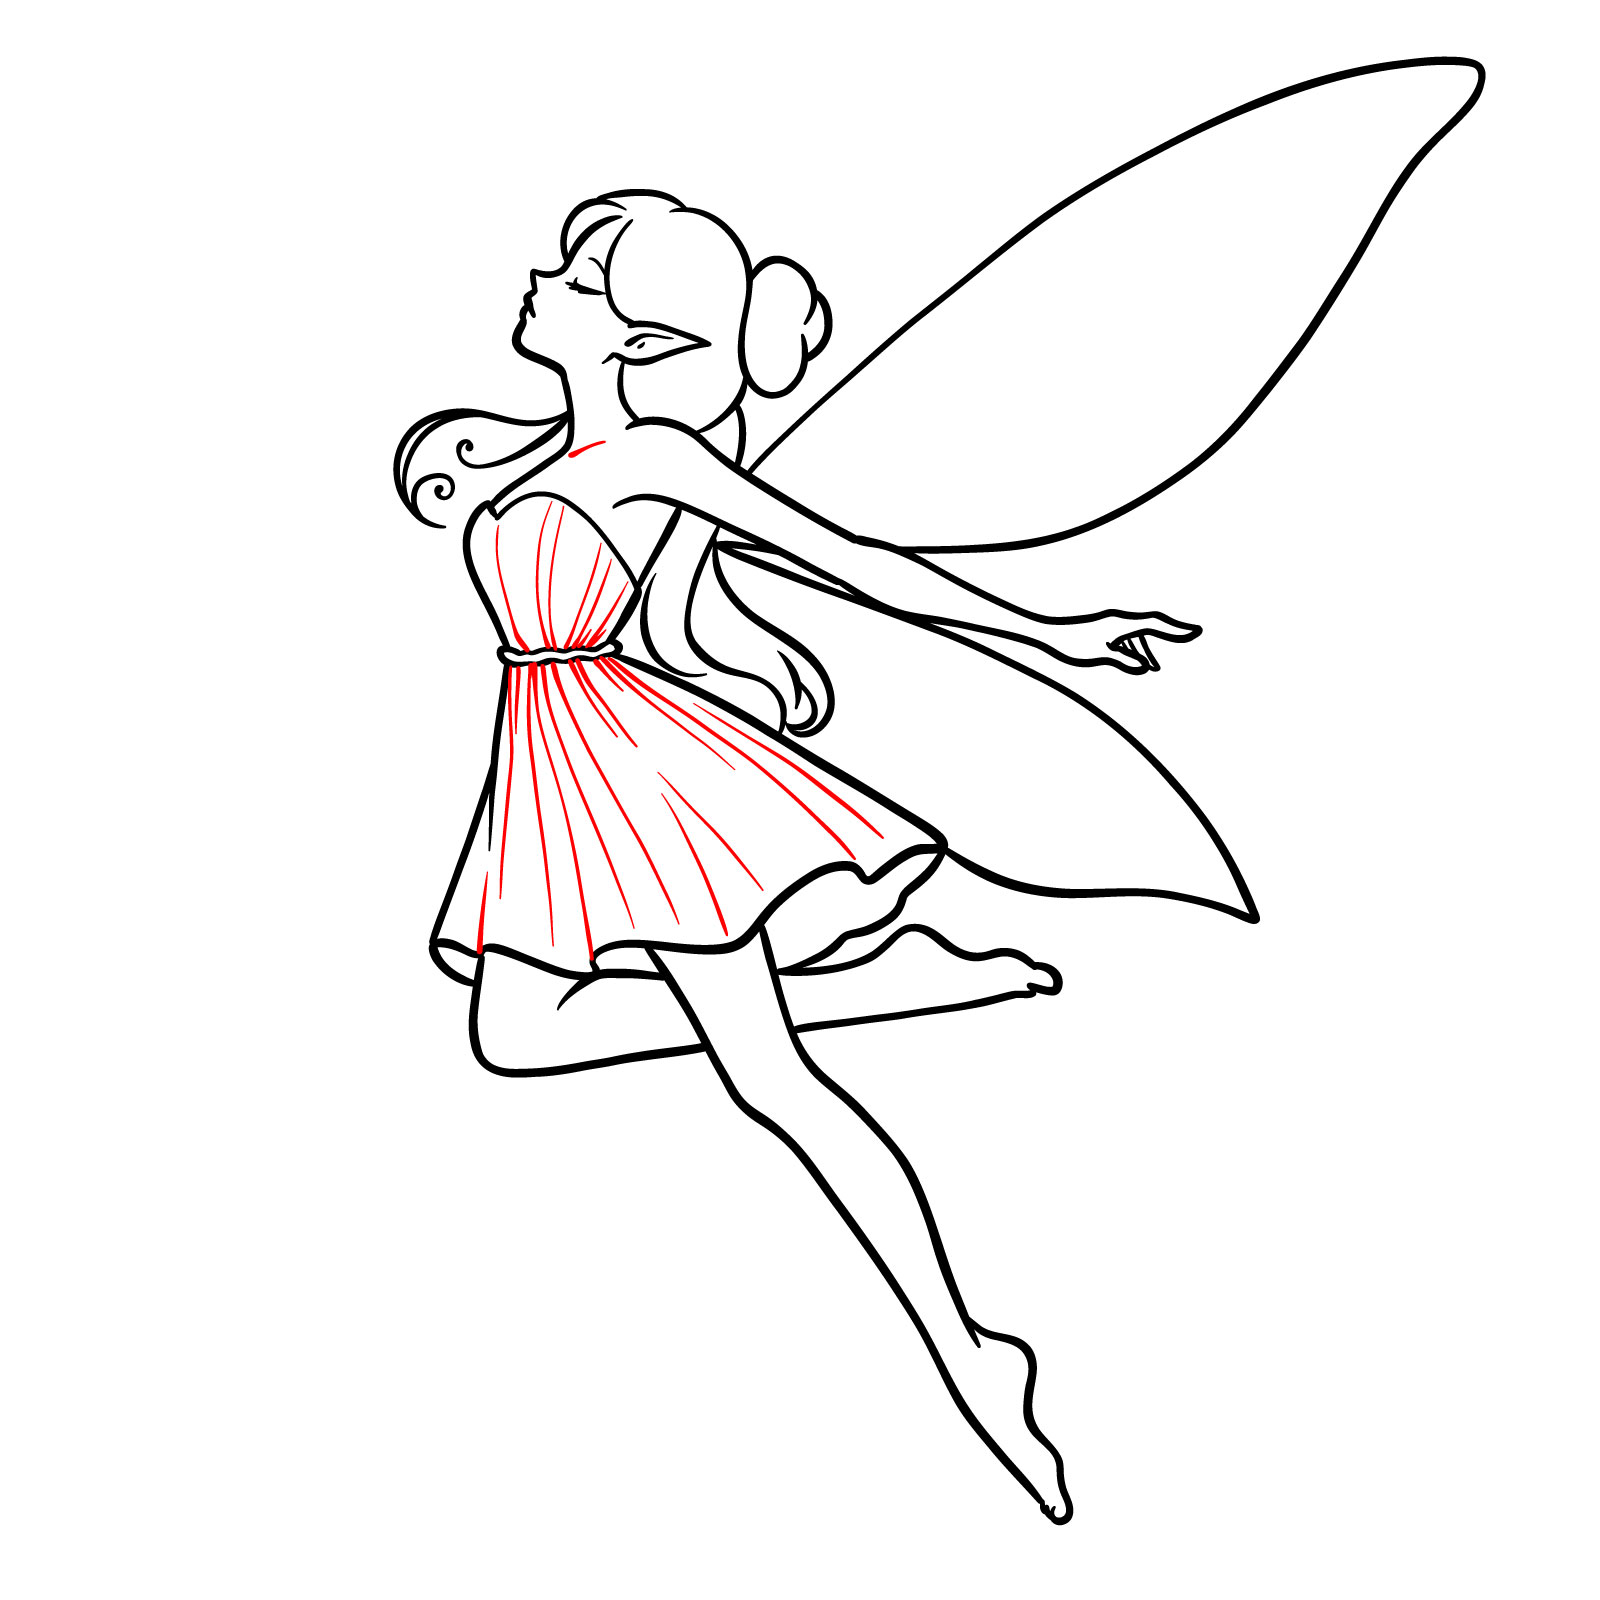
Step 06 – From the waist, extend the lines outwards and downwards to create the skirt of the dress. Give it a gentle wave along the bottom edge to depict movement and a light, airy fabric that might flutter in the breeze
Designing the skirt of the fairy’s dress
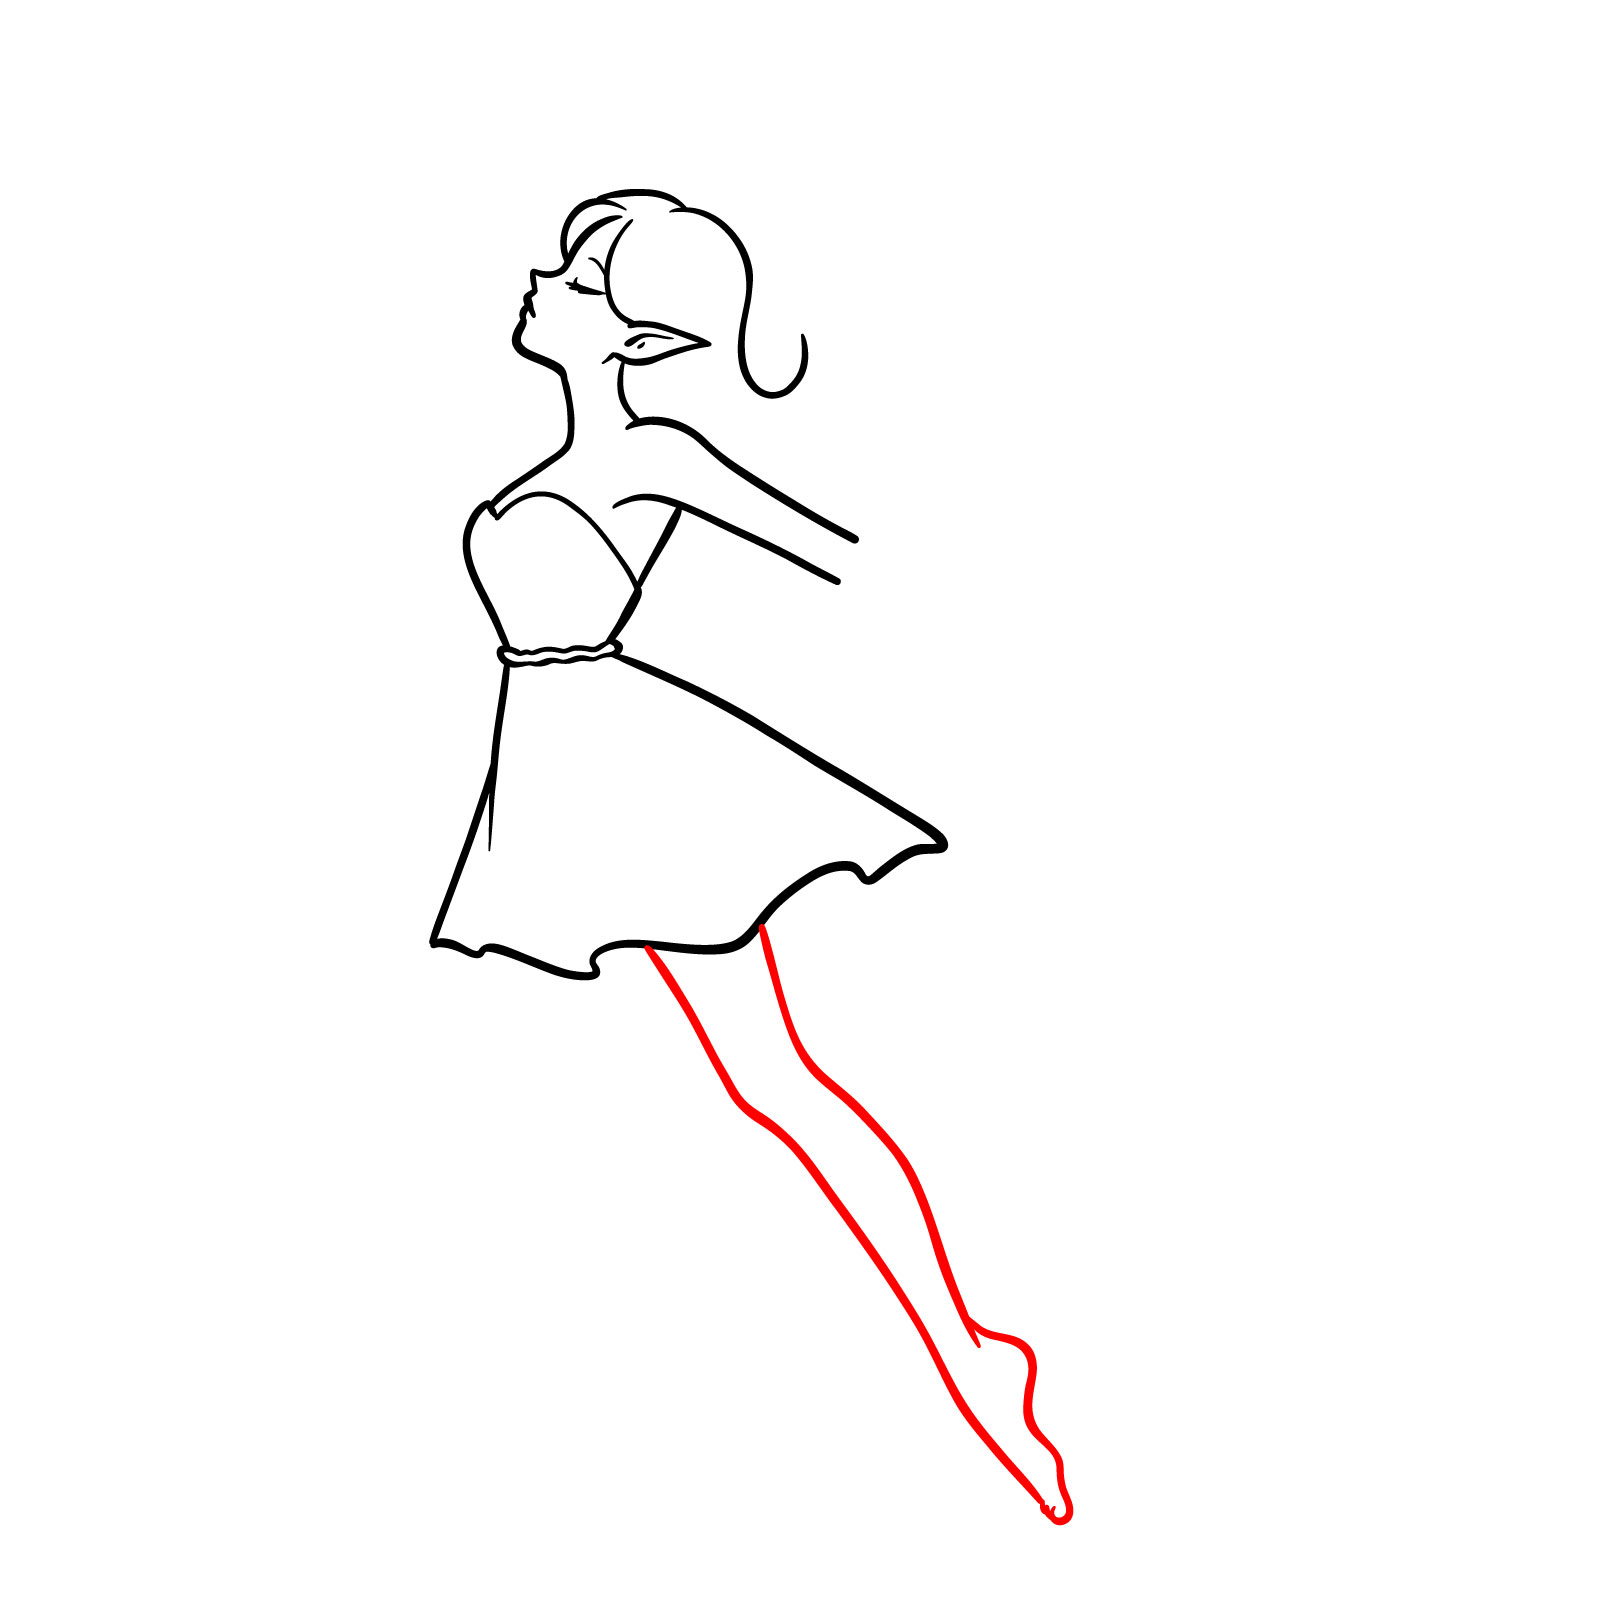
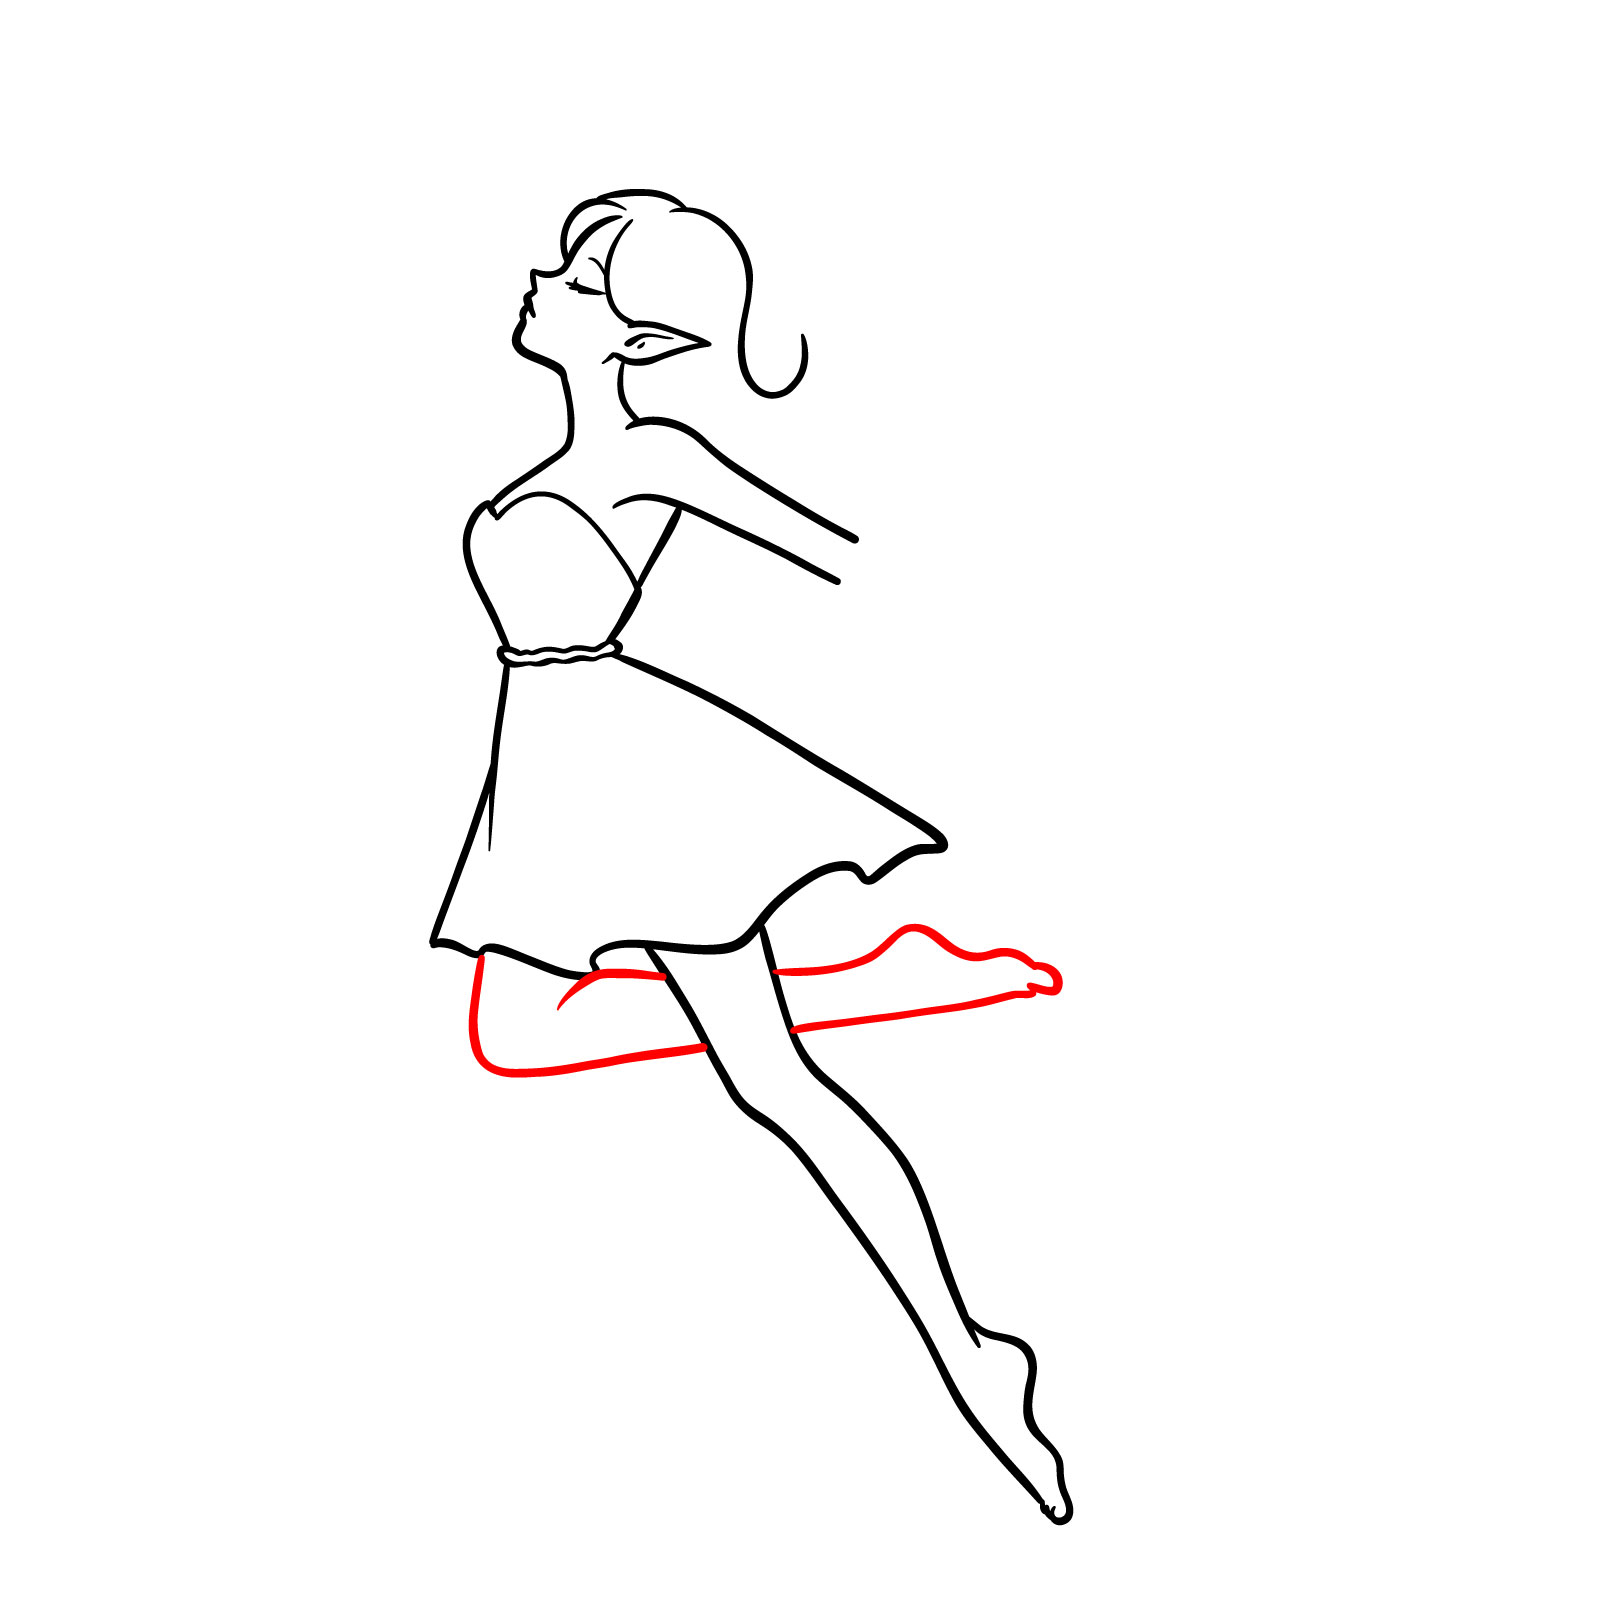
Step 07 – Draw the first leg, starting from the bottom of the skirt. The leg should be slender and bend naturally, with the knee slightly lifted to suggest a mid-flight or dancing position
Drawing the first leg of the fairy
Step 08 – Finish the lower body by drawing the second leg. It should mirror the first in shape but can differ in position to enhance the sense of movement. The legs together should balance the fairy and give the impression of her dancing or preparing to take flight
Finalizing the lower body with the second leg
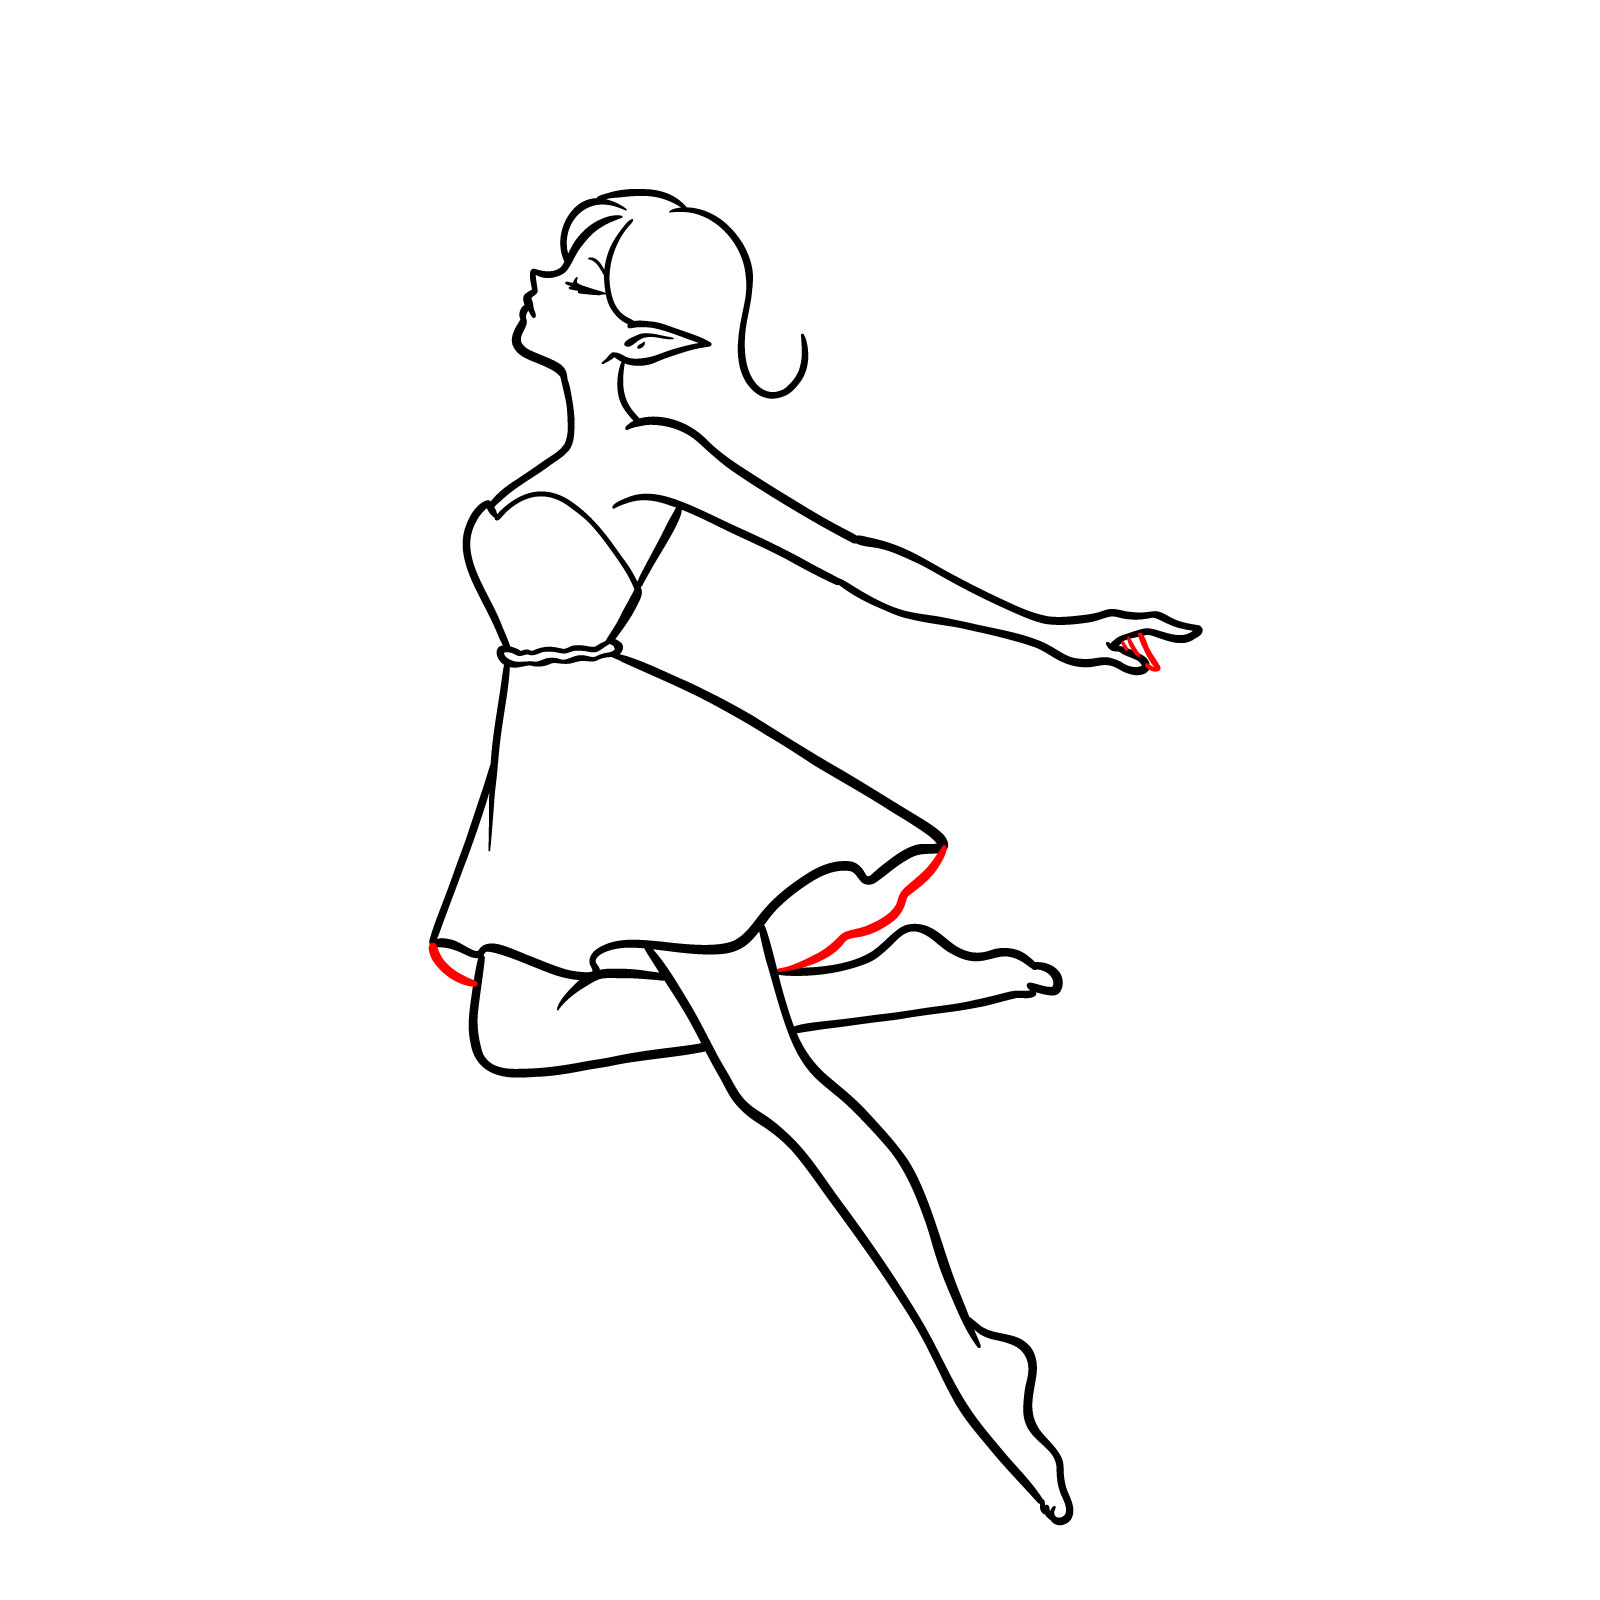
Step 09 – Refine the fairy’s left arm, ensuring the lines are smooth and the hand is proportionate to the body. The arm should extend gracefully, with a gentle curve at the elbow leading to the hand. Pay attention to the wrist’s subtle bend as it transitions into the hand
Detailing the fairy’s left arm
Step 10 – Focus on the fingers, making them delicate but clearly defined. Each finger should be distinct and well-articulated. Then, add the final touches to the skirt’s hem, giving it a light and flowy appearance. This will add movement to the drawing
Adding fingers and skirt details
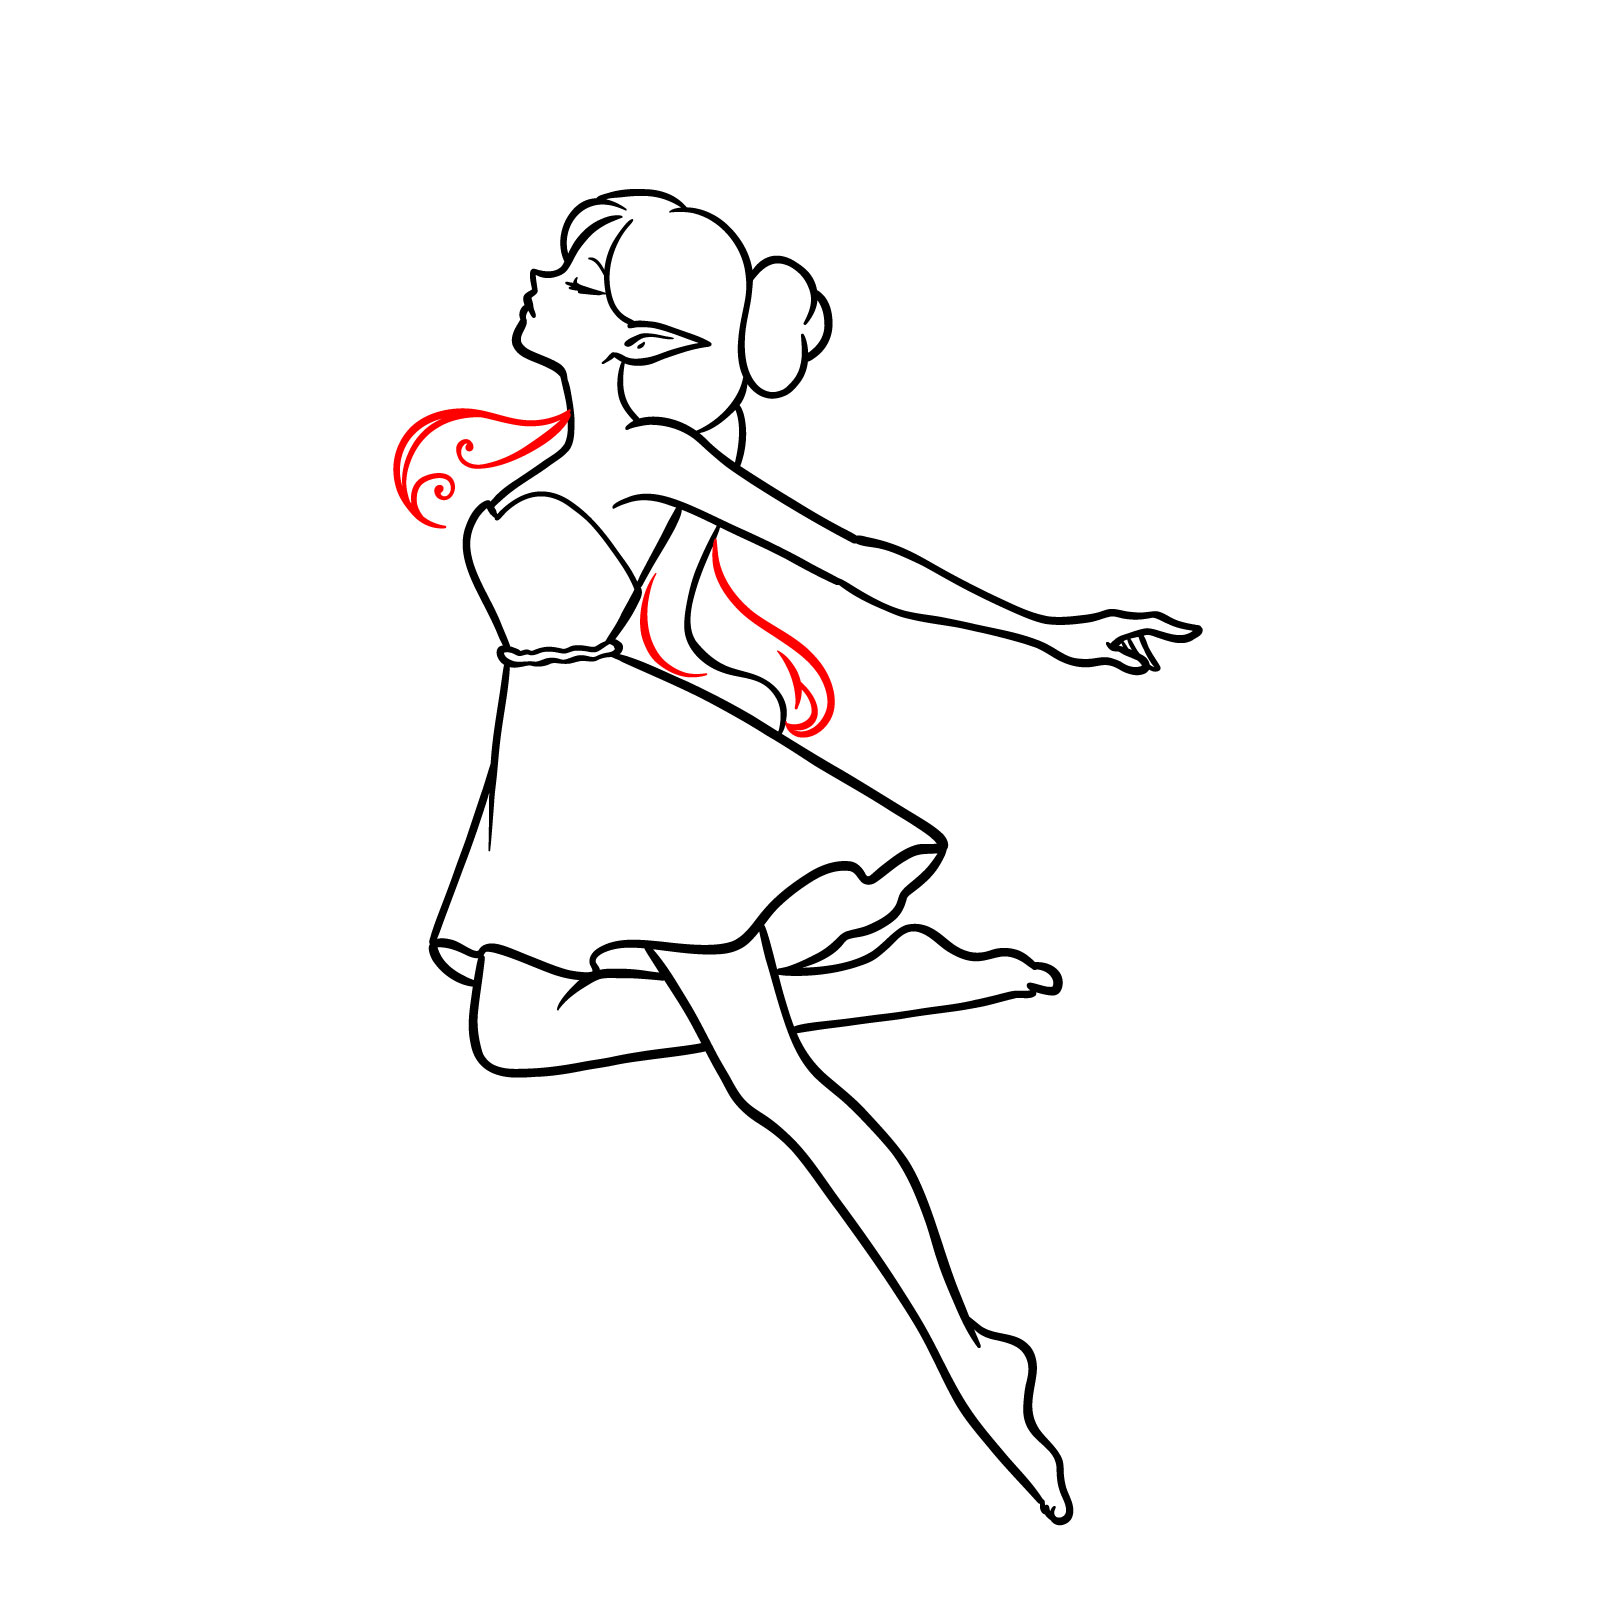
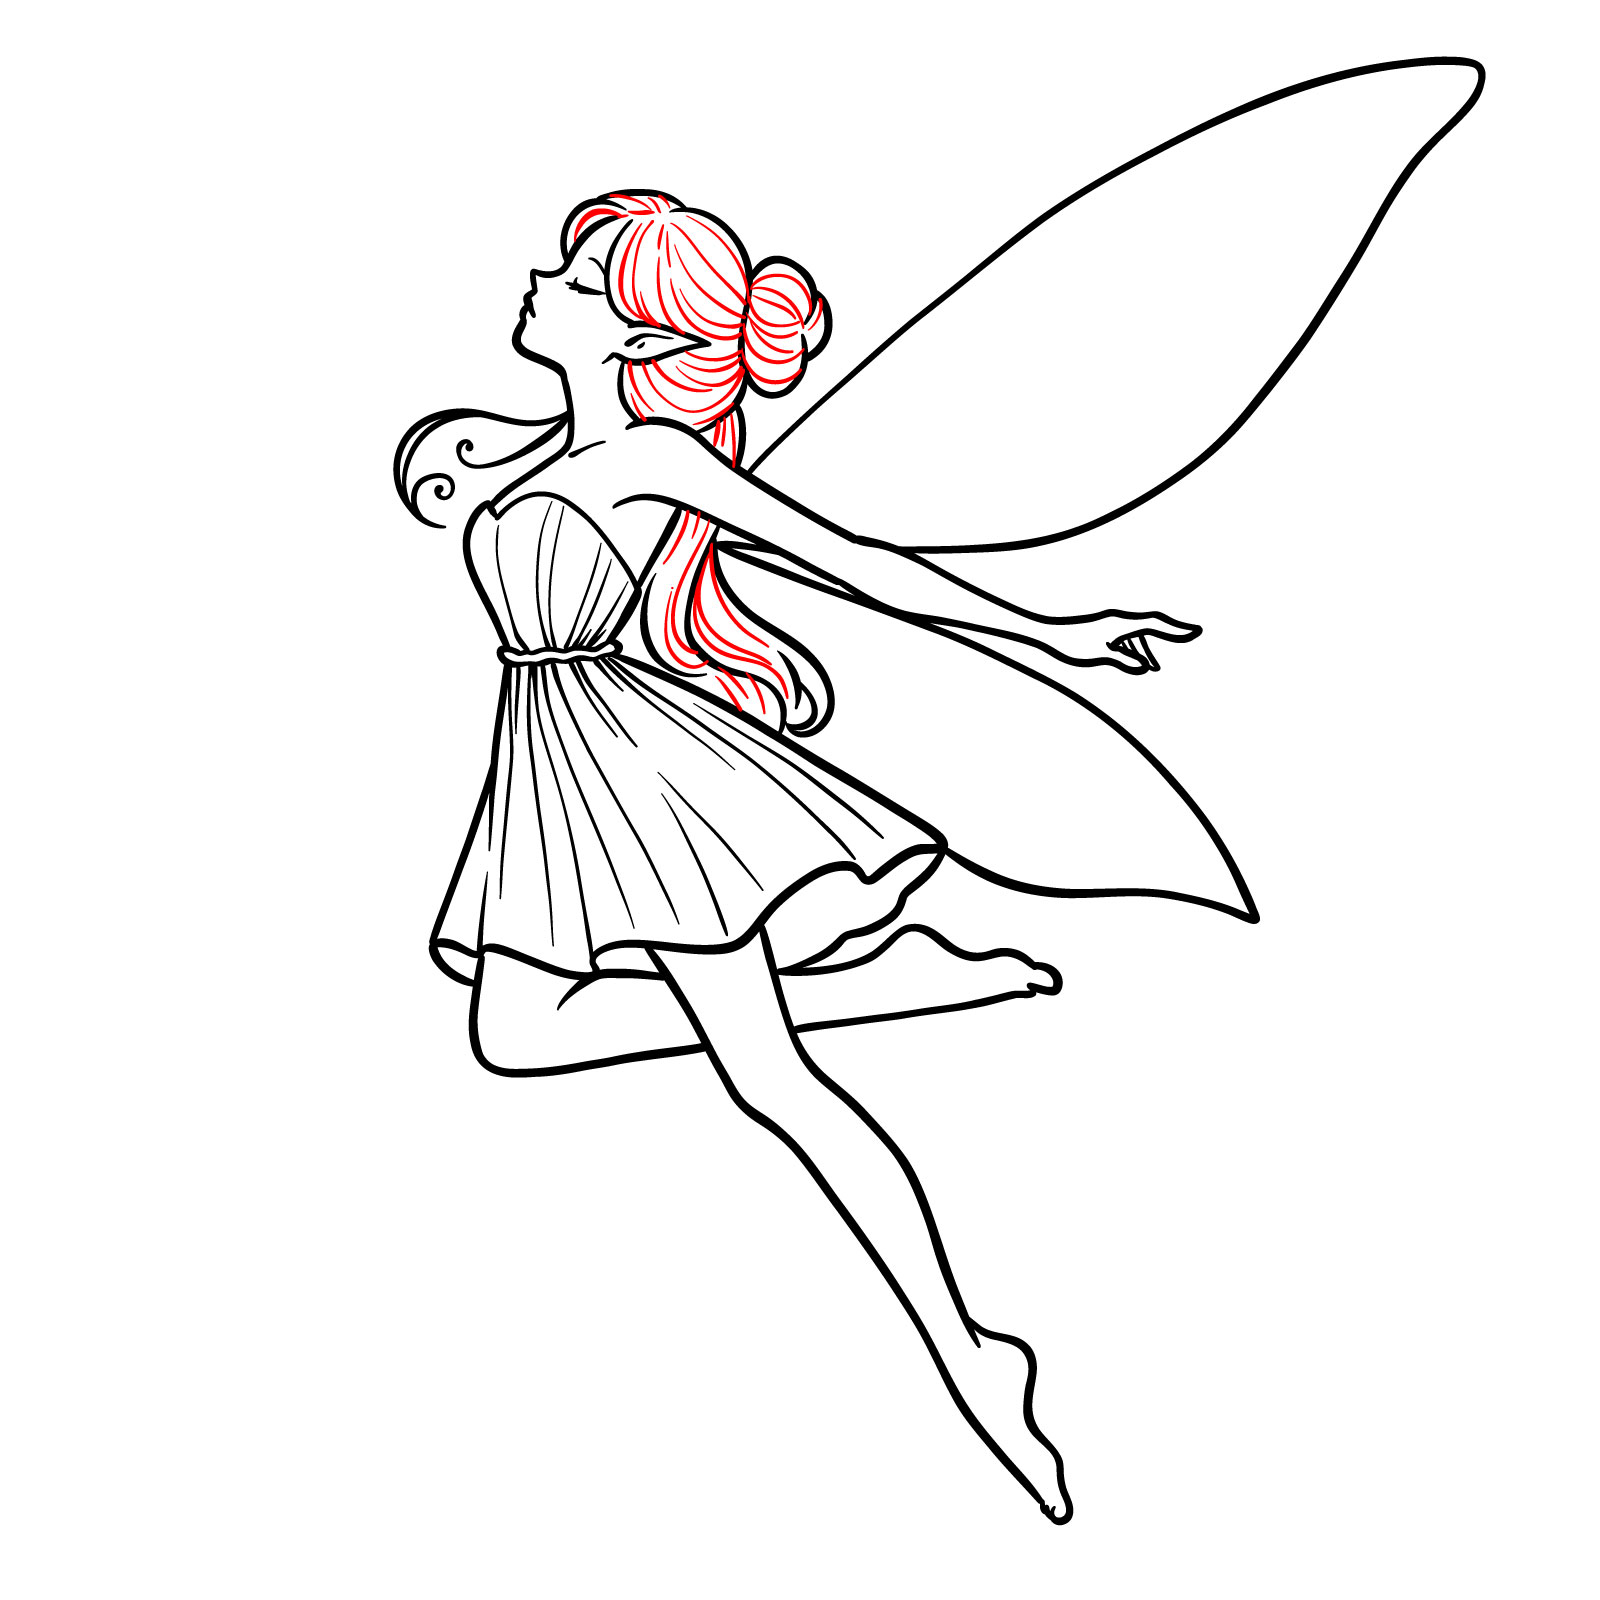
Step 11 – Begin shaping the fairy’s hairstyle, outlining the main volume of the hair around the head. This includes the overall flow and direction, creating a natural look as if influenced by the fairy’s motion or a gentle breeze
Crafting the hair form
Step 12 – With the hair’s form established, it’s time to draw individual strands. This will give the hair texture and depth. Draw these strands with a light touch
Detailing hair strands
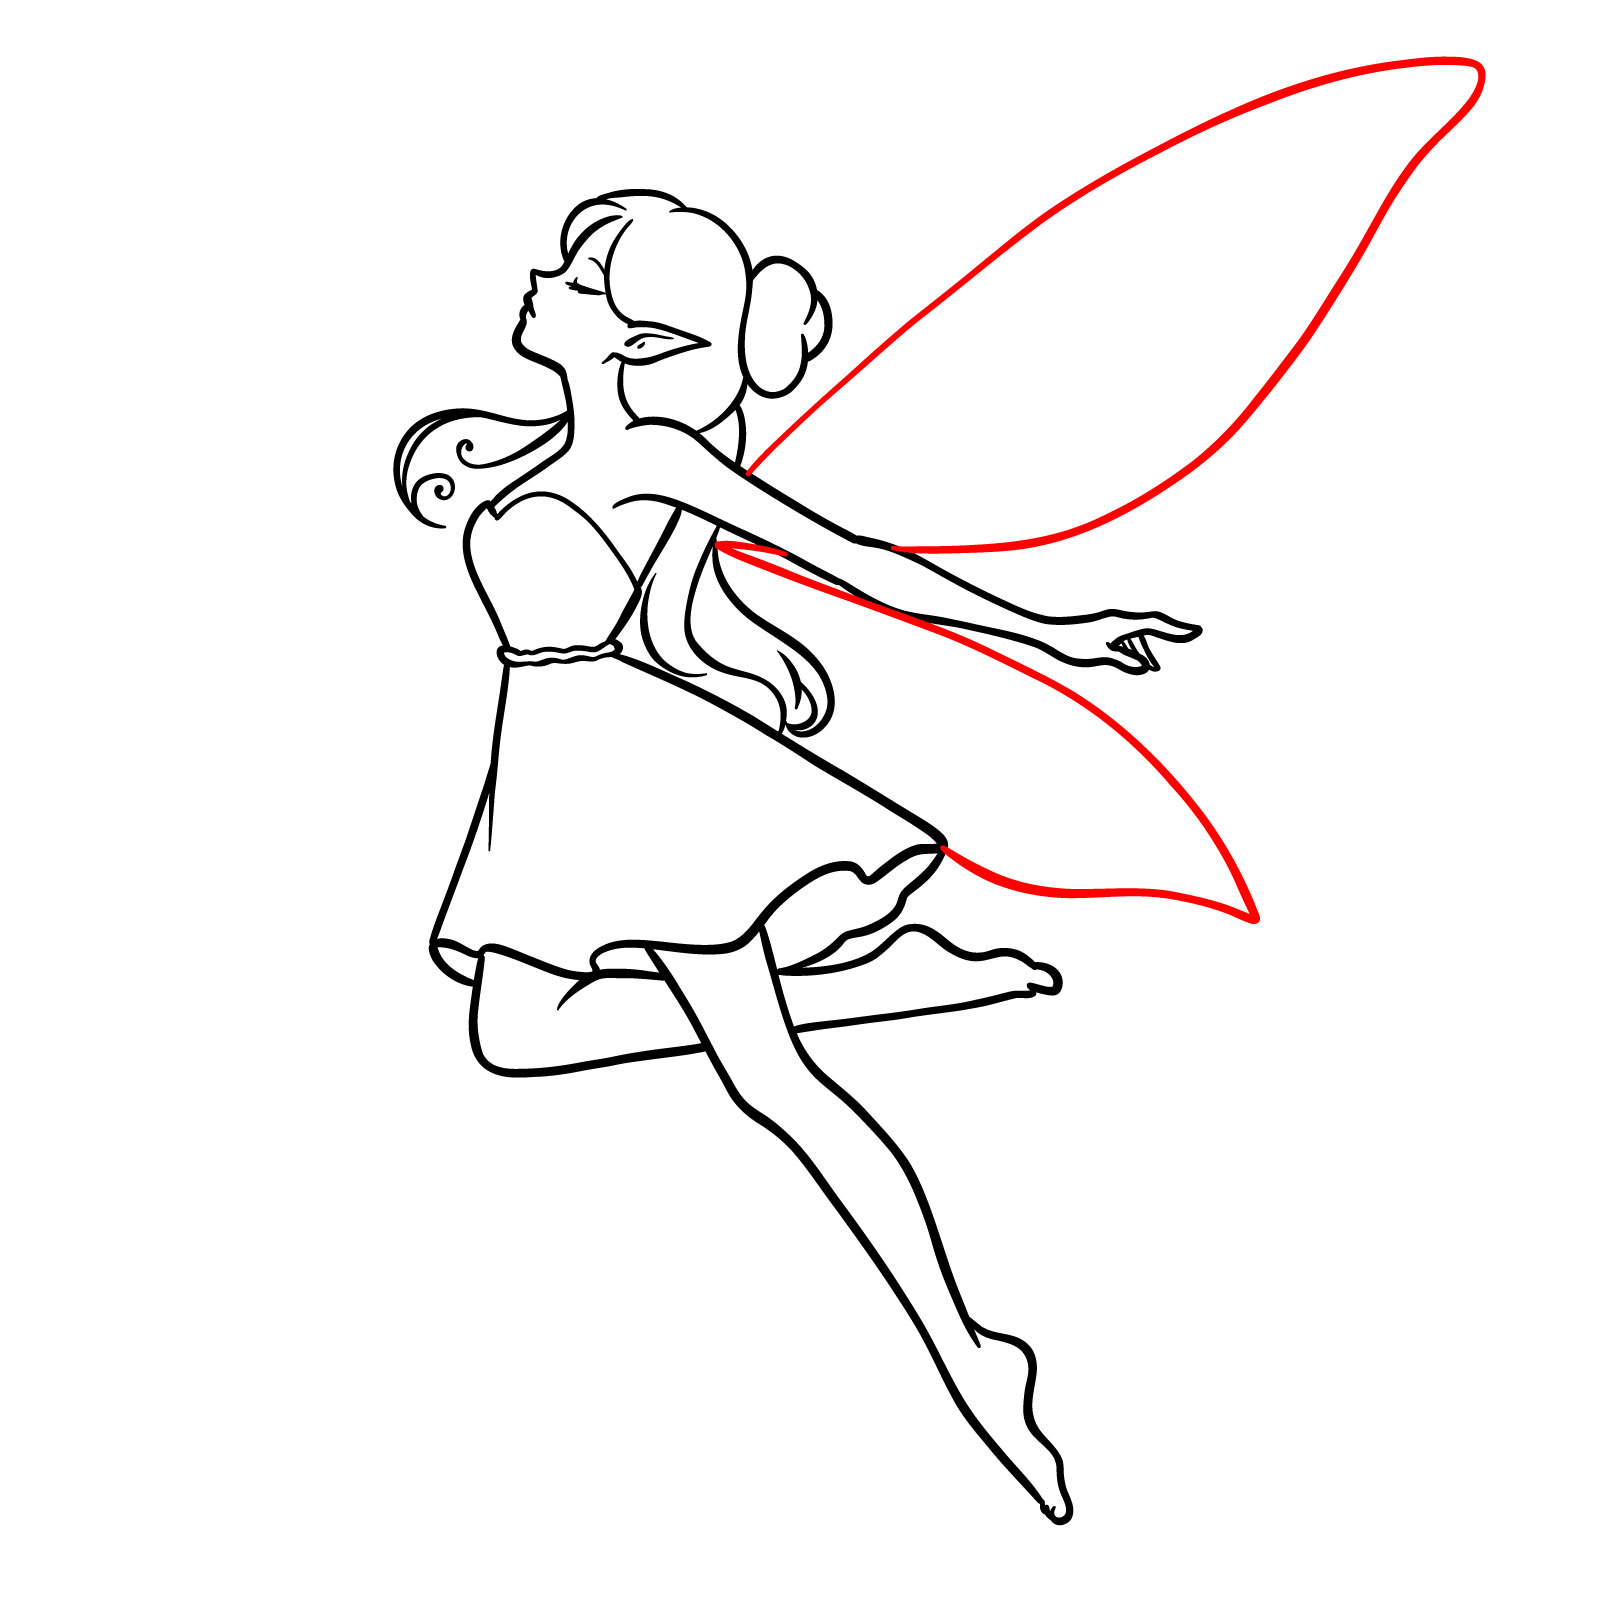
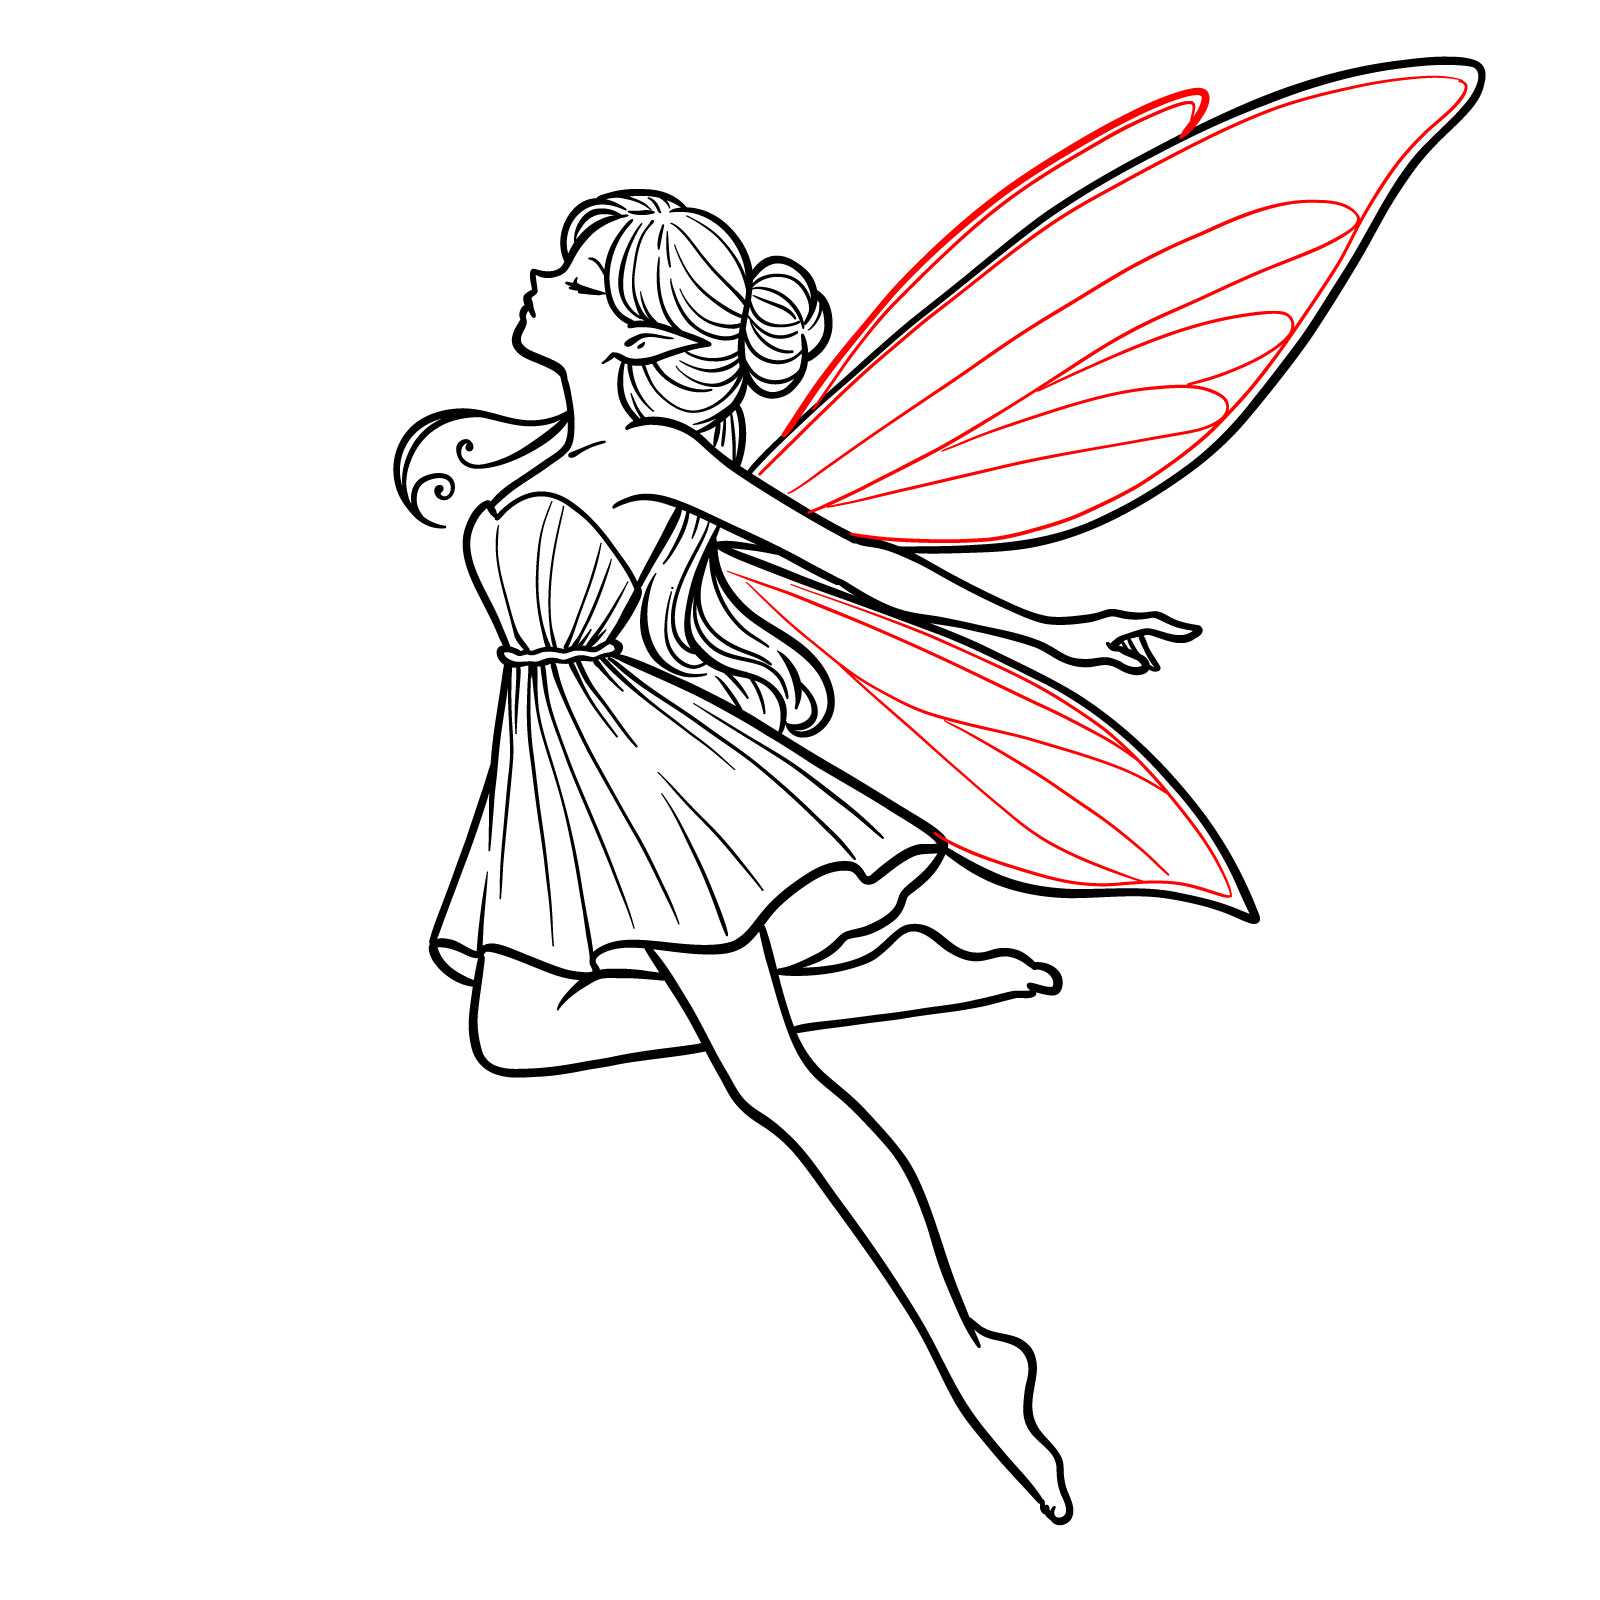
Step 13 – Begin by sketching the overall shape of the fairy’s wings, extending from her back. The wings should have a pointed tip and a wide base near the body to illustrate a natural attachment point
Drawing the wings
Step 14 – Add depth to the fairy’s dress by drawing folds. These lines should suggest the fabric’s flow and the movement of the fairy, creating a realistic and three-dimensional effect
Adding dress folds
Step 15 – Enhance the hair by adding more lines to represent individual strands. These lines should follow the direction of the hair’s flow and add volume to the hairstyle
Enhancing the hair with lines
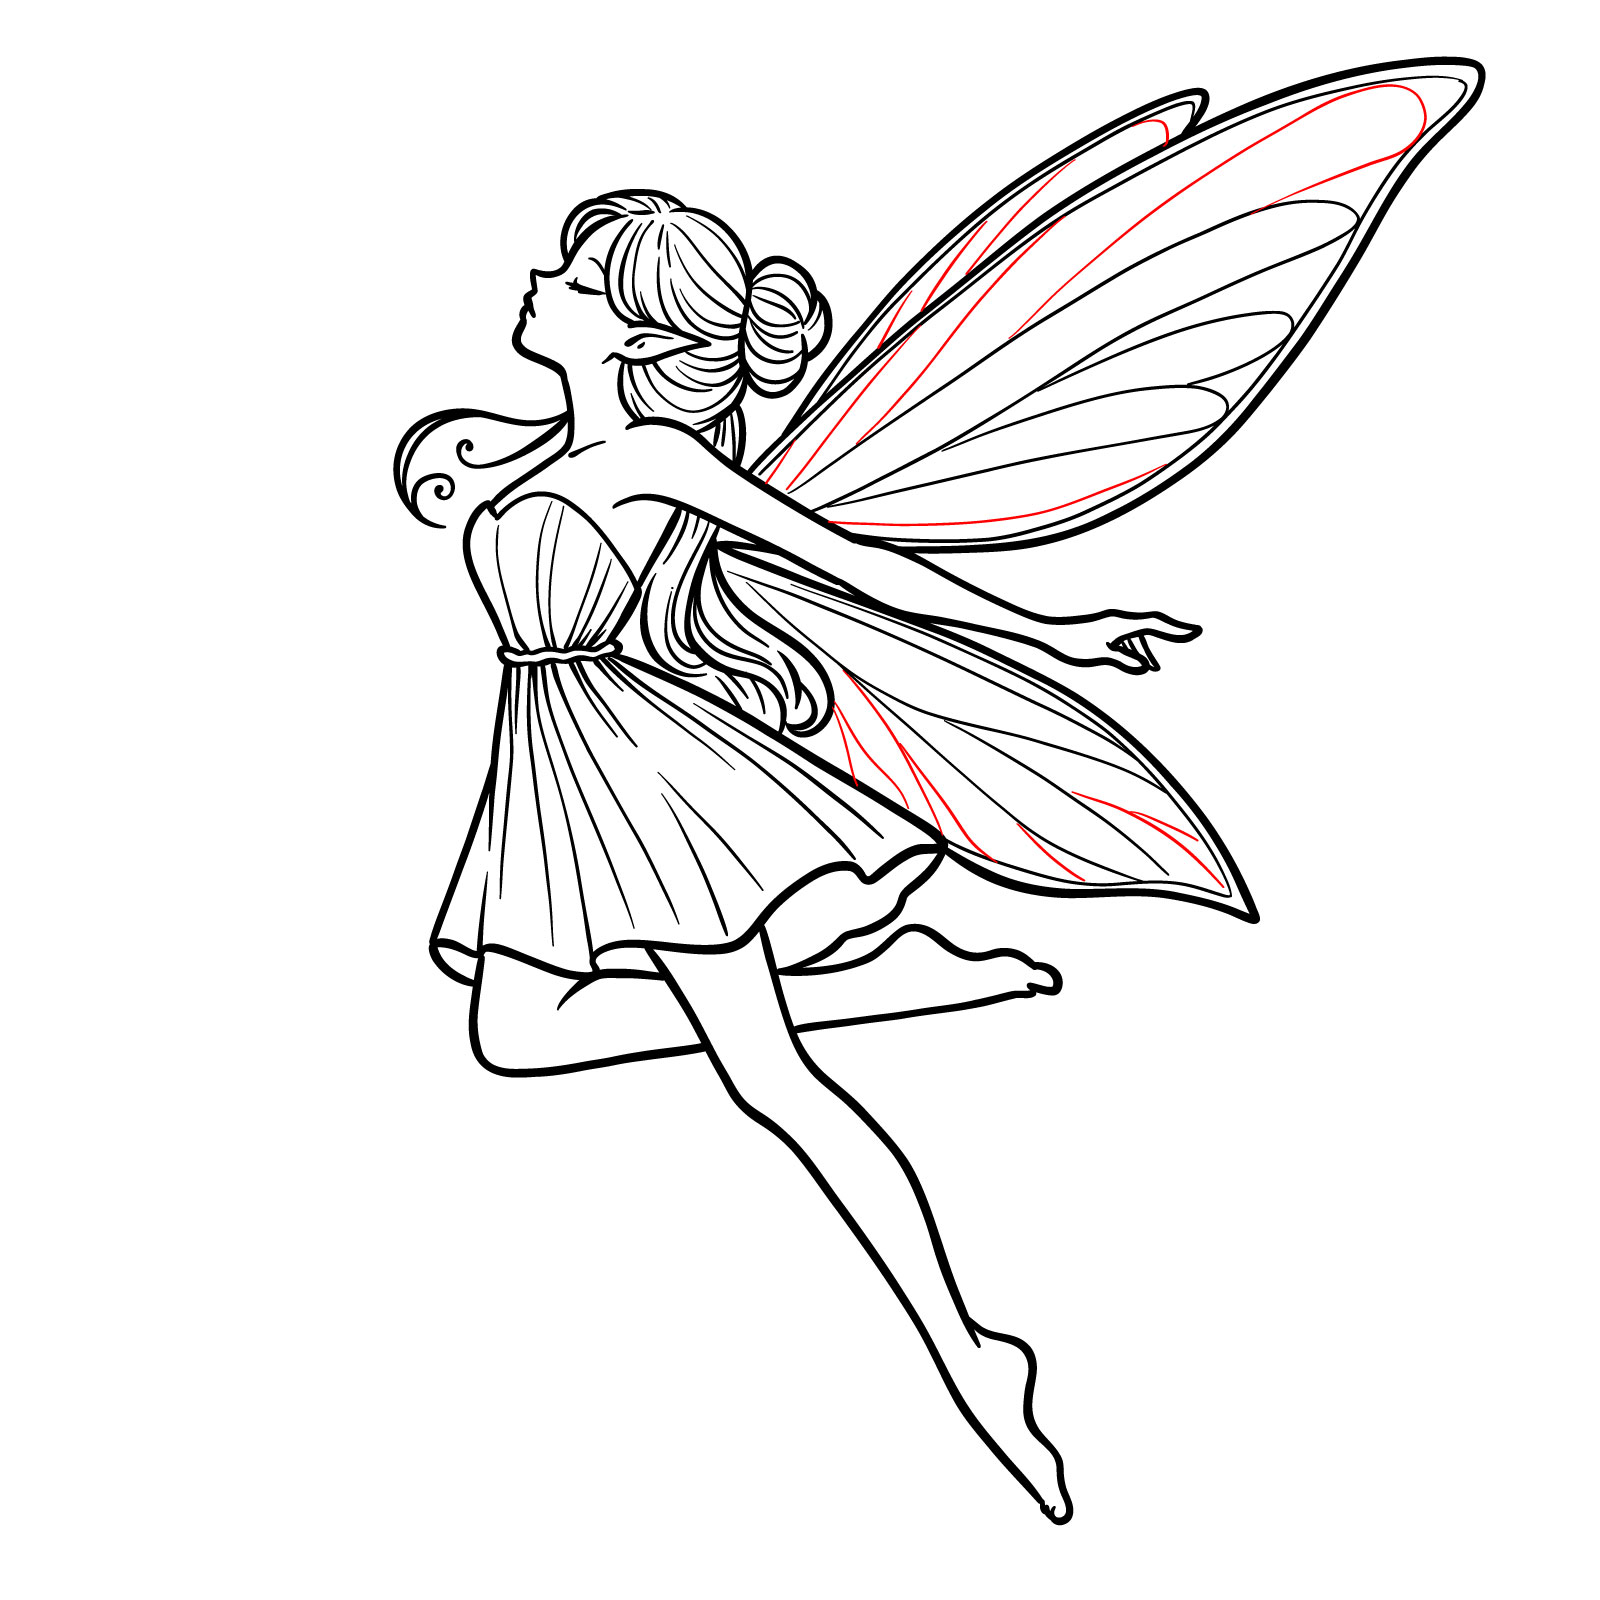
Step 16 – Illustrate the upper portion of the wing on the far side. Begin adding patterns to the wings, such as veins or markings
Detailing the wings
Step 17 – Complete the patterns on the wings, paying attention to symmetry and natural wing designs. This step brings an element of intricacy and detail that is crucial in fairy drawings
Completing the wing patterns
Step 18 – With all details in place, your 5th guide on how to draw a fairy is complete. This final image captures the enchantment and grace of a fairy, with every element from the delicate wings to the flowing dress contributing to the magical whole. For those visiting the site not with the intent to sketch but to find a fairy image for leisure activity, this drawing can be saved, printed, and enjoyed as a coloring page, providing a delightful opportunity to bring the fairy to life with color
The completed realistic fairy drawing
6. Anime Fairy
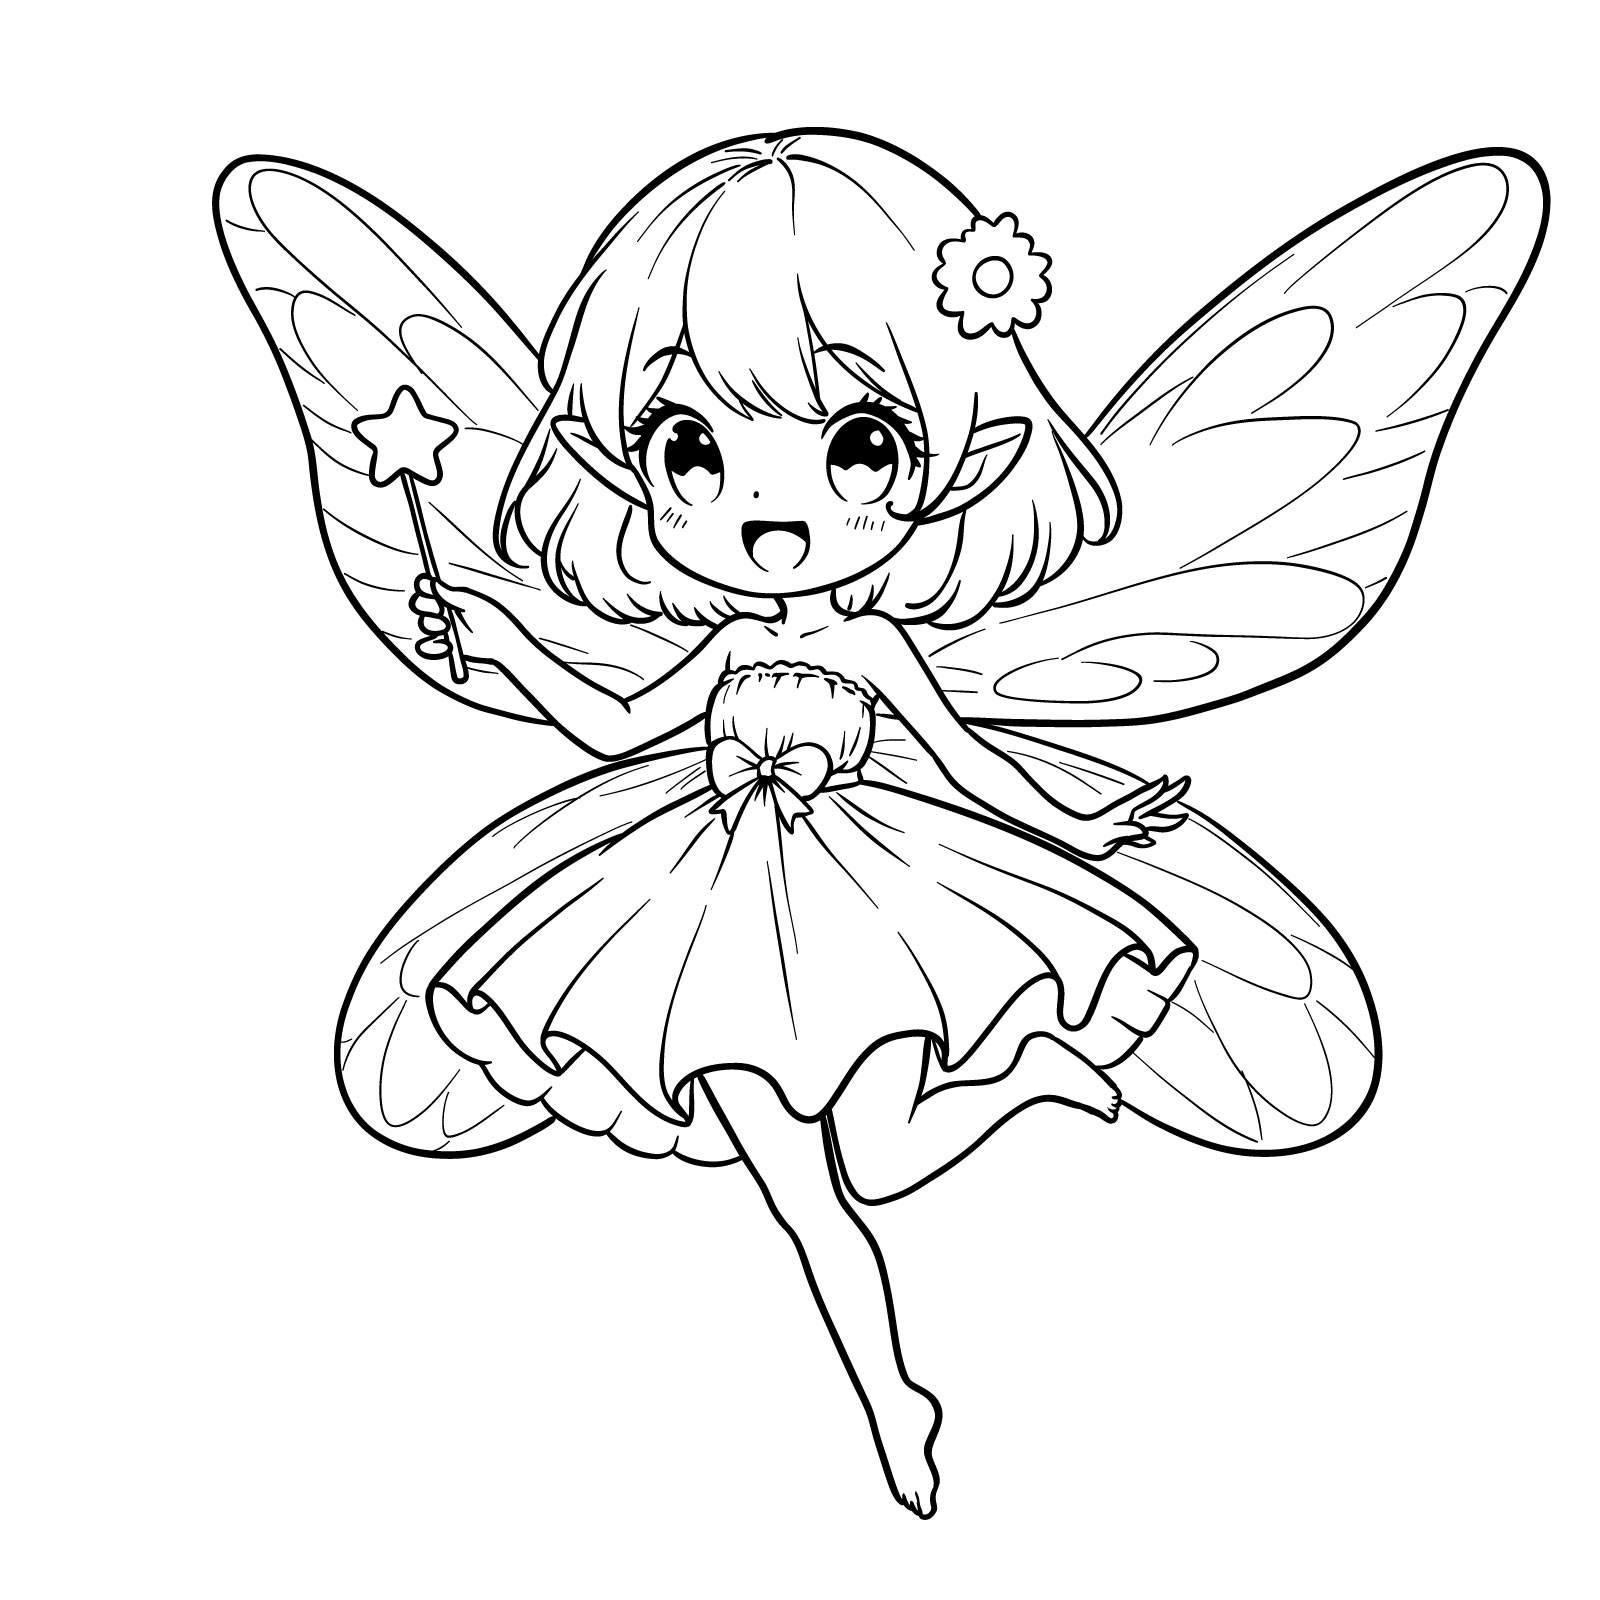
Completed anime fairy drawing
The final guide in our series teaches you how to draw an anime fairy, bringing together the charm of anime with the enchantment of fairy lore. This guide begins with a rough sketch that ensures correct proportions, setting the stage for the intricate details that define anime art. Our subject is a sprightly fairy, distinguished by her oversized, sparkling eyes and a playful stance, holding a wand topped with a star.
Across 21 detailed steps, you will learn not only how to draw an anime fairy but also how to infuse your drawing with the vivacity and emotion characteristic of anime.
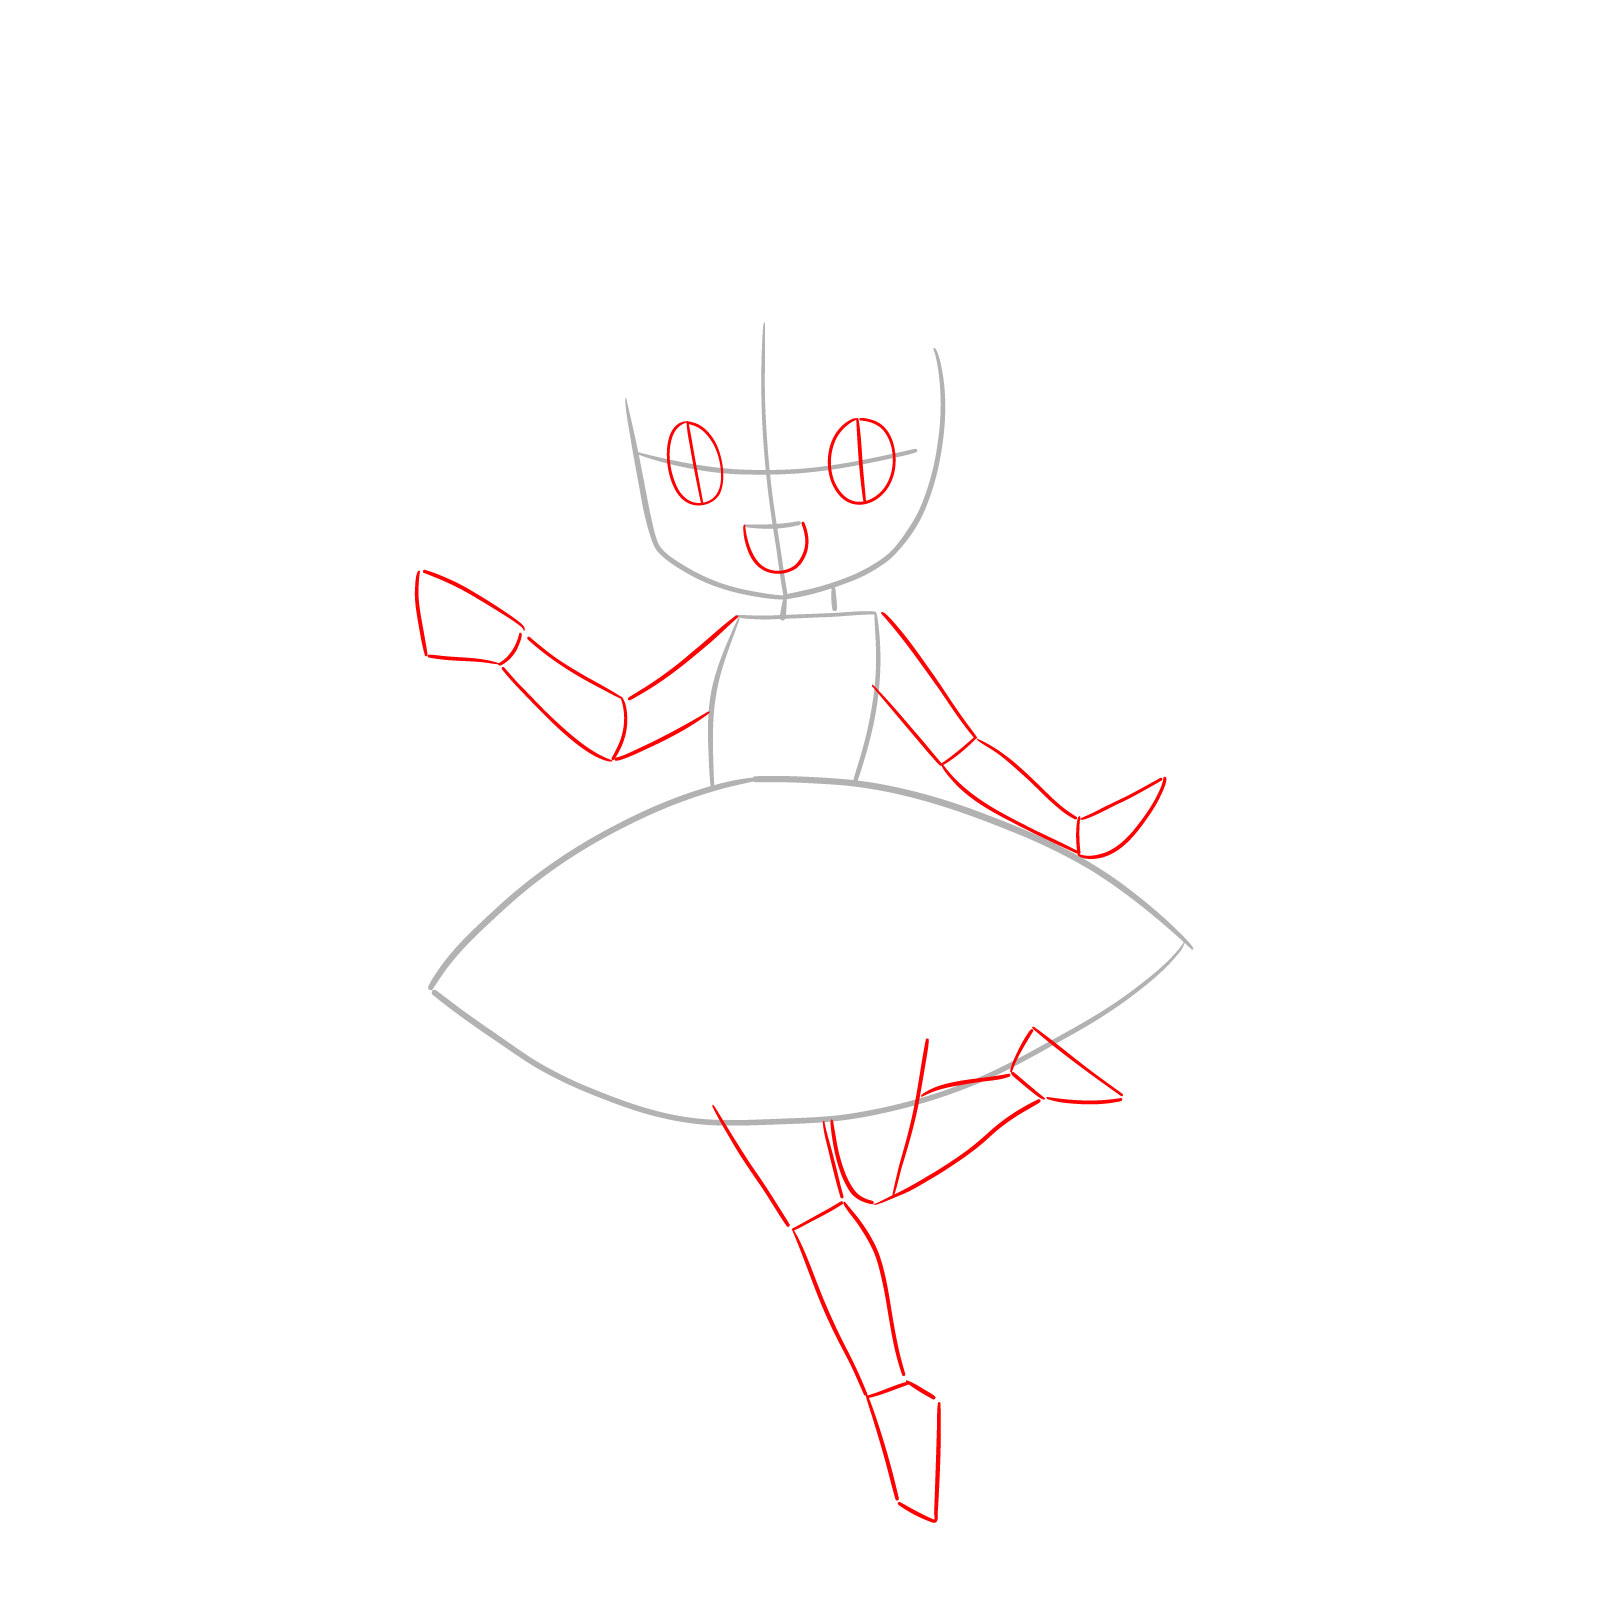
Step 01 – Start by shaping the fairy’s face, adding a line for symmetry. Sketch a small rectangle for the neck and a larger rectangular shape for the torso. The skirt is drawn as a wide, flared shape beneath the torso, setting the foundation for a balanced figure
Constructing the basic shapes
Step 02 – Map out the fairy’s facial features with two large ovals for the eyes and a curved line for the mouth. Outline the arms and legs with basic geometric shapes to capture the posture, ensuring all proportions are accurate and even
Outlining facial features and limbs
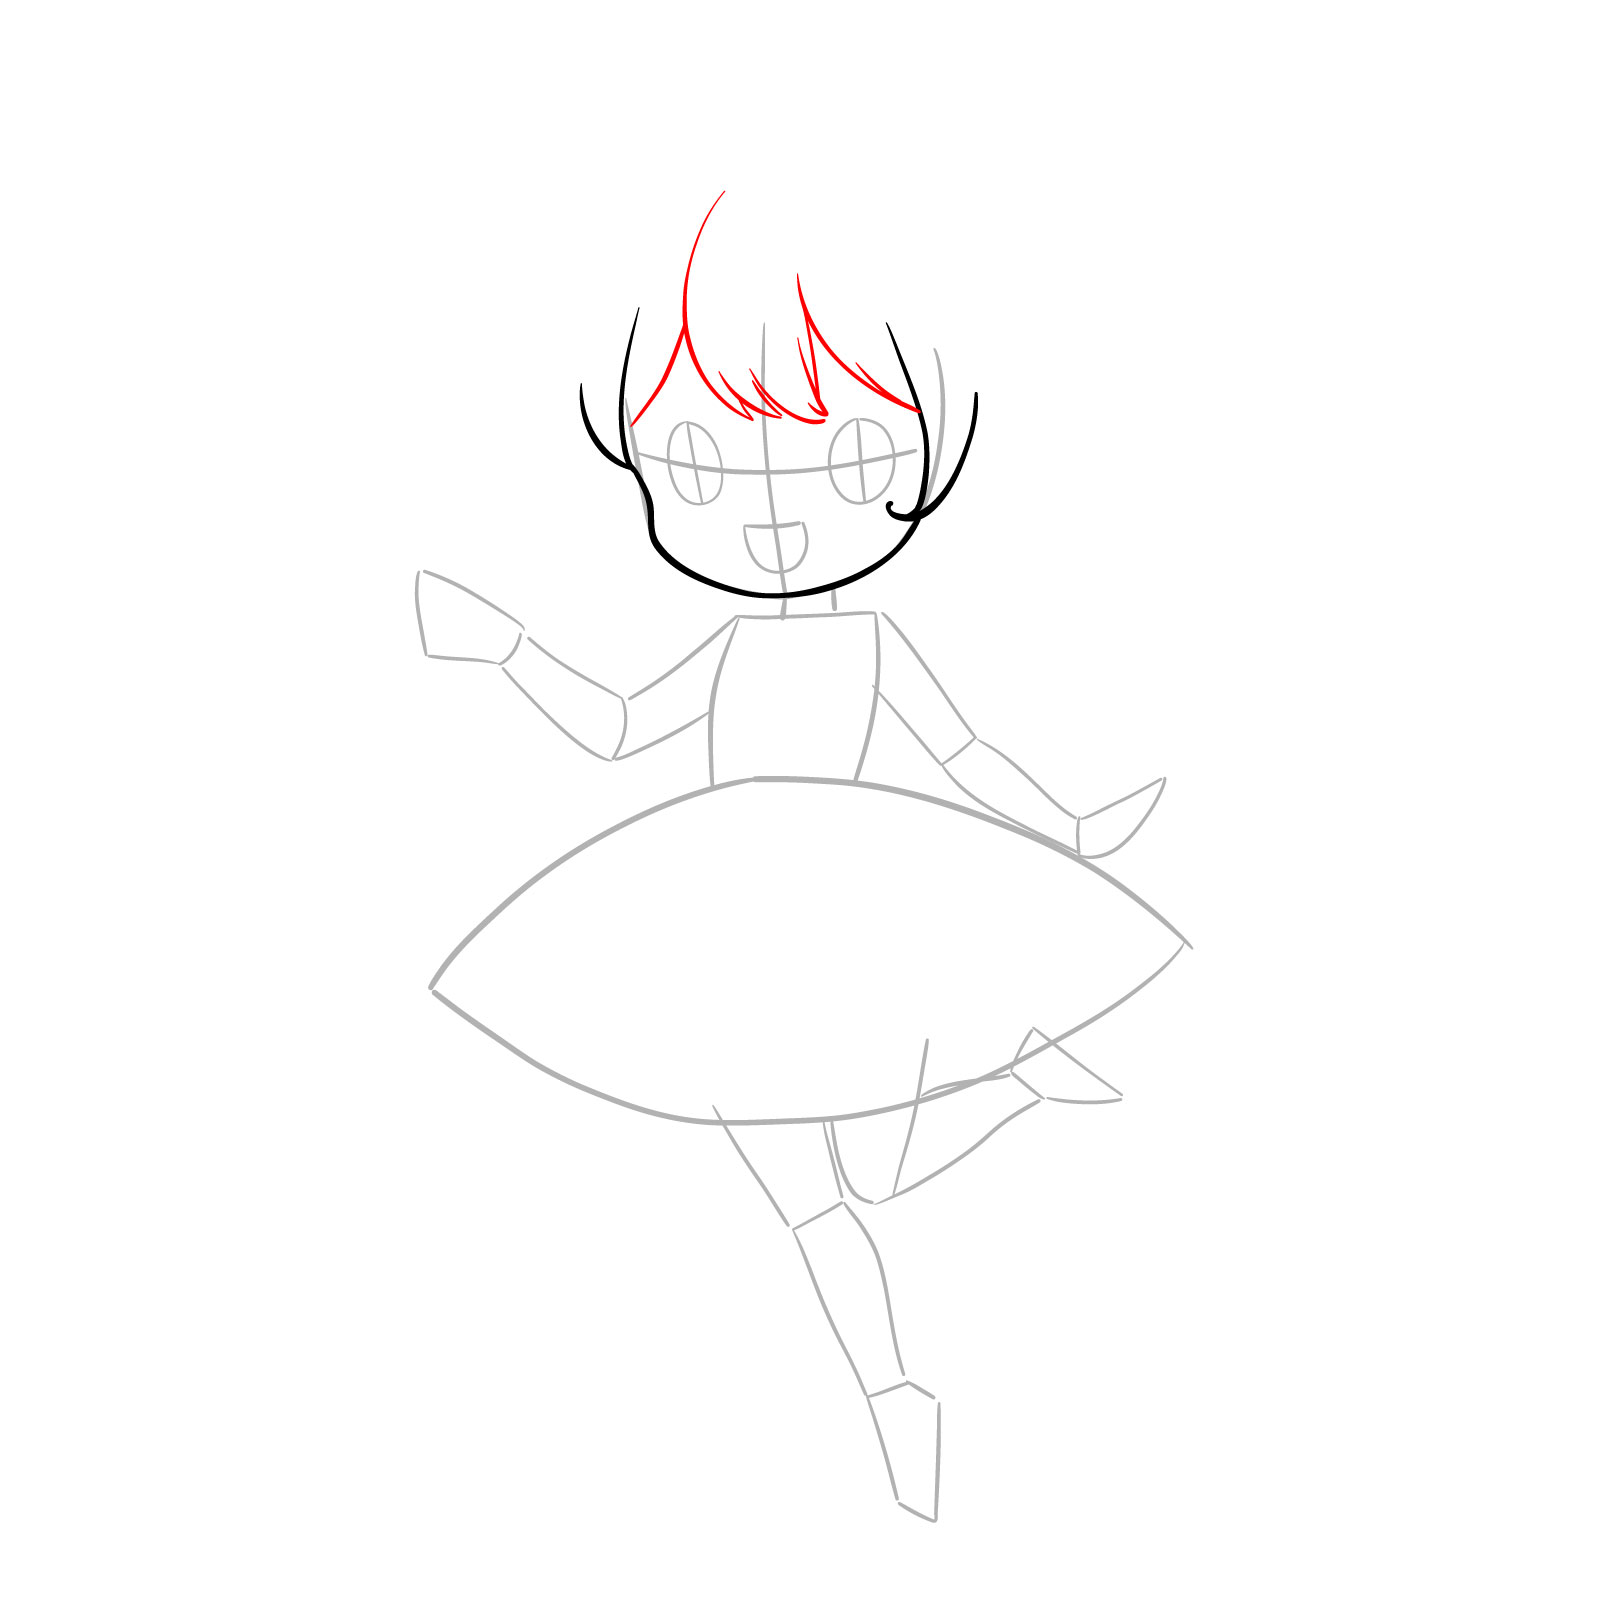
Step 0 – Define the fairy’s face frame, sketching gentle line that outlines the face and extend to strands on each side
Defining the face frame and side strands
Step 04 – Add strands of hair in the front, creating a sense of volume and texture. These lines should be soft and wavy, suggesting the lightweight and whimsical nature of the fairy’s hairstyle, providing a frame for the face and enhancing the anime aesthetic
Adding front hair strands
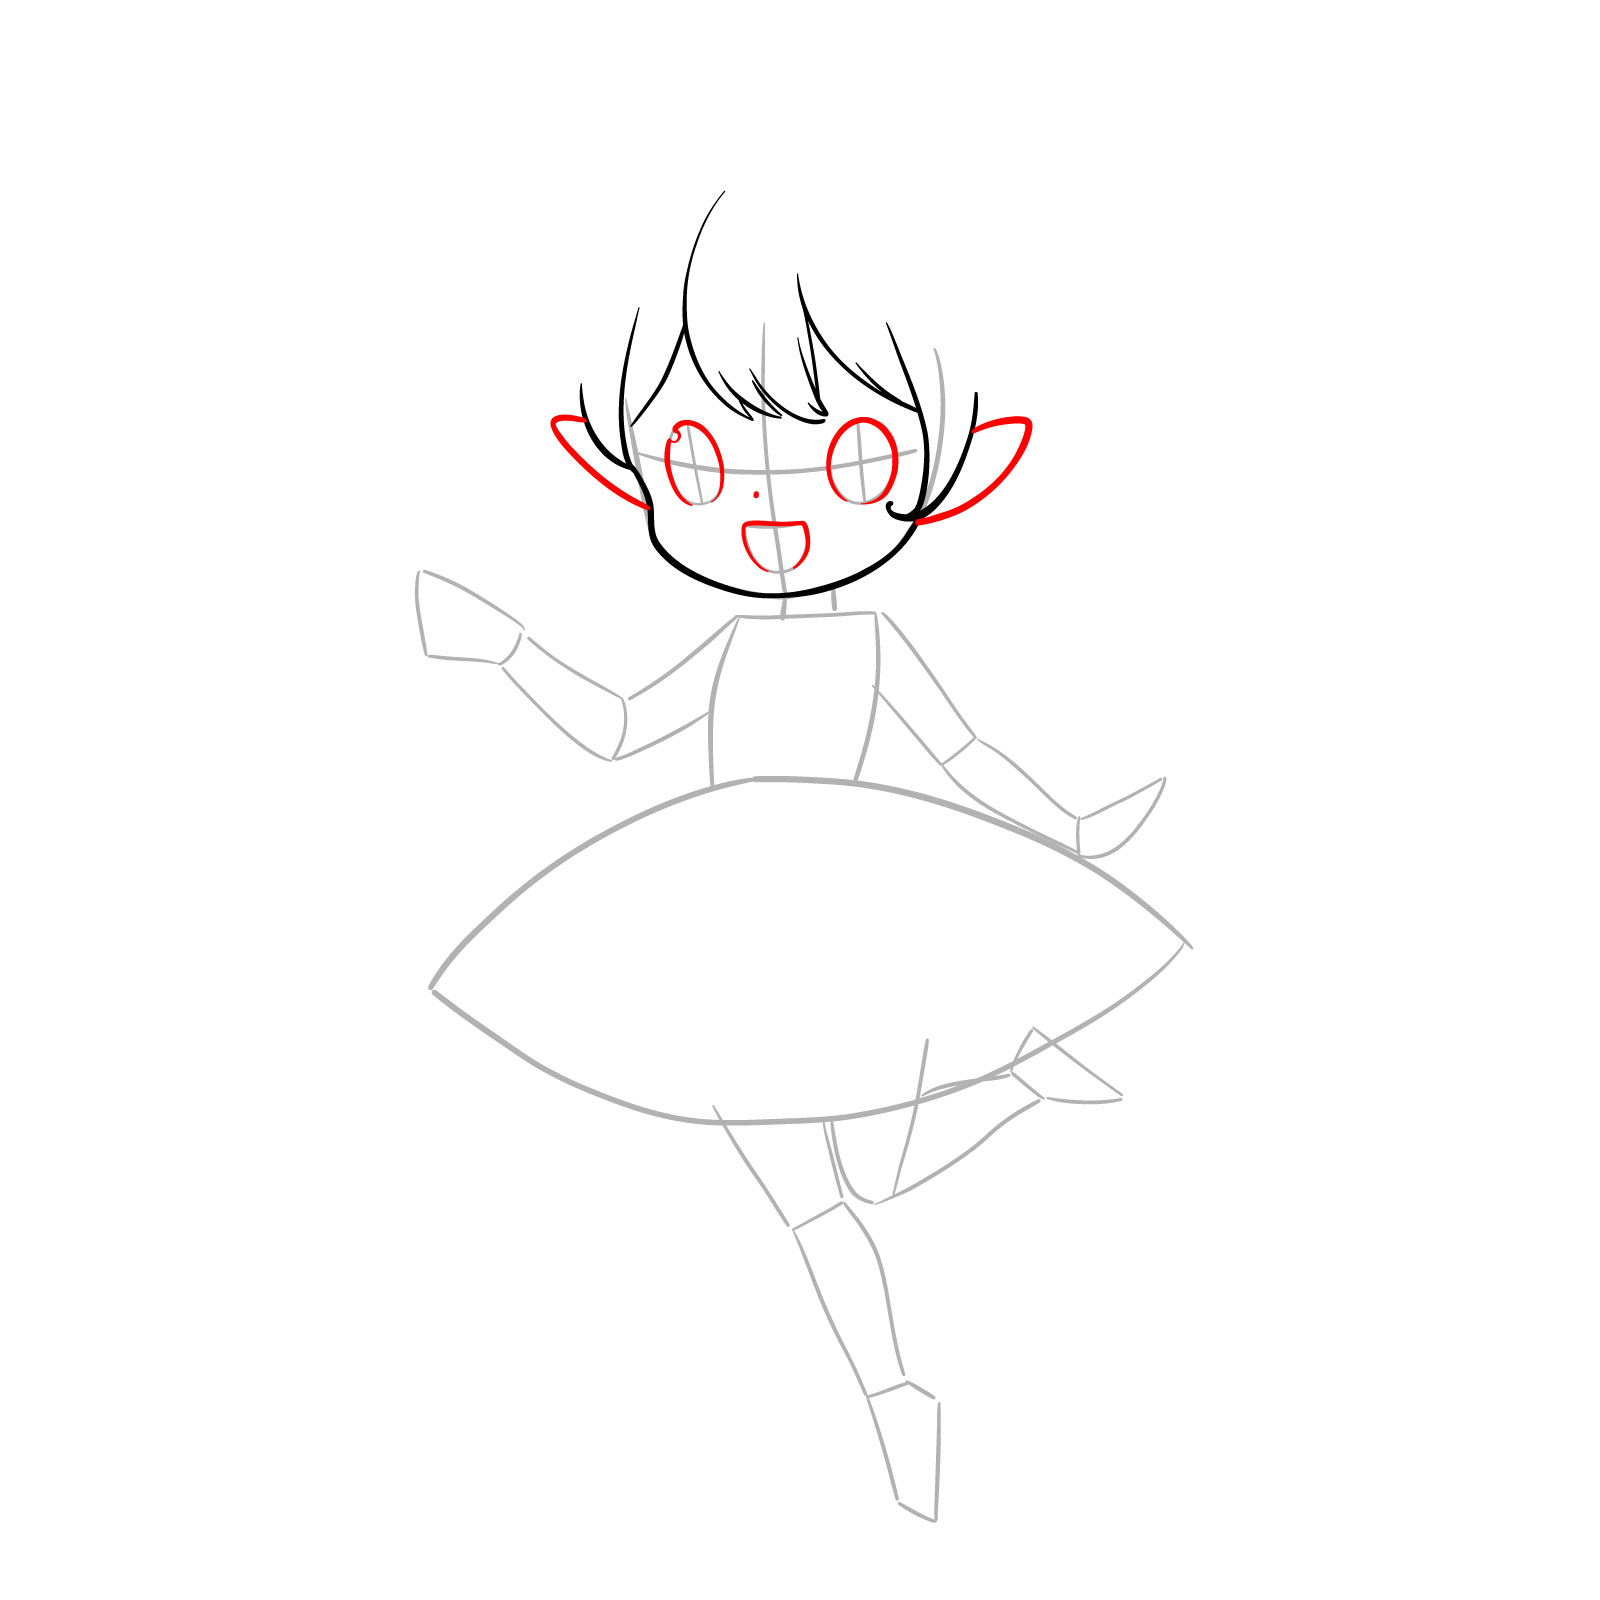
Step 05 – Detail the facial features by outlining the ears, eyes, and mouth. Place a small dot for the nose
Sketching facial features
Step 06 – Draw the outer curves of the eyes to create the iconic anime look and add a line in the mouth for the tongue and fill in the gap between the tongue and upper lip
Refining the eyes and mouth
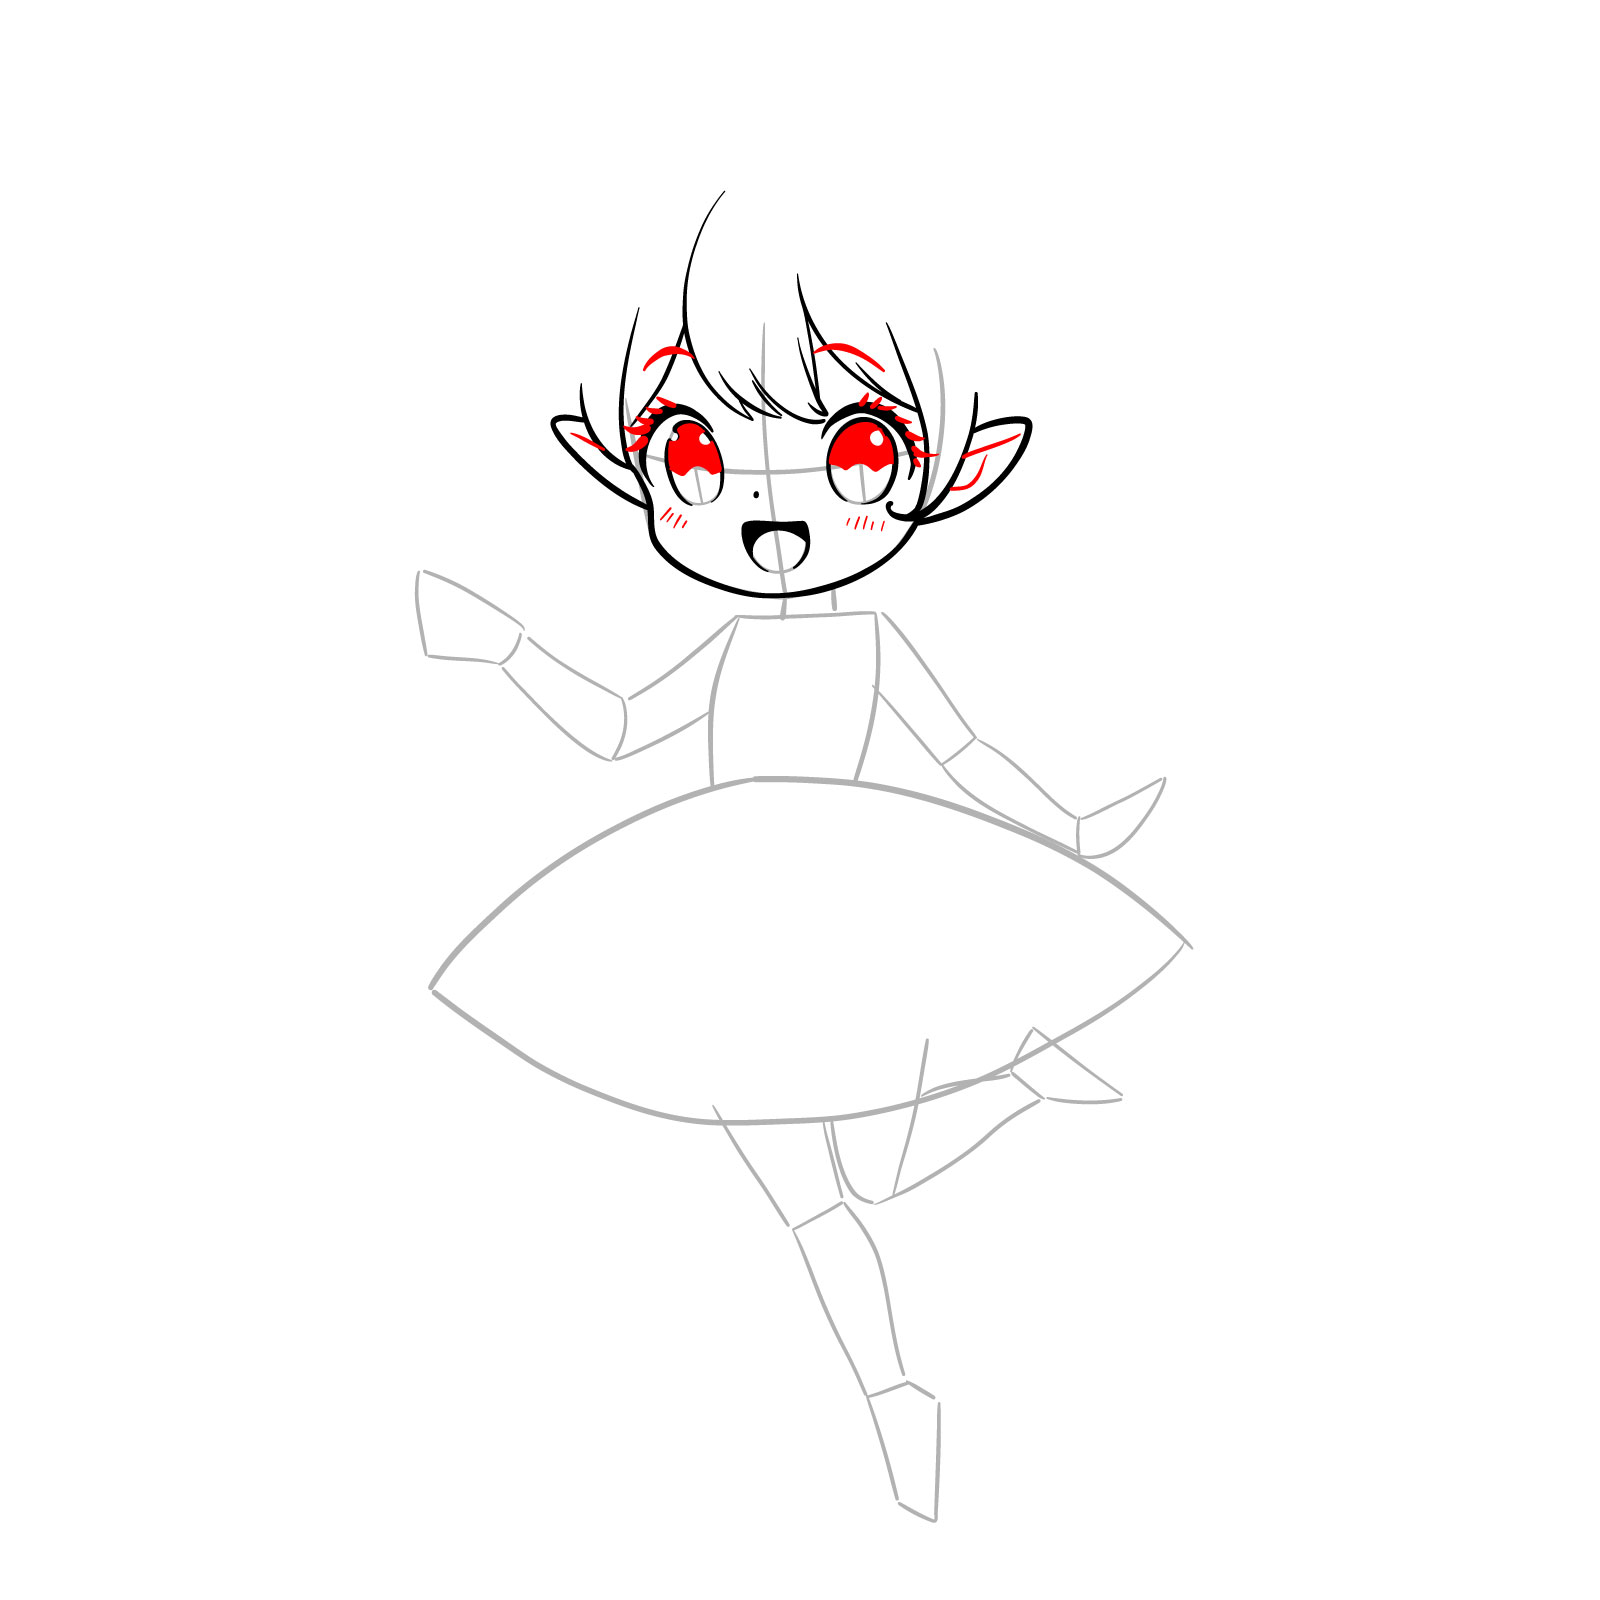
Step 07 – Add eyelashes and pupils, leaving small circles inside the eyes for highlights to create a spark of life. Sketch the inner ear lines and eyebrows, and use thin, scratchy lines to give a blush to the cheeks for a touch of whimsy
Adding expressive details to the face
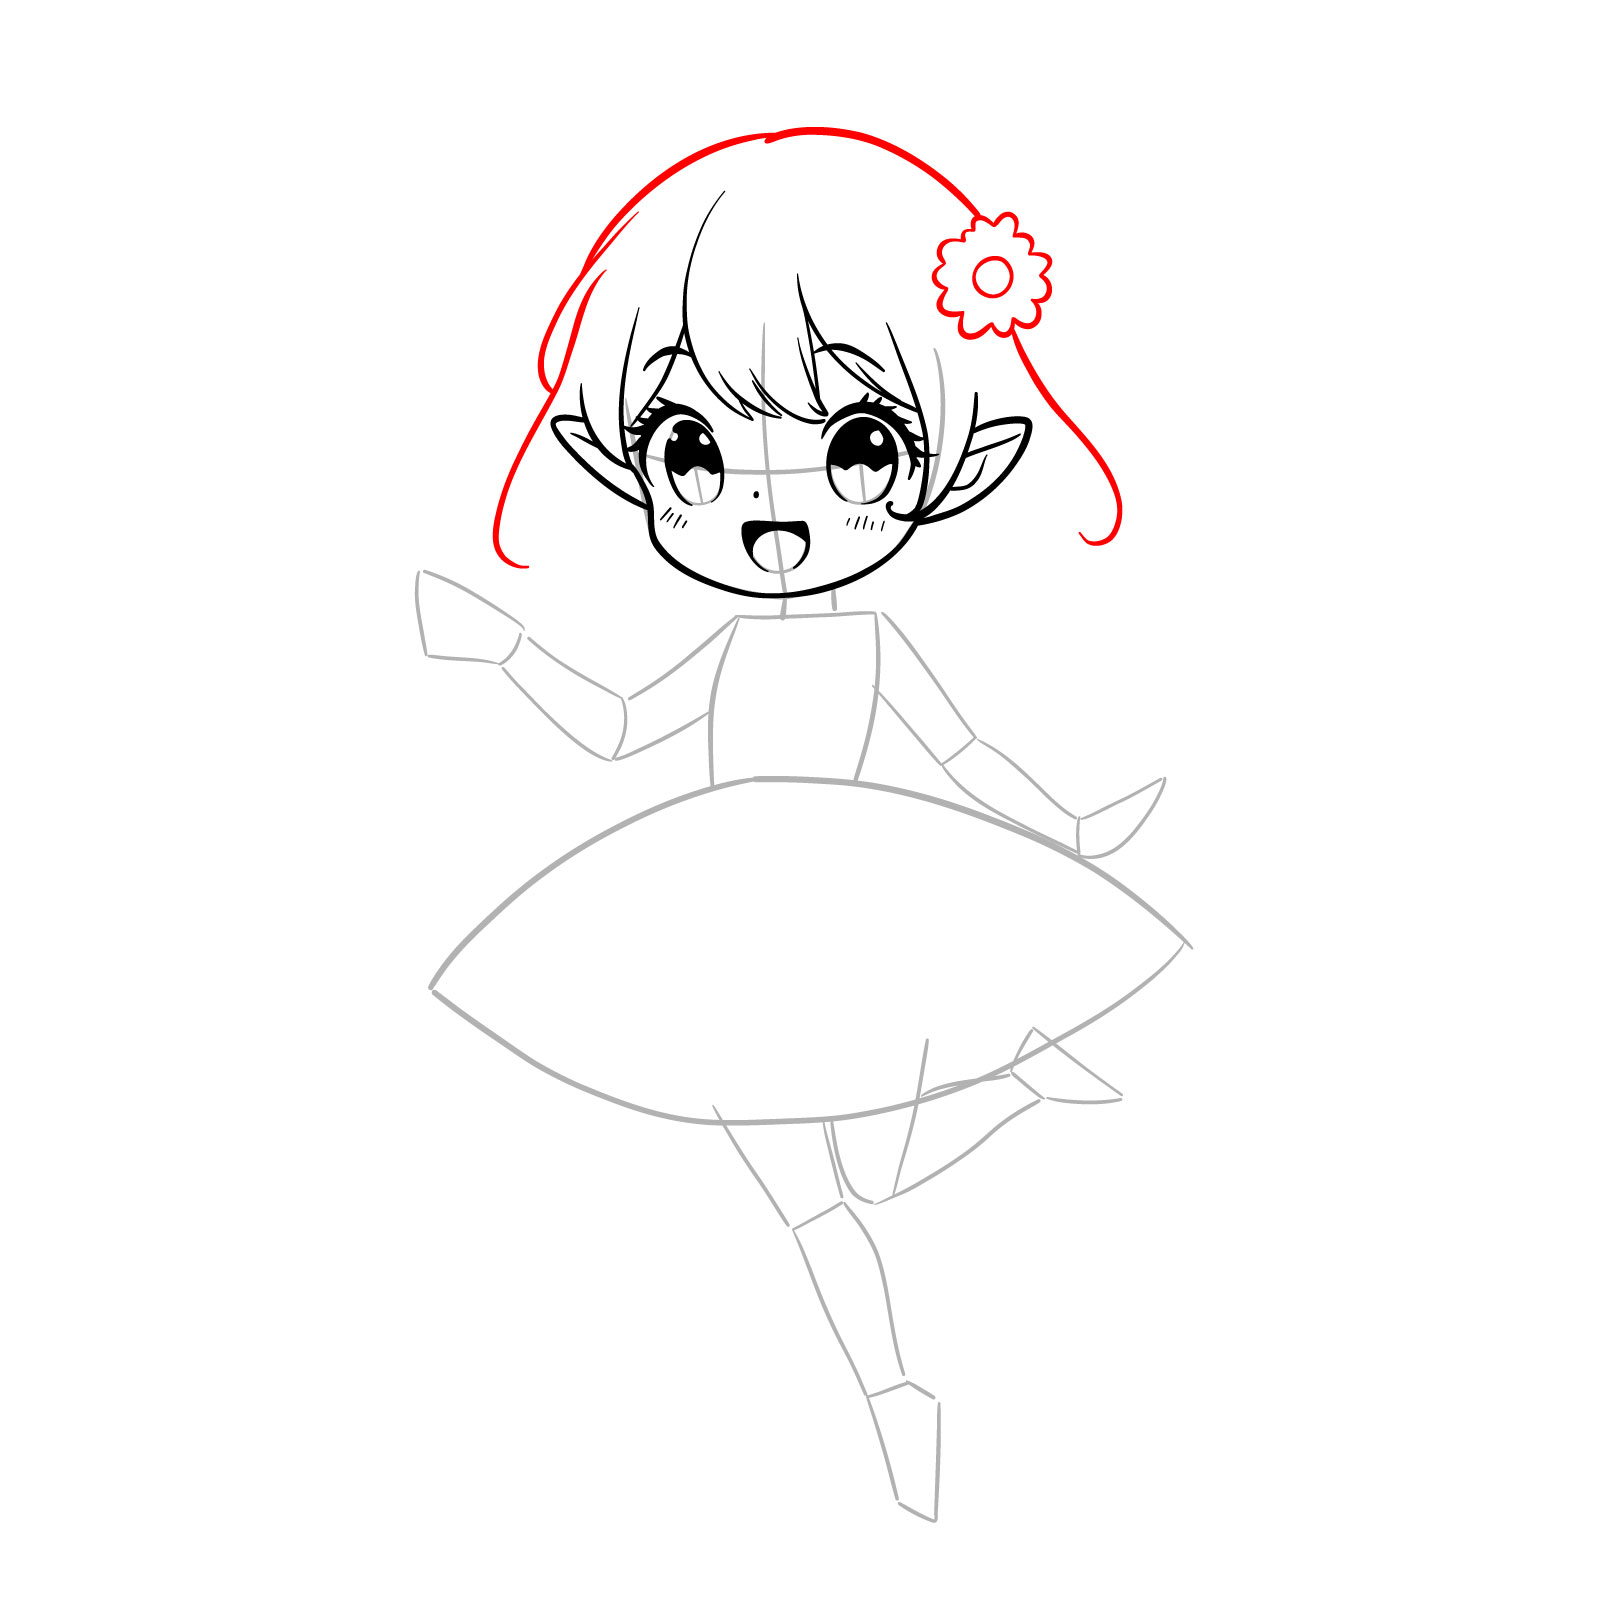
Step 08 – Sketch the hair by adding the top strands and placing a flower pin for an enchanting accessory
Completing the hairstyle with accessories
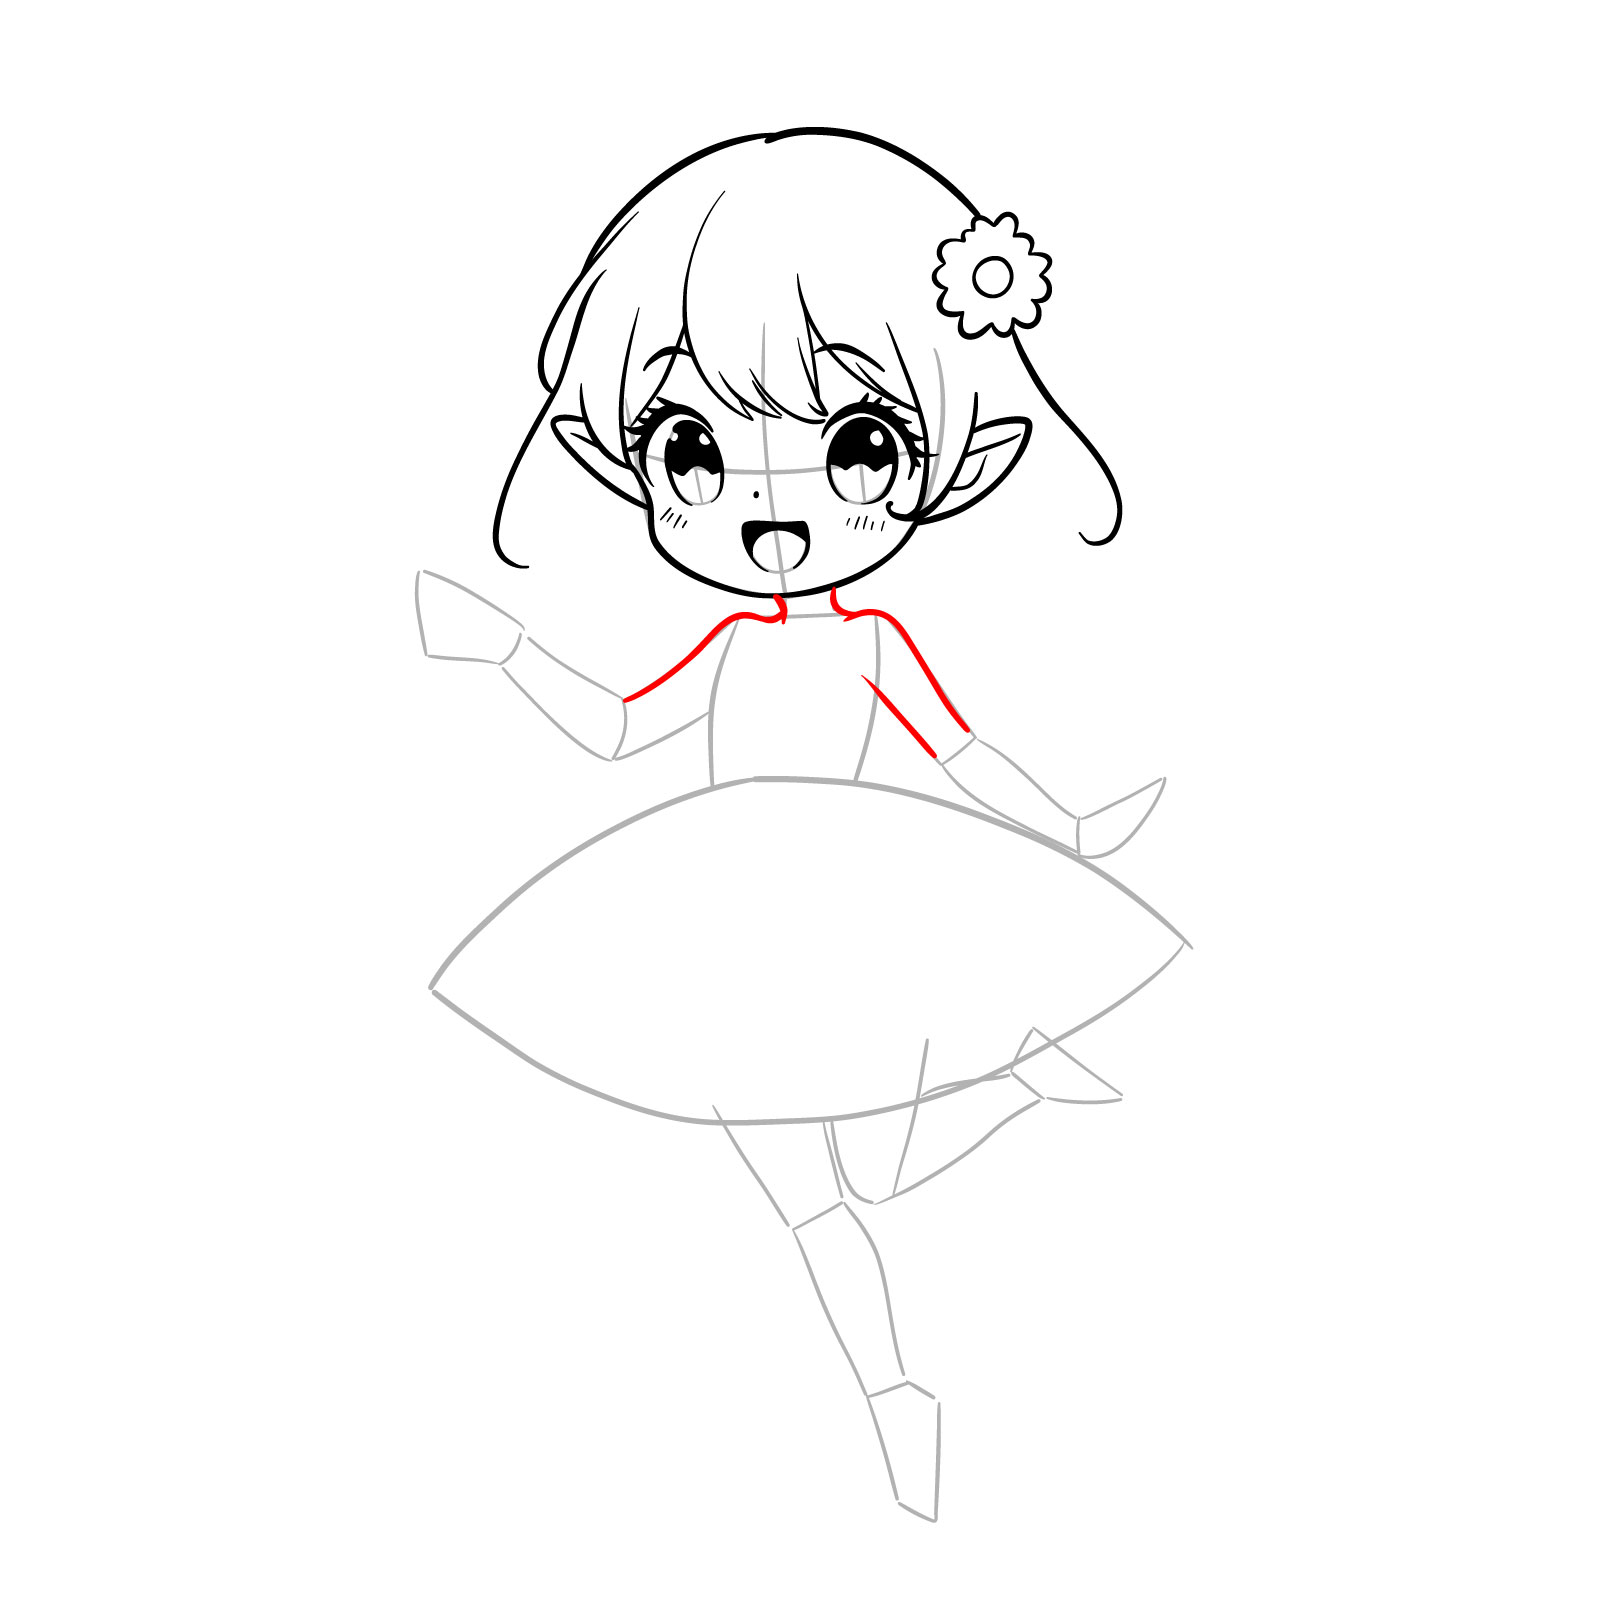
Step 09 – Draw the neck leading down from the head, widening as it meets the shoulders. This creates a graceful transition from the head to the body, setting the stage for defining the upper torso
Outlining the neck and shoulders
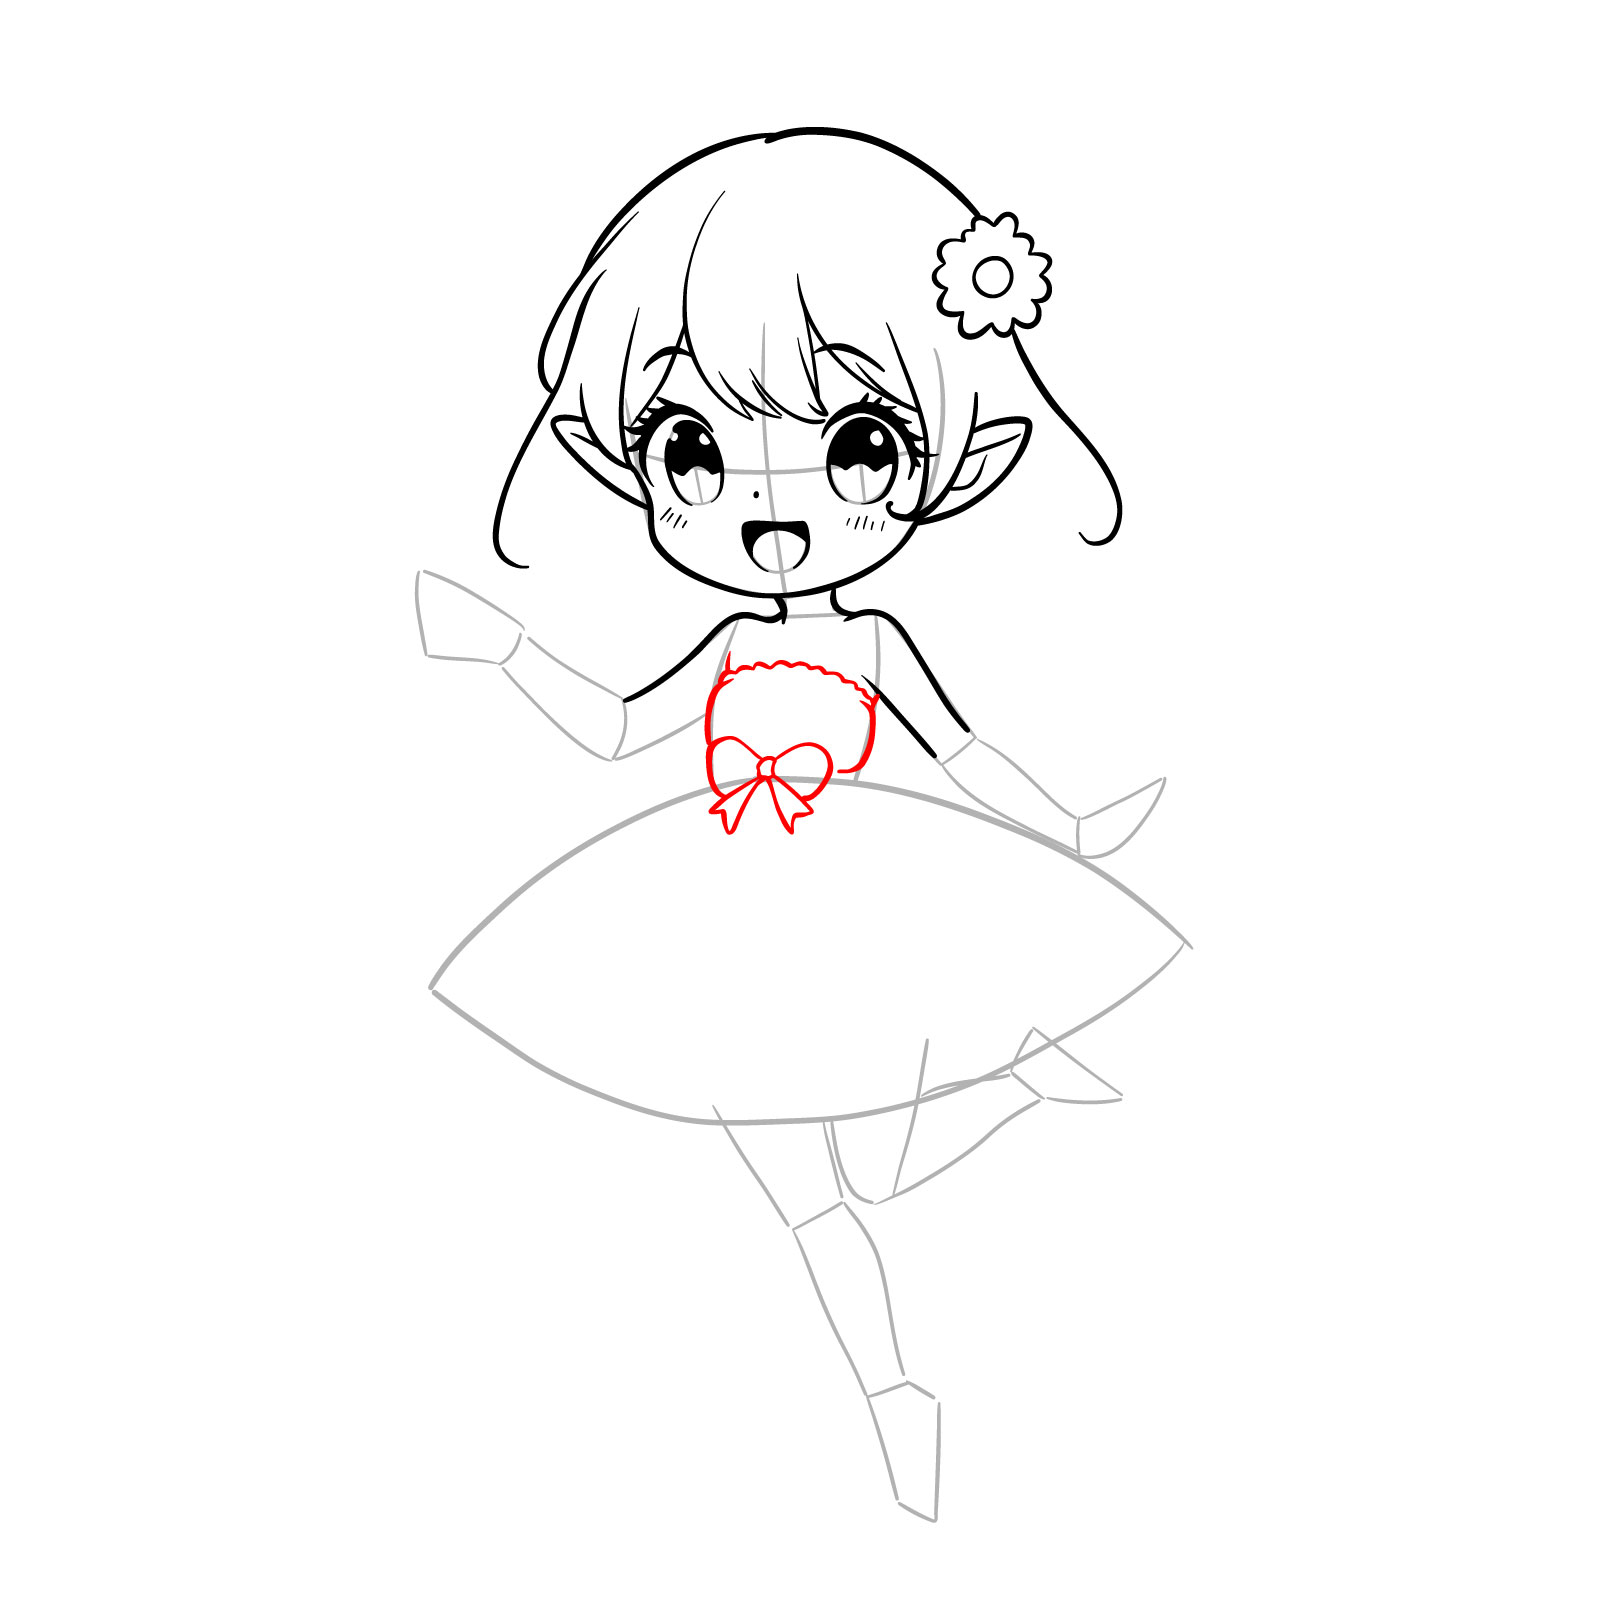
Step 10 – Illustrate the upper portion of the dress, ensuring it wraps naturally around the fairy’s form. Add a bow tie at the center
Drawing the upper dress and bow
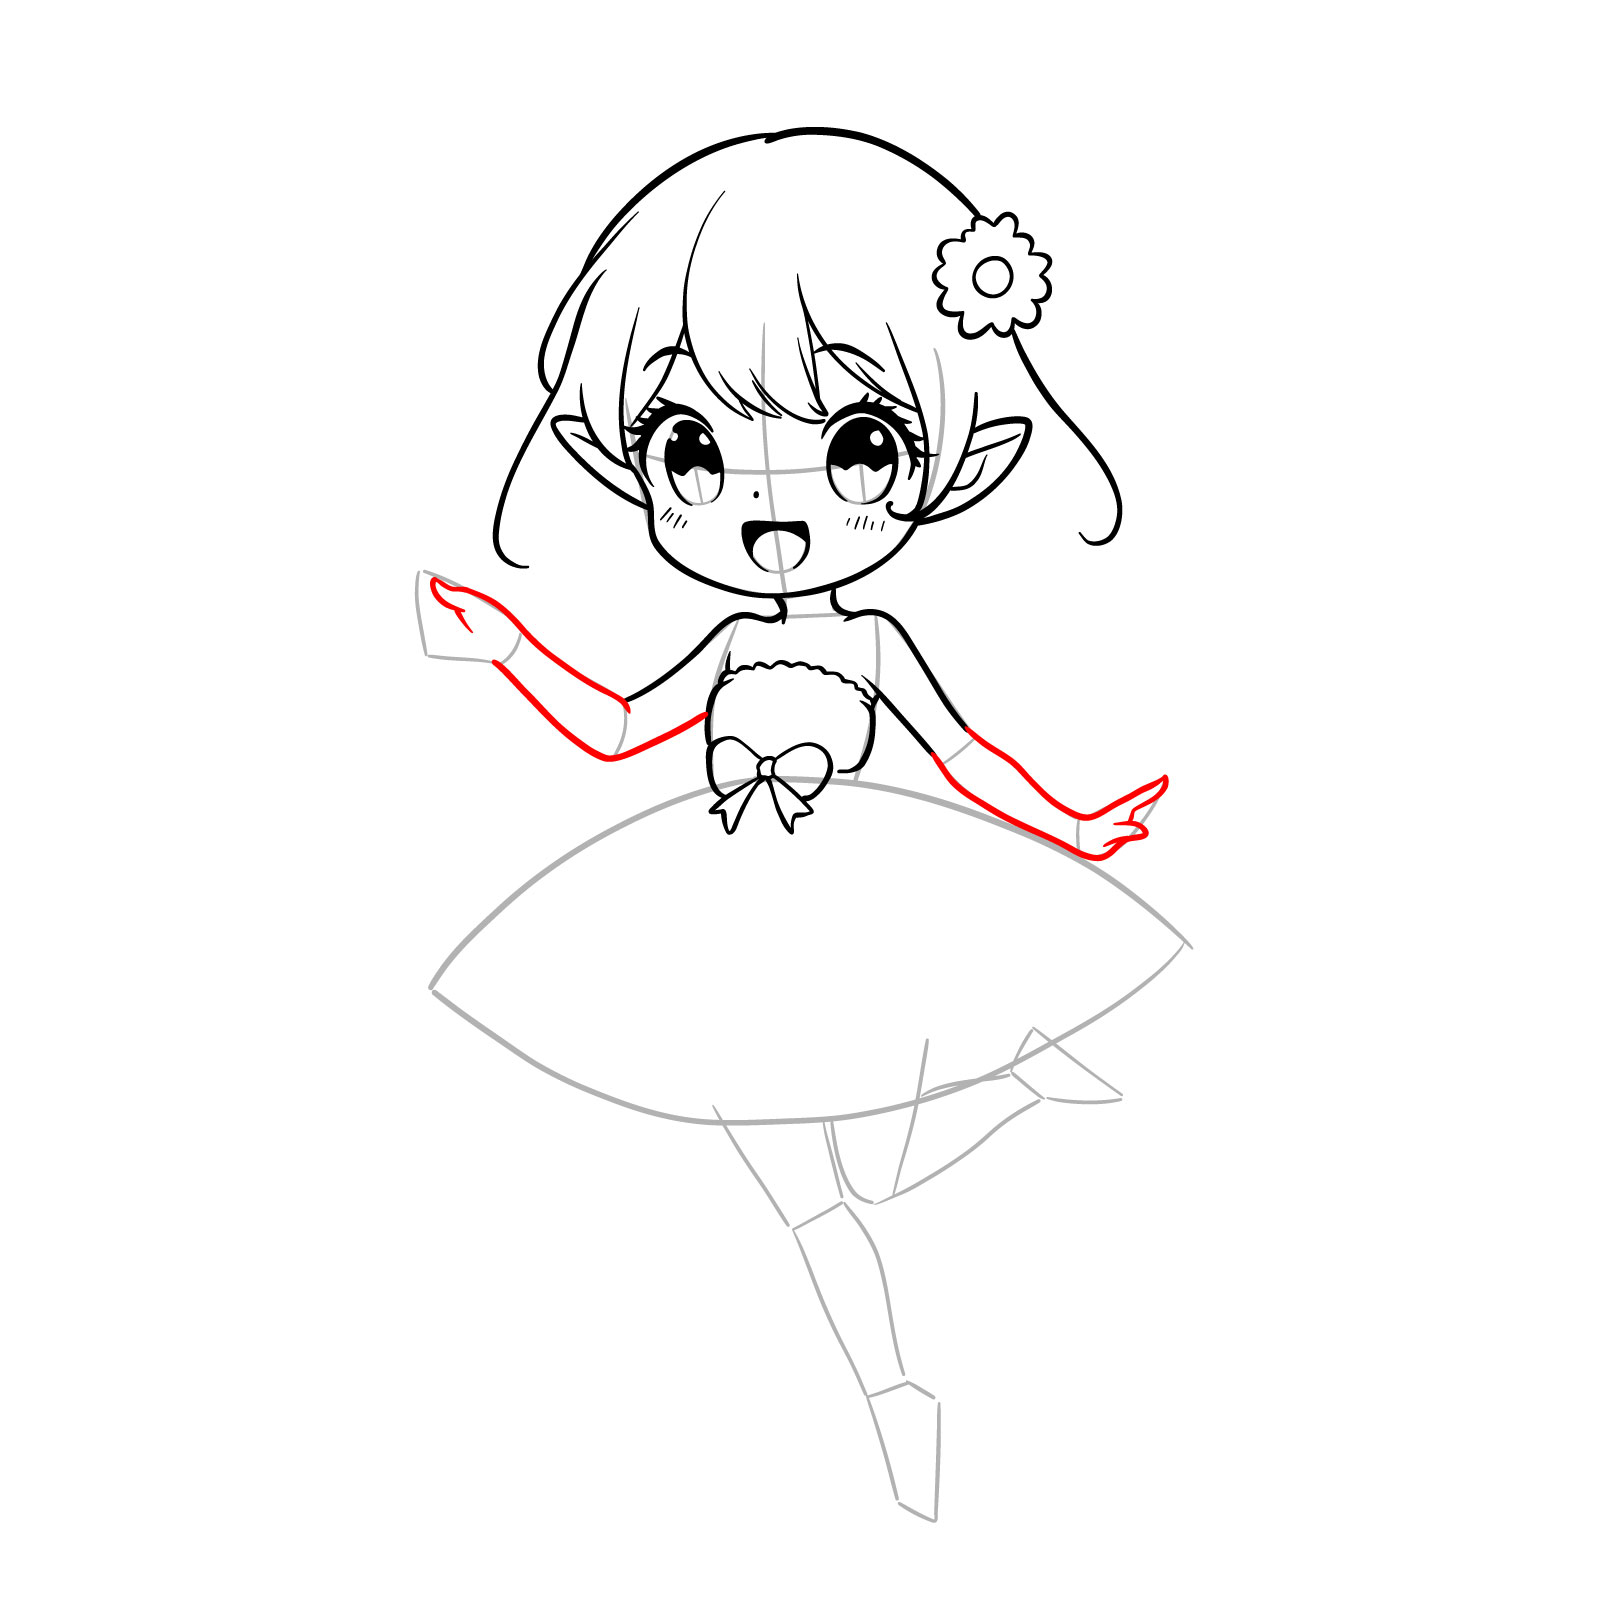
Step 11 – Extend lines from the shoulders to form the arms, paying attention to the proportions and angles to suggest a natural and relaxed pose
Sketching the arms
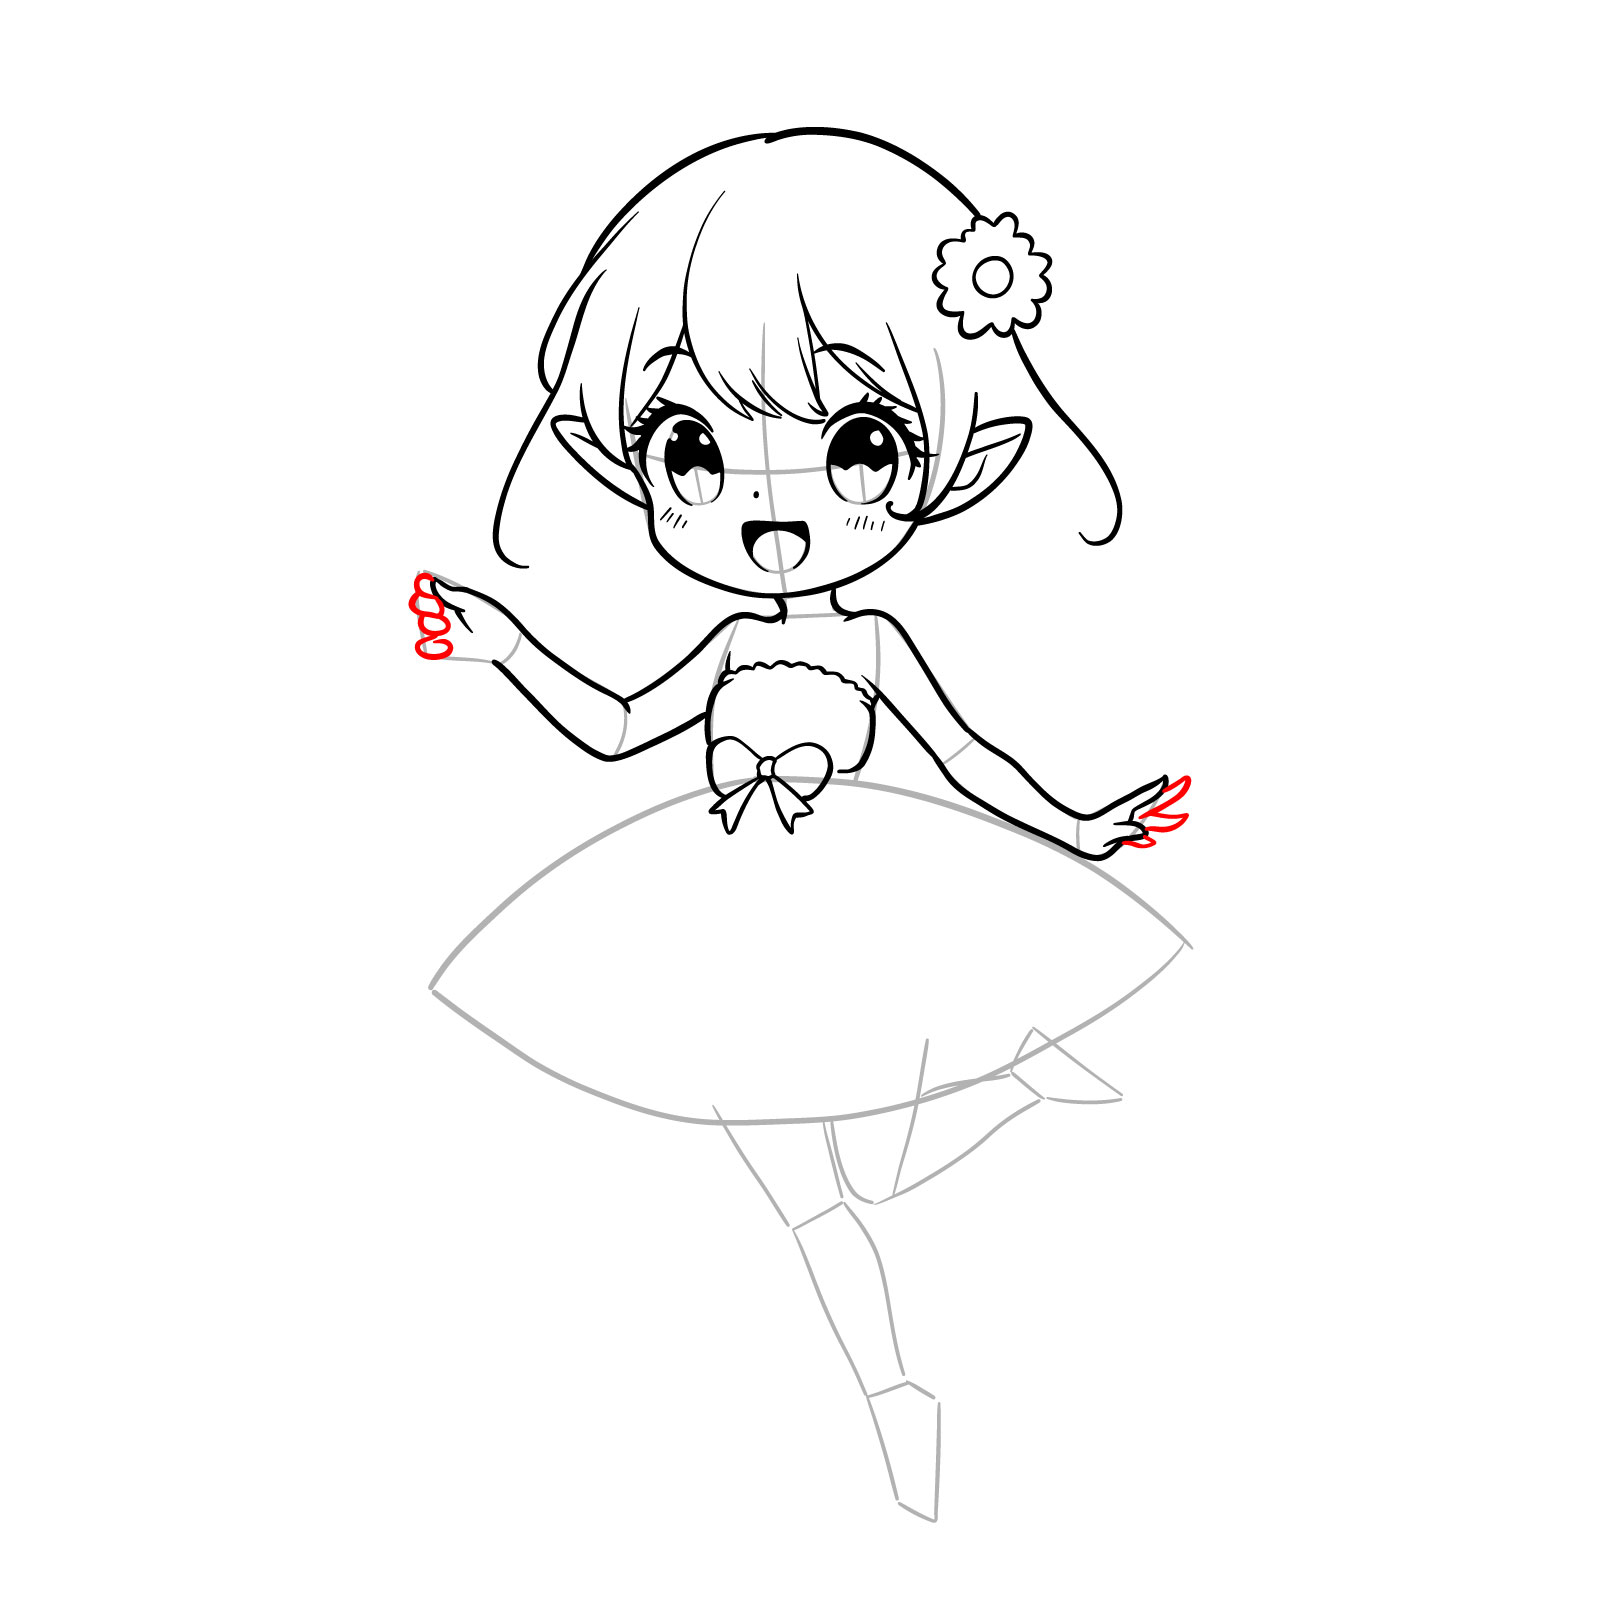
Step 12 – Define the fingers at the end of each arm with careful attention to their shape and delicate appearance
Adding fingers to the hands
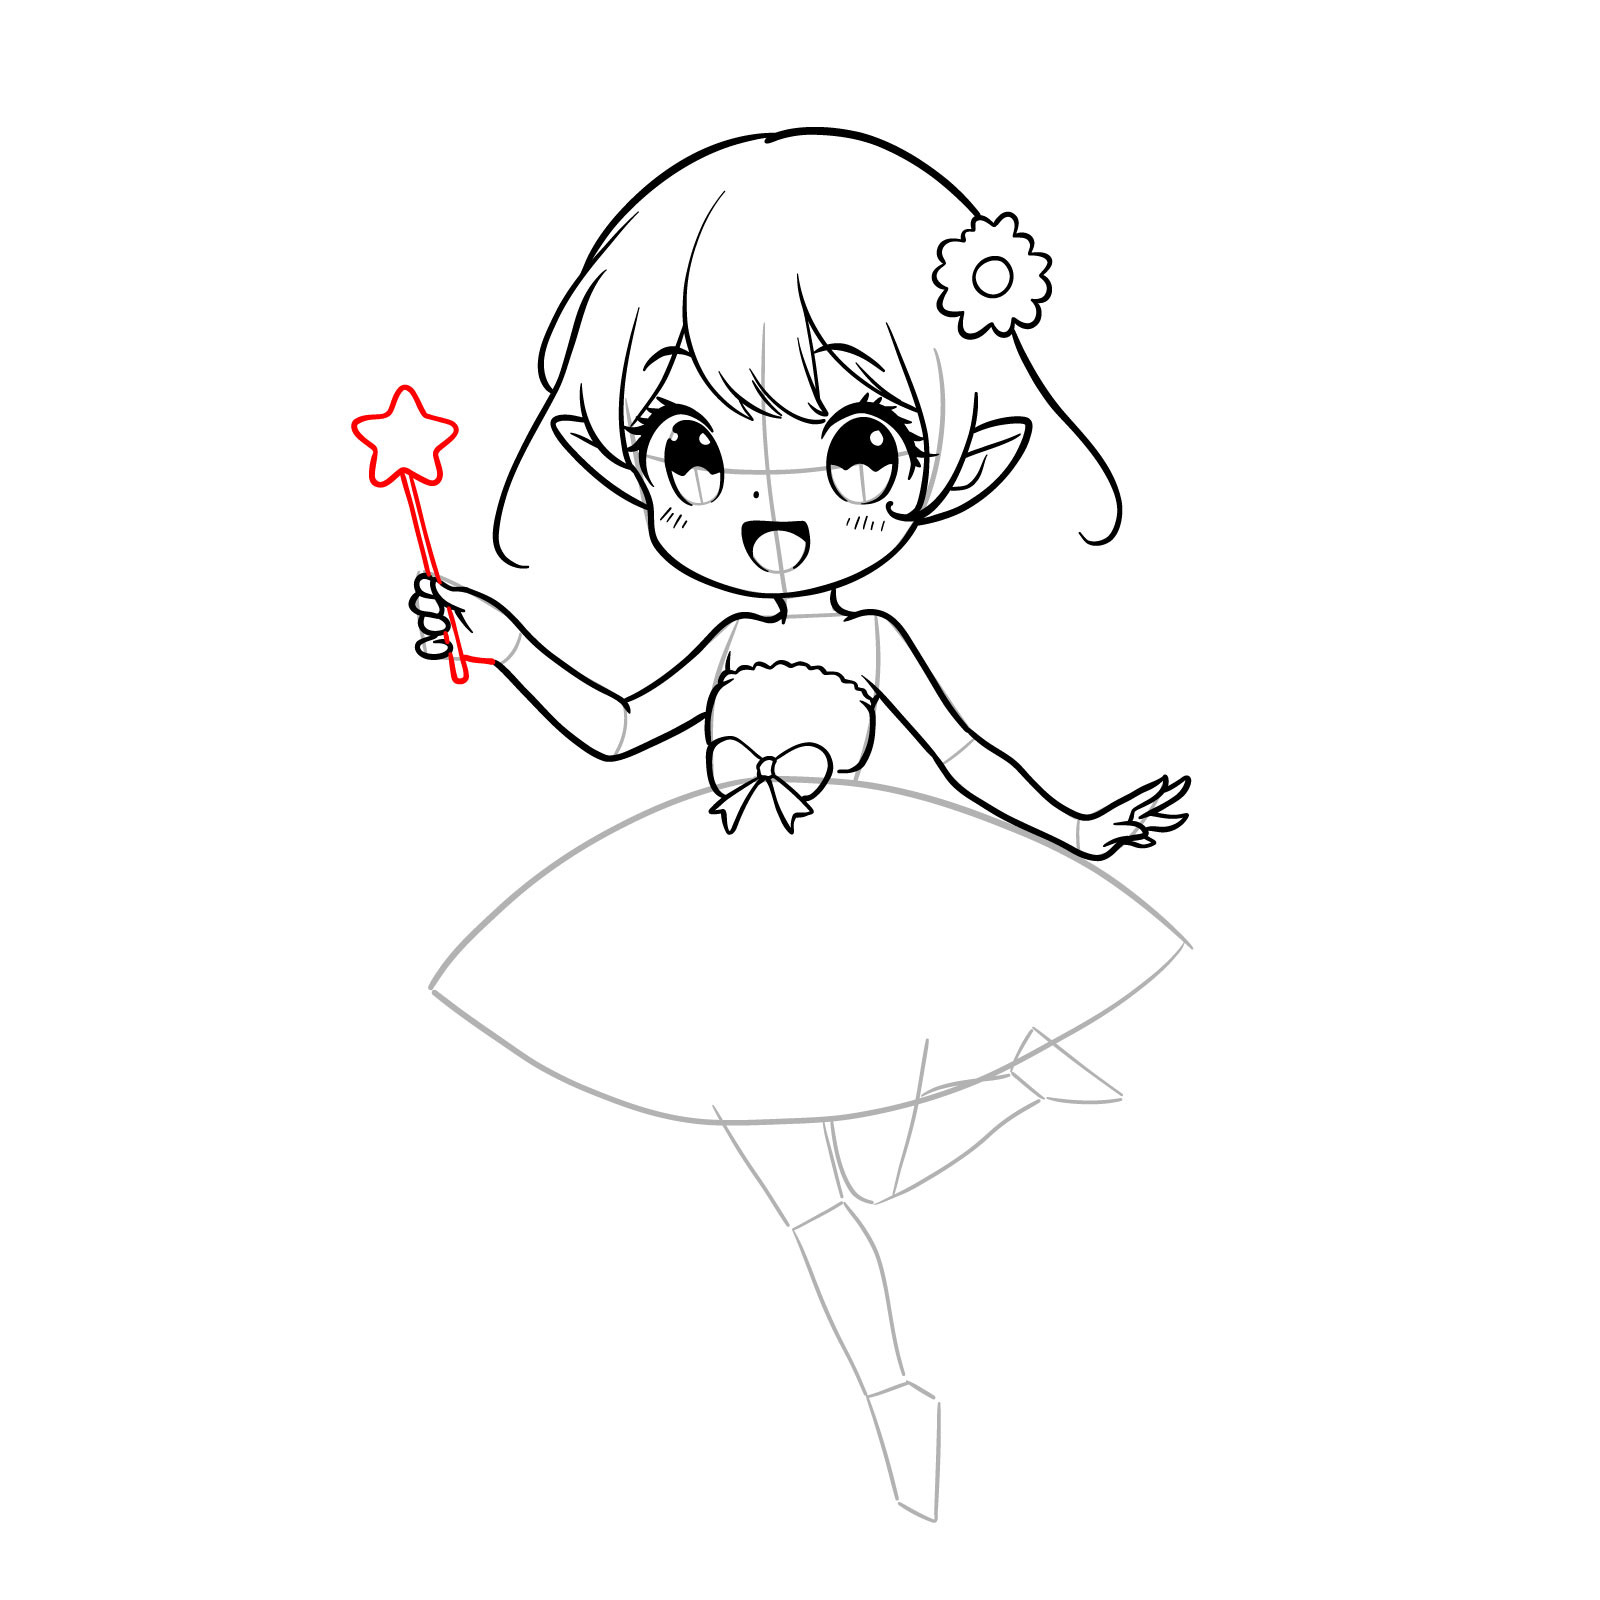
Step 13 – Add the magic wand to the fairy’s hand, with a star at the tip to symbolize her magical powers
Sketching the magic wand
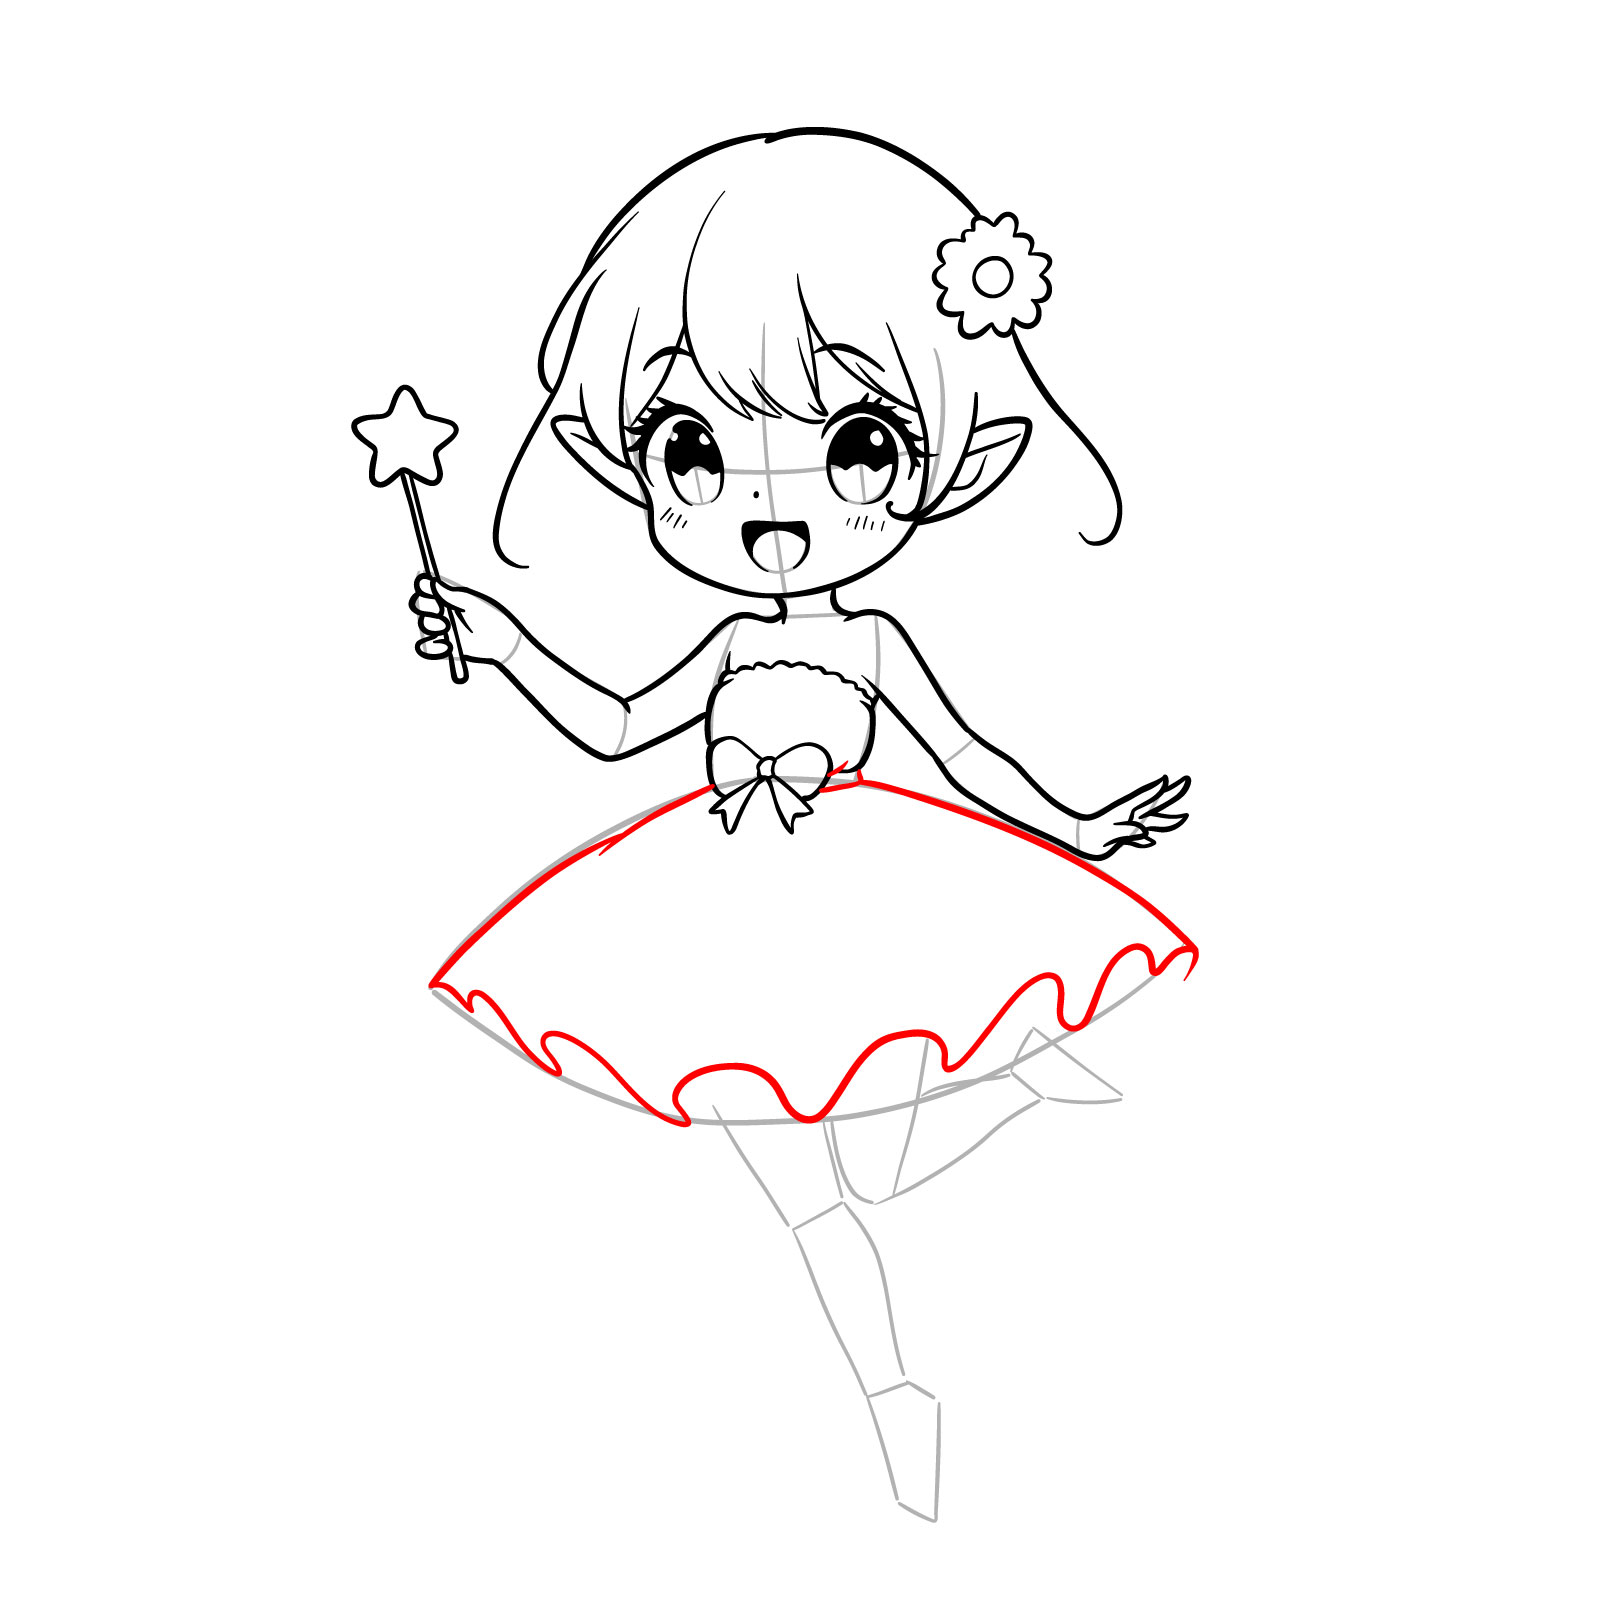
Step 14 – Illustrate the skirt with a wavy hemline to convey movement and add a playful touch to the fairy’s outfit. The skirt’s curve enhances the fairy’s dynamic posture and brings a sense of fluidity to the drawing
Drawing the skirt
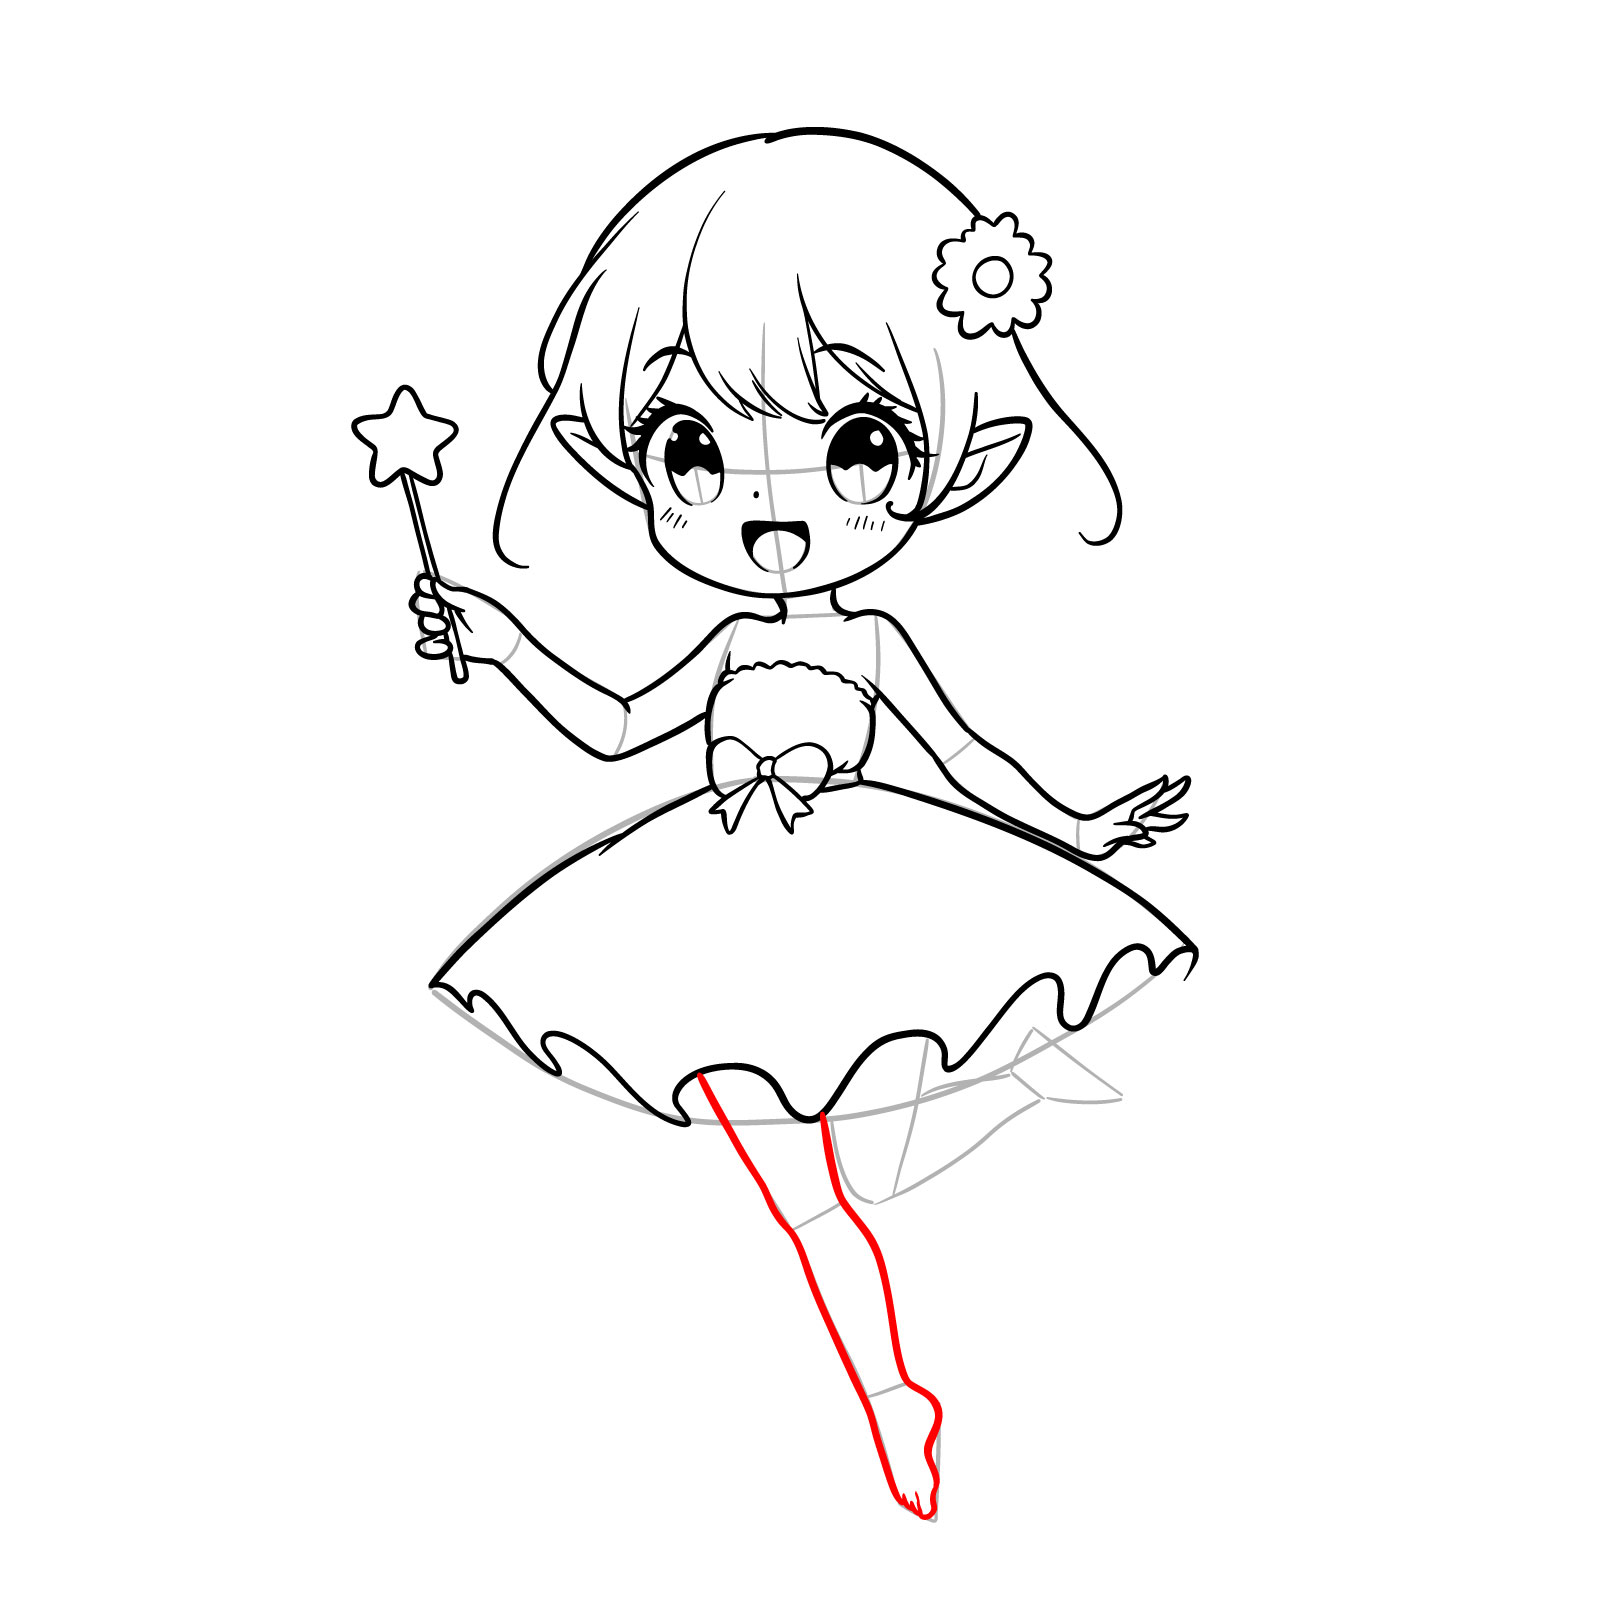
Step 15 – Define the first leg, extending it downward with a slight bend at the knee to show the fairy’s lively step. The leg should be not too long, with the foot pointed to accentuate the character’s delicate nature
Outlining the first leg
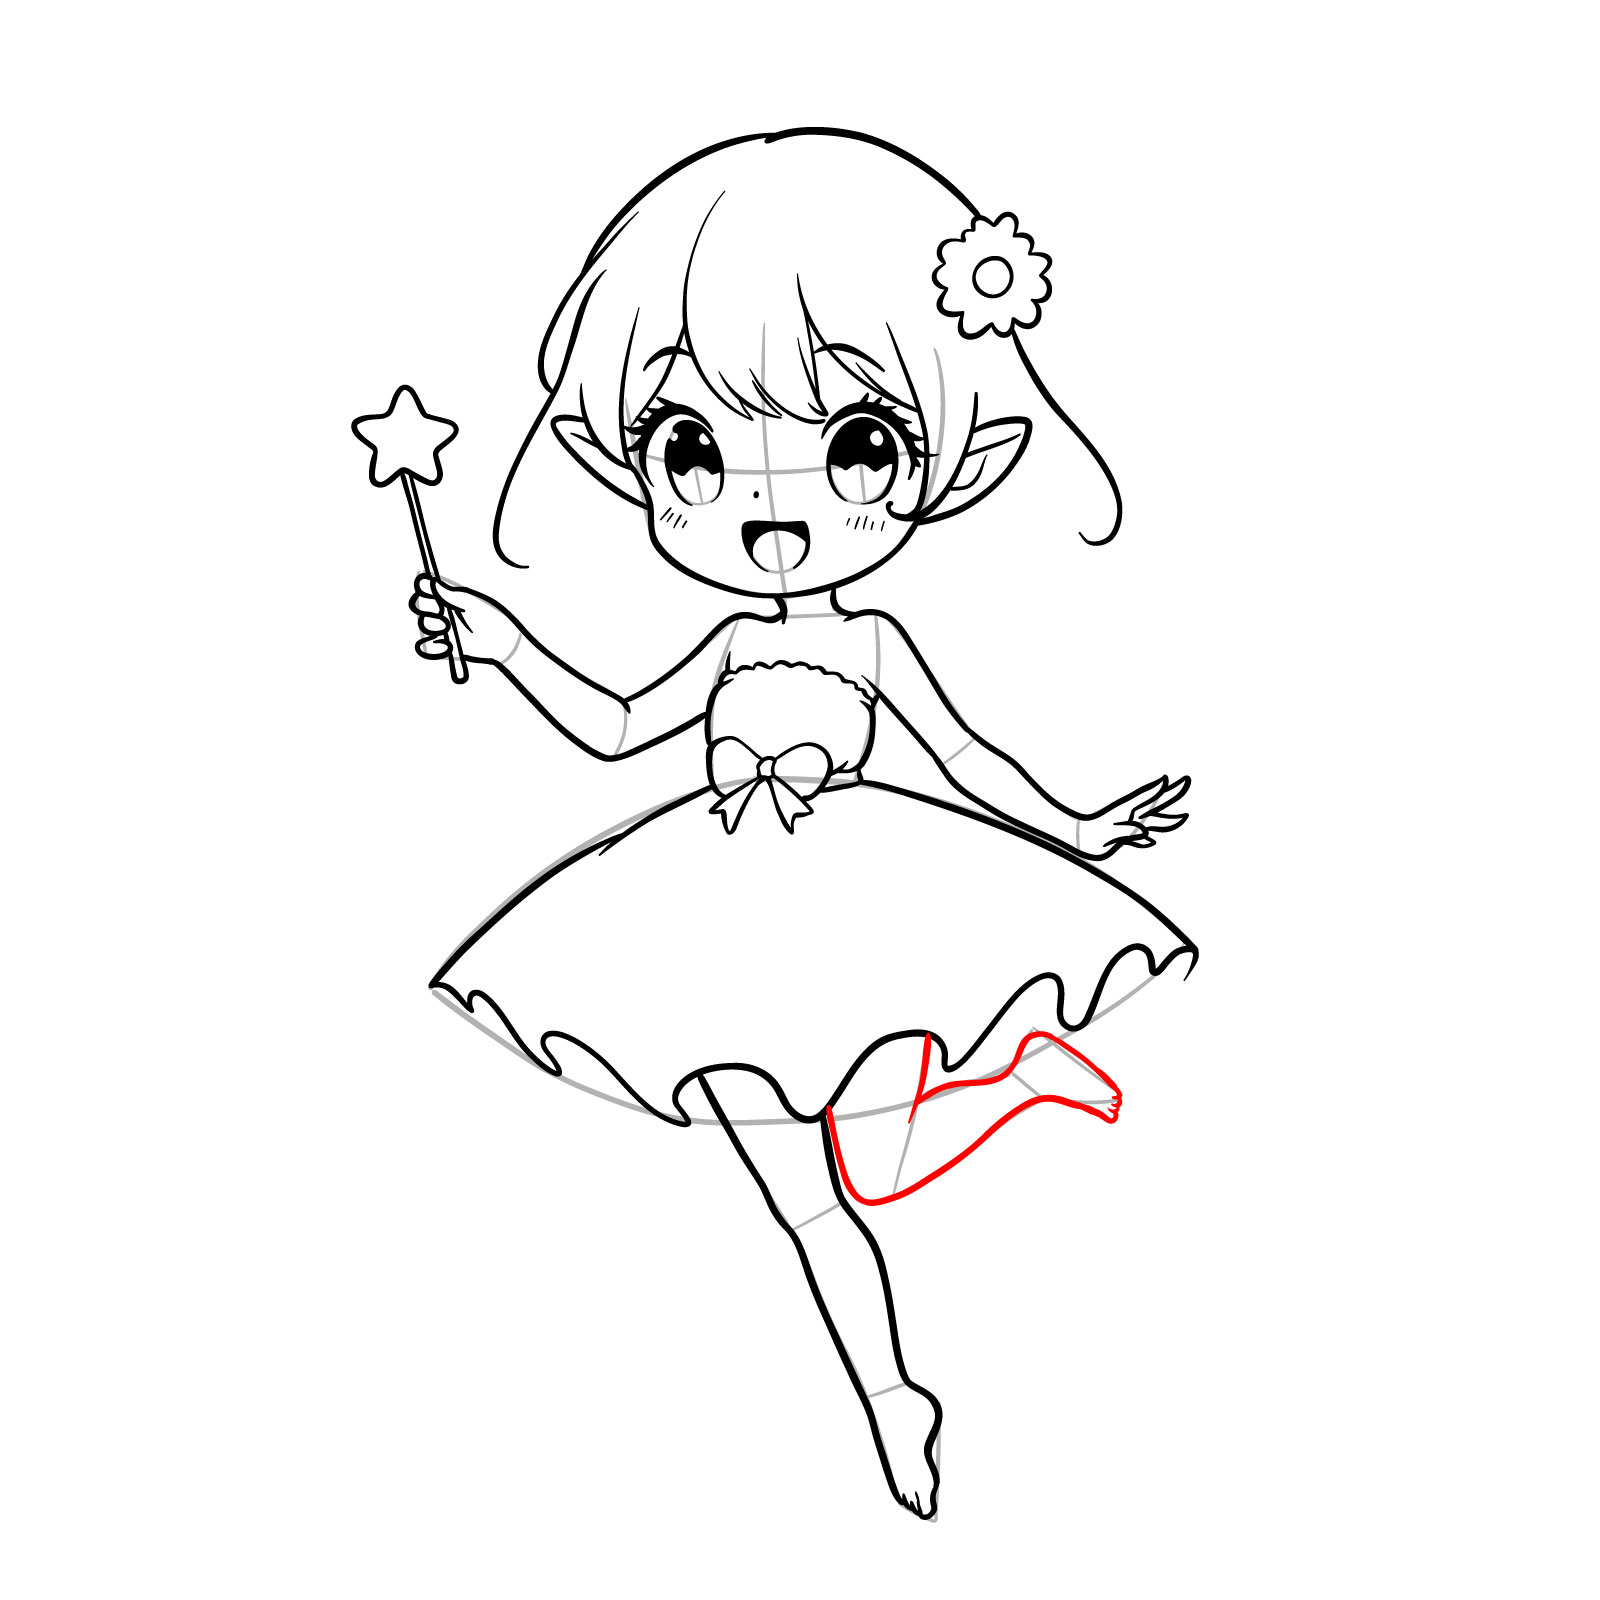
Step 16 – Add the second leg bended in the knee. This leg completes the lower part of the fairy’s body
Adding the second leg
Step 17 – Create the folds in the dress to add volume and texture, emphasizing the flow and movement of the fabric. The folds should radiate from the waist, where the bow tie is located, to the edges of the skirt
Detailing the dress folds
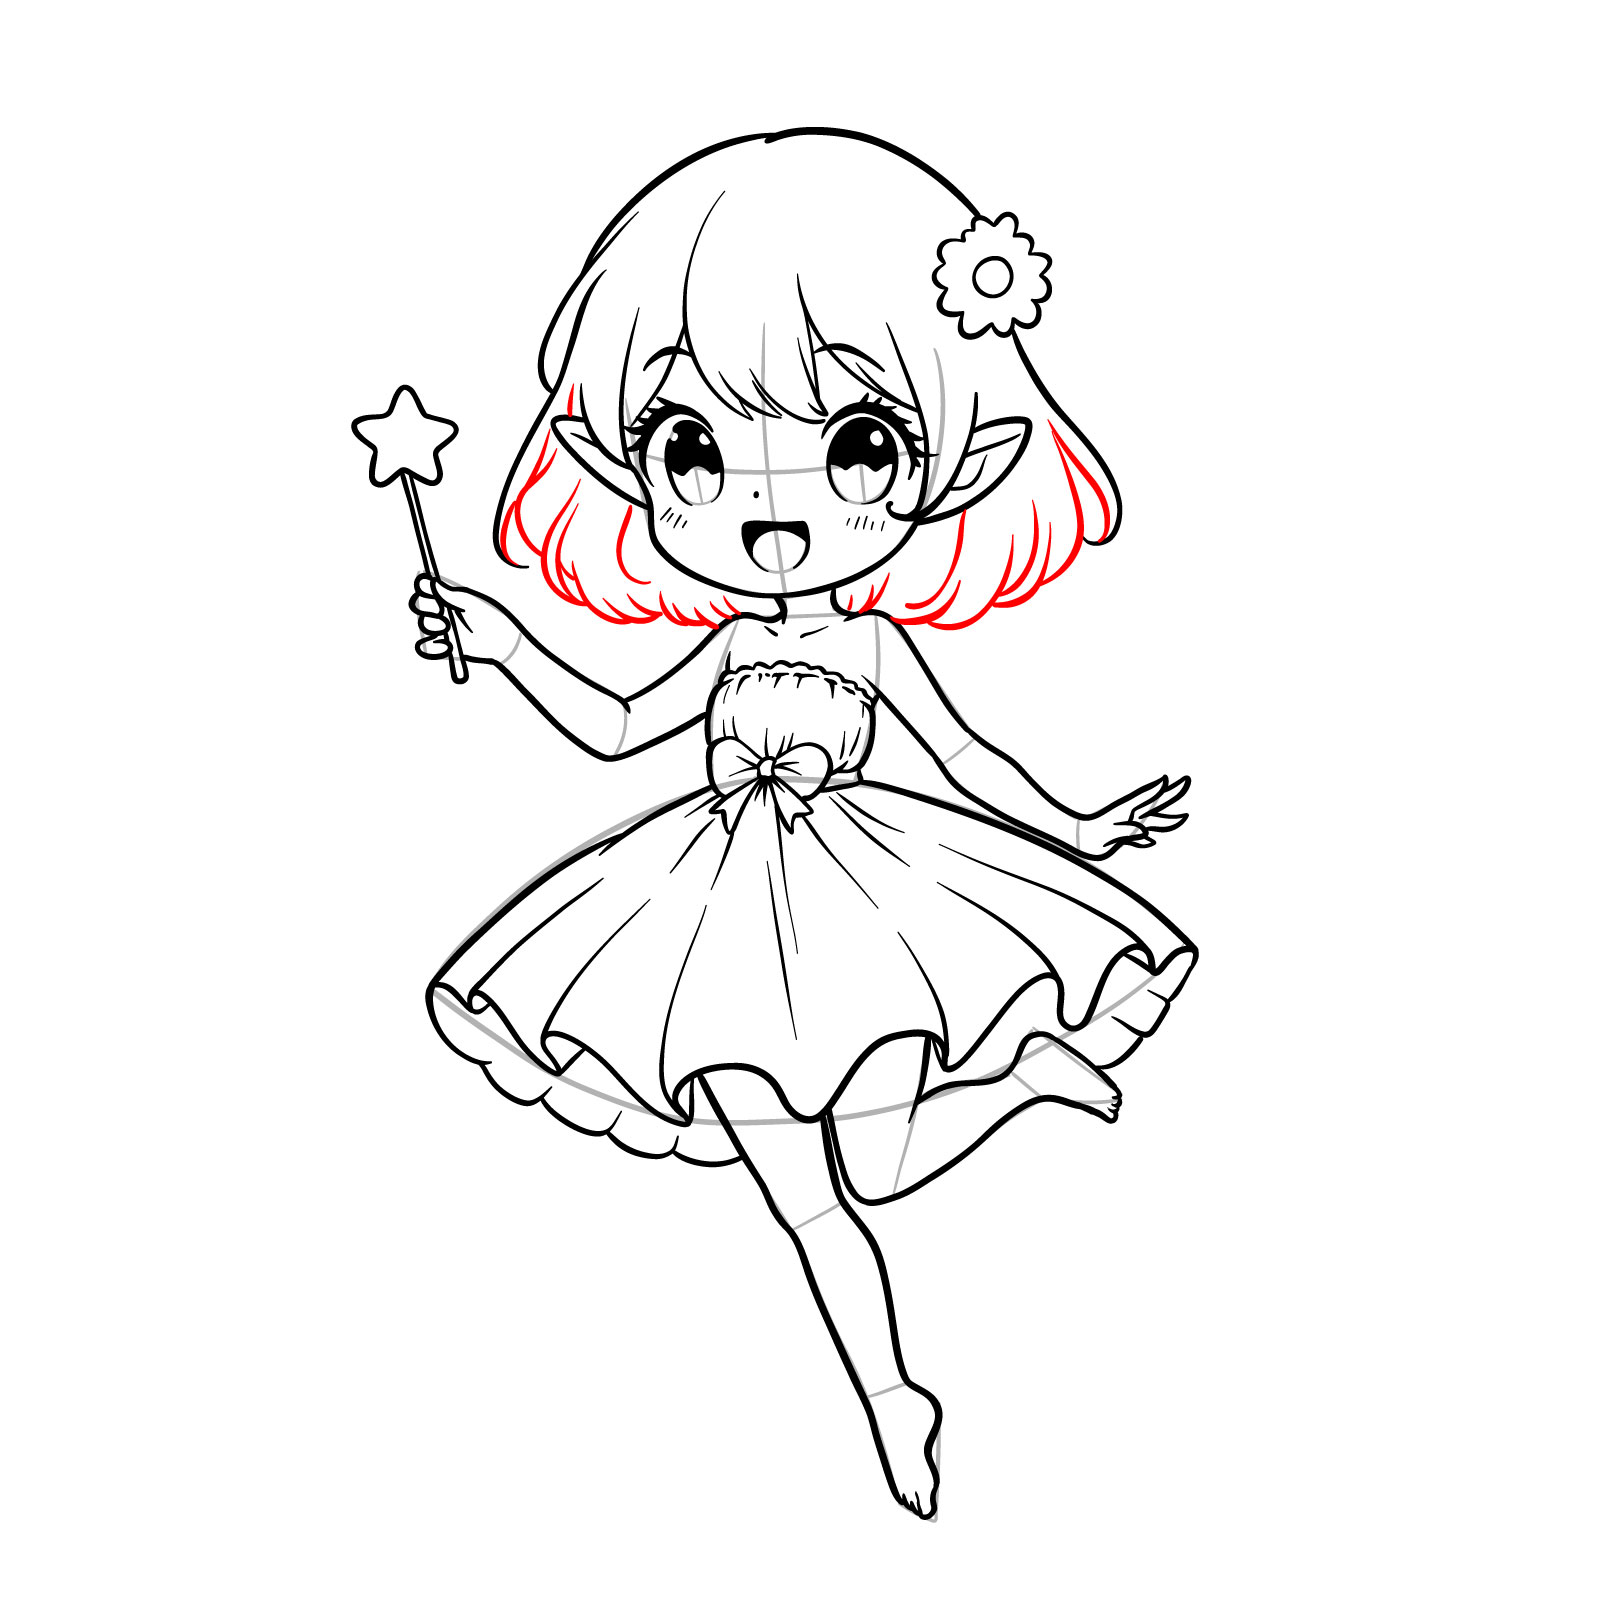
Step 18 – Complete the fairy’s hairstyle by refining the shape and adding any remaining details to the strands, ensuring they look soft and natural
Finalizing the hair
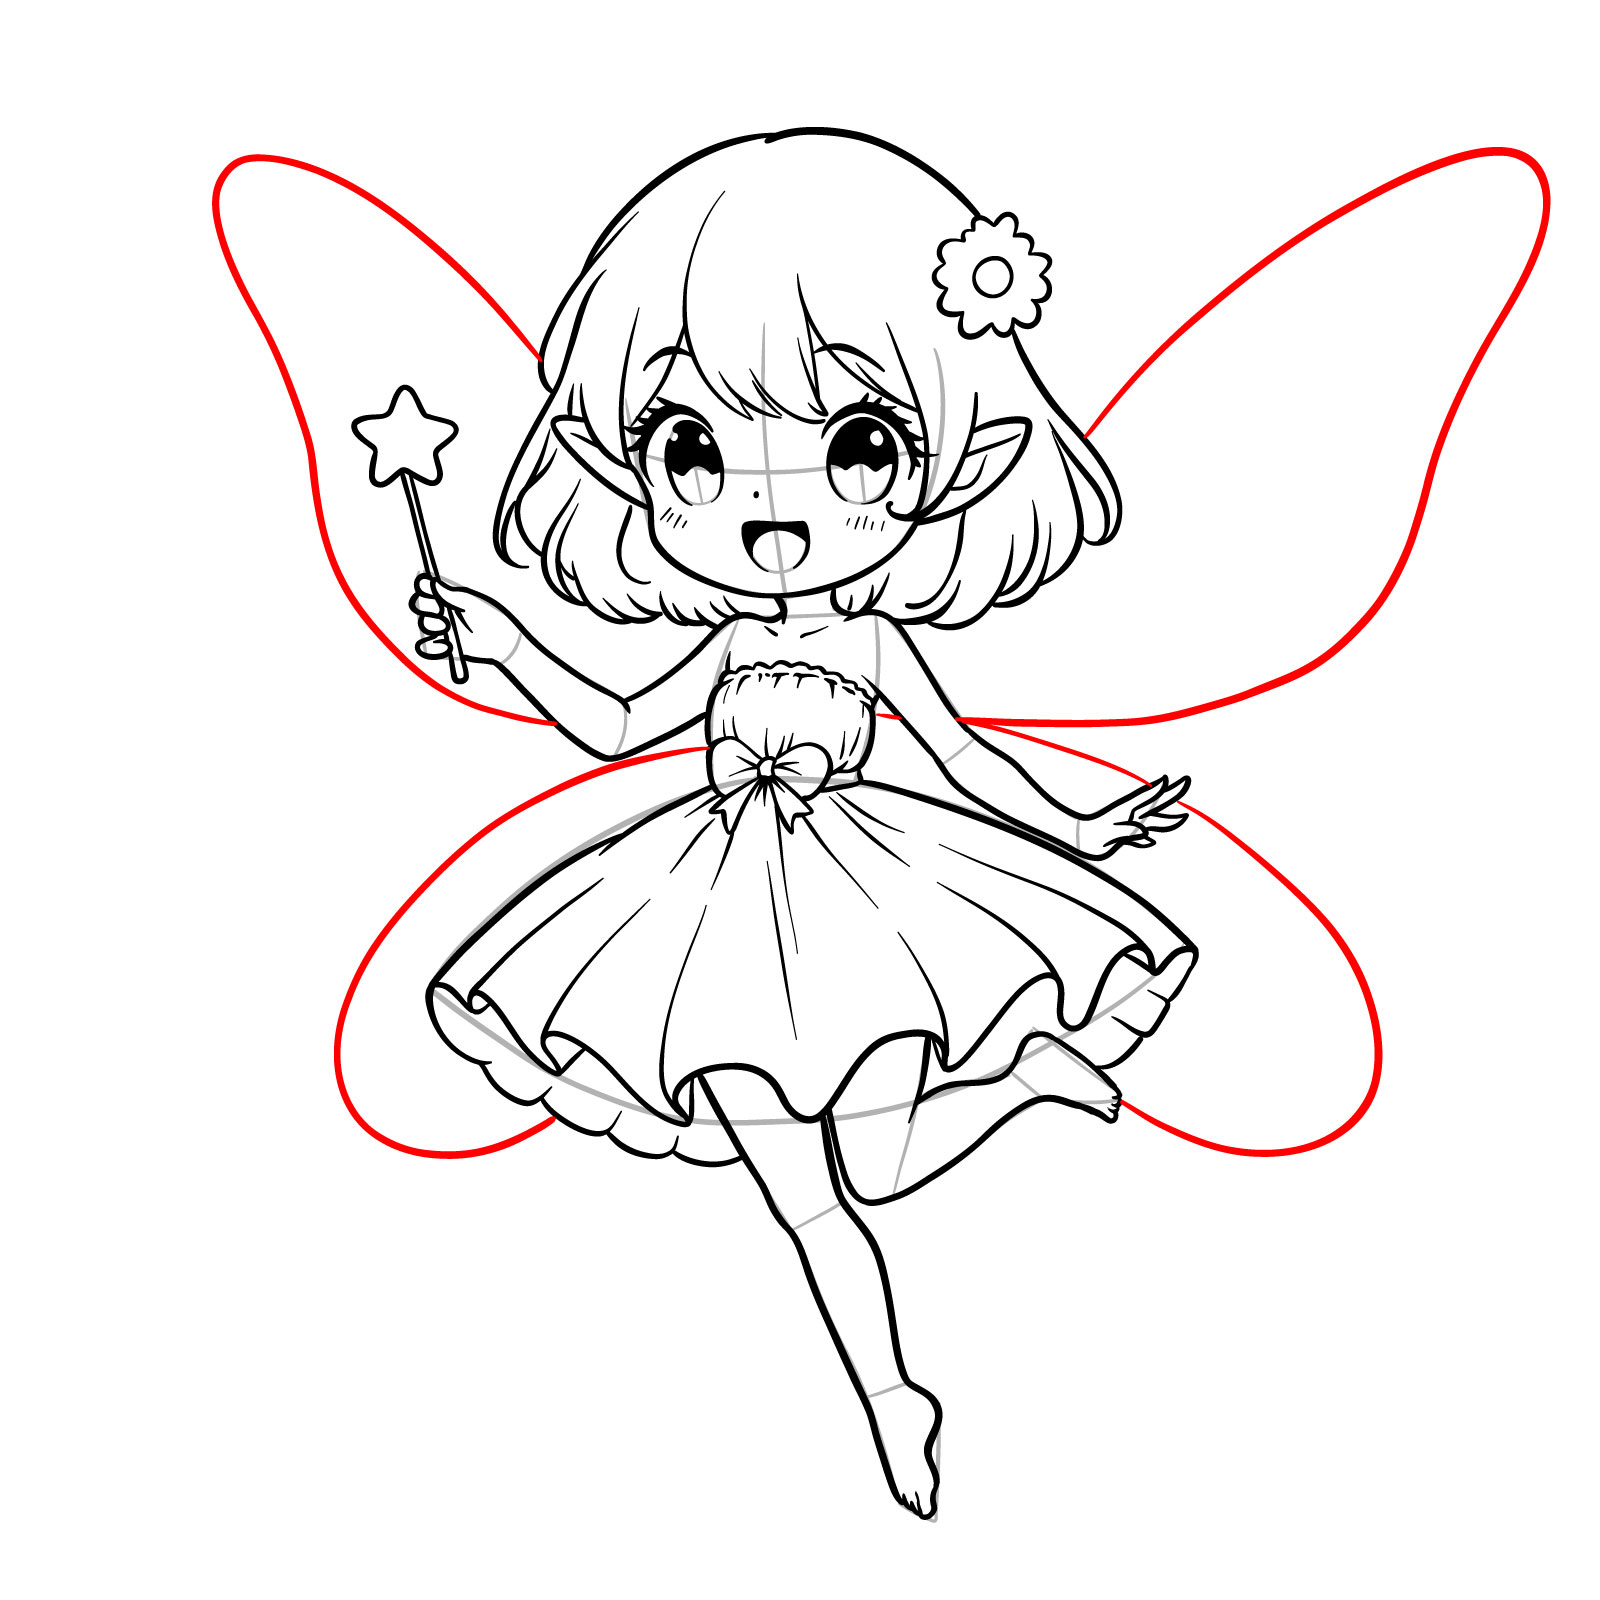
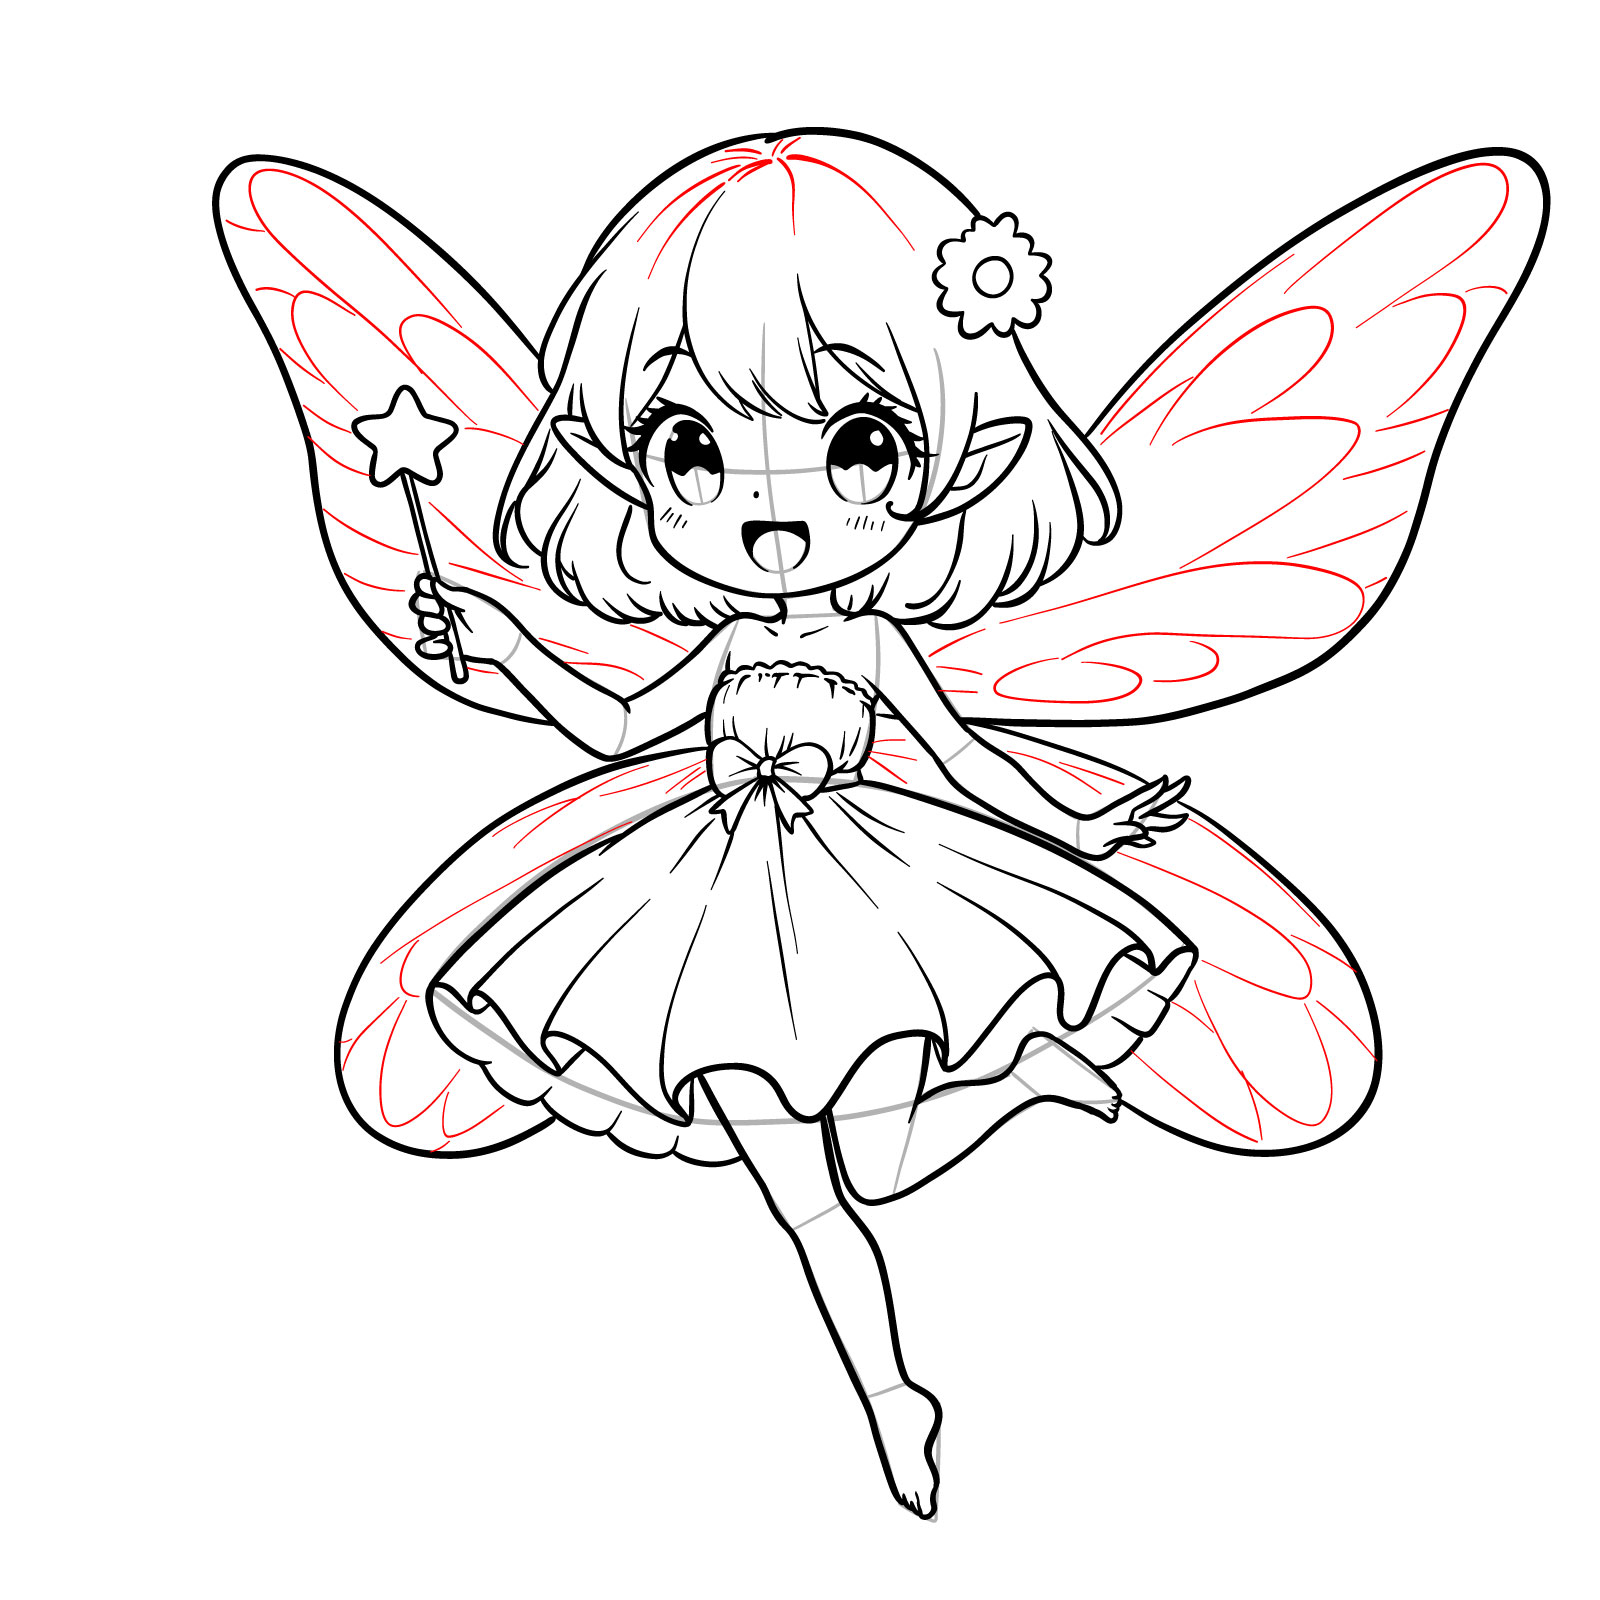
Step 19 – Add two pairs of wings to the fairy’s back to bring her to life. The wings should have slight curves and be proportionate to her body, resembling butterfly wings
Sketching the wings
Step 20 – Embellish the wings with delicate patterns to suggest their gossamer nature. Add more lines to the top of the head to represent hair texture and depth, ensuring the fairy’s hair looks full and lively
Adding wing patterns and hair details
Step 21 – Your anime fairy drawing is now complete, capturing the essence of both the anime style and the magical whimsy of fairy tales. This drawing is a culmination of careful detailing and character design, making it a perfect inspiration for those learning how to draw an anime fairy
Don't Miss New Tutorials! Follow SketchOk
I publish new step-by-step drawing guides every single day. Follow on your favorite platform so you never miss a tutorial. Thousands of artists are already drawing along and I can't wait you to join in!
On my Patreon you can grab unique hand-made coloring pages: each one drawn by me personally. Every purchase directly supports the creation of new drawing tutorials. It's the best way to practice your skills, keep the site going, and get something truly original at the same time.
As I bring this detailed tutorial on how to draw fairies to a close, I sincerely hope that the various steps and styles presented have enriched your artistic capabilities. This article was designed to inspire artists of every level, providing the means to create captivating fairy illustrations that whisk you away to realms of fantasy and charm.
I encourage you to showcase your artworks and to become an active participant in our artistic community by connecting with SketchOk on social media. You can follow the Facebook page for regular updates, get inspired on Instagram, or browse our collections on Pinterest. Your contributions make our community more vibrant, and we eagerly anticipate seeing your interpretations of fairy drawings.
Thank you for choosing this article to aid in your artistic pursuits. Keep refining your talents and sharing your developments; the uniqueness of your artistic path adds to the collective splendor of our creative landscape.
Disclaimer: This is a non-commercial, fan-made educational site. All characters belong to their respective owners. We are not affiliated with any rights holders.
Read full Disclaimer
4 thoughts on “How to Draw Fairies: 6 Drawing Guides in 1”


The fairy tutorial was very helpful!
Thank you for the feedback! Glad you liked it
Could you show us how to draw male fairies ?
Of course, I’ll add the idea for the future tutorials