Welcome, aspiring artists and Disney enthusiasts! Today, we’ll embark on a magical journey where we will learn how to draw one of the most endearing characters from the Disney realm – Goofy. Known for his clumsy yet lovable nature, Goofy’s distinct features make for an interesting and fun sketching session.
Goofy’s Signature Appearance
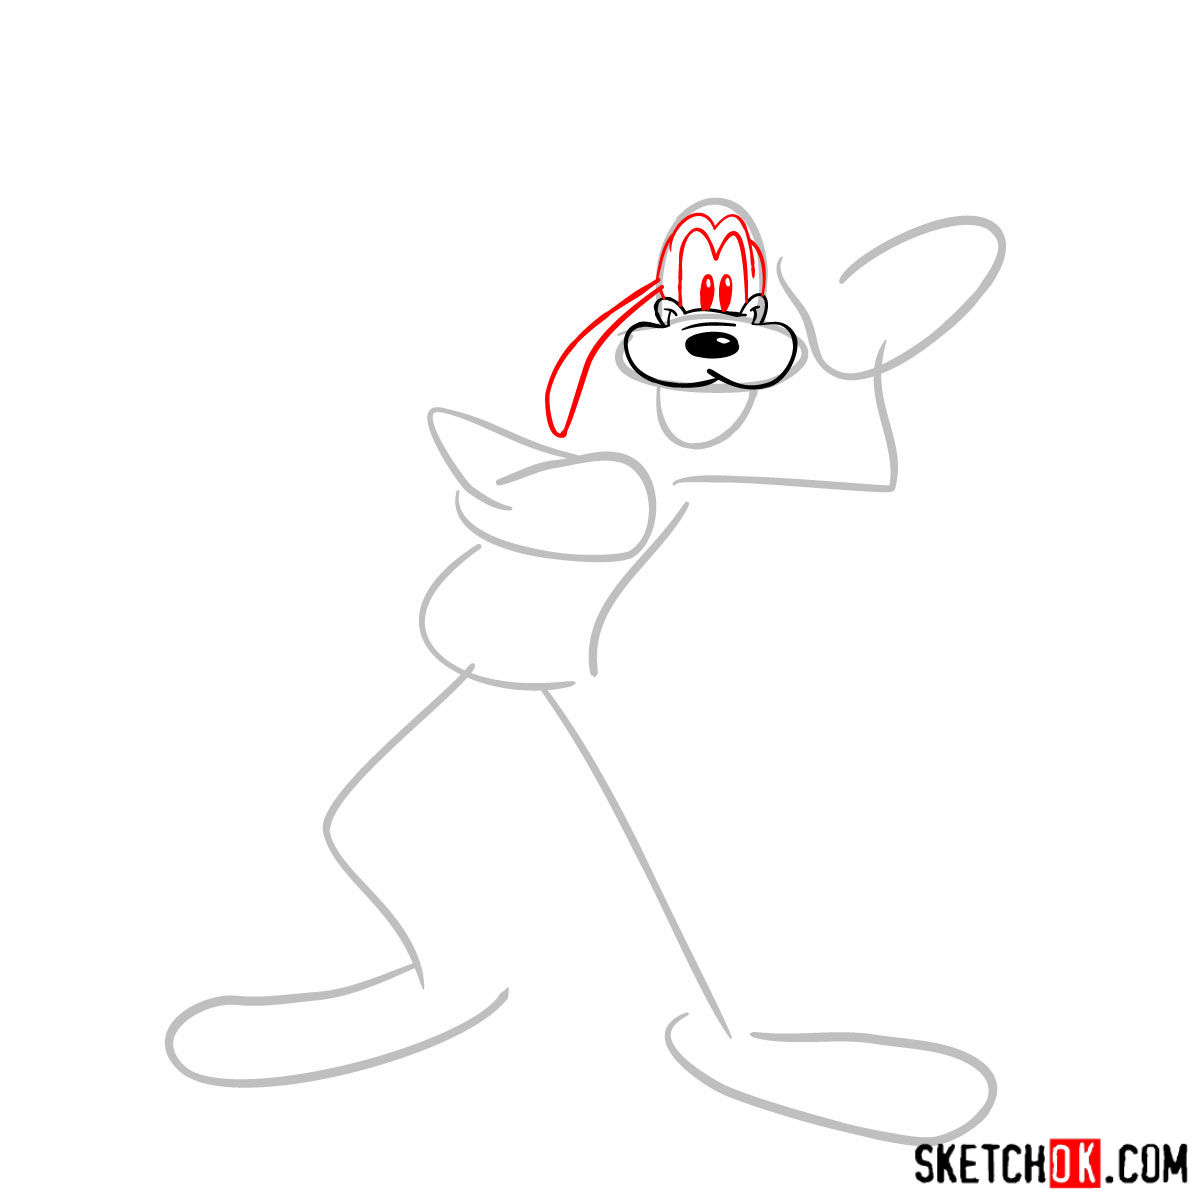
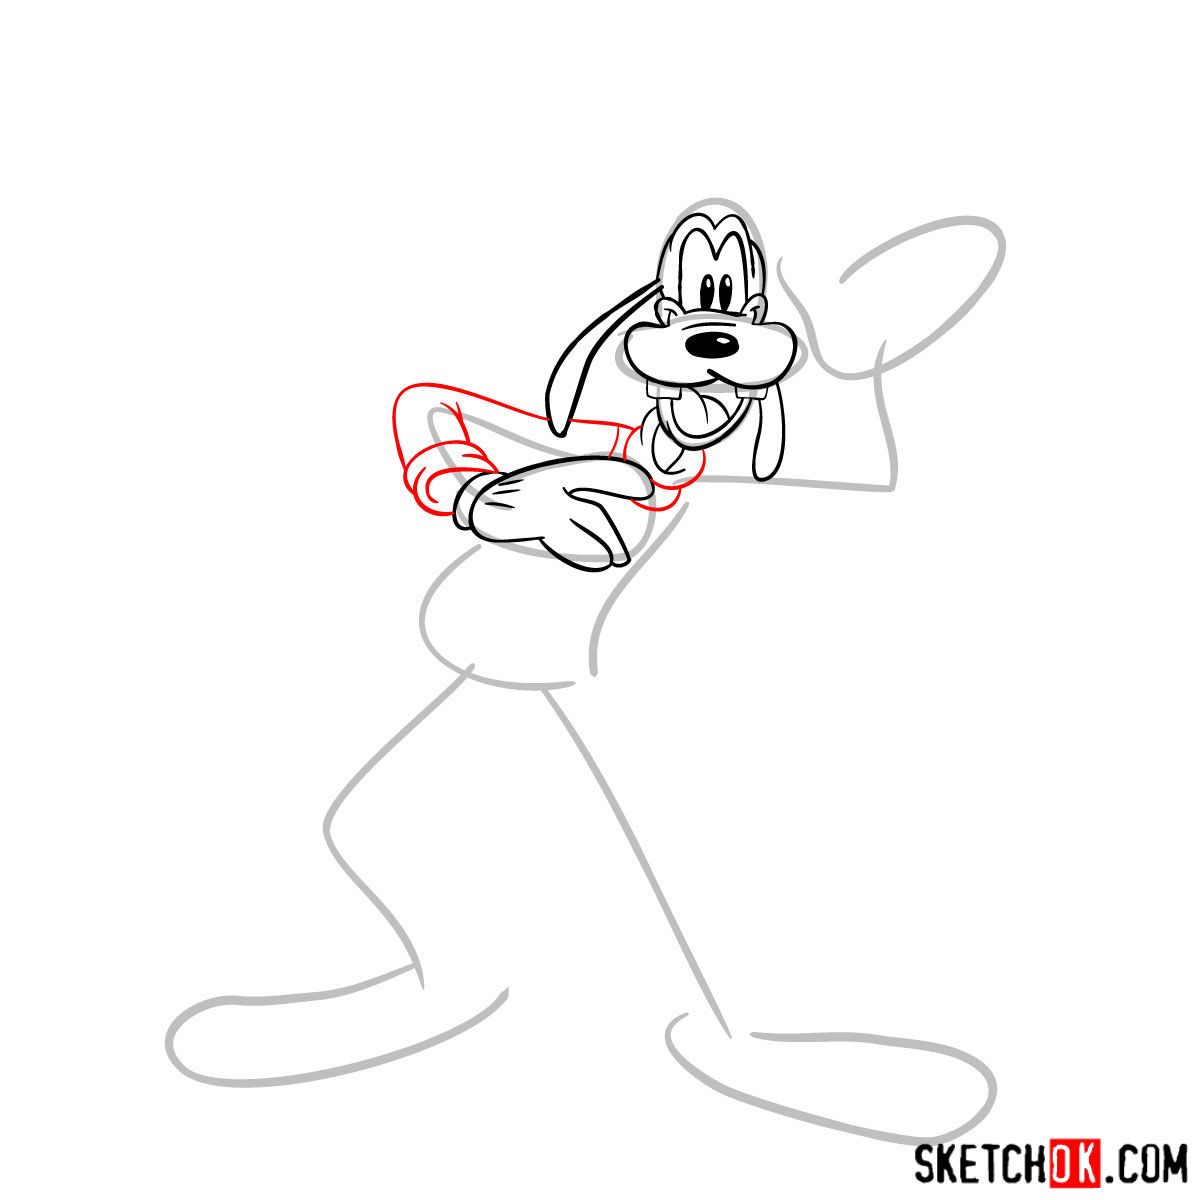
Goofy is an anthropomorphic dog and his appearance is filled with quirky details that set him apart. From his signature rumpled fedora to his turtle neck and vest ensemble, his outfit is simply iconic. Goofy’s long, droopy ears, prominent front teeth, and the always-gaunt white gloves add to his unique charm. Of course,his lanky stature is something to consider when you’re outlining the character. Drawing Goofy is as much about capturing his personality as it is about getting his physical attributes right.
When it comes to other characters to include in your drawing, consider adding Goofy’s close friends – Mickey Mouse and Donald Duck, to create a wholesome Disney scene. These characters, with their distinctive looks and features, would add more depth and life to your sketch.
Sketching Made Easy: The Guide Explained
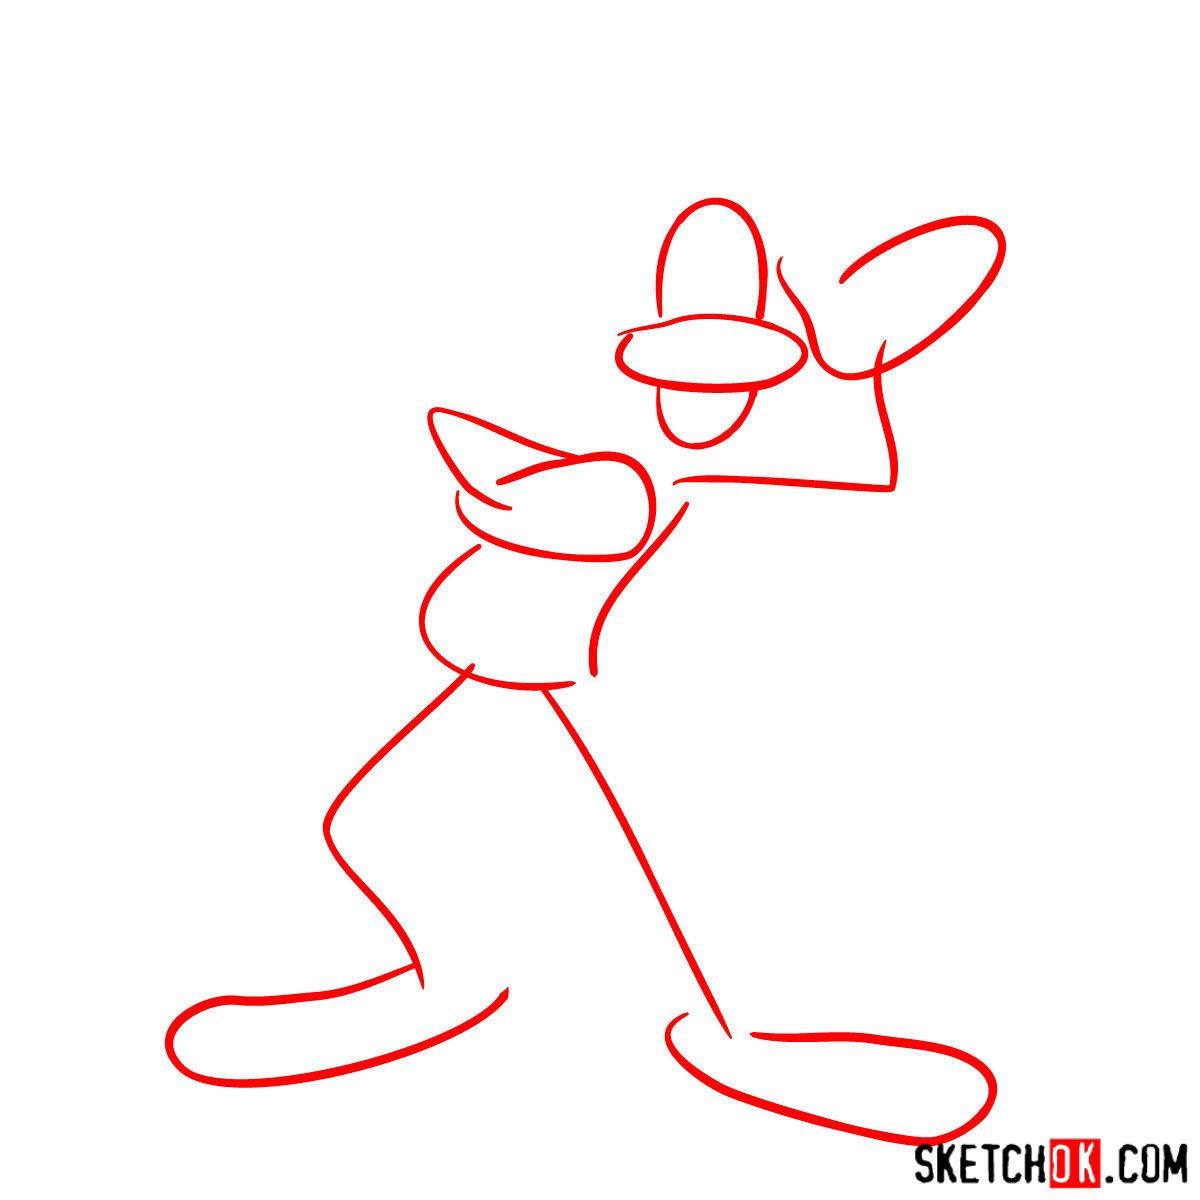
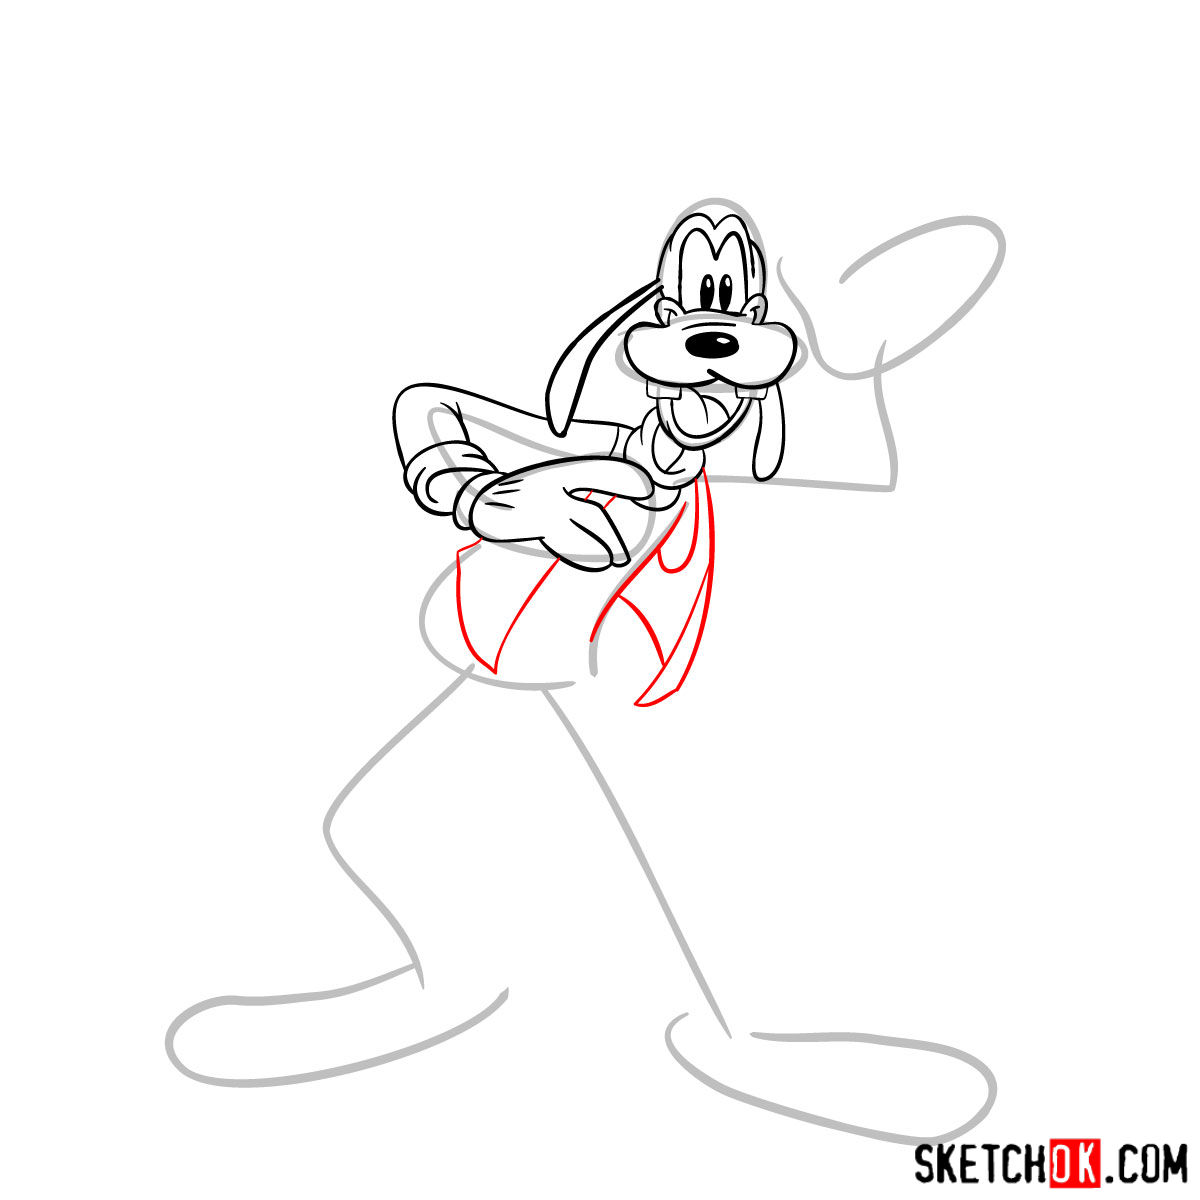
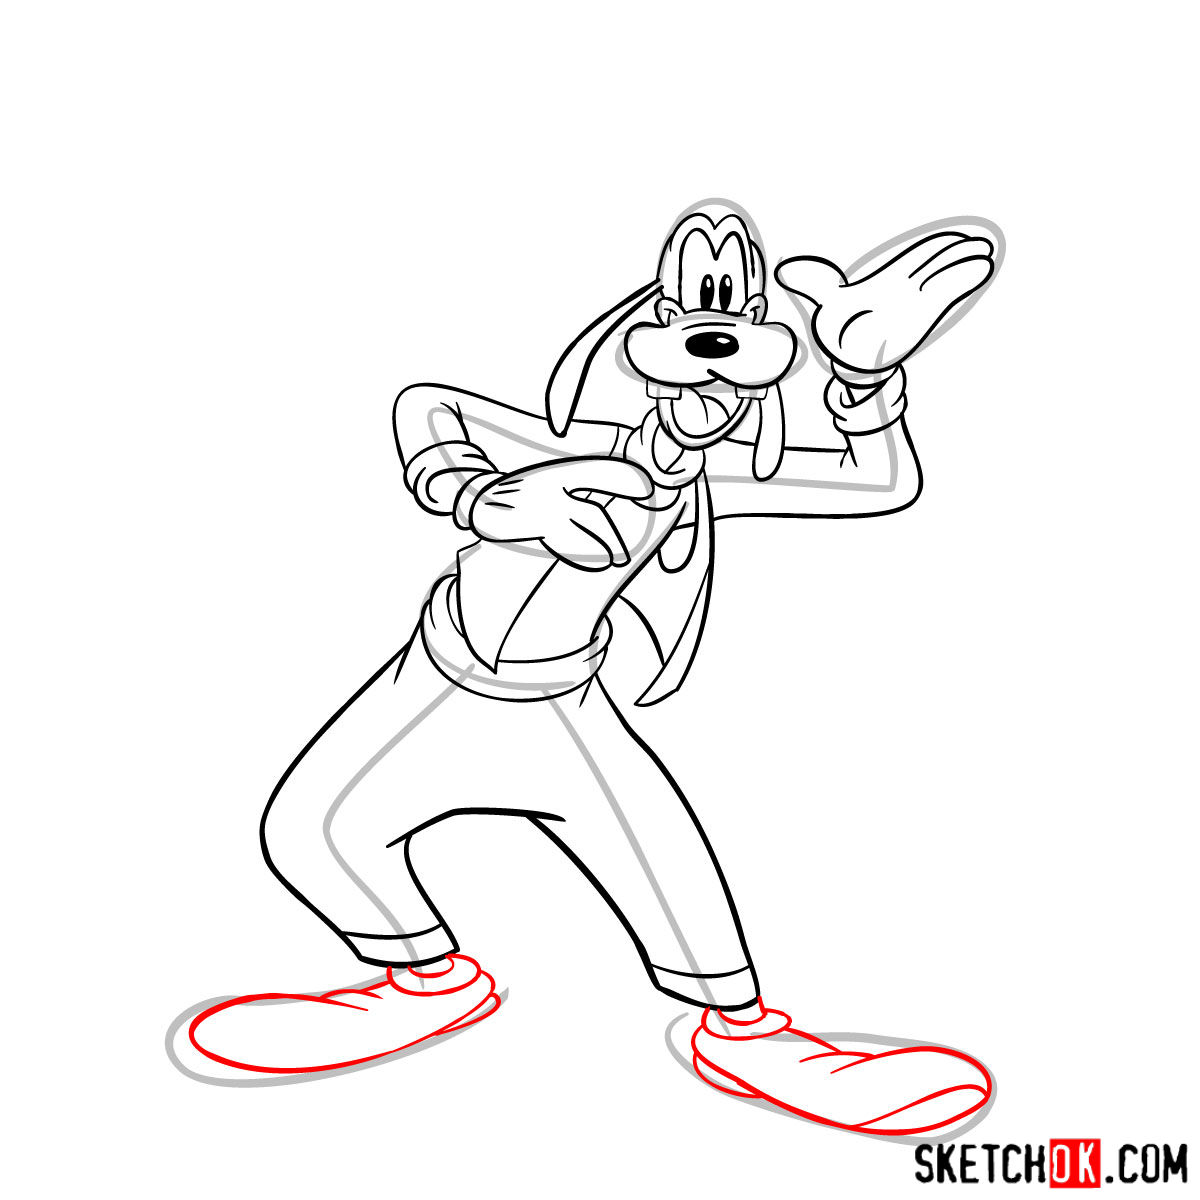
This step-by-step guide is carefully designed to assist you through your drawing journey. The guide consists of 14 steps, starting with a basic sketch to establish the correct proportions, which should be done using light pencil strokes.
The guide uses a color-coding system for clarity:
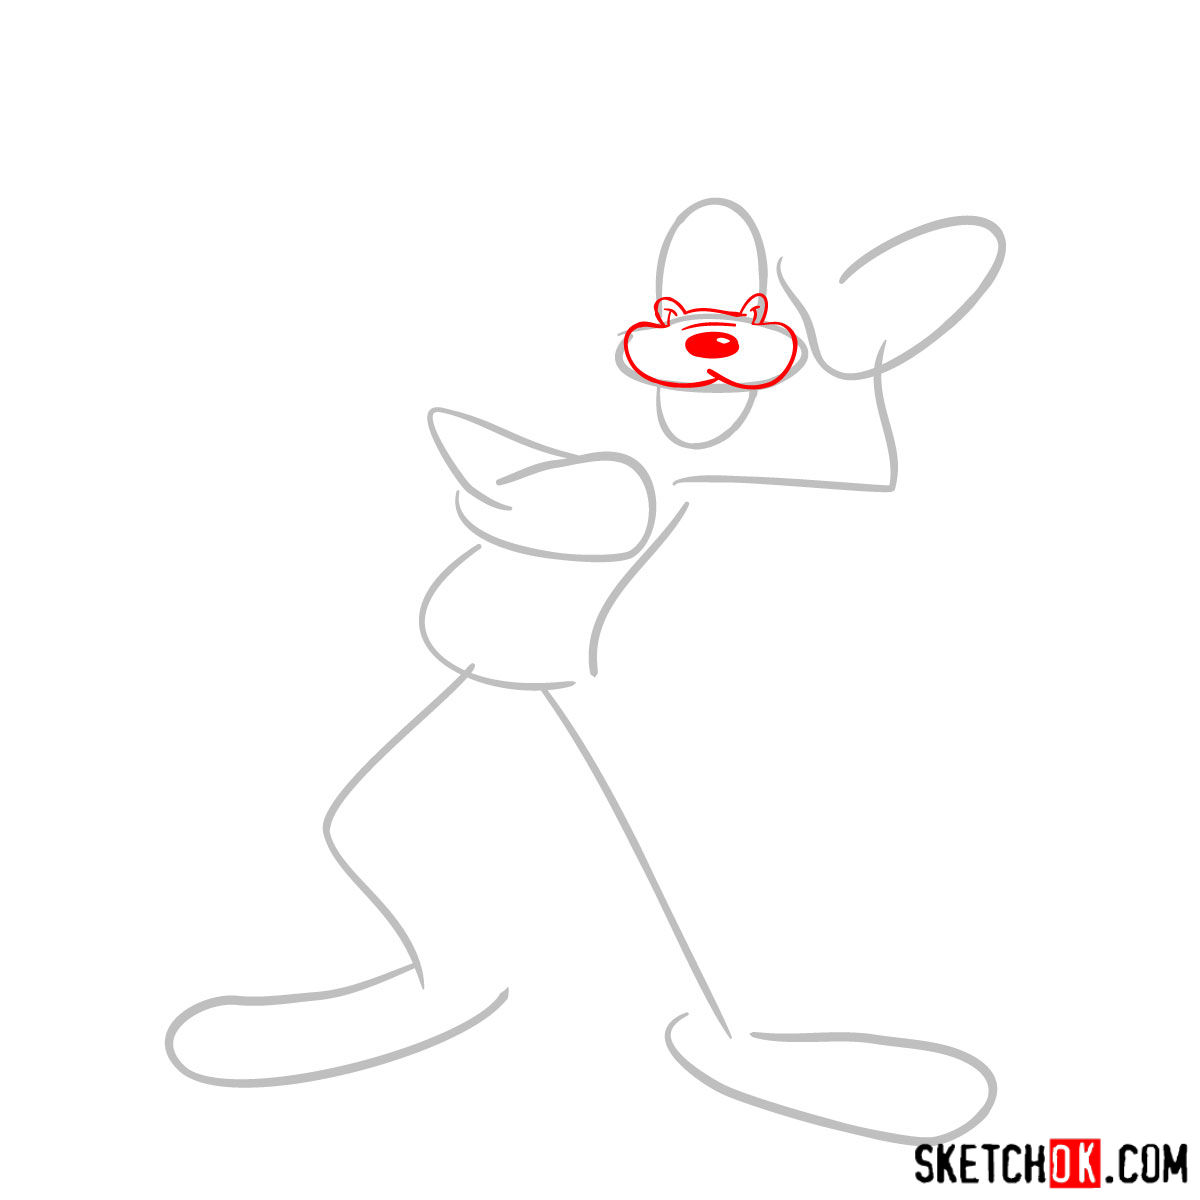
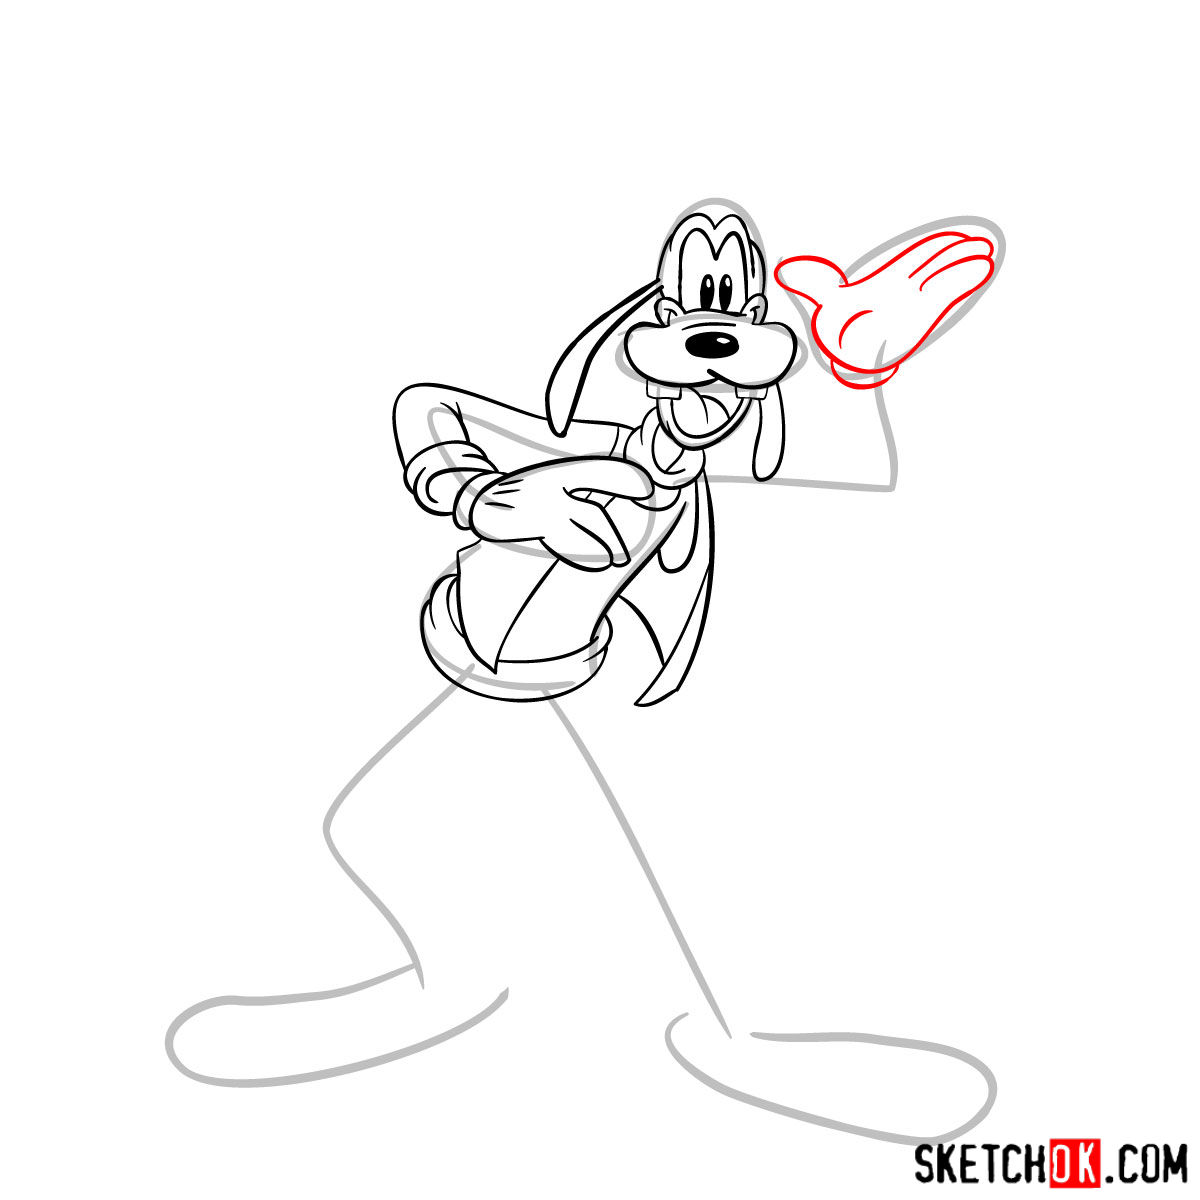
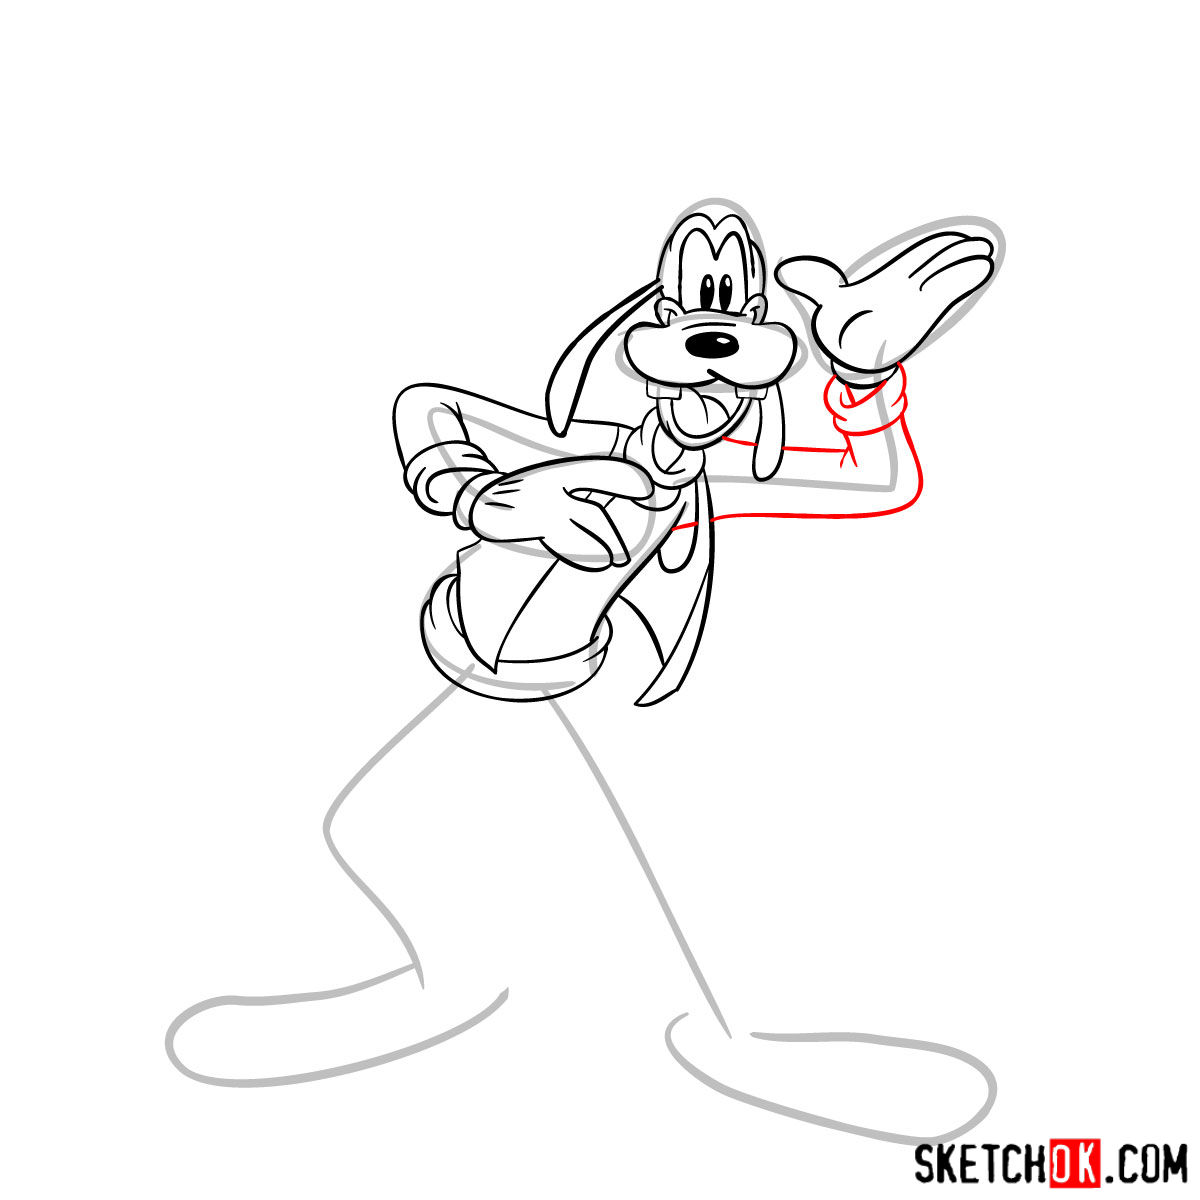
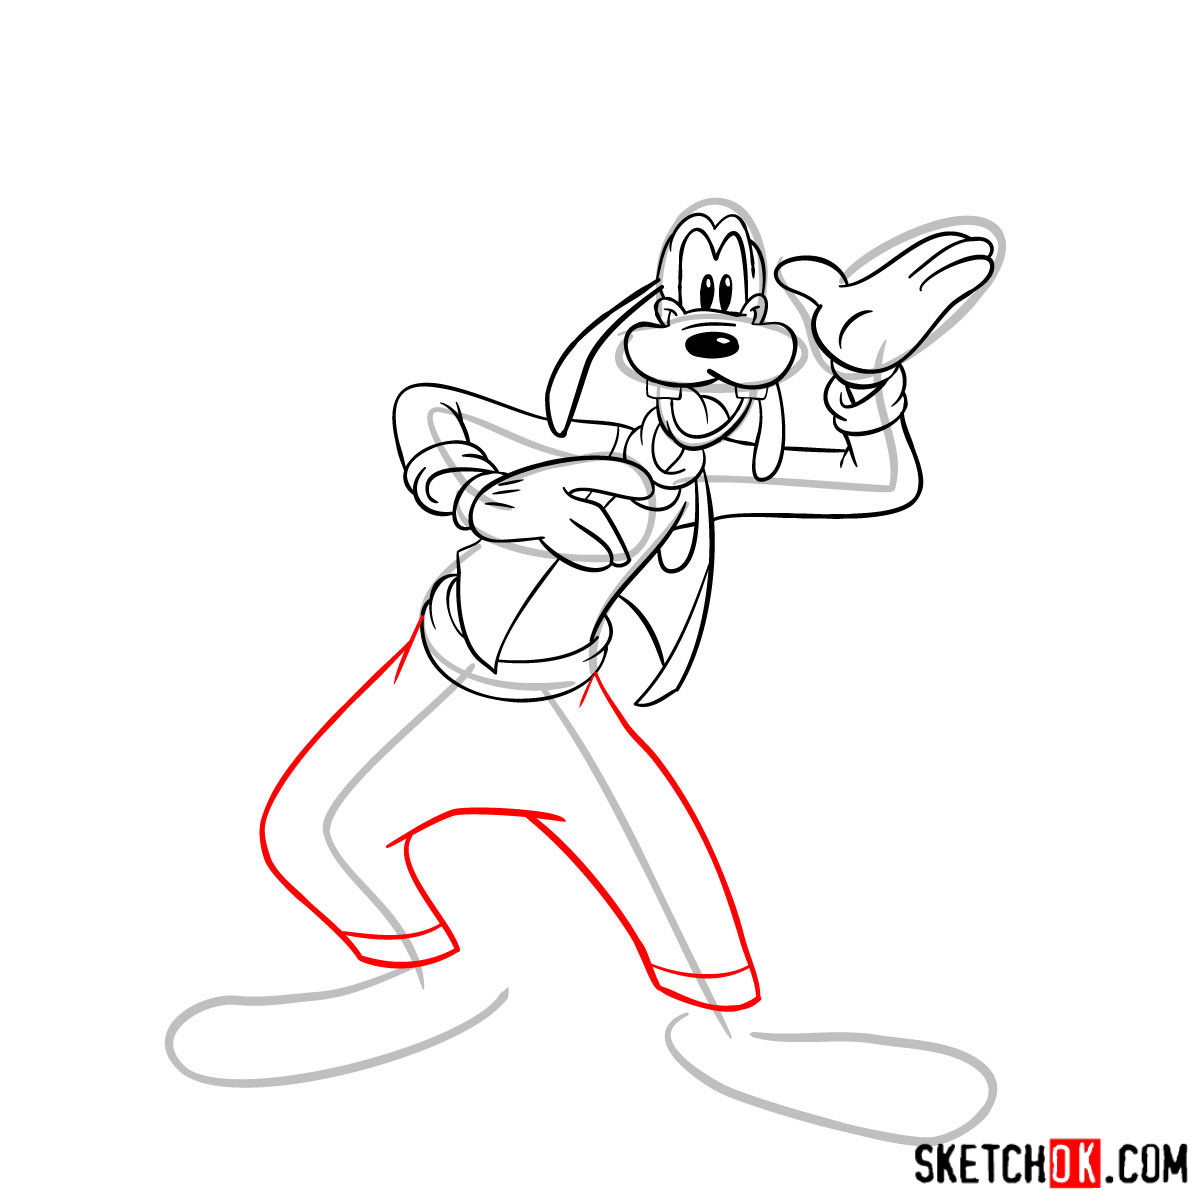
- Red Color: Represents the current step you should be focusing on.
- Black Color: Showcases the lines you have previously drawn.
- Grey Color: Illustrates the basic sketch or proportions.
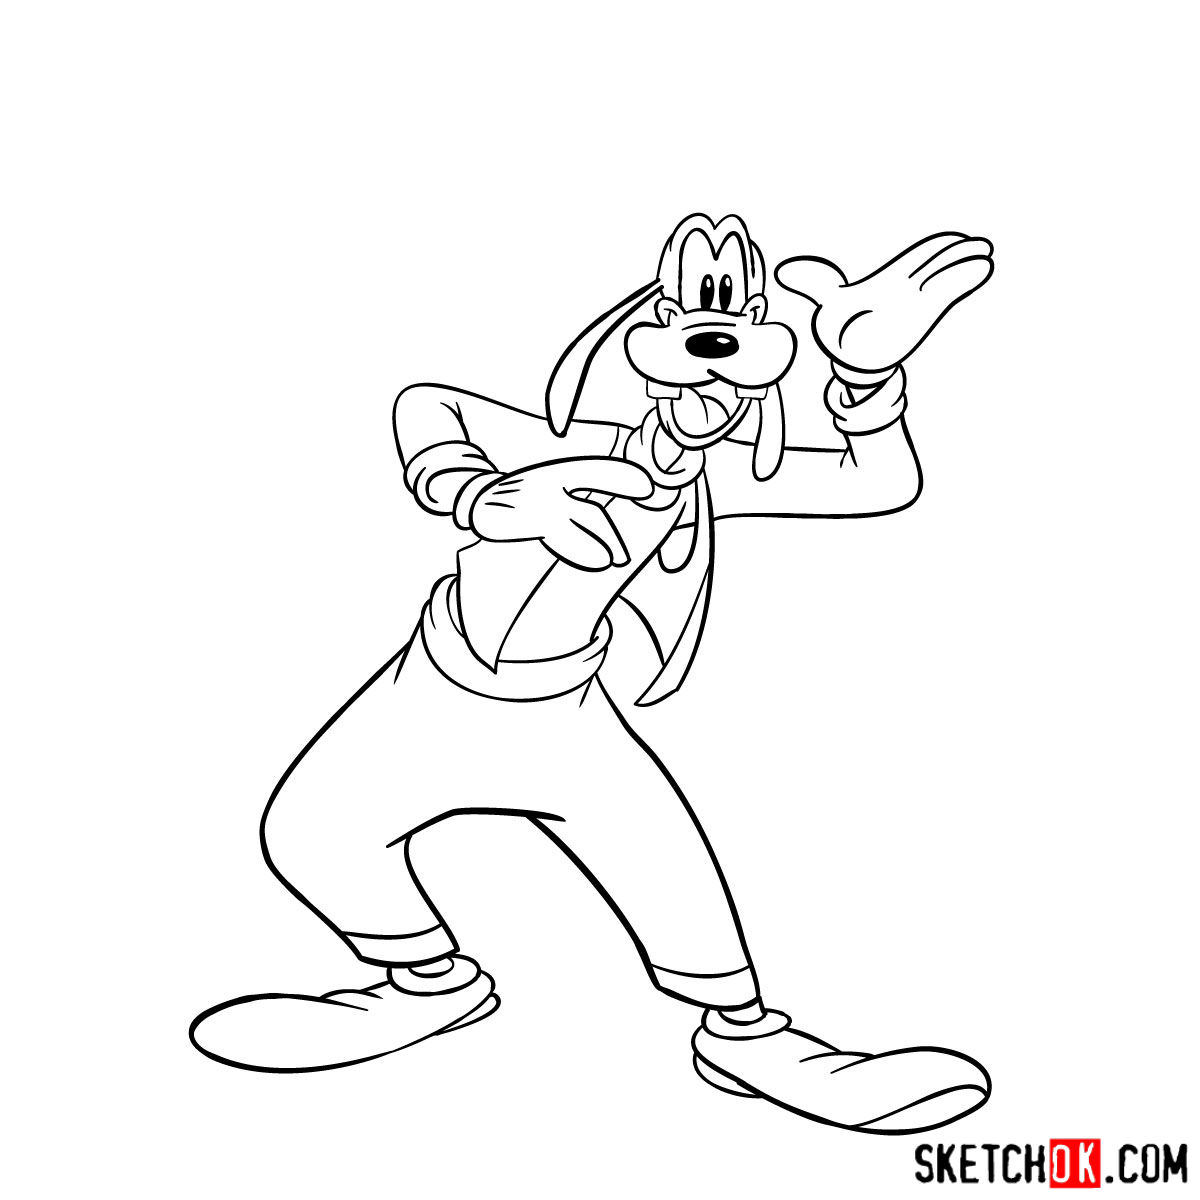
In the final step, you may choose to ink your sketch. This can enhance the depth and sharpness of your drawing. Remember to wait until the ink has fully dried before gently erasing the pencil lines. This prevents any smudging and keeps your artwork clean and crisp.


Frequently Asked Questions
Why is it necessary to sketch lightly in the initial steps?
Sketching lightly helps you to easily erase and adjust lines in the early stages. It makes the refining process more forgiving and less messy. This practice is particularly crucial when establishing the basic proportions of your sketch.
Why should I wait for the ink to dry before erasing the pencil sketch?
Inking provides a clean, defined outline to your sketch, but it requires patience. Erasing the pencil lines before the ink has fully dried can lead to smudging and ruining the crispness of your lines. It is always best to let the ink dry to maintain the neatness of your final sketch.
How can I make my Goofy sketch more expressive?
Capturing Goofy’s persona is all about exaggerating his distinctive features. His long, droopy ears, the iconic hat, and his tall and lanky build are all things to emphasize. Remember, cartoons are expressive and exaggerated. The goal is to capture the character’s essence rather than striving for realism.
Together, We Sketch!
Our fun-filled journey of sketching Goofy comes to an end here, but the world of drawing is limitless. Remember, practice makes perfect, and each pencil stroke brings you one step closer to mastering the art. Feel free to share your creations or our guide with others. Every share, every sketch, and every word of encouragement adds to the magic.
If you found this guide helpful and wish to support the SketchOk project, you can donate at Buy Me A Coffee. Your donations help us in creating more of these free drawing guides, thereby keeping the project alive.
Don’t forget to connect with us on Facebook, Instagram, and Pinterest to stay updated and gain more insights into the wonderful world of drawing.
Keep sketching, keep laughing, and remember – the world is but a canvas to our imagination. Until next time, when we’ll learn how to draw another character, keep your pencils ready and spirits high!
SSSSSSSSSSSSSSSSSSSSSSSSSSSSSSSSSSSSSSSSSSSSSSSSUUUUUUUUUUUUUUUUUUUUUUUUUUUUUUUUUUUUUPPPPPPPPPPPPPPPPPPPPPPPPPPPPPPPPPPPPPPPPPPEEEEEEEEEEEEEEEEEEEEEEEEEEEEEEEEEEEEEEEEEEEEERRRRRRRRRRRRRRRRRRRRRRRRRRRRRRRRRRRRRRRRR!!!!!!!!!!!!!!!!!!!!!!!!!!!!!!!!!!!!!!!!!!!!!!!!!!!!!!!!!!!!!!!!!!!!!!!!!!!!!!!!!!!!!!!!!!!!!
I CAN’T EXPRESS HOW MUCH I LOVE THIS TUTORIAL!!!!!!!