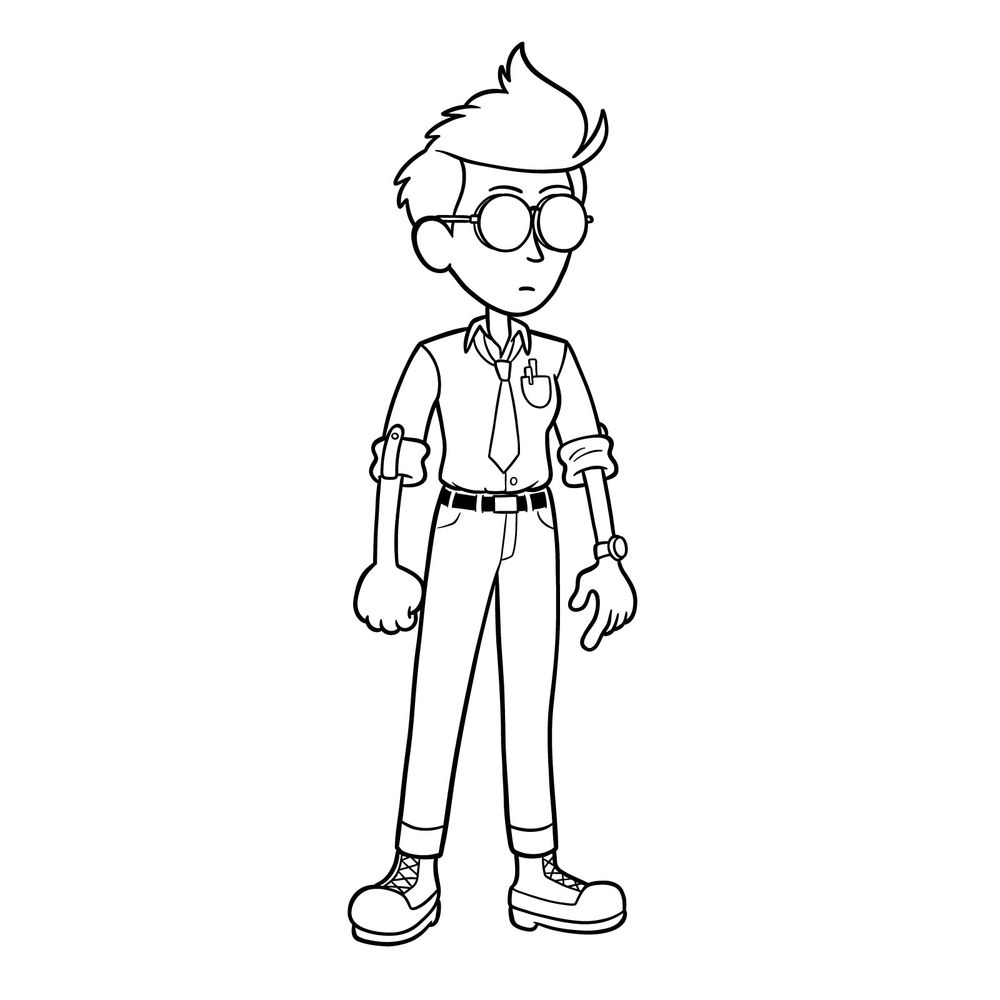
Discover the fascinating world of Amphibia and master the art of drawing one of its enigmatic characters – Jenny. For those passionate about sketching, understanding the essence and intricate details of the character can enhance the outcome. This guide aims to provide you with all the tools and insights you’ll need to create a perfect Jenny drawing.
The Character’s Aesthetic and Key Details
Jenny is a character that exudes an air of silent confidence, often remaining stoic and unyielding. When sketching Jenny, there are a few key elements to focus on:
- Facial Features: Jenny has a distinctive face framed by short, messy blond hair and adorned with round glasses.
- Attire: She sports a white shirt with rolled-up sleeves, a tie, and dark pants paired with brown boots.
- Accessories: Don’t forget the details of her silver wristwatch and the pens in her pocket.
Drawing a character as detailed as Jenny can seem daunting. But remember, like any other subject, it’s all about breaking it down into simpler shapes and gradually adding the details. As you work on your Jenny drawing, consider sketching alongside other Amphibia characters like Anne or King Andrias for a complete scene.
Sketching Tips: Always start with a light hand, giving room for errors and adjustments. It’s more comfortable to darken your lines later than erase heavy strokes. Focus on the overall shape and posture of Jenny first, then delve into her attire and accessories.
Understanding the Guide
Our guide is built around high-quality images designed to guide you through the entire sketching process. As you embark on your journey, here’s what you need to know about the guide’s structure:
- Red Color: This indicates the current step you’re on.
- Black Color: Represents the lines you’ve drawn in previous steps.
- Gray Color: Denotes the basic sketch for proportions.
Comprising 24 steps, our guide is designed to be user-friendly. The initial step involves sketching a basic stick figure of Jenny. Following steps build upon this foundation, adding in details of the head, body, outfit, and other essential elements. As you progress, each step refines and adds more detail, culminating in an intricate portrayal of Jenny.
Once you’re satisfied with the sketch, you may choose to ink it. Ensure you use high-quality ink and allow it sufficient drying time. Once dried, you can gently erase the pencil sketch, revealing a clean inked version of your Jenny drawing.


Drawing Jenny from Amphibia is not just about sketching a character; it’s about capturing her essence. With patience and practice, you’ll be amazed at how you can bring Jenny to life on paper. If you’ve found this guide helpful, don’t hesitate to share the link with others. Also, make sure to follow us on Facebook, Instagram, and Pinterest for more exciting sketching tutorials.
