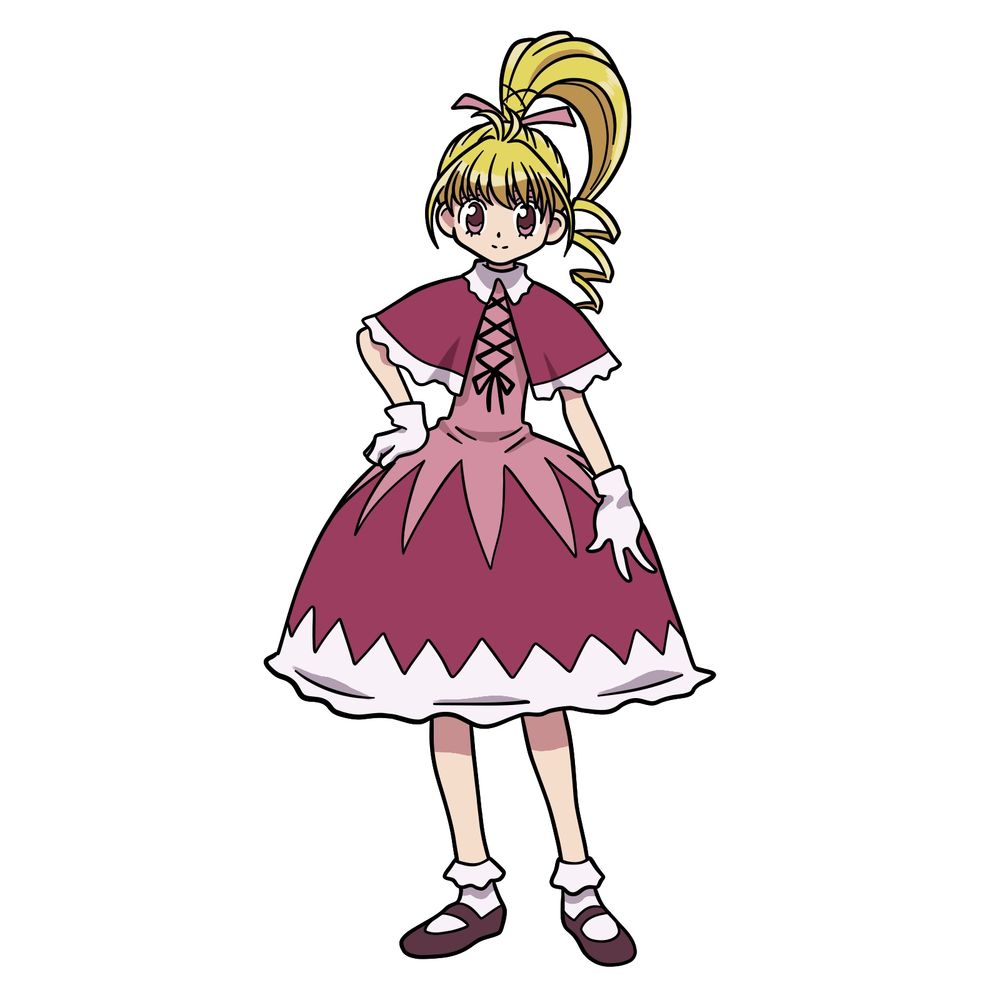
Let’s walk through how to draw Biscuit Krueger in her fake, youthful form from the 2011 Hunter x Hunter anime series. Biscuit, often seen with a delicate and charming look, is a character who loves to present herself as a young girl, despite her true form. This guide will help you capture her doll-like appearance step by step.
Biscuit’s Features: What to Focus On
- Doll-Like Appearance: Biscuit has a soft, porcelain doll-like look with smooth features.
- Classic Outfit: She wears a sleeveless dress paired with a mantle and skirt, along with gloves and simple leather shoes.
- Neatly Styled Hair: Her hair is always tied up neatly, and she has worn it in various styles throughout the series.
- Large, Expressive Eyes: Her big, expressive eyes are essential for capturing her youthful and innocent look.
After you’ve mastered Biscuit, you might enjoy drawing other characters from the series, like Feitan Portor, Killua, or try sketching Biscuit’s face in more detail. Each one has their own distinctive features that make them fun to draw.
Biscuit Fake Form Drawing Guide
This guide is here to help you draw Biscuit Krueger in her youthful form, one step at a time. We’ll start with simple shapes and gradually add the details that make her look so unique. Each step is clearly illustrated and explained. Here’s how the color coding in the images works:
- Red: Focus on these lines during the current step.
- Black: These are the lines you’ve already drawn in previous steps.
- Grey: These are the basic guidelines to help you keep the proportions right.
By the end of this guide, you’ll have a complete drawing of Biscuit in her fake form, ready to be inked or colored if you choose.
Start by drawing a circle for the head, divided vertically into two parts. Add a simple stick figure to establish the proportions and posture.

Draw a curved horizontal line within the head circle to show the placement of the eyes, with short vertical lines for the eyes. Add short lines on the vertical line from step 1 to indicate the nose and mouth positions. Sketch a basic, simplified shape of Biscuit’s dress.

Sketch simple outlines for the arms, hands, legs, and feet, completing the basic sketch of the figure.

Outline the face frame, including hair strands that frame the top of Biscuit’s face.

Draw the outline of Biscuit’s eyes and ears. Add the nose and sketch the mouth.

Finish the eyes by adding pupils, eyelashes (three below each eye), and eyebrows. Also, add the inner ear lines.

Sketch Biscuit’s fringe, adding more detail to her hairstyle.

Draw another layer of hair and add the bow tie on top of her head.

Draw Biscuit’s neck and the collar of her dress, adding detail to the upper part of her outfit.

Begin sketching the dress by drawing the shoulders and sleeves, outlining the upper part of her dress.

Sketch Biscuit’s arms and hands, making sure to include the gloves she’s wearing.

Draw the waist area and the full shape of the skirt of her dress.

Add the pattern to the skirt and shoulders of Biscuit’s dress.

Sketch her legs down to the ankles, including the wavy top part of her socks.

Outline the shape of her feet in the shoes, completing the lower part of her figure.

Draw her ponytail, adding volume and shape to complete her hairstyle.

Add the lacing on her chest, refine the hair, sketch small fabric folds on her dress, detail the shoes, and add additional strands to the ponytail.

Once you’ve finished your drawing, take a moment to clean it up. Erase any remaining guidelines if everything looks good. If you want to ink your drawing, do so carefully and make sure the ink is fully dry before erasing any pencil marks. Note that you can download and print this image to use as a coloring page of Biscuit.

Use this final colored version as a reference if you want to add colors to your drawing.

If this guide was helpful, be sure to check out my other tutorials for more characters from Hunter x Hunter and other anime series. You can follow me (SketchOk) on social media for updates on new guides or support my work by pinning this tutorial on Pinterest or donating on Buy Me a Coffee. Your support helps me keep creating content like this!
