Welcome to the 3 in 1 tutorial on how to draw Frieren. Today, I’ll take you through the process of drawing the mage Frieren, the protagonist of ‘Frieren: Beyond Journey’s End‘. We’ll tackle three different aspects: her face from the front view, the 3/4 view, and her full body.
Focus on her large, expressive eyes and long, white hair styled into two pigtails.
Her attire, a combination of a striped shirt, a white jacket with gold accents, and a high-collared cape.
Pay attention to the earrings that complement her outfit.
To expand your anime characters portfolio, or to add story to your drawing, consider sketching Himmel, Eisen, Heiter, Stark or Fern next to Frieren, fellow characters from her journey.
Navigating the Drawing Guide
Each tutorial is composed of different number of images, each serves as a single step to construct Frieren’s image. Here’s how to use the color guide:
Red Color: Indicates the current step in the drawing process.
Black Color: Displays the lines from previous steps.
Grey Color: Shows the basic sketch, the initial framework of your drawing.
Start with a basic sketch, then add details. As the final touch, consider inking your masterpiece. Erase the pencil lines after inking for a crisp Frieren drawing.
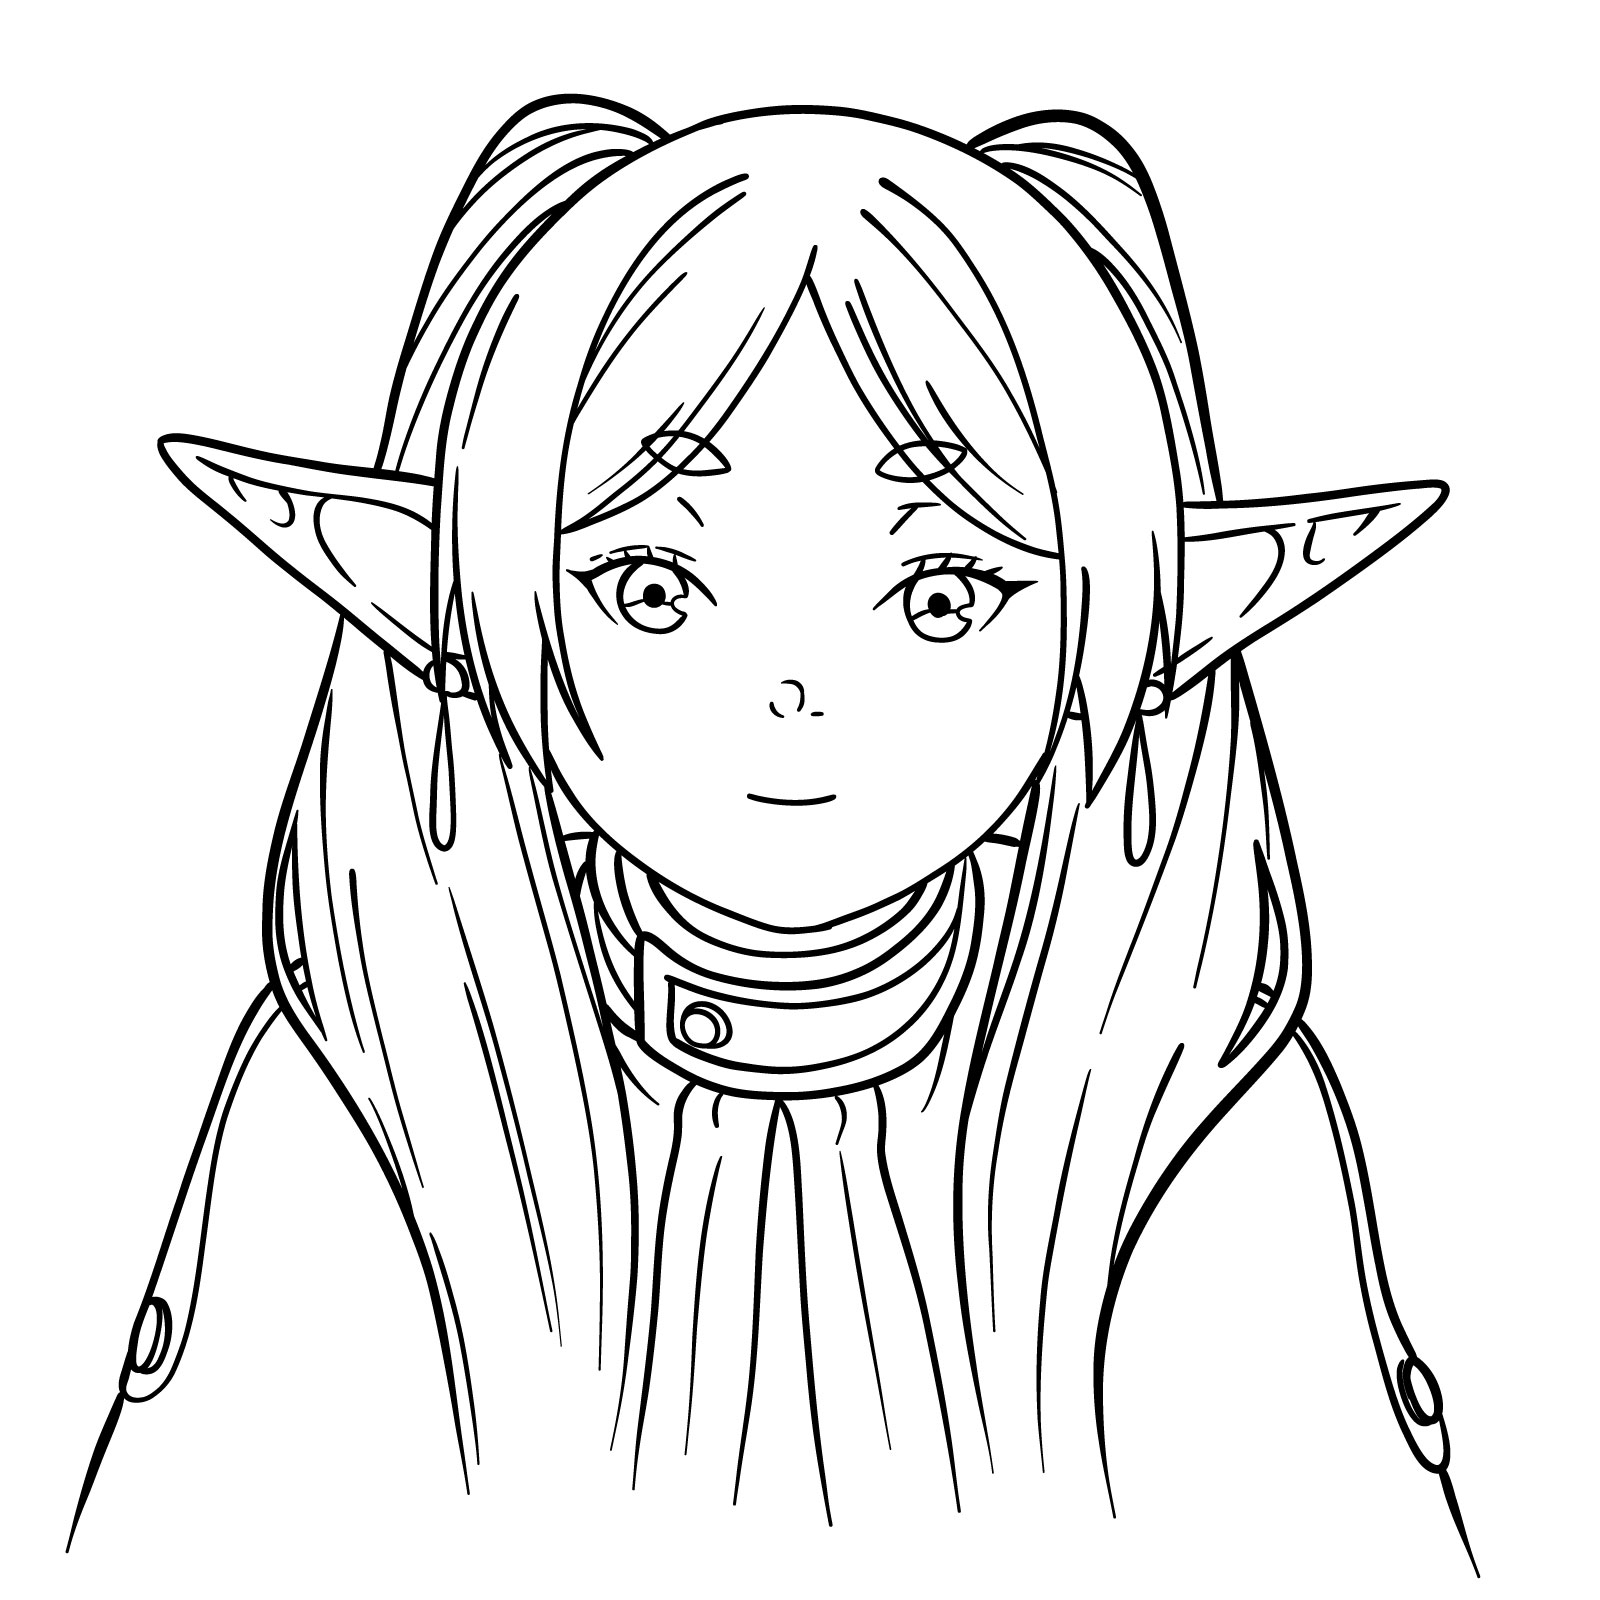
How to Draw Frieren’s Face – Front View
FIGCAPTEXT
Ok, guys! Ready to draw Frieren’s face from the front? It’s easier than you think. We’ll walk through 16 simple steps to nail her look. First off, we sketch the basics and get those proportions just right. Picture her eyes and pointy ears? That’s where we begin.
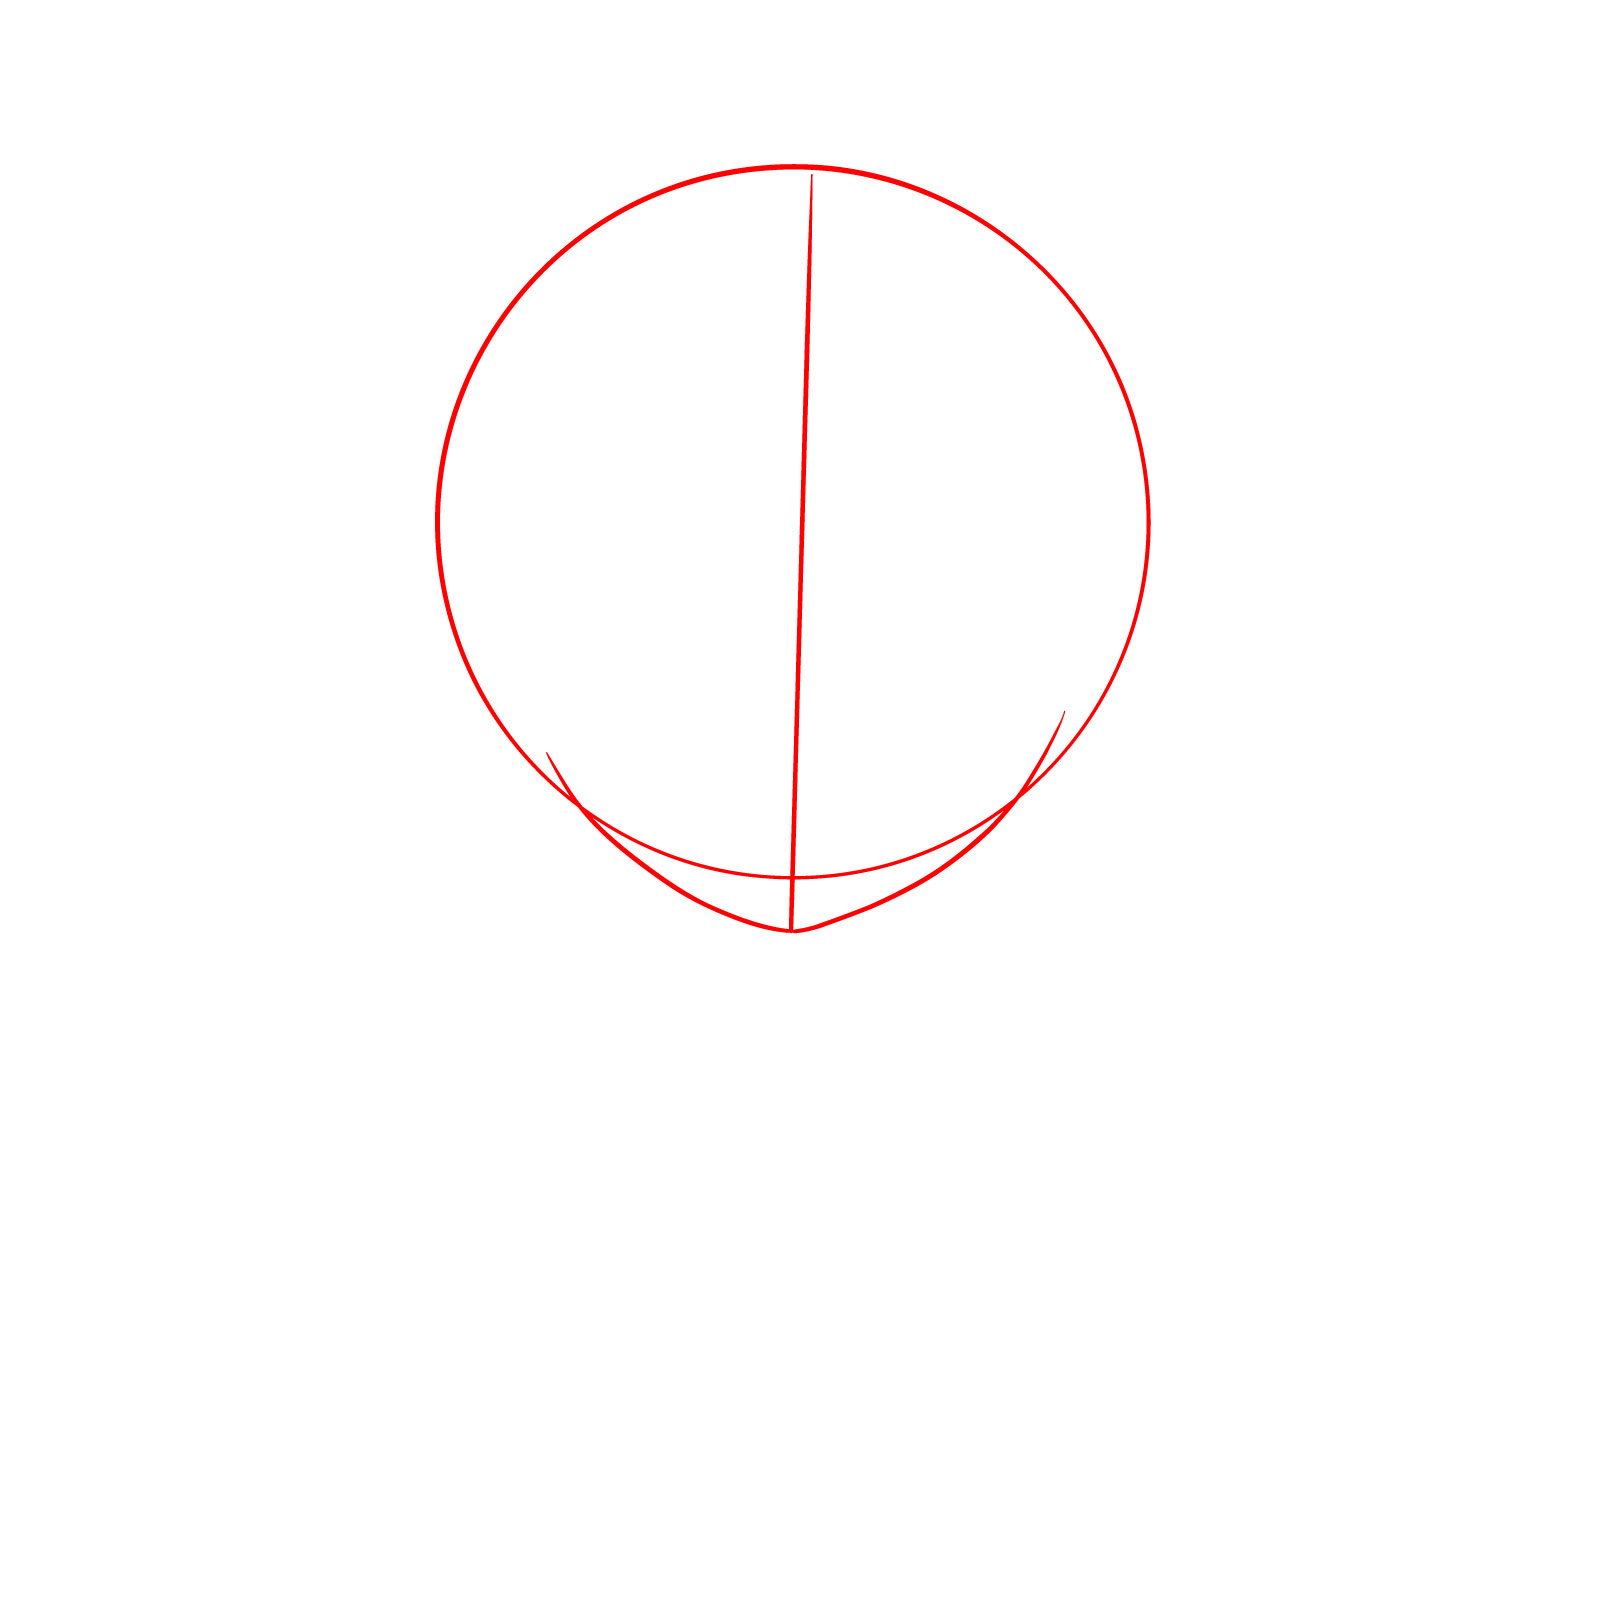
Step 01 – Kick off your sketch with a simple circle for her head. Draw a straight line down the middle to keep everything even. Then, add the chin with a gentle curve coming down from the circle. You’ve just set up the canvas for her face
Starting with the basic shapes for Frieren’s face
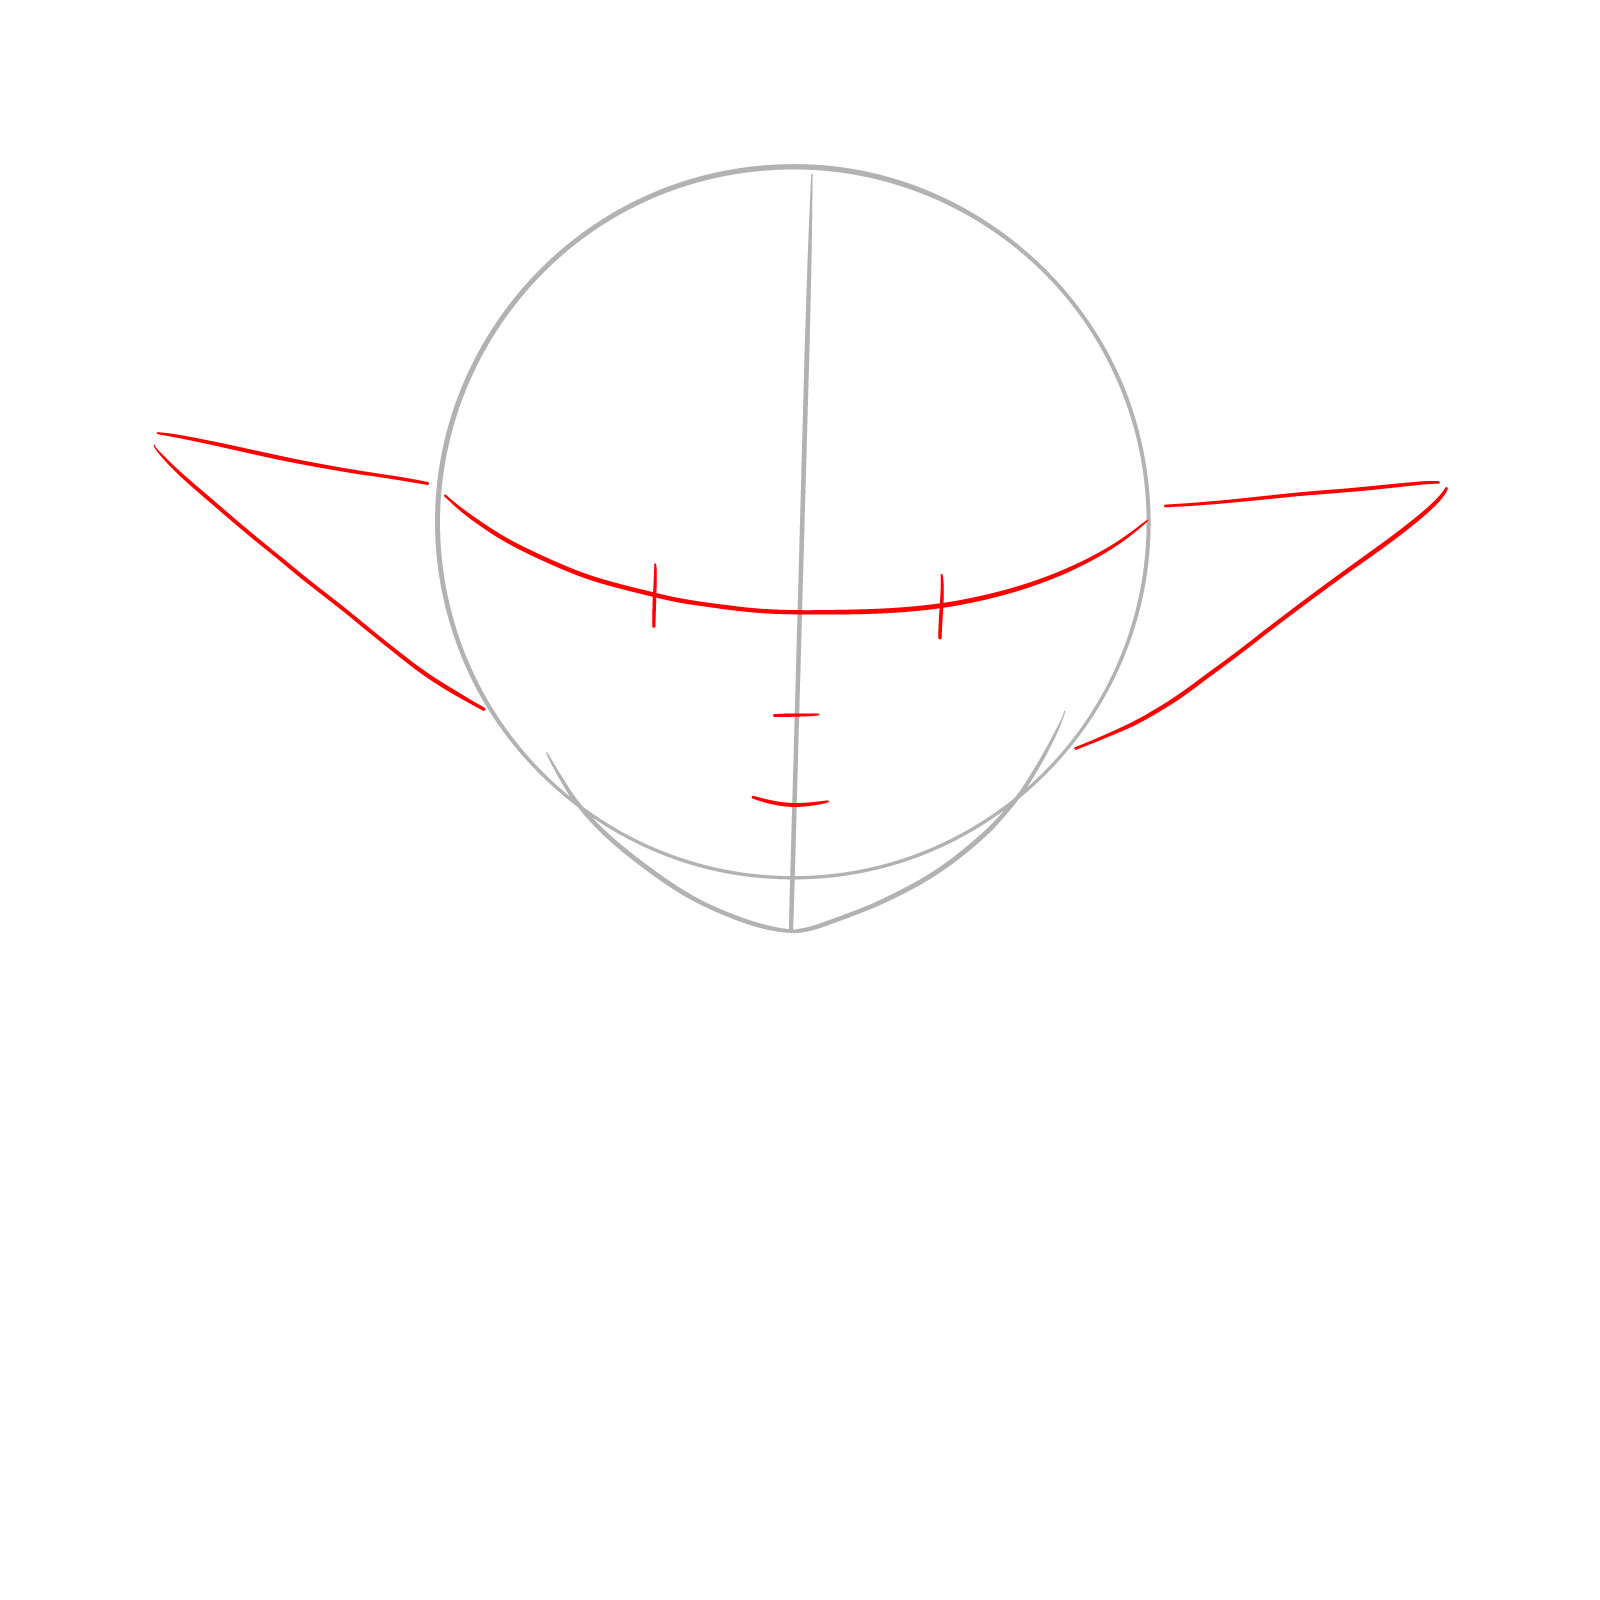
Step 02 – Now, draw a curved horizontal line across the circle for where the eyes will sit. Add little lines for the eyes on it. Then add two more lines for nose, and mouth along the vertical line. Then, on the sides, outline her ears, making sure they’re level with the eyes
Mapping out where Frieren’s features and ears will go
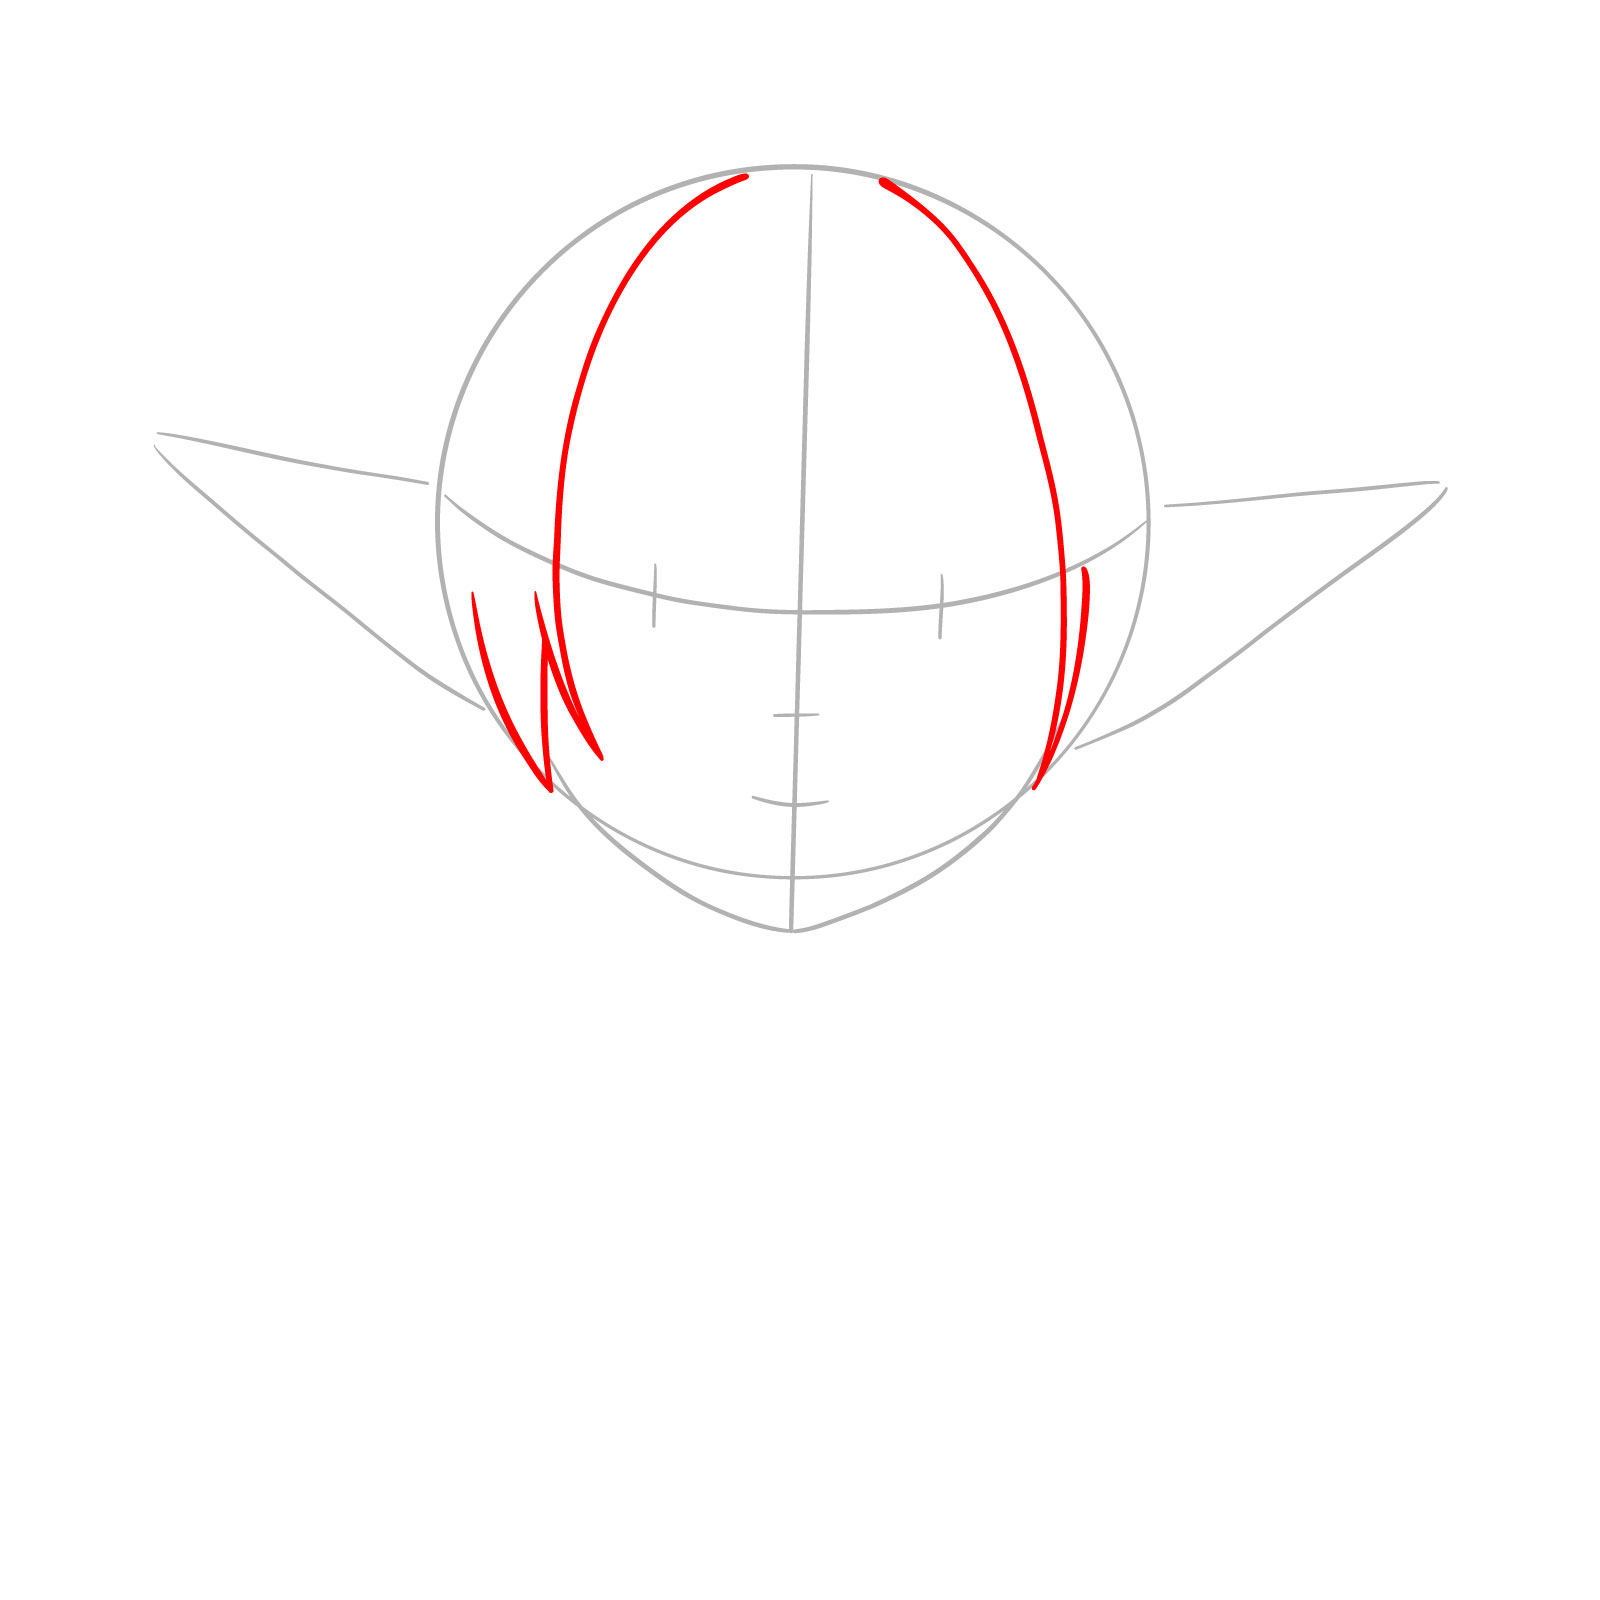
Step 03 – It’s hair time! Draw smooth curves on each side of the head for her hair strands, framing her face
Sketching in hair strands on the sides
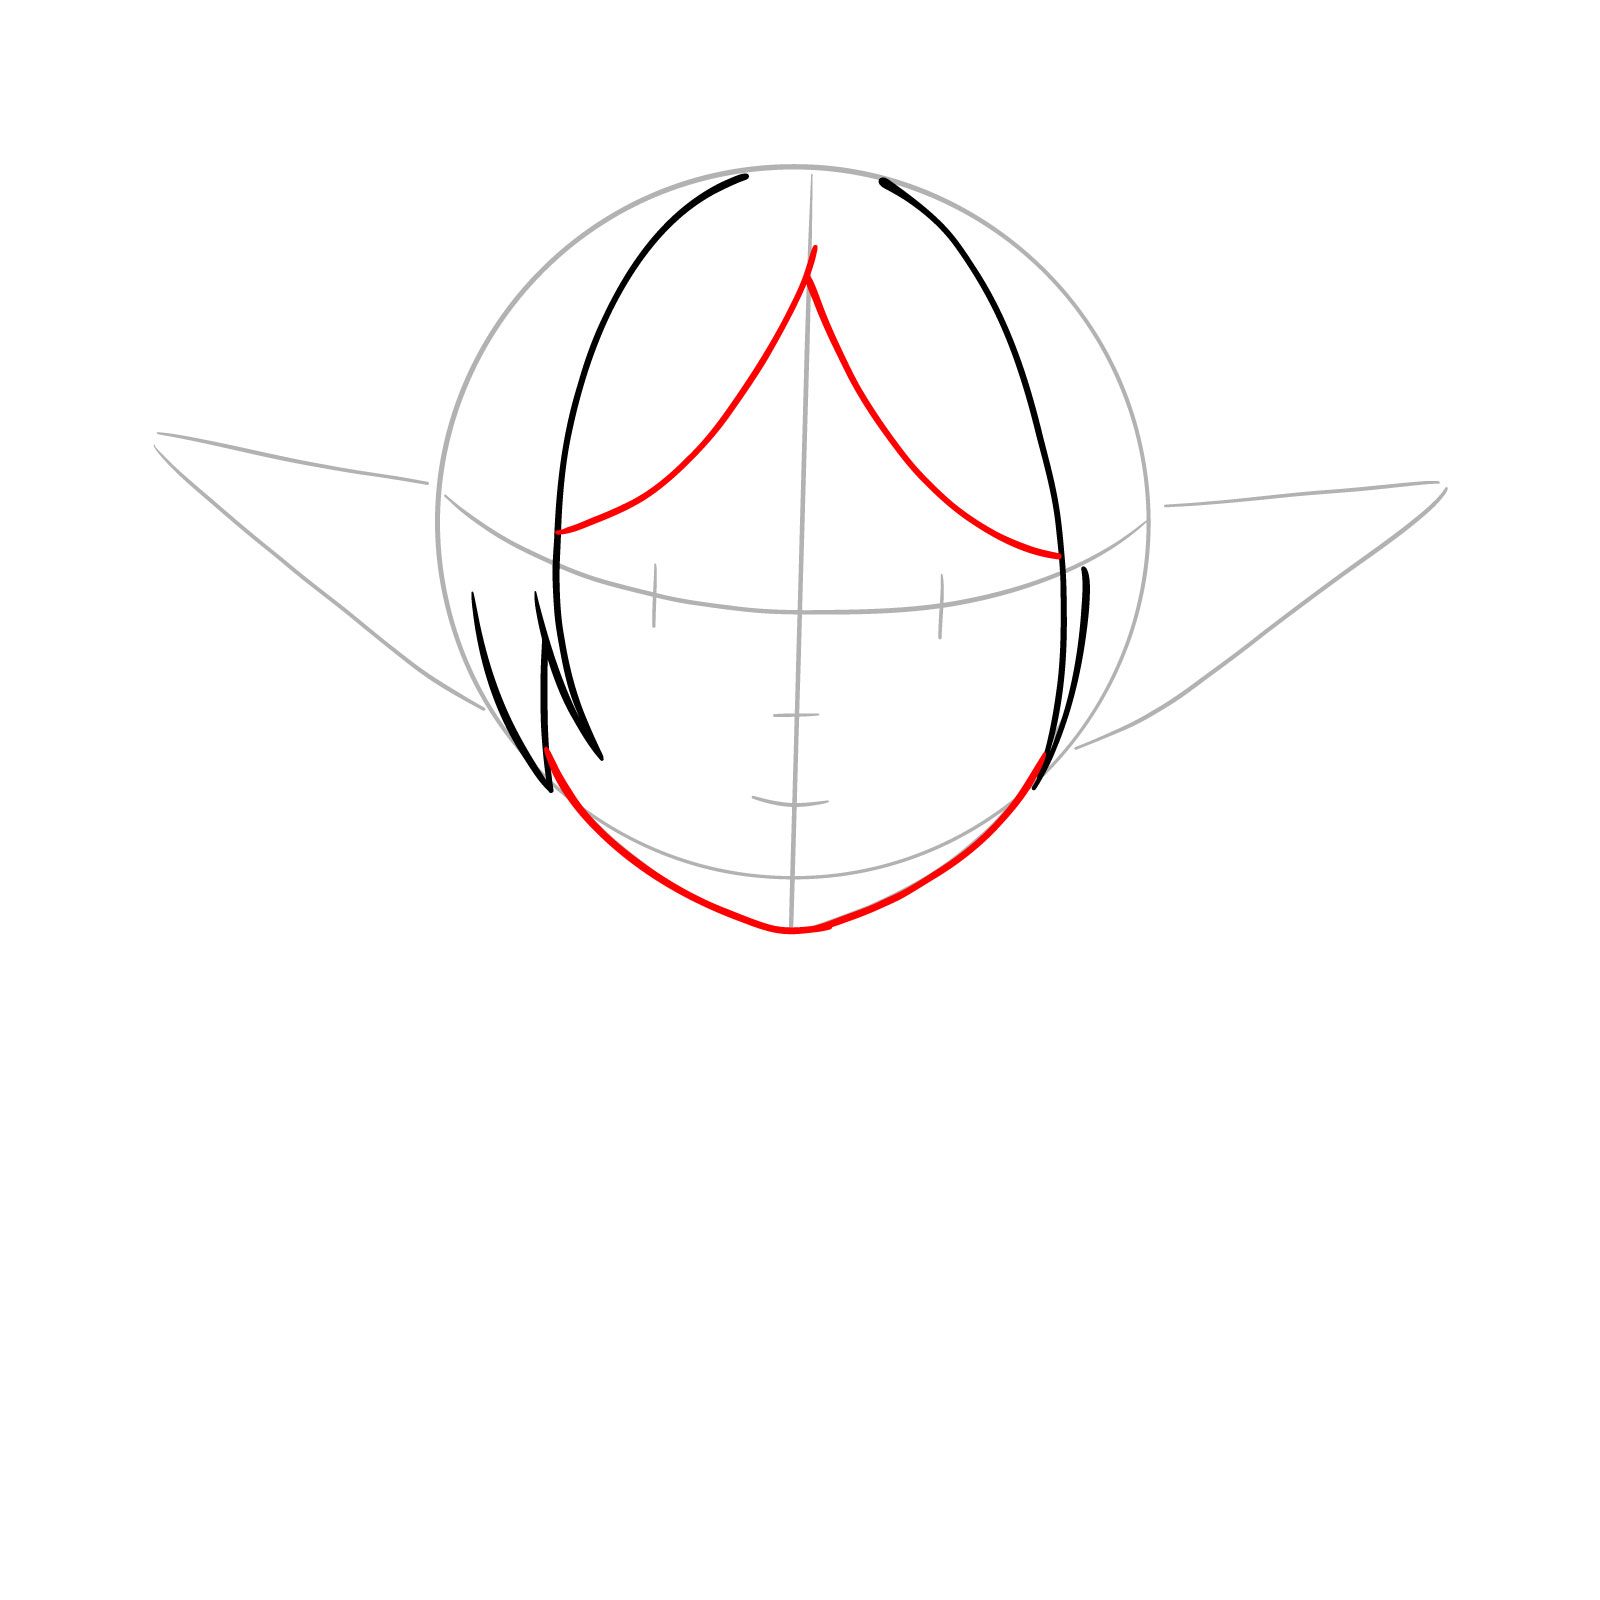
Step 04 – Refine her jawline for a more defined look, then start sketching the fringe across her forehead. Think of creating the outlines for her bangs, which set up the rest of her hairstyle
Shaping Frieren’s jaw and the start of her fringe
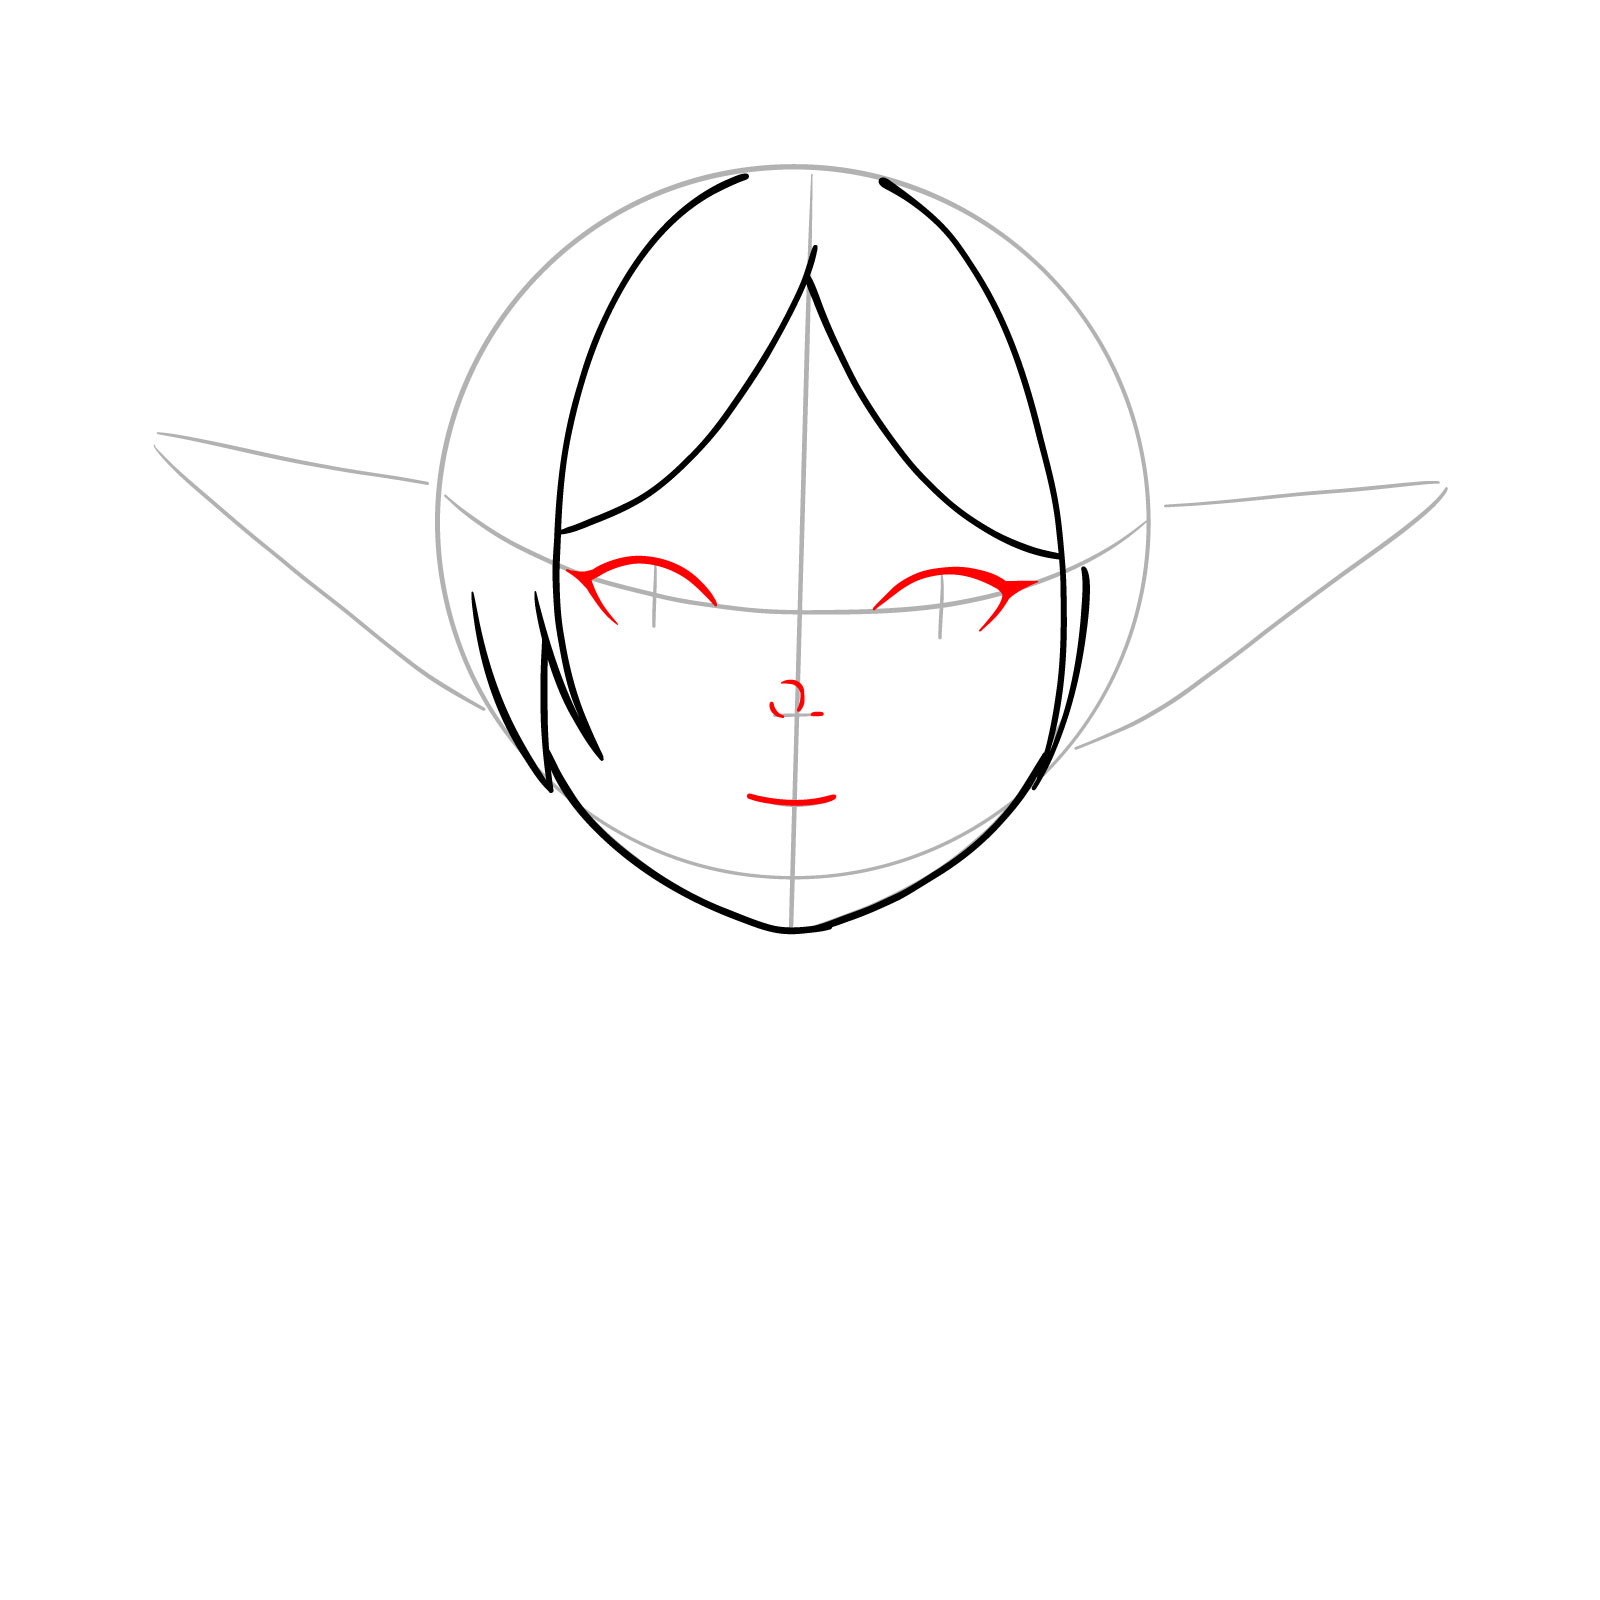
Step 05 – Let’s give Frieren some personality! Draw bold eyelids that pop, a hint of a nose, and a small curved mouth below it. Keep the anime vibes strong here
Drawing the anime-style features of Frieren’s face
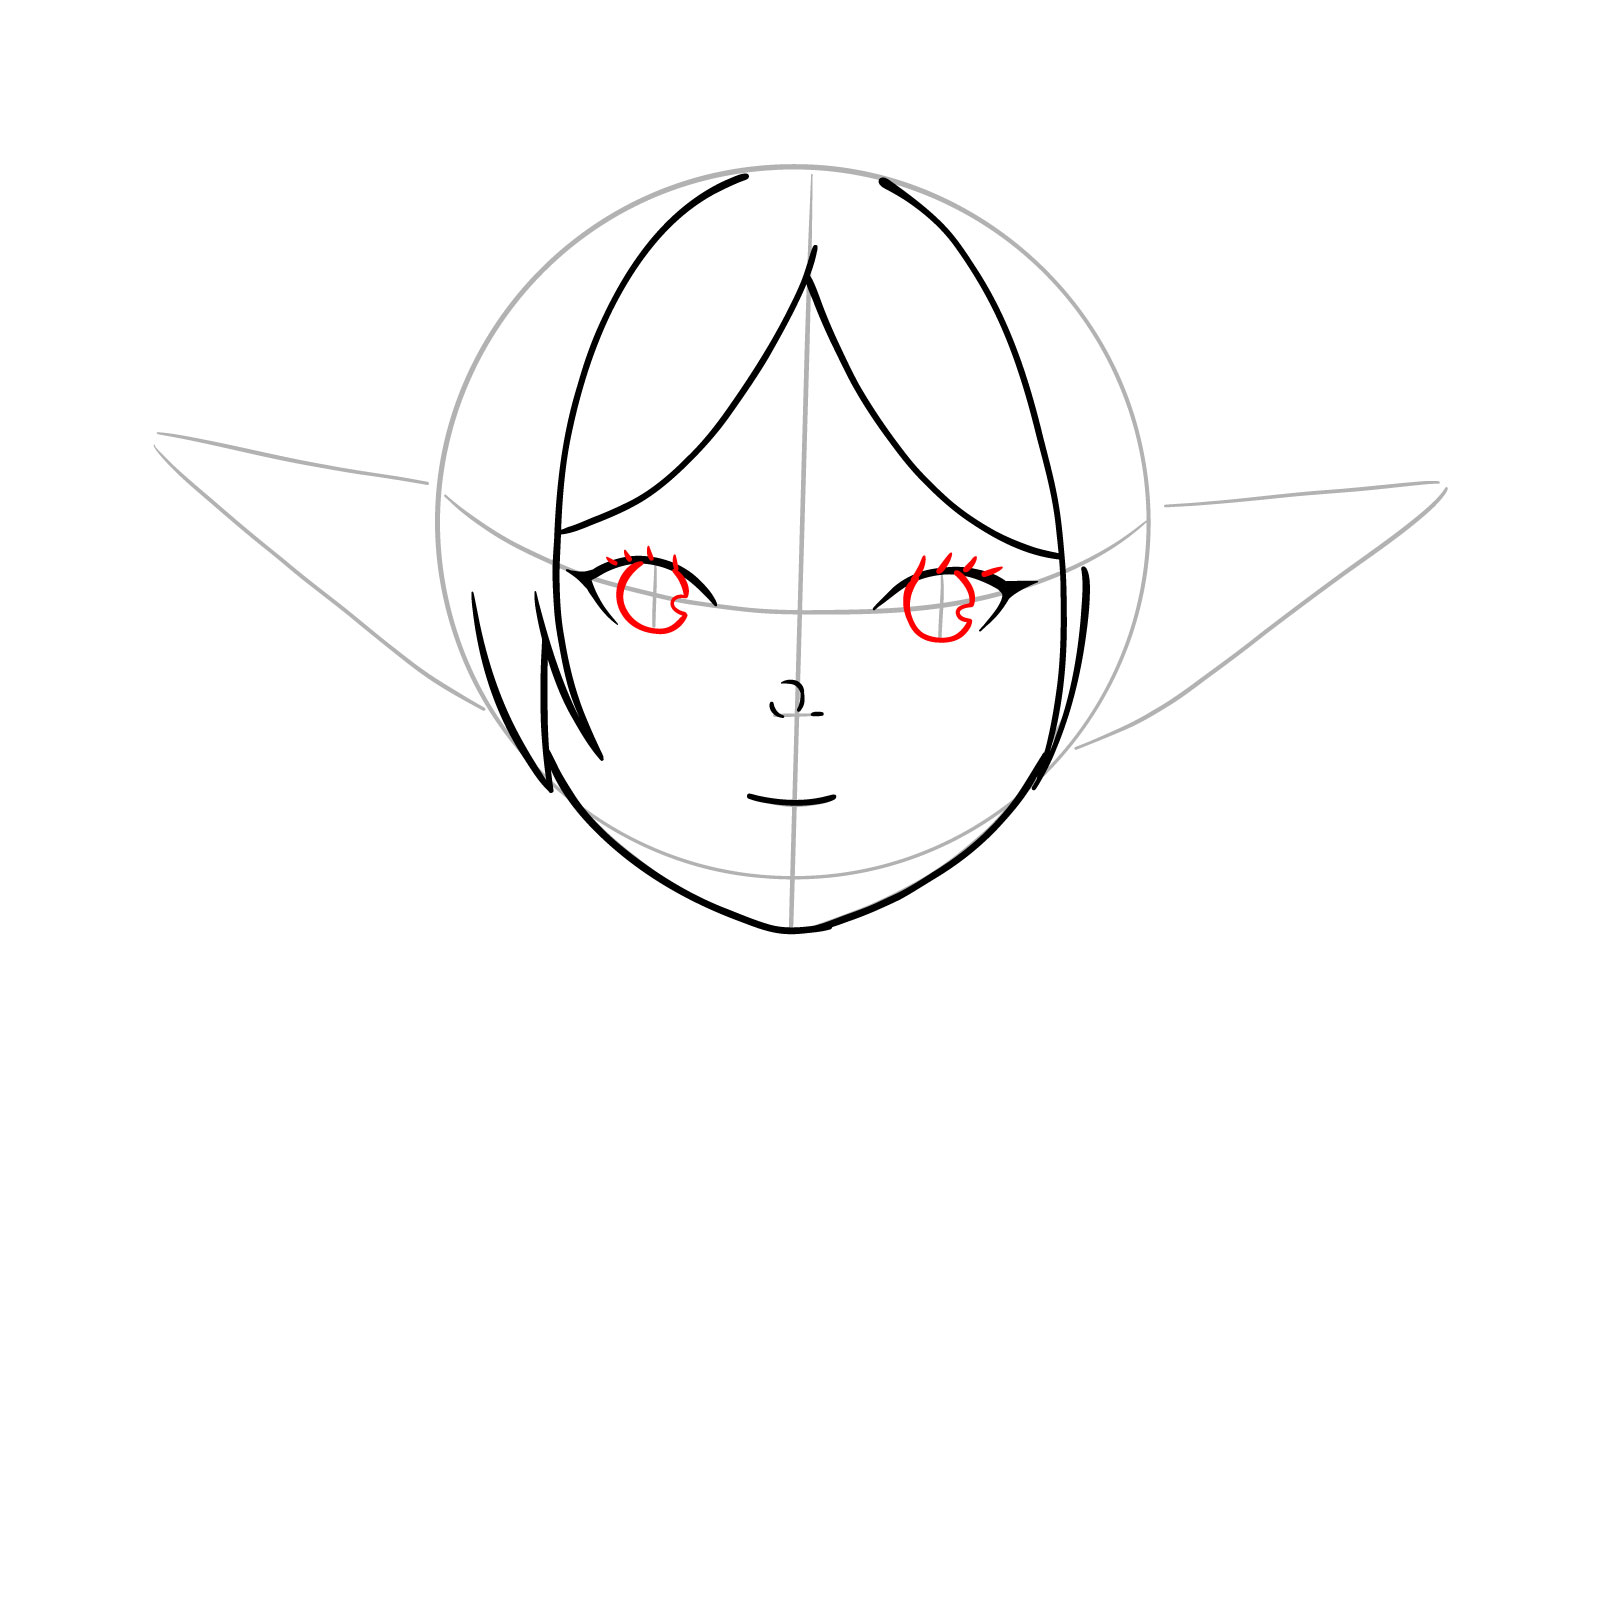
Step 06 – Inside those bold eyelids, draw the eyeballs with higlights on the right for that sparkle in her eyes. Don’t forget to flick out four lashes on top of each eye
Bringing Frieren’s eyes to life with detail
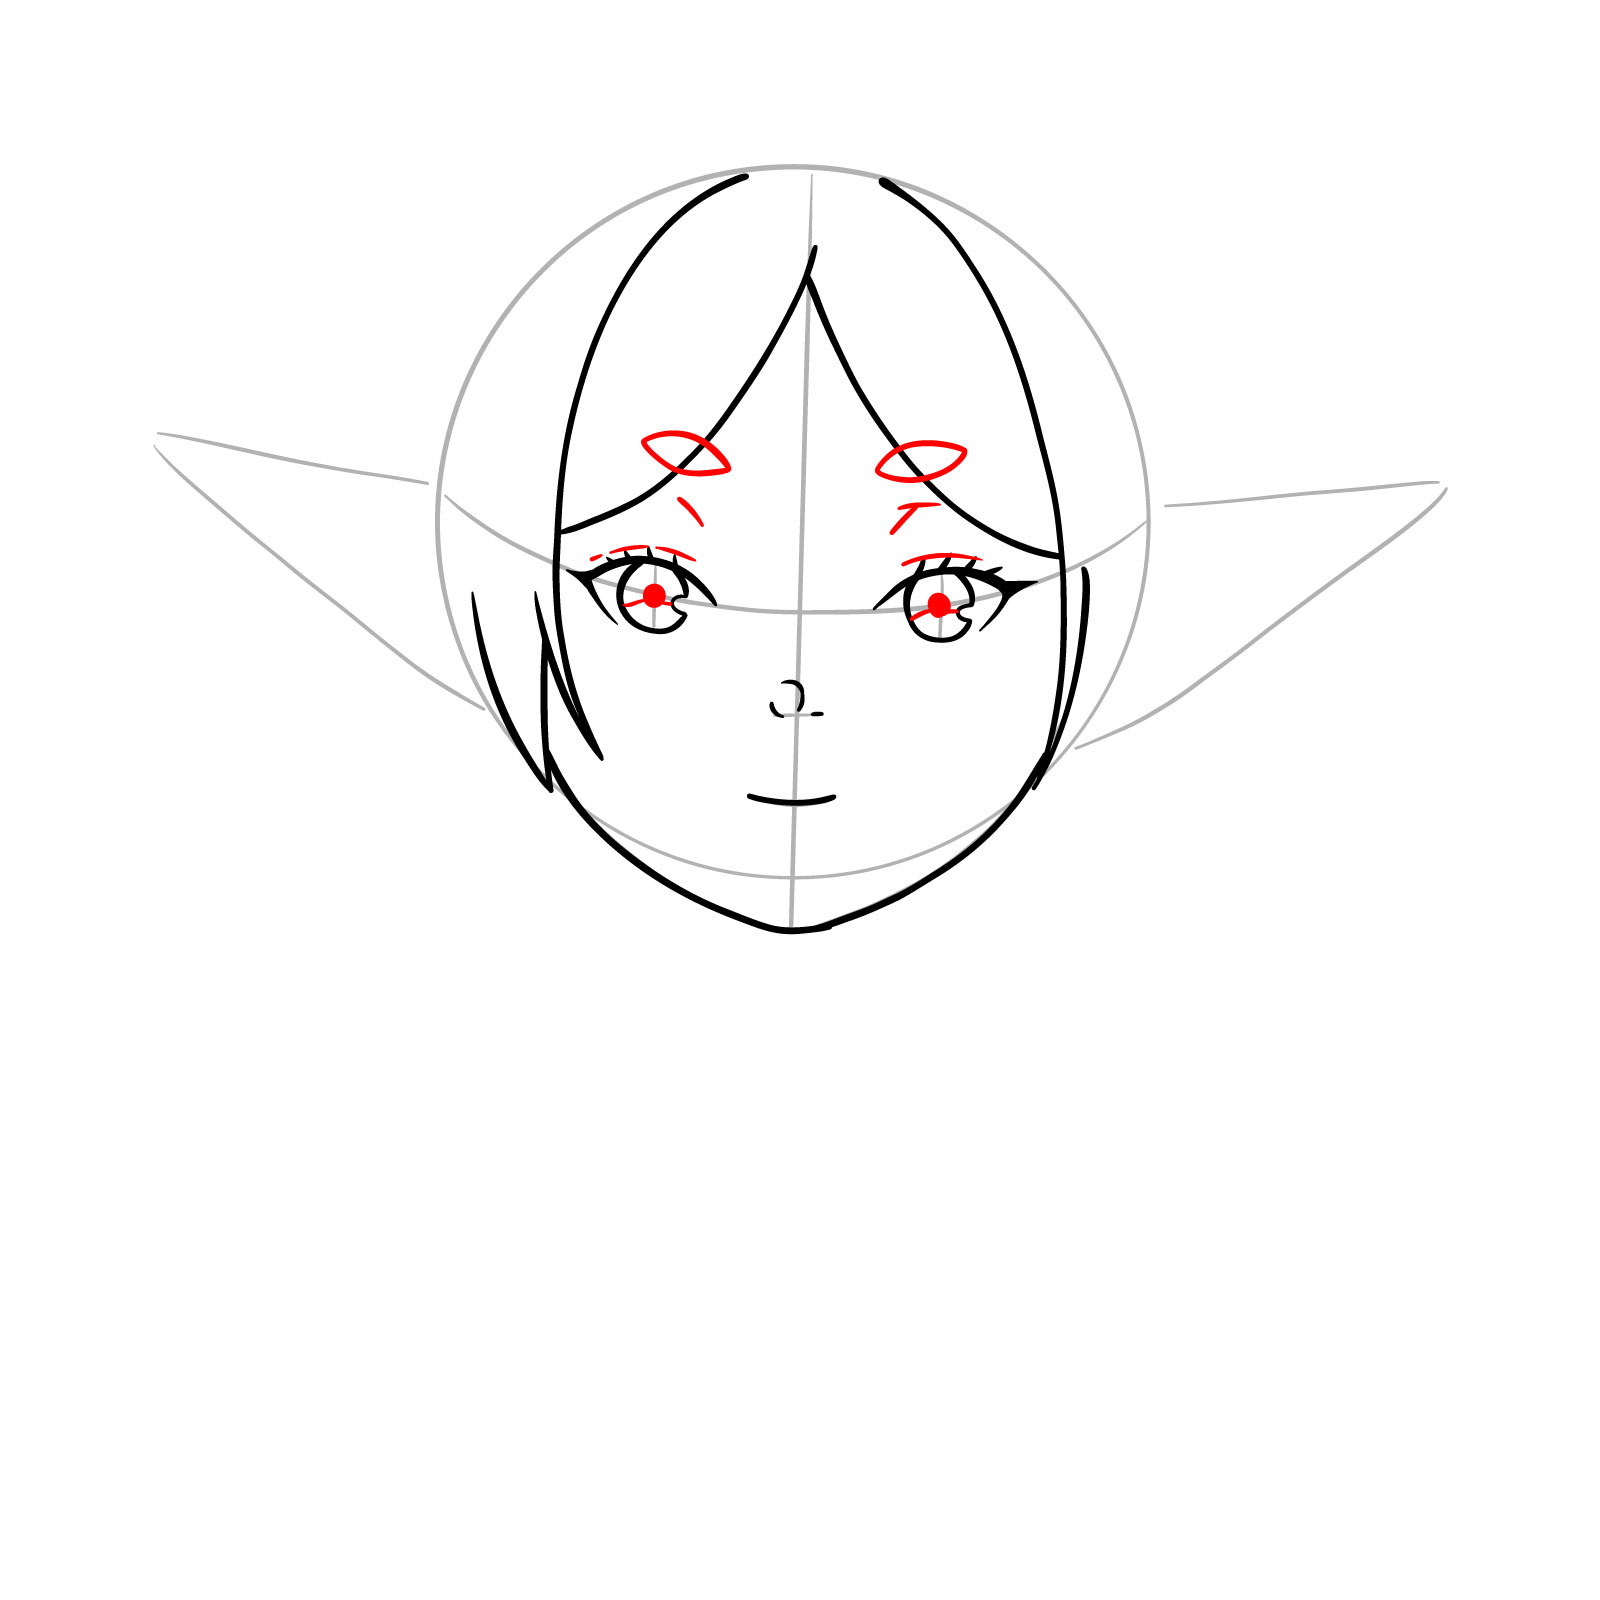
Step 07 – Now, get the pupils in there, centered and staring back at you. Add lines for the upper eyelids and then sketch her eyebrows
Completing the eye details
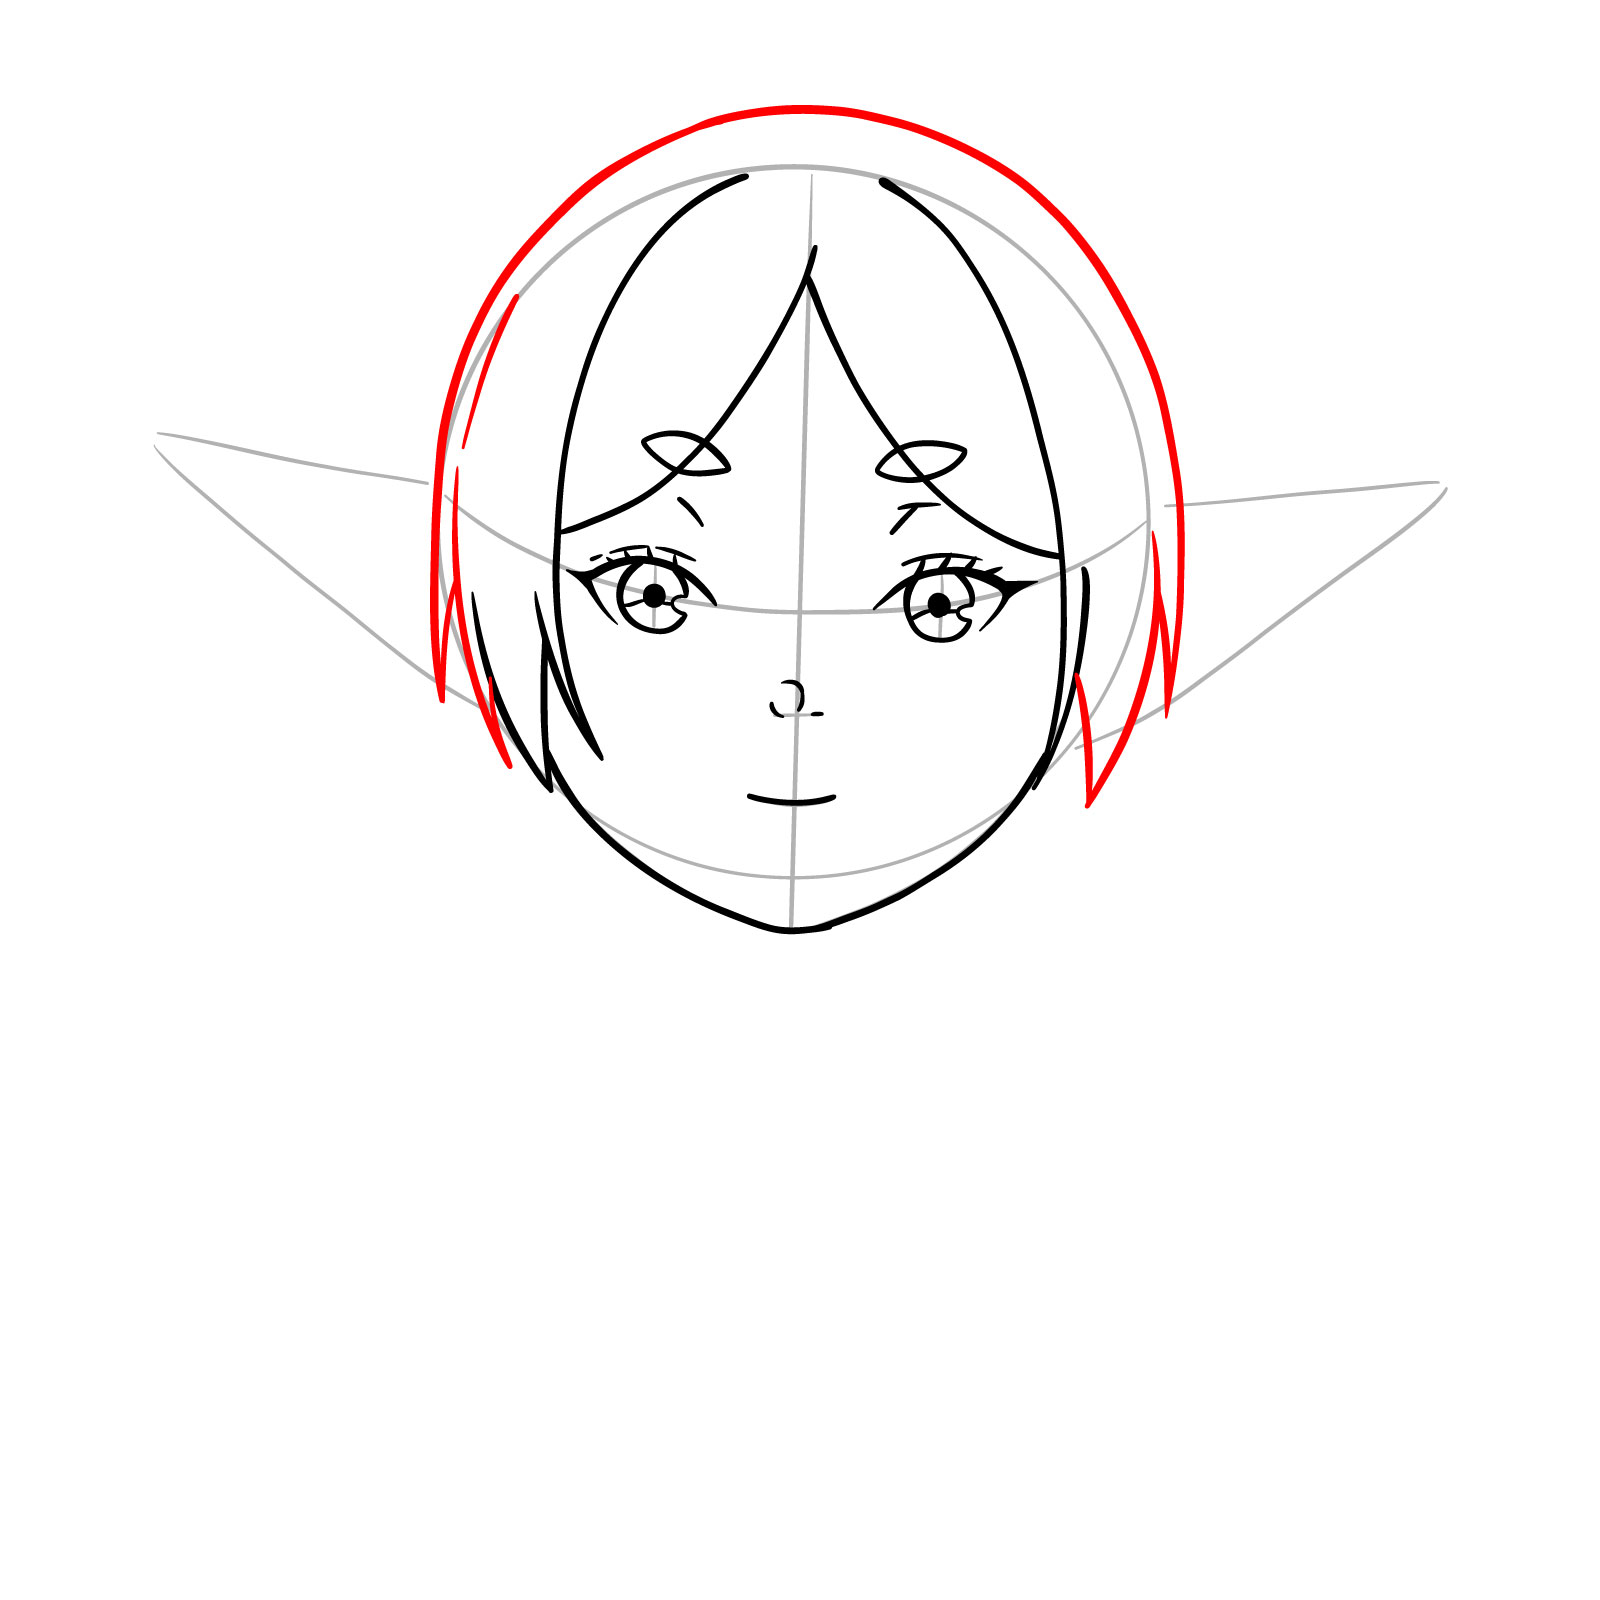
Step 08 – Last but not least, it’s time for the hairline. Sketch it around the base circle and let it slightly cover the ears, showing off the volume of her hair
Finishing the hair outline for Frieren
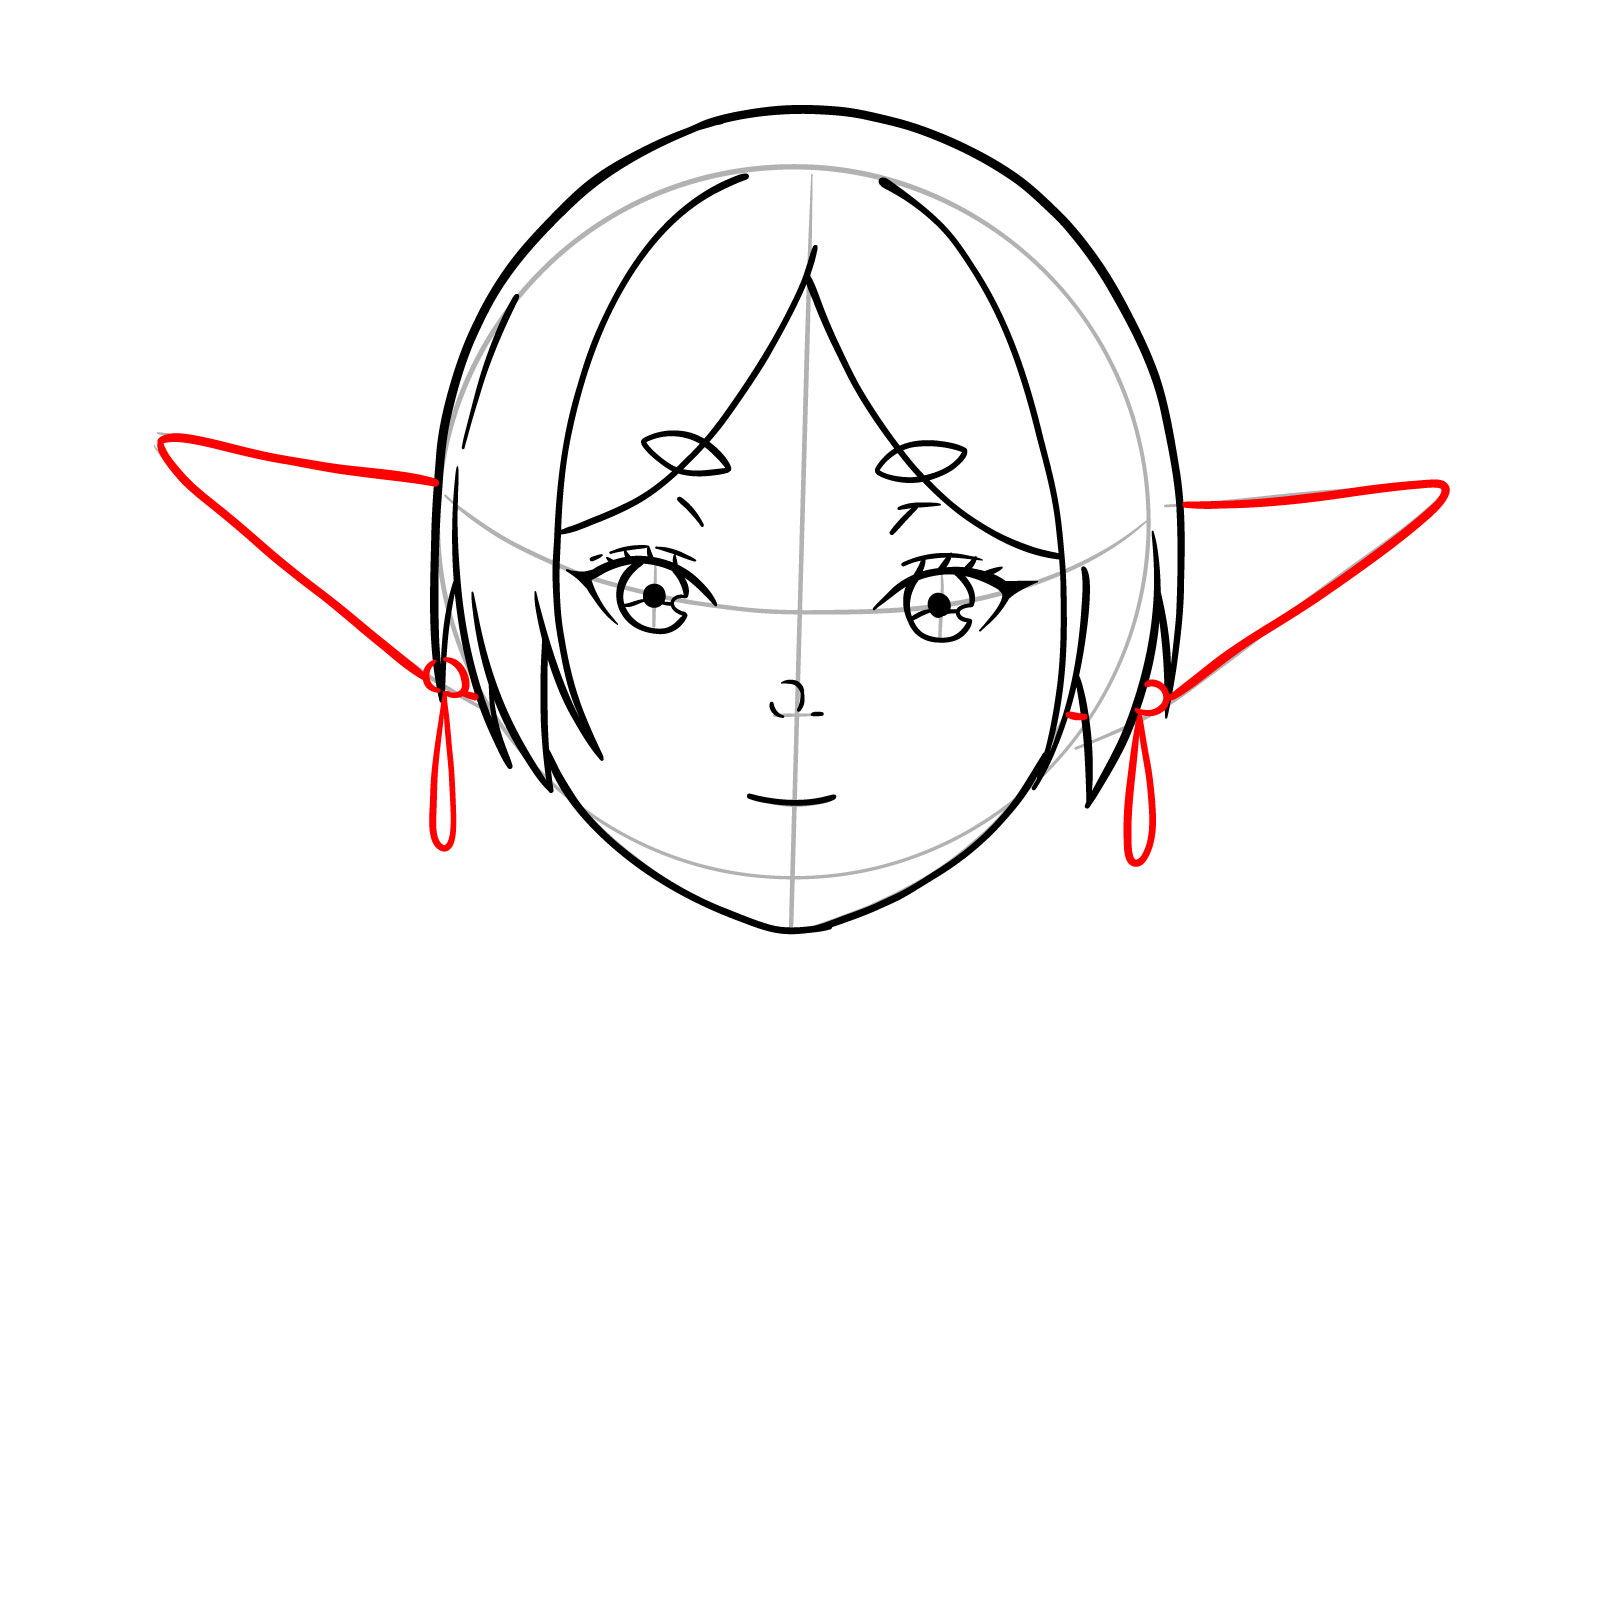
Step 09 – Now let’s give Frieren some elven flair with her ears. Define the ear shapes we made in the beginning. Pop in an earring on each
Perfecting Frieren’s ears with her cool earrings
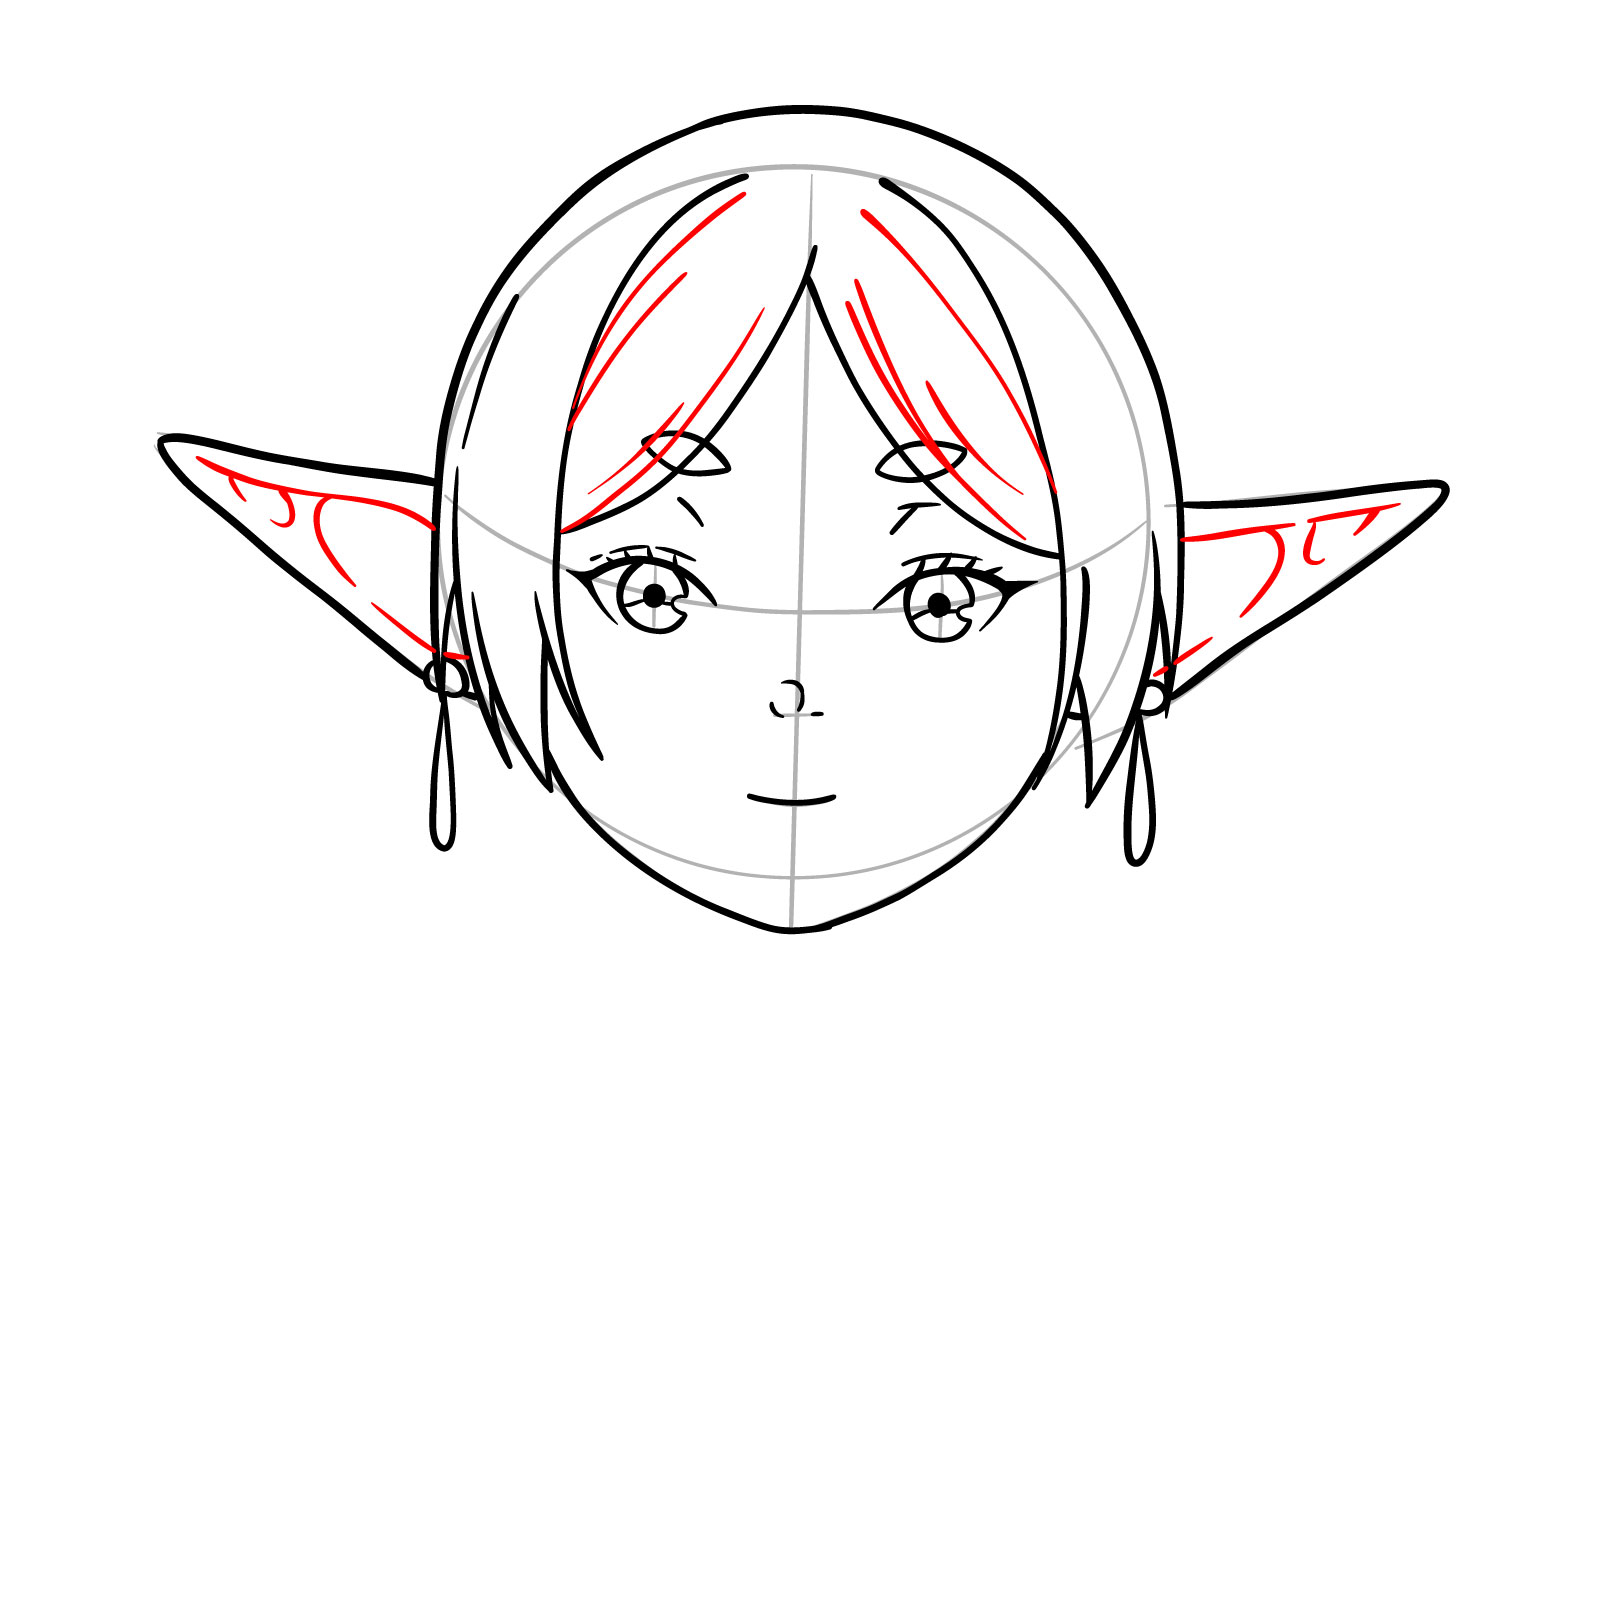
Step 10 – Her hair needs to look more flowy. Sketch more fringe strands. Next, add inner ear lines
Adding hair and ear details
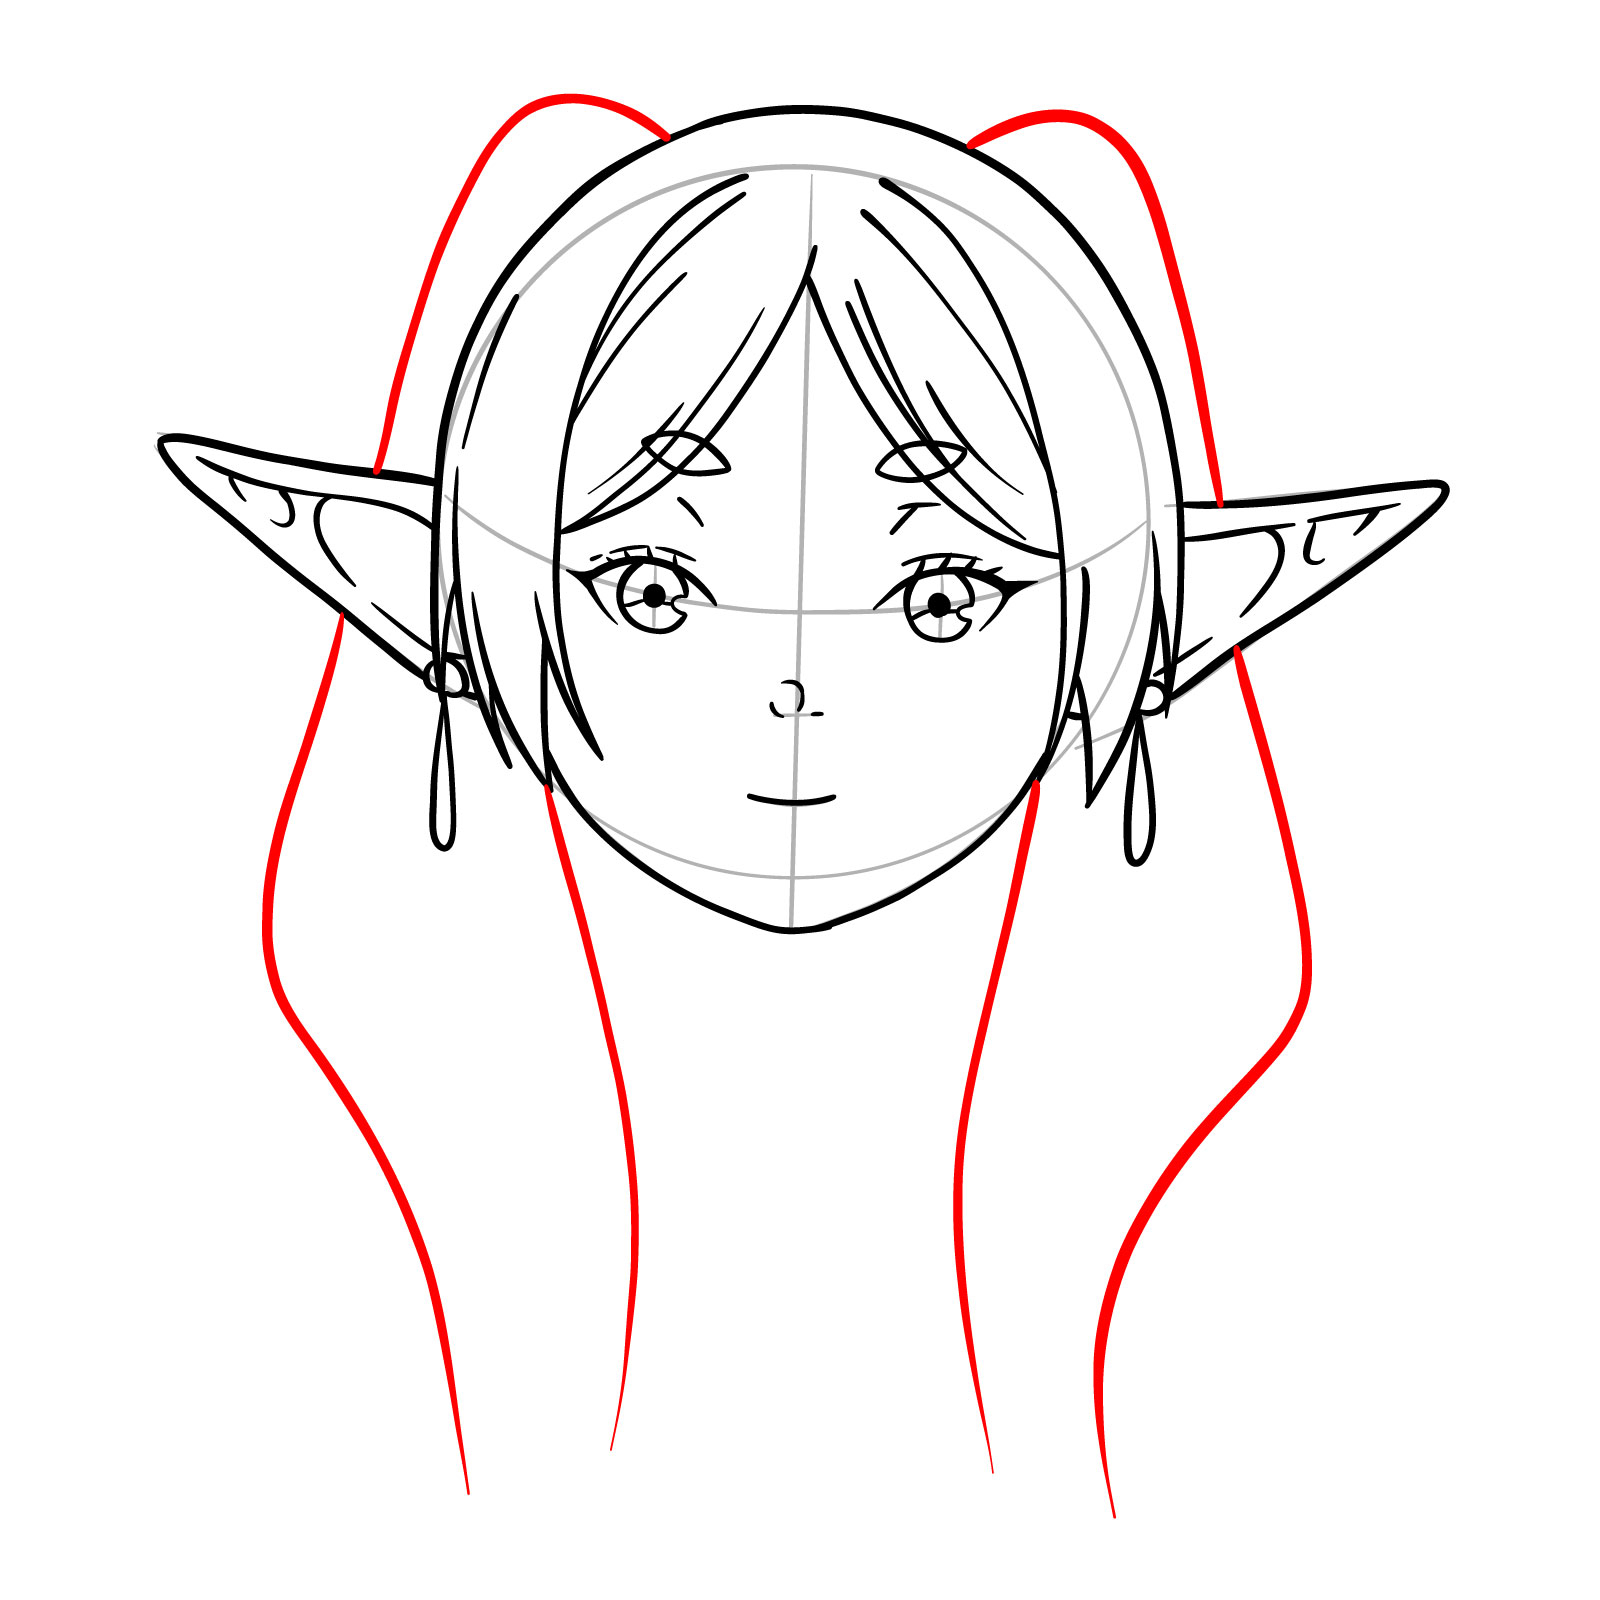
Step 11 – Draw two big, flowing shapes starting from above each ear. These are the start of those iconic pigtails
Starting the outlines for Frieren’s signature pigtails
Step 12 – Add lines inside those big shapes to give the pigtails some texture and life. It’s all about making them look bouncy and full
Filling in pigtails with details
Step 13 – Draw the shape shown in the image for for her neck and the rounded collar of her outfit
Sketching in her neck and collar
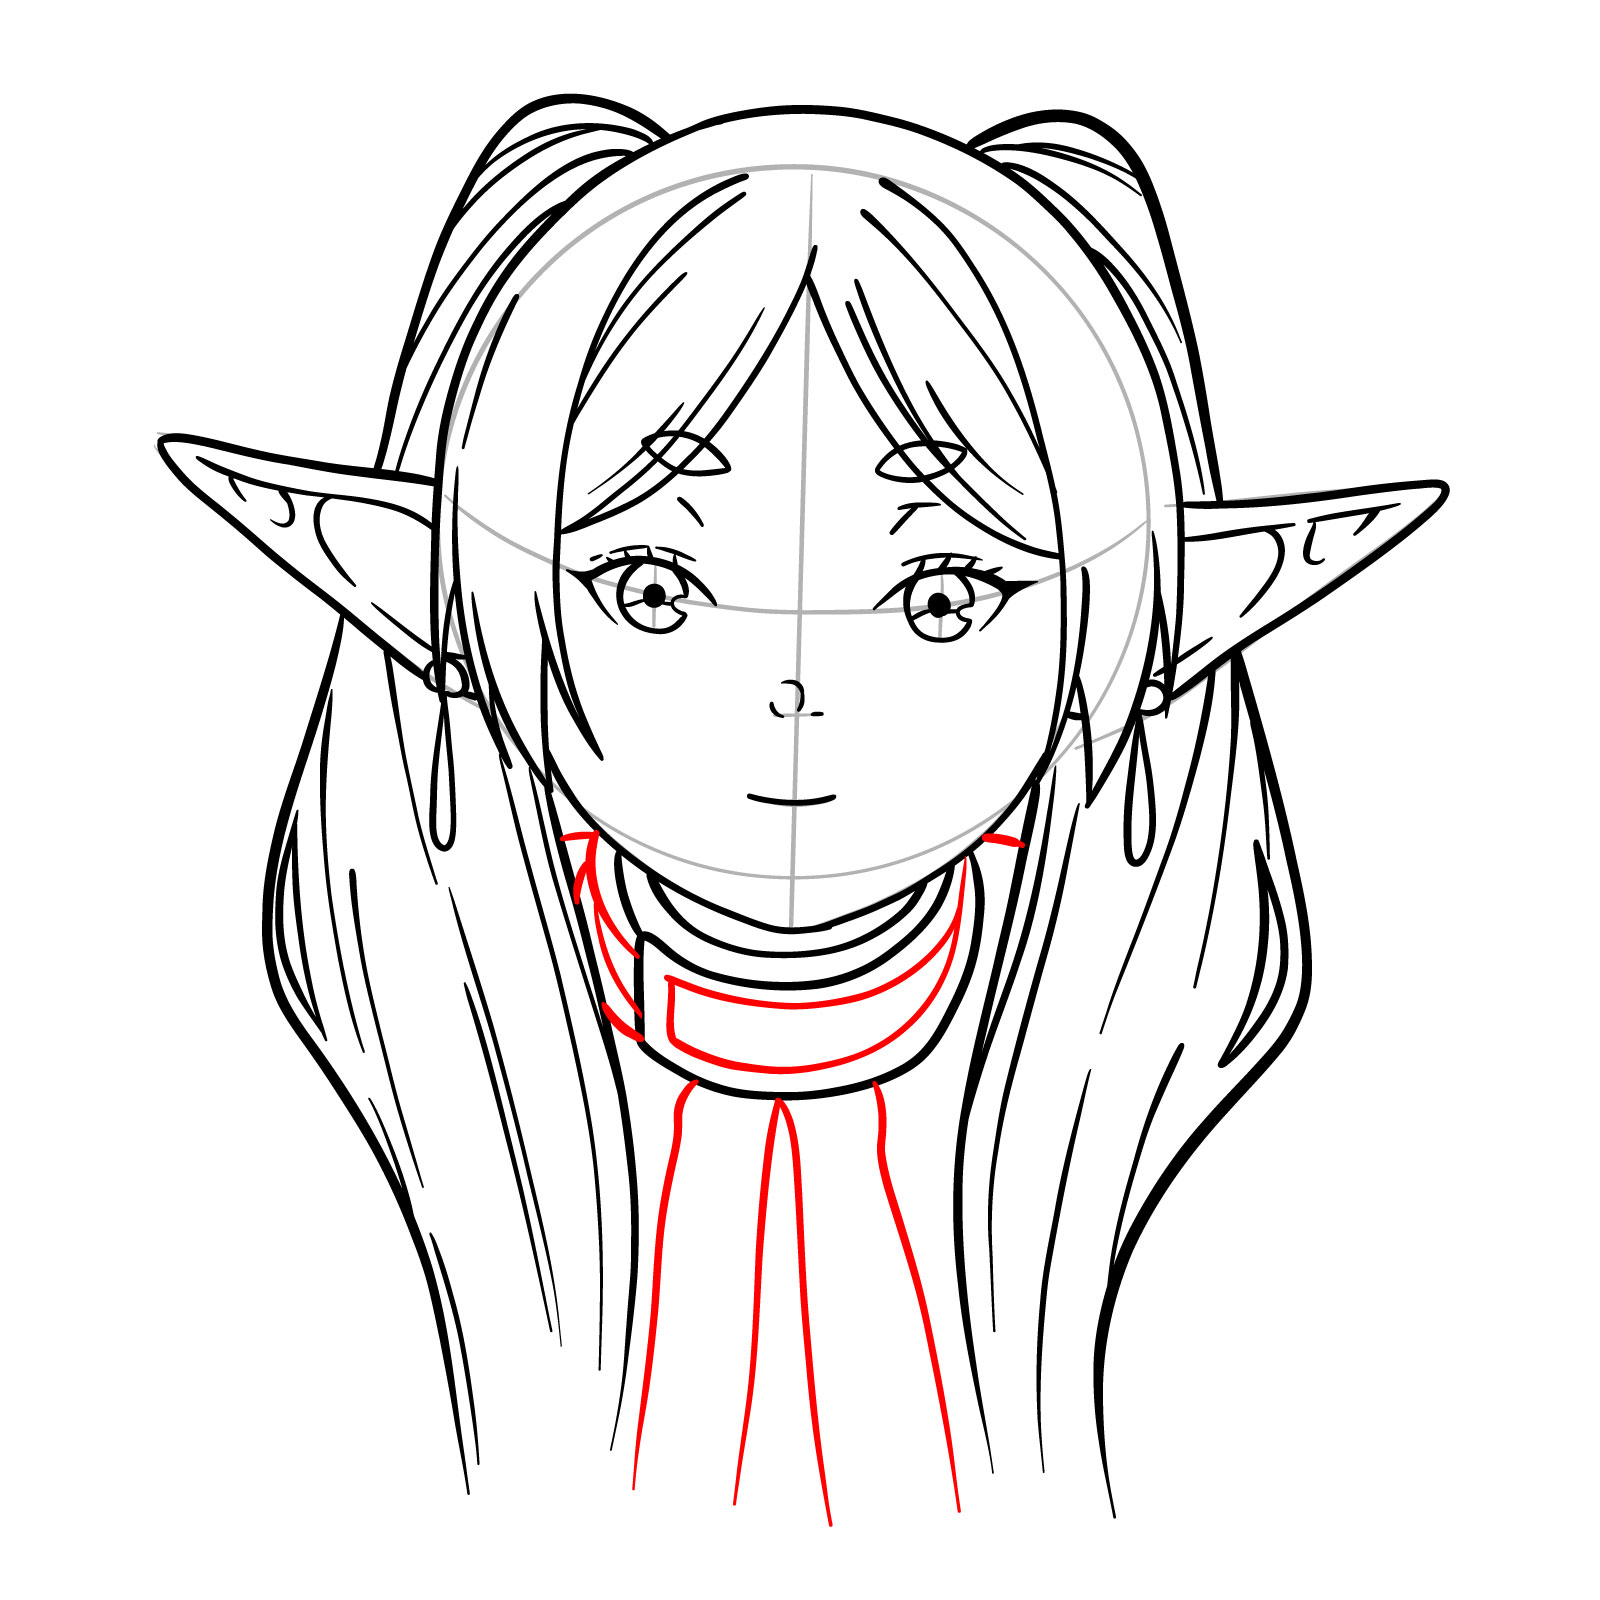
Step 14 – For this step, draw the details of her clothes
Adding character to the top of the outfit
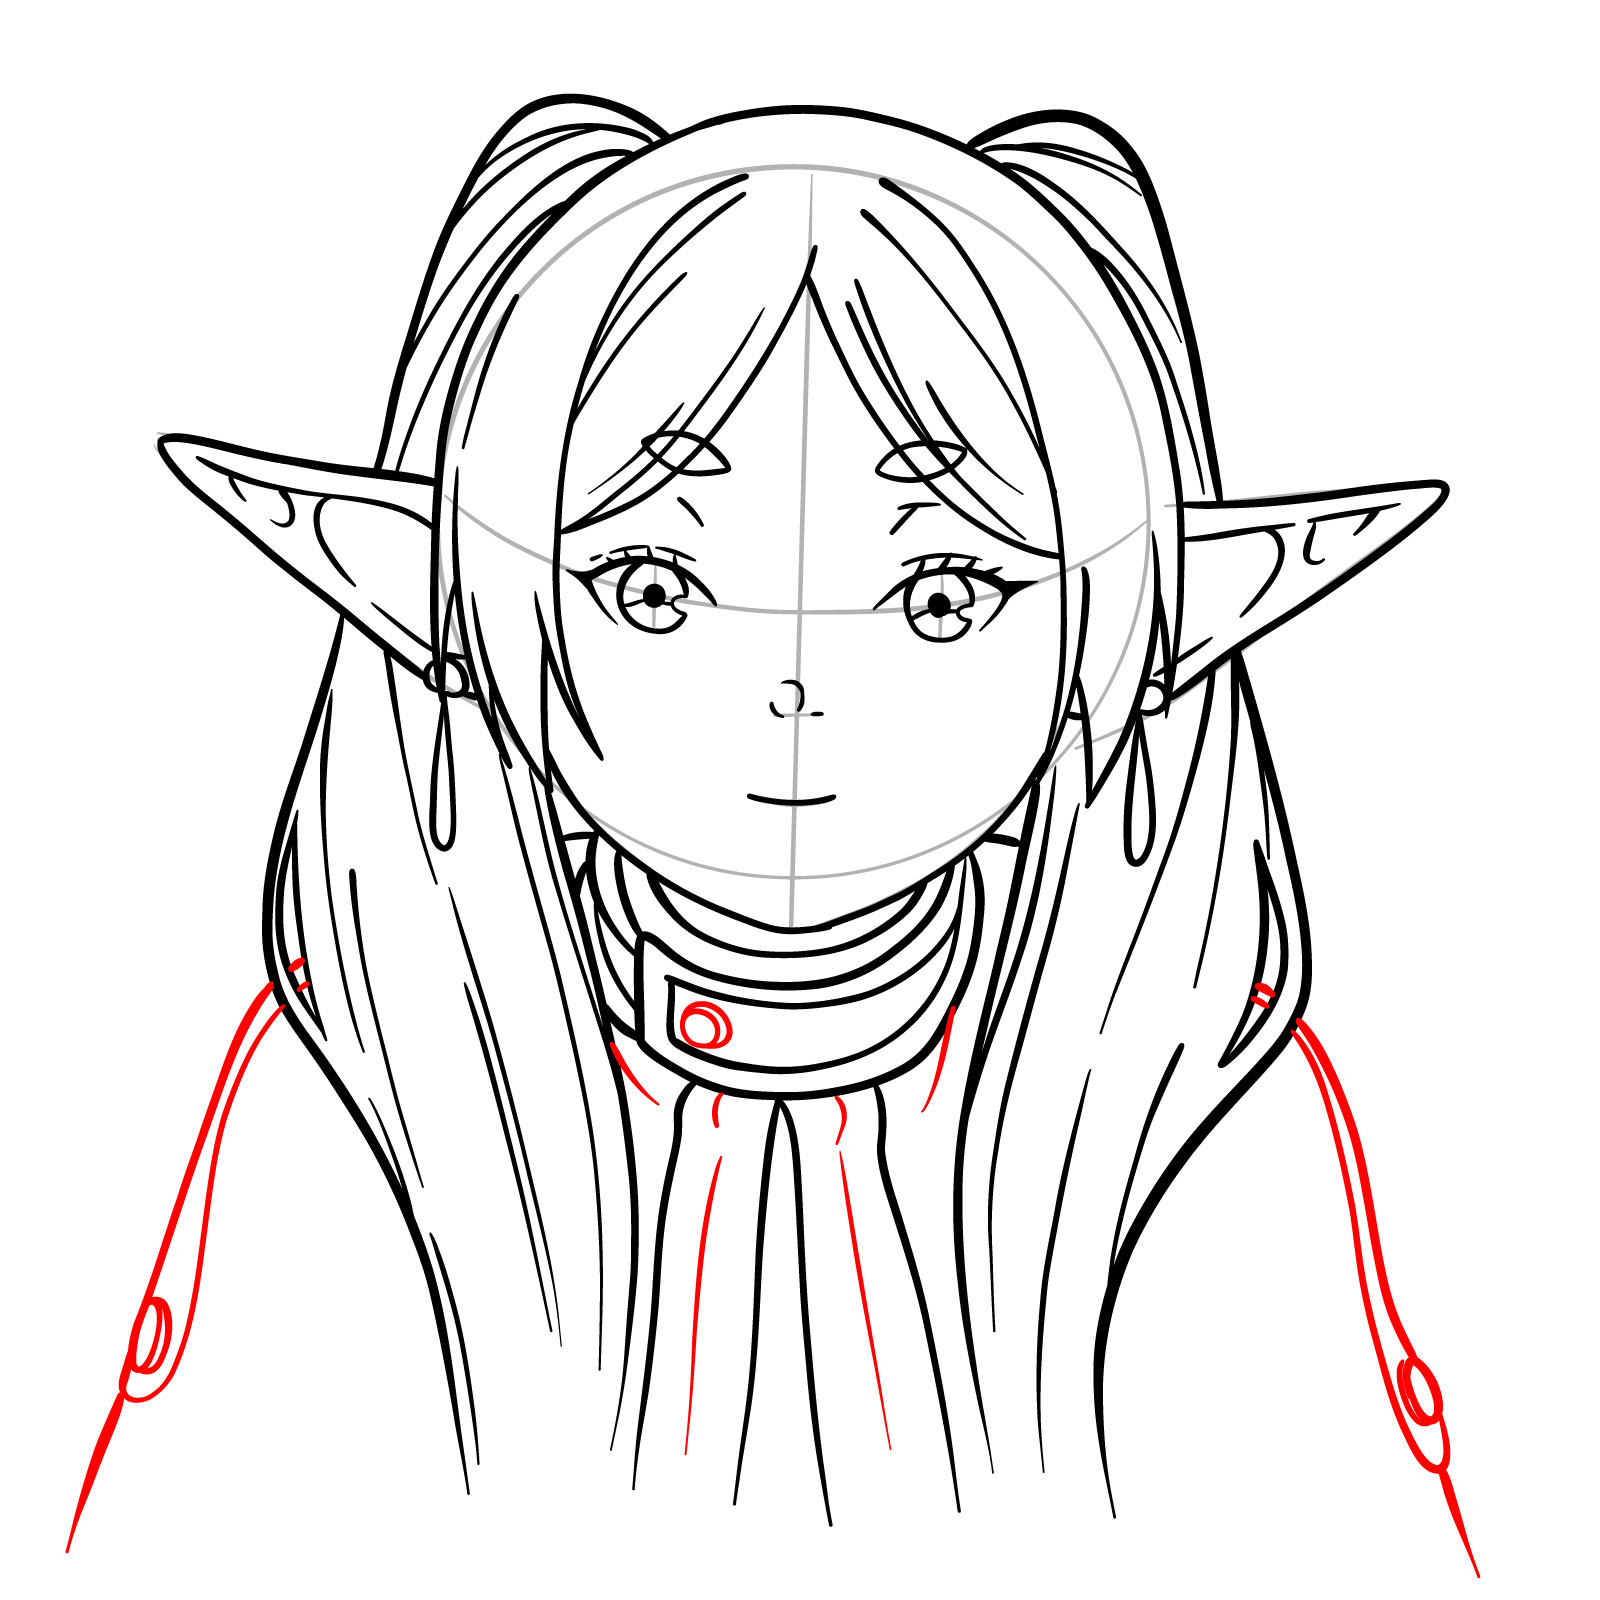
Step 15 – Almost there! Add her shoulders and all the little touches that make her outfit look awesome
Putting the final details on Frieren’s outfit
Step 16 – And that’s a wrap! Every step you’ve followed adds up to this detailed final drawing of Frieren. Take a moment to check over your masterpiece and make any little tweaks. Give yourself a pat on the back — you’ve mastered drawing Frieren’s face
The final Frieren face drawing
Frieren’s Face – 3/4 View
Easy step-by-step drawing of the face of Frieren in 3/4
Ready to tackle a new angle? This second guide will show you how to draw Frieren’s face in a dynamic 3/4 view. Through 17 detailed steps, we’ll go from a basic sketch to a fully proportioned drawing.
Starting with the foundational lines for proper head structure, you’ll then map out the facial features and dive into detailing the sketch.
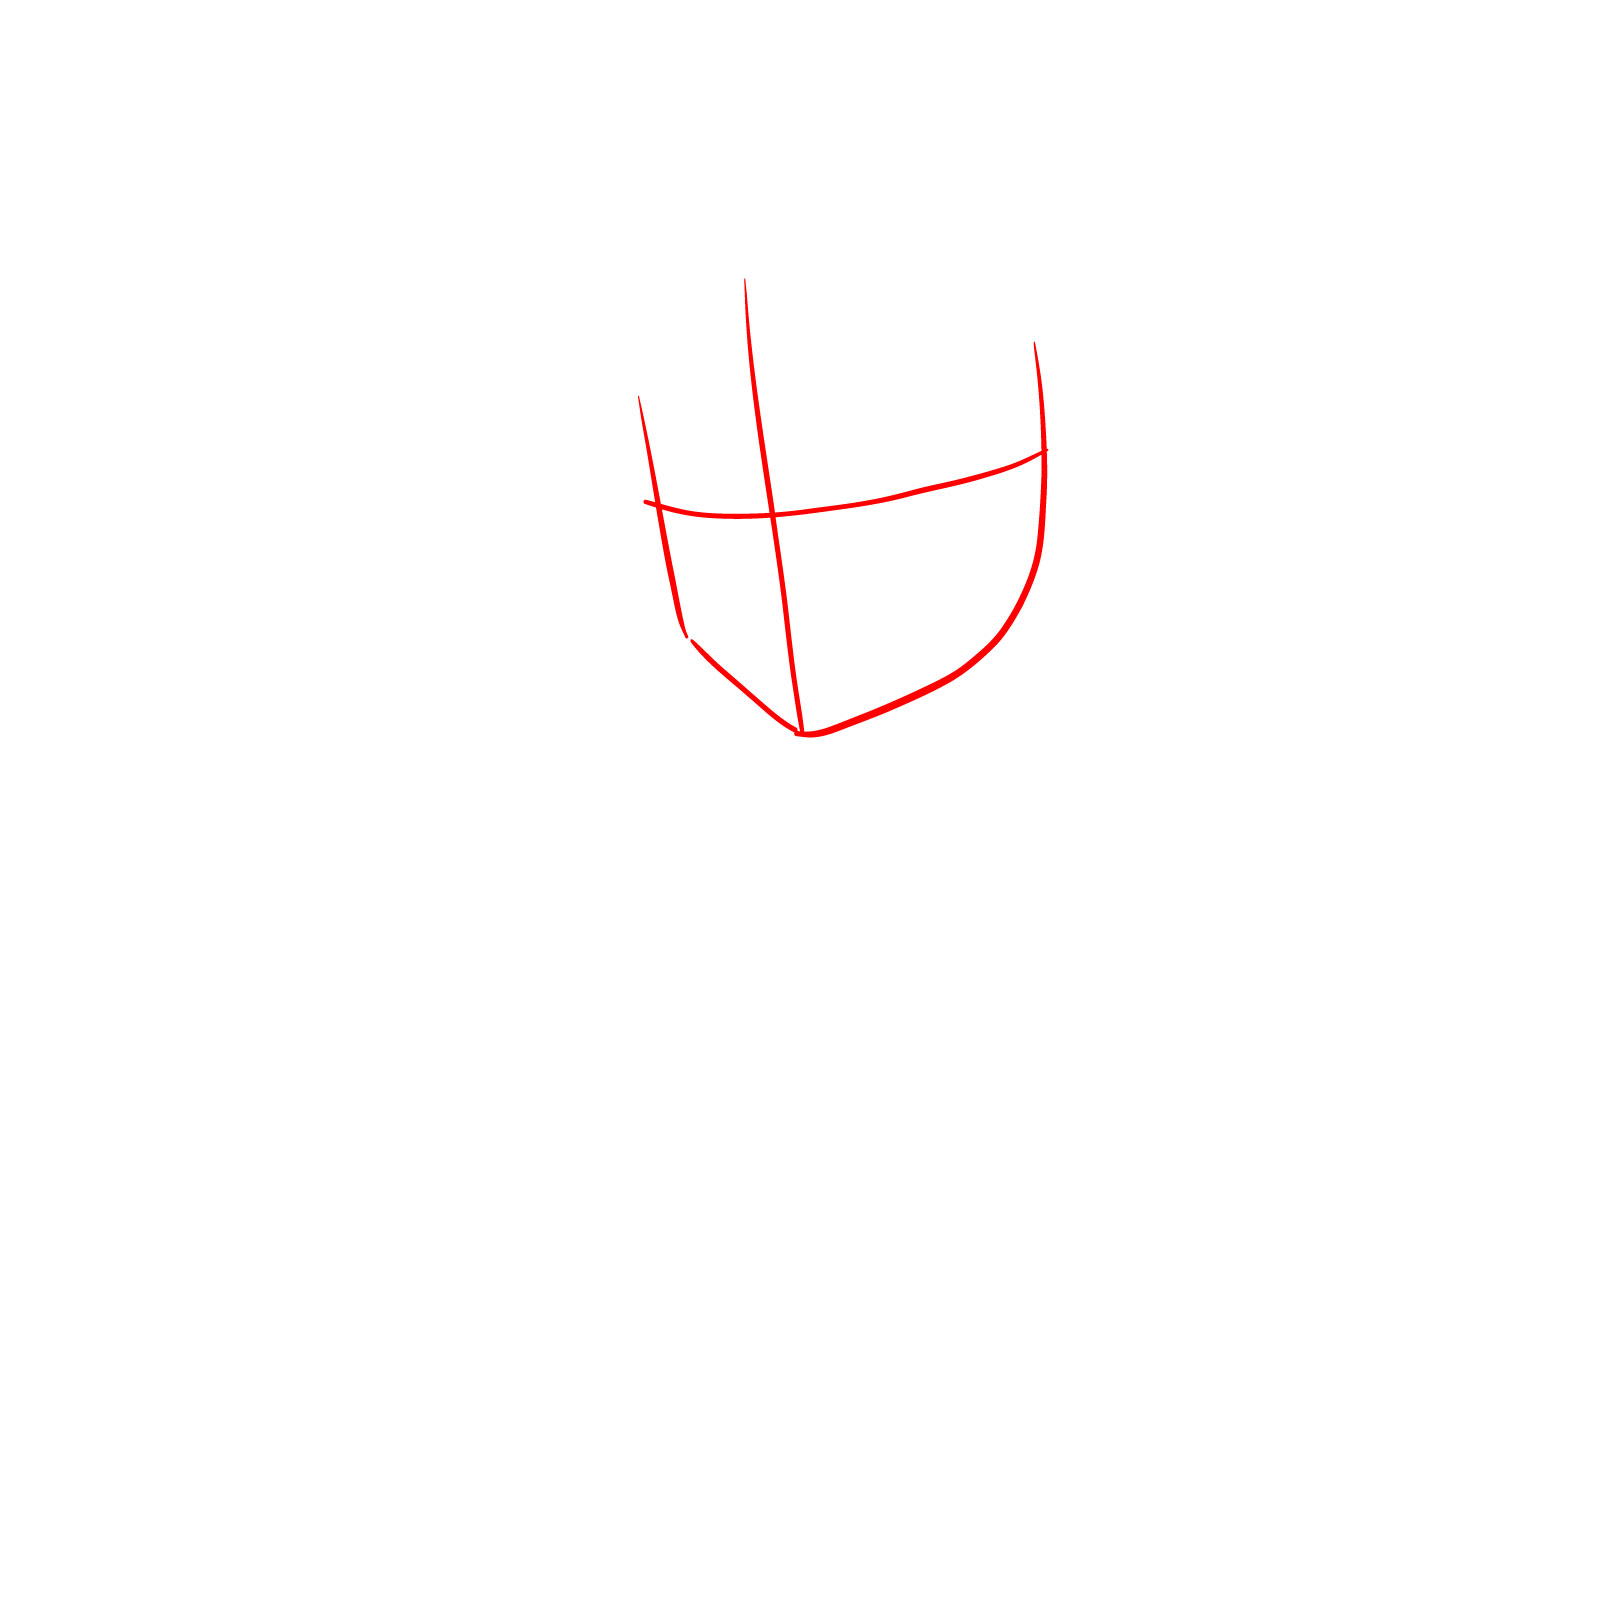
Step 01 – Let’s get going by drawing a shape of the face frame. Cross it with a vertical and a horizontal line to help us place her features just right
Starting off with the basic face shape
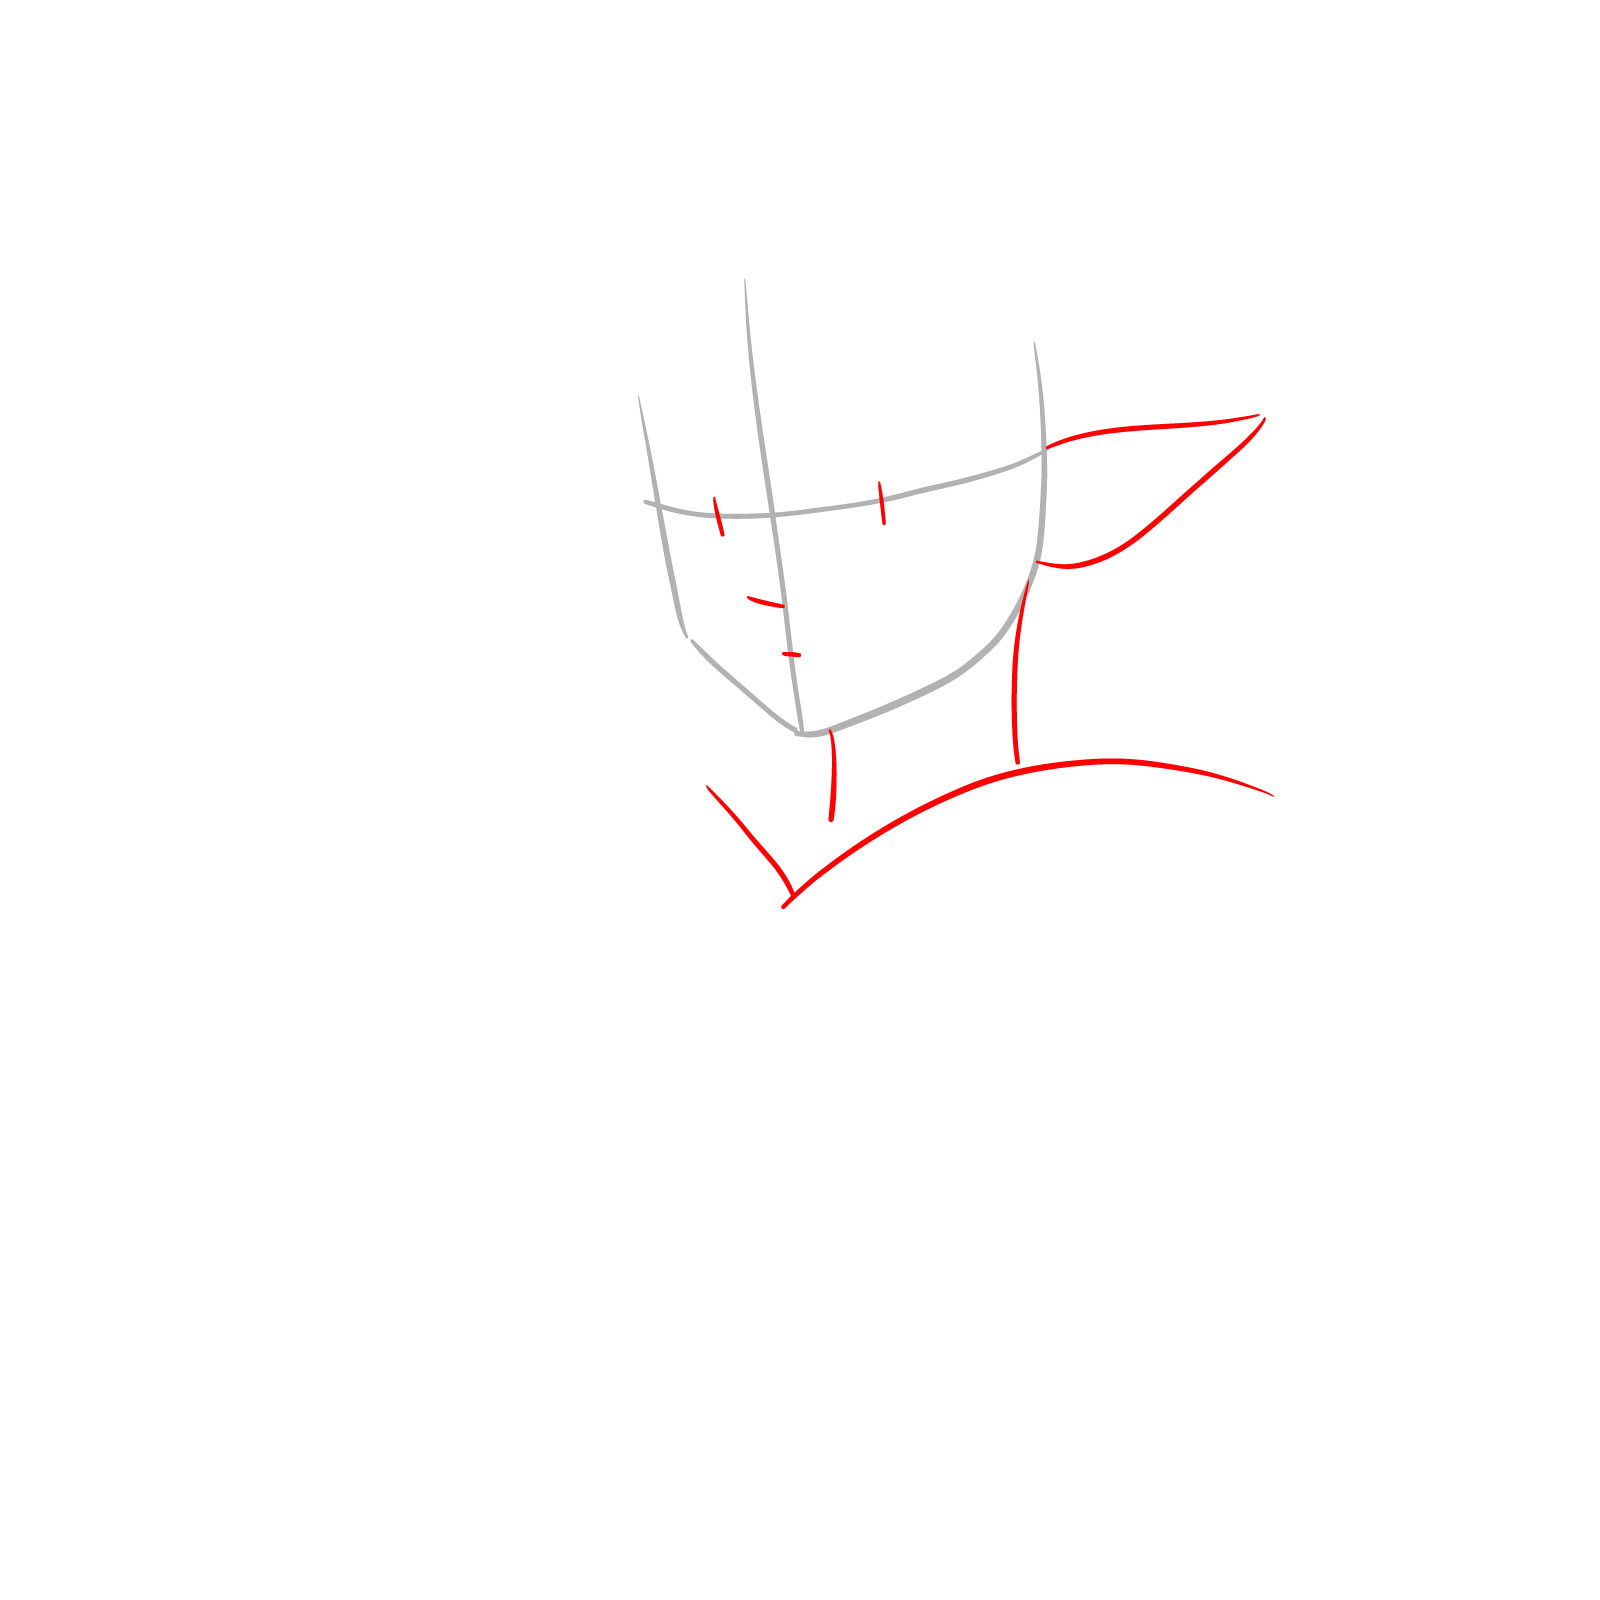
Step 02 – On that simple face shape, mark where the eyes, nose, and mouth will go. Don’t forget to draw in her left ear shape and a basic shape for the neck
Mapping Frieren’s features and neck in her 3/4 view portrait
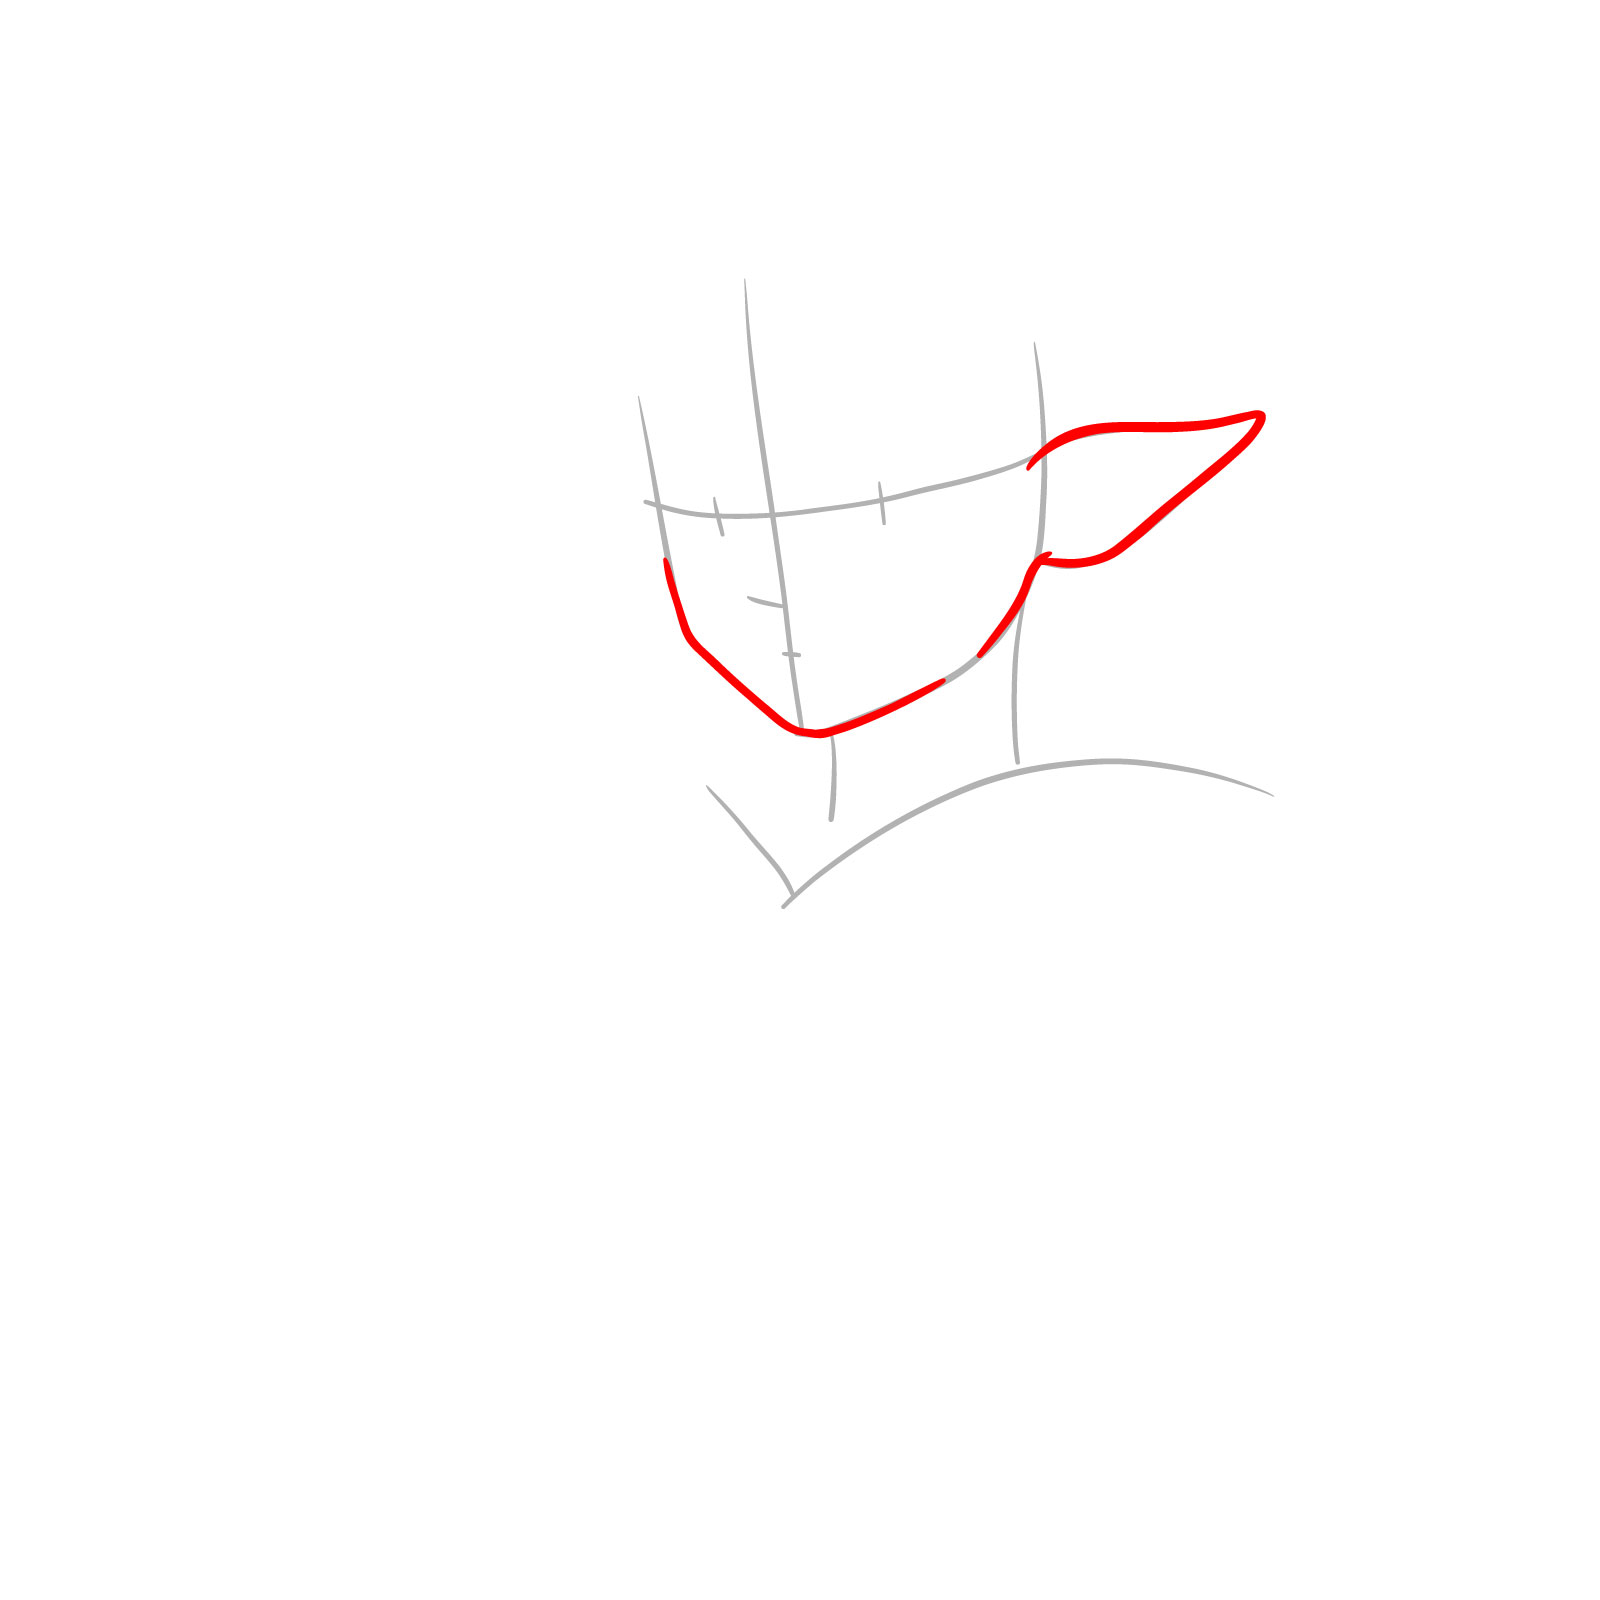
Step 03 – Give the jawline a bit more shape for a defined look. Get the ear’s outline done too, making sure it lines up with her face
Sharpening Frieren’s jaw and ear in her 3/4 view sketch
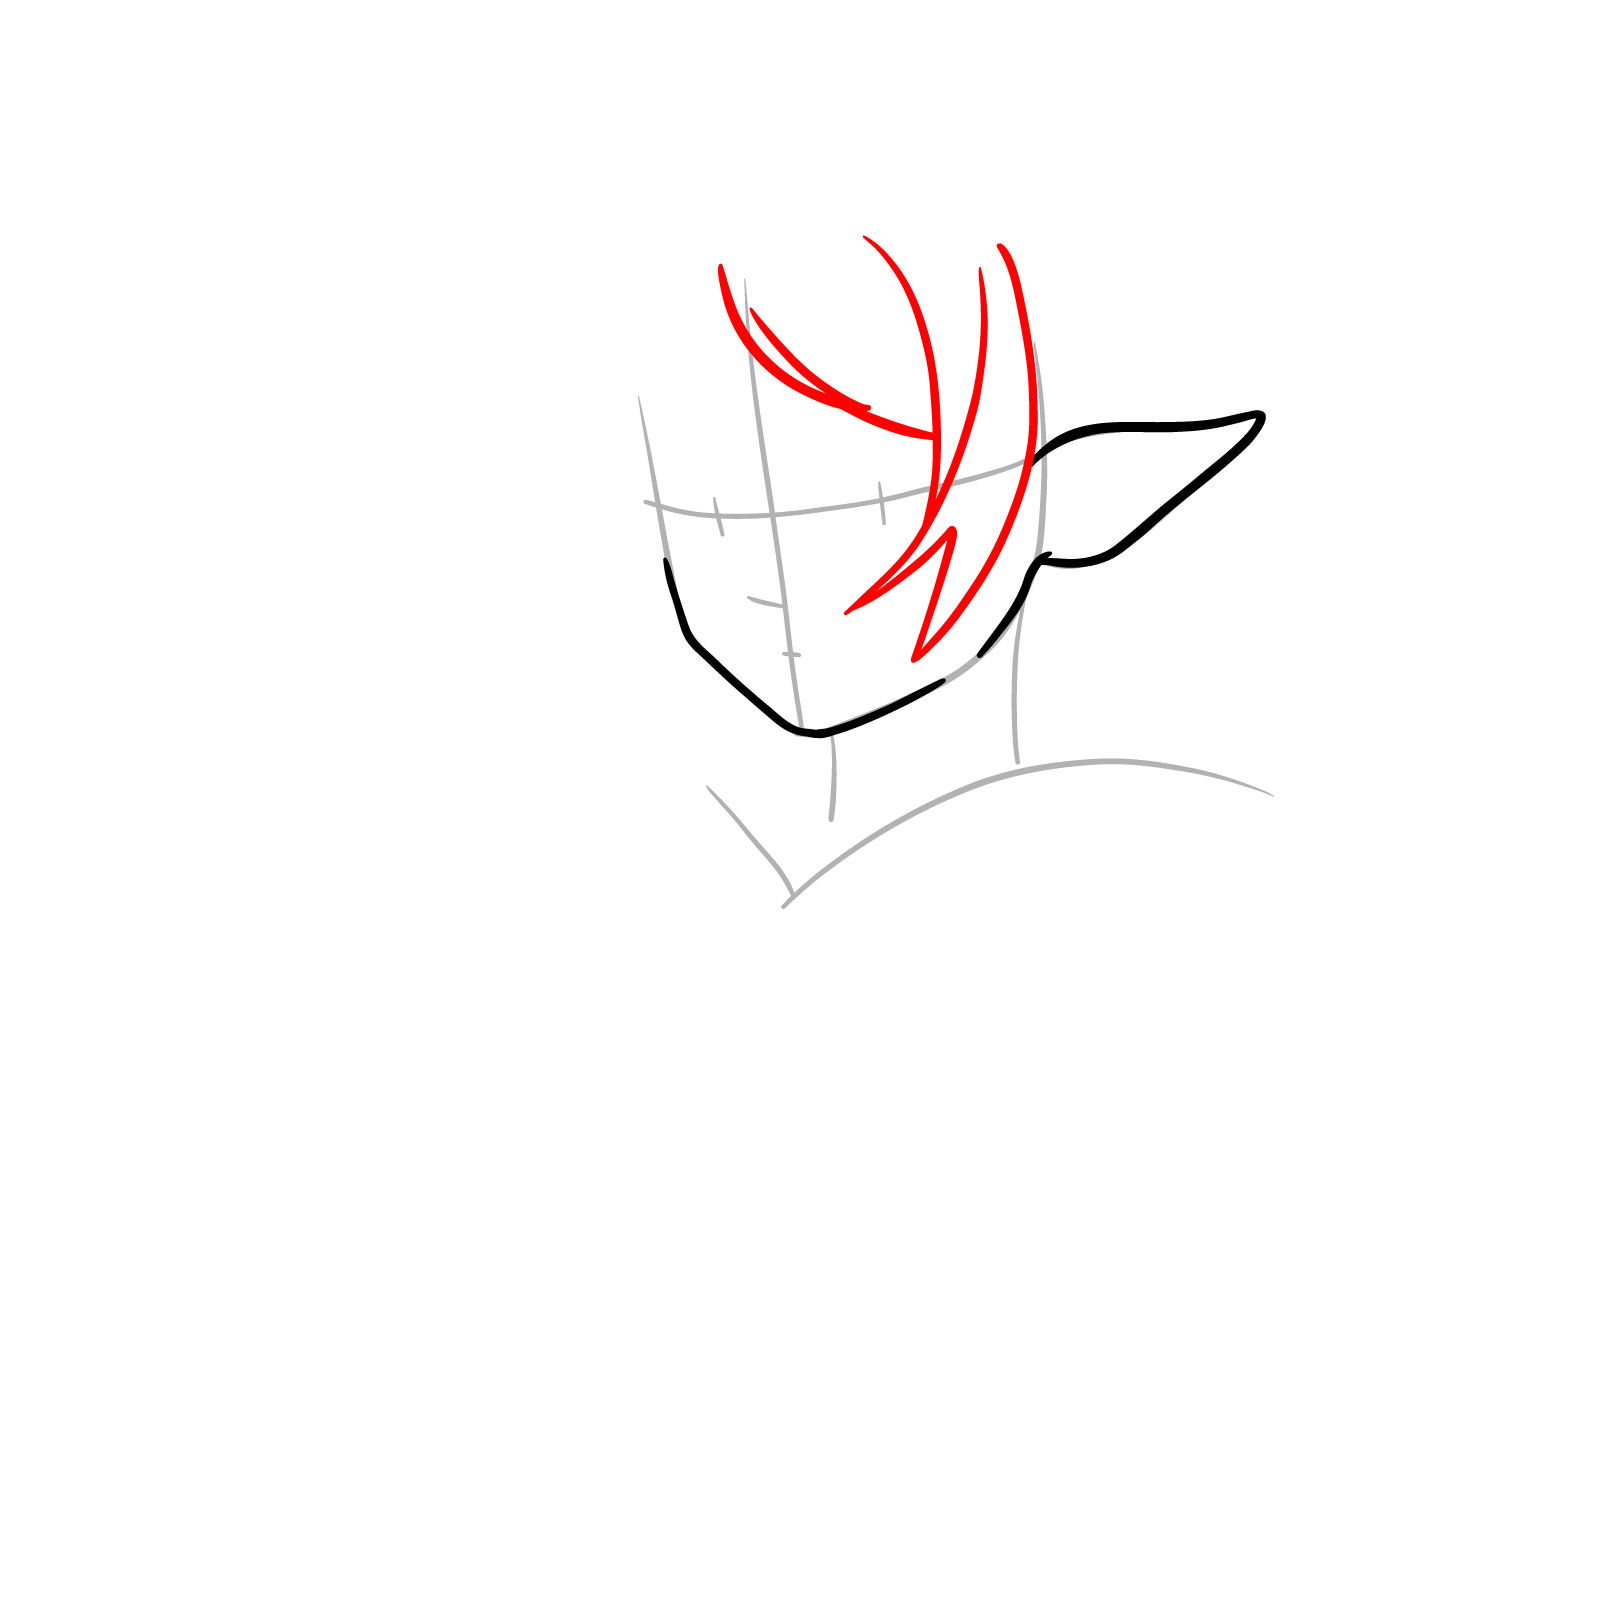
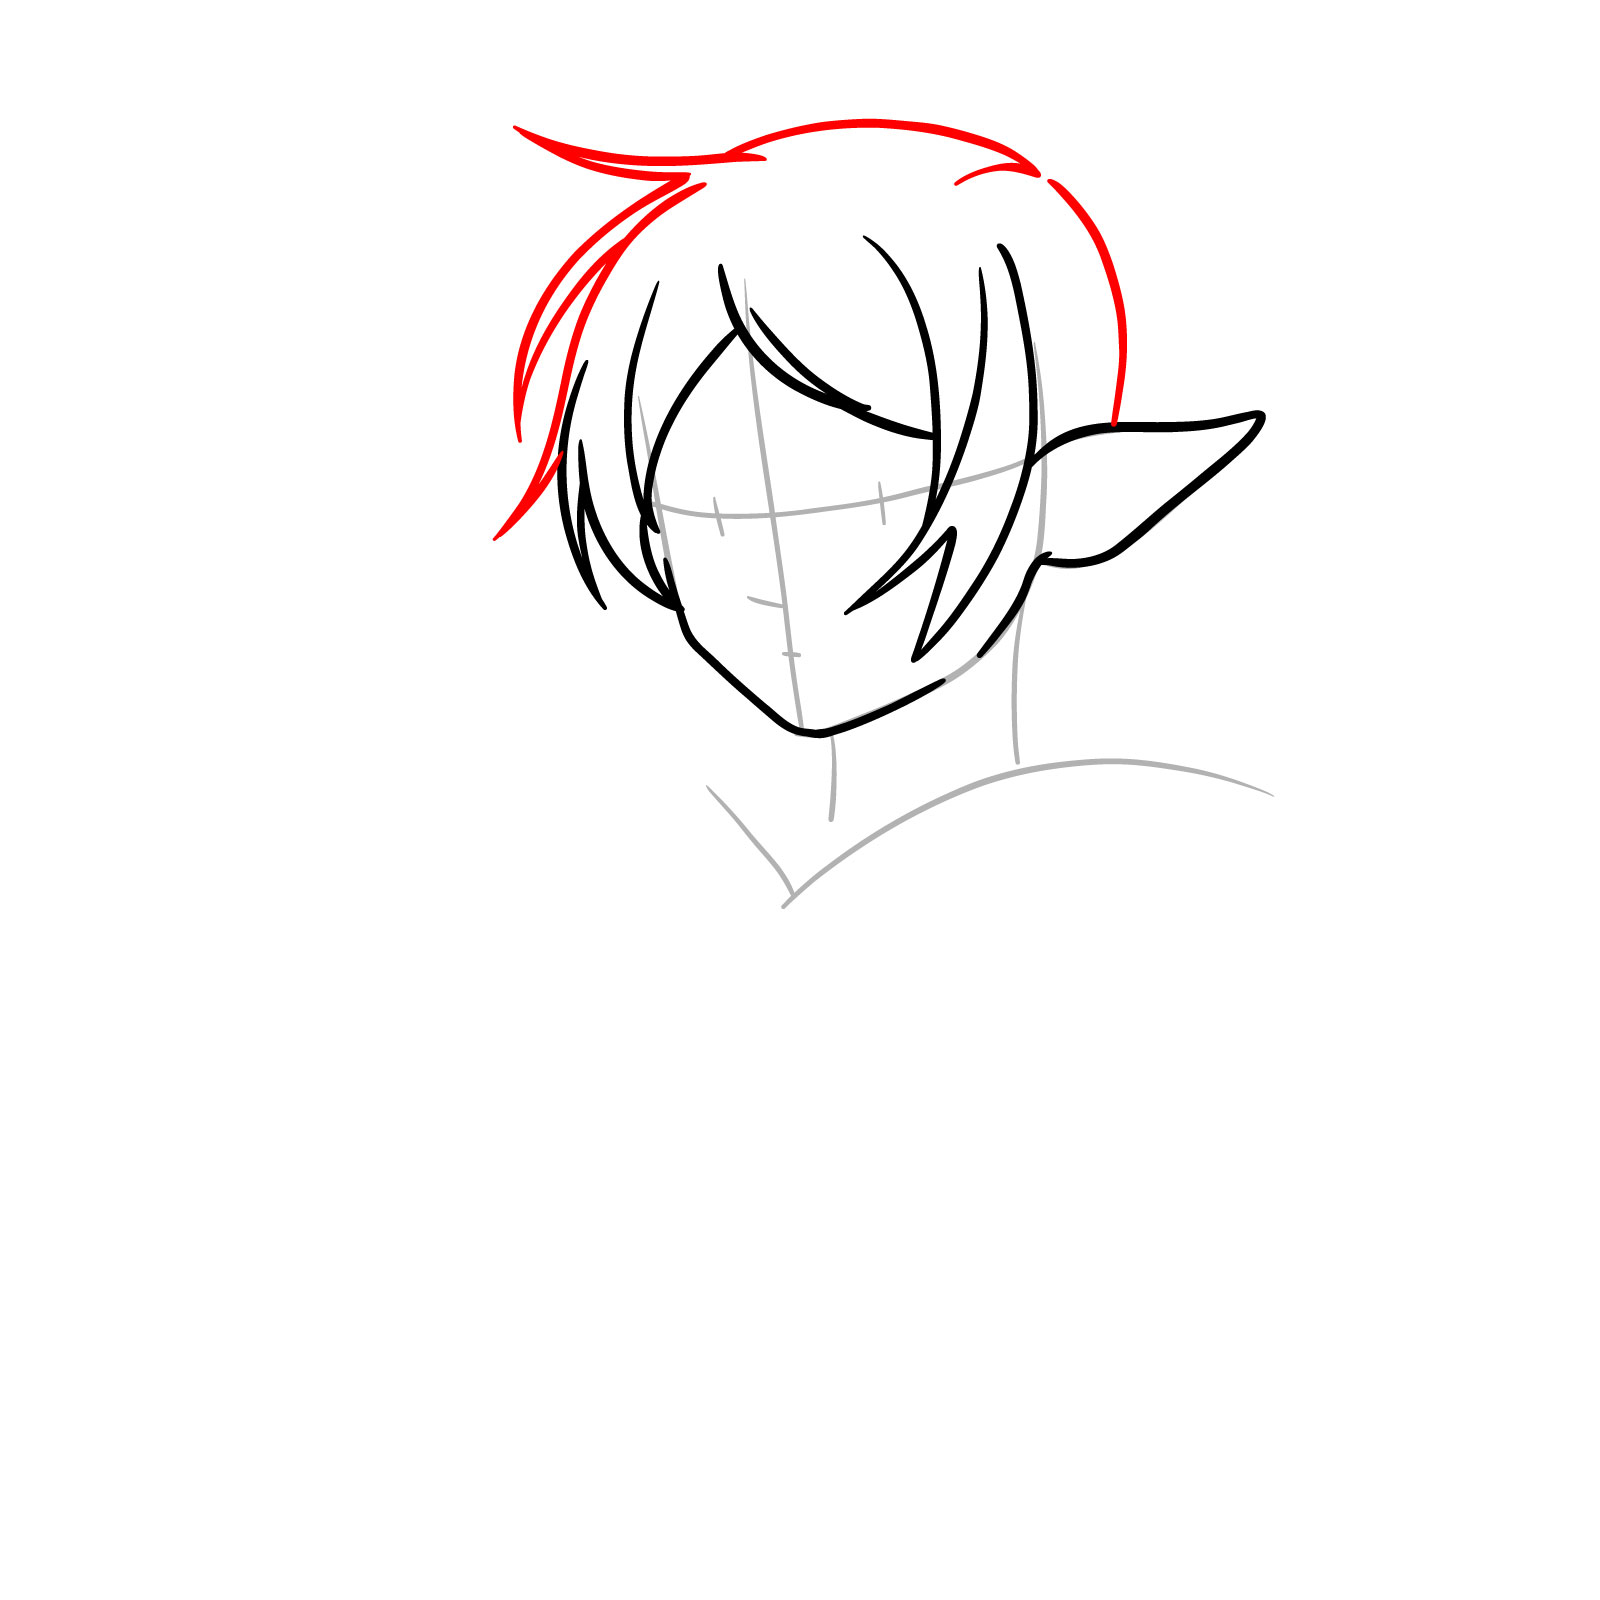
Step 04 – Time for hair again! Start with the fringe on the left, making it sweep over her forehead. This will start to show off her signature style
Crafting the fringe and bangs
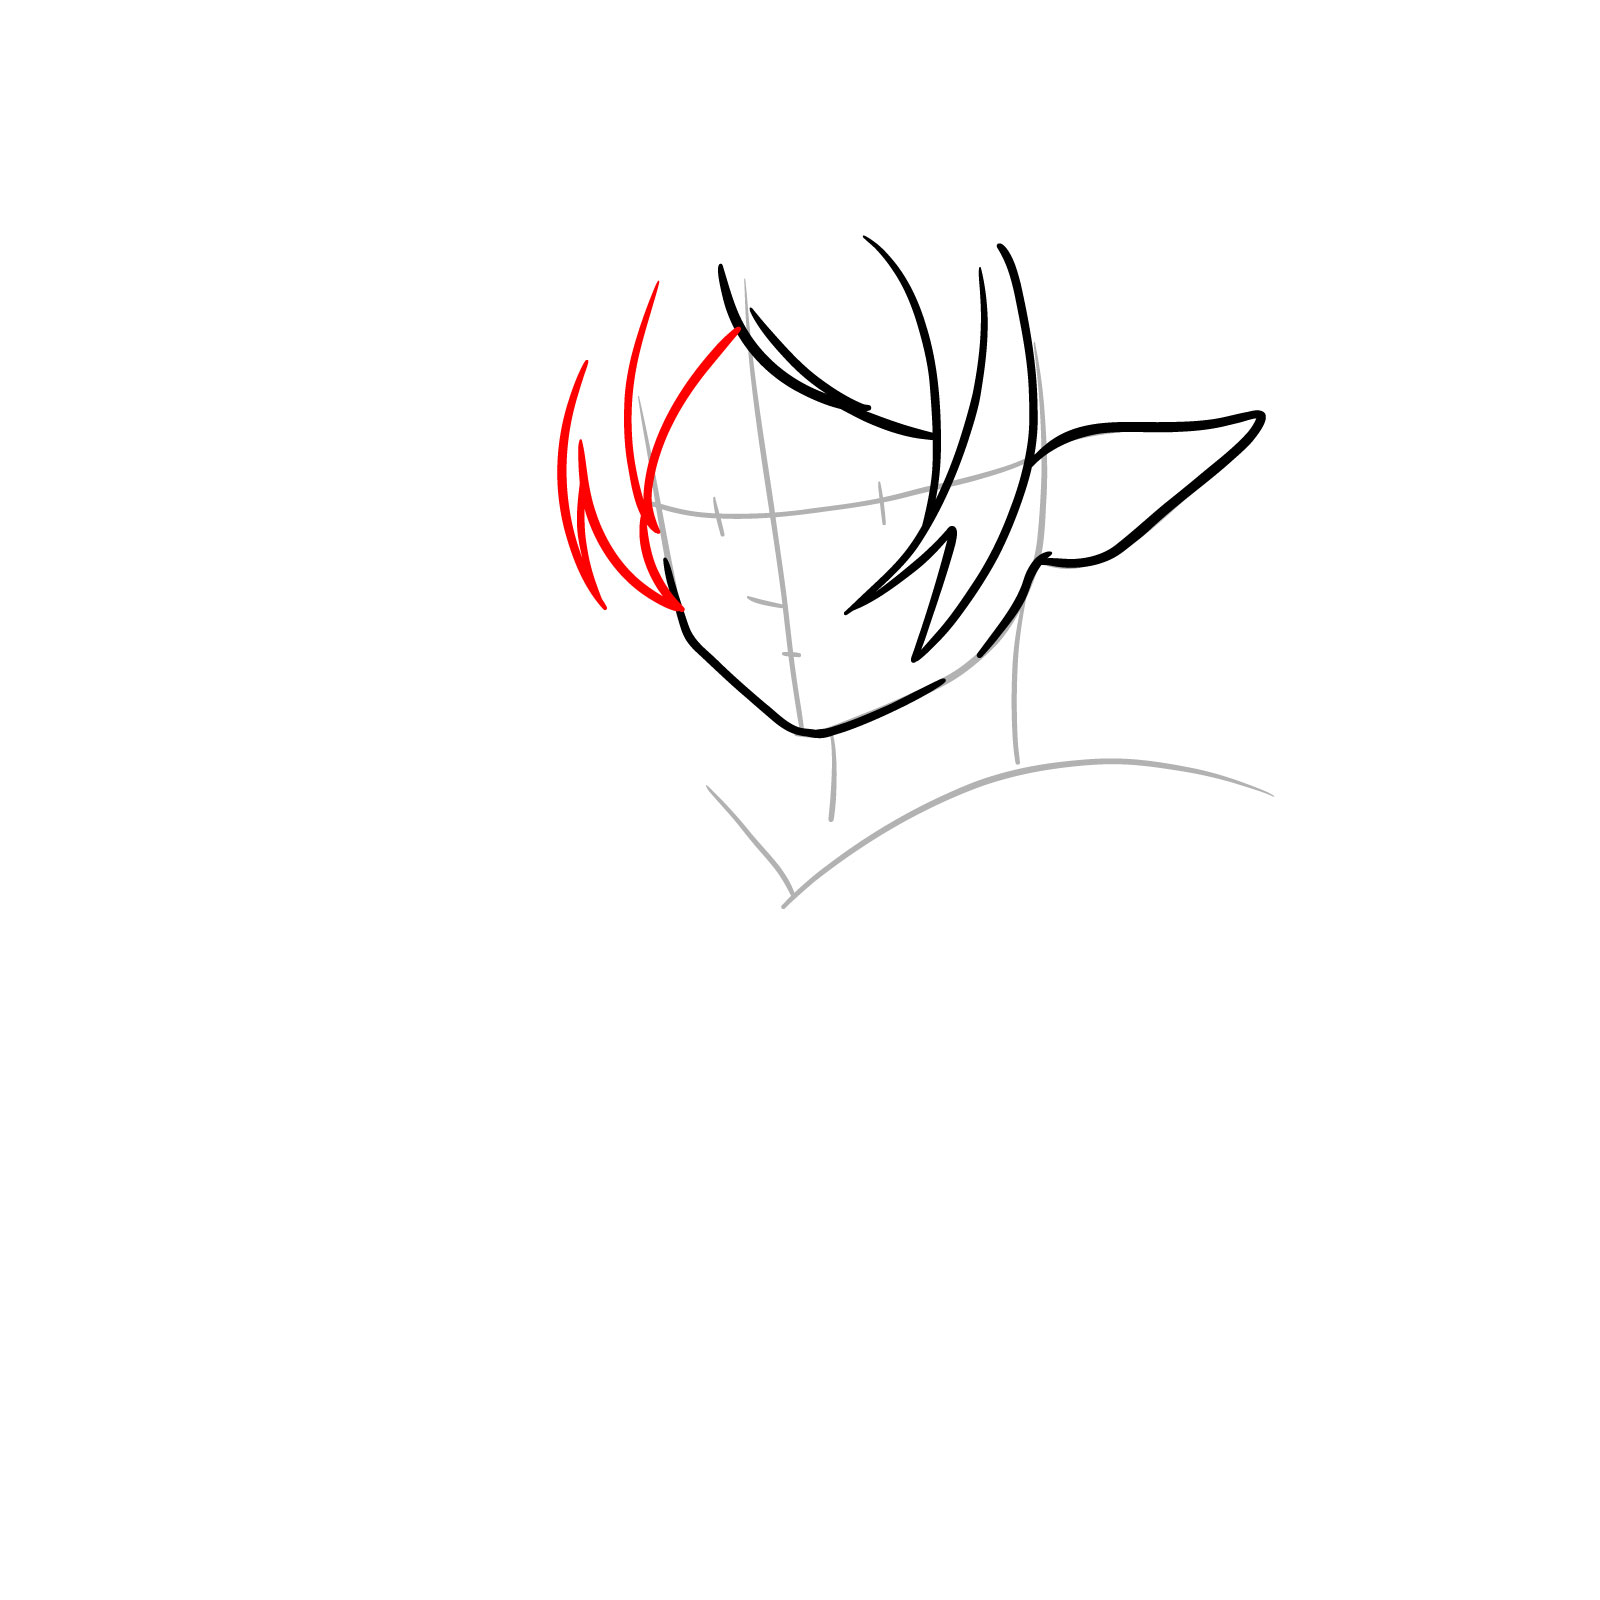
Step 05 – Do the same on the right, mirroring the left side but keeping in mind the perspective and the direction her hair naturally flows
Completing the fringe on the right
Step 06 – Now let’s get the rest of her hair in, framing her face/head nicely. Think about how it falls and moves to get it looking just right
Bringing together Frieren’s hairstyle
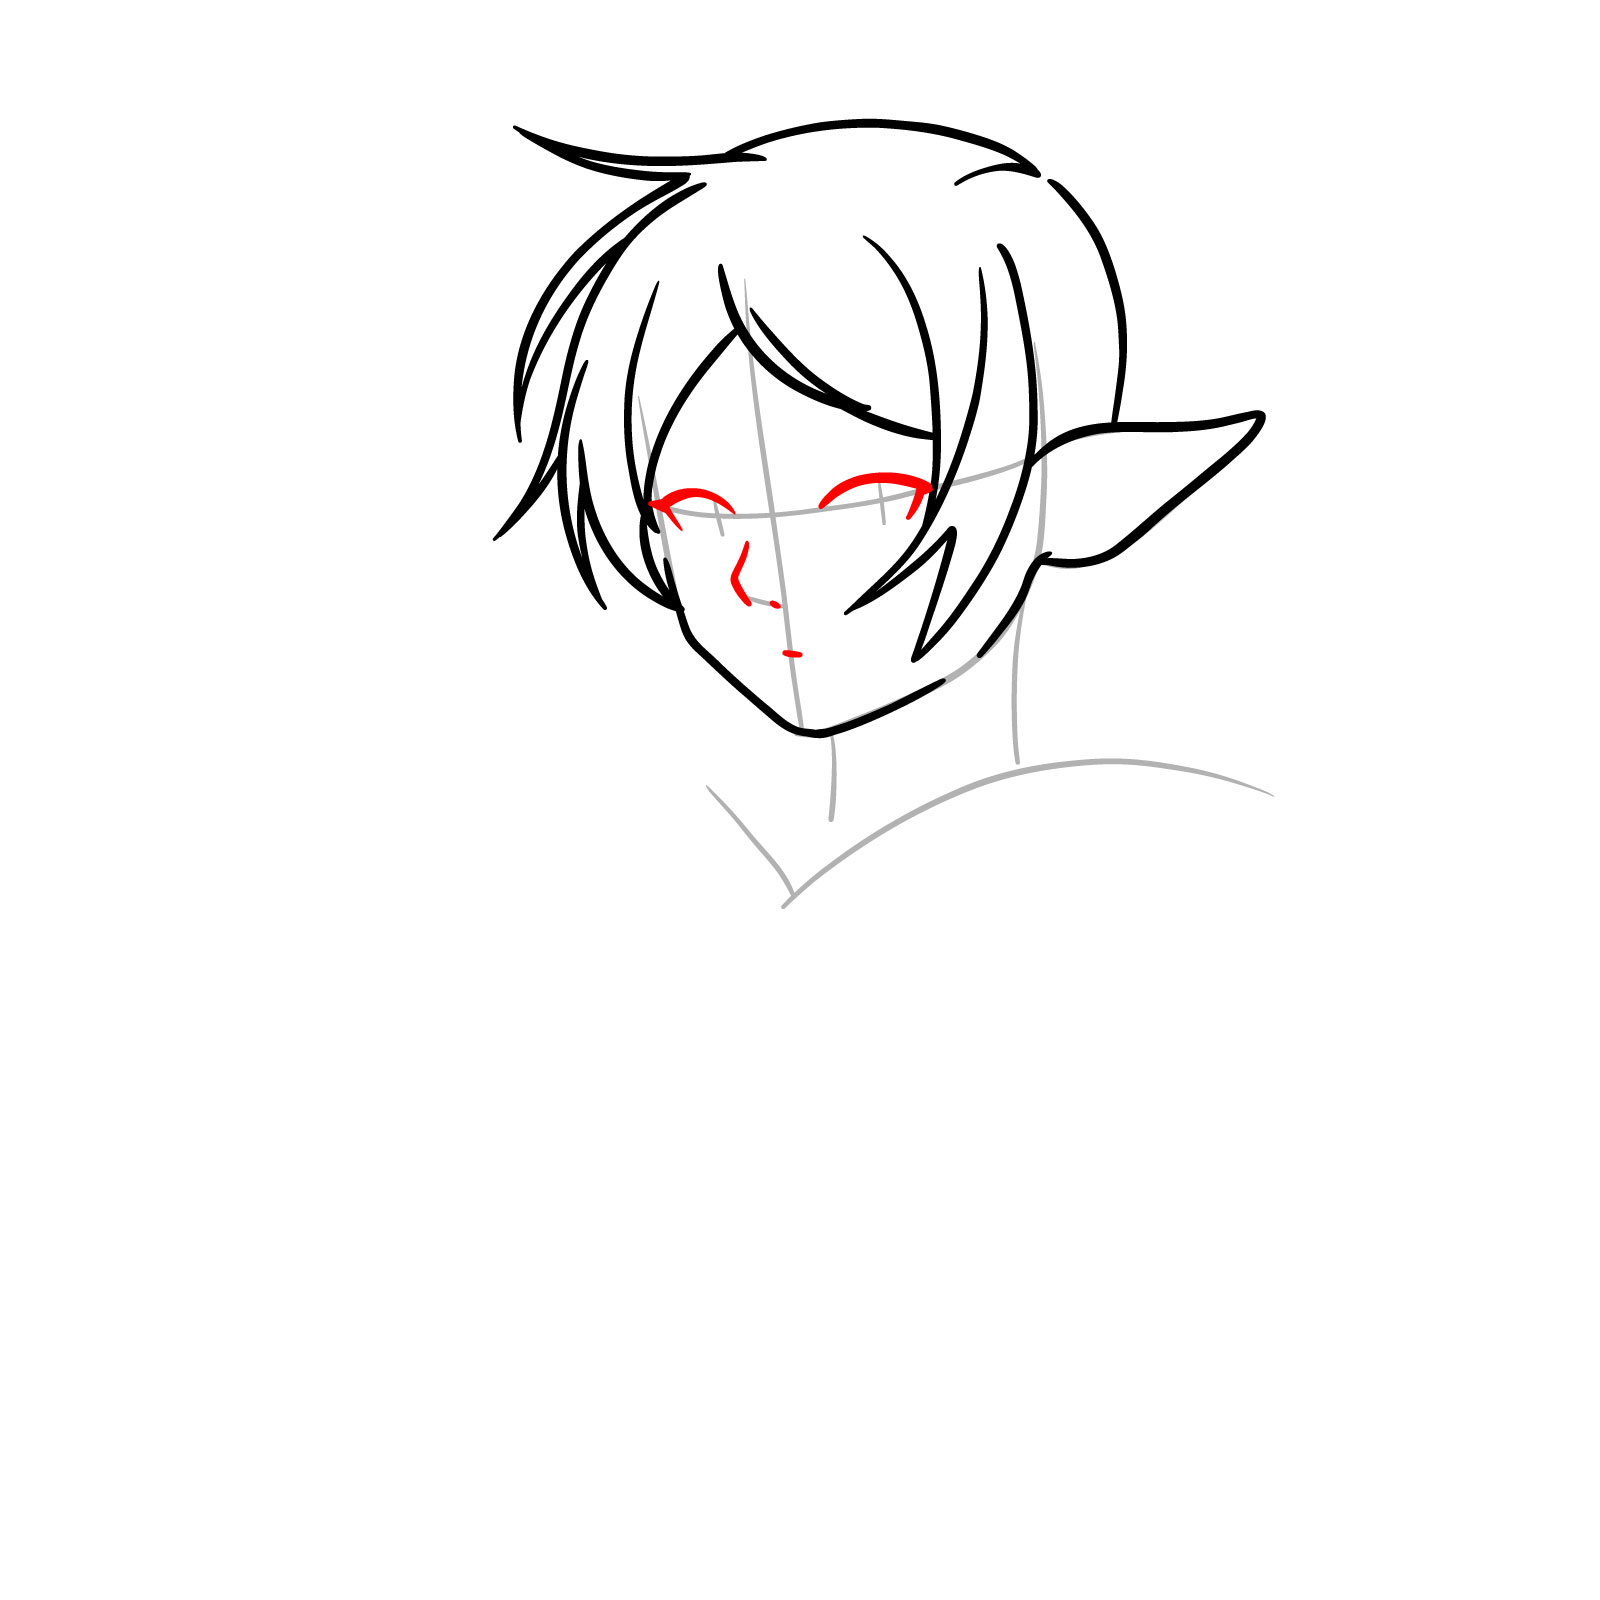
Step 07 – Sketch the eyelids with soft bold curves, draw in the nose, and get the shape of the mouth down, keeping her expression in mind
Defining the eyelids, nose, and mouth
Step 08 – Time for the eyes – add the eyeballs and a couple of lashes for each side. Remember the sparkle with those little highlight spaces
Adding life to Frieren’s eyes with pupils and lashes
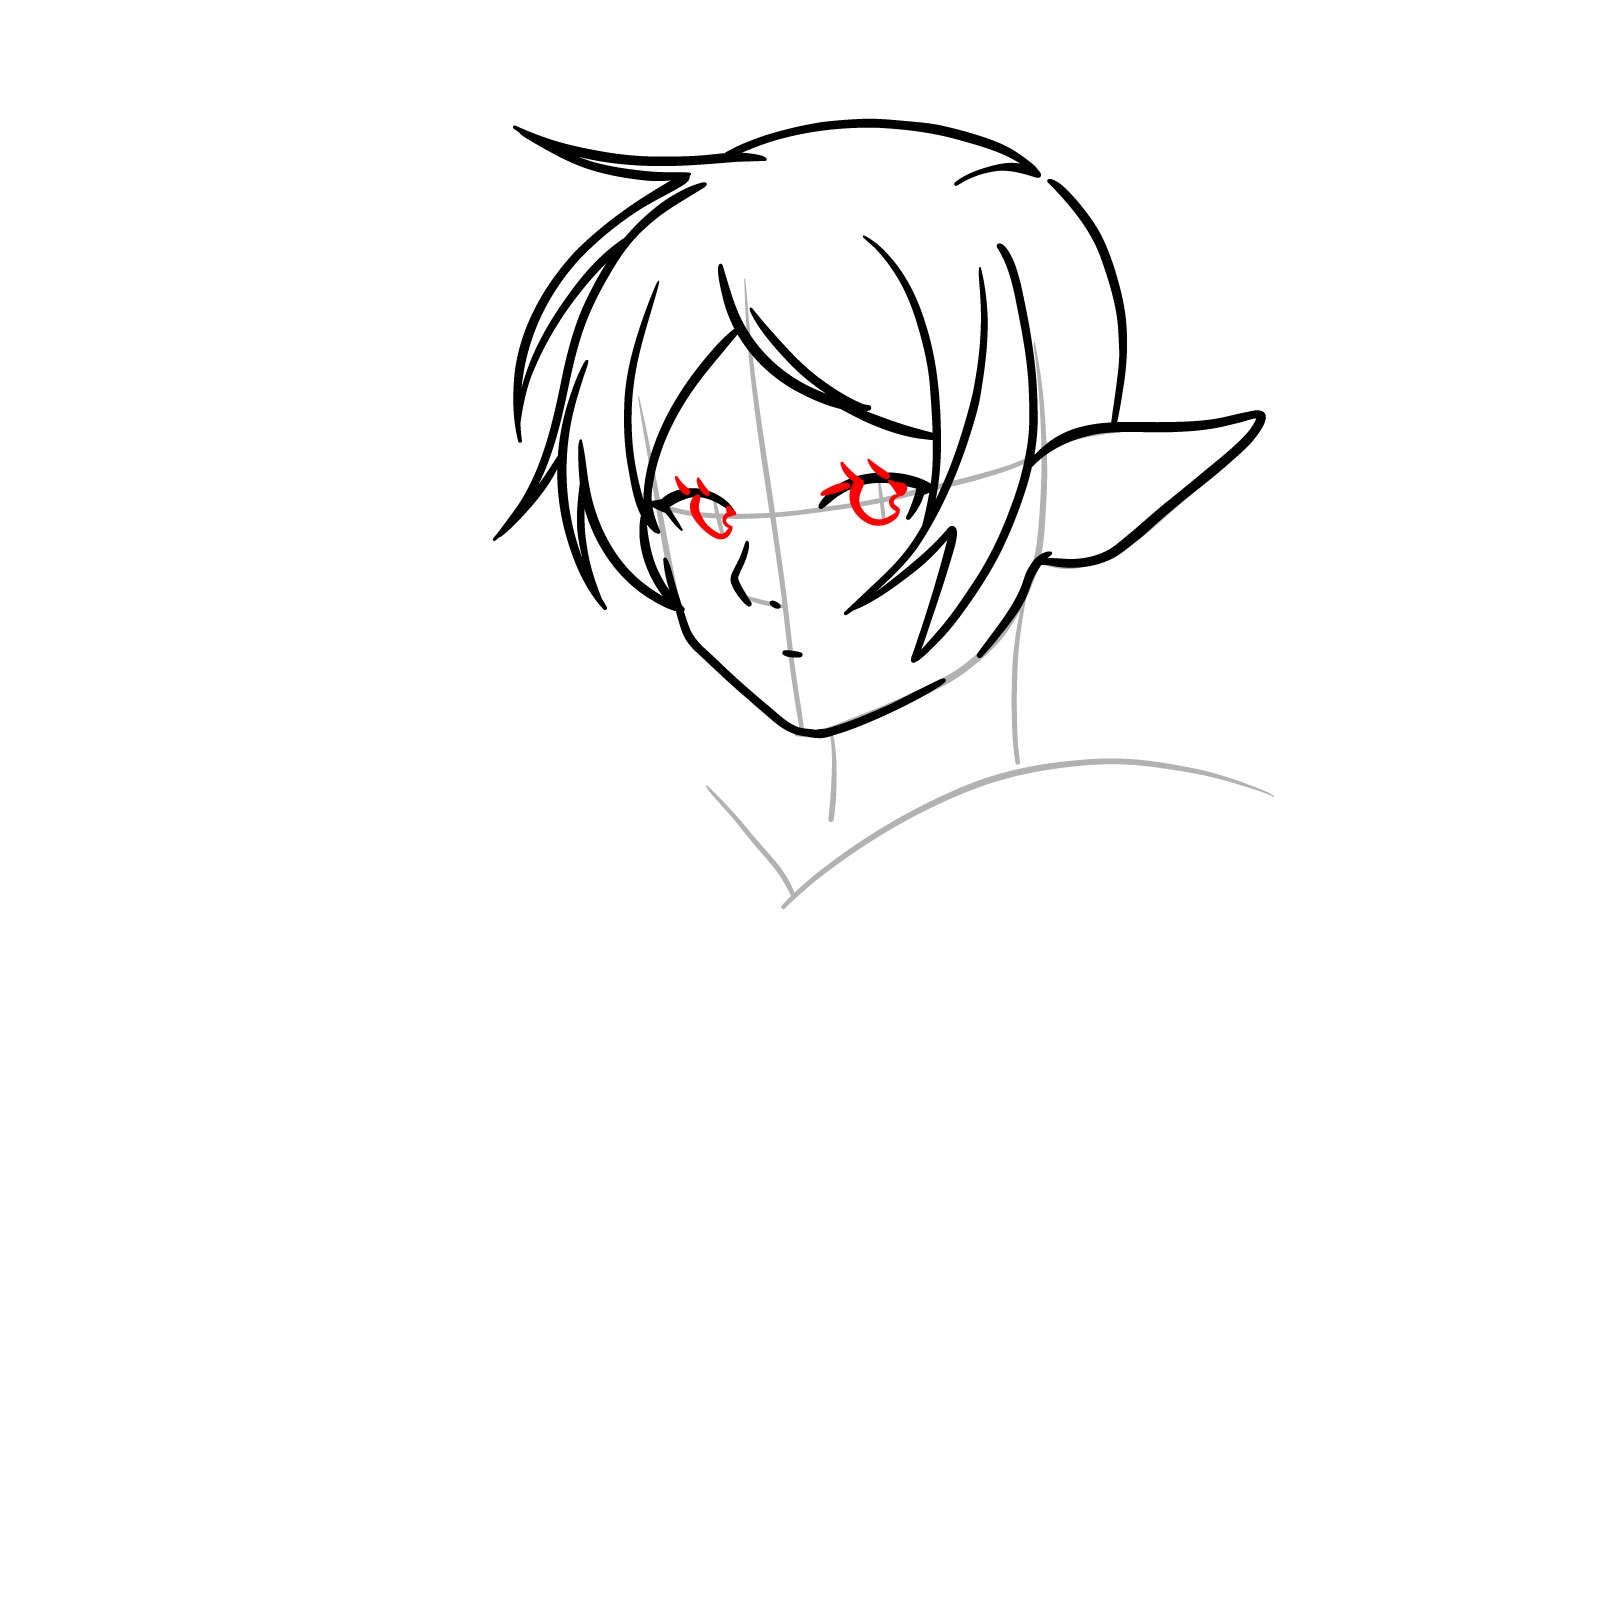
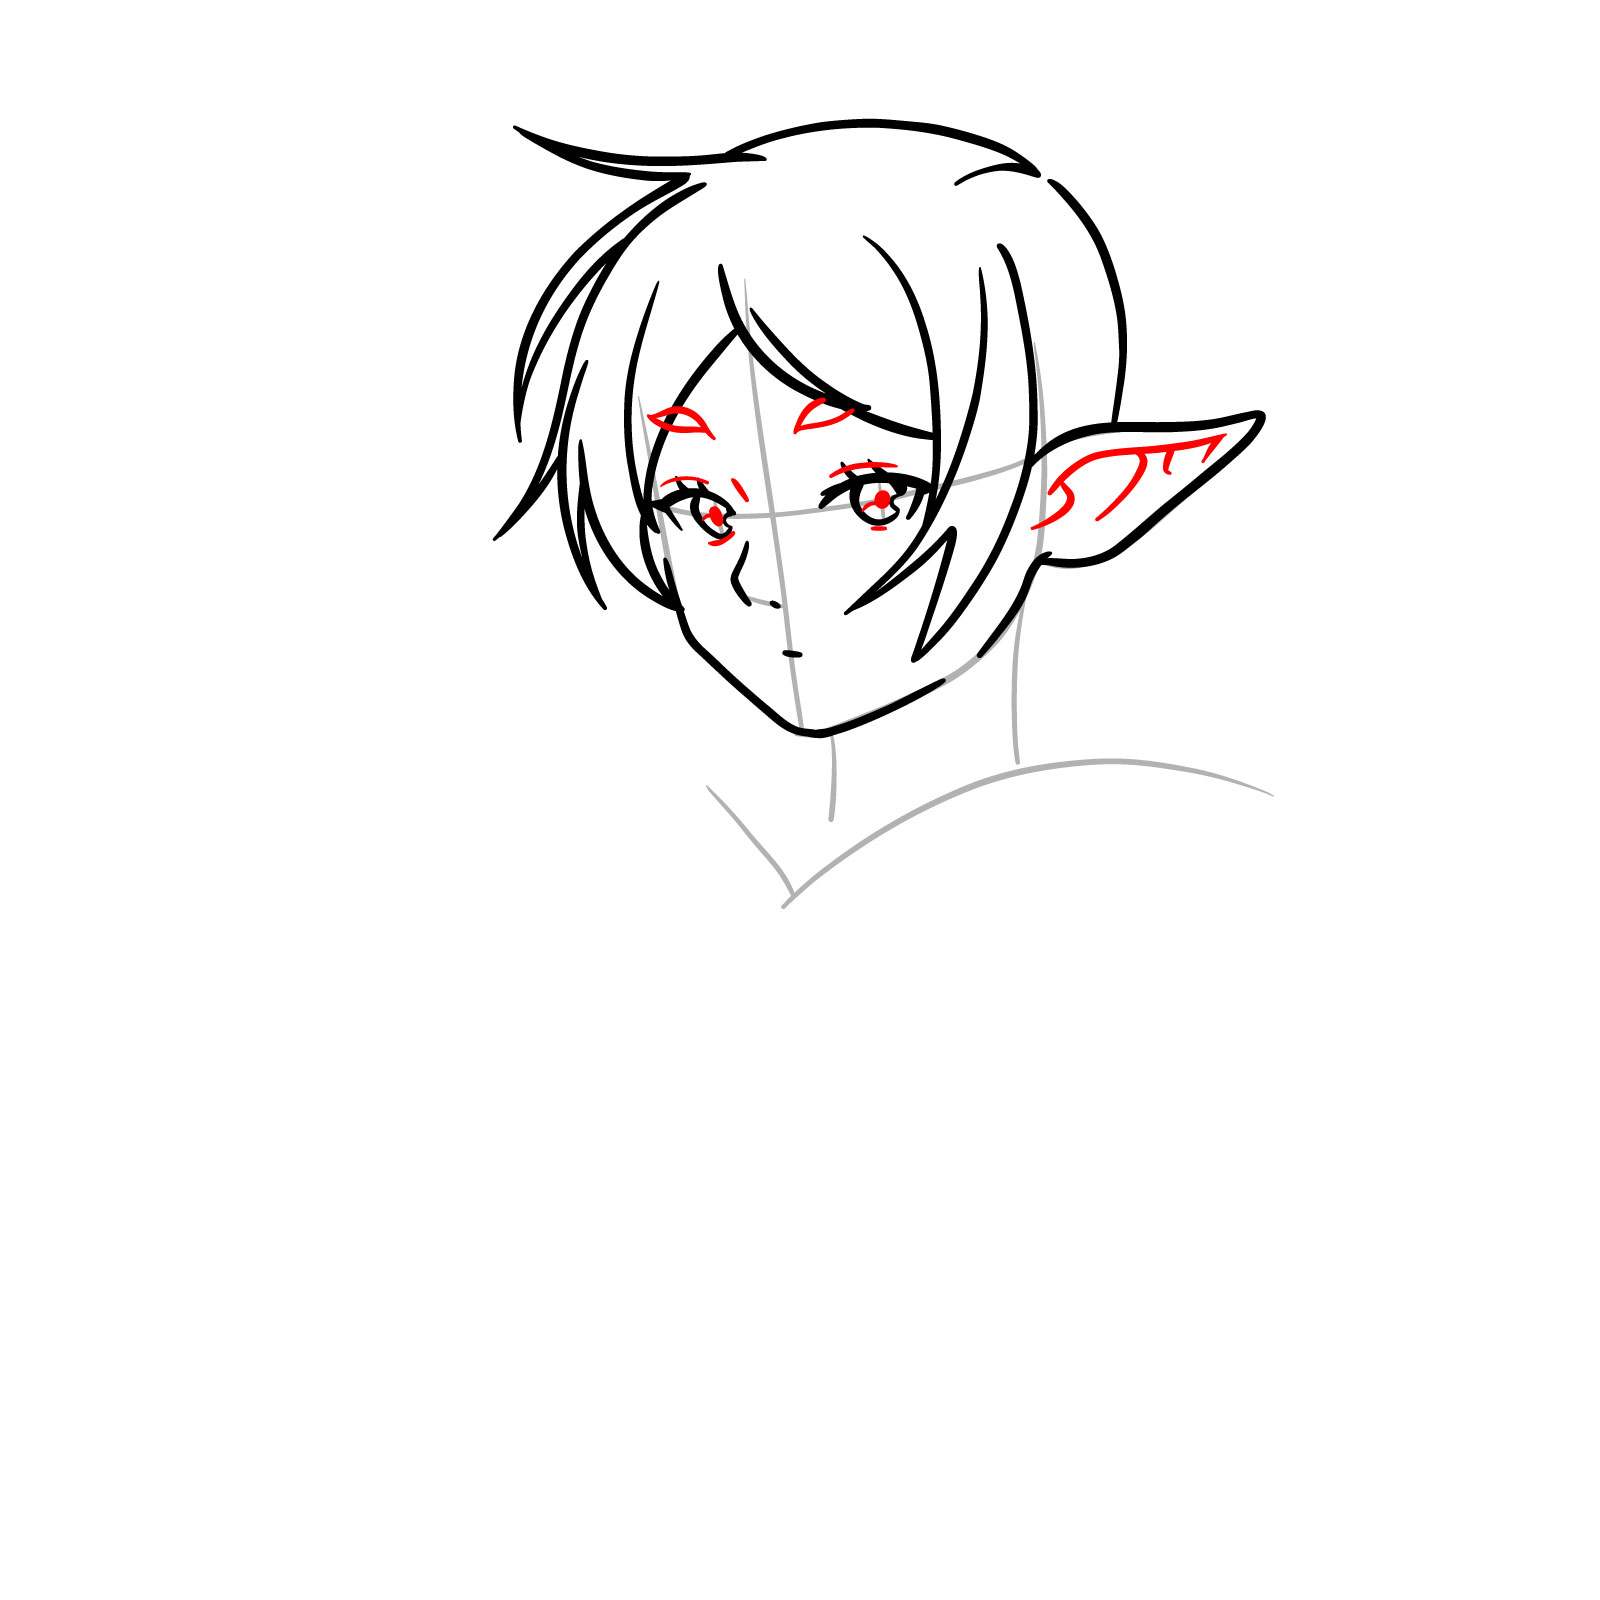
Step 09 – Place the pupils carefully, sketch the eyebrows with a light touch, and add details inside the ear
Detailing the eyes and ears
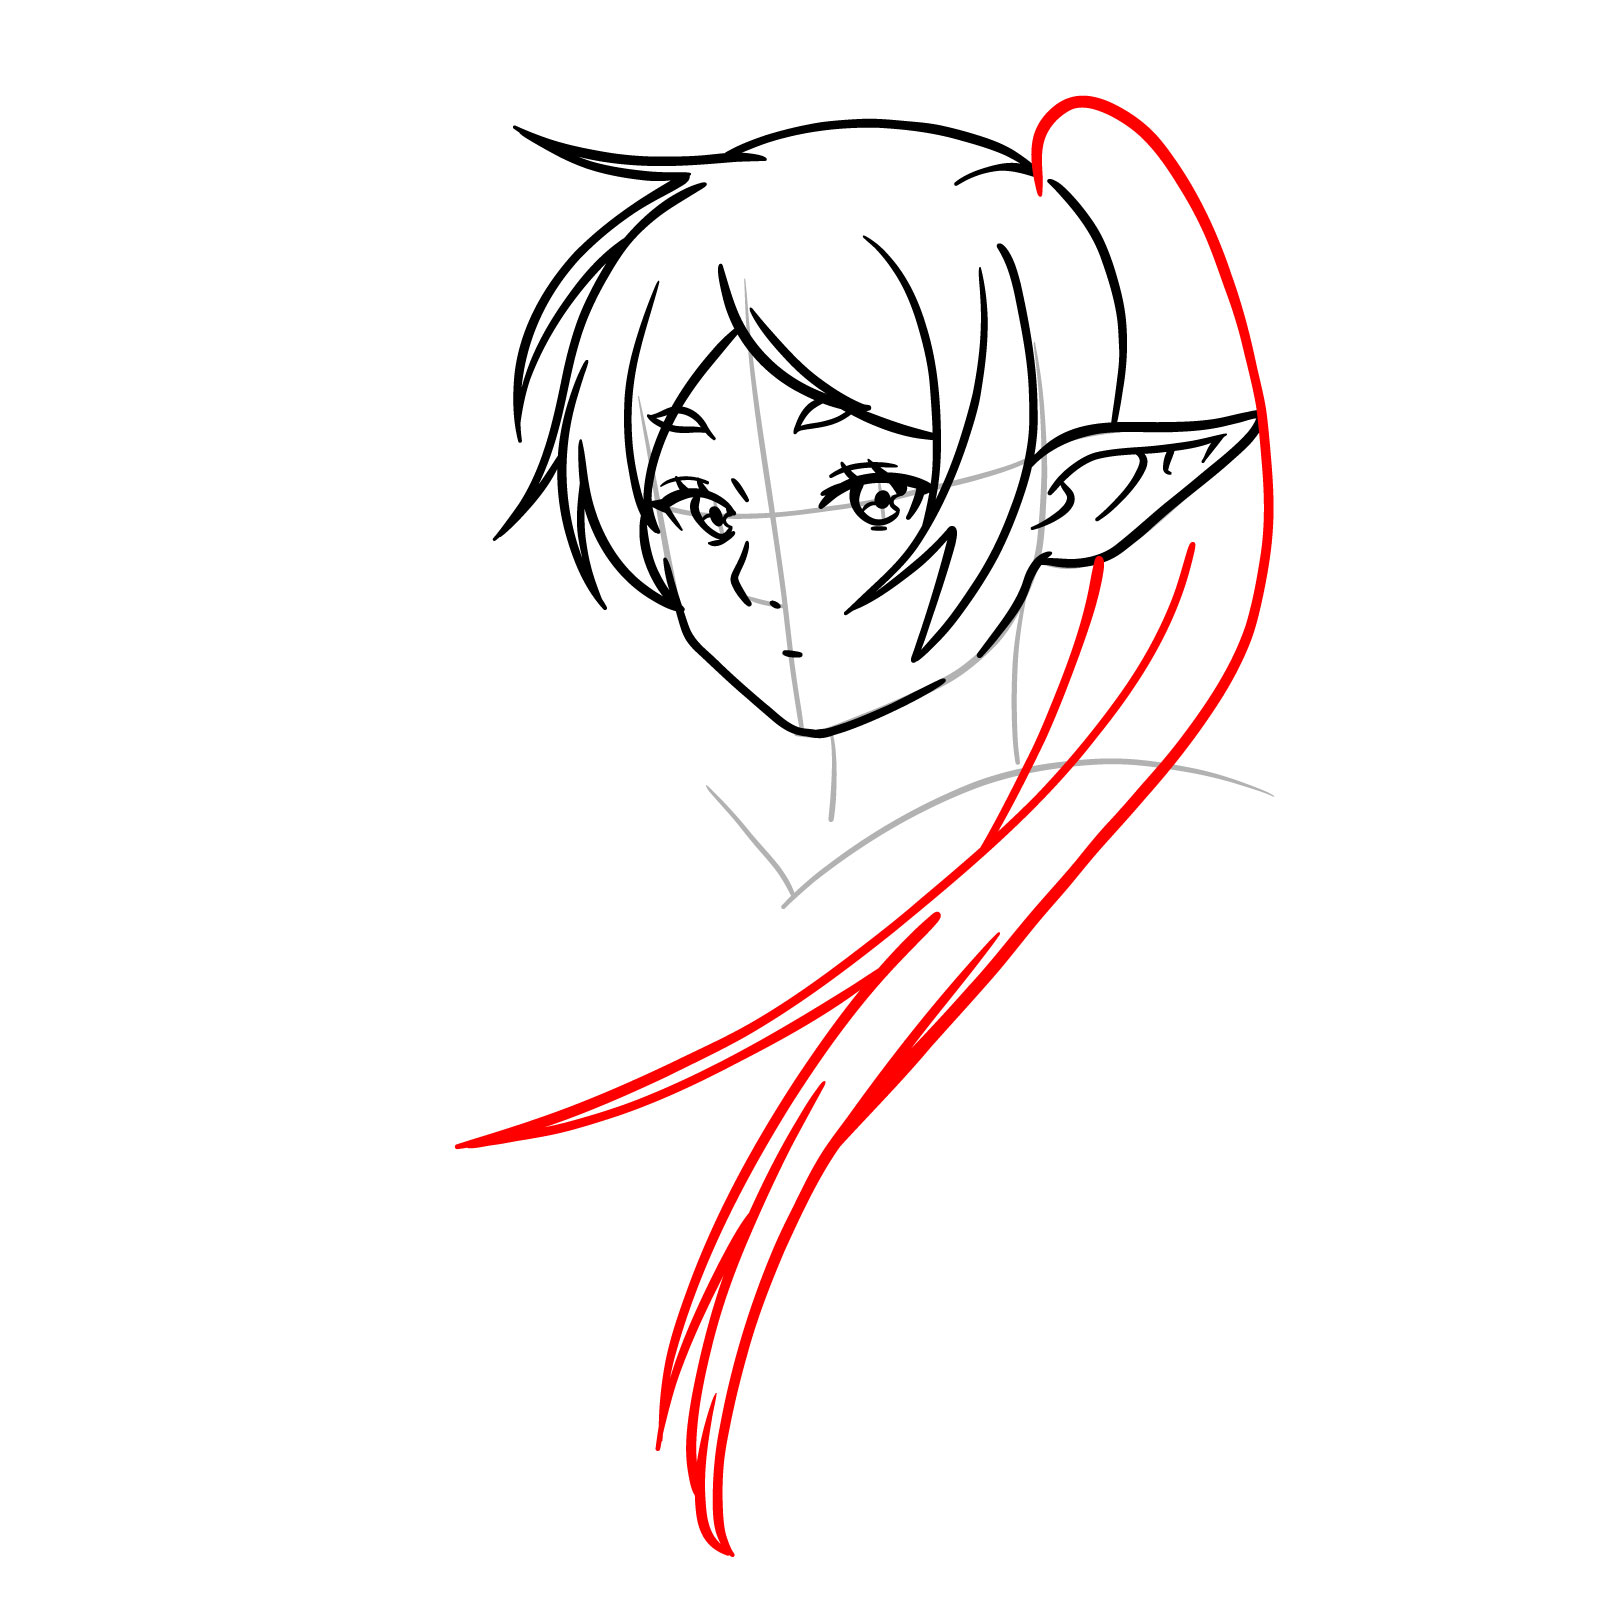
Step 10 – Let’s bring the first pigtail to life, starting at the top and letting it cascade down, curving it for a bouncy look. Make it full and dynamic
Drawing the first pigtail for Frieren’s face sketch
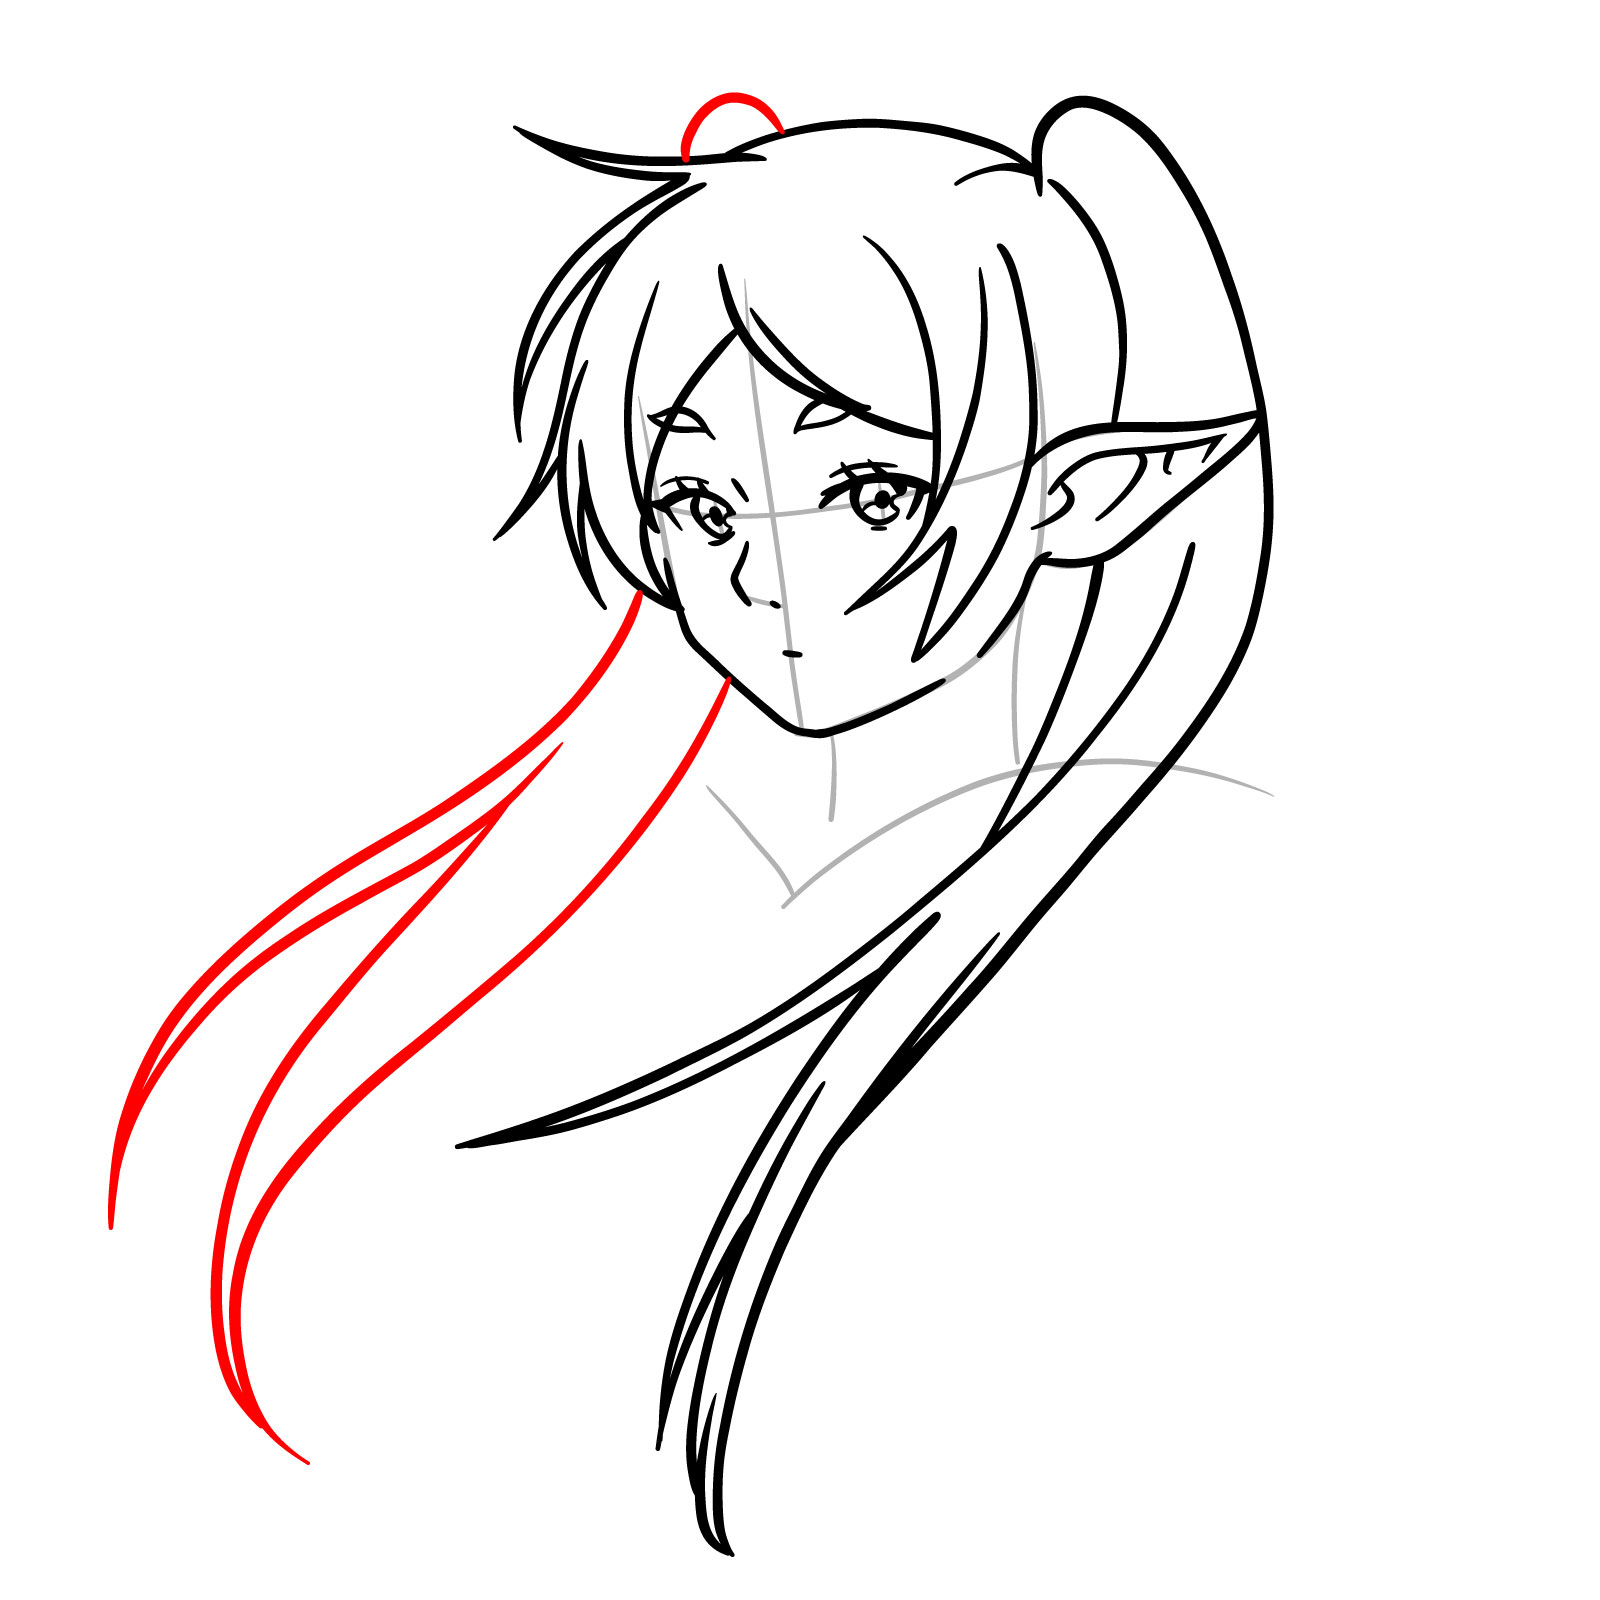
Step 11 – Now for pigtail number two. Sketch it like the first, but tucked slightly behind to create a sense of depth
Adding the second pigtail
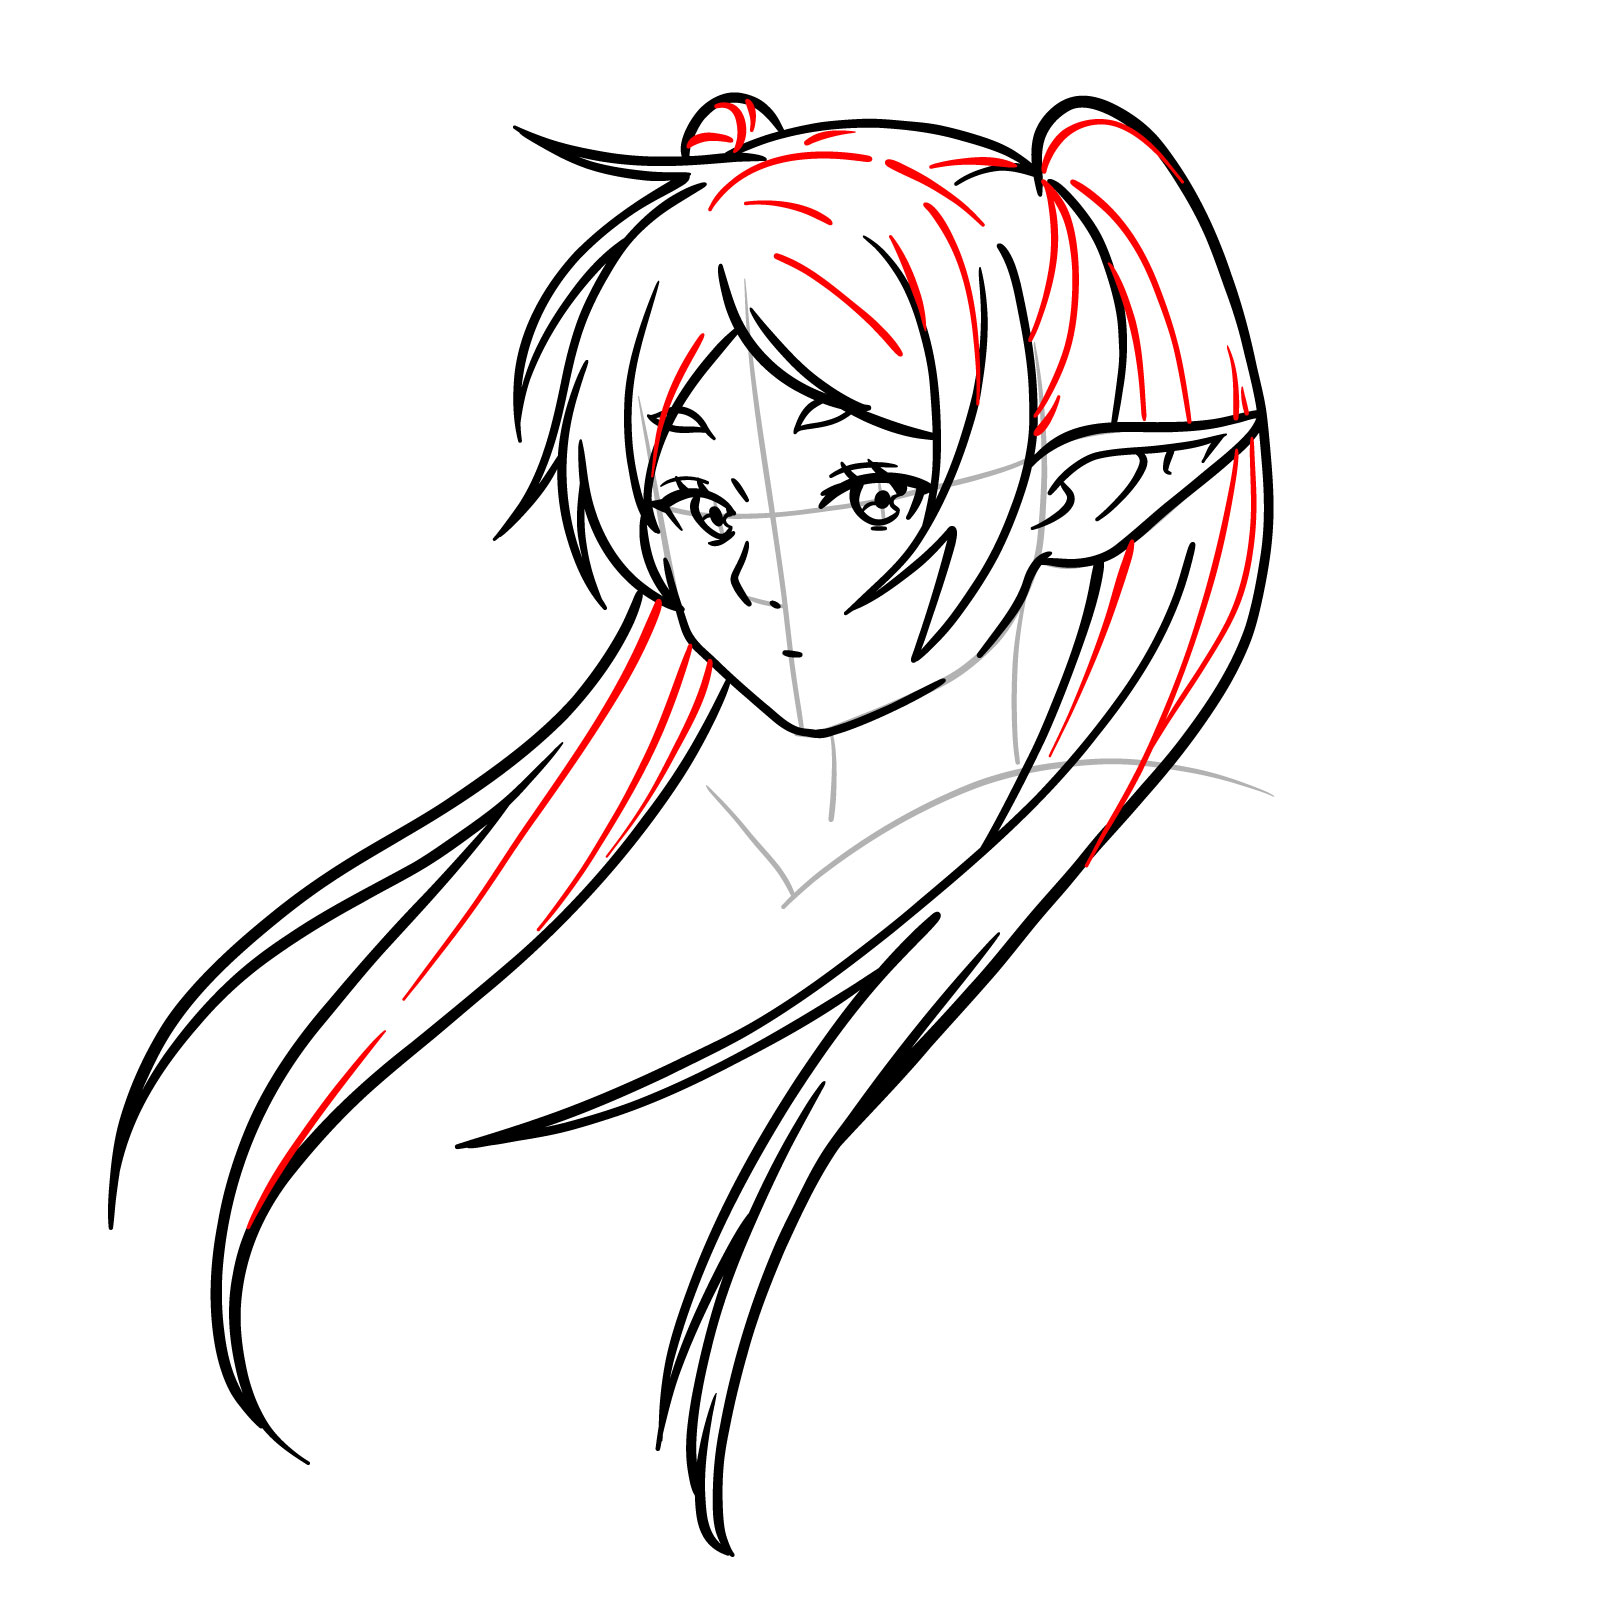
Step 12 – Time for texture! Draw each strand with care, making the hair flow beautifully and naturally
Detailing Frieren’s hair strands
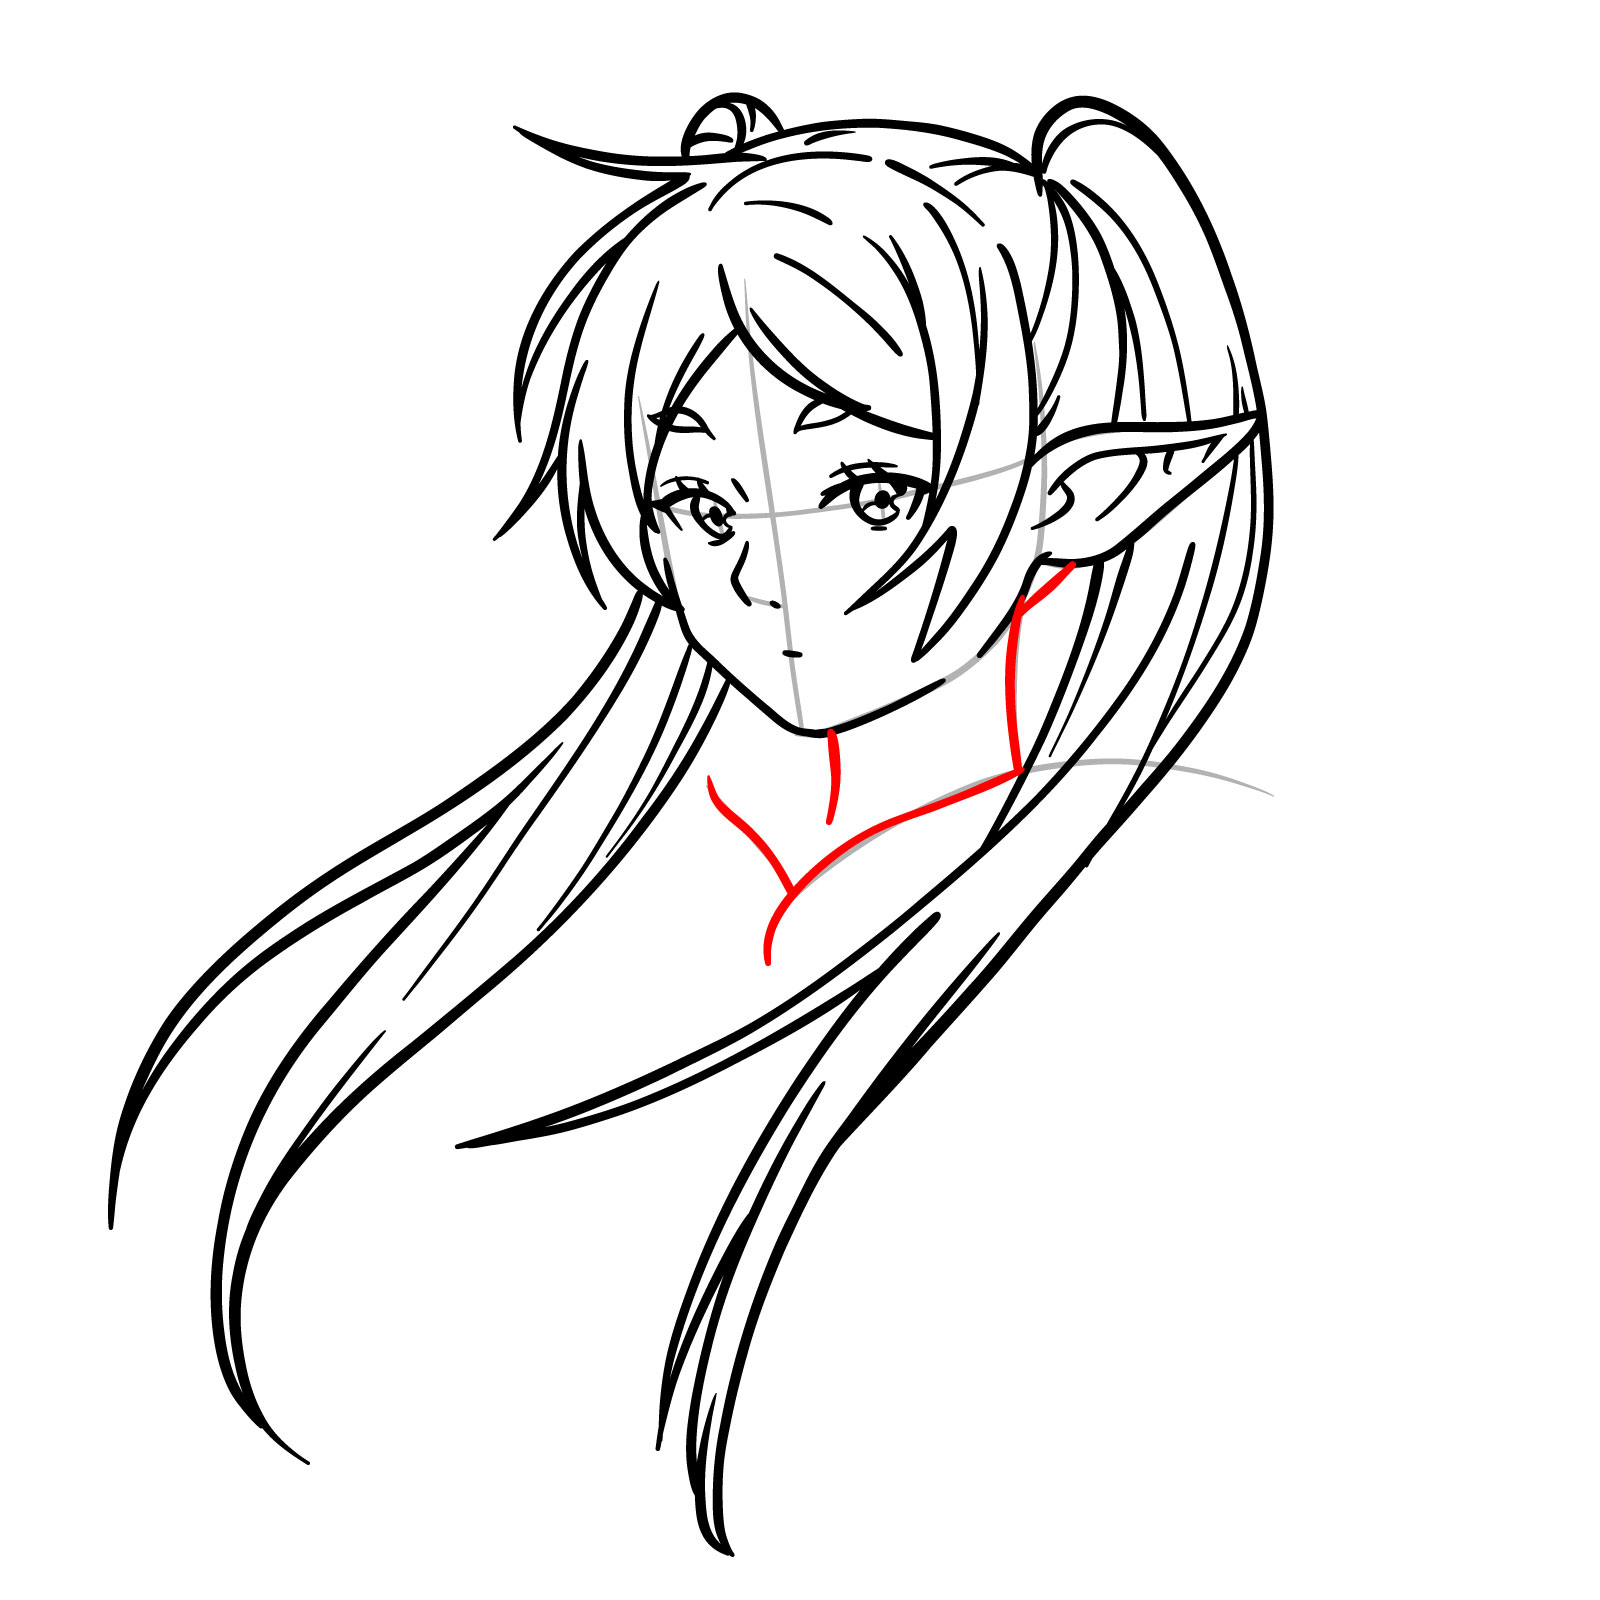
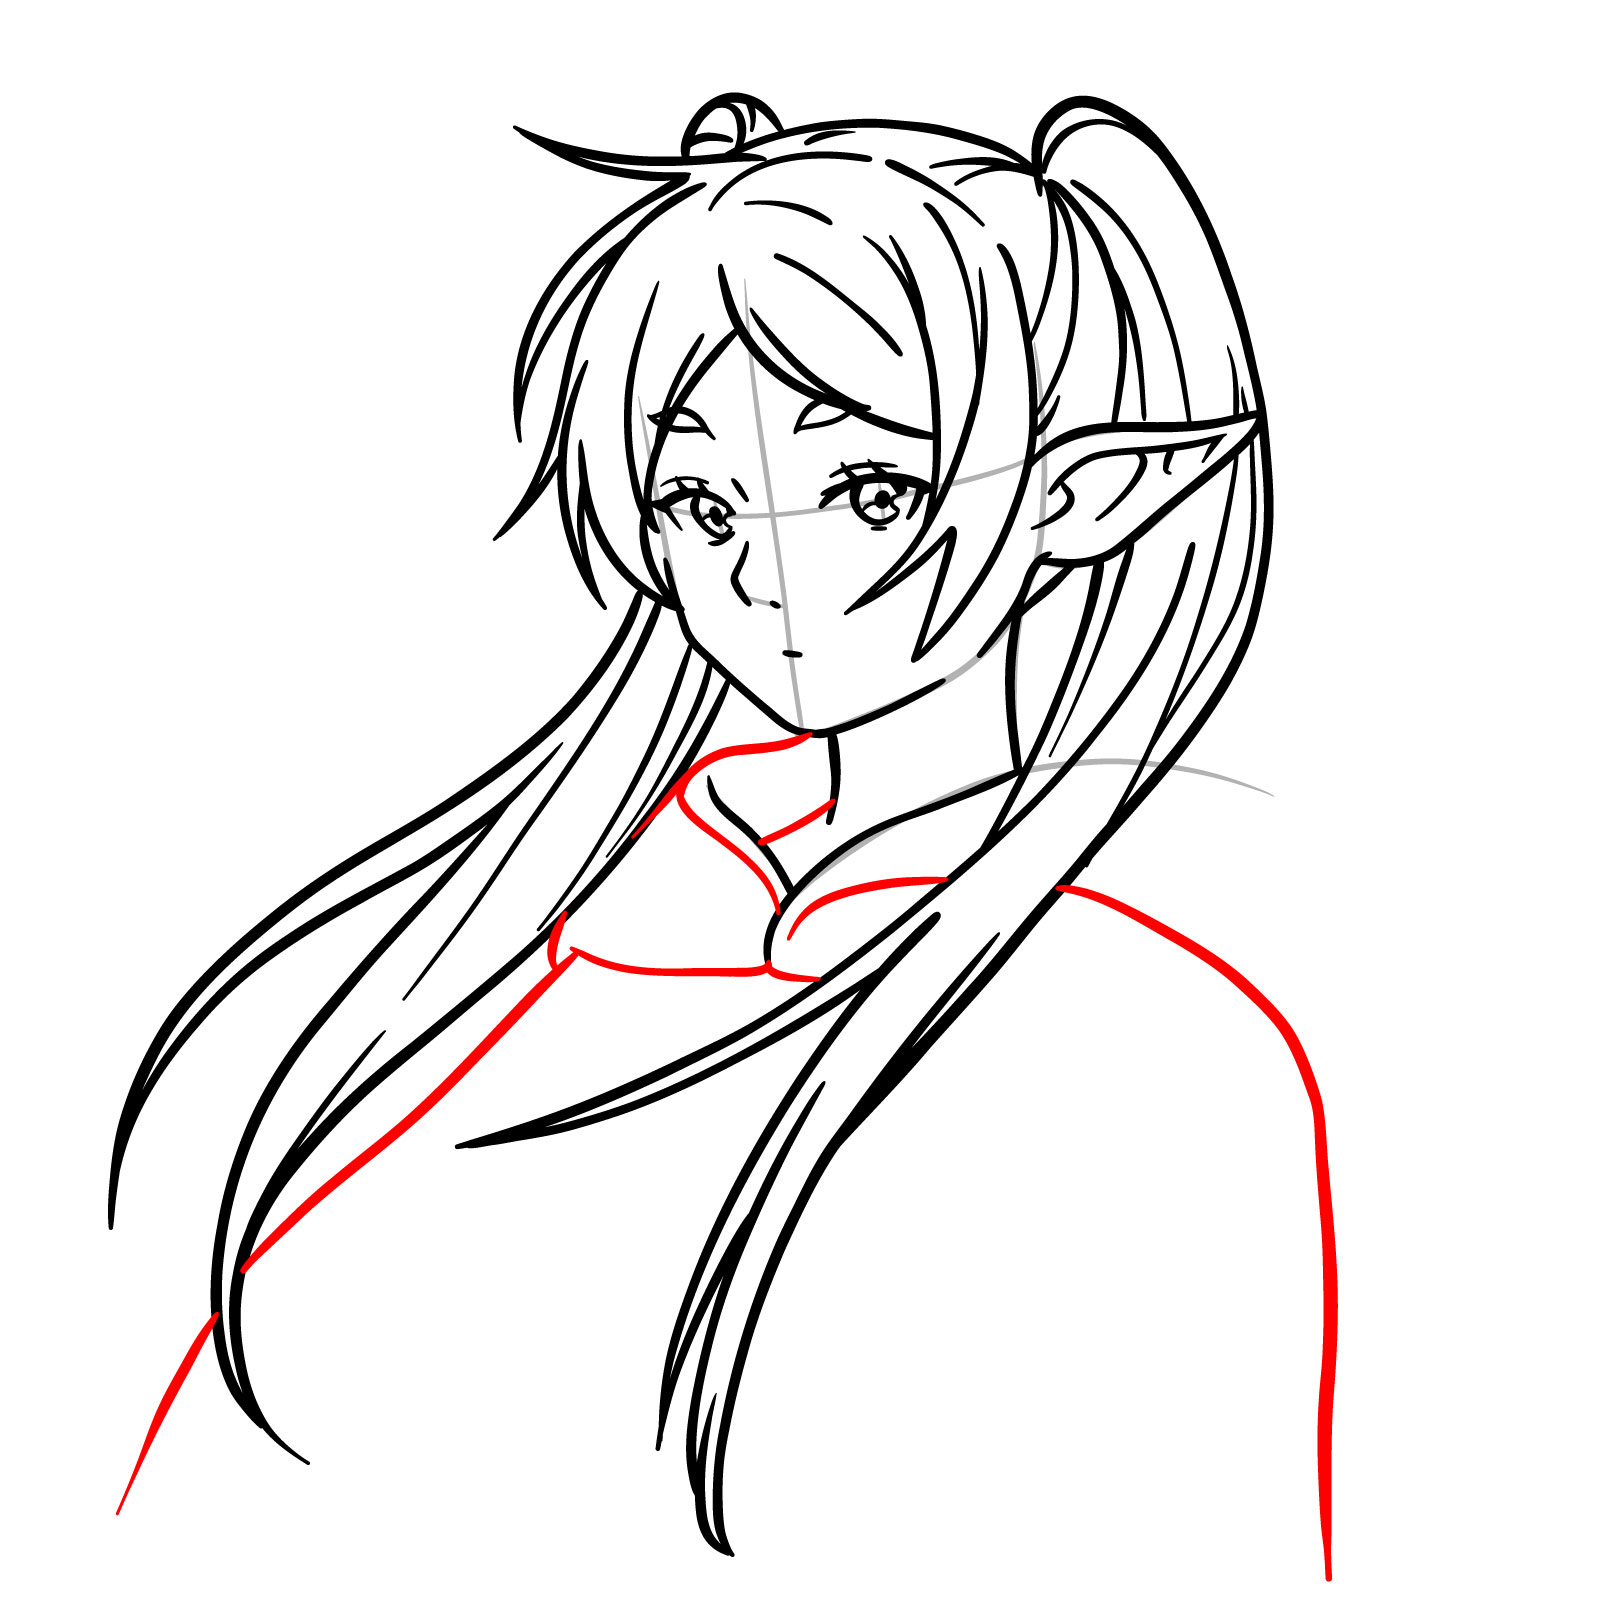
Step 13 – Outline the top of her cloak, as well as her neck
Sketching the hair and cloak’s top
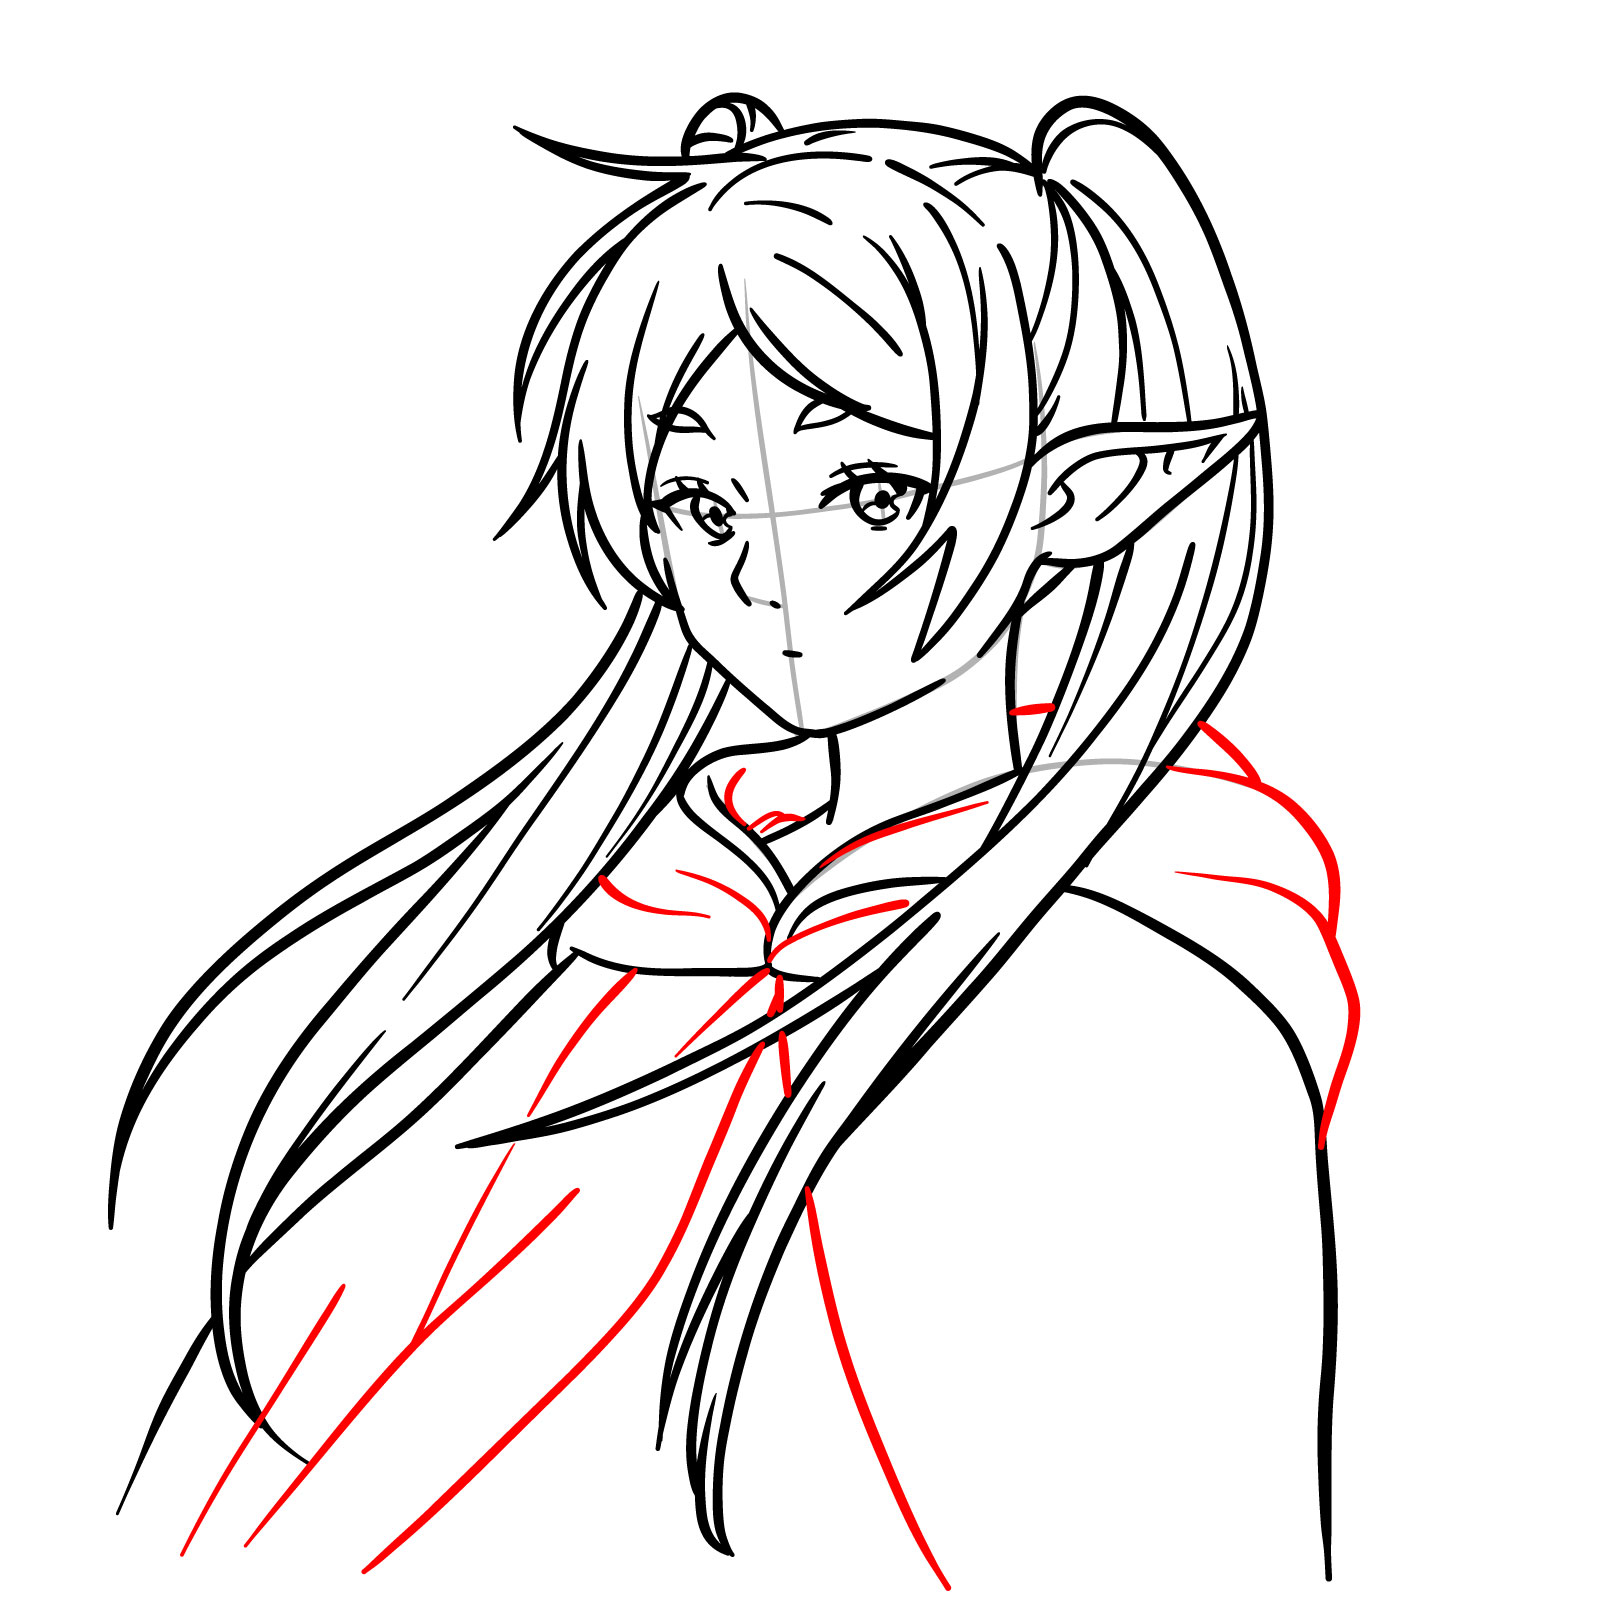
Step 14 – Start on her clothing by drawing the neckline and shoulders. Use flowing lines to suggest the folds and the form beneath her clothes
Outlining Frieren’s attire
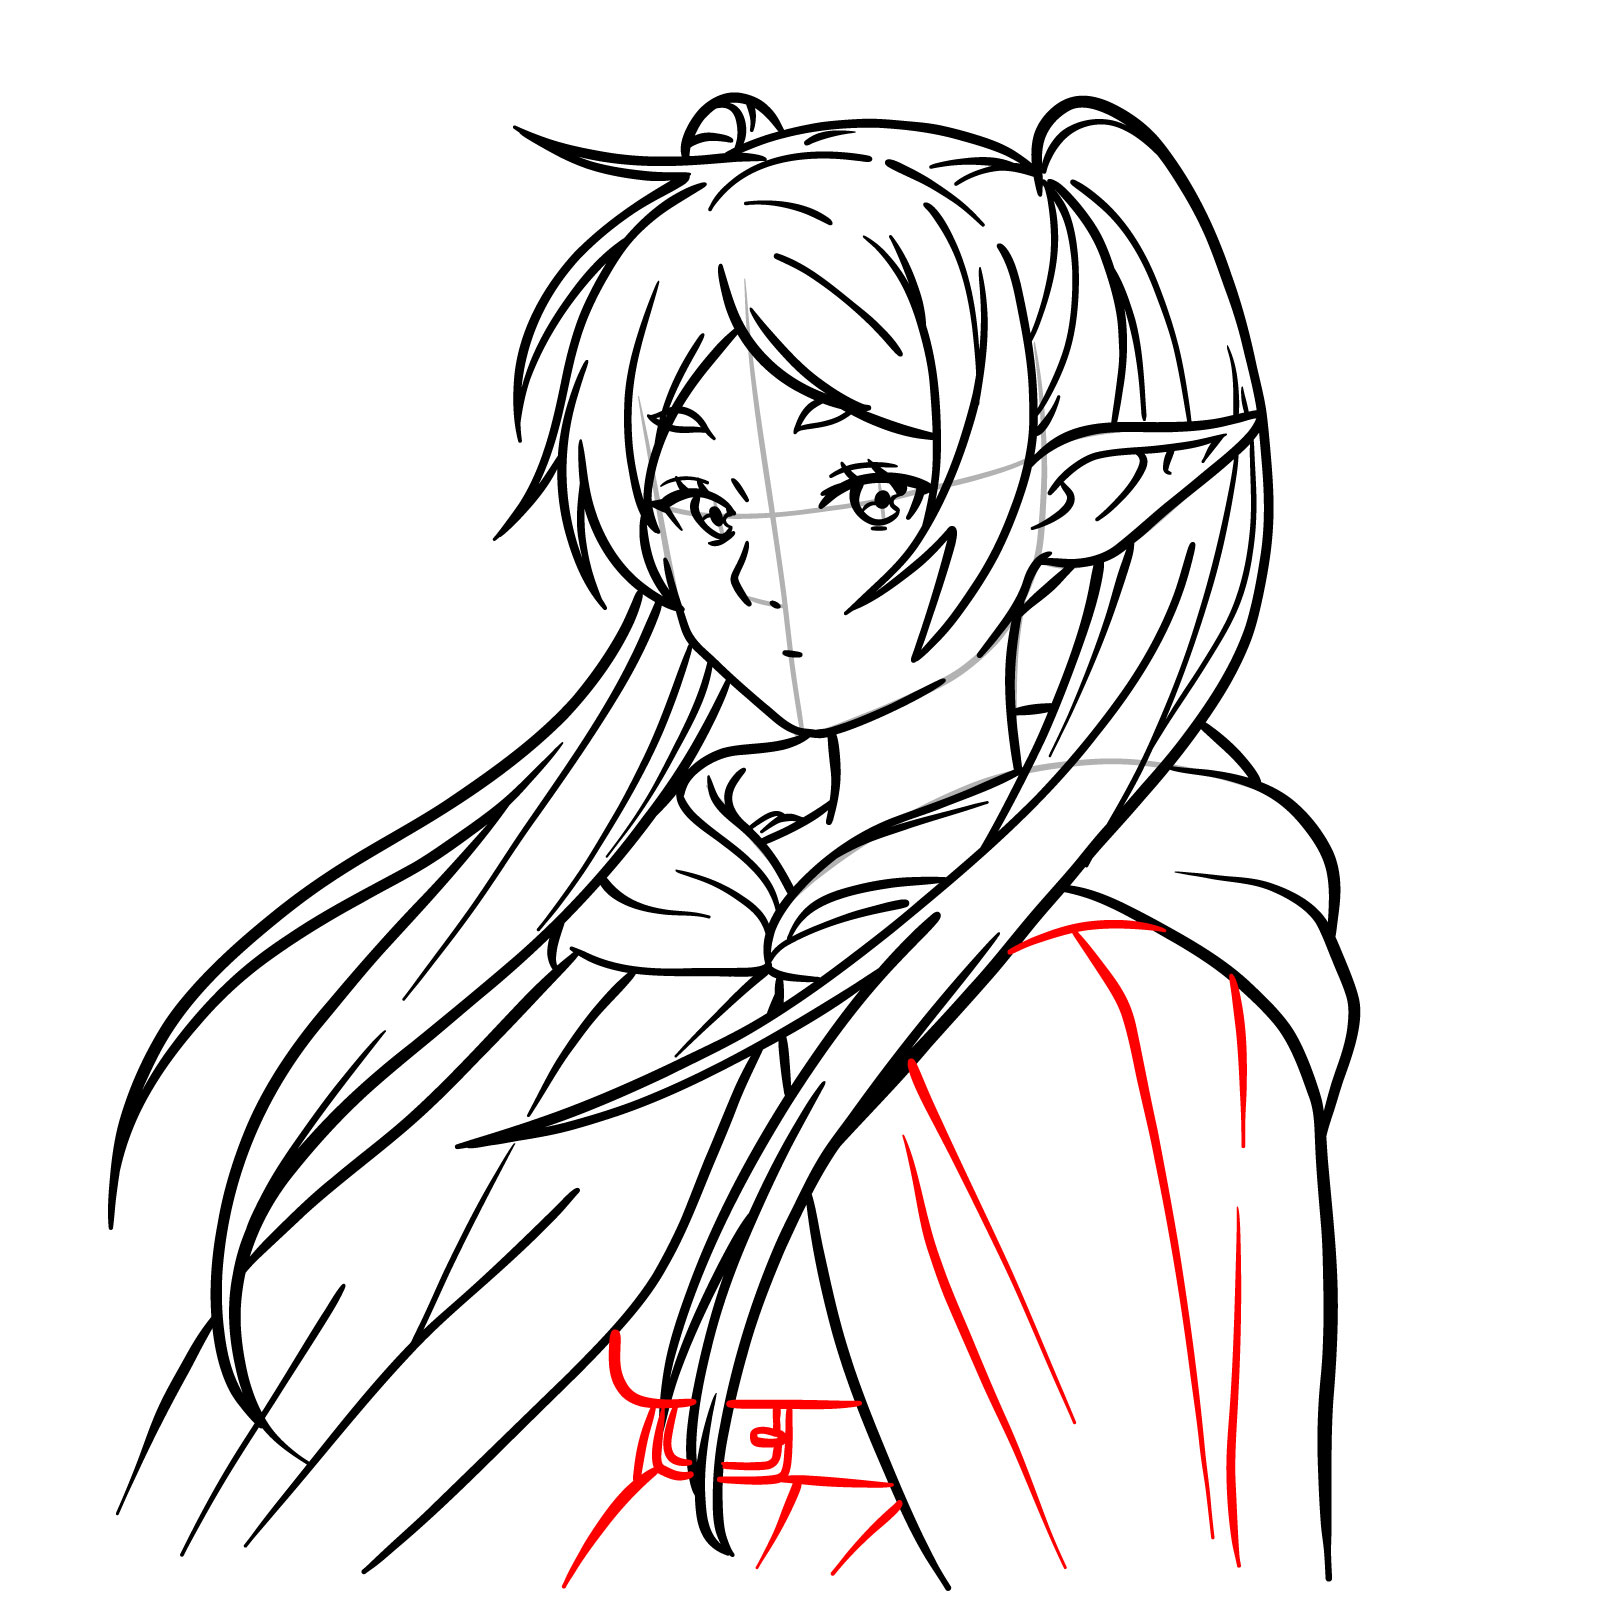
Step 15 – Add depth to the cloak with folds and creases that make it look weighty and real. It should rest naturally, flowing from her shoulders
Bringing the cloak to life with detailed folds
Step 16 – Finishing the outfit
Finishing touches on Frieren’s outfit
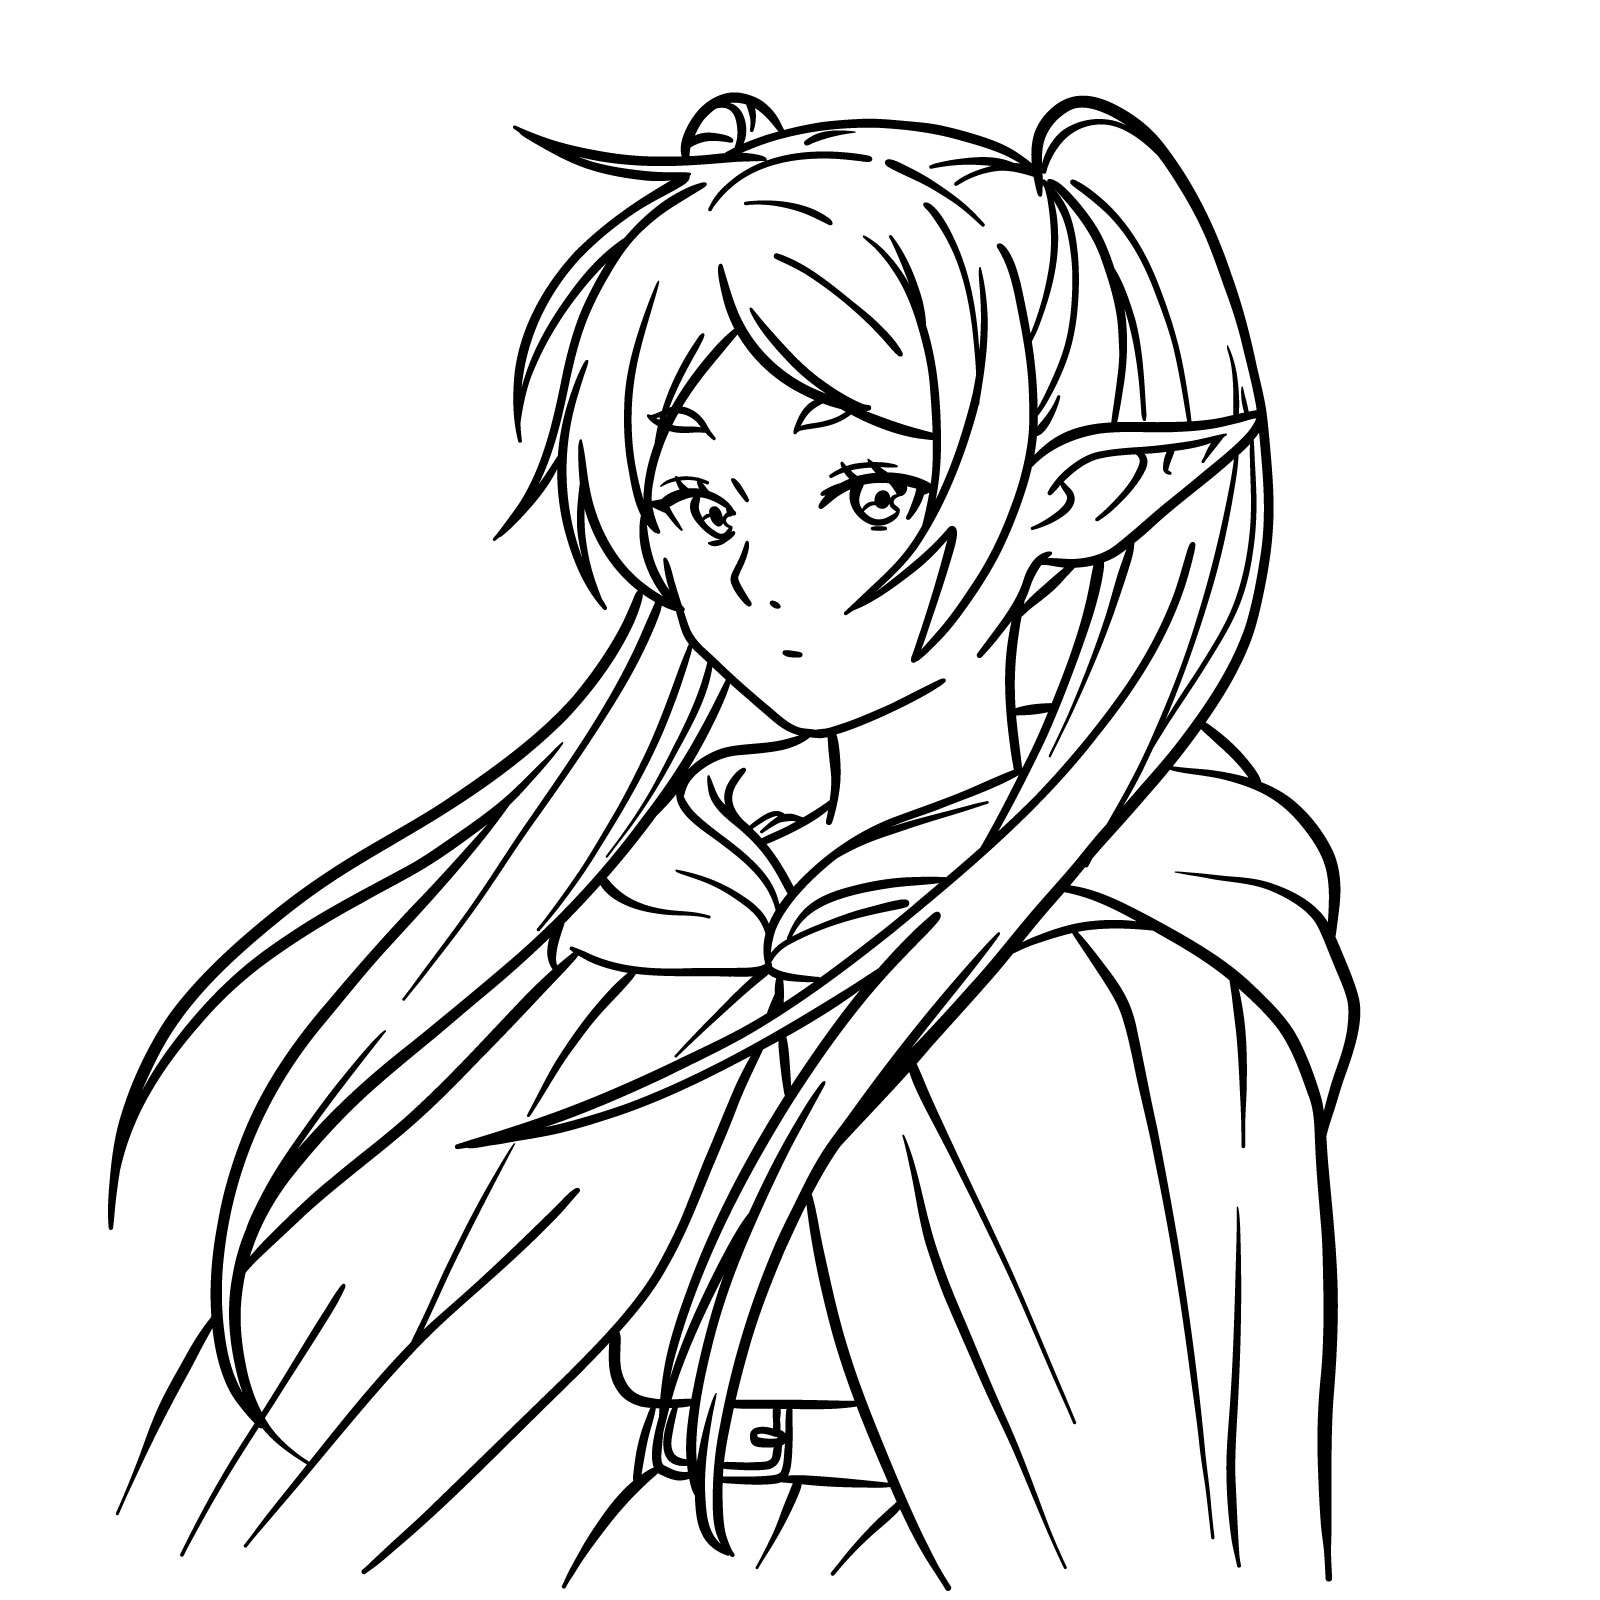
Step 17 – Take a step back and make any last tweaks to your sketch. Ink it if you wish. Here it is, the complete and detailed illustration of Frieren in a 3/4 view—full of personality and style
Frieren’s complete 3/4 view portrait
How to Draw Frieren Full Body
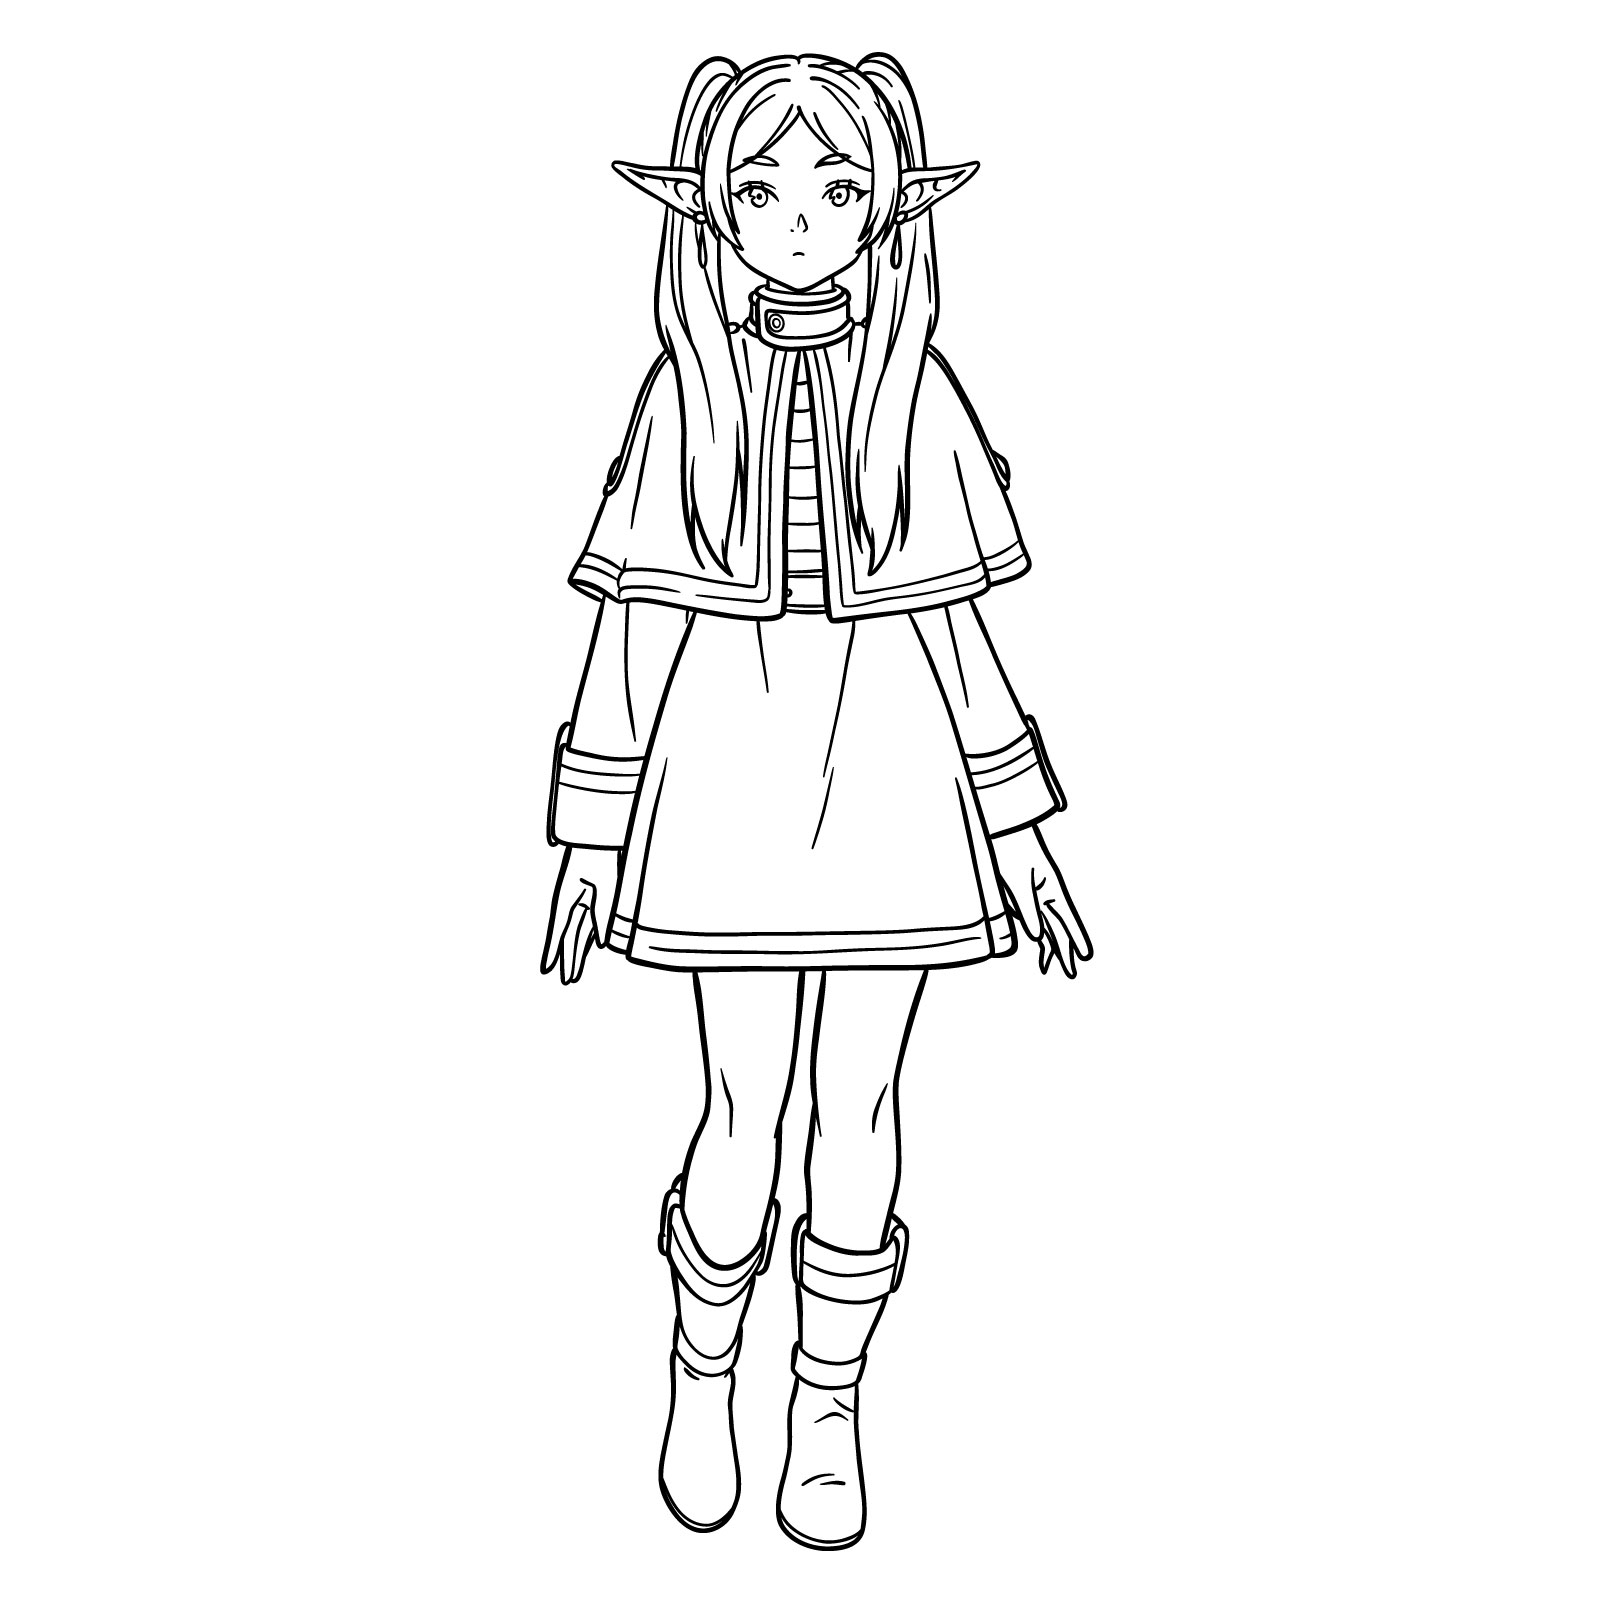
Easy step-by-step drawing of Frieren
For the final challenge, get ready to draw Frieren from head to toe! This step-by-step guide has 25 easy parts. We’ll start with a simple sketch to get her shape just right. It’s all about making her look as cool and magical as she does in her adventures.
Check out the complete drawing – see how Frieren stands all relaxed, with her clothes looking super natural and flowy? We’ll go through each step together so you can make her look just the same.
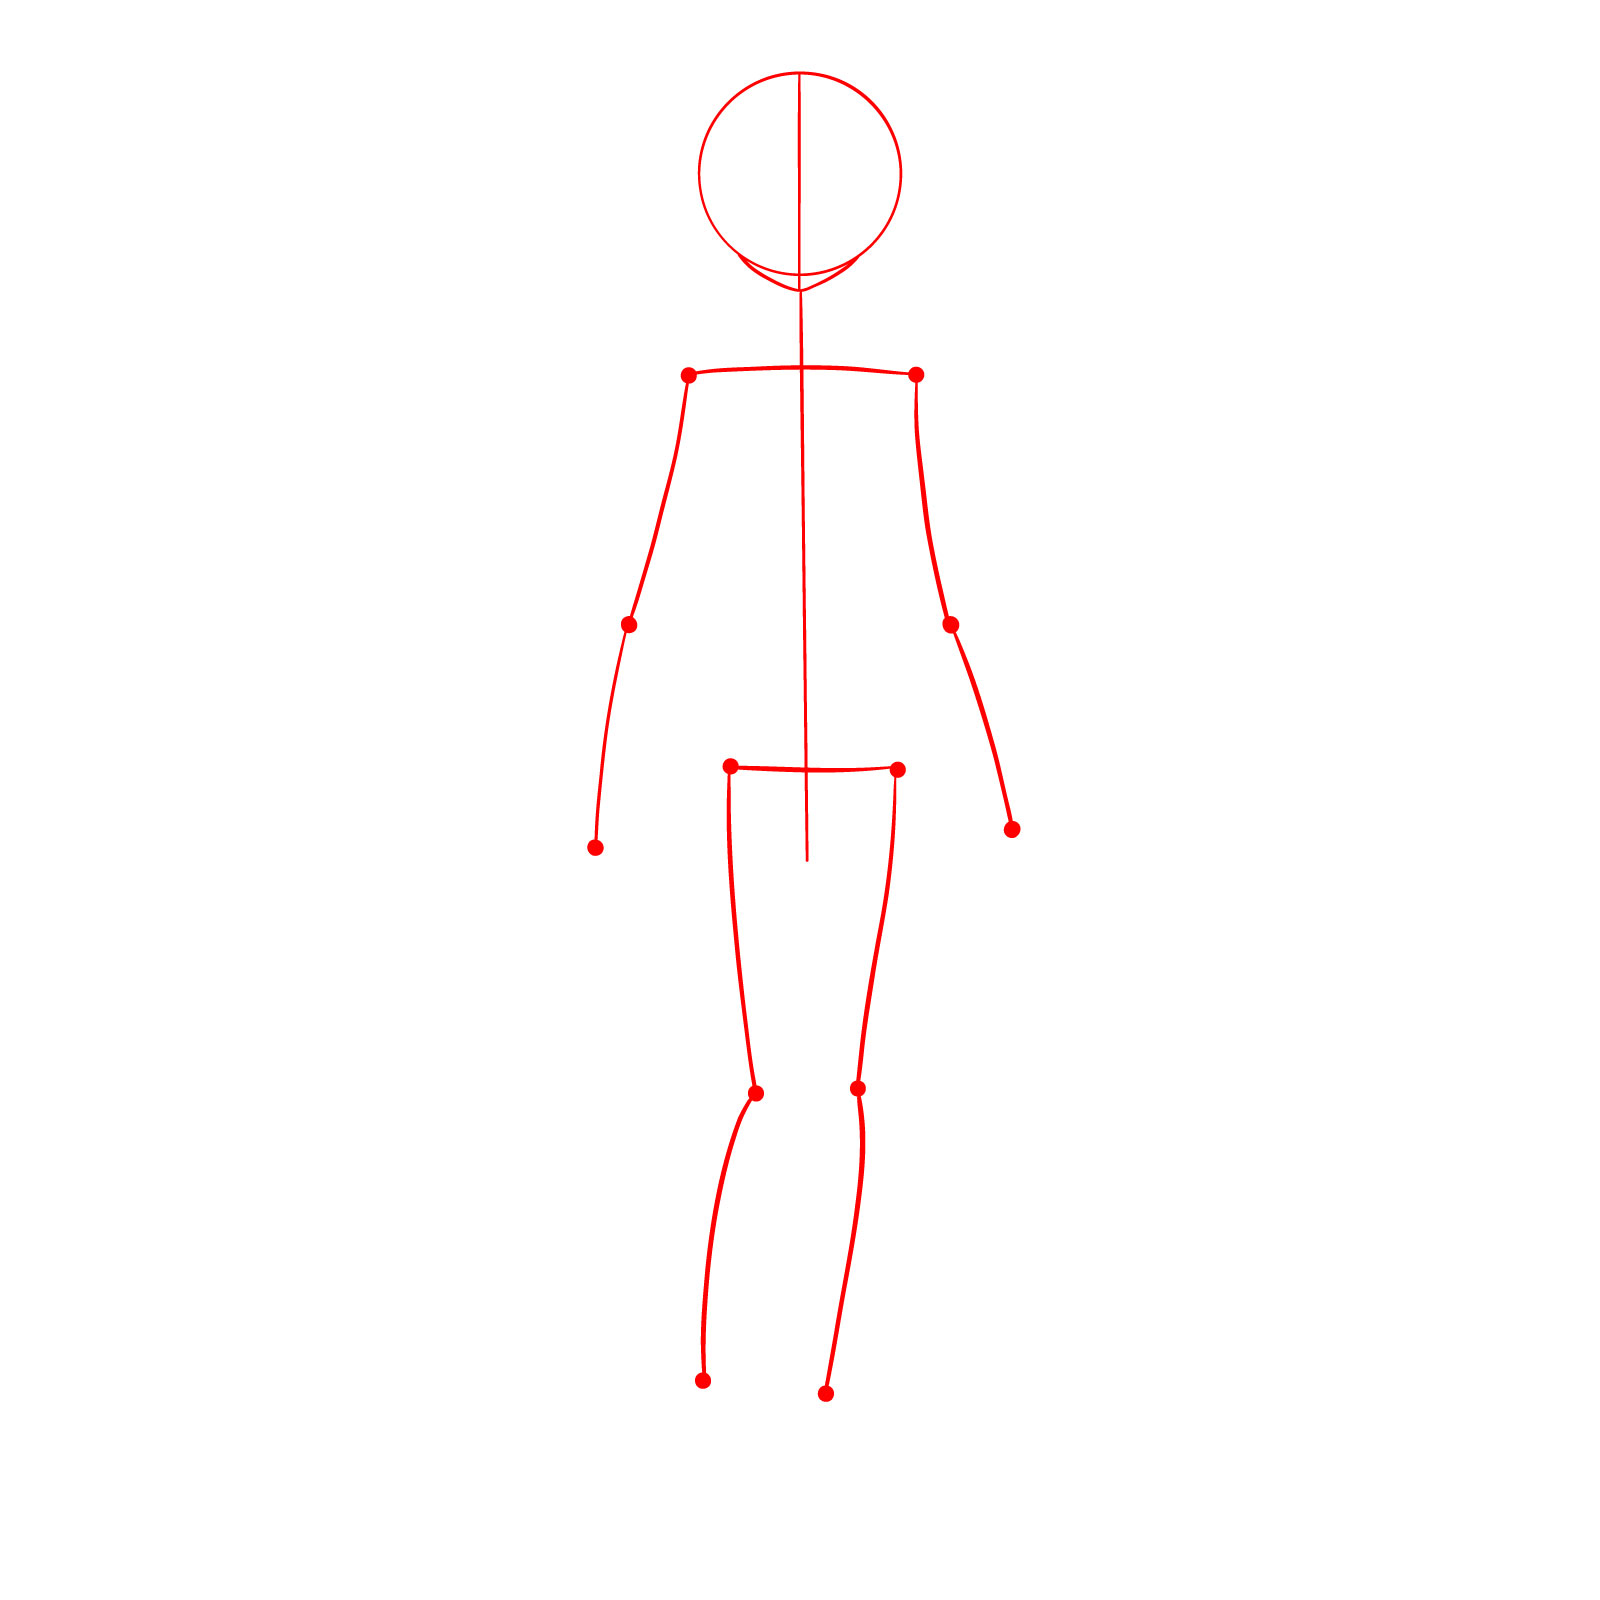
Step 01 – Begin with a simple head circle and a hint of a chin. Then draw a straight line down the middle for facial balance and sketch a stick figure to mark her posture and overall body shape
Starting off Frieren’s full body with a stick figure
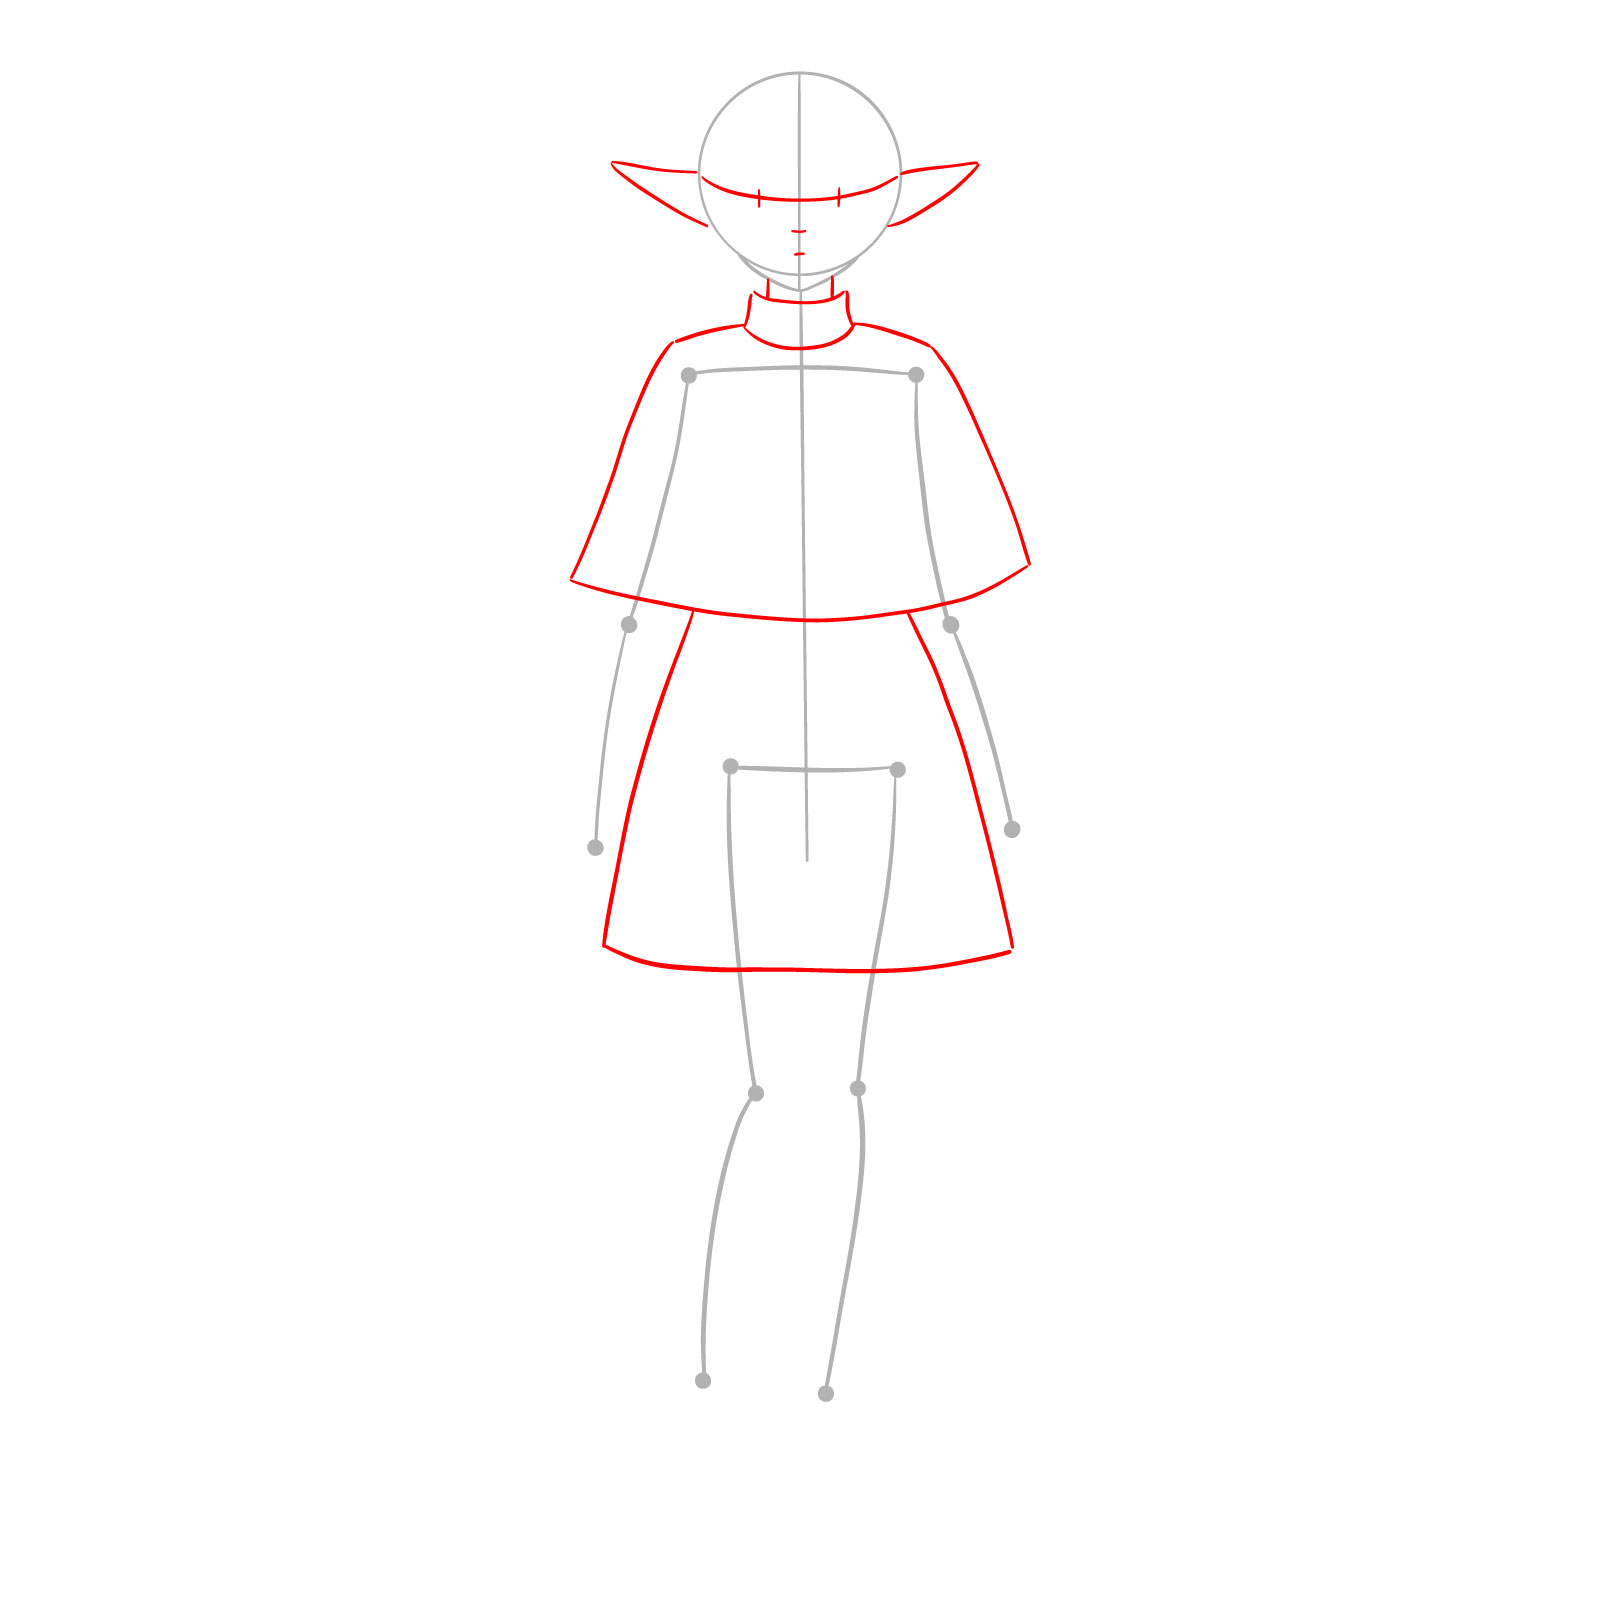
Step 02 – Time to mark places for her eyes, nose, and mouth on the face. Also, roughly outline her ears and body, using the stick figure as a sizing guide
Placing Frieren’s facial and body landmarks
Step 03 – Sketch out basic forms for her arms and legs to get the proportions right. They’re just guidelines for now but will help with symmetry
Shaping Frieren’s arms and legs
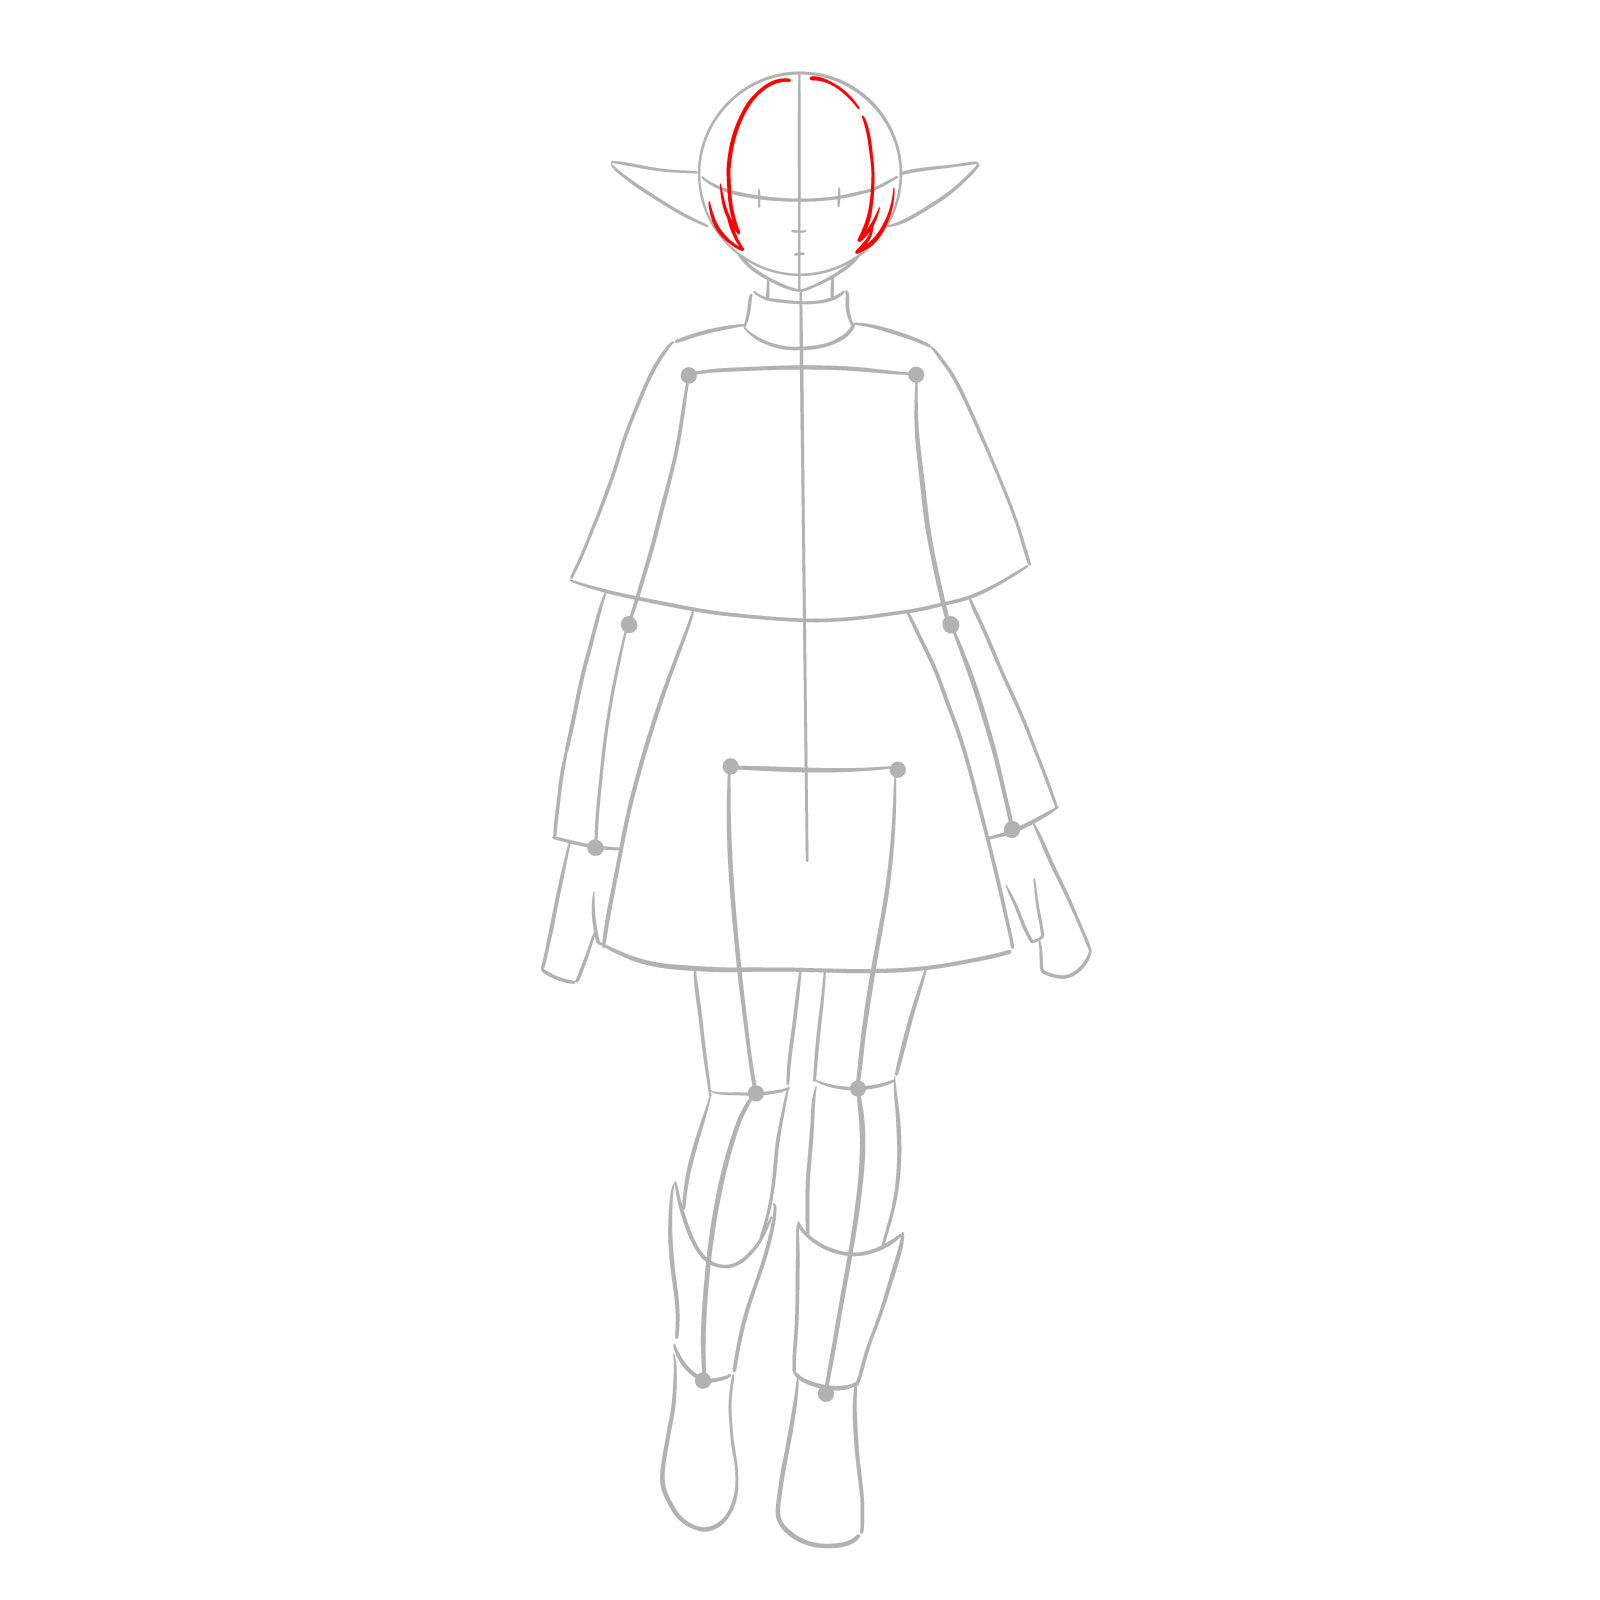
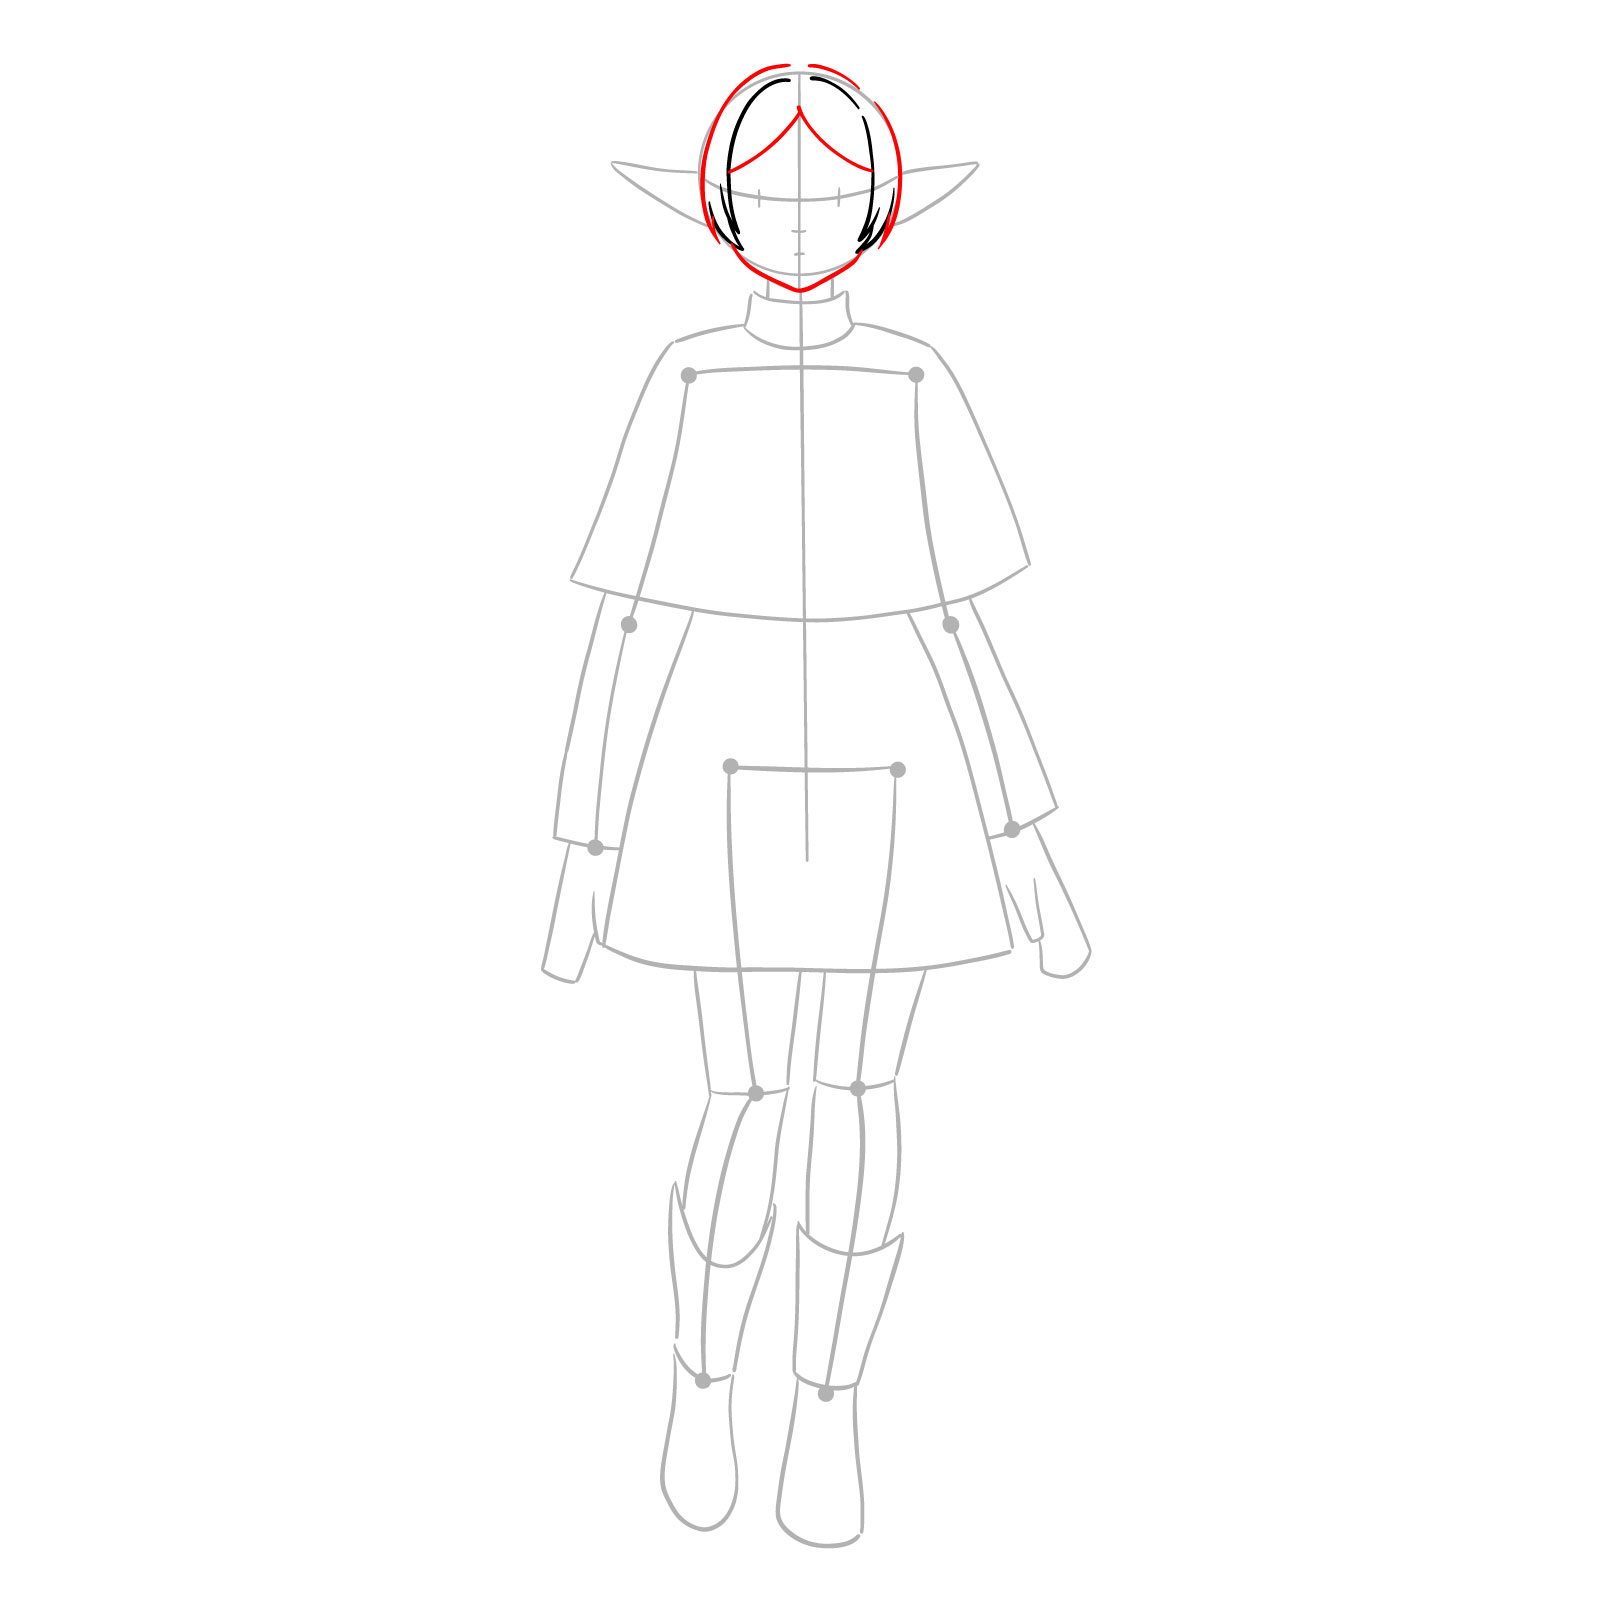
Step 04 – Add some curves for her bangs to frame the face
Drawing Frieren’s hair around her face
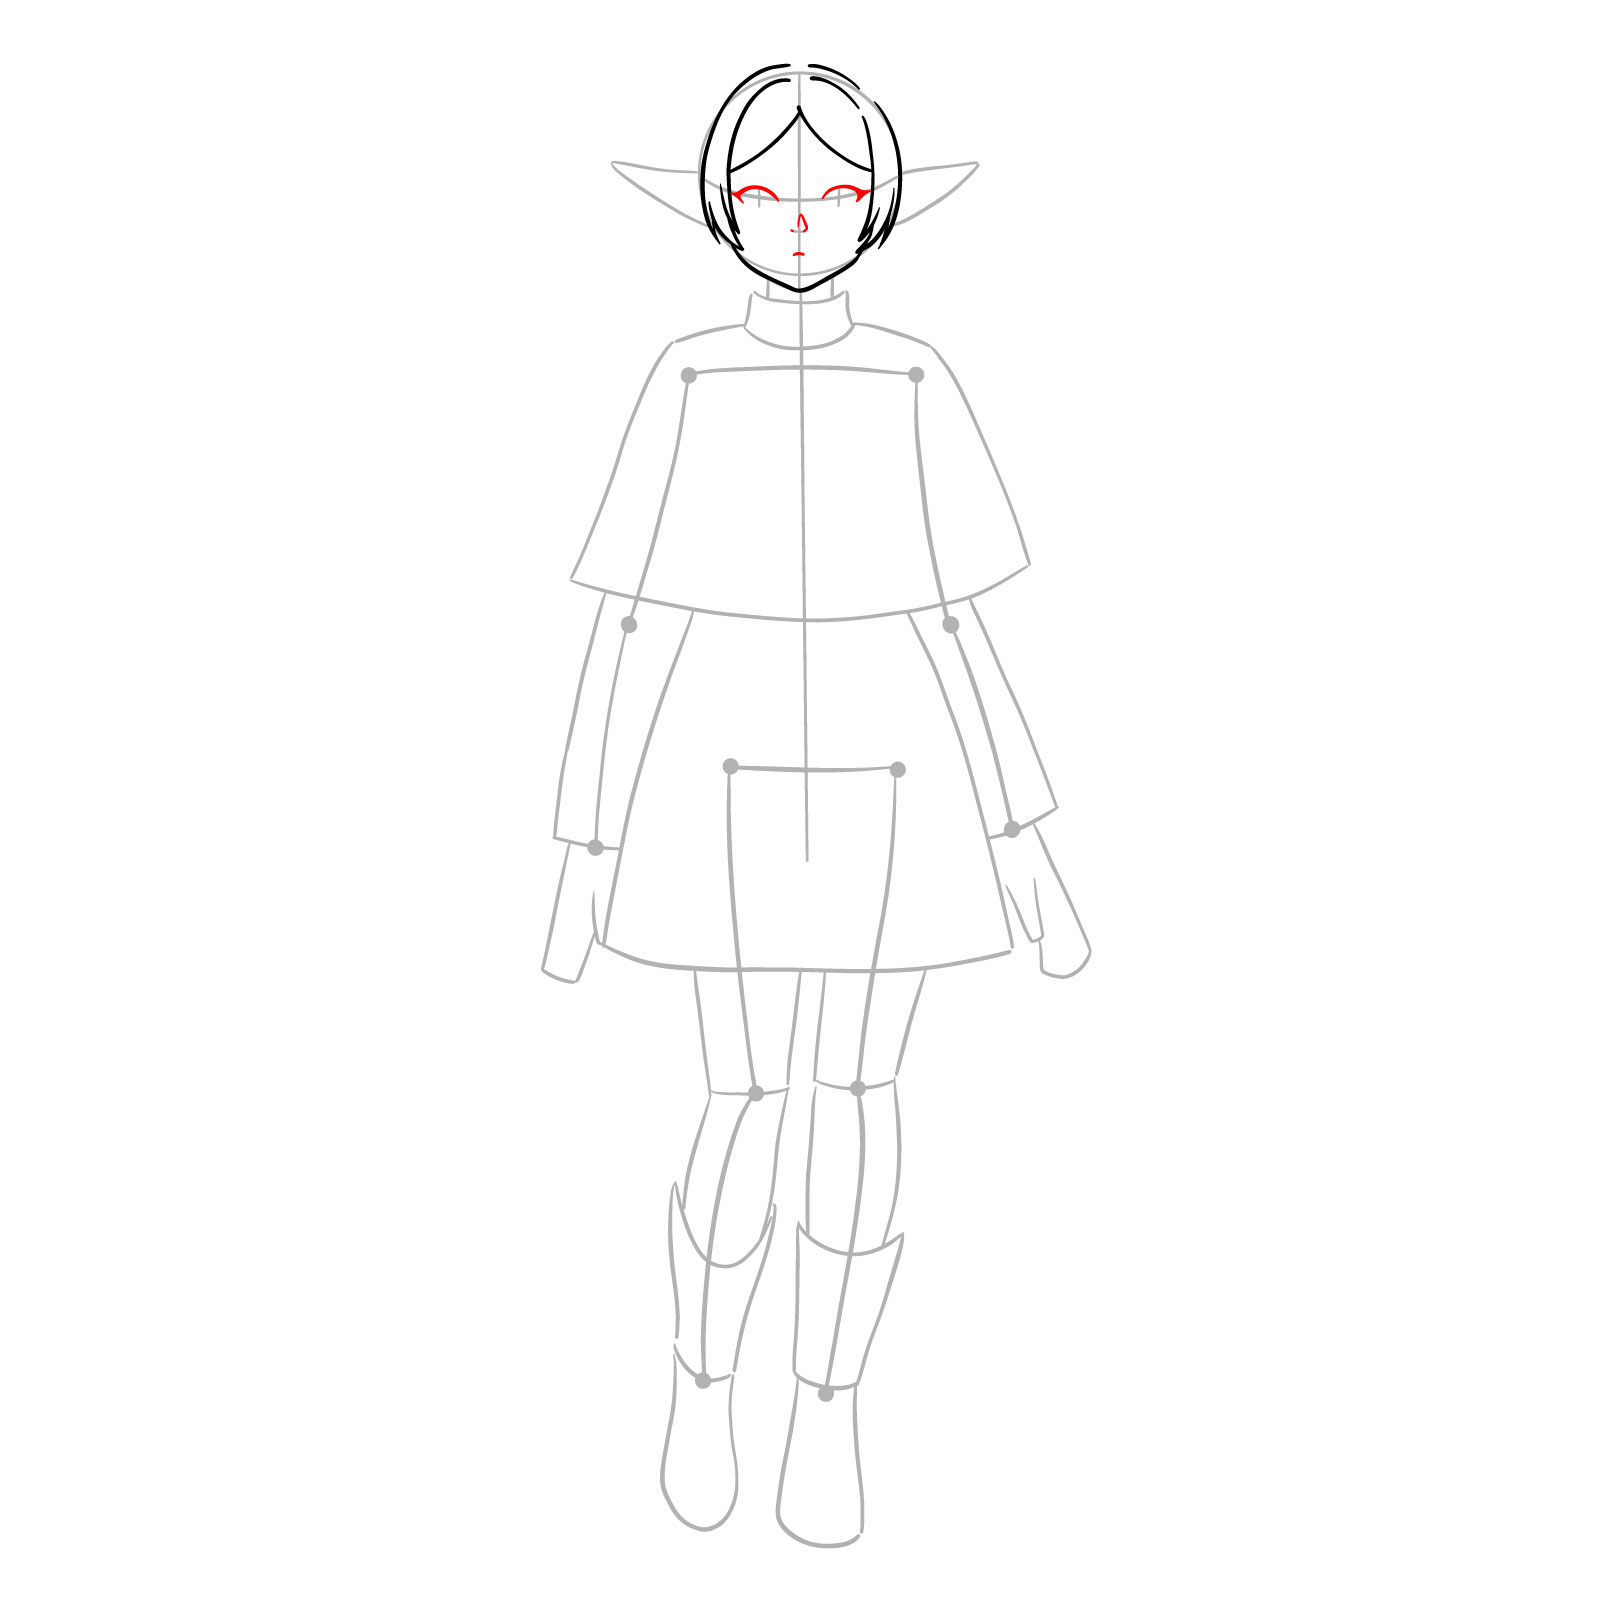
Step 05 – Sharpen up that jawline and give her fringe some style. Add outer stands for the bangs we did in the previous step
Defining Frieren’s jaw and hair
Step 06 – Now, define those eyes, nose, and mouth to bring her face into focus. Getting her expression right is key here
Outlining Frieren’s eyes, nose, and mouth
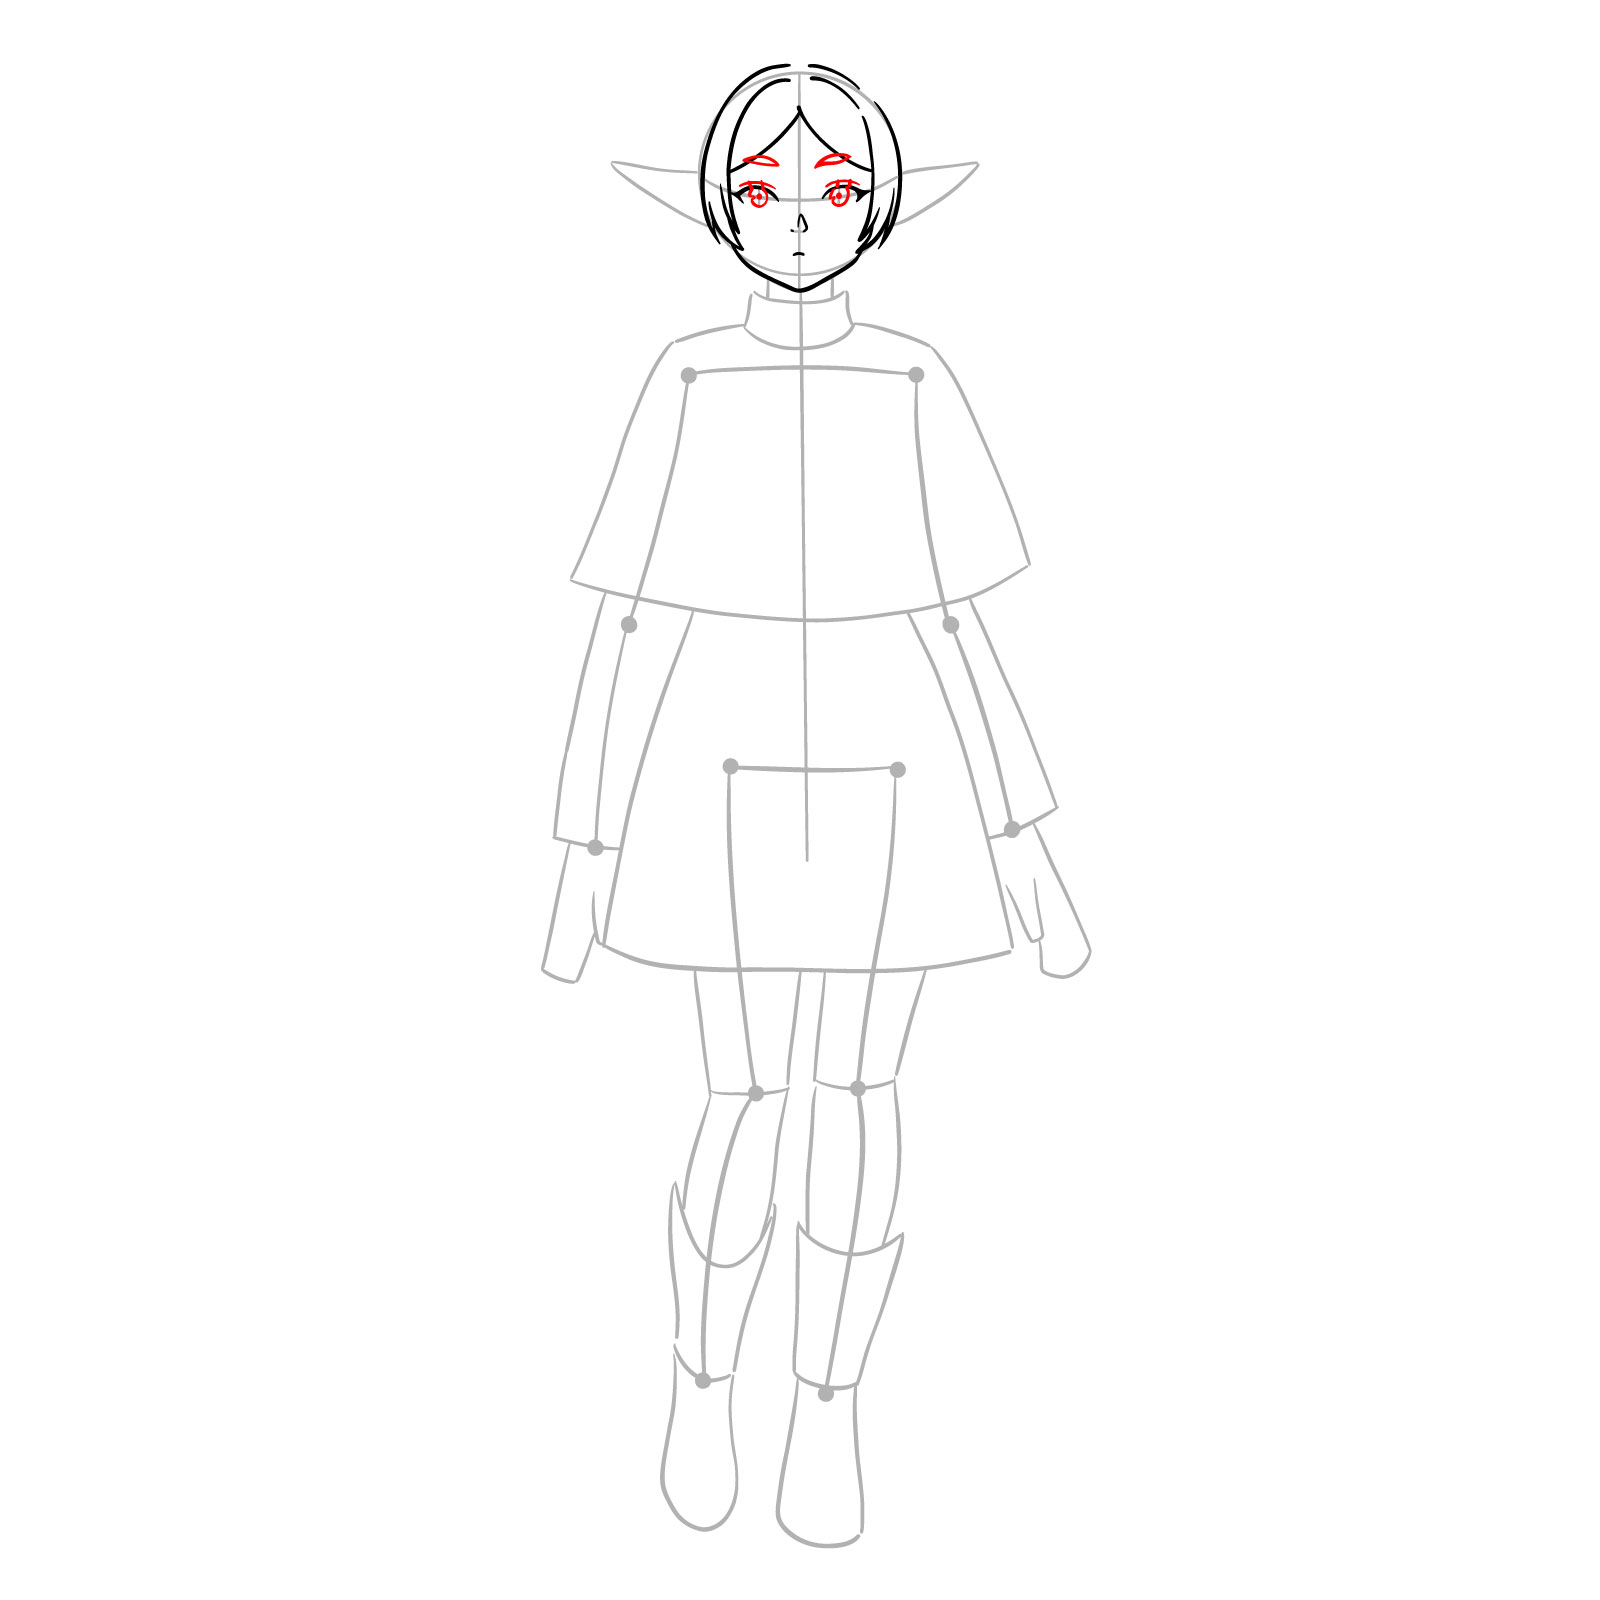
Step 07 – Draw in the irises and lashes, and shape those brows
Detailing her eyes and brows
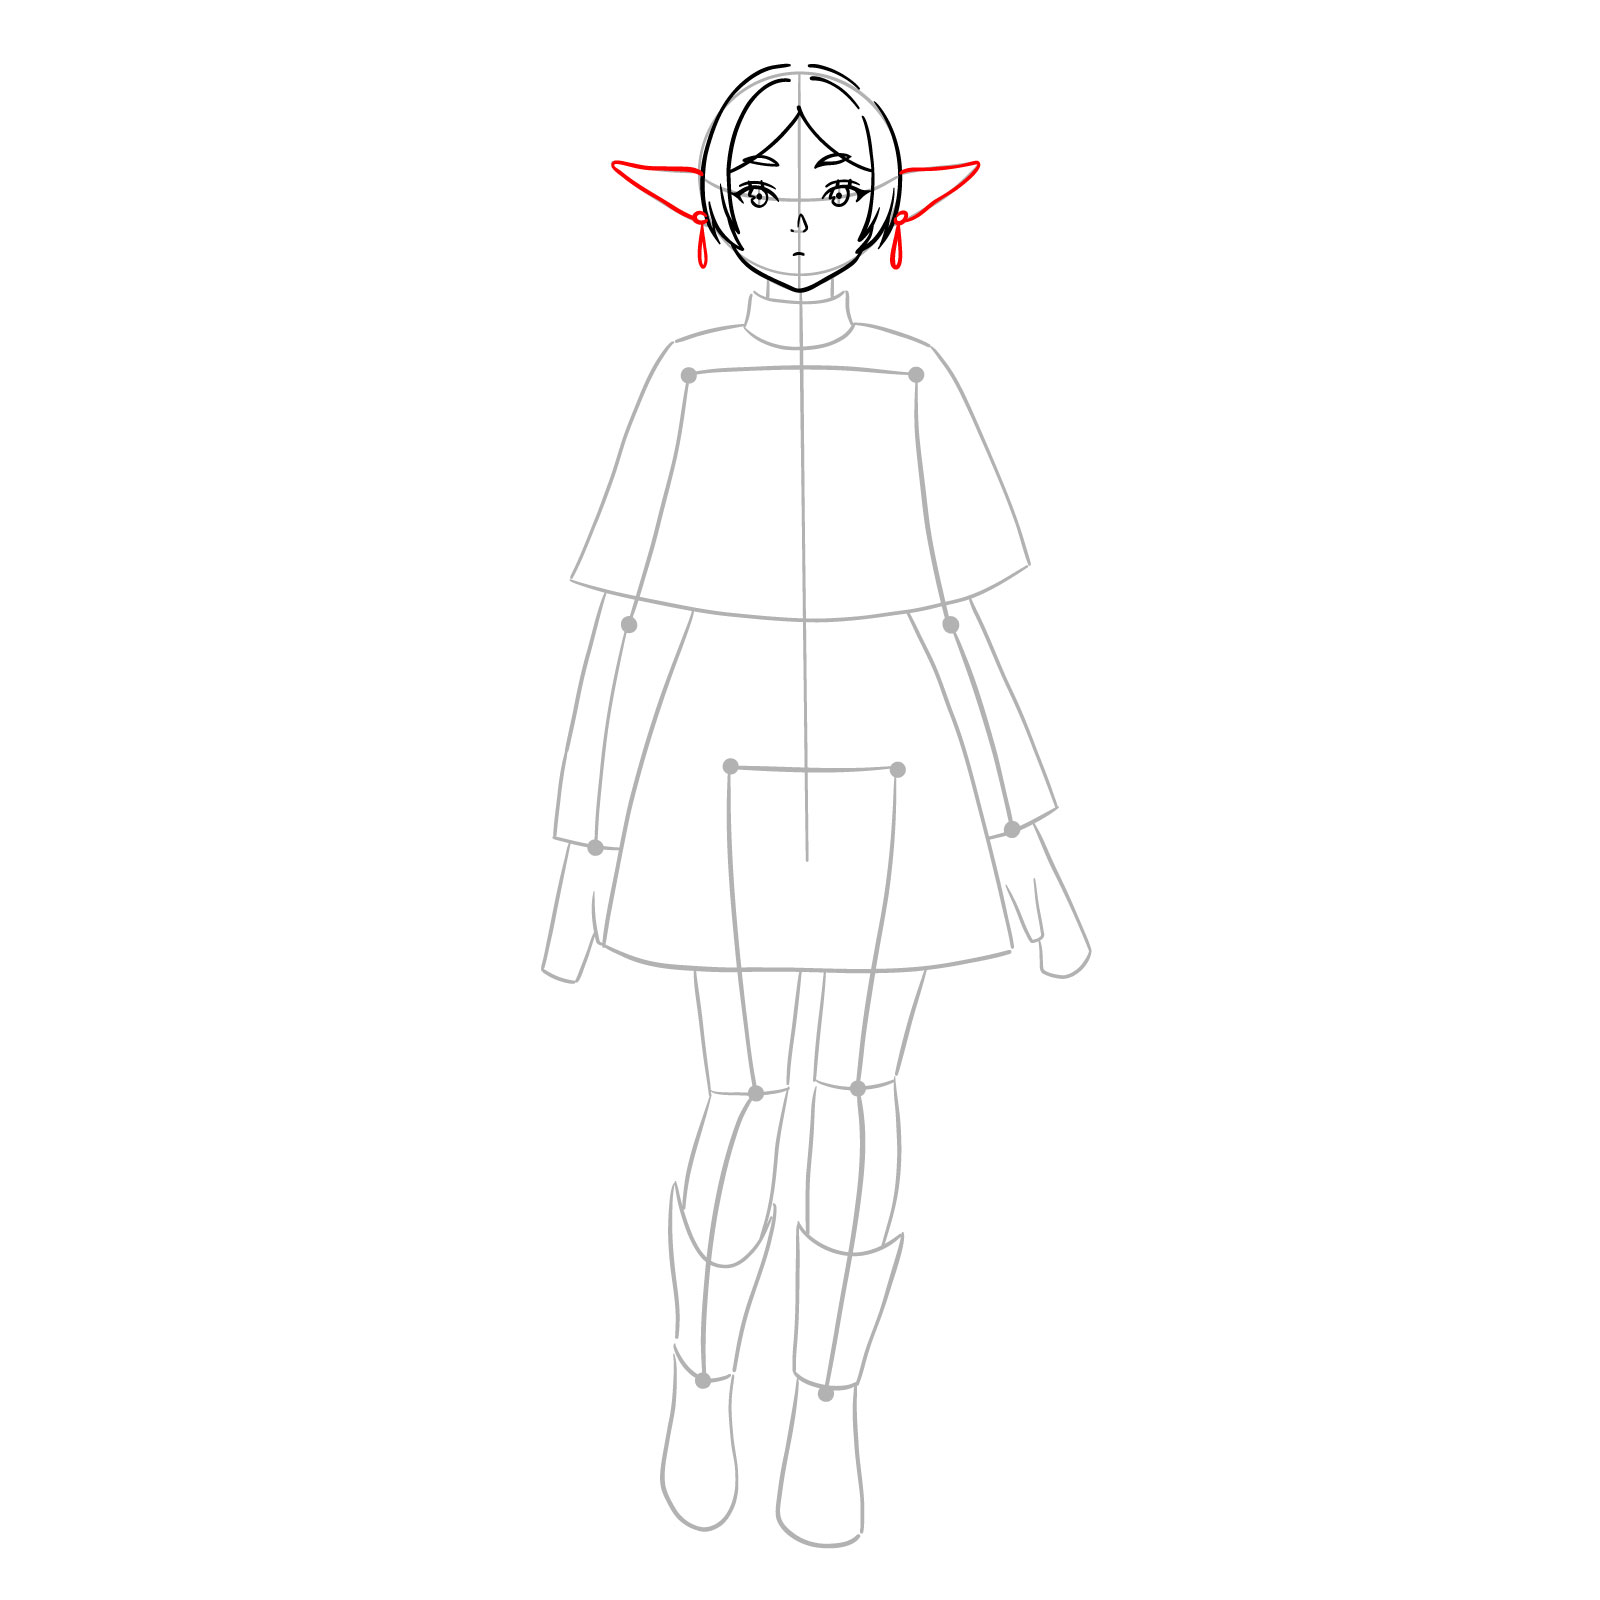
Step 08 – Time for her ears and those distinctive earrings
Adding Frieren’s ears and earrings
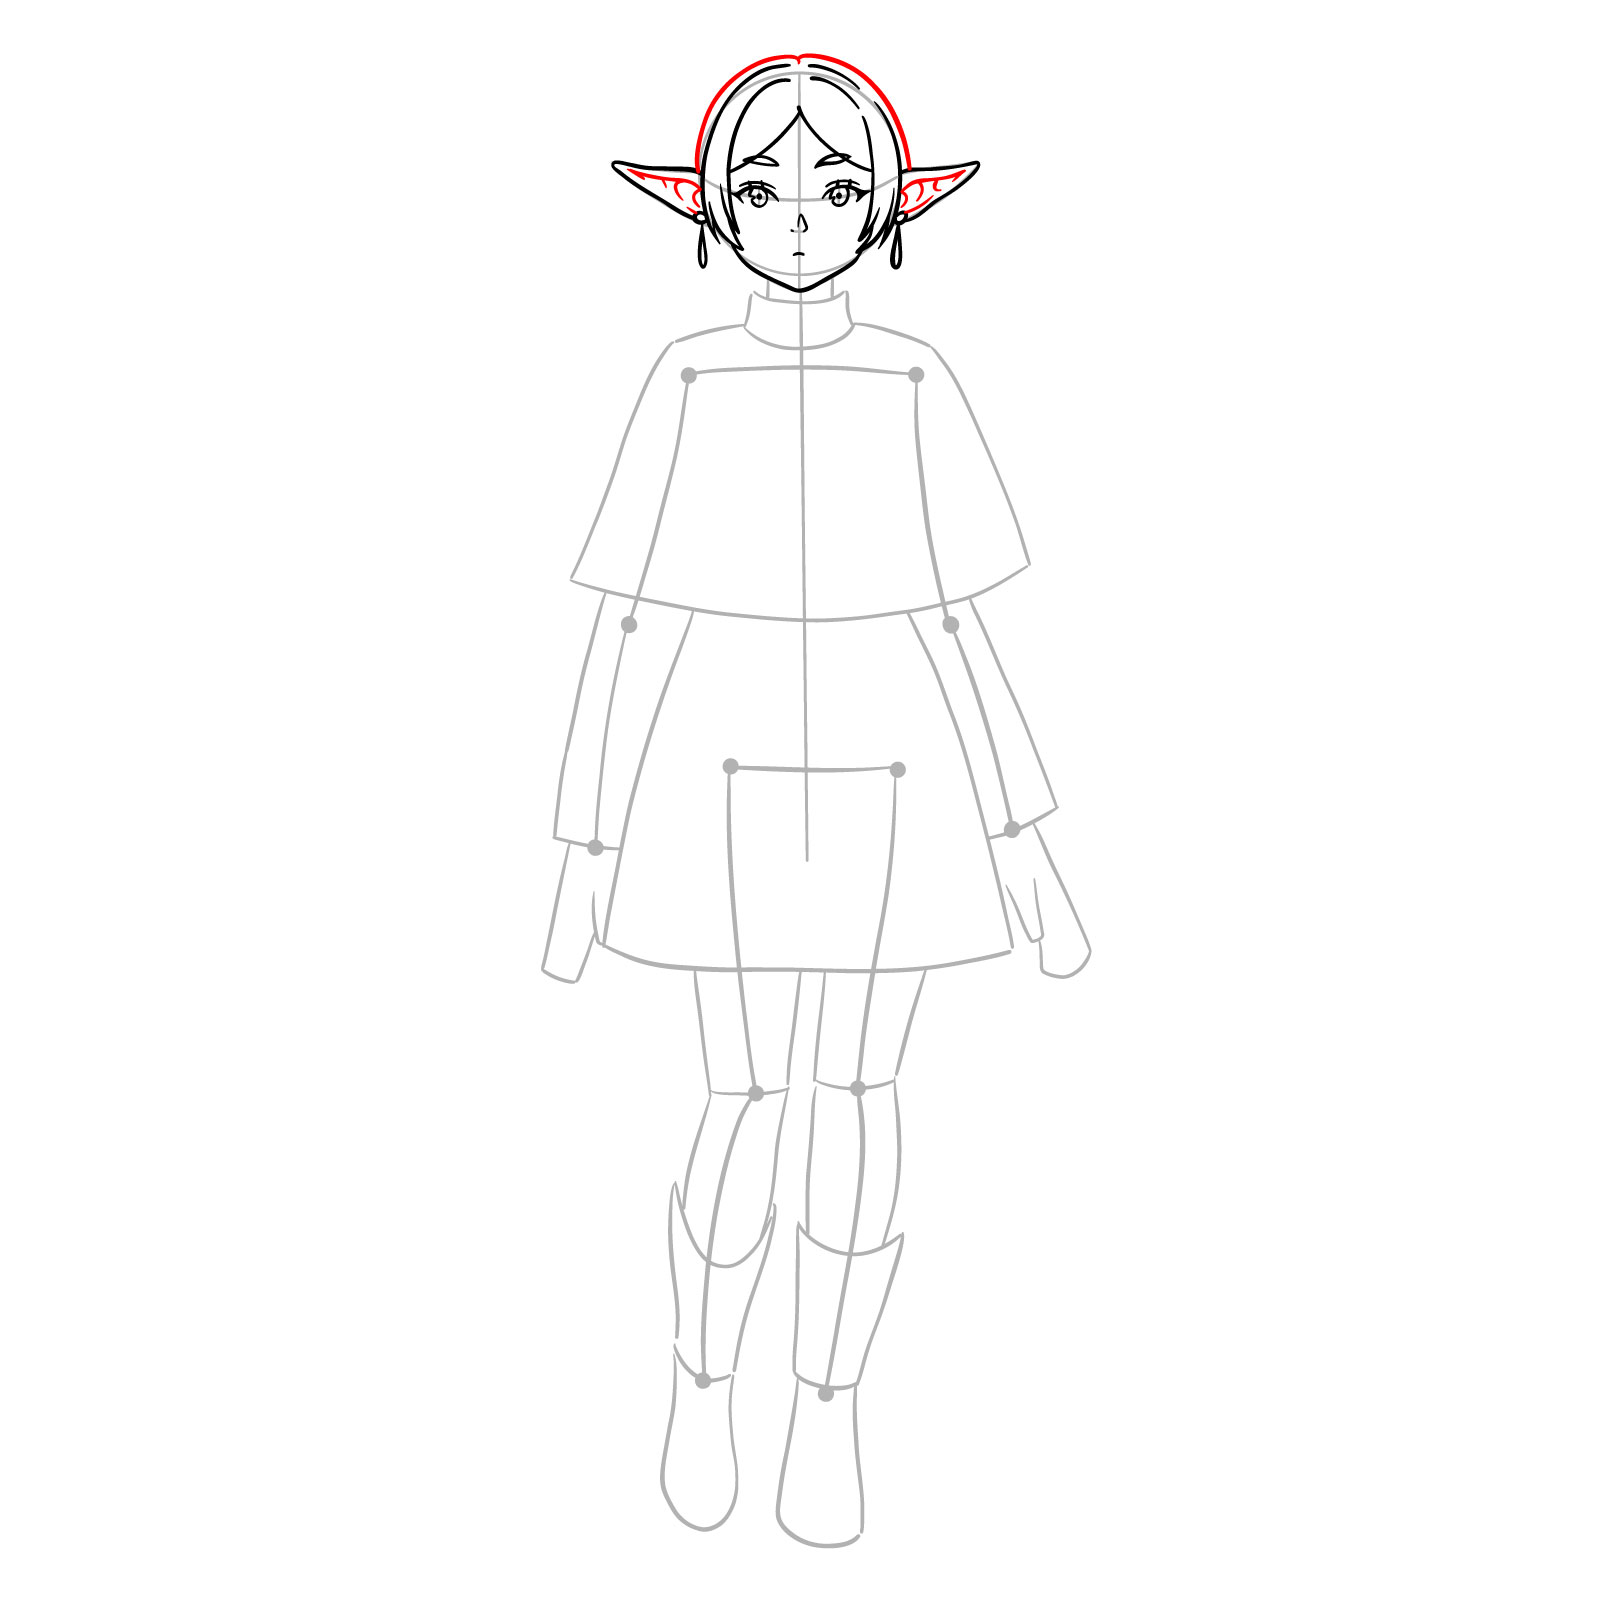
Step 09 – Finish the top part of her hair and add in those inner ear details. Now her head’s fully outlined and ready to go
Finishing the hair outline and ear details
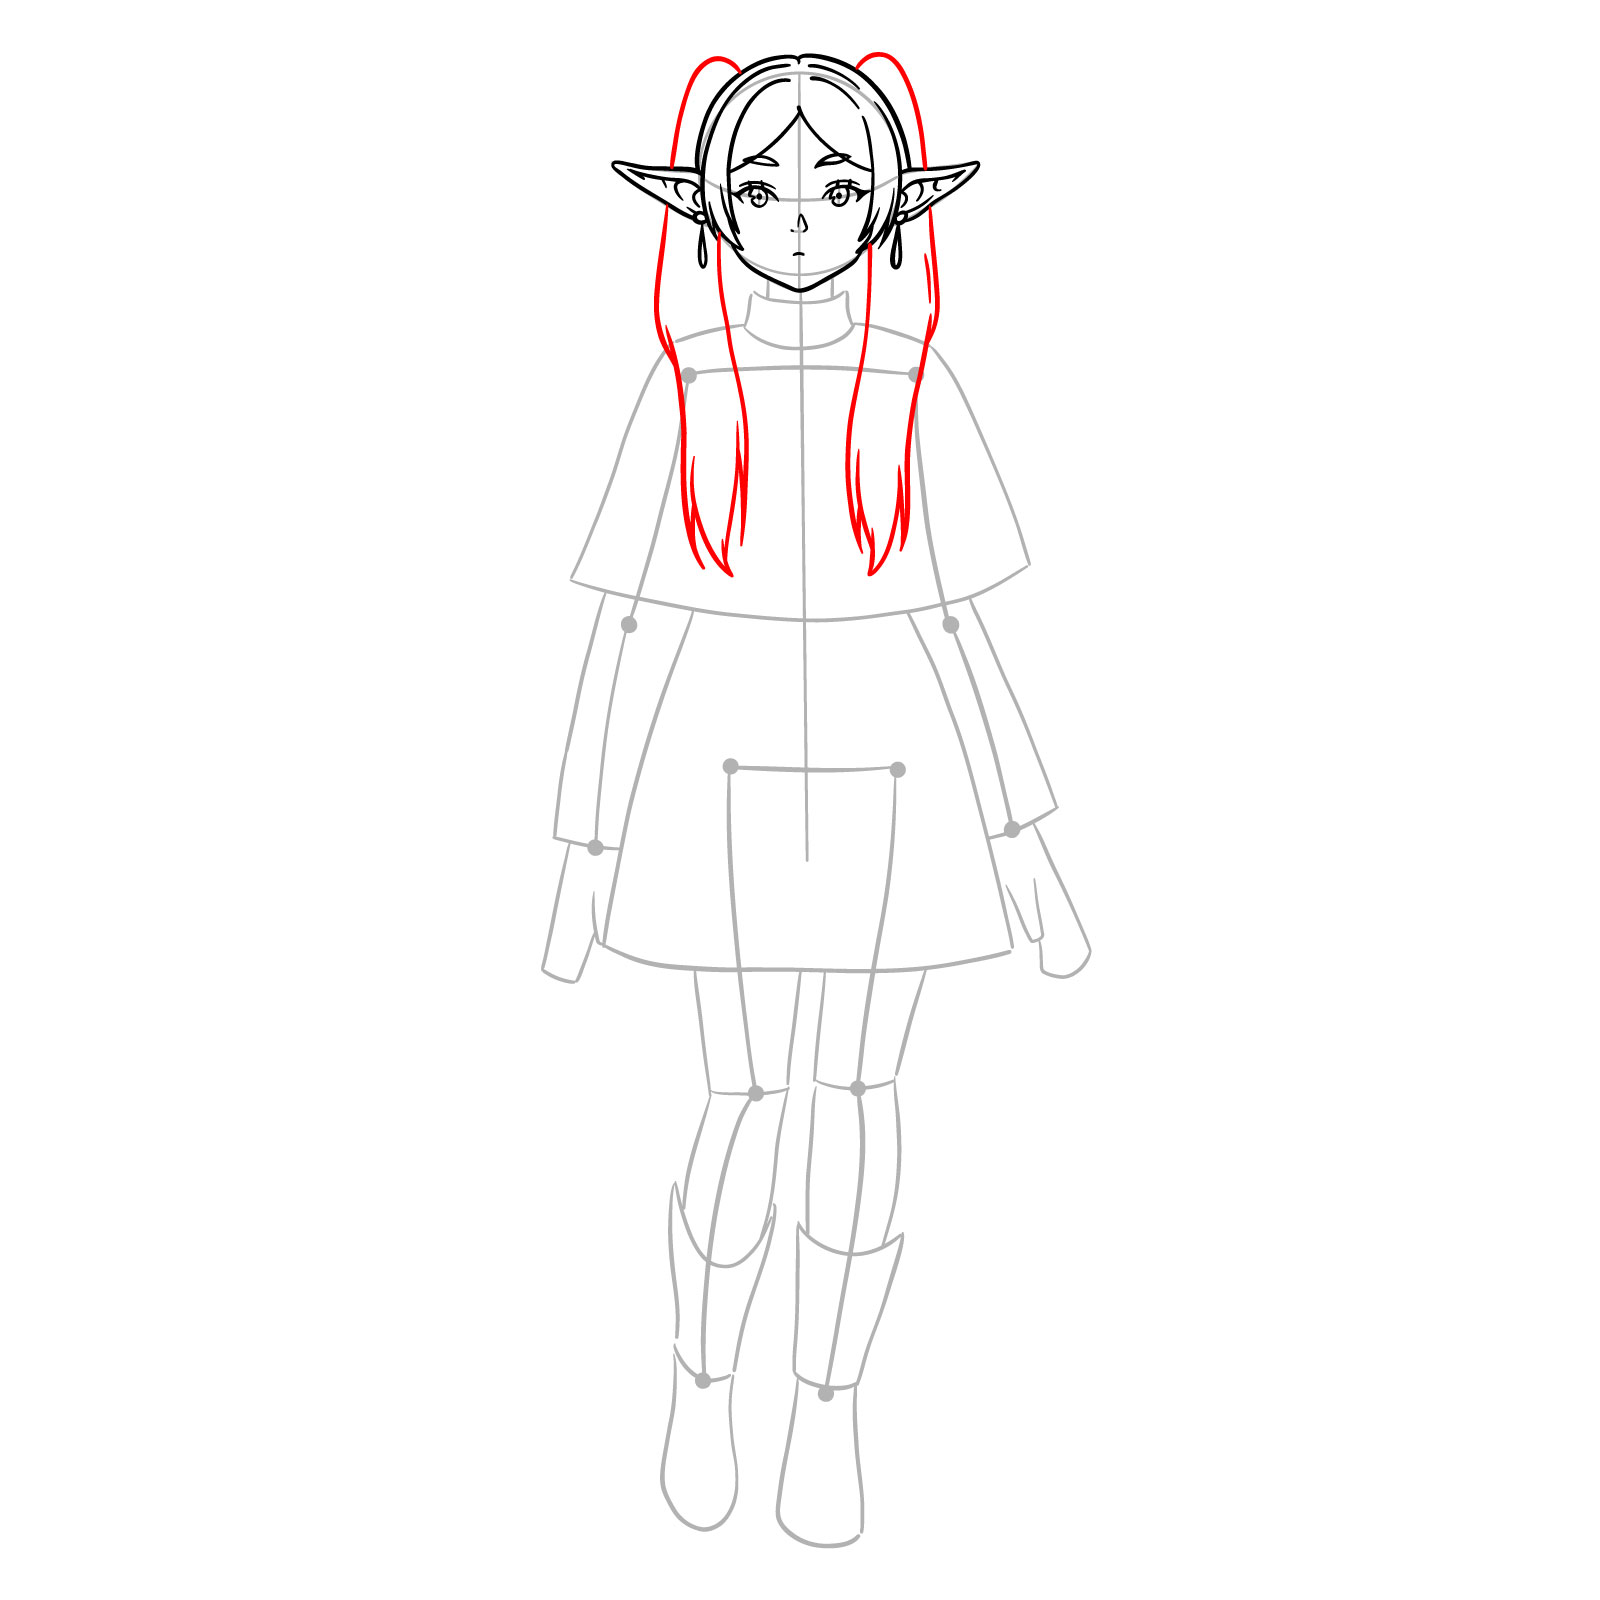
Step 10 – Time to draw her iconic pigtails, make them long and wavy to match her style
Sketching Frieren’s signature pigtails
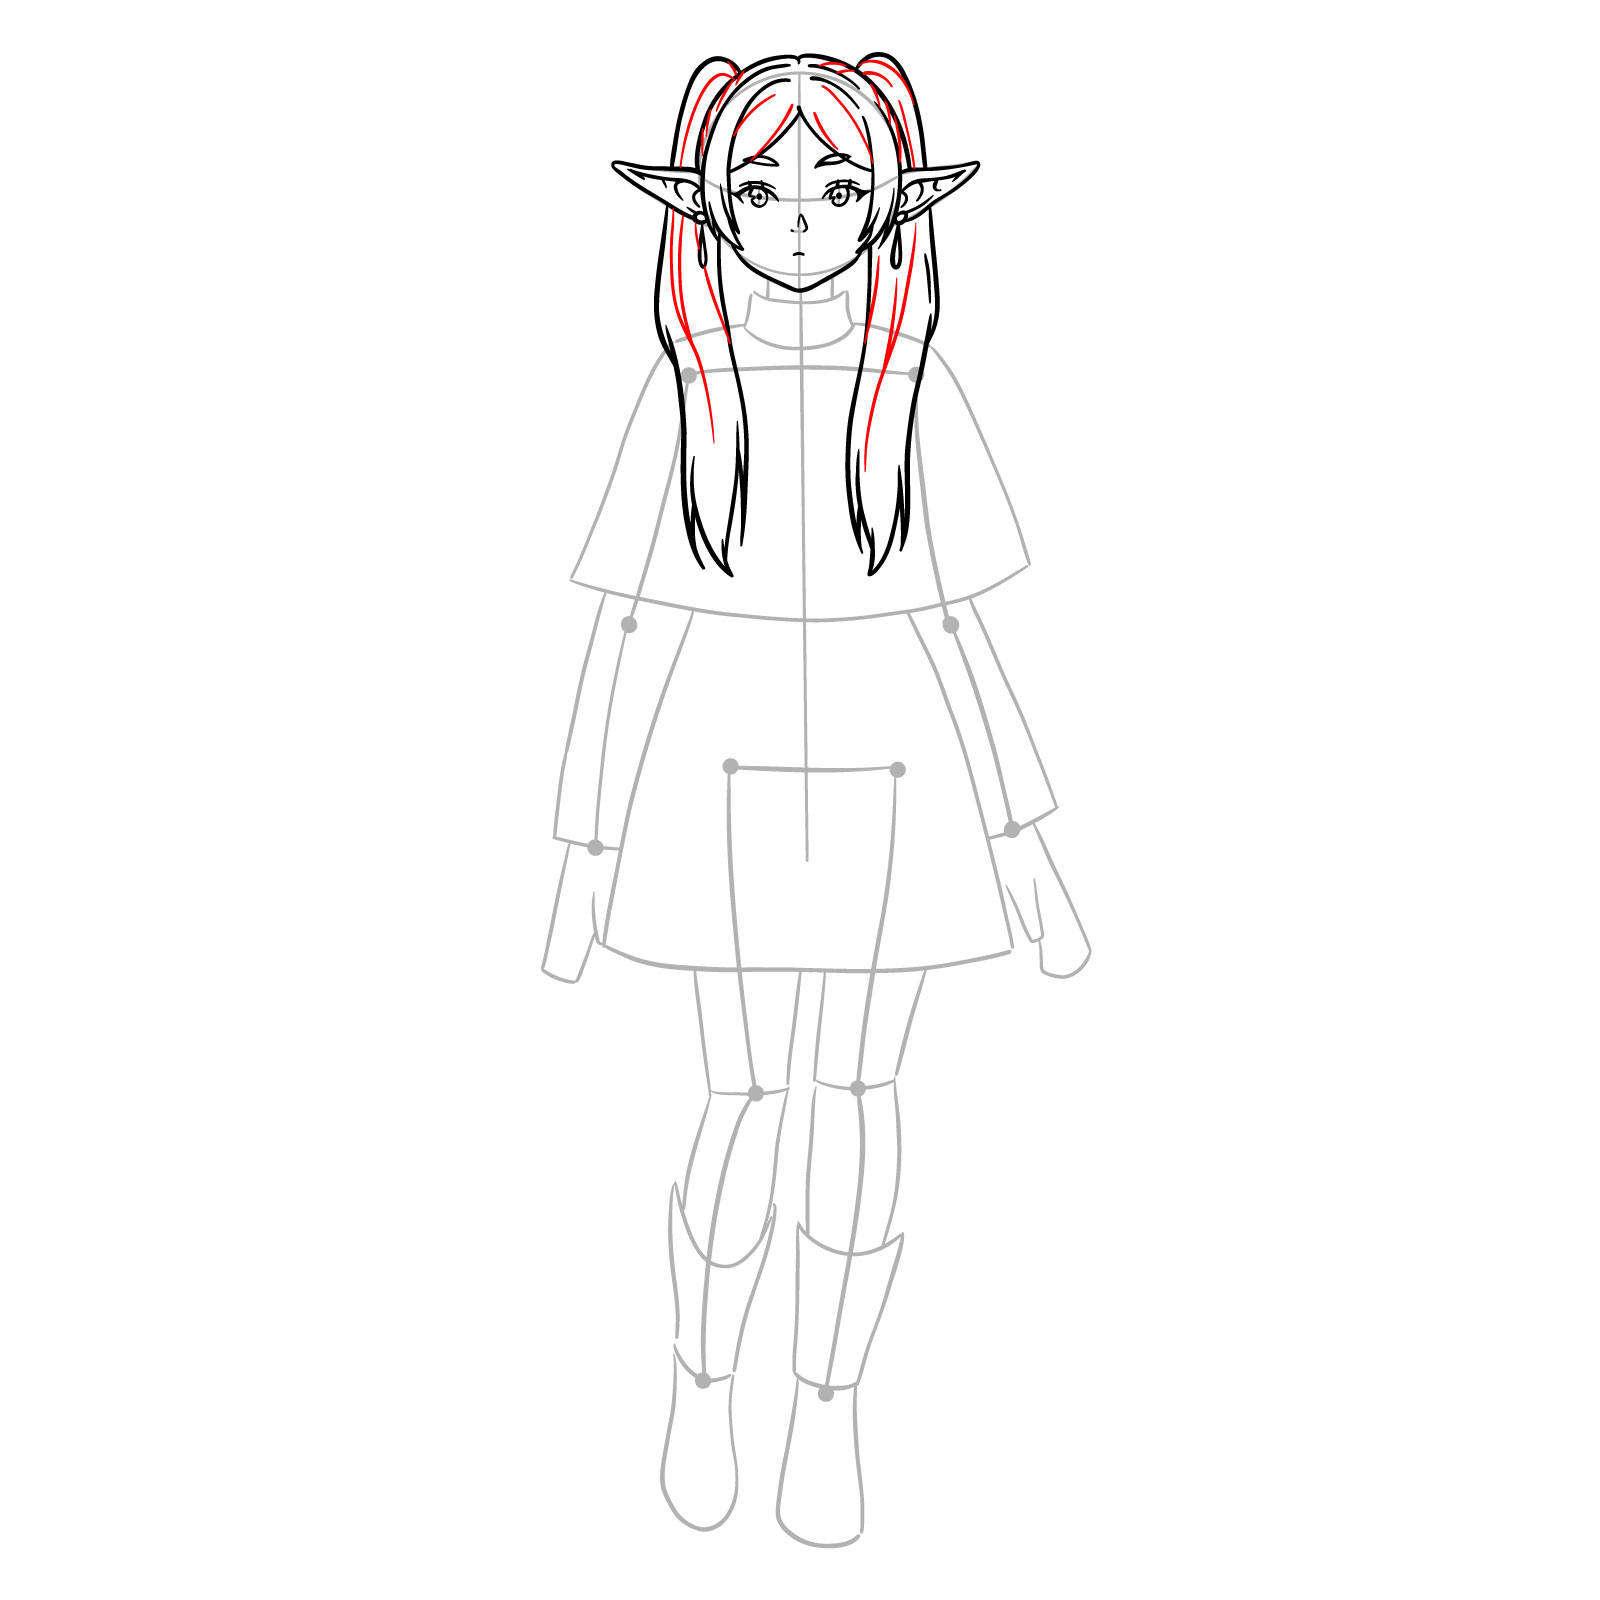
Step 11 – Now, add strands to those pigtails to add volume to her hair
Giving texture to her hair
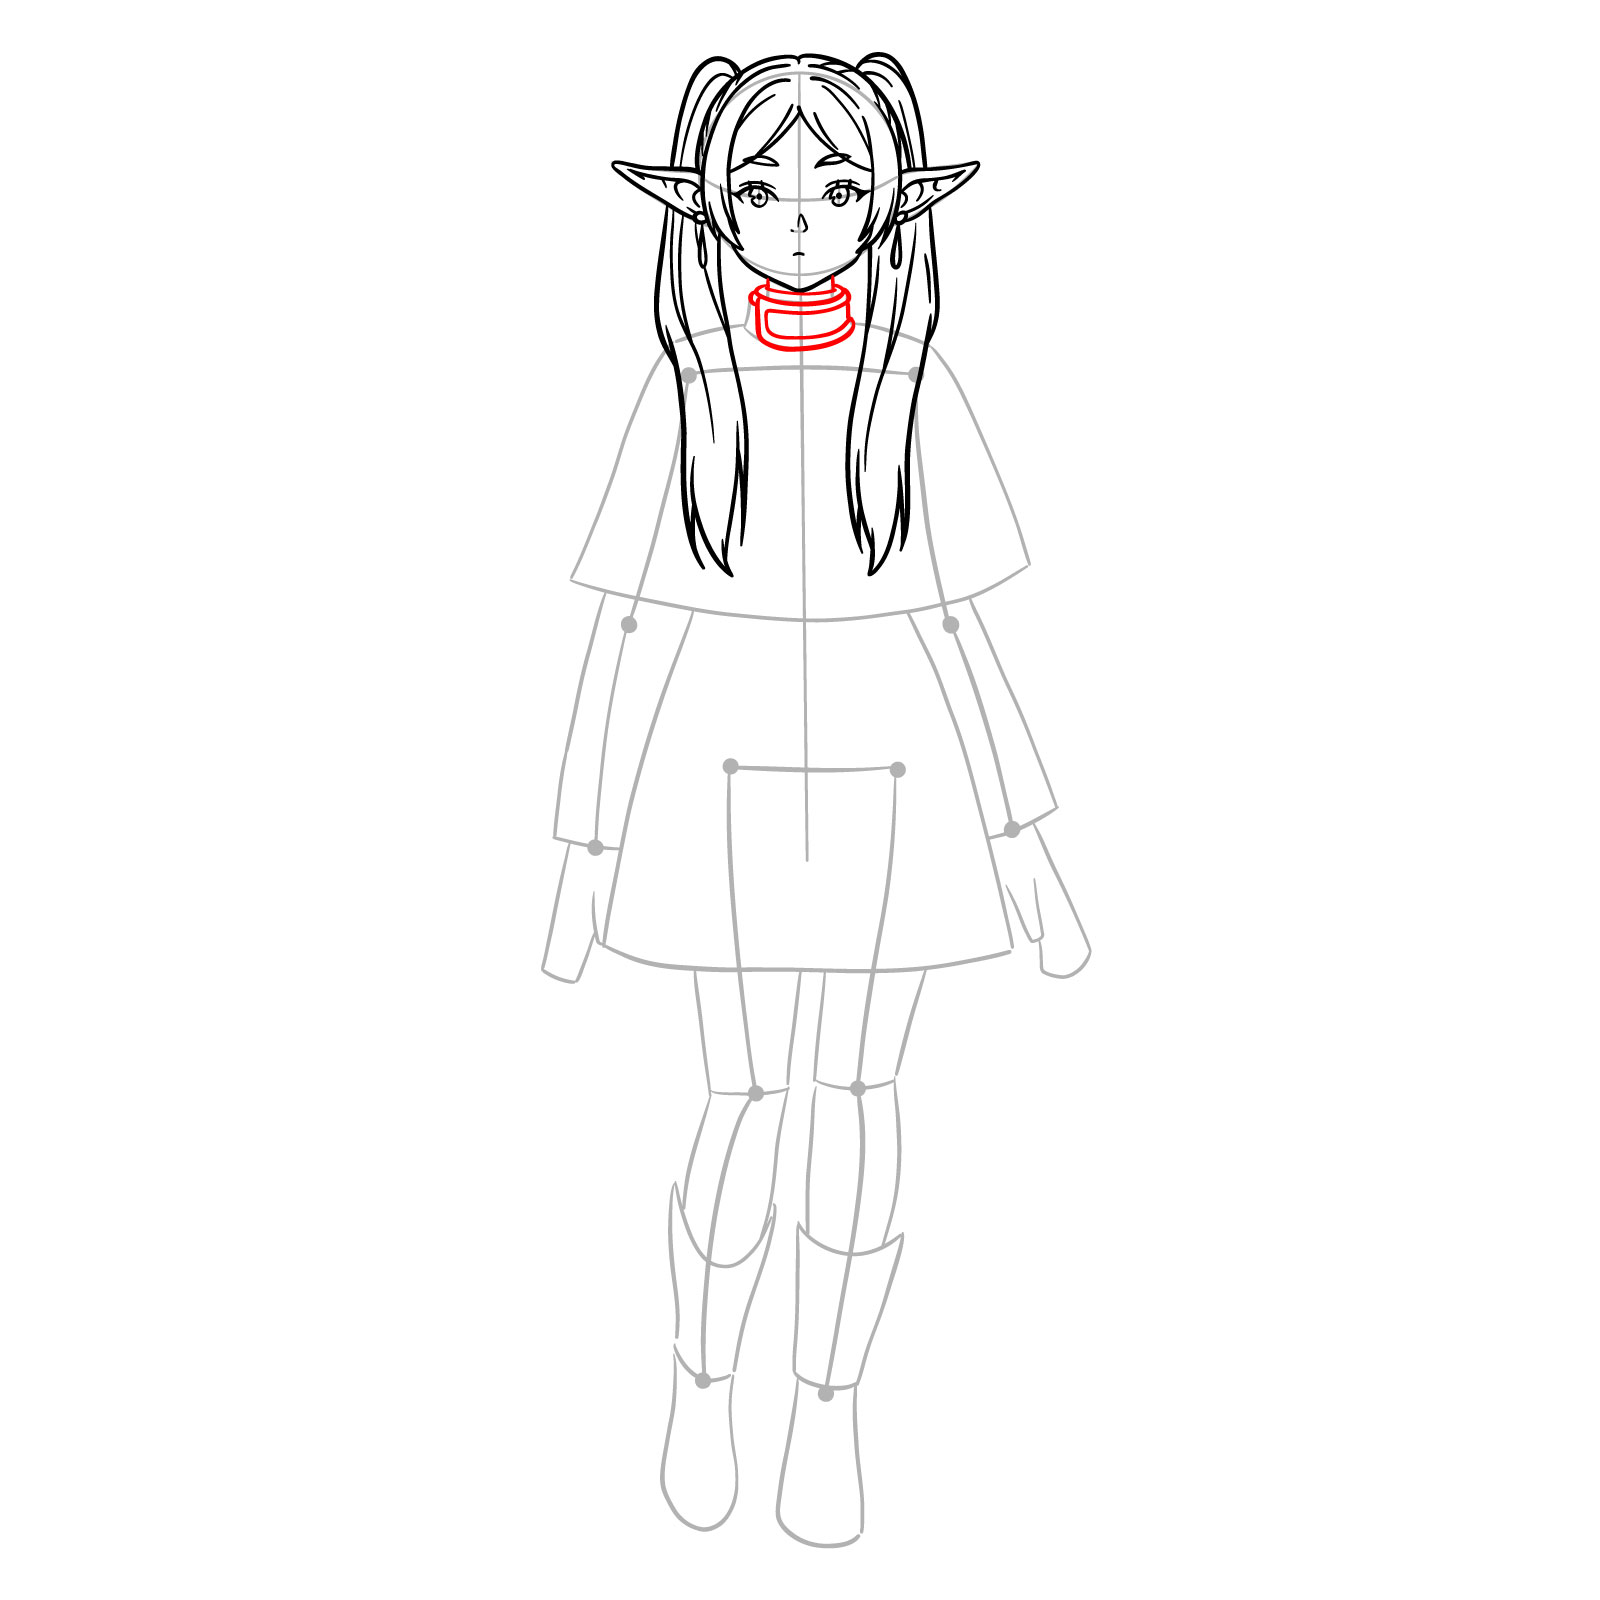
Step 12 – Outline the neck and the collar of her jacket like it is shown in the image below
Drawing Frieren’s neck and jacket collar
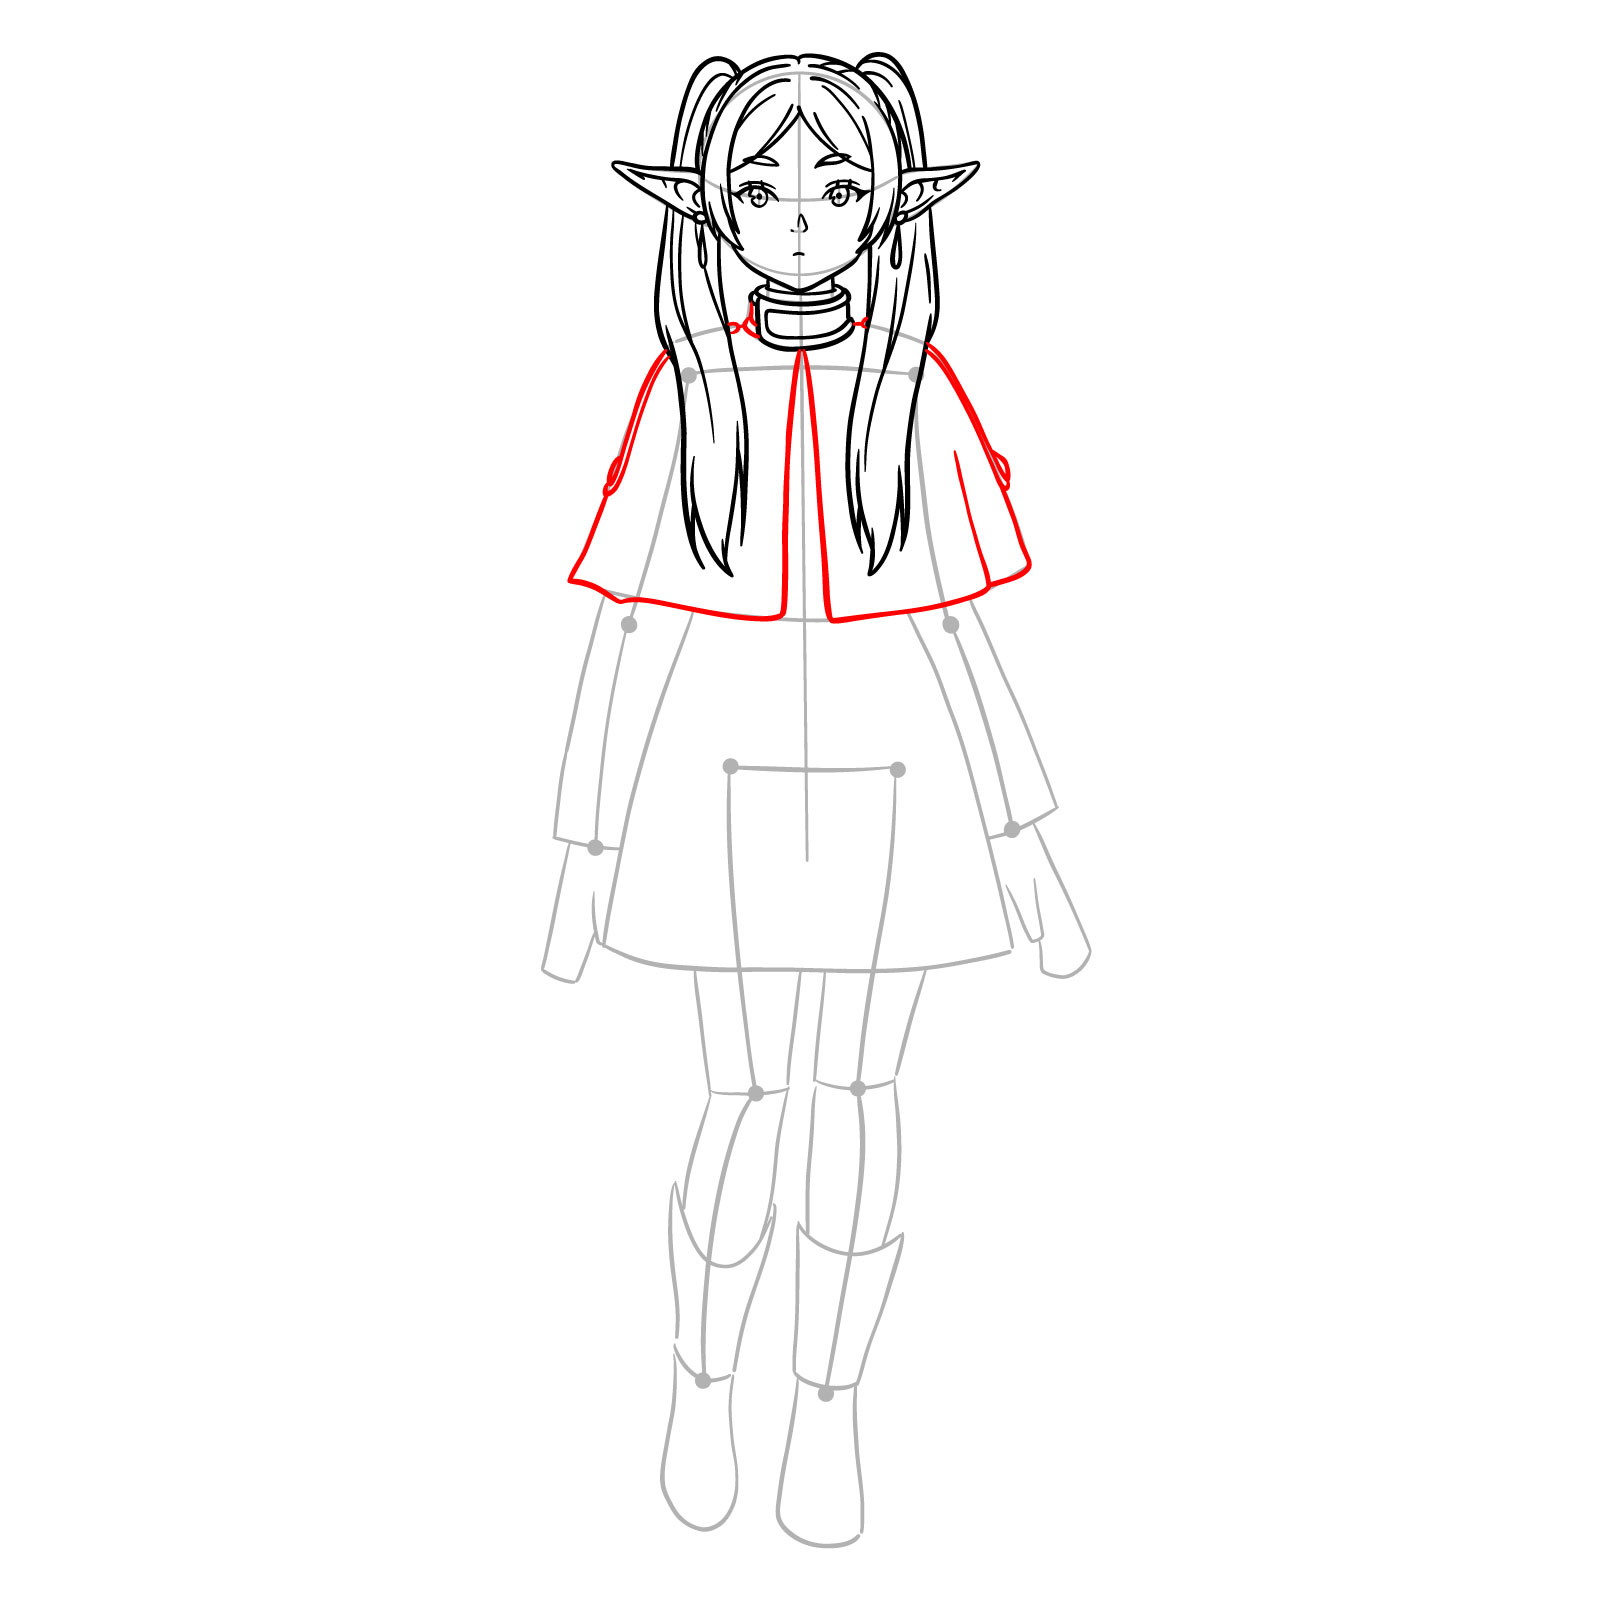
Step 13 – Draw the rest of her jacket (except the sleeves), including the folds to show how the fabric falls
Crafting the top of Frieren’s jacket
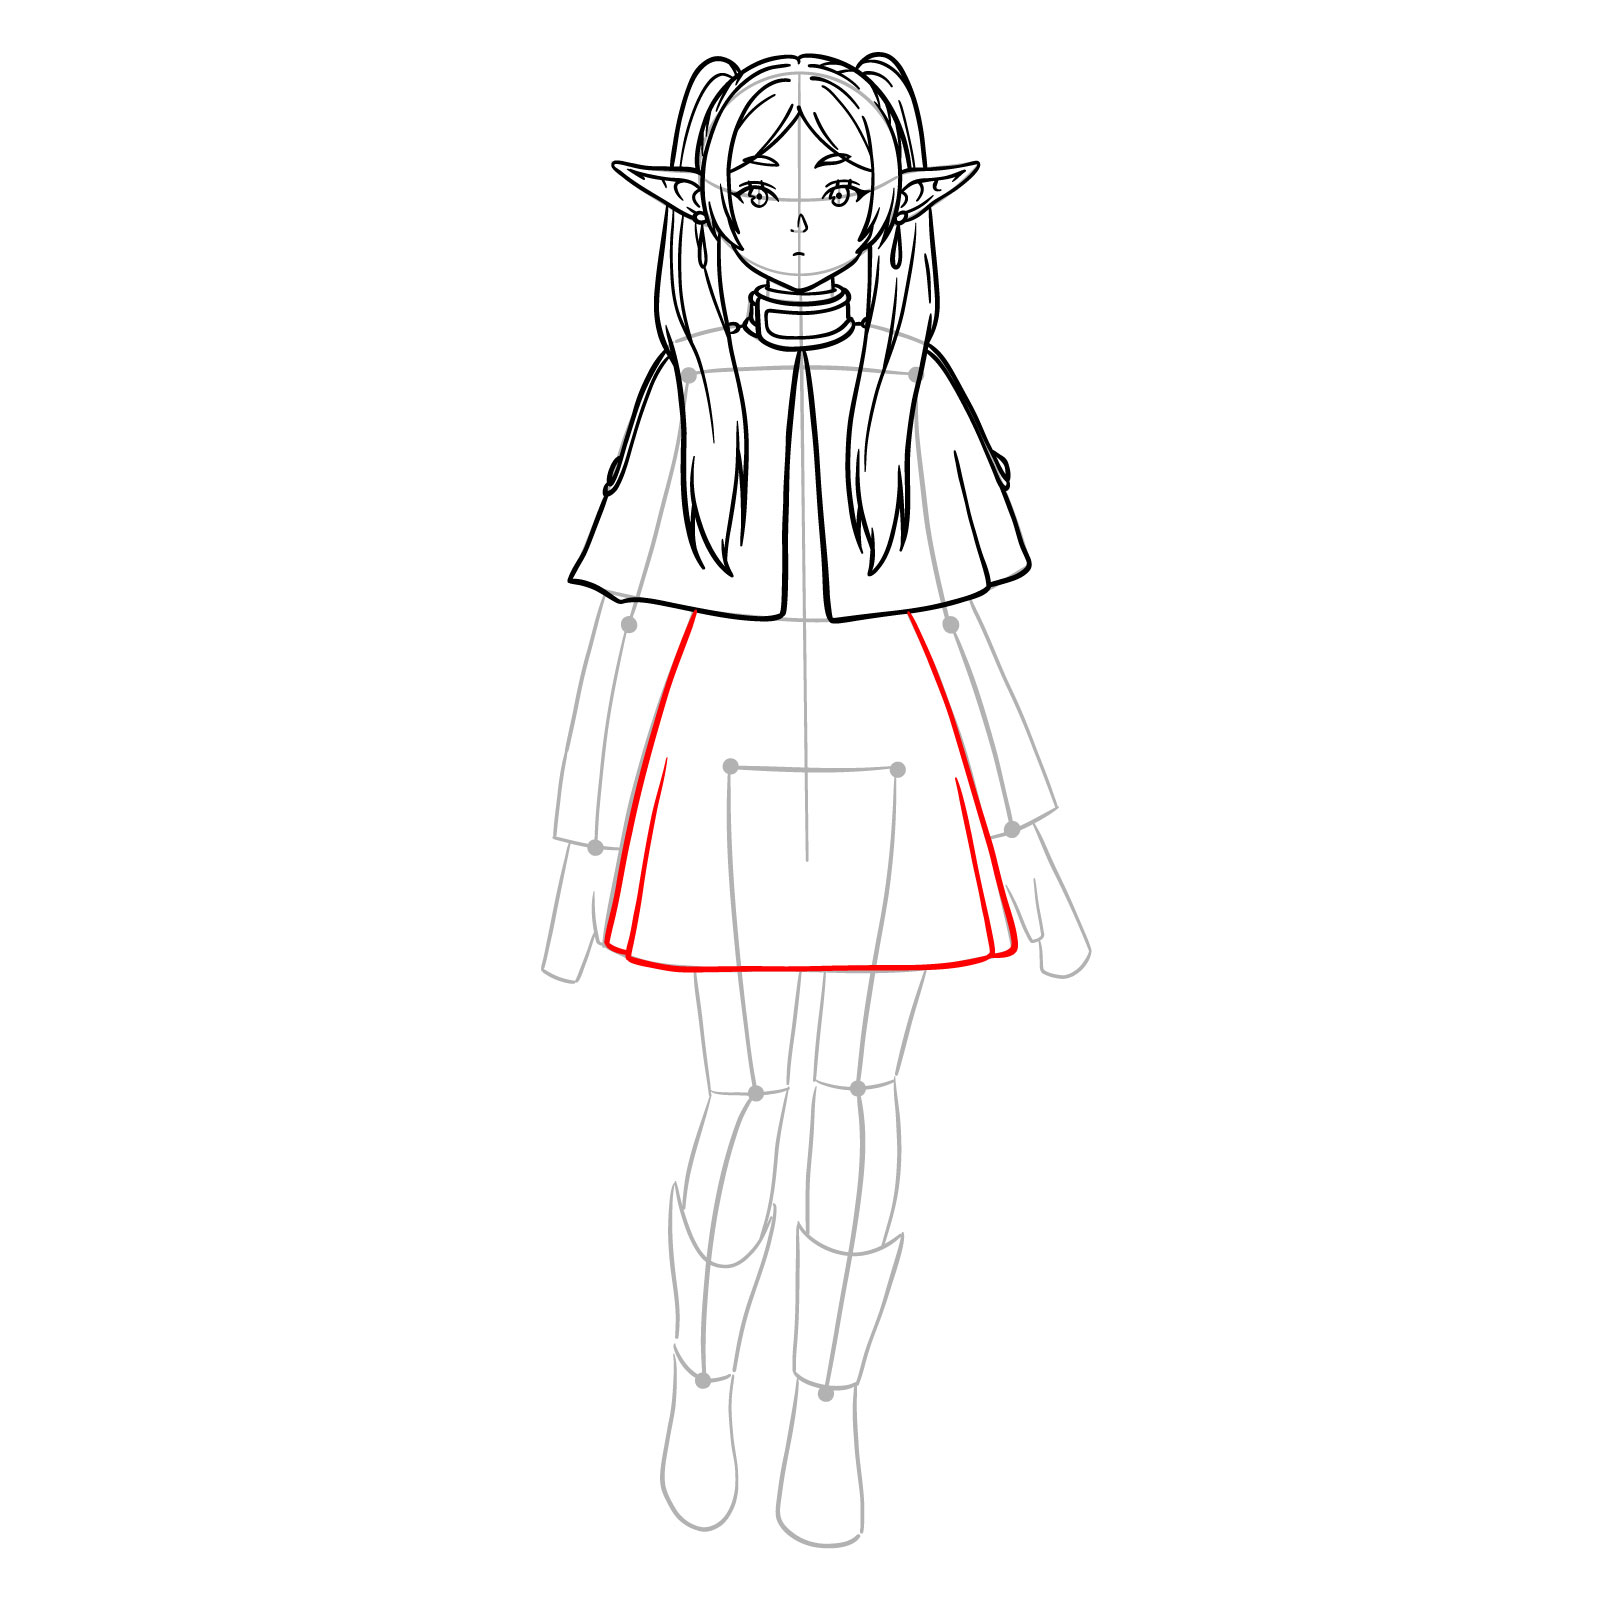
Step 14 – Add the skirt, keeping it in proportion to her top and making it flow with her pose
Sketching Frieren’s skirt
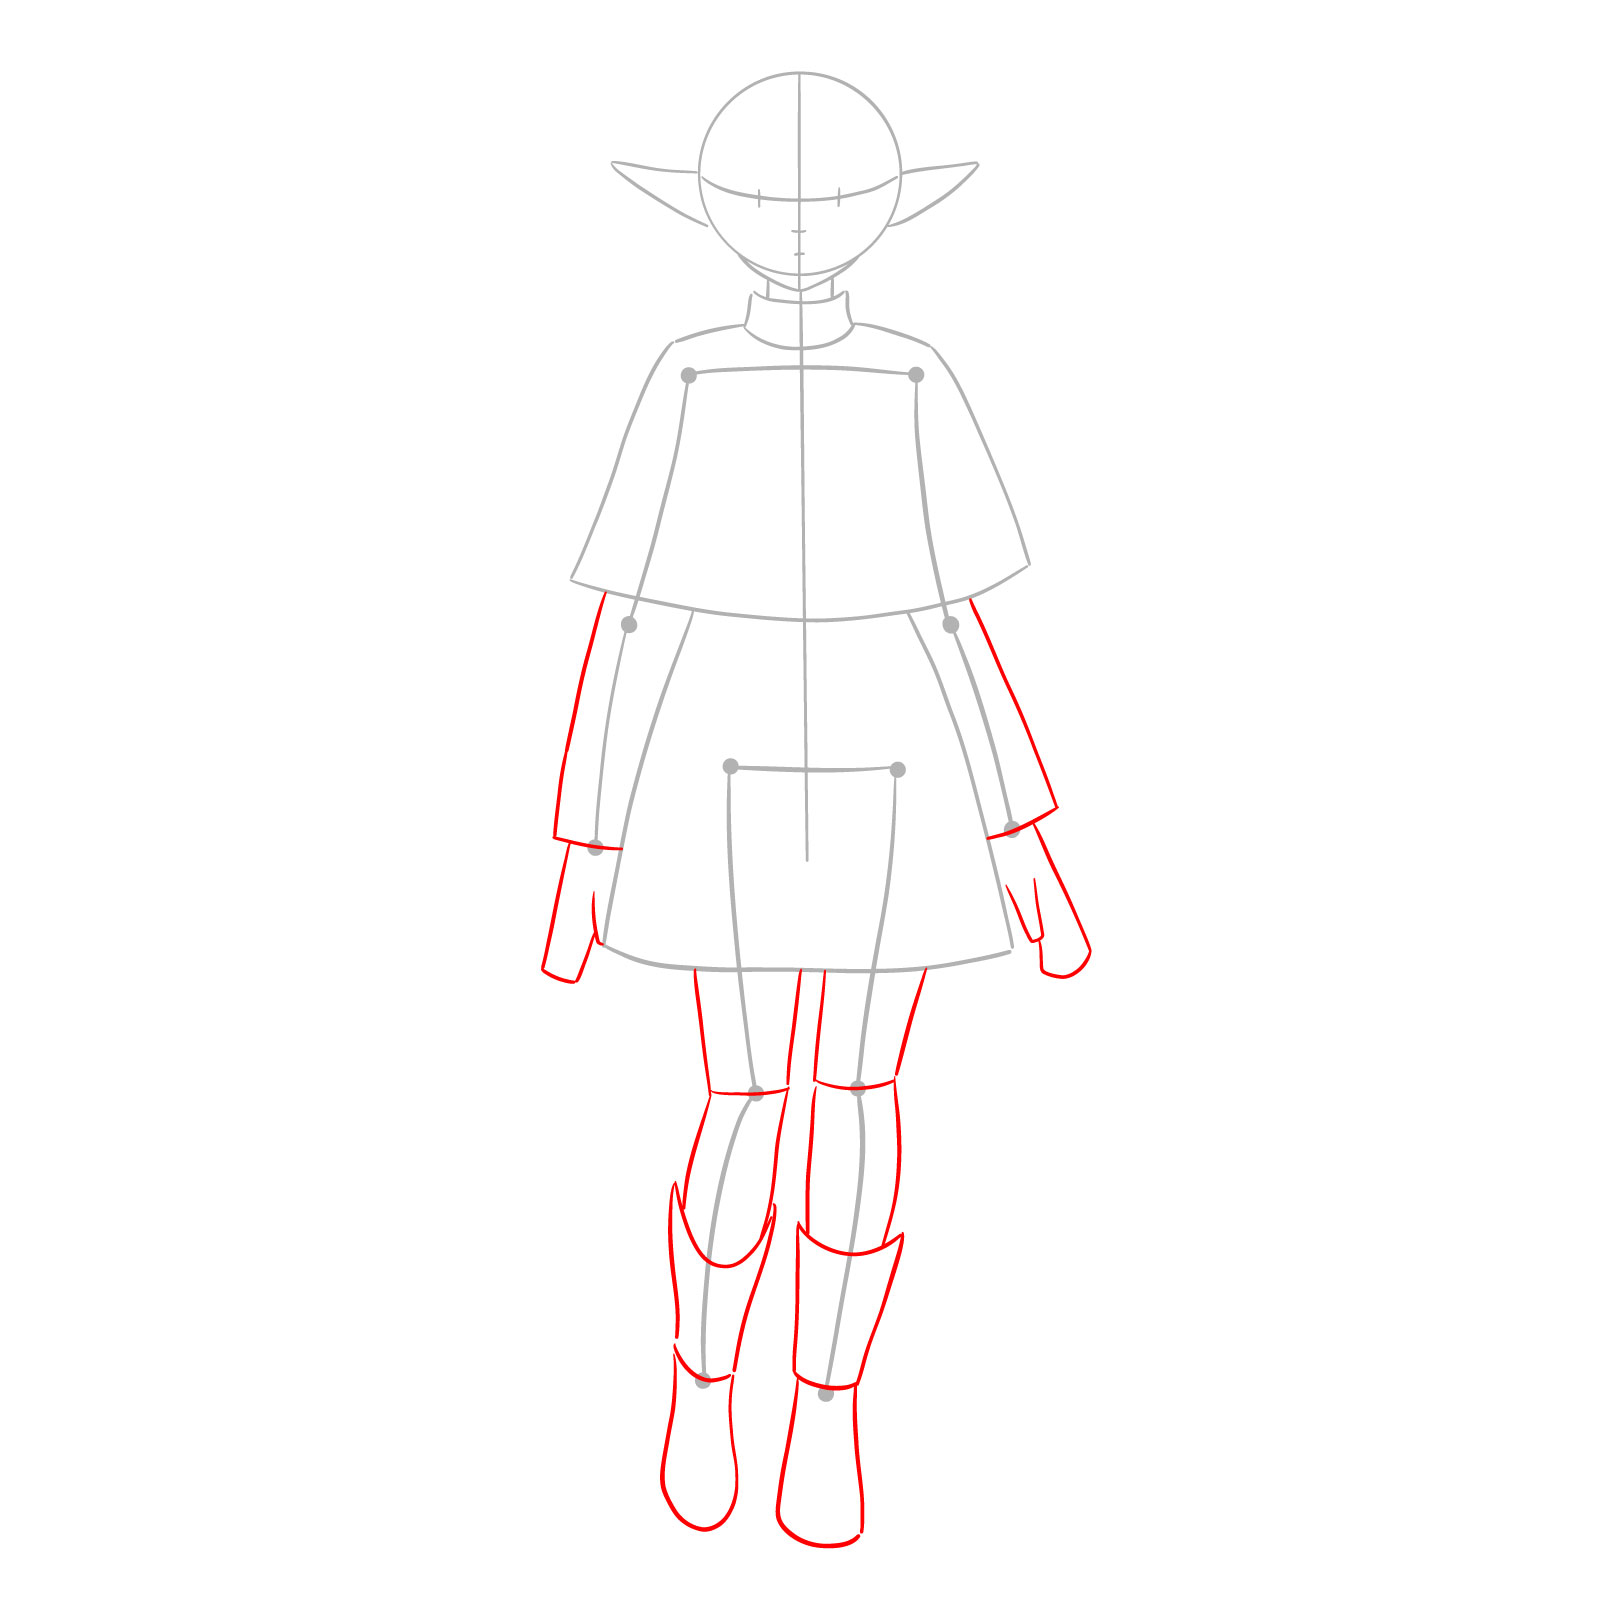
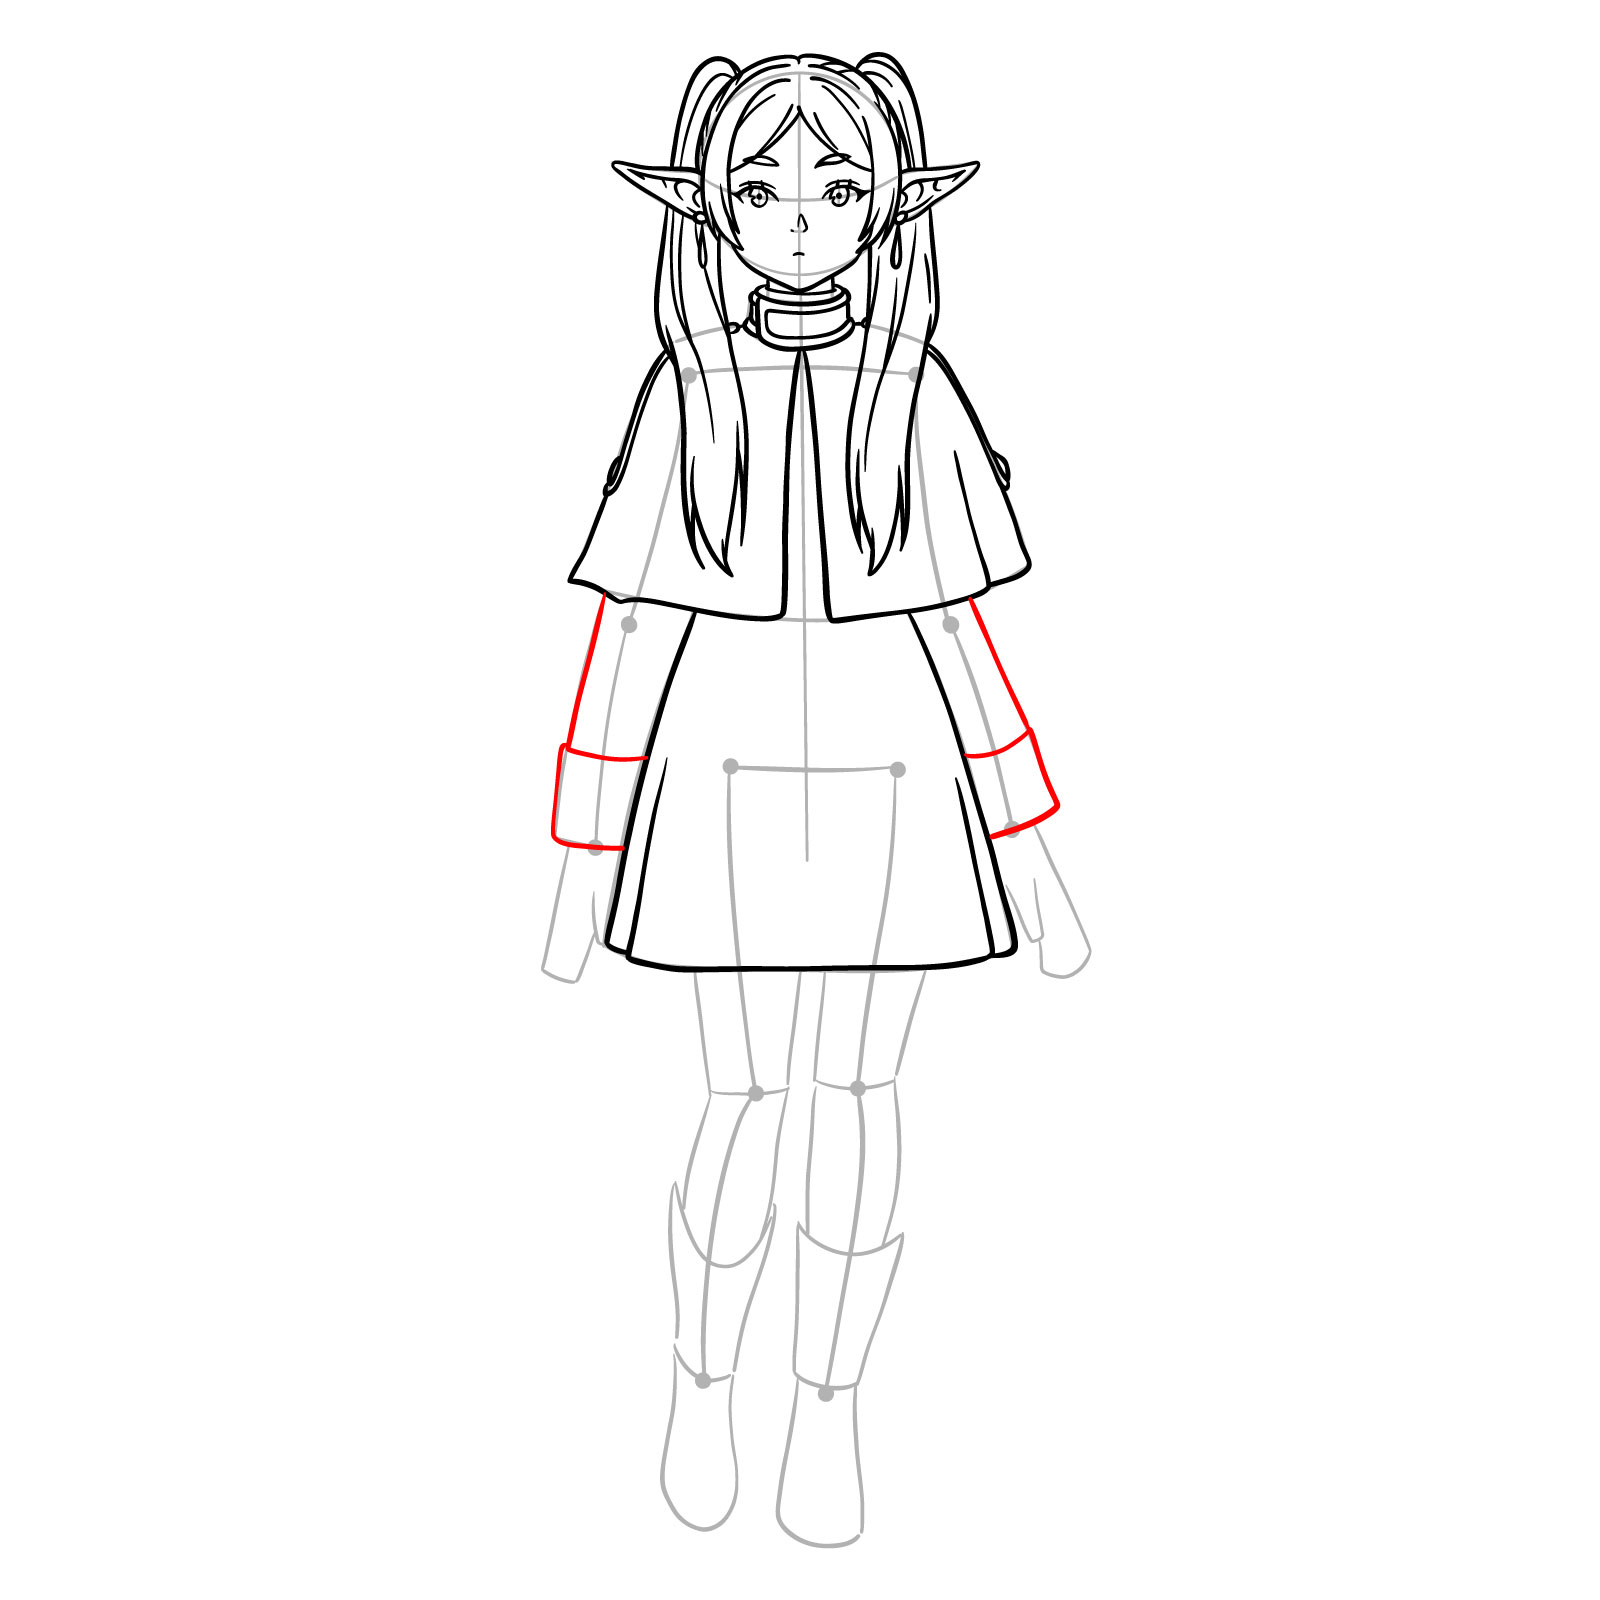
Step 15 – Get those sleeves in, thinking about their length and how they fit with her jacket, sketch the cuffs which are around 1/3 of the sleeve length
Detailing the sleeves
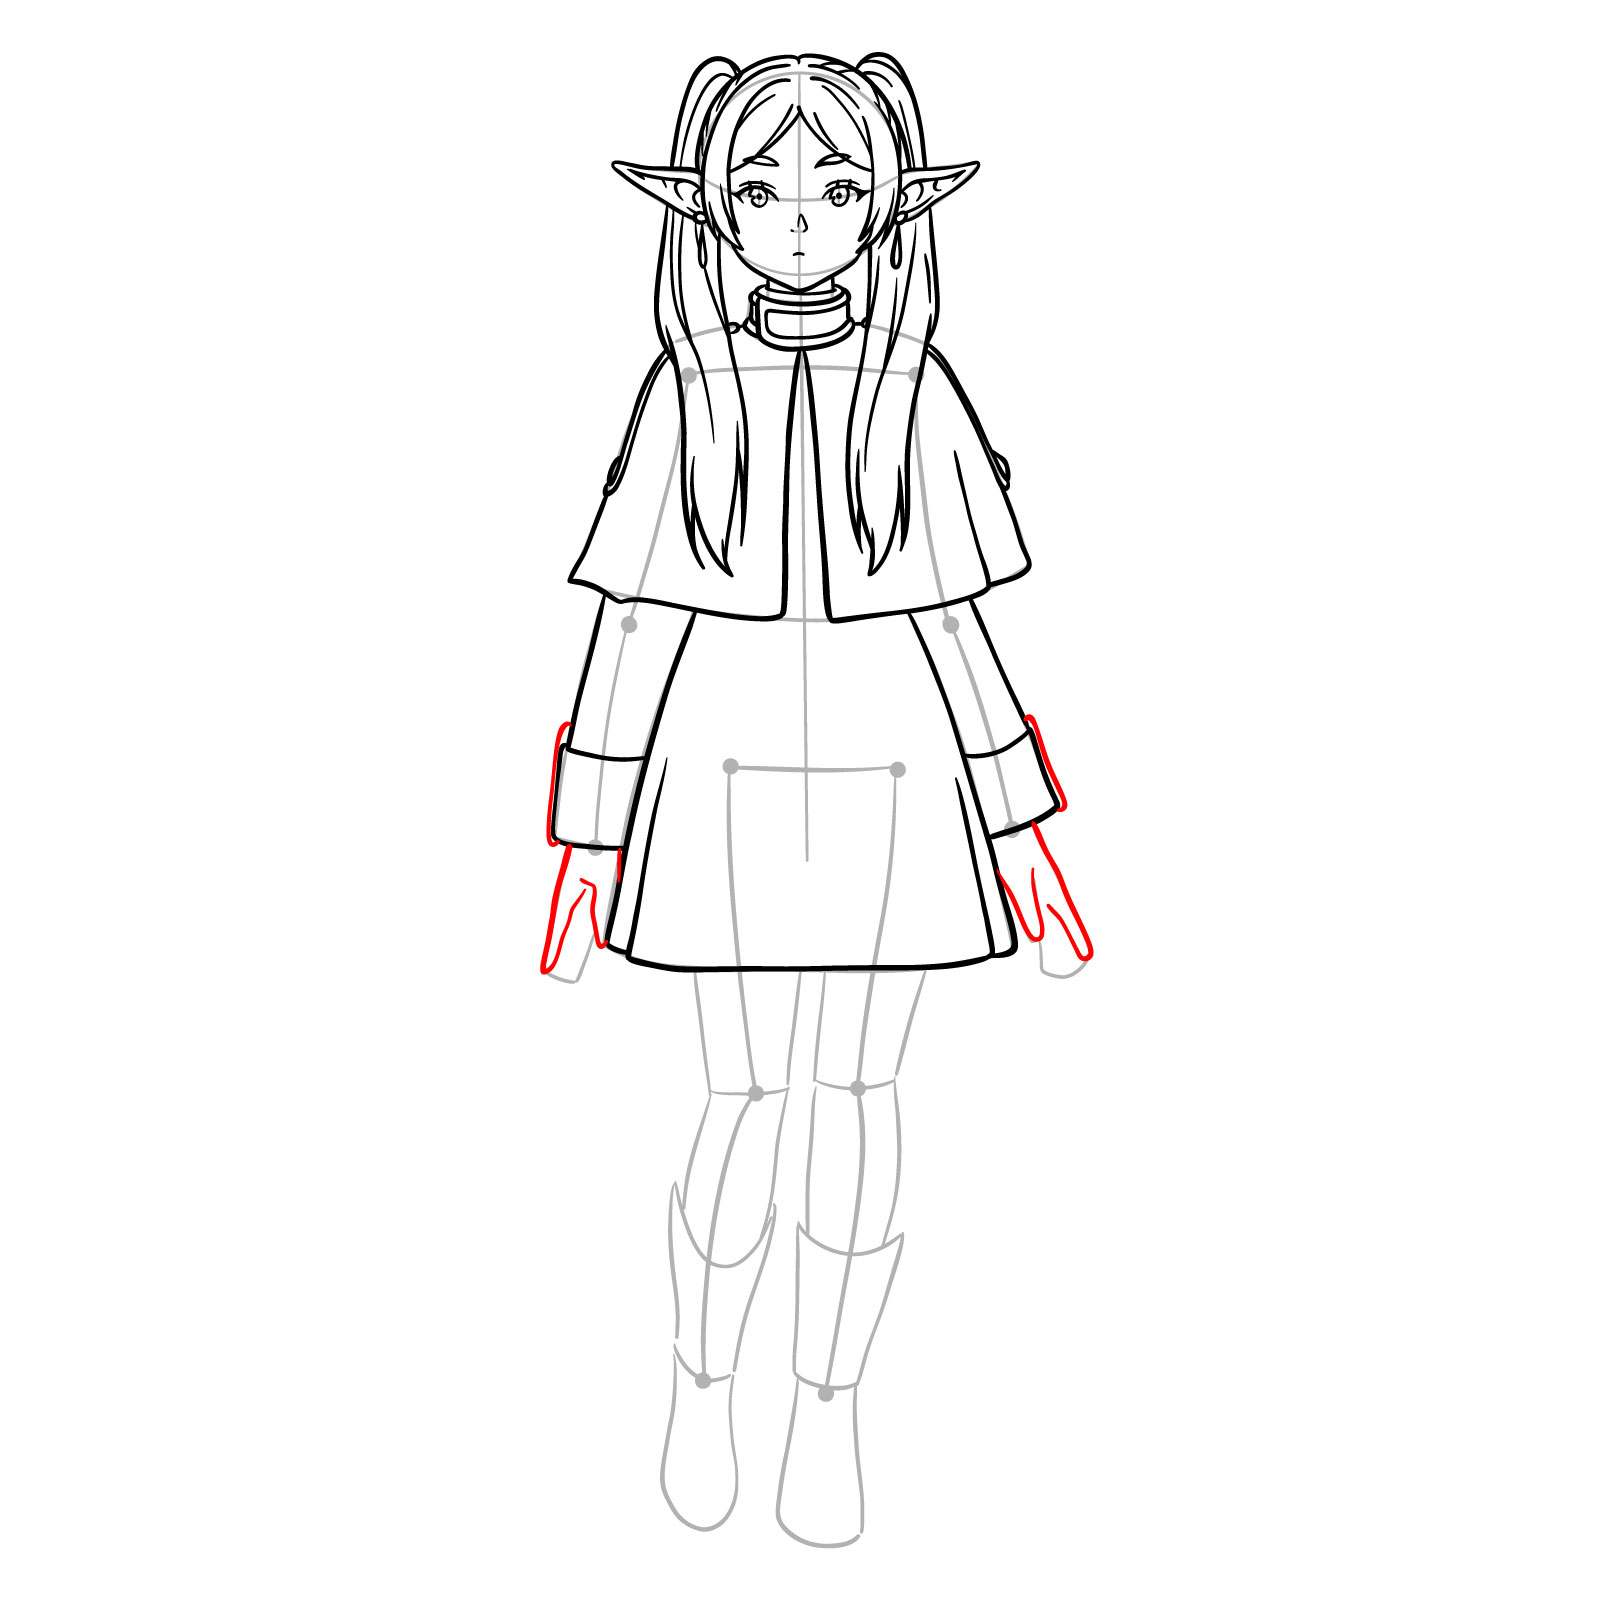
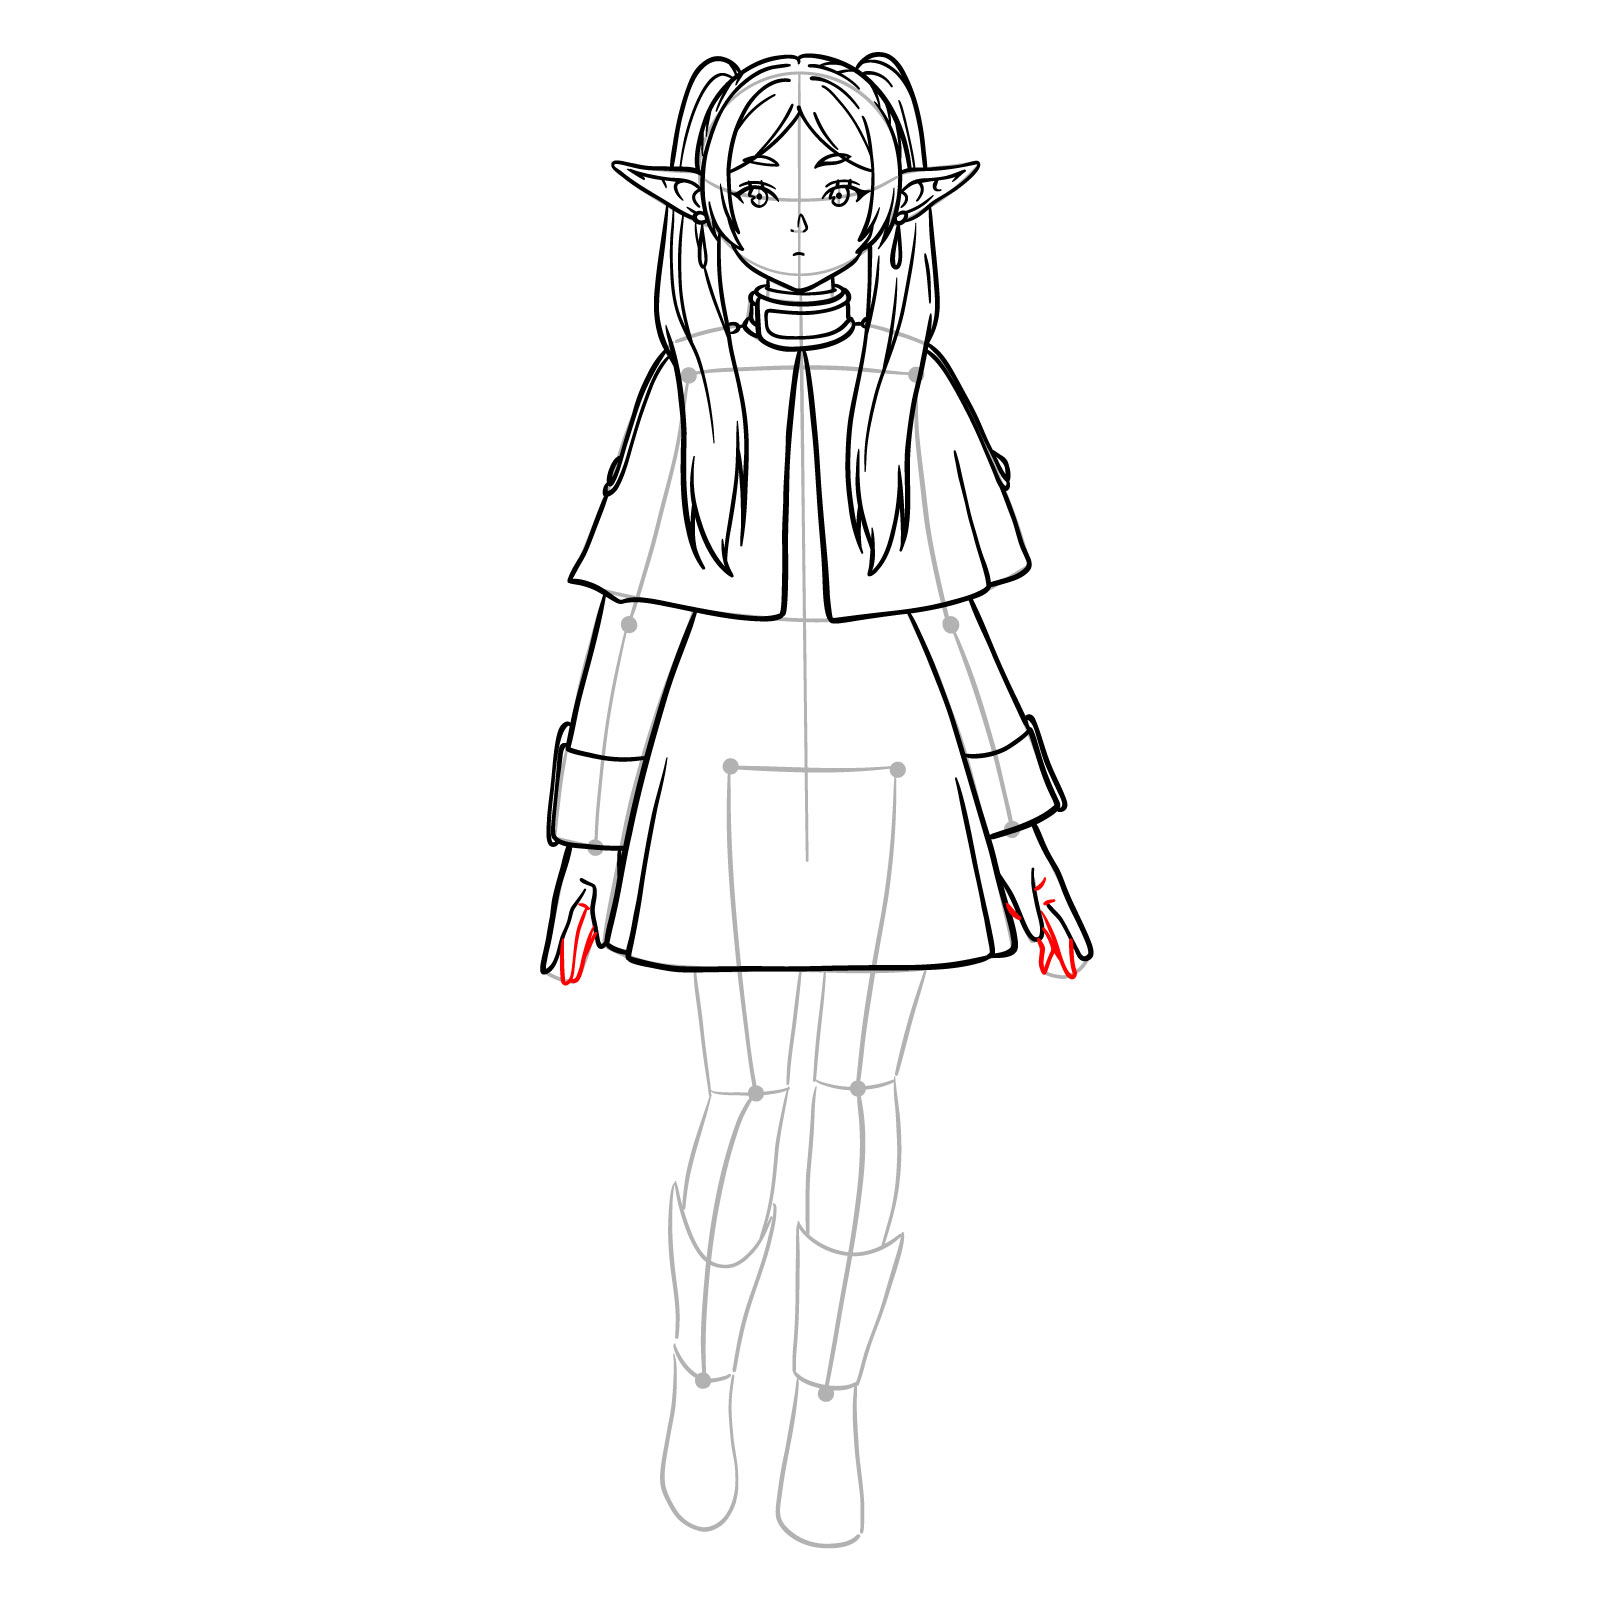
Step 16 – Work on the cuffs, and begin outlining her hands, focusing on thumbs and index fingers for now
Drawing cuffs and the start of her hands
Step 17 – Finish up her hands, making sure the fingers are positioned naturally
Finishing up Frieren’s hands
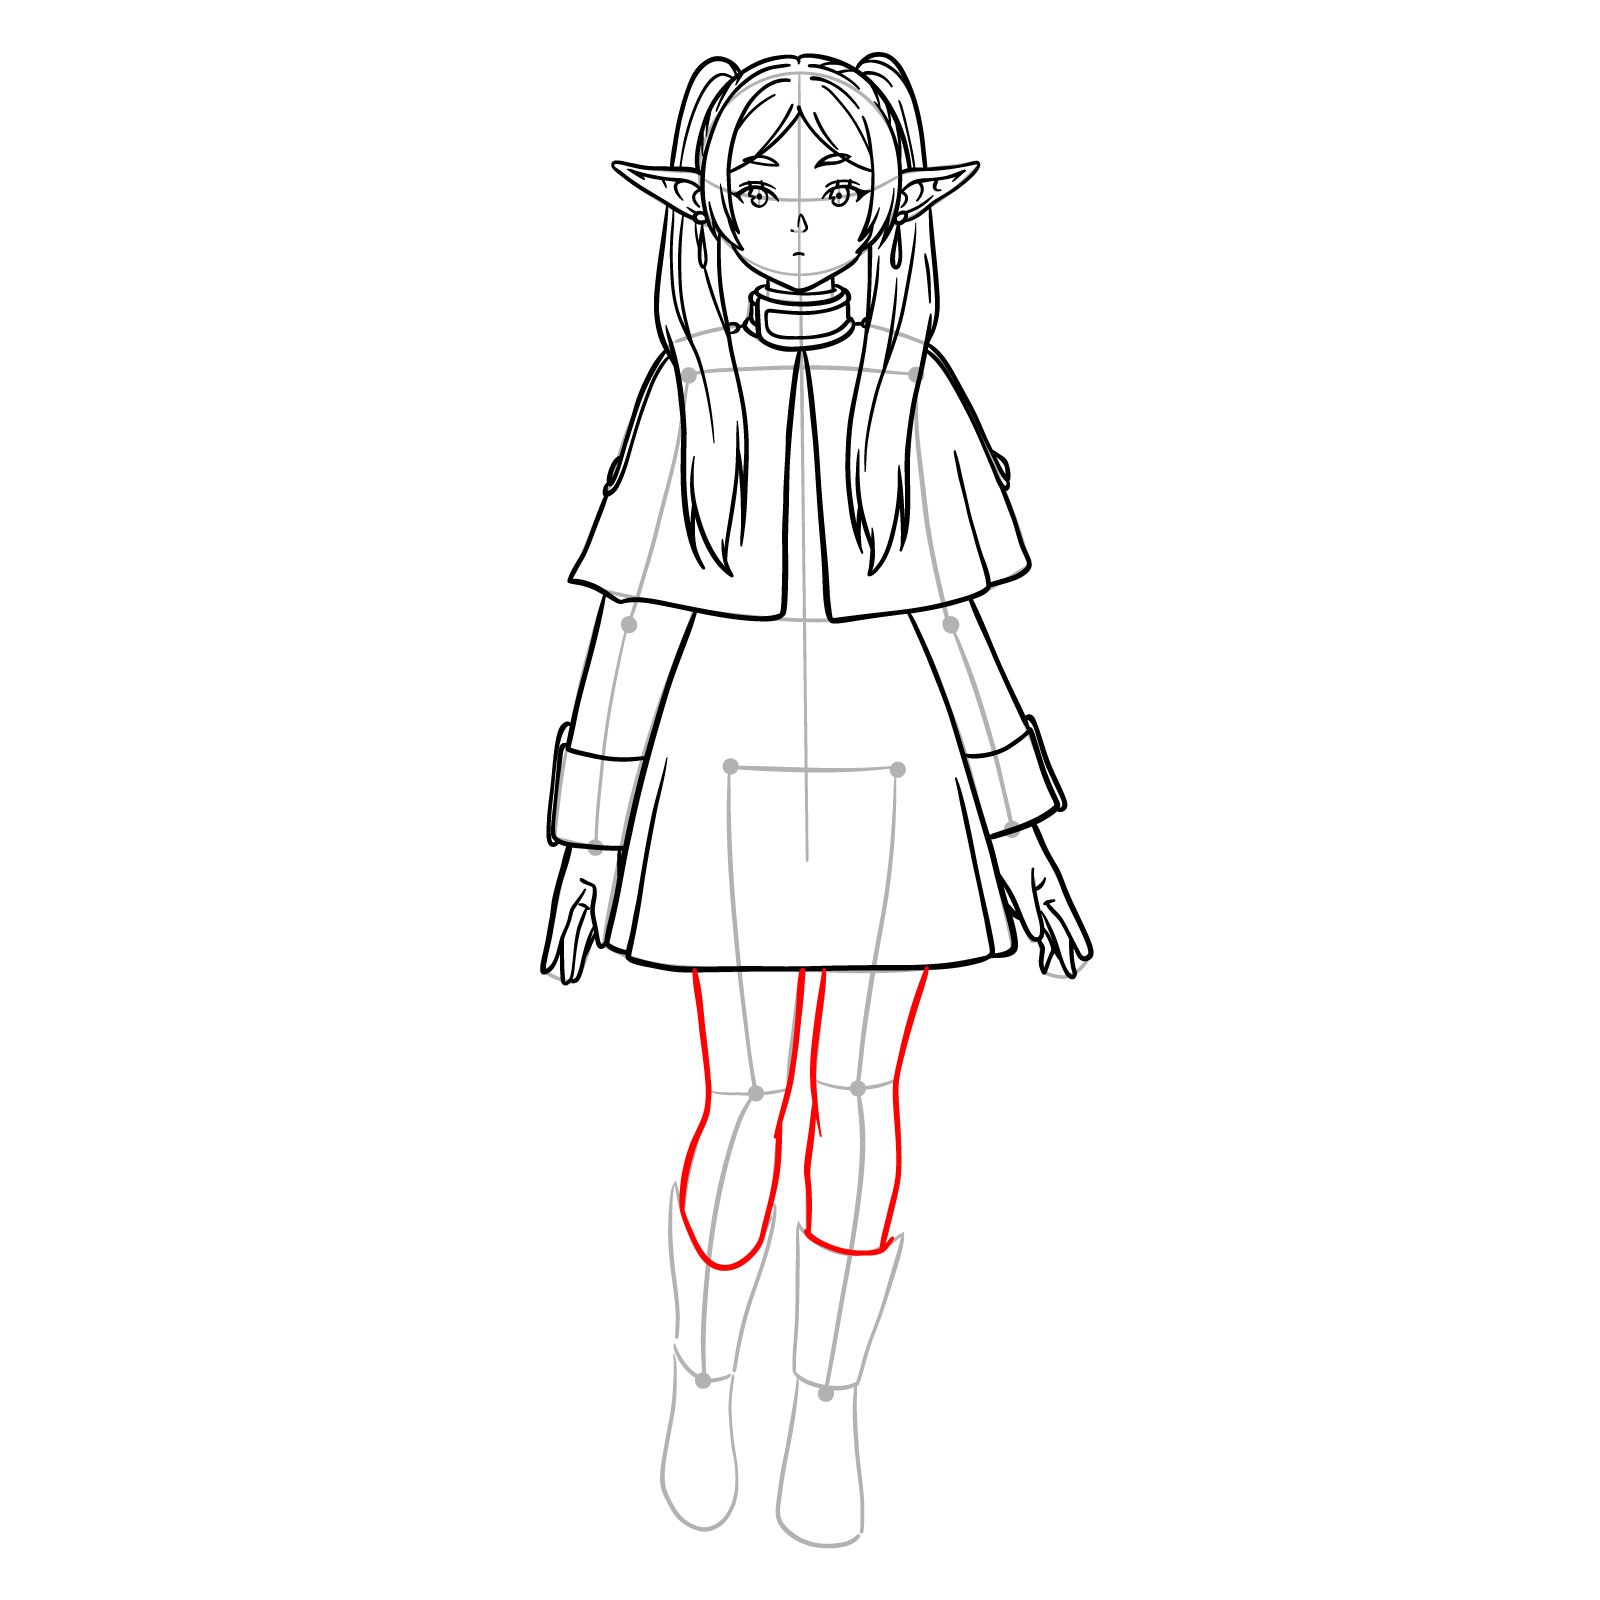
Step 18 – Sketch her legs, from the skirt hem to where her boots start, keeping the anatomy accurate
Outlining her legs down to her boots
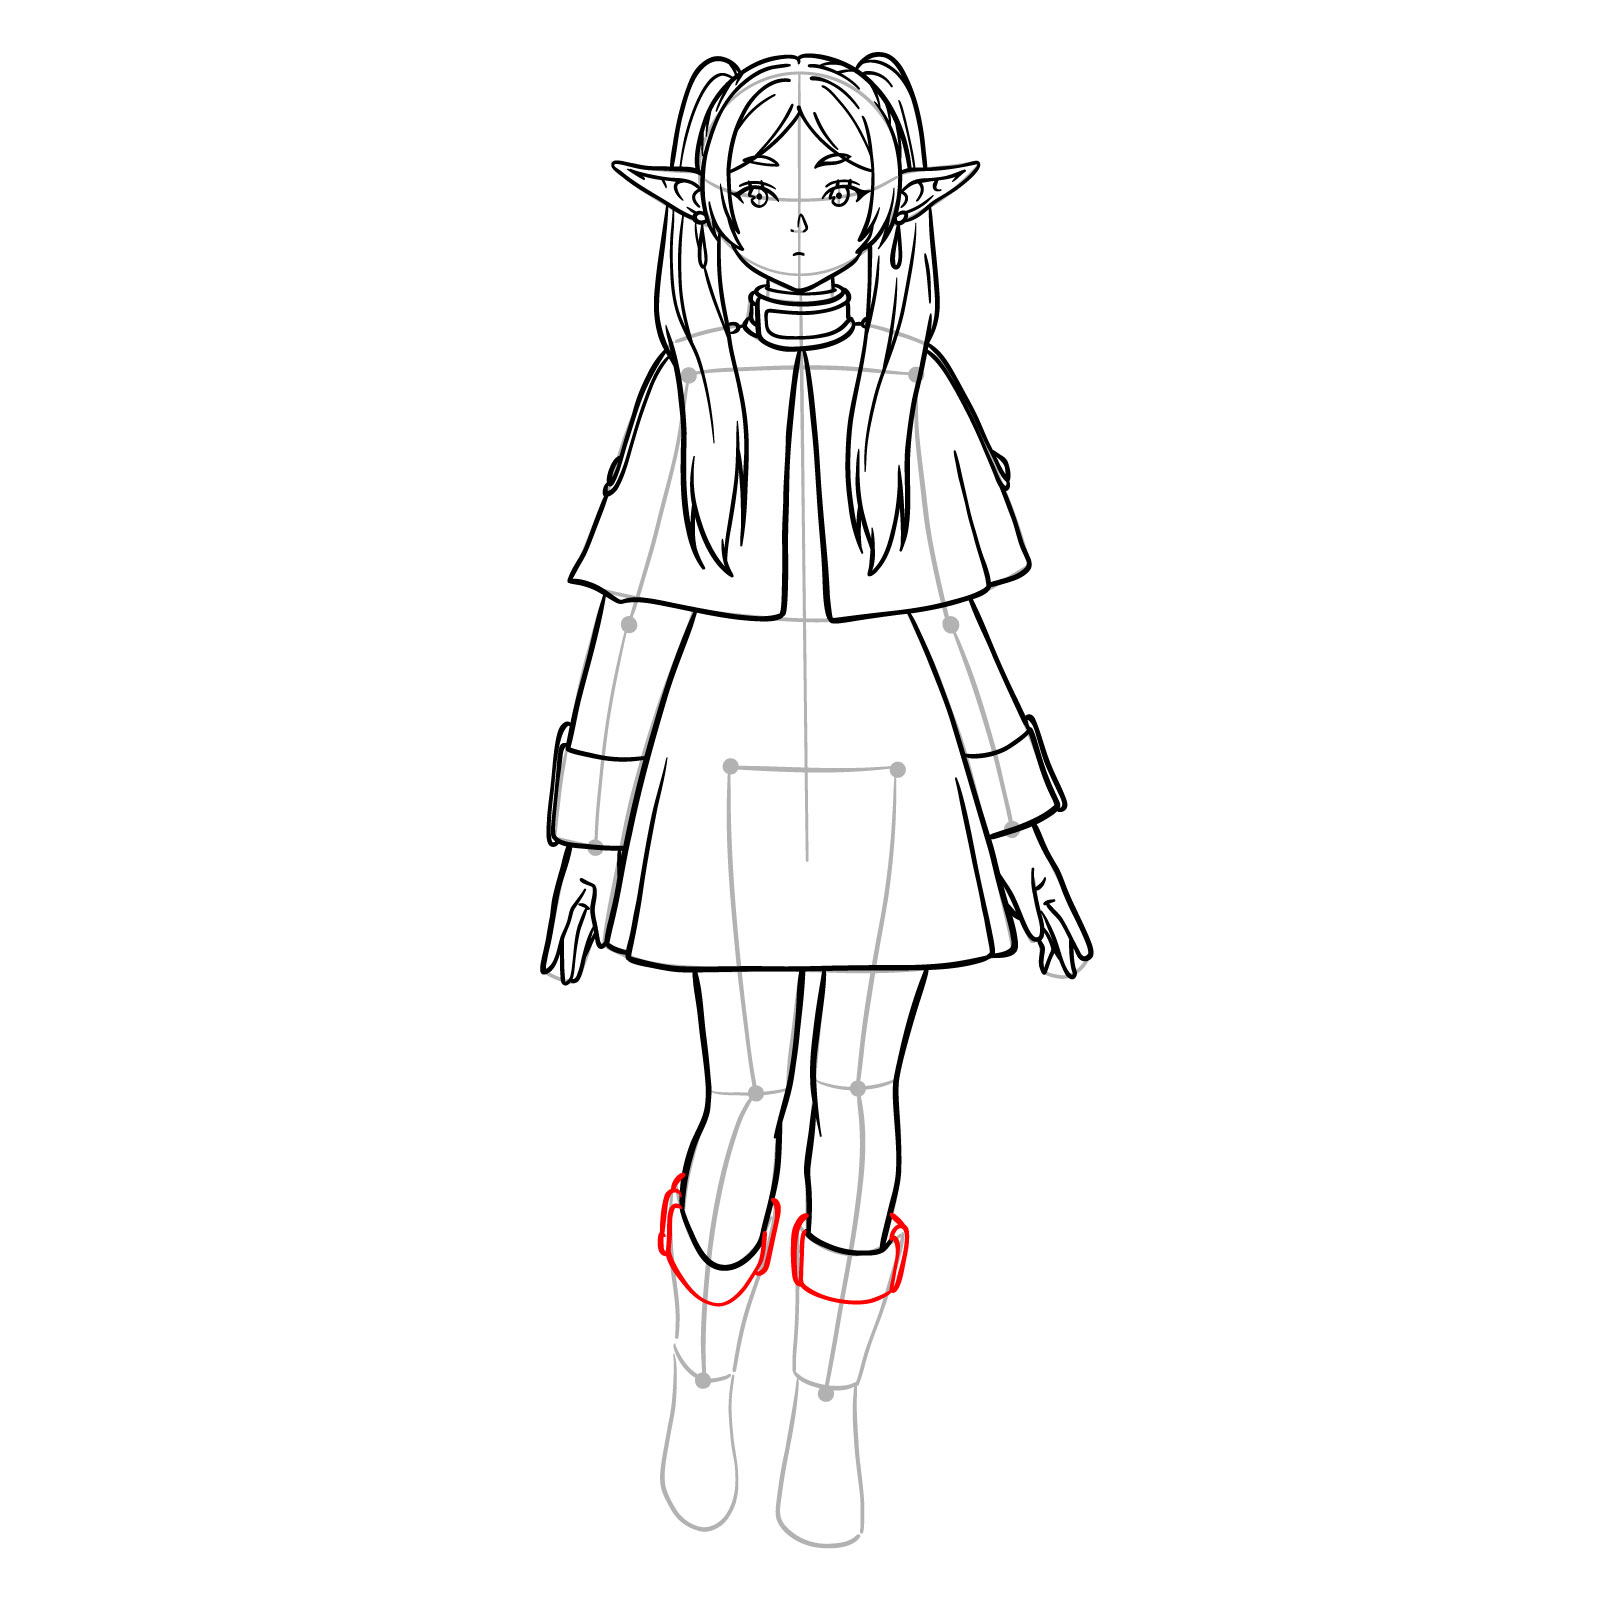
Step 19 – Begin with the upper part of the footwear. Sketch the basic shapes, making them look snug around her calves
Starting the boots
Step 20 – Draw the rest of the footwear down to her ankles, following the curve of her legs
Shaping the boots to the ankles
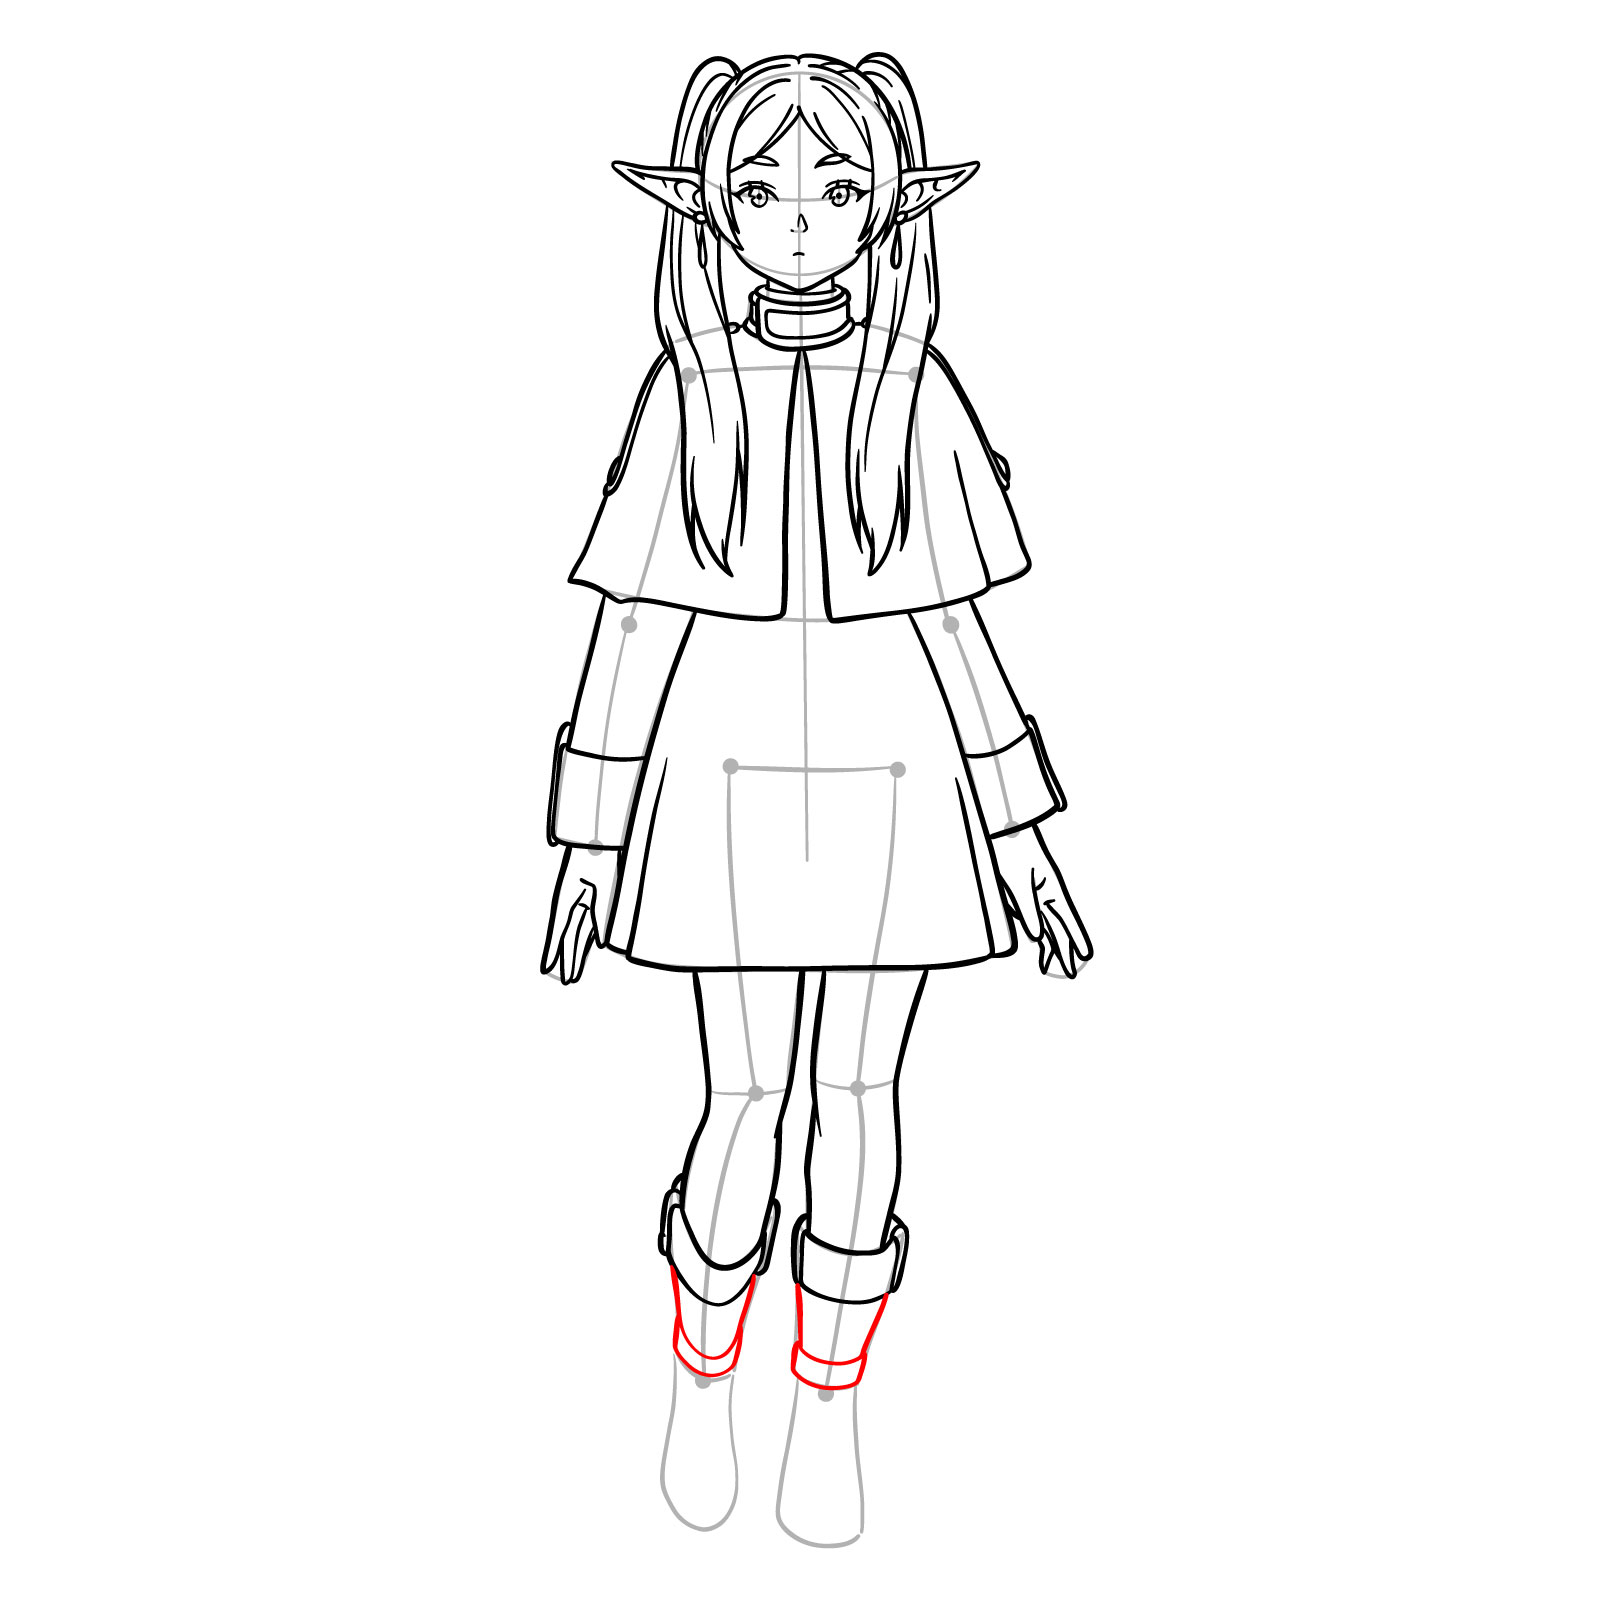
Step 21 – Now outline the boots in the feet area
Outlining Frieren’s boots completely
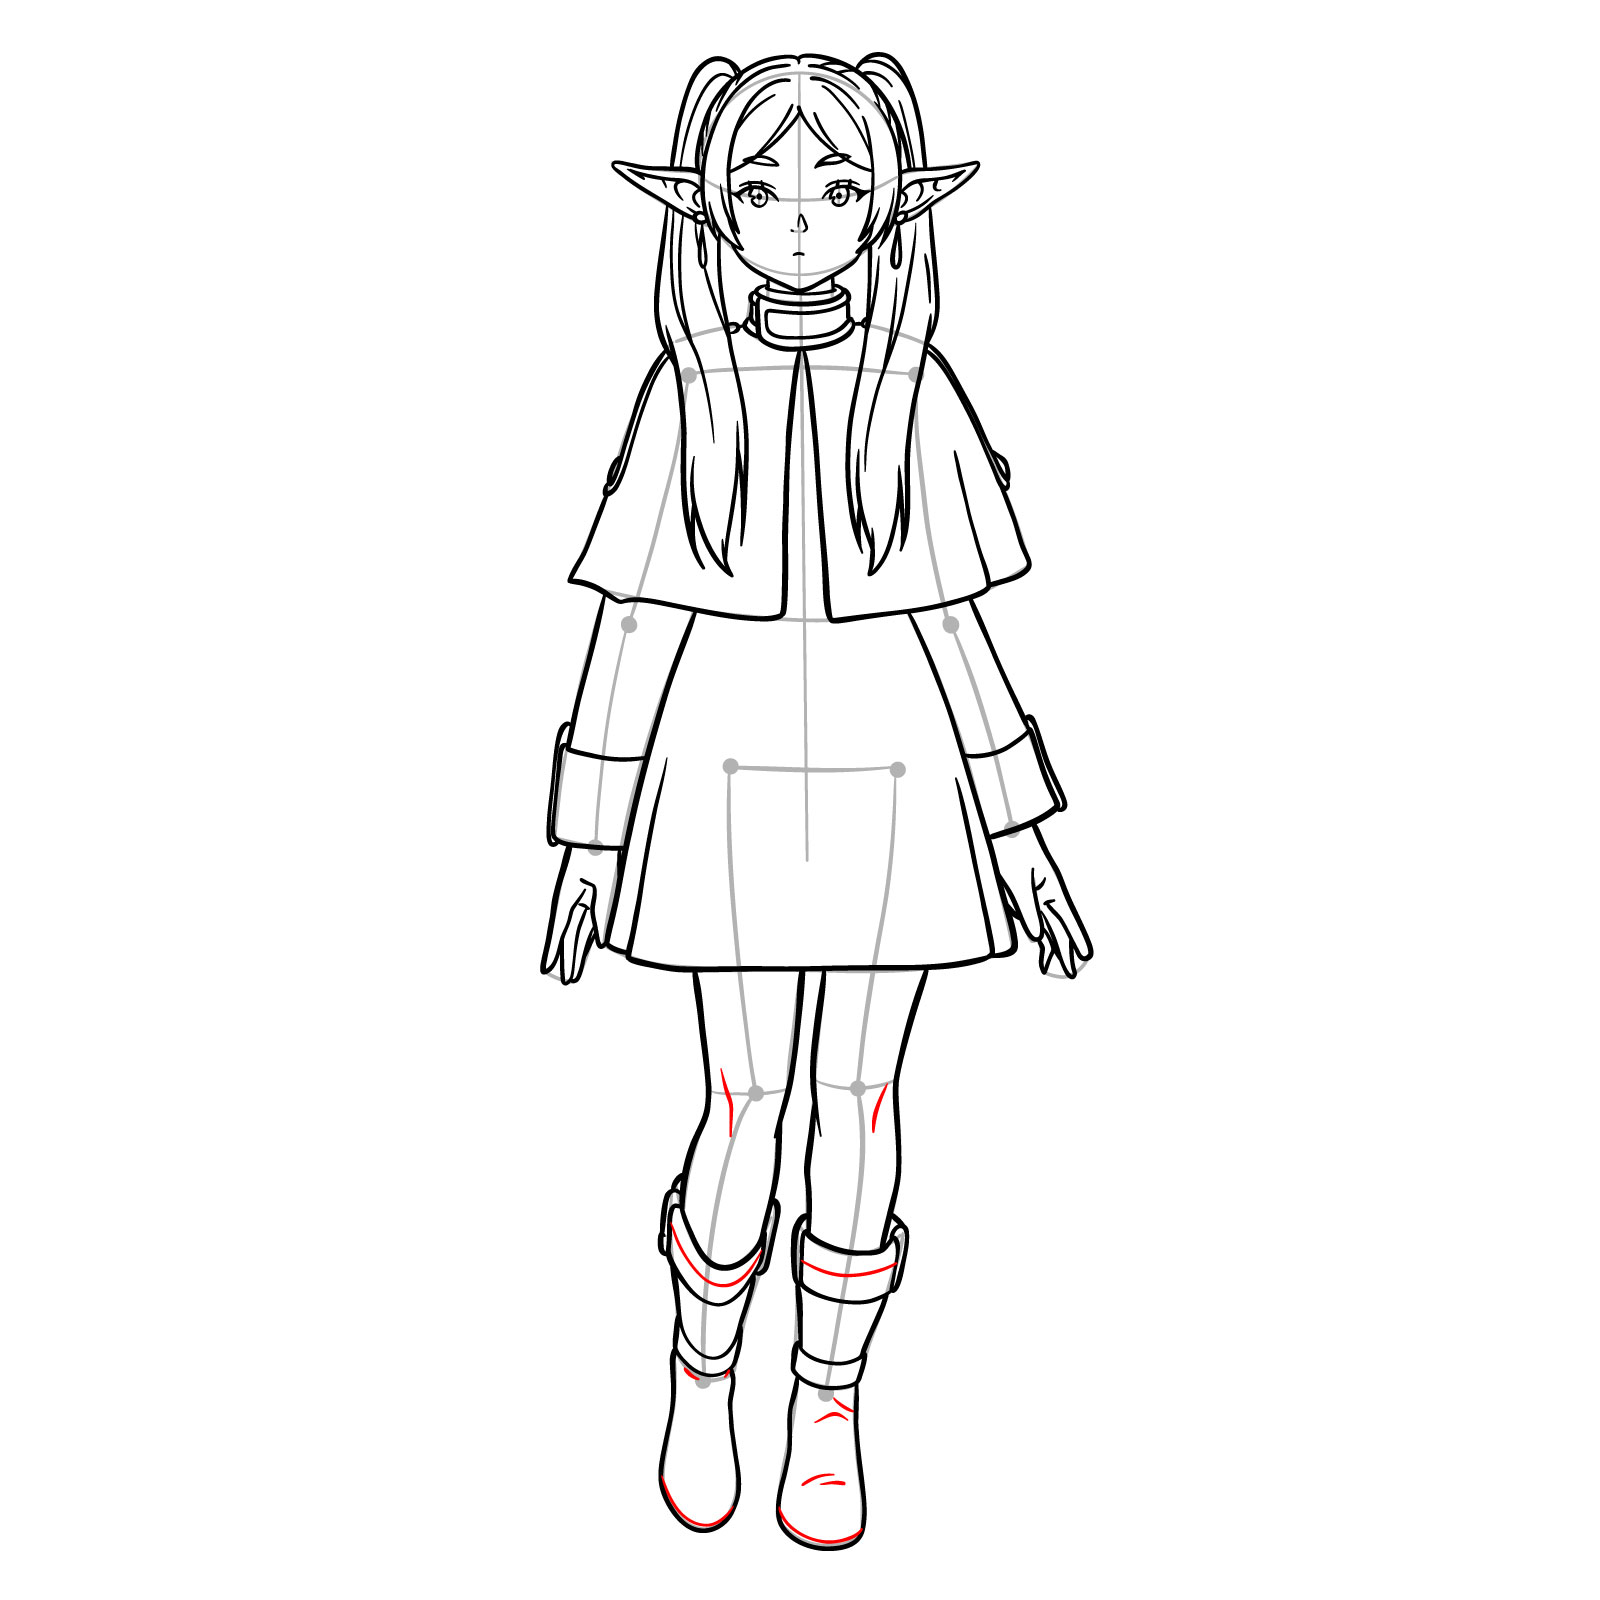
Step 22 – Give those boots some texture and depth with soles and creases, and don’t forget the knee lines
Detailing the boots
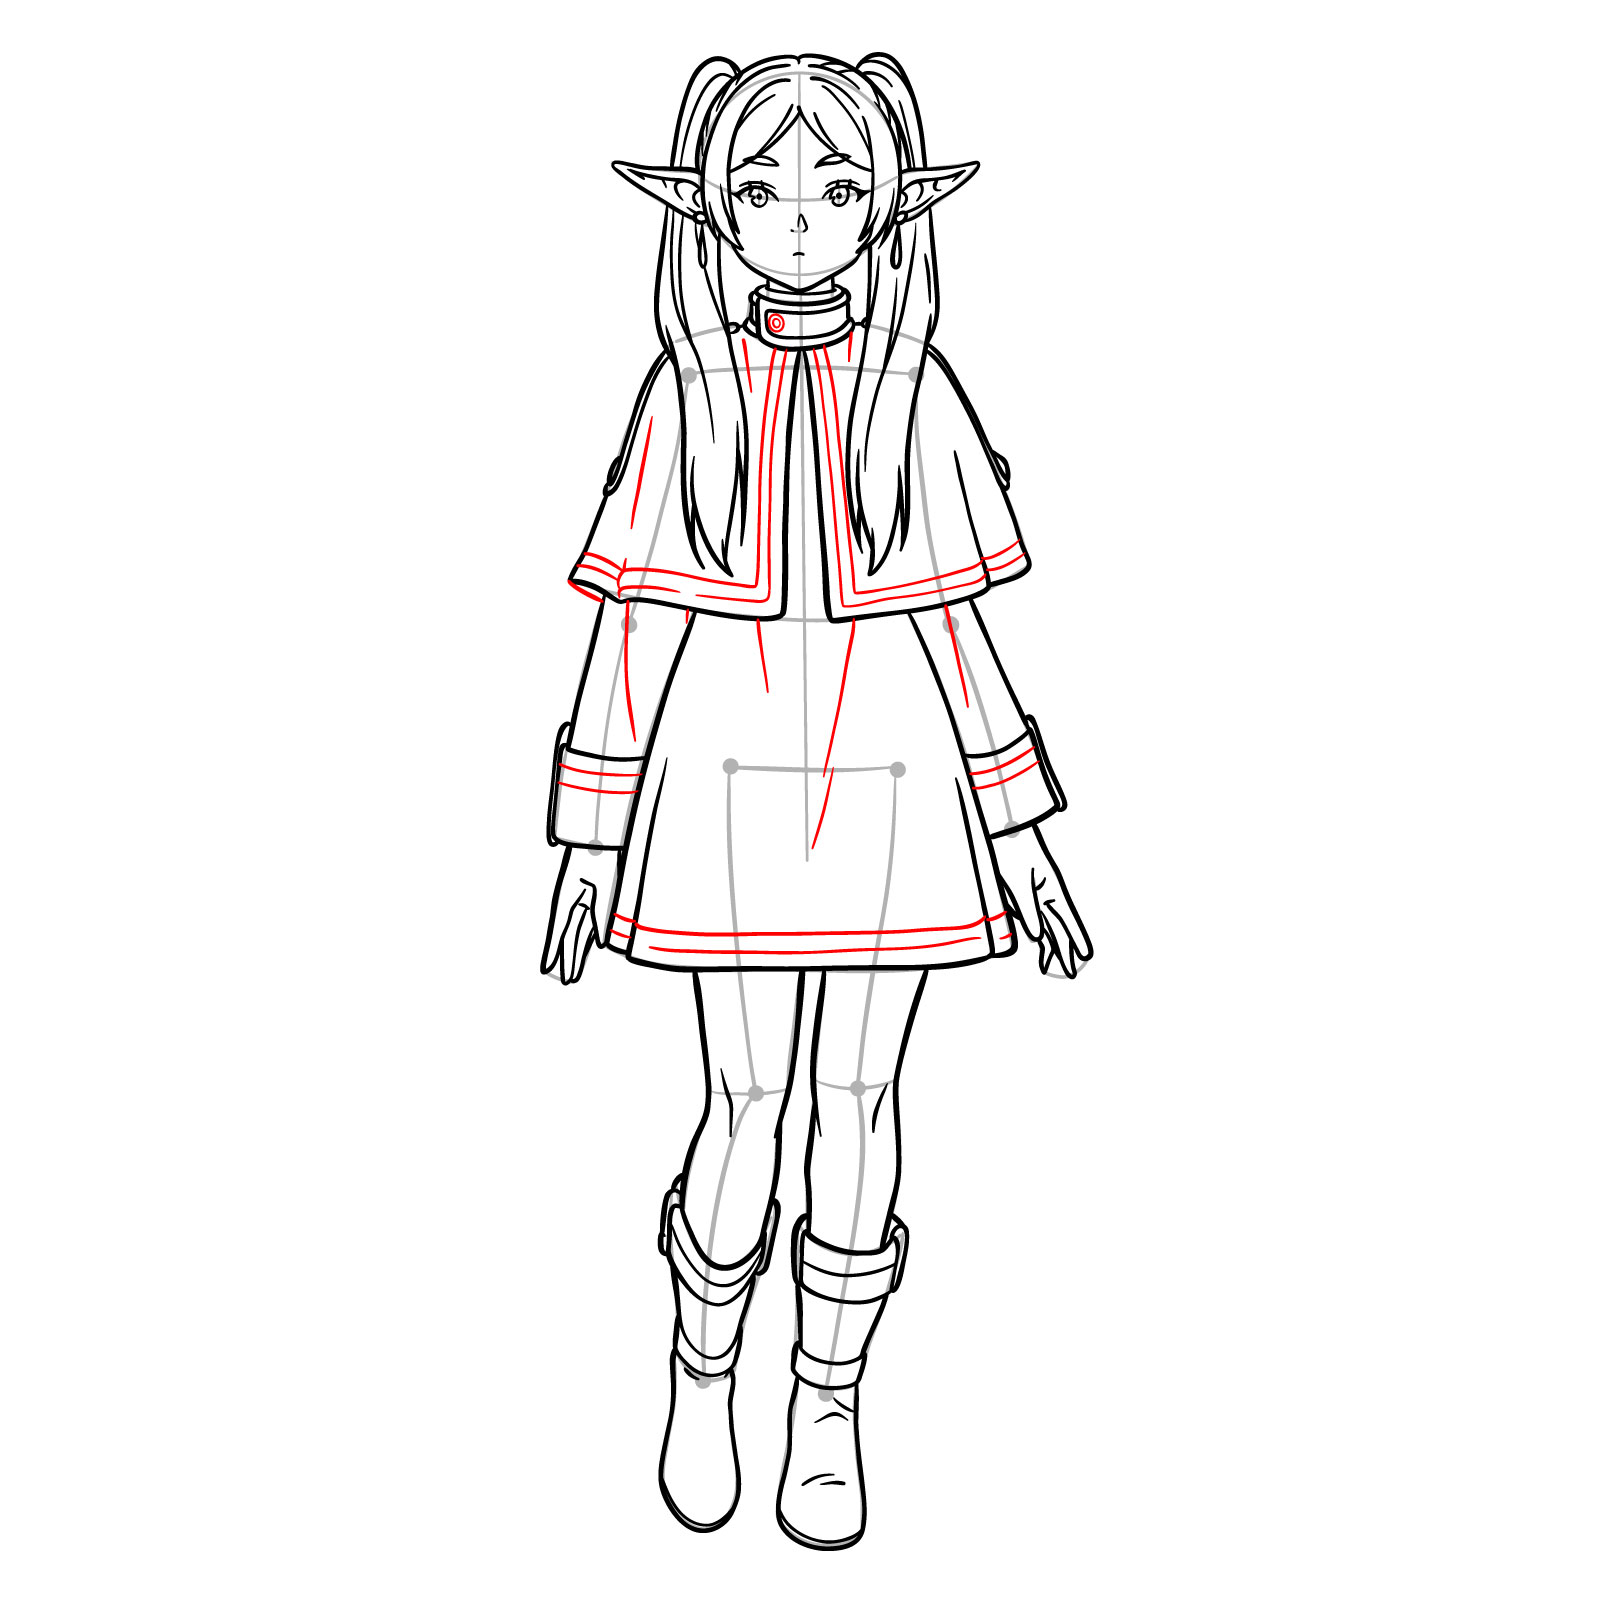
Step 23 – Time for the jacket’s final touches. Add trims, seams, and buttons to make it look as good as new
Finishing the jacket details
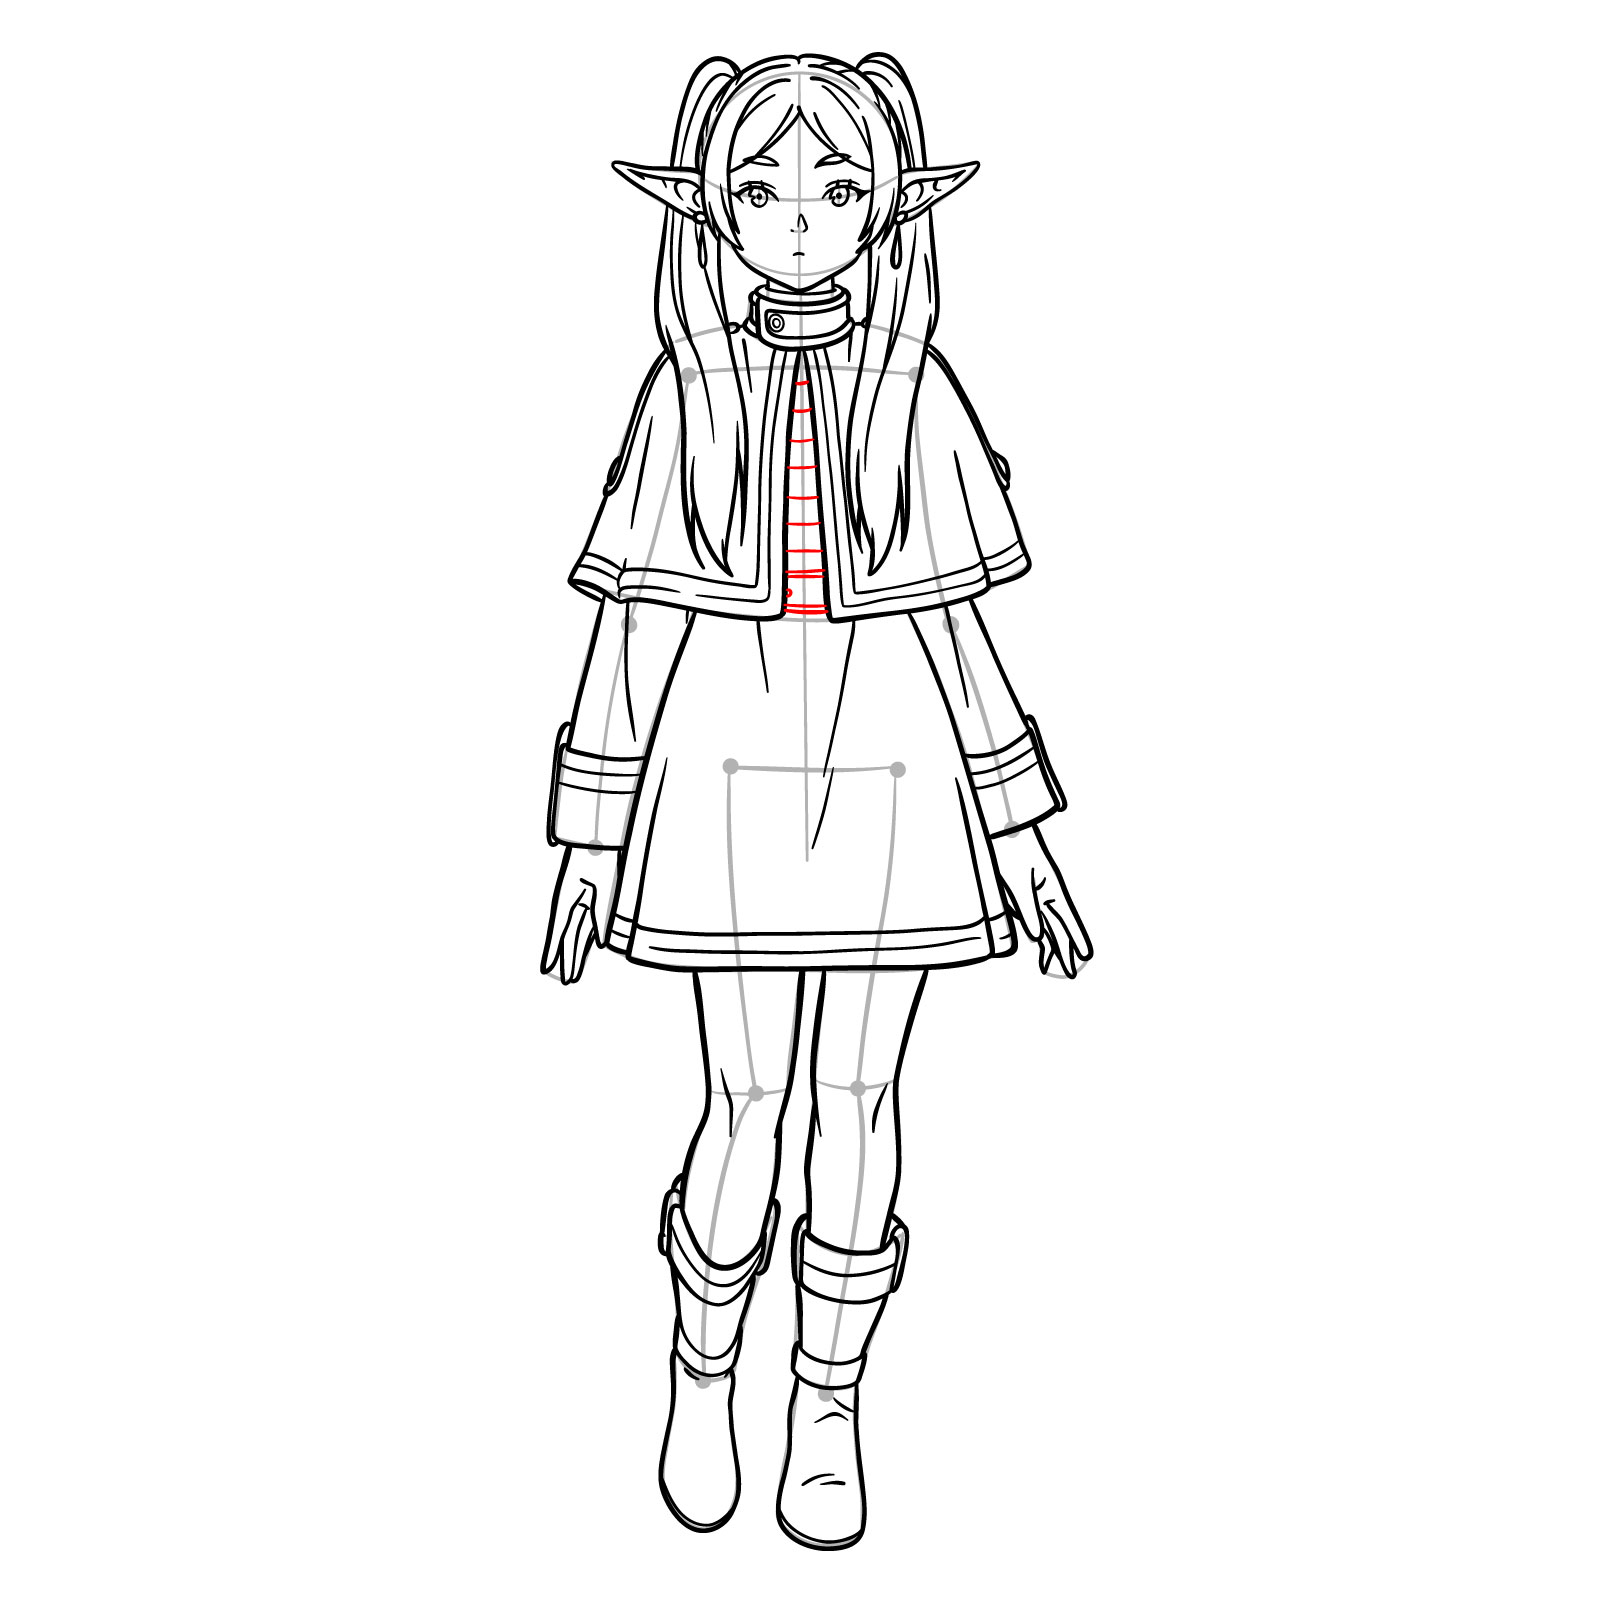
Step 24 – Draw in the part of the striped shirt that peeks out from under the jacket
Sketching the striped shirt
Step 25 – The last step! Clean up your sketch lines or, if you’re inking, let it dry and then erase any pencil marks. And… you’ve got a clean, finished drawing of Frieren, ready for the world to see
Don't Miss New Tutorials! Follow SketchOk
I publish new step-by-step drawing guides every single day. Follow on your favorite platform so you never miss a tutorial. Thousands of artists are already drawing along and I can't wait you to join in!
On my Patreon you can grab unique hand-made coloring pages: each one drawn by me personally. Every purchase directly supports the creation of new drawing tutorials. It's the best way to practice your skills, keep the site going, and get something truly original at the same time.
I hope you this 3 in 1 tutorial helped you learn how to draw Frieren! Follow SketchOk on social media for more fun drawing tutorials and don’t forget to share your art with us there.
Vector illustrator and the creator of Sketchok.com and TheHowToDraw.com. I publish free step-by-step drawing tutorials to help people of all levels learn to draw.
Disclaimer: This is a non-commercial, fan-made educational site. All characters belong to their respective owners. We are not affiliated with any rights holders.
Read full Disclaimer
2 thoughts on “How to Draw Frieren in 3 Guides: Front View, 3/4 View, Full Body”
Thank you I am a beginner and this tutorial helped me a lot


Thank you I am a beginner and this tutorial helped me a lot
Happy to hear that! Thank you for the feedback