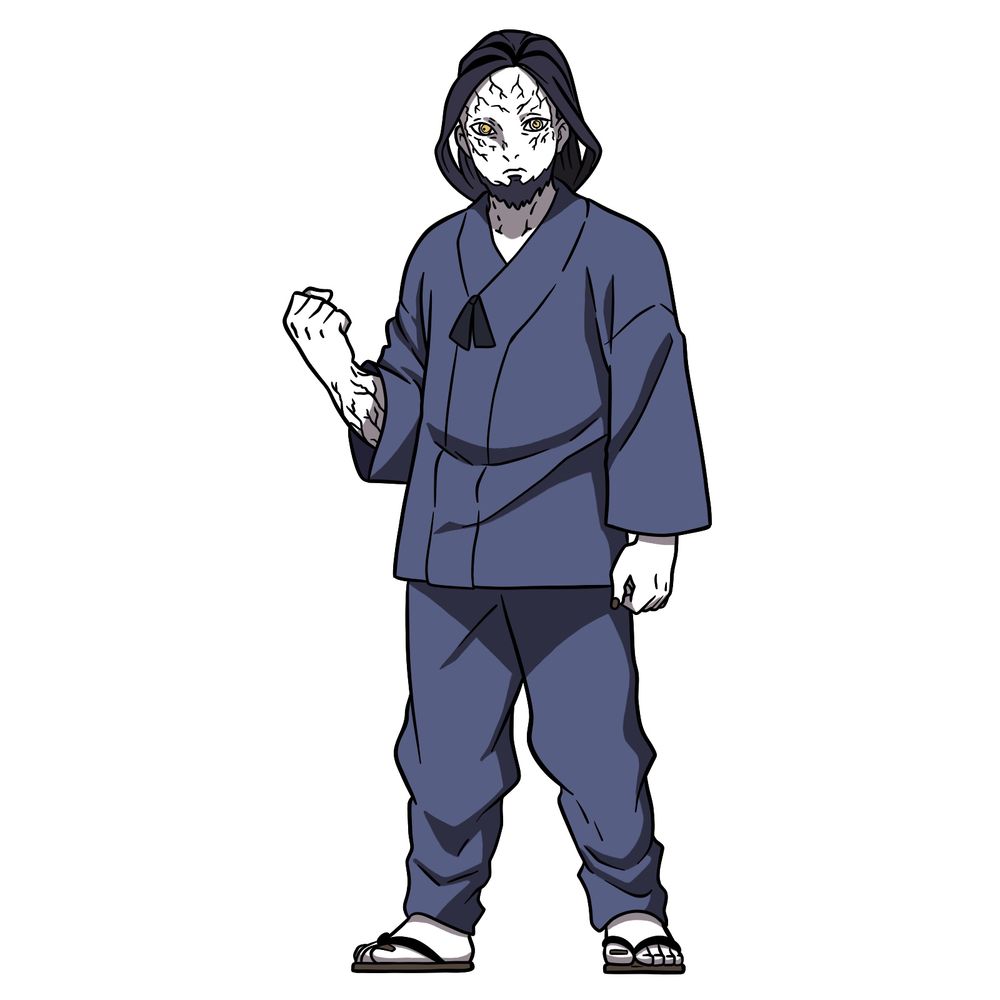
In this guide, we’ll go through the steps to draw Rokuro, a powerful character from the Demon Slayer anime series. Rokuro, a member of the Twelve Kizuki, has a distinctive appearance that sets him apart. This tutorial will help you capture his unique features on paper.
Rokuro: Key Features to Focus On
- Stocky Build and Pale Skin: Rokuro has a strong, broad frame with pale skin.
- Black Vein-like Patterns: His face, arms, and legs are decorated with black, vein-like patterns.
- Long Dark Purple Hair: Rokuro’s hair is long, dark purple, and worn down.
- Jagged Beard: He has a short, jagged beard around his jawline.
- Golden Cat-like Eyes: His eyes are golden and cat-like, with the kanji for “Lower” and “Two” etched into his left eye.
Once you’ve mastered drawing Rokuro, you might want to try your hand at other demons from the series, like Muzan Kibutsuji, Daki, Nakime, Gyokko or Akaza. Each character has their own unique features and offers a new challenge.
Rokuro Drawing Guide
This step-by-step guide is designed to help you draw Rokuro accurately. We start with basic shapes and gradually build up the details, ensuring that you capture his look. Each step includes clear instructions and an image to guide you. Here’s how the color coding works:
- Red: Indicates the lines you should focus on in the current step.
- Black: Represents the lines you’ve already drawn in previous steps.
- Grey: Shows the basic sketch lines, helping you keep everything in proportion.
By following each step, you’ll build up a detailed drawing of Rokuro that you can leave as a sketch or finish with ink or color.
Start by drawing a circle for the head, vertically divided into two parts. Add a chin shape below the circle. Sketch a simple stick figure for the body, with dot joints on the shoulders, elbows, wrists, hips, knees, and ankles.

Draw a horizontal line in the head circle to indicate the eye position, and add a short line for the nose. Outline the ears, sketch the neck, and add a simplified shape for his gi outfit.

Sketch the shapes of the hands and feet to complete the basic structure of the figure.

Outline the face frame, including the outer beard shape. Add hair strands that frame the face from the forehead down to the sides.

Draw the outline of the ears, the shapes of the eyes, the nose. Add a middle line of the mouth.

Outline the shape of the beard, add inner ear lines, and finish the eyes with the kanji signs for “Lower” and “Two.”

Add the vein-like pattern on Rokuro’s face, which is a key characteristic of his appearance.

Draw the neck and the chest area of his karate gi, beginning to detail the outfit’s structure.

Sketch the collar of Rokuro’s gi.

Draw the shoulders of the gi, outline the left sleeve, and add a side line of the body part.

Sketch the outline of Rokuro’s left hand almost clenched into a fist.

Finish sketching the top part of Rokuro’s gi by adding the bottom and right sleeve.

Draw Rokuro’s right hand clenched into a fist.

Add the remaining outer line for Rokuro’s right sleeve. Sketch the vein-like pattern on his right hand and add small lines to indicate the knuckles.

Sketch the outline of Rokuro’s gi pants down to the knees, starting to build the lower half of the figure.

Complete the outline of Rokuro’s gi pants, drawing them all the way down to the ankles.

Sketch Rokuro’s feet, drawing them inside his slippers.

Add nails to the toes, sketch fabric folds in the gi pants, and draw the soles of the slippers.

Sketch Rokuro’s hair, focusing on the overall shape and flow.

Add detailed strands to Rokuro’s hair, draw veins on the visible collarbone area, and include additional fabric folds in the gi shirt.

In this step, review your work to ensure all the details are in place. If you’re happy with the result, gently erase any remaining guidelines to clean up the sketch. You can also choose to ink the drawing, making sure the ink dries completely before erasing any pencil marks. If you want to use this Rokuro image as a coloring page, simply download and print it.

Use the final colored version as a reference if you want to add colors to your drawing, matching Rokuro’s anime appearance.

If you found this guide on drawing Rokuro helpful and want to explore more, check out my other drawing tutorials for anime characters. Don’t forget to follow me on social media for more tips and updates, or consider supporting my work by pinning this guide on Pinterest or donating on Buy Me a Coffee. Your support helps me continue creating detailed guides like this one!
