Welcome to a complete tutorial on how to draw cats. This guide is ideal if you’re looking to master drawing cats in various styles, without needing to delve into complex cat anatomy. Each of the 19 guides is simplified, making it possible for you to draw cats effortlessly, even if you have no previous experience. We’ll start with simple cat outlines, then gradually move to more realistic depictions of cats in different poses – walking, jumping, lying on their back, sitting from different angles, stretching, and playing with a ball.
In addition to these poses, we’ll also cover how to draw a cat’s face and delve into various styles such as minimalistic, cartoon, anime, and kawaii cats. The last four guides, added as a bonus, are quite straightforward. I created them while developing this article and included them for their simplicity and fun – they are perfect for drawing with kids. So, let’s begin our journey into the delightful world of cat drawing!
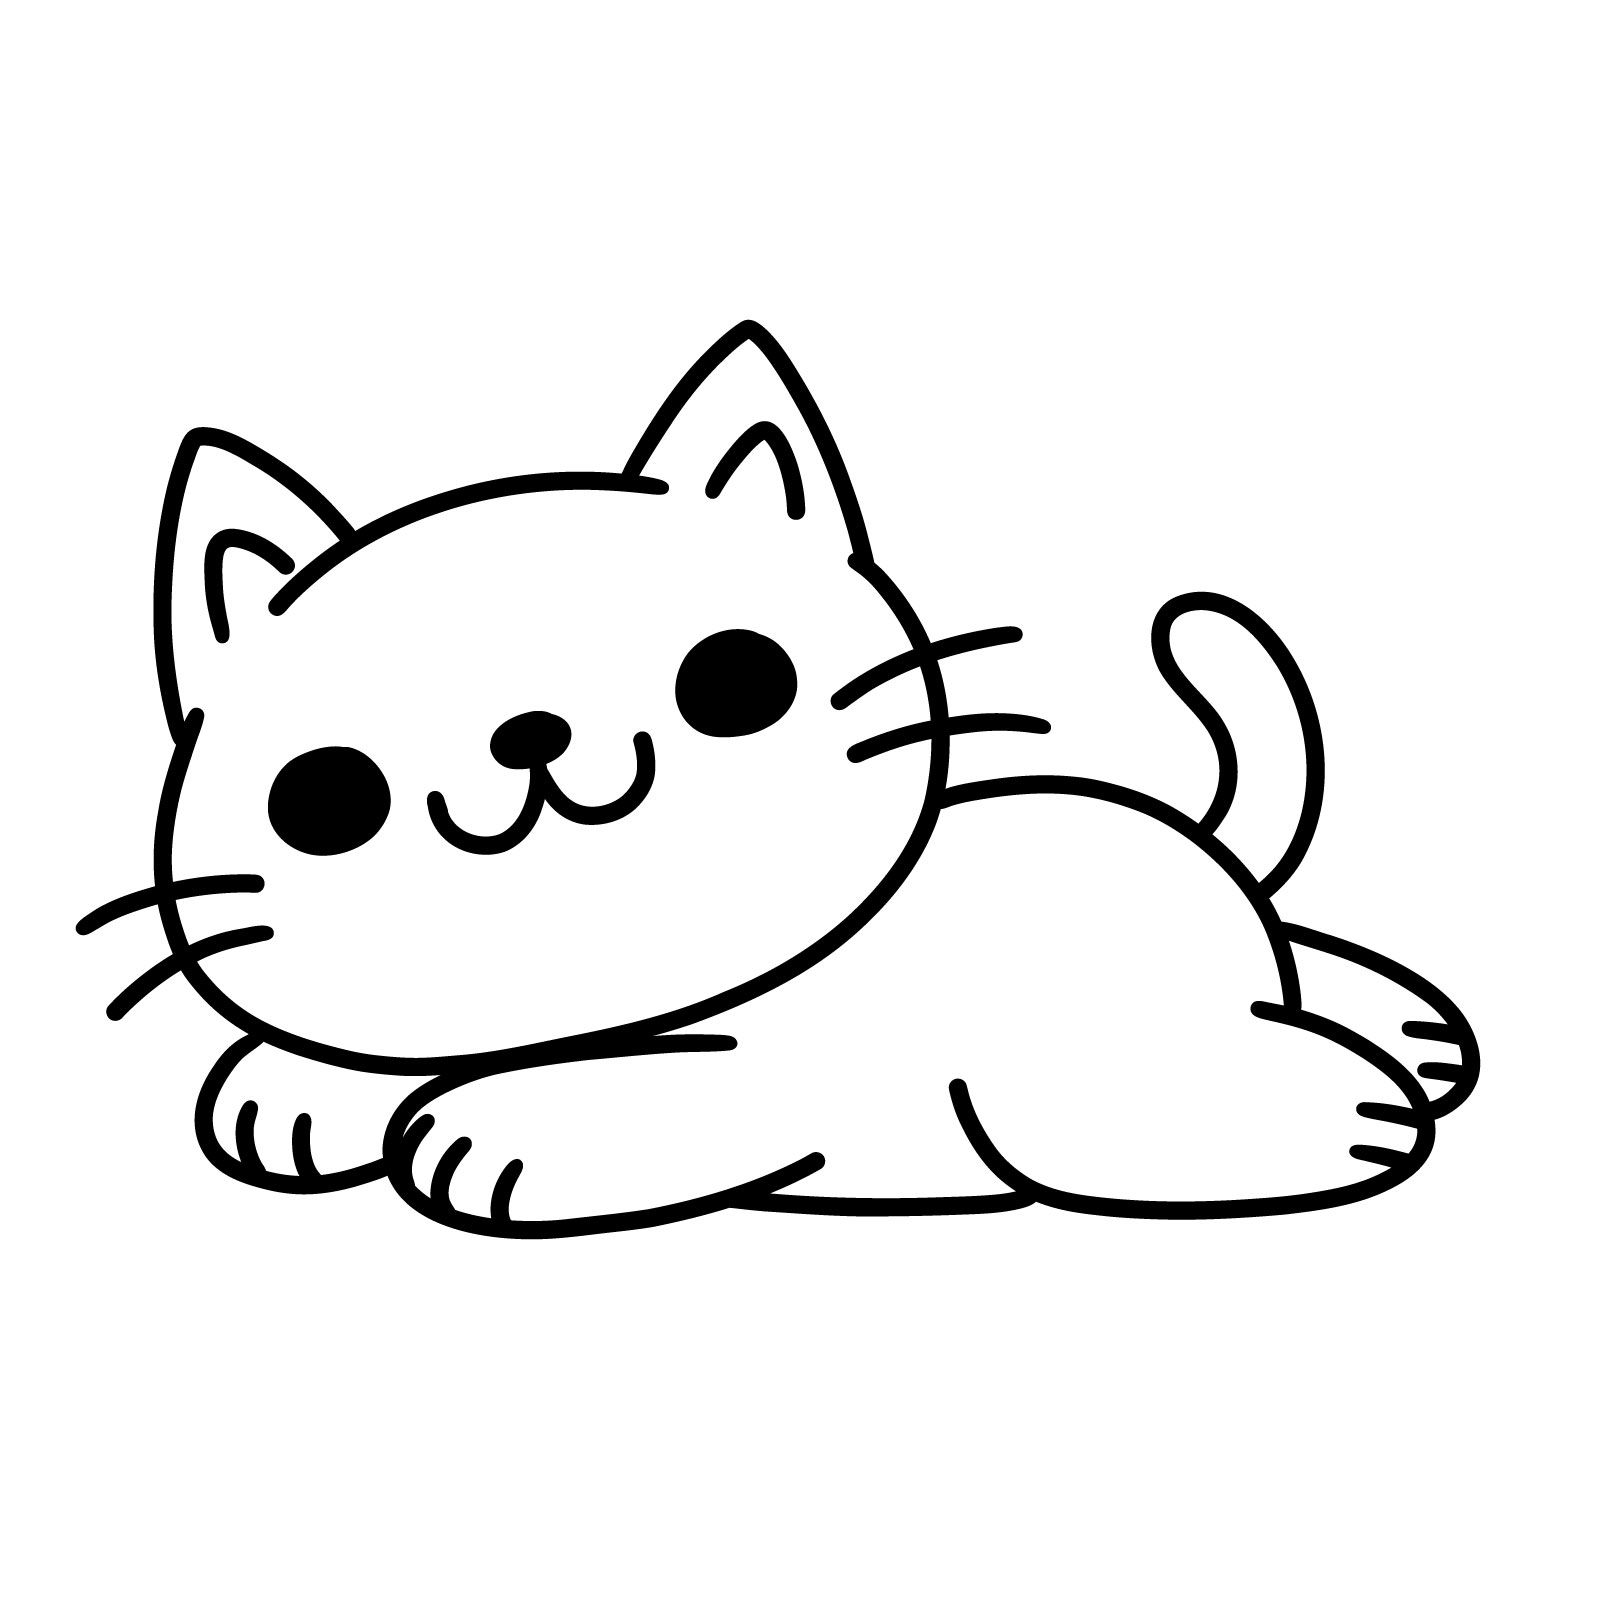
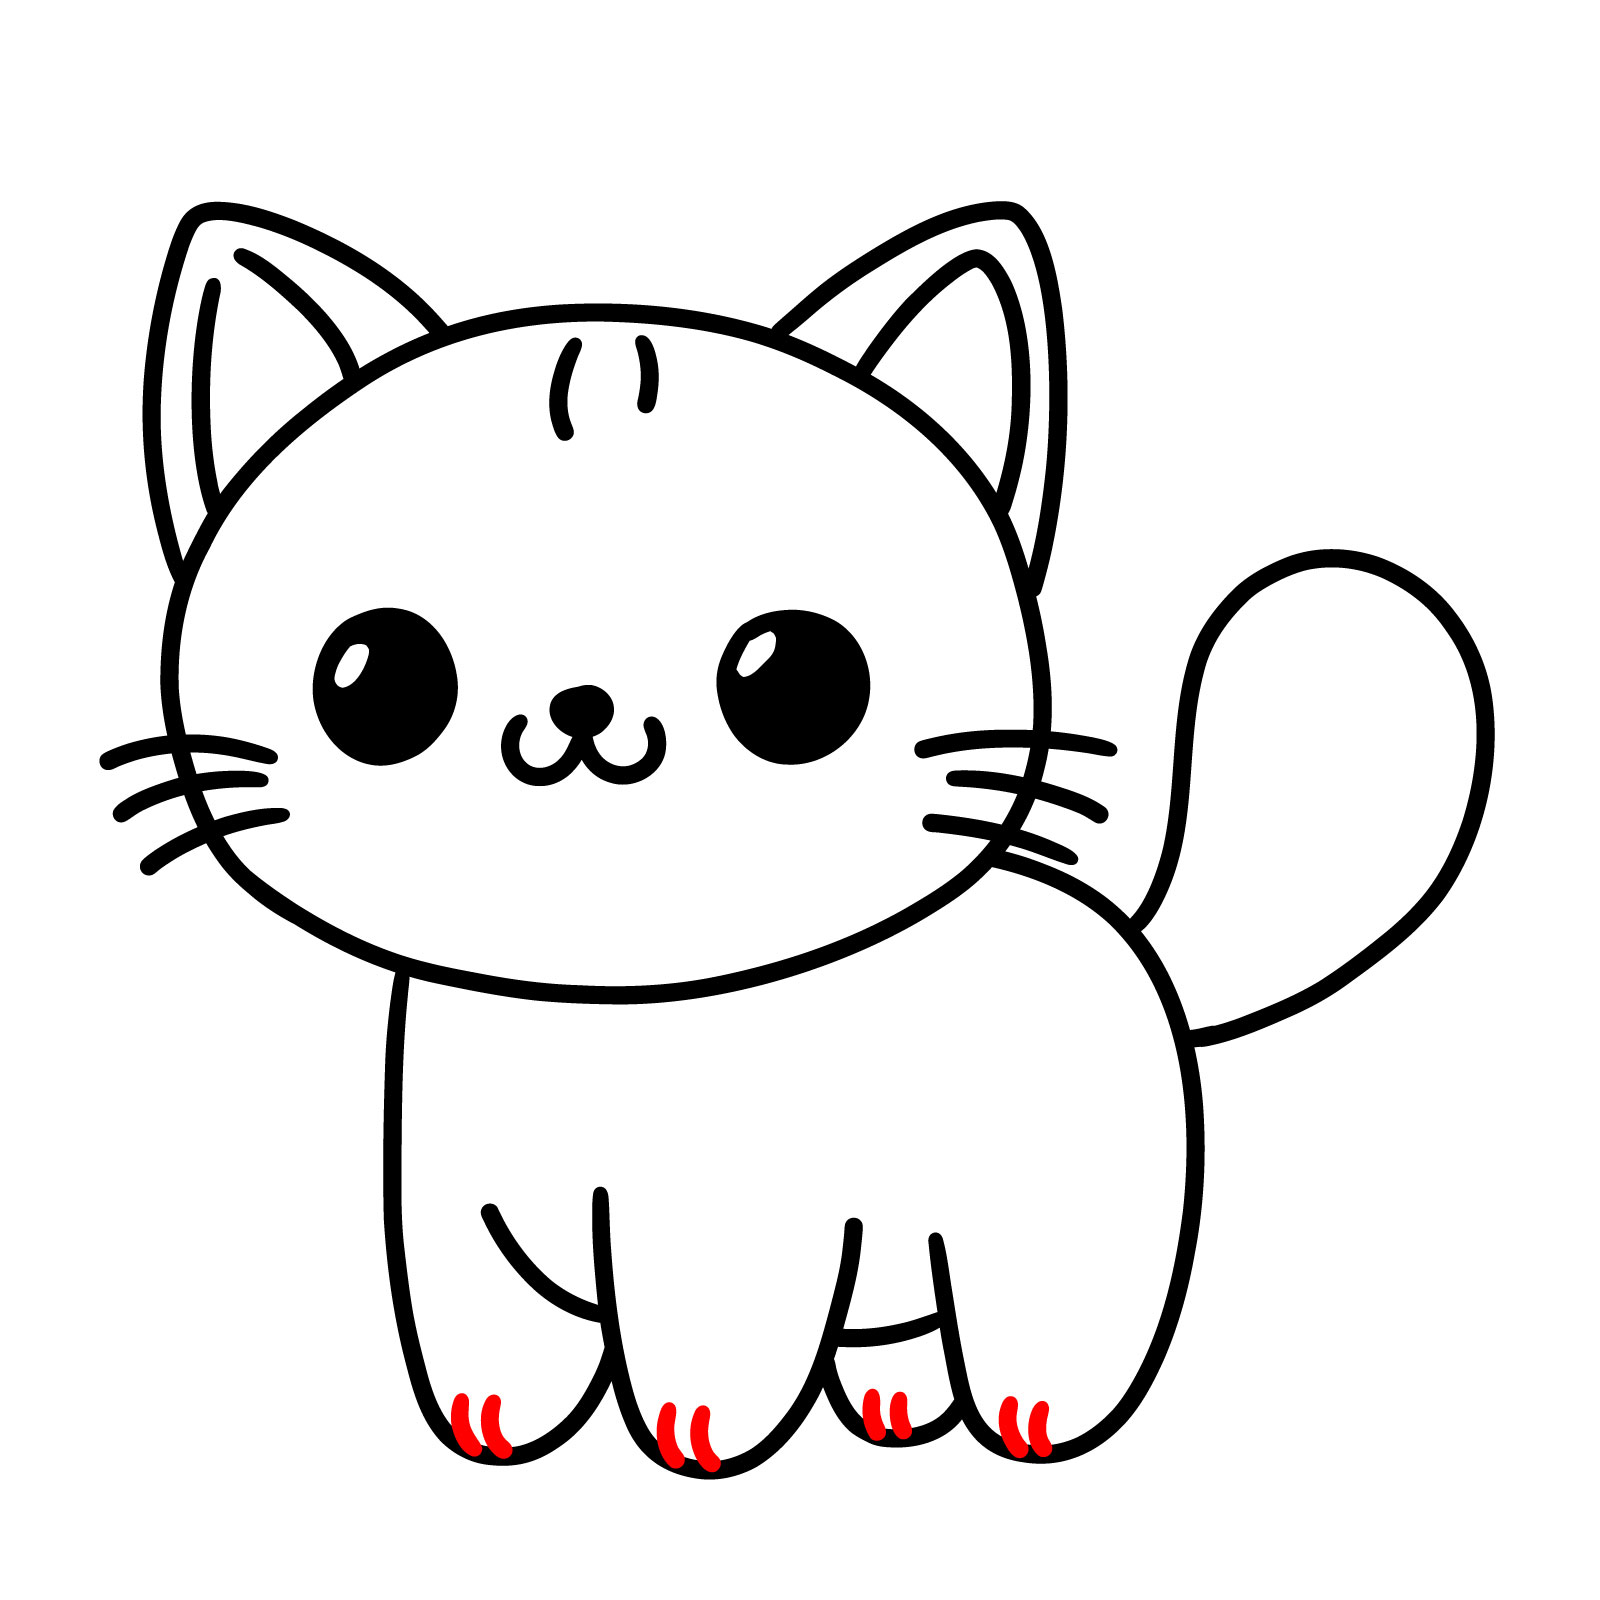
Let’s start our drawing adventure with an adorable and straightforward cartoon cat. This cute little feline sports a round face, big expressive eyes, and a tiny, playful smile. Its body is depicted with simple shapes, making it the perfect starting point for beginners. With just five easy steps, you’ll learn how to bring this charming cartoon cat to life. It’s a great way to get familiar with basics without getting too technical. Grab your pencil, and let’s create some cute with ease!
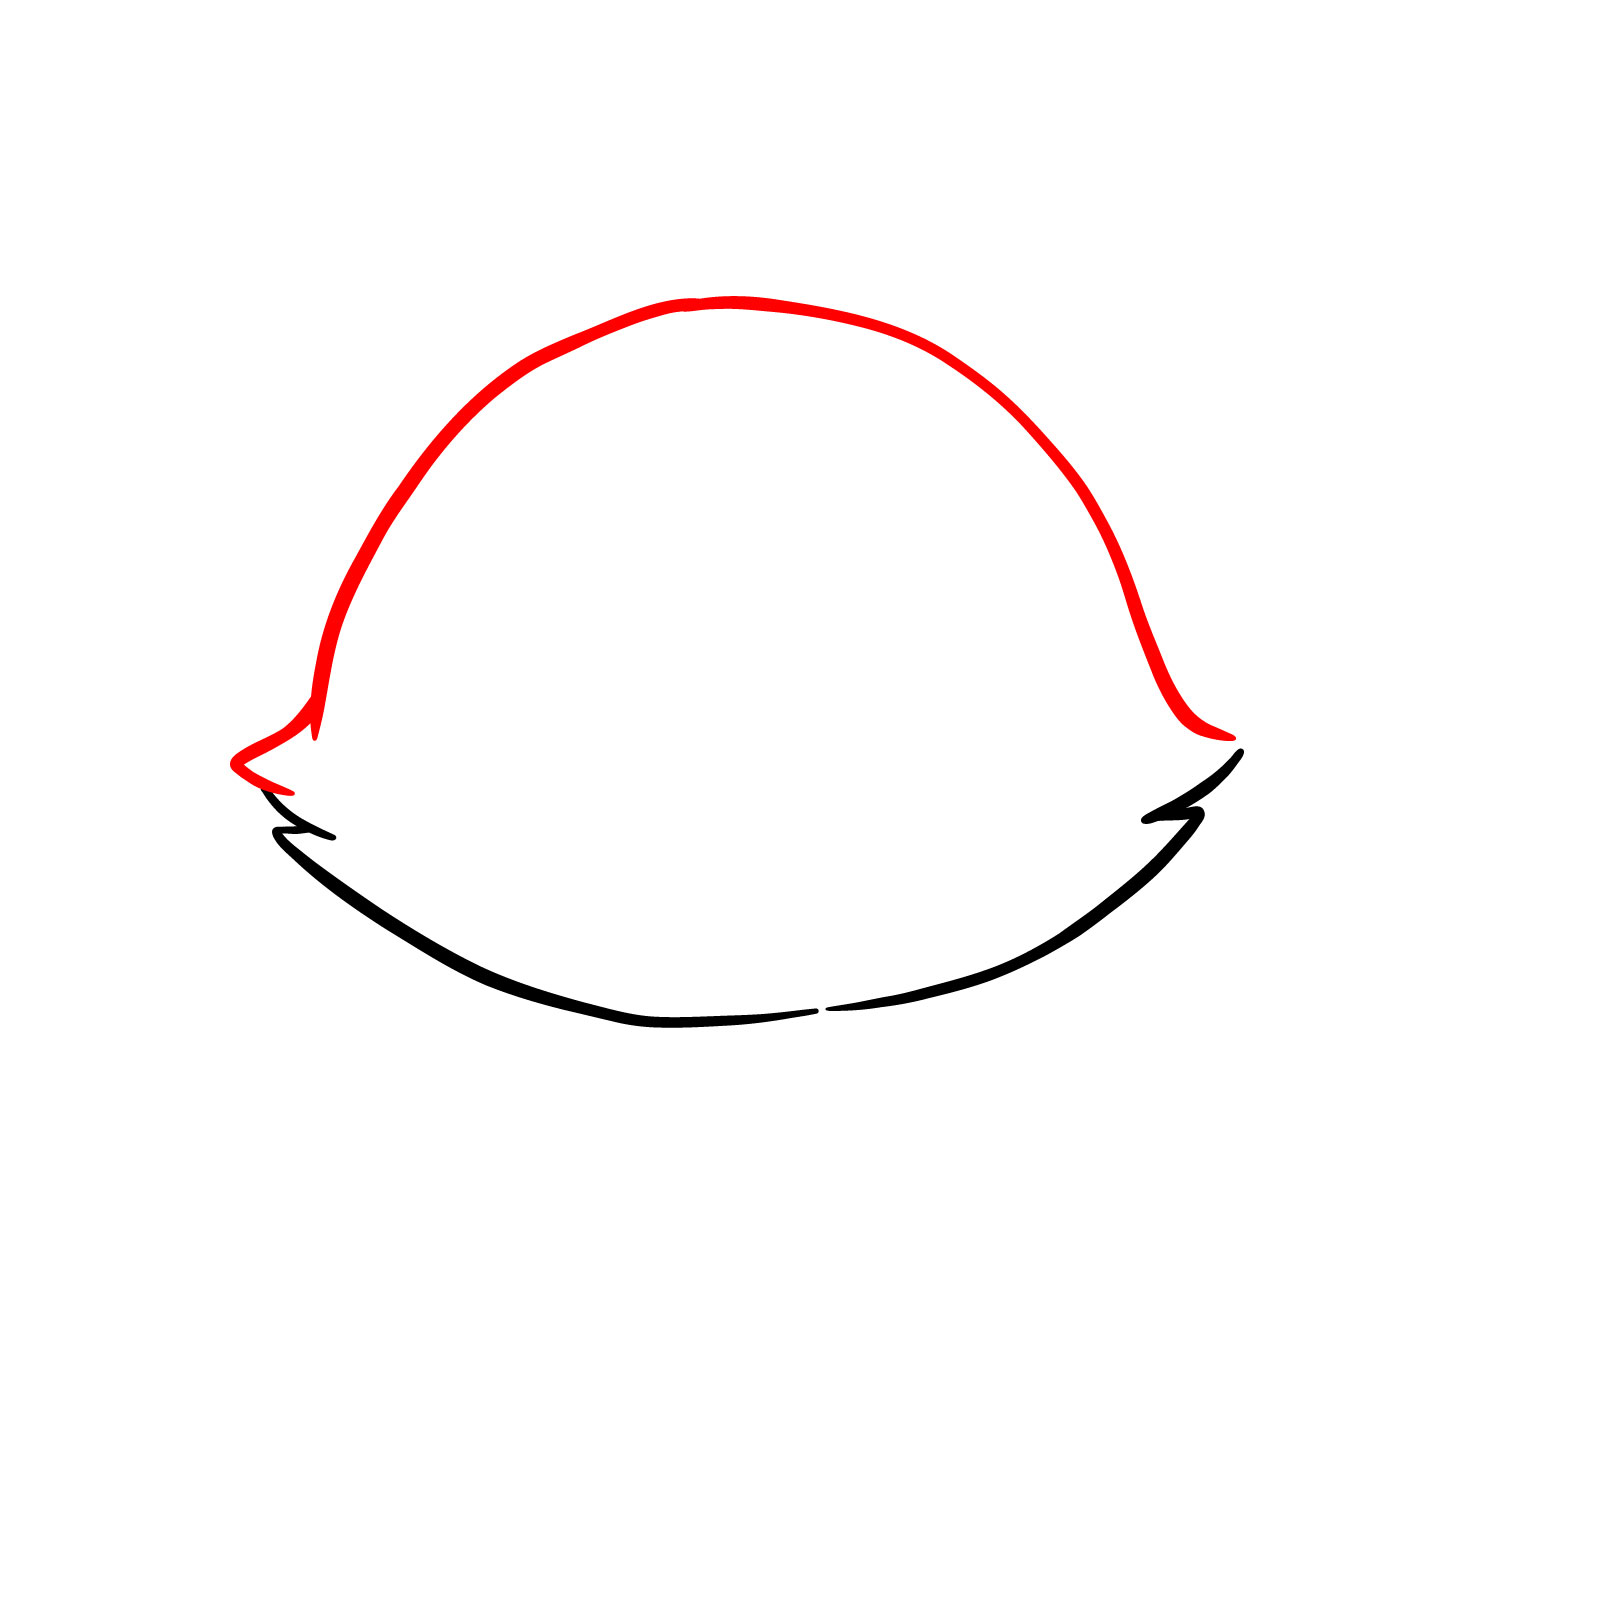
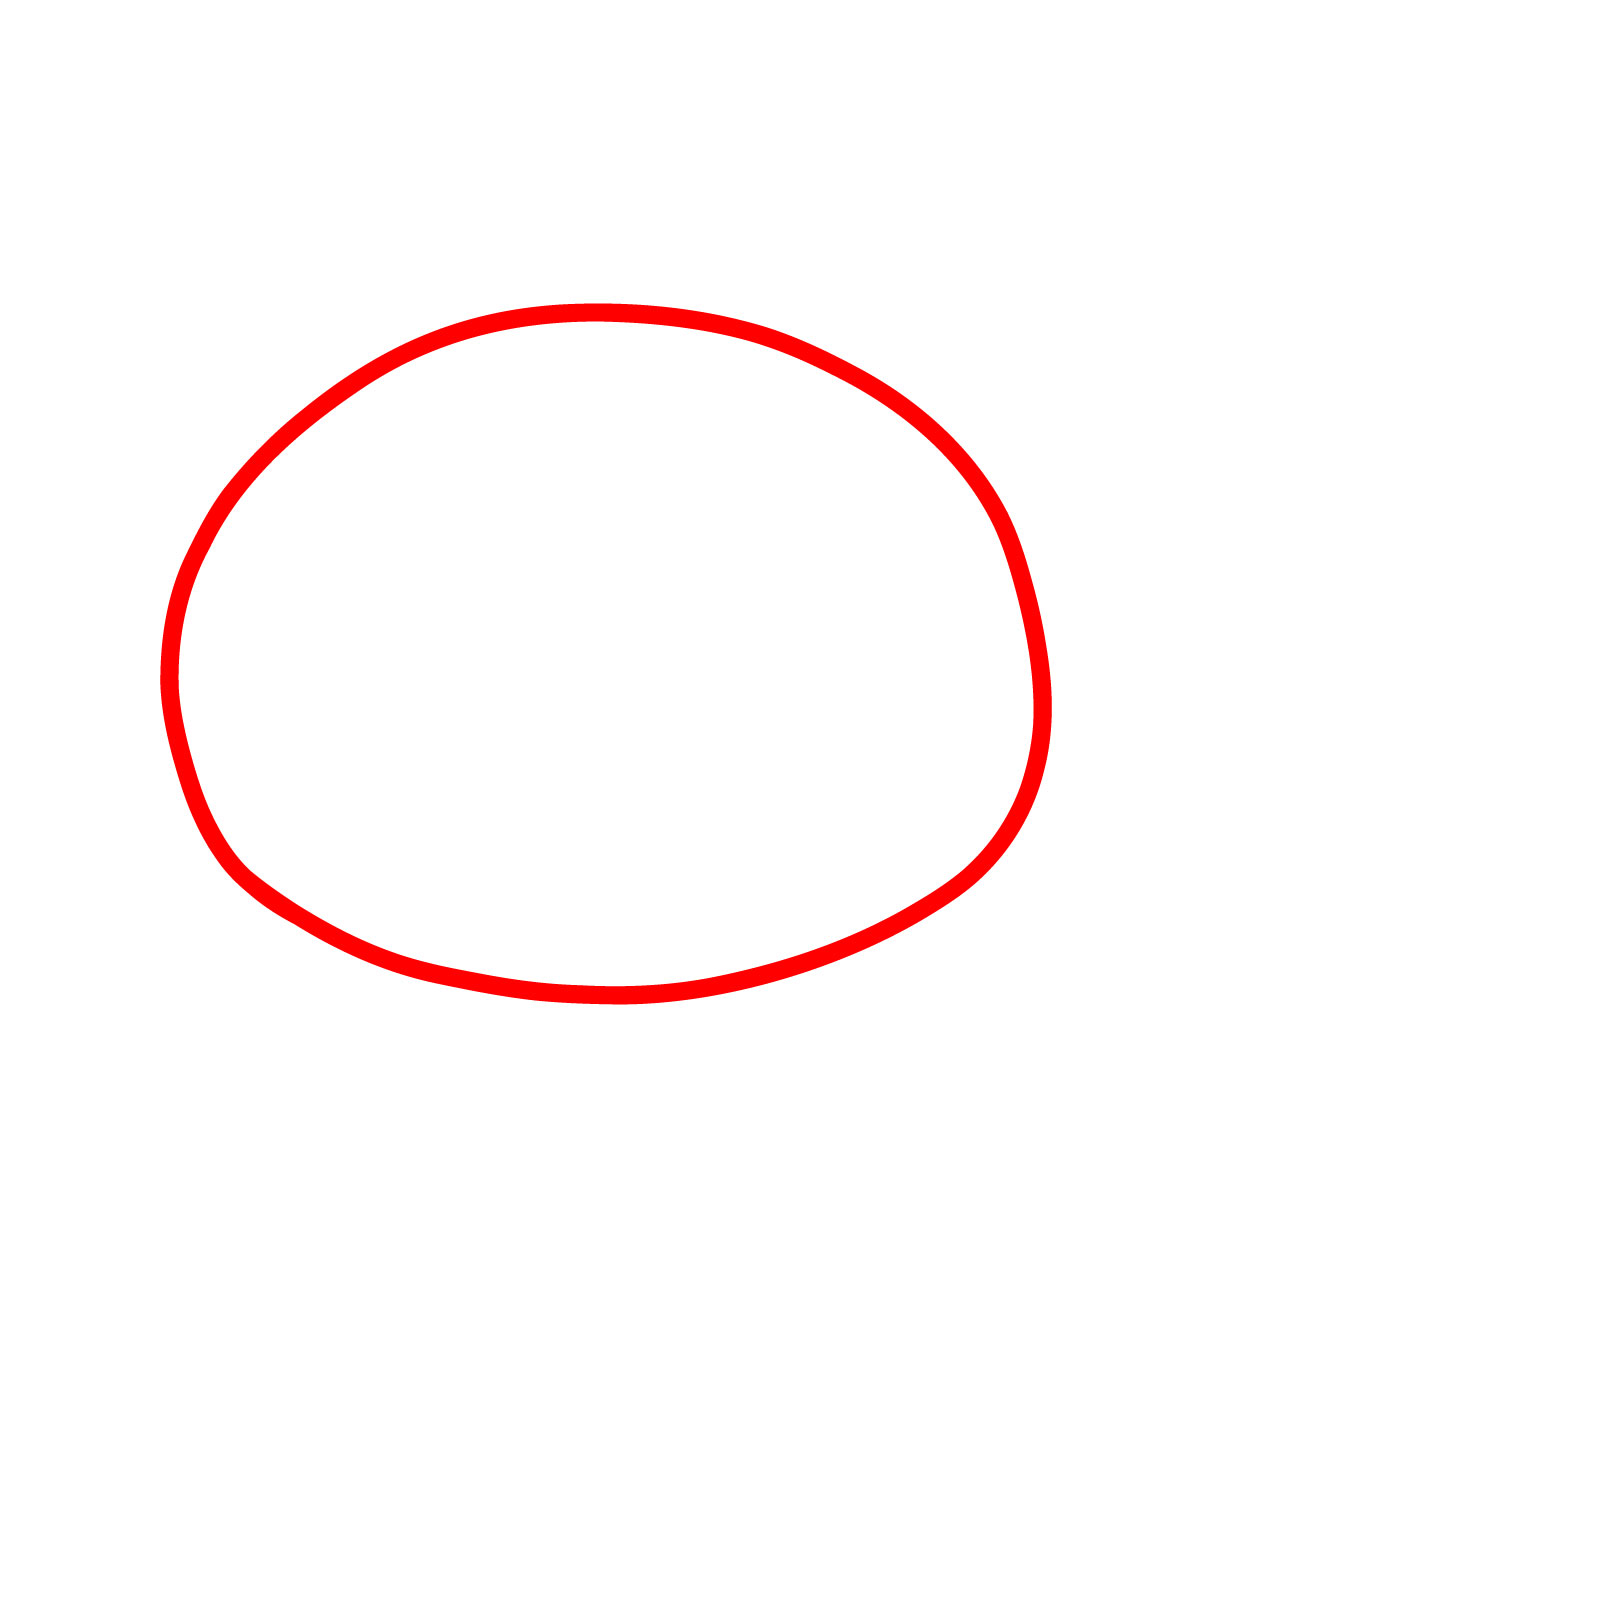
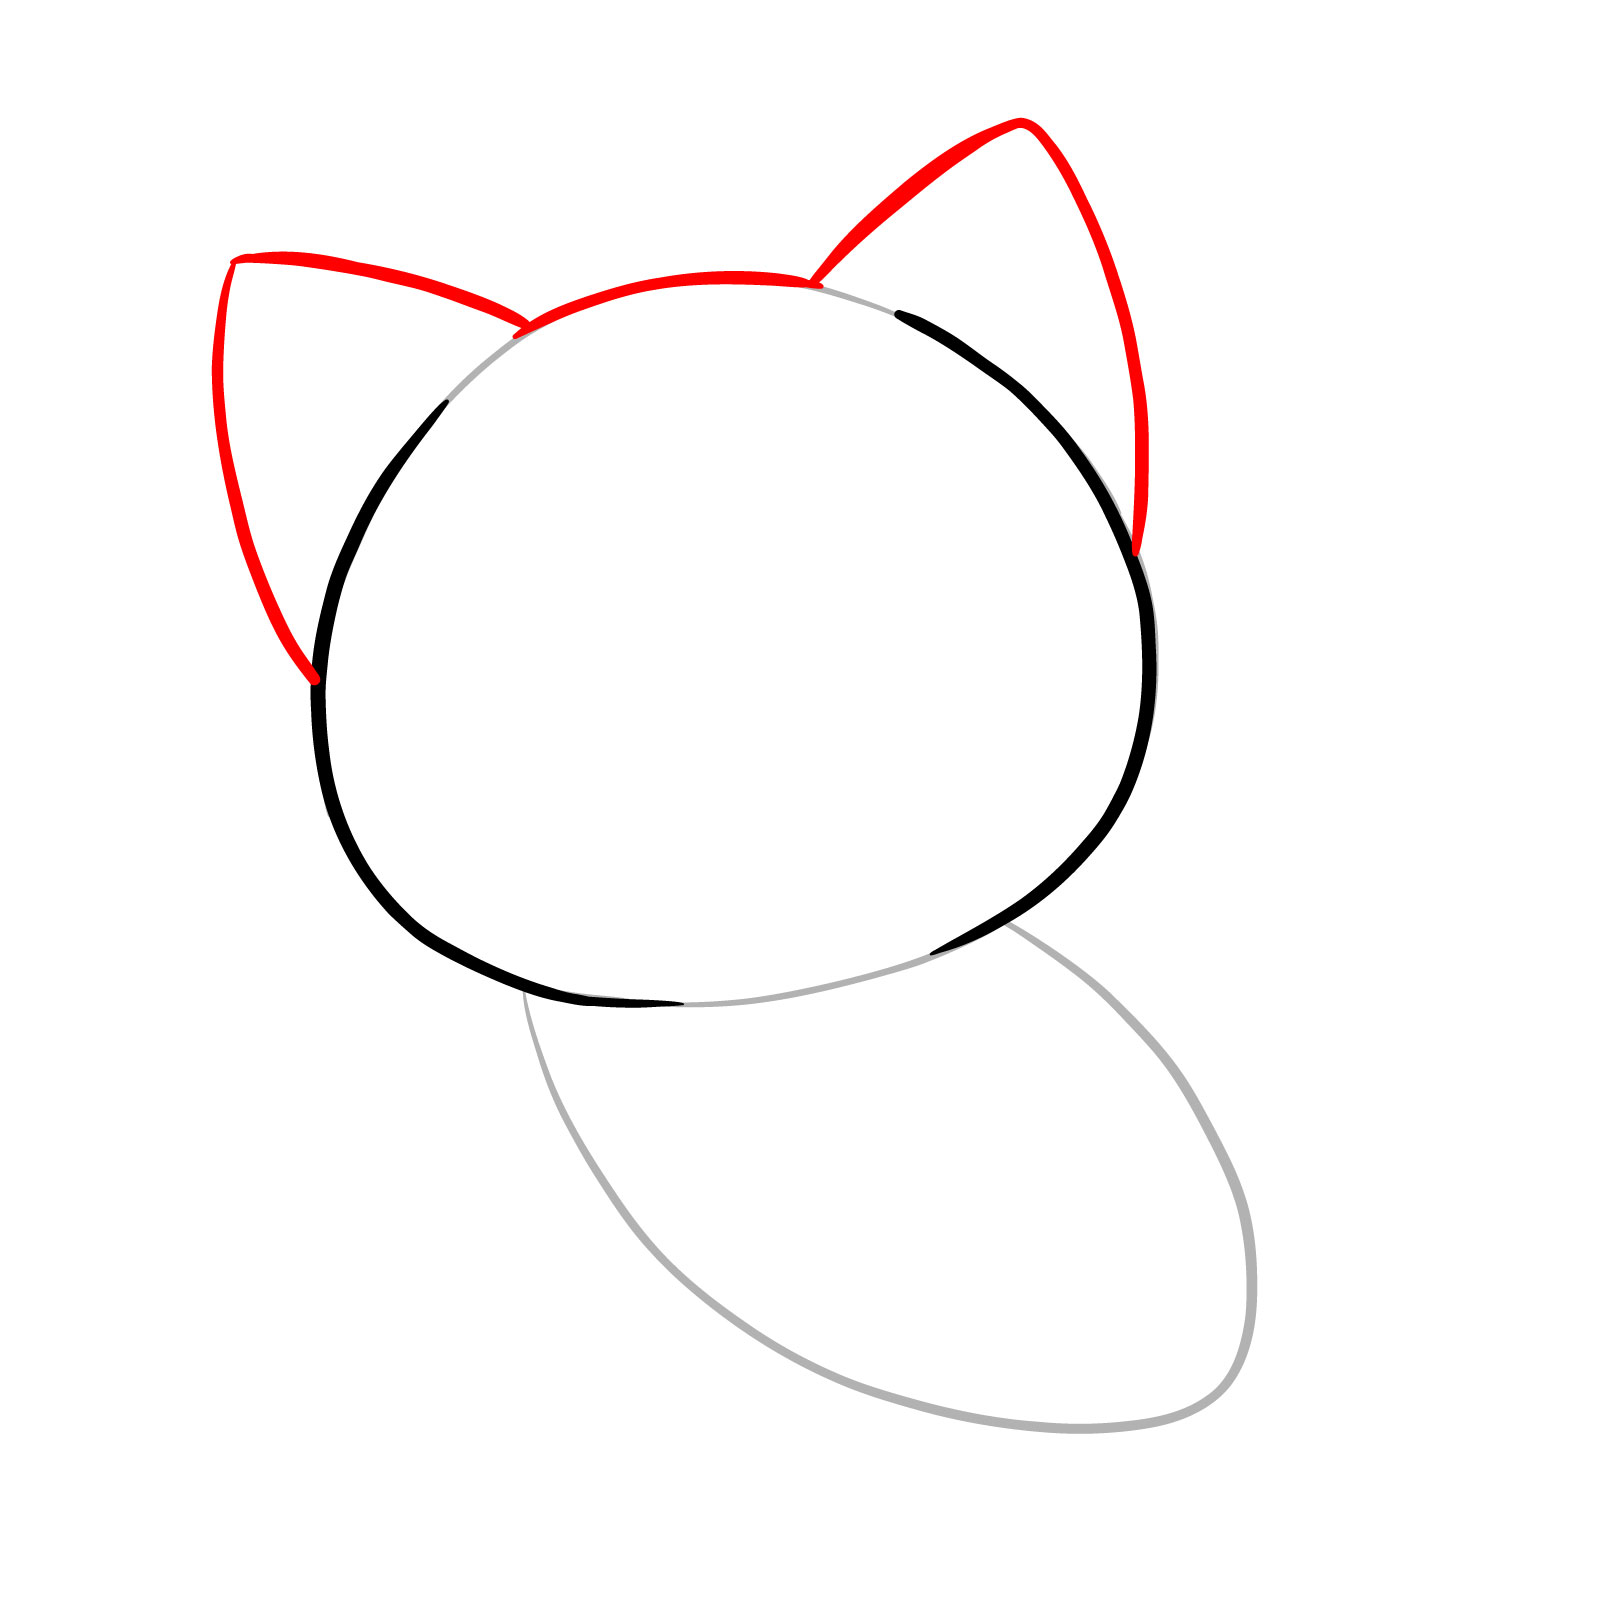
Step 01 – Start with simple shapes to form the basic outline of the cat’s head and body, ensuring the right proportion and placement for a balanced structure
Initial shapes for the cat’s head and body
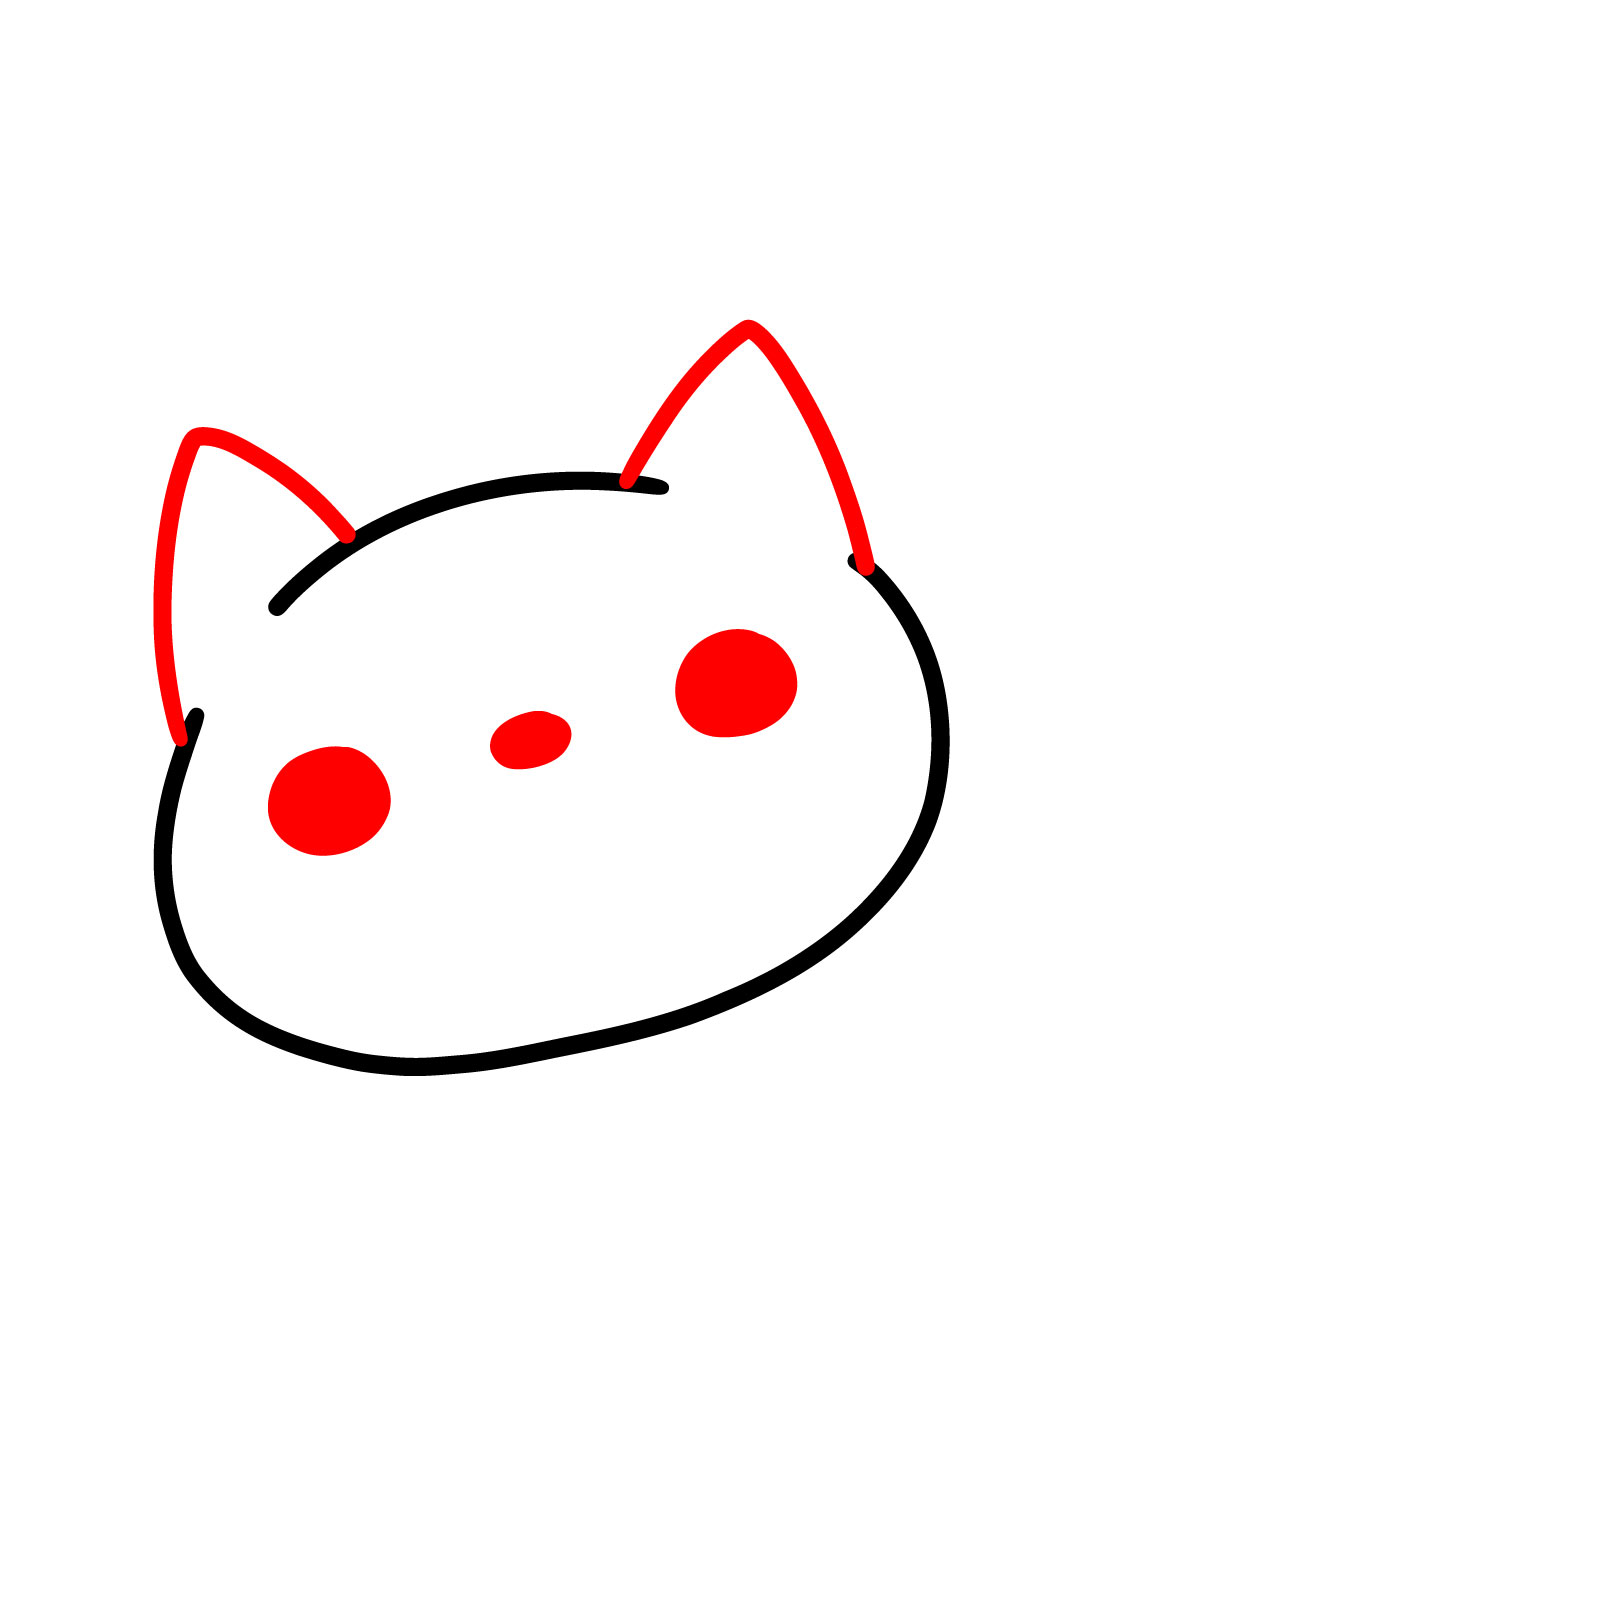
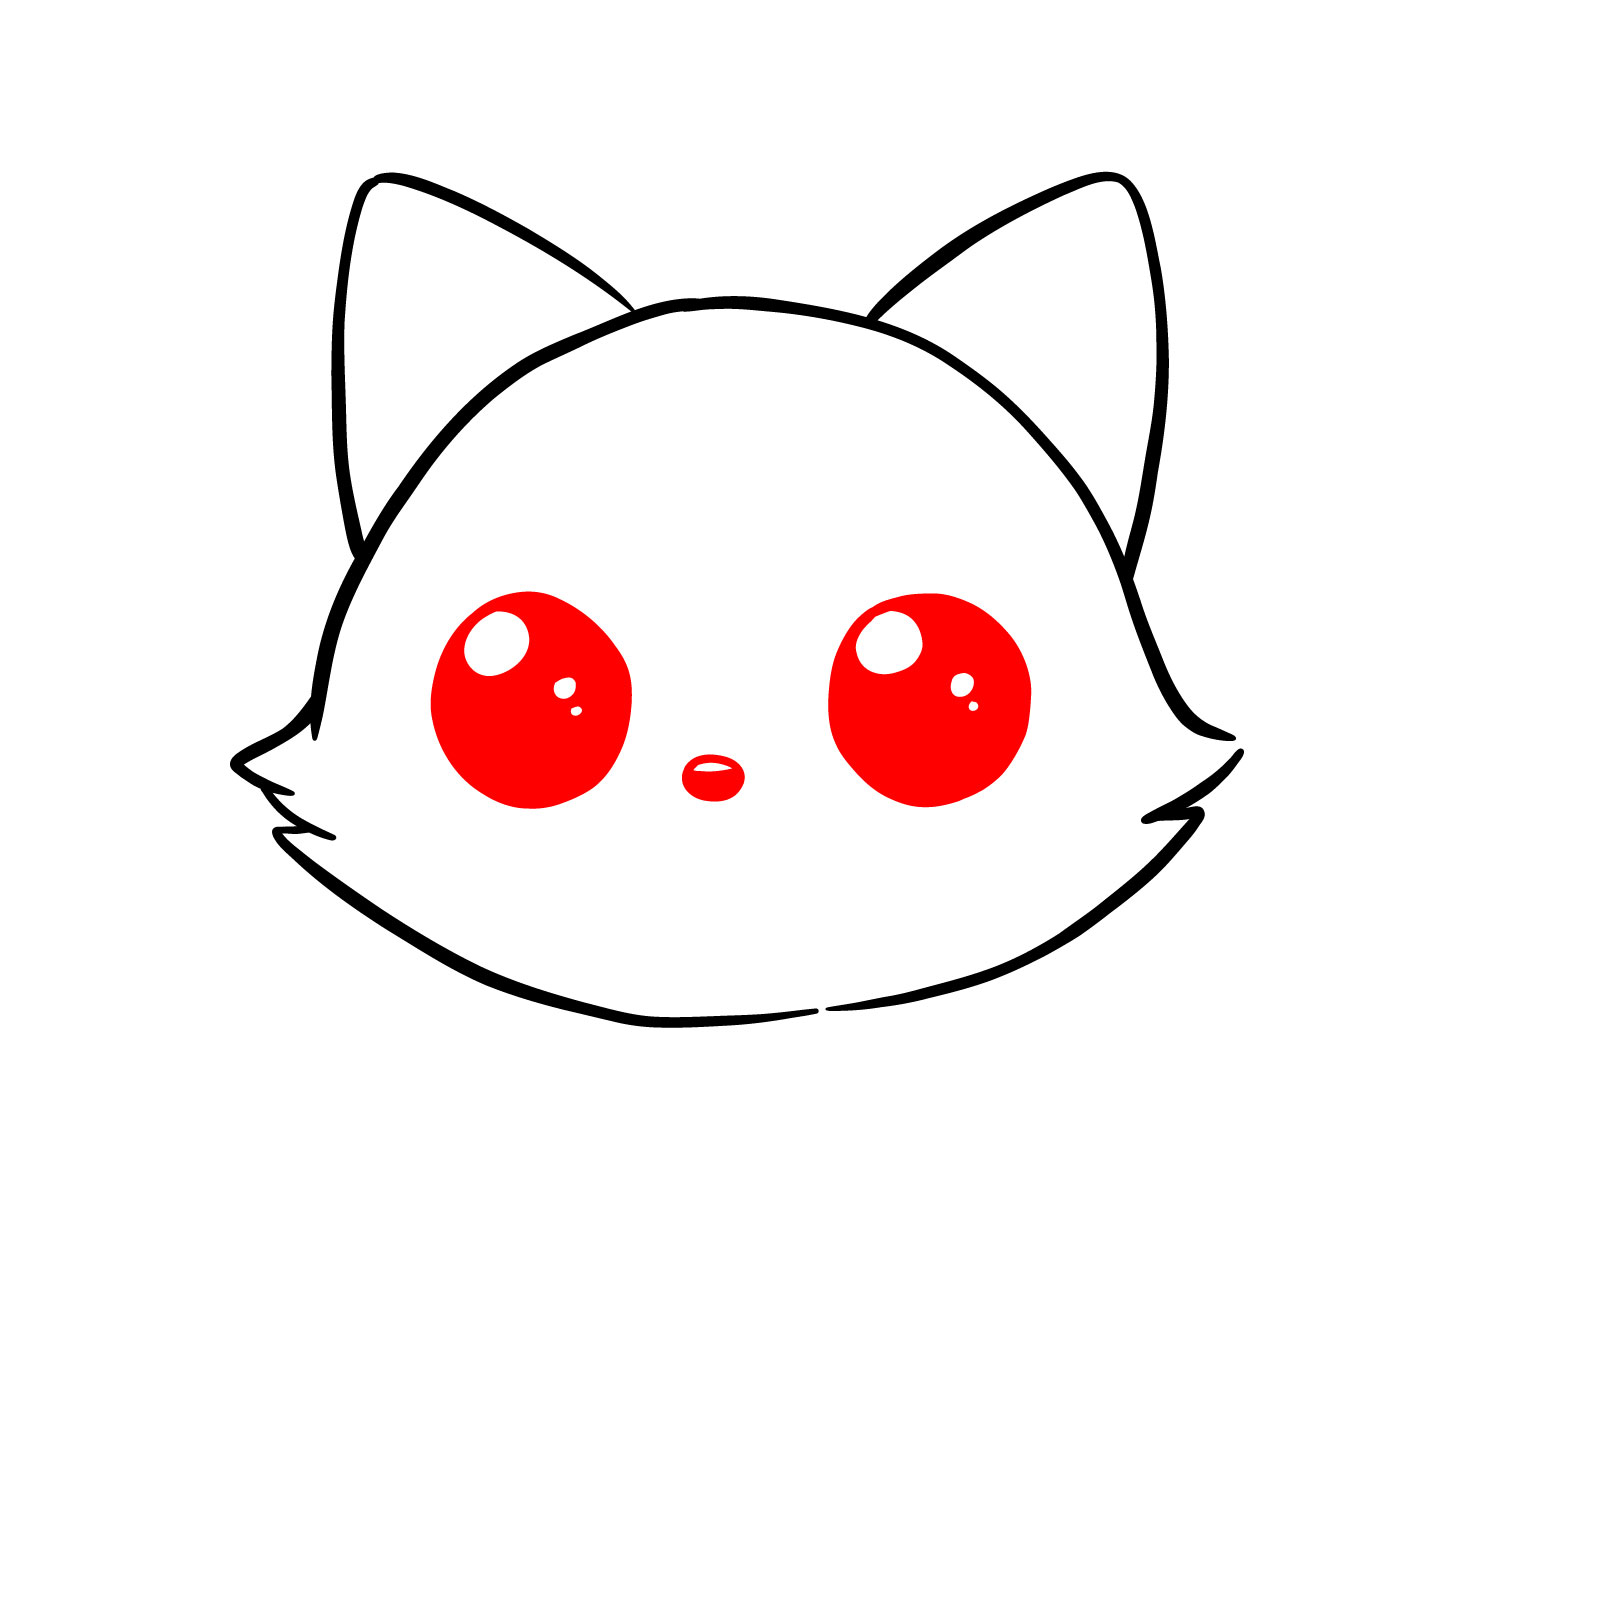
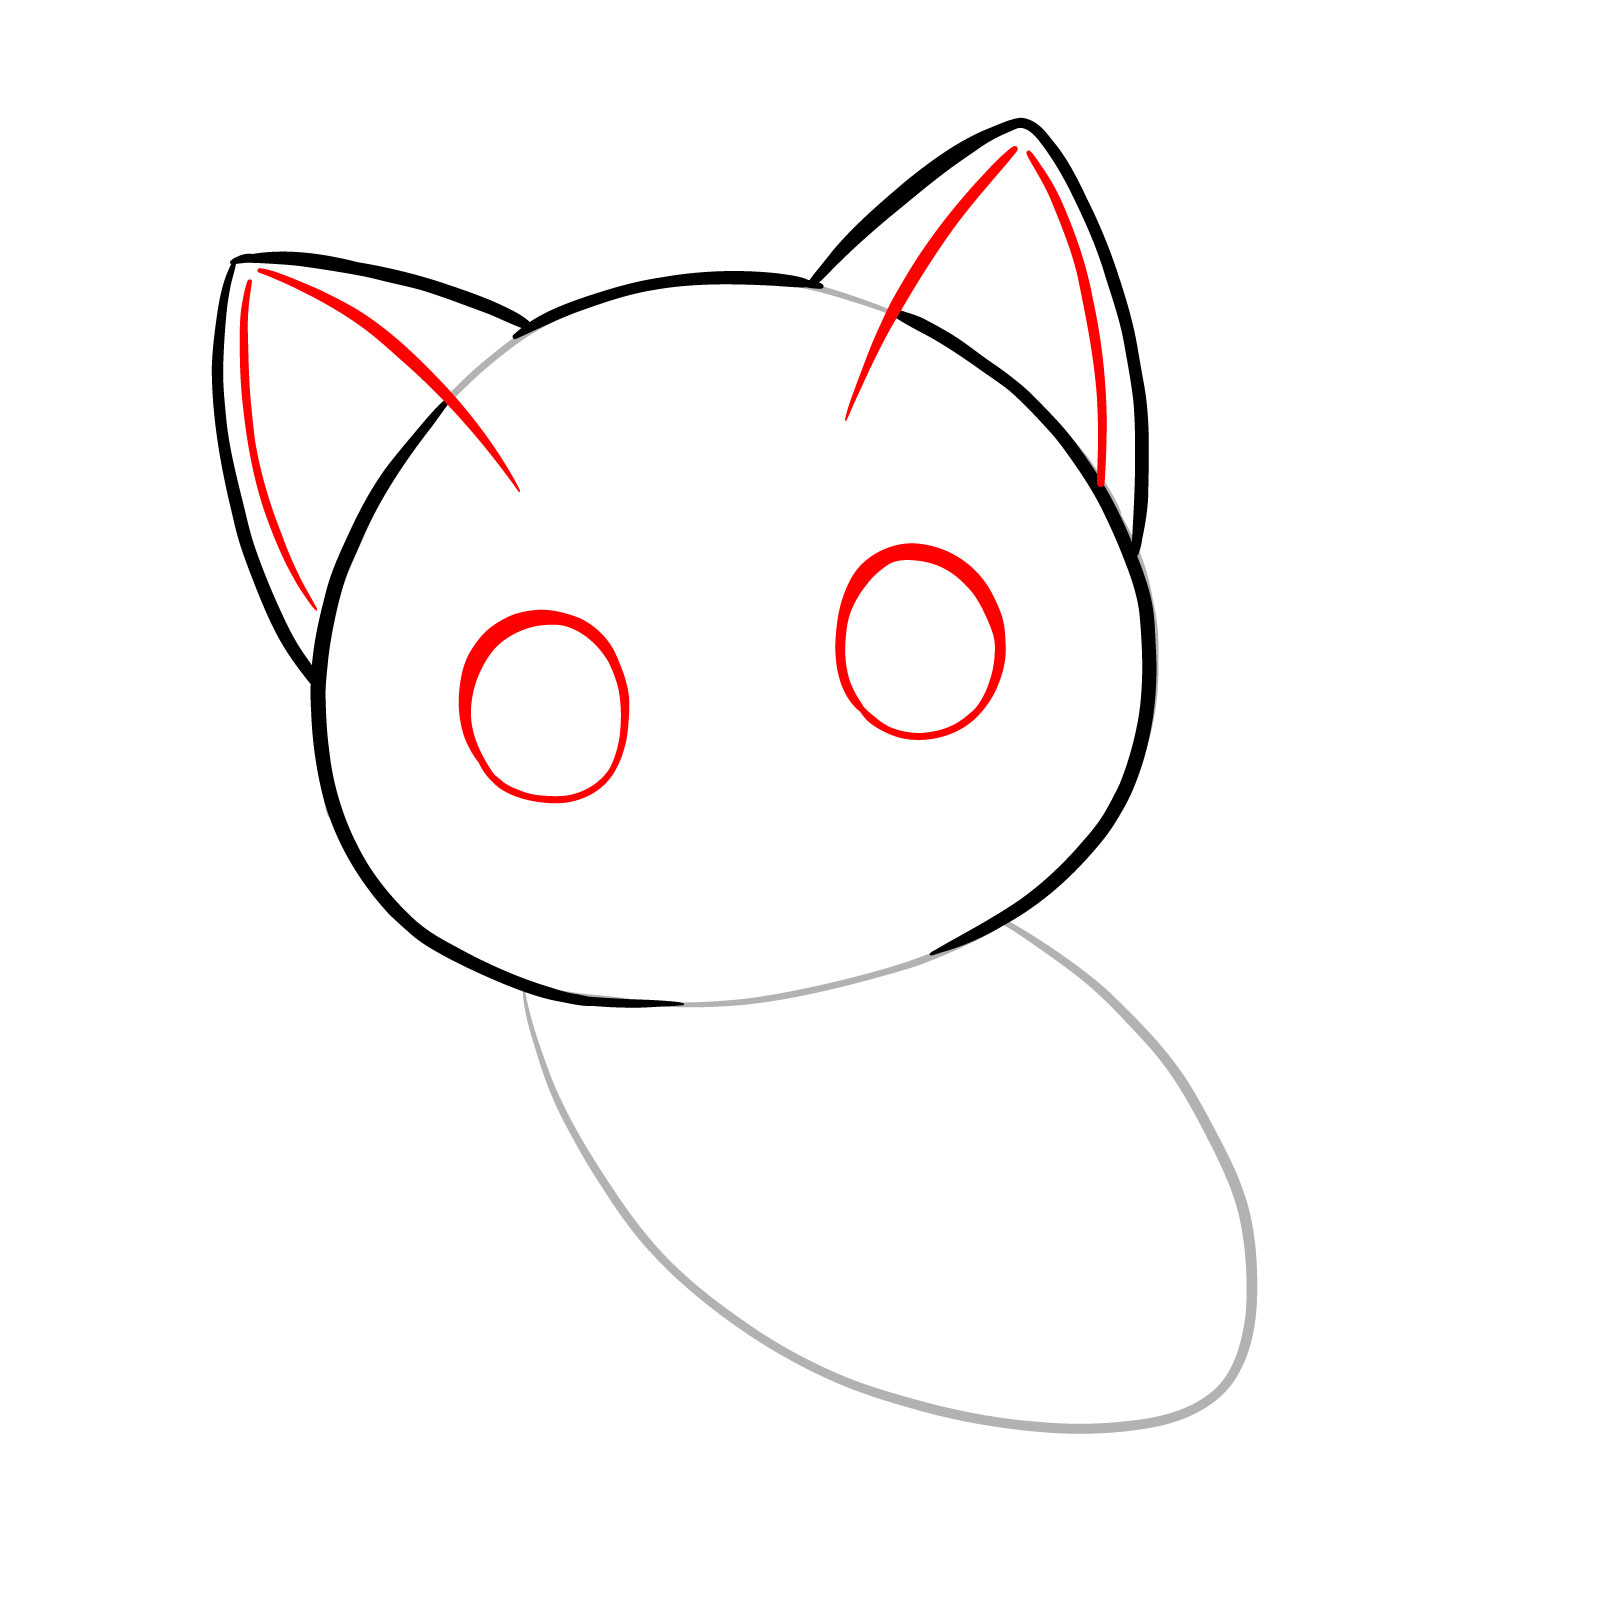
Step 02 – Draw two large circles for the eyes on the head oval, fill them in while leaving small white dots to represent the light reflecting in the cat’s eyes
Eyes with reflective highlights added
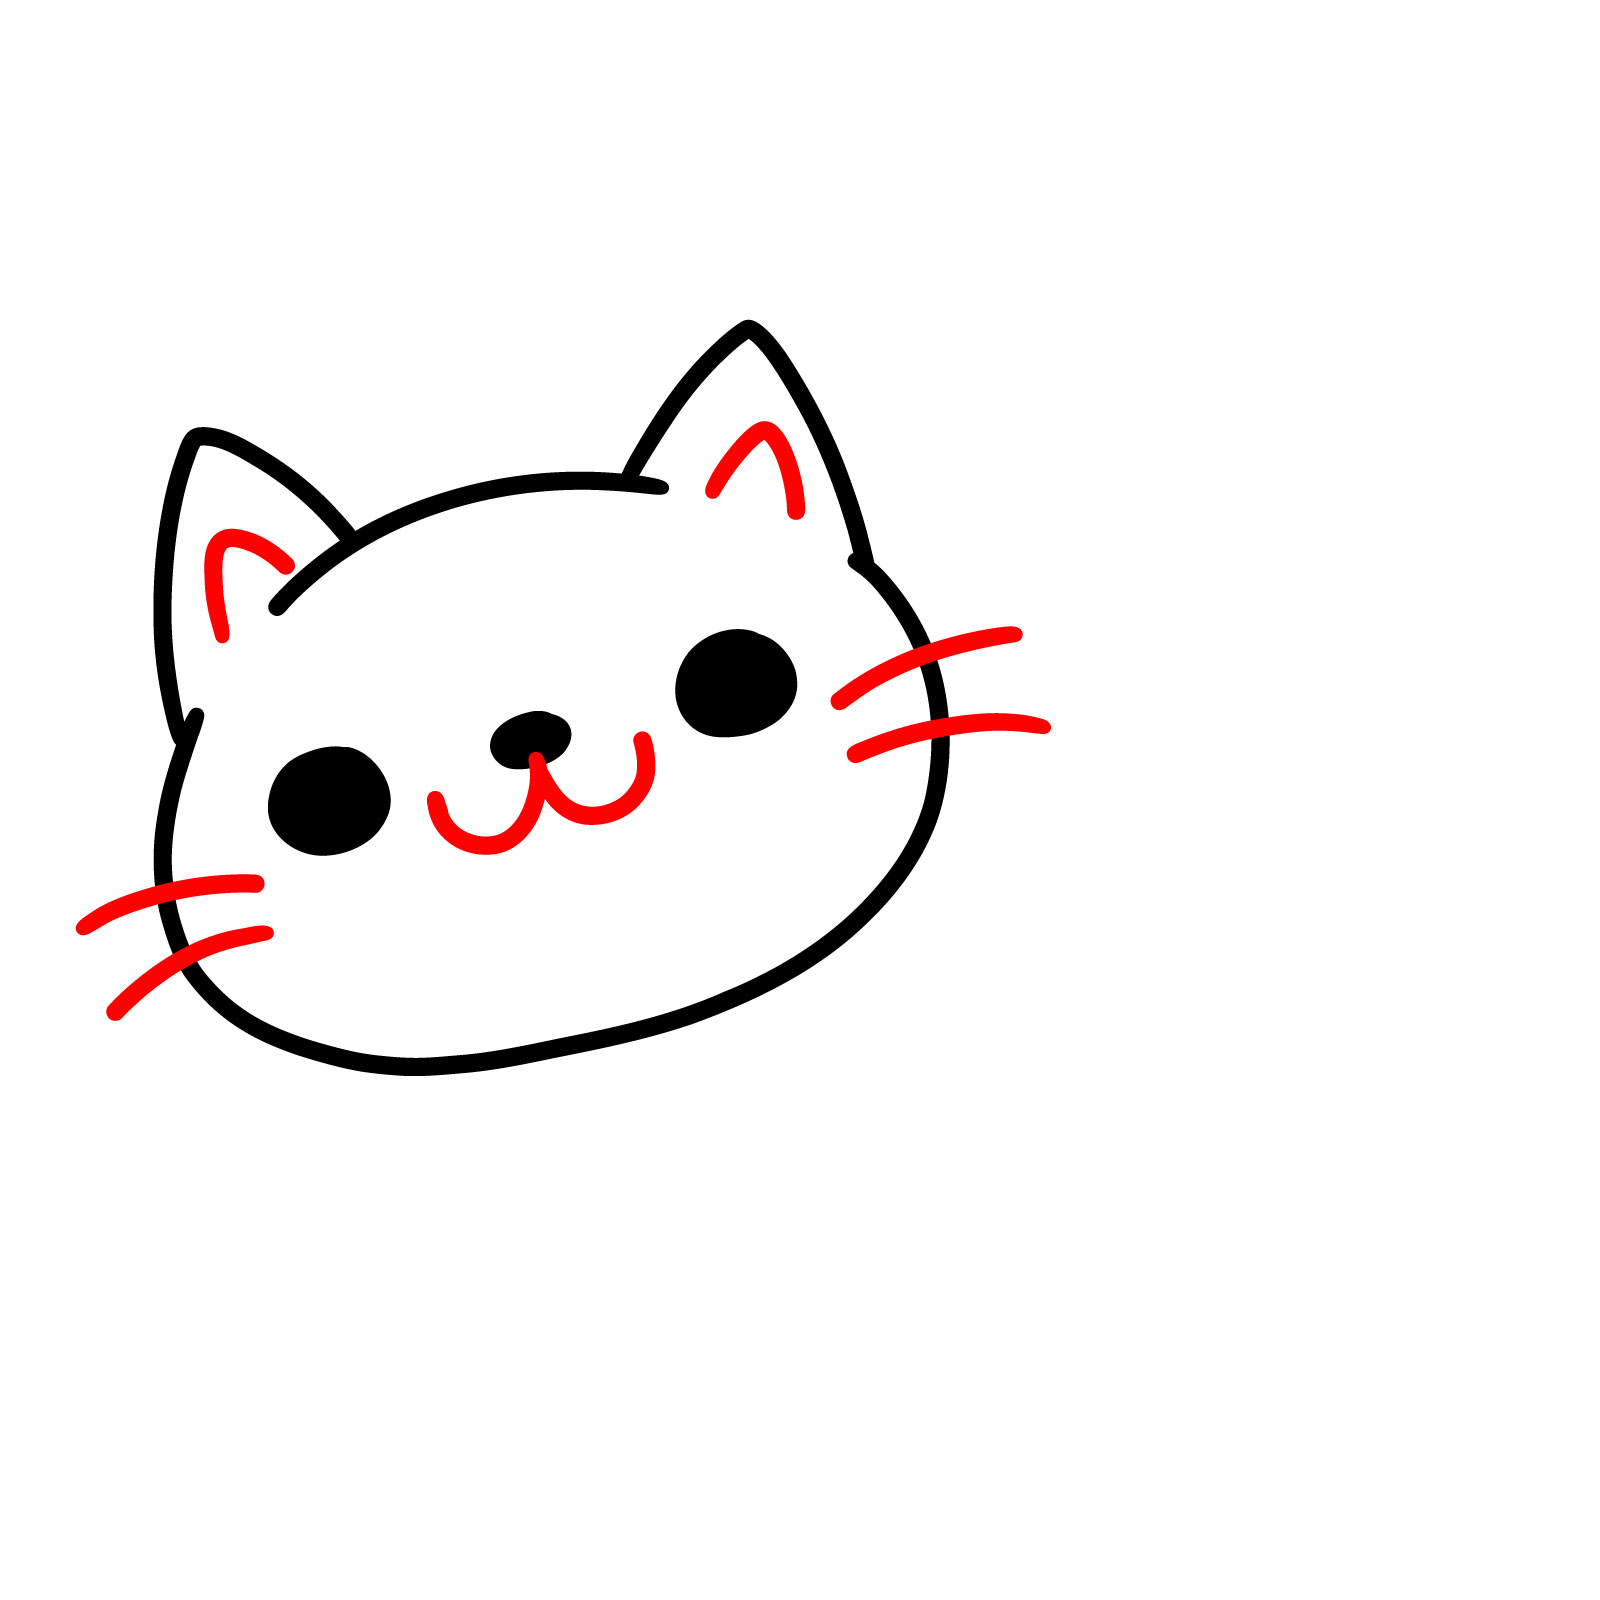
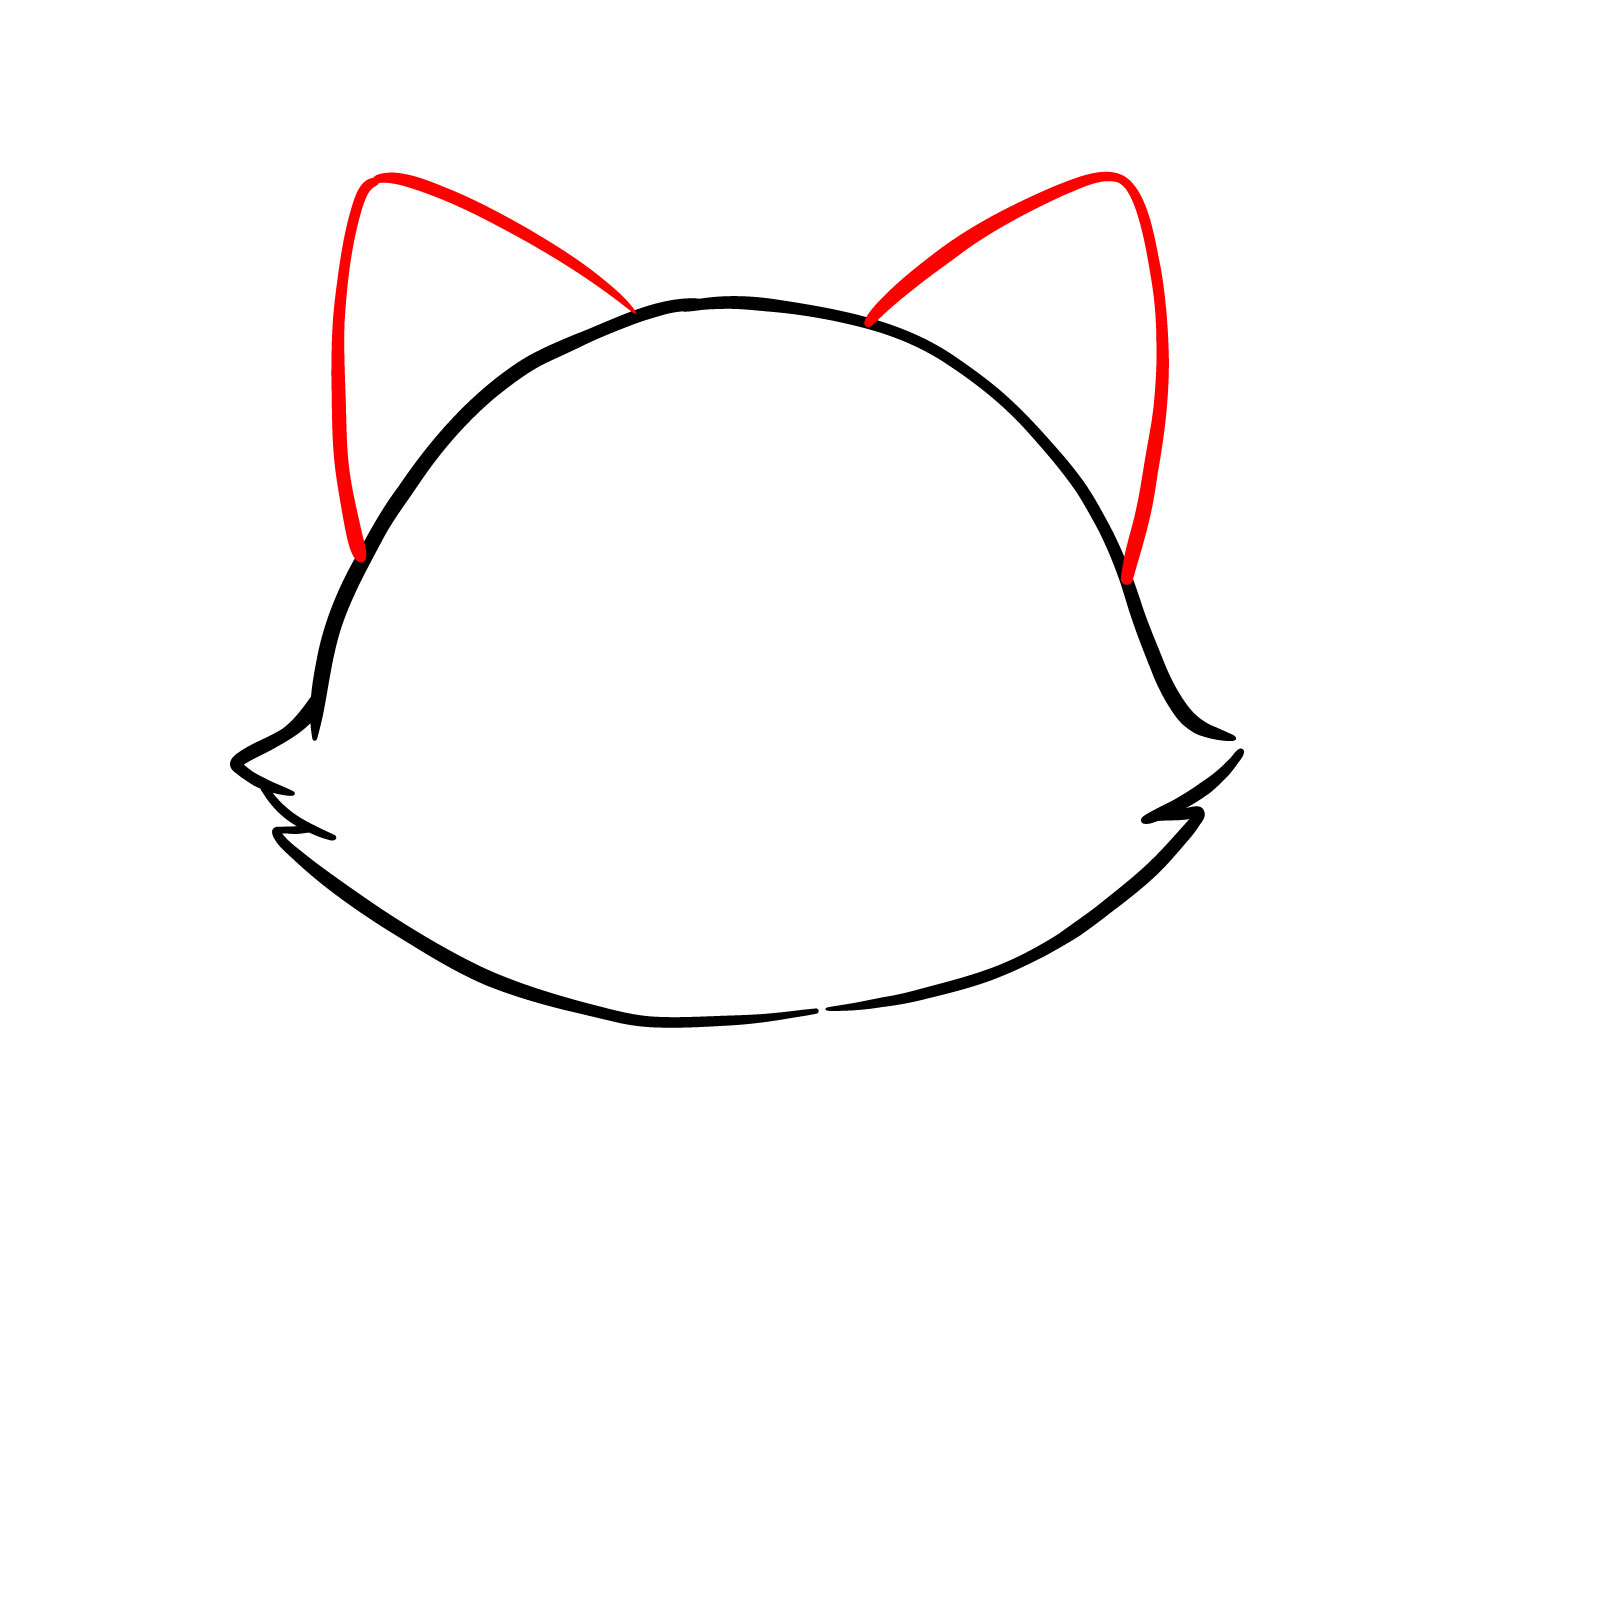
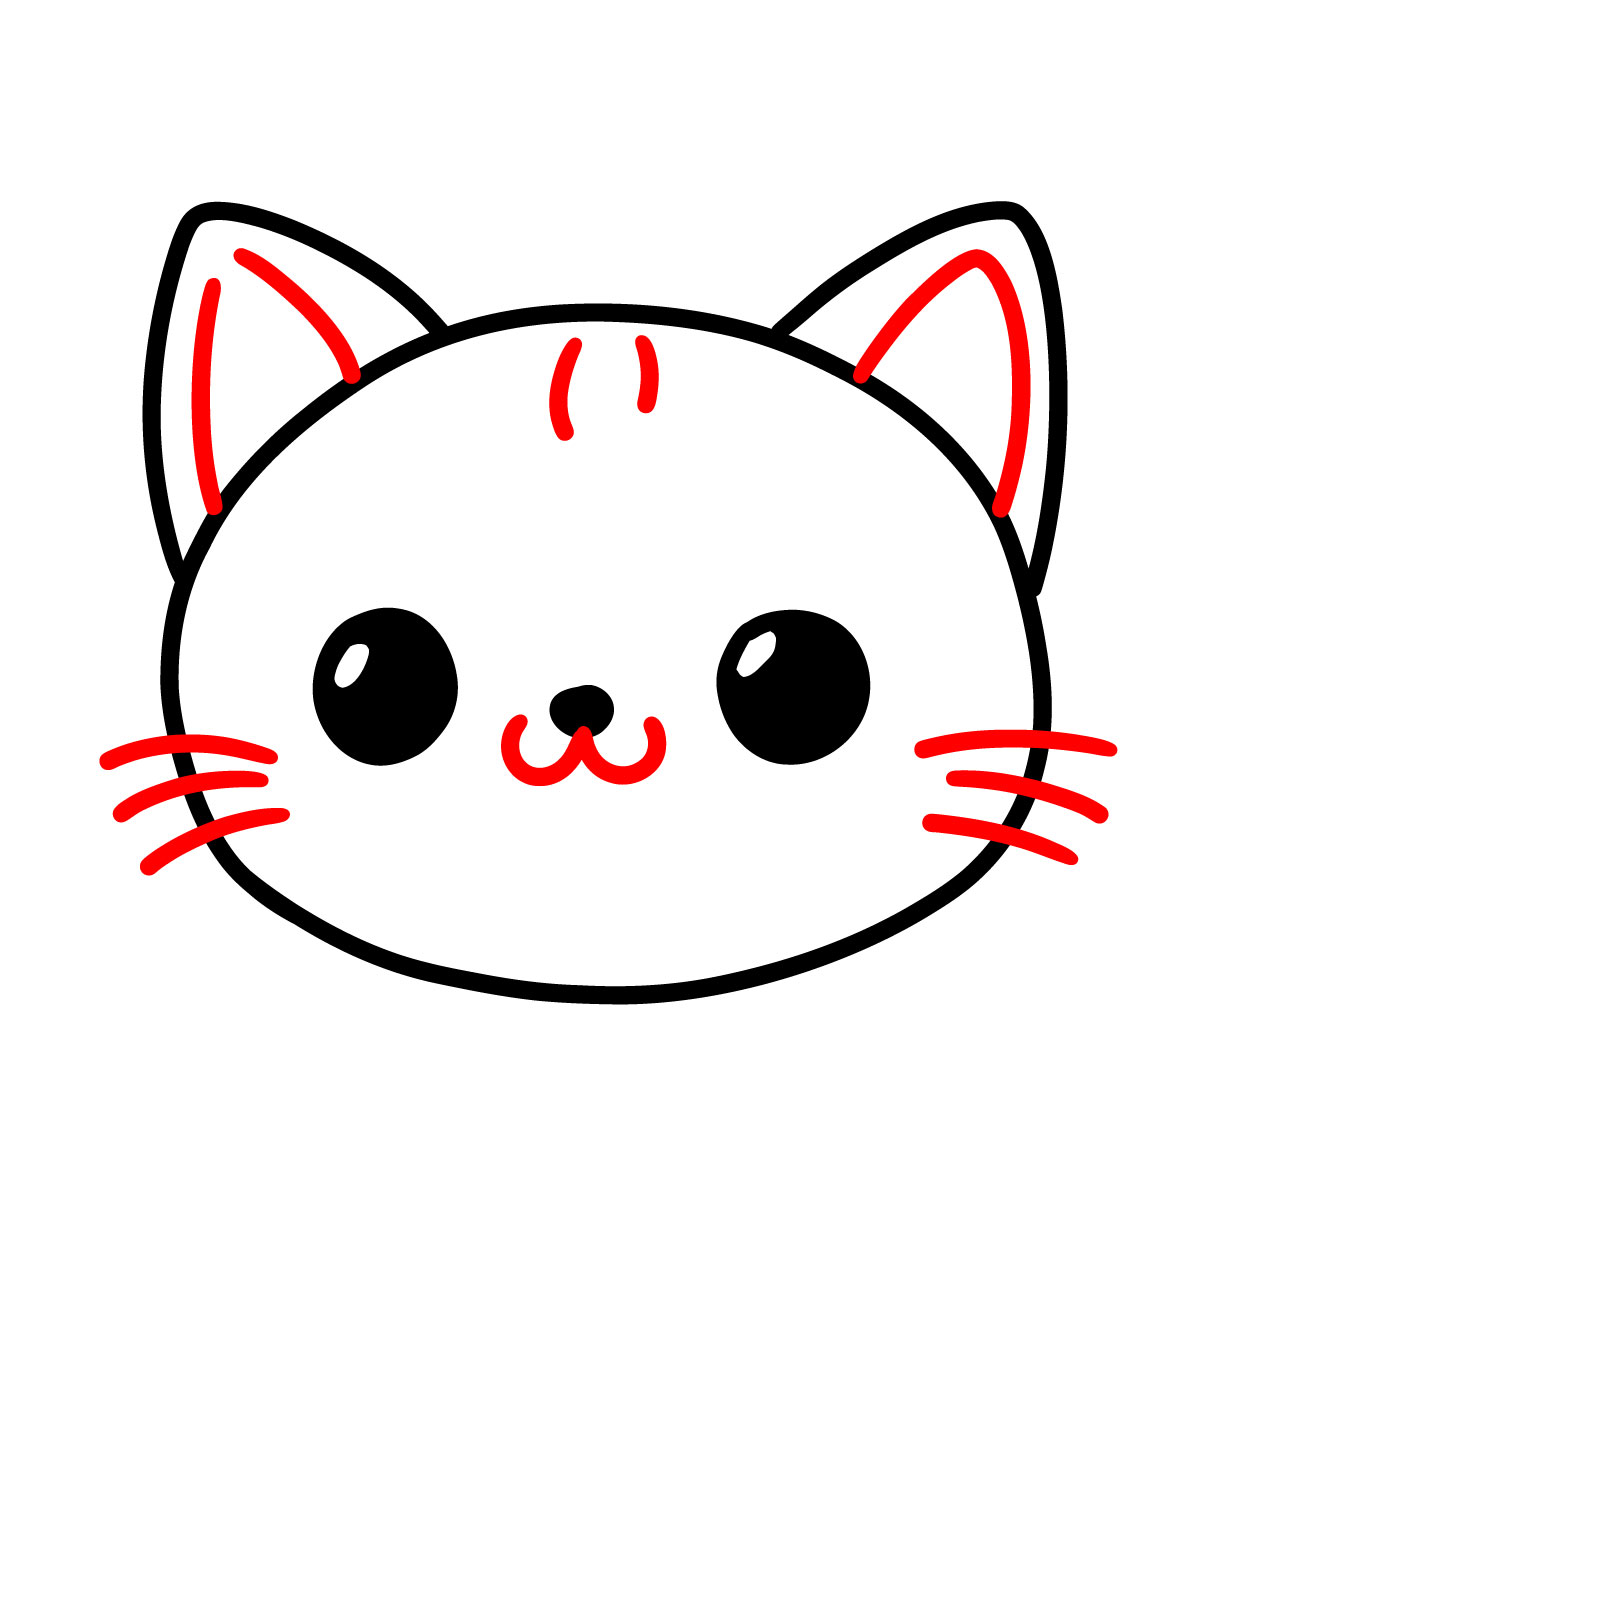
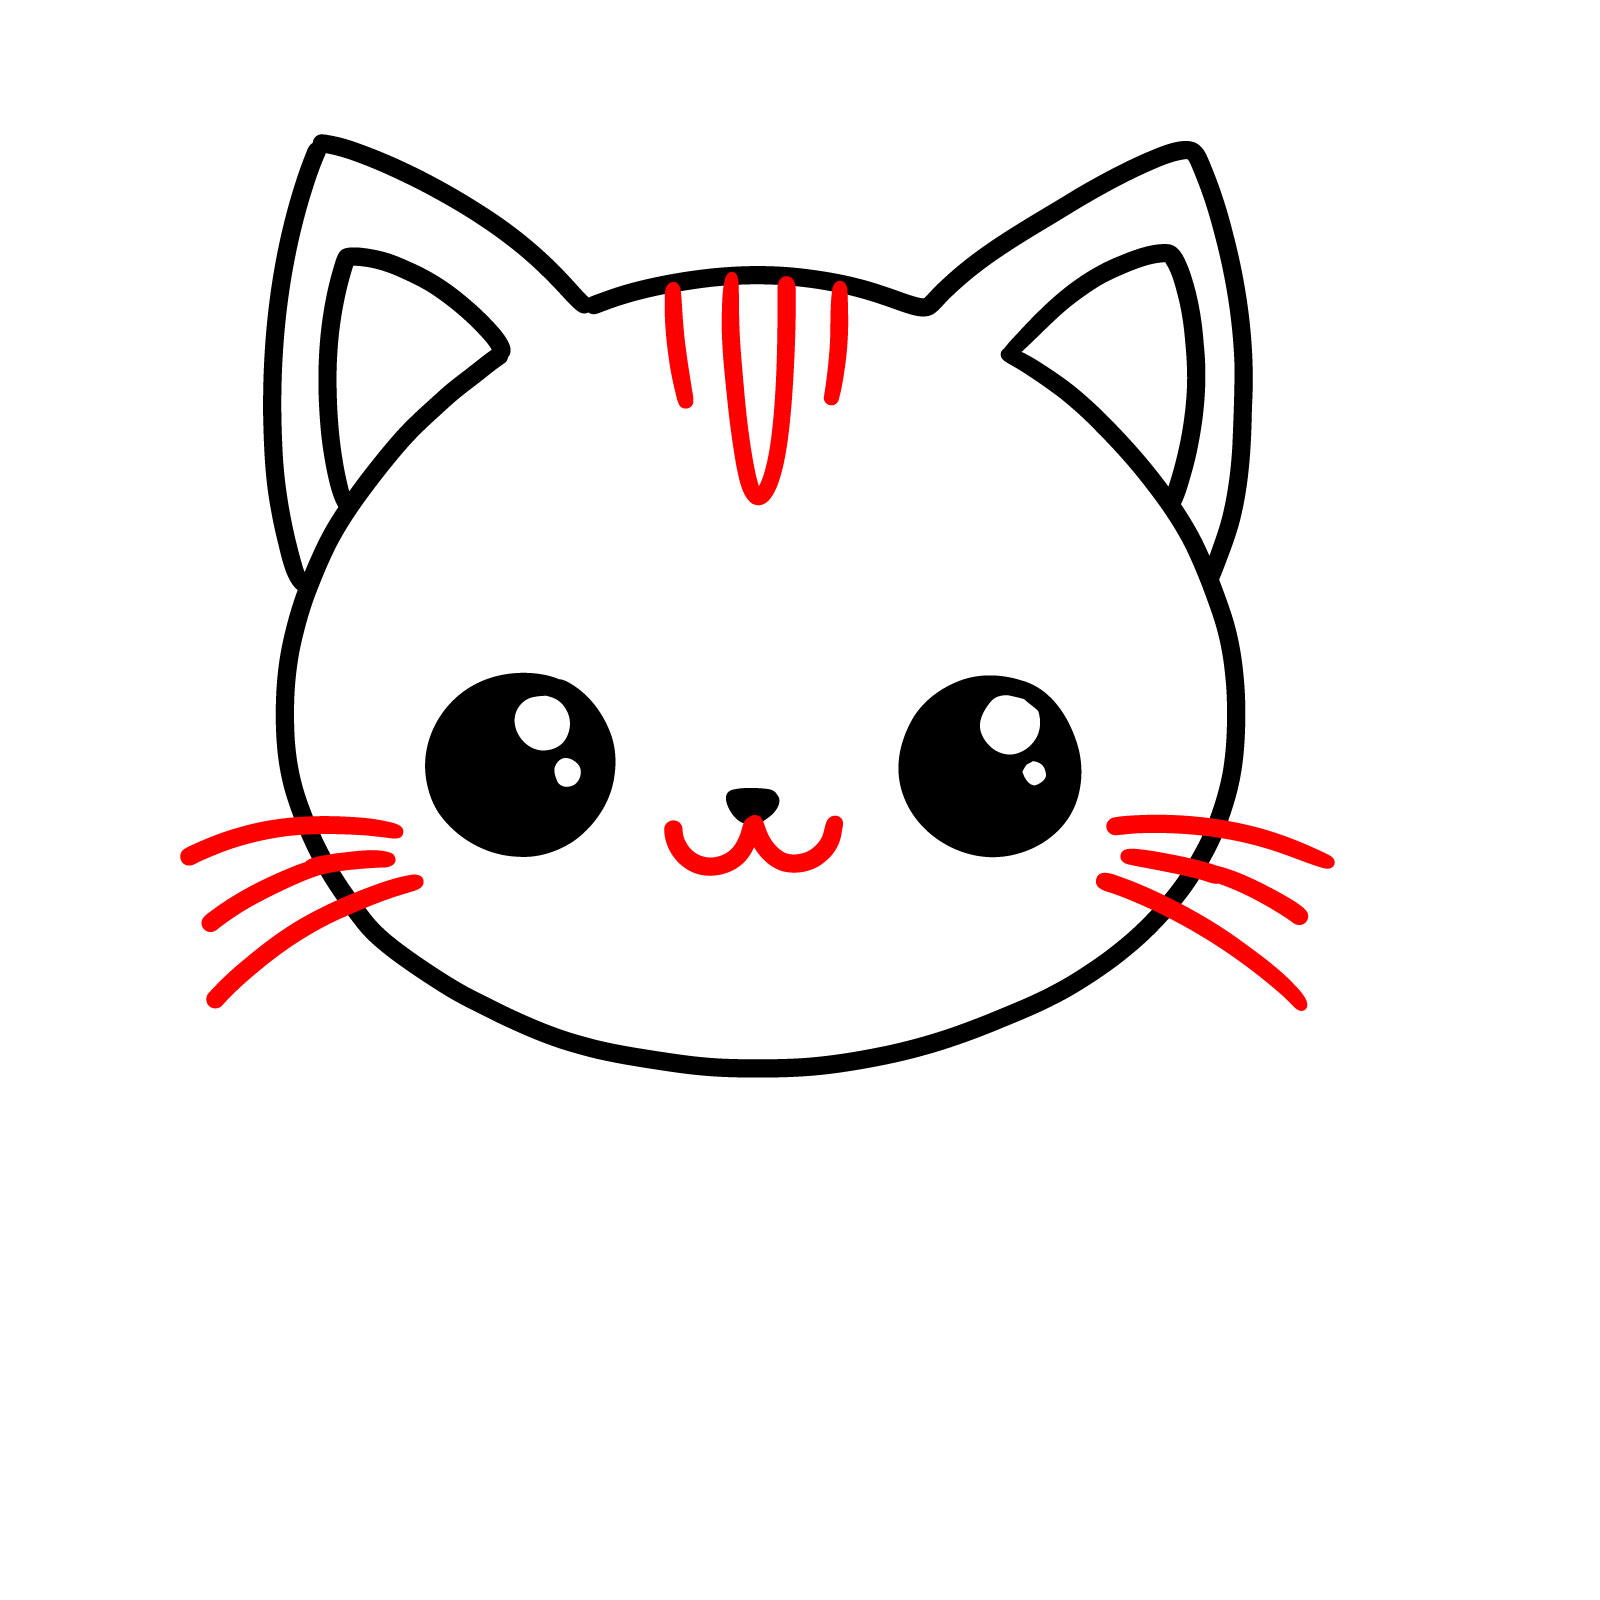
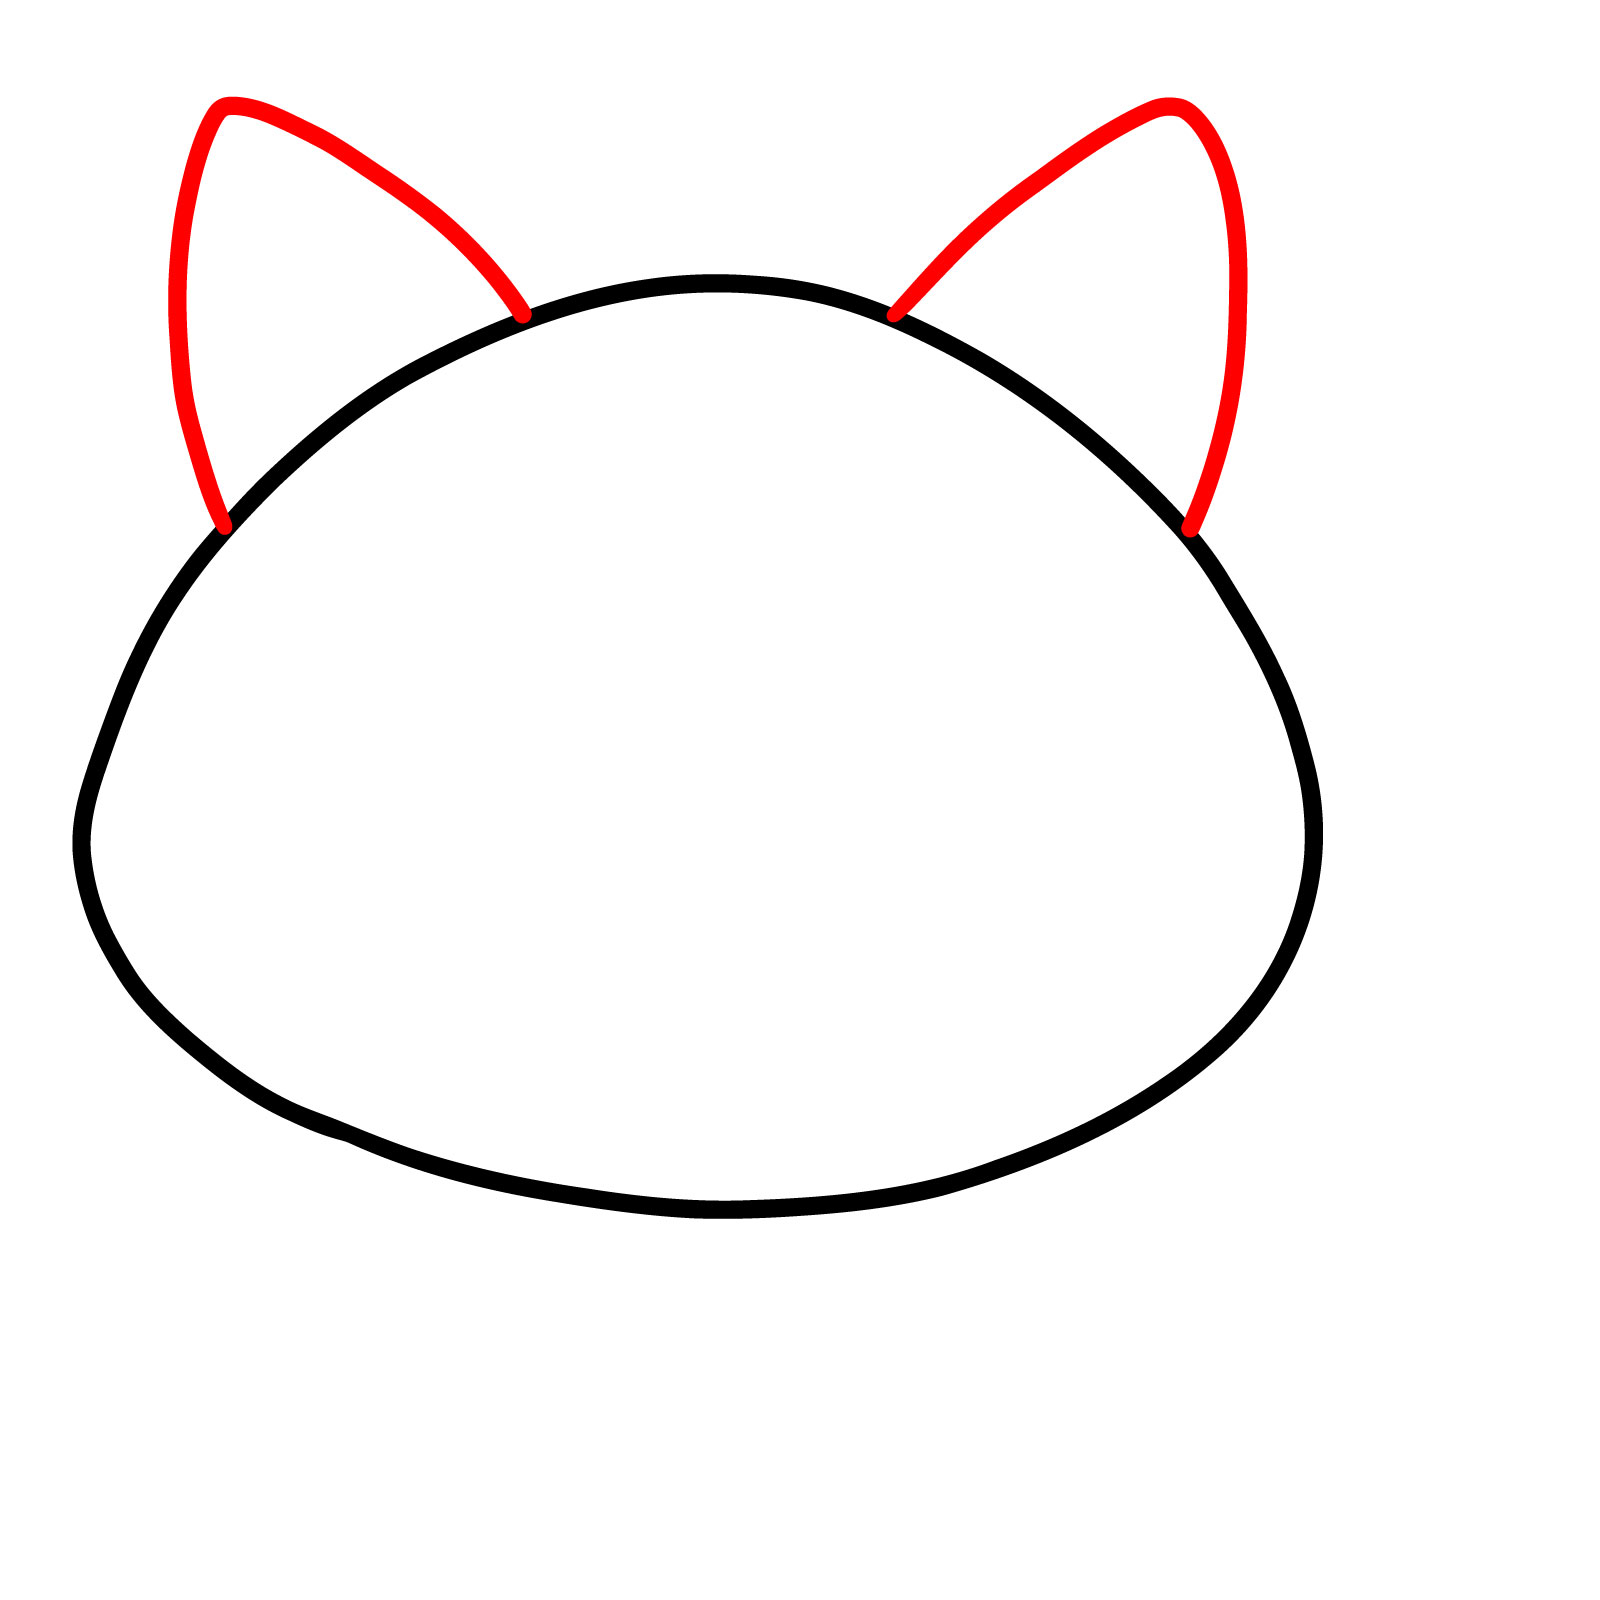
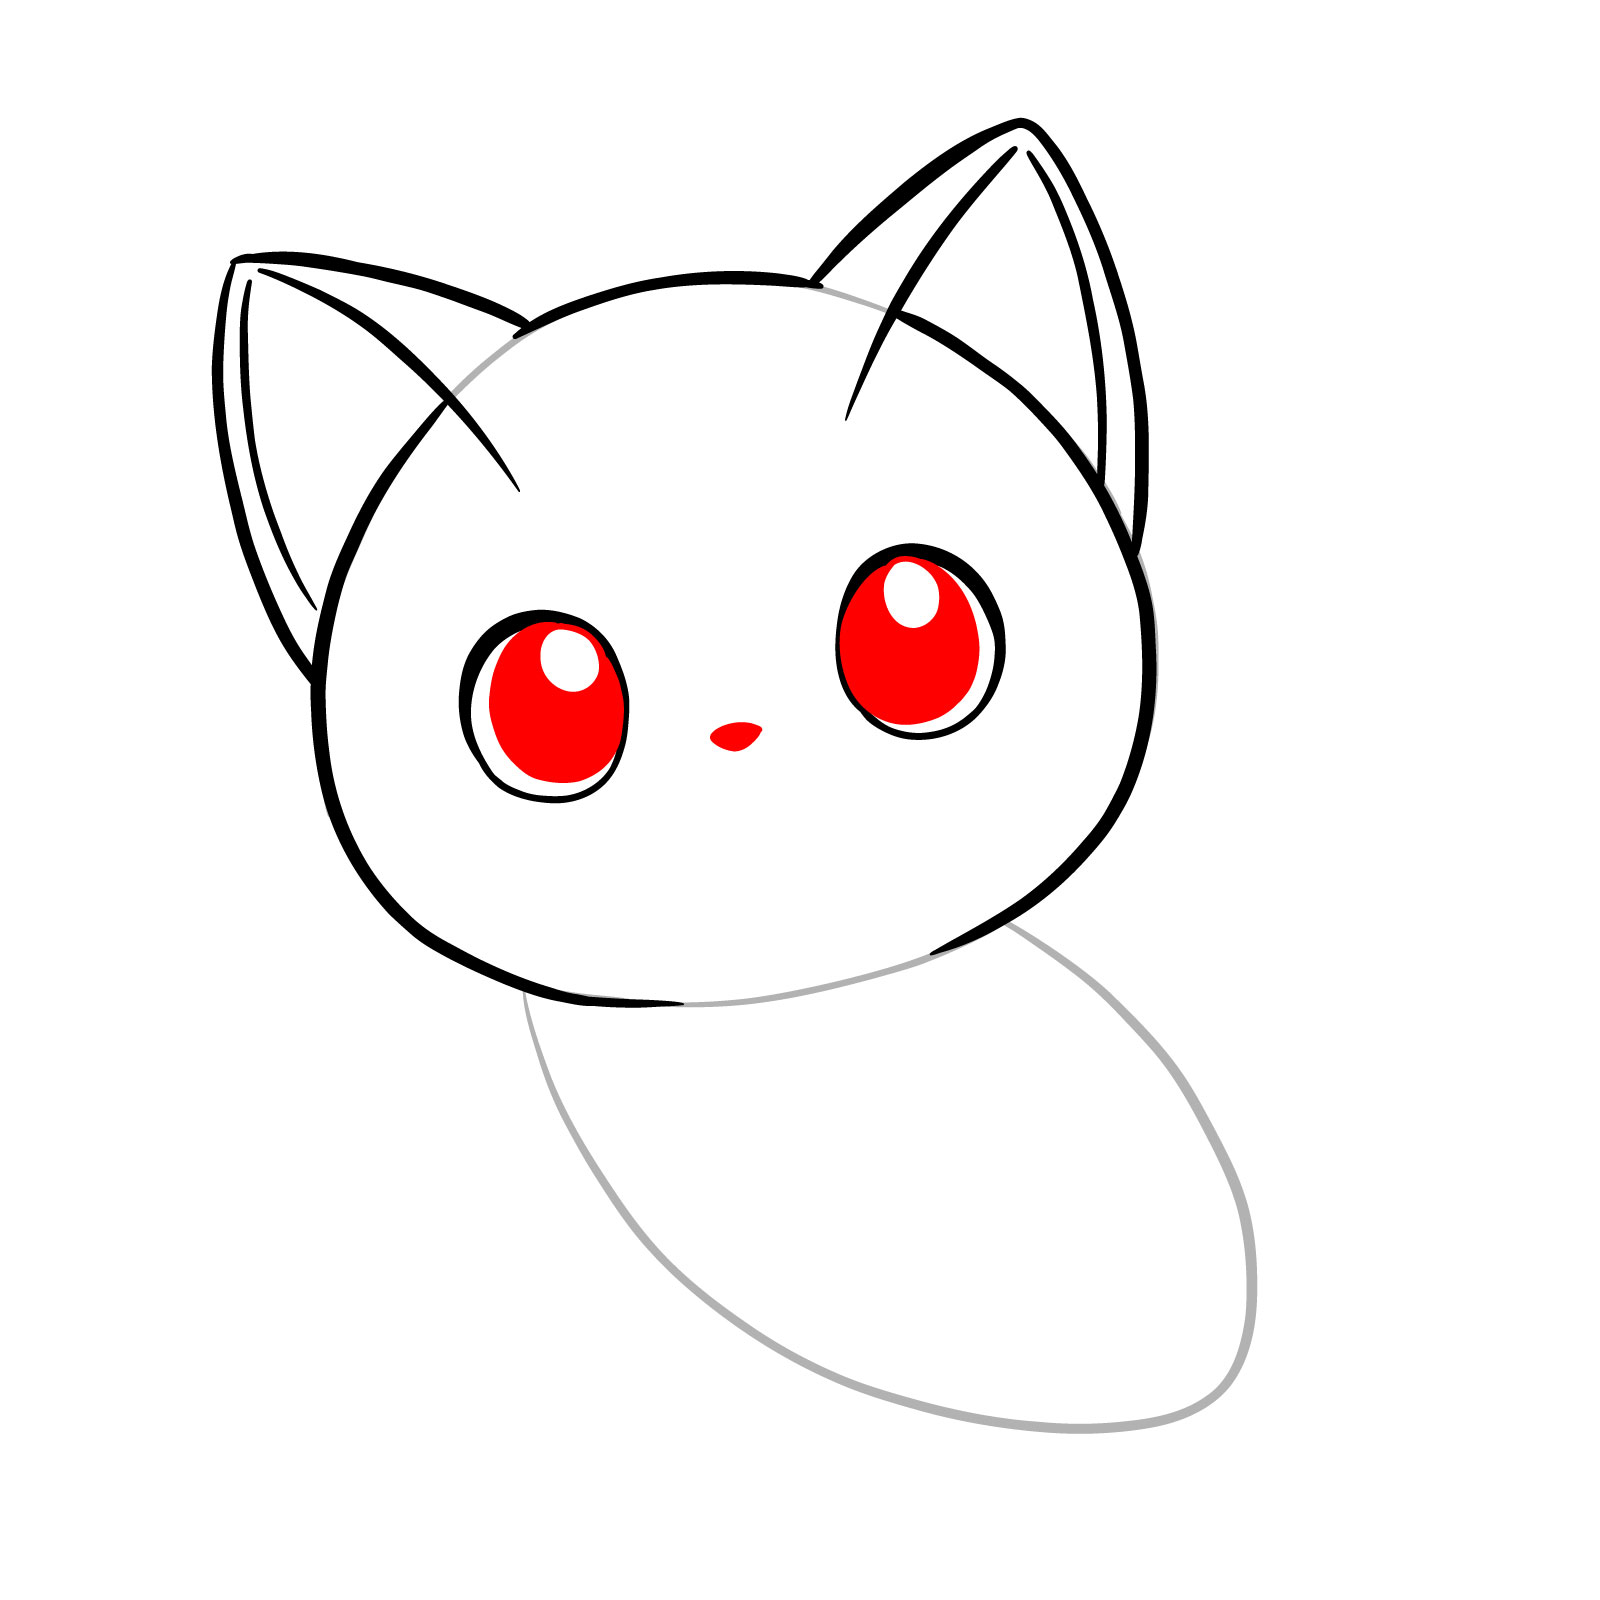
Step 03 – Define the cat’s face by adding triangular shapes for ears at the top of the head, a small nose, curved lines for the mouth, and several straight lines for whiskers, detailing your cat’s face
Facial features and ears sketched in.
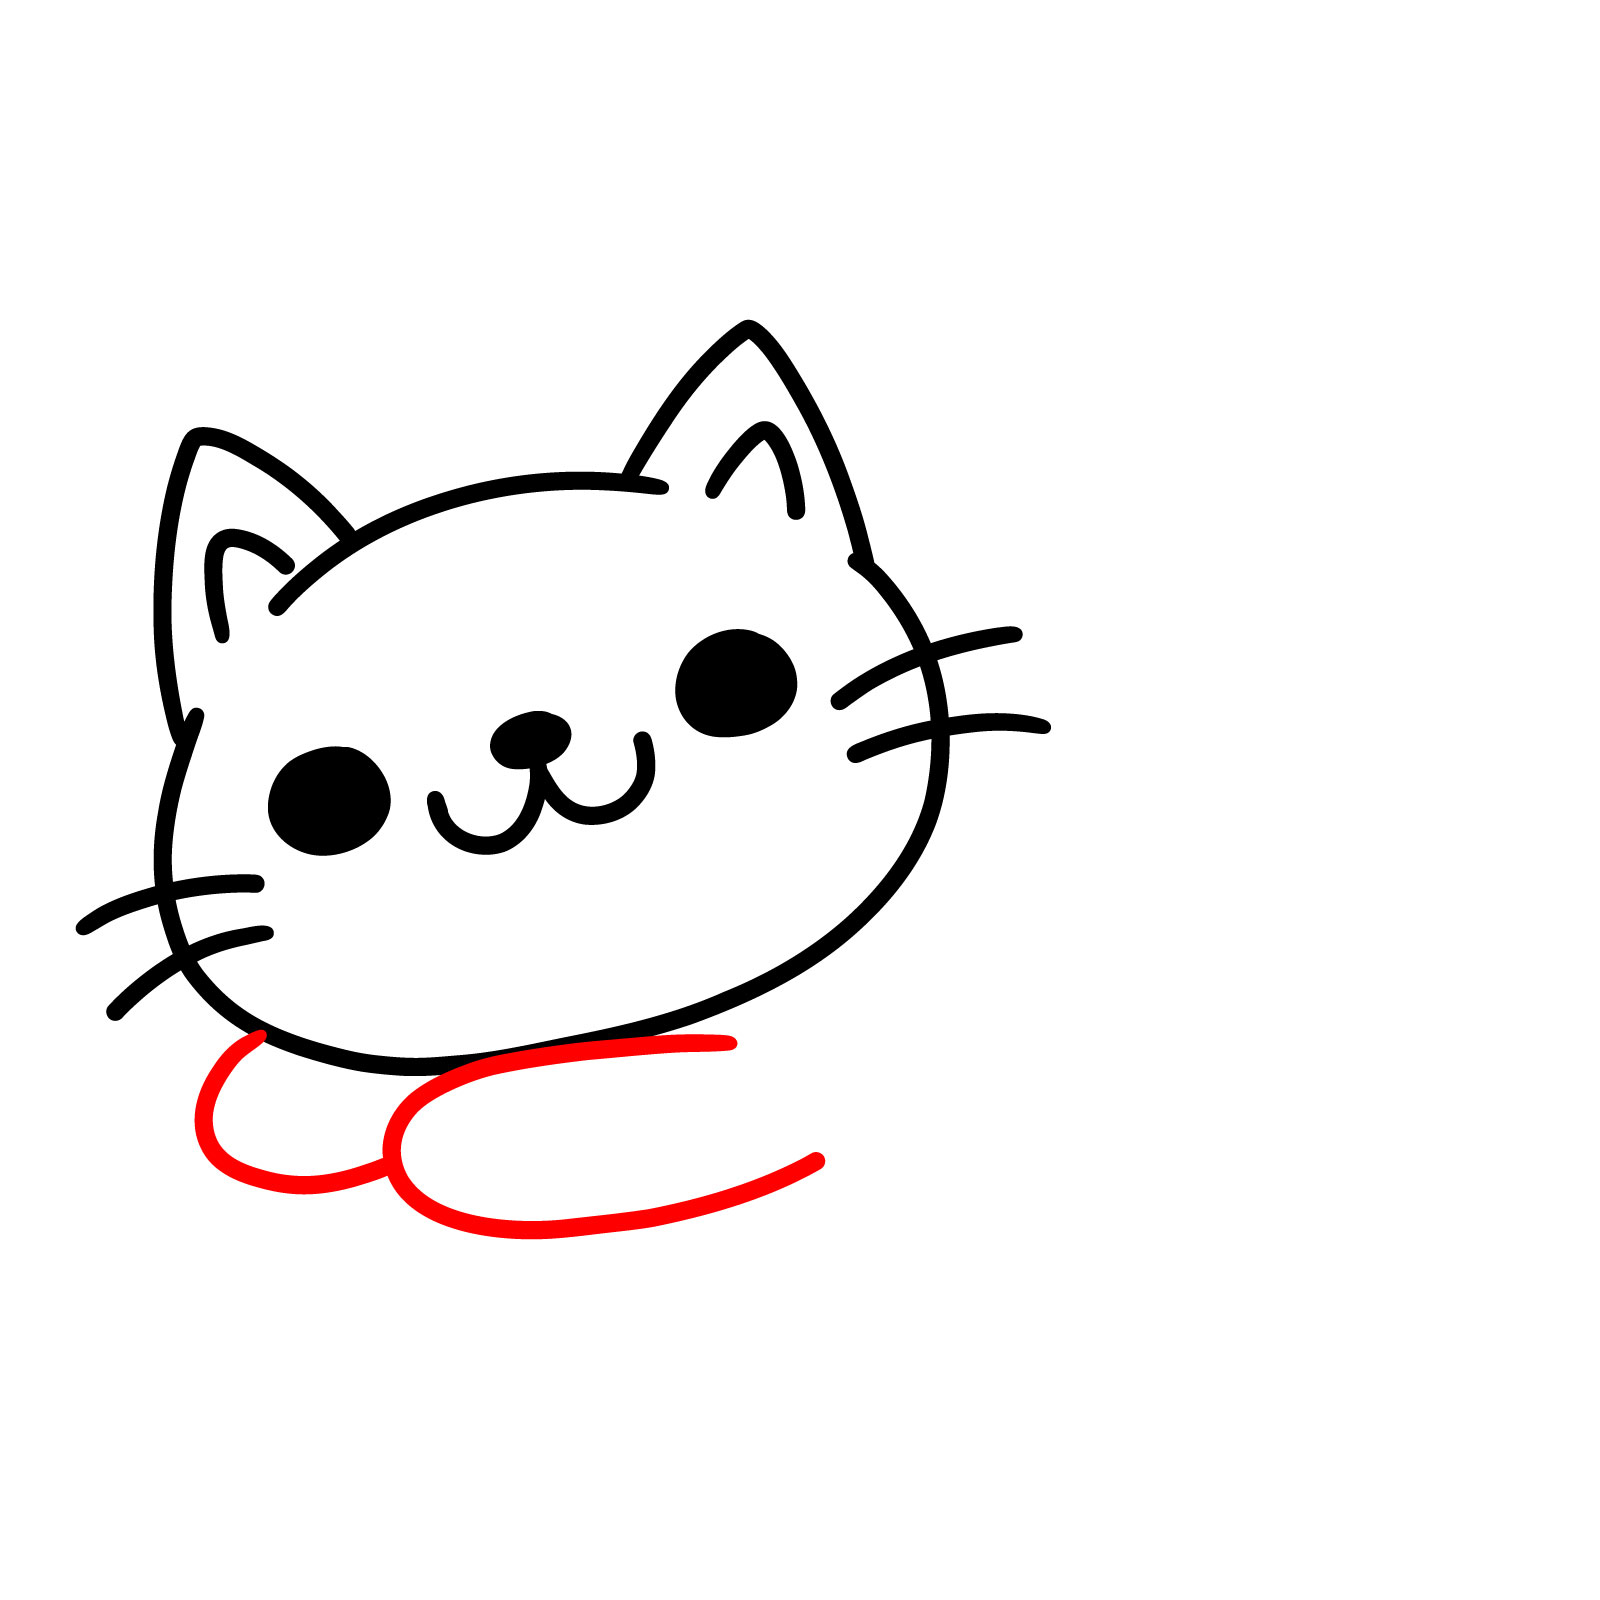
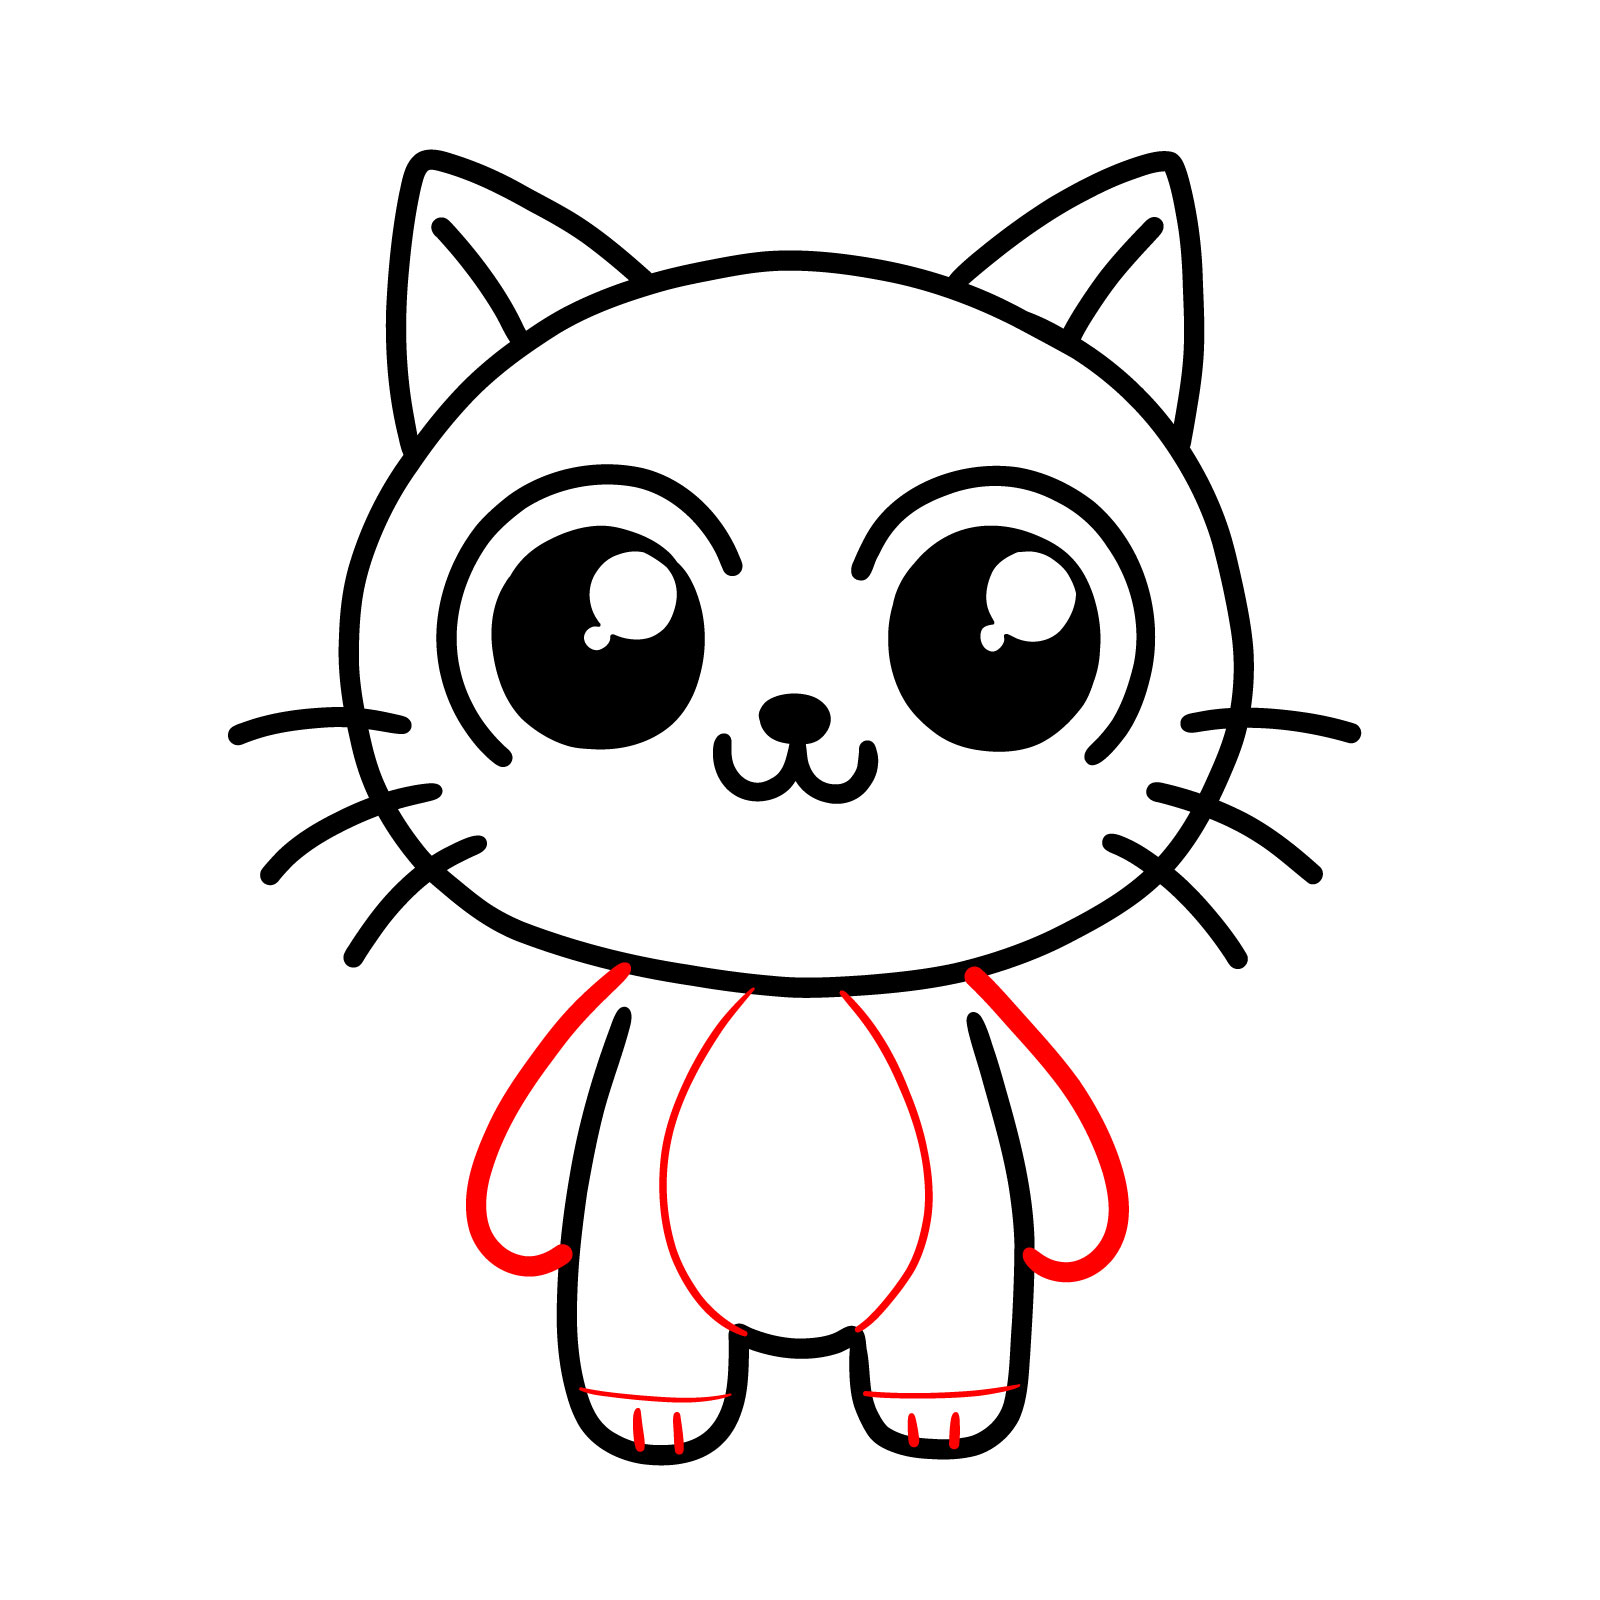
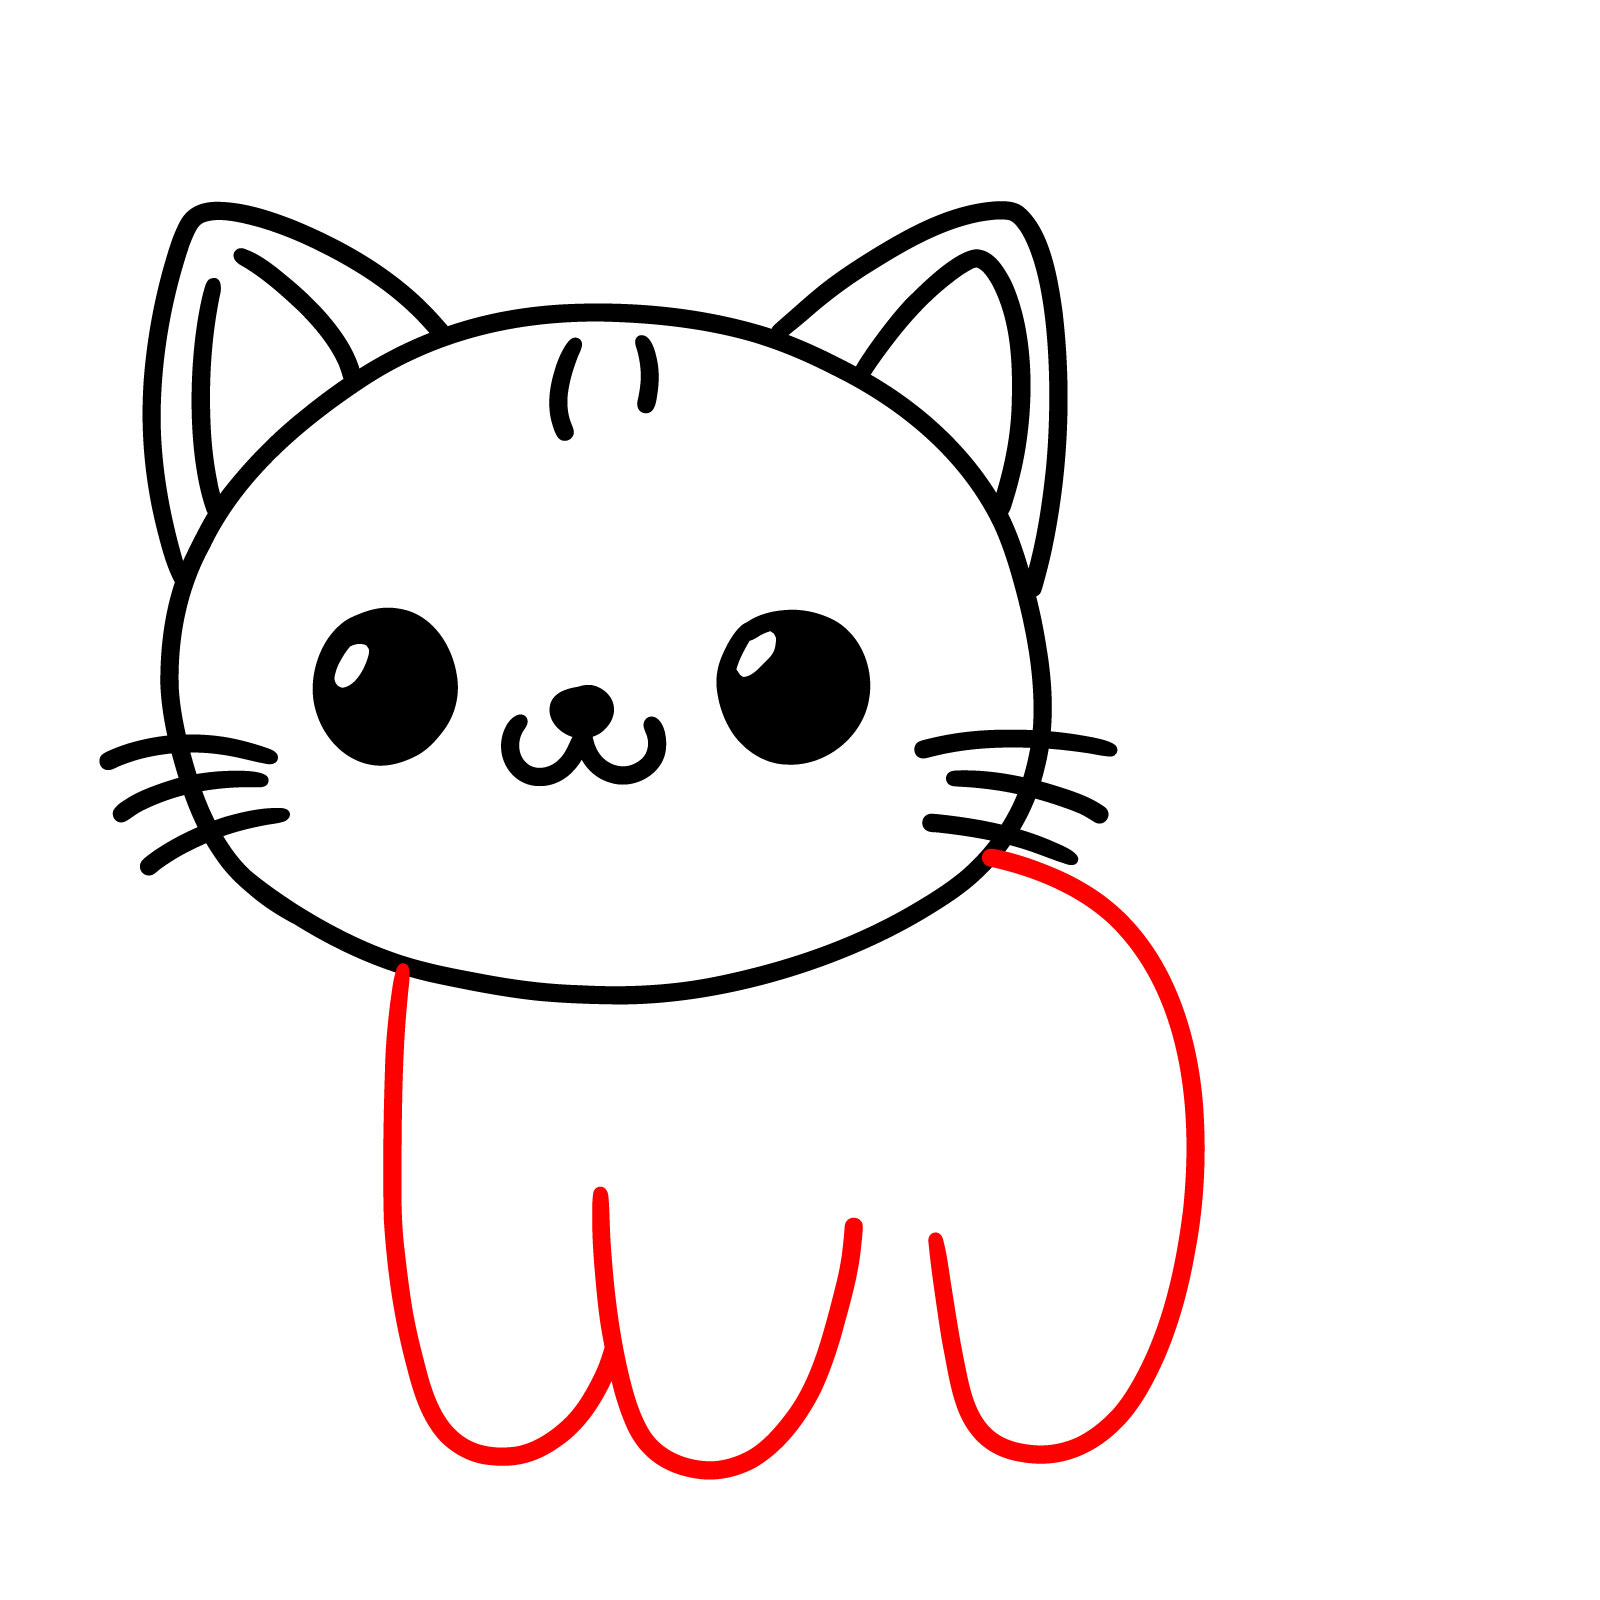
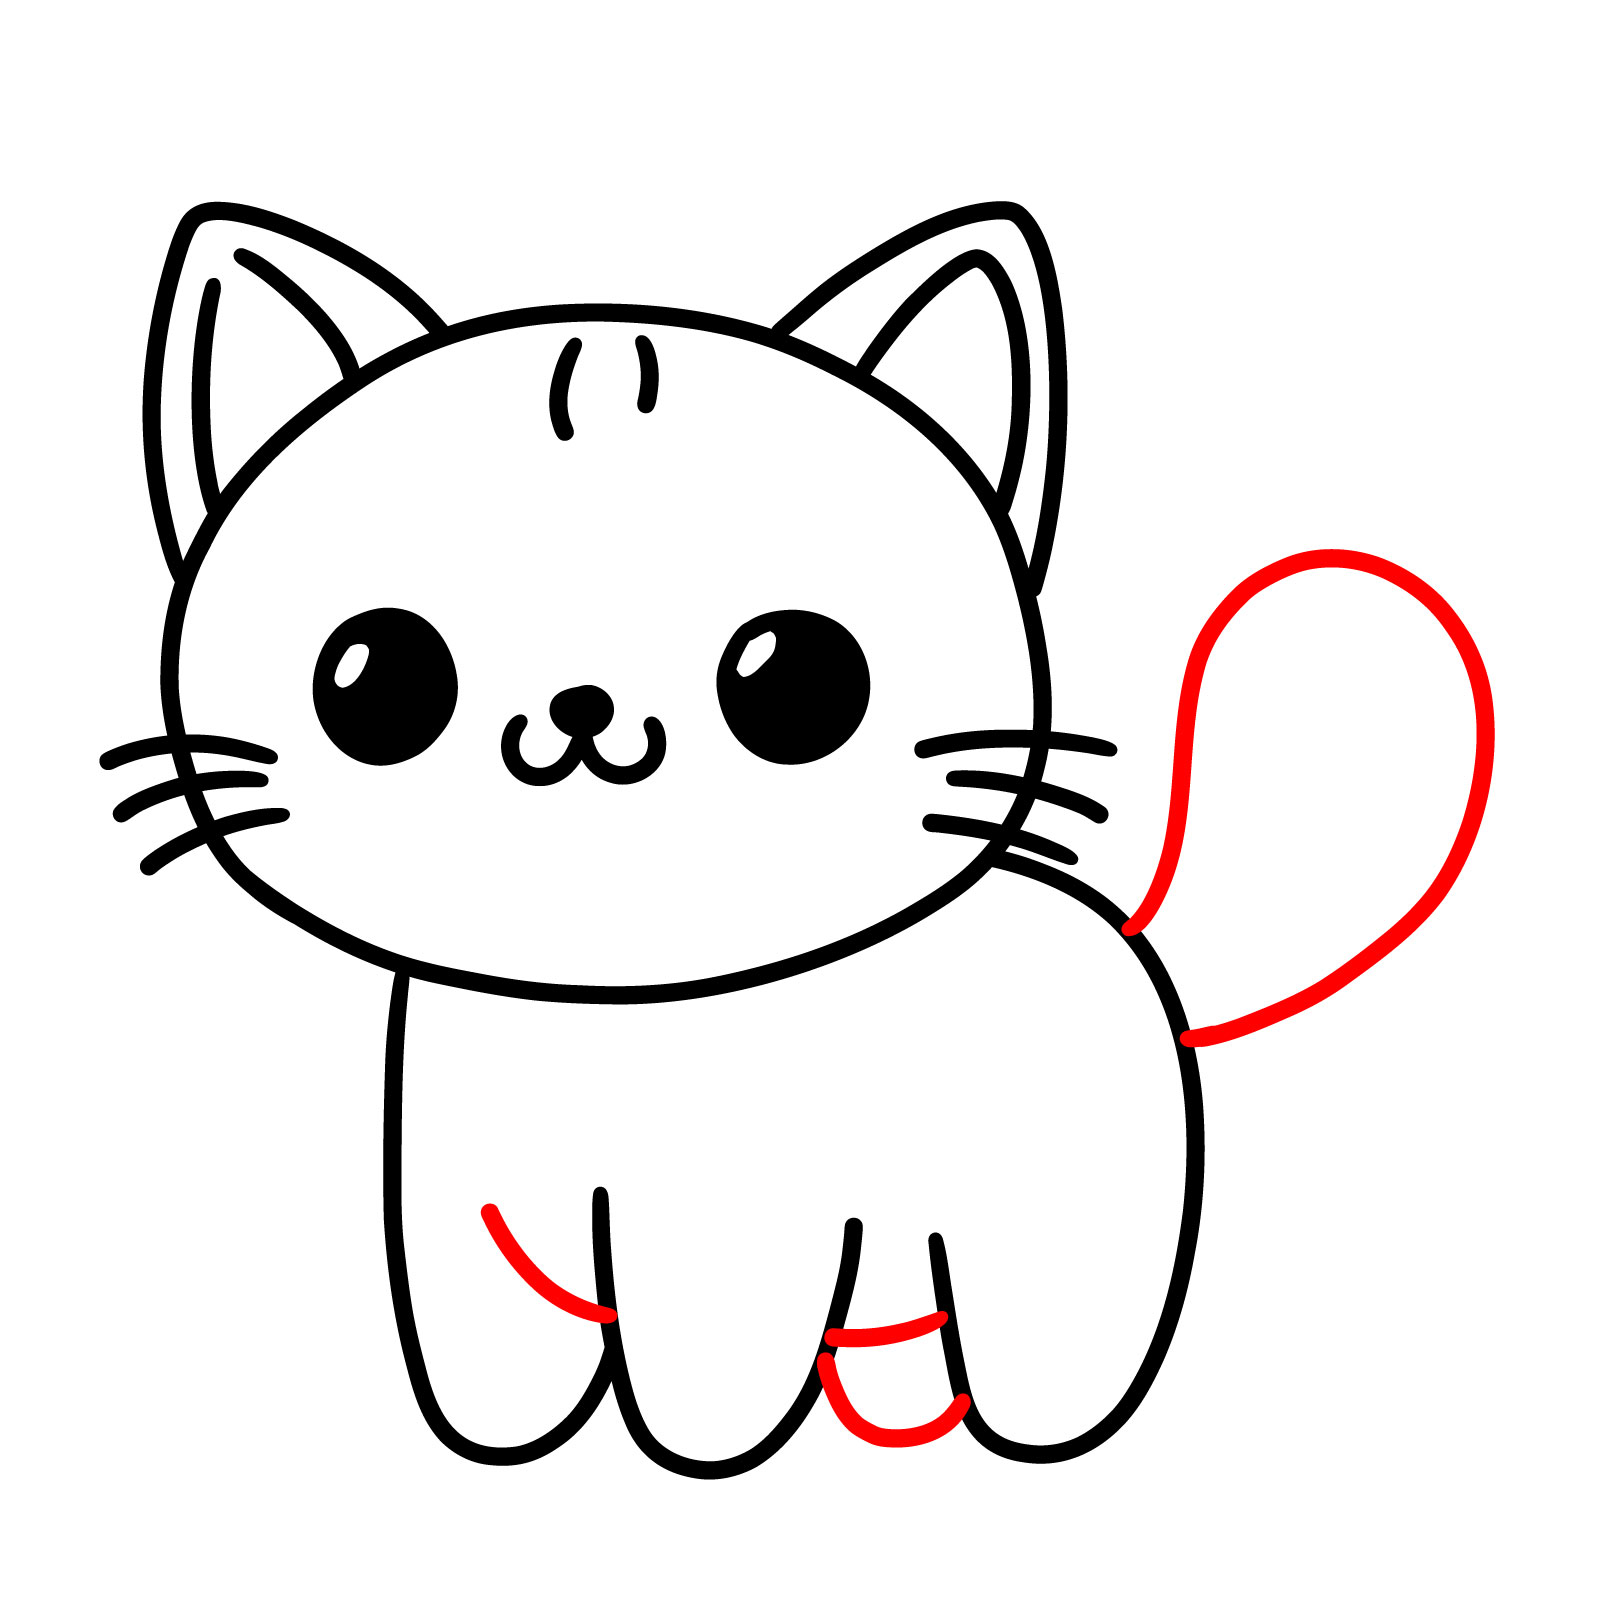
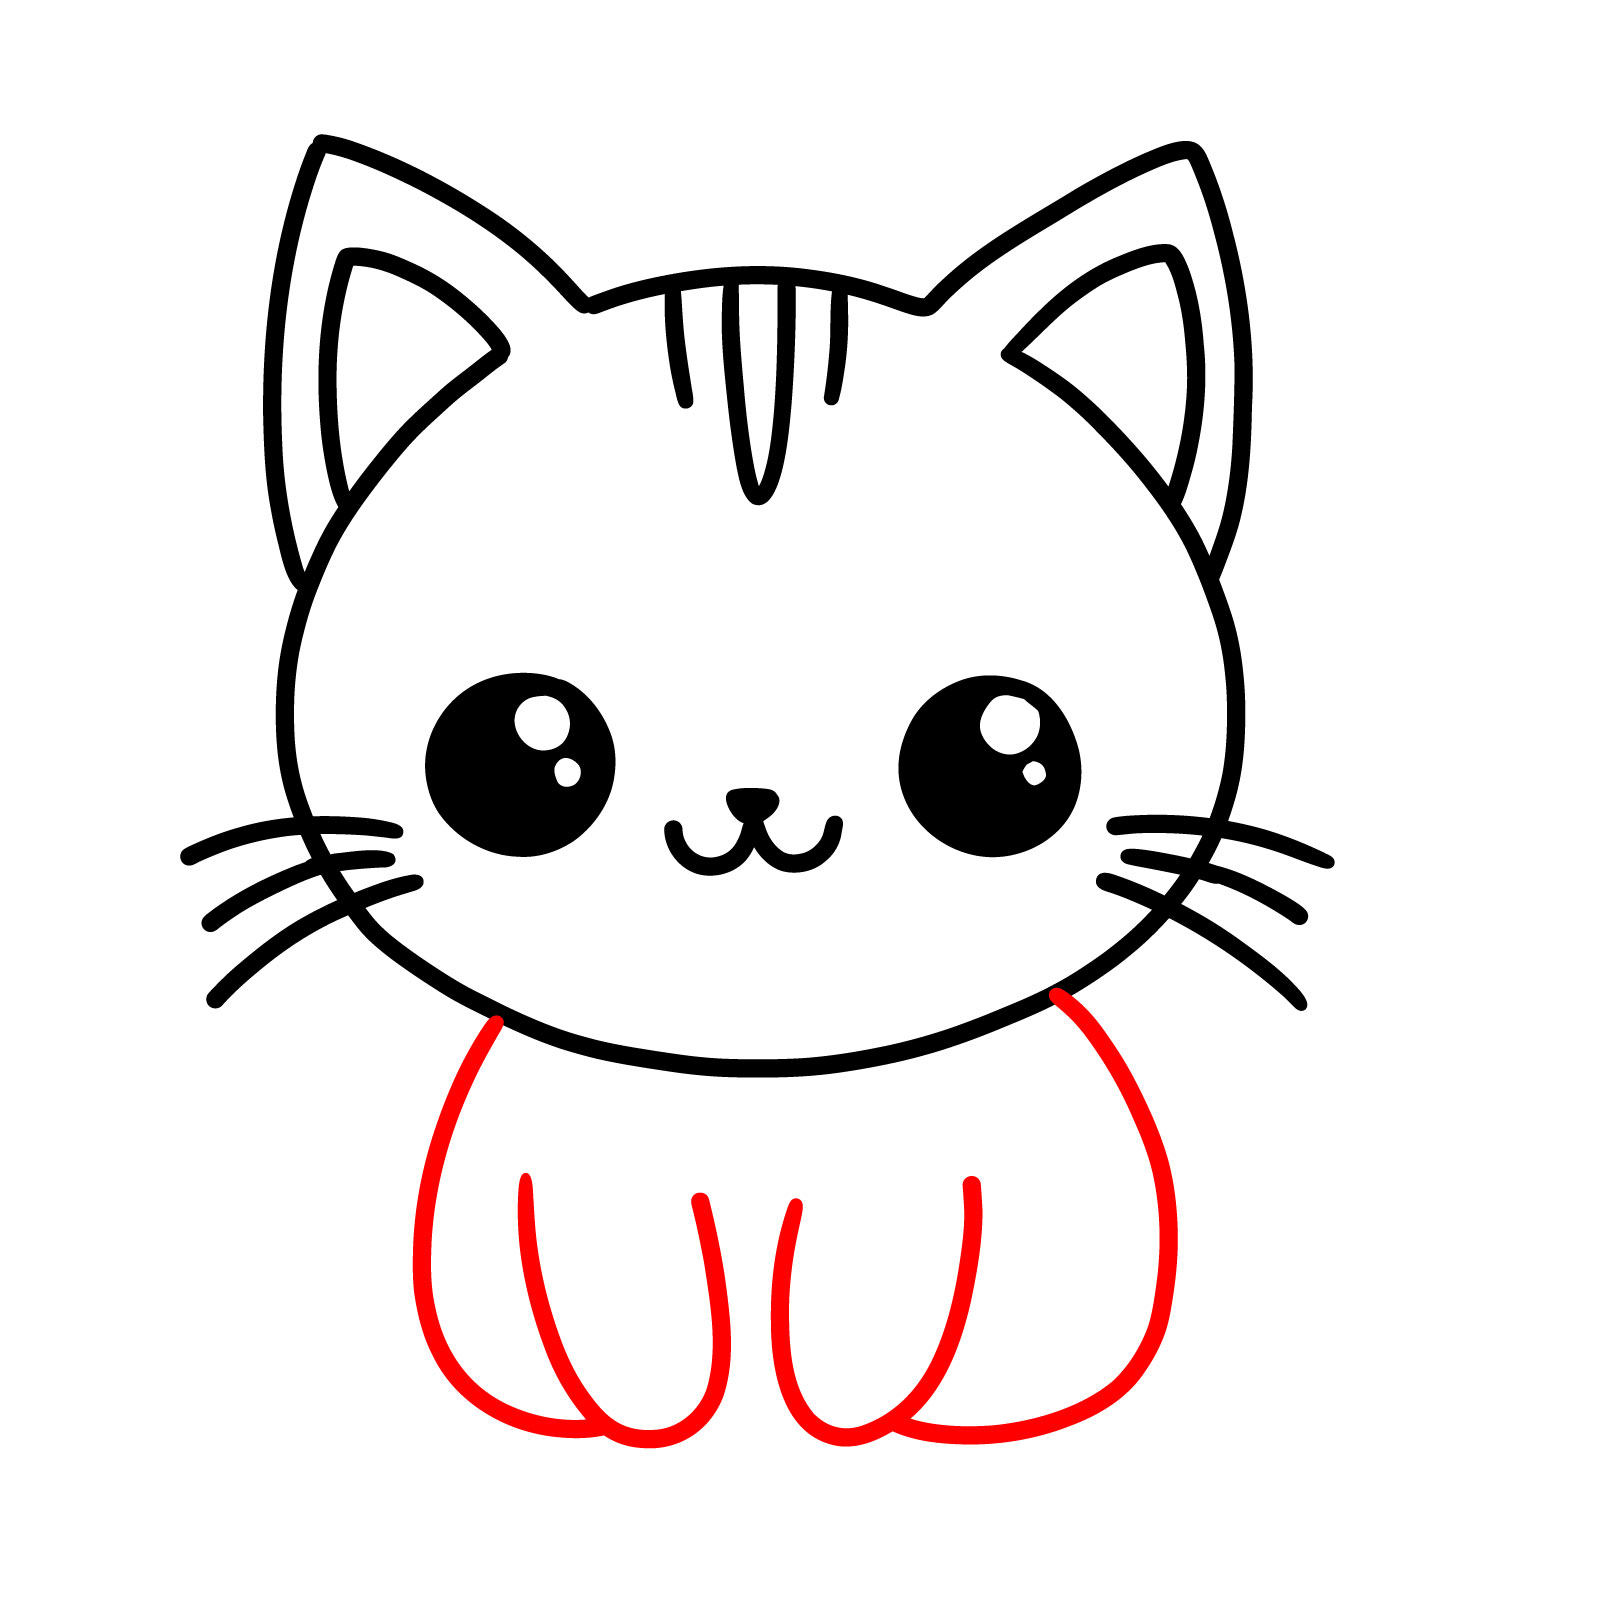
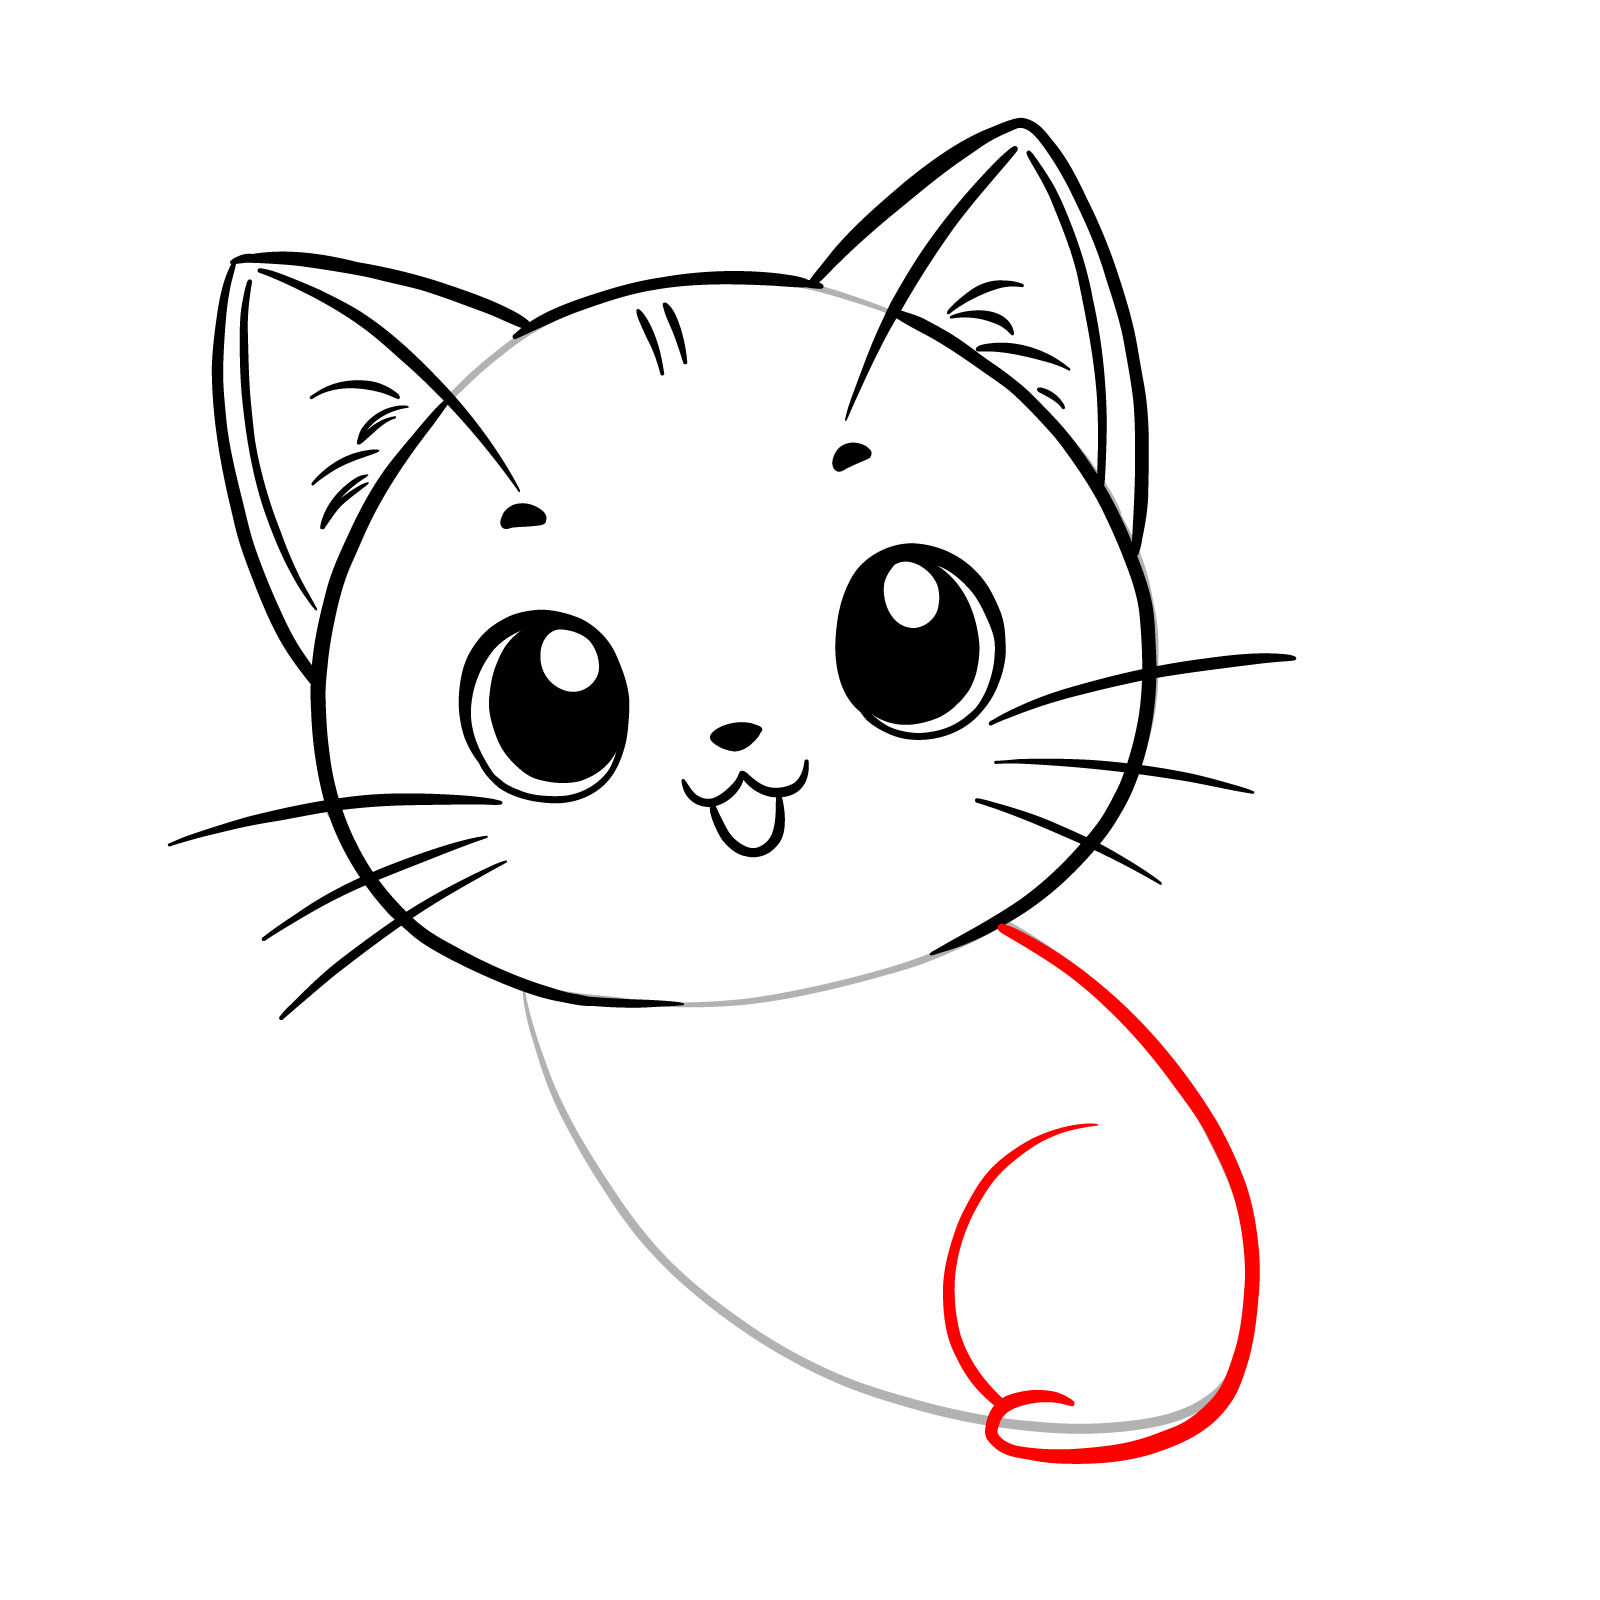
Step 04 – Draw simple vertical lines under the body to suggest legs and a curled line for the tail, giving your cat drawing a sense of completeness and posture
Legs and tail outlined
Step 05 – Finish your easy cat drawing by outlining all features clearly. You now have a complete drawing that captures the essence of a playful and charming feline
Completed simple cat sketch
Guide 2: Drawing a Cat Lying on Its Belly – 8 Steps
Cat lying on the belly – easy drawing
Welcome to the second step of our cat drawing series, where we’ll tackle a slightly more complex subject: a cat lying on its belly. This endearing pose has a bit more detail and requires eight steps to complete. This cat’s appearance is marked by its relaxed posture, with its paws neatly tucked under its body and a content expression on its face. Though more intricate than our first guide, this drawing remains within reach for those who are new to the art. With each step, you’ll see how simple shapes come together to form a cozy feline, ready to be brought to life by your hand.
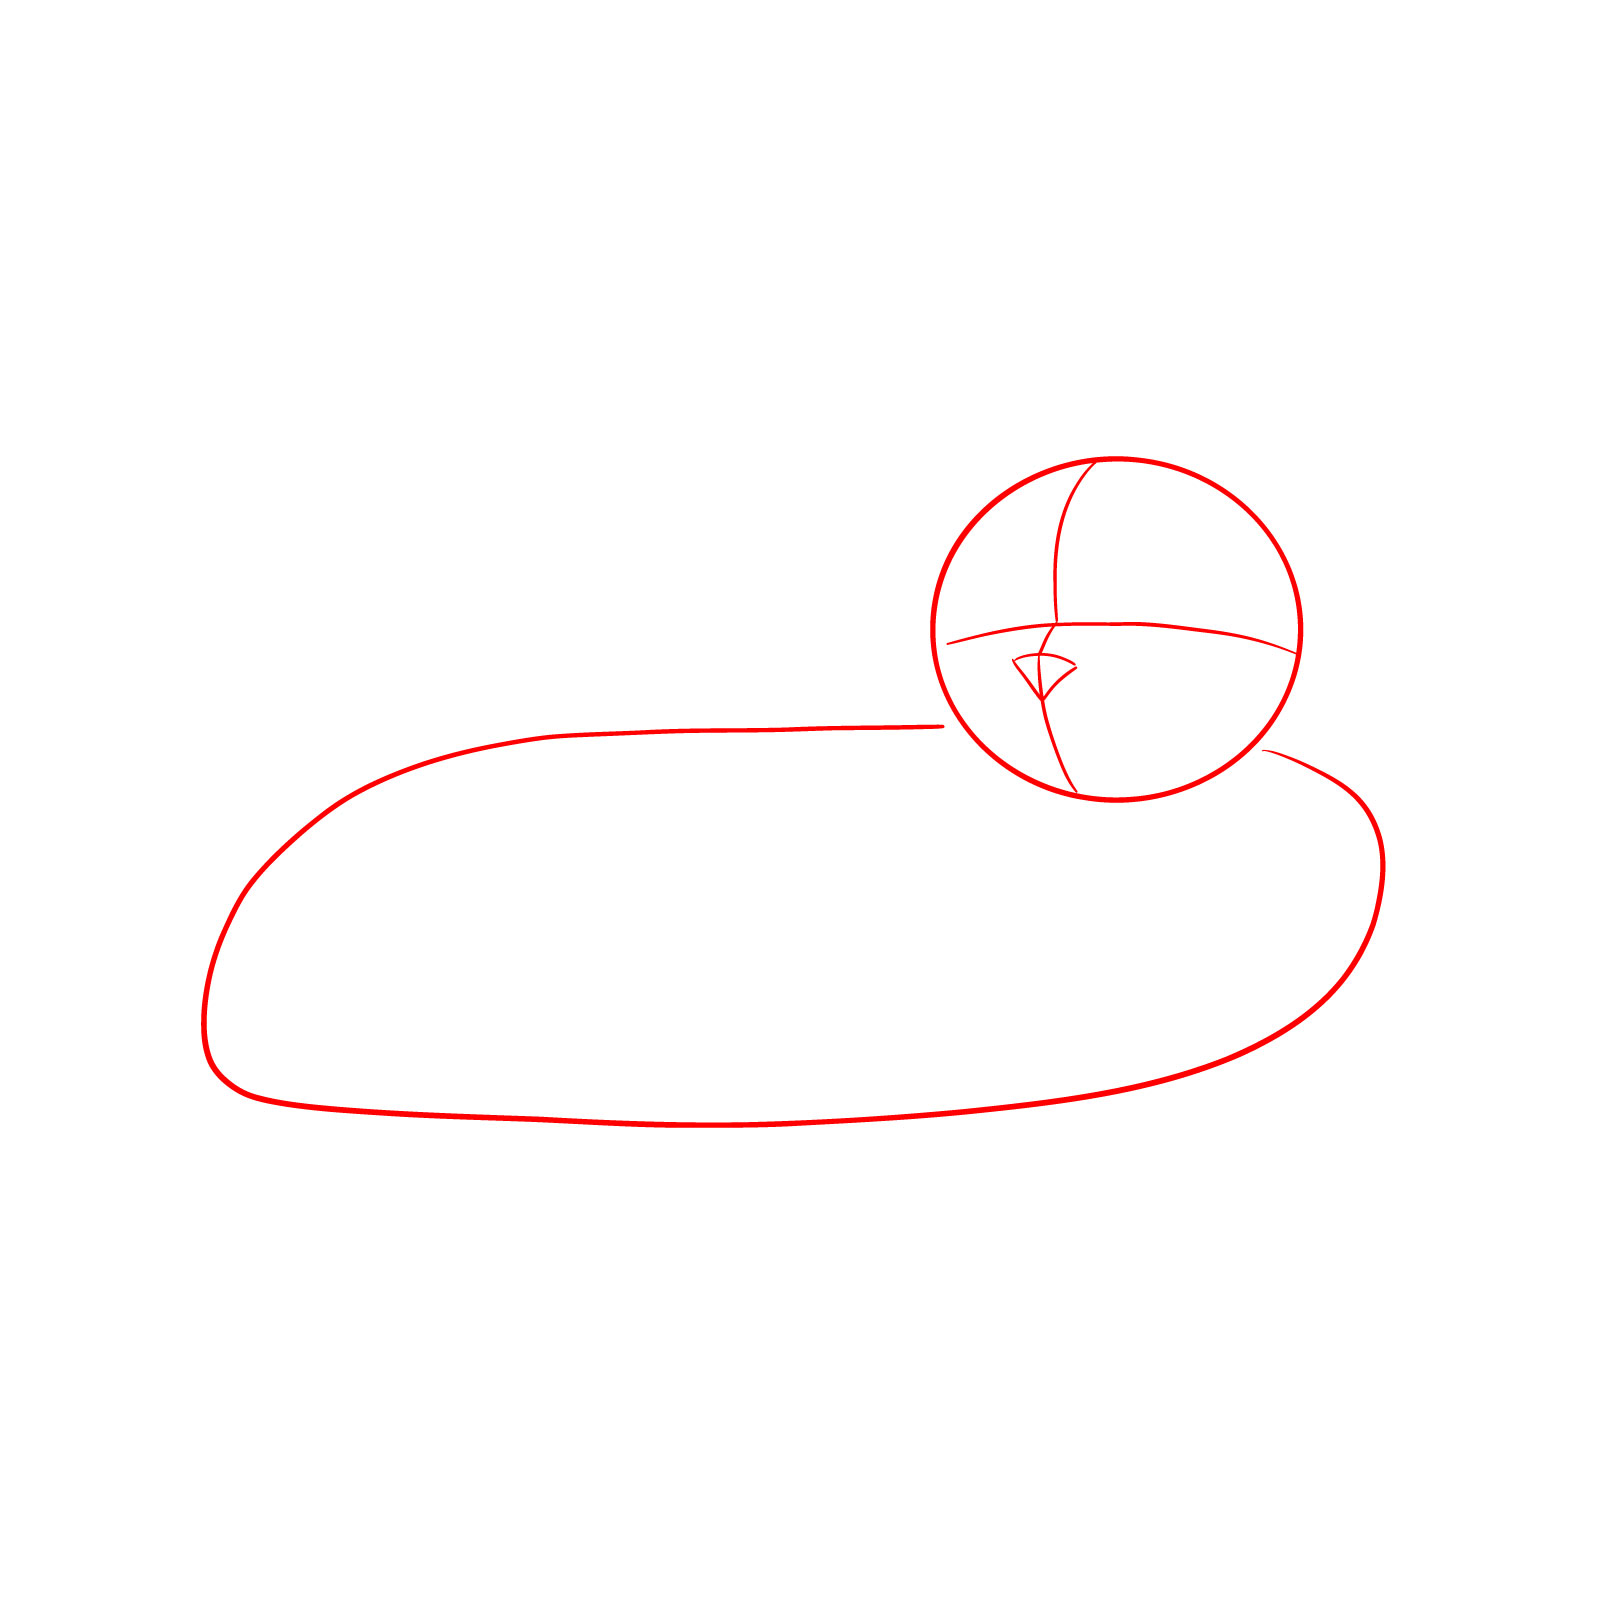
Step 01 – Begin with an oval shape for the head, leaving space at the top where the ears will be positioned
Starting oval for the cat’s head
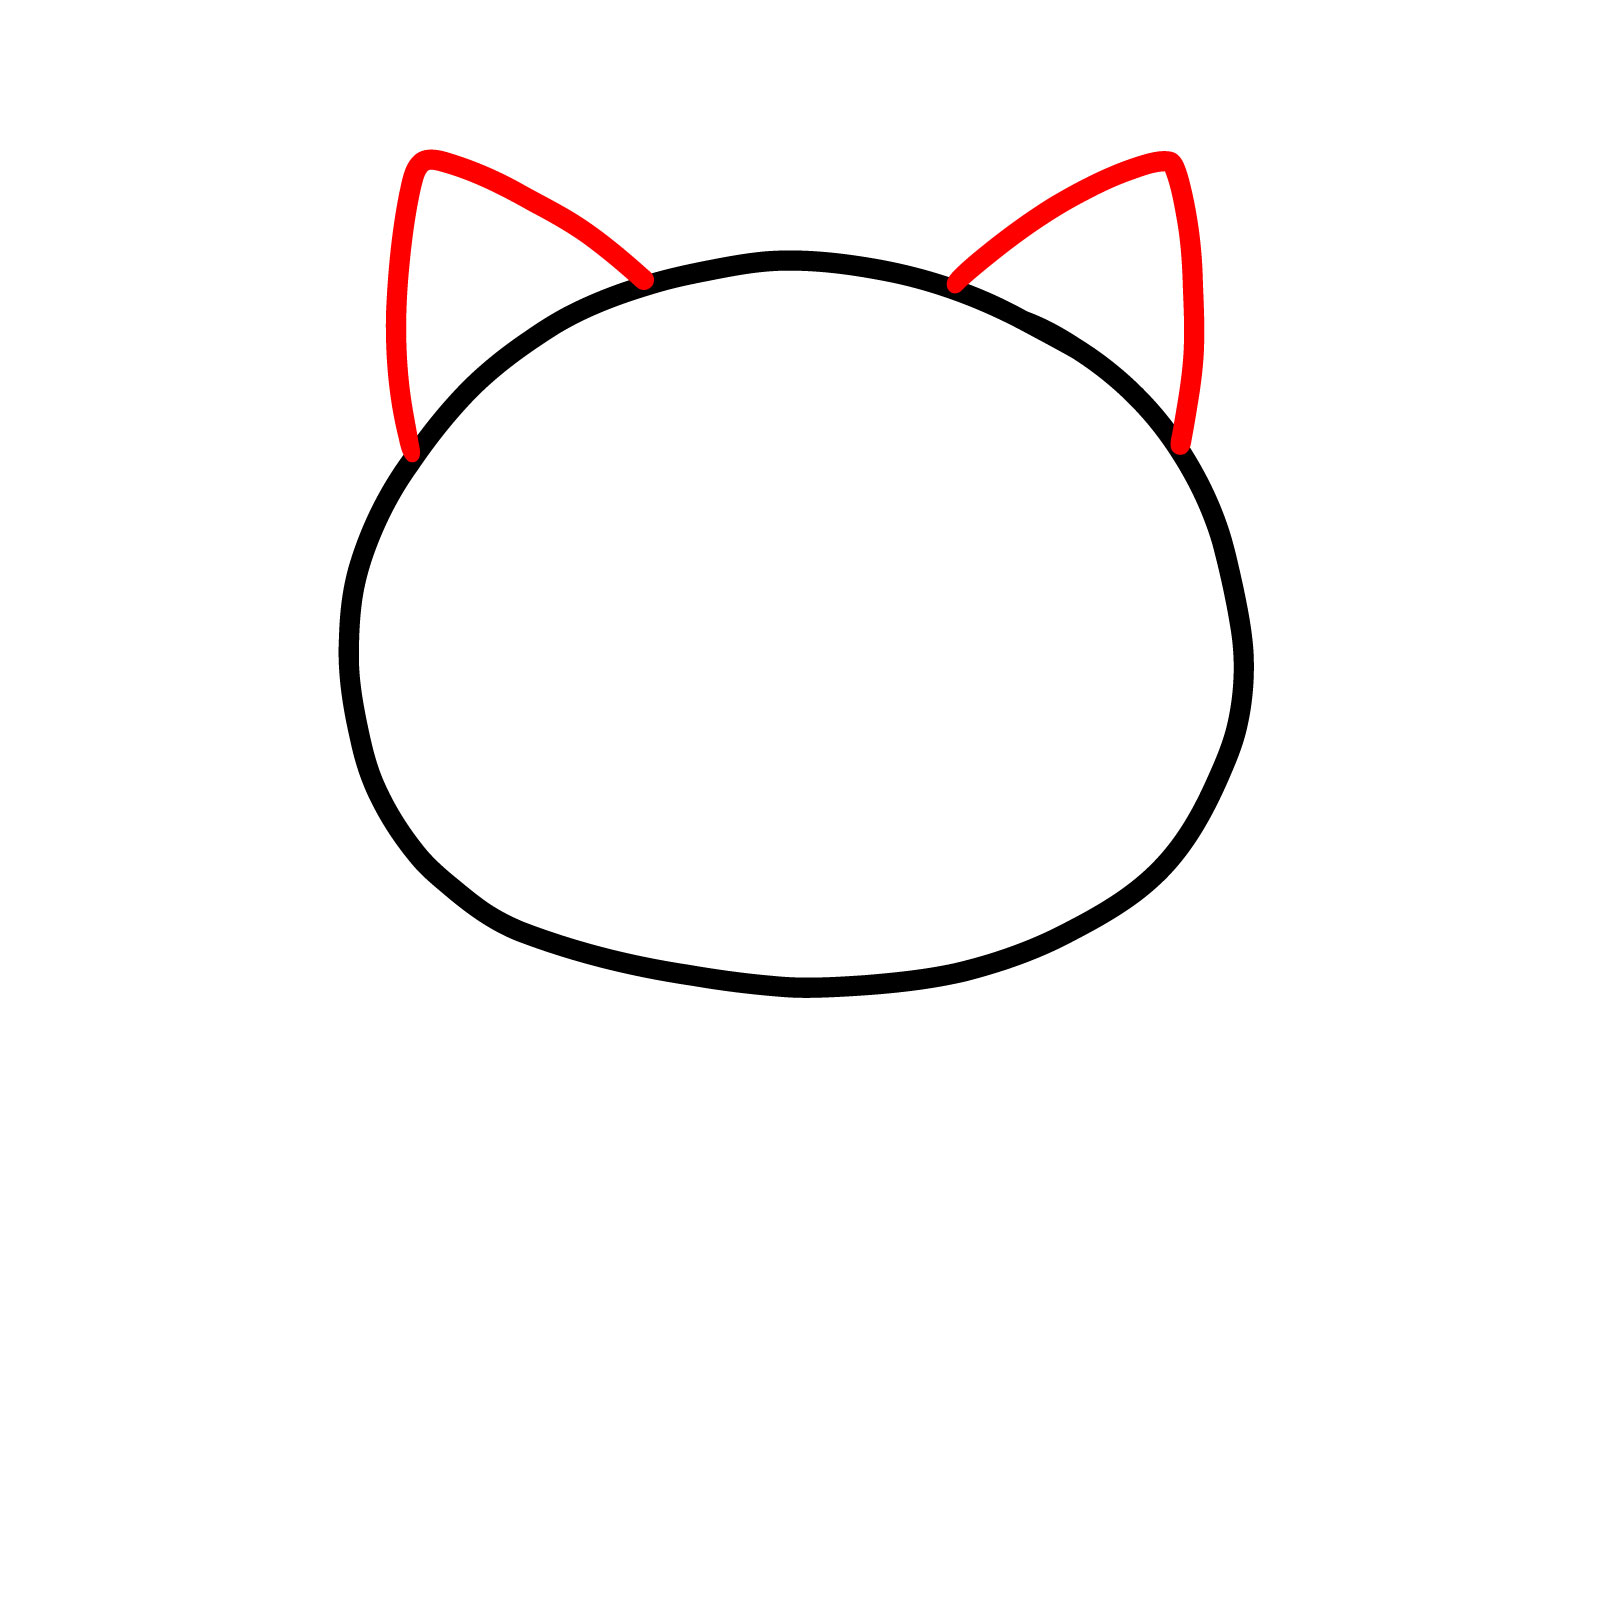
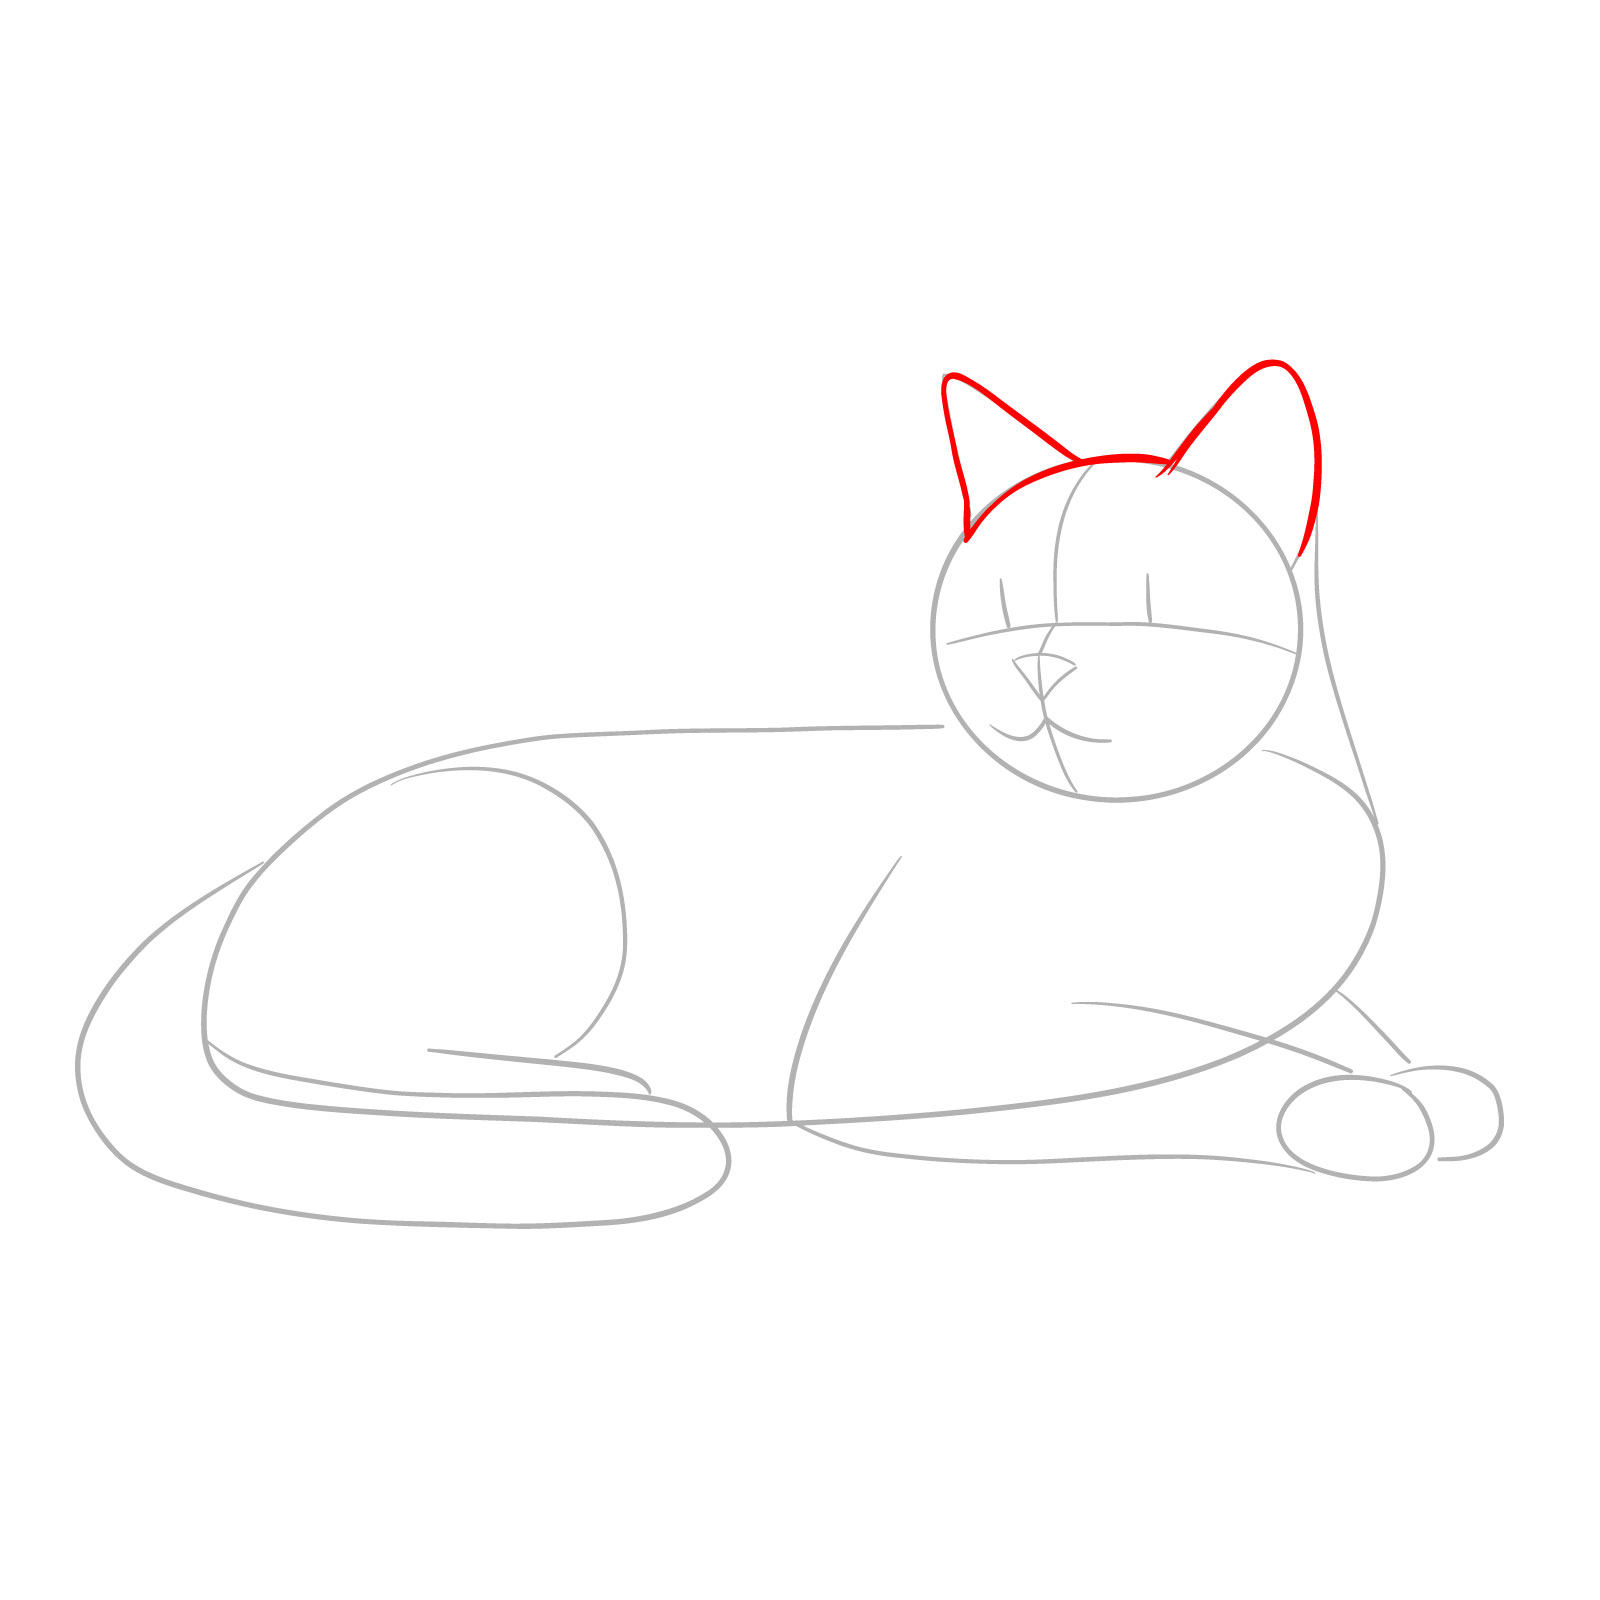
Step 02 – Add two circles for the eyes and a smaller oval for the nose. Sketch triangles on top of the head to represent the ears
Features taking shape
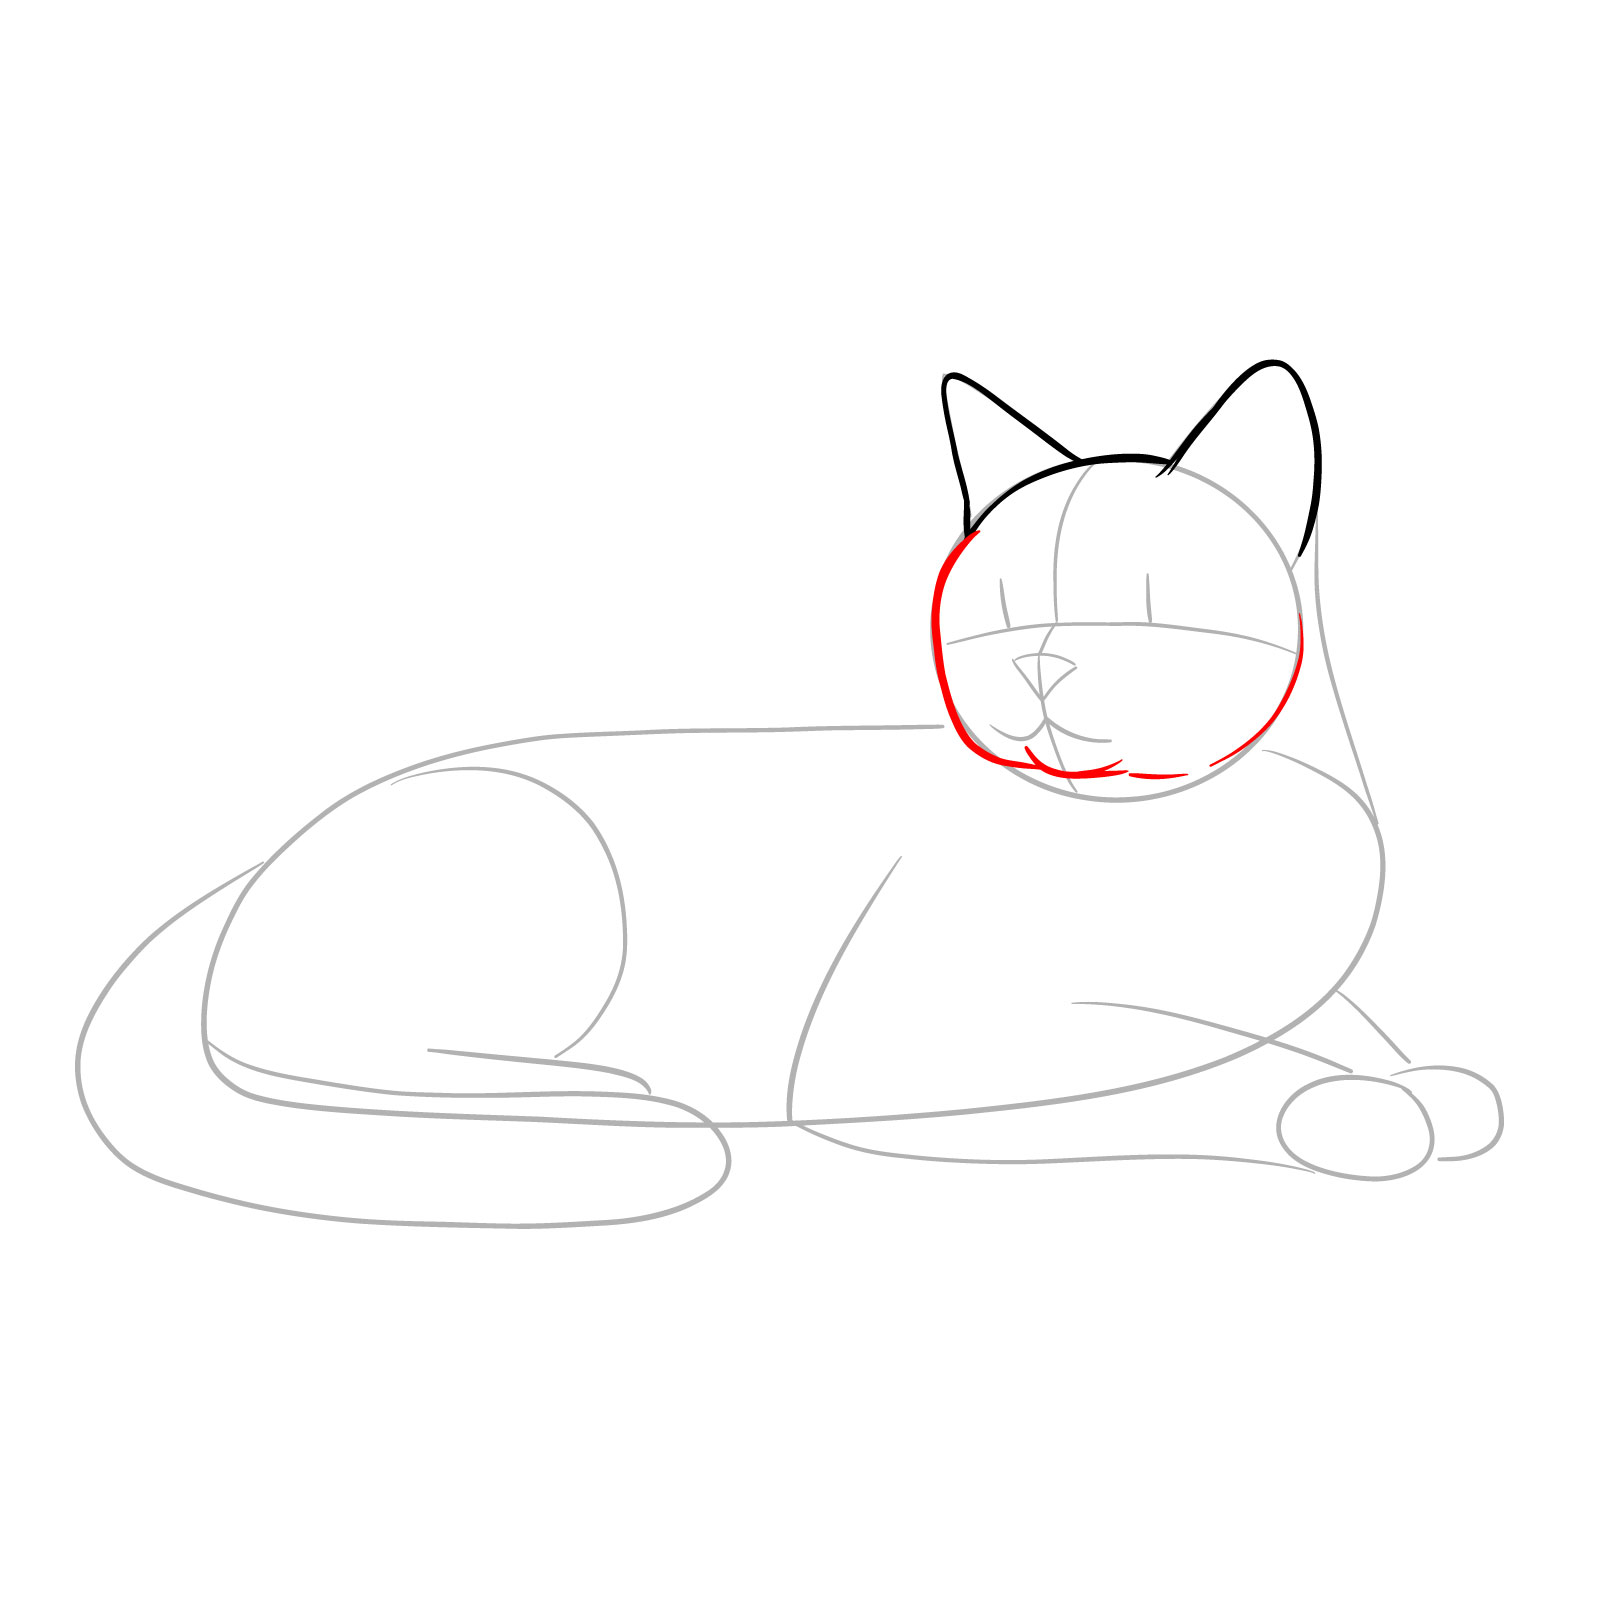
Step 03 – Draw the inner lines of the ears for depth and add the mouth and whiskers to bring the cat’s expression to life
Facial details emerge
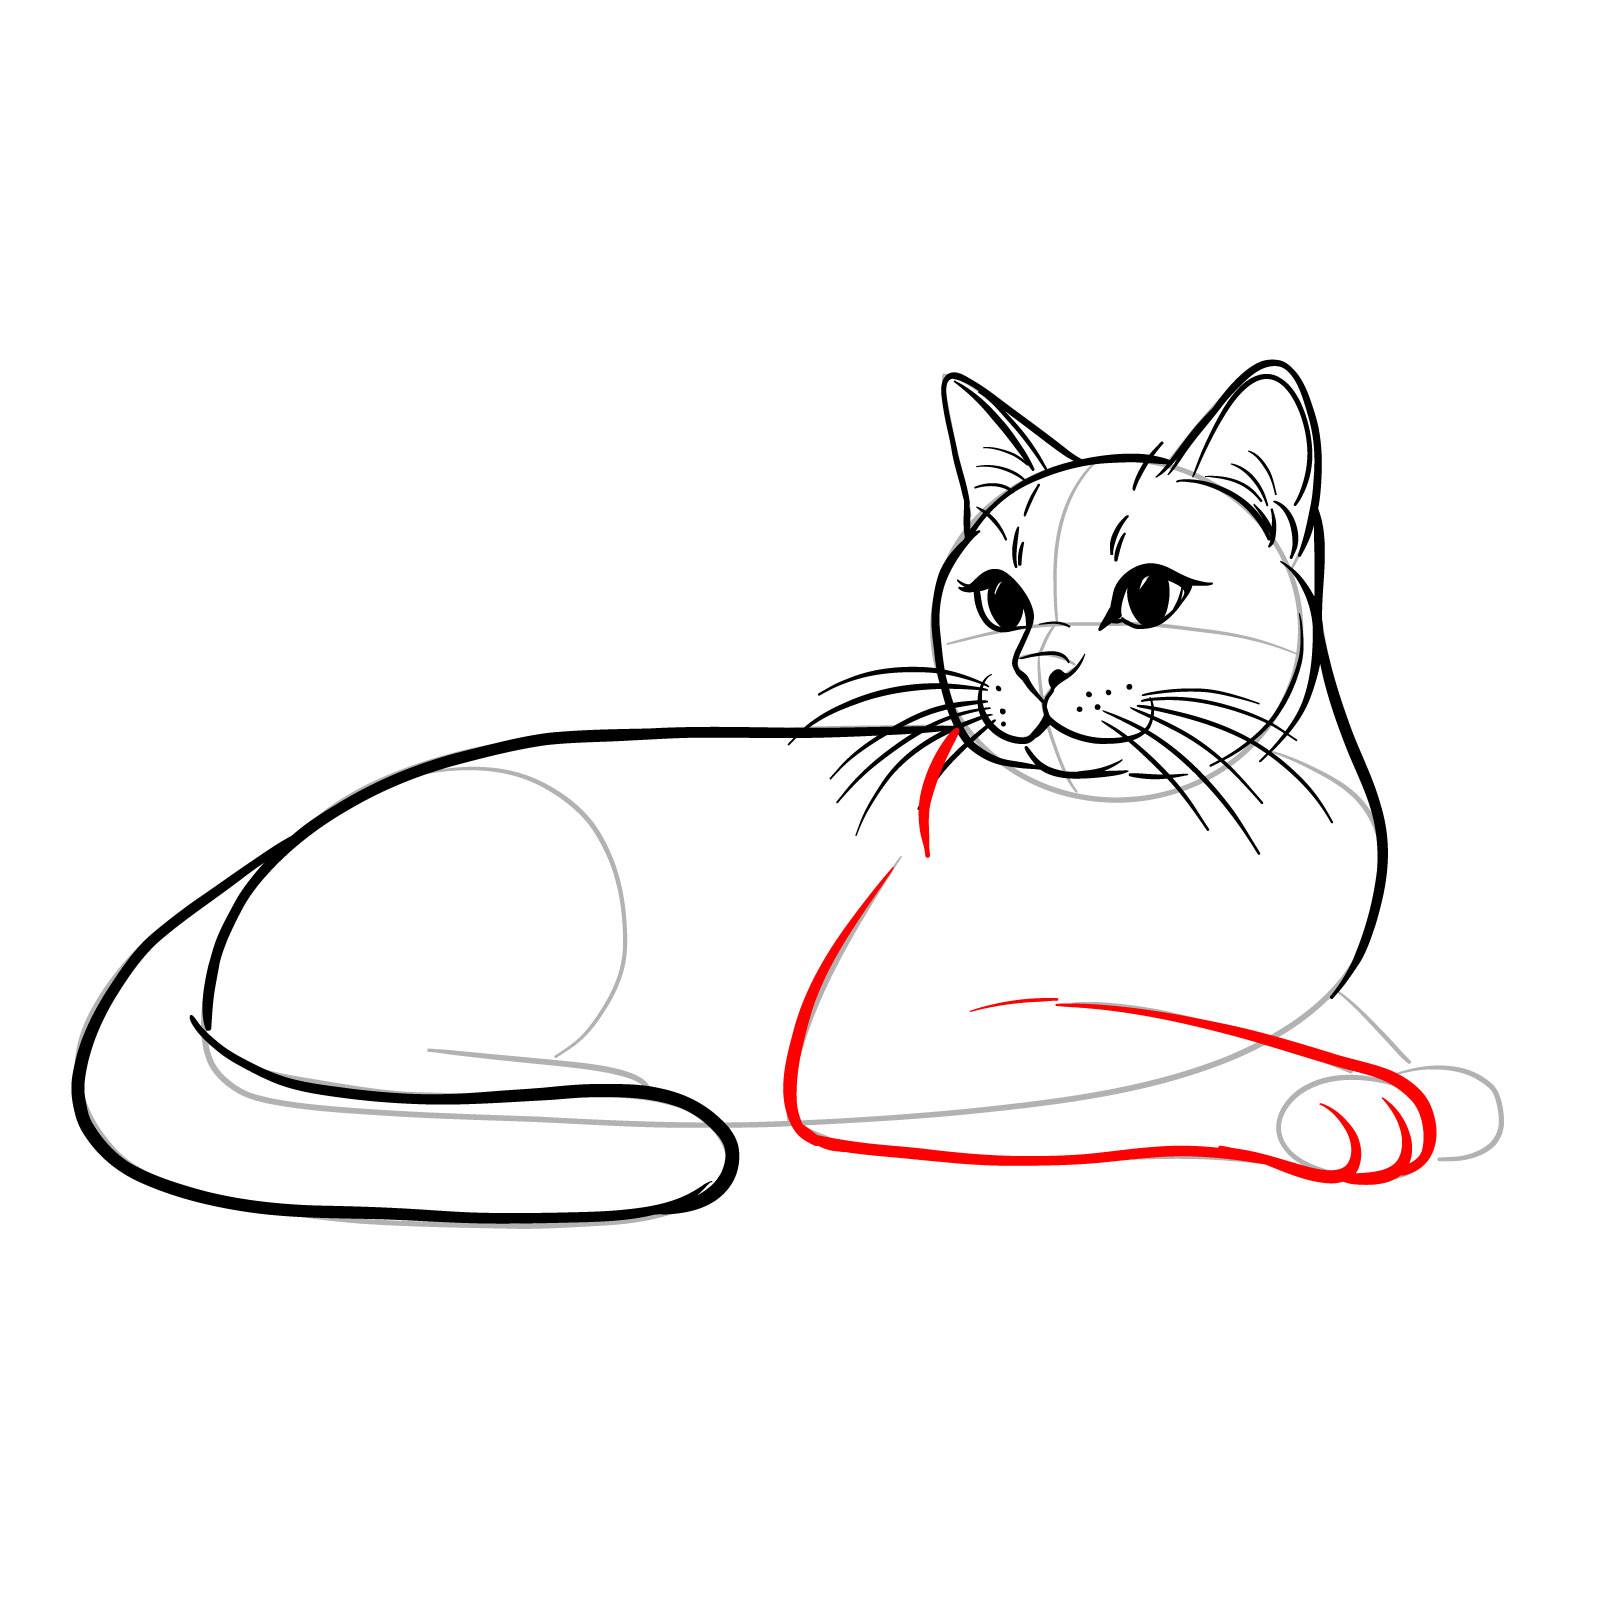
Step 04 – Sketch the two front legs of the cat, showing it lying comfortably on its belly
Front legs outlined
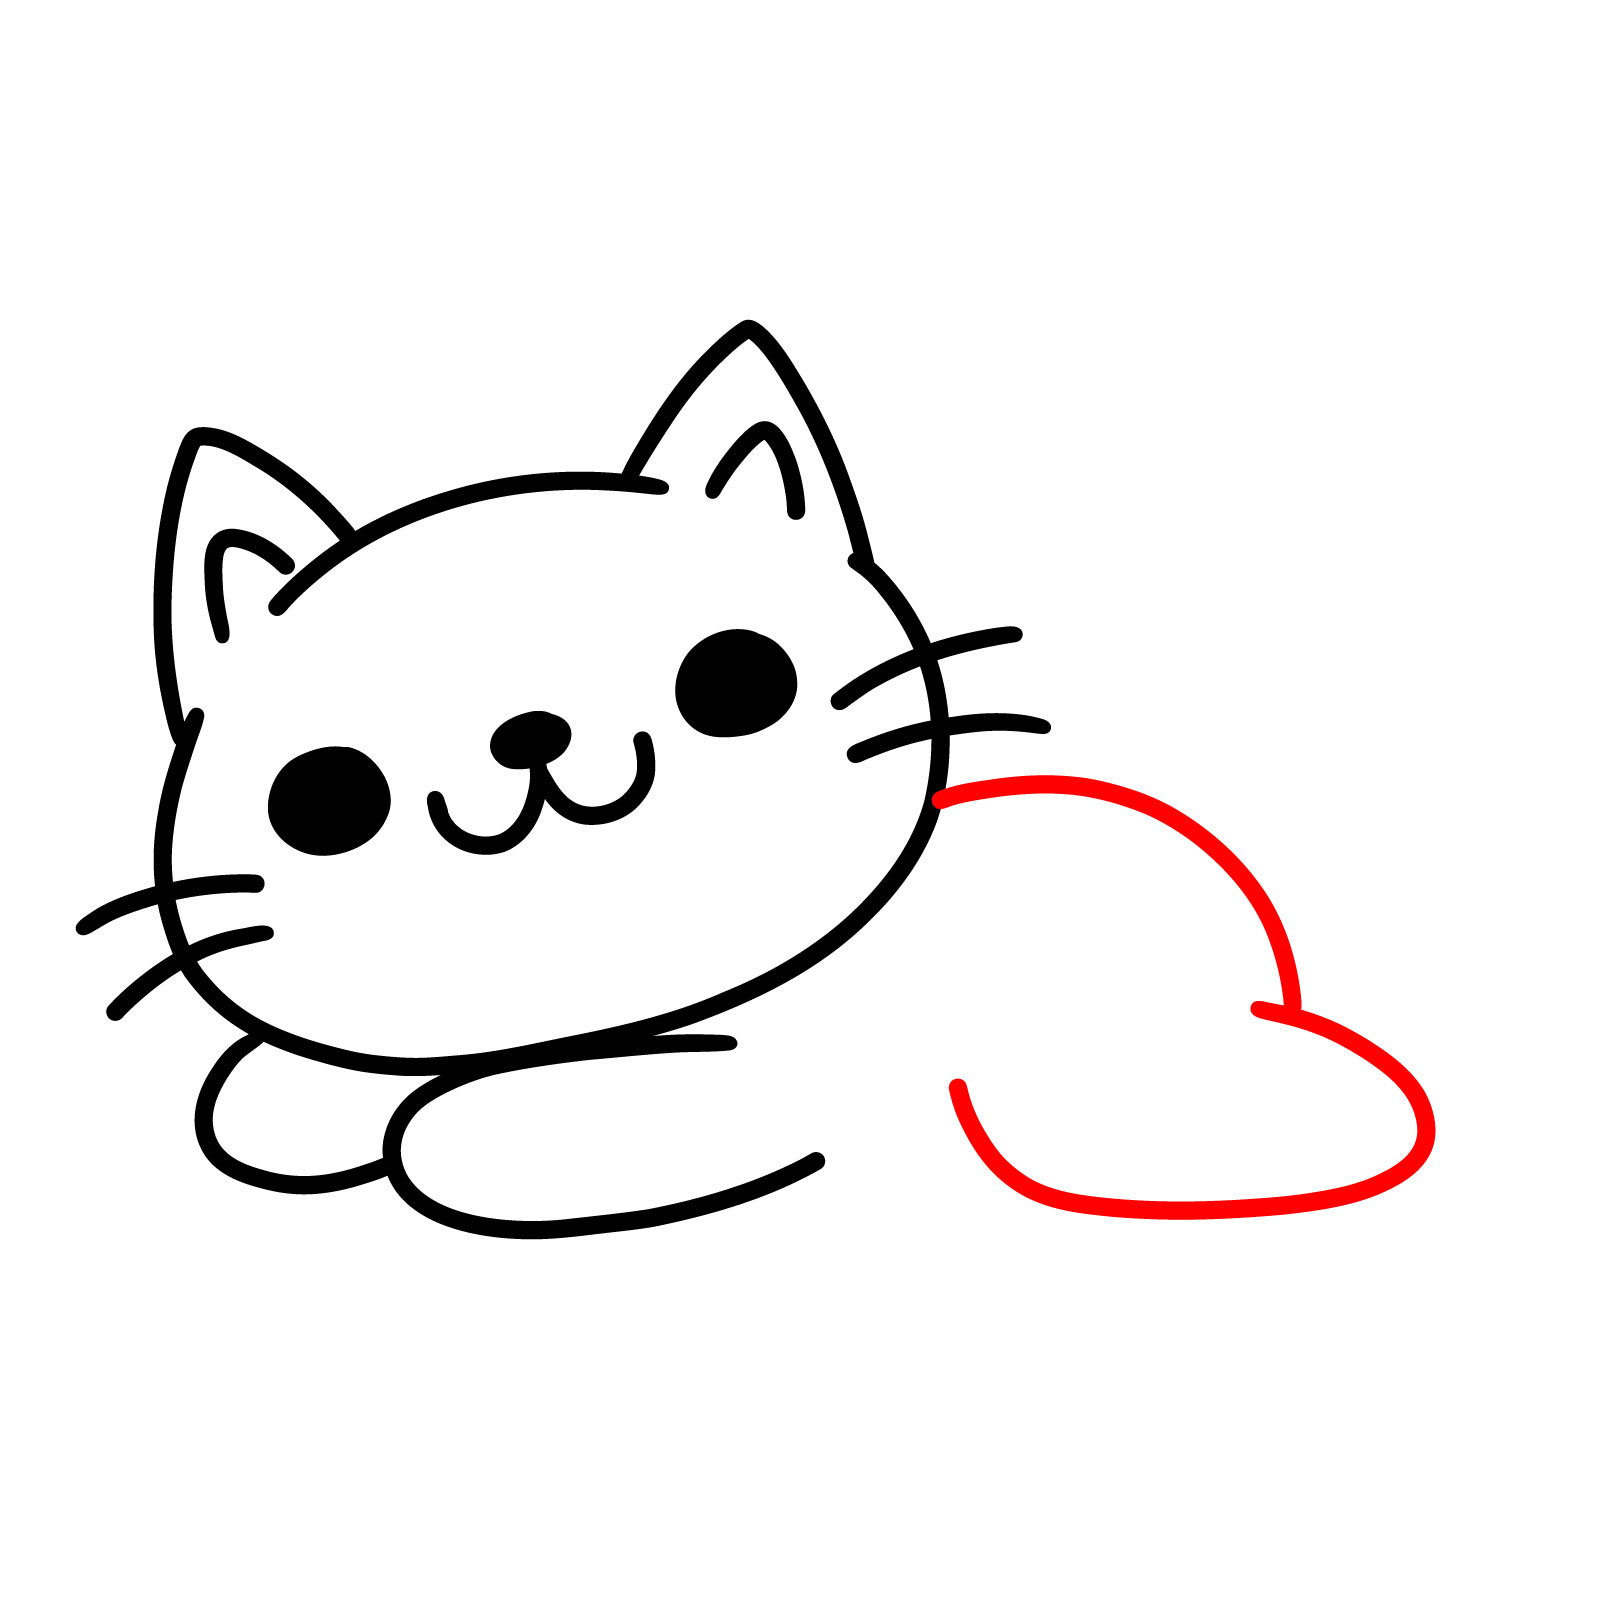
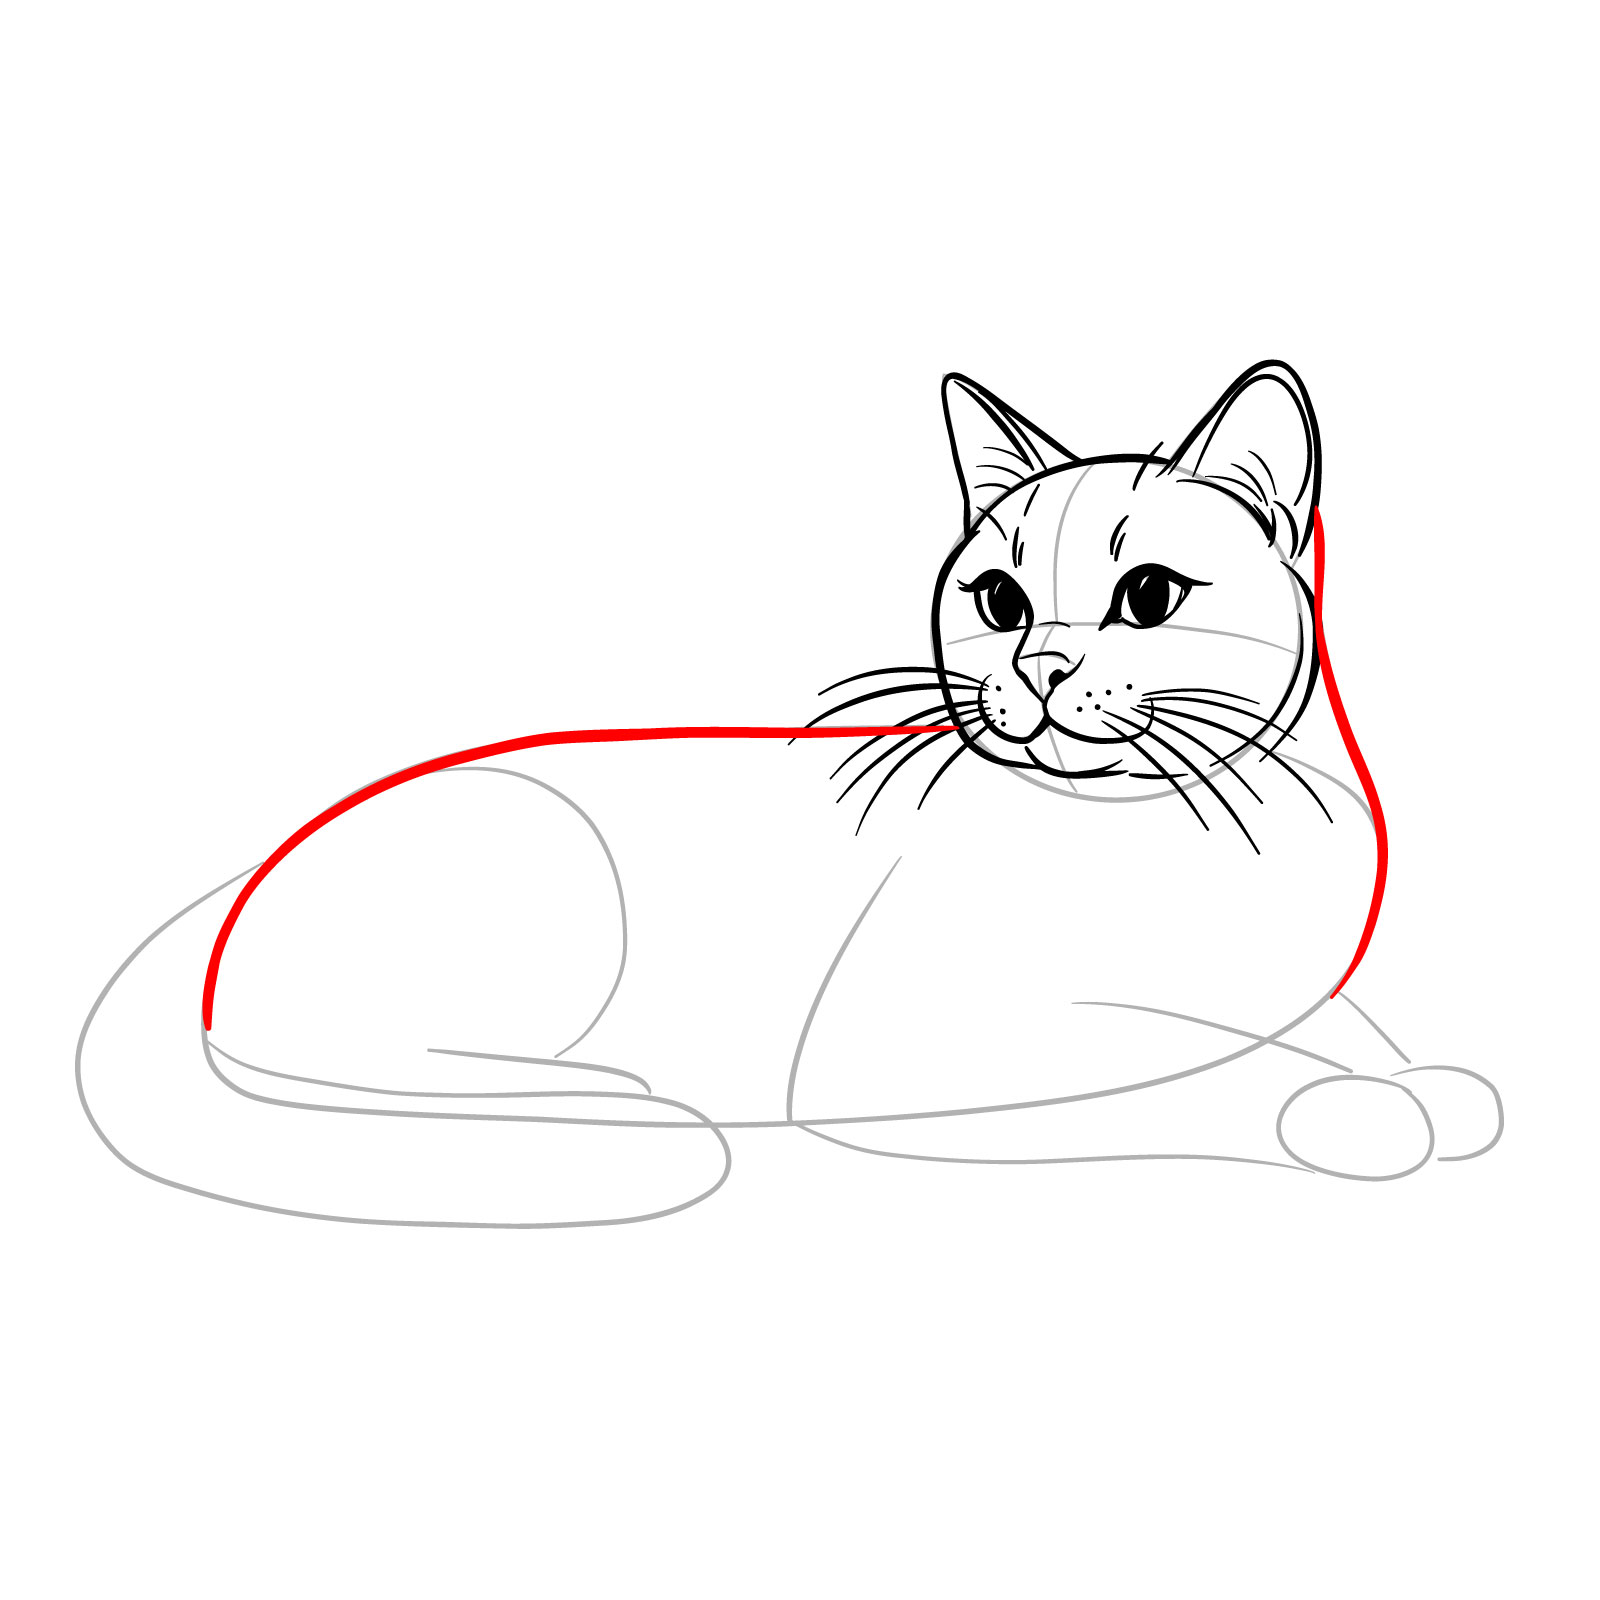
Step 05 – Draw the outline of the cat’s back arching smoothly into one visible hind leg
Back and hind leg added
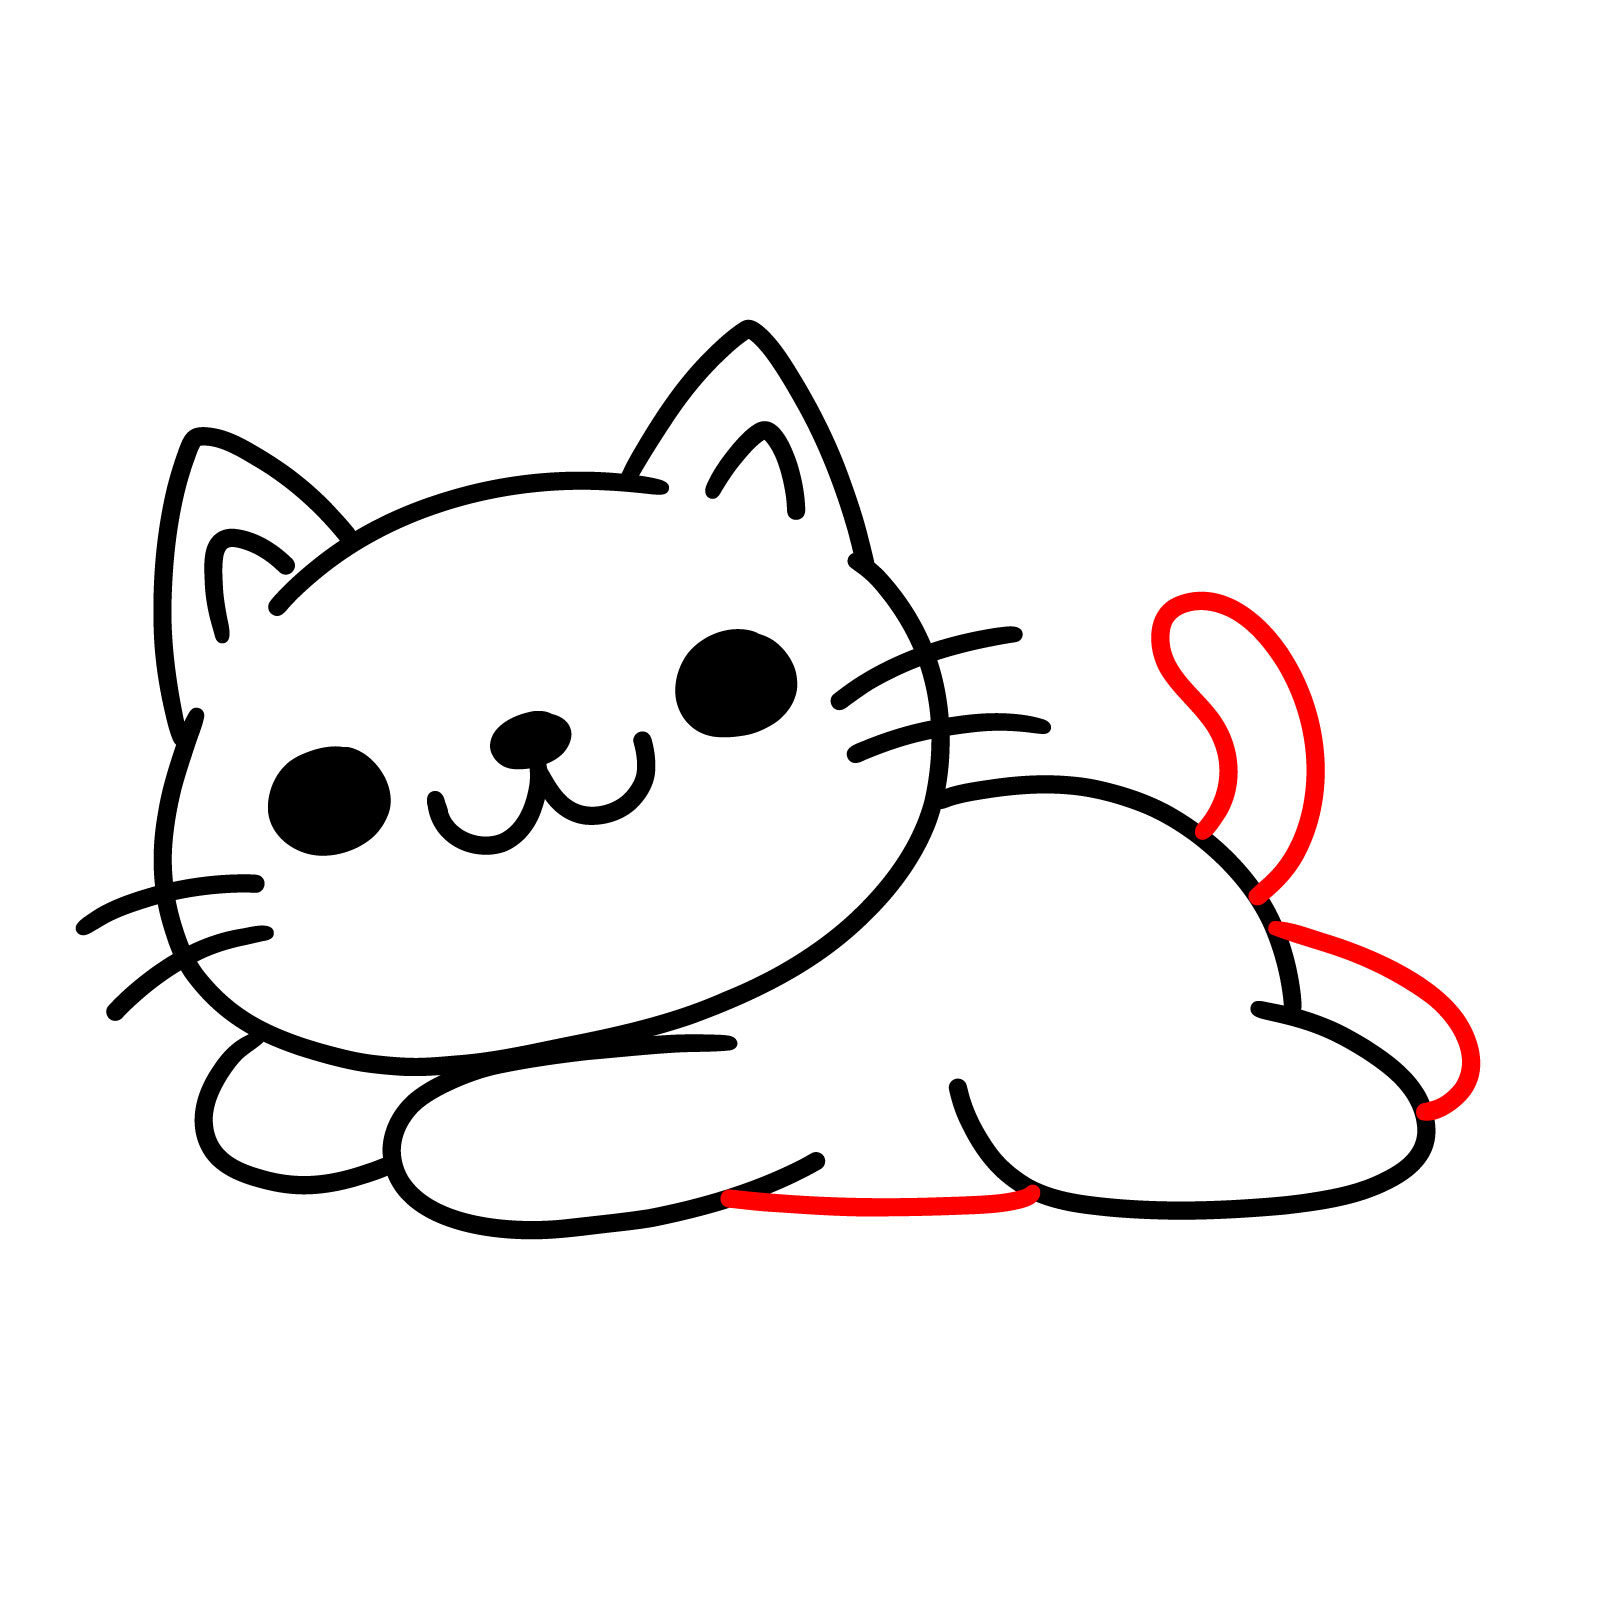
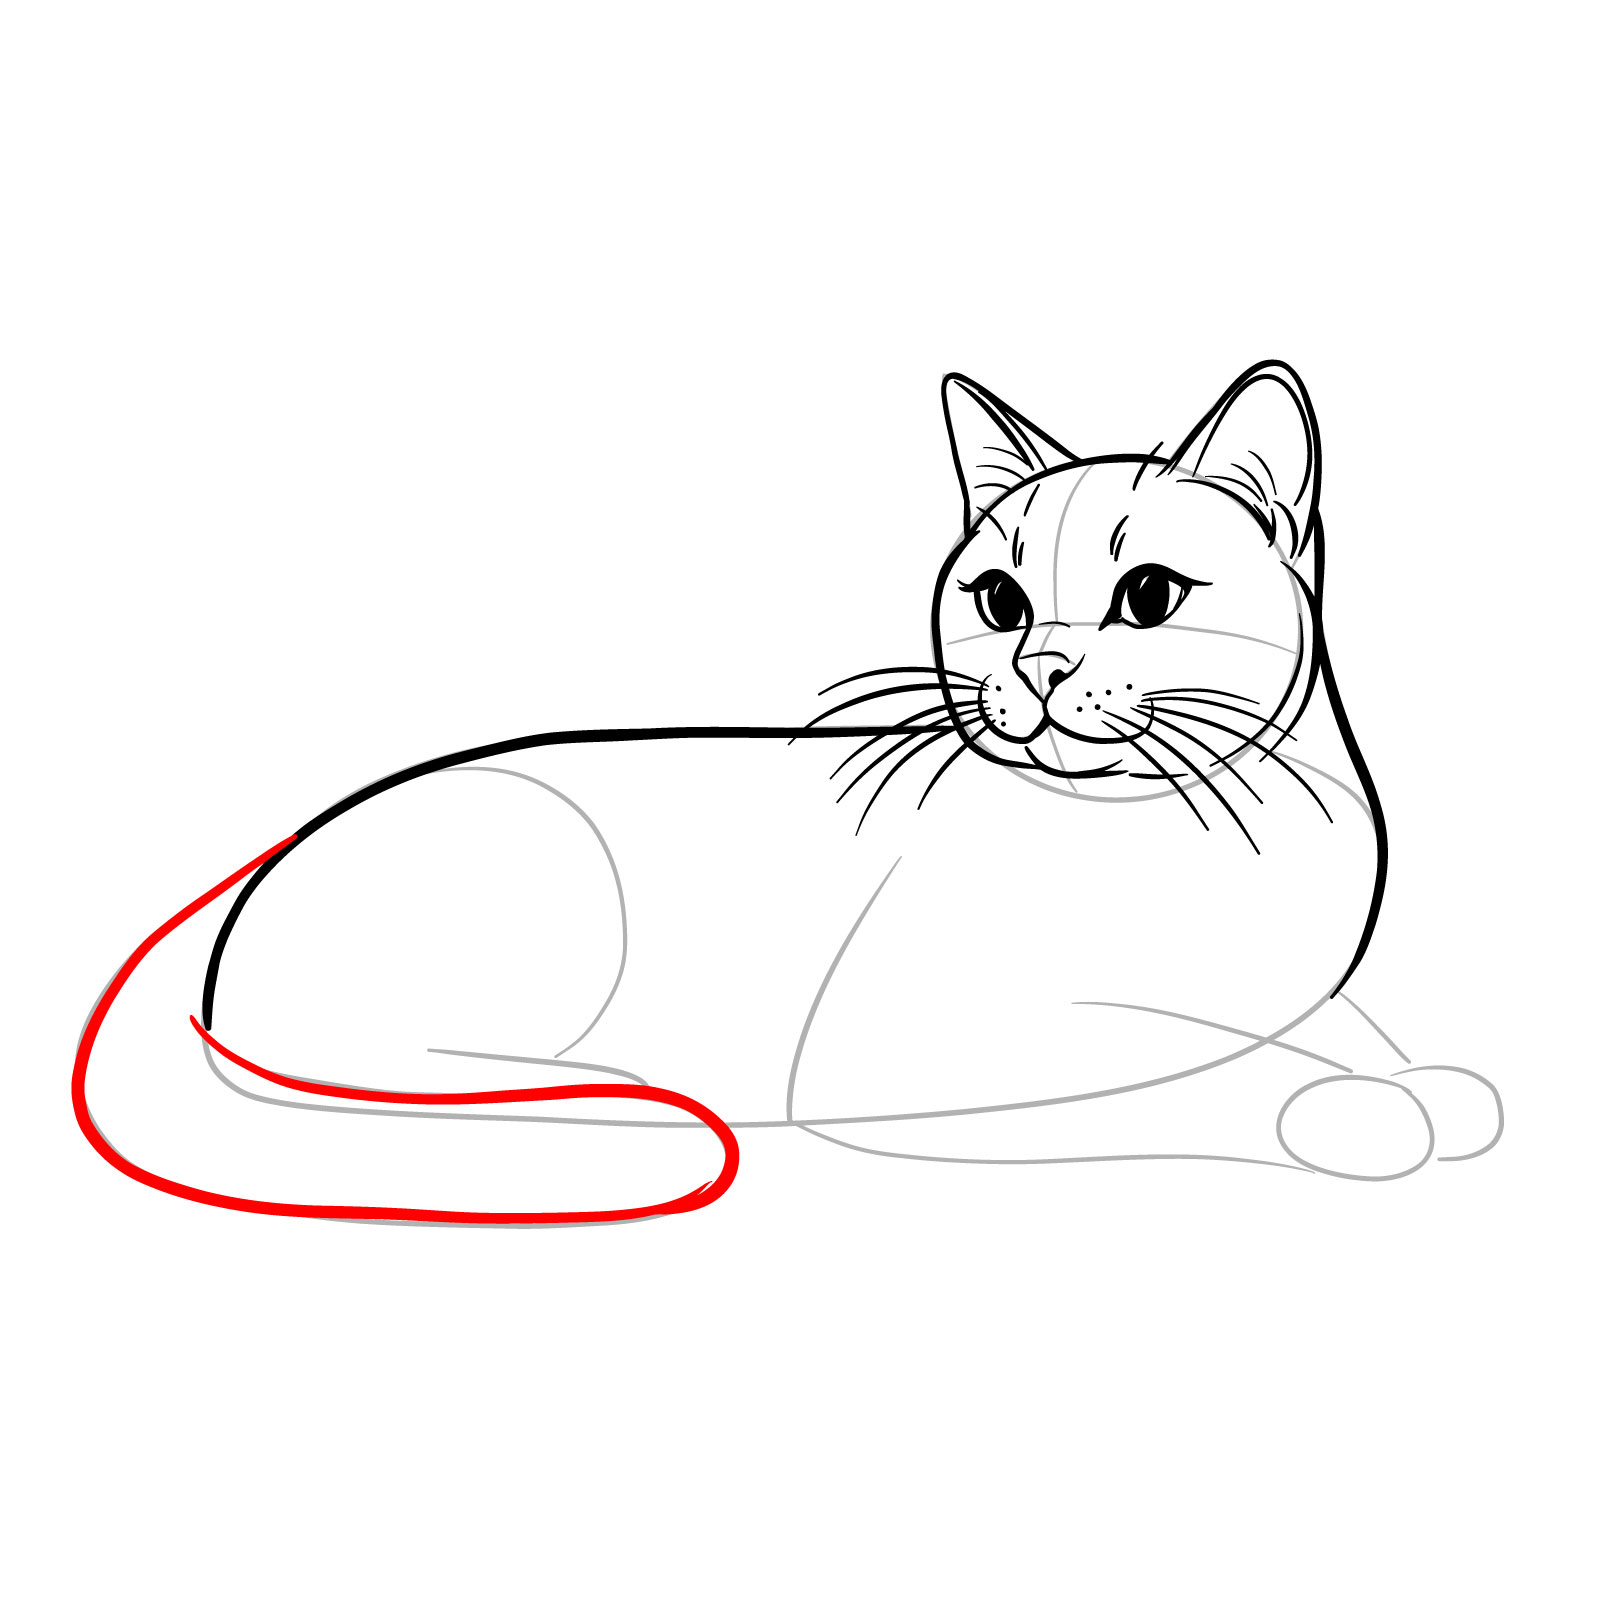
Step 06 – Add the second hind leg and the cat’s belly, finishing with the tail curling alongside the body, offering a sense of relaxed posture
Second leg and tail in place
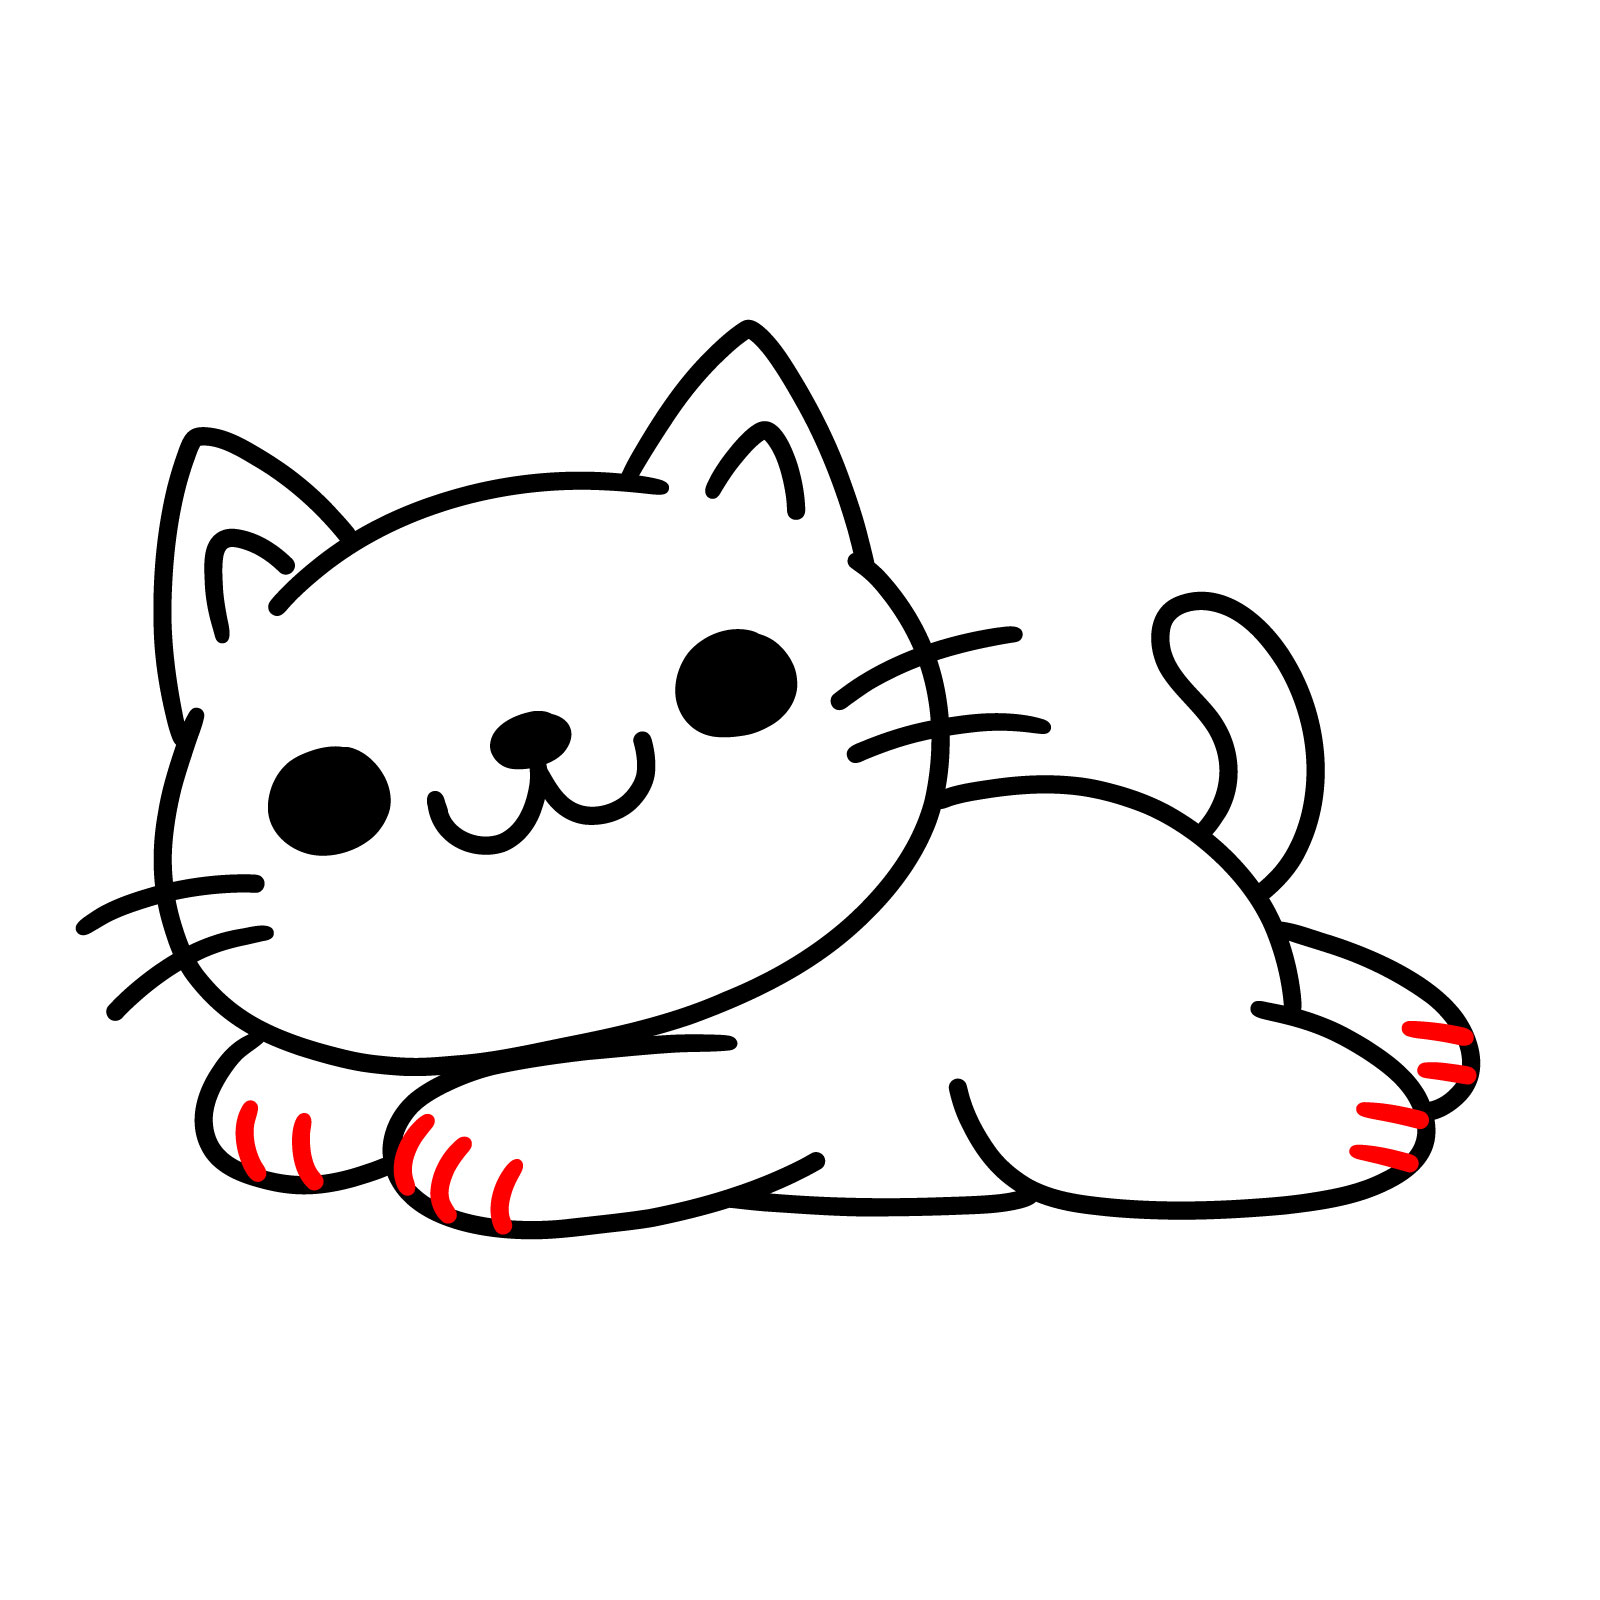
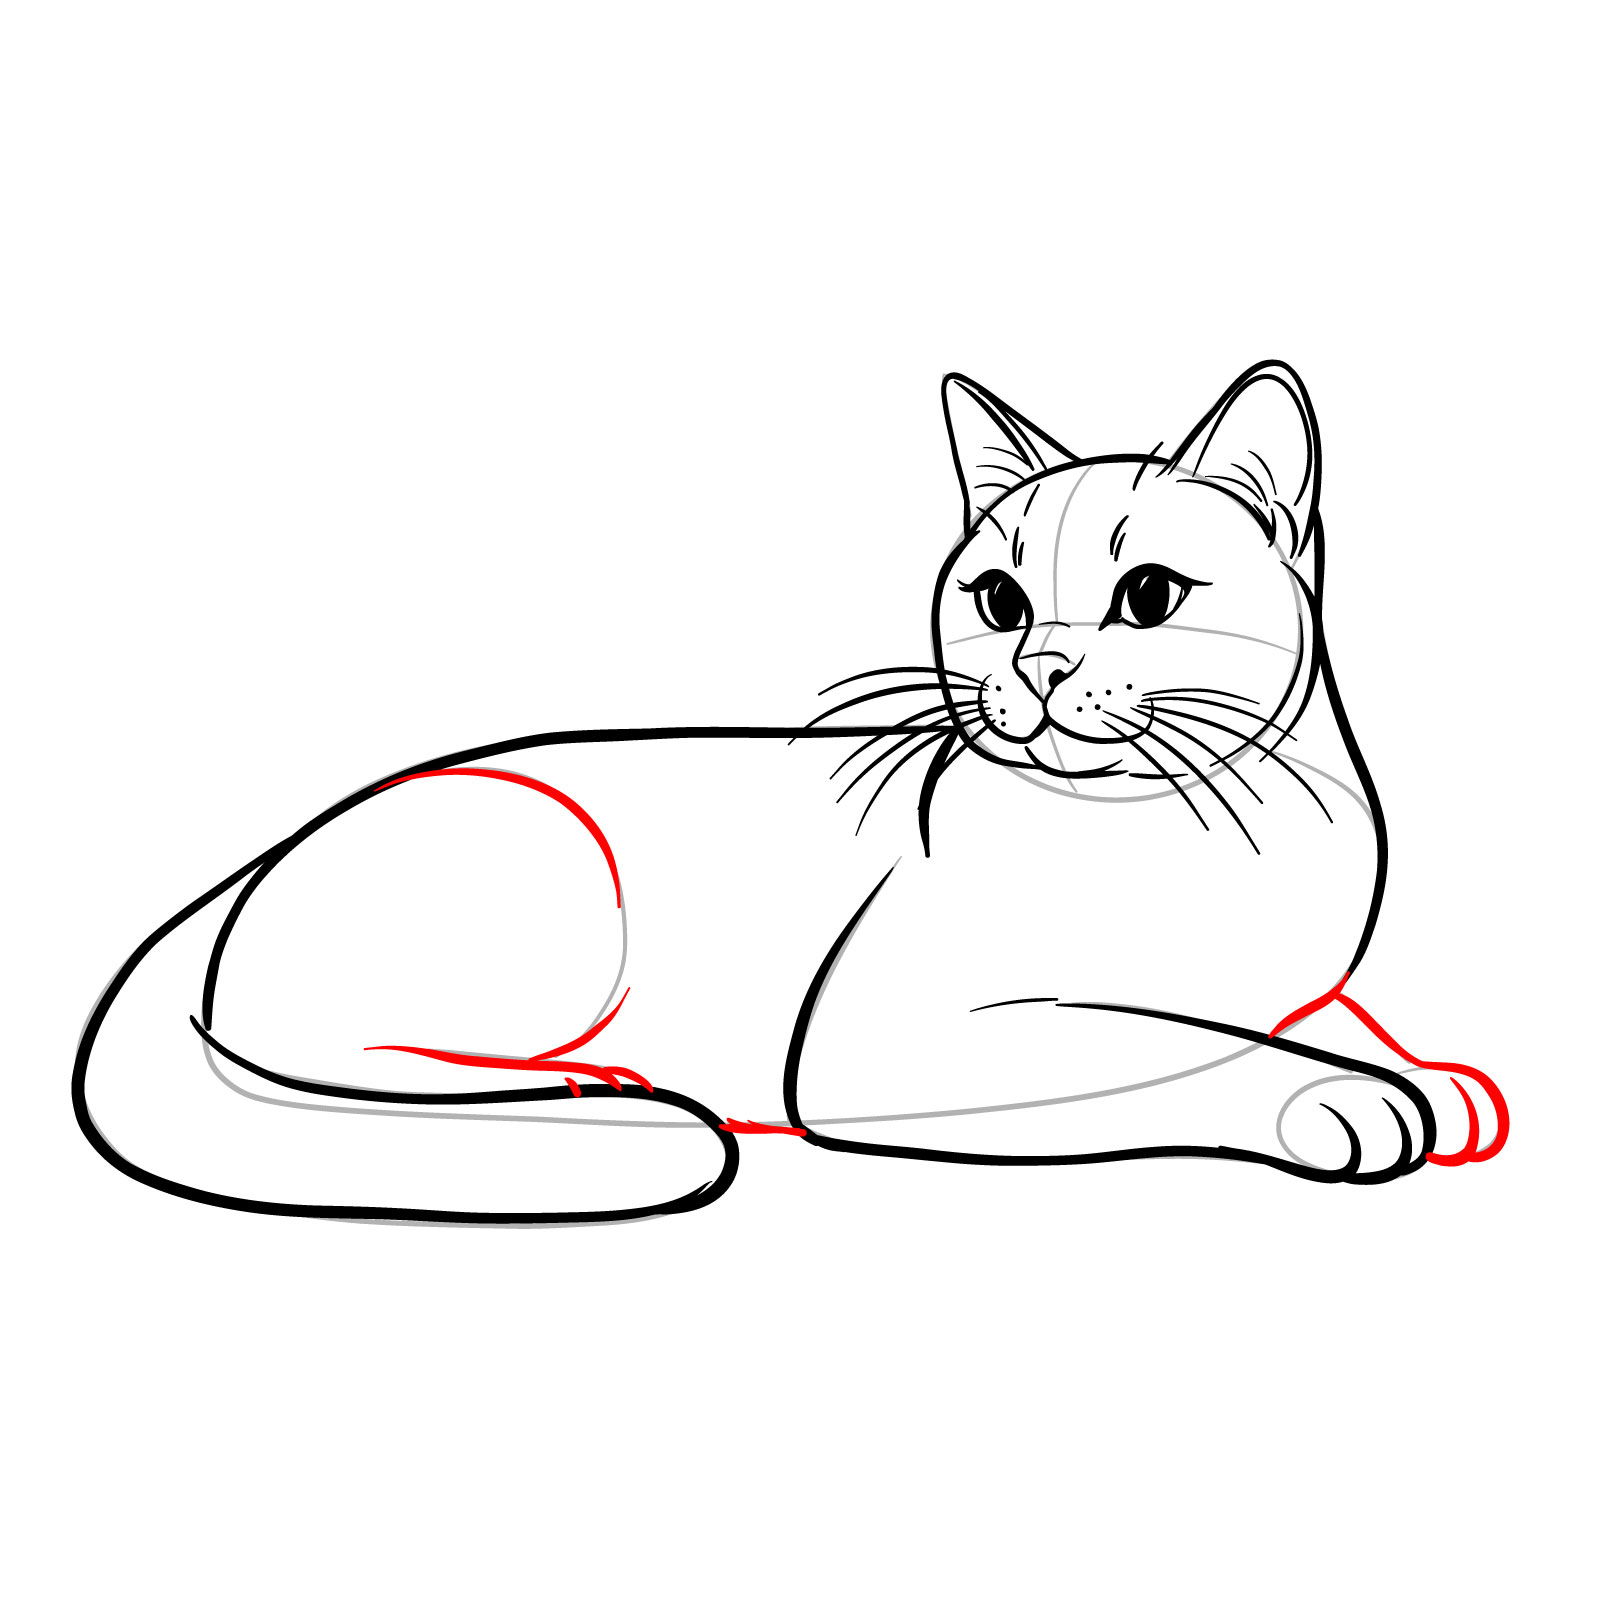
Step 07 – Insert lines to separate the paws, detailing the individual sections
Paws distinctively marked
Step 08 – Finalize the drawing, reviewing all outlines for clarity, and solidify any details necessary for the complete image of a cat lying contentedly on its belly
Finished lying cat drawing
Guide 3: Drawing a Bipedal Cartoon Cat – 8 Steps
Bipedal Cartoon Cat Easy Drawing – the Result
Ready for another fun challenge? The third guide features a whimsical bipedal cartoon cat that stands on its two feet. This drawing, composed of eight steps, is similar in complexity to the second guide but introduces the delightful twist of anthropomorphism. Your sketch will come to life with this character’s oversized eyes and an endearing upright stance. This little feline is full of personality, from its perky ears down to its tiny paws. Whether you’re a beginner or looking to add some playful characters to your portfolio, this guide is sure to inspire your creativity.
Step 01 – Begin with an oval shape to form the head of the cartoon cat, which will serve as the foundation for facial features
Head shape for cartoon cat
Step 02 – Add two triangular shapes to the top of the oval for the cat’s ears, ensuring they are symmetrical and proportional to the head
Cat ears take shape
Step 03 – Draw two large circles for the eyes and fill them with color, leaving two dots—one larger and one smaller in the center—for the highlights that give the eyes a lively expression
Eyes with highlights
Step 04 – Outline the eyes with thick lines to represent lashes or eyelids, then sketch a small nose and a mouth to complete the cartoon cat’s face
Final facial features
Step 05 – Enhance the cat’s face with whiskers and add simple lines near the ears to indicate fur
Whiskers and ear fur added
Step 06 – Draw the body shape for the bipedal cartoon cat, starting with the torso below the head. Outline the legs to establish a standing posture
Body and legs sketched
Step 07 – Add the arms with rounded ends for hands, an oval shape on the torso for the belly detail, and finalize the paws to complete the limbs
Arms and paws outlined
Step 08 – Conclude this easy-to-follow guide by reviewing the outlines and details, ensuring your bipedal cartoon cat has a cohesive and friendly appearance. This drawing seamlessly combines simple shapes and lines to create an engaging character that’s perfect for beginner artists looking to expand their repertoire
As we progress, let’s add a bit more intricacy to our drawings with this adorable cartoon kitten in a sitting pose. Spanning 12 steps, this guide is designed to introduce a more dynamic pose with a greater level of detail, yet it remains accessible and enjoyable. This kitten captures the essence of curiosity, with large, gleaming eyes and a fluffy tail, creating a sense of life and movement. While it’s a step up in complexity, the clear instructions will make it easy to follow along. This guide is perfect for those who’ve mastered simpler shapes and are ready to try something with a touch more detail.
Step 01 – Start the sketch with the bottom part of the kitten’s head, creating a base for the facial features
Beginning of the head outline
Step 02 – Finish the head outline by drawing the upper part, rounding it off to form the full head shape
Head outline completed
Step 03 – Sketch two triangular shapes on the top of the head for the ears, paying attention to their symmetry and angle
Ears sketched in
Step 04 – Draw two large circles for the eyes and fill them with color, leaving small blank circles for highlights to create a sparkling effect. Add a small highlighted nose to bring the kitten’s face to life
Facial features take shape
Step 05 – Outline the eyes to enhance their shape, add a small mouth for expression, and refine the ears to give them a more realistic appearance
Facial expression defined
Step 06 – Sketch the whiskers extending from the face and add fur details inside the ears and at the top of the head for texture
Whiskers and ear fur sketched
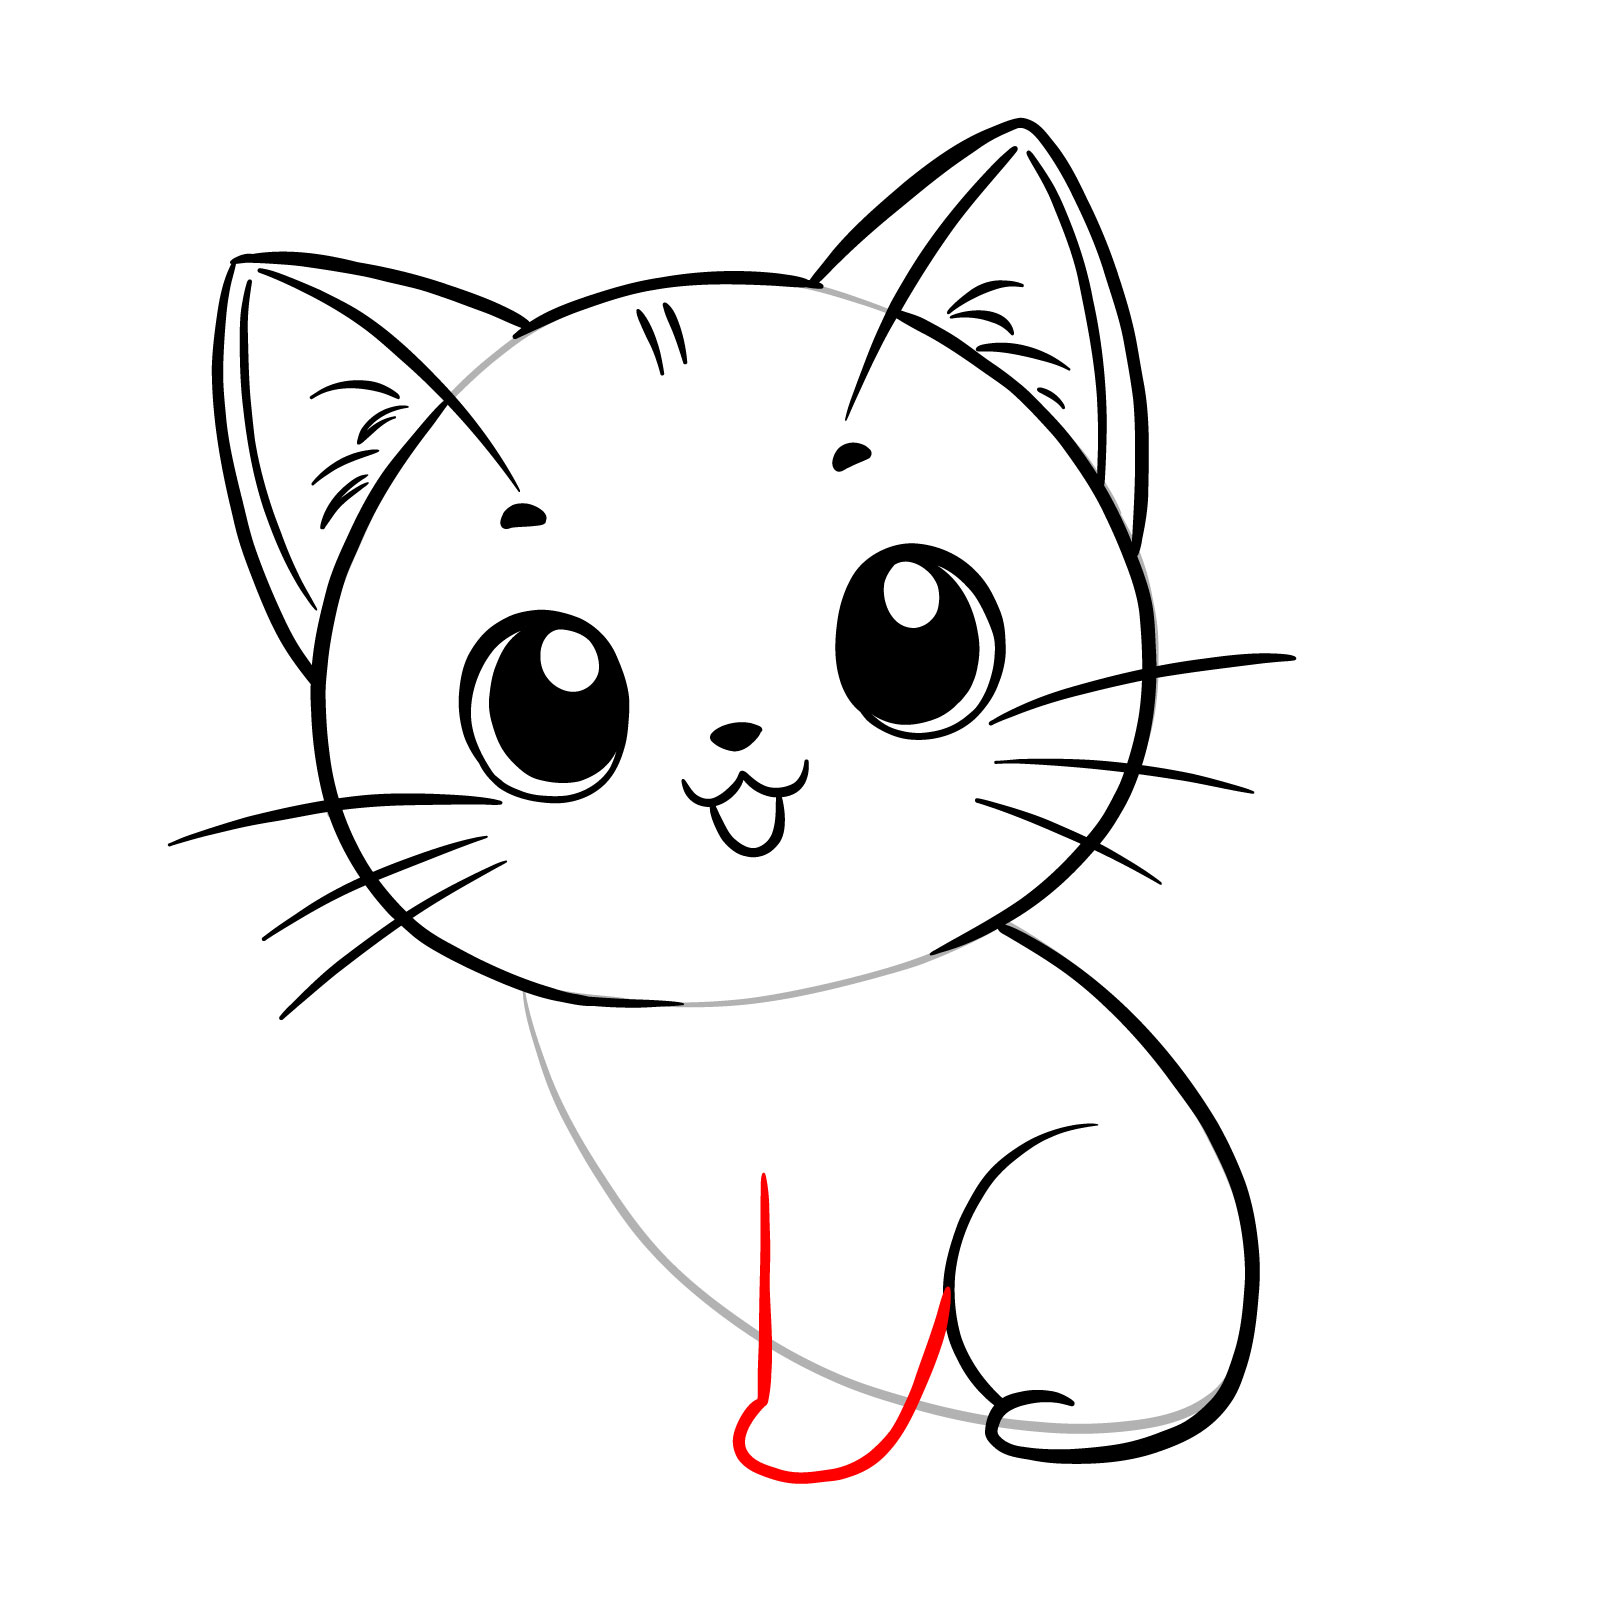
Step 07 – Draw the curve of the kitten’s back and the outline of a back leg, positioning it to suggest a sitting posture
Back and hind leg outlined
Step 08 – Illustrate the two front legs, ensuring they are proportionate to the body and aligned with the sitting pose
Front legs added
Step 09 – Sketch the initial shapes for the front legs and the outline of the back leg, ensuring they support the sitting posture of the kitten
Limbs taking shape
Step 10 – Draw the second back leg and a fluffy tail, completing the lower body of the sitting kitten
Second leg and tail added
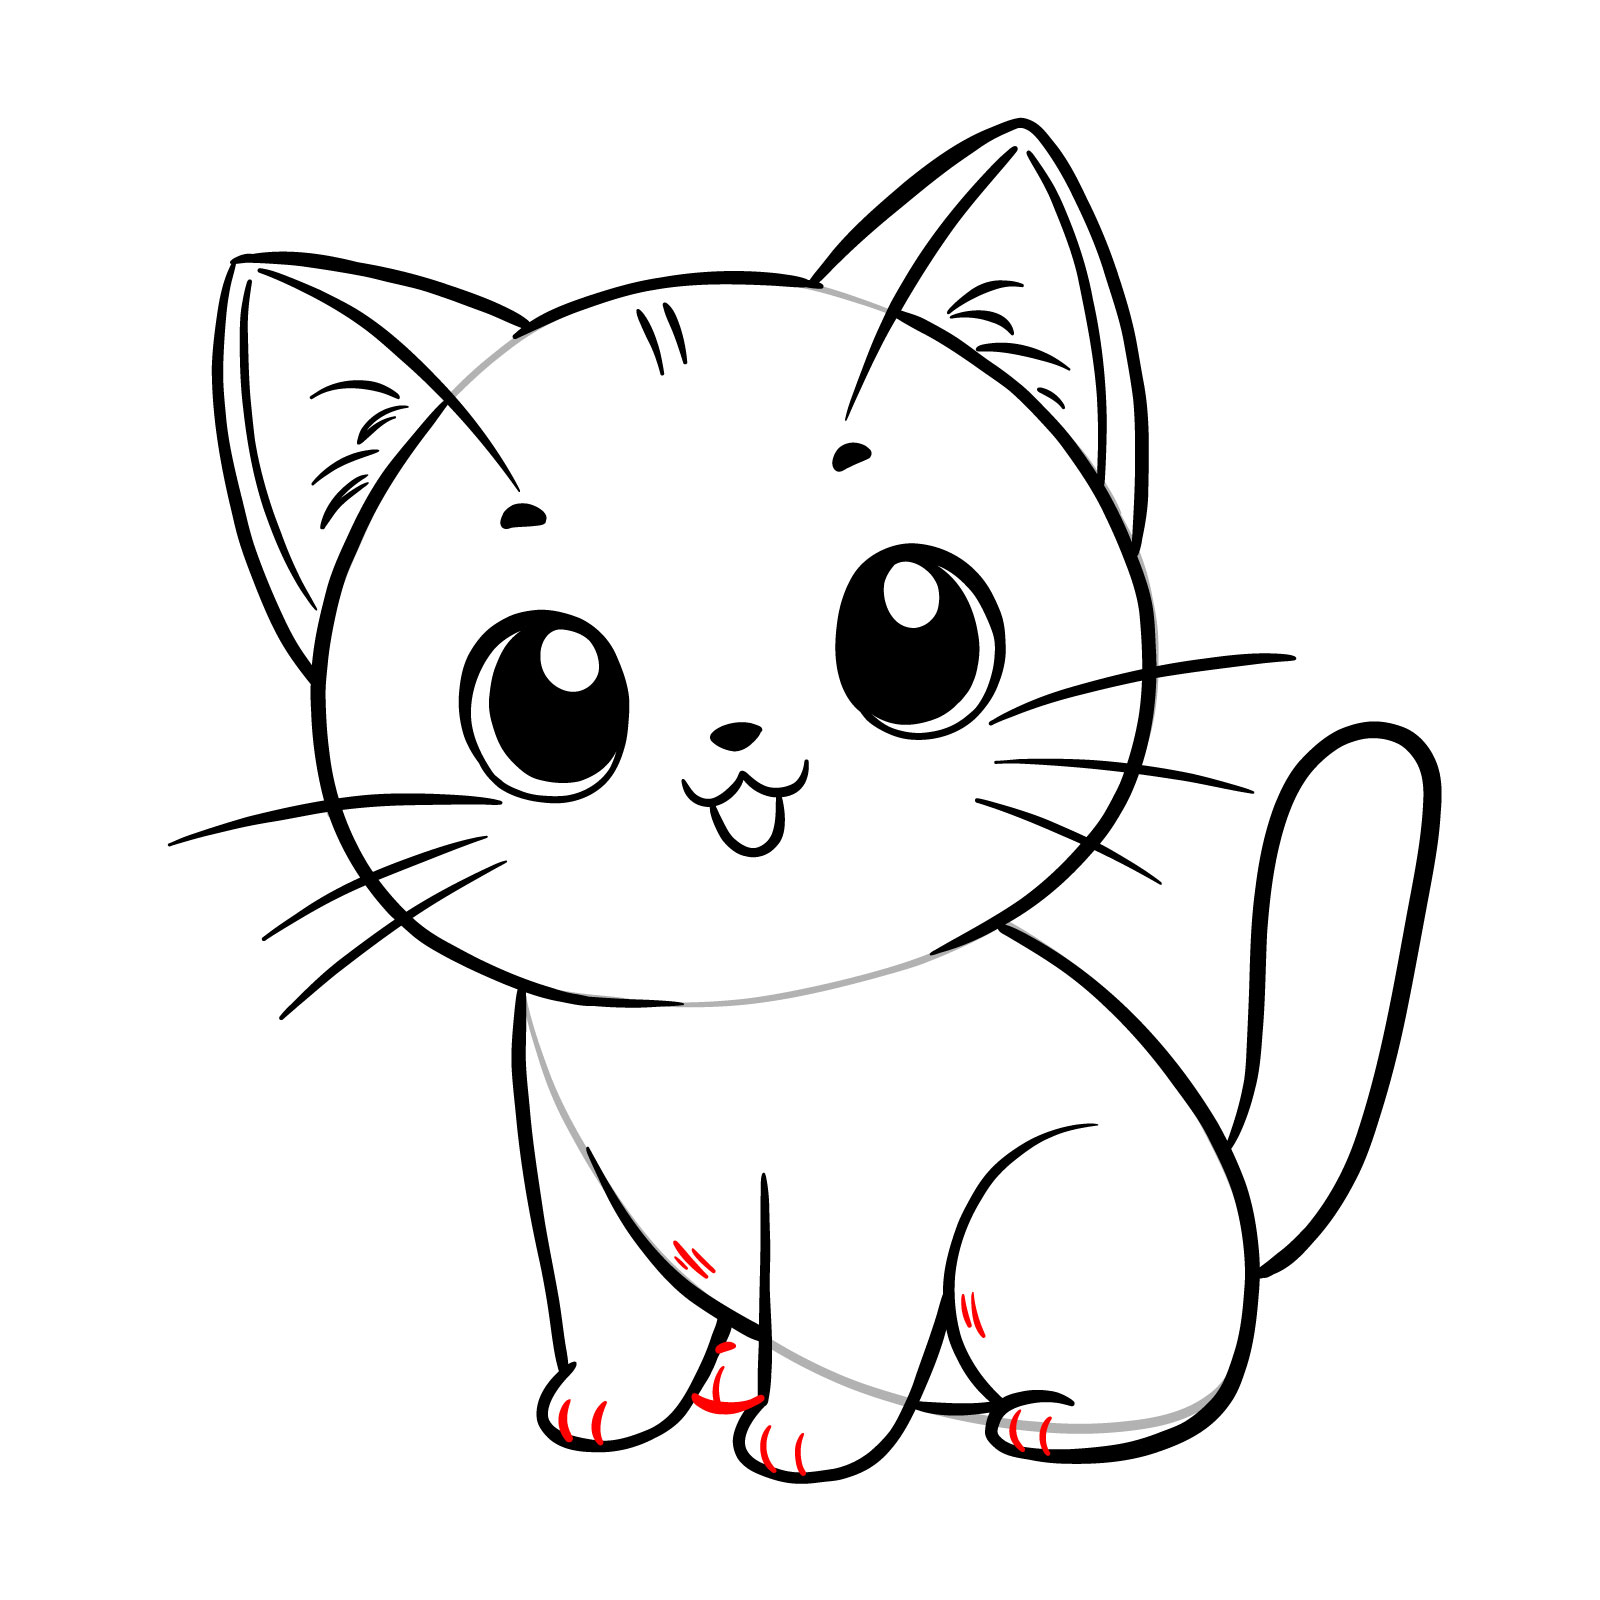
Step 11 – Add the pads to the back paws, separate the front paws, and include fur details on the body and tail to add texture and depth to the sketch
Paws and fur details
Step 12 – Finalize your drawing, capturing the playful essence of a sitting cartoon kitten. This step-by-step guide offers a structured approach to depicting a more dynamic and detailed character, perfect for those learning how to draw cartoon animals
Cartoon kitten drawing complete
Guide 5: Drawing a Minimalistic Sleeping Cat – 6 Steps
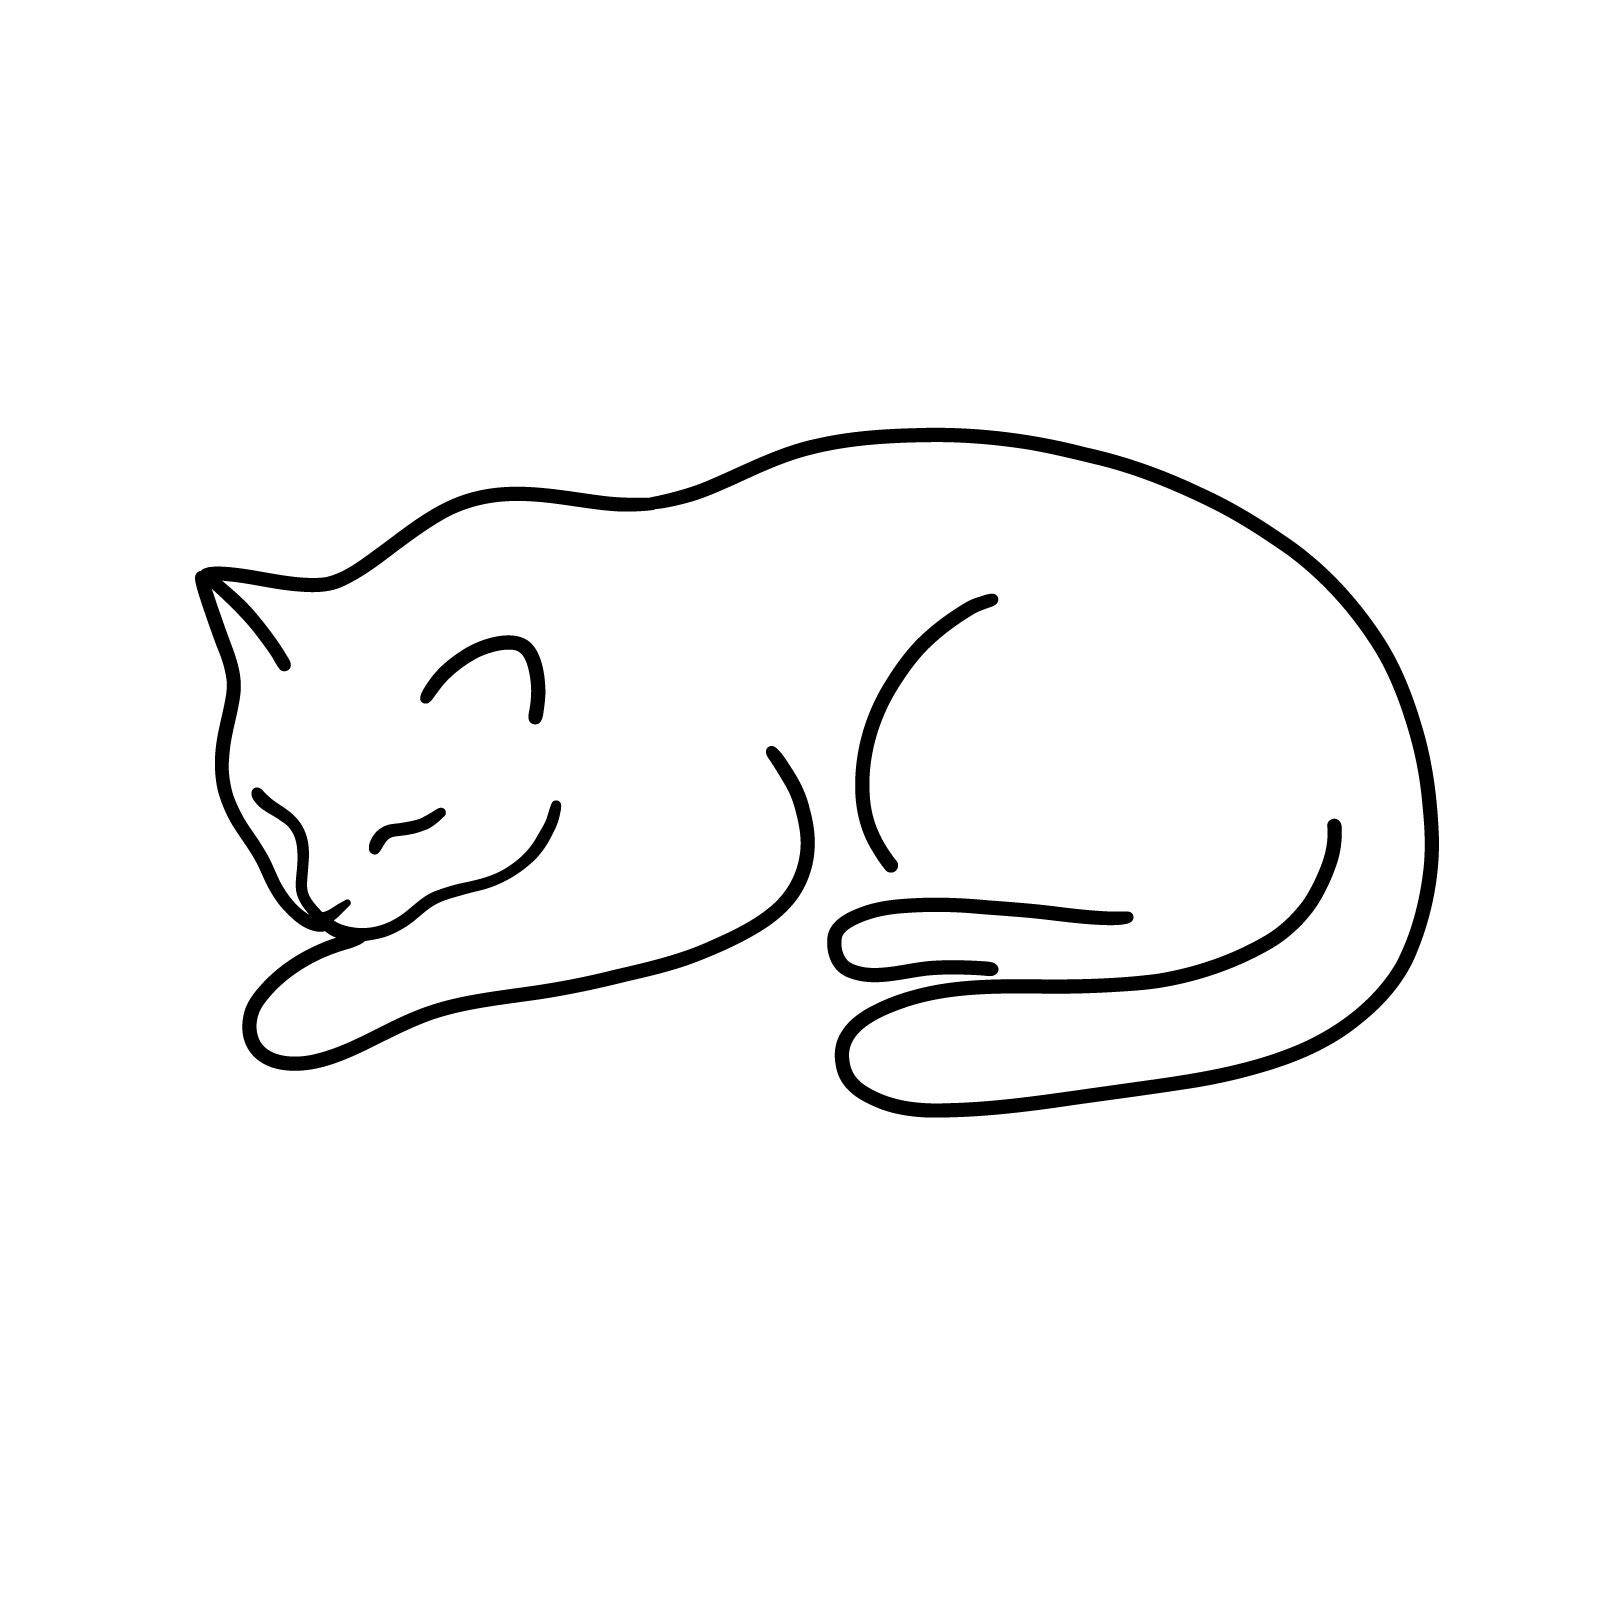
Finished Drawing of the Minimalistic Sleeping Cat
For our fifth step in the cat-drawing series, we simplify our approach with a minimalistic sleeping cat. This serene creation, completed in just six steps, is one of the easiest designs to replicate, making it a perfect exercise in line art. Although it ranks fifth, it’s not due to complexity but rather its shift towards a more realistic cat shape, moving away from the cartoonish style of earlier guides. This guide will help you capture the essence of a cat at rest with clean, flowing lines, proving that sometimes simplicity can be strikingly beautiful and tranquil.
Step 01 – Start with the basics by drawing lines for the eyes and nose, setting the stage for the minimalistic style of the sleeping cat
Eyes and nose in place
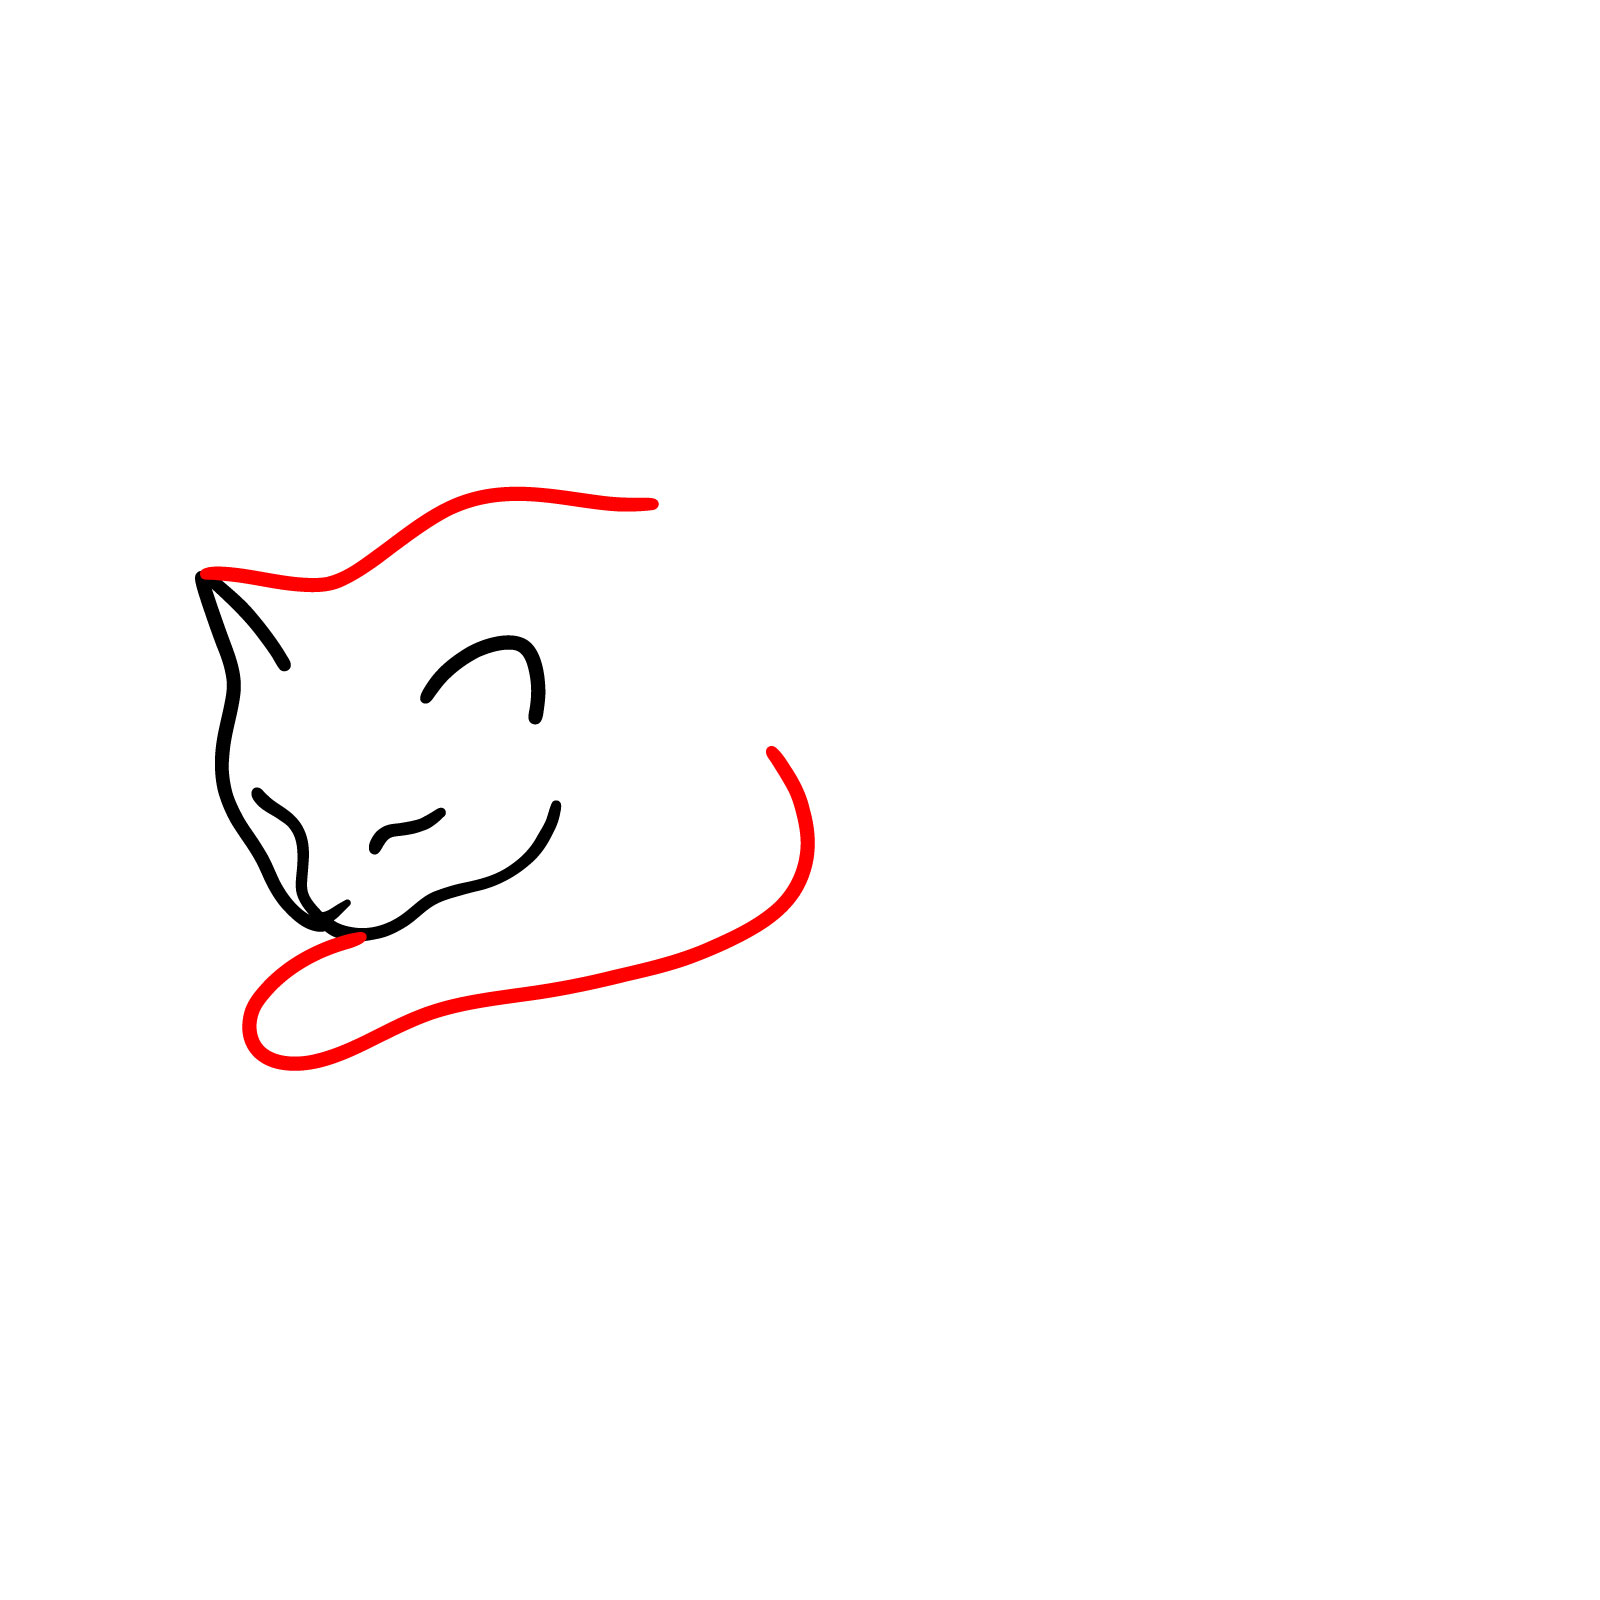
Step 02 – Outline the shape of the head and ears, using gentle curves to suggest the peacefulness of the cat’s sleeping form
Head and ears outlined
Step 03 – Draw the upper back line and the front leg, creating the initial contours of the cat’s relaxed, sleeping posture
Upper body and front leg sketched
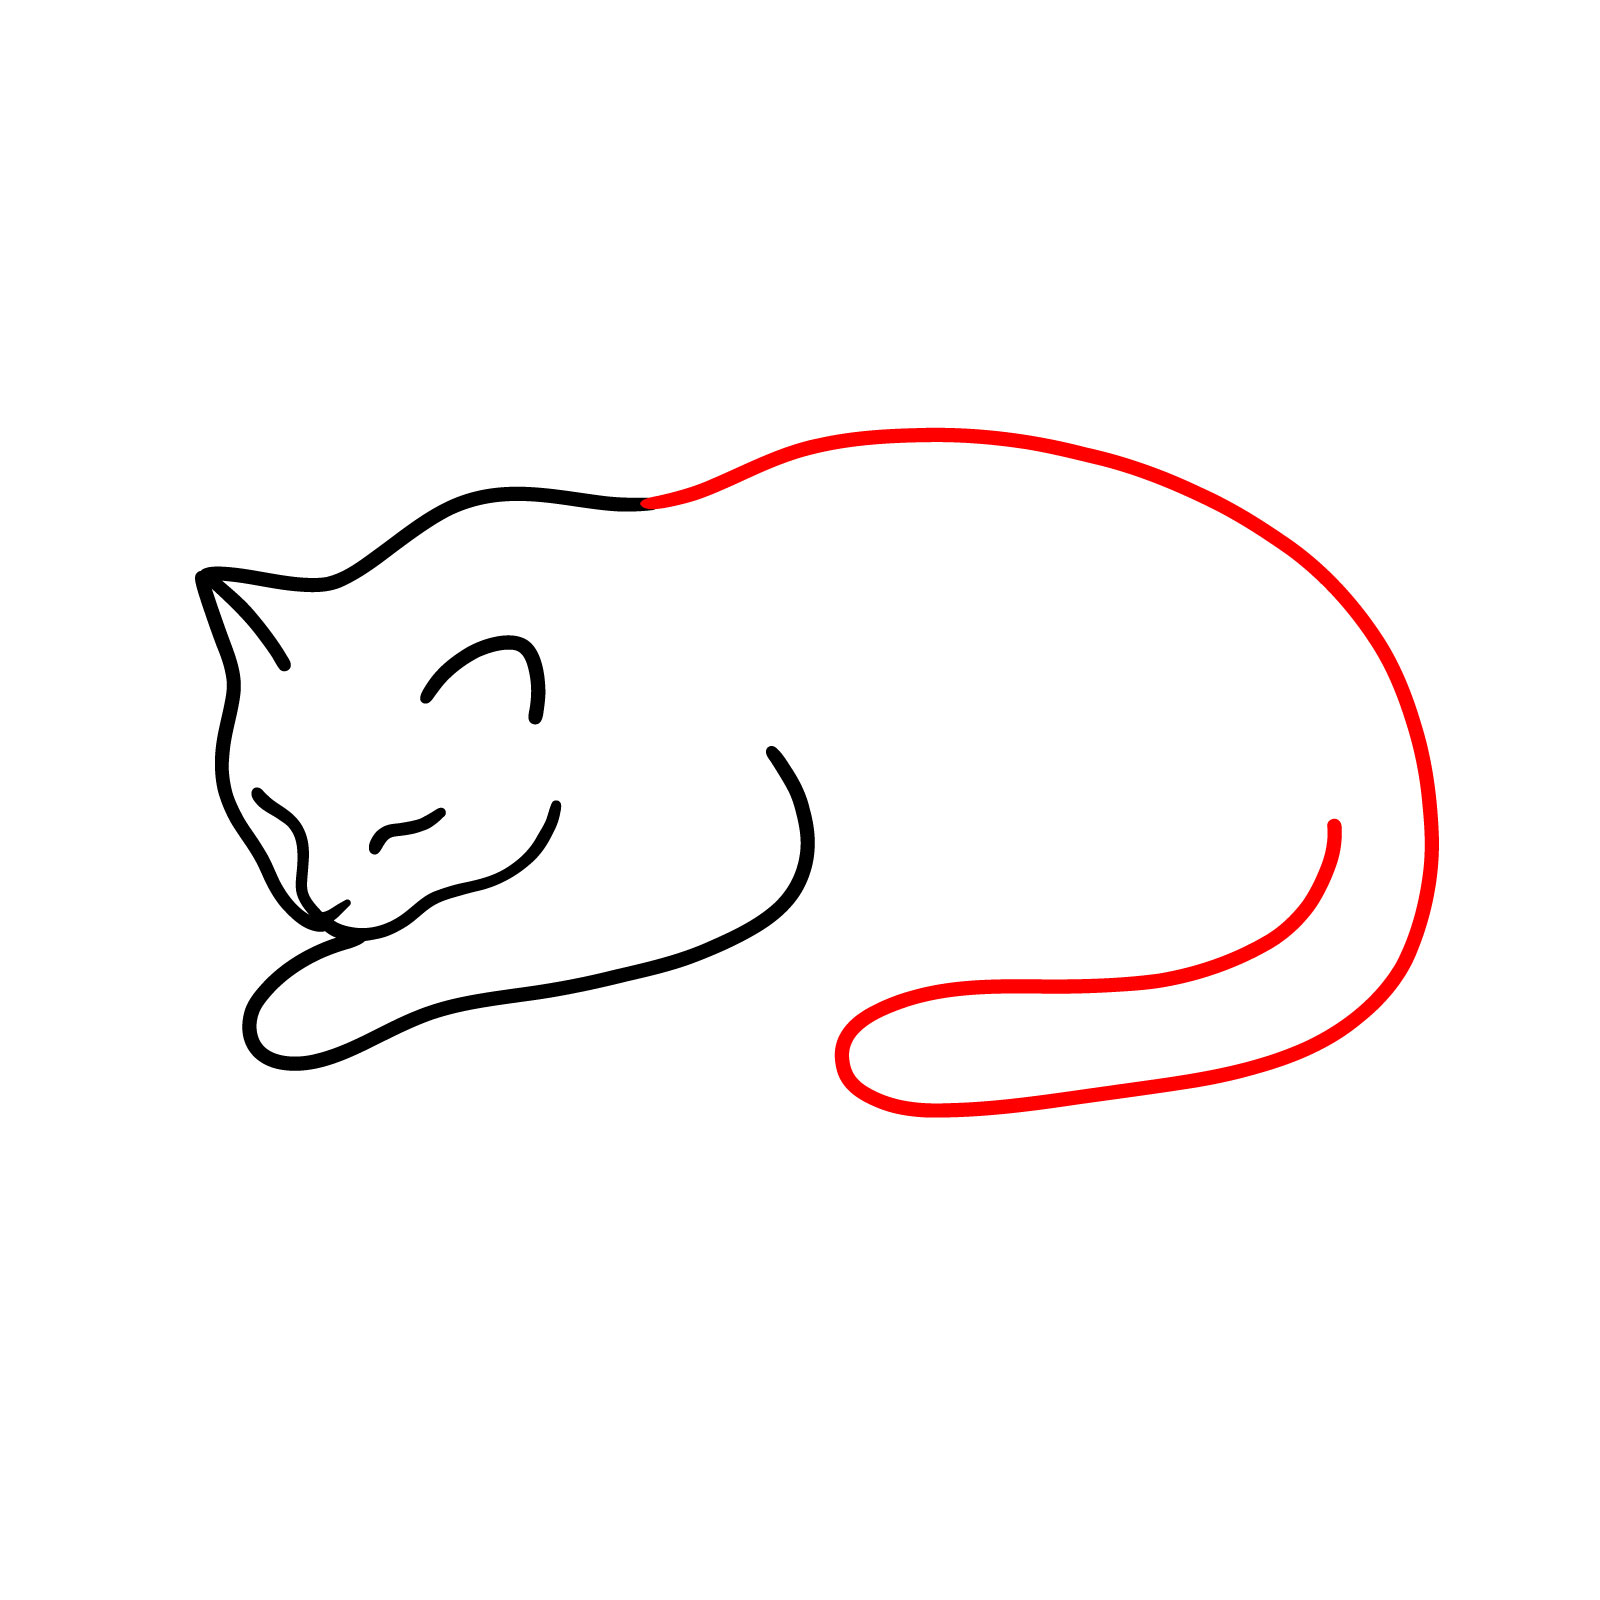
Step 04 – With a fluid line, shape the back of the cat, extending it to form the tail
Back and tail shaped
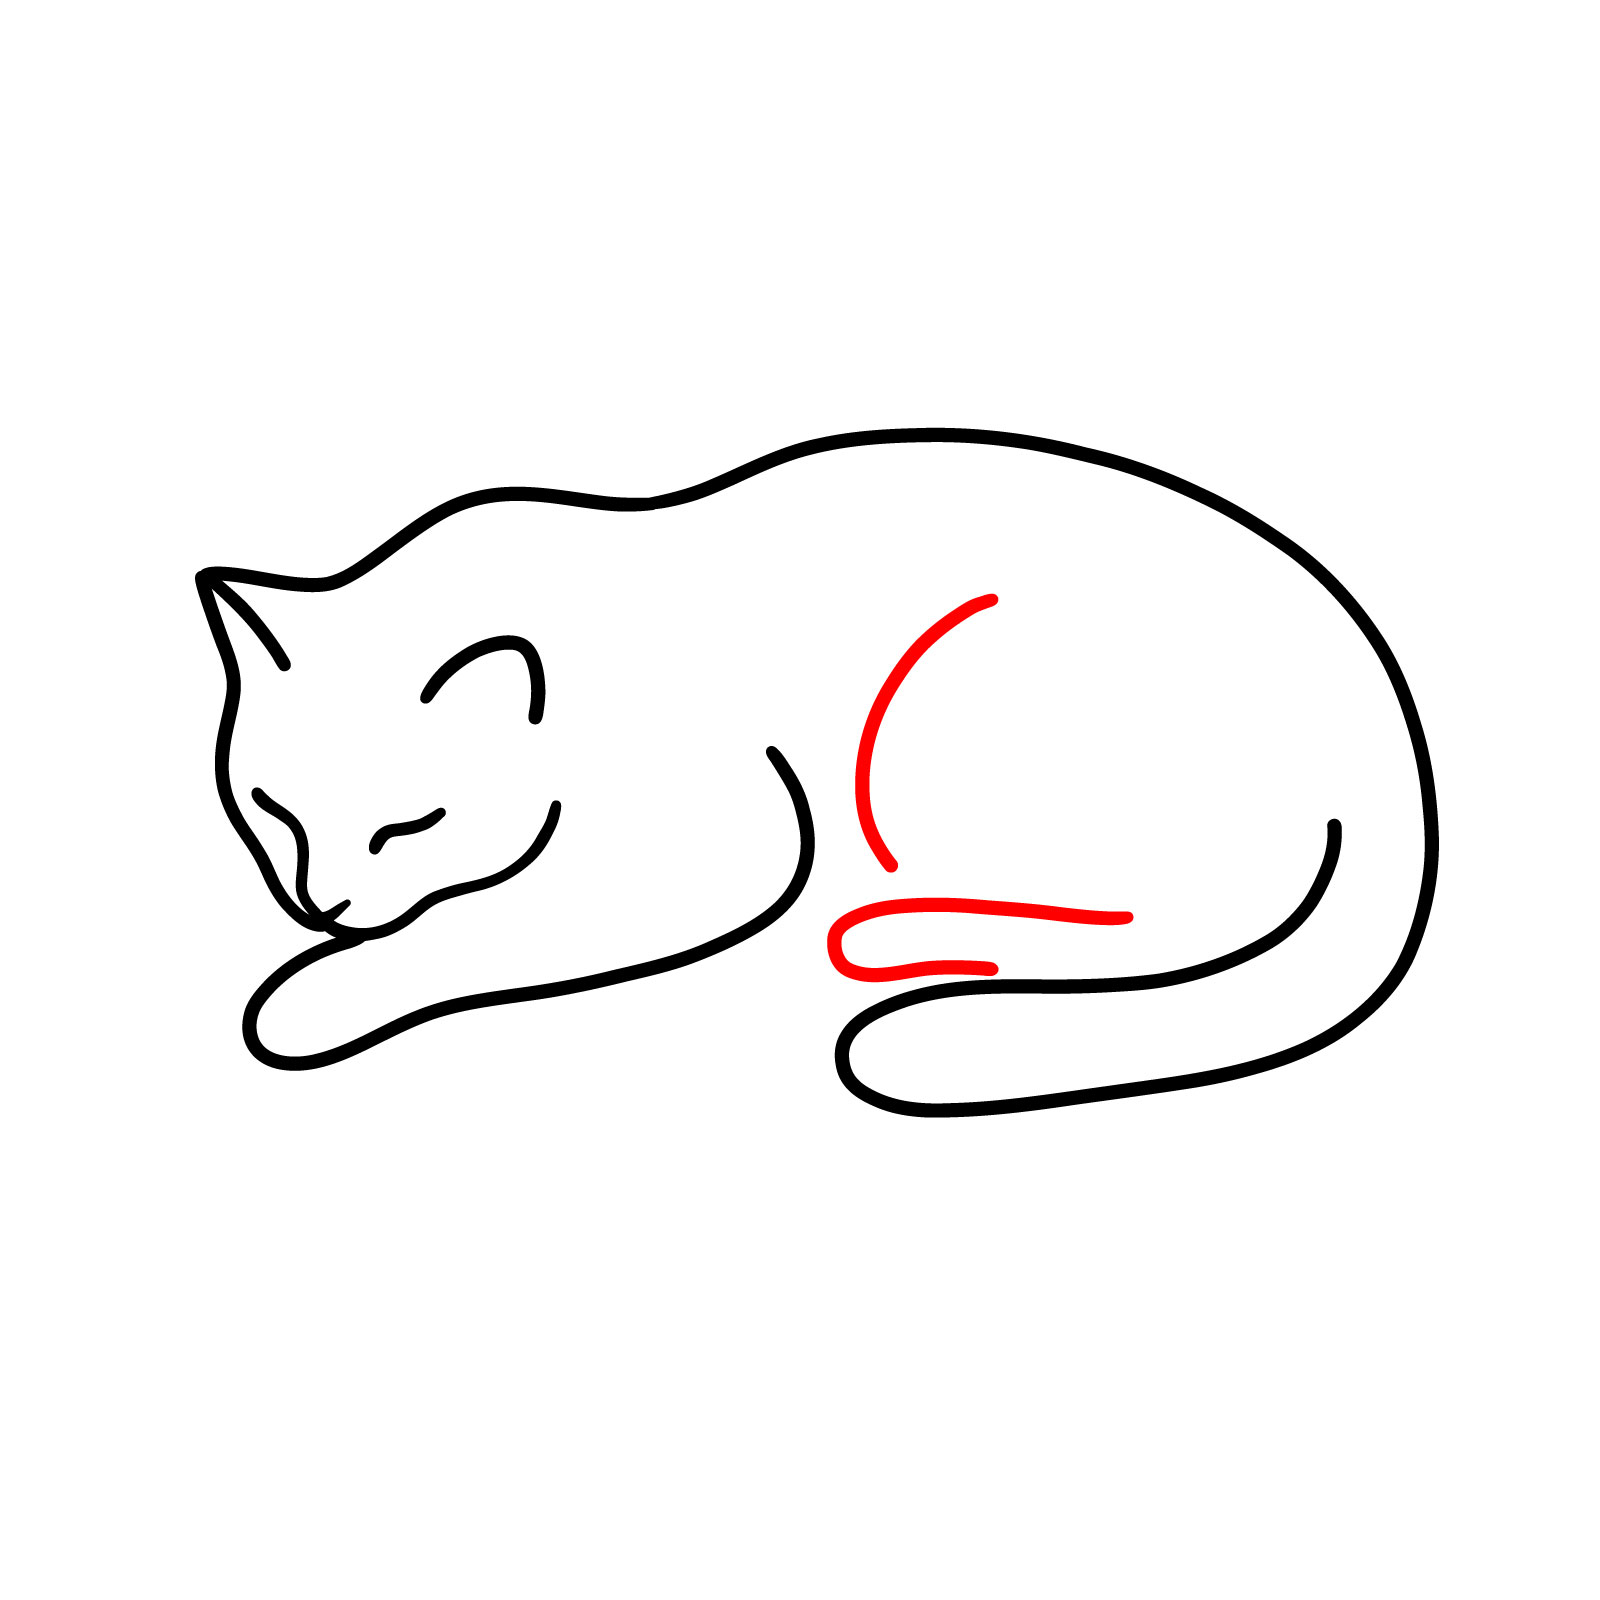
Step 05 – Add the line for the visible back leg, completing the main body structure of the minimalistic cat
Back leg added
Step 06 – Now you mastered how to draw a minimalistic cat, perfecting the simplicity and elegance of the sleeping form. Let’s move to the next one
Sleeping minimalistic cat complete
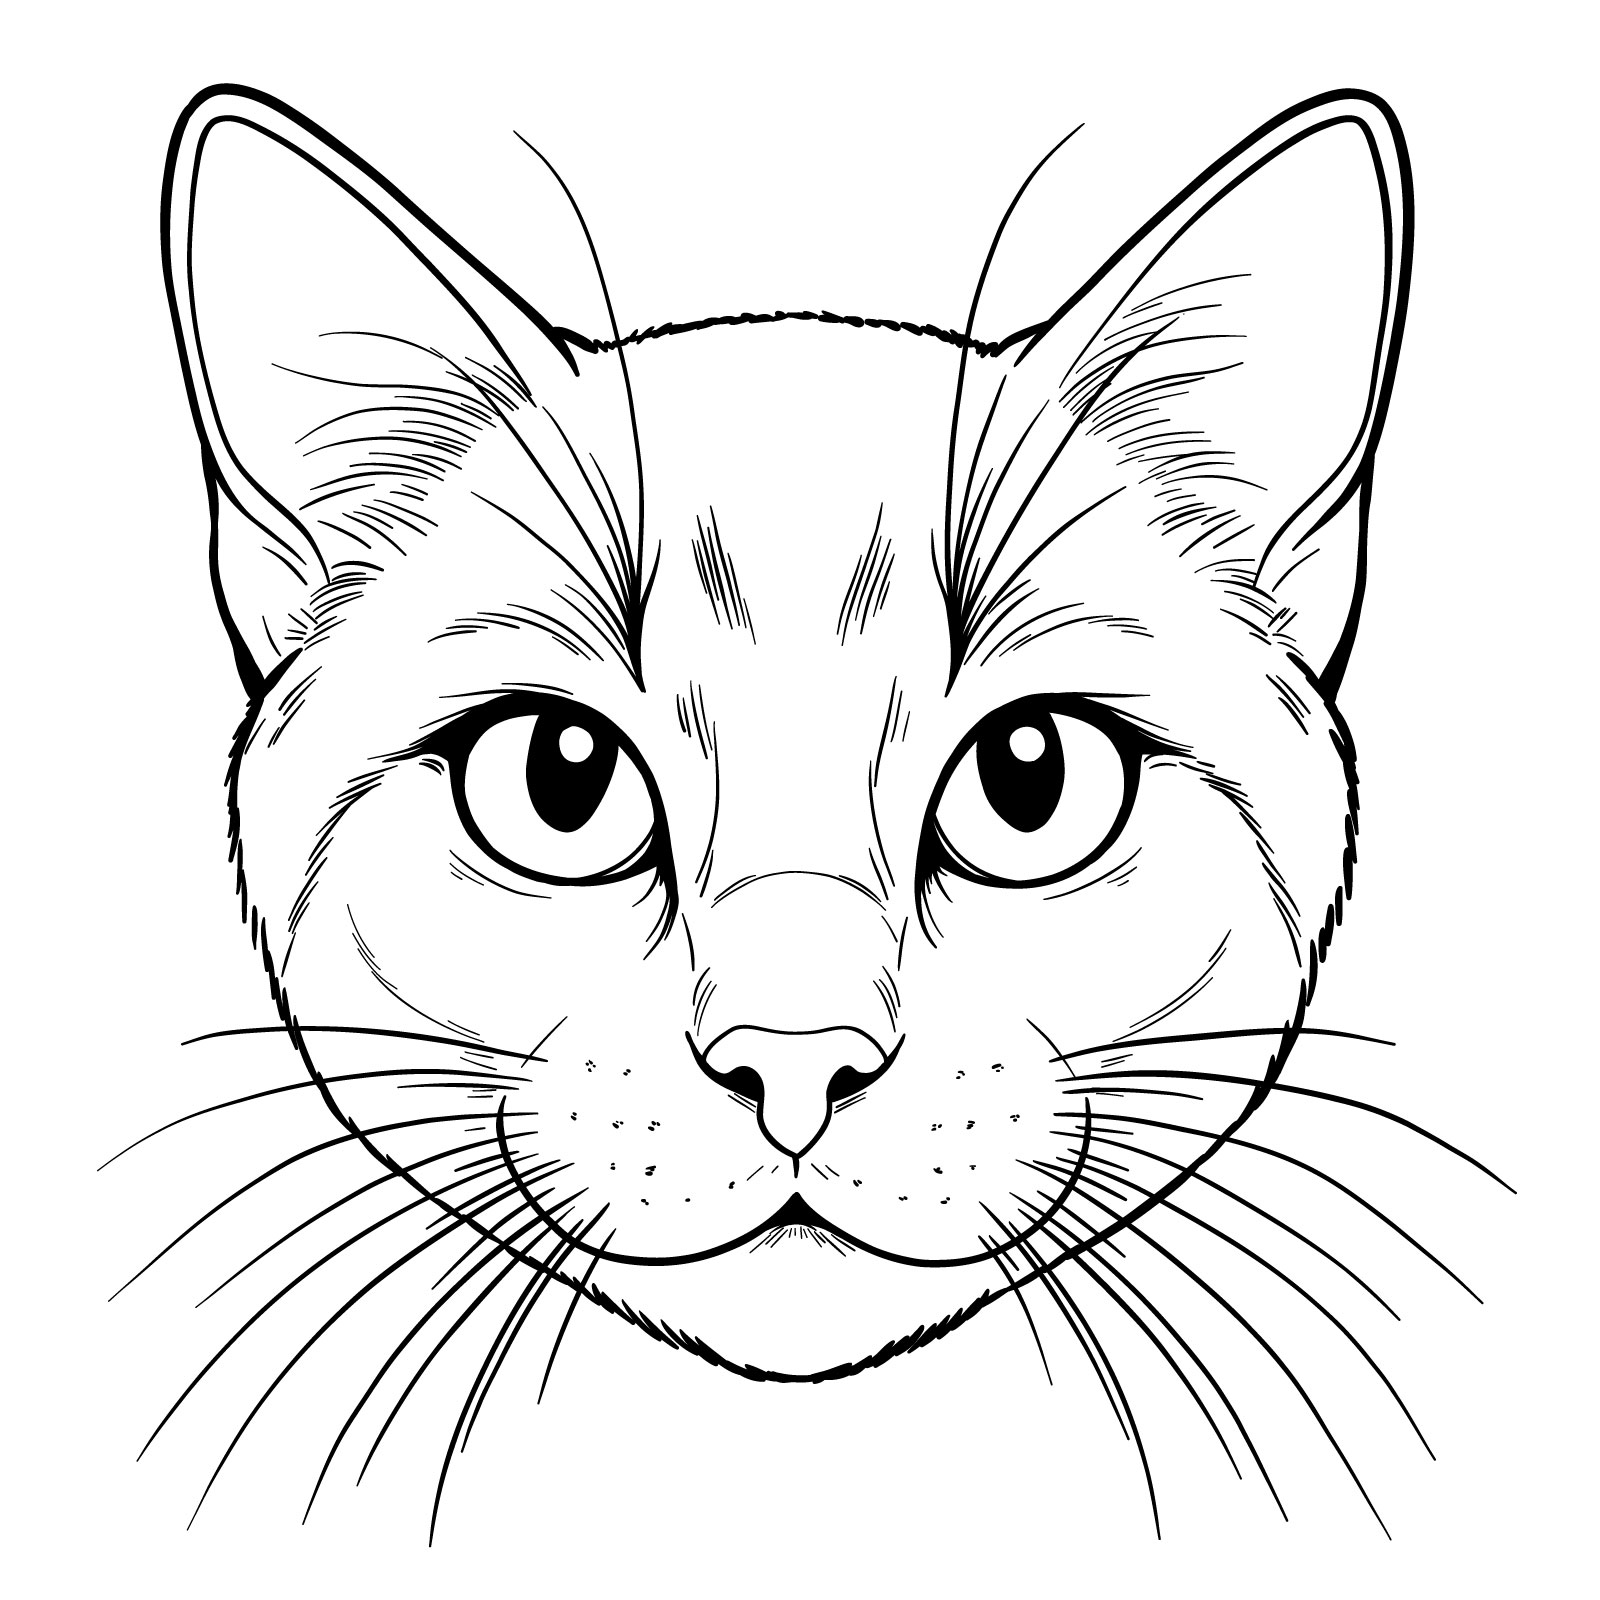
Guide 6: How to Draw a Cat’s Face with Realistic Features – 12 Steps
How to Draw a Cat’s Face – Easy Guide
Advancing to the sixth guide, we delve into the finer details of how to draw a cat’s face. This 12-step tutorial is designed to help you capture the realistic features of a cat’s face with precision. Unlike the more simplistic styles we’ve tackled so far, this guide focuses on creating a proportional structure from the start, laying the foundation for the intricate details that follow. You’ll learn to layer each step to sculpt the cat’s facial features, from the piercing gaze of its eyes to the delicate whiskers and fur texture. Whether you’re a seasoned artist or a curious beginner, this guide will elevate your drawing skills and bring the captivating expressions of a cat to your paper.
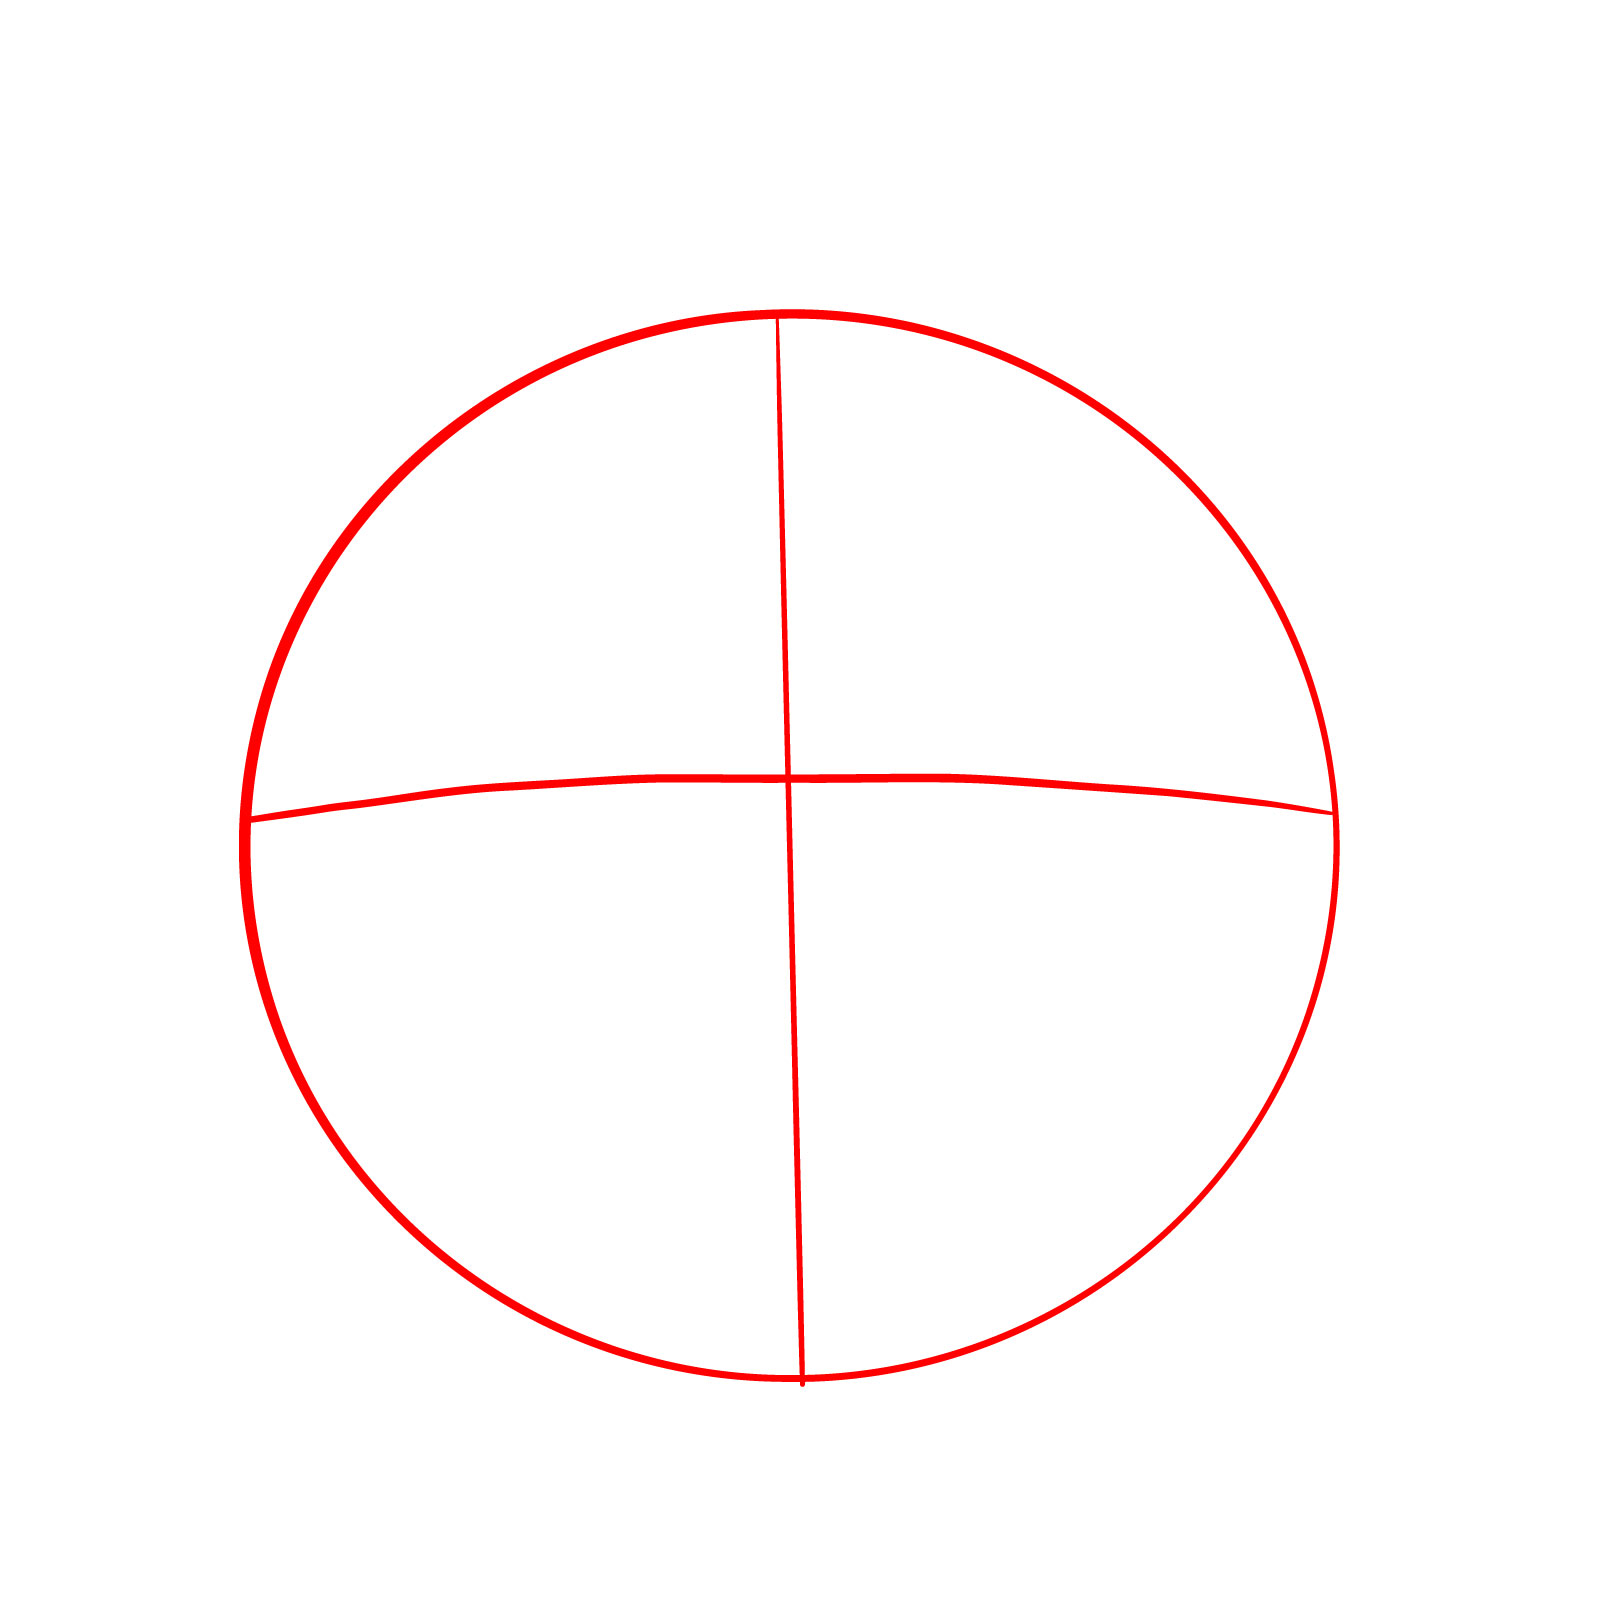
Step 01 – Begin your realistic cat face drawing with a simple circle. This foundational shape is divided into halves with a vertical line and a curved horizontal line to map out facial proportions accurately. Position the horizontal line slightly above the center to establish the eyes’ level
Constructing the proportions of the Cat’s face
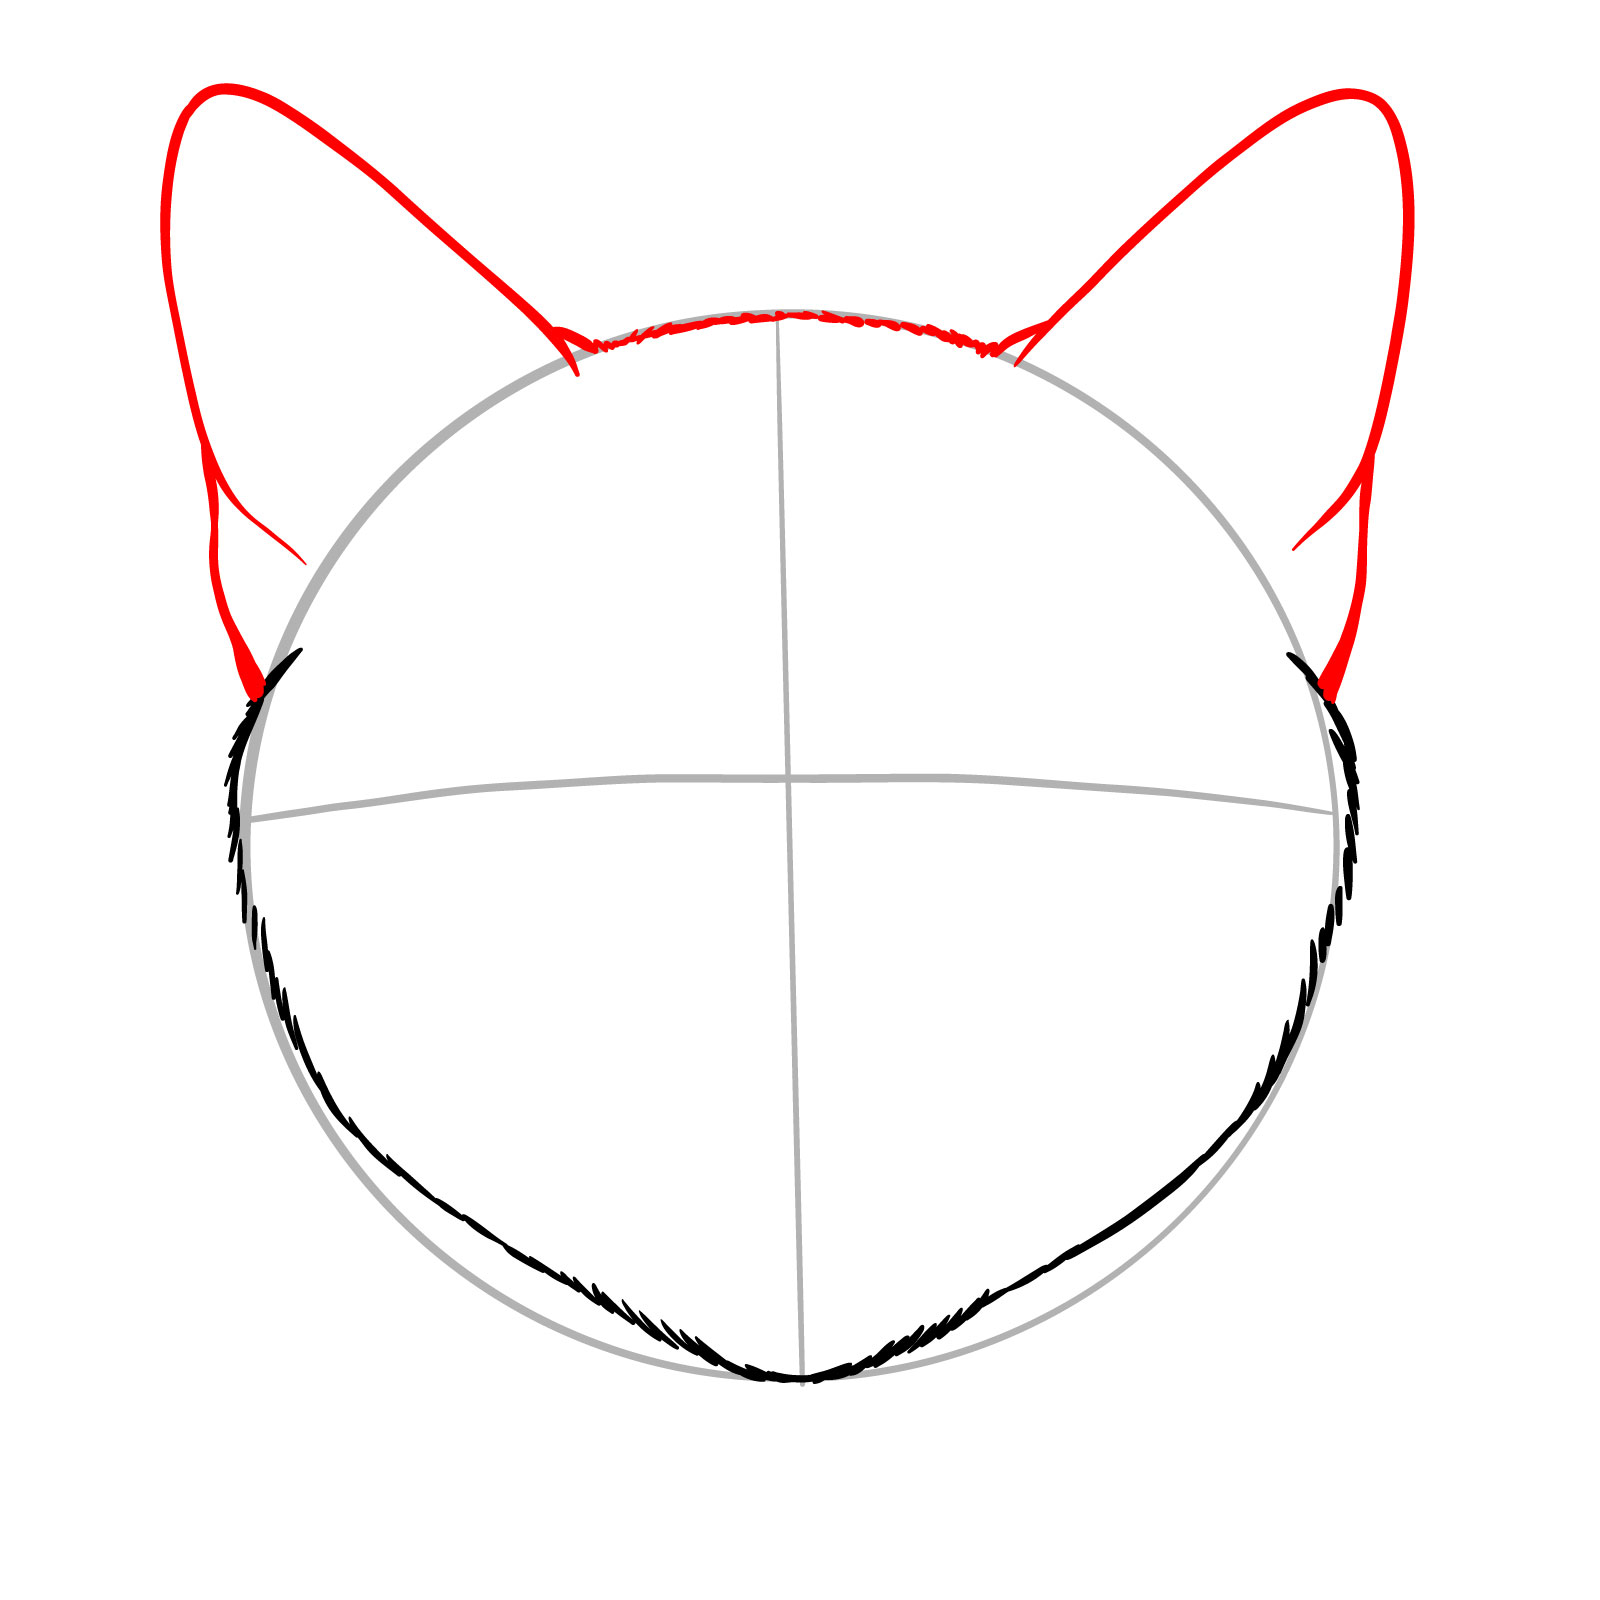
Step 02 – Shape the chin and the cheekbones of the cat by sketching short strokes that mimic fur texture. Start the outline approximately one-third above the horizontal guide line and ensure that the chin touches the bottom of your initial circle
Shaping the cat’s chin and cheeks
Step 03 – Progress to adding the cat’s ears and the upper head. Sketch two triangular ears extending from the top of the head, keeping in mind the perspective and angle of the ears in relation to the face
Adding the ears and upper head
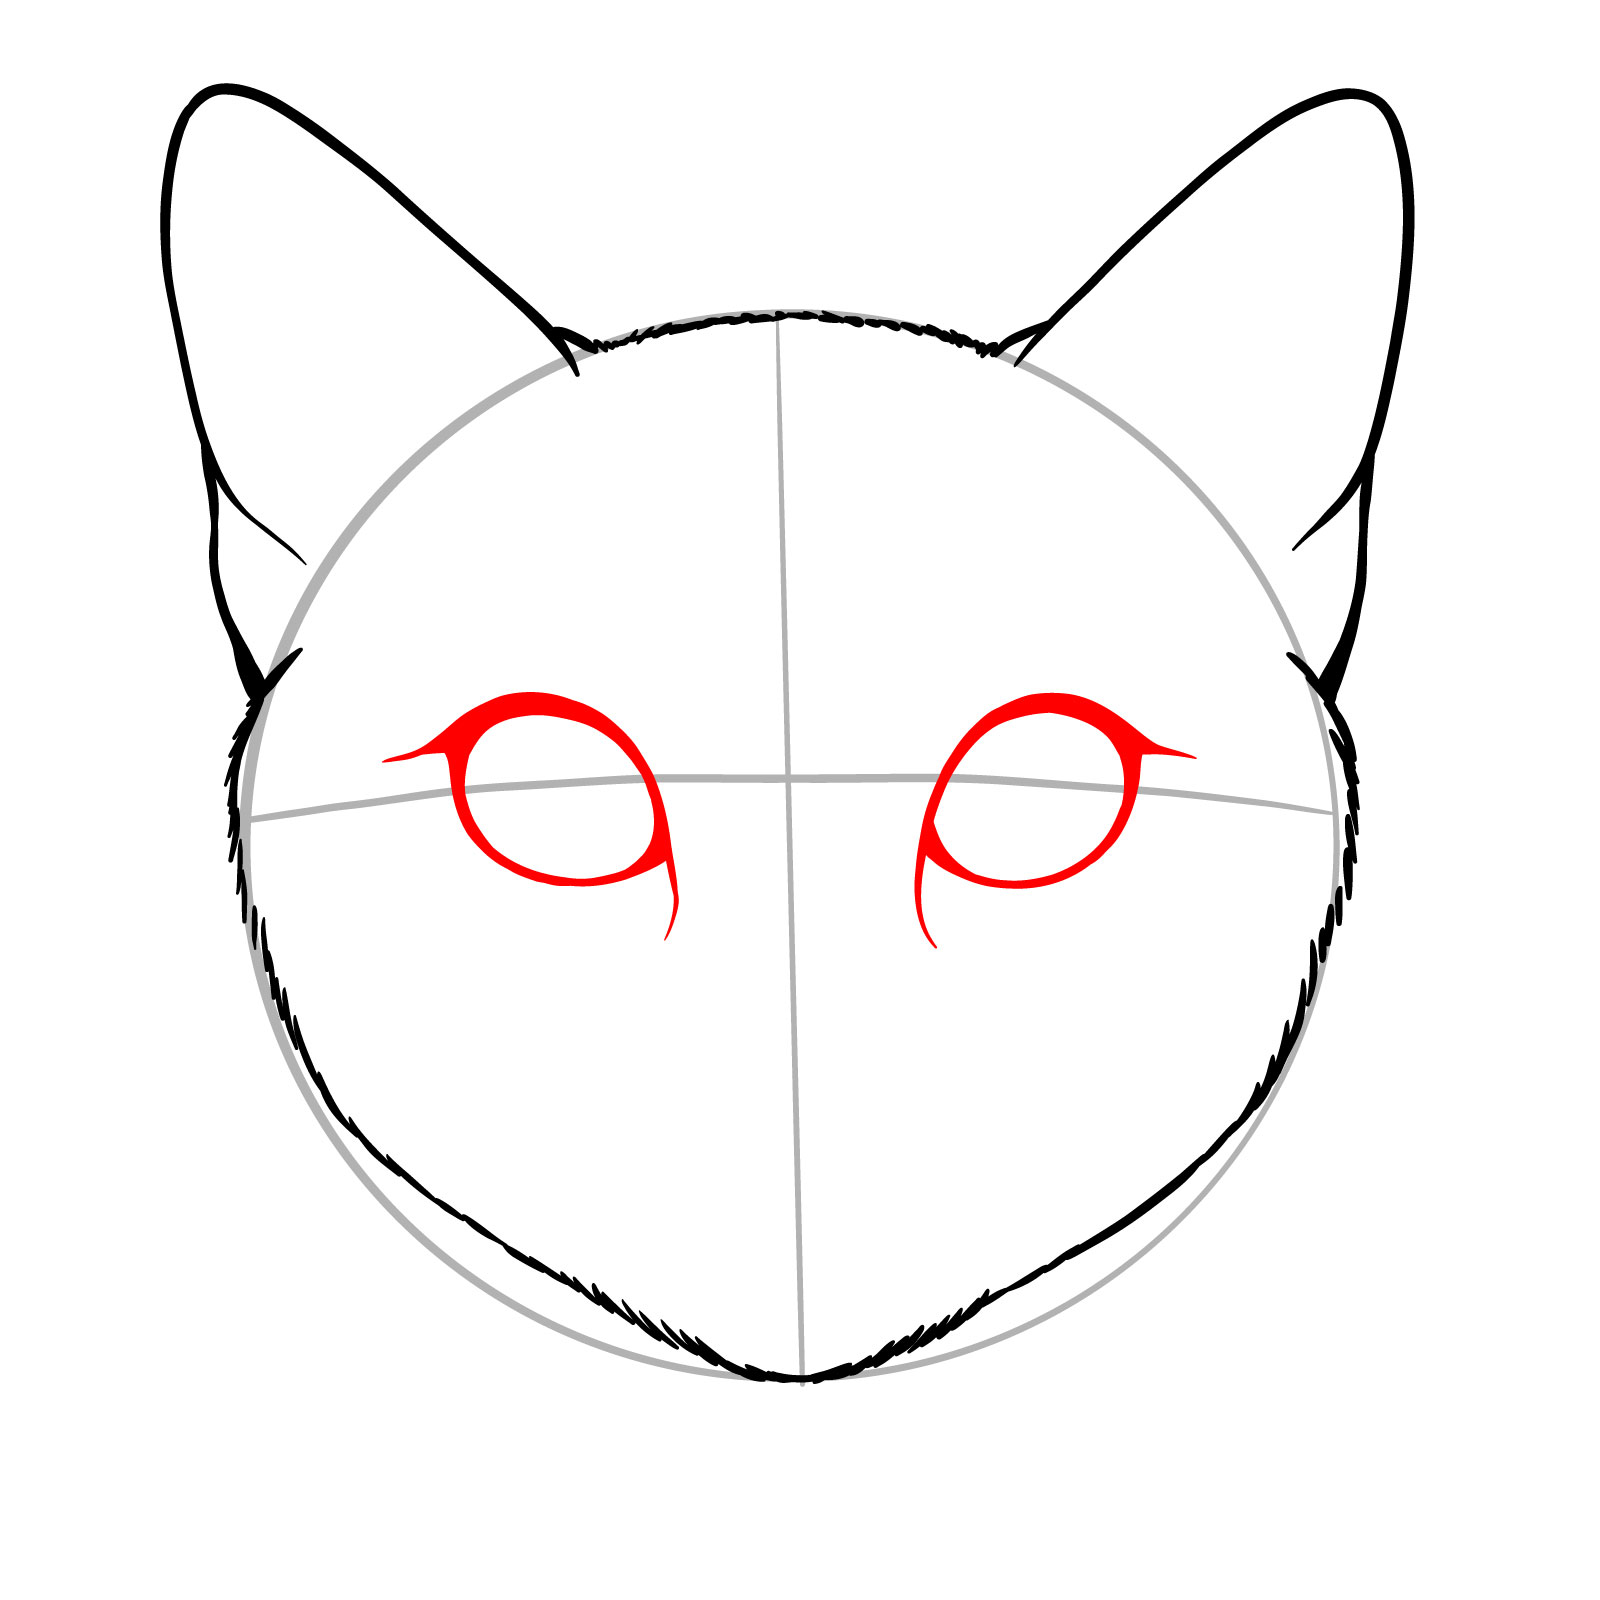
Step 04 – Focus on the cat’s eyes by adding almond-shaped outlines. Position them symmetrically across the vertical line to ensure a balanced facial expression. The eyes are a focal point and are crucial for capturing the cat’s essence
Outlining the cat’s eyes
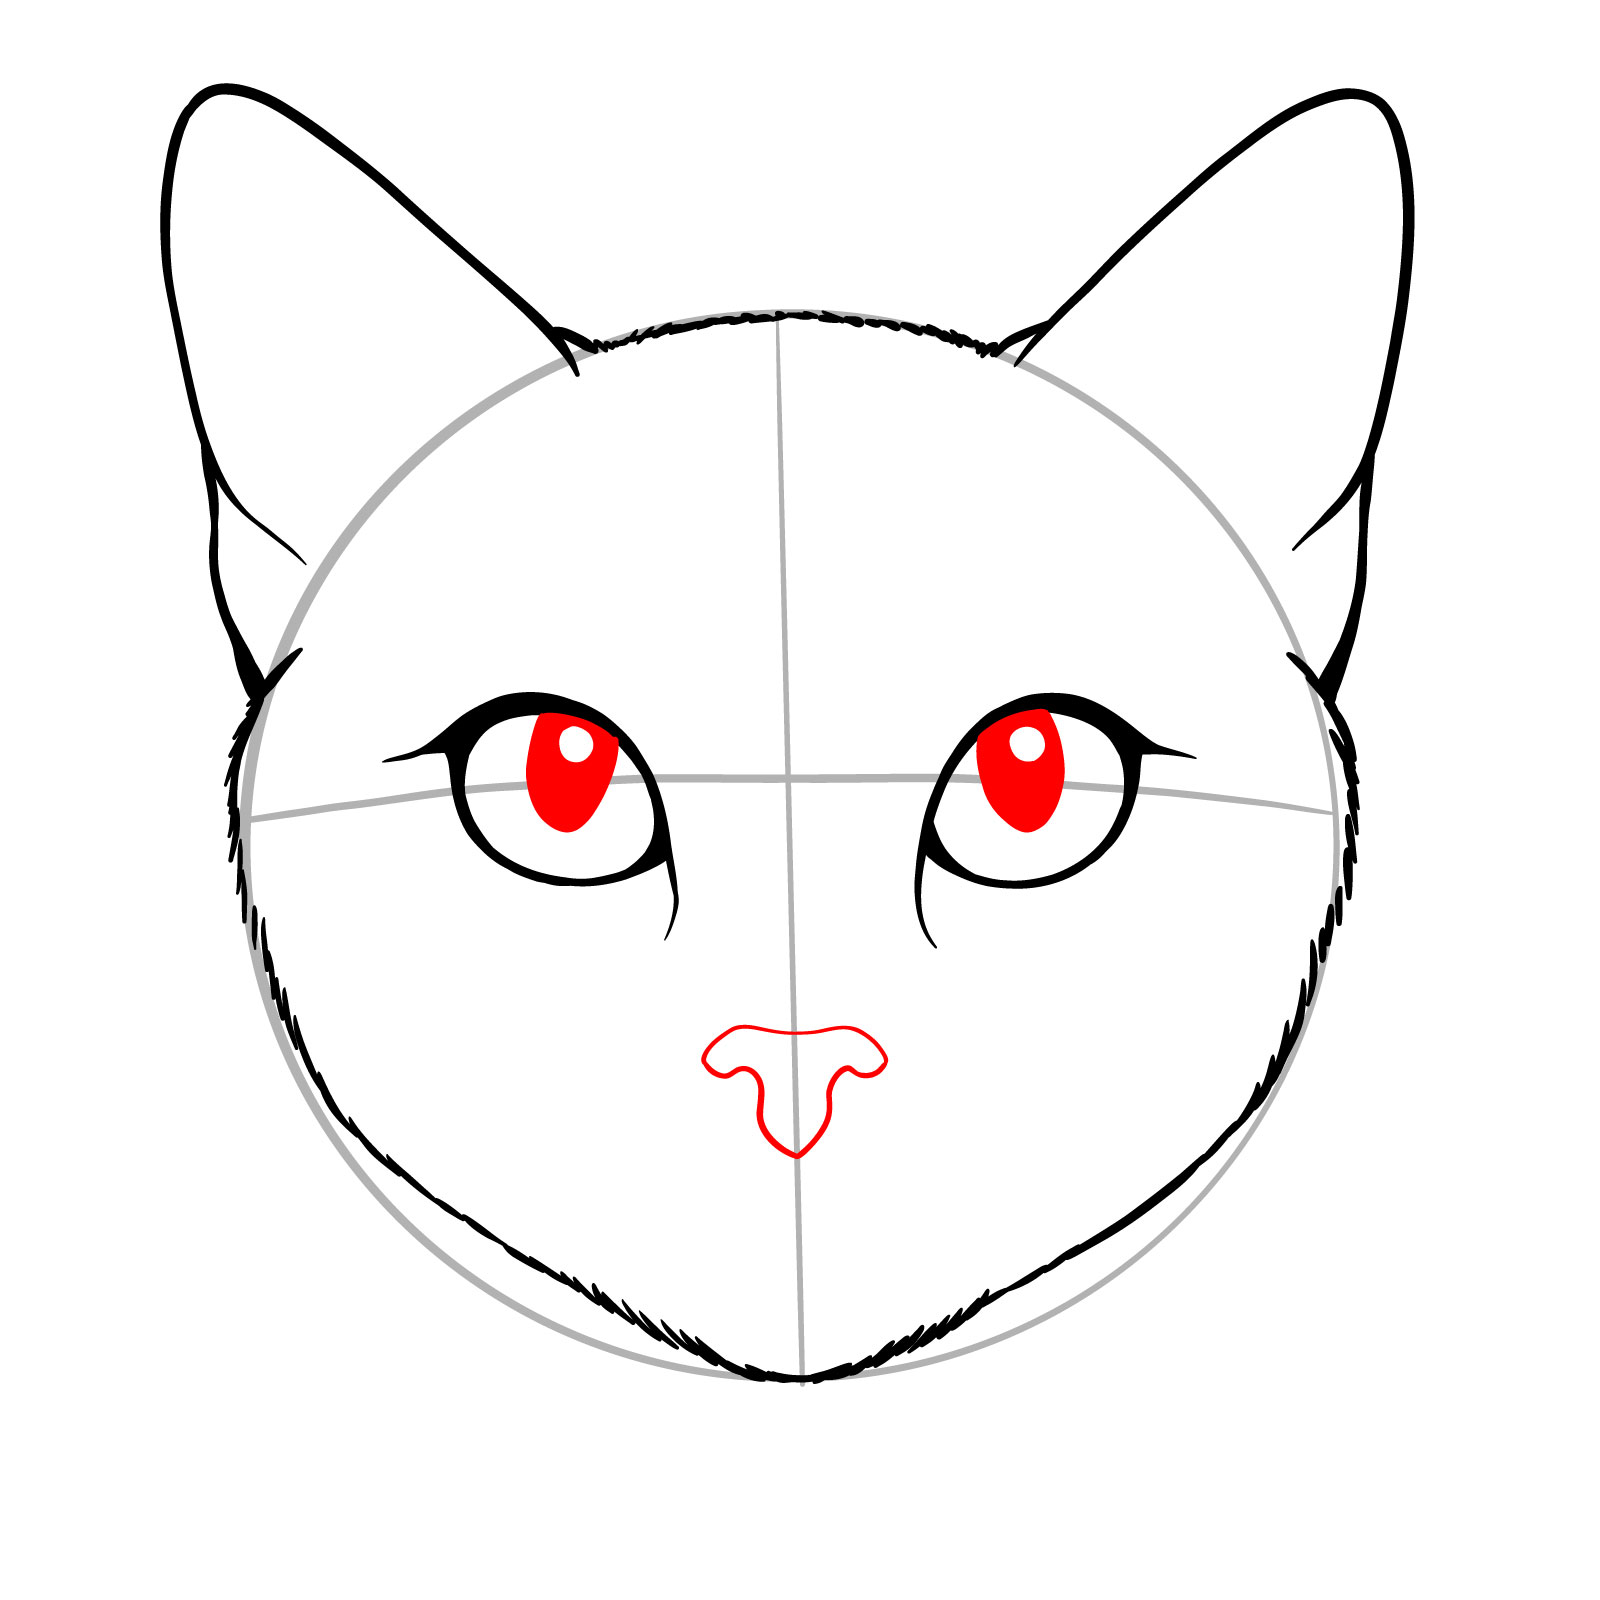
Step 05 – With the cat’s eyes in place, add pupils filled with black and leave small white dots for highlights to give life to the gaze. Sketch a subtle T-shaped outline to indicate the nose placement, giving your cat’s face a more defined appearance
Detailing the Eyes and Nose of the Cat
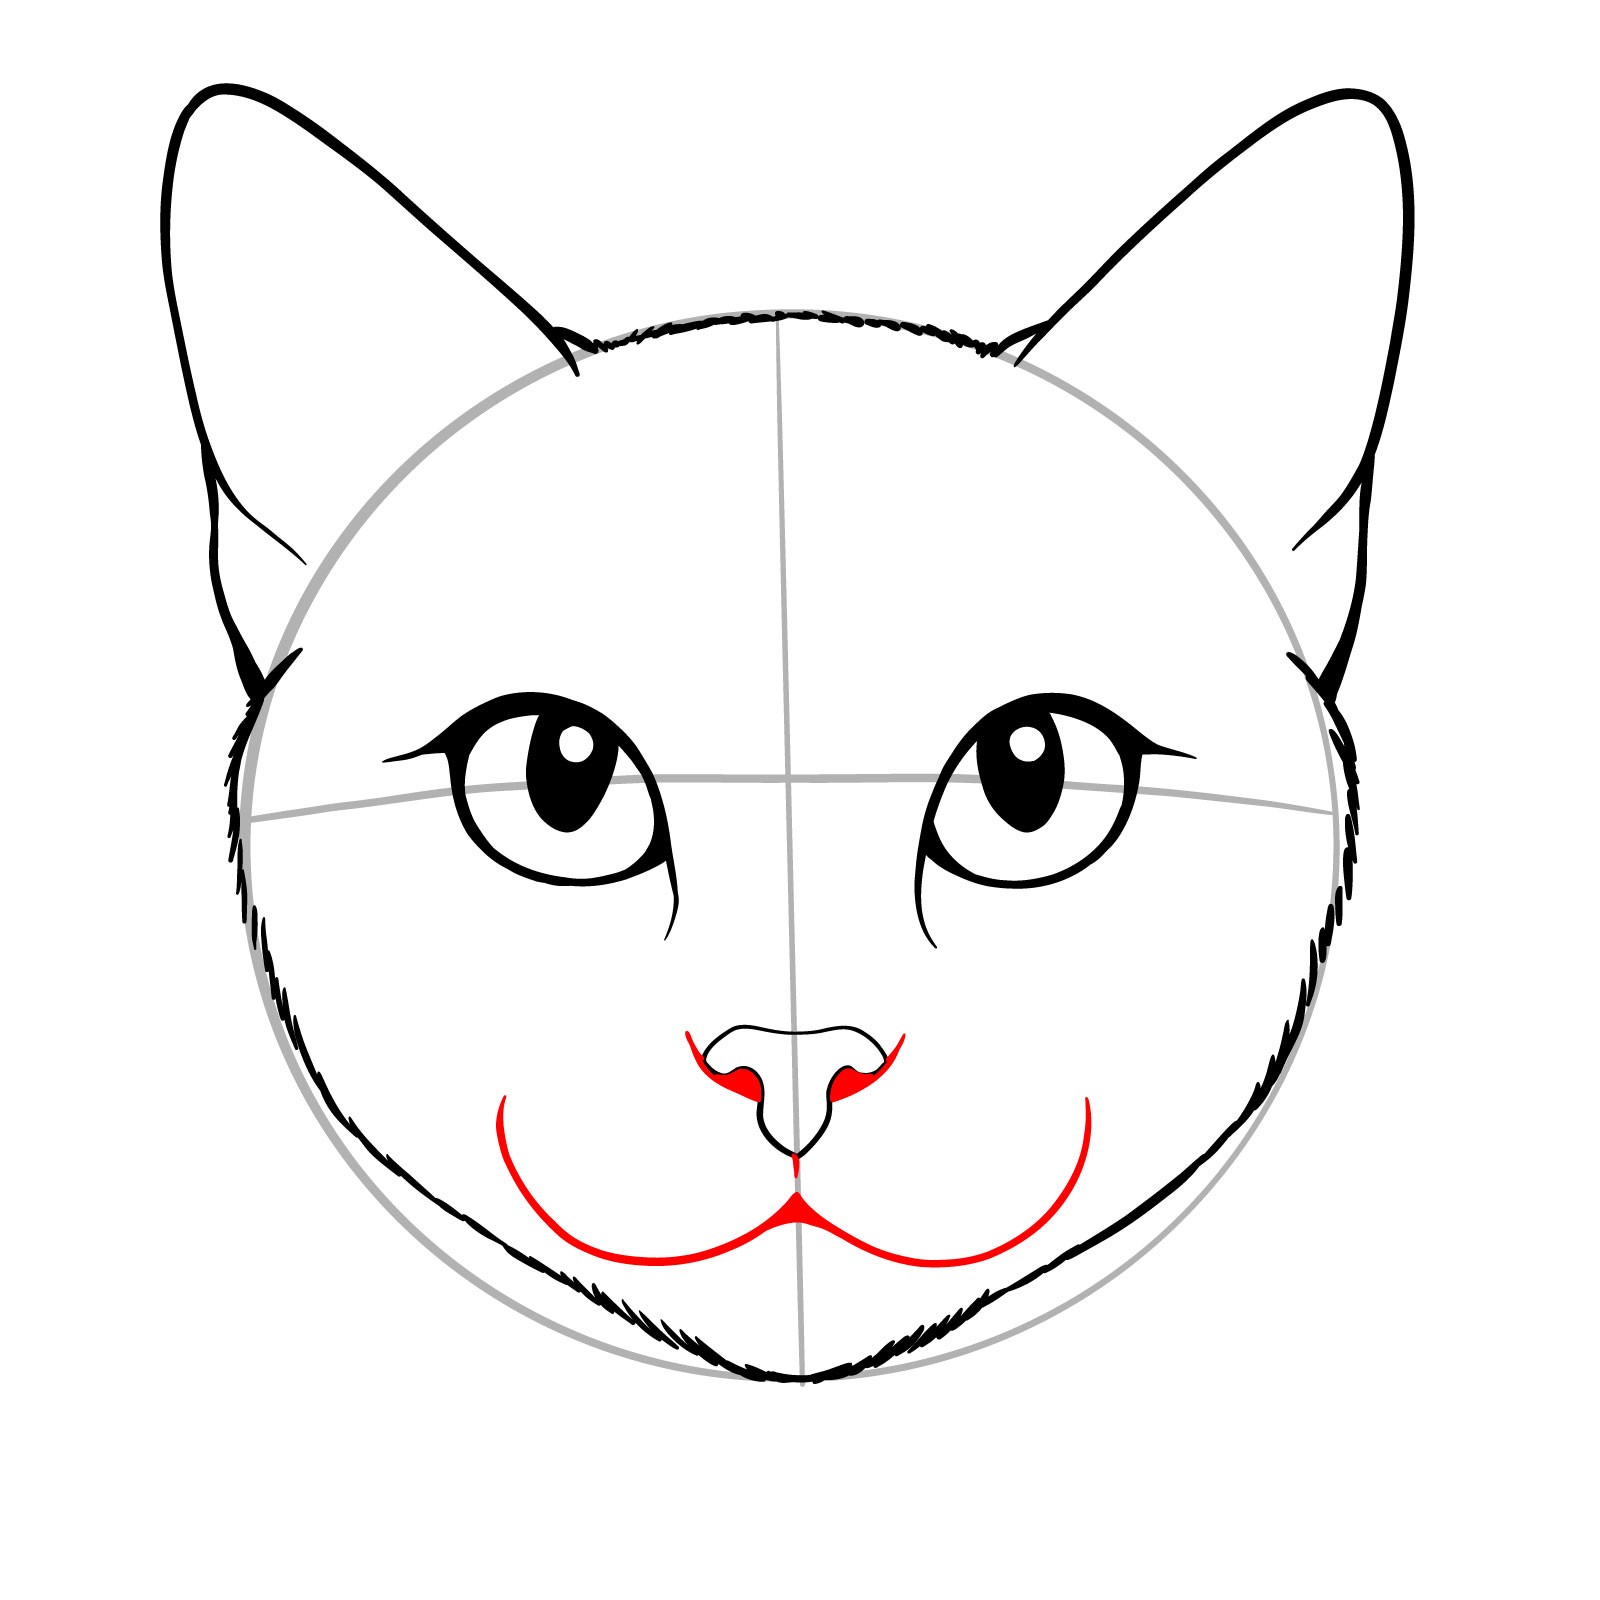
Step 06 – Darken the nostrils for depth and draw a curved ‘W’ shape to form the cat’s mouth. This step begins to bring together the facial features, providing a guide for the more intricate details to follow
Refining the cat’s nose and mouth
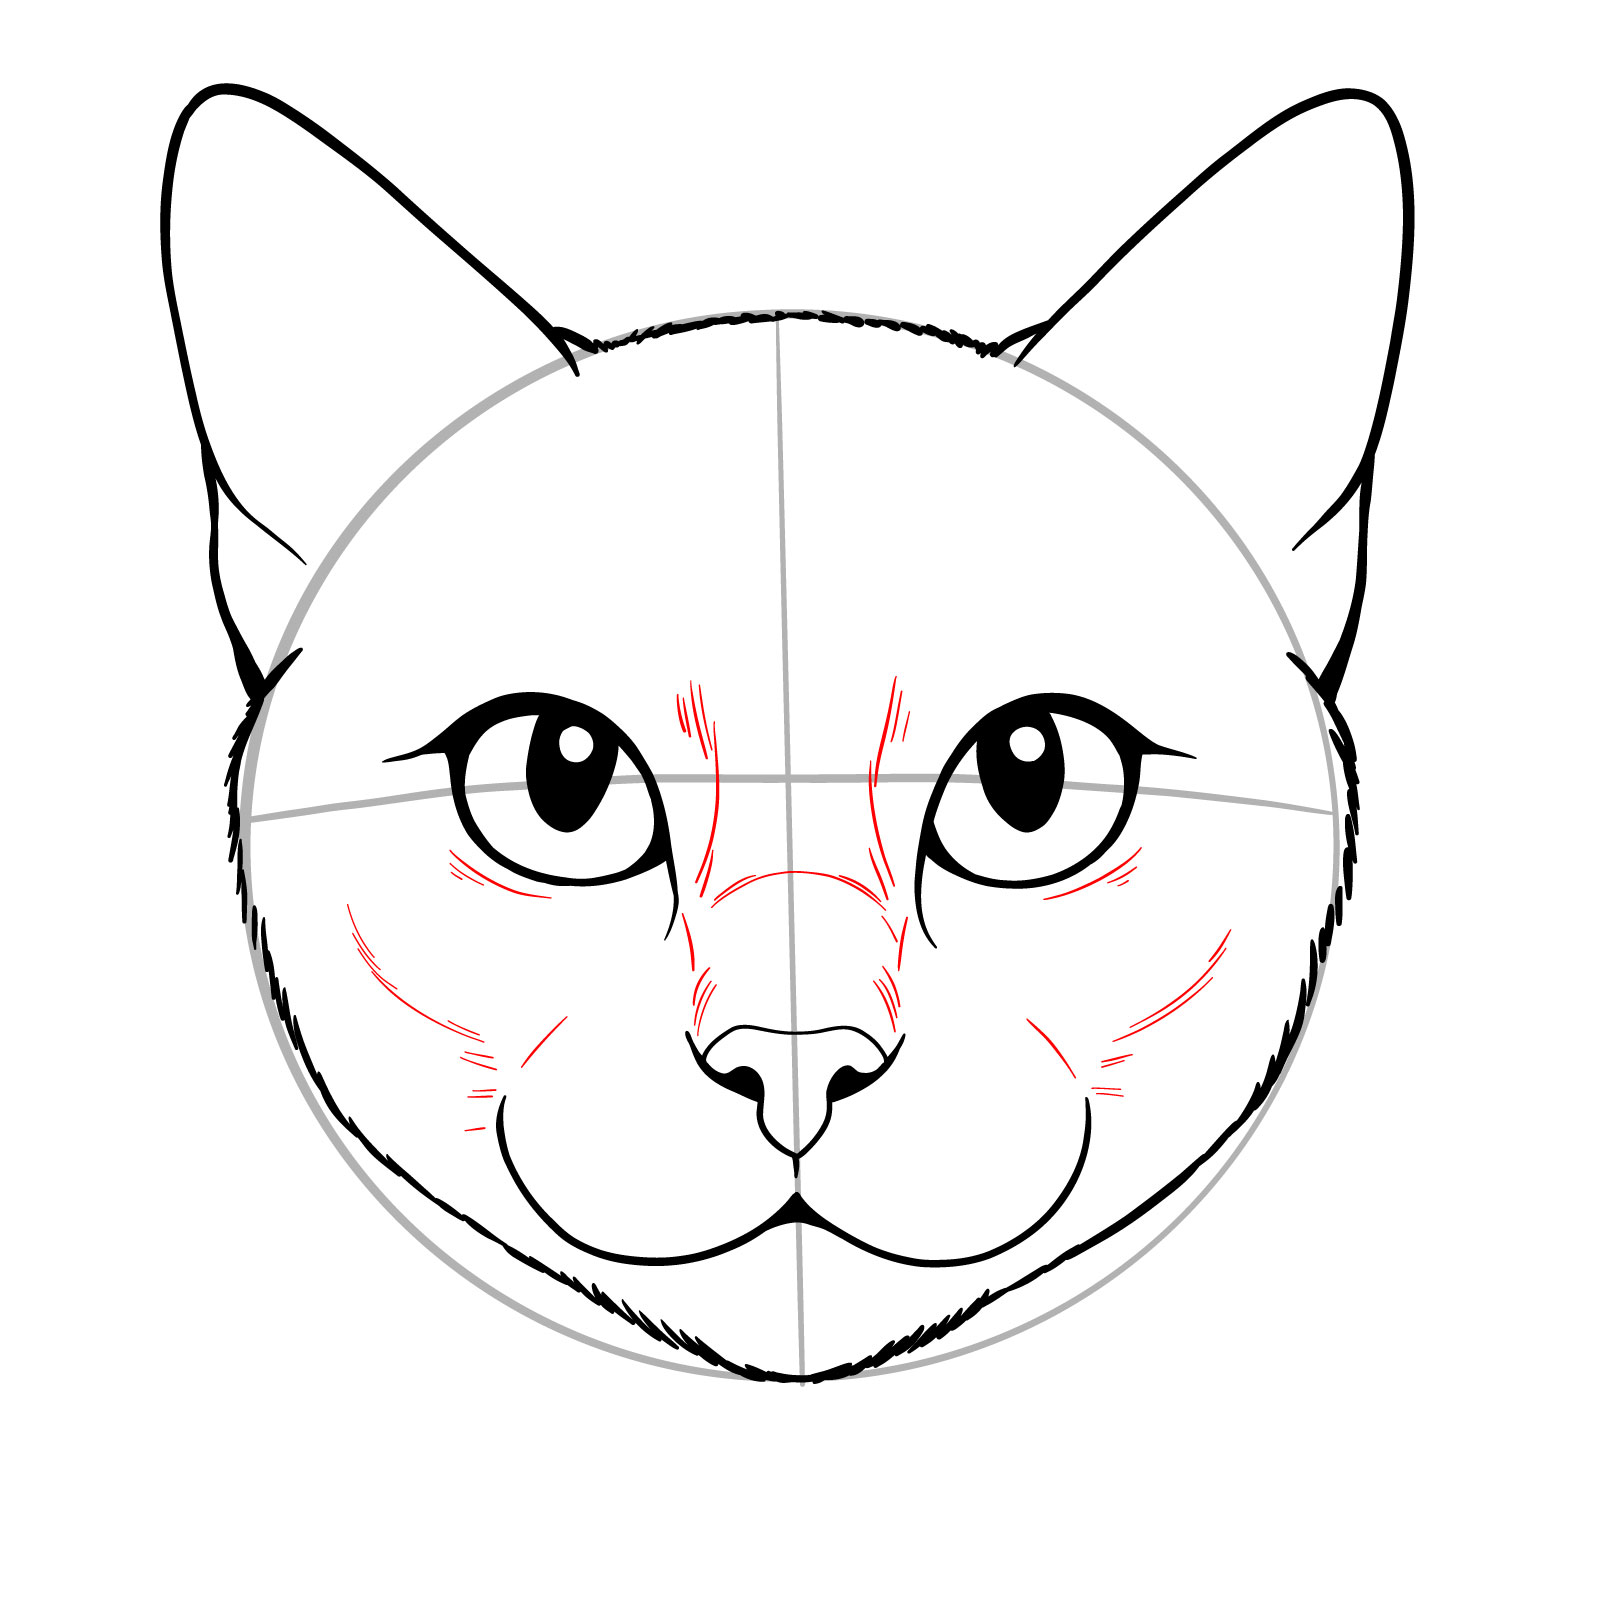
Step 07 – Enhance the realism of your cat’s face by adding short lines around the nose and cheeks to suggest fur texture. This step adds volume and character to the drawing, making the face look more dynamic and three-dimensional
Shaping the nose and facial features
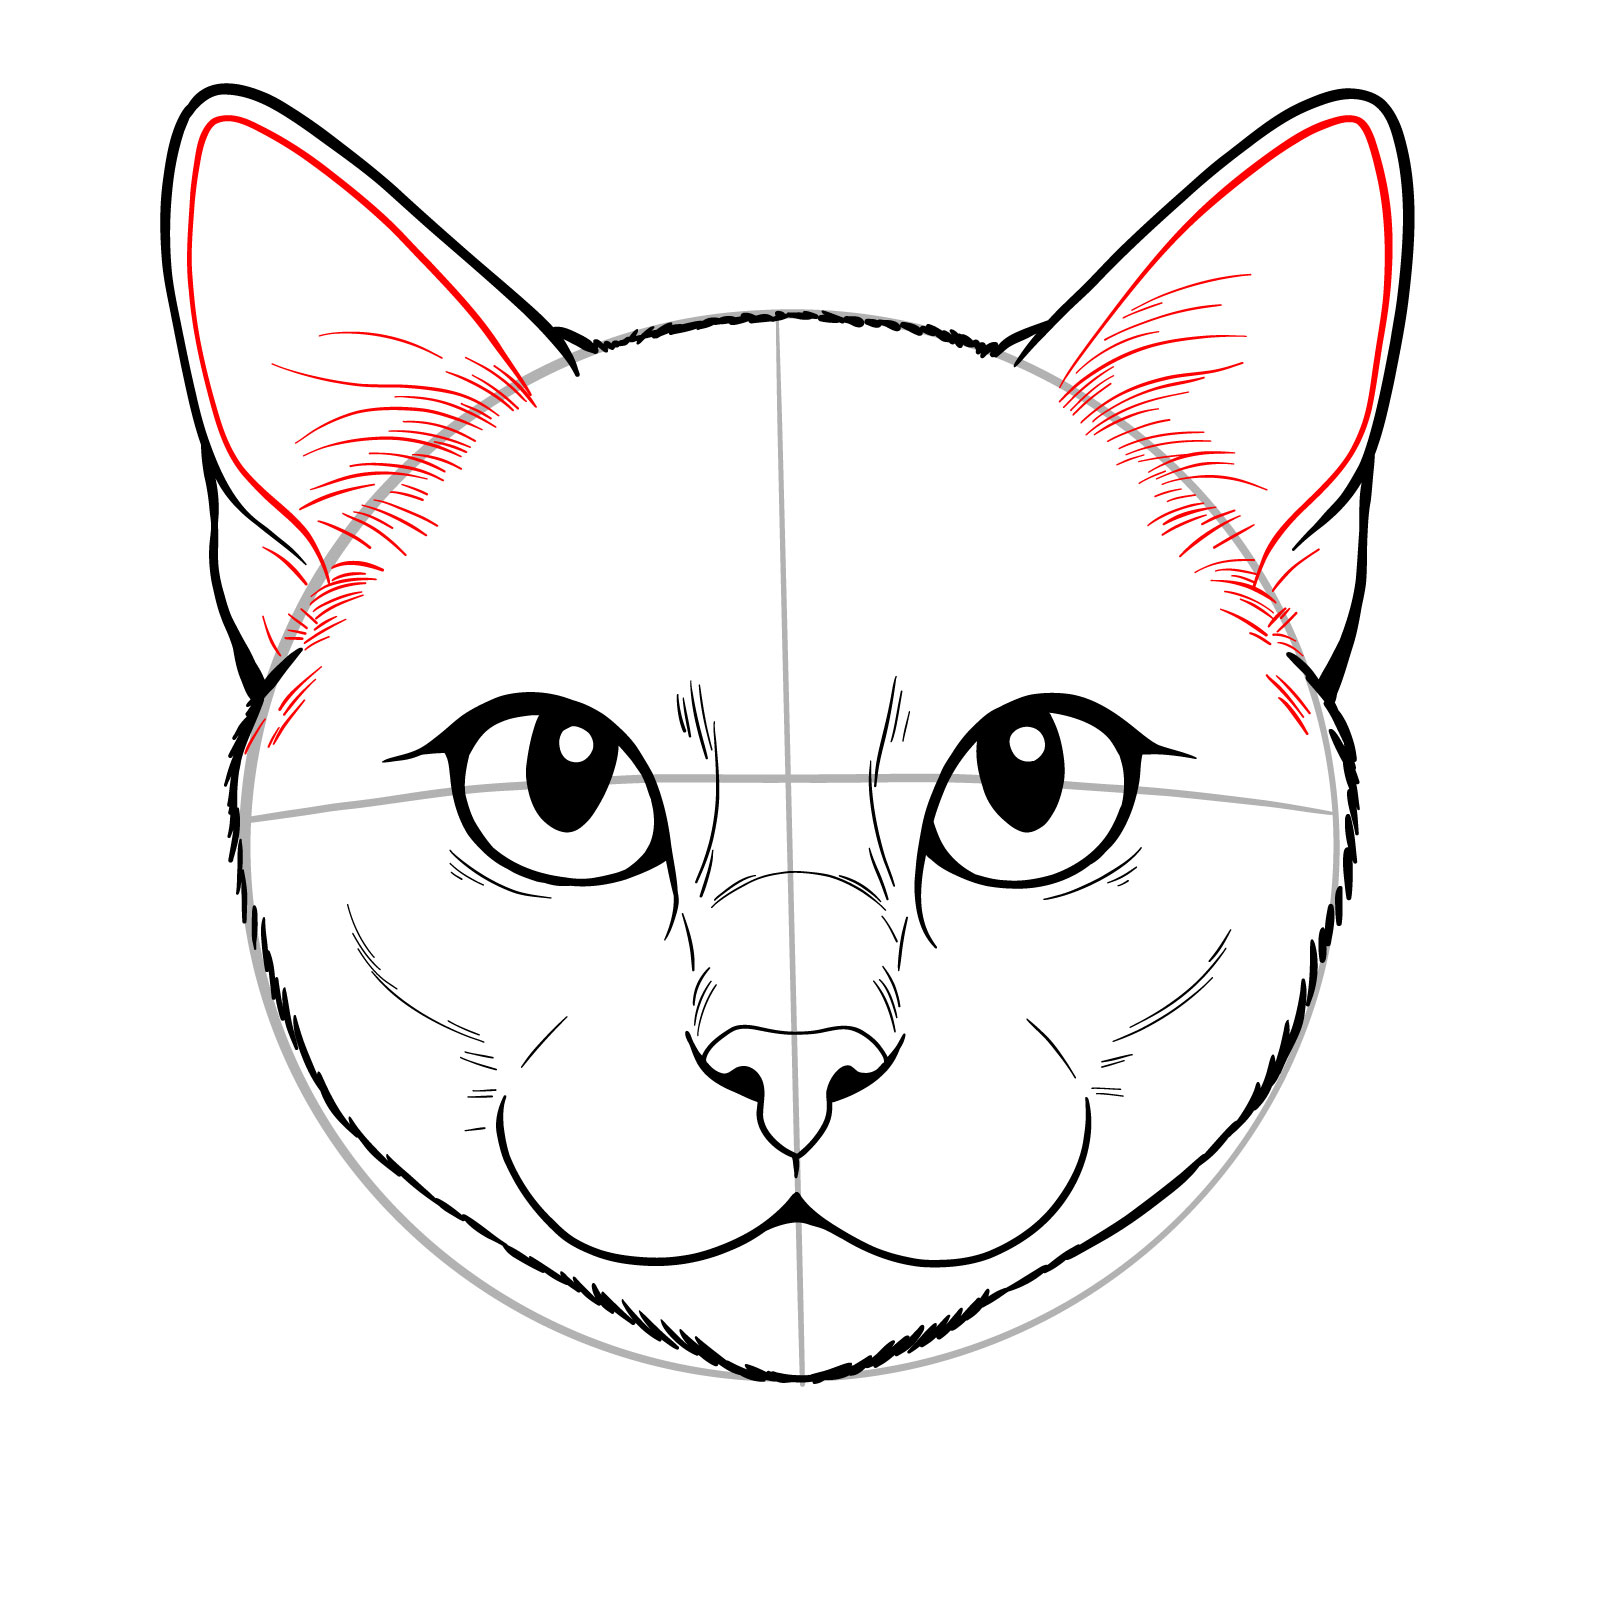
Step 08 – Define the inner ear lines and apply smooth, gentle strokes to represent the fur within the ears and below them. These subtle touches add softness and texture, which are essential for the realistic depiction of a cat’s face
Adding ear details and fur texture to the cat’s face drawing
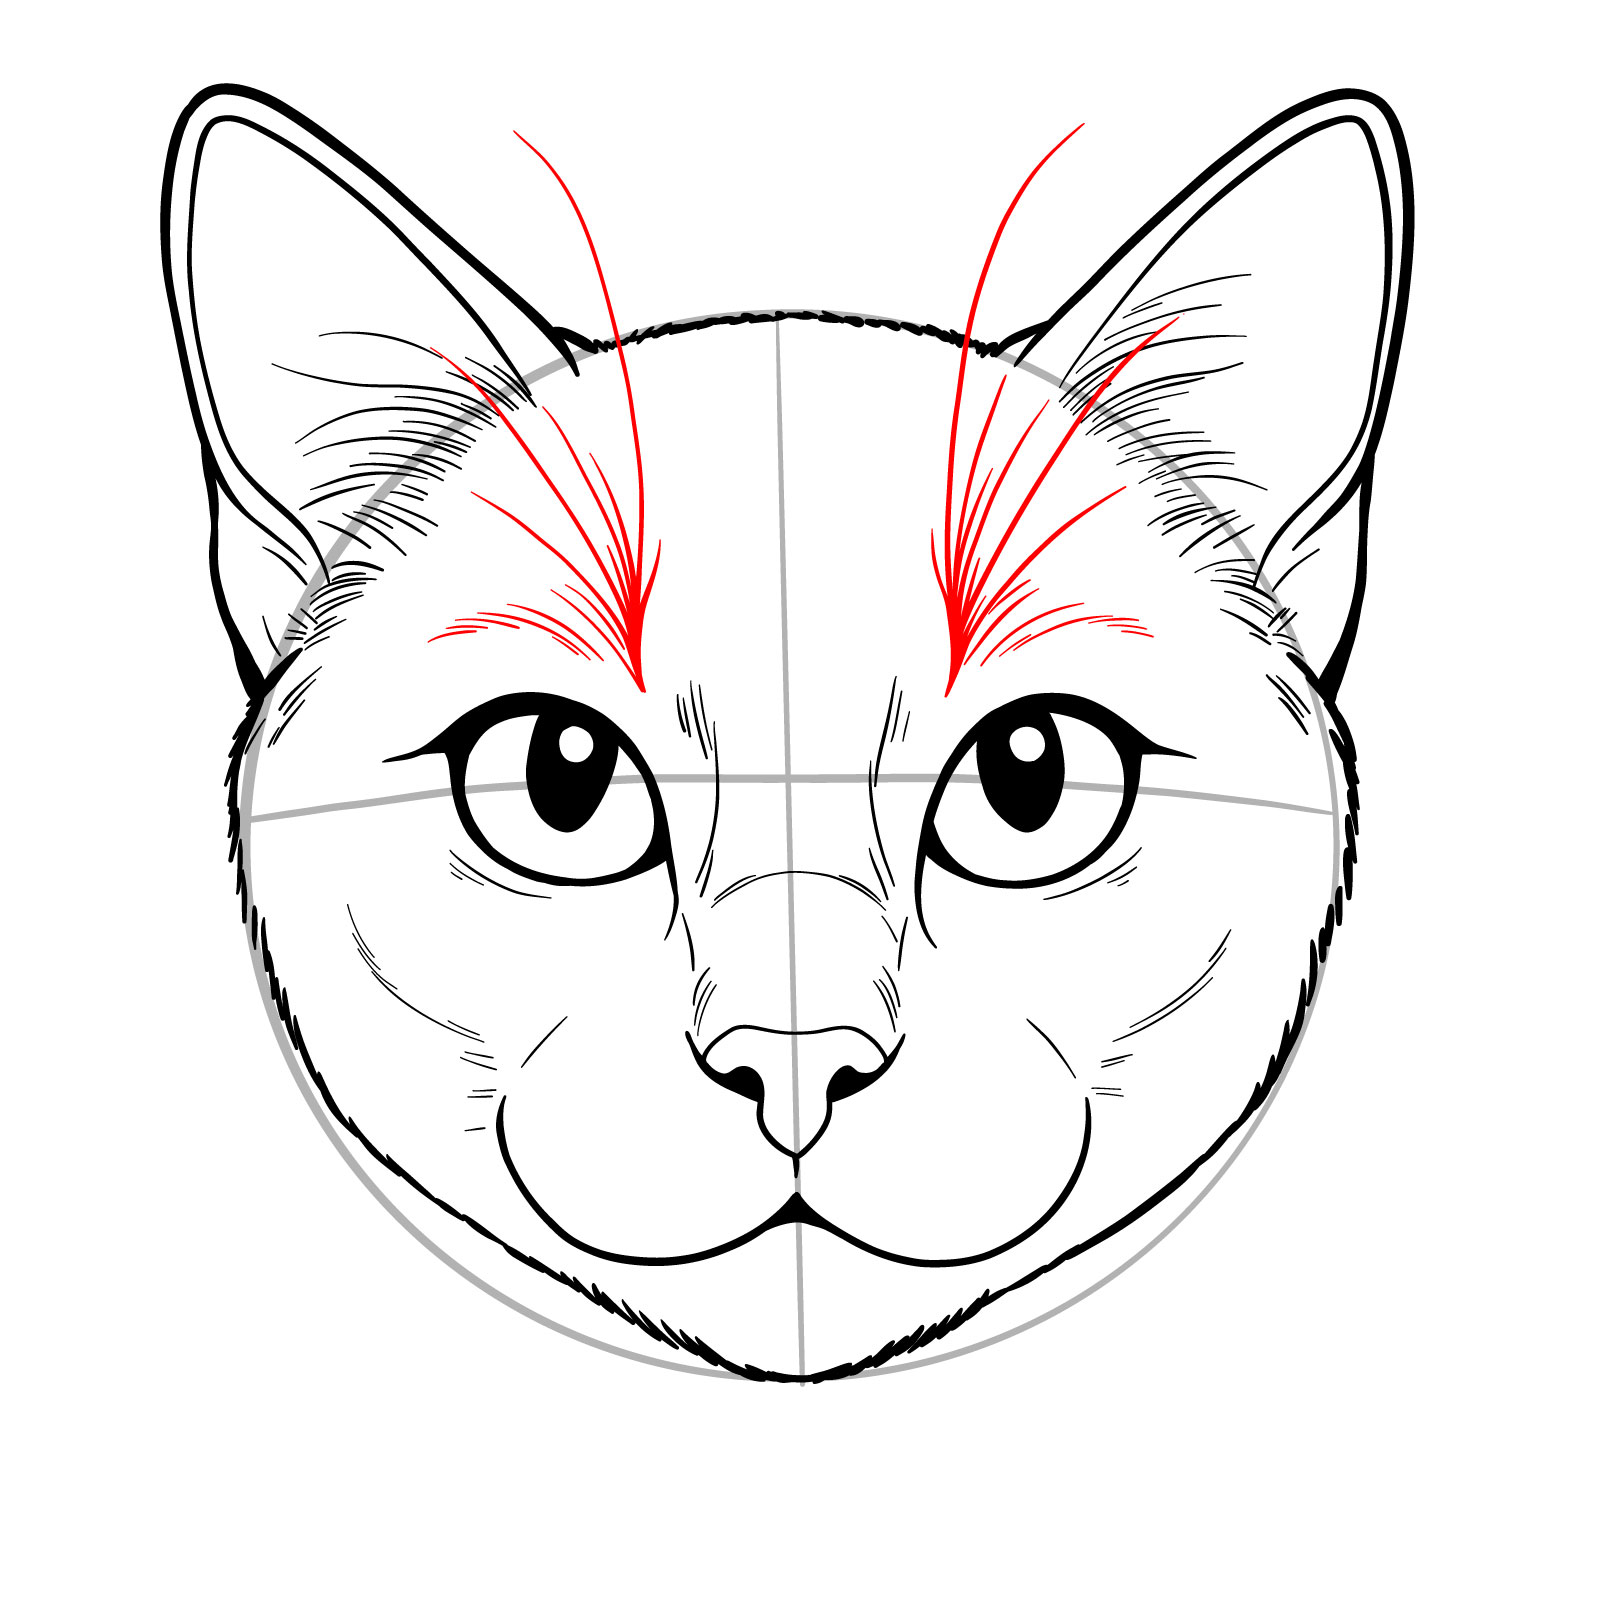
Step 09 – Depict the whiskers by drawing fine, radiating vertical lines from the forehead area. Add short strokes above the eyes to simulate fur, giving your drawing an extra level of detail
Illustrating whiskers and forehead texture
Step 10 – Intensify the fur detail around the eyes and on the forehead. Use a series of short lines to create a fur pattern
Enhancing details around the eyes and forehead
Step 11 – Draw the whisker spots as small dots where the whiskers emanate from the snout. Add additional whiskers to these spots, ensuring they are of varying lengths to mimic the natural randomness found in a cat’s face
Defining whiskers and spot patterns in the cat’s face drawing
Step 12 – Conclude the guide on how to draw a cat’s face with the final touches on whiskers and fur patterns if needed. Review the overall shape and symmetry to ensure a lifelike representation. The result is a detailed and authentic portrayal of a cat’s face that artists of any level can achieve with practice and attention to detail
Completing the realistic cat face drawing
Guide 7: How to Draw a Sitting Cat – Front View – 16 Steps
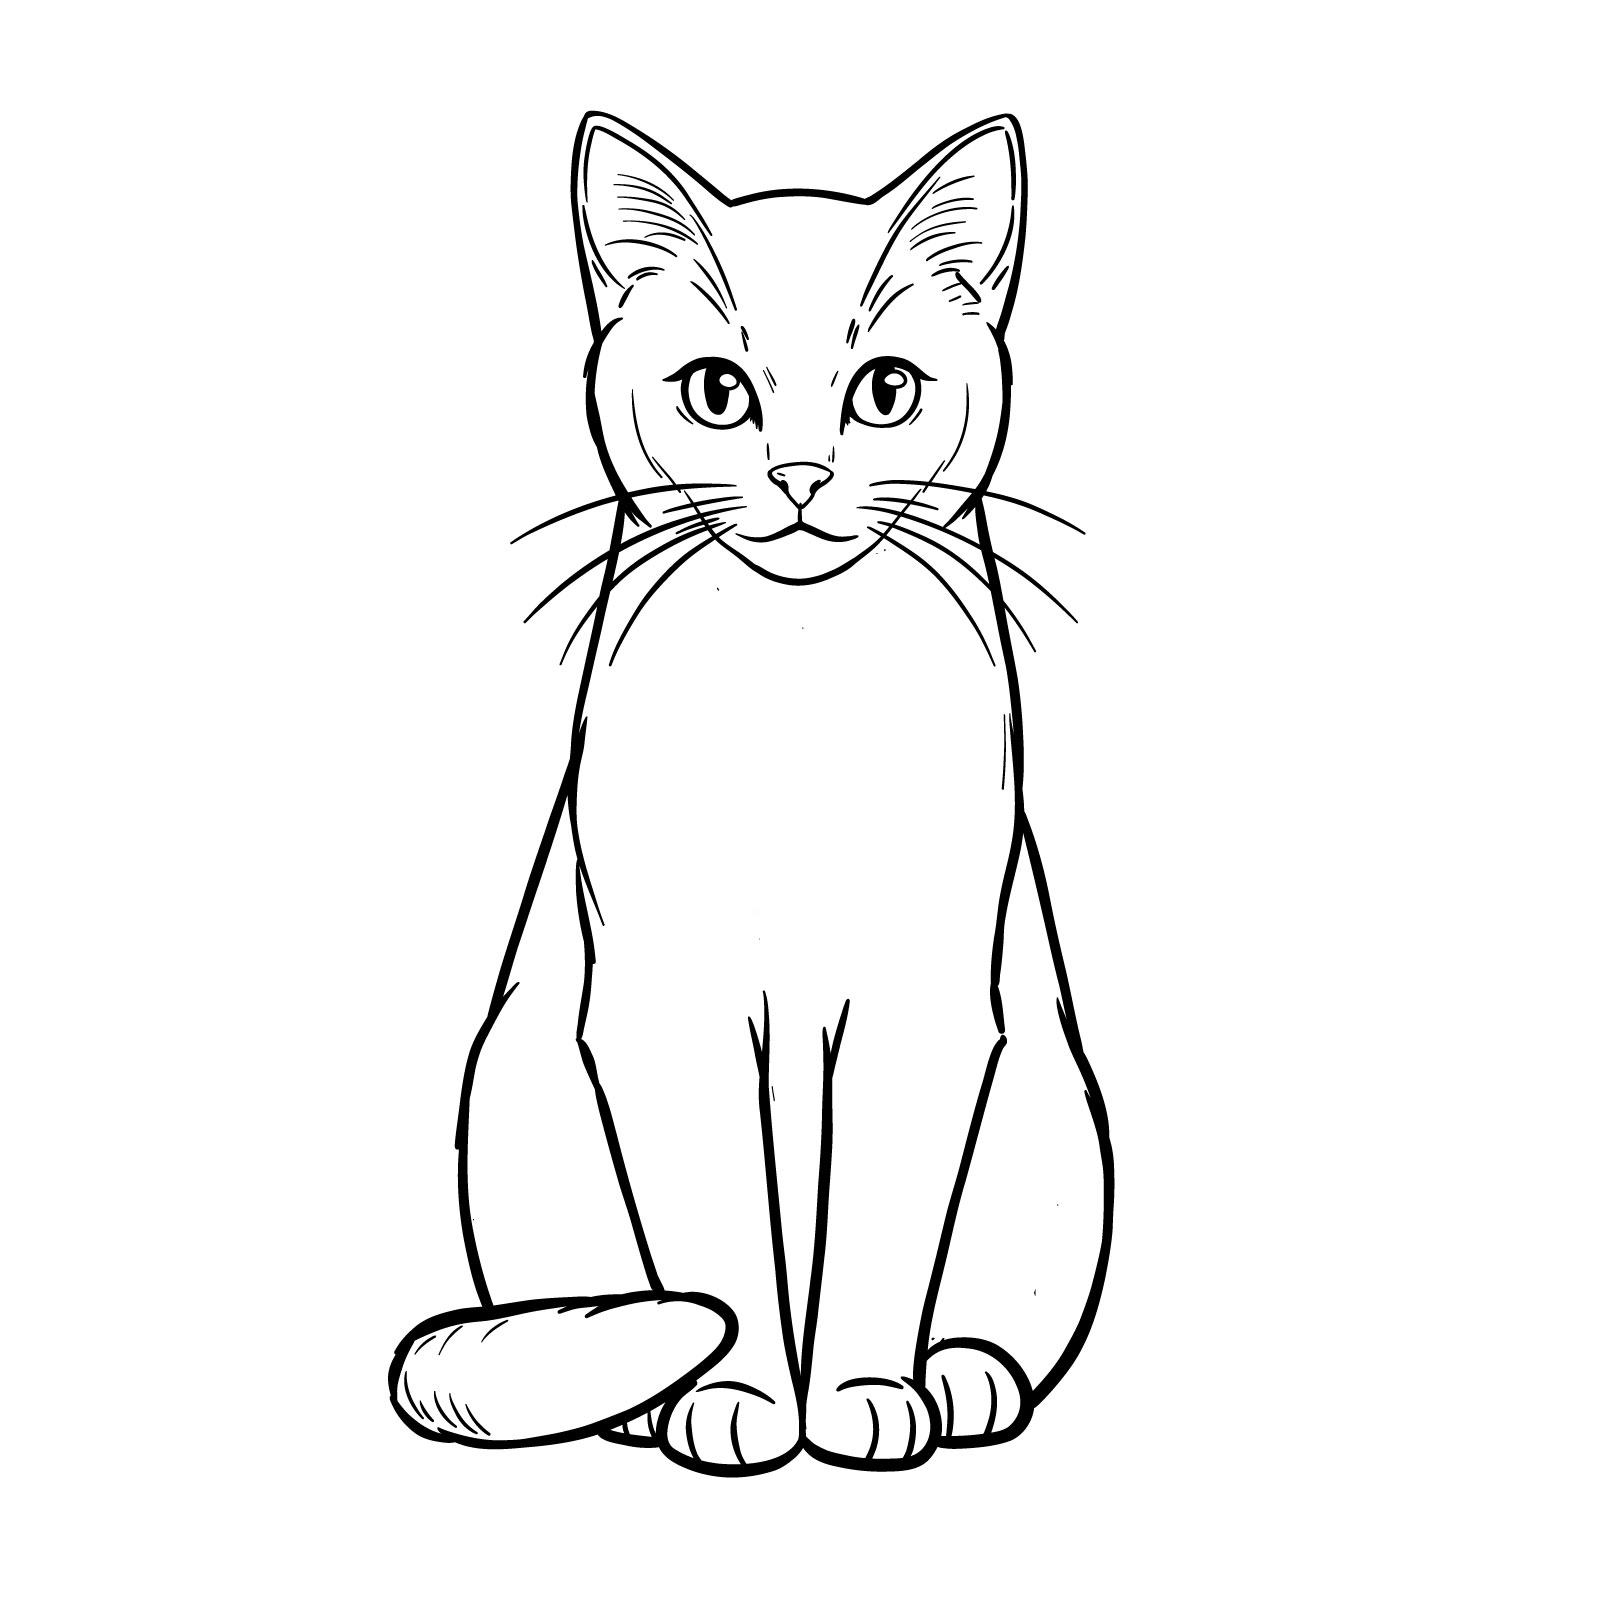
How to draw a sitting cat – front view
Moving forward in our drawing series, let’s learn how to draw a sitting cat, viewed from the front. This tutorial breaks the process down into 16 manageable steps, ensuring clarity and ease for artists at any level. While this cat presents a realistic shape, it is not burdened with an overwhelming amount of detail, striking a balance between authenticity and simplicity. The first two steps will guide you in creating a proportional structure, which serves as the foundation for the rest of your drawing. By following each step, you will be able to draw this composed feline with confidence and ease.
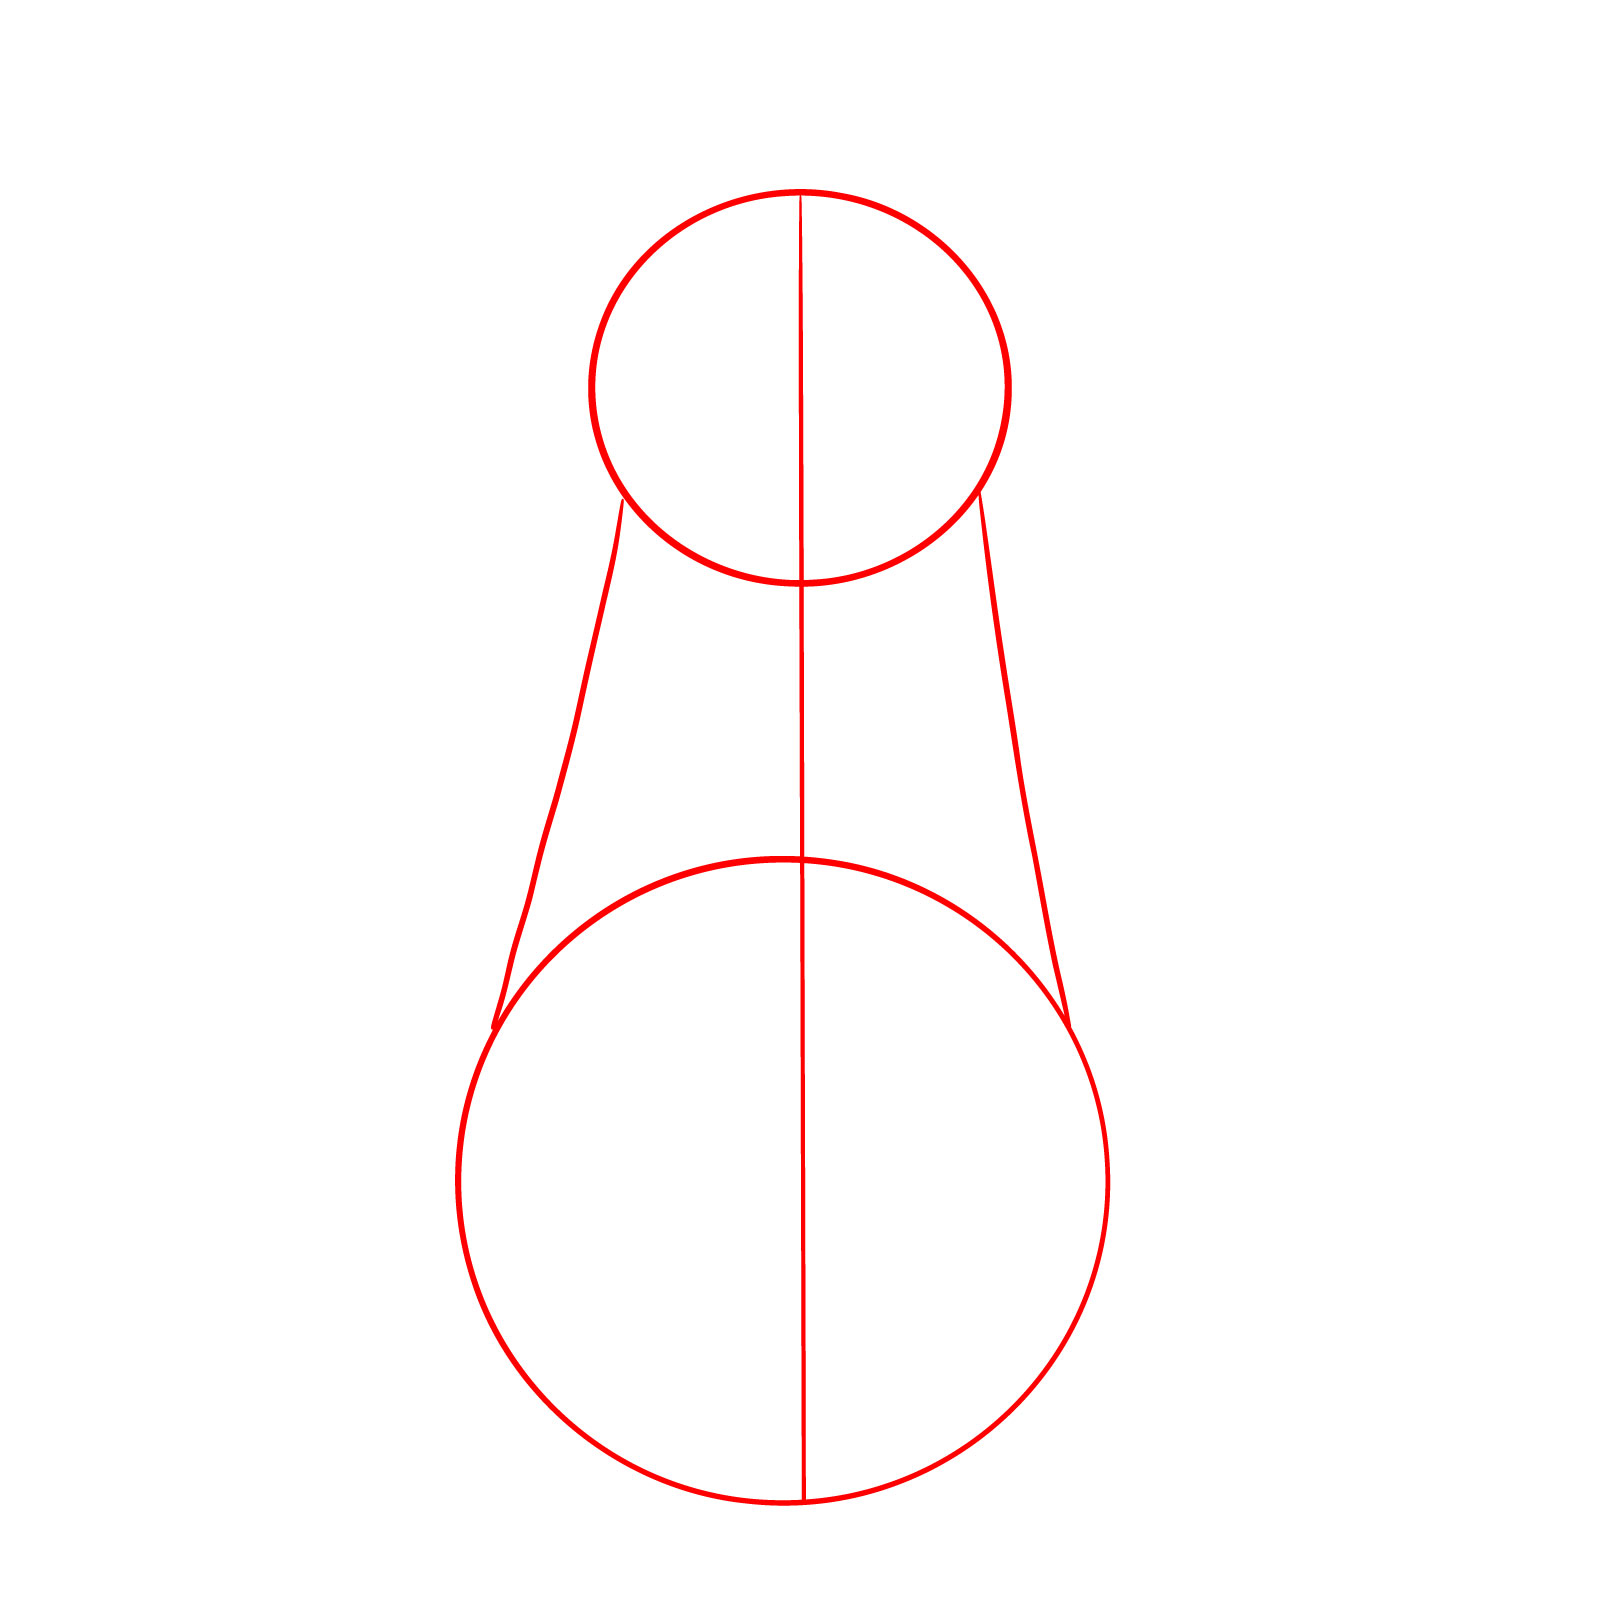
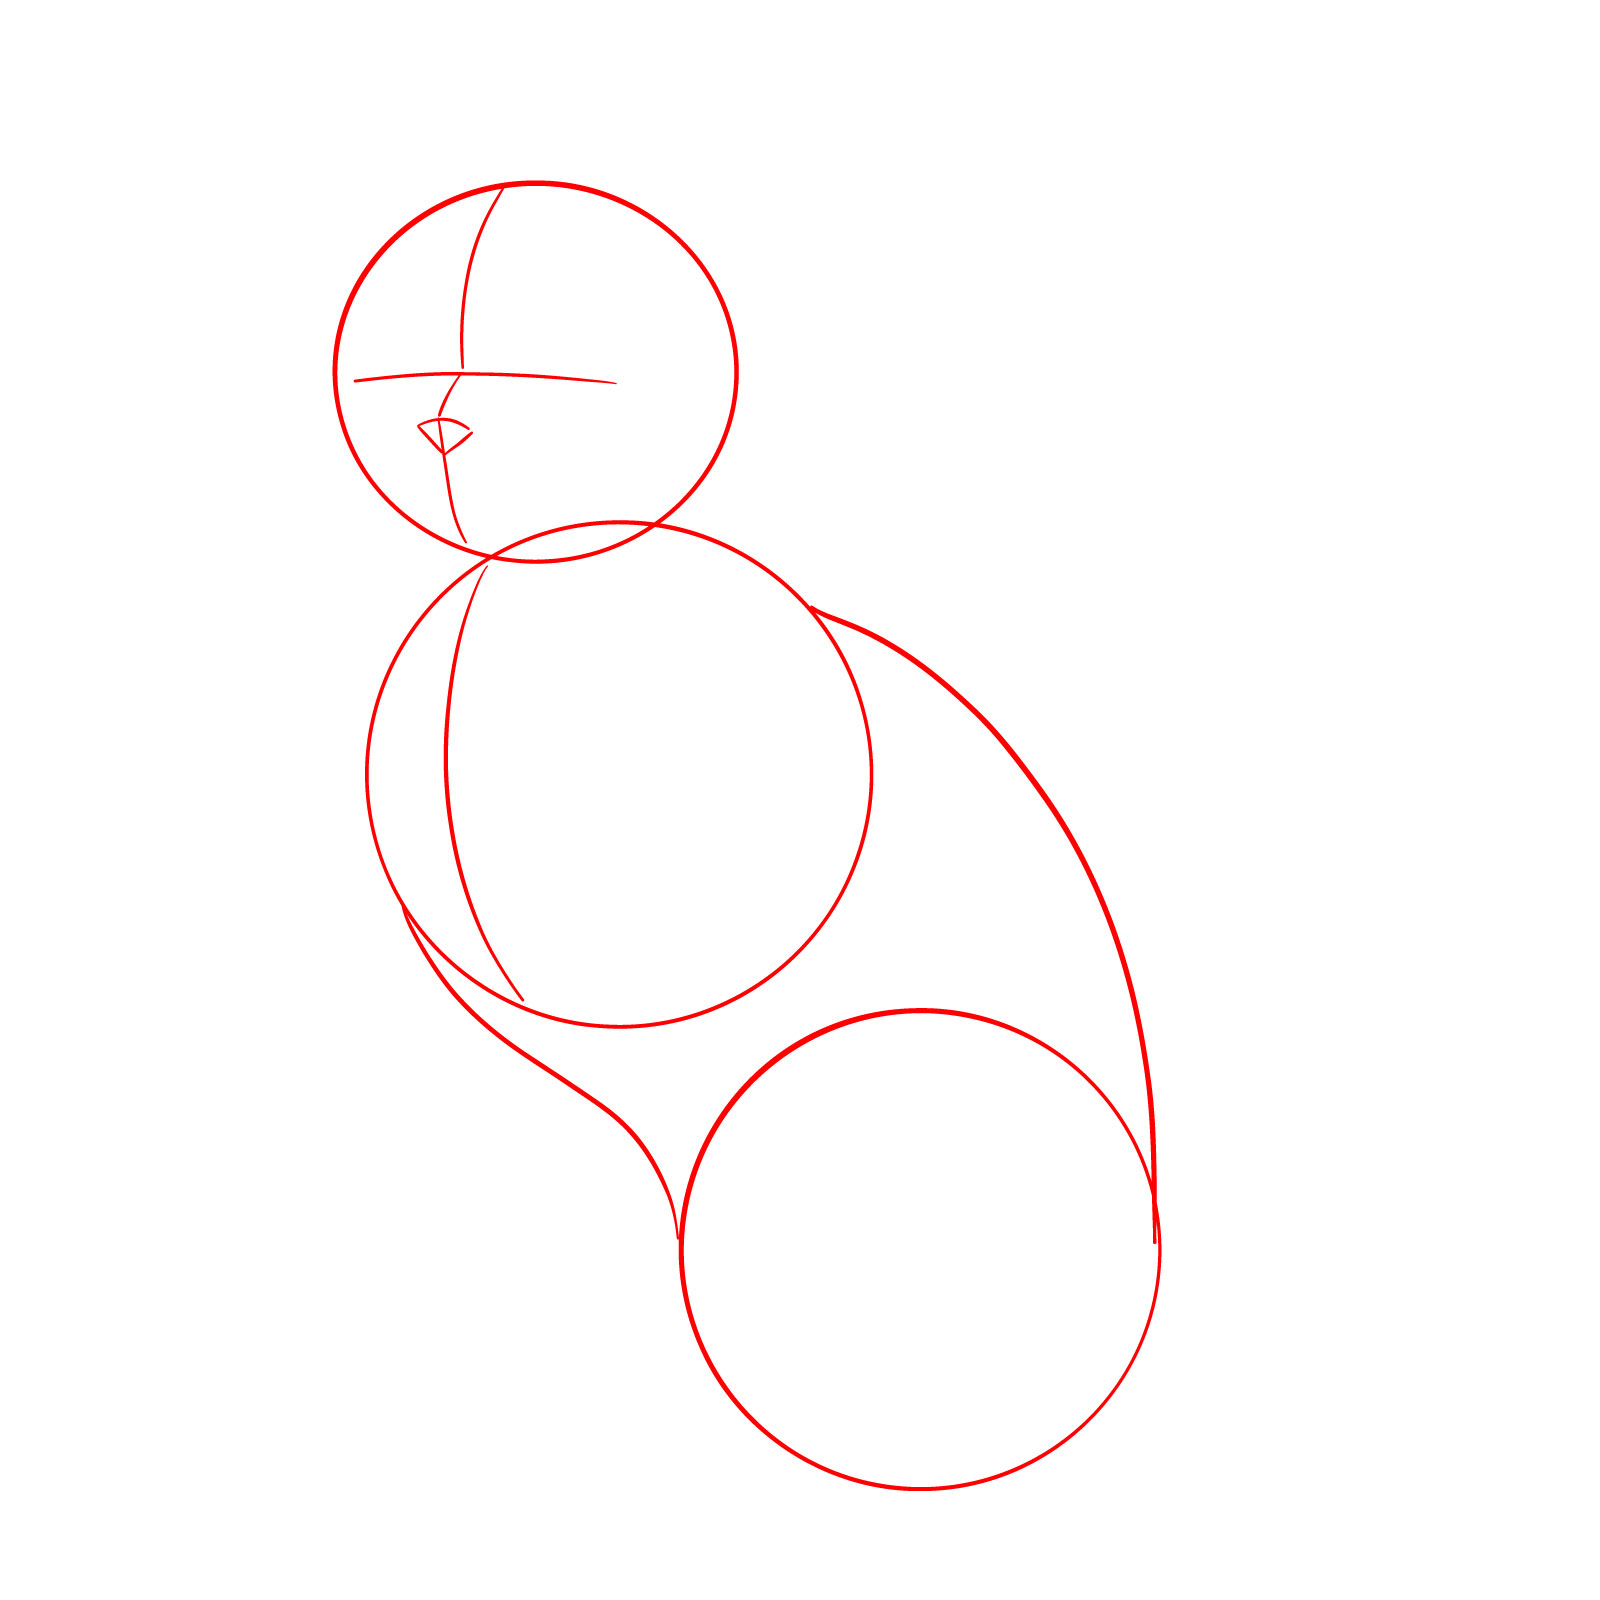
Step 01 – Start by drawing a circle for the head and a larger circle for the body. Connect these circles with two lines on the sides to form the cat’s neck and back. A vertical line bisects the structure, marking the center and ensuring symmetry in the pose
Creating the structural base for a sitting cat
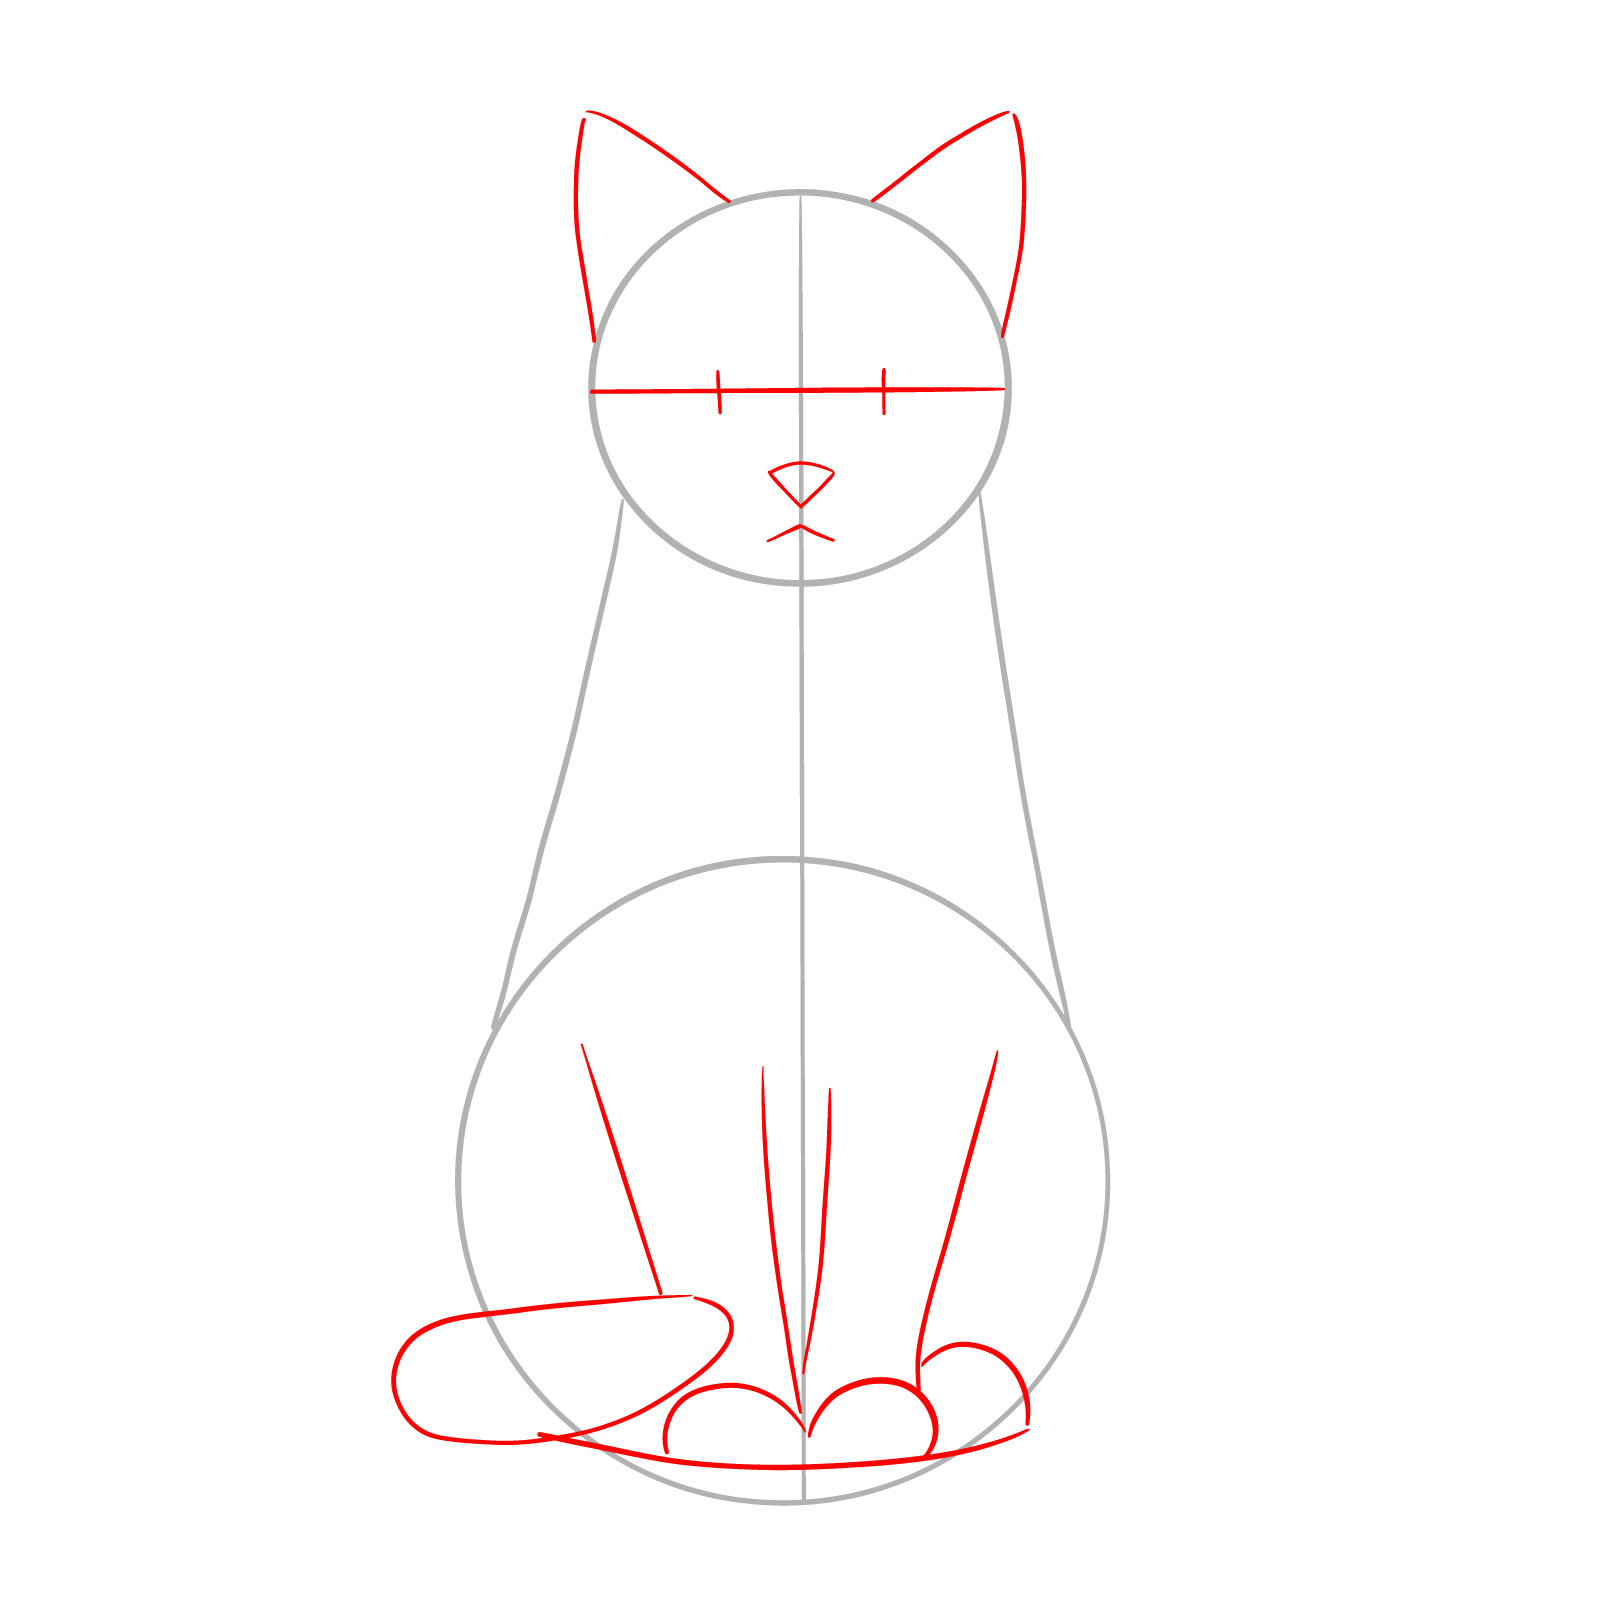
Step 02 – Add a horizontal line across the head circle with two short lines to indicate the future position of the pupils. Sketch the basic outlines for the nose, mouth, and ears, and introduce the fundamental shapes for the legs and tail, setting the groundwork for the cat’s sitting posture
Mapping out facial and body guidelines
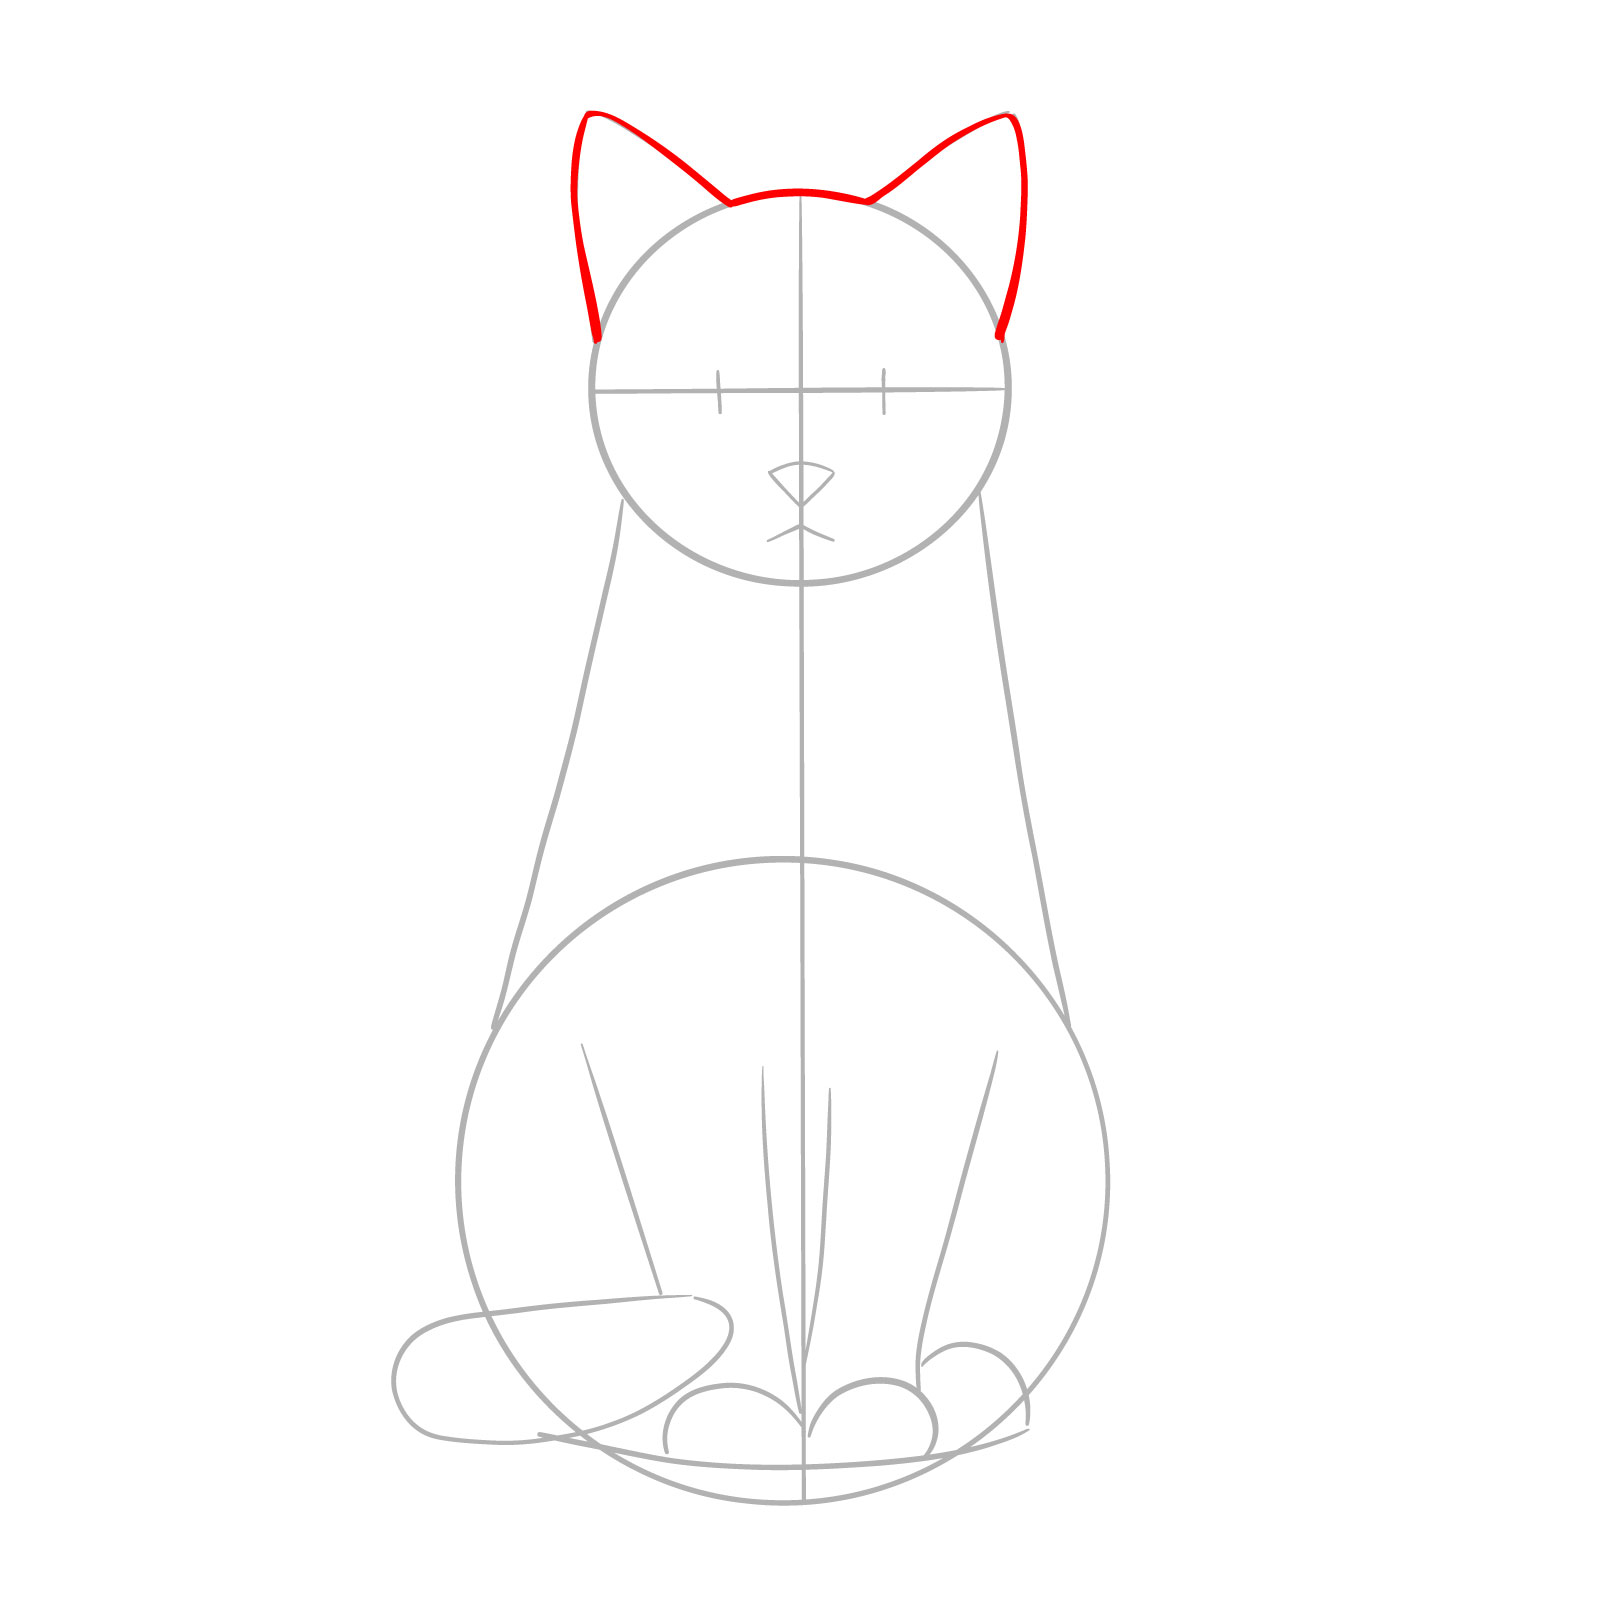
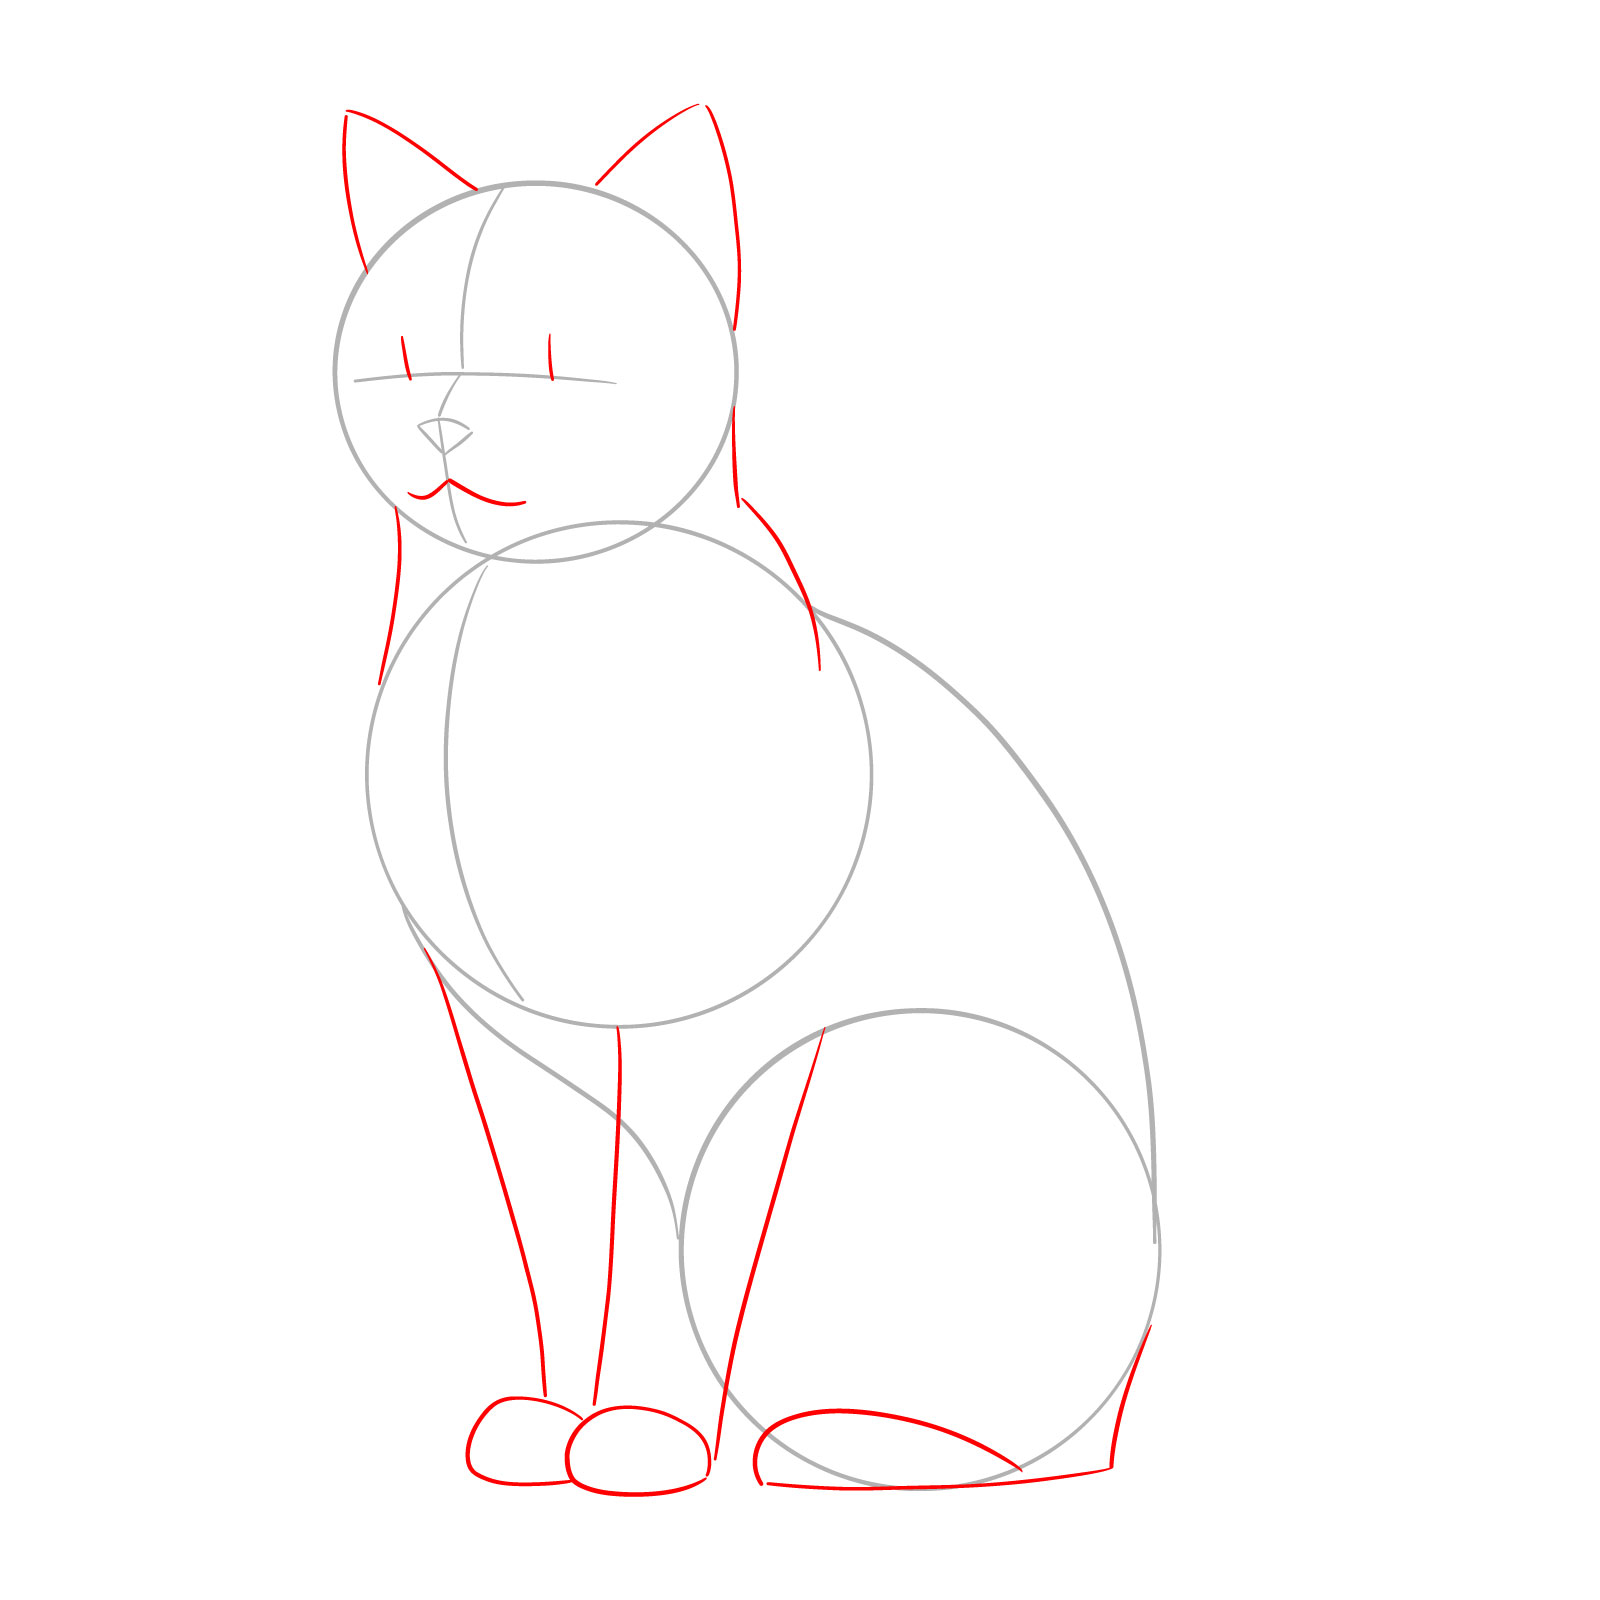
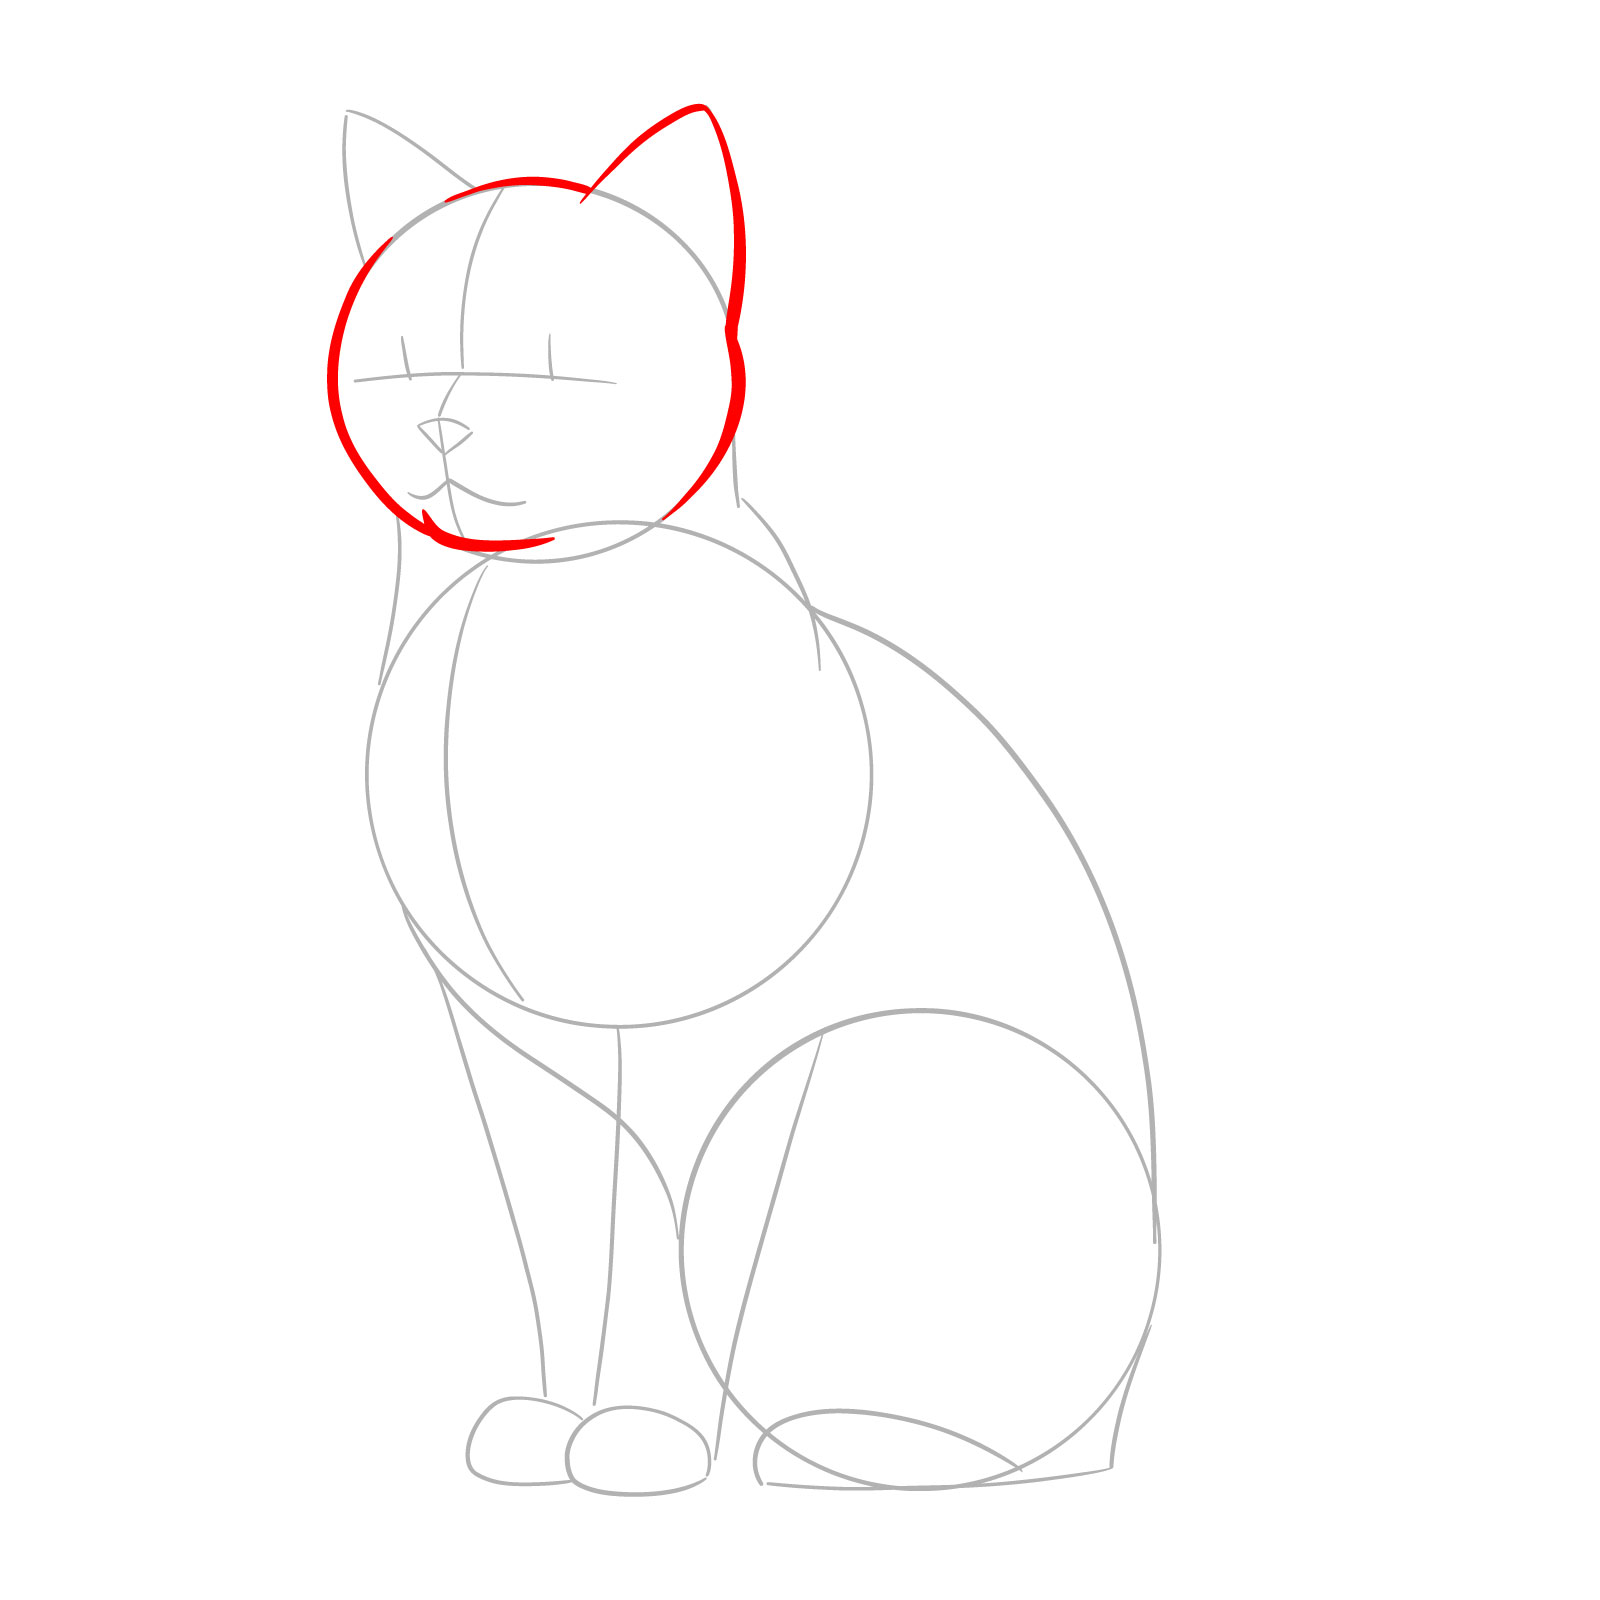
Step 03 – Refine the top of the head and sketch the pointed ears, ensuring they align with the guidelines. This step shapes the head’s contour, which is integral for a realistic depiction of a sitting cat
Defining the cat’s head and ear outlines
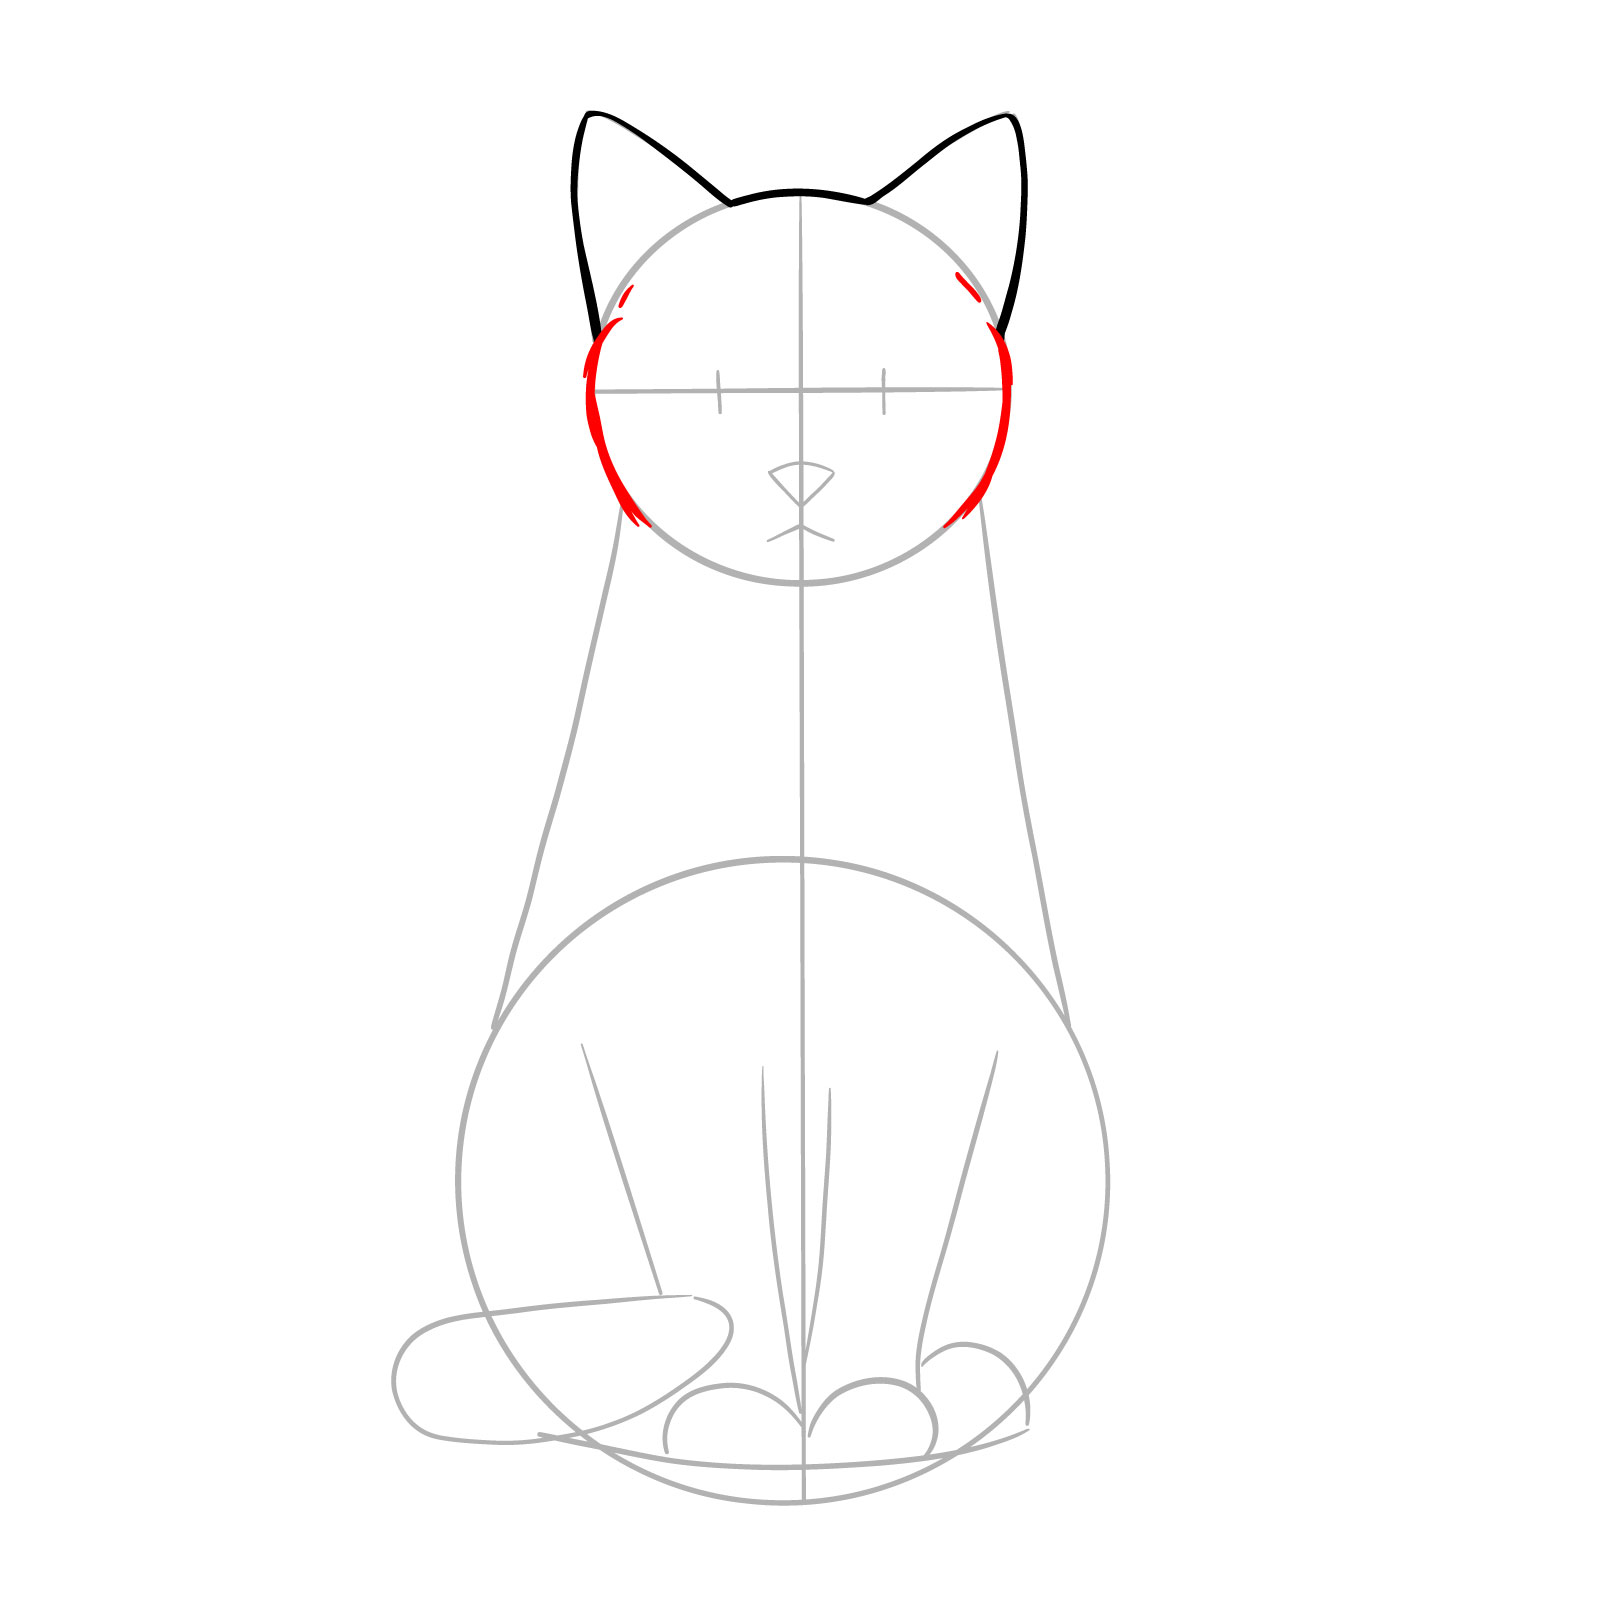
Step 04 – Draw the sides of the cat’s head to indicate the cheekbones, which add dimension and form to the face
Shaping the cheekbones of the sitting cat
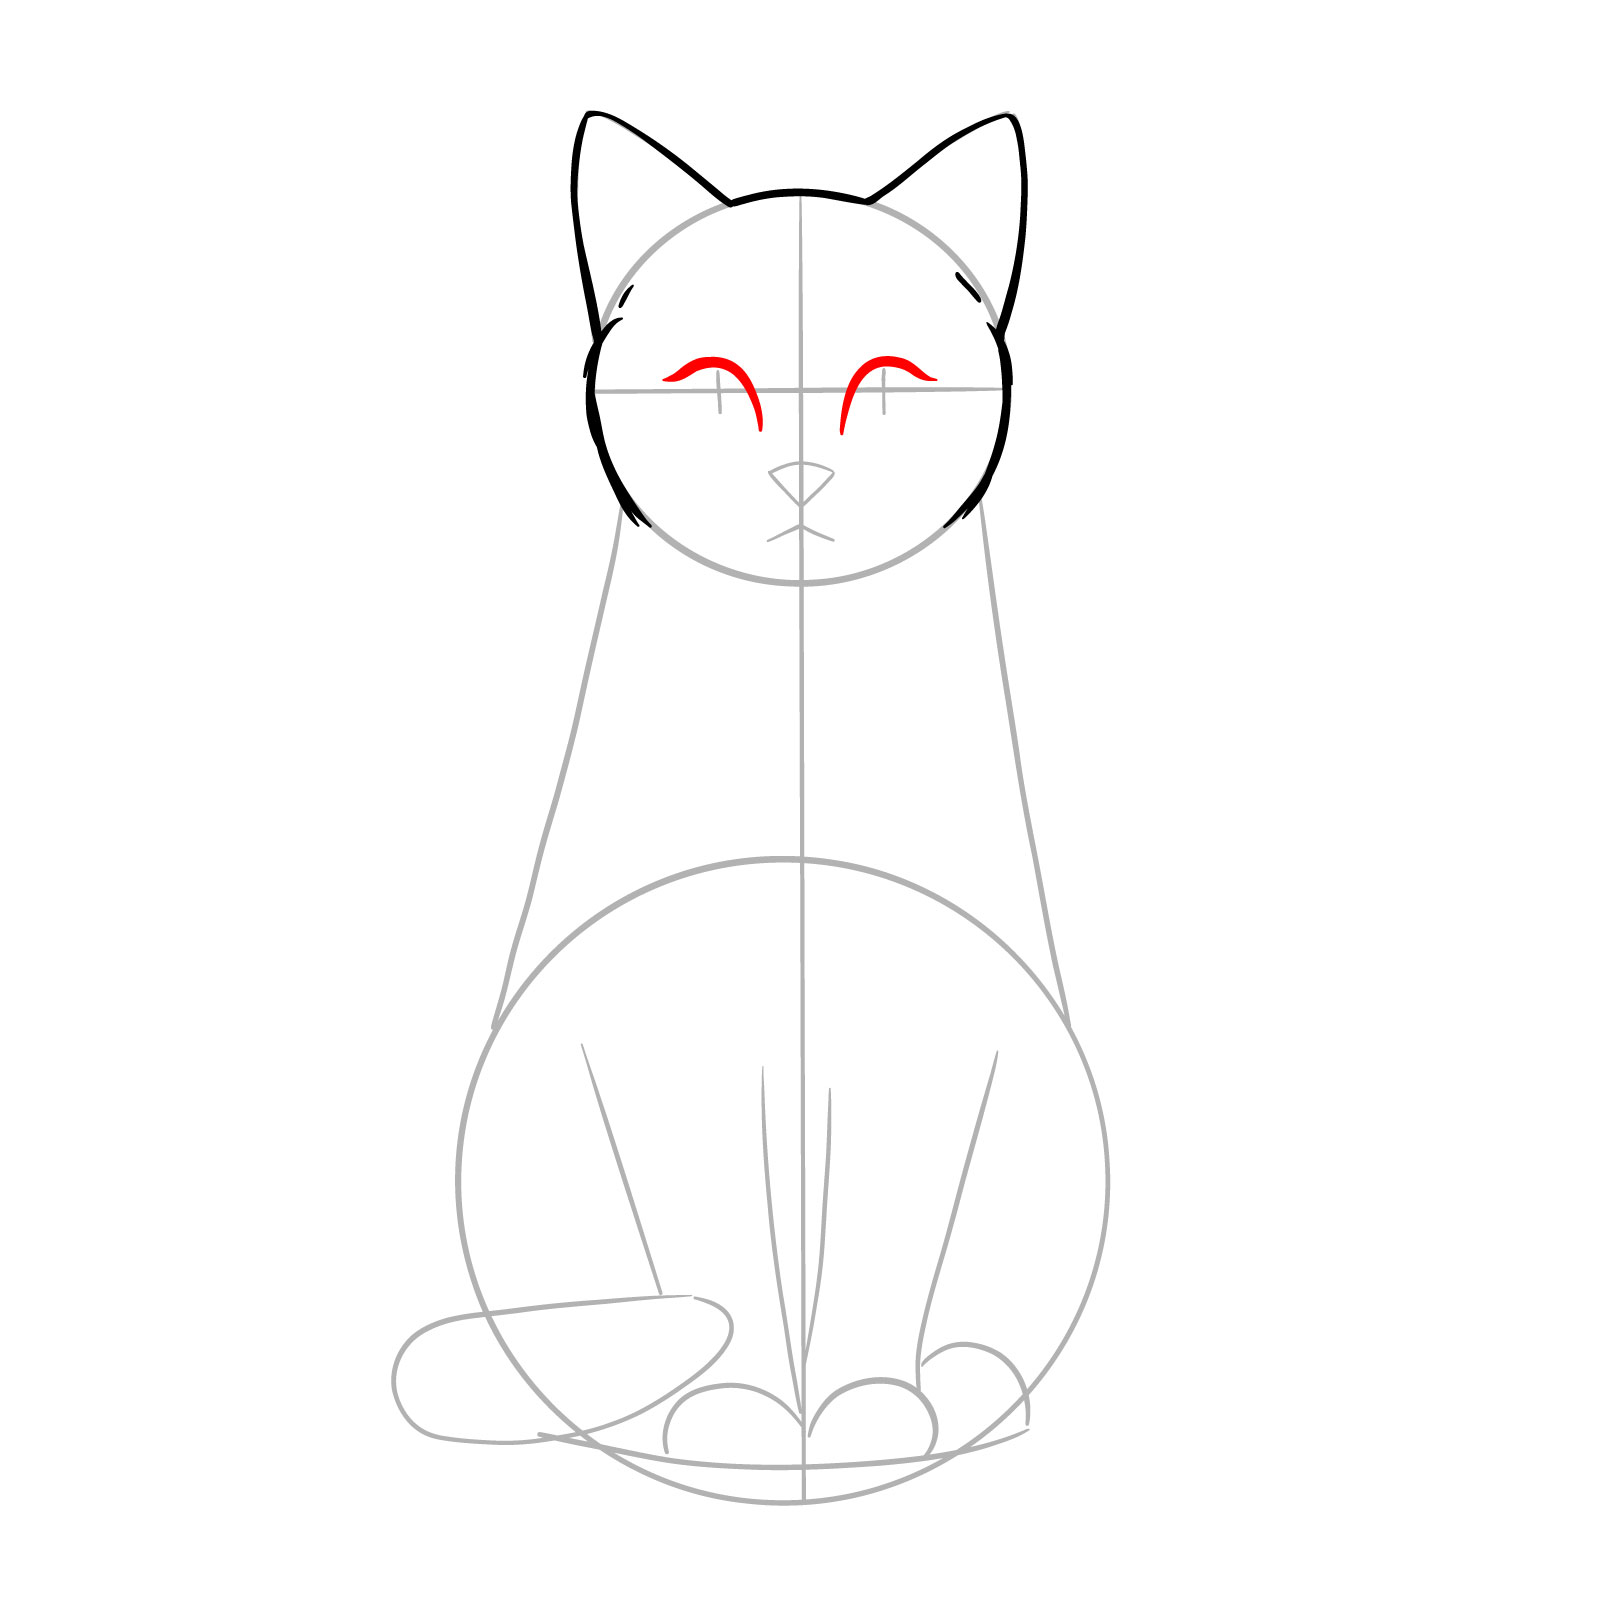
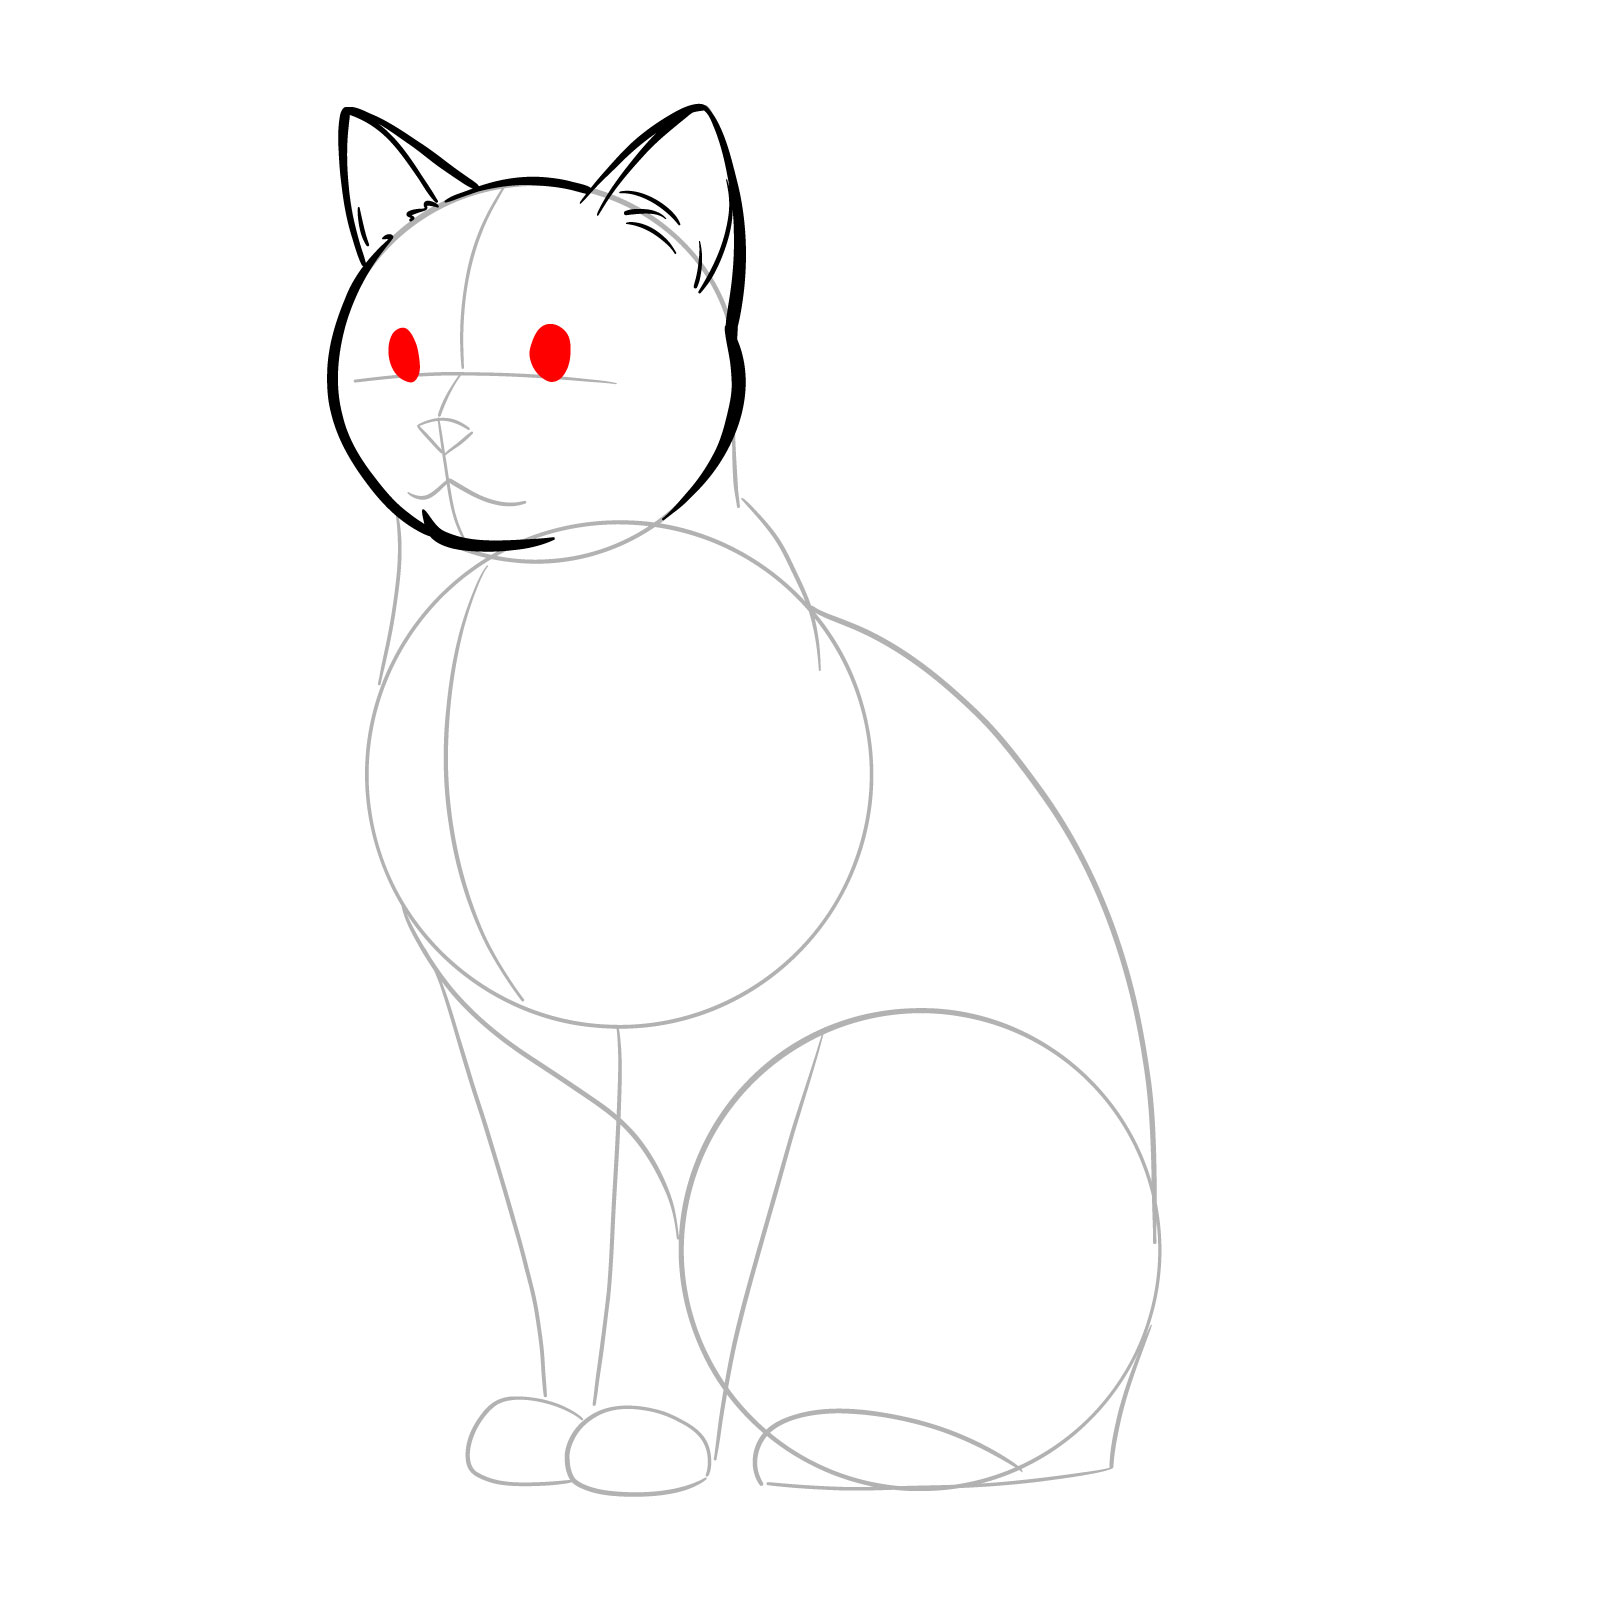
Step 05 – Define the upper parts of the cat’s eyes, which resemble eyelashes, to bring focus to the eyes
Drawing the upper eyelids for a sitting cat
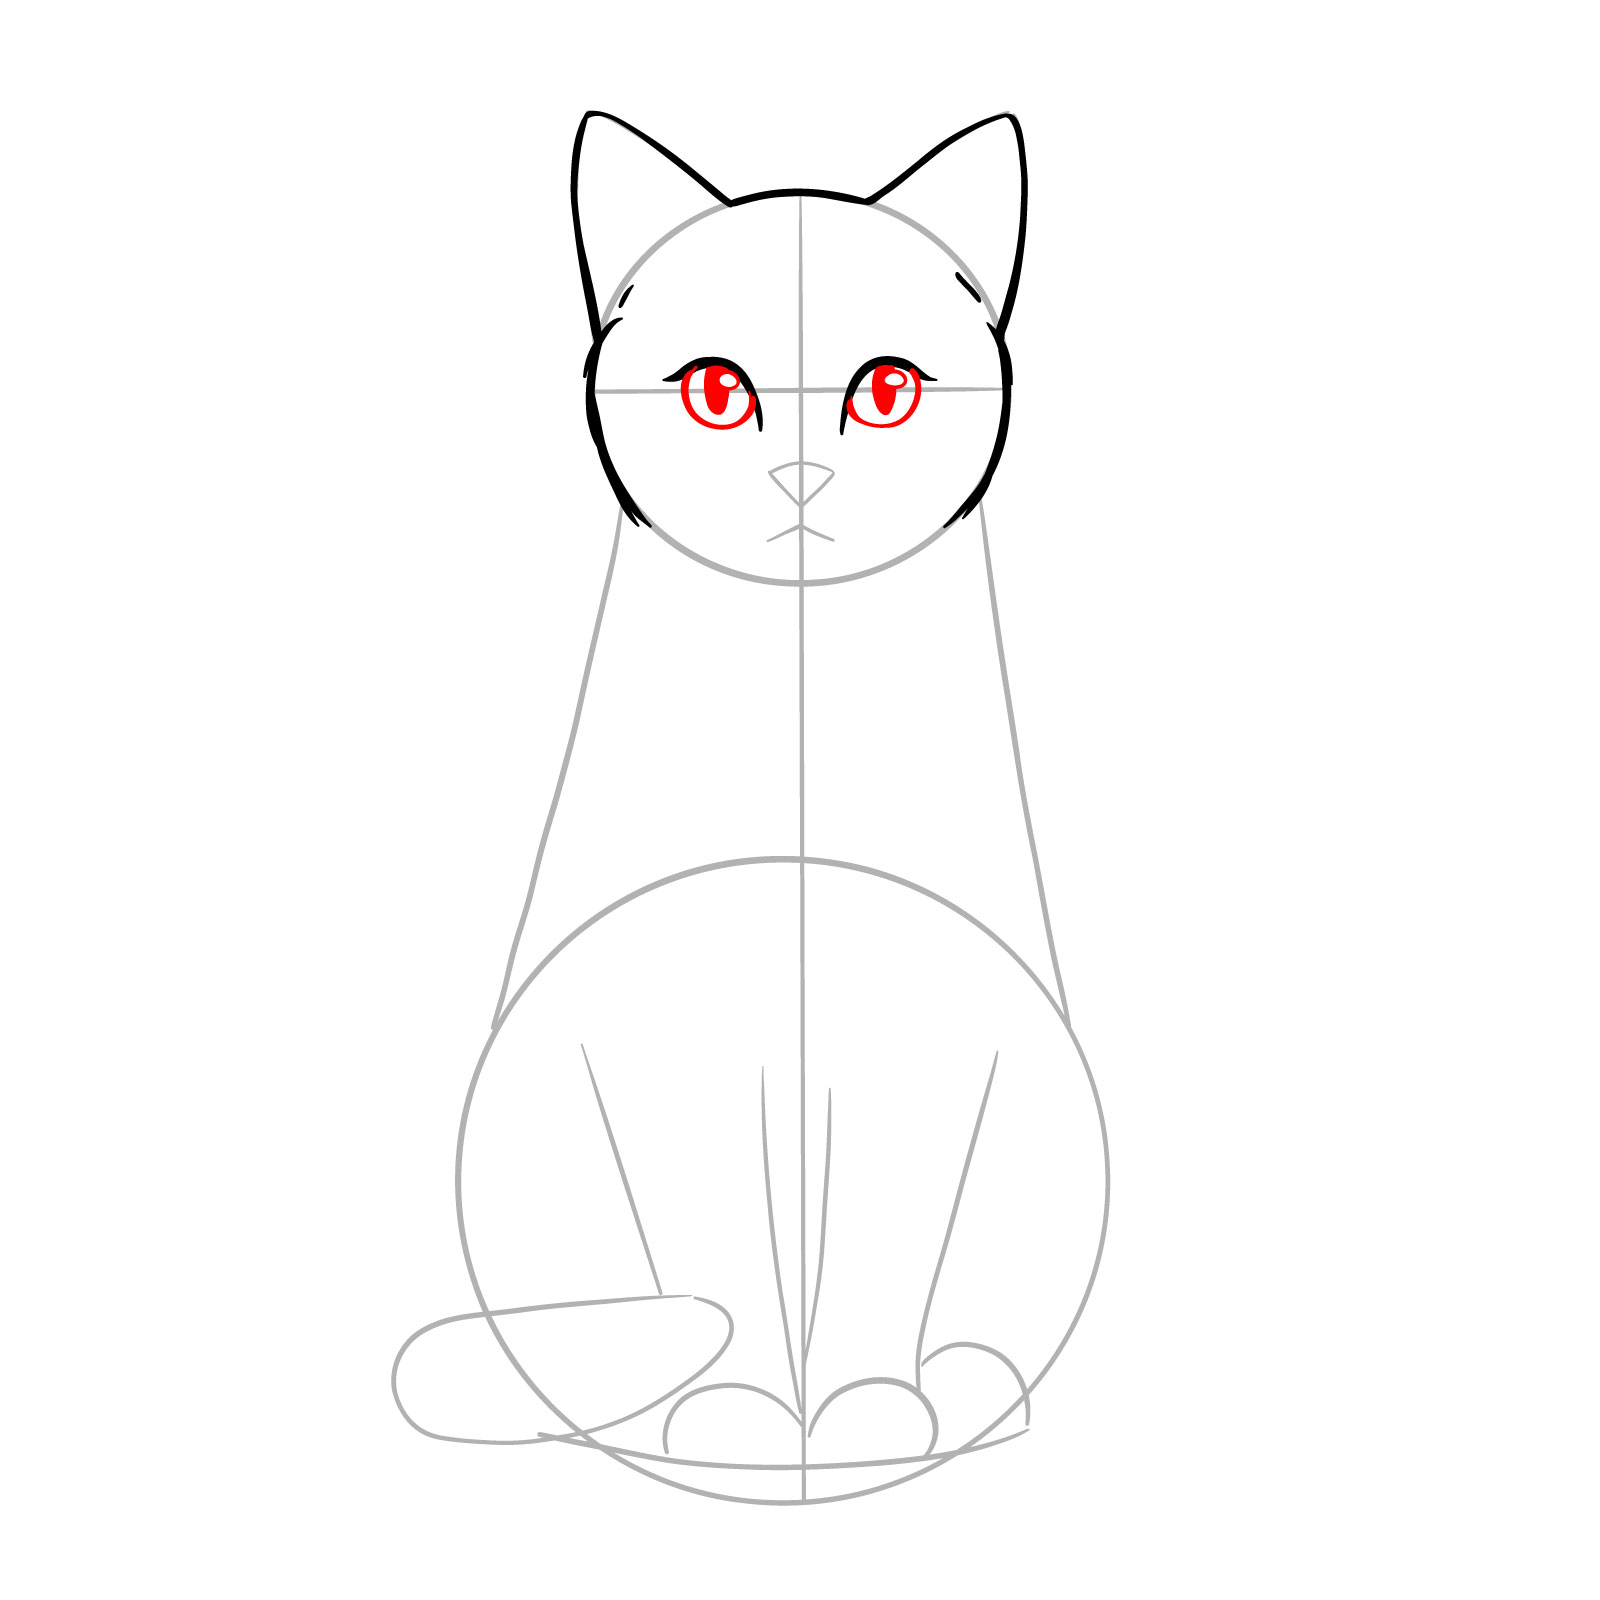
Step 06 – Complete the eye shapes by adding the lower lines, and fill in the pupils with color, leaving small blank circles for highlights
Completing the eye shapes with highlights
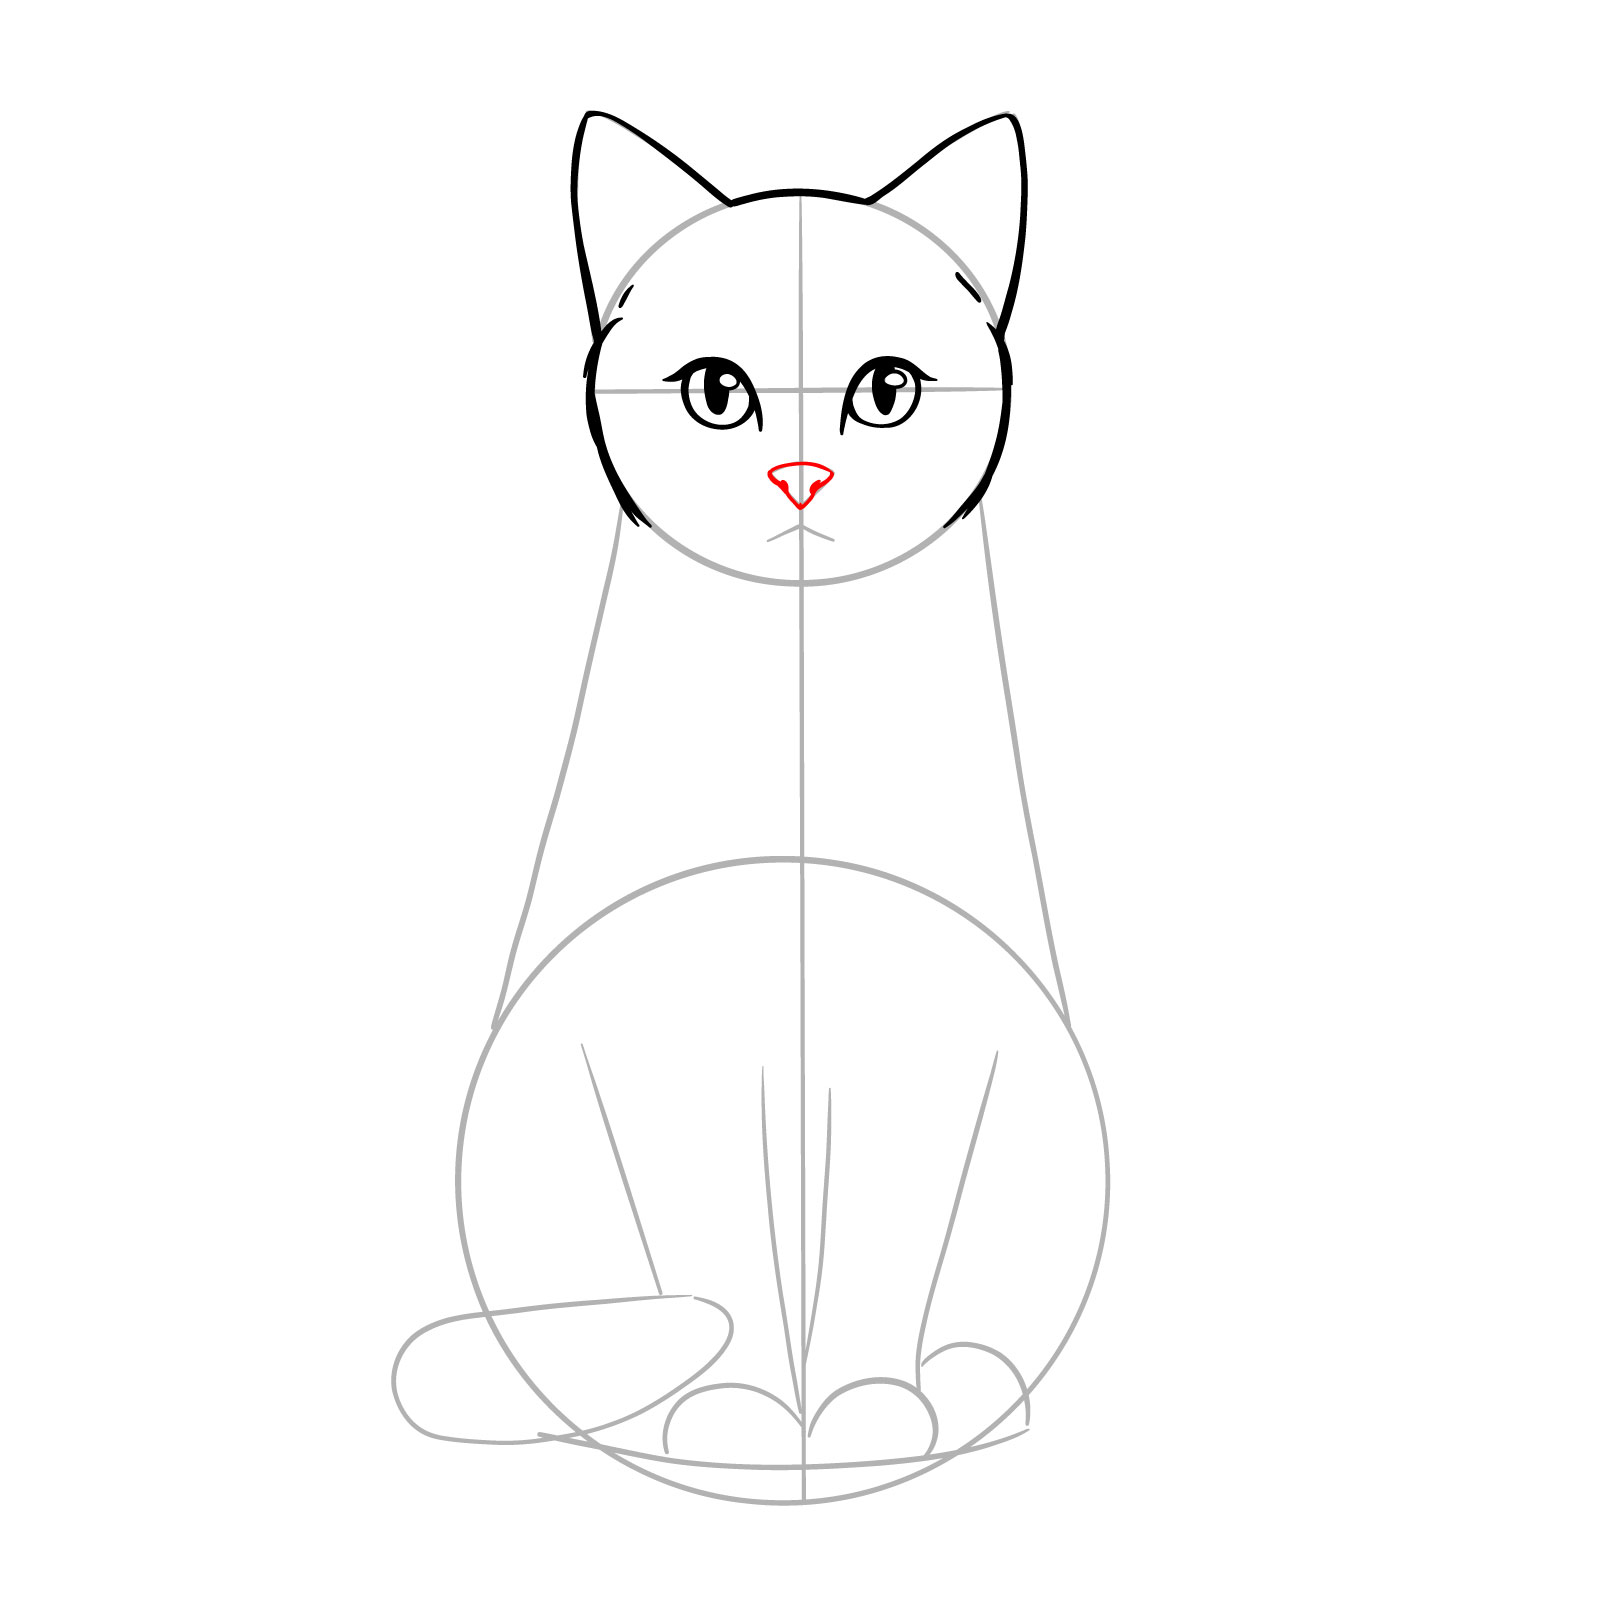
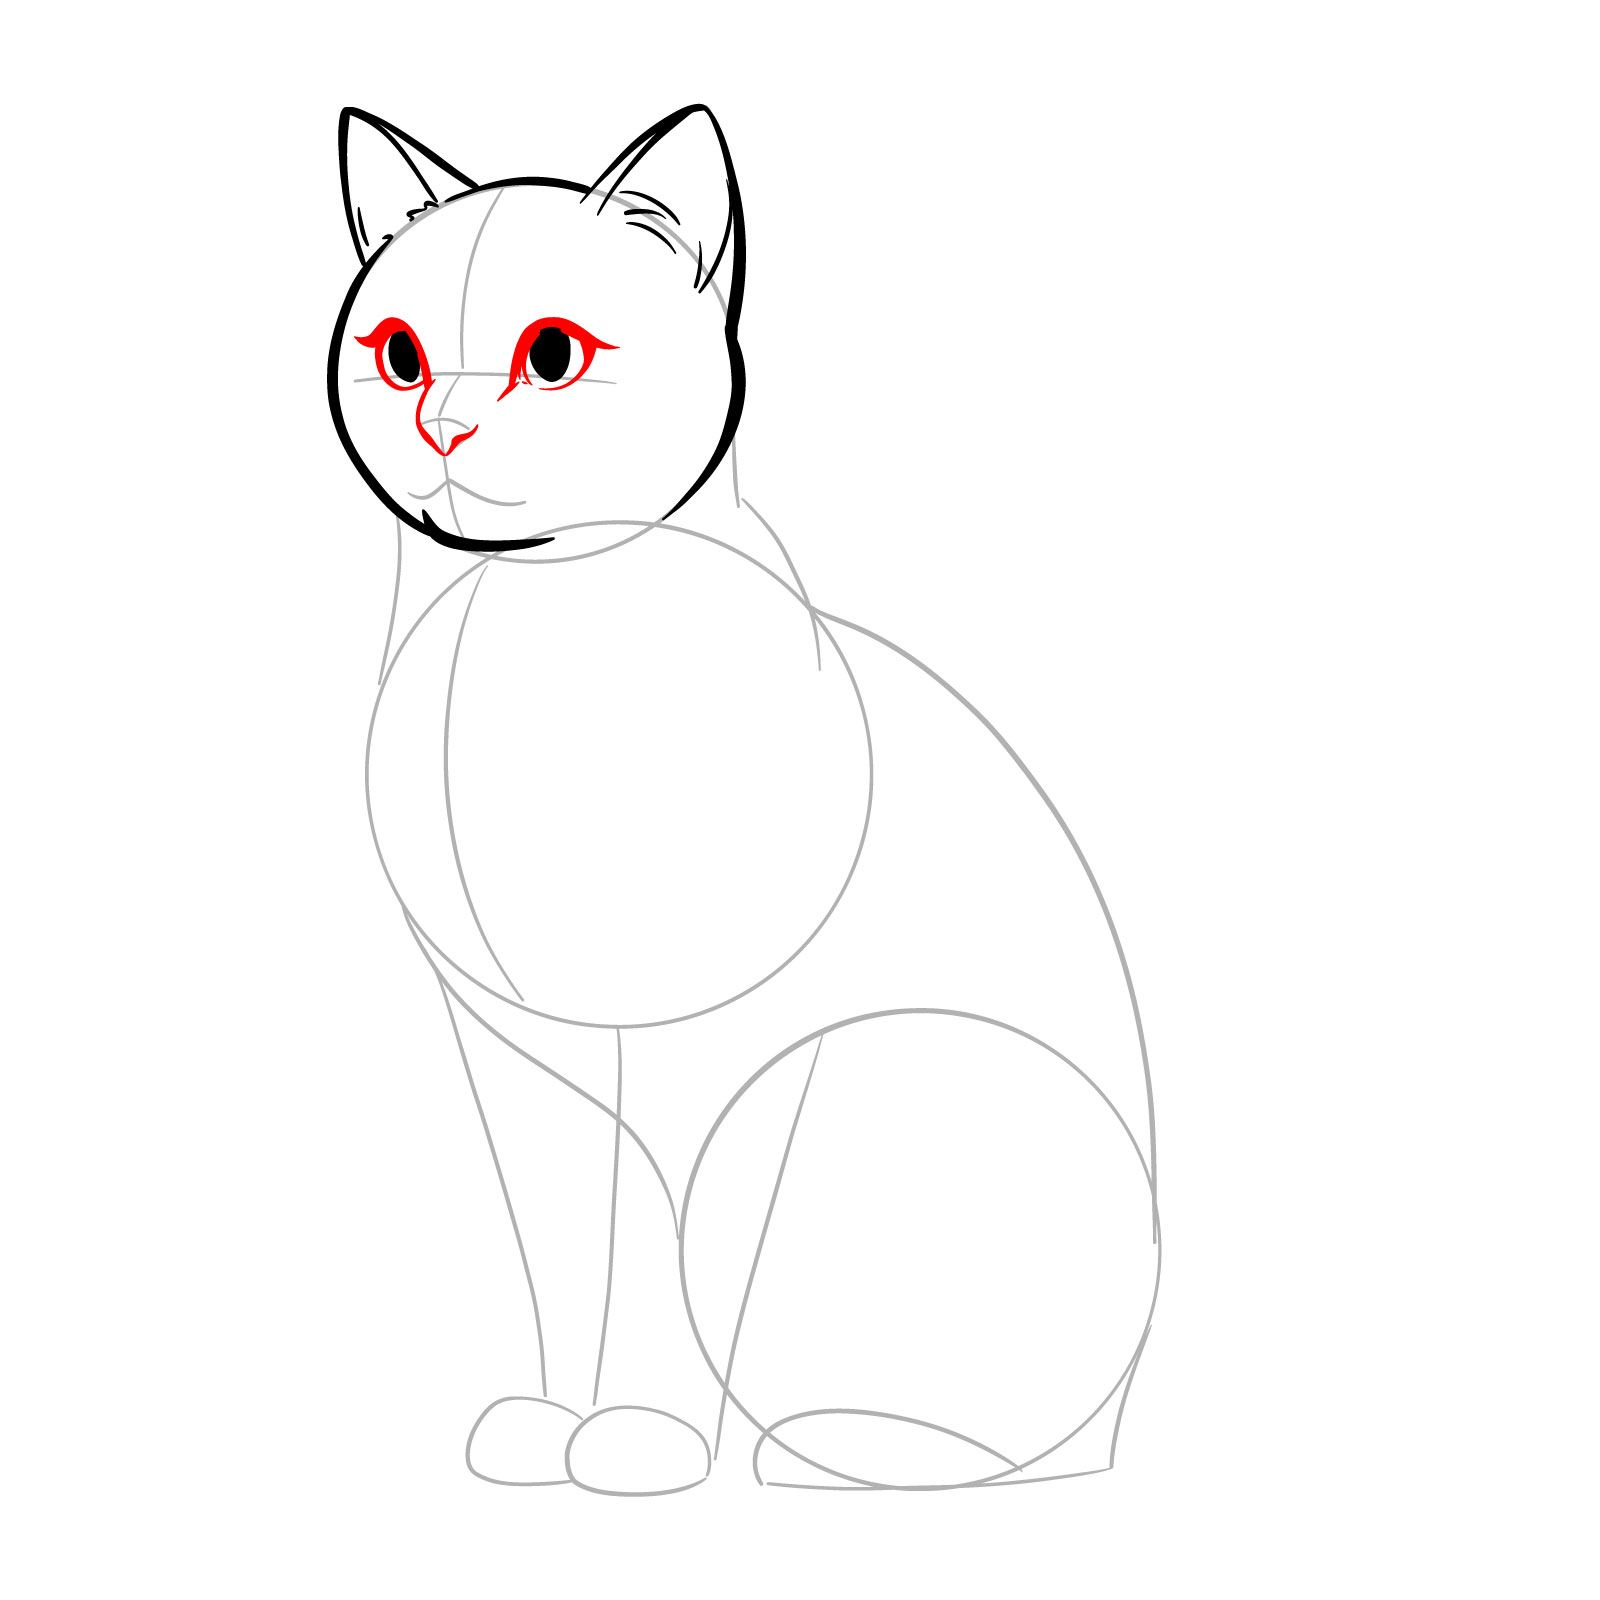
Step 07 – Outline a triangular shape for the nose, positioned in the center of the facial guidelines
Outlining the nose of the sitting cat
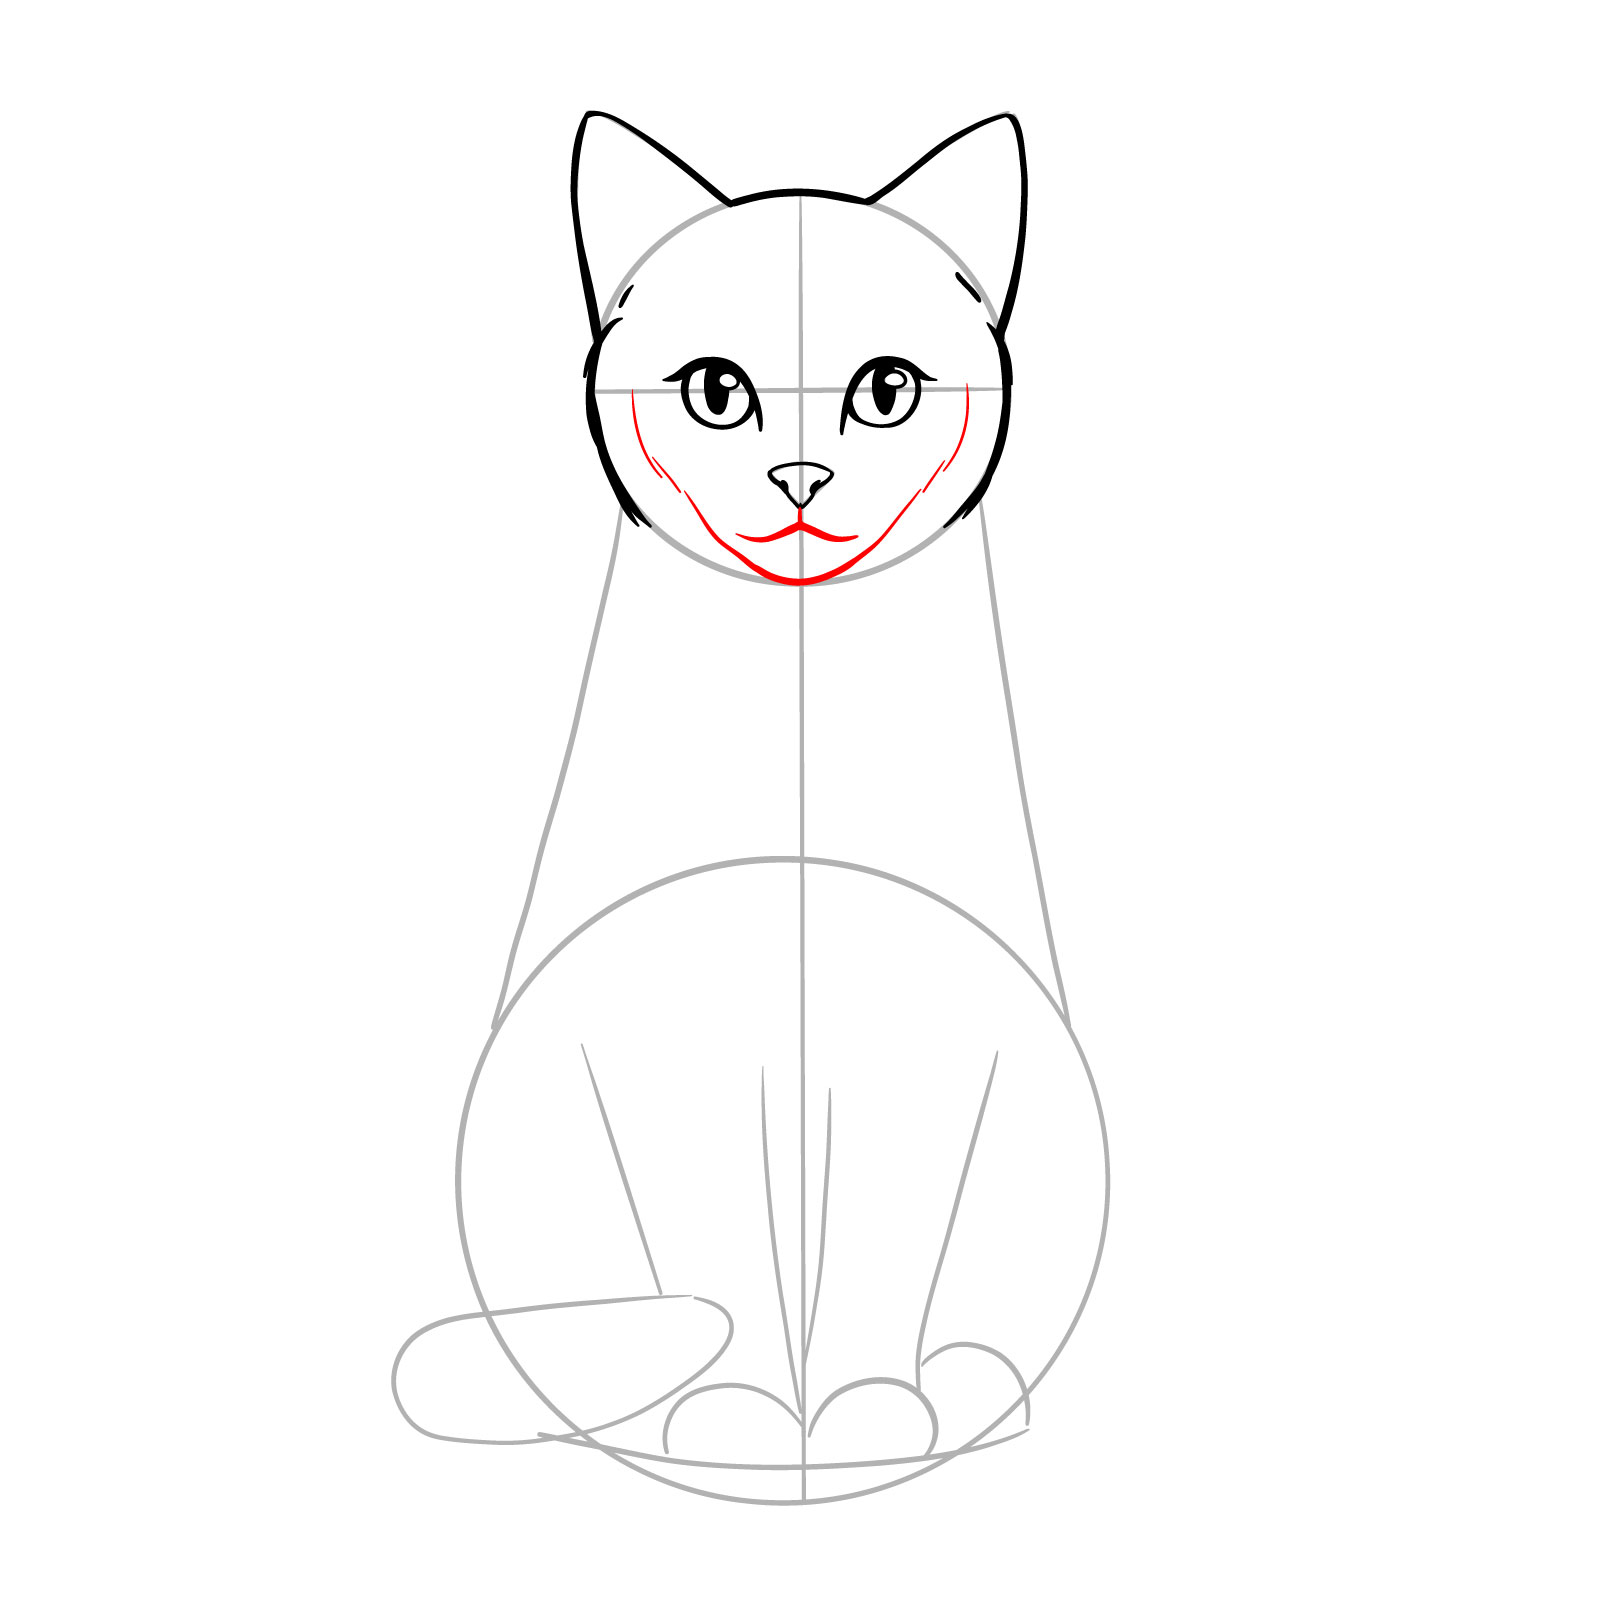
Step 08 – Sketch the cat’s mouth, forming the chin and whisker pads, and use short, gentle lines to suggest a fur texture. This technique avoids the appearance of smooth, unnatural lines, adding a sense of realism to the drawing
Shaping the mouth and chin with a fur-like texture
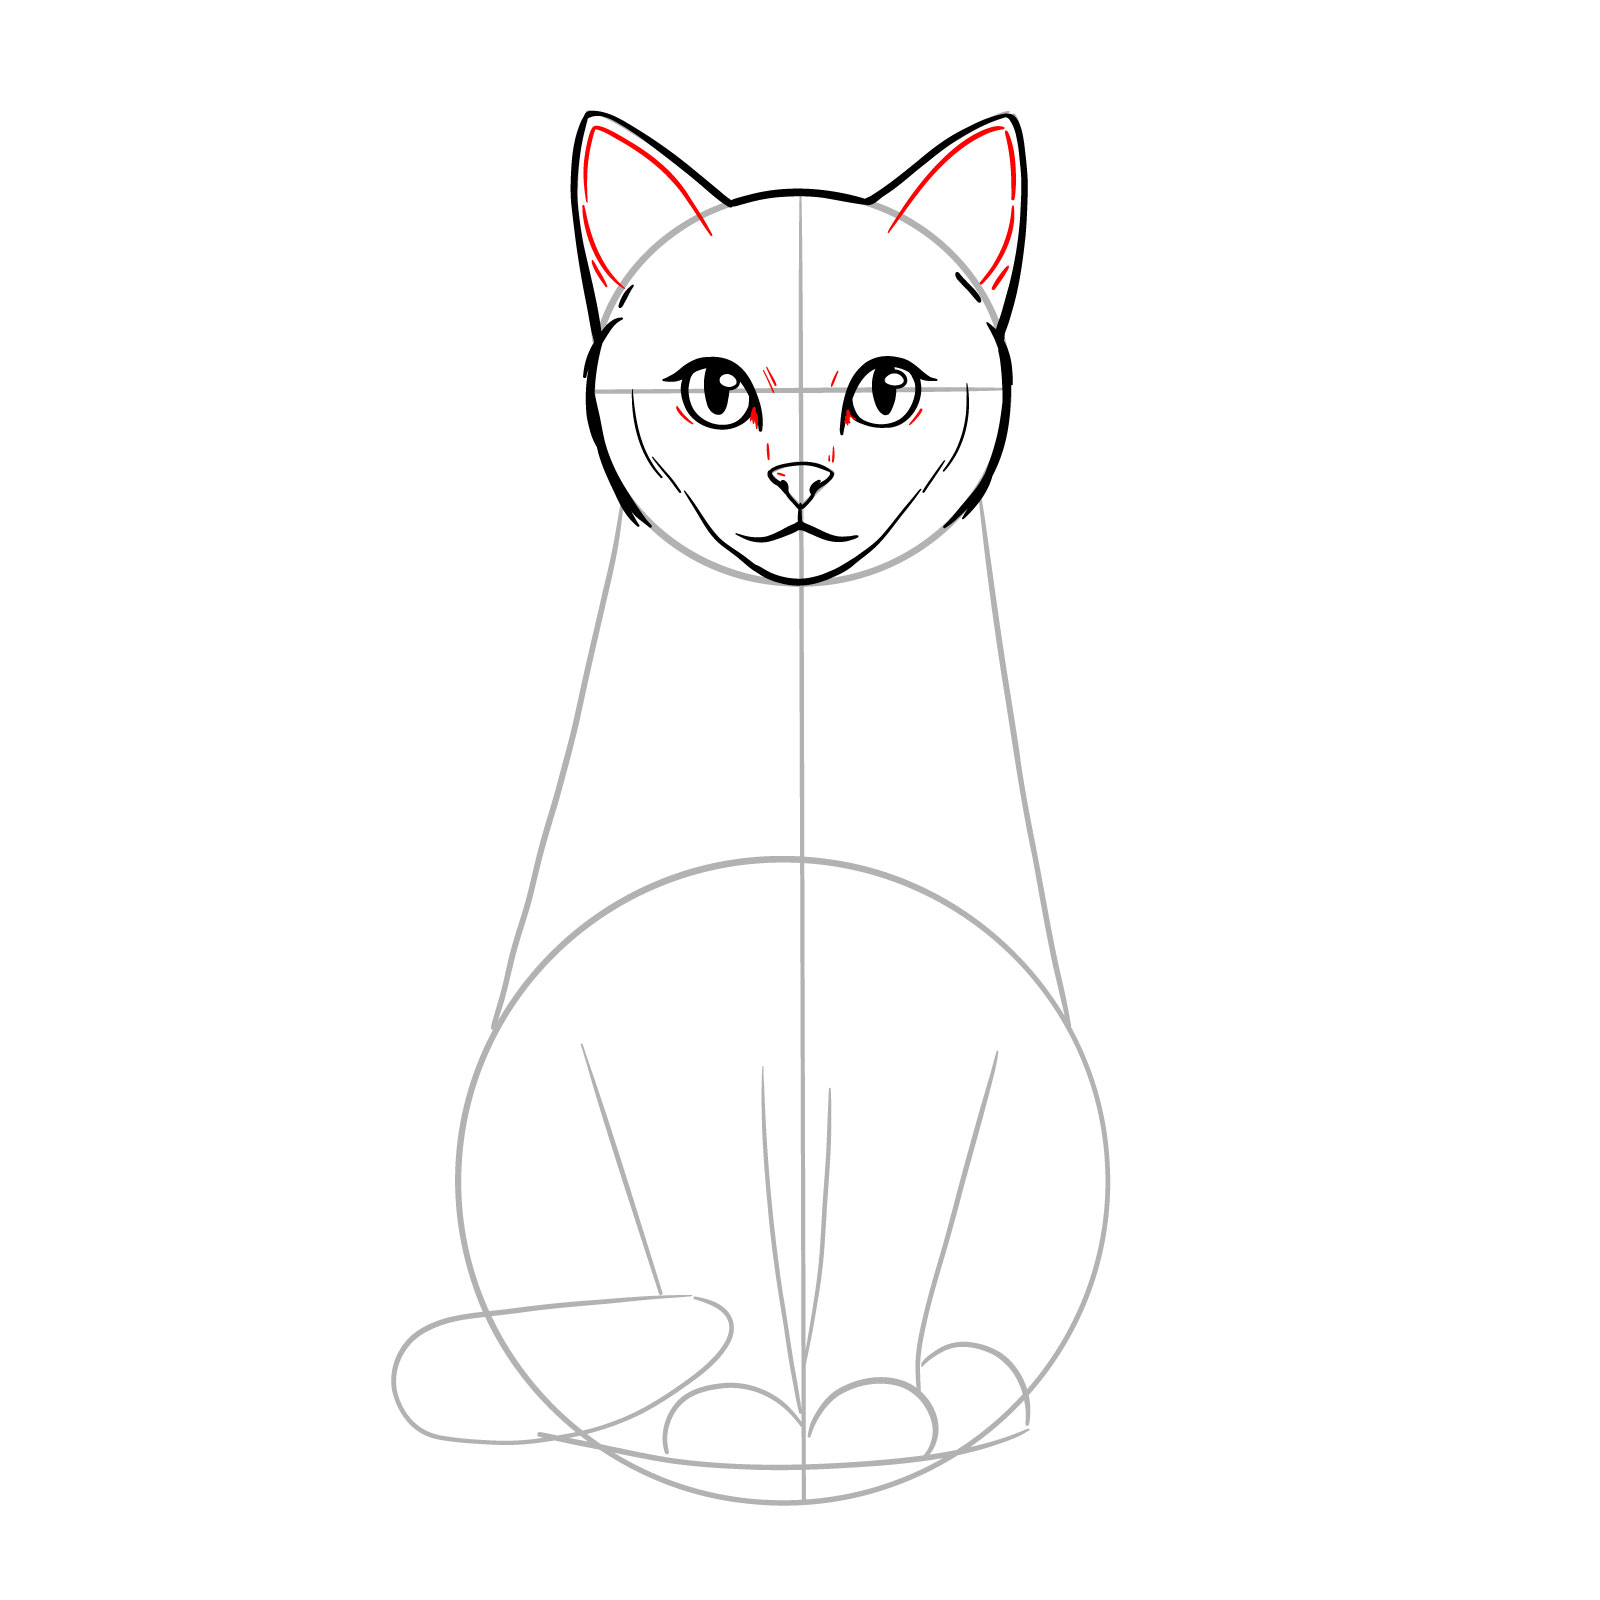
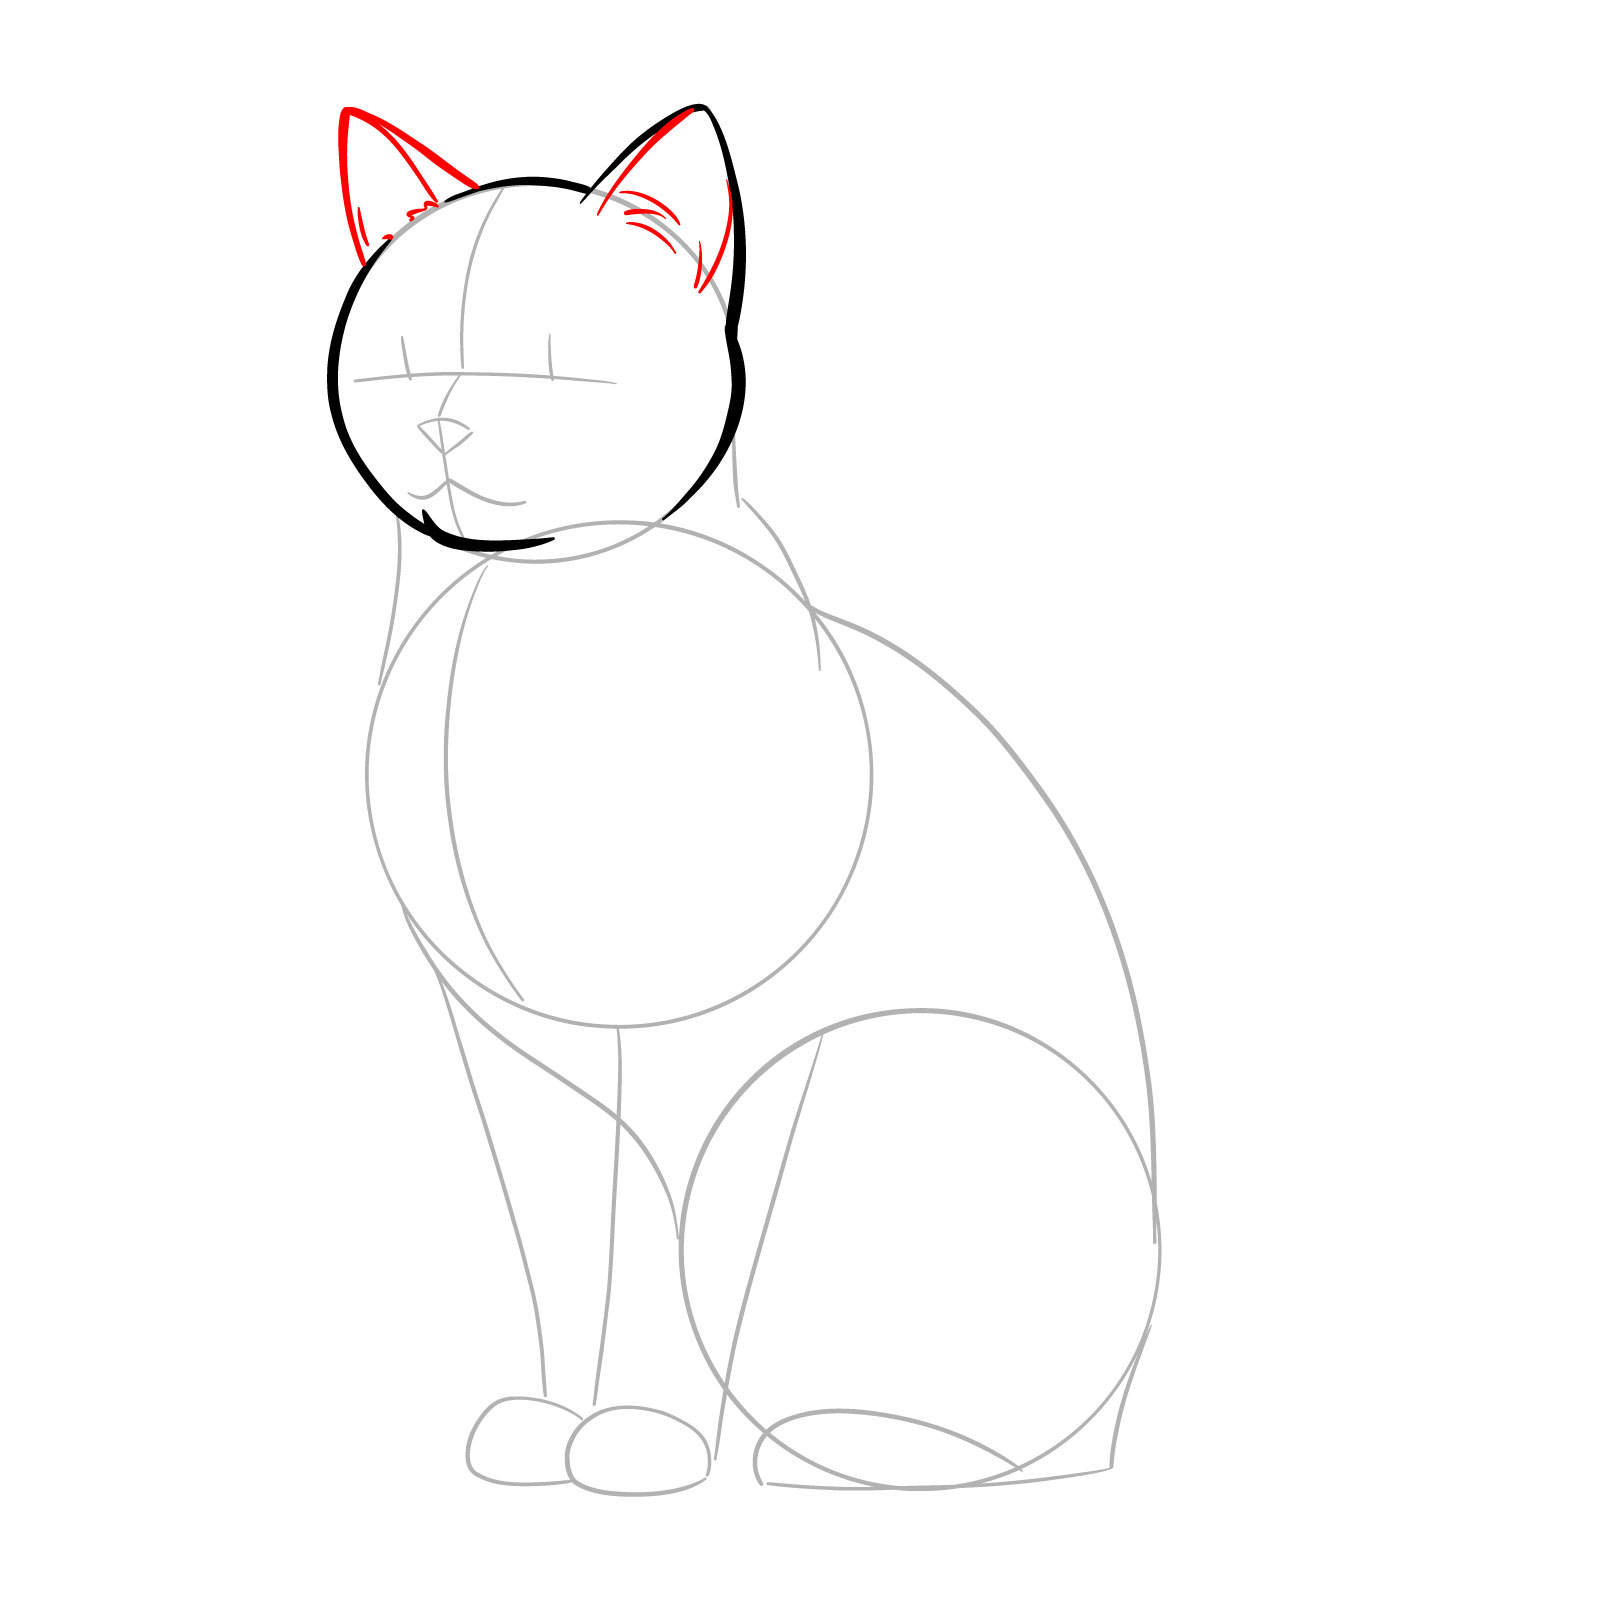
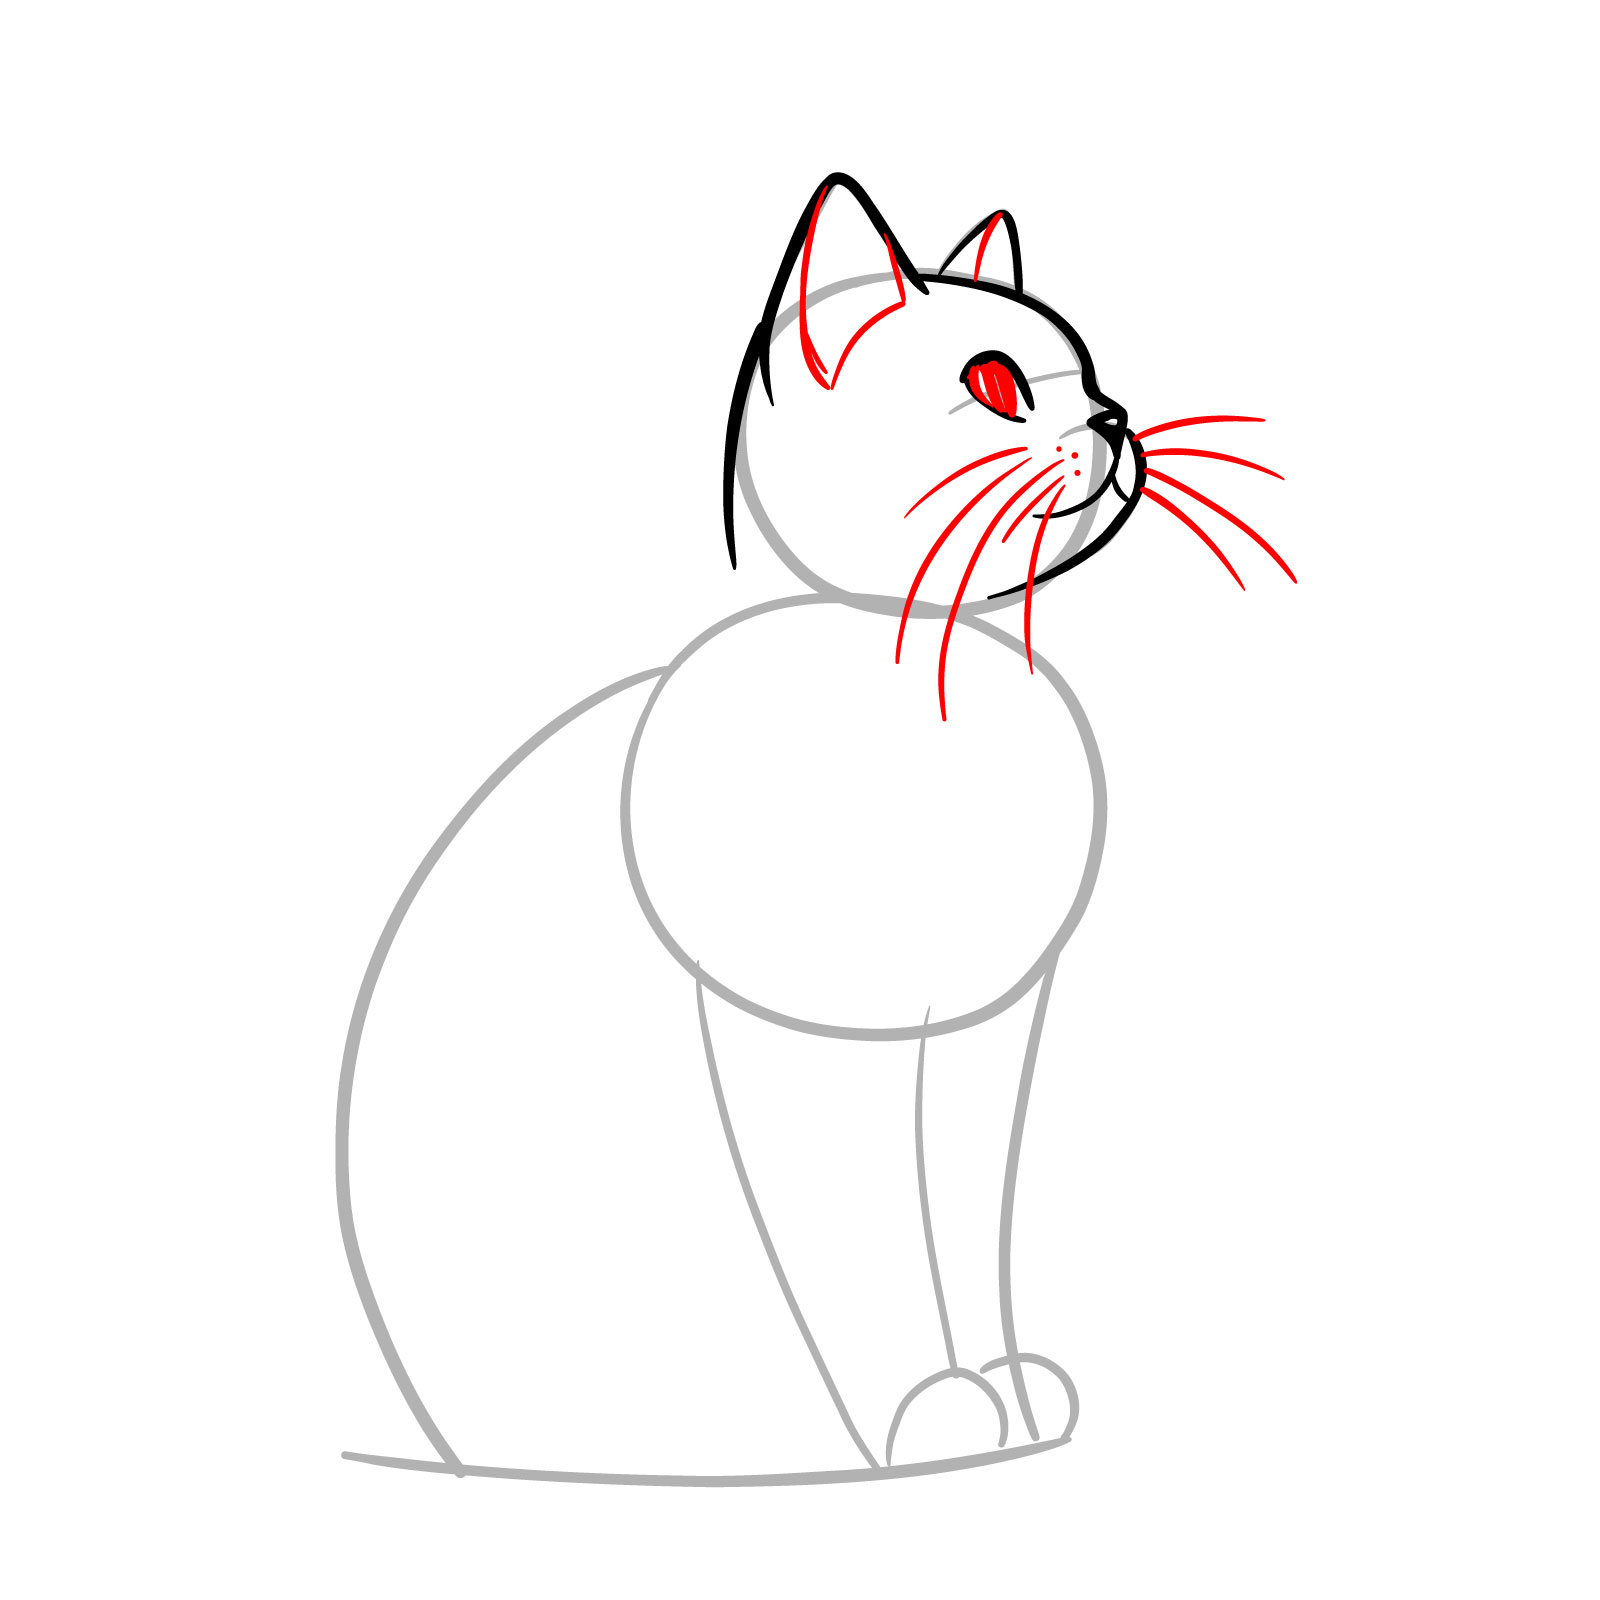
Step 09 – Refine the area around the eyes by adding more defined lines to illustrate the cat’s gaze. Insert inner lines within the ears to give some depth
Enhancing eye details and inner ear lines
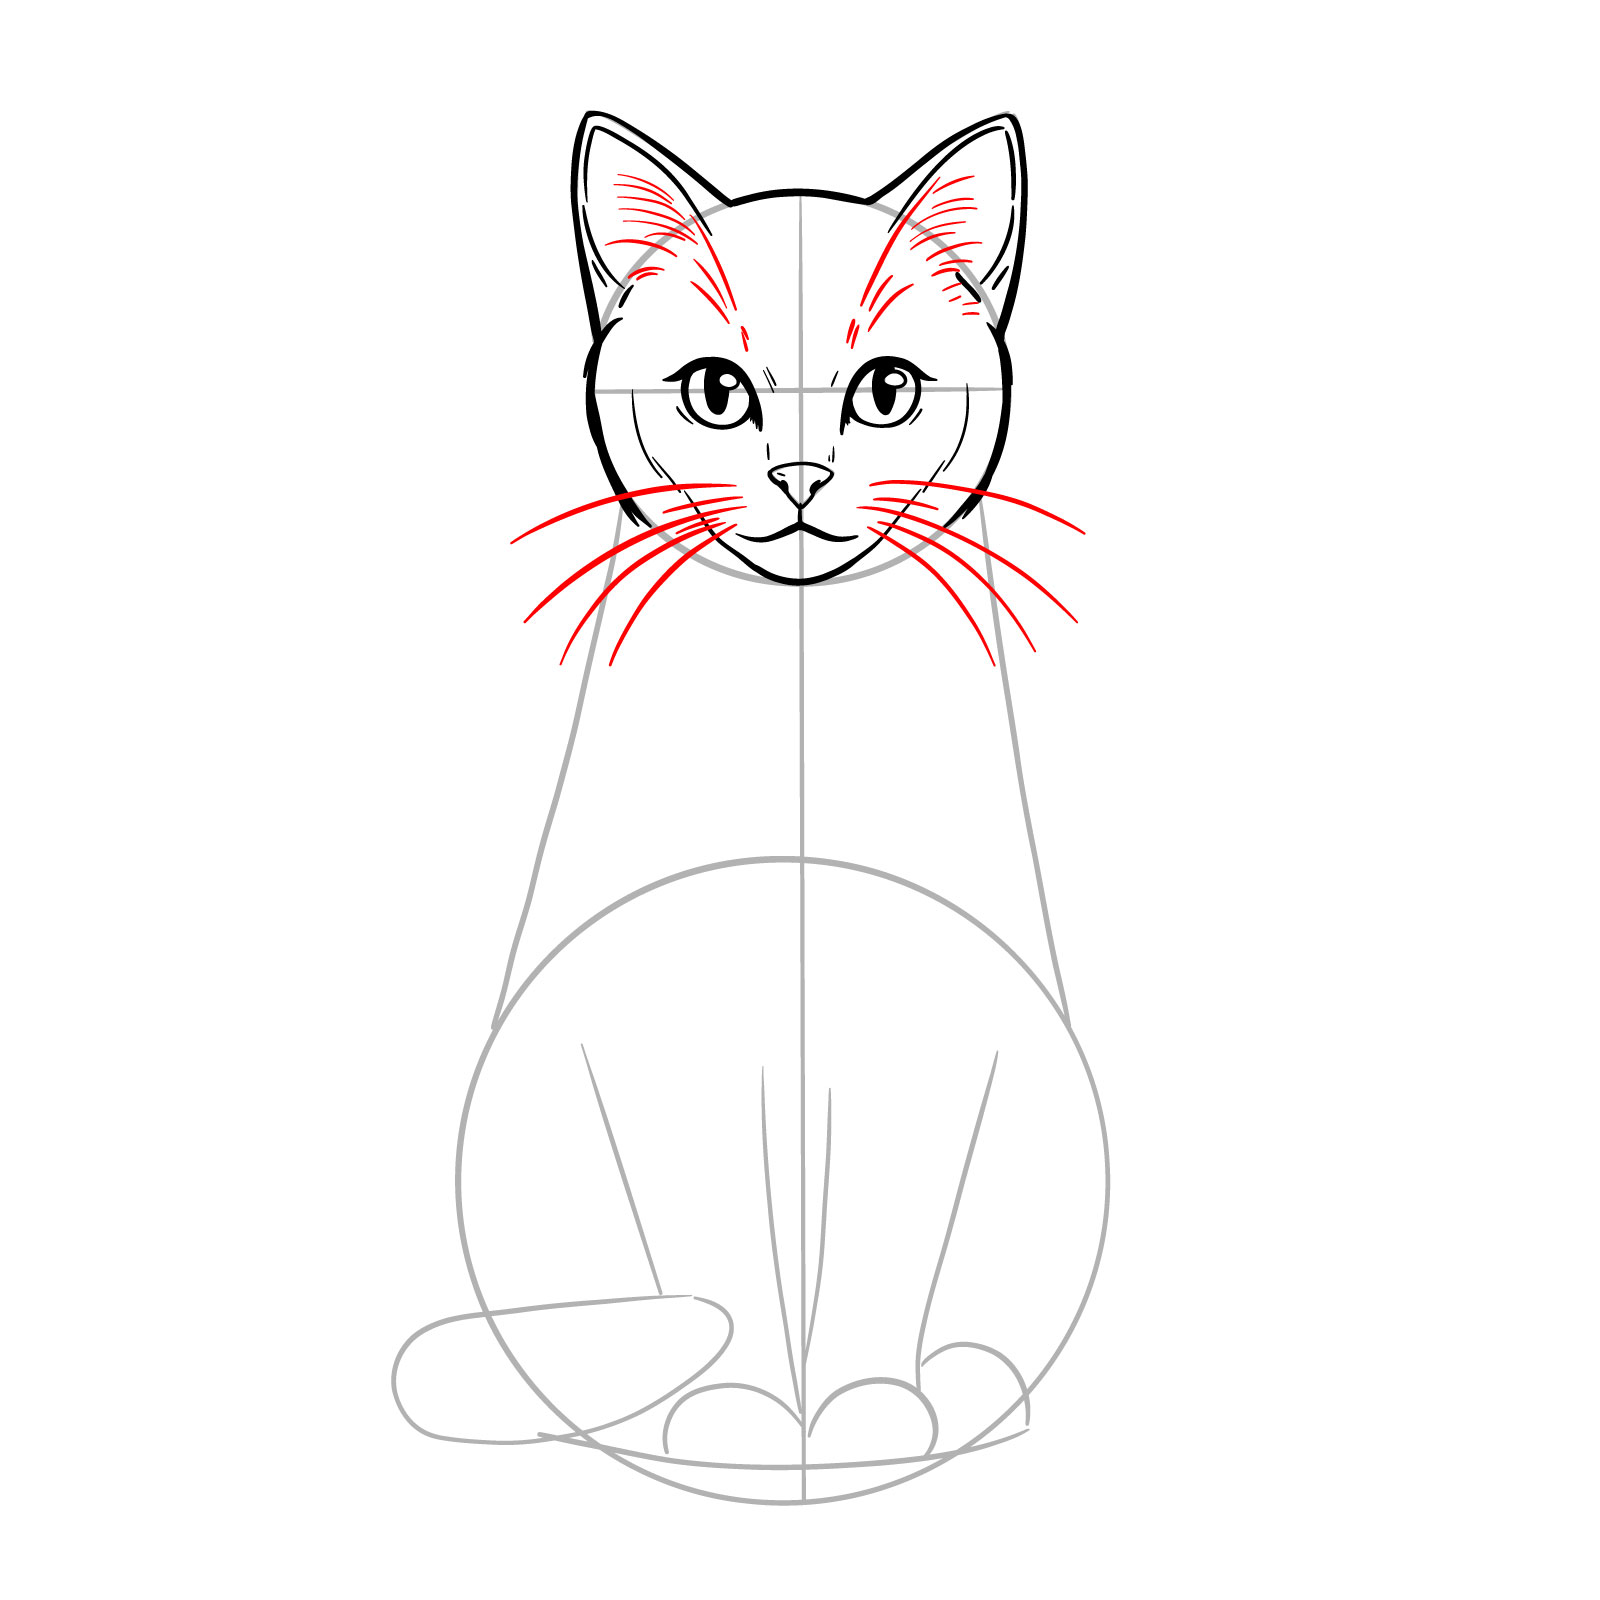
Step 10 – Draw whiskers extending from the muzzle and add fine lines above the eyes to represent the fine hair in that area. Include fur details within the ears to create a soft texture that captures the essence of a cat’s ears
Adding whiskers and ear fur to the sitting cat
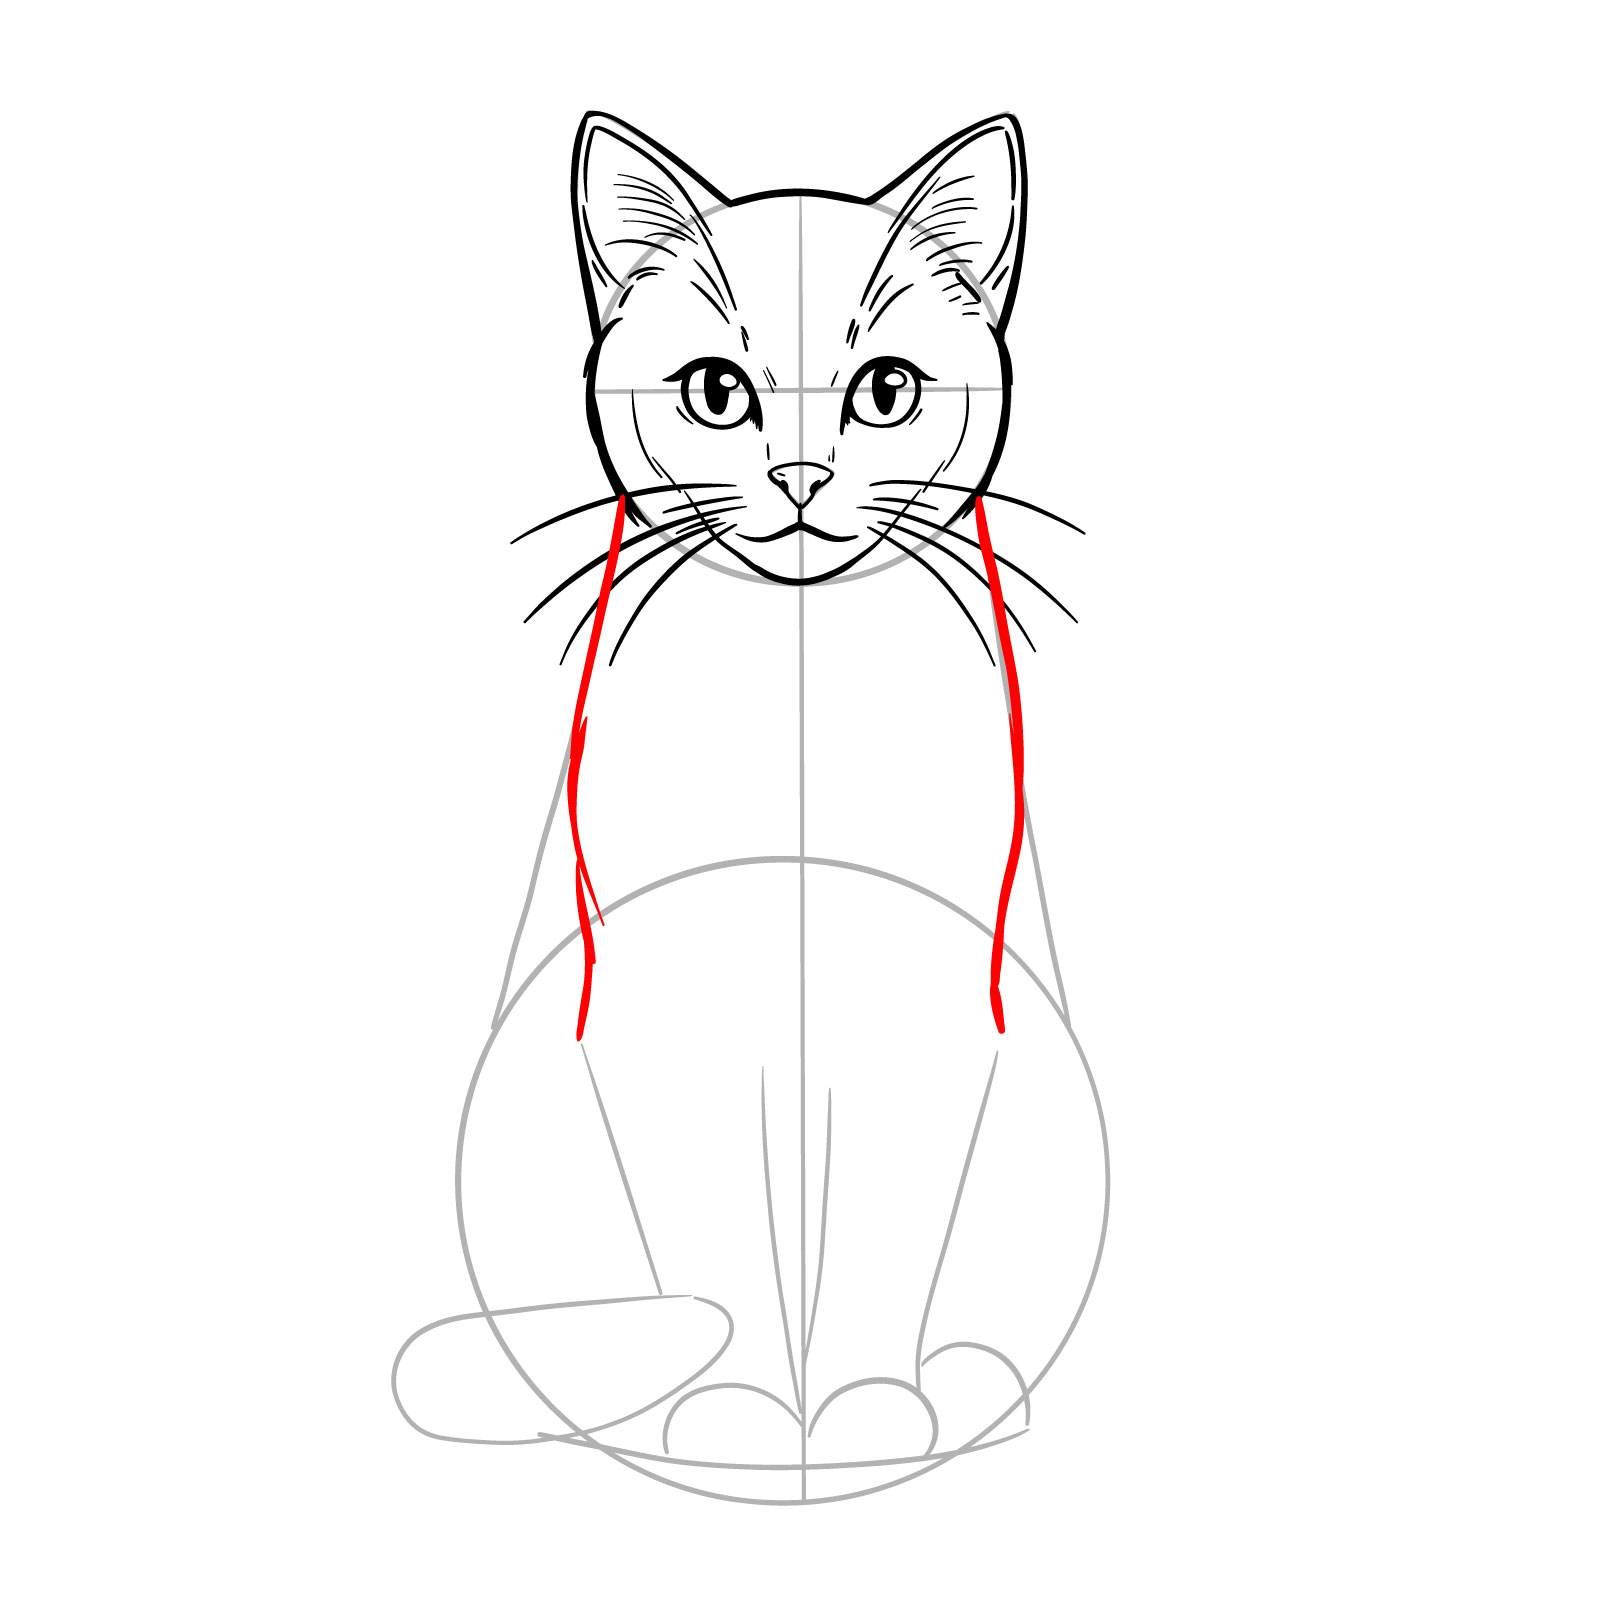
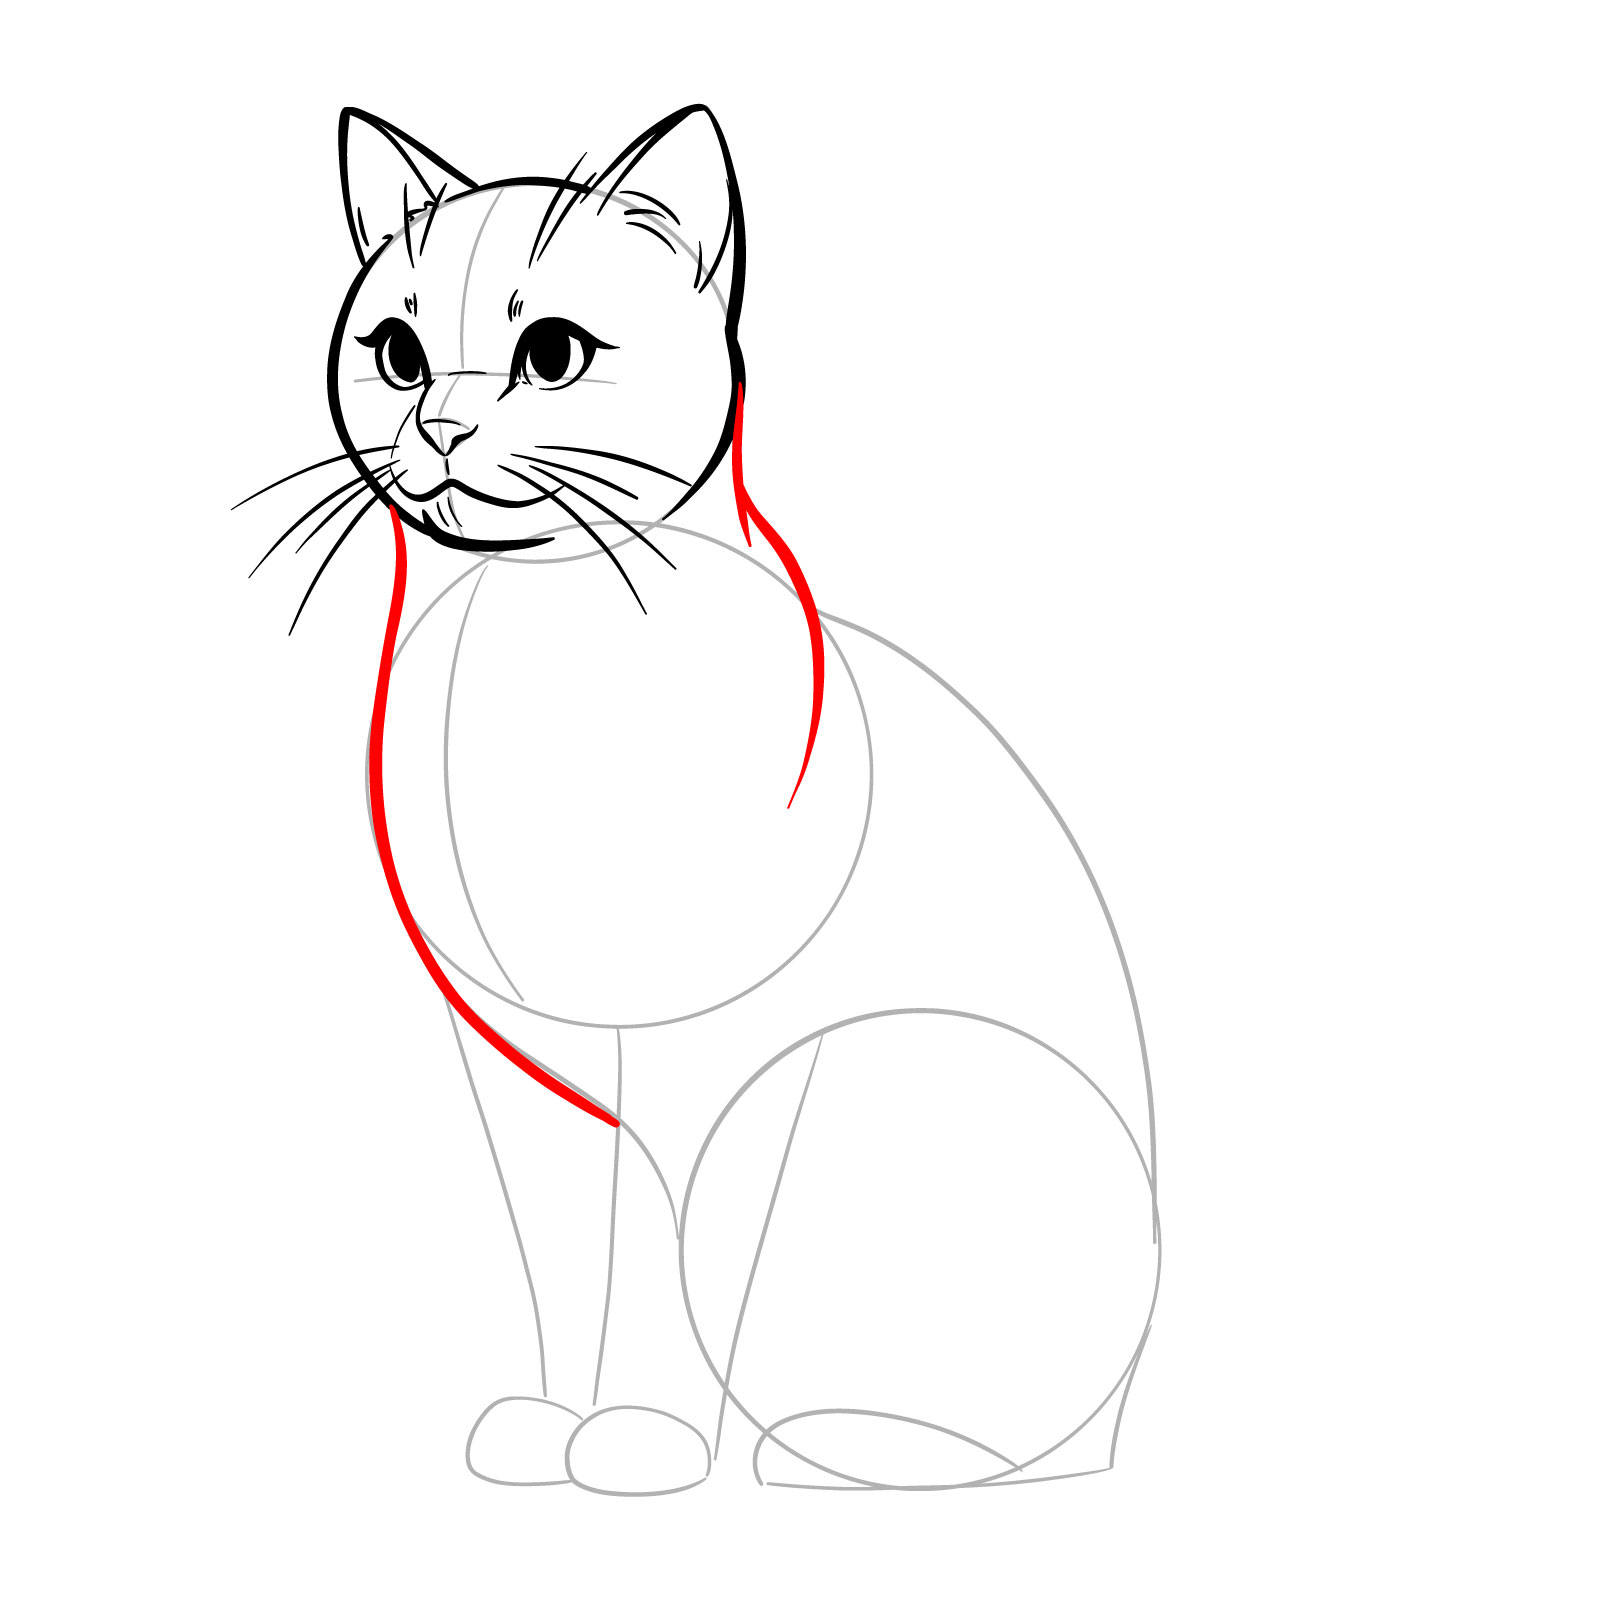
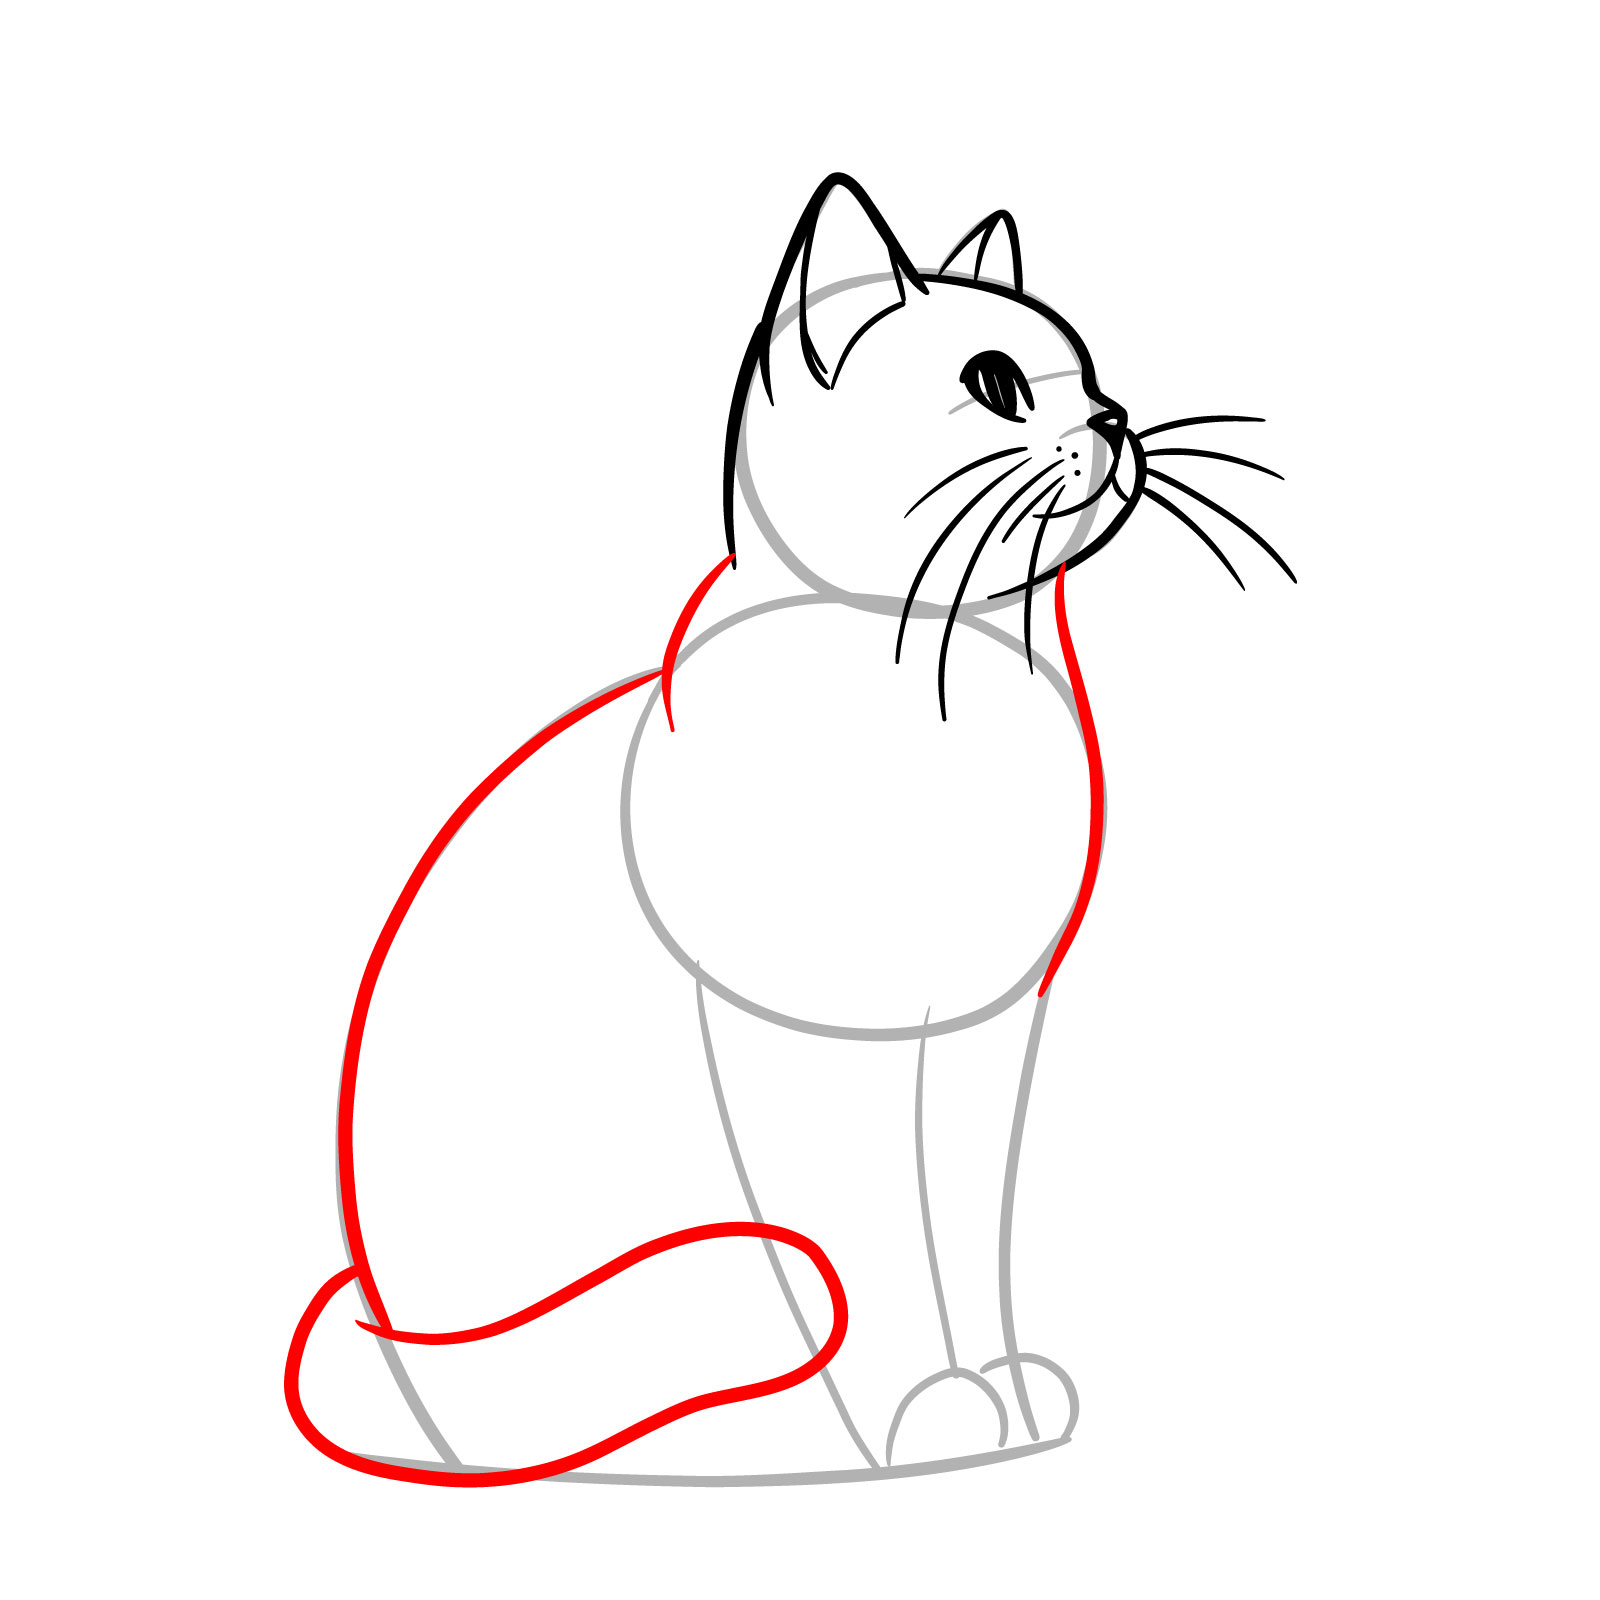
Step 11 – Sketch the neck, transitioning smoothly into the upper body to establish the cat’s posture
Outlining the neck and upper body contours
Step 12 – Finalize the outline of the cat’s body, curving down to the base where the tail begins. Sketch the tail with a smooth, flowing lines
Defining the cat’s side body and tail
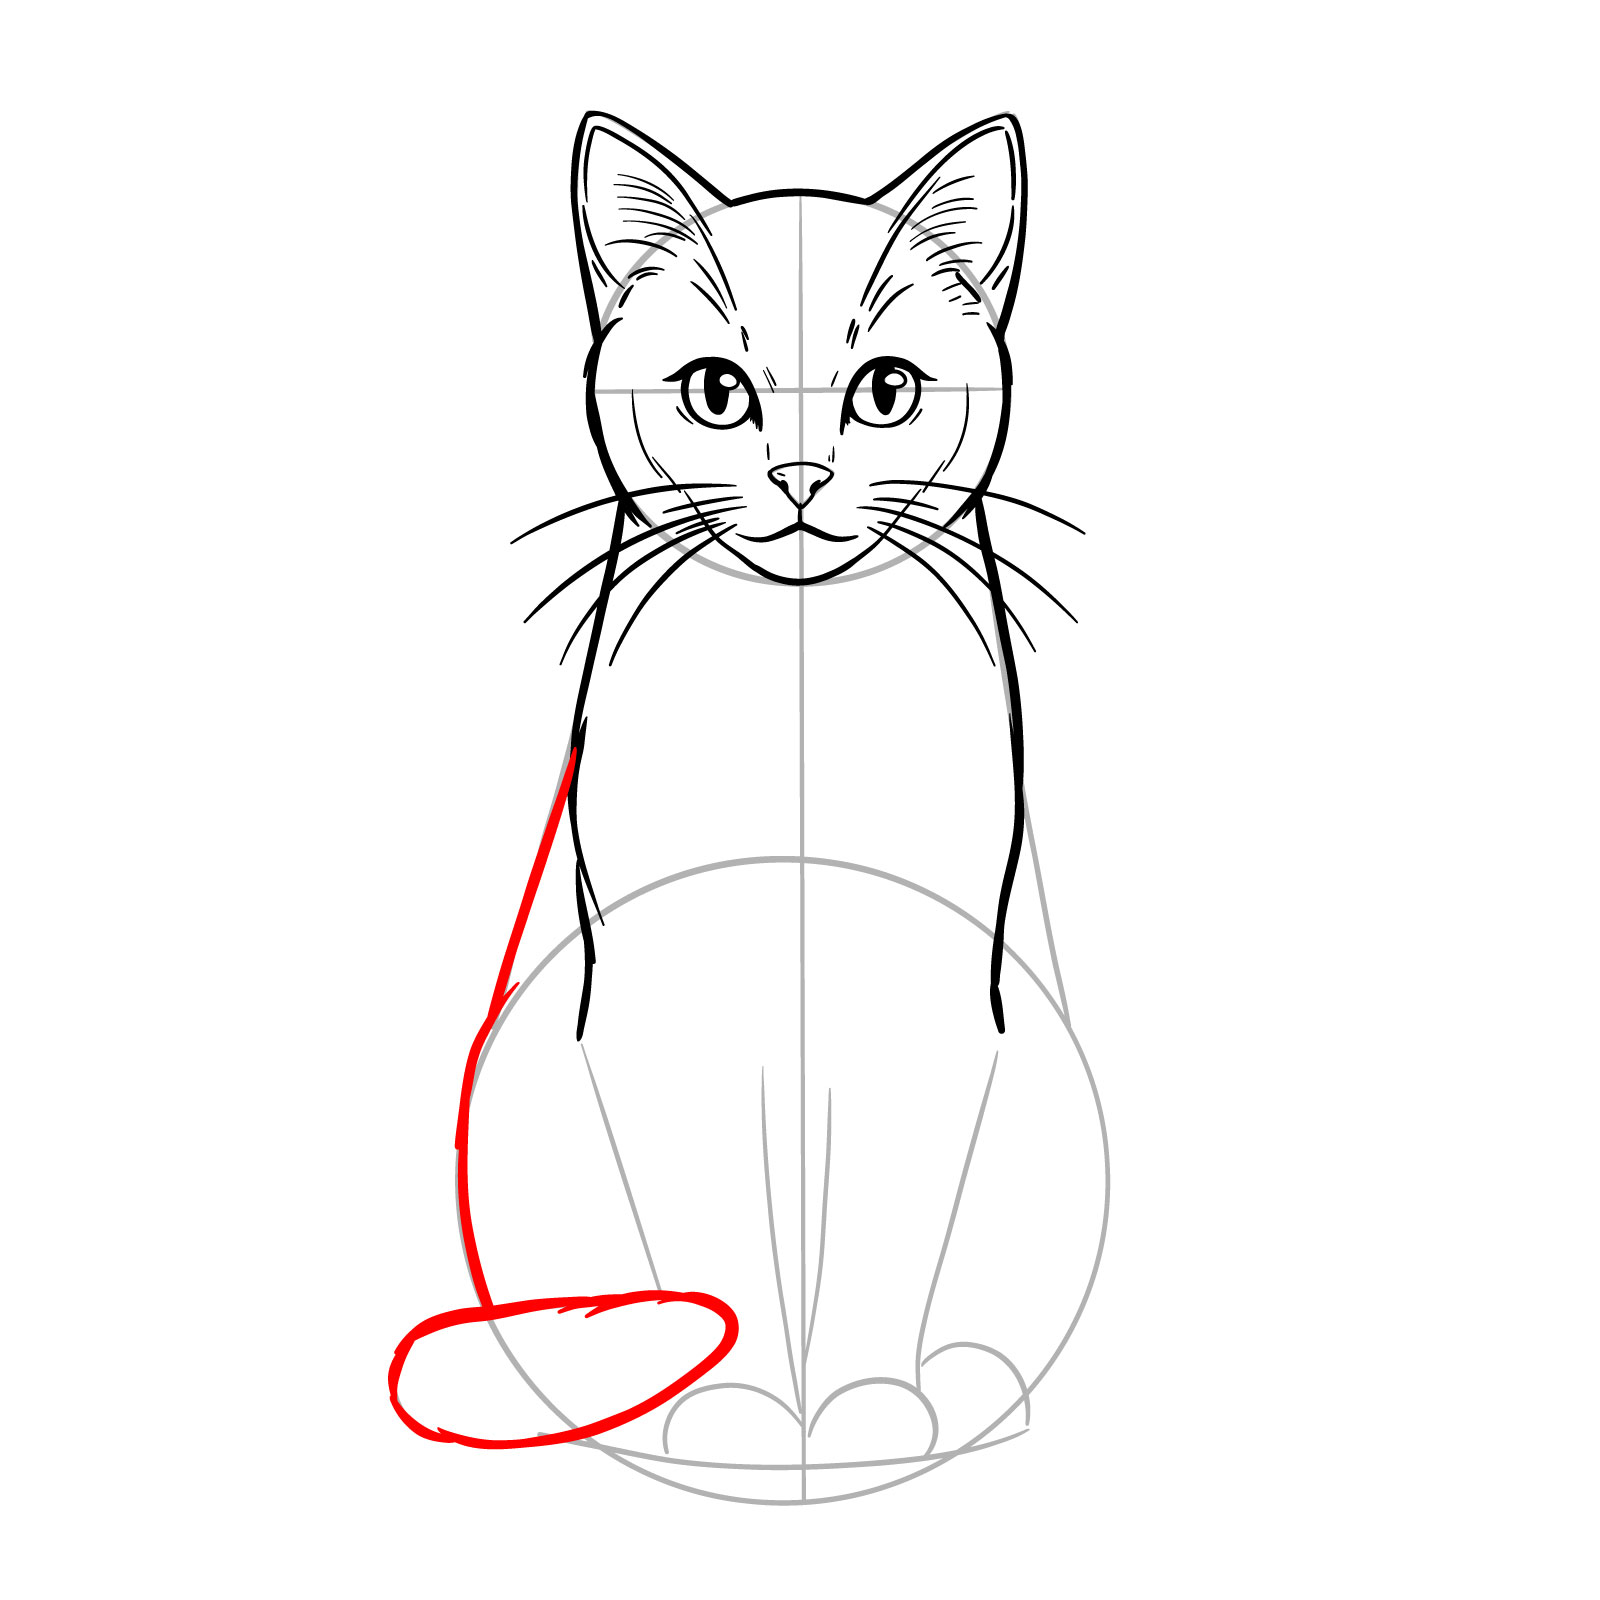
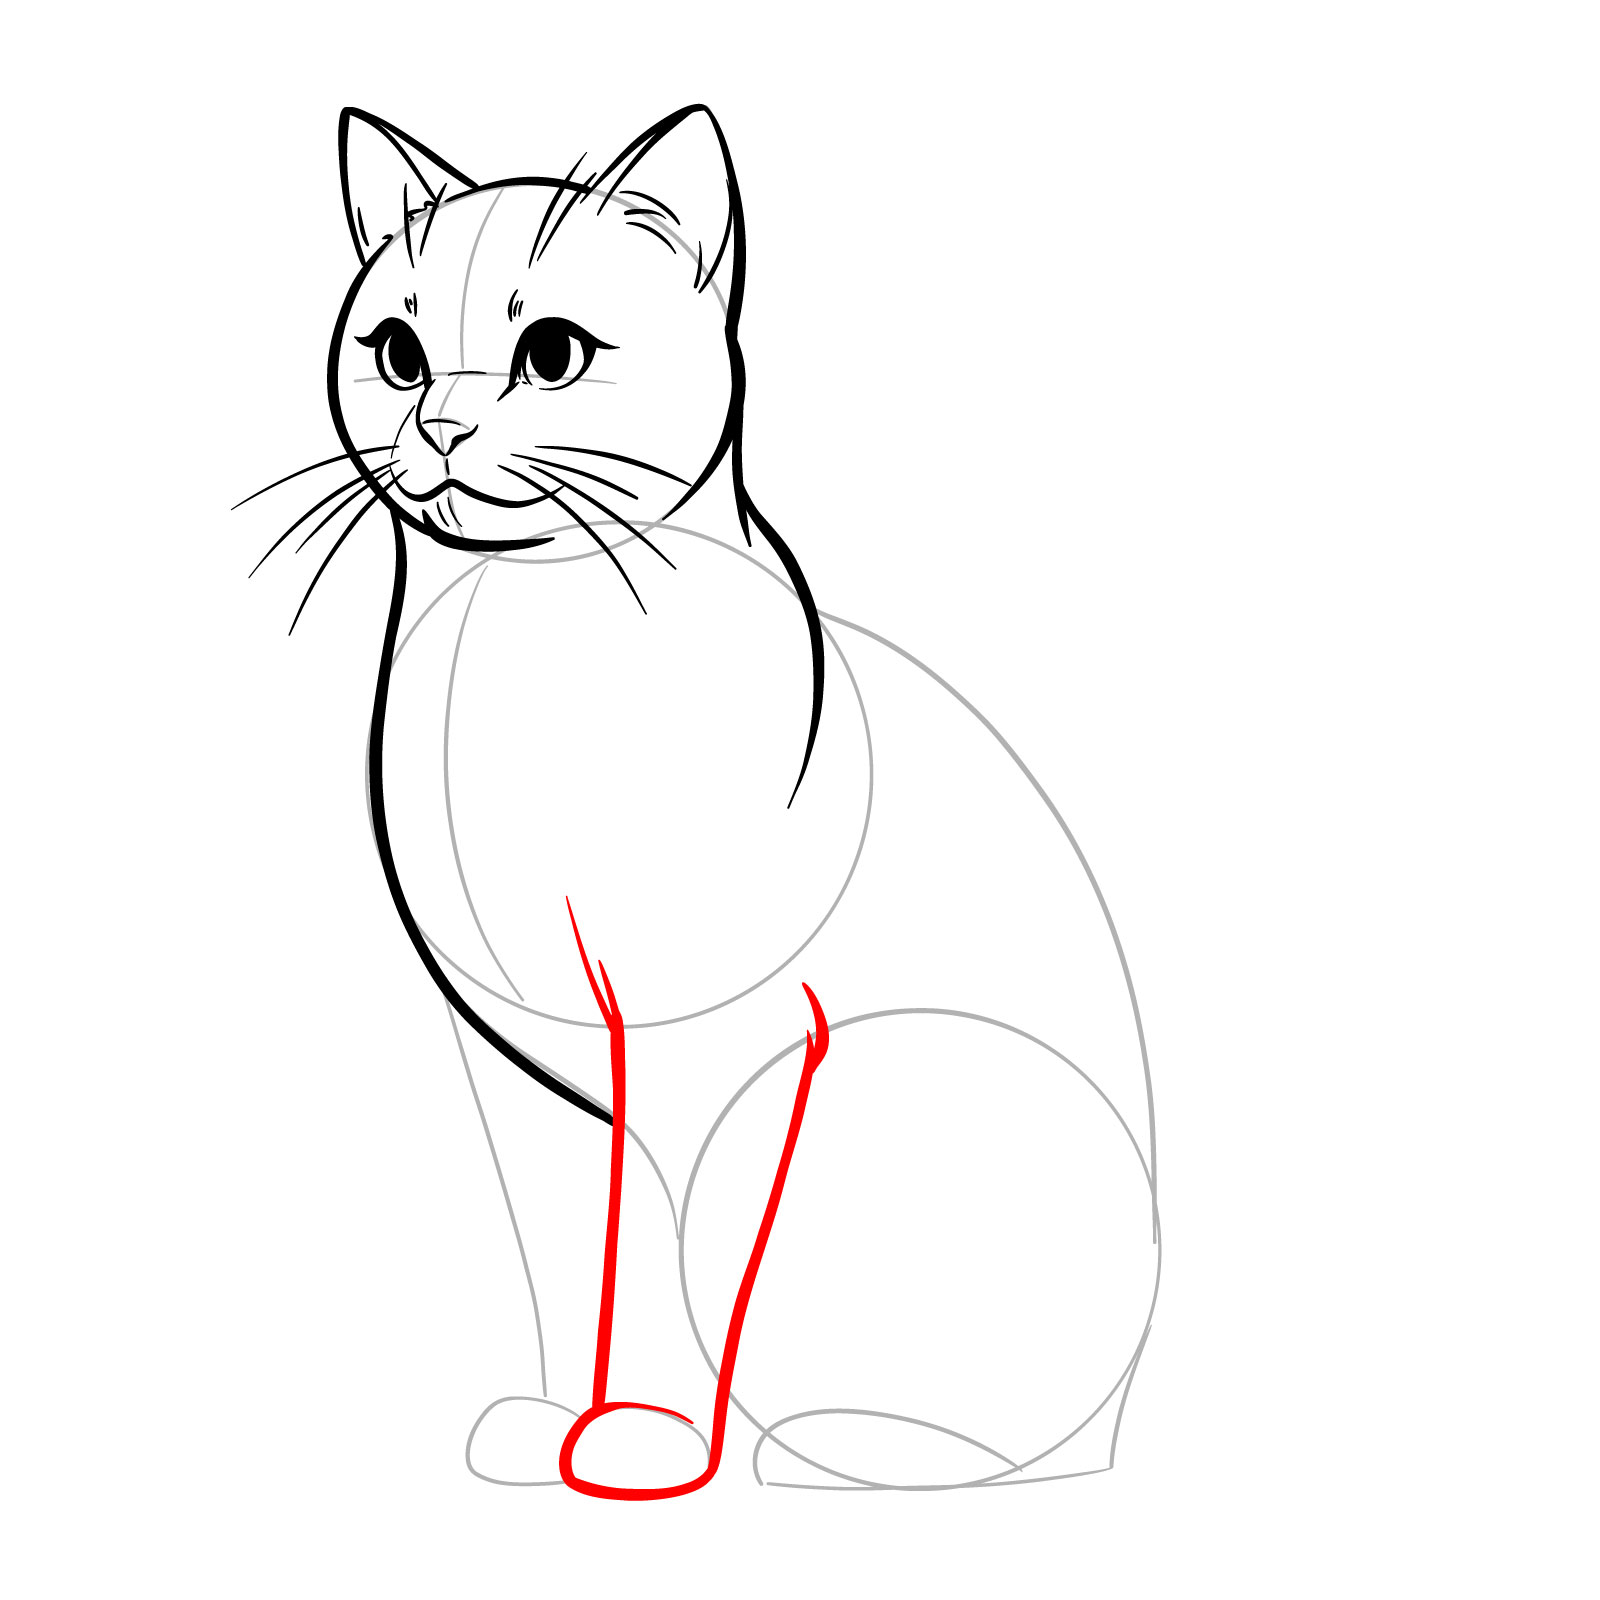
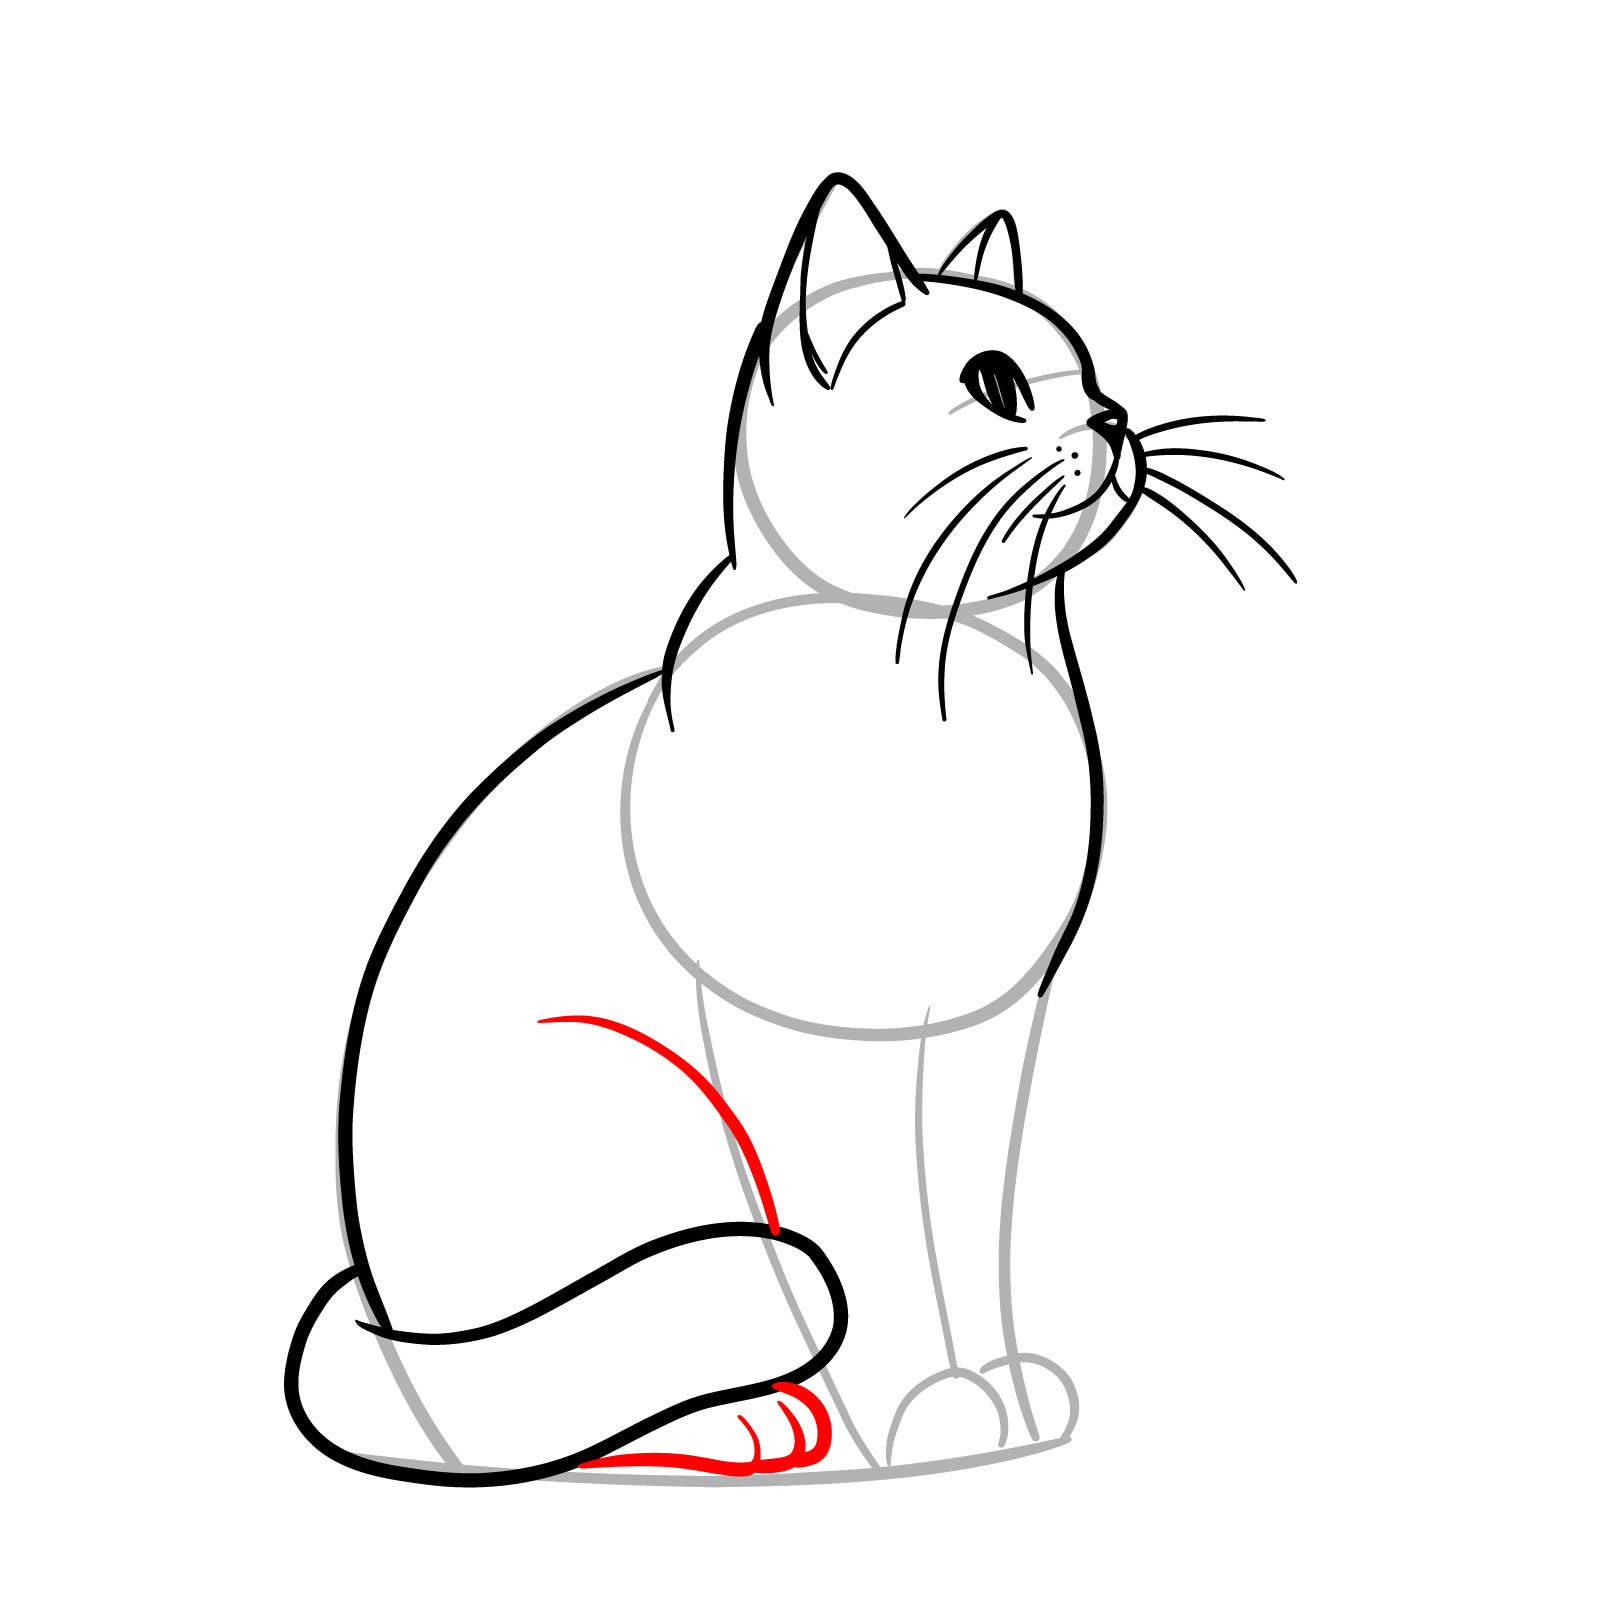
Step 13 – Begin shaping the two front legs, ensuring they are proportionate and symmetrical
Sketching the front legs of the sitting cat
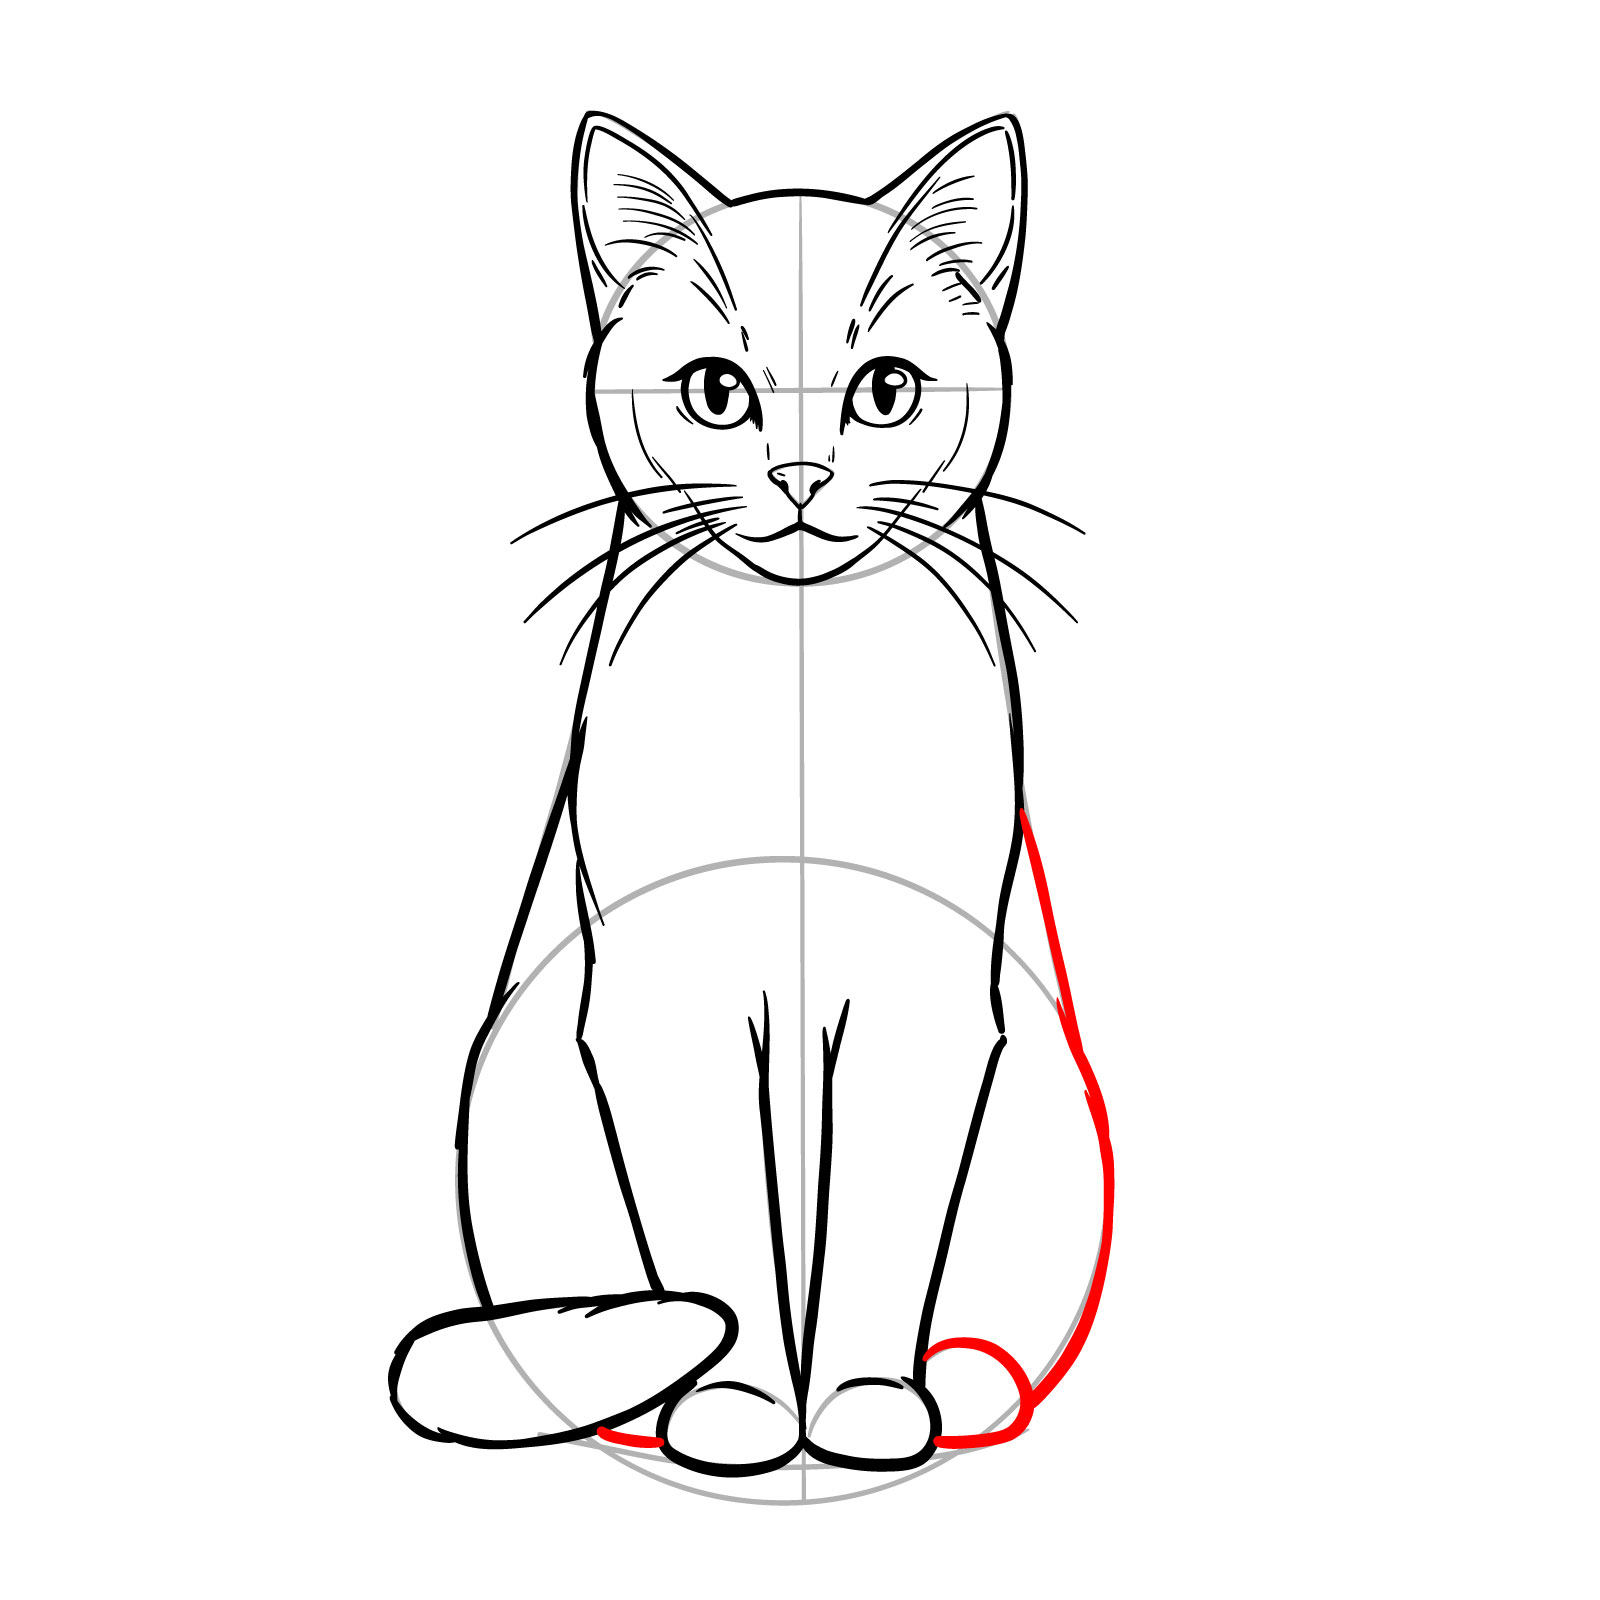
Step 14 – Draw the second side of the cat’s body and outline the back legs, tucked comfortably underneath
Defining the body and back legs of the sitting cat
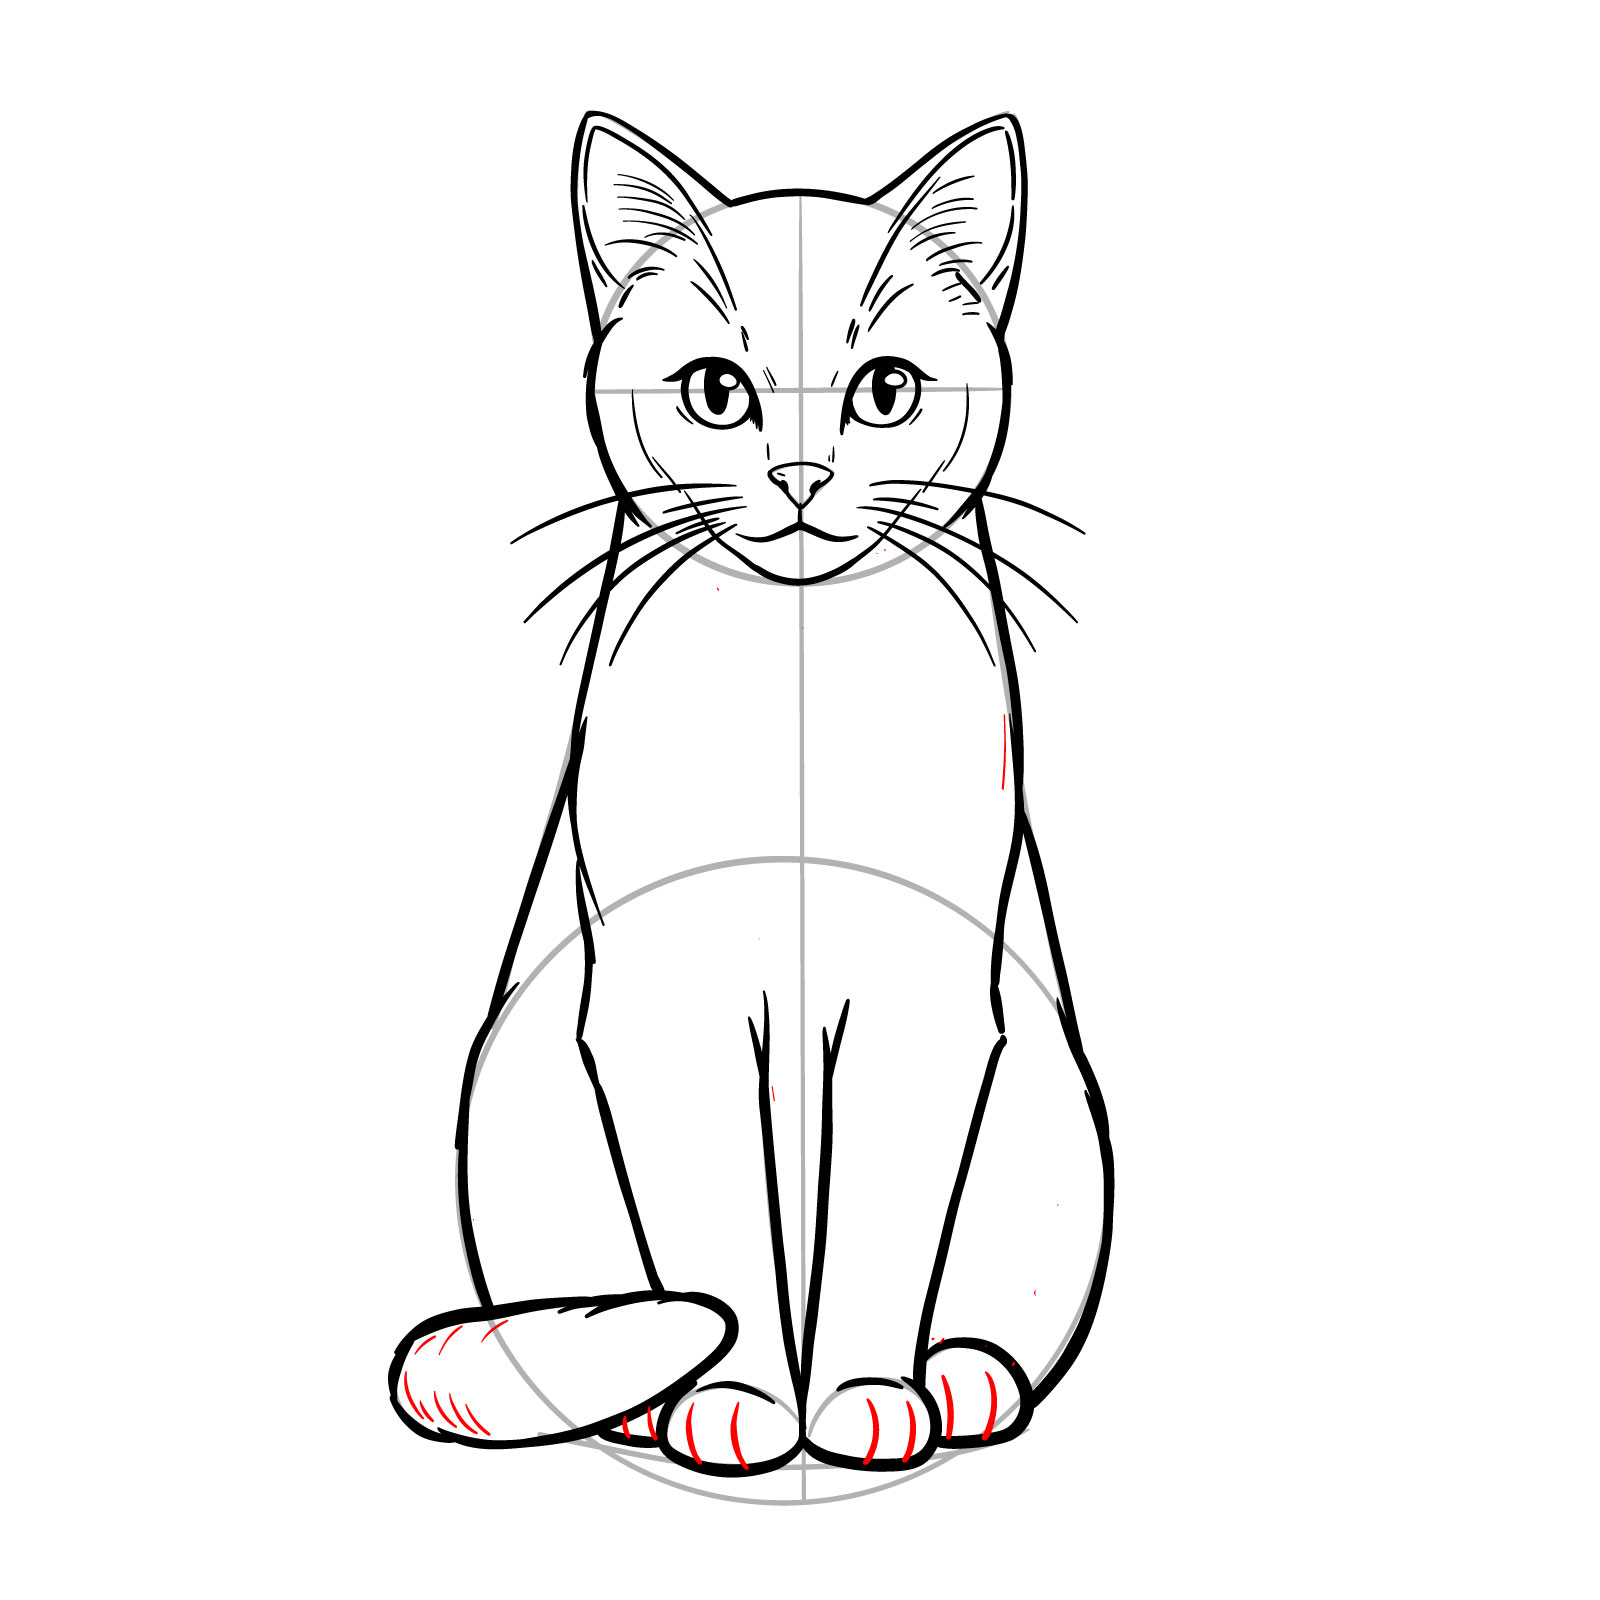
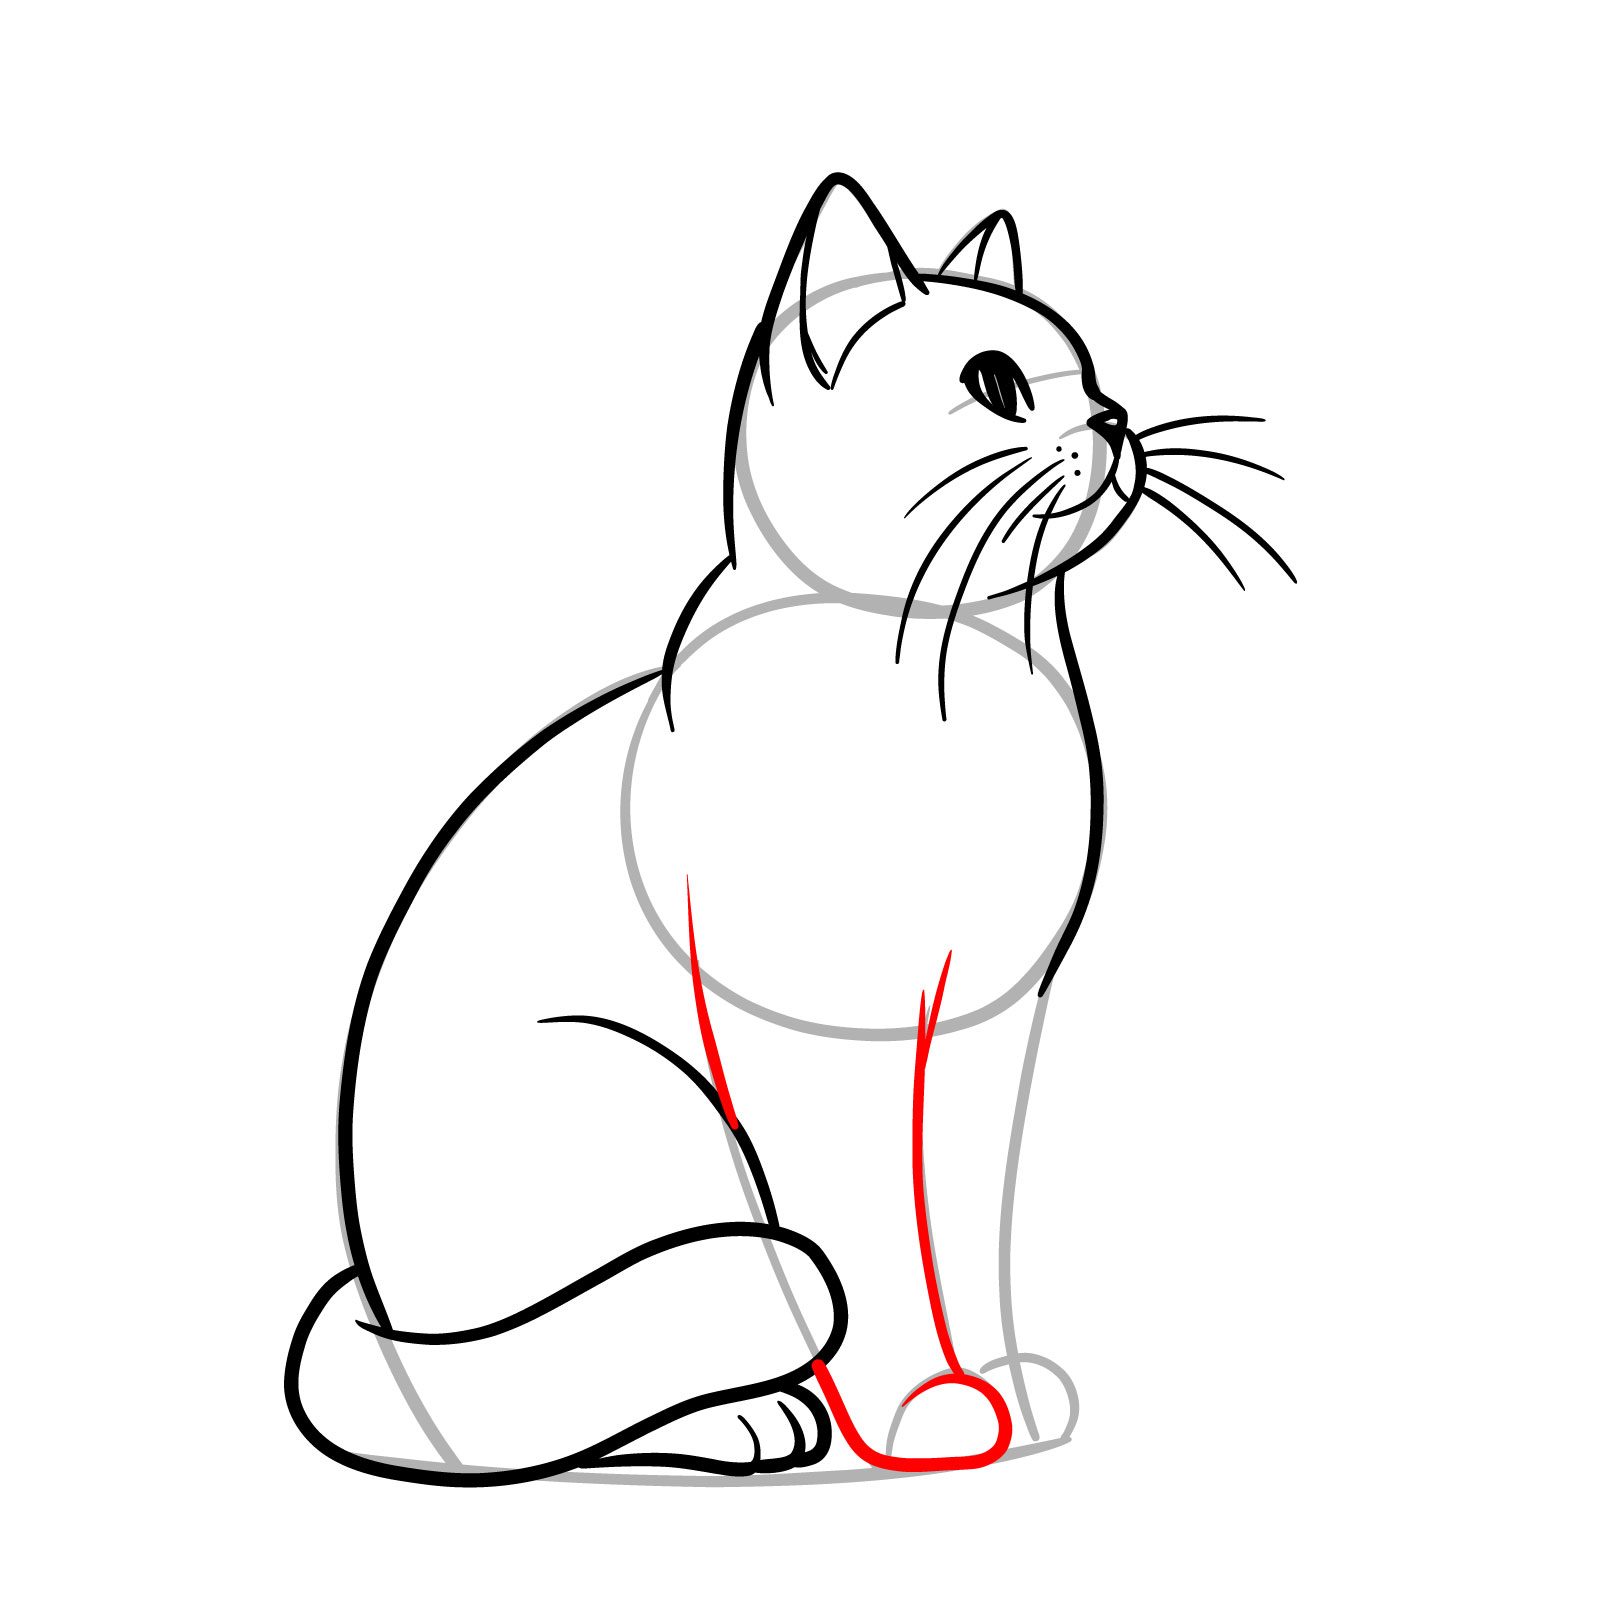
Step 15 – Separate the paws into individual sections, often referred to as toes or paw pads, to add realism. Introduce some texture to the tail for a fluffy appearance, which enhances the cat’s lifelike look
Detailing the paws and tail of the sitting cat
Step 16 – Your guide on how to draw a sitting cat concludes with a finished drawing, showcasing a serene feline in a front sitting position. Review all lines for clarity, add any final touches to fur texture, and ensure the overall symmetry and balance. Accurately erase the basic structural sketch if needed. Optionally, ink your sketch and erase the pencil lines and marks then.
Completing the sitting cat drawing with detailed features
Guide 8: How to Draw a Sitting Cat – 3/4 Left Side View – 13 Steps
Sitting cat 3/4 left side view – easy drawing guide
Continuing our artistic exploration, this eighth guide focuses on how to draw a sitting cat from a left side view. The 3/4 left side perspective gives depth and dimension to our subject. This 13-step process is ranked as normal in complexity, offering a balance between detail and manageability. By following these steps, artists can confidently depict a realistic cat without getting bogged down by intricacies. We start by establishing a proportional structure within the first two steps, setting a solid foundation for the cat’s poised and attentive stance. Step by step, you’ll bring this graceful feline to life.
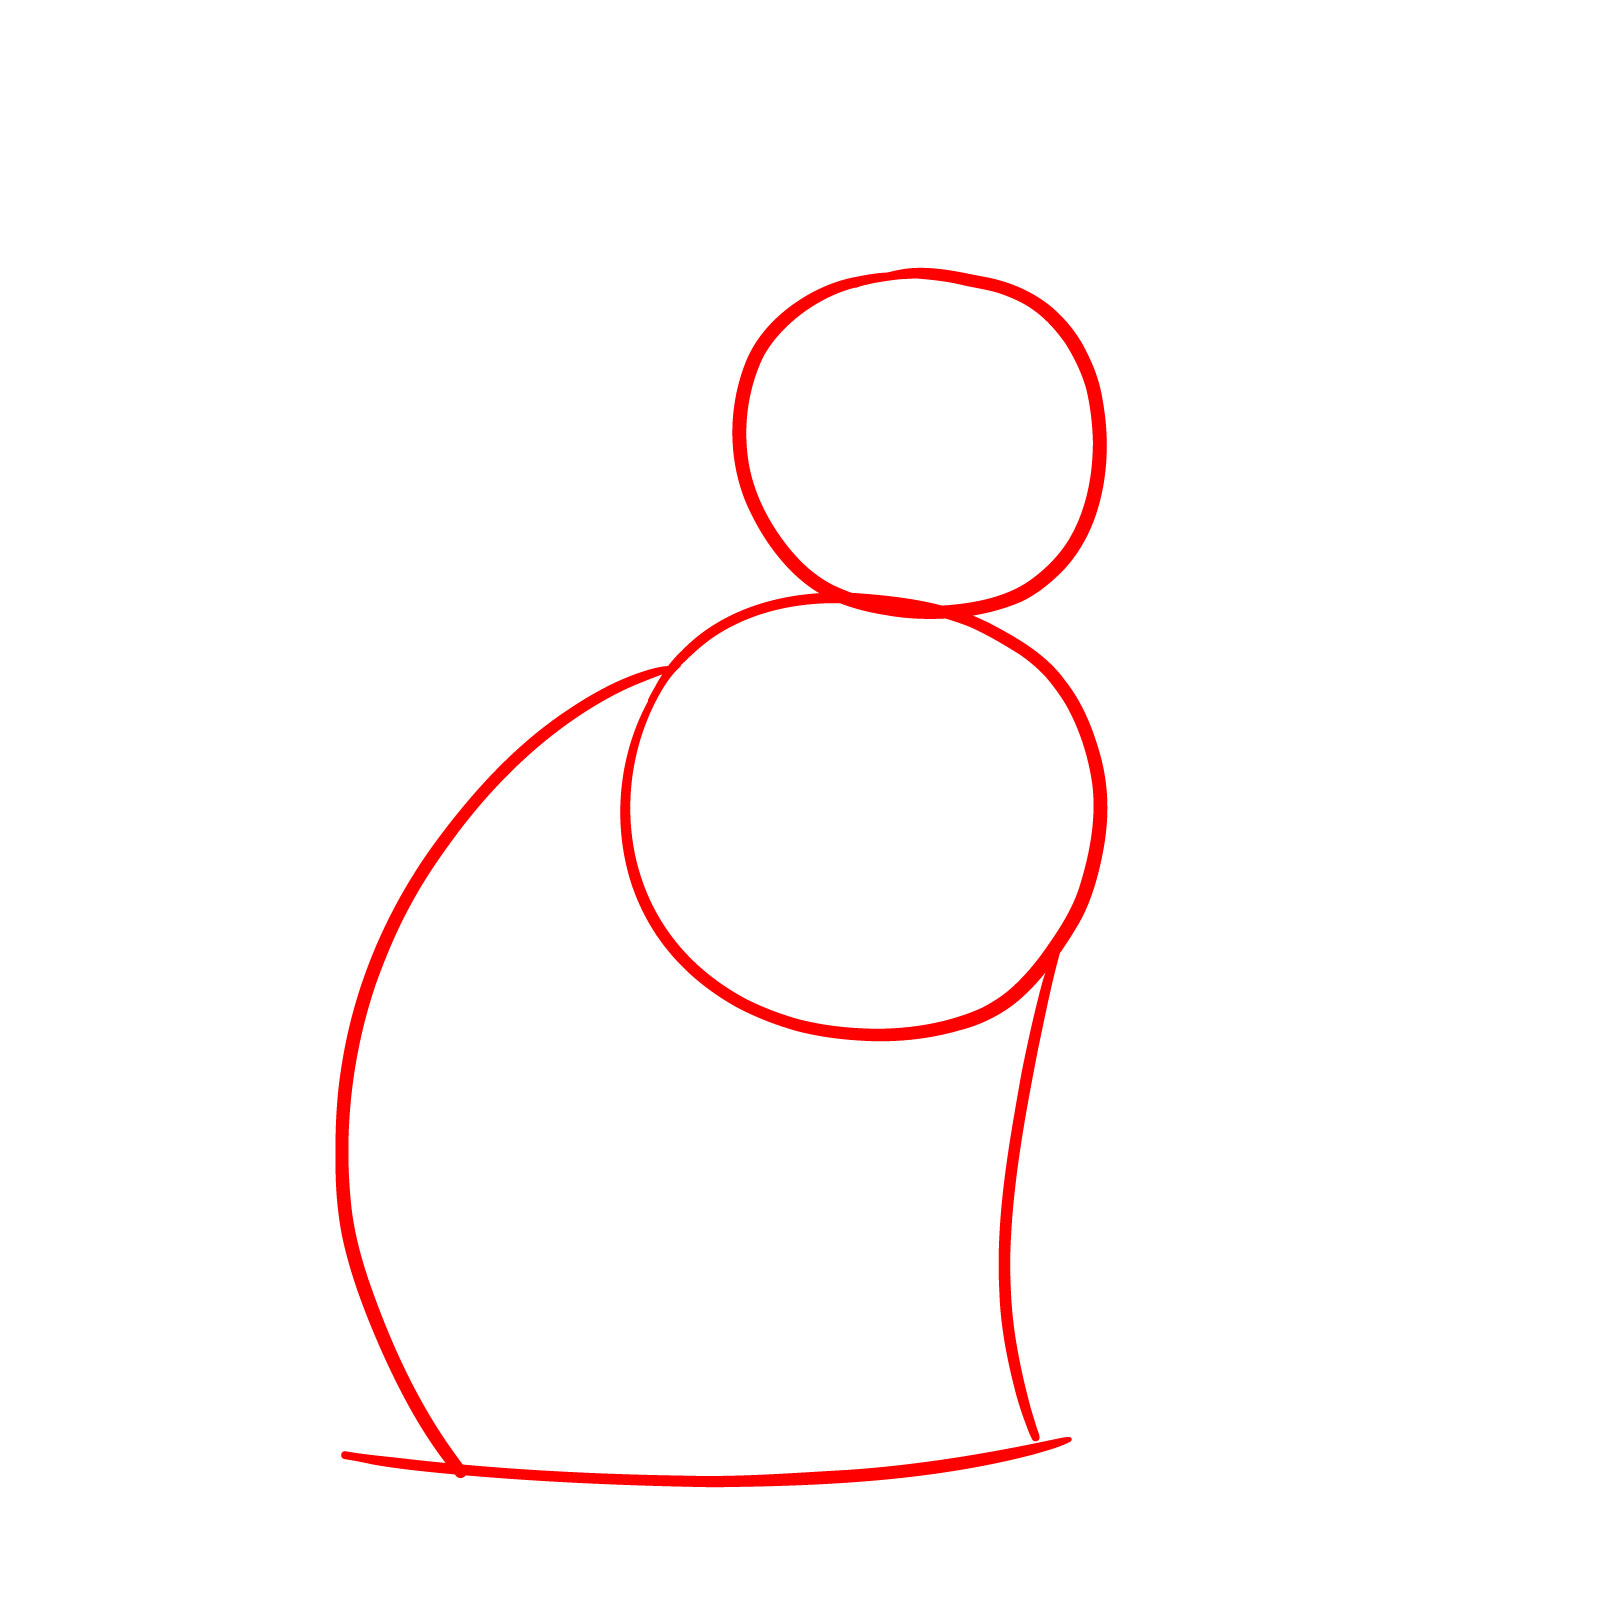
Step 01 – Draw a circle for the cat’s head and intersect it with a vertical line for center alignment and a horizontal line for eye placement. Sketch the position of the nose and muzzle. Add a larger circle for the upper body, slightly overlapping the head circle. For the bottom part of the body, draw a circle that’s between the head and upper body in size. Connect these two larger circles with curved lines to define the body’s shape
Constructing the base of a cat in a 3/4 side view
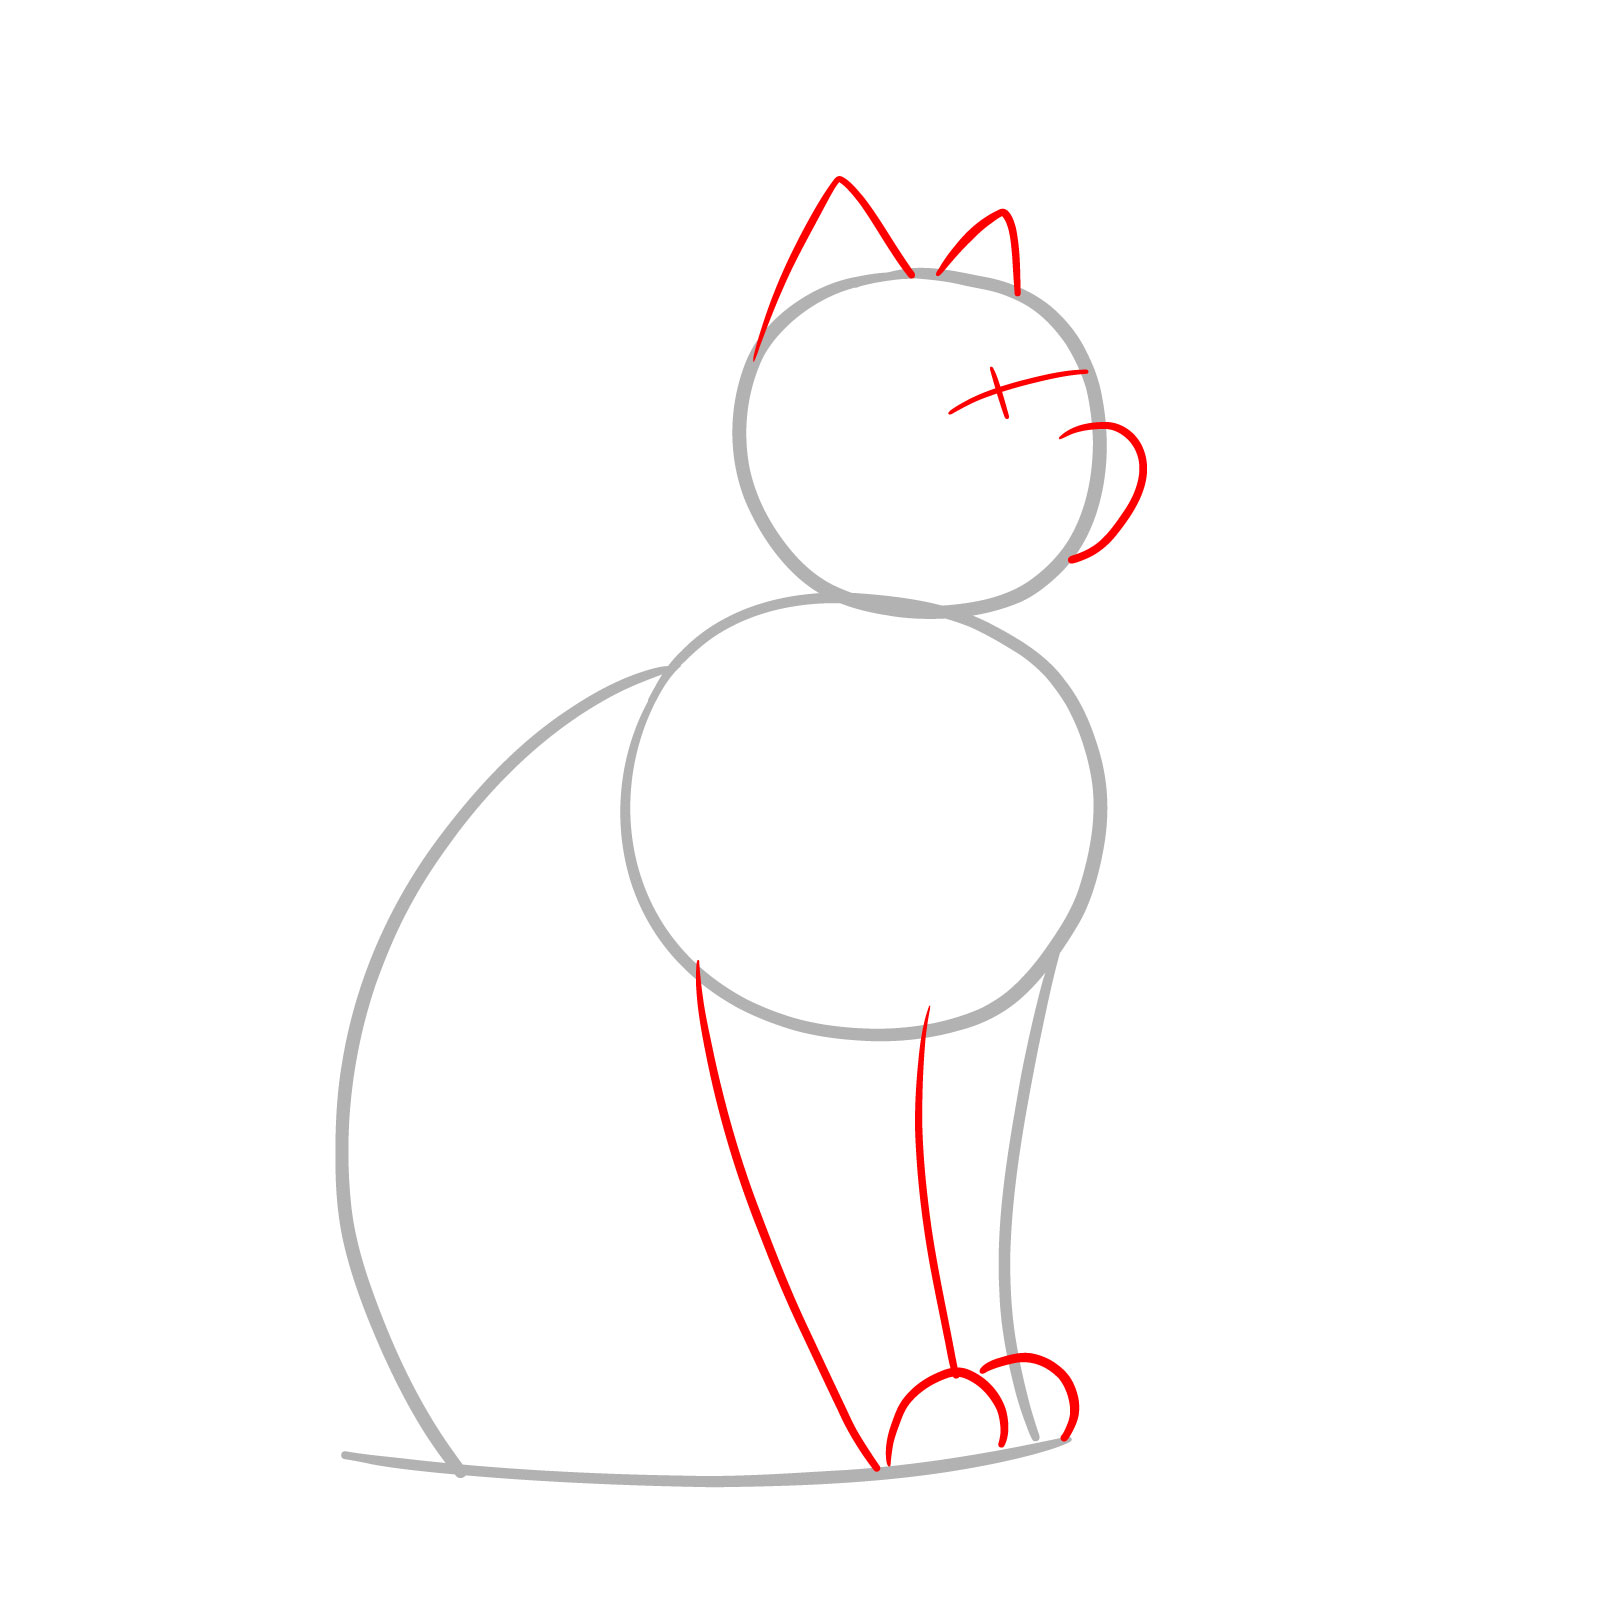
Step 02 – Map the pupils, mouth, and ears onto the head circle. Outline the neck’s curve and then sketch basic shapes and lines for the leg bases and paws, creating a framework for the sitting posture
Outlining facial features and basic leg shapes
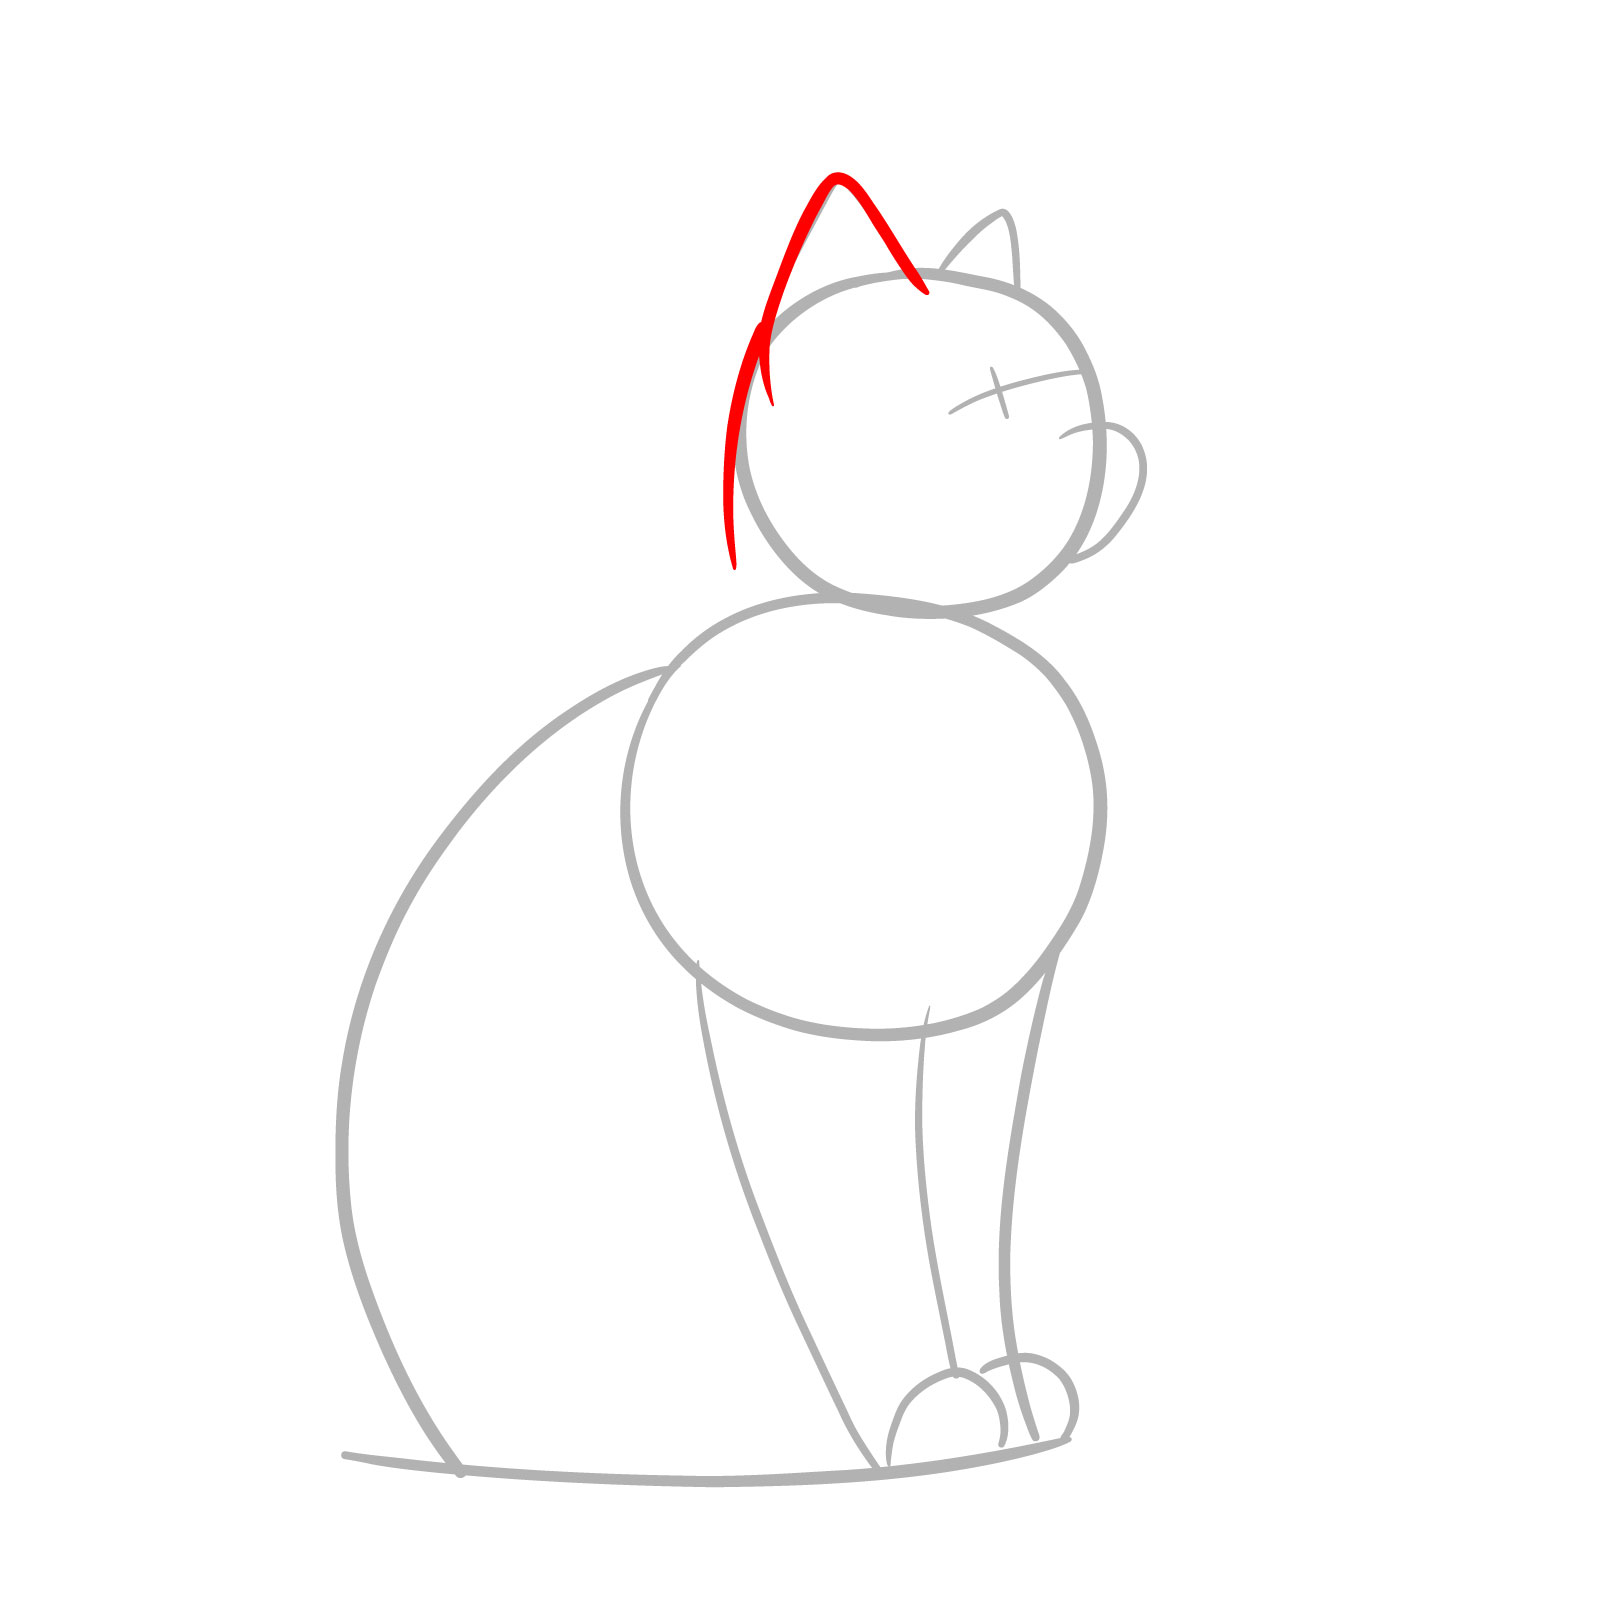
Step 03 – Outline the shape of the head, making sure to separate the chin with a distinct line starting within the head circle. Also, sketch one ear’s outline (which is closer to us), following the curvature of the head
Shaping the head and one ear
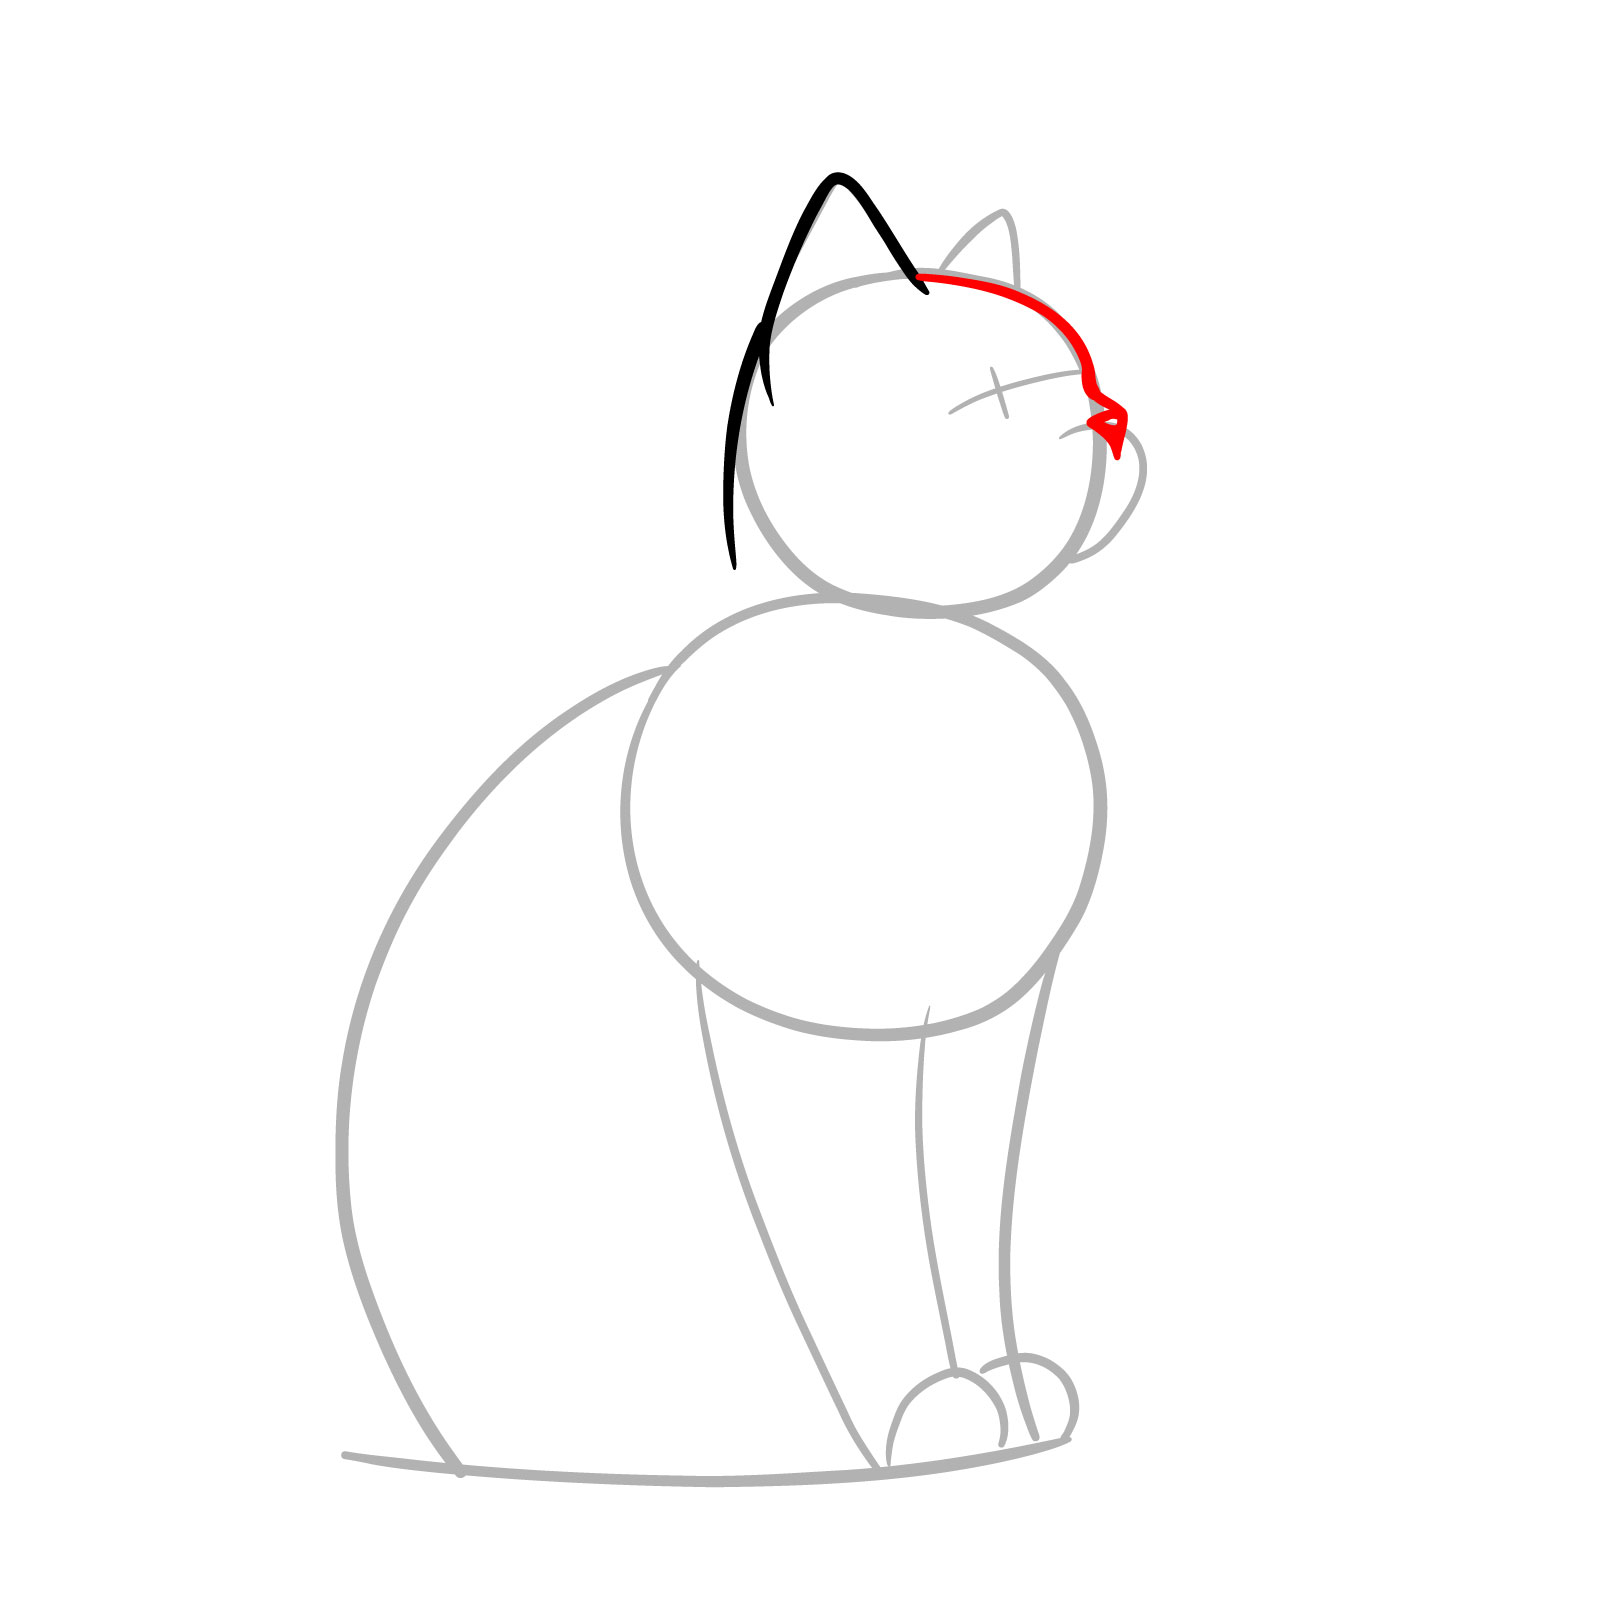
Step 04 – Add the second ear, ensuring it’s consistent with the perspective of a 3/4 side view. Sketch the inner lines and add fur details within the ears to give them depth and texture
Detailing the ears of the cat
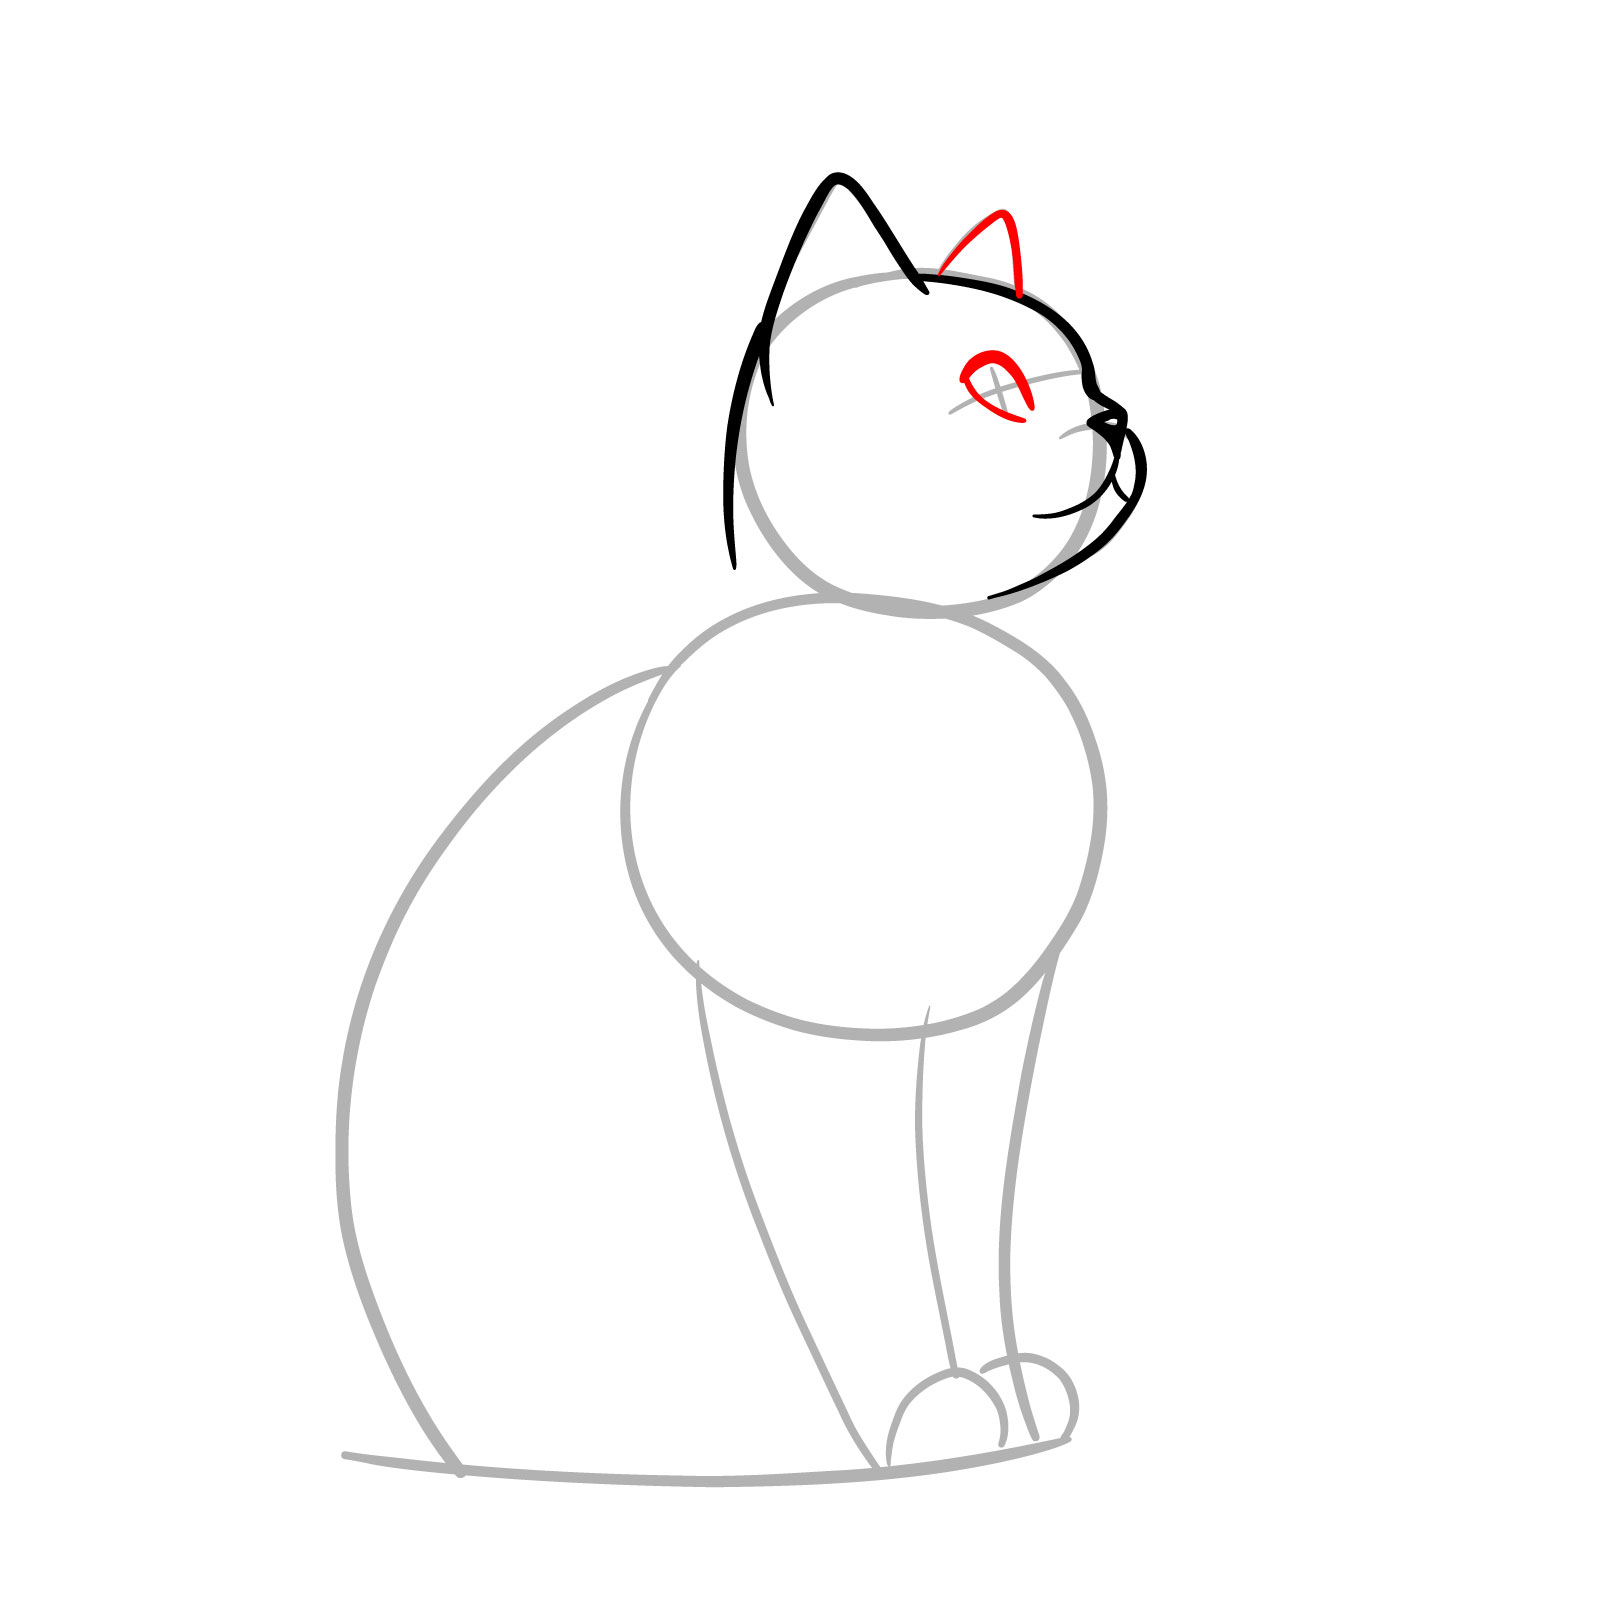
Step 05 – Draw oval shapes where the pupils will be, ensuring they are proportionally placed within the guidelines set for the eyes
Drawing the pupils
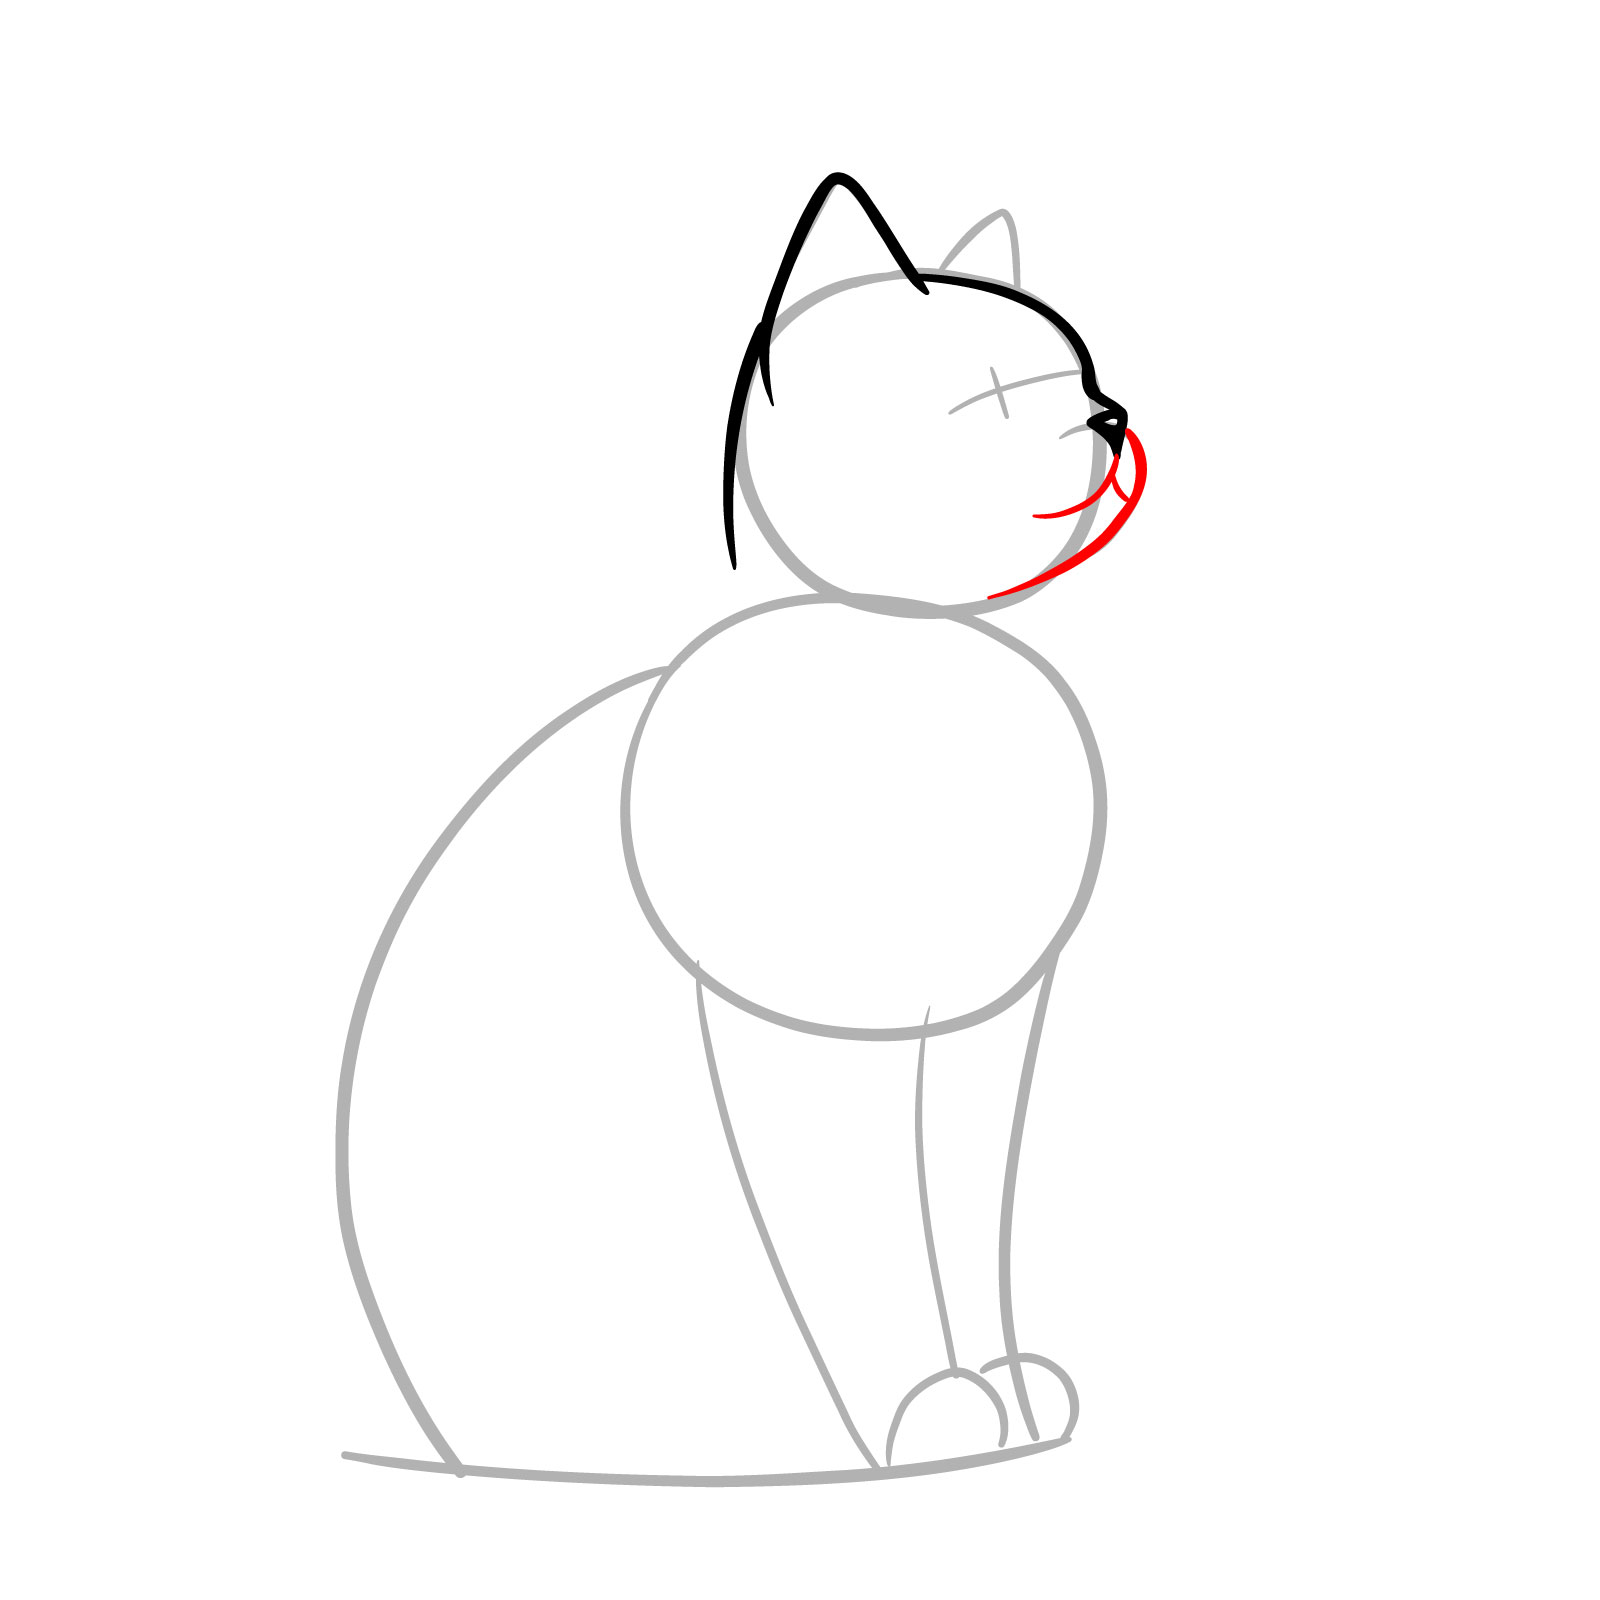
Step 06 – Outline the upper and lower eyelids to form the shape of the eyes. Then, define the nose’s shape, following the initial guidelines for the muzzle
Shaping the eyelids and nose
Step 07 – Sketch the mouth and add lines for the whiskers on either side of the nose and above the eyes. Introduce some short lines around the face to suggest fur texture
Adding mouth and whiskers
Step 08 – Draw the lines that form the upper part of the body, creating the back’s curve and the chest’s front line, to give structure to the cat’s sitting posture
Outlining the upper body
Step 09 – Begin by outlining the front leg with a light sketch, paying attention to its proportion to the body and its placement, ensuring it appears natural and supports the cat’s sitting posture
Initial sketch of the cat’s front leg, focusing on proportion and placement
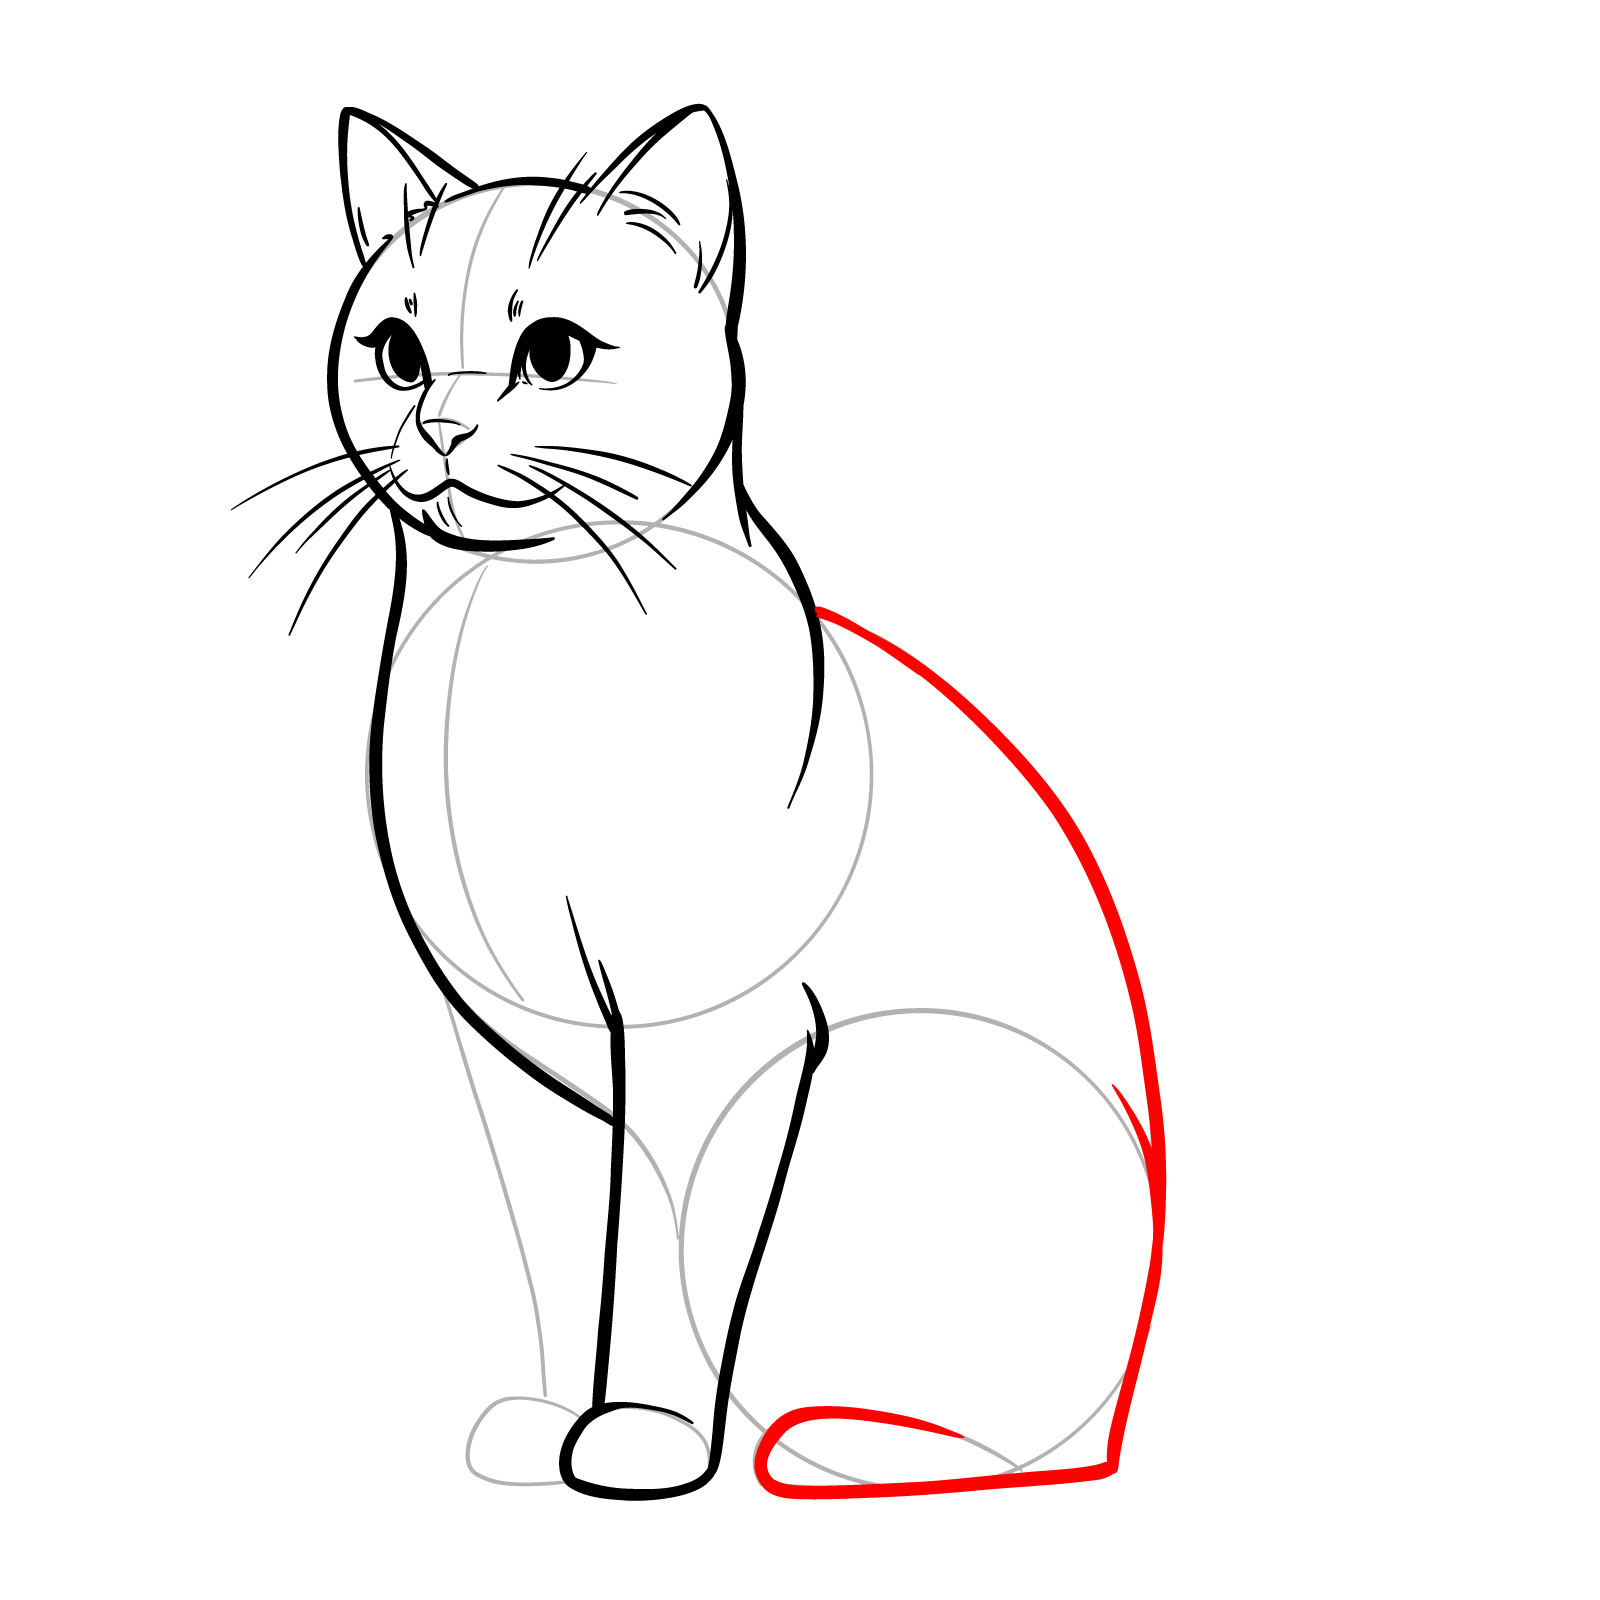
Step 10 – Continue the cat’s form by sketching the curve of the back, extending into the hind leg. Draw the hind leg with a slight bend to convey the relaxed, sitting position, maintaining the overall balance of the figure
Progression of the sitting cat’s form with the back and hind leg outlined
Step 11 – Refine the legs by adding subtle lines to suggest muscle structure. Sketch the remaining front and back legs, ensuring they follow the natural symmetry and muscular tone of a cat’s posture
Refining the cat’s front and hind legs with added muscle detail
Step 12 – Draw the tail with a gentle curve to enhance the relaxed pose. Incorporate fur texture with light strokes across the body, and separate the paws into distinct sections to reflect the anatomy of the cat’s feet
Adding a tail and fur texture details to the cat’s sitting figure
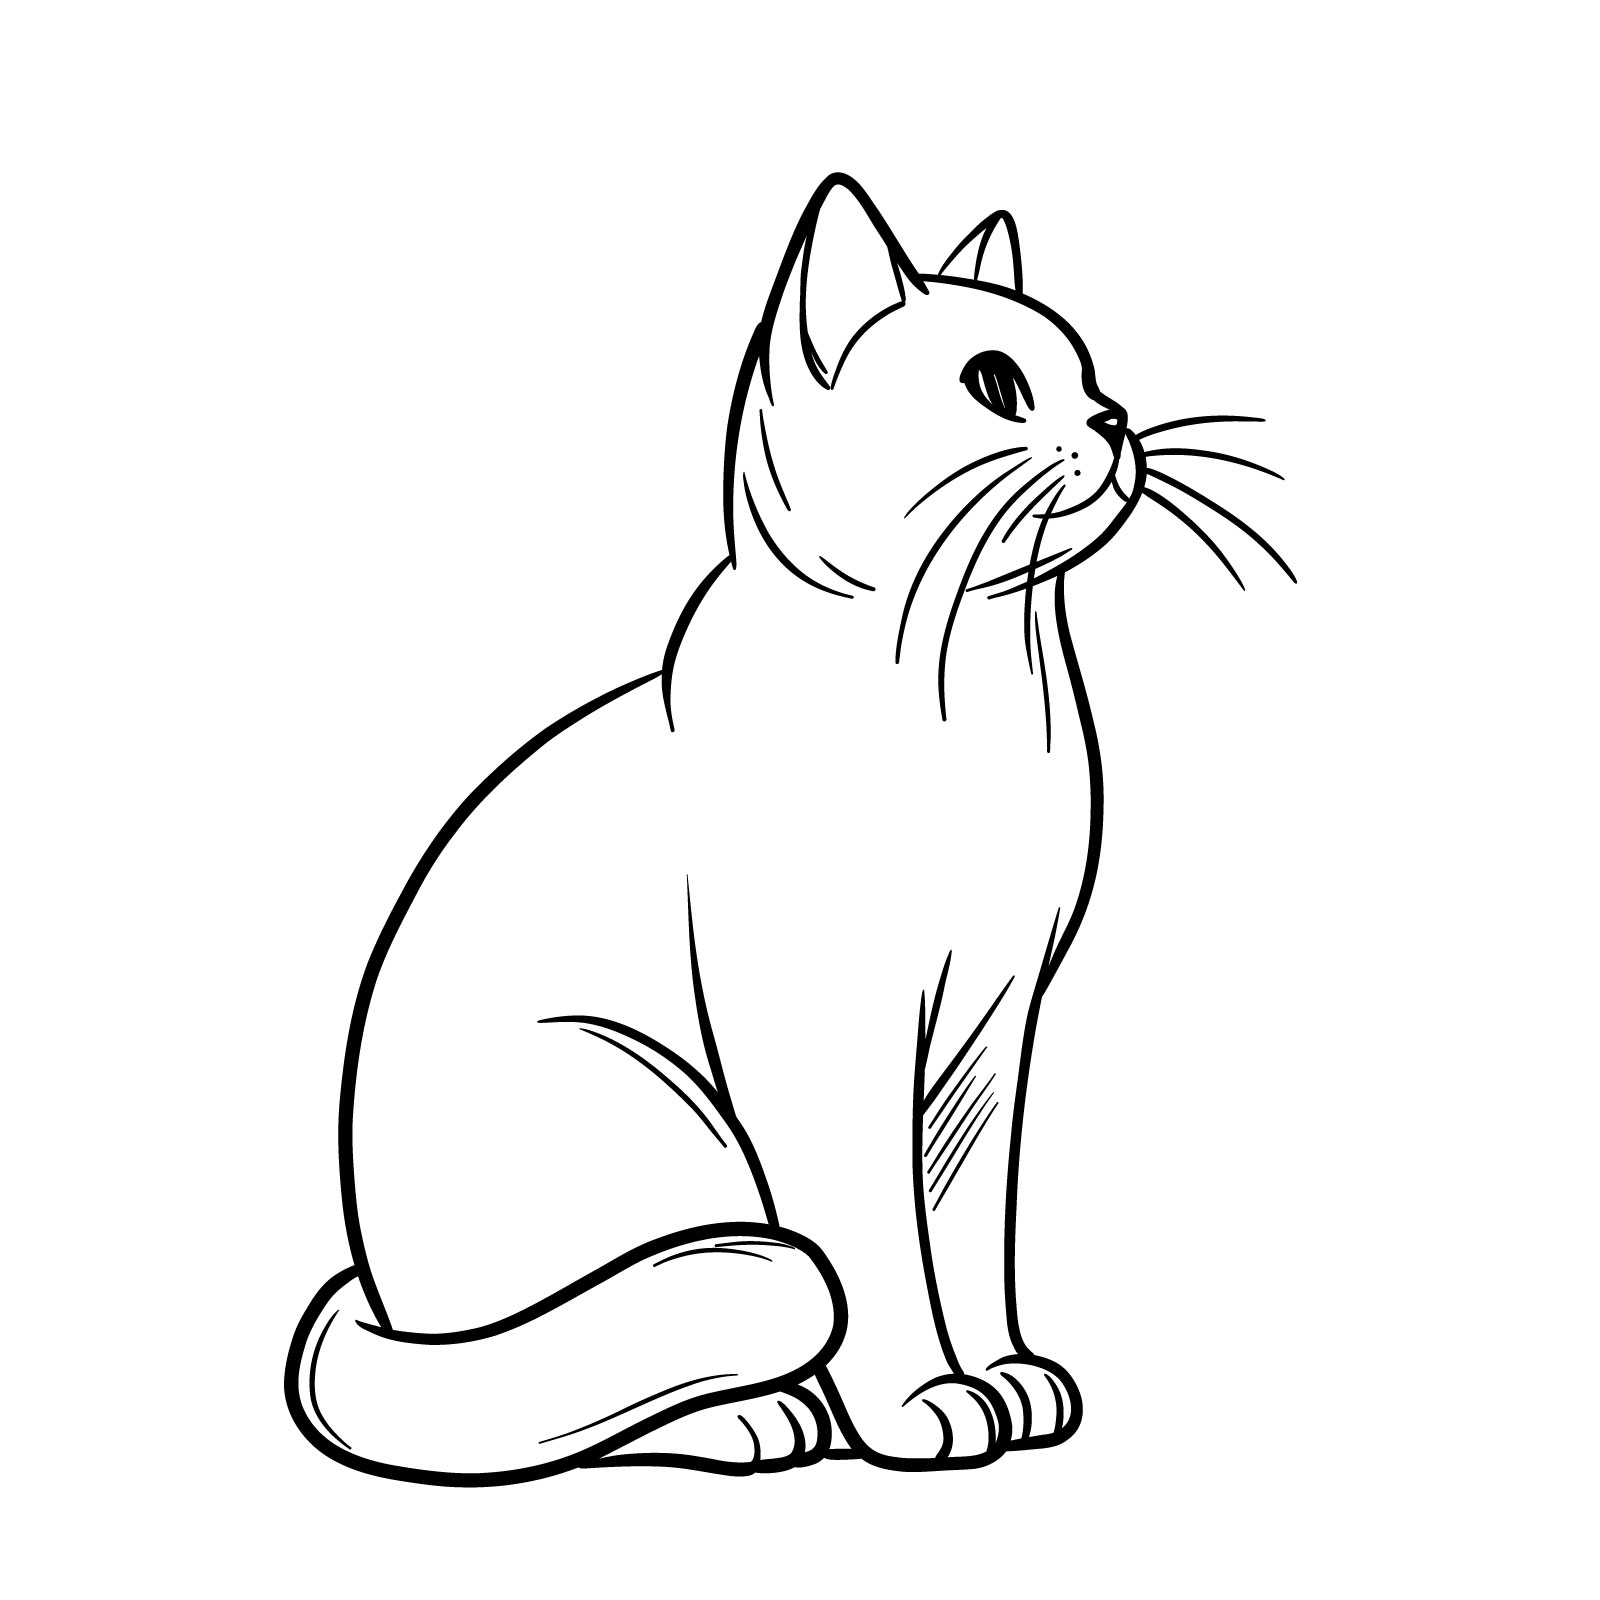
Step 13 – Conclude the guide by reviewing the entire figure, making final adjustments to the cat’s face, ensuring the expression is serene and attentive. Your drawing of a sitting cat in a 3/4 left side view should now be complete. If so, let’s move to the next one!
Finalized drawing of a sitting cat 3/4 left side view
Guide 9: How to Draw a Sitting Cat – 3/4 Right Side View – 13 Steps
How to Draw a Sitting Cat – 3/4 Right Side View
Our ninth guide invites you to master the art of drawing a sitting cat, this time from a 3/4 right side view. This perspective offers the same angle but from the other side. In 13 well-paced steps, this tutorial maintains a normal level of complexity, making it quite accessible for artists to follow. The realistic portrayal focuses on capturing the cat’s essence without an excessive focus on minute details. Starting with a proportional framework in the initial steps, you will build upon this to flesh out a lifelike and poised cat, comfortably sitting and observing its surroundings.
Step 01 – Begin your drawing by sketching out the fundamental shapes that form the cat’s structure. Start with a circle to define the head. Below it, draw a larger circle for the upper body to capture the bulk of the torso. Finally, create a flowing base shape that will stabilize your cat’s sitting posture
Sketching the foundational shapes for the cat’s body
Step 02 – With the basic shapes in place, lightly sketch the facial guidelines to indicate the position of the eyes and muzzle. For the ears, place two triangular shapes at the top of the head circle. Outline the front limbs with simple lines and shapes to represent the paws resting on the body
Mapping the face and front limbs of the cat
Step 03 – Focus on the head and refine its shape. Draw the first ear by following the triangular guideline, making sure it’s pointing upwards to reflect the cat’s alertness. Then, sketch the curved line that represents the back side of the head, giving it a three-dimensional form
Drawing the ear and back contour of the head
Step 04 – Now, create the outline for the forehead and nose to establish the facial structure. Start from the inner base of the ear, bringing the line down to form the forehead. Then, continue to extend the line outwards, creating a slight curve that will represent the nose bridge
Outlining the forehead and nose
Step 05 – Draw the lower part of the cat’s face by adding the mouth and the muzzle. Start with a gentle curve for the mouth, using the cross guide for symmetry. Extend this into a small rounded muzzle below the nose, setting the stage for a detailed feline expression
Crafting the mouth and muzzle details
Step 06 – Add the second ear, mirroring the first in shape but keeping perspective in mind for a three-quarter view. Then, sketch the outline of the visible eye, using the facial cross as a guide to place it correctly on the face
Completing the ears and eye outline
Step 07 – Shape the ears to a more natural point and add inner lines for depth. Draw the eye, with a pupil and a small vertical space for a highlight to bring life to your cat’s gaze. Sketch whiskers emanating from the muzzle, adding characteristic feline charm
Refining the ears, eye, and adding whiskers
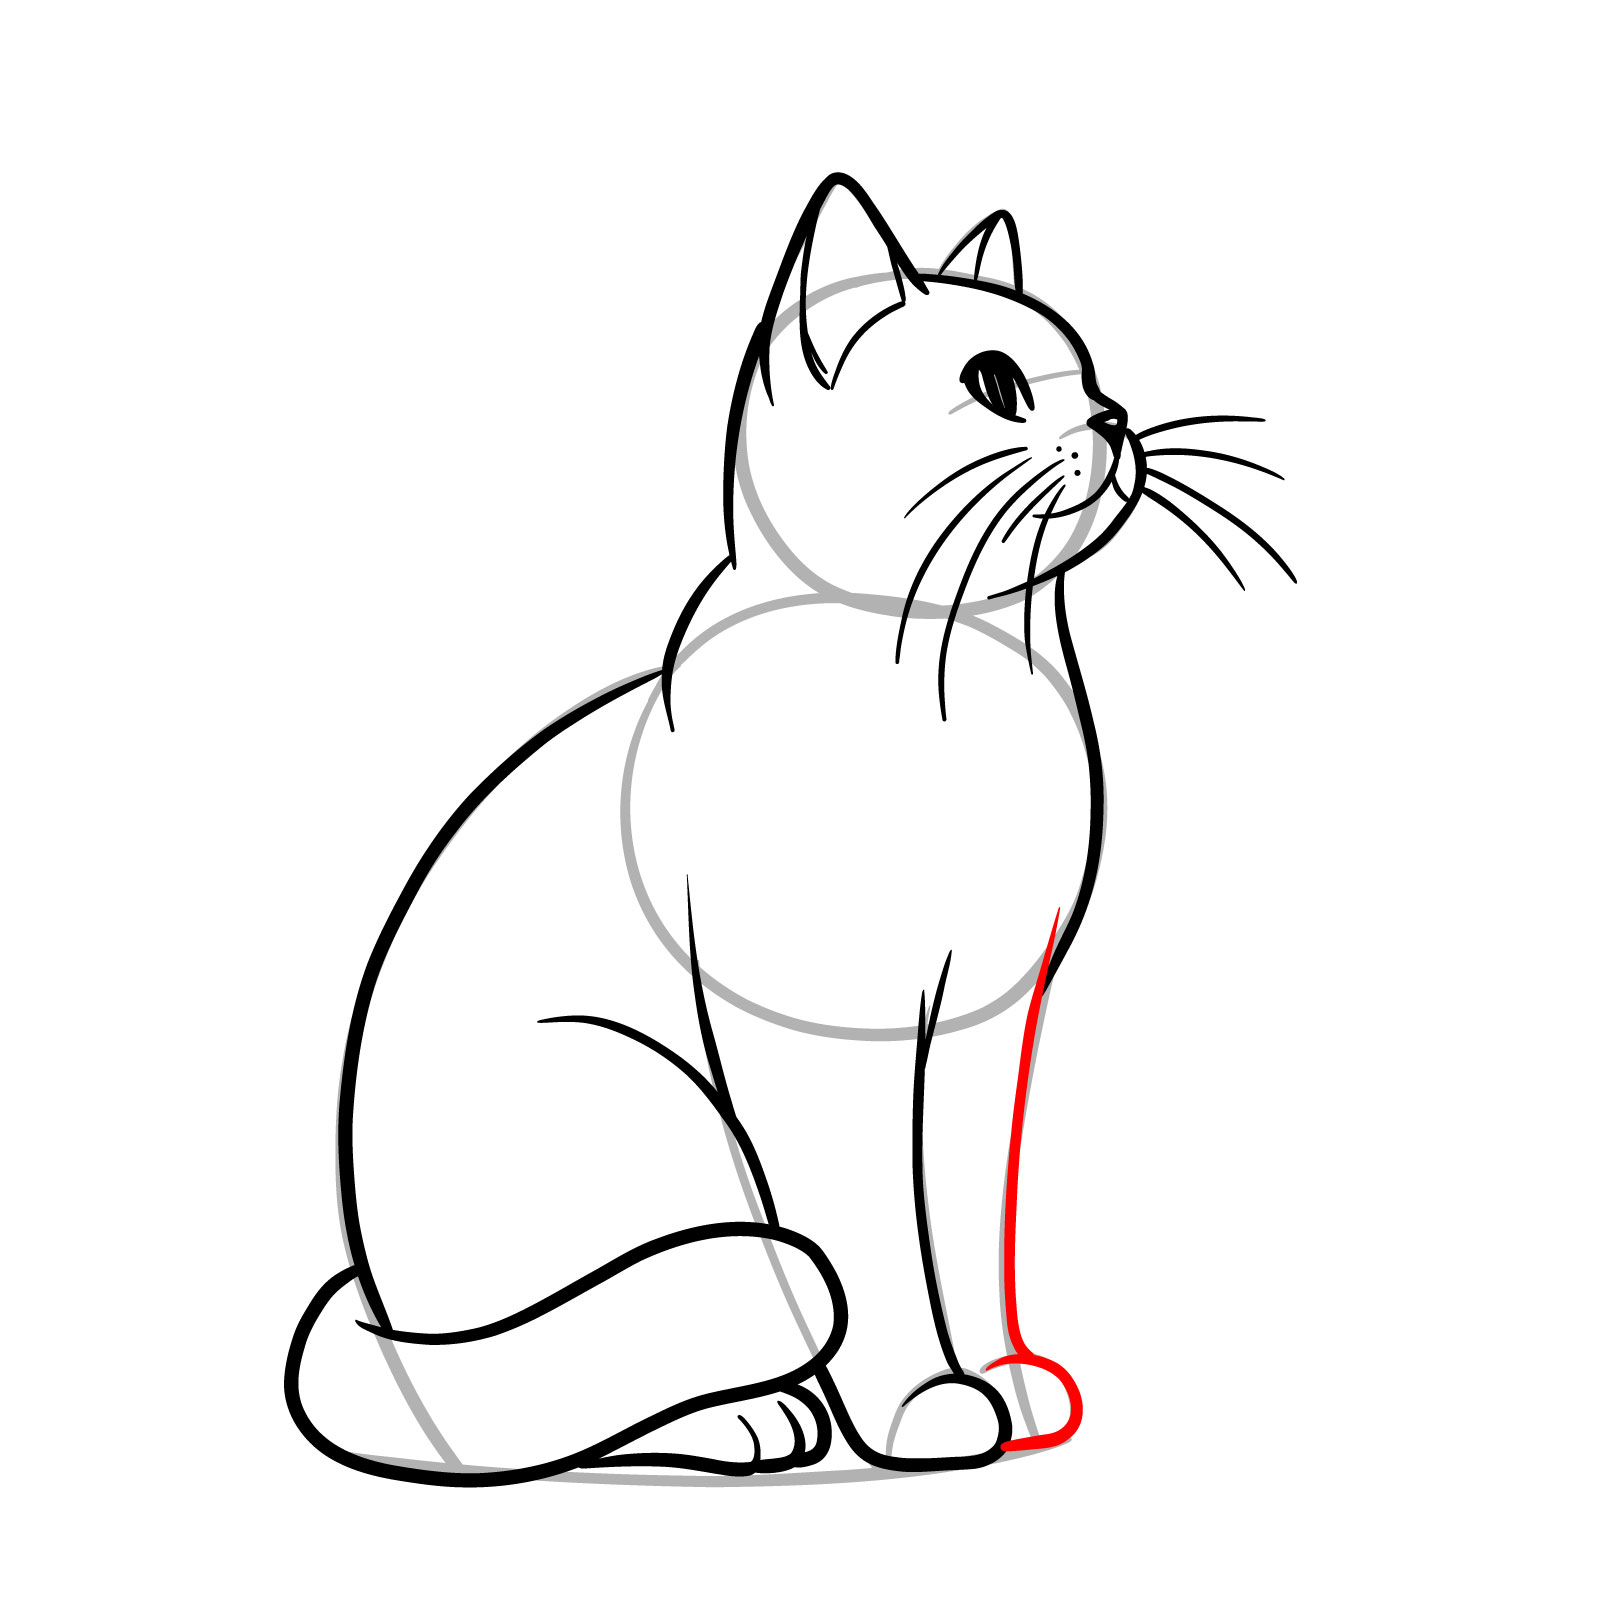
Step 08 – Outline the neck, flowing down to the upper body to create a seamless transition from the head. Draw the cat’s back, curving gently towards the tail. Finally, sketch the tail itself, giving it a relaxed, curved posture behind the body
Shaping the body and tail
Step 09 – Draw the back leg by adding a curve that starts below the bottom of the body circle and wraps around to the front. This creates the illusion of the leg being folded underneath the body, a common sitting position for cats
Sketching the back leg’s bent shape
Step 10 – For the front leg, sketch a straight line downward from the body, defining the leg’s outer edge. At the bottom, draw the paw, ensuring it appears to support the cat’s weight. Separate the paw from the leg with a slight indentation to suggest the joint
Detailing the front leg and paw
Step 11 – Outline the second front leg, partially obscured by the first, to maintain the perspective. Ensure this leg mirrors the first in its proportions and position, maintaining a symmetrical and balanced posture for the cat
Adding the second front leg
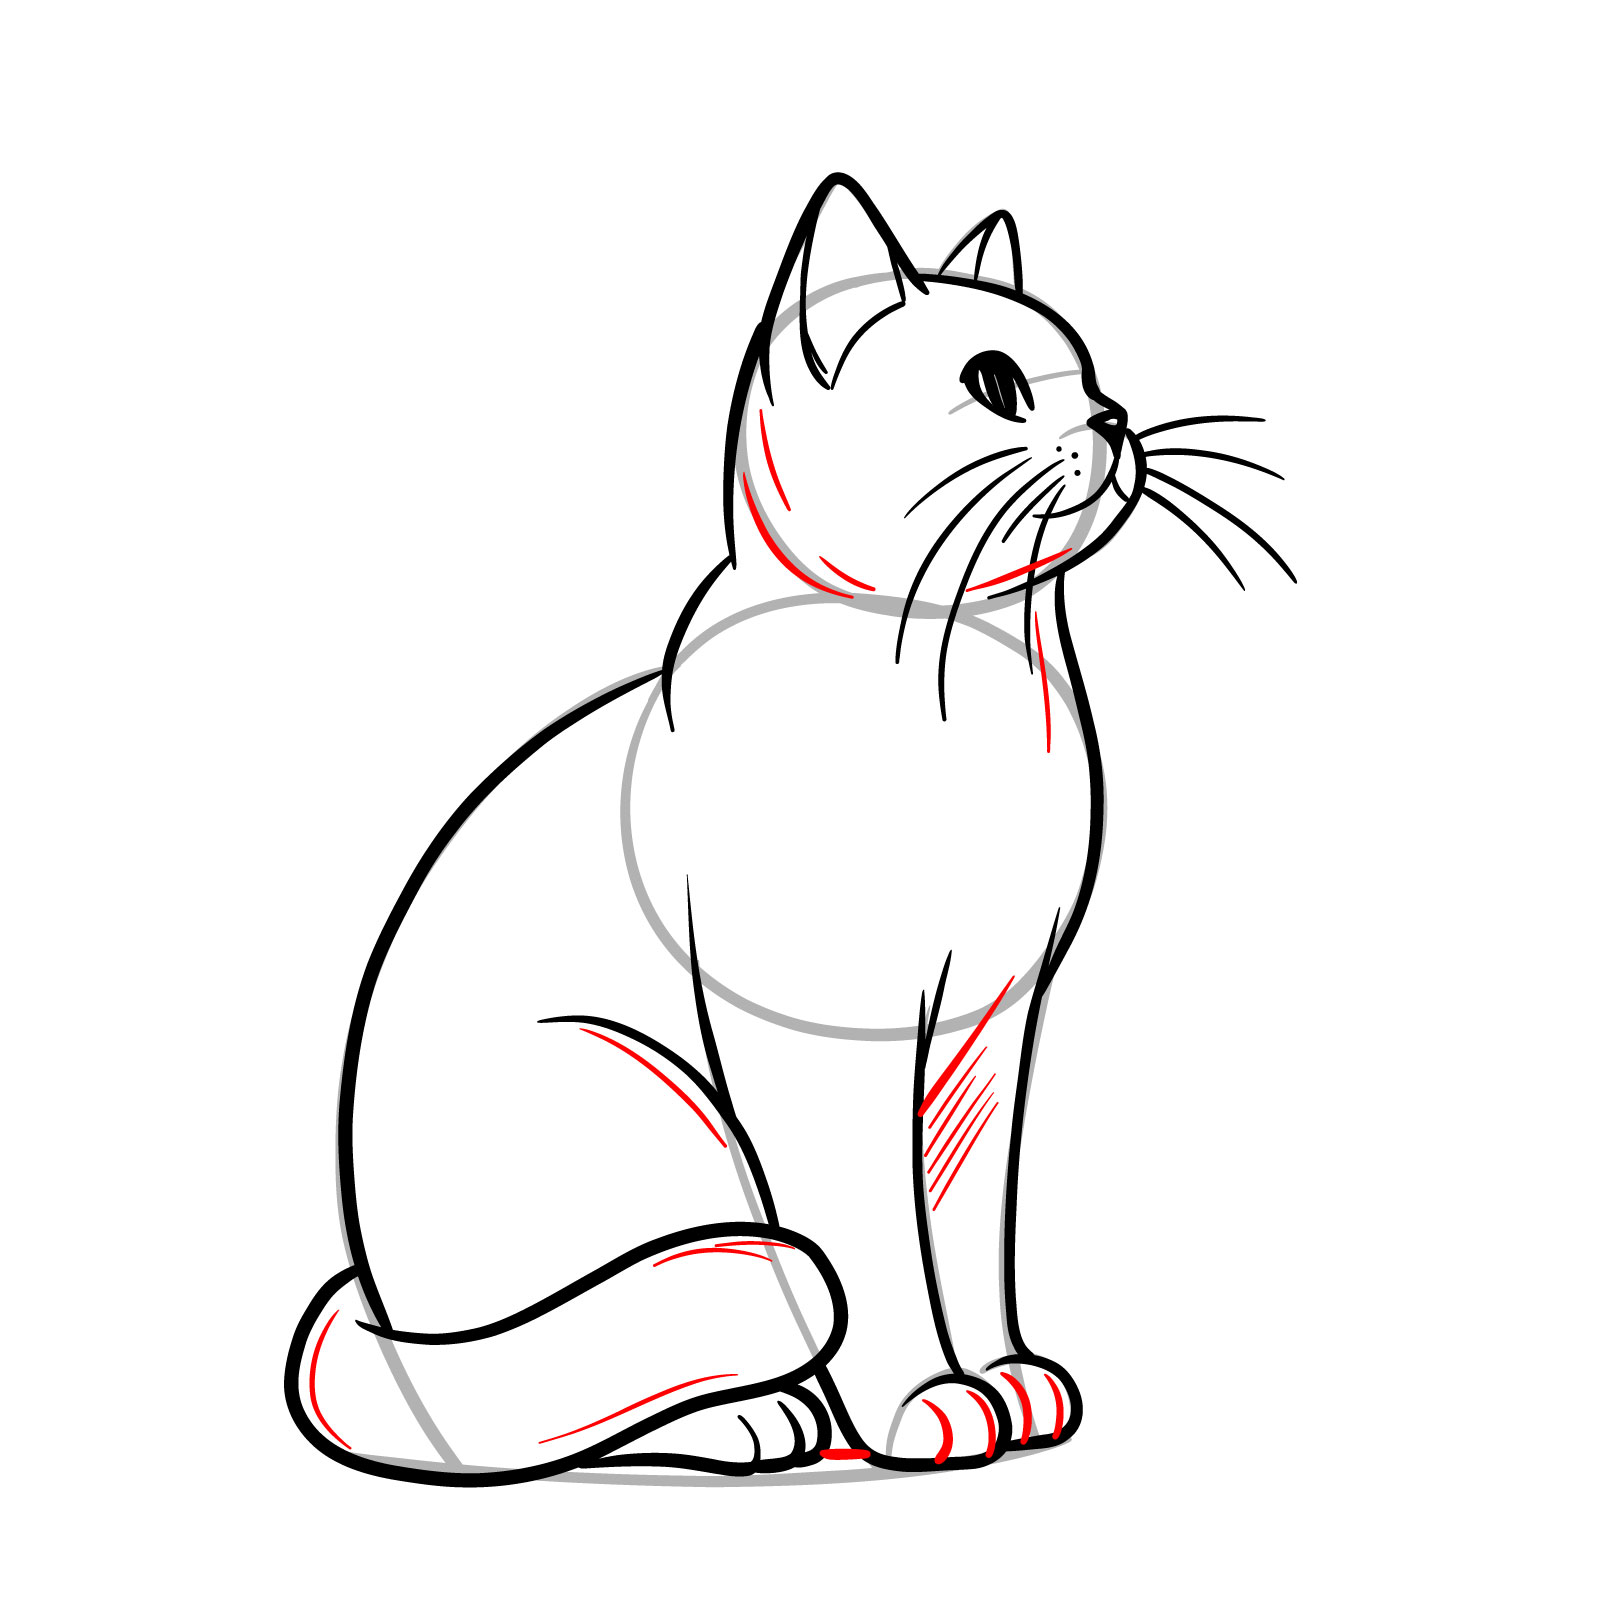
Step 12 – Refine the cat’s form by adding texture and details. Suggest fur patterns with light strokes on the body and head. Define the paws by separating them into sections, adding realism to the sketch
Refining the cat’s body with texture and details
Step 13 – Conclude your drawing cats for beginners’ journey by finalizing the details. Enhance the fur texture, ensuring it’s consistent with the cat’s natural patterns. With all elements in place, you have a complete illustration of a sitting cat, captured in a dynamic 3/4 right side view, perfect for cat drawing practice exercises
Completed drawing of a sitting cat in a 3/4 view
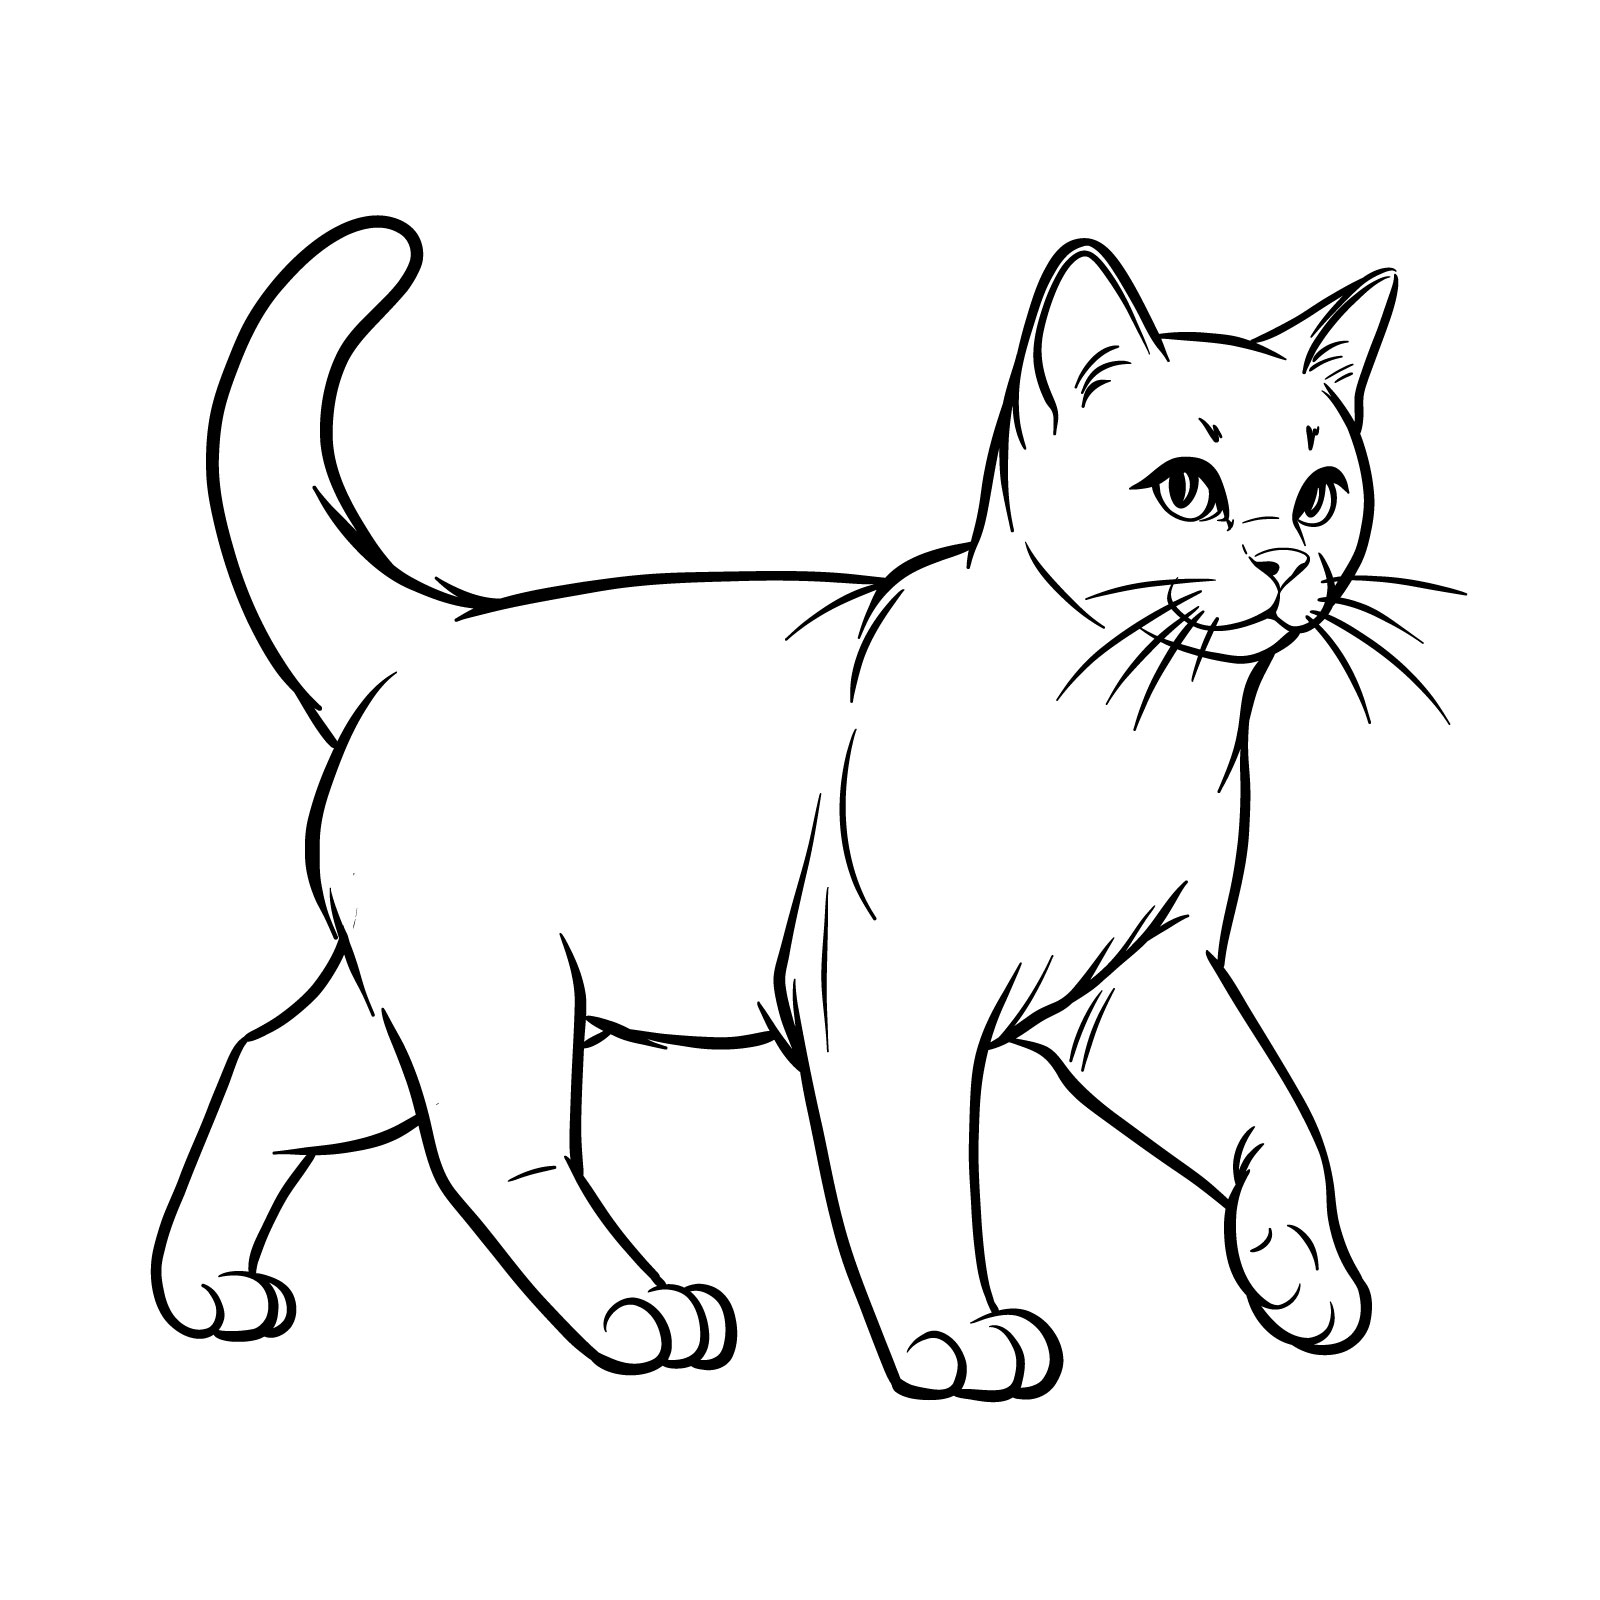
Guide 10: How to Draw a Walking Cat – 15 Steps
How to Draw a Walking Cat – The Result
Step into the next phase of our drawing journey with the tenth guide: how to draw a walking cat. This tutorial, set in a dynamic 3/4 view, breaks down the movement and grace of a strolling cat into 15 achievable steps. Although the complexity is average, it remains approachable, with each step easy to follow. This realistic representation avoids overwhelming details, allowing you to focus on the rhythm and flow of the cat’s movement. The initial two steps are crucial as they help you sketch a proportional structure that serves as the canvas for your walking cat. Follow along, and you’ll soon have a lifelike cat pacing across your page.
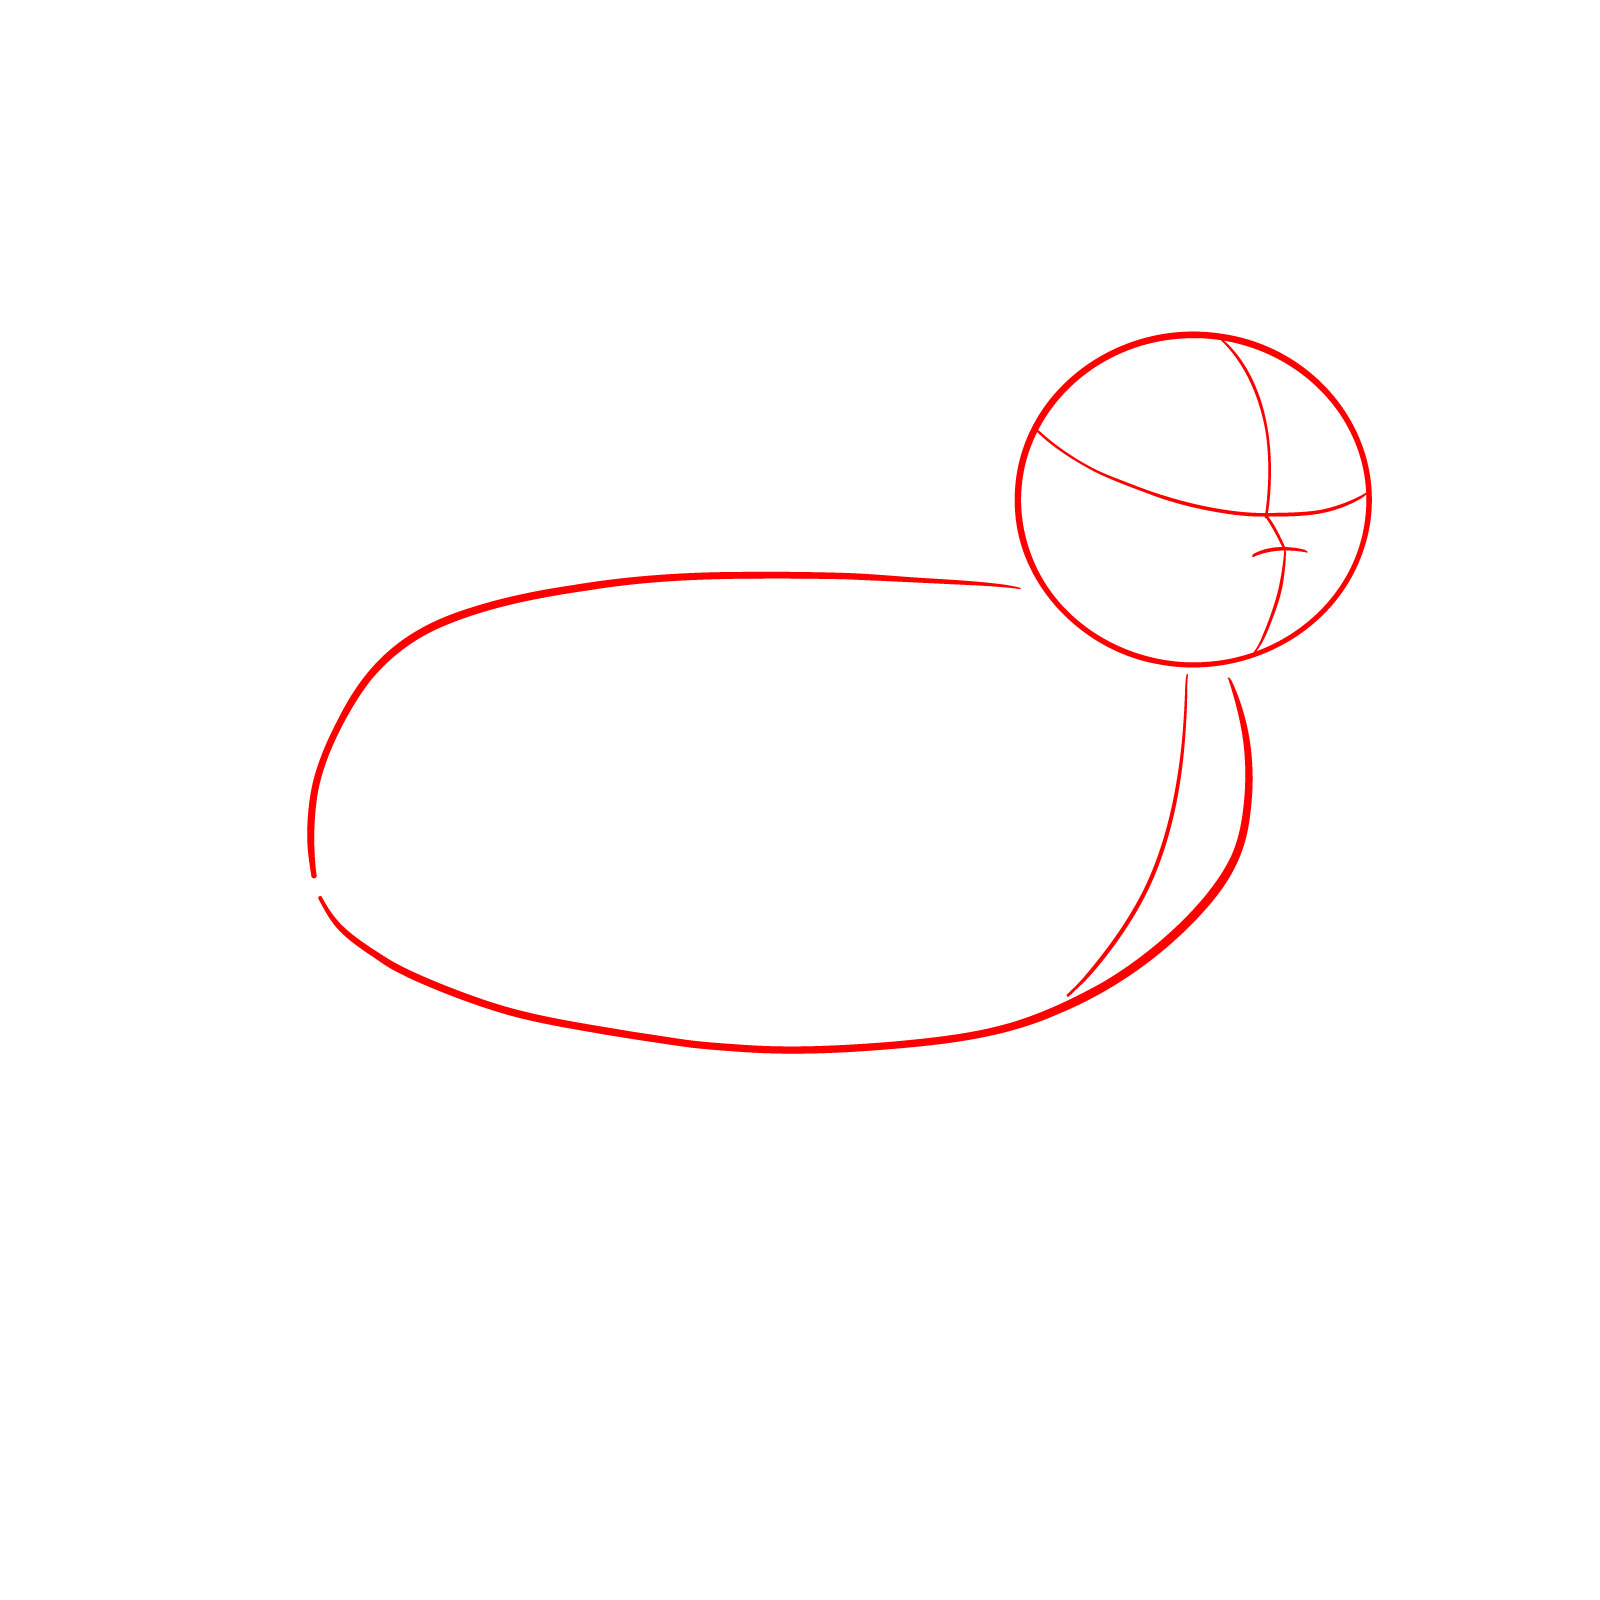
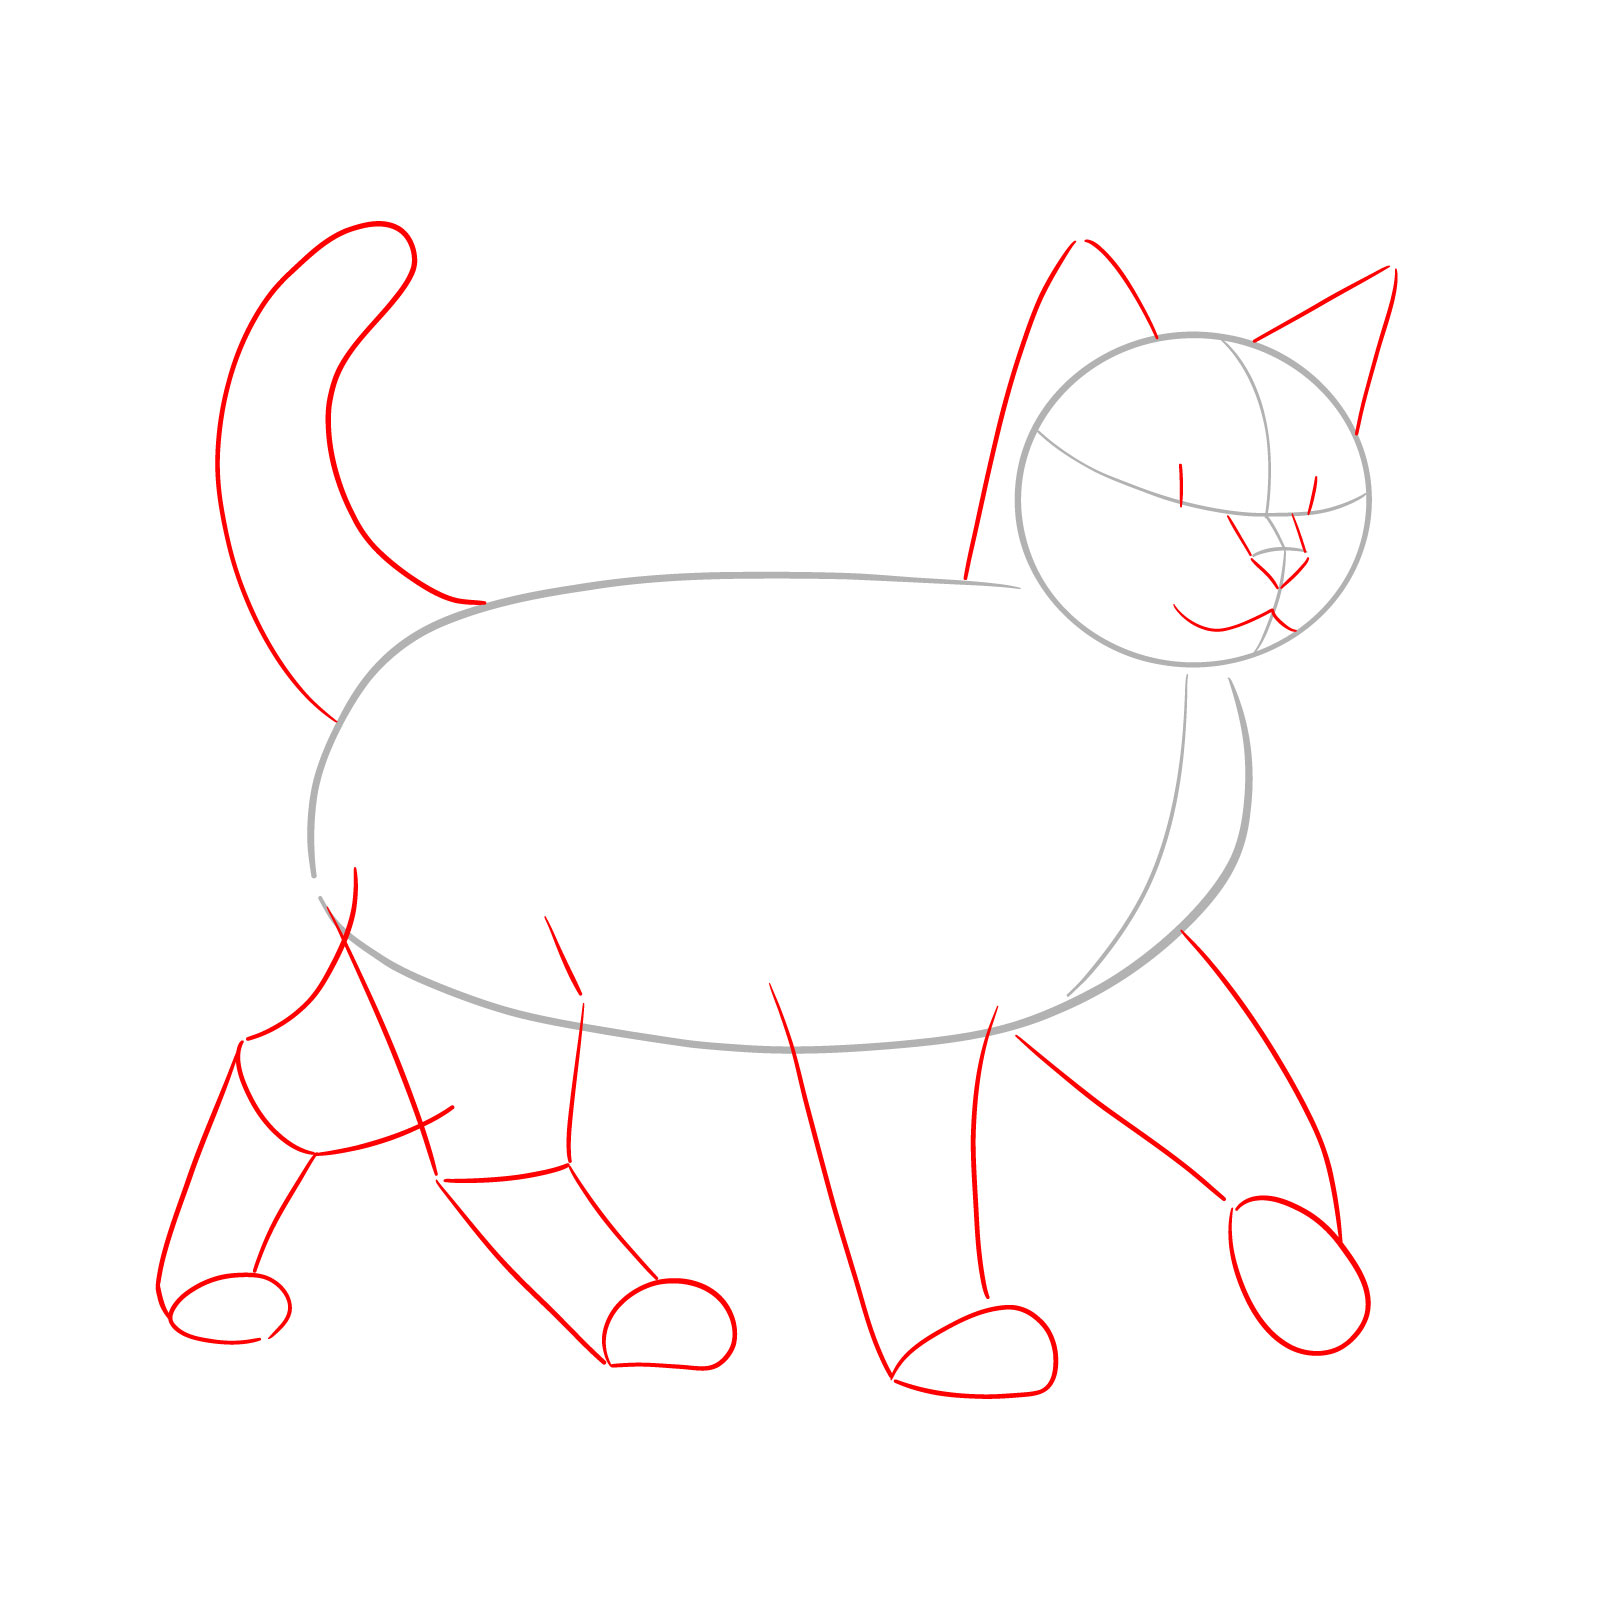
Step 01 – Begin with a circle for the head, adding a vertical line for symmetry and a horizontal line for the eyes to establish the direction of the cat’s gaze. Shape the muzzle with a slight protrusion at the bottom part of the circle. For the body, draw an elongated oval to represent the torso in motion
Starting with basic shapes for the cat’s head and body
Step 02 – Map out the cat’s eyes, nose, and mouth on the face, ensuring they follow the guidelines for proper alignment. Sketch the ears with simple triangular shapes at the top of the head. Add a flowing line for the tail and basic shapes for the legs to capture the dynamic of a walking cat
Laying out facial features and limbs
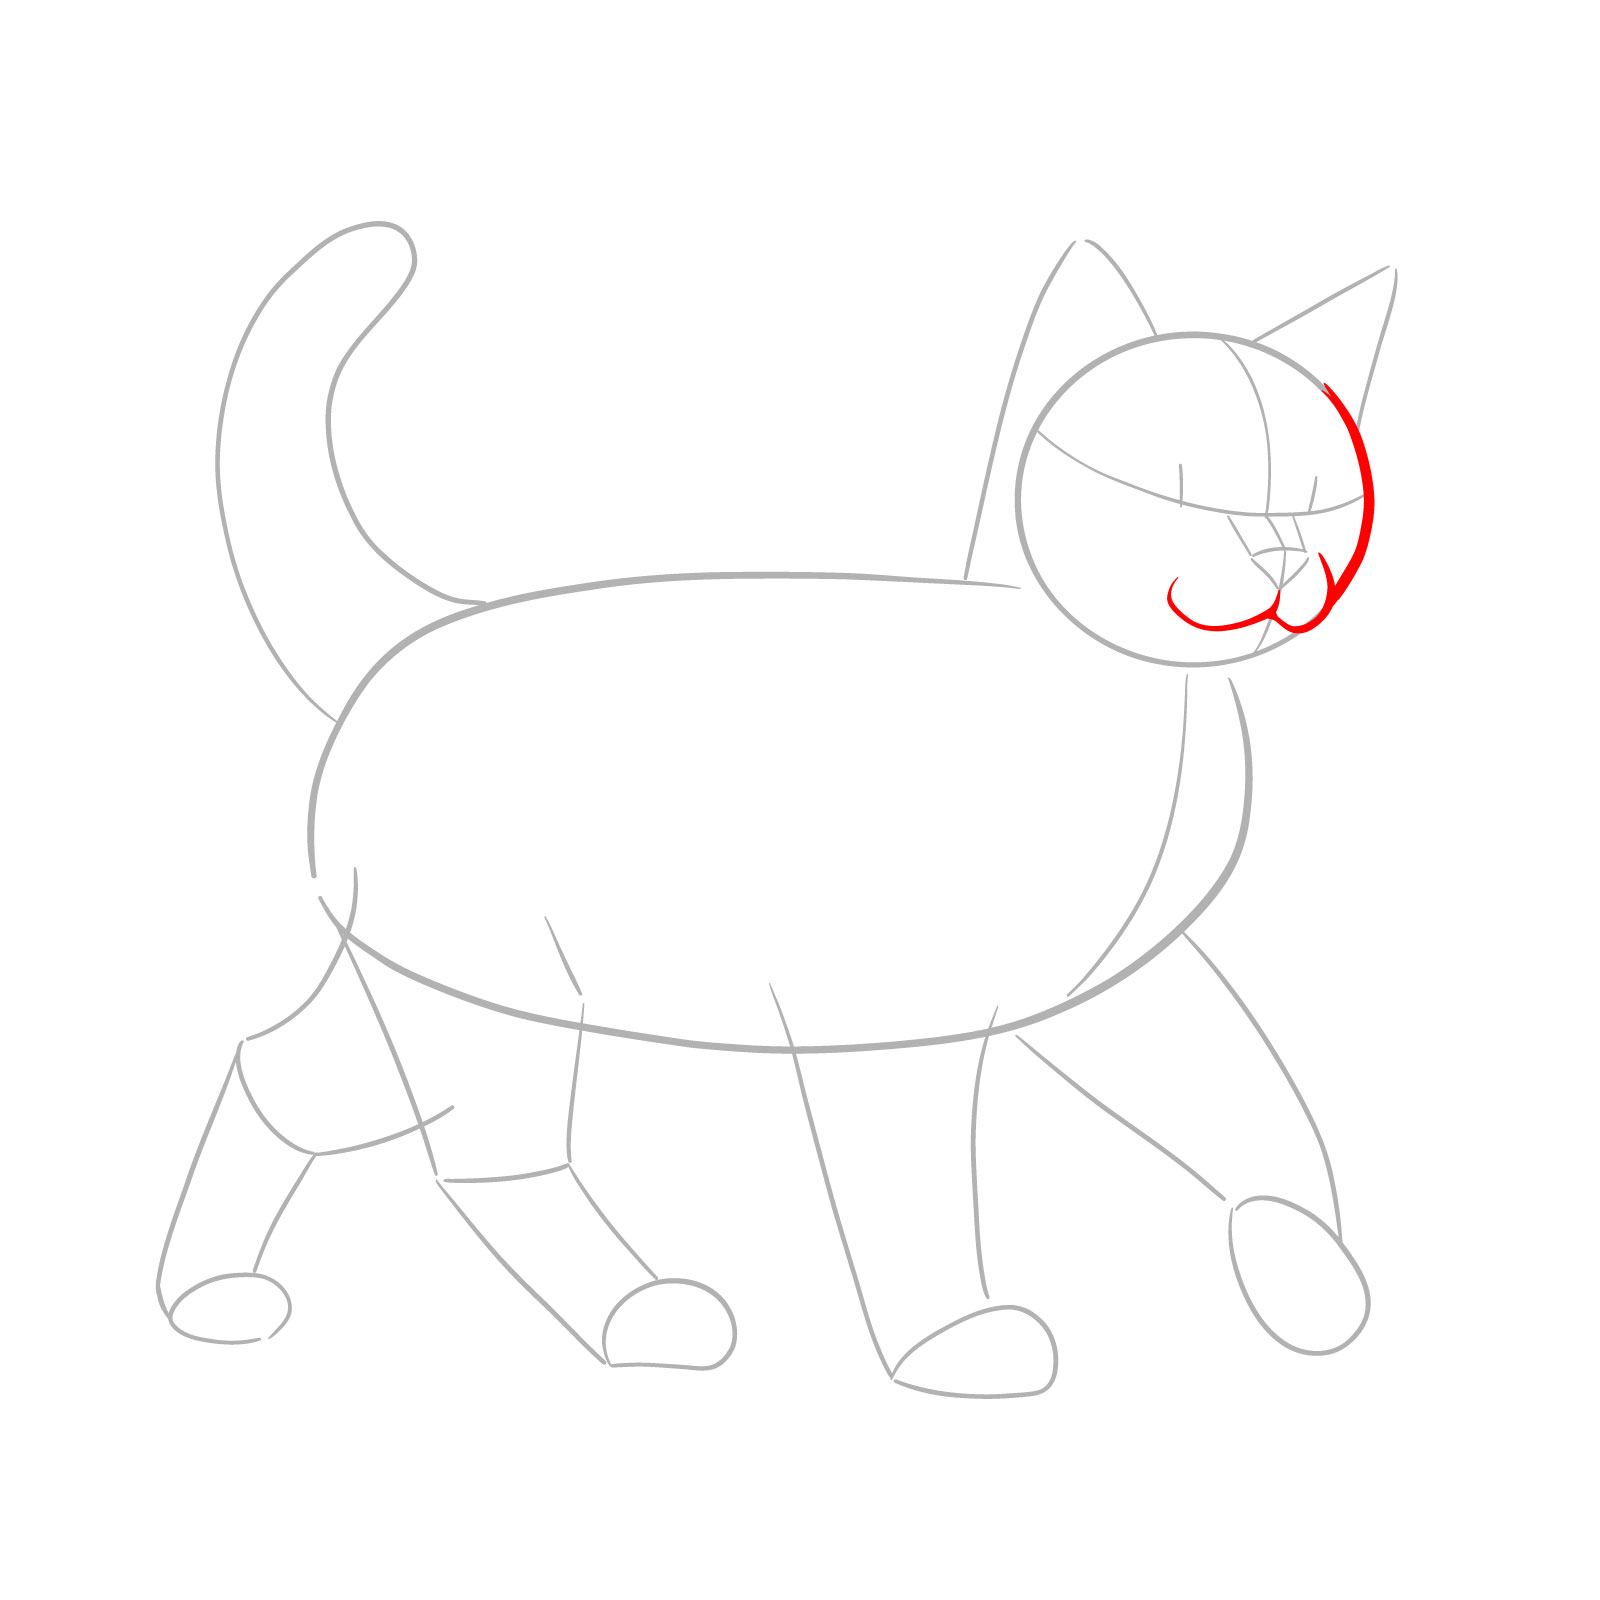
Step 03 – Outline the side of the cat’s head, curving the line to form the cheek and jaw, which will later help position the whisker pads. This step begins to add more definition to the cat’s face, contributing to a more realistic depiction
Defining the head and whisker areas
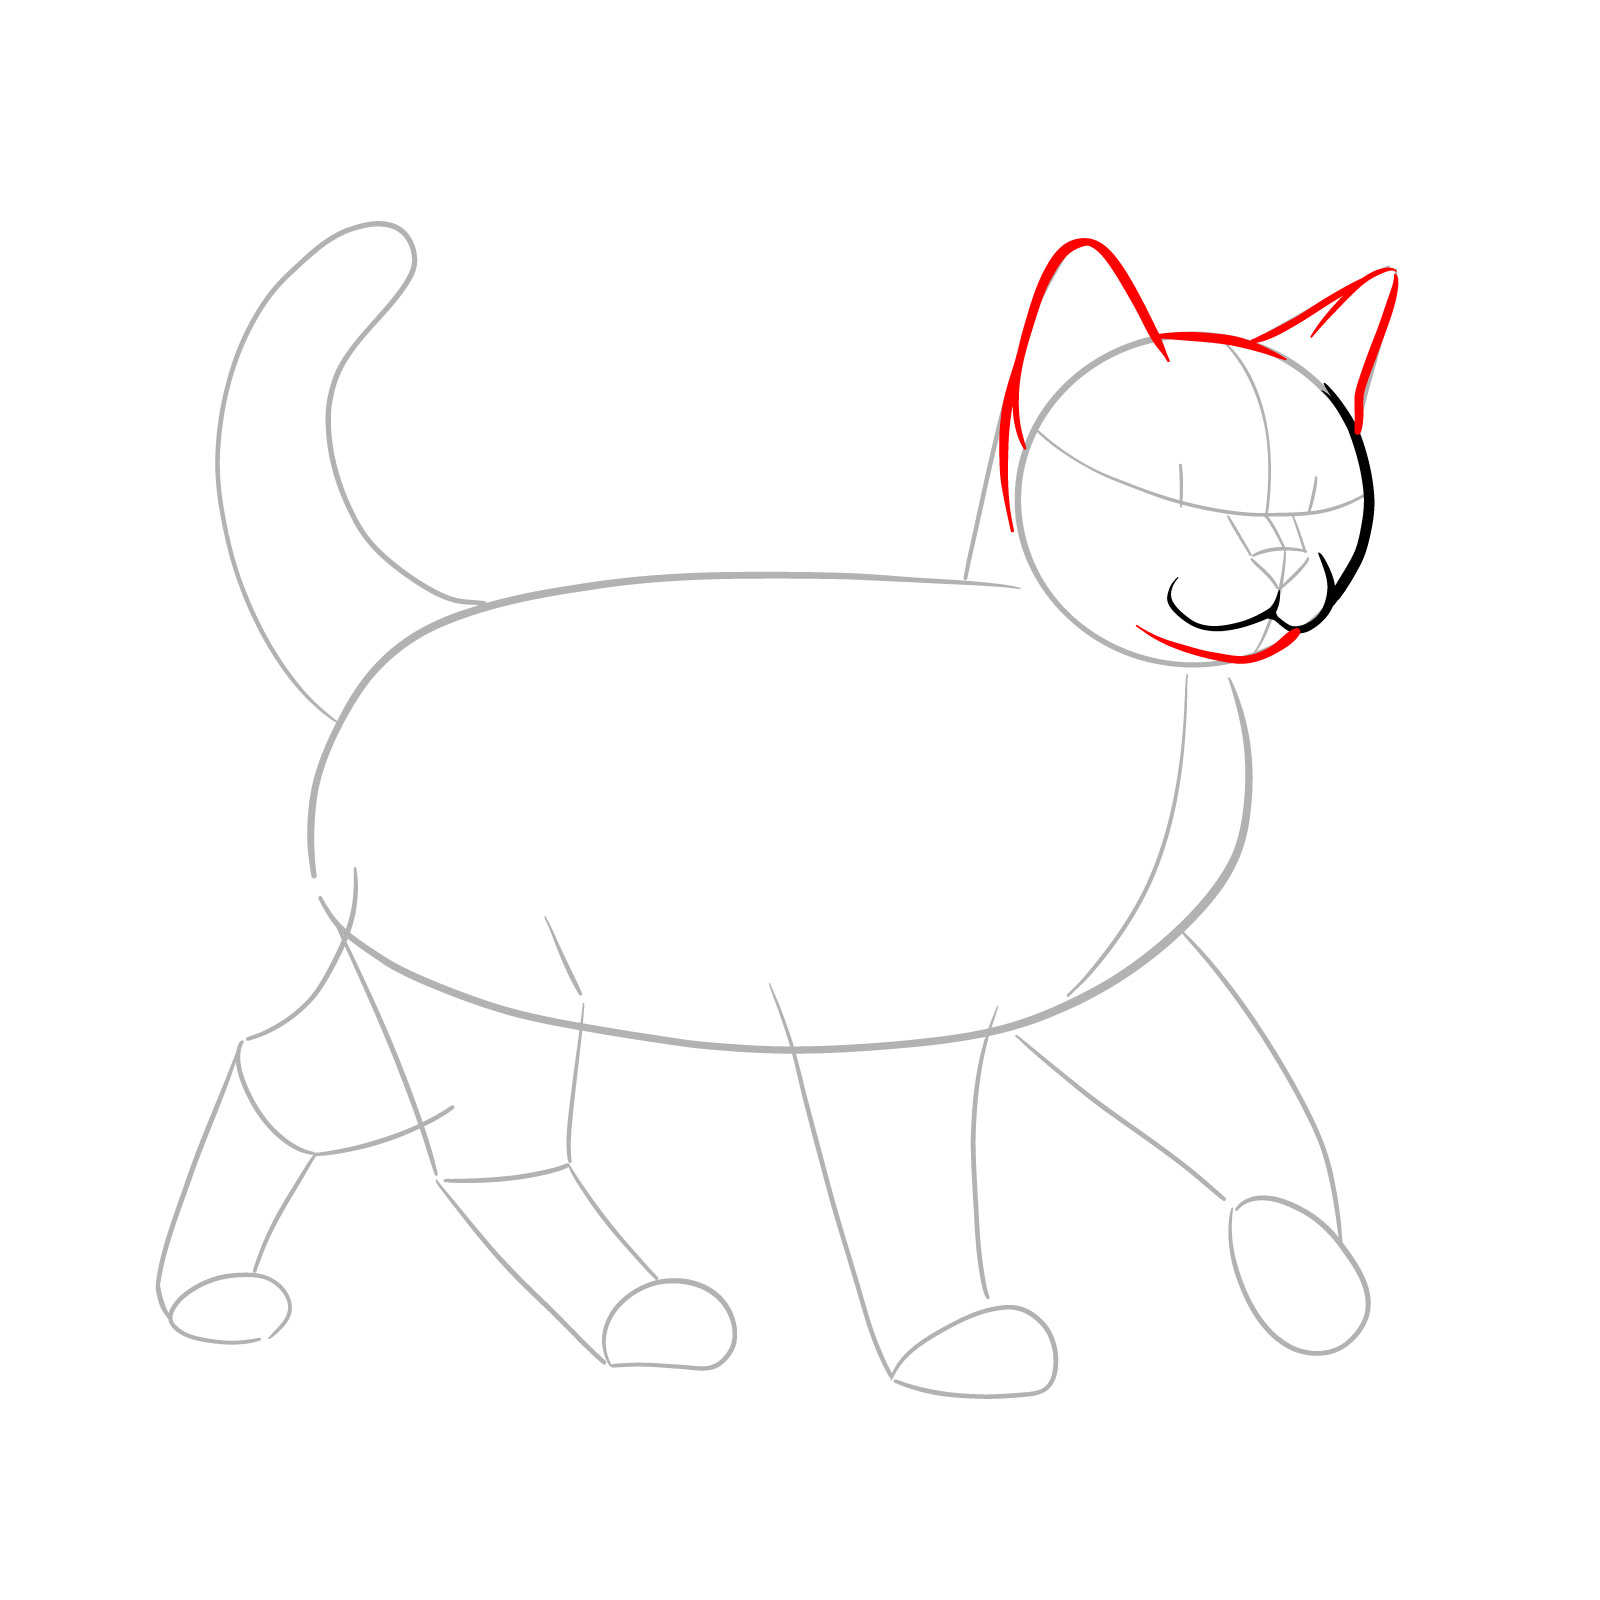
Step 04 – Draw the chin with a gentle curve beneath the muzzle to complete the lower part of the face. Add the ears by refining the triangular shapes, and connect them with a curved line across the top of the head. These details will enhance the cat’s realistic appearance and walking posture
Finalizing the head with essential details
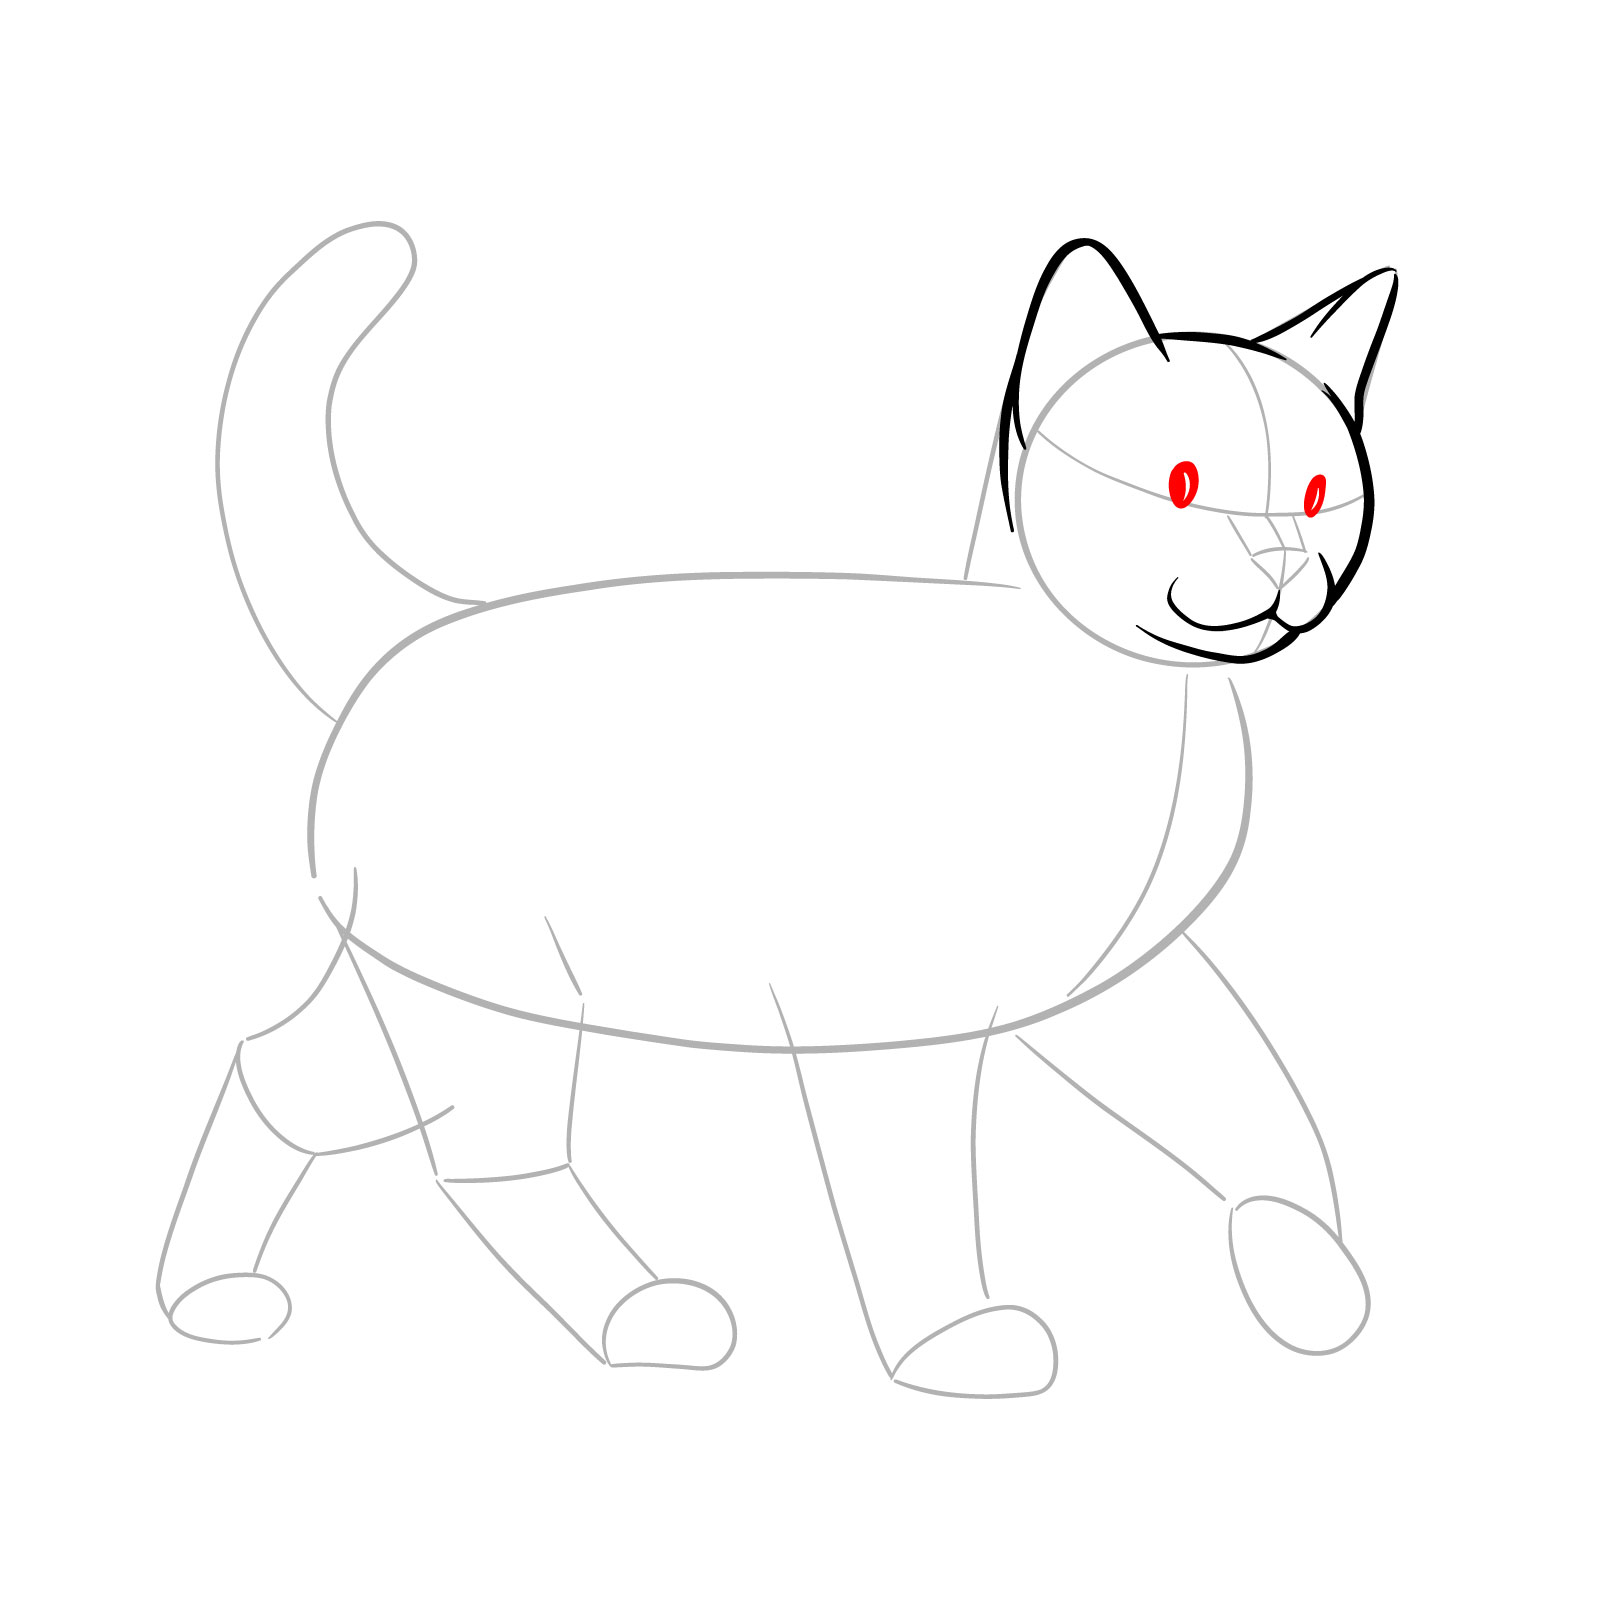
Step 05 – Draw vertical ovals to form the pupils, ensuring to leave thin vertical blank spaces to represent highlights. This gives the eyes a sense of life and depth, enhancing the realism of your walking cat illustration
Placing pupils
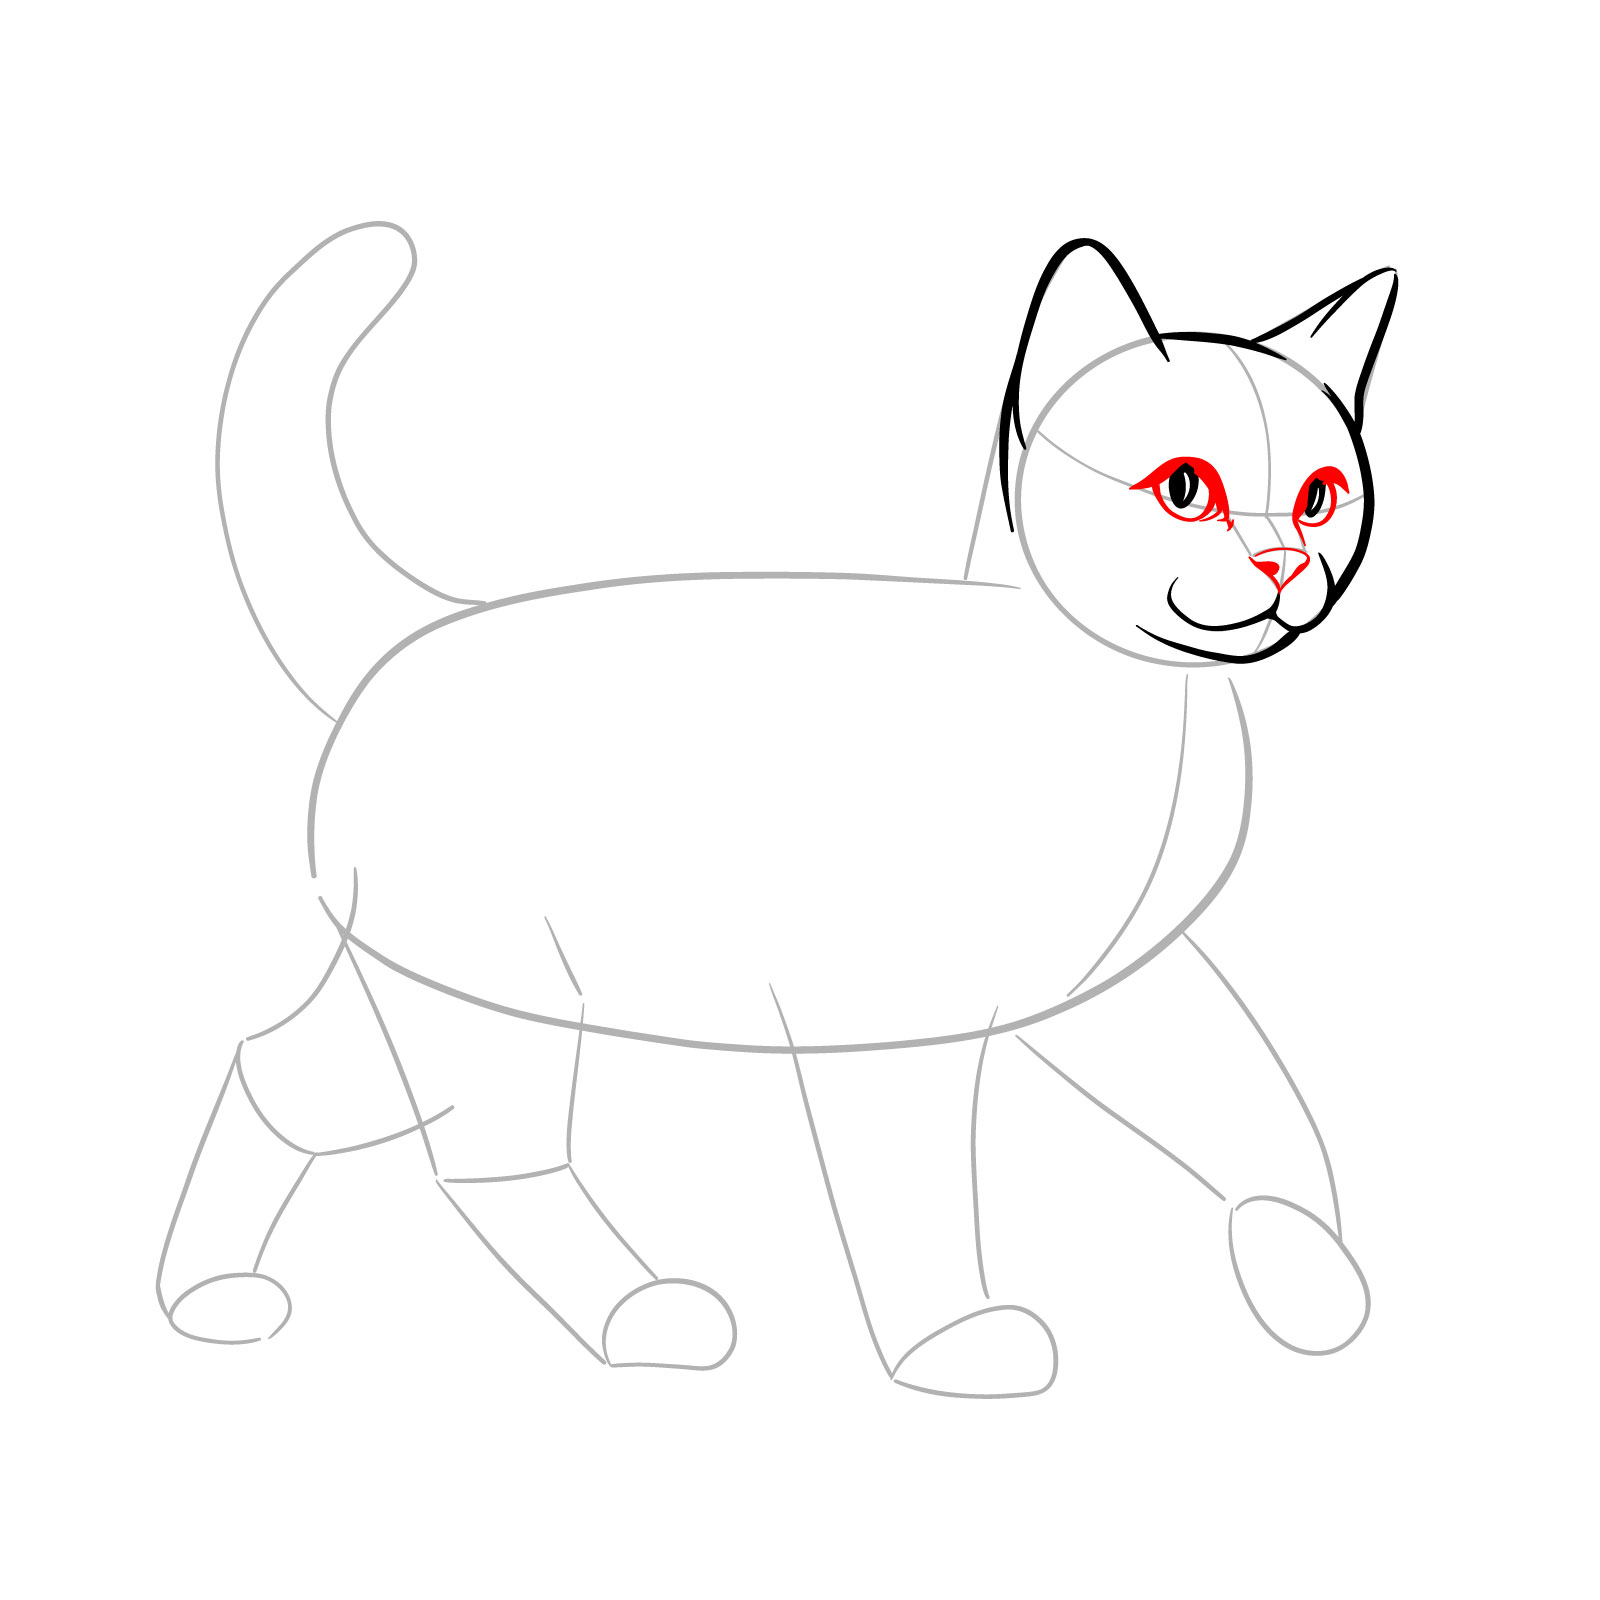
Step 06 – Refine the eye shapes, contouring around the pupils and adding curvature to the bottom and top to mimic a cat’s unique eye structure. Place a small triangular shape to represent the nose, positioned centrally between the eyes at the lower end of the vertical facial line
Shaping the eyes and defining the nose
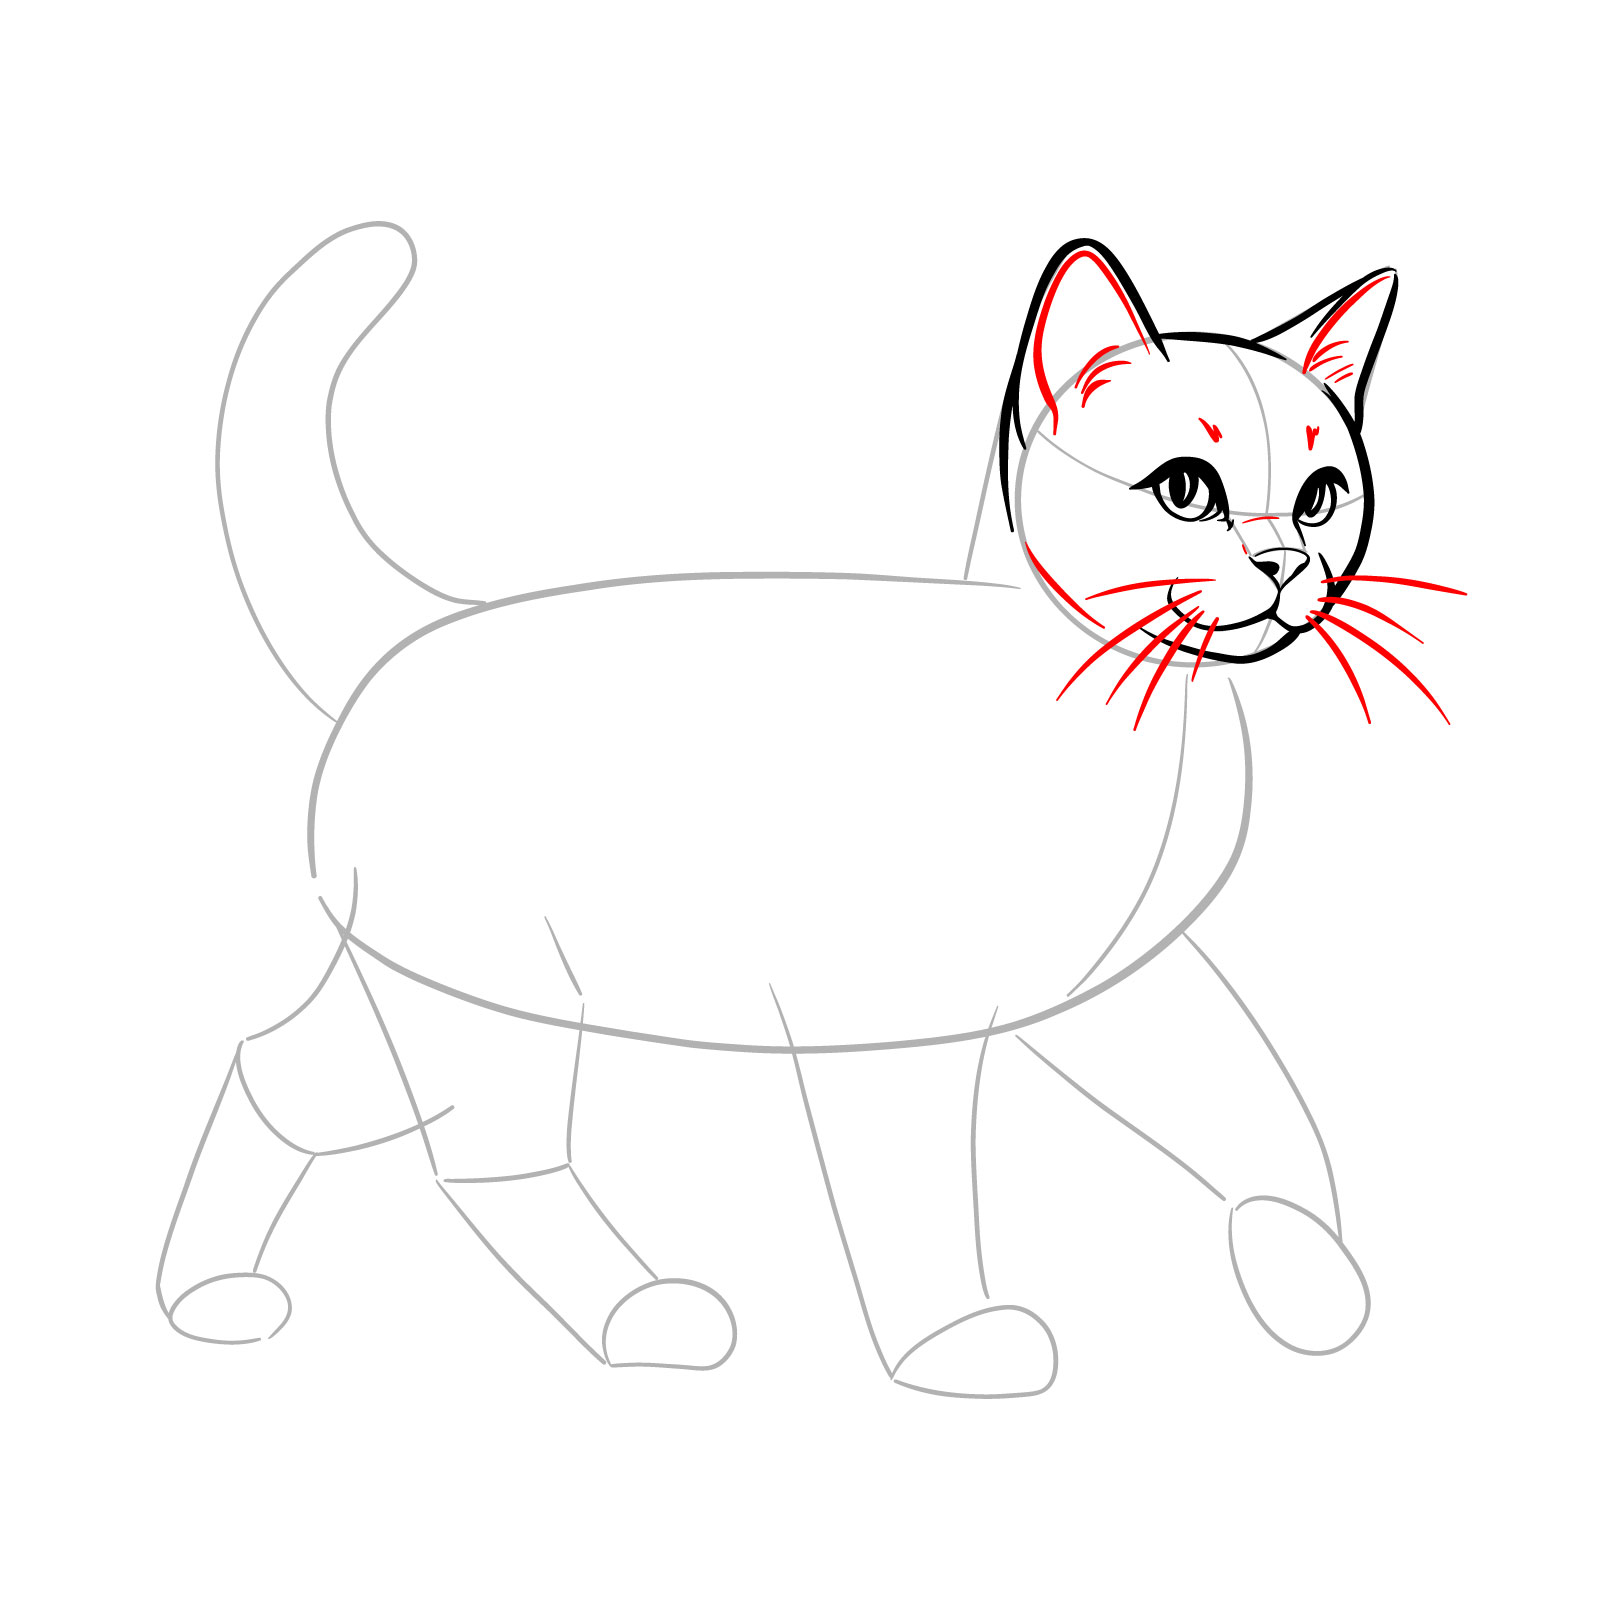
Step 07 – From the whisker pads, draw several long, curved lines on each side to create whiskers. Fine-tune the ears’ inner details for a more structured appearance and to give the head its finished form
Adding whiskers and ear details to the face
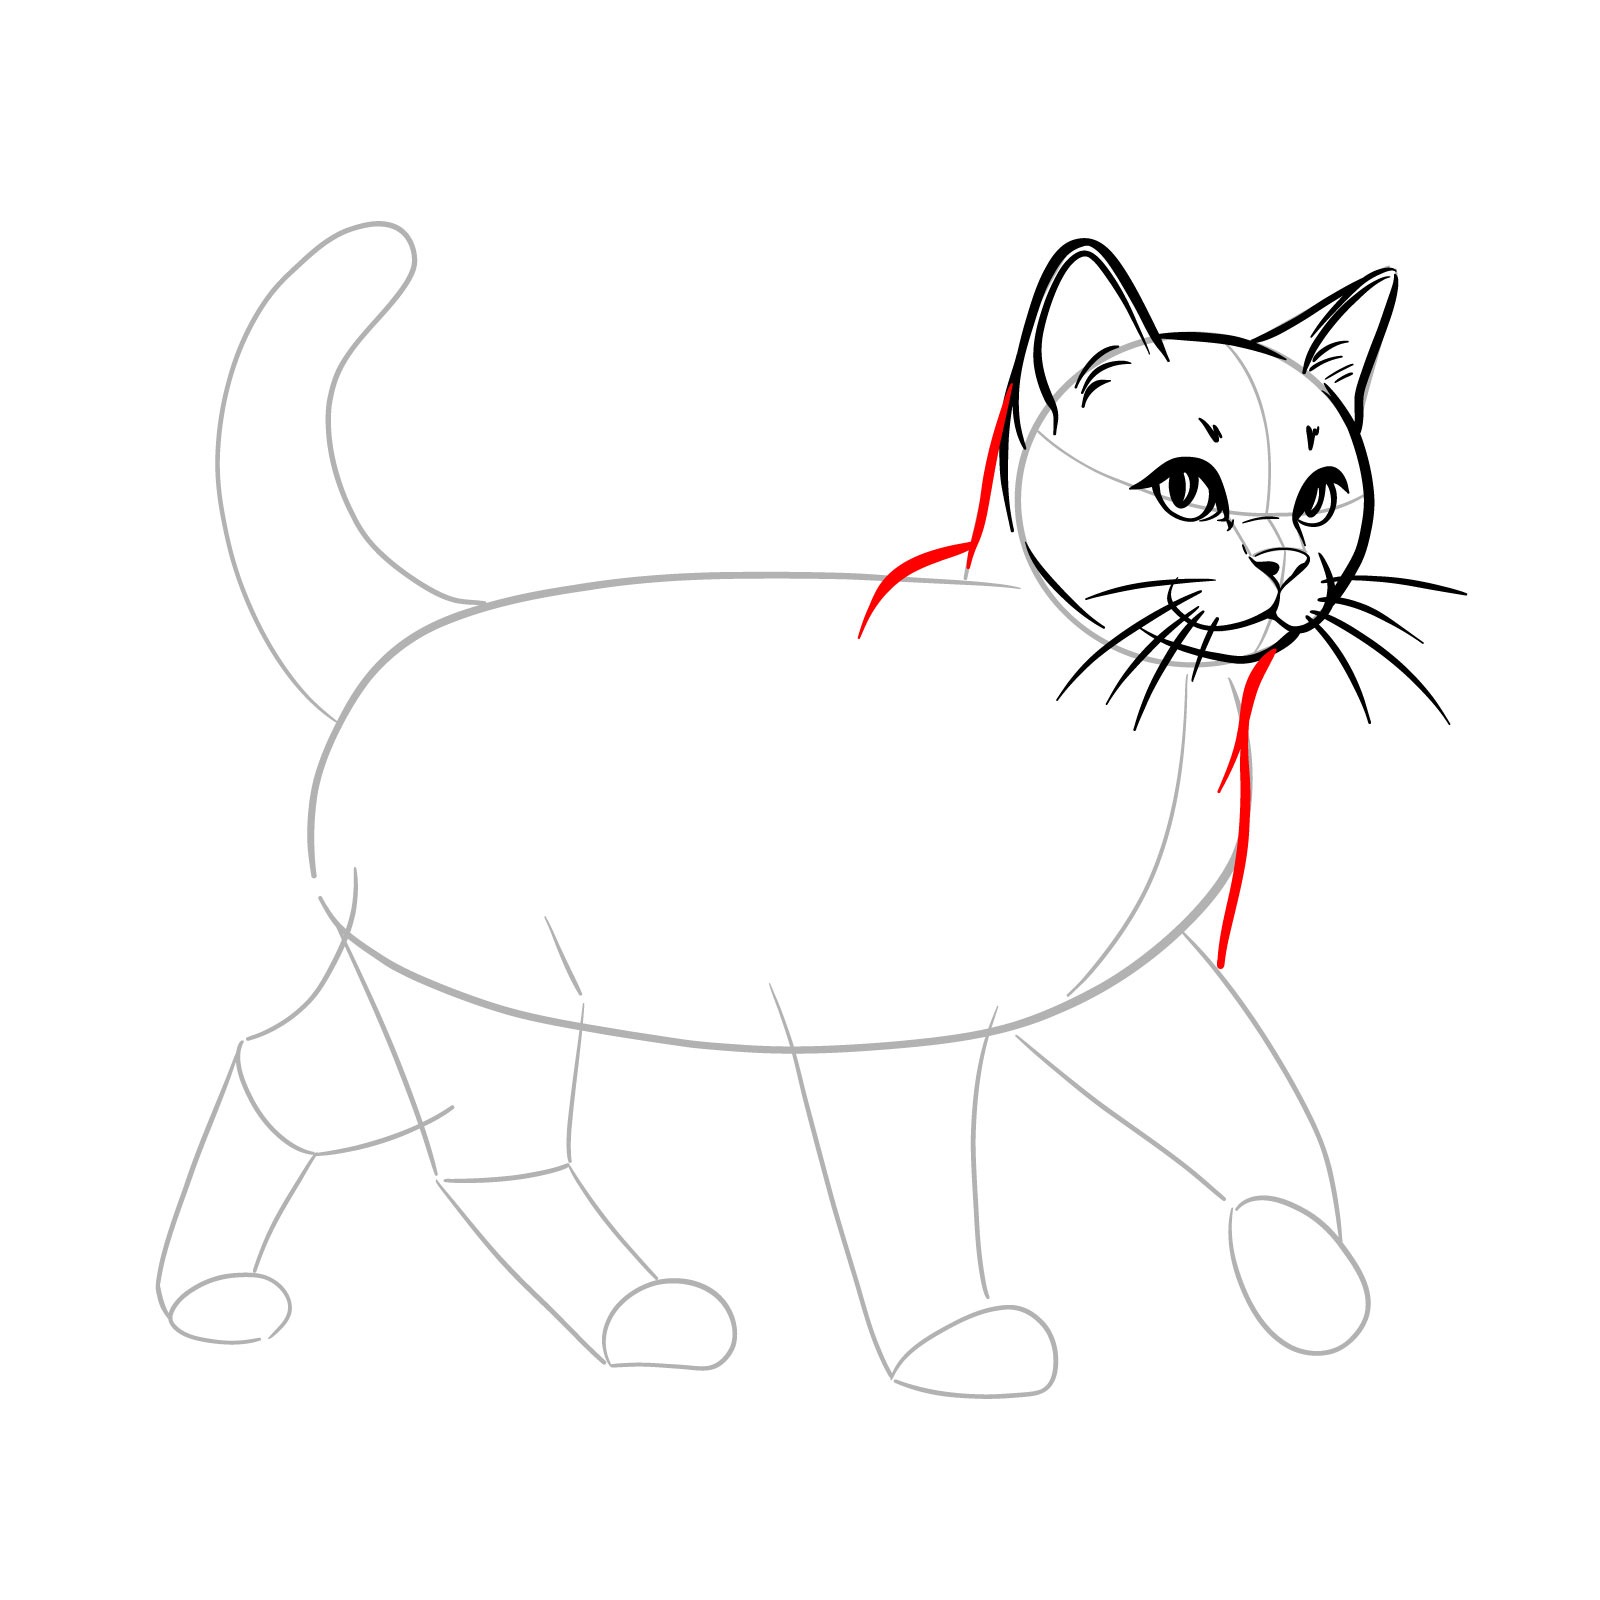
Step 08 – Connect the head to the body with two curved lines for the neck, suggesting the cat’s forward movement
Drawing the neck and body contours
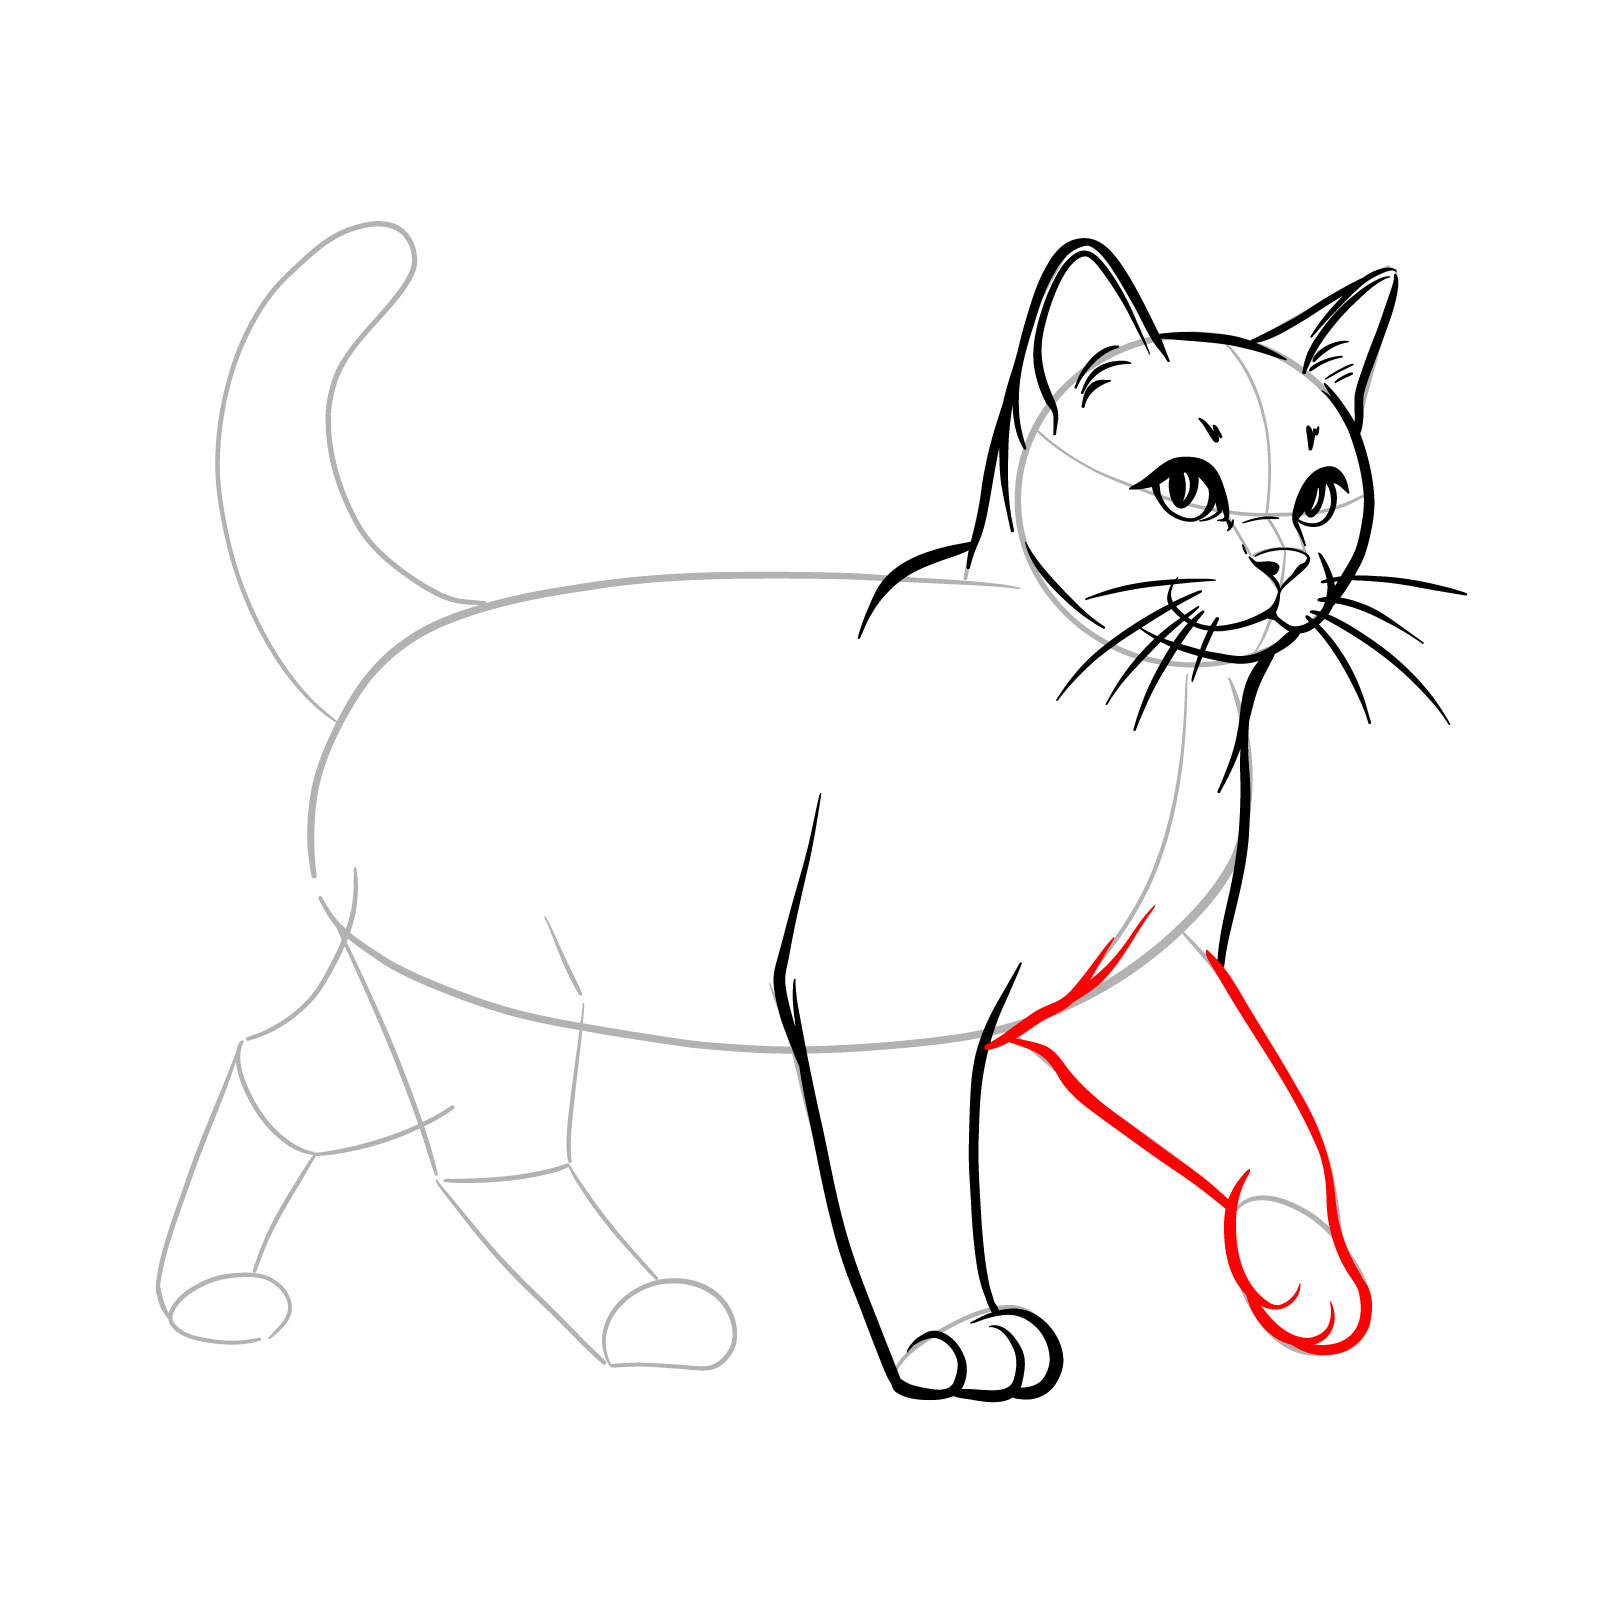
Step 09 – To depict the walking motion, draw the front paw with care. Start by sketching the leg leading down to the paw, then add the individual toes. Ensure the paw is angled slightly outward to mimic the natural step of a cat in stride
Detailing the front paw
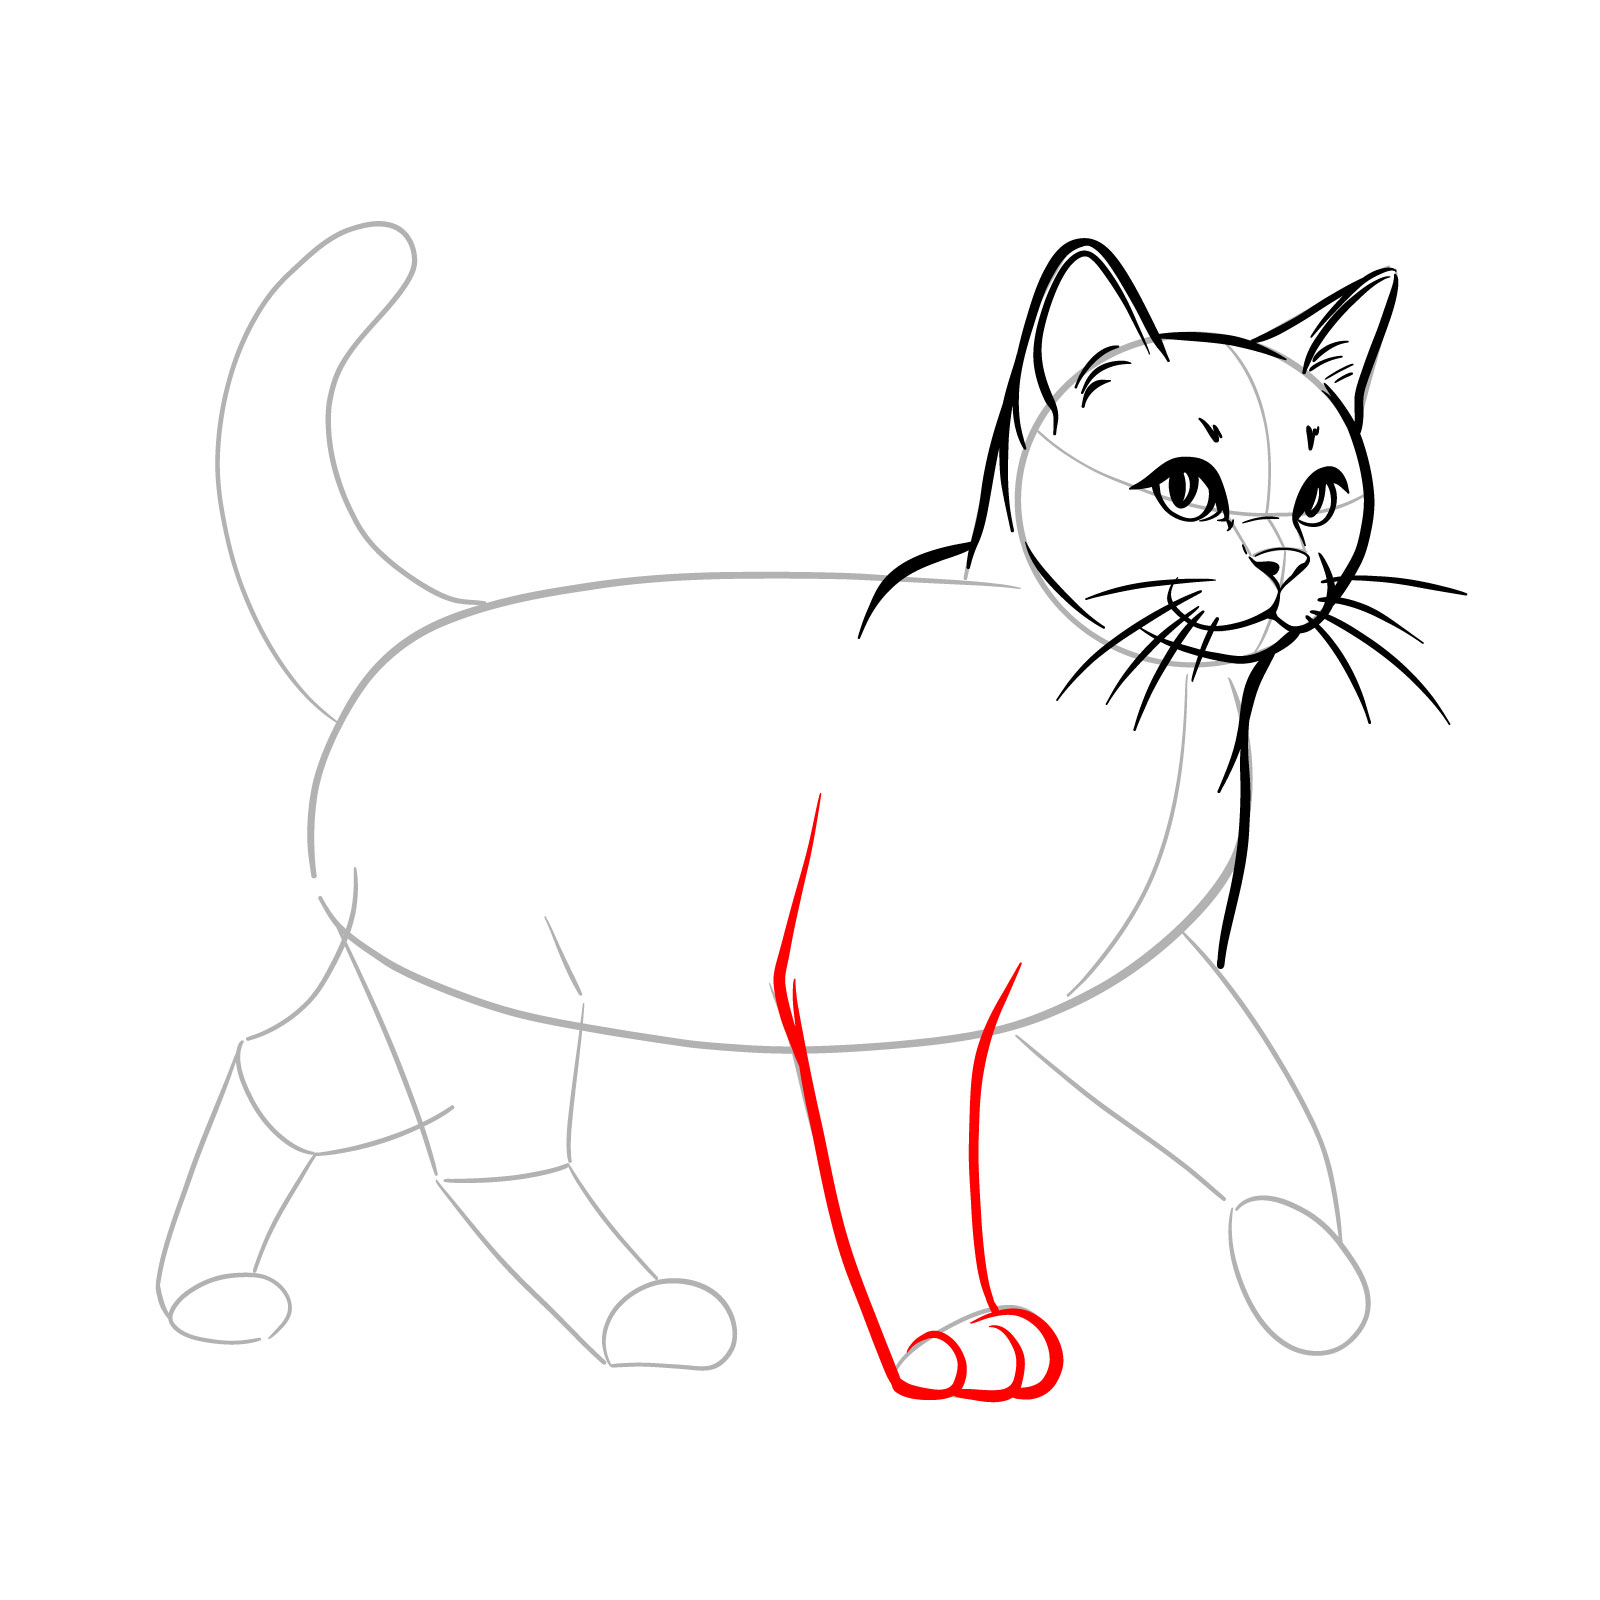
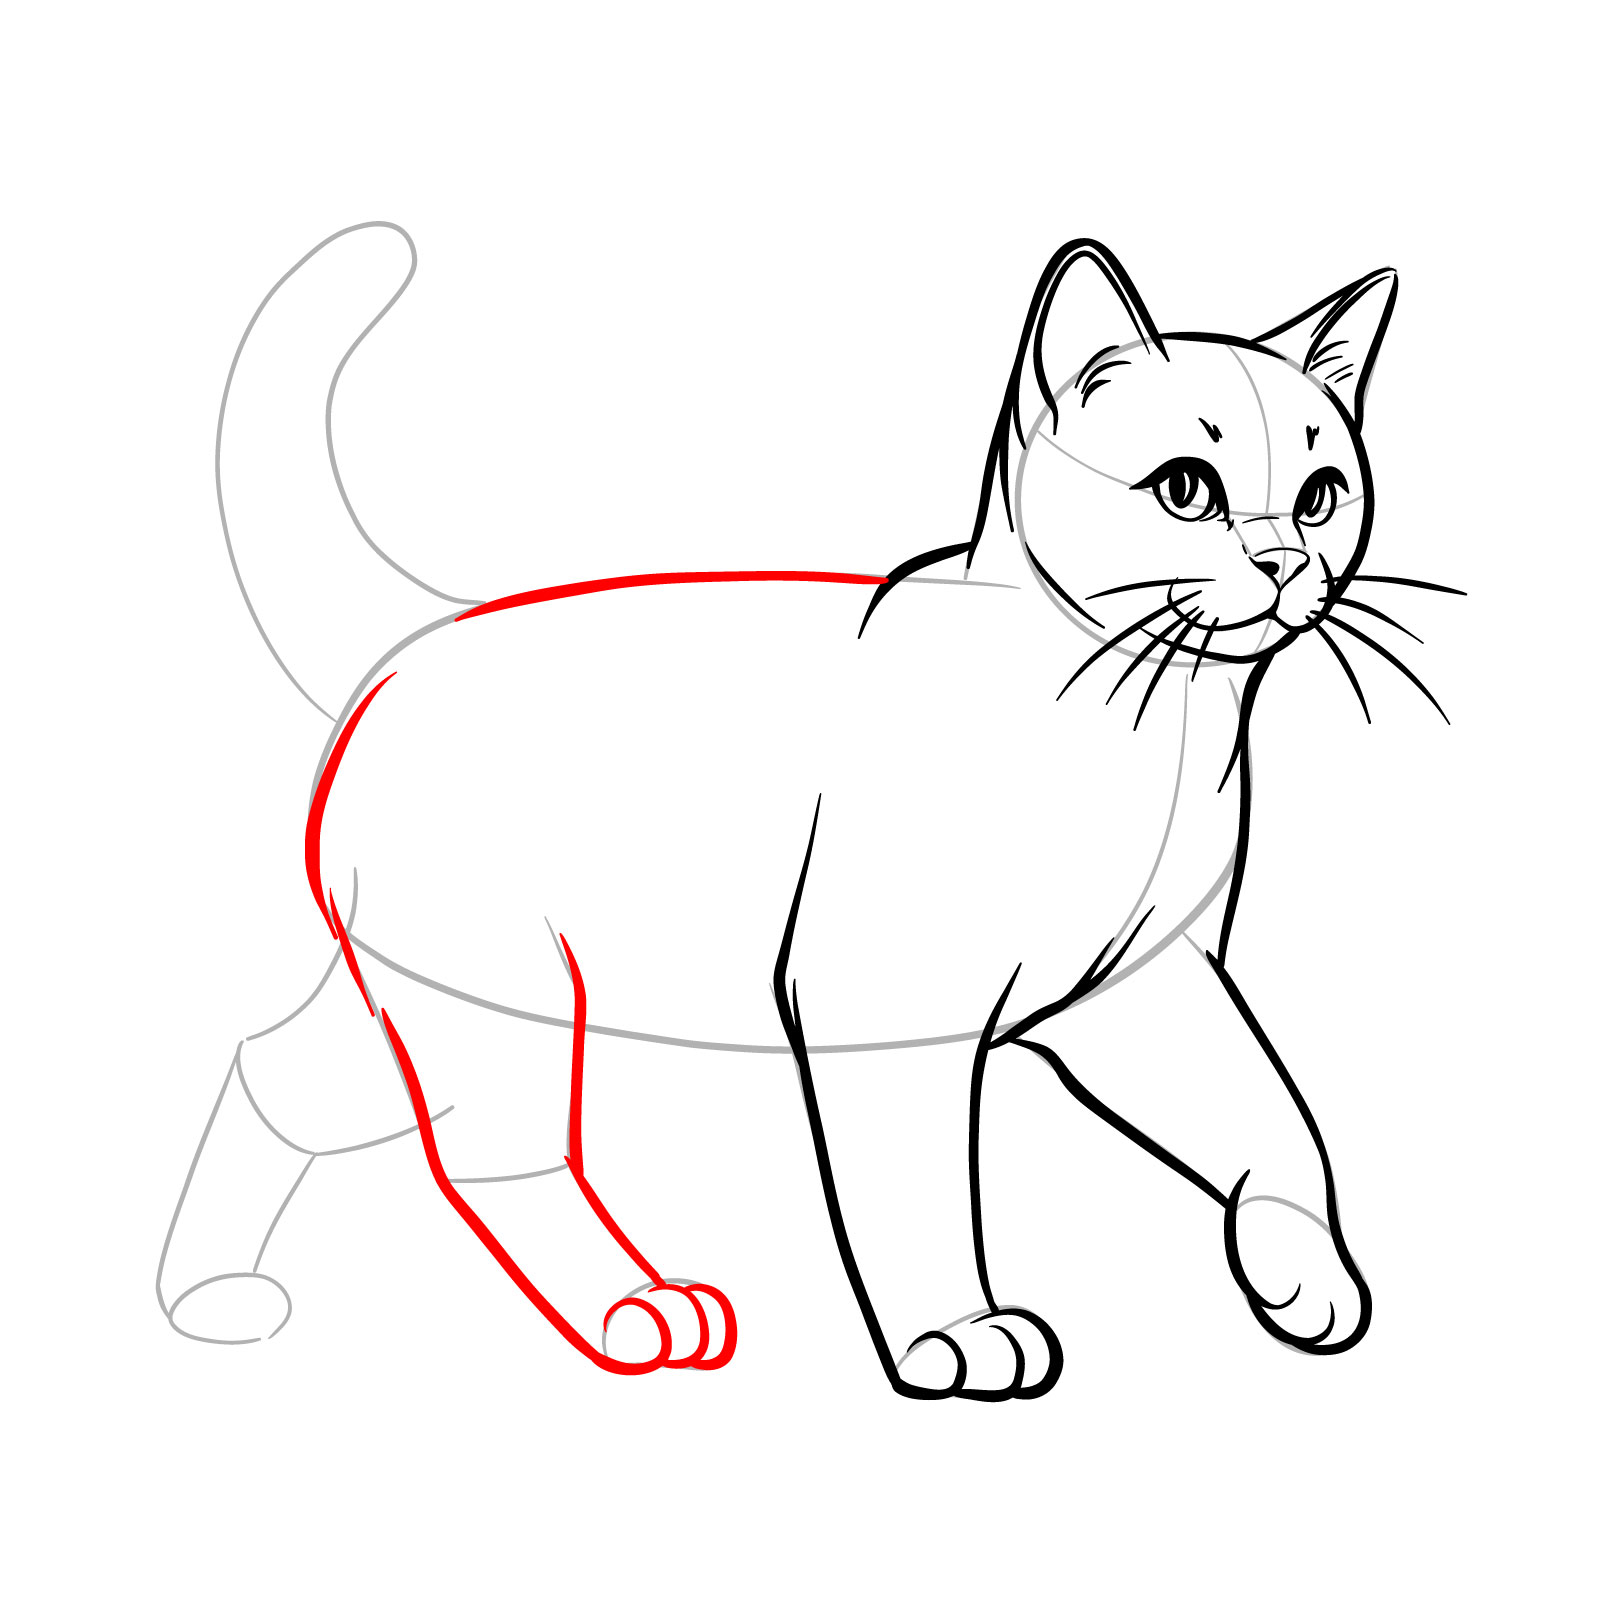
Step 10 – Focus on the leg that’s stepping forward. Illustrate its motion by drawing a smooth line from the body to the paw, indicating the leg’s muscular form. The leg should protrude forward, with the paw pointing towards the ground, ready to take the next step
Outlining the forward front leg
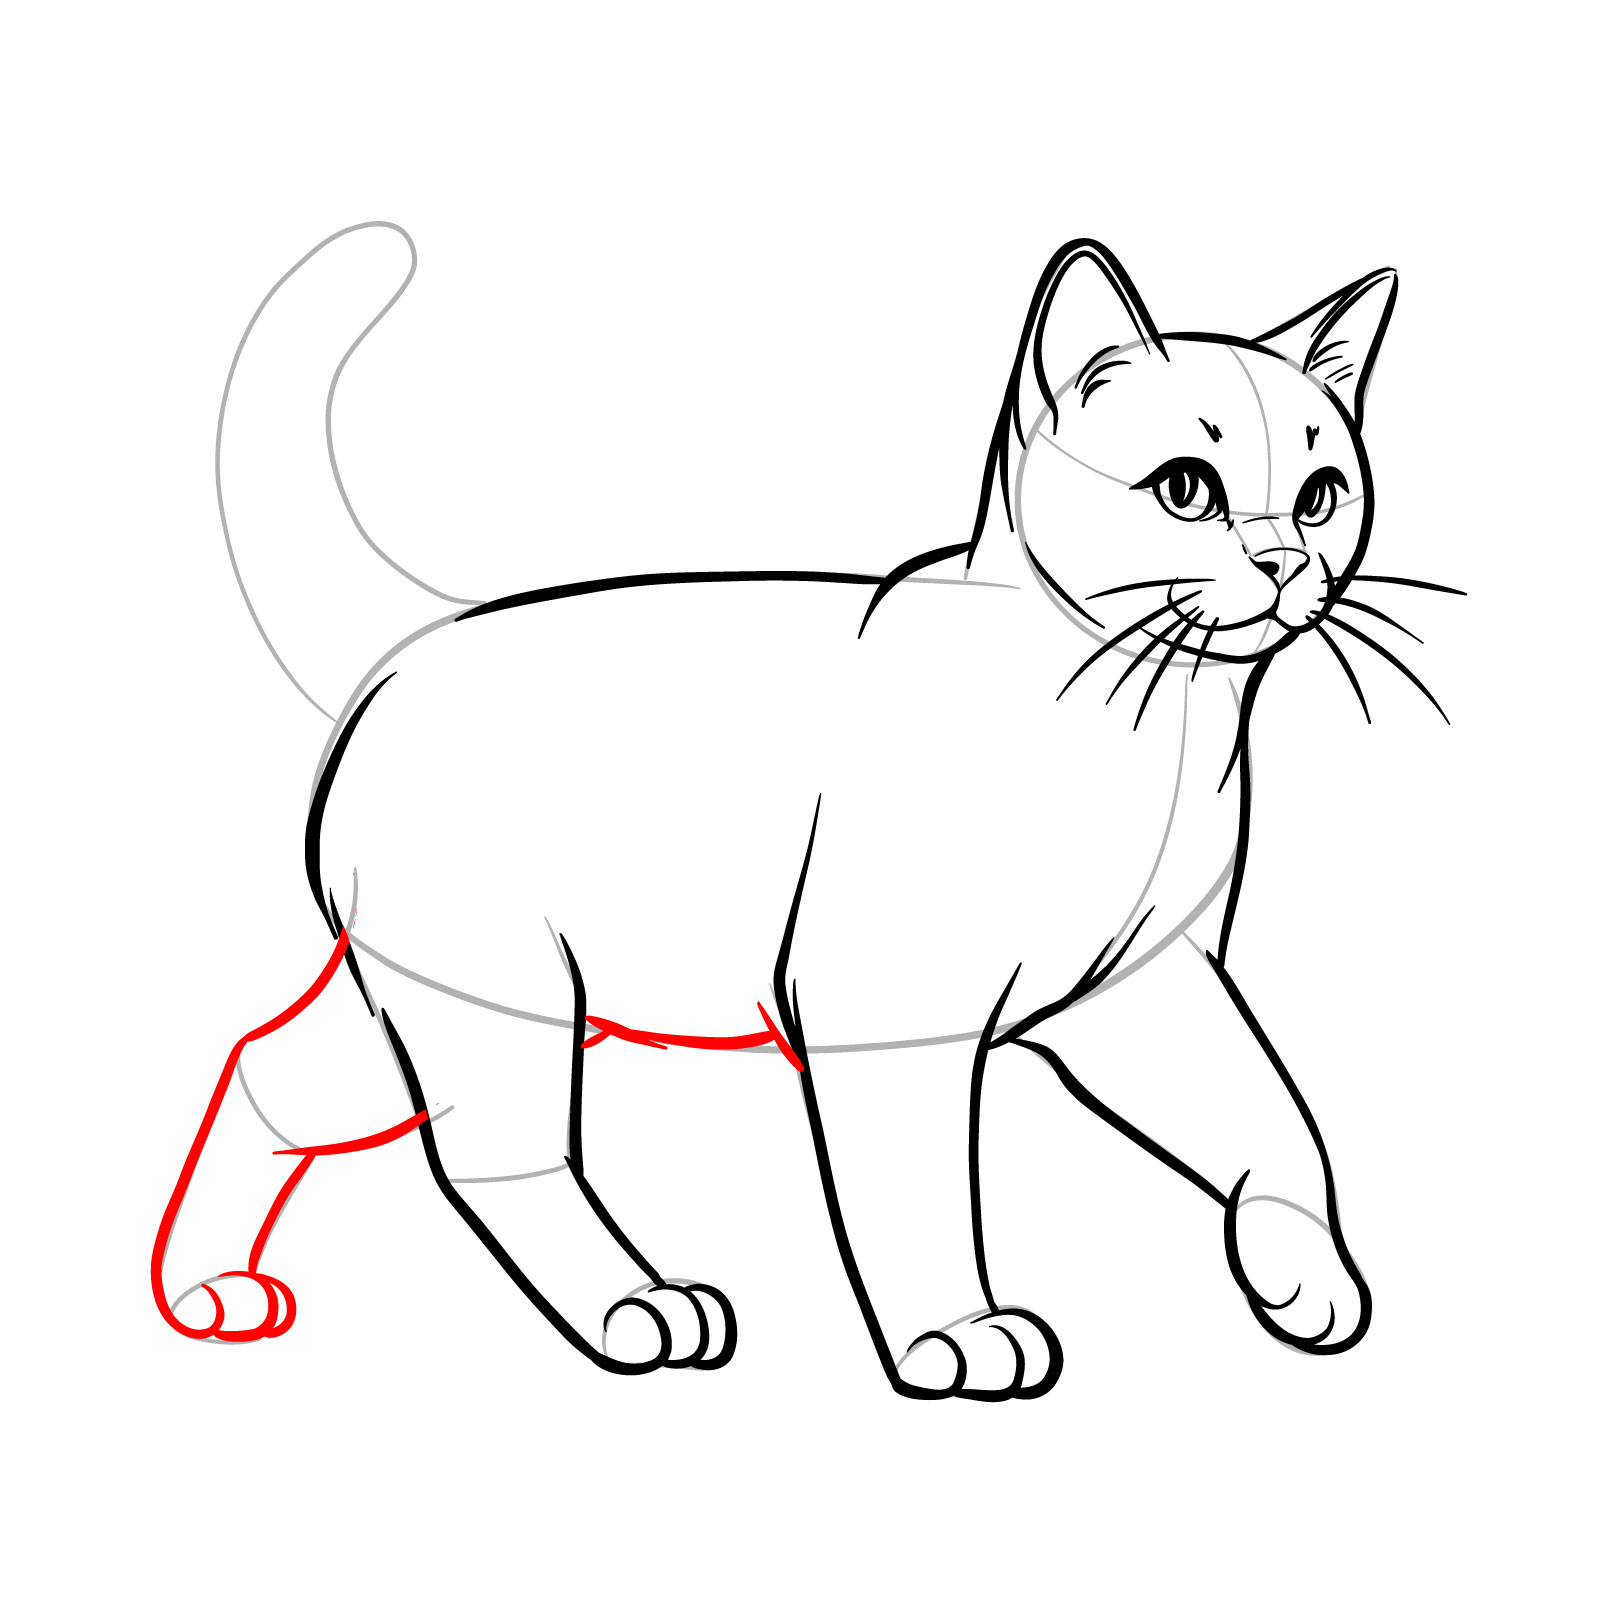
Step 11 – Create the backline starting from the neck, arching slightly upwards to represent the cat’s backbone. Then sketch the rear leg that is supporting the cat’s weight, showing the thigh and lower leg bent in a walking position
Sketching the back and first rear leg
Step 12 – For the second back leg, mimic the position of the first but with a slight variation to show the different phases of the walking cycle. Ensure the bottom part of the body is drawn with a gentle curve to indicate the underside and the belly of the cat
Adding the second rear leg
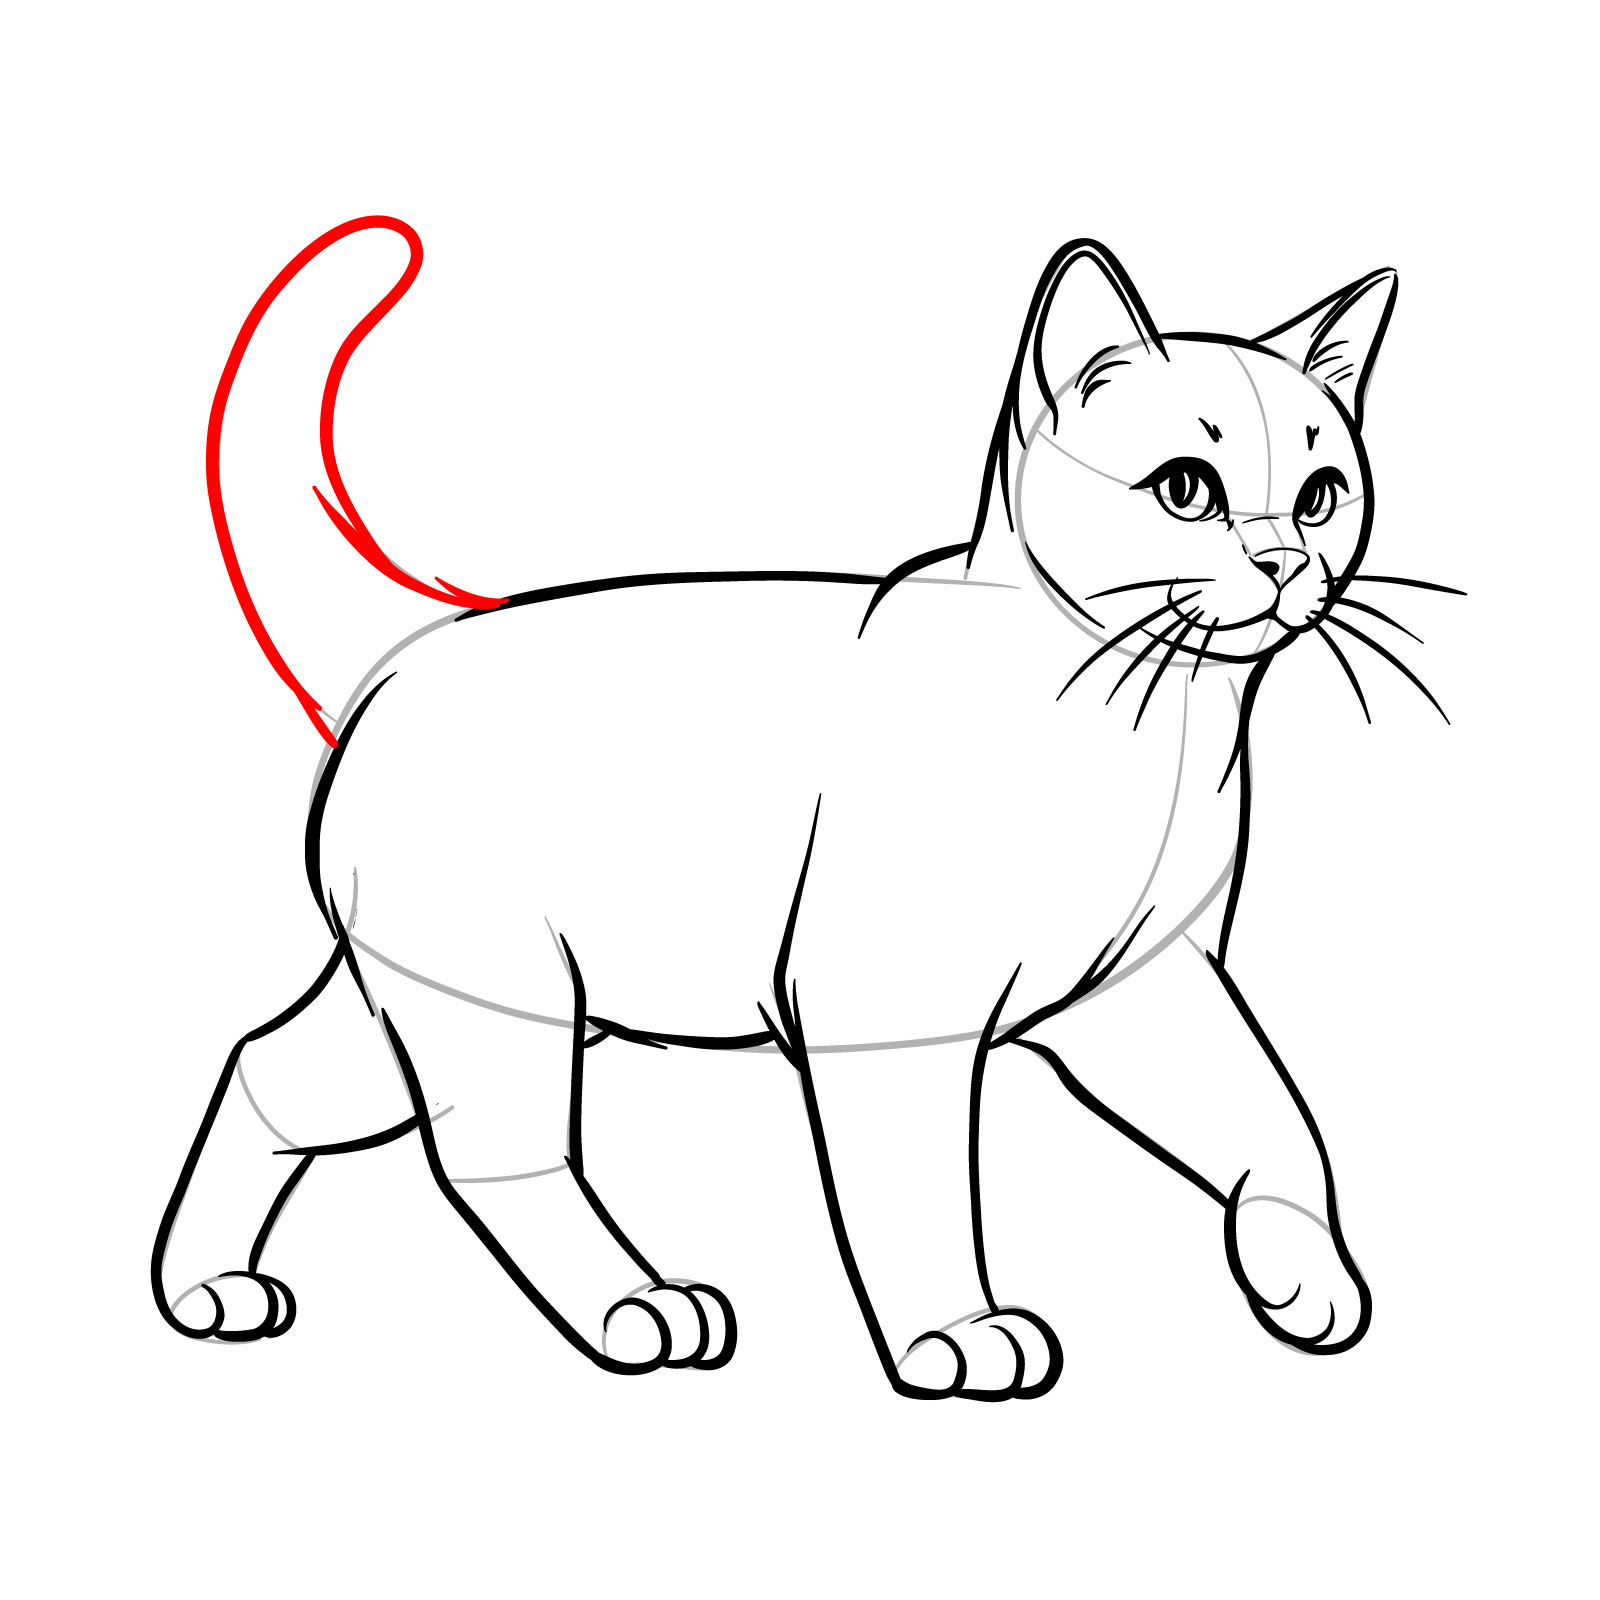
Step 13 – For the tail, draw a long, curved line that starts from the back and extends upwards, giving a sense of movement and balance to the walking cat. The tail should be fluid and dynamic, contributing to the overall action of the pose
Shaping the cat’s tail
Step 14 – Add some light folds to the front of the body to suggest the movement of the cat’s muscles and fur as it walks. This includes a slight indentation where the leg meets the body to indicate the natural contours of the feline form
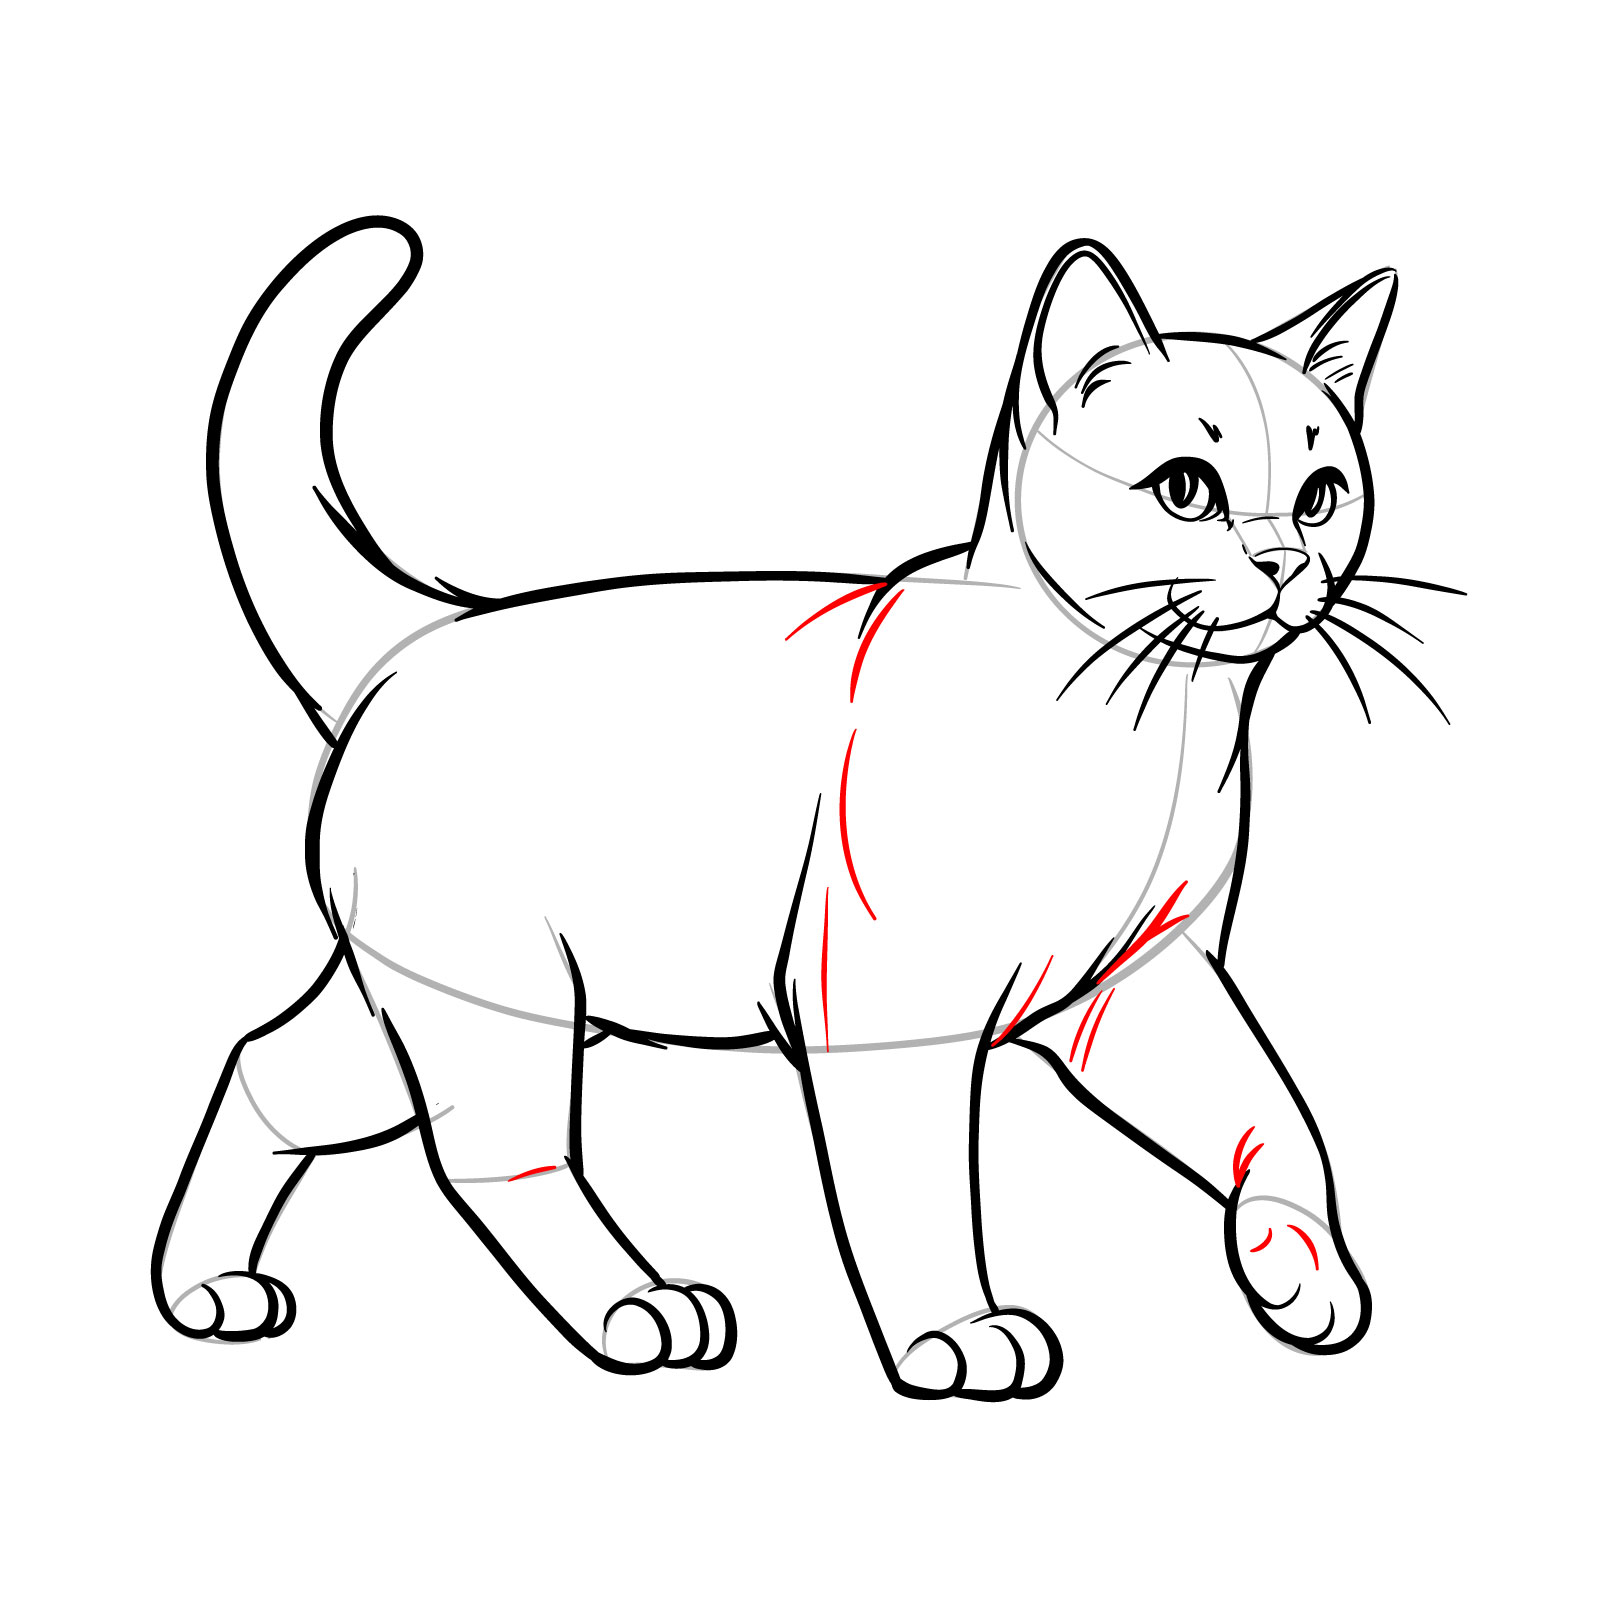
Refining the front body with details
Step 15 – Your guide on how to draw a walking cat culminates in this final illustration. With attention to proportion, movement, and realistic detailing, the cat’s walking pose is now complete. The drawing captures the essence of a cat in motion, making it an ideal reference for both beginners and those looking to refine their skills in capturing the subtleties of animal movement
Finalized drawing of a walking cat
Guide 11: How to Draw a Lying Cat – Side View – 14 Steps
How to Draw a Lying Cat – the Result
Our eleventh guide eases you into depicting the serene posture of a lying cat, viewed from the side. Within this 14-step tutorial, you’ll learn how to draw a lying cat with an average level of complexity, suitable for beginners yet still engaging for those with more drawing experience. We focus on a realistic depiction that simplifies the details to ensure a smooth drawing process. The guide begins by constructing a proportional framework in the first two steps, which is key to achieving the relaxed and natural pose of a resting cat. With each step, you’ll see your cat take shape, capturing the quiet elegance of a cat at rest.
Step 01 – Begin by drawing a circle for the cat’s head, with a vertical line down to show the center and a horizontal line across for eye placement, indicating the direction of the face. Extend the bottom of the circle to suggest the muzzle. Draw an elongated oval-like shape for the body to represent the cat’s relaxed posture
Establishing the basic structure for a lying cat
Step 02 – Within the head, mark the positions for the eyes and mouth using the guidelines. Sketch simple shapes where the ears will be at the top of the head, a curve for the tail’s base, and basic outlines for the legs
Placing facial and body landmarks
Step 03 – Draw two triangular shapes for the ears, ensuring they are appropriately sized for the head. Connect the ears with a gentle curve to represent the top of the head
Outlining the ears and the head’s crown
Step 04 – From the ears, bring down two lines to form the sides of the head, converging slightly to outline the chin
Refining the head’s sides and chin
Step 05 – Draw two ovals for the pupils and leave a small blank space for the highlight to give the eyes a sense of life and dimension
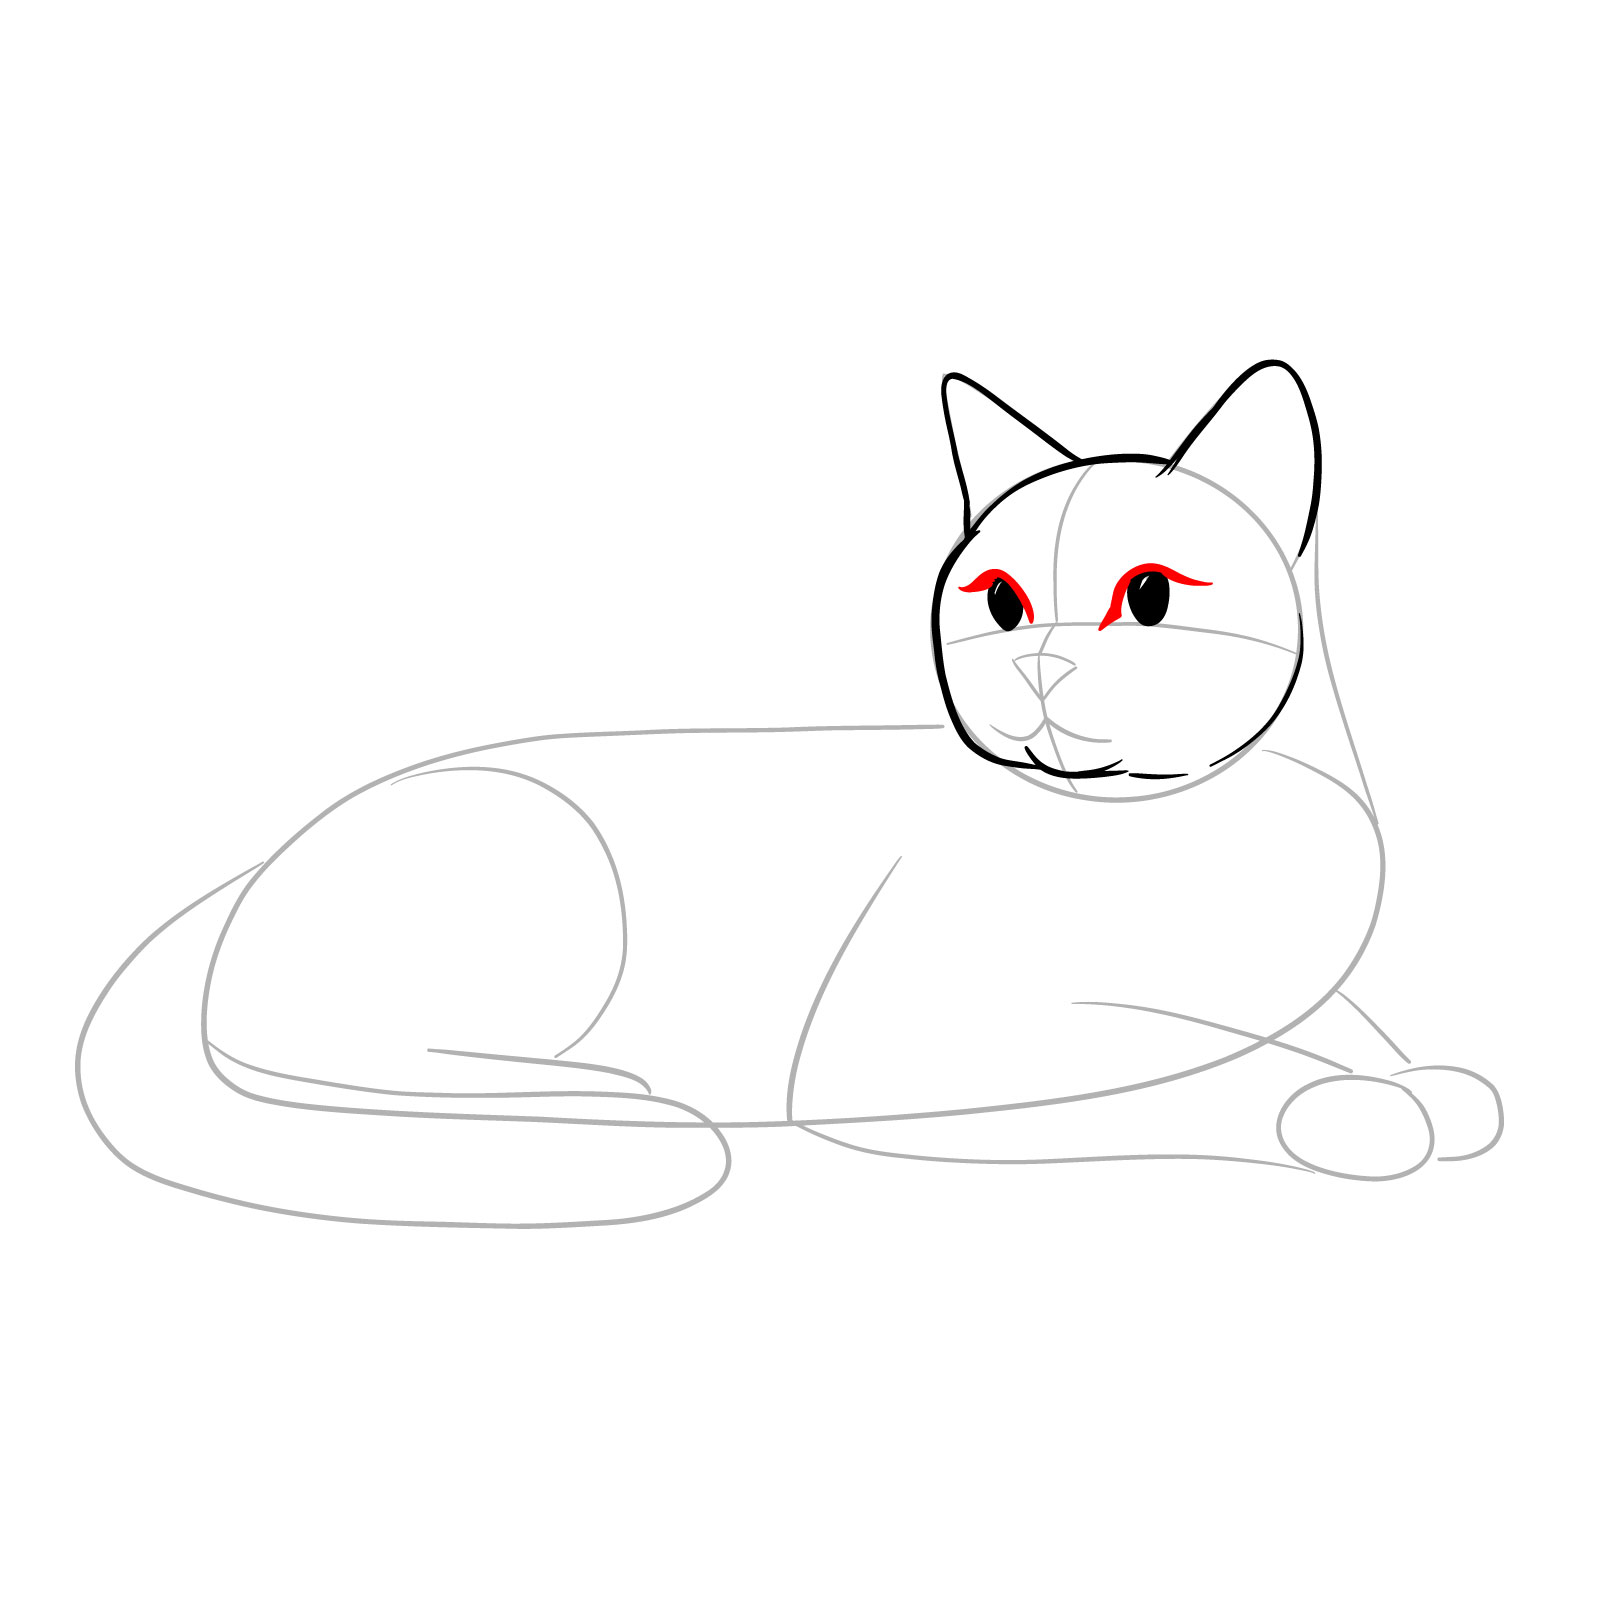
Drawing the cat’s pupils and highlights
Step 06 – Above each pupil, sketch the upper eyelids, giving them a slight curve to indicate the eyelid’s contour and the cat’s peaceful expression
Defining the upper eyelids
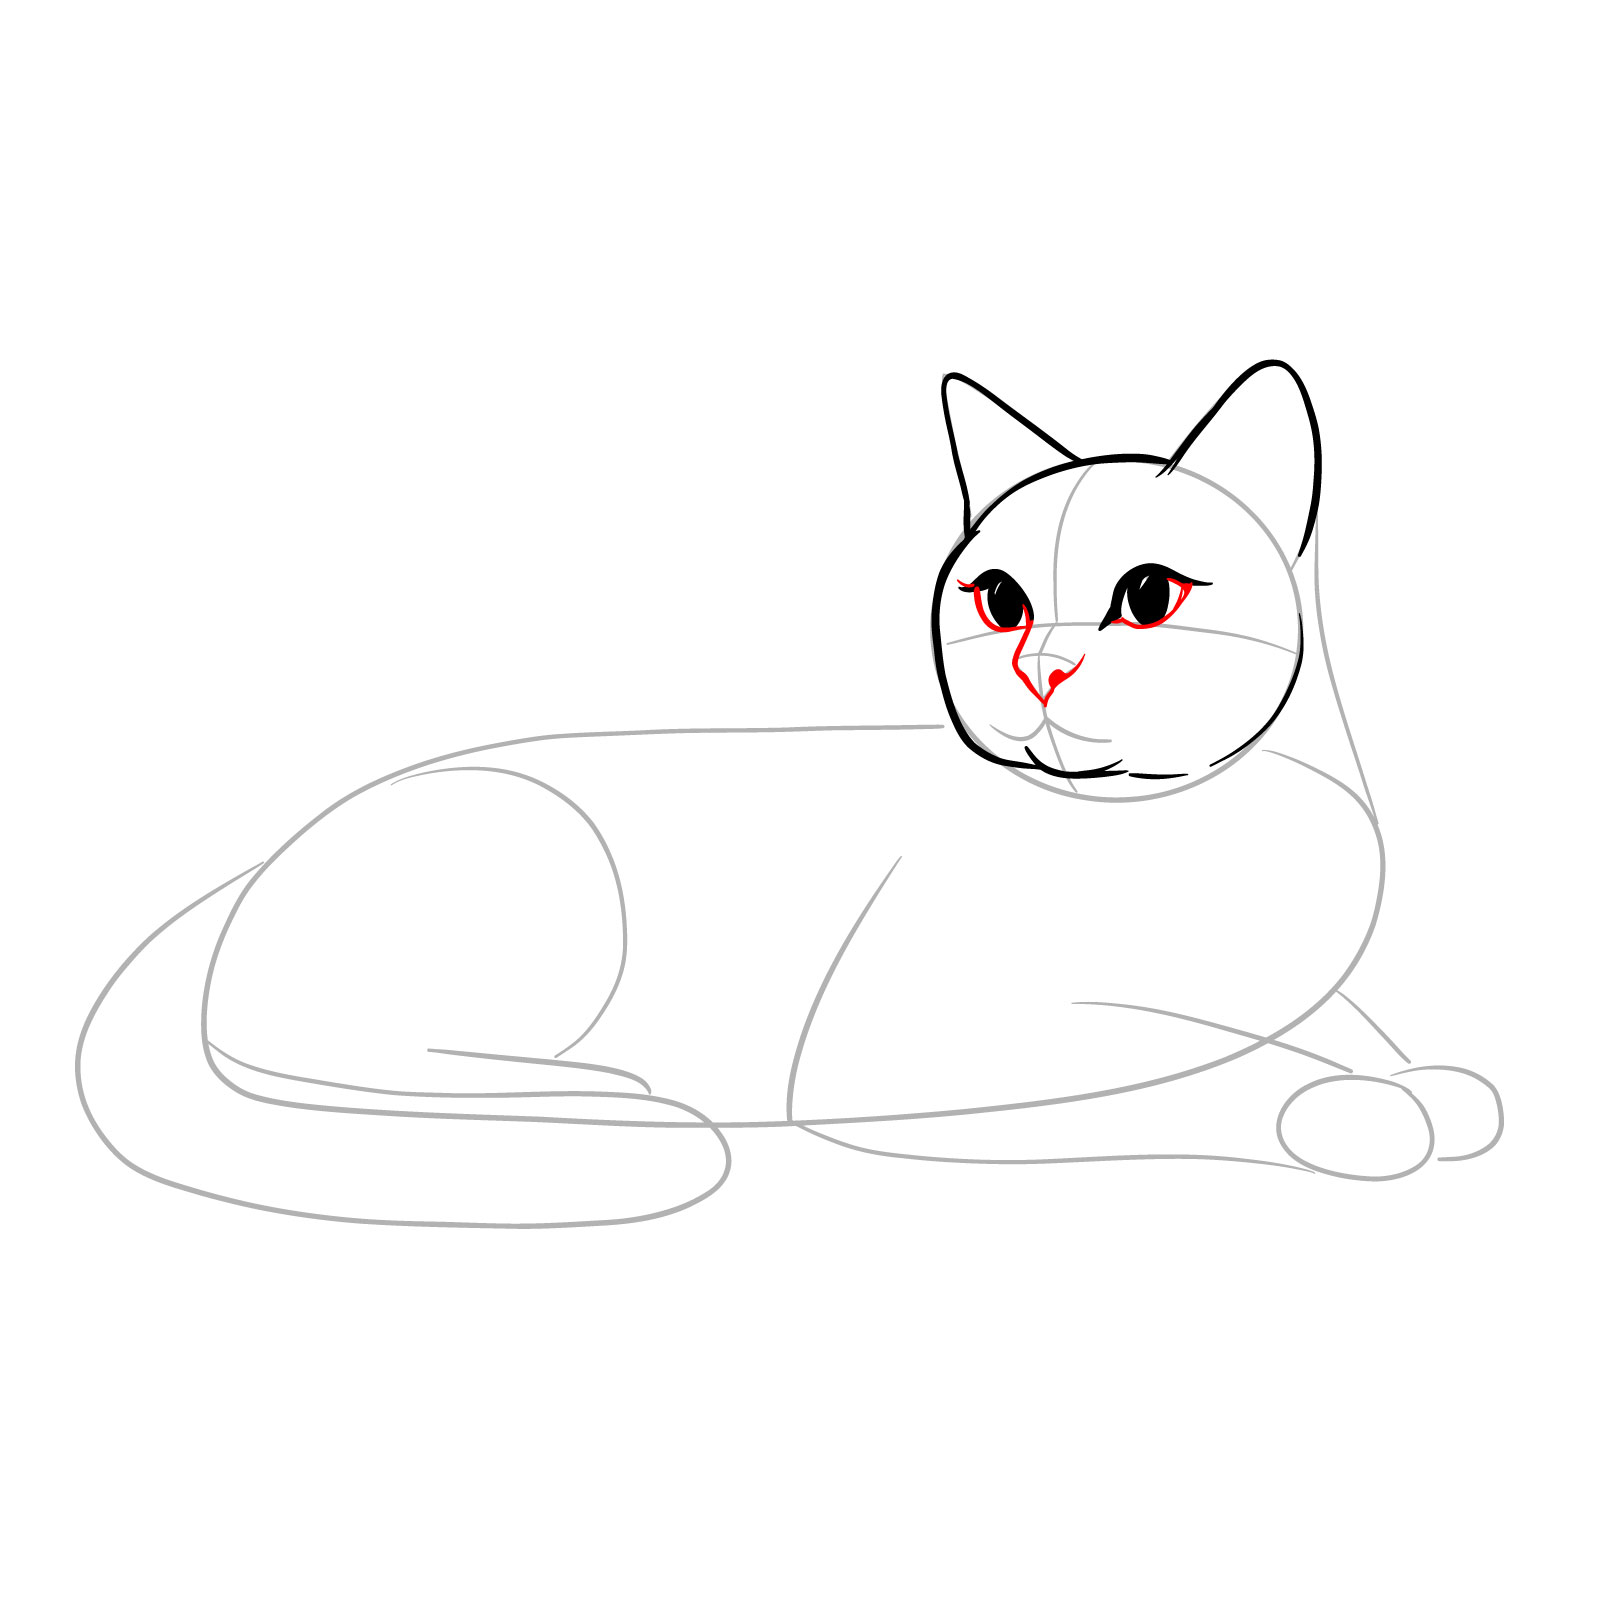
Step 07 – Detail the eyes by refining the shape around the pupils and adding any necessary lines to suggest the eye’s depth. Place a small triangular shape for the nose, aligning it with the guideline
Completing the eyes and sketching the nose
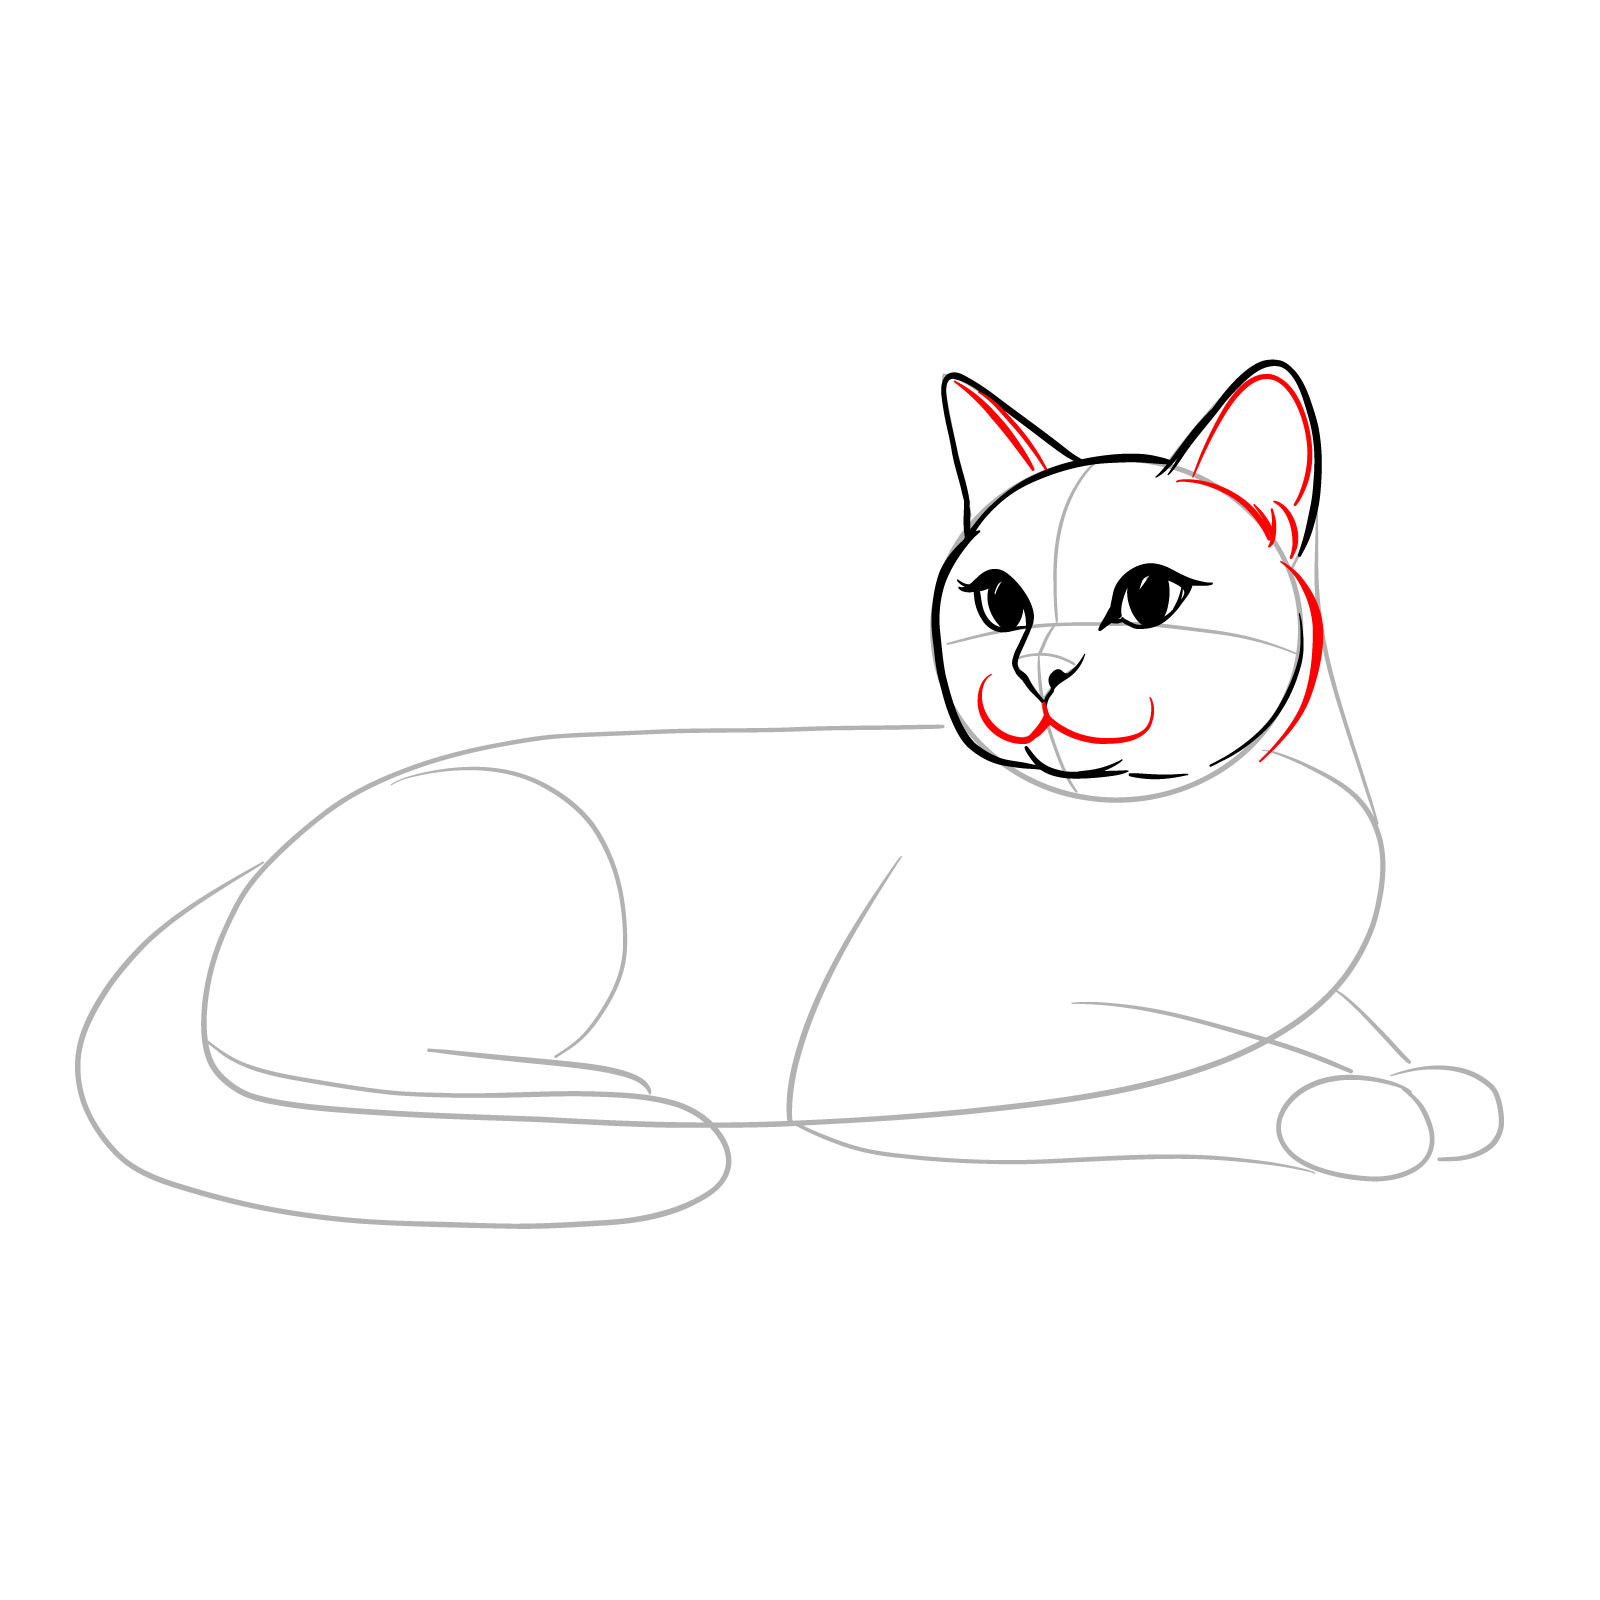
Step 08 – Draw the mouth with gentle curves beneath the nose to define the muzzle area. Then, add the inner lines of the ears to create a more detailed and realistic depiction of a cat lying down in a side view
Outlining the mouth and ear details
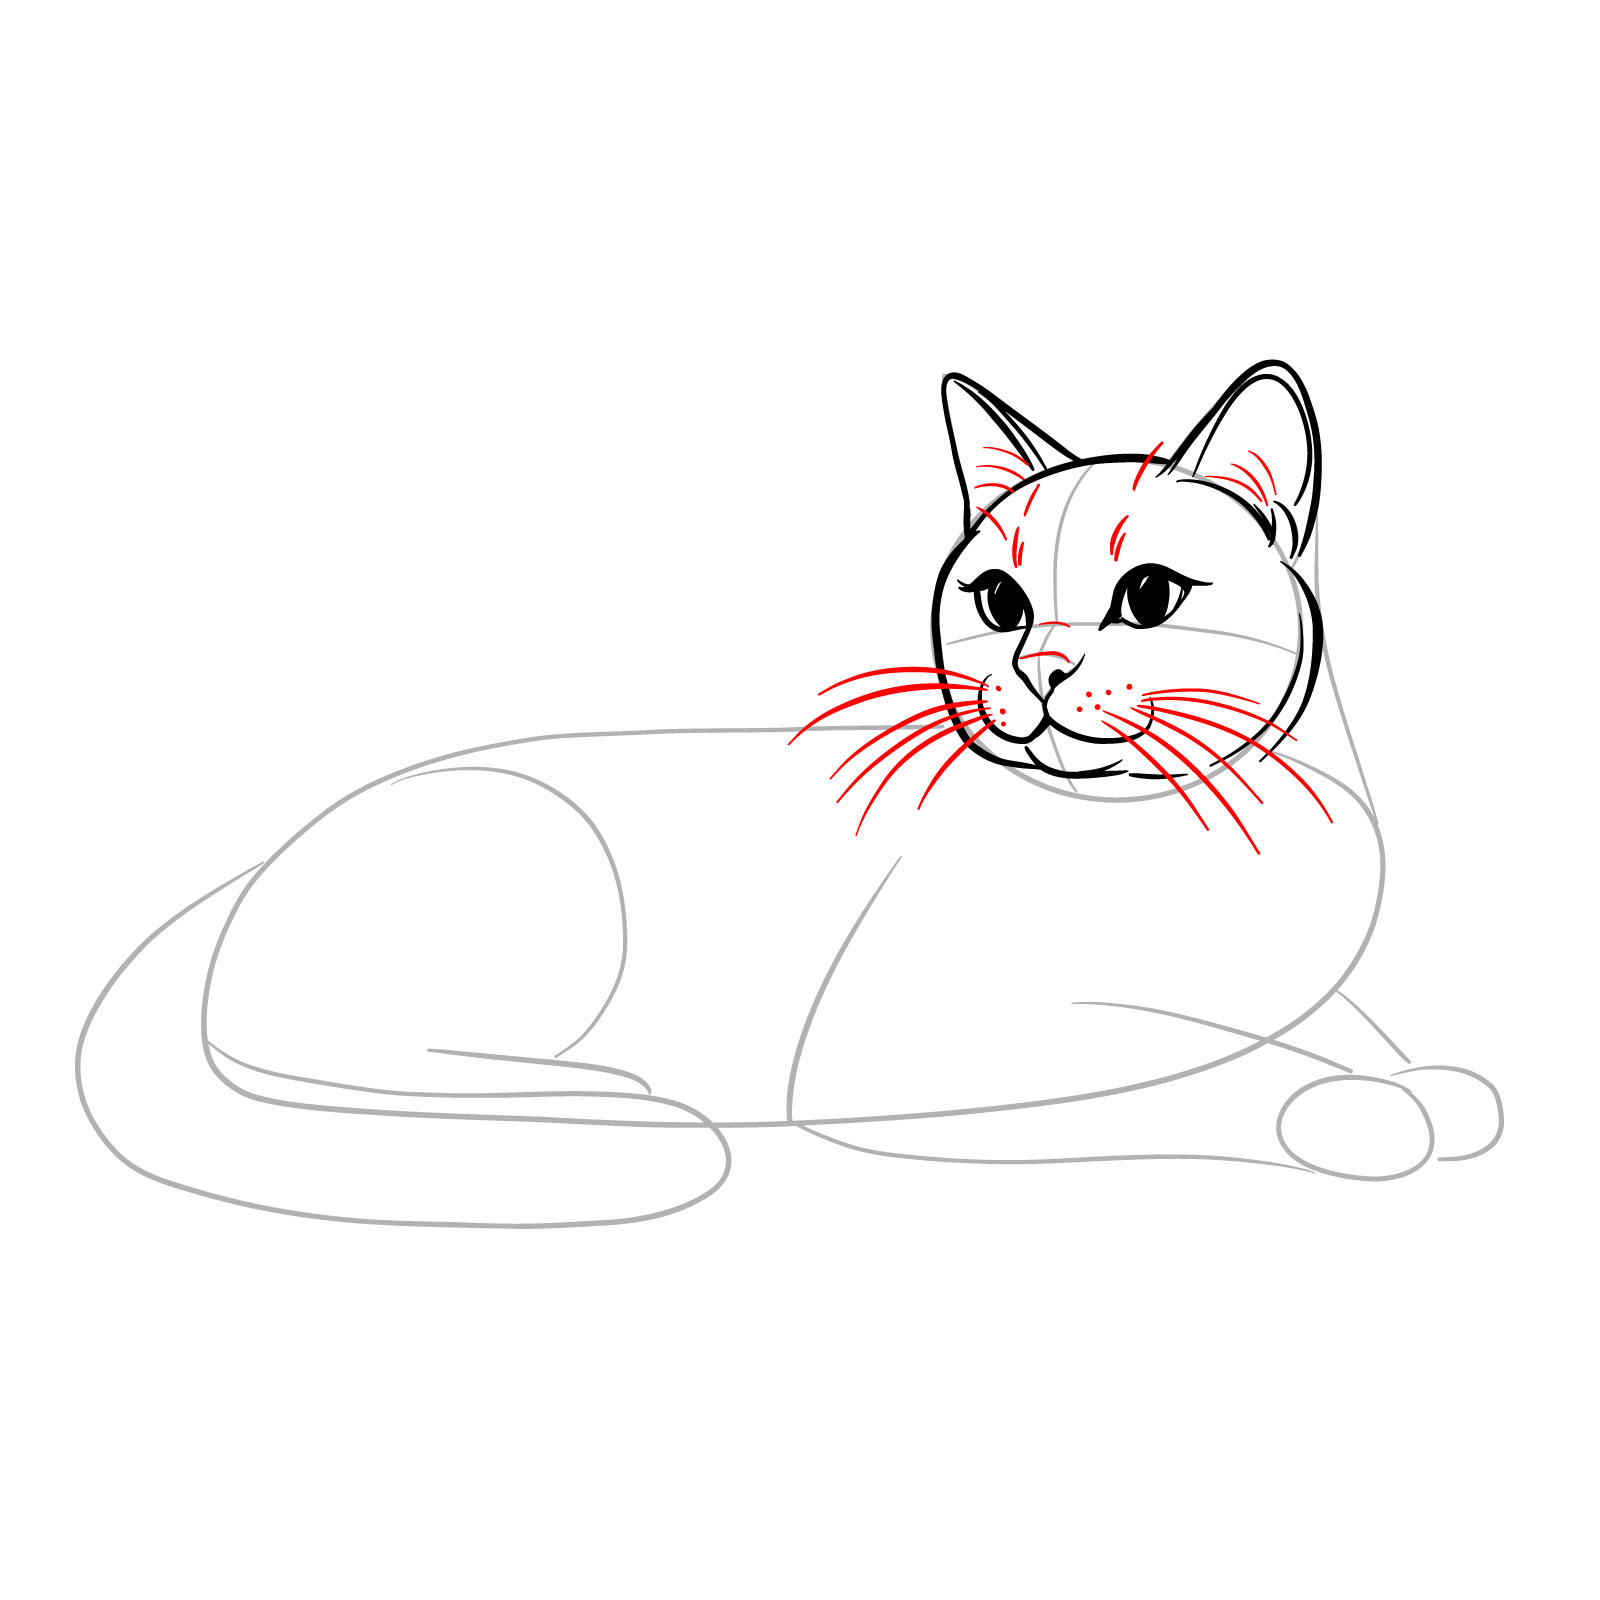
Step 09 – Begin by sketching fine lines radiating from the muzzle to represent whiskers, ensuring they vary in length for a natural look. Add short strokes along the cheeks and forehead to suggest a soft fur texture
Adding whiskers and fur texture to the cat’s head
Step 10 – Trace a smooth, continuous line along the back and neck, following the initial guide. This defines the upper contour of the cat’s body, giving structure to the lying pose
Refining the back and neck outline of the cat
Step 11 – Draw the tail starting from the base, extending it with a gentle curve. Keep the tail’s width consistent for a realistic depiction
Sketching the cat’s tail
Step 12 – Outline the front leg, starting from the shoulder down to the paw. Sketch the paw’s structure with distinct toe pads and ensure the leg’s proportions are accurate to the rest of the body
Detailing the front leg and paw
Step 13 – Focus on the hindquarters, drawing the rear leg bent at the joint and tucked under the body. Add the far leg by hinting at its presence with a subtle outline behind the front leg
Sketching the hind legs and lower body
Step 14 – With all elements in place, review your drawing for any needed refinements. Smooth out the lines, adjust proportions if necessary, and erase any remaining guide marks. Your depiction should capture the serene repose of a cat, showing a balance between relaxed form and alertness in the facial expression. This completed illustration demonstrates the key aspects of how to draw a lying cat in a side view, offering an exemplary guide for beginners seeking to master the art of feline sketching
Final drawing of a lying cat in side view
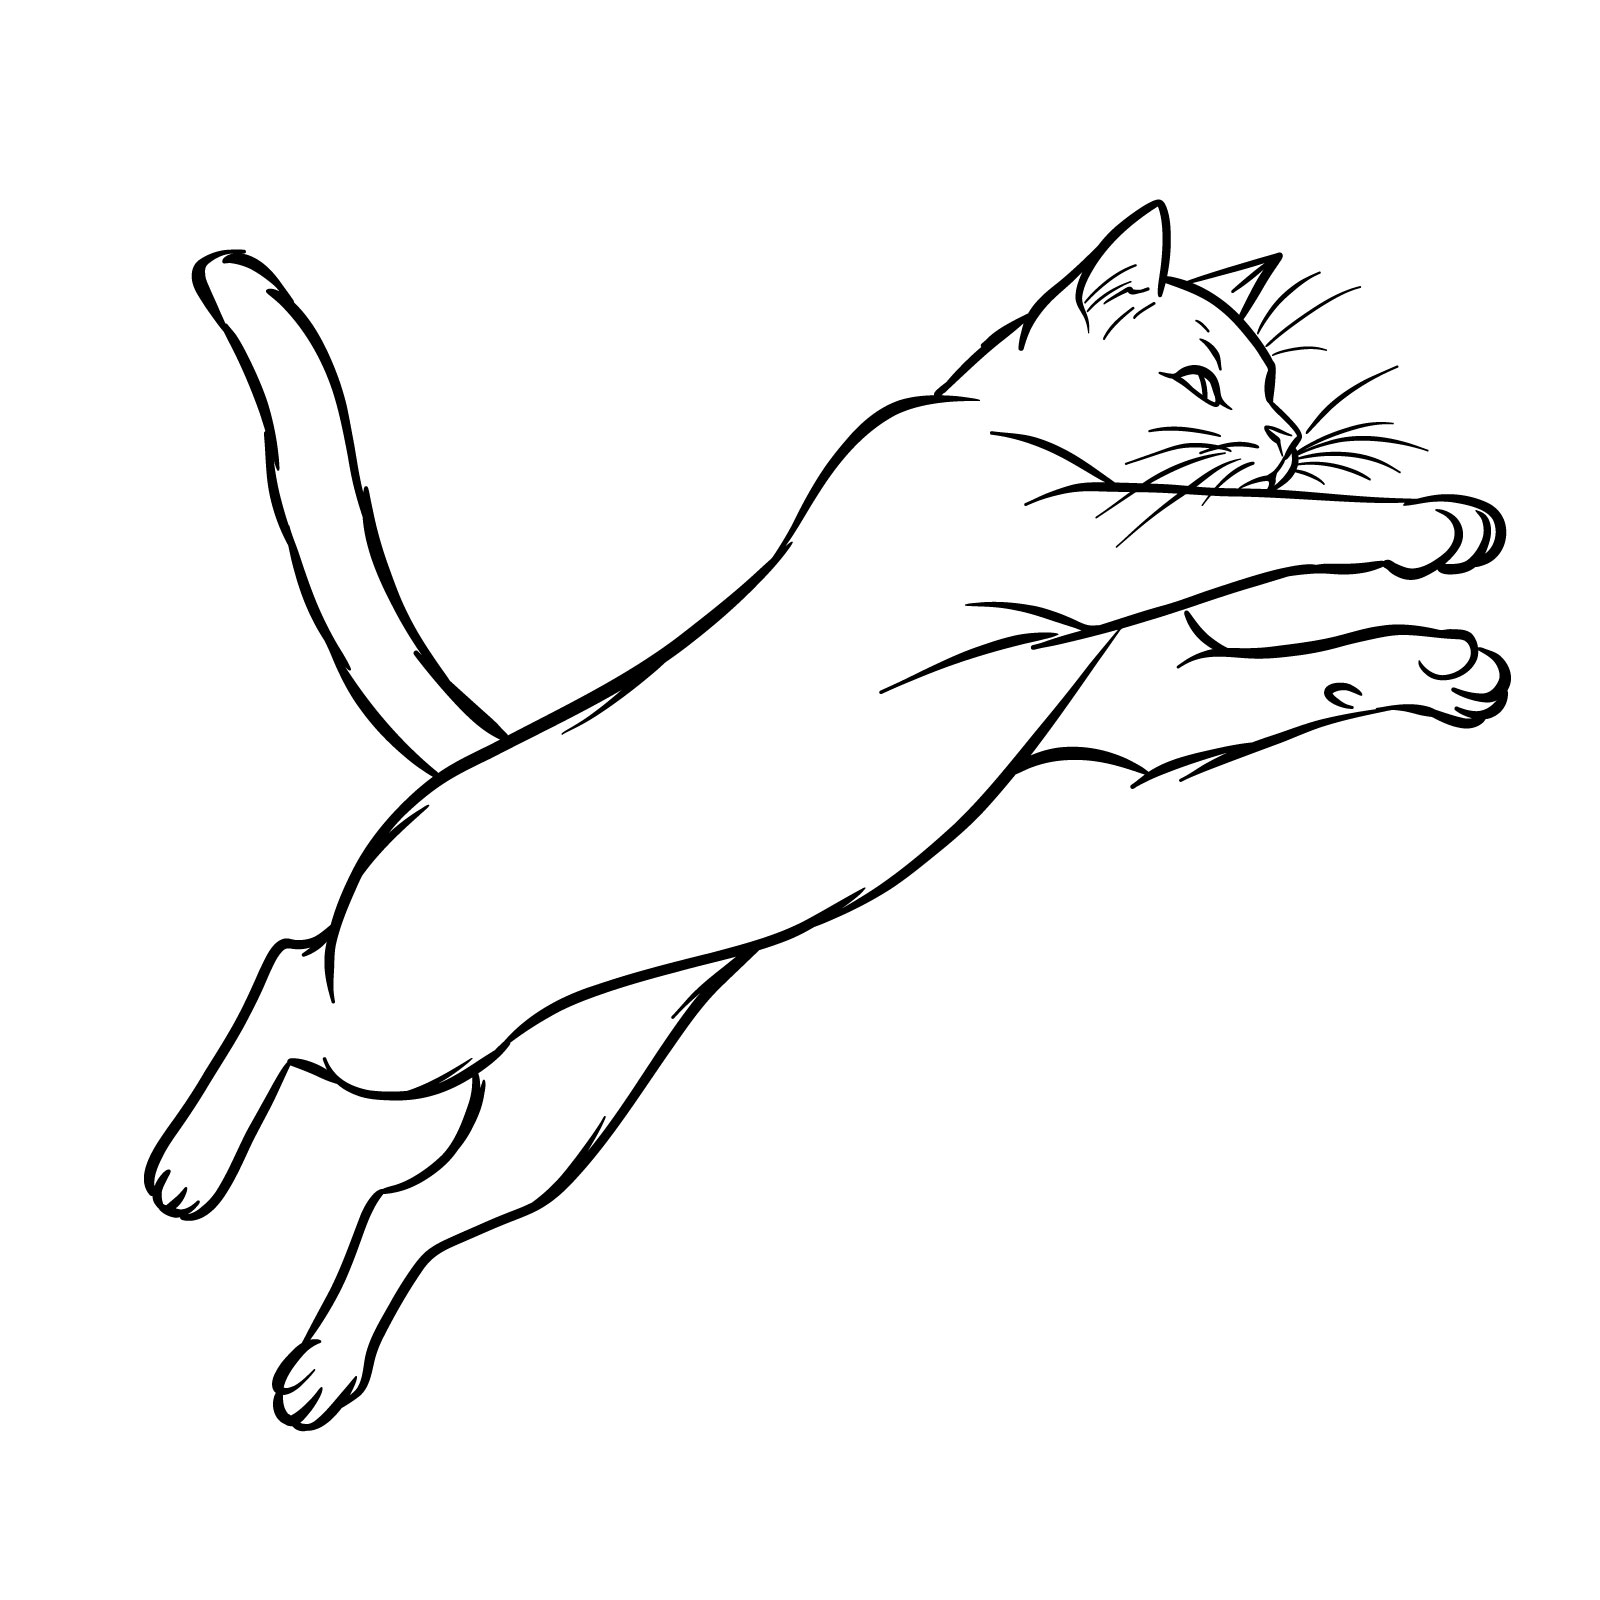
Guide 12: How to Draw a Cat in a Jump – 13 Steps
How to Draw a Cat in a Jump – the Result
Leap into drawing motion with our twelfth guide on how to draw a cat in a jump. This exciting tutorial consists of 13 steps, tailored to convey the average complexity of capturing a cat in mid-air. Suitable for beginners yet intriguing for more practiced artists, this guide keeps the difficulty balanced and the drawing process straightforward. The depiction is realistic, yet not overburdened with details, making it approachable for all skill levels. Beginning with the fundamental two steps to establish a proportional structure, you’ll have a solid basis to animate your cat with the energy and grace of a natural jumper.
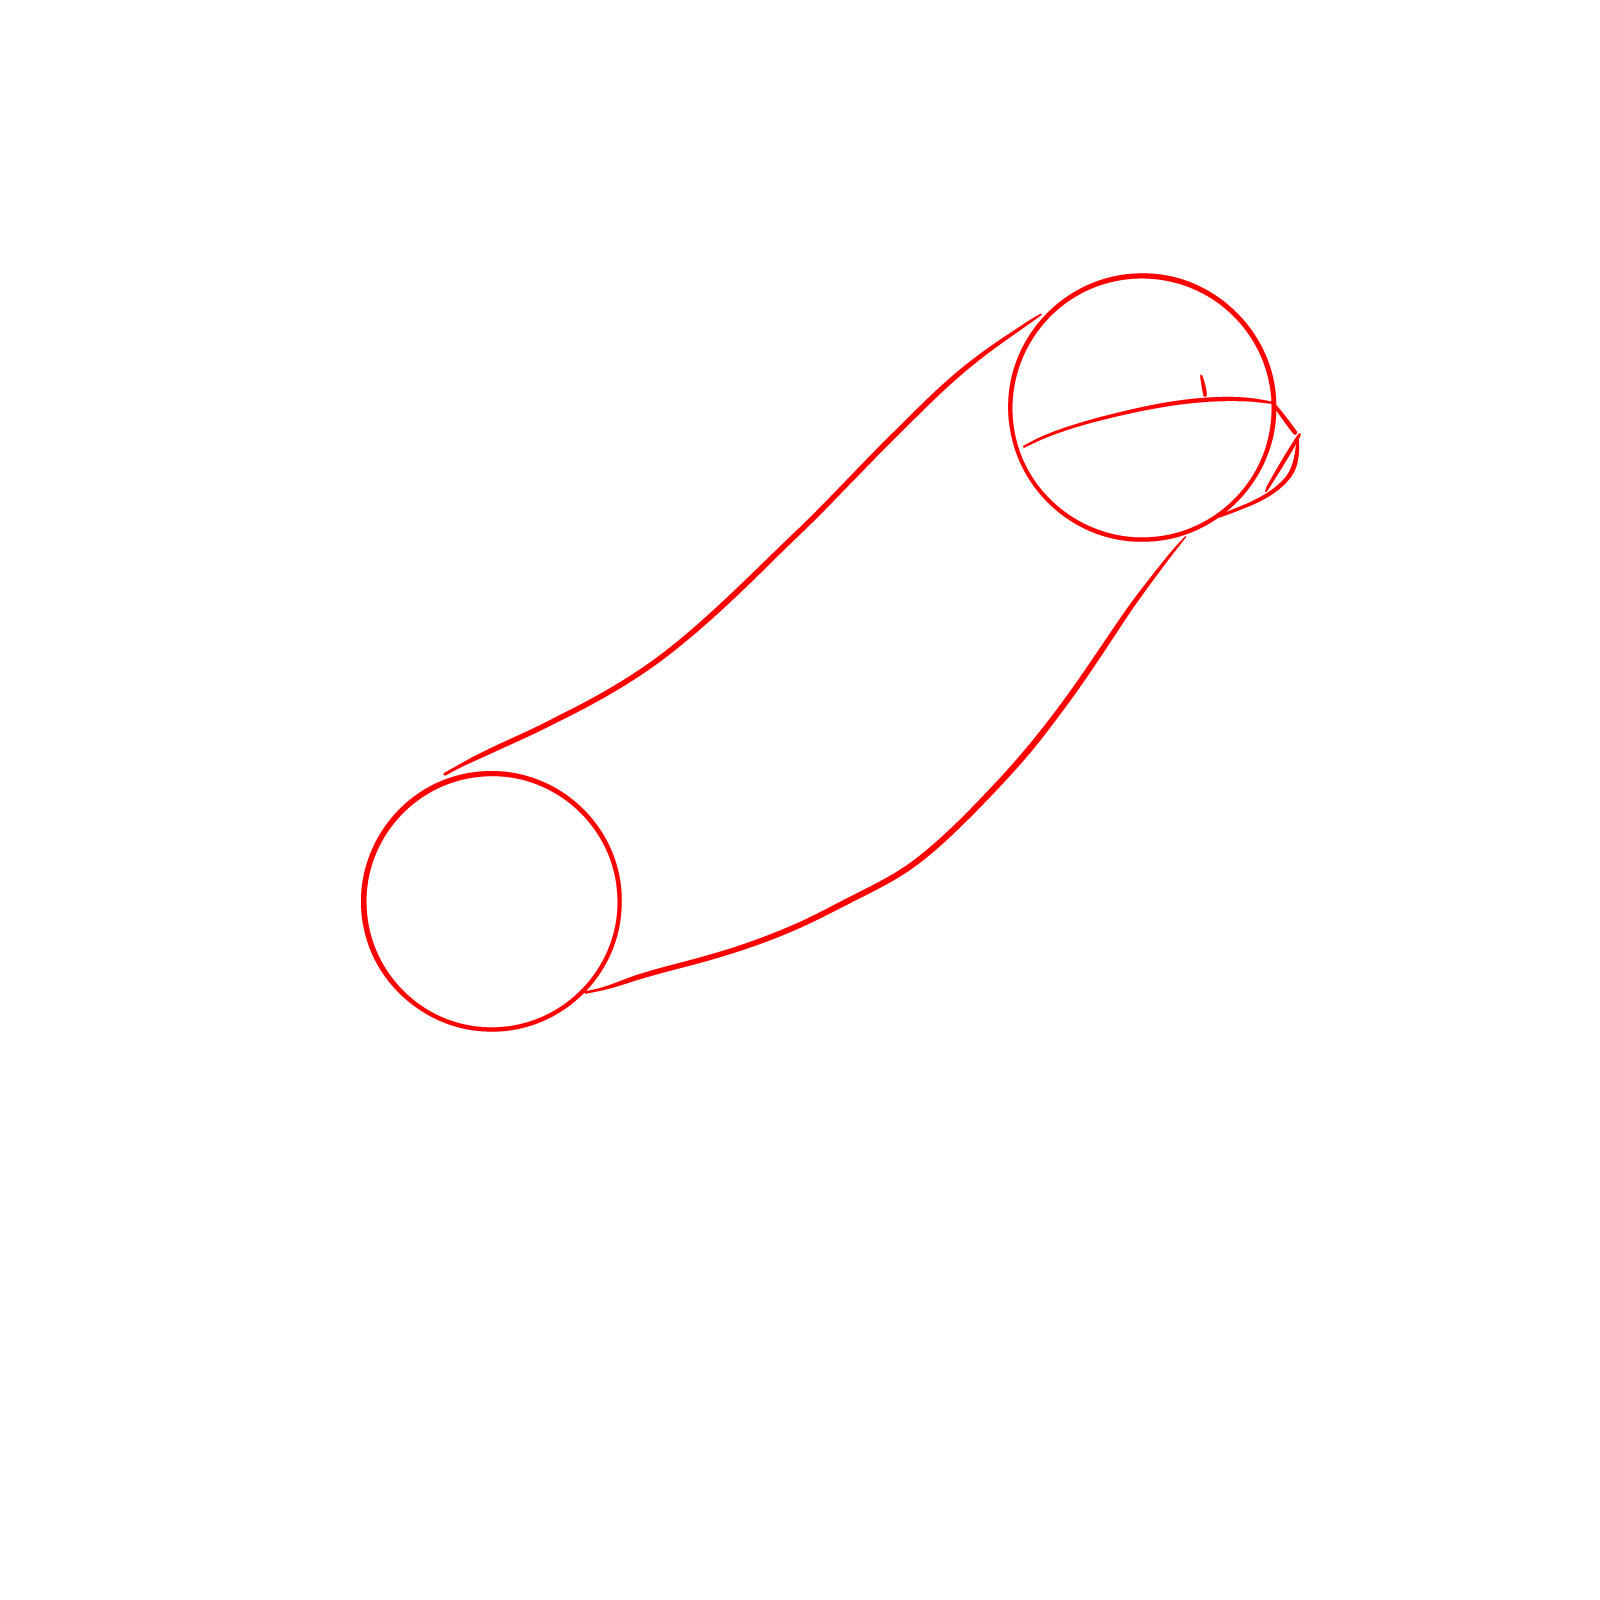
Step 01 – Start by drawing two circles: one for the head with a horizontal line across for eye placement and a basic outline for the muzzle, and another for the lower body. Connect these circles with gently curved lines to establish the fluid shape of the cat’s body in motion
Sketching the basic structure for a jumping cat
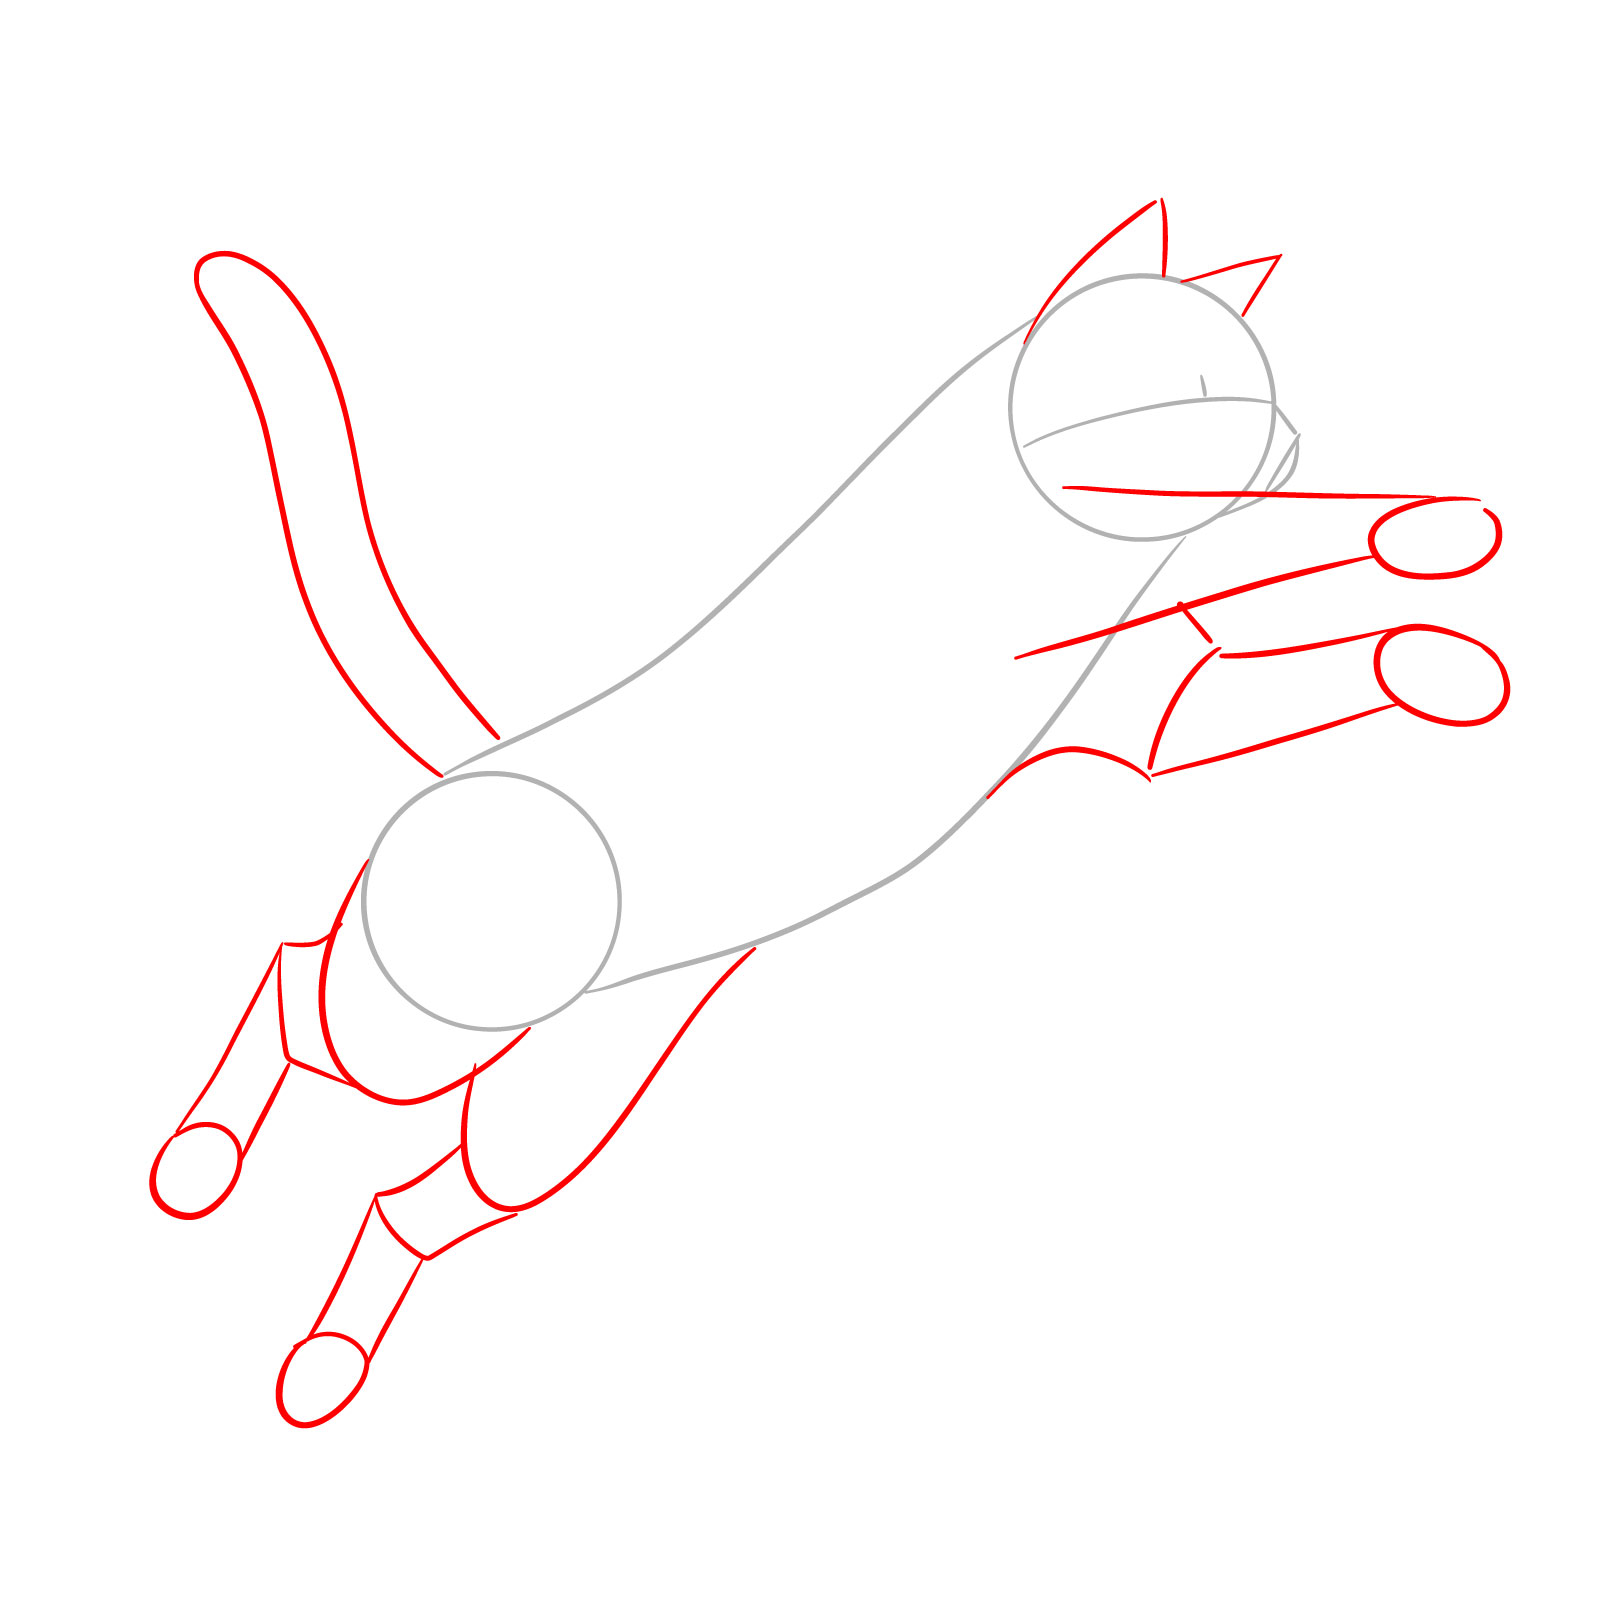
Step 02 – Place the ears with simple triangular shapes atop the head. Sketch the tail and legs using basic lines and shapes to represent the directional flow and action of the jump, ensuring the limbs suggest forward momentum
Adding ears, tail, and leg shapes to the jump pose
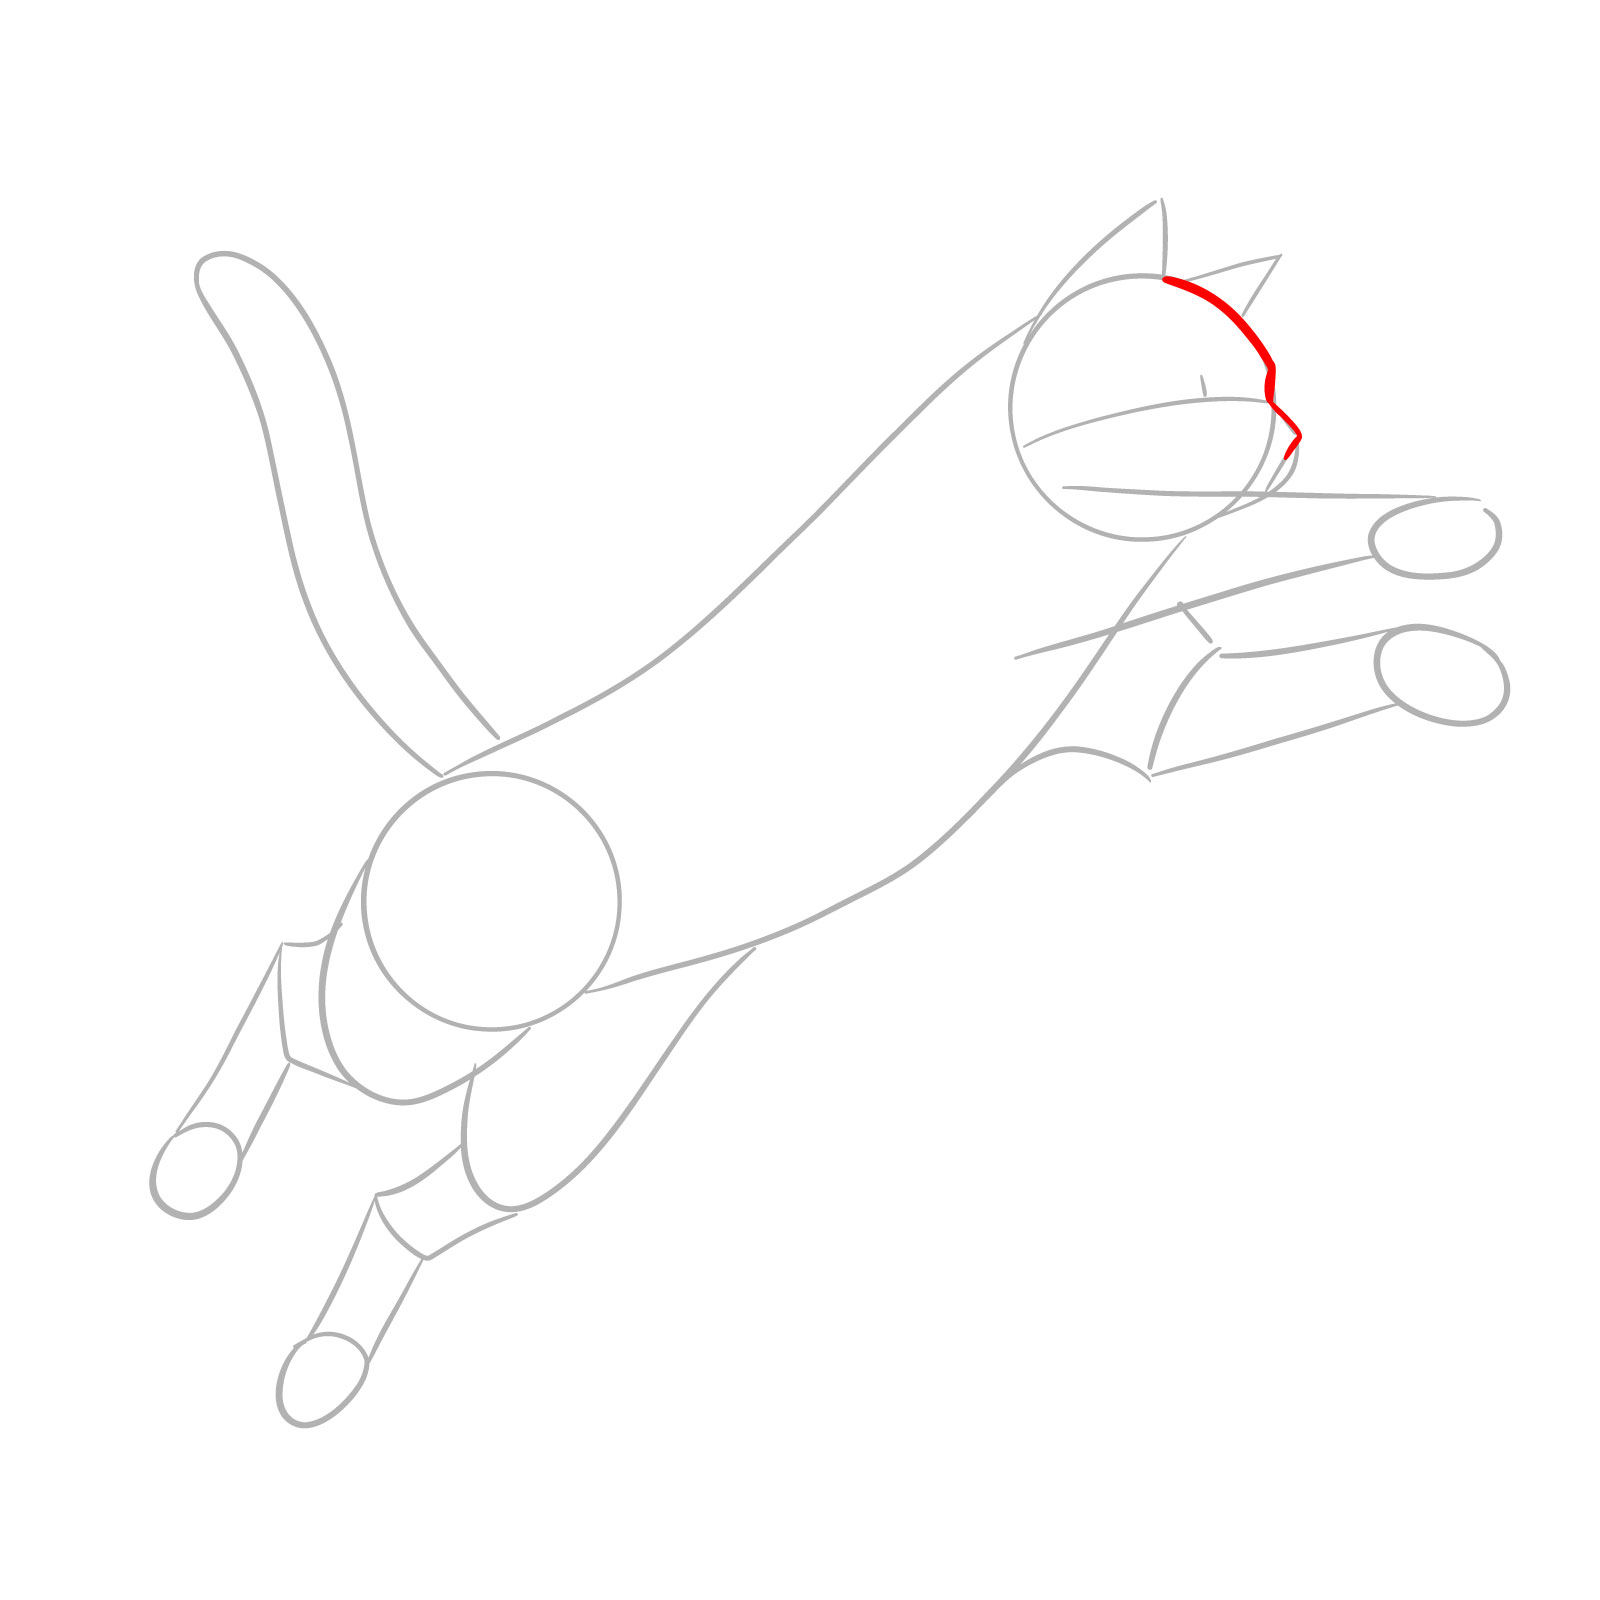
Step 03 – Refine the front of the head, drawing the nose and extending the lines to form the muzzle, making sure these features align with the horizontal guideline across the head for accurate positioning
Detailing the head and nose of the jumping cat
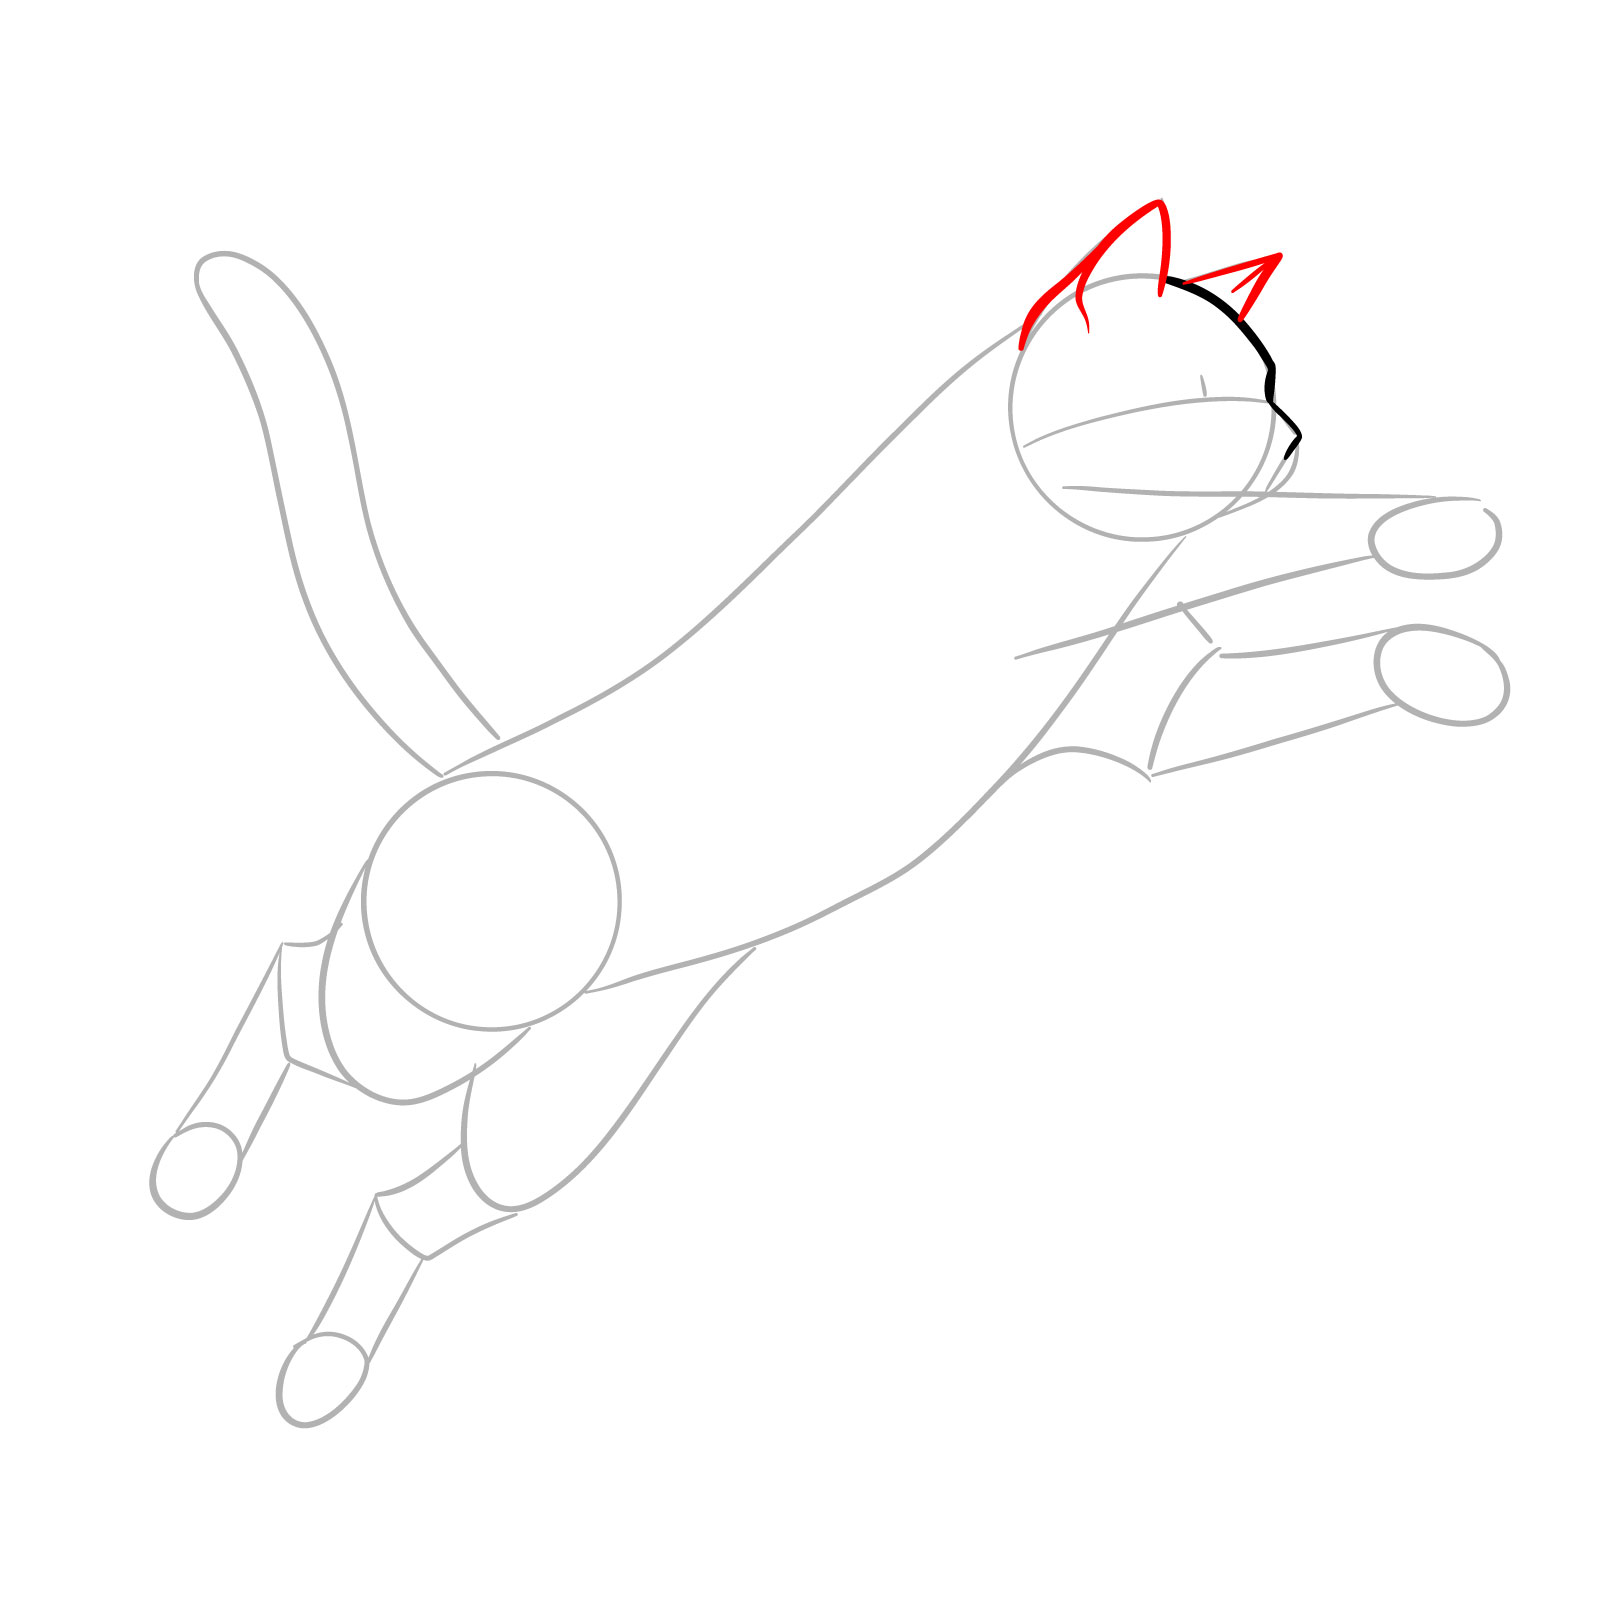
Step 04 – Define the ears by refining the triangular shapes, adding depth and curvature
Sketching the ears on the jumping cat
Step 05 – For the eye, sketch a gentle curve for the upper eyelid. Just below the head, draw the initial line for the upper part of the nearest front leg
Outlining the eye and upper front leg
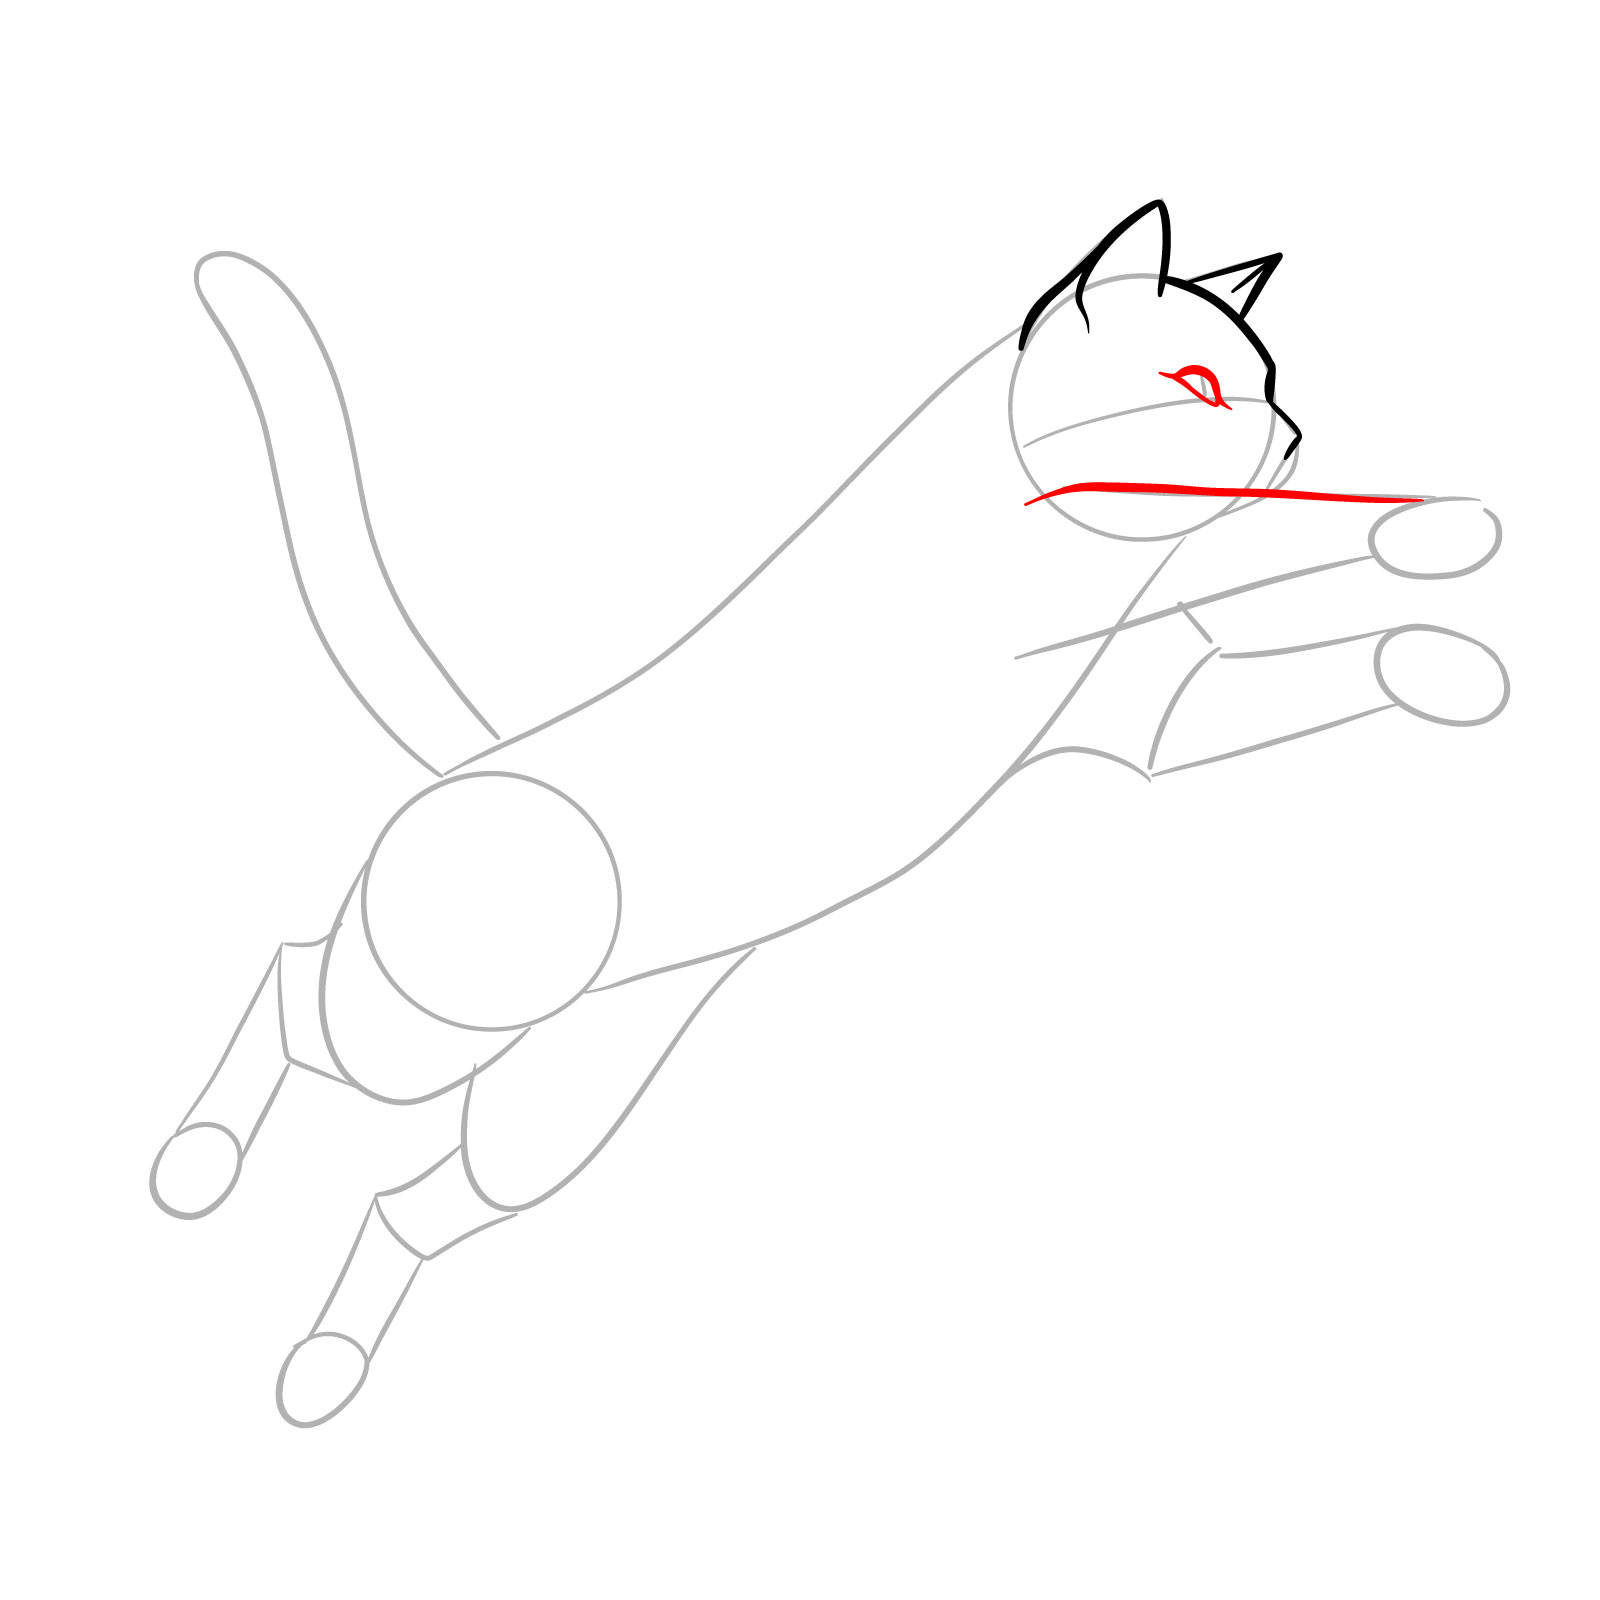
Step 06 – Define the pupil within the eye, ensuring it reflects the cat’s focus and direction. Complete the nose and mouth details, and outline the whisker pads to provide the base for whiskers
Detailing the face with pupil, nose, and mouth
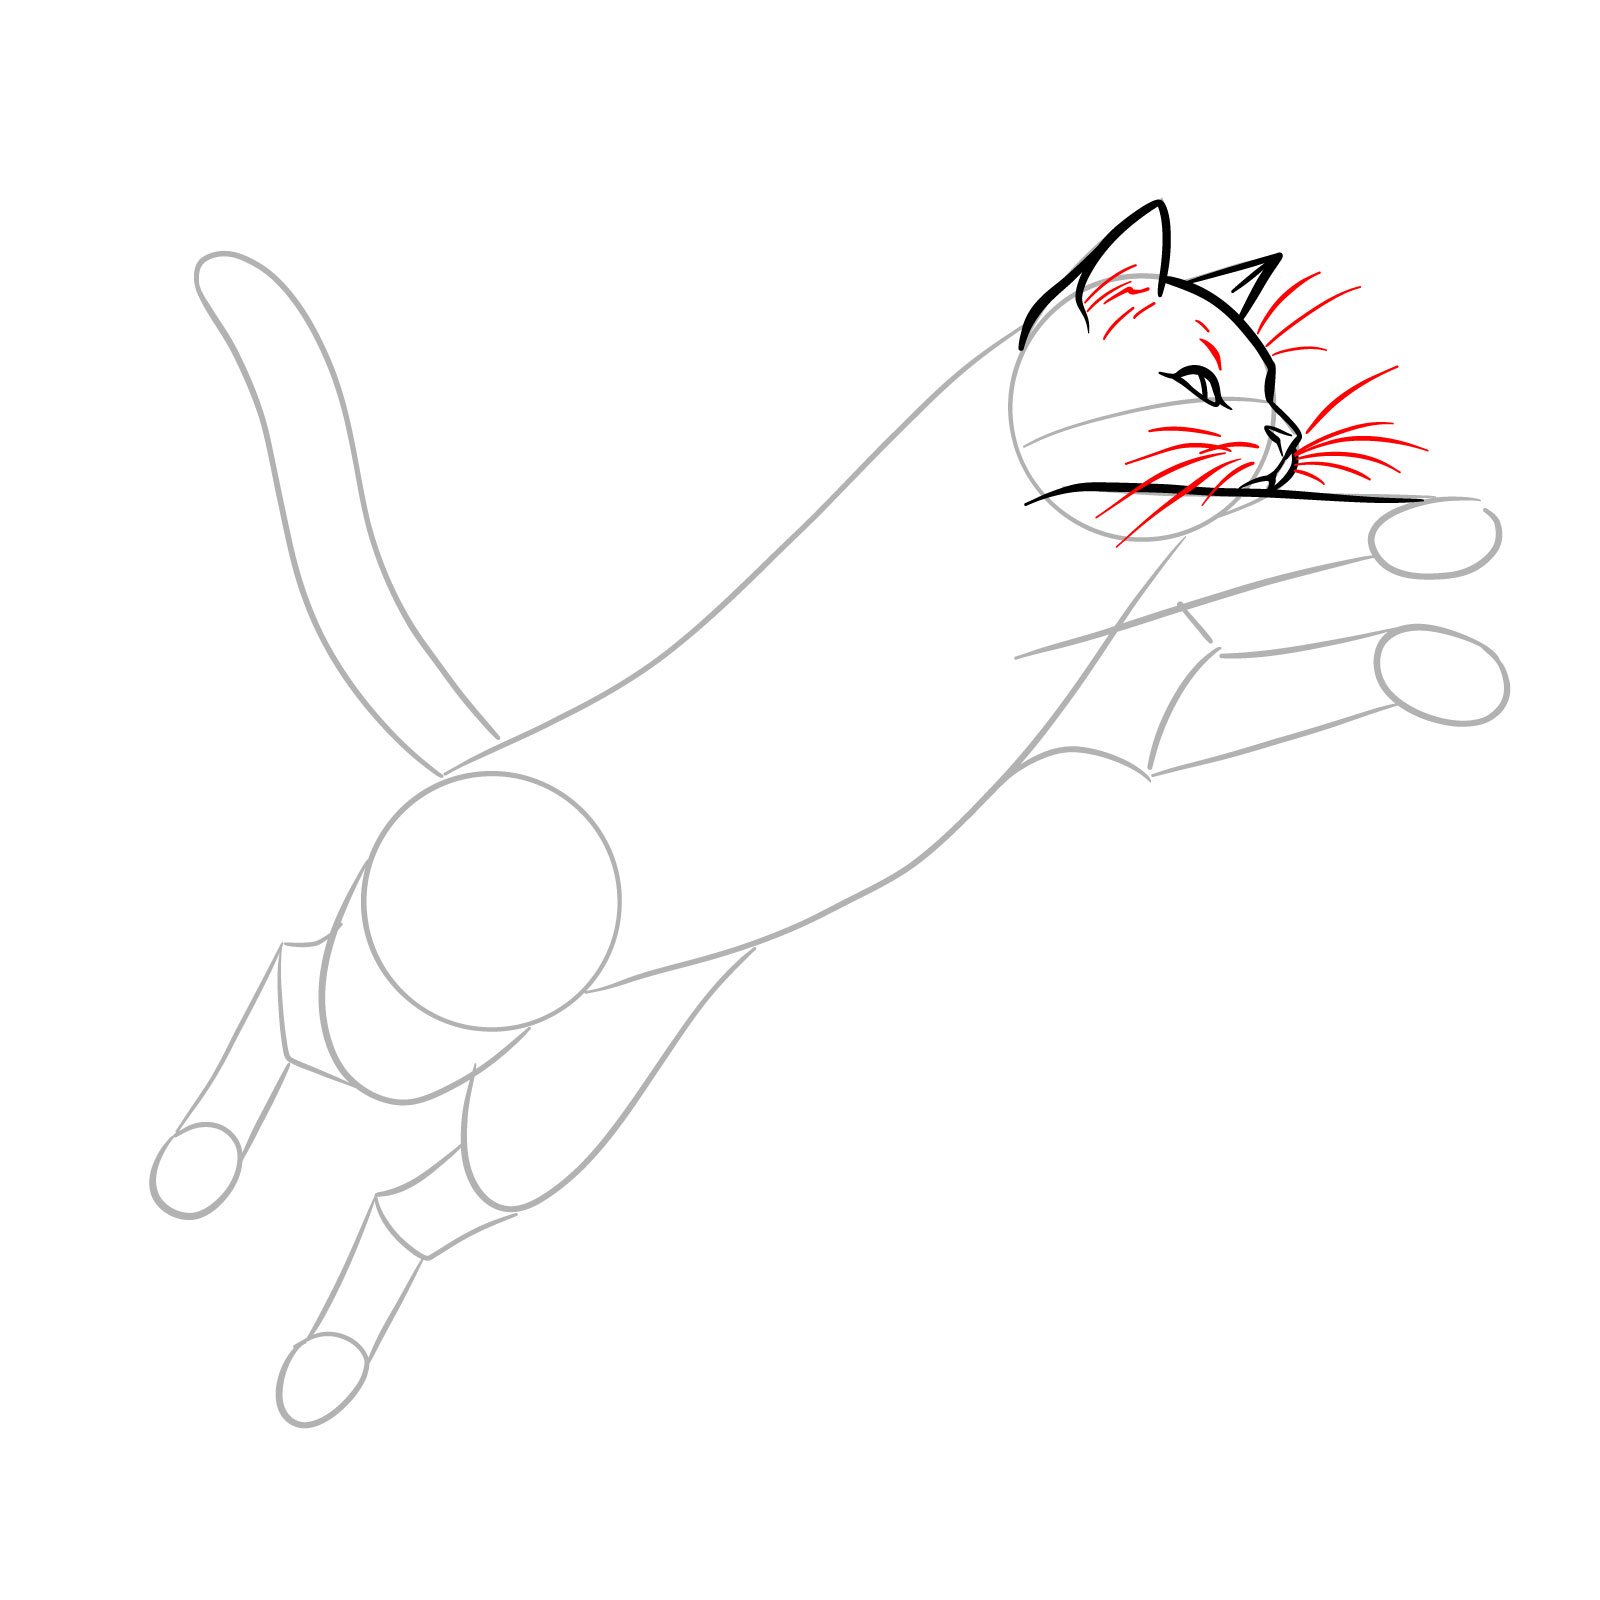
Step 07 – From the whisker pads, draw several fine lines to create the whiskers, varying in length. Add short strokes around the head to represent the fur texture, giving life to the cat’s expression
Adding whiskers and fur texture to the head
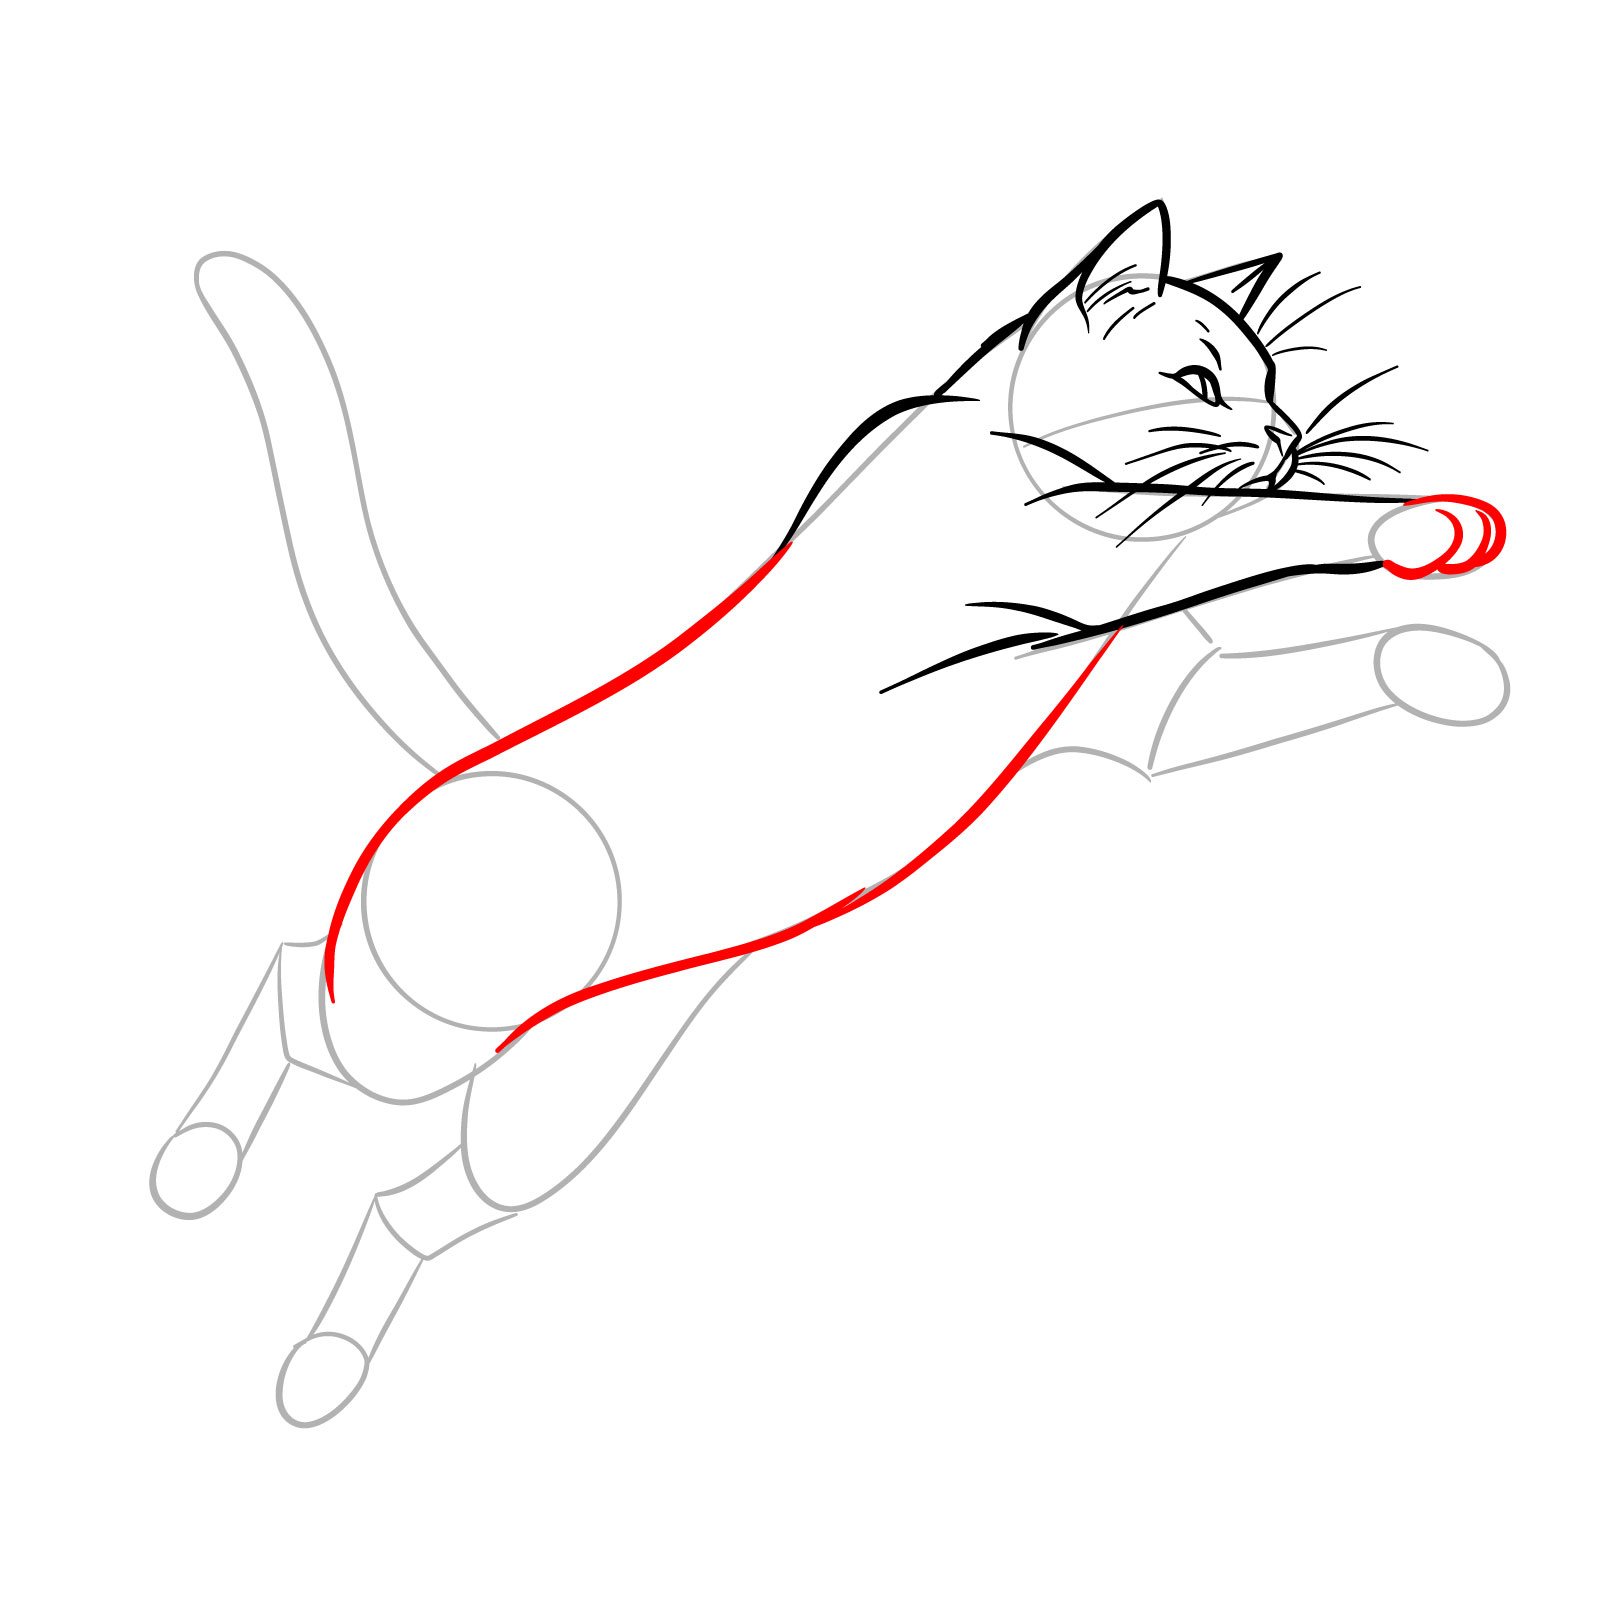
Step 08 – Connect the head to the body with a line to form the neck, suggesting muscular tension. Extend the line from step 5 to develop the lower part of the front leg, indicating the limb’s extension during the jump
Sketching the neck and lower front leg
Step 09 – Detail the paw by dividing it into sections to represent the toes, ensuring it captures the spread seen in a cat’s leap. Then, draw a continuous line from the neck down the body, curving gracefully to outline the thigh of the nearest hind leg
Drawing the paw and defining the body to the hind leg
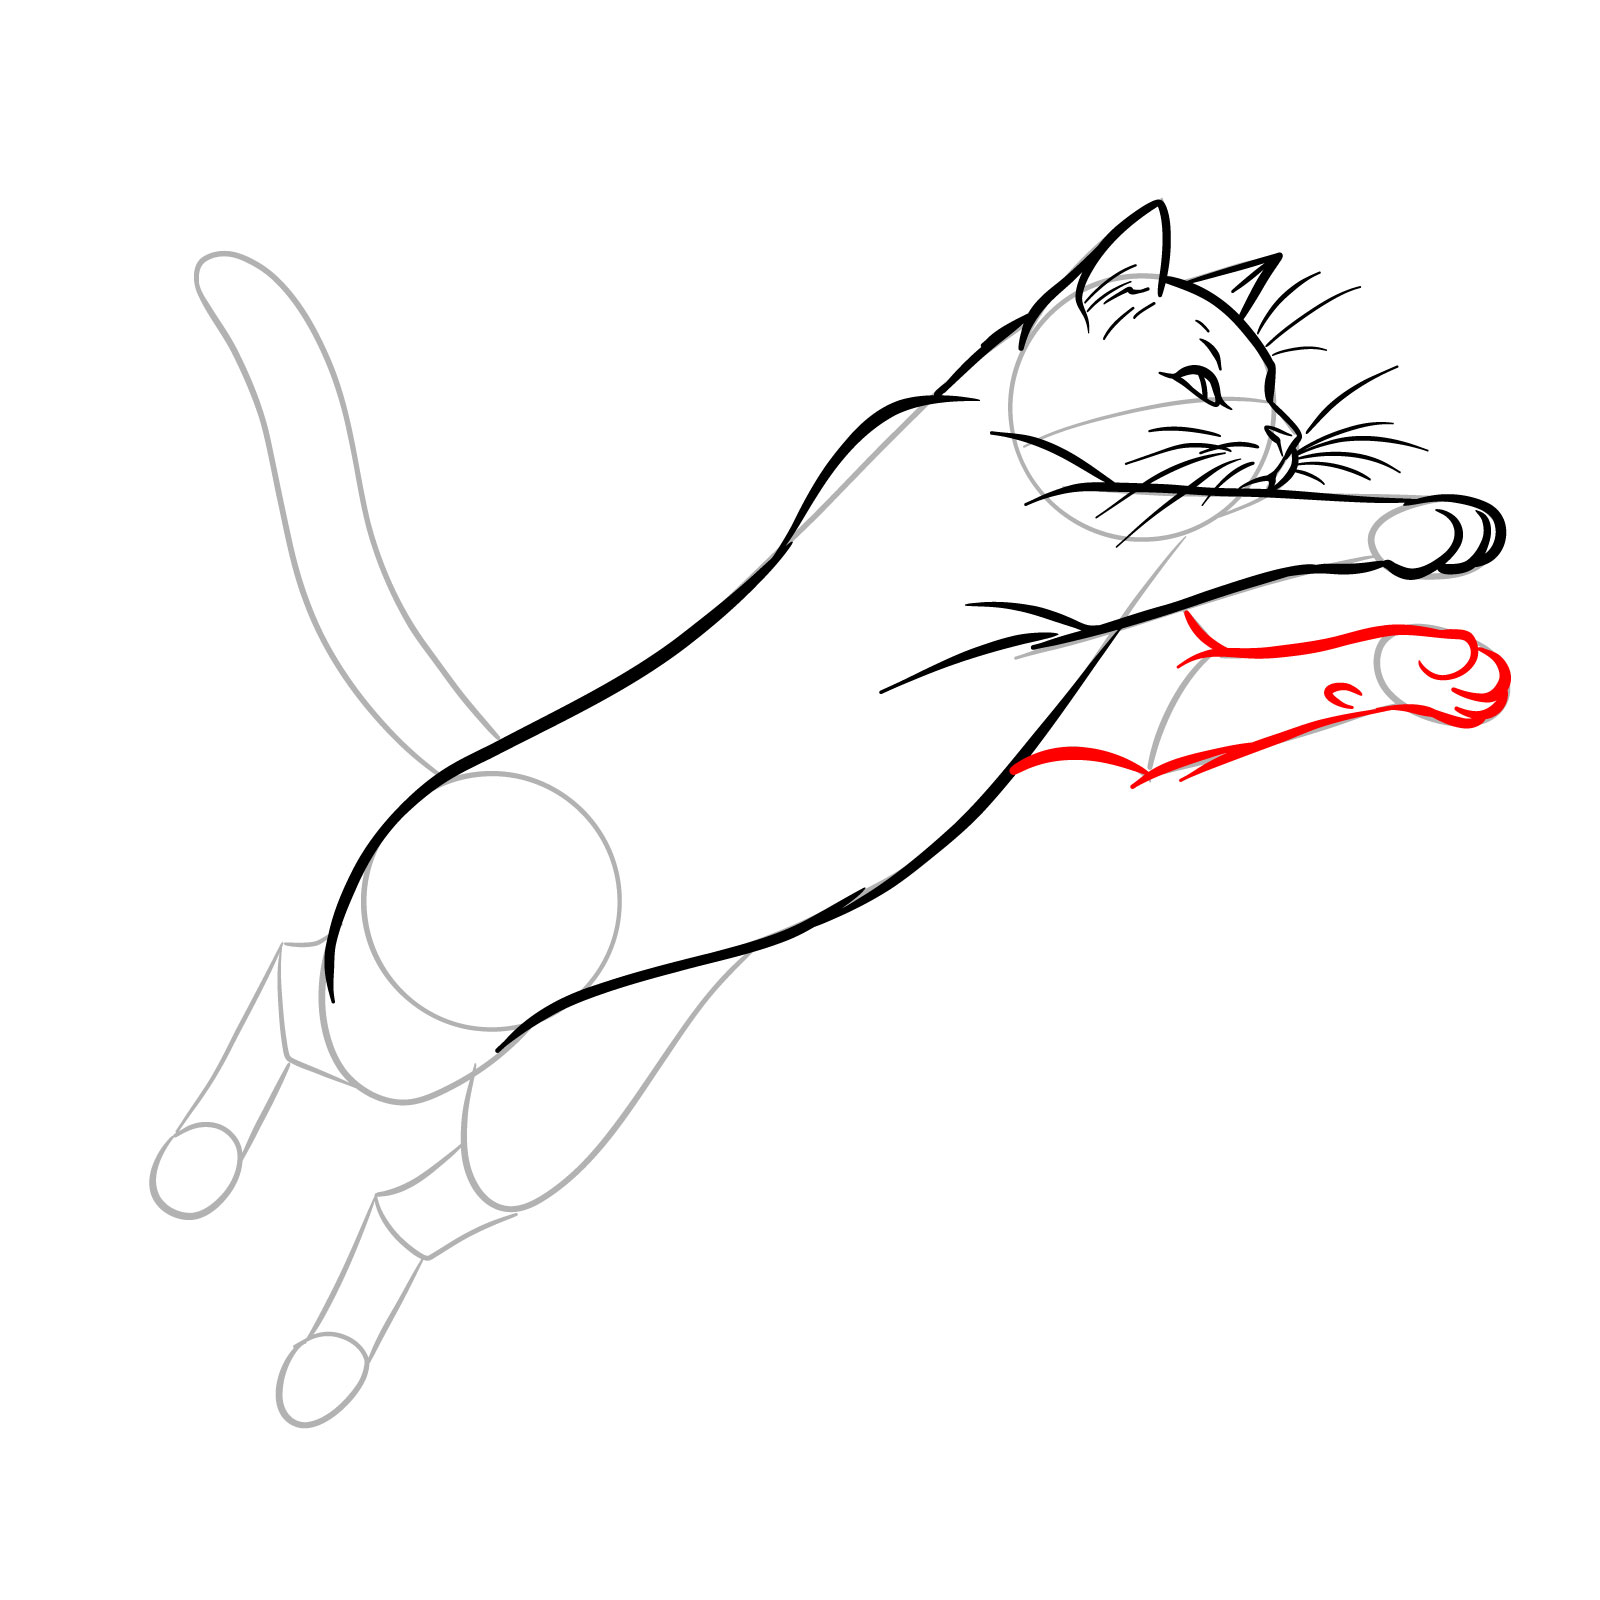
Step 10 – On the opposite side of the body, illustrate the second front leg extended forward, mimicking the action of the first. Draw the paw with defined toes, ready to land
Sketching the second front leg and paw
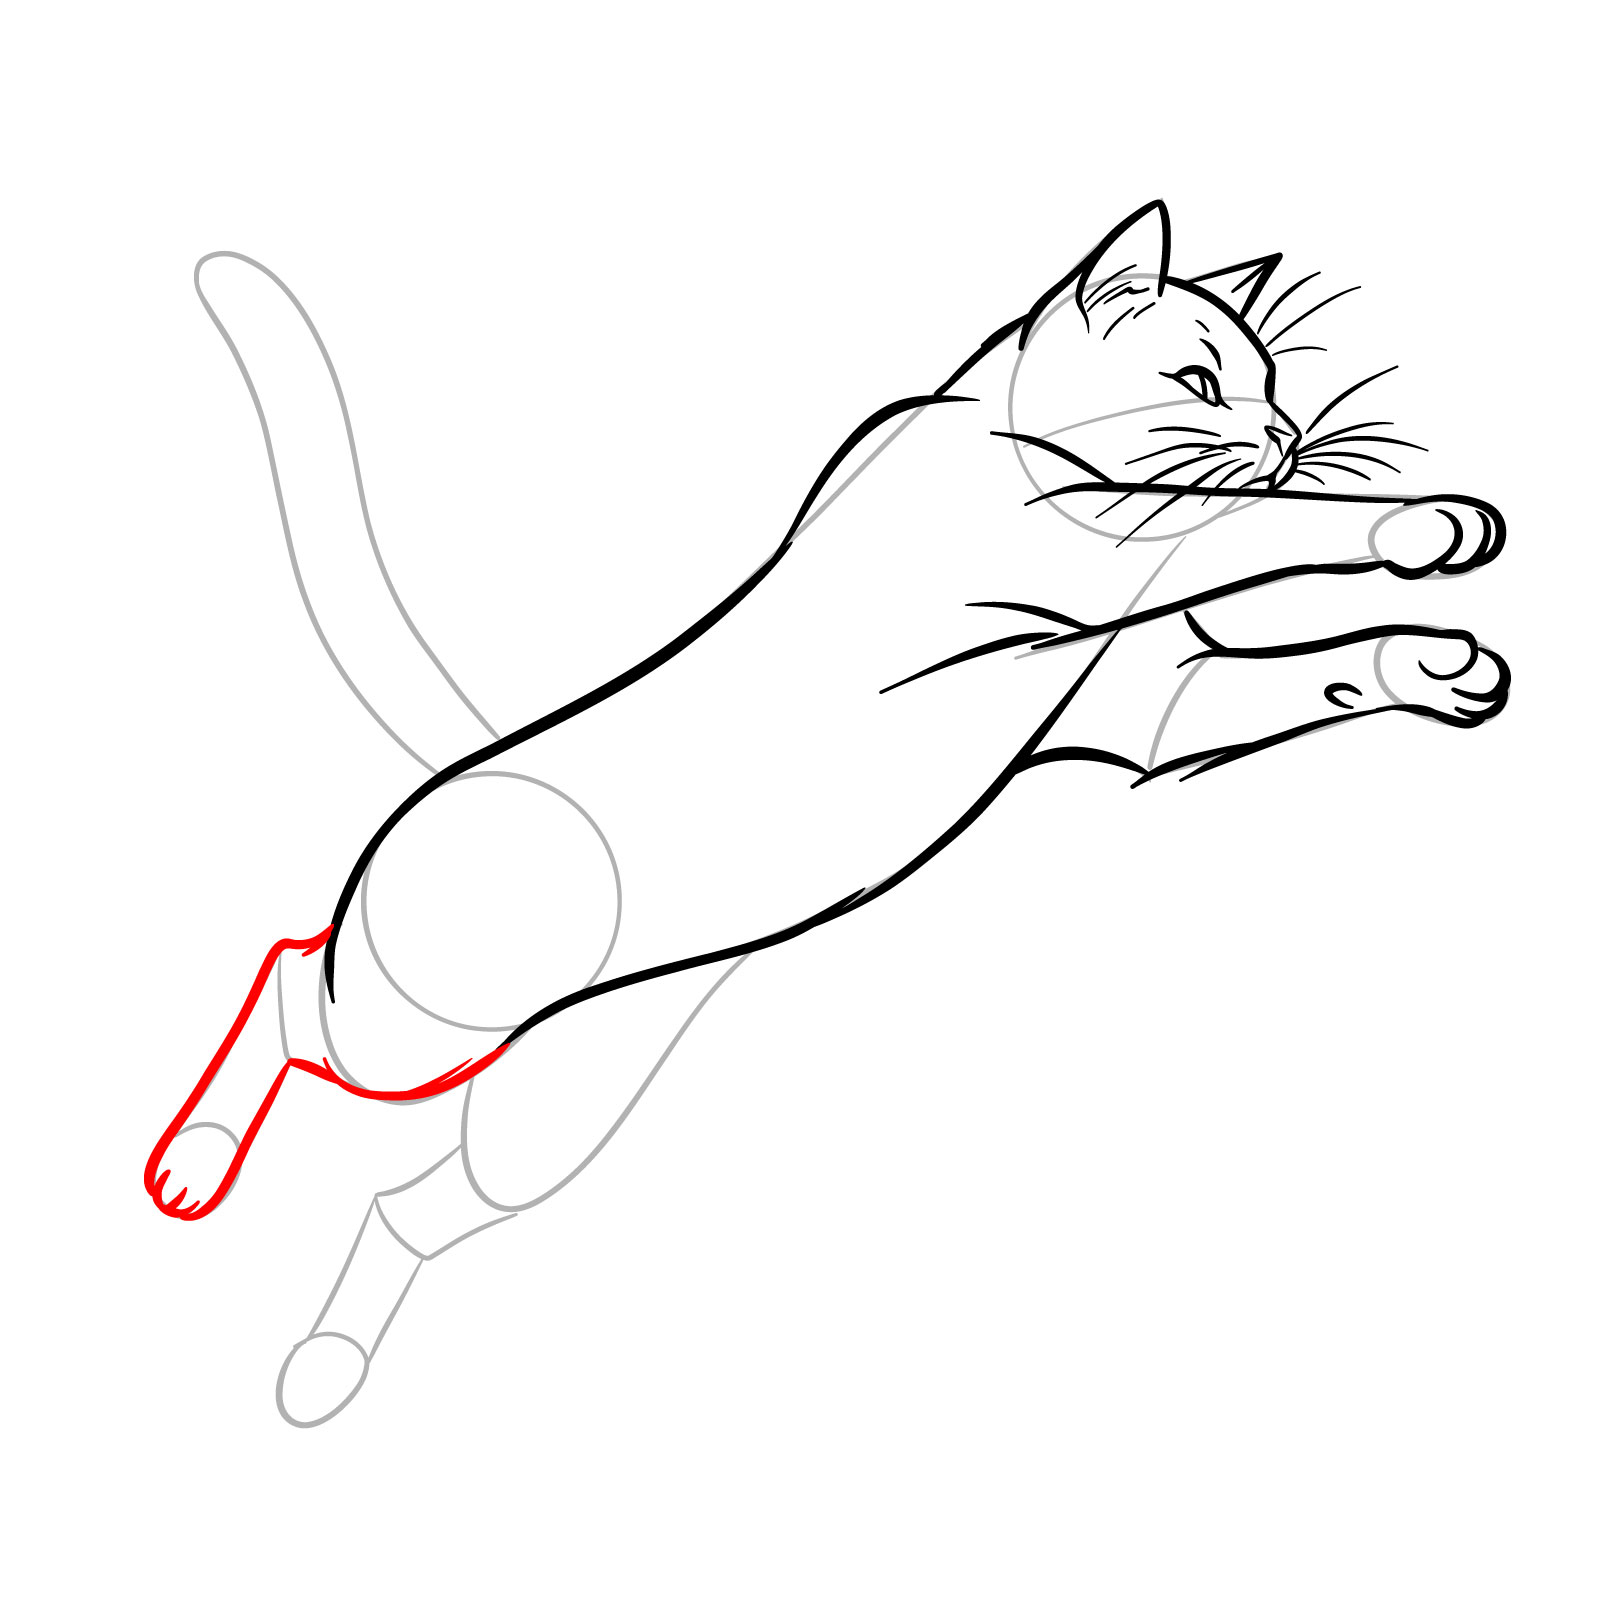
Step 11 – Refine the first rear leg, adding contours to represent the muscular structure and joints. Ensure the paw is positioned to show the natural extension of the leg in the jump
Finalizing the first rear leg
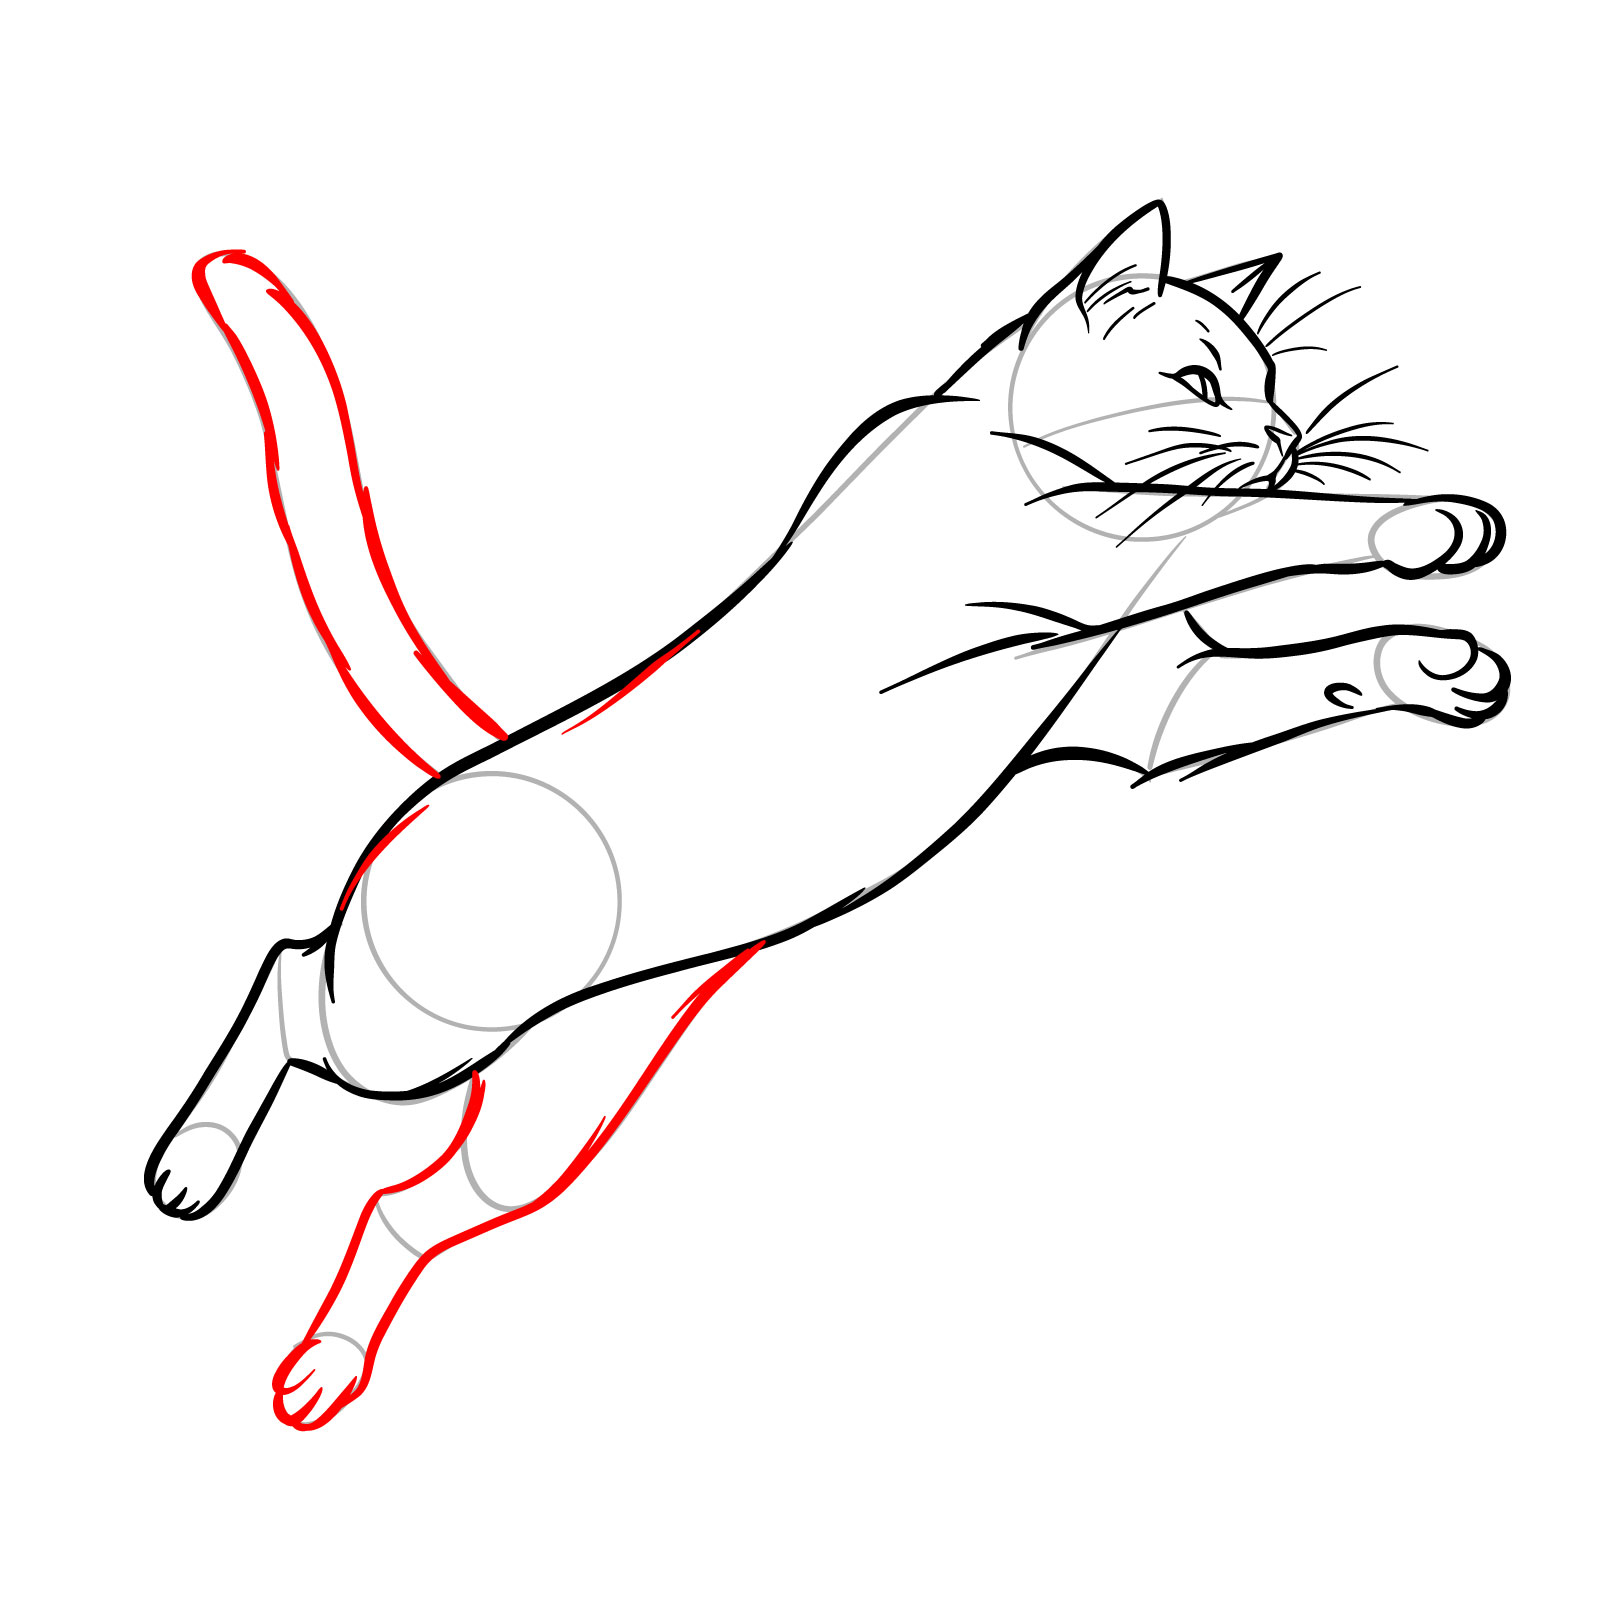
Step 12 – Sketch the tail with a fluid motion to enhance the feeling of movement. Outline the second rear leg, ensuring it complements the angle and form of the first, to maintain the balance of the jump
Adding the tail and second rear leg
Step 13 – With all elements in place, finalize your drawing by smoothing out the lines and ensuring the anatomy is coherent. Your finished sketch should convey the energy and grace of a cat in mid-jump, serving as a comprehensive example for those learning how to draw a cat in a jump. Review the proportions and adjust as needed to capture the feline’s athletic form in this dynamic pose and gently erase the basic sketch
Completed illustration of a cat in a jump
Guide 13: How to Draw a Playing Cat – 13 Steps
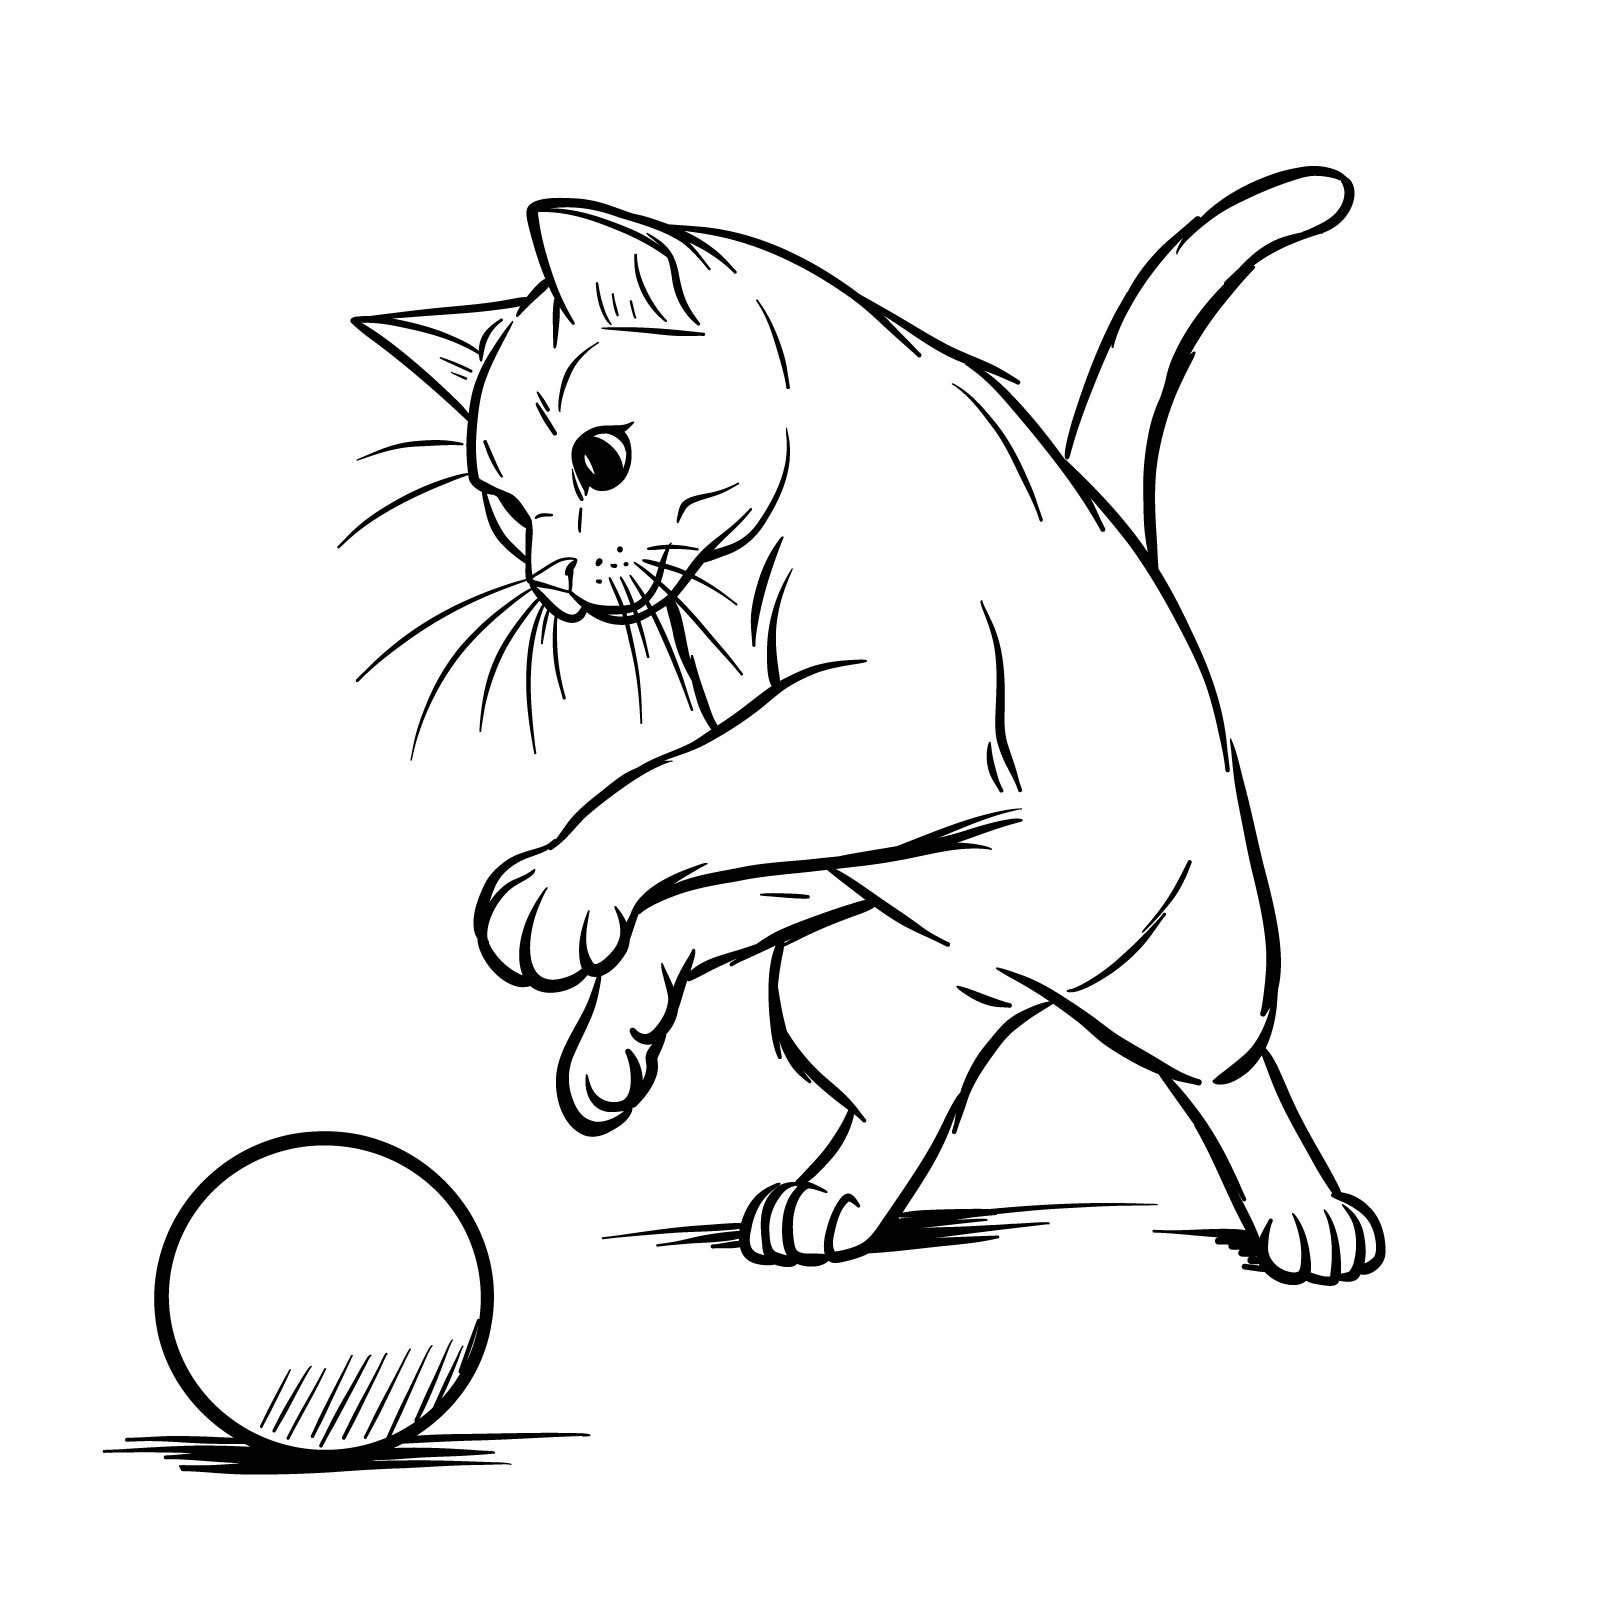
How to Draw a Cat Playing with a Ball – the Result
Engage in the delightful scene of sketching with our thirteenth guide: how to draw a playing cat. This dynamic pose is broken down into 13 steps, offering a slightly higher complexity that remains friendly for beginners and a breeze for those with some drawing experience. The guide captures the playful spirit of a cat interacting with a ball, rendered in a realistic shape yet simplified to focus on the essence of the movement. In the first two steps, you’ll create the proportional structure that’s crucial for a lively representation. While I use only bold lines for clarity and technical detail, feel free to enhance your artwork with additional shading and texture to the cat and the ball for a more lifelike finish.
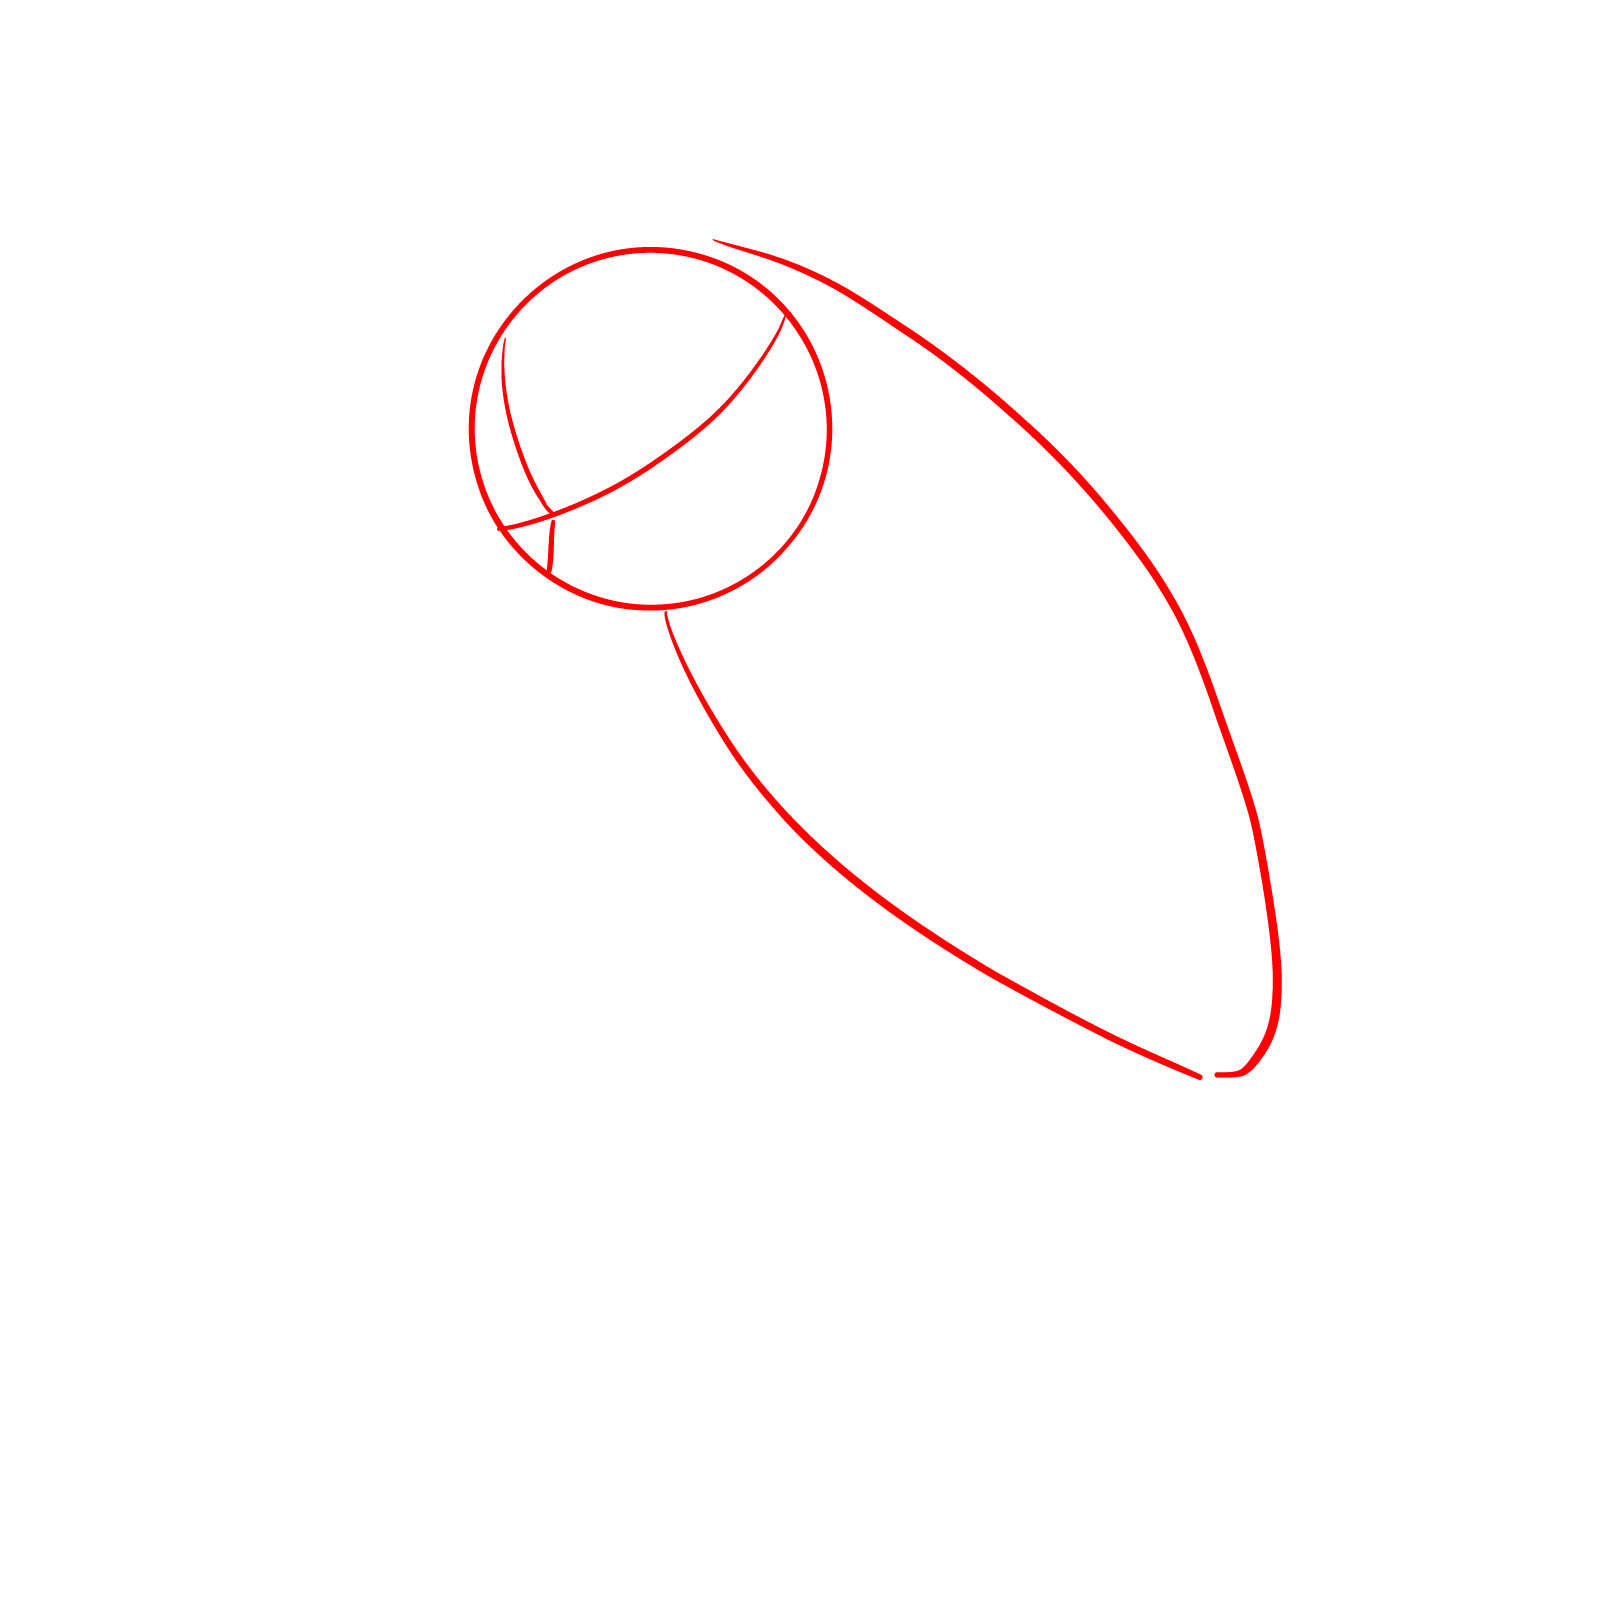
Step 01 – Draw a circle for the head, marked with a vertical and a horizontal line to guide facial feature placement. Sketch a pointed oval shape for the body to suggest the cat’s playful posture
Starting with the head and body shapes for a playing cat
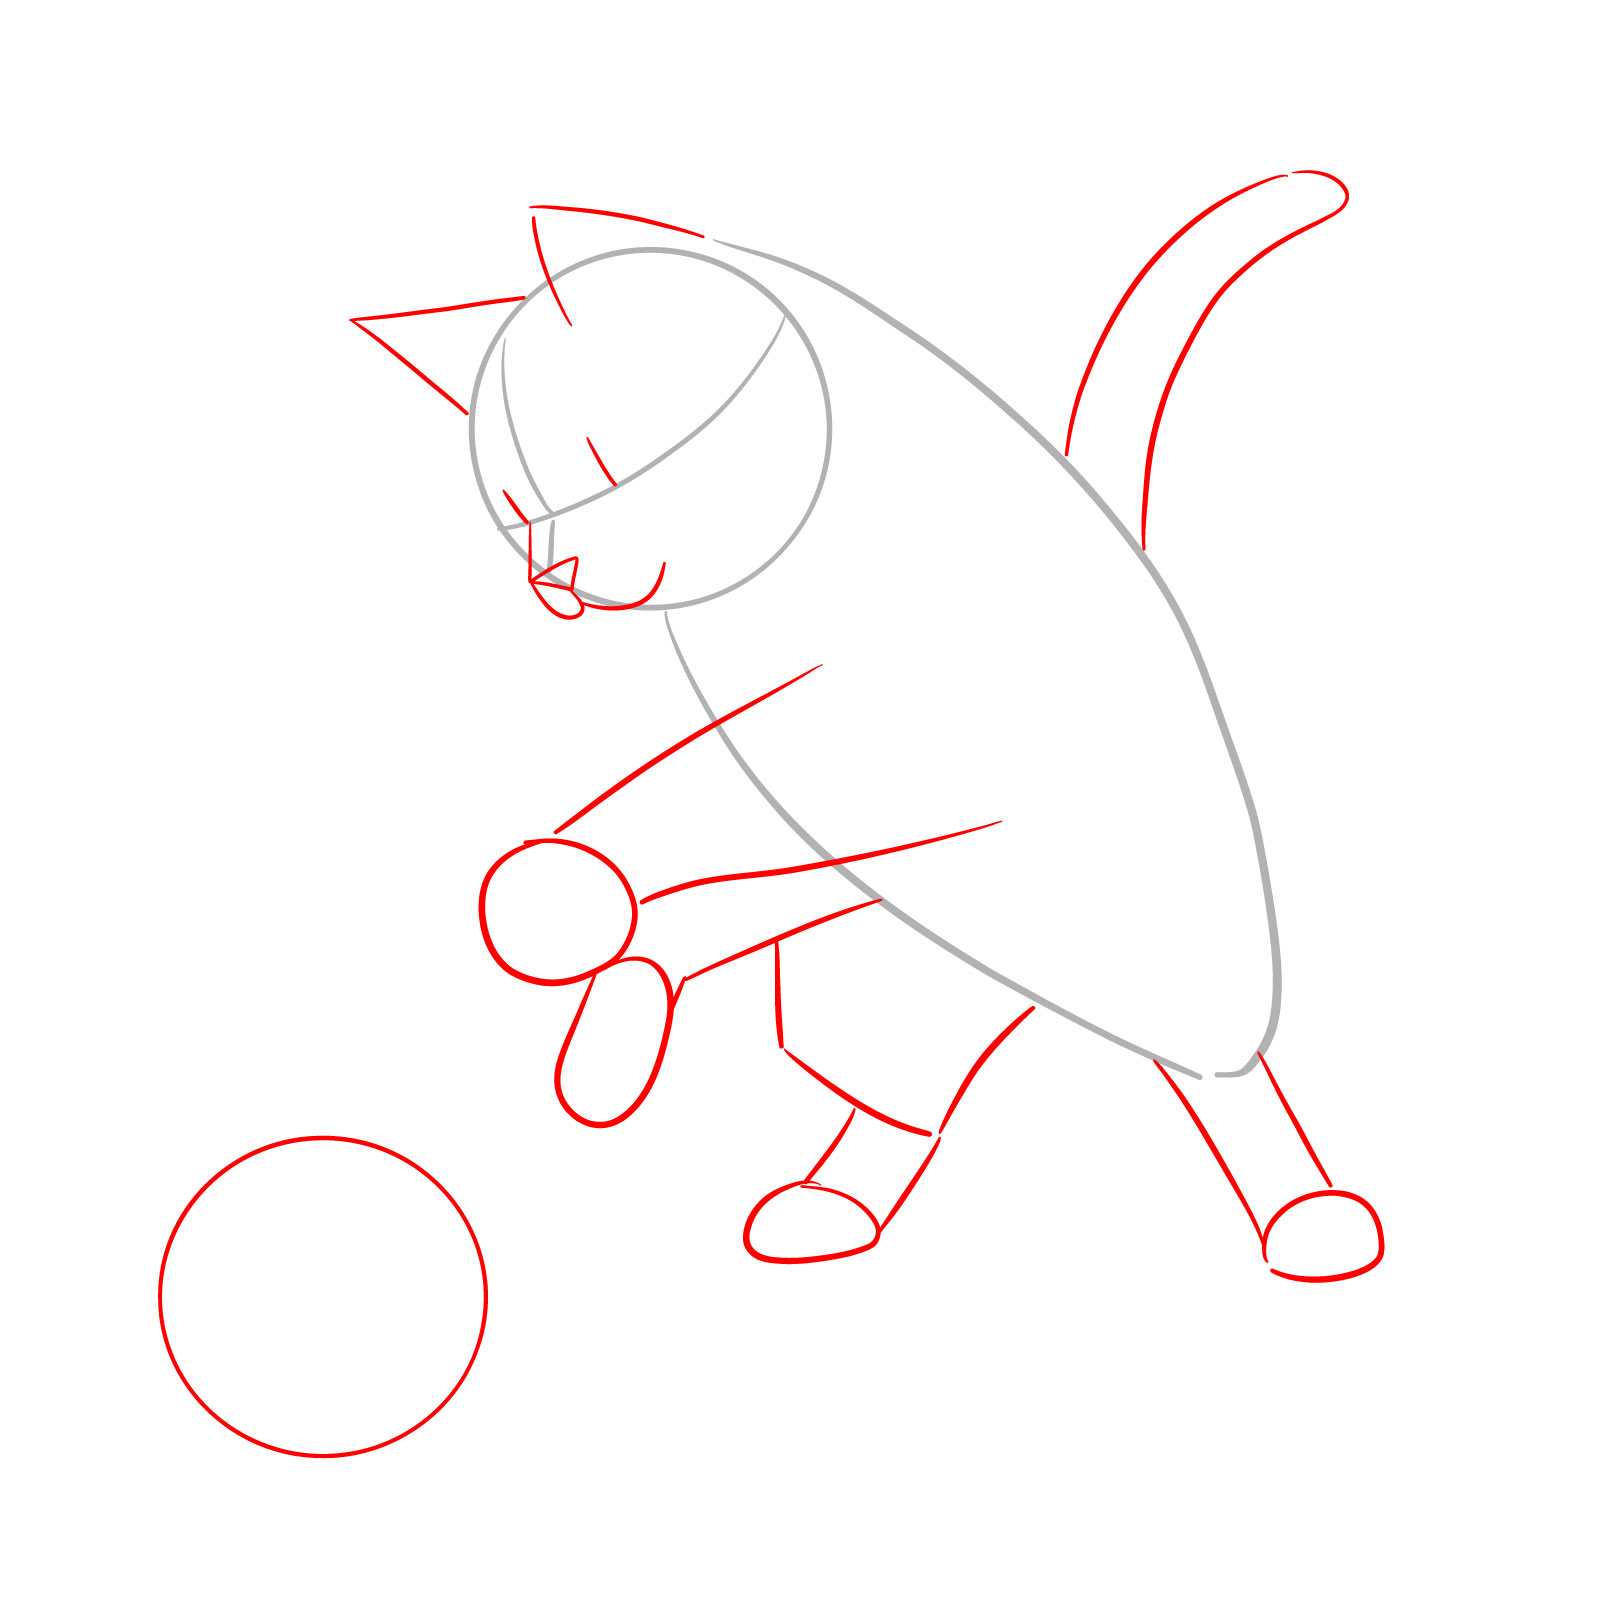
Step 02 – Outline basic shapes for the nose, muzzle, and ears on the head, add lines where the eyes will be drawn. Add elongated shapes for the legs, a curved line for the tail, and a circle to represent the ball, establishing the playful interaction
Adding basic shapes for facial features and limbs, and a ball
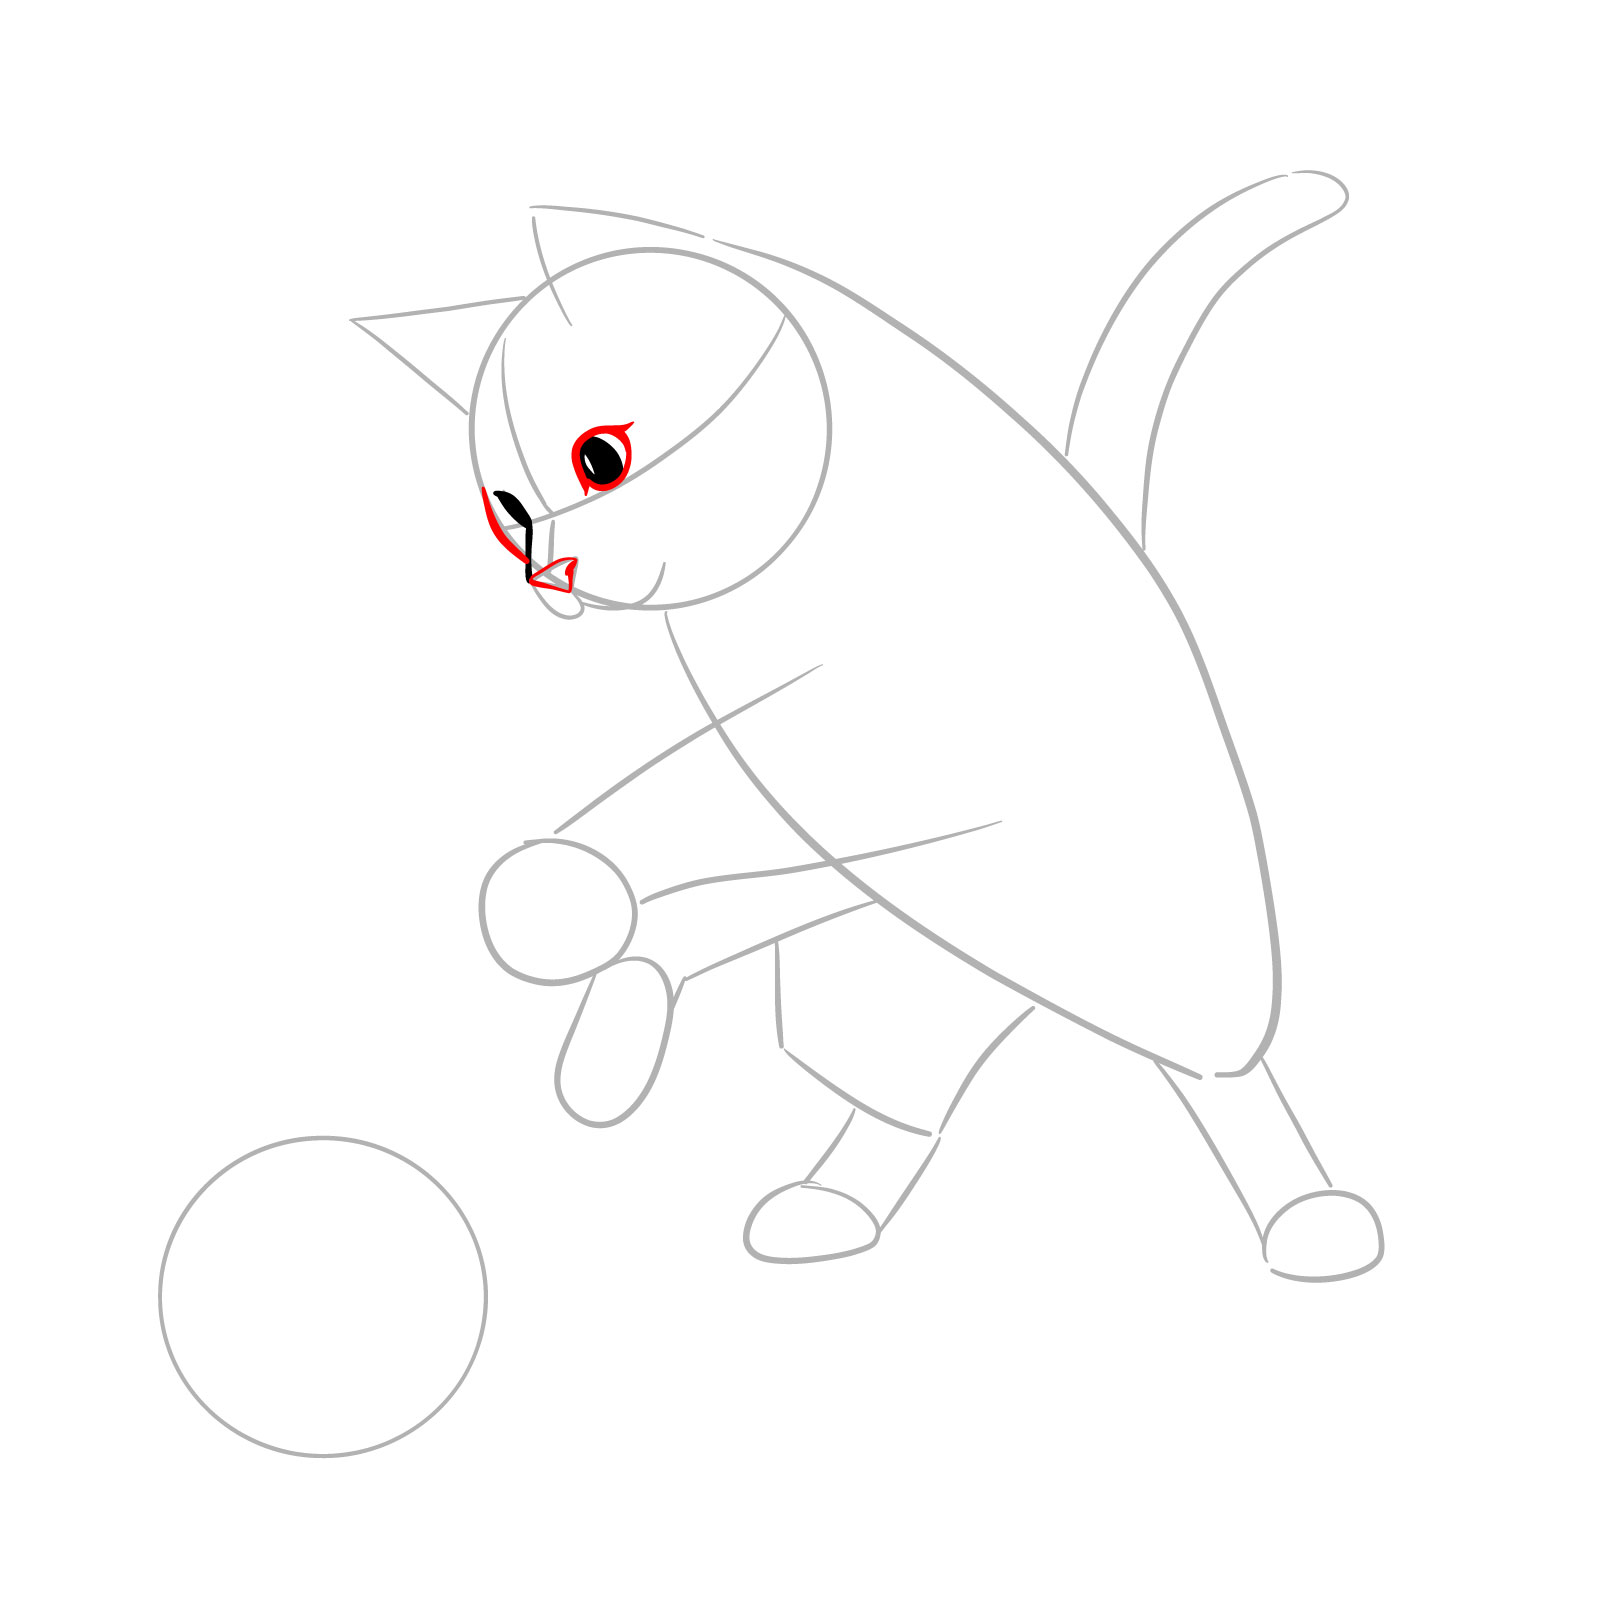
Step 03 – Create ovals filled in black for the pupils, leaving small blank spaces for highlights to convey liveliness. Draw a line from the pupil towards the nose to define the facial structure
Drawing the pupils and nose bridge for a playful cat
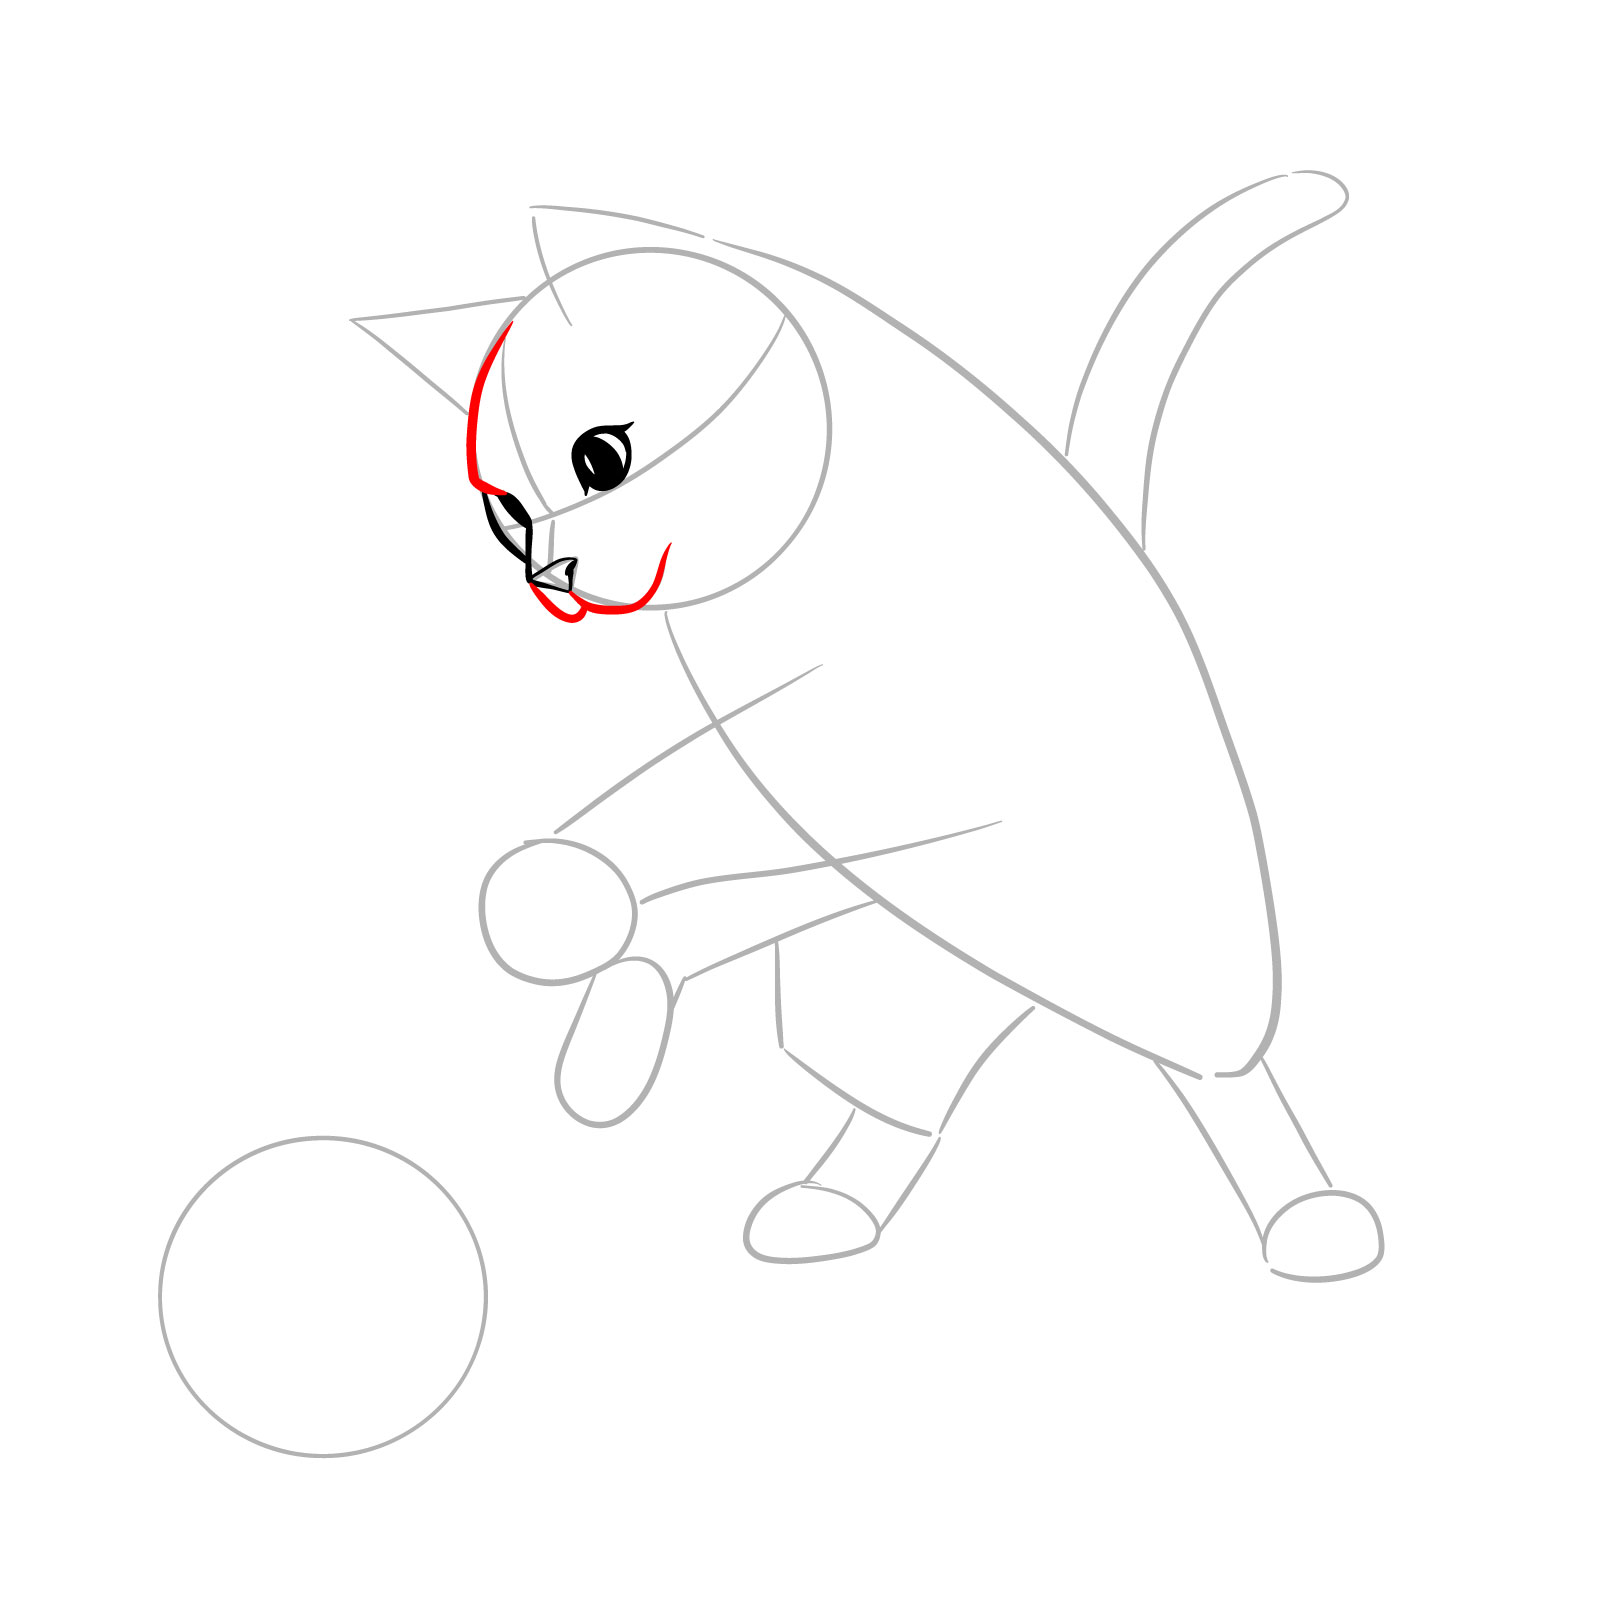
Step 04 – Carefully outline the eyes, ensuring they are symmetrical and expressive. Sketch the nose’s shape, keeping it simple and in proportion to the head
Outlining the eyes and nose for a playful cat
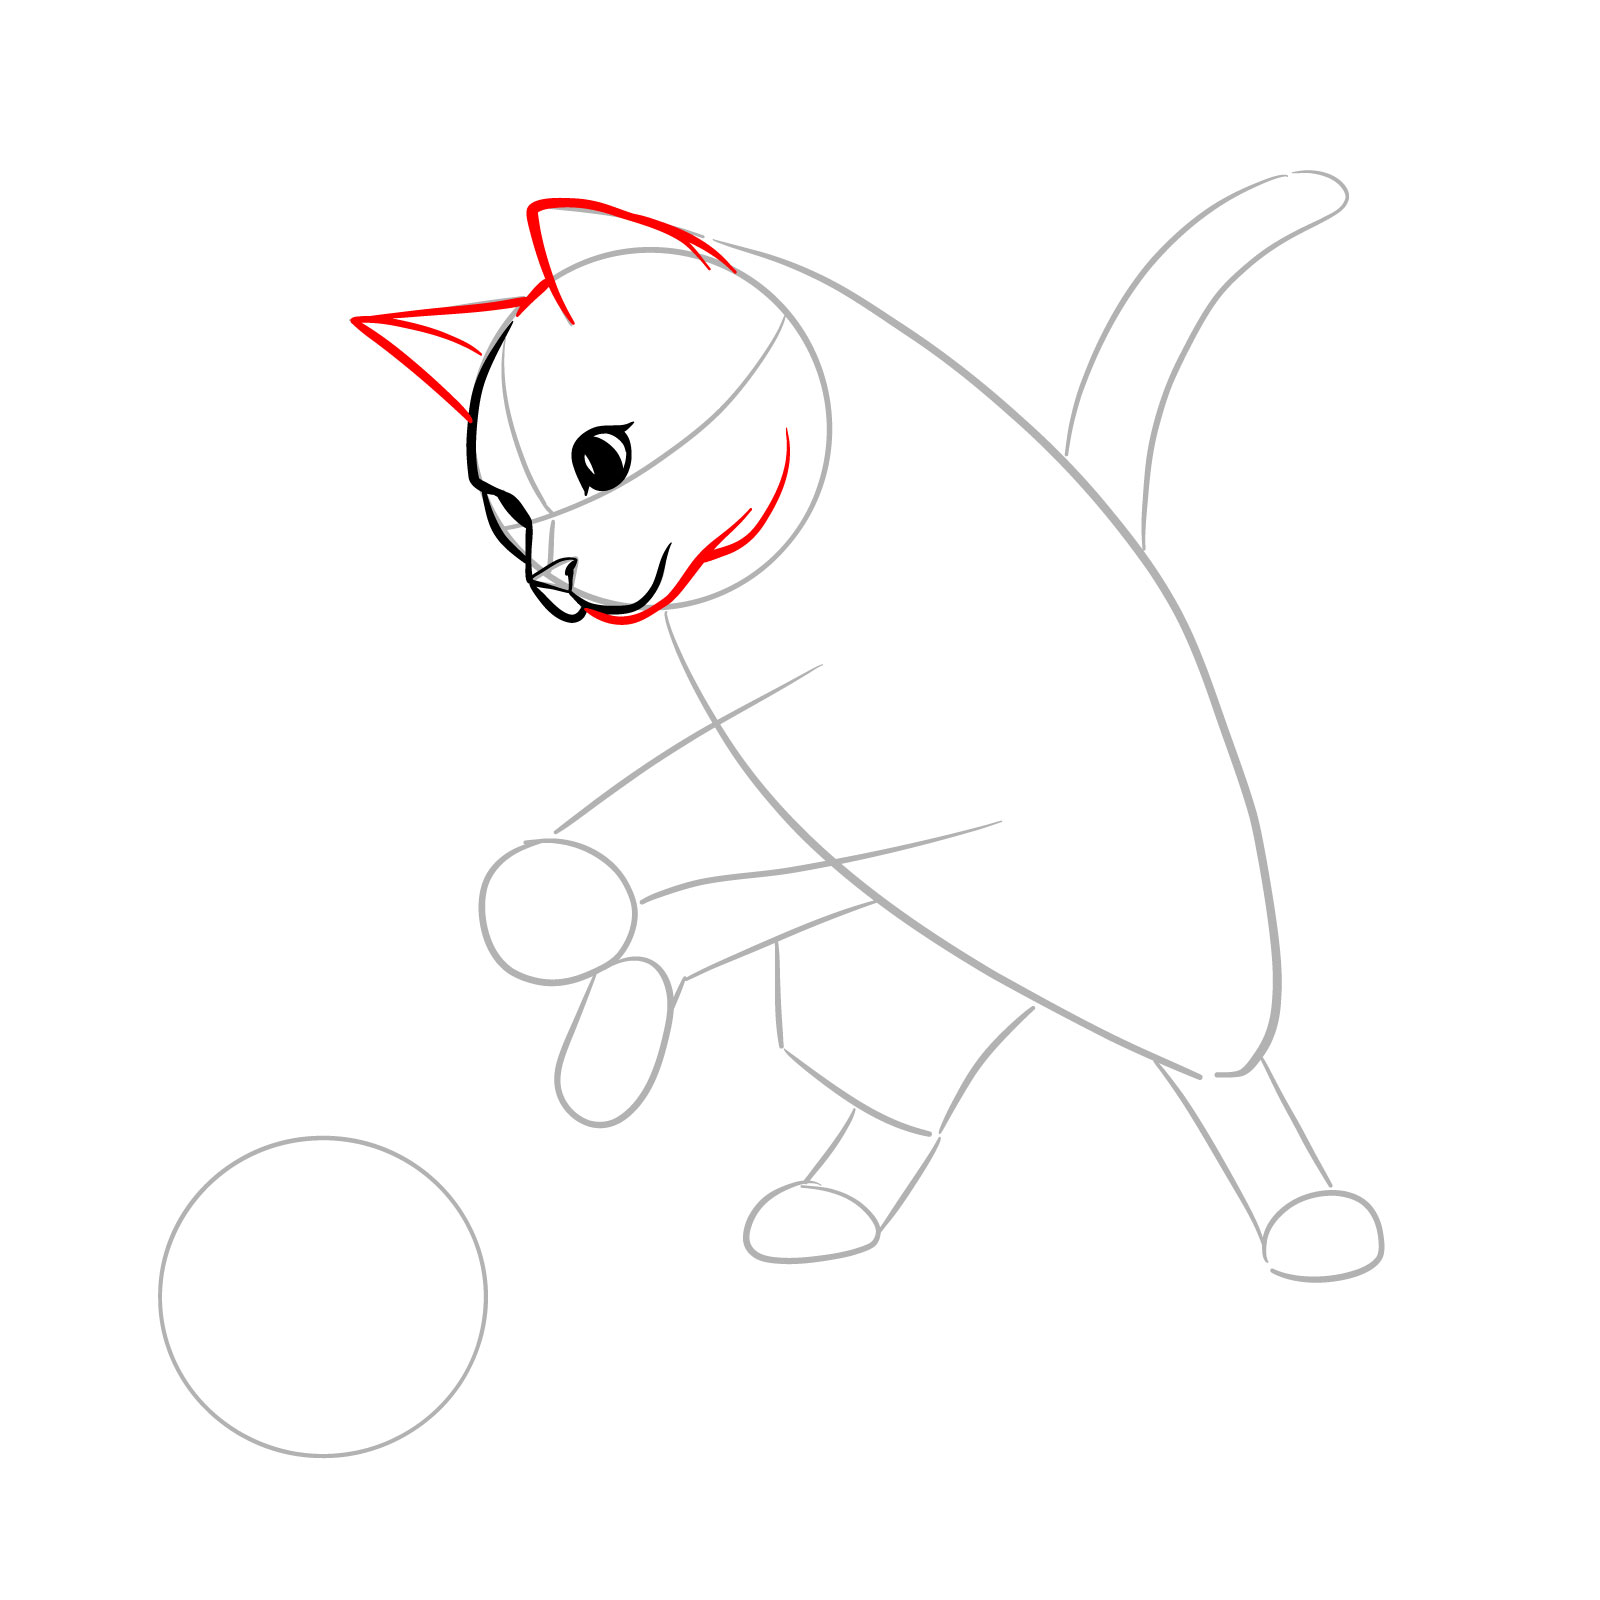
Step 05 – Define the curve of the forehead between the ears. Add curved shapes on the muzzle to indicate the whisker pads, the starting point for future whisker details
Detailing the forehead and whisker pads on the playful cat
Step 06 – Sketch the chin and complete the lower outline of the head for a rounded, natural shape. Refine the ears with inner lines to suggest depth and alertness
Drawing the chin, head’s bottom, and ears for the playful cat
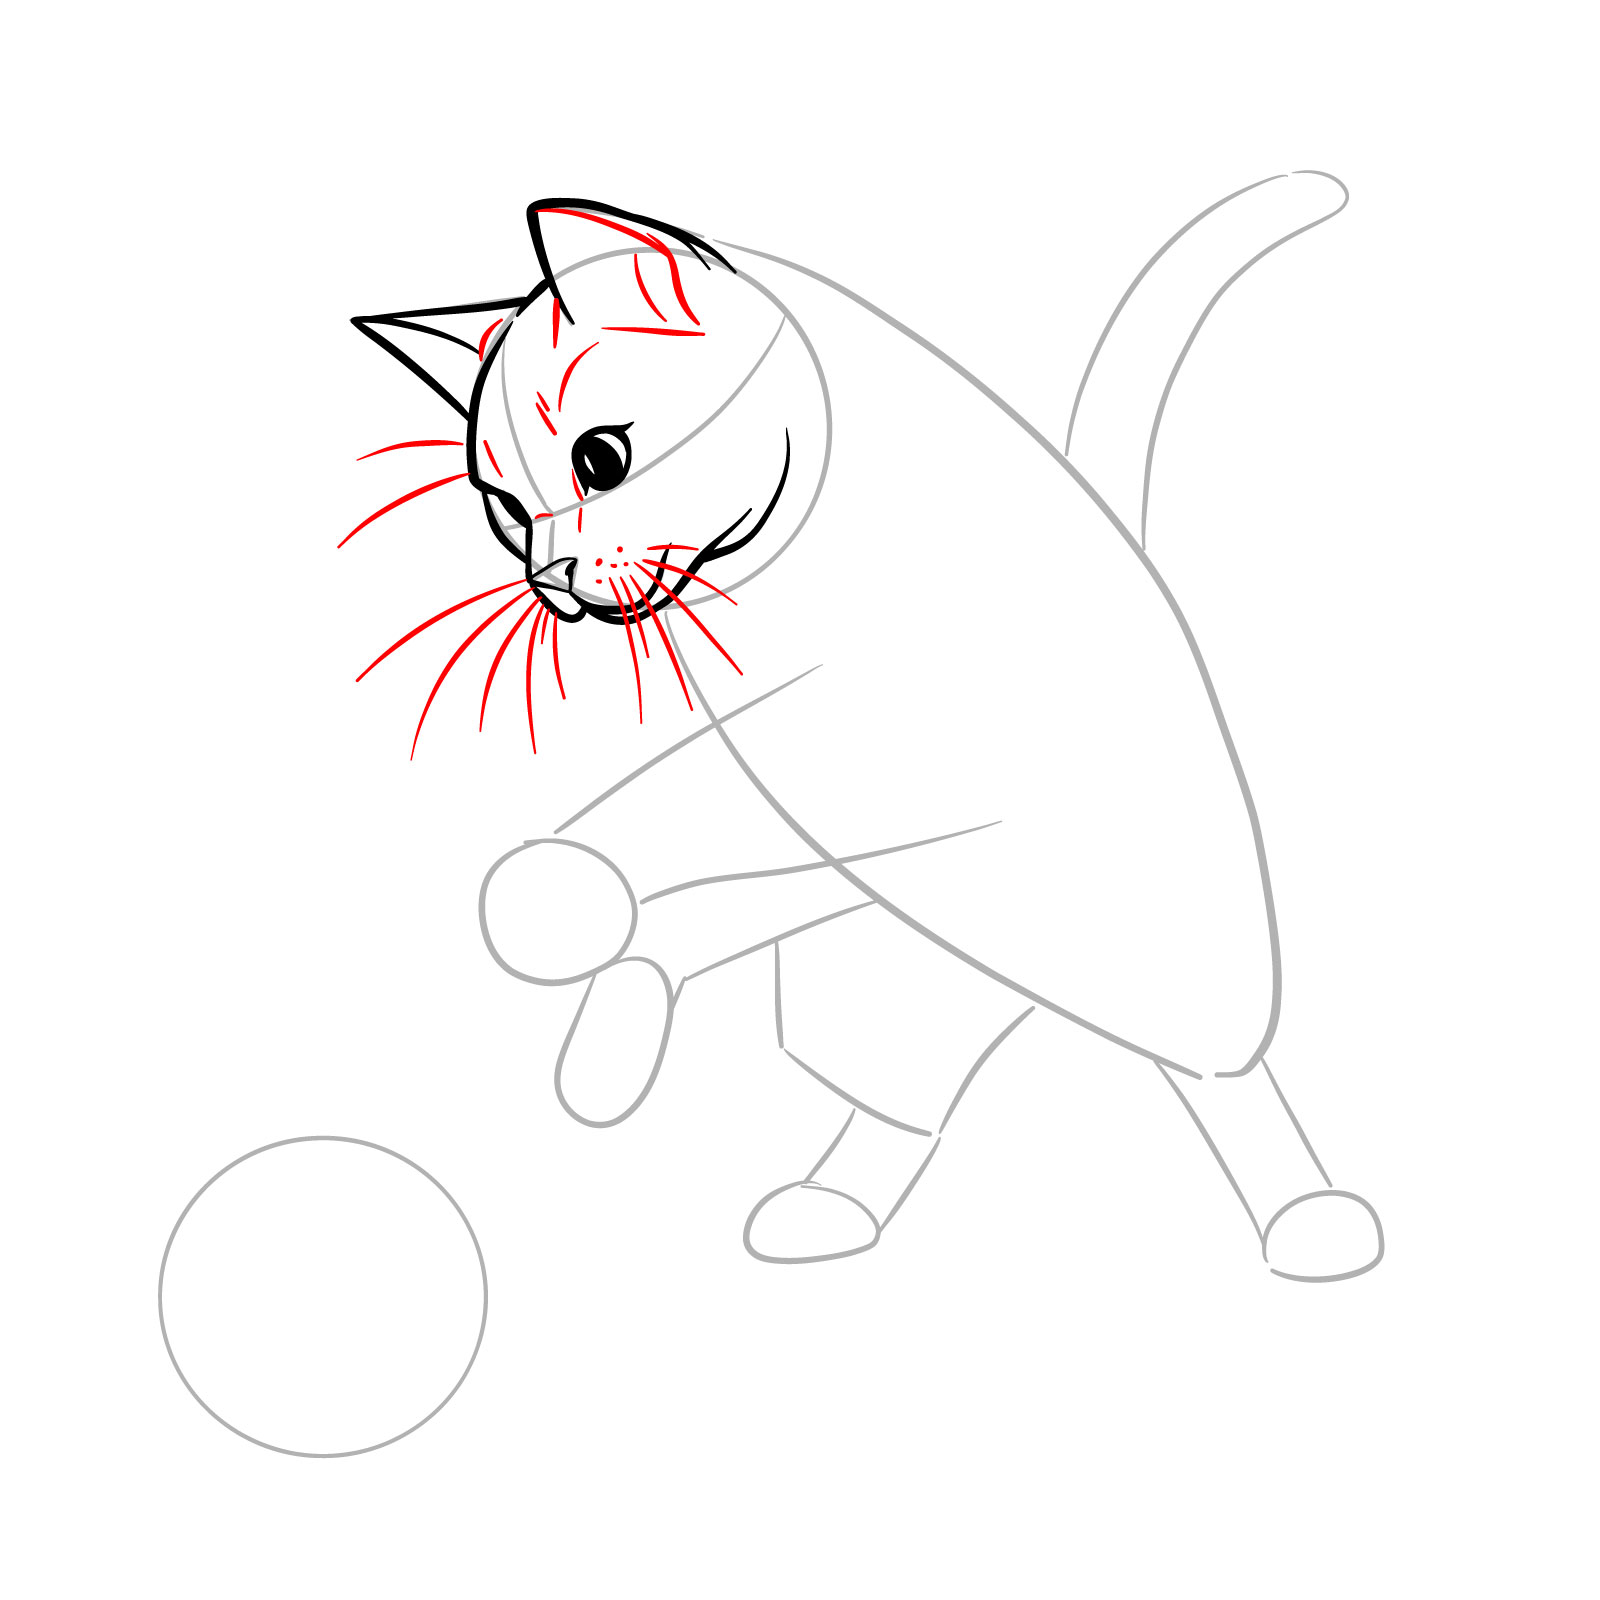
Step 07 – From the whisker pads, extend lines outwards to form whiskers of varying lengths. Add details inside the ears and small strokes around the head for a furry texture
Adding whiskers and fur details
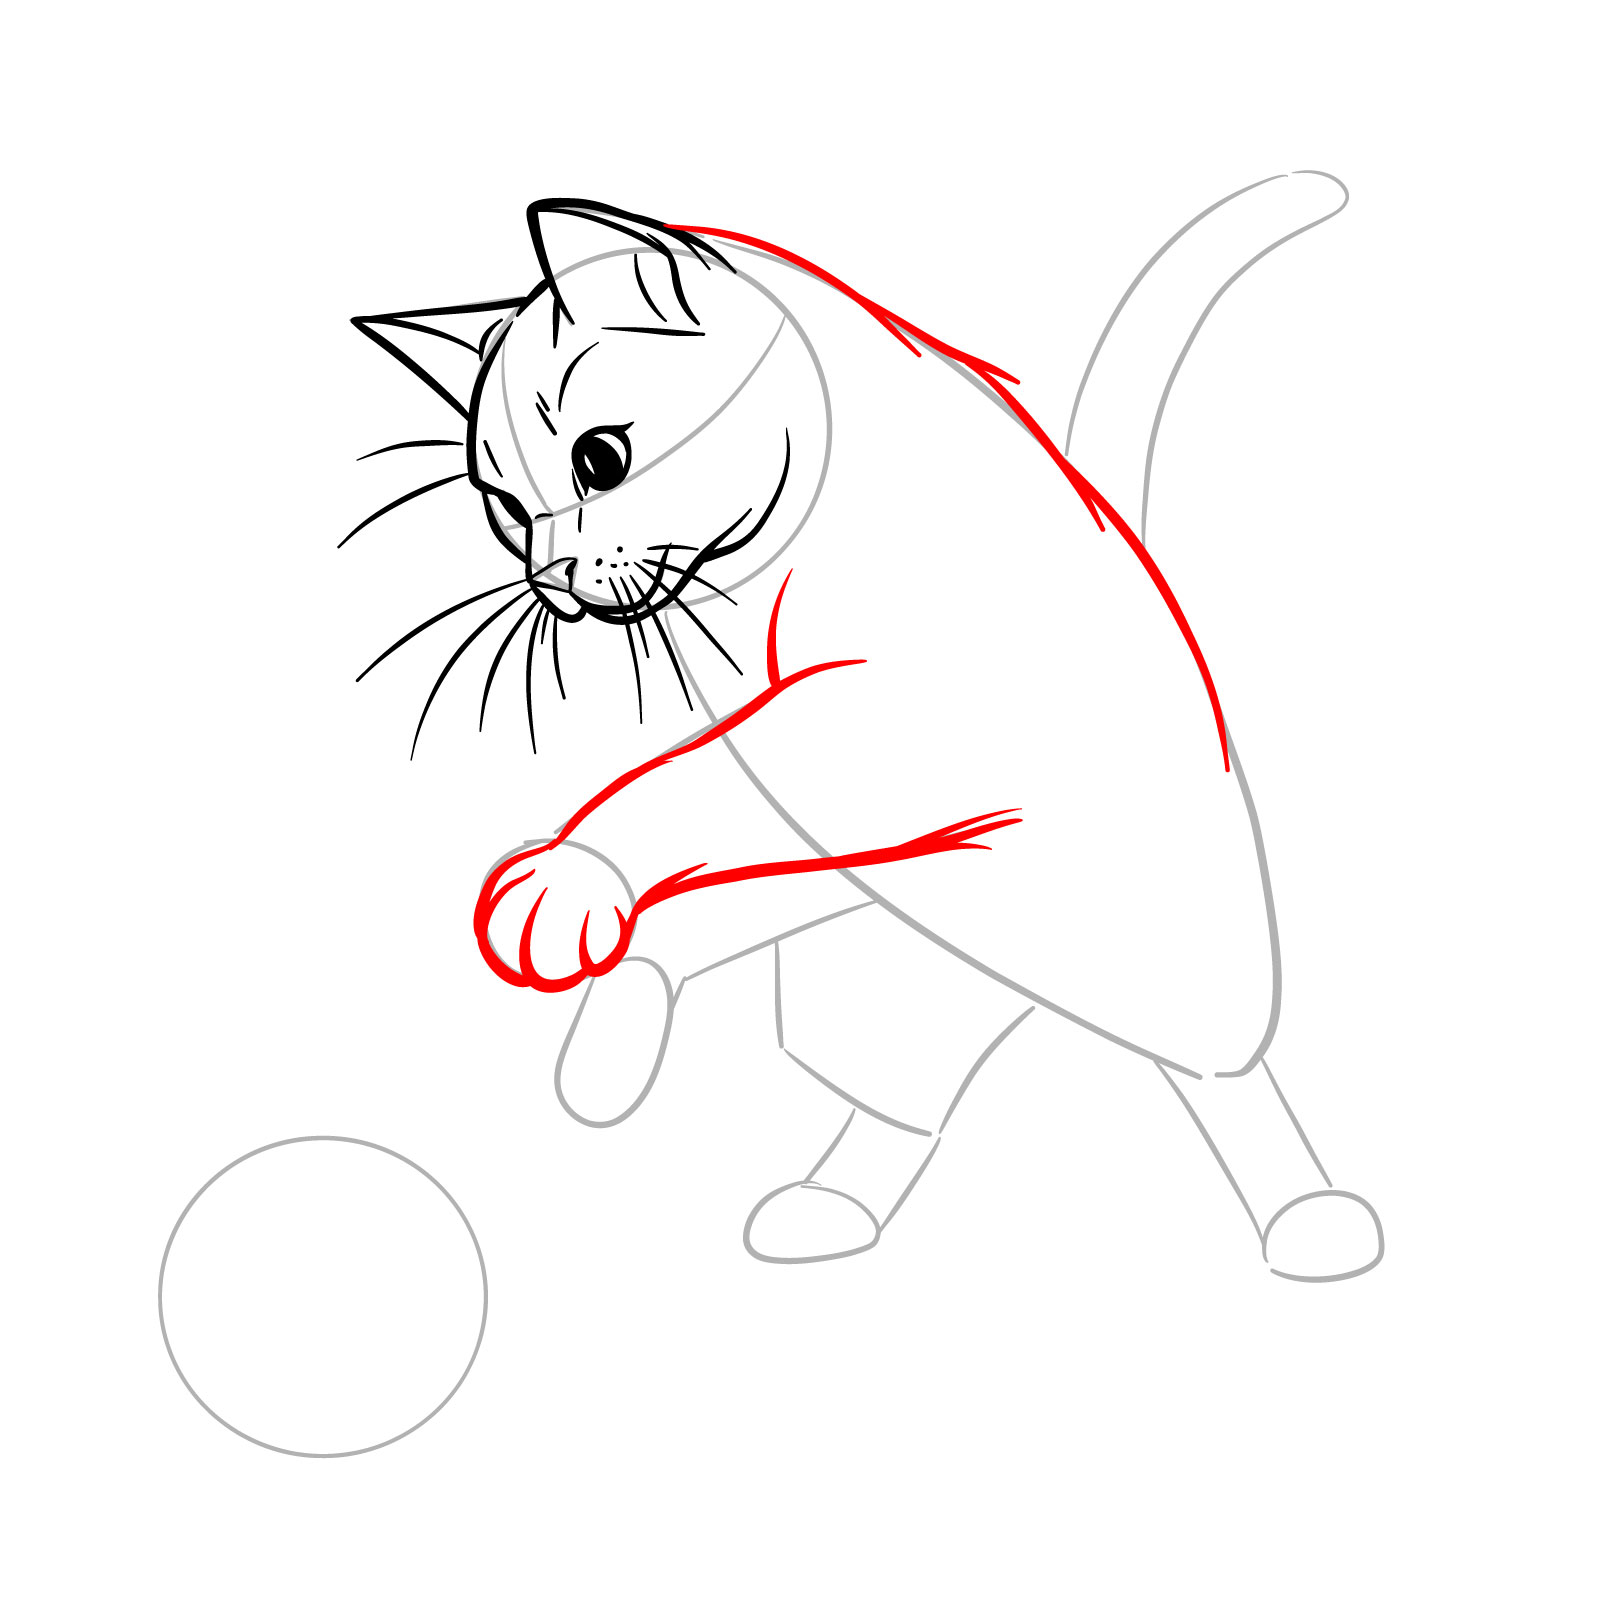
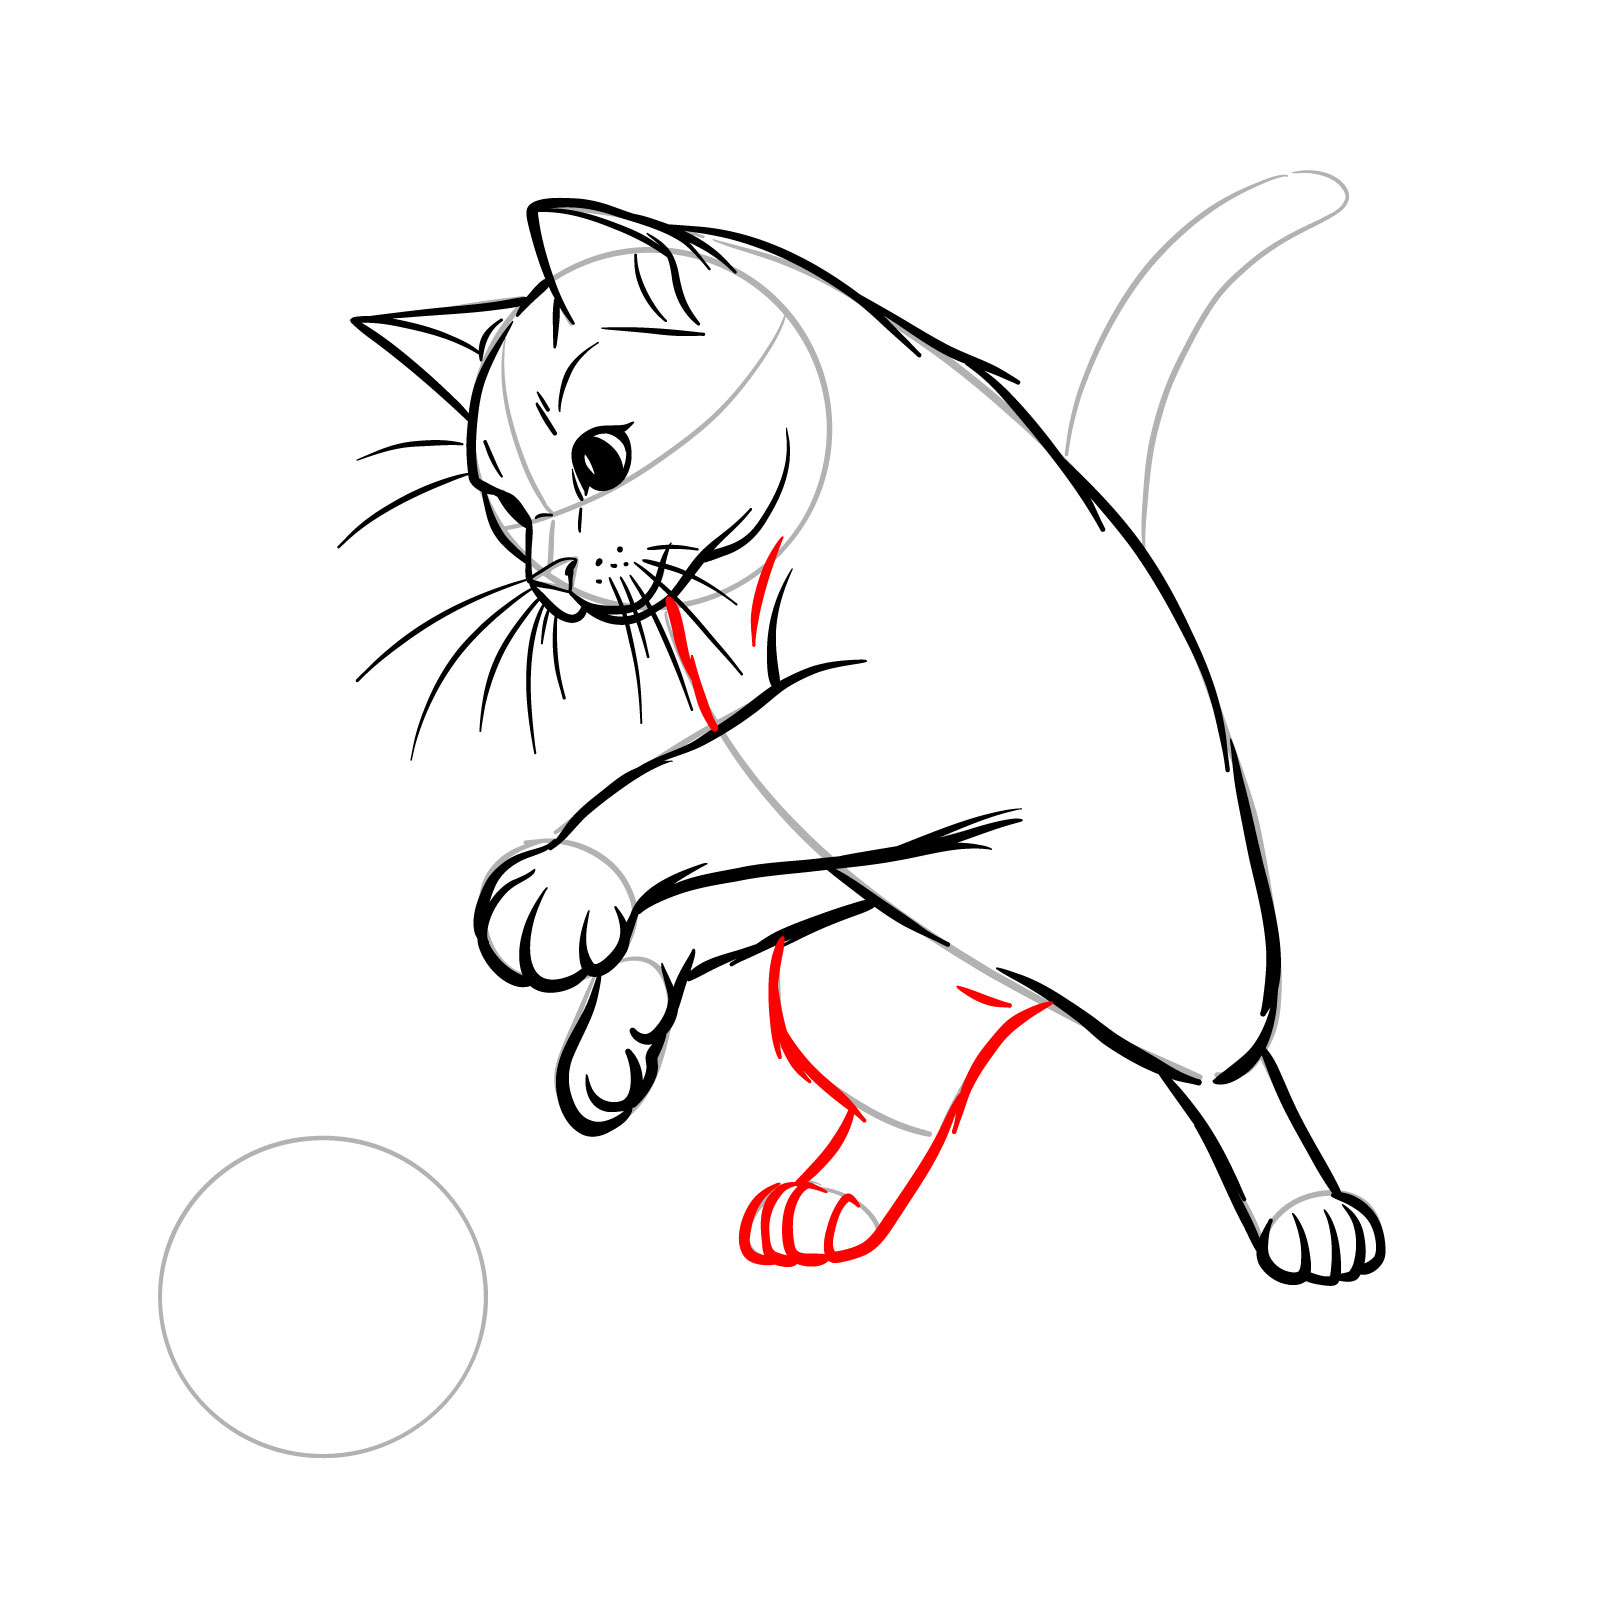
Step 08 – Draw the backline with short strokes to suggest fur, curving it down to the tail’s base. For the front leg, use similar short strokes to create a furry appearance, defining the leg’s form and the paw reaching out to touch the ball
Sketching the back and front leg with a fur-like texture
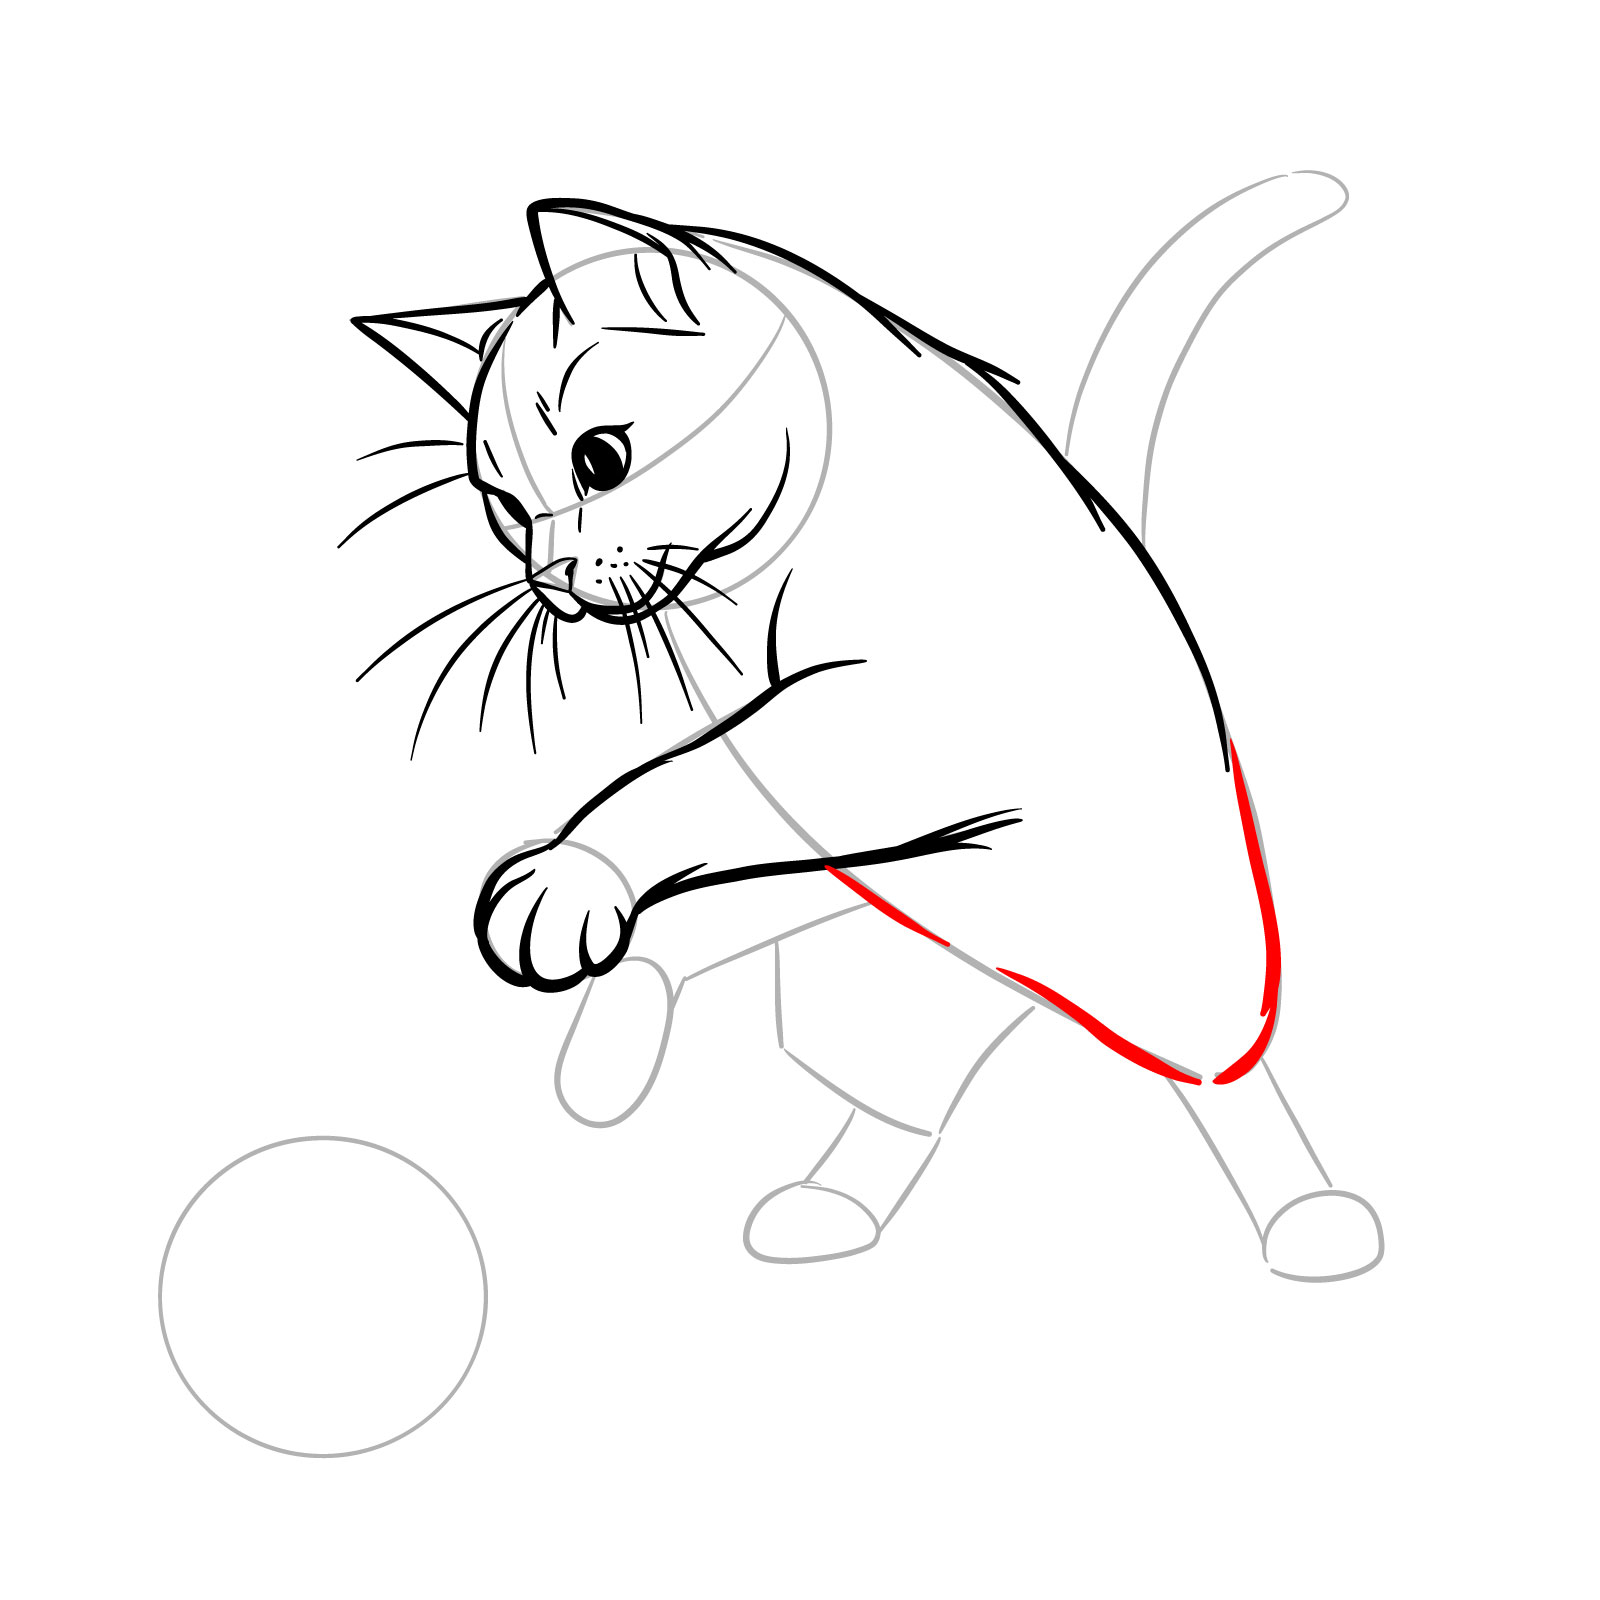
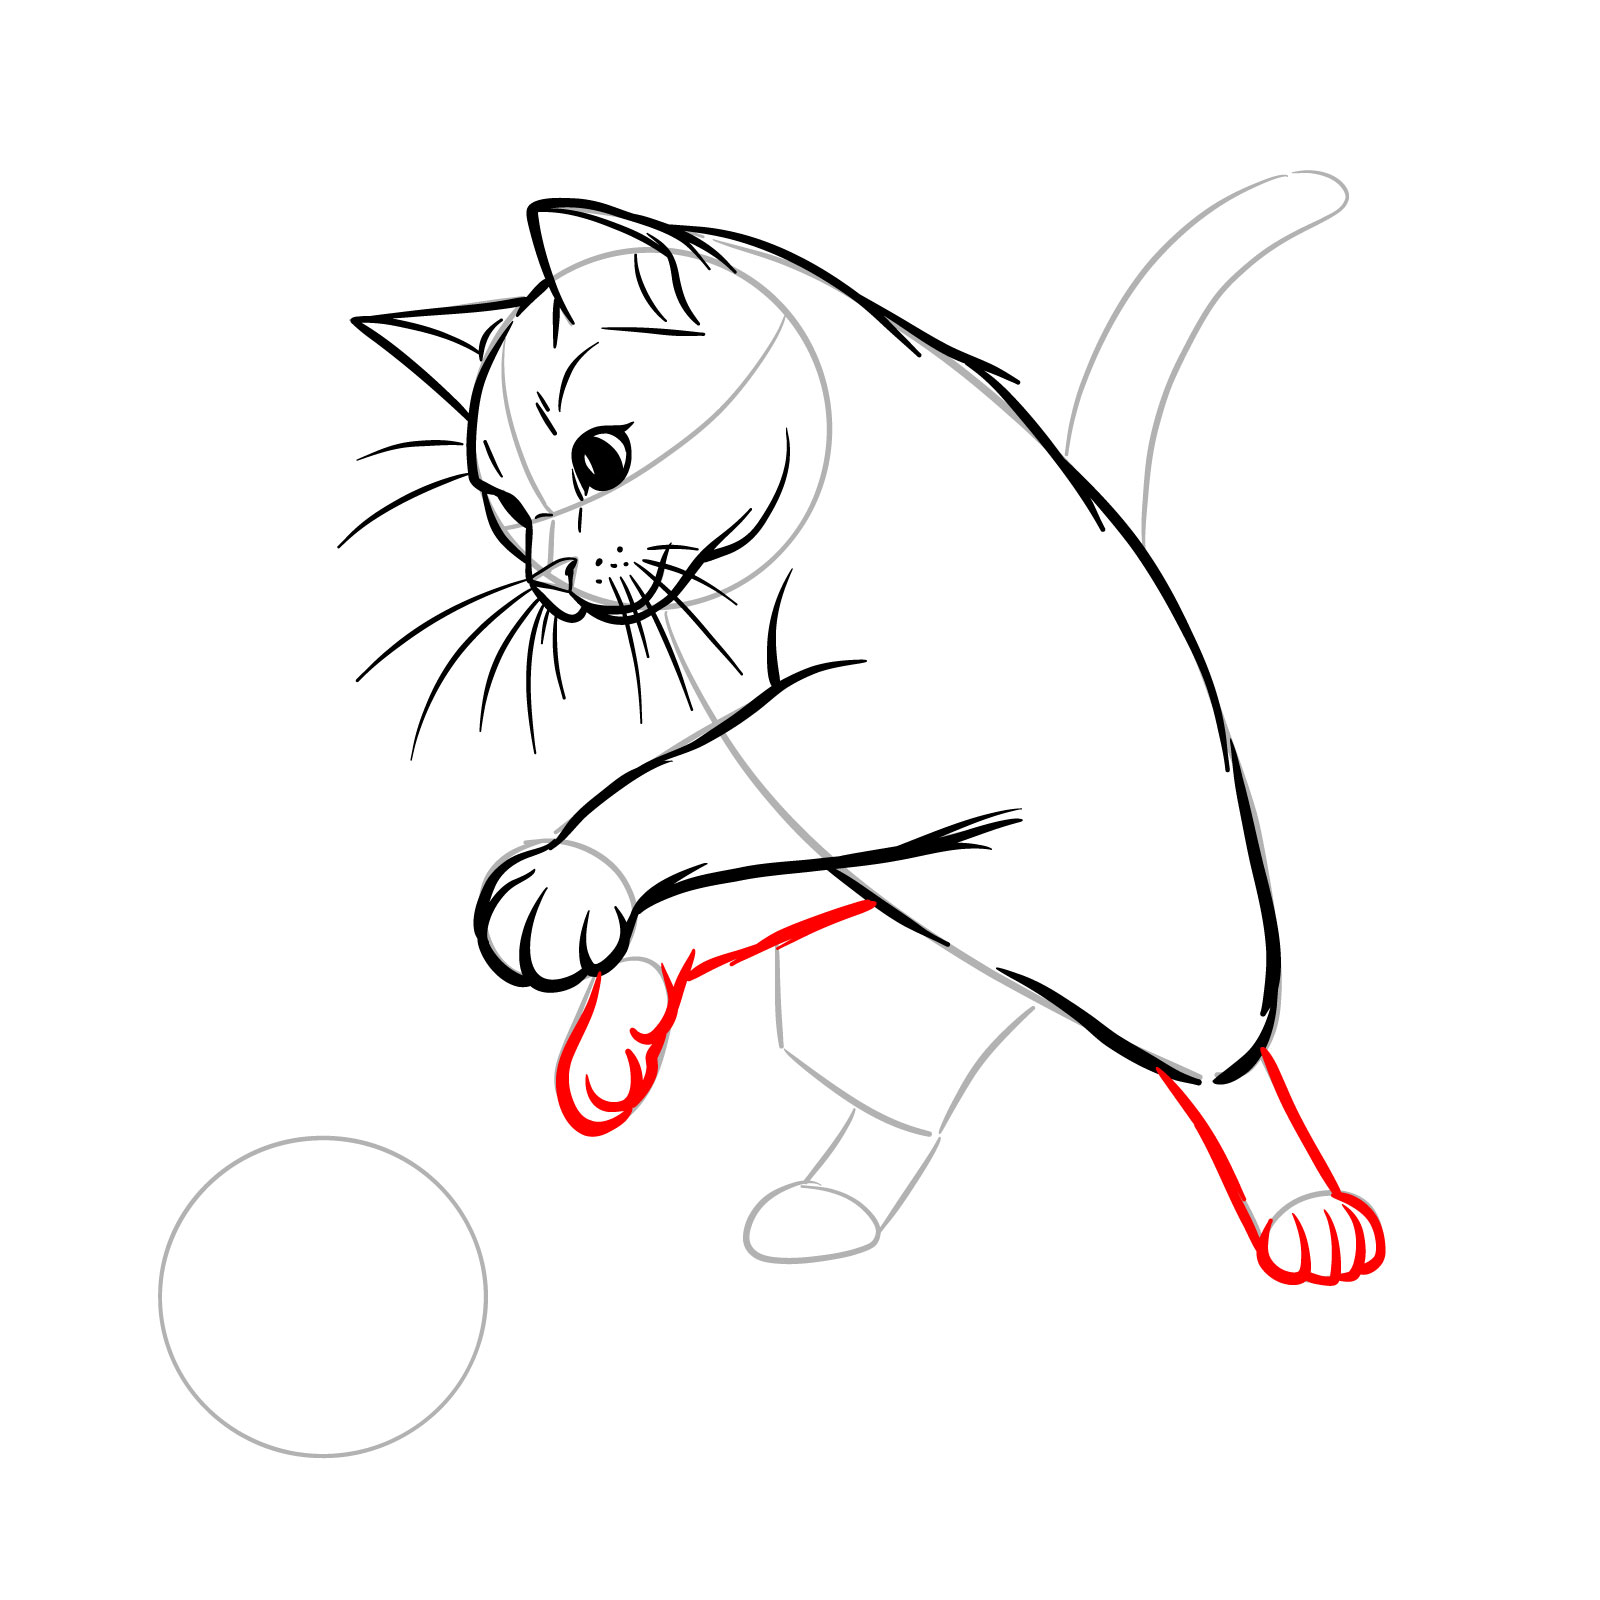
Step 09 – Extend the line from the front leg to create the underside of the cat’s body, curving it upwards to indicate the start of the hind leg, bent in anticipation of playful movement
Sketching the underside and beginning the first hind leg
Step 10 – Detail the first hind leg’s shape, showing the leg’s segments and paw. Begin sketching the second front leg, raised and poised to interact with the ball
Finalizing the first hind leg and sketching the second front leg
Step 11 – Smooth out the body’s outline for a rounded appearance and finalize the second hind leg, ensuring it mirrors the position and form of the first for a balanced look
Completing the body shape and second hind leg
Step 12 – Draw the tail with an expressive curve for added dynamic. Sketch the ball with light shading to create depth, and add minimal lines to the body for definition
Adding the final details with tail, ball, and shading
Step 13 – With all details in place, remove any remaining guidelines and, if desired, ink the sketch for a polished look. This final image serves as a complete guide for those seeking to learn how to draw a cat playing with a ball, capturing the playful spirit and dynamic posture of a feline engaged in play
Finished sketch of a cat playing with a ball
Guide 14: How to Draw a Cat Stretching – 11 Steps
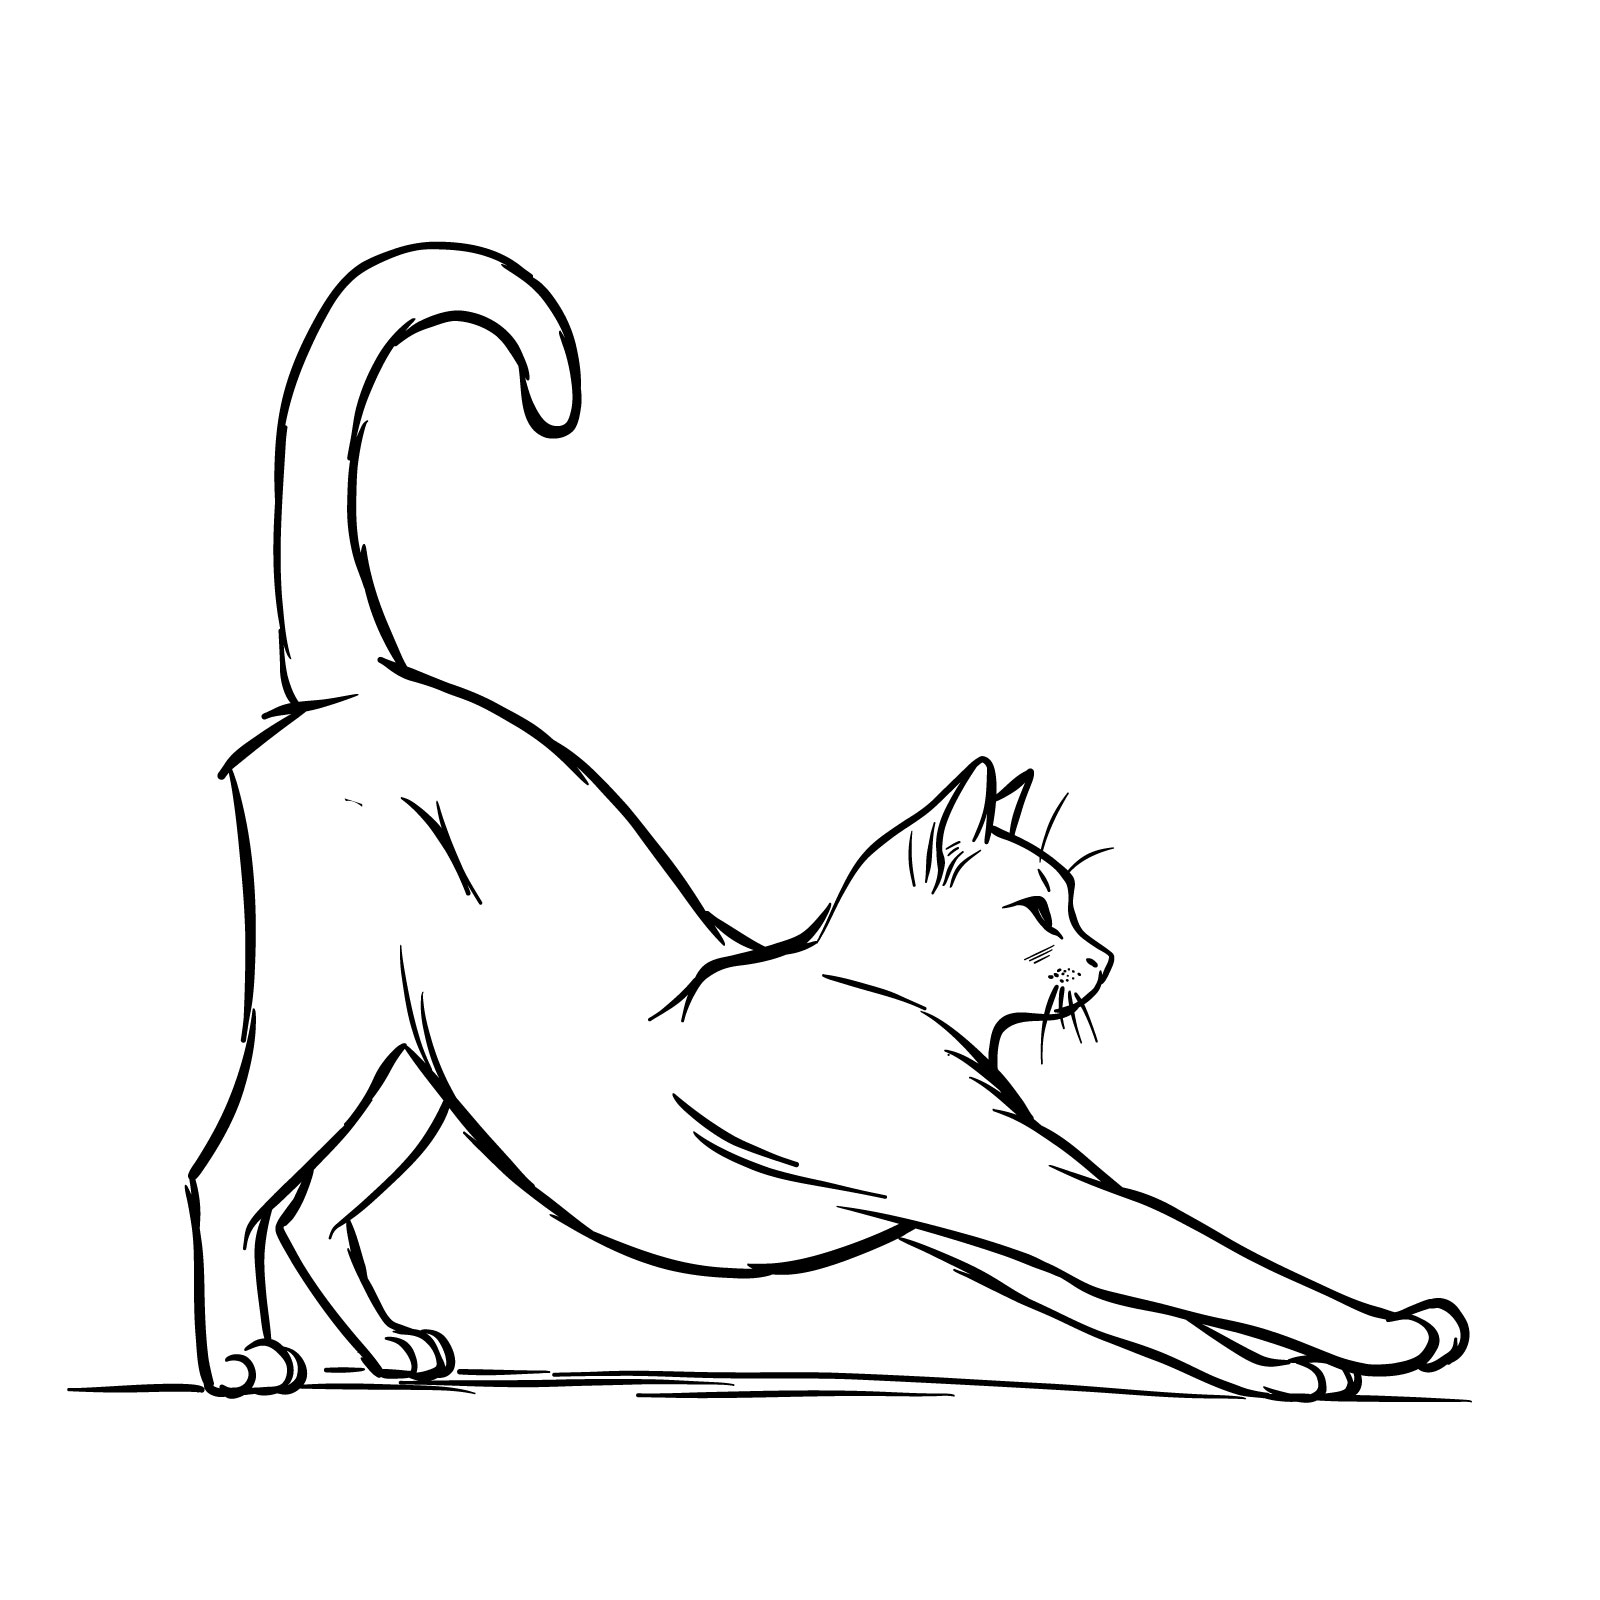
How to Draw a Cat Stretching
Embrace the elegance of feline flexibility with our fourteenth guide on how to draw a cat stretching. This relaxed yet dynamic pose is broken into 11 simple steps, ensuring an enjoyable drawing process for artists of all levels. The realistic form of the cat is depicted without an overwhelming amount of detail, allowing you to focus on capturing the movement and grace of the stretch. Starting with the basic proportional structure, you’ll create the foundation for your cat’s elongated body and limbs. While my instructions use only bold lines to emphasize the technical aspects, you’re encouraged to add your personal touch with shading and texture to bring your cat to life.
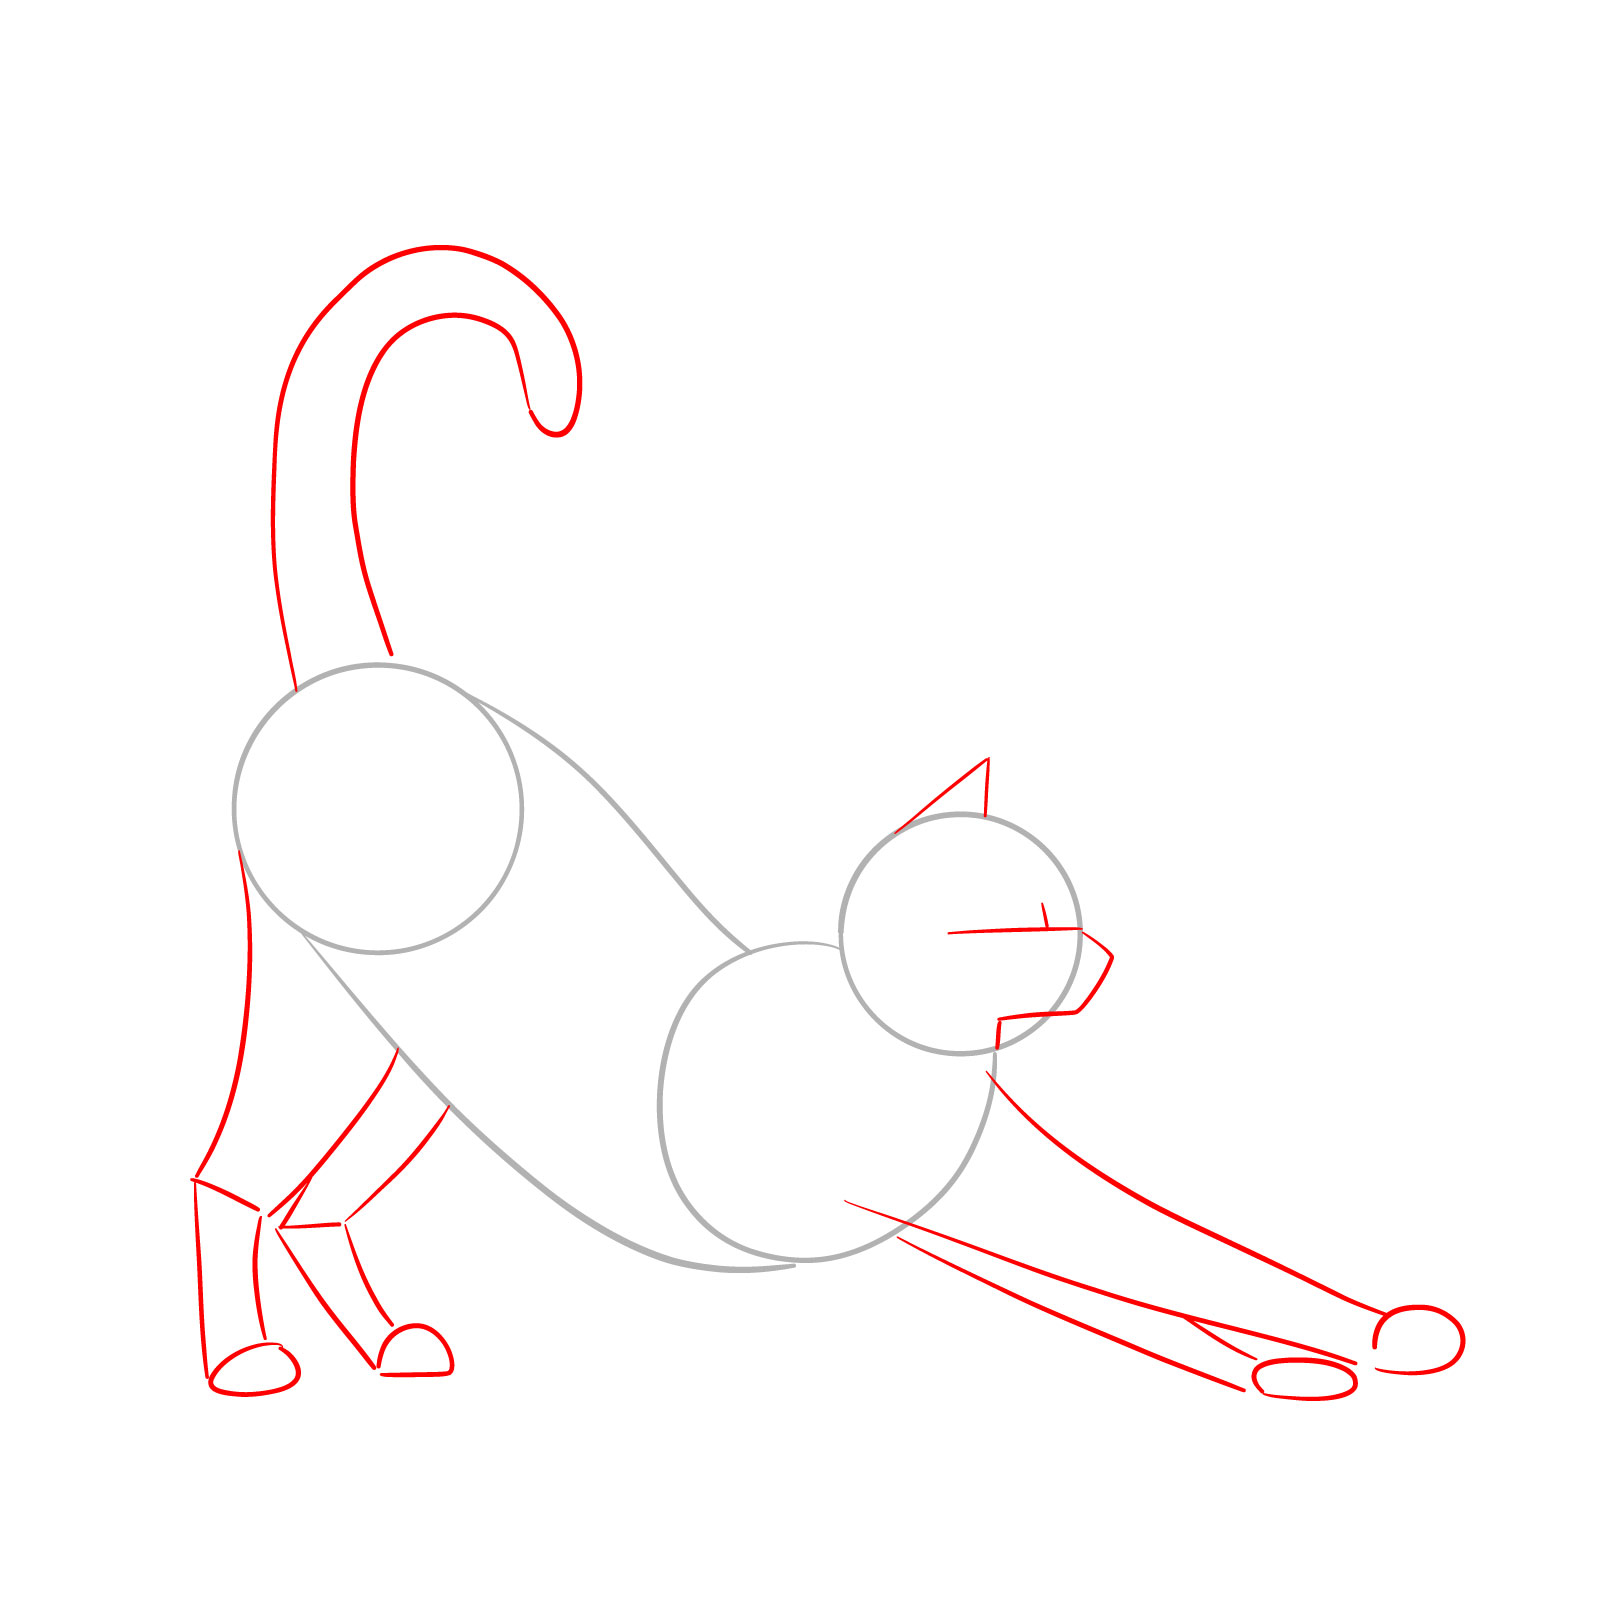
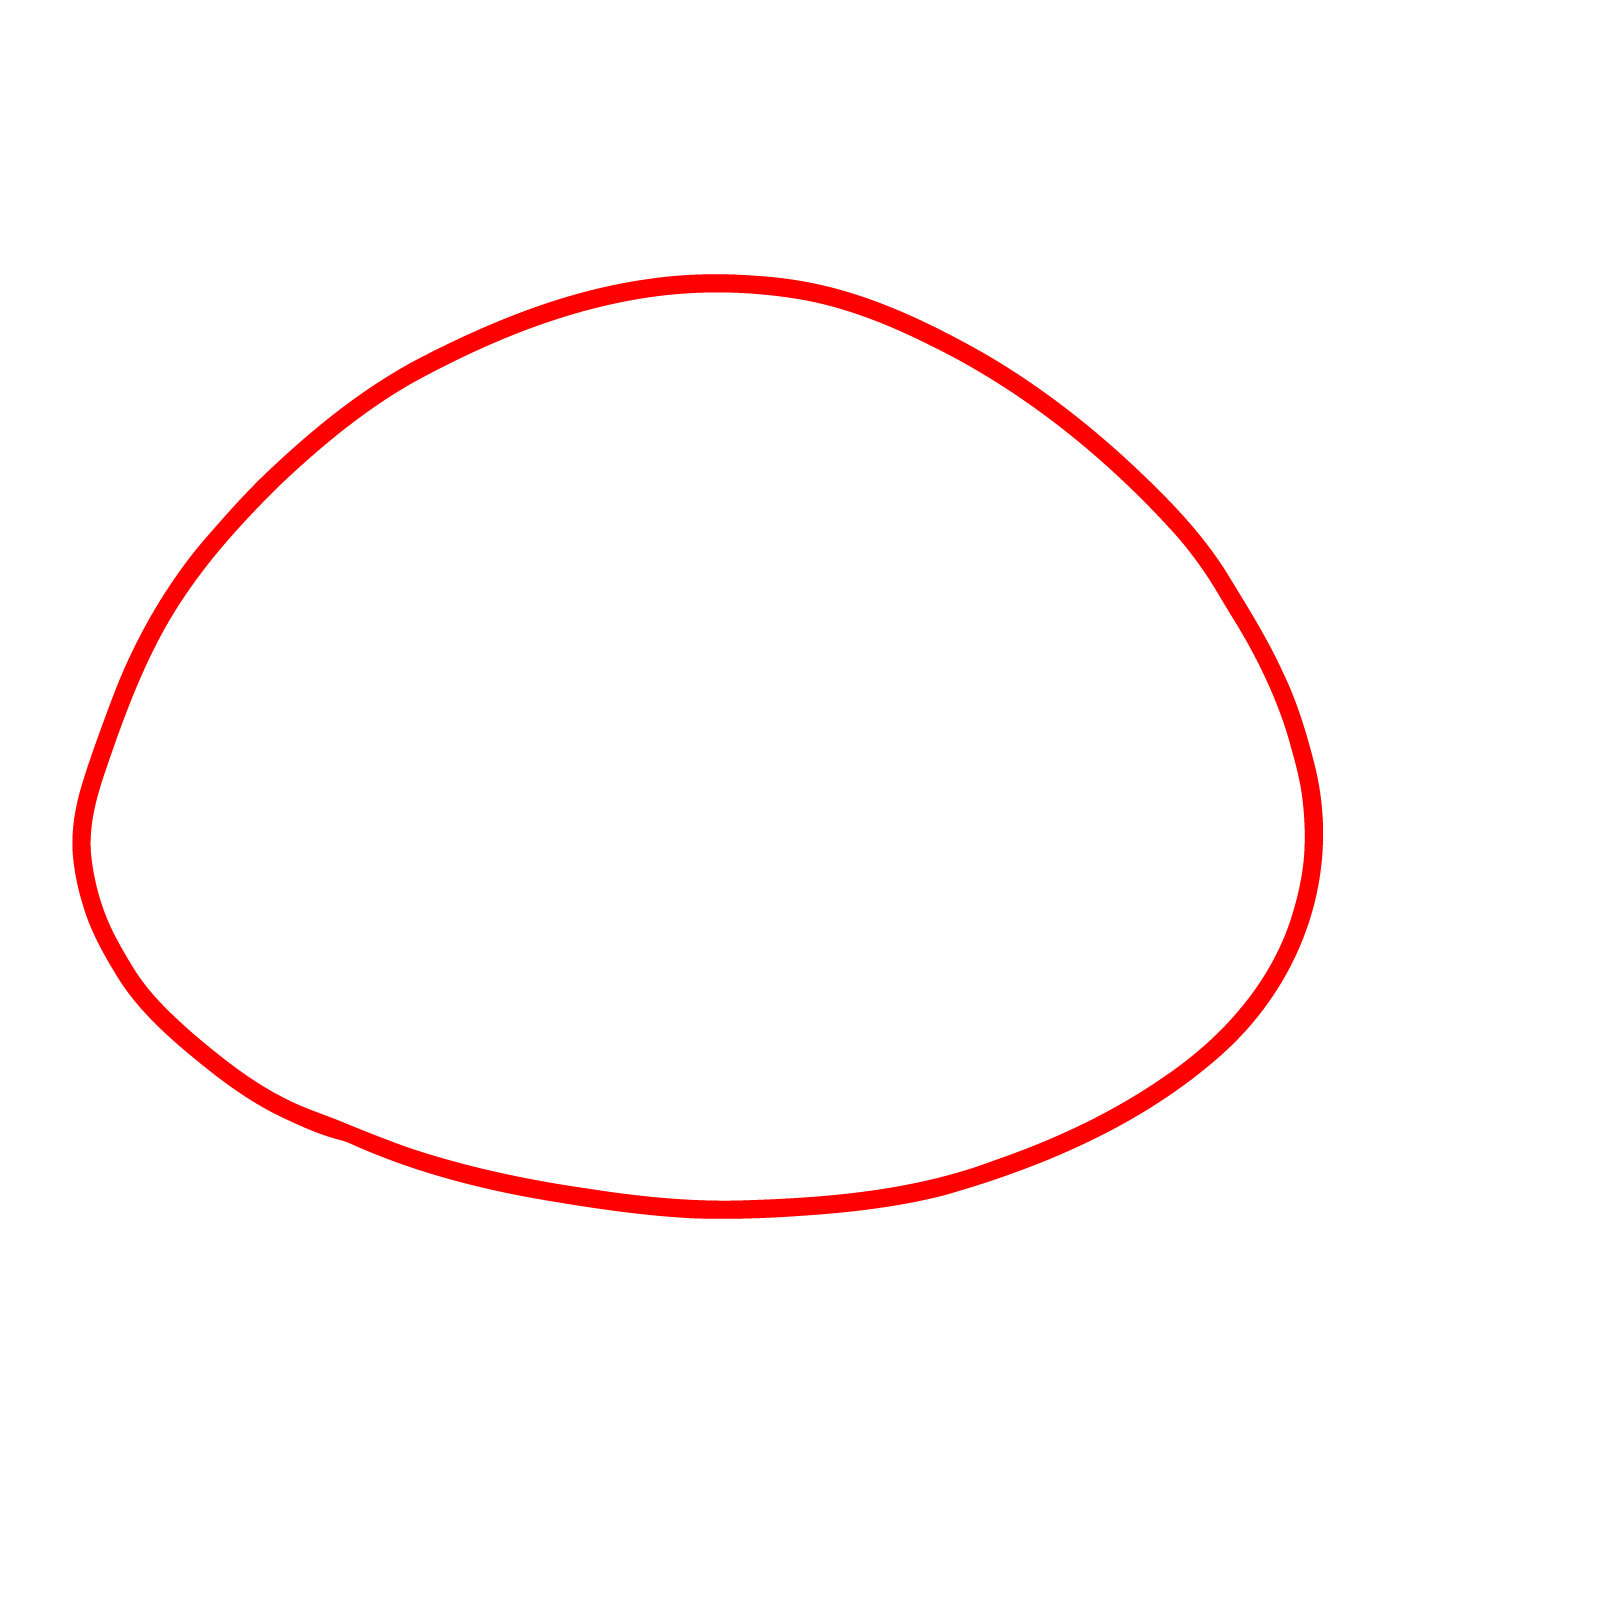
Step 01 – Start with a small circle for the head, then a larger circle below for the chest and a medium-sized one for the hindquarters. Position the hindquarters’ circle halfway above the head’s level. Connect these with smooth, curved lines to outline the body’s form
Creating the foundational structure for a stretching cat
Step 02 – Outline the eye and muzzle placement on the head circle. Sketch simplified forms for the legs and paws, capturing the stretching posture. Add a curved line to represent the tail’s flow
Adding basic shapes for the cat’s features and limbs
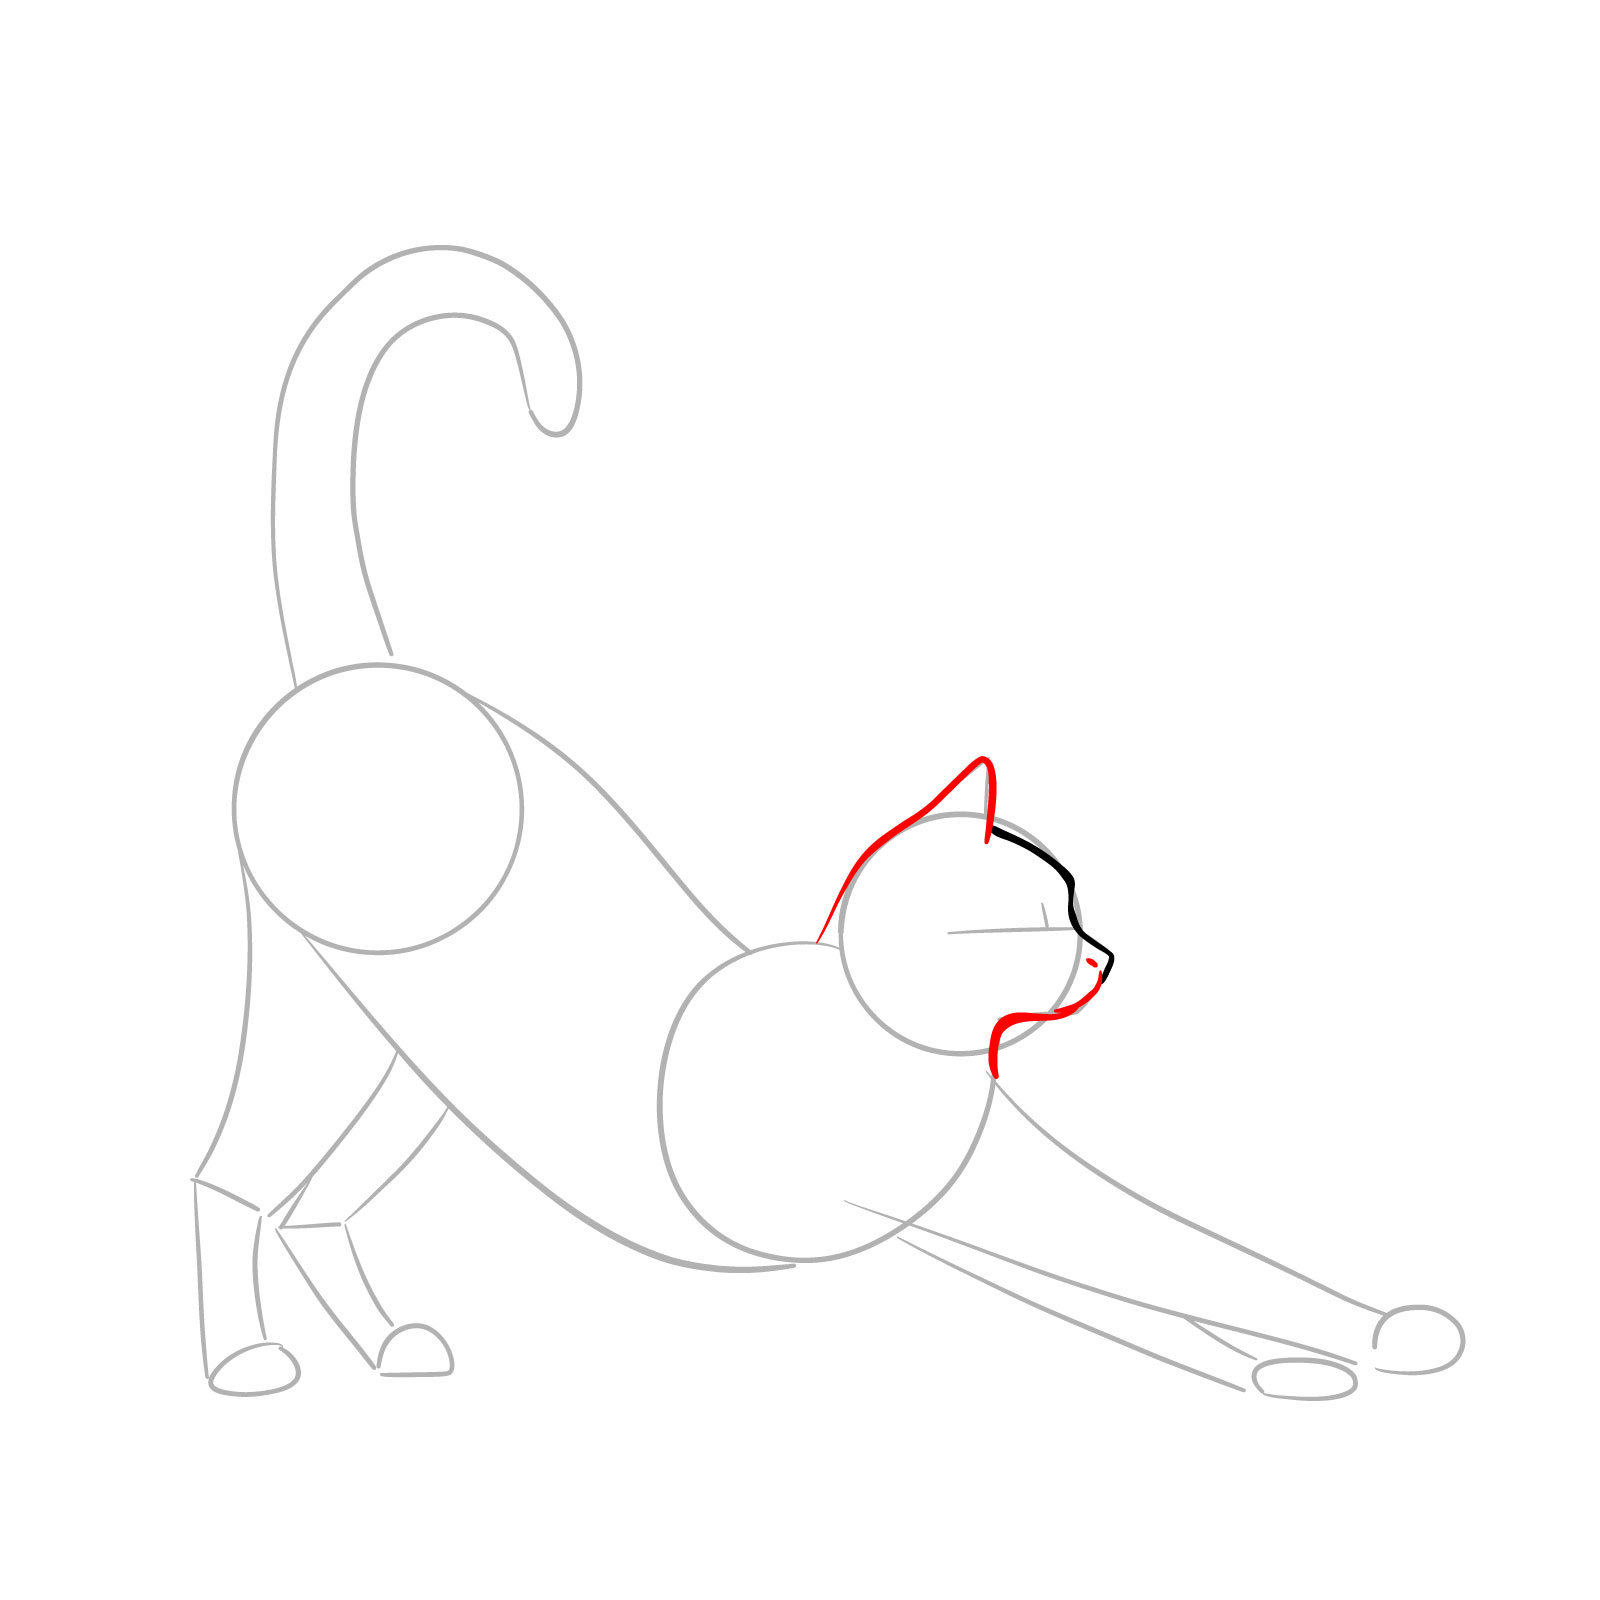
Step 03 – Define the forehead by sketching a line that extends from the top of the head circle, curving down to indicate the nose’s bridge. Ensure this line follows the natural curvature of a feline’s head in profile
Outlining the cat’s forehead and nose
Step 04 – Draw the ears starting from the top of the head circle, tapering to pointed tips. For the chin, extend a line from the lower part of the head circle to form the bottom contour of the cat’s head, completing its profile
Detailing the ears and chin of the cat
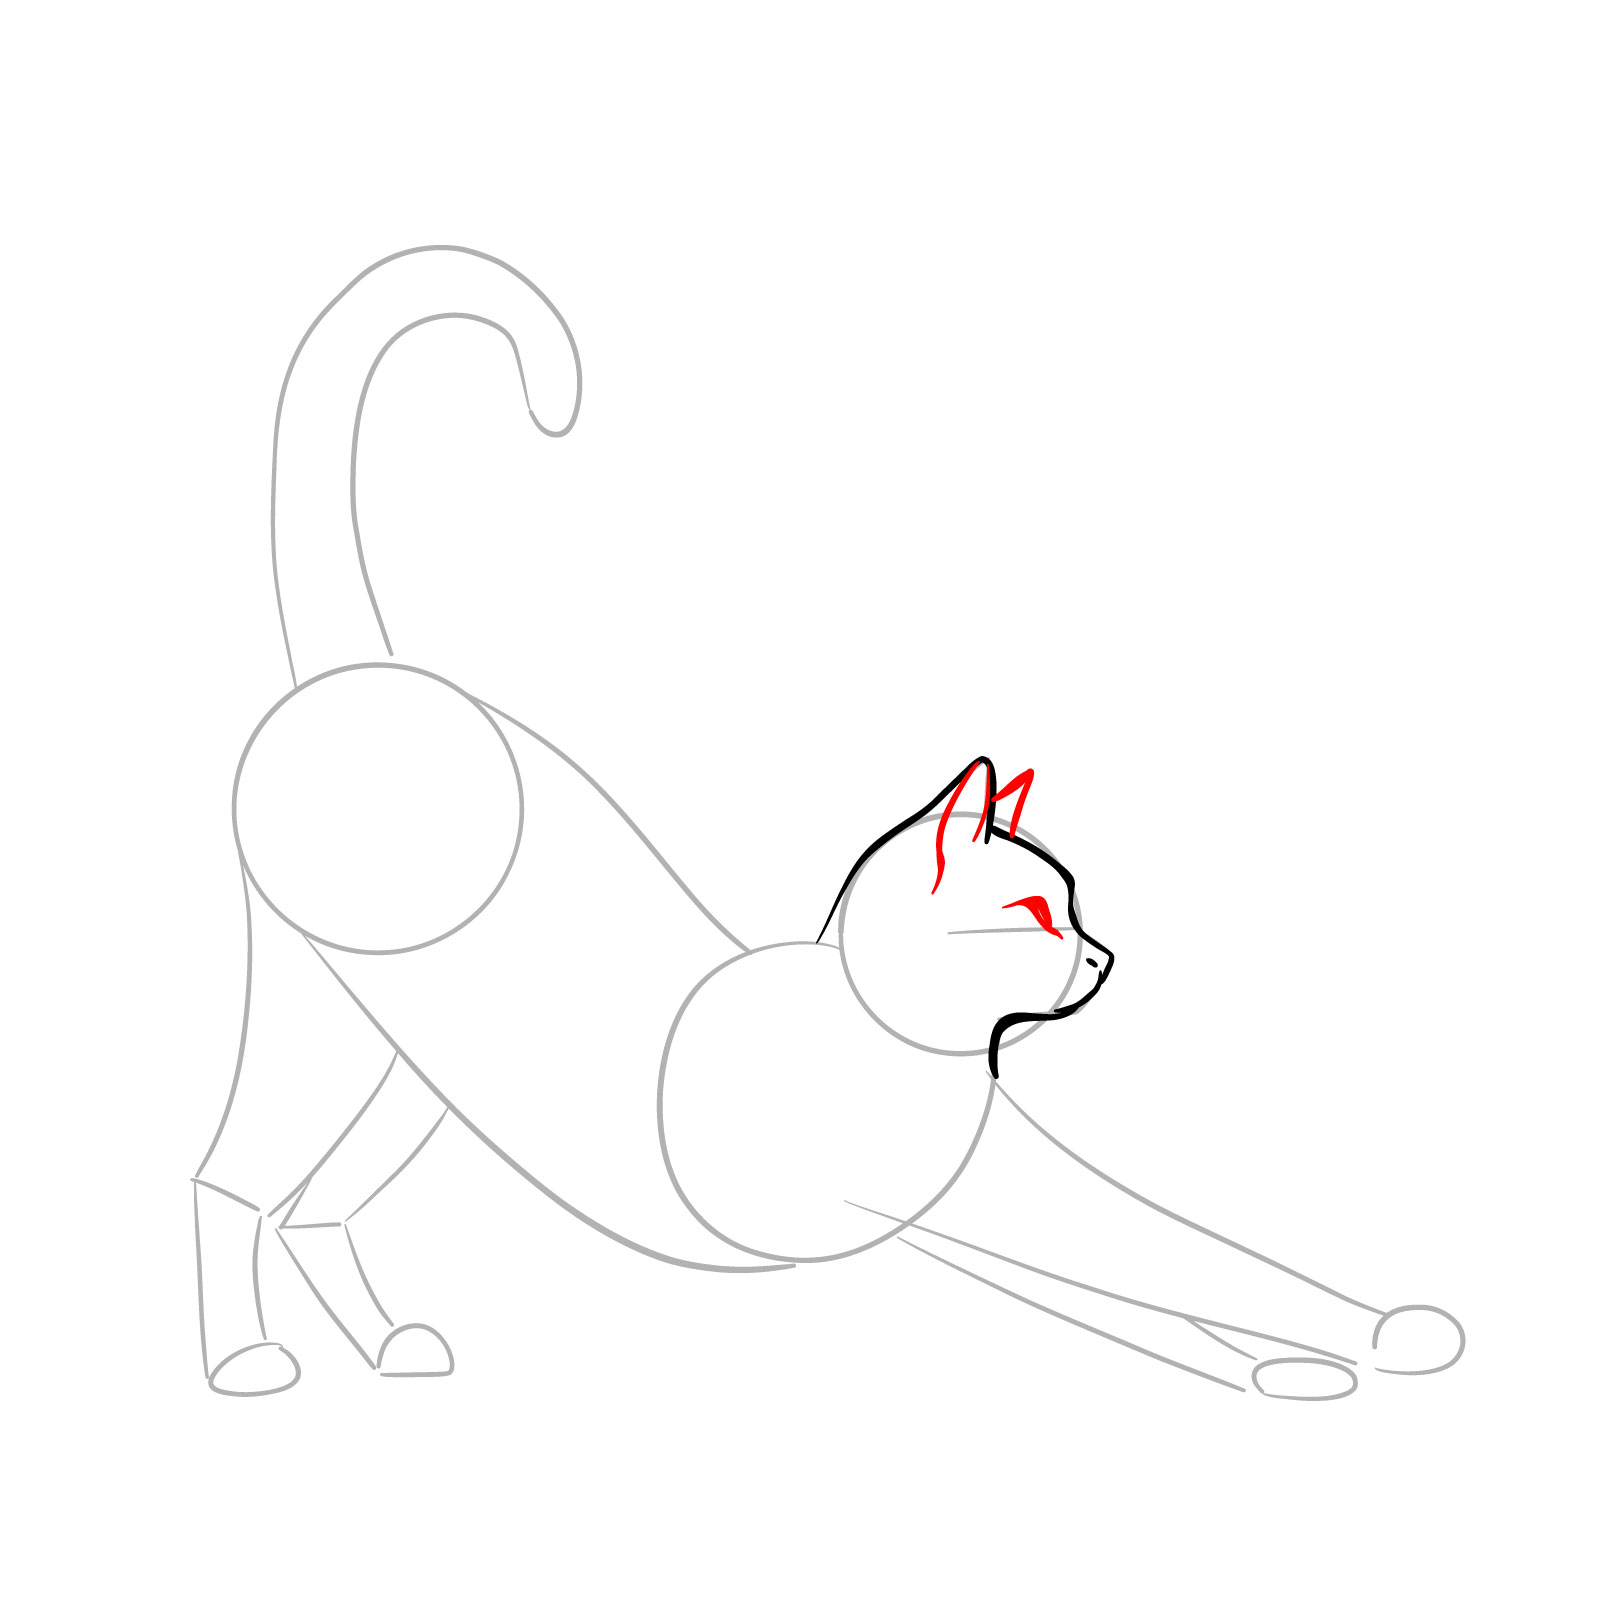
Step 05 – Refine the ears with additional lines to indicate inner ear details. Position the eye correctly within the guidelines on the head, giving it a slightly almond shape
Detailing the cat’s ears and eye
Step 06 – Sketch thin, delicate whiskers protruding from the muzzle. For the ears, add fur texture using short lines to represent the fine hairs within the cat’s inner ear
Adding whiskers and ear fur to the cat
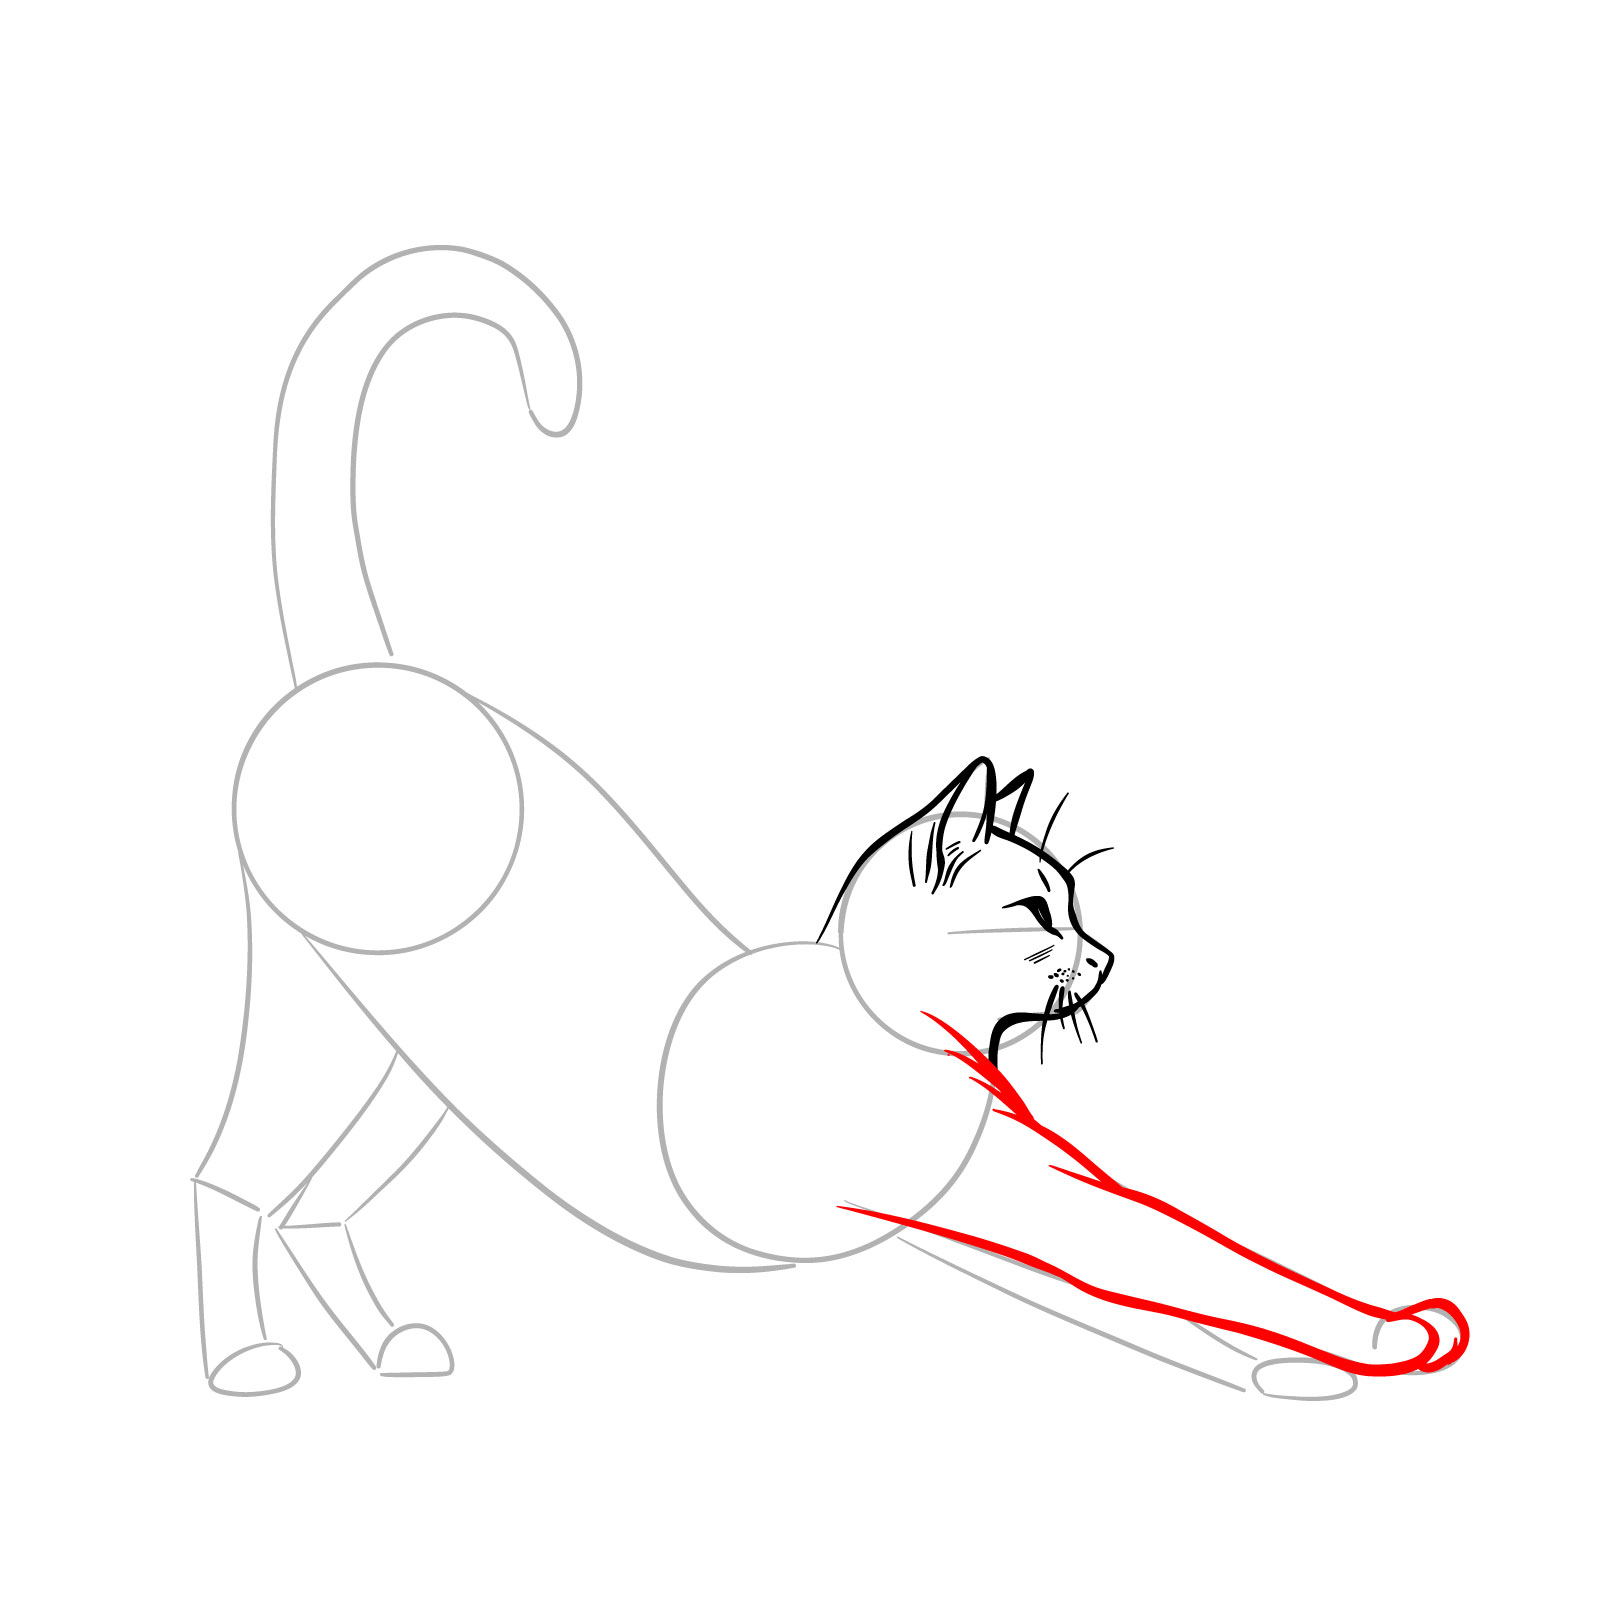
Step 07 – Depict the first front leg with the paw slightly lifted off the ground. Use short, quick strokes instead of smooth lines to mimic the fur texture, giving life to the leg’s appearance
Sketching the raised front leg with fur texture
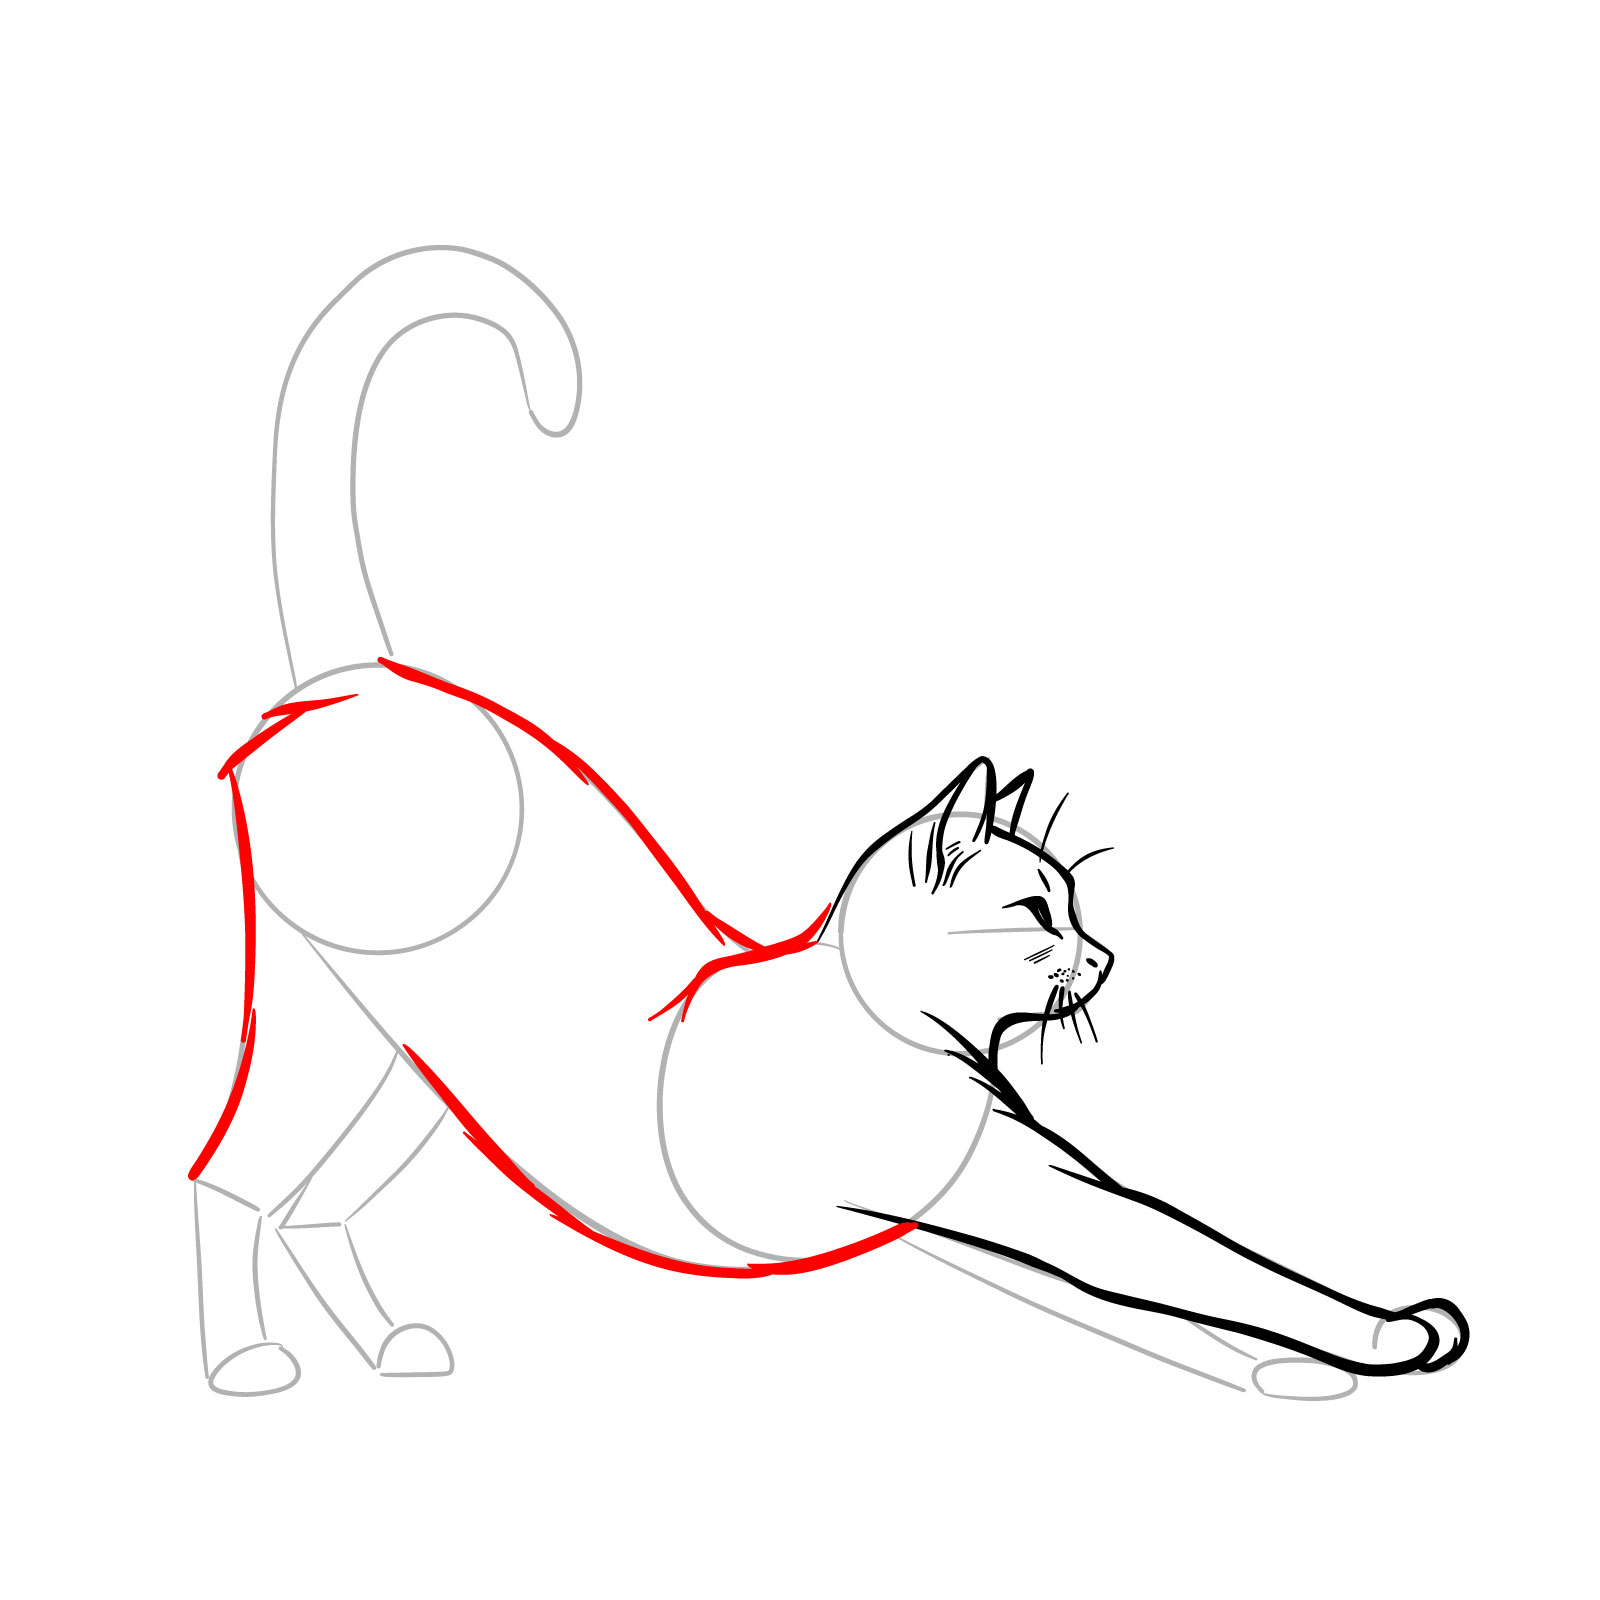
Step 08 – Outline the back and belly of the cat with short flowing lines to show the stretching motion. For the upper part of the rear leg, indicate its form with lines that suggest the muscle structure and fur texture
Outlining the cat’s torso and rear leg
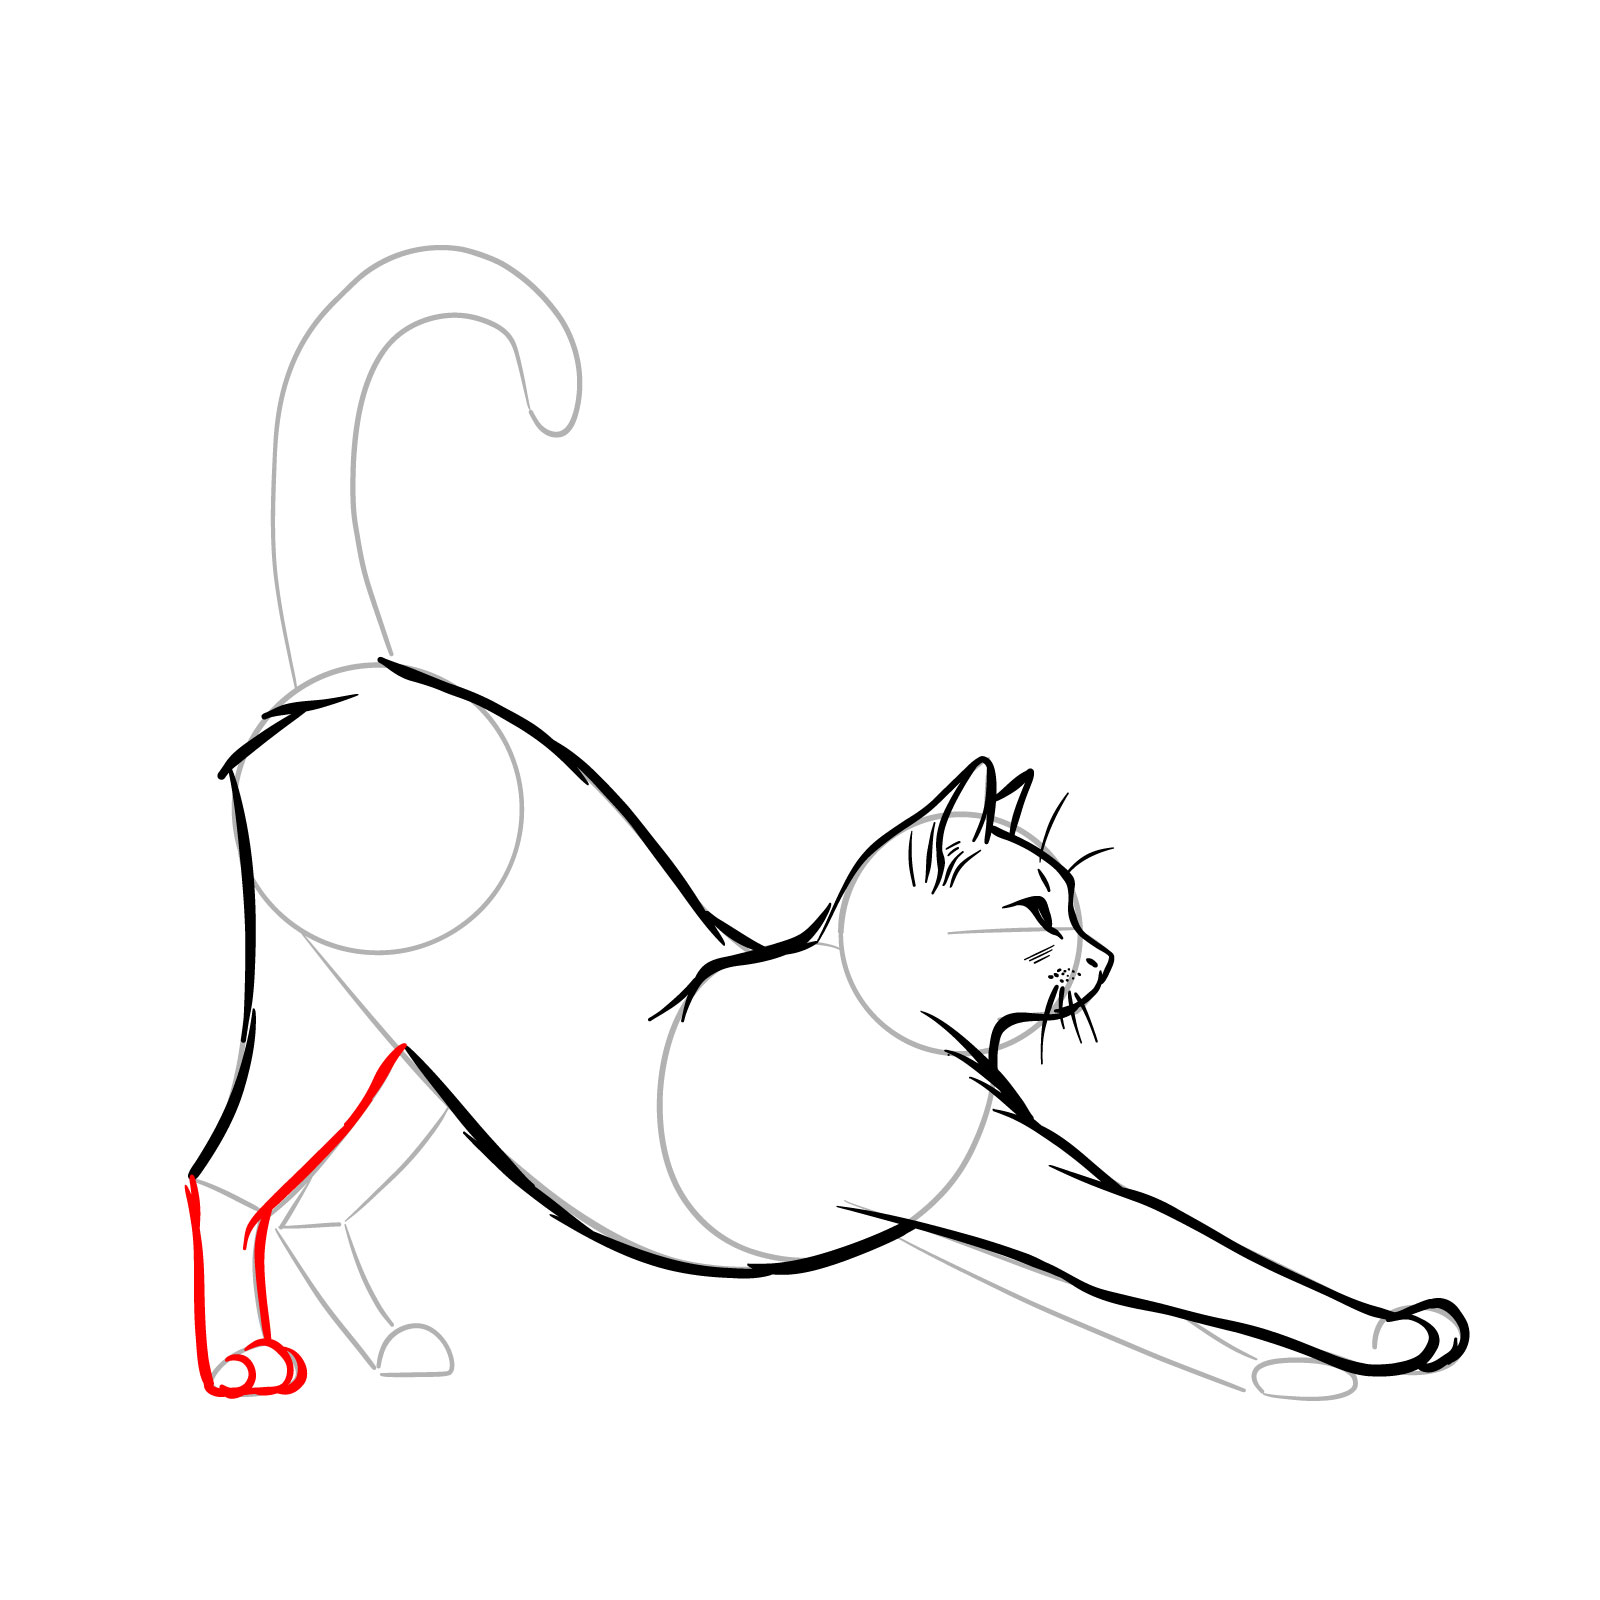
Step 09 – Draw the rear leg, ensuring it has a slight bend to indicate the cat’s stretching action. Use short lines near the paws to suggest fur texture and remember to define the paw pads
Finishing the first rear leg
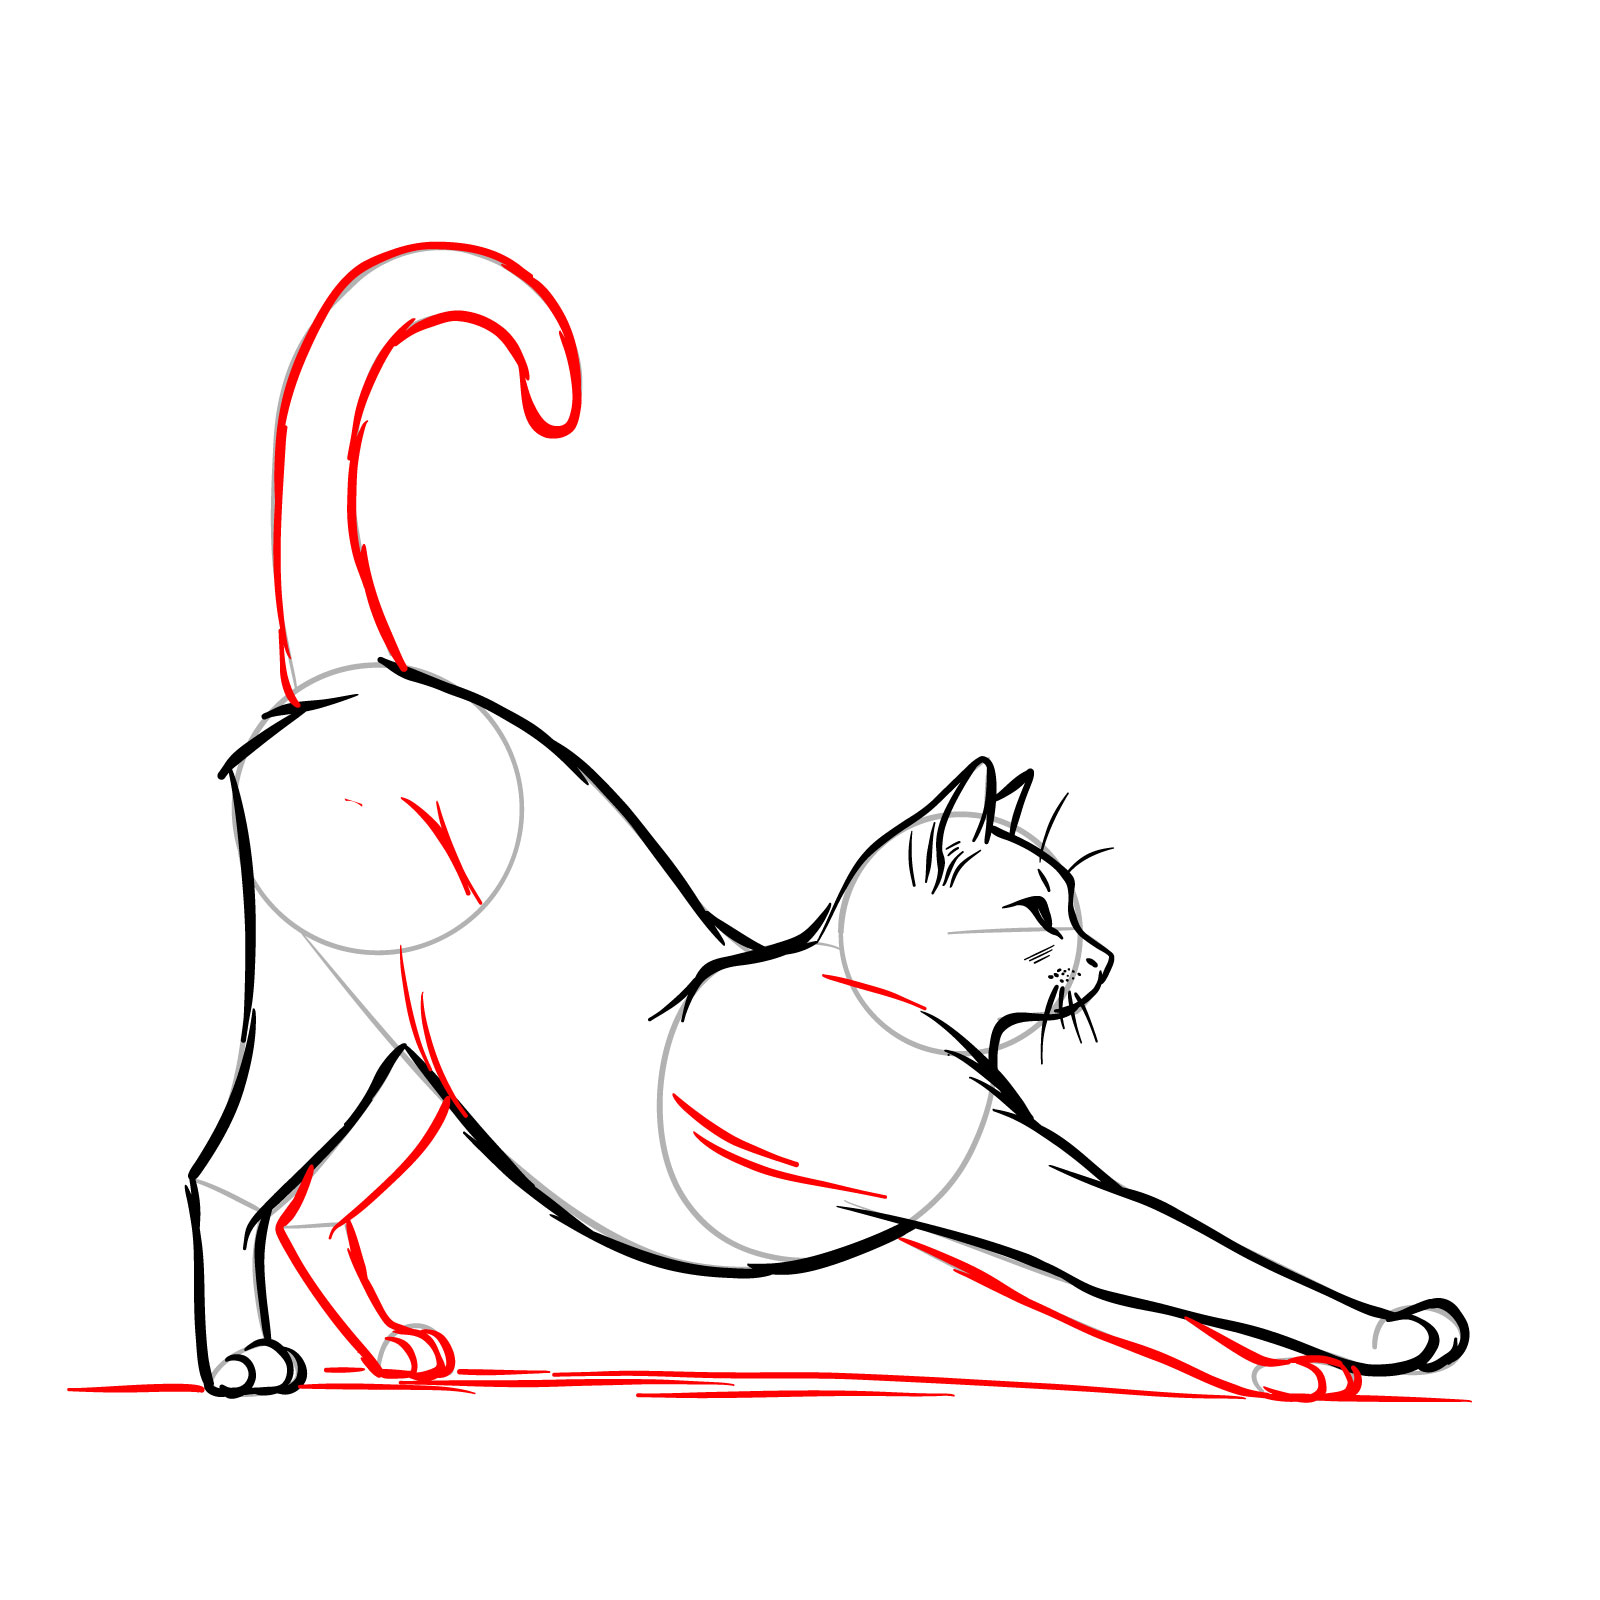
Step 10 – Sketch the second rear leg, mirroring the first’s position. Add the tail with a smooth, curved shape. Place the second front leg forward and add horizontal lines to represent the ground, providing context for the stretch
Adding the remaining legs and tail
Step 11 – With the cat’s form fully sketched, remove all the guideline marks. If you wish to finalize the drawing, go over the lines with ink to make them crisp and clean. This results in a clean, finished stretching cat drawing, ready to be showcased or further embellished with shading or color
Finalized stretching cat drawing
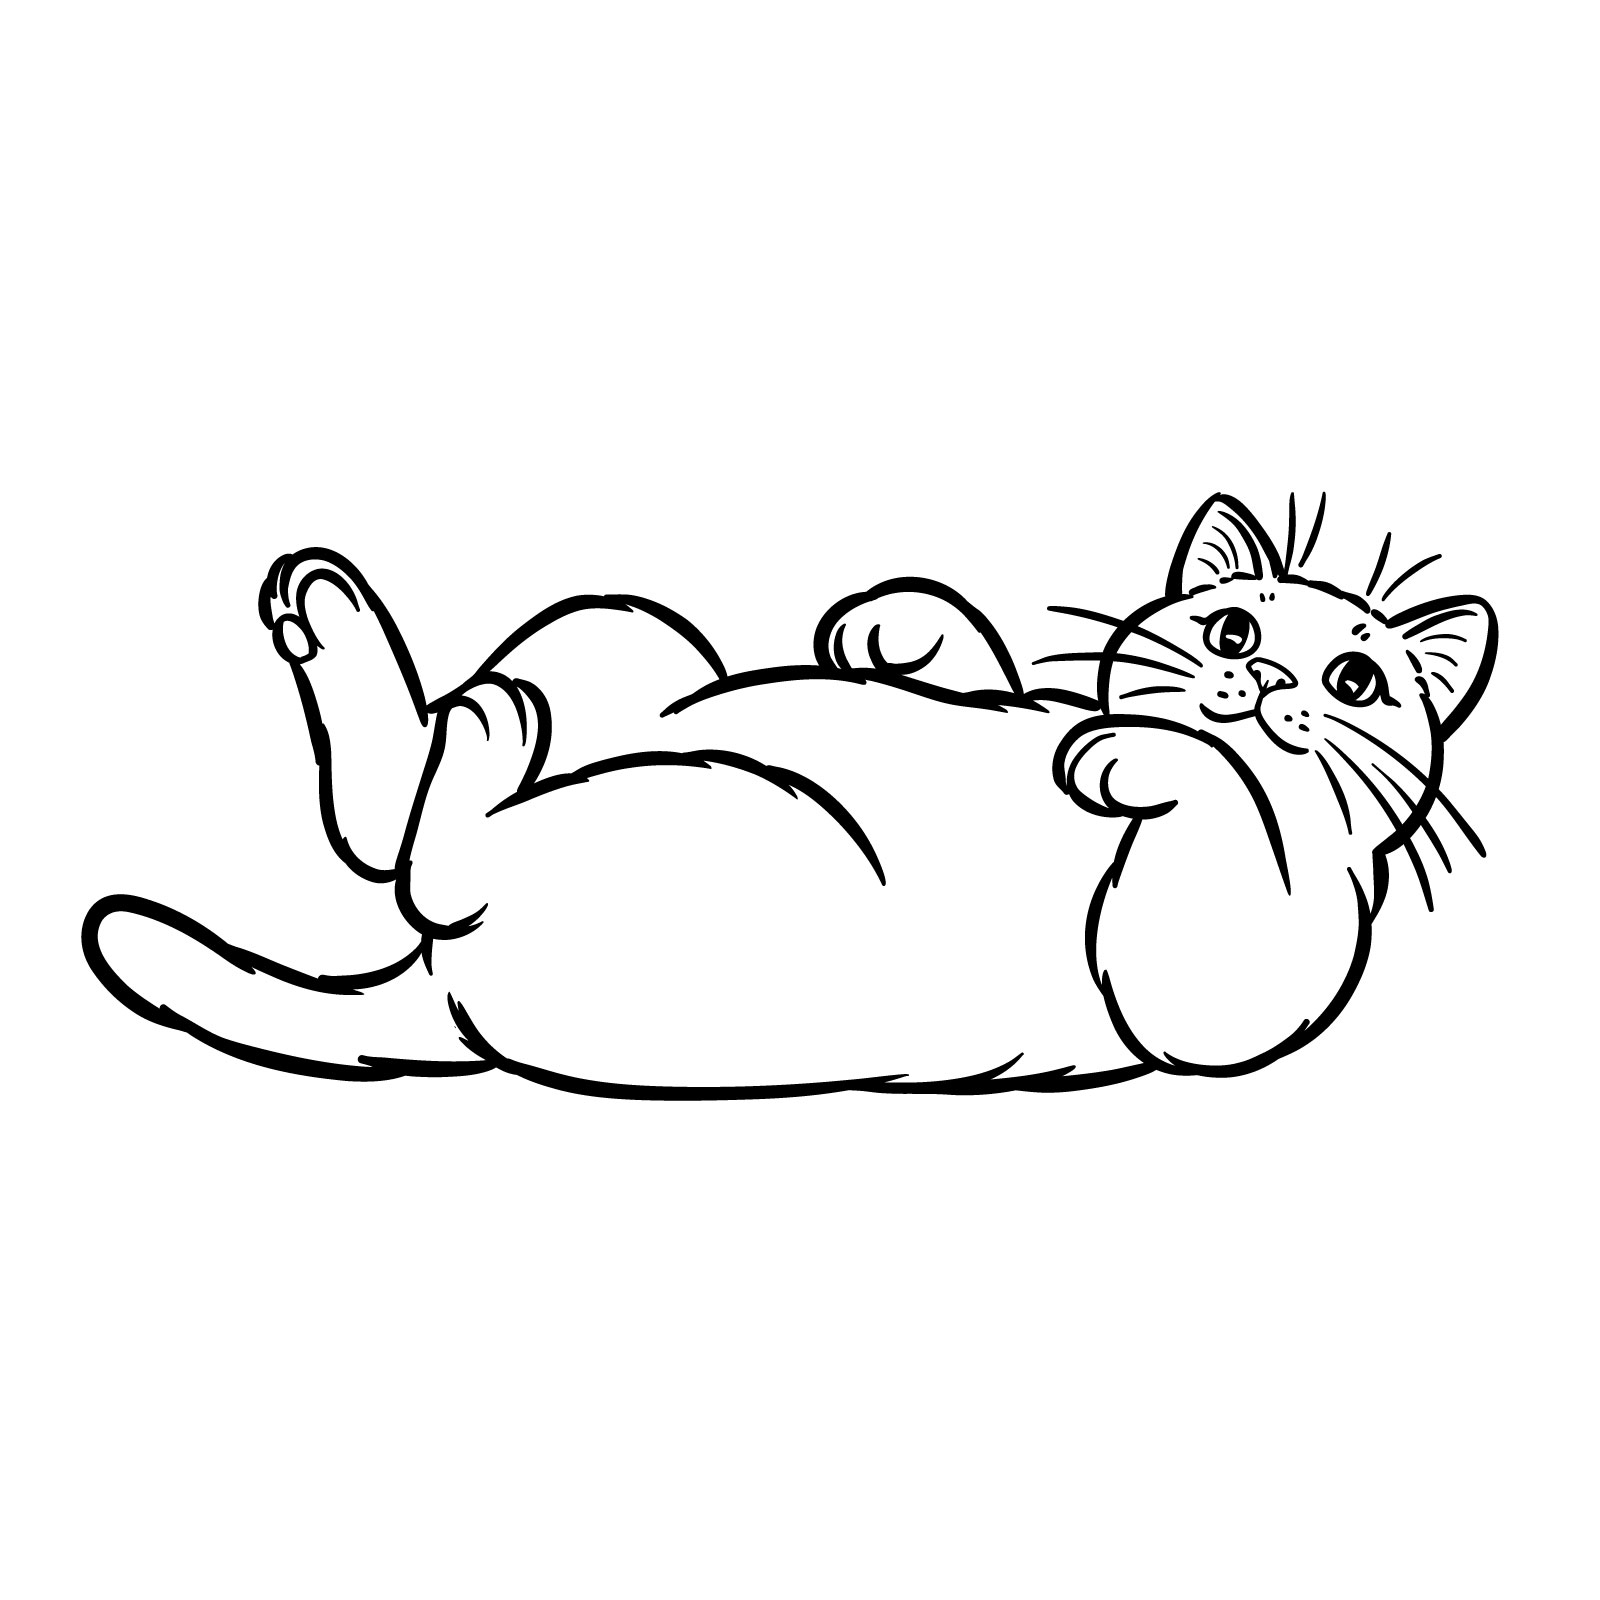
Guide 15: How to Draw a Cat Lying on Its Back – 10 Steps
How to Draw a Cat Lying on Its Back – The Result
Get ready to capture the adorable posture of a cat lounging in leisure with our fifteenth guide: how to draw a cat lying on its back. This pose, presented in 10 easy steps, is perfect for all drawing enthusiasts looking for a fun and simple project. The style strikes a charming balance between semi-realistic and cartoonish, avoiding intricate details to keep the drawing process straightforward. Starting with the first two steps, you’ll create a proportional base for your cat’s playful form. Throughout this guide, I’ll use bold lines to outline the major features, which allows you to focus on the general shape without getting lost in the complexity. You’re encouraged to enhance your drawing with personalized shading and texture to give your cat its own unique character.
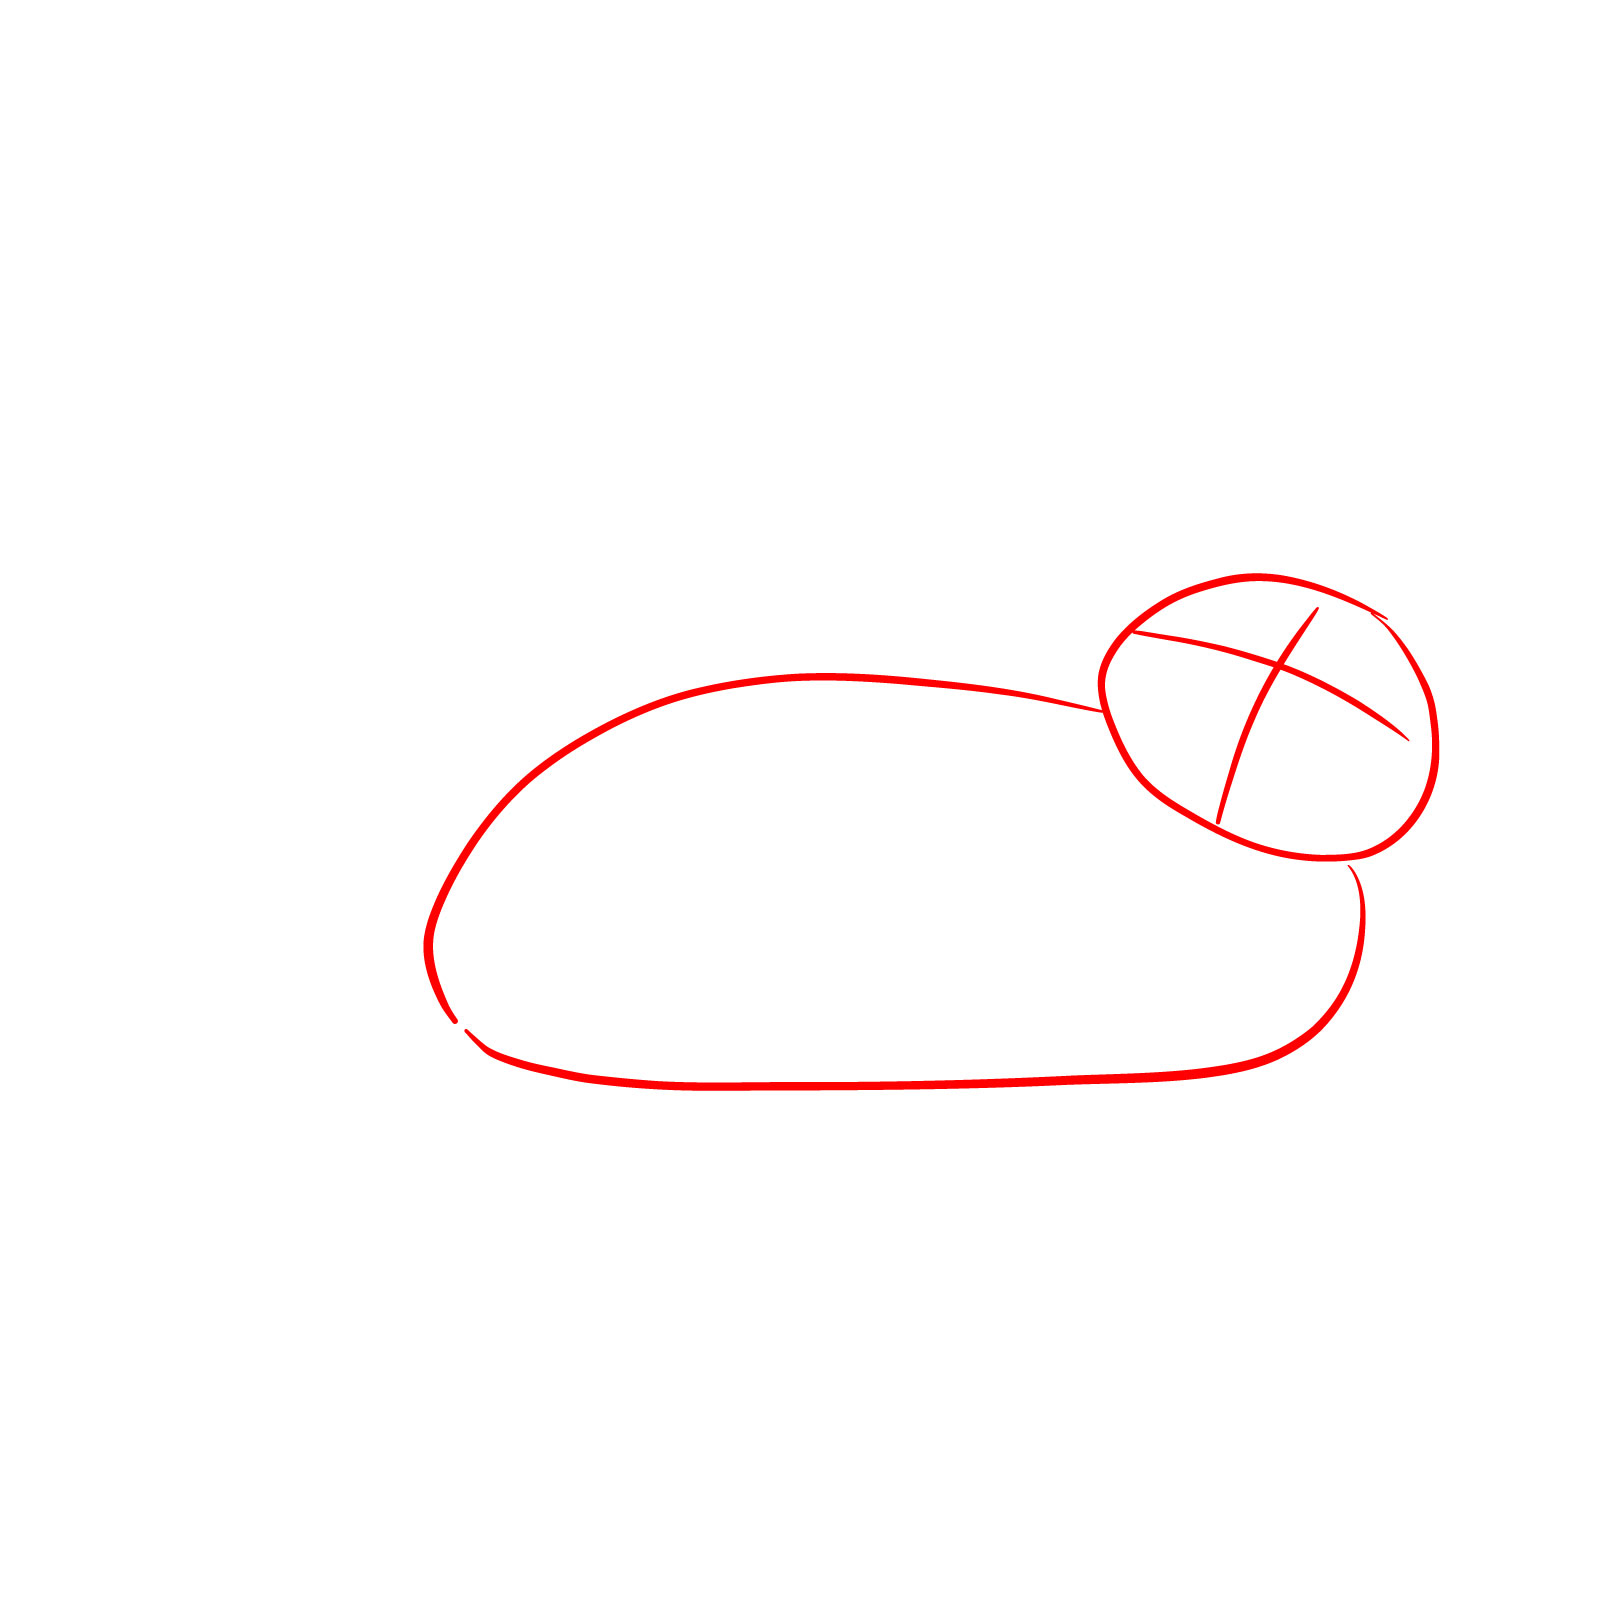
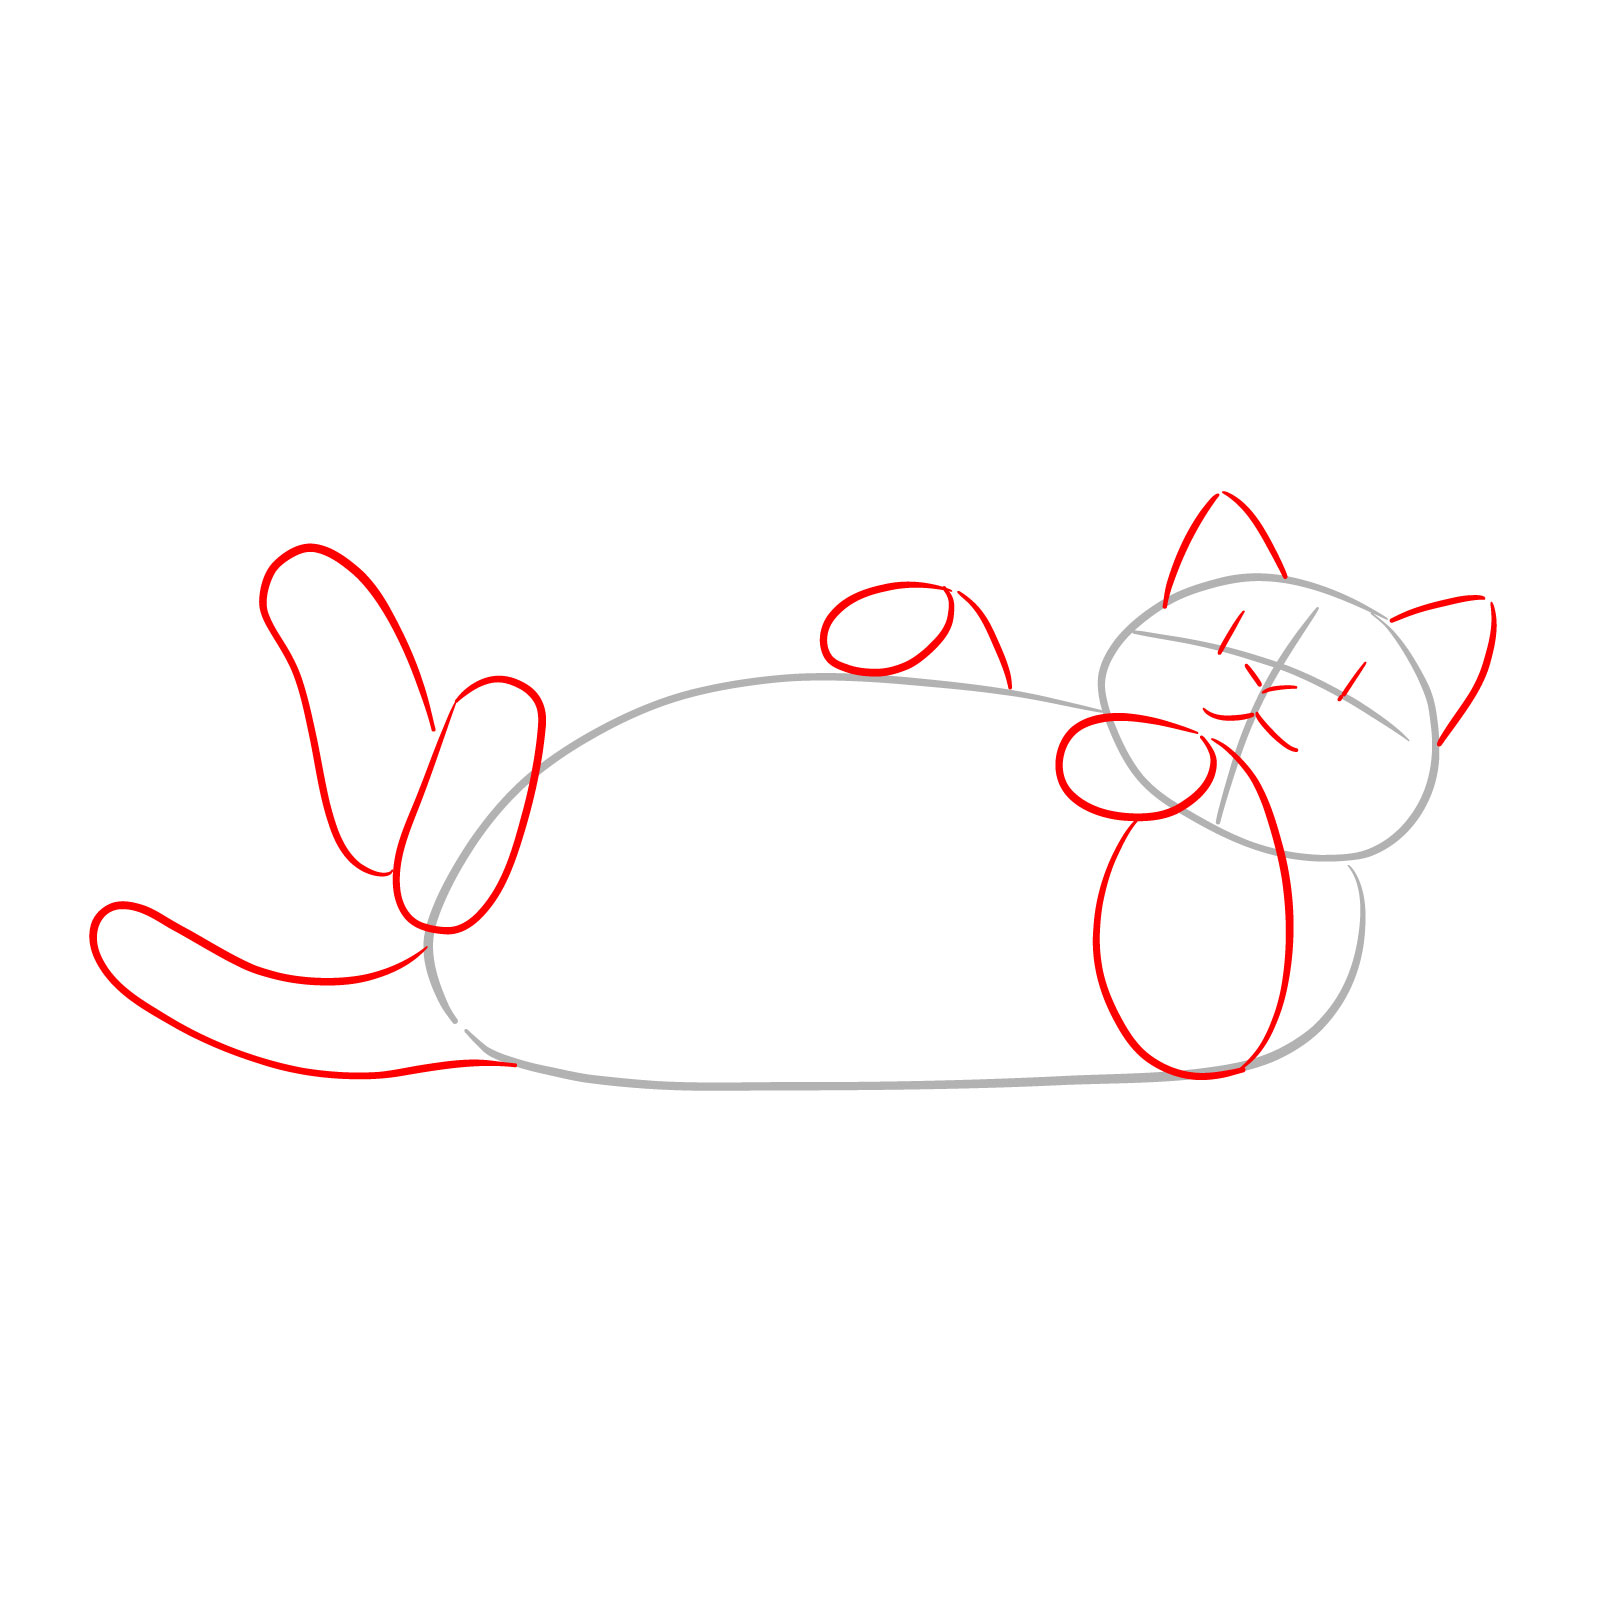
Step 01 – Begin by drawing an oval shape to represent the cat’s body. For the head, sketch another oval-like shape and add a cross through it to indicate the direction of the face and the angle at which it’s tilted
Starting the structure for a cat lying on its back
Step 02 – Add triangular shapes for the ears and simple lines for the eyes, nose, and mouth. Sketch the limbs’ placement with oval shapes for the front leg paws, and a curved line for the tail
Placing the cat’s key features
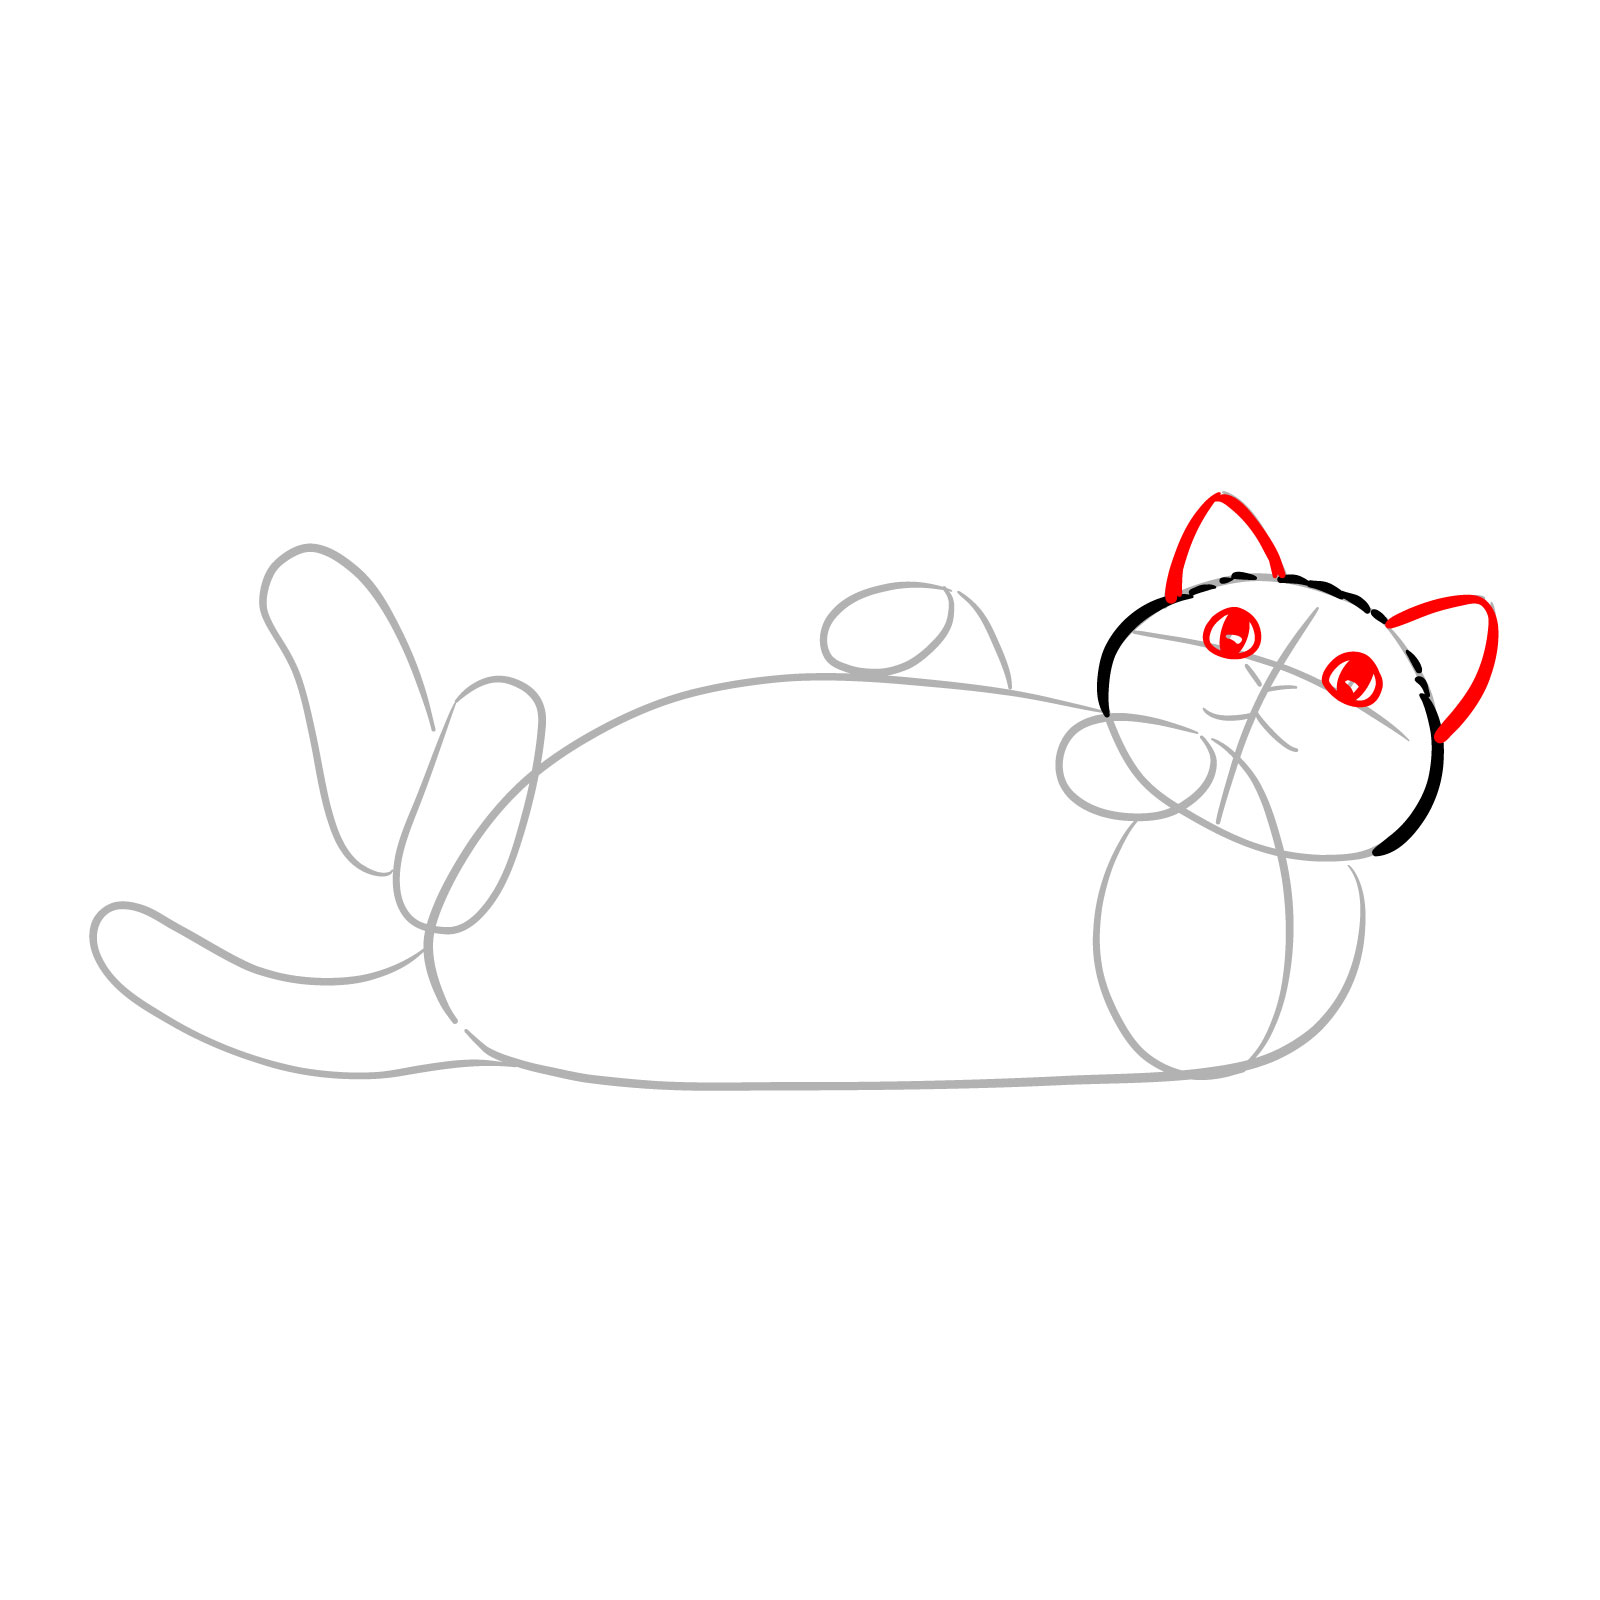
Step 03 – Draw the contours of the head, refining the top and sides, ensuring they align with the guide lines. Use short lines to mimic the fur texture
Defining the head’s top and sides
Step 04 – Fill in the pupils with black, leaving small blank dots for highlights to give life to the gaze. Outline the eyes for definition. Draw the ears using short lines to suggest fur texture
Detailing the cat’s eyes and ears
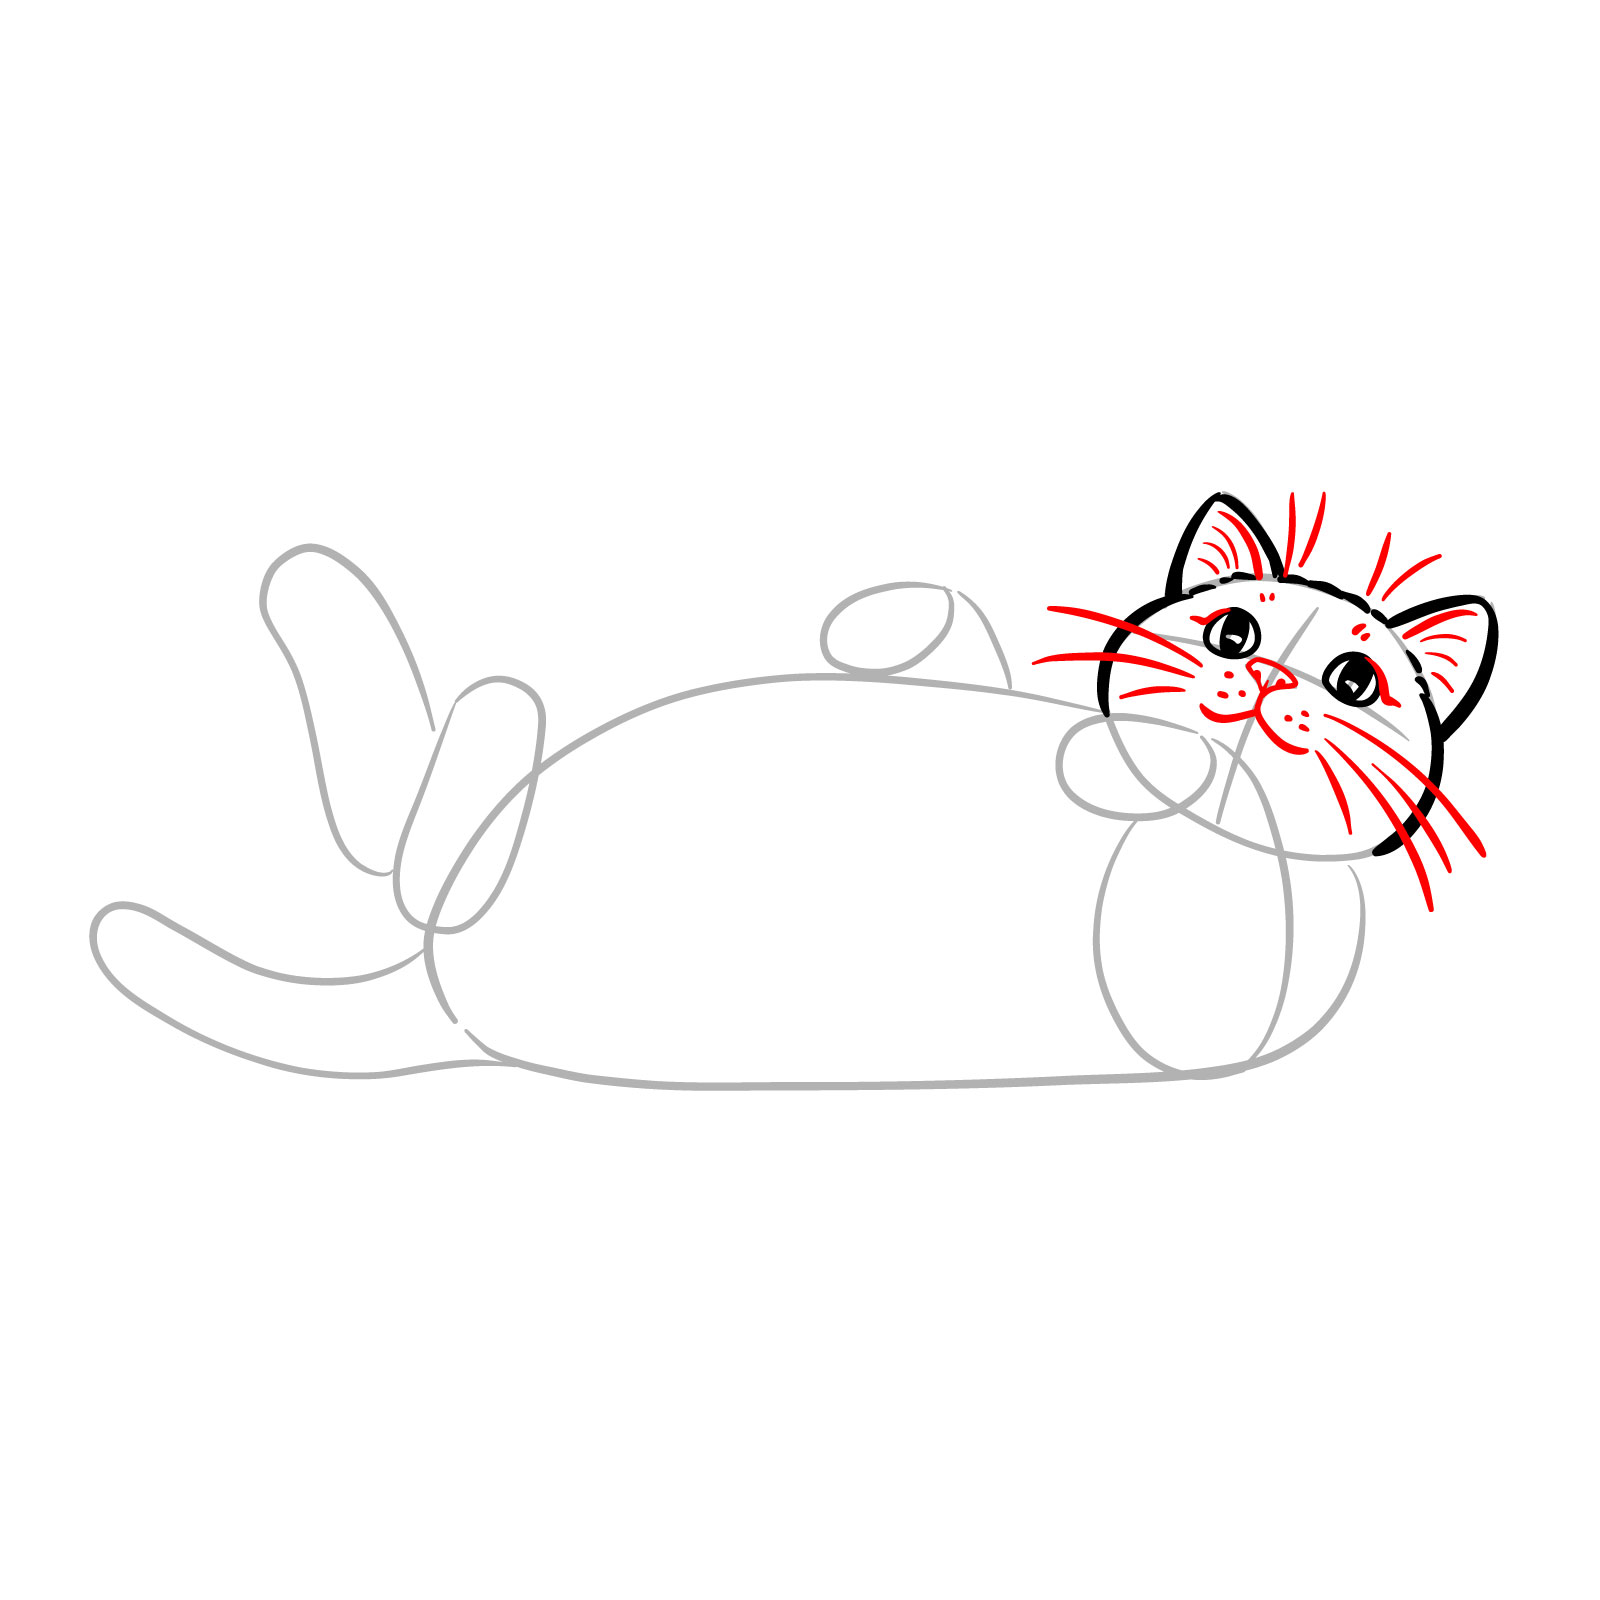
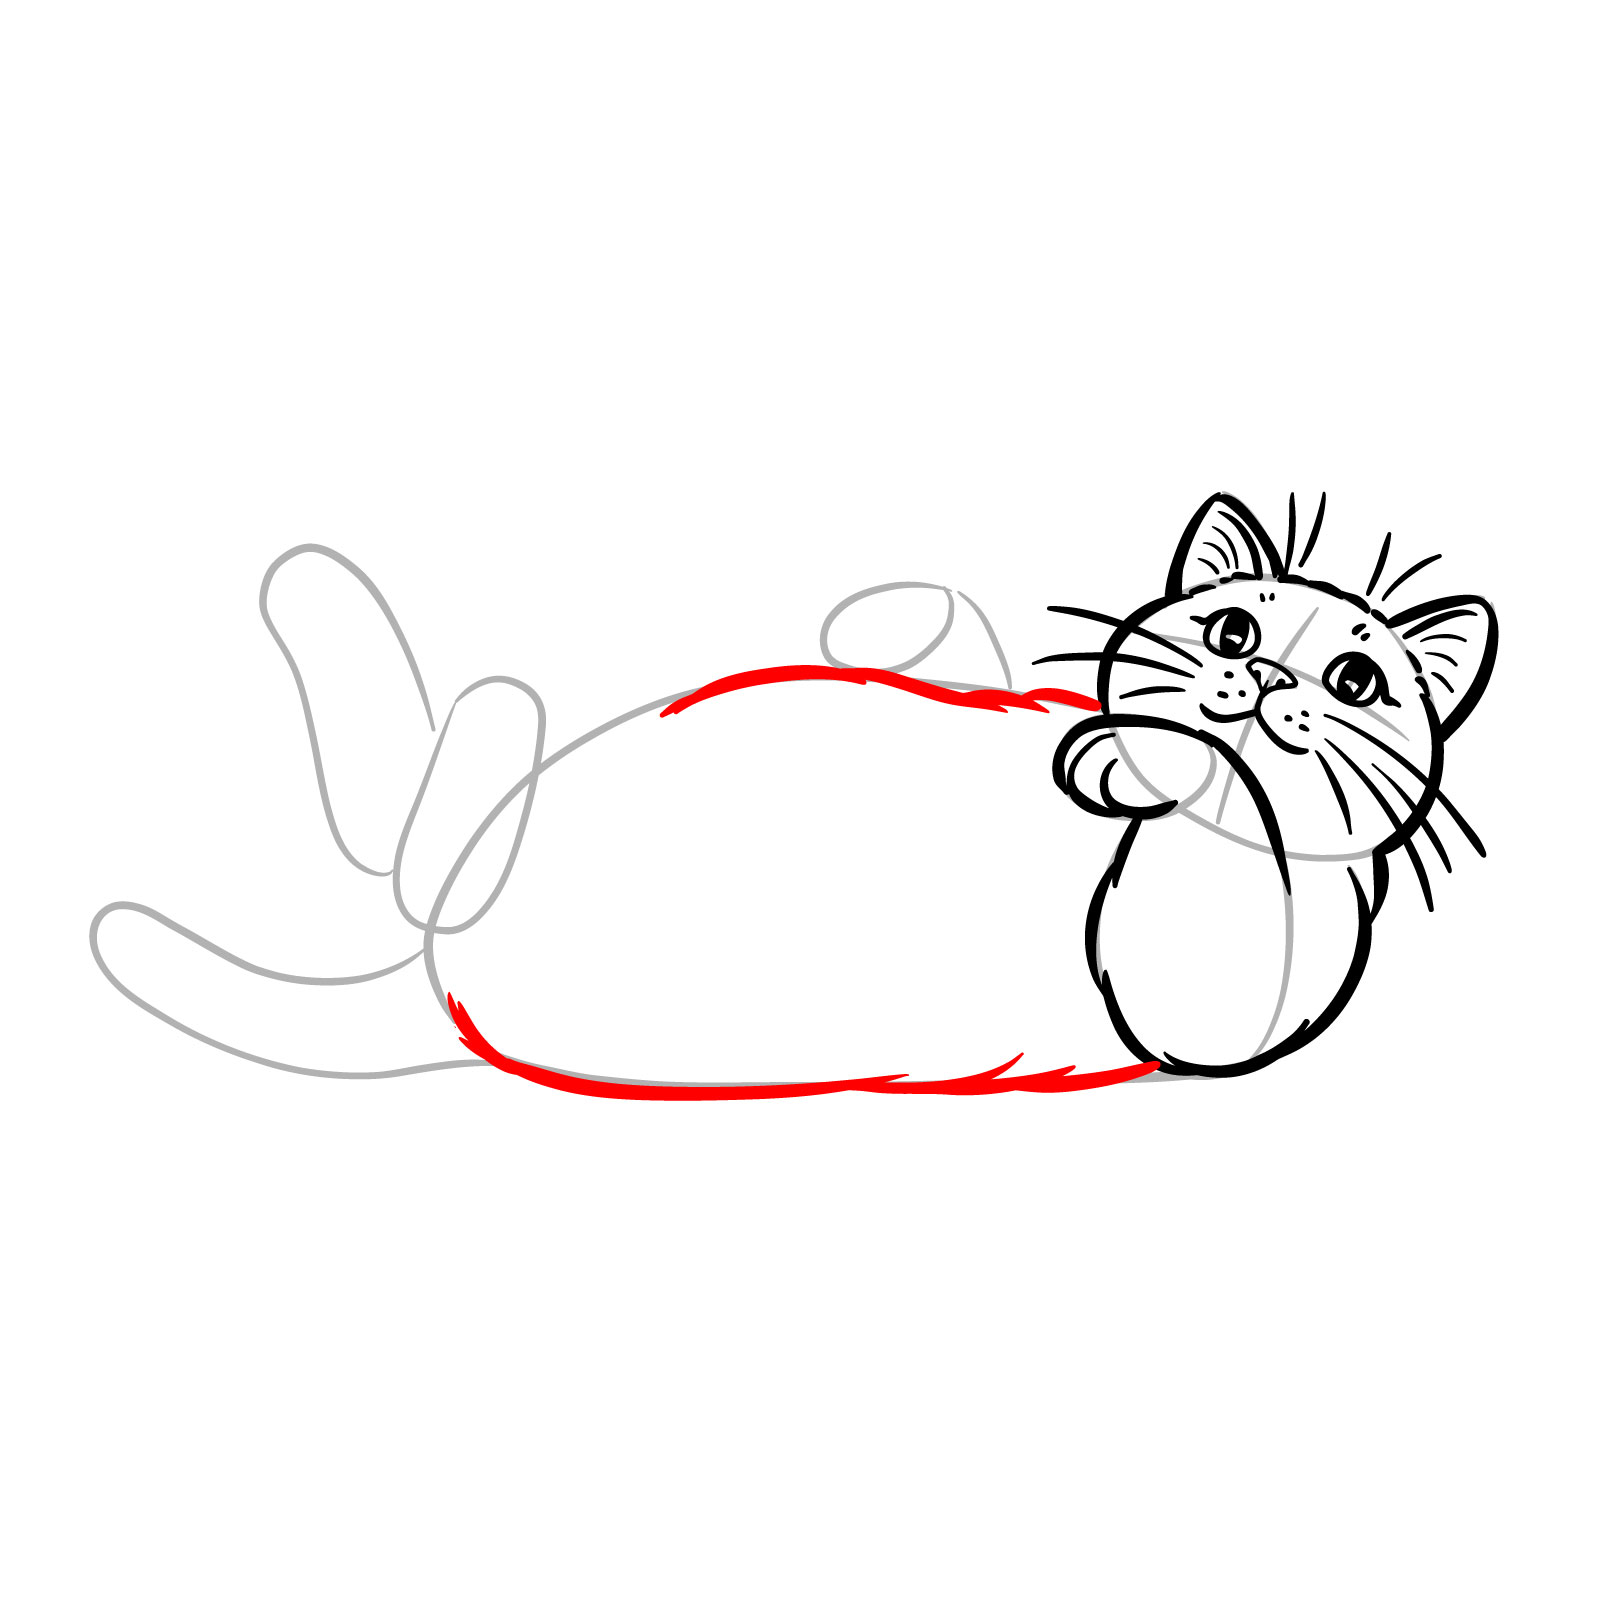
Step 05 – Draw the nose and mouth with gentle curves to capture the cat’s relaxed expression. Sketch a series of whiskers fanning out from the muzzle and add fluffier lines inside the ears for texture
Adding facial features and ear details
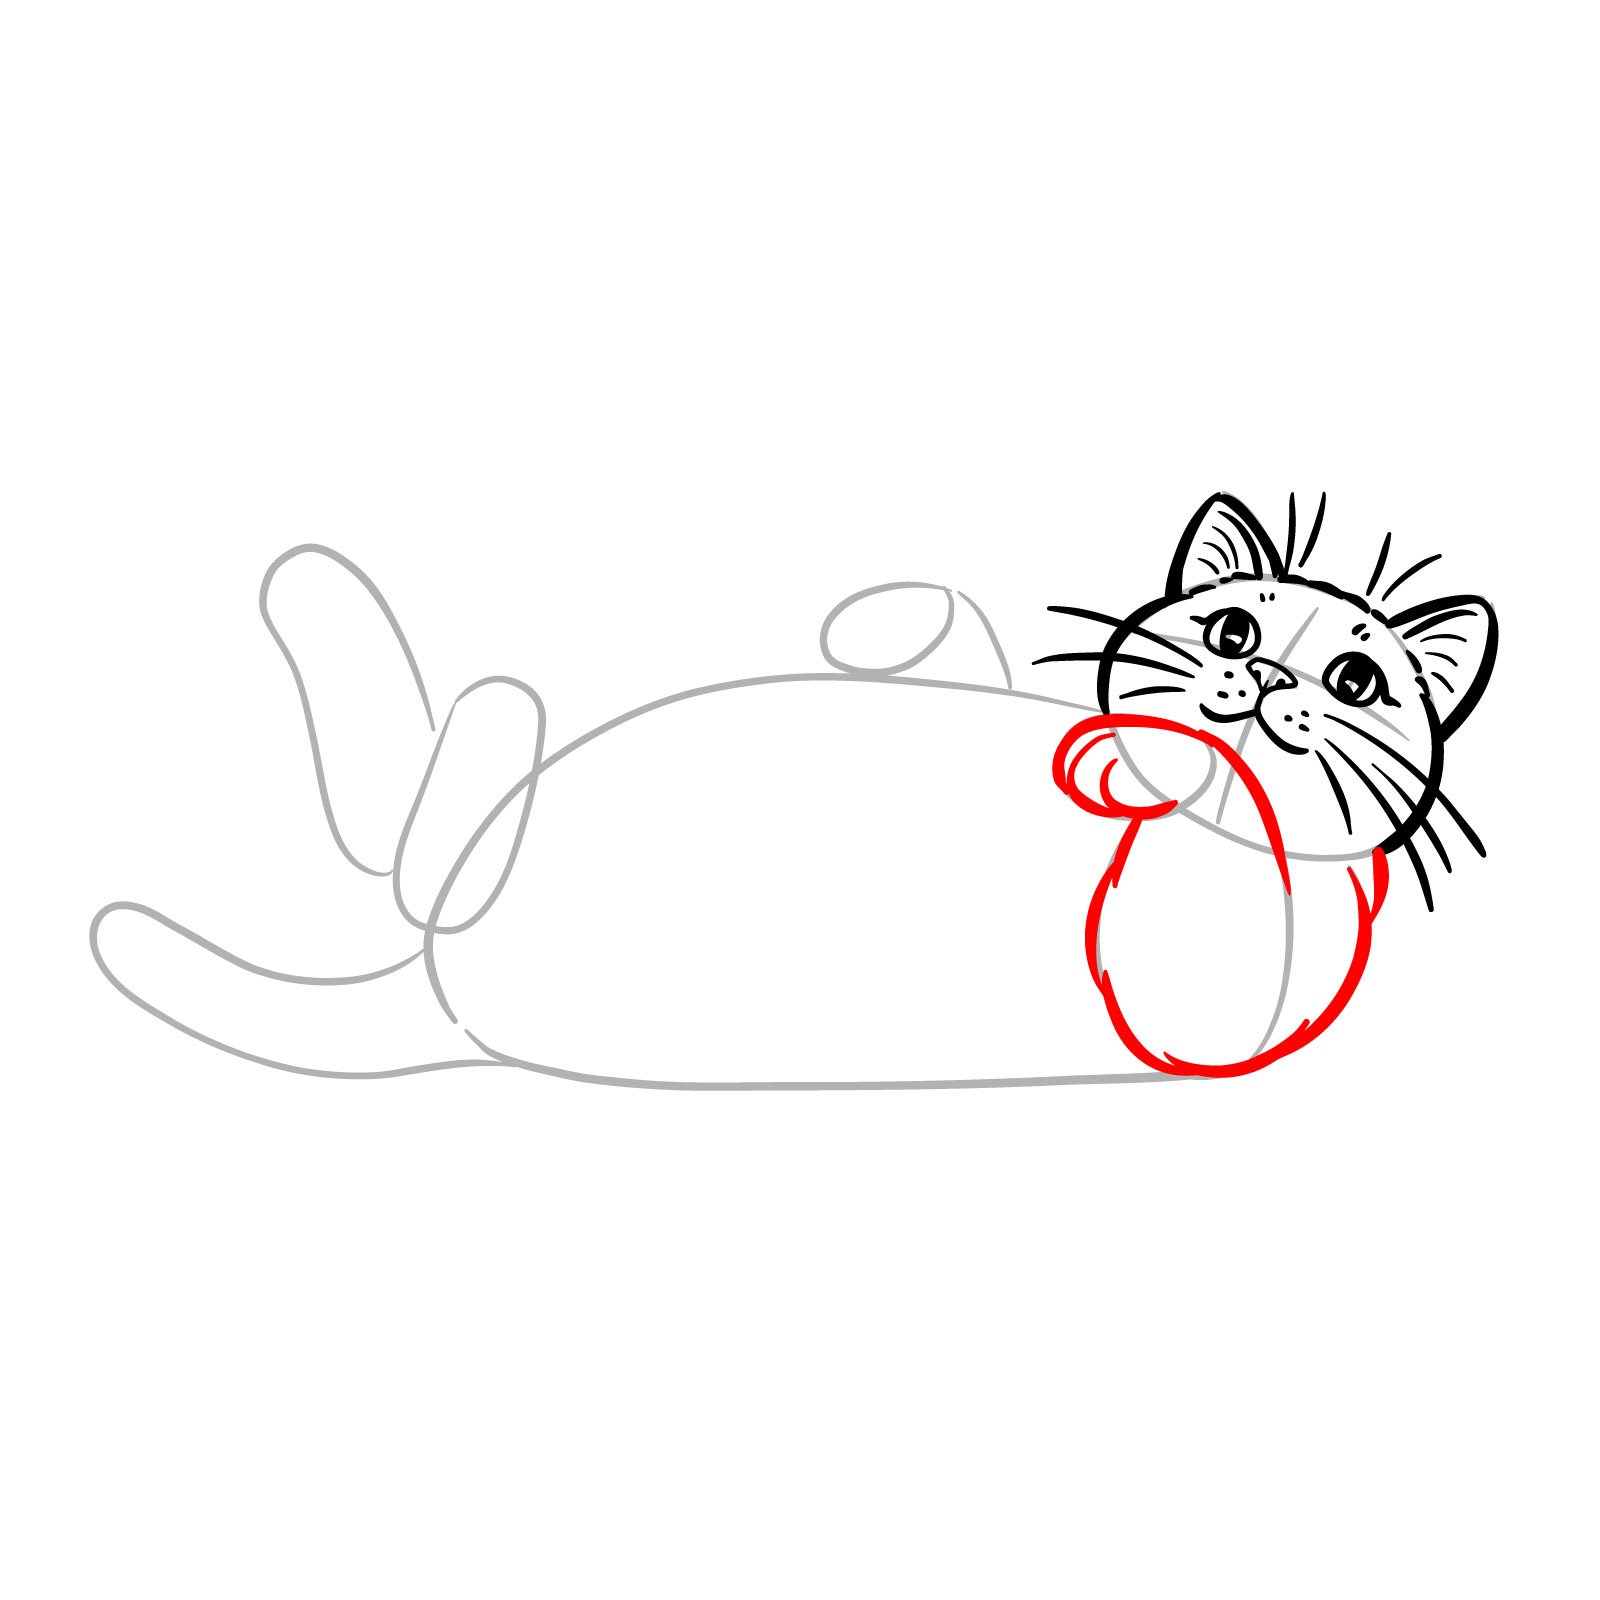
Step 06 – Illustrate the first front leg bent at a gentle angle, using short lines to simulate the fur. Shape the paw distinctly, giving it a relaxed, slightly curled posture
Sketching the first front leg
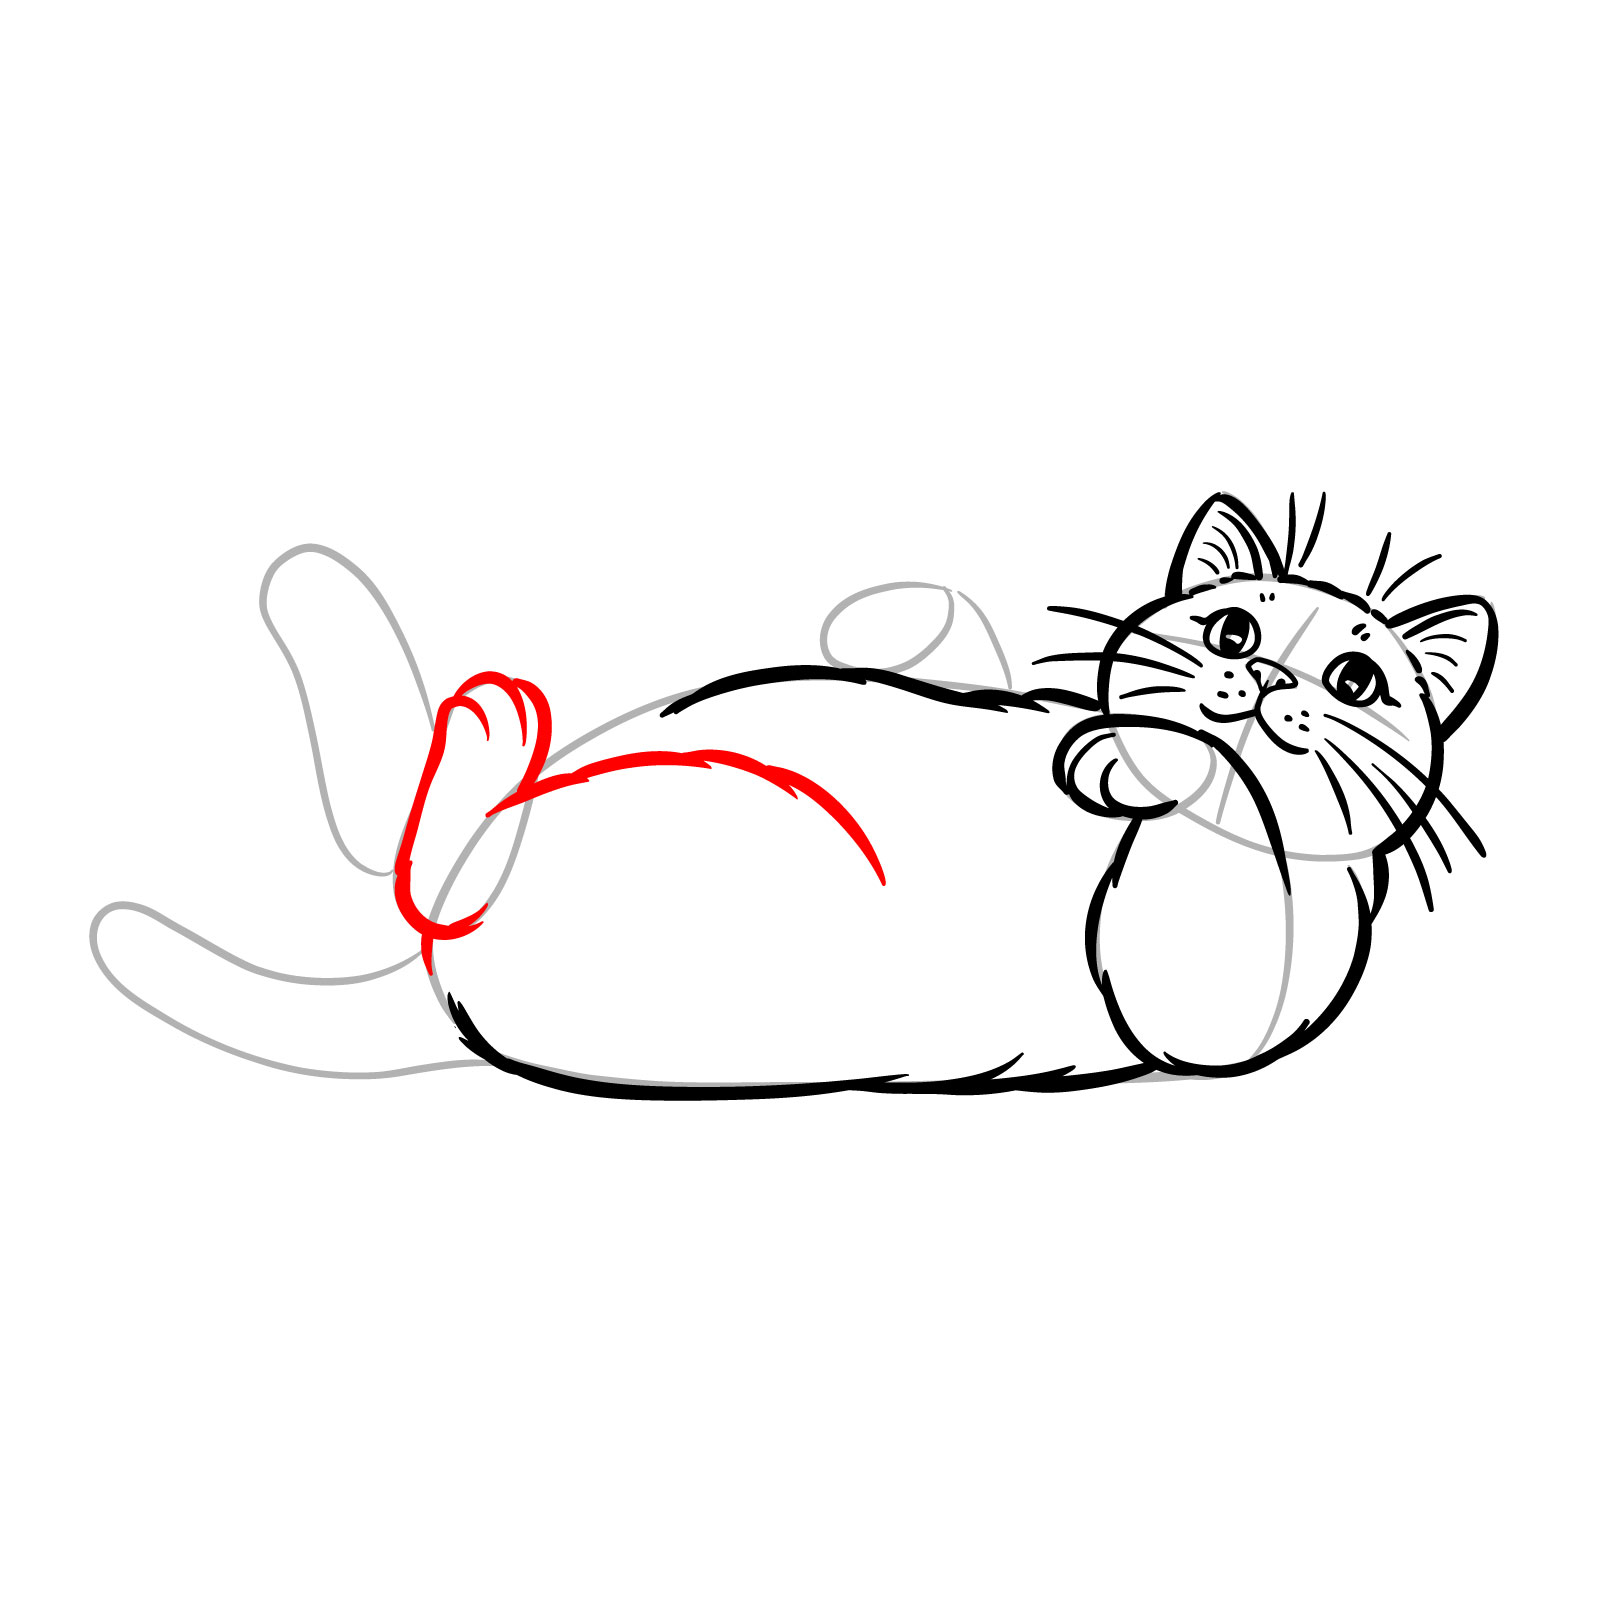
Step 07 – Draw the cat’s back arching slightly with the belly protruding to emphasize the cat’s position lying on its back. Use smooth, rounded lines to maintain a soft and organic feel
Defining the back and belly
Step 08 – Detail the first rear leg, showing it bent and resting against the body. Use short strokes to give the impression of fur, especially around the thigh and paw areas
Drawing the first rear leg
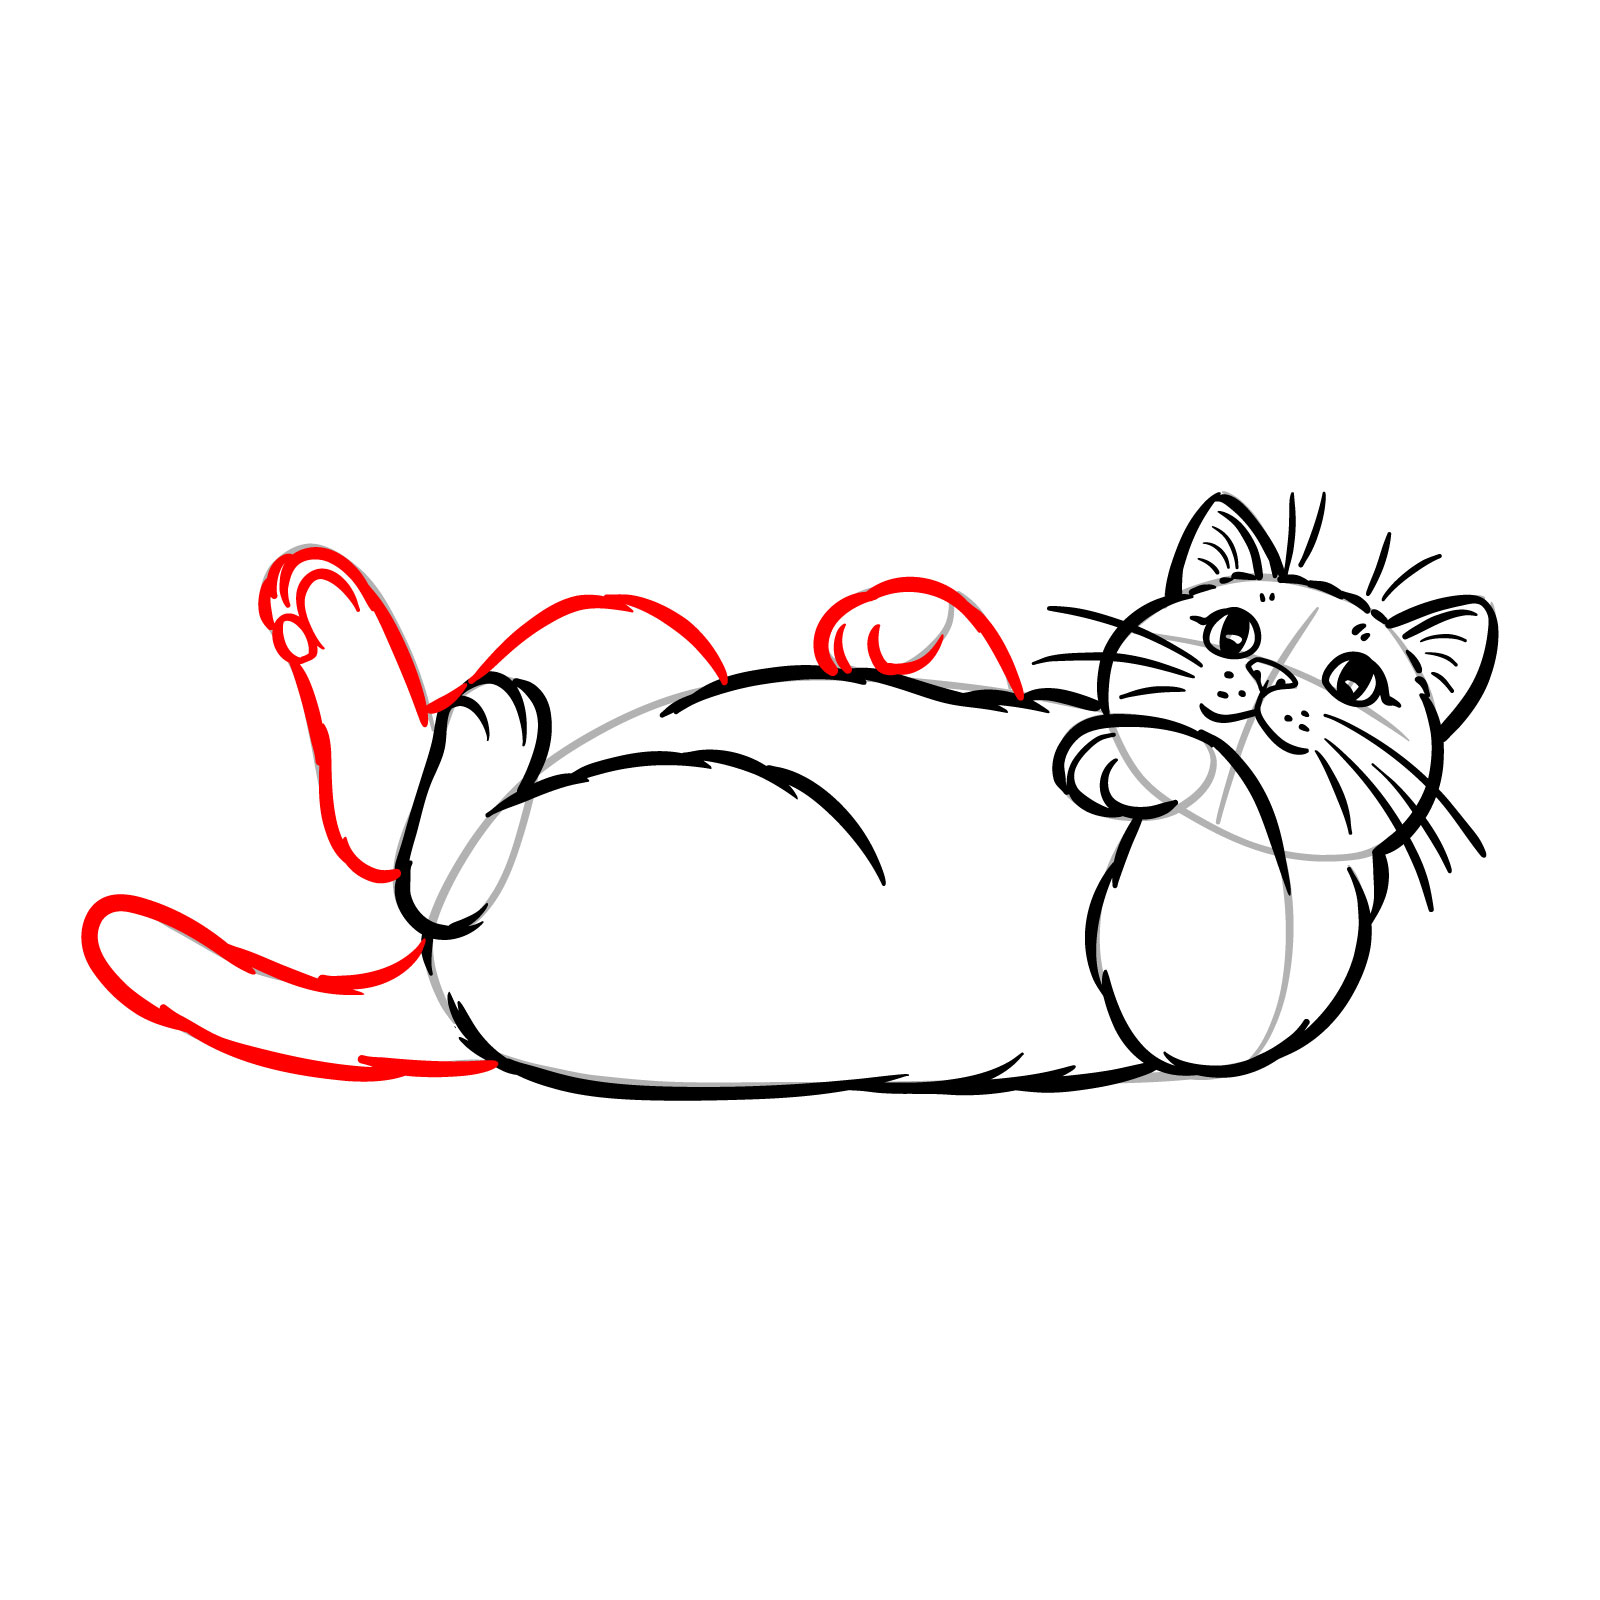
Step 09 – Draw the remaining paws, capturing the playful nature of the cat’s pose with the legs in the air. Include the tail, ensuring it has a natural curve as it lies relaxed on the ground
Sketching the remaining legs and tail
Step 10 – Review your drawing, removing any remaining construction lines to reveal the cat’s figure. This completes the step-by-step guide on how to draw a cat lying on its back, creating a playful and endearing image that’s both semi-realistic and stylized for ease of drawing
Final drawing of a cat lying on its back
Bonus Drawing Guides for Kids
As a special addition to our comprehensive drawing series, I included four bonus guides that are perfect for practicing basic sketching techniques or for enjoying a drawing session with children. These tutorials, designed with simplicity, are ideal for young artists and beginners alike. Each guide offers a unique and delightful style, from the whimsical to the whimsy, providing a fun and easy way to engage with art and creativity.
Whether you’re teaching the basics of drawing to kids or just looking for a light-hearted artistic activity, these guides offer a stress-free approach to drawing. With easy-to-follow steps, they are tailored to help you and the little ones create adorable cat drawings with a touch of personal flair. Let’s explore these playful illustrations that are sure to bring smiles and spark imagination.
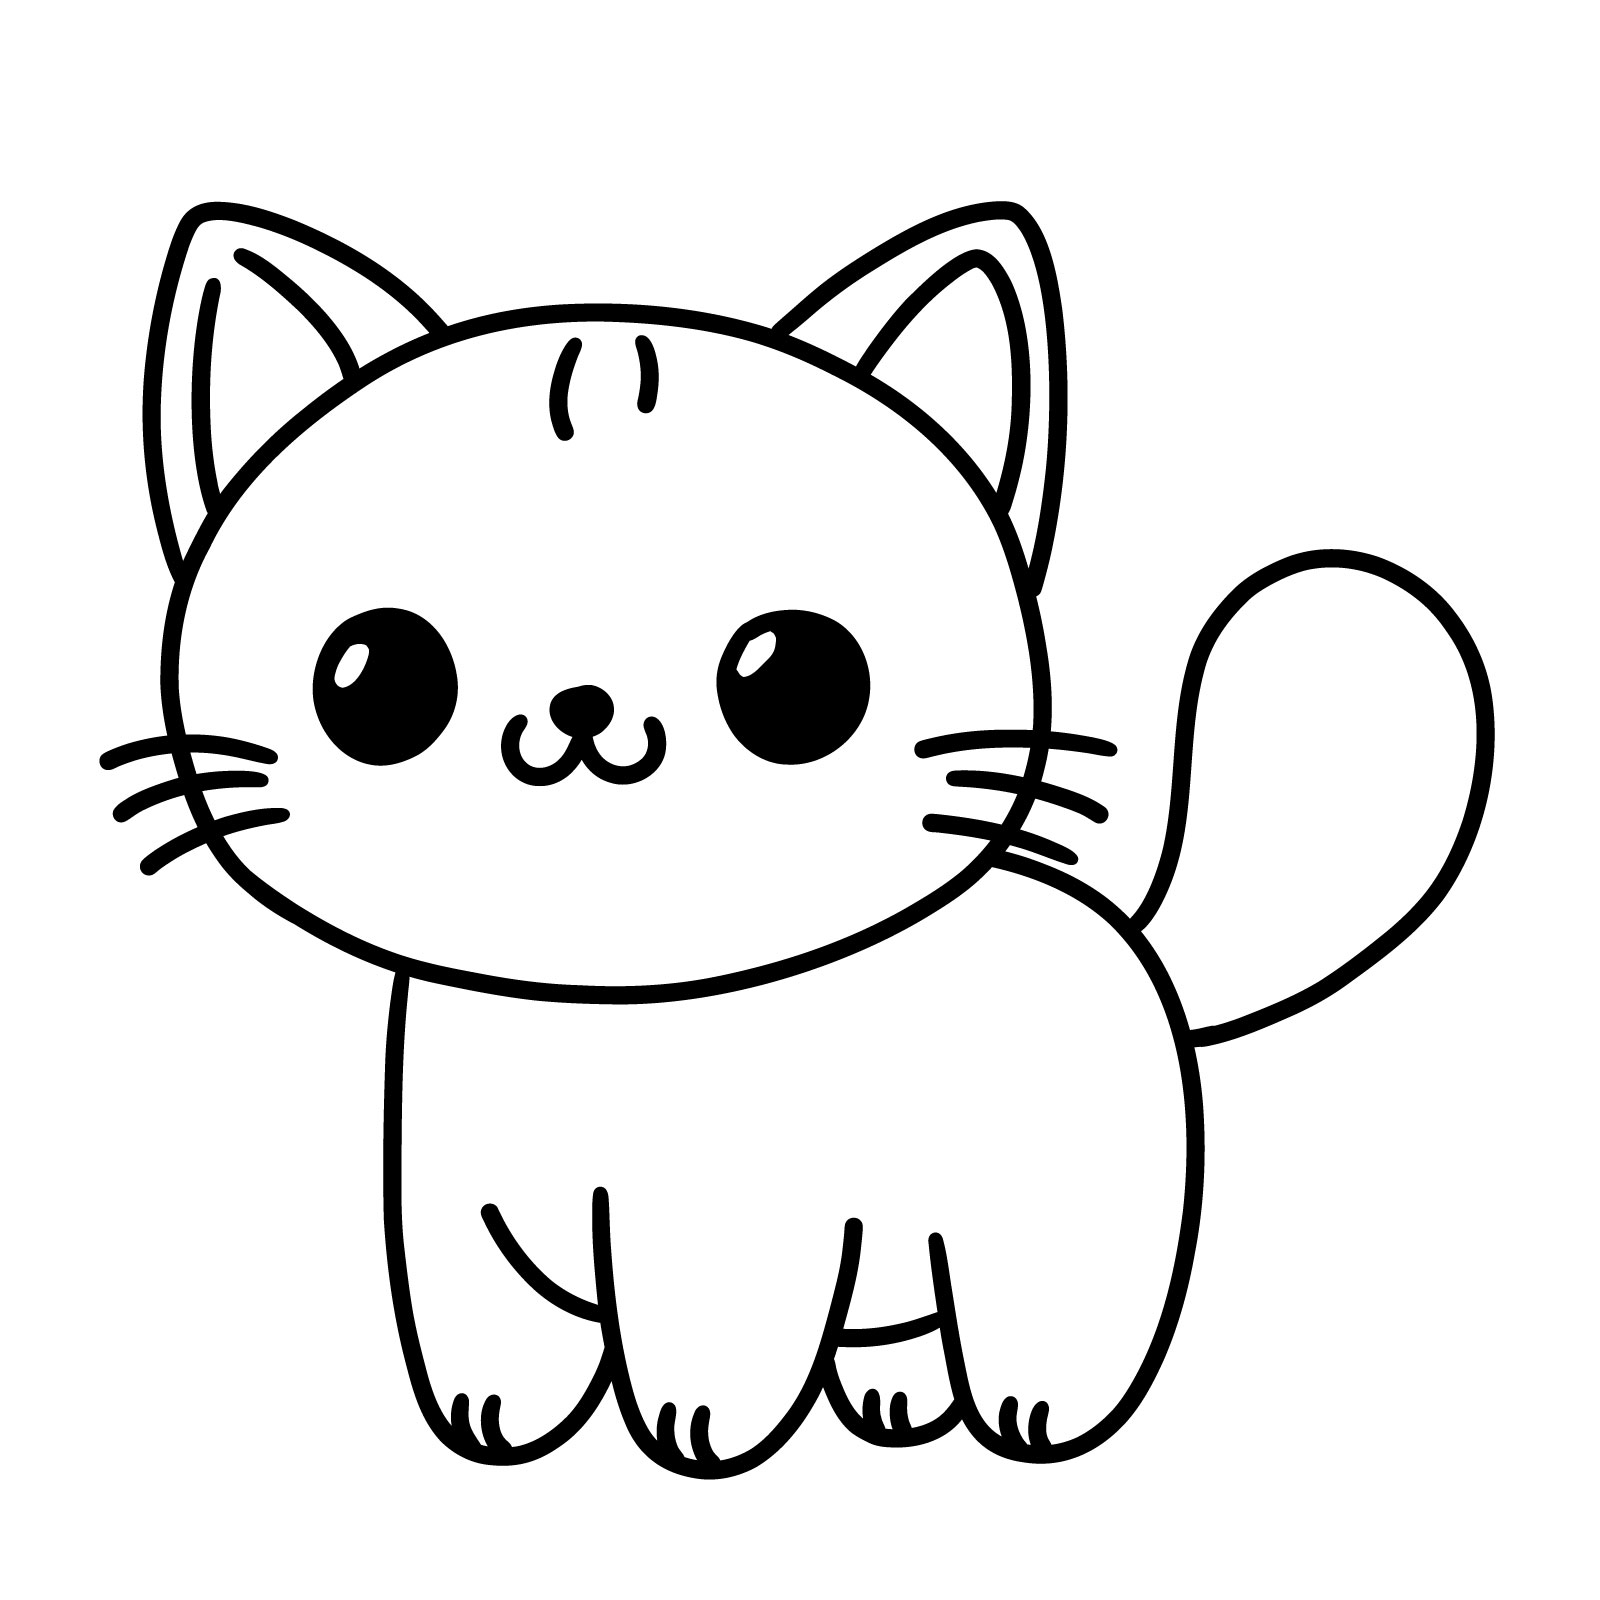
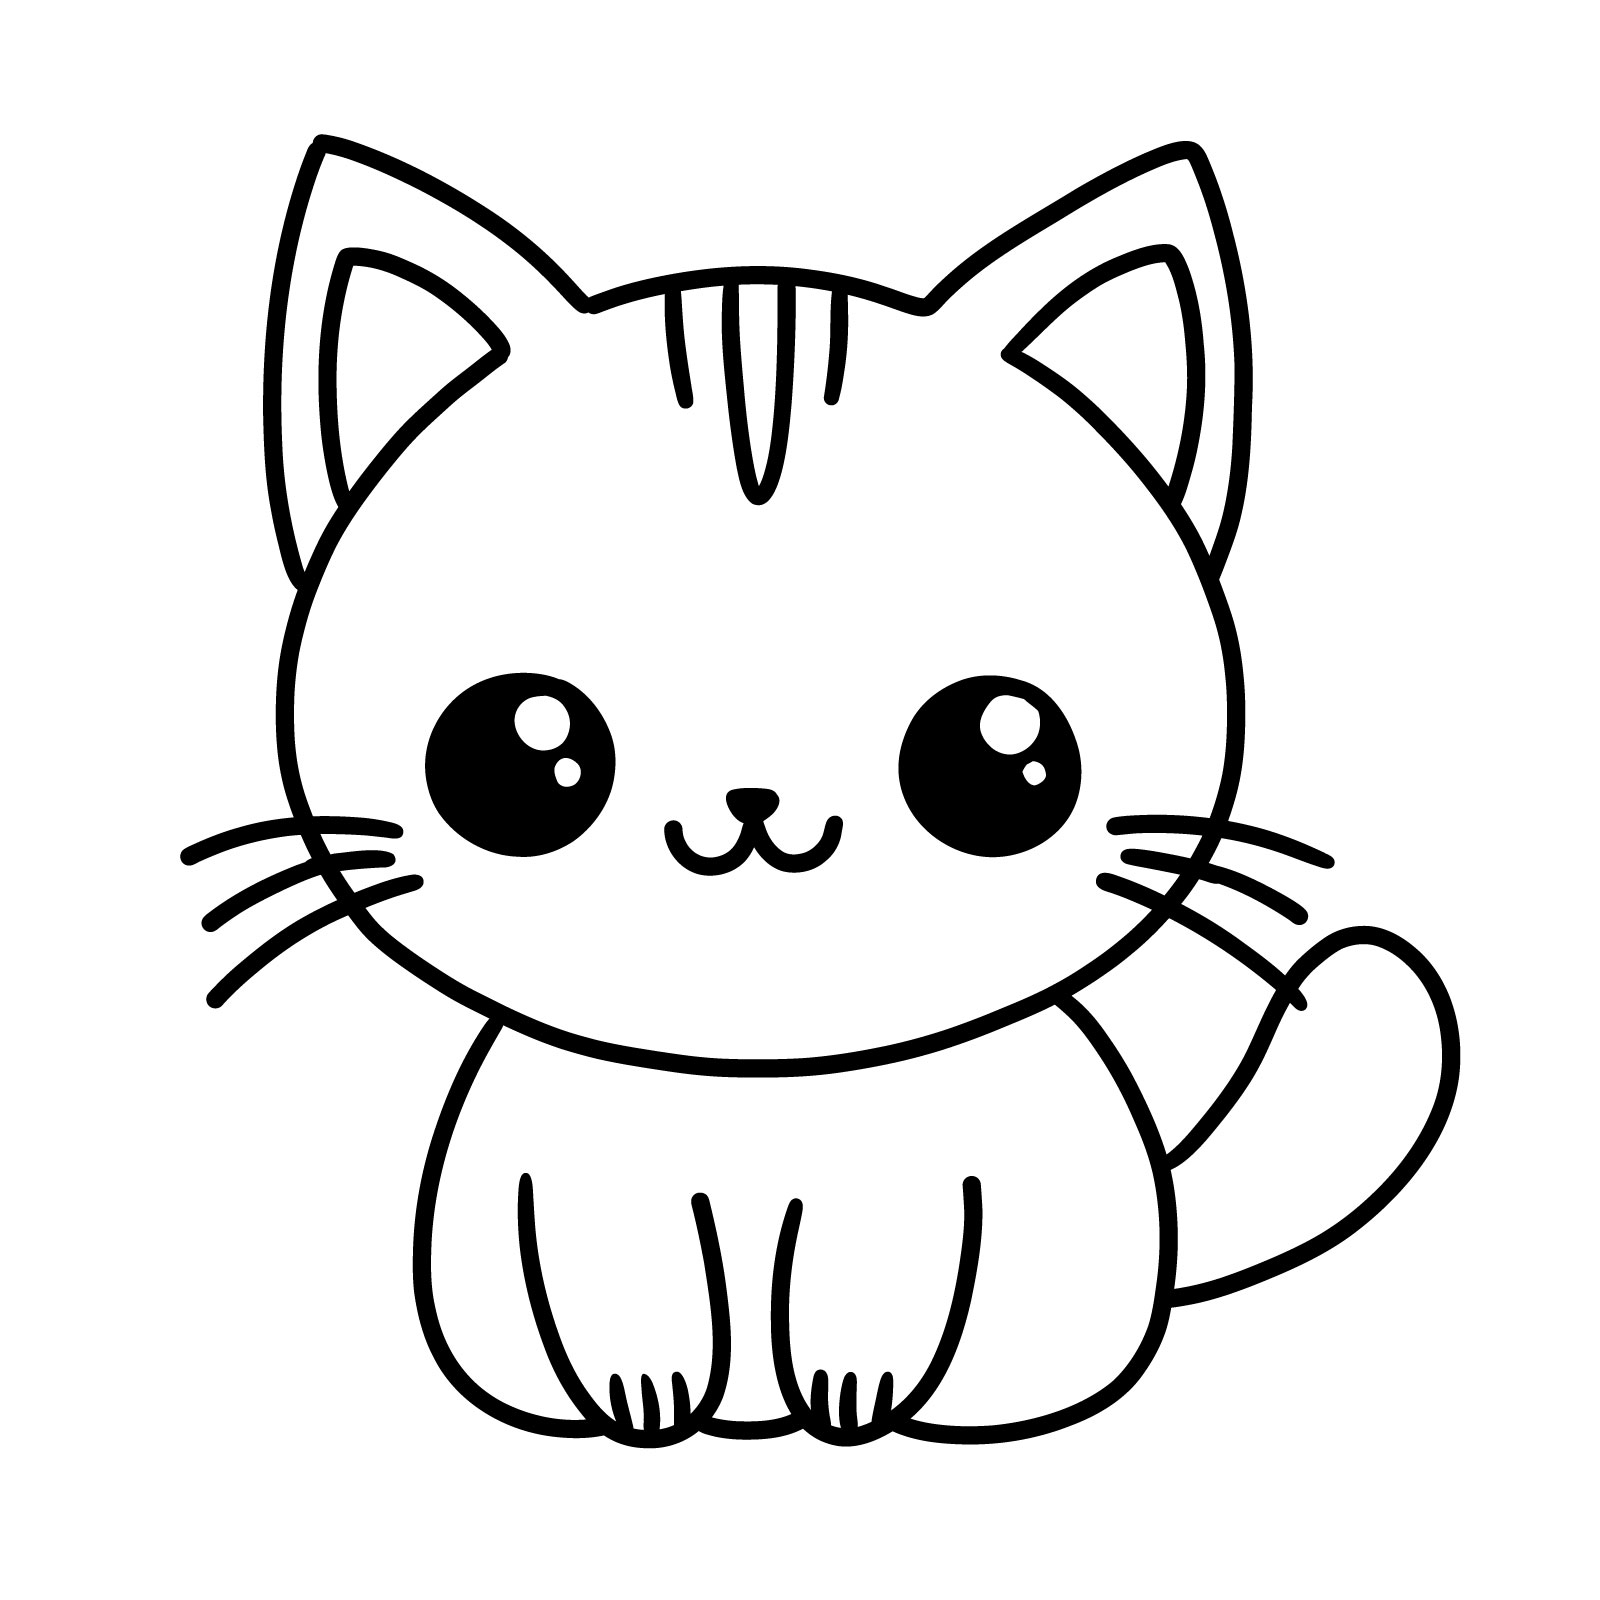
Guide 16: Chubby Cheeks Cat
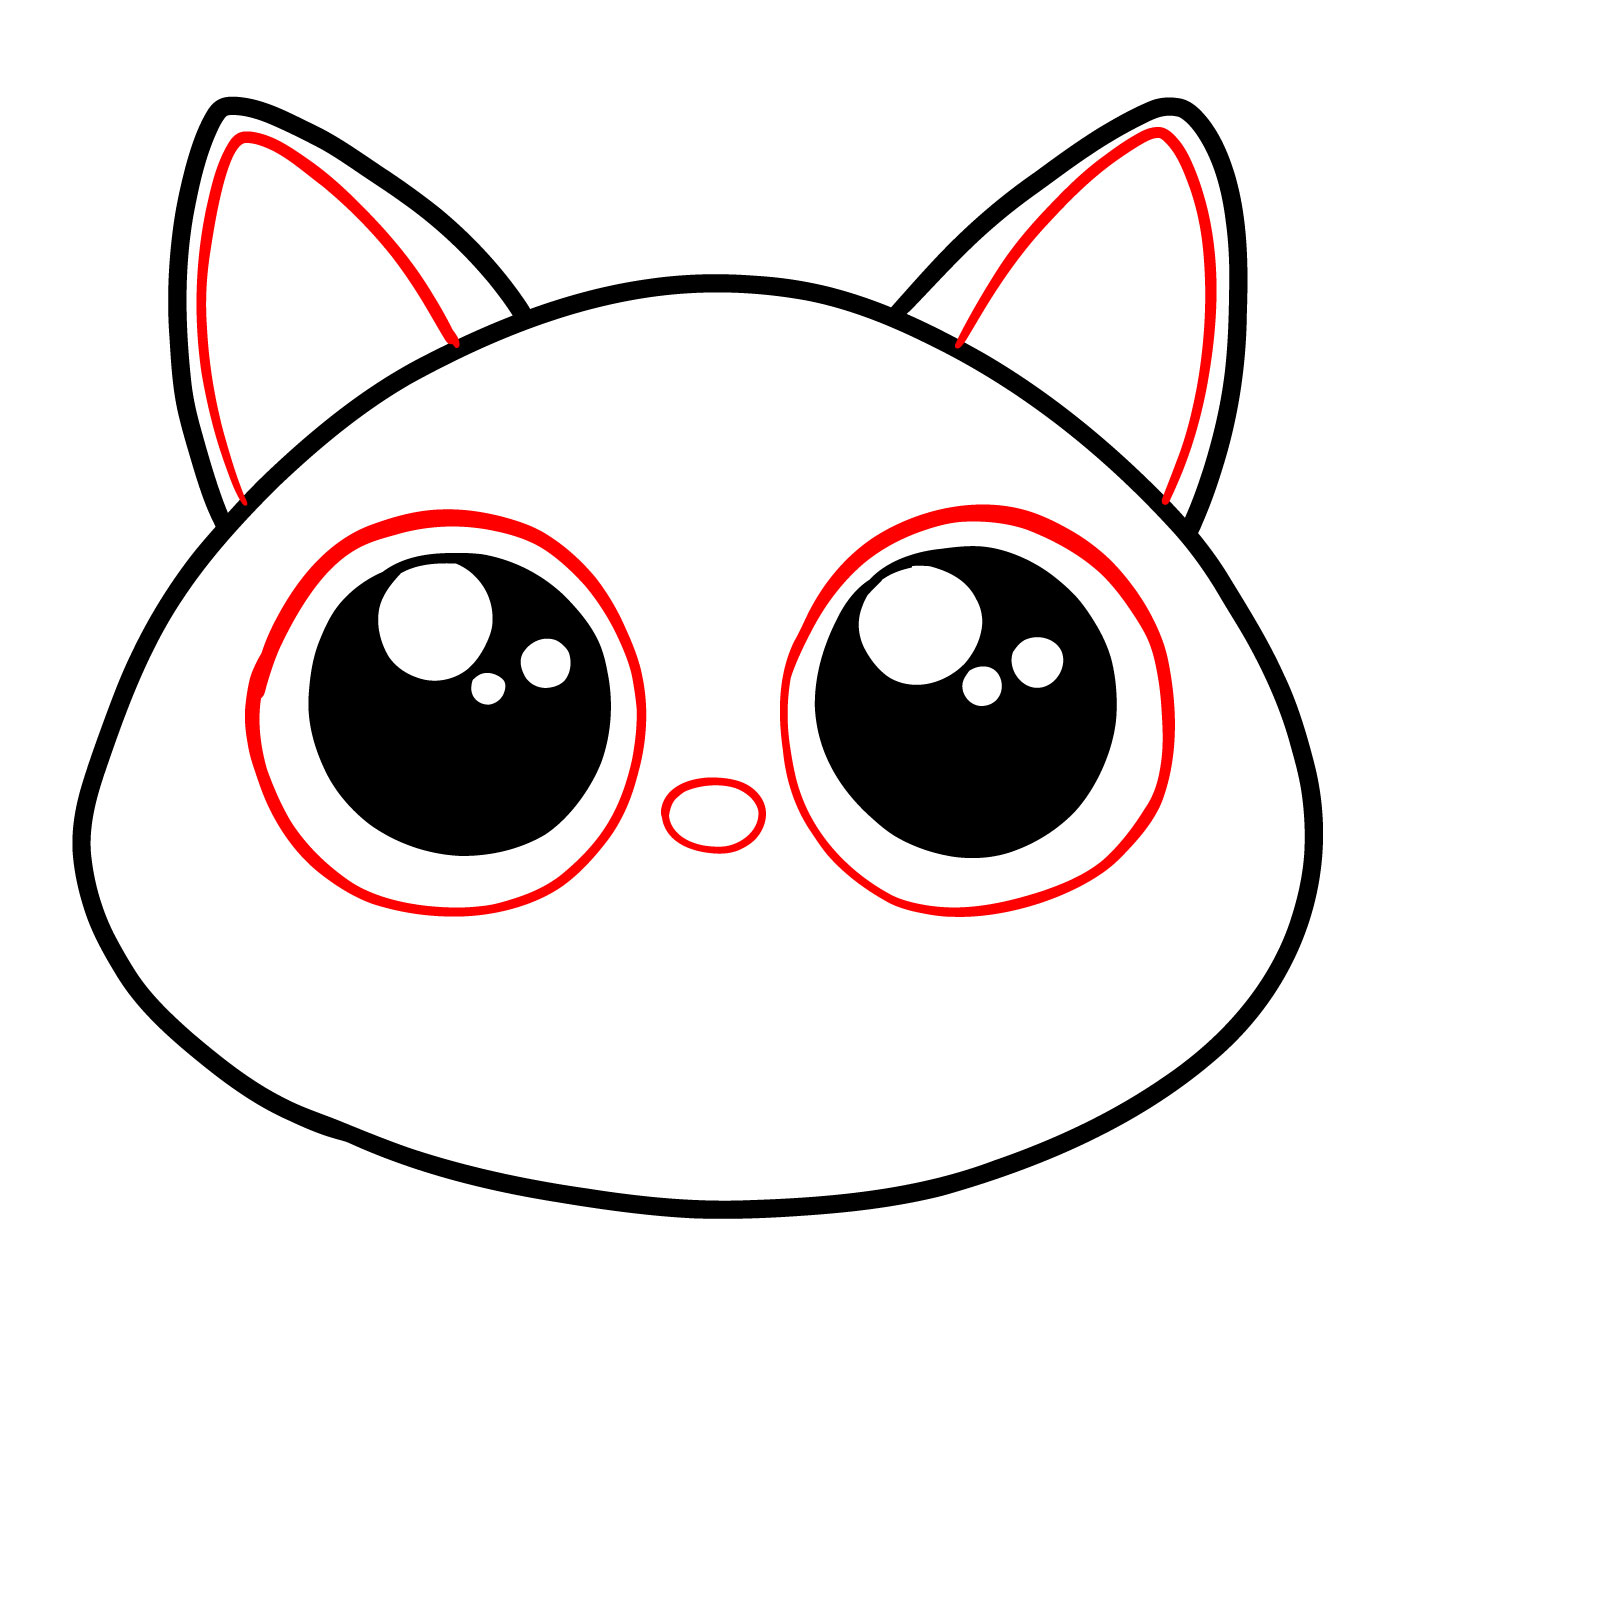
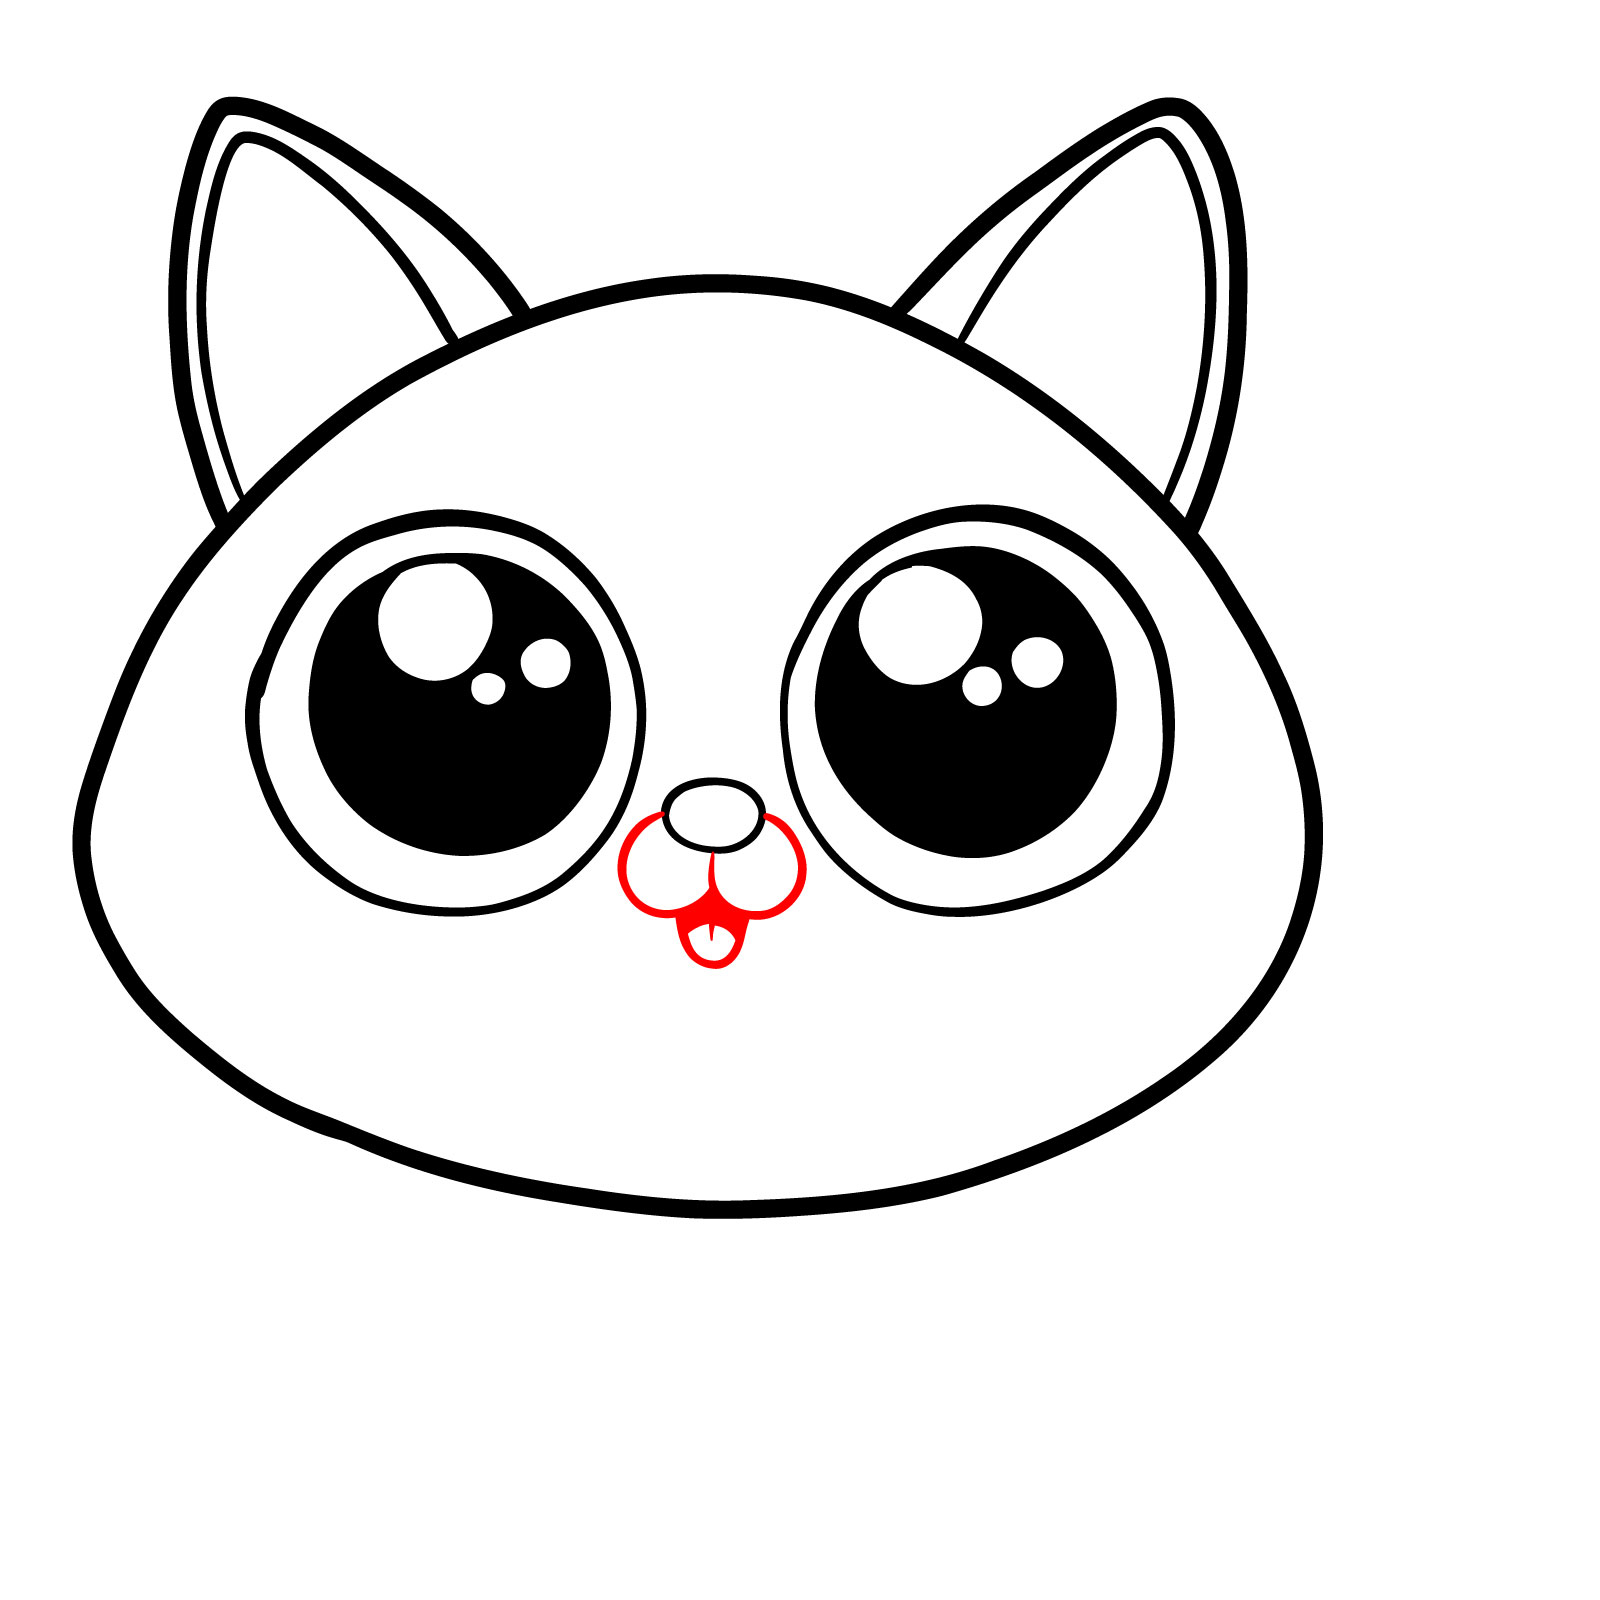
This guide brings to life a charming cat with plump cheeks and wide, innocent eyes. It’s a fantastic starting point for learning how to draw facial features with simple shapes.
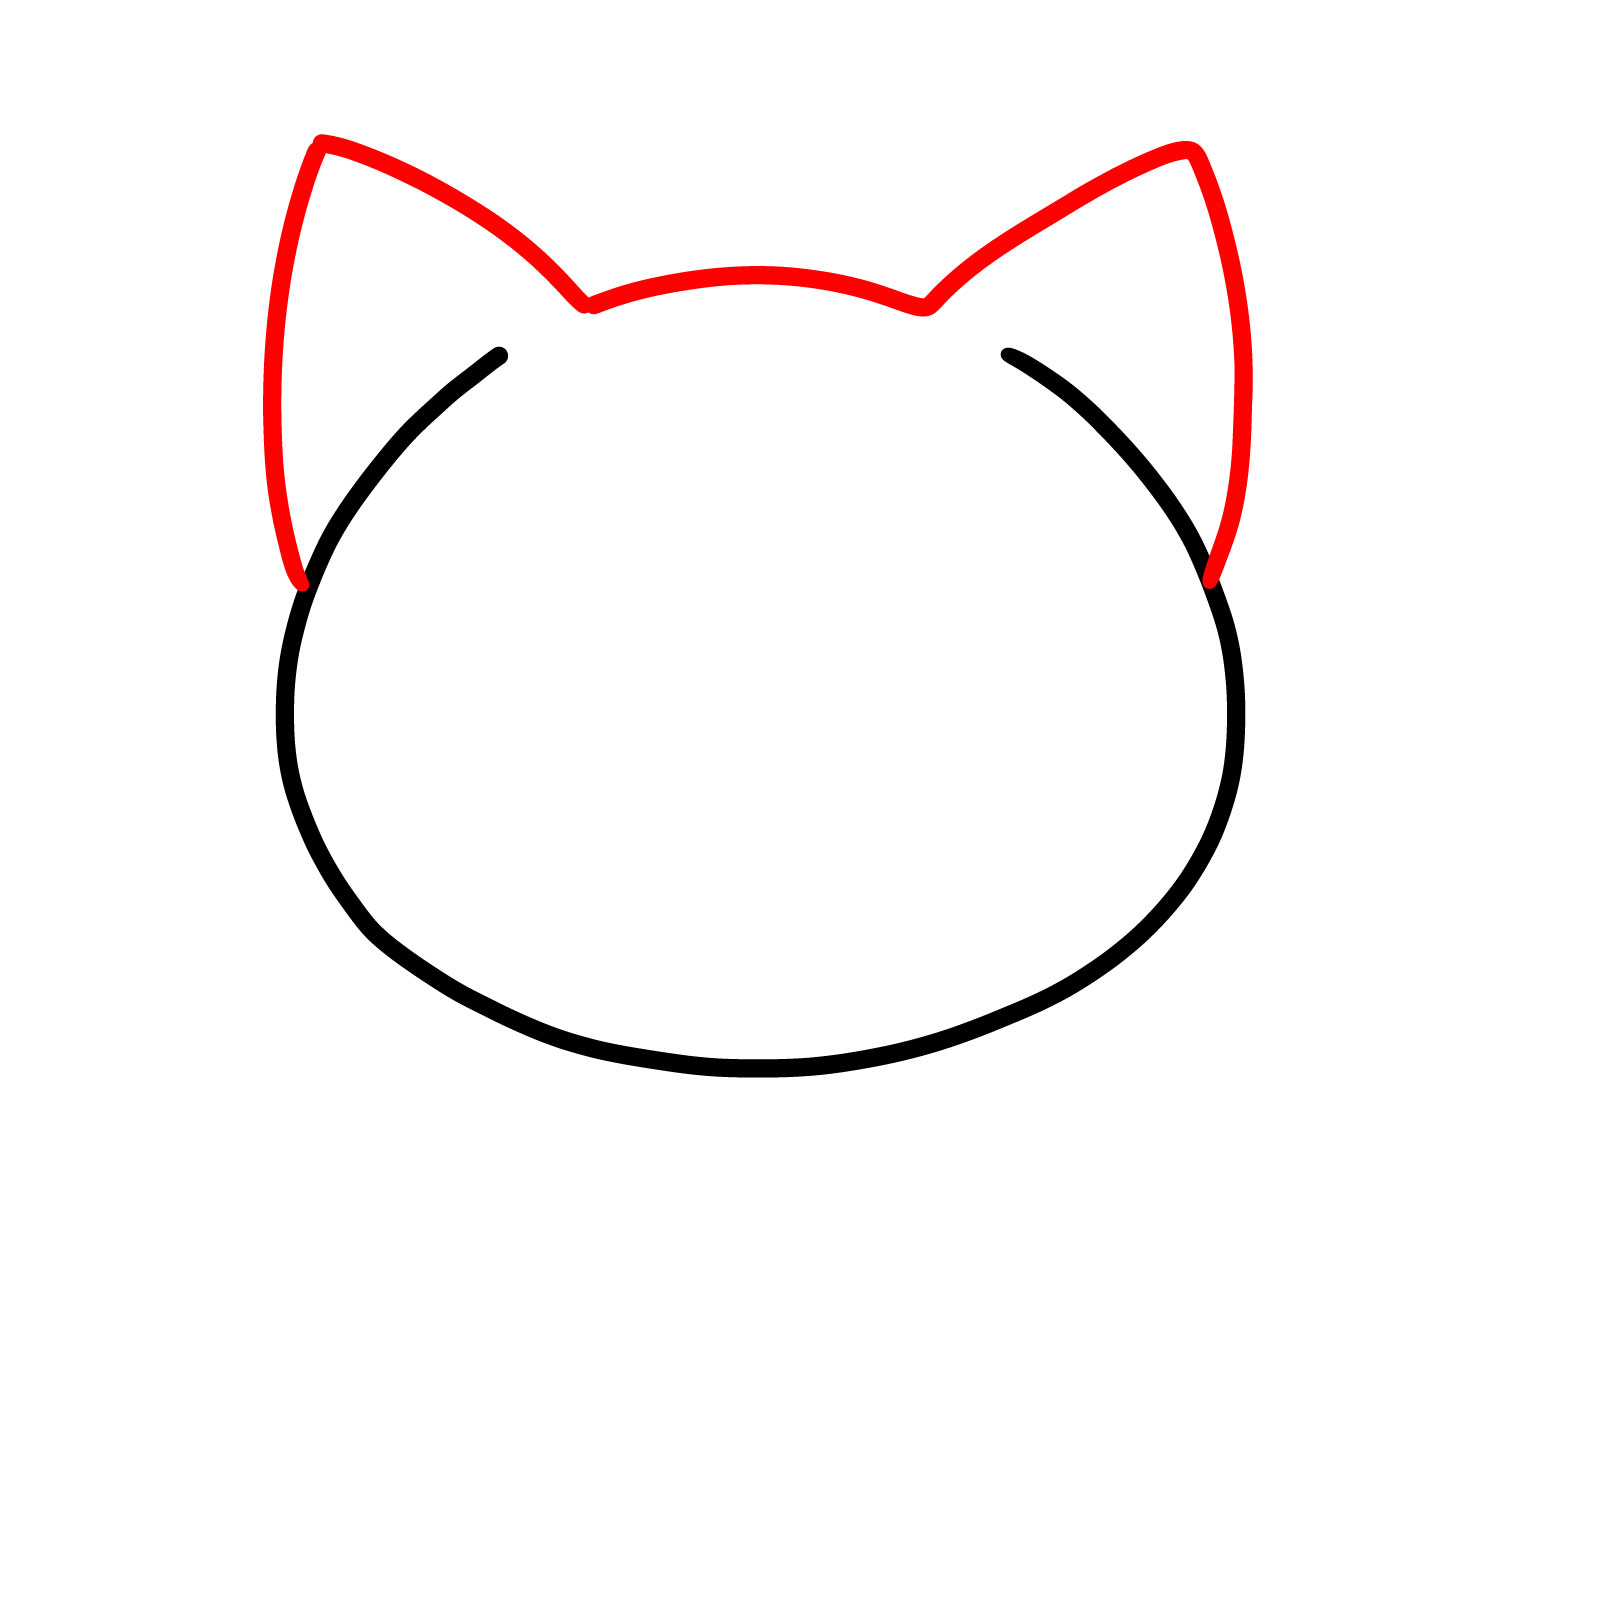
Step 01
Step 02
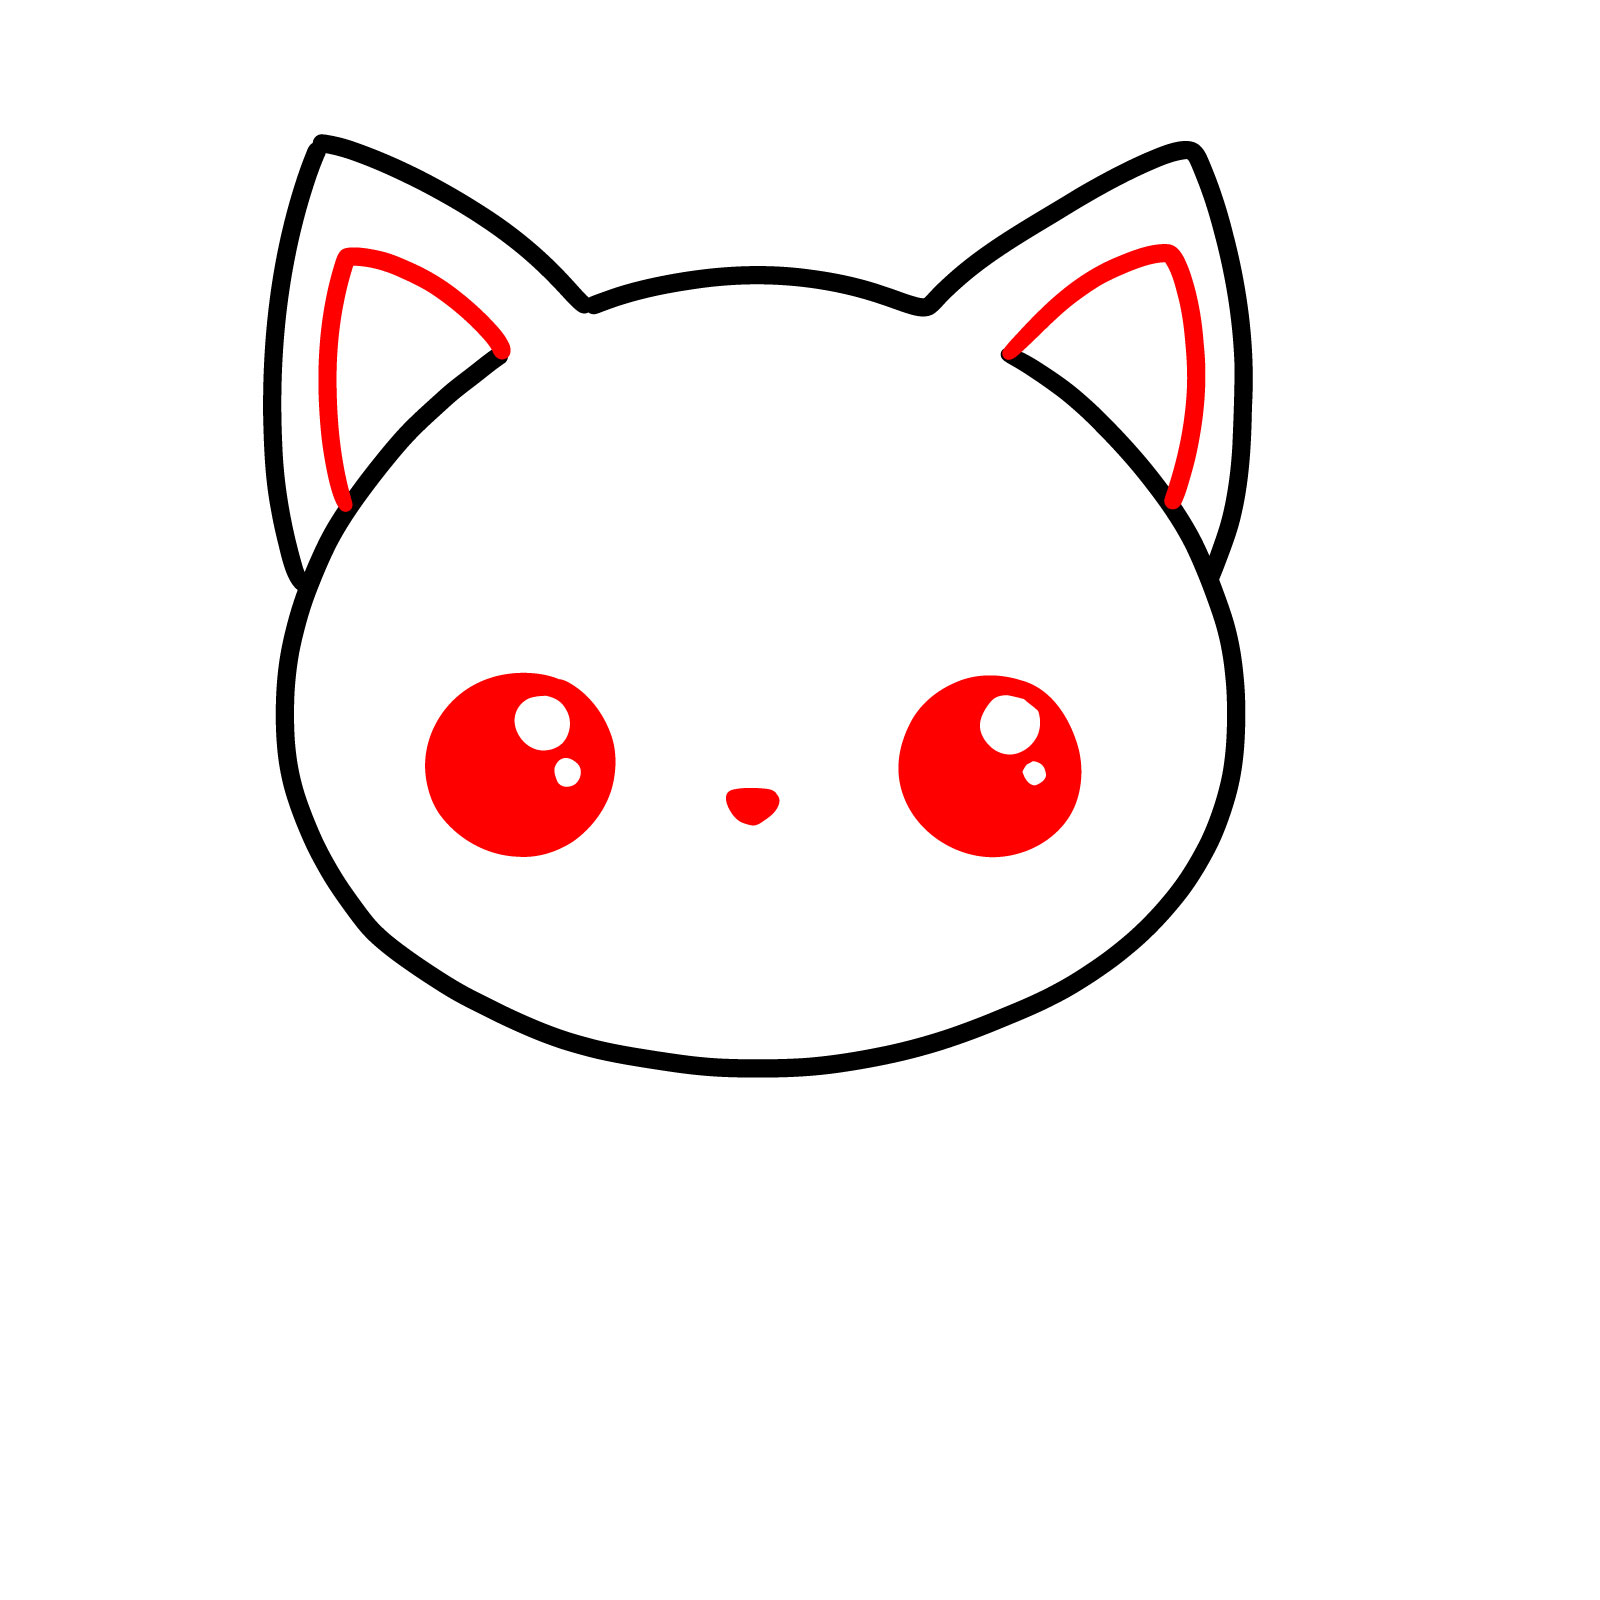
Step 03
Step 04
Step 05
Step 06
Step 07
Guide 17: Kawaii Cat
Embrace the cuteness of Japanese-inspired art with this kawaii cat drawing. Its exaggerated expressions and body proportions are sure to capture the hearts of children and adults alike.
Step 01
Step 02
Step 03
Step 04
Step 05
Step 06
Step 07
Guide 18: Pudgy Paws Cat
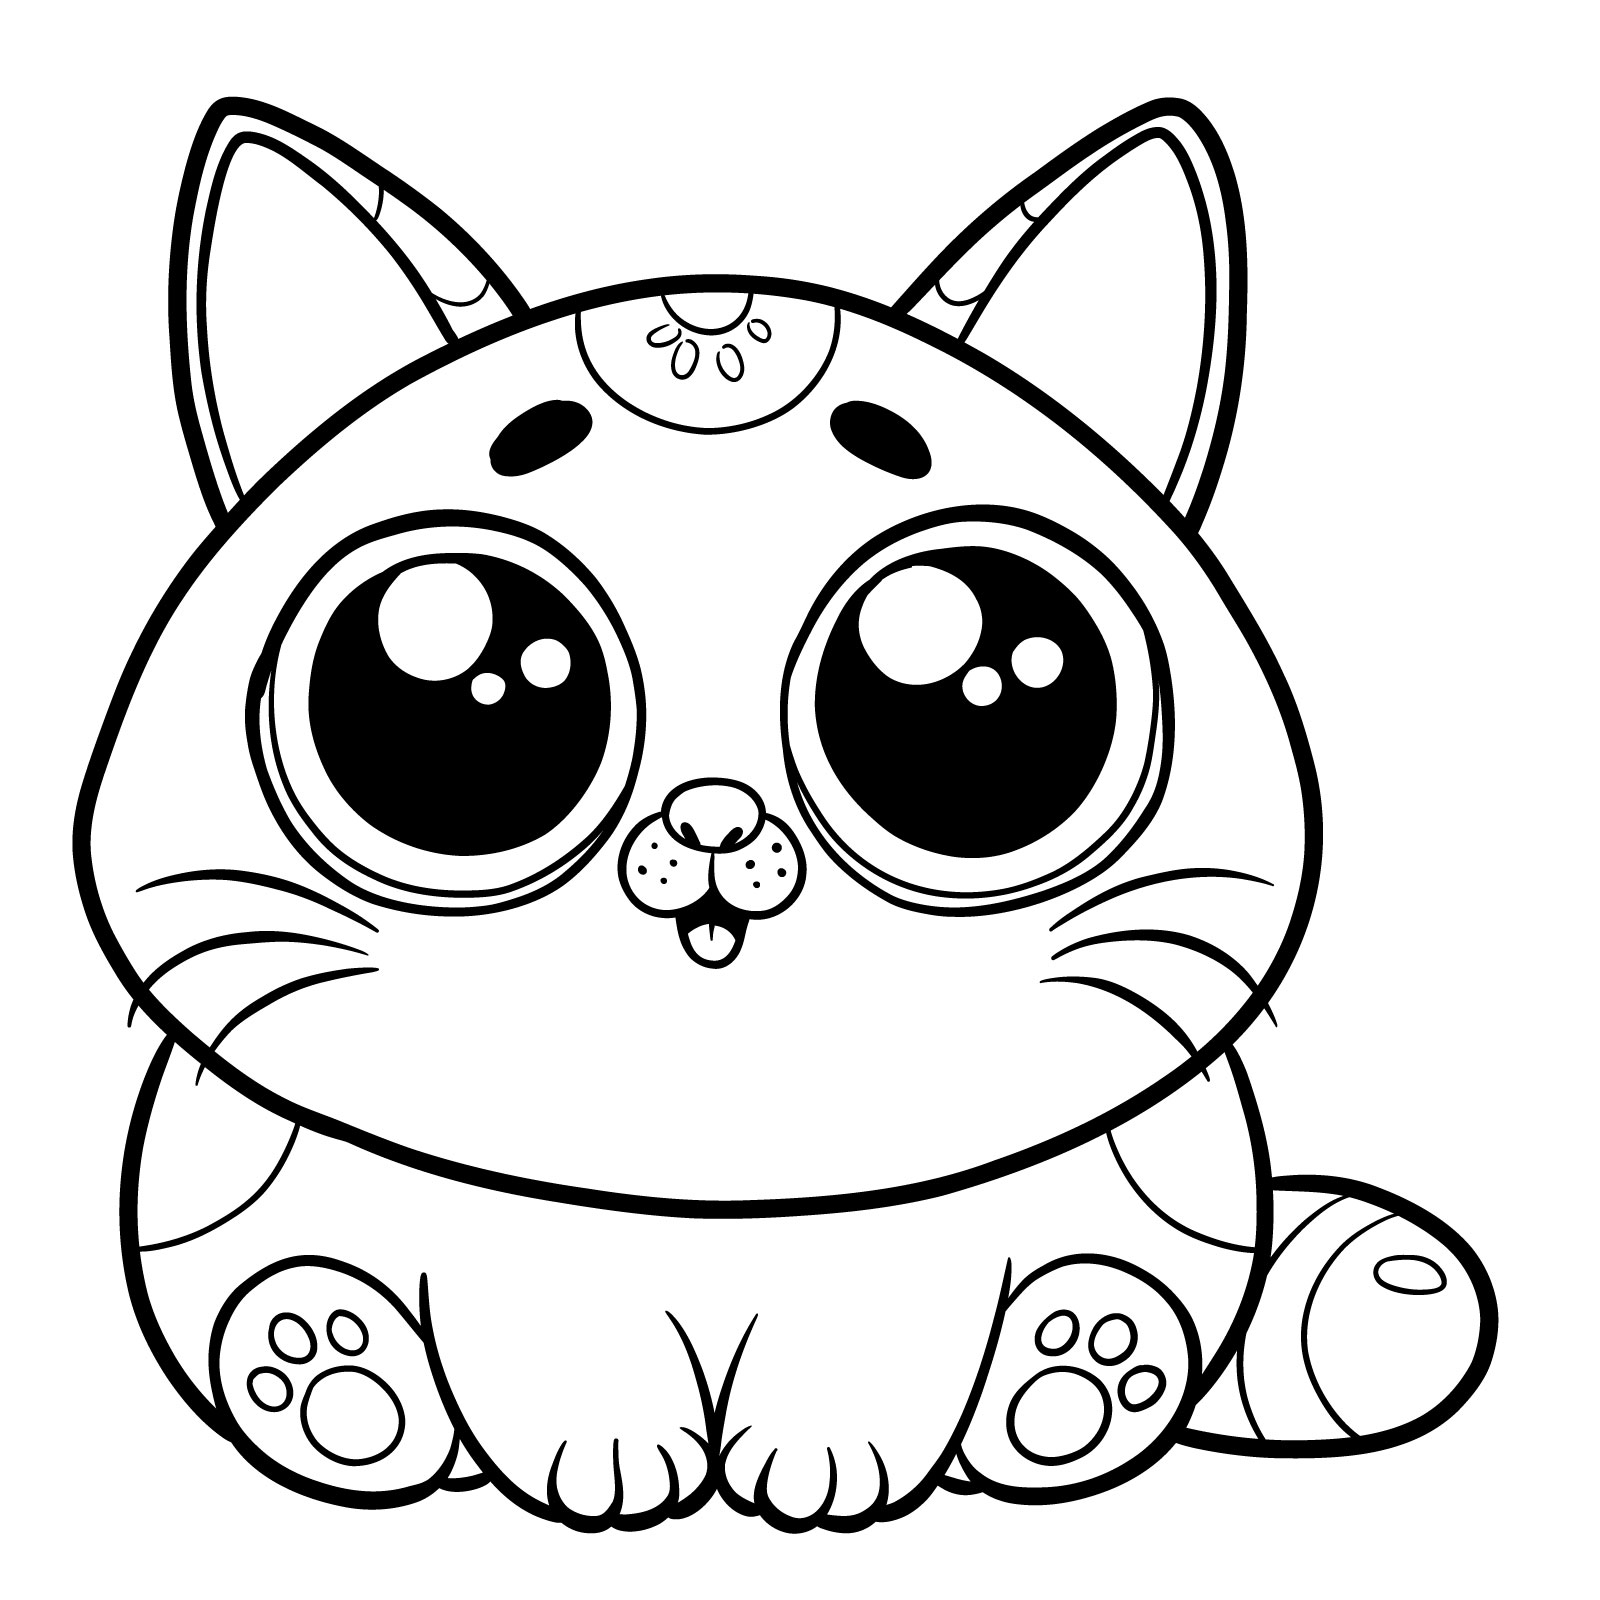
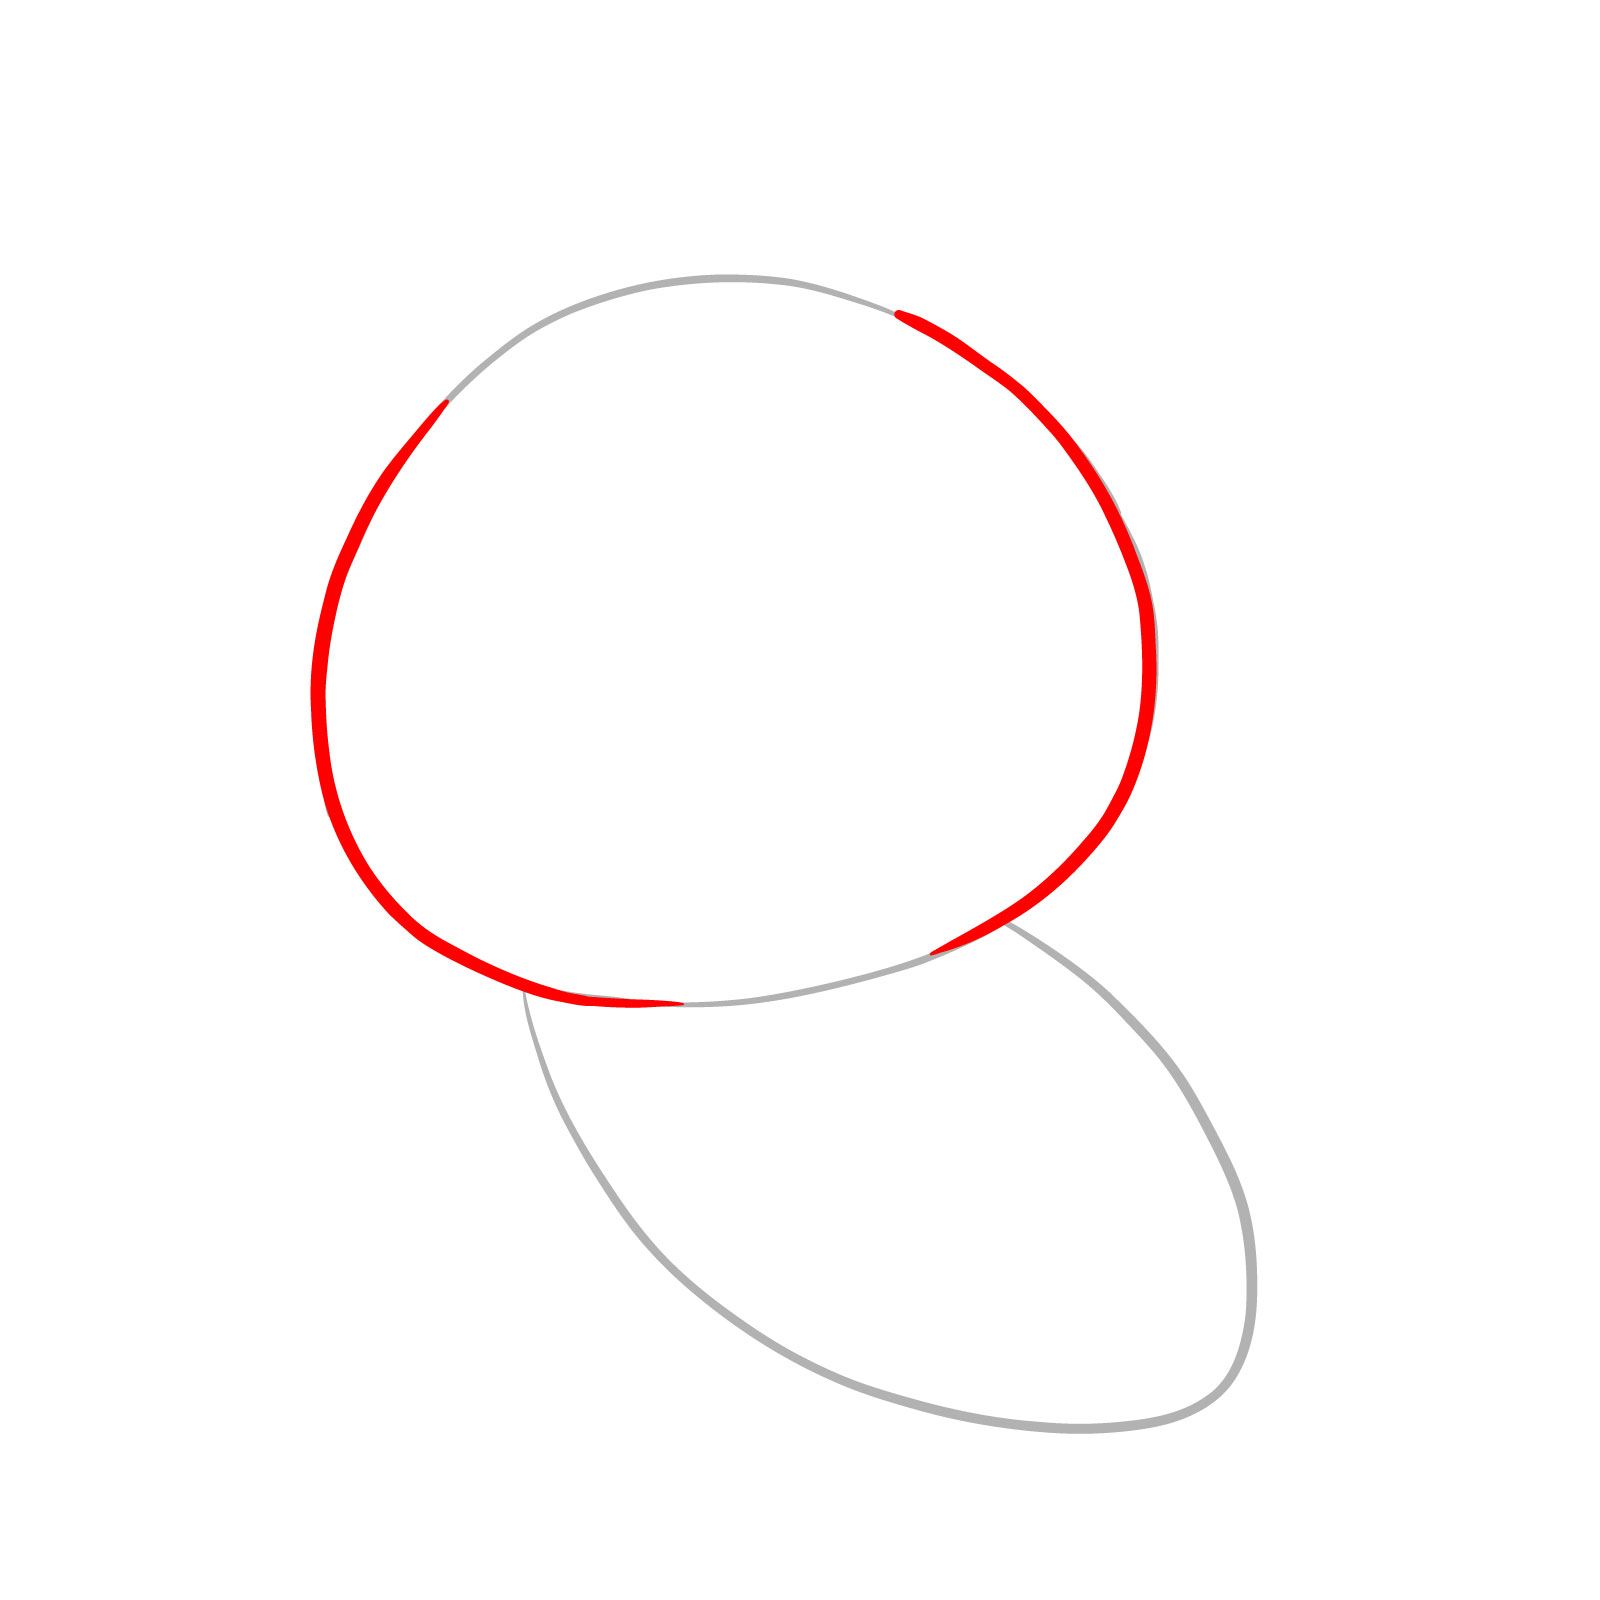
Learn to draw a cat that’s all curves and cuddles. This pudgy-pawed friend is sitting up and ready for a gentle pat, with each stroke of the pencil bringing its soft form to life.
Step 01
Step 02
Step 03
Step 04
Step 05
Step 06
Step 07
Step 08
Step 09
Step 10
Step 11
Step 12
Guide 19: Anime Cat
Dive into the world of anime with this stylized cat. Its large eyes and sleek lines are characteristic of the genre, making it an enjoyable draw for aspiring young anime artists.
Step 01
Step 02
Step 03
Step 04
Step 05
Step 06
Step 07
Step 08
Step 09
Step 10
Step 11
Step 12
Don't Miss New Tutorials! Follow SketchOk
I publish new step-by-step drawing guides every single day. Follow on your favorite platform so you never miss a tutorial. Thousands of artists are already drawing along and I can't wait you to join in!
On my Patreon you can grab unique hand-made coloring pages: each one drawn by me personally. Every purchase directly supports the creation of new drawing tutorials. It's the best way to practice your skills, keep the site going, and get something truly original at the same time.
Conclusion: Your Journey to Mastering Cat Sketches
With the comprehensive array of guides provided, you’re now equipped to sketch cats in almost any pose and style, making this tutorial perfect for amateurs and drawing enthusiasts alike. We’ve traversed through simple outlines to more dynamic and playful depictions, each designed to build your confidence and skill in drawing our feline friends.
If these guides have sparked your interest and you find yourself craving a deeper dive into the feline form, with a focus on anatomy and more intricate details, let me know. Your interest and requests could lead to the creation of an advanced tutorial tailored to those looking to refine their technique even further.
In the meantime, don’t forget to explore my other cat drawing tutorials, which feature different breeds like Siamese, Maine Coon, and British Shorthair etc. While simpler, they are equally fascinating and a joy to draw. This guide was a massive undertaking, and I would greatly appreciate your support. Please follow and share if you’ve found it helpful!
Stay connected and share your progress with the community on social media:
Thank you for joining me on this artistic journey. Whether you’re scribbling a quick sketch or carefully crafting a detailed portrait, remember that each stroke brings you closer to mastering the art of cat drawing. Keep creating, keep sharing, and above all, keep enjoying the process of bringing your artistic visions to life. Until next time, happy drawing!
Disclaimer: All original artworks and photos used as references for the creation of these drawing tutorials are the property of their respective owners. If your work has been featured without proper credit, please kindly leave a comment below, and the issue will be promptly addressed. We greatly appreciate your exceptional art. Thank you.
4 thoughts on “How to Draw Cats – 19 Easy Guides in One Tutorial”
Hi! I plan to create a separate guide for dragons as soon as I have some free time. In the meantime, you can explore the guides with the tag “Dragon”. Hopefully you’ll find something interesting to draw there. Here’s the tag: Dragon


Could you show us how to draw wolves?
Of course, I’m working on the similar complete tutorial and will post it soon!
Tysm Lilina, you read my mind! Can you make one on dragons?
Hi! I plan to create a separate guide for dragons as soon as I have some free time. In the meantime, you can explore the guides with the tag “Dragon”. Hopefully you’ll find something interesting to draw there. Here’s the tag: Dragon