In this guide, I want to show you how to draw a bald eagle full body by focusing on its features and breaking down the process into manageable steps. With a bit of patience and attention to detail, you can bring this majestic bird to life on paper. Let’s get started.
Key Details to Capture in a Bald Eagle
Head: White feathers and piercing eyes that give it a sharp, alert look.
Beak: A strong, curved yellow beak.
Wings: Wide, dark brown wings.
Talons: Sharp, yellow talons perfect for gripping prey or perching.
If you’re exploring other drawings, birds like a crow, a sparrow or an albatross will make a great follow-up project to practice various features.
How This Tutorial Works
To make each step easier to follow, I’ve added a visual guide with specific color indicators:
Red Color: Focus on the current step you’re working on.
Black Color: Shows what you’ve already drawn.
Grey Color: Provides the basic outline to guide your proportions.
Using these colors keeps your drawing process clear and organized as you work through each stage.
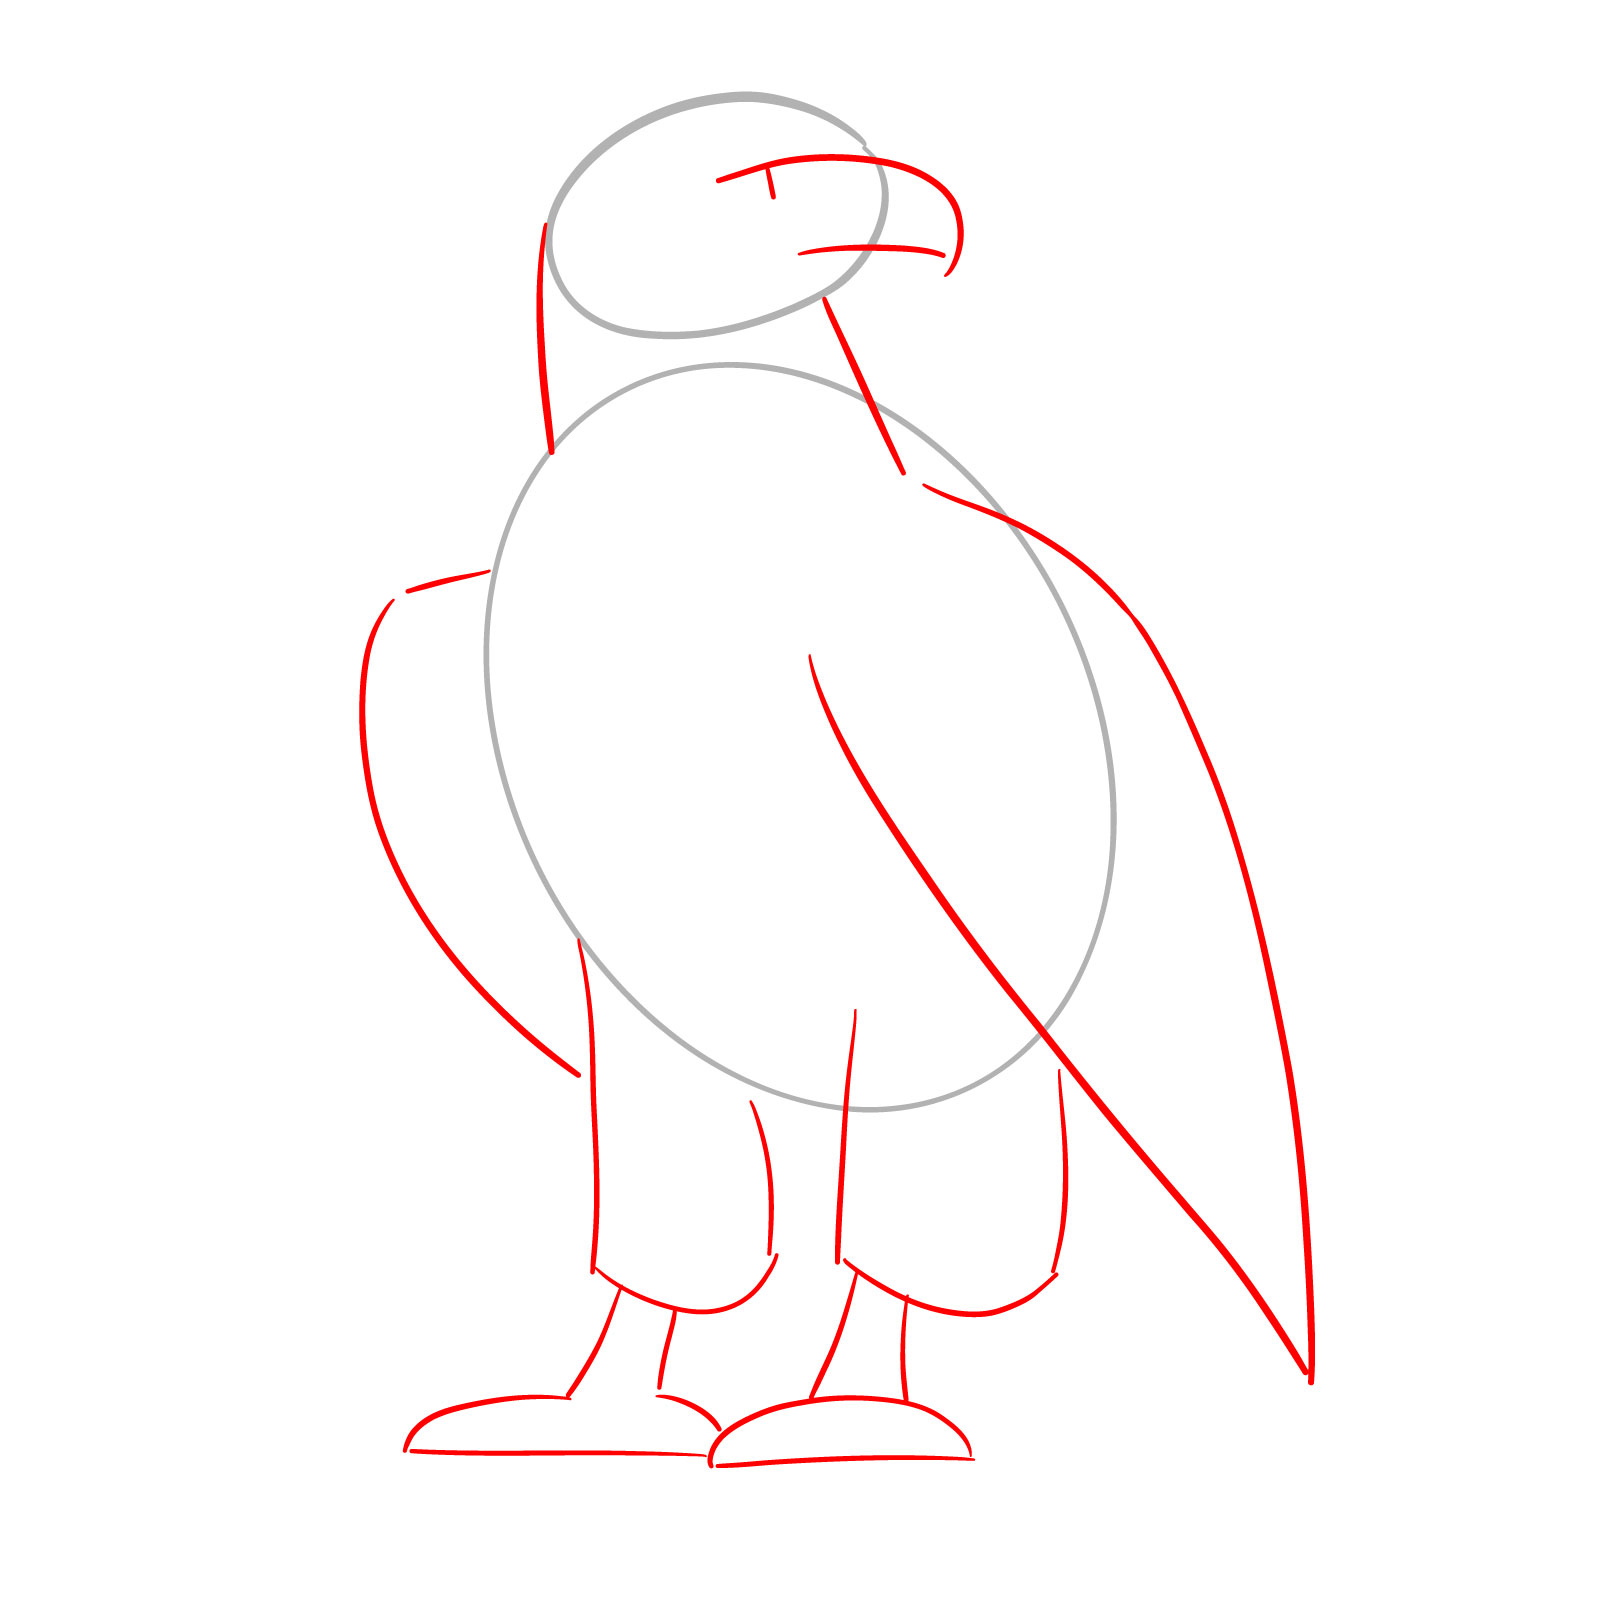
Step 1 – Draw a small oval for the head and a larger oval beneath it for the body. These shapes are the base of the bald eagle’s structure. Refer to the step image to observe the correct angle and positioning of the ovals for accuracy.
Step 2 – Add basic lines and shapes to form the beak, neck, wings, and legs. Draw a short line on the upper beak line, indicating the eye placement as shown in the image. Keep the shapes simple at this stage to maintain clarity.
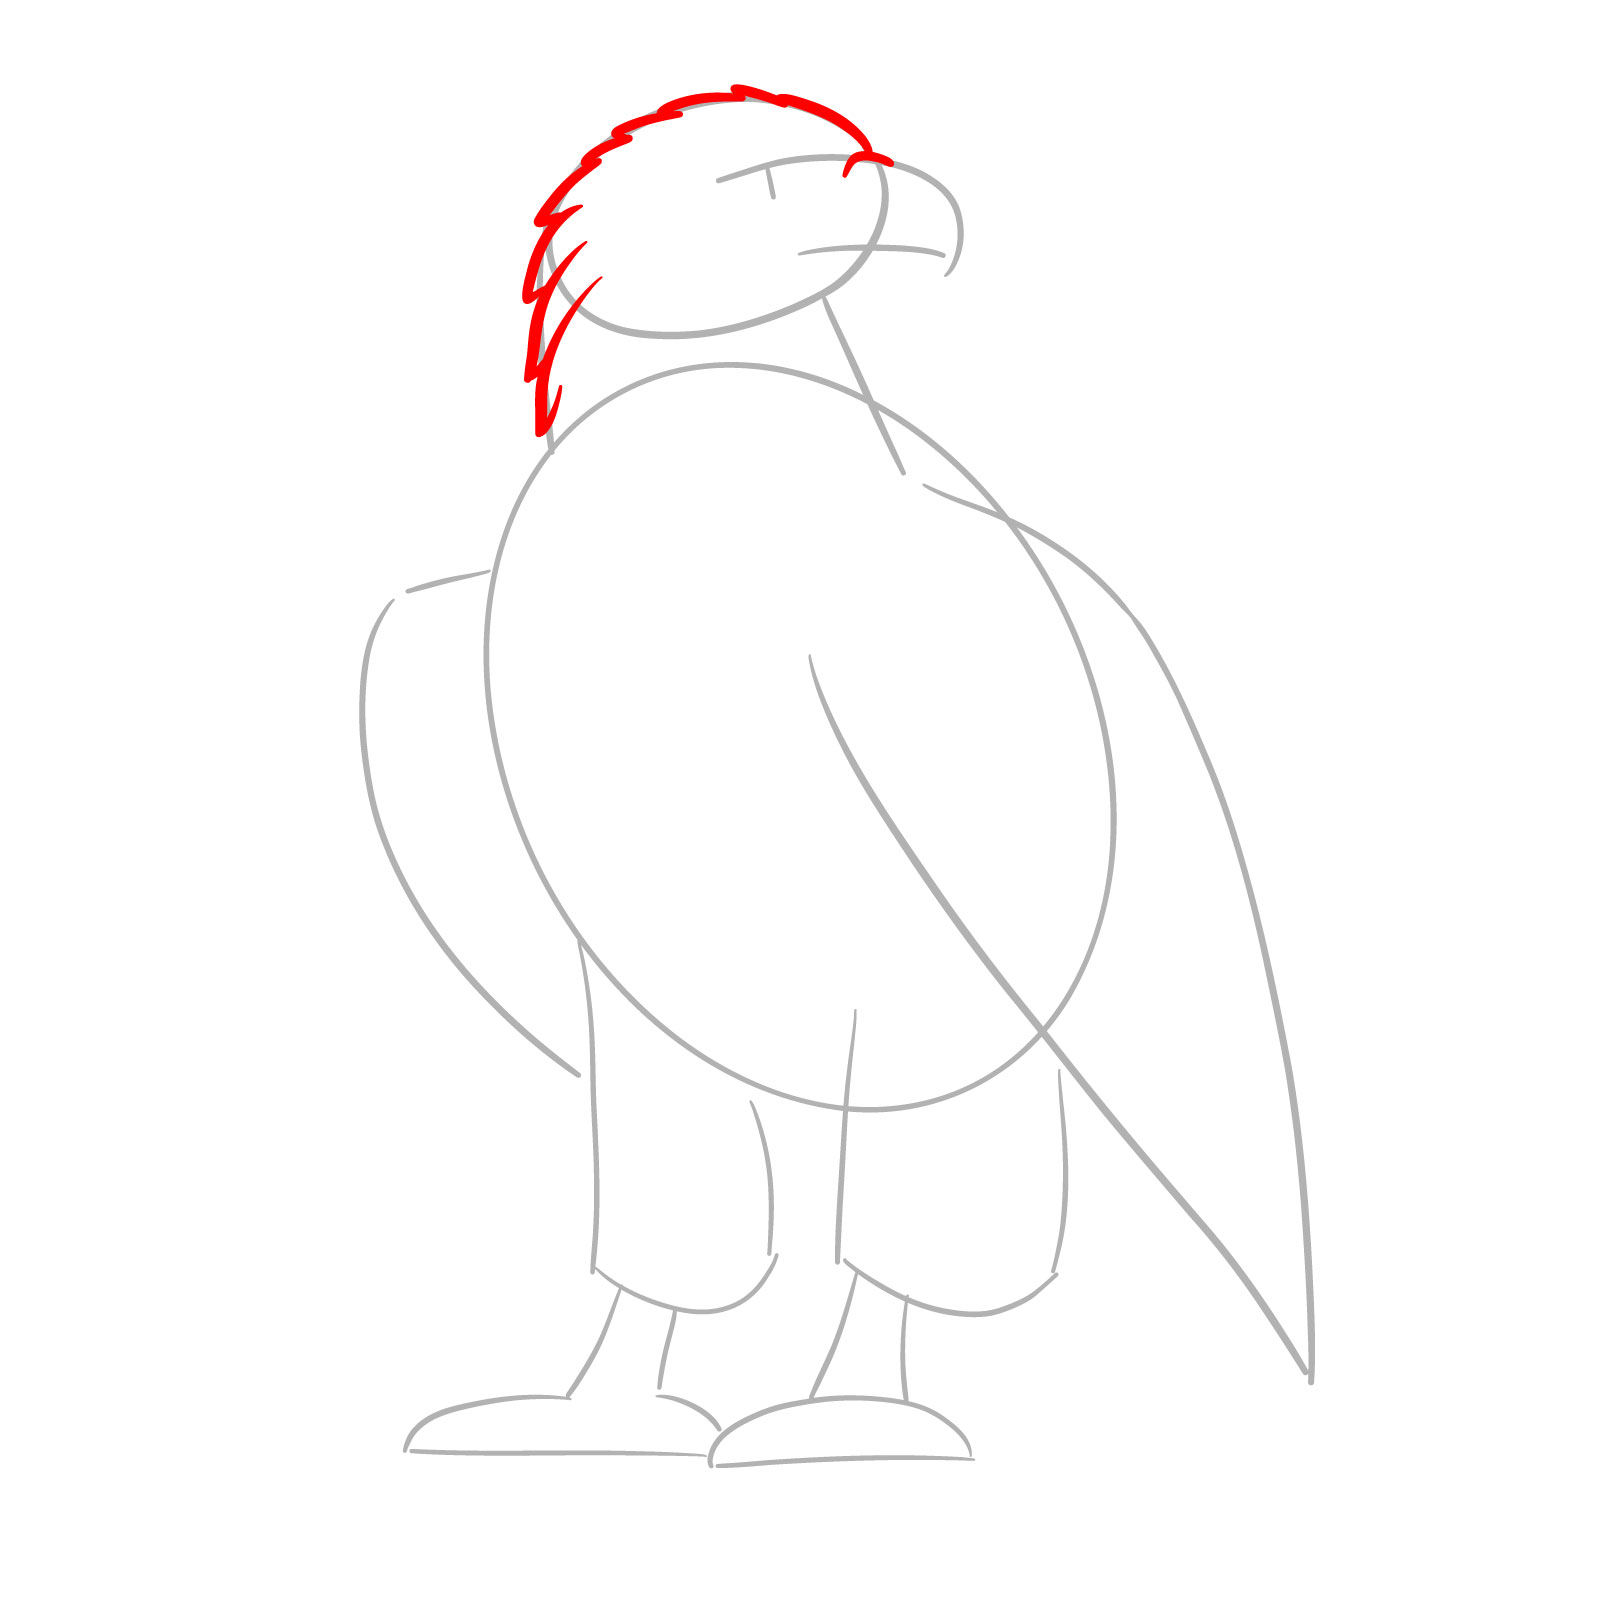
Step 3 – Outline the upper base of the beak, the top of the head, and the side of the neck. Use short, feather-like strokes to start defining these areas for a more realistic shape.
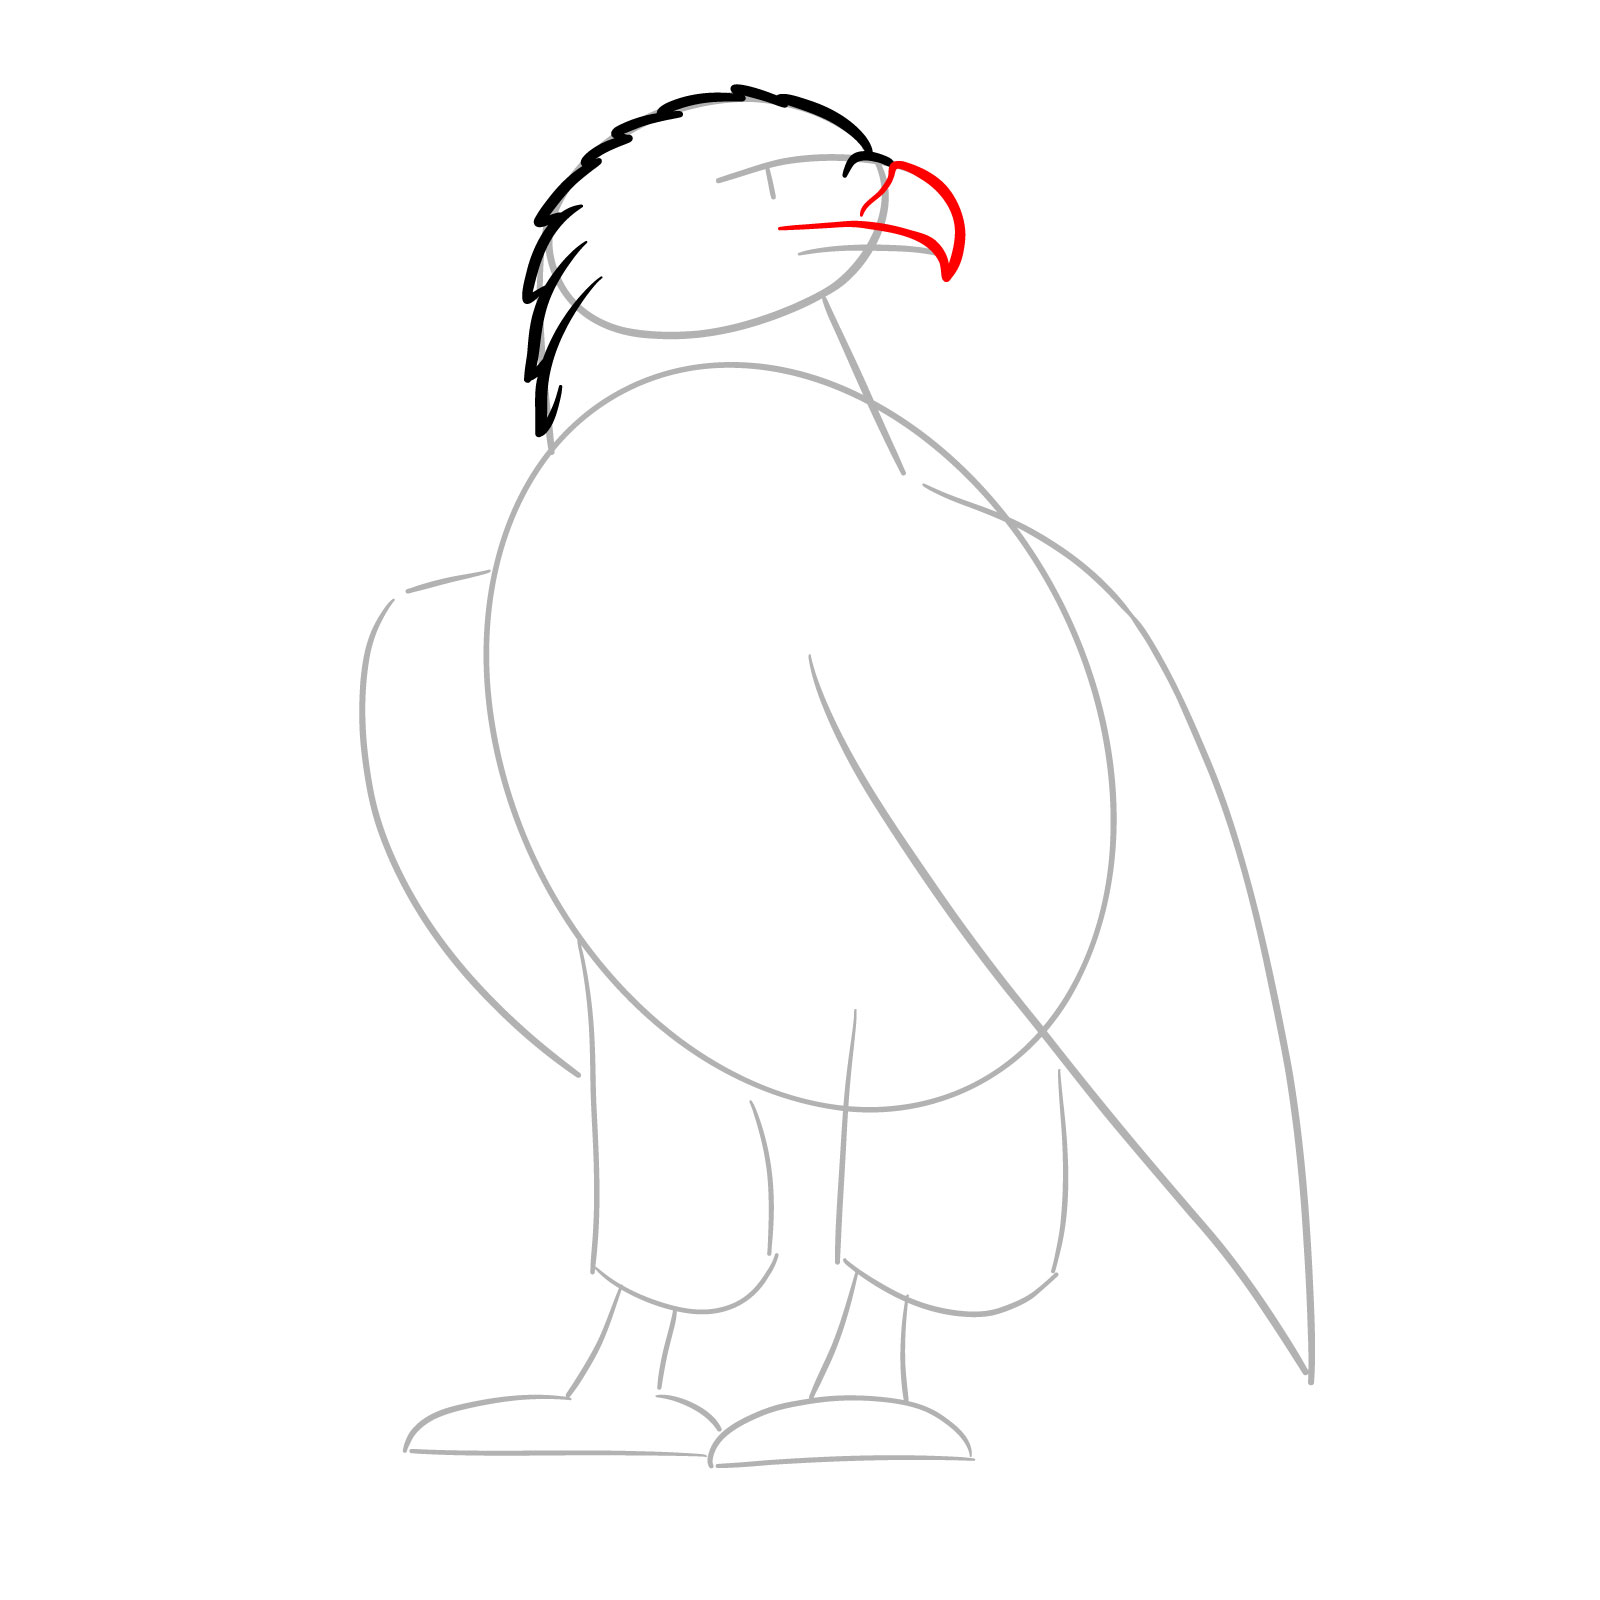
Step 4 – Draw the upper part of the beak, focusing on its curved and sharp structure. Take note of the shape and size in the step image to maintain proportion.
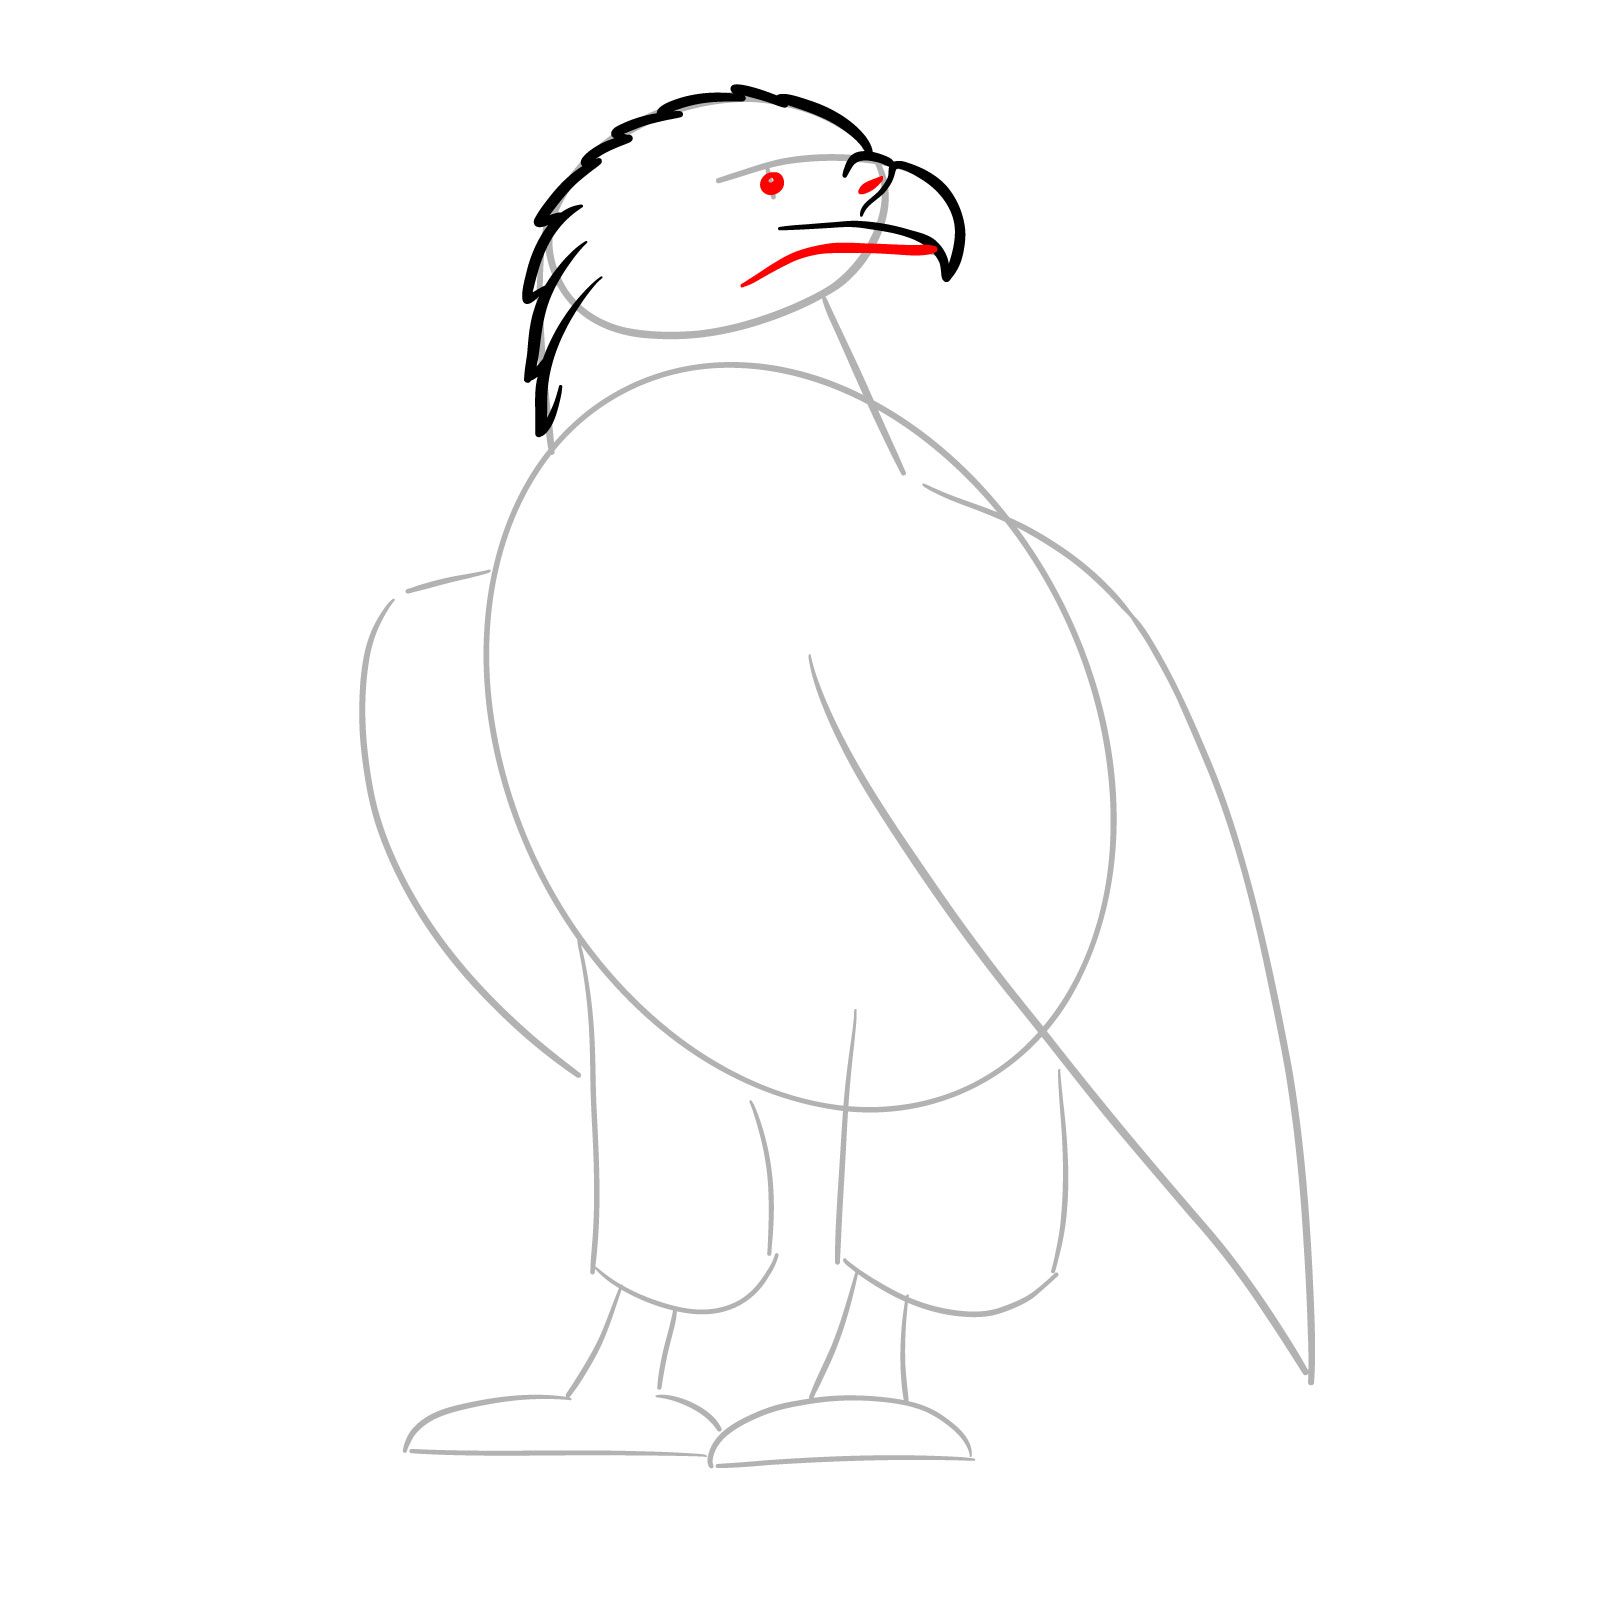
Step 5 – Sketch the nostril, complete the bottom part of the beak, and add a small black circle for the eye. Leave a blank dot in the eye for the highlight.
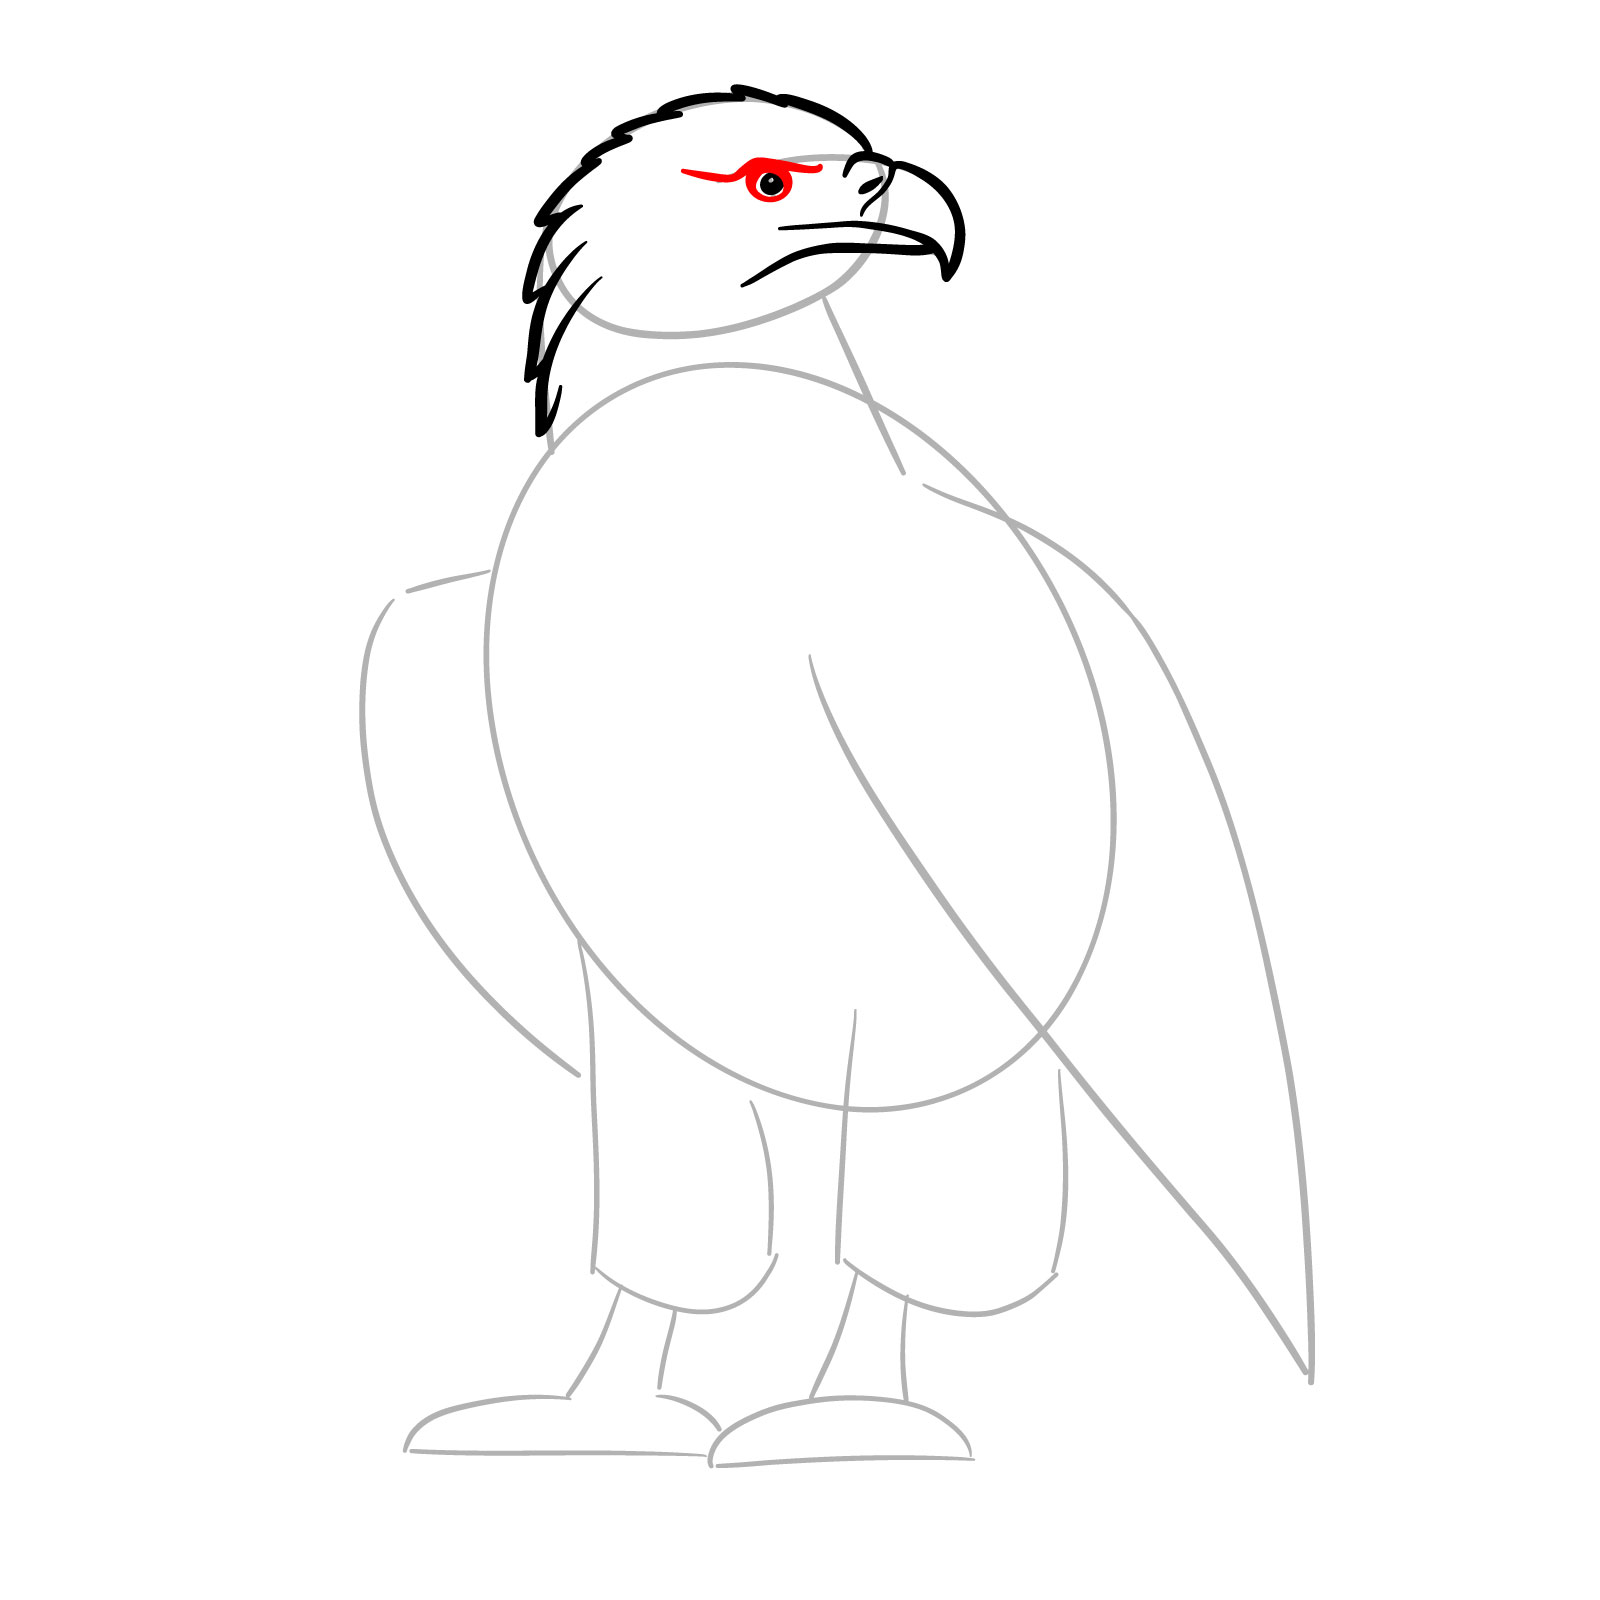
Step 6 – Add subtle details around the eye, such as small lines to define the area further. This step helps to enhance the eagle’s expression.
Step 7 – Continue adding details around the beak and eye area, using small strokes to refine the structure and texture. These elements contribute to the lifelike appearance of the bald eagle.
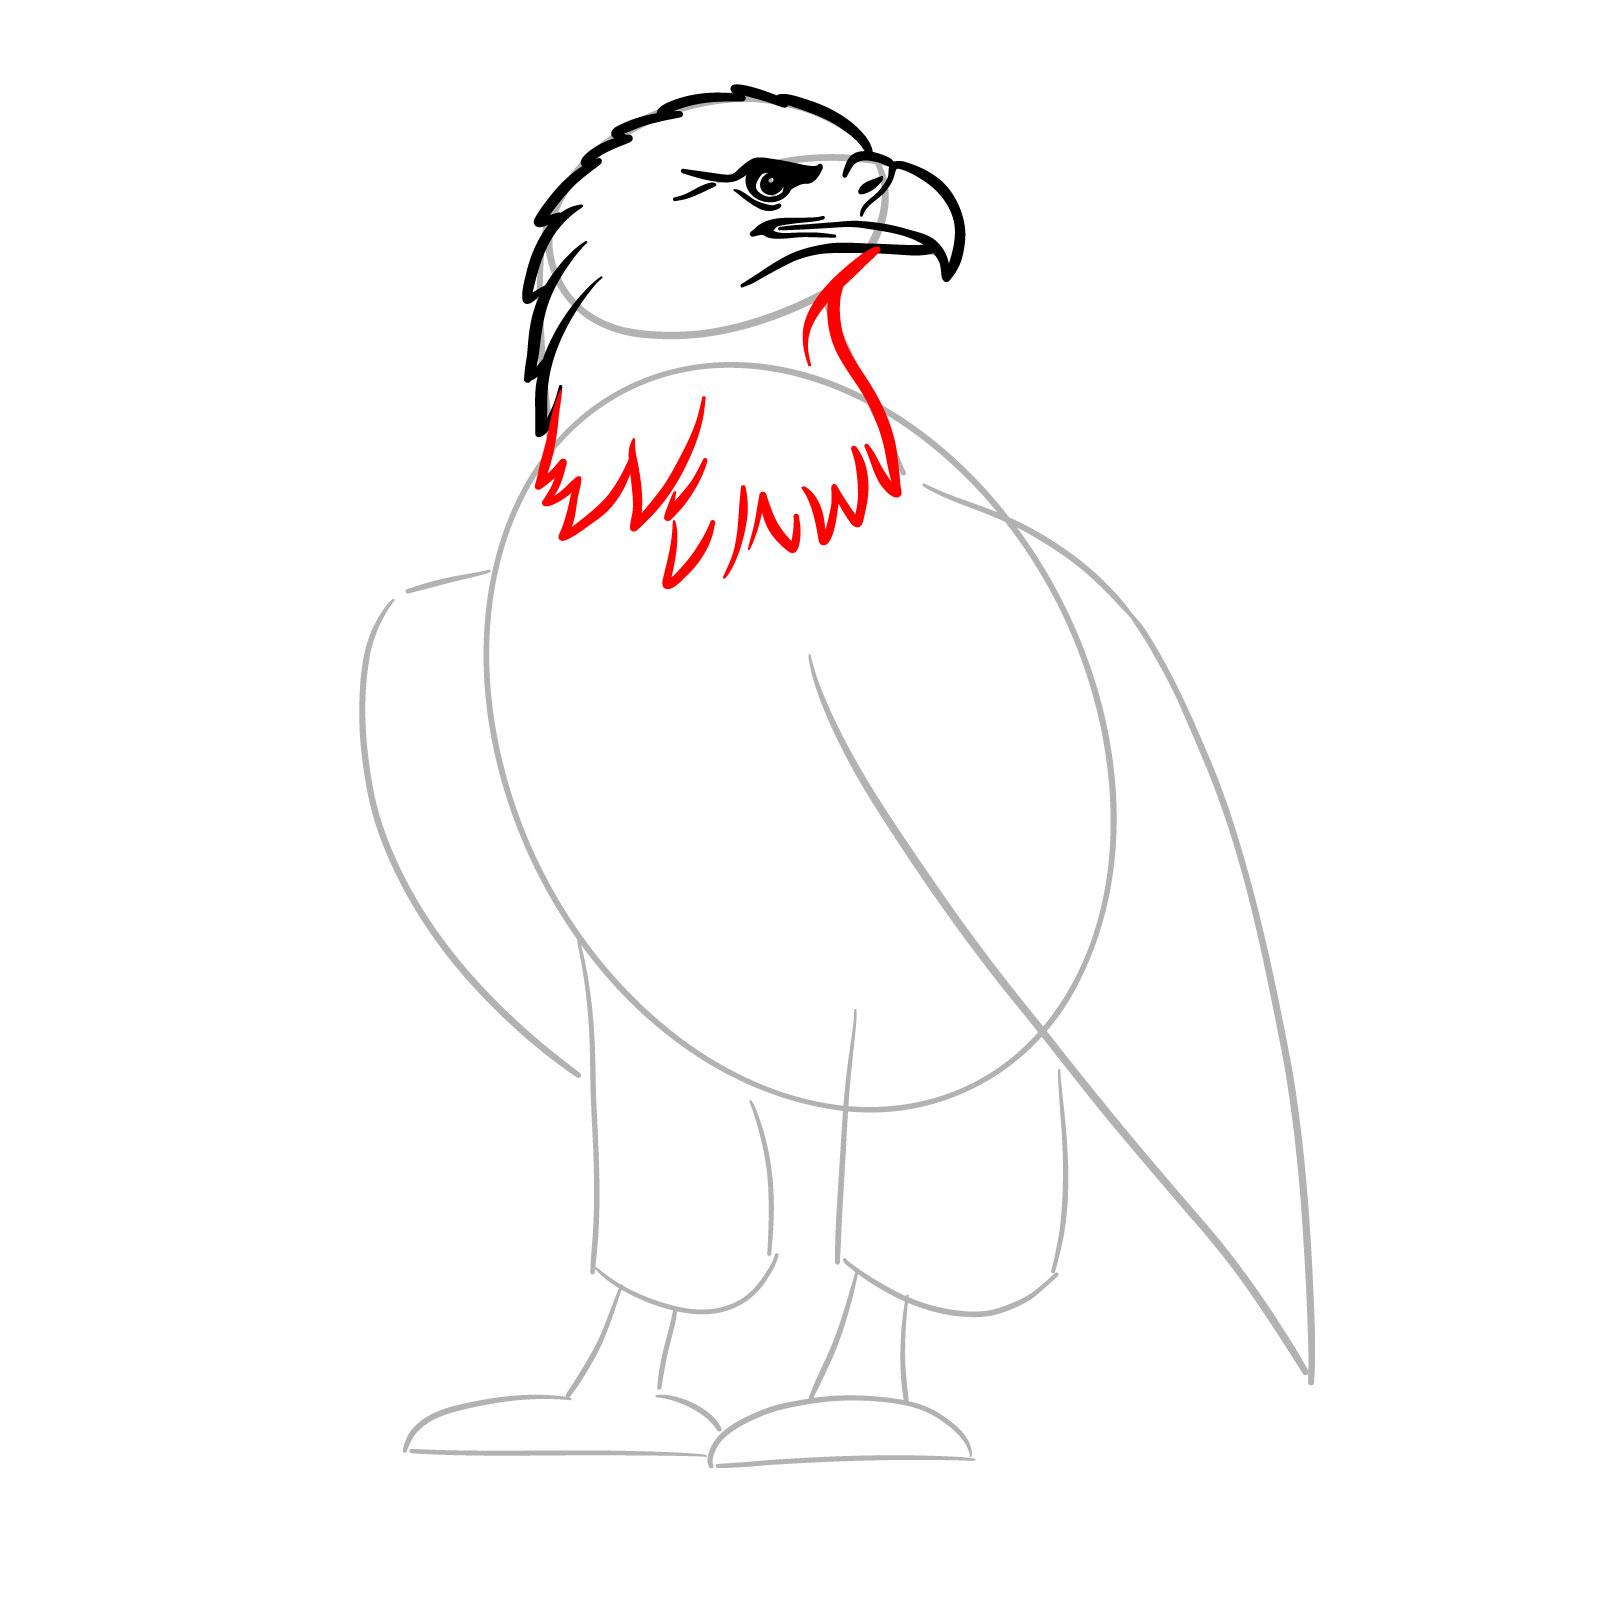
Step 8 – Draw the neck, separating it from the body with jagged or feather-like lines. Remember, the head and neck are white, while the body is brown, so this division is important.
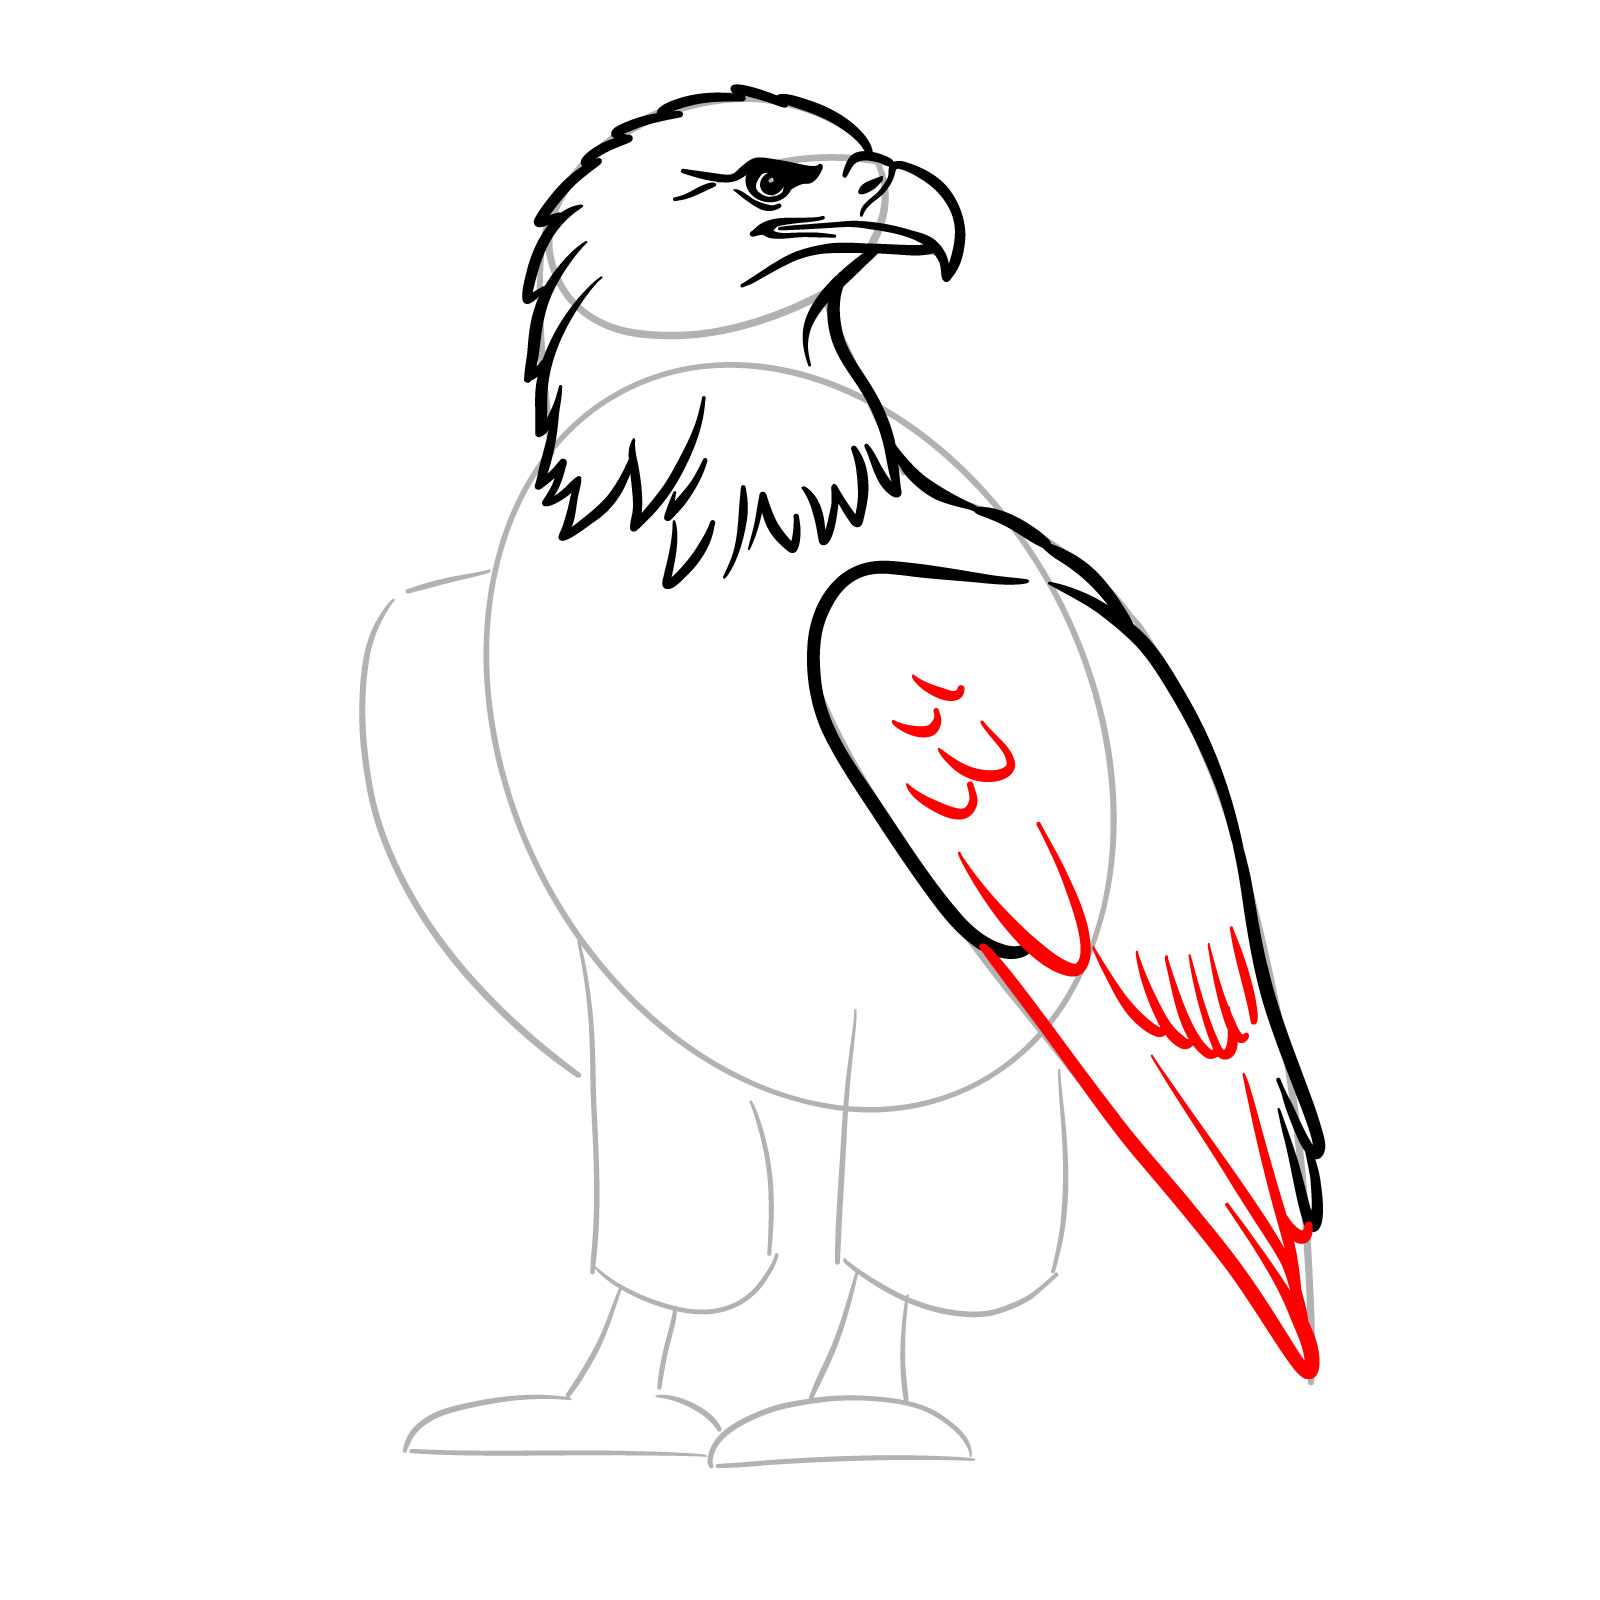
Step 9 – On the right side of the sketch, draw the visible part of the back and start outlining the shape of the wing. Refer to the image to align the wing’s angle with the body.
Step 10 – Finish sketching the wing by shaping it with feather patterns. Add more feather details to define the texture and structure.
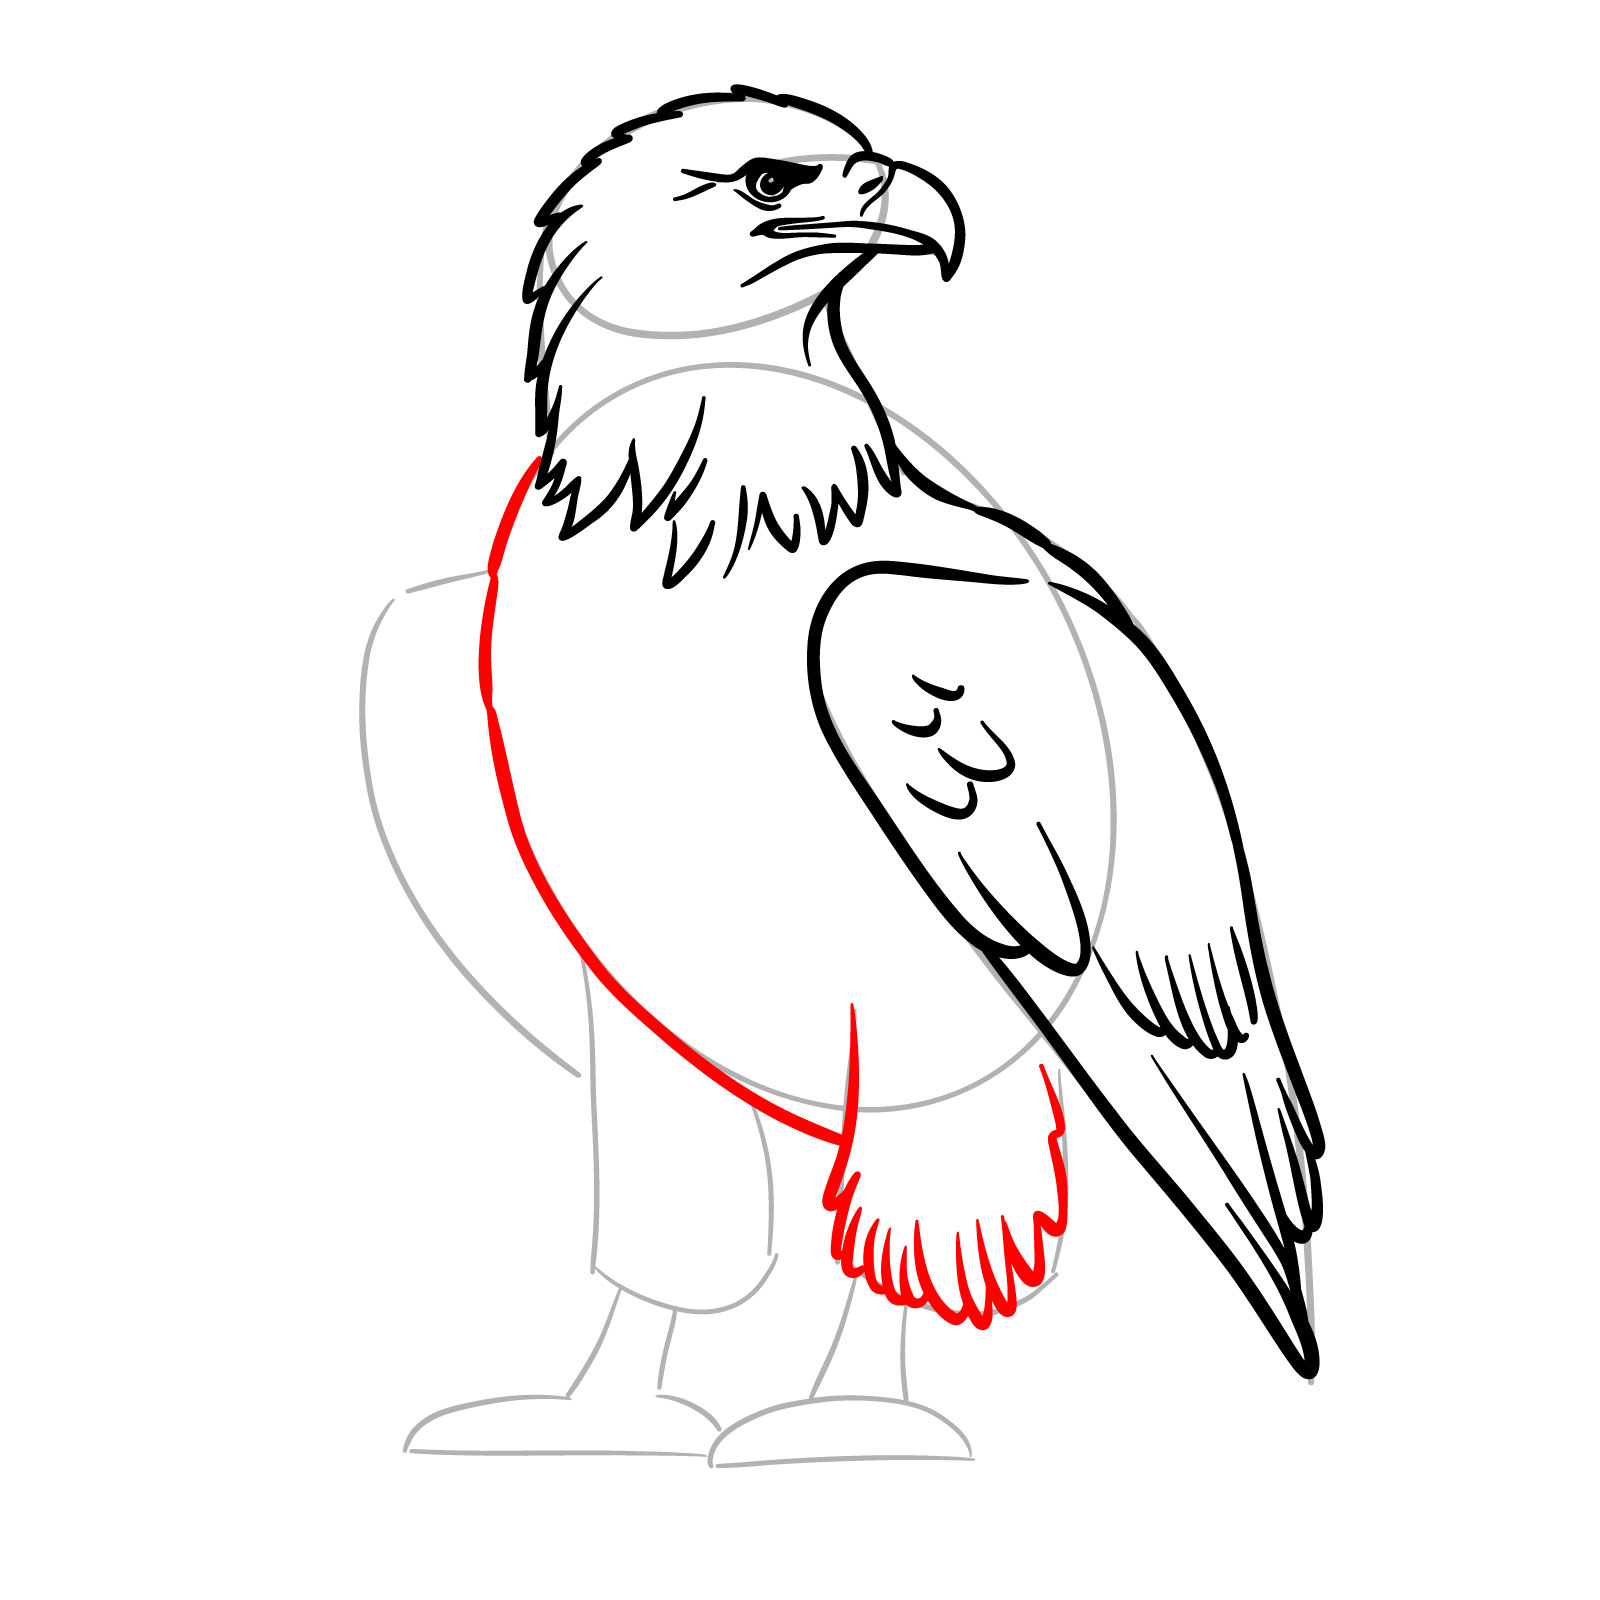
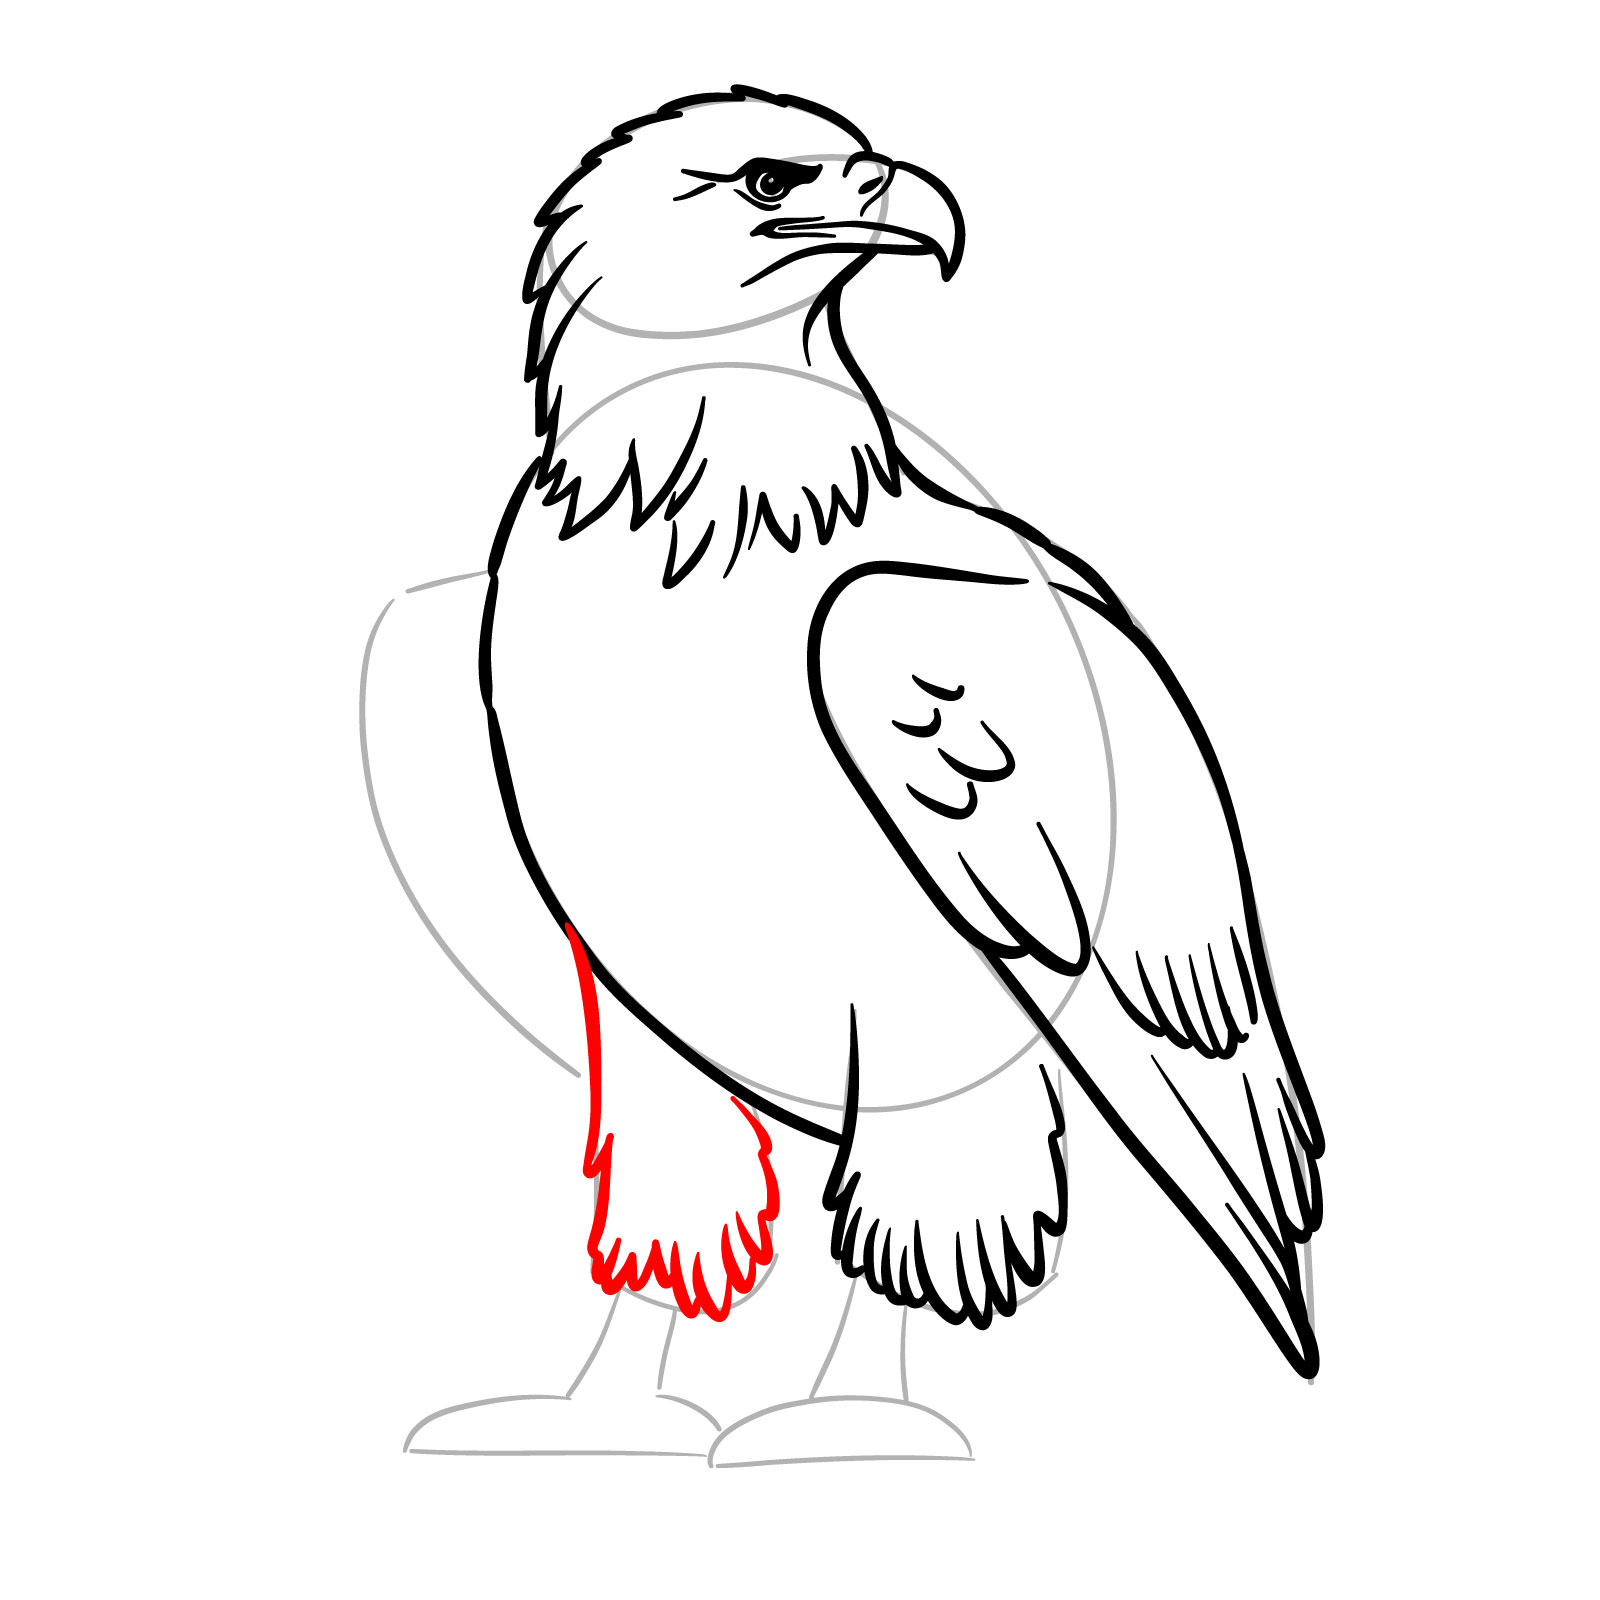
Step 11 – Sketch the main outline of the body and form the feathered upper section of the right leg. Observe how these elements blend into the body.
Step 12 – Draw the feathered upper part of the next leg. Keep the texture consistent with the feathers on the first leg for a cohesive look.
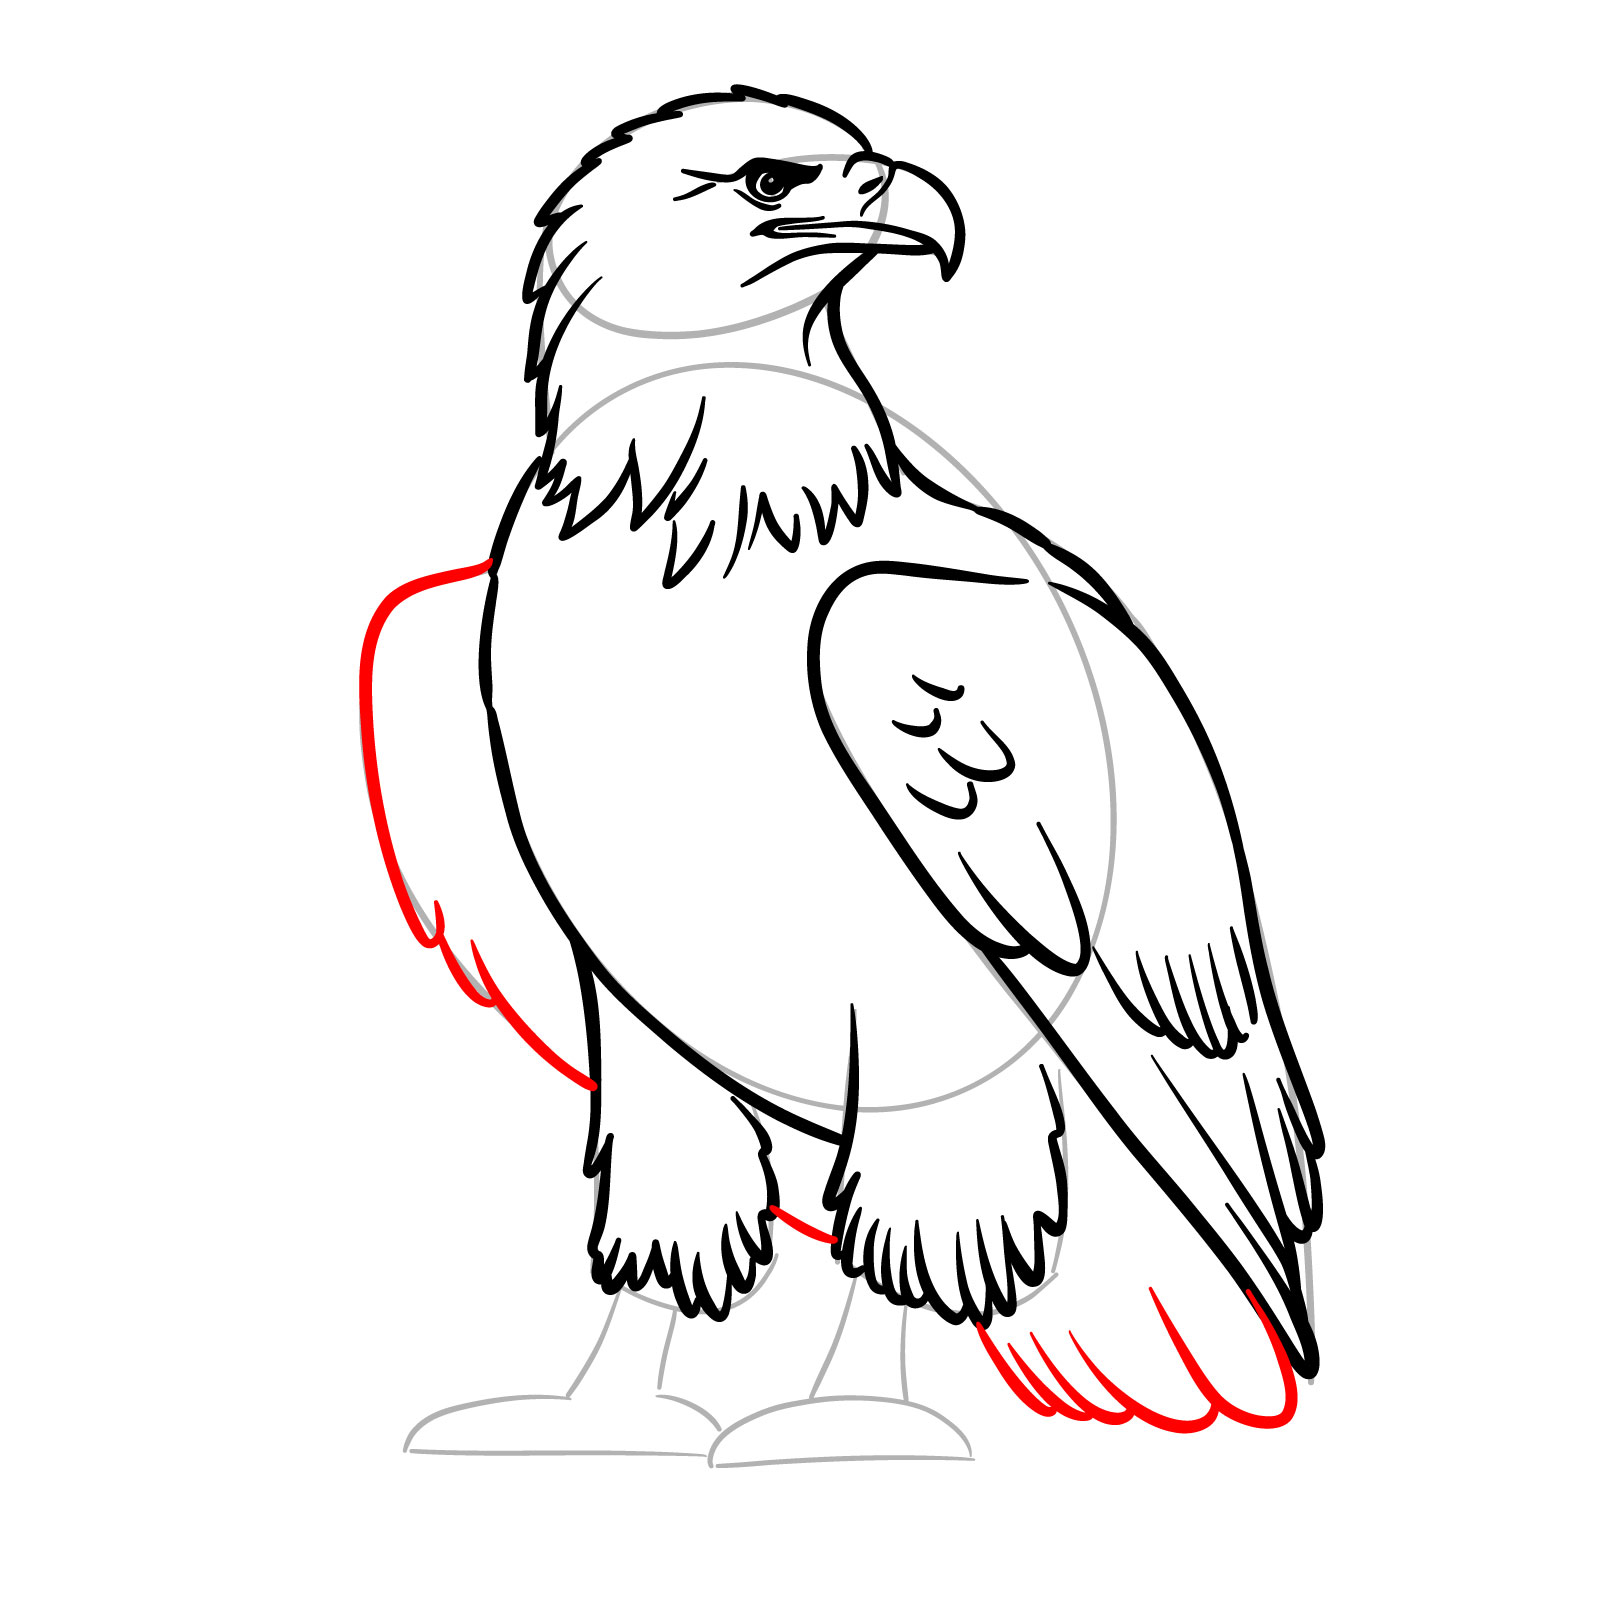
Step 13 – Outline the second wing and sketch the tail. Use simple, flowing lines to capture the shape of the tail feathers.
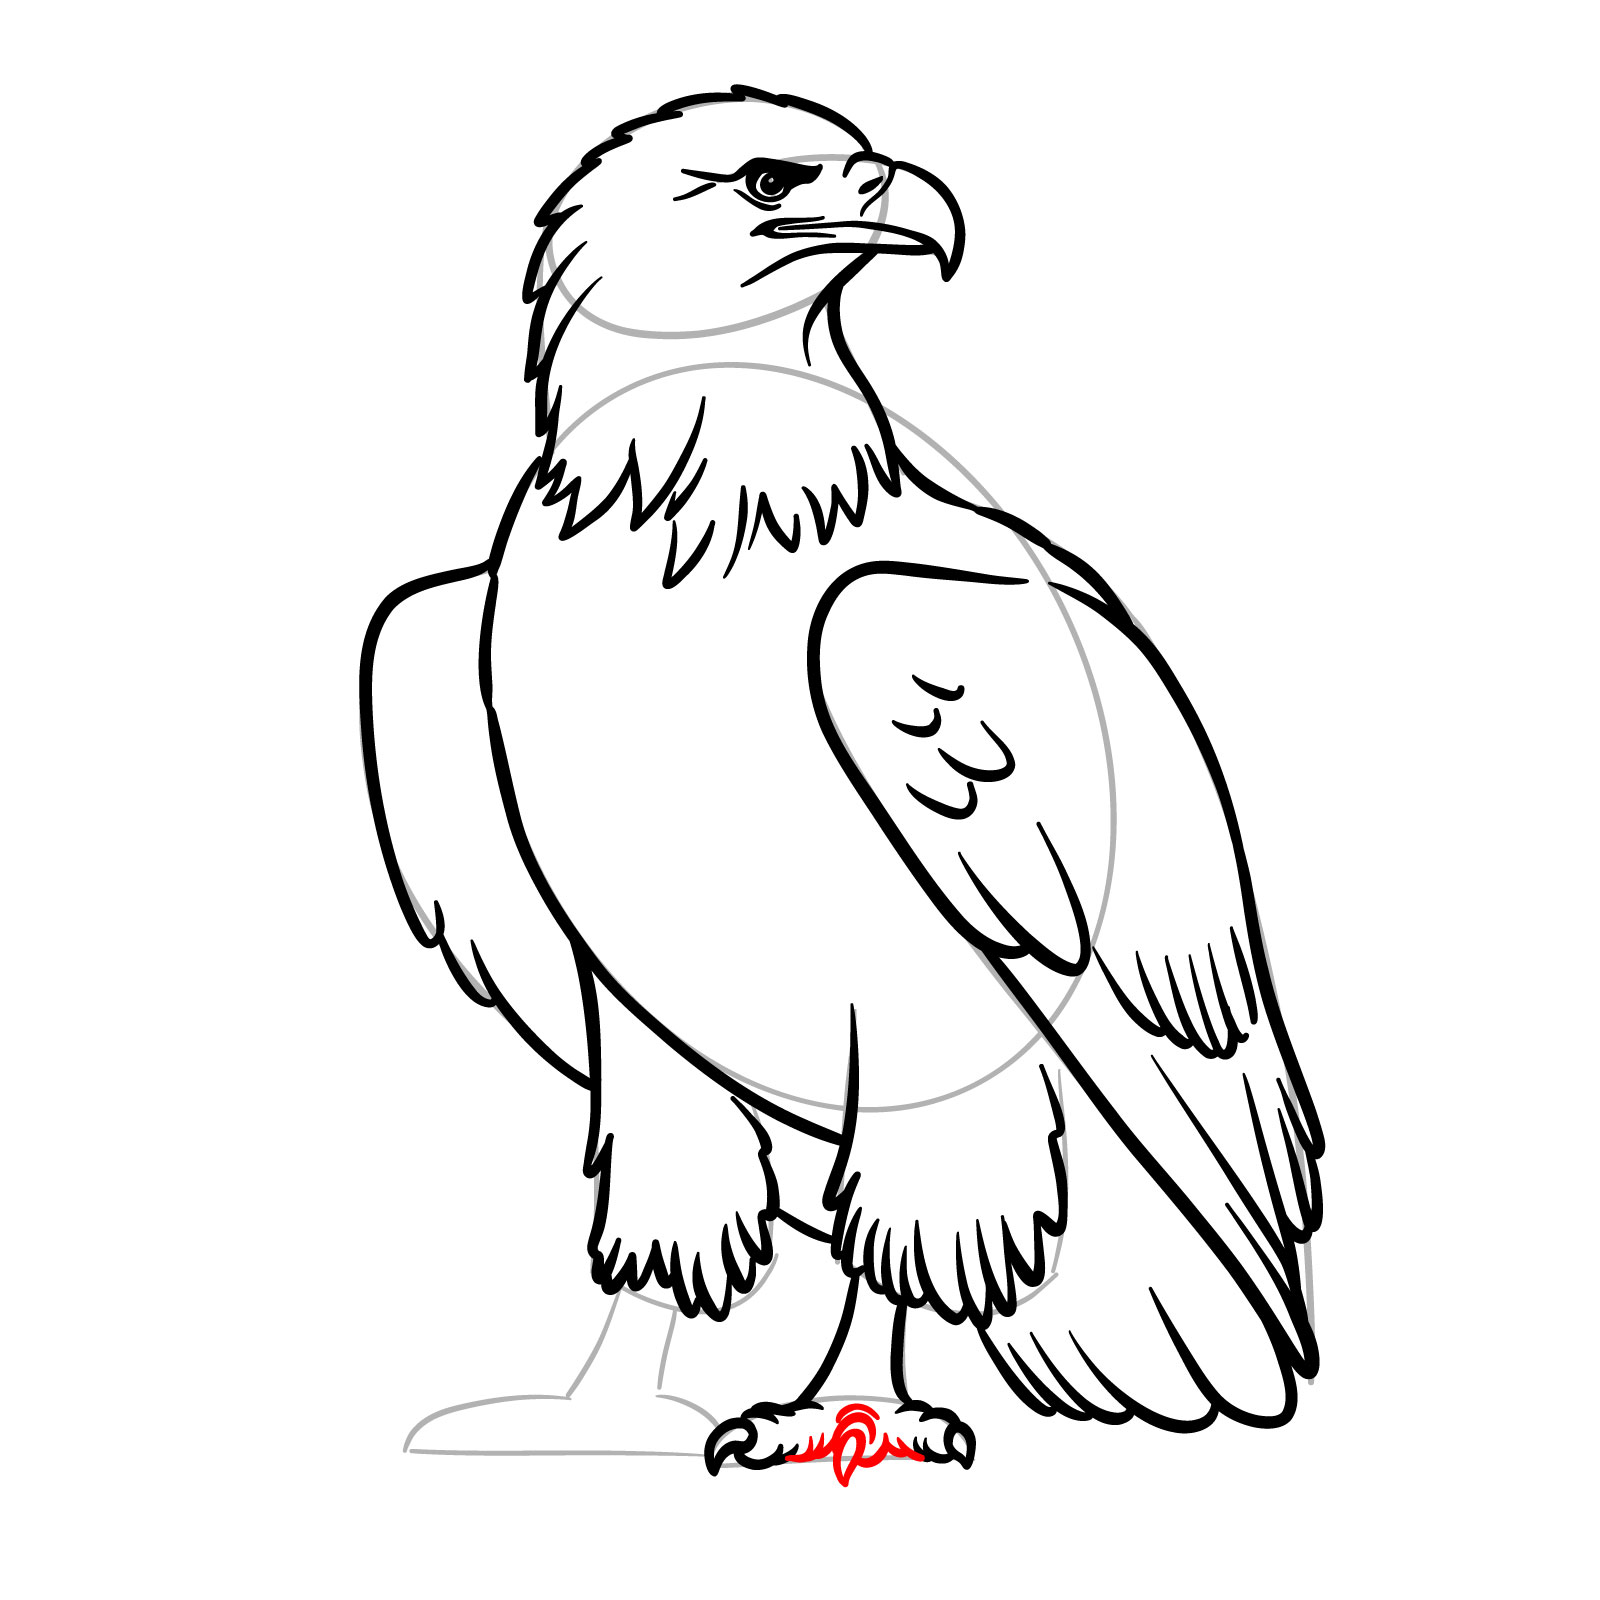
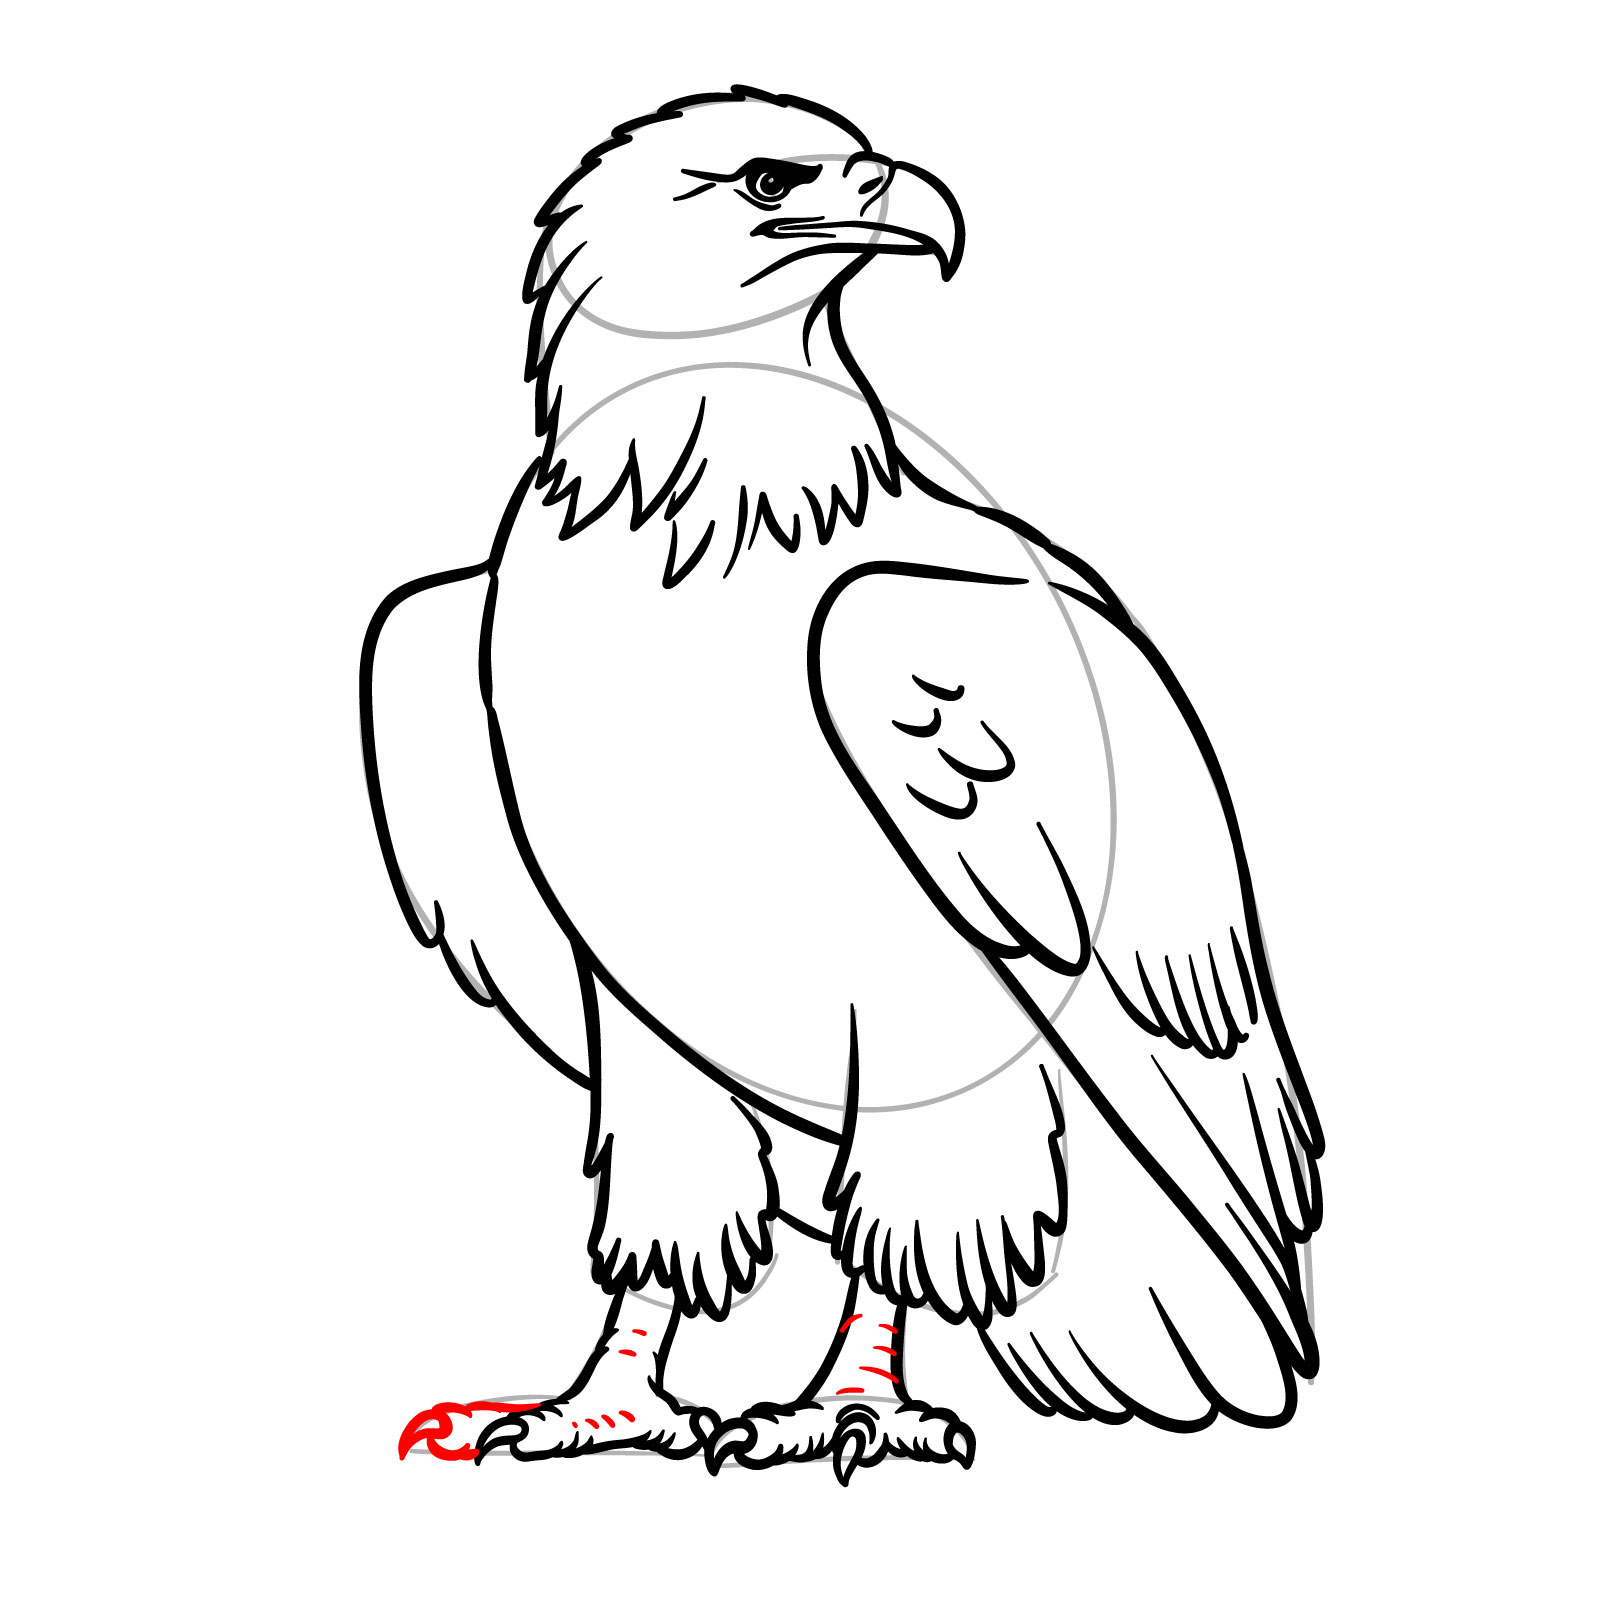
Step 14 – Start drawing the right leg by outlining its structure and sketching two front toes with claws. Leave space for the middle toe to add later.
Step 15 – Complete the first leg by adding the middle toe with its claw. Ensure the toes and claws are proportionate and well-placed.
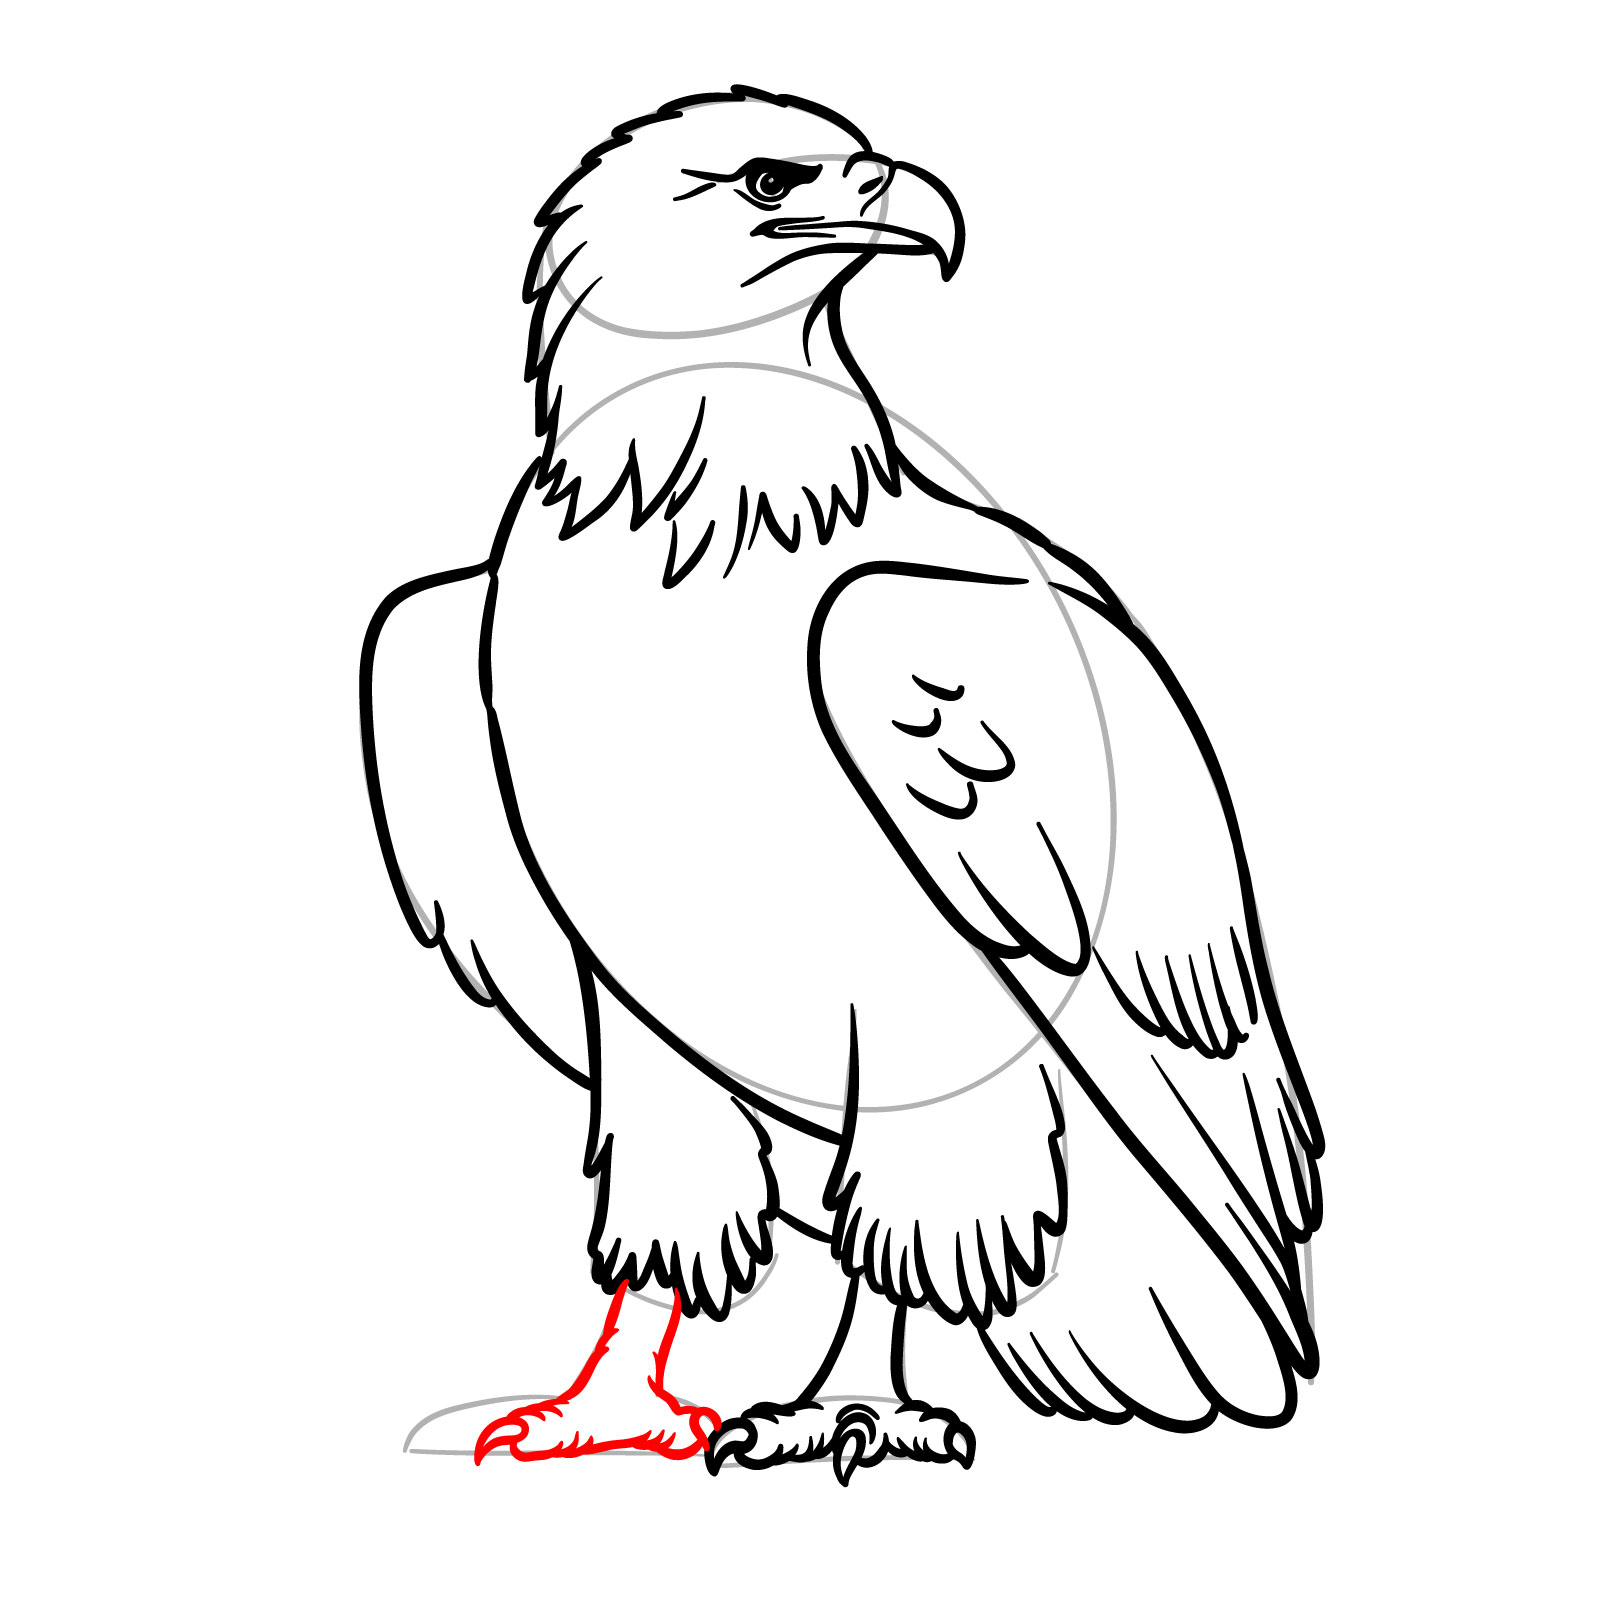
Step 16 – Begin sketching the second leg by outlining its structure and drawing two toes: the rear toe visible from this perspective and one closer to the viewer.
Step 17 – Add the visible toe beside the first front one. The third toe isn’t visible in this view, so skip it. Include small lines on the legs to create texture.
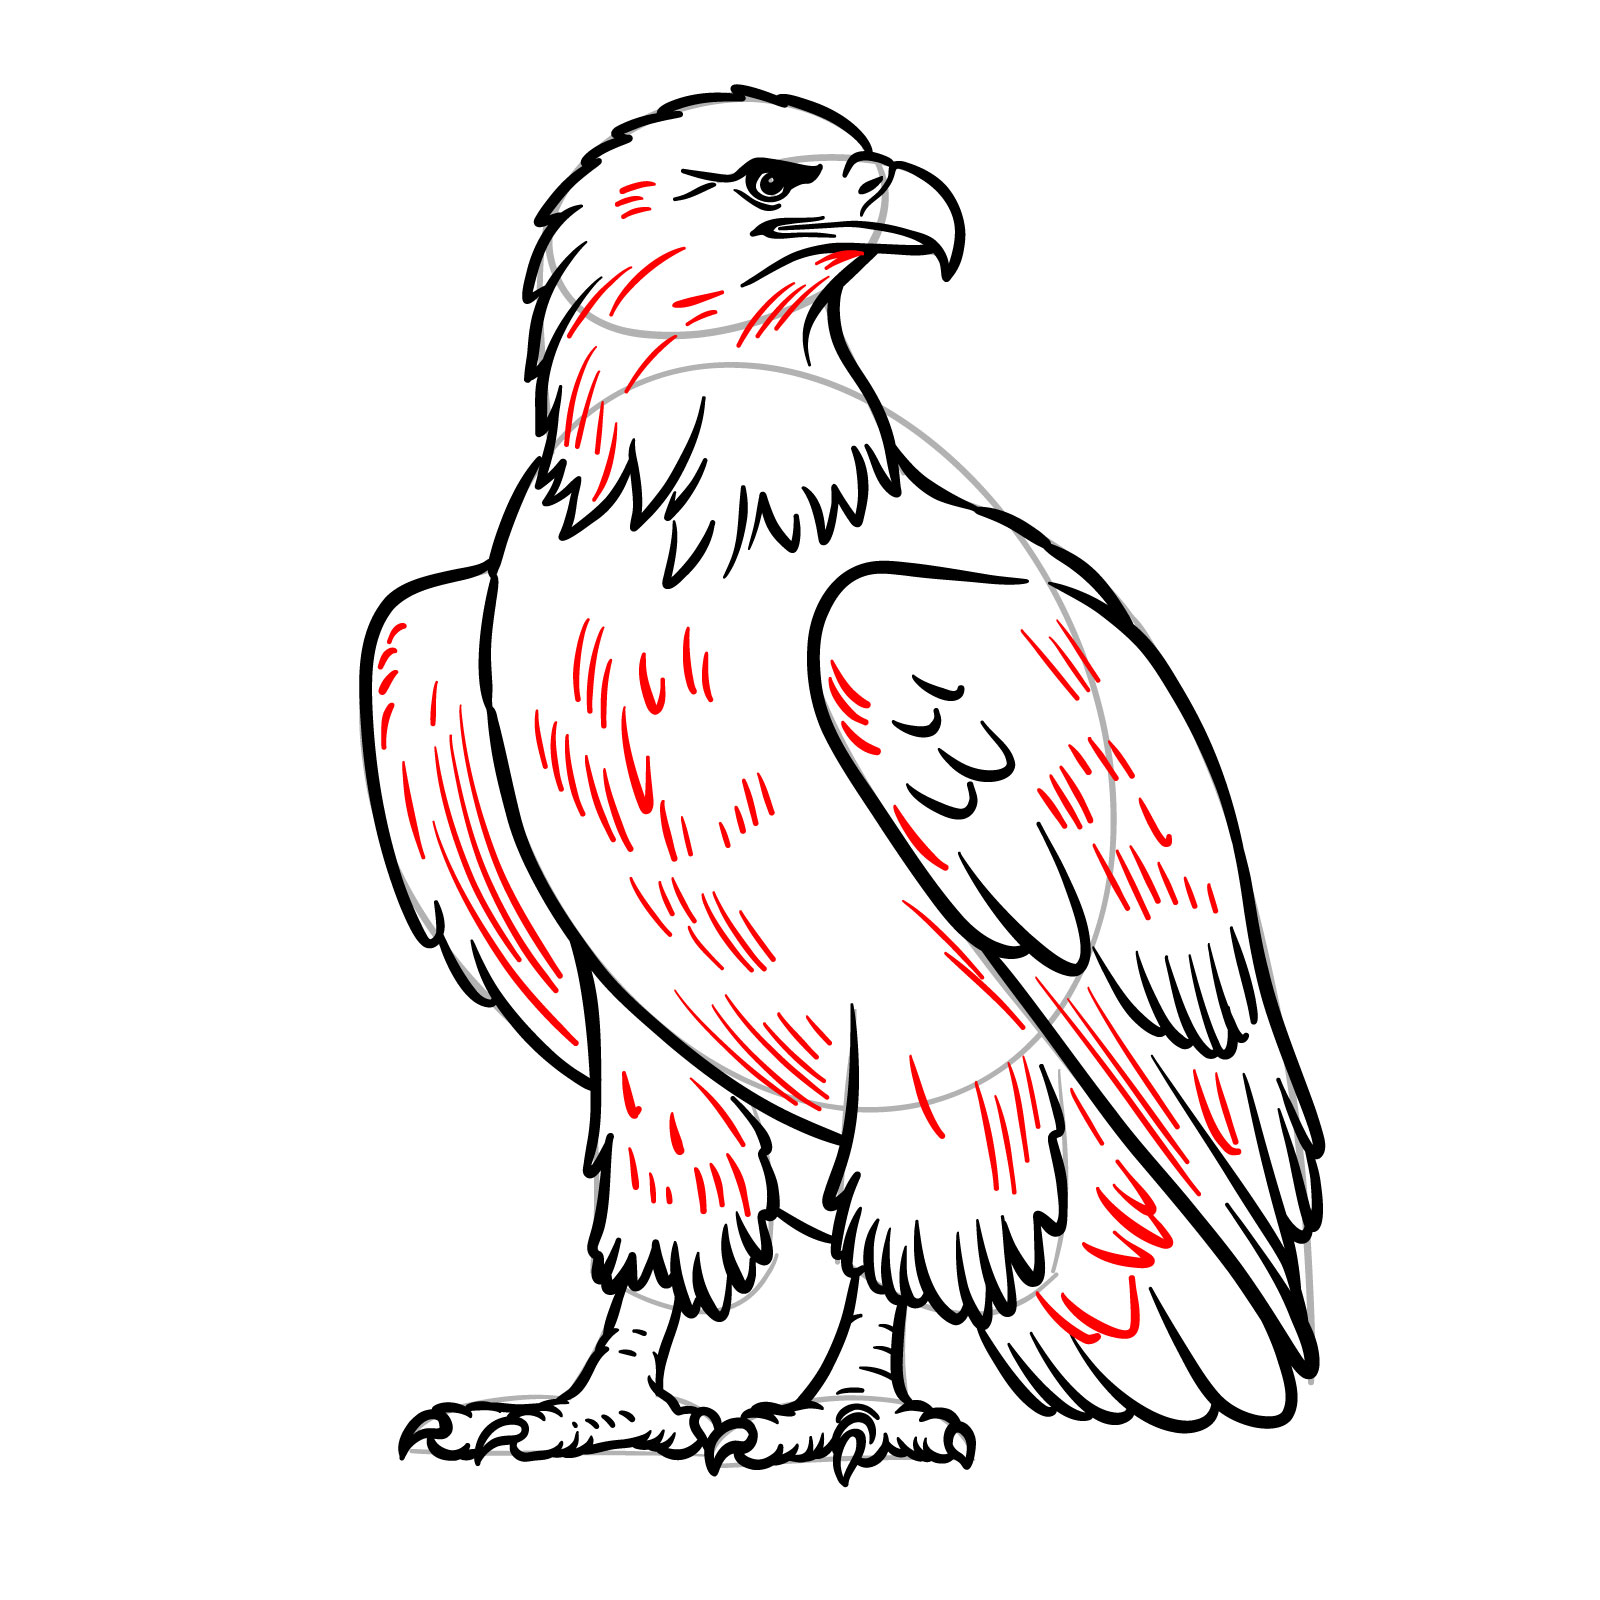
Step 18 – Optionally, add fine lines on the body and head to suggest texture and feather patterns. This step enhances the overall appearance of the drawing.
Step 19 – Erase the basic sketch lines to clean up your drawing. If you prefer, ink over the lines for a finished look. Wait for the ink to dry before erasing any pencil marks.
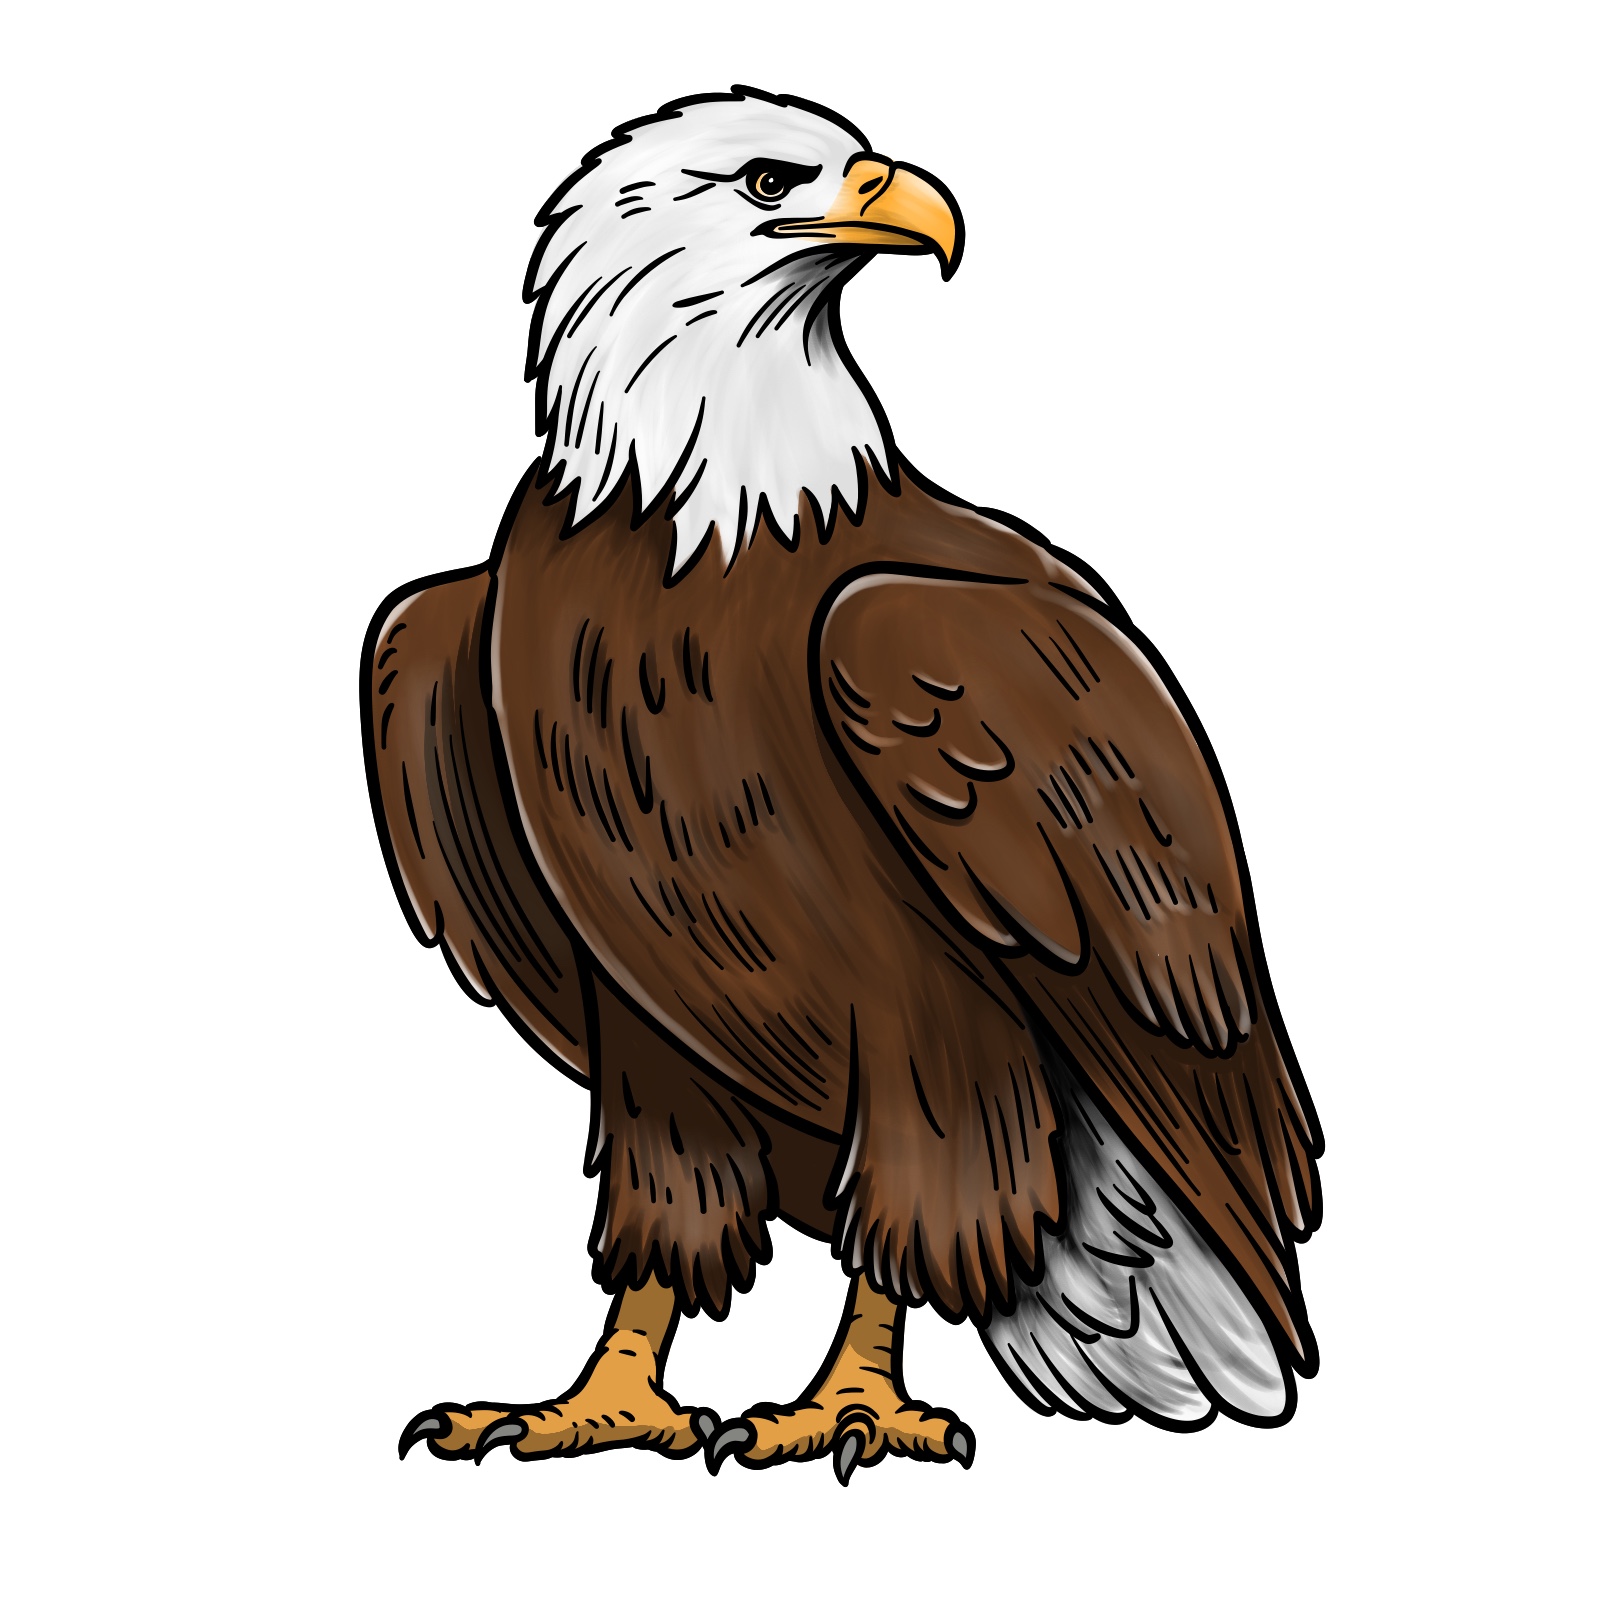
Step 20 – Color and shade the drawing if desired. Use grey shades for the head and tail, brown for the body and wings, and yellow for the beak and talons. Add shading to emphasize depth.
Your support helps make more tutorials like this possible. If you found this guide helpful, please consider supporting my work through a small donation. Every contribution goes a long way in creating new content.
On my Patreon you can grab unique hand-made coloring pages: each one drawn by me personally. Every purchase directly supports the creation of new drawing tutorials. It's the best way to practice your skills, keep the site going, and get something truly original at the same time.
I’d love to see how your drawing turned out! Share your finished piece in the comments on this Pinterest post. You can also find more tutorials on social media:
Disclaimer: All original artworks and photos used as references for the creation of these drawing tutorials are the property of their respective owners. If your work has been featured without proper credit, please kindly leave a comment below, and the issue will be promptly addressed. We greatly appreciate your exceptional art. Thank you.
2 thoughts on “Learn How to Draw a Bald Eagle Full Body in Easy Steps”


excellent 👌 thanks
Thank you for the feedback! Glad you enjoyed it 😊