Drawing has always been an intriguing way to bring your favorite characters to life. Especially when the character in question is as iconic as Robert “Bob” Parr, better known as Mr. Incredible. Whether you’re an experienced artist or someone picking up the pencil for the first time, our guide on how to draw Mr. Incredible will guide you through every step of the process.
Understanding Mr. Incredible’s Physique and Features
Before diving into the drawing process, it’s essential to familiarize yourself with the character’s unique features. Mr. Incredible, the patriarch of the Incredible family, stands tall and muscular, showcasing strength in every curve and angle.
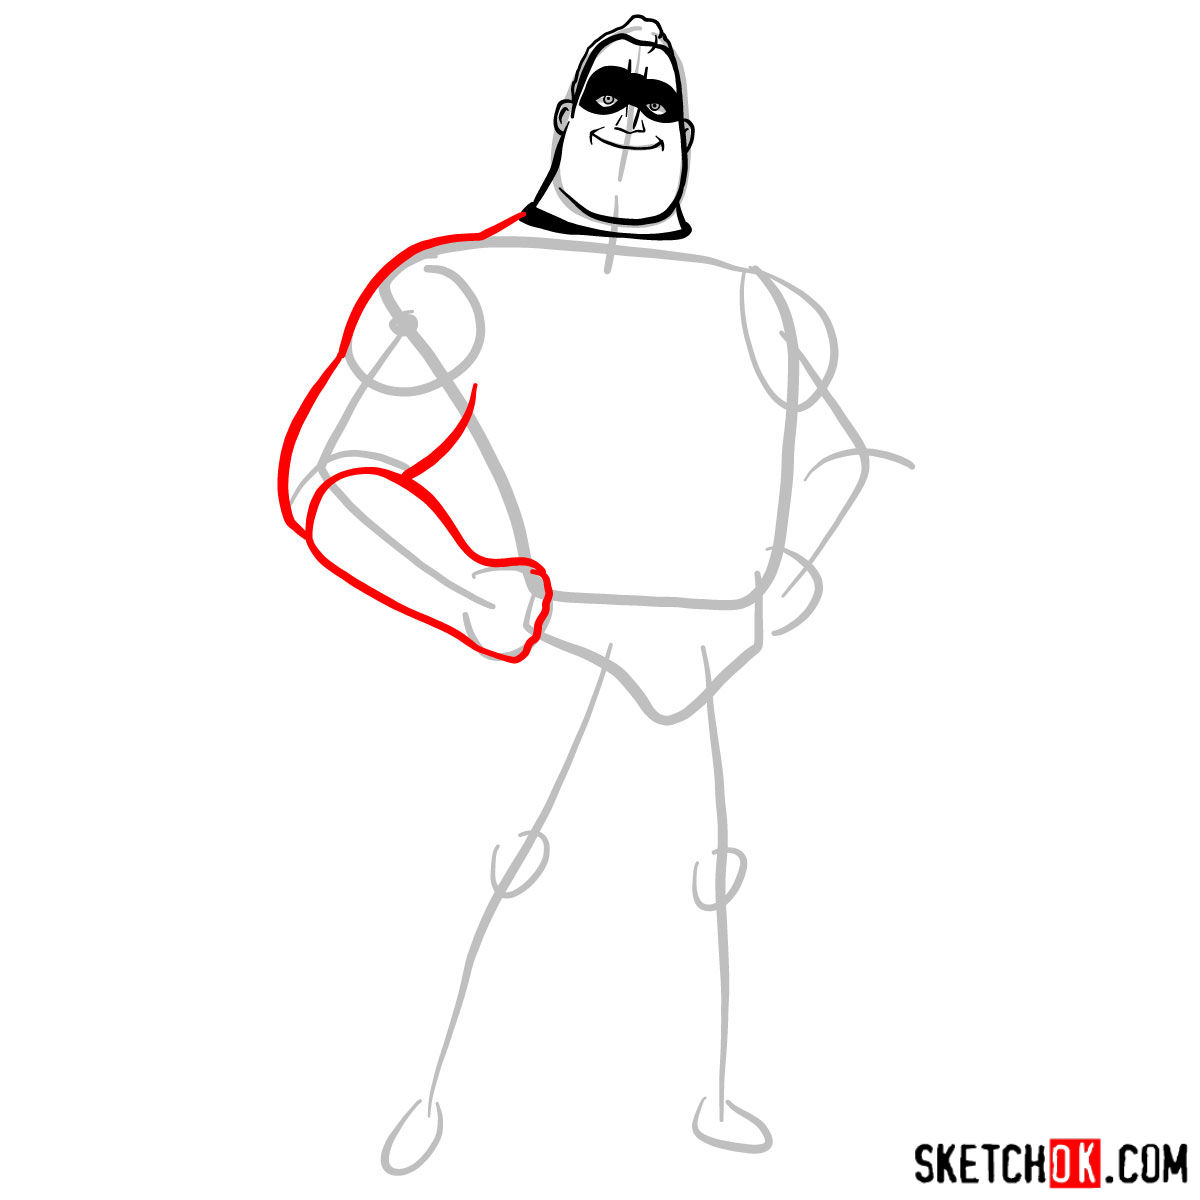
- Height and Build: Bob is a colossal figure, standing at 6 ft 7 in. His muscular build, broad shoulders, and chest are symbolic of his superhuman strength.
- Appearance Evolution: In his youthful days, a 25-year-old Bob sported a slim waist. However, with time, life’s challenges, and perhaps a few too many dinners, he developed a more rounded physique by the age of 40. But, being the superhero he is, he embarked on a rigorous training regime, regaining much of his former glory.
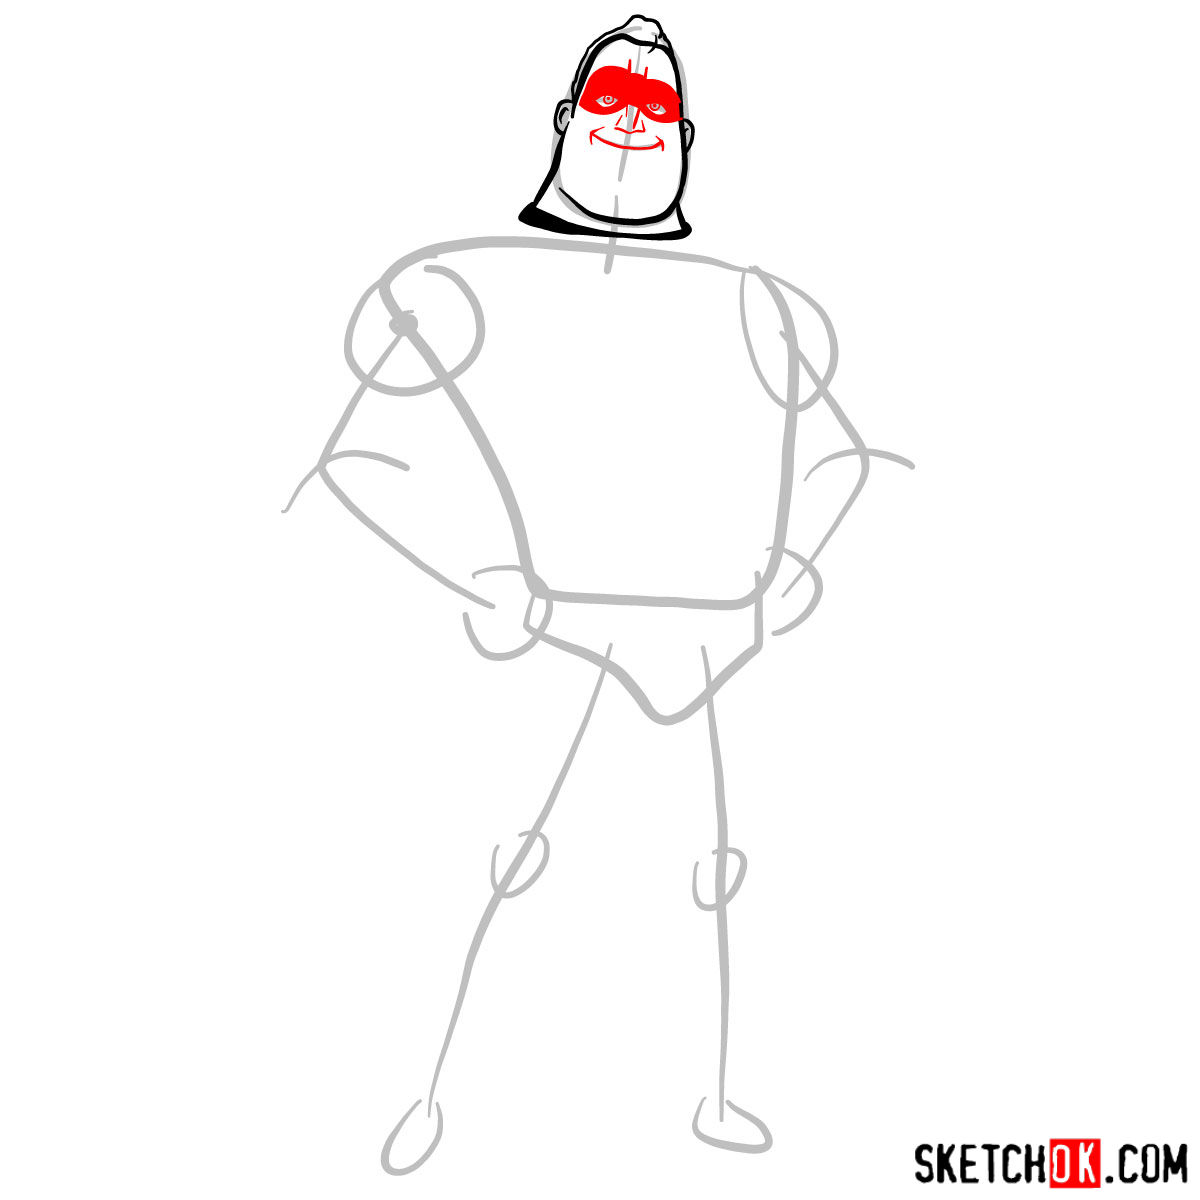
- Facial Features: Hair (though slightly receding with age), fair skin, and piercing blue eyes complete his look.
Additionally, while focusing on Mr. Incredible, you might also consider drawing his dynamic family members, like Helen Parr or Dash, to add more depth and context to your art piece.
Decoding the Drawing Guide
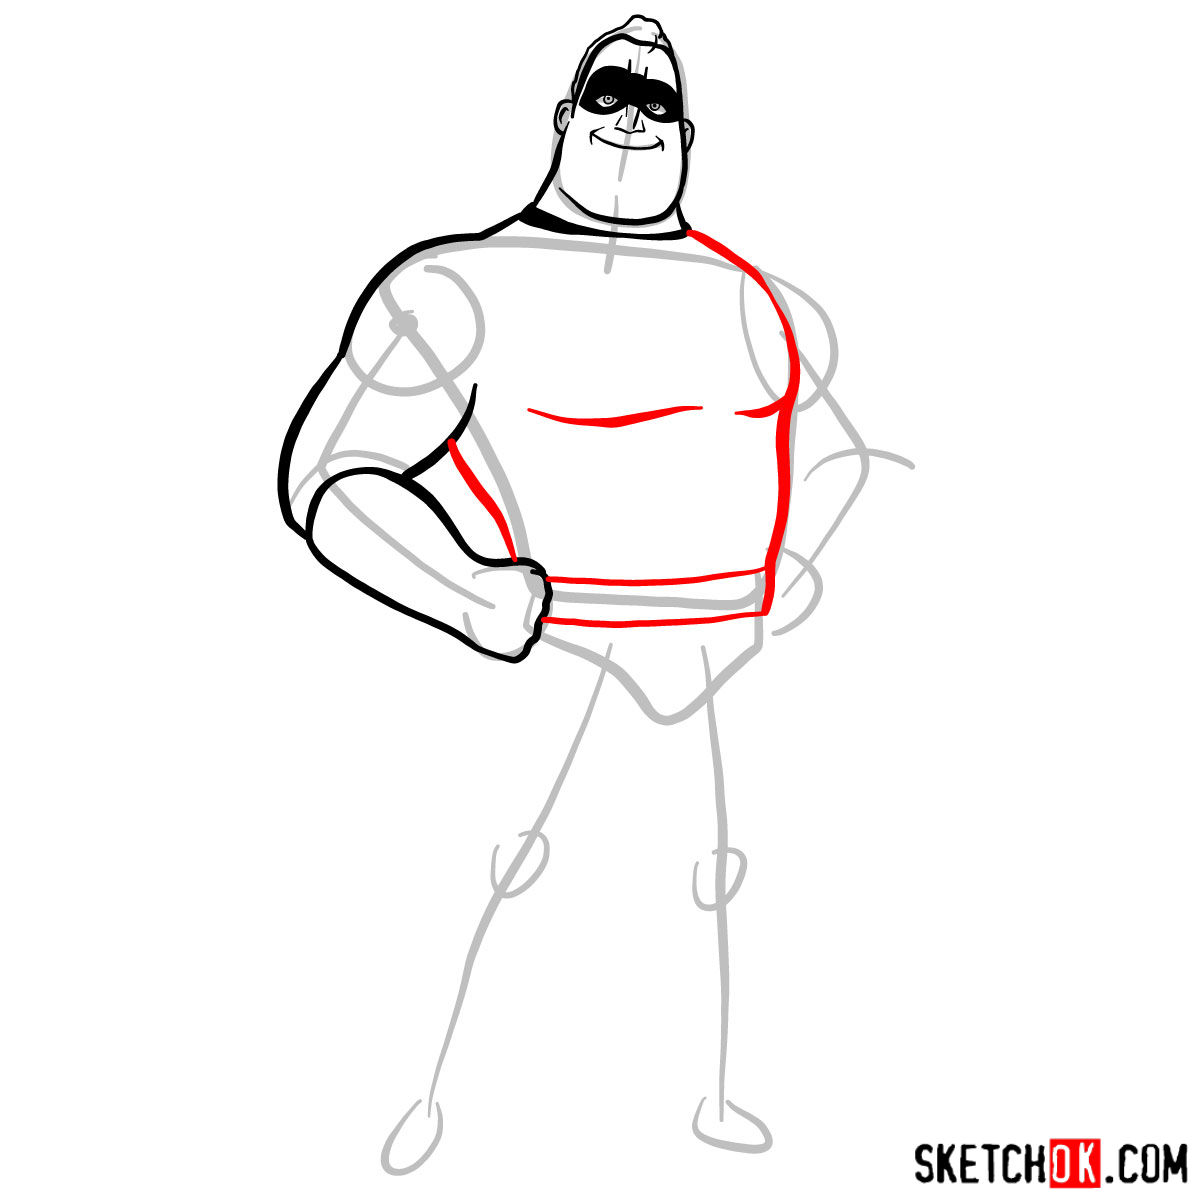
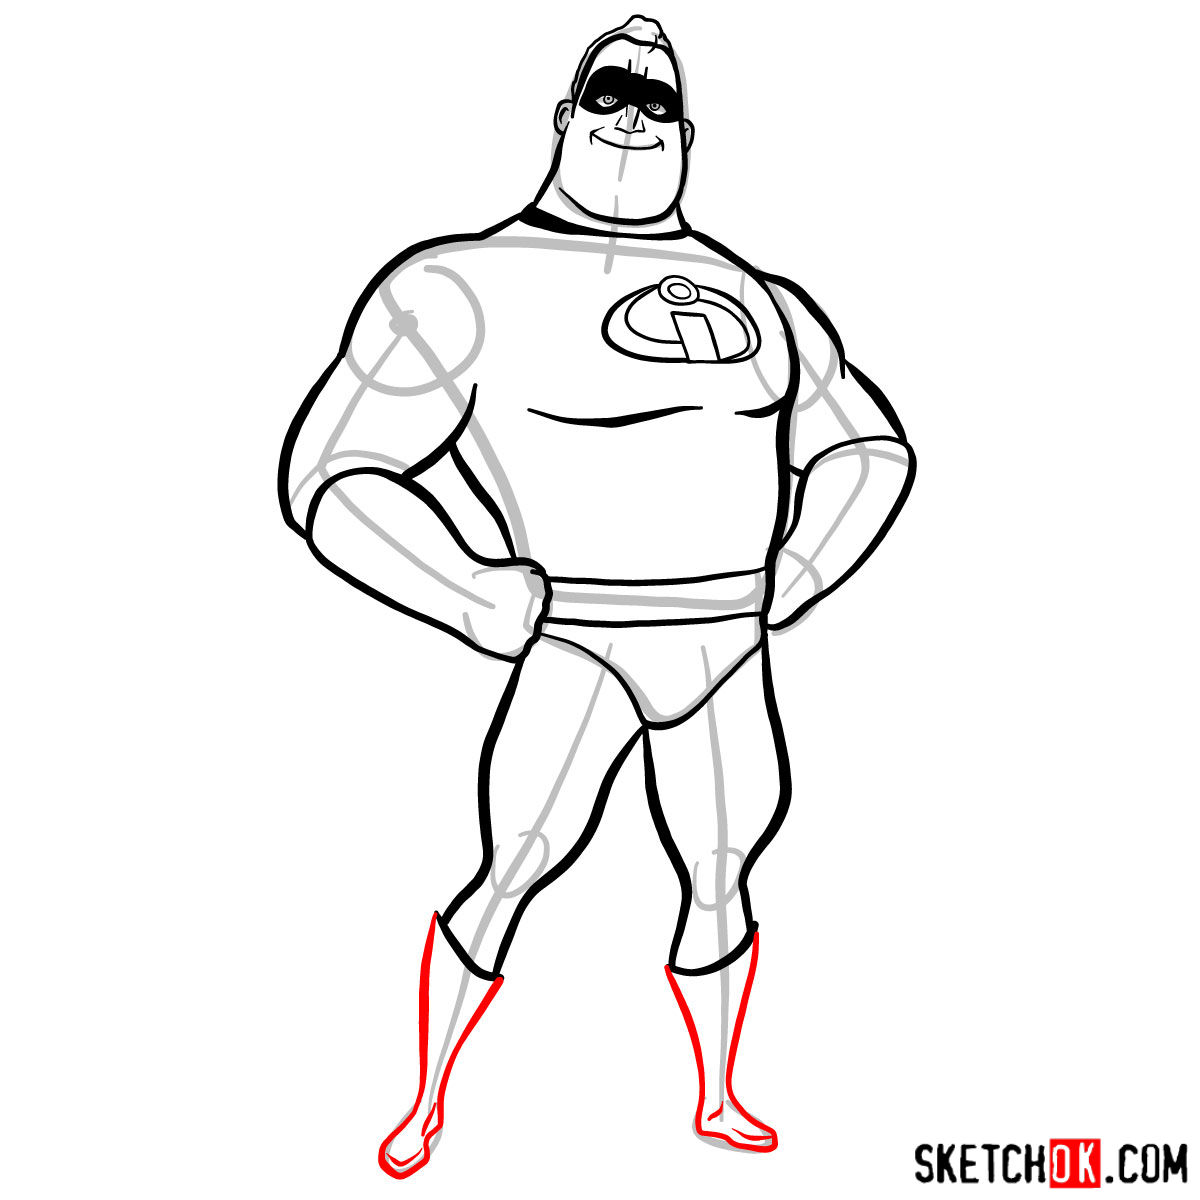
Understanding the guidelines is crucial before you embark on your drawing journey. Our tutorial uses a color-coded system to make the process intuitive.
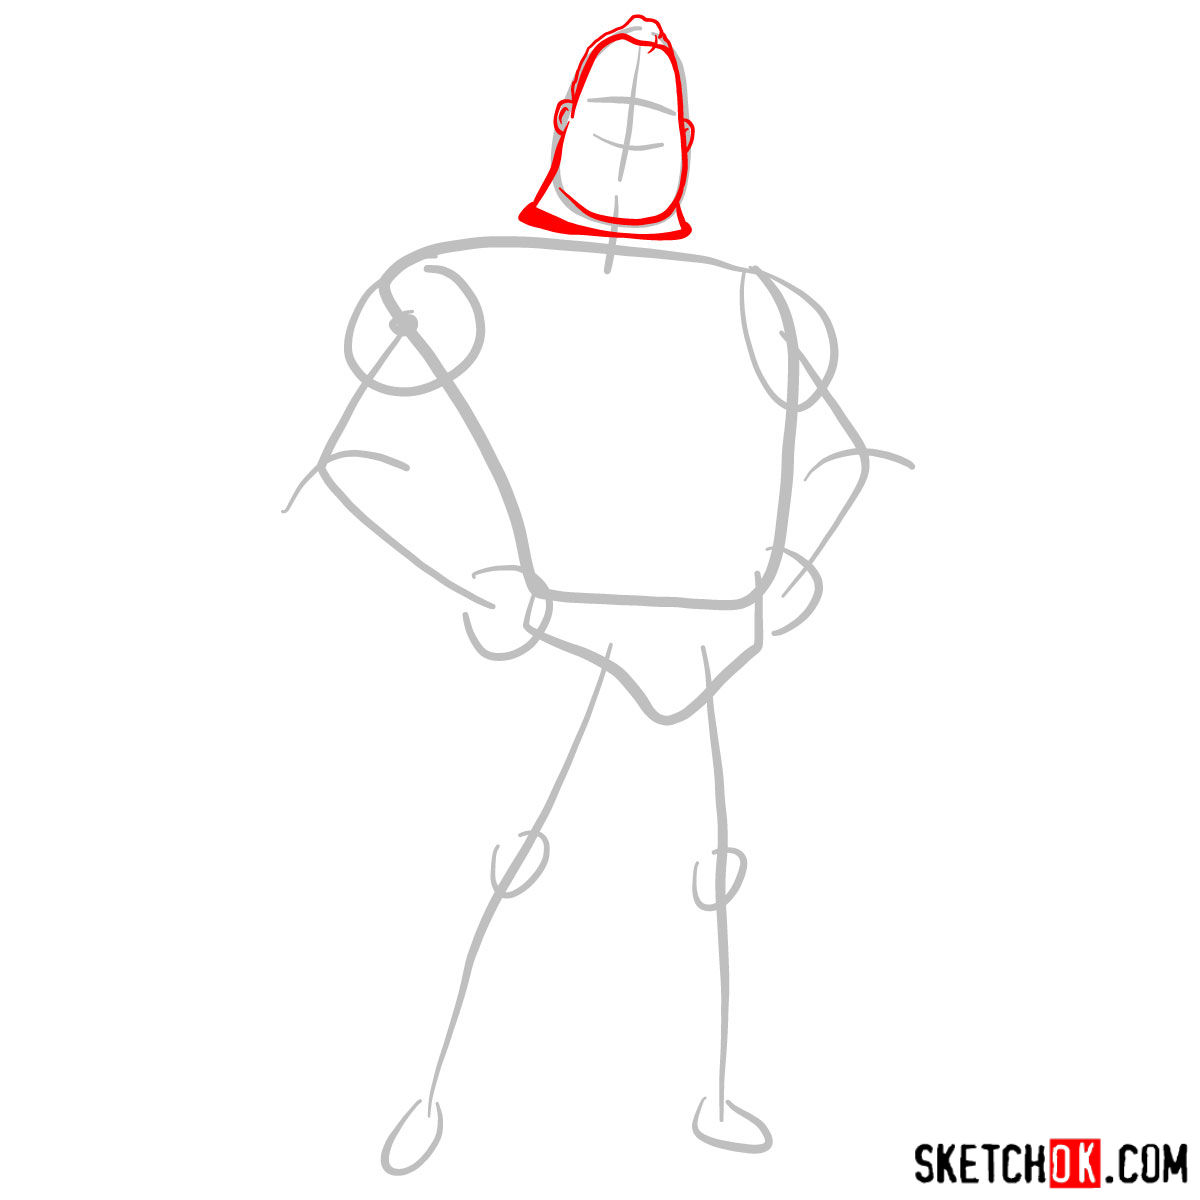
- Red Color: Represents the current step. Focus on this and ensure you get it right.
- Black Color: Indicates lines you’ve previously drawn. It’s a reference point to help maintain proportion and accuracy.
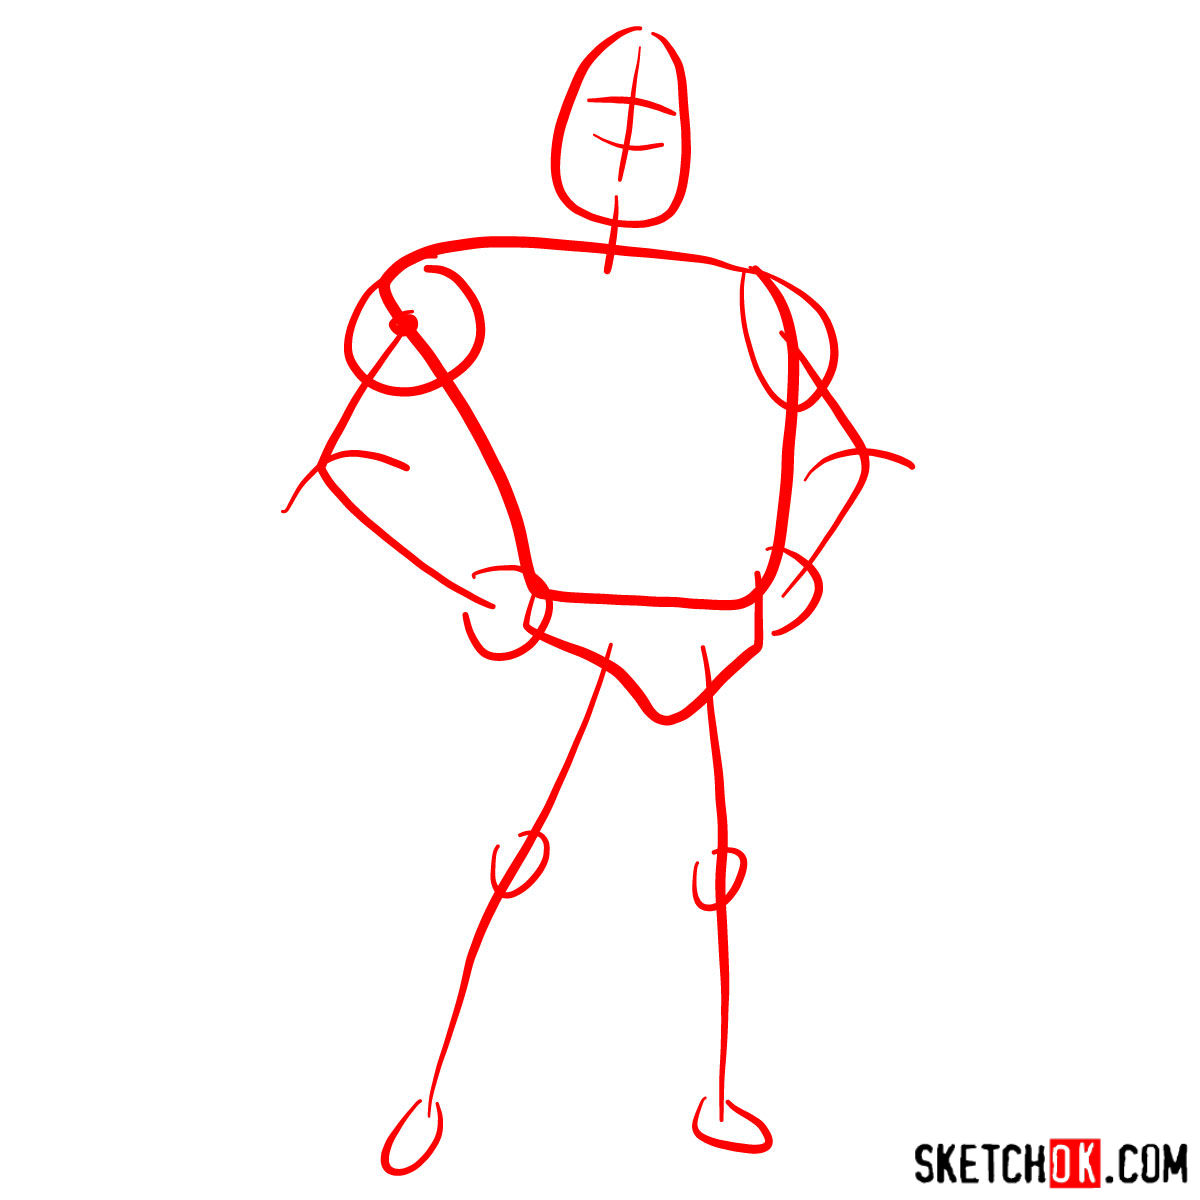
- Grey Color: Denotes the basic sketch or structure. It forms the foundation of your drawing, especially in the first step where you lay down the essential proportions using light pencil strokes.
There are 11 steps in total, starting with the foundation and progressing to intricate details. Once satisfied with the sketch, artists may choose to ink it. When inking, ensure the ink dries thoroughly before erasing any pencil lines to avoid smudging and maintain the crispness of the drawing.

")
Frequently Asked Questions
How can I best capture Mr. Incredible’s muscular physique?
Start with broad strokes to outline his robust frame. Focus on the width of his shoulders, chest, and biceps. Drawing overlapping curves can help depict muscles more realistically. Remember, his structure is not just about size but also about power and form.
Any tips for sketching his distinctive face?
His square jawline and prominent chin are defining features. Ensure you give them prominence. His eyes, though sharp, often carry a gentle expression, reflecting his protective nature. Capturing these subtle nuances will make your drawing more authentic.
How can I ink my sketch without smudging?
Use fine-tip inking pens for precision. Allow the ink to dry completely—usually a few minutes—before erasing pencil lines. Always test the ink on a separate paper to see its drying time. Working from the top left to bottom right (or vice versa for left-handers) can also prevent unwanted smudging.
The joy of bringing Mr. Incredible to life through your artistic endeavor is unmatched. We hope our guide on how to draw Mr. Incredible provided insights and made the process enjoyable. If you found value in our tutorial, consider supporting the SketchOk project. Your donations not only keep the initiative alive but also allow us to continually create free drawing guides. By contributing, you get the unique opportunity to suggest ideas for new tutorials.
Moreover, spread the word! Share our guide with friends, family, or on your social platforms. You never know who might discover a newfound passion for drawing. Stay connected and updated with our latest tutorials by following us on our social media platforms.
Thank you for being a part of our community, and remember, every stroke matters. Keep practicing, keep drawing, and most importantly, keep enjoying the process!