Hello everyone, today I’m here with a new tutorial on how to draw Levi Ackerman, often known as Captain Levi, the squad captain of the Special Operations Squad within the Survey Corps. He is celebrated as humanity’s strongest soldier, and his character design is iconic within the anime and manga series. This tutorial is designed to help you draw Levi in various styles, capturing his distinct look and personality.
Each Levi Ackerman drawing guide consists of a series of images that break down the drawing process into manageable steps. By focusing on each step sequentially, you gradually build upon your work until the full image emerges. I’m working on similar tutorials for Mikasa and Eren, but if you don’t want to wait and sketch these characters next, you can check the guides that are already posted: Eren as a titan, or full body Mikasa.
Color Coding and Guidelines
To aid in navigation and focus during the drawing process, I’ve implemented a color-coding system within each step-by-step image:
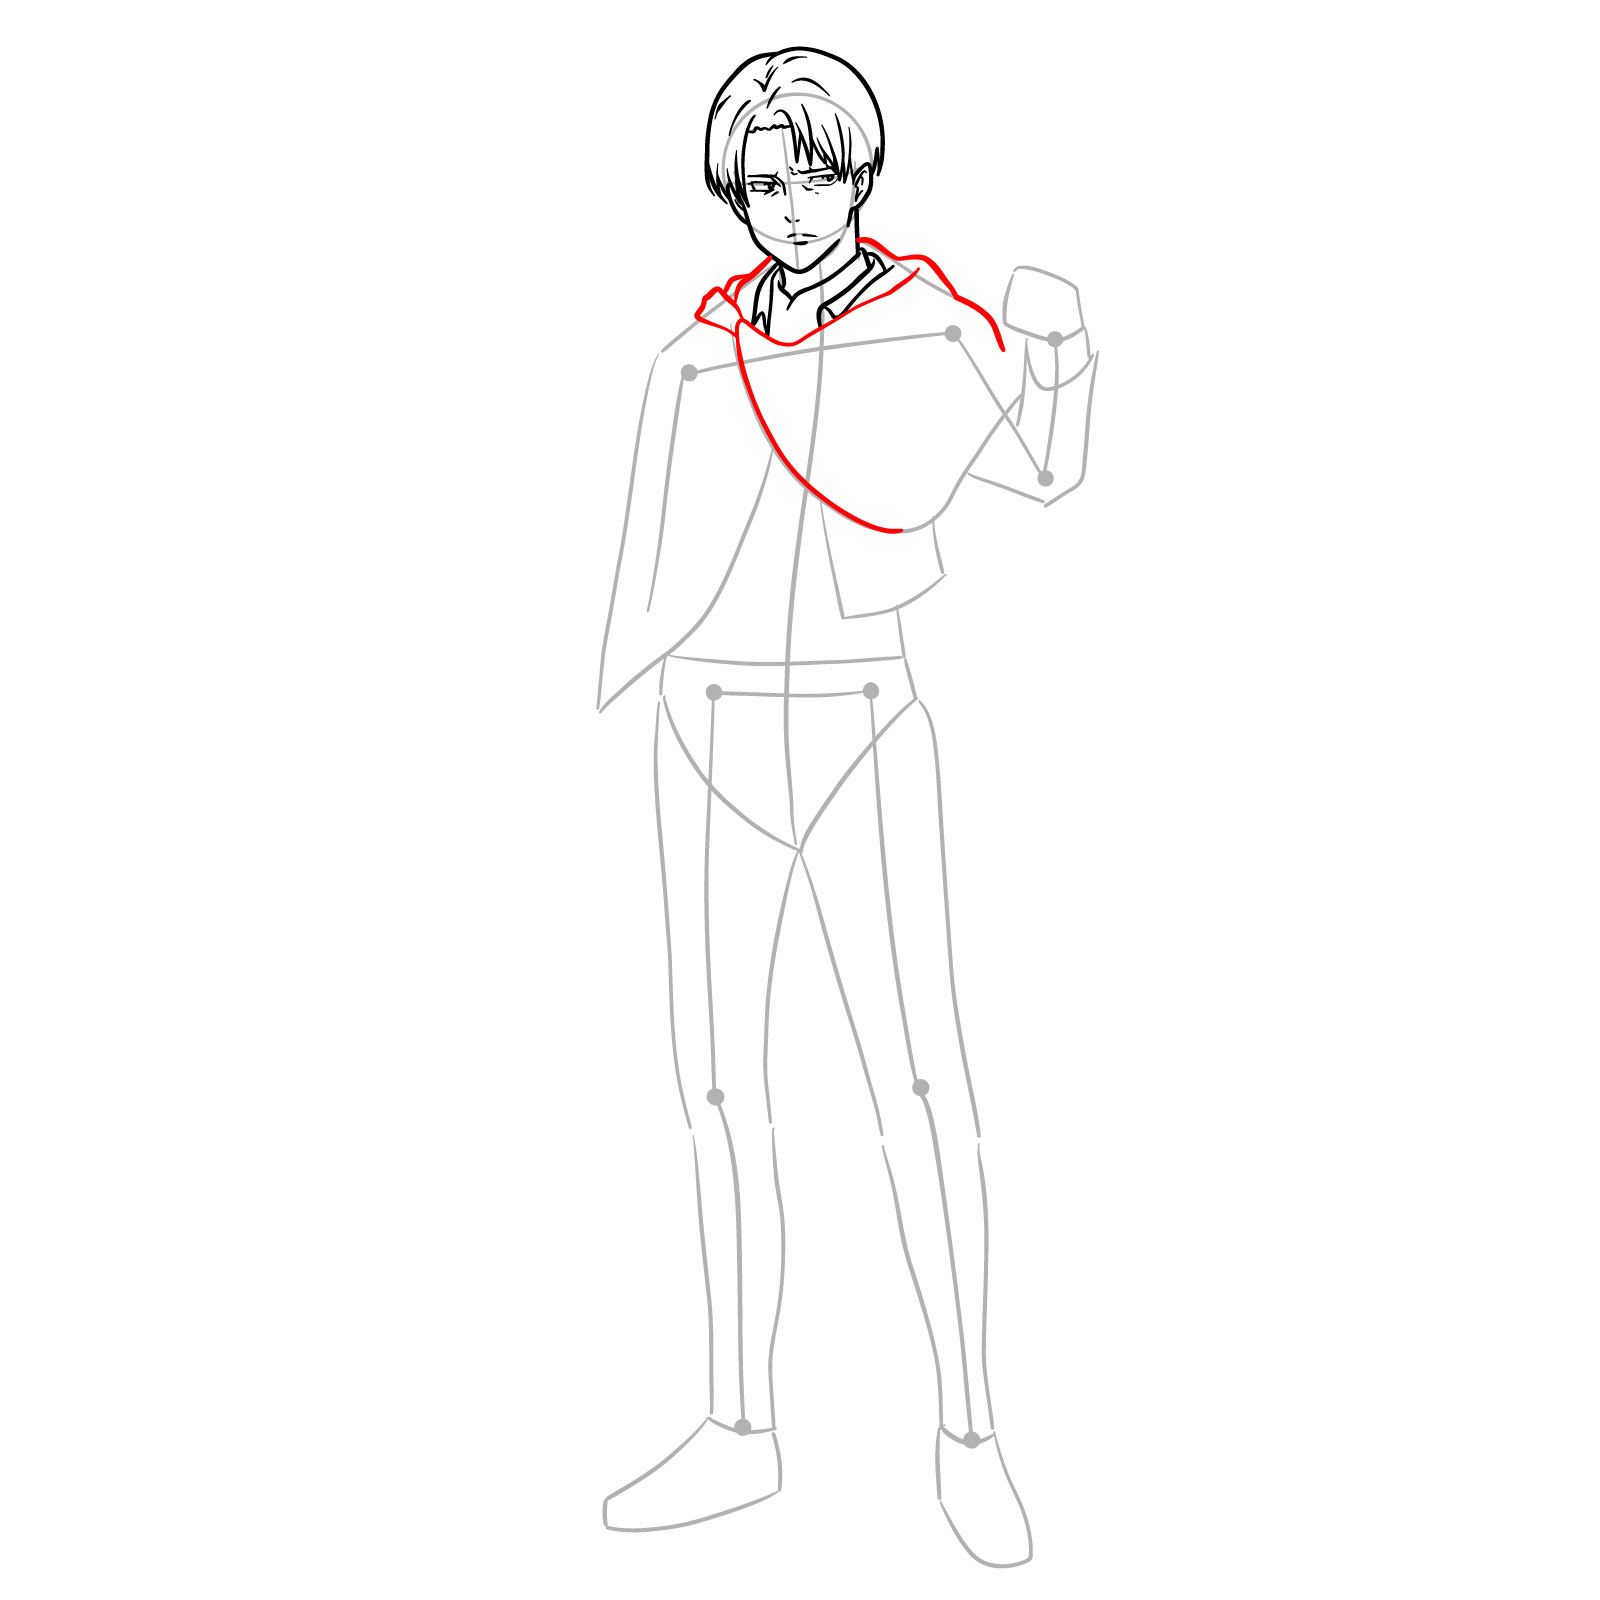
Red Color: Indicates the current step you should be focusing on. This highlights new lines or details added at this stage.
Black Color: Represents the lines and details you have previously drawn. This helps in maintaining perspective on how the current step integrates with the work done so far.
Grey Color: Shows the basic sketch or underlying guide lines. These are initial shapes and lines that form the foundation of your drawing.
Each Levi drawing guide varies in complexity and the number of steps required to complete it. Generally, the more detailed and dynamic the pose, the more steps there are in the guide. The first stage of every guide emphasizes creating a basic sketch, laying down the structural framework of Levi’s figure, which is crucial for achieving accurate proportions and positioning.
Inking and Finishing Touches
Upon completing the pencil sketch, you have the option to ink your drawing. Inking involves going over the pencil lines with a pen or marker, enhancing the drawing’s clarity and contrast. Here are a few tips for inking:
Choose the right pen: Use a fine liner or a pen suitable for inking, which won’t smudge or bleed through your paper.
Steady and confident strokes: Work slowly and with confidence to produce smooth, clean lines.
Let the ink dry: Before erasing any pencil marks, ensure the ink has completely dried to prevent smudging.
Waiting for the ink to dry is crucial as it prevents the ink from smearing and ruining your work. Gently erasing the pencil sketch after the ink has dried helps in achieving a neat, polished look, leaving behind only the striking inked drawing of Captain Levi.
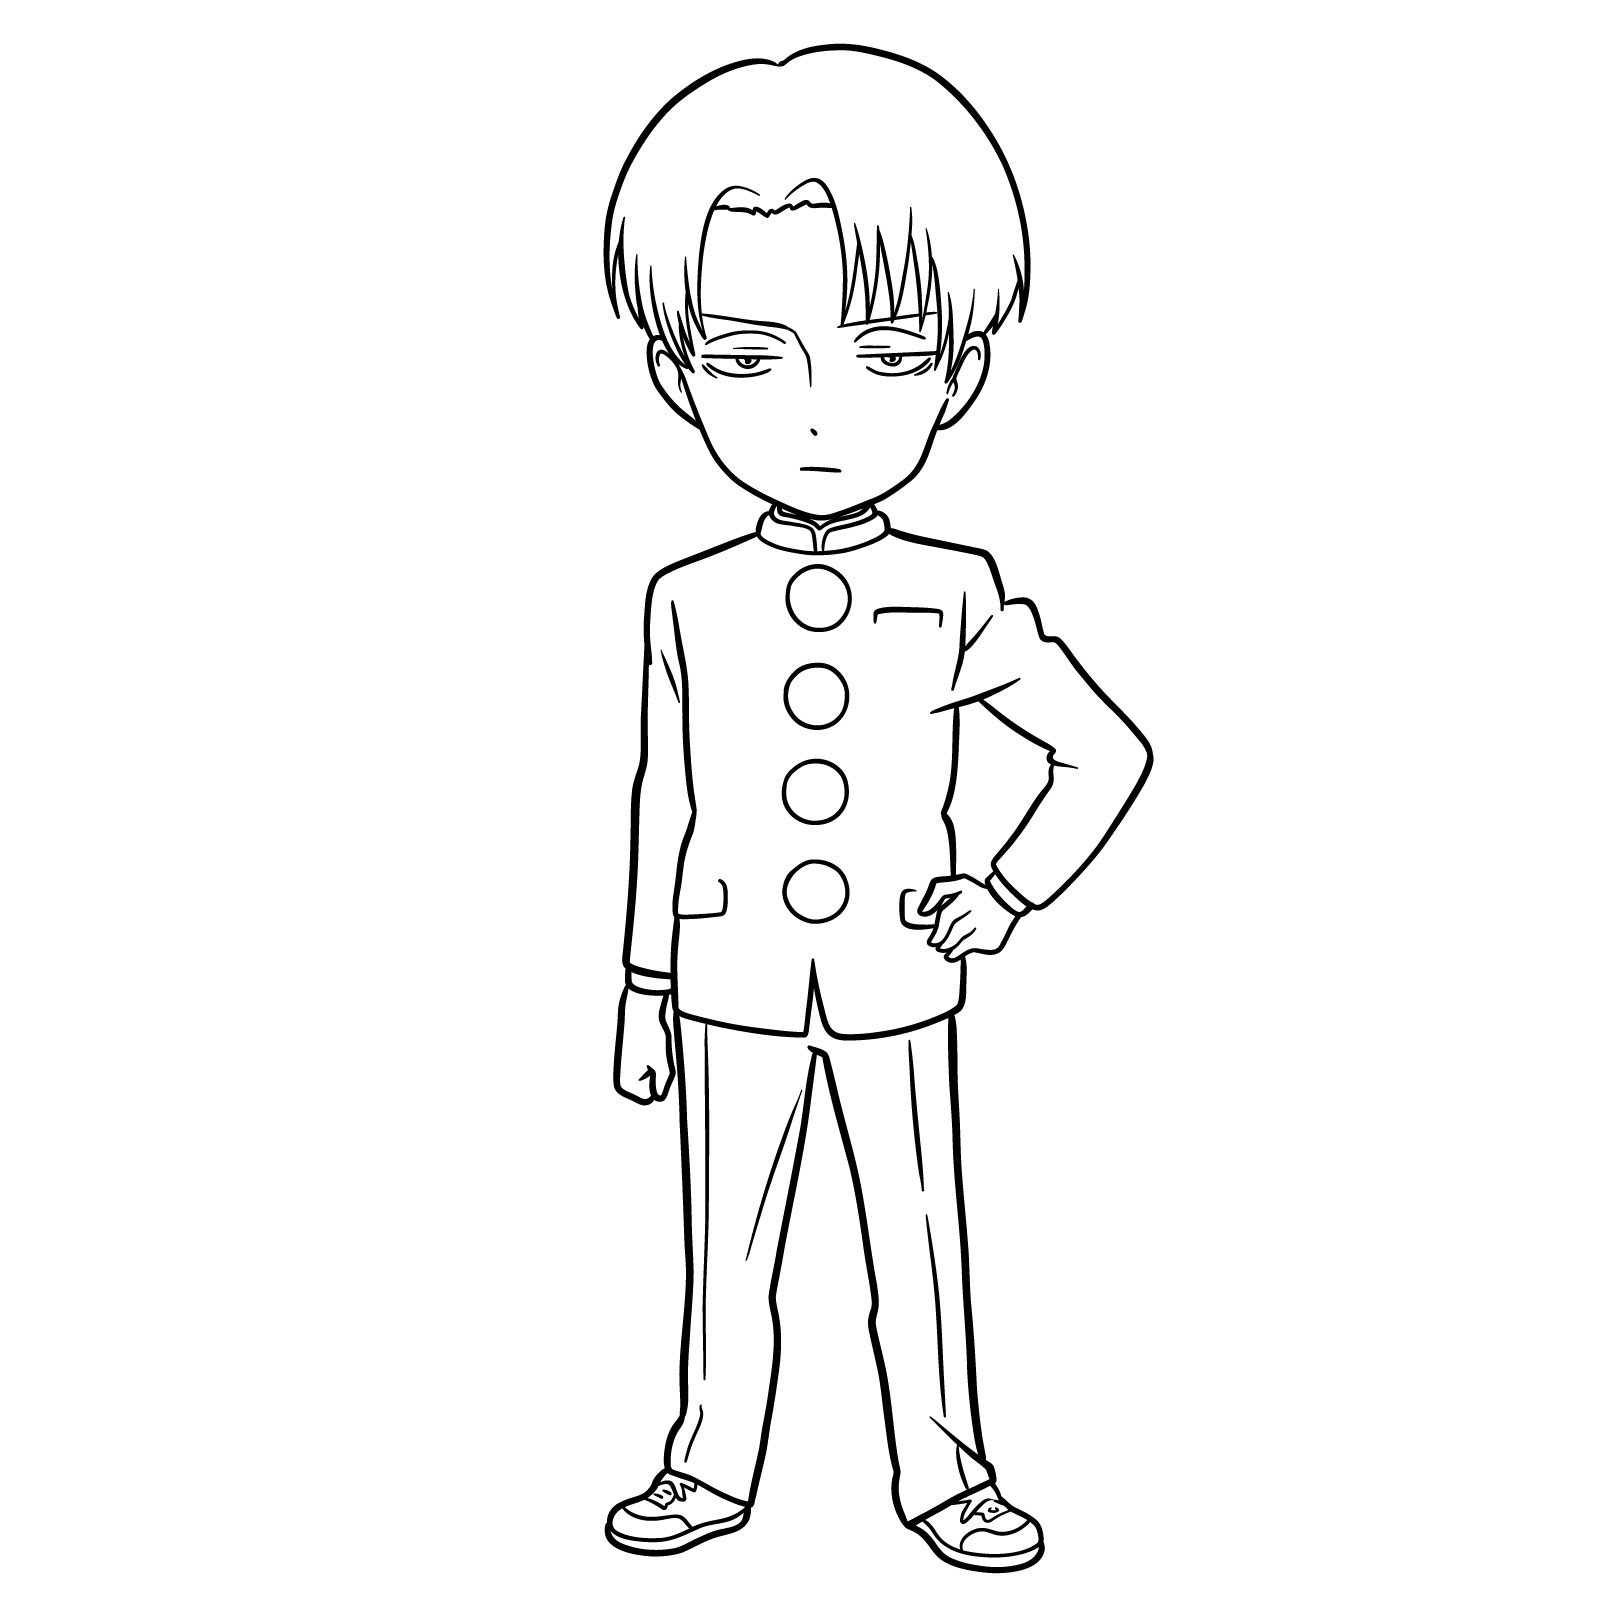
Guide 1: How to Draw Chibi Levi Ackerman
How to draw chibi Levi – finished drawing
Welcome to the first guide on how to draw chibi Captain Levi. Chibi characters are known for their exaggerated features, larger heads and eyes, which convey emotions vividly. This particular drawing captures Levi in his uniform, with the characteristic undercut curtain of straight black hair and his usual unimpressed expression. His stance is authoritative yet adorable, with one hand on his hip, reflecting his status as humanity’s strongest soldier in a more whimsical form. Over the next 19 steps, we’ll start with the stick figure to establish a dynamic pose, then move on to flesh out the basic figure. I’ll guide you through the process as we add layers of detail to bring this chibi version of Levi to life.
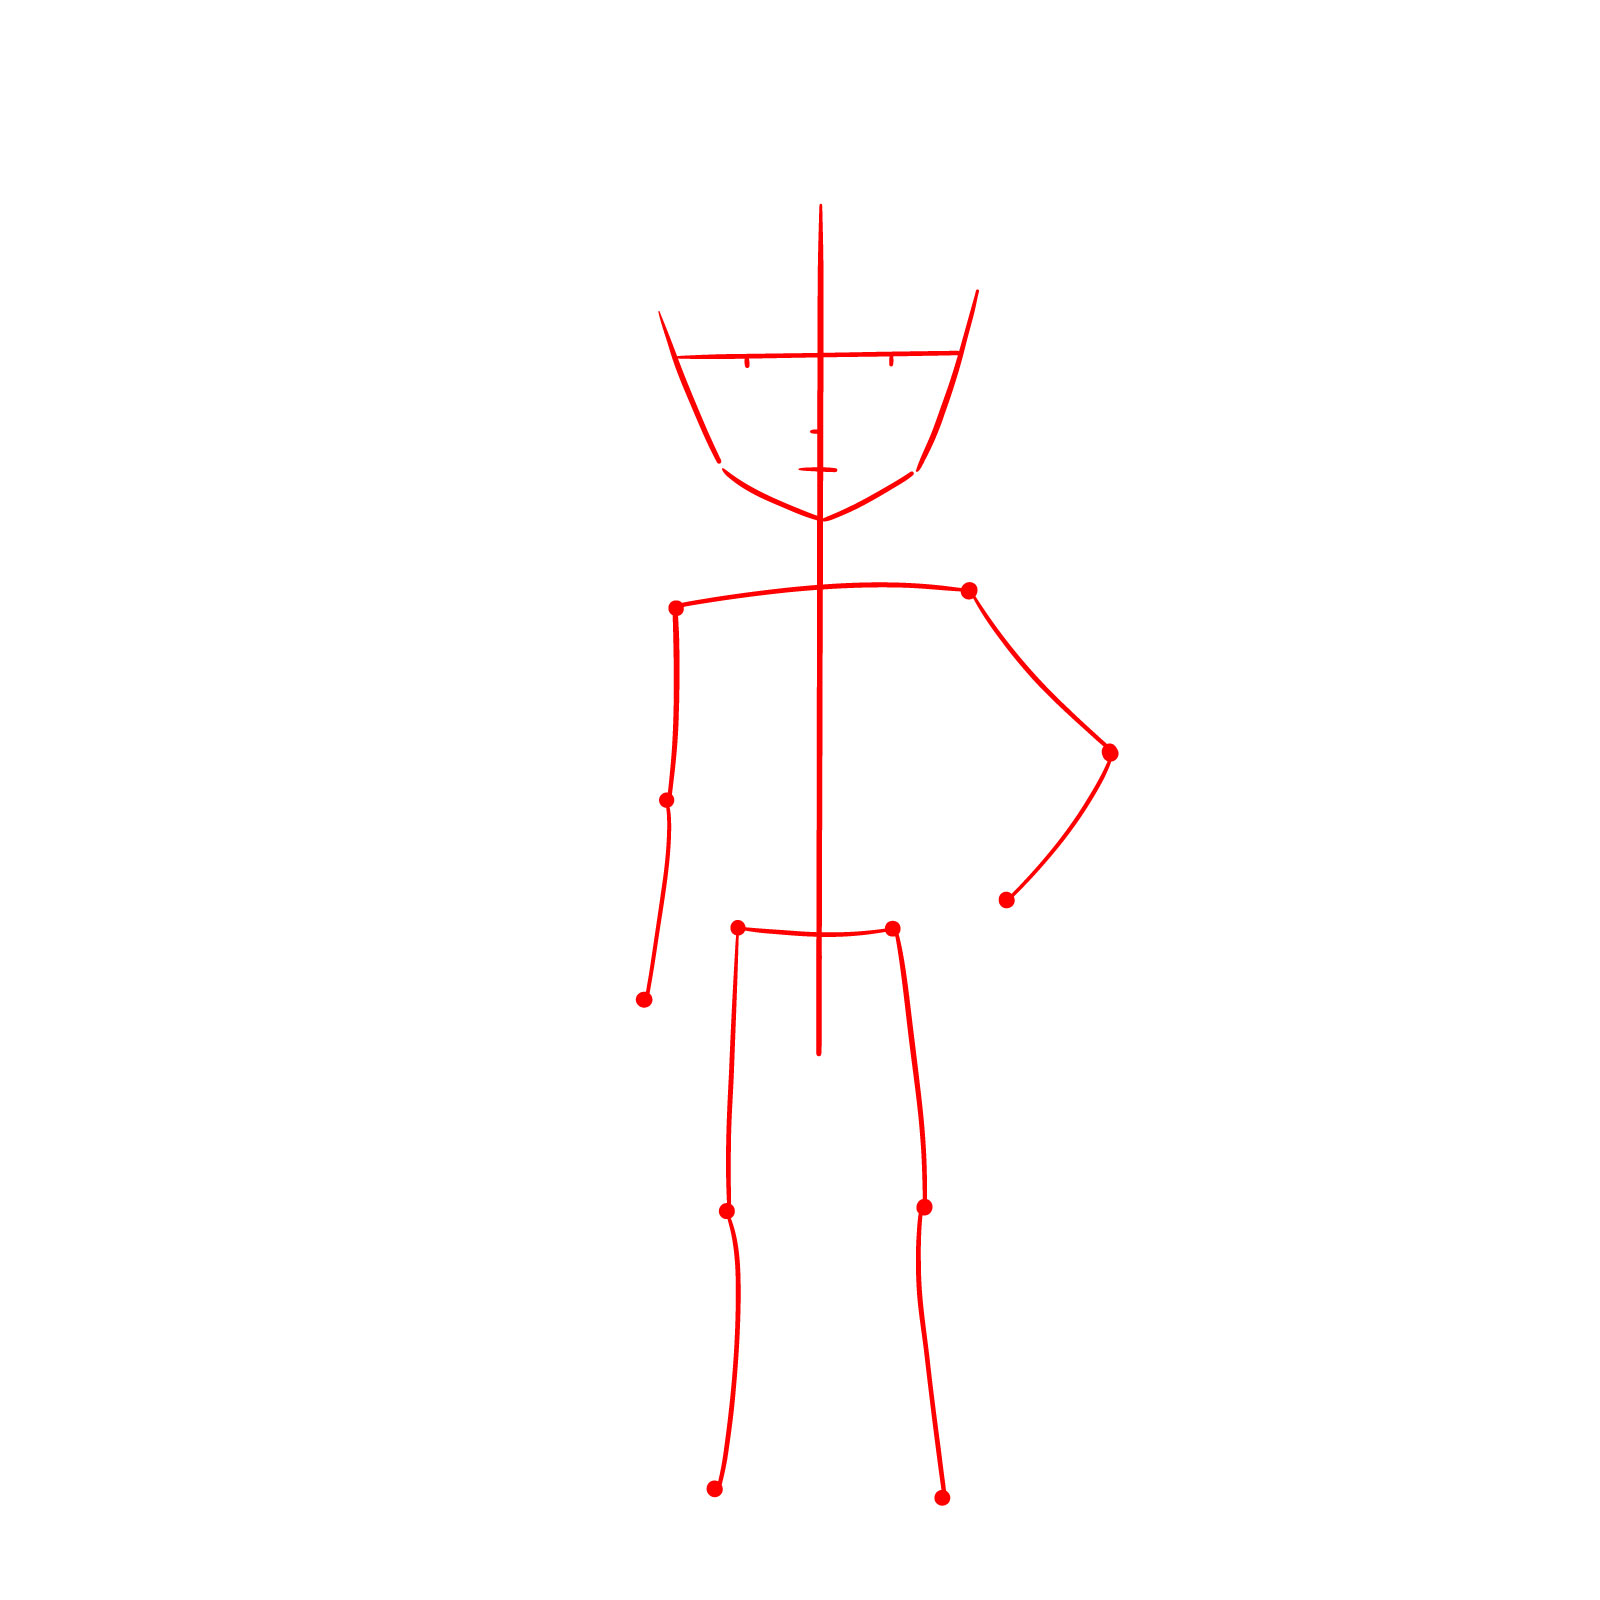
Step 01 – Begin by drawing a basic outline of the face shape using light strokes, indicating the chin at the bottom. Then, sketch a simple stick figure that includes a straight vertical line for the body axis, horizontal lines for the shoulders and hips, and additional lines for the arms and legs to establish the posture
Drawing the basic face shape and stick figure for chibi Captain Levi
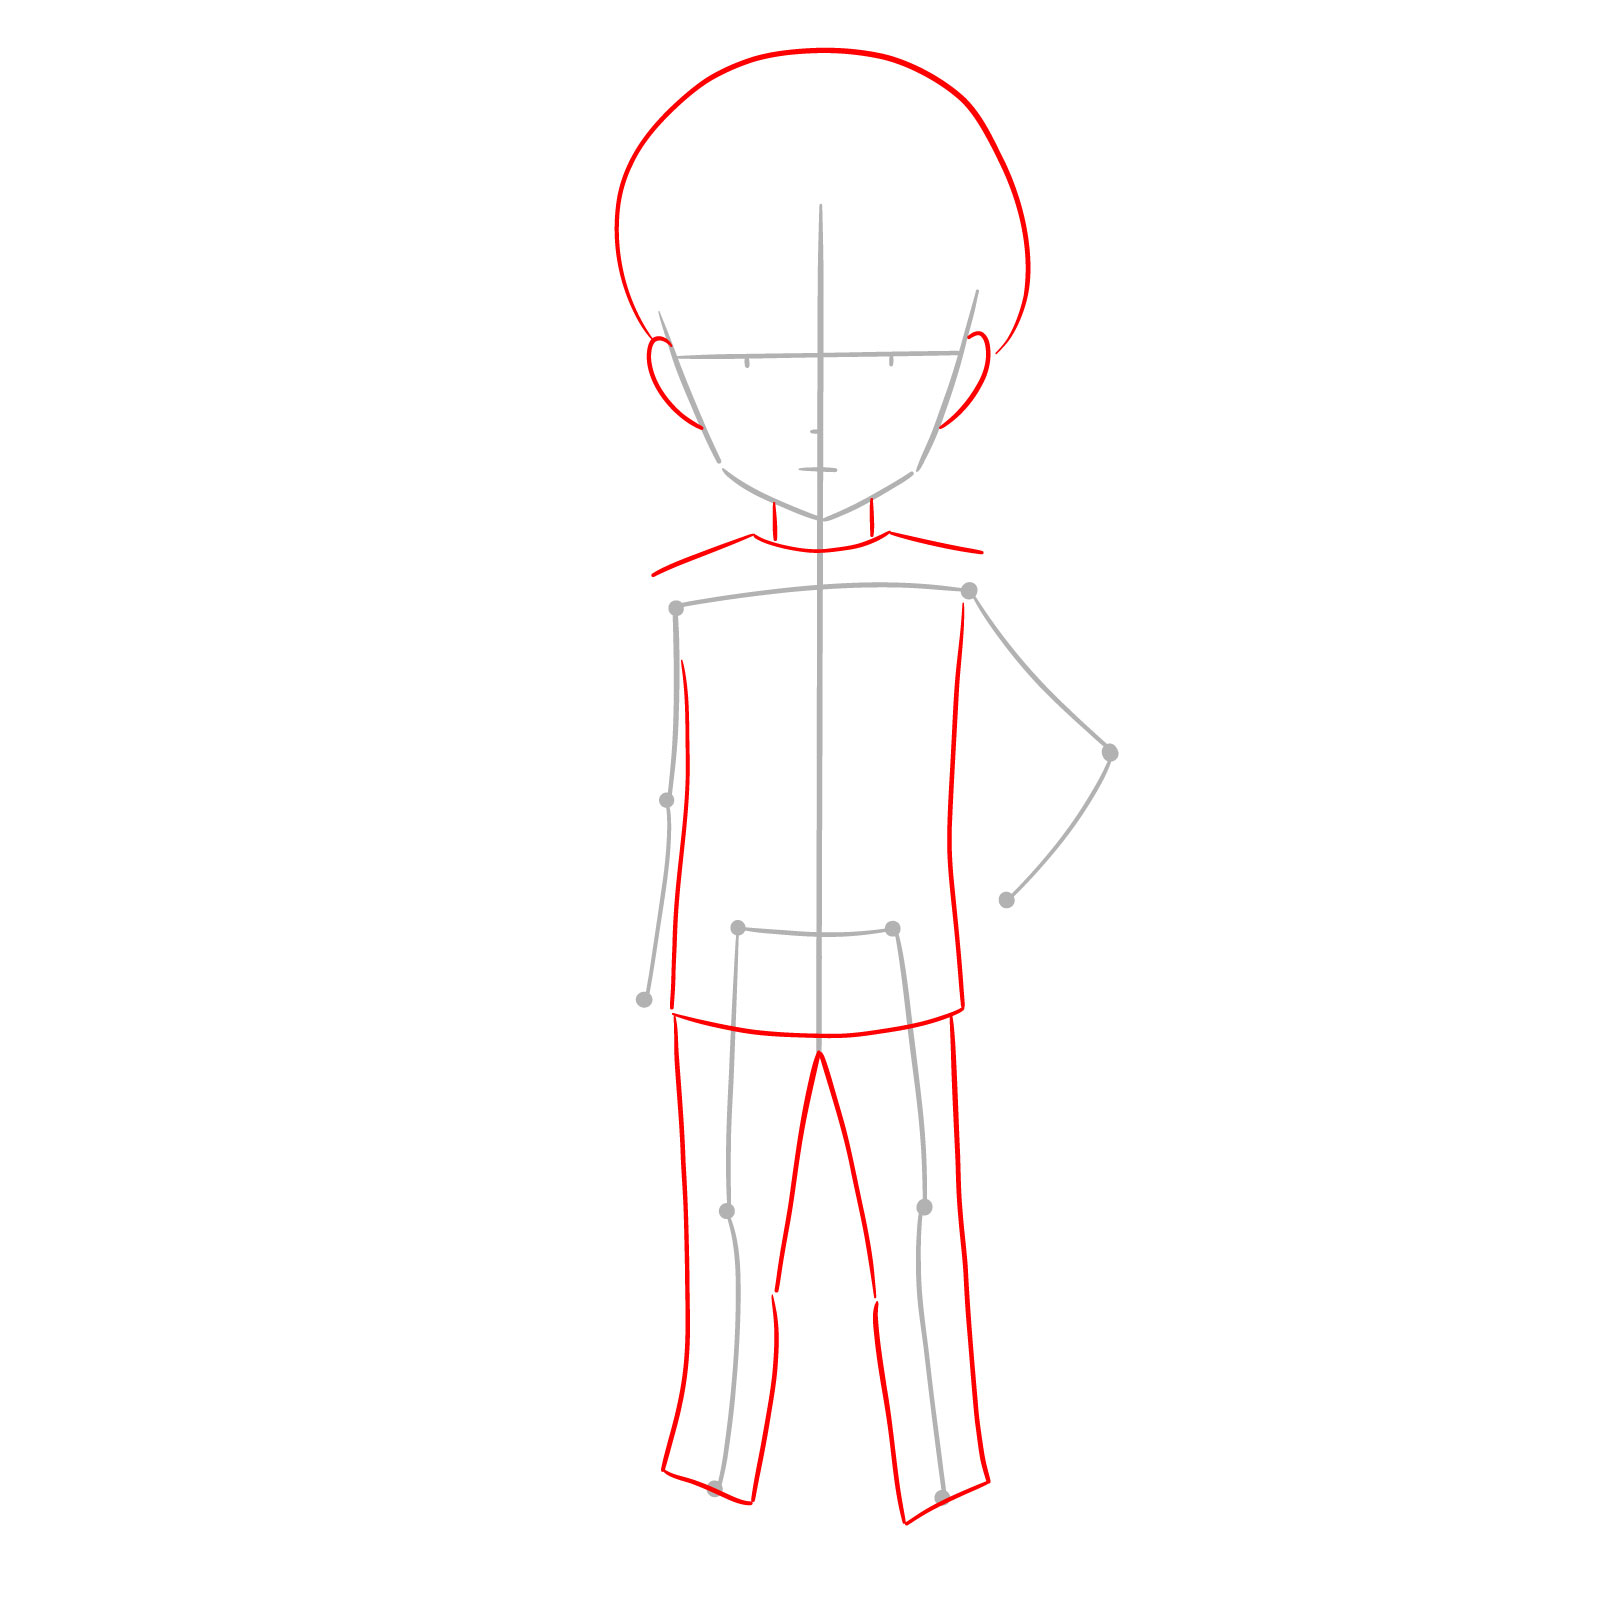
Step 02 – Sketch the head outline. Add the ears on either side of the head and two short lines for the neck. Draw the basic shapes for the torso and legs, ensuring the body’s proportions are consistent with a chibi character’s typically large head and smaller body
Sketching the head shape, ears, neck, torso, and legs
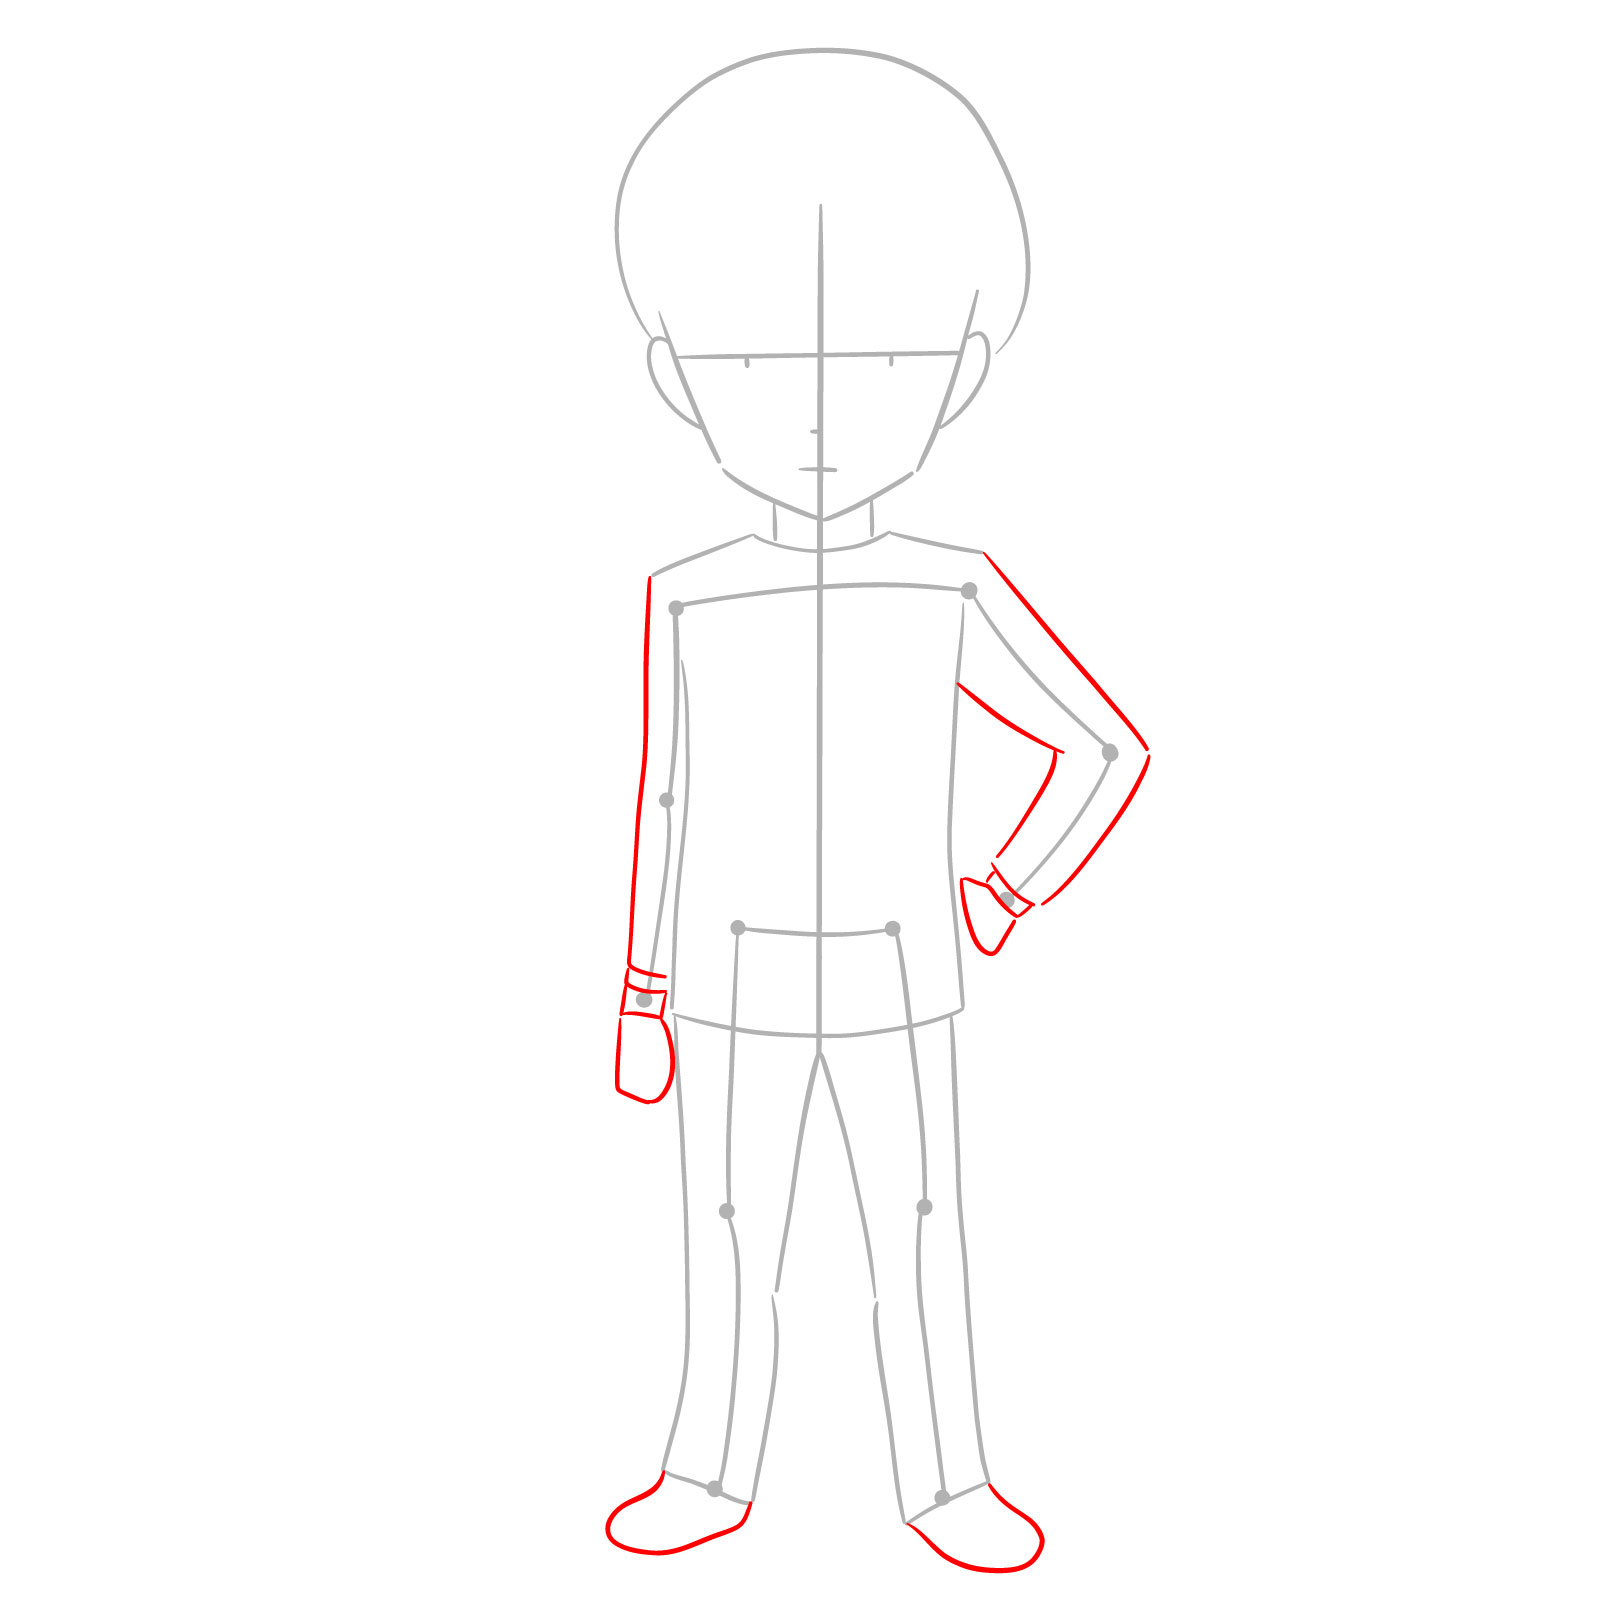
Step 03 – For this step, focus on drawing the basic shapes for the hands, making sure they’re proportionate to the chibi body size. Draw the feet with simple shapes at the ends of the leg lines, capturing the character’s stance
Sketching the hands and feet for chibi Captain Levi
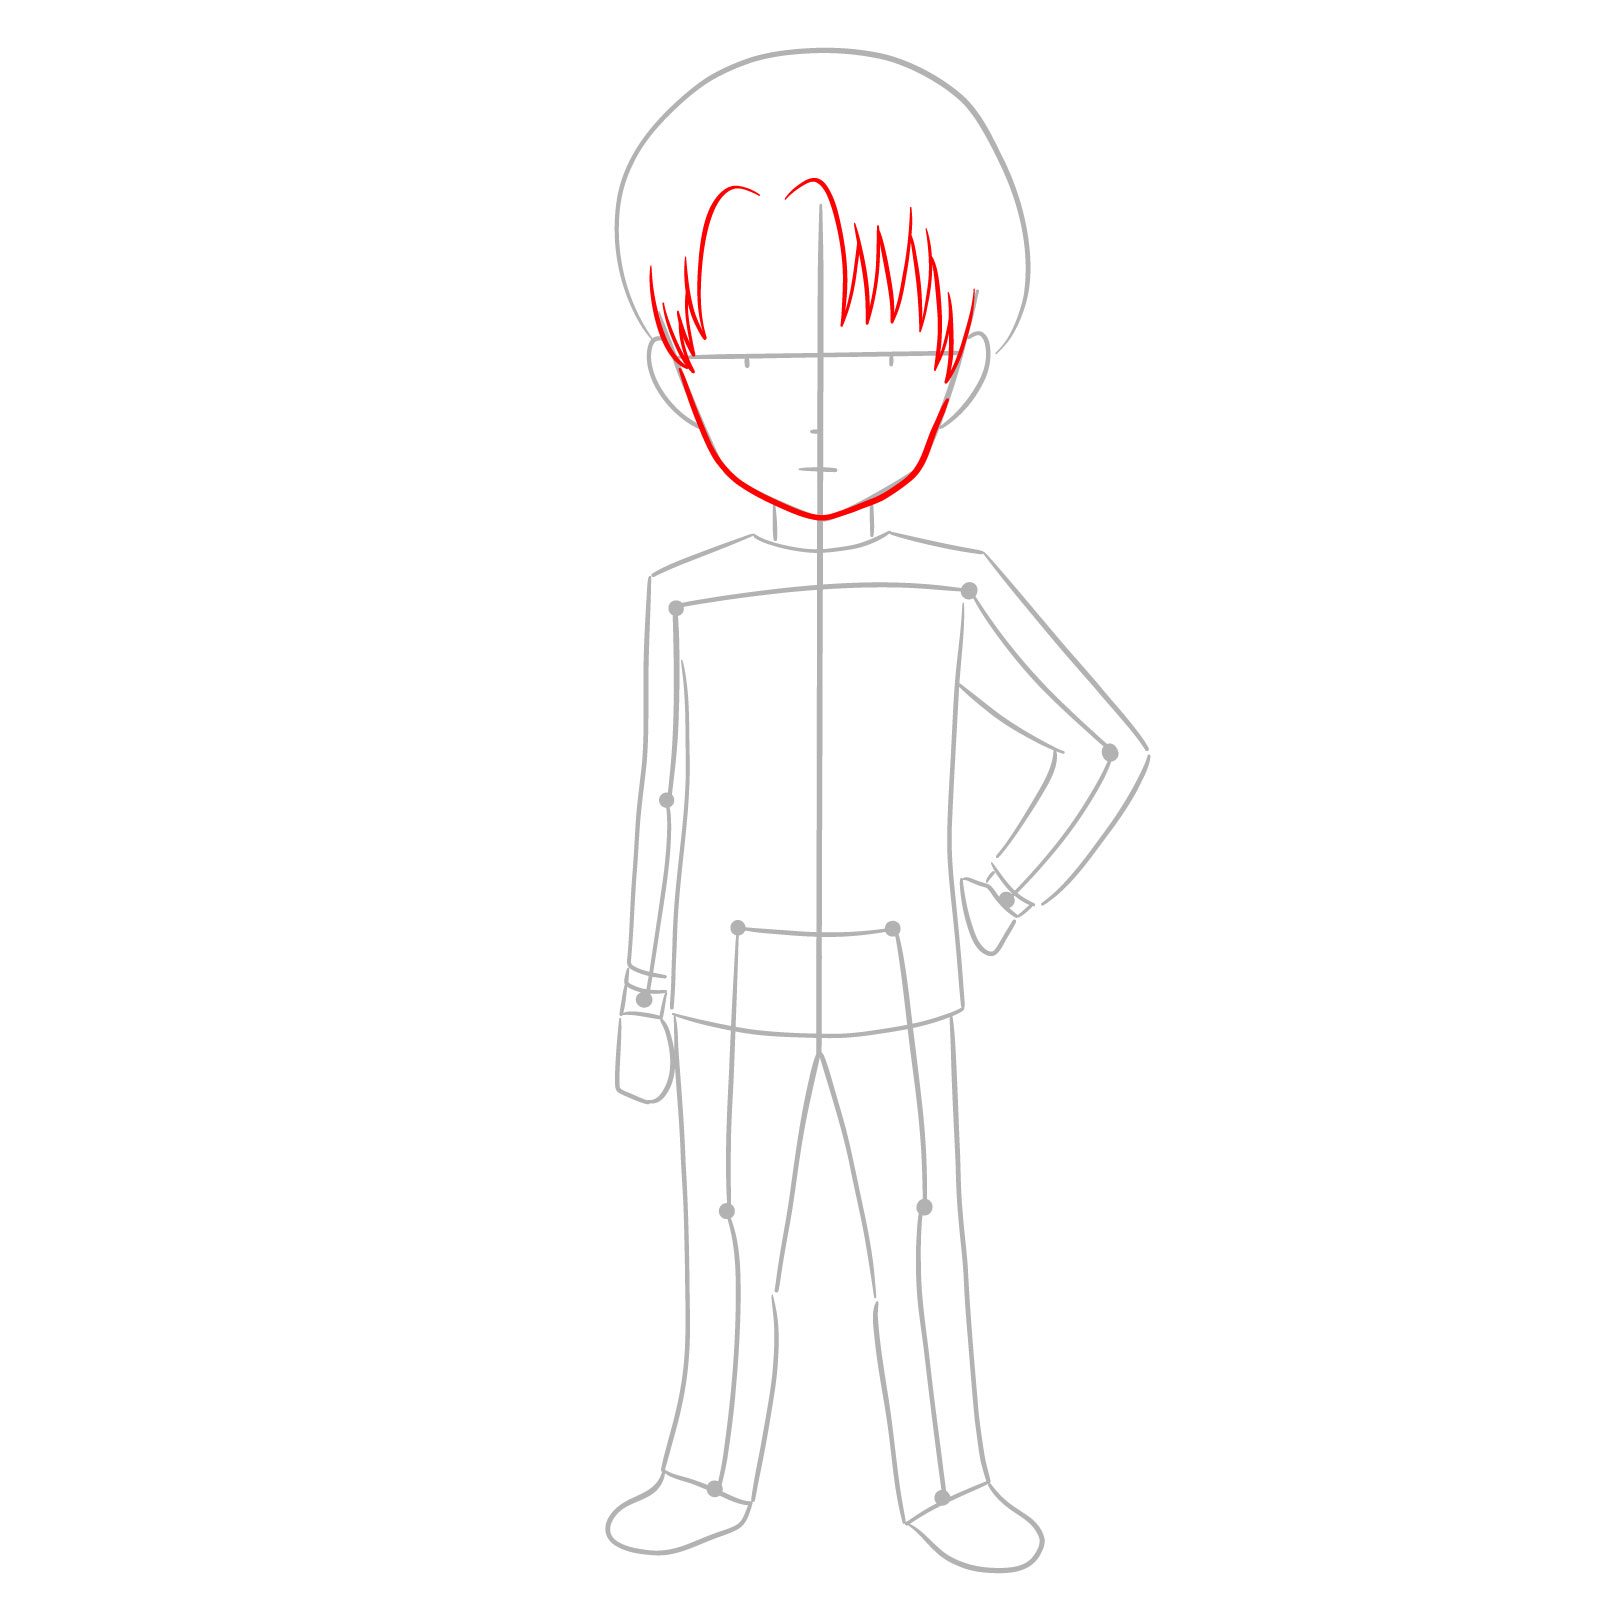
Step 04 – Outline the front hair (fringe), from the top of the head and coming down across the forehead
Defining chibi Levi’s face frame with fringe
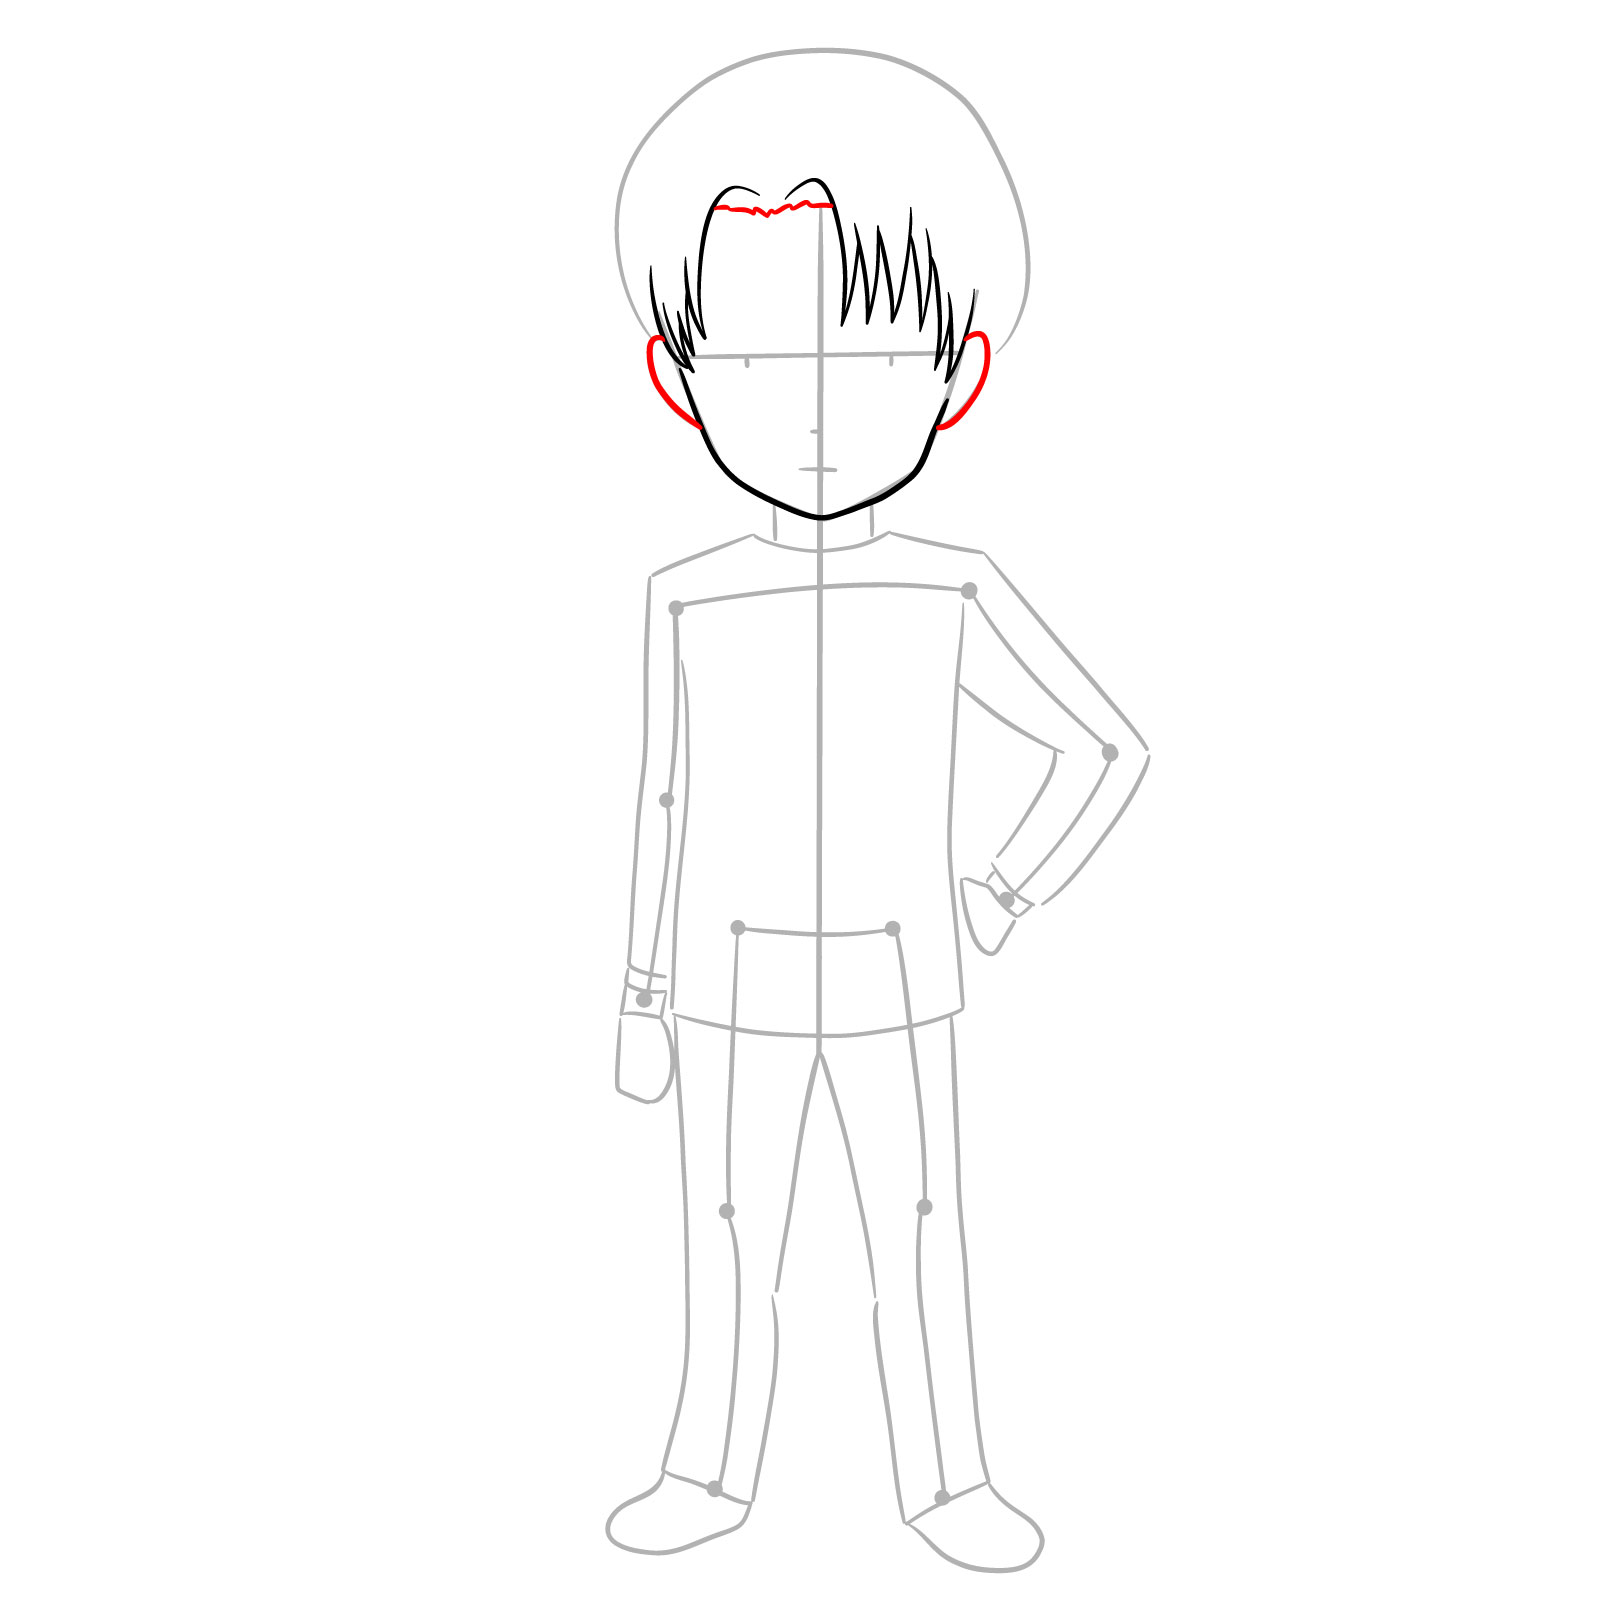
Step 05 – Define the ears with bolder lines. Add the hairline on the forehead, between the hair fringe, giving a shape to the top front of the hair
Detailing the ears and hairline on the forehead
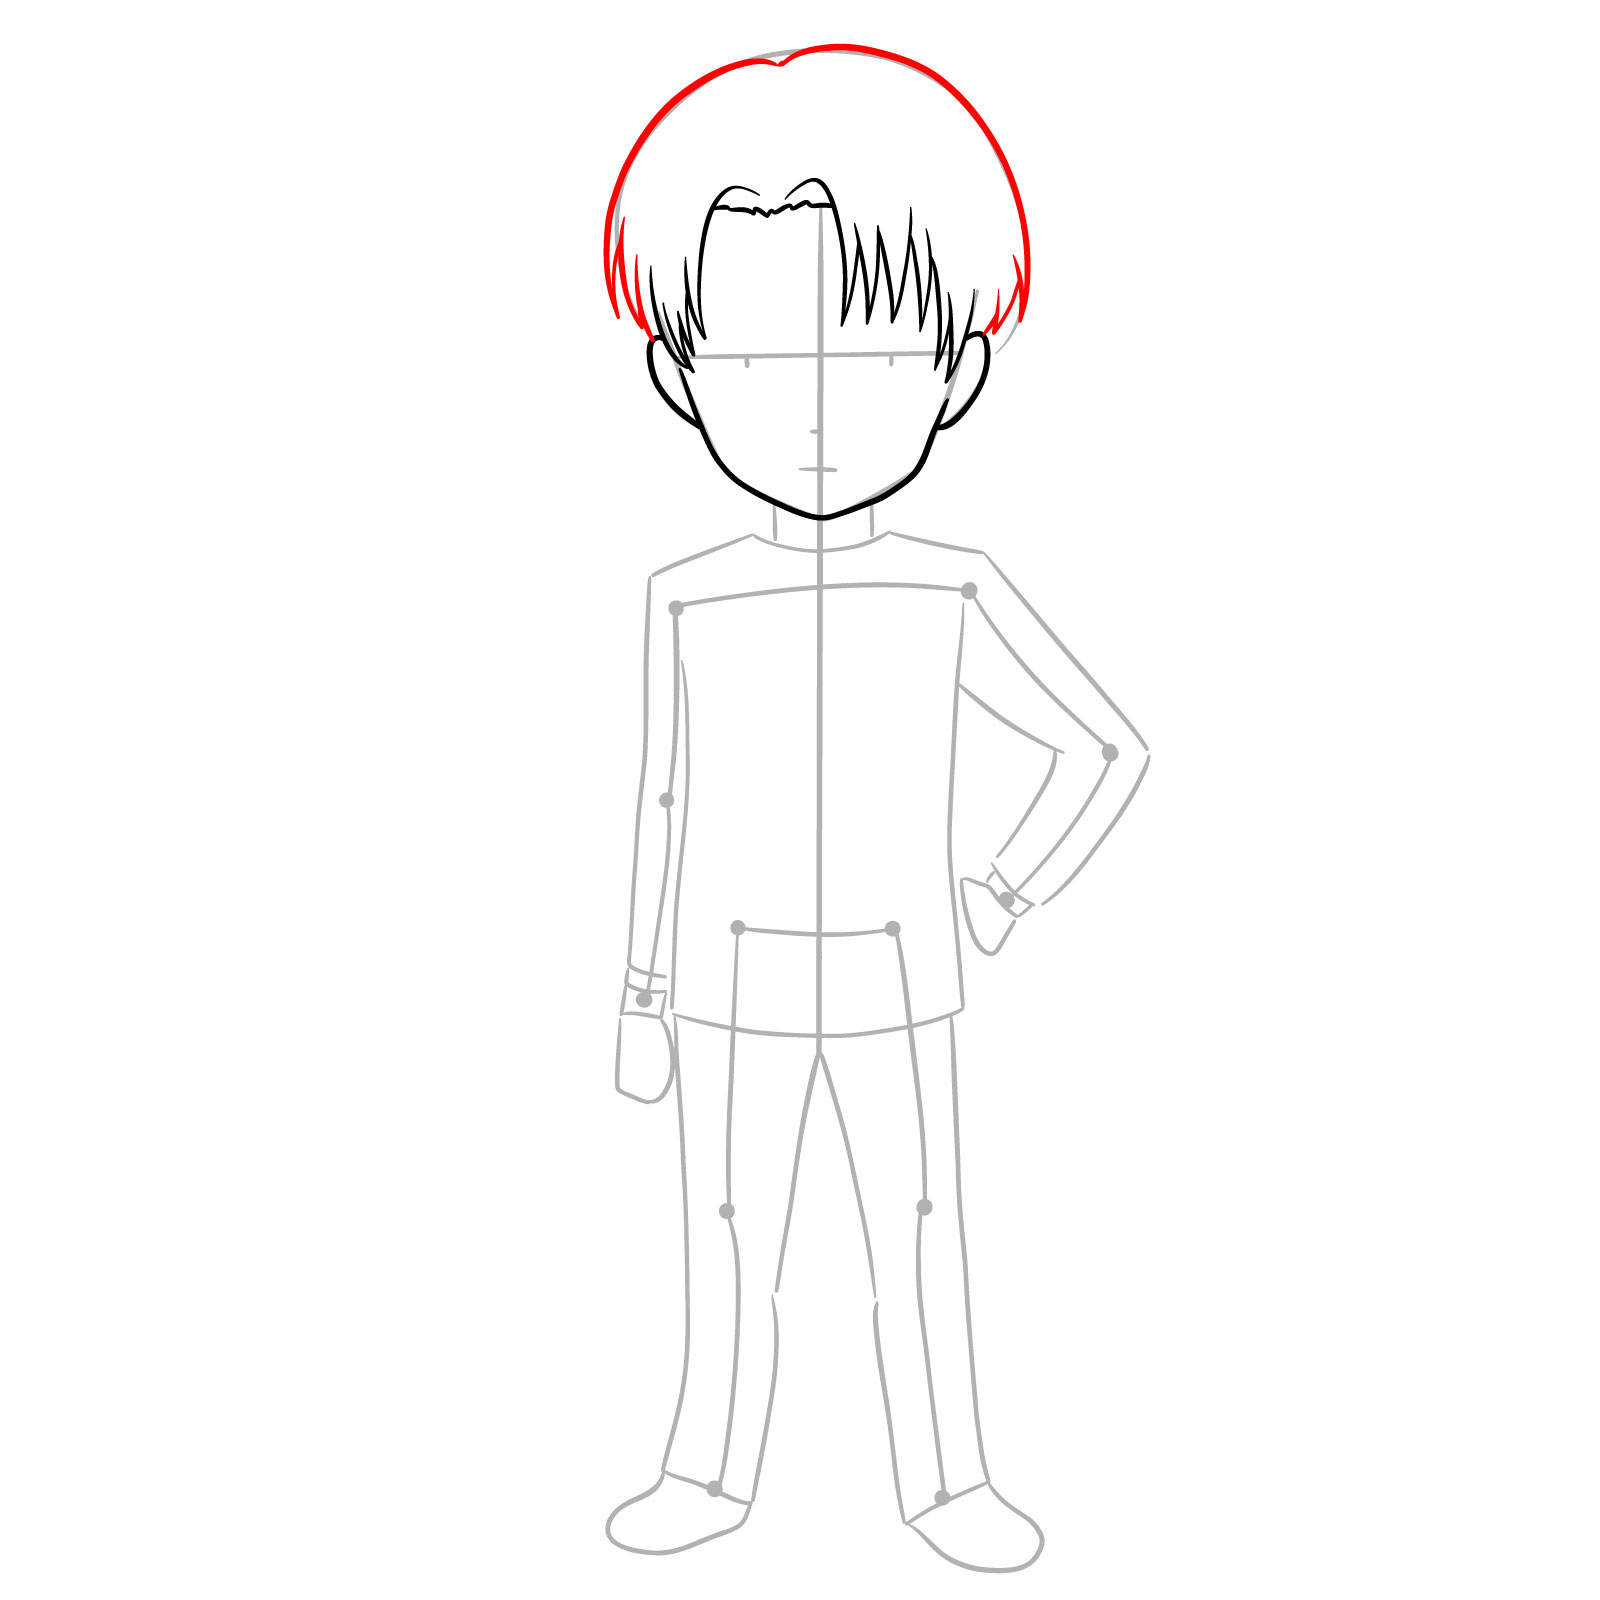
Step 06 – Add volume to the hair by drawing the top section of the hairstyle. Create the illusion of hair strands with jagged lines that connect to the fringe
Crafting the hairstyle
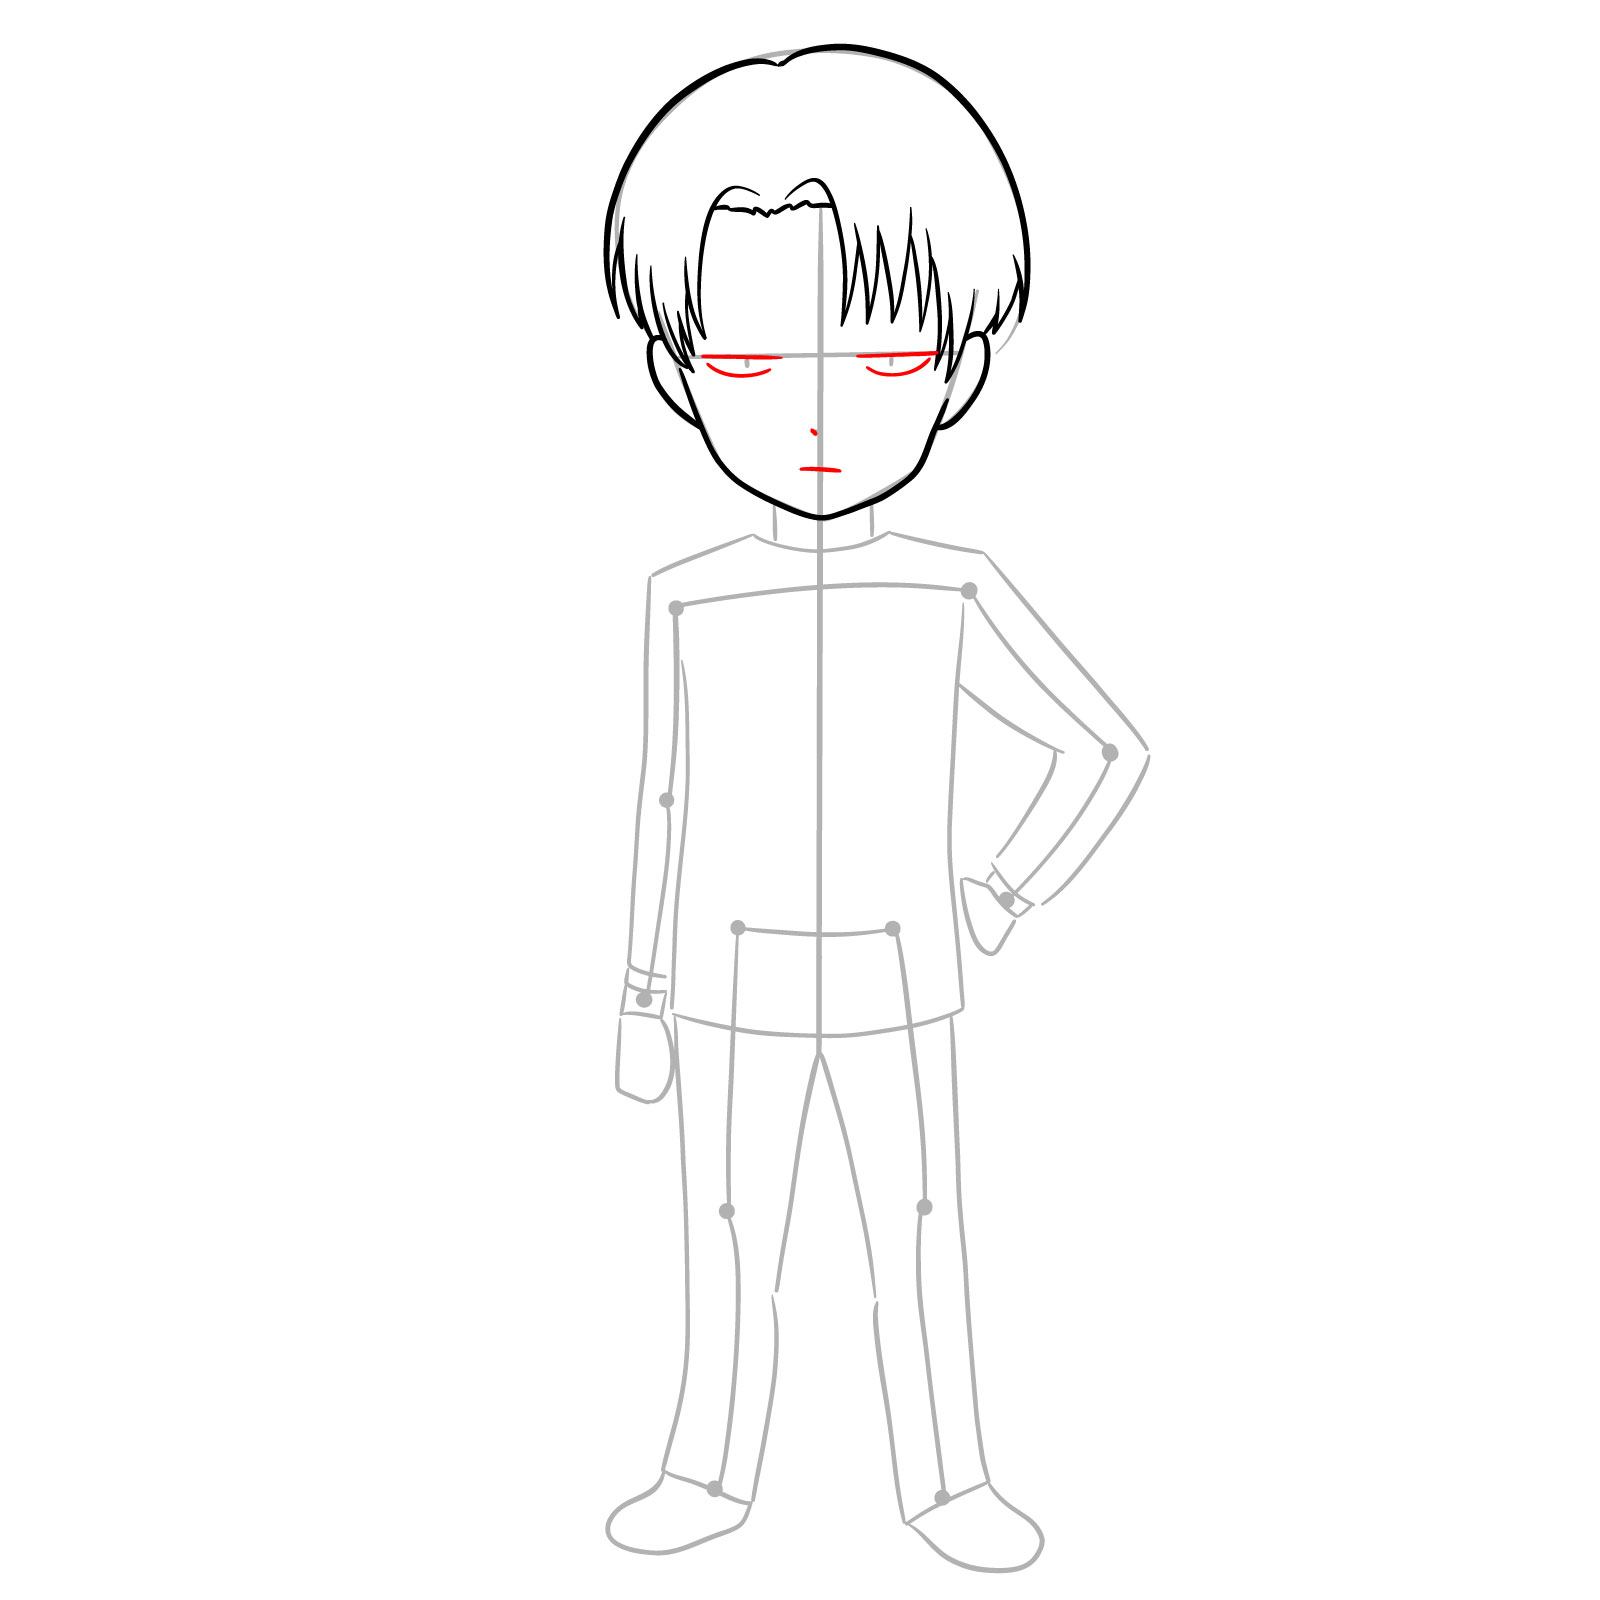
Step 07 – Draw the outlines for the eyes – straight lines for the top, curved line for the bottom eyelids. Sketch a simple nose and mouth, placing them centrally on the face
Outlining the eyes, nose, and mouth
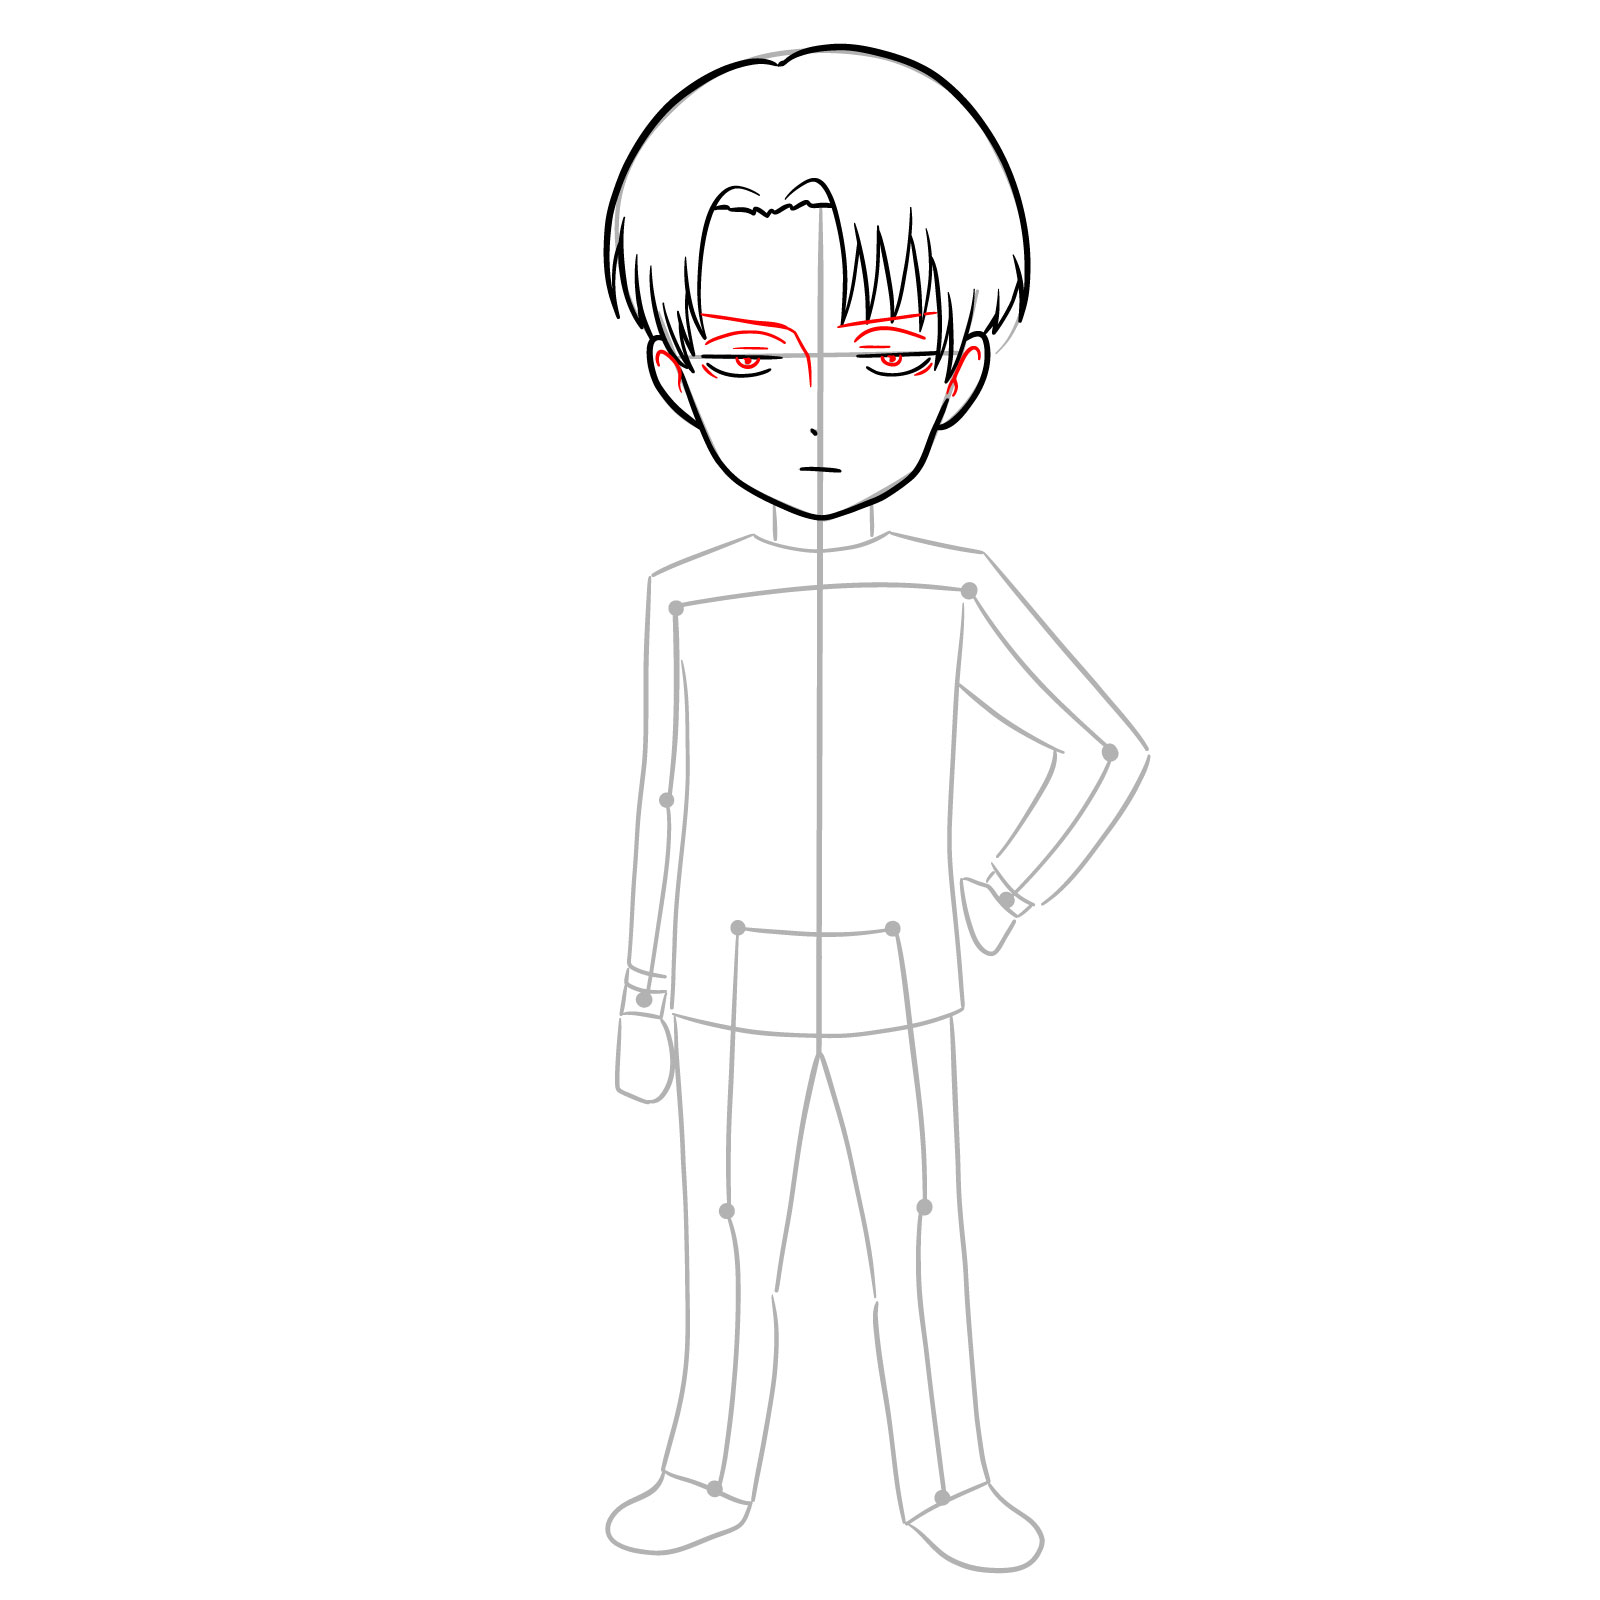
Step 08 – Detail the eyes with more defined shapes for the iris and pupils, and add thin lines above for the eyebrows. Sketch the eyelids slightly above the eyes to give depth and expression to the character’s gaze
Adding the eyes, eyebrows, and eyelids details
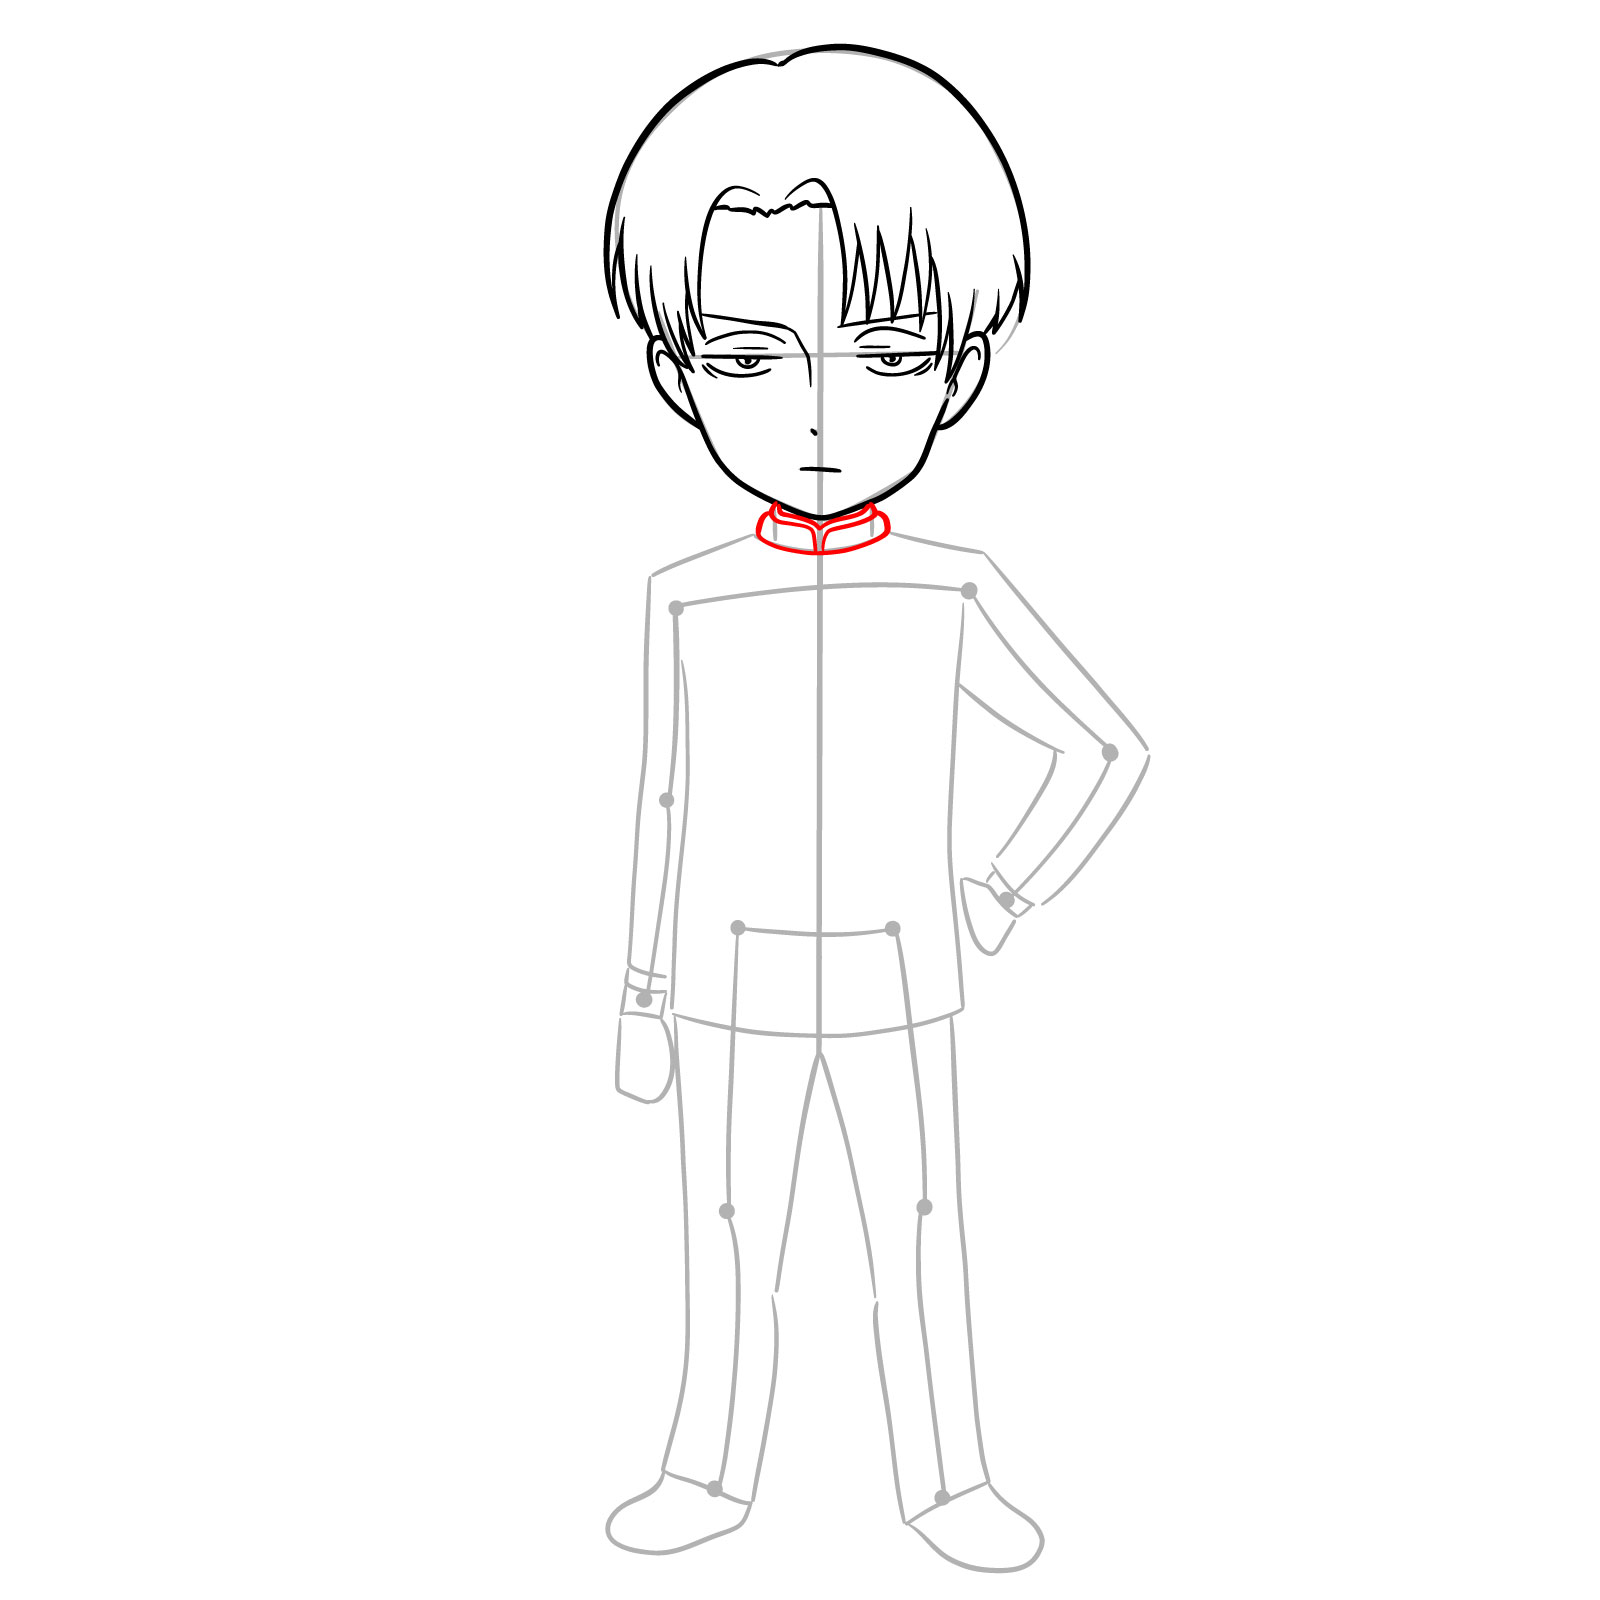
Step 09 – Draw the neck connecting the head to the shoulders. Then, add the collar
Illustrating the neck and collar
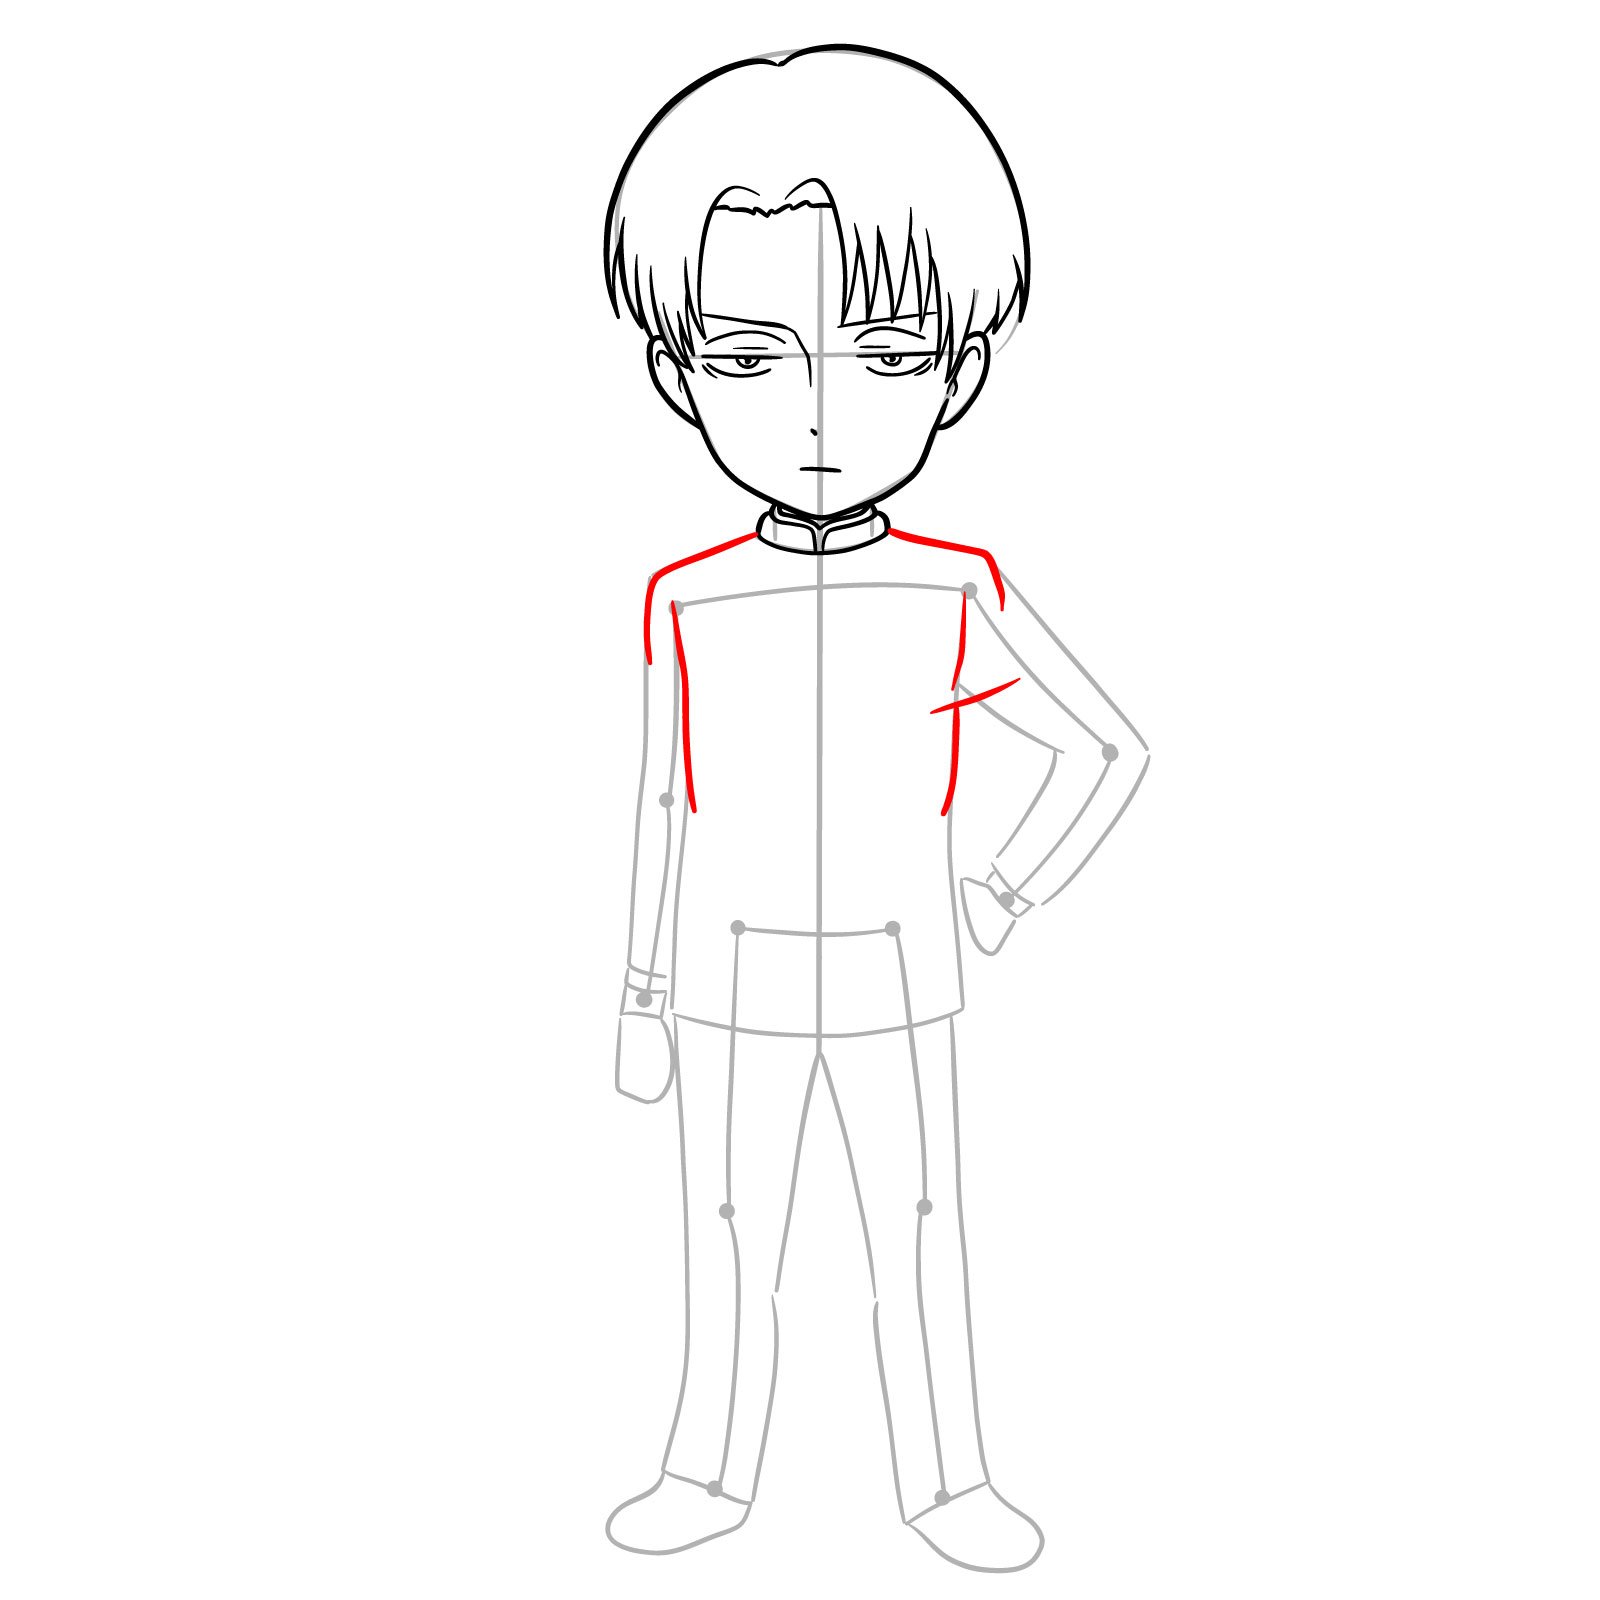
Step 10 – Start drawing chibi Levi’s upper body by sketching the shoulders. Outline the upper torso to the waist, defining the character’s clothing and ensuring the proportions are correct for a chibi figure
Adding the shoulders and upper torso outline
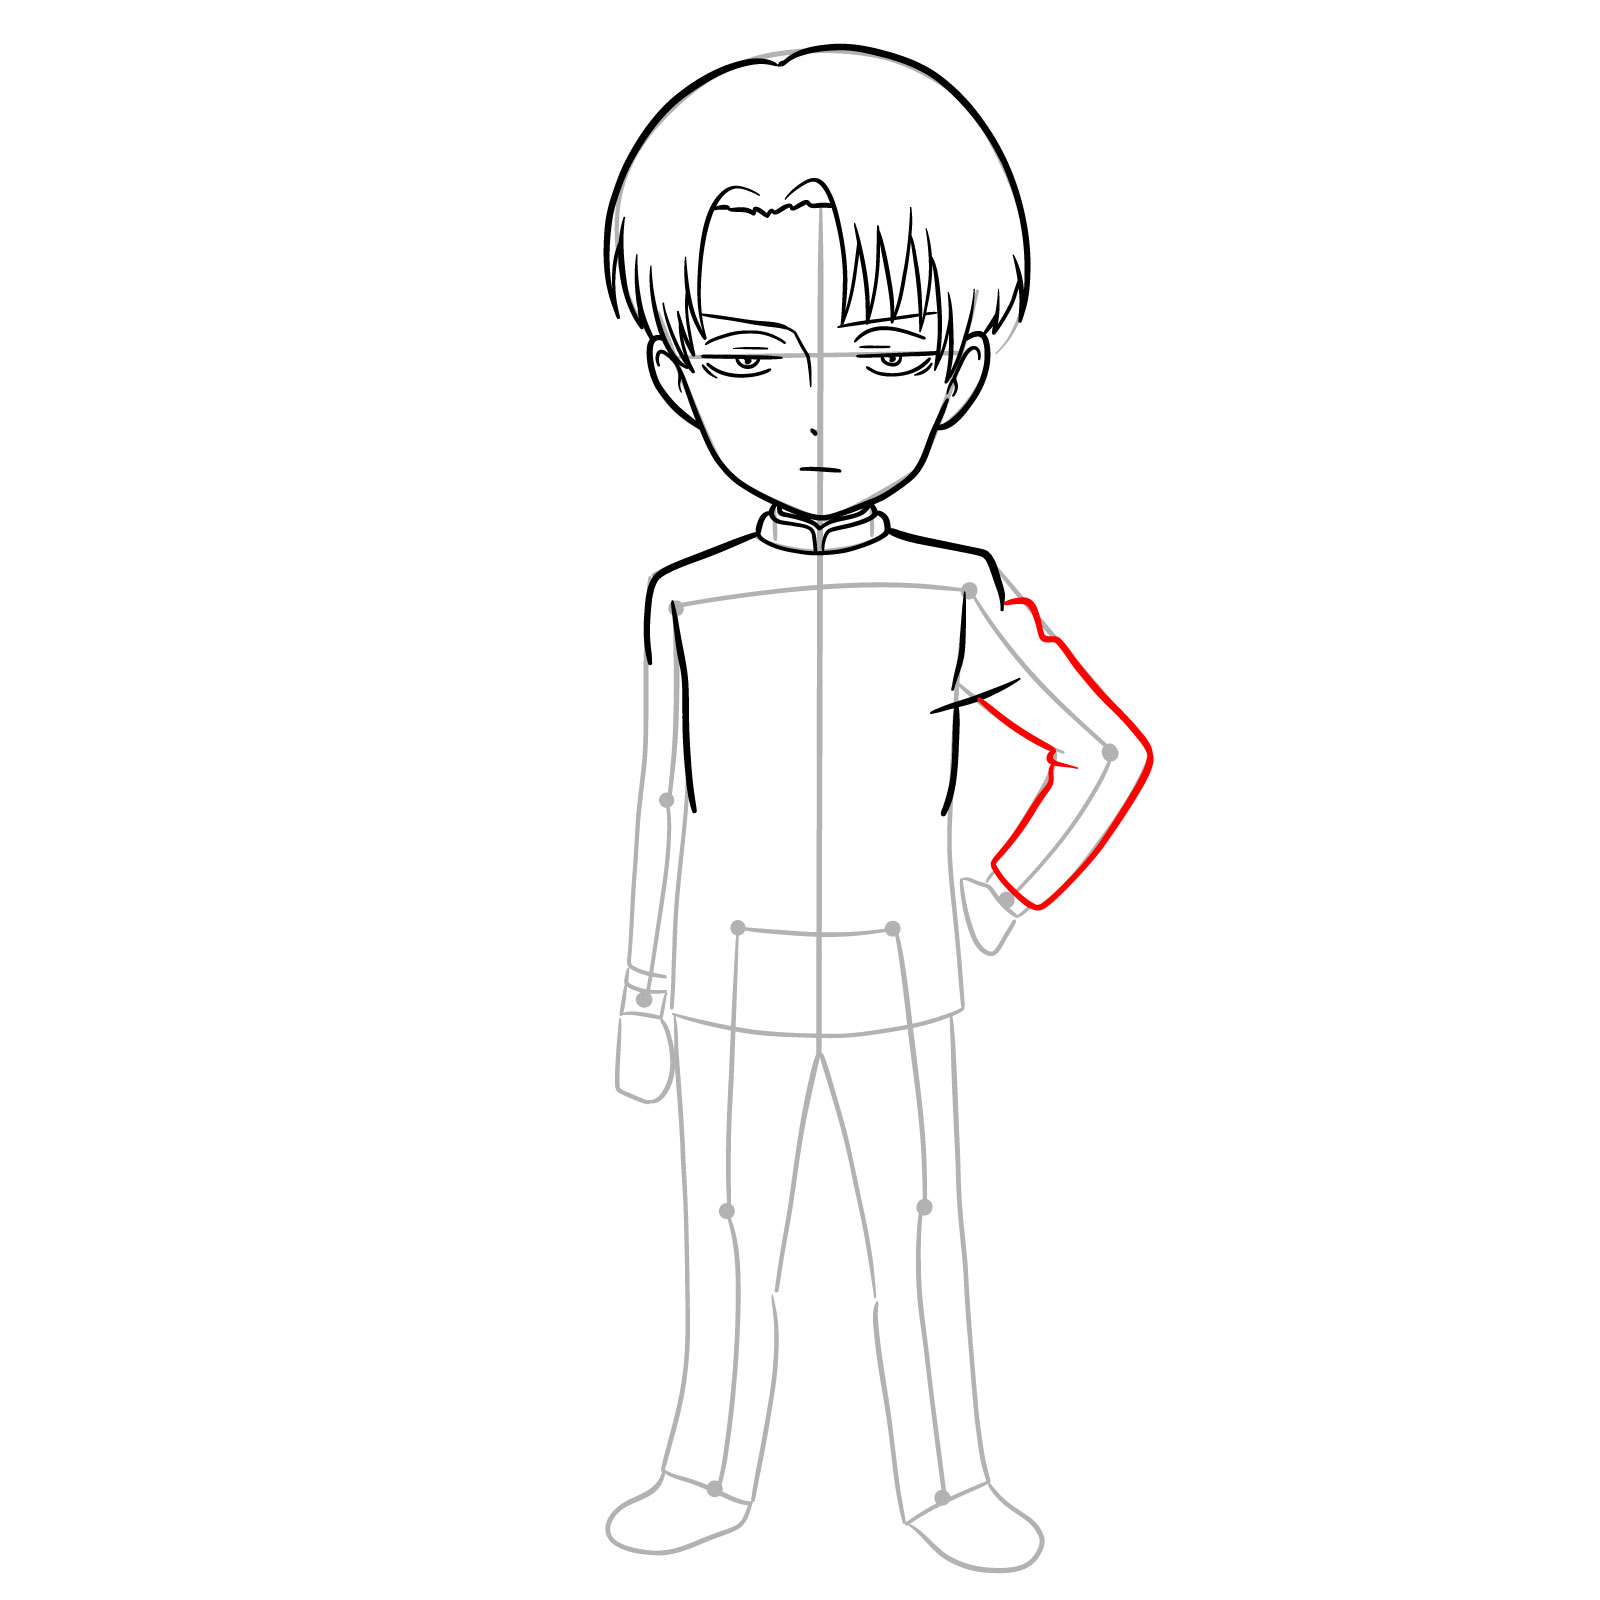
Step 11 – Begin to outline the arm that rests on the hip. Start from the shoulder, drawing a bent elbow leading to the forearm, emphasizing the character’s assertive stance
Drawing the outline of the arm/sleeve
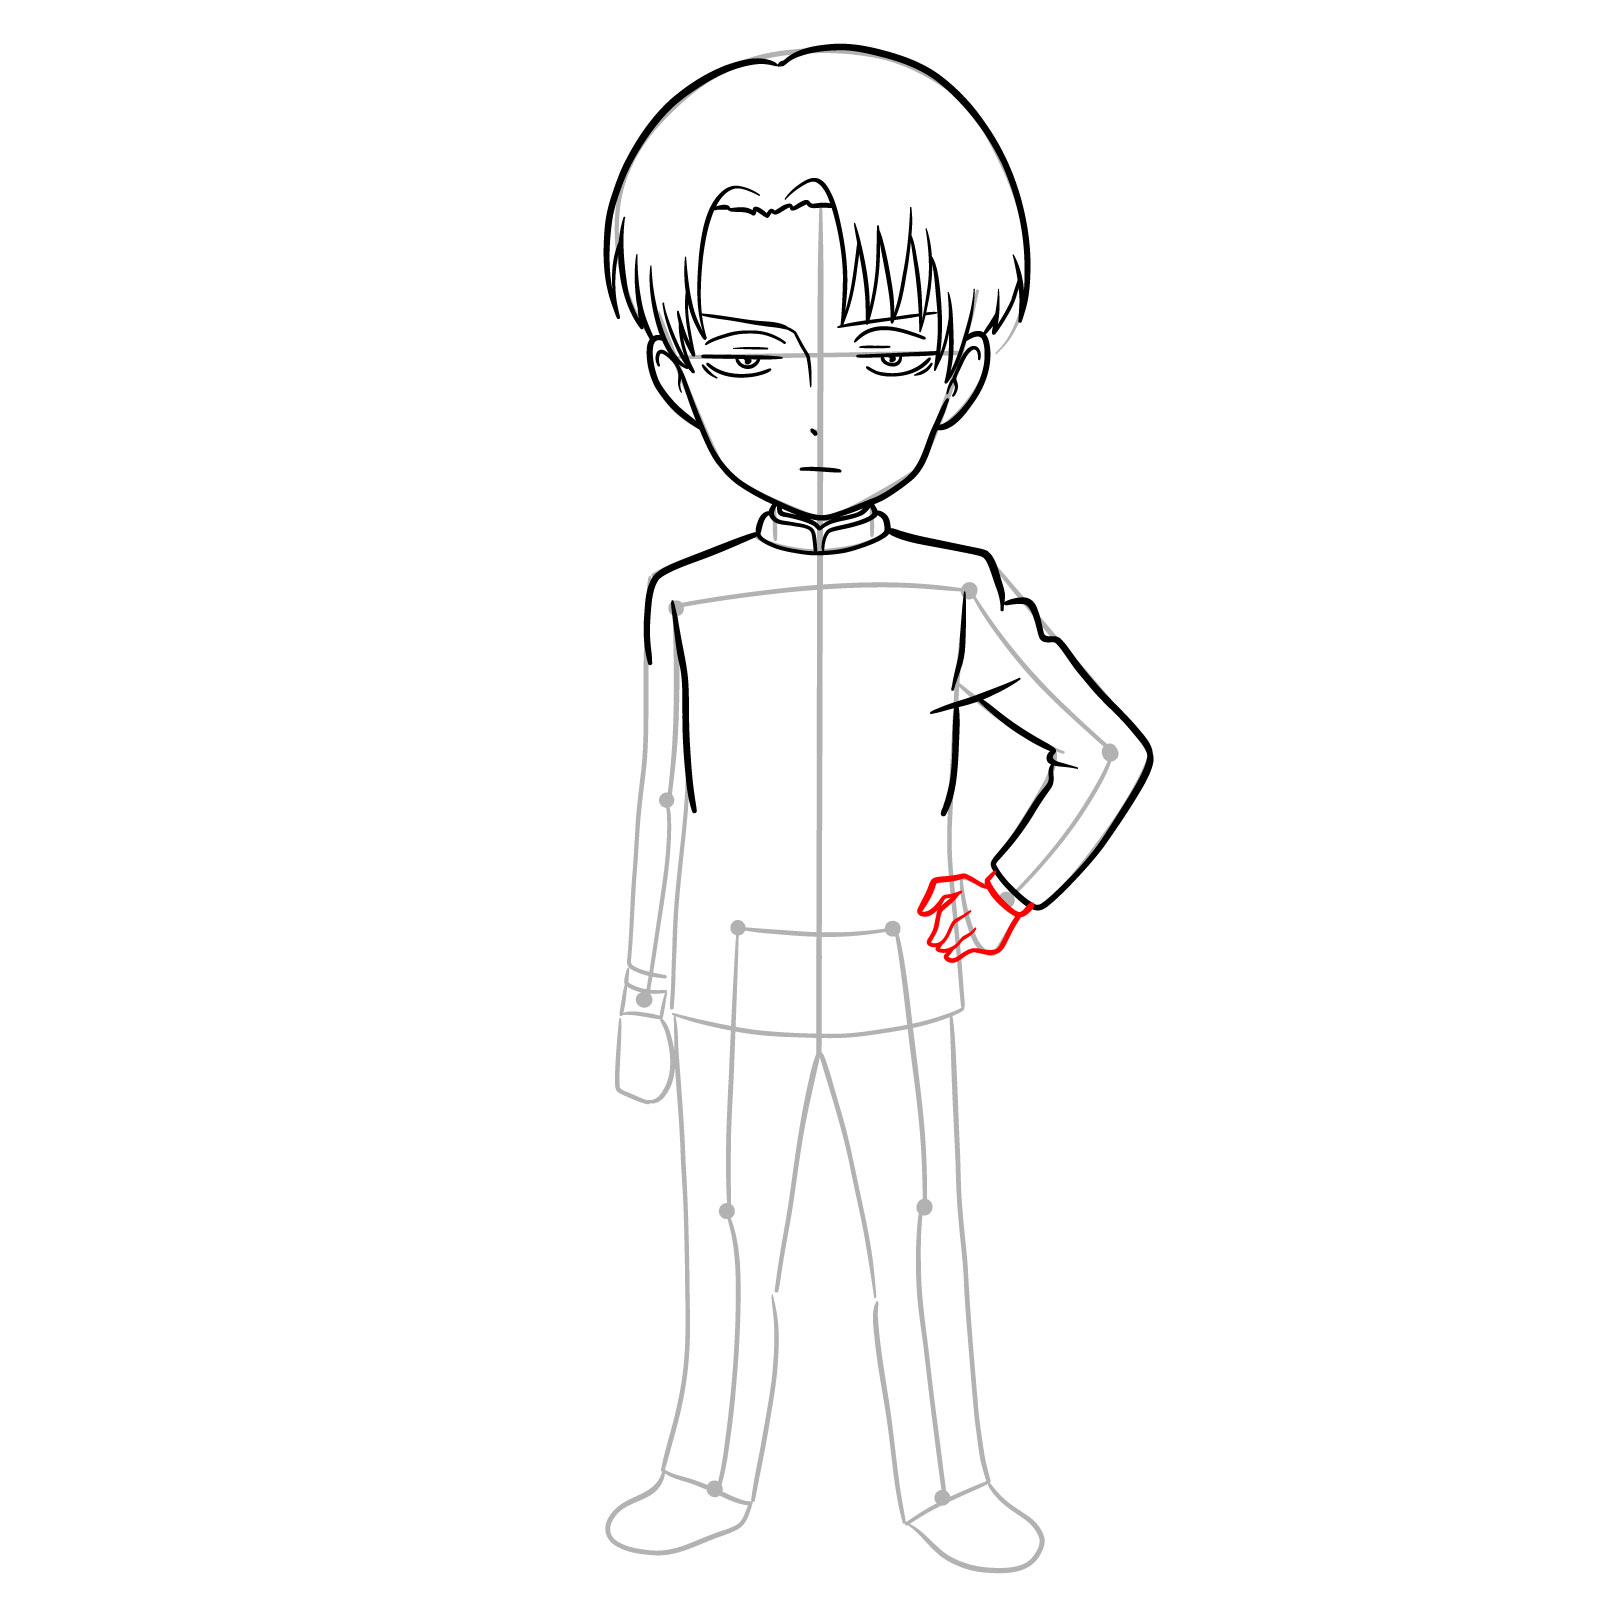
Step 12 – Sketch the hand that’s placed on the hip, detailing the fingers to convey a sense of Captain Levi’s commanding presence
Adding the hand on the hip for chibi Levi
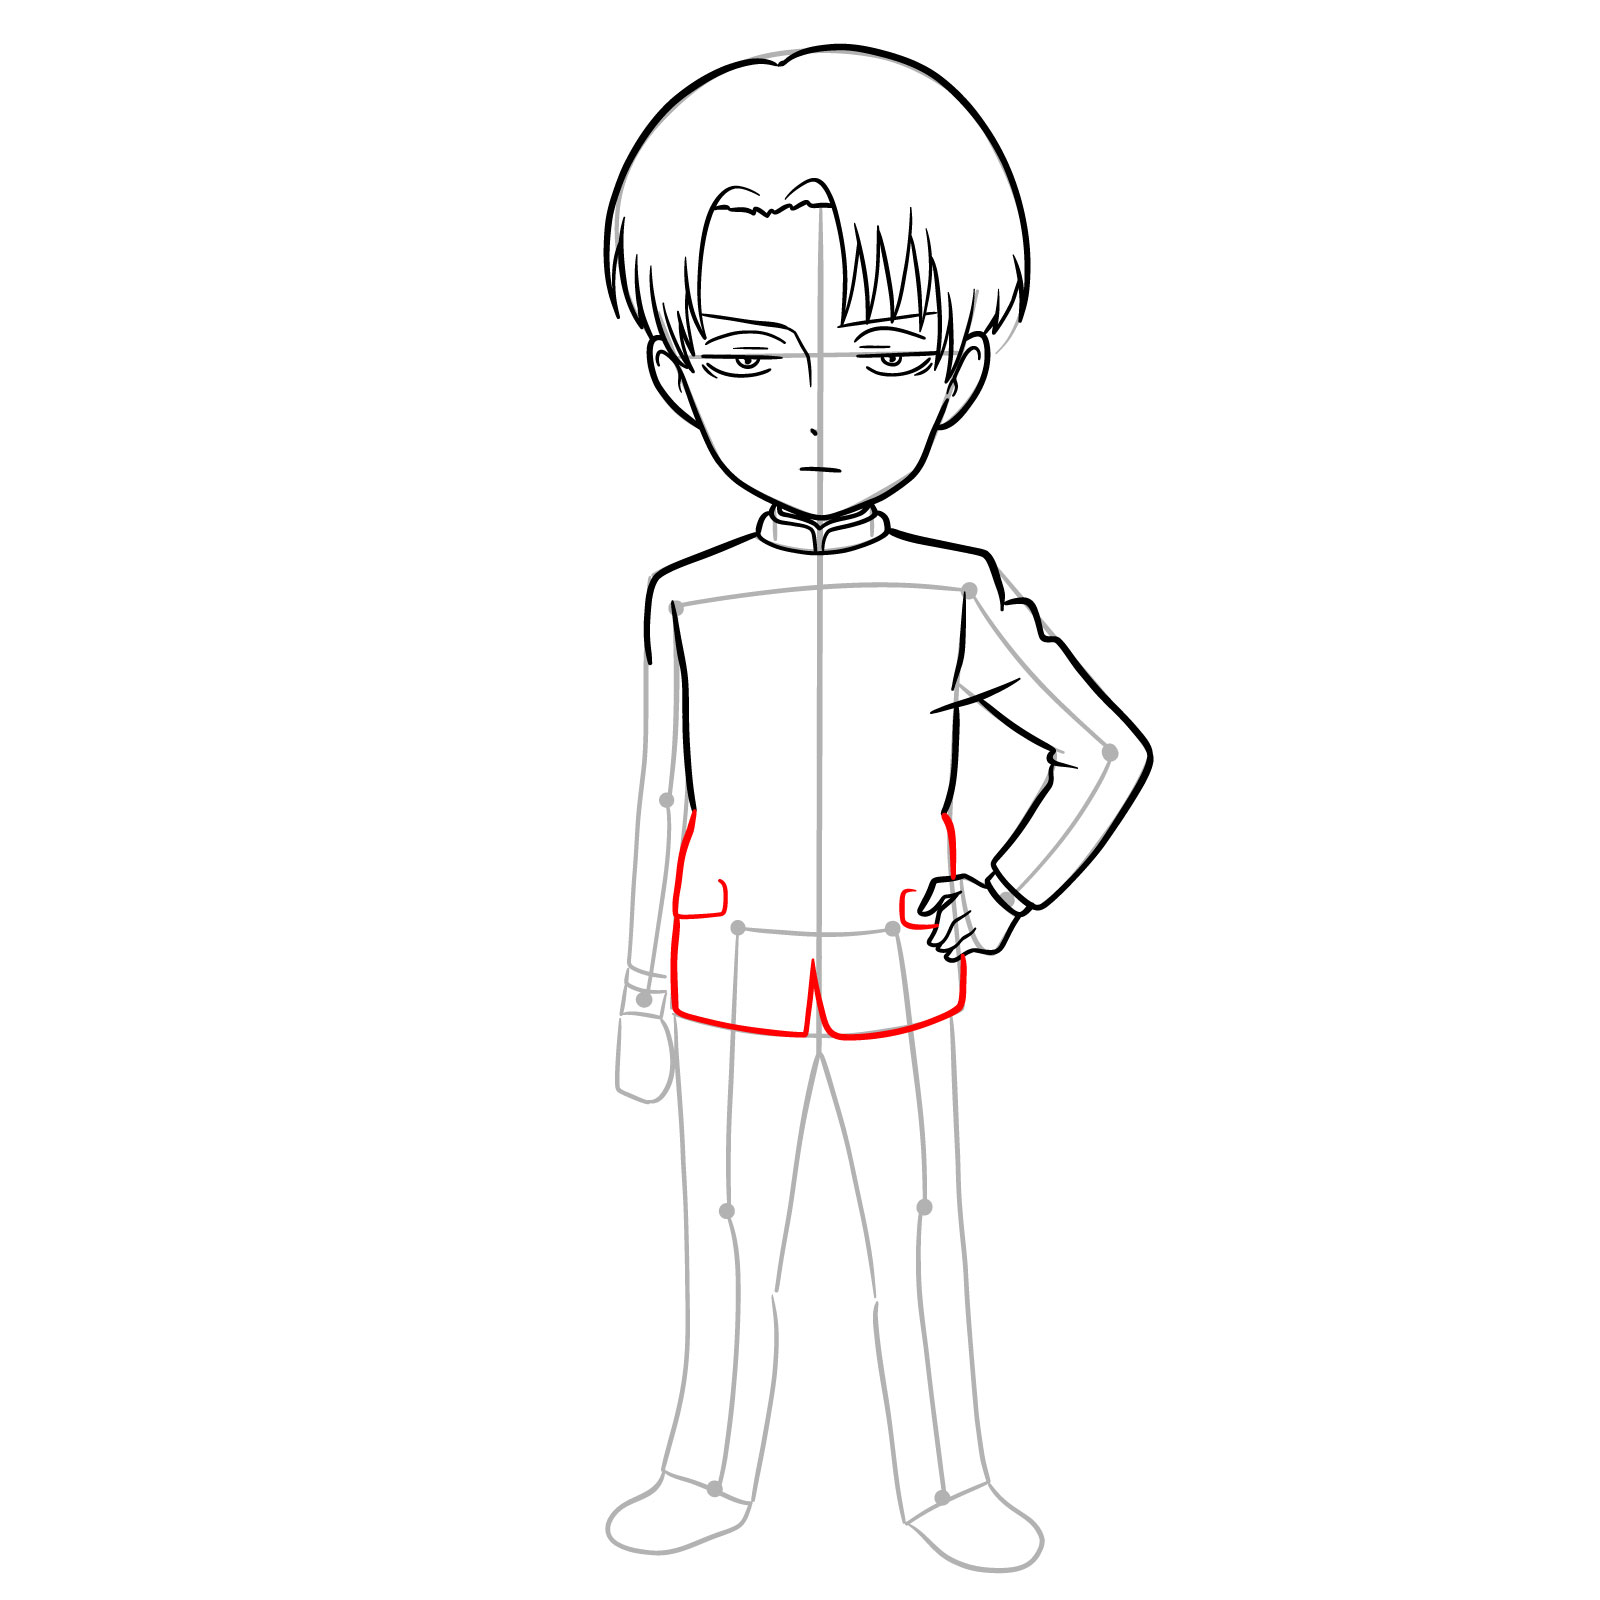
Step 13 – Outline the remaining main part of the uniform jacket, curving around the waist and hips to create the bottom edge of the jacket
Outlining the lower part of the torso for chibi Levi’s uniform
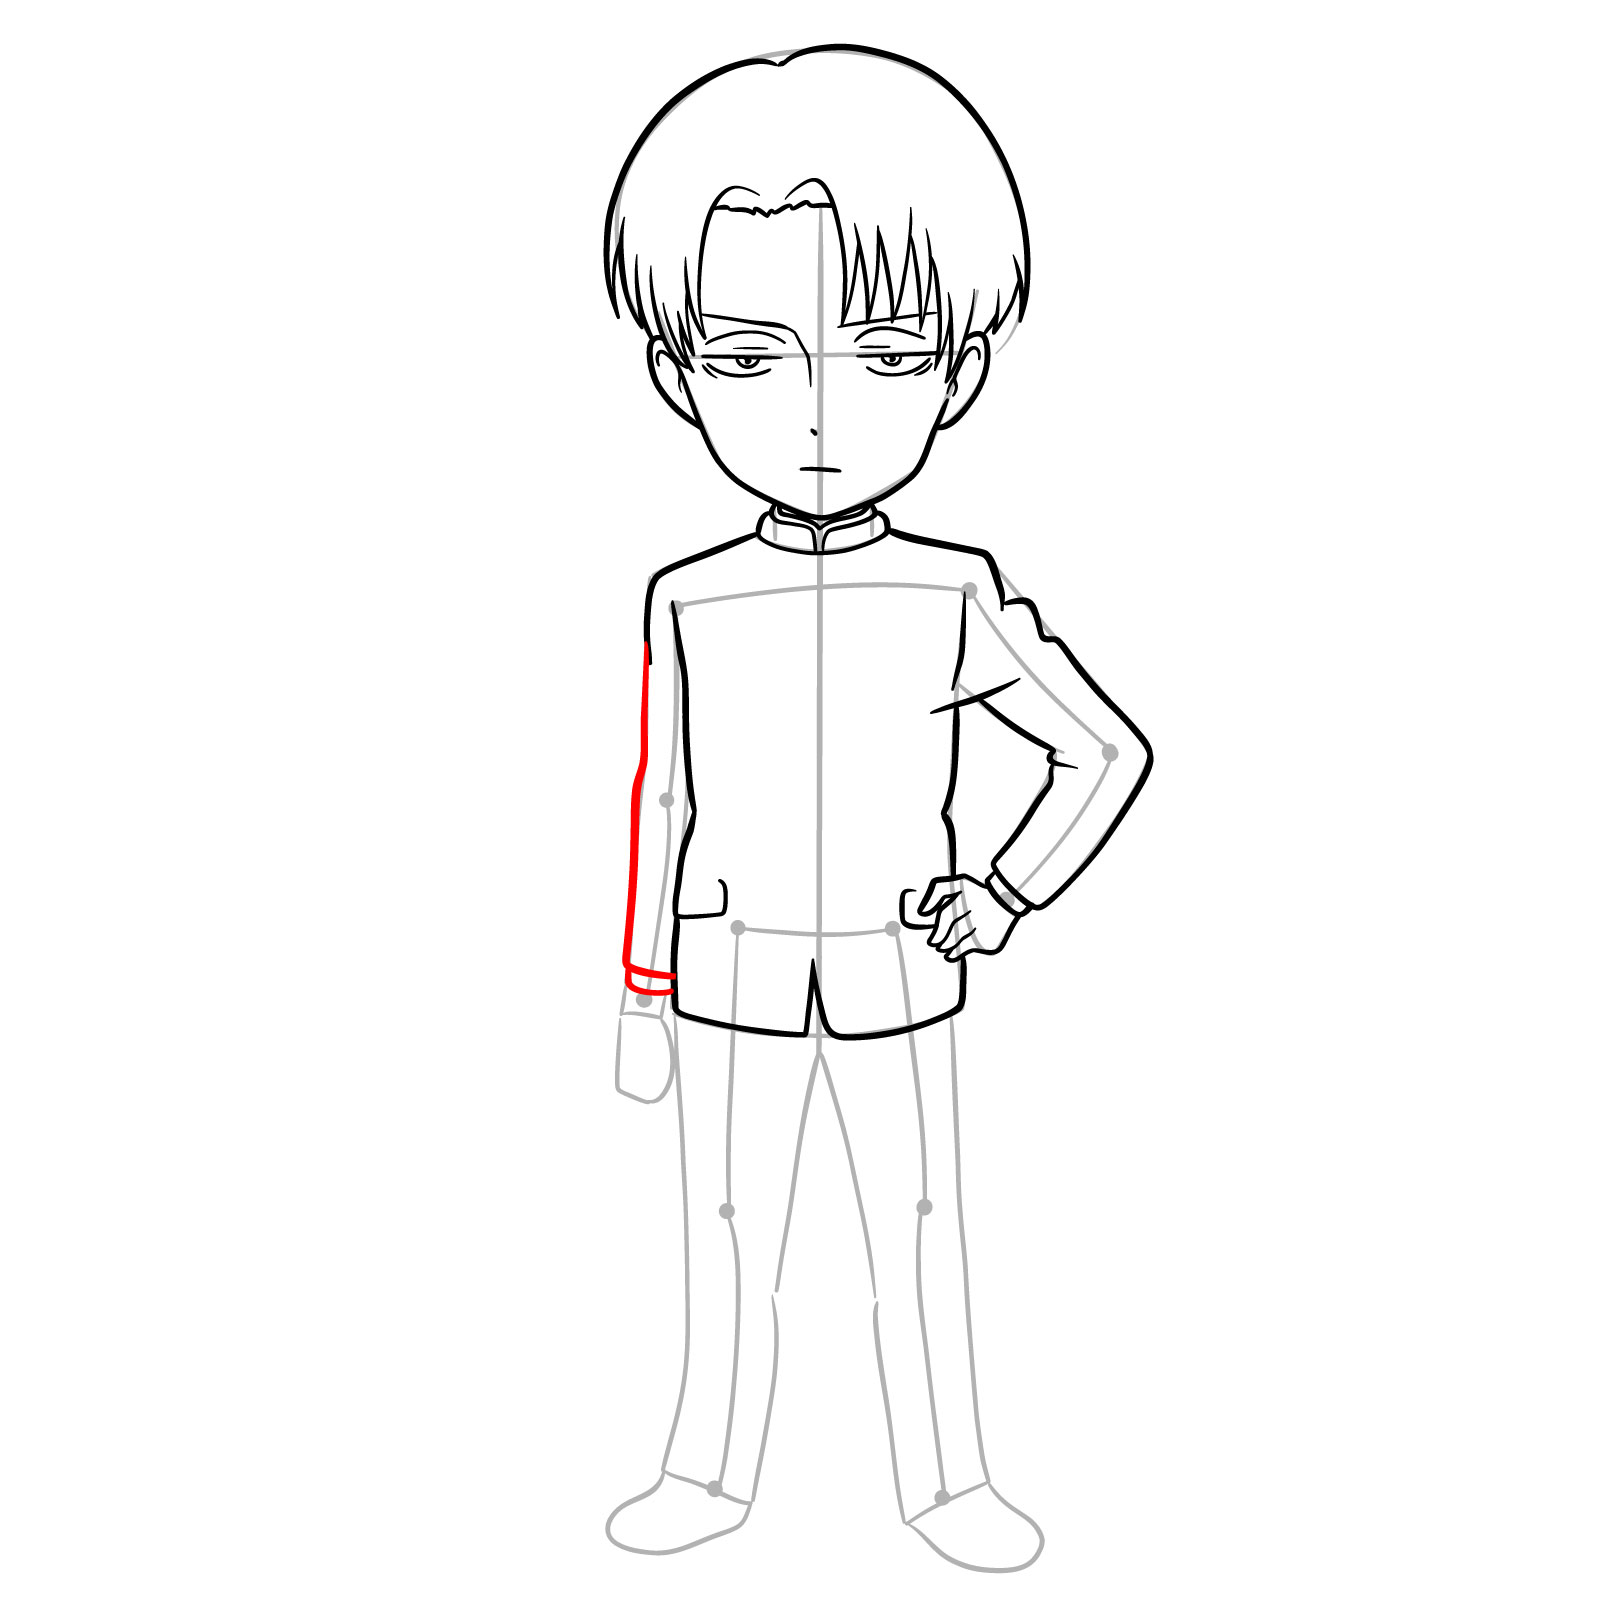
Step 14 – Draw the second sleeve, starting from the shoulder and extending it down
Drawing the second sleeve
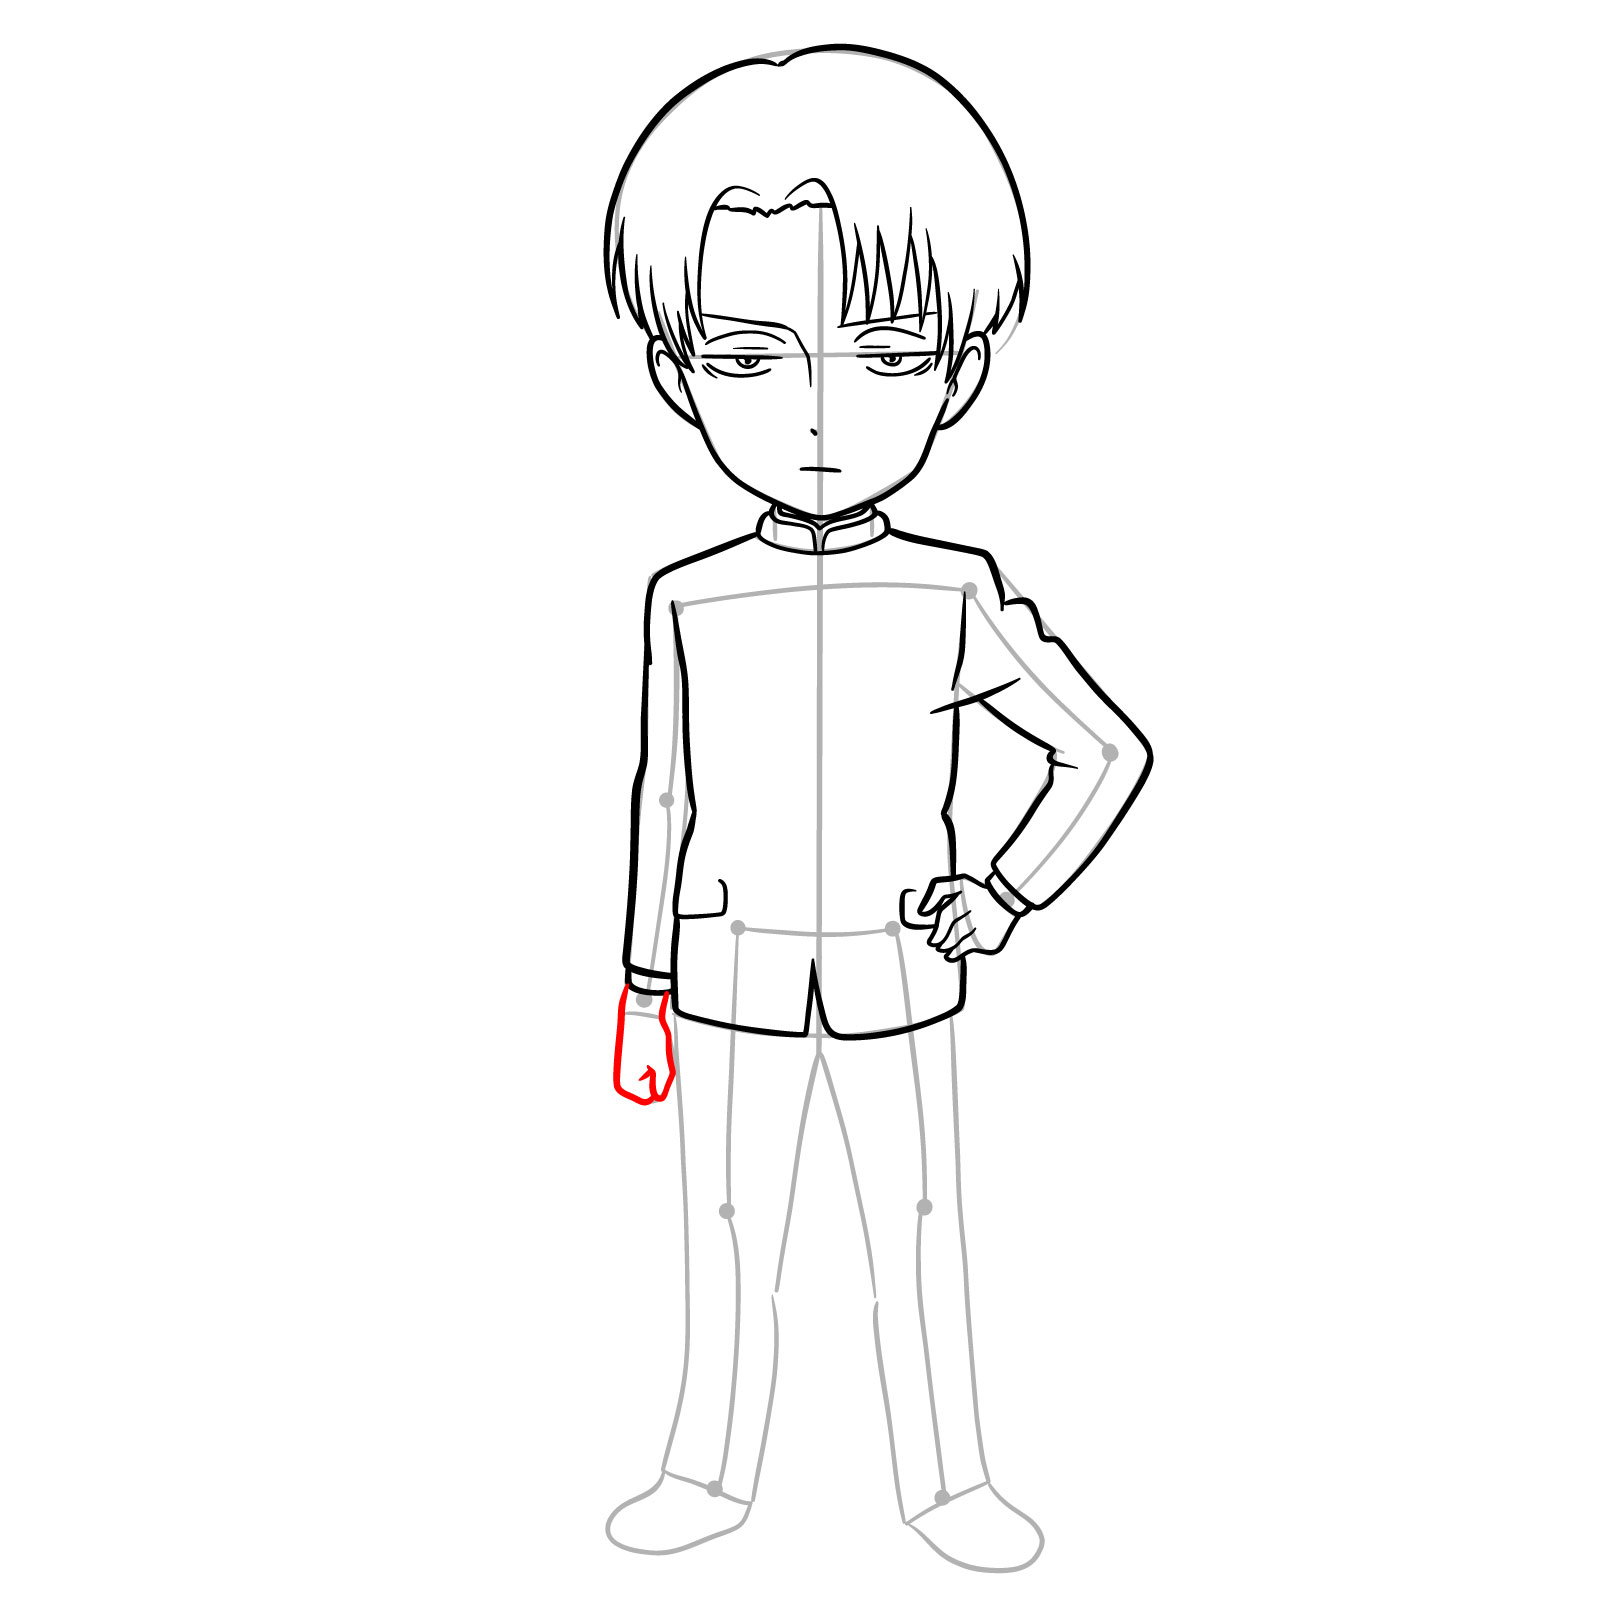
Step 15 – Add the second hand, clenched in a fist. This adds to the character’s determined and ready-to-action pose
Sketching the second hand in a fist
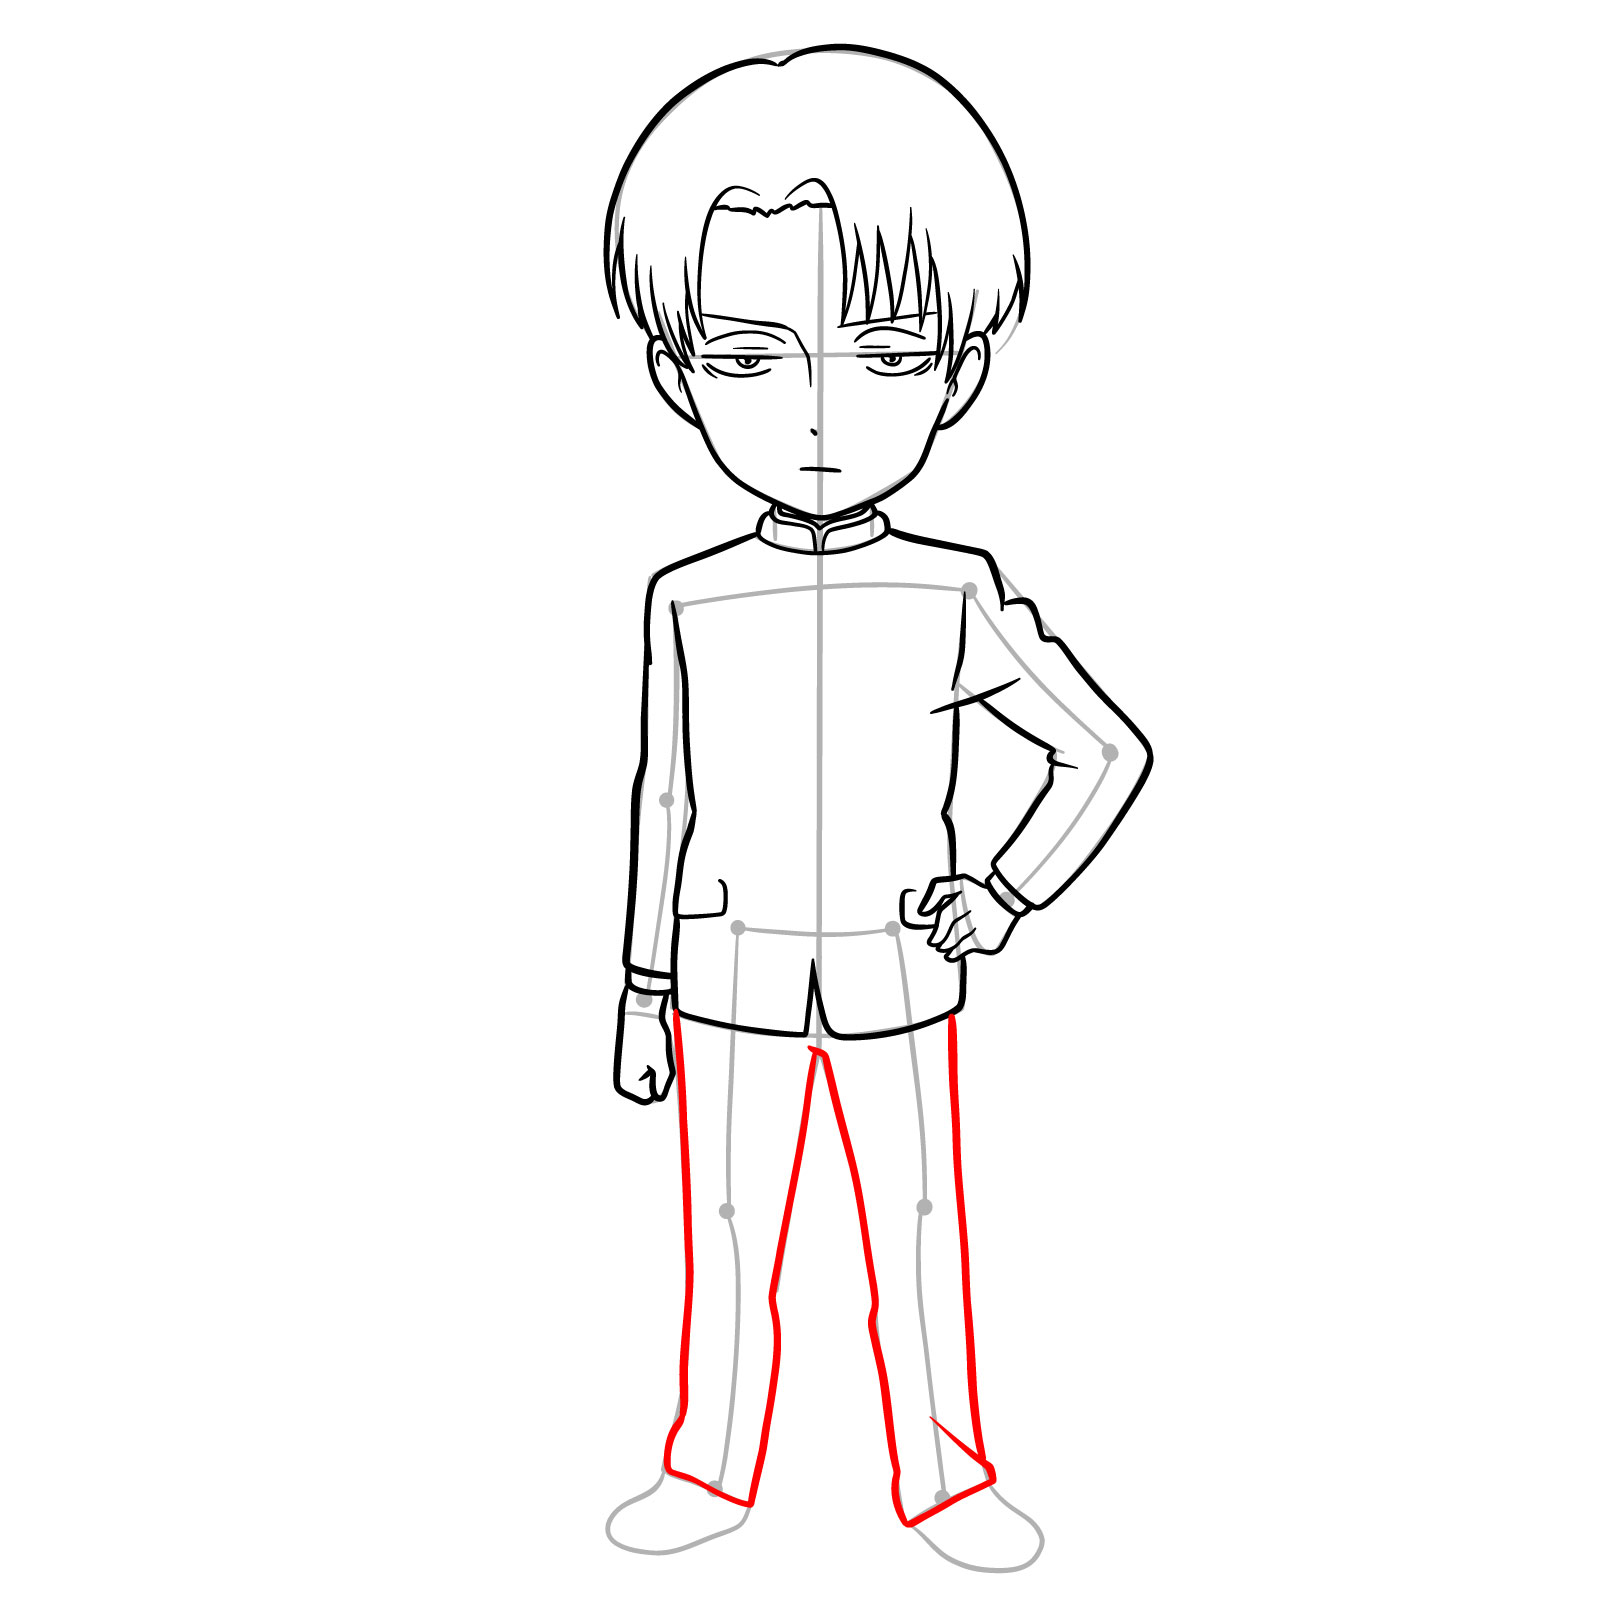
Step 16 – Next, draw the pants, outlining them from the waist down to the ankles
Sketching the pants
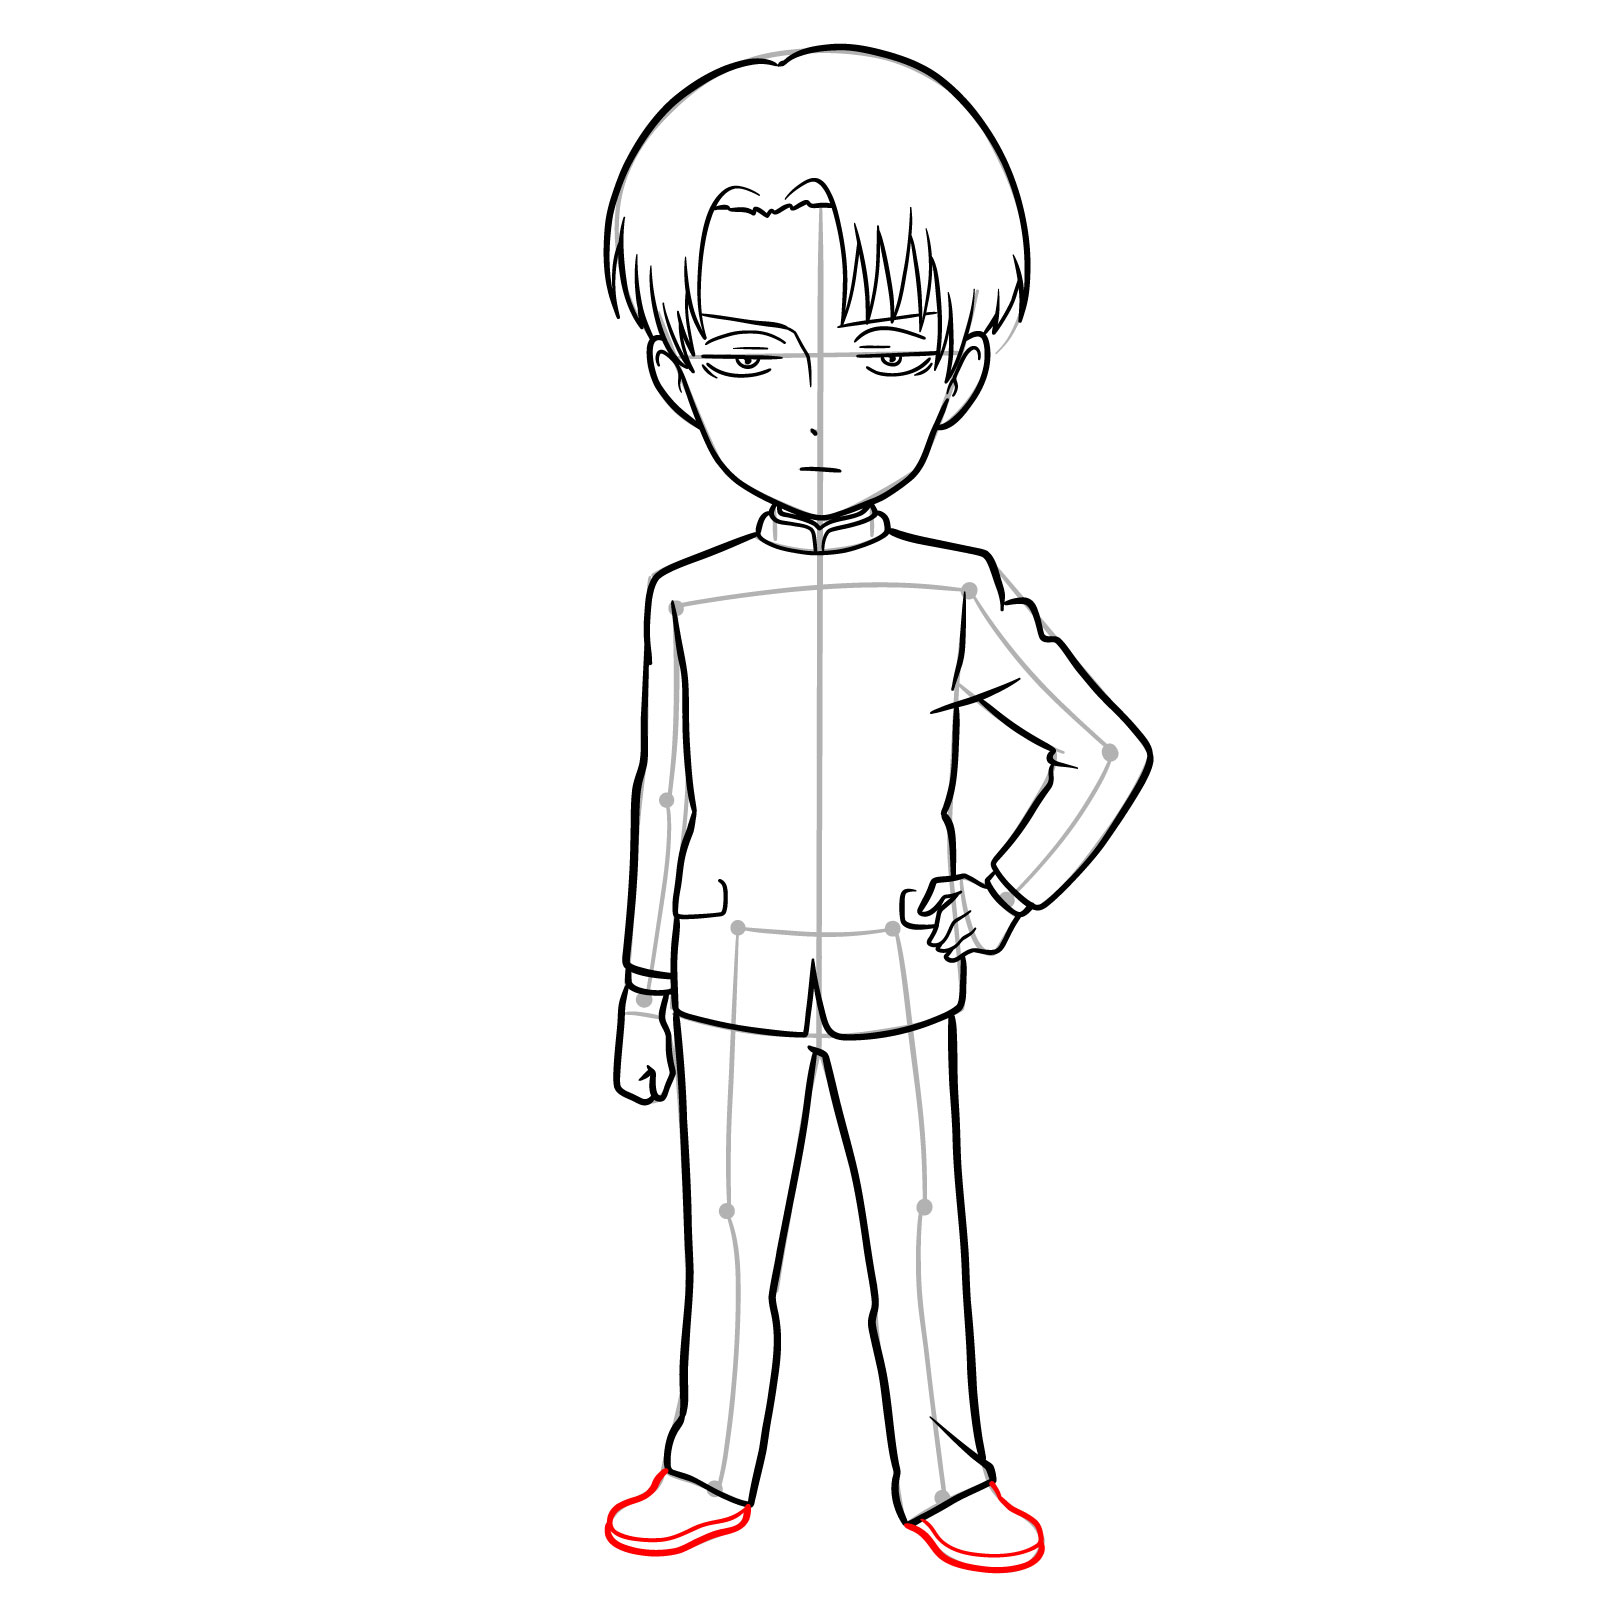
Step 17 – We’ve almost finished the chibi Levi drawing. Now, sketch the shoes, giving them a simple but recognizable shape
Adding the shoes to chibi Levi’s drawing
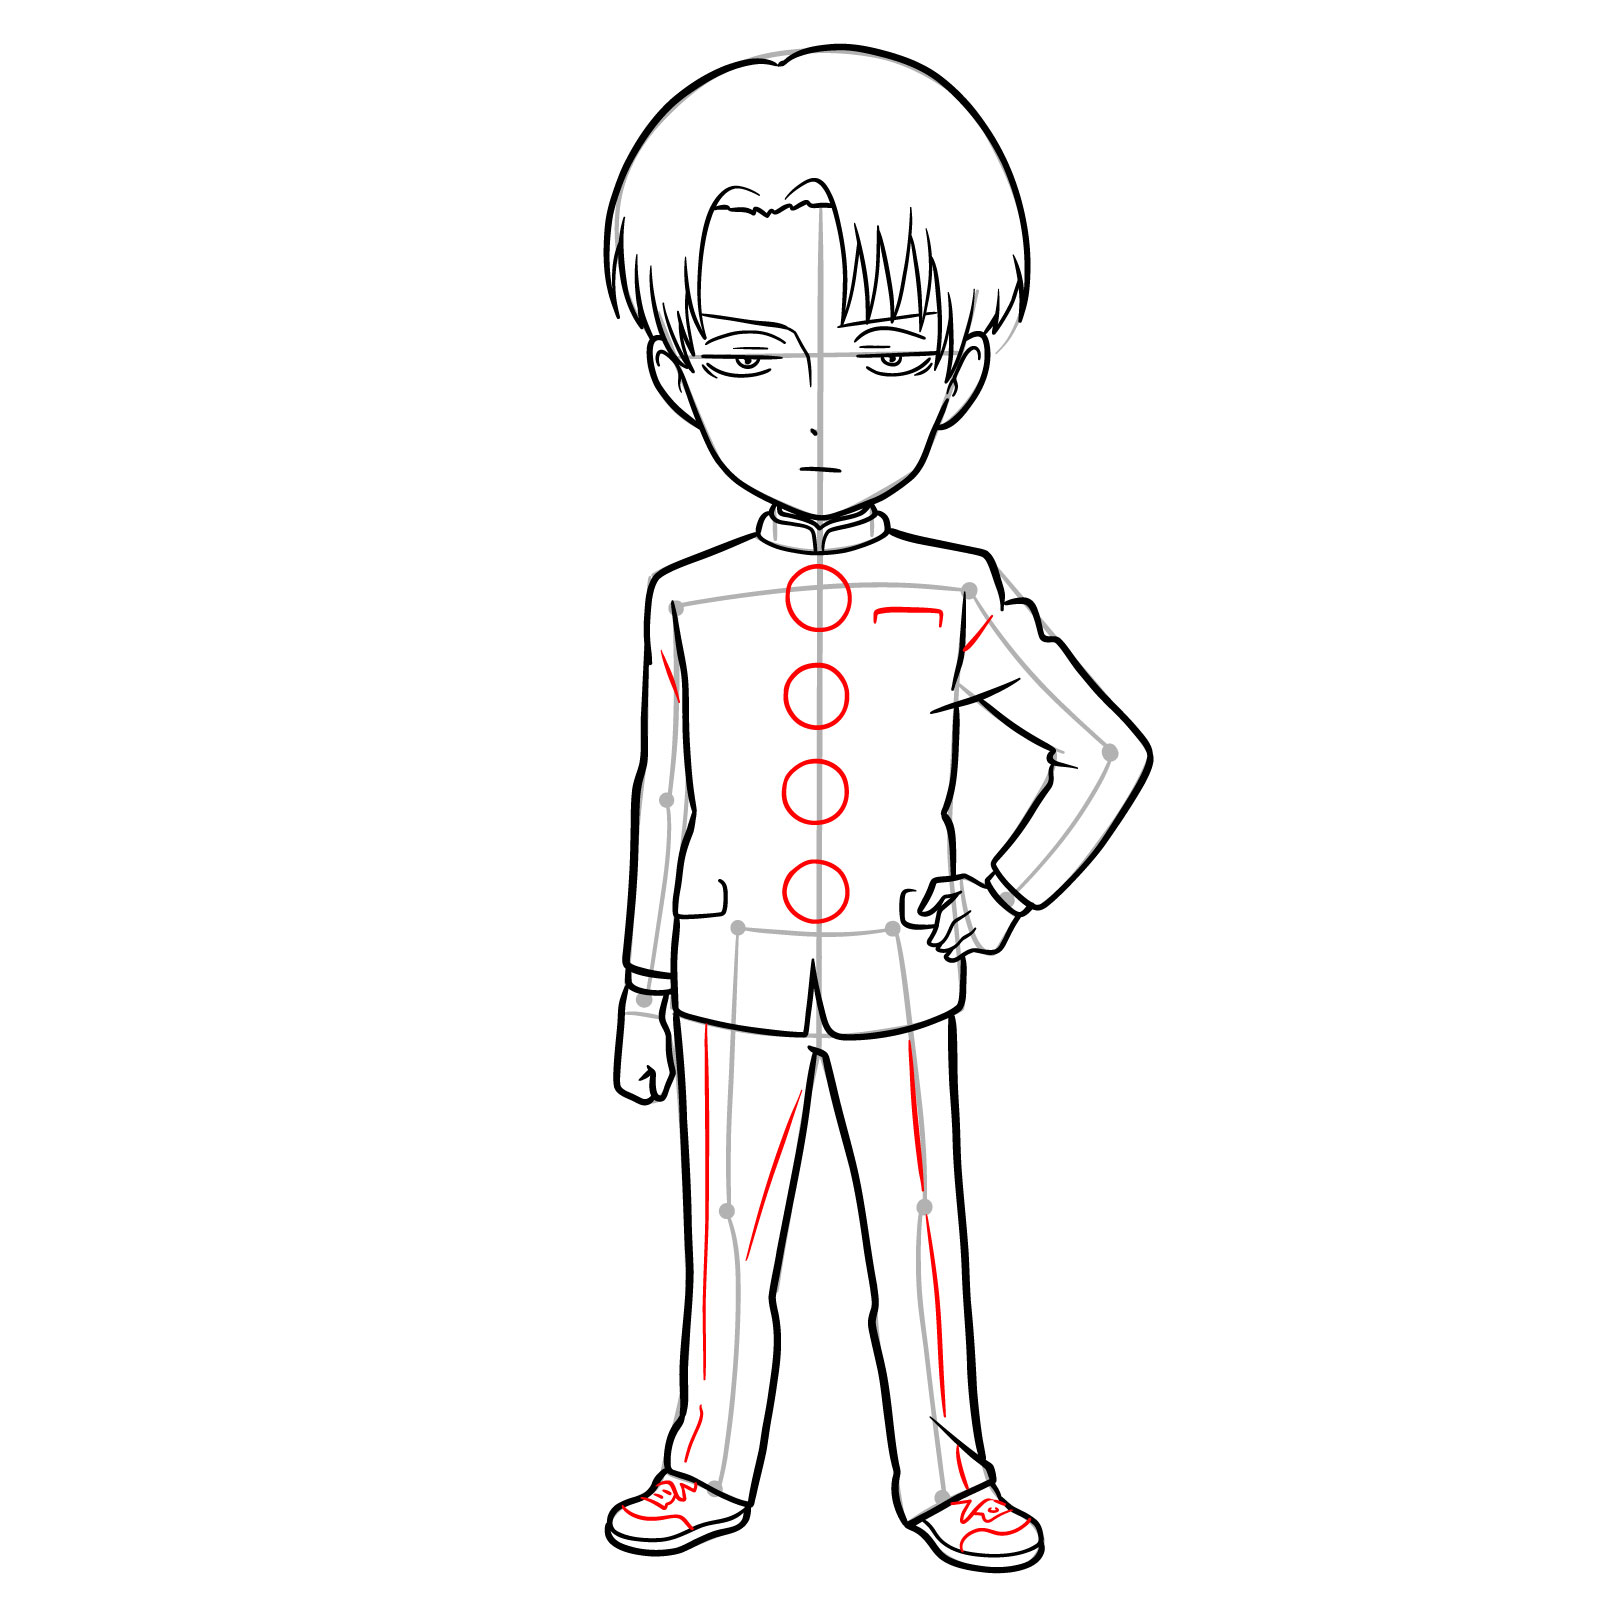
Step 18 – To finish the sketch, add details such as shoelaces, folds, and creases in the pants and jacket. Sketch large buttons on the jacket, aligned down the center, to add the finishing touches to Levi Ackerman’s military attire
Detailing the uniform of chibi Captain Levi
Step 19 – Your chibi Levi drawing is now complete. If you decide to ink the sketch, carefully go over the pencil lines with ink to finalize the drawing. Once the ink is dry, gently erase any remaining pencil marks. This final illustration showcases Levi’s distinct features and military uniform with a cute chibi twist
The completed chibi Levi drawing
Guide 2: Drawing Levi’s Face in 3/4 View
Levi’s face in 3/4 – finished drawing
Drawing a character’s face in 3/4 view adds depth and interest to a portrait, presenting a more dynamic angle than the full front view. In this second guide, we’ll capture Levi’s face as it appeared in the first three seasons of the anime, before the battle of Shiganshina. This drawing showcases his undercut curtain of straight black hair, narrow and intense dull gray eyes, and the subtle frown that often graces his lips, all signature elements of his character design. The 3/4 view reveals the structure of his jaw and the turn of his head, giving a sense of his contemplative yet formidable nature.
As we proceed, we’ll focus on the proportions that make Levi’s face distinct, ensuring that his steely gaze and the tilt of his chin are just right. By paying close attention to the outline of his facial features and the way his hair frames his face, we can create a drawing that truly resembles Captain Levi. Remember, the key to a successful 3/4 portrait lies in the alignment of the eyes, nose, and mouth, and how these features are shaped by the perspective of the chosen angle.
Step 01 – Draw a perfect circle to establish the basic shape of Captain Levi’s head. This will serve as the foundation for the face in the 3/4 view
Begin the drawing with a simple circle to form the base of Levi’s head
Step 02 – Add a “V” shape for the face frame. Draw a vertical line down the 1/3 of the circle to the chin and a horizontal line across it for eye placement. Add smaller lines indicating the base of the nose and the eyes placement, setting the structure for Captain Levi’s facial features
Adding guidelines to the face for feature placement
Step 03 – Sketch the jawline coming down from the circle to form Captain Levi’s chin and add the curve of the ear on the left side. Ensure that the ear is in line with the horizontal guidelines for the eyes and the circle
Defining the jawline and ear of Levi’s face
Step 04 – Begin to draw Captain Levi’s hairstyle. Sketch the hairline starting from the forehead, falling over slightly with a curtain-like fringe, and remember to show the parting on the side
Sketching the front part of Levi’s hairstyle
Step 05 – Define the side of Captain Levi’s head with a hairline that shows the beginning of his undercut, making sure to add the temple area detail
Shaping the temple area of Levi’s hairstyle
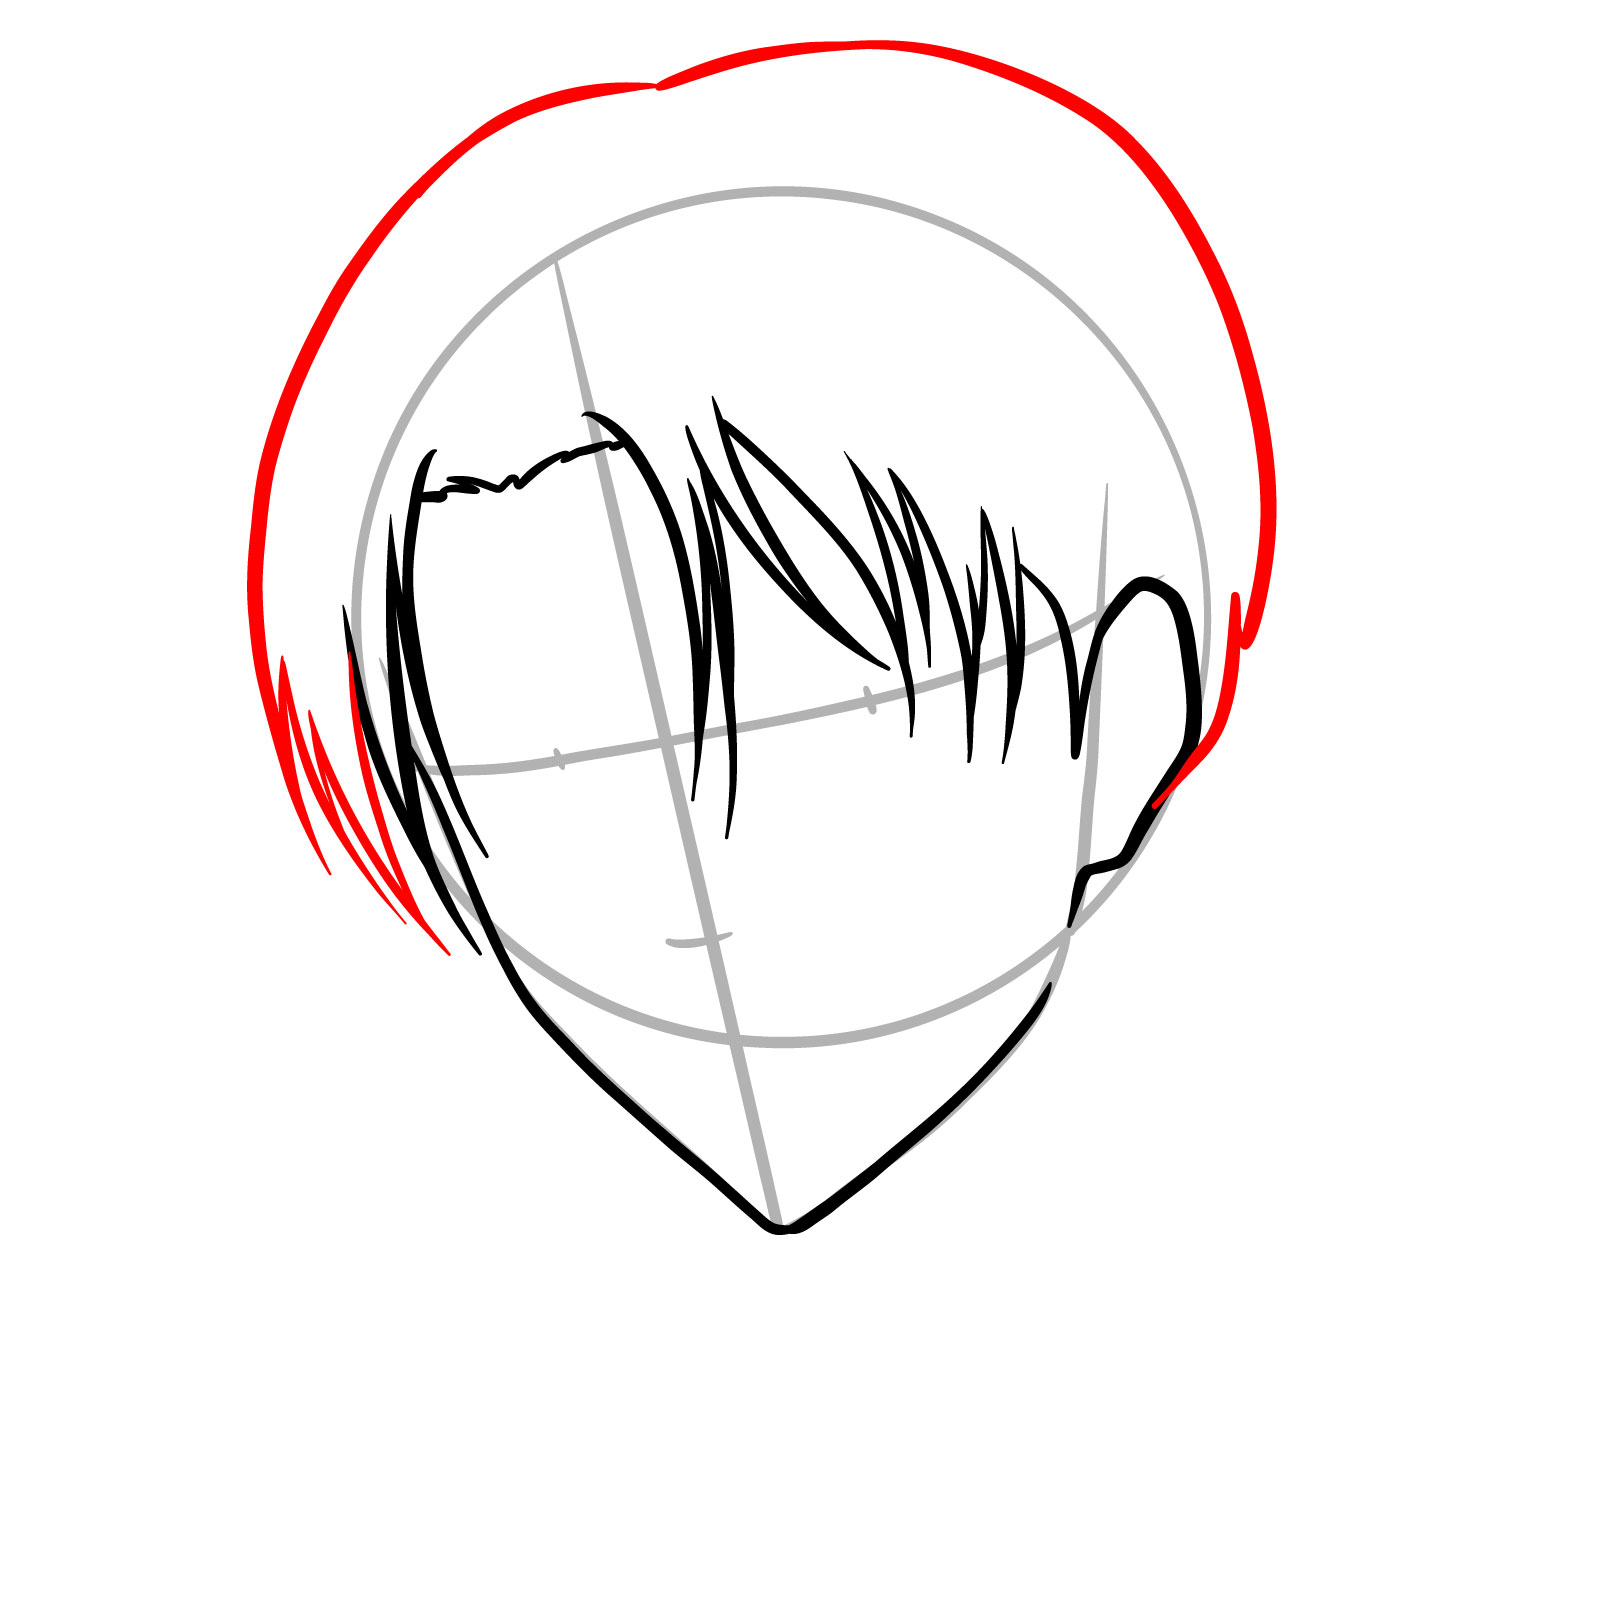
Step 06 – Outline the entire shape of Captain Levi’s hair, paying attention to the flow and direction. The hair should wrap around the head and taper down neatly
Outlining the complete hairstyle shape
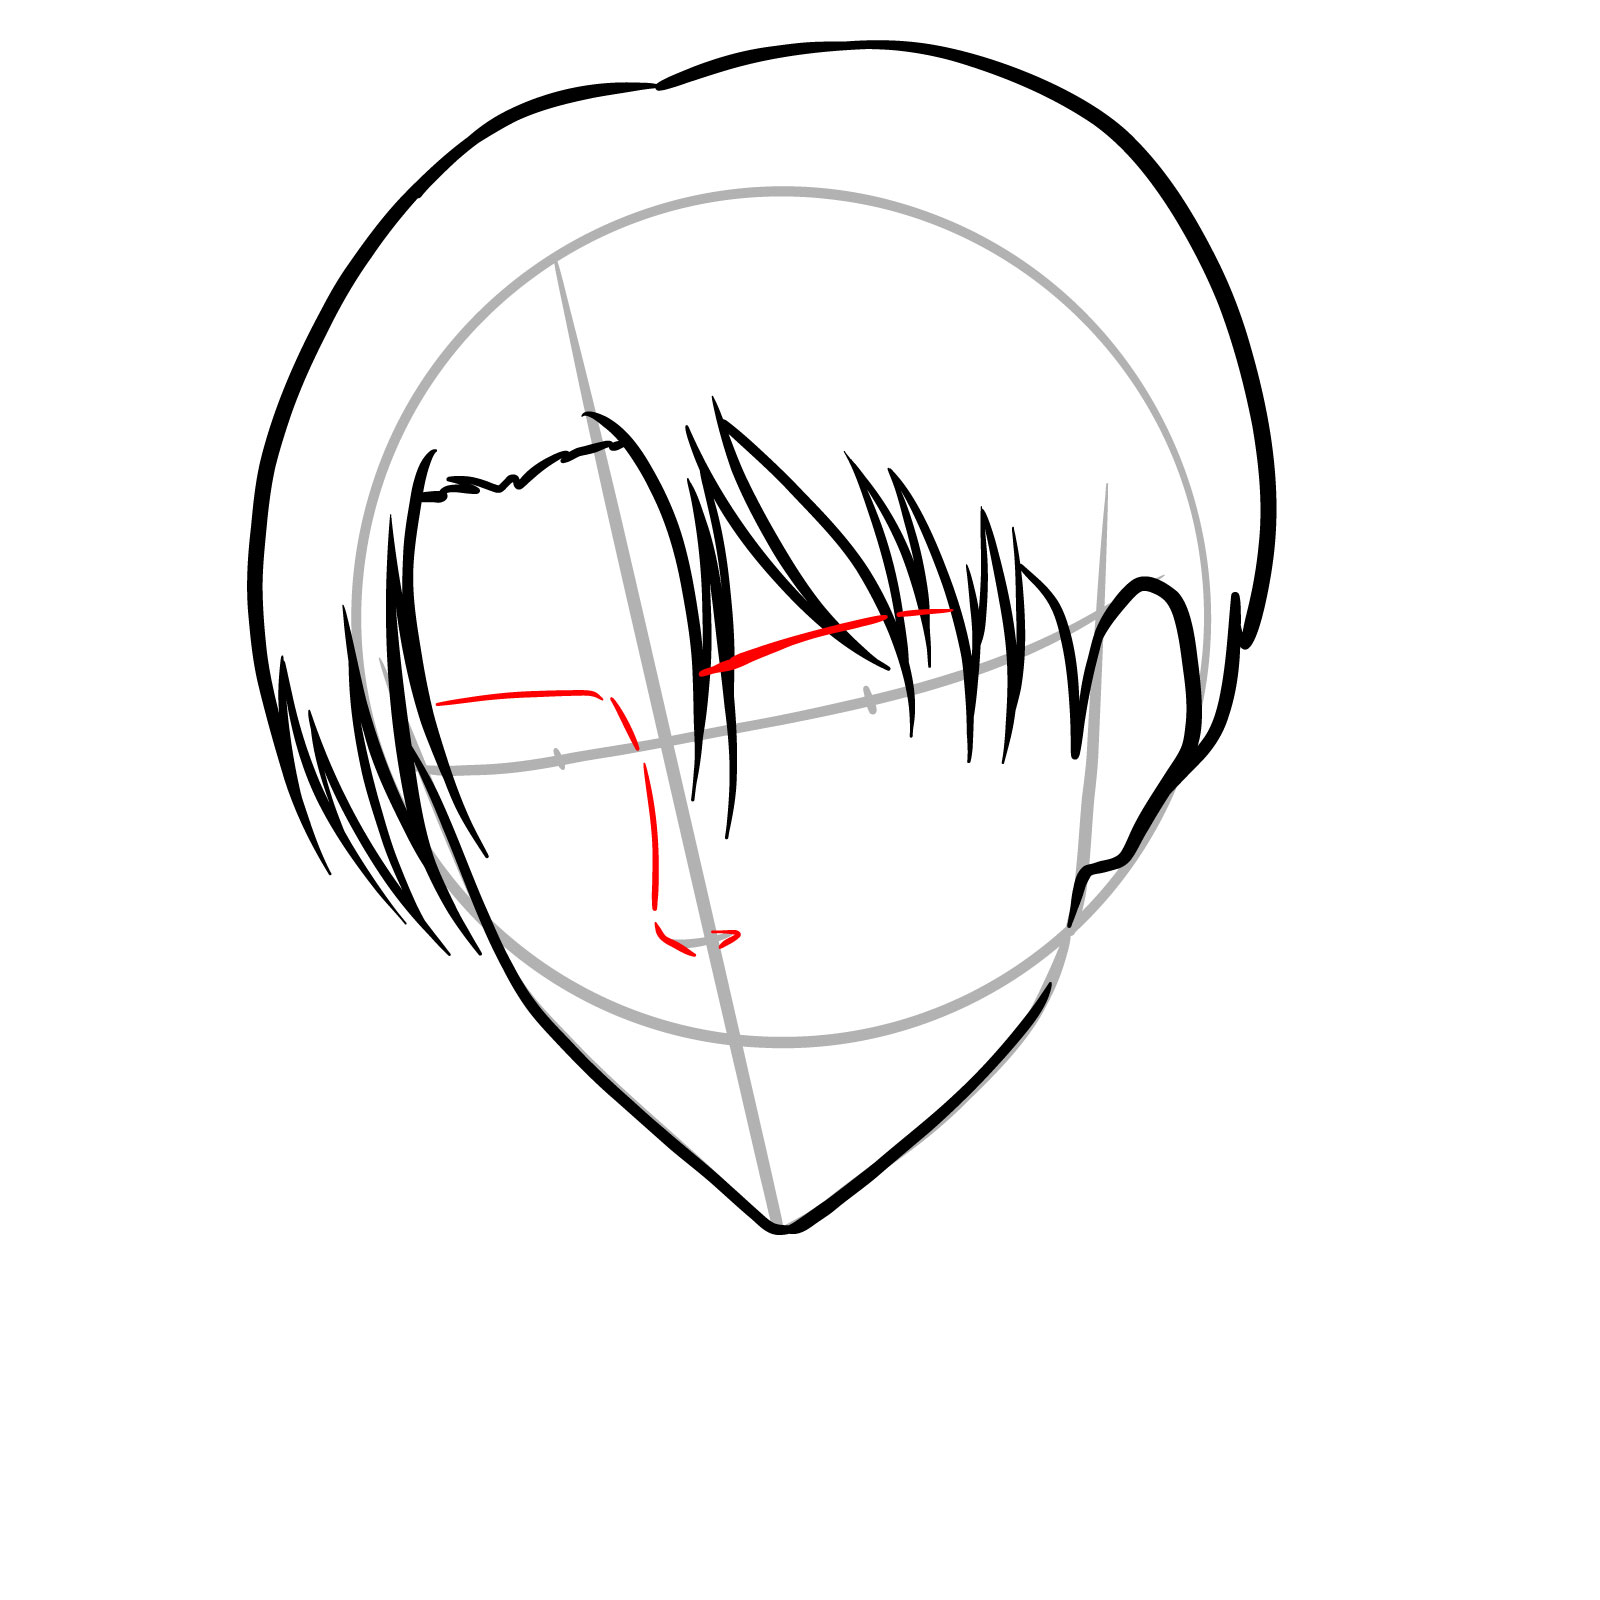
Step 07 – Add Captain Levi’s eyebrows, following the guideline for the eyes, and sketch the nose using the lower guideline, ensuring that the features align properly with the perspective of the 3/4 view
Drawing the eyebrows and nose for Captain Levi’s face
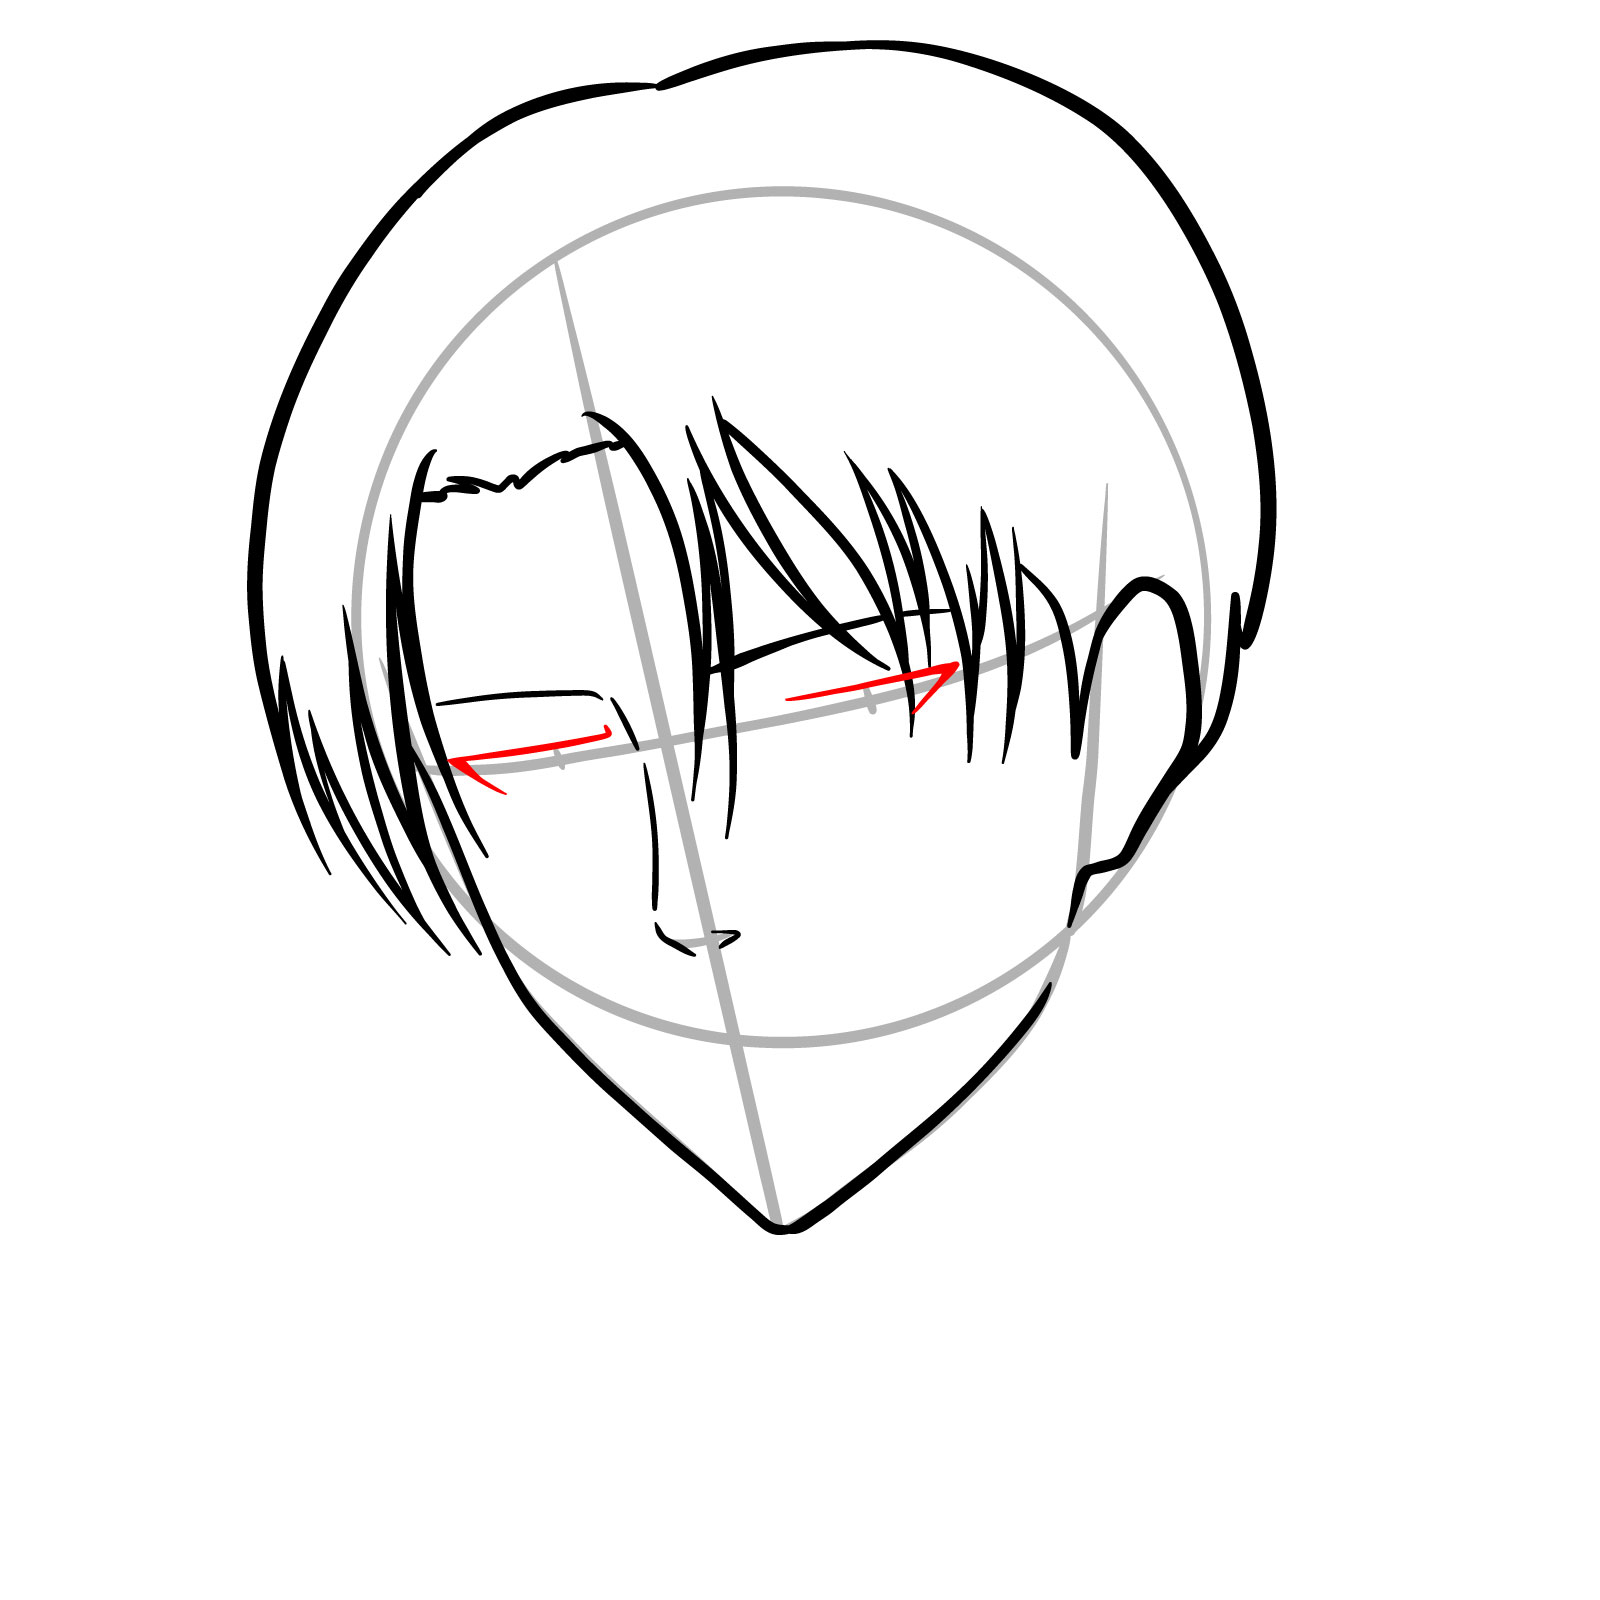
Step 08 – Begin outlining the eyes by adding two lines above the guideline to represent the upper eyelids. Ensure that the lines are angled to match the 3/4 perspective of Levi’s face
Drawing the basic outlines for Captain Levi’s eyes
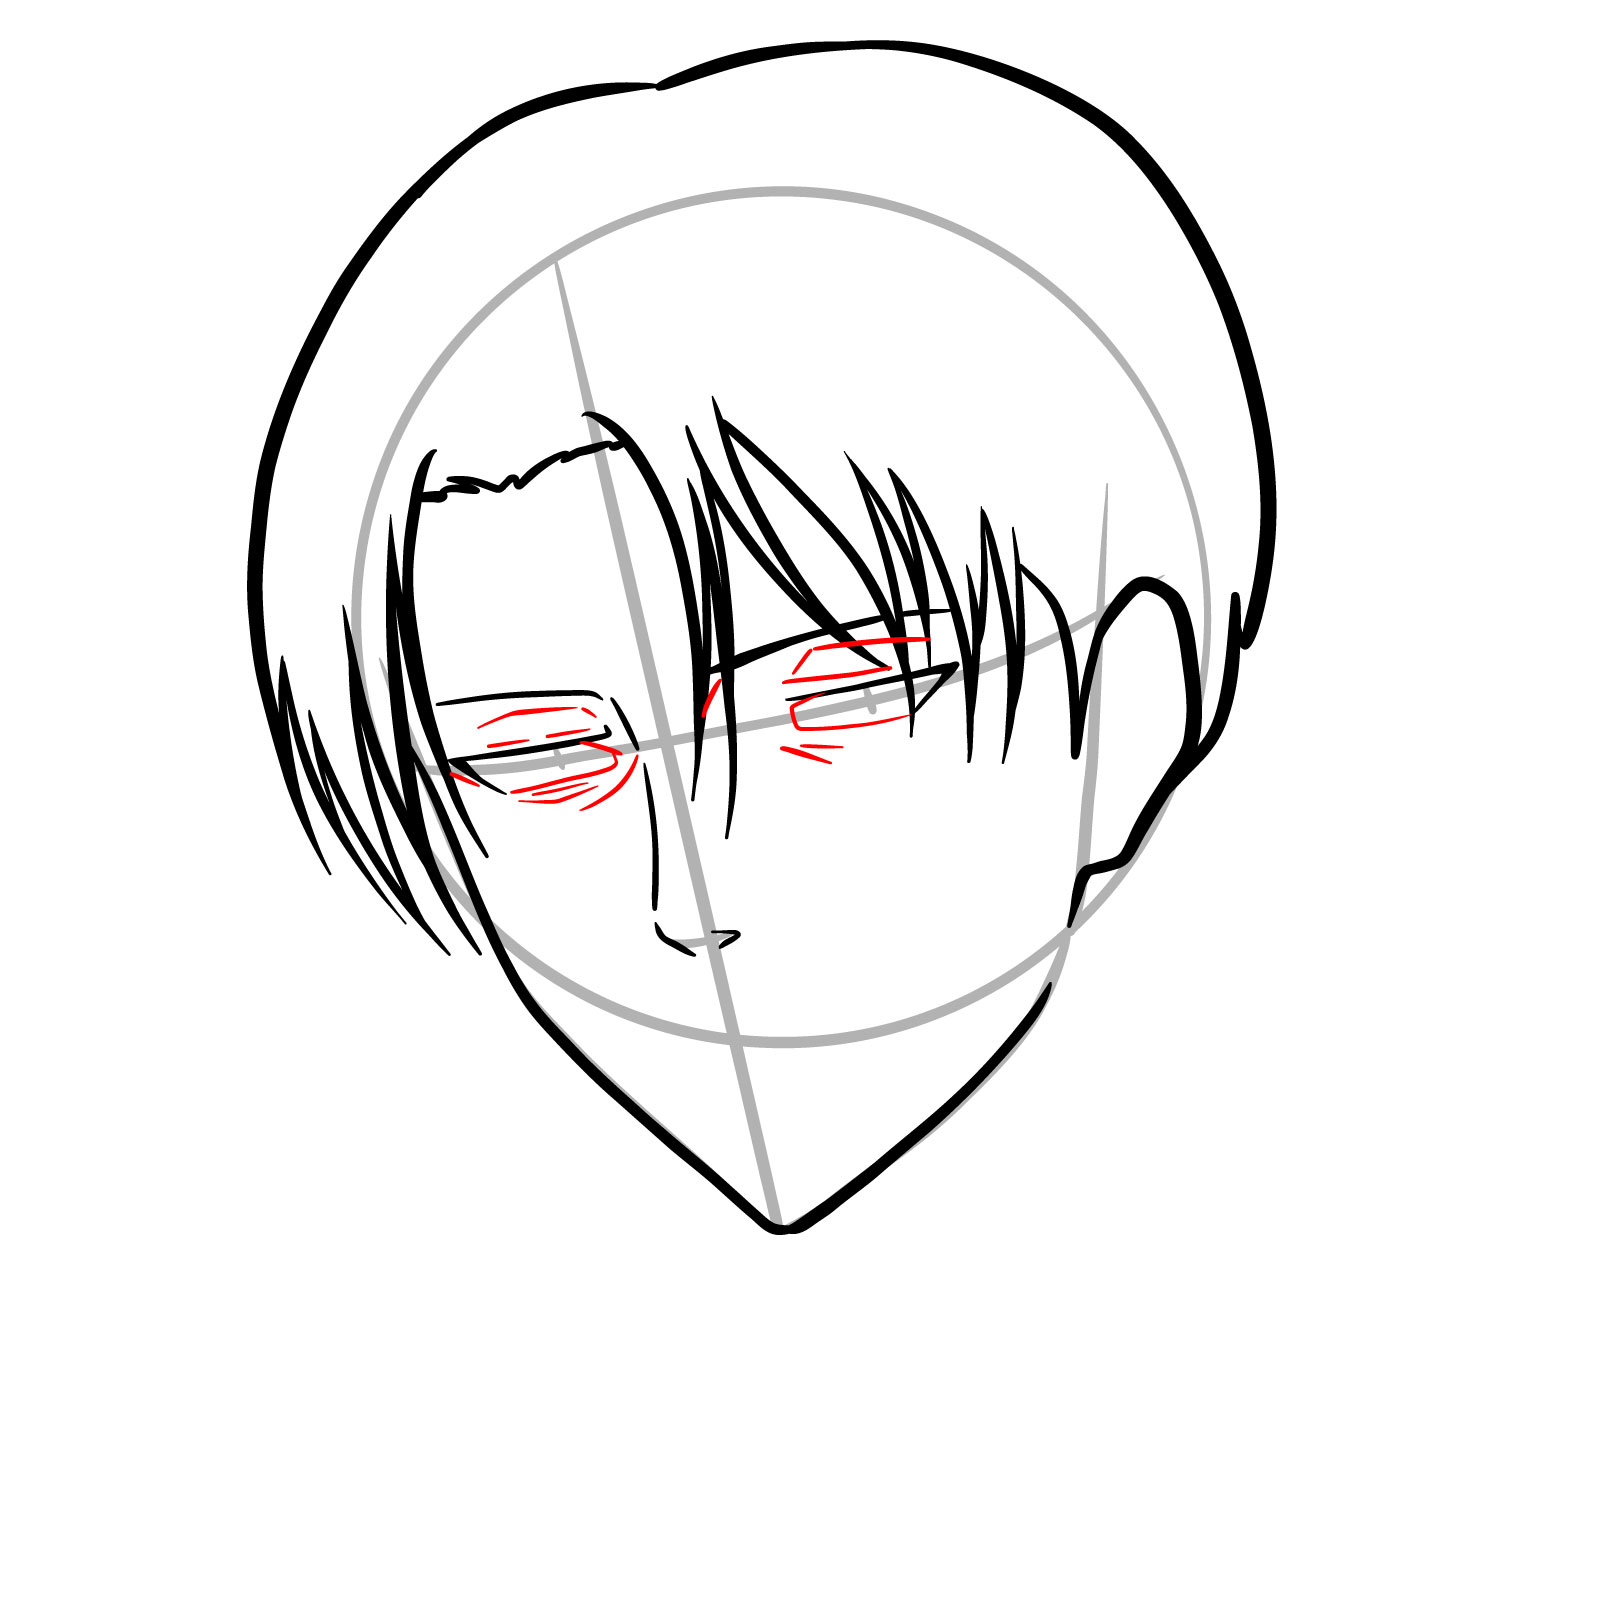
Step 09 – Define the shapes of Captain Levi’s eyes with more precision, including the lower eyelids. Add thickness to the upper lids to give depth and intensity to his gaze, characteristic of his sharp features
Forming the detailed shapes of Captain Levi’s eyes
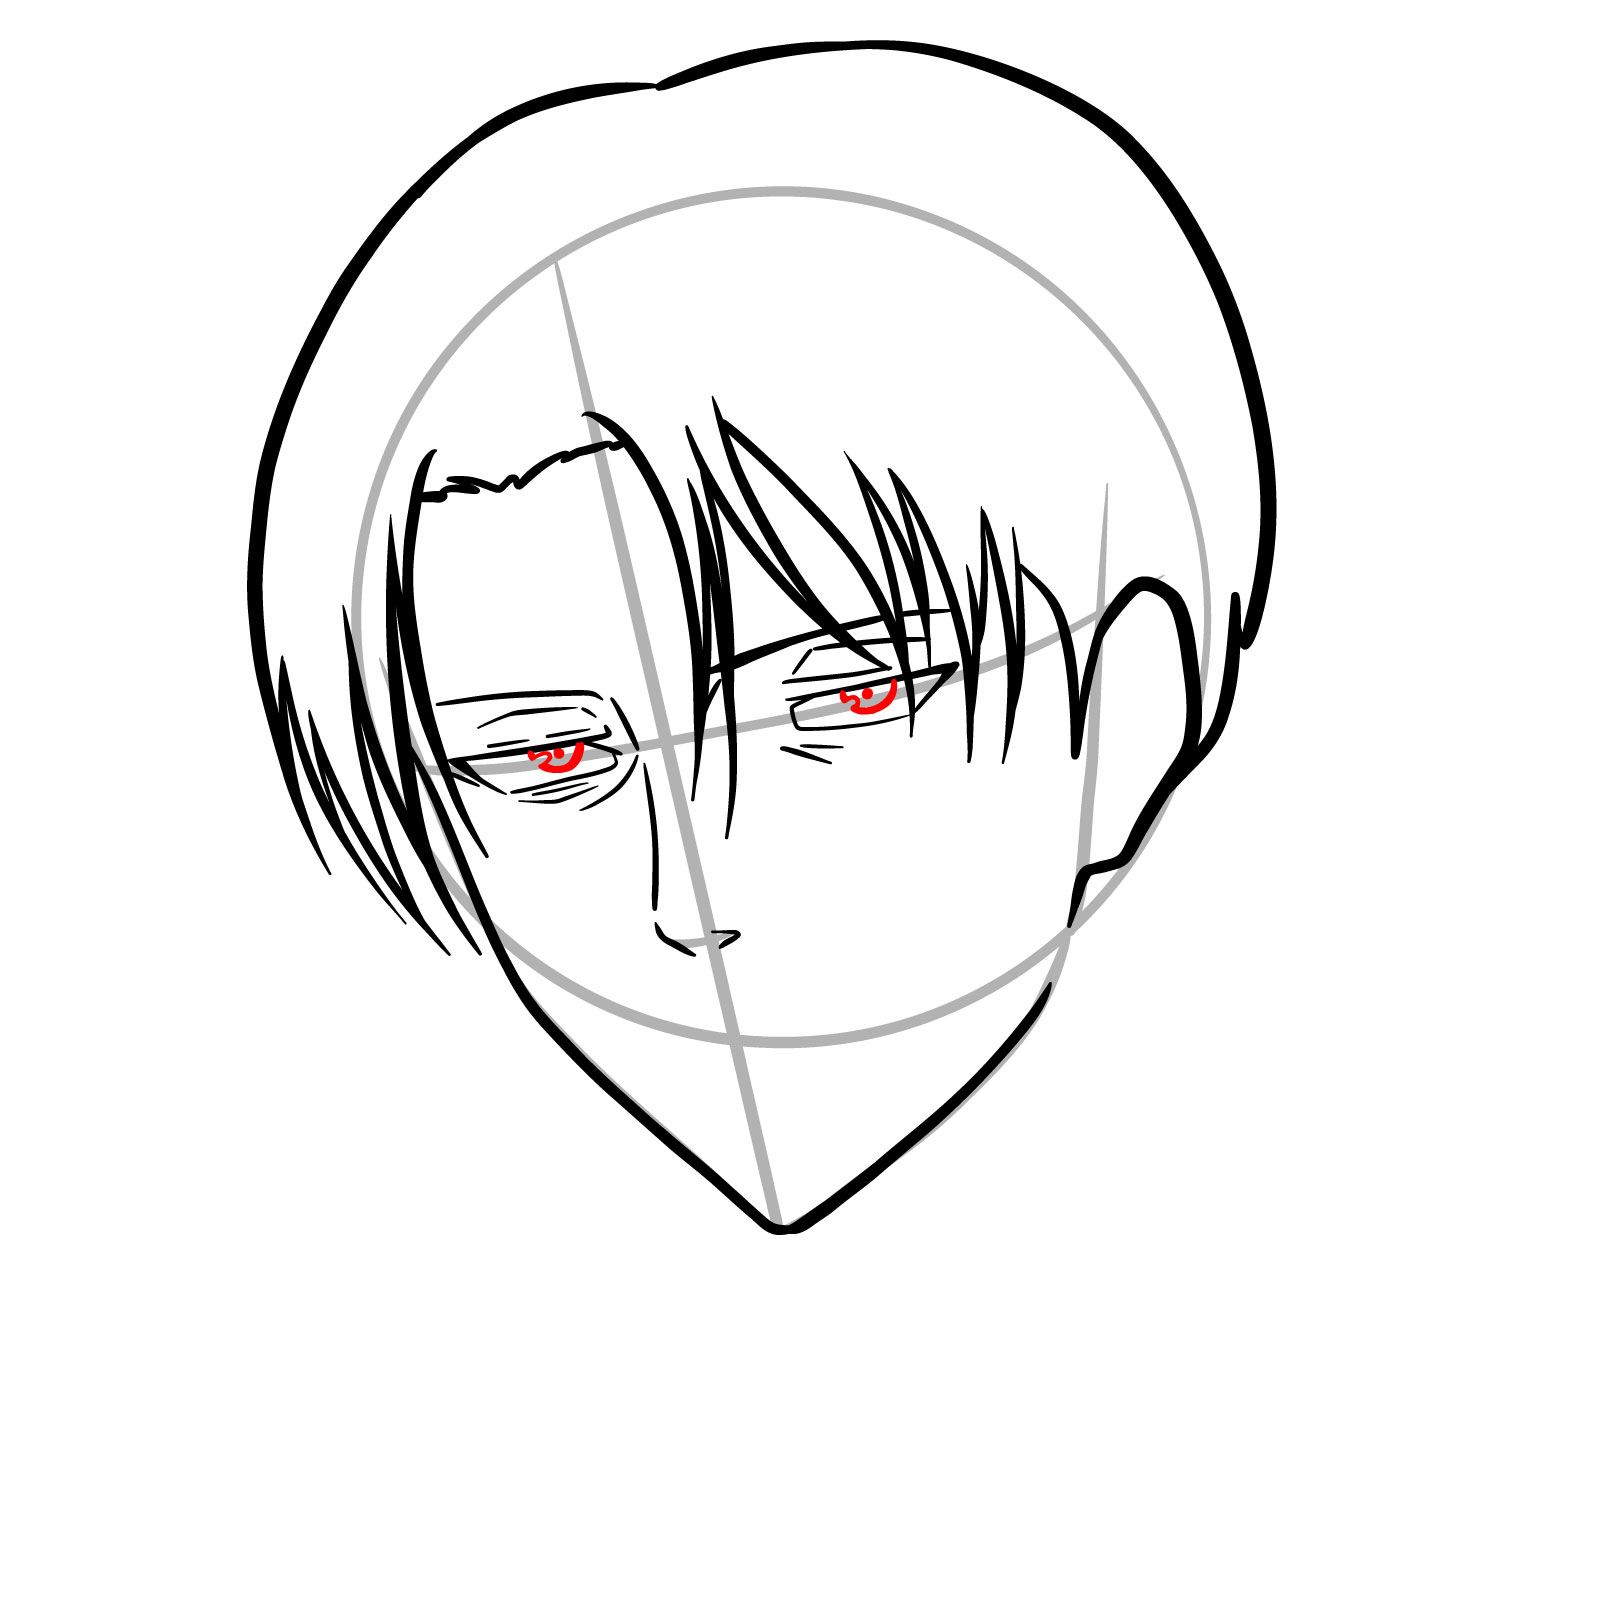
Step 10 – Draw the pupils and irises within the outlines of the eyes, making sure they are proportionate. This step brings Captain Levi’s gaze to life, adding emotion and focus to the drawing
Sketching the pupils and irises in Captain Levi’s eyes
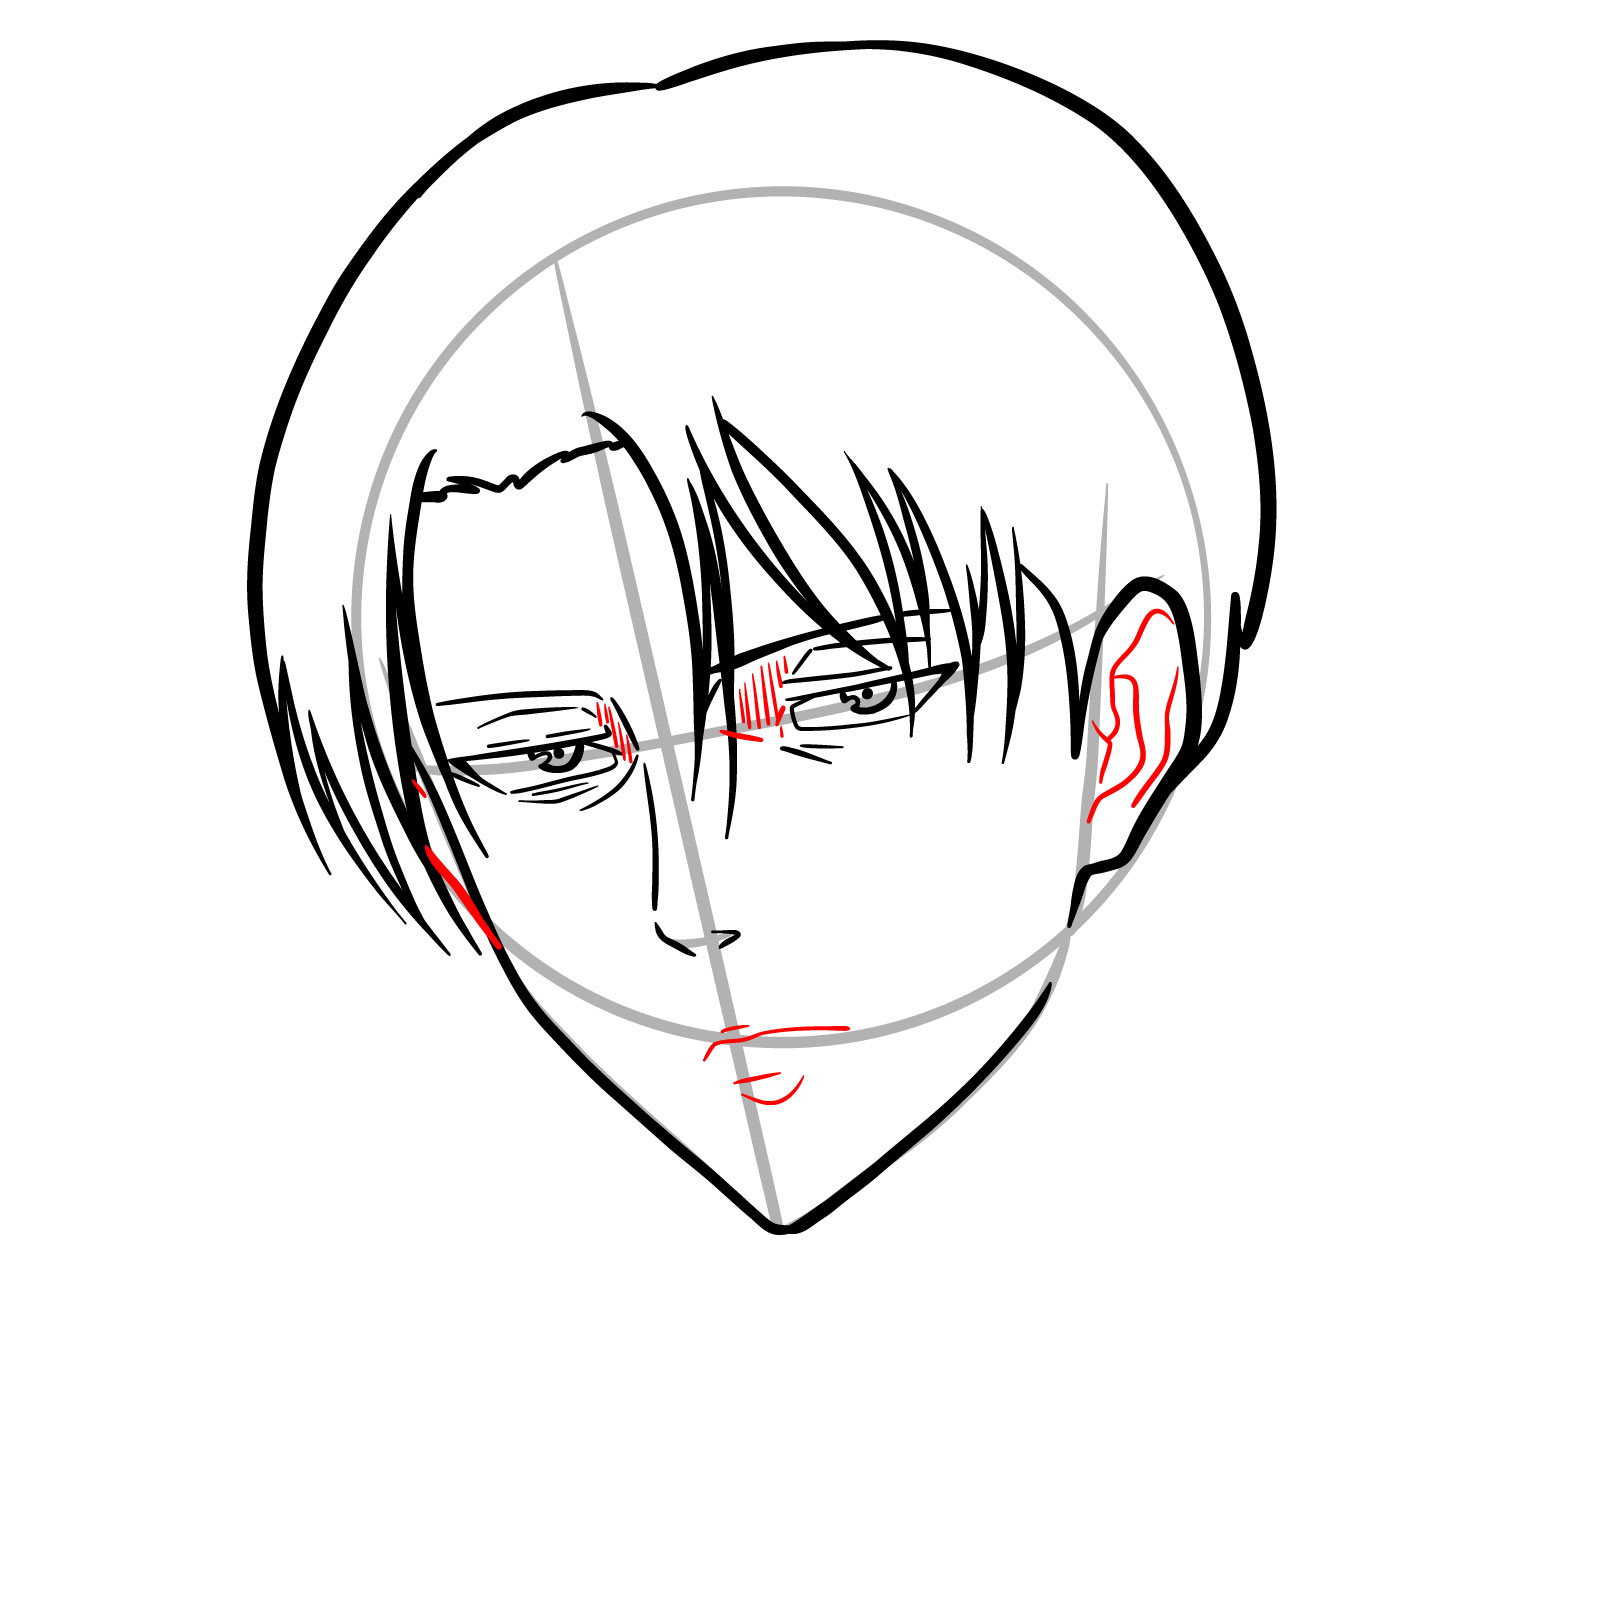
Step 11 – Sketch Captain Levi’s mouth with subtle lines, detail the inner ear, and add vertical lines between the eyes and nose to suggest shading, mimicking the anime style’s bold line work for depth and contour
Adding facial details to Captain Levi’s face
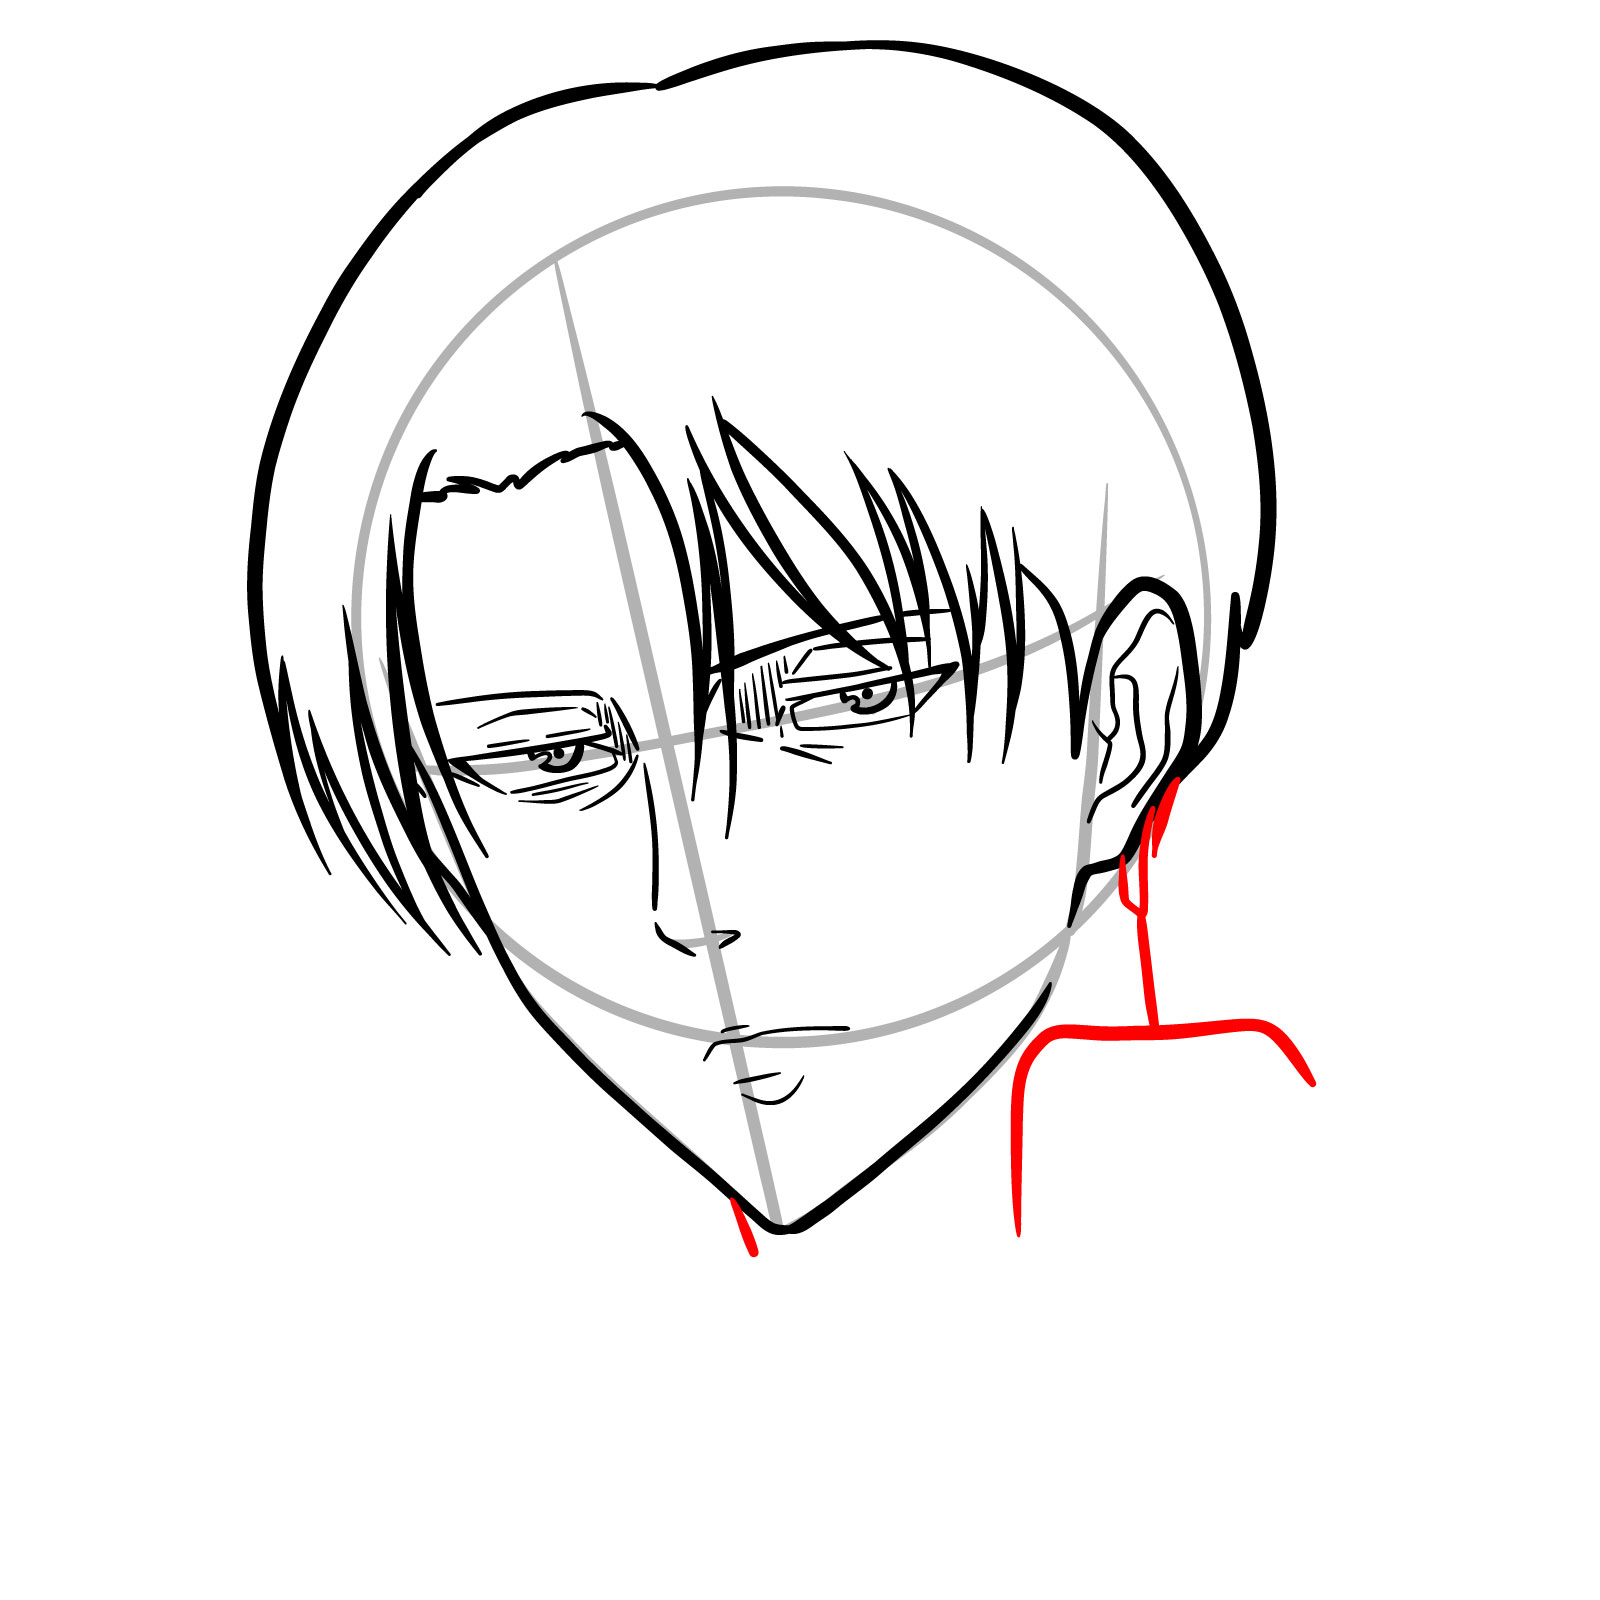
Step 12 – Extend two lines down from the jaw and the back of the head to form Captain Levi’s neck. Start drawing the collar of his uniform
Drawing the neck and the collar of Levi’s uniform
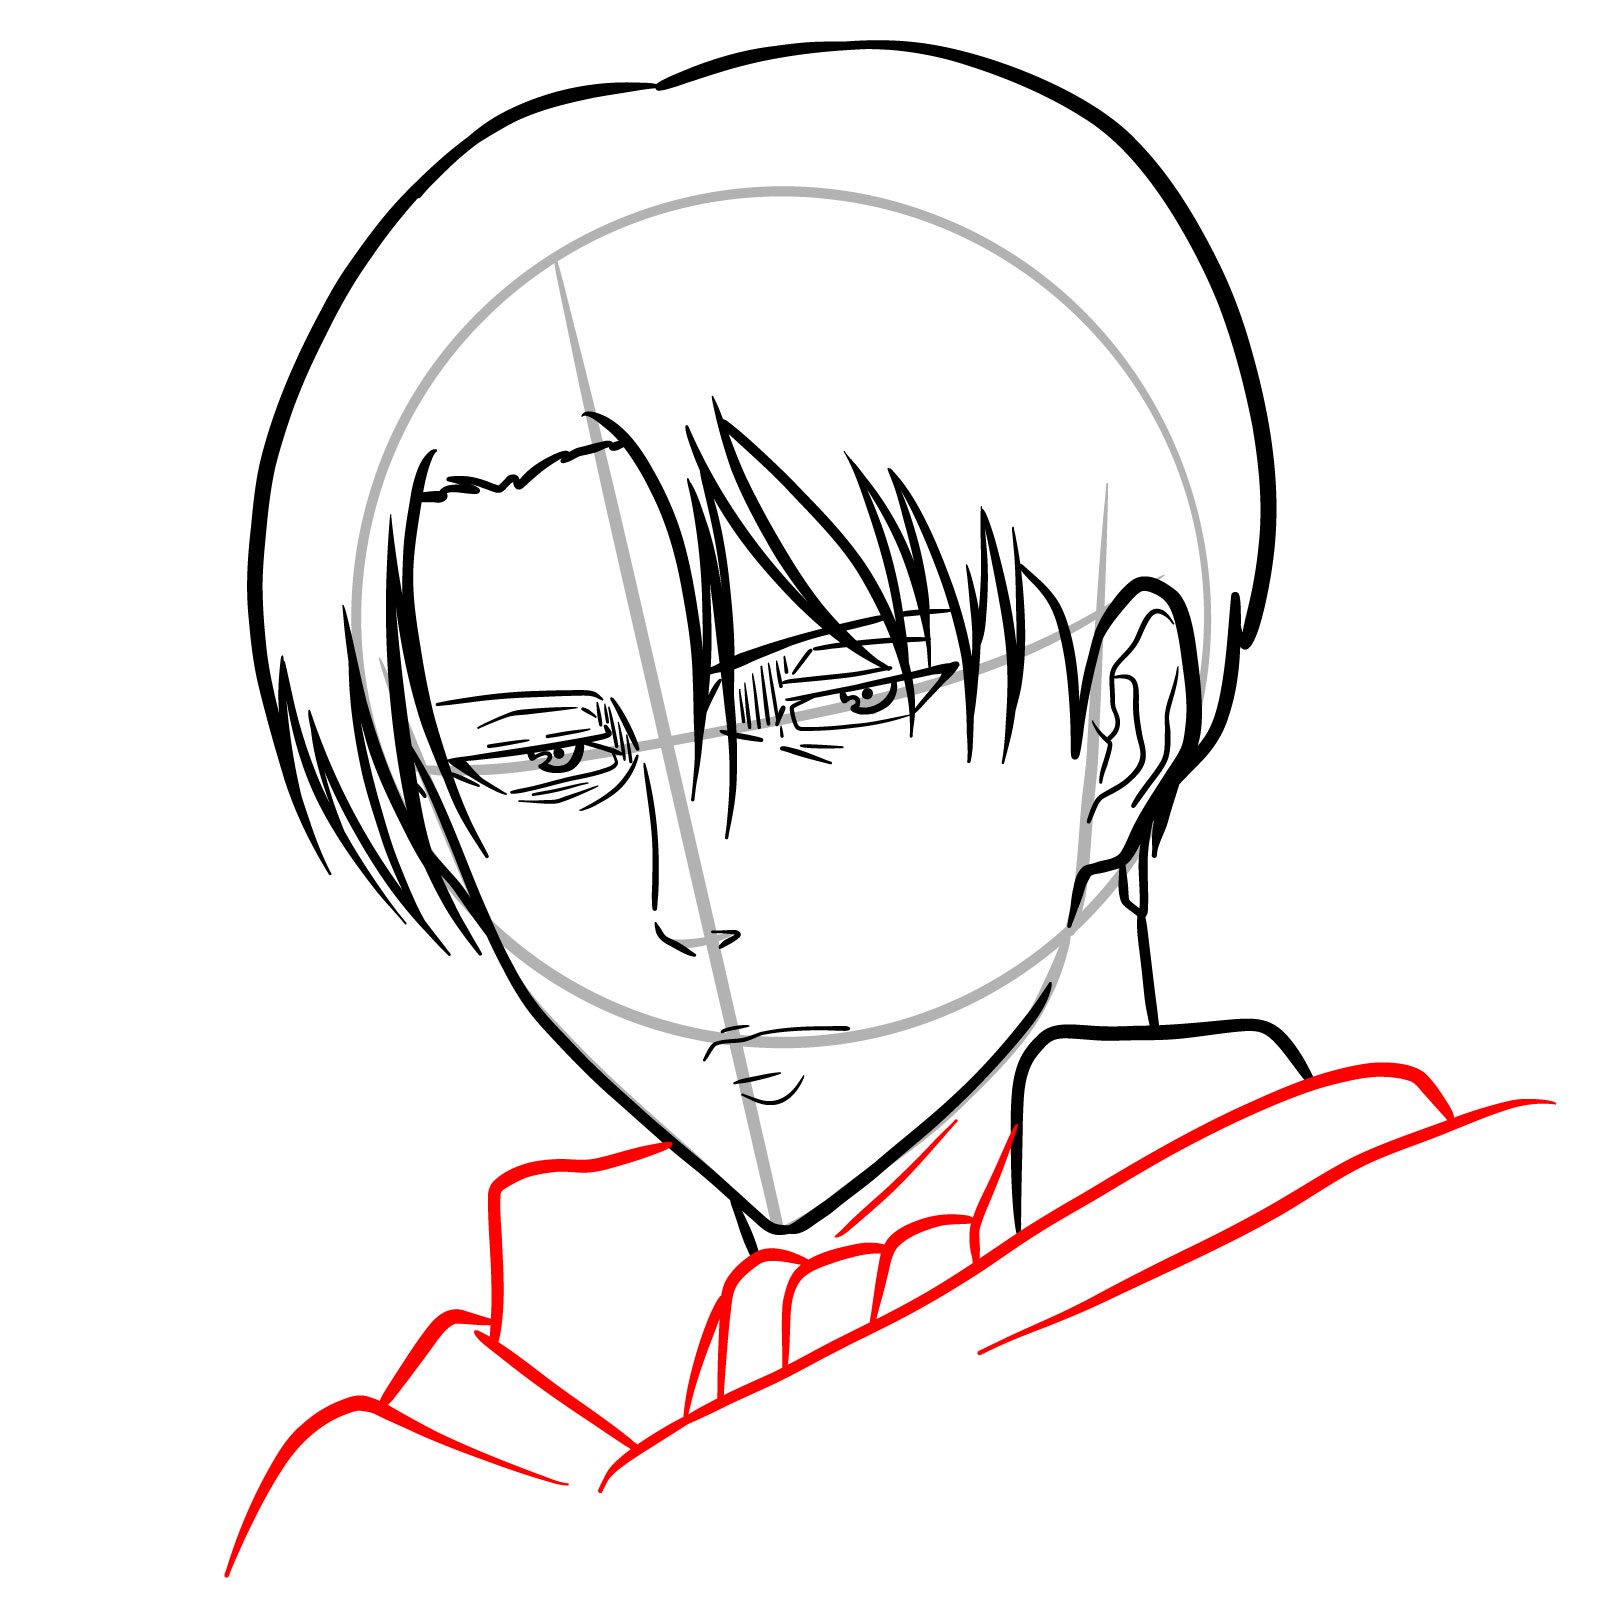
Step 13 – Outline the shoulders and the collar area of Captain Levi’s uniform, ensuring to capture the stiff, high-collared look of his iconic Survey Corps attire
Illustrating the visible part of Captain Levi’s uniform
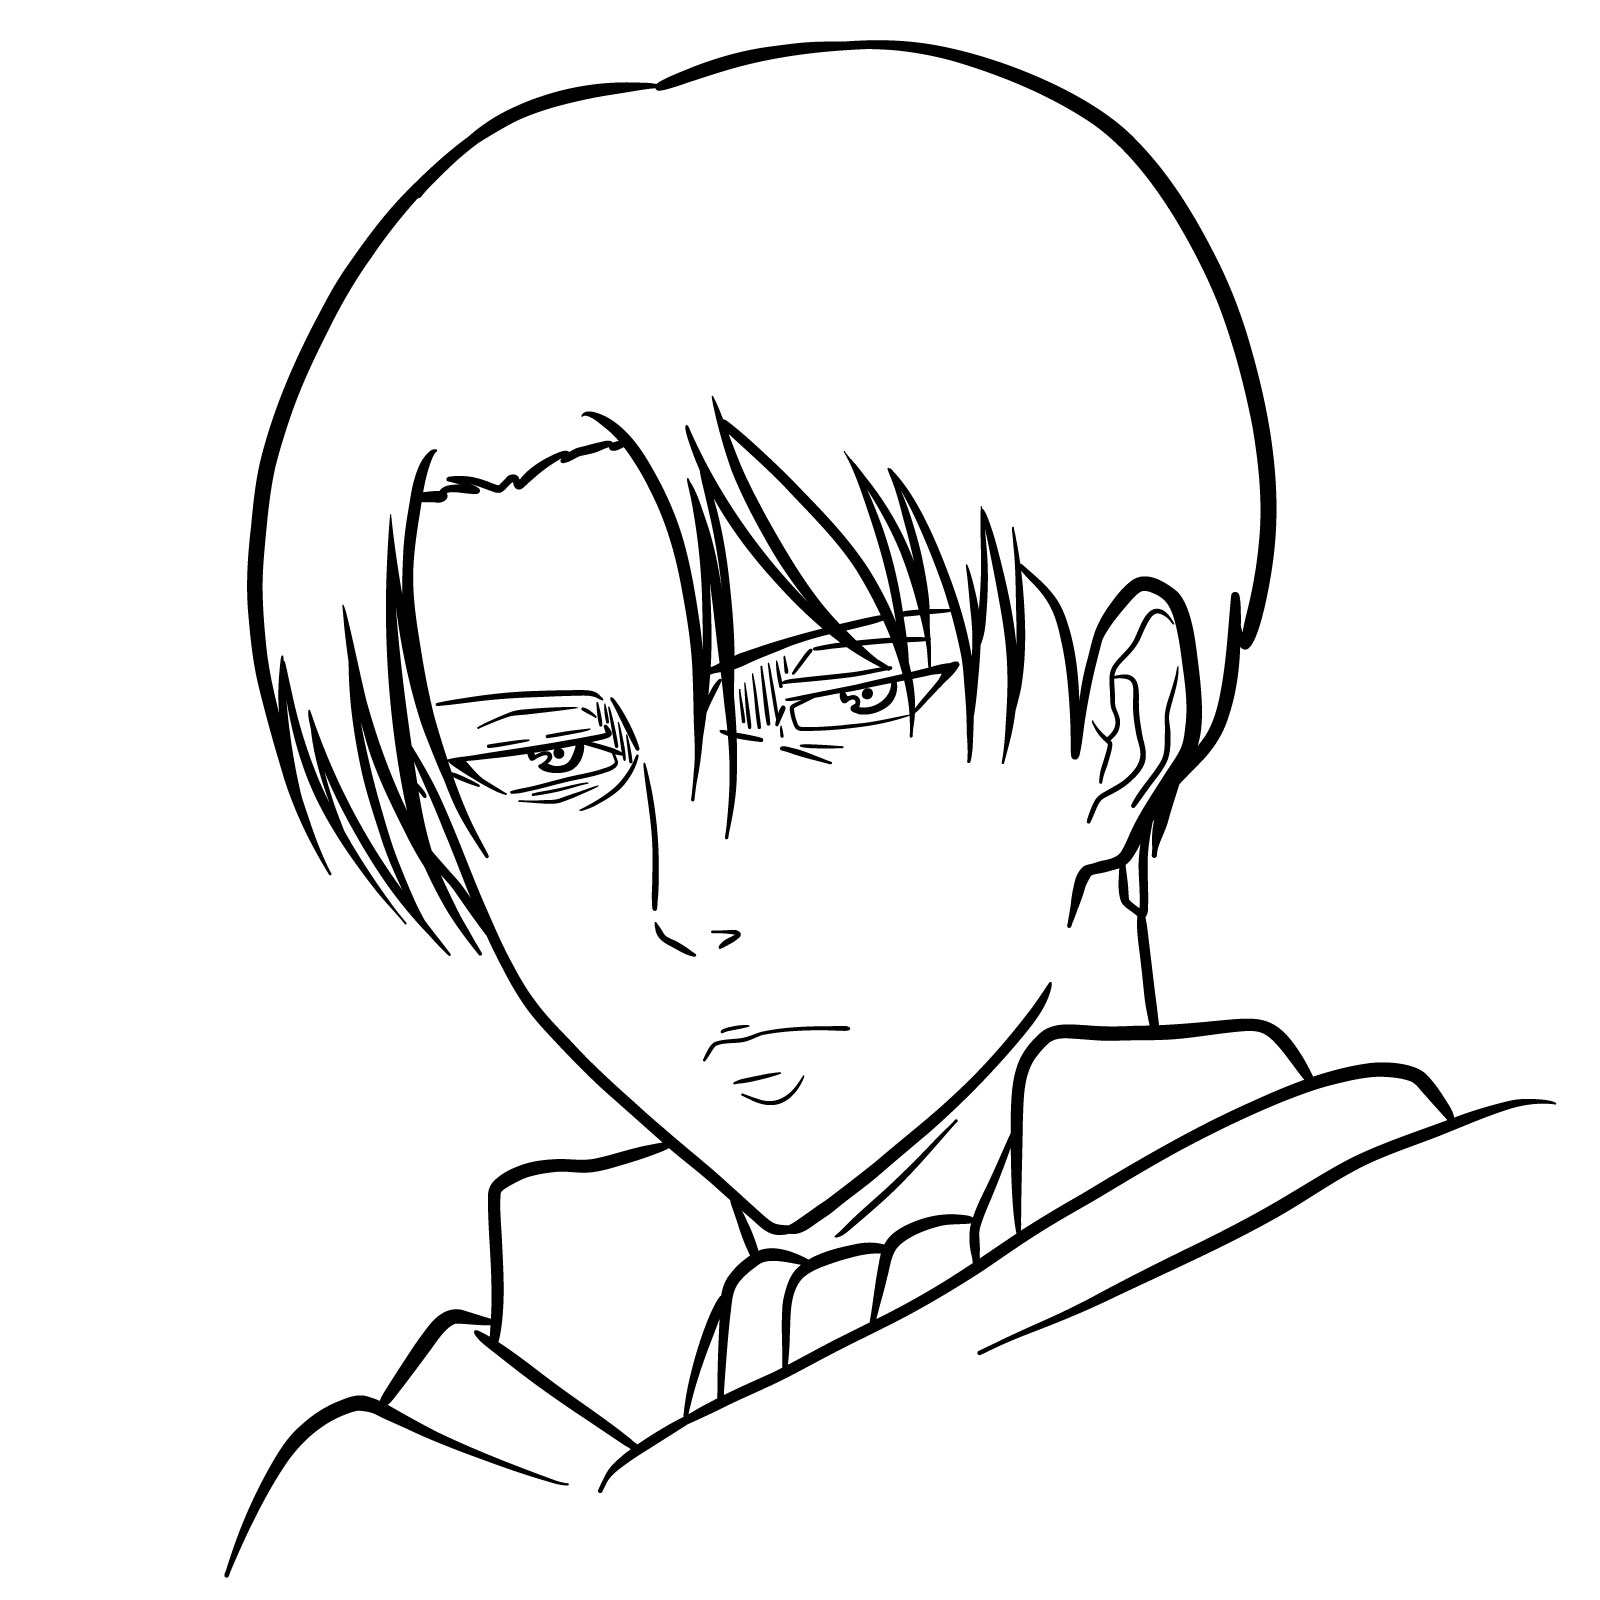
Step 14 – The drawing guide concludes with a complete and detailed illustration of Captain Levi’s face. Every feature from the intense eyes to the characteristic hairstyle and the crisp uniform collar has been carefully drawn, showing how to draw Captain Levi’s face from the first seasons with accuracy and style
Finalized drawing of Captain Levi’s face from Attack on Titan
Guide 3: Drawing Levi’s Face Front View
How to draw Levi Ackerman’s face (front view) – the result
Mastering the front view of a character’s face is essential for any artist, as it lays the groundwork for expressing the character’s personality and mood. In the third guide, we’ll focus on drawing Levi’s face from a front view, capturing the same stern expression and sharp features seen in the earlier seasons of the series. This drawing highlights Levi’s straight hair, parted in the middle, and his narrow, intense eyes that are characteristic of his vigilant and composed demeanor.
The key to this front view portrait is symmetry and balance. Paying special attention to the spacing of the eyes, the shape of the eyebrows, and the line of the mouth will be crucial in rendering Levi’s distinctive look. The firm set of his lips should convey his no-nonsense personality. As you draw, keep checking that each side of the face mirrors the other accurately, and that the facial features align correctly with one another. With careful attention to these details, you’ll be able to create a striking and recognizable portrayal of Captain Levi.
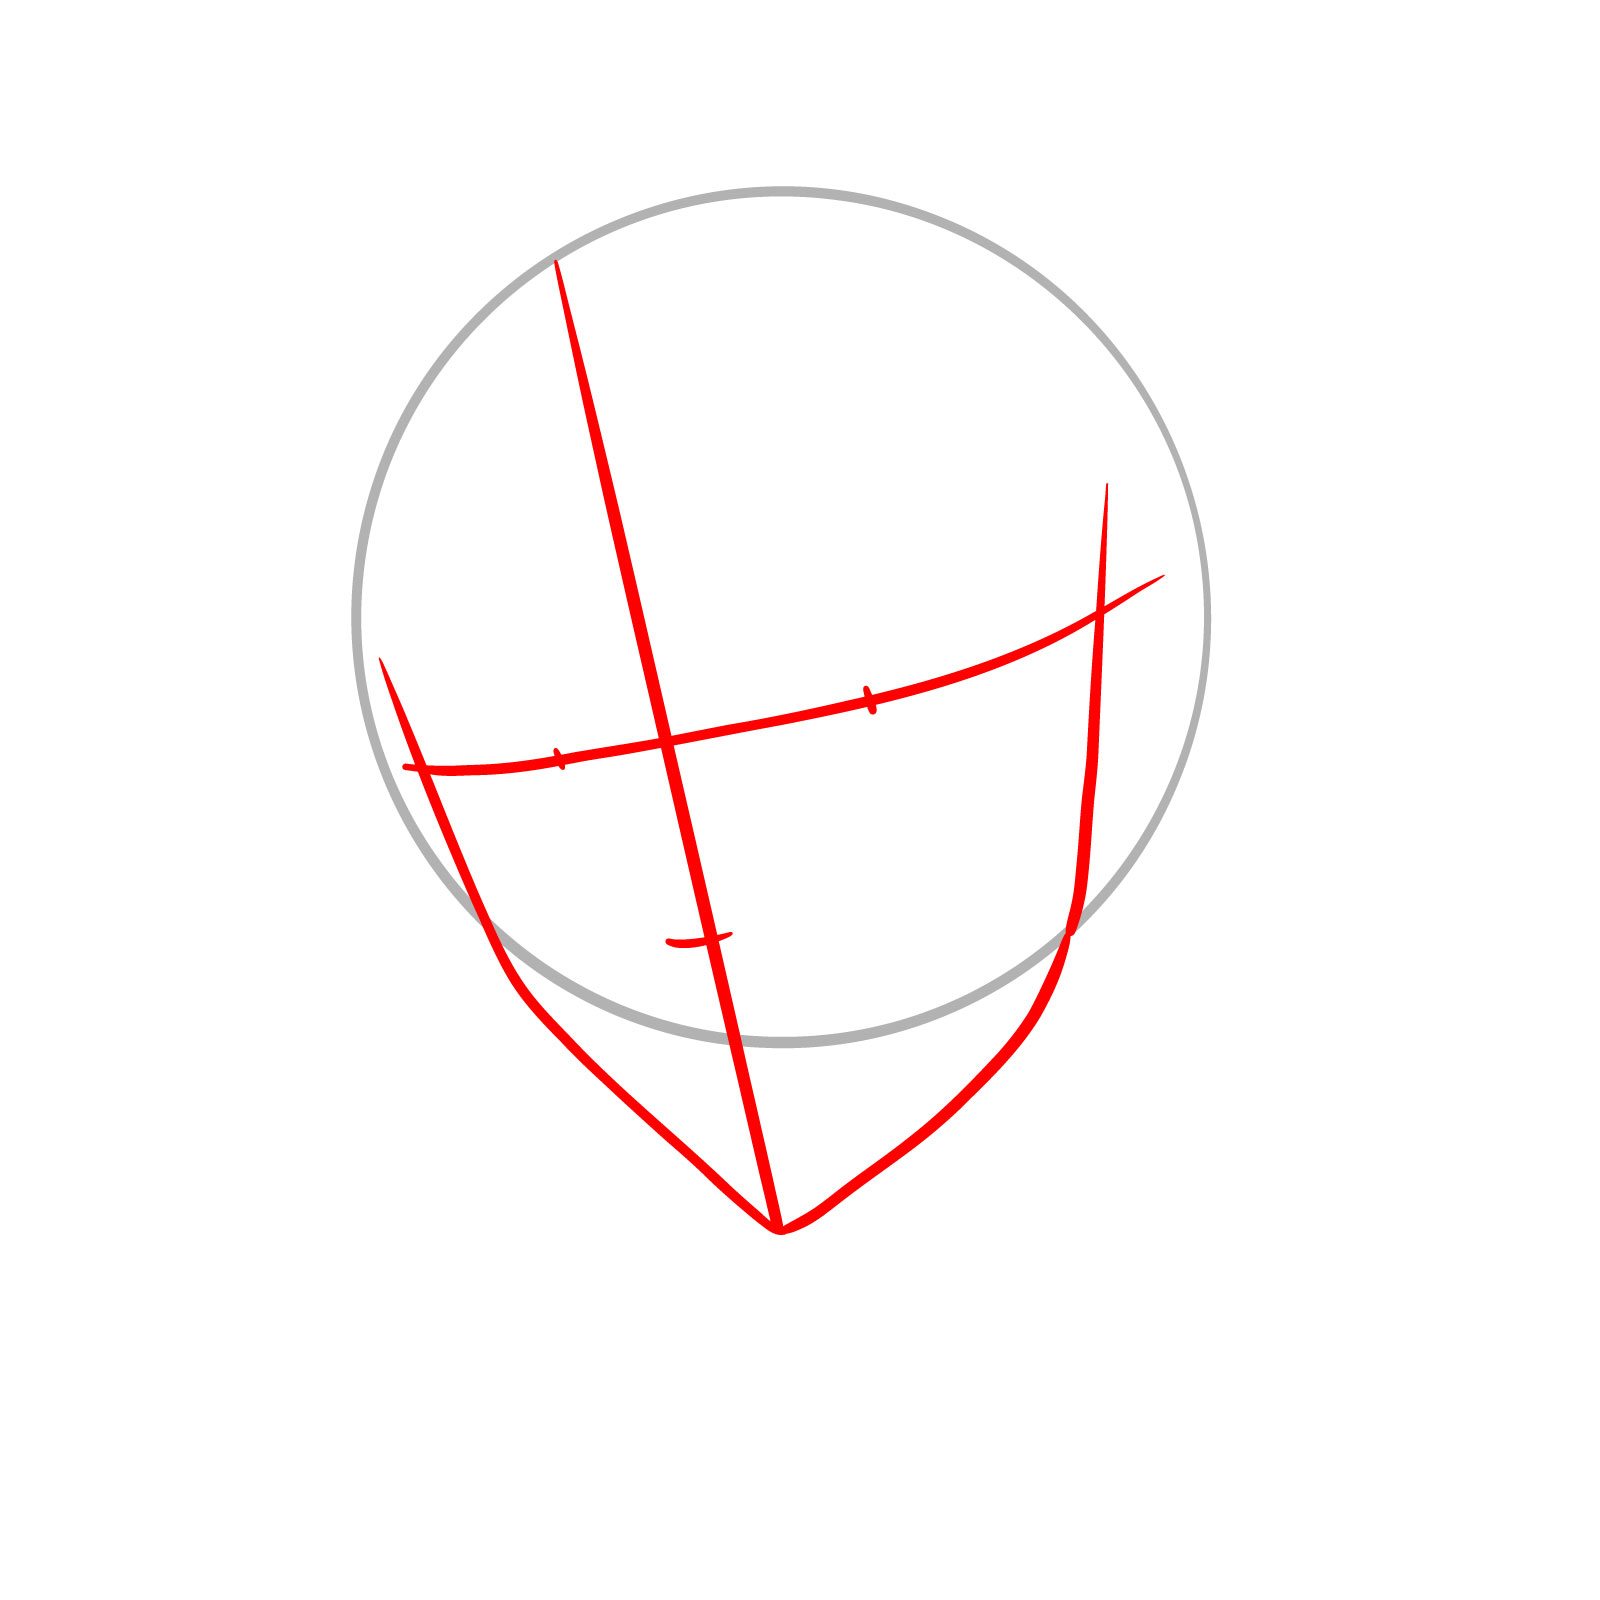
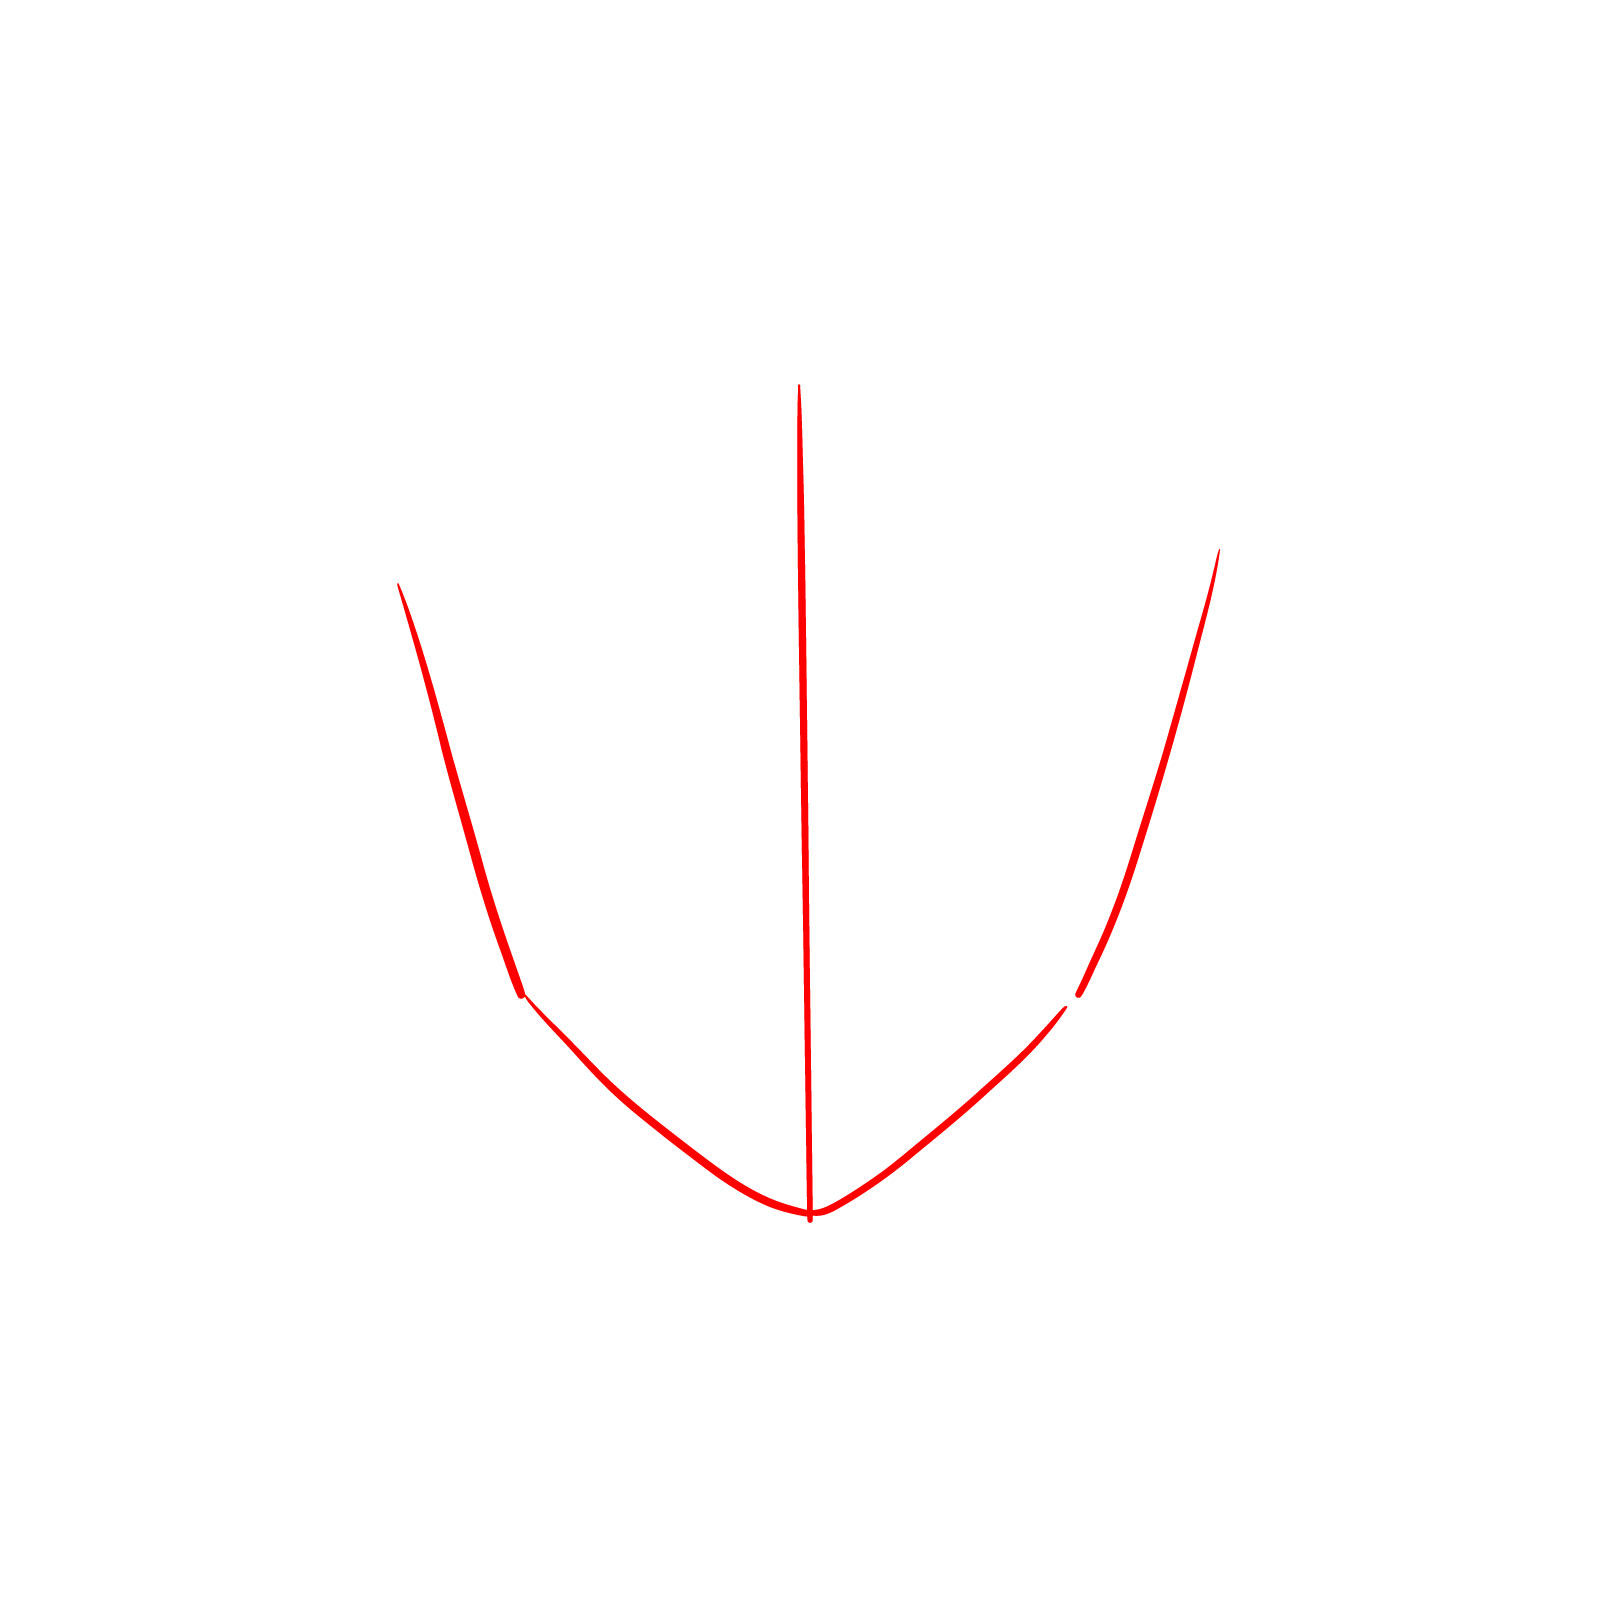
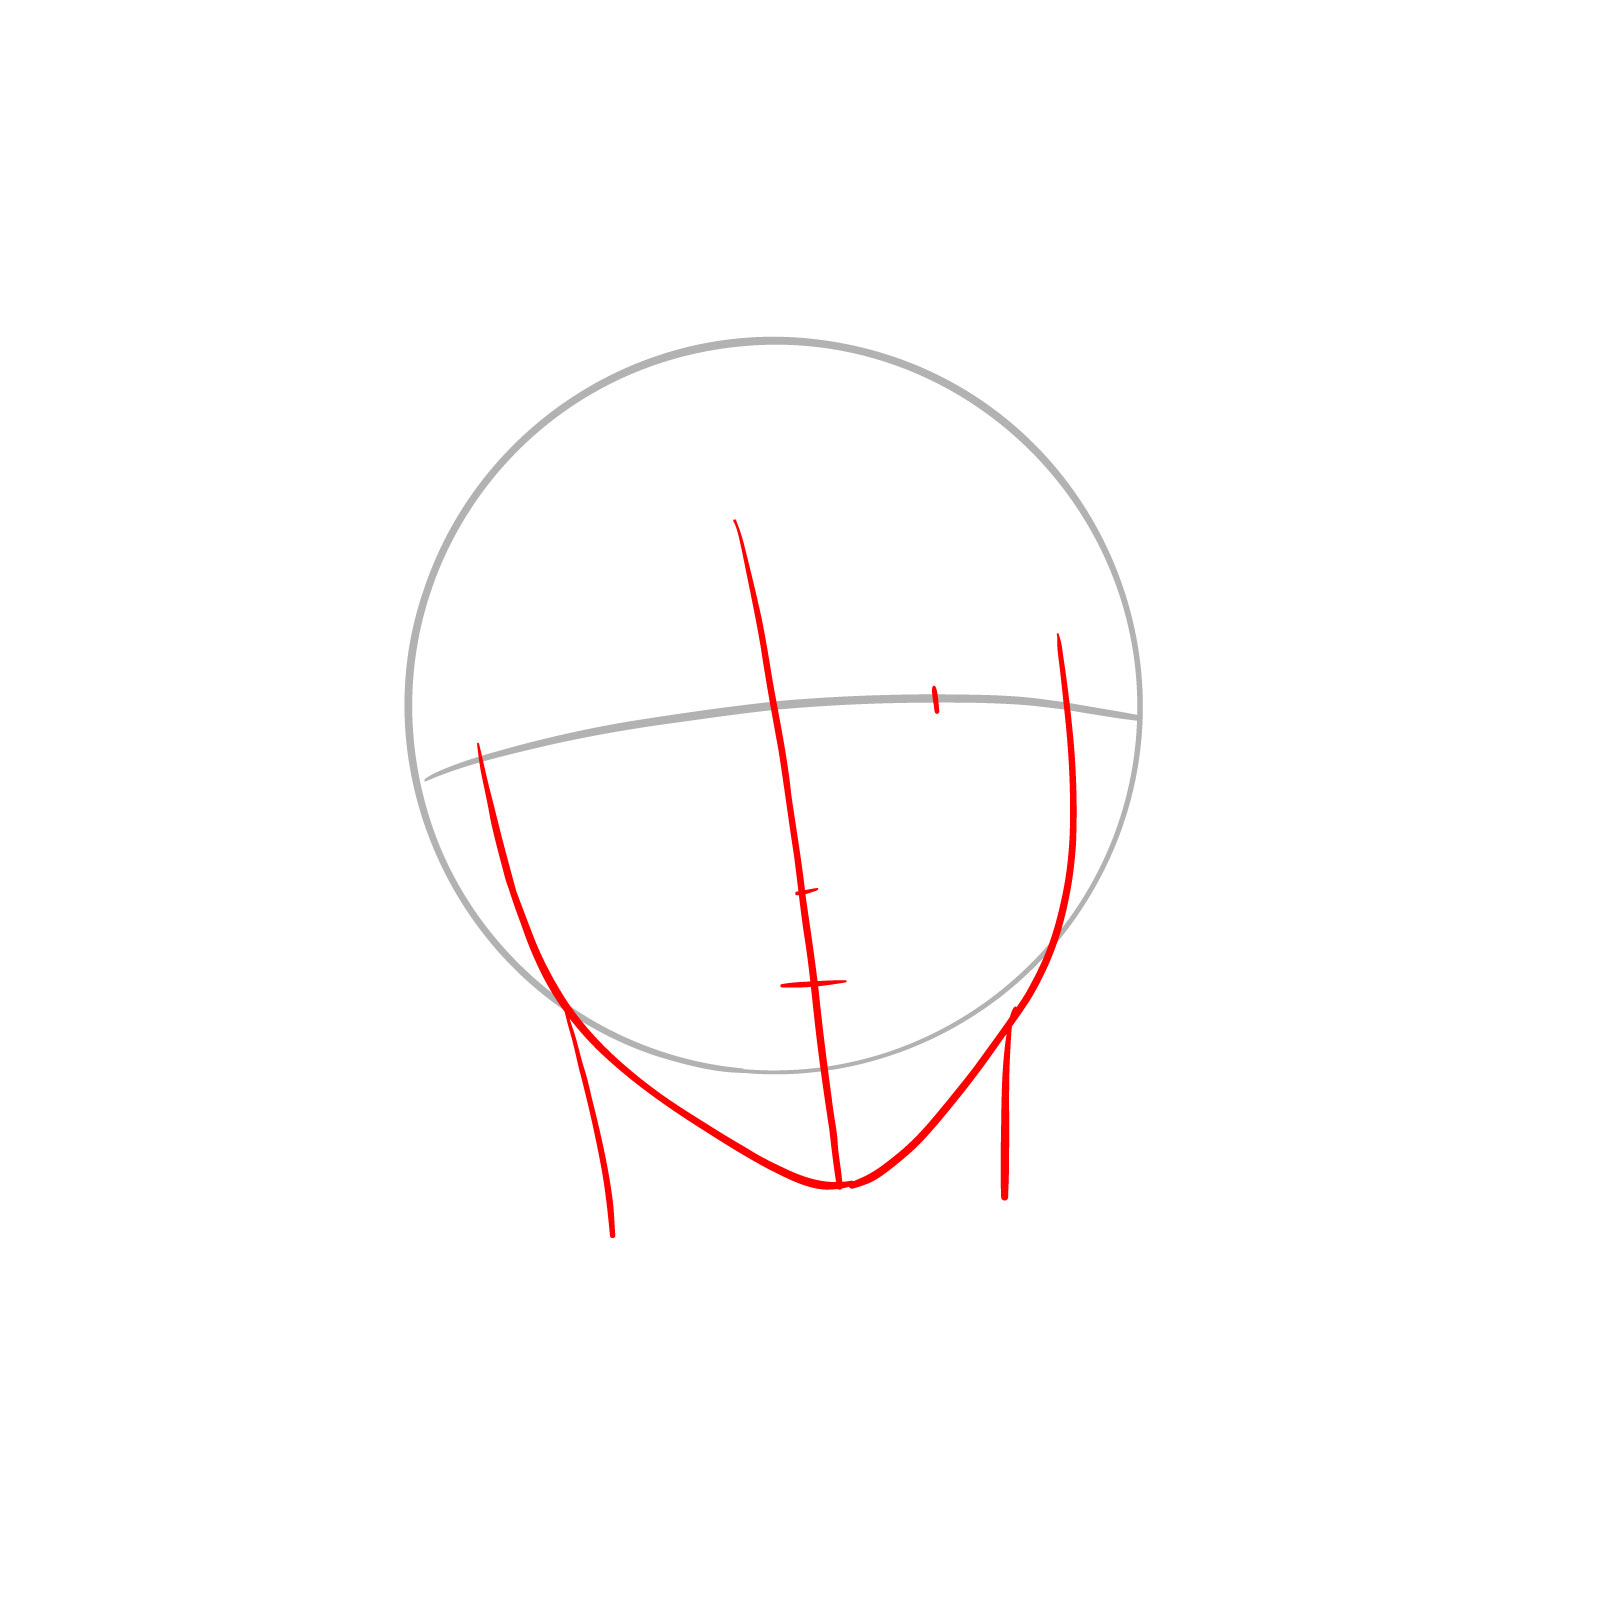
Step 01 – Begin by drawing a “V”-like shape to form the chin and face shape, and add a vertical line to divide the face into two symmetrical parts, laying the foundation for the front view of Levi’s face
Starting with the chin and face structure for Levi’s face drawing
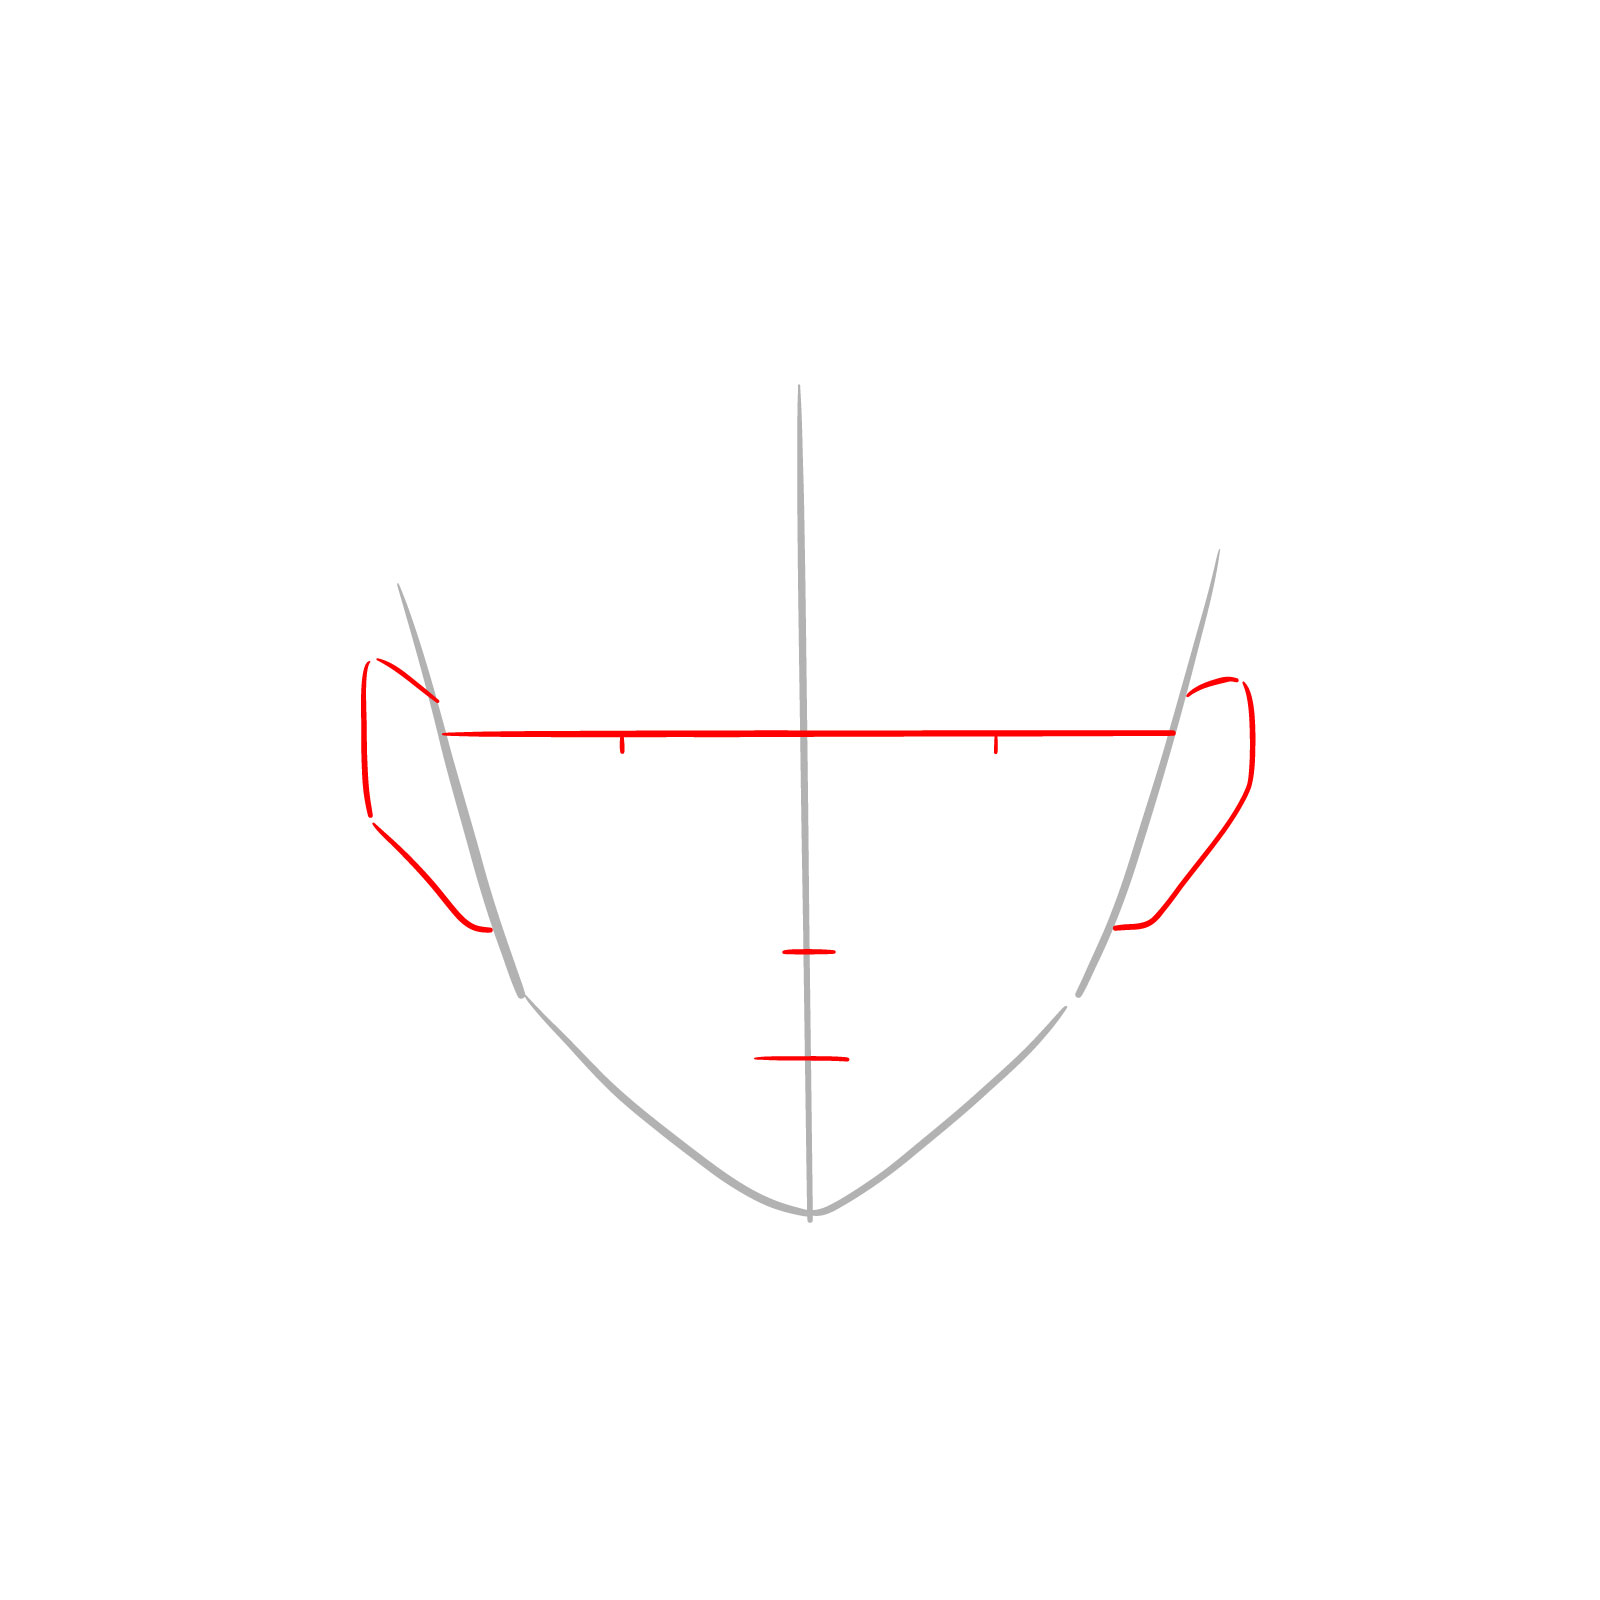
Step 02 – Sketch the basic outlines of the ears on both sides of the head and draw horizontal lines across the face to establish the positions for the eyes, nose, and mouth. This step is crucial for maintaining symmetry in the front view of Levi’s face
Mapping out the ears and facial features for Levi’s drawing
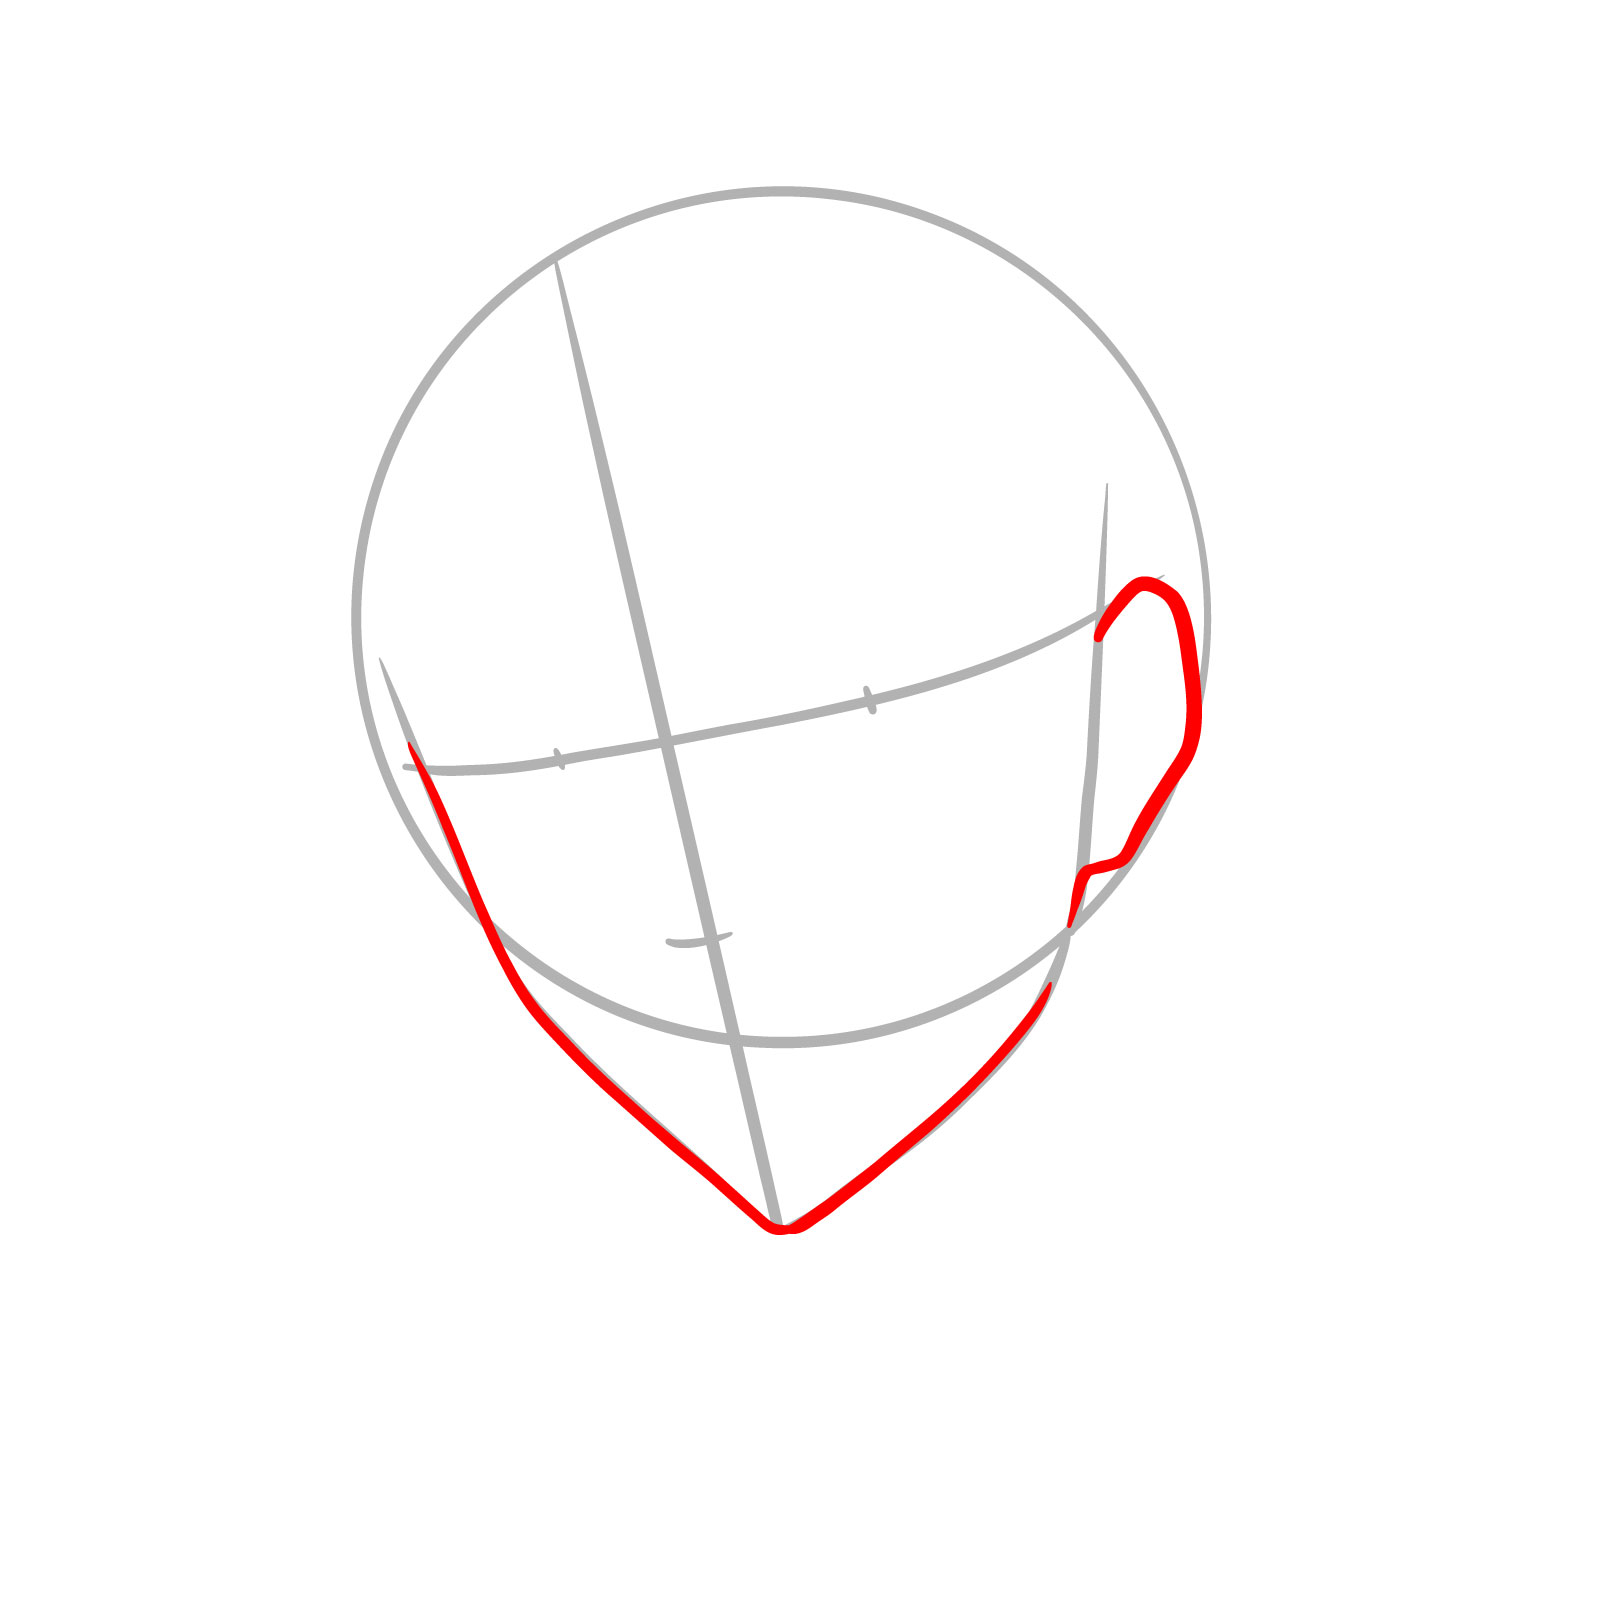
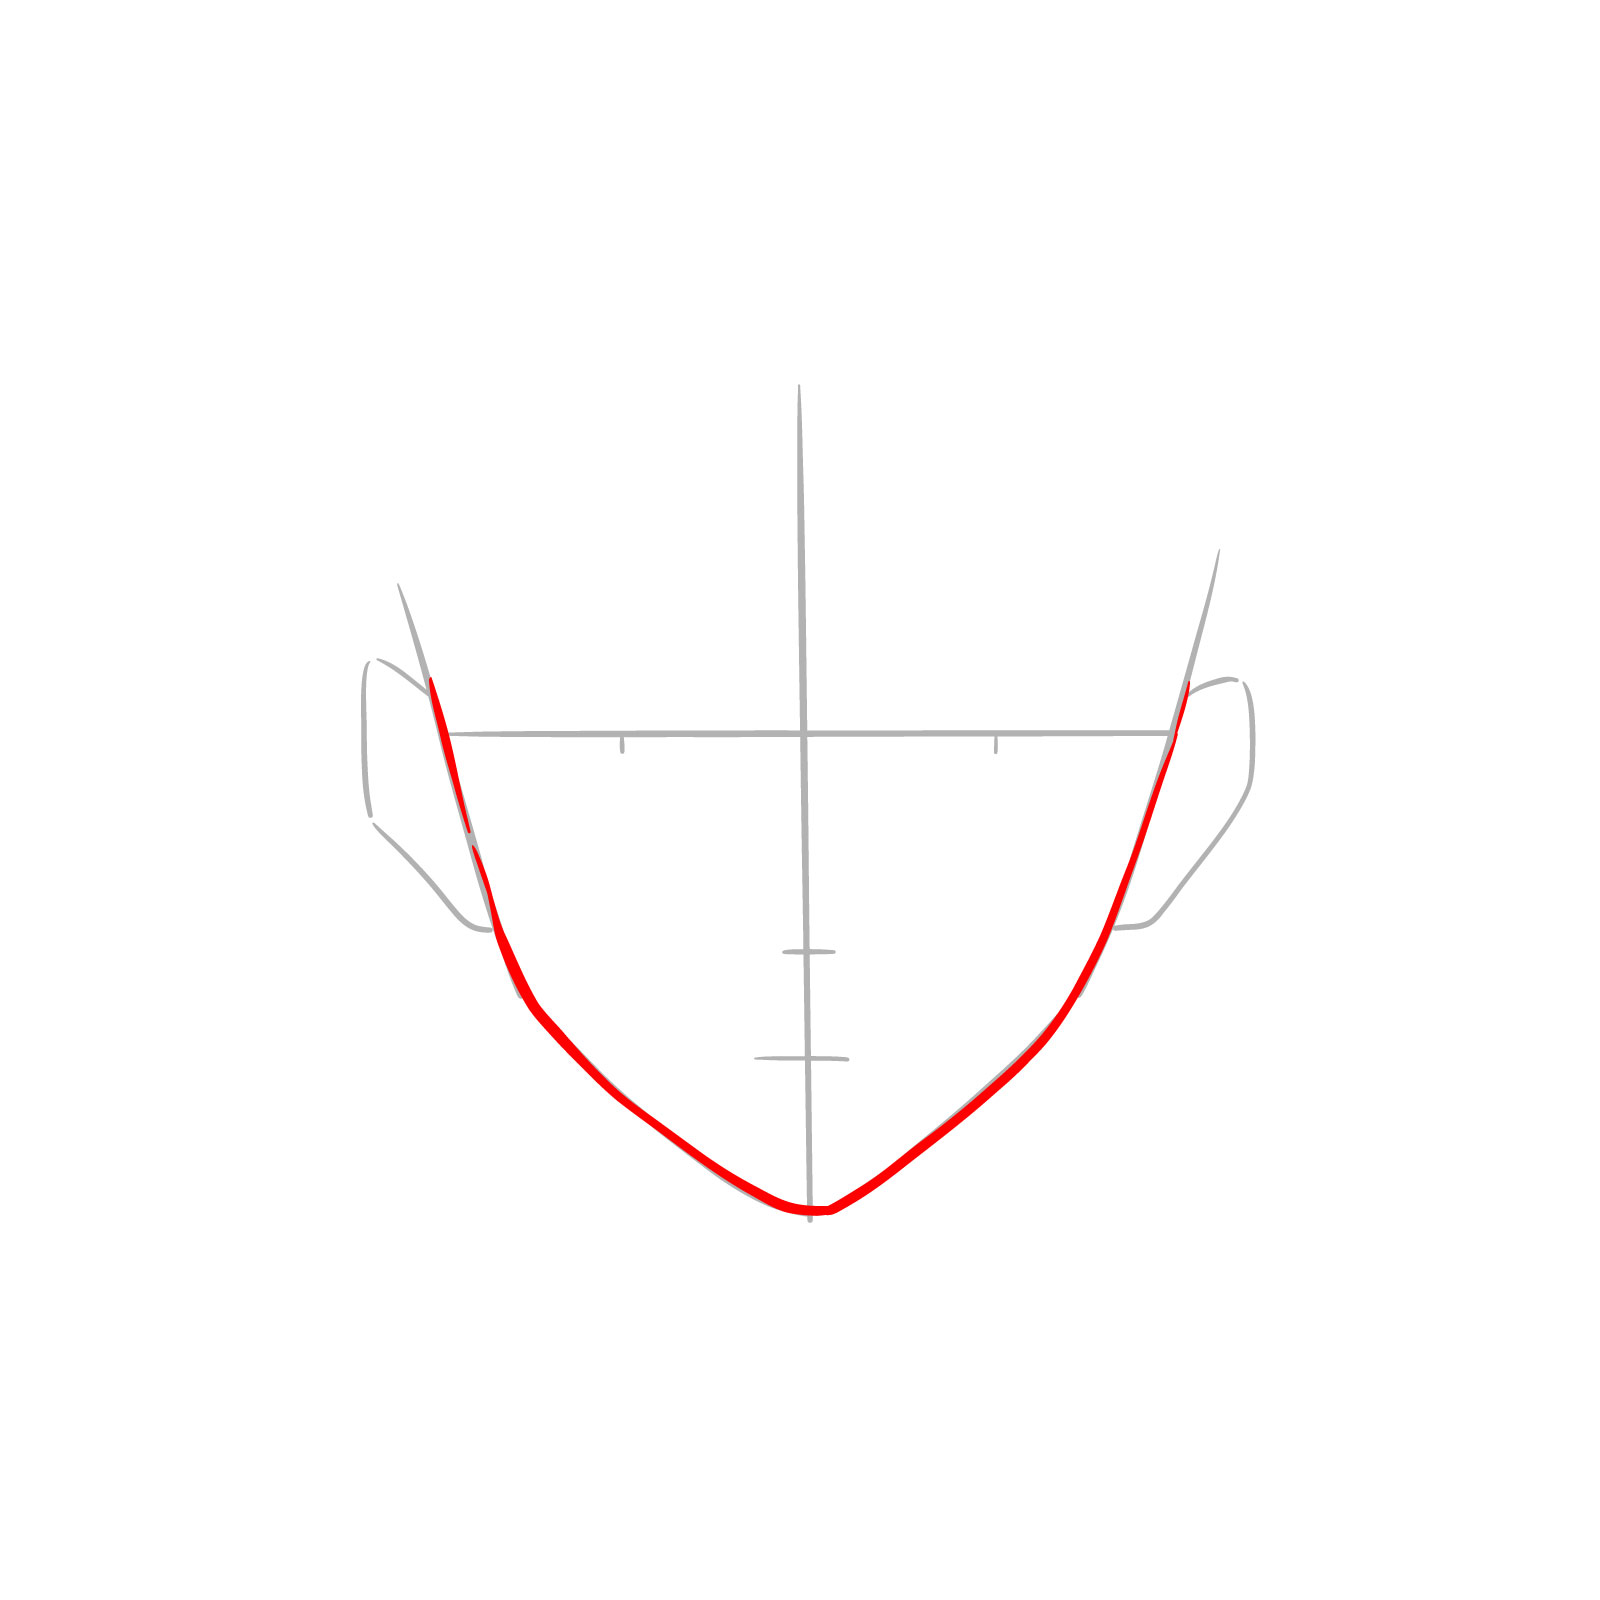
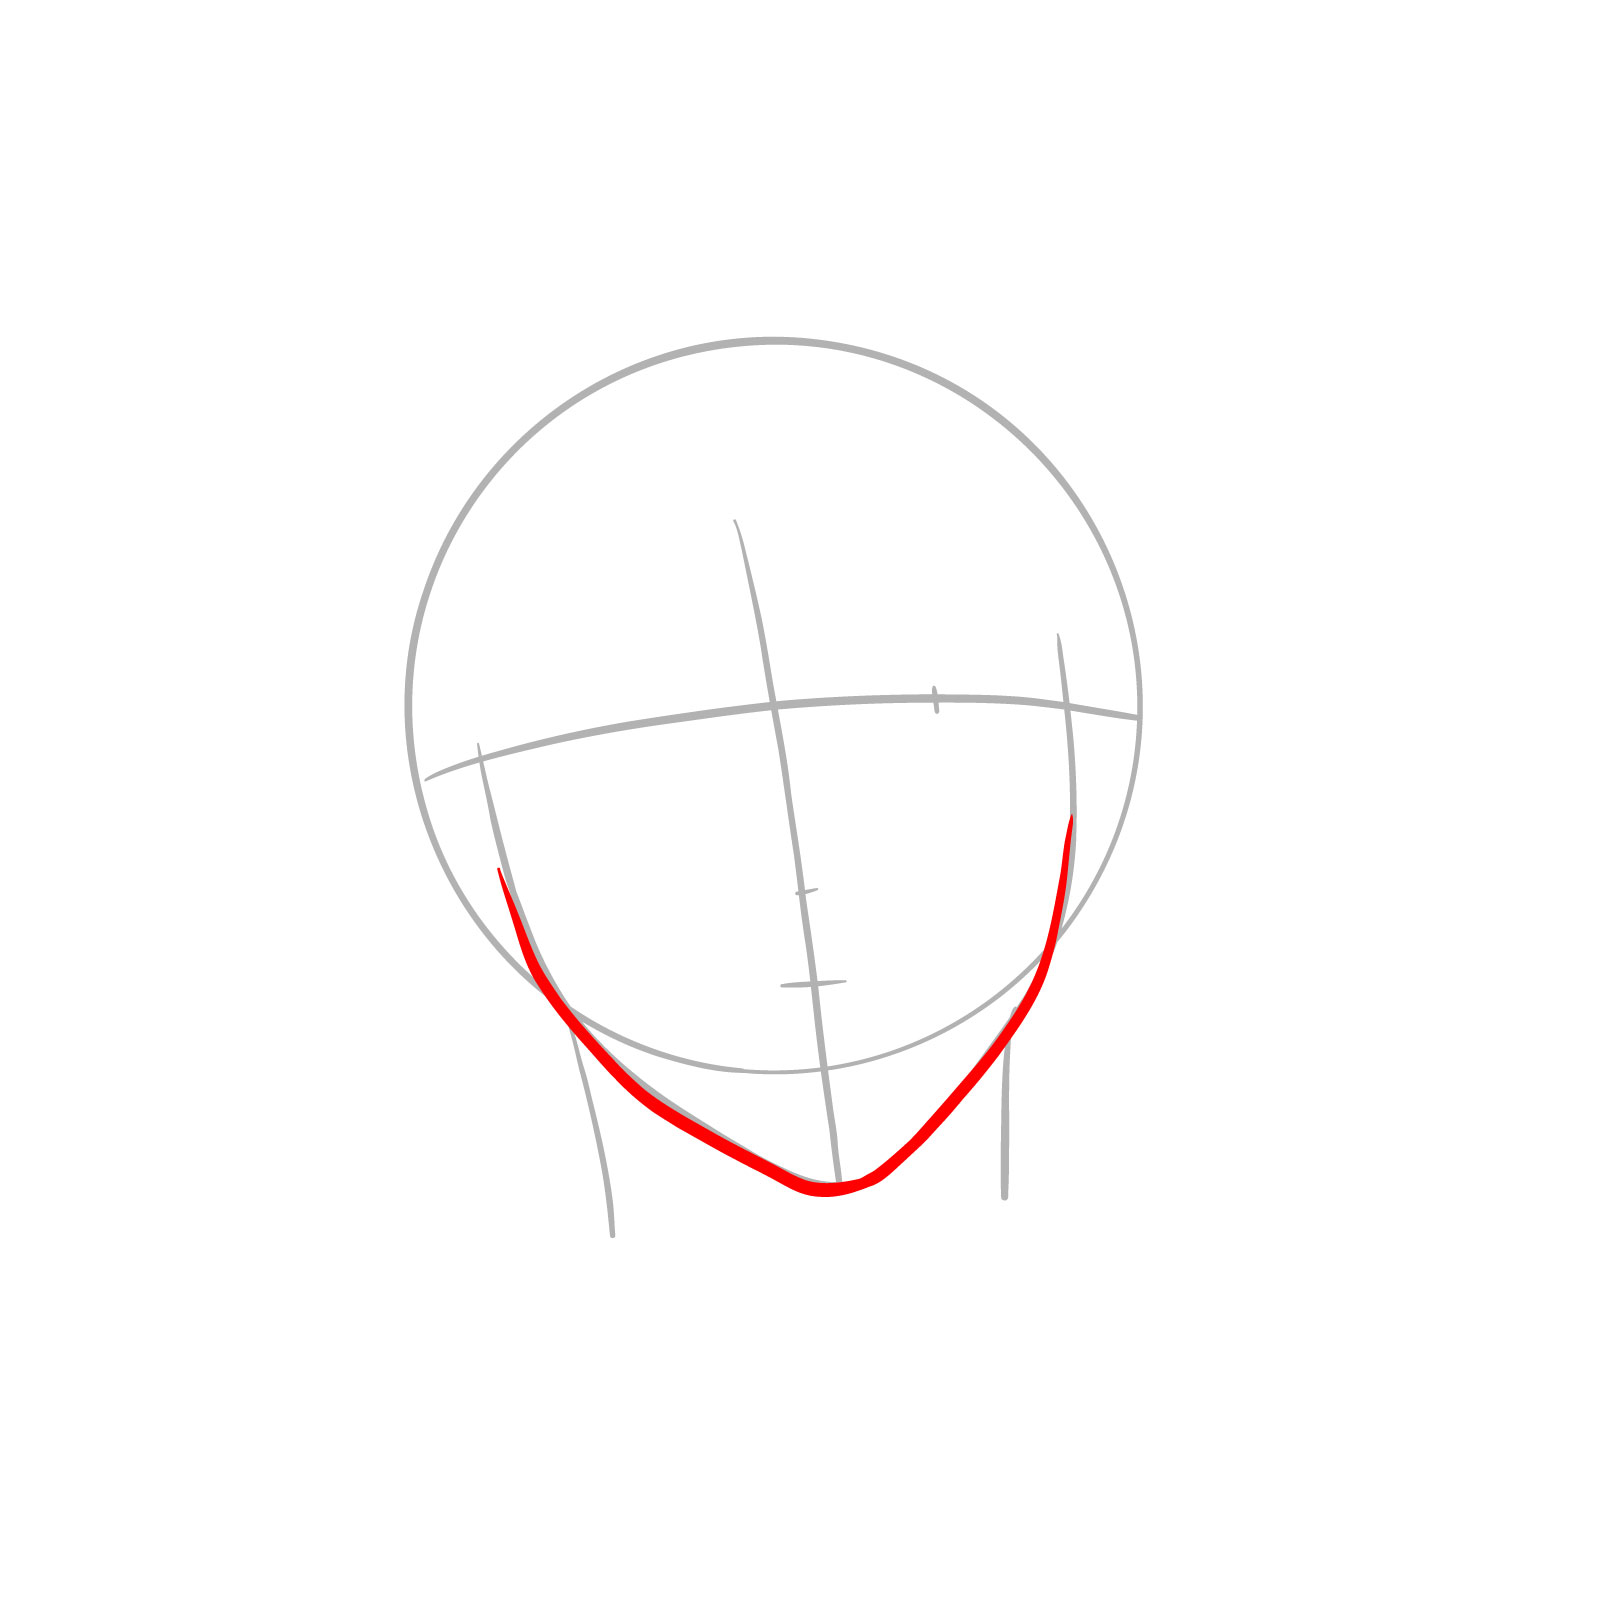
Step 03 – Shape the chin more precisely and add the sides of the face, ensuring a smooth transition from the jawline to the “V” shape, which will bring together the bottom part of Levi’s face
Refining the chin and sides
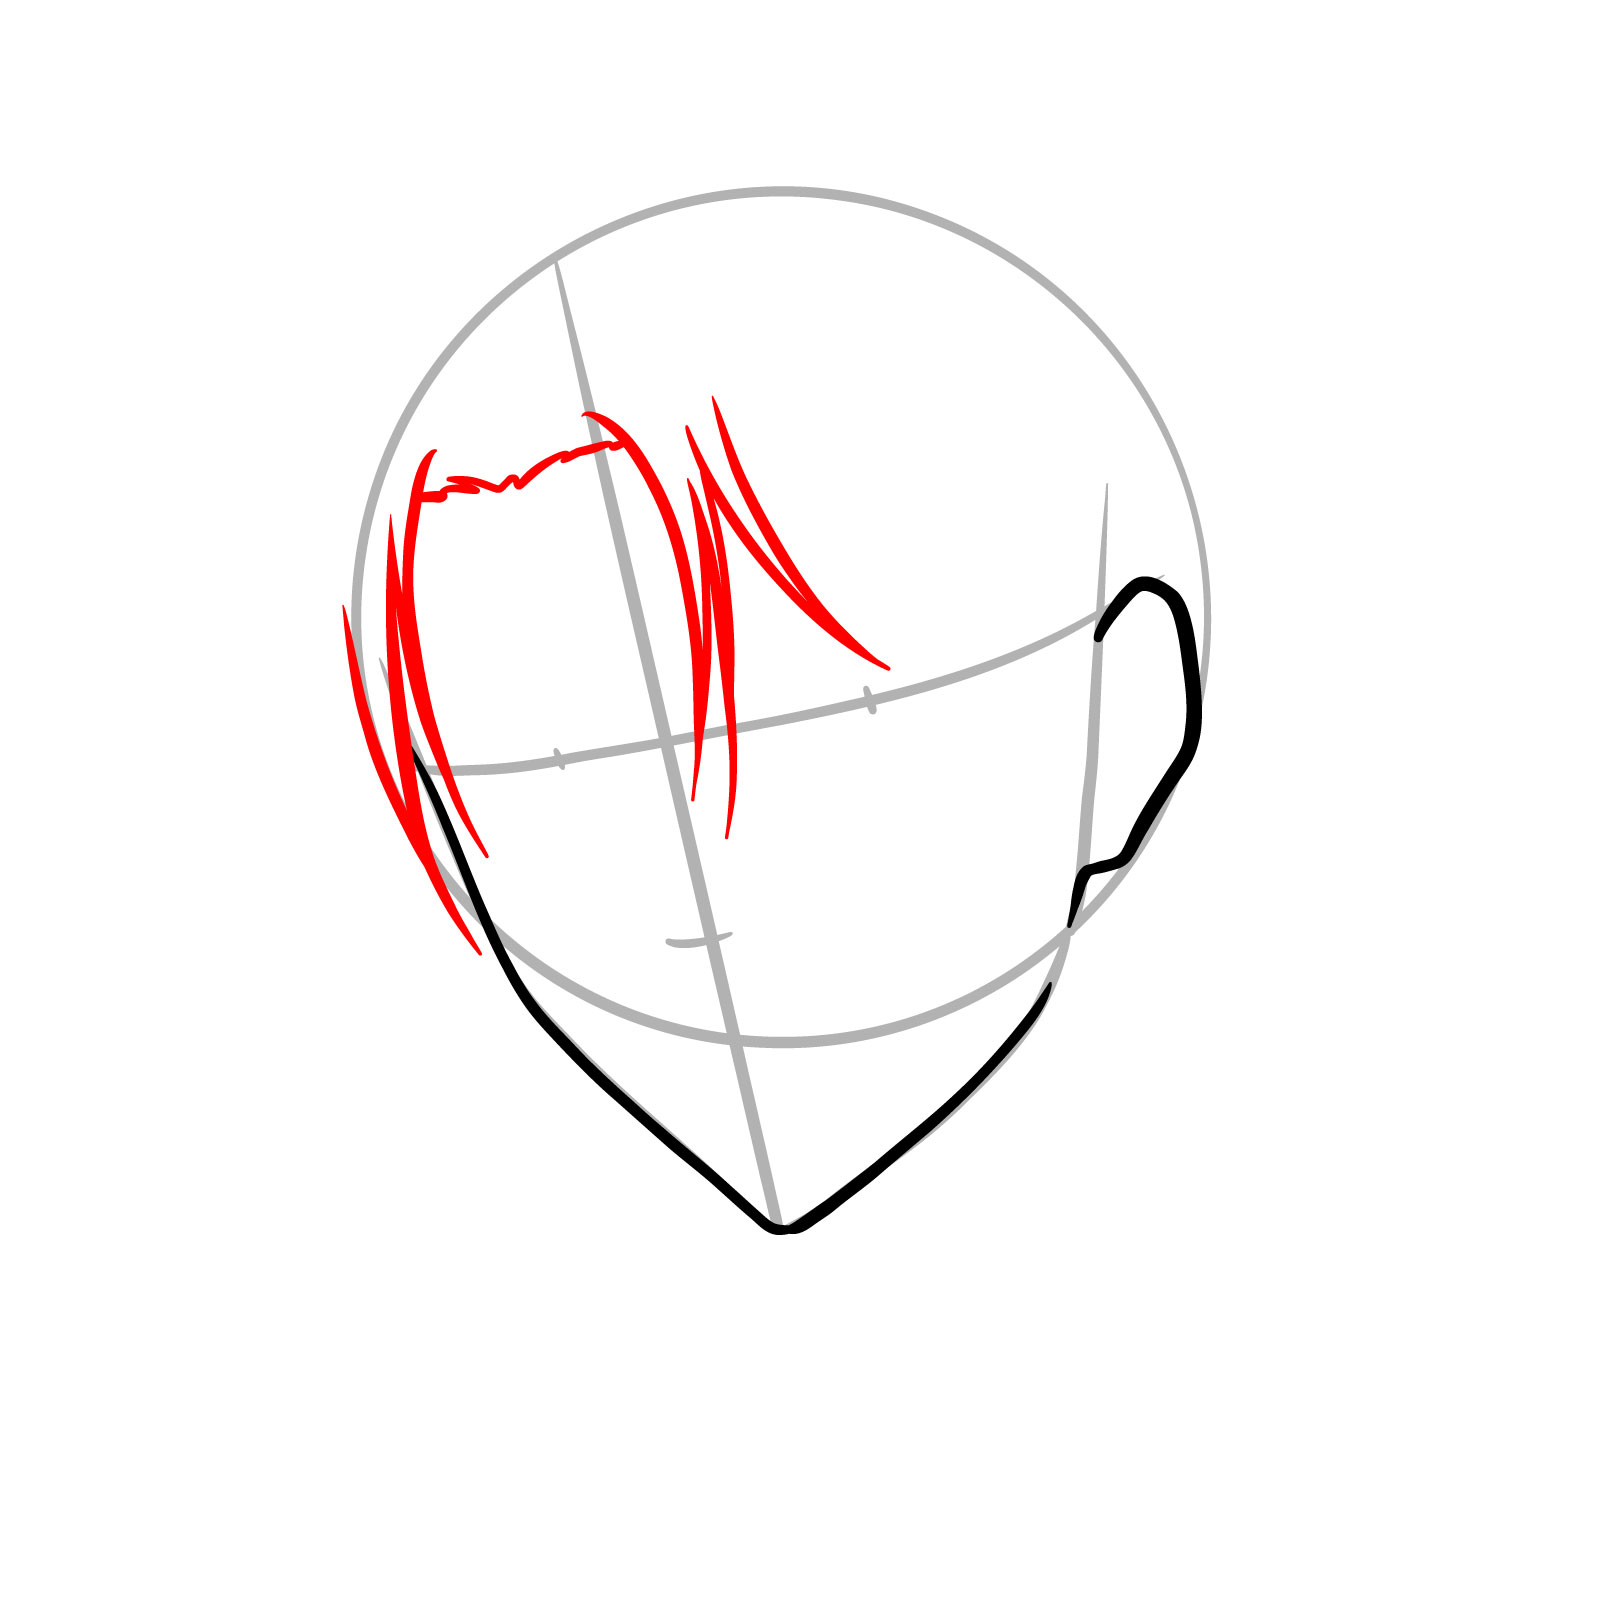
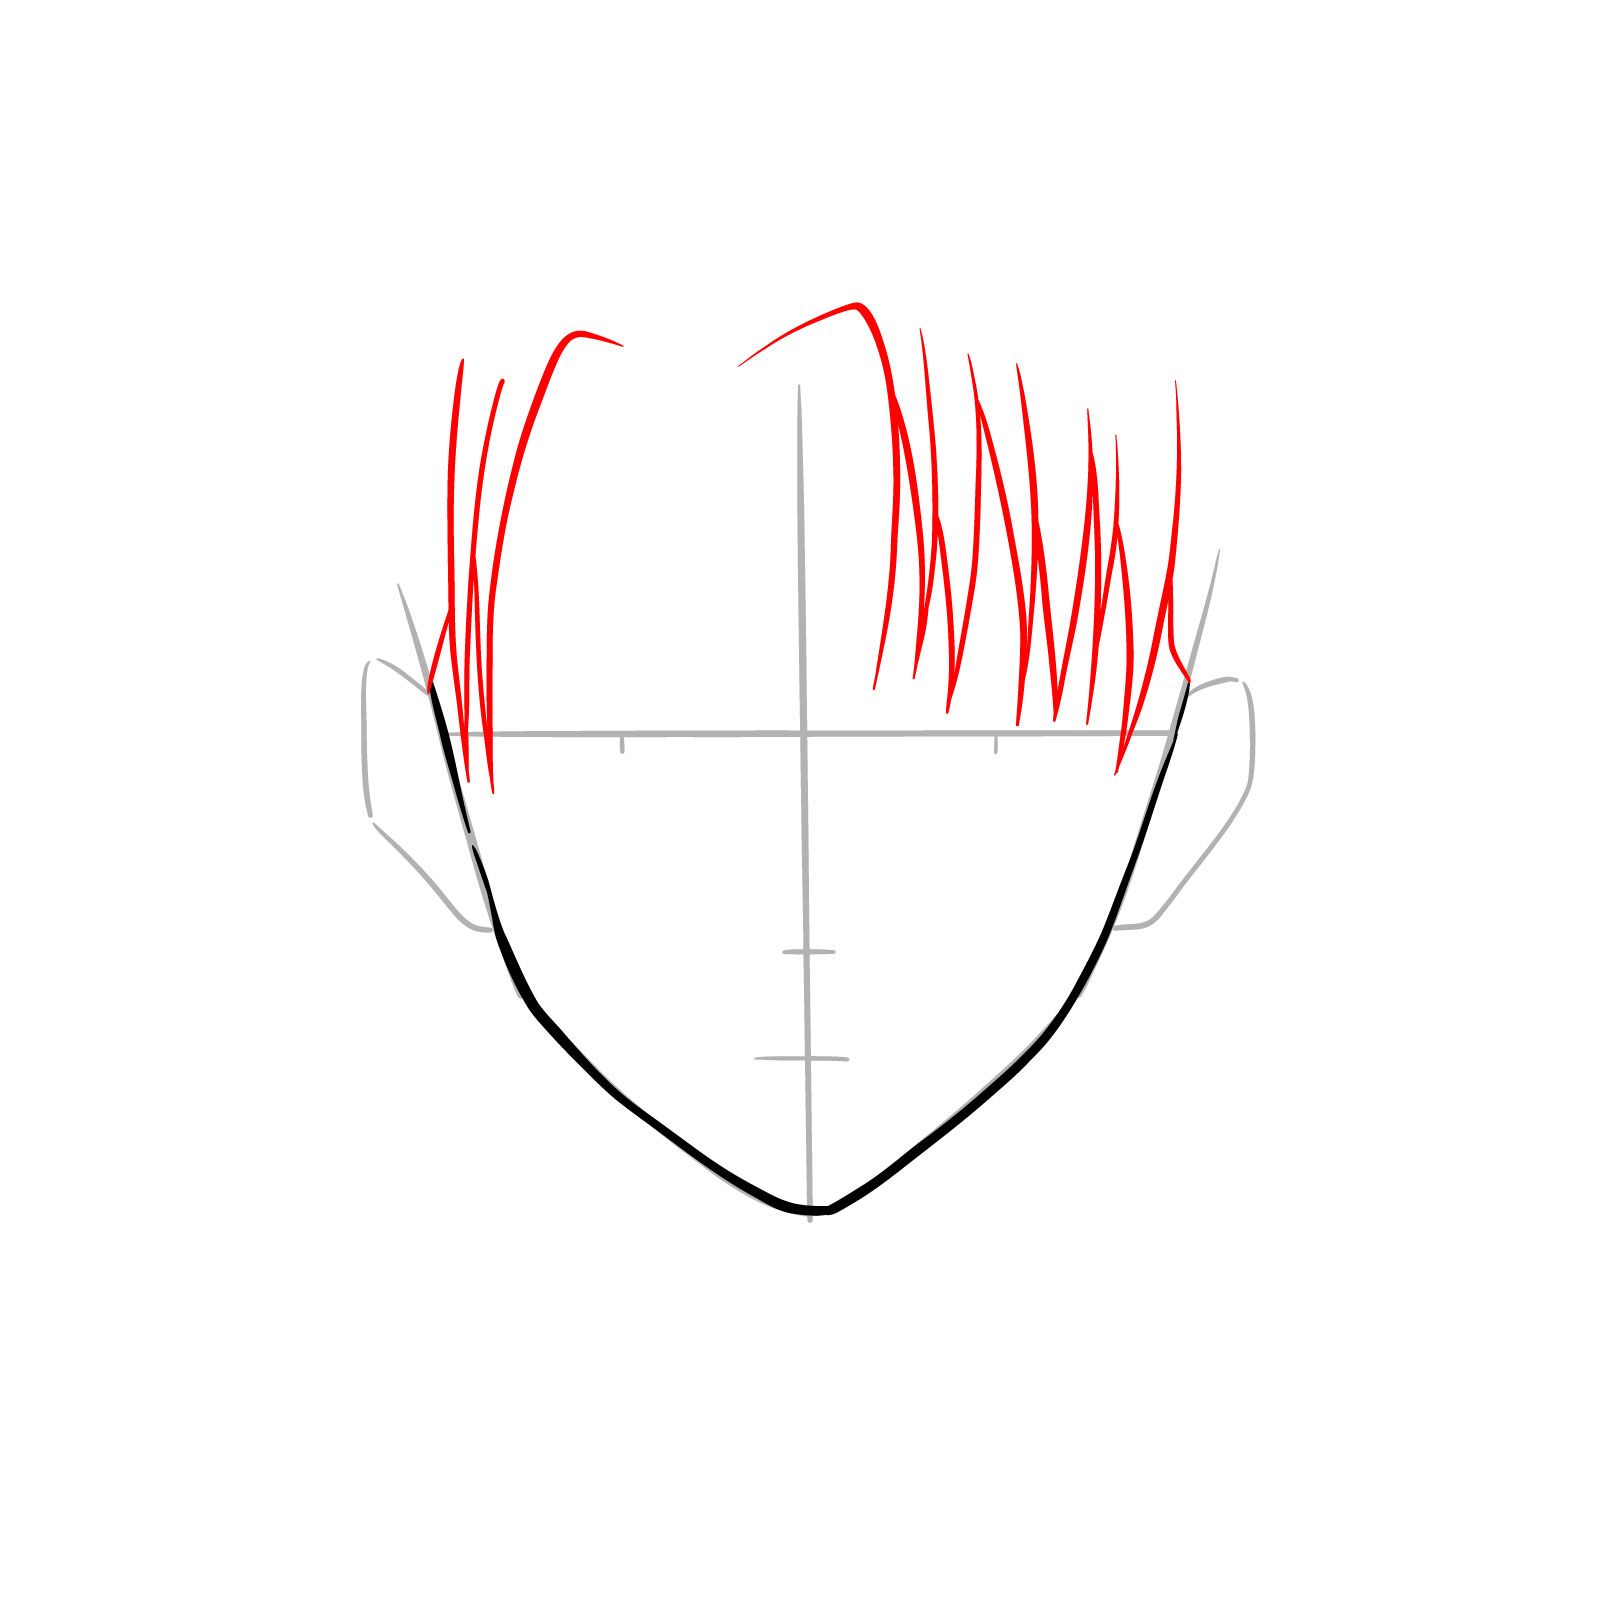
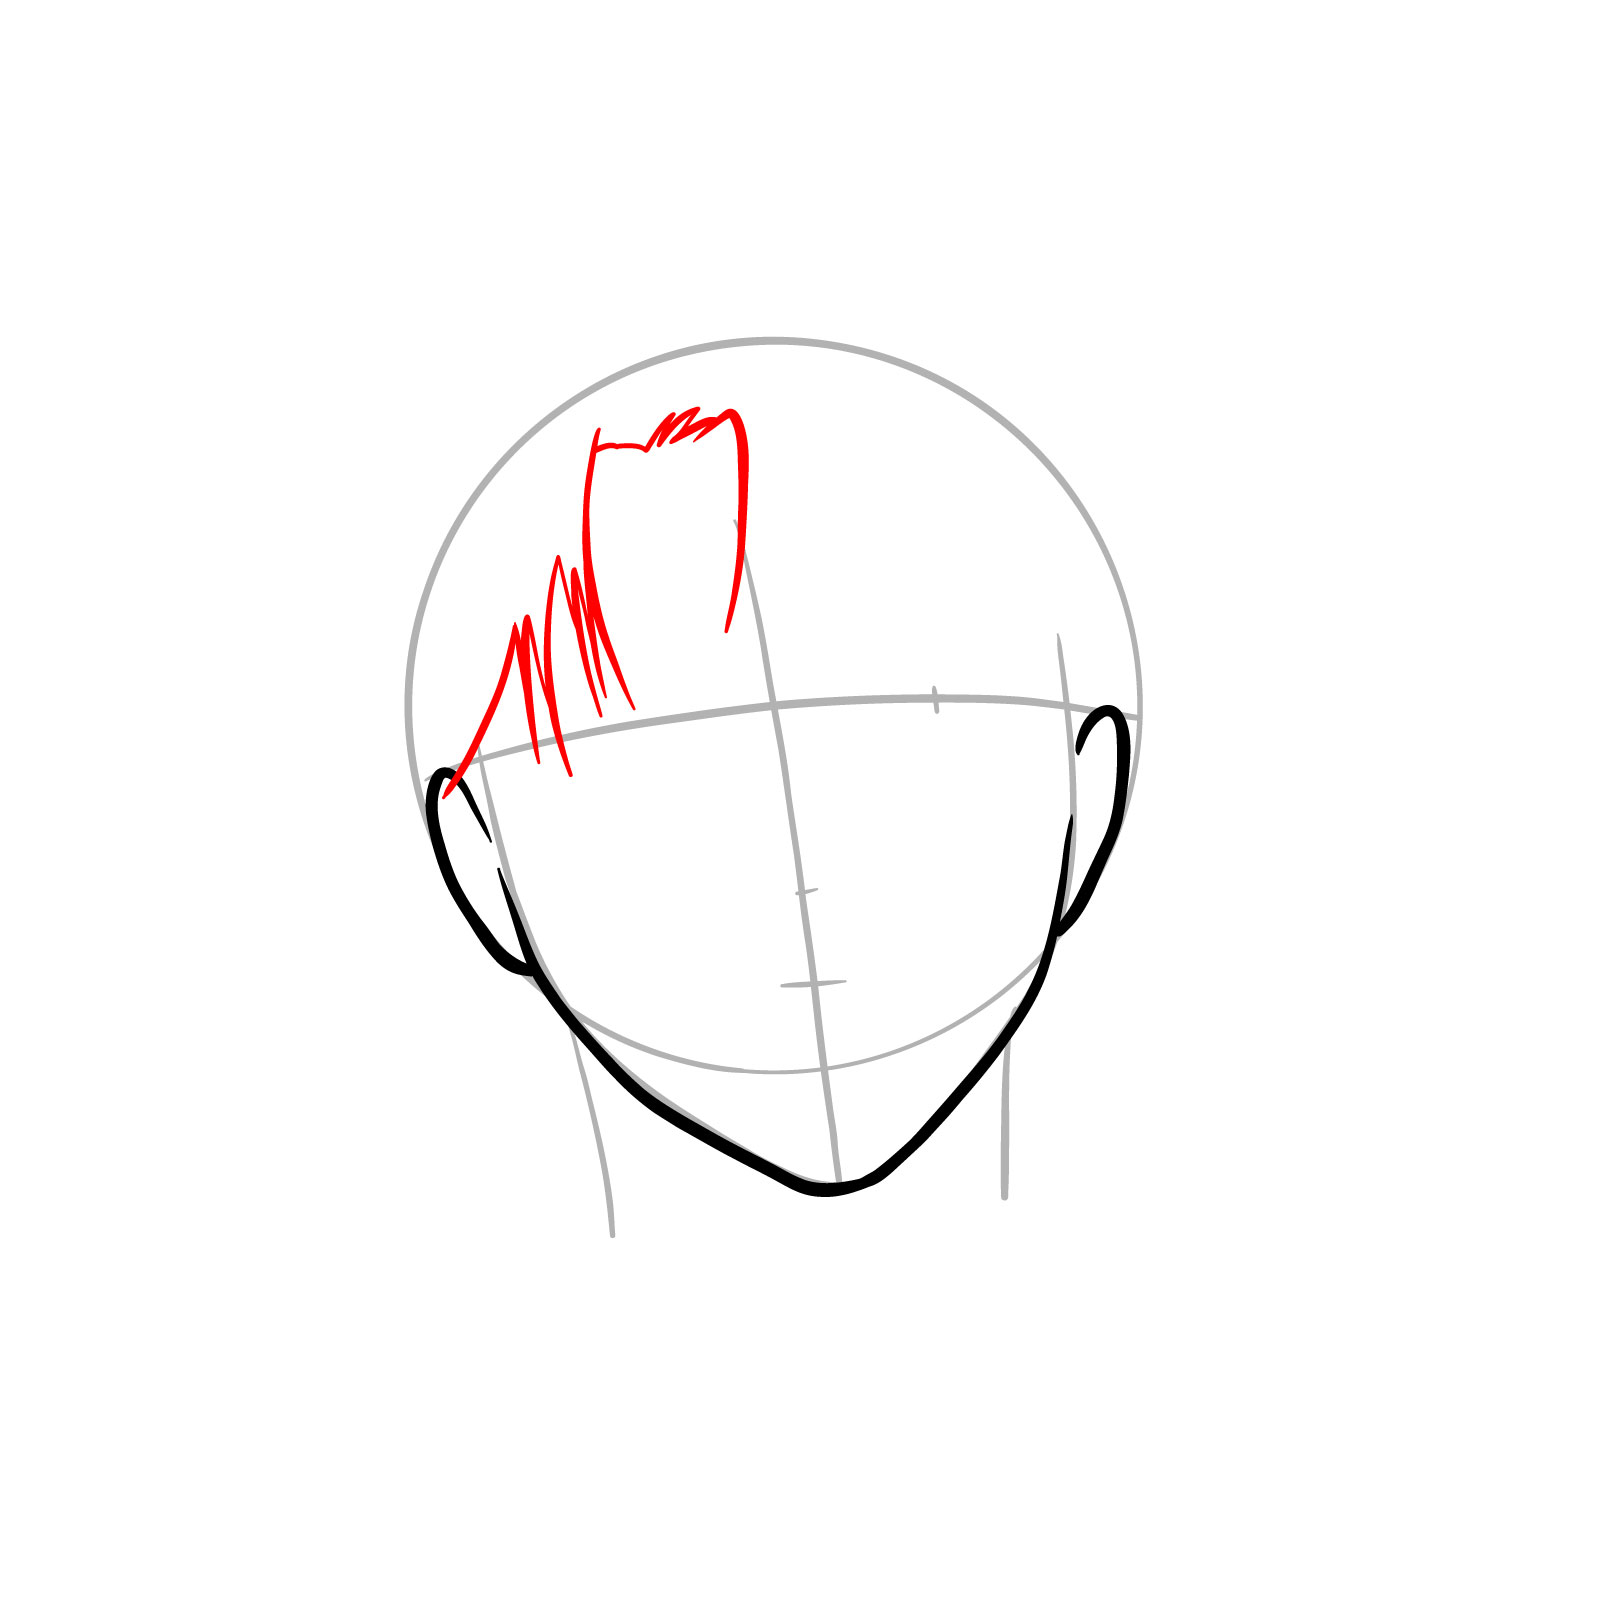
Step 04 – Begin drawing the hair in the forehead area, with strands coming down towards the eyebrows, indicating the start of Levi’s characteristic hairstyle in the front view
Sketching the hair on Levi’s forehead
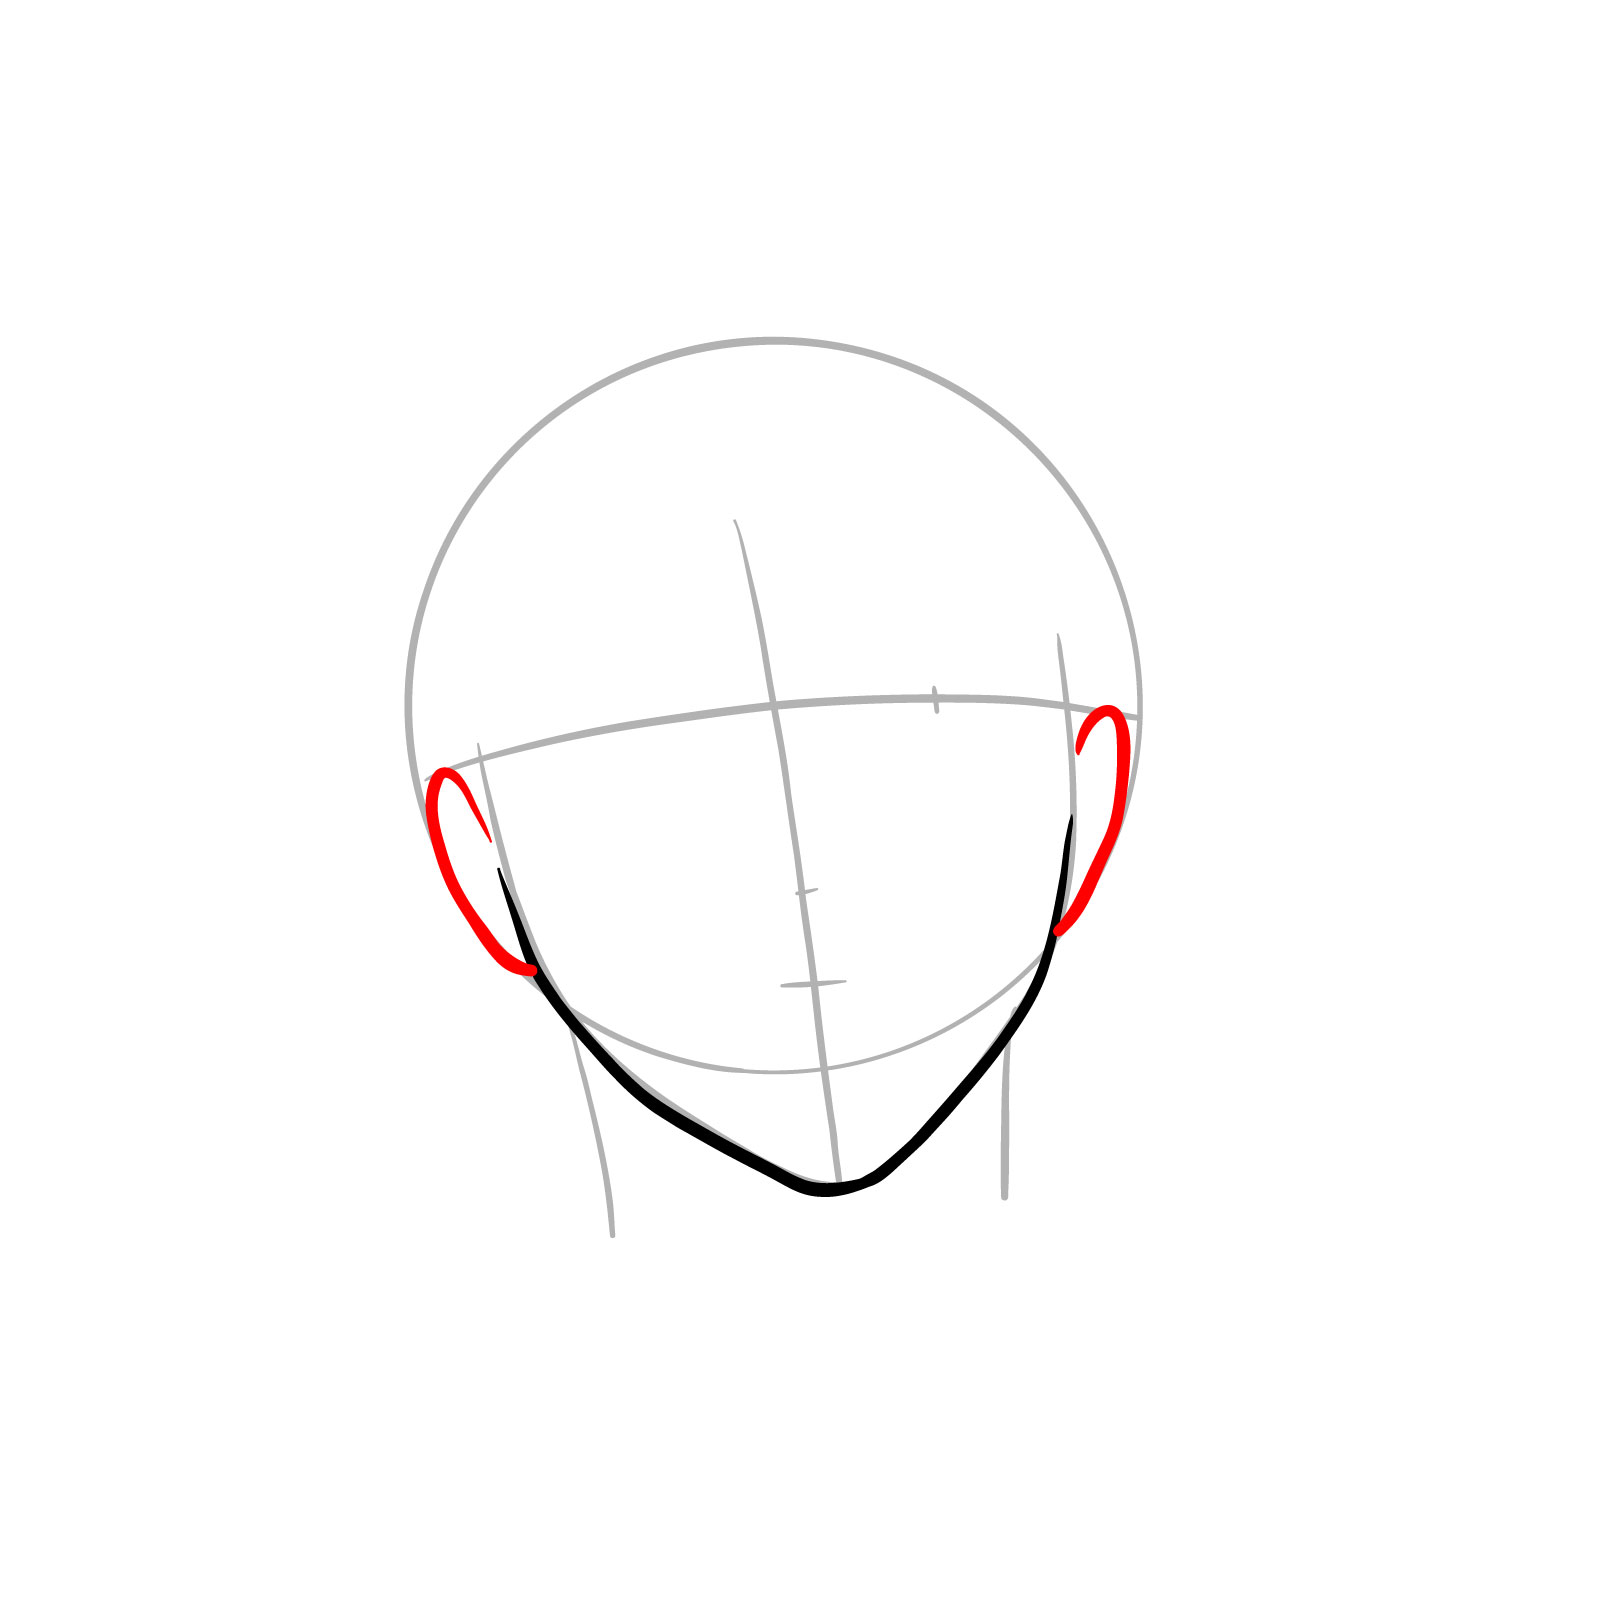
Step 05 – Define the hairline above Levi’s forehead and refine the shape of the ears, ensuring that the hairline frames the face appropriately and the ears are proportional and correctly positioned
Drawing the hairline above the forehead and detailing the ears
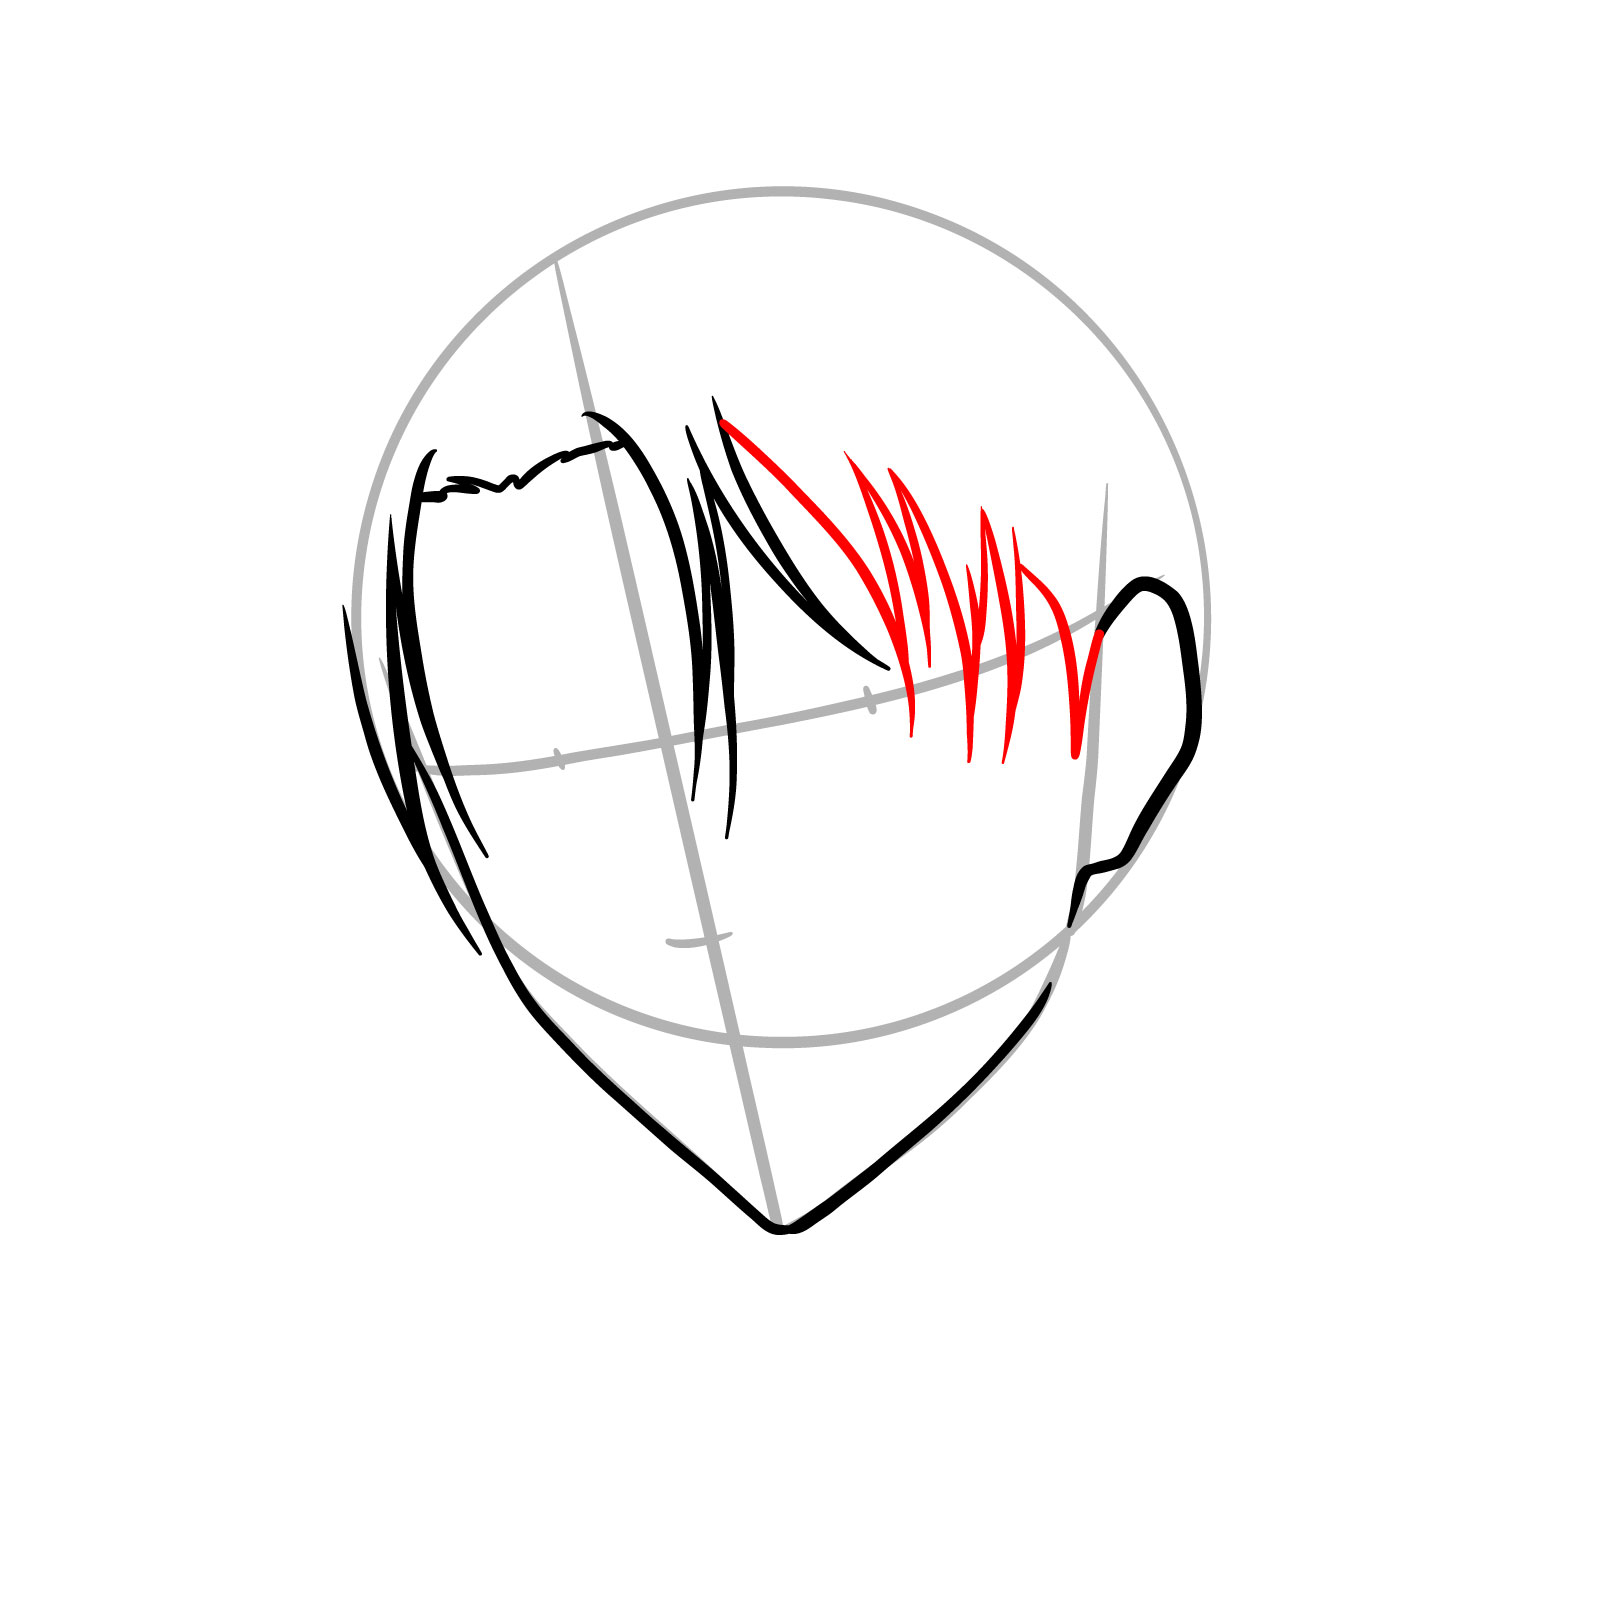
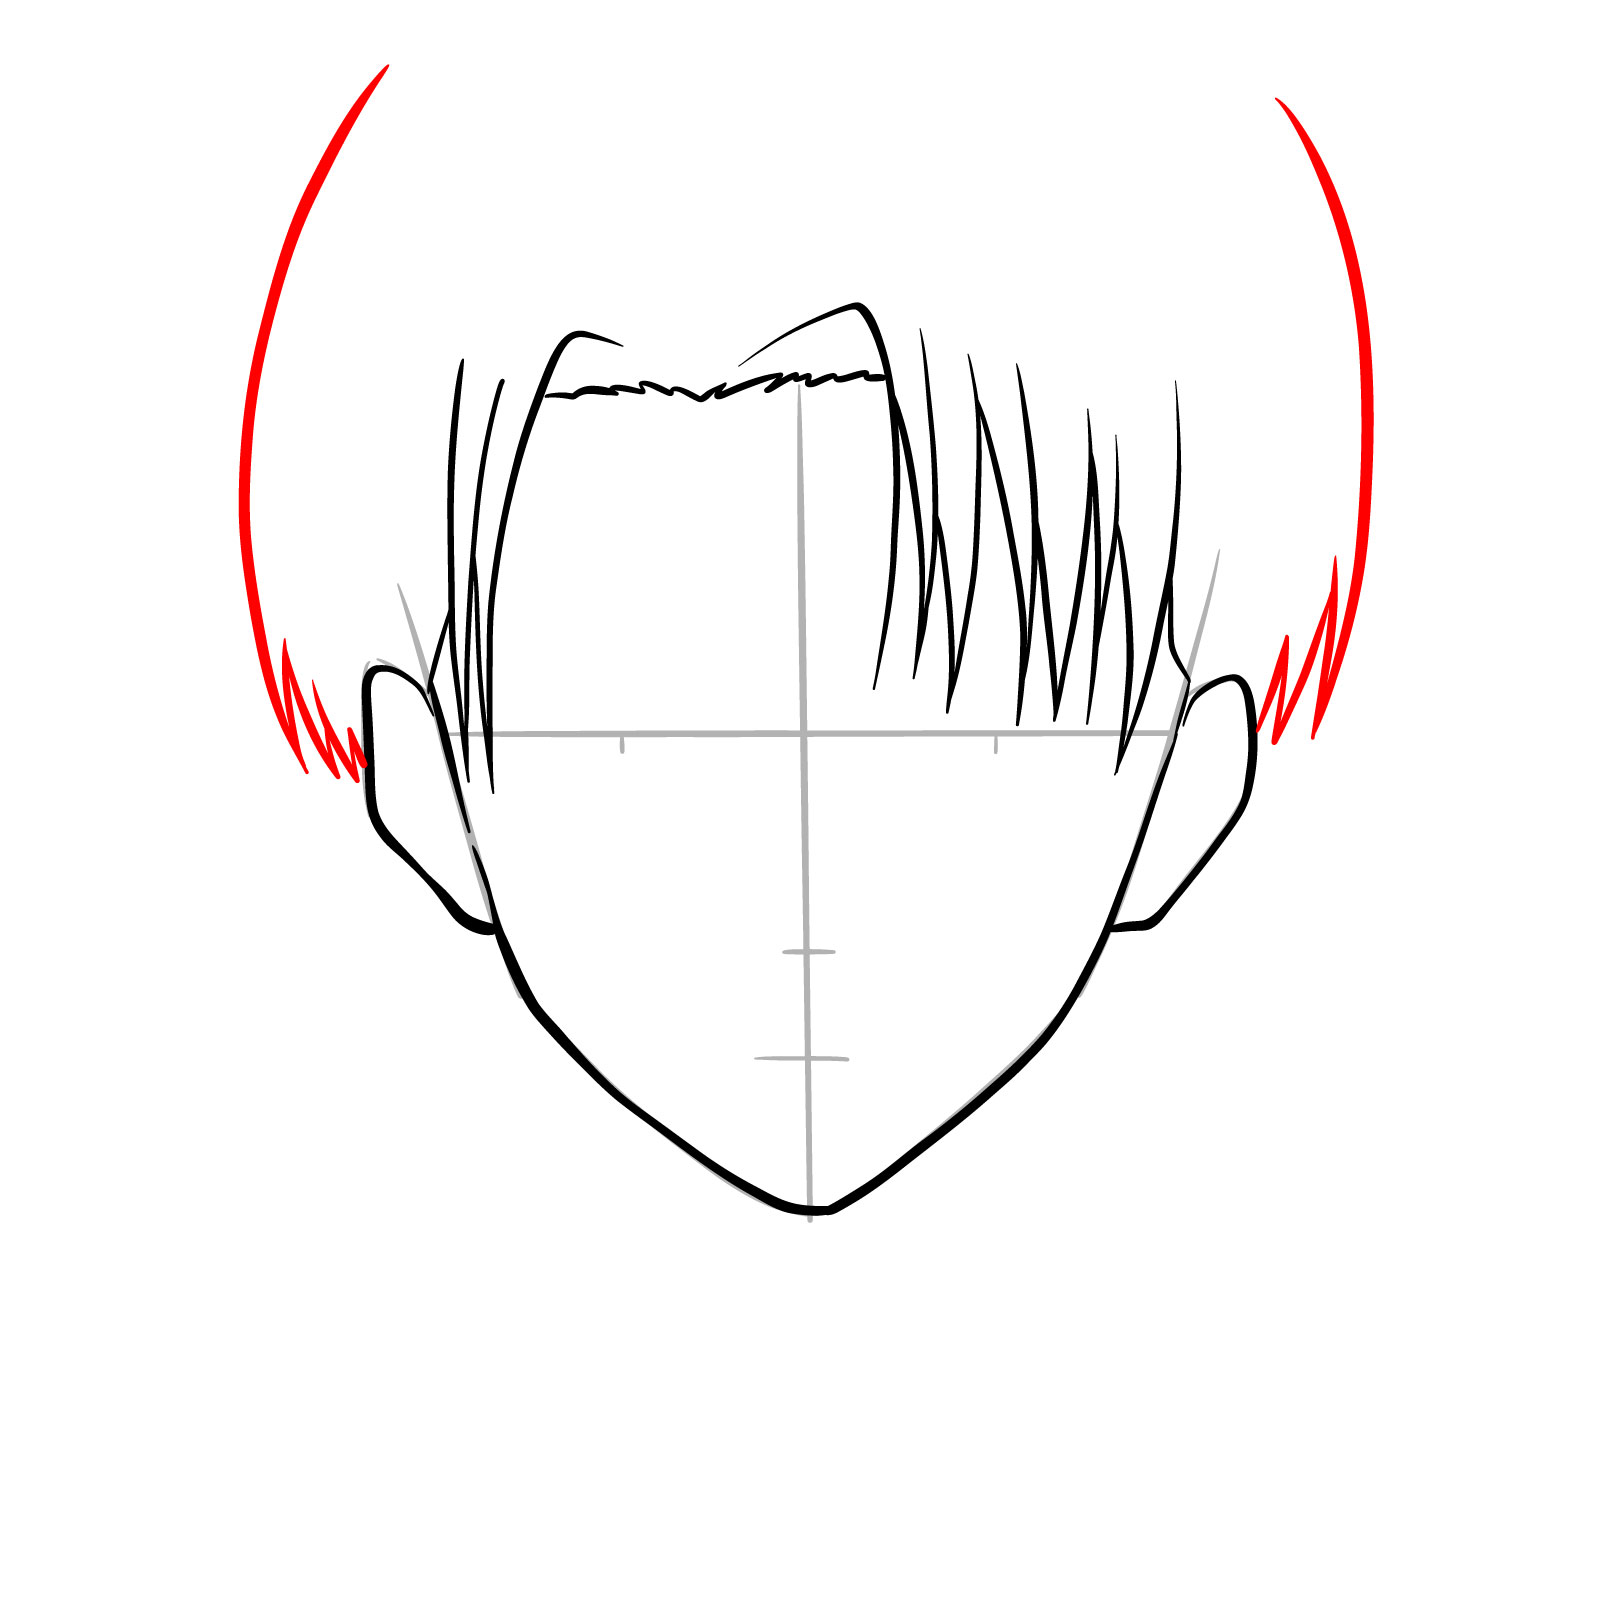
Step 06 – Sketch the hair on the sides of the head, paying attention to the direction and flow of the hair, capturing the essence of Levi’s style with precision and care
Illustrating the hairstyle on the sides of Levi’s head
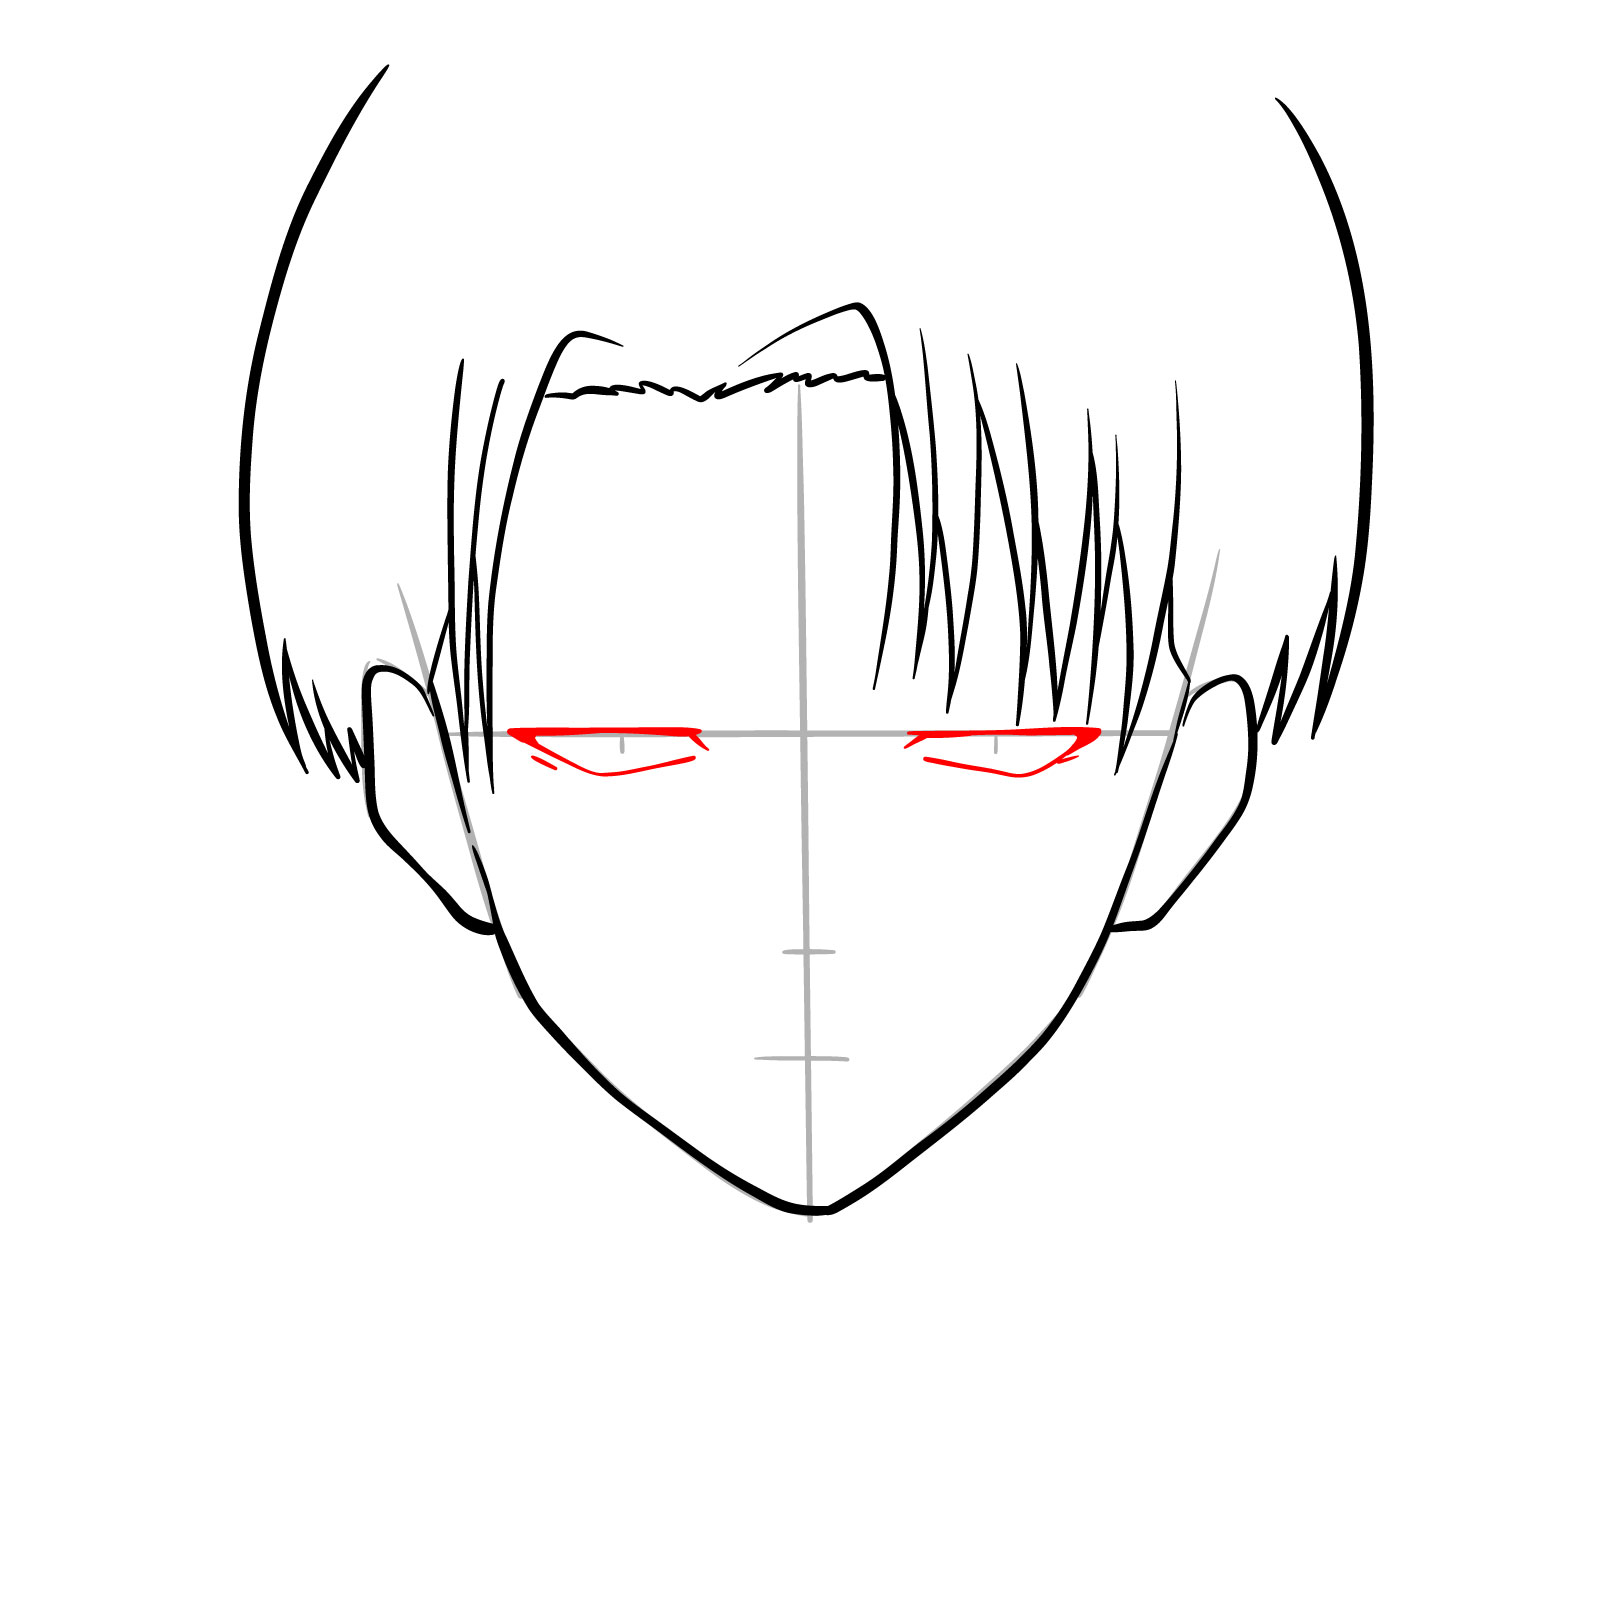
Step 07 – Carefully outline the eyes, ensuring that they are even and symmetrical. The outlines should capture Levi’s intense and focused expression, a defining feature of his character
Outlining the eyes
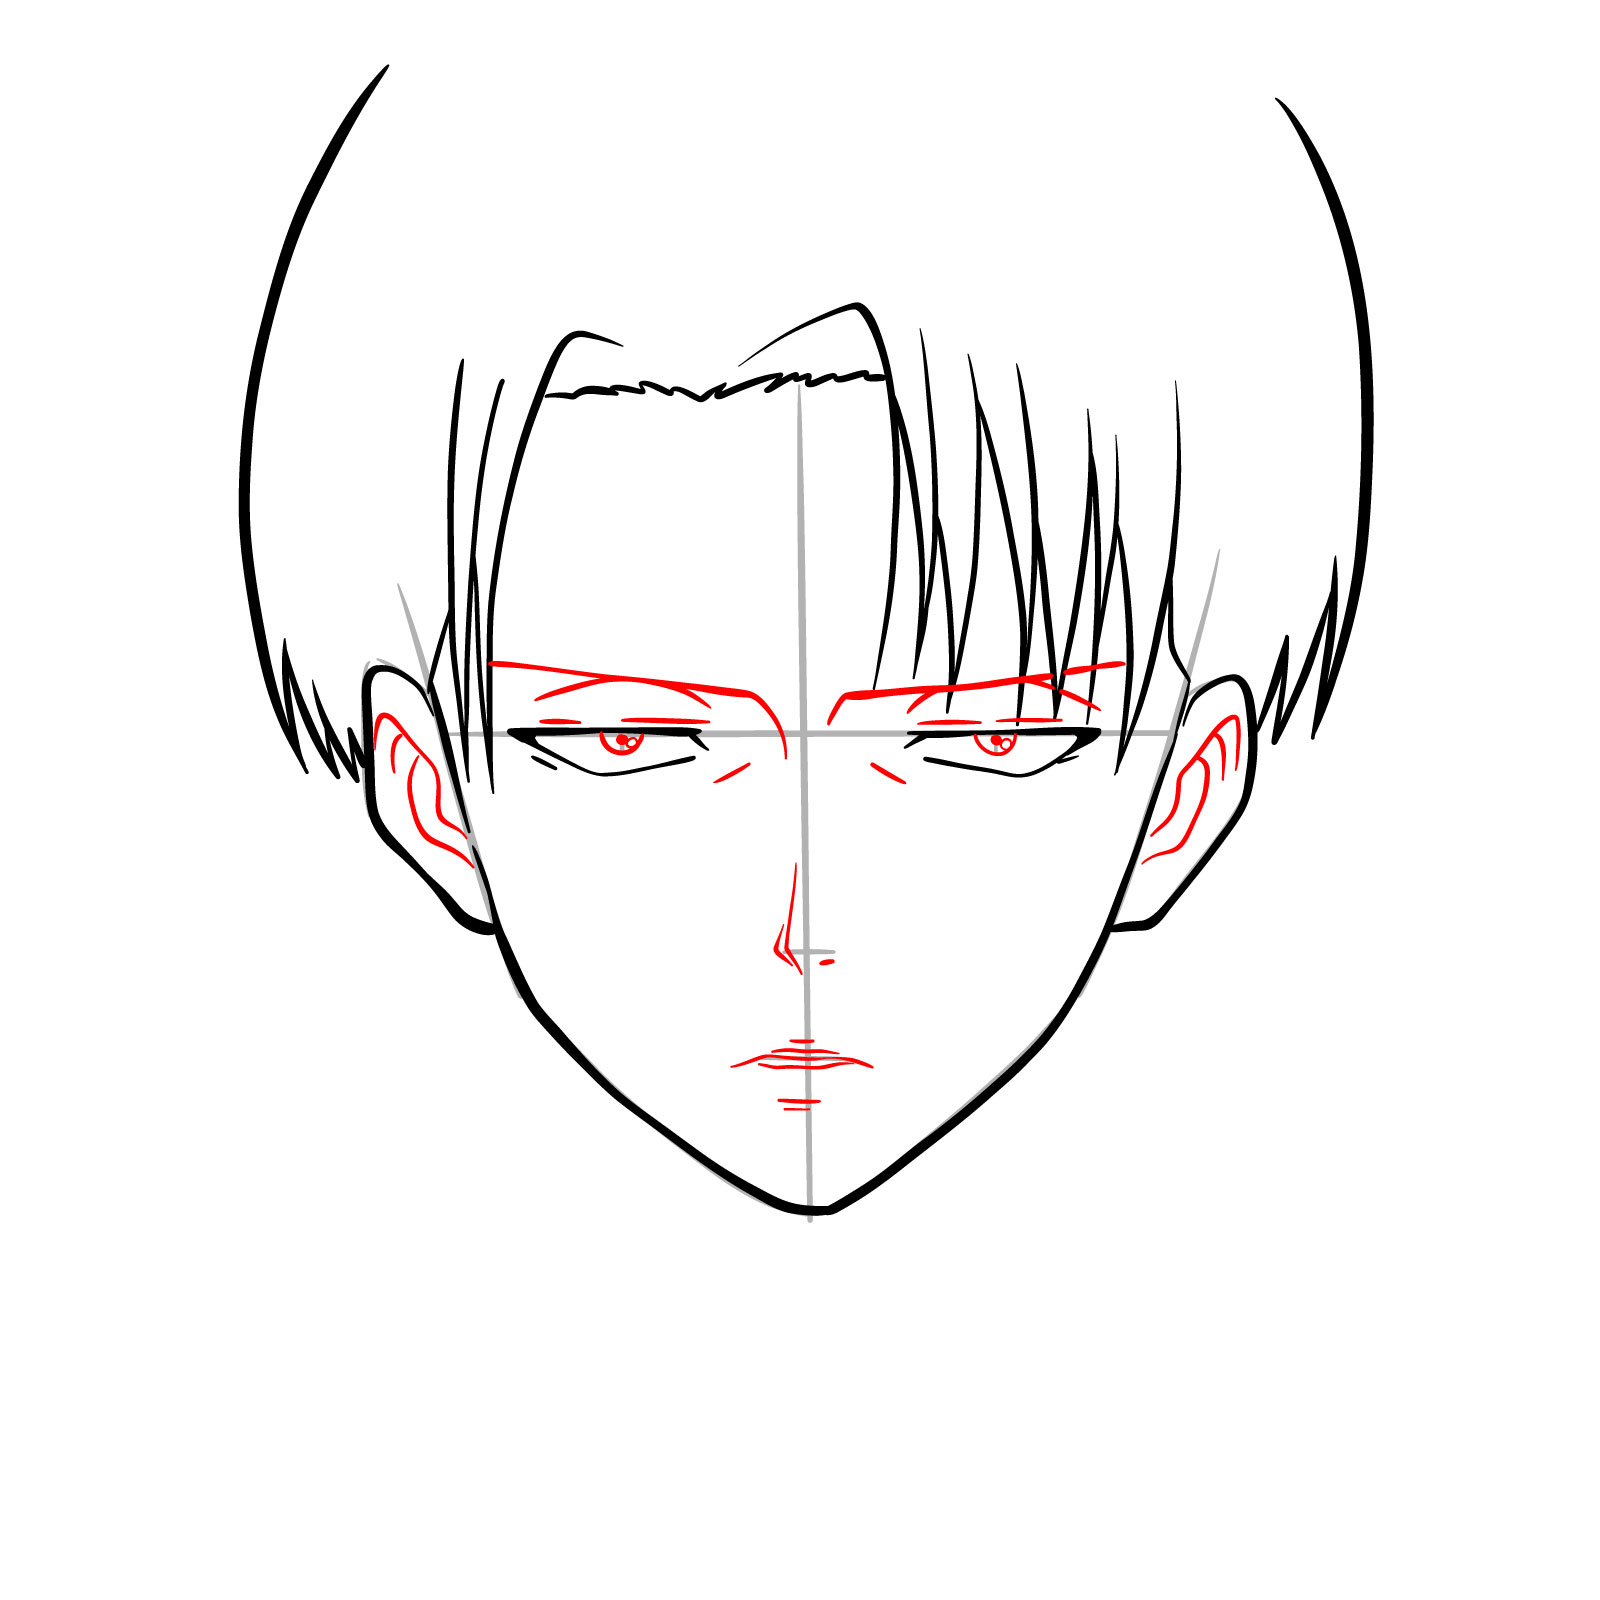
Step 08 – Draw the eyeballs and eyelids, giving attention to the unique sharpness of Levi’s eyes. Sketch the eyebrows with a slight curve, the nose with its distinct straight lines, and a subtle mouth. Detail the ears to match the proportions of the face
Adding Levi’s eyes, eyebrows, nose, mouth, and ear details to the sketch
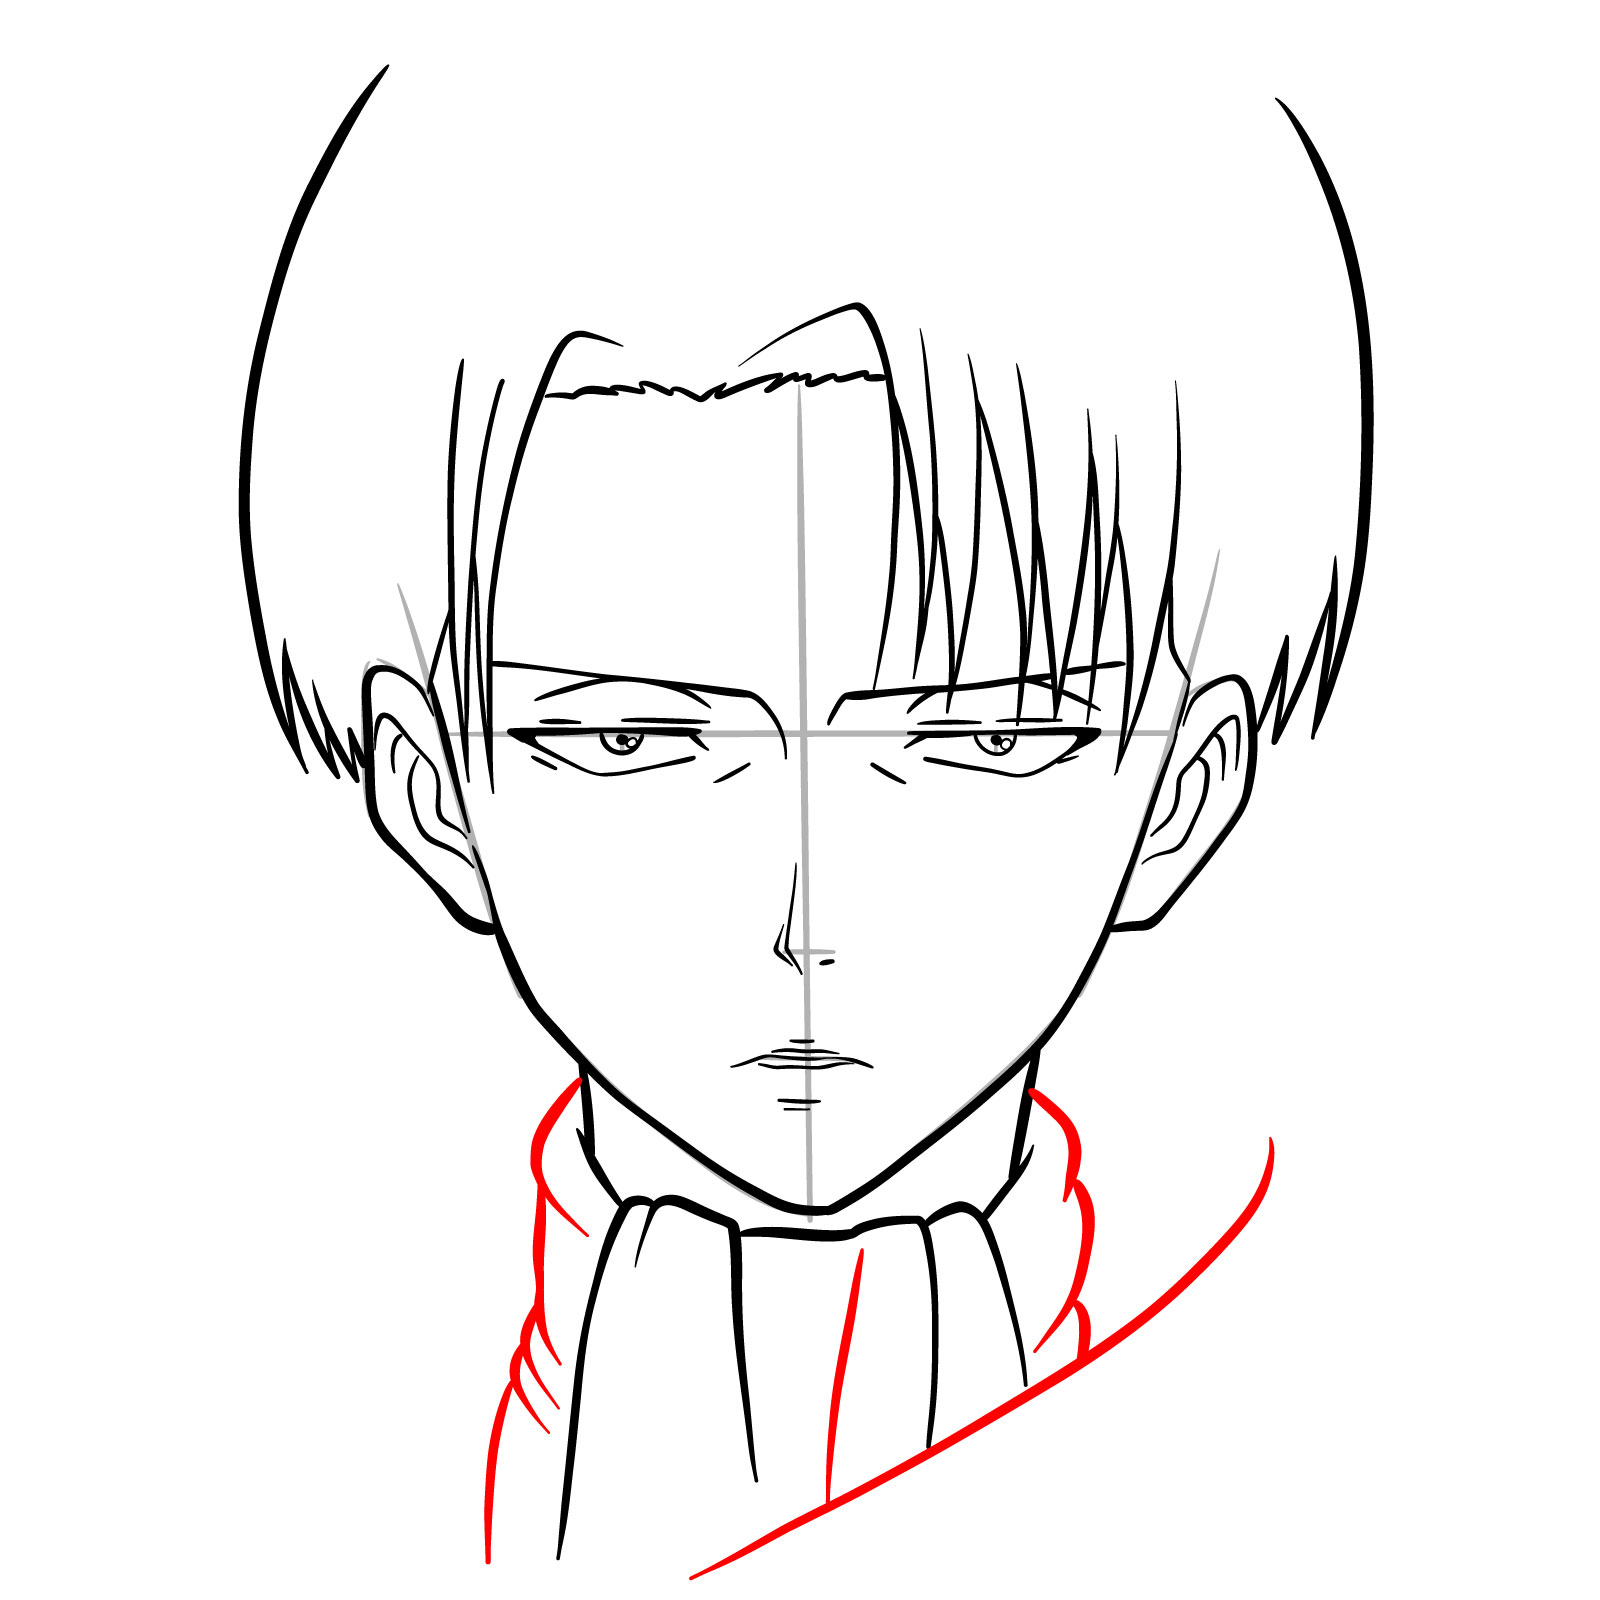
Step 09 – Extend lines down from the jawline to form Levi’s neck. Start outlining the top of the collar, indicating the beginning of his Survey Corps uniform
Sketching the neck and the start of Levi’s collar
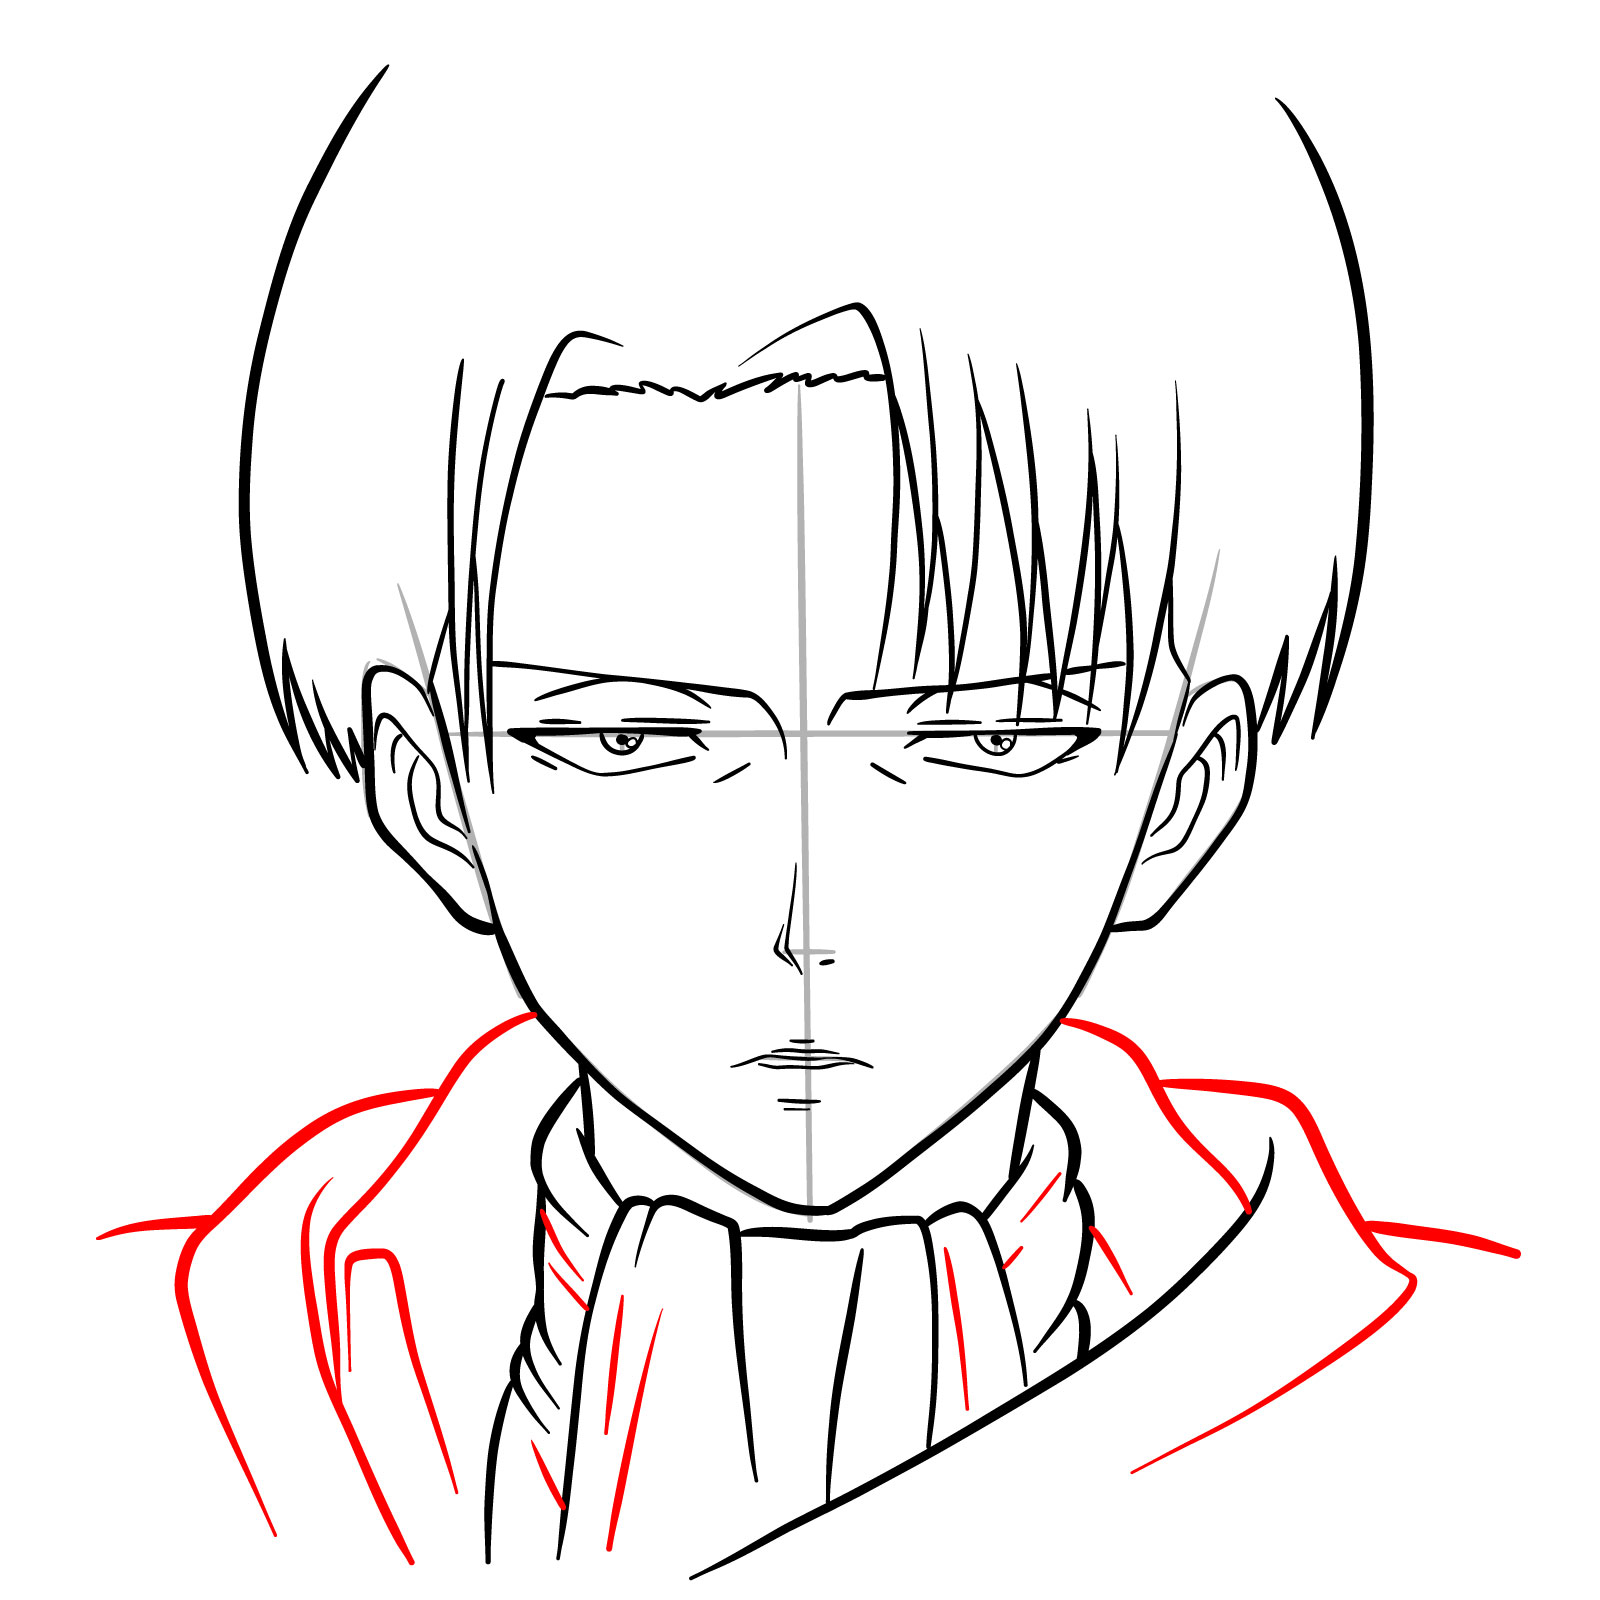
Step 10 – Further define the collar, drawing the sides to show the flaps and the detail lines that suggest the folds of the fabric
Continuing to shape the collar of Levi’s uniform
Step 11 – Complete the upper part of Levi’s uniform, adding the final lines for the collar and the shoulders, ensuring to capture the crispness of the military attire
Finishing the details on the upper part of Levi’s uniform
Step 12 – This final step reveals a fully detailed and finished drawing of Levi Ackerman’s face in a front view. Every element, from the intense eyes and distinct hair to the precise lines of his uniform, is drawn with care, illustrating a complete guide on how to draw Levi Ackerman’s face in front view. This guide captures the character’s focused and stoic expression, true to the earlier seasons of “Attack on Titan”
Finalized front view drawing of Levi Ackerman’s face
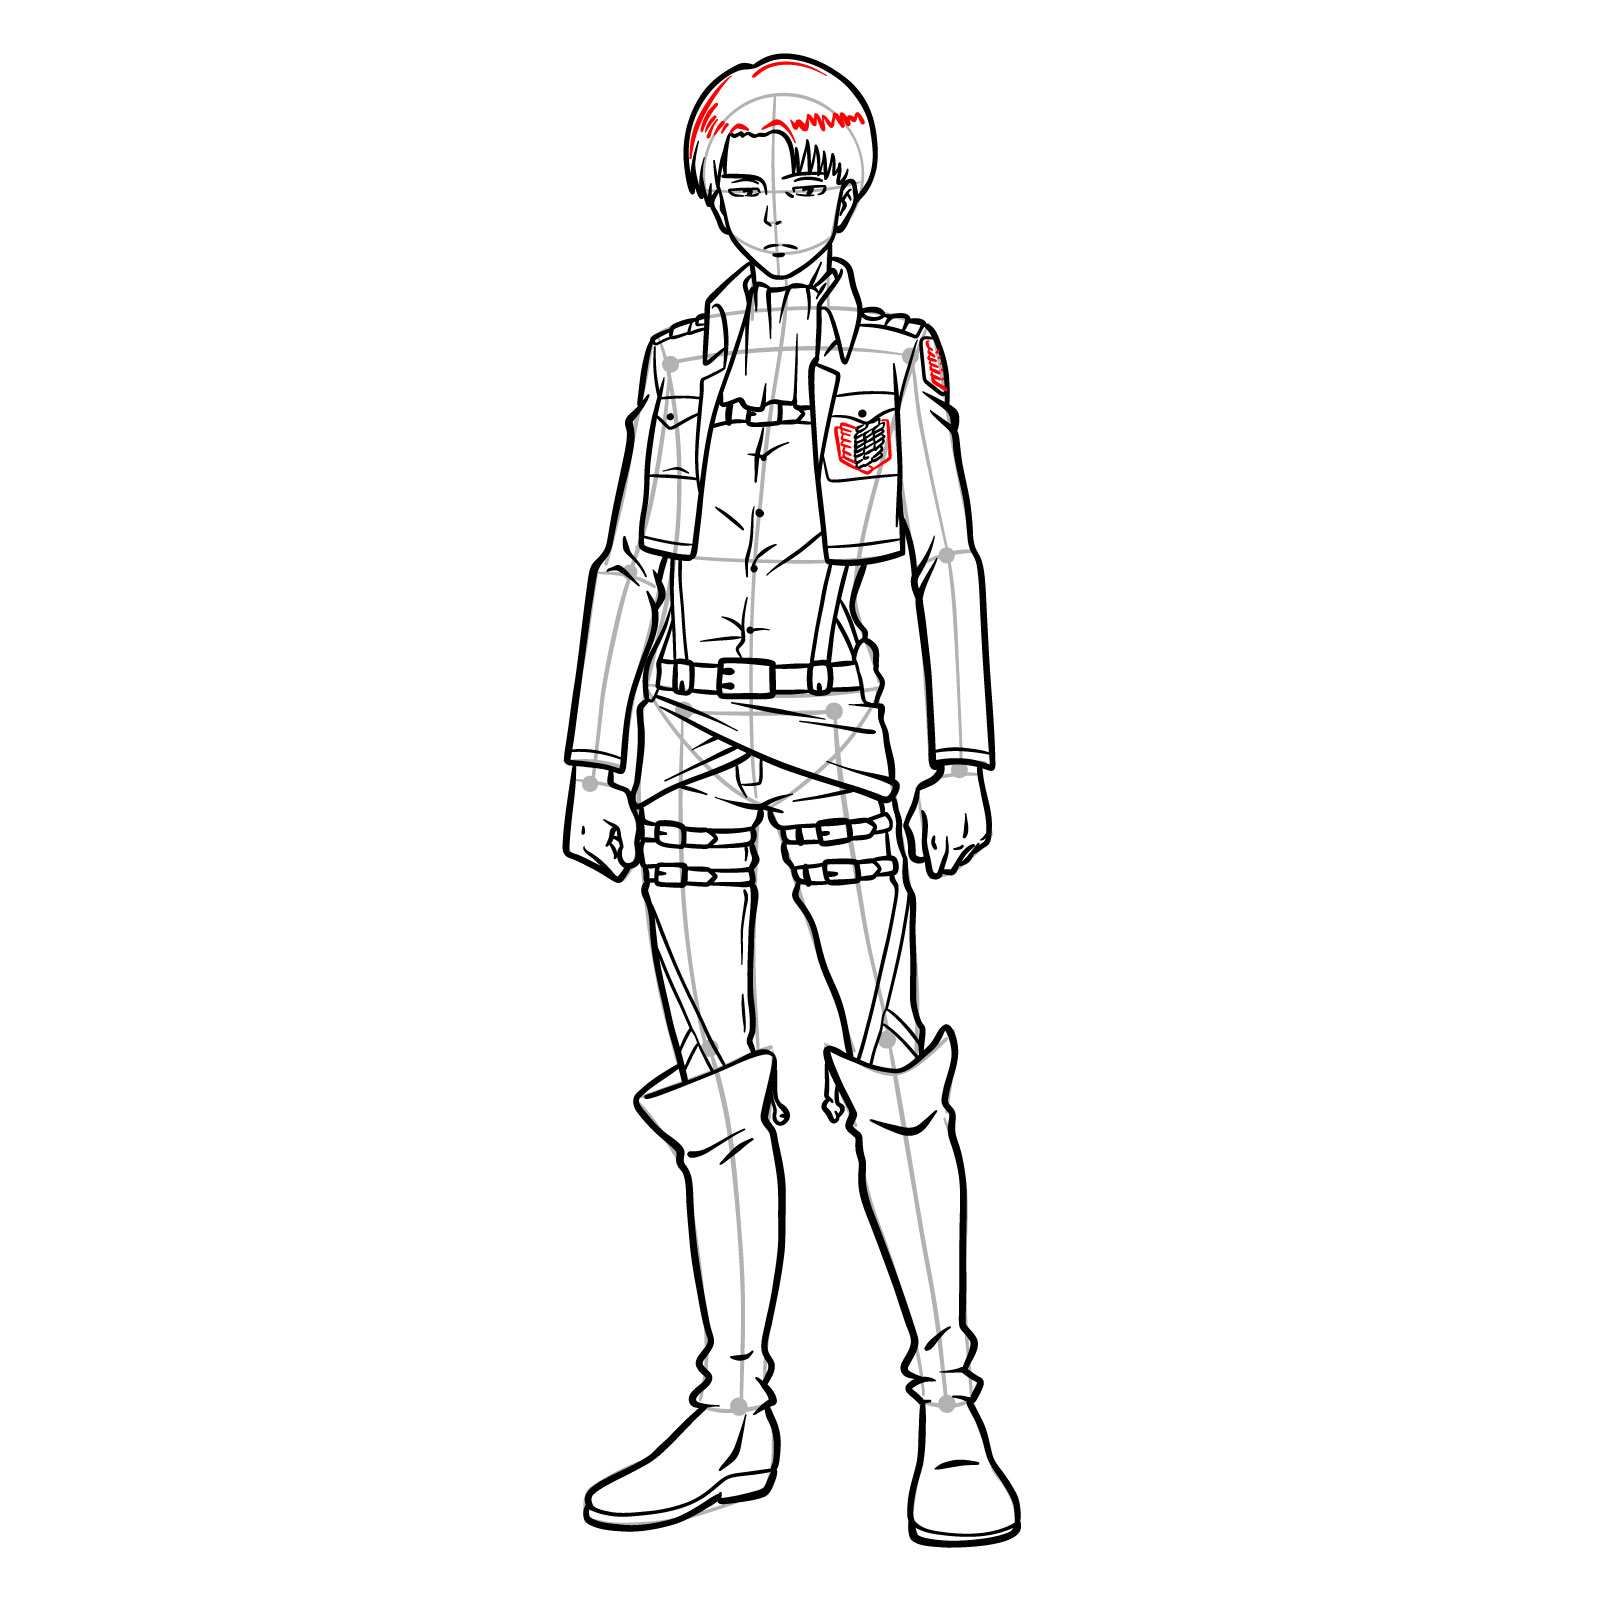
Guide 4: Drawing Levi in The Survey Corps Outfit Full Body
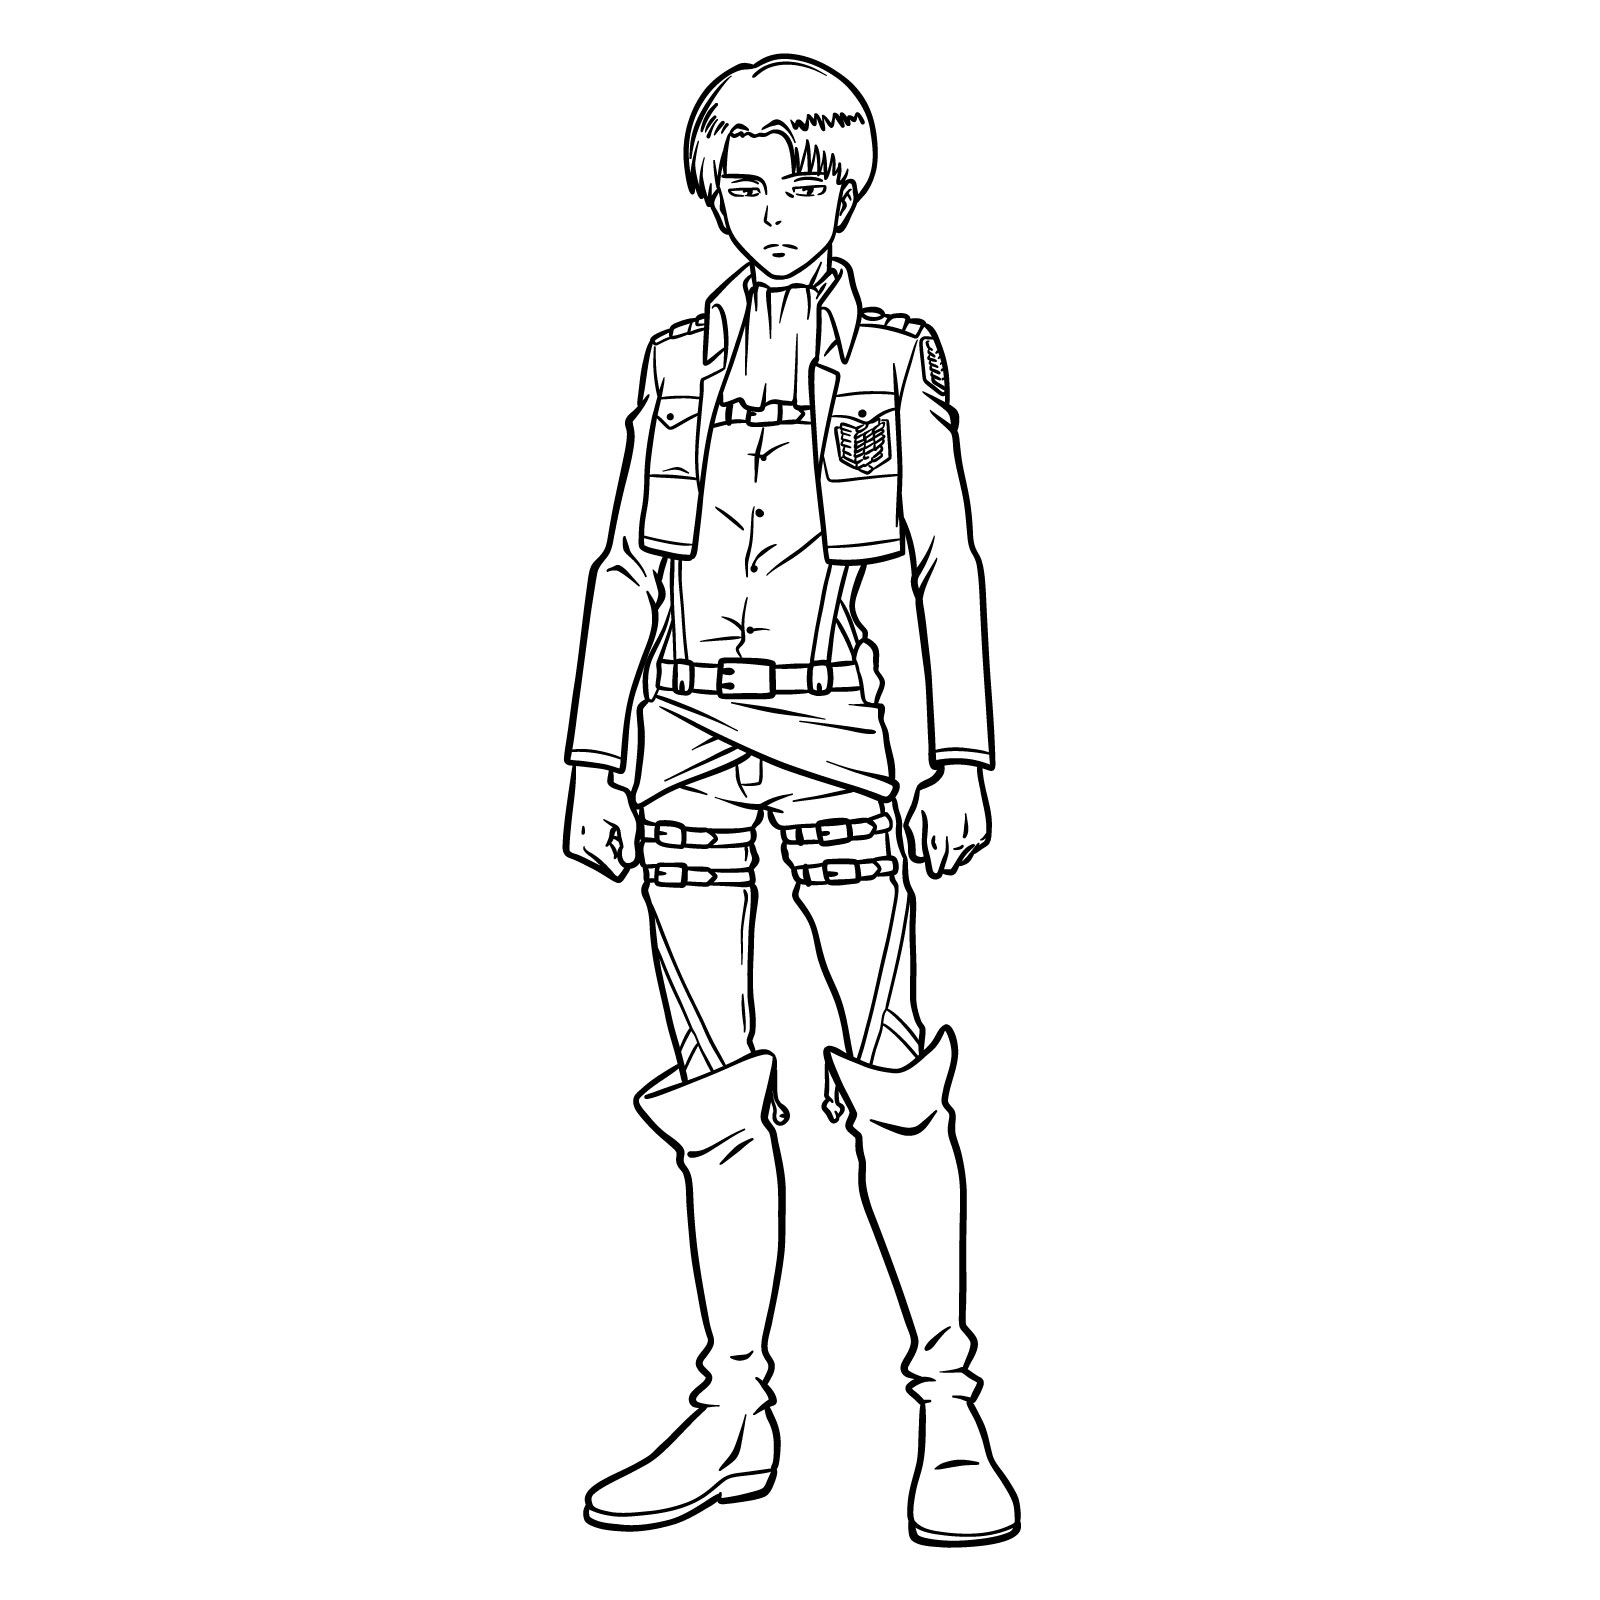
Easy drawing of Captain Levi full body
Depicting Levi in his full Survey Corps regalia is a task that combines the intricacies of character design with the challenge of maintaining correct body proportions. In this 27-step guide, we will create a full-body image of Levi, starting with the basic proportions using a stick figure. The finished drawing shows Levi standing upright, his gaze firm and posture disciplined, embodying the essence of his character as the squad captain.
Levi’s Survey Corps uniform is detailed, with the Wings of Freedom insignia on his left pocket, the straps of the 3D maneuver gear wrapped around his body, and the boots reaching up to his knees. The initial steps will help you get the proportions right, from the length of his limbs to the positioning of his hands. As we progress, we’ll add the layers of his uniform, the gear, and the finer details of his attire.
When drawing Levi, it’s important to capture not only the physical aspects but also the intangible qualities that make him who he is. His expression is calm yet commanding, his build is compact yet powerful, and his presence is understated yet formidable. With each step, ensure that these characteristics come through in your sketch to achieve a drawing that is true to Levi’s iconic image.
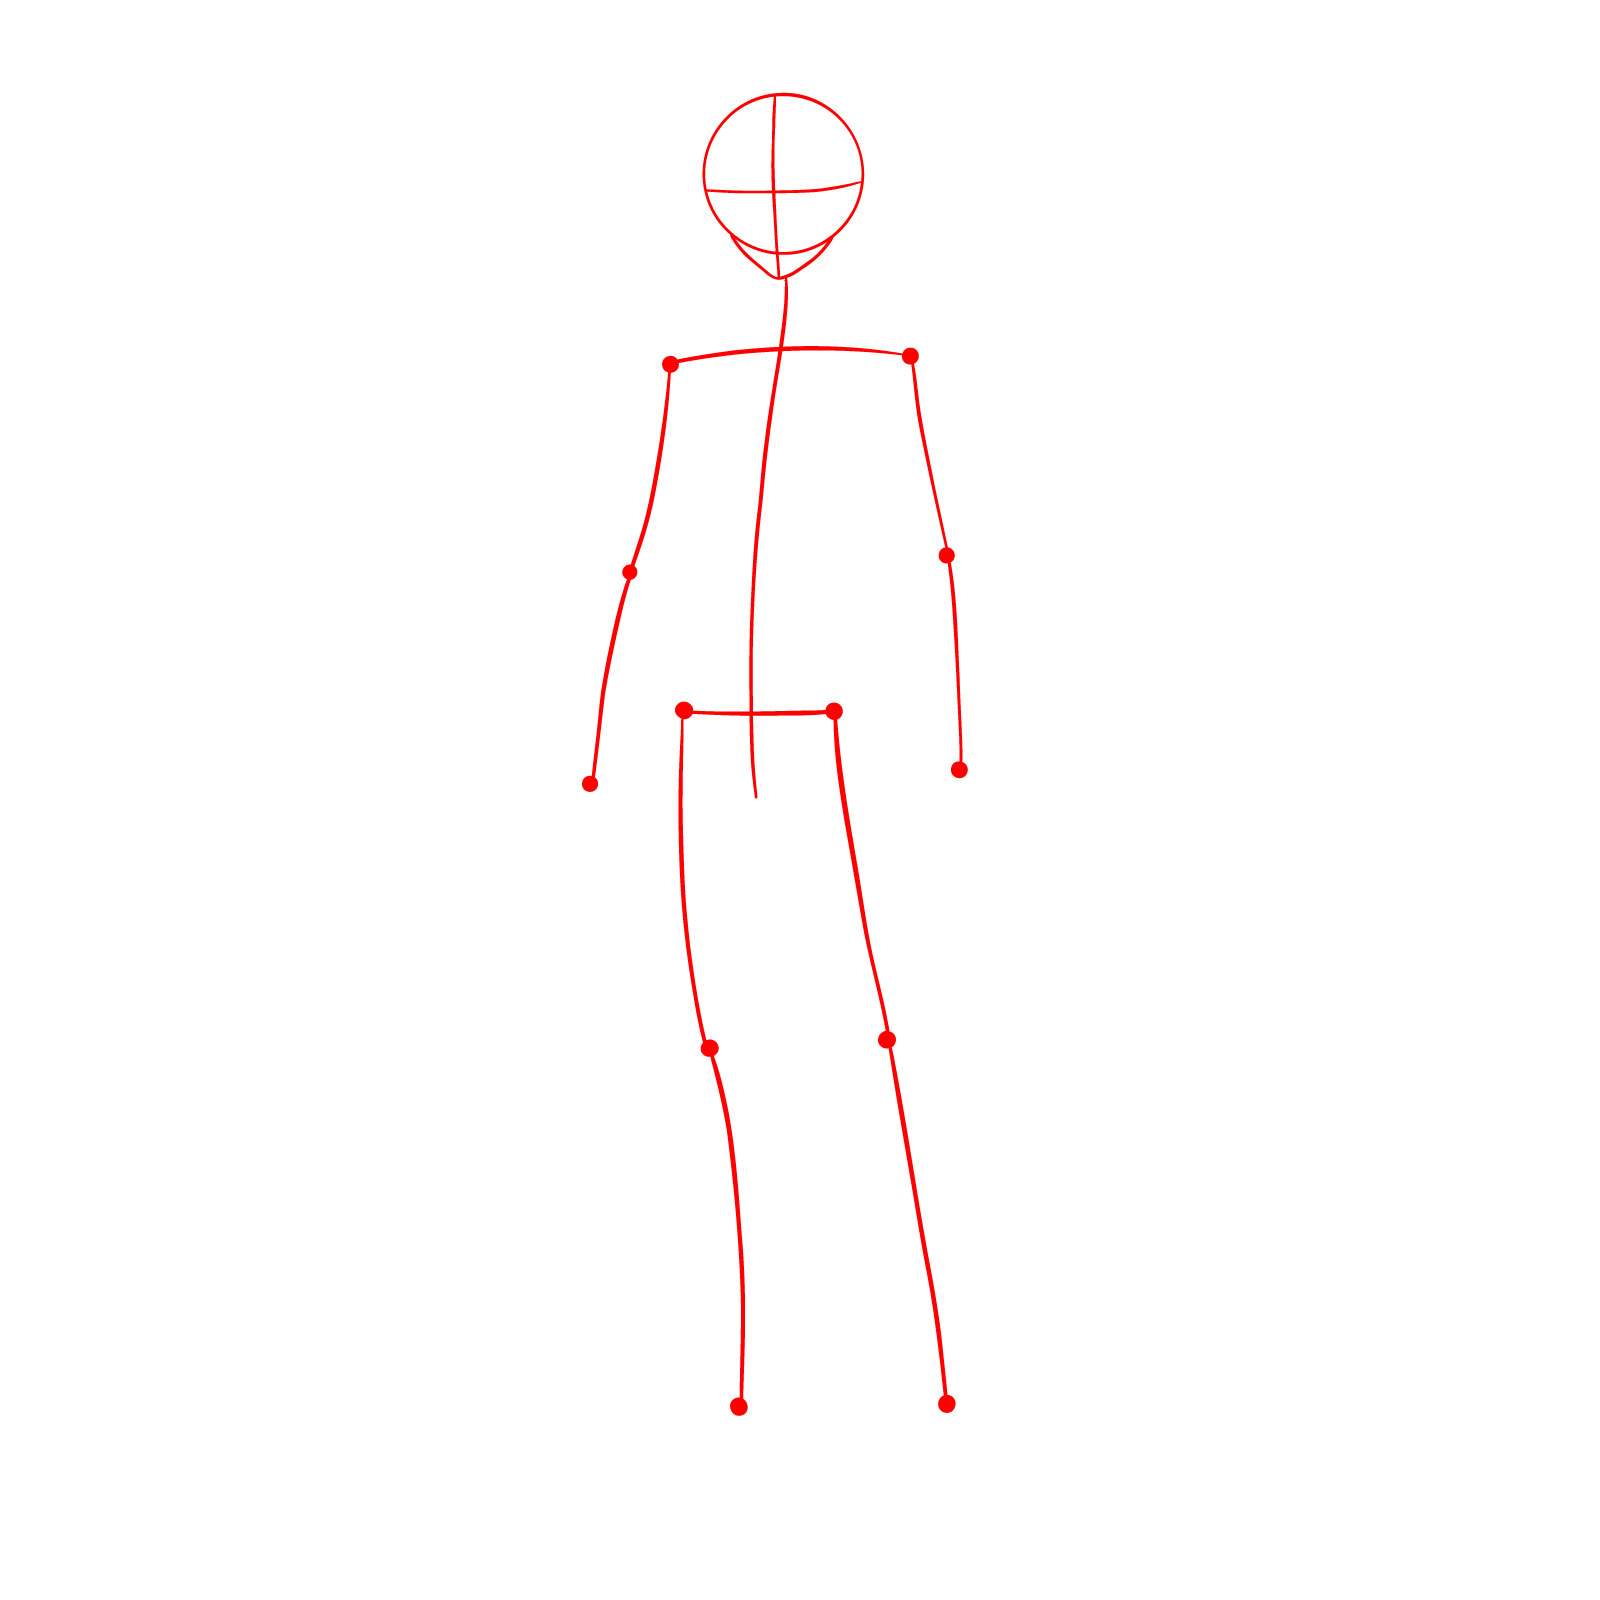
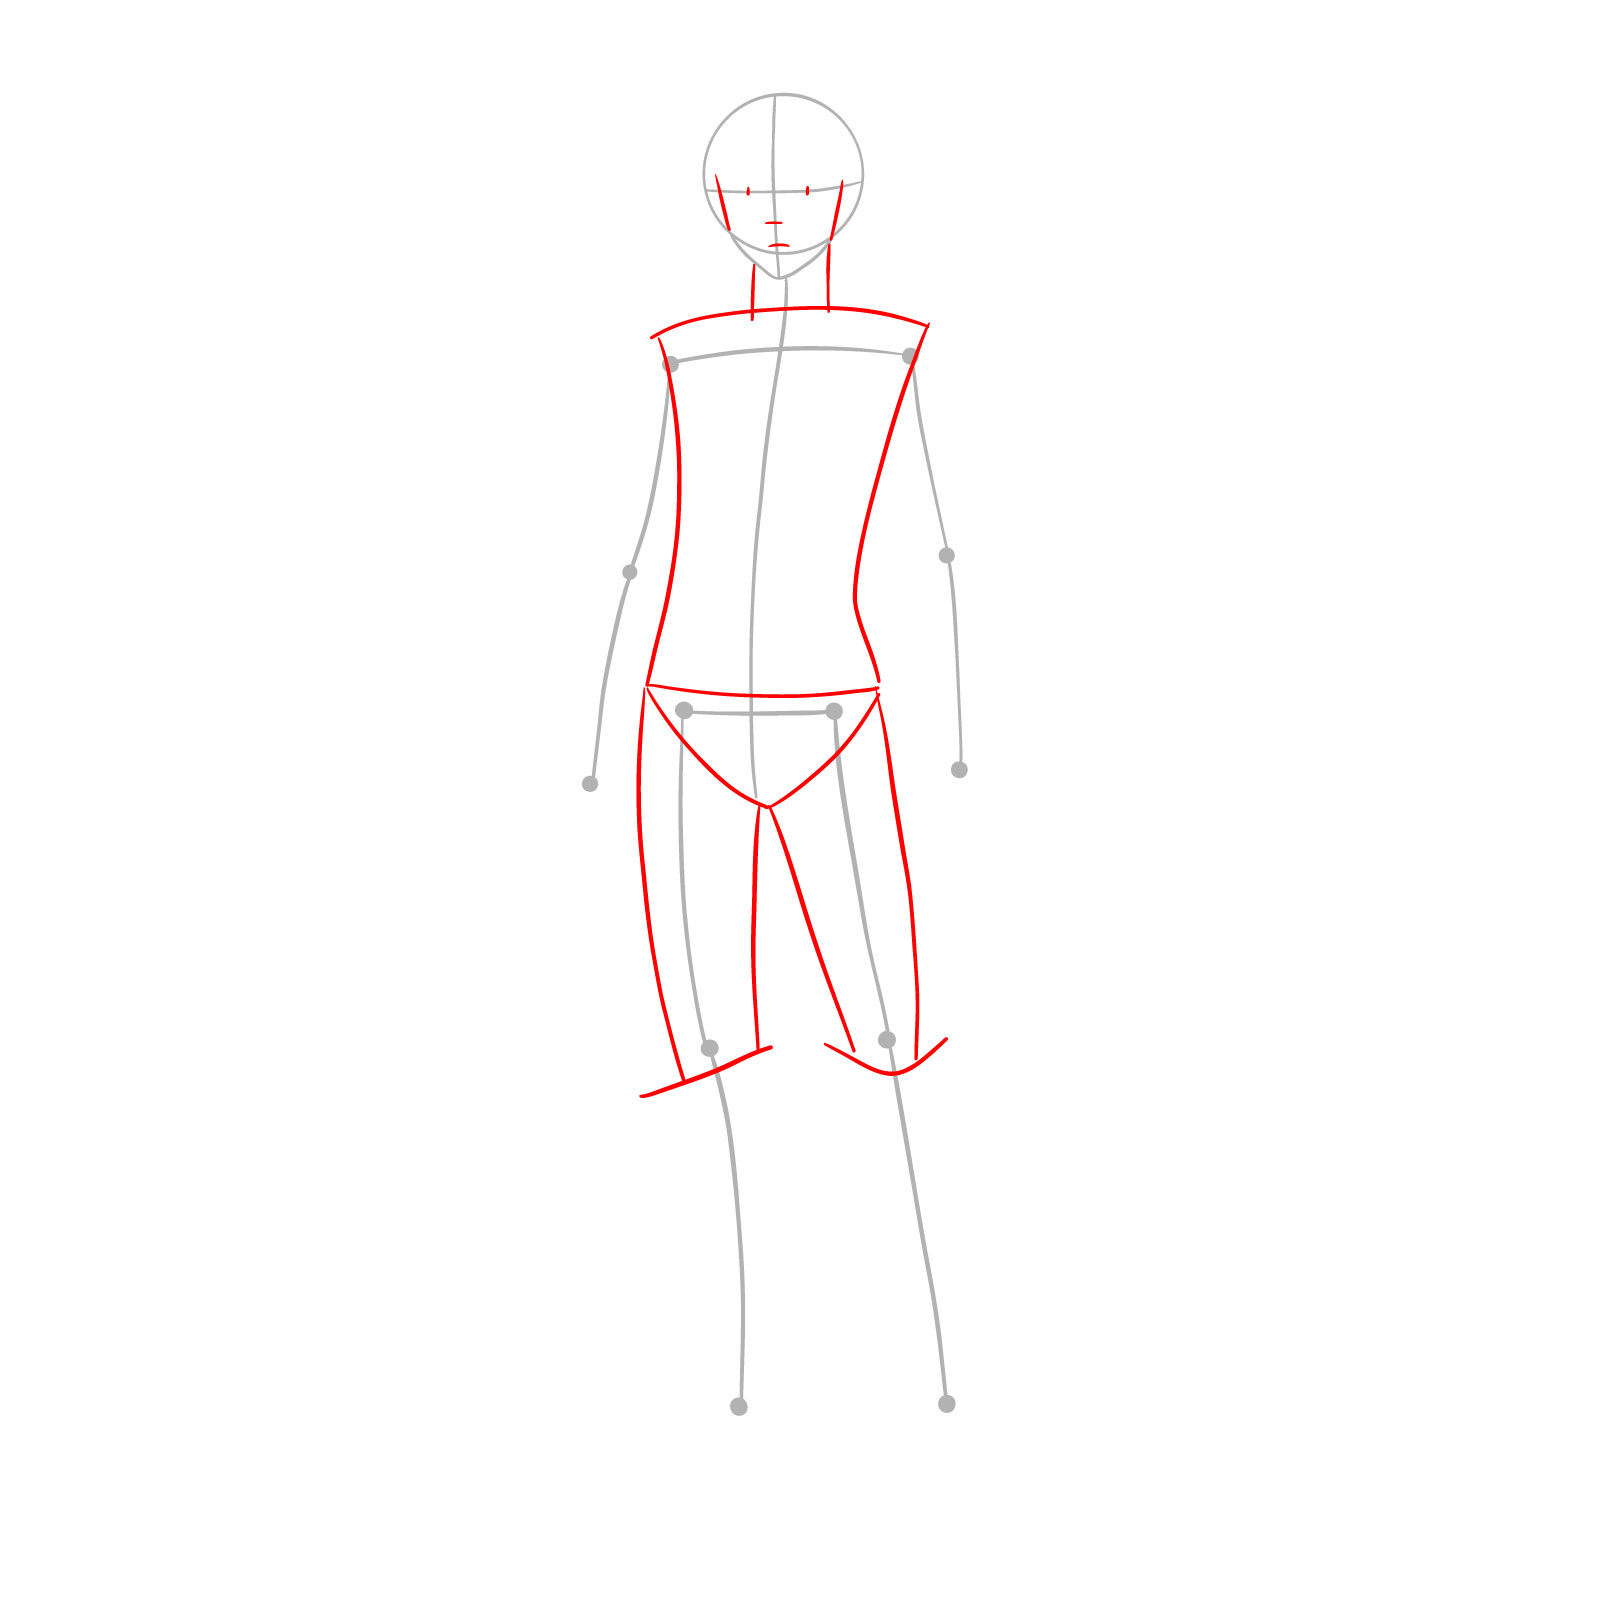
Step 01 – Begin your drawing with a circle for the base of the head, a V-shape for chin and a vertical line and horizontal lines for proportions, sketch a simple stick figure, using straight lines and dots to represent the joints, which will serve as a guide for Captain Levi’s body posture and proportions
Starting the full body drawing of Captain Levi with a basic stick figure
Step 02 – Sketch the face frame, placing the eyes, nose, and mouth. Draw the neck, and outline the torso and legs down to the knees with basic geometric shapes and lines to form the structure of Levi’s body
Adding the face frame and body outlines to Levi’s full body sketch
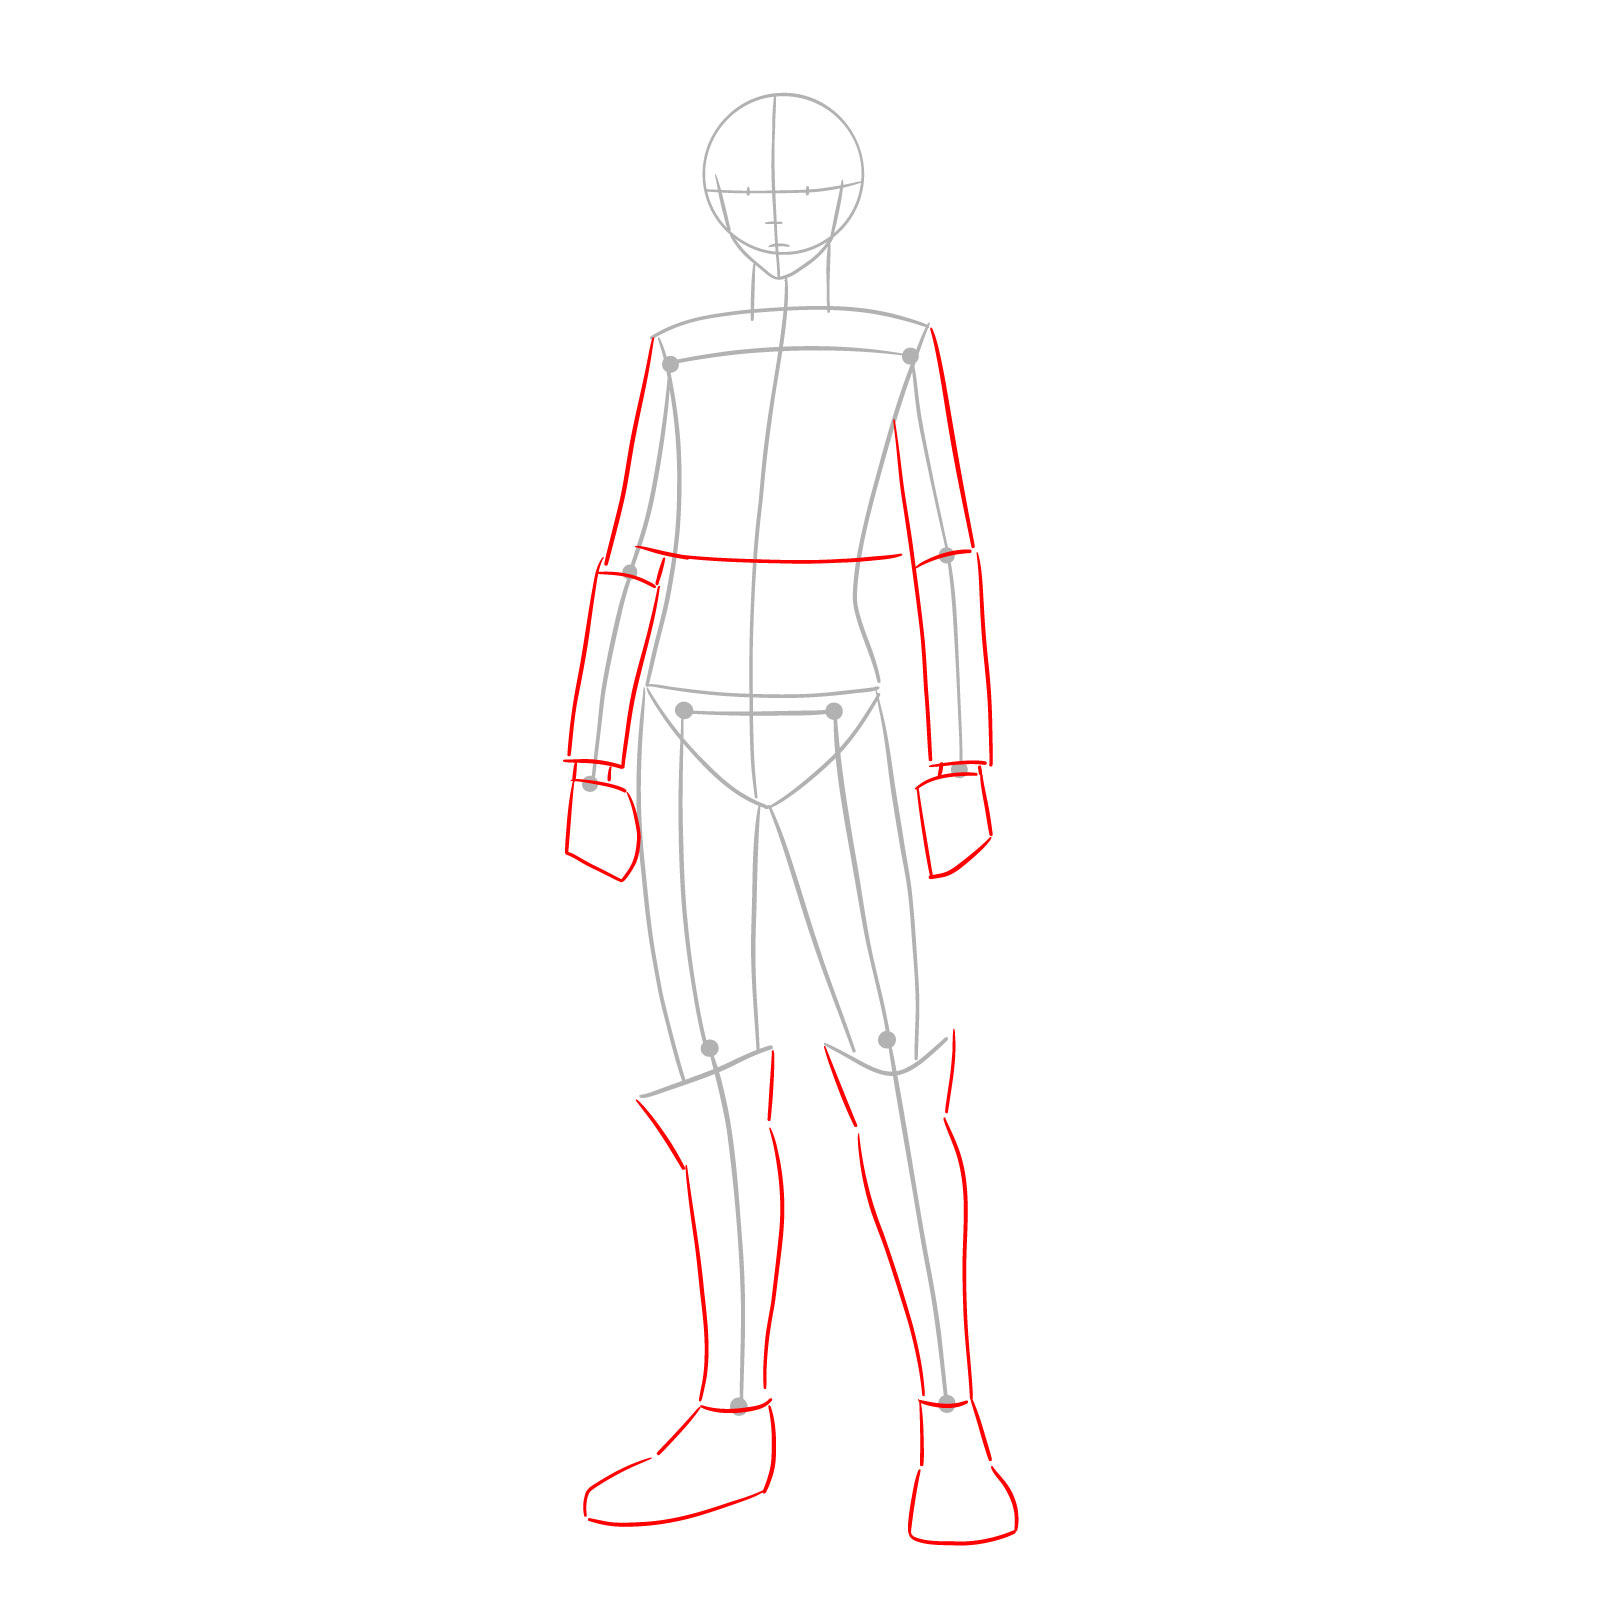
Step 03 – Add to your sketch by drawing the basic shapes for Levi’s arms and hands, ensuring proper proportion and angle. Continue the legs with simple shapes down to the feet to complete the full body structure
Outlining the basic shapes for Levi’s arms, hands, and legs
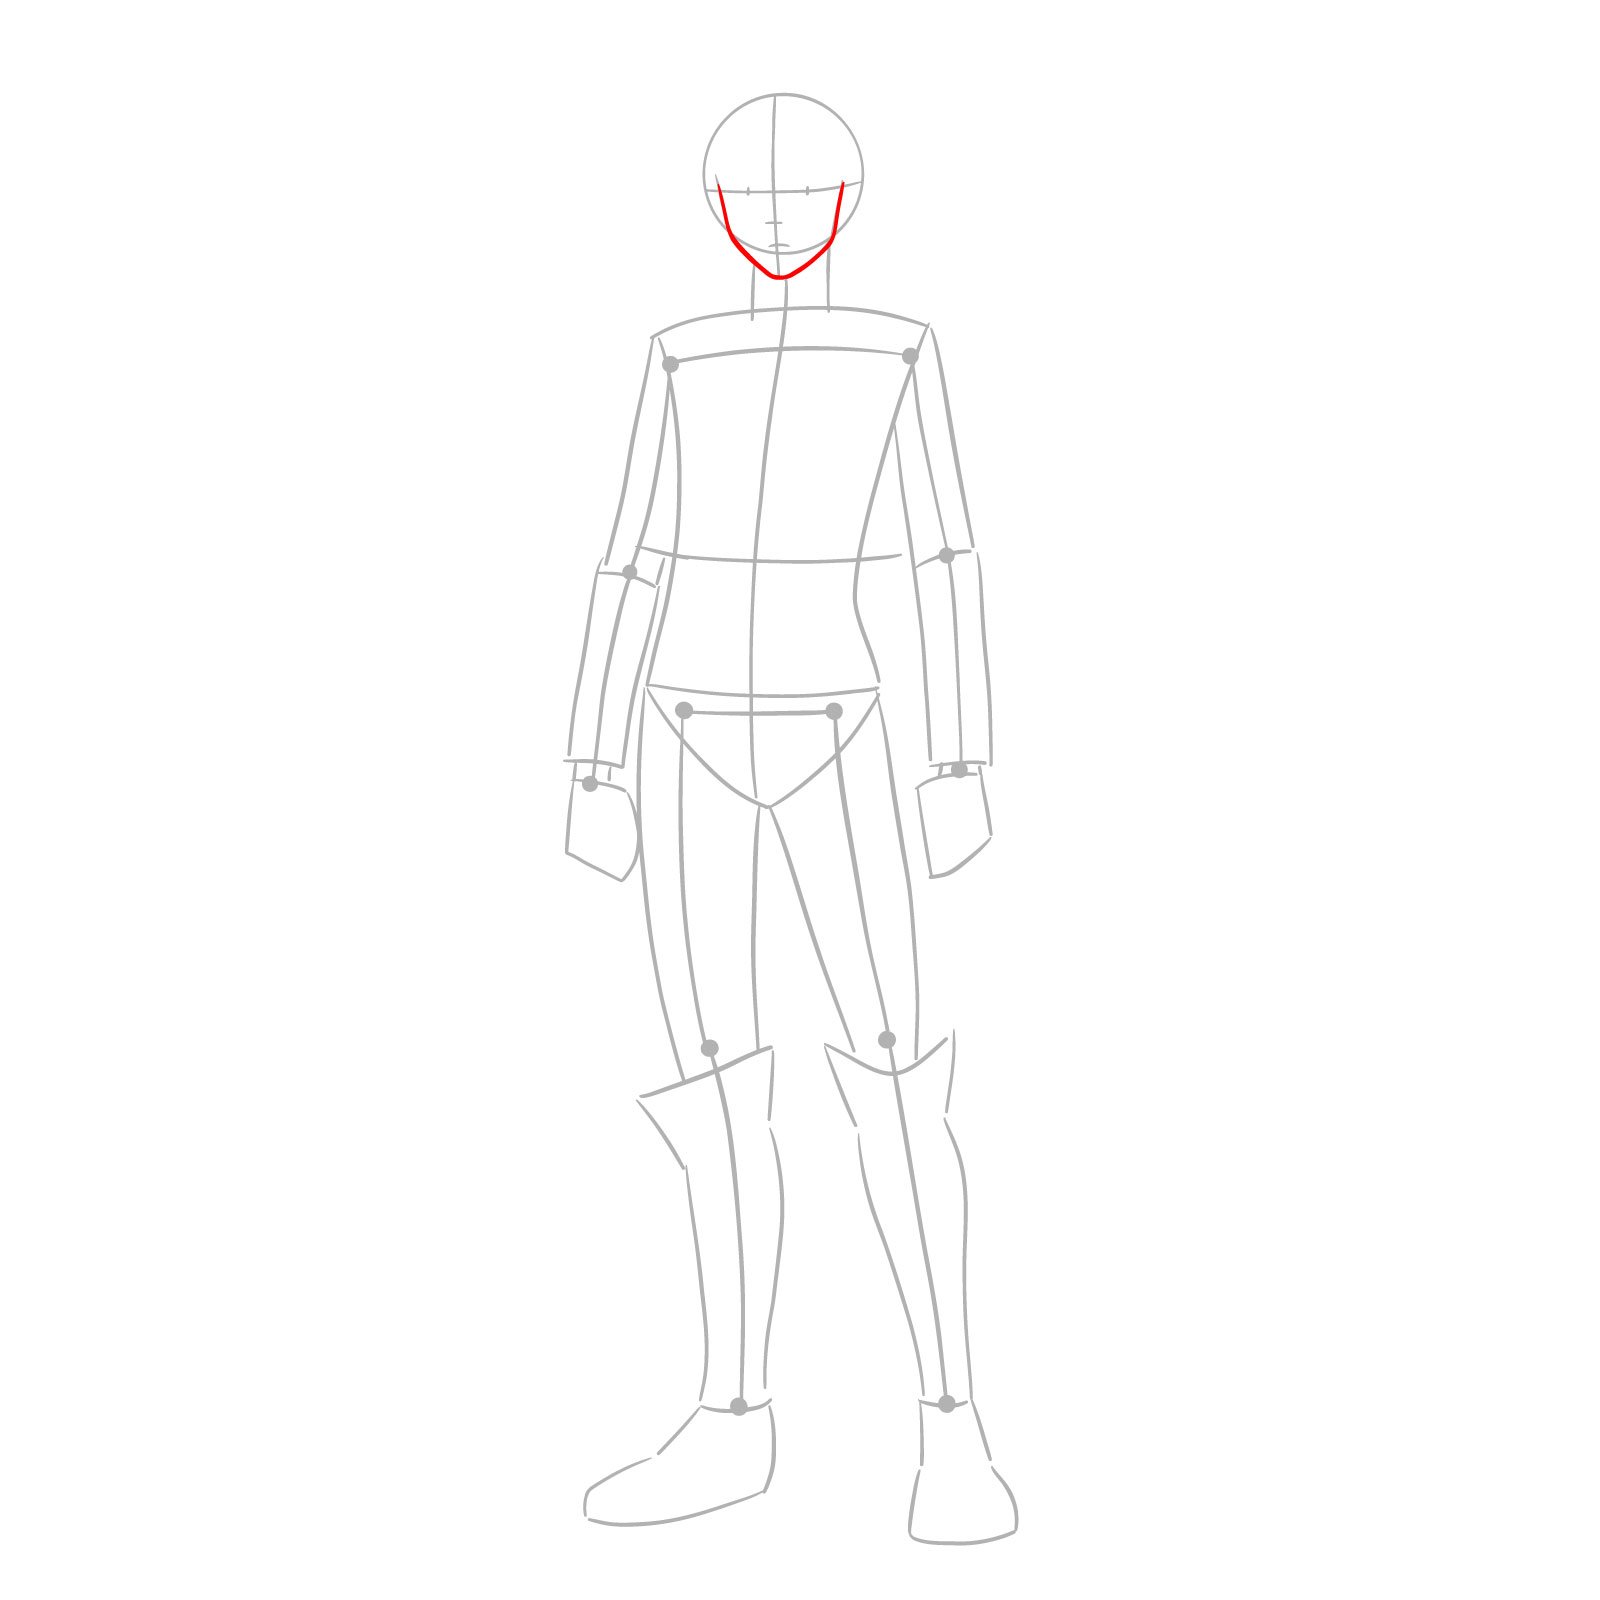
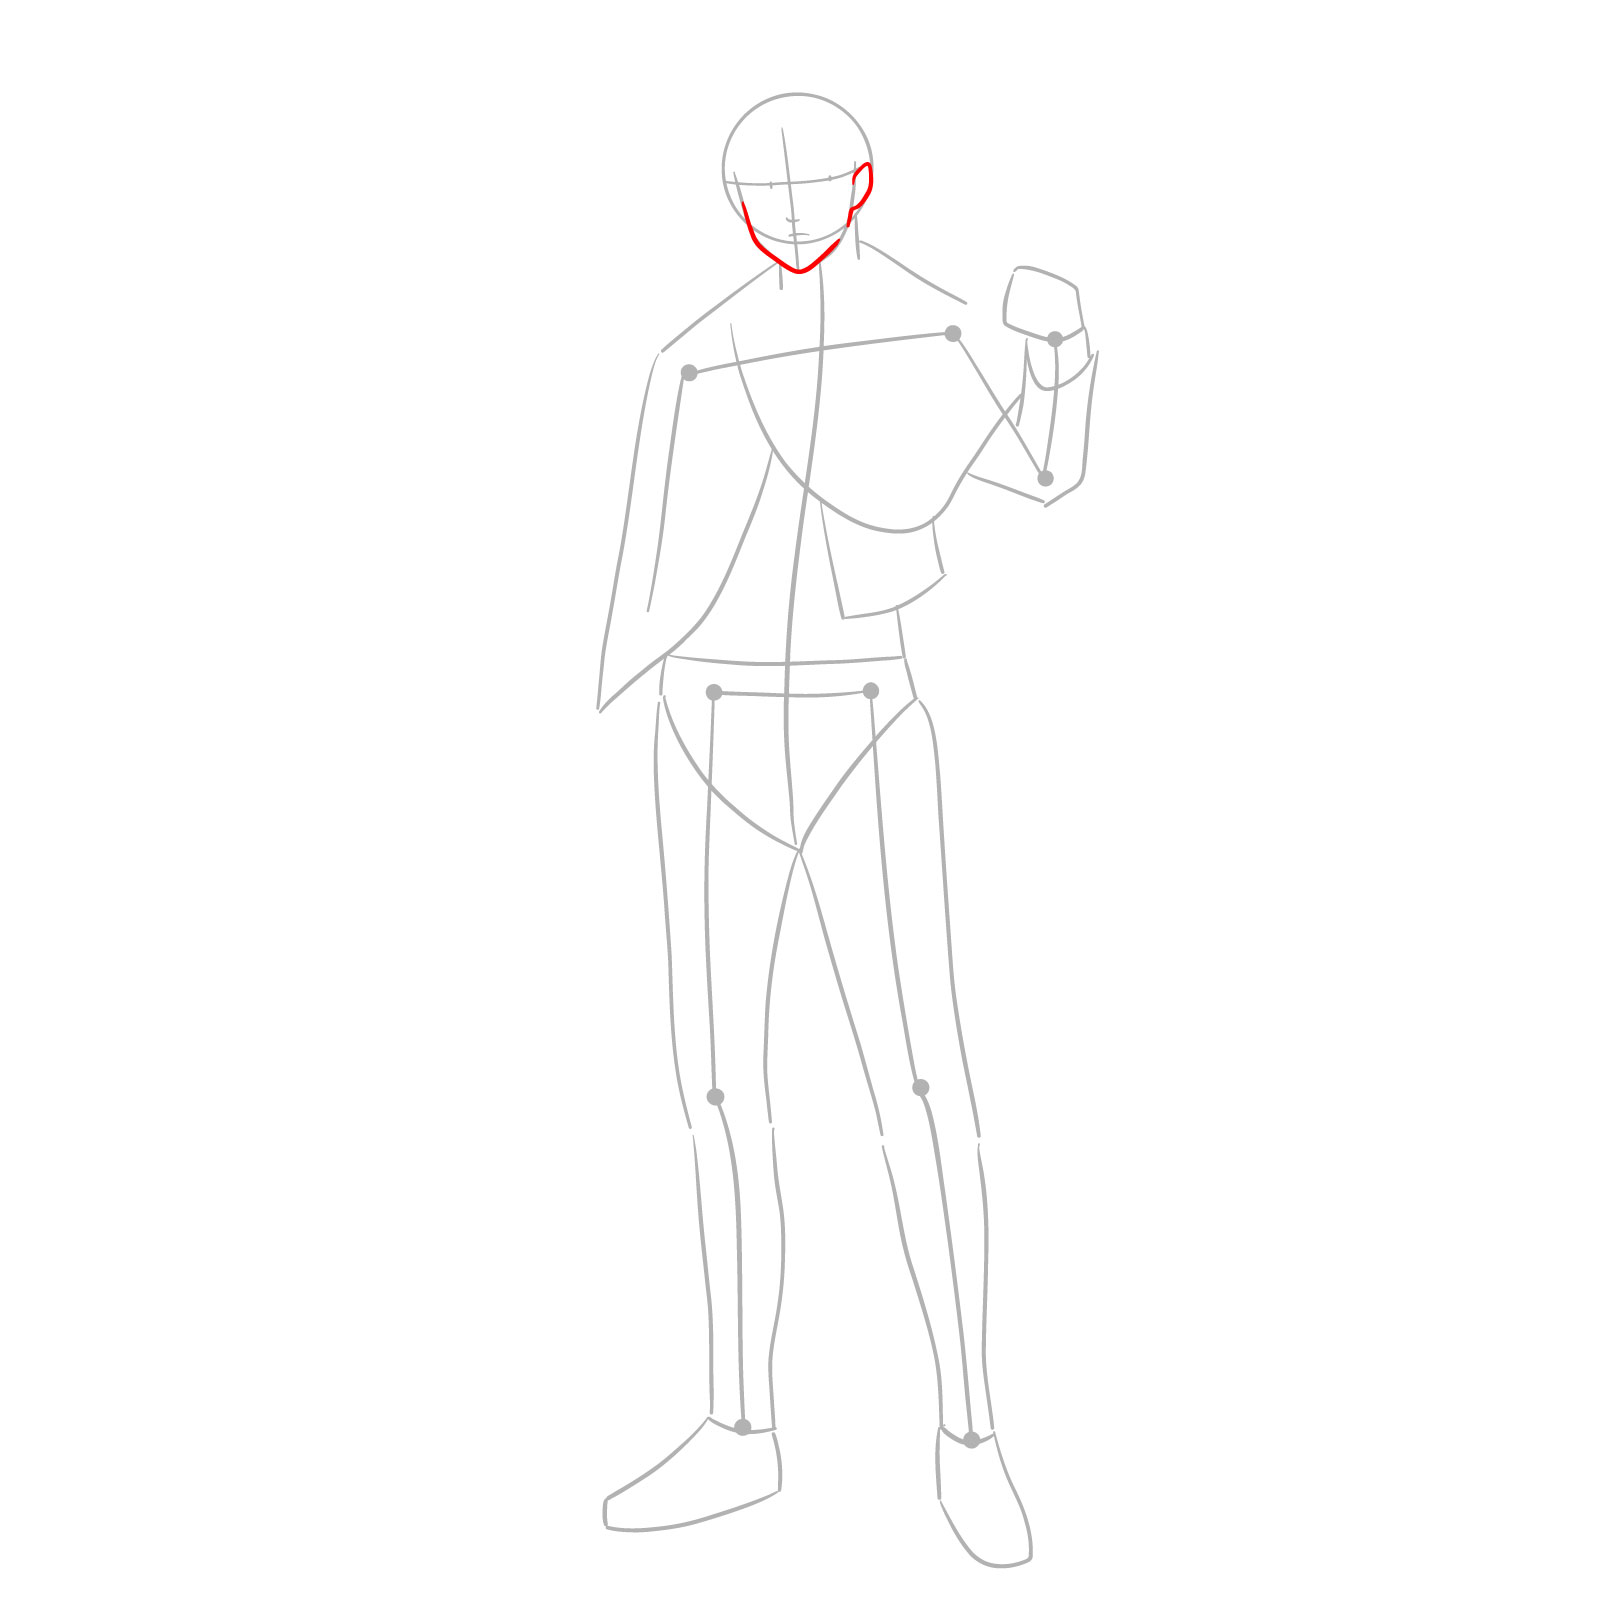
Step 04 – Define Levi’s face frame more clearly, paying attention to the jawline and the overall shape of his head to ensure a likeness to his character
Sketching the facial structure for Levi Ackerman’s full body image
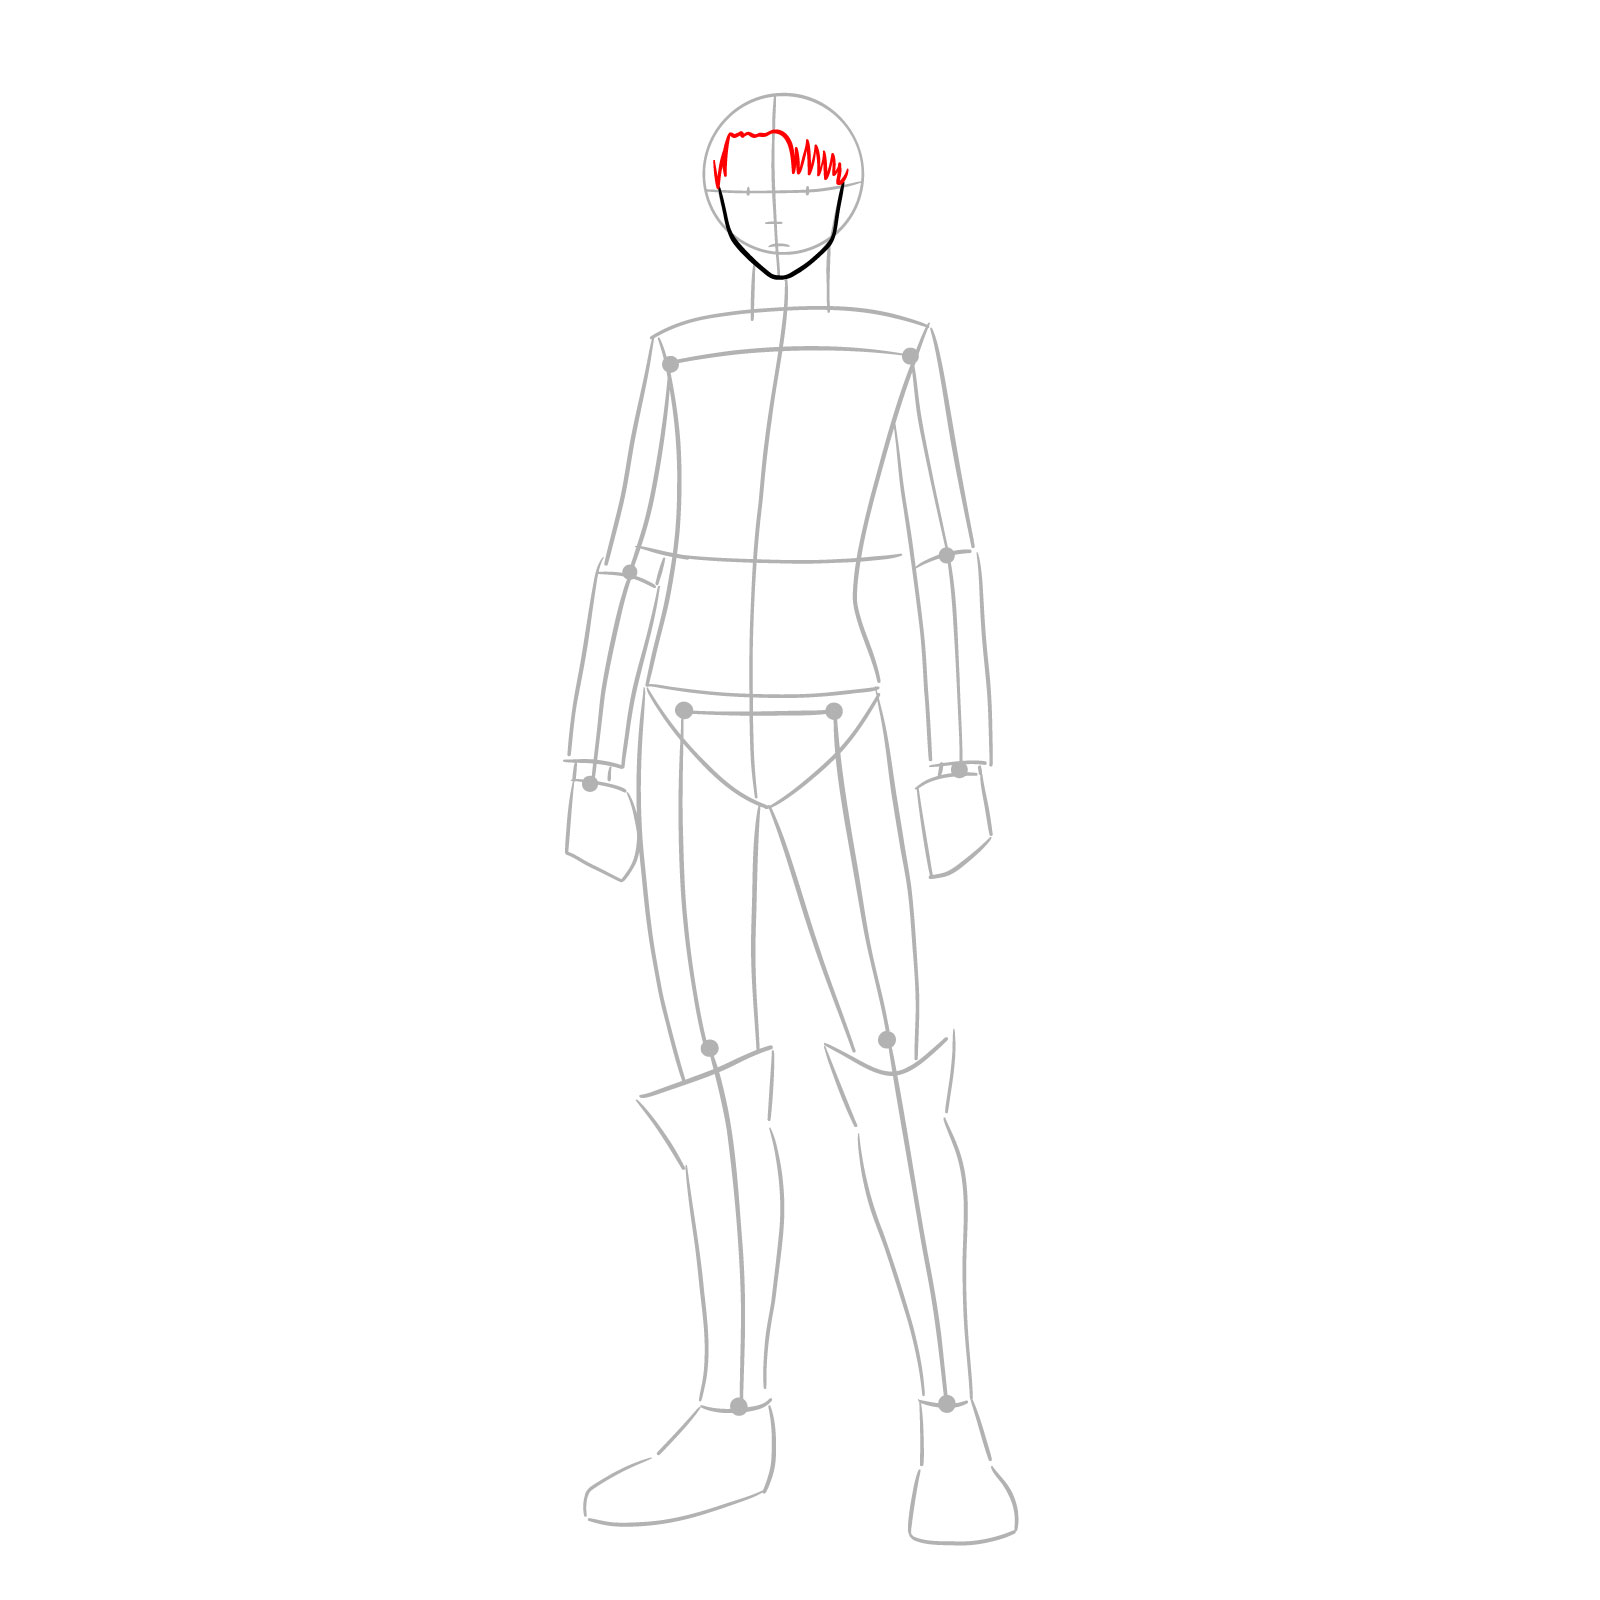
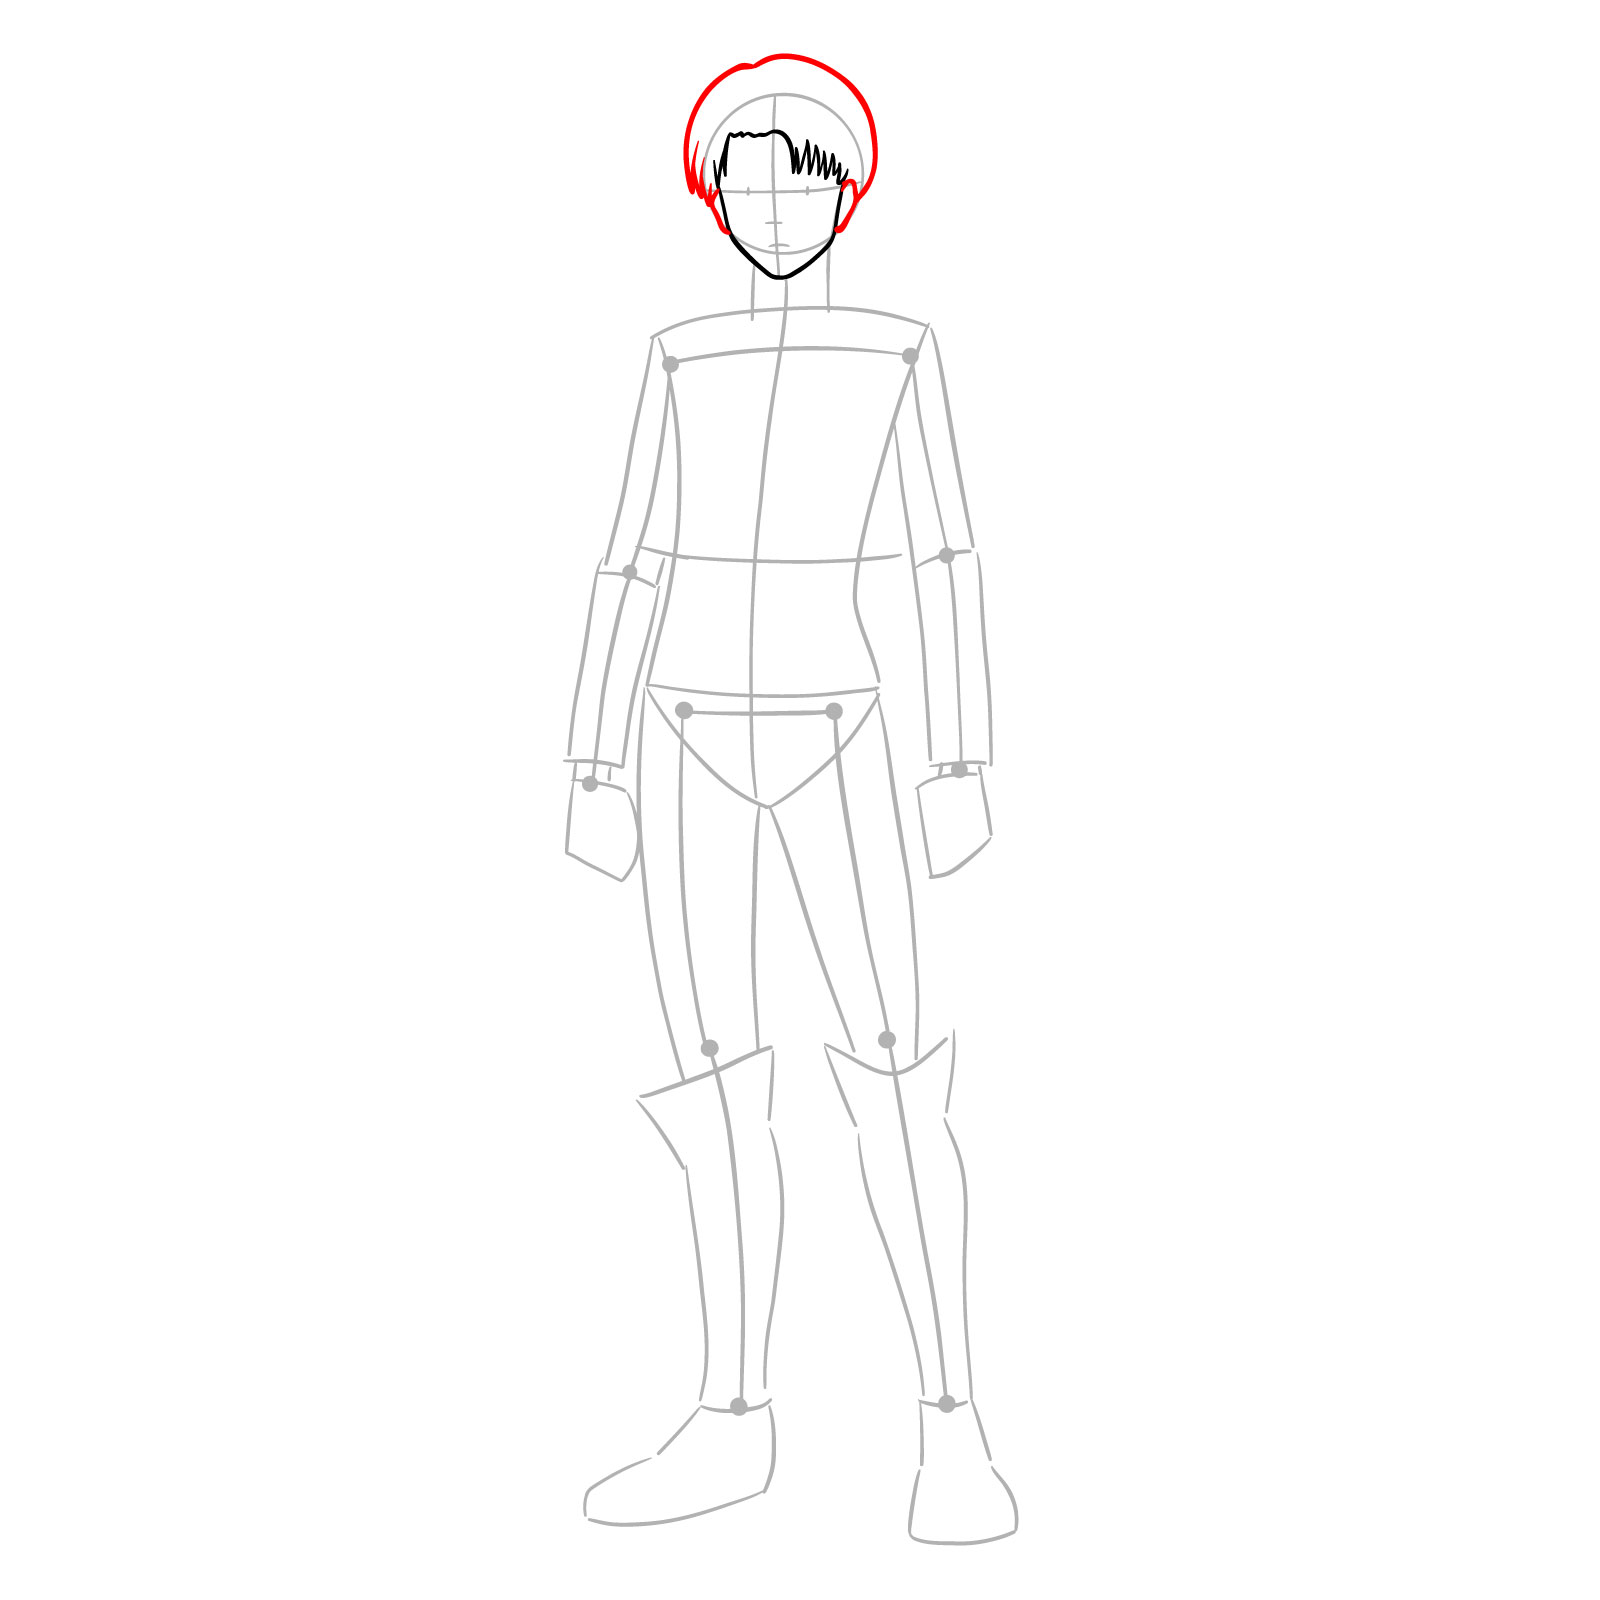
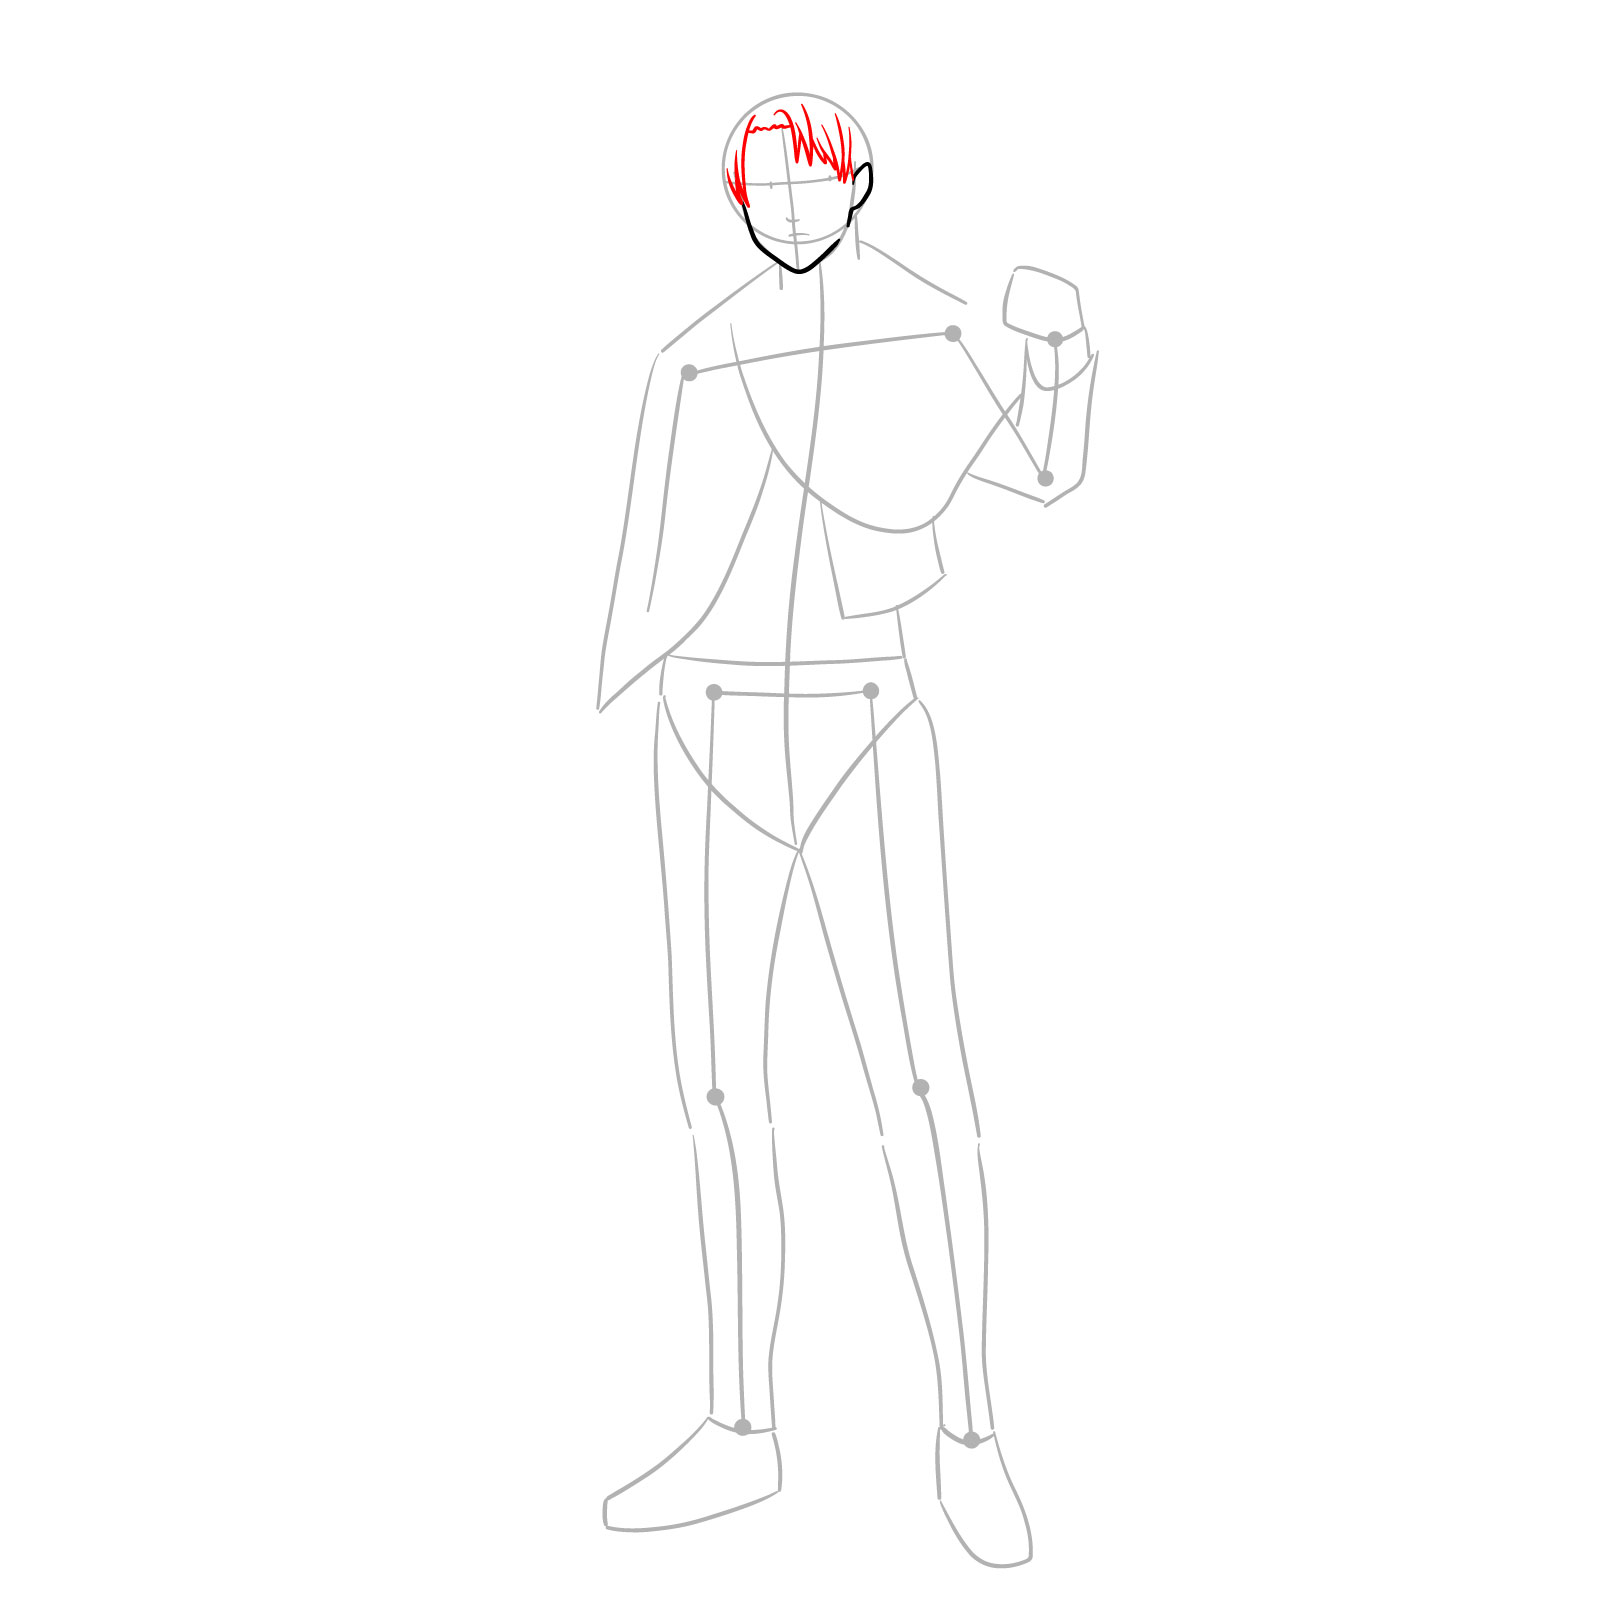
Step 05 – Begin sketching the hair starting from the forehead, outlining the style and shape that frames Captain Levi’s face
Outlining the hair on the forehead area for Captain Levi’s full body drawing
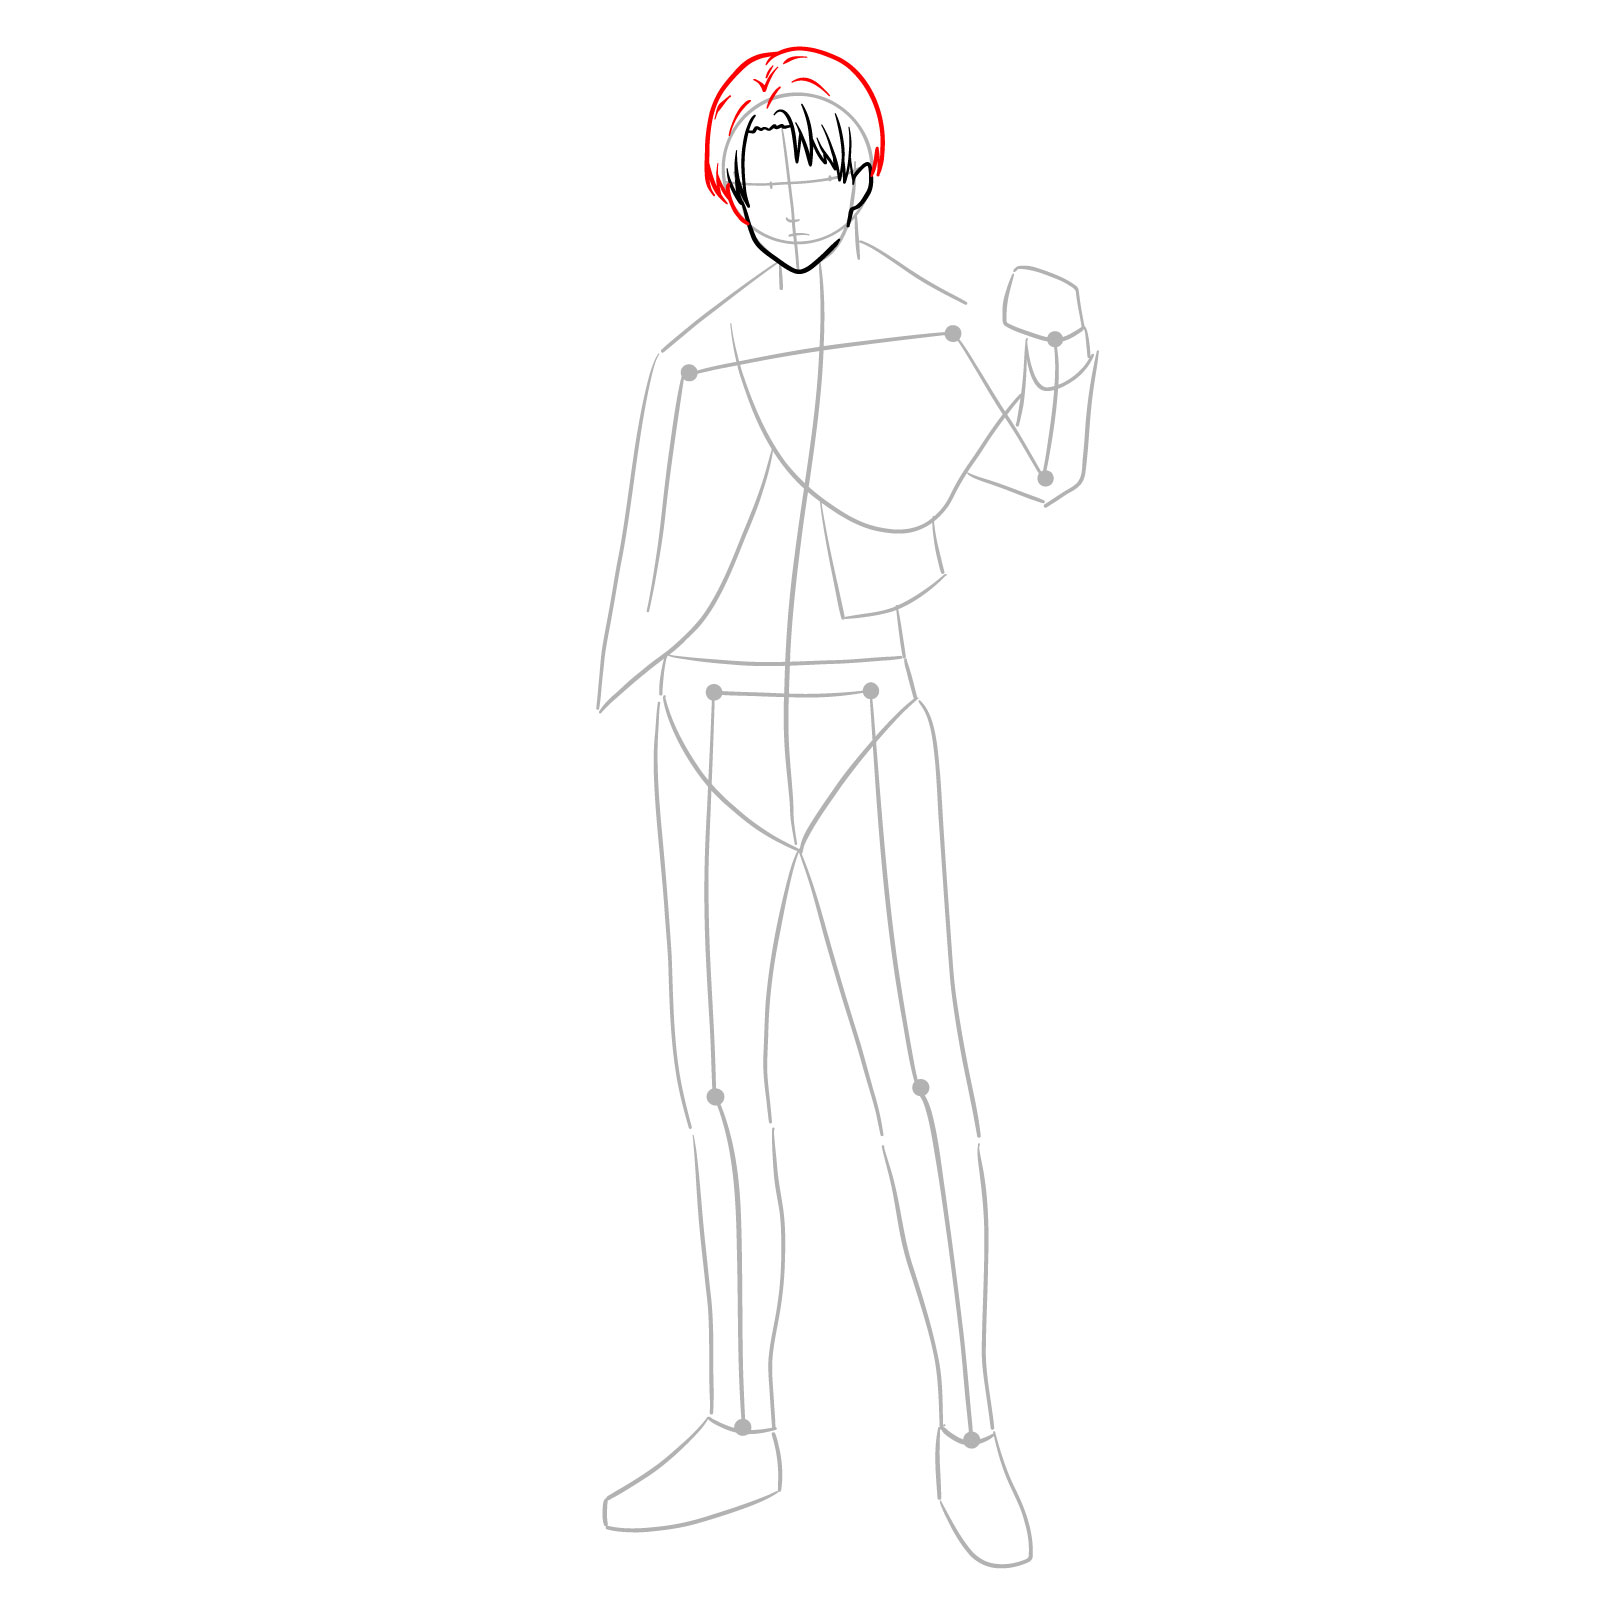
Step 06 – Sketch the ears on either side of the head and refine the hair shape around the head, capturing the distinctive style of Levi’s haircut
Adding the ears and refining the hair shape in Levi’s drawing
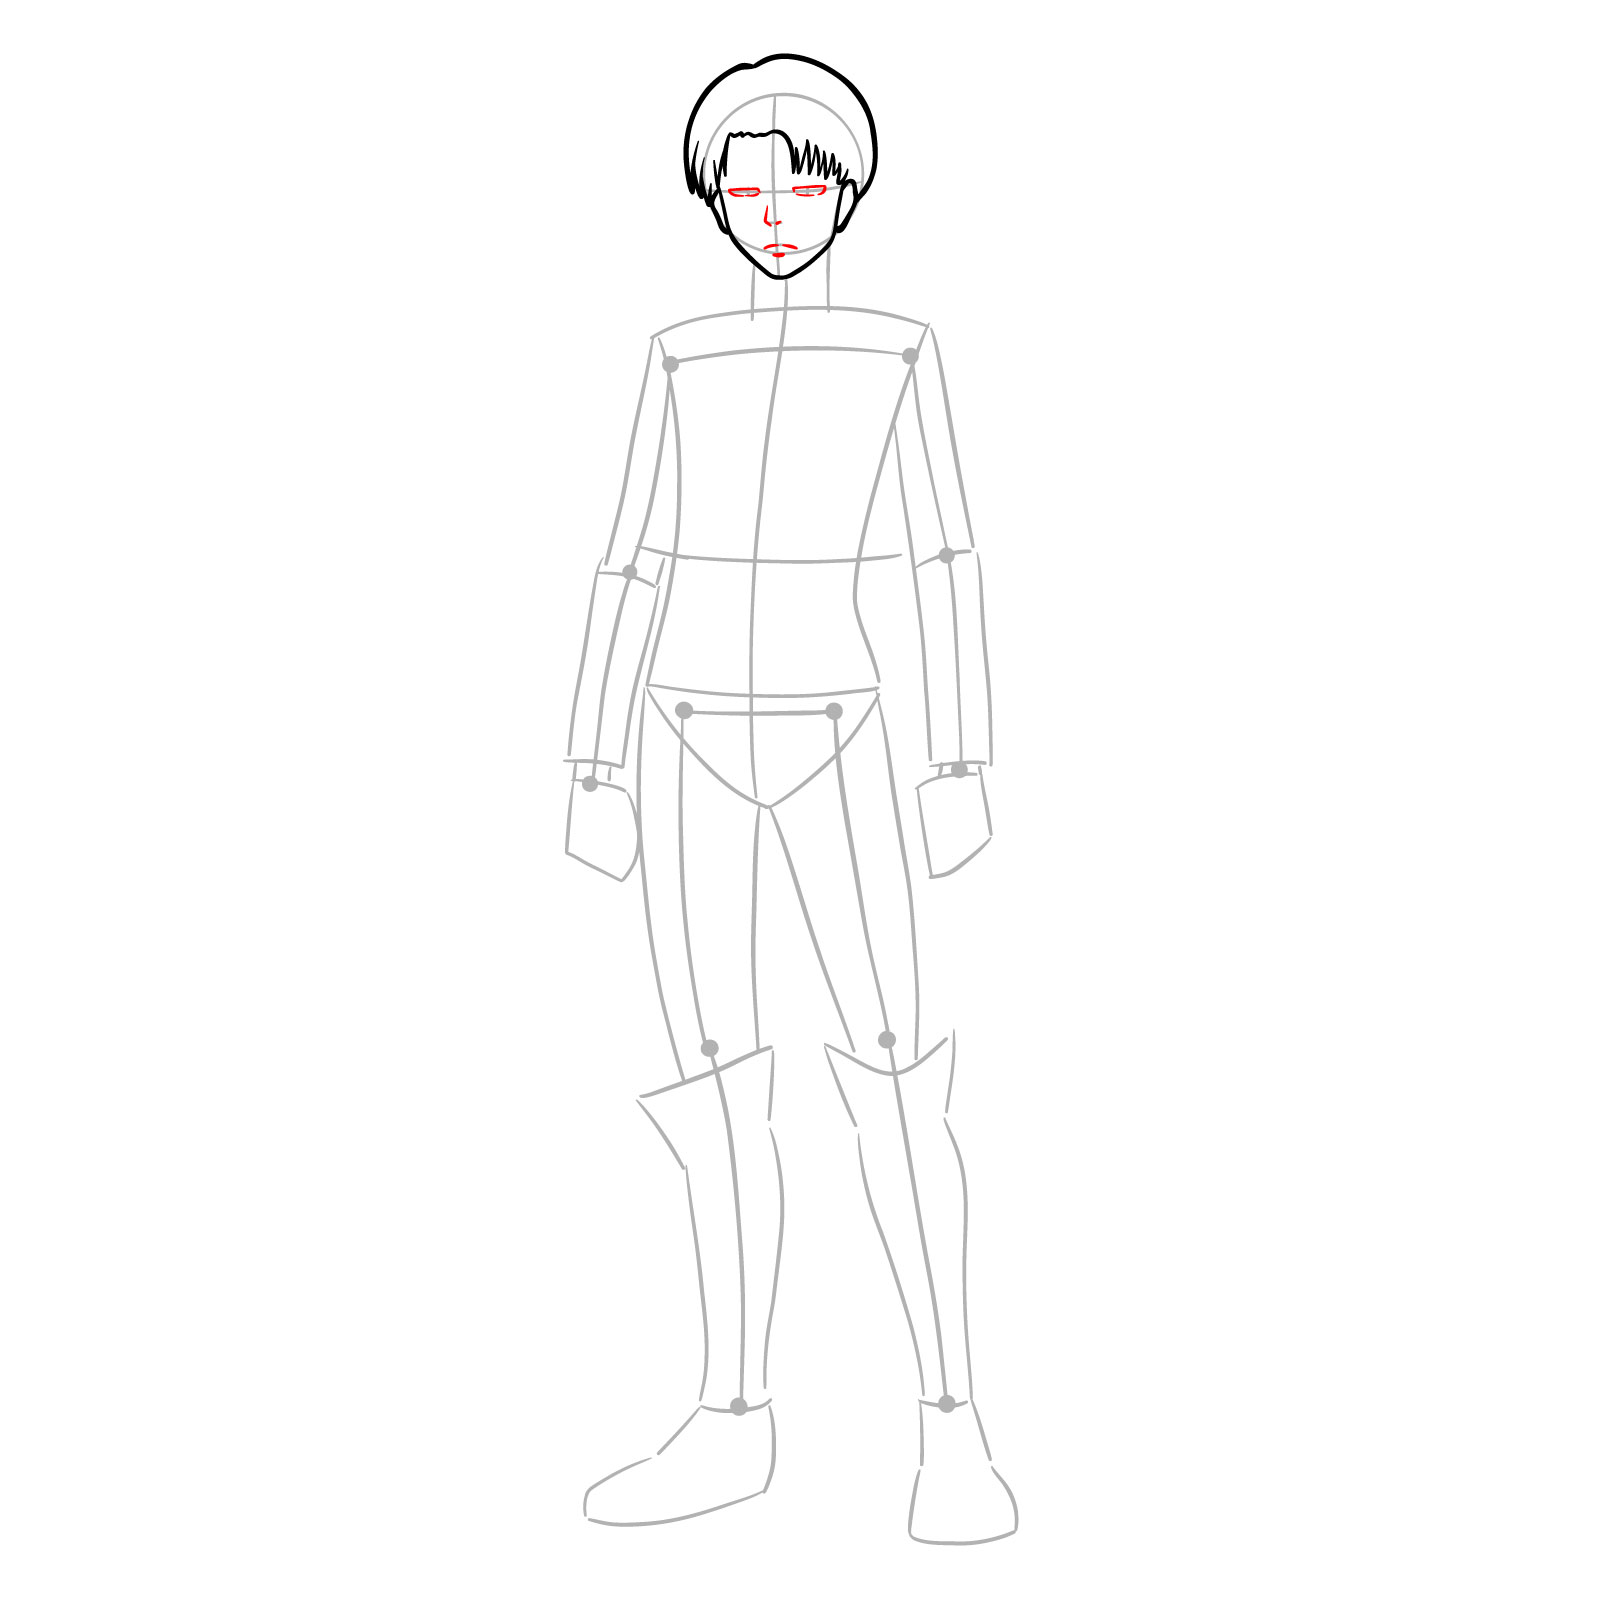
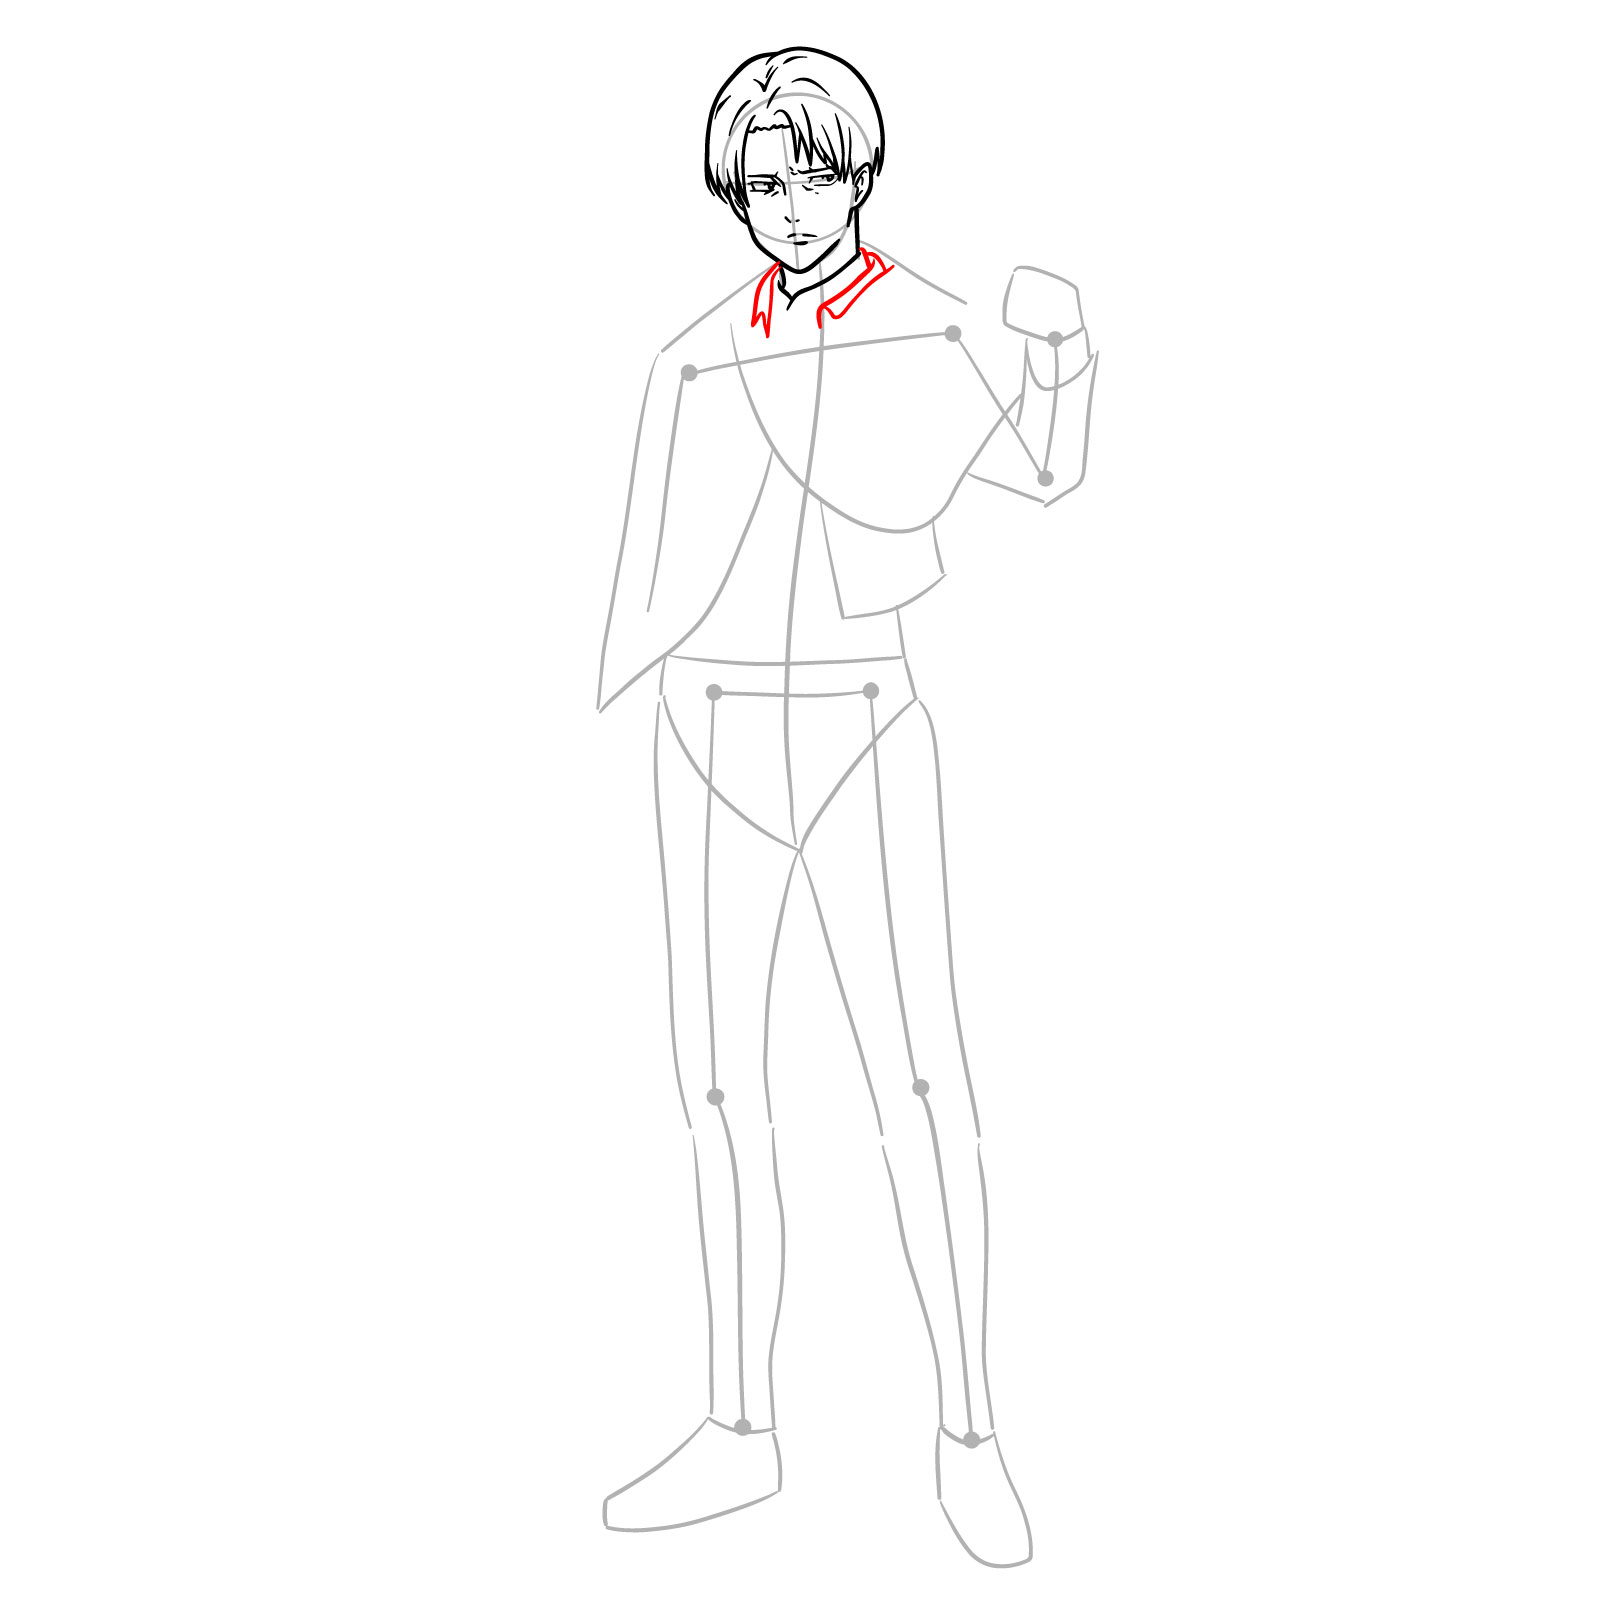
Step 07 – Carefully outline the eyes, nose, and mouth, adding the detailed features that bring Captain Levi’s expression to life, ensuring they are symmetrical and aligned on the face
Drawing the outlines of the eyes, nose, and mouth for Levi’s full body illustration
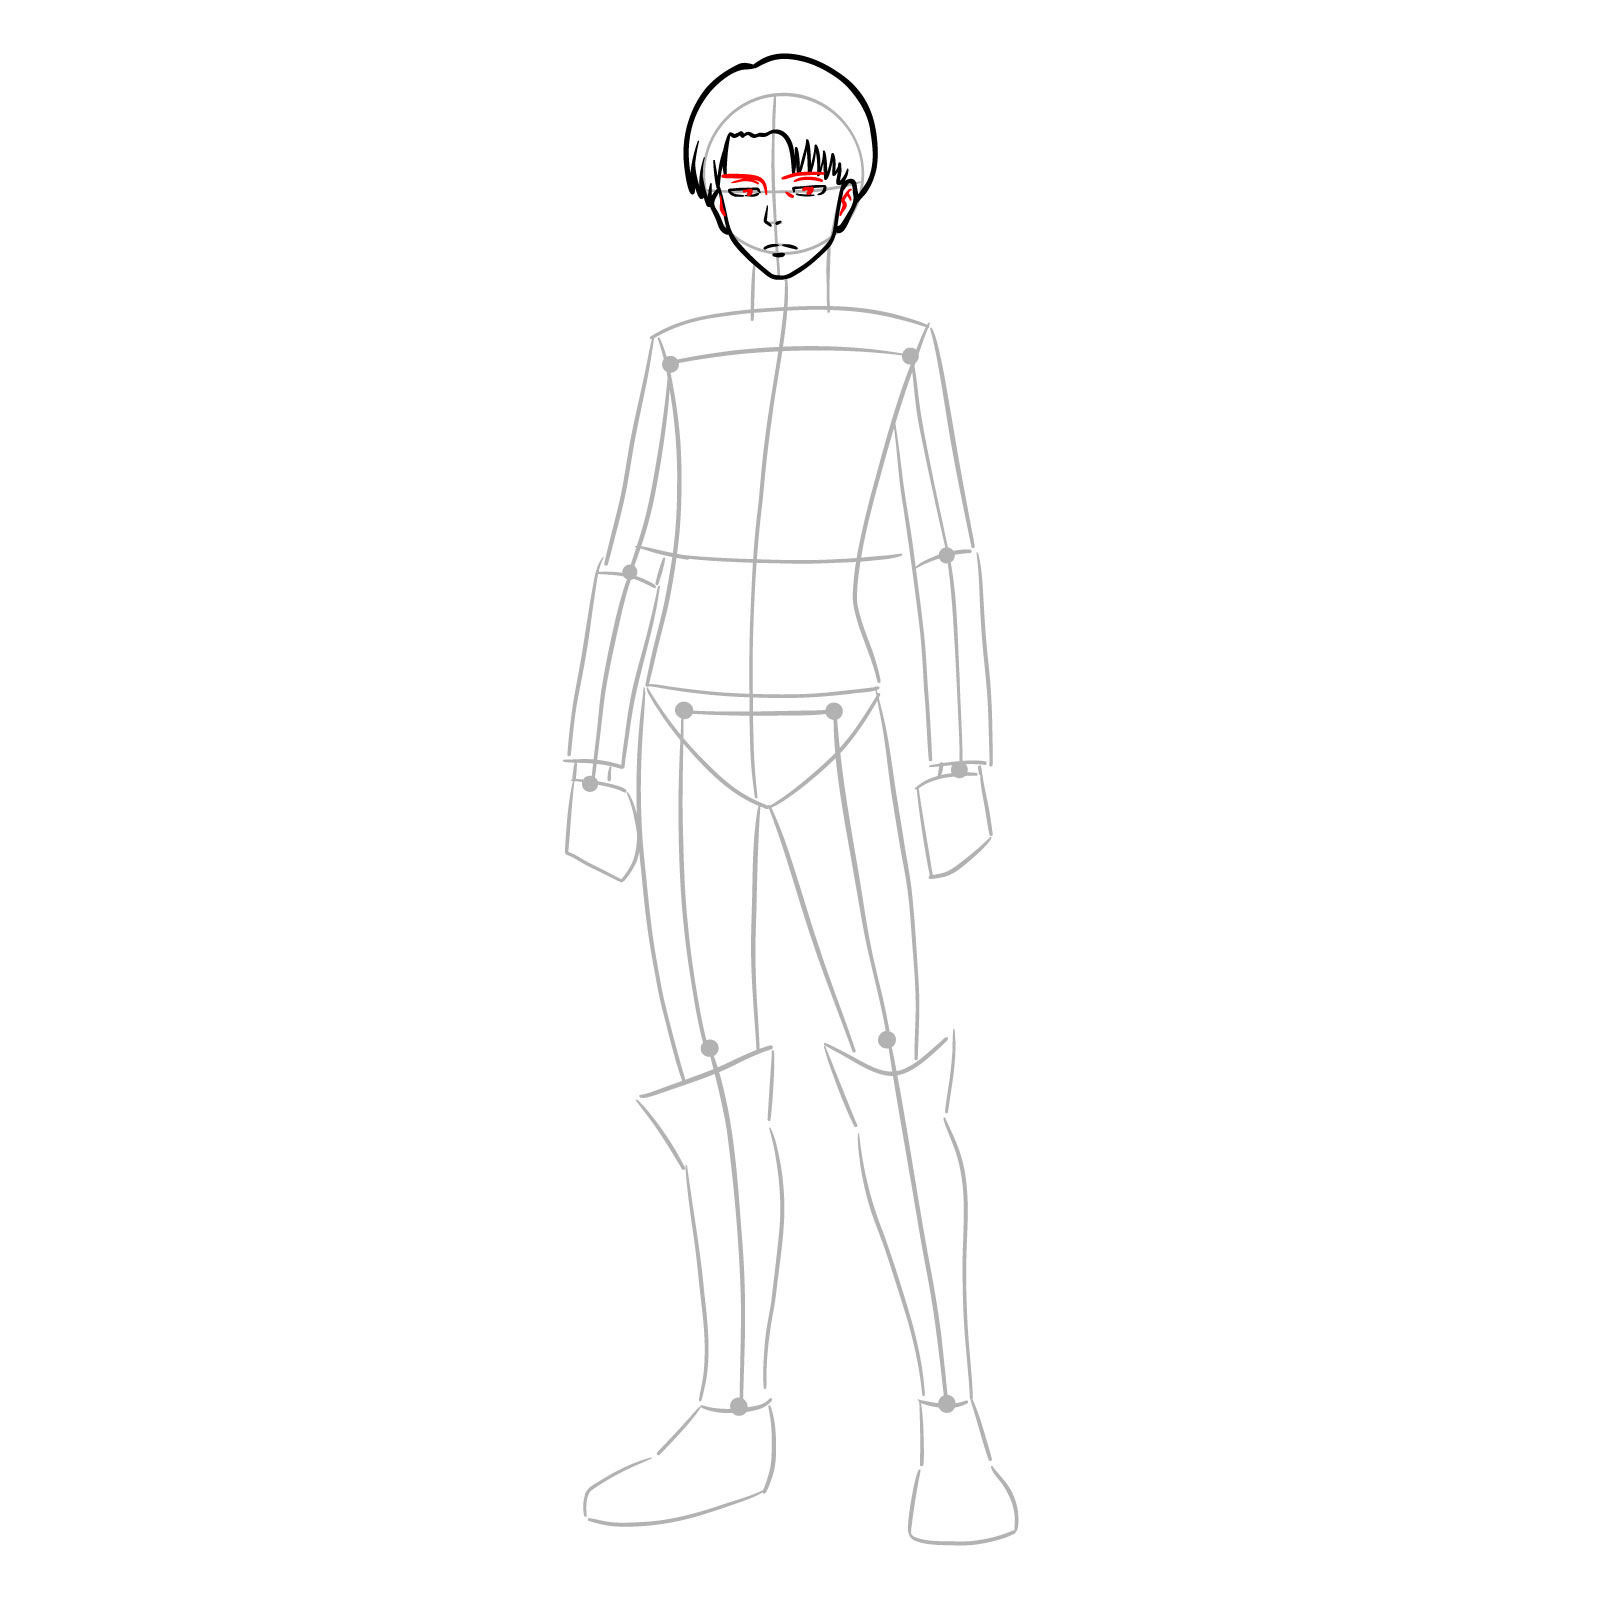
Step 08 – Focus on the facial features, drawing the eyes with upper and lower eyelids and the eyebrows, giving Levi his characteristic intense gaze. Add the ear details for a complete facial appearance
Illustrating detailed eyes, eyelids, eyebrows, and ears on Levi’s full body sketch
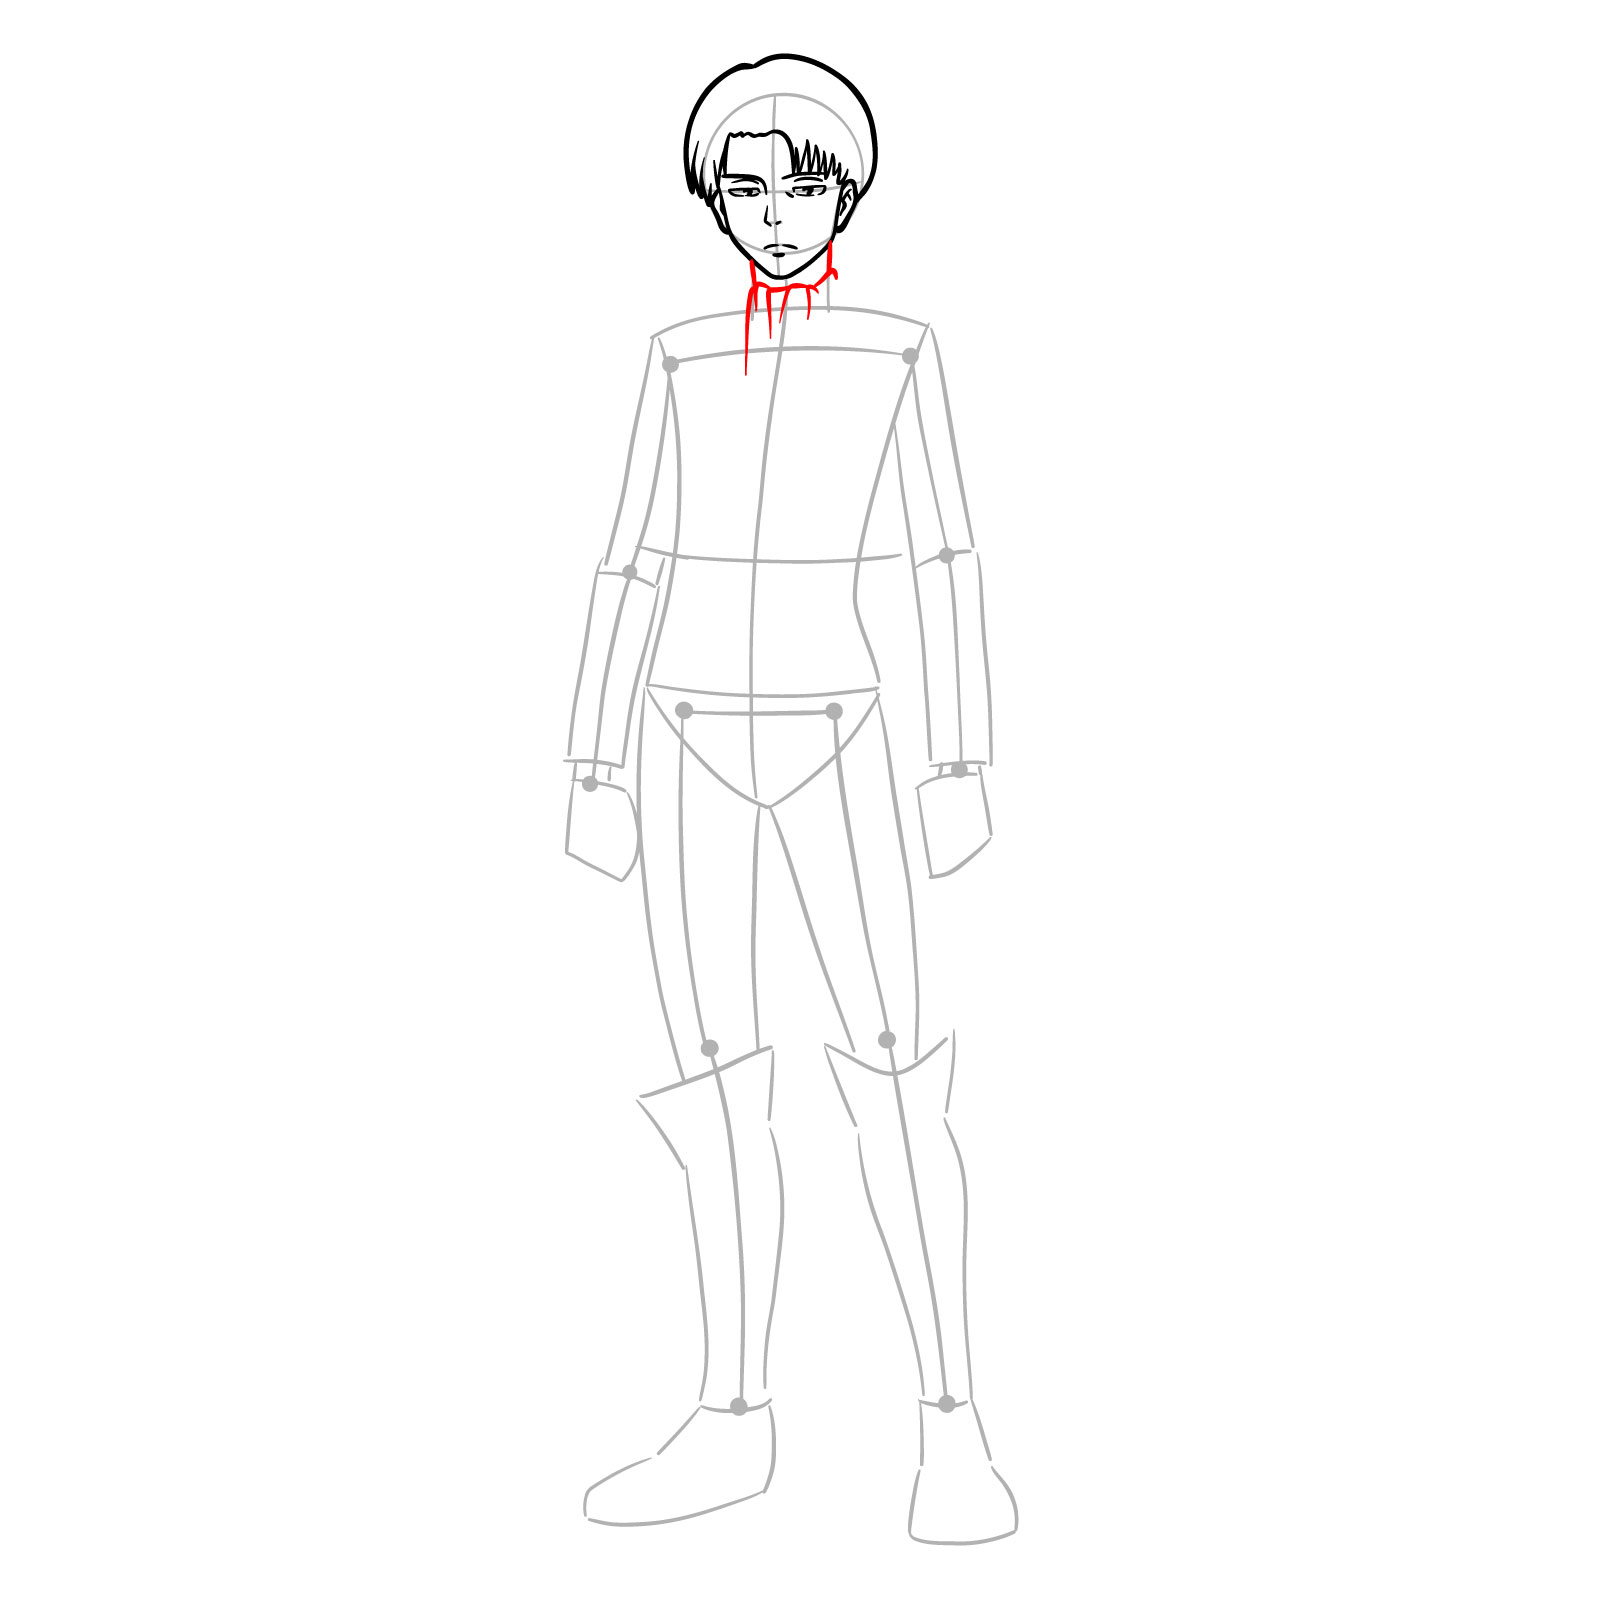
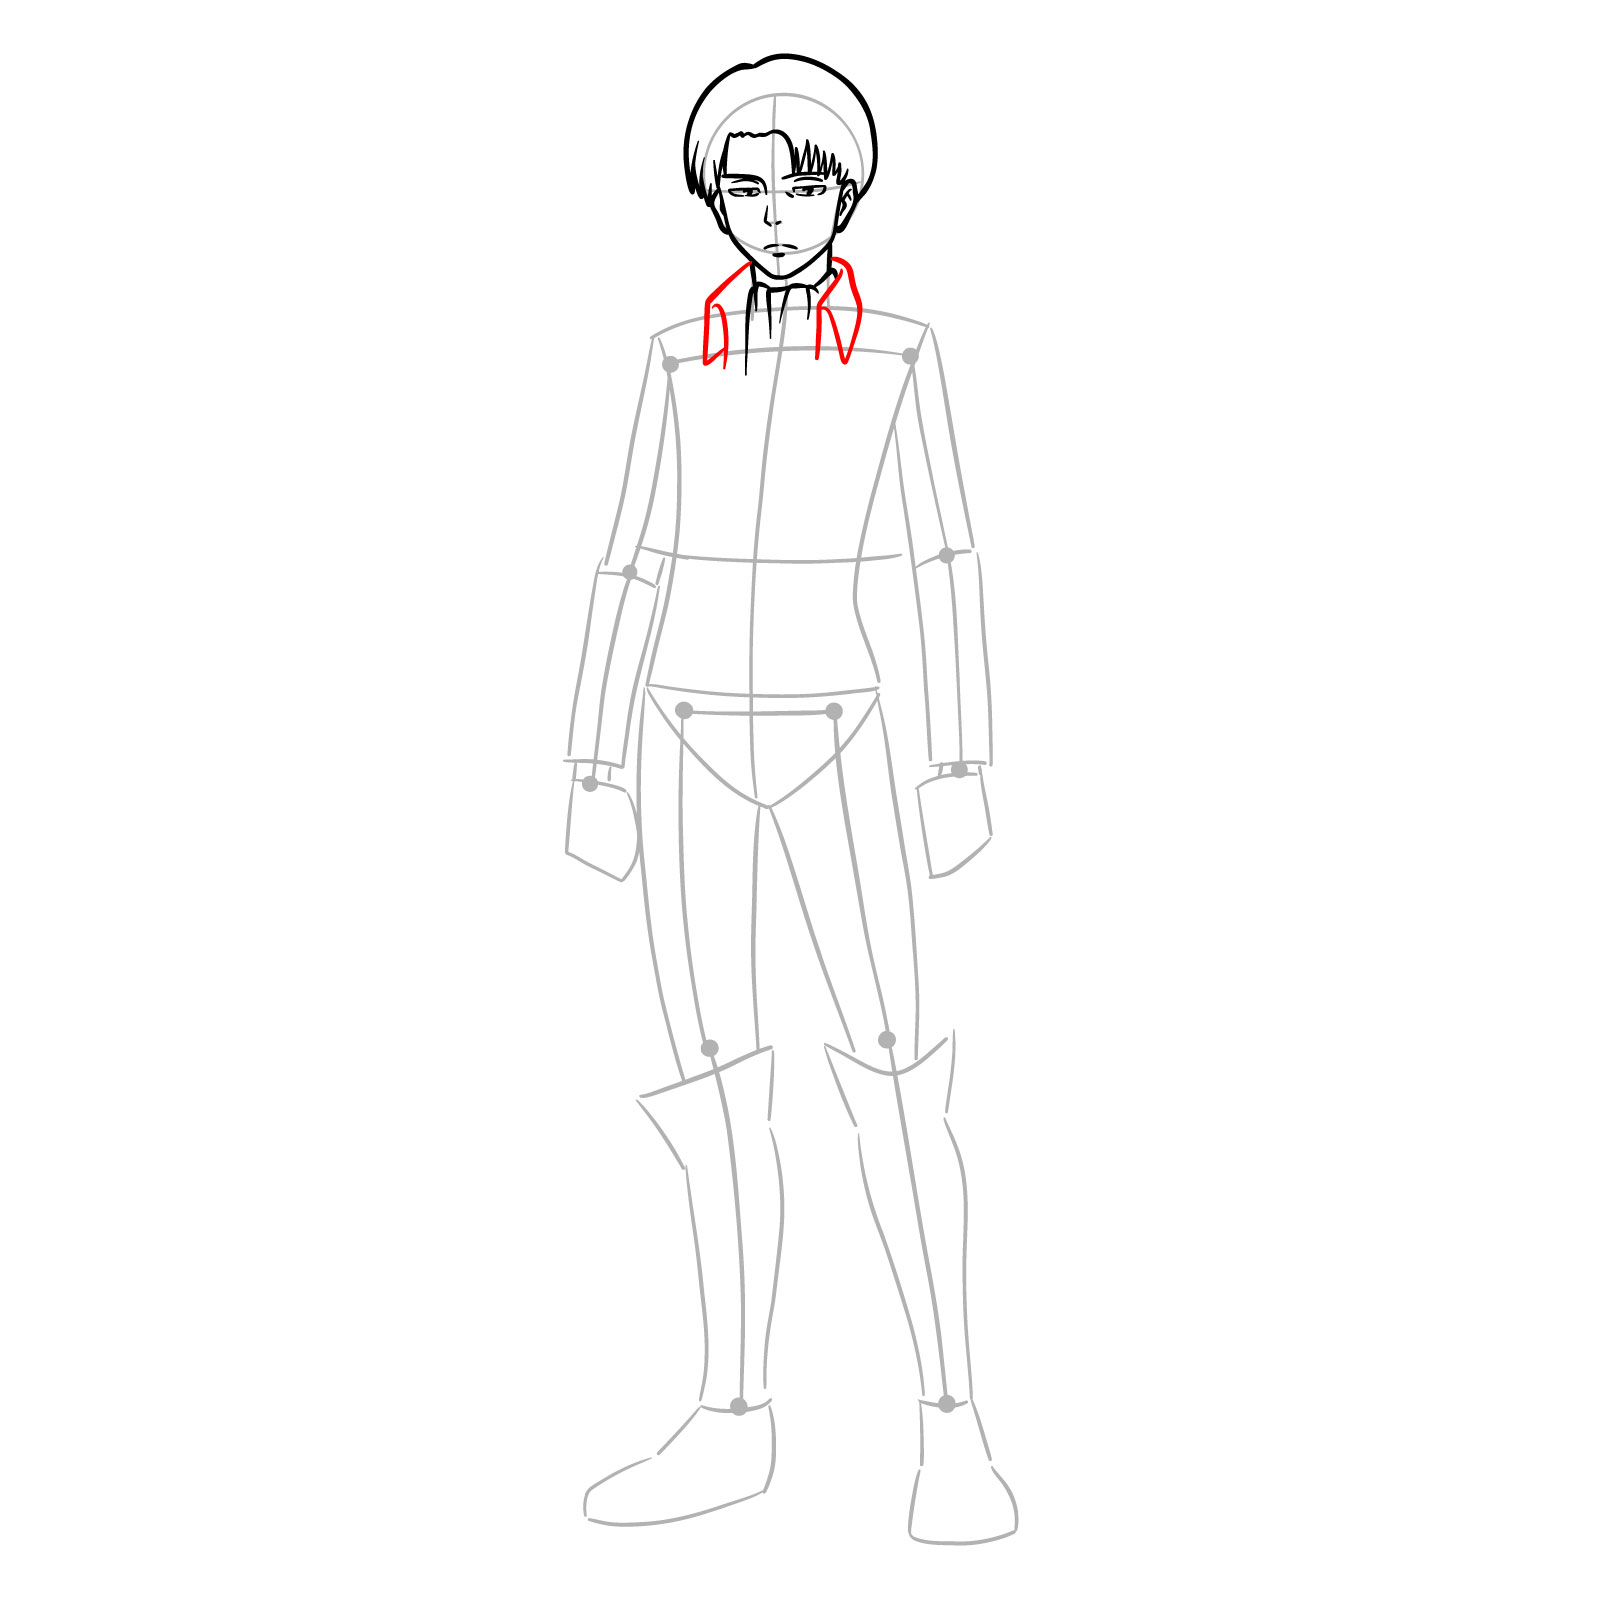
Step 09 – Draw the neck leading down from the jaw and start outlining the collar of the uniform, ensuring it sits naturally on the shoulders
Sketching the neck and beginning the collar for Levi’s Survey Corps uniform
Step 10 – Define the shape of the jacket’s collar, with attention to the way it folds and the details that indicate the thickness of the material
Shaping the collar of Levi’s jacket
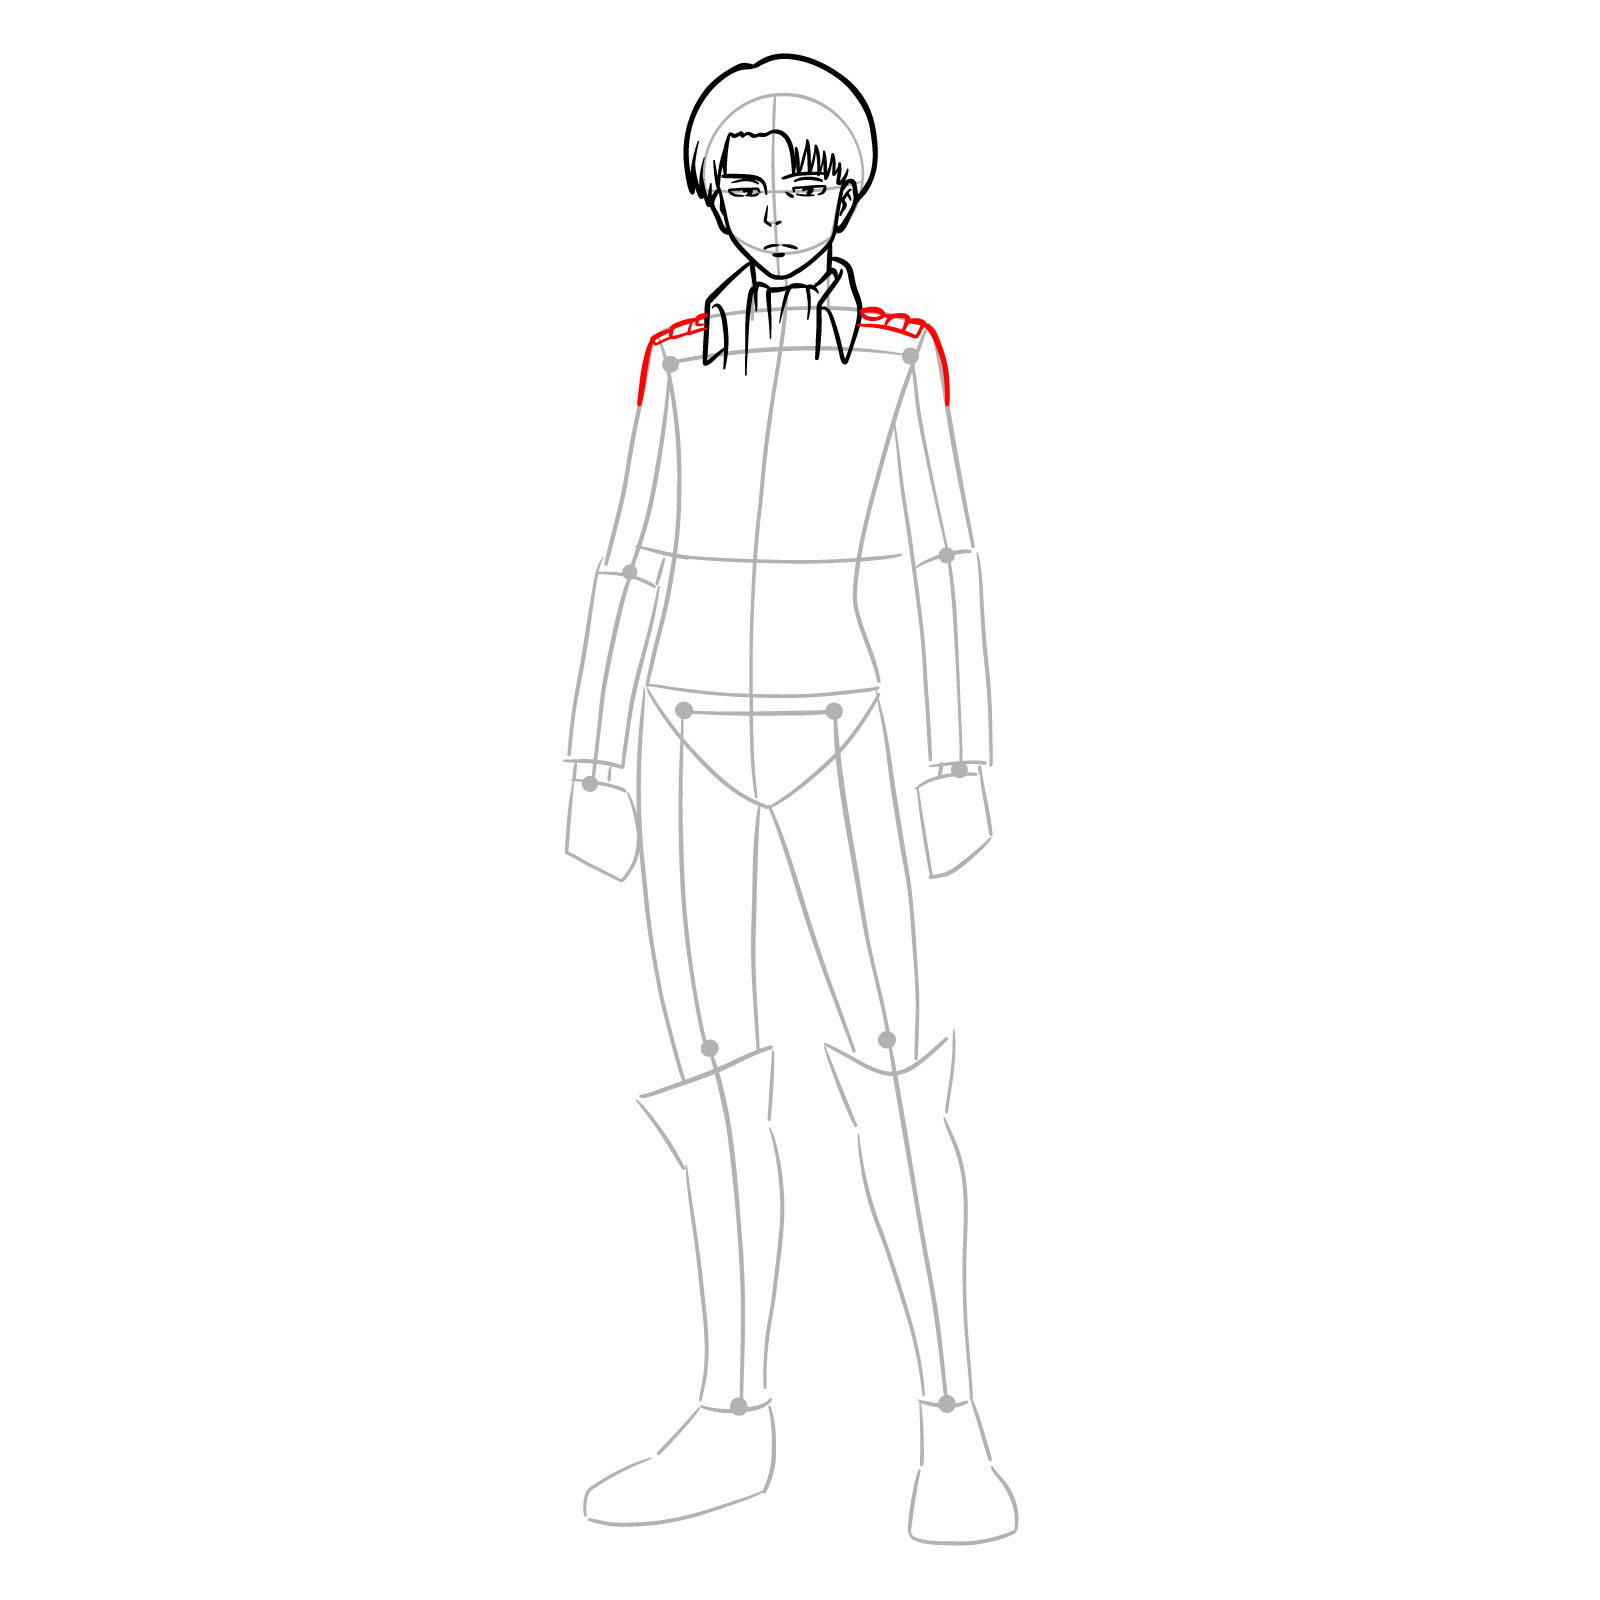
Step 11 – Outline the shoulders and add the shoulder straps of the uniform, which are iconic to the Survey Corps gear, ensuring they have the correct width and placement
Adding the shoulders and shoulder straps to Levi’s full body drawing
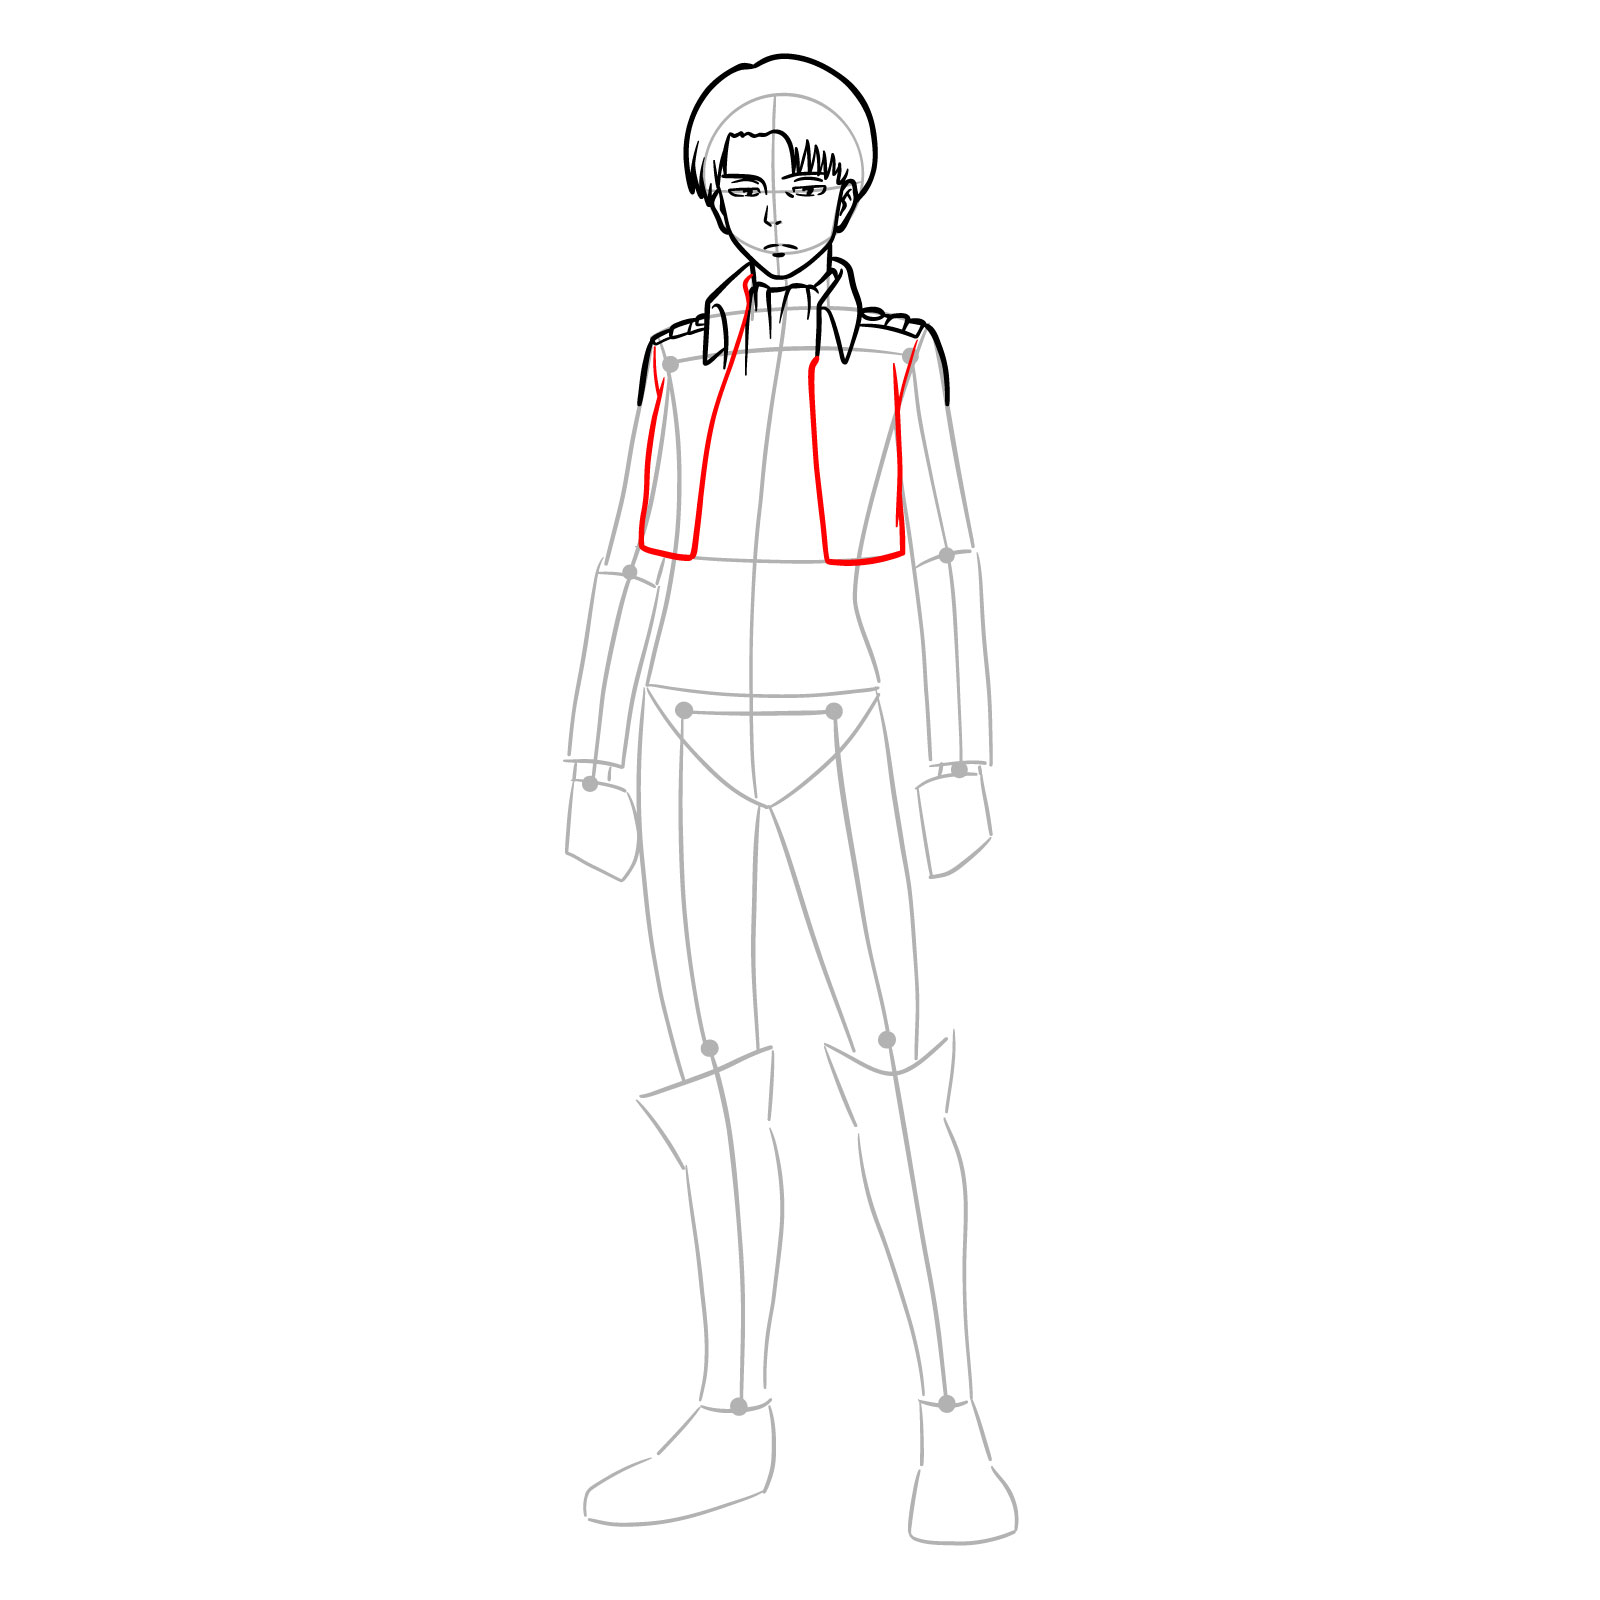
Step 12 – Sketch the body part of the jacket. Pay attention to the proportions and how the jacket conforms to the body’s shape
Outlining the body of Levi’s jacket in the full body drawing
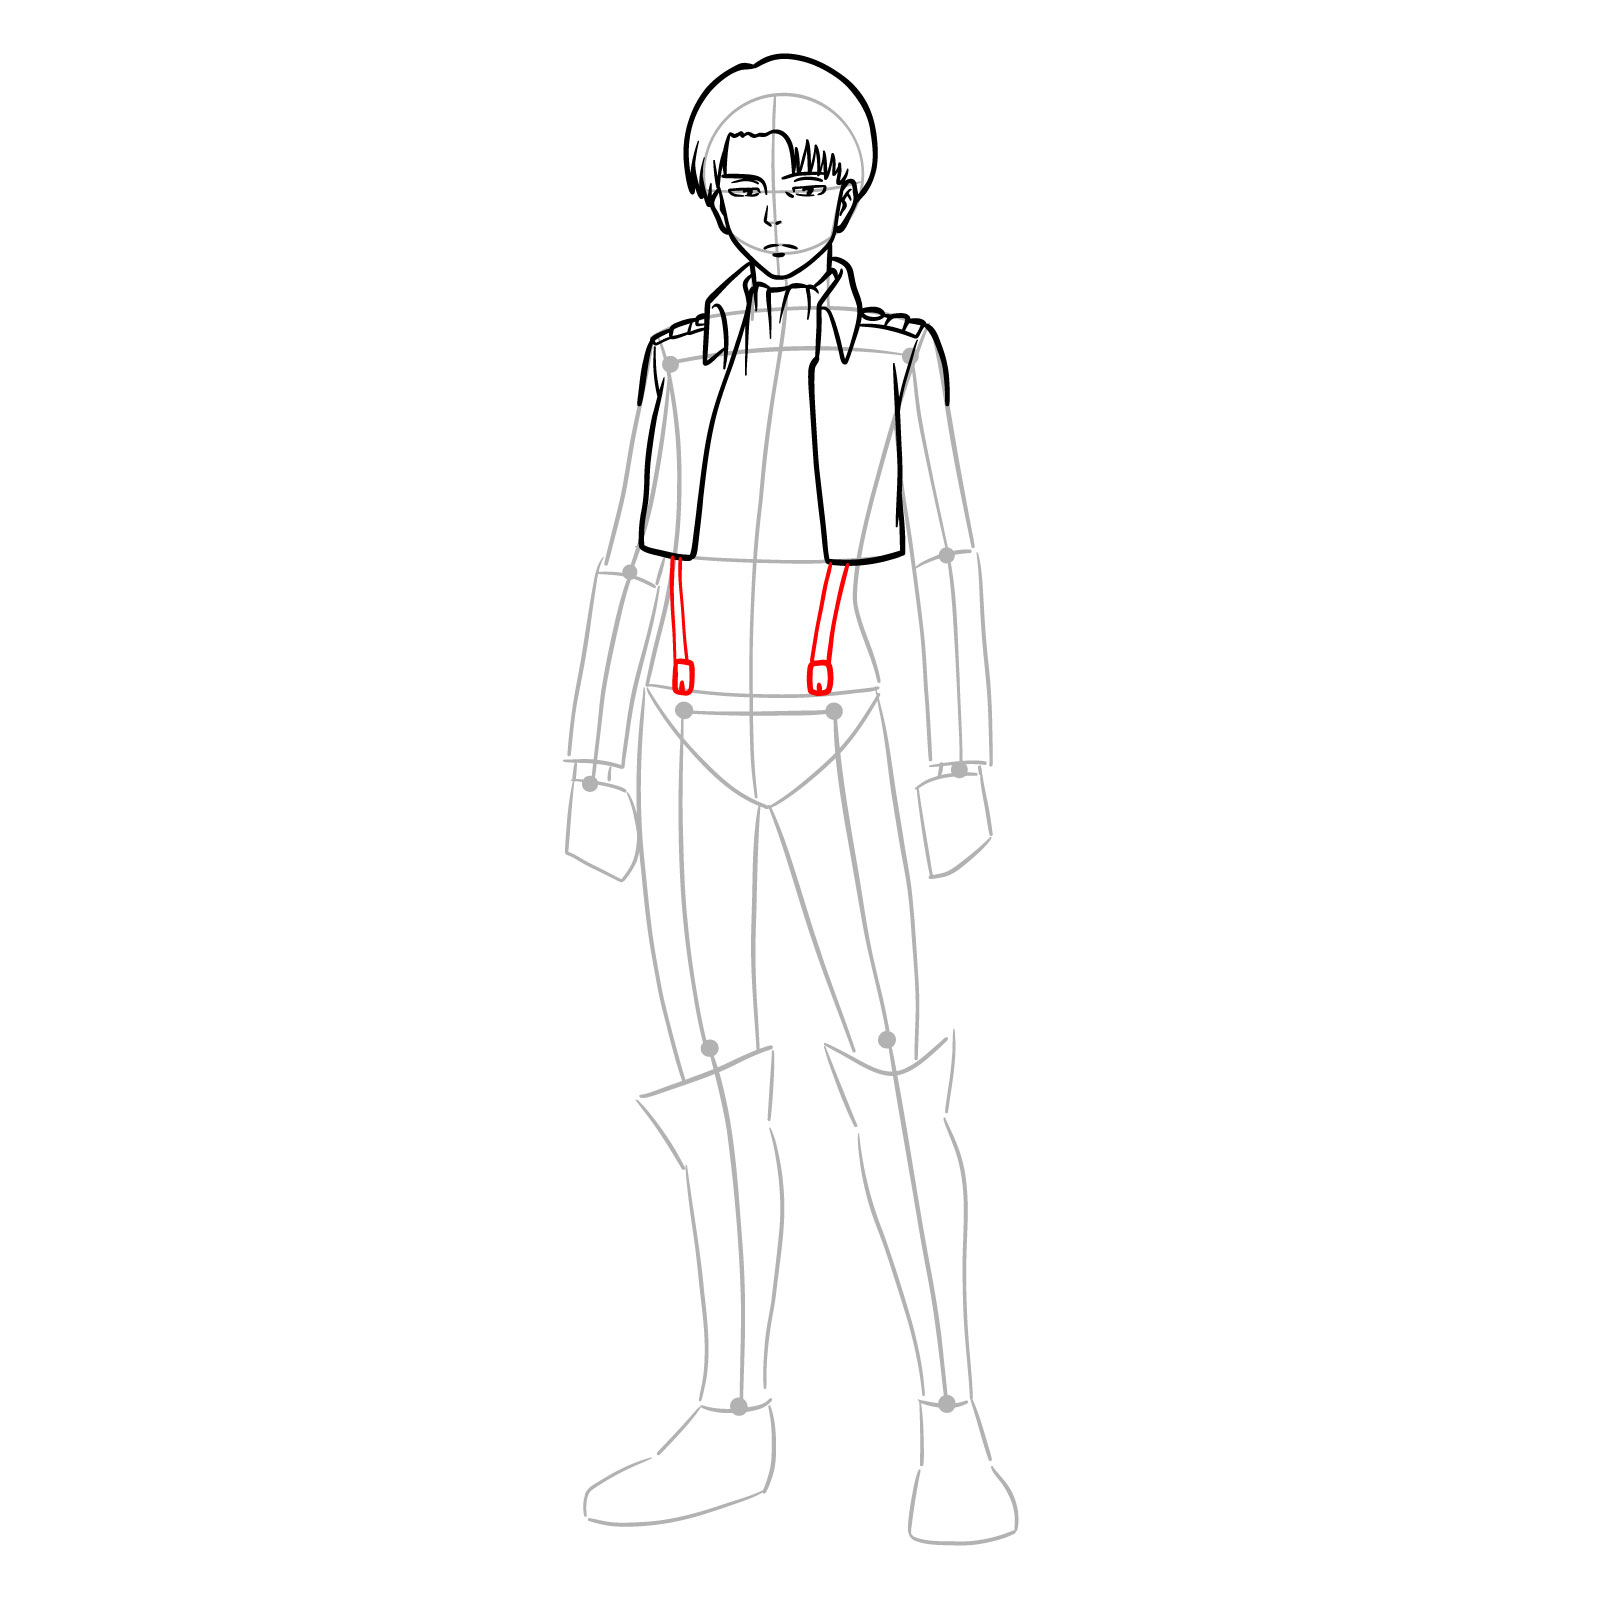
Step 13 – Add the suspenders, making sure they hang correctly from the underside of the jacket to his pants
Drawing the suspenders on Levi’s uniform in the full body sketch
Step 14 – Draw the belt and waist details, indicating the separation between the jacket and the pants, and providing the finishing touches to the uniform’s lower section
Finalizing the belt and waist details on Levi’s full body illustration
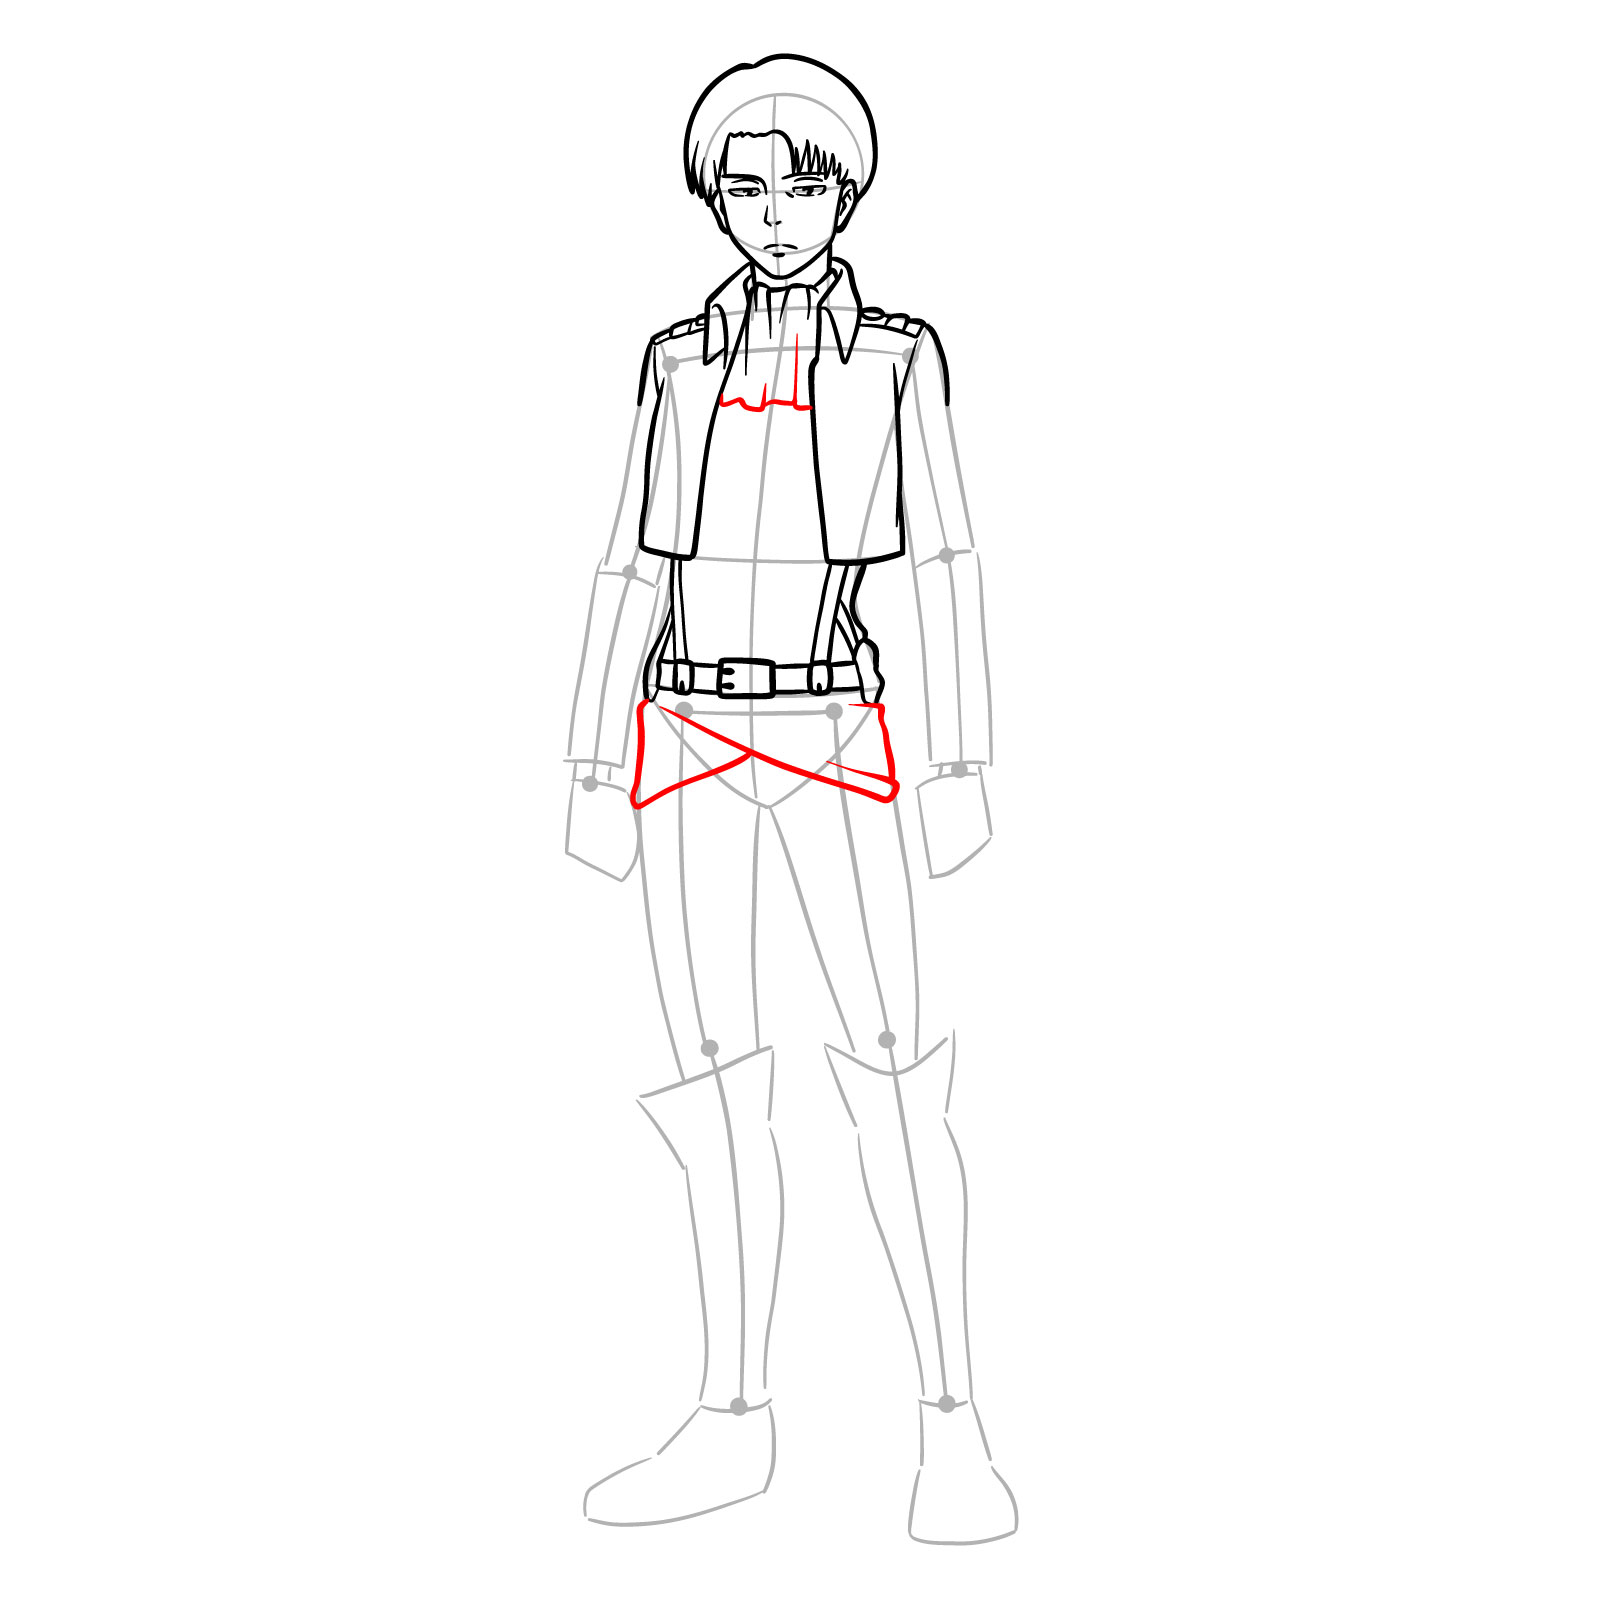
Step 15 – This step focuses on refining Levi’s shirt collar and adding the outlines for the clothing below the belt. Draw the collar with attention to its flowing fabric. Below the belt, sketch the contours of the fabric, indicating the top of the pants
Detailing Levi’s shirt collar and outfit below the belt
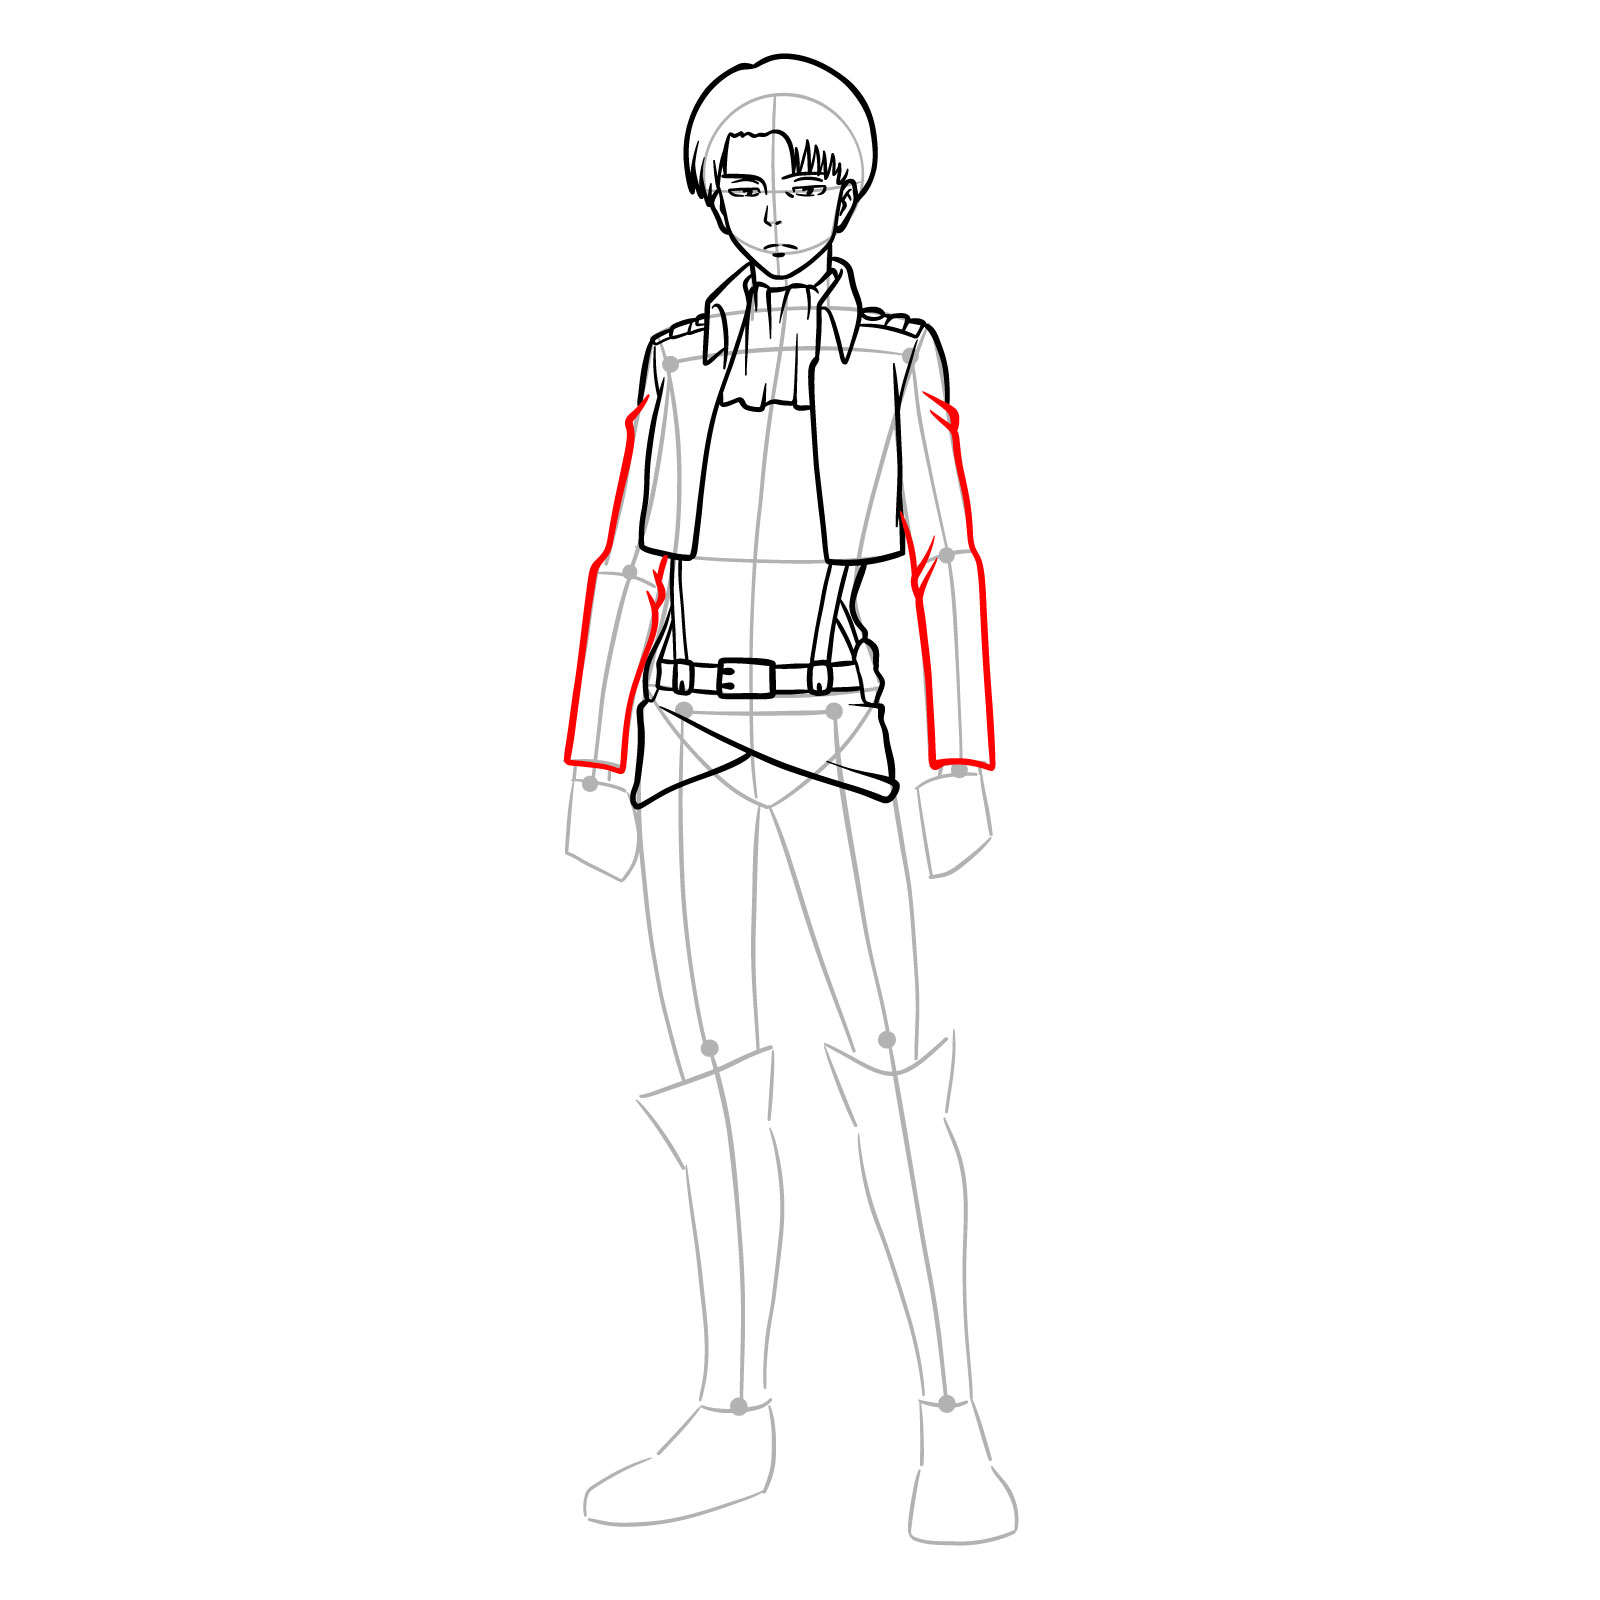
Step 16 – Now concentrate on drawing the sleeves of Levi’s jacket. Ensure that the outlines show the loose fit of the fabric. Take care to mirror the shape and folds of the fabric on both arms for symmetry
Sketching the sleeves of Levi’s Survey Corps outfit
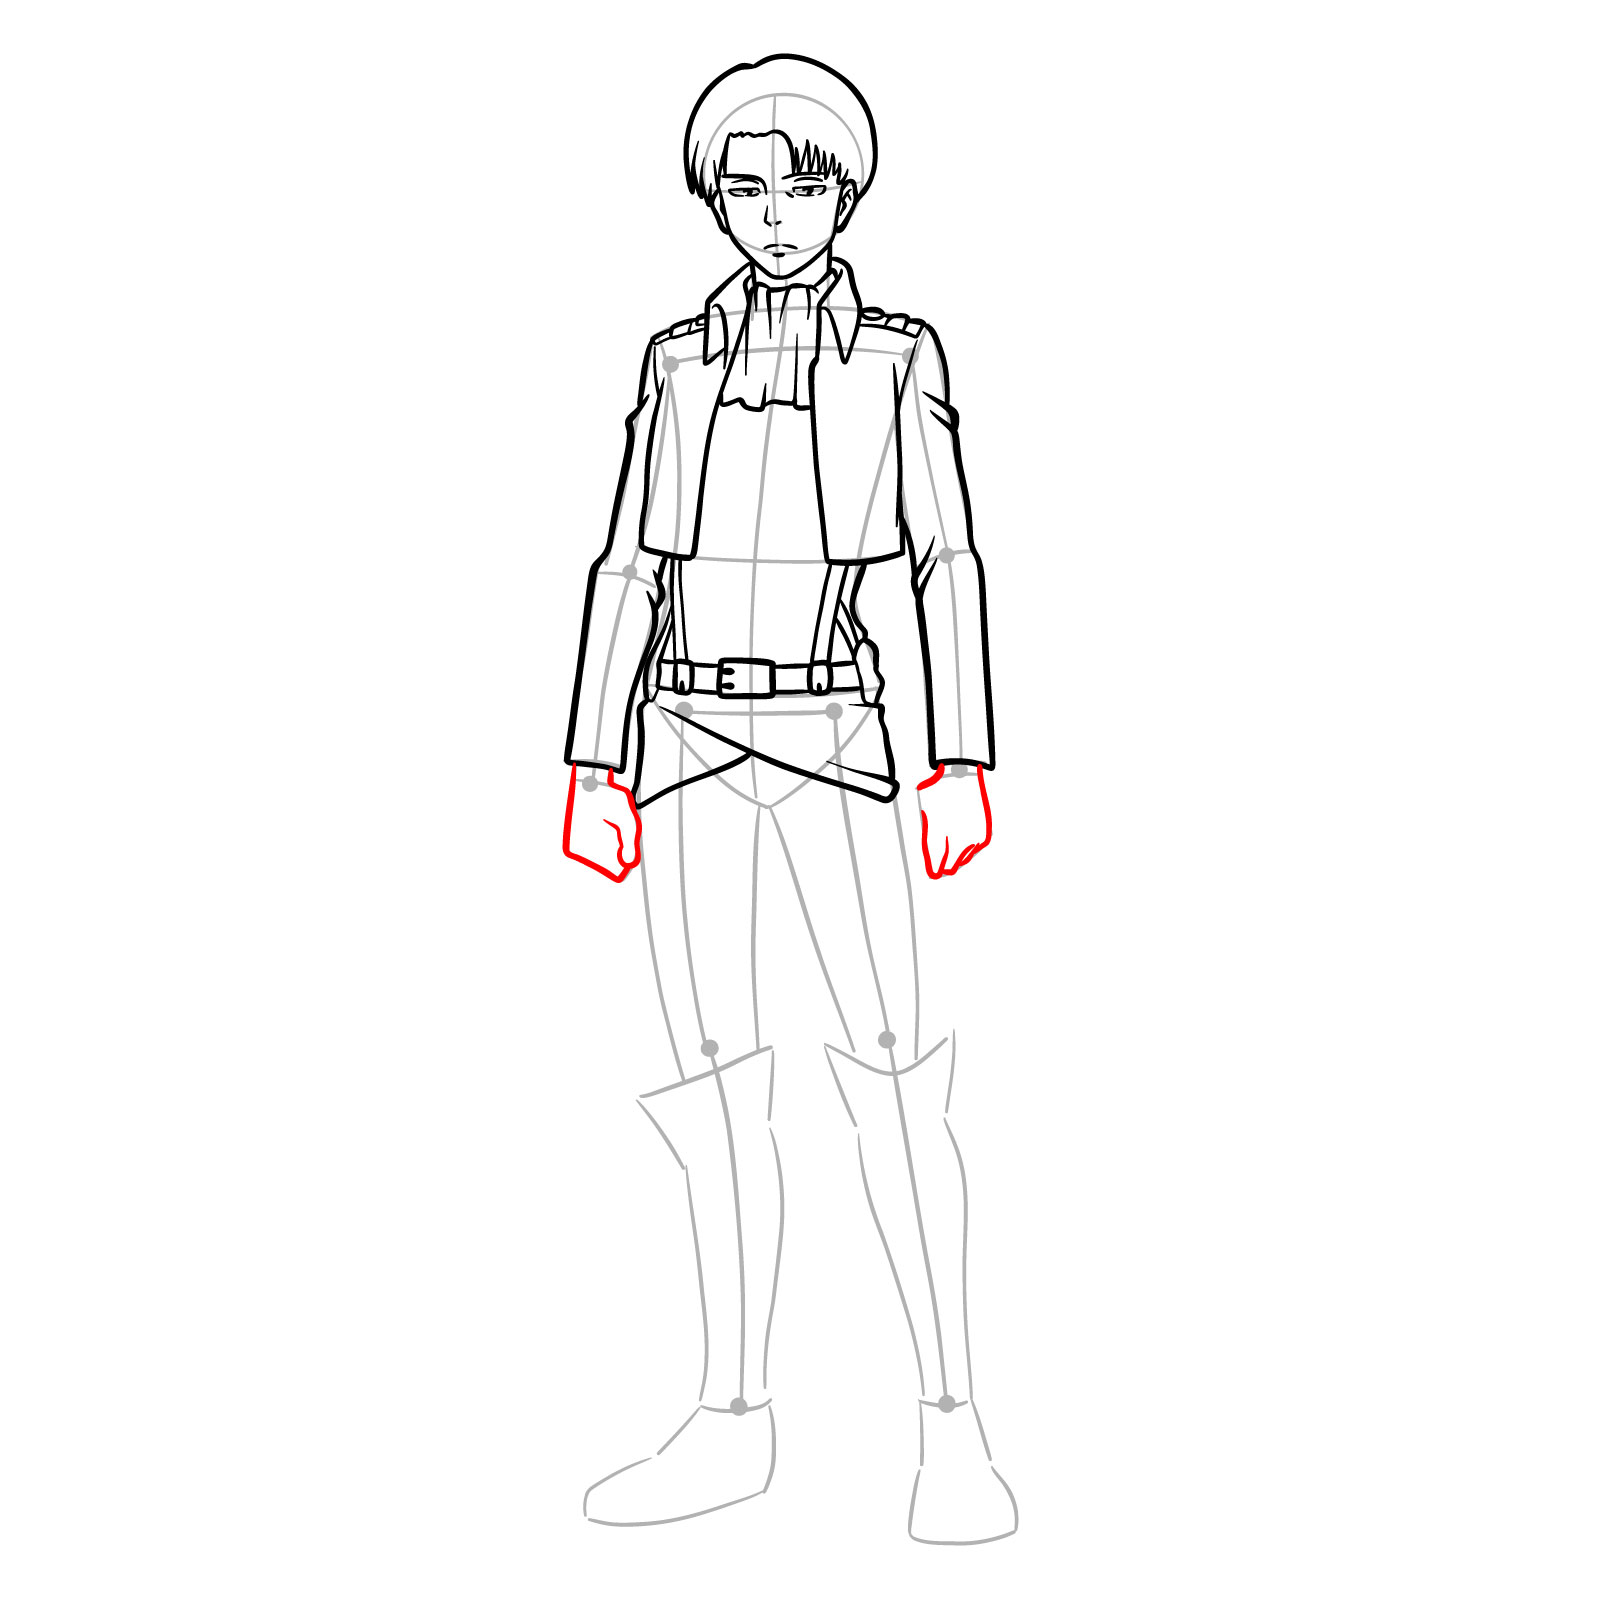
Step 17 – Begin shaping Levi’s hands. Start by outlining the overall structure of the hands emerging from the cuffs of the sleeves. At this stage, the hands should be in a clenched position, with the fingers together. The thumb on his right hand should be indicated with a simple outline, and the fingers should show the basic shape without individual detailing
Beginning to shape Levi’s hands
Step 18 – This step involves adding details to Levi’s hands. Add the missing thumb on his left hand. Define the fingers and thumbs with more precise lines, indicating knuckles. Pay attention to the natural curvature and proportion of each finger
Finishing the detailing of Levi’s hands
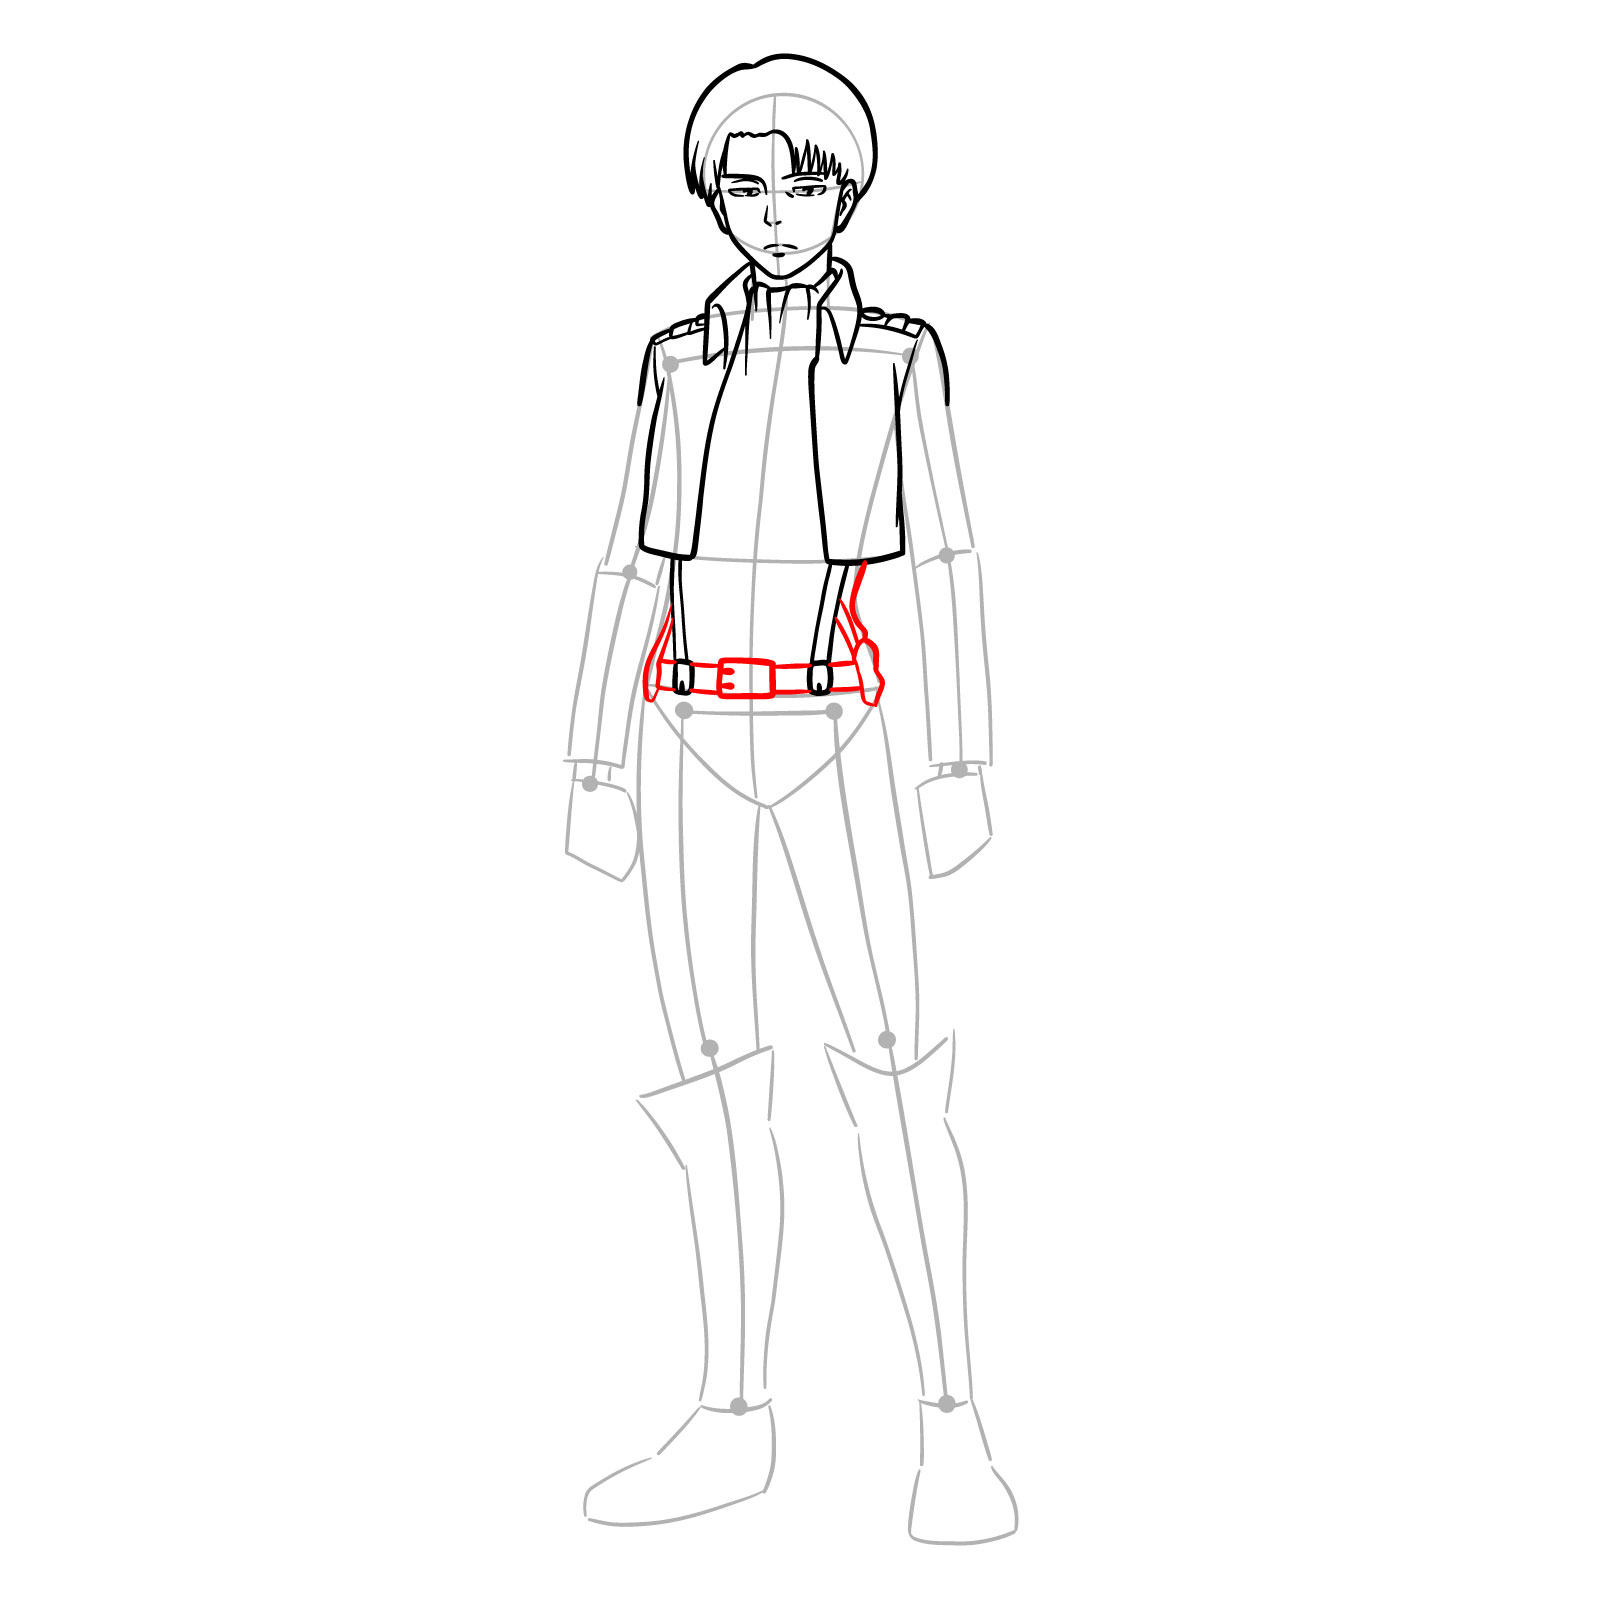
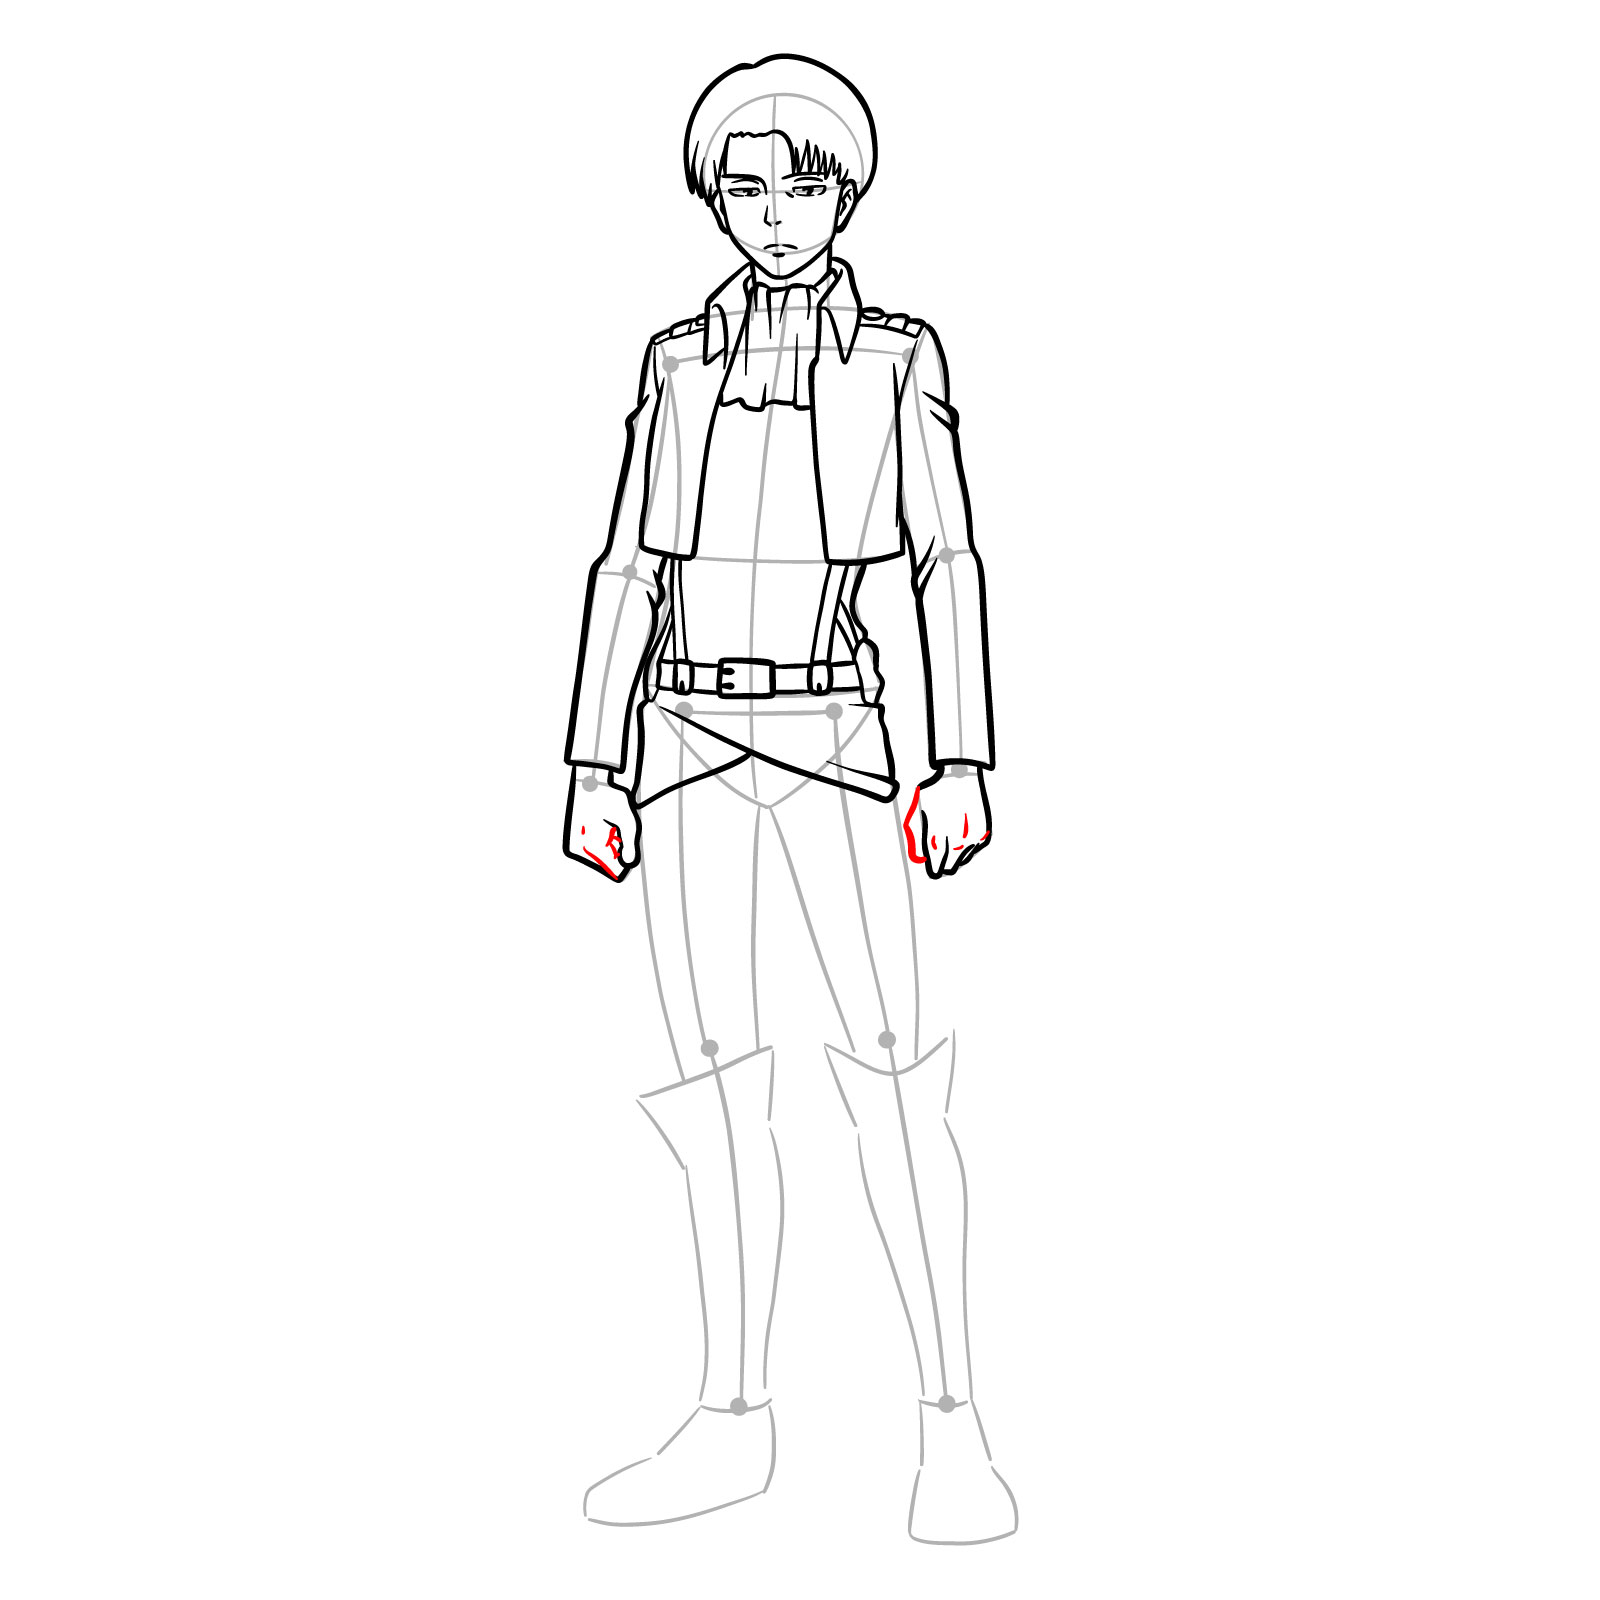
Step 19 – Begin sketching the pants and hip straps. Draw the top part of the pants to show the waistband and the upper thighs. Indicate the hip straps with two horizontal lines across the hips. Add slight curves to these lines and sketch the fasteners
Starting to sketch the pants and hip straps
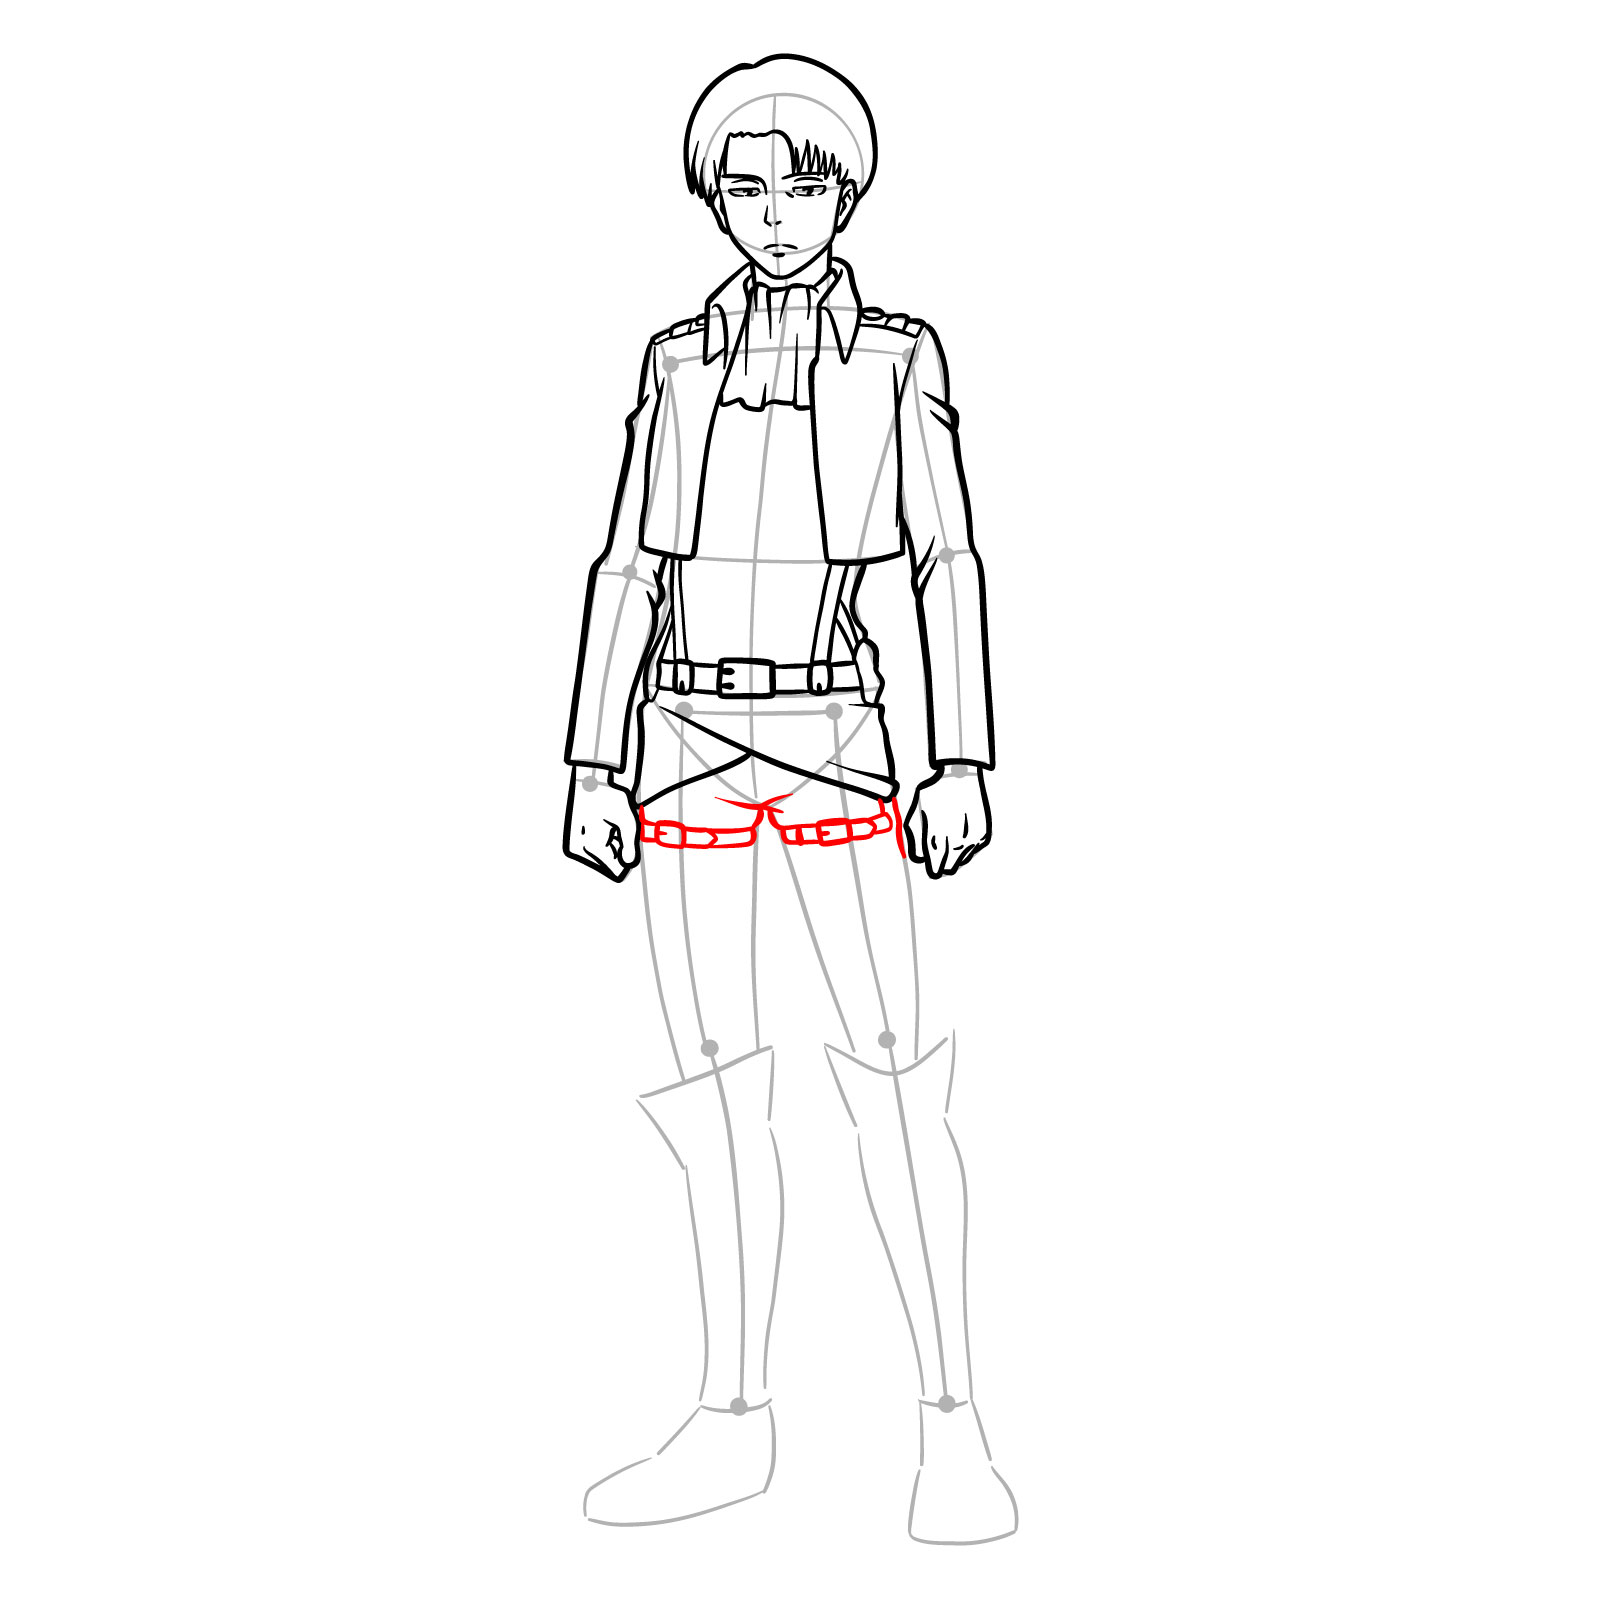
Step 20 – Add the second pair of hip straps and outline Levi’s legs down to the knees. The straps should be parallel to the first set and sit just below them. For the legs, ensure that the trousers show volume and creases
Sketching the second pair of hip straps and Levi’s legs to the knees
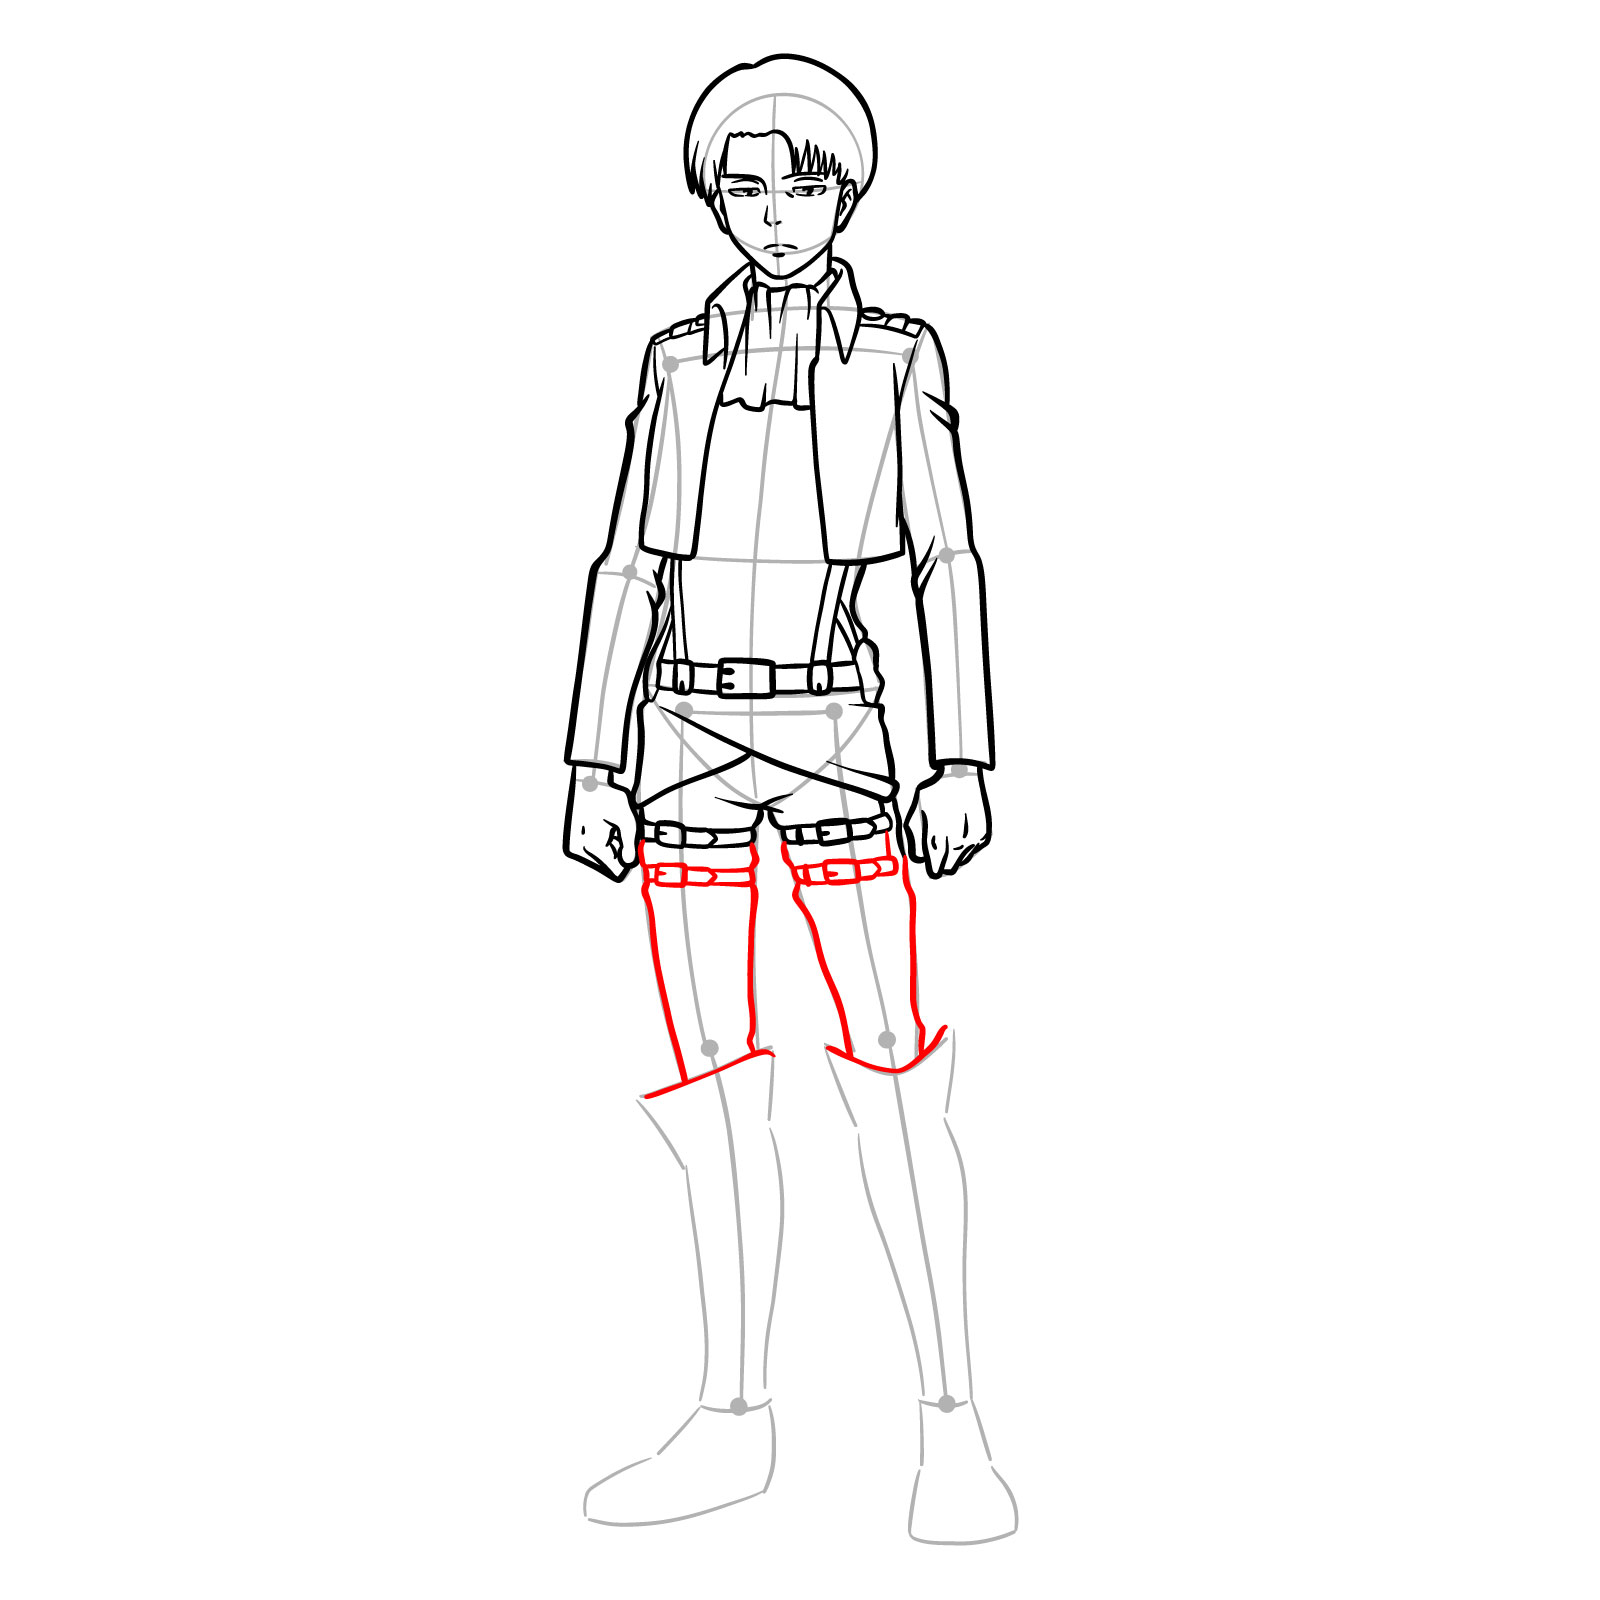
Step 21 – Detail the upper part of Levi’s boots, from the knees to the ankles. The boots should be snug around the legs, showing the outline of the calves. Include the top rim of the boots with a slight flare
Detailing the upper part of Levi’s footwear starting from knees to ankles
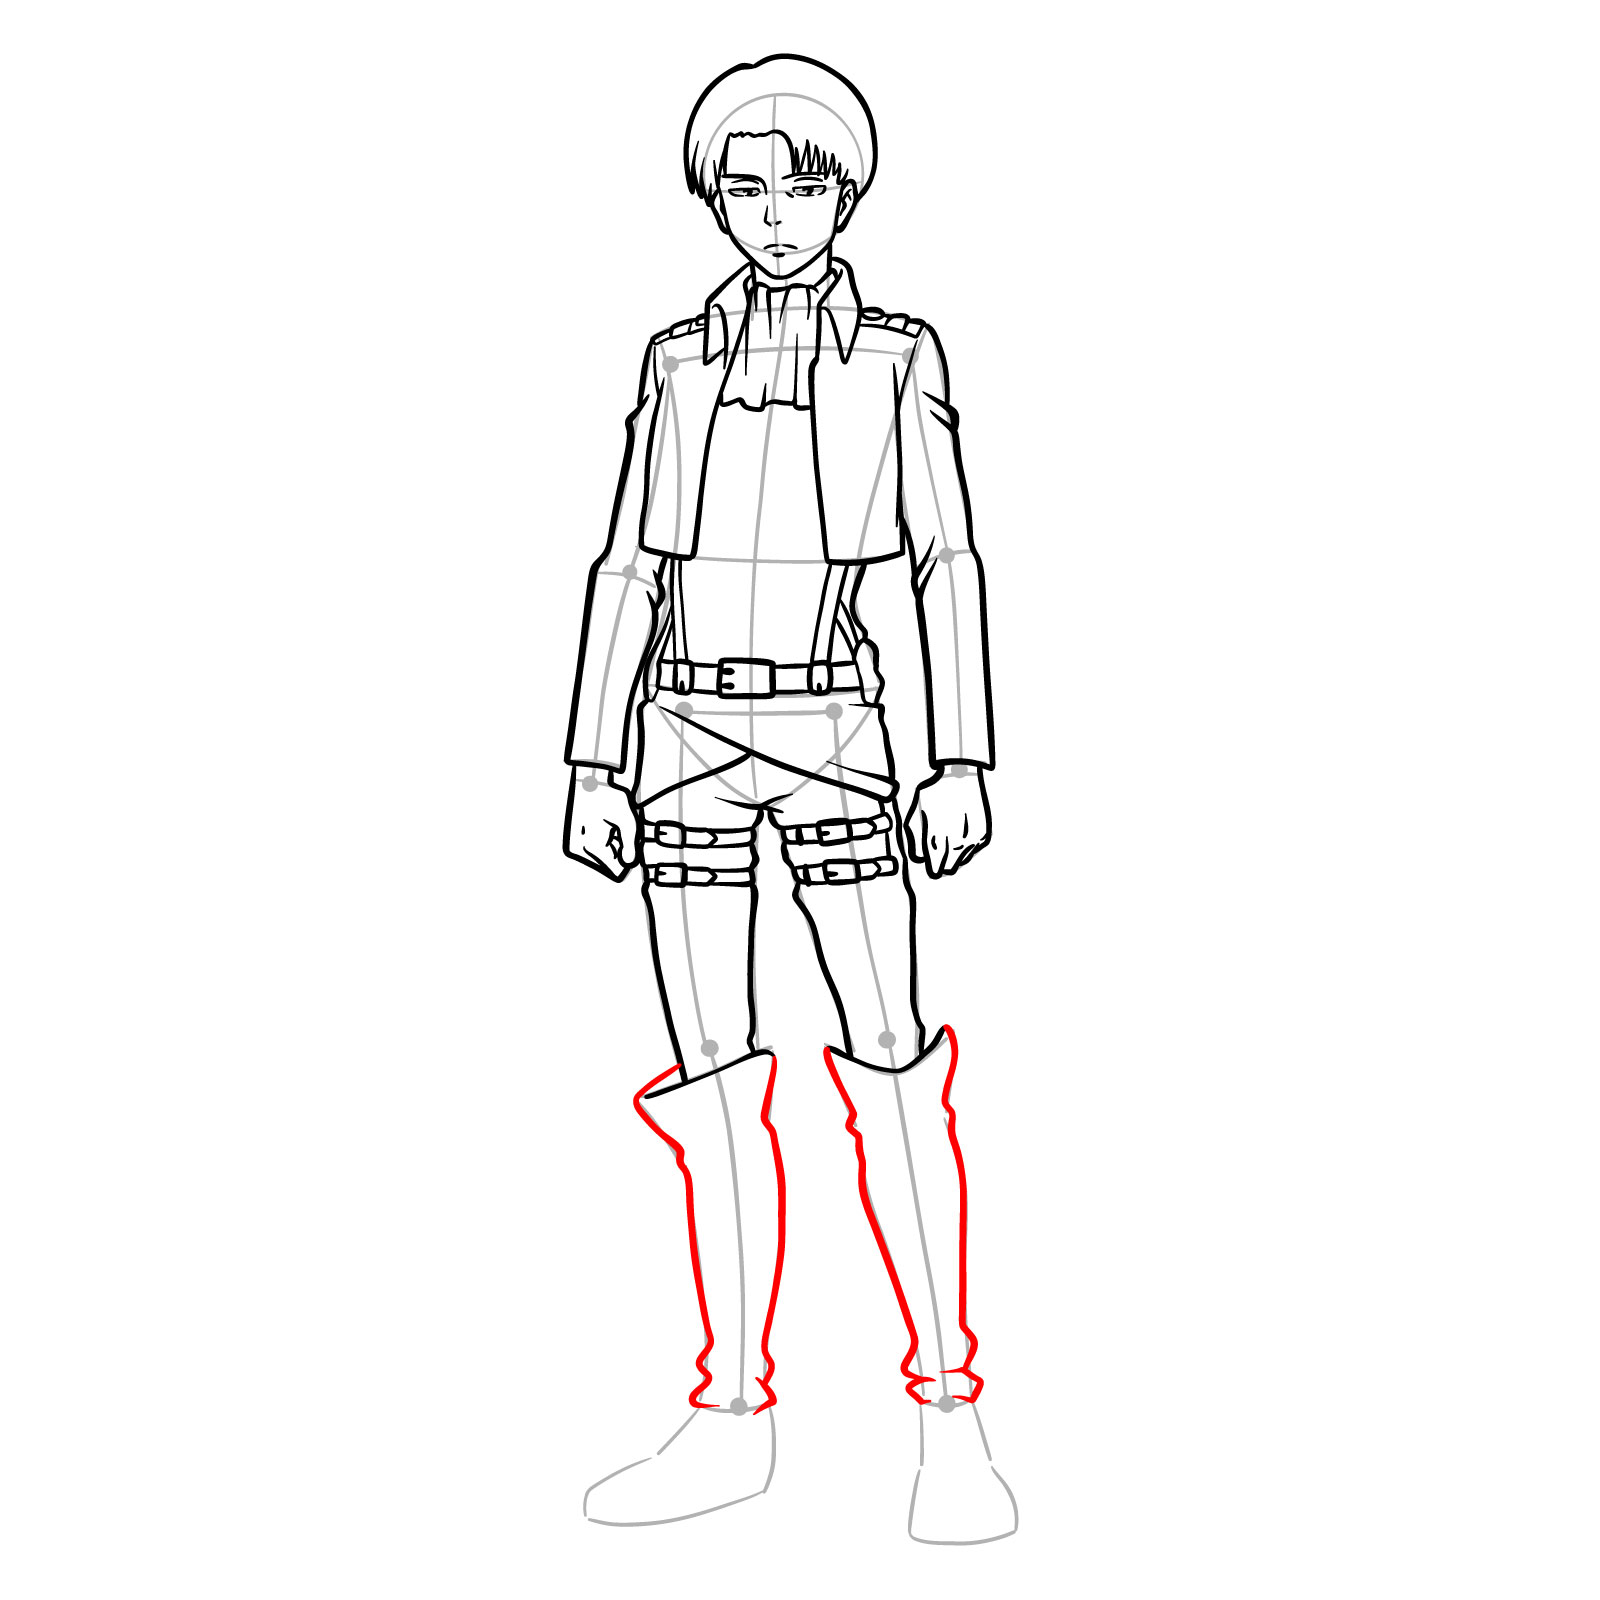
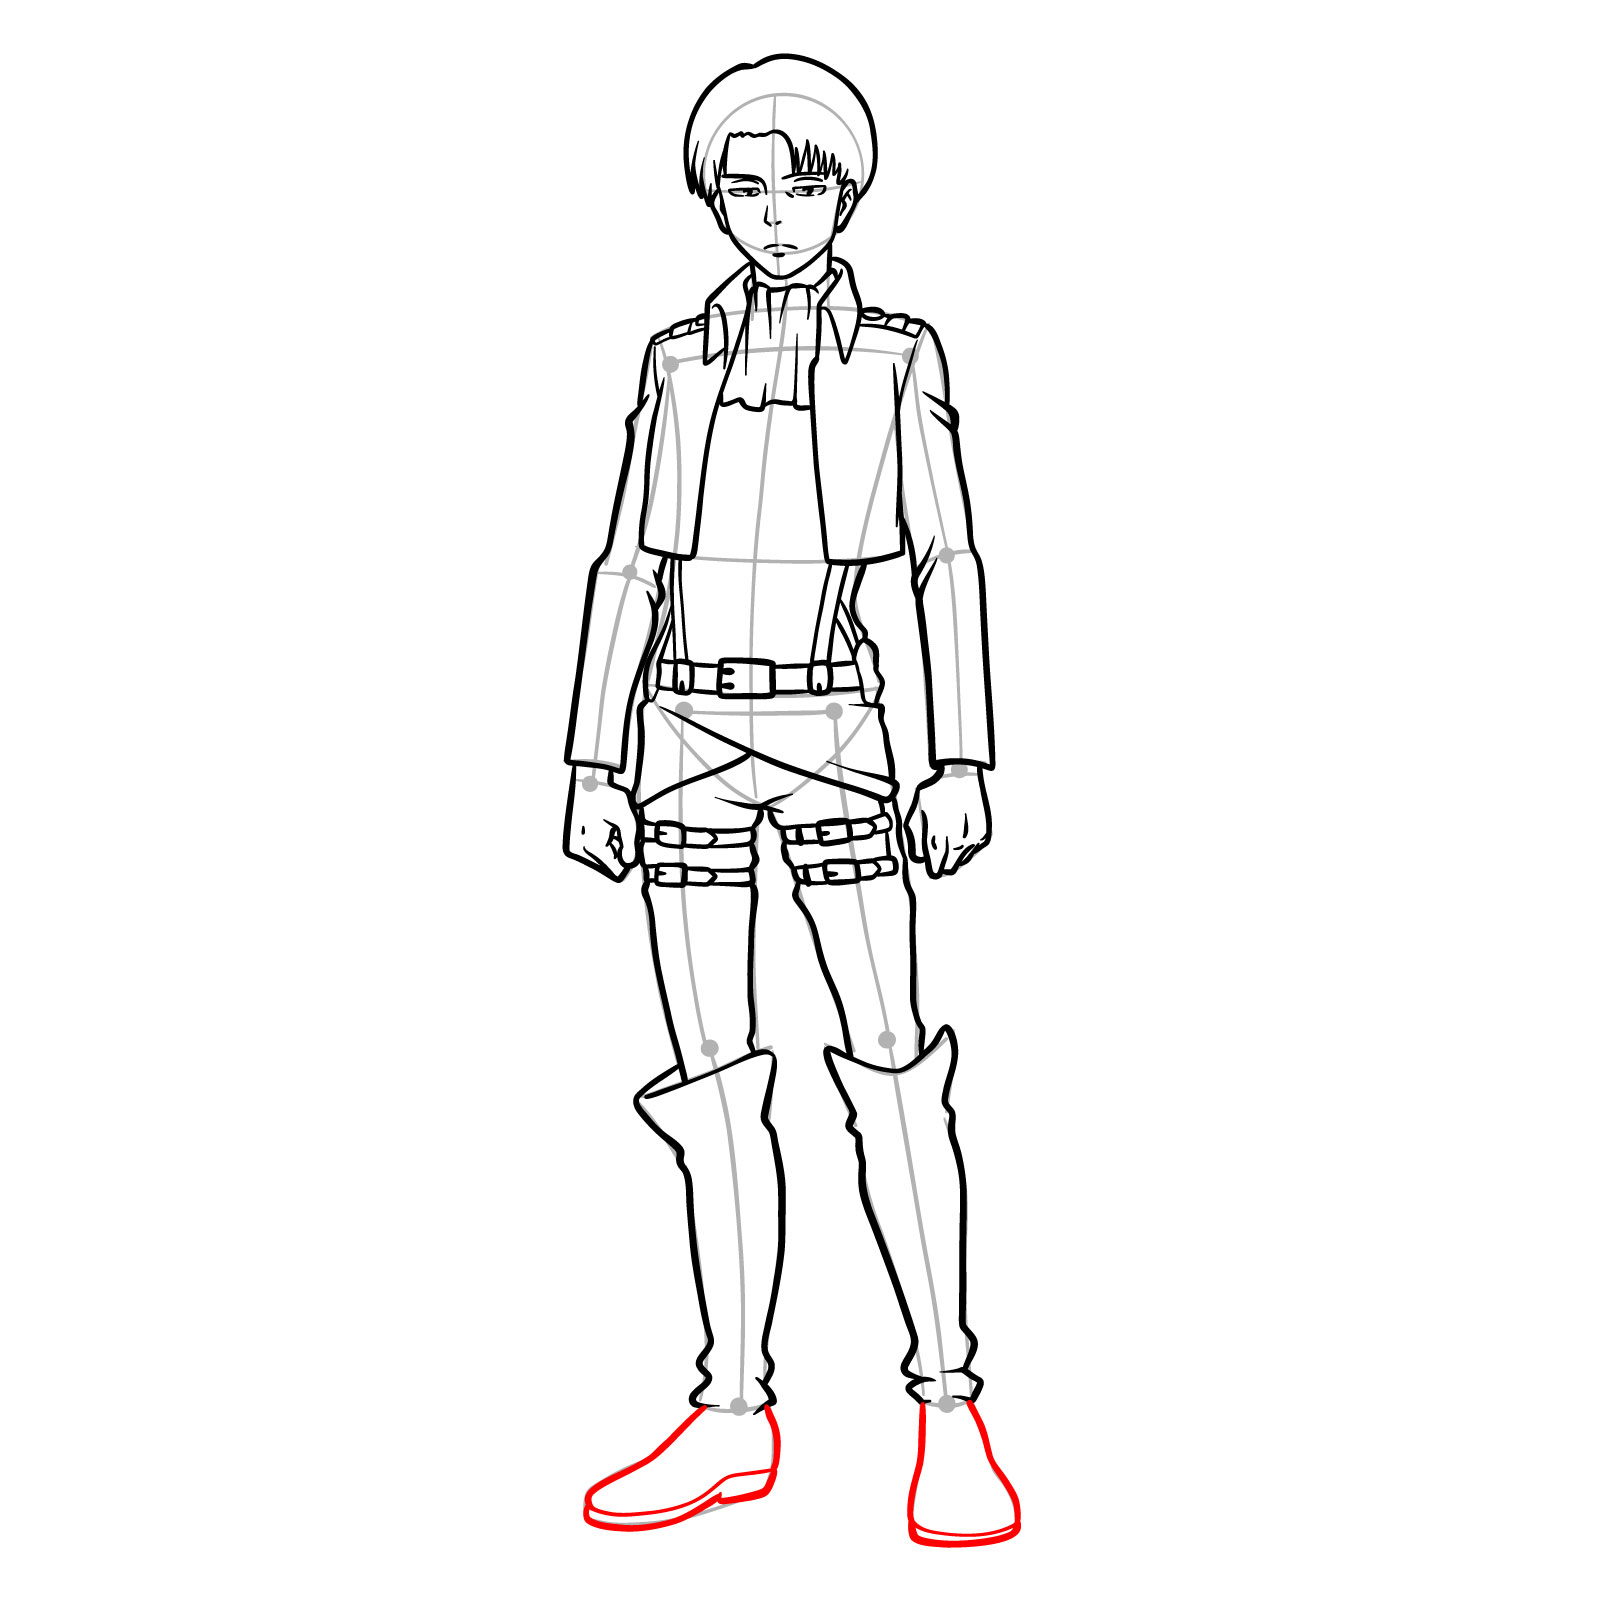
Step 22 – Focus on sketching Levi’s boots in this step. Draw the overall shape of the boots. Add the soles and heels, ensuring they look sturdy and functional
Sketching Levi’s footwear in the Survey Corps outfit
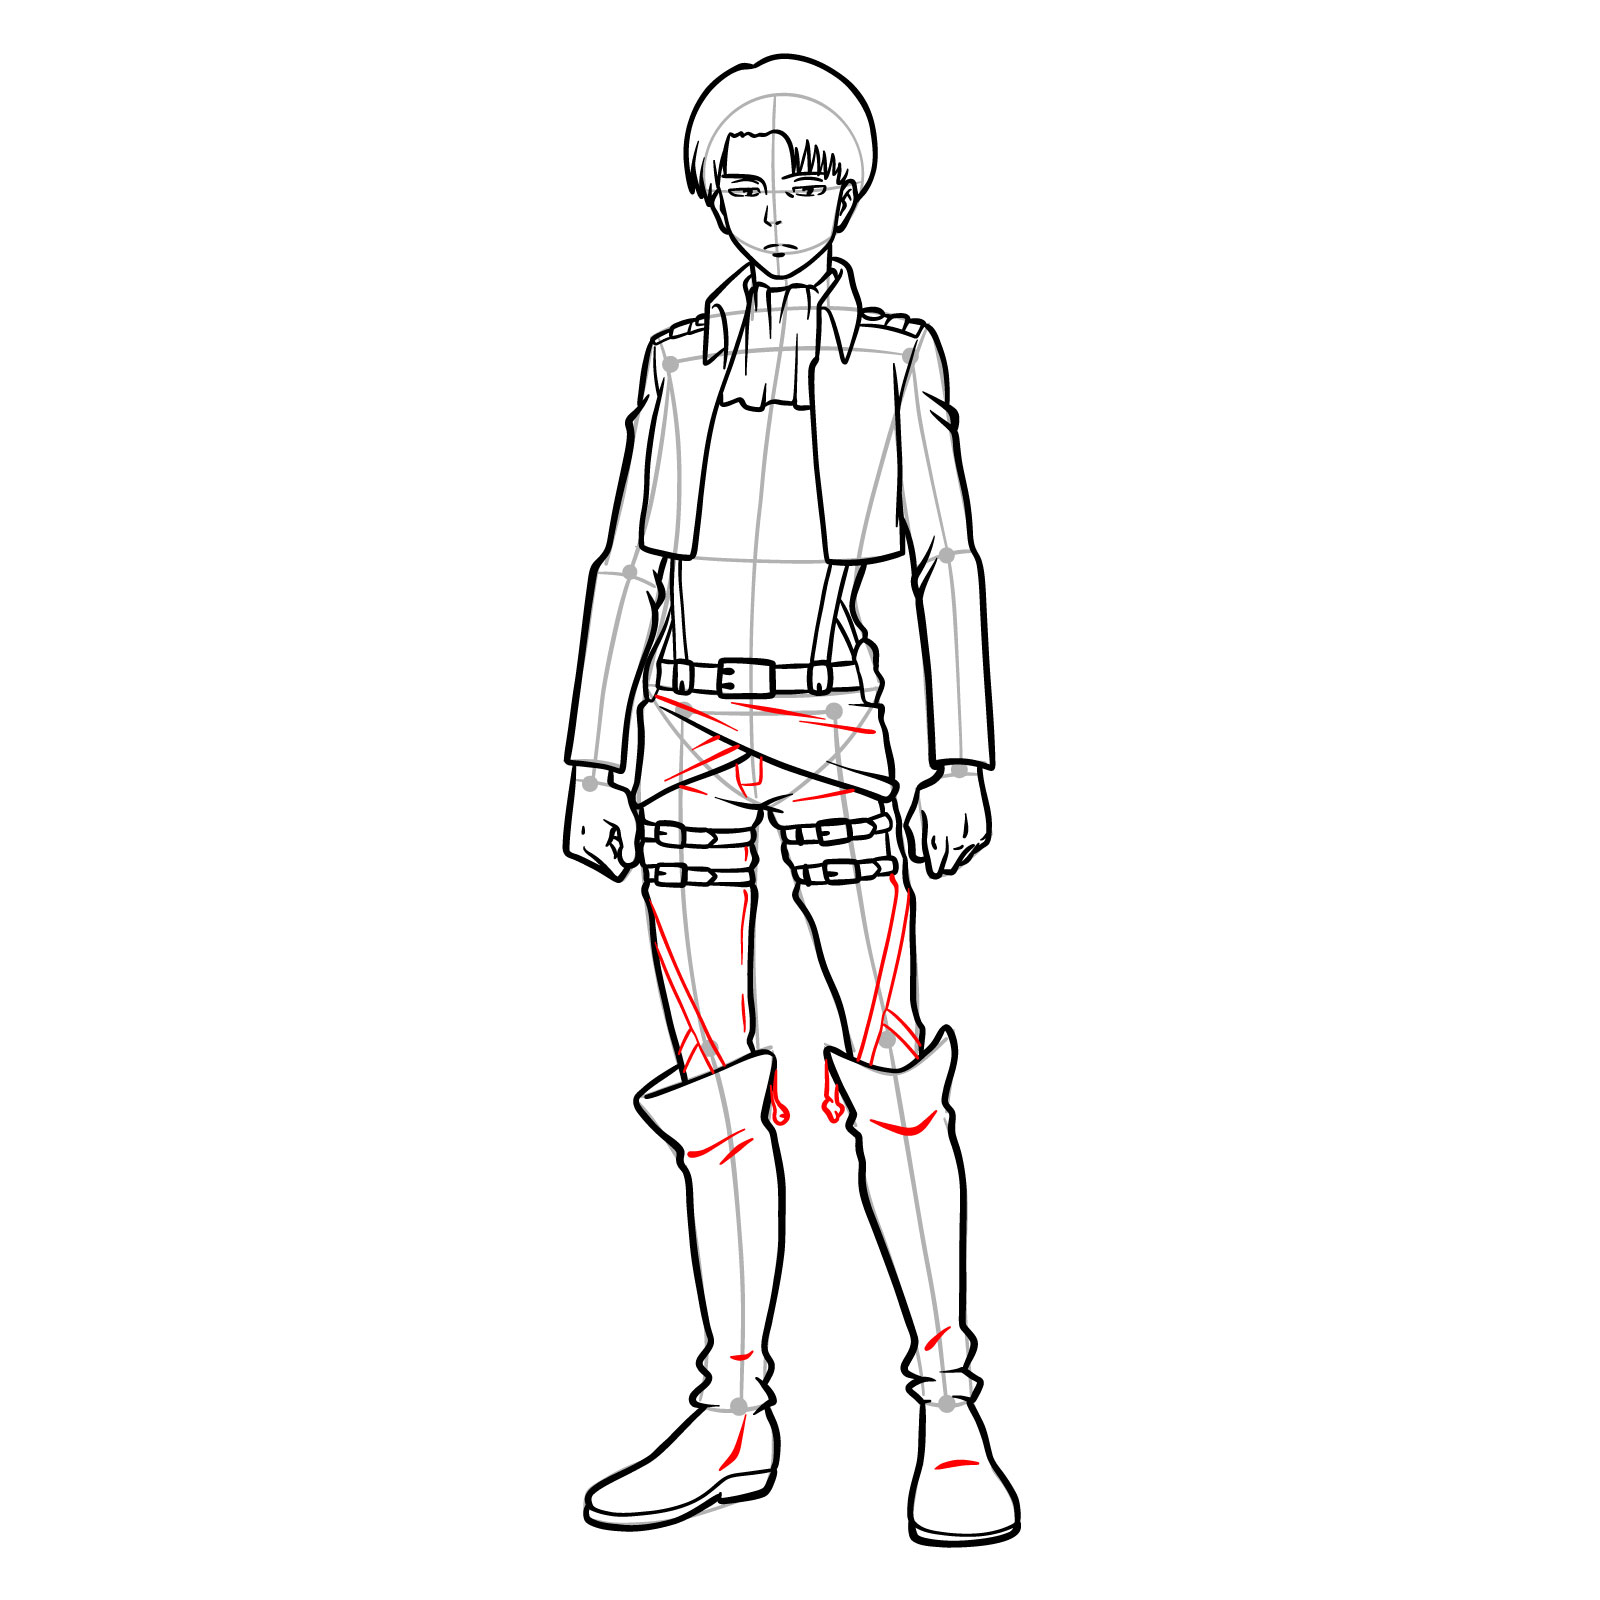
Step 23 – Add more details to the legs and boots, including the straps around the thighs. For the pants, indicate the seams and any folds to create a sense of movement. Enhance the boots with details like creases
Adding additional straps and detailing to Levi’s legs and footwear
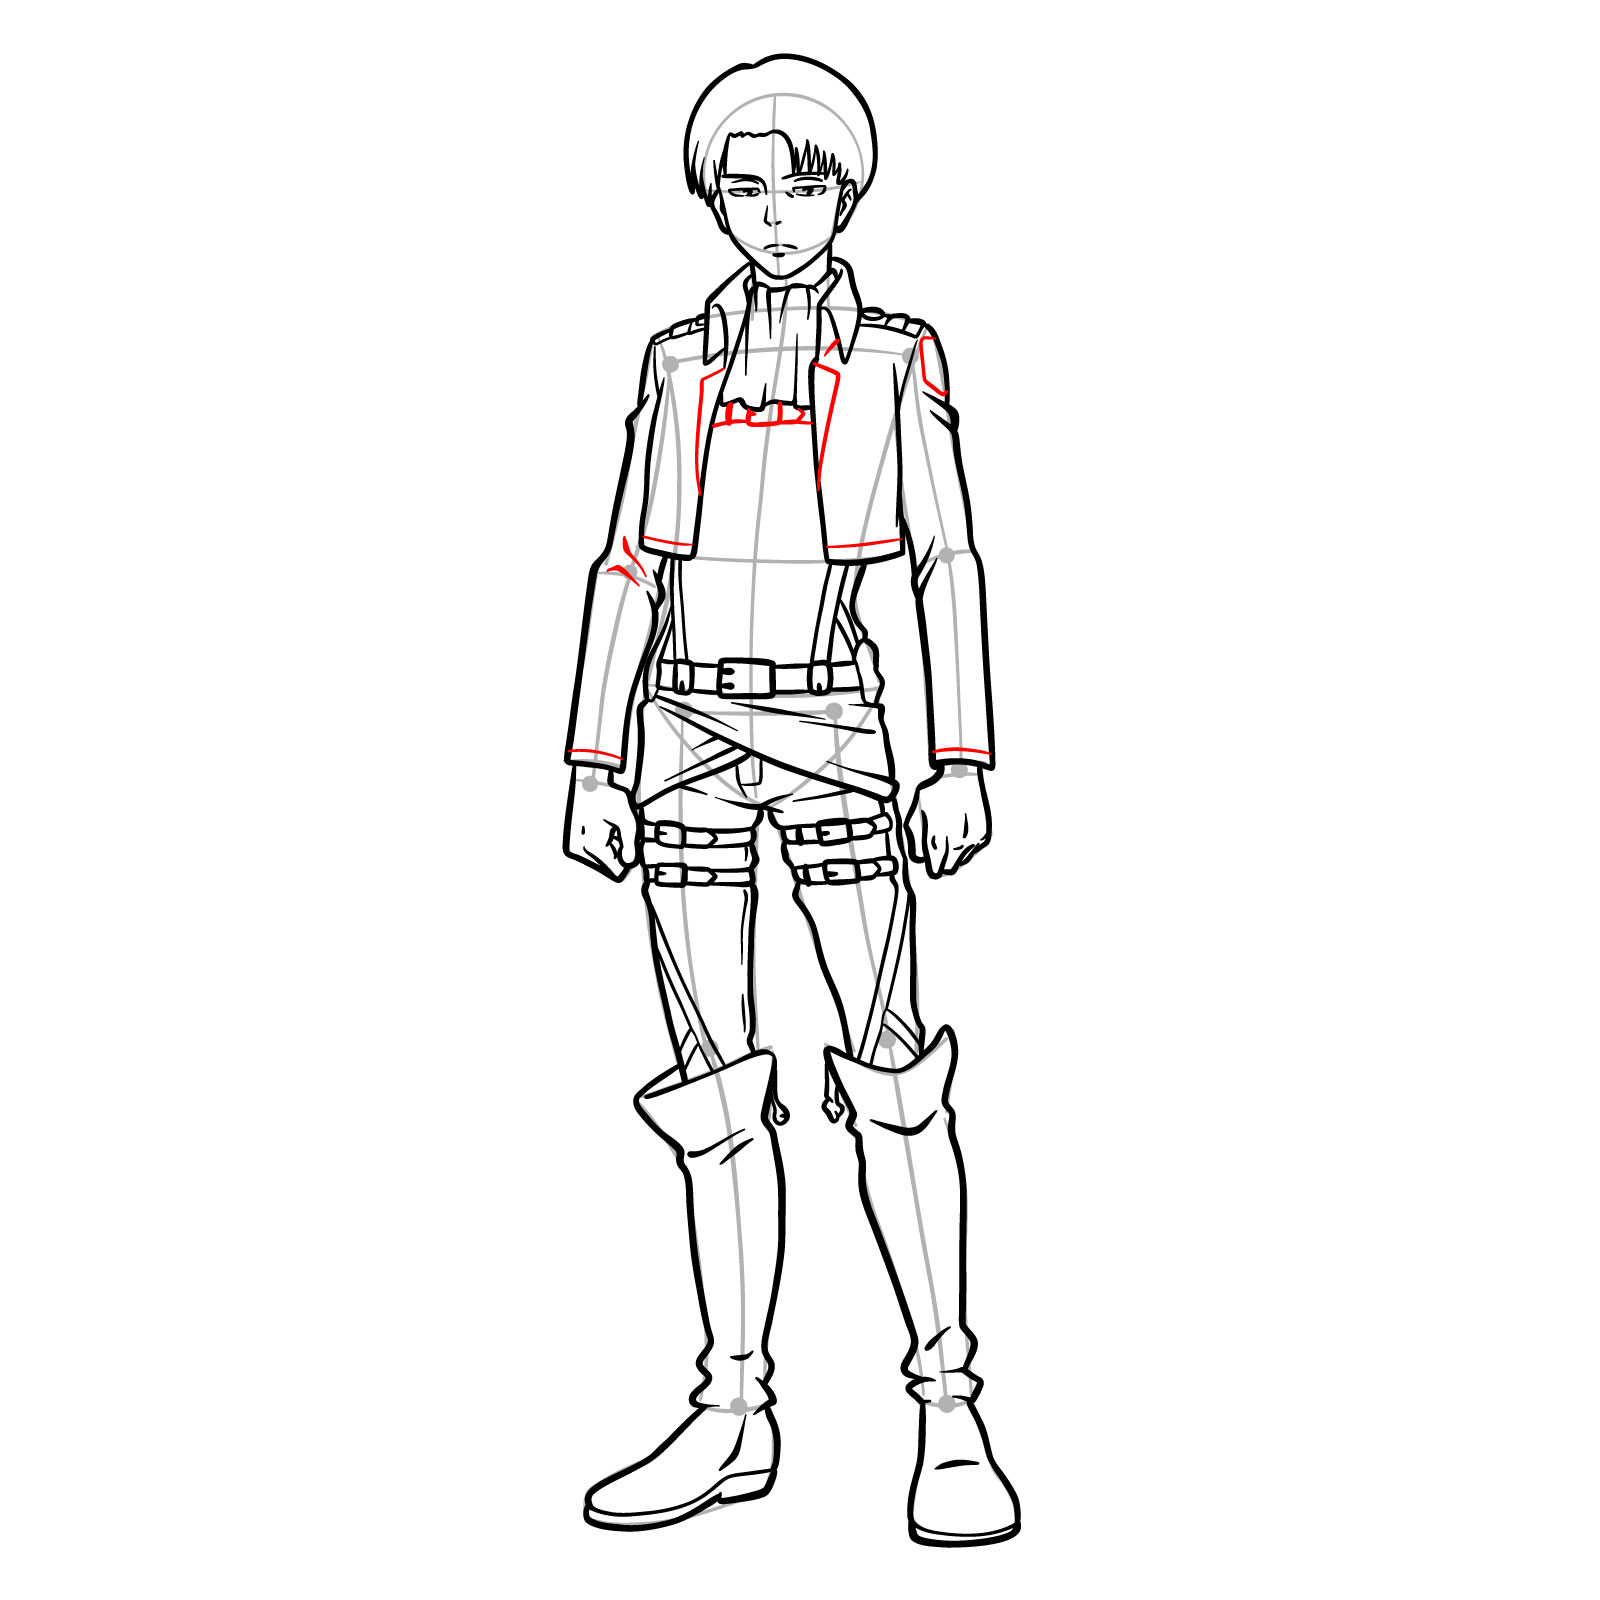
Step 24 – Detail the shirt and jacket, adding the lines for the seams, edges, and creases. Ensure each element is proportional and aligned with the rest of the clothing
Detailing the shirt and jacket of Levi’s Survey Corps outfit
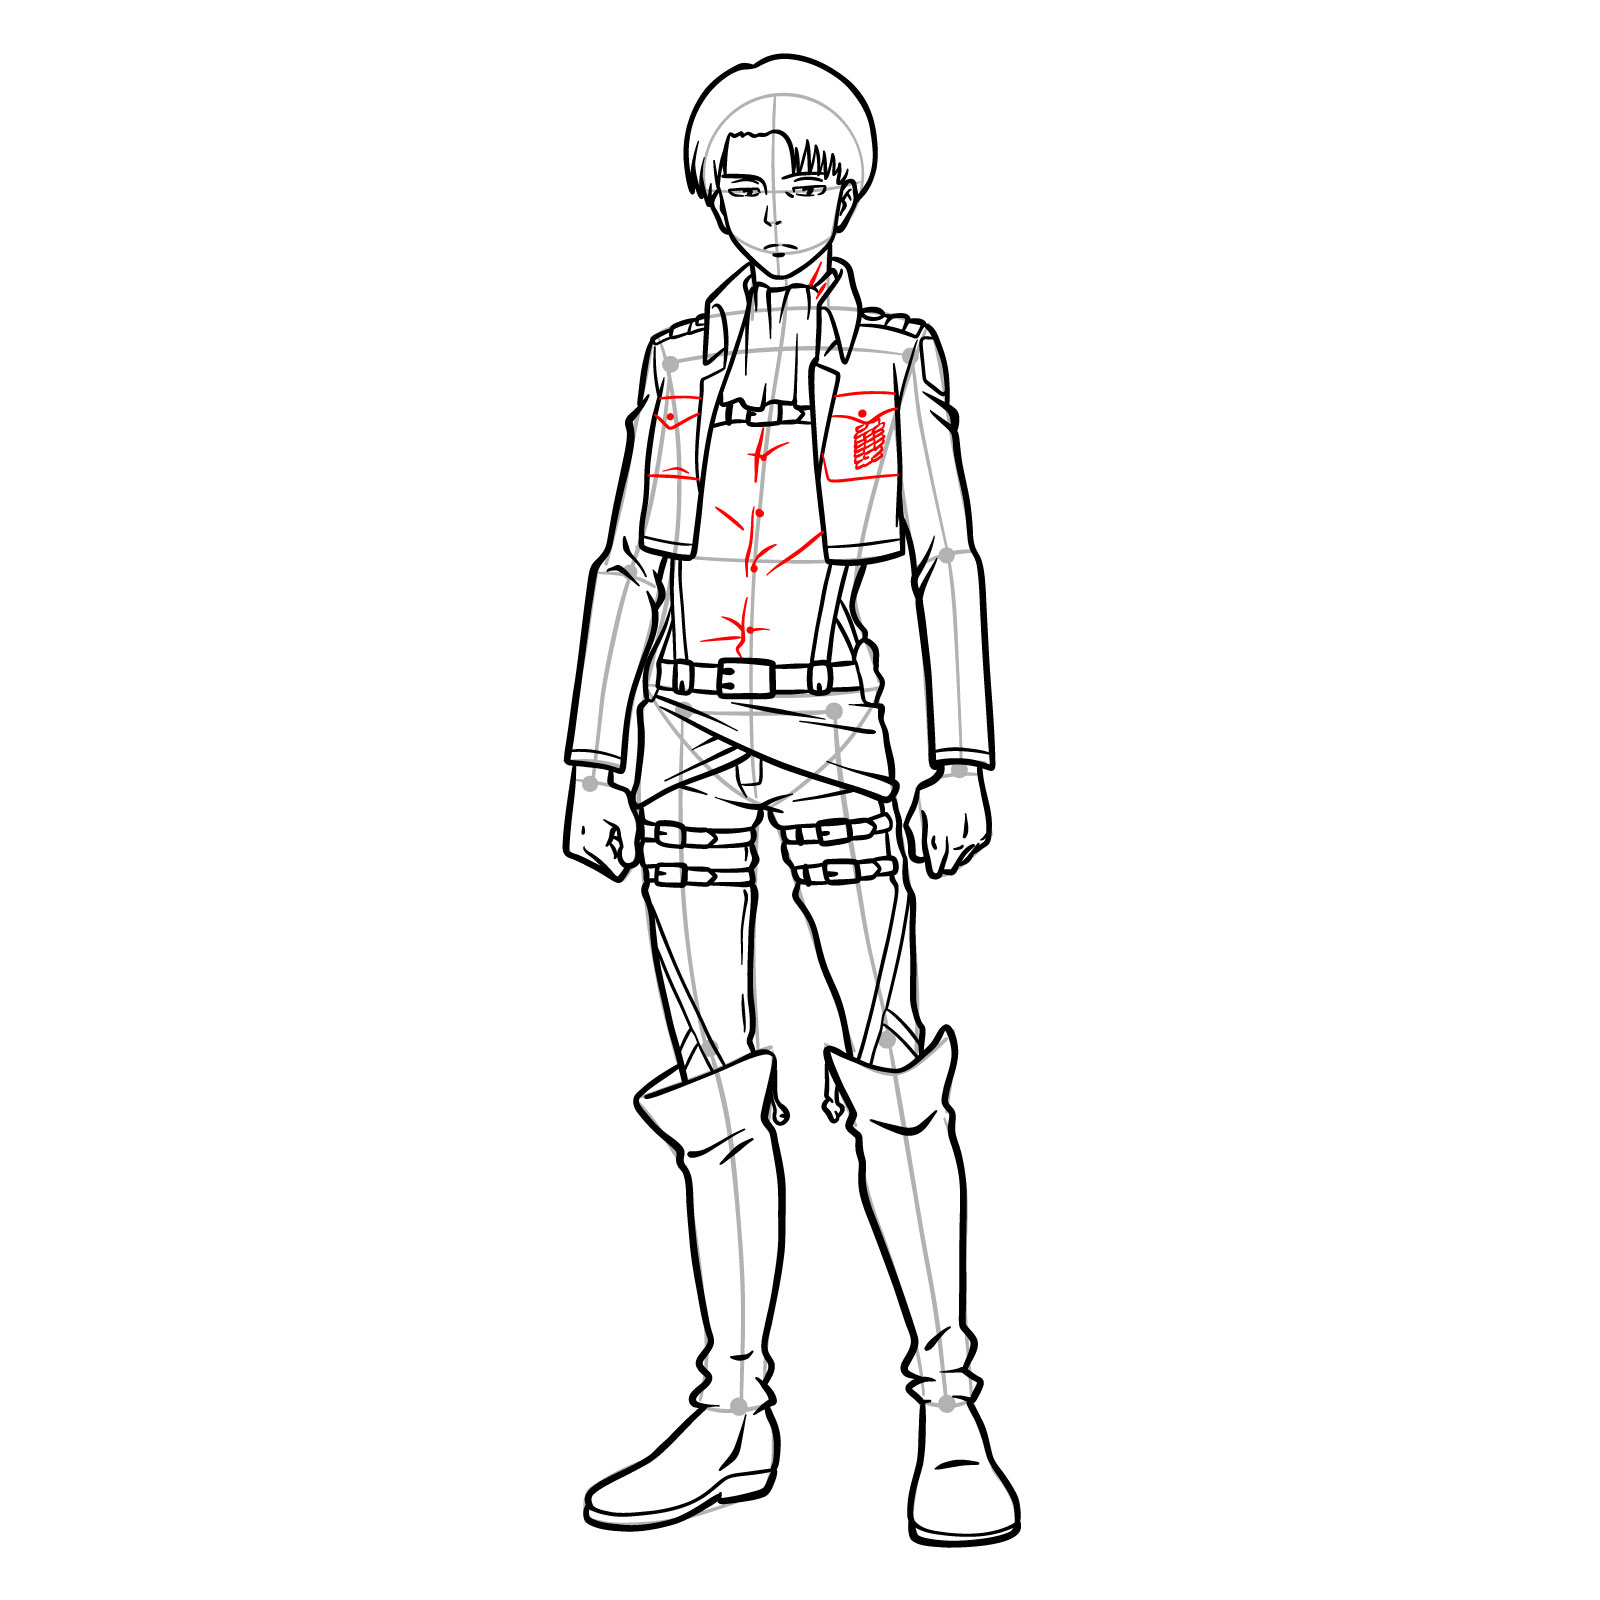
Step 25 – Add the finer details to Levi’s shirt, including buttons, folds, and the neckline. Begin sketching the Survey Corps emblem on the left side of the chest (on the pocket). Pay attention to the proportions and placement of these elements for accuracy
Adding shirt details and beginning the Survey Corps emblem
Step 26 – Finalize Levi’s hairstyle, adding texture and individual strands to create a more realistic appearance. Complete the Survey Corps emblem on the chest and the shoulder by drawing the wings of freedom symbol. Make sure the emblems are symmetrical and clearly defined
Finalizing Levi’s hair and emblems on the outfit
Step 27 – With the last touches added, the drawing of Captain Levi in full Survey Corps regalia is now complete. At this stage, all the details from his iconic hairstyle down to the buckles on the straps have been sketched out, capturing his formidable presence. For those who wish to finalize their artwork, this sketch can optionally be inked, tracing over the pencil lines with a fine liner or brush pen to give the drawing a polished look. Once the ink has dried, gently erase any remaining pencil marks to reveal a clean and finished drawing of Captain Levi, ready to be displayed or colored
Final step in completing the full body drawing of Captain Levi
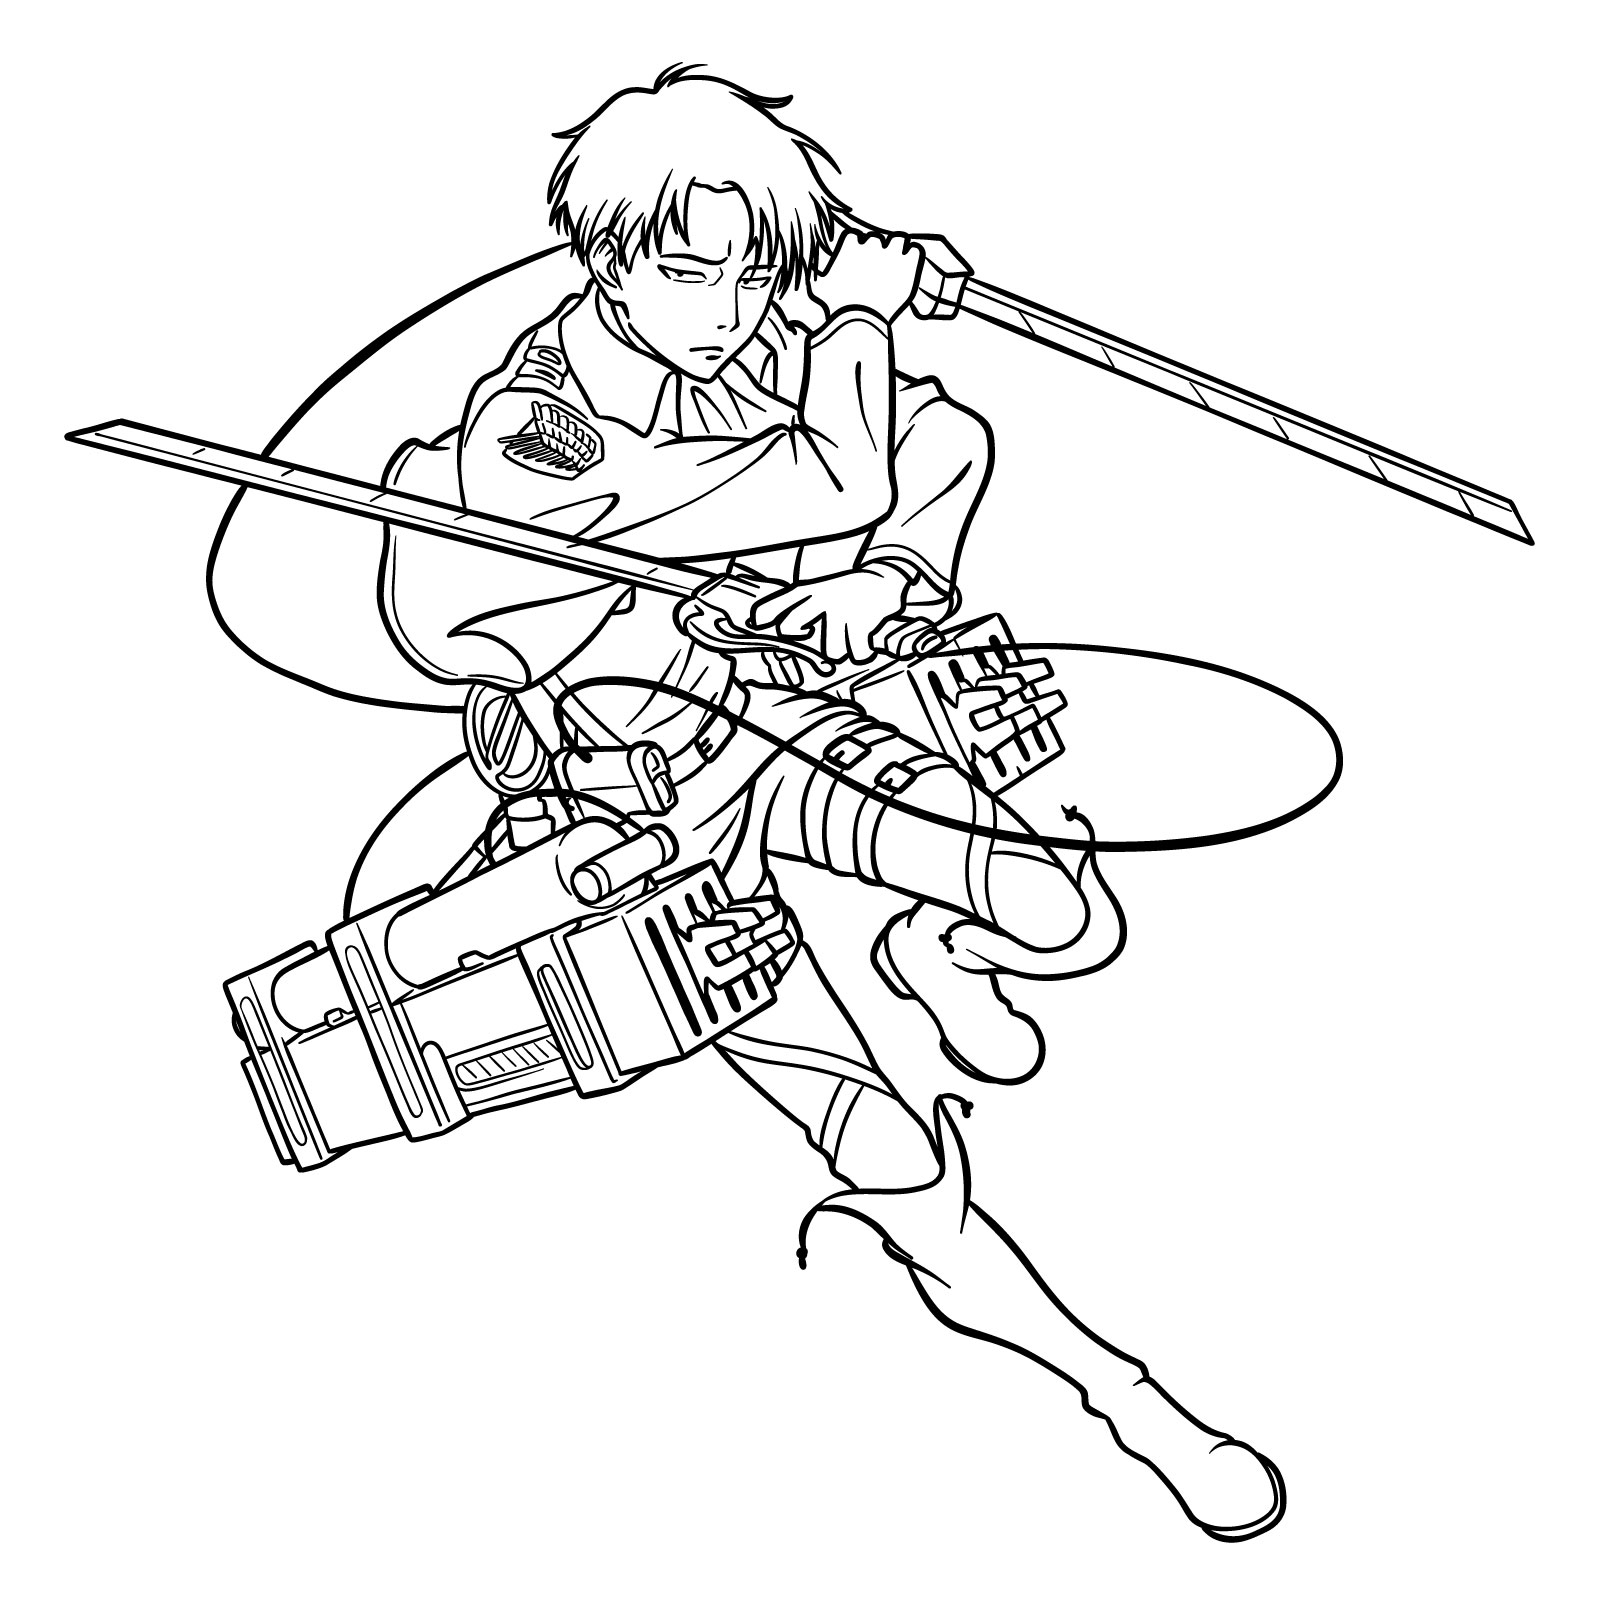
Guide 5: Drawing Levi in Action Pose with His ODM Gear and Swords
How to draw Levi from Attack on Titan in action pose – the finished drawing
Drawing an action pose requires a keen understanding of movement and anatomy, and when it comes to a character like Levi, who is often seen in the midst of battle, it becomes even more crucial. This guide, consisting of 39 steps, will lead you through the process of creating an intense action scene featuring Levi with his ODM gear and swords.
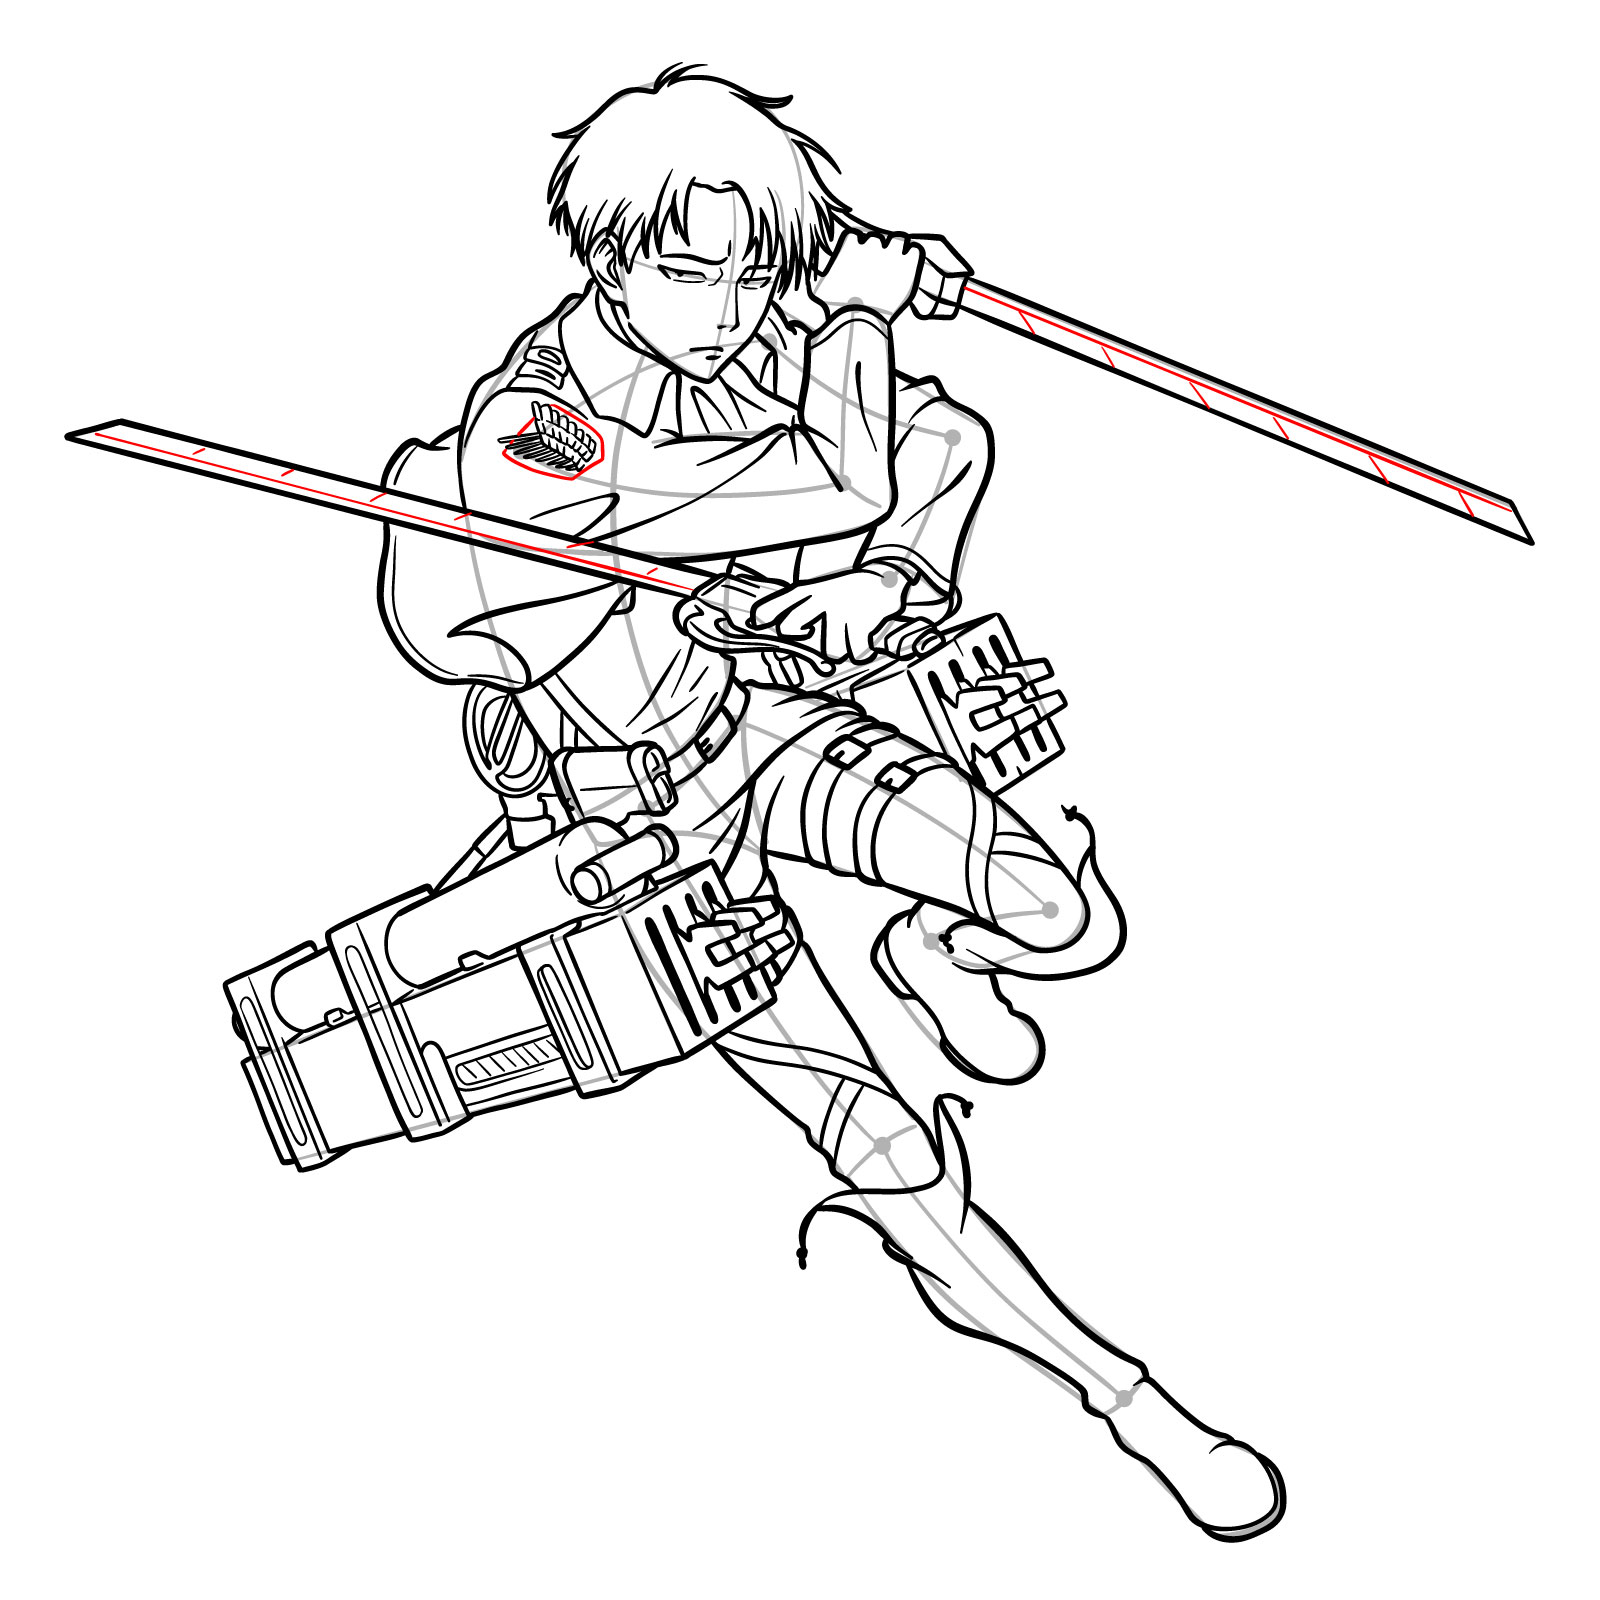
The final drawing captures Levi in mid-action, swords drawn, and ODM gear firing, propelling him through the air. His body is angled forward, showing momentum and focus, with one leg trailing behind to balance the composition. The ODM gear is detailed, with its gas-powered mechanism and the iconic blades Levi wields so masterfully. His expression is concentrated and serious, befitting a soldier in the heat of battle.
During the first three steps, we will lay down the basic proportions using a stick figure, establishing the pose and the angle of Levi’s body. It’s important to get the proportions correct from the start, as they serve as the foundation for the dynamic figure we will be building upon. As the guide progresses, we will add the complex elements of the ODM gear, the texture of the clothing, and the finishing touches that will bring the scene to life. Remember to consider the direction of the action and the force of movement to make the drawing as realistic as possible.
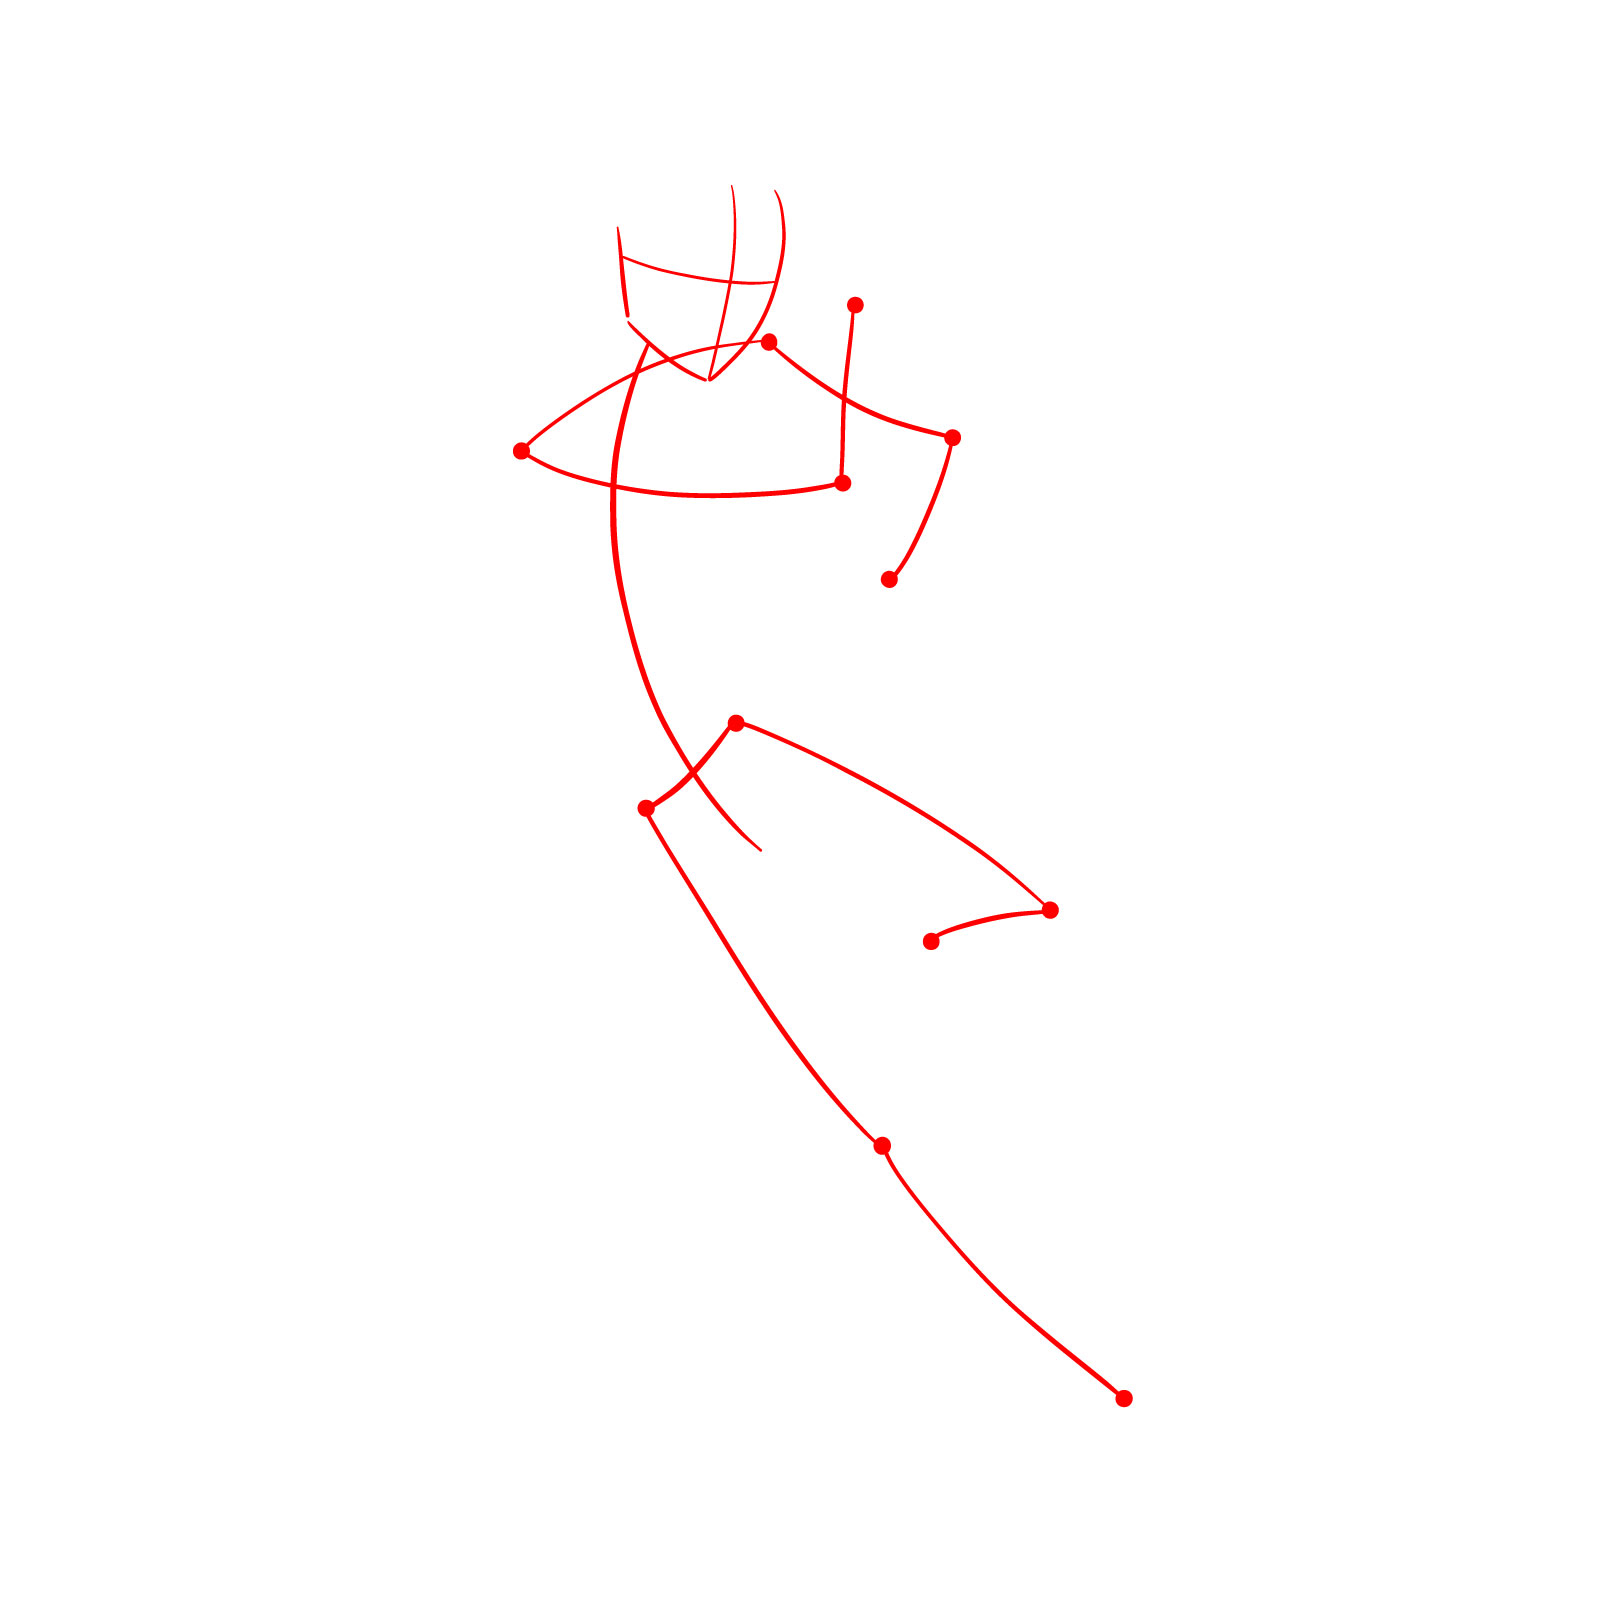
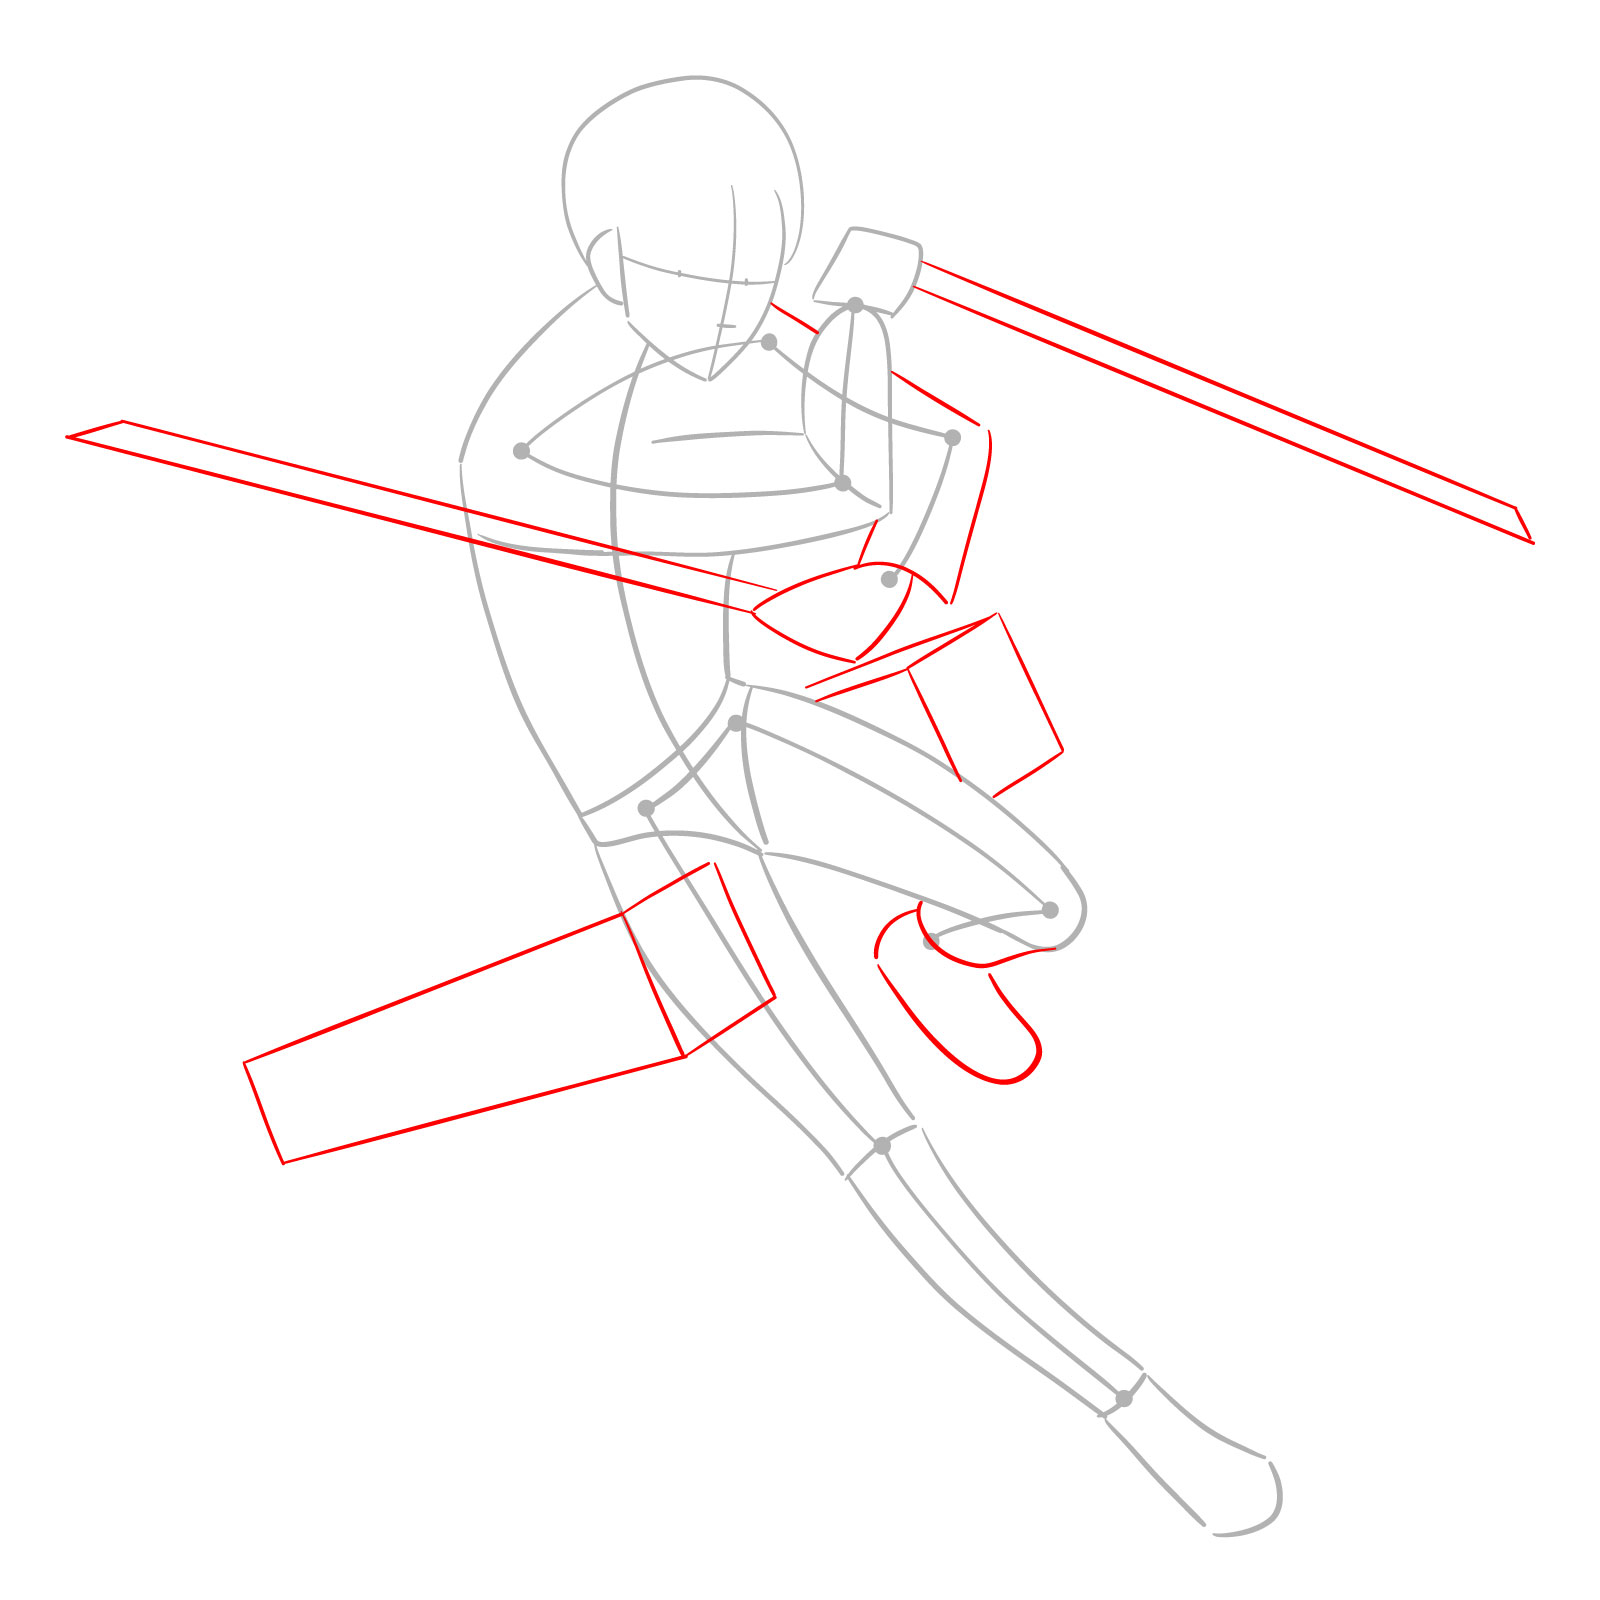
Steps 1 – 3: Begin your drawing with a simple stick figure to capture the dynamic action pose of Captain Levi. Sketch a basic outline of his head and torso, ensuring the proportions are correct for an action stance. Draw simple lines to represent his ODM gear and swords, focusing on their placement and angle to match the movement of the figure
Step 01:
Steps 1 to 3 of a drawing guide showing the initial sketch of Captain Levi in action with ODM gear
Step 02
Basic sketch – Step 2
Step 03
Basic sketch – Step 3
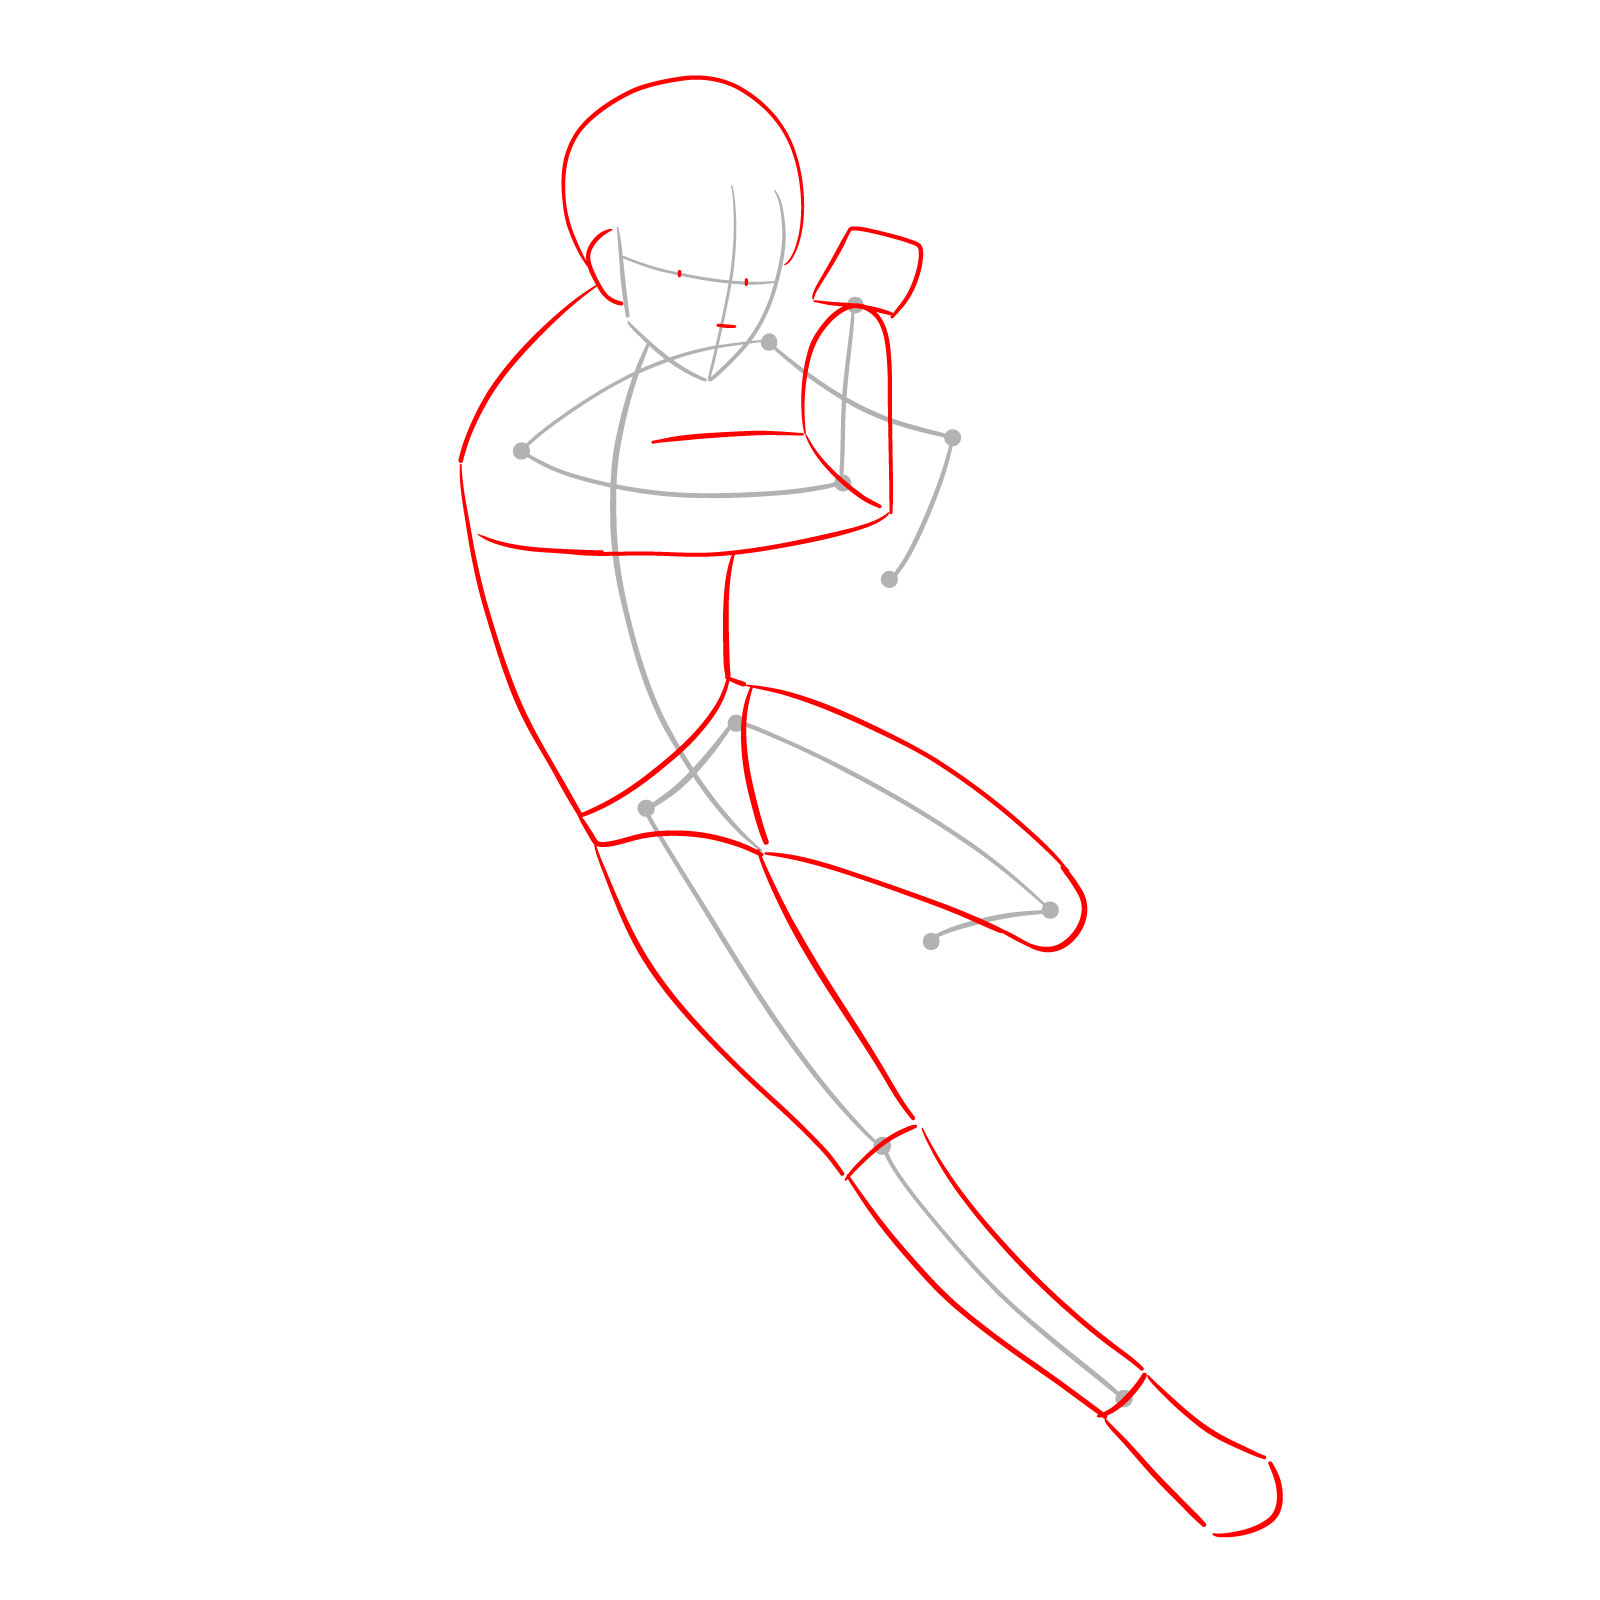
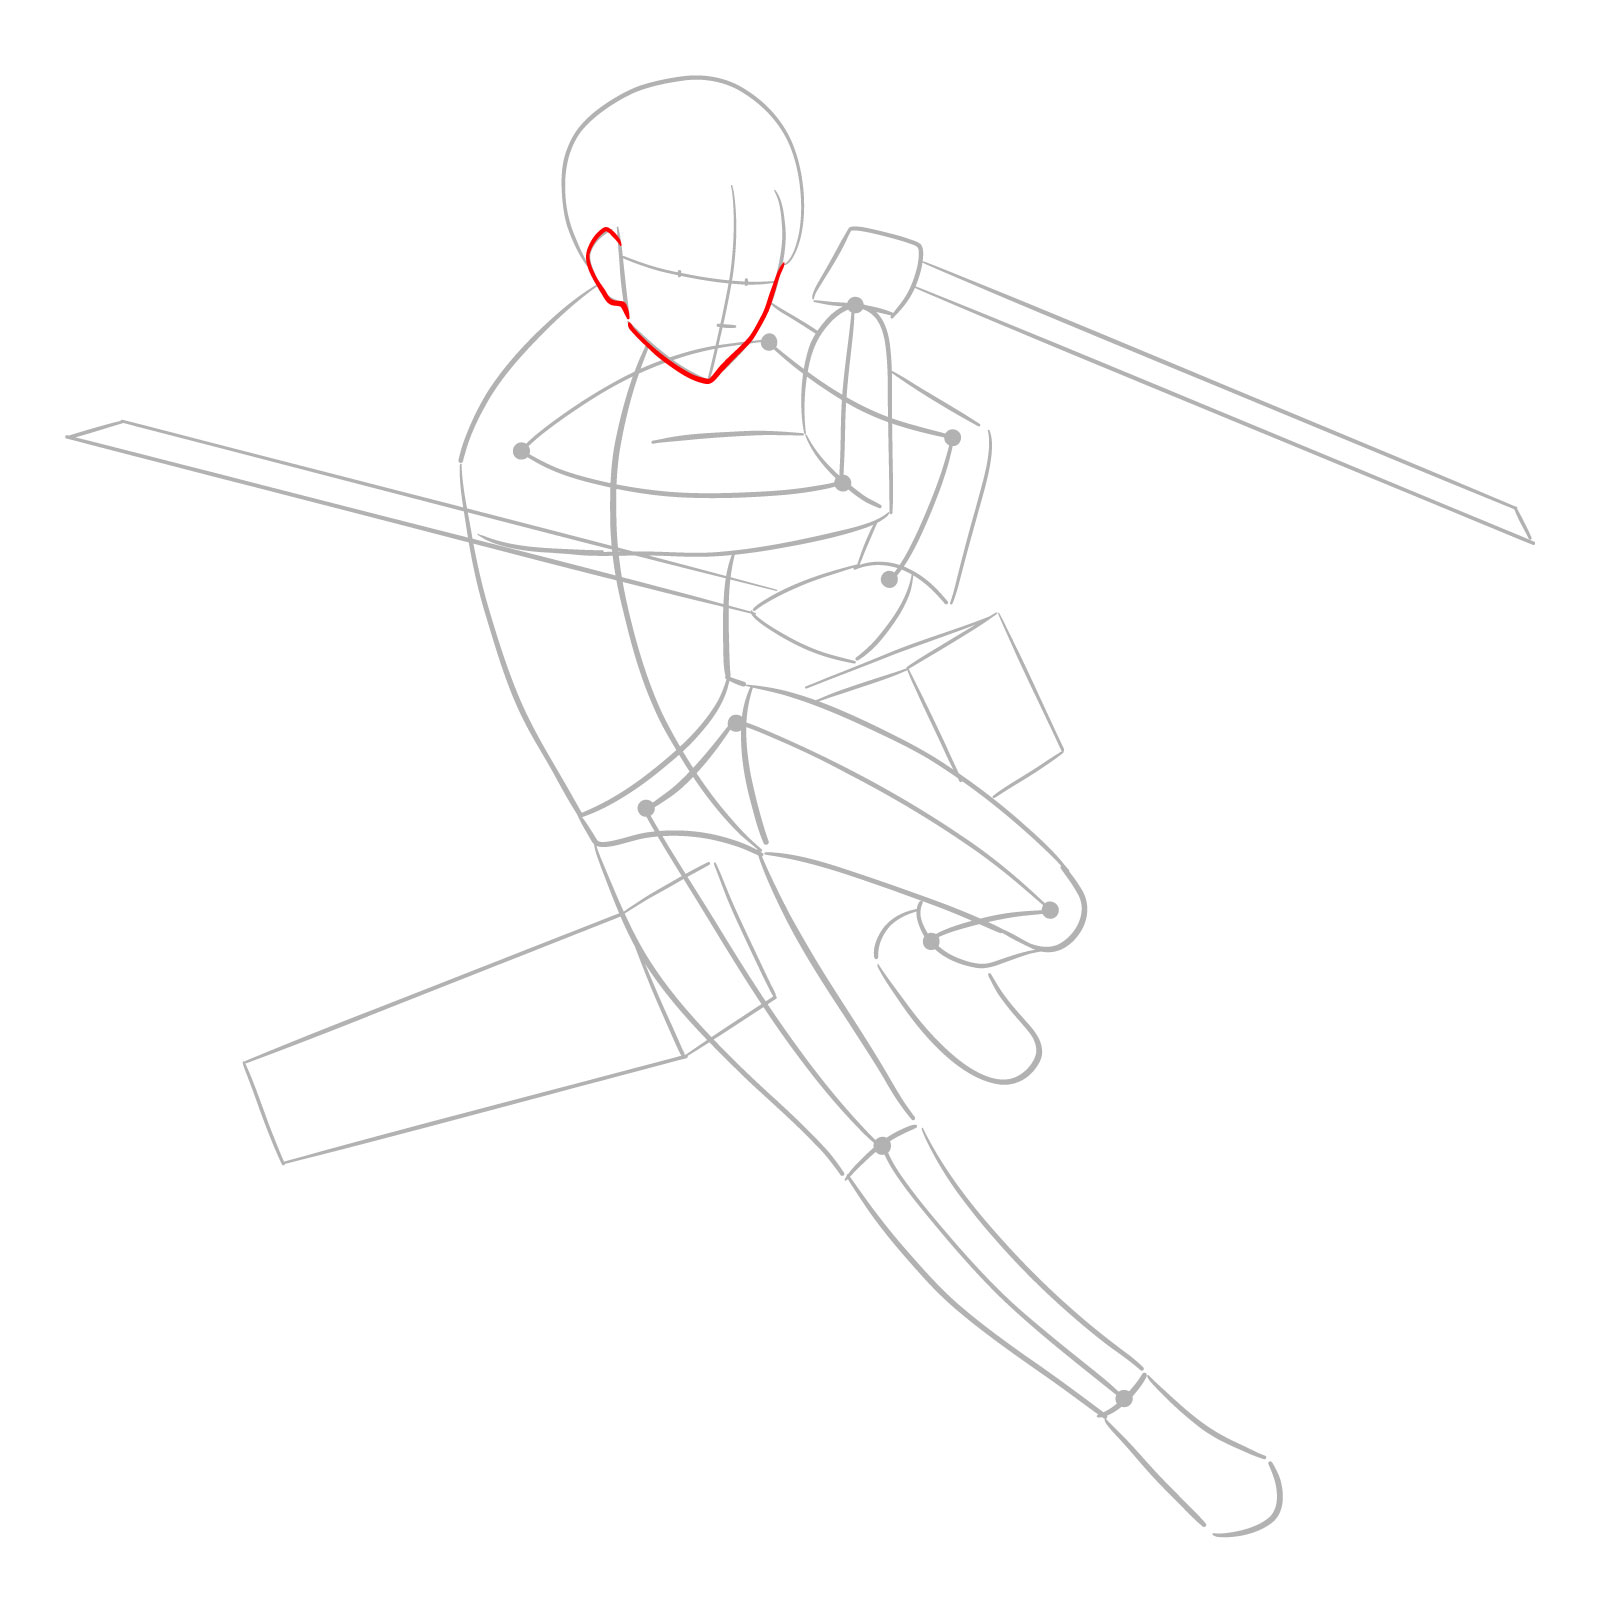
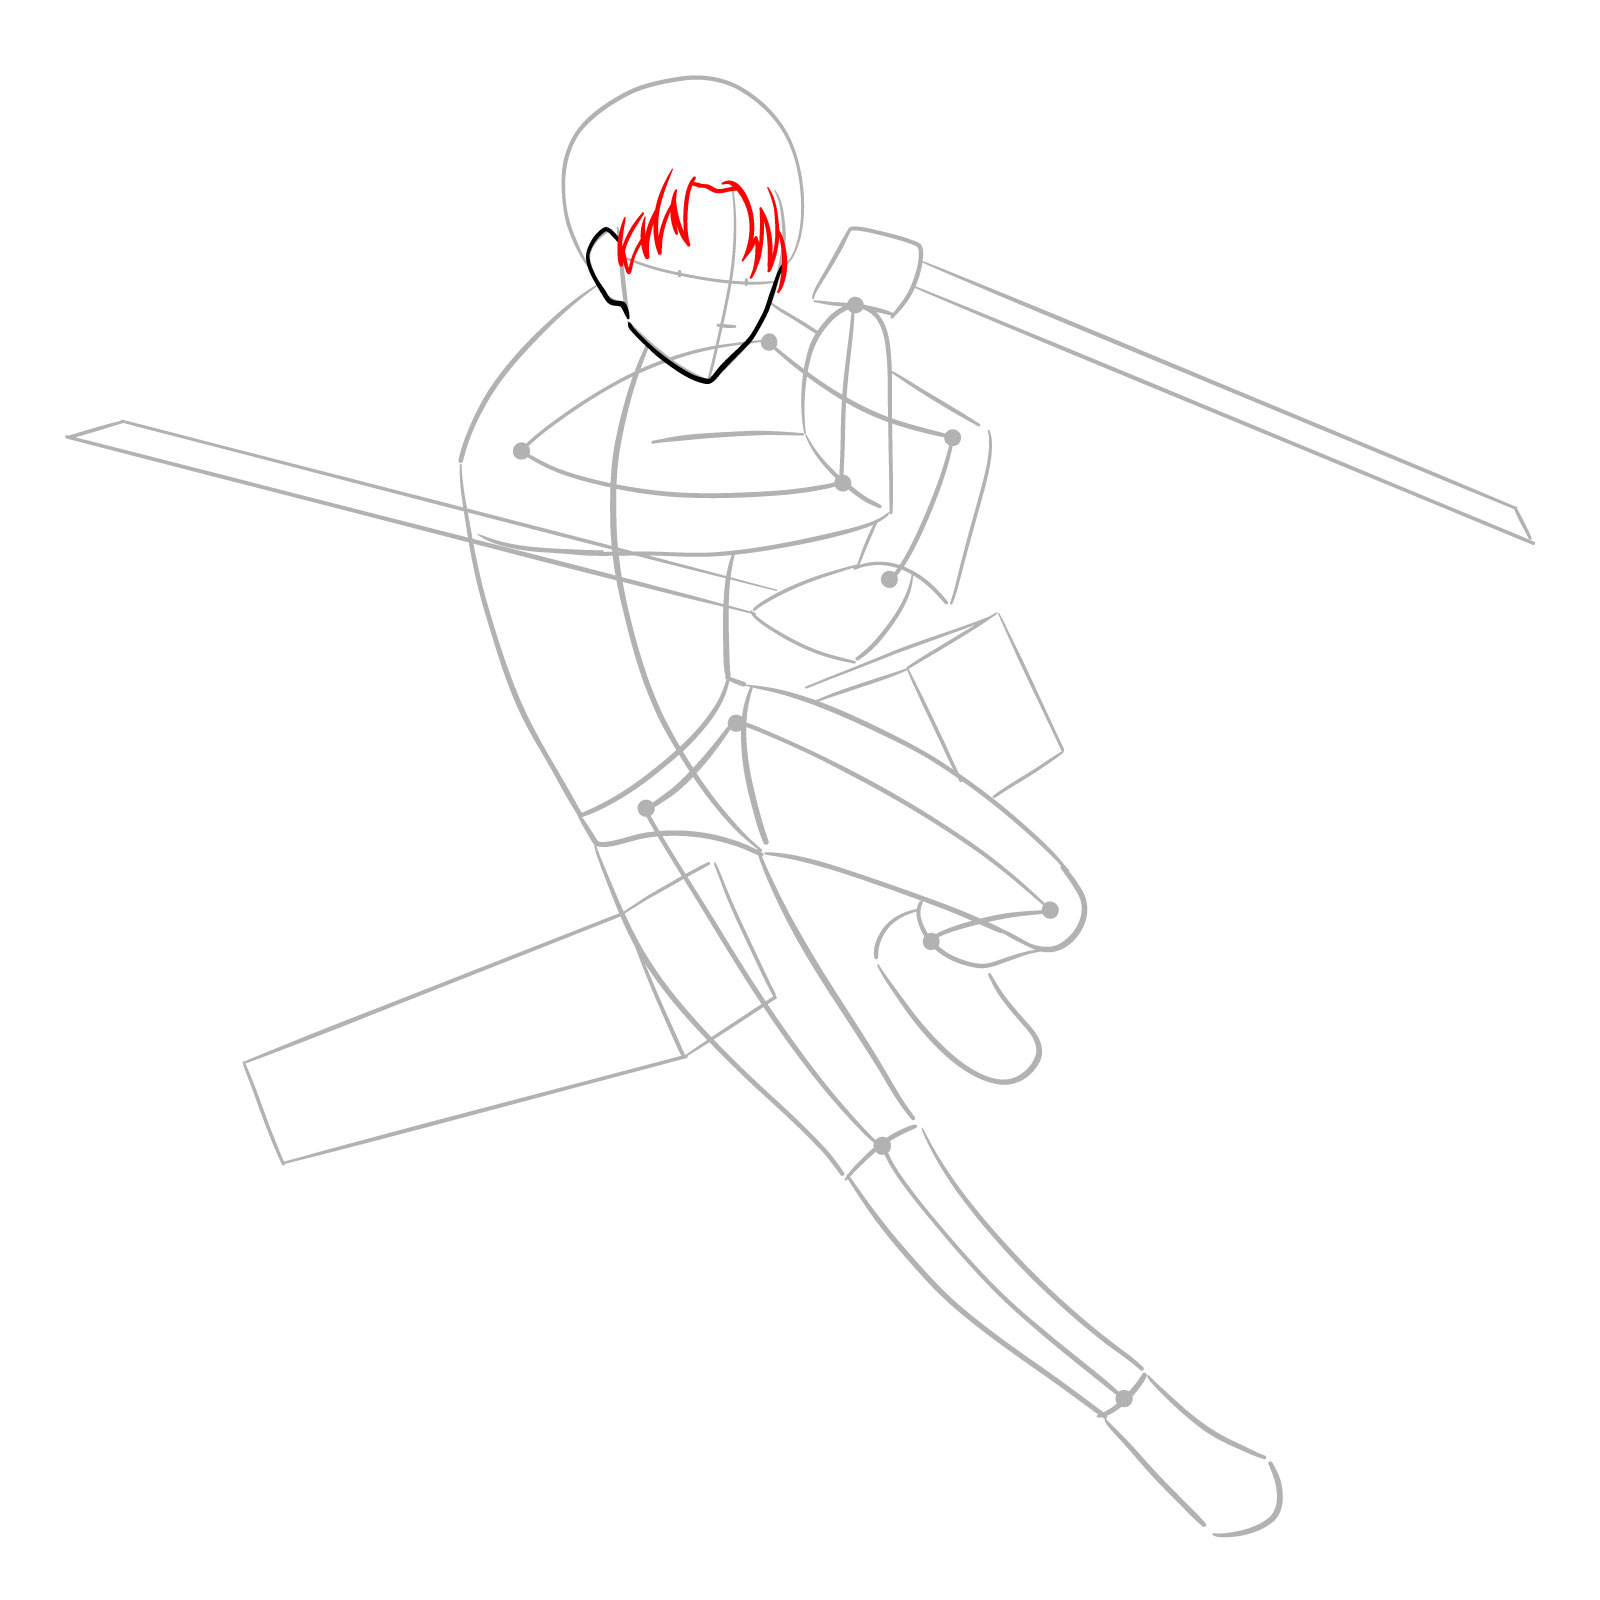
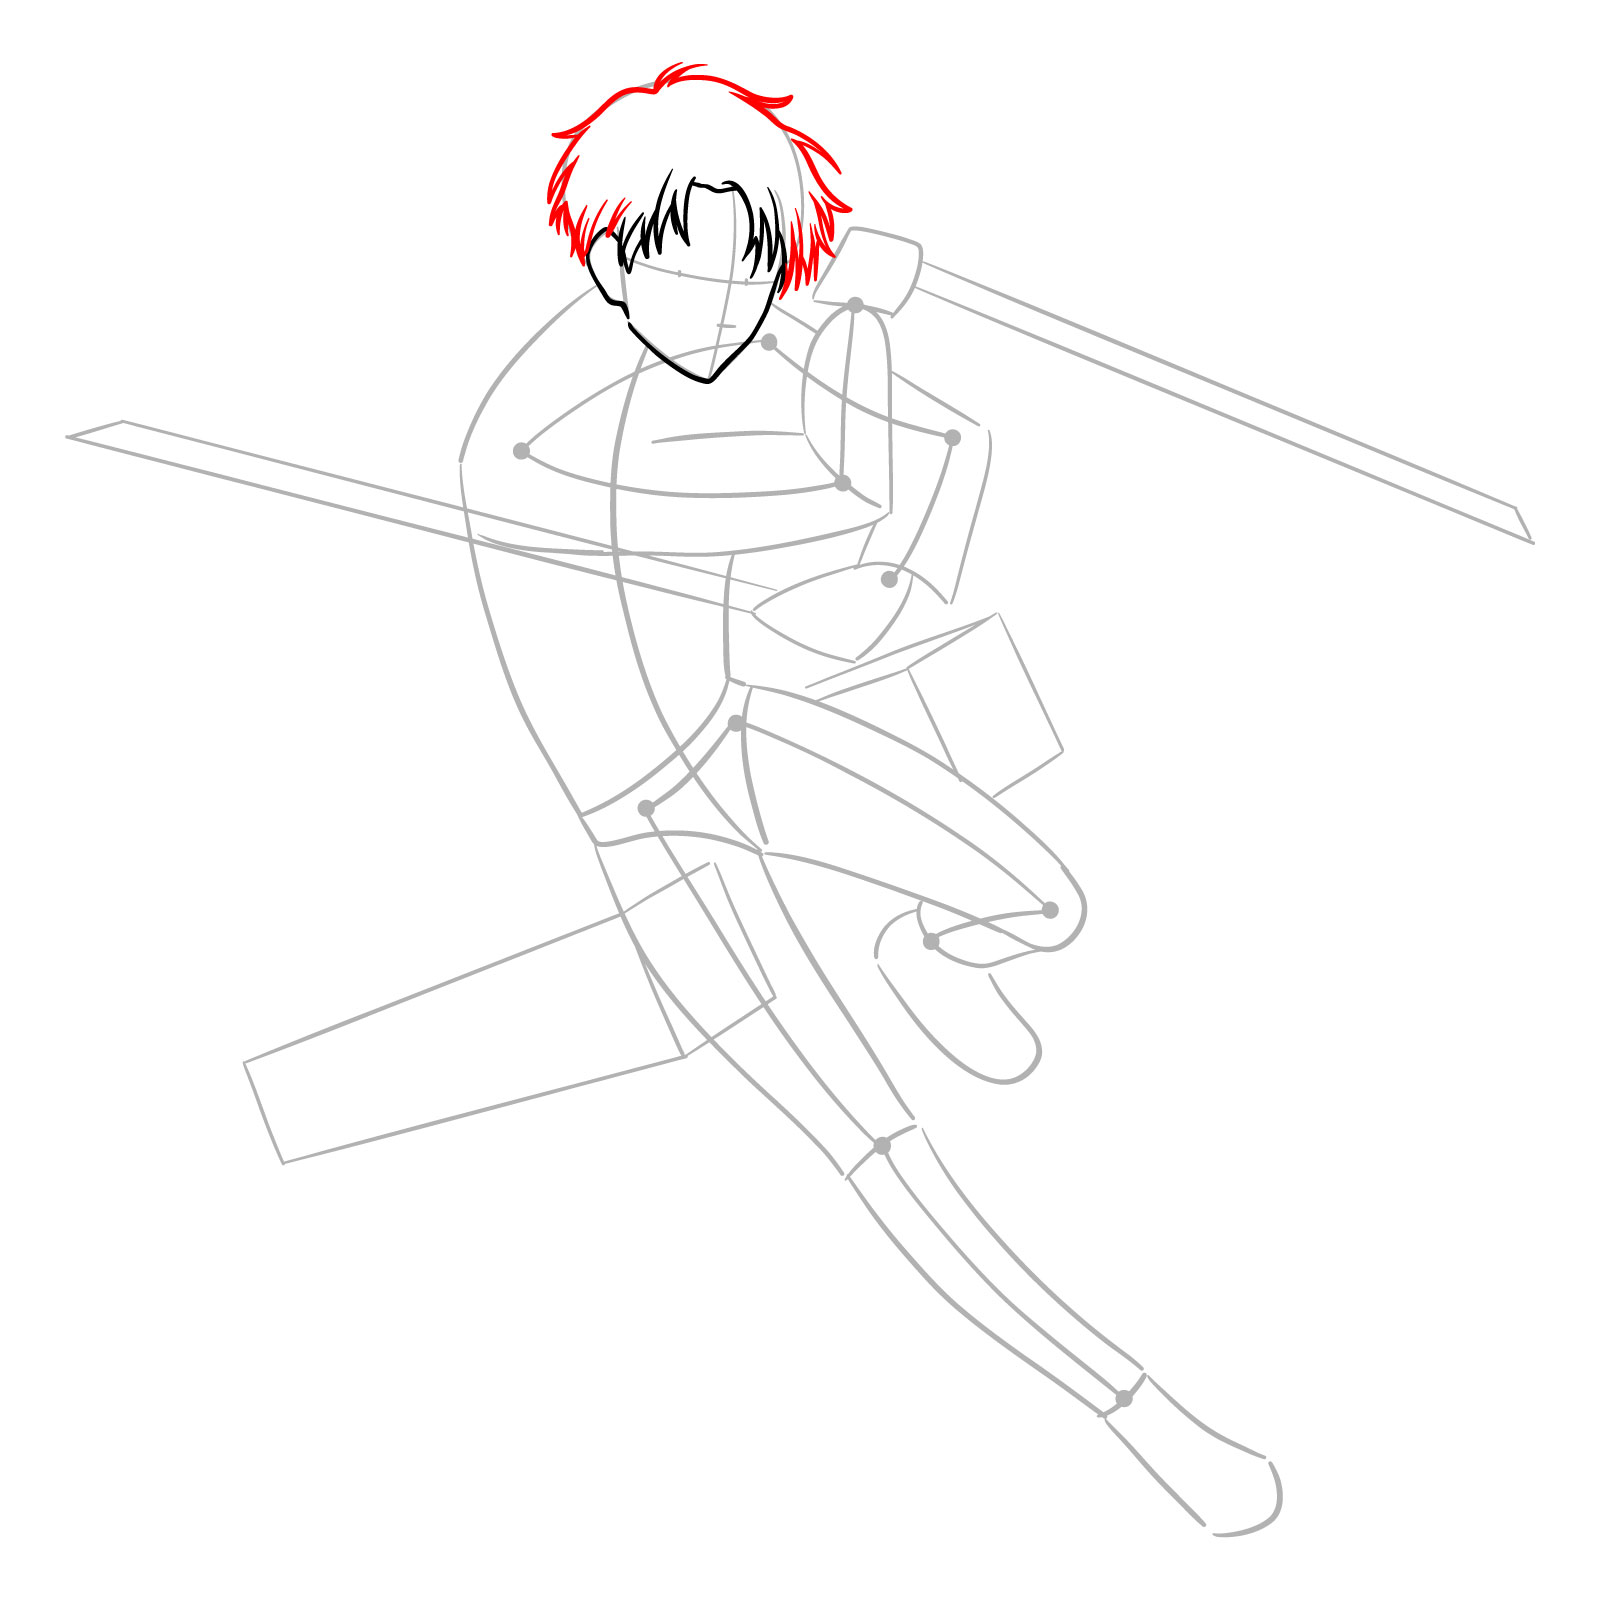
Steps 4 – 6: In these steps, refine Captain Levi’s facial features starting with the face frame. Sketch the contour of his face, noting the jawline and chin to capture his determined expression. Add his iconic hairstyle, paying attention to the strands of hair and their direction to convey motion and intensity in the action pose
Step 04:
Steps 4 to 6 of a drawing guide focusing on adding the face frame and hairstyle to Captain Levi in action
Step 05
Adding the face frame and hairstyle – step 5
Step 06
adding the face frame and hairstyle – step 6
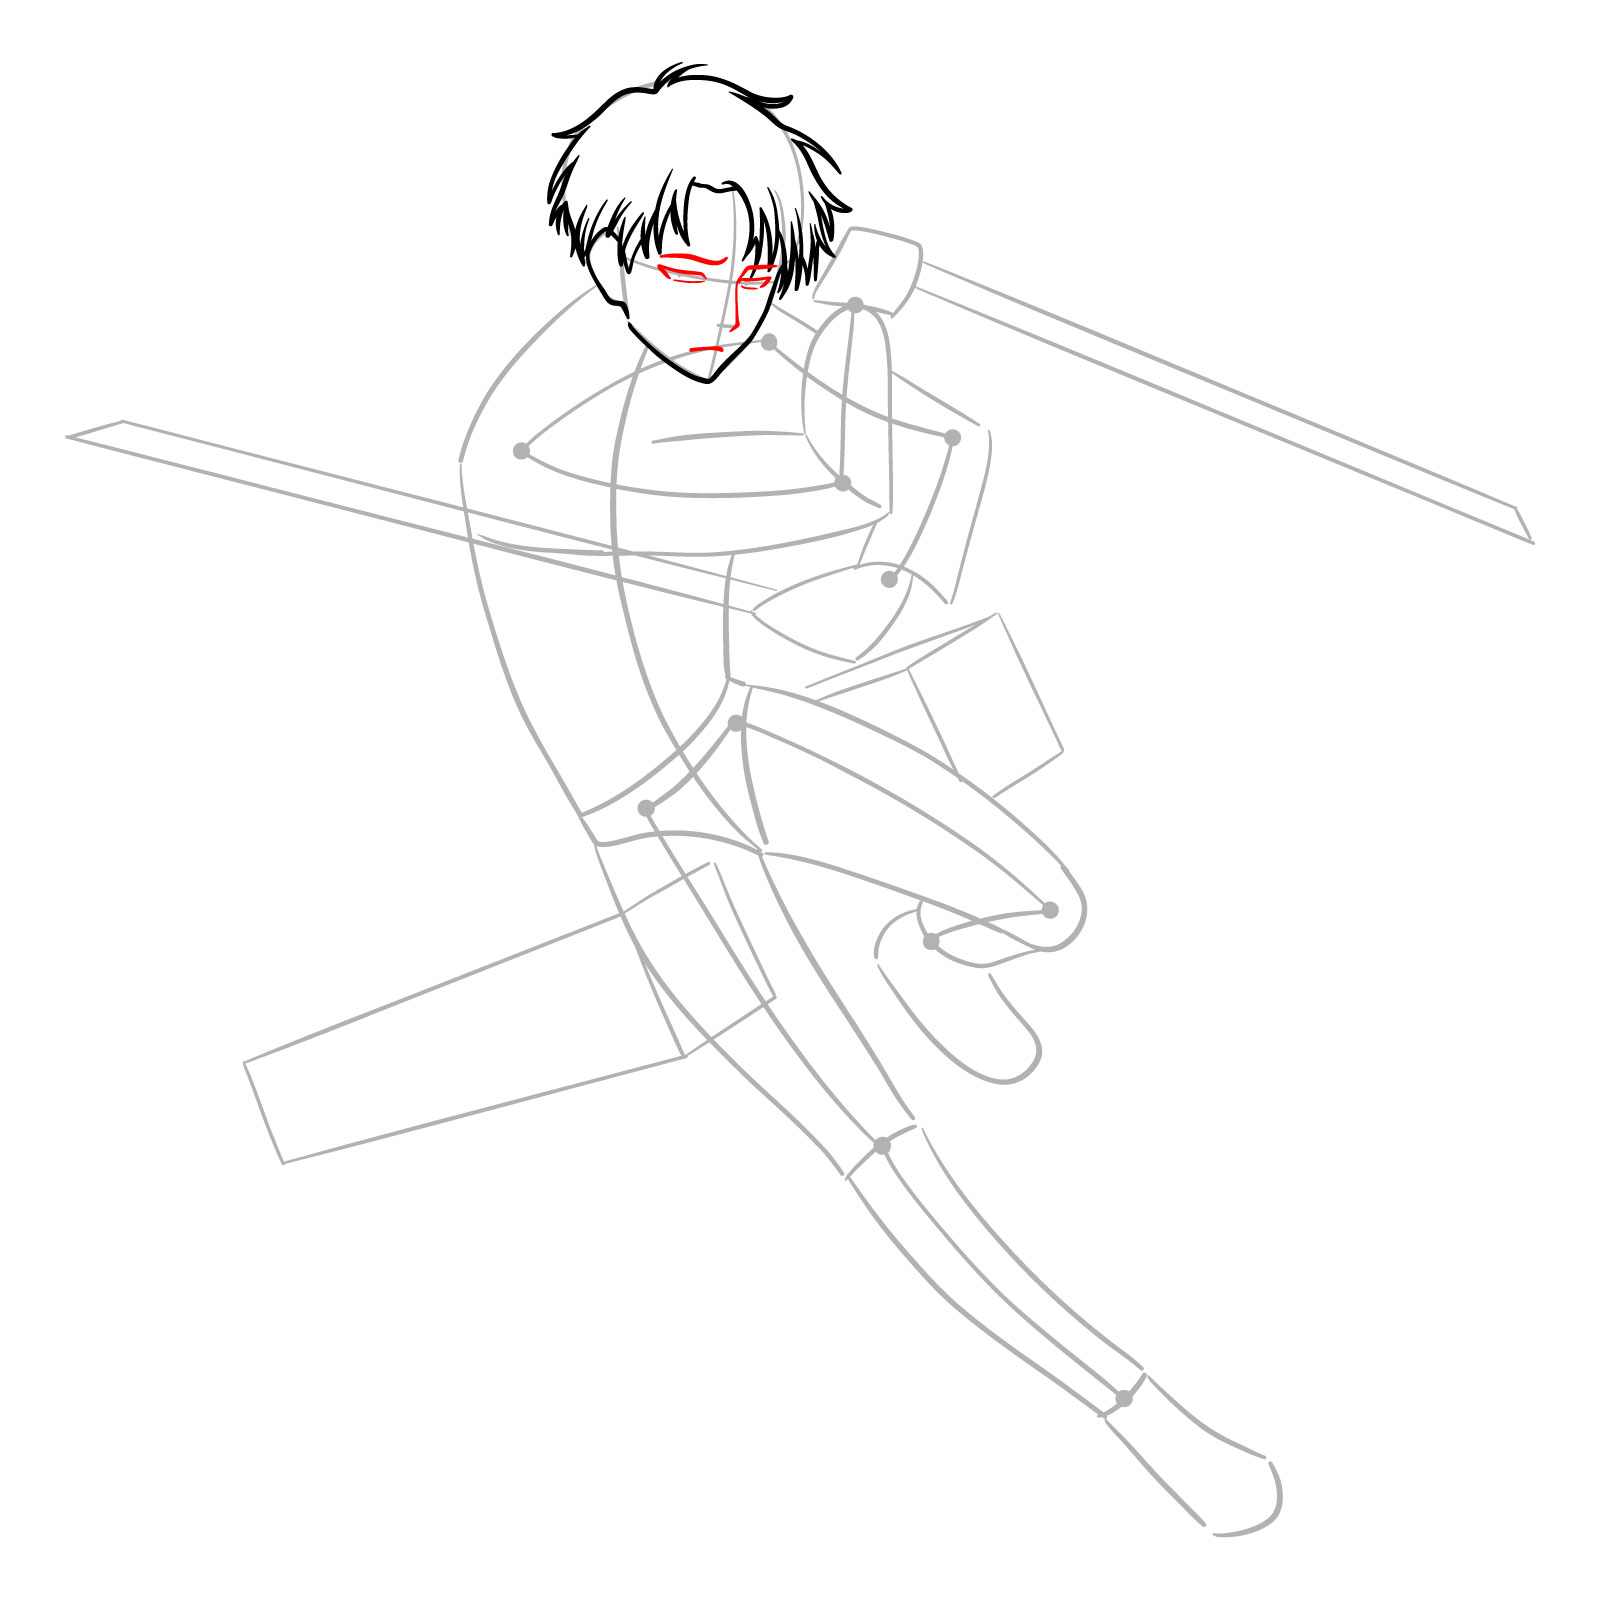
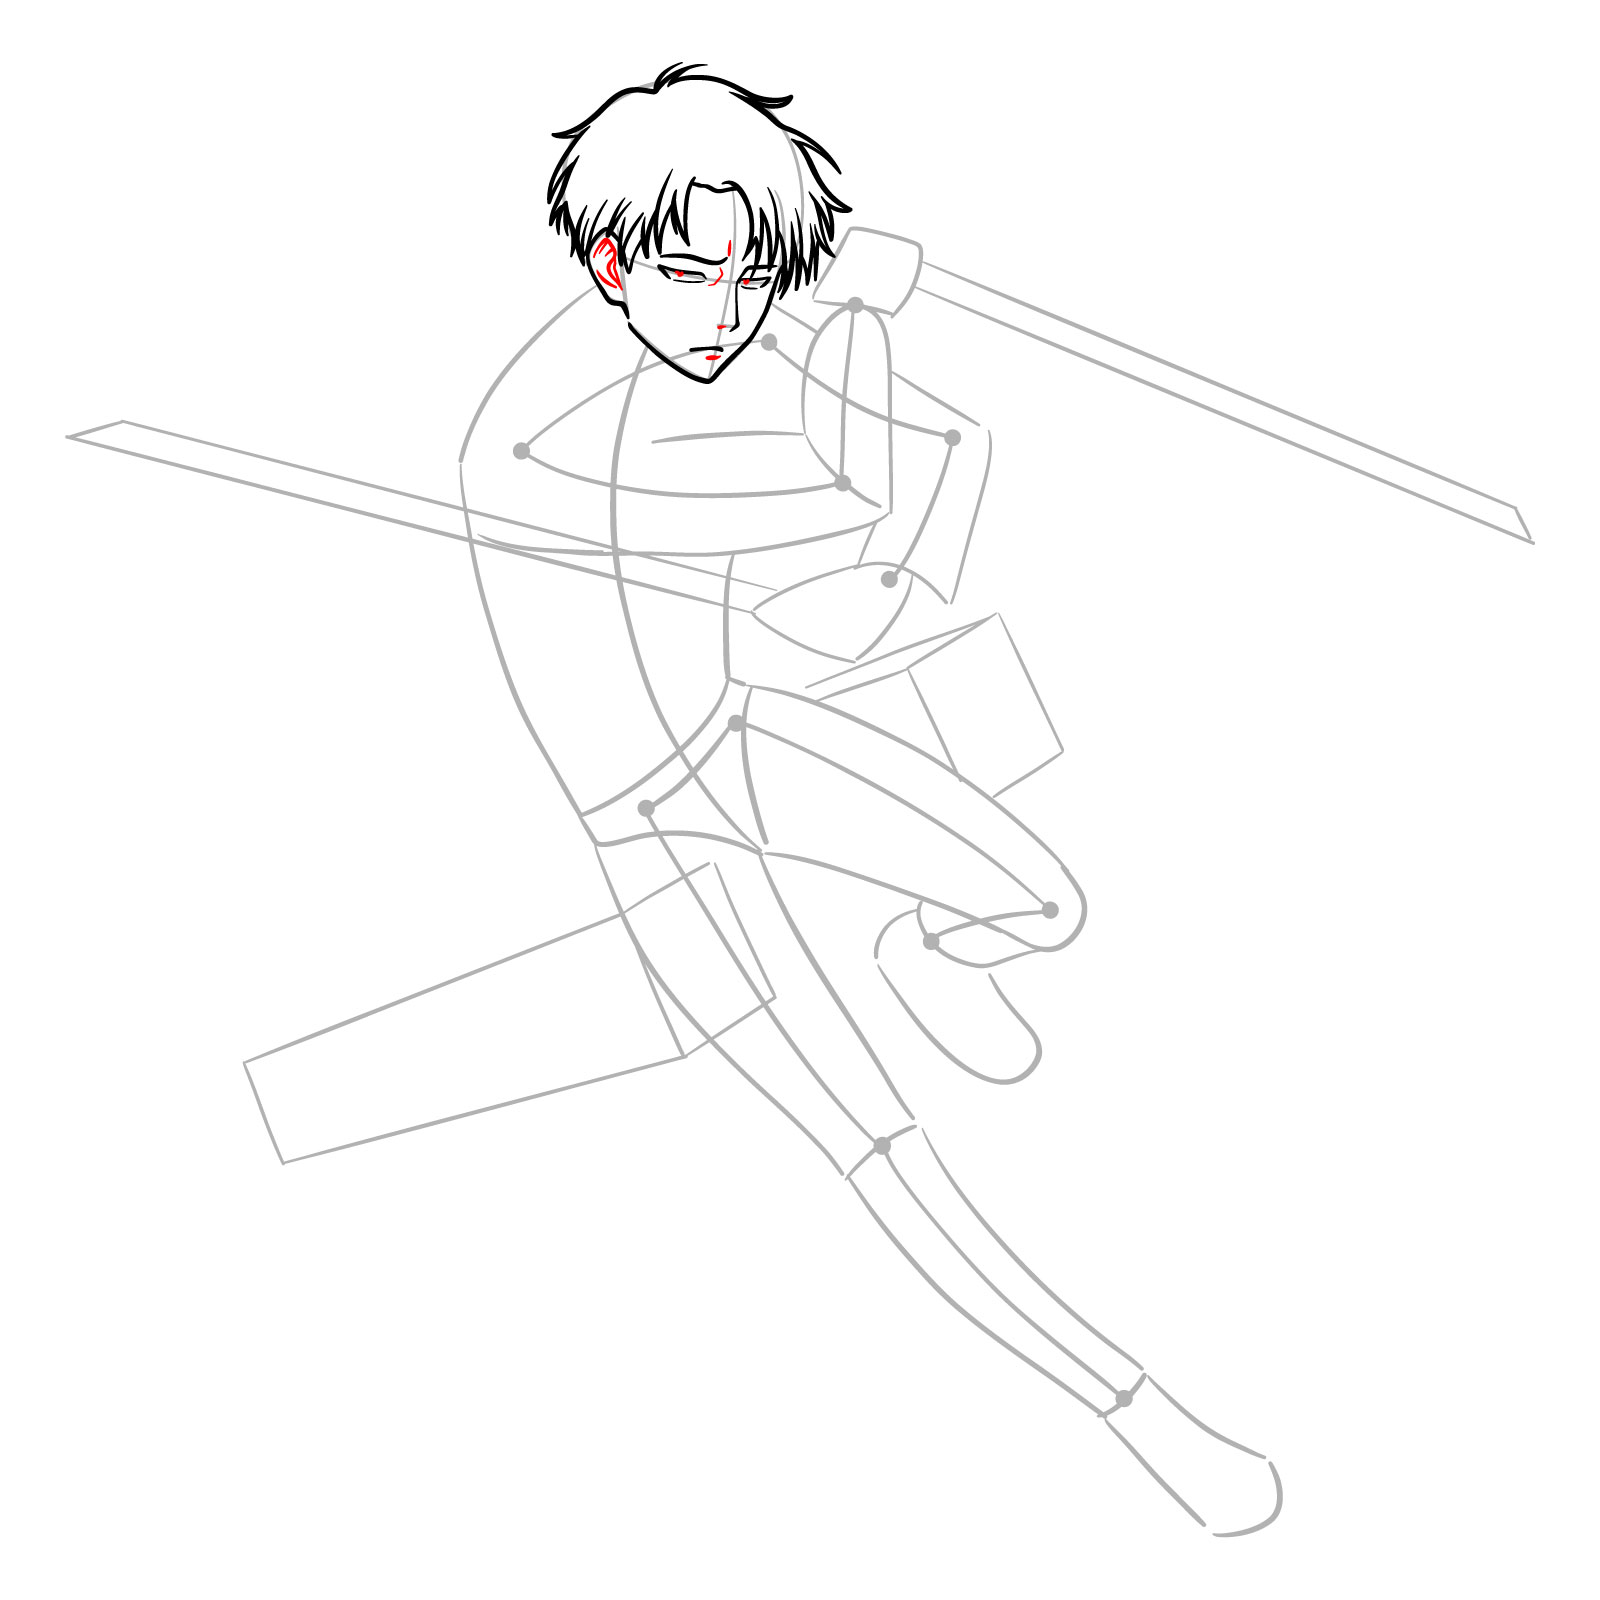
Steps 7 – 8: Focus on adding life to Captain Levi’s face by carefully drawing his intense eyes, defined nose, and firm mouth. Ensure the eyes are sharp and convey his fierce determination. Add the subtle lines for his facial structure, which will bring out his stern expression, essential for his action pose
Step 07:
Steps 7 to 8 of a drawing guide detailing Captain Levi’s eyes, nose, and mouth
Step 08
Detailing Captain Levi’s eyes, nose, ear and mouth
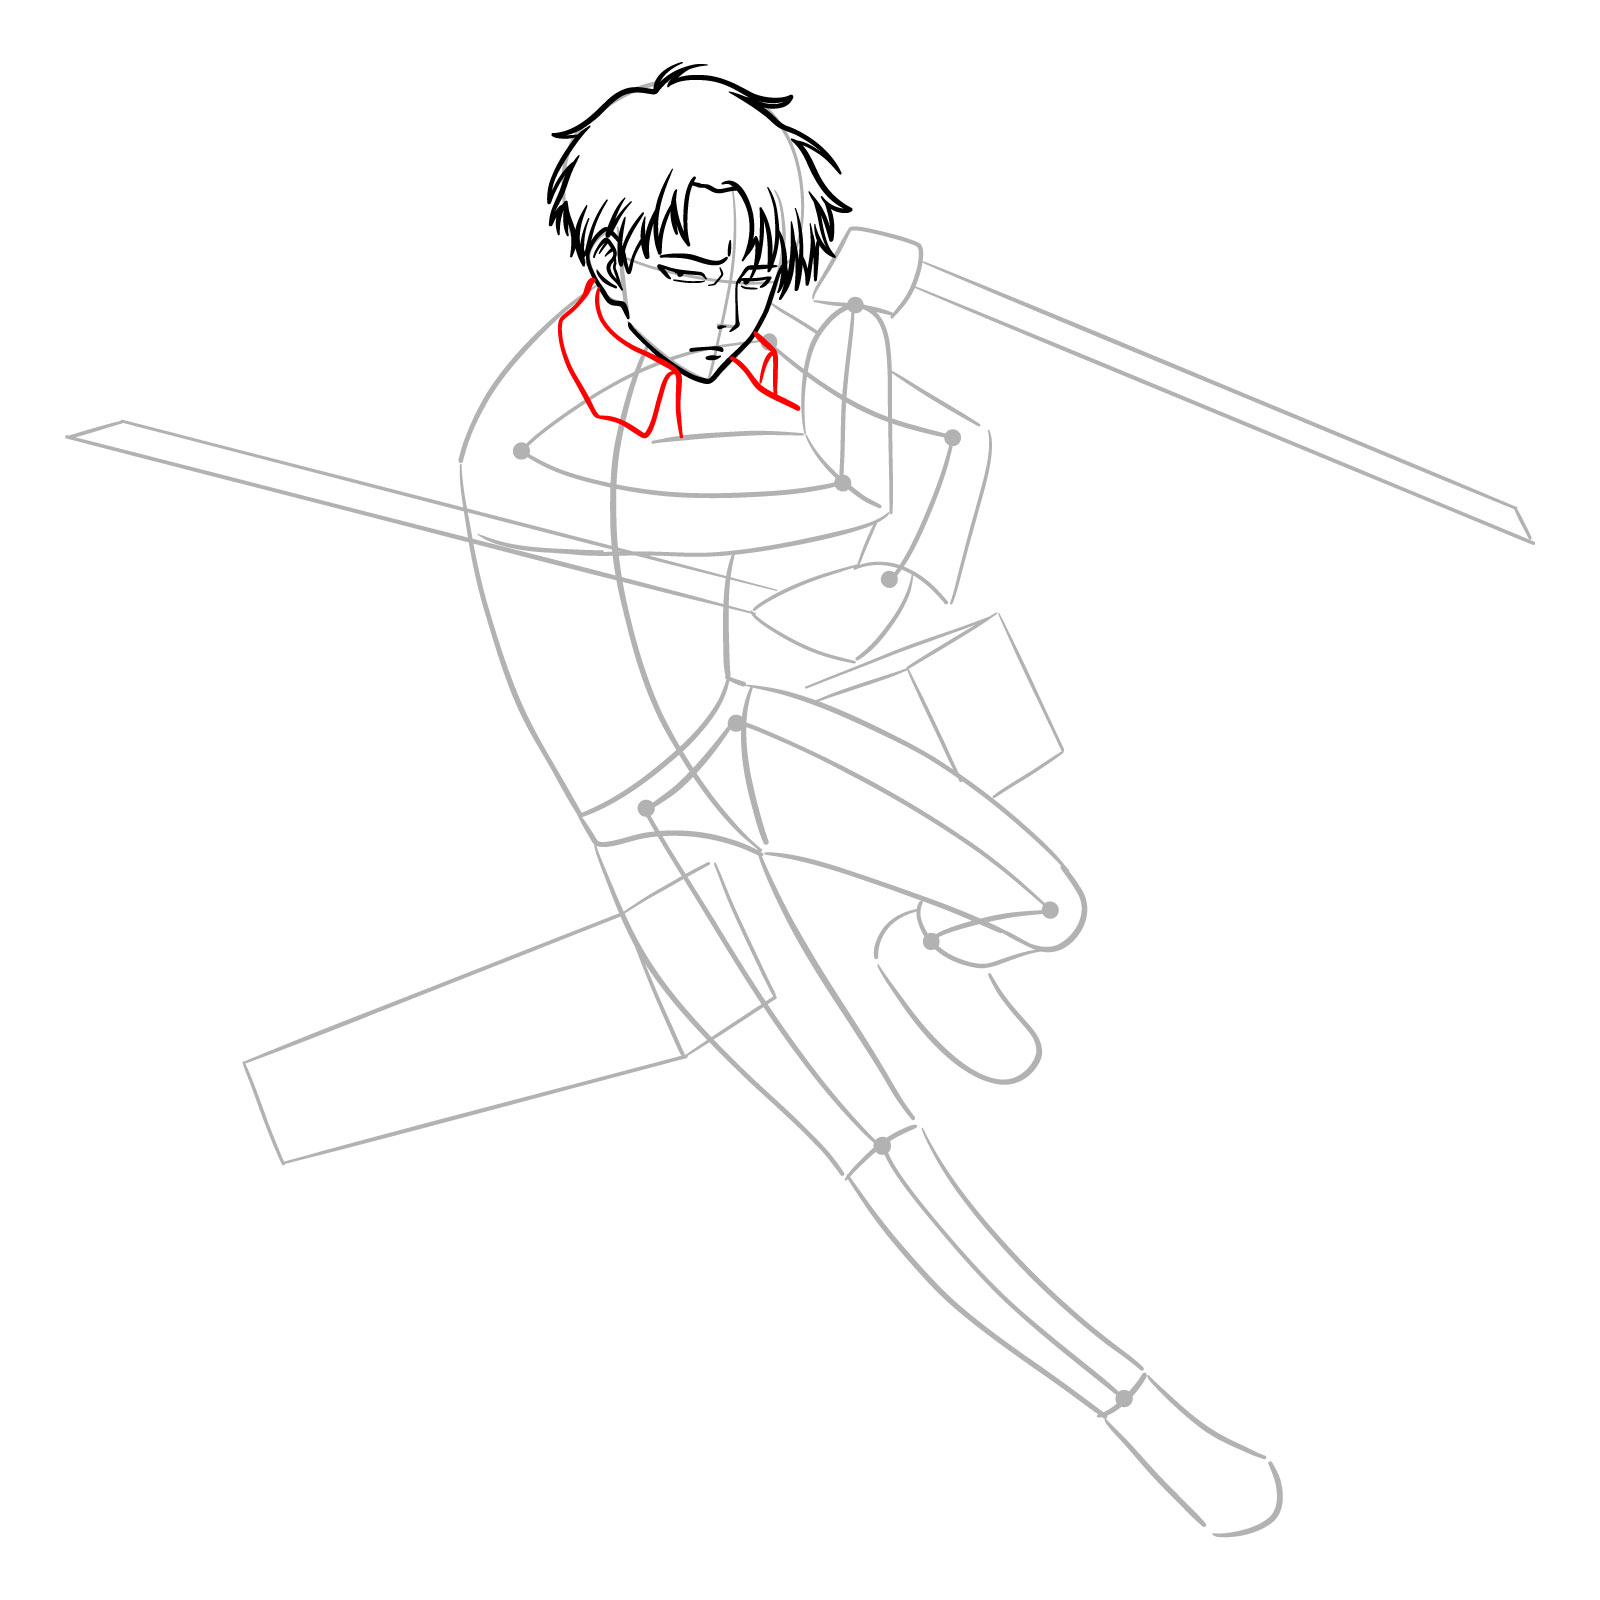
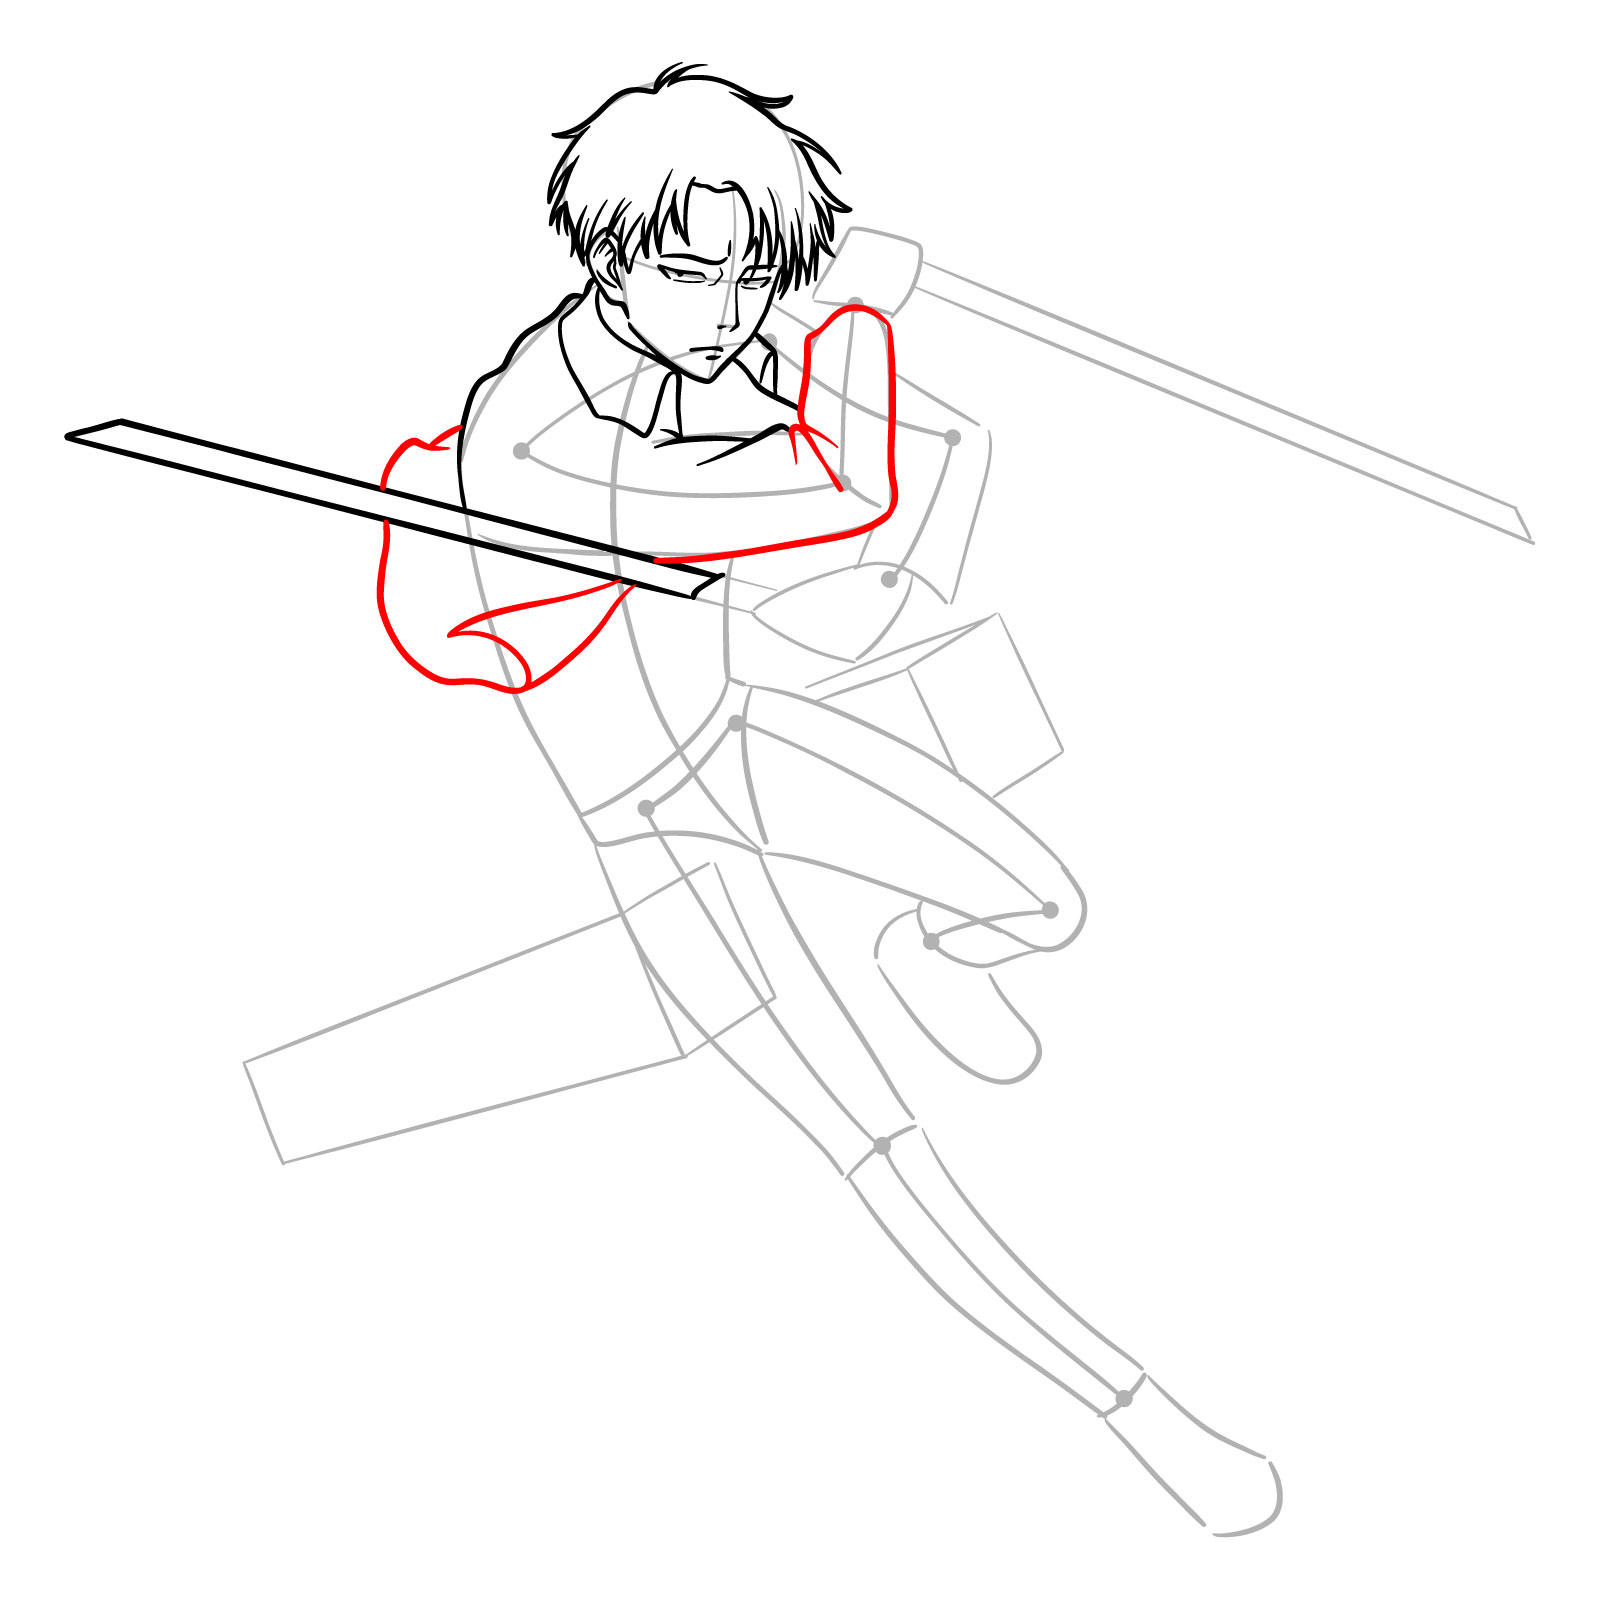
Steps 9 – 11: Now, bring attention to Captain Levi’s gear by sketching the high collar of his jacket and the main part of the jacket itself, making sure it appears to be flowing with the action of the pose. Draw the right sleeve with attention to the folds that indicate movement. Finally, draw the sword nearest to us with precision, capturing the sharpness and details of the blade that reflect its deadly purpose
Steps 9 to 11 of a drawing guide on adding the collar of the jacket, right sleeve, and the blade of the sword to Captain Levi’s action pose
Step 10
Drawing jacket and the sword’s blade
Step 11
Adding the right sleeve of the jacket
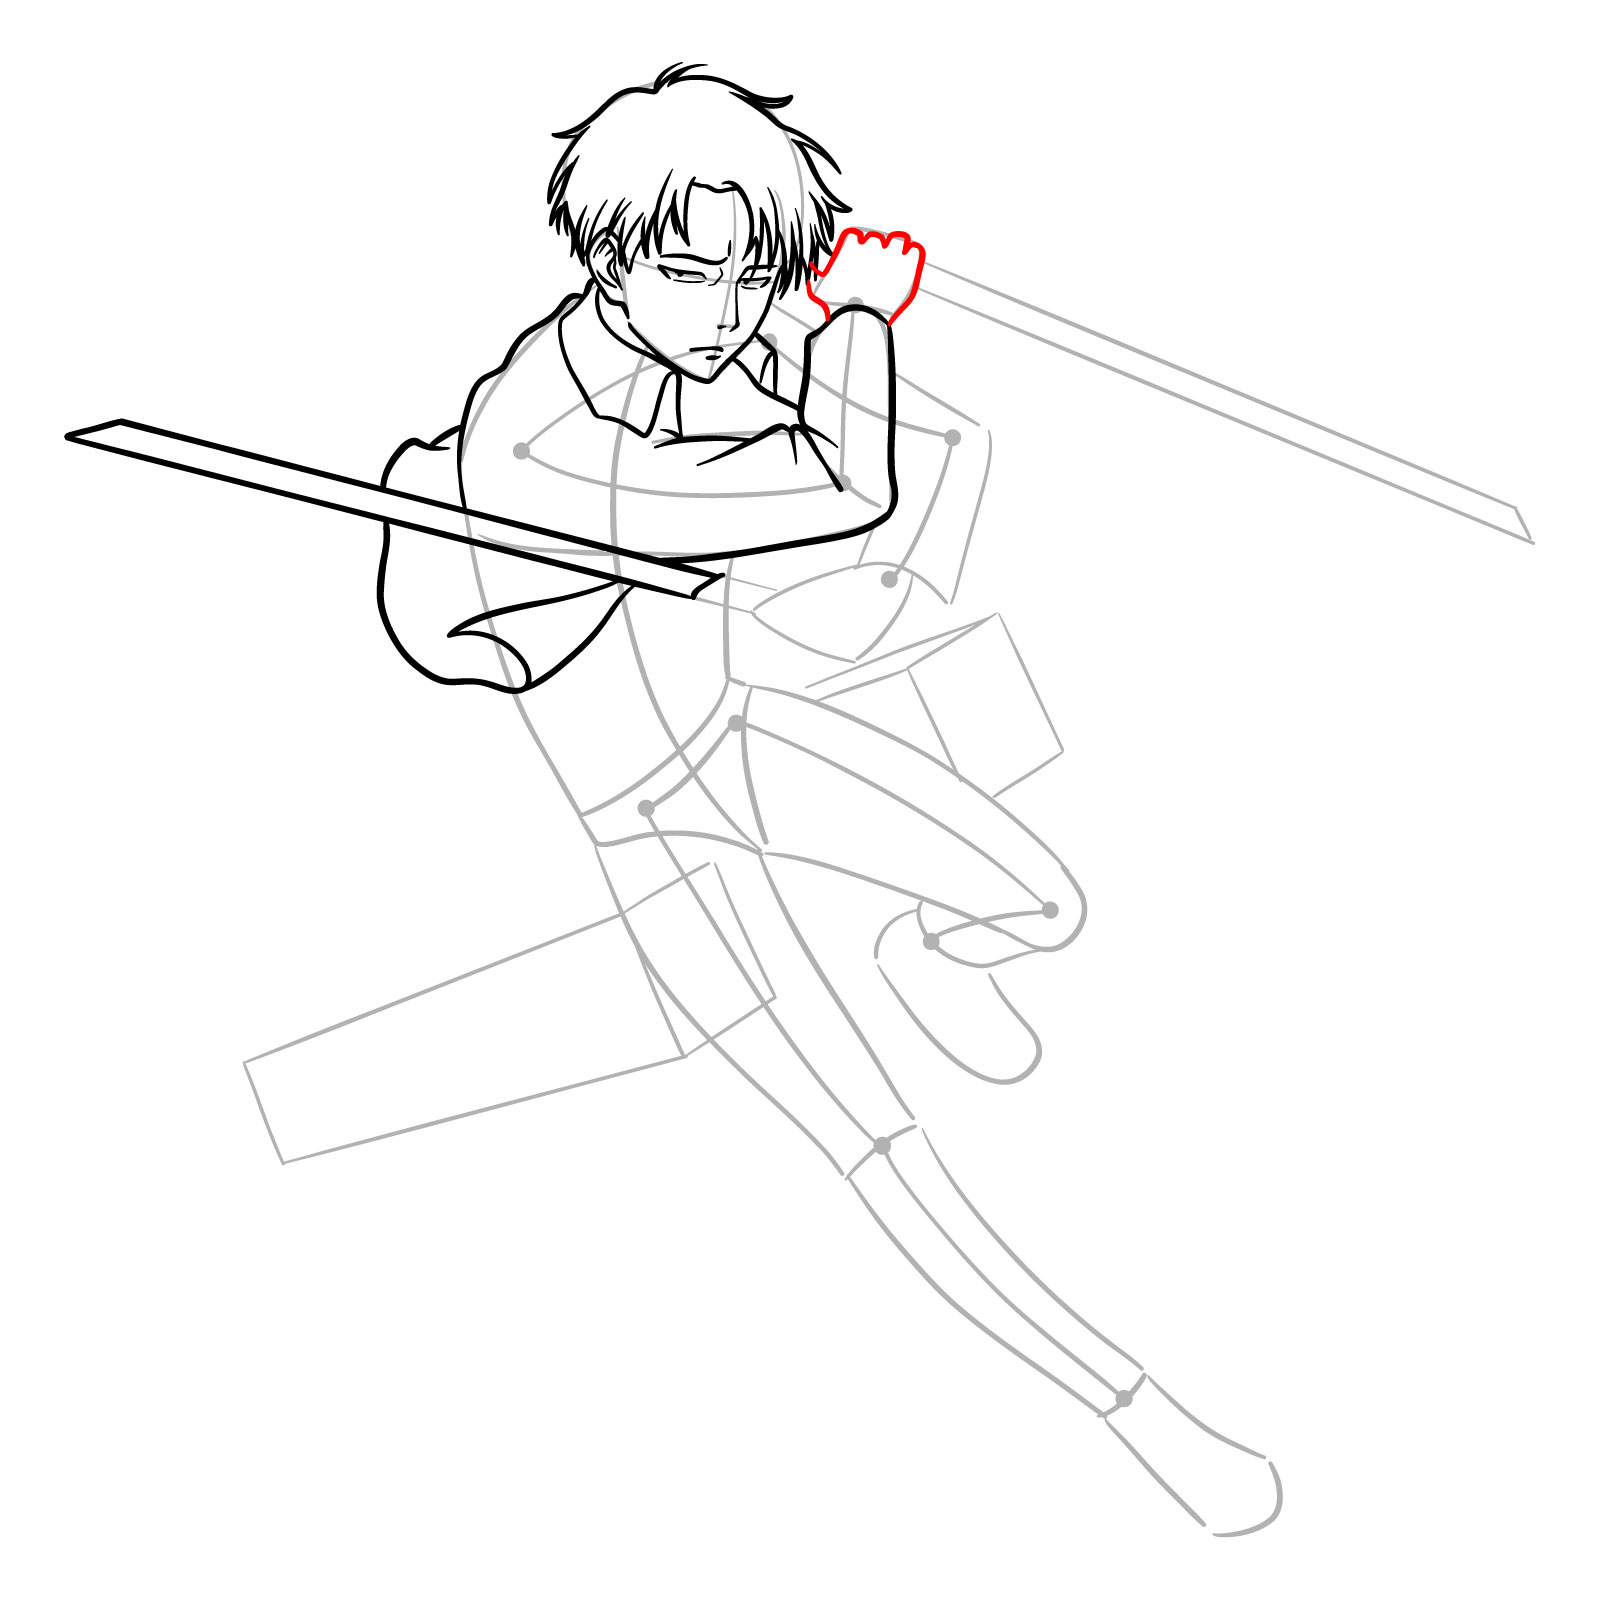
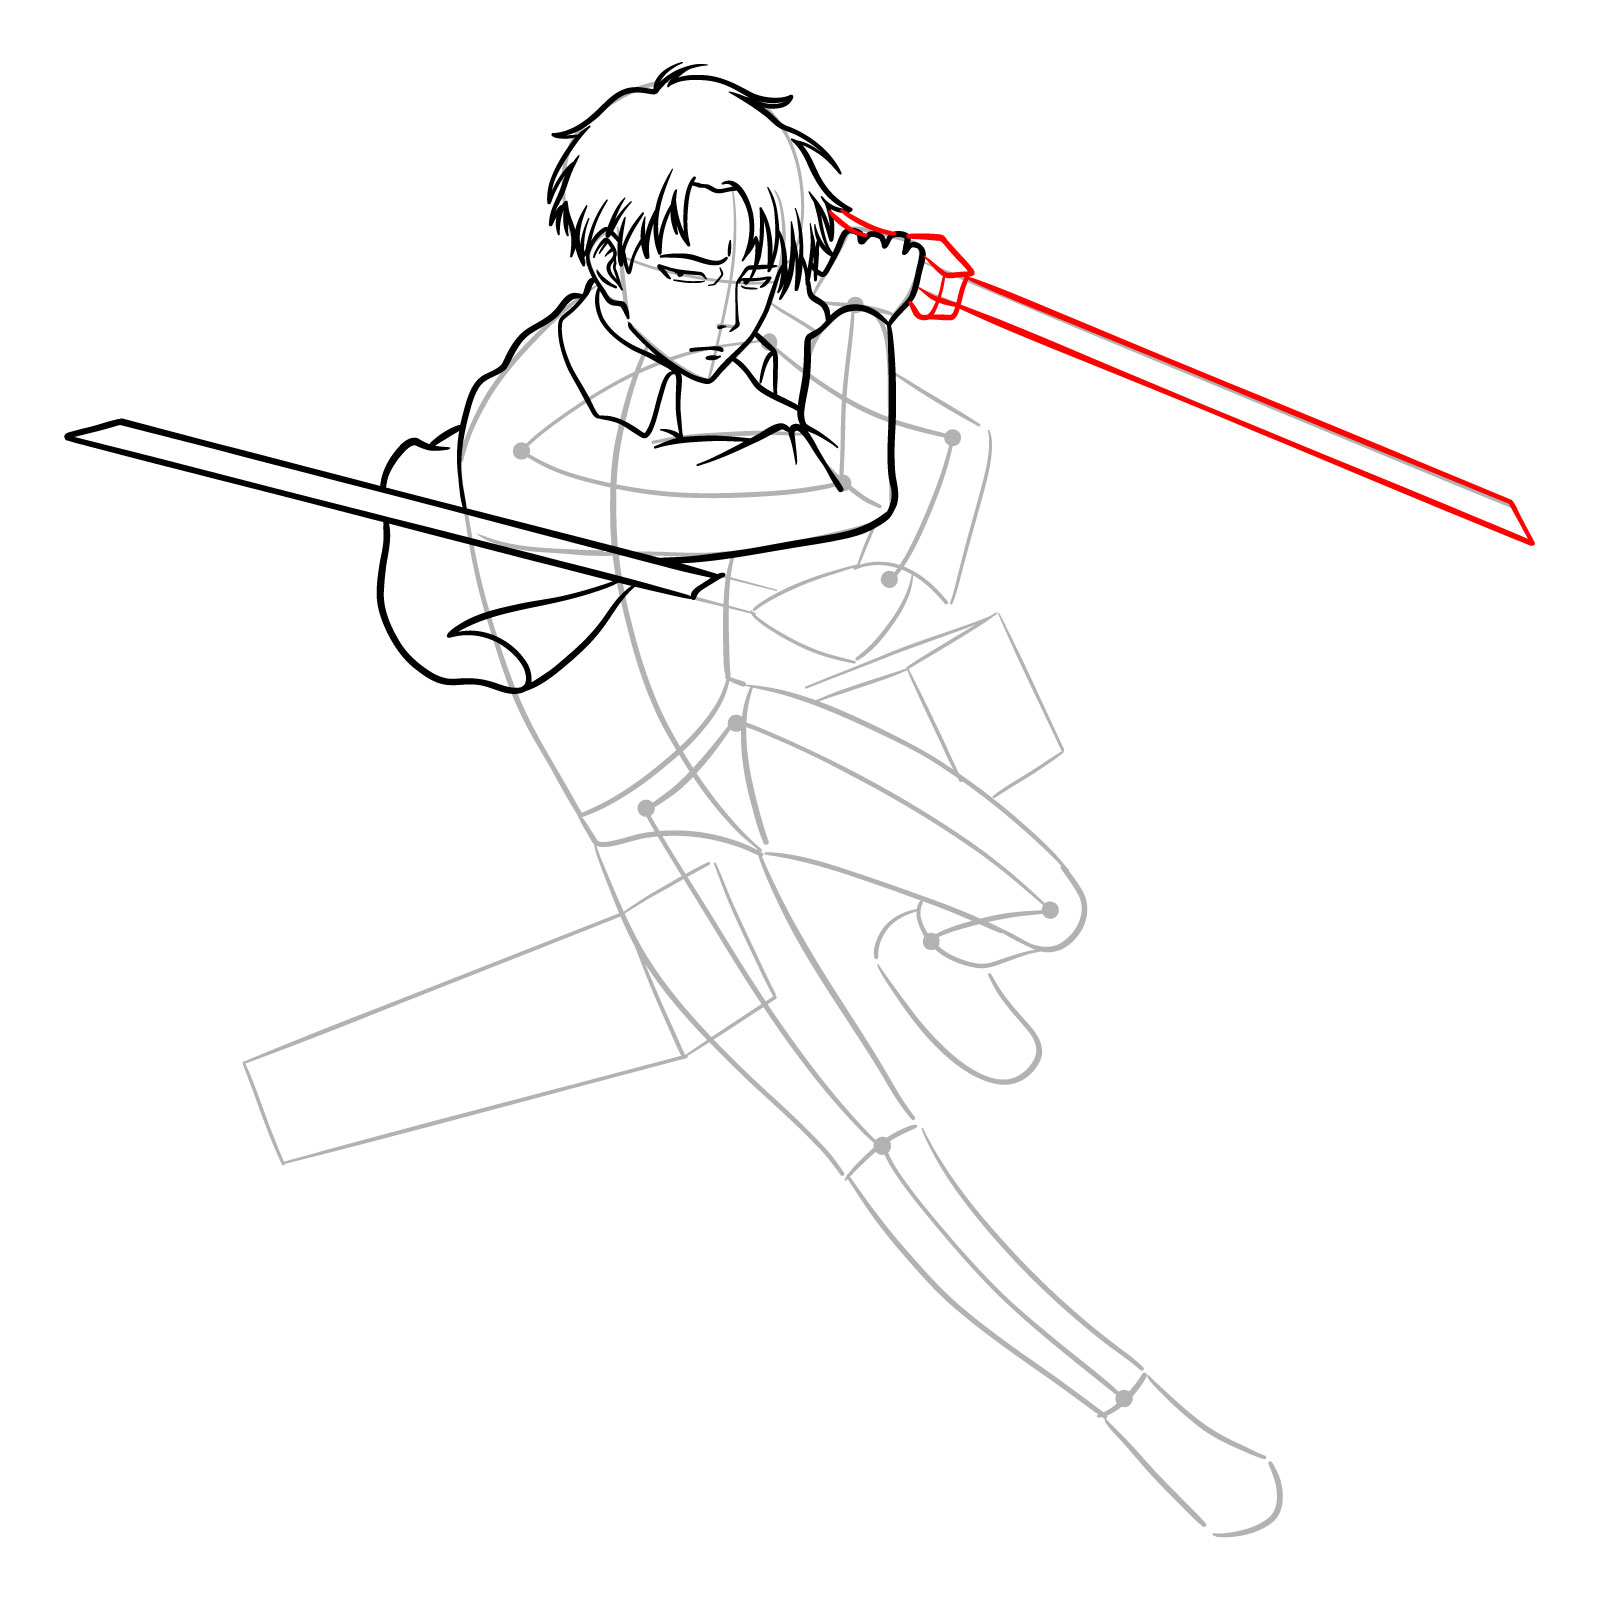
Steps 12 – 13: Detail Captain Levi’s right hand gripping the handle of his sword. Draw the fingers wrapped tightly around the hilt, showing the tension of the action. Sketch the outline of the sword extending from his hand, maintaining the perspective and the dynamic angle indicative of a swift movement
Step 12:
Steps 12 to 13 of a drawing guide capturing Captain Levi’s right hand and sword details
Step 13
Drawing Captain Levi’s right hand and sword
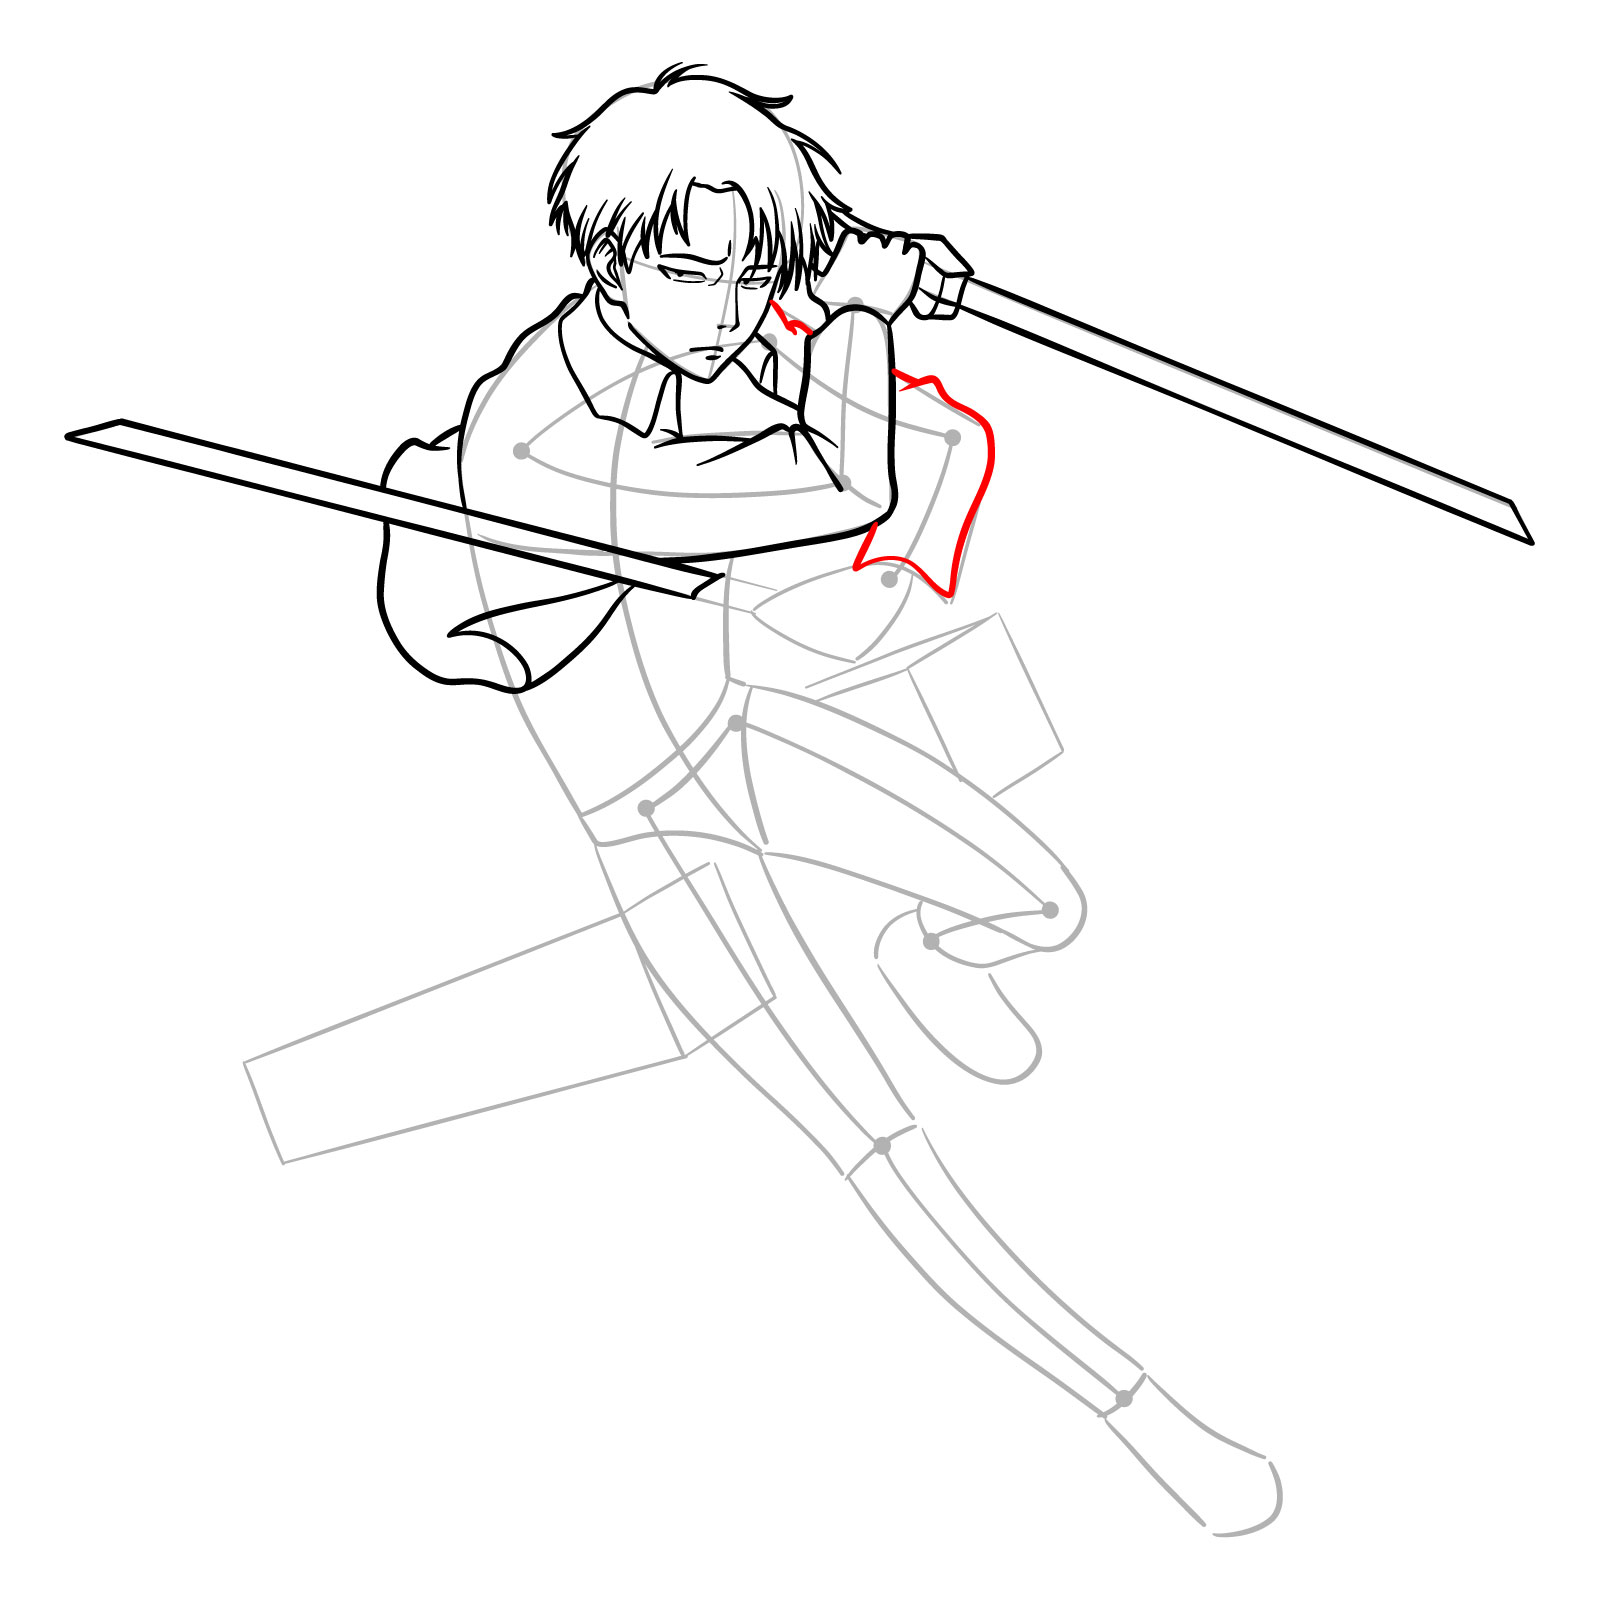
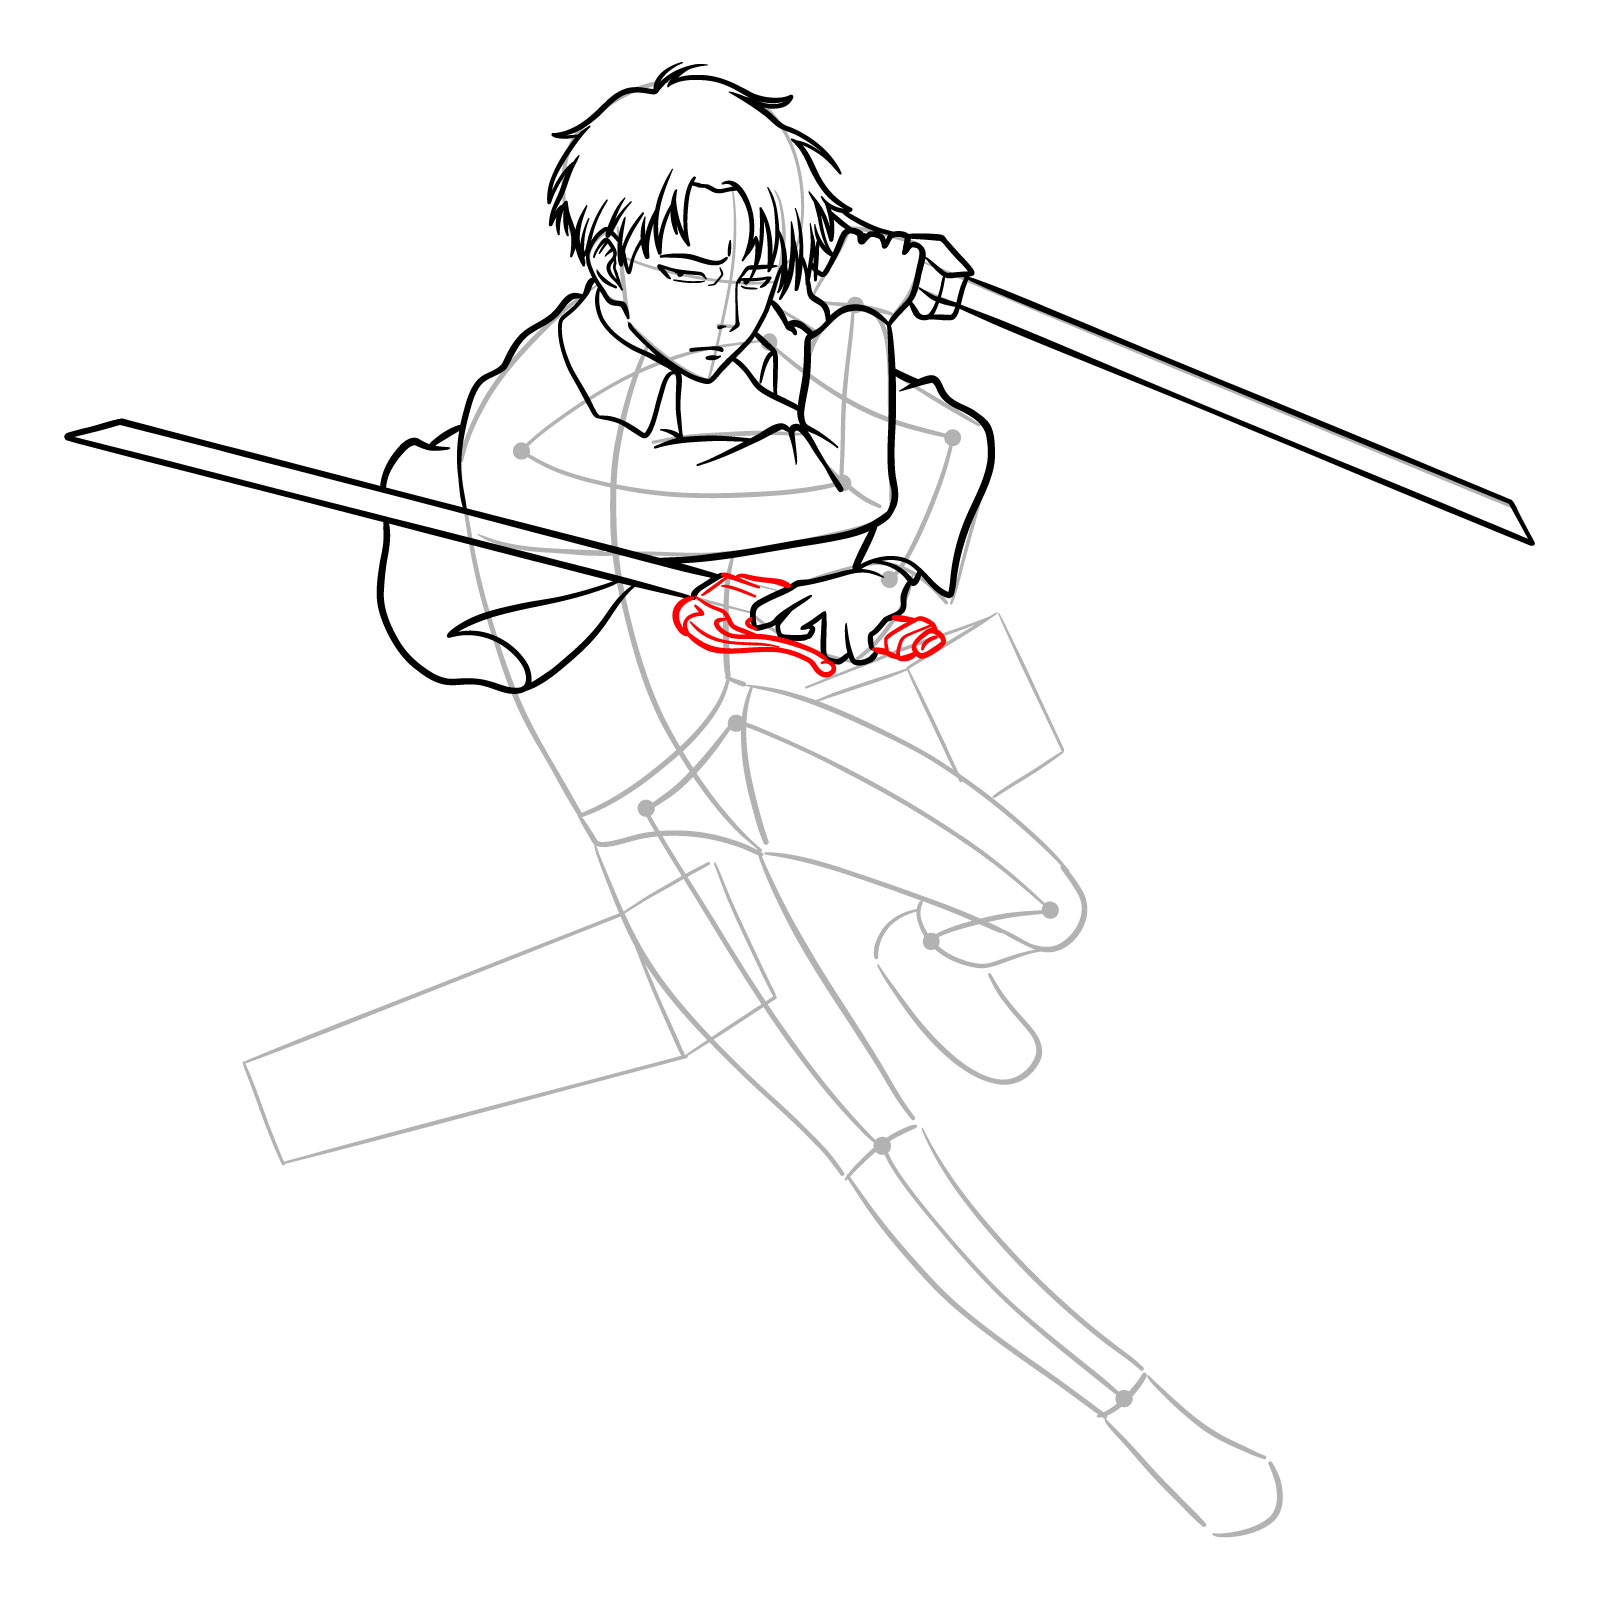
Steps 14 – 16: Move on to Captain Levi’s left side, starting with the left sleeve of his jacket. Indicate the flow and the folds of the fabric to suggest movement. Draw his left hand and make sure to illustrate the grip on the sword handle. Connect this handle to the blade drawn previously, ensuring the sword looks functional and proportional to the rest of the figure
Step 14:
Steps 14 to 16 of a drawing guide for Captain Levi’s left sleeve, hand, and the sword handle in an action pose
Step 15
Sketching Captain Levi’s left sleeve, hand, and the sword handle
Step 16
Sketching Captain Levi’s left sleeve, hand, and the sword handle
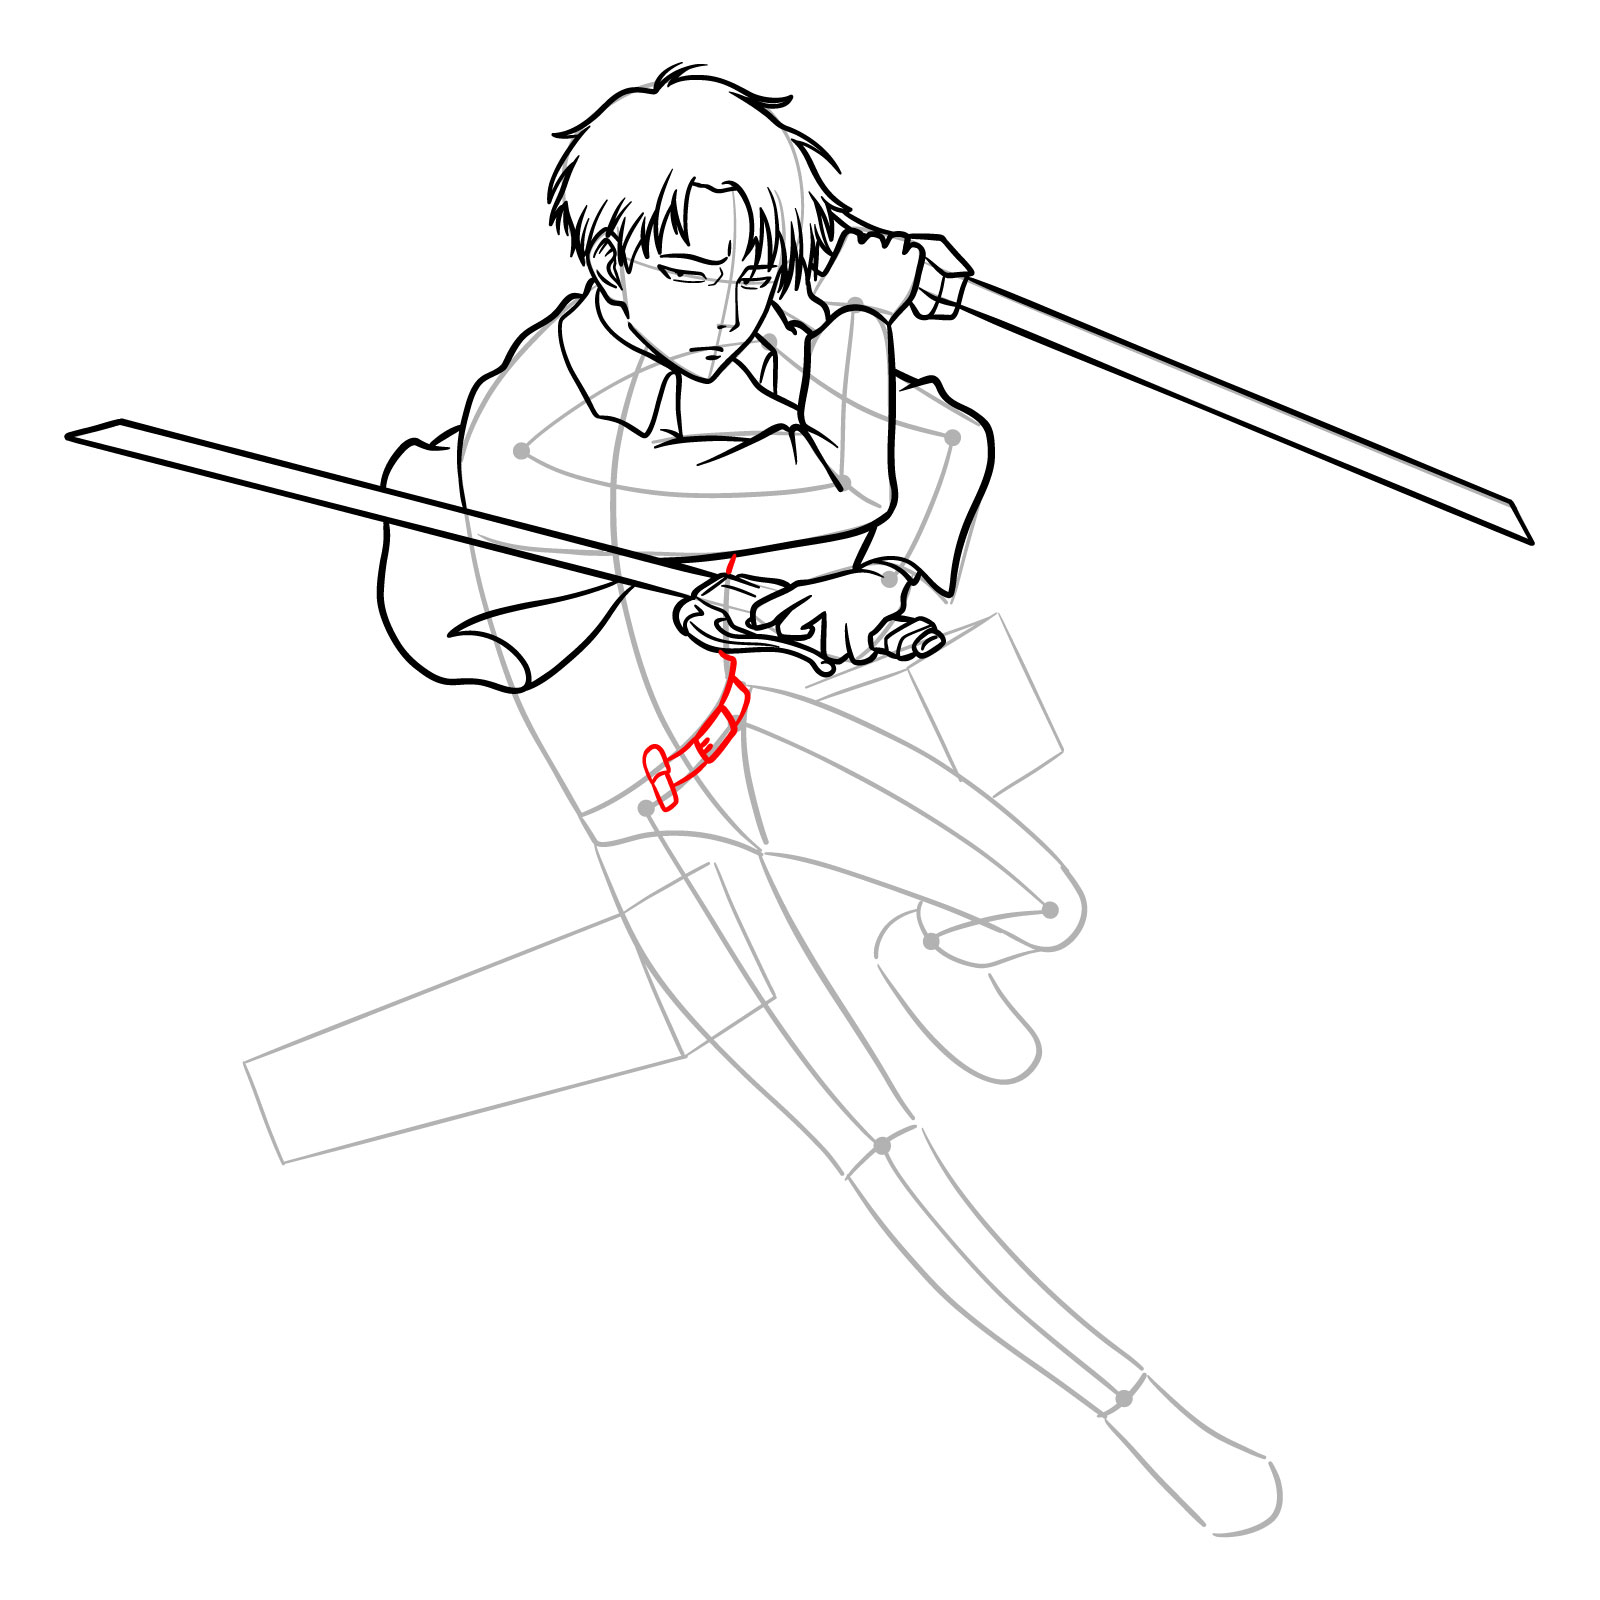
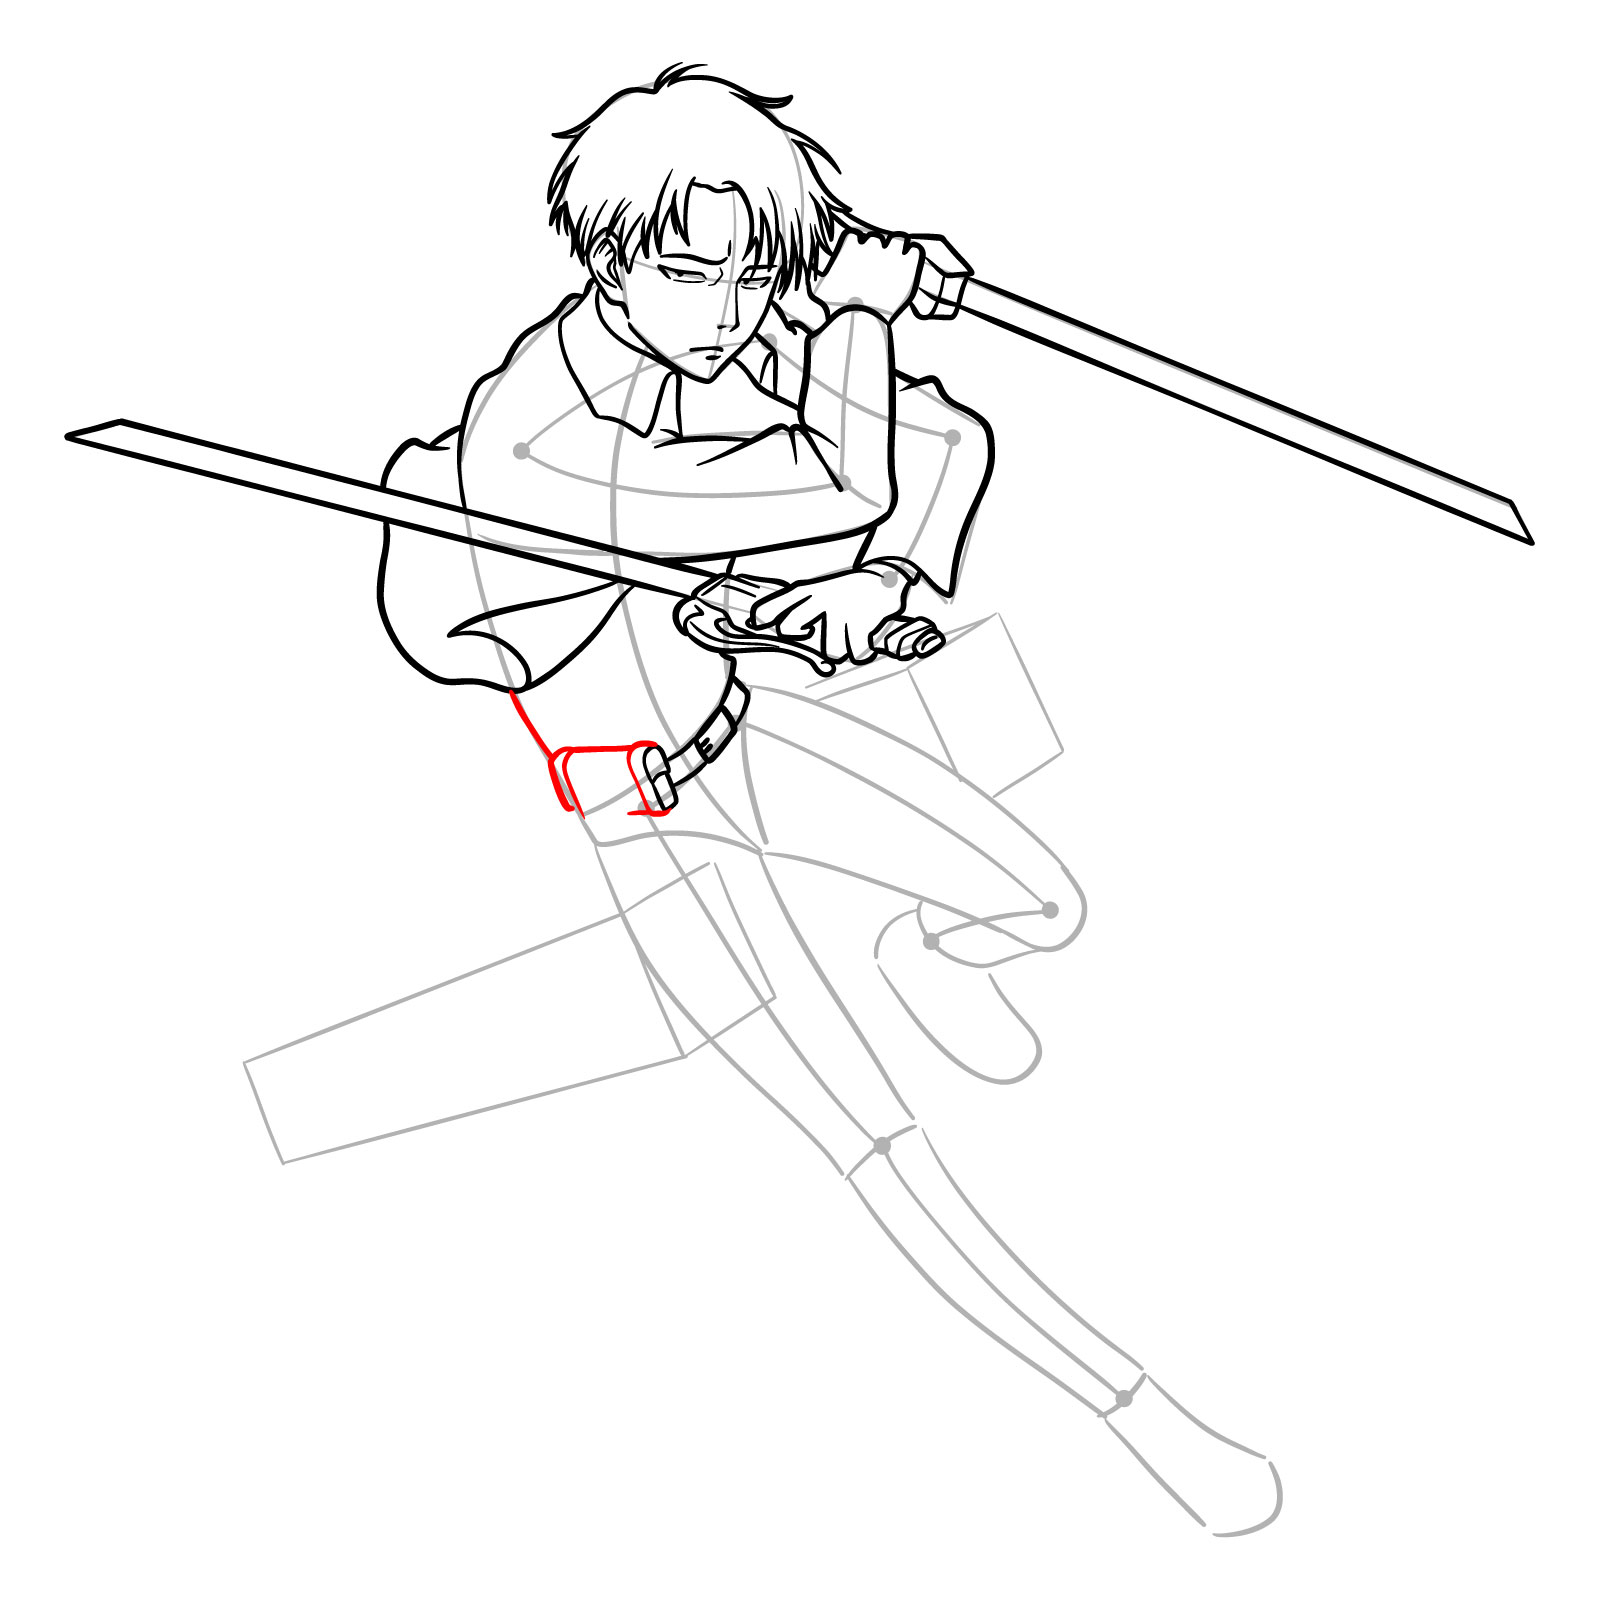
Steps 17 – 18: Finalize the lower part of the figure by sketching Captain Levi’s utility belt and the waist part of his body. Pay attention to the belt’s details and the gear that hangs from it, emphasizing the utility and readiness for battle. Ensure the waist is drawn to look natural and consistent with the twisting motion of his action pose
Step 17:
Steps 17 to 18 of a drawing guide showing the utility belt and waist area of Captain Levi
Step 18
Sketching the utility belt and waist area of Captain Levi
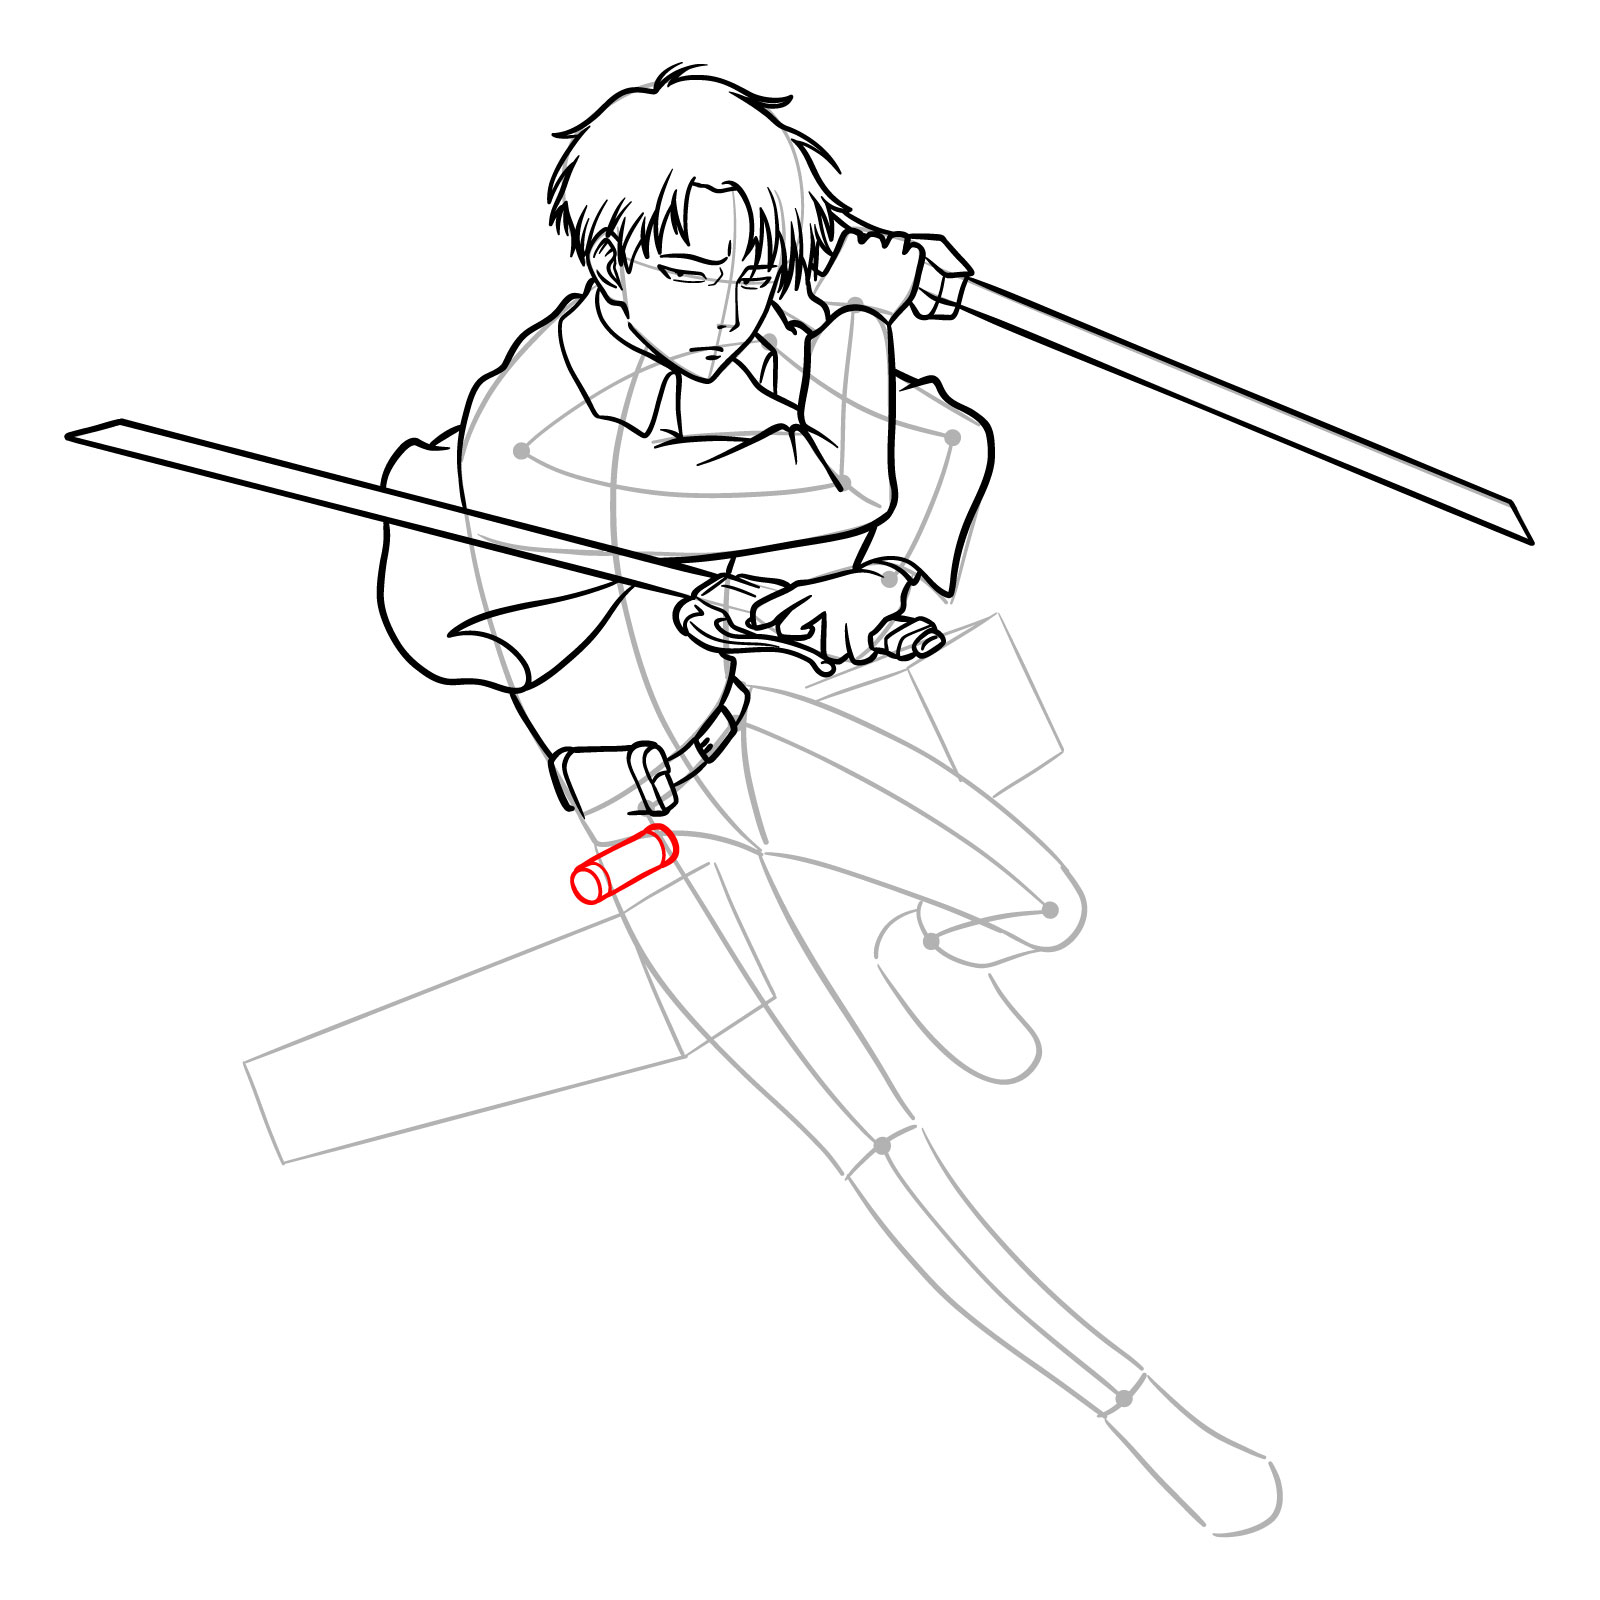
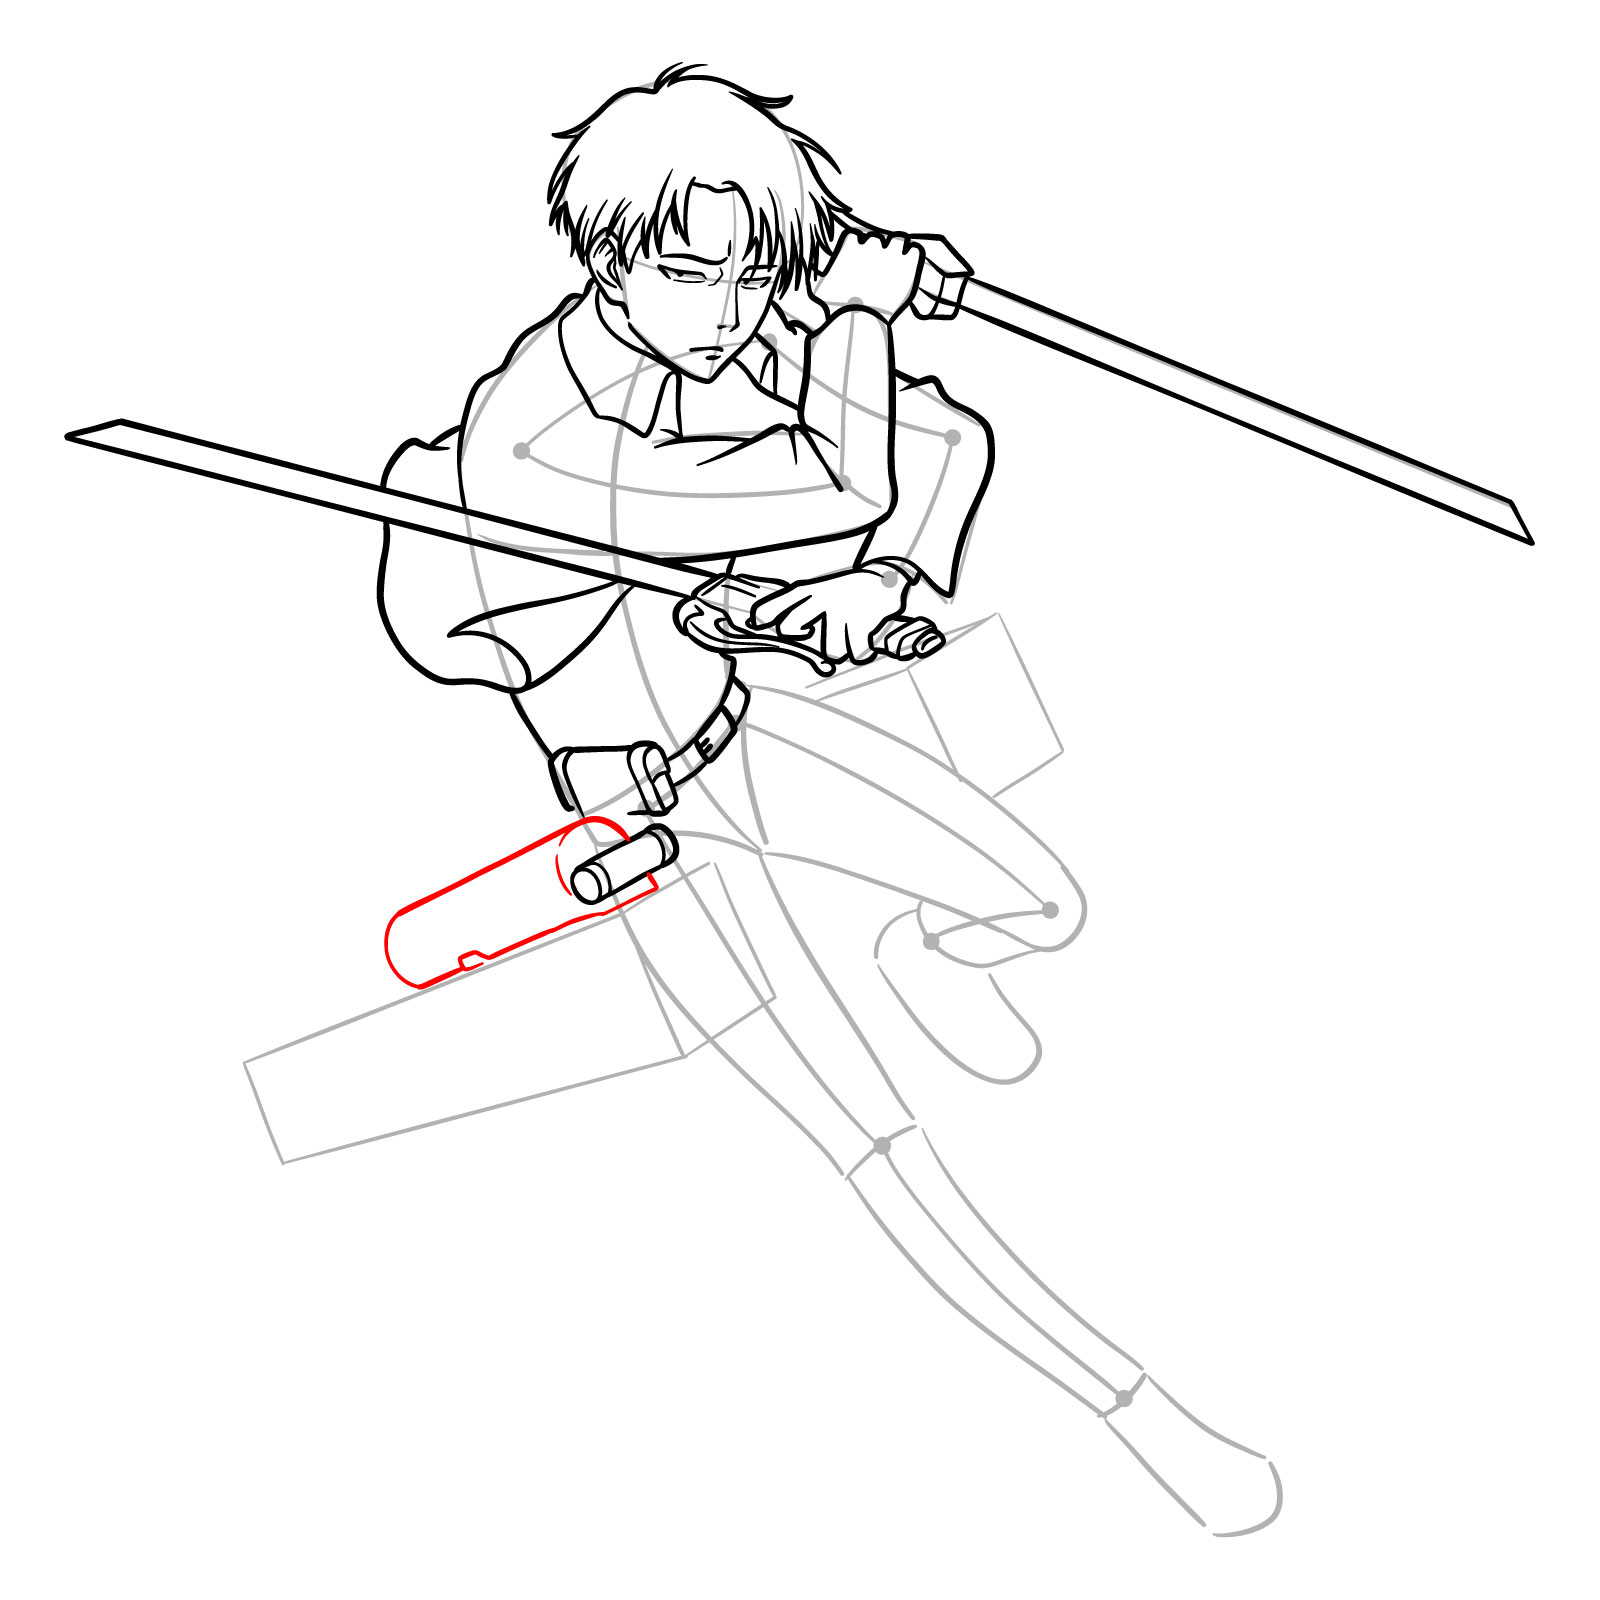
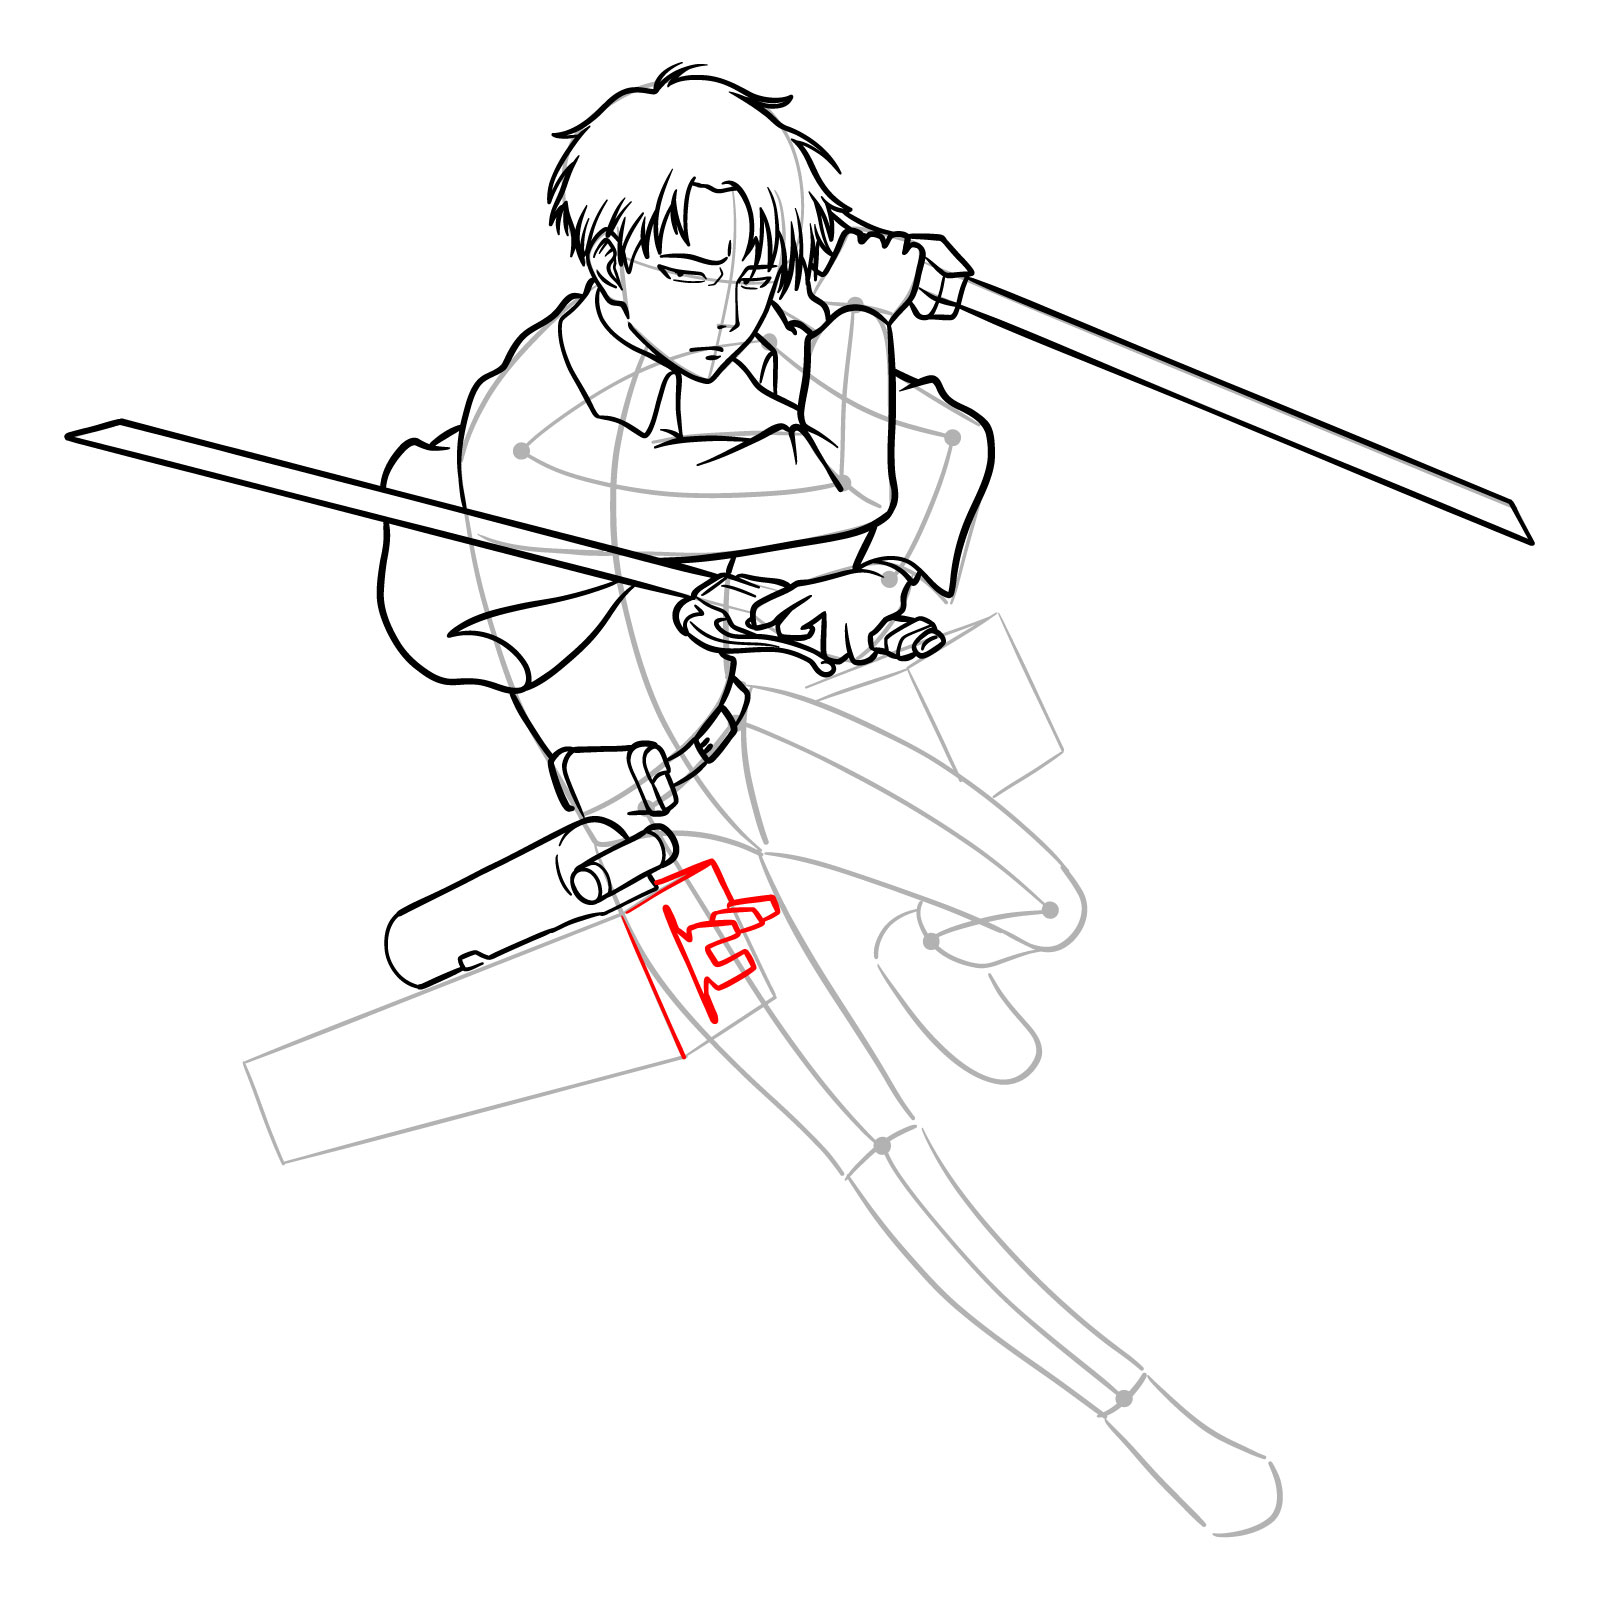
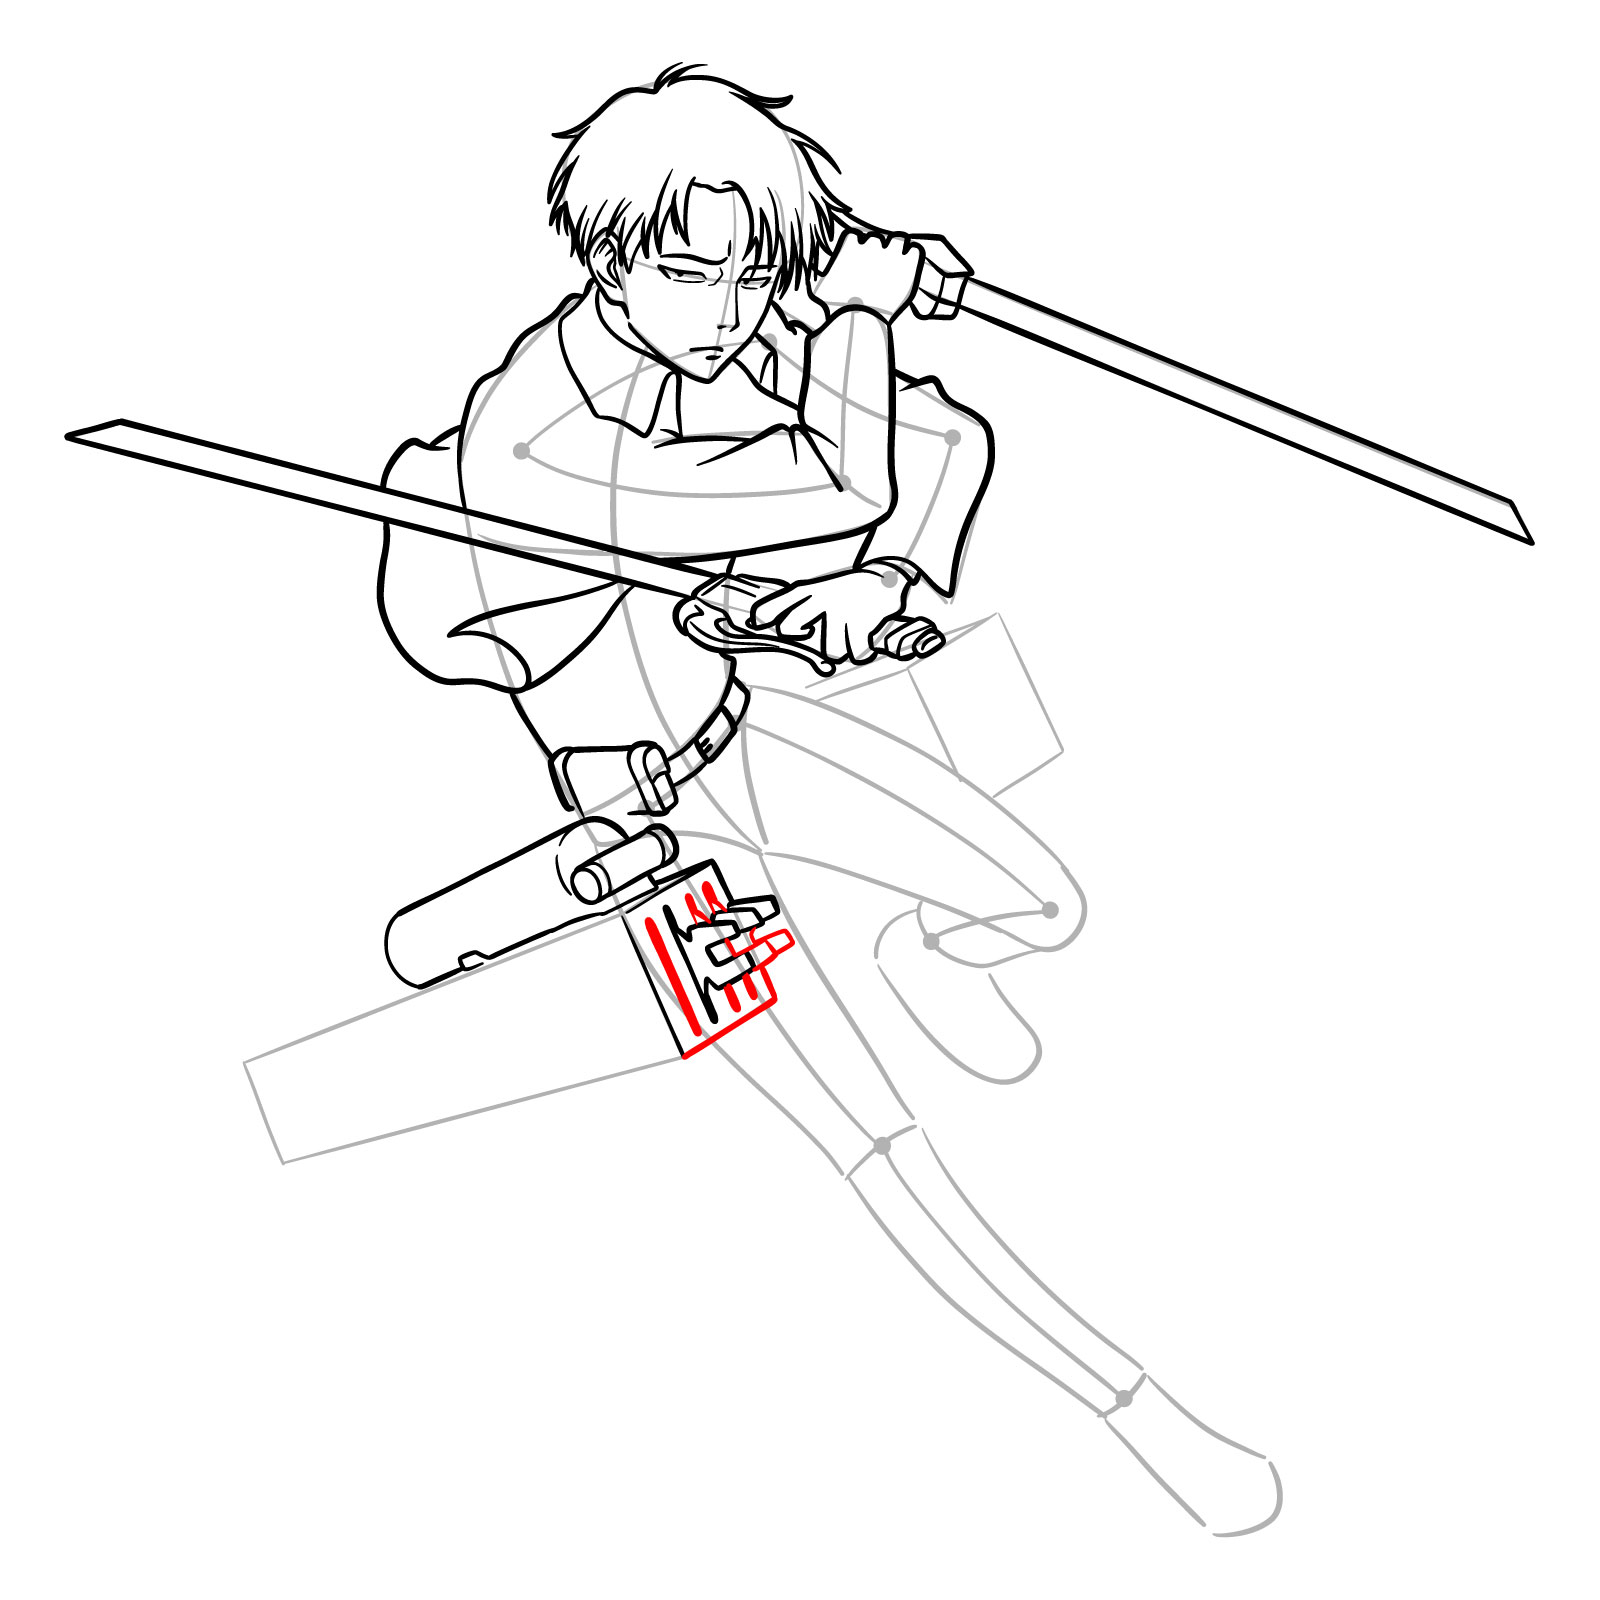
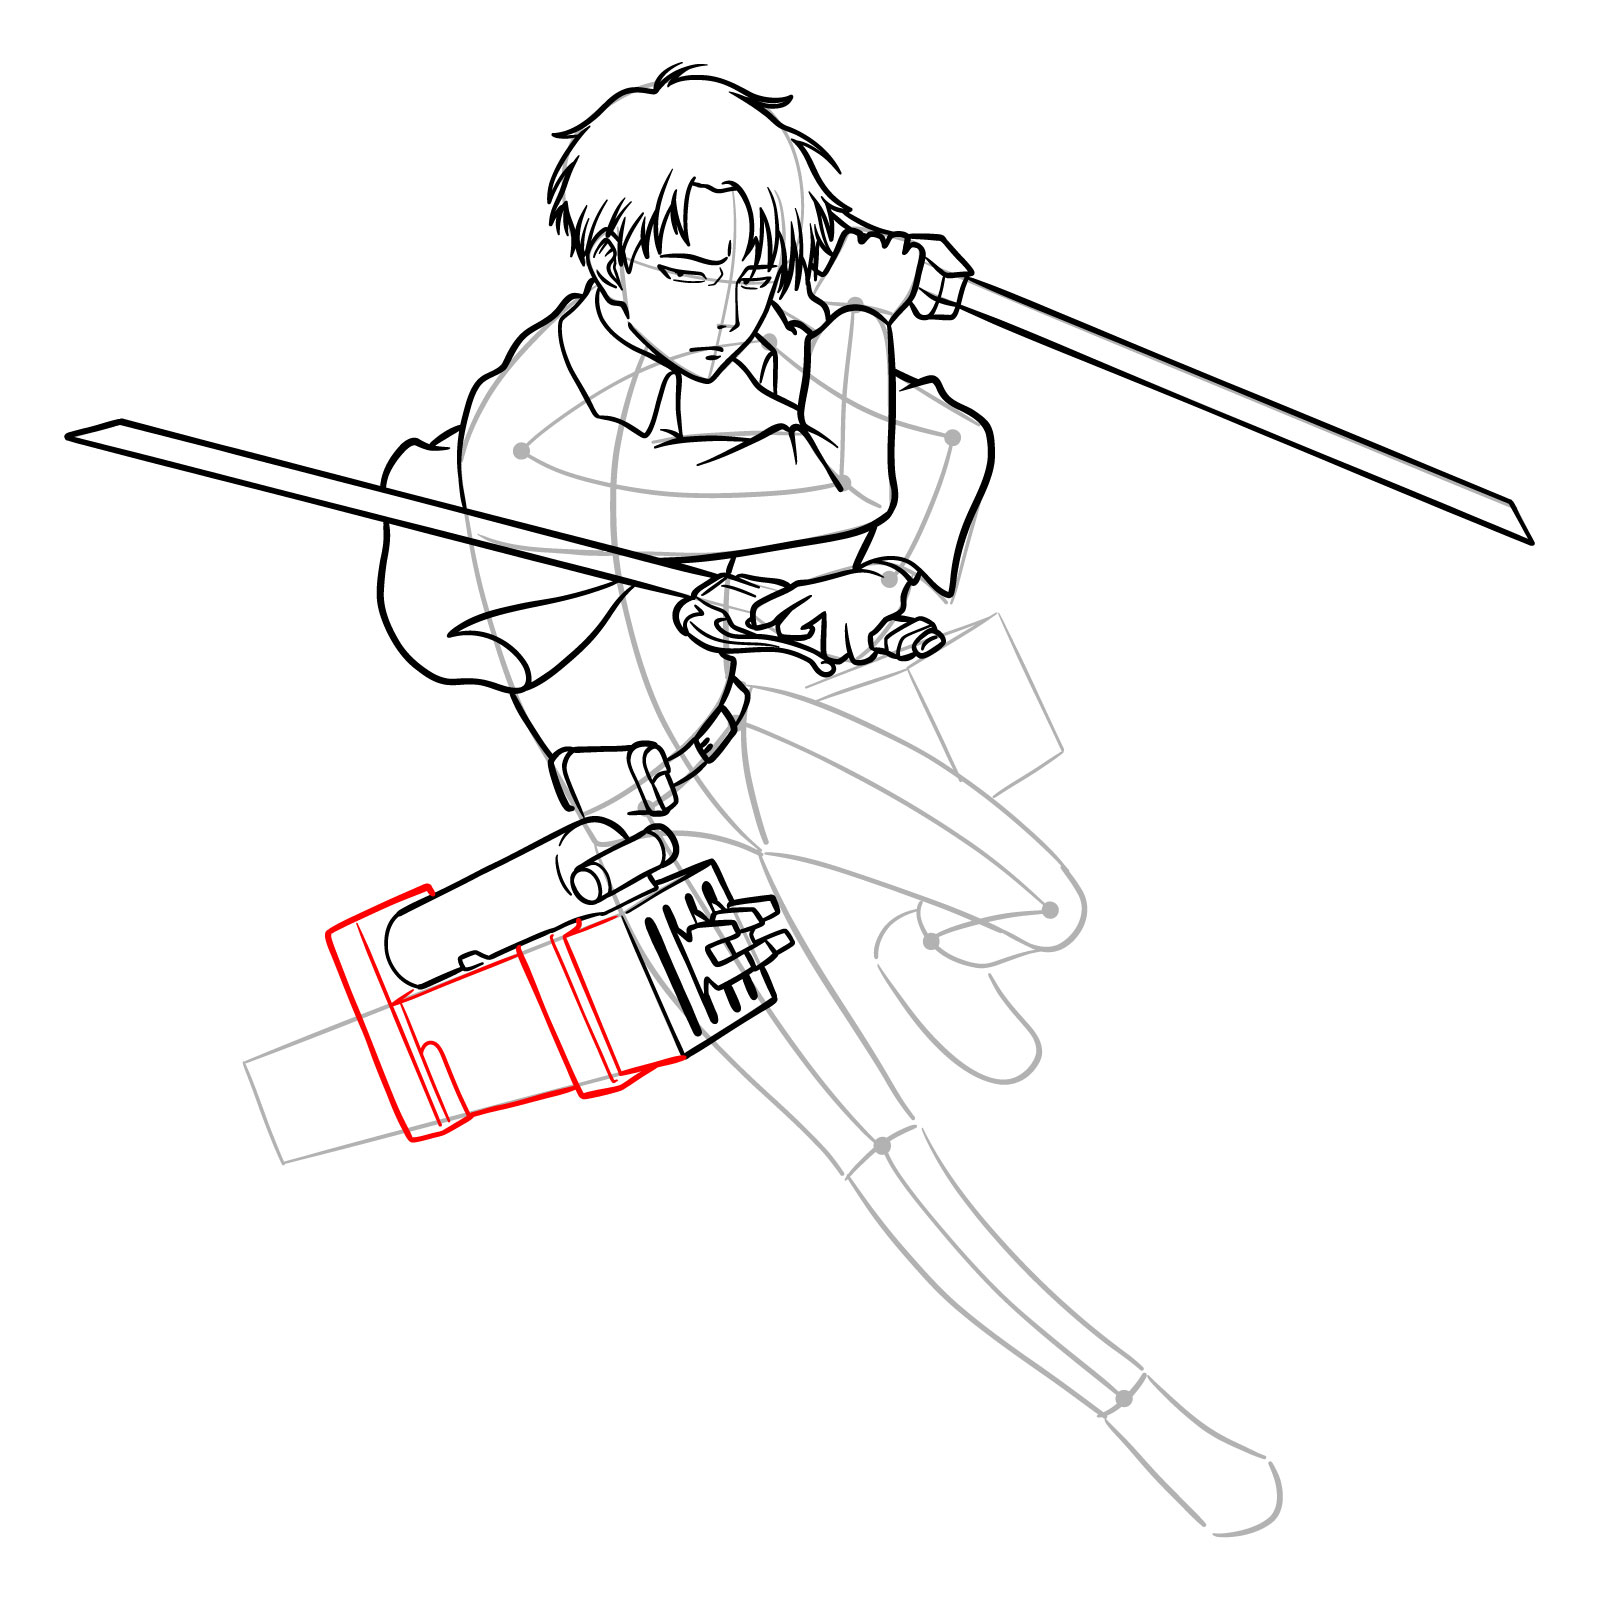
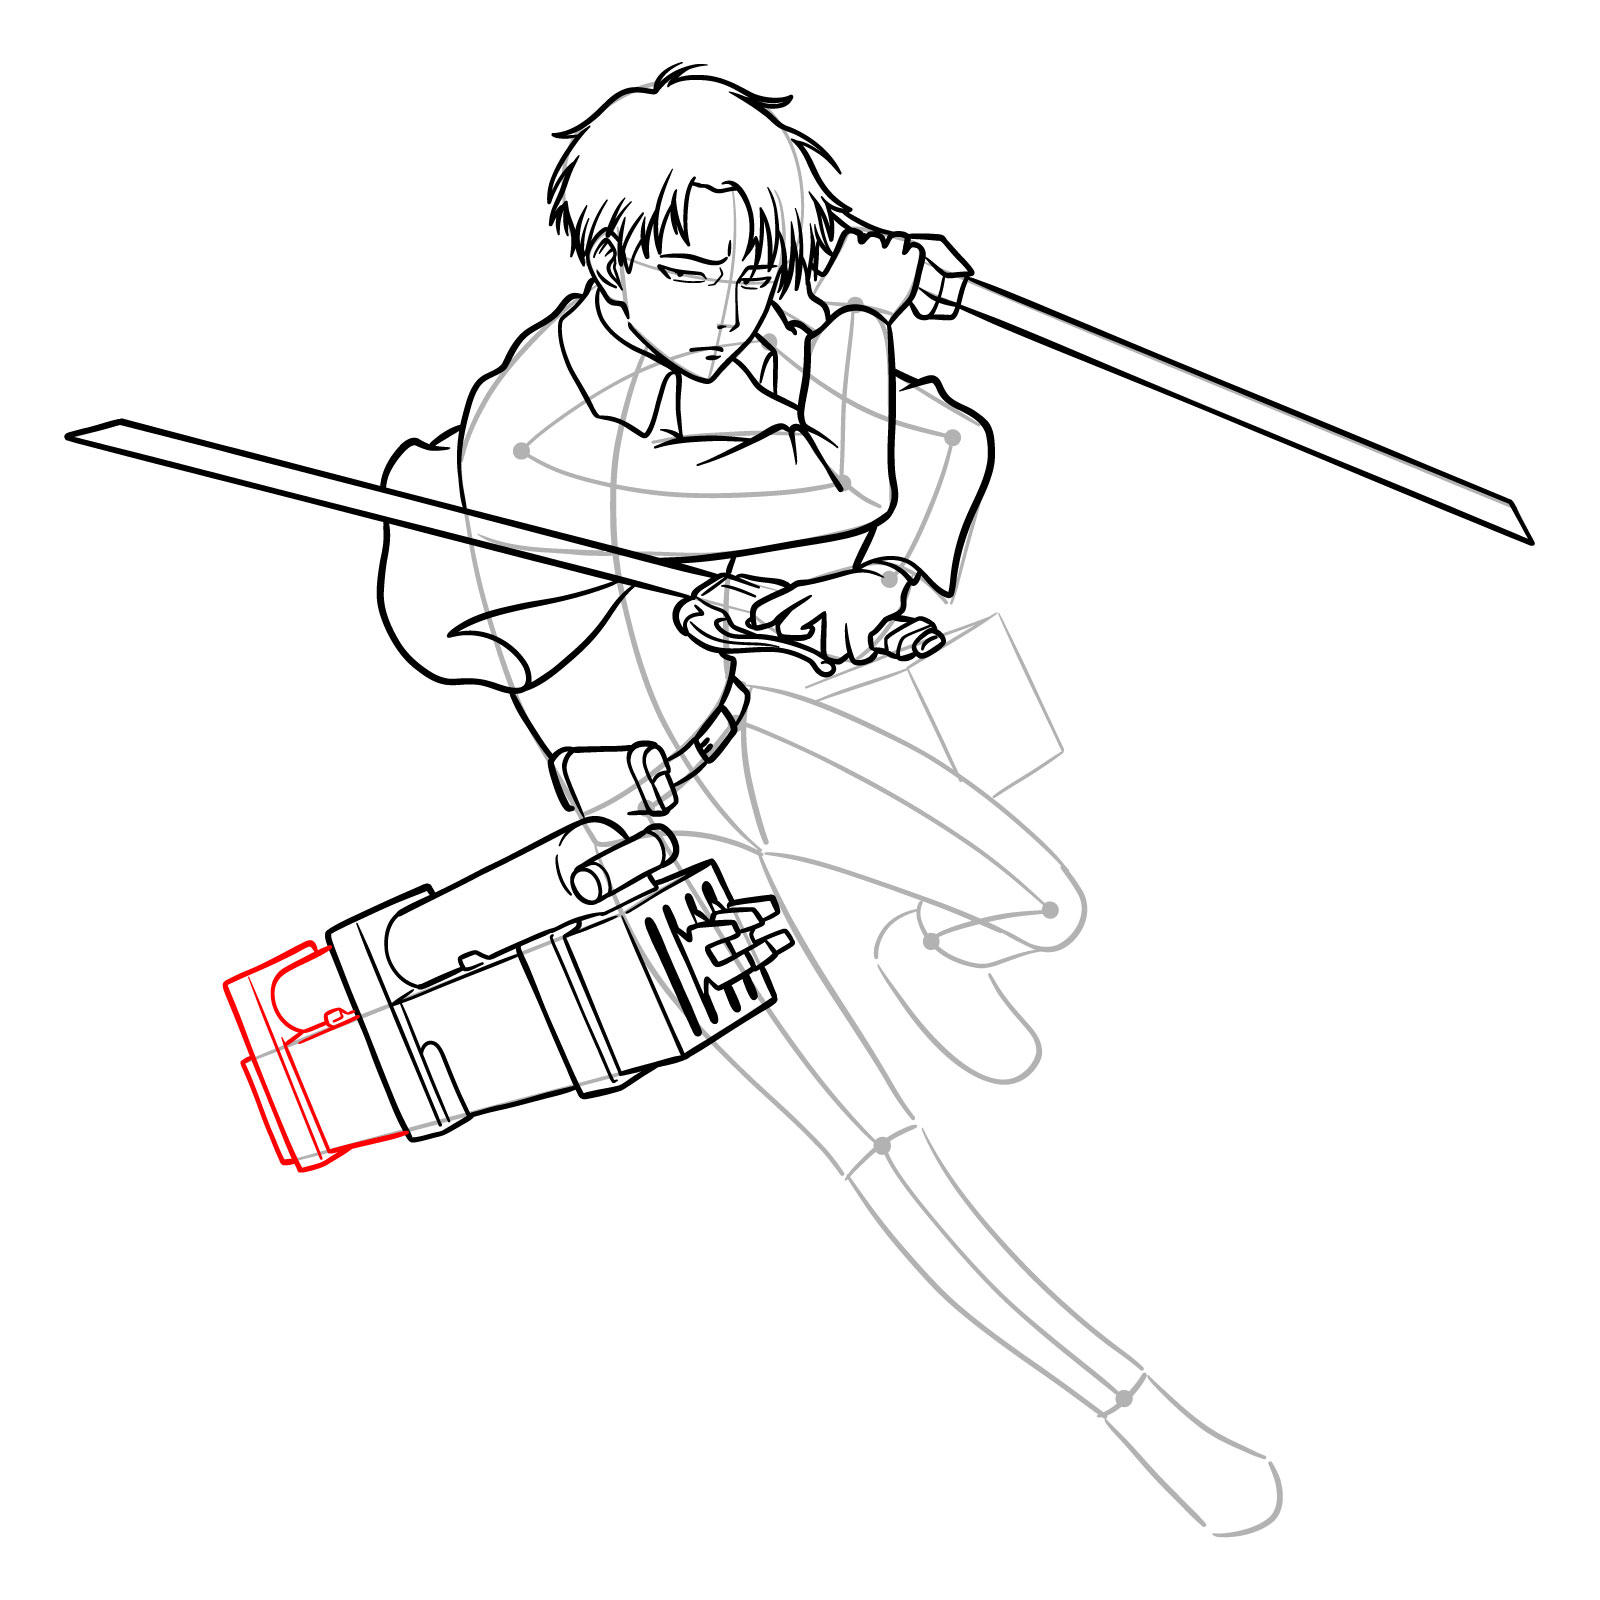
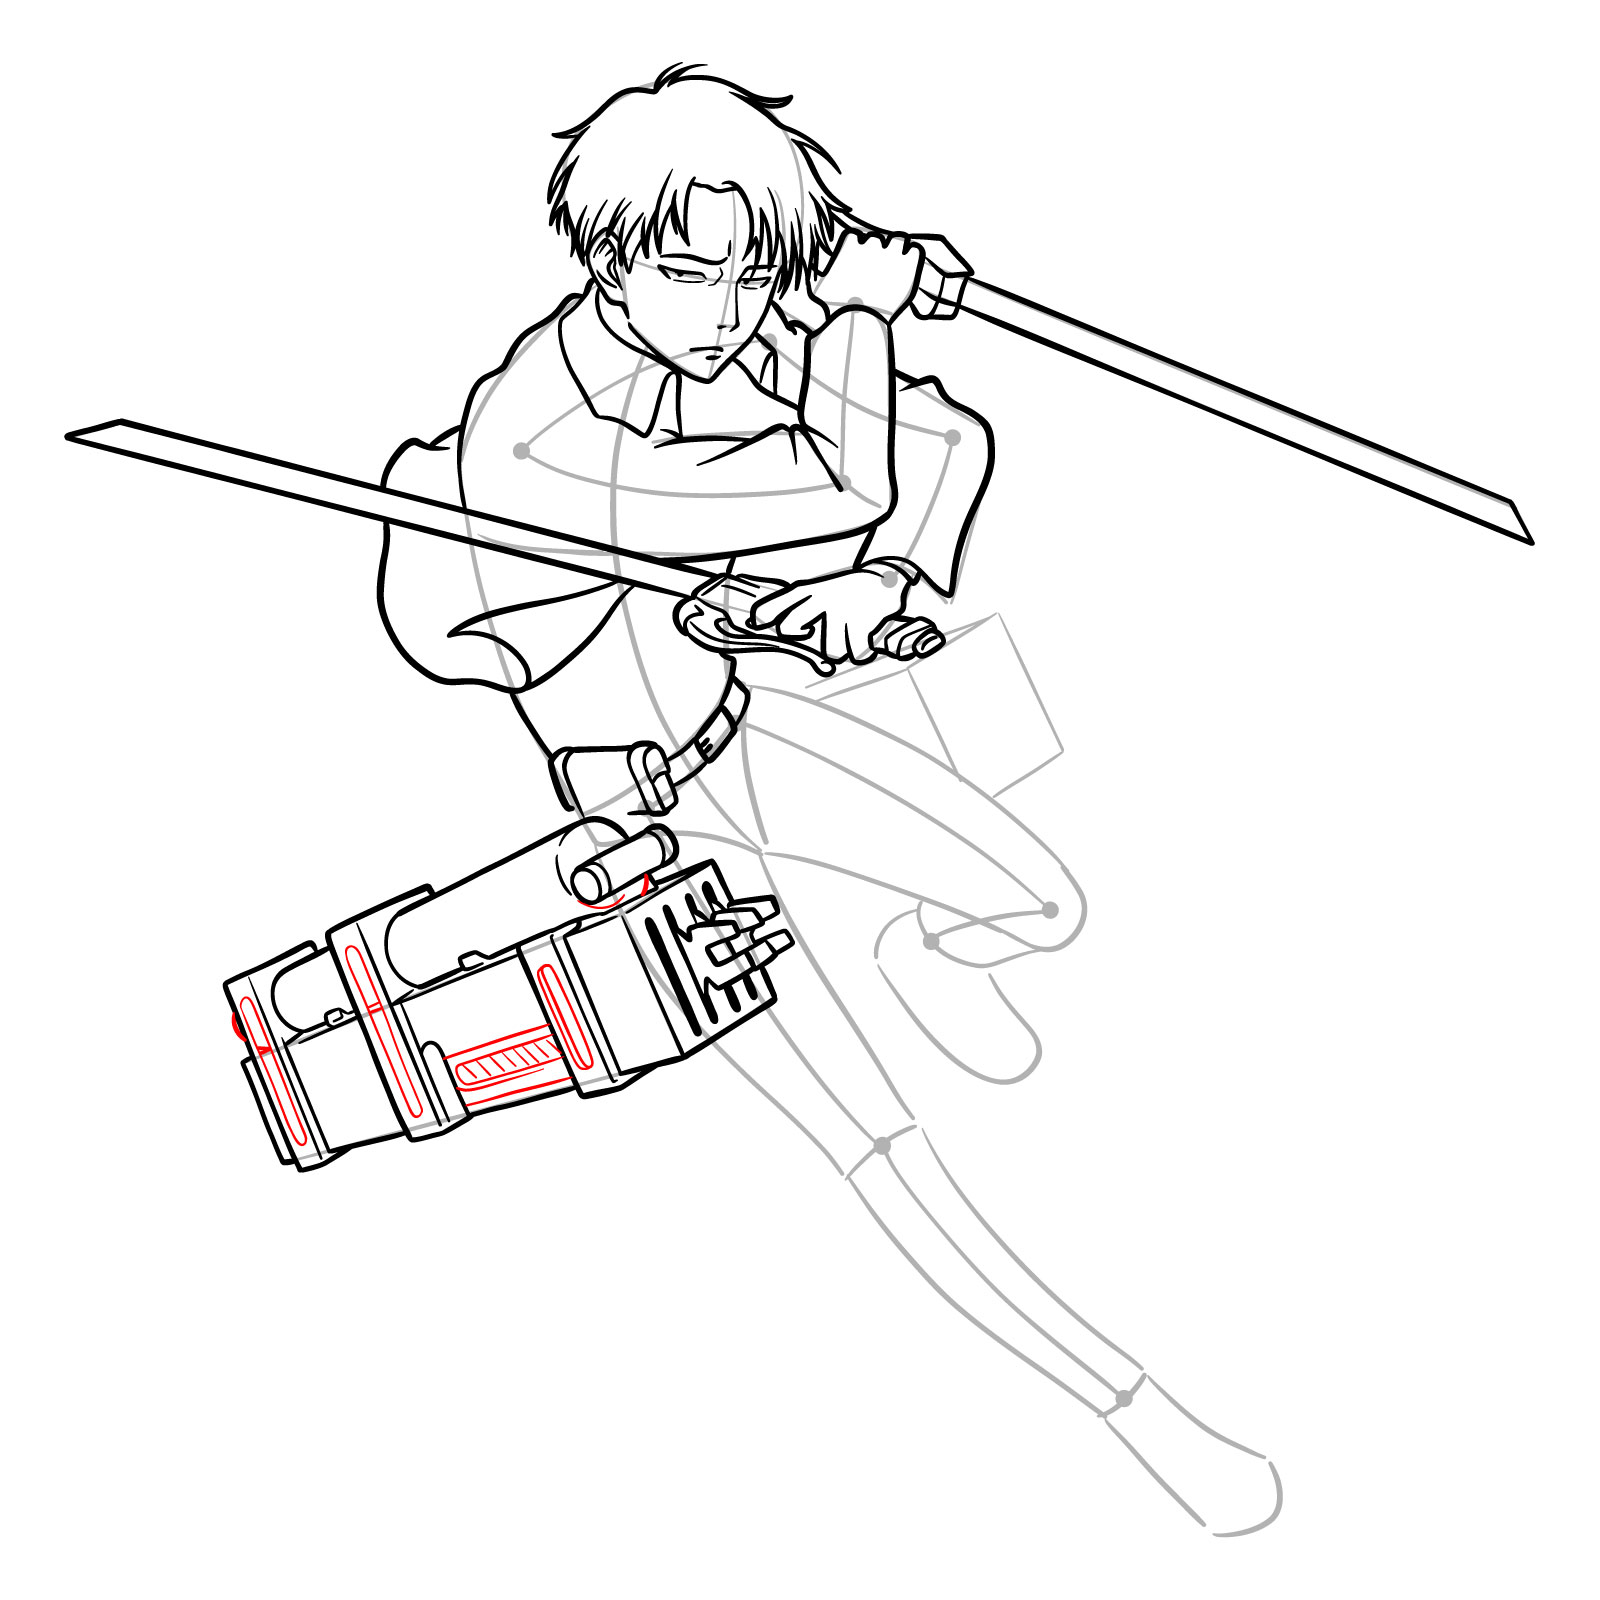
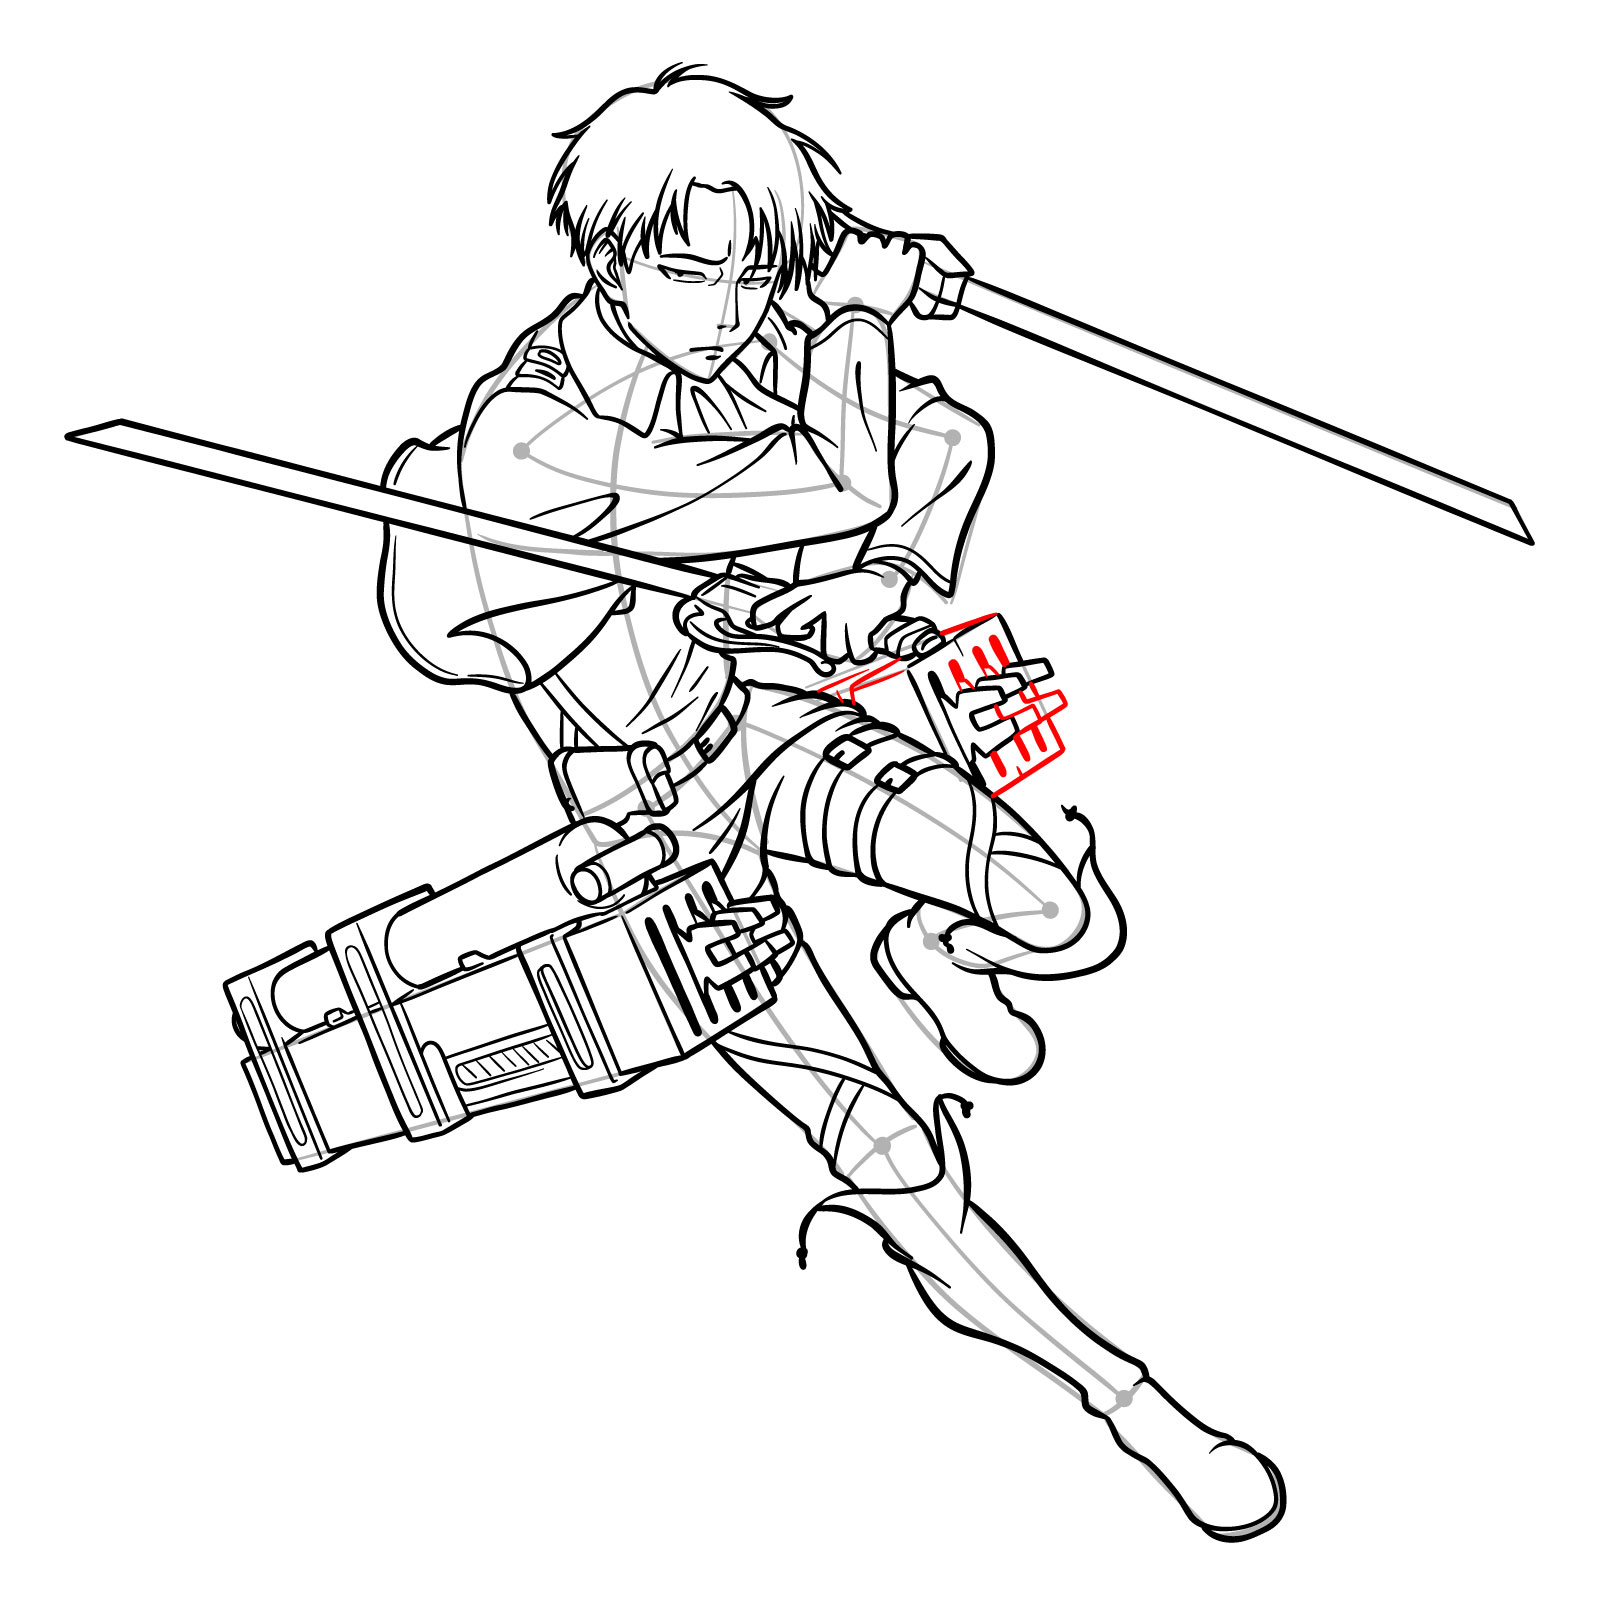
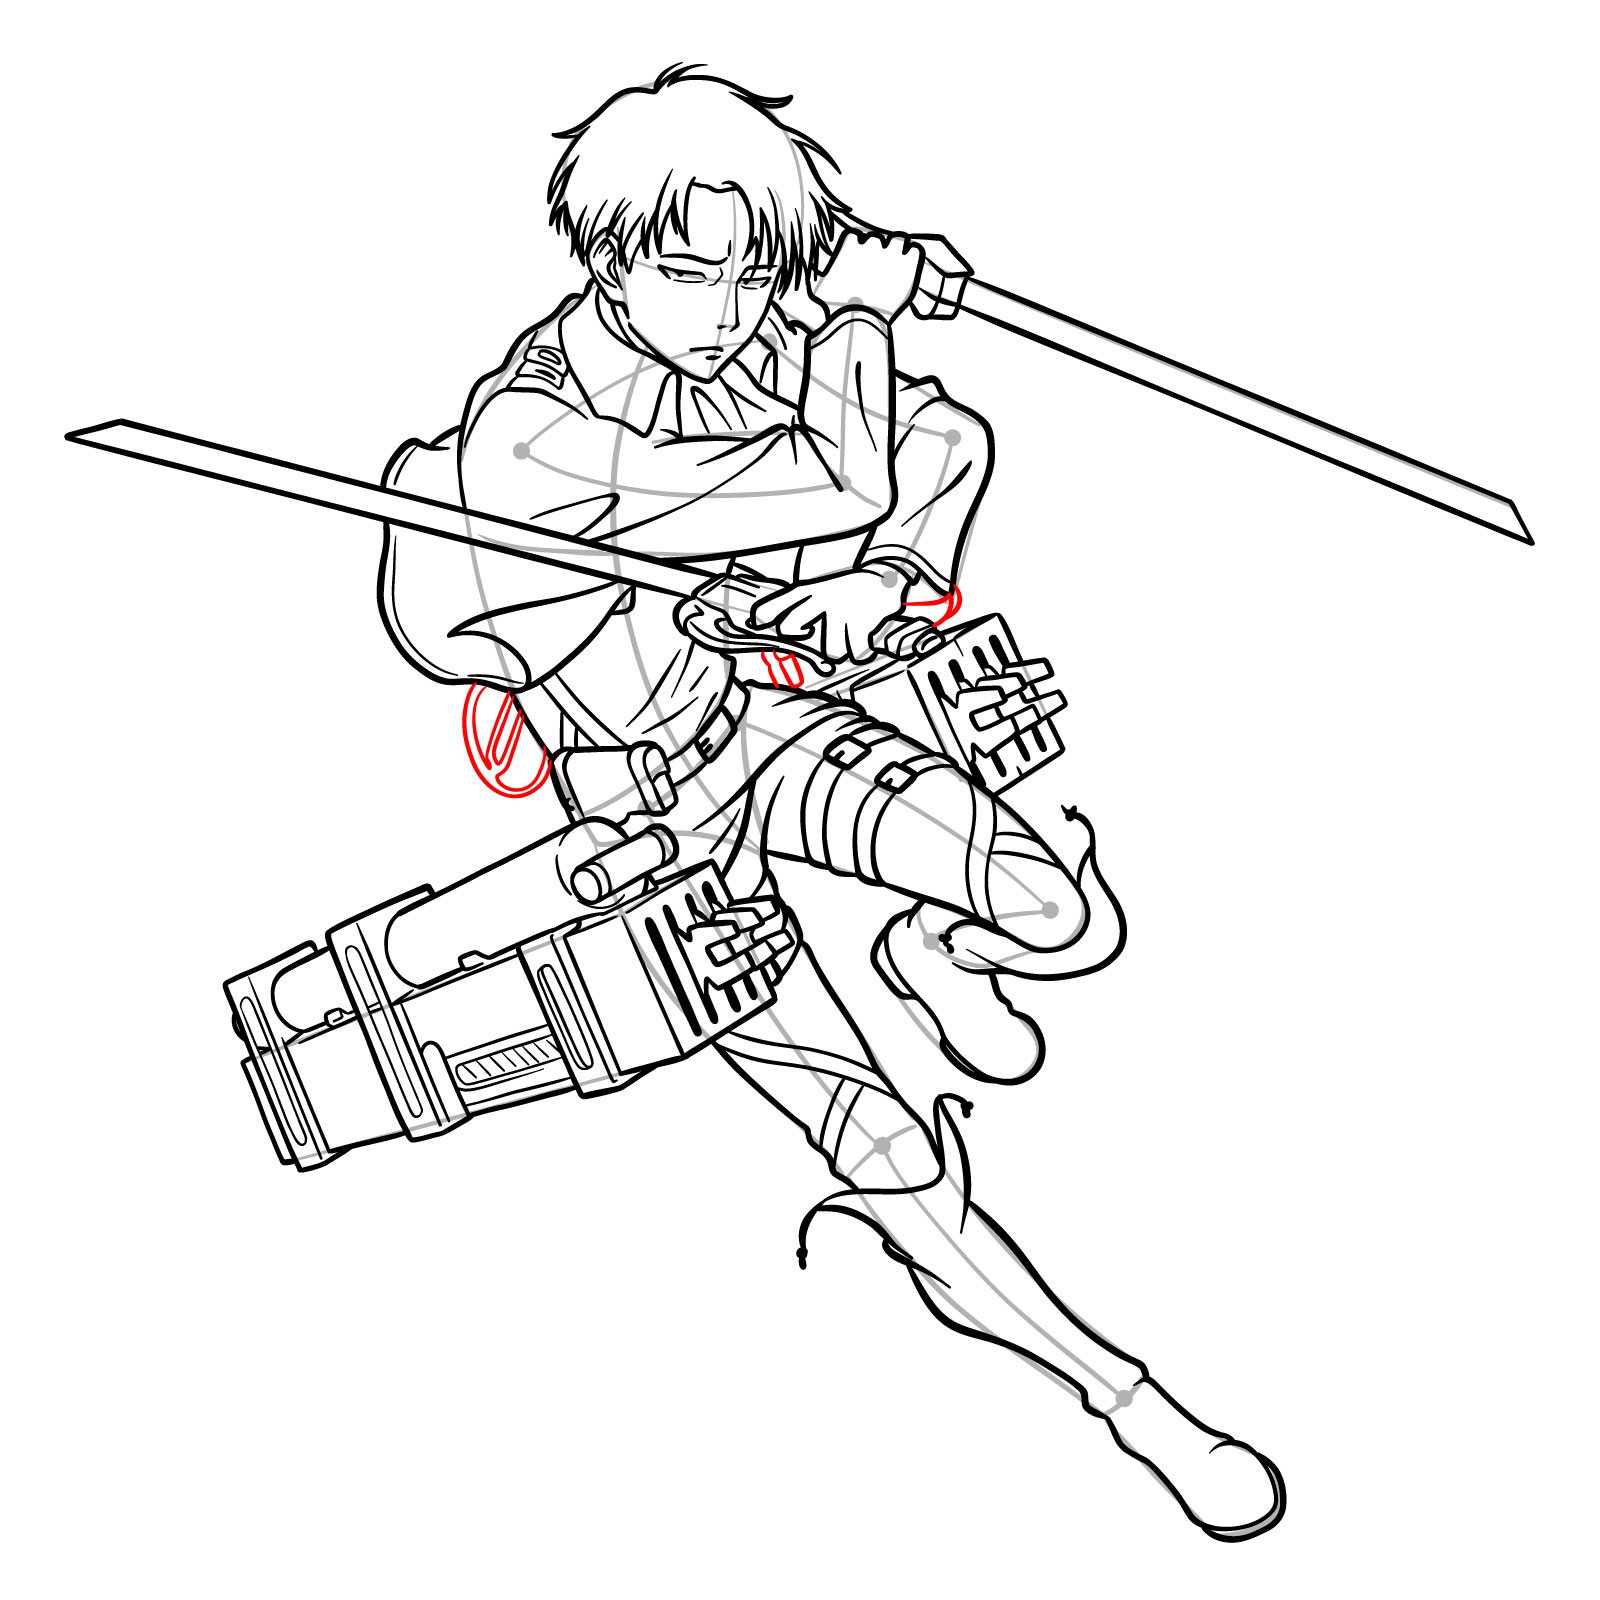
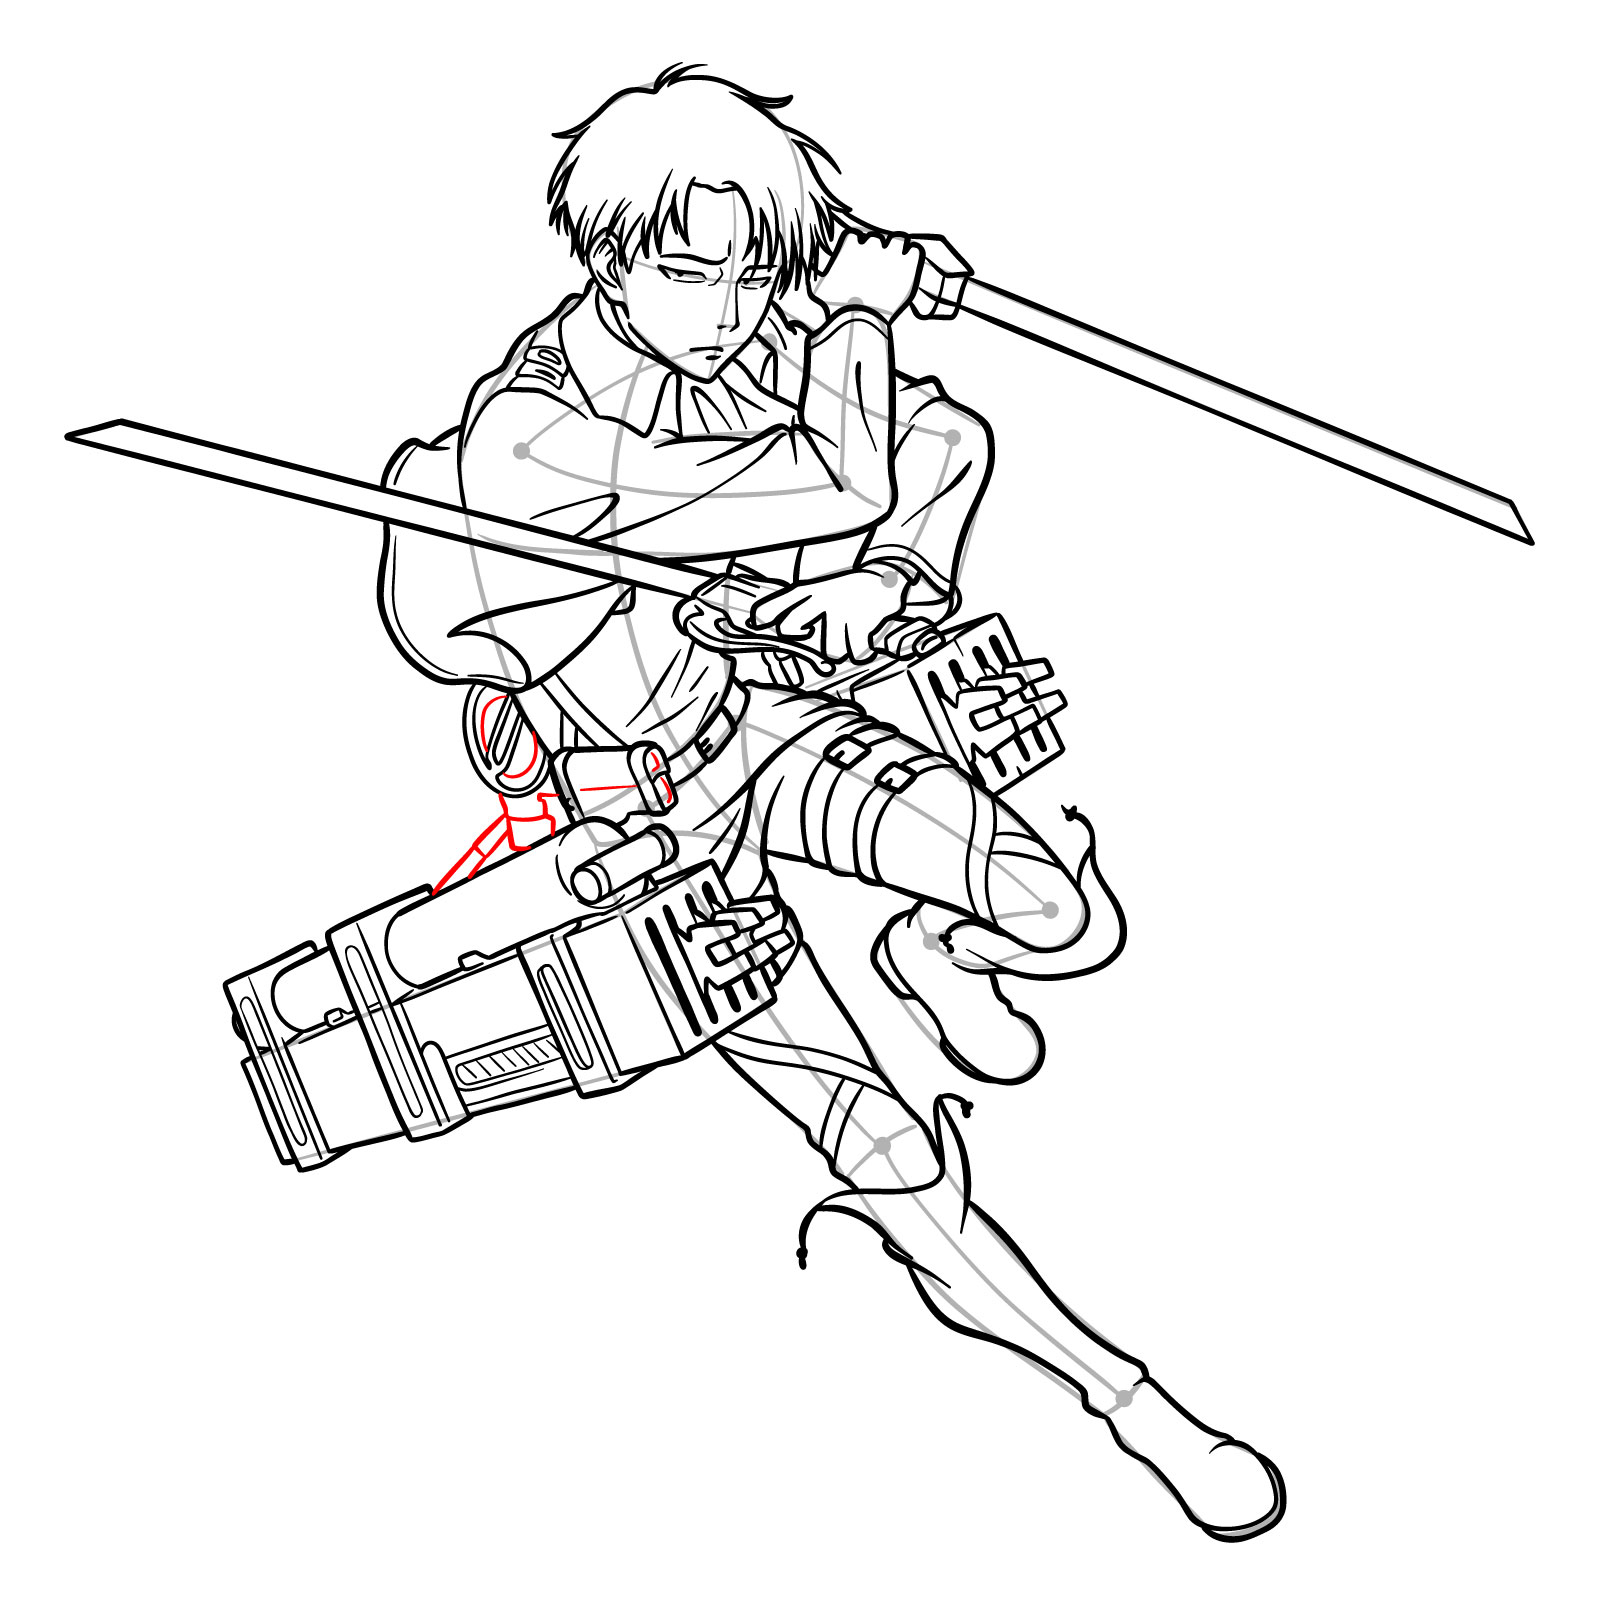
Steps 19 – 25: These steps involve the intricate detailing of Captain Levi’s Omni-directional mobility gear, which is a significant part of his battle equipment. Start by outlining the gear’s casing that sits on his leg, taking care to overlap it correctly with his body to create a three-dimensional effect. Progressively add the mechanical details, gas canisters, and control grips, ensuring each element is proportional and well-placed. The gear should look as if it’s strapped securely to his leg, ready for agile movement. Finish by refining the gear’s outlines and adding the smaller components and textures to give it a realistic and functional appearance
Step 19:
Steps 19 to 25 of a drawing guide illustrating the details of Captain Levi’s ODM gear
Step 20
Sketching Levi’s ODM – step 20
Step 21
Drawing the details of Captain Levi’s ODM – step 21
Step 22
Drawing ODM – step 22
Step 23
Drawing Captain Levi’s first ODM – step 23
Step 24
Detailing Captain Levi’s ODM gear – step 24
Step 25
Drawing the details of Captain Levi’s ODM – step 25
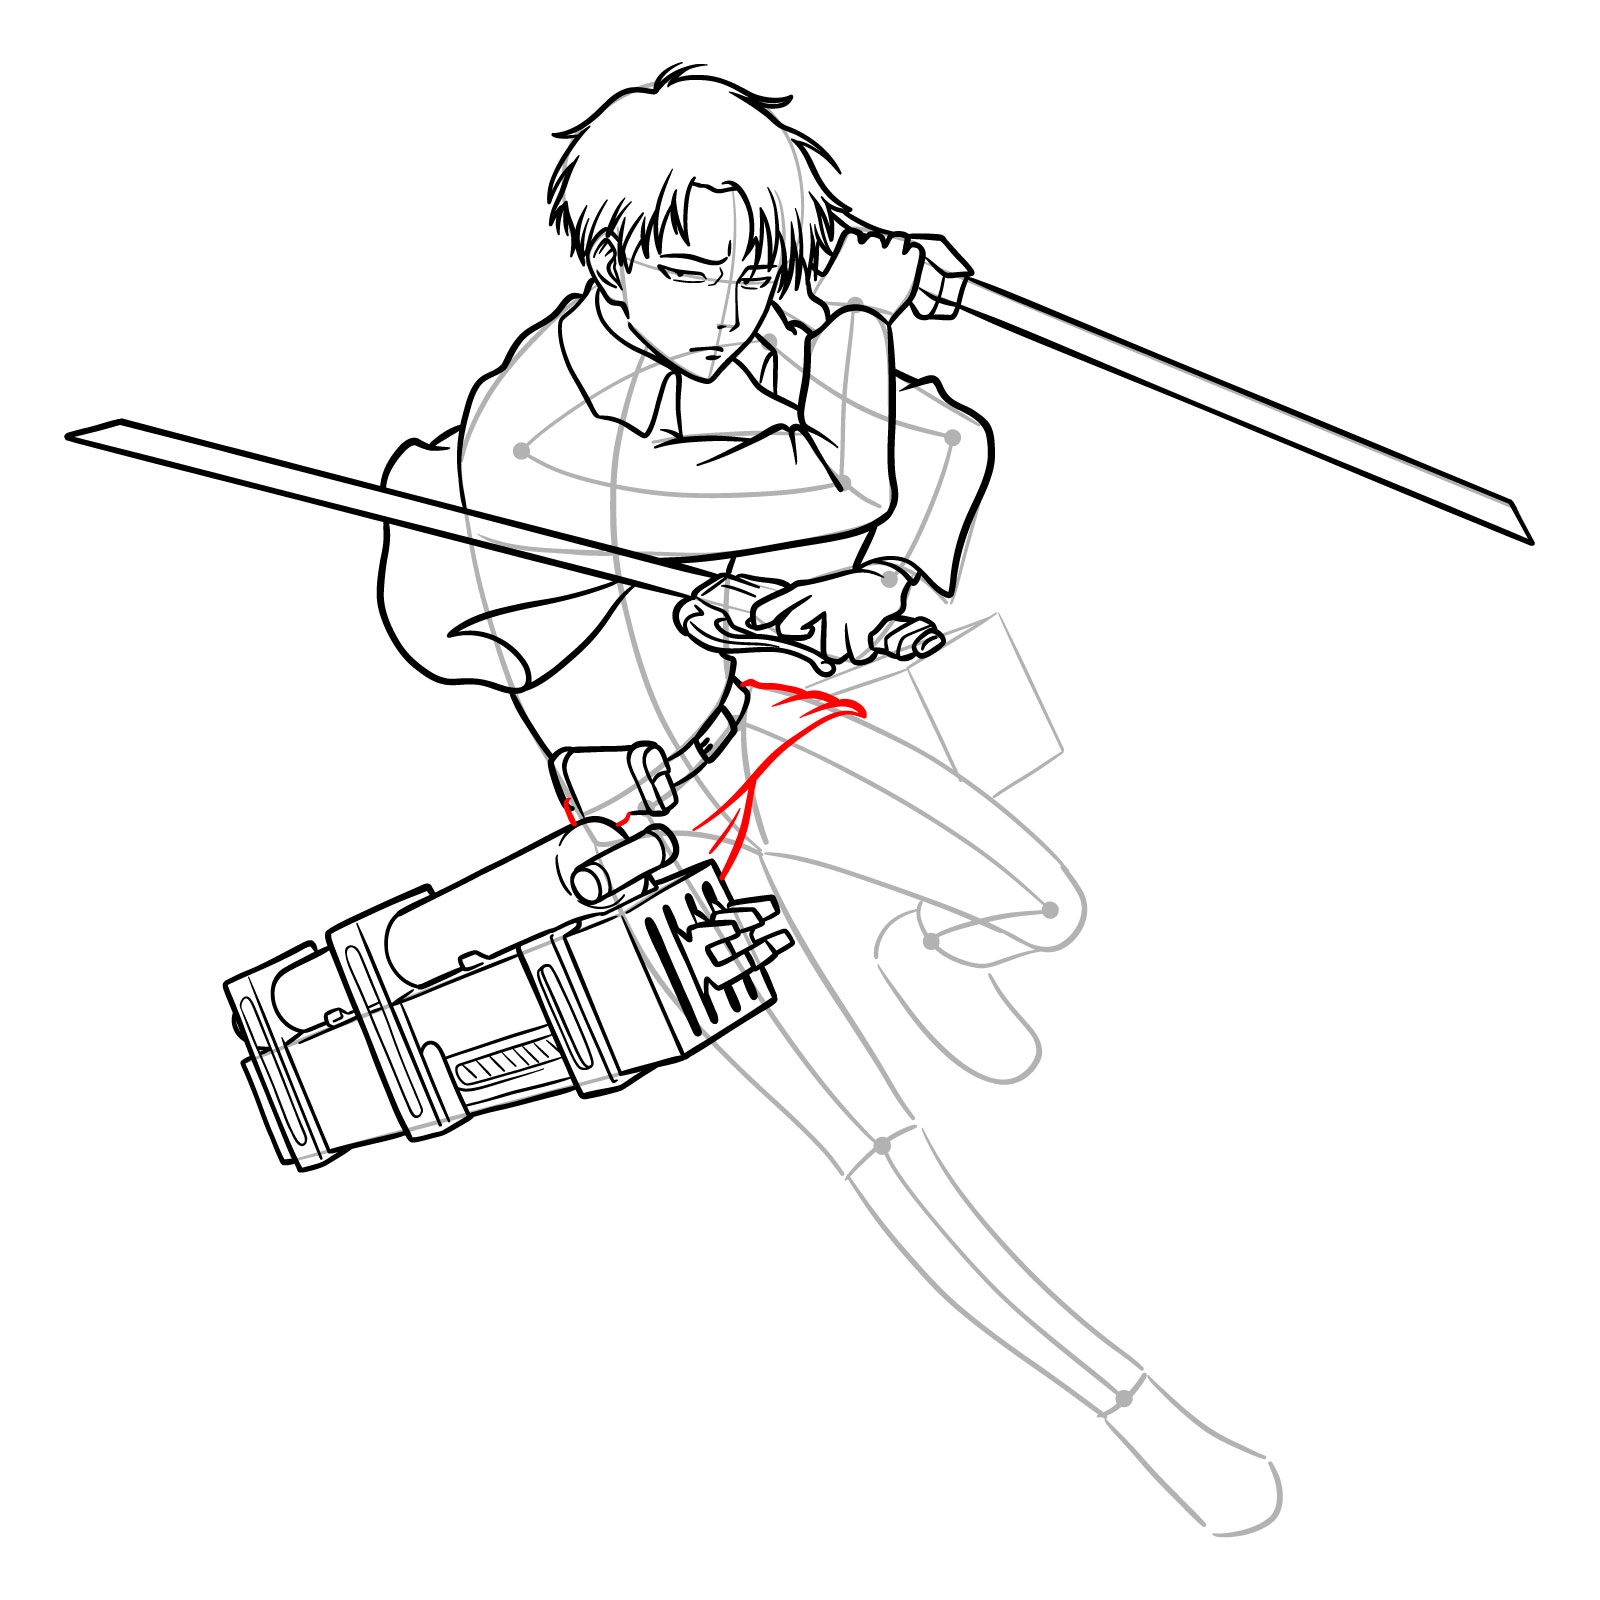
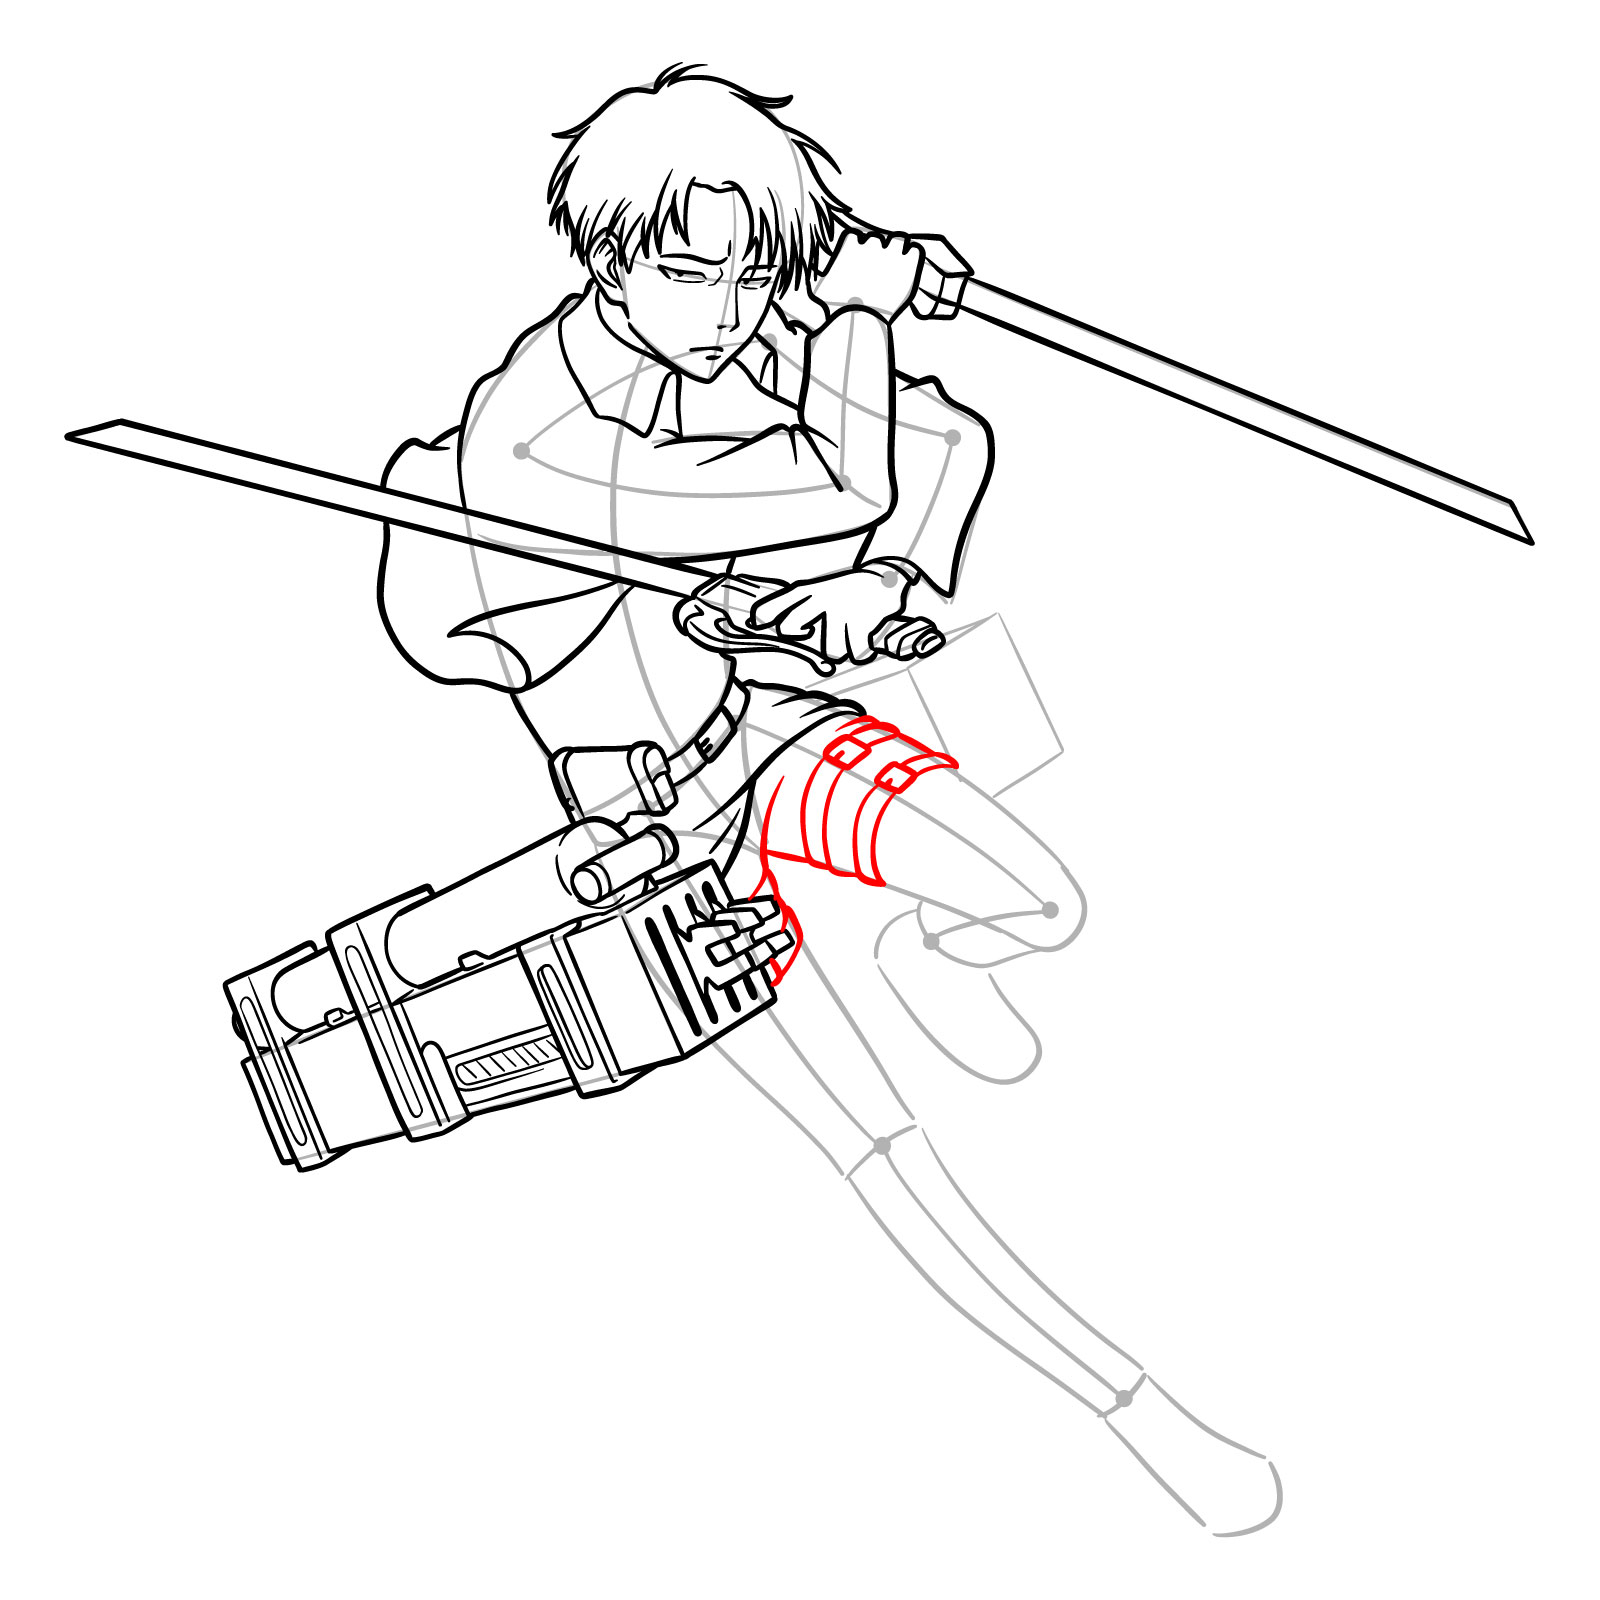
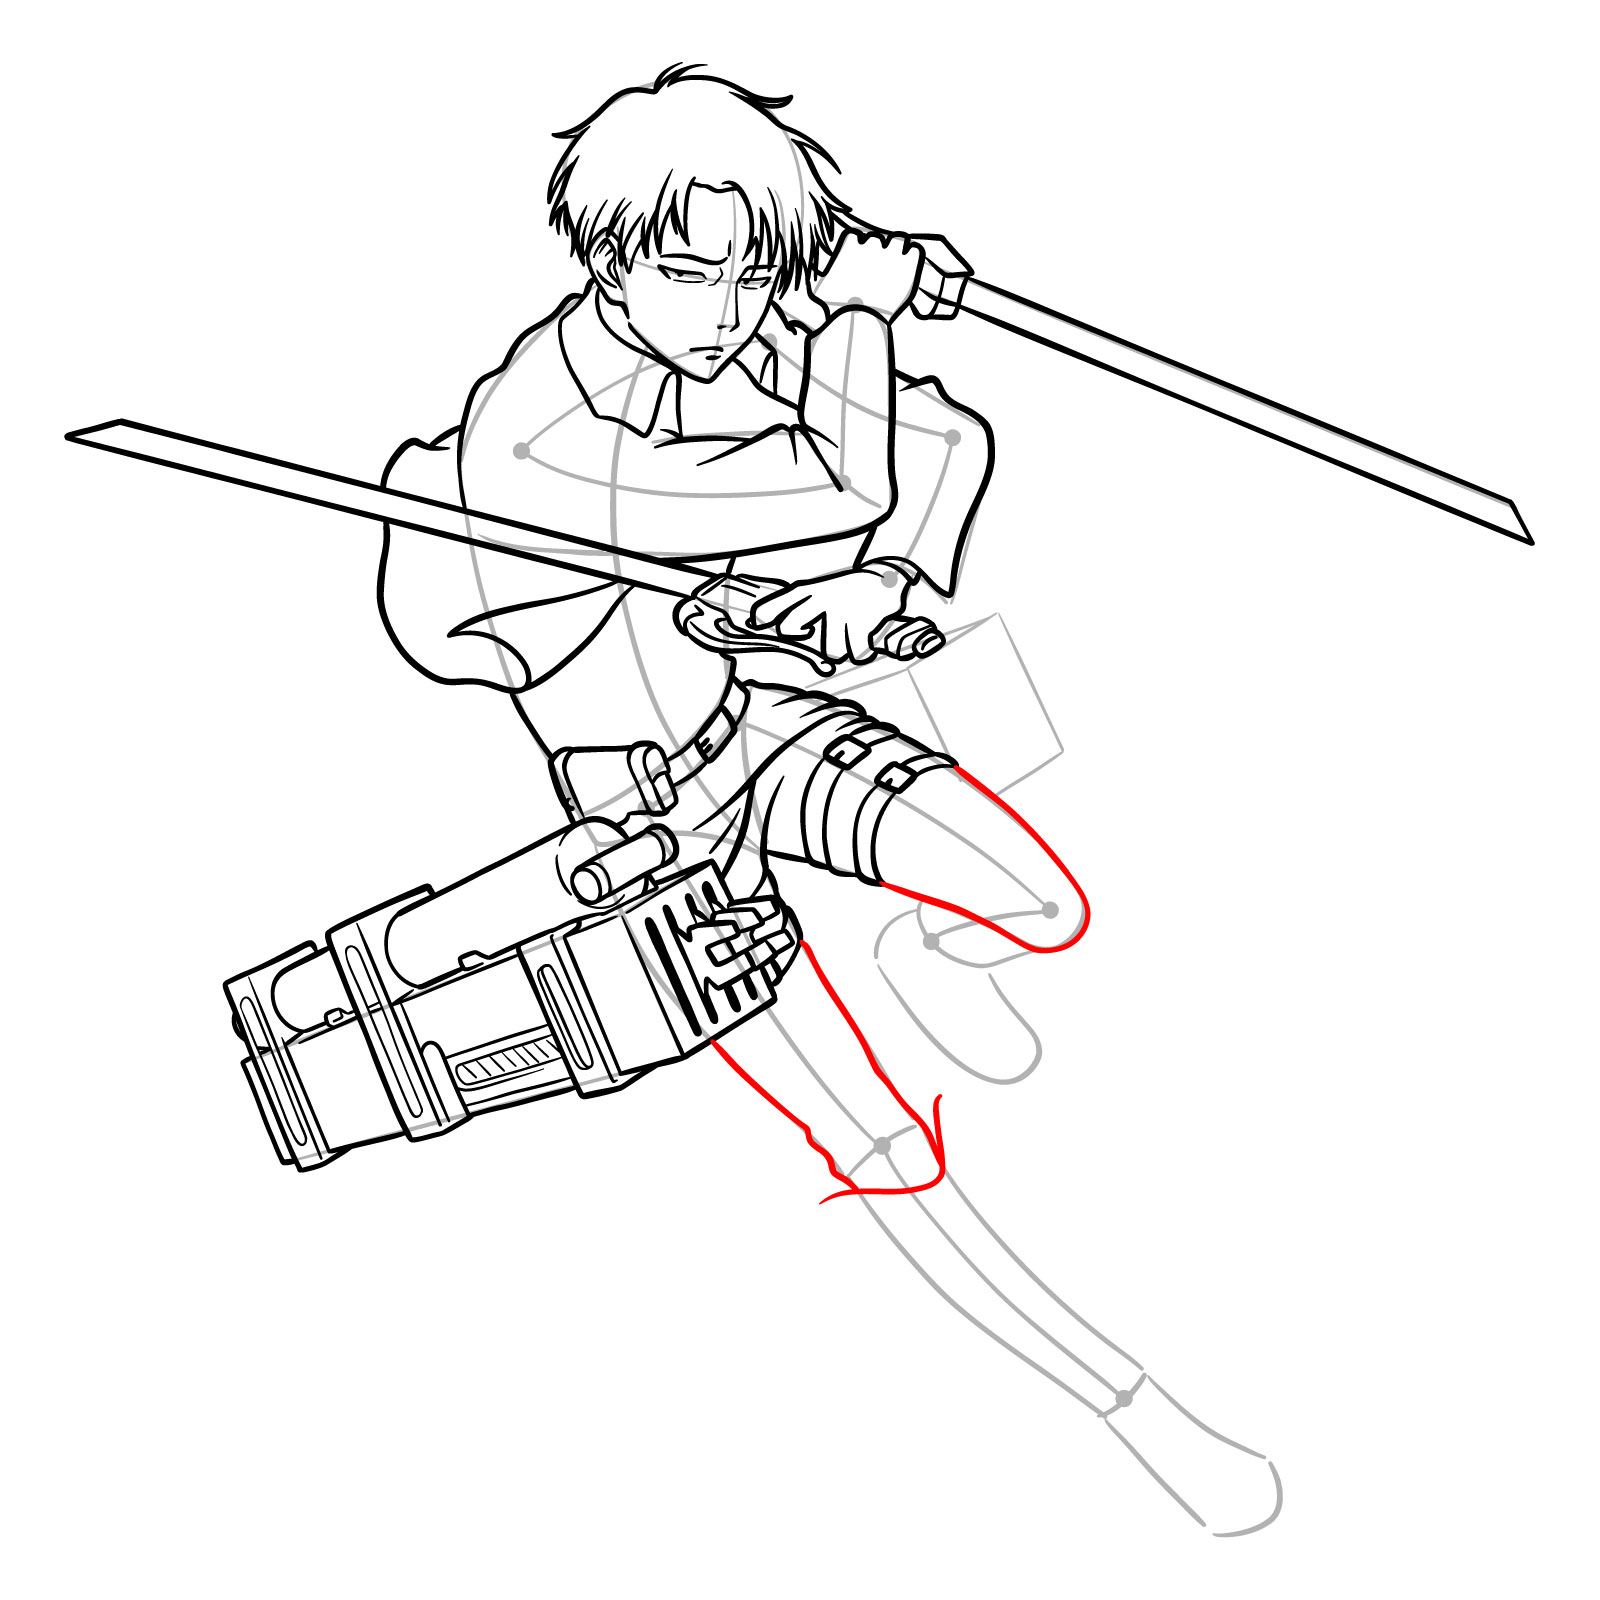
Steps 26 – 28: Begin to flesh out Levi’s legs by sketching them down to the knees, paying attention to the musculature and positioning that reflects his dynamic stance. Add the hip straps of his uniform, ensuring they contour the form of his body accurately. Include the details of his uniform, such as the seams and the folds that suggest the fabric’s tension and movement
Steps 26 to 28 of a drawing guide for Levi’s legs, hip straps, and uniform details
Step 27
Sketching legs, hip straps, and uniform details
Step 28
Drawing Levi’s legs
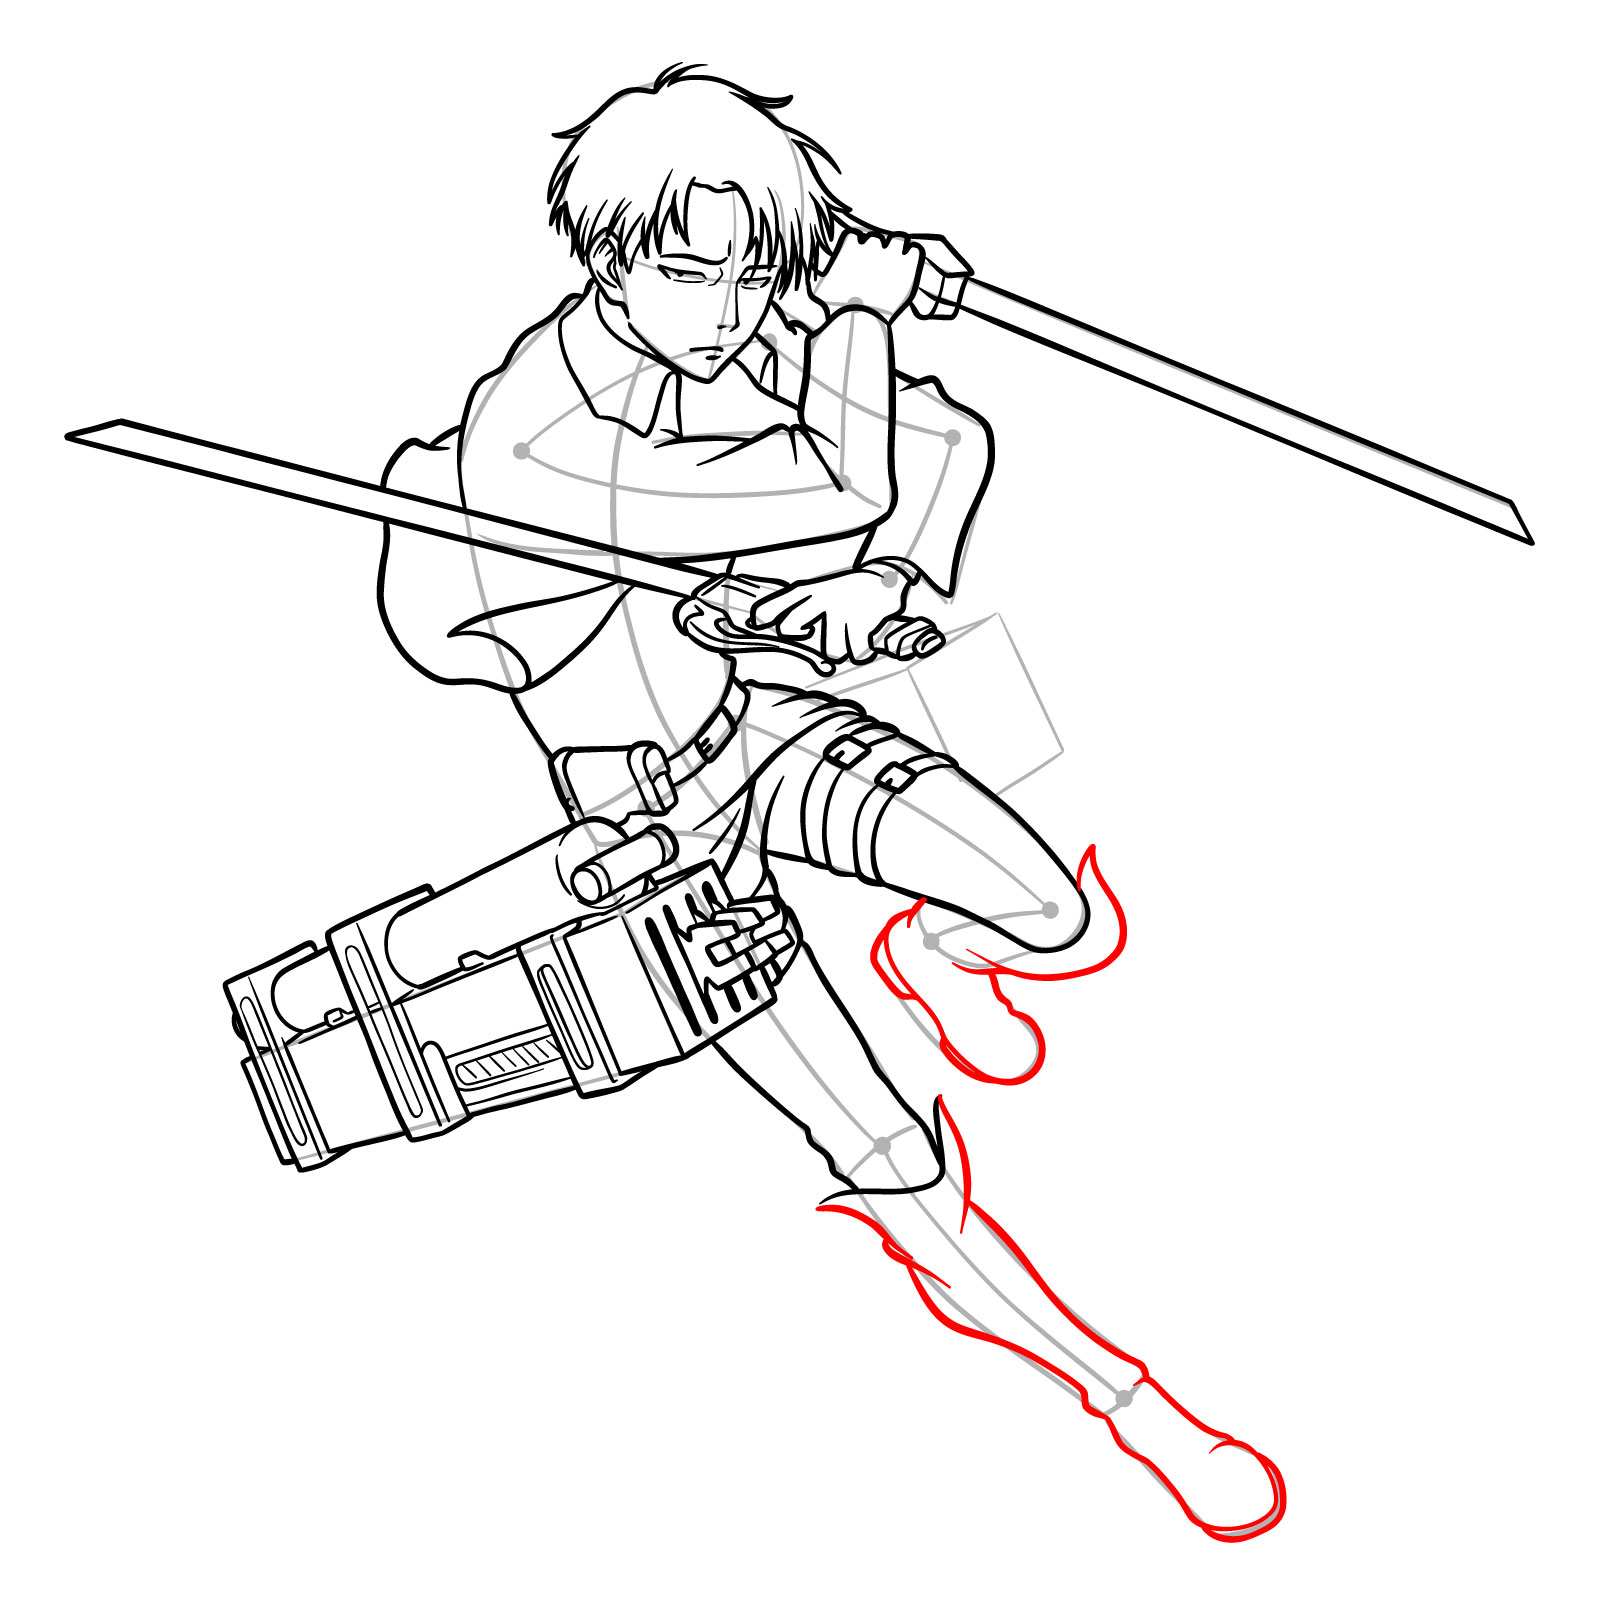
Step 29 – Draw Levi’s footwear with precision, showing the boots’ design that is typical for his character. Capture the sturdy build of the boots, adding creases and details to convey the material and functionality
Step 29 of a drawing guide illustrating Levi’s boots in detail
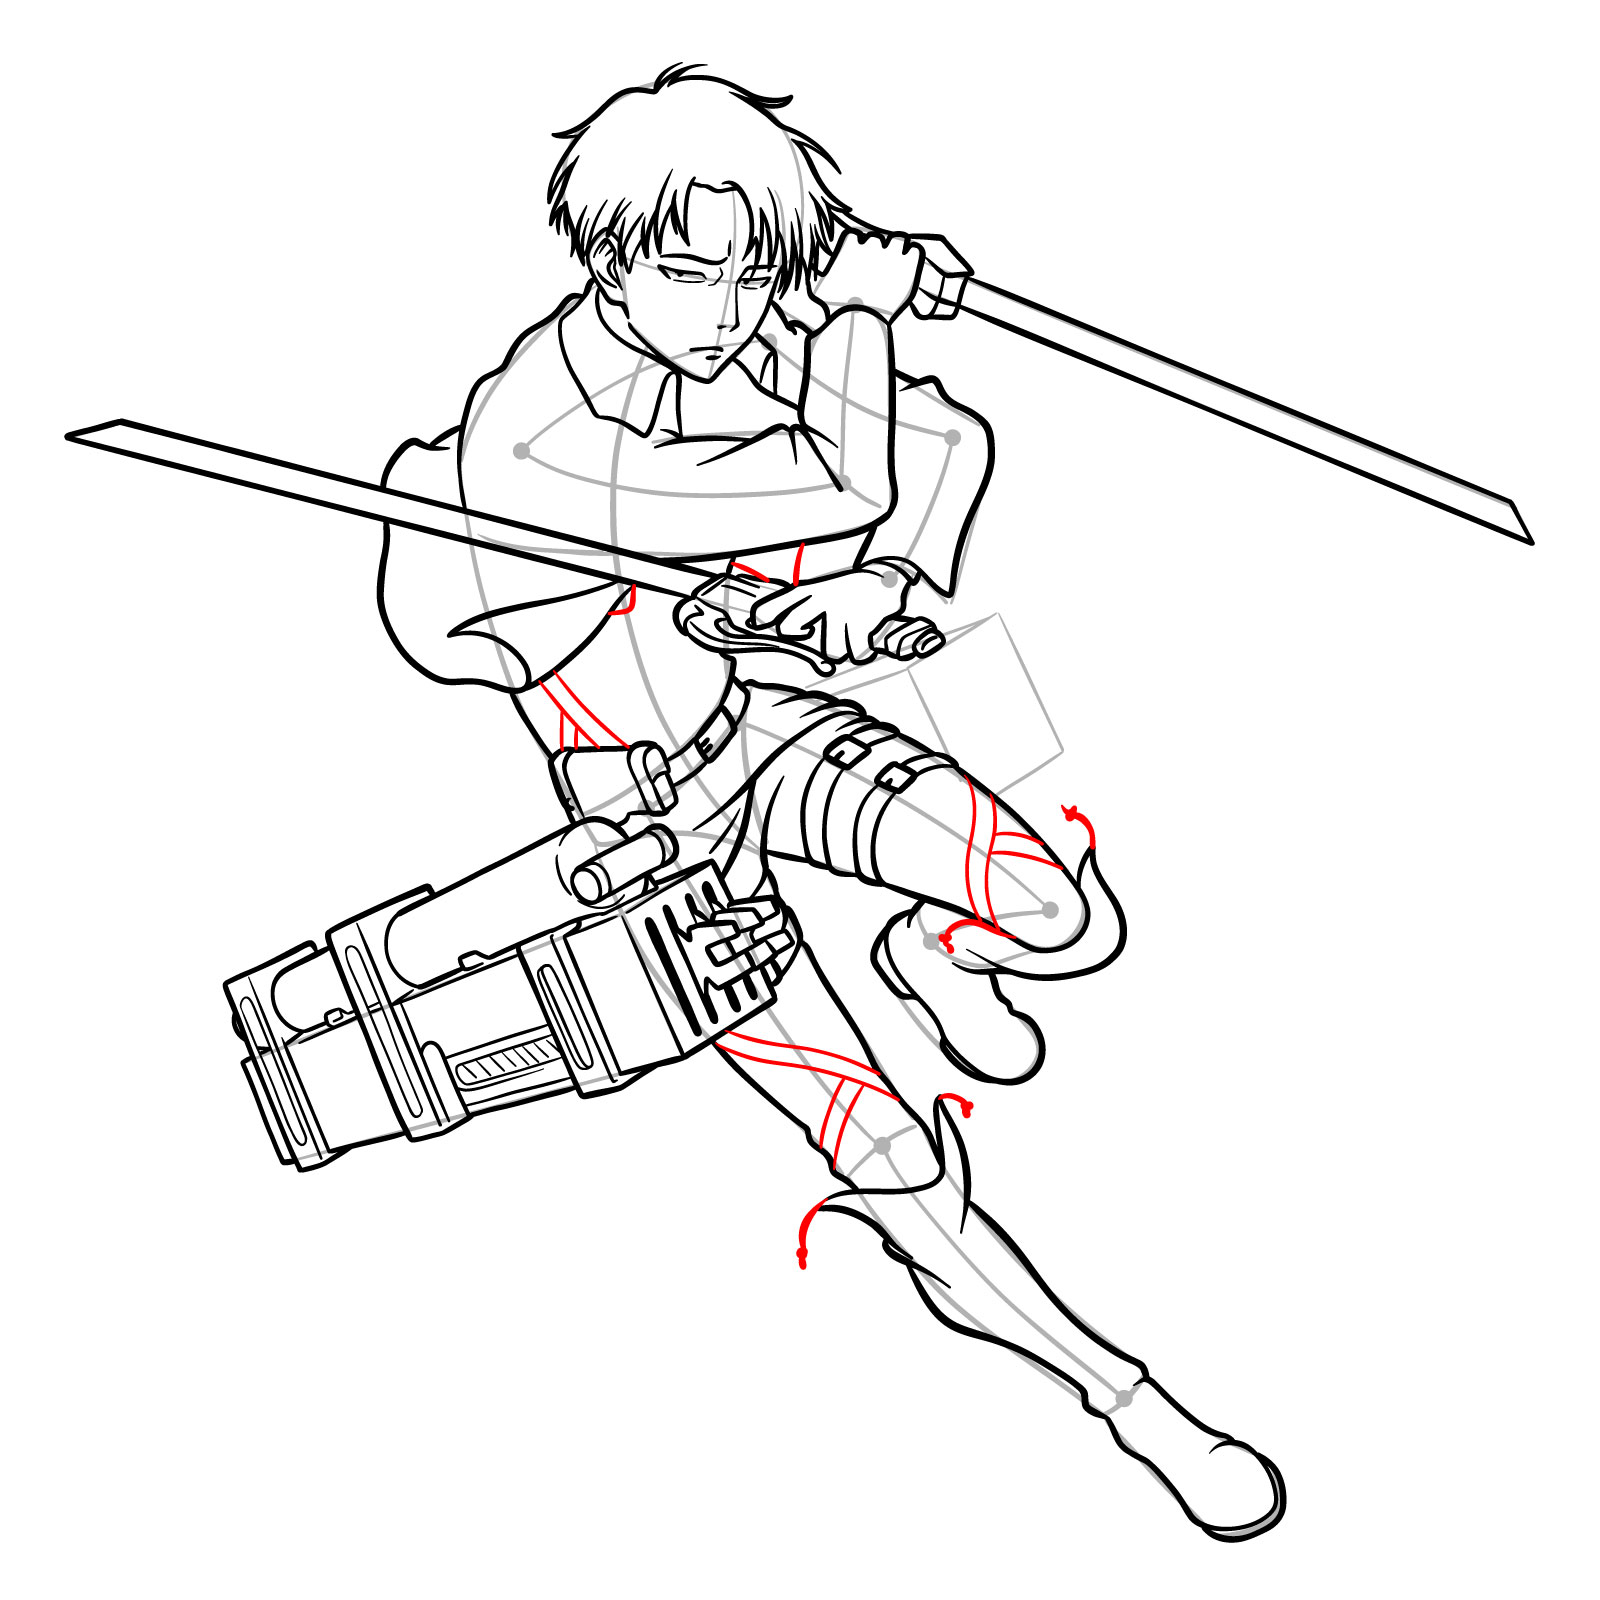
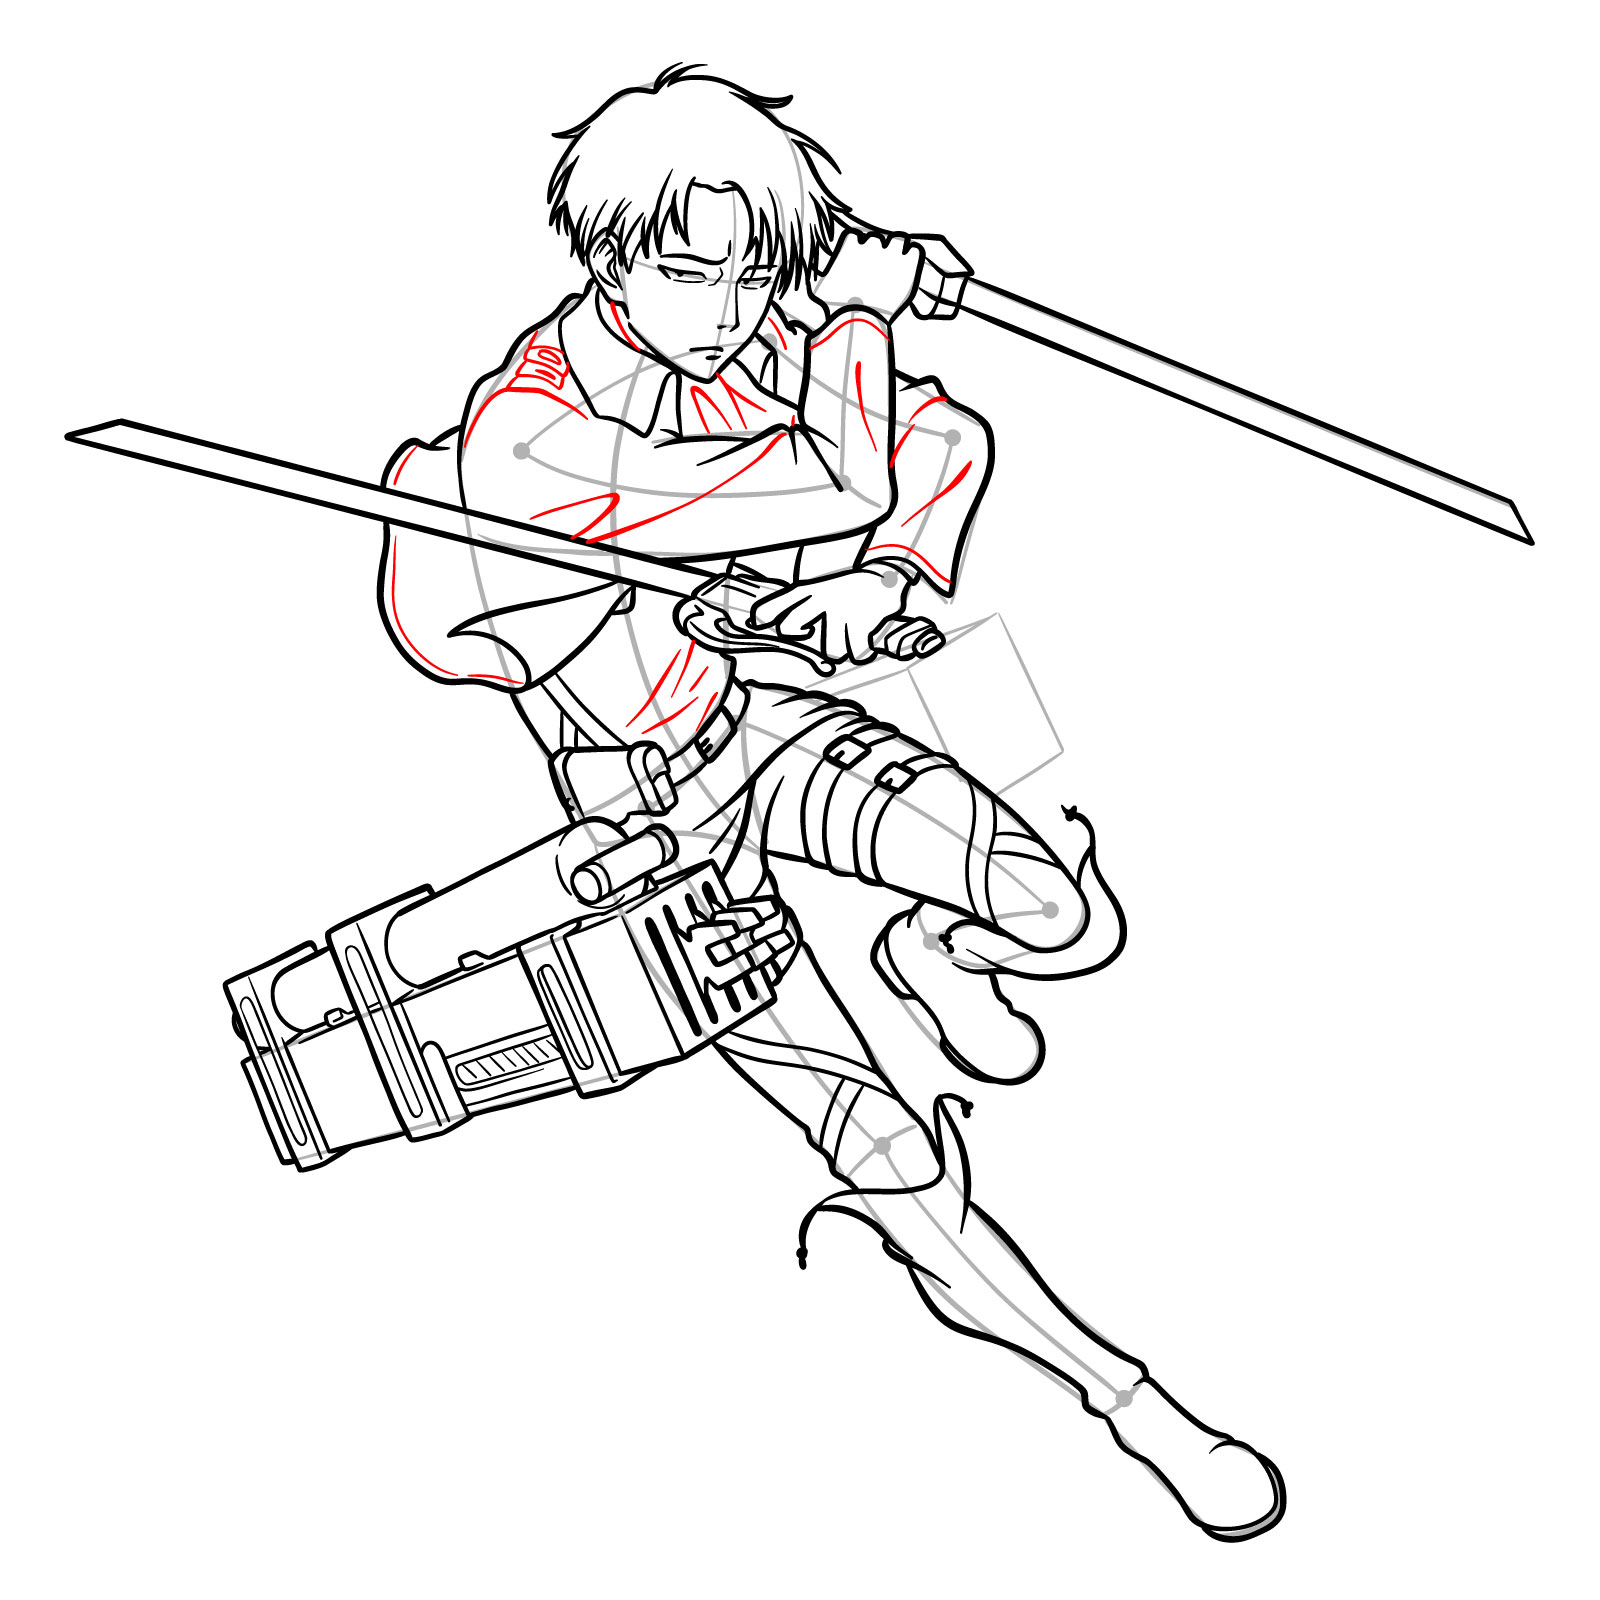
Steps 30 – 31: Finalize the main part of the drawing by adding intricate details to Levi’s pants, including additional straps for his gear. Detail the lace knots of his boots and the tops. Sketch the suspenders and jacket, taking care to illustrate the folds and creases that arise from his action-packed pose. Add any final shirt details to complete the portrayal of Levi in full battle attire, ready for action
Steps 30 to 31 of a drawing guide adding final details to Captain Levi’s outfit
Step 31
Detailing the uniform
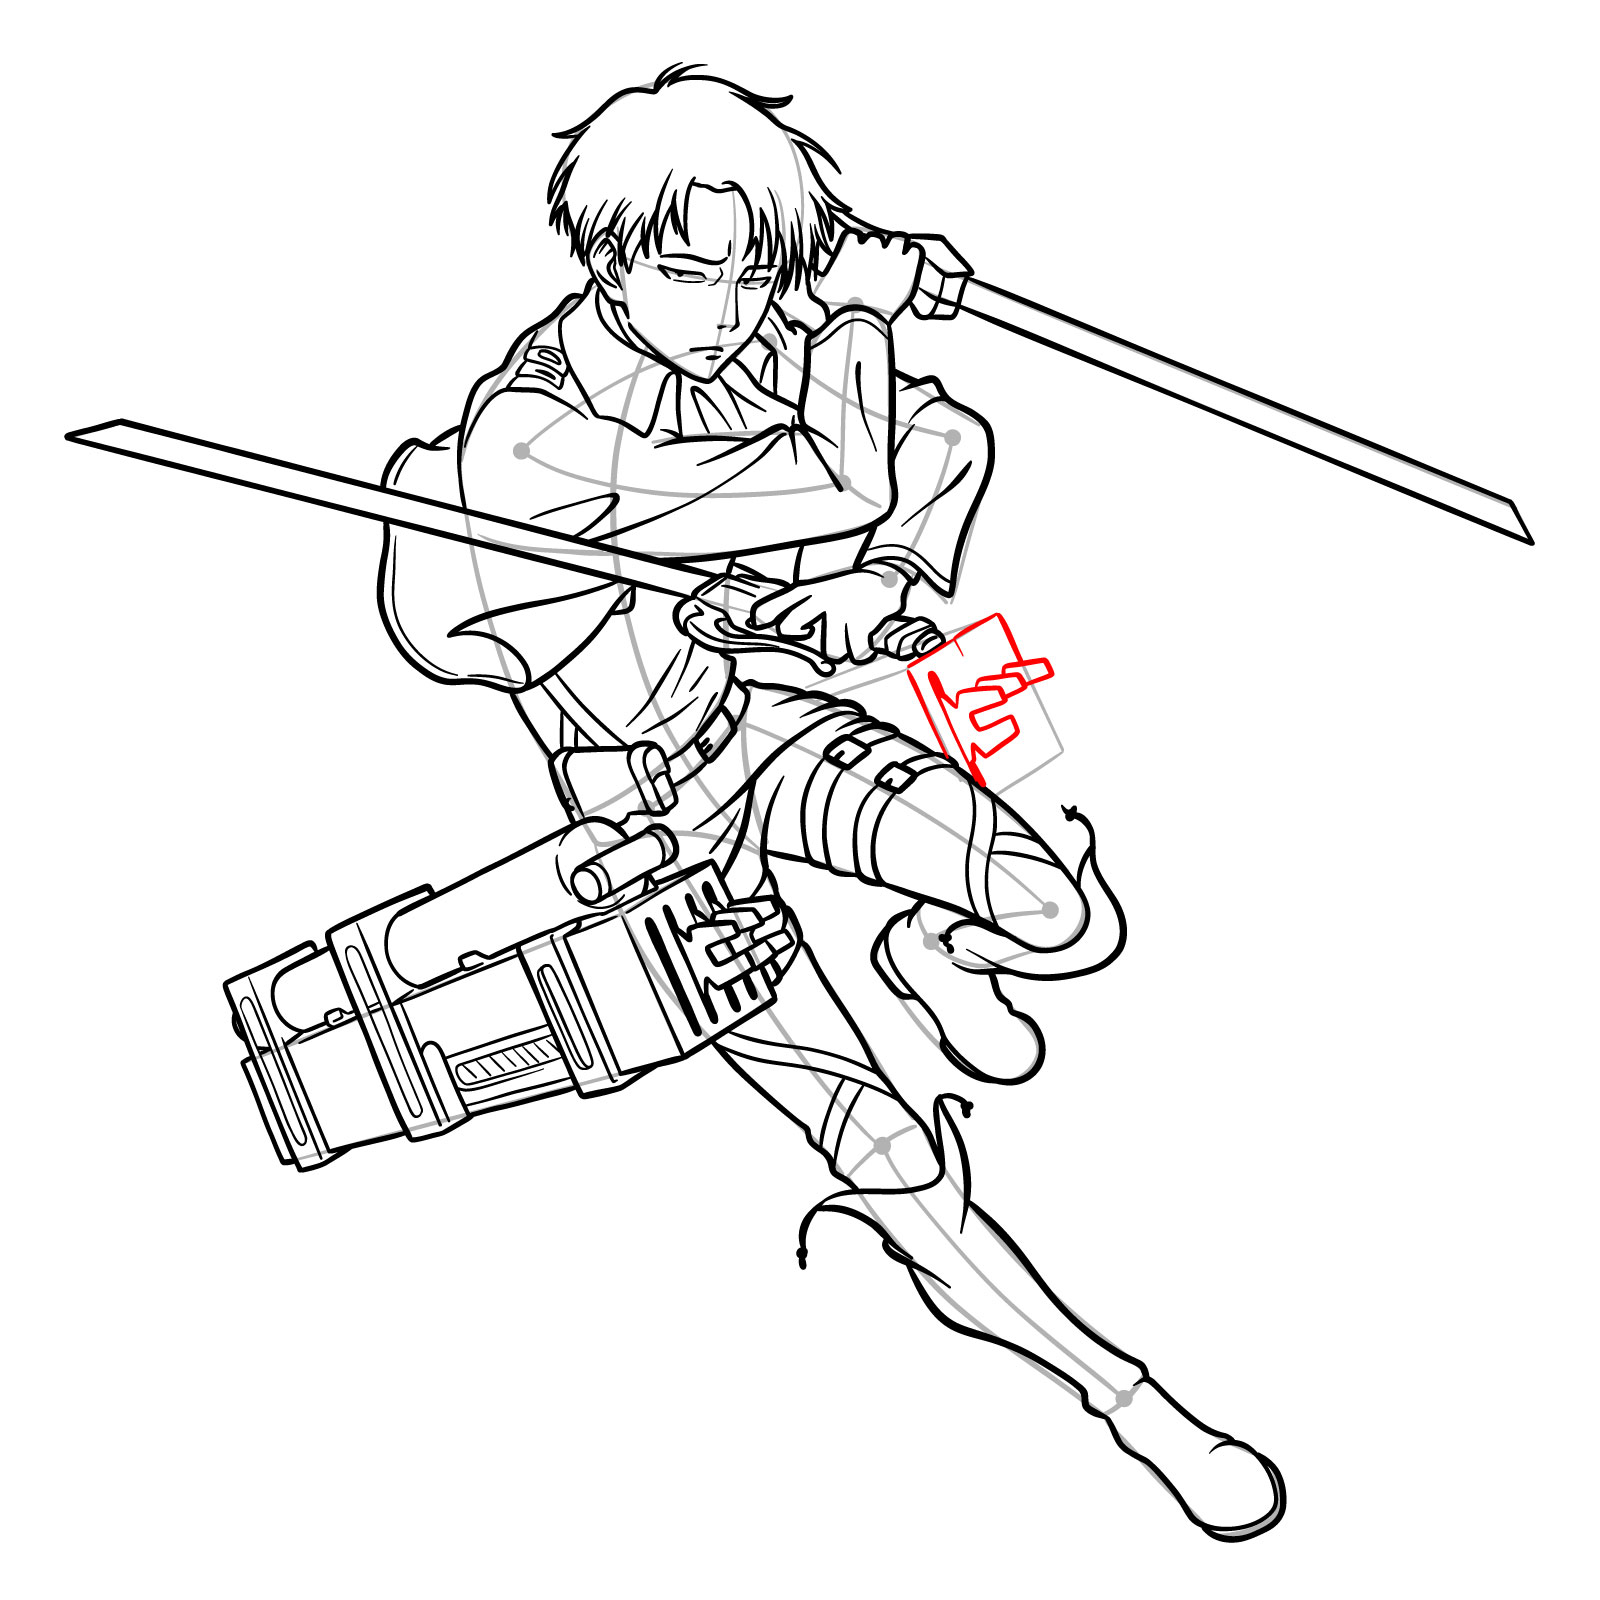
Steps 32 – 35: Begin sketching the second ODM gear on the opposite side of Levi’s body. Add the details of the gear, such as the gas canisters and the maneuvering equipment
Step 32:
Steps 32 to 35 of a drawing guide for Levi’s second ODM gear and additional details
Step 33
Sketching the second ODM gear and additional details
Step 34
Adding details to Levi’s gear
Step 35
Detailing the gear behind his back
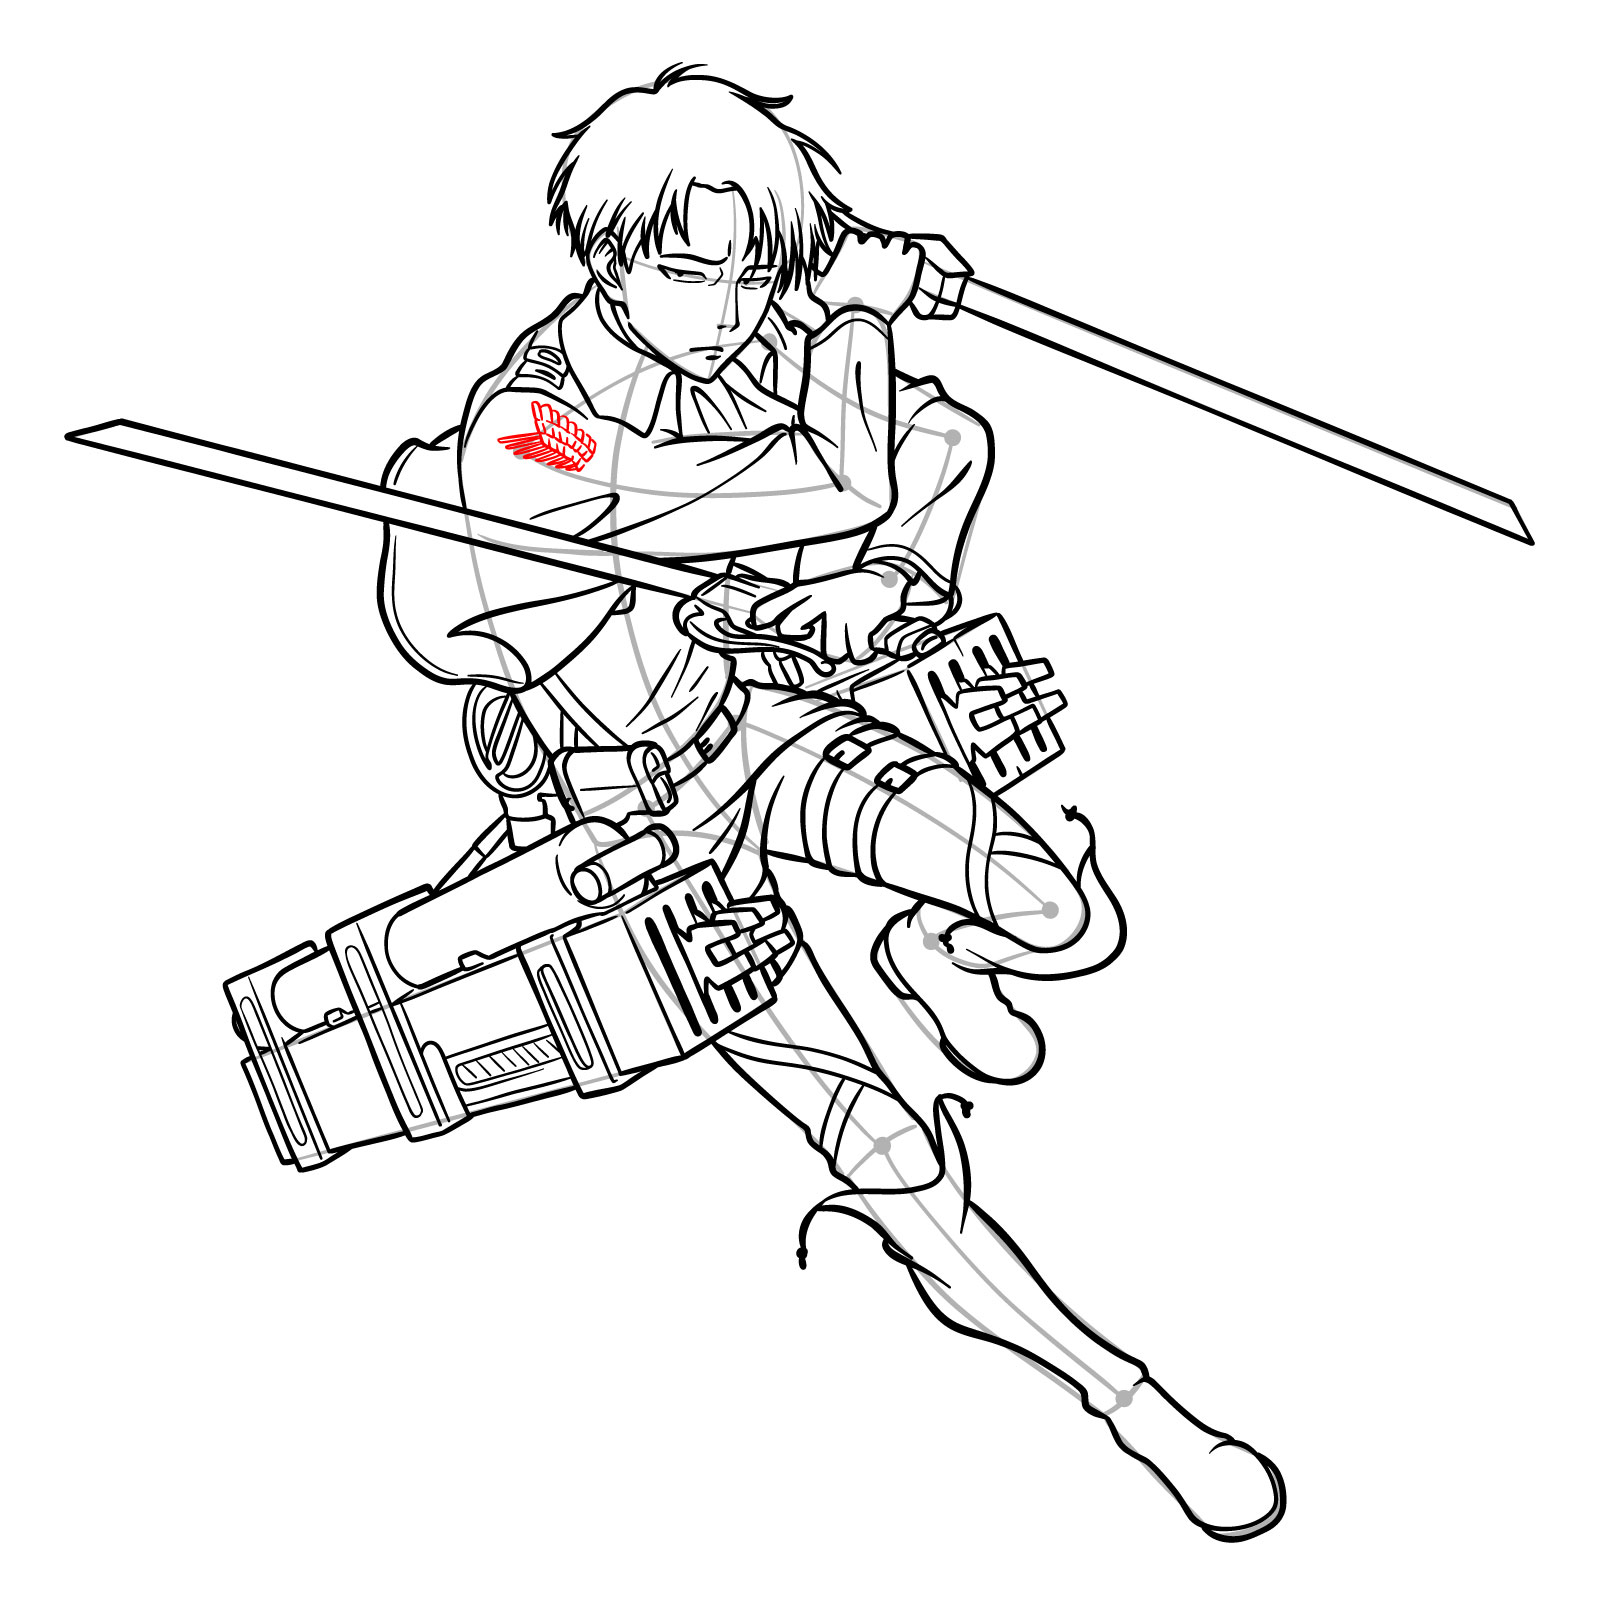
Steps 36 – 37: Draw the iconic Survey Corps emblem on Levi’s shoulder, capturing its recognizable wings of freedom symbol
Steps 36 to 37 of a drawing guide focusing on the Survey Corps emblem on Levi’s uniform
Step 37
Sketching the Survey Corps emblem on Levi’s uniform
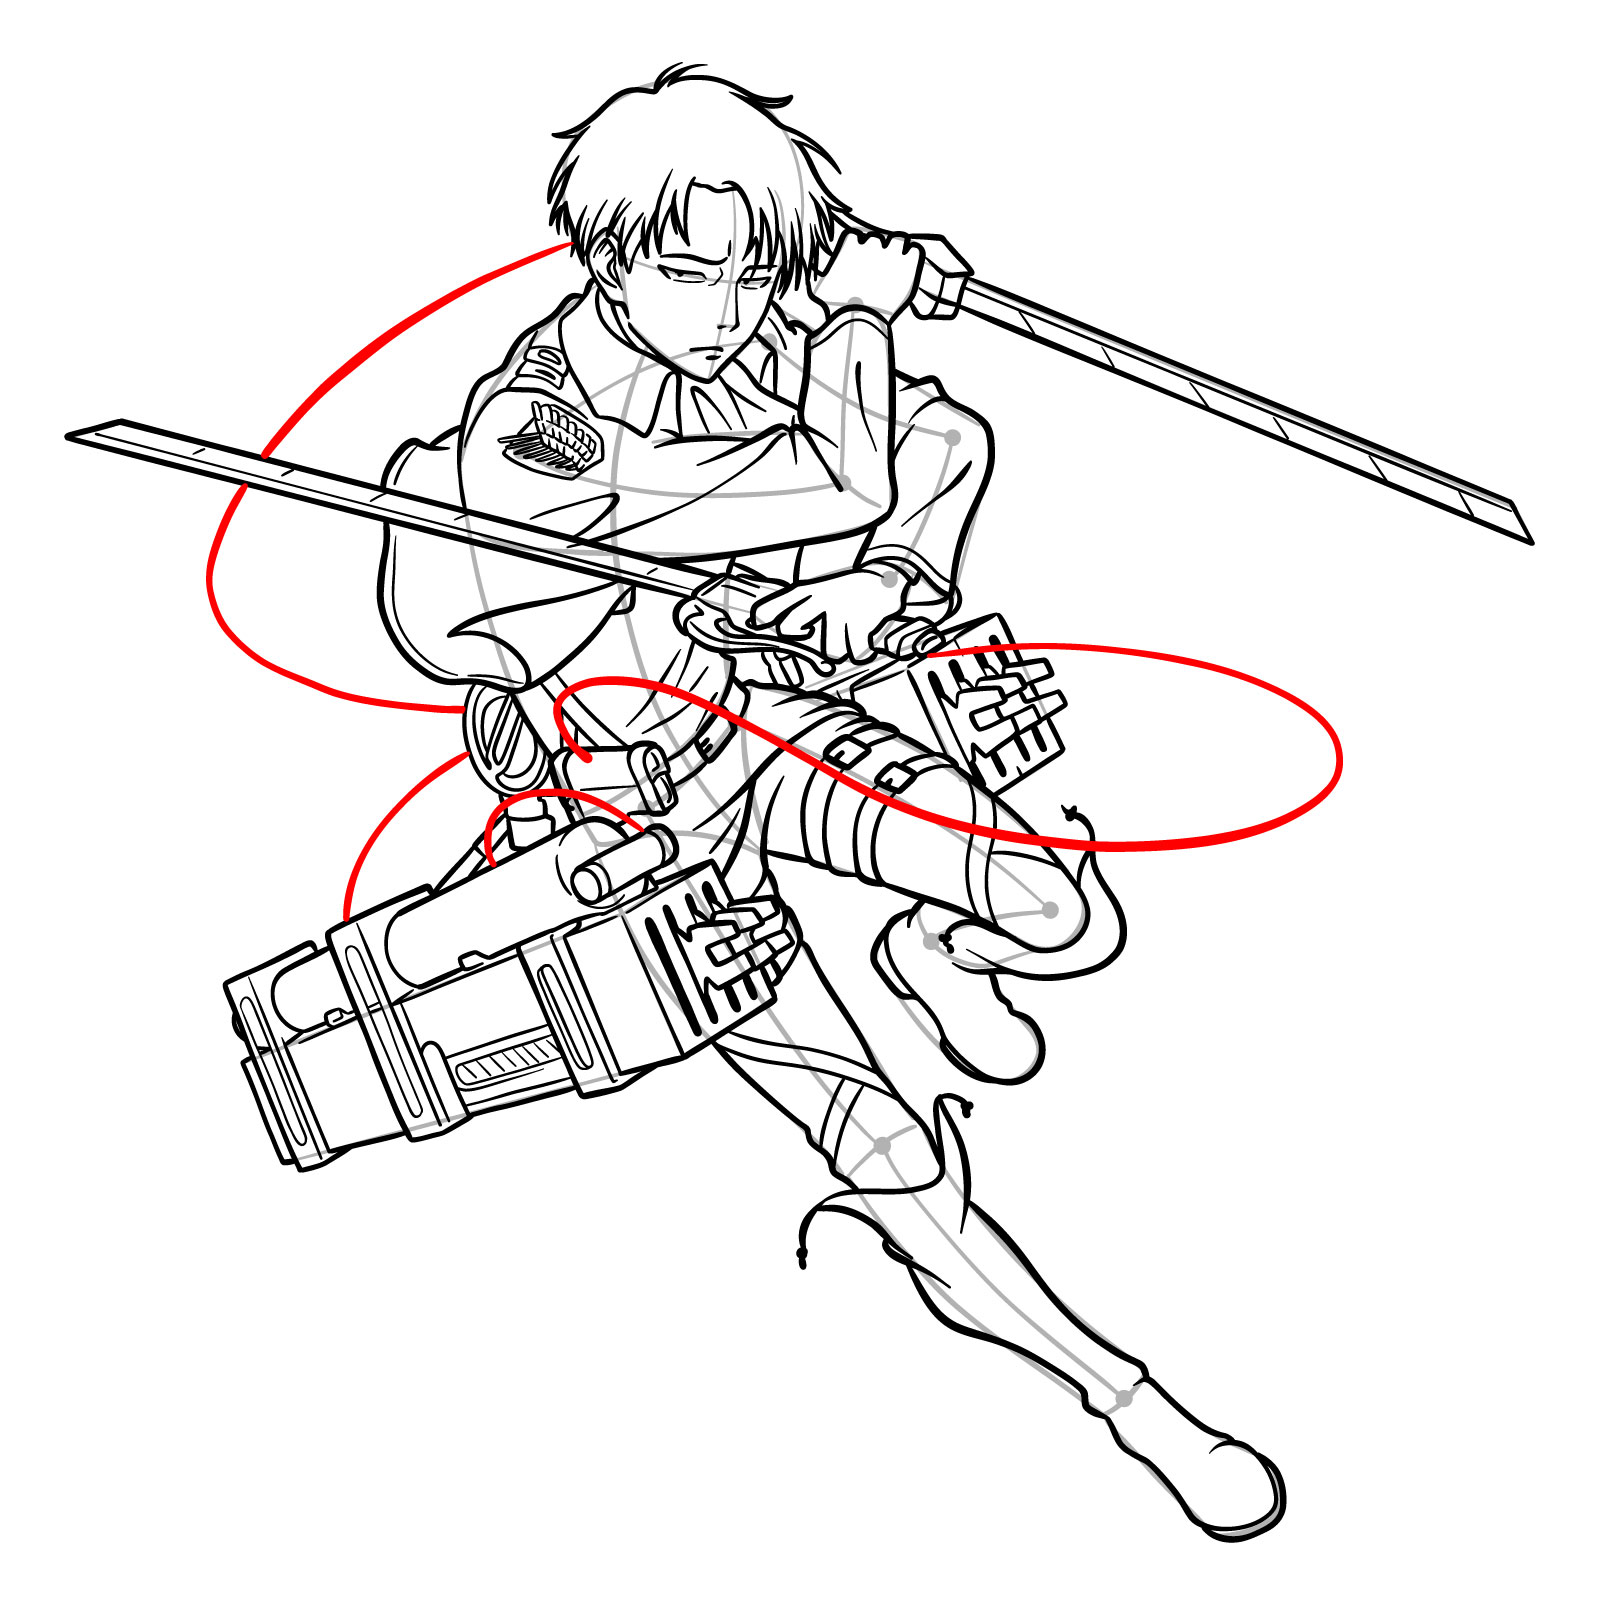
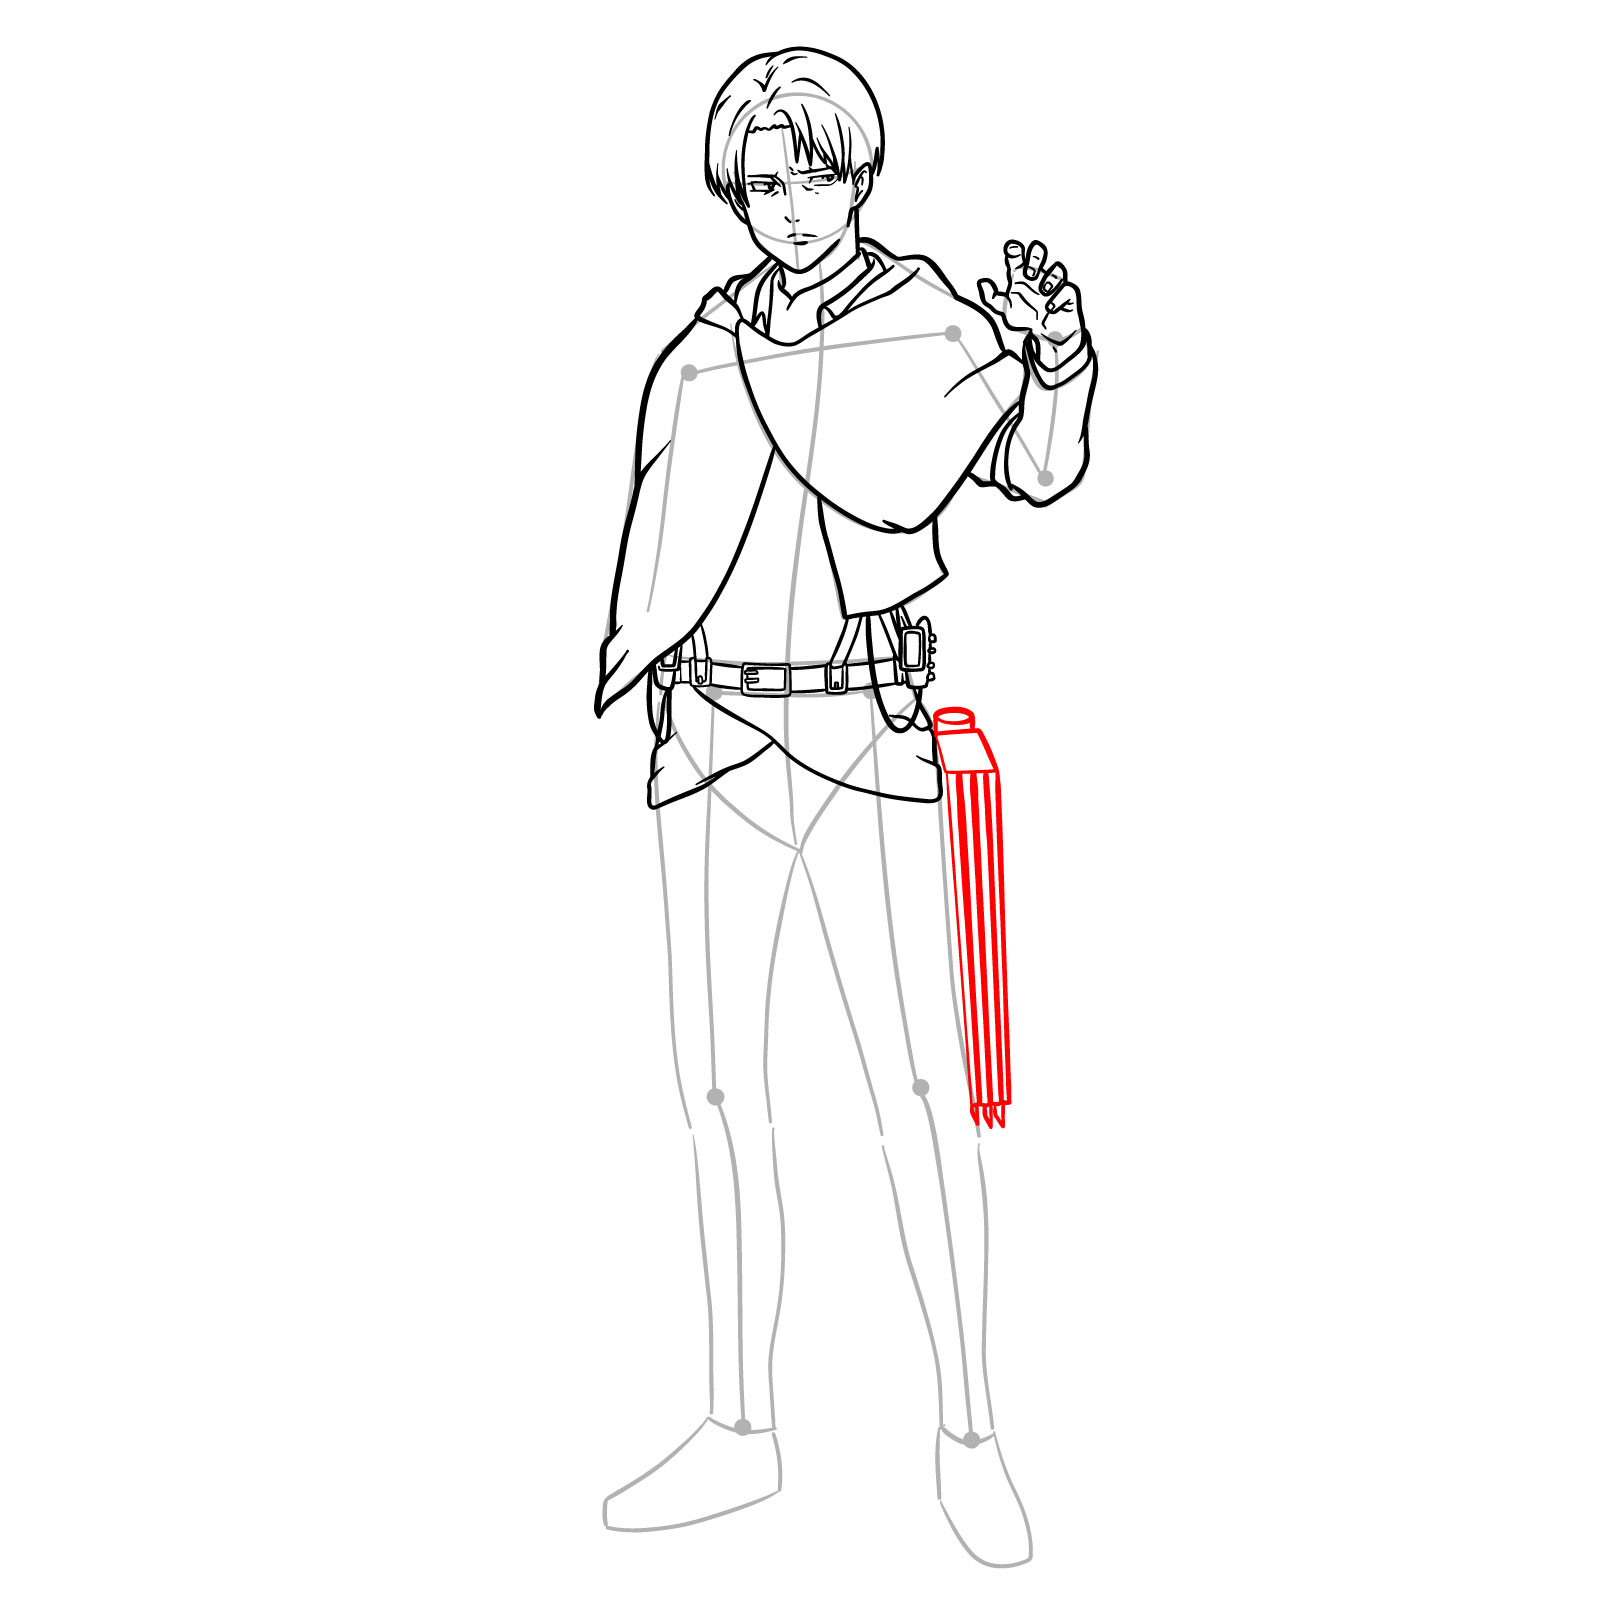
Step 38 – Sketch the cords of the ODM gear, which are essential for Levi’s mobility and vertical maneuvering. These cords should be drawn with tension, as they are in use, and should connect to the gear and Levi’s hand where he controls them
Step 38 of a drawing guide illustrating the addition of gear cords to Levi’s ODM gear
Step 39 – Conclude your artwork with a completed drawing of Captain Levi Ackerman in a dynamic action pose, equipped with his ODM gear and swords. At this stage, you can optionally ink your drawing to finalize the lines and then erase the pencil sketch underneath to clean up your work, fully revealing how to draw Levi Ackerman in his battle-ready form
Step 39 of a drawing guide, presenting the finished sketch of Levi Ackerman in action
Guide 6: Drawing Levi’s Face with Bandages After the Epilogue Battle
How to draw Levi’s face after the final battle
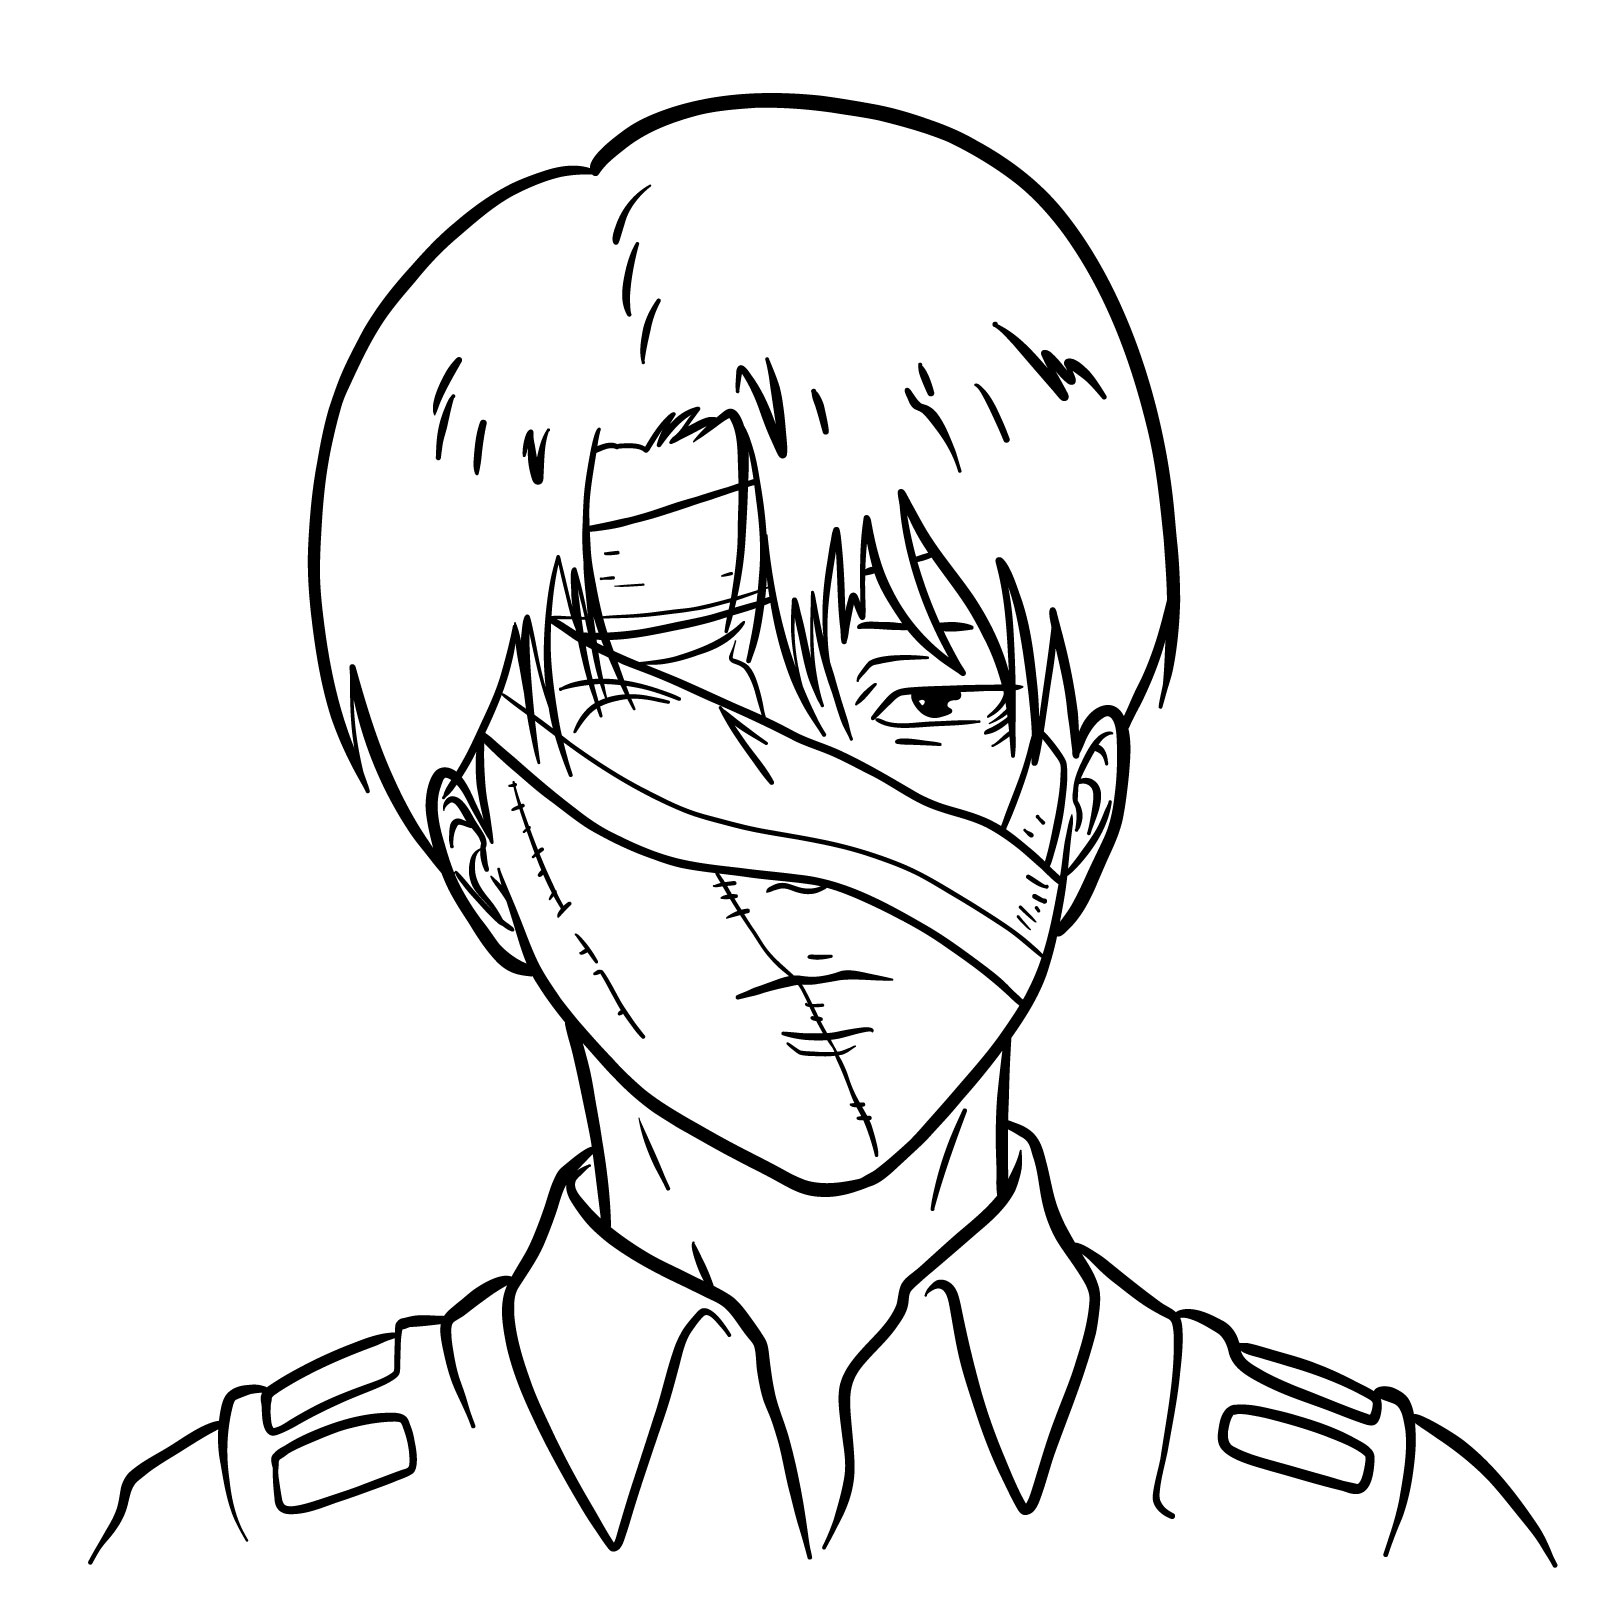
In this sixth guide, we will draw Levi Ackerman’s face as seen in the epilogue episode, capturing a moment of quiet victory and somber remembrance after the final battle against Eren the Titans. The finished drawing reflects Levi’s relief and sorrow, with his face partly obscured by bandages that mark the cost of war.
Levi’s typically sharp gaze is softened by the weight of his experiences, visible through the unbandaged eye. His face bears scars, a testament to the battles fought, and the bandages wrap around his head, crossing over his closed eye, adding a texture of both injury and healing. Despite the physical damage, Levi’s strong character and resilience shine through.
The guide consists of 14 steps, beginning with two steps focused on sketching the basic proportions of Levi’s face. Getting the proportions right is crucial for capturing the essence of Levi’s character, even with the bandages and scars altering his familiar features. We will pay special attention to the eyes, ensuring that even with the bandages, the intensity of Levi’s character is not lost. By the end of this guide, you will have created not just a portrait of physical features, but a reflection of a soldier’s sacrifice and endurance.
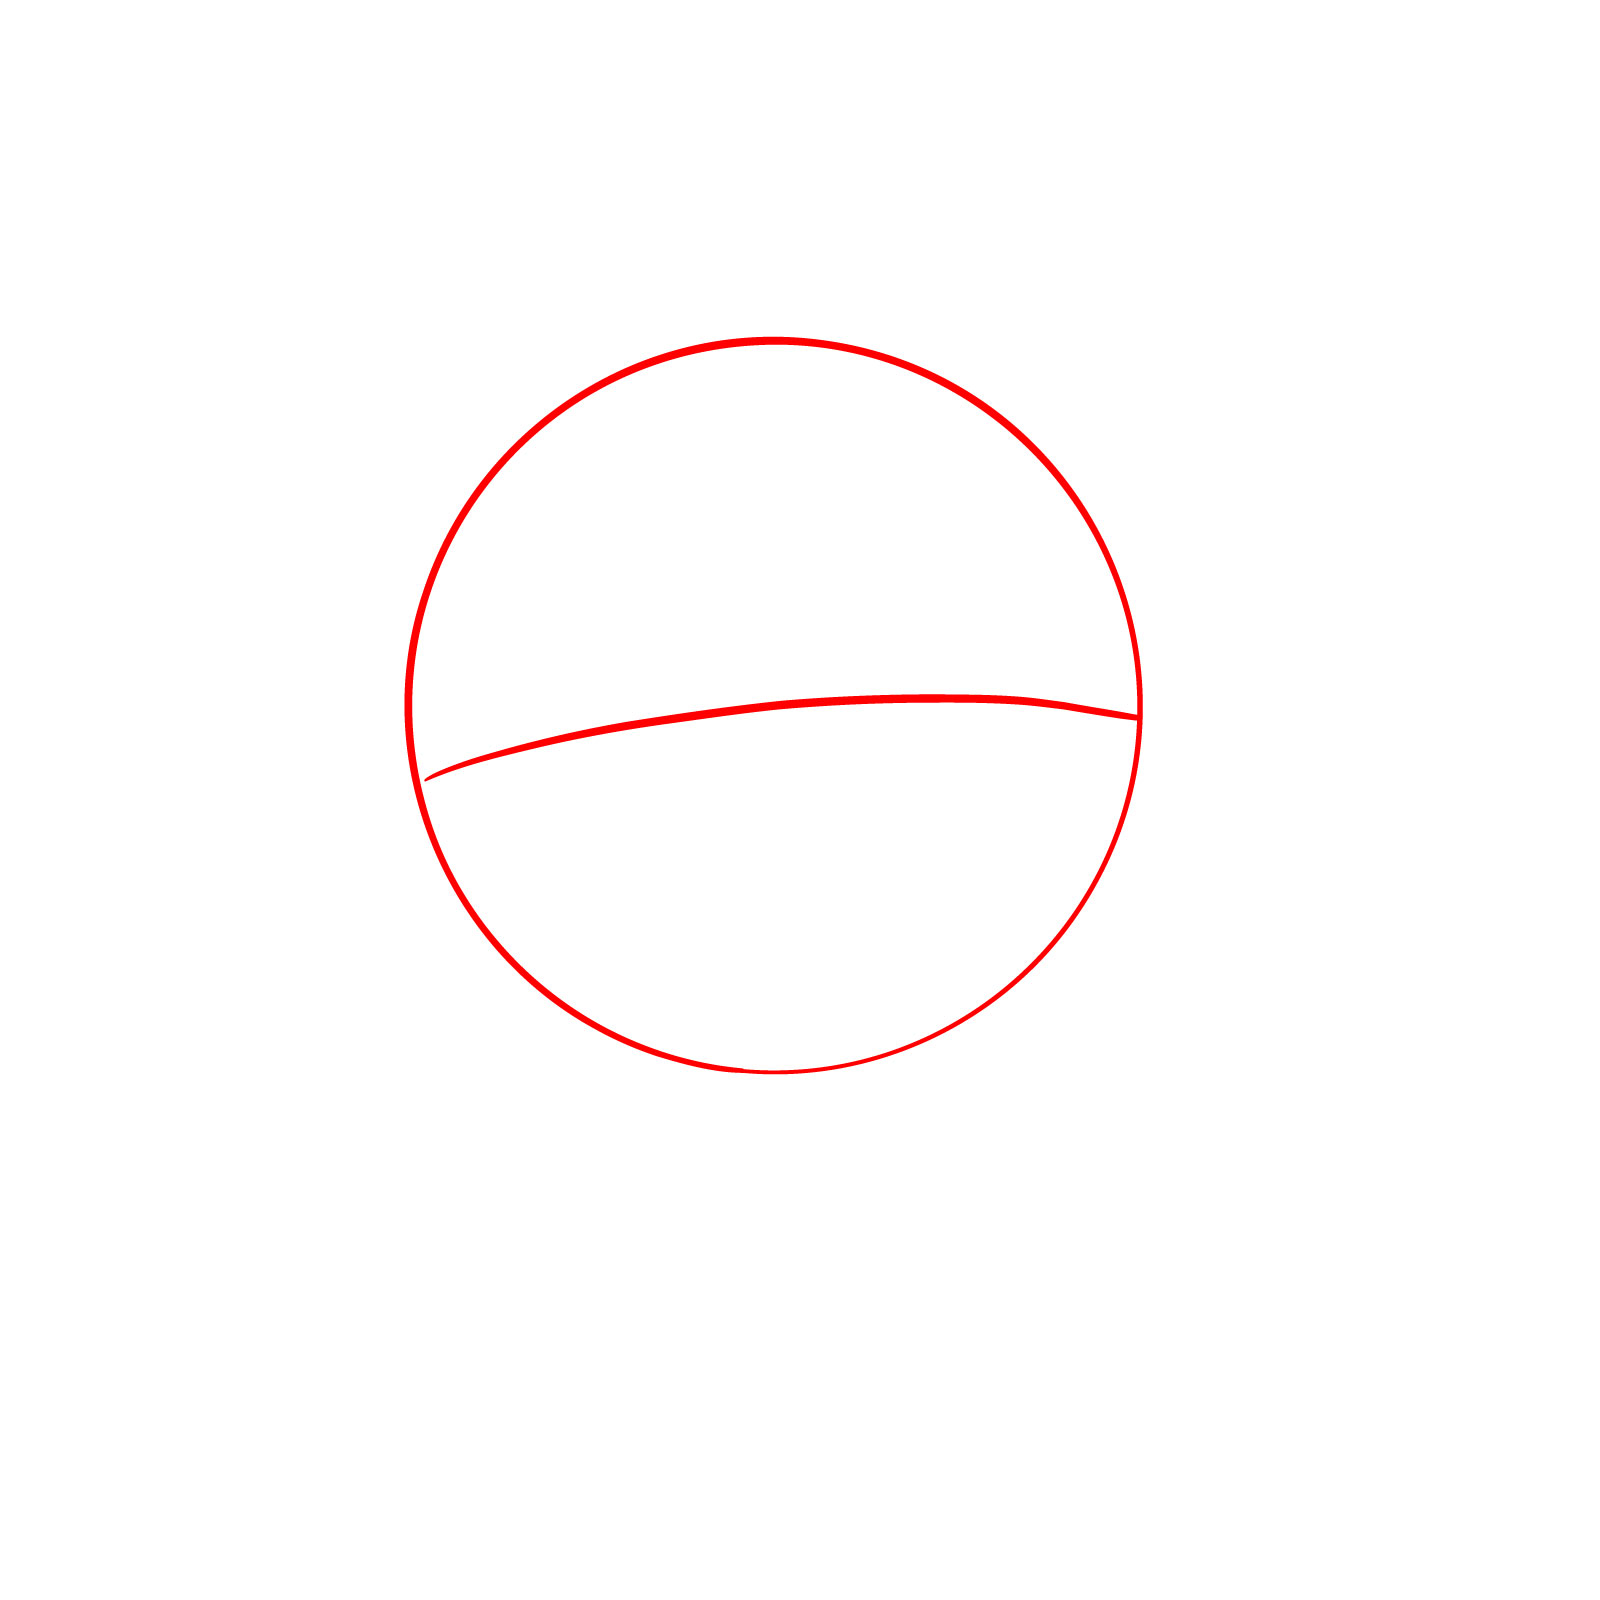
Step 01 – Begin by sketching a circle which will form the base of Levi’s head. Inside the circle, draw a slightly curved horizontal line to establish the basic proportions of the face
Starting the outline for Levi’s face with a circle and a horizontal guide line
Step 02 – Draw a V-like shape to create the jawline and chin of Levi’s face. Add a vertical line down the center to divide the face into two symmetrical parts. Mark the positions for the nose and mouth with short horizontal lines. Indicate the placement of Levi’s left eye with a short stroke; the right eye will be obscured by bandages. Also, sketch guidelines for the neck
Defining the shape of Levi’s face and the position of facial features
Step 03 – Refine the chin area with more defined lines, and add the cheekbones to bring structure to the face
Shaping the chin and cheekbones of Levi’s face
Step 04 – On either side of the head, within the bounds of the horizontal line, sketch the outlines of the ears
Adding ears to the sketch of Levi’s face
Step 05 – Begin drawing Levi’s hair bangs at the forehead, creating jagged lines to represent the fringe
Starting the hairstyle with Levi’s fringe
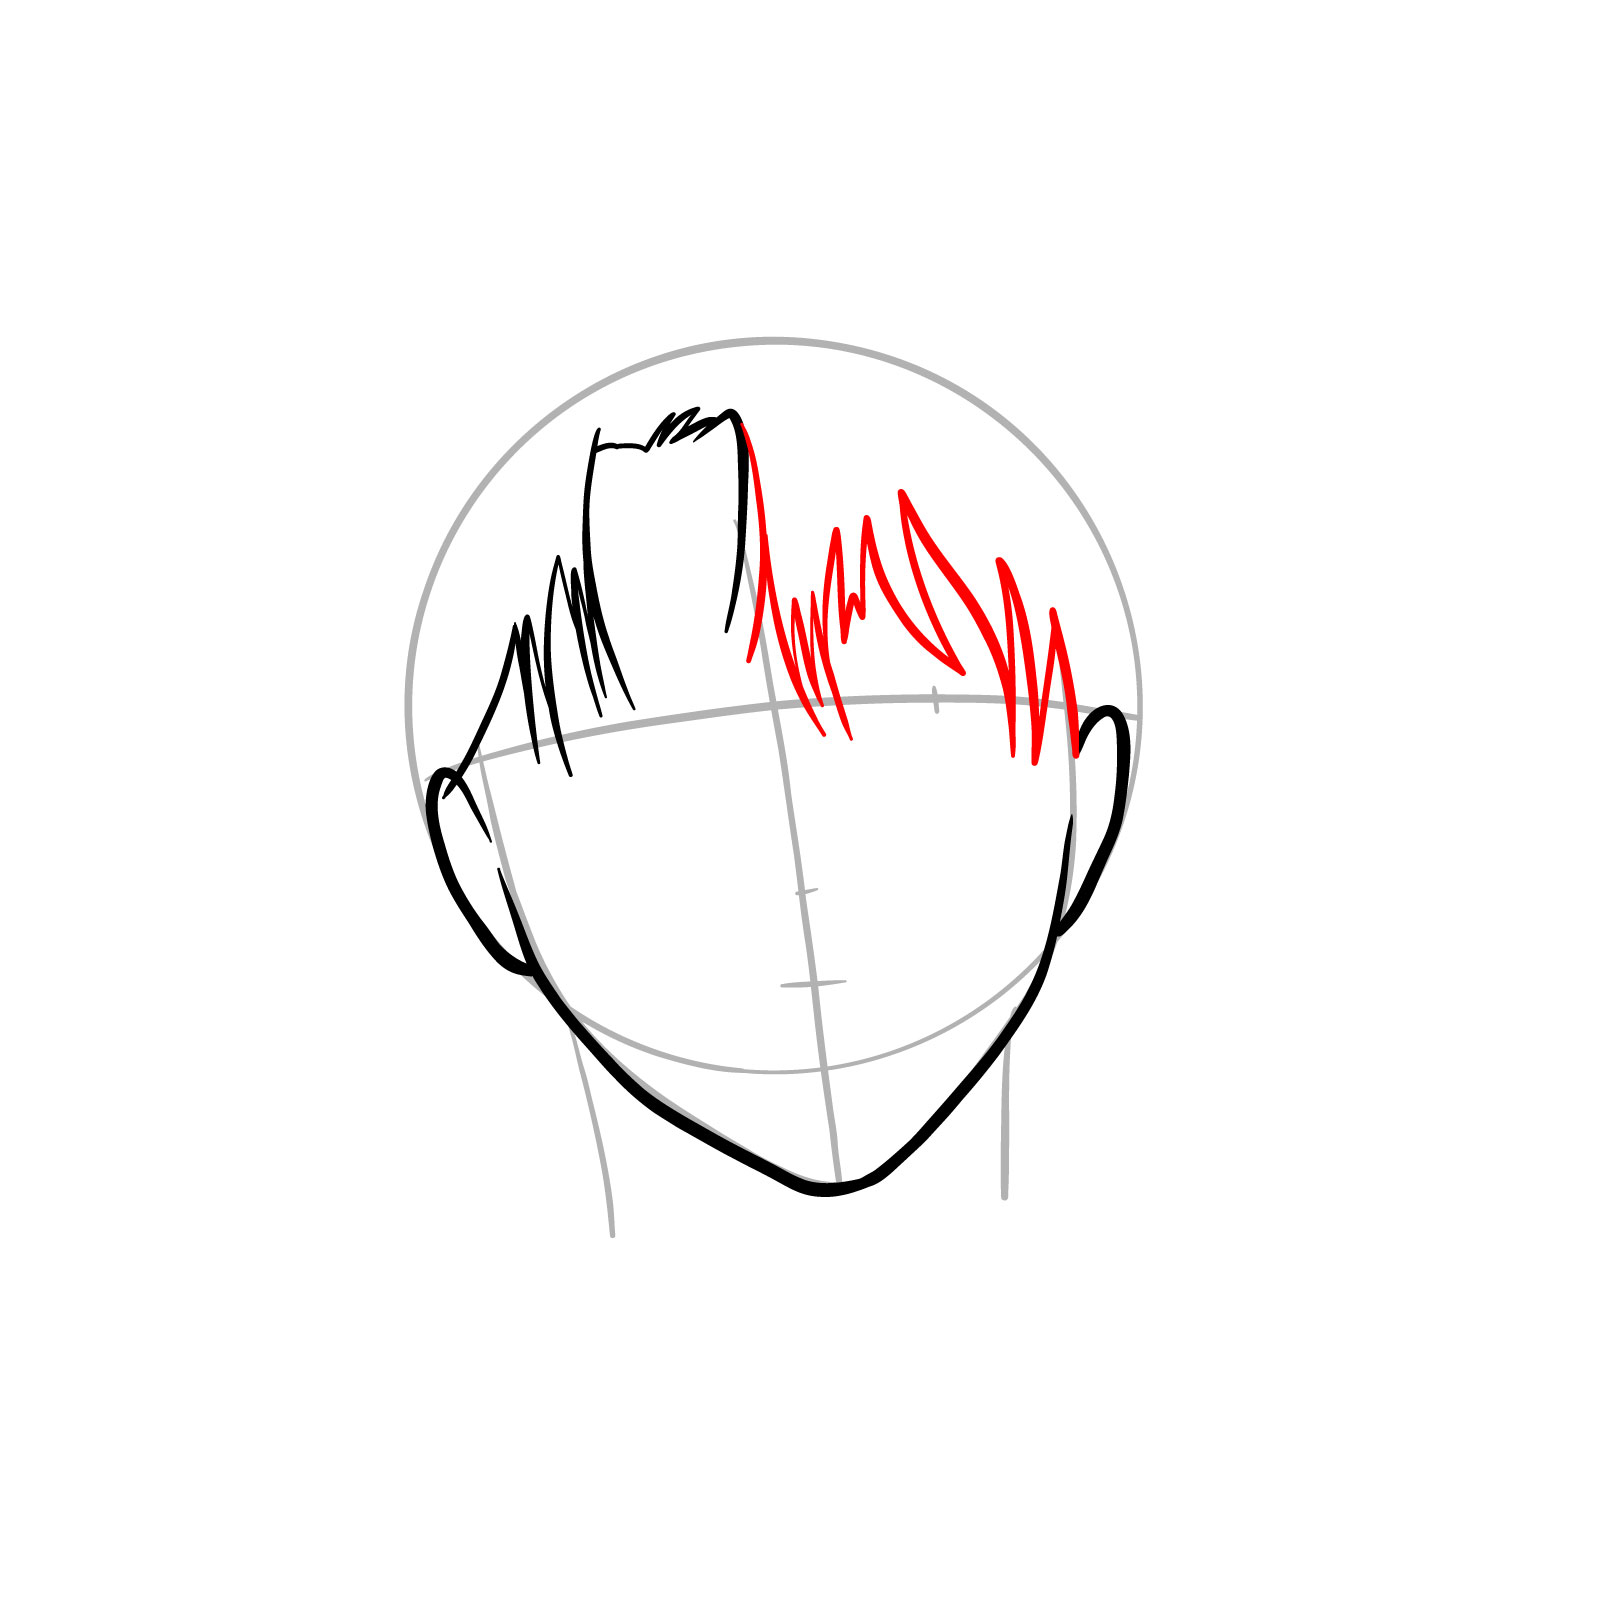
Step 06 – Continue adding detailed lines to complete the fringe, making sure to capture the characteristic style of Levi’s hair
Finishing the hair fringe on Levi’s forehead
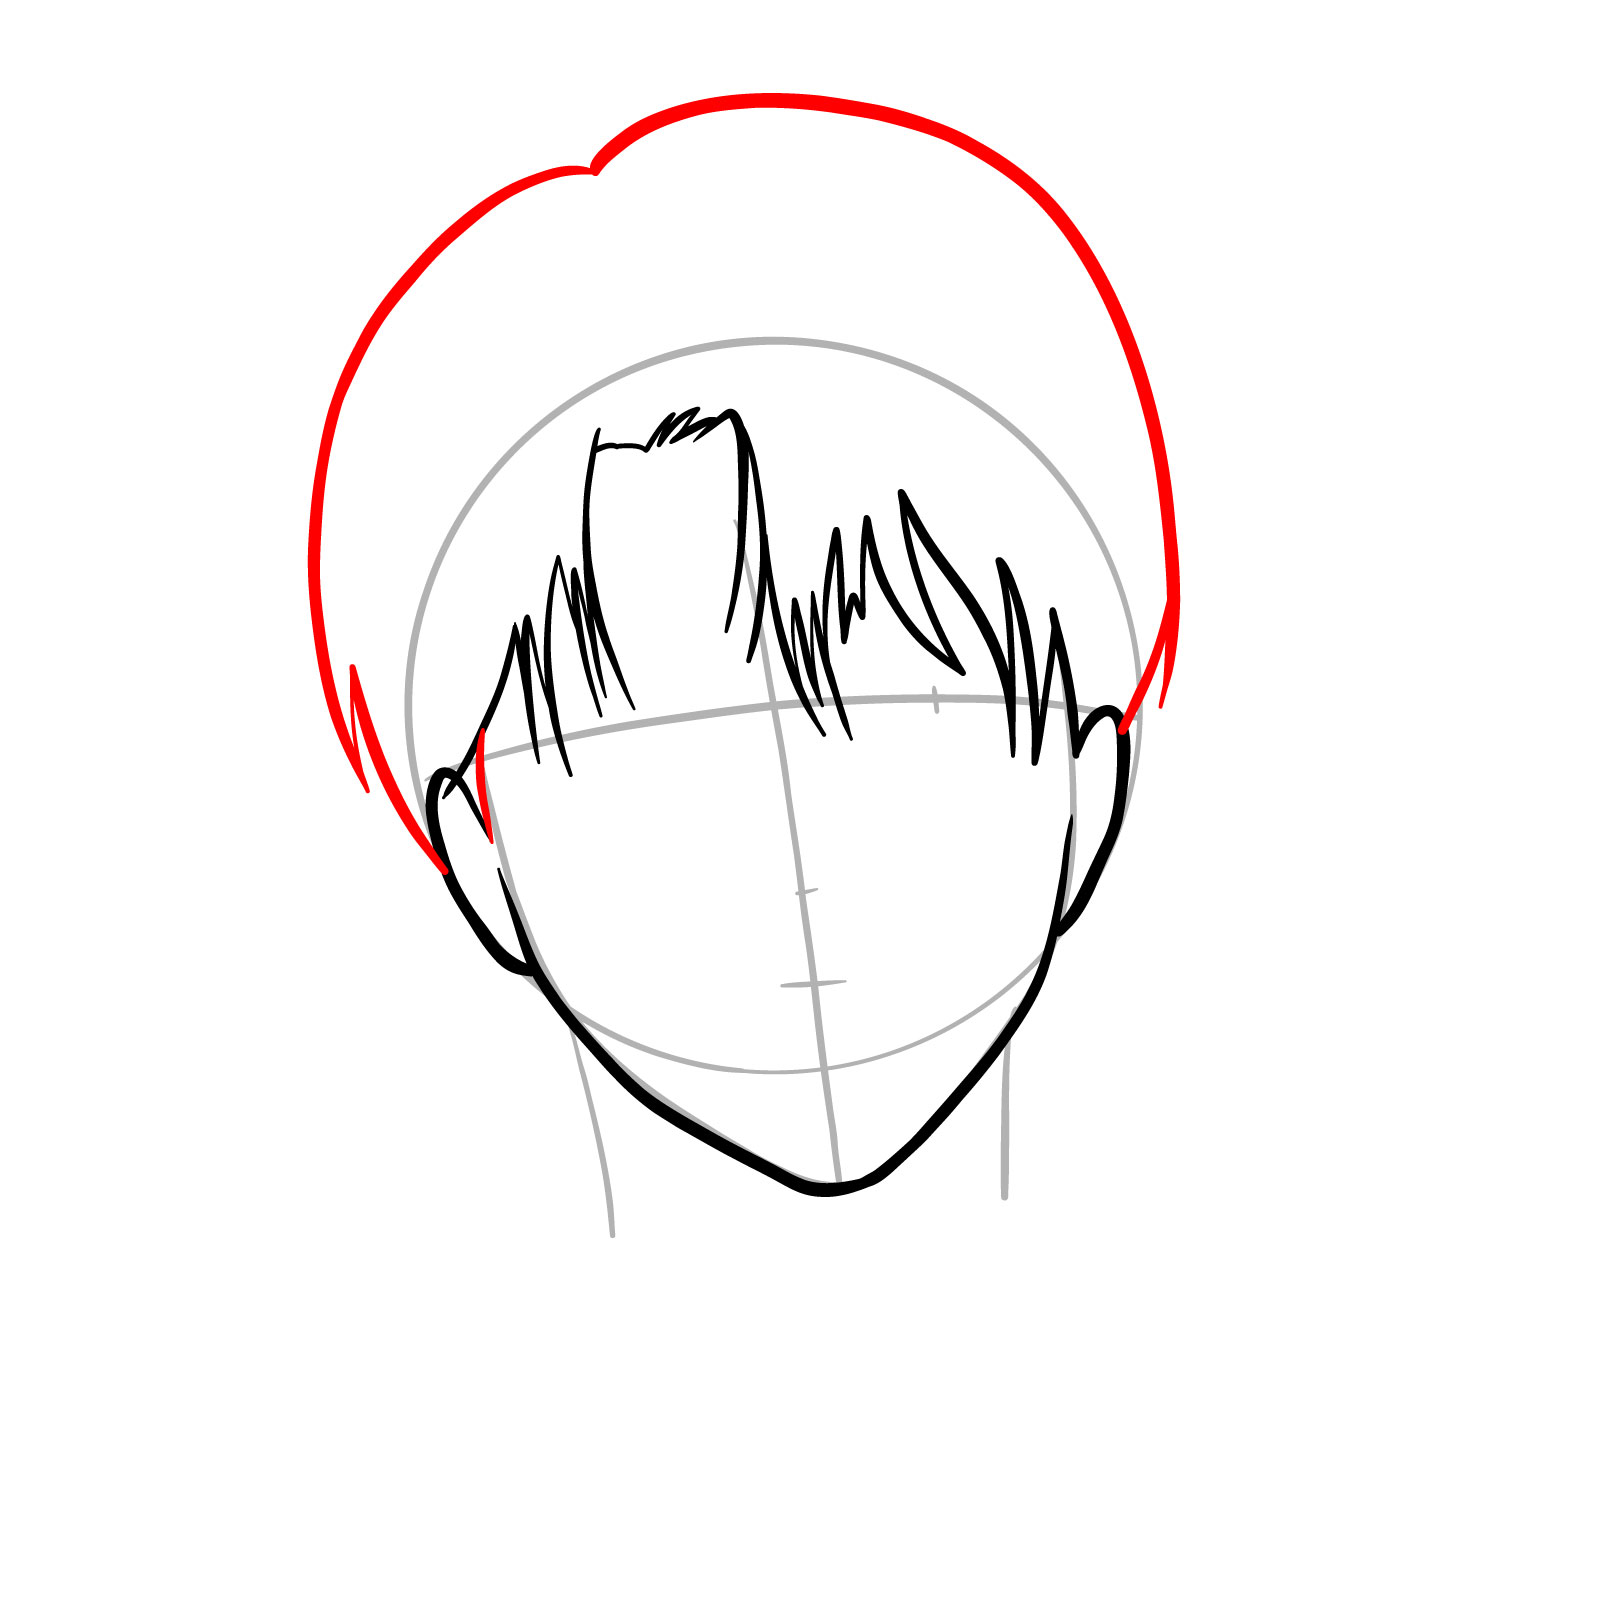
Step 07 – Sketch the hair shape around the sides and top of the head, completing the overall silhouette of Levi’s hairstyle
Defining the full hair shape of Levi’s hairstyle
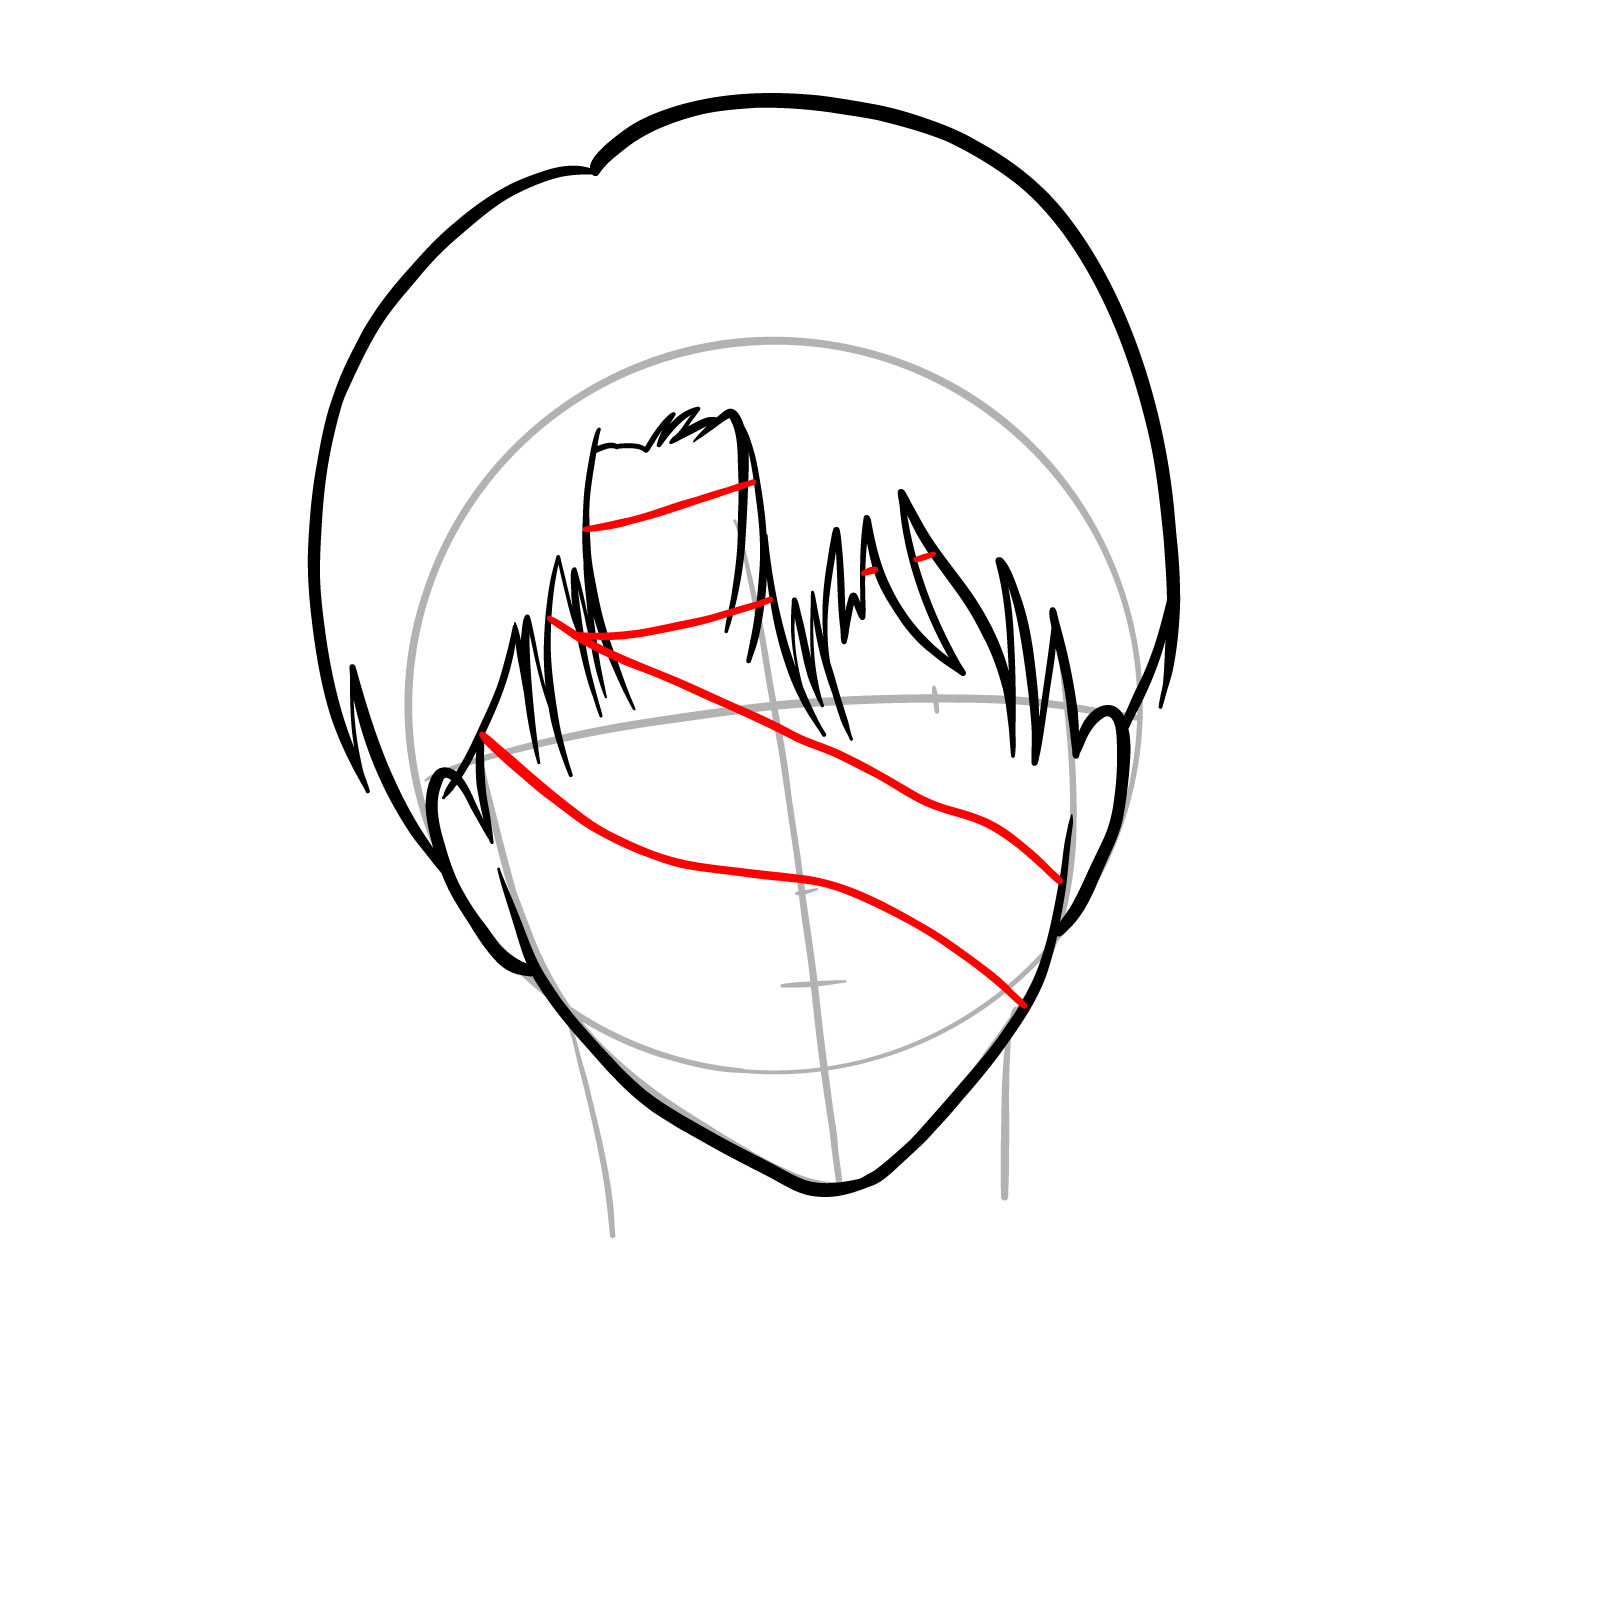
Step 08 – Sketch the initial layer of bandages across the forehead and diagonally over the face, covering the right eye and the majority of the nose
Adding the first layer of bandages on Levi’s face
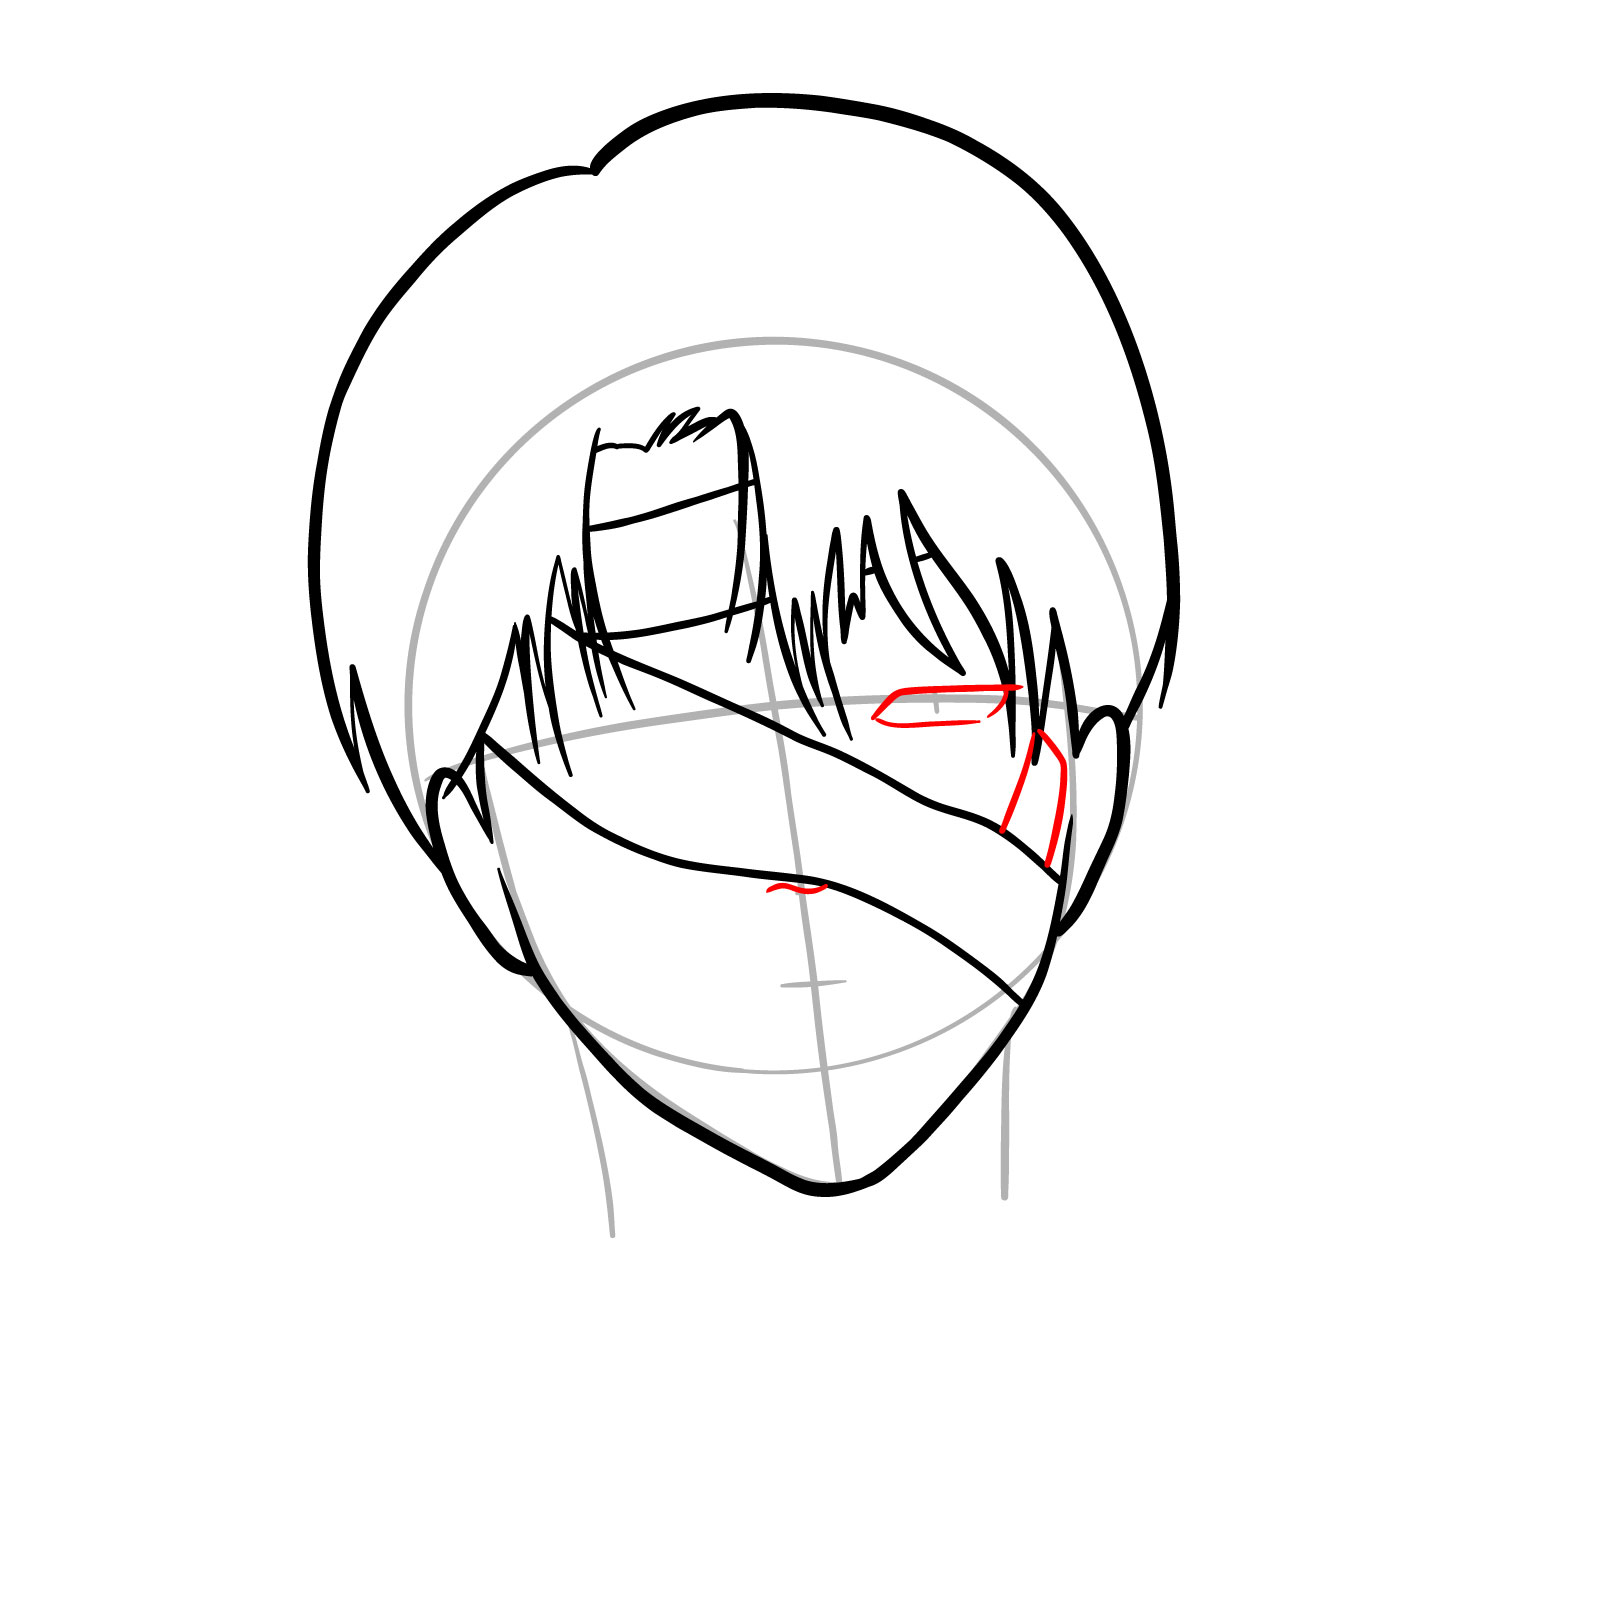
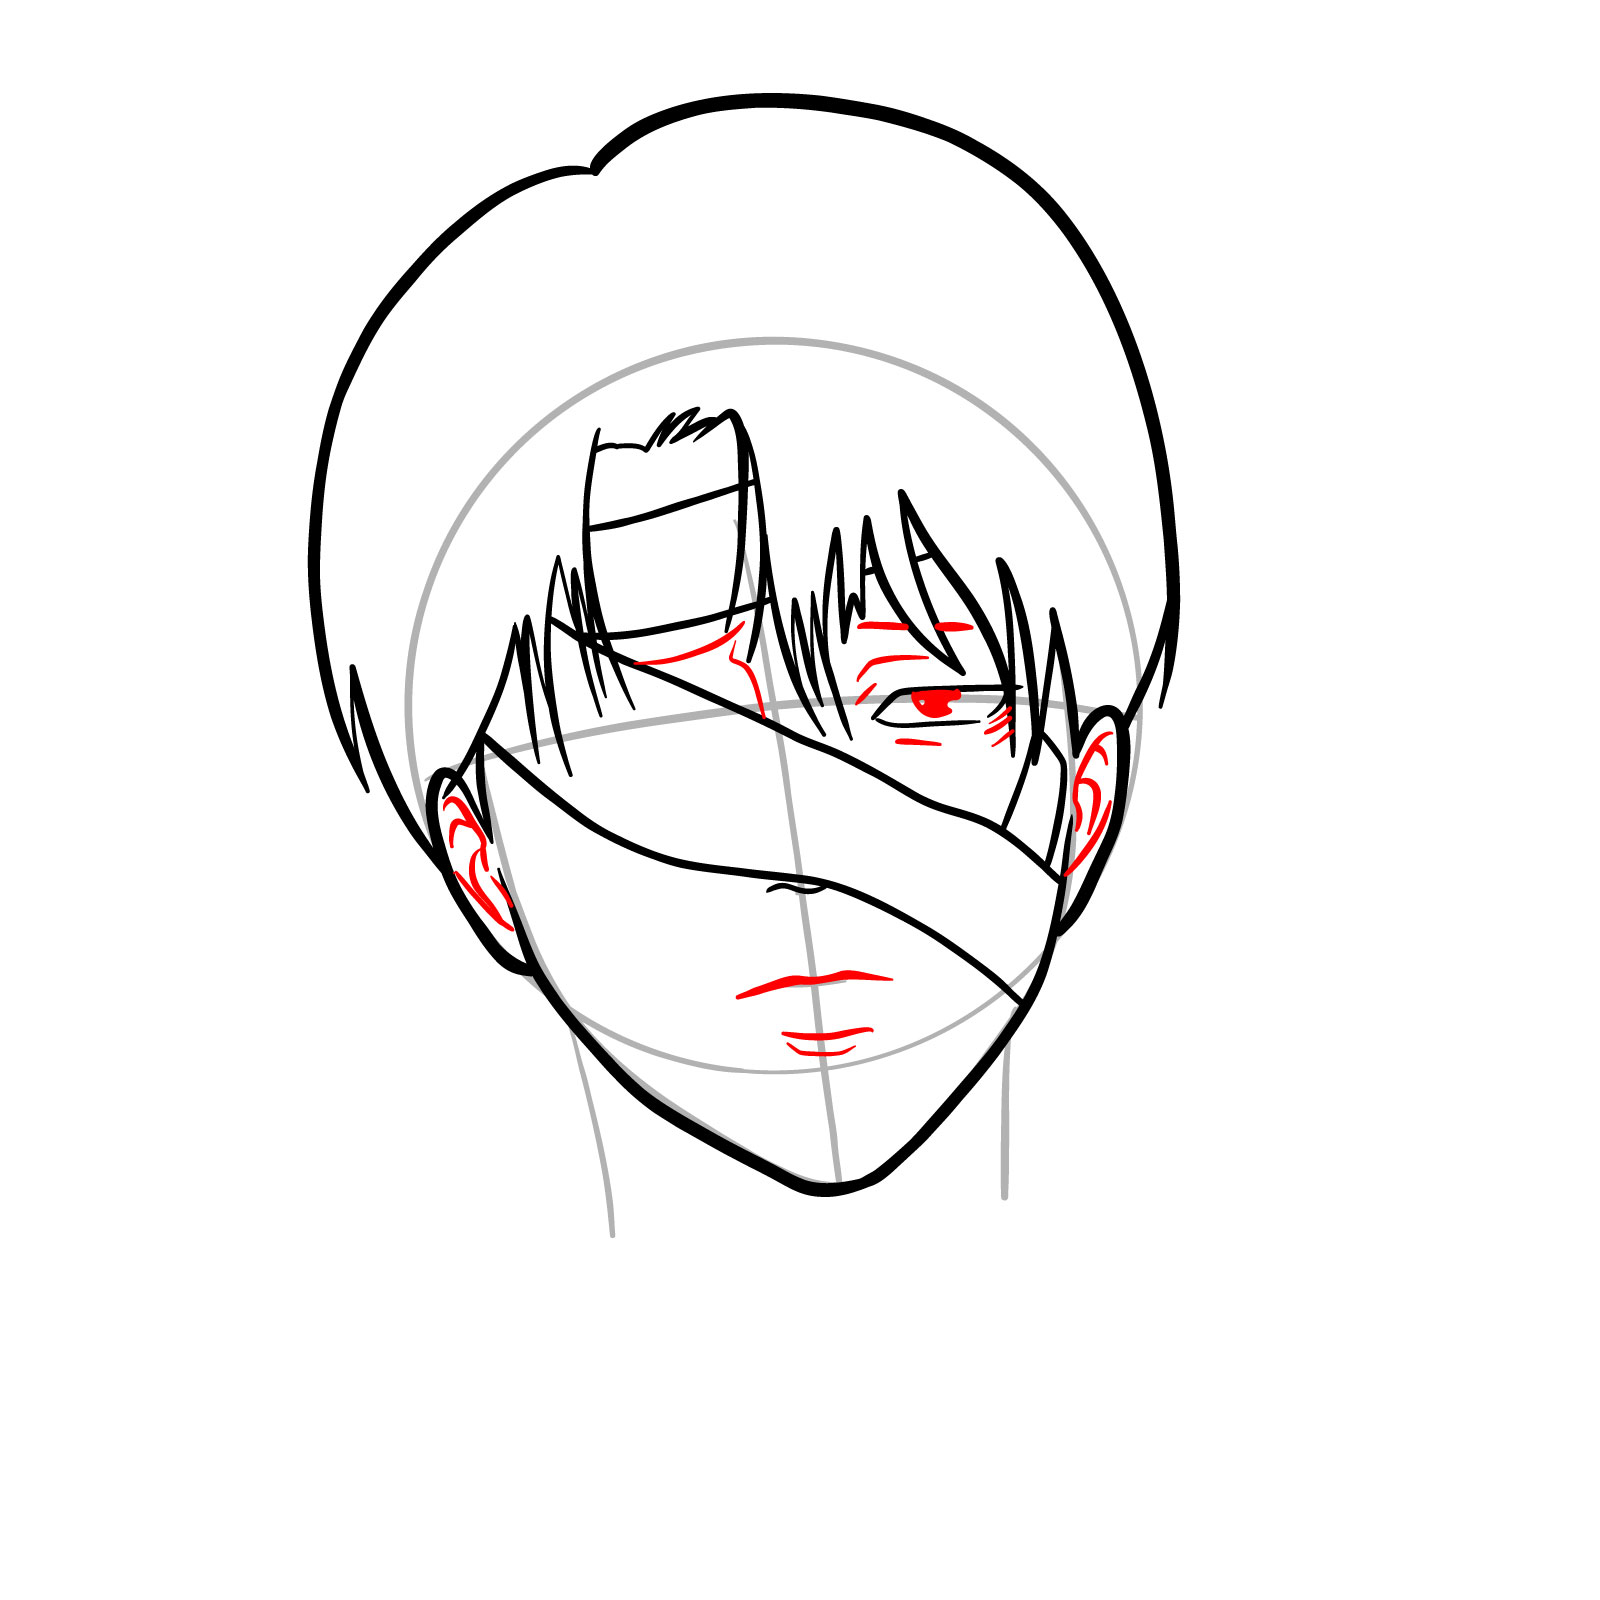
Step 09 – Outline the shape of the left eye and the visible part of the nose. Add a small plaster on the left cheek to indicate injury
Outlining Levi’s left eye and nose, with a small plaster on the cheek
Step 10 – Draw the details of the mouth, the visible eye, and the eyebrows, along with more defined features of the ear
Drawing Levi’s mouth, eyes, eyebrows, and detailing the ear
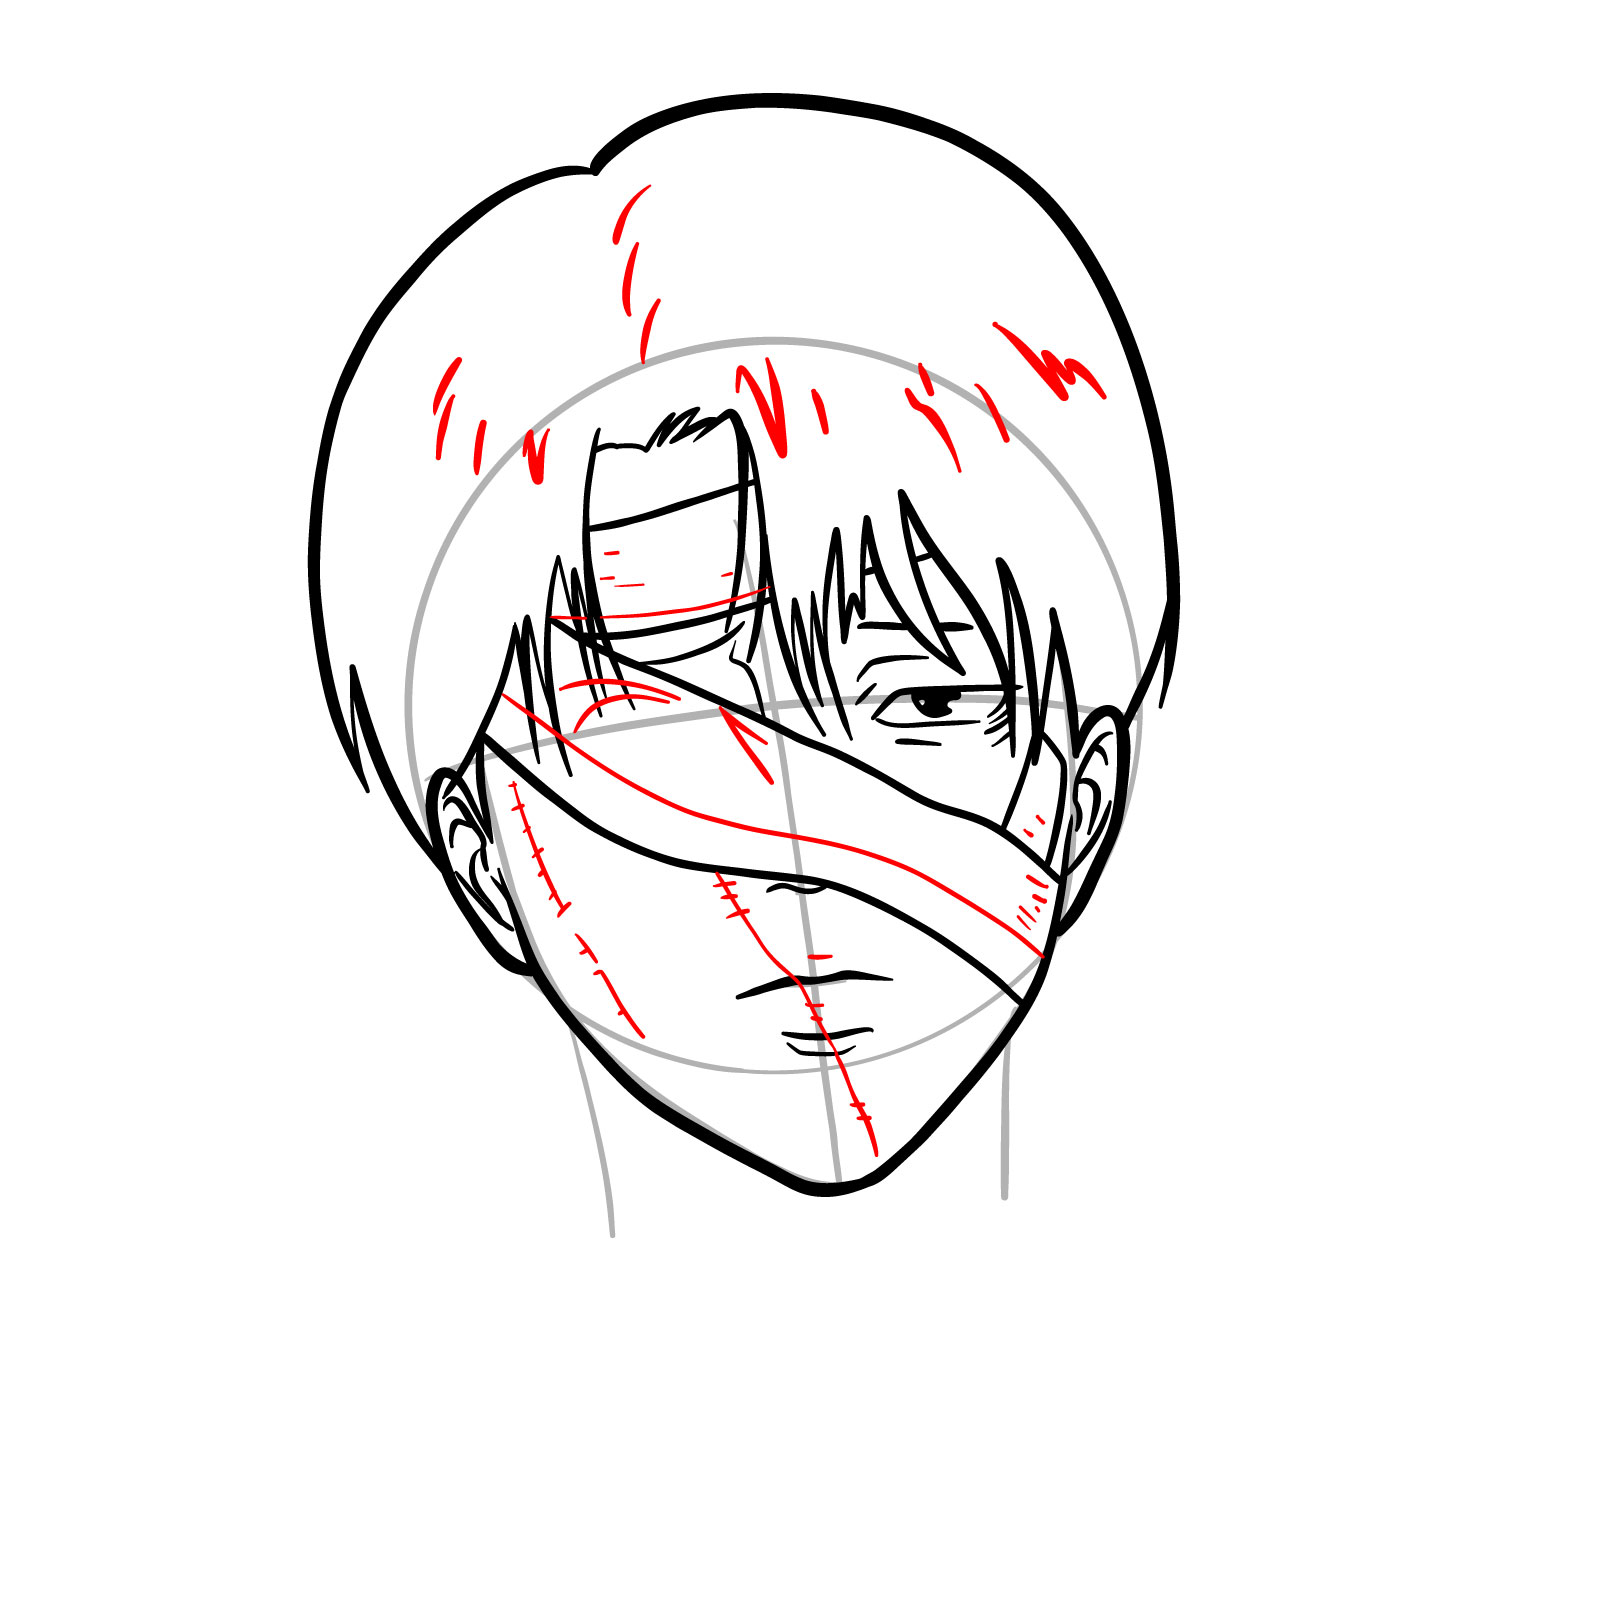
Step 11 – Enhance the hair with additional strokes for texture. Add scars with stitch marks and illustrate the layers and folds of the bandages
Adding hair details, scars with stitches, and folds in the bandages
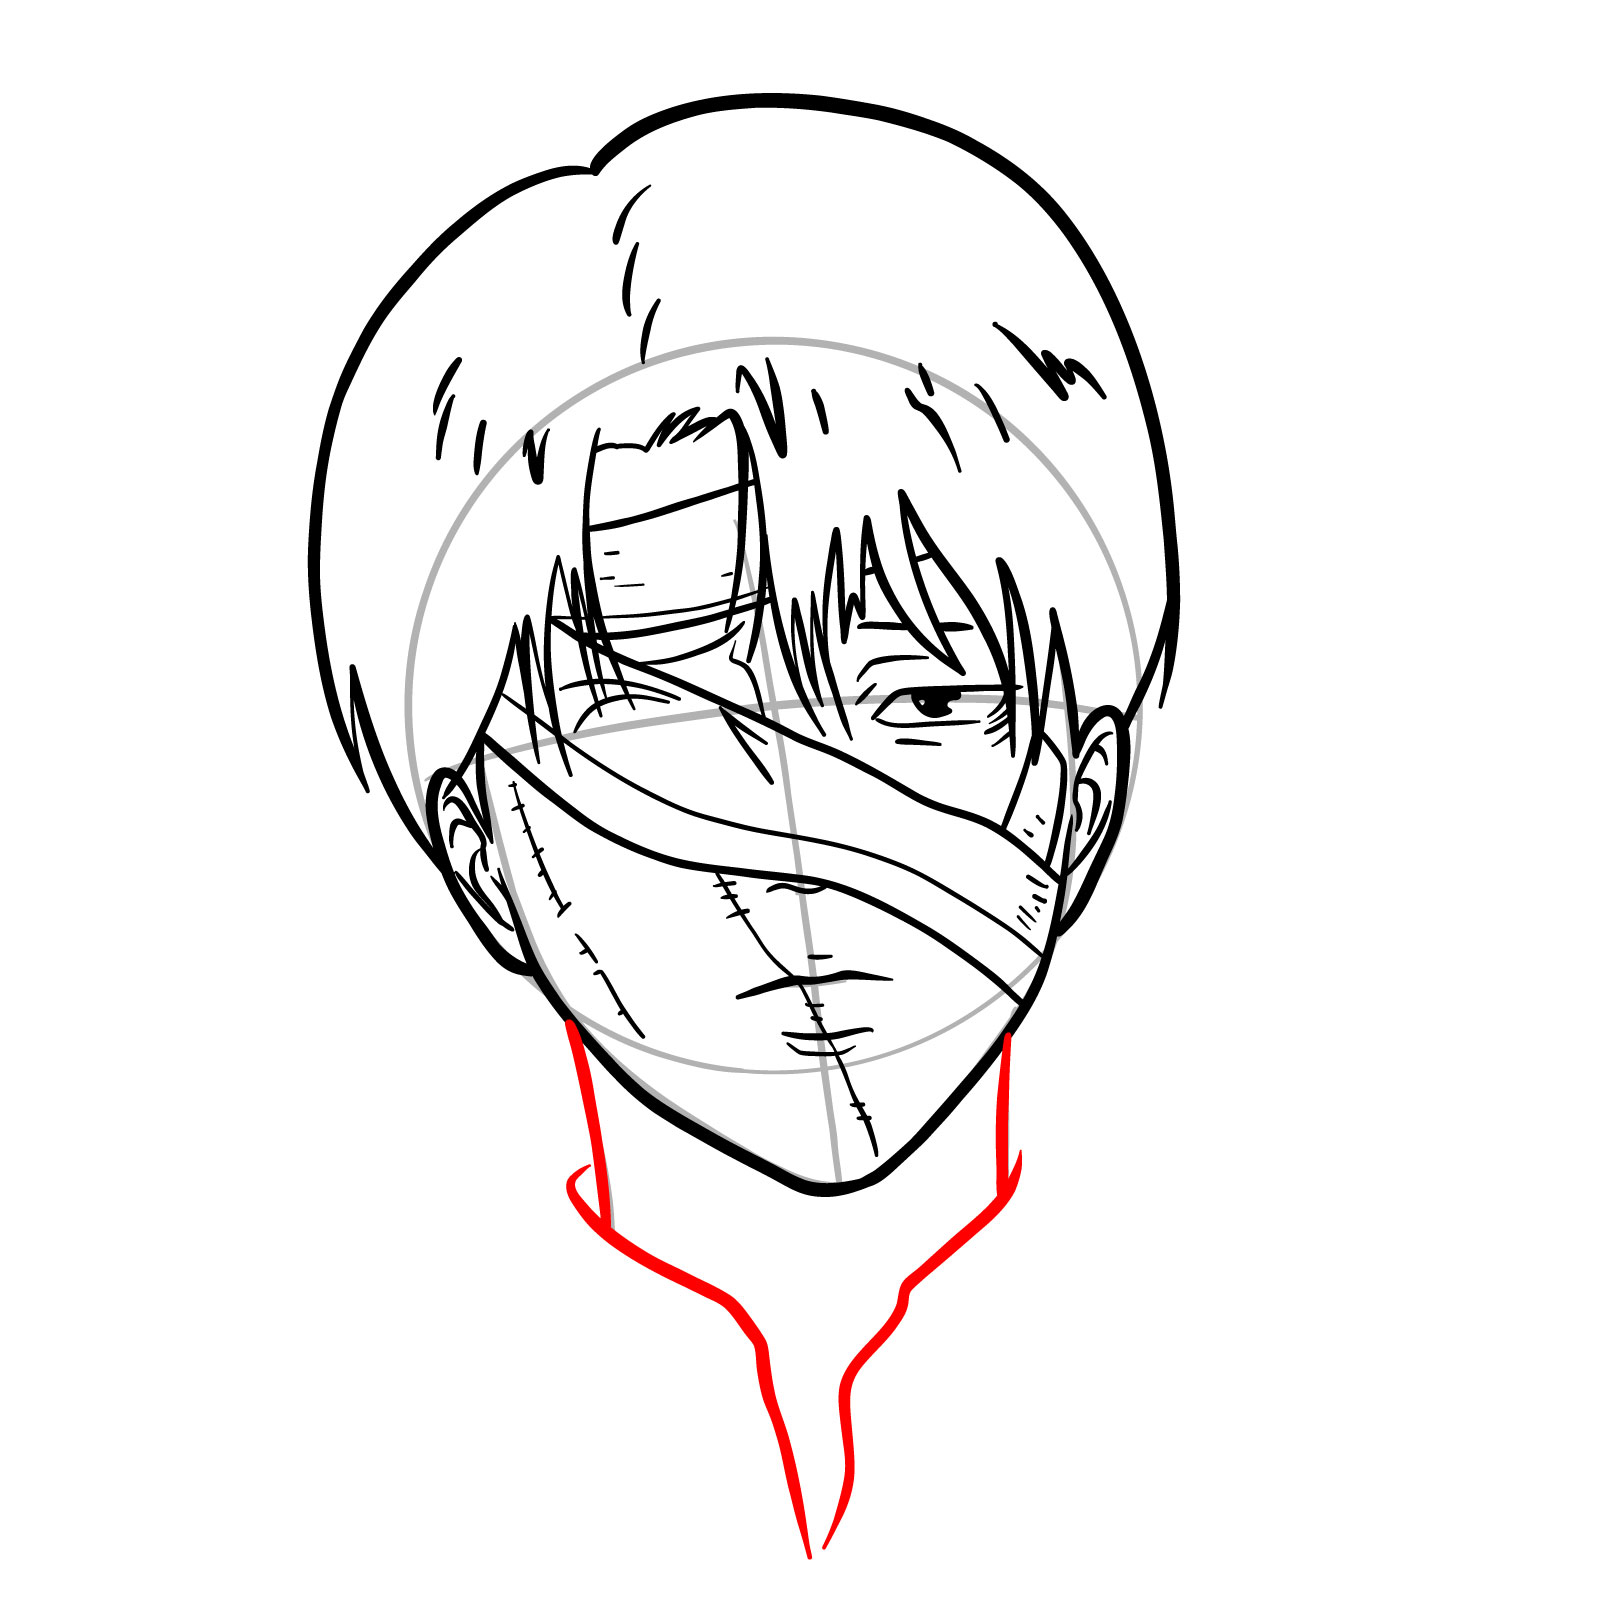
Step 12 – Extend the lines down from the head to form the neck, and start sketching the upper part of Levi’s collar
Sketching the neck and beginning of Levi’s collar
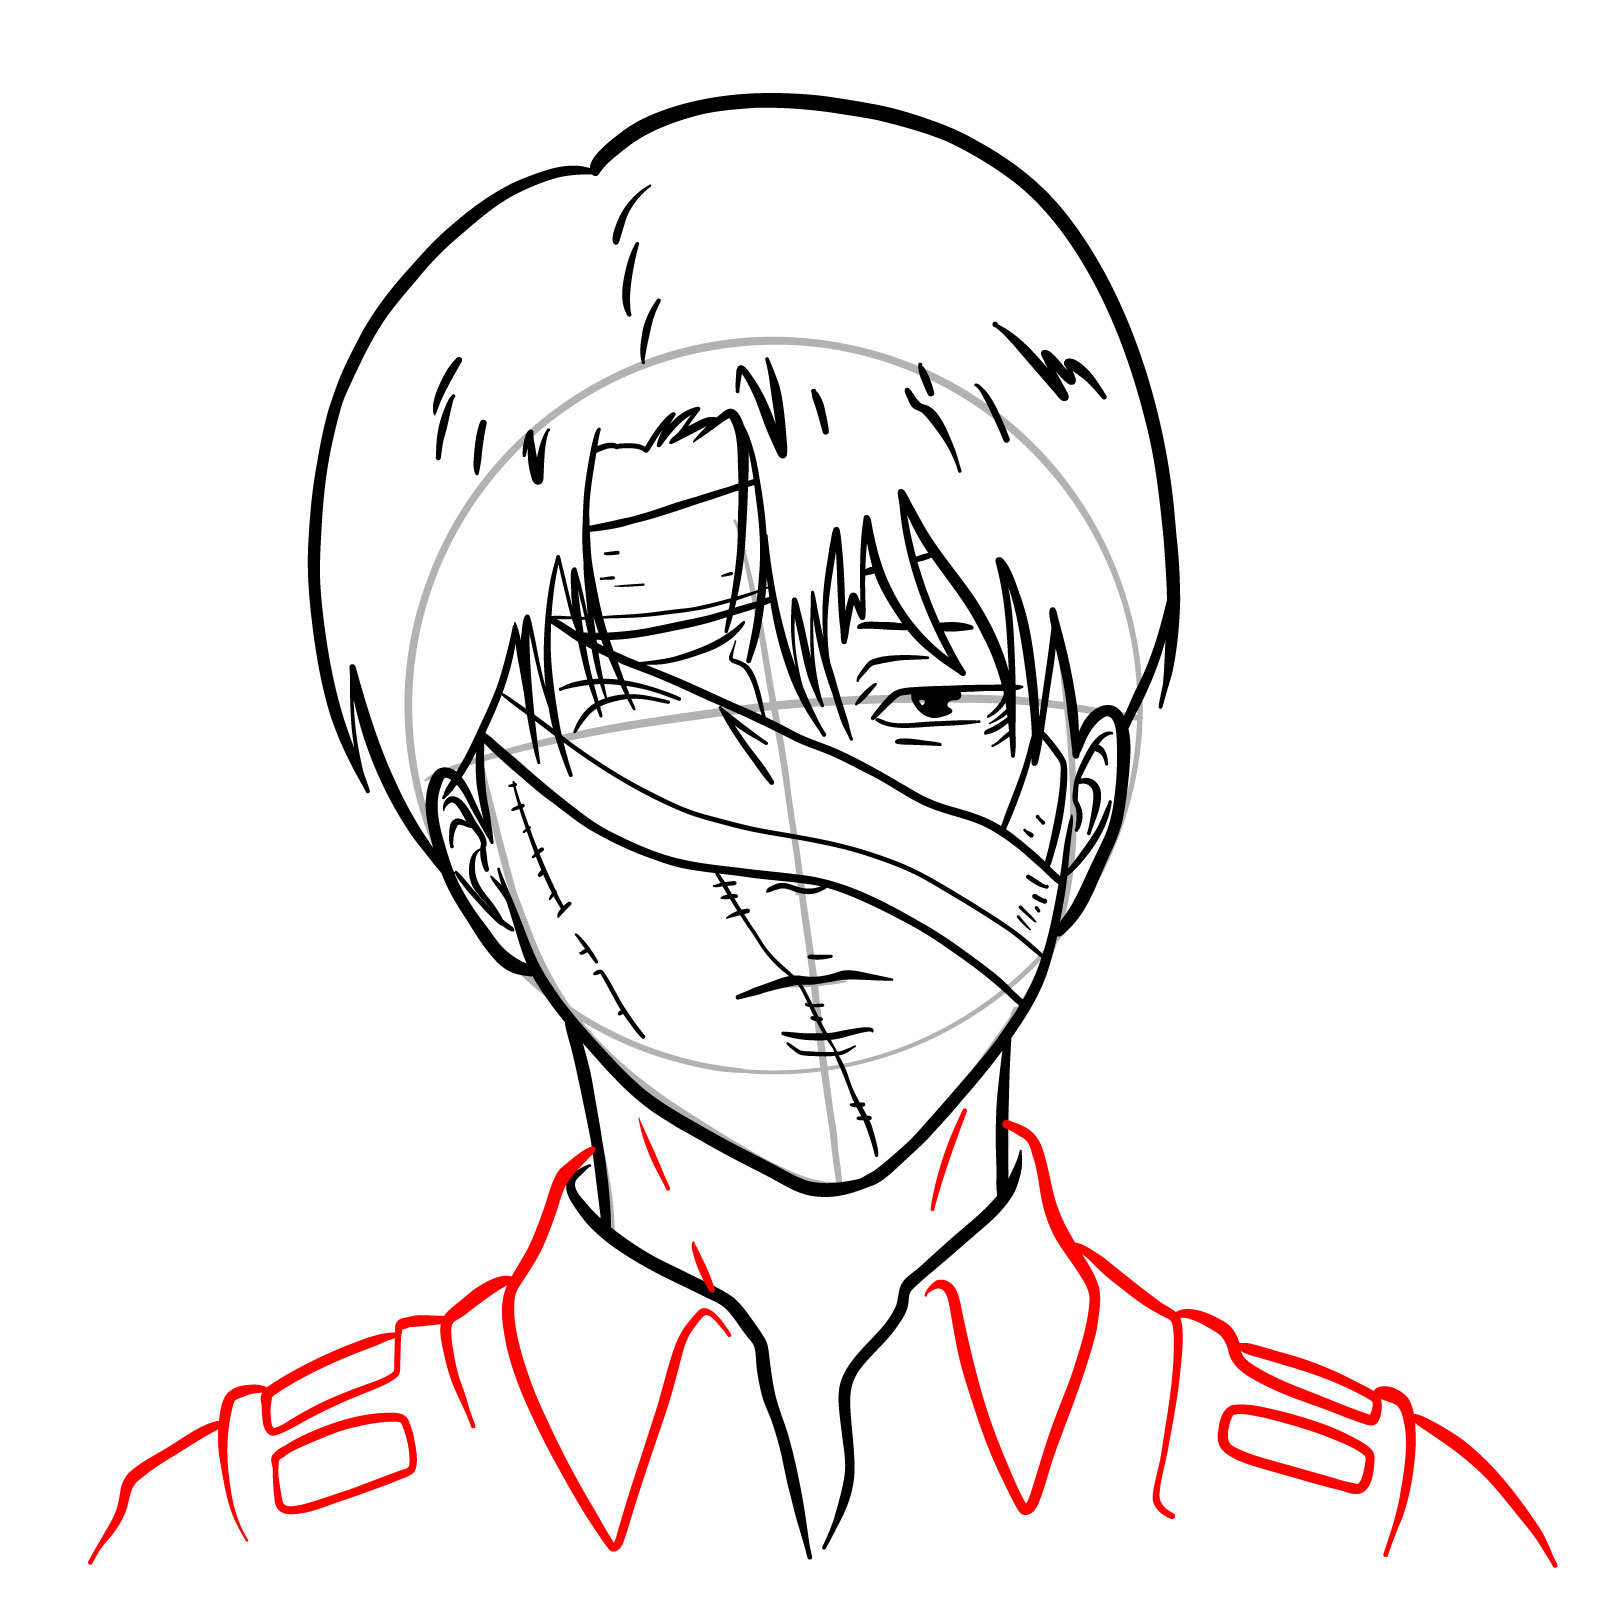
Step 13 – Finish the details of the collar and draw the shoulders to give the image a complete upper body frame
Completing the collar and adding Levi’s shoulders
Step 14 – Review the entire drawing, refining any details necessary for a finished look. The final image captures Levi’s stoic expression from the last episode, with his face marked by bandages and scars—a symbol of his sacrifices and the culmination of his battles against the titans. This final step concludes our guide on how to draw Levi Ackerman from the last episode of Attack on Titan, showcasing his resilience and enduring spirit as he bids farewell to his comrades
FIGCAPTEXT
The completed drawing of Levi from the final episode of Attack on Titan
Guide 7: How to Draw Levi Ackerman Full Body from Season 3
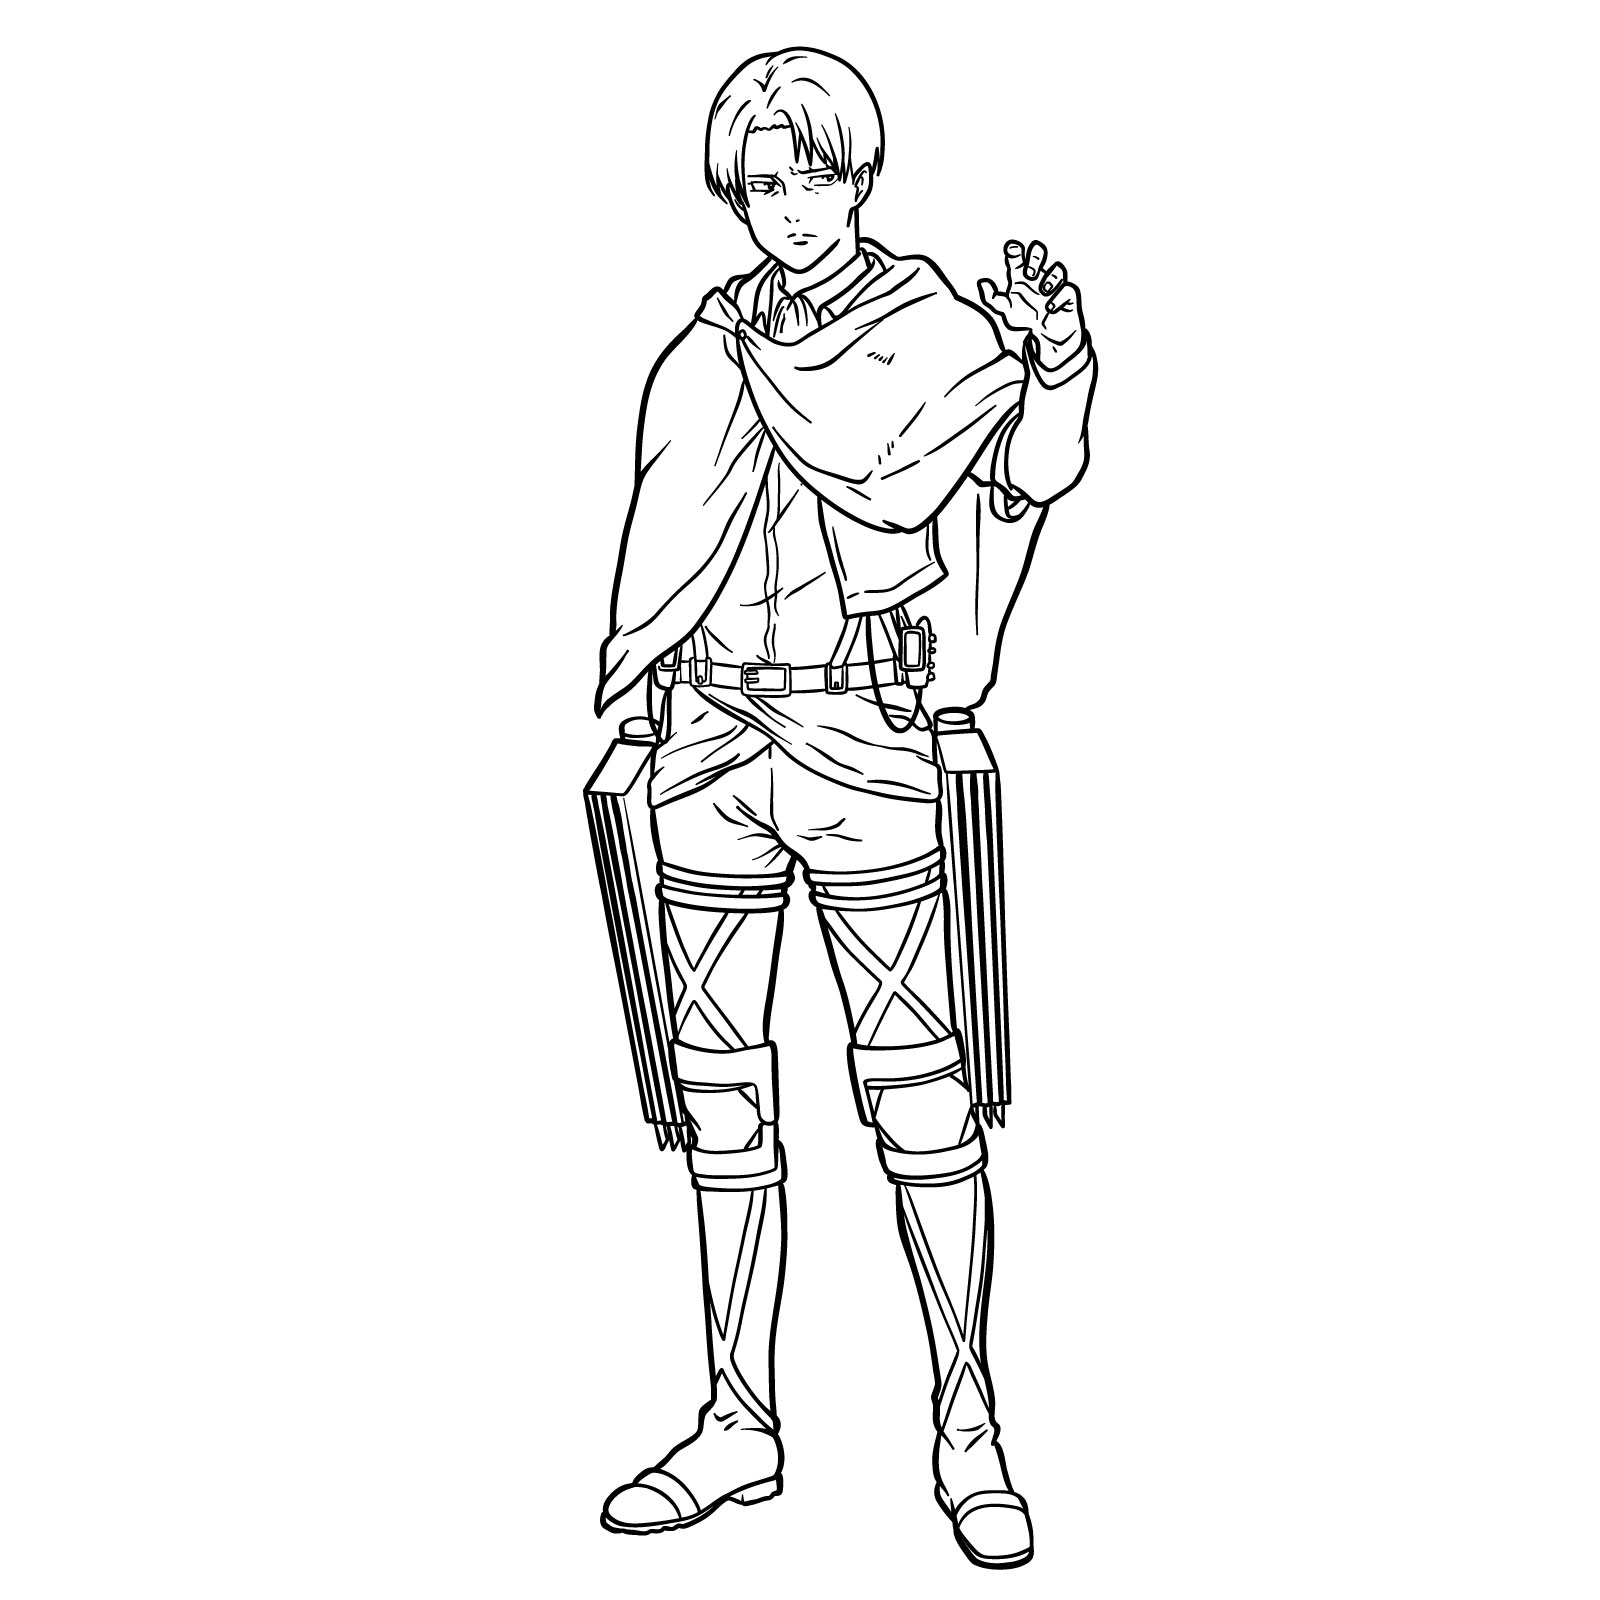
Easy drawing of Levi full body
For the final guide, we will delve into how to draw Levi Ackerman full body from Season 3, where he dons his updated uniform with the cloak that symbolizes the Survey Corps. This guide unfolds in 30 steps, starting with establishing the basic facial proportions and the stick figure to set the pose and balance of the character.
The finished drawing presents Levi in a casual stance, with his signature stoic expression and the Survey Corps cloak draped over his shoulders. The details of his updated uniform, from the belts of the ODM gear to the creases in the fabric, are all captured to convey a sense of realism and depth.
The first three steps ensure that we get the structure right, which is essential for a full-body drawing where each element needs to be in harmony with the rest. We’ll also pay close attention to Levi’s hands and feet, capturing the subtle intricacies of his relaxed yet alert posture. By the end of this guide, you’ll have a comprehensive understanding of how to draw Levi Ackerman in his full glory, as seen in the intense and pivotal moments of Season 3.
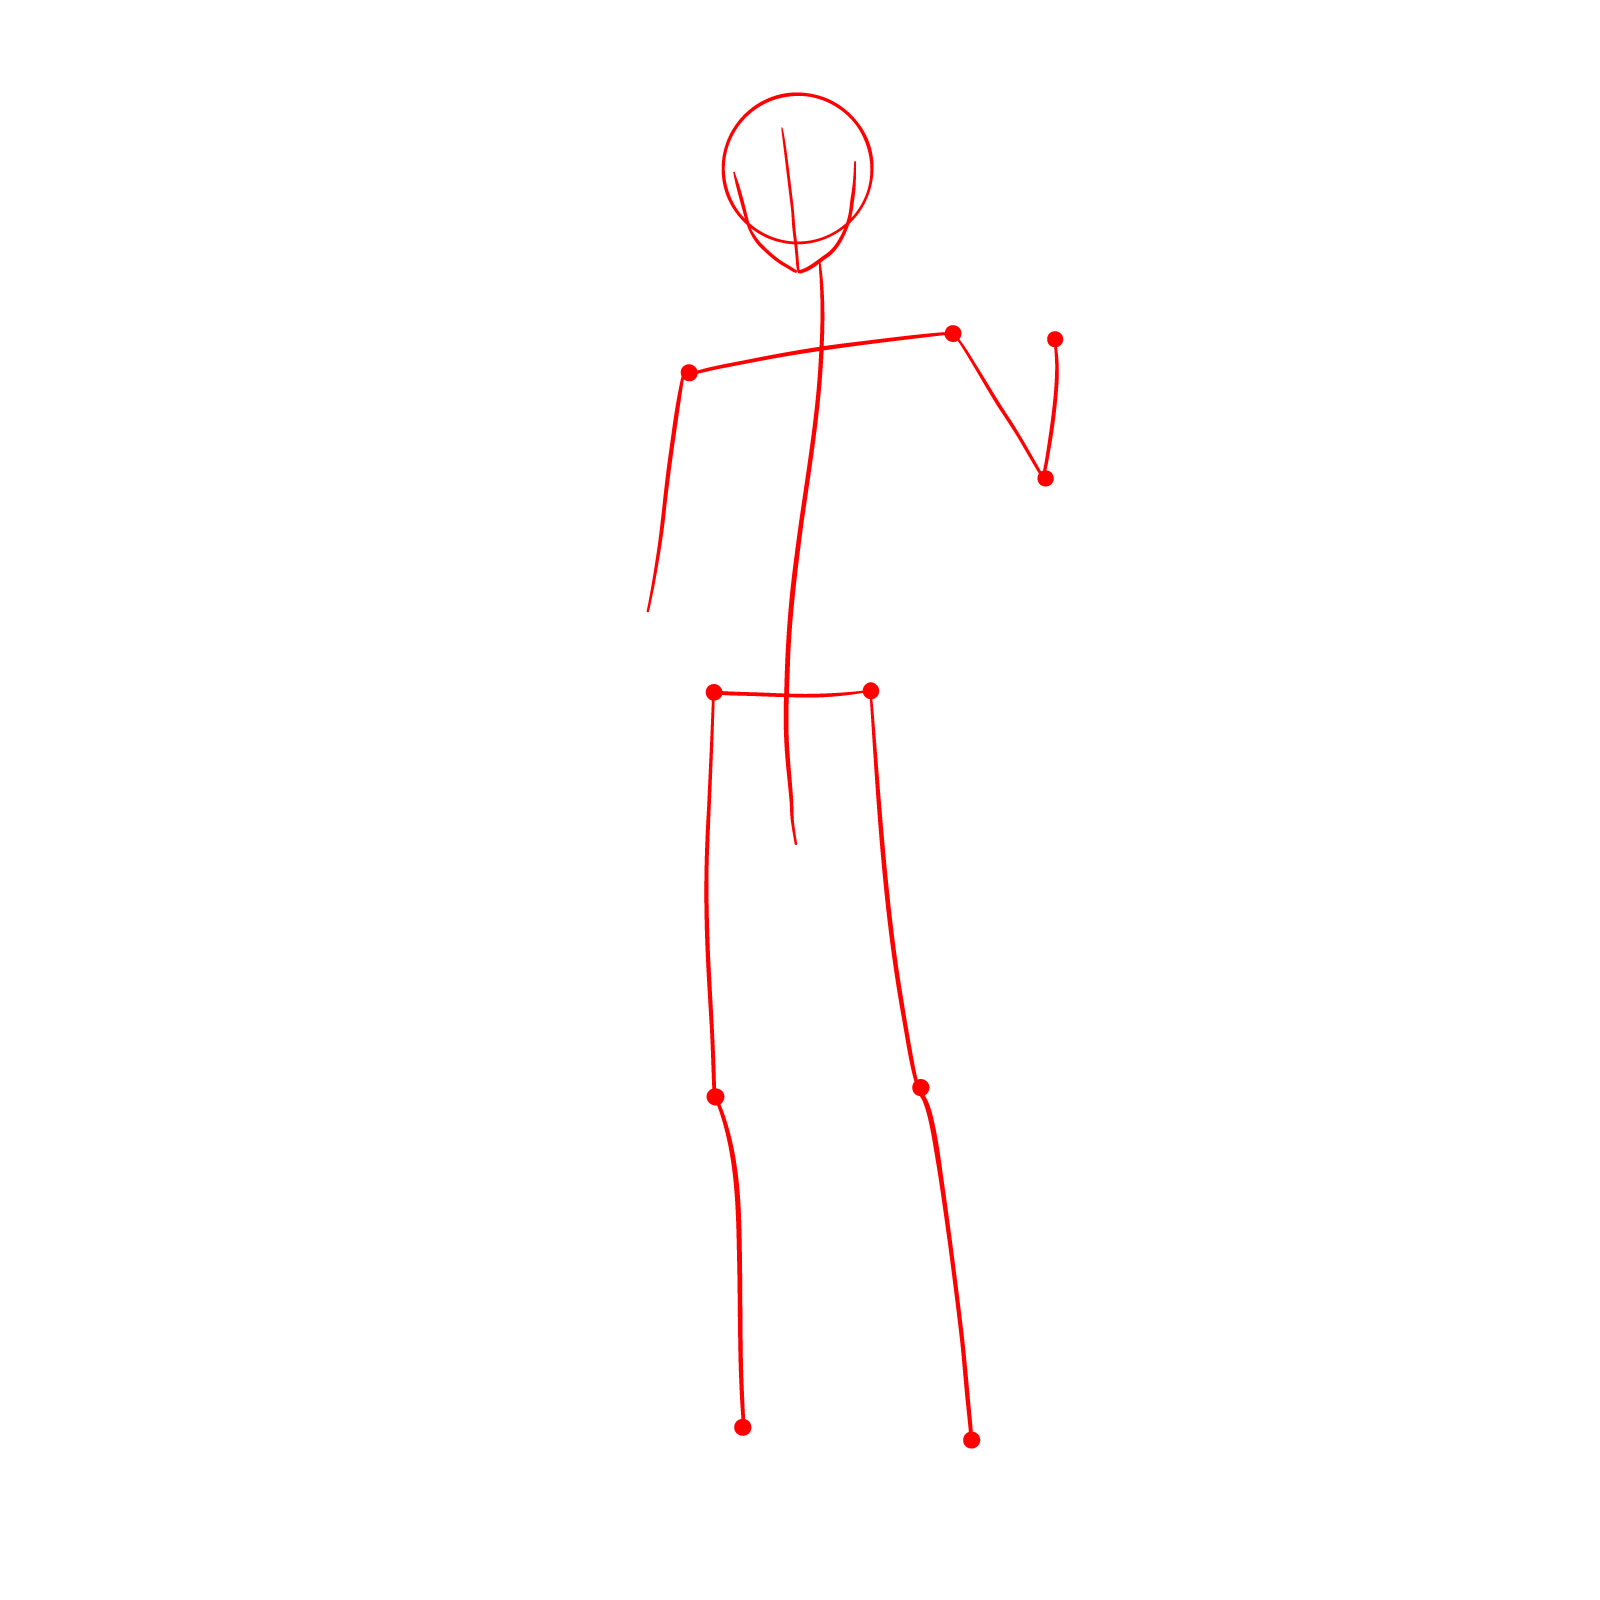
Step 01 – Begin your drawing by creating a simple stick figure that serves as the foundation for Levi’s body. Start with a small circle for the head, followed by a straight line for the spine, and add simple lines to represent the arms and legs, positioning them to capture Levi’s dynamic stance. This basic framework will help you maintain the correct proportions and pose as you add more detail in the following steps
Initial stages of drawing Levi from Attack on Titan, capturing the stick figure and basic body structure
Step 02
Levi’s basic body structure
Step 03
Levi’s basic body structure – finishing
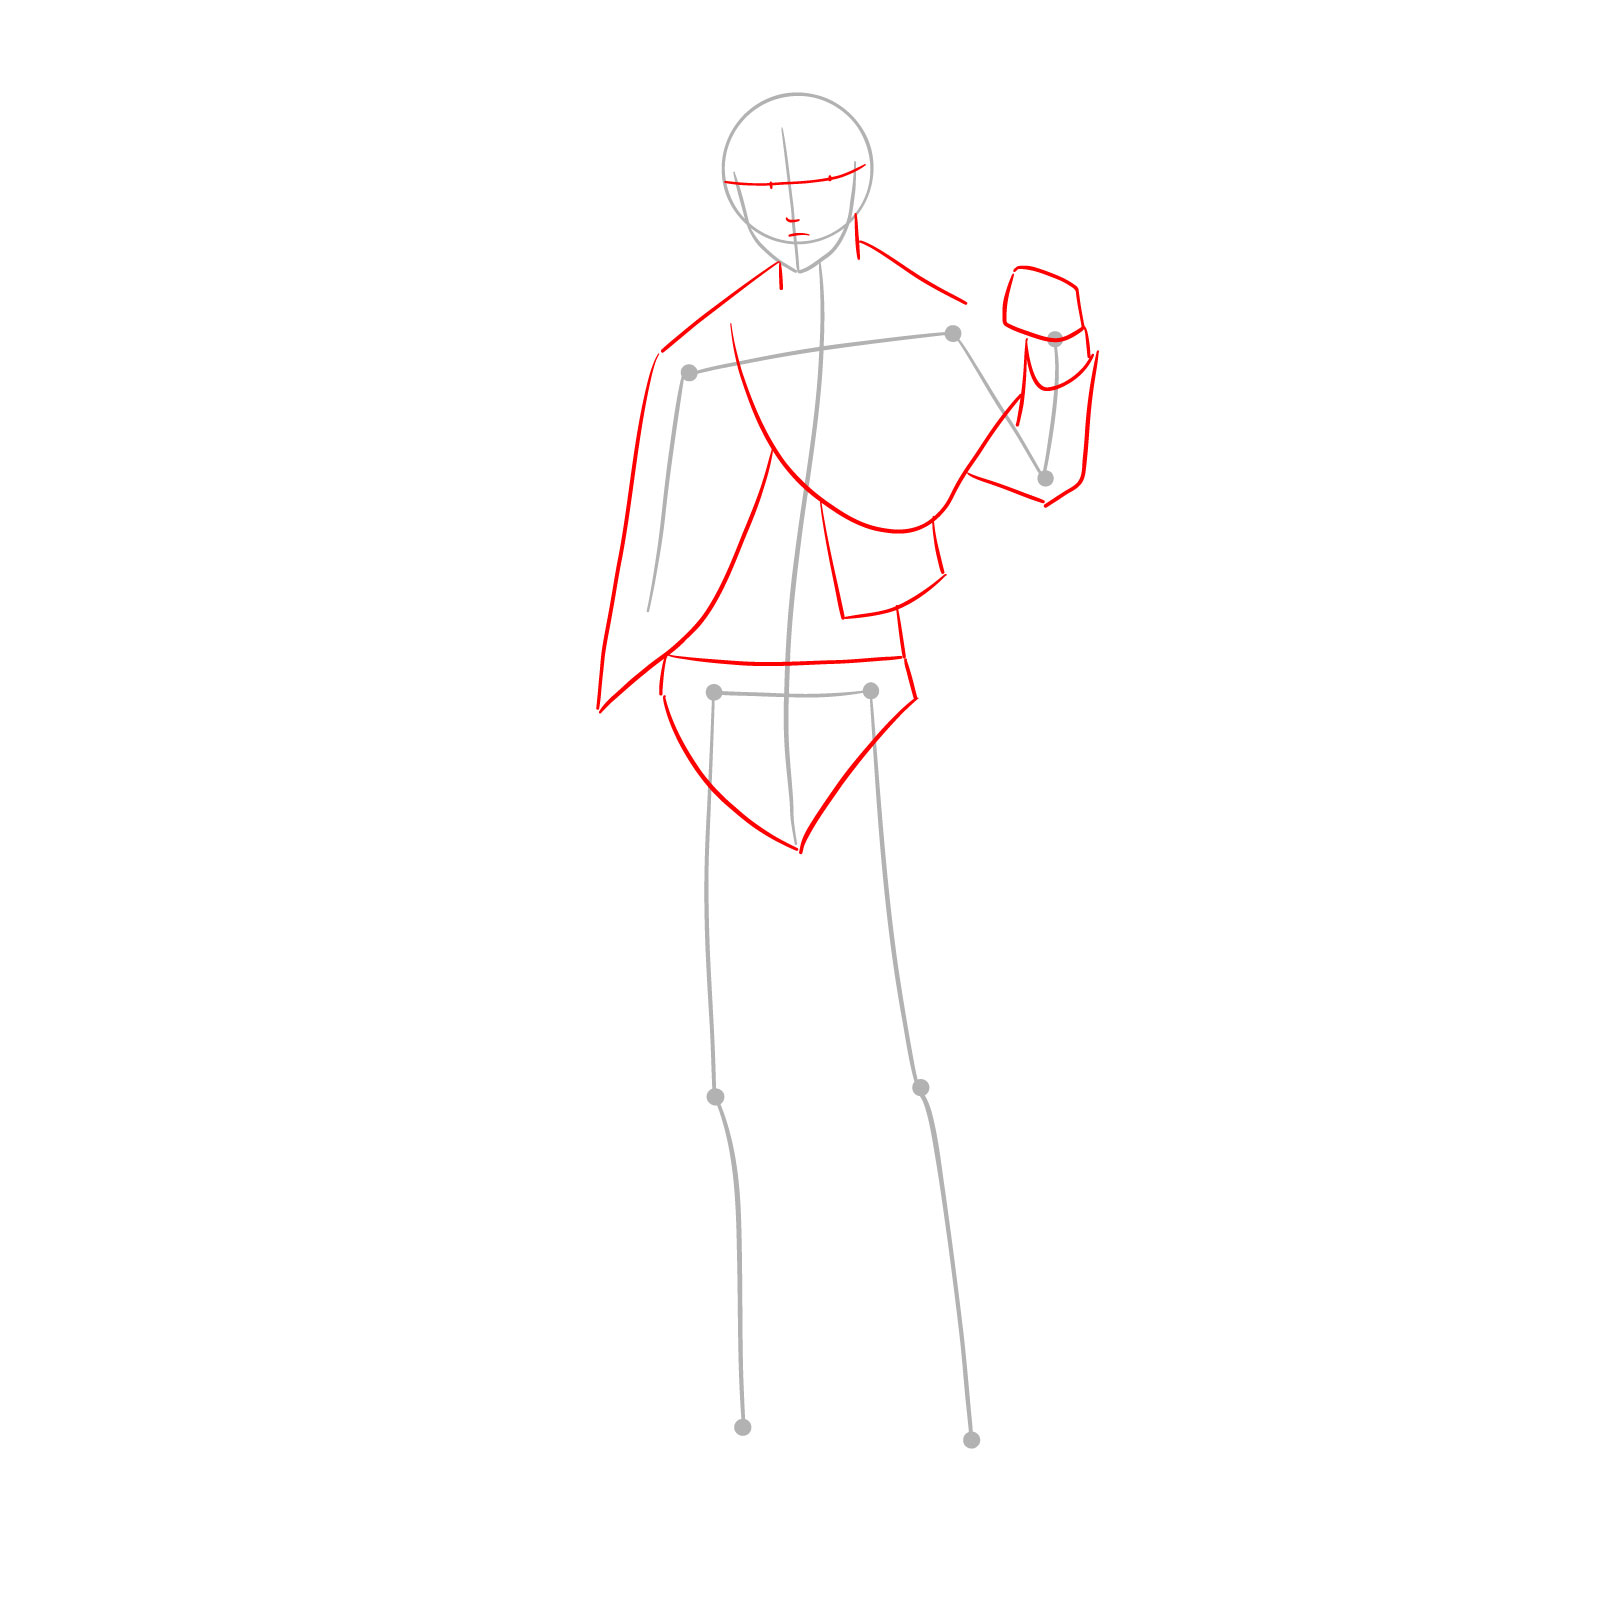
Step 04 – With the basic structure in place, refine the head by adding the shape of the faceframe and the ear. Sketch the outline of Levi’s distinctive hairstyle, ensuring that the hairline and the flow of the hair reflect his character’s style. Pay attention to the placement of the ear, which should align with the facial features you will draw in the next steps
Progressing through the drawing guide with detailed facial features and hairstyle for Levi
Step 05
Adding facial features and hairstyle for Levi
Step 06
Head shape outline
Step 07 – Focus on Levi’s facial features by drawing his sharp eyes, nose, and mouth. Add more definition to the ear and make sure the facial expressions convey Levi’s intense and focused demeanor. Take your time to get the details right, ensuring that each feature is in the correct position and proportion to the others
Adding facial expressions and details to complete the portrait of Captain Levi
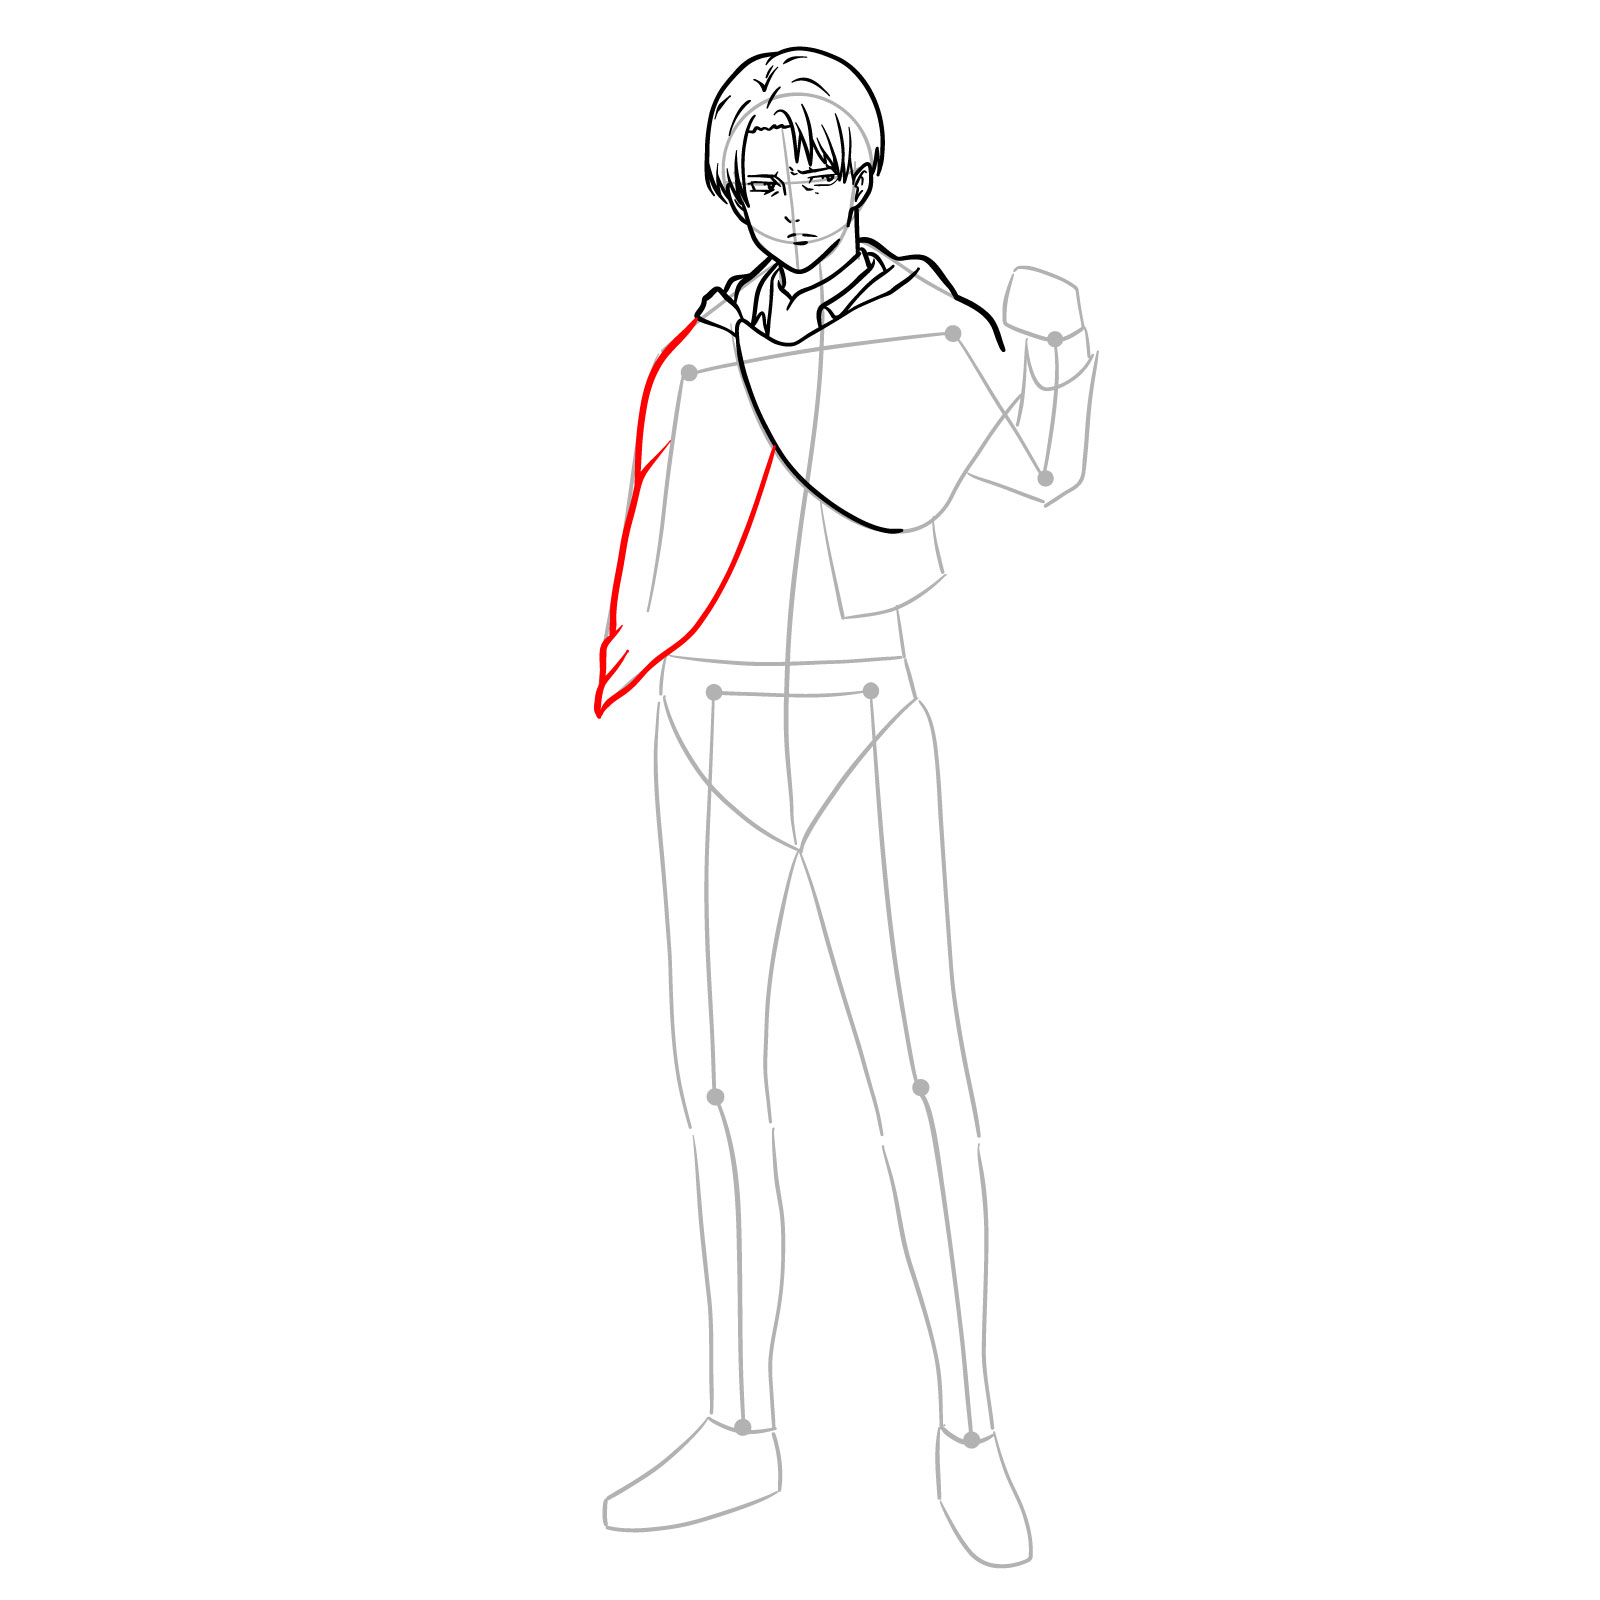
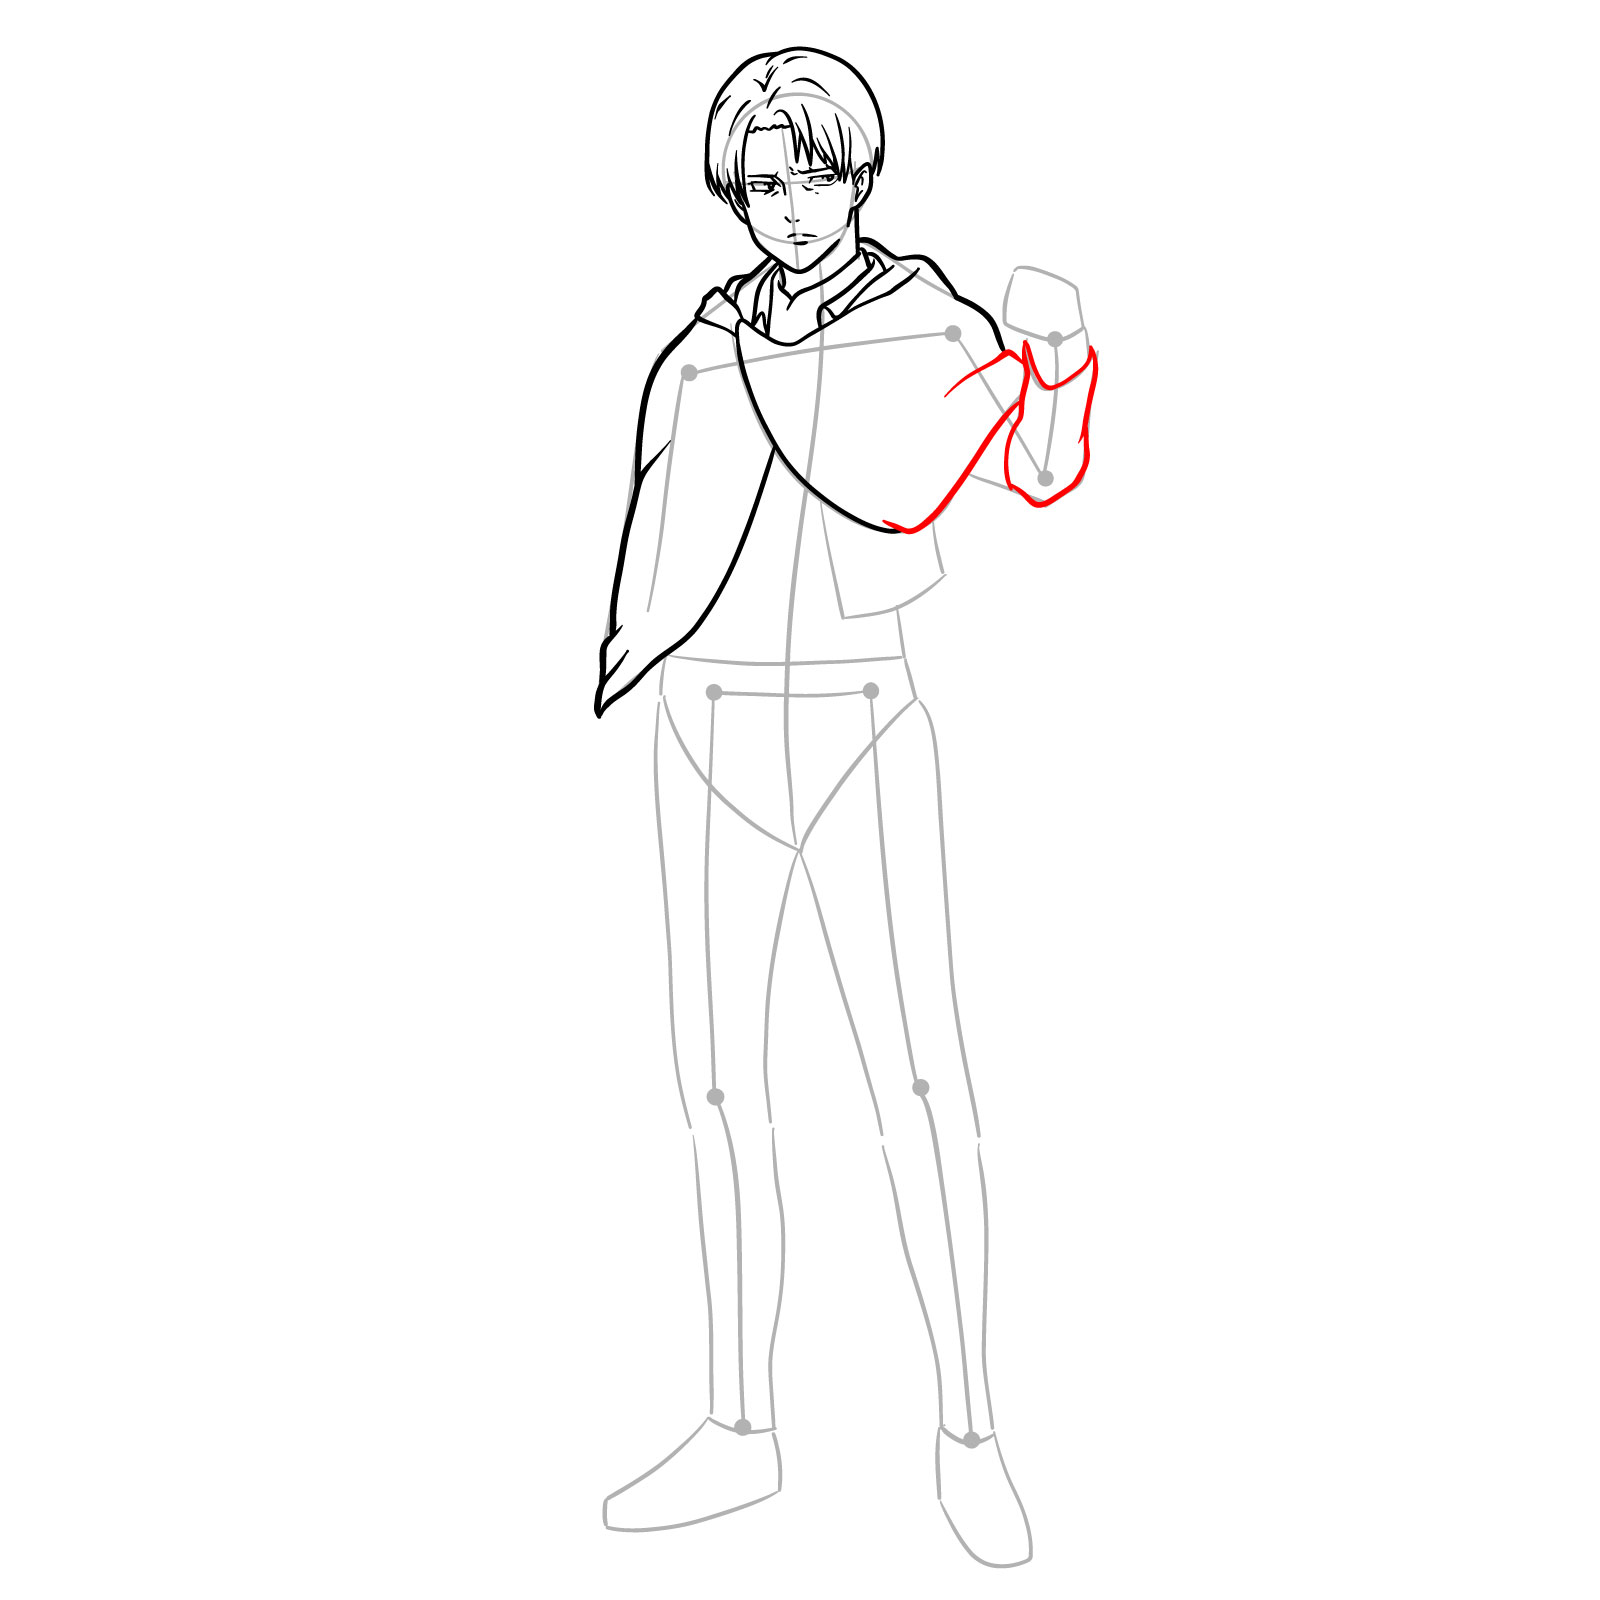
Step 08 – Continue your drawing by sketching the neck, ensuring it’s proportional to the head and shoulders. Move on to the cloak, outlining its broad, flowing shape as it drapes over Levi’s shoulders. Capture the folds and the way the fabric falls naturally. In step 12, focus on the forearm part of the sleeve of his jacket, paying attention to the cloth’s tension and creases, indicating movement
Constructing Levi’s neck and the shape of his cloak, followed by the outline of his shirt sleeve
Step 09
Constructing Levi’s his cloak
Step 10
Continue sketching the cloak
Step 11
Draw the right side of Levi’s cloak
Step 12
Finishing the cloak and adding a part of the left sleeve
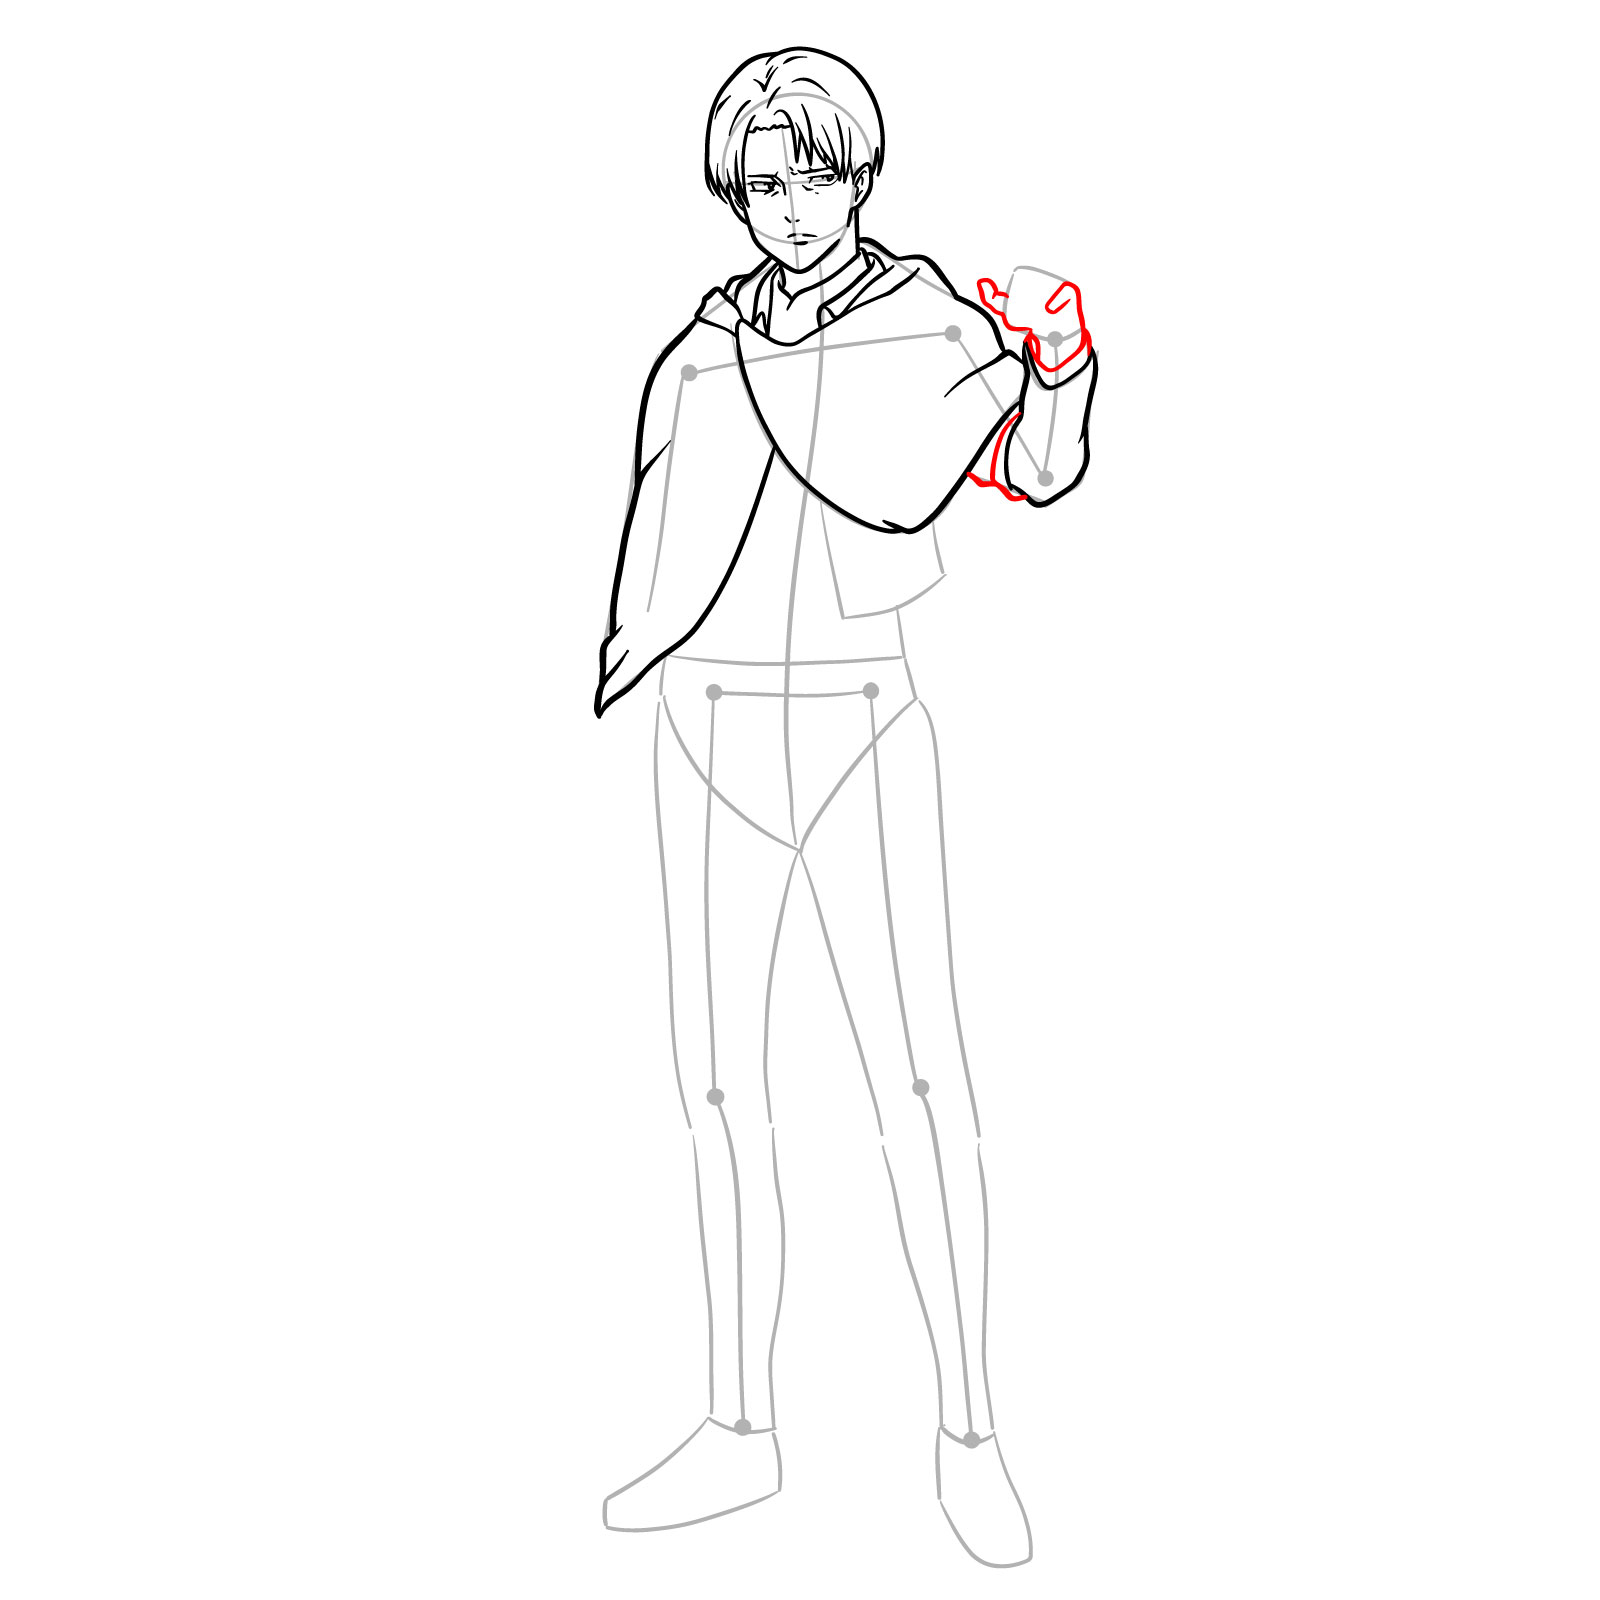
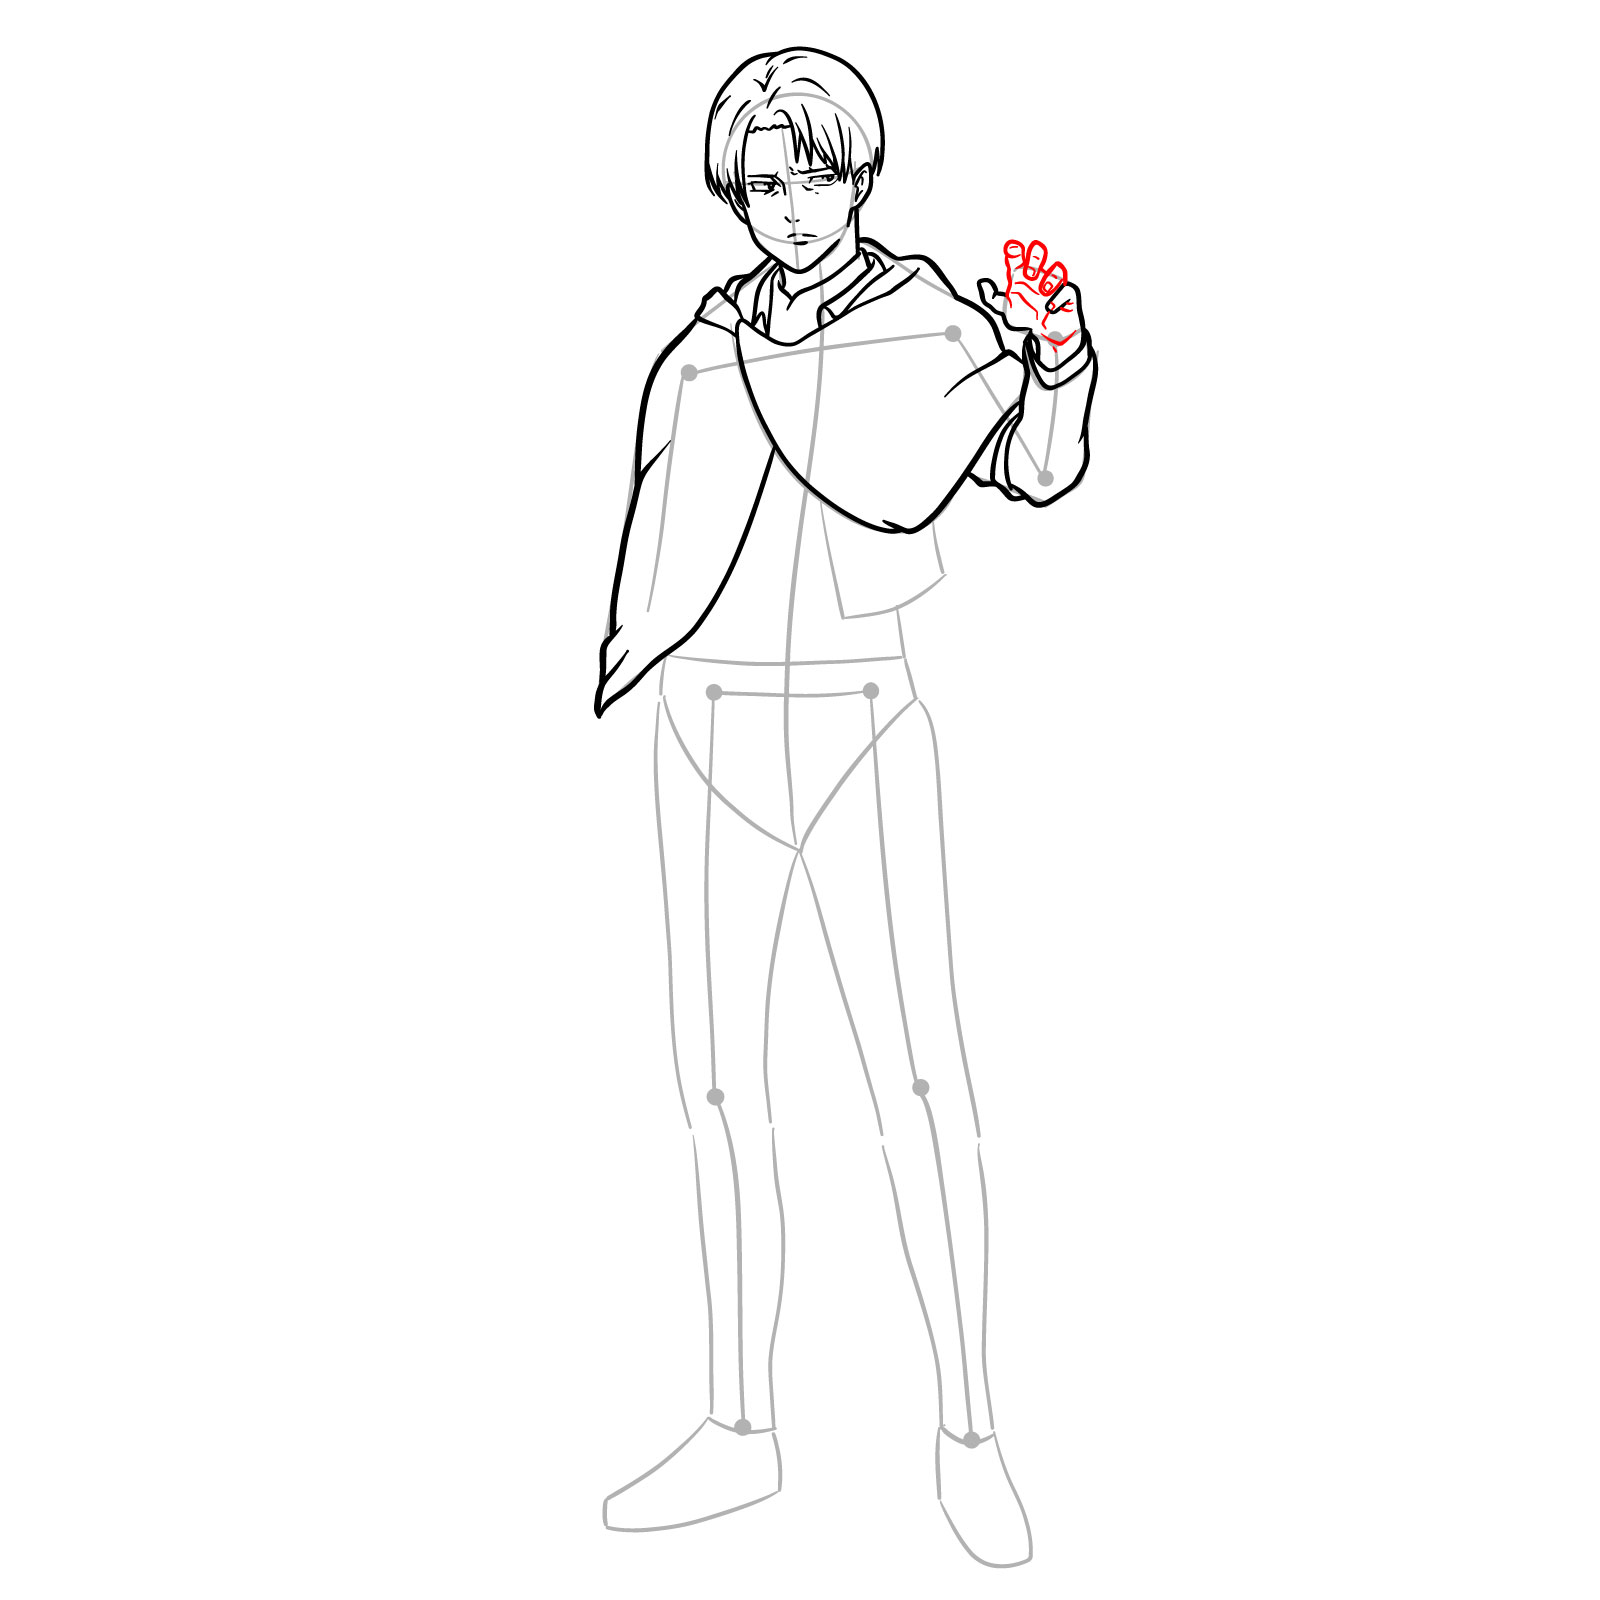
Step 13 – Define the rest of the sleeve, illustrating the cuff and any visible folds. Then, draw Levi’s left hand. Pay close attention to the positioning of the fingers to convey the character’s strength and precision. Each finger should be proportionate to one another and correctly aligned with the wrist and forearm, completing the dynamic posture of Levi from Attack on Titan
Completing the sleeve and carefully drawing Levi’s left hand to finalize the pose
Step 14
Sketching the fingers
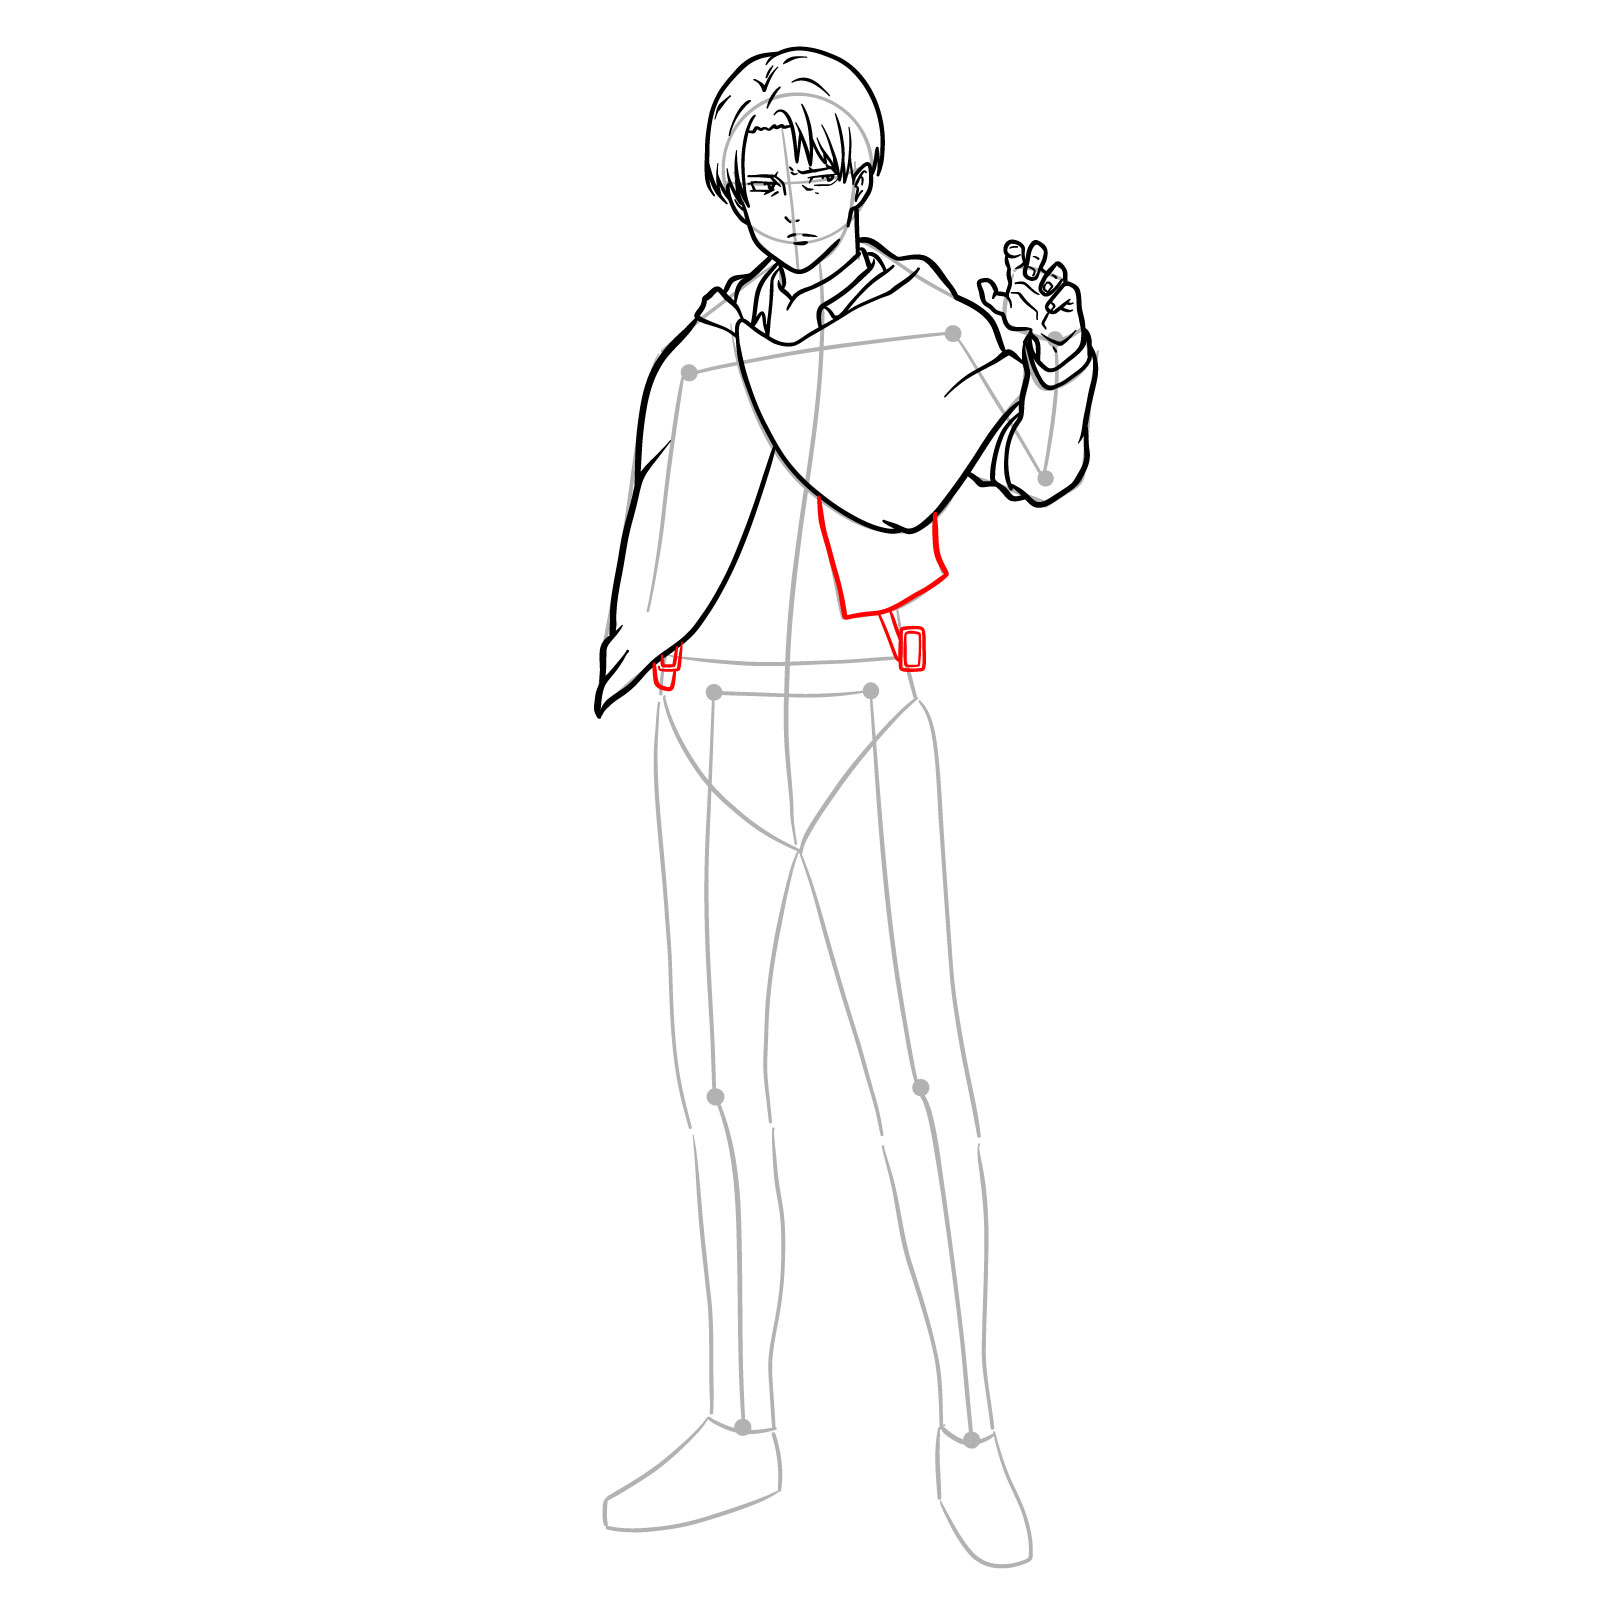
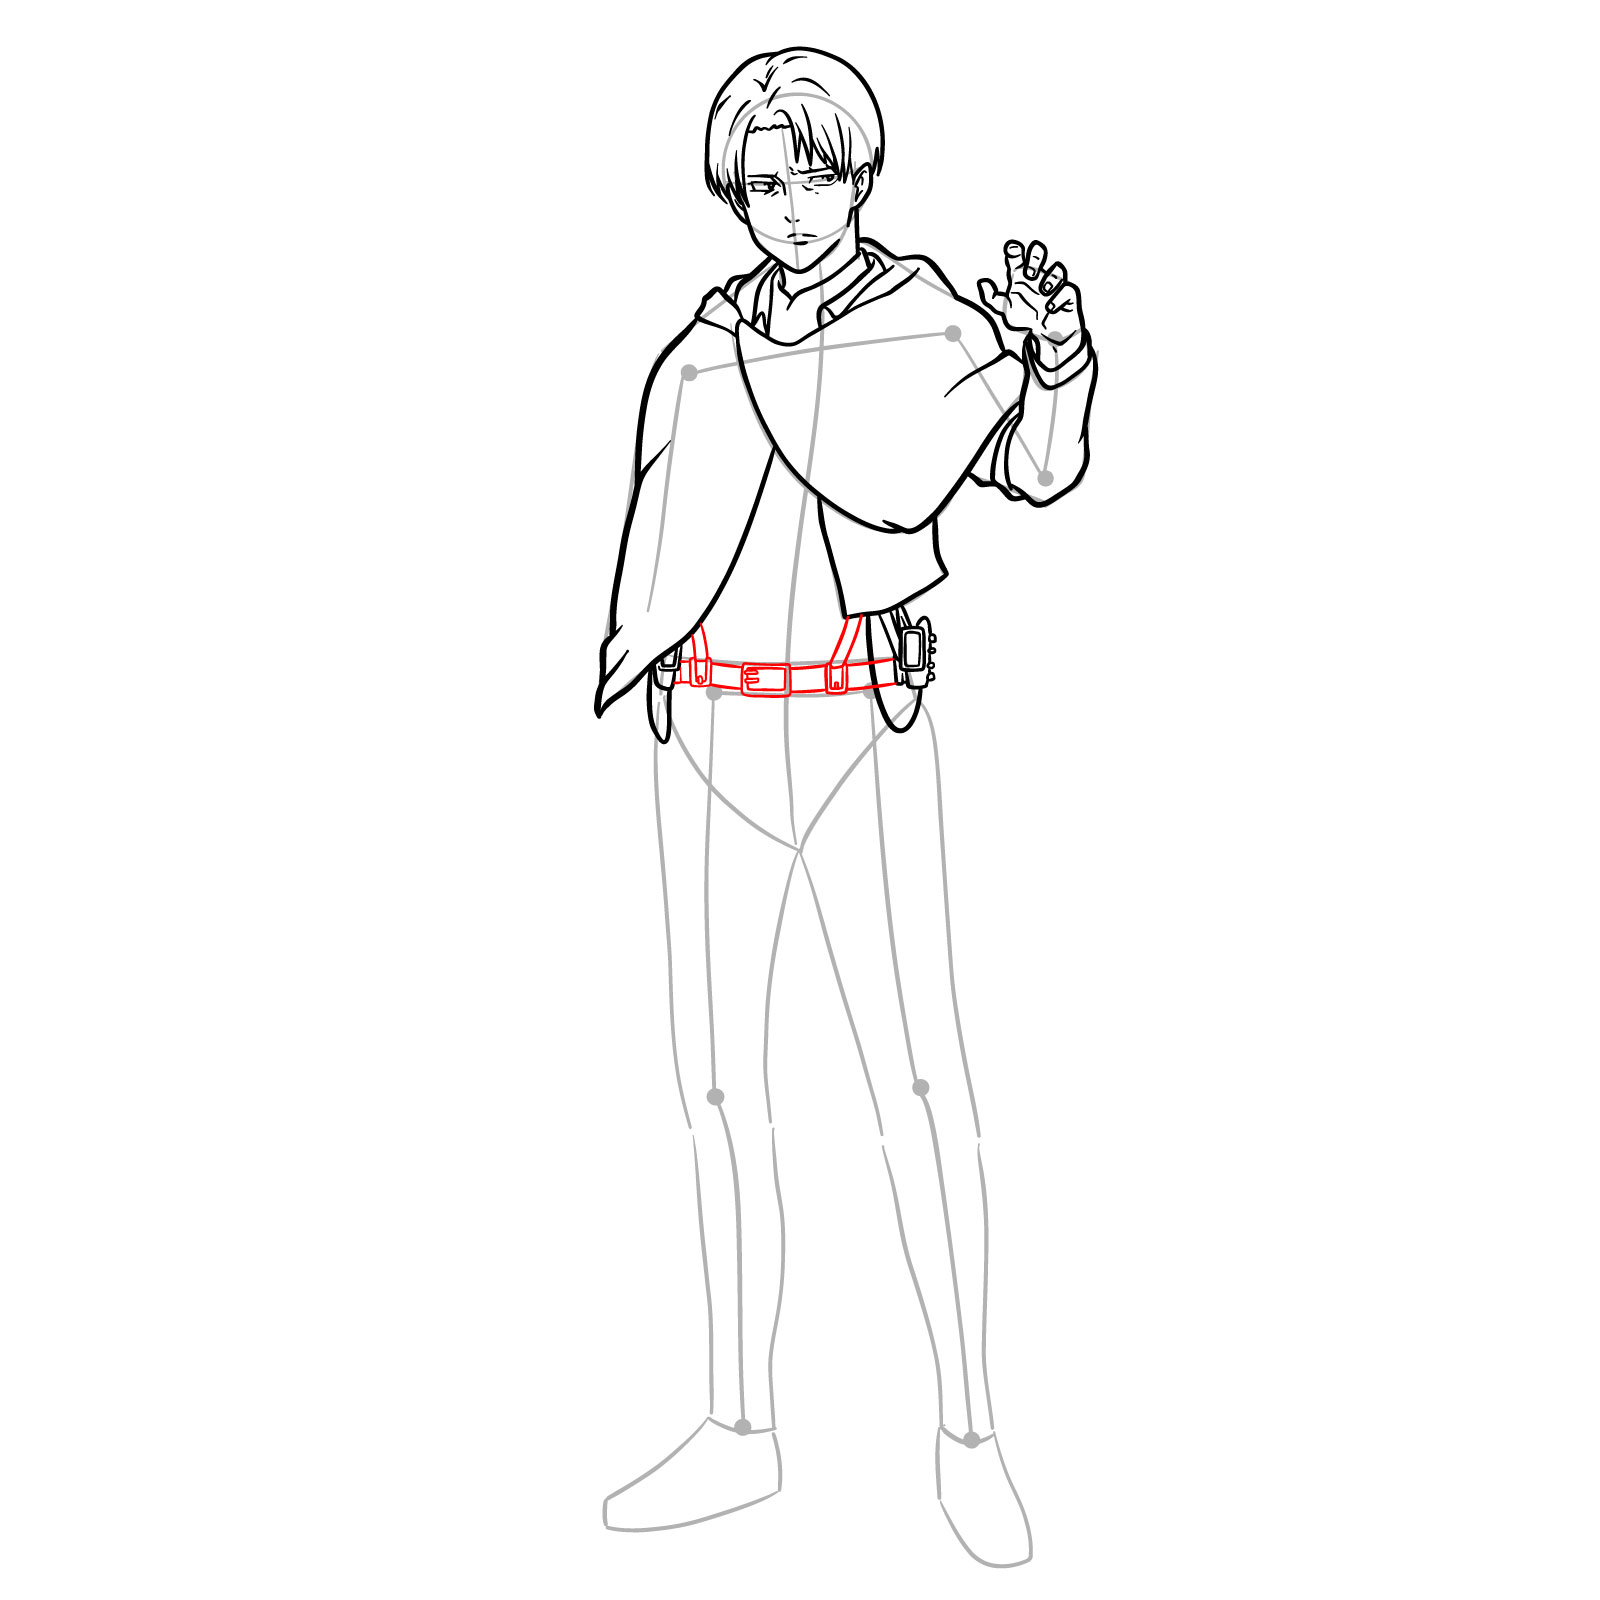
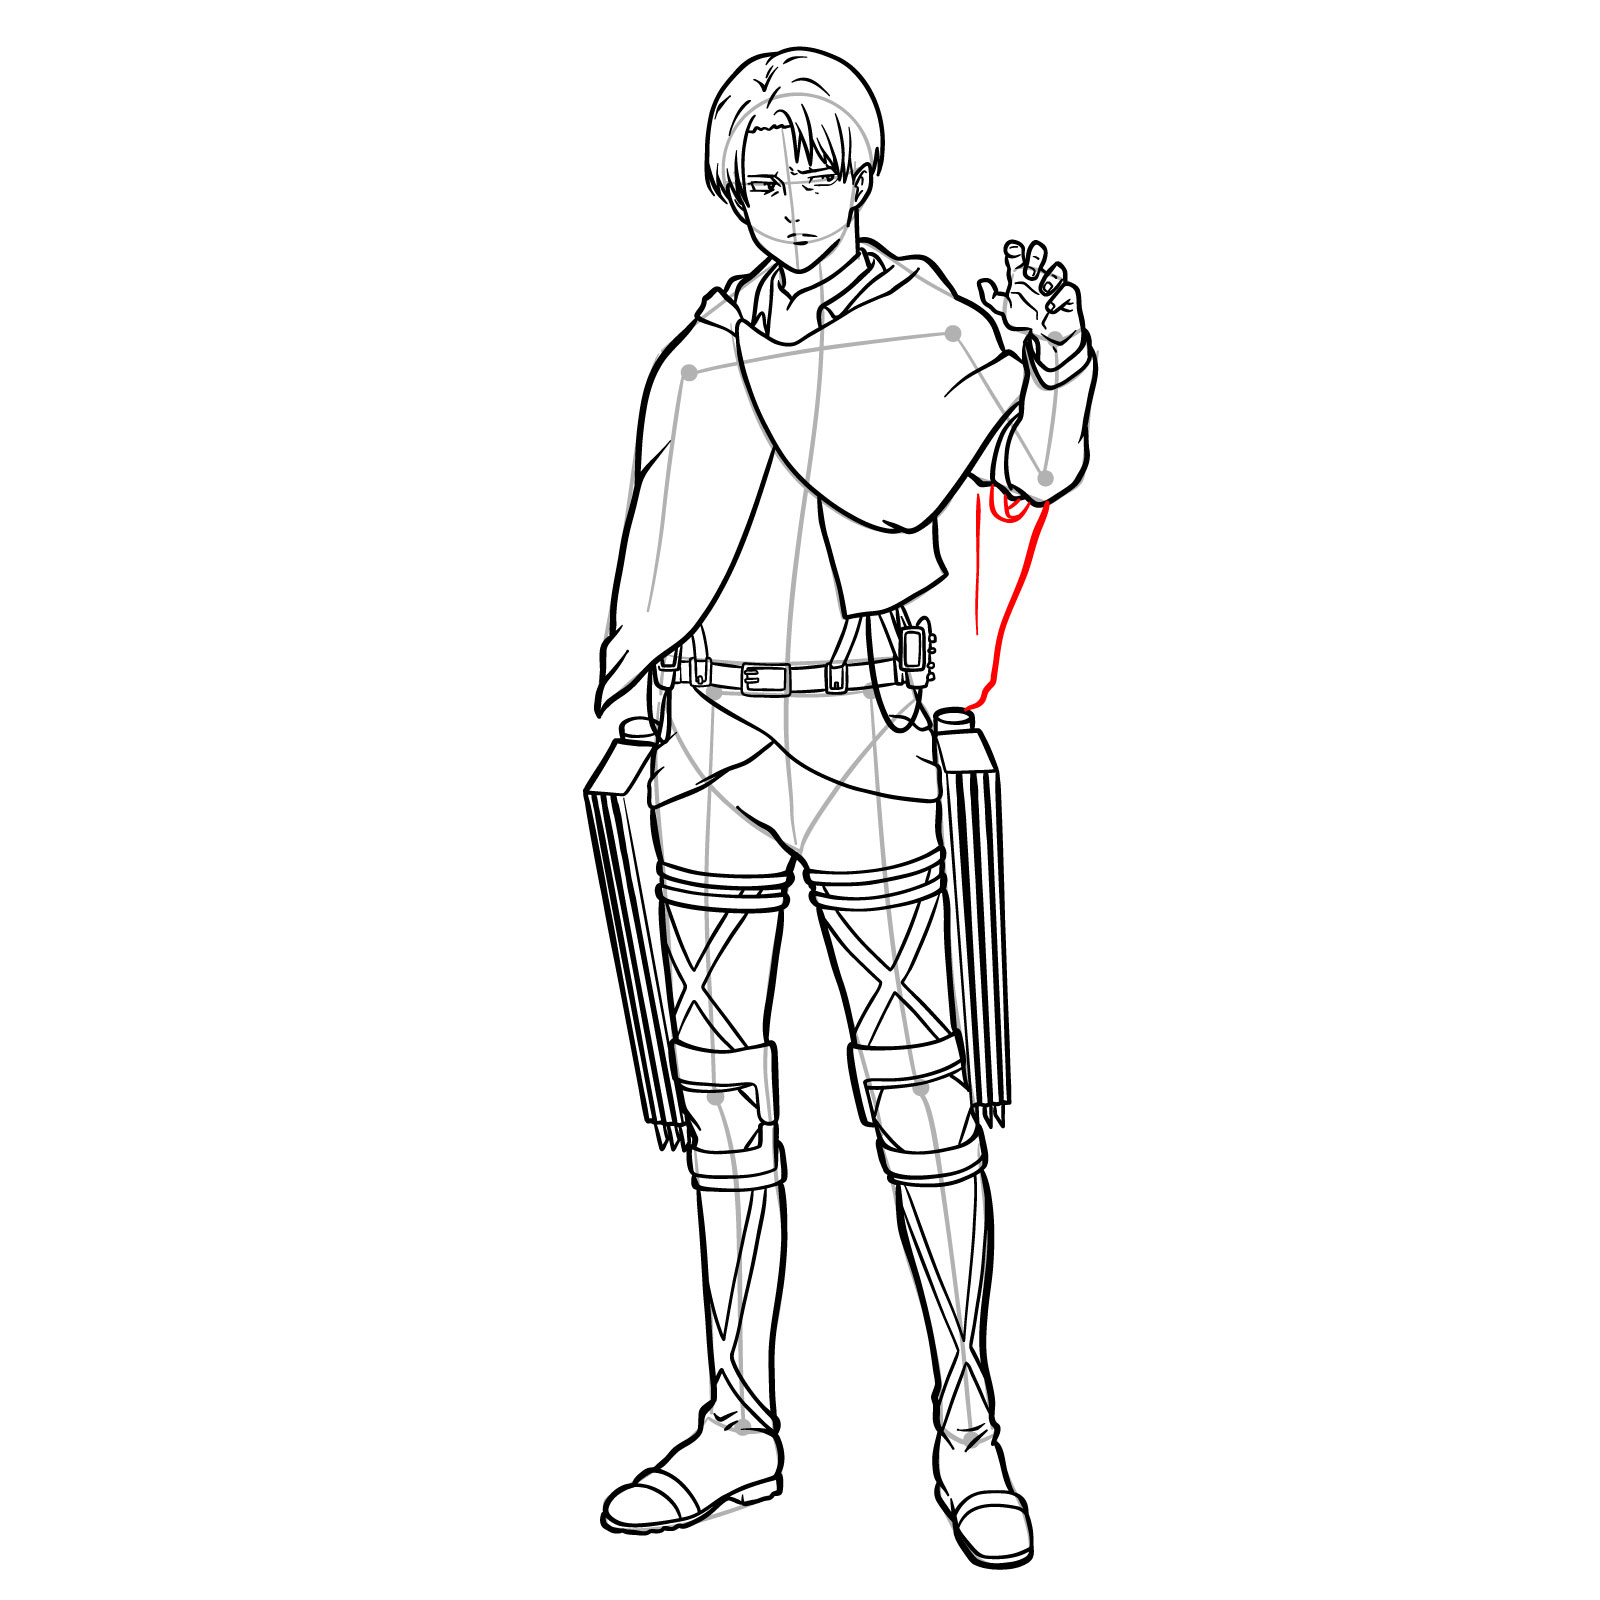
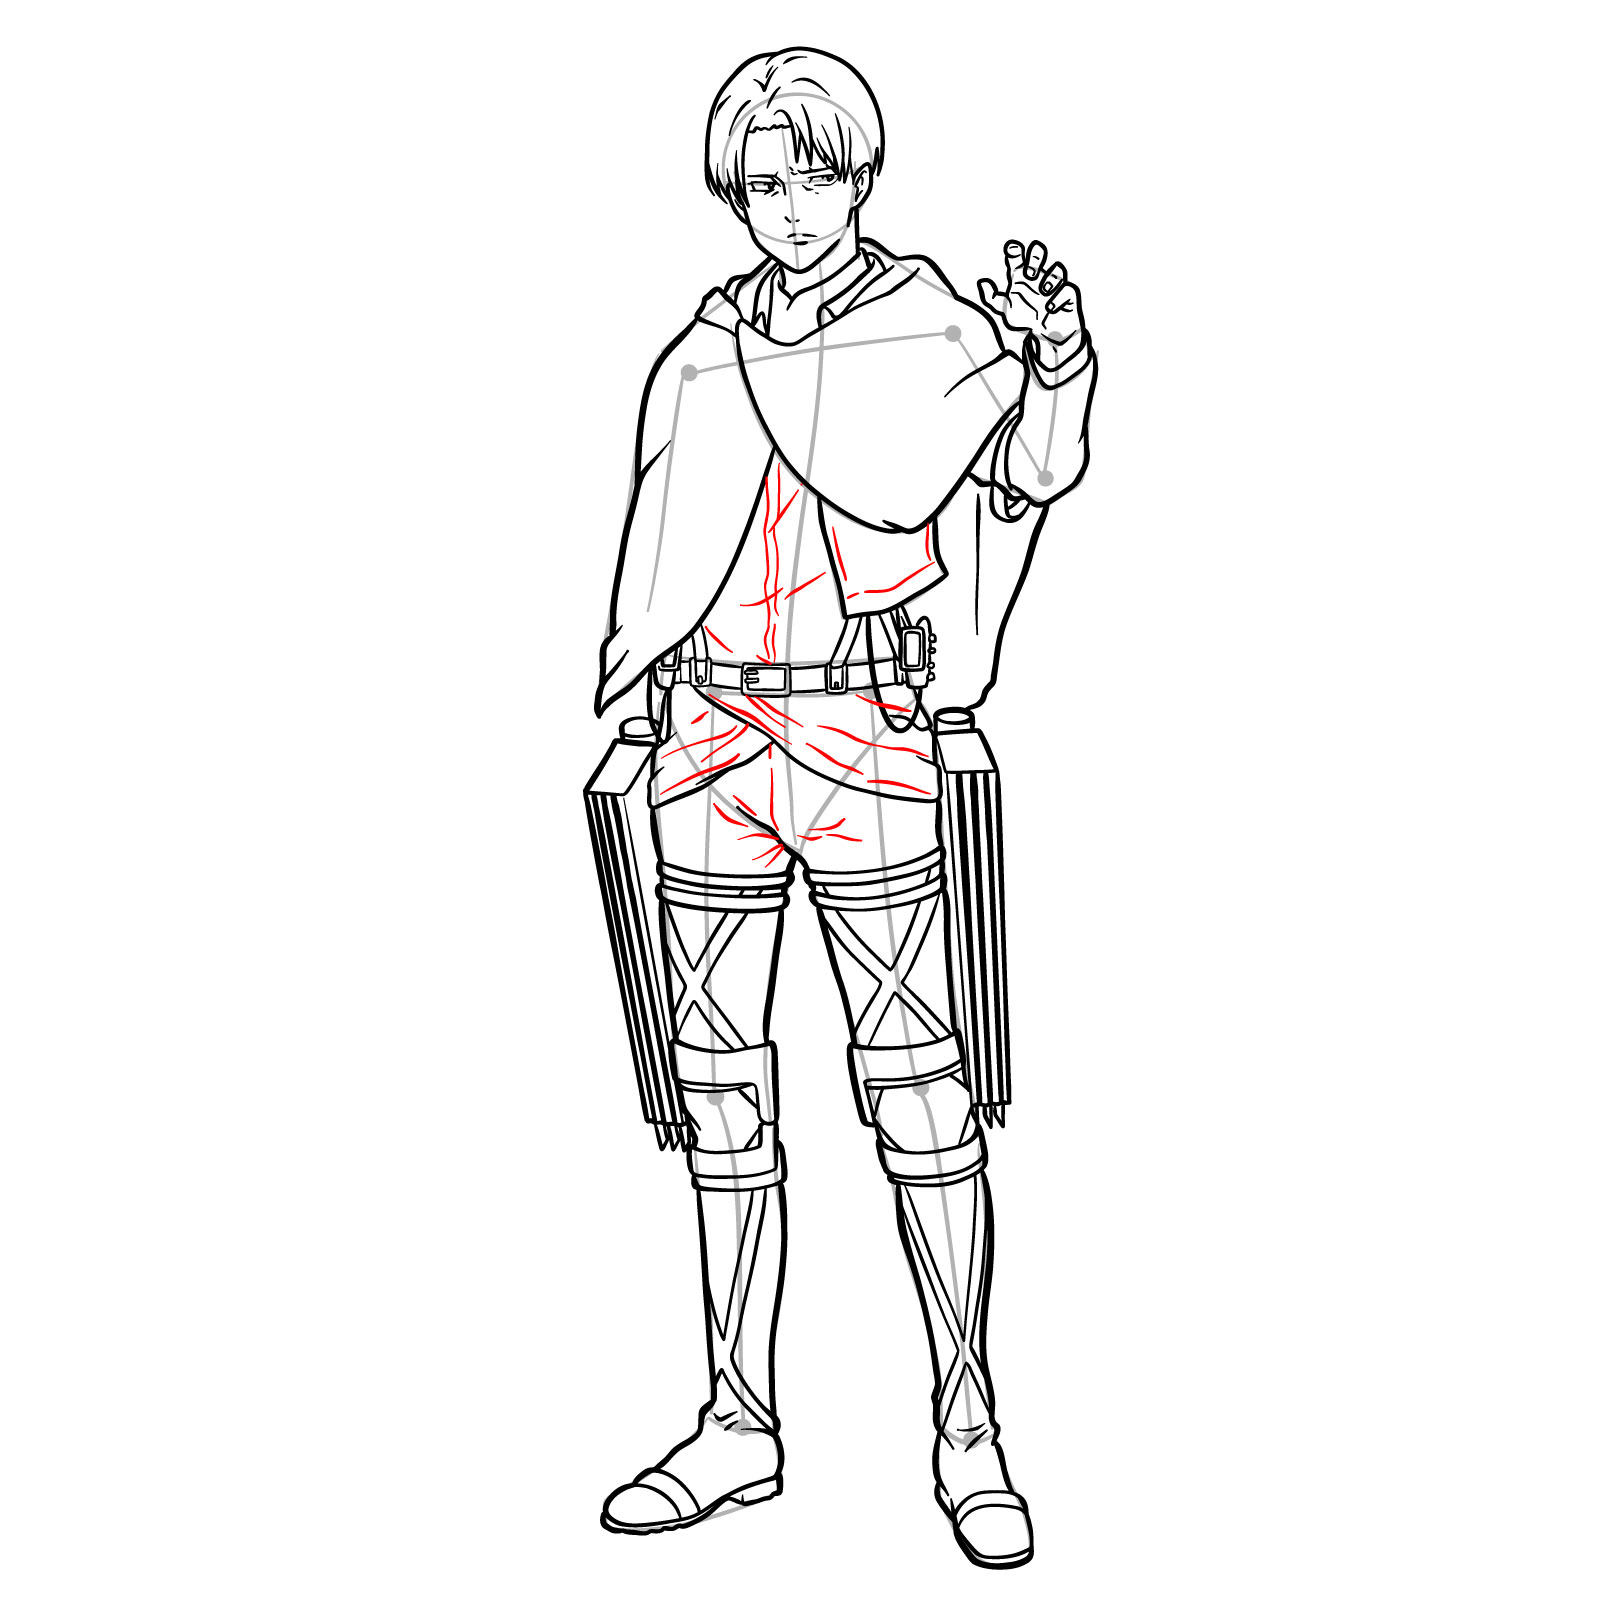
Step 15 – Begin adding detail to Levi’s uniform by sketching the portion of the jacket that is visible beneath the cloak. Then, draw the suspenders and the utility belt, incorporating the small, intricate details such as the pouches and gear, which are crucial for Levi’s character design
Illustrating the hidden part of Levi’s jacket, suspenders, and the detailed utility belt
Step 16
Detailing the waist area
Step 17
Belt and suspenders
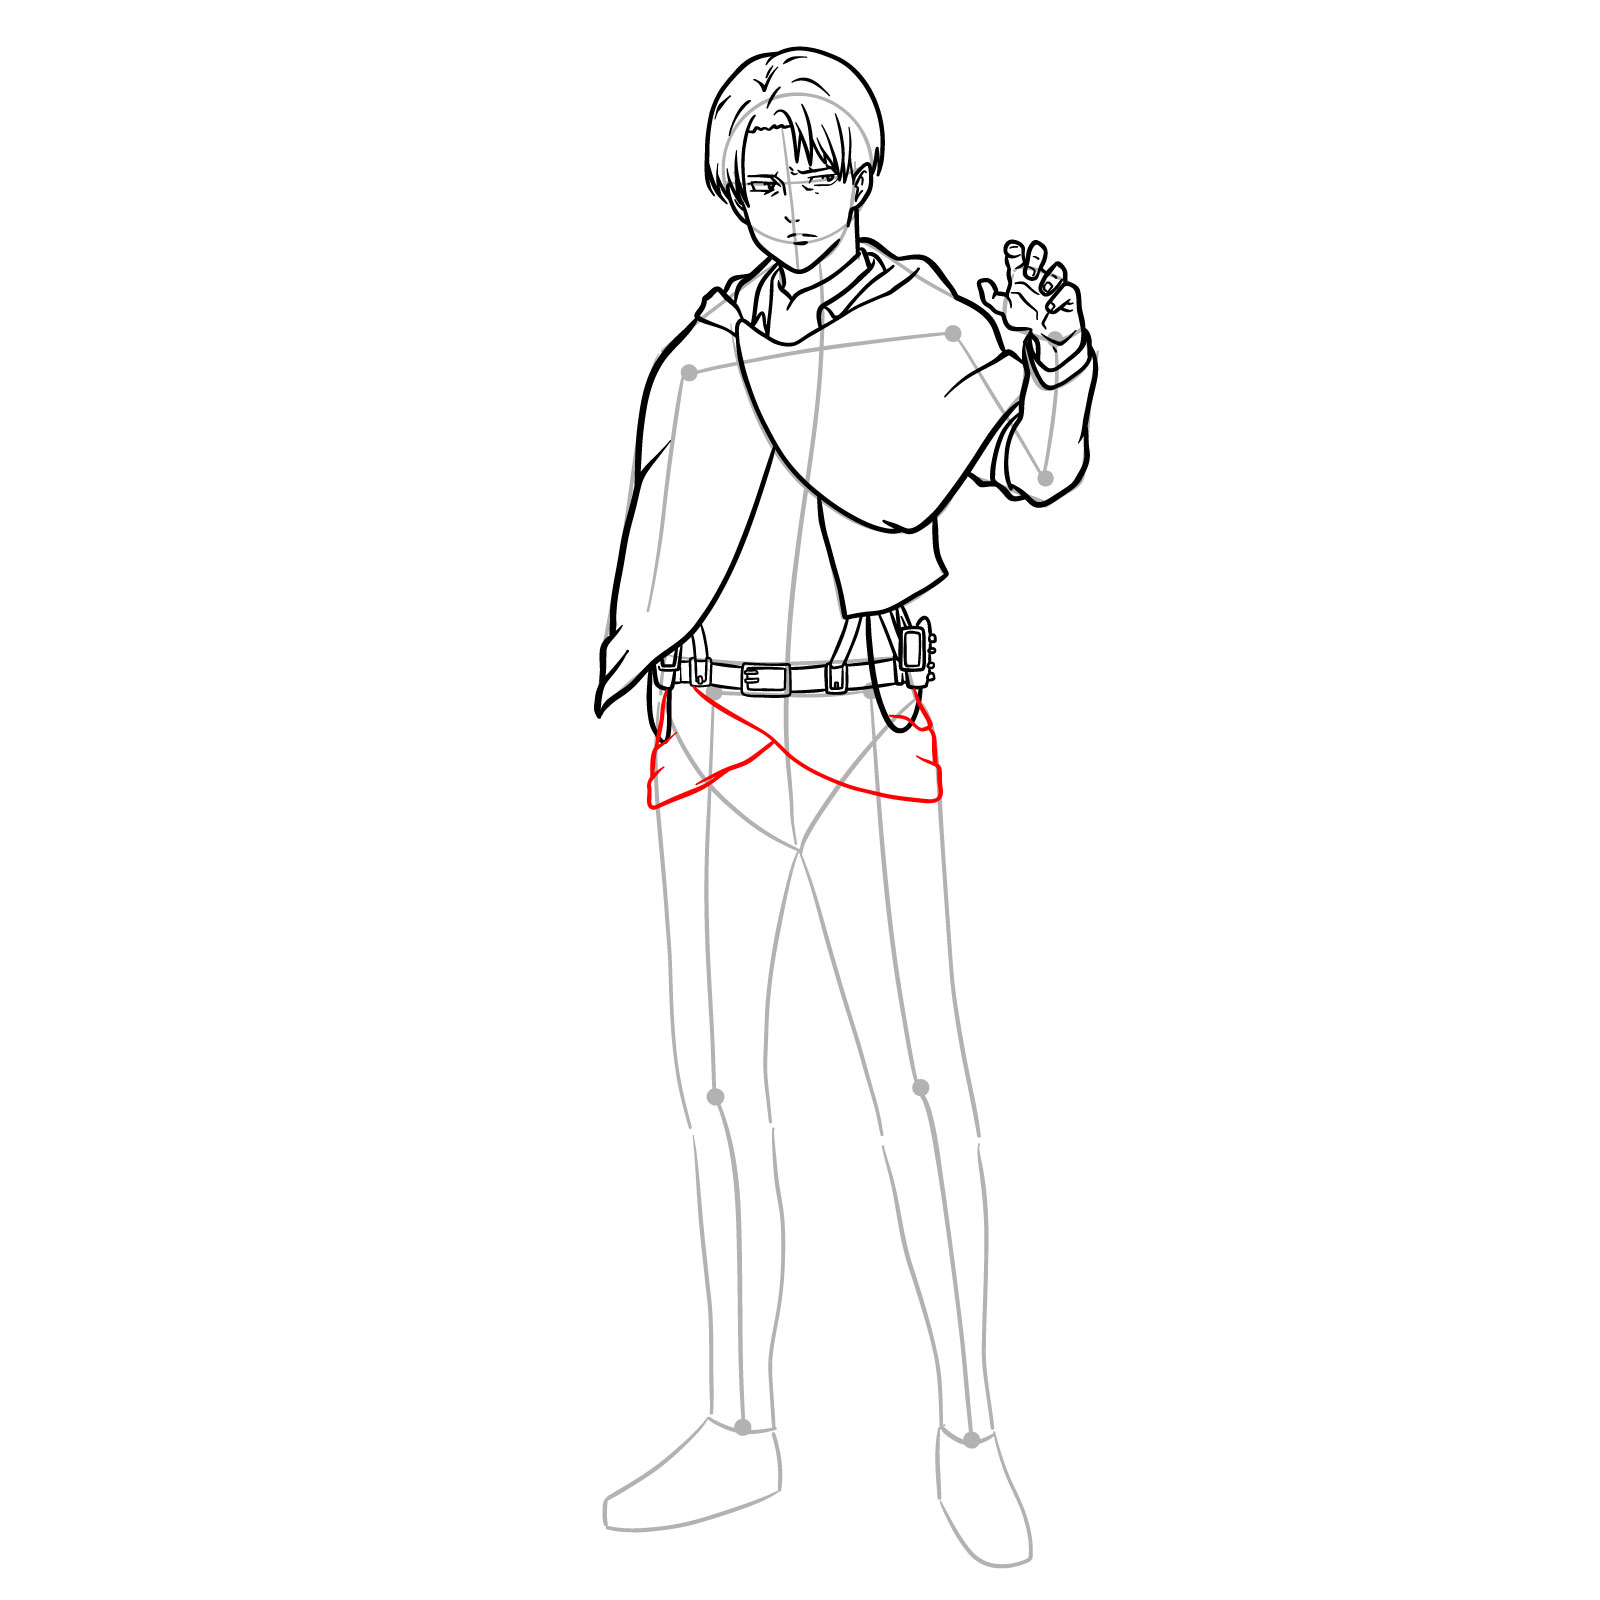
Step 18 – Draw Levi’s legs from the hips to the knees, ensuring they are proportionate to the rest of the body. Add definition to the muscles and the fabric of the pants. Then, carefully illustrate the left ODM gear, capturing the complexity of the mechanism
Outlining Levi’s legs and his left ODM gear as part of the full body drawing process
Step 19
Sketching the first ODM
Step 20
Sketching the upper part of Levi’s hips
Step 21
Drawing his legs to the knee area
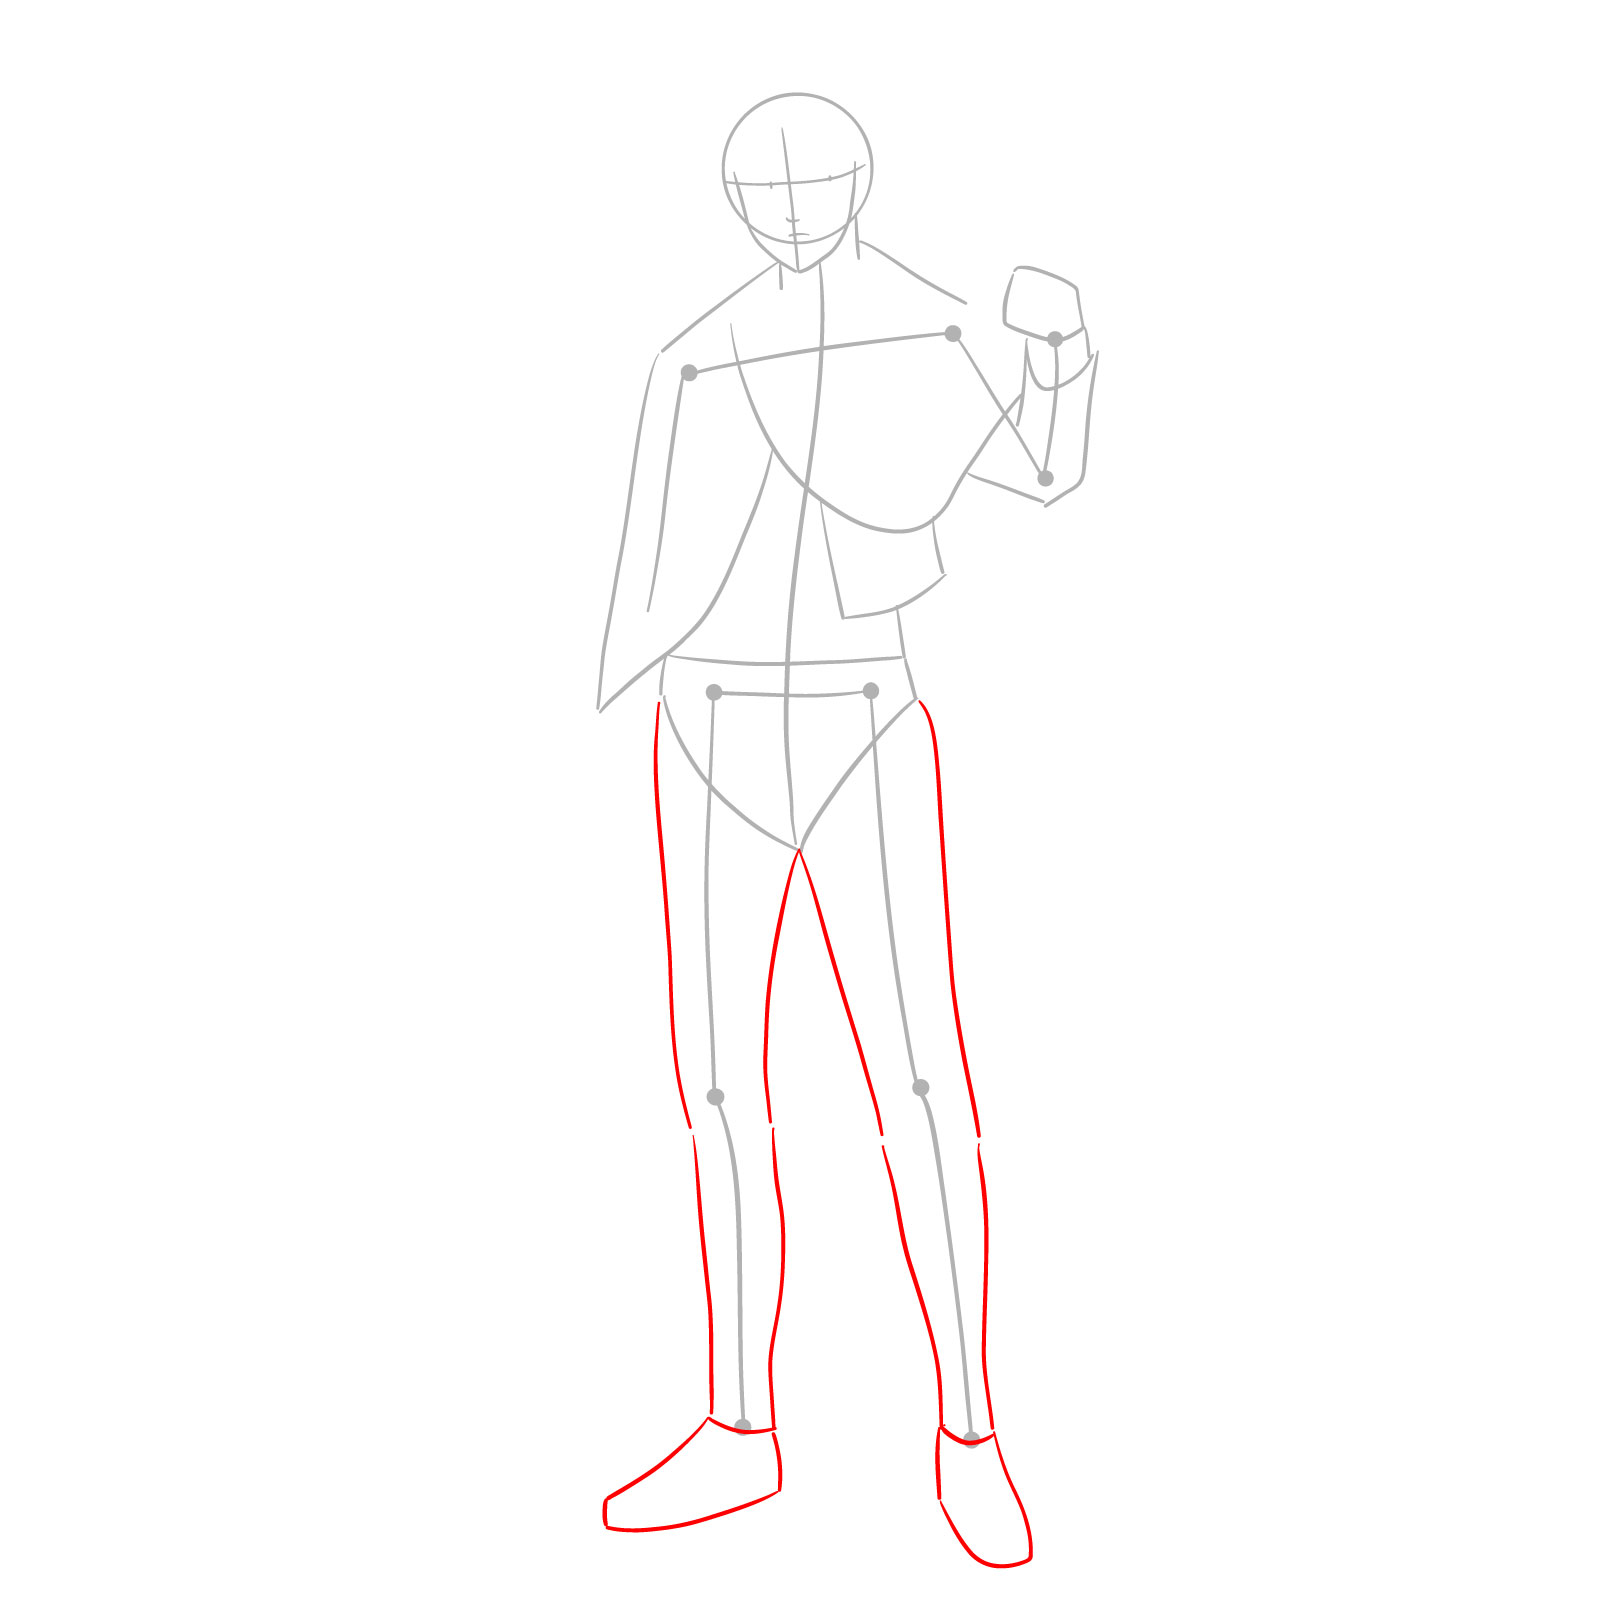
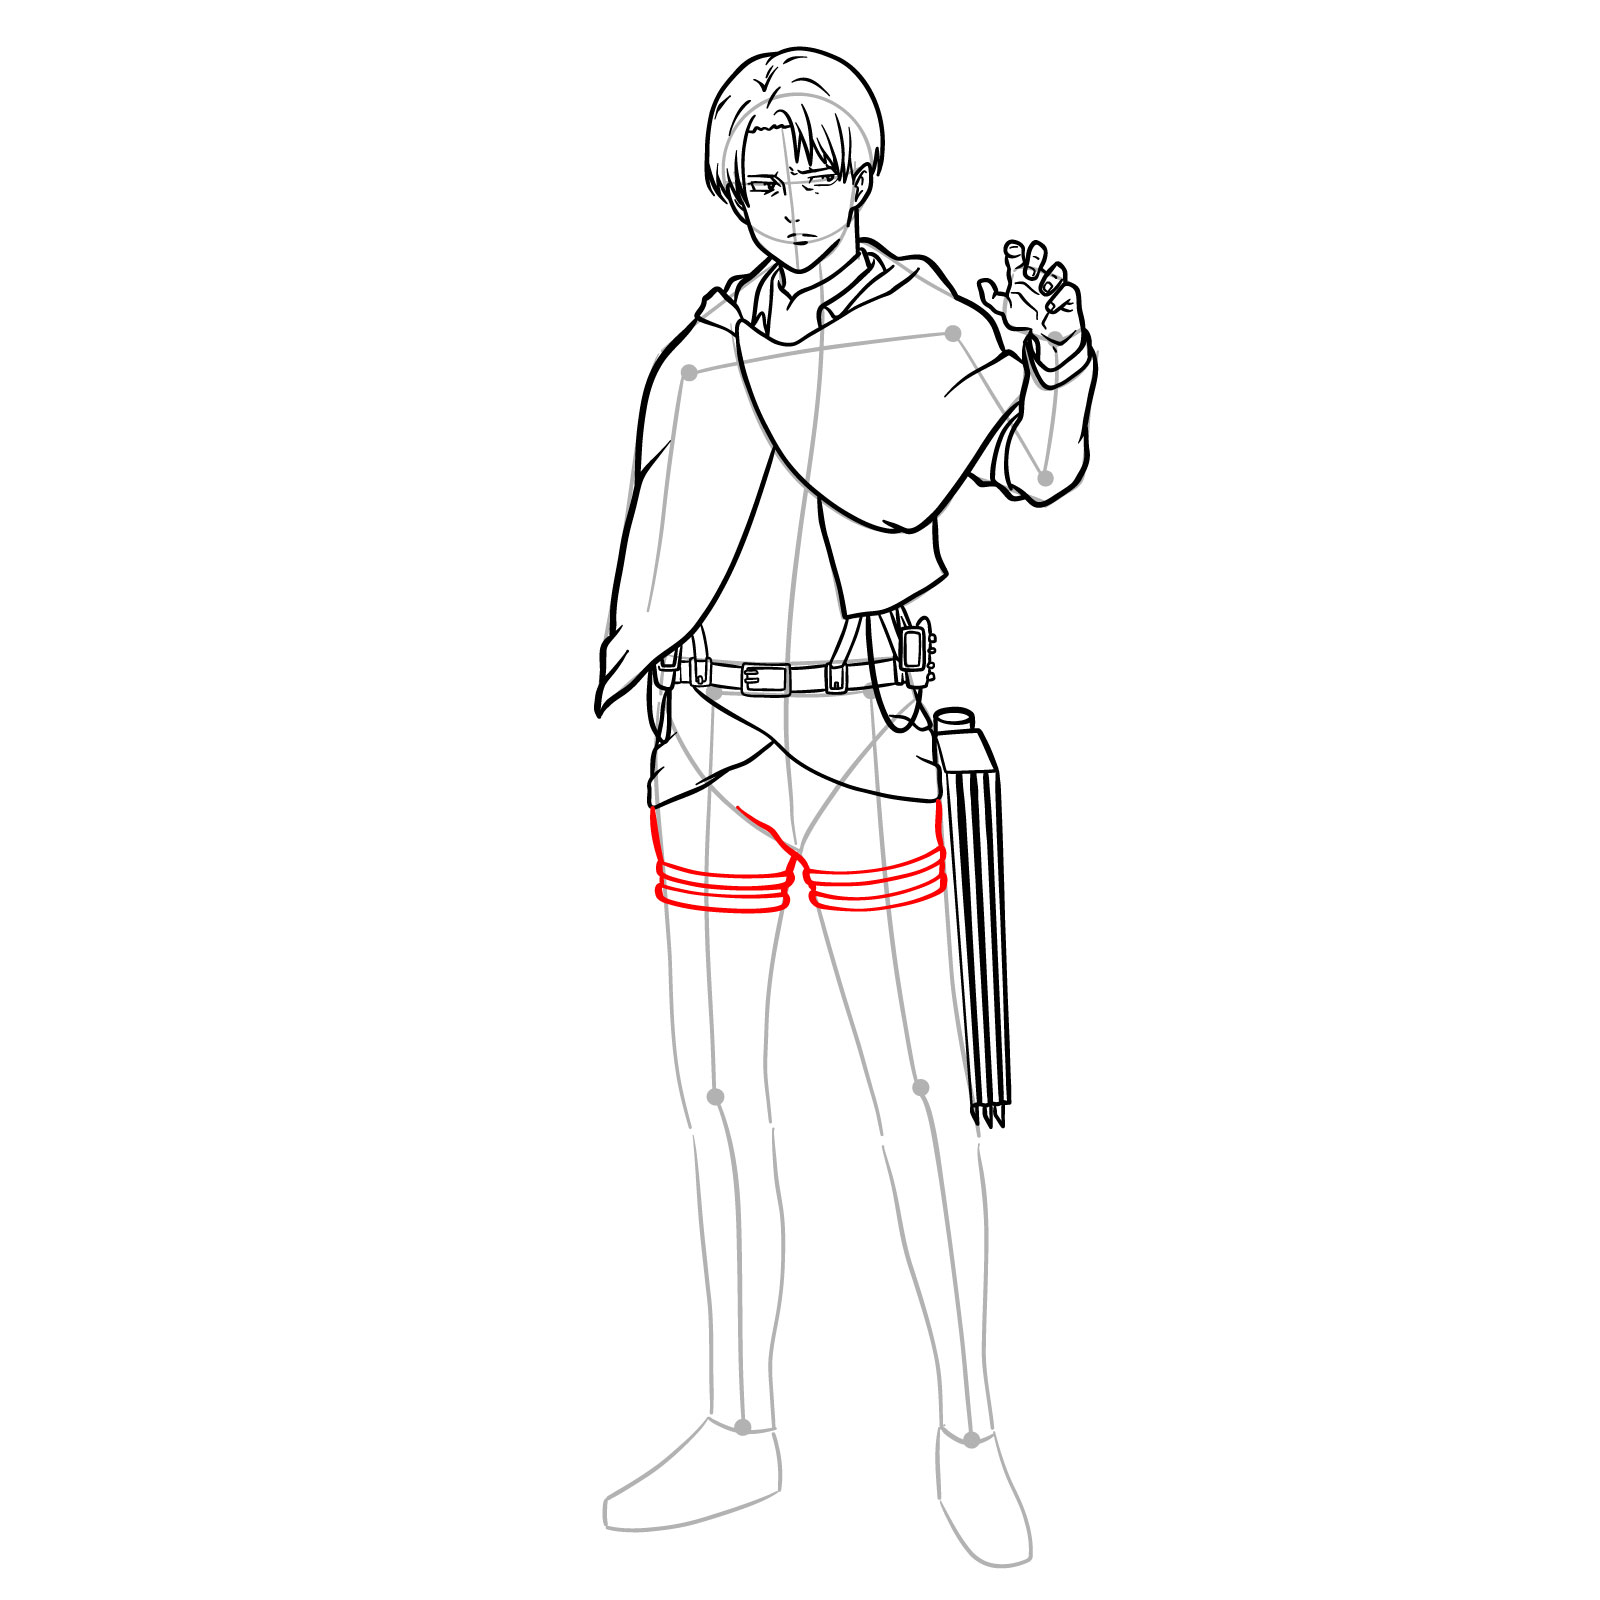
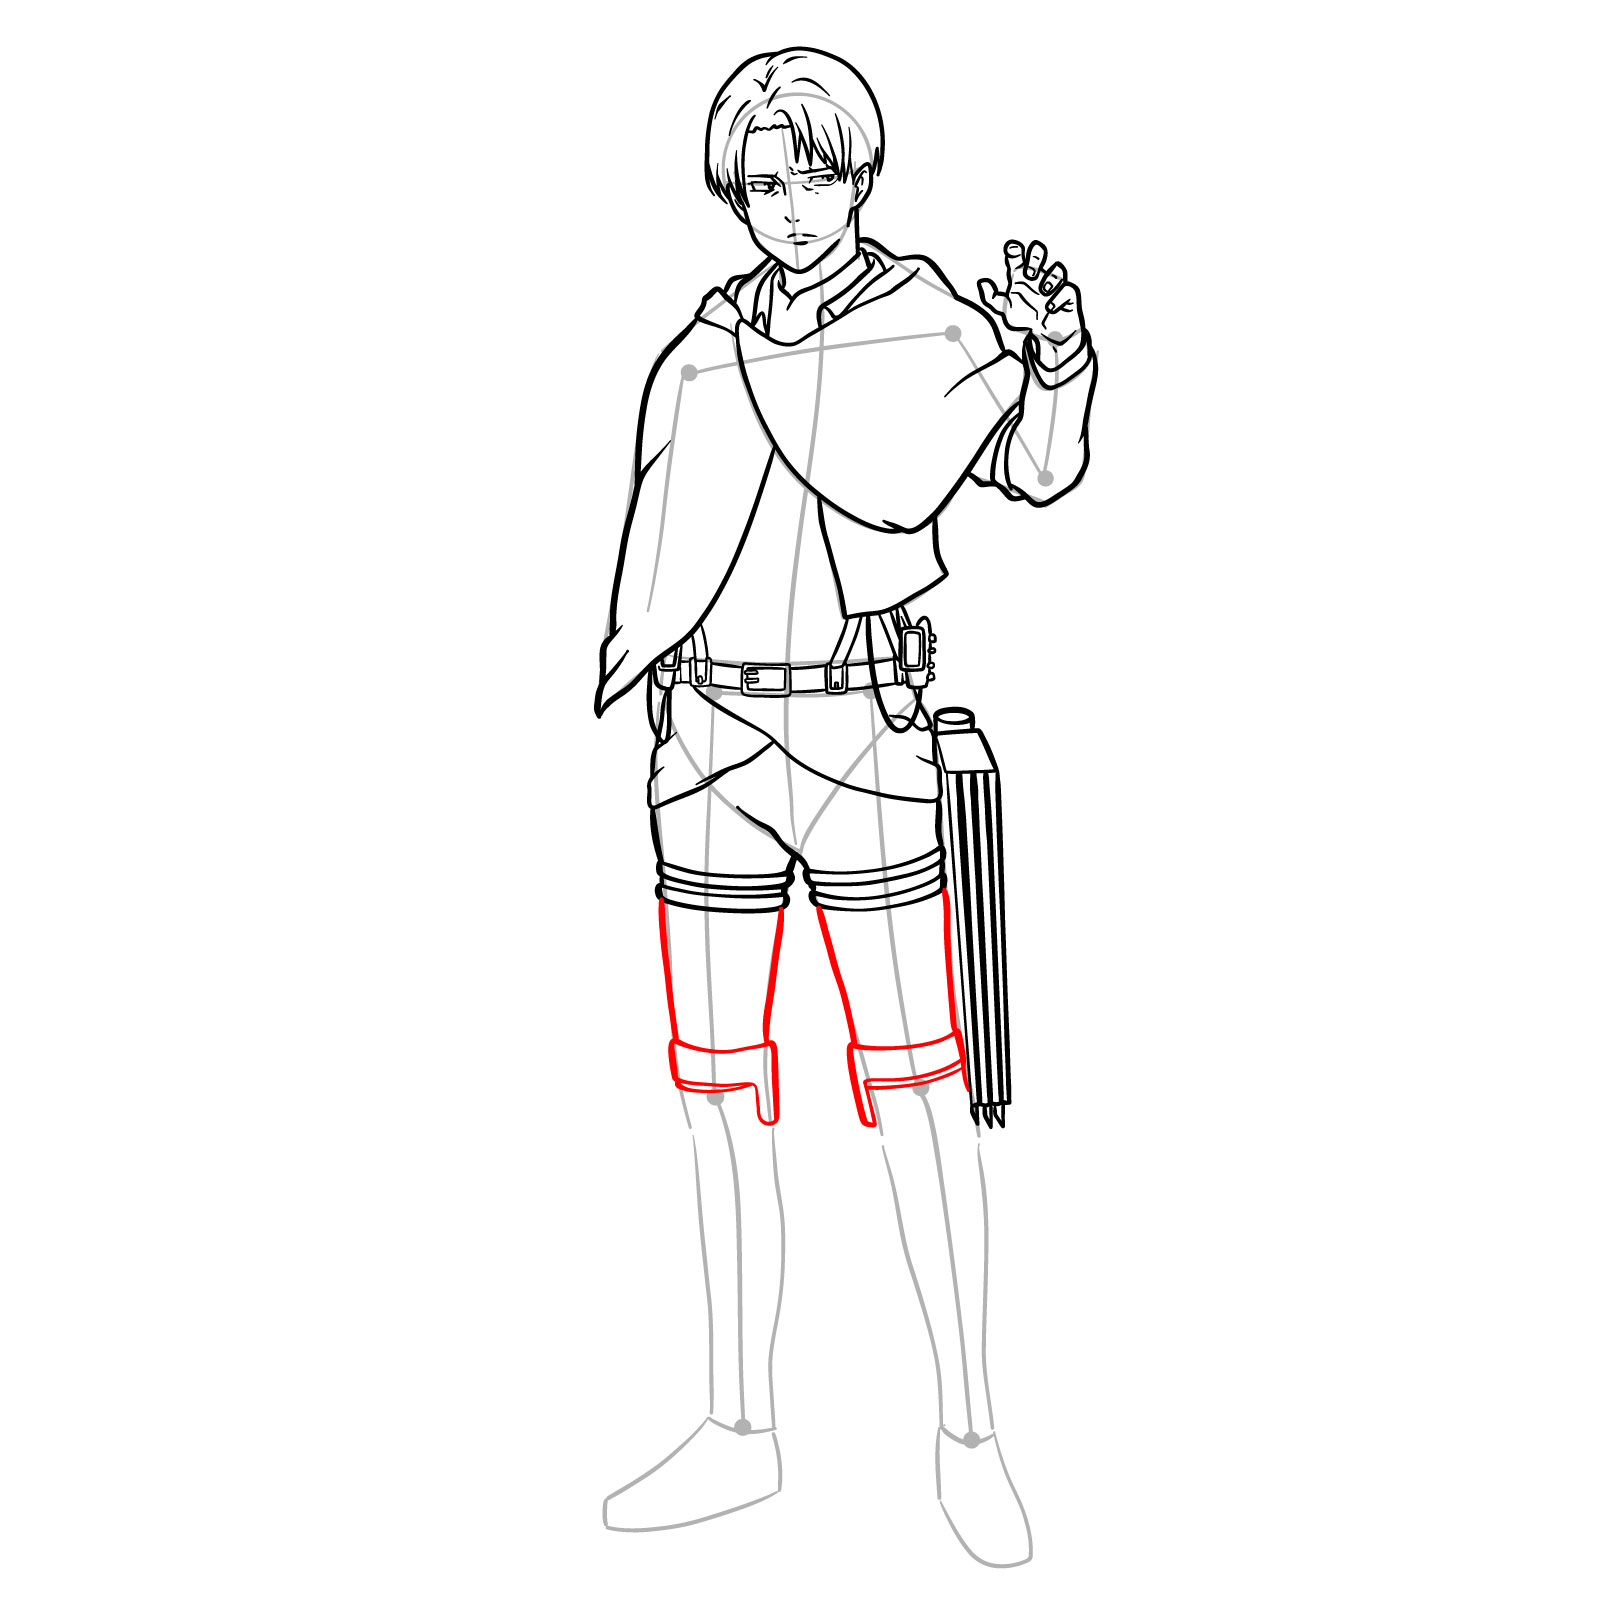
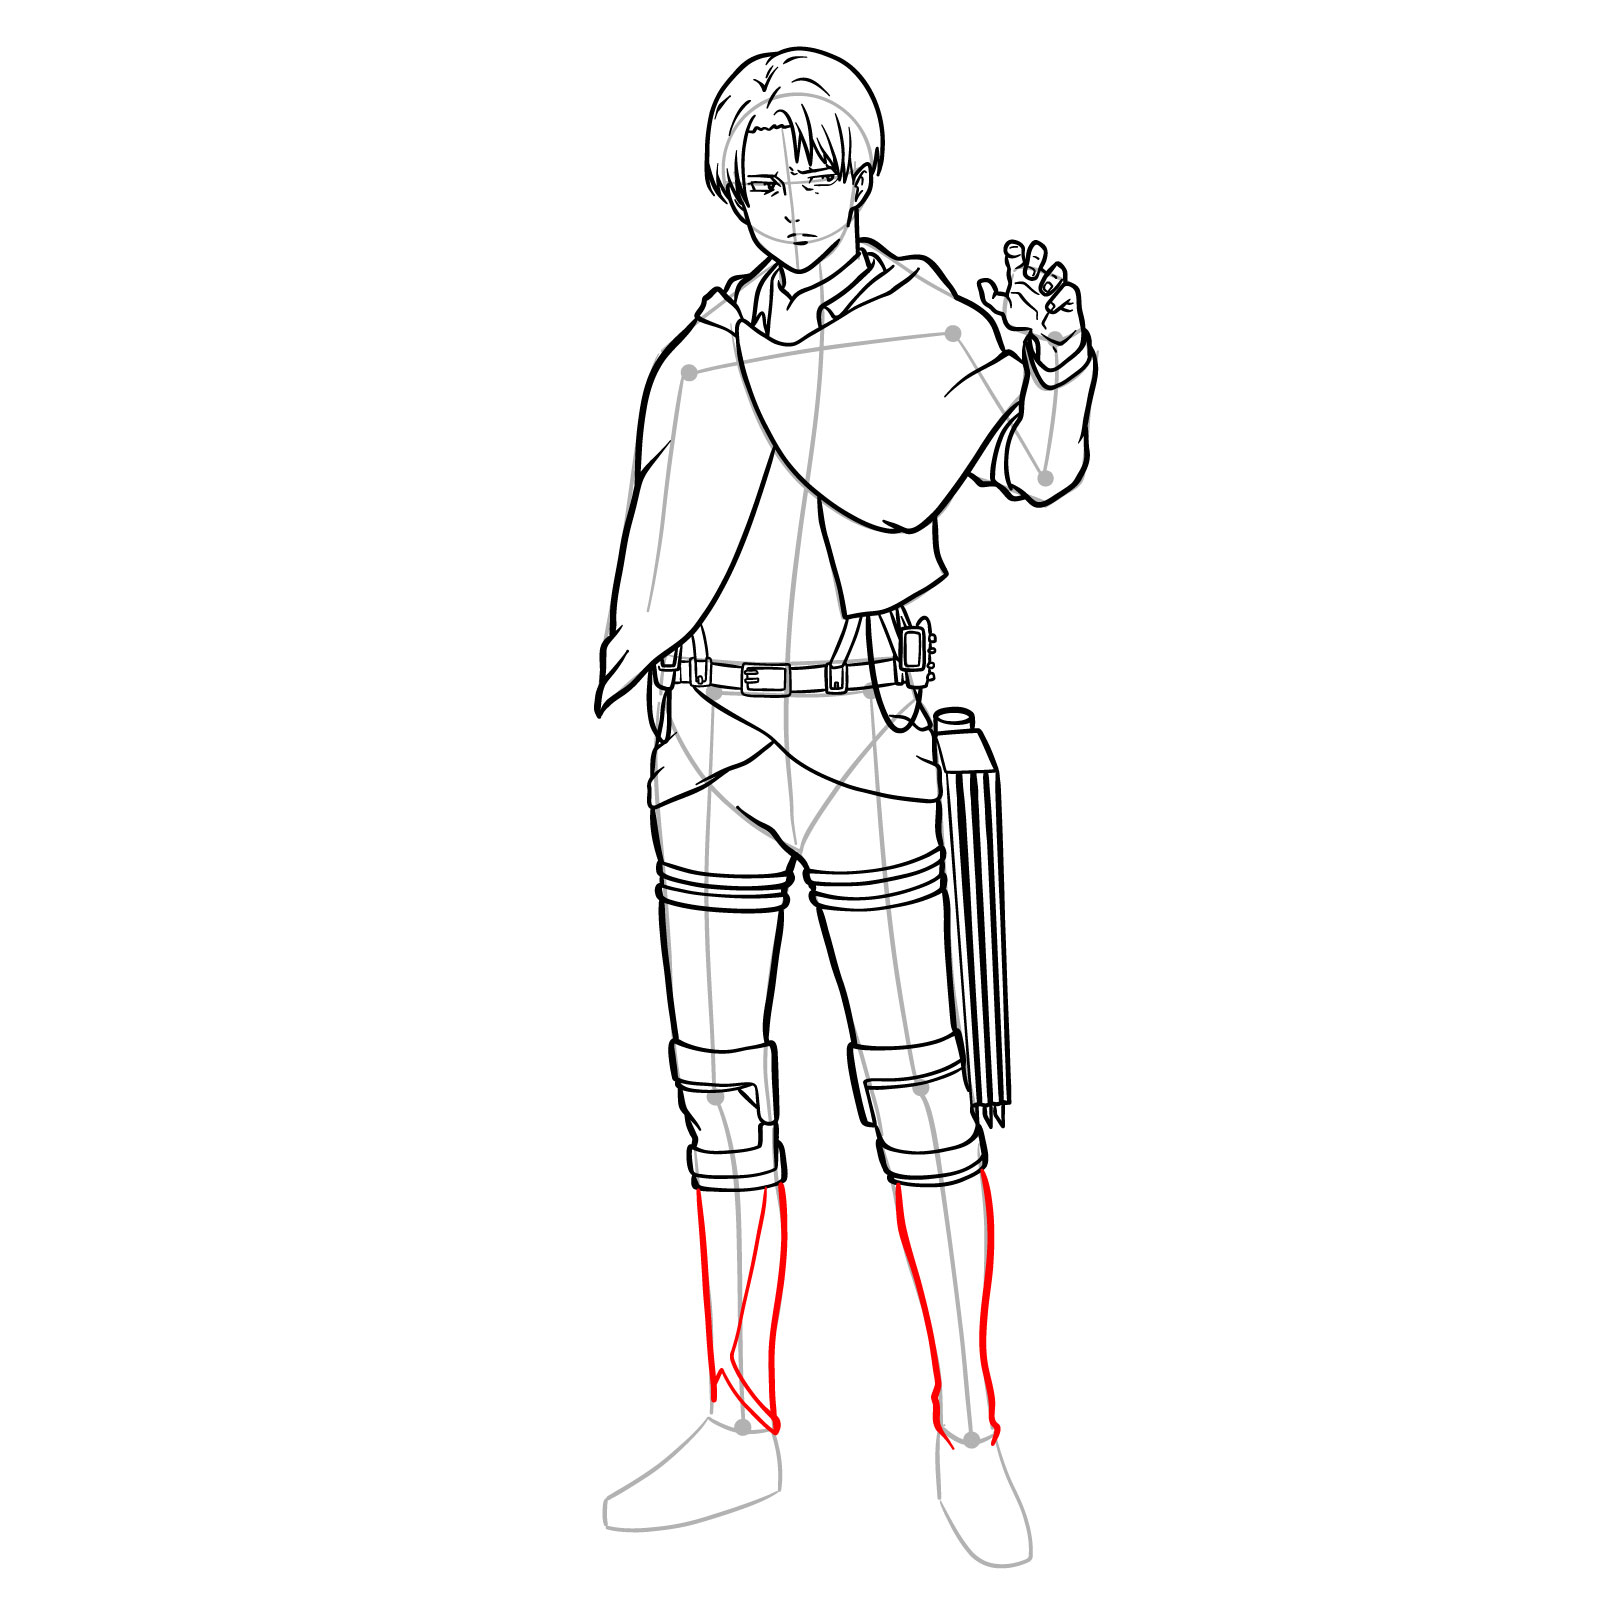
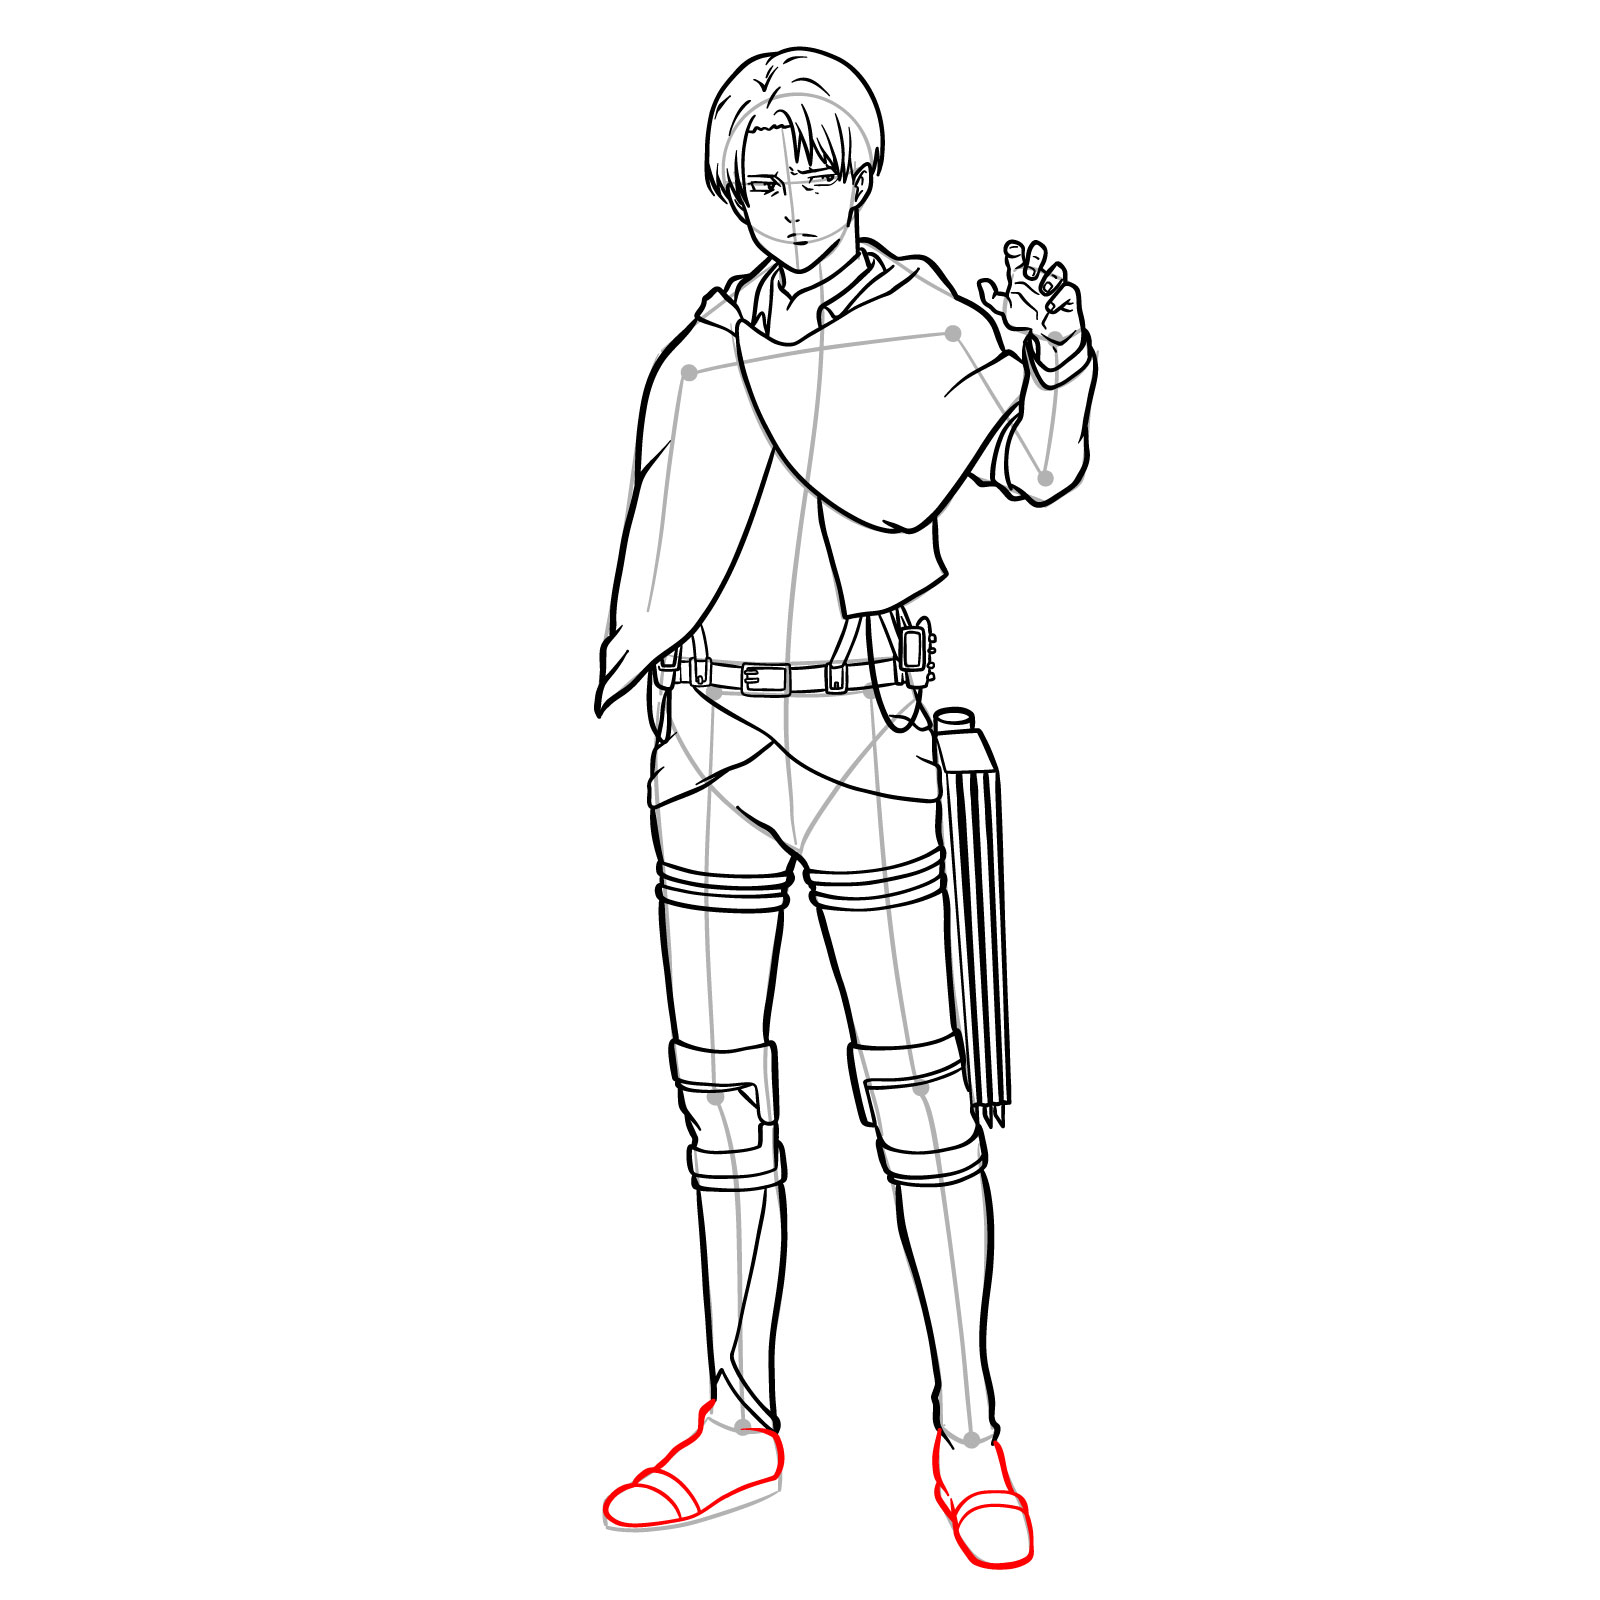
Step 22 – Draw Levi Ackerman’s legs in full, extending down to his boots. Add the intricate details of the uniform’s straps, the knee guards. Sketch the boots and soles, add straps to the pants in step 25
Steps 22 – 25: Sketching Levi Ackerman’s lower half, focusing on the details of his uniform’s legs and footwear
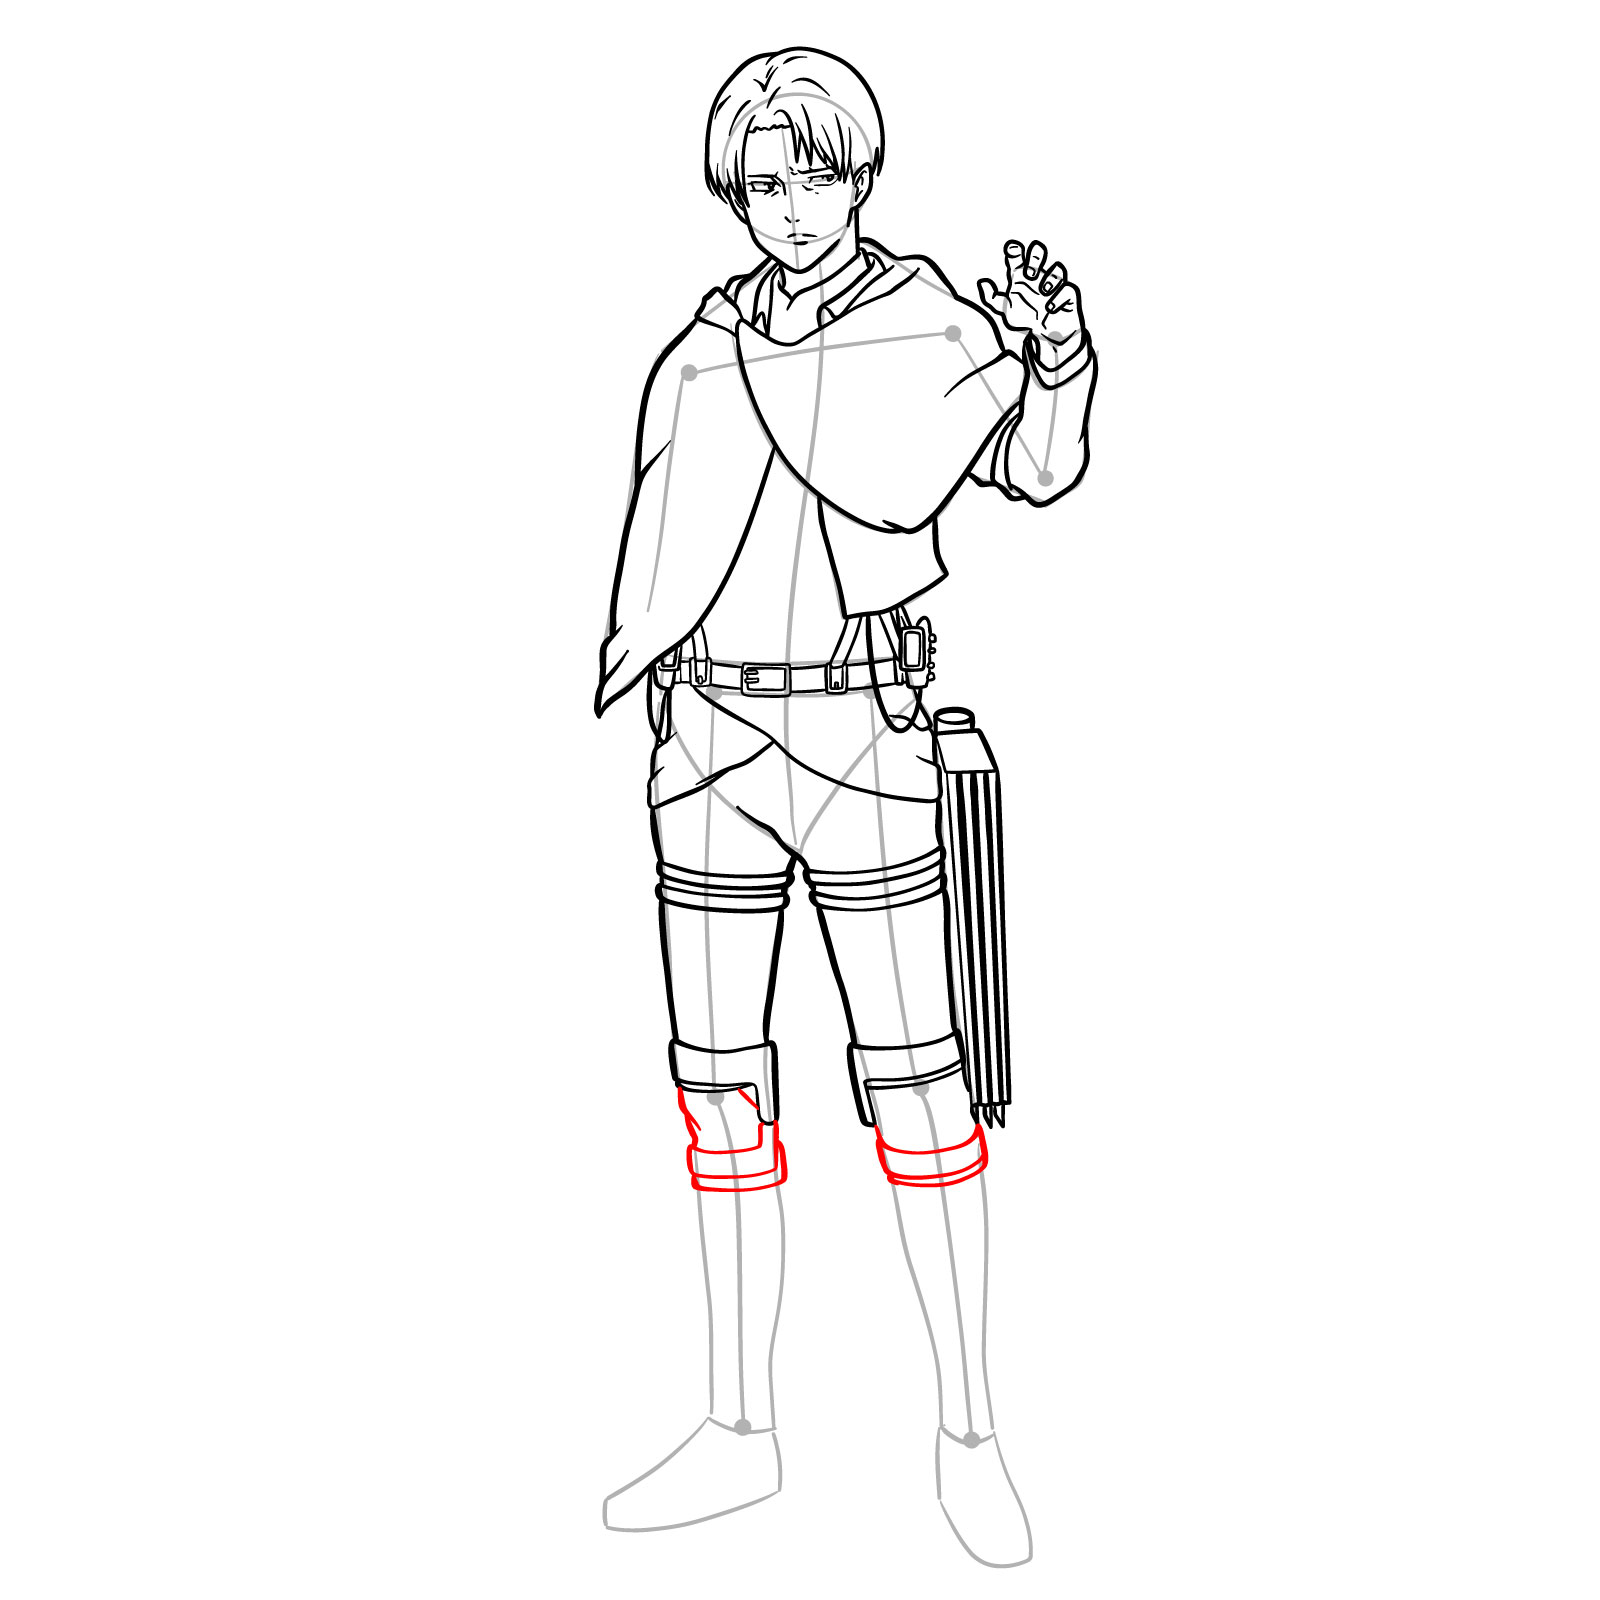
Step 23
Sketching the lower part of Levi’s legs
Step 24
Adding the base of the footwear
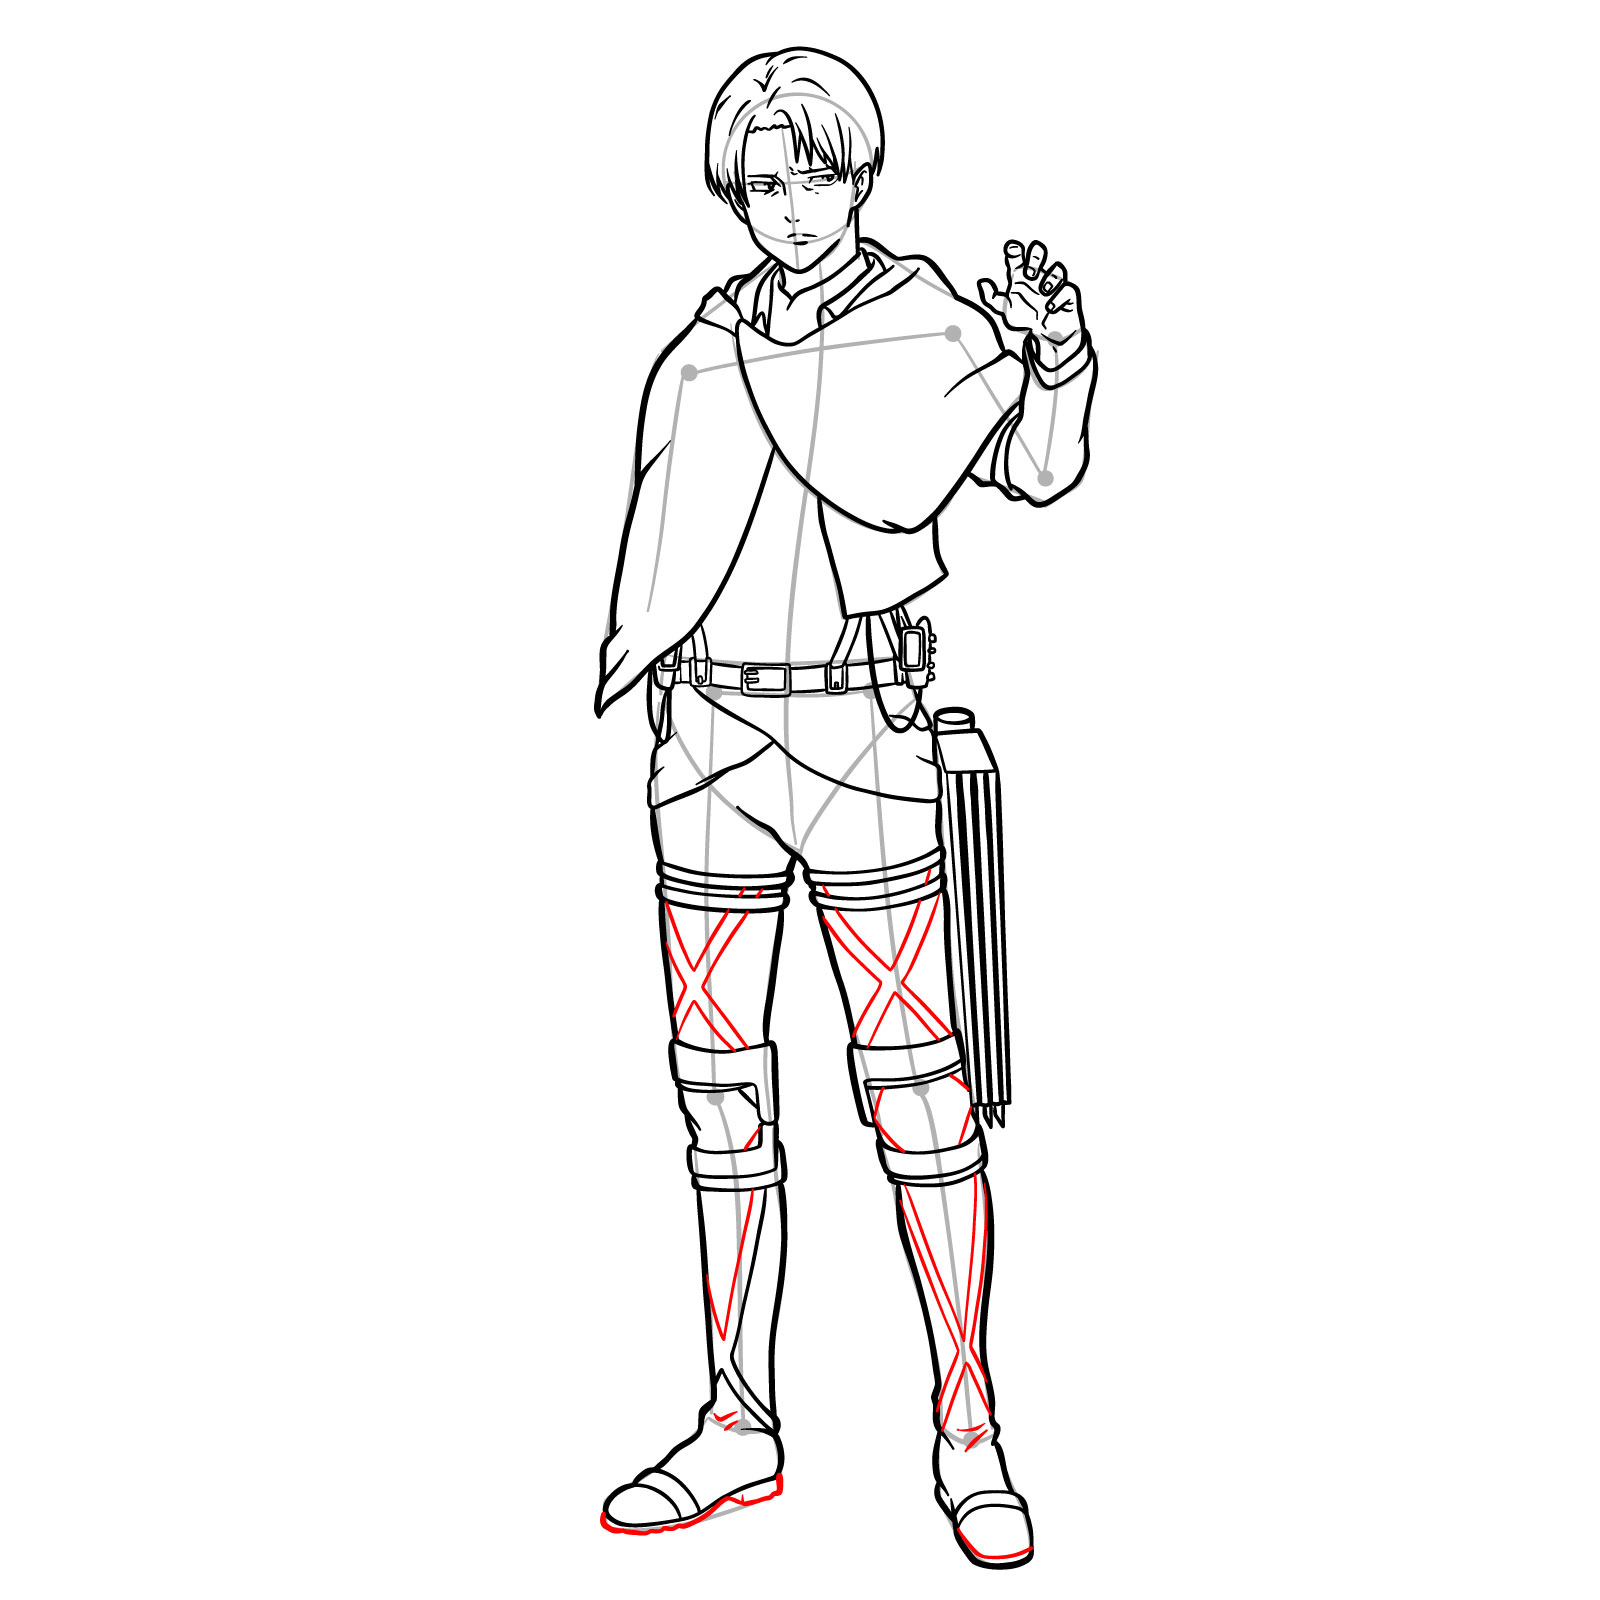
Step 25
Drawing the details of the pants and boots: straps and soles
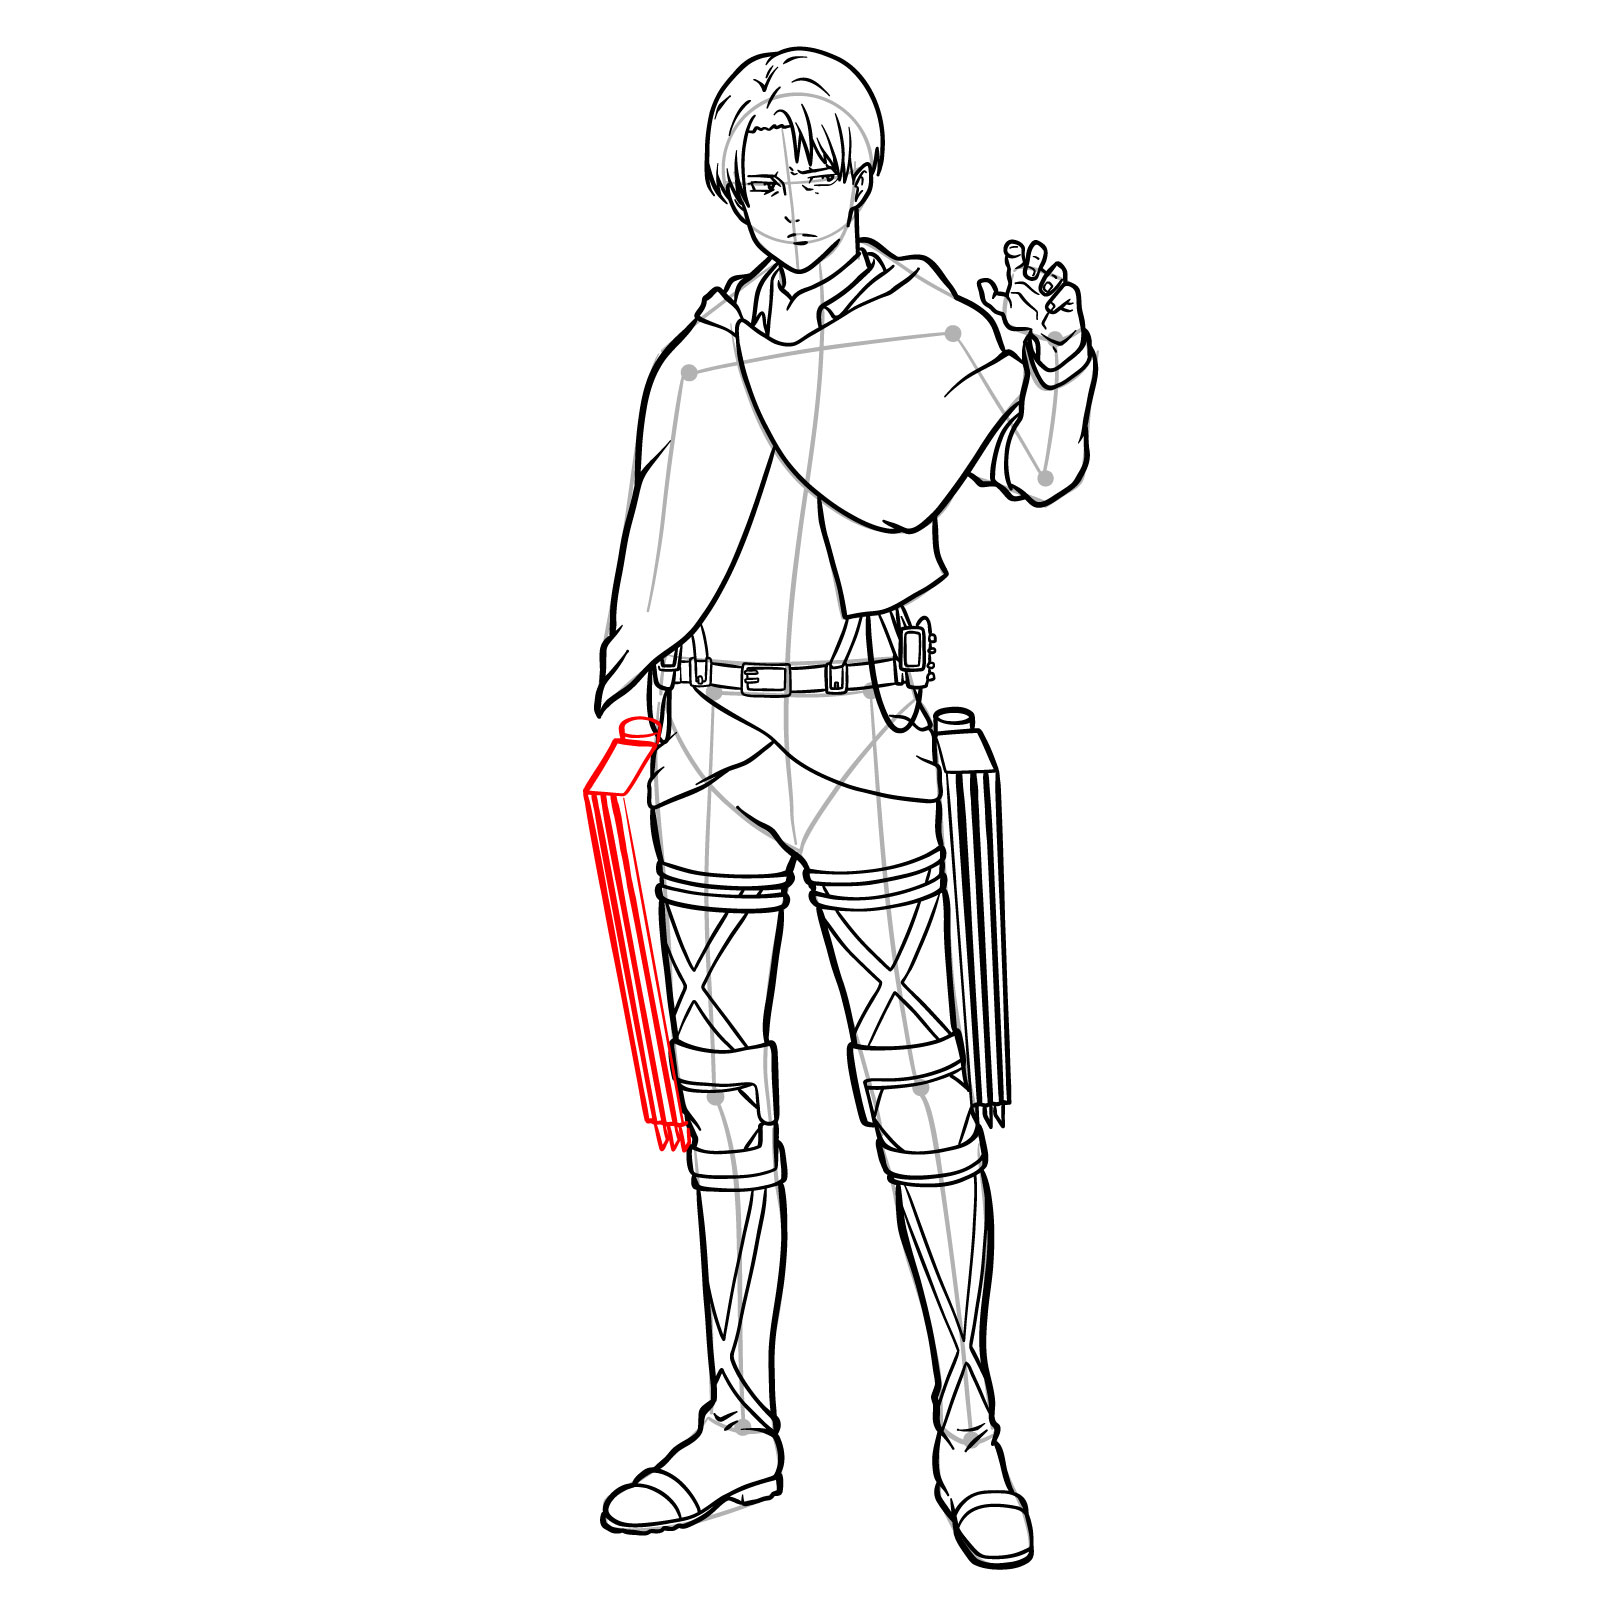
Step 26 – With one ODM gear in place, replicate the process to draw the second gear on Levi’s right side. Ensure symmetry and consistency in design between both sets of gear, capturing the functionality and combat-readiness of his equipment
Placing the second ODM gear on Levi’s right side to match the previously drawn left gear
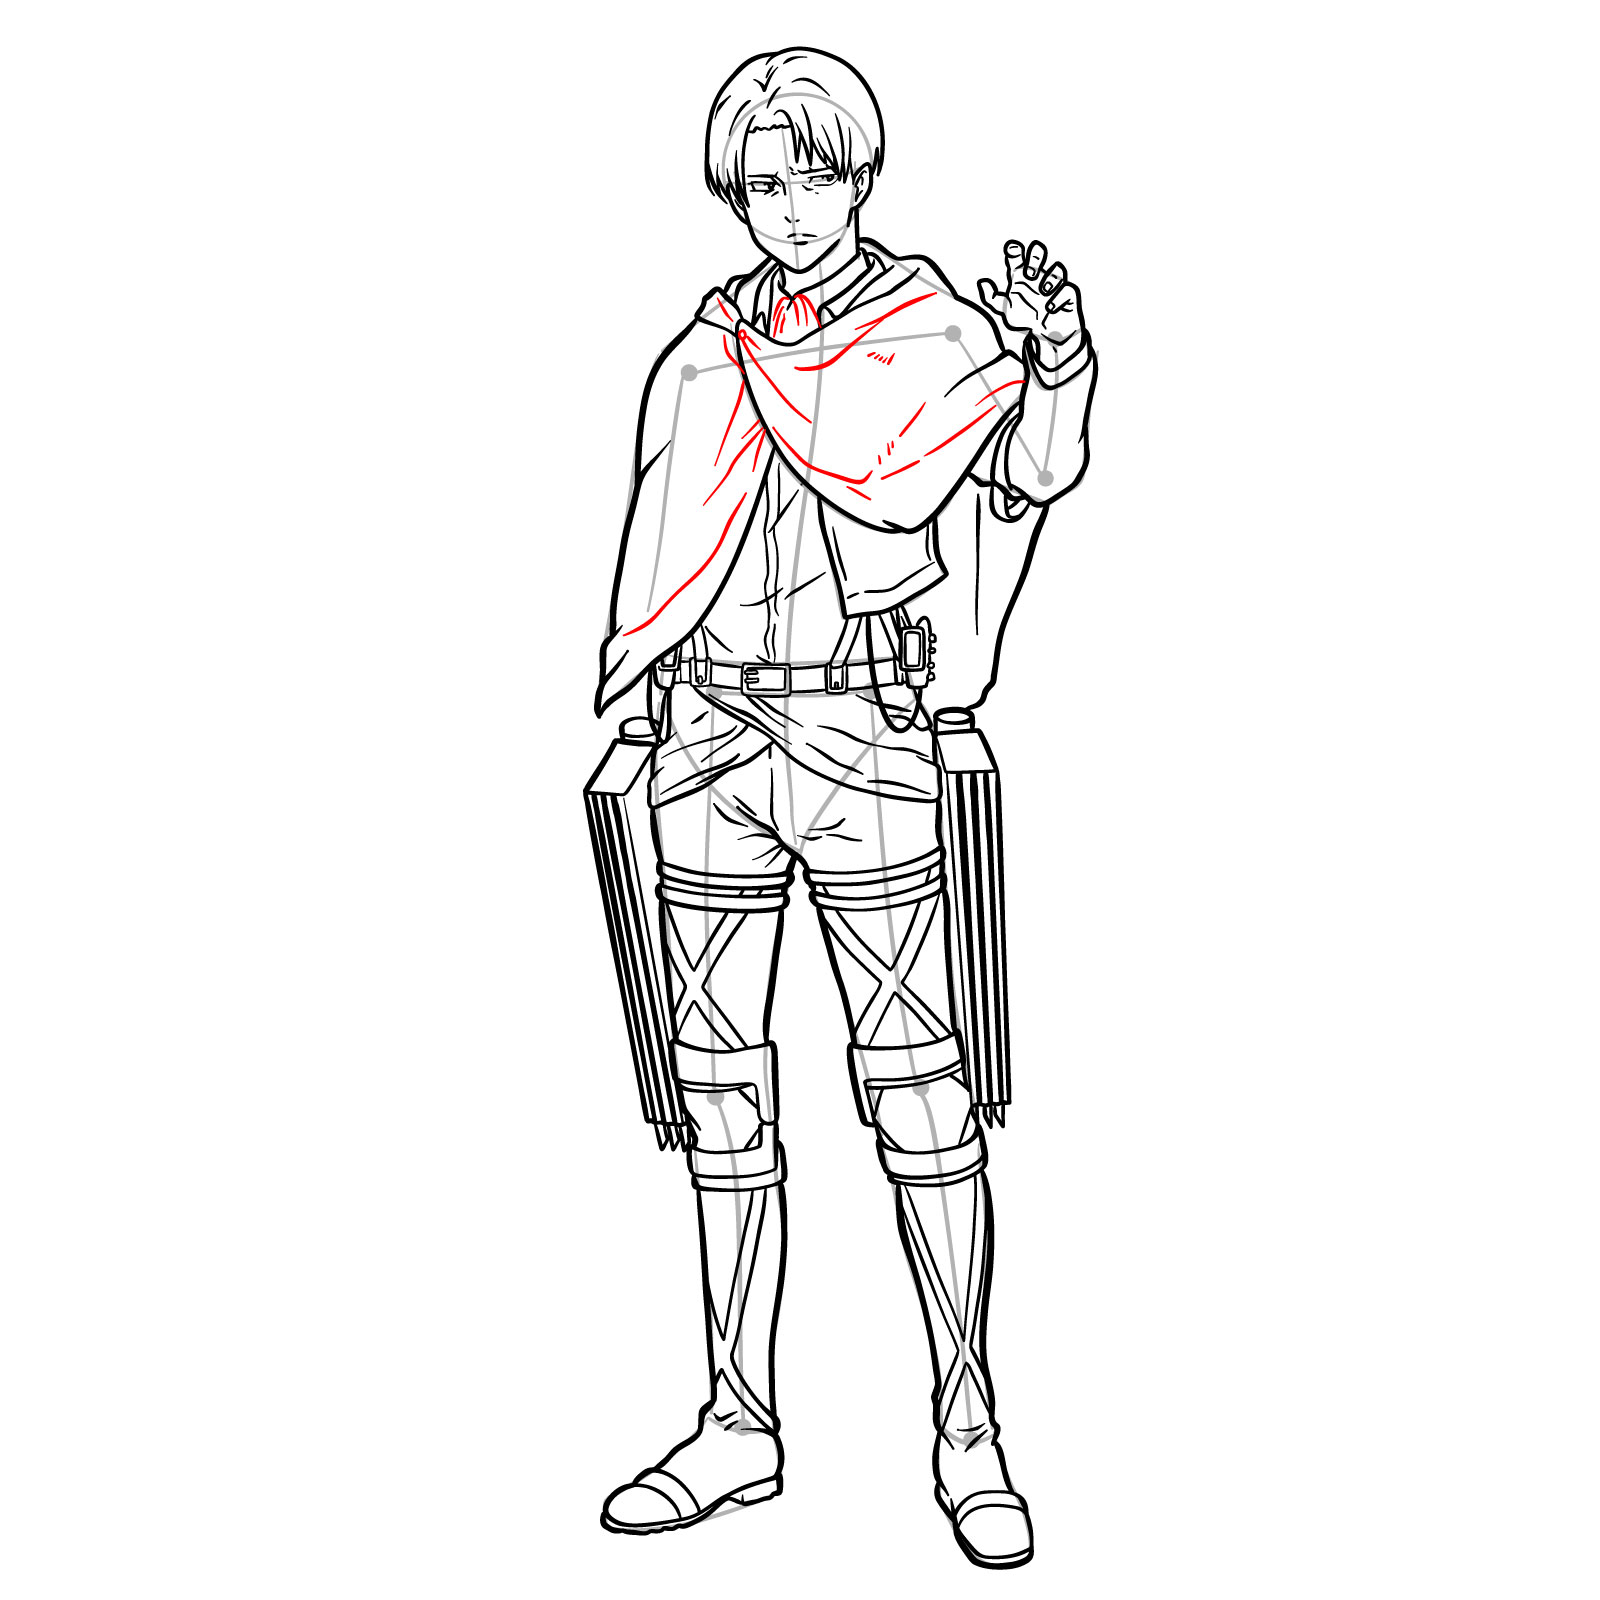
Step 27 – Finish the outline of the cloak, ensuring it wraps around Levi’s figure appropriately, with natural folds and the correct flow of the fabric
Completing Captain Levi’s iconic look by adding the remaining section of the cloak
Step 28 – Refine the uniform with fine details like seams, folds, and creases to convey the texture of the fabric and the movement of the body underneath
Enhancing the realism of Levi Ackerman’s uniform with fine details such as seams and folds
Step 29
Adding final details to Levi’s uniform
Step 30 – The drawing of Levi Ackerman is now complete, capturing his stoic presence and meticulous uniform. Now, you have the option to ink your pencil sketch for a polished look and erase any unnecessary lines. This final step will enhance the contrast and sharpness of the drawing, emphasizing the precision of Levi’s character design. Whether you leave the sketch as is or decide to ink it, you now have a complete portrait of the formidable Captain Levi Ackerman from Attack on Titan
Don't Miss New Tutorials! Follow SketchOk
I publish new step-by-step drawing guides every single day. Follow on your favorite platform so you never miss a tutorial. Thousands of artists are already drawing along and I can't wait you to join in!
On my Patreon you can grab unique hand-made coloring pages: each one drawn by me personally. Every purchase directly supports the creation of new drawing tutorials. It's the best way to practice your skills, keep the site going, and get something truly original at the same time.
The completed guide on how to draw Levi Ackerman, showcasing the detailed character in full uniform
And there we have it—a complete guide on how to draw Levi Ackerman in various styles and poses. From the adorable chibi version to the complex full-body renditions, we’ve explored how to bring Captain Levi to life through your artwork. Whether you were drawing Levi’s face in 3/4 view or capturing him in action with his ODM gear and swords, I hope these guides have helped you in your artistic journey.
Remember, practice is key when it comes to mastering any Levi Ackerman drawing or perfecting your technique in general. Don’t be discouraged by the complexity of some steps; with each attempt, you’re sure to improve. Keep experimenting with different styles, whether it’s the heartfelt epilogue scene or Levi’s poised stance in his Season 3 Survey Corps uniform.
If you’ve enjoyed this tutorial and want to continue learning and growing as an artist, make sure to follow SketchOk on all our social media pages for more great content. We share tips, new tutorials, and much more to help you develop your skills further. Here’s where you can find us:
Thanks for joining me on this tutorial. I can’t wait to see your Levi drawings, and I’m excited to help you on your next drawing adventure. Keep creating, and don’t forget to share your progress and final works with the community!
Disclaimer: All original artworks and photos used as references for the creation of these drawing tutorials are the property of their respective owners. If your work has been featured without proper credit, please kindly leave a comment below, and the issue will be promptly addressed. We greatly appreciate your exceptional art. Thank you.