
This guide focuses on how to draw an African elephant face from a three-quarter angle. It’s a semi-detailed sketch, and with 13 steps, it breaks down the structure in a way that’s manageable. The subject has a lot of surface detail—especially around the trunk and eyes, so I’d say this is moderately complex. It’s best to take it slow and stay aware of the perspective changes between both sides of the face.
Main Features to Focus On While Sketching
- Curved trunk with ringed folds
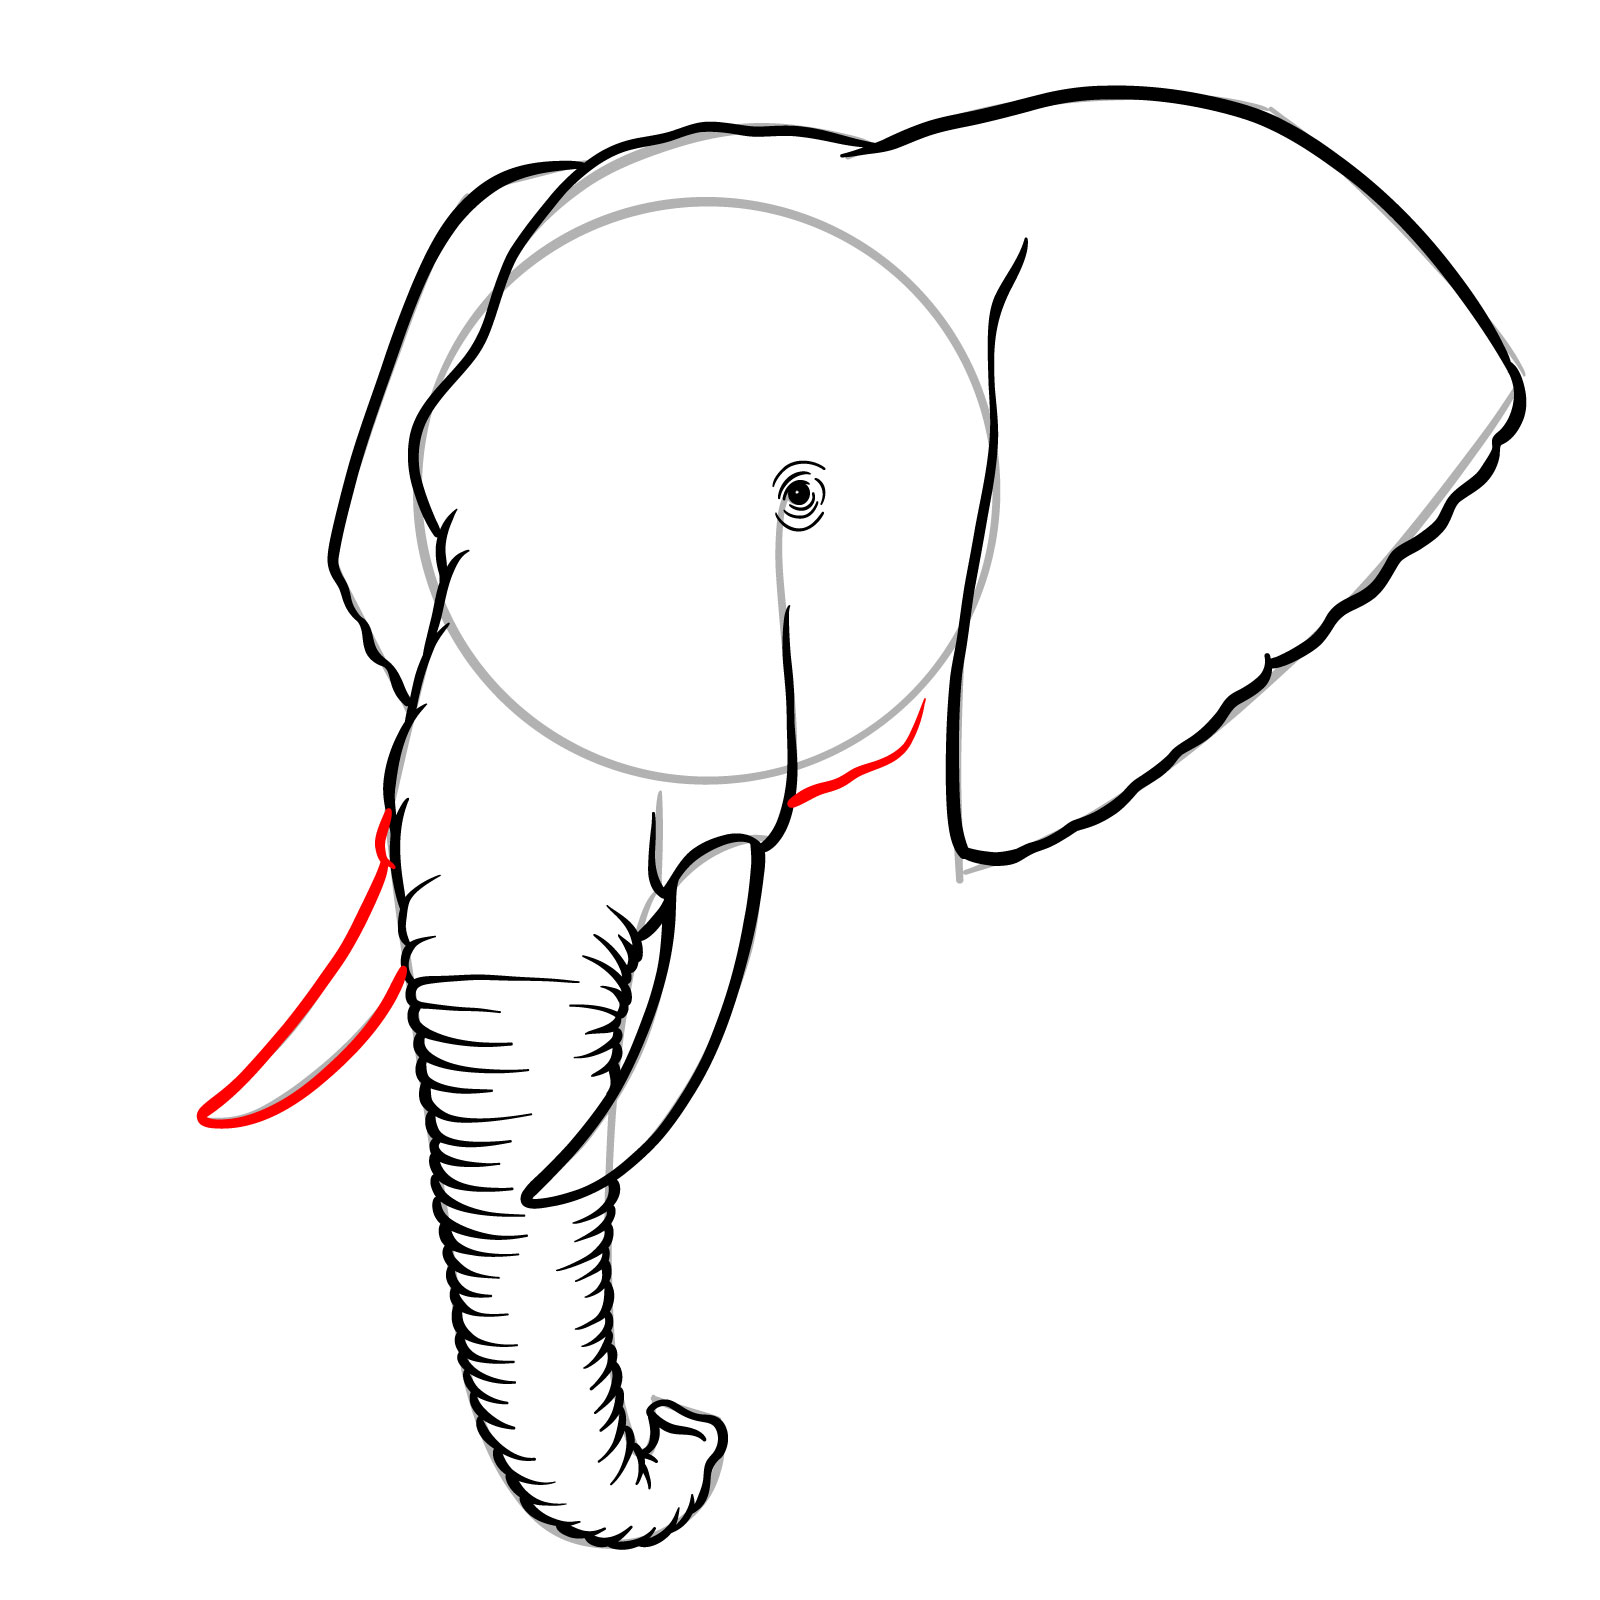
- The right tusk slightly hidden because of the perspective
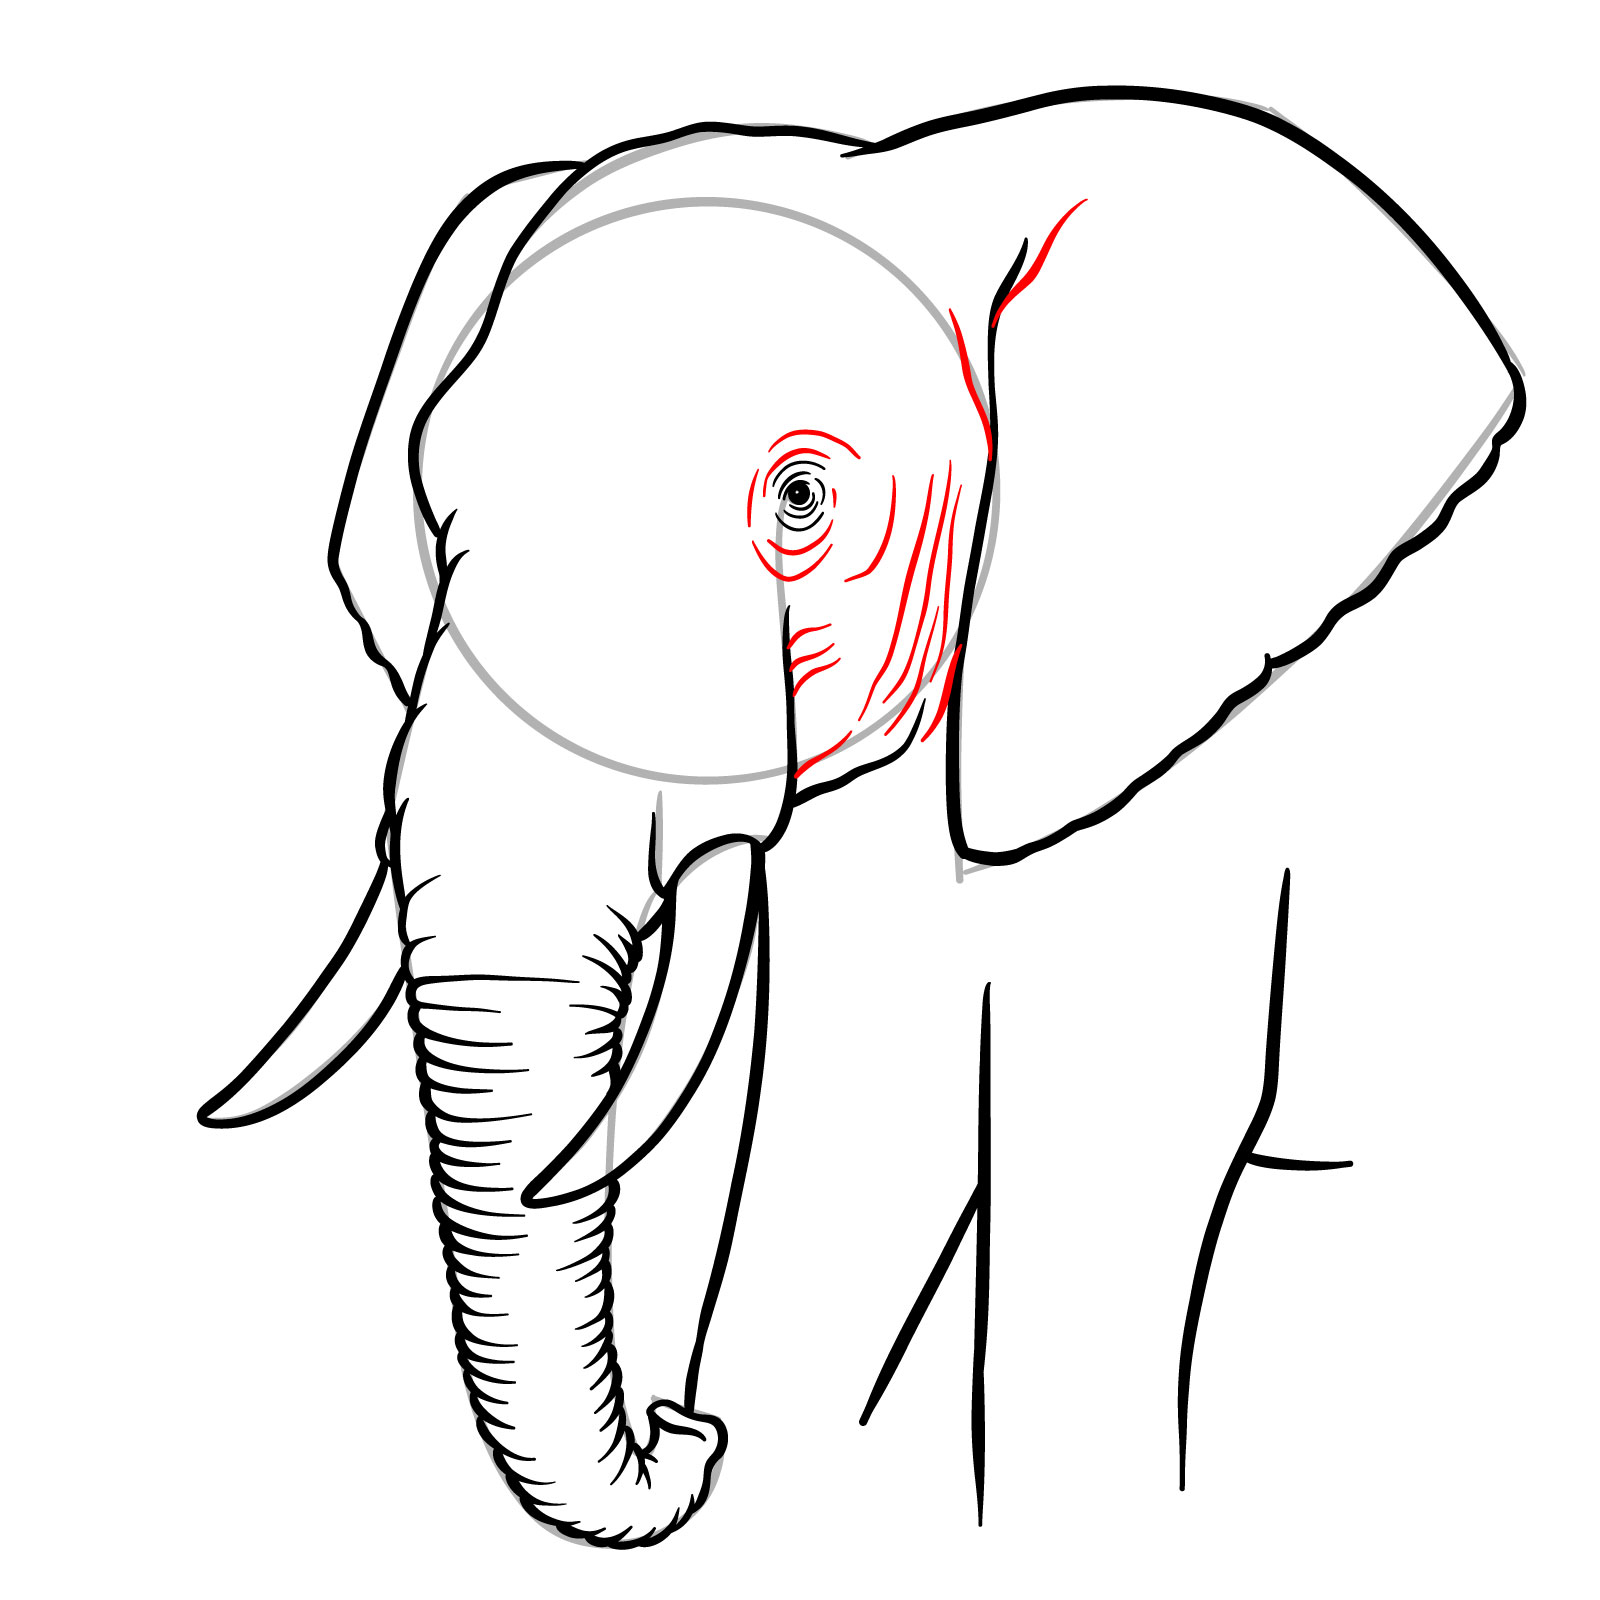
- Wrinkles around the eye and cheeks
- Broad ear shape on one side, other partially hidden
- Three-quarter view showing depth on trunk and face
If you’re practicing animals, this one pairs well with a lioness face drawing, a hippo profile, or a rhino head to explore different skull shapes and skin textures.
The Drawing Breakdown and Color Key
This 13-step African elephant drawing guide uses a simple color system that makes the construction process easier to follow:
- Red Color: shows the current line being drawn in that step
- Black Color: indicates the lines from previous steps
- Gray Color: marks the basic framework and proportions
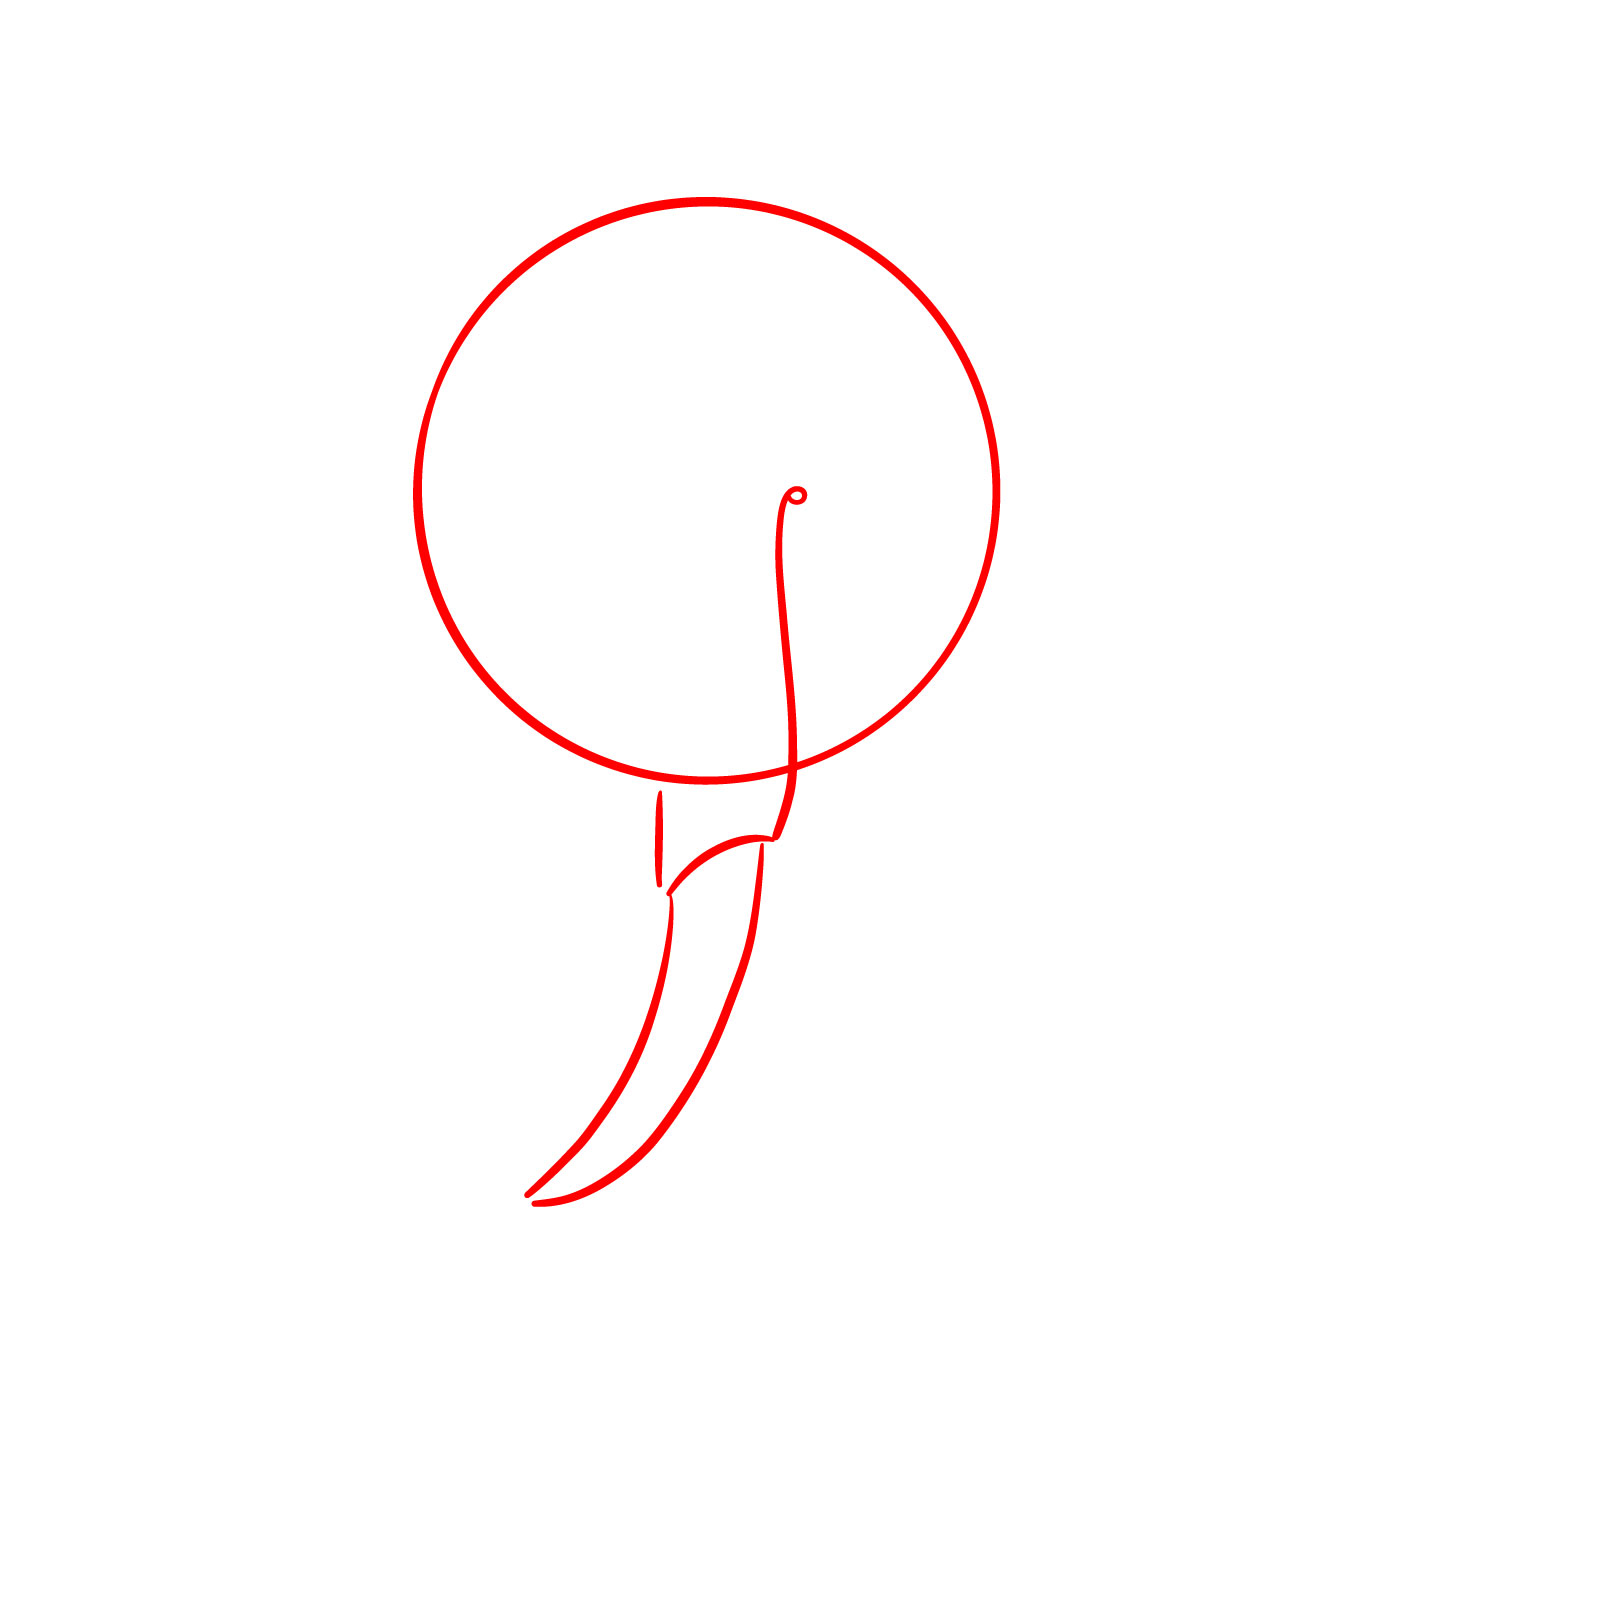
Starting with the basic shapes and positioning, we’ll build out the sketch by outlining the details, finishing with texture lines. The structure is realistic but simplified, so it’s a good exercise in learning how to sketch folds, tusk curves, and animal face proportions from a non-frontal view.


If you enjoy these guides and want to support the project, you can donate using this button:

Share your version of the African elephant in the comments under the pinned post on Pinterest. That’s usually where artists post their sketches and results.
Follow SketchOk for more drawing ideas and step-by-step tutorials:
And if you’re interested in more animal tutorials like this, I post a new video every other day over on YouTube, so feel free to follow and stay updated.