Capturing a resting dog on paper can be a great exercise in understanding body structure and relaxed postures. In this guide, I’ll show you how to draw a sleeping dog step by step, covering its curled body, soft facial expression, and the gentle flow of its fur.
To make it easier to follow, I use a color-coded system:
Red Color: Highlights the current step
Black Color: Represents previously drawn lines
Grey Color: Shows the basic sketch foundation
These colors will guide you through each stage, ensuring that your drawing progresses smoothly.
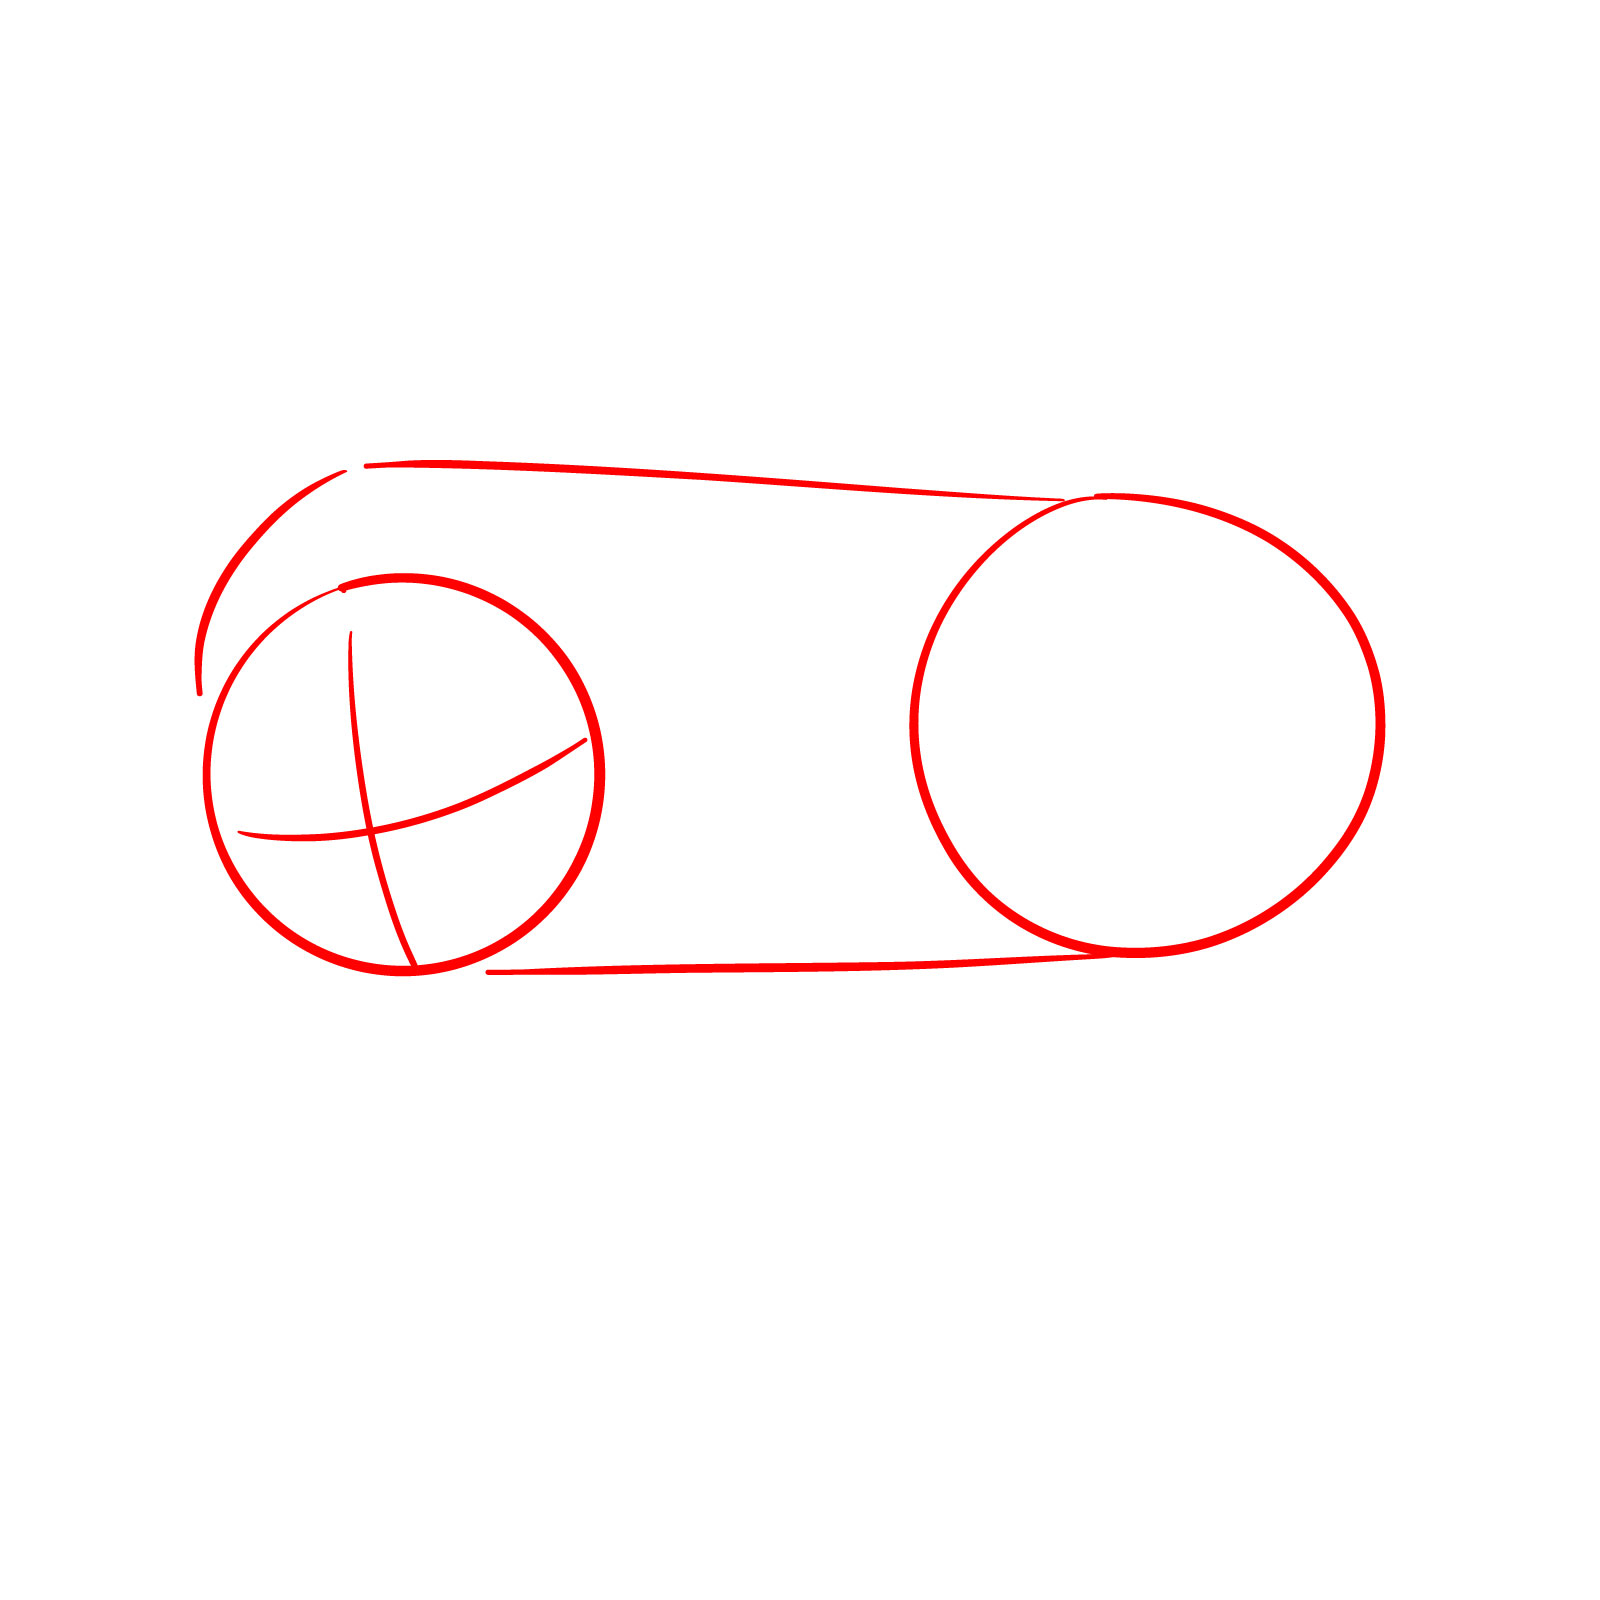
Step 1: We begin by creating a basic sketch of our sleeping dog. Start by drawing a circle for the head, with slightly curved vertical and horizontal lines to indicate its orientation. To the right of this circle, draw a larger circle to represent the back part of the body. Then, connect these circles with simple lines to outline the overall shape and proportions of the body.
Step 2: Using simple lines, indicate the general placement of the dog’s features and body parts. Sketch the position and shape of the ears, muzzle, nose, tail, and the three visible legs in the sleeping position.
Step 3: Now, draw the nose of our dog. Keep it simple by sketching a black oval, leaving a small unshaded area at the top for the highlight.
Step 4: Draw the lower part of the nose, also in black, as shown in the reference. From there, begin to form the outline of the muzzle and cheeks, and start sketching the lower half of the dog’s head.
Step 5: To the left of the horizontal line from our basic sketch, add a couple of curved lines to show the upper part of the head in this area. On the right, draw the outline of the dog’s ear.
Step 6: Since our dog is sleeping, we’ll draw closed eyes at this stage. Add a few simple lines around the eyes and muzzle to give volume and character to our sleeping dog.
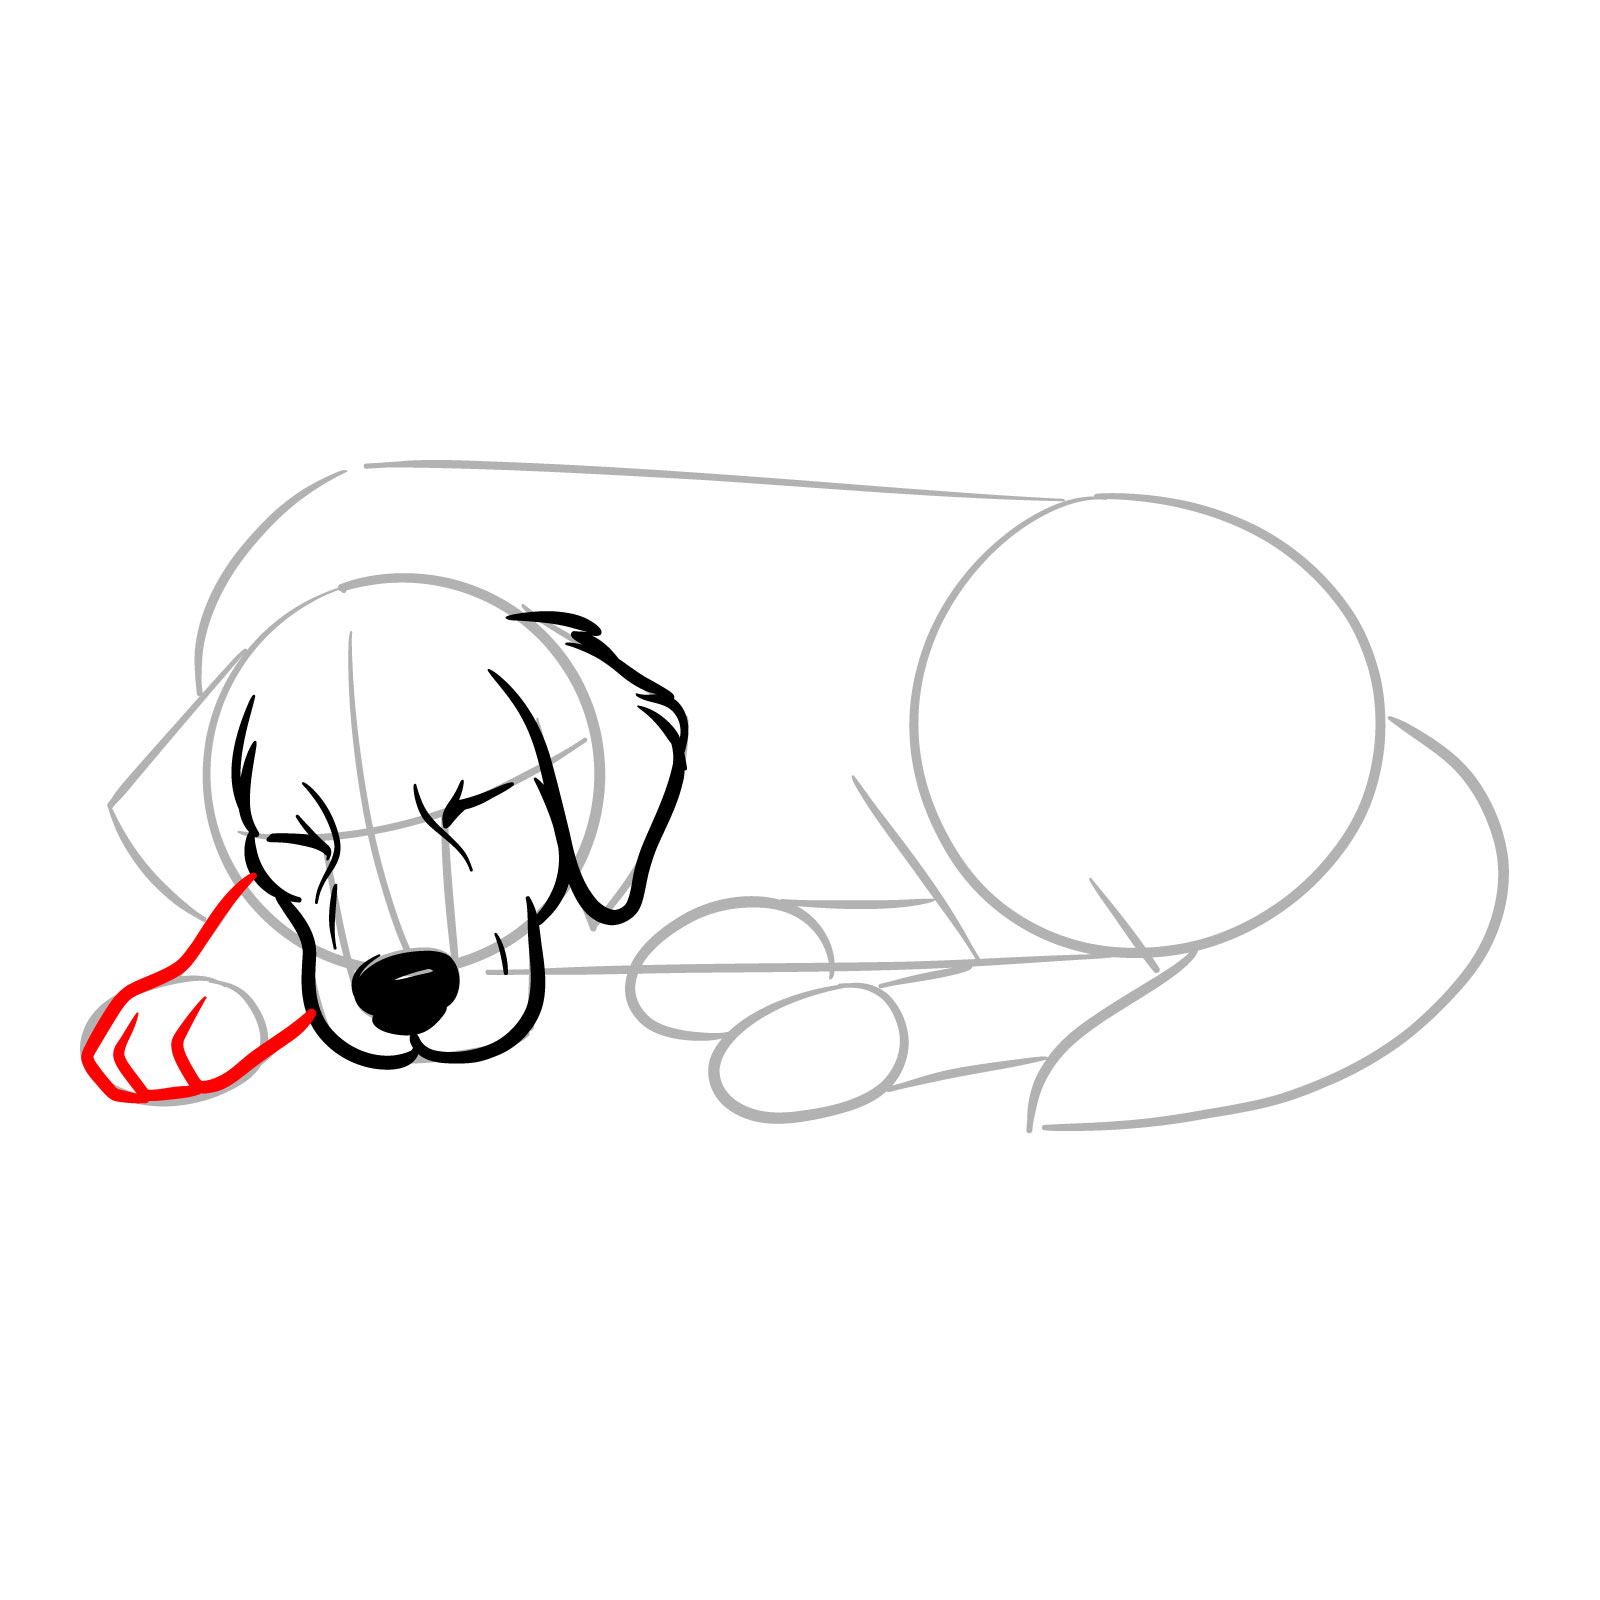
Step 7: Begin drawing the first leg, which is located to the left of the dog’s head, as the dog is partially resting its head on this leg. Outline the shape and include the divisions for the toes.
Step 8: Now draw the upper part of the head, smoothly transitioning into the outline of the ear on the left side, which we haven’t drawn yet.
Step 9: Using simple lines above the dog’s head, create the shape of the neck. Starting from the ear on the left, draw the outline of the upper body and back up to where the tail begins.
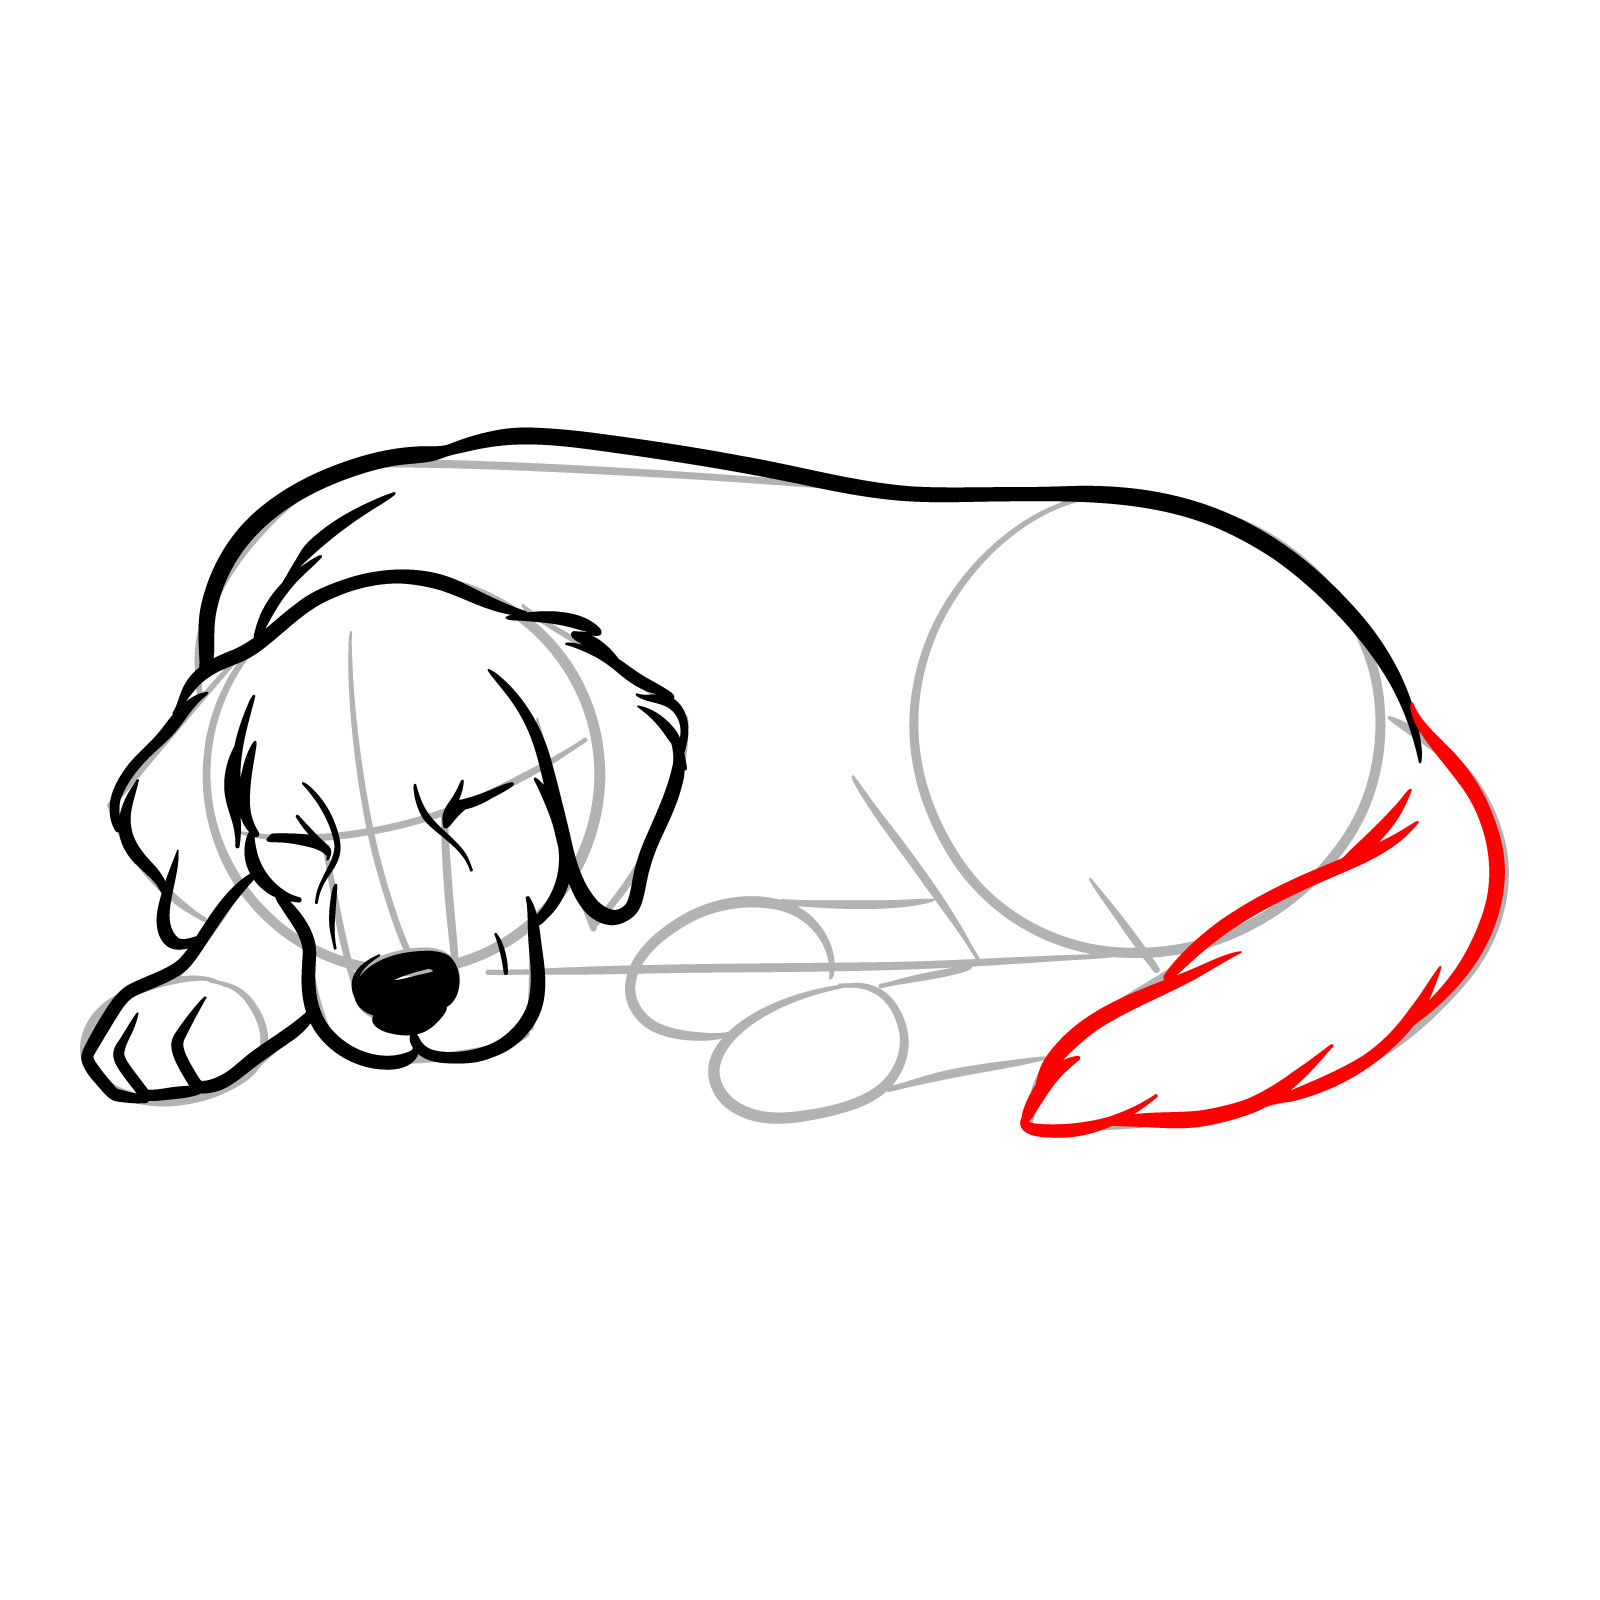
Step 10: Now, let’s add the tail.
Step 11: Draw the hind leg, positioned in a way that complements the sleeping pose. This leg is closer to us and is partially covered by the tail we drew in the previous step.
Step 12: Continue our guide on how to draw a sleeping dog by adding the visible part of the second hind leg, which is partially hidden behind the leg we drew in the previous step.
Step 13: Behind the leg we drew earlier, draw lines to indicate the beginning of the front leg that we outlined when completing the main part of the dog’s head, the leg on which the dog is resting its head.
Step 14: Add the final details to enhance realism and enrich the drawing. Include lines on the ears, head near the eyes, whisker marks on the lower left side of the muzzle, simple lines above the head near the middle of the body to show curves, lines on the legs for volume, and visible paw pads on the hind legs.
Step 15: Complete your drawing by erasing the basic sketch lines. If you’d like, you can also outline the final sketch with a pen or ink and erase the pencil lines once the ink is dry. This will give your drawing a clean, finished look.
Don't Miss New Tutorials! Follow SketchOk
I publish new step-by-step drawing guides every single day. Follow on your favorite platform so you never miss a tutorial. Thousands of artists are already drawing along and I can't wait you to join in!
On my Patreon you can grab unique hand-made coloring pages: each one drawn by me personally. Every purchase directly supports the creation of new drawing tutorials. It's the best way to practice your skills, keep the site going, and get something truly original at the same time.
The email signup form at the top of the page is the easiest way to stay current with new guides, so if you want a fresh batch of drawing ideas delivered weekly, that’s the place to go. Now that you know how to draw a Sleeping Dog with Soft and Relaxed Features, you might want to try a few more dog poses from the Dogs series to keep the practice going. The SketchOk Pinterest page is also worth a look, since readers drop their finished drawings in the comments there.
Disclaimer: All original artworks and photos used as references for the creation of these drawing tutorials are the property of their respective owners. If your work has been featured without proper credit, please kindly leave a comment below, and the issue will be promptly addressed. We greatly appreciate your exceptional art. Thank you.
4 thoughts on “How to Draw a Sleeping Dog with Soft and Relaxed Features”
Hello Ilnur! Can you do tutorials for Dominic “Dom” Baker, Benicio “Beni” Turner, Kyle Thompson, Mark Sullivan and Jared Armstong from Coastline Chronicles?


Hello Ilnur! Can you do tutorials for Dominic “Dom” Baker, Benicio “Beni” Turner, Kyle Thompson, Mark Sullivan and Jared Armstong from Coastline Chronicles?
https://pbs.twimg.com/media/GZoe6QgXkAIe-a8?format=jpg&name=4096×4096
Hey Drawing Fan, sorry for the late response! Sure, I’ve already added these characters to my list.
thank you for letting me draw
Sure, thank you for the comment!