Hello everyone! Drawing lions can be a challenge, and I would be honored to guide you through it. In this tutorial, I’m going to walk you through 14 step-by-step guides on how to draw realistic lions, each unraveling a different style and pose. These are male lions, there will be a separate tutorial for lionesses soon. This tutorial is huge, almost as the one for cats.
We start with what I like to call a warmup – drawing a semi-realistic lion in a standing pose viewed from a 3/4 angle. This exercise eases us into the intricate world of lion drawing without overwhelming us with too many details. Next, we’ll shift our focus to the lion’s face, seen from the front. The third guide takes us to a side view of the lion’s head, a classic angle that portrays the majesty of its profile.
As we progress, each guide brings a new challenge. We’ll explore various poses like a lion standing in a side view, then in a 3/4 view with its head turned away, and another with its head looking forward. Capturing movement is crucial too, so we’ll sketch a walking lion in 3/4 and front views, and a side view of it running.
The tranquility of lions also deserves attention. We’ll draw a lion sitting from the back, lying down, and a peaceful scene of a sleeping lion. The grand finale? A dynamic sketch of a lion in action – either hunting or in a fight pose (you decide).
Throughout this tutorial, I’ll sprinkle in handy tips to help you perfect your lion sketches, whether you’re aiming for a simple outline or a more detailed, realistic lion sketch.
Before we dive into the wild world of lion drawing, scroll the table of contents down and check the paragraph on the guides structure on how everything works. If you’re not new to SketchOk, then simply choose the desired angle and pose from the list below!
Each guide is built with a series of images. Picture them as visual stepping stones. Each image represents a step in the drawing process. As you follow these steps sequentially, a picture gradually emerges from the paper, growing more defined with each stage.
Each guide uses a color-coding system to keep you on track. Let’s break it down:
Red Color: Highlights the current step you should focus on. It’s like a beacon, guiding your pencil where it needs to go next.
Black Color: Outlines the lines you’ve already drawn. It’s your trail of breadcrumbs, showing you where you’ve been.
Grey Color: Displays the basic sketch. Think of it as the skeleton of your lion, the foundation upon which you’ll build.
The first part is about laying down this basic sketch. You start by drawing simple lines and shapes to form the lion’s basic shape and posture.
When you reach the final stage, you have the option to ink your sketch. Inking involves going over your pencil lines with a pen or marker, giving your lion a bold, definitive outline. Patience is key here; wait for the ink to dry completely. Rushing might smudge your masterpiece. Once the ink is dry, you can gently erase the underlying pencil marks. This leaves you with a crisp, clean drawing.
Now, you’re equipped with the needed knowledge, so let’s start!
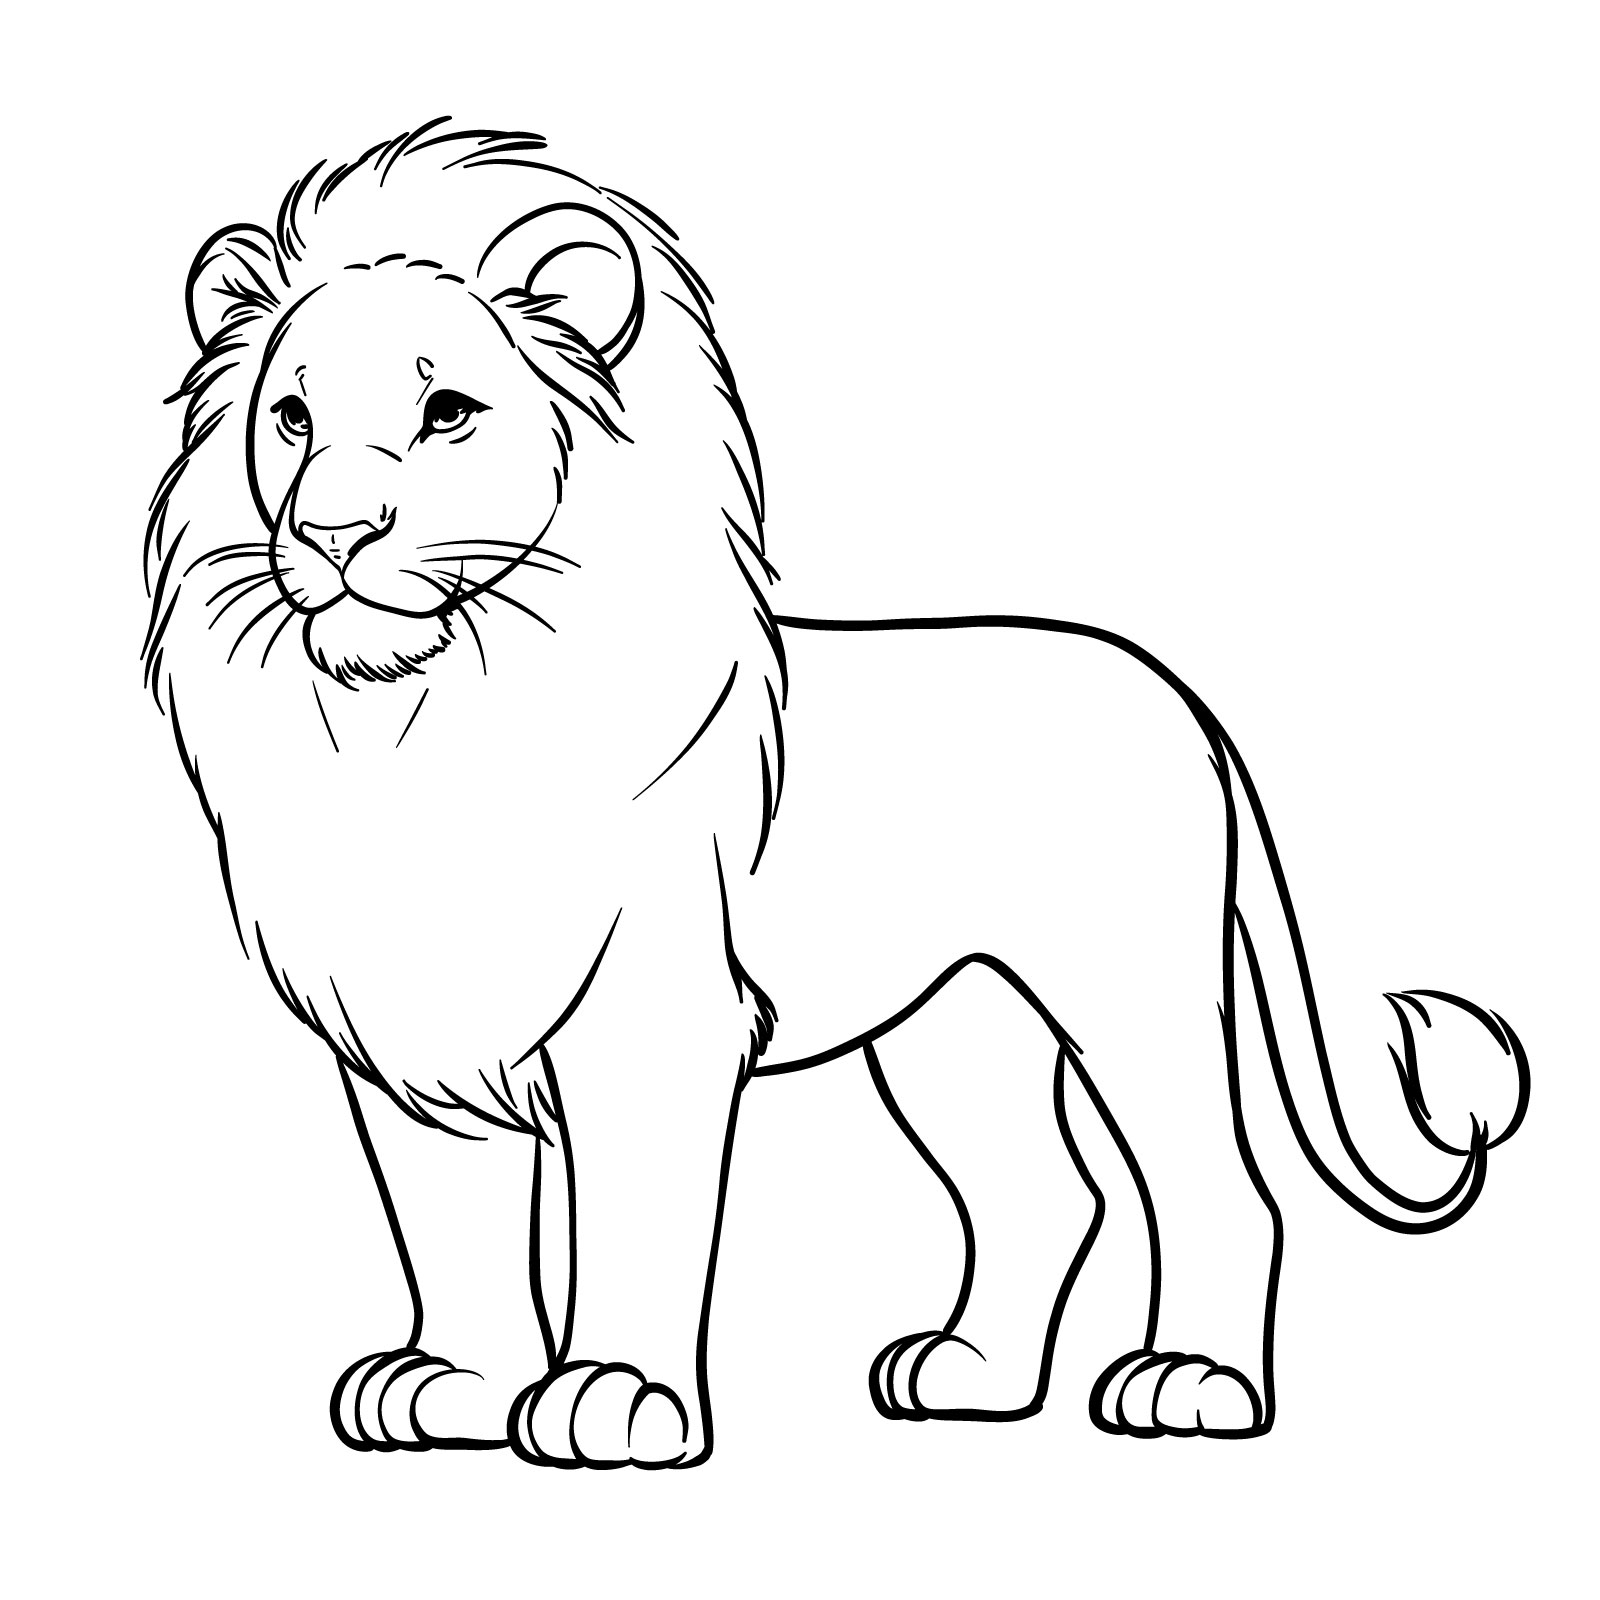
Guide 1: Simplified Lion Drawing
Easy realistic lion drawing
This first sketch is all about keeping things simple and enjoyable. We’re focusing more on getting that pose right and nailing the basic structure, rather than getting bogged down in the tiny details of the lion’s face or fur. In this guide, I’ll walk you through 13 steps. Each one builds on the last, making sure that by the time you’re done, you’ll have a solid grasp of how to sketch out a lion’s form.
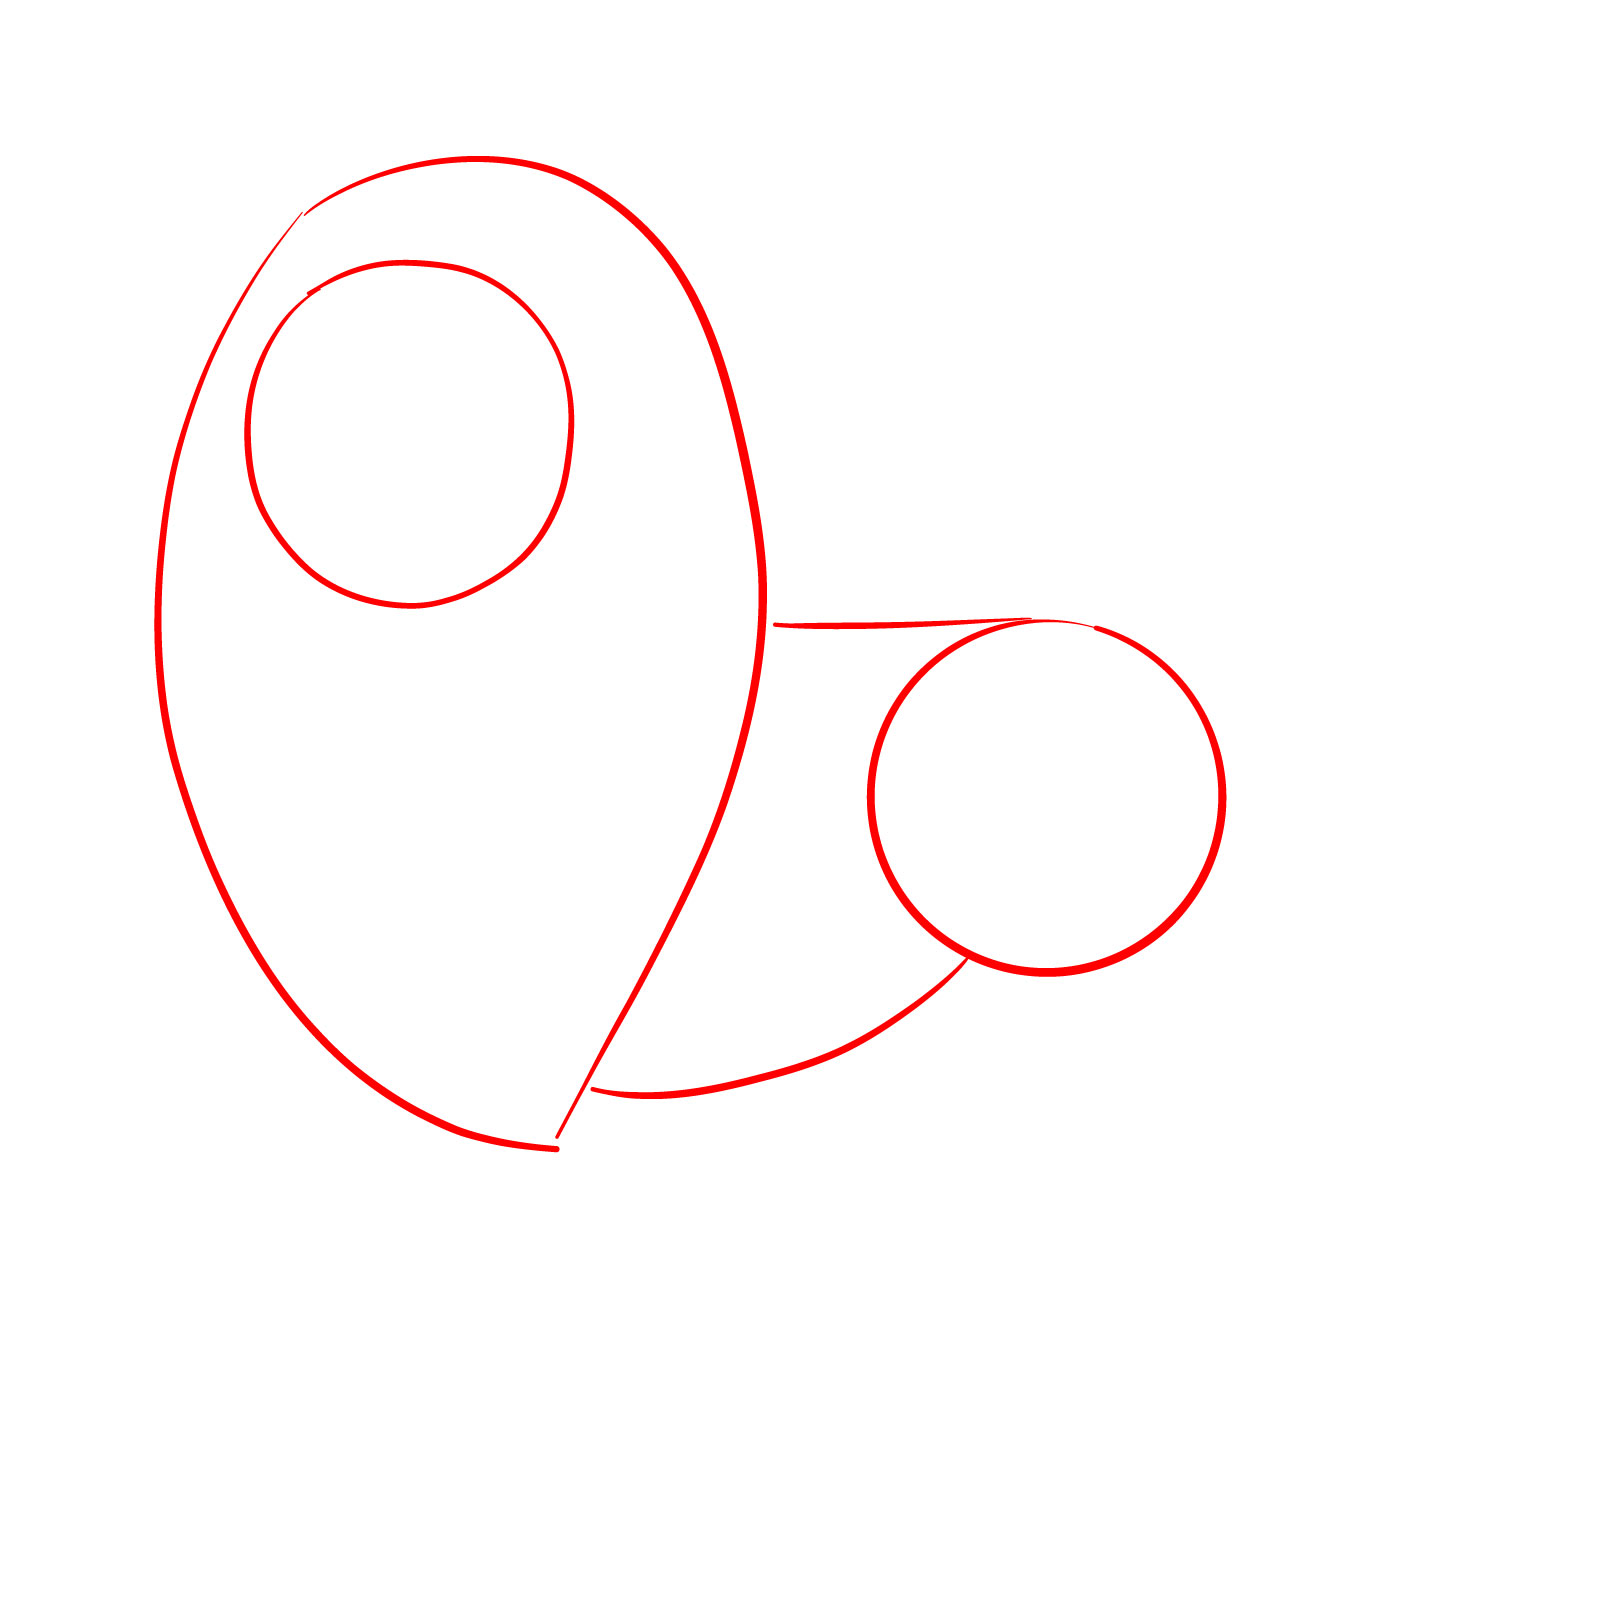
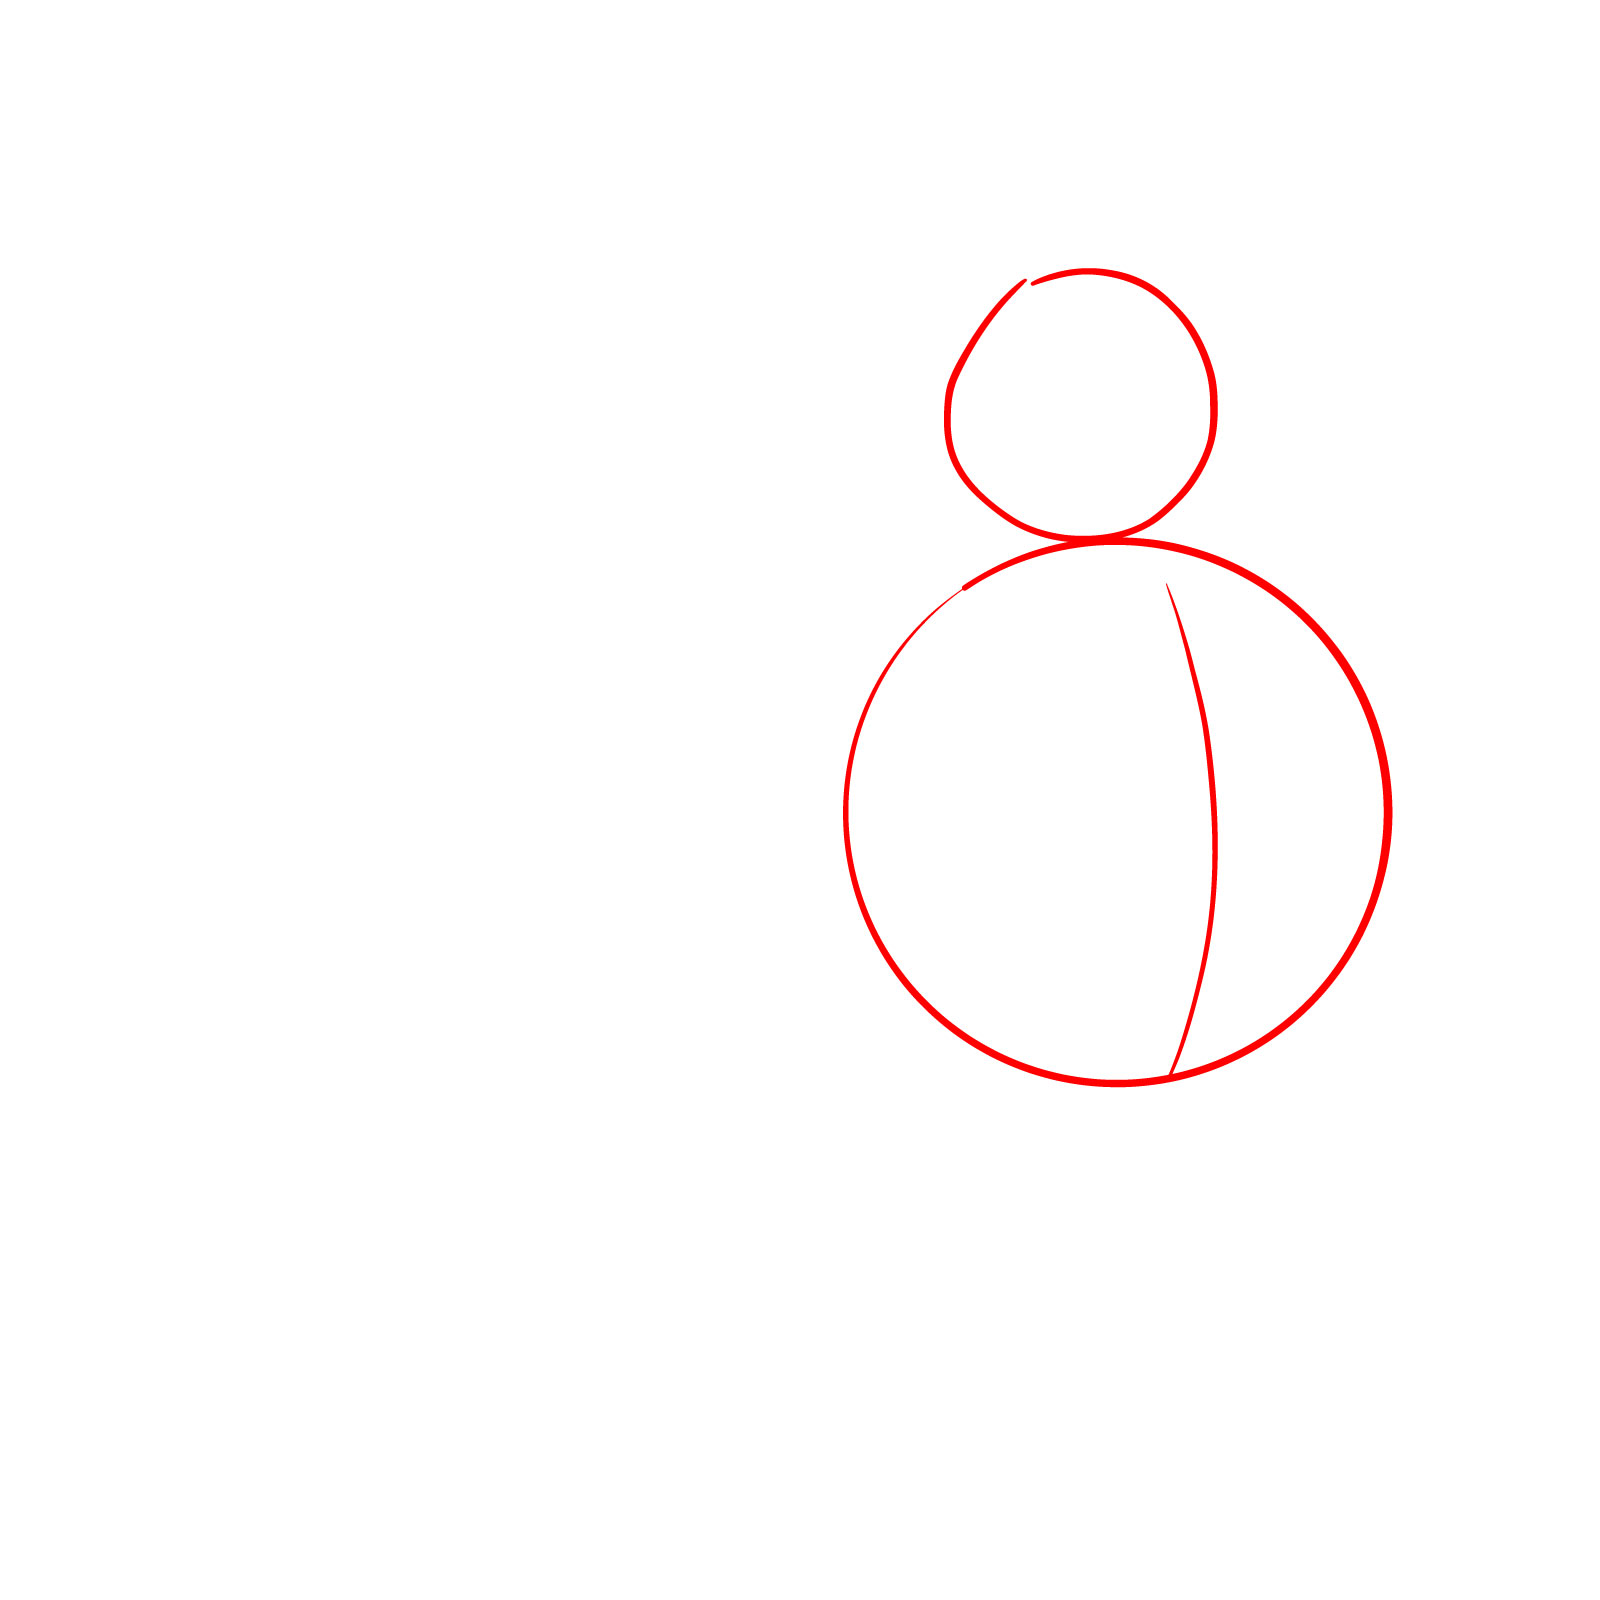
Step 01 – Begin by drawing a large drop-like shape for the mane, a smaller circle within it for the base of the head, another larger circle for the rear body, and two lines to connect the mane shape to the rear body circle.
Starting the easy lion drawing with basic shapes for body and head
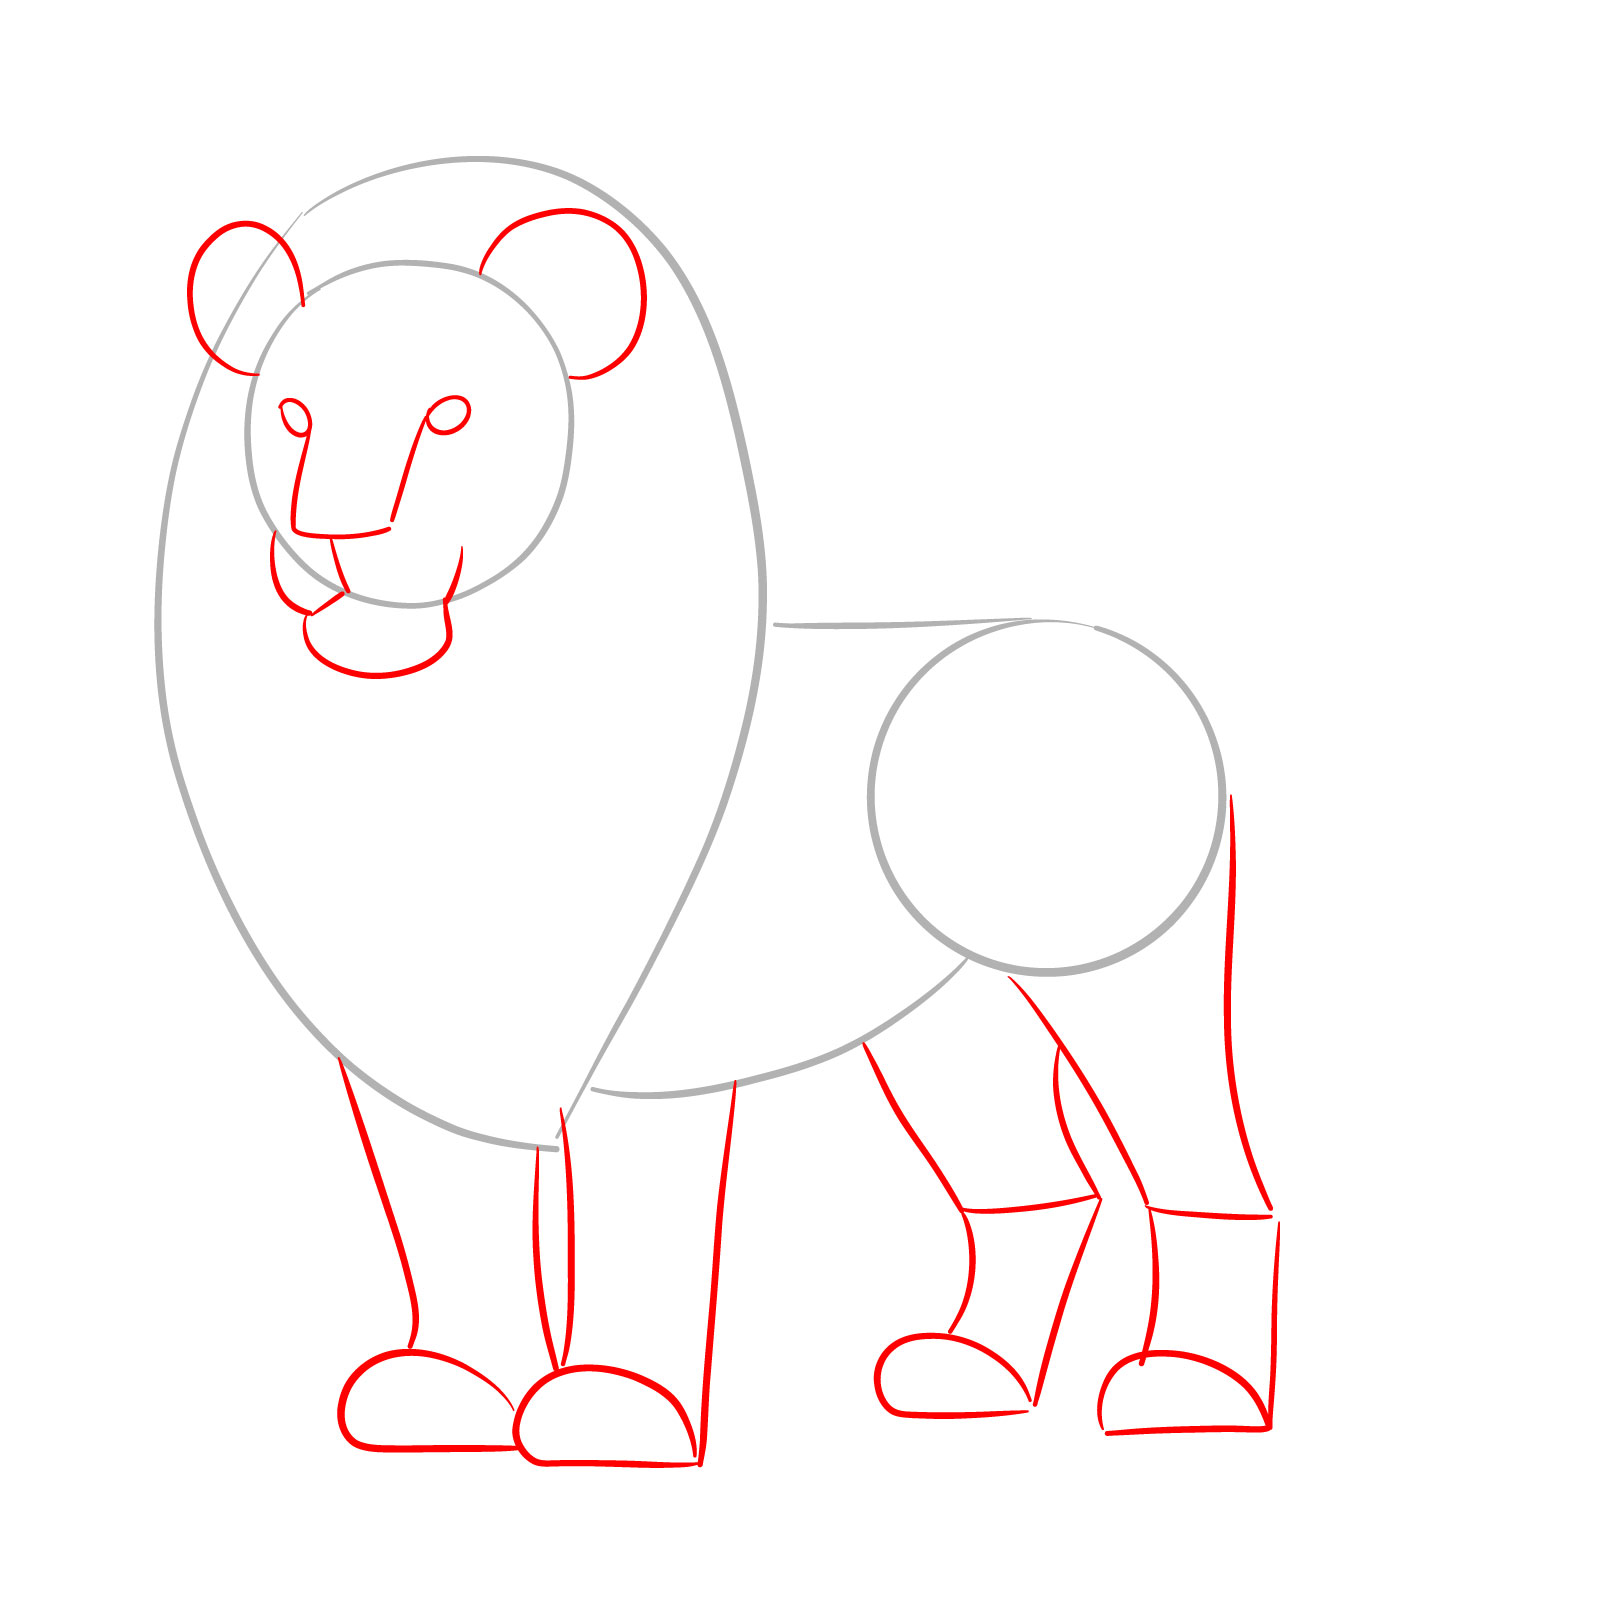
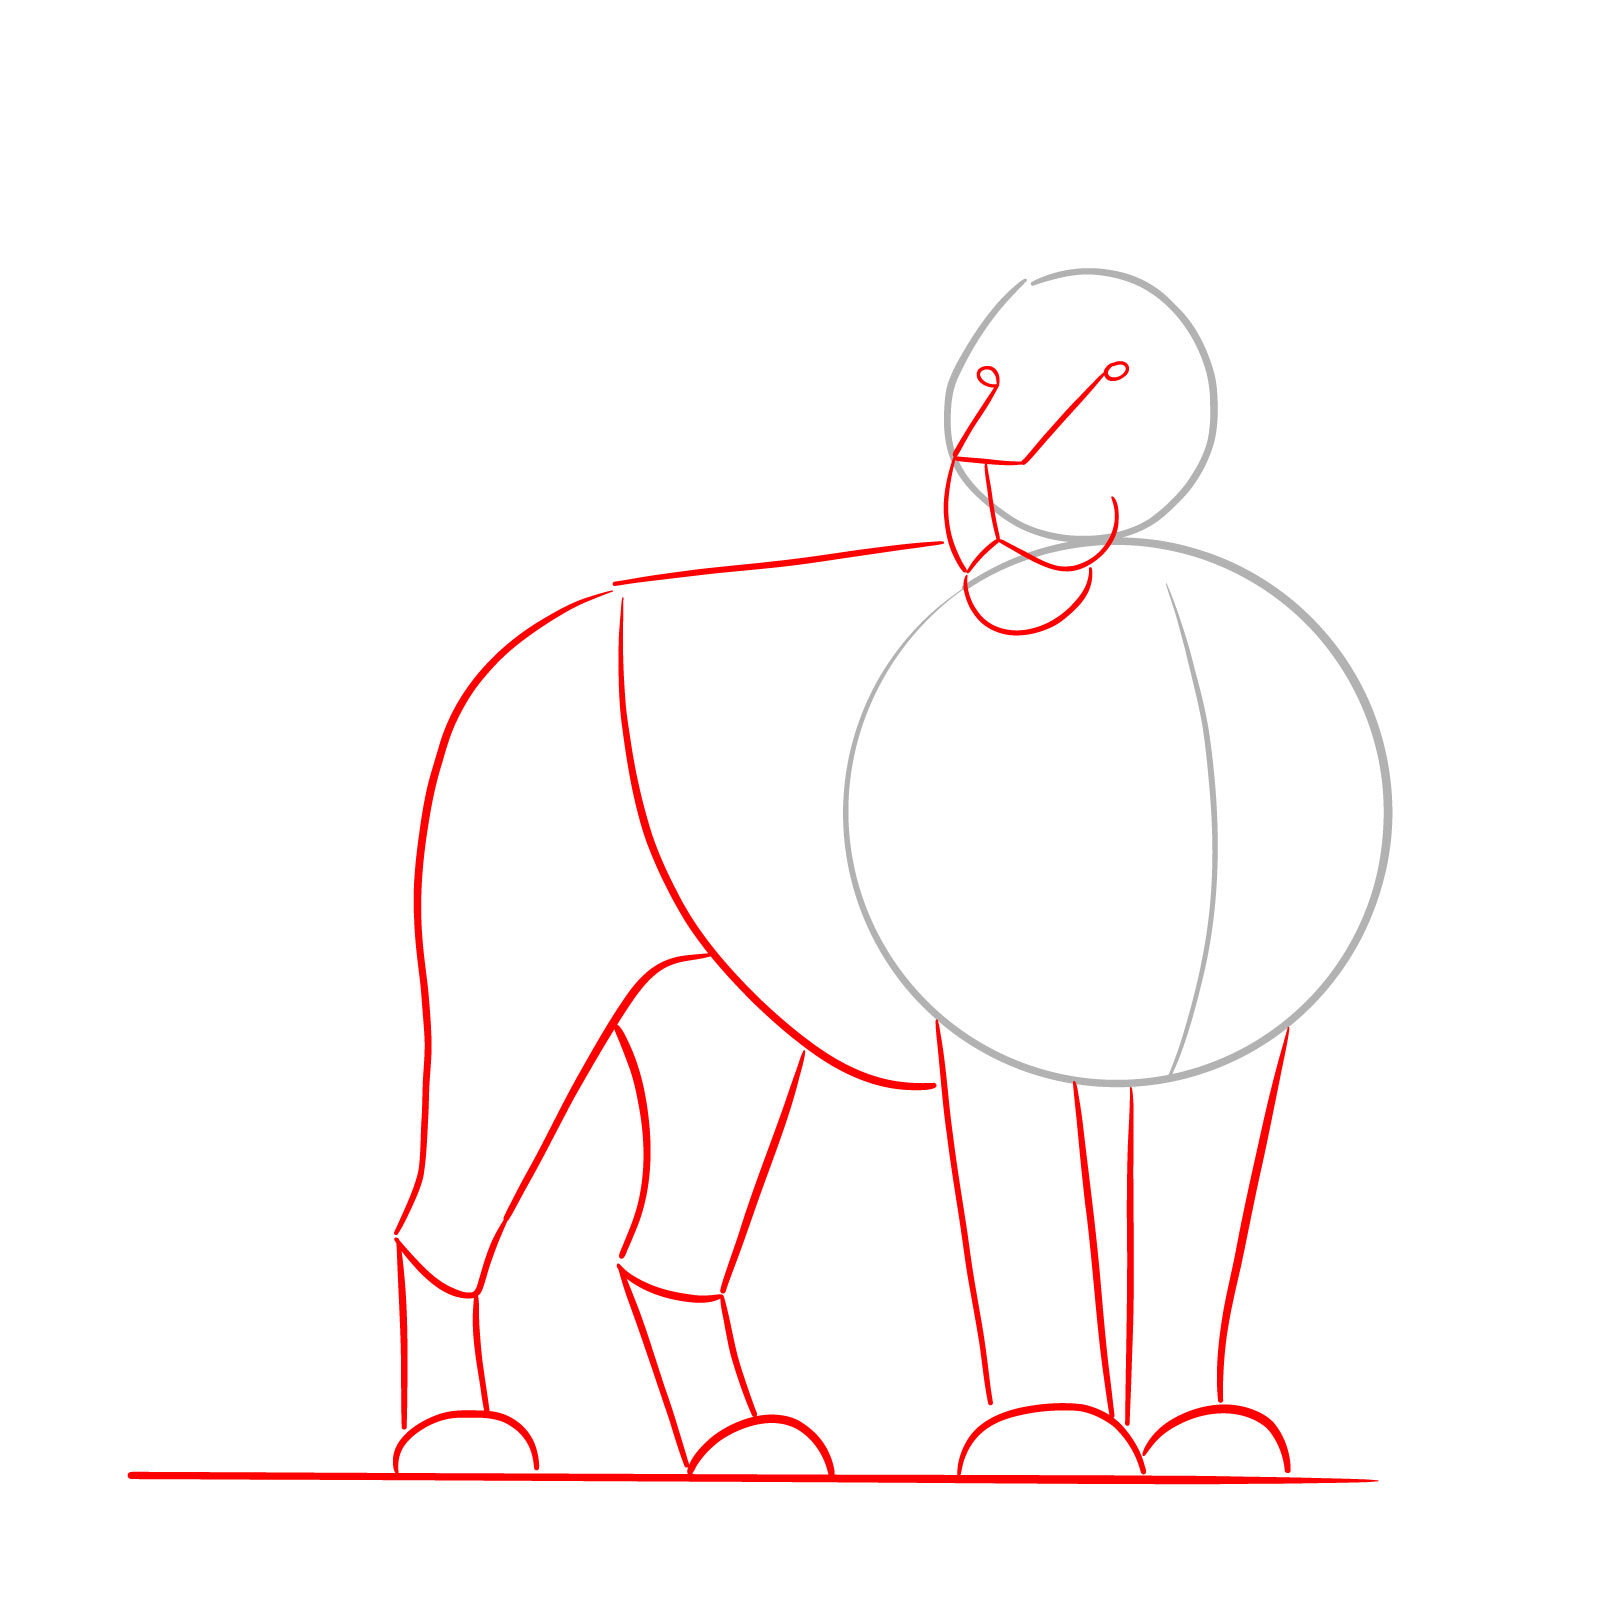
Step 02 – For the second step, draw a U shape with small circles at each end to create the nose and space for the eyes, similar to the approach used for wolf sketches. Add circular shapes for the ears and rough shapes for the front and back legs to outline the lion’s limbs.
Shapes for legs and face
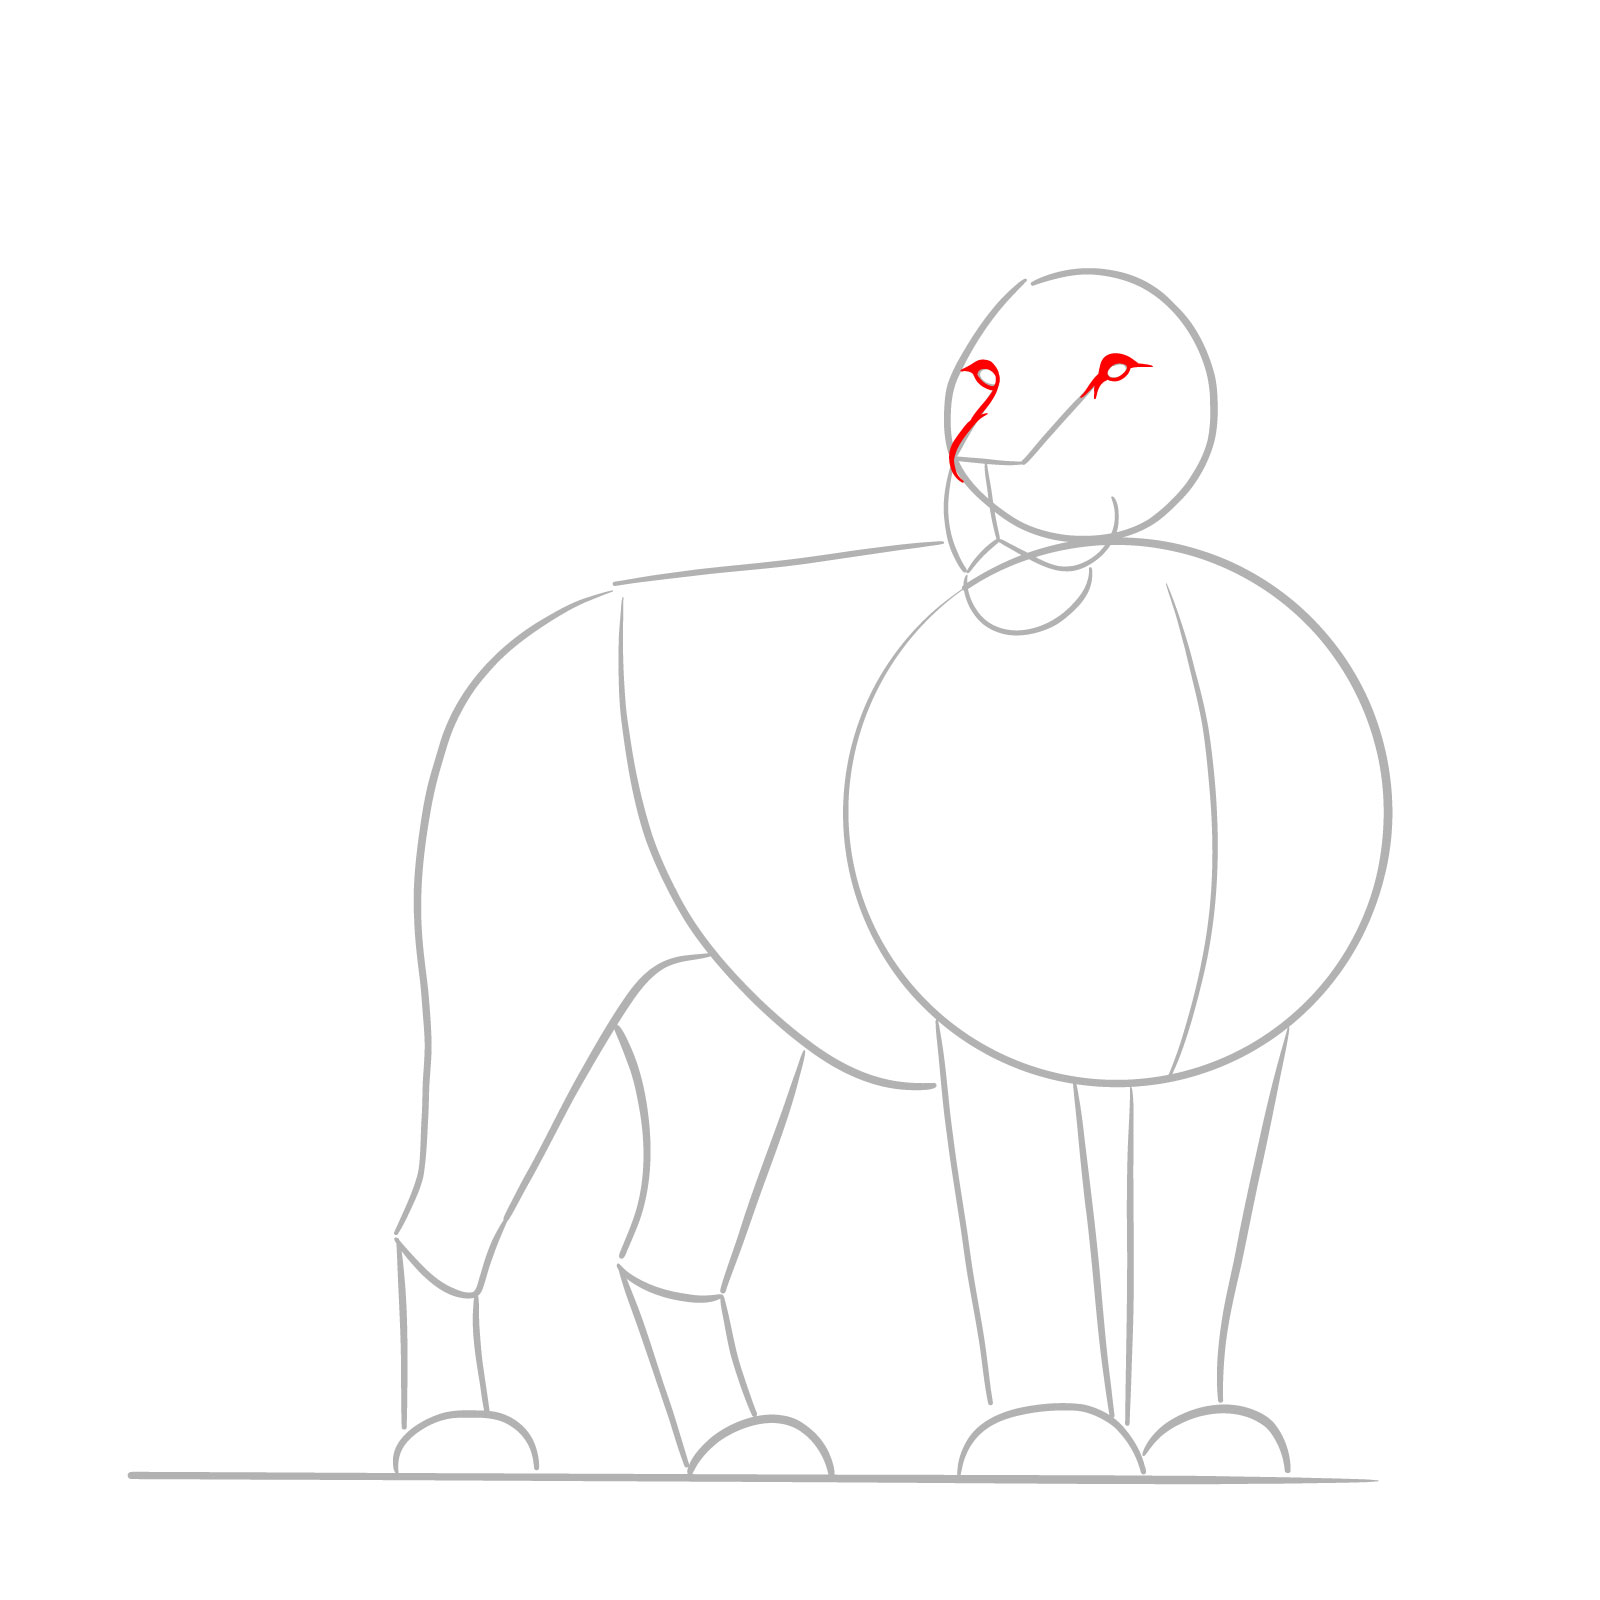
Step 03 – In this step, focus on the face by outlining the shapes for the eyes and defining the upper part of the muzzle. Ensure these lines are curved to reflect the lion’s facial structure
Refining the lion’s gaze and muzzle
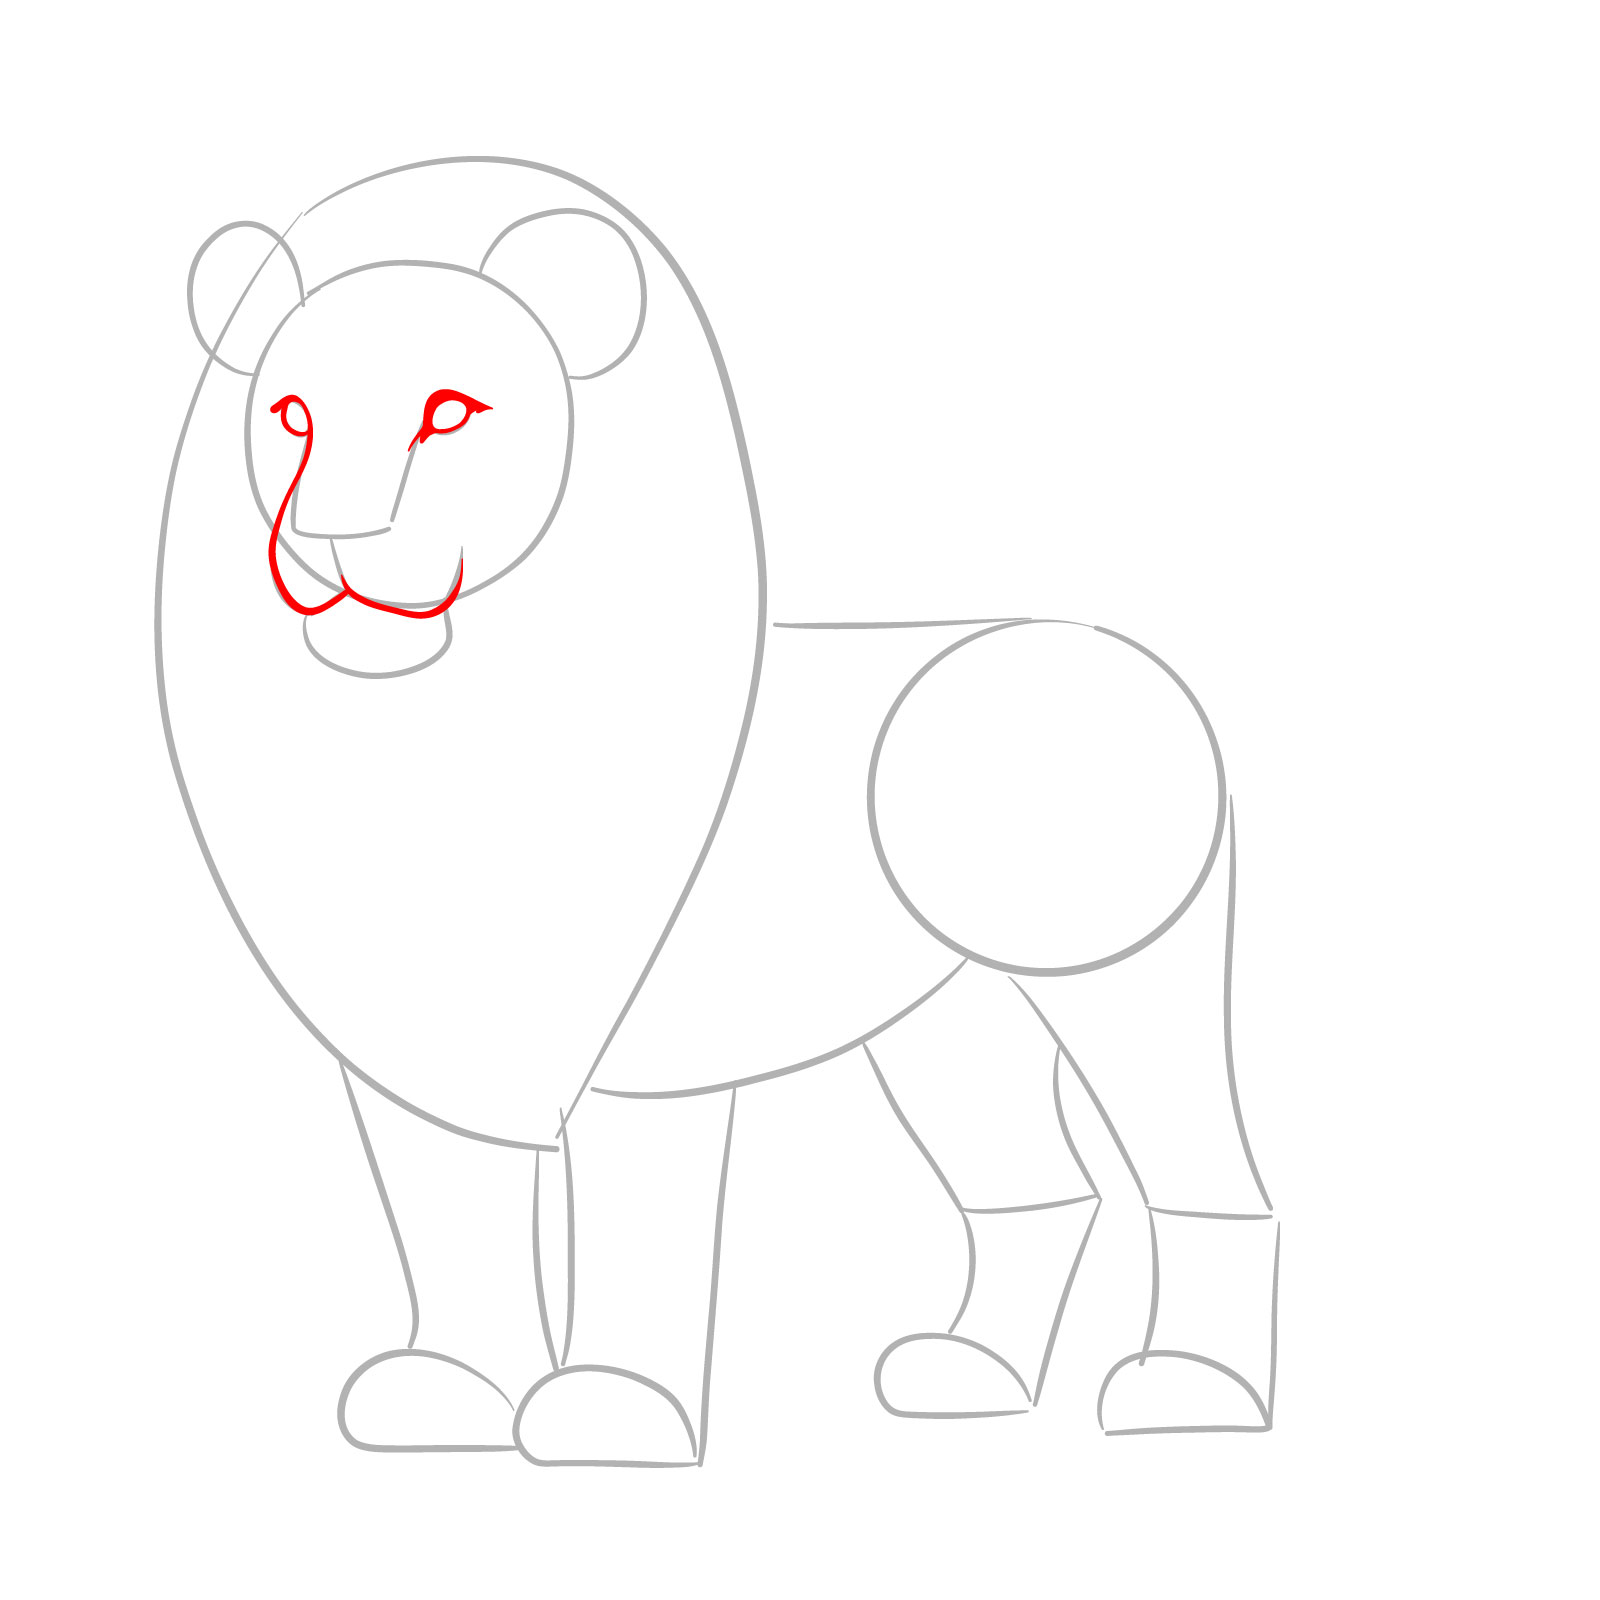
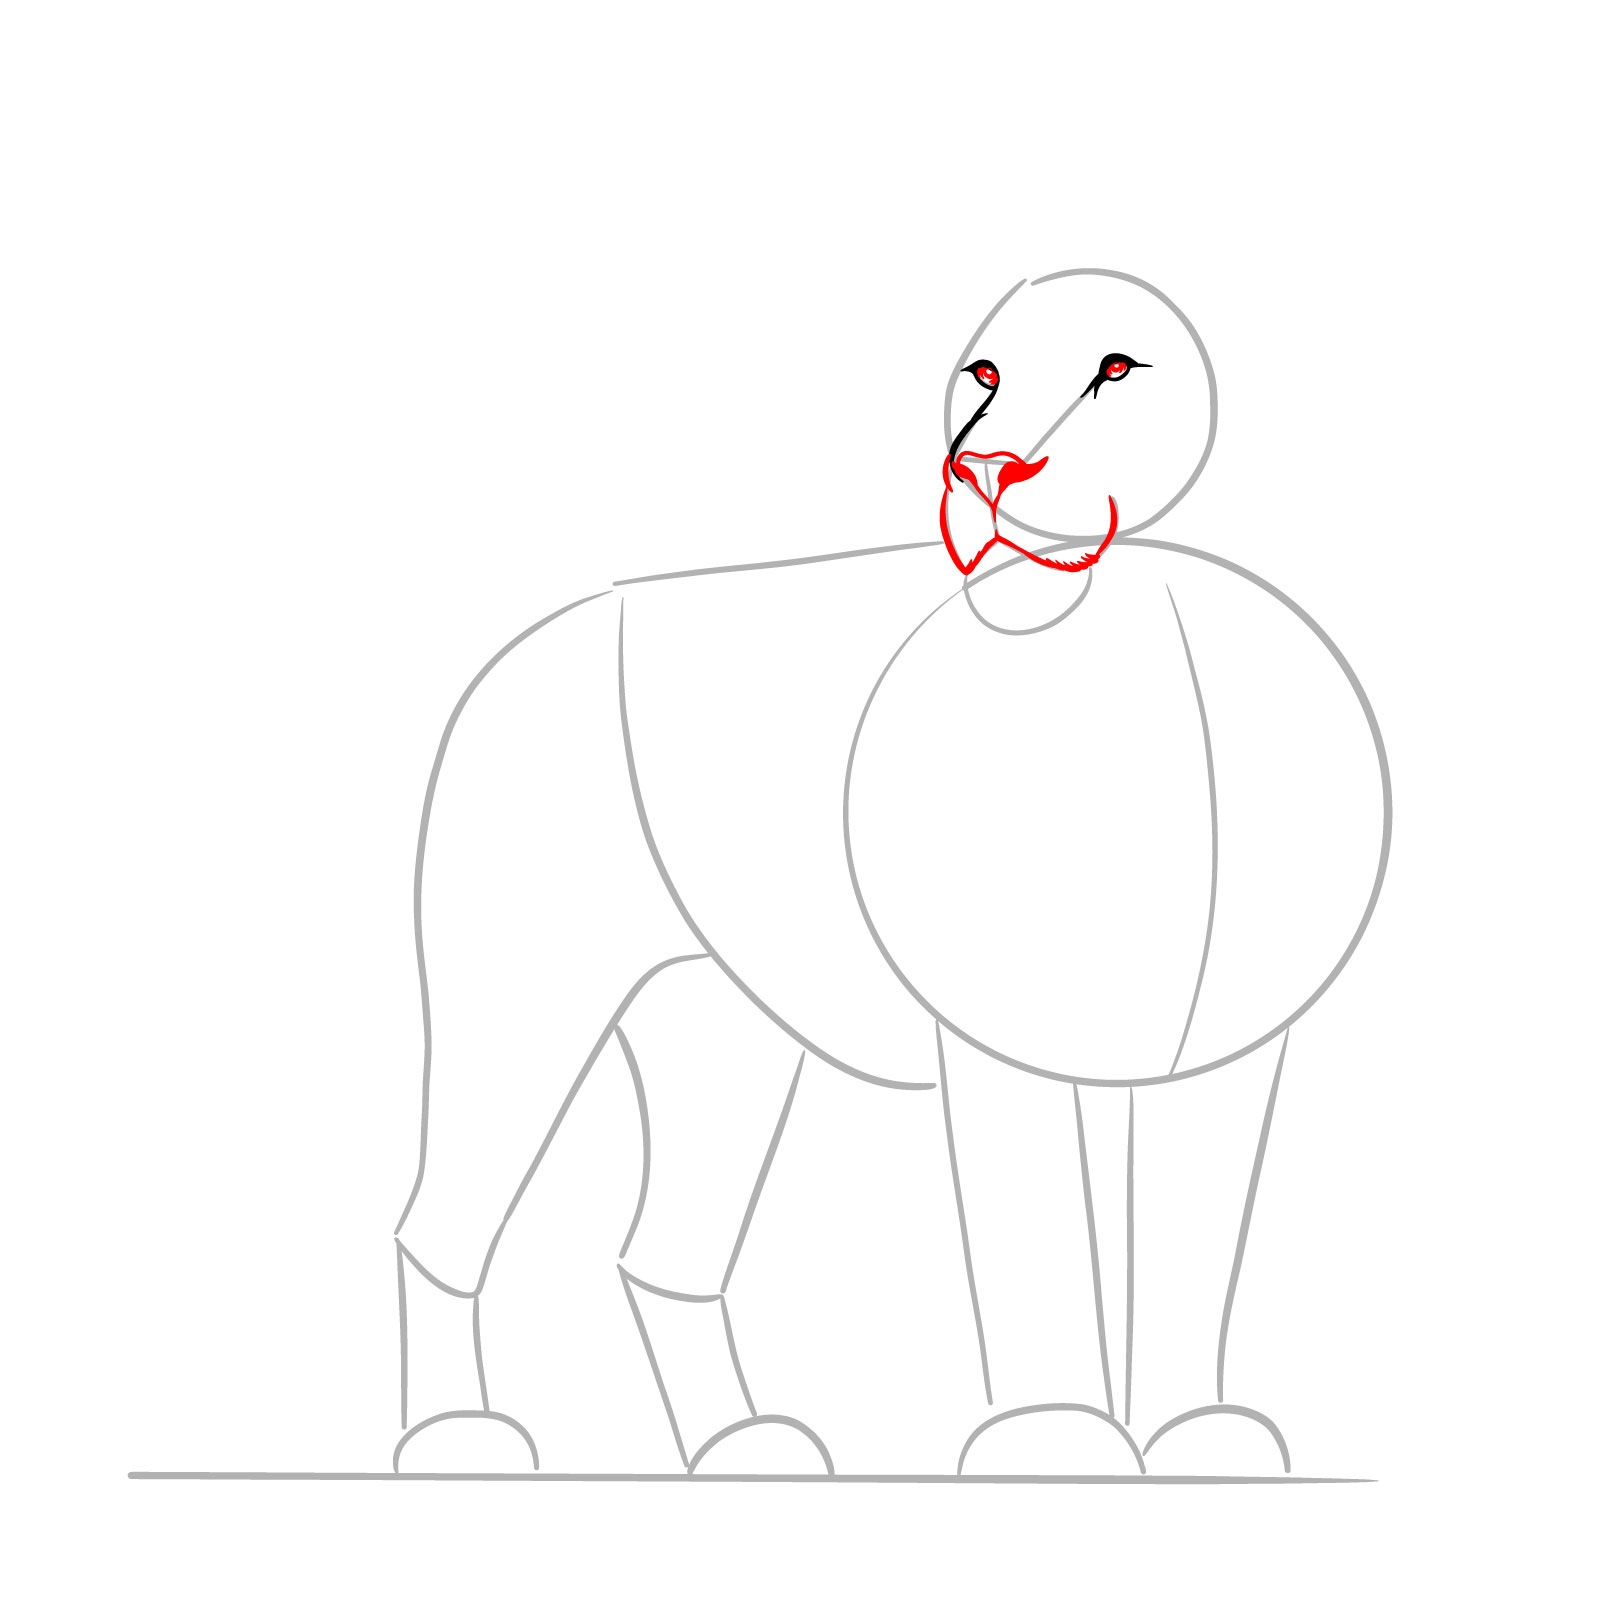
Step 04 – Now, draw the lion’s nose at the bottom of the U shape and fill in the eyes, leaving small blank spaces for Highlights
Enhancing the facial features with the nose and eyes
Step 05 – Create the chin below the nose using short lines and draw the contours that frame the lion’s face, connecting the bottom of the ears to the chin
Shaping the lion’s chin and face frame
Step 06 – Add whiskers extending from the muzzle and small lines inside the ears to suggest fur. Enhance the face with additional details in the nose and eyes area
Adding whiskers and fur details
Step 07 – Finalize the face by drawing the lion’s ears, using the initial lines as guides to form the inner and outer ear shapes
Finishing the head with ears
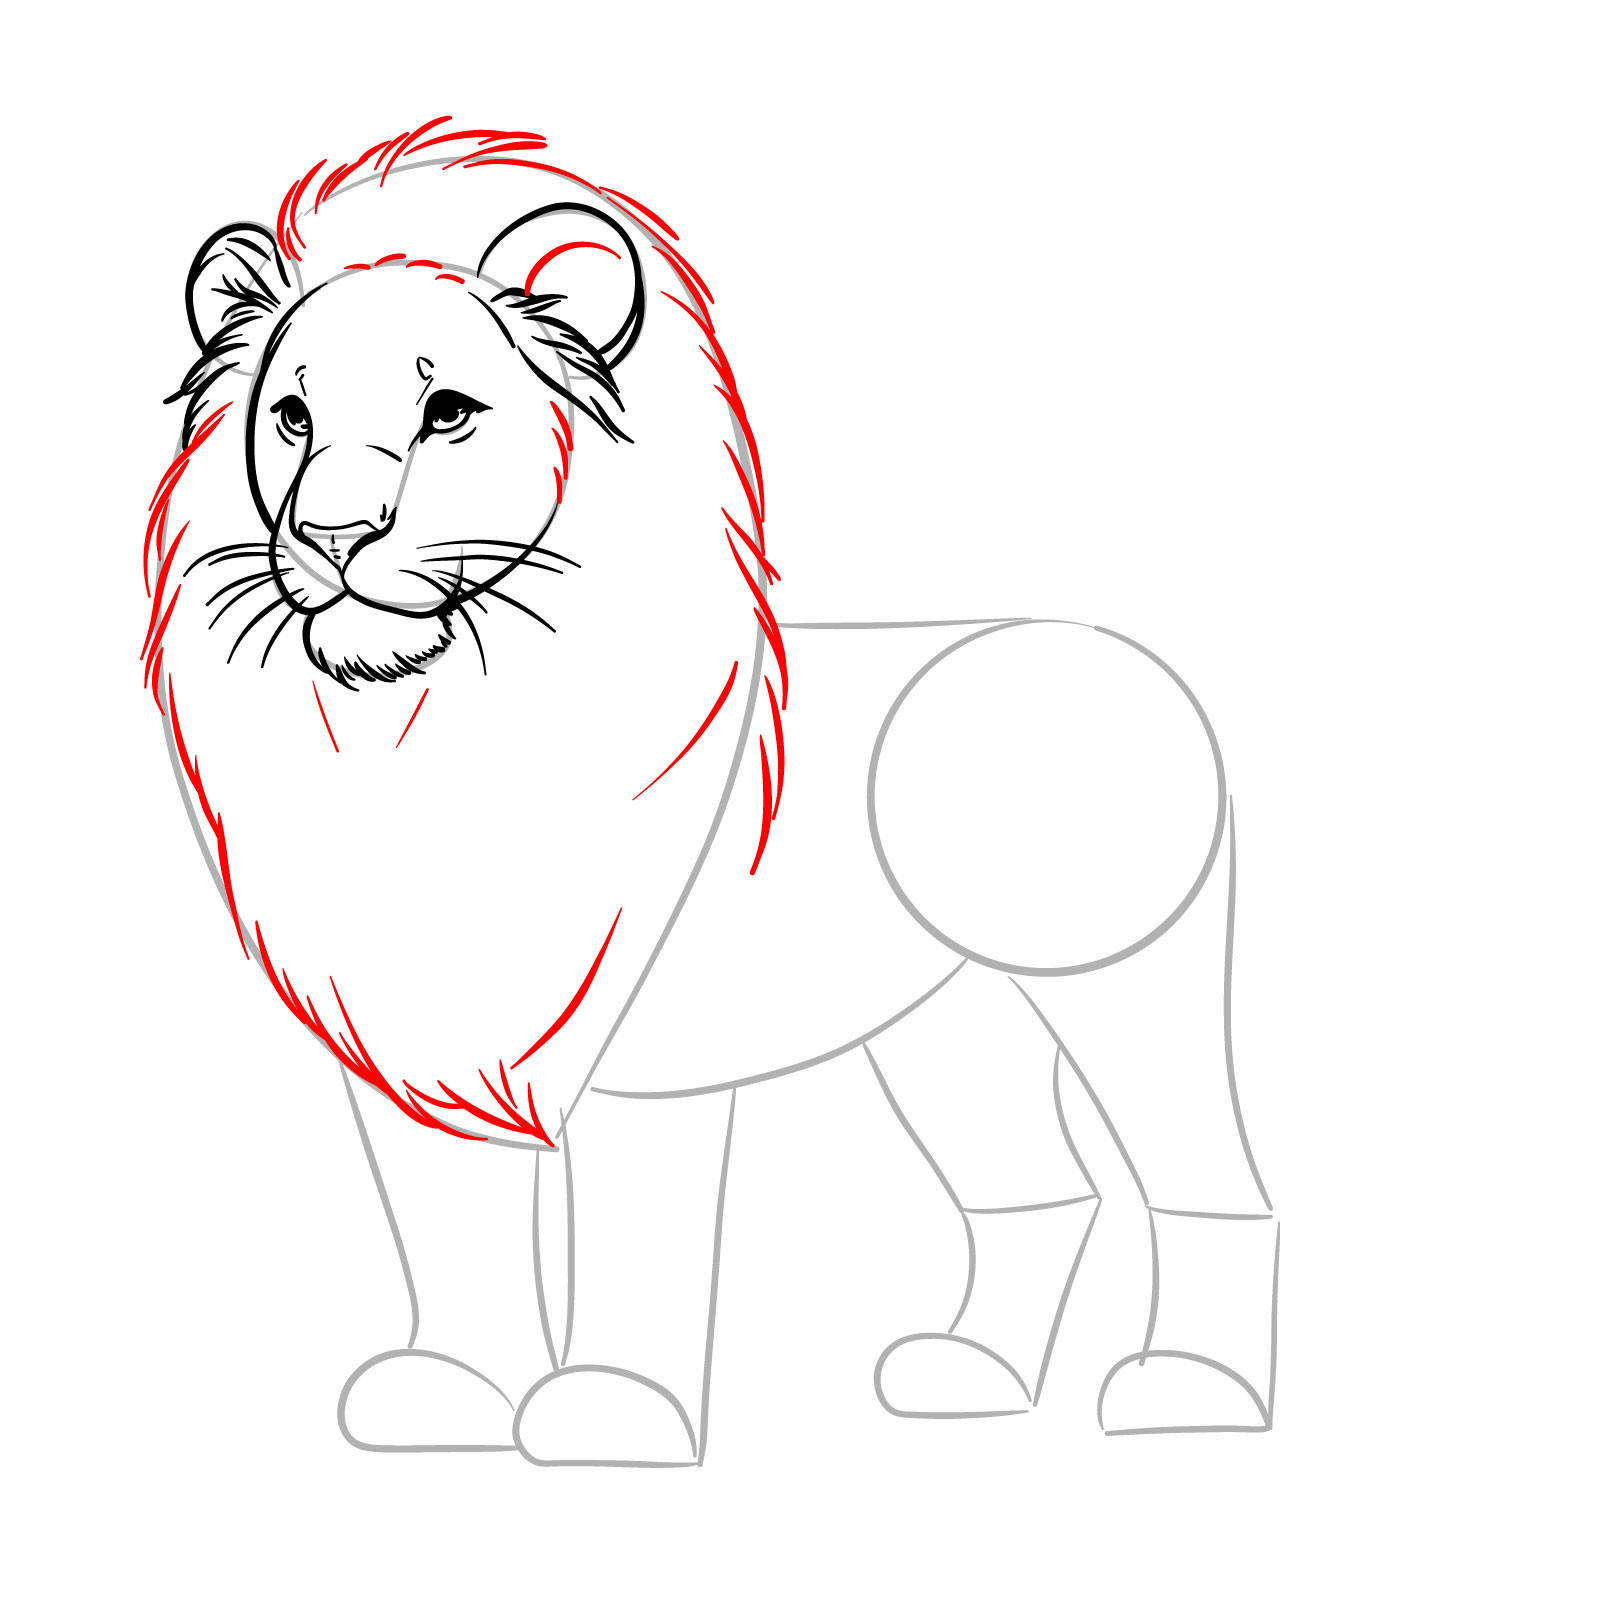
Step 08 – Add texture to the lion’s mane by drawing short strokes around the head, neck and chest area. These strokes mimic the flow and layering of the mane’s fur
Creating the mane
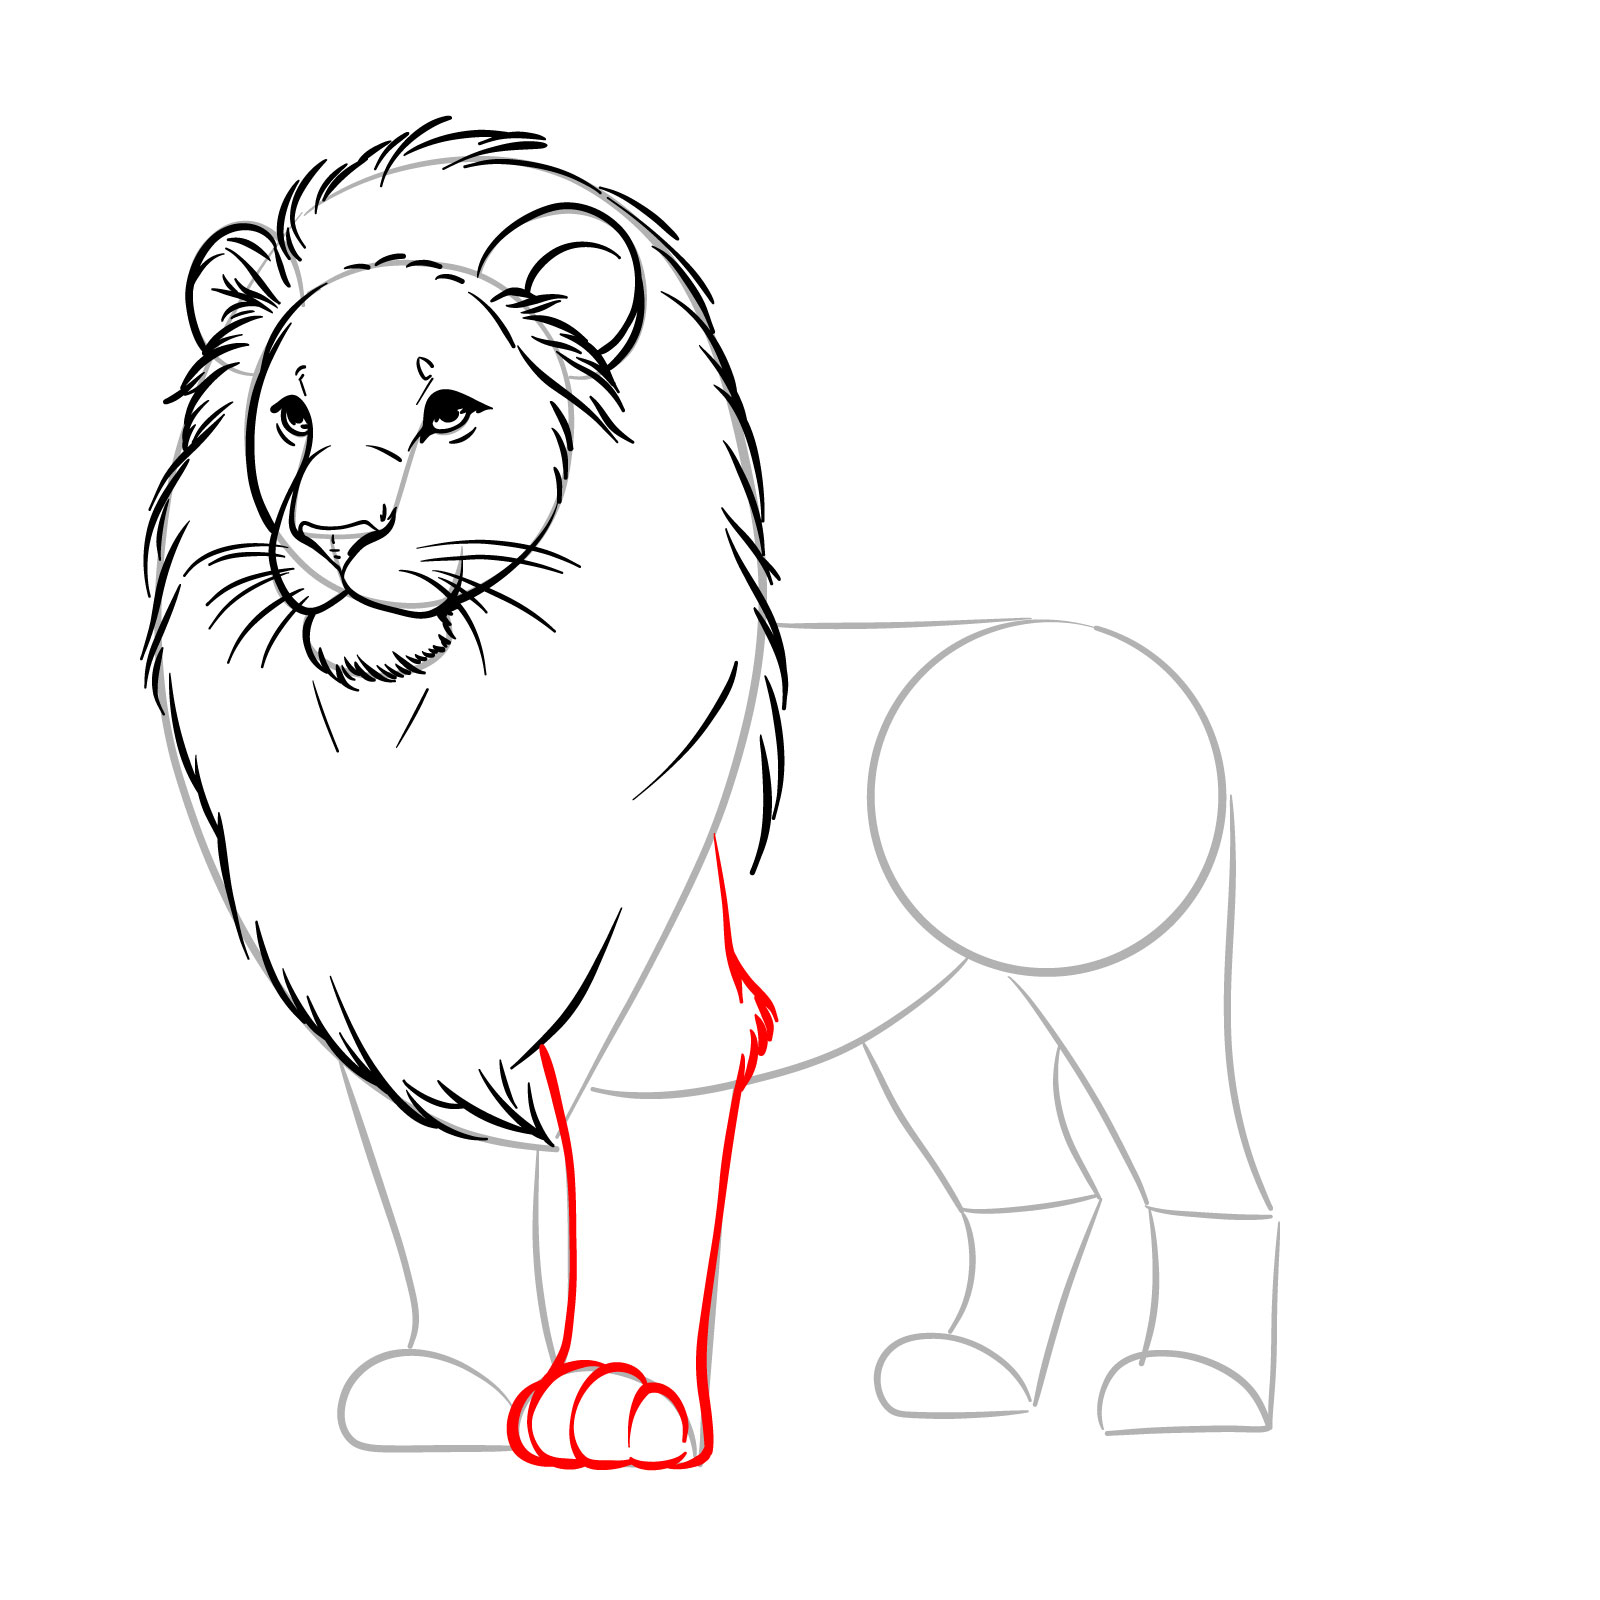
Step 09 – For the front leg, define the basic shape we made earlier as it is shown in the image
Sketching the first front leg and paw
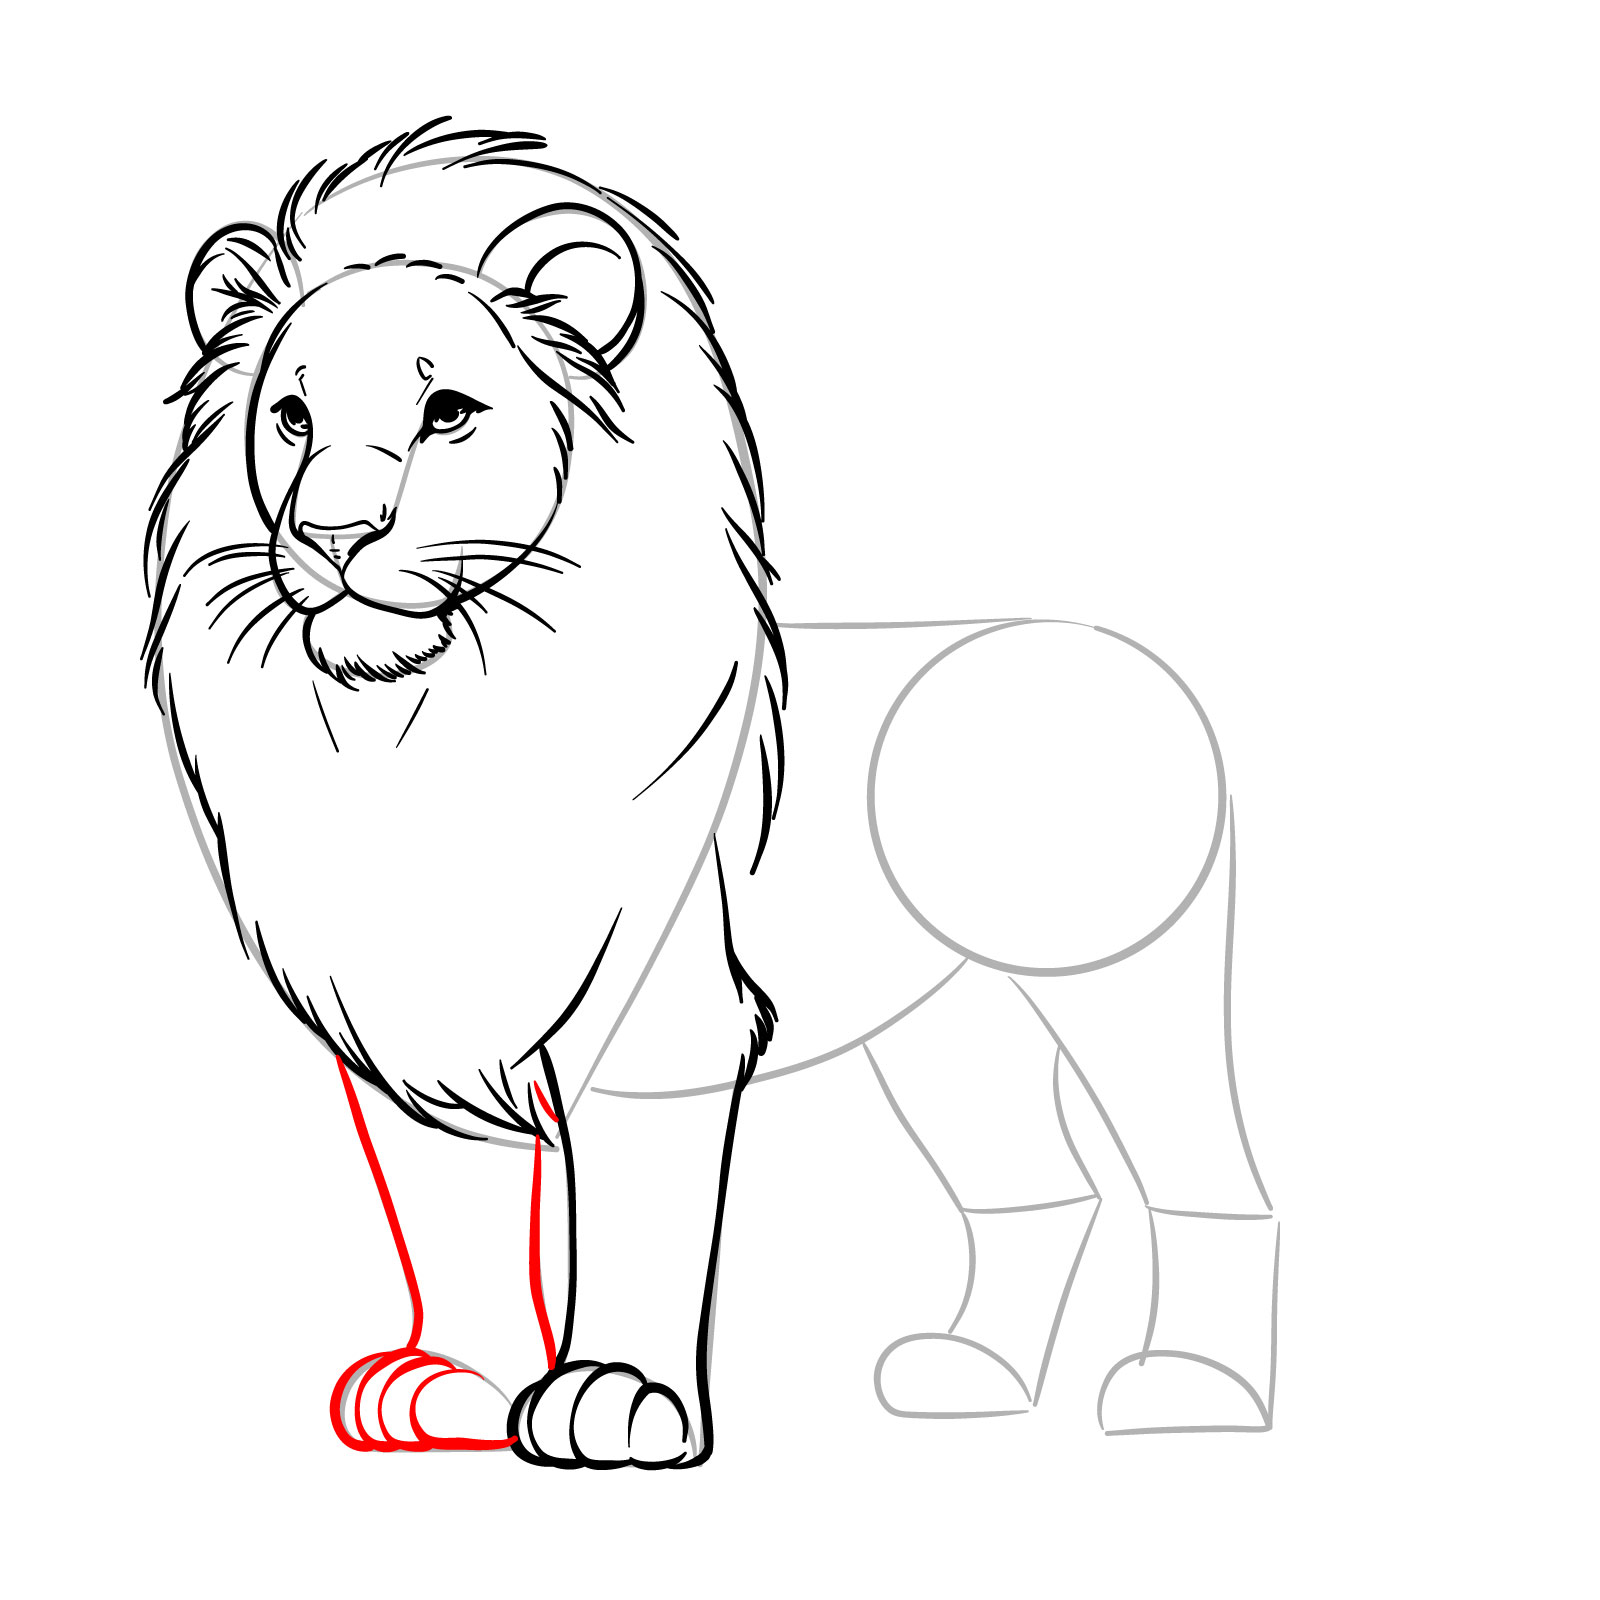
Step 10 – Repeat the process for the second front leg, ensuring it mirrors the first. Include the curves for the paw and separate the toes
Drawing the second front leg
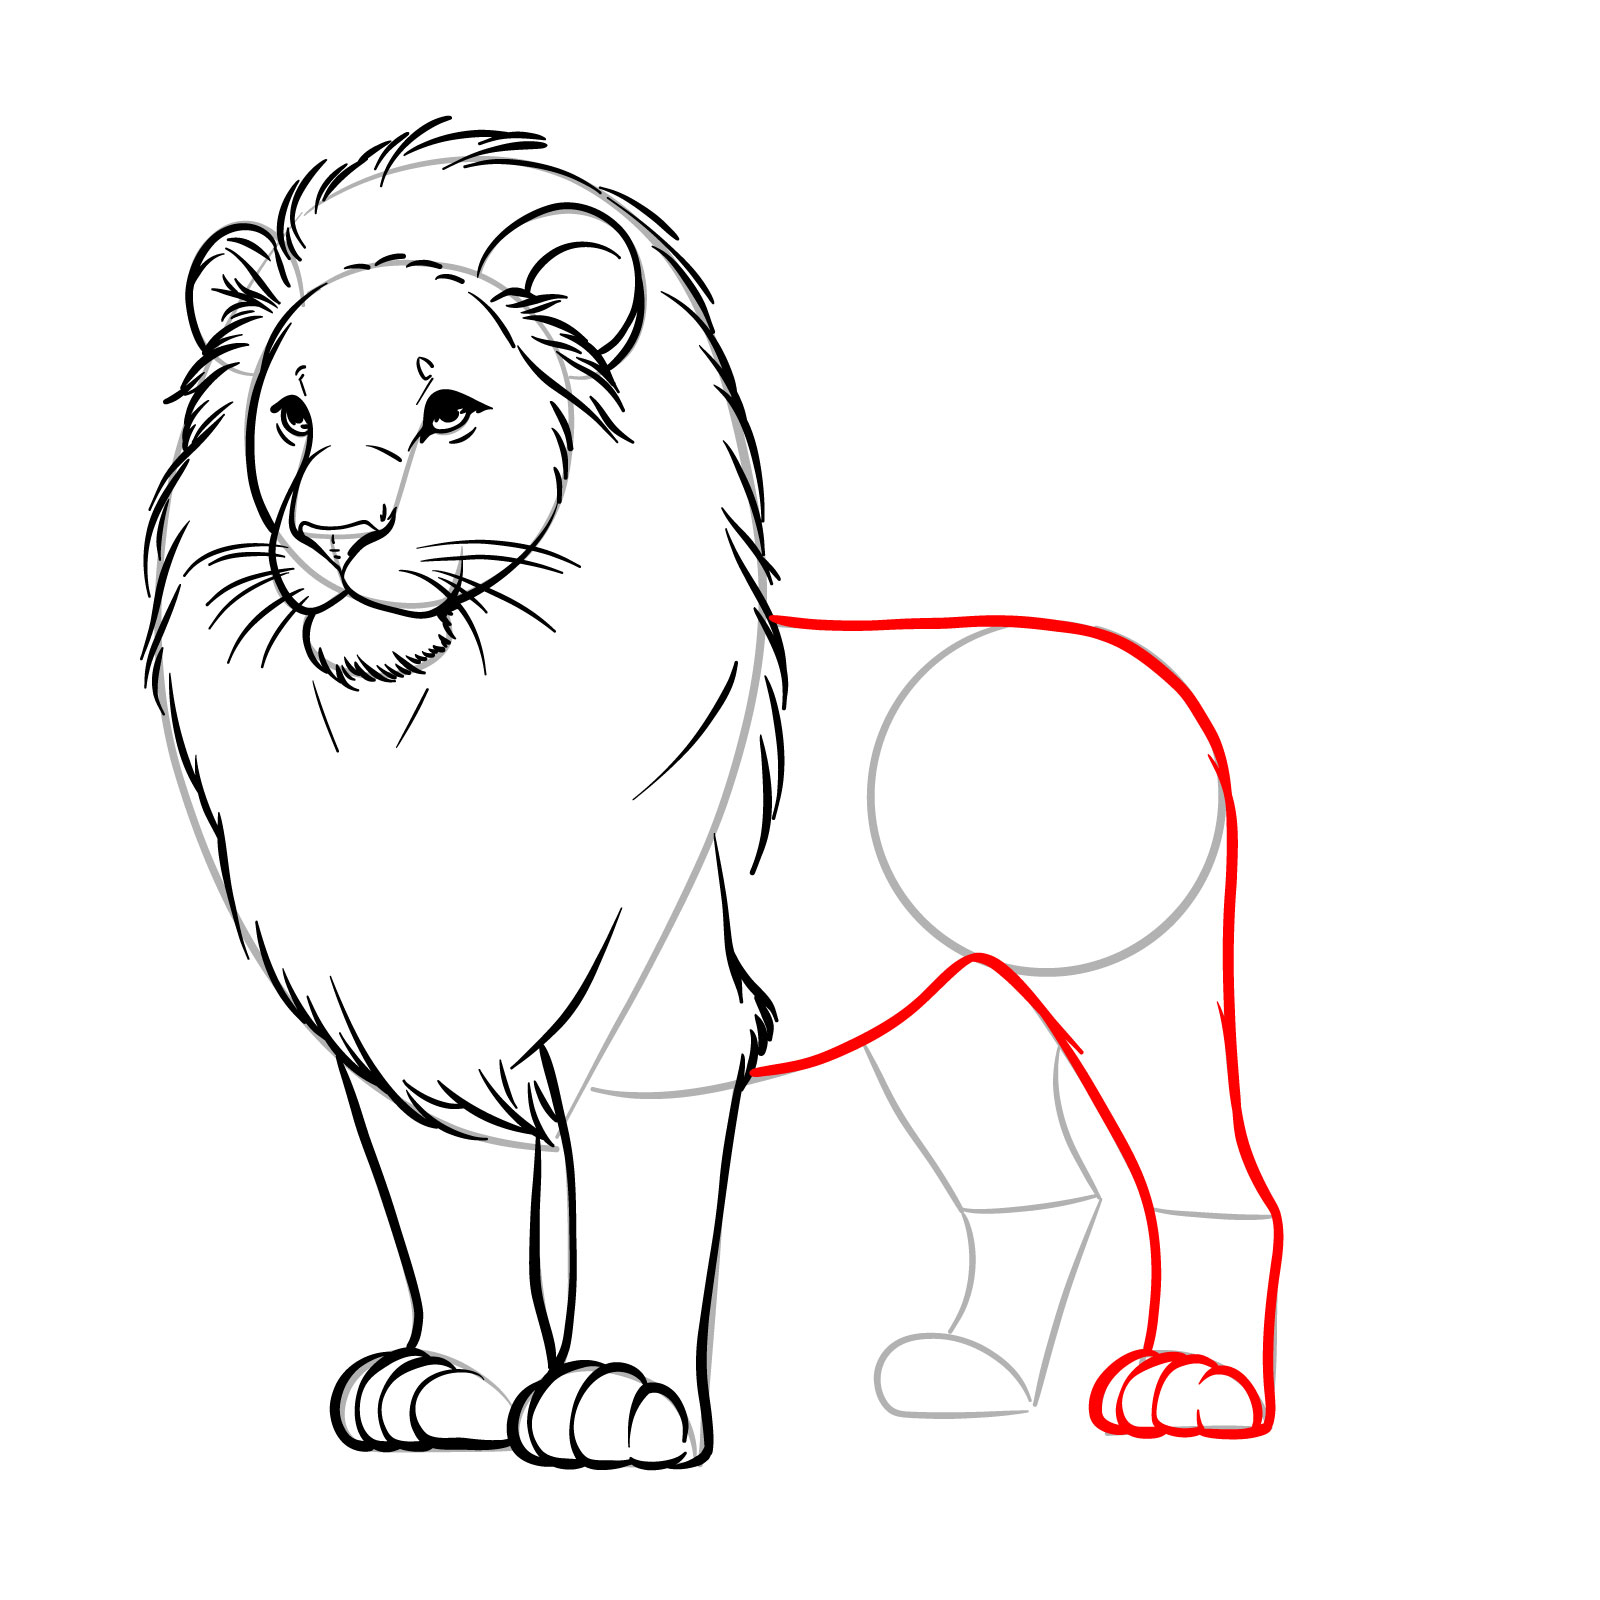
Step 11 – Draw the body outline connecting the mane to the rear leg, and sketch the rear leg by adding curves for the thigh, calf, and paw
Shaping the body and outlining the first rear leg
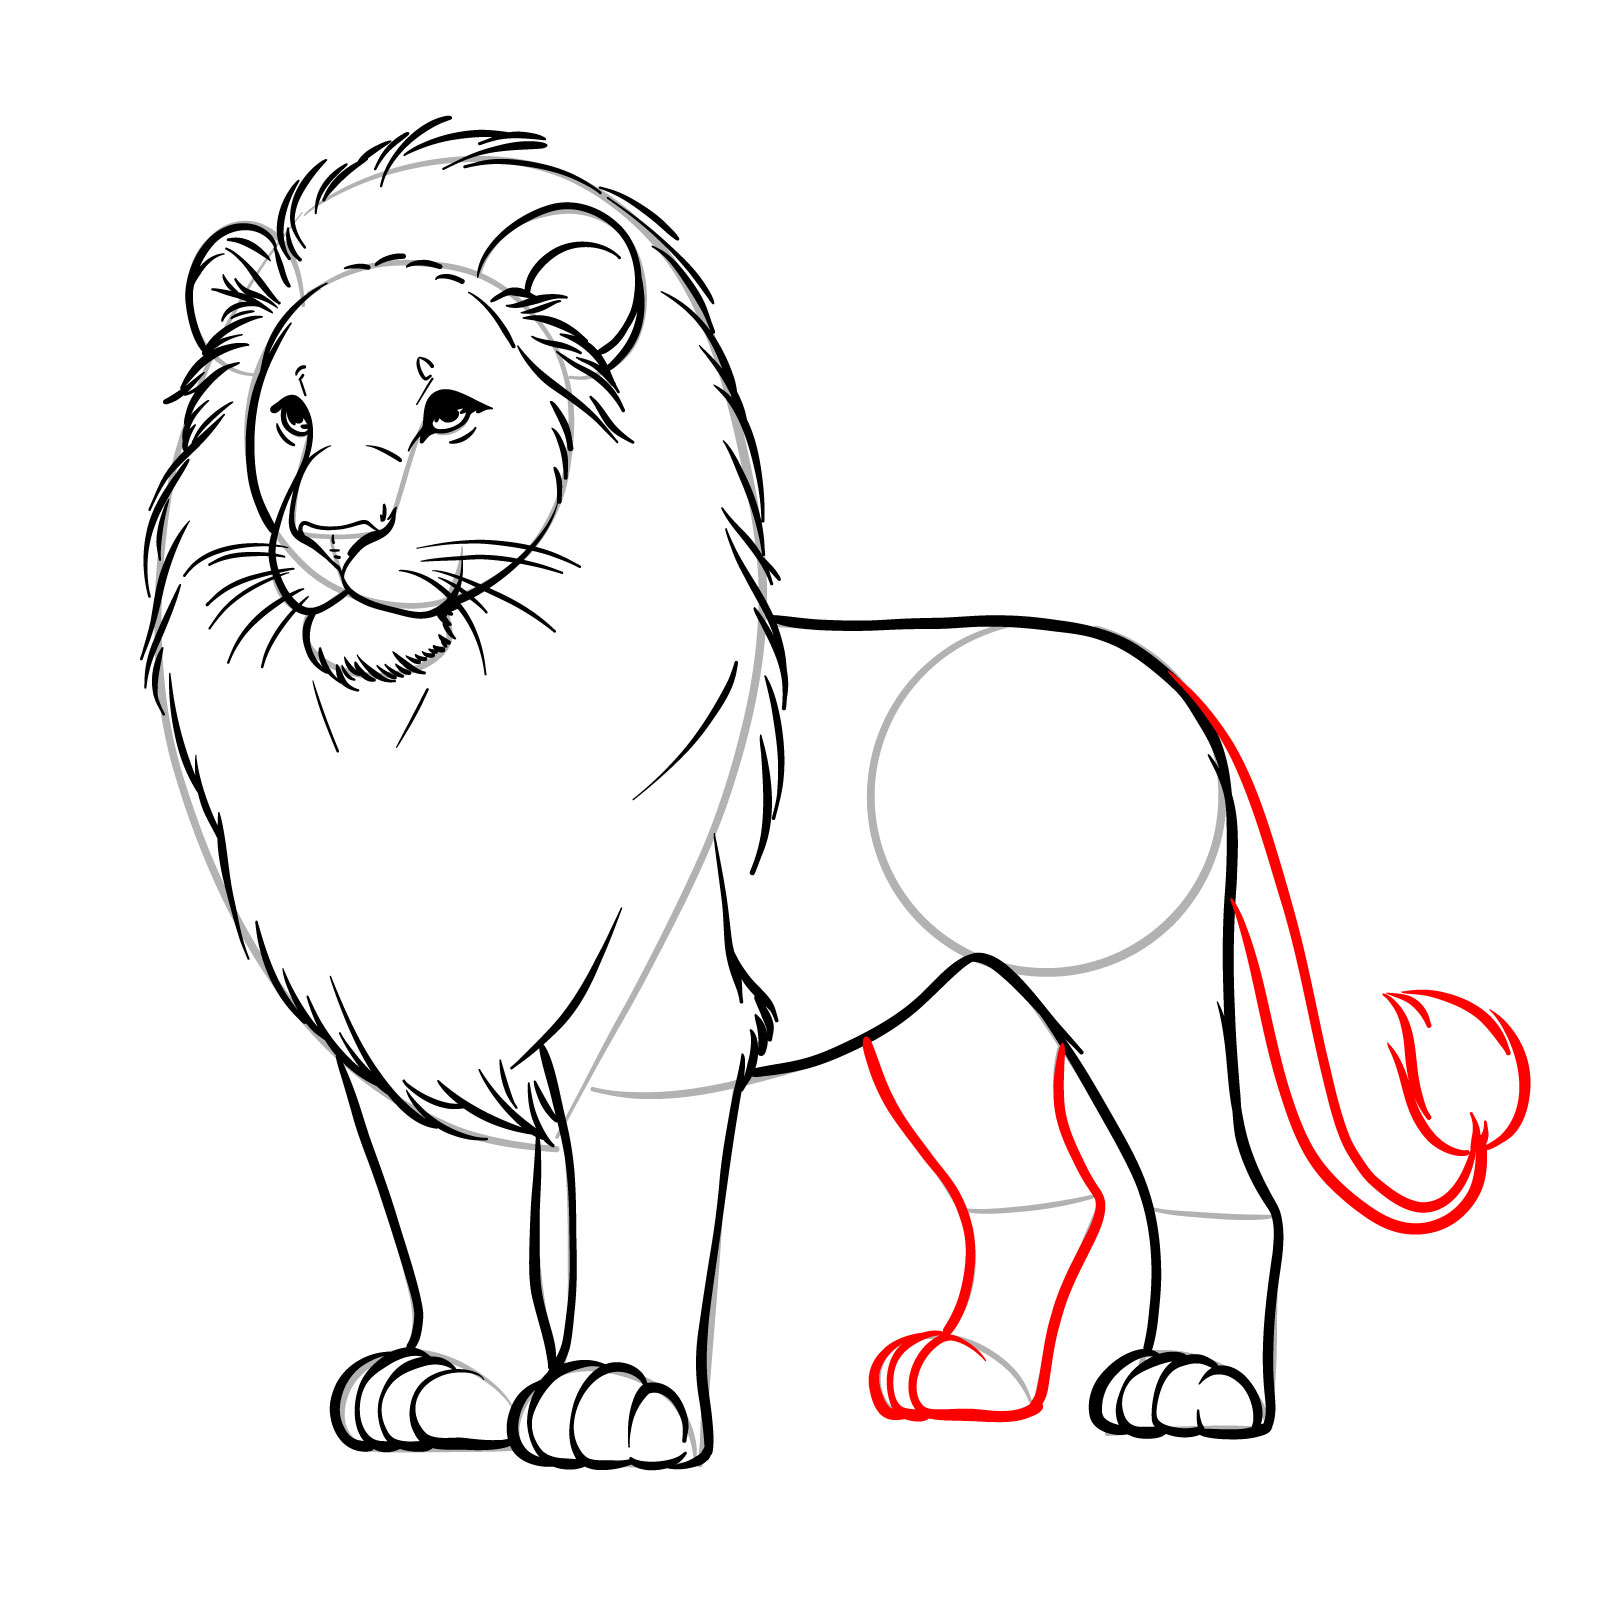
Step 12 – Draw the second rear leg with attention to its curves and the paw. Add a curved tail with a tuft at the end to give it a natural flow
Completing the lower body with the second rear leg and tail
Step 13 – Your drawing of a simple realistic lion is now complete. You can now erase the basic sketch gently or, if you prefer, ink the sketch and remove the pencil lines to finalize your artwork
Our final step reveals a finished simple realistic lion drawing
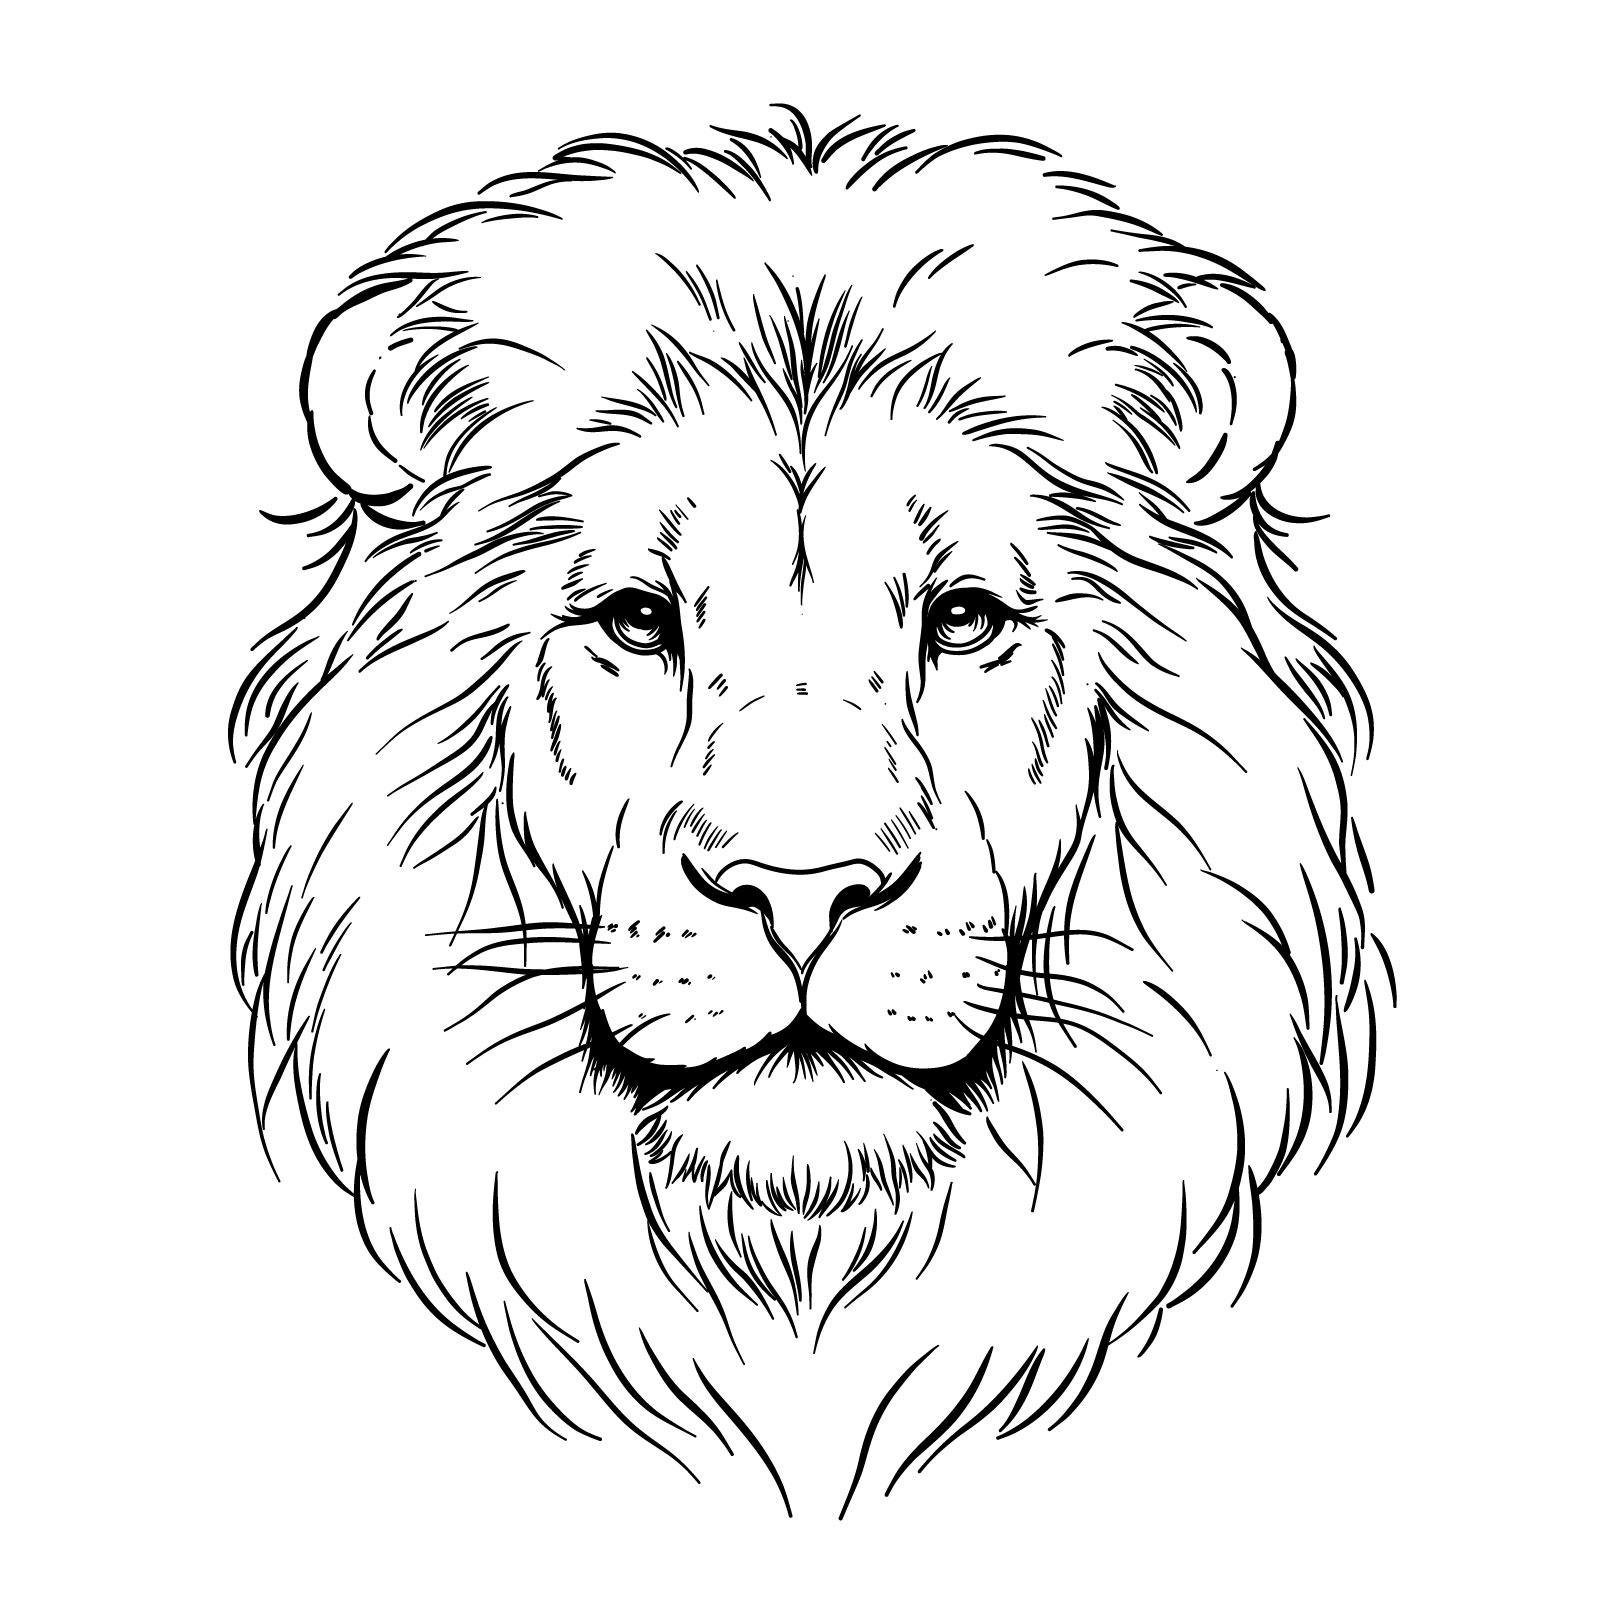
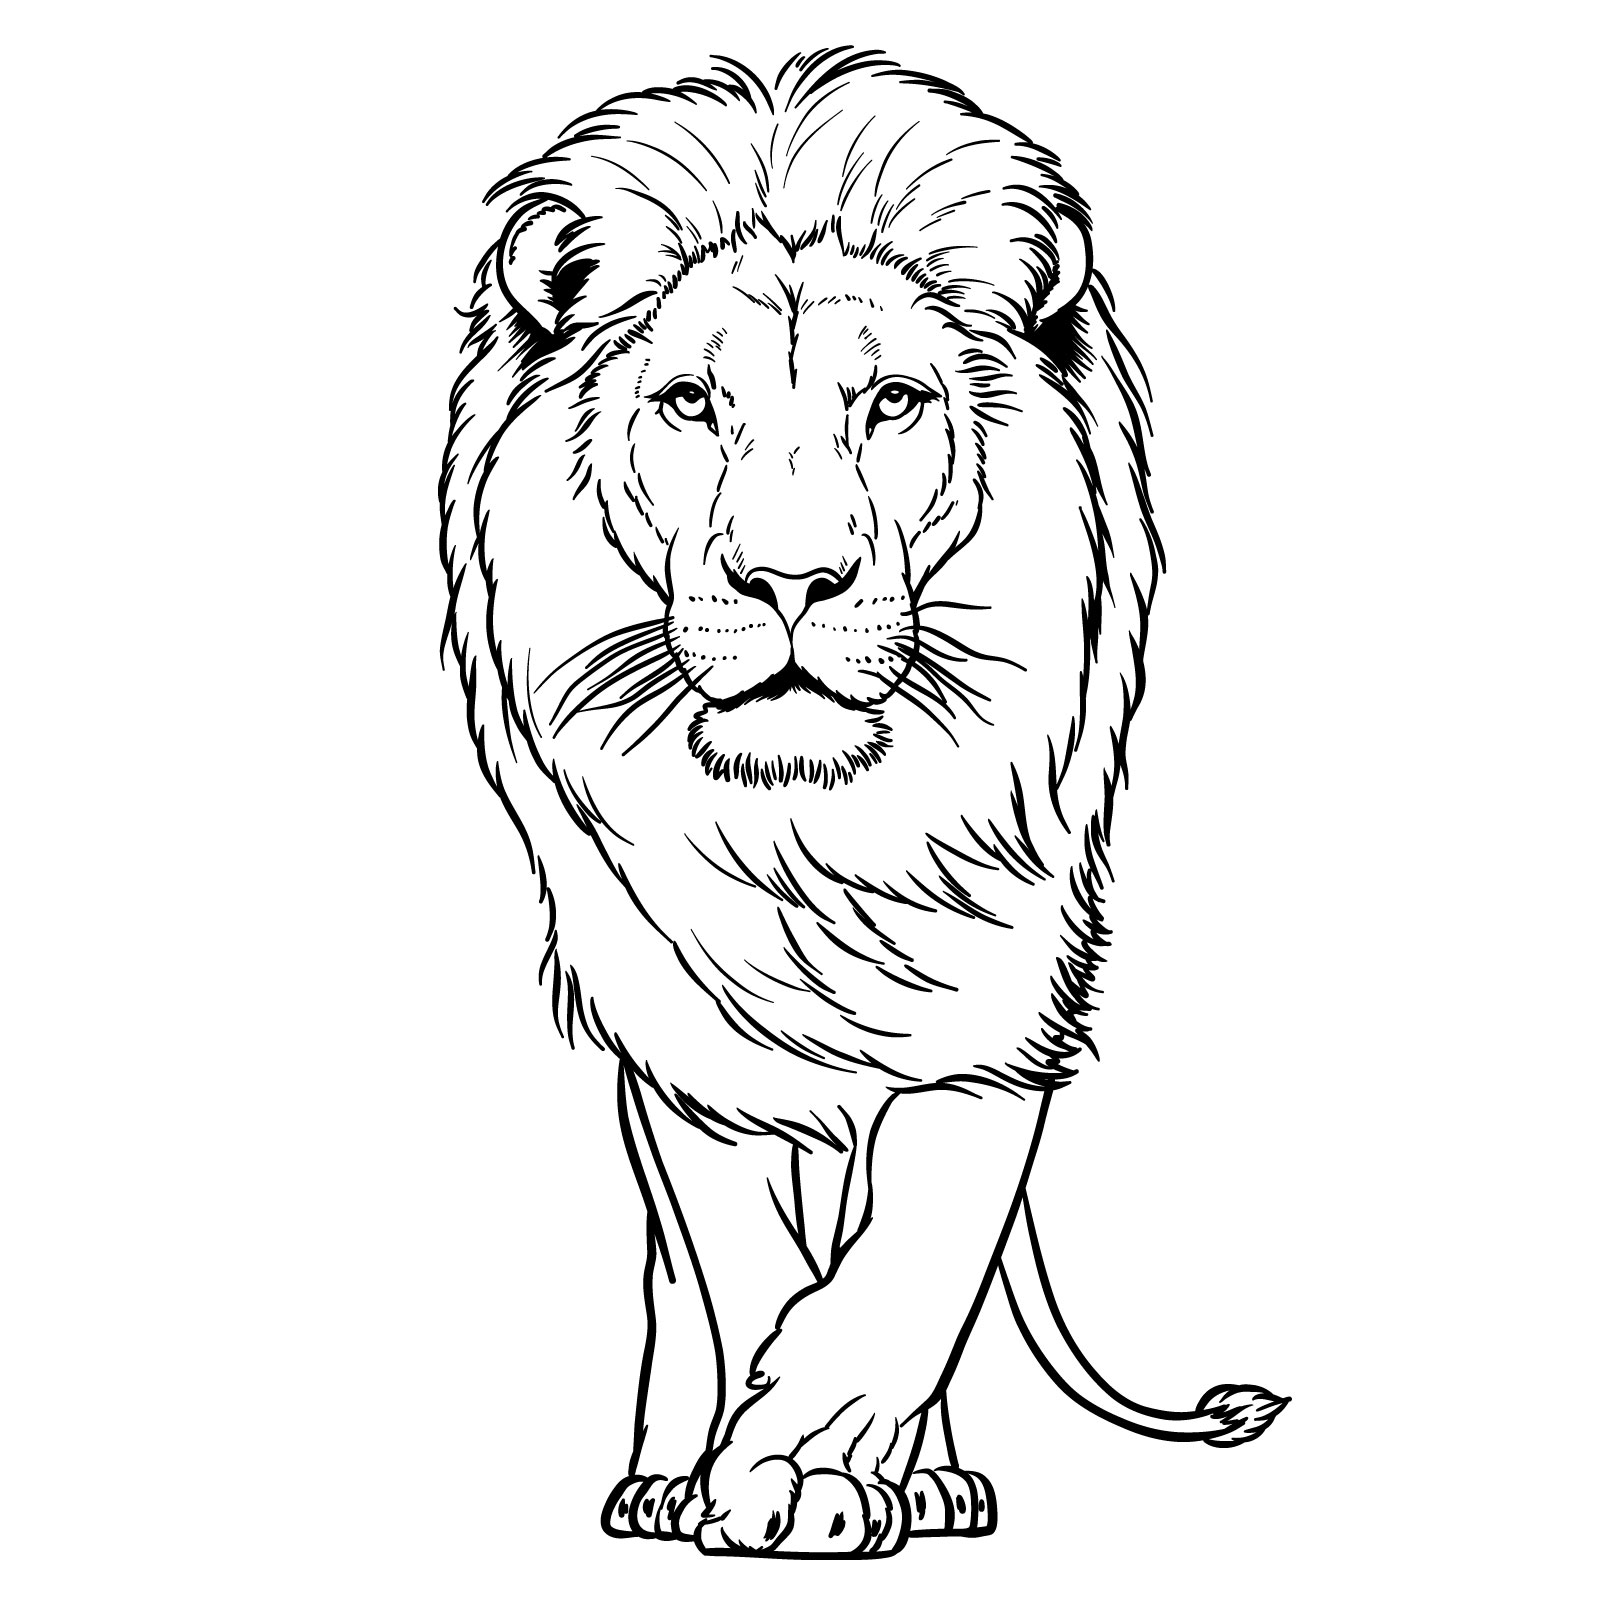
Guide 2: Lion’s Face Drawing – Front View
The lion’s face drawing we are about to create
In the second guide, we’ll focus on sketching the front view of a lion’s face. This drawing, broken down into 14 steps, will help you convey the lion’s visage. We’ll concentrate on the symmetrical balance required for a front view — paying close attention to the eyes that hold a calm dominance, the mane that frames the face with its flowing lines and other details. This step-by-step process will allow you to build the lion’s features gradually, ensuring that each element is in place for a harmonious and realistic lion sketch.
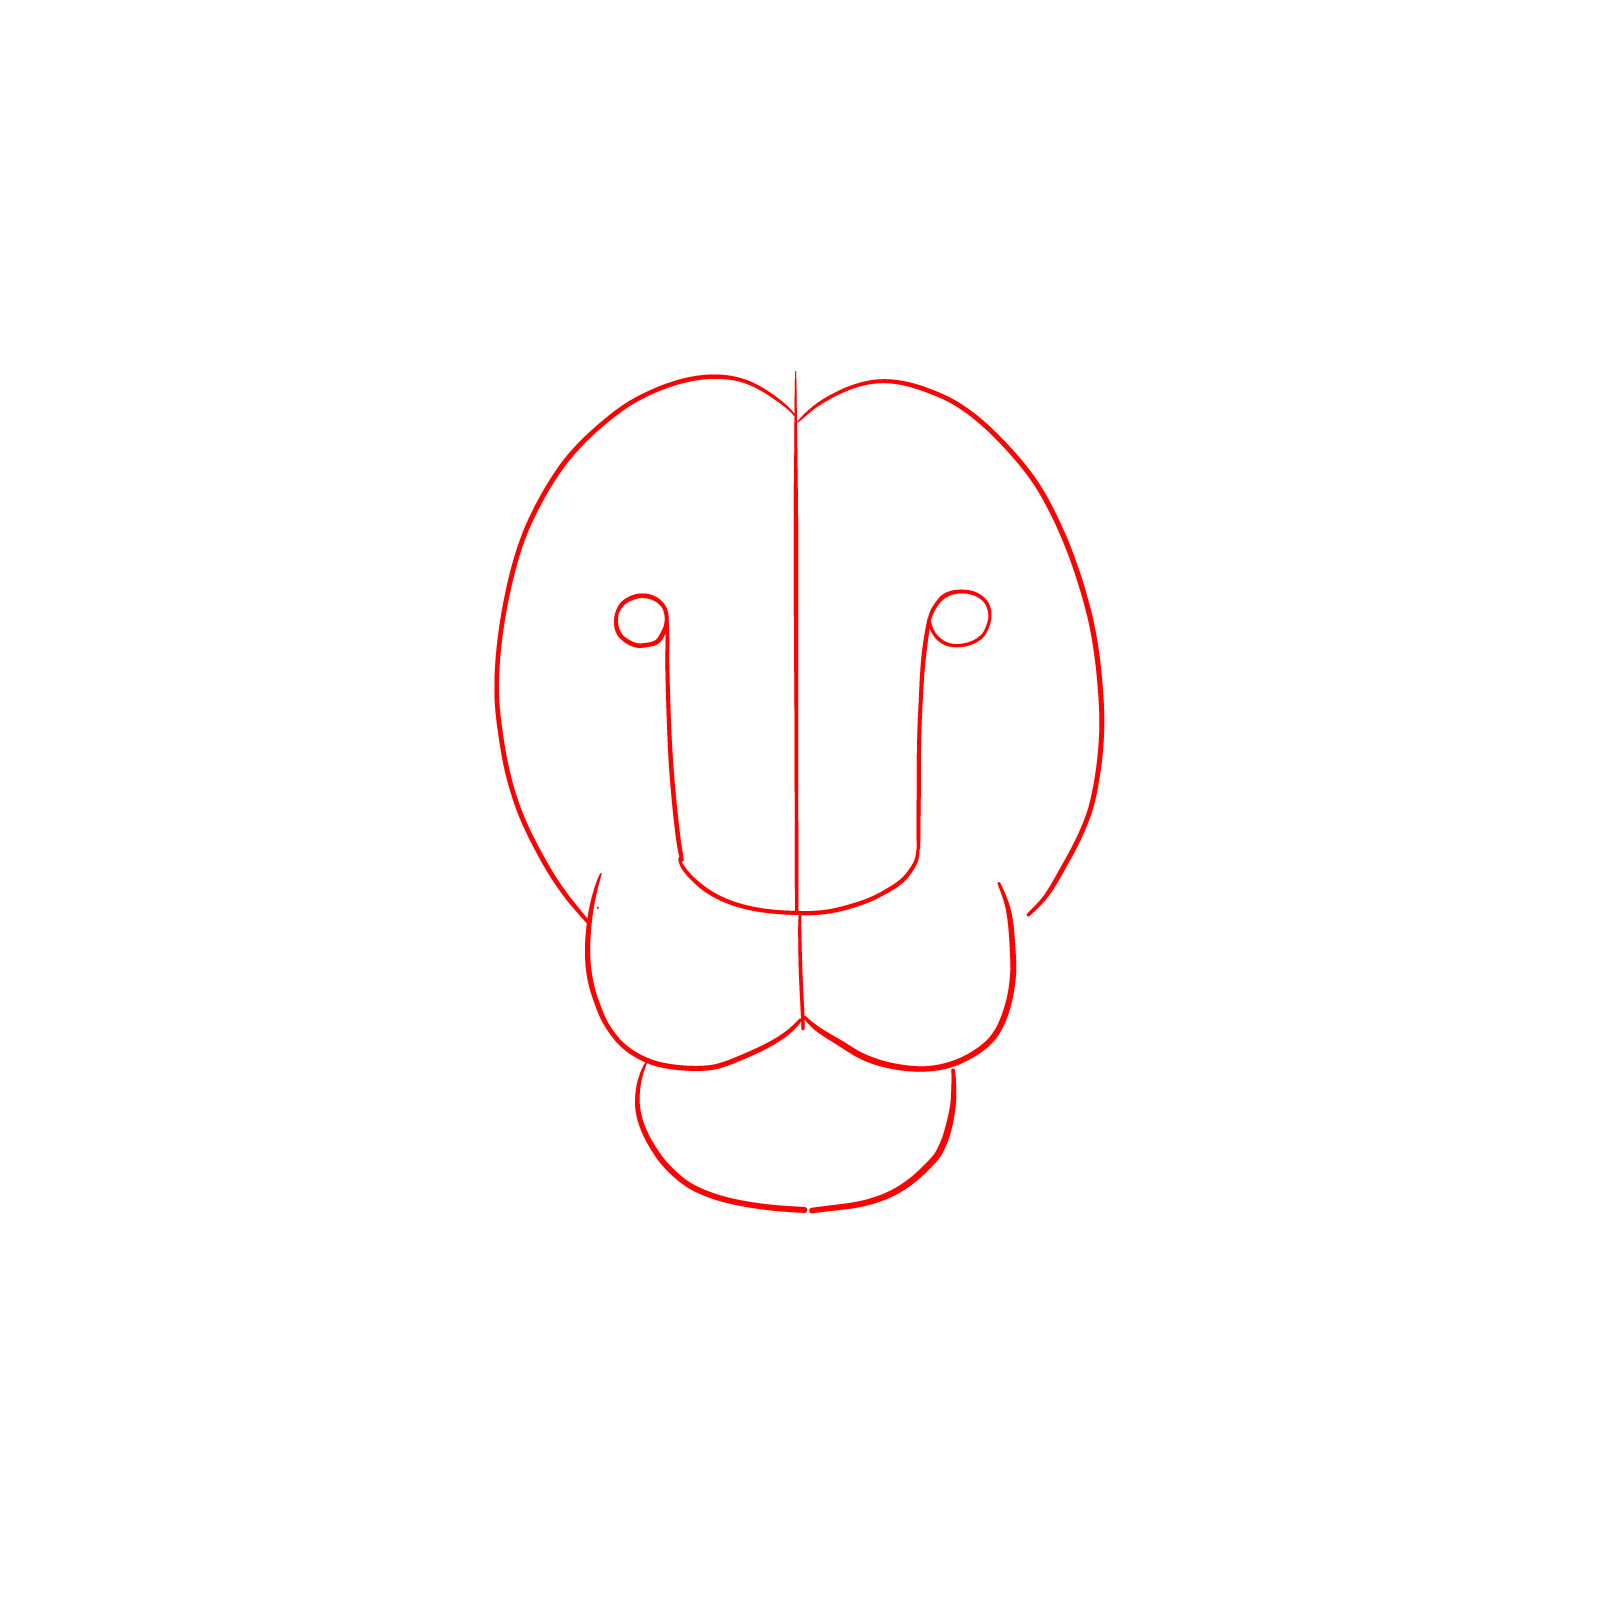
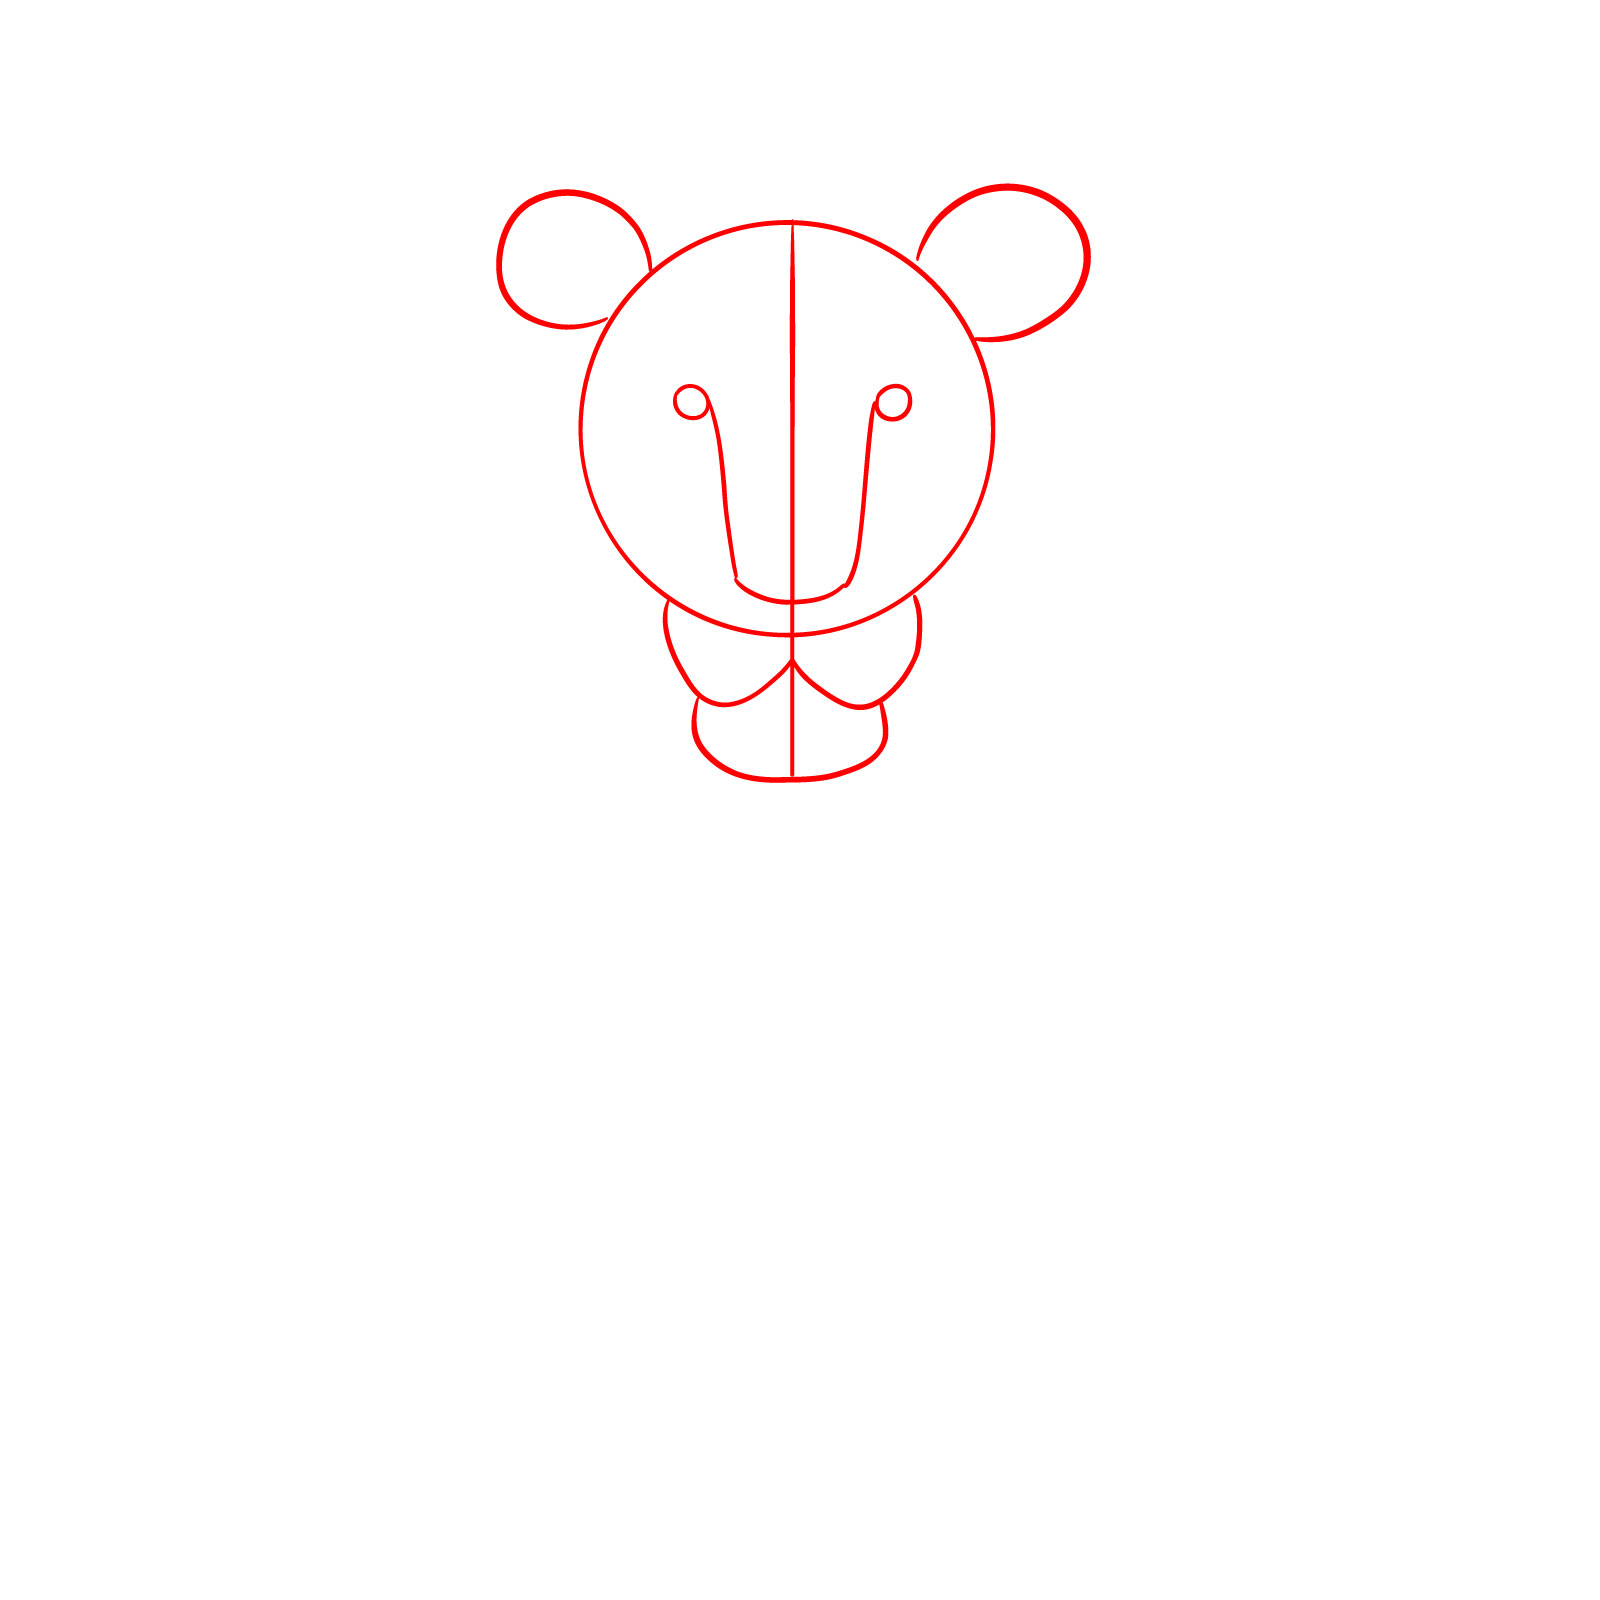
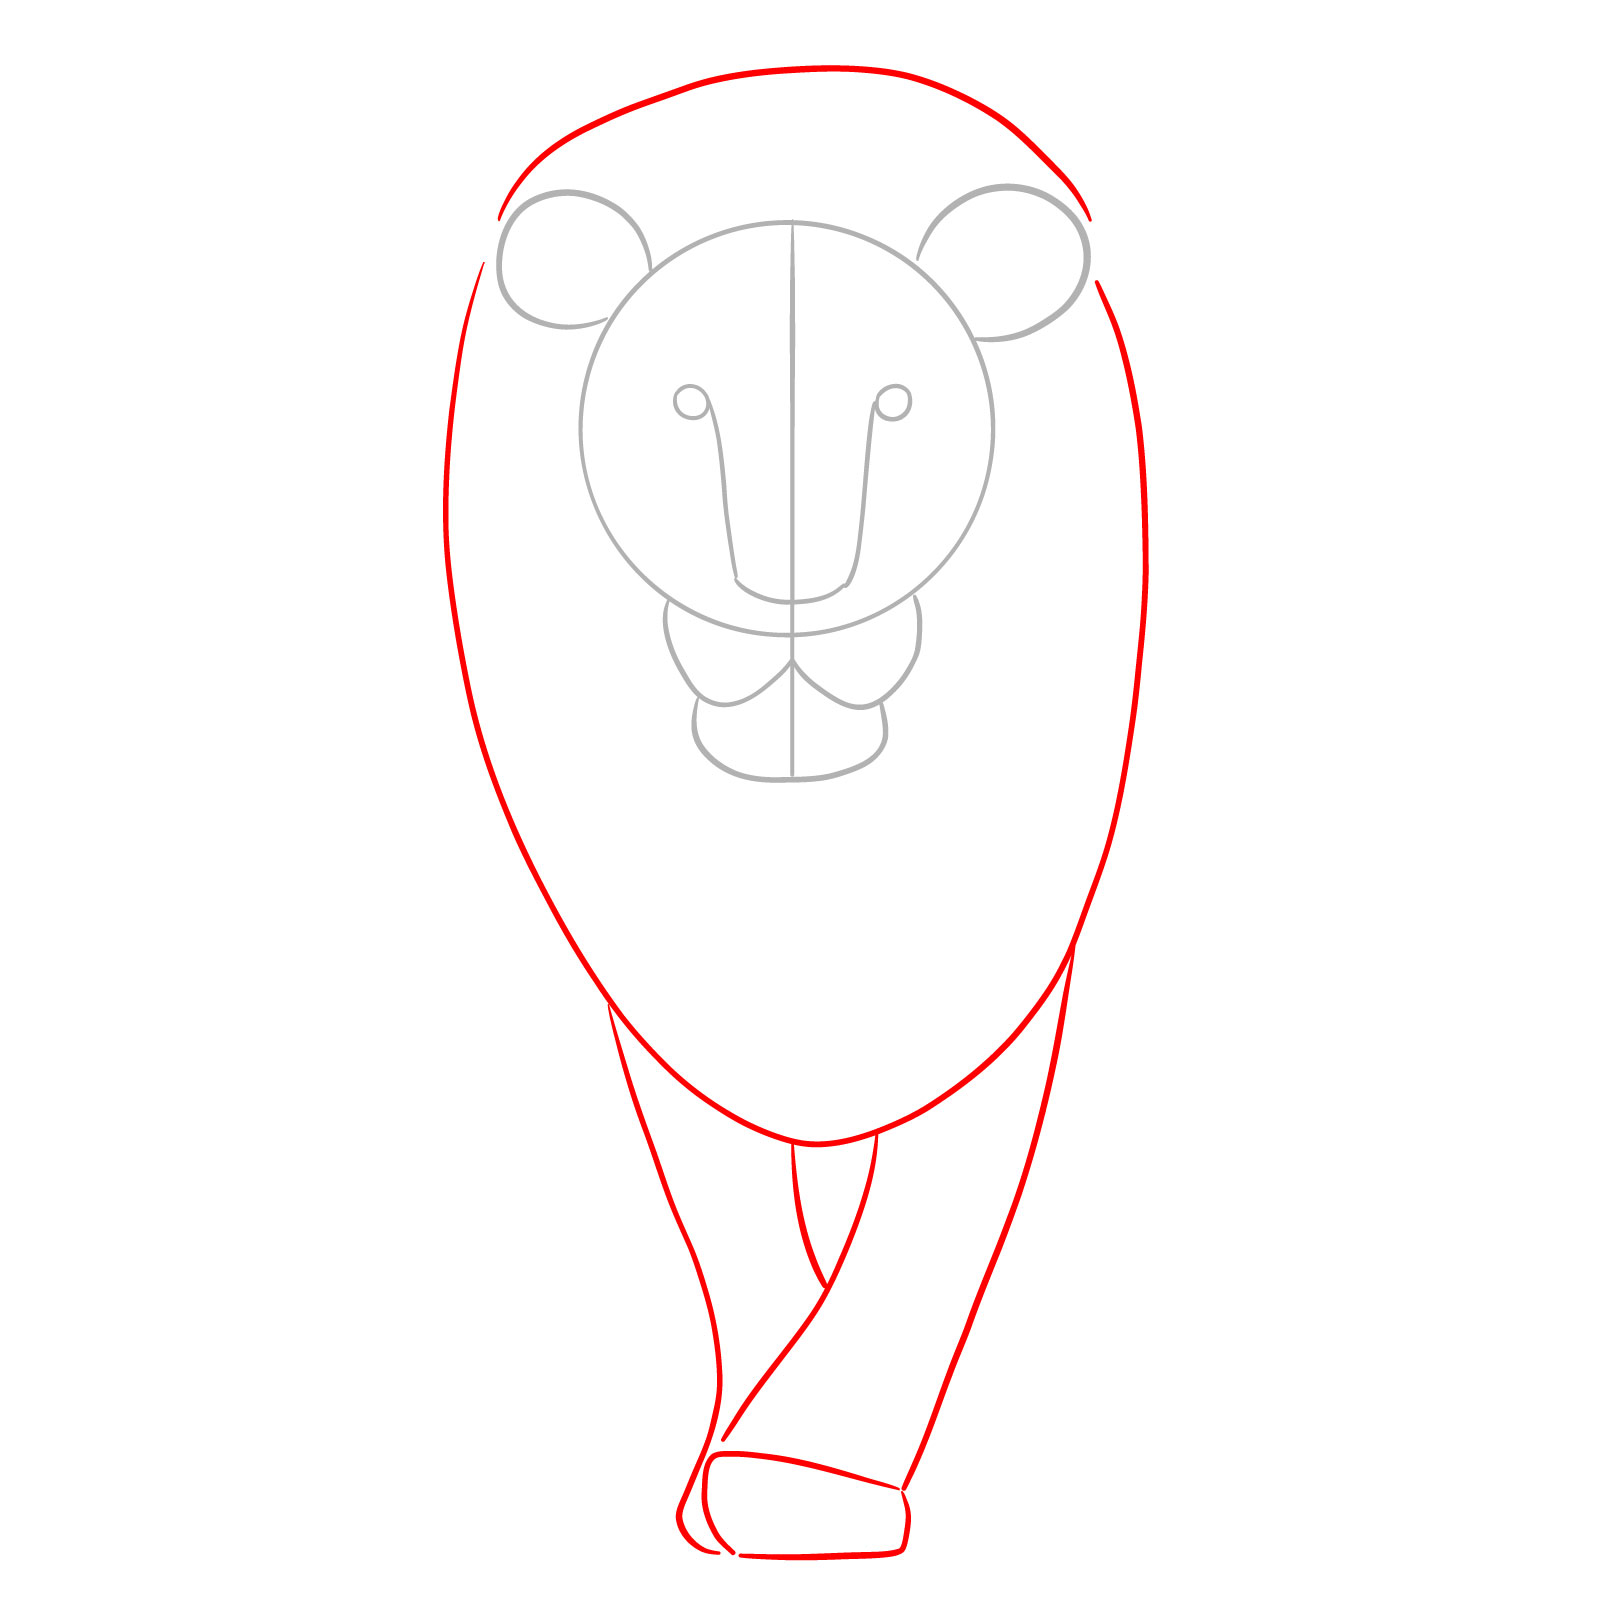
Step 01 – Begin by sketching a well known U shape to form the basic outline of the lion’s muzzle. Add two circles at the top of the U to establish the eye sockets and a central vertical line to ensure symmetry. Draw the contours of the face, allowing for slight indentations where the forehead will be, and a more pronounced curve for the muzzle area
Starting the lion’s face with basic shapes and guidelines
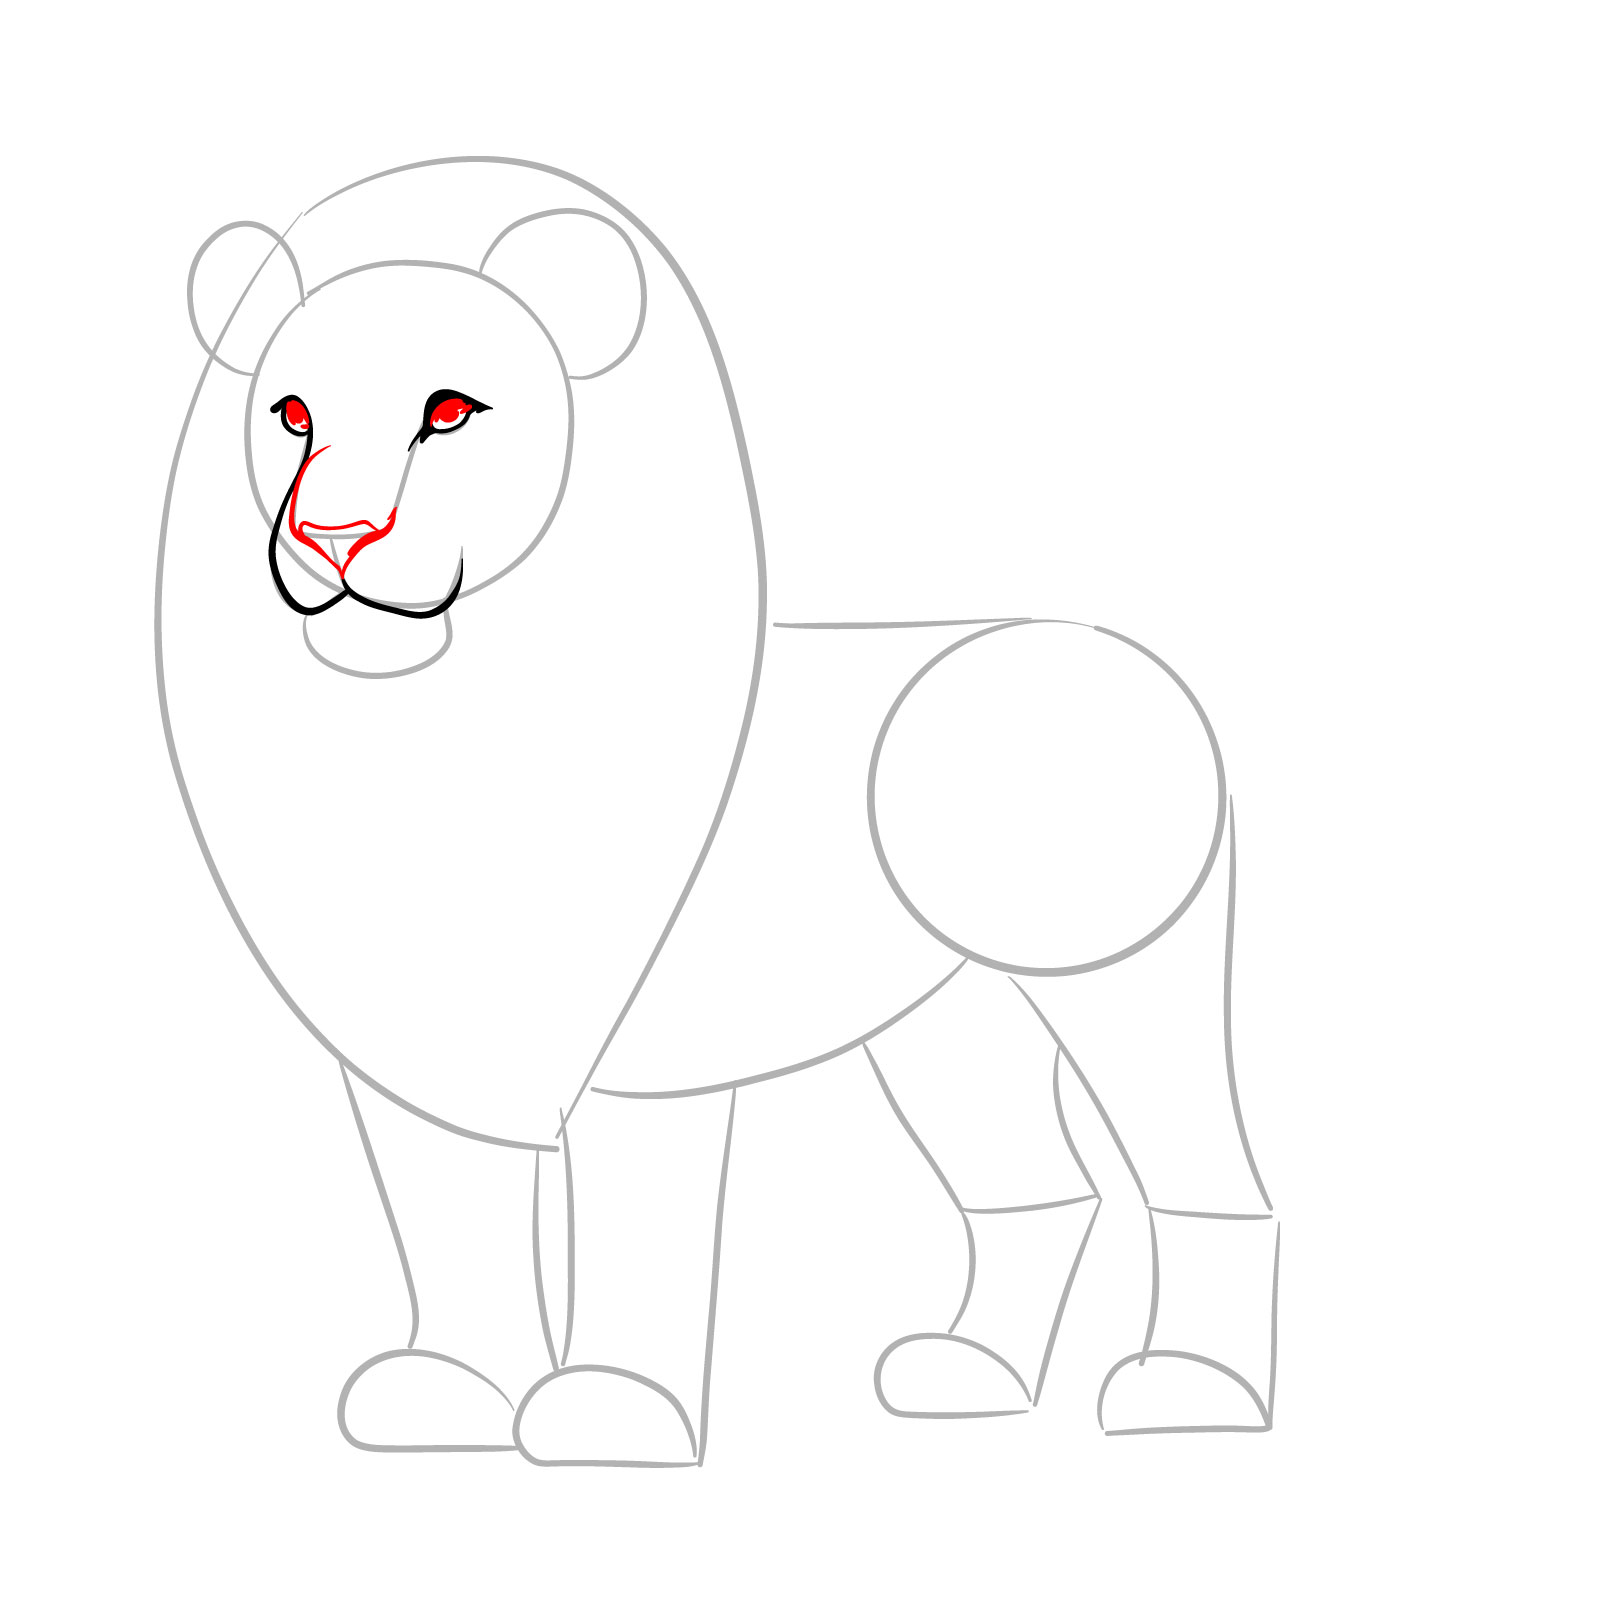
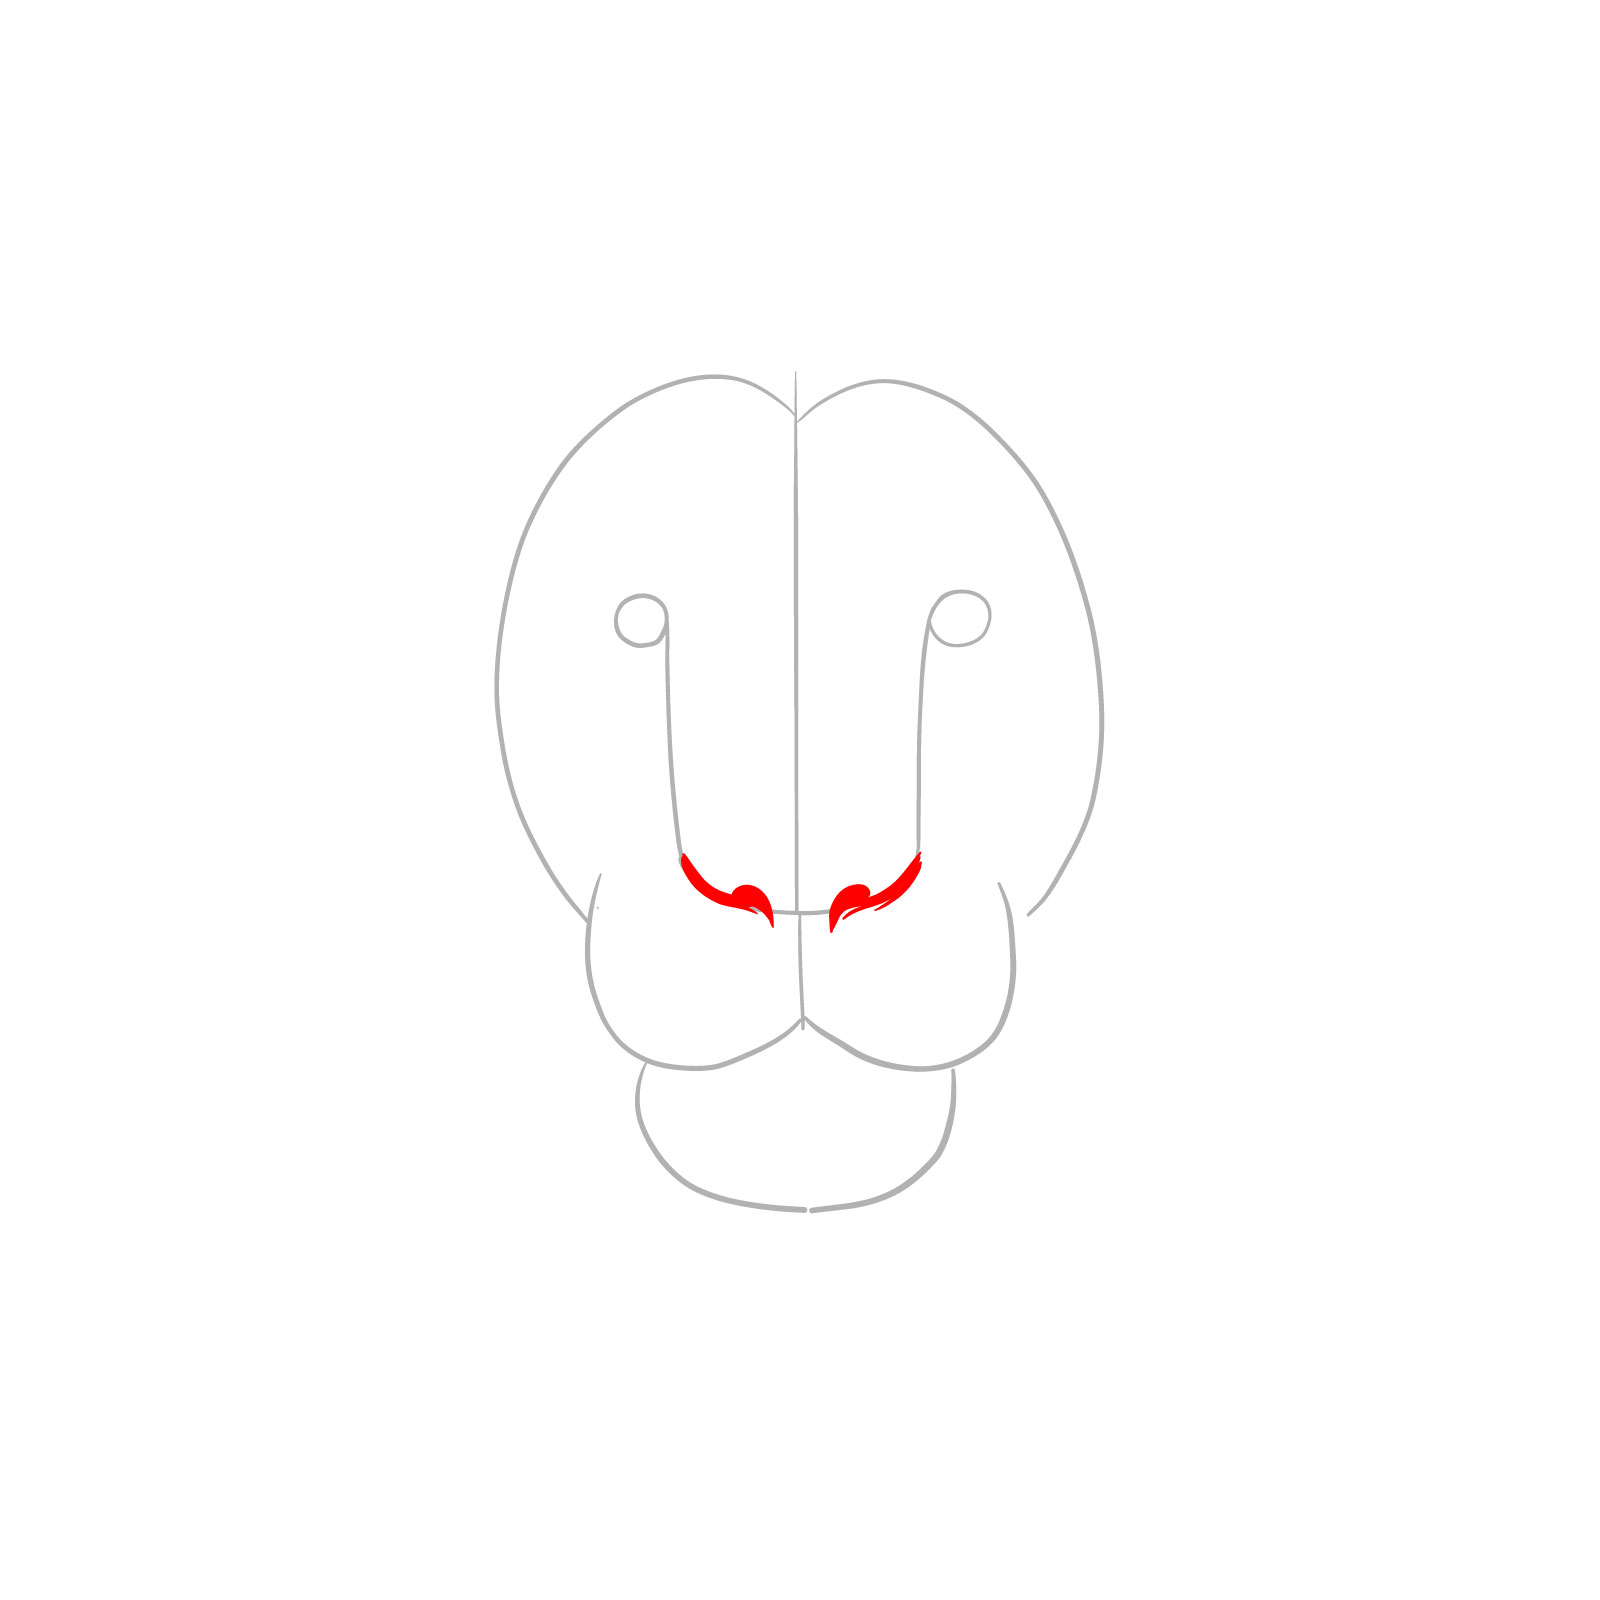
Step 02 – Draw two small curved shapes at the same distance from the central vertical line for the lion’s nostrils, placing them within the bottom half of the U shape to set the nose’s position
Adding nostrils to the sketch of the lion’s face
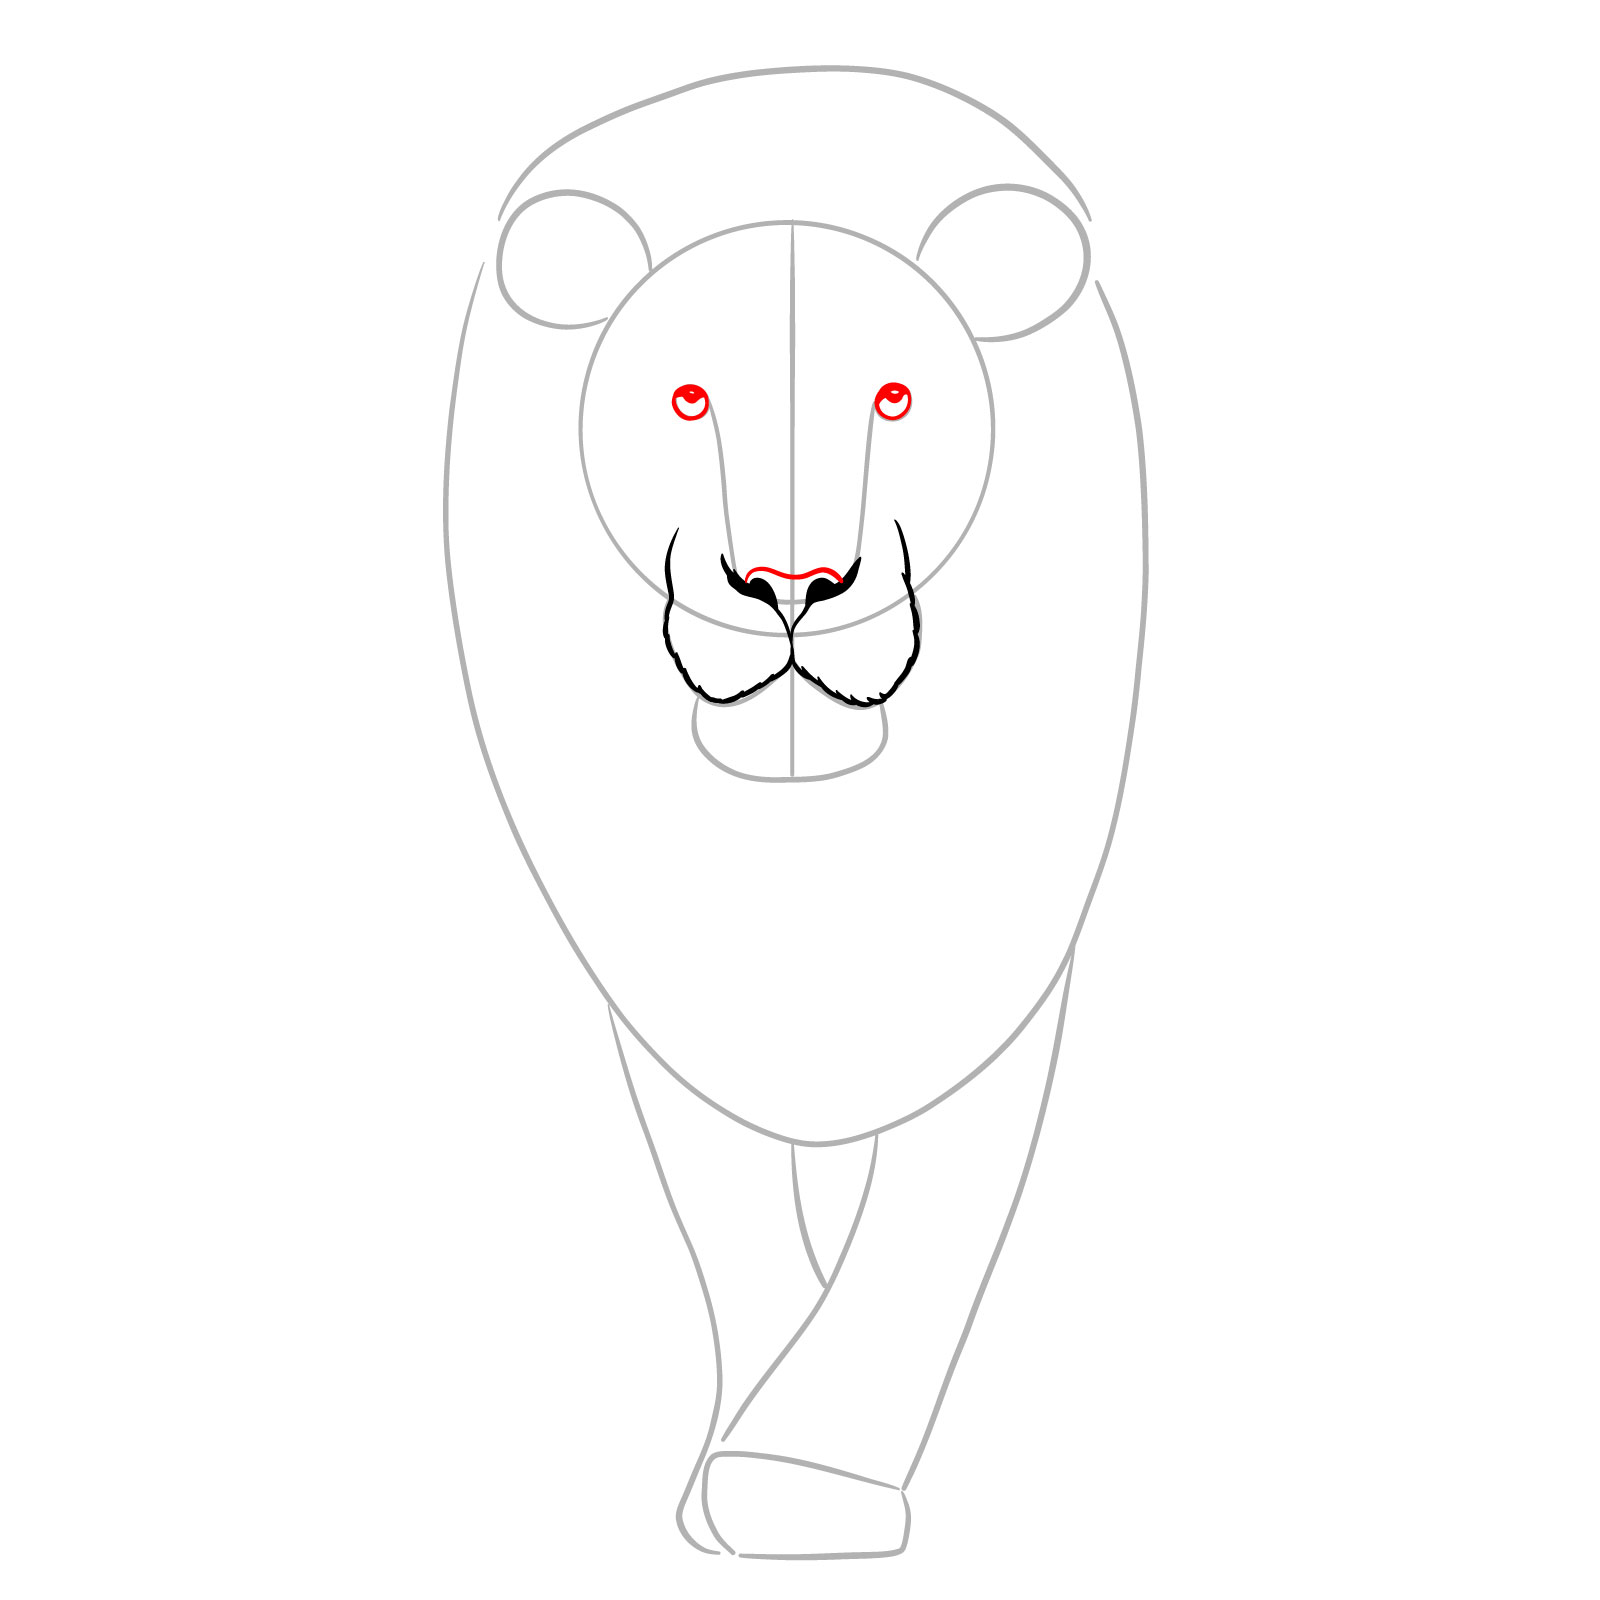
Step 03 – After the nostrils, form the lion’s nose as shown in the image
Shaping the lion’s nose
Step 04 – Sketch the upper part of the muzzle by drawing a series of short lines that extend from the nose across the basic lines, creating the outline of the lion’s upper lip and mouth area. Also define the area between the eyes
Defining the lion’s muzzle
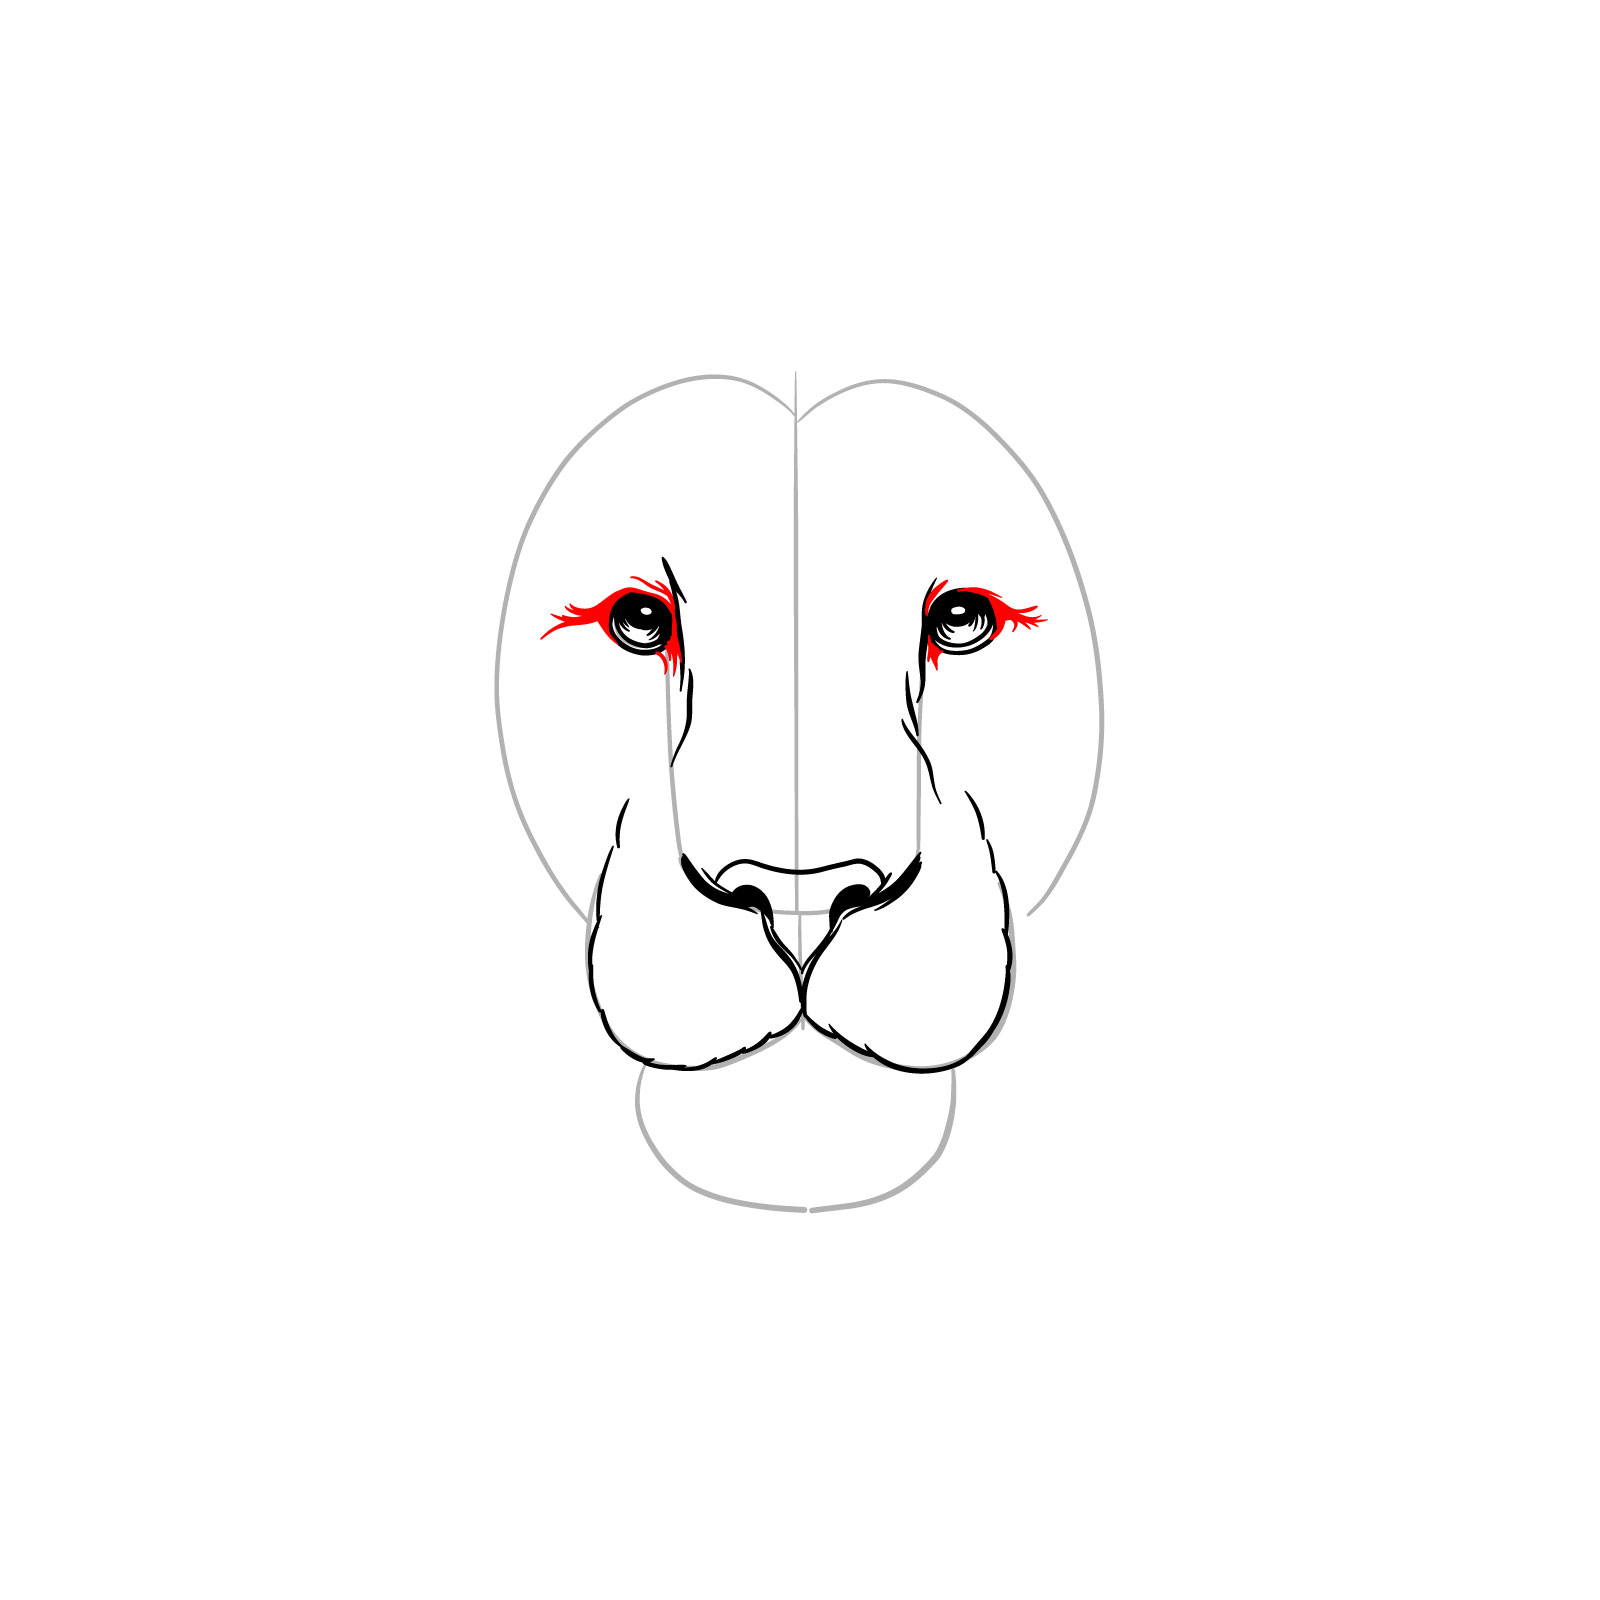
Step 05 – In the circular shapes, draw the eyes, starting with the eyeballs with small blank circles for Highlights, then creating the upper and lower eyelids
Drawing the lion’s eyes
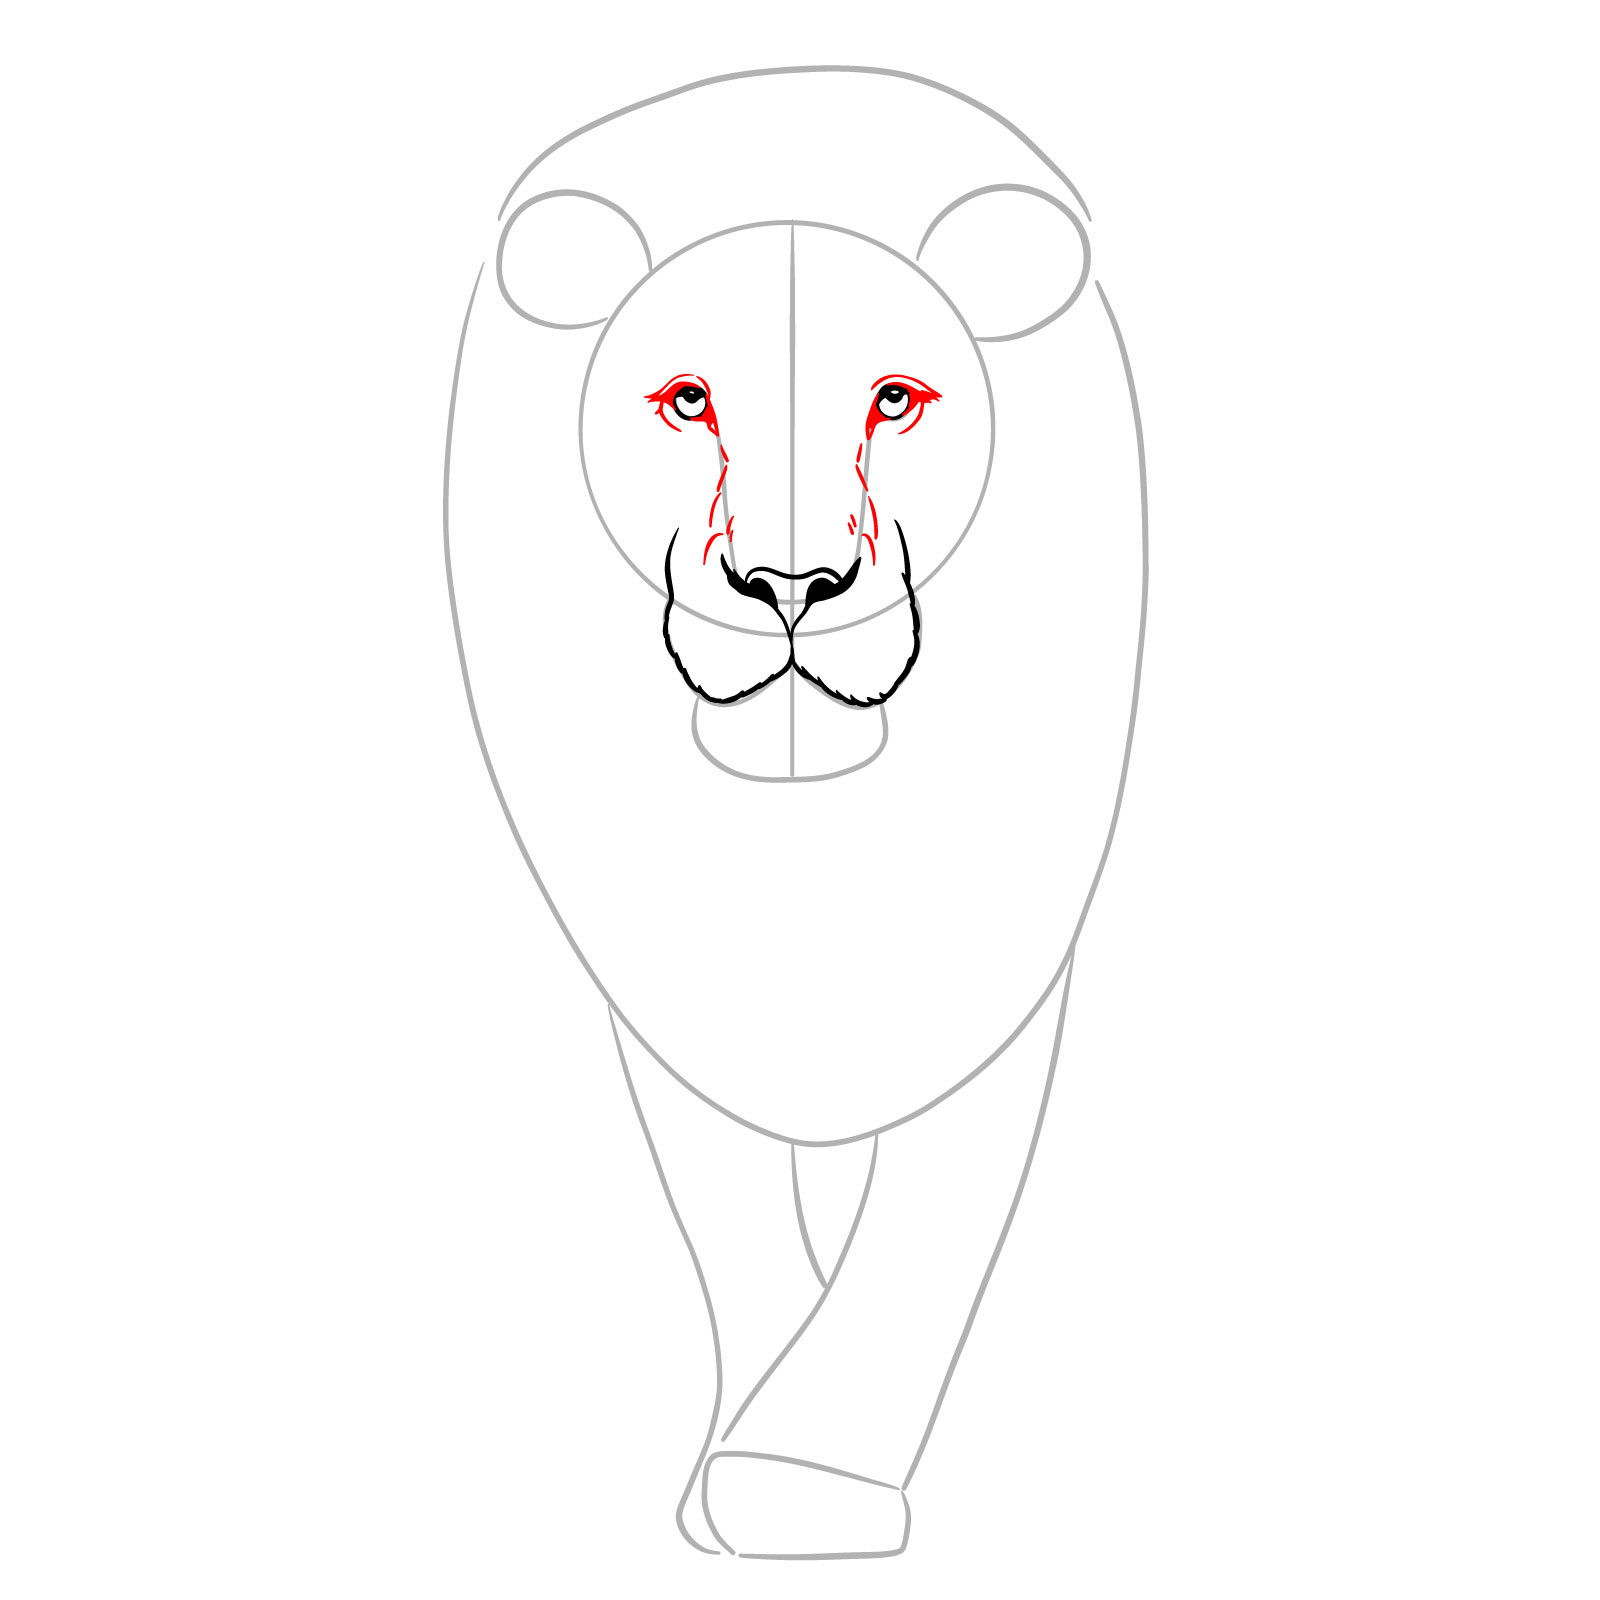
Step 06 – Add details around the eyes, such as the tear ducts and the folds of the eyelids
Refining the lion’s eyes
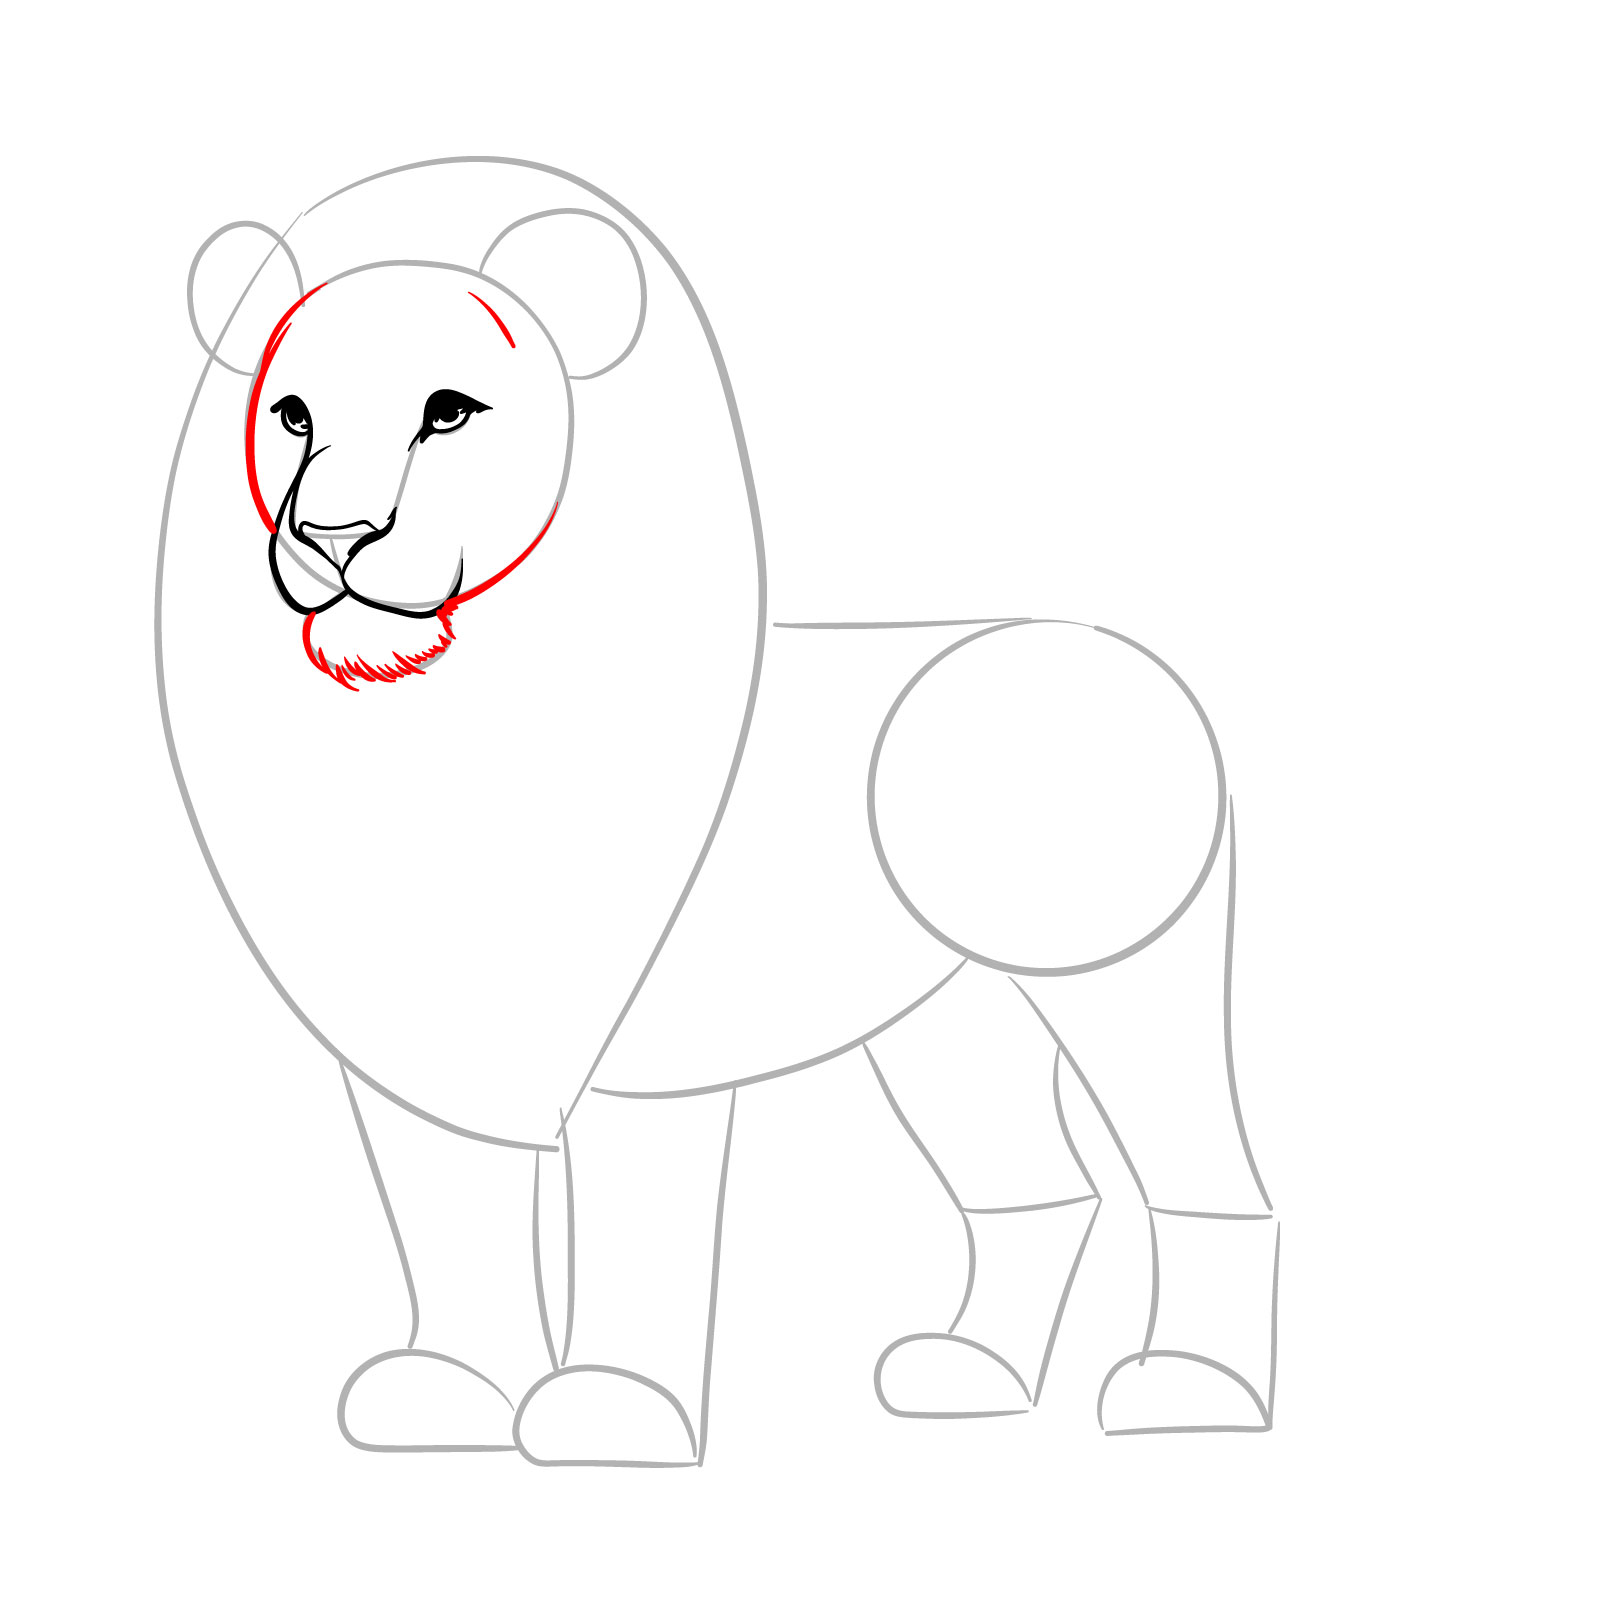
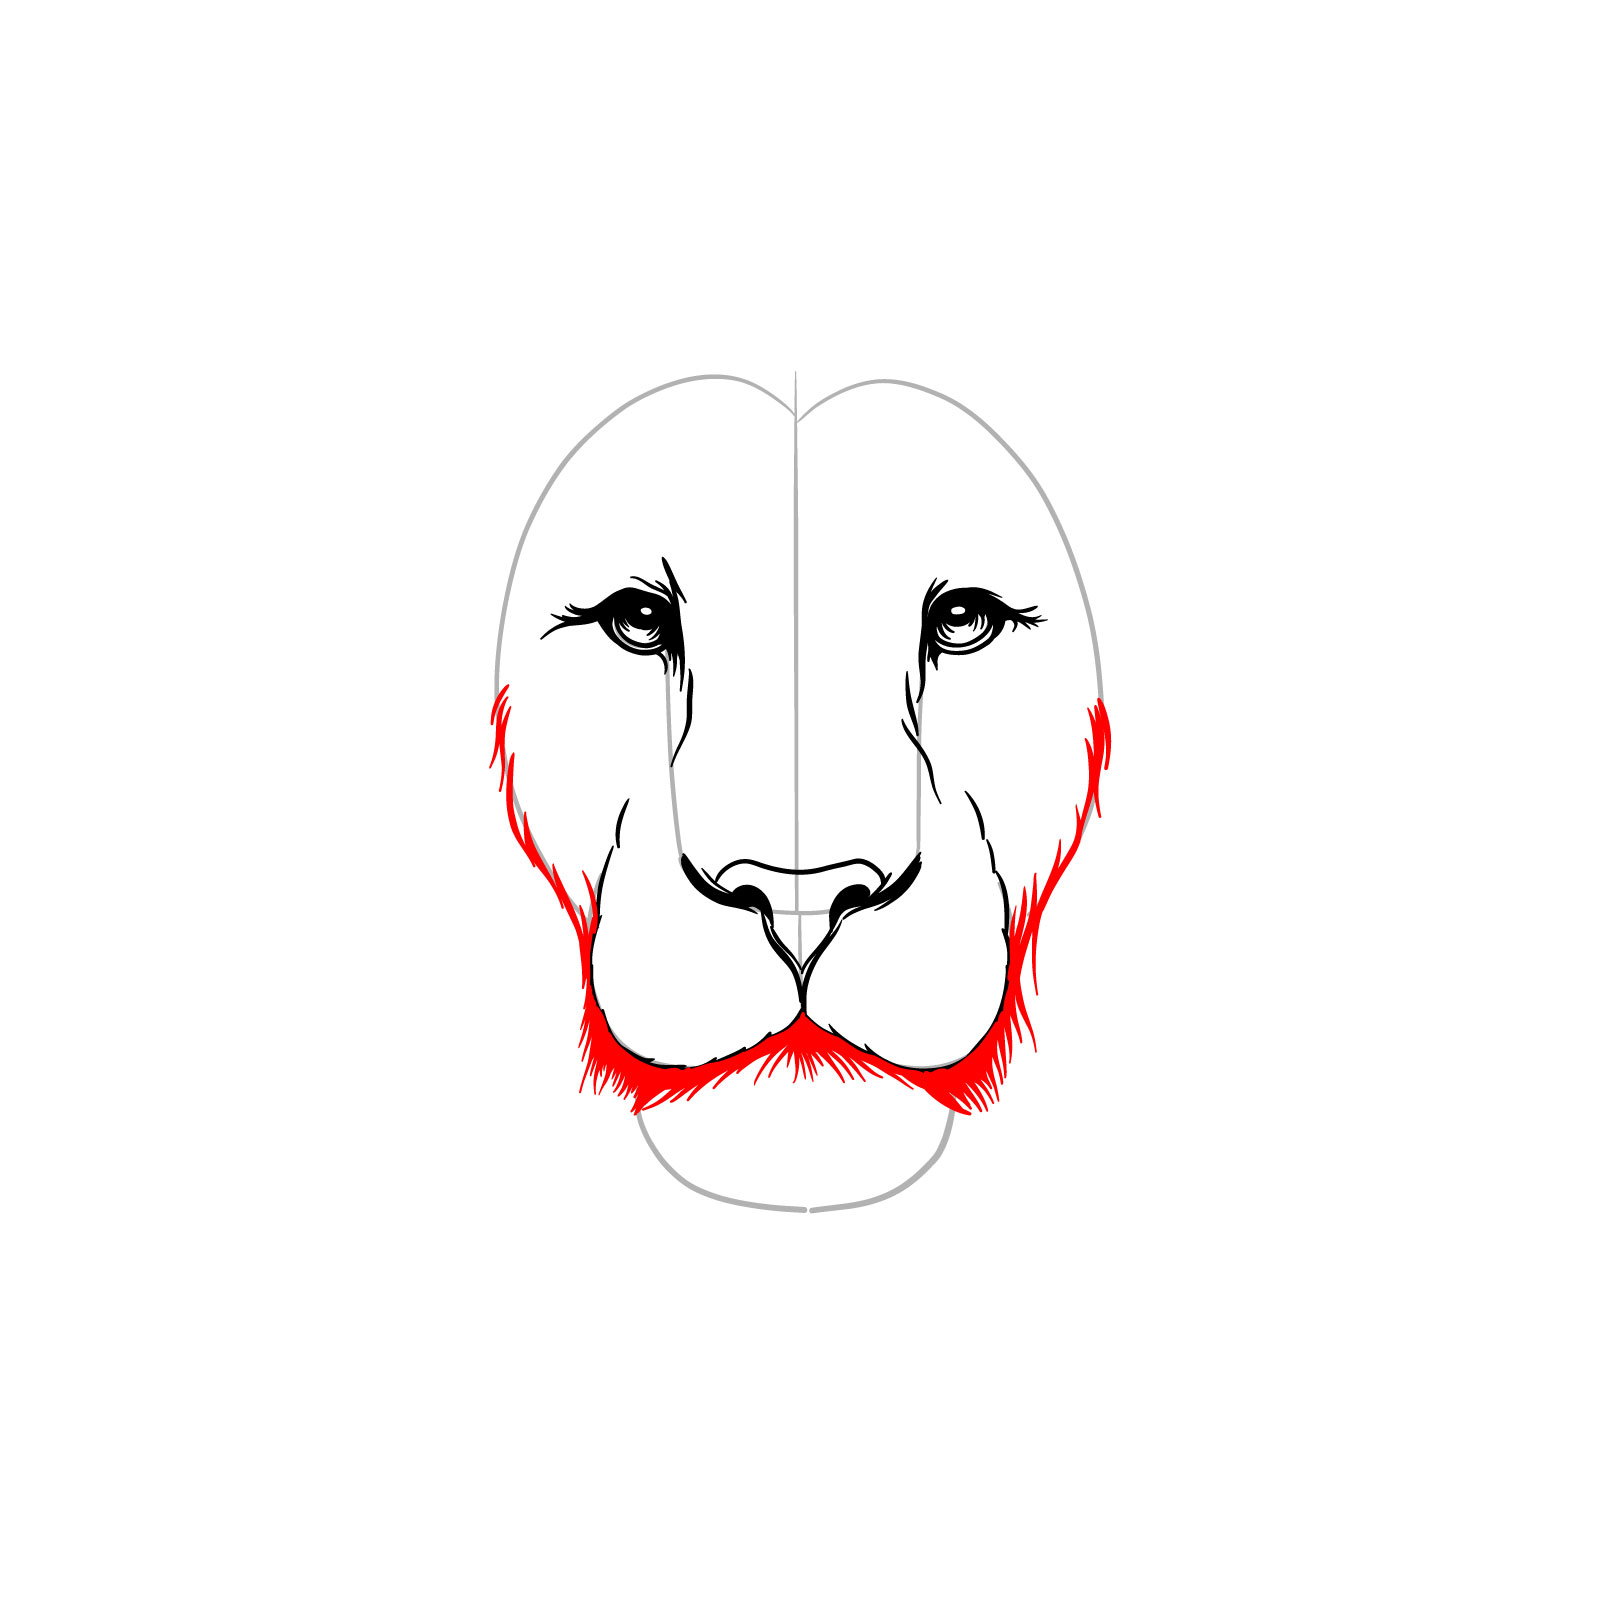
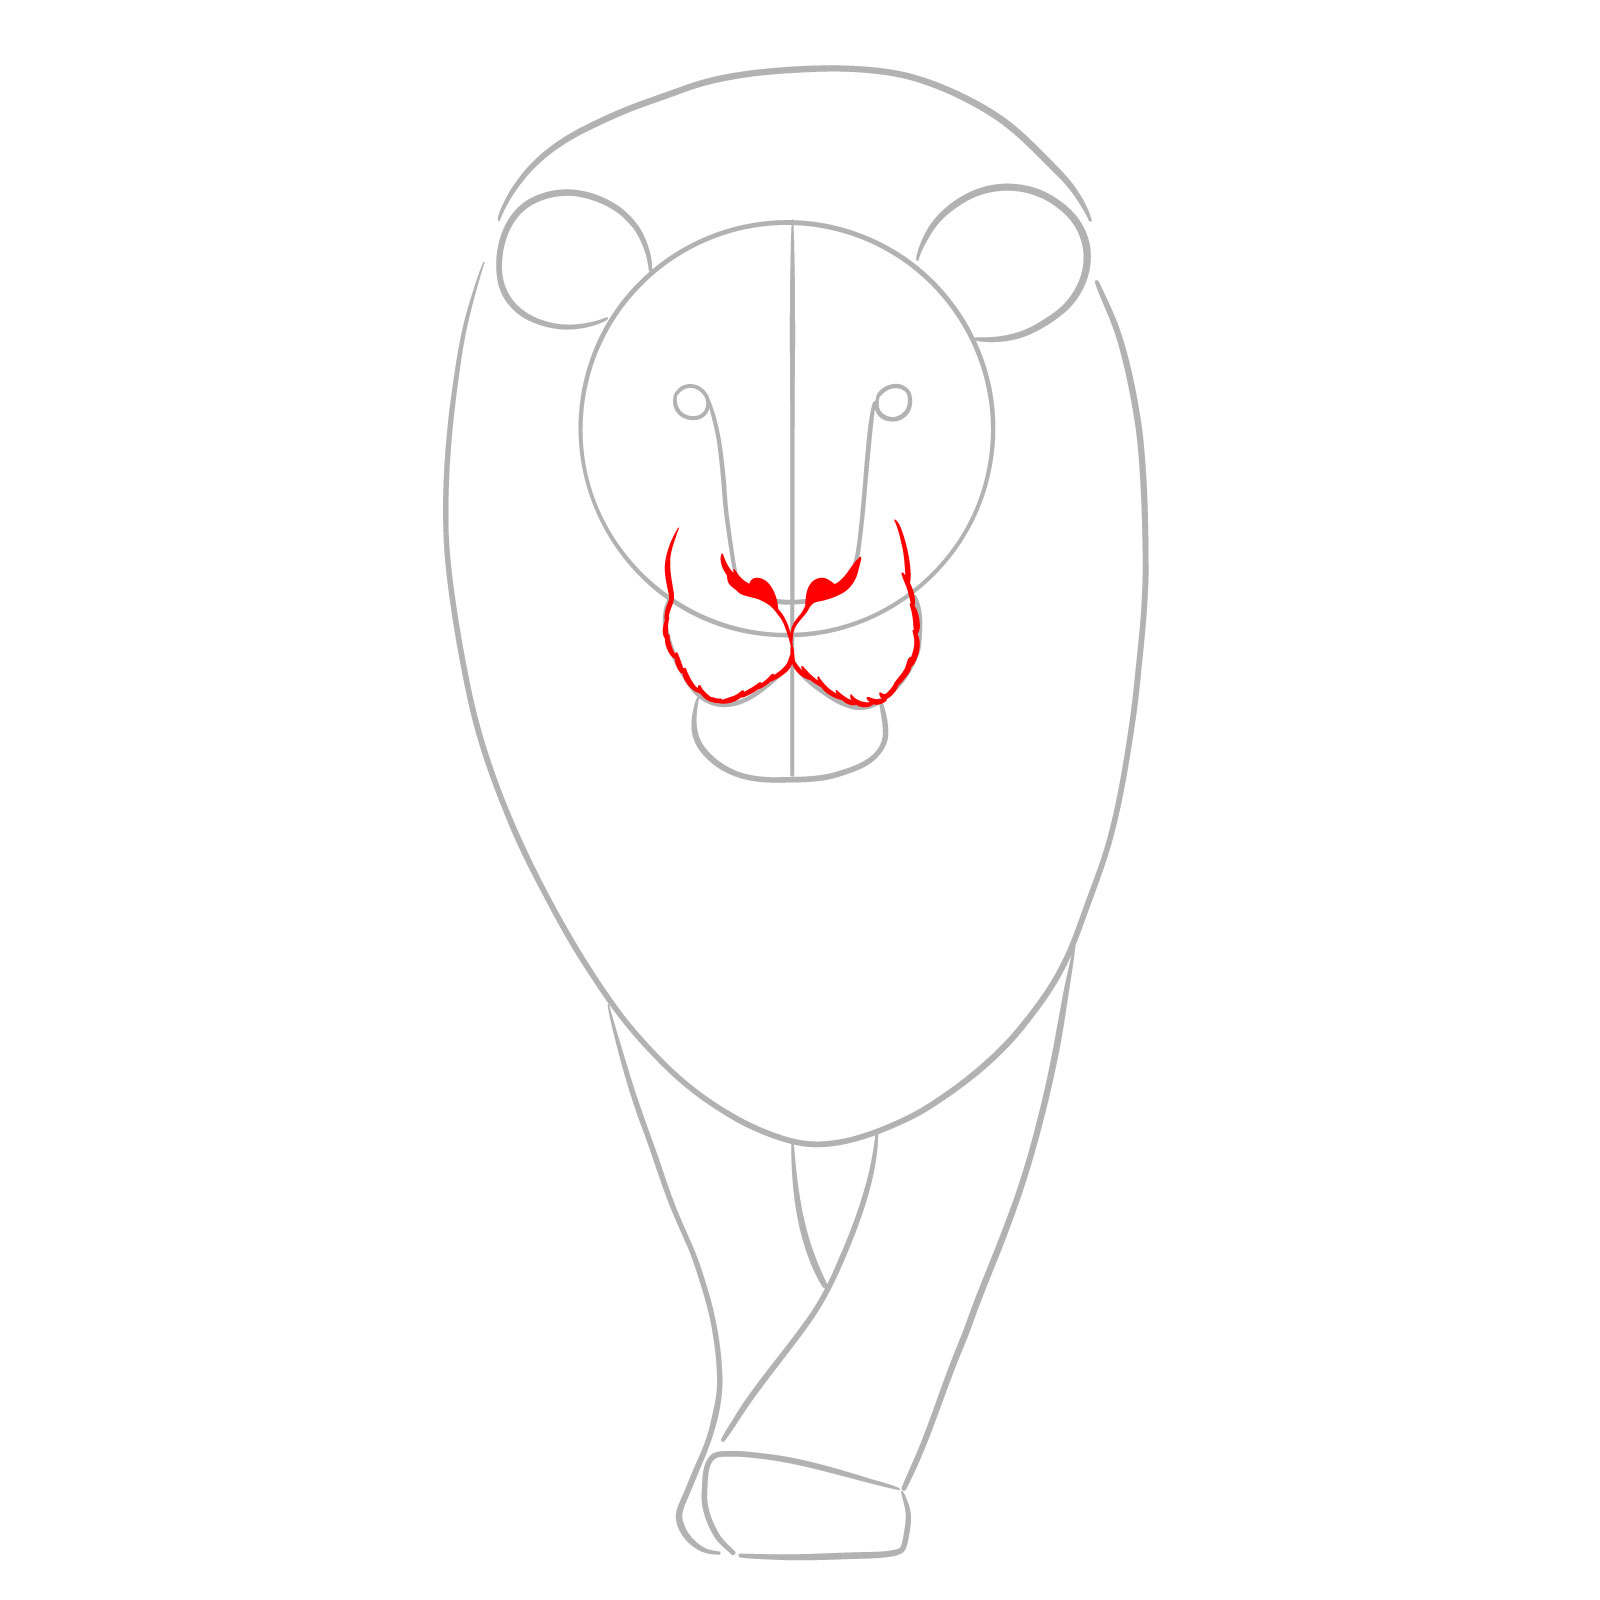
Step 07 – Draw short lines around the lion’s mouth and across the bottom half of the face base to suggest fur texture. These lines should mimic the natural growth pattern of the lion’s fur
Sketching the lion’s mouth and facial texture
Step 08 – With short strokes, add definition to the chin to create a sense of fur texture. Include additional details around the face, such as the subtle fur pattern and skin folds to enhance the realism
Sketching the lion’s chin and facial details
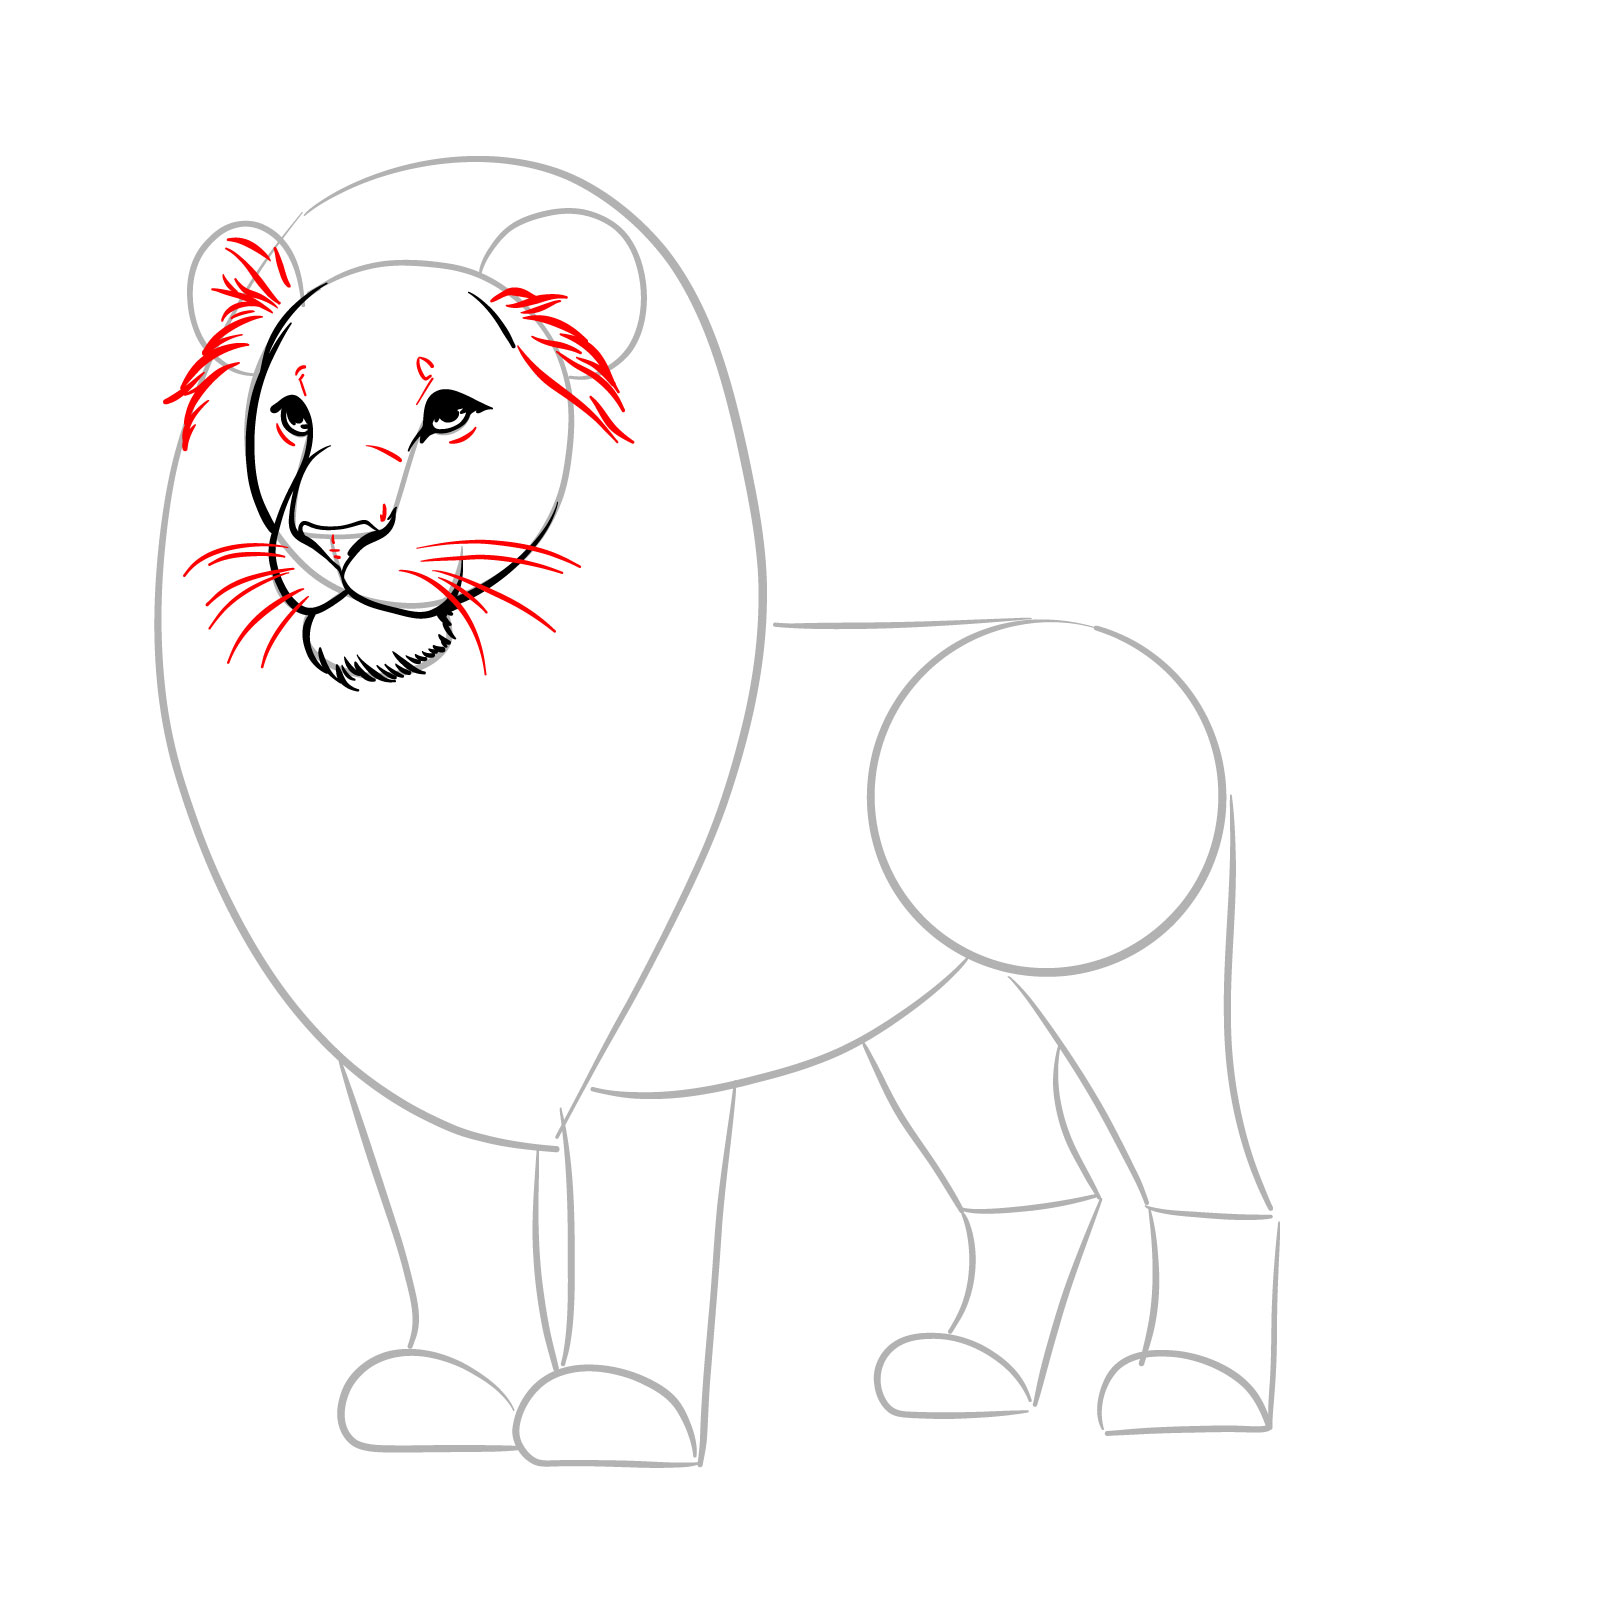
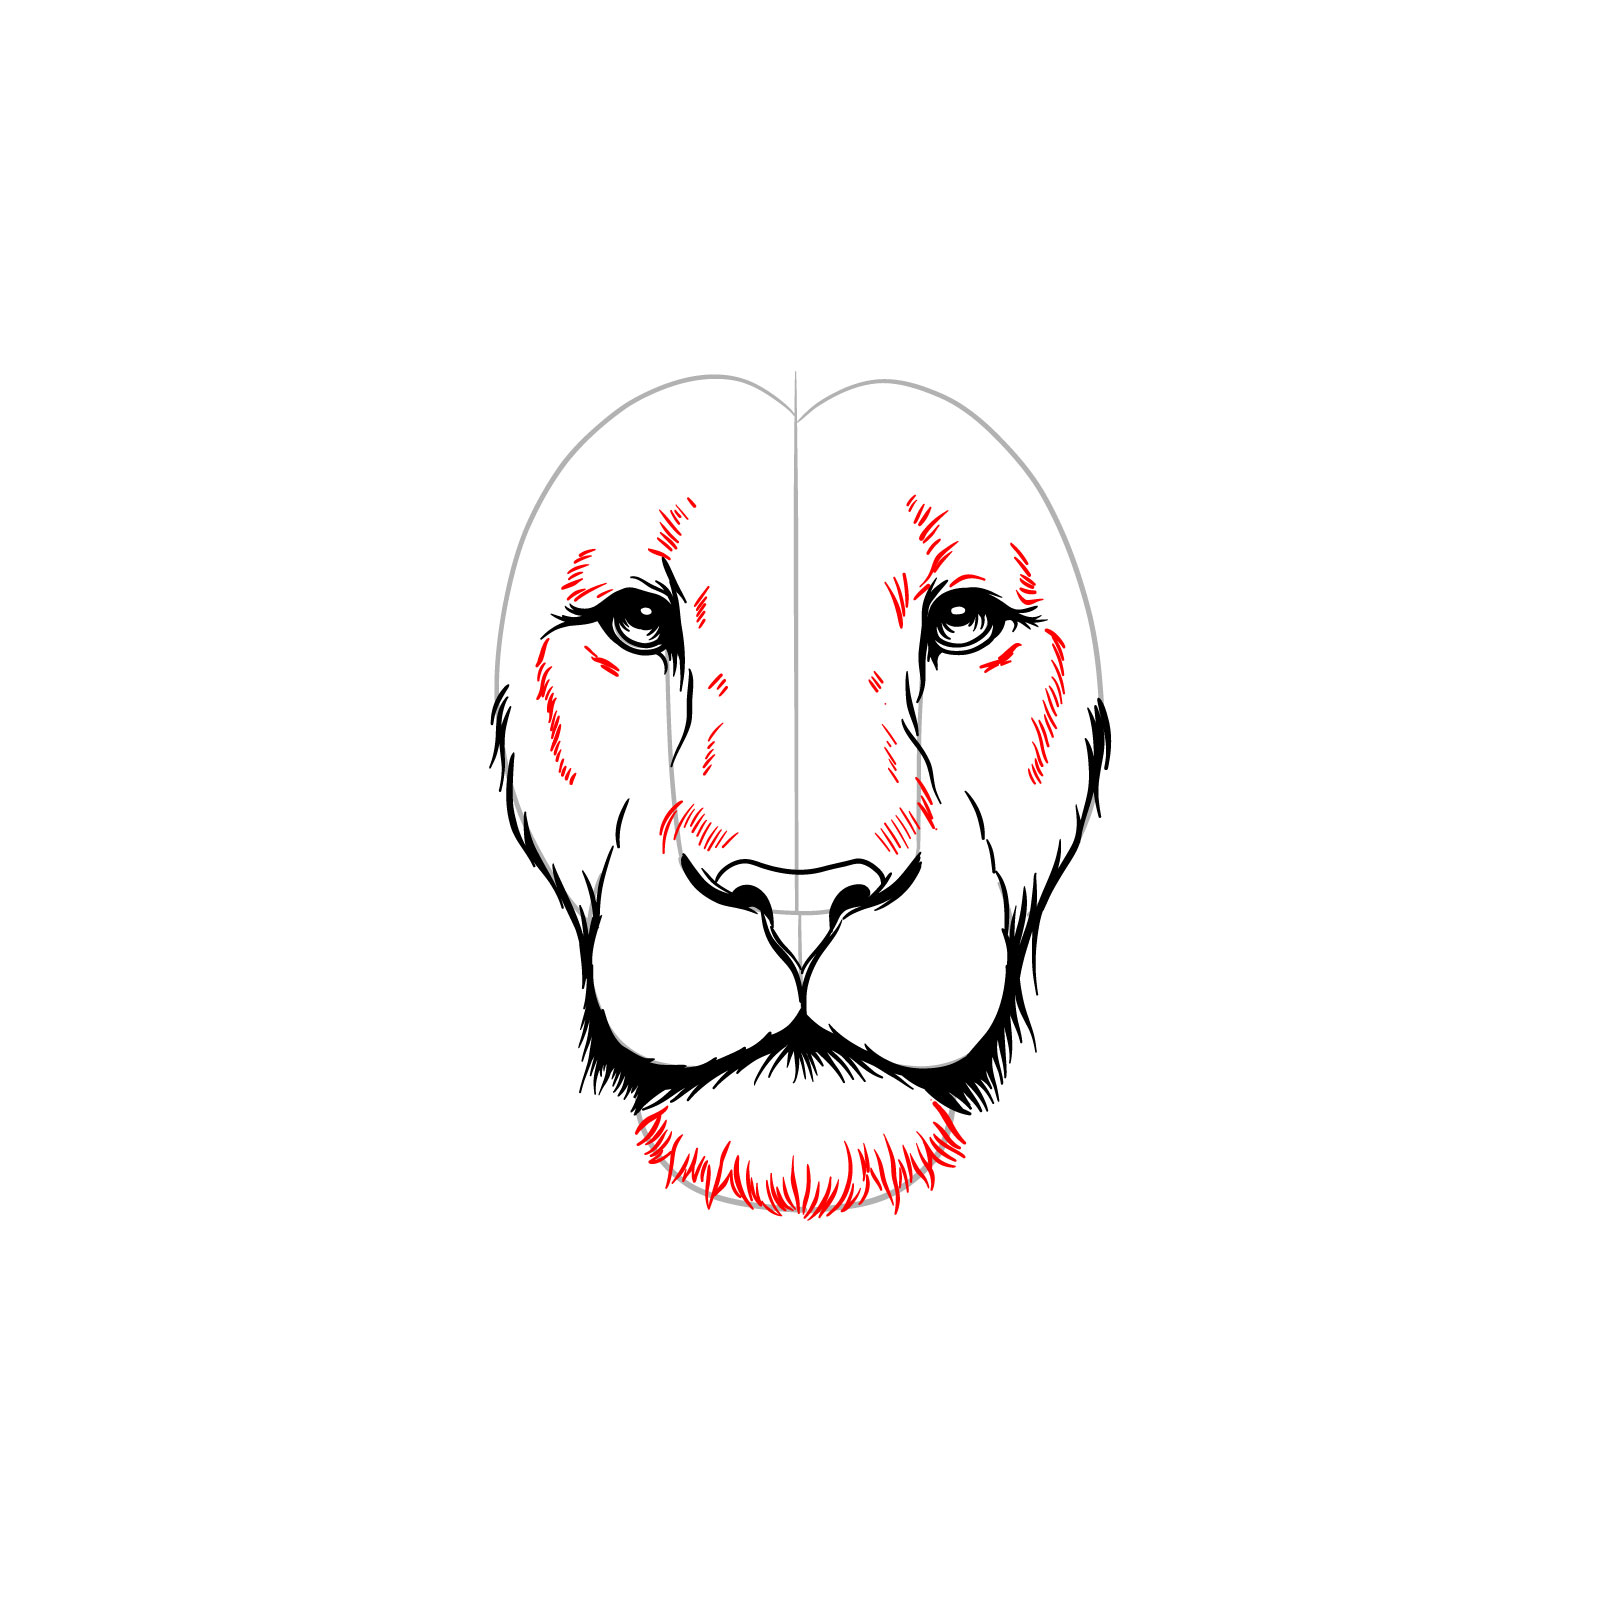
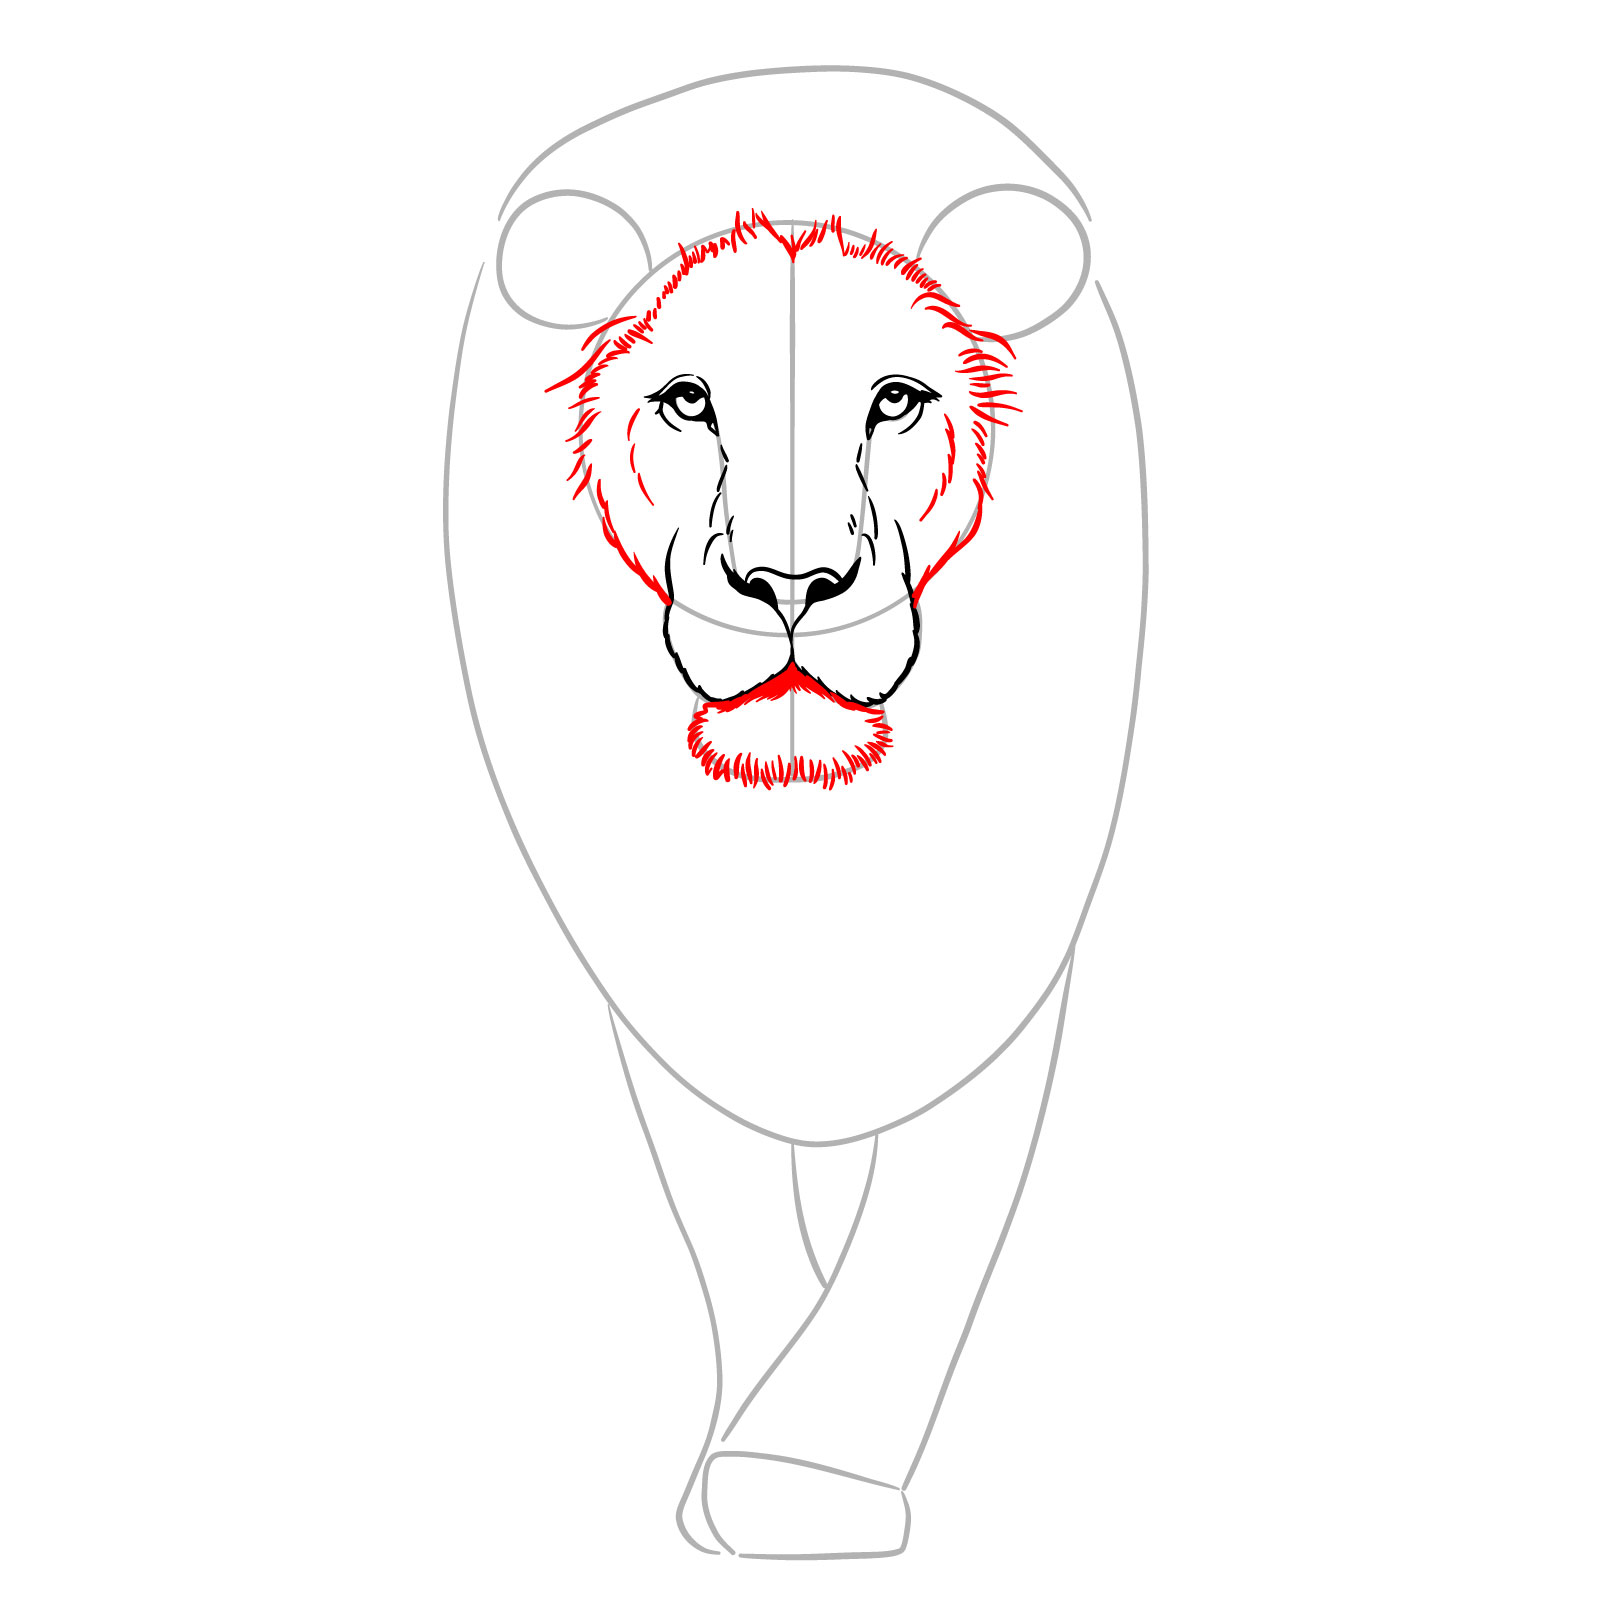
Step 09 – Use short lines to draw the fur patterns on the lion’s forehead, following the natural direction in which the fur grows
Defining the forehead and upper face frame
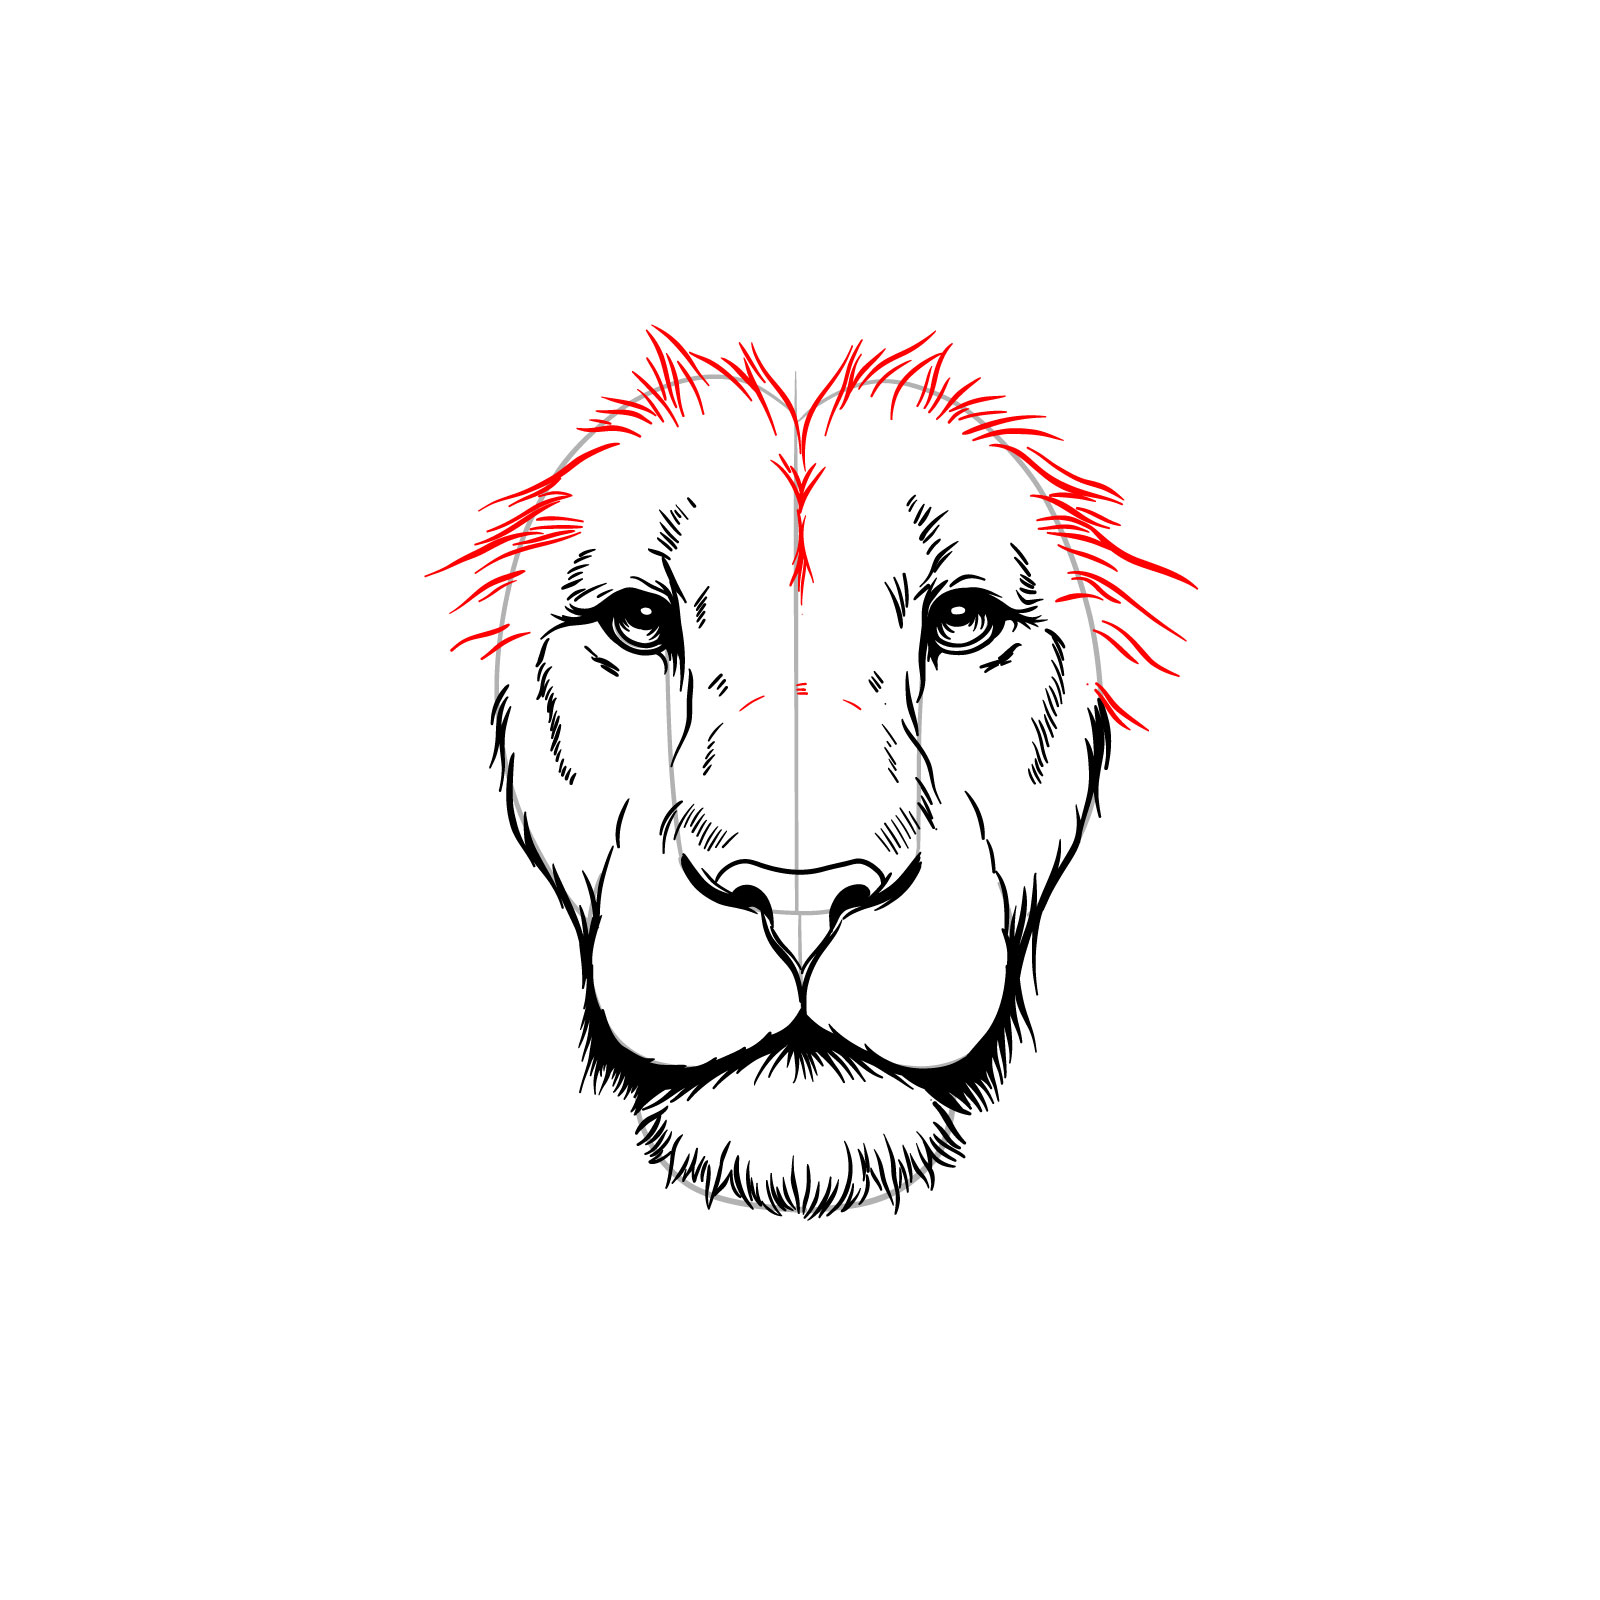
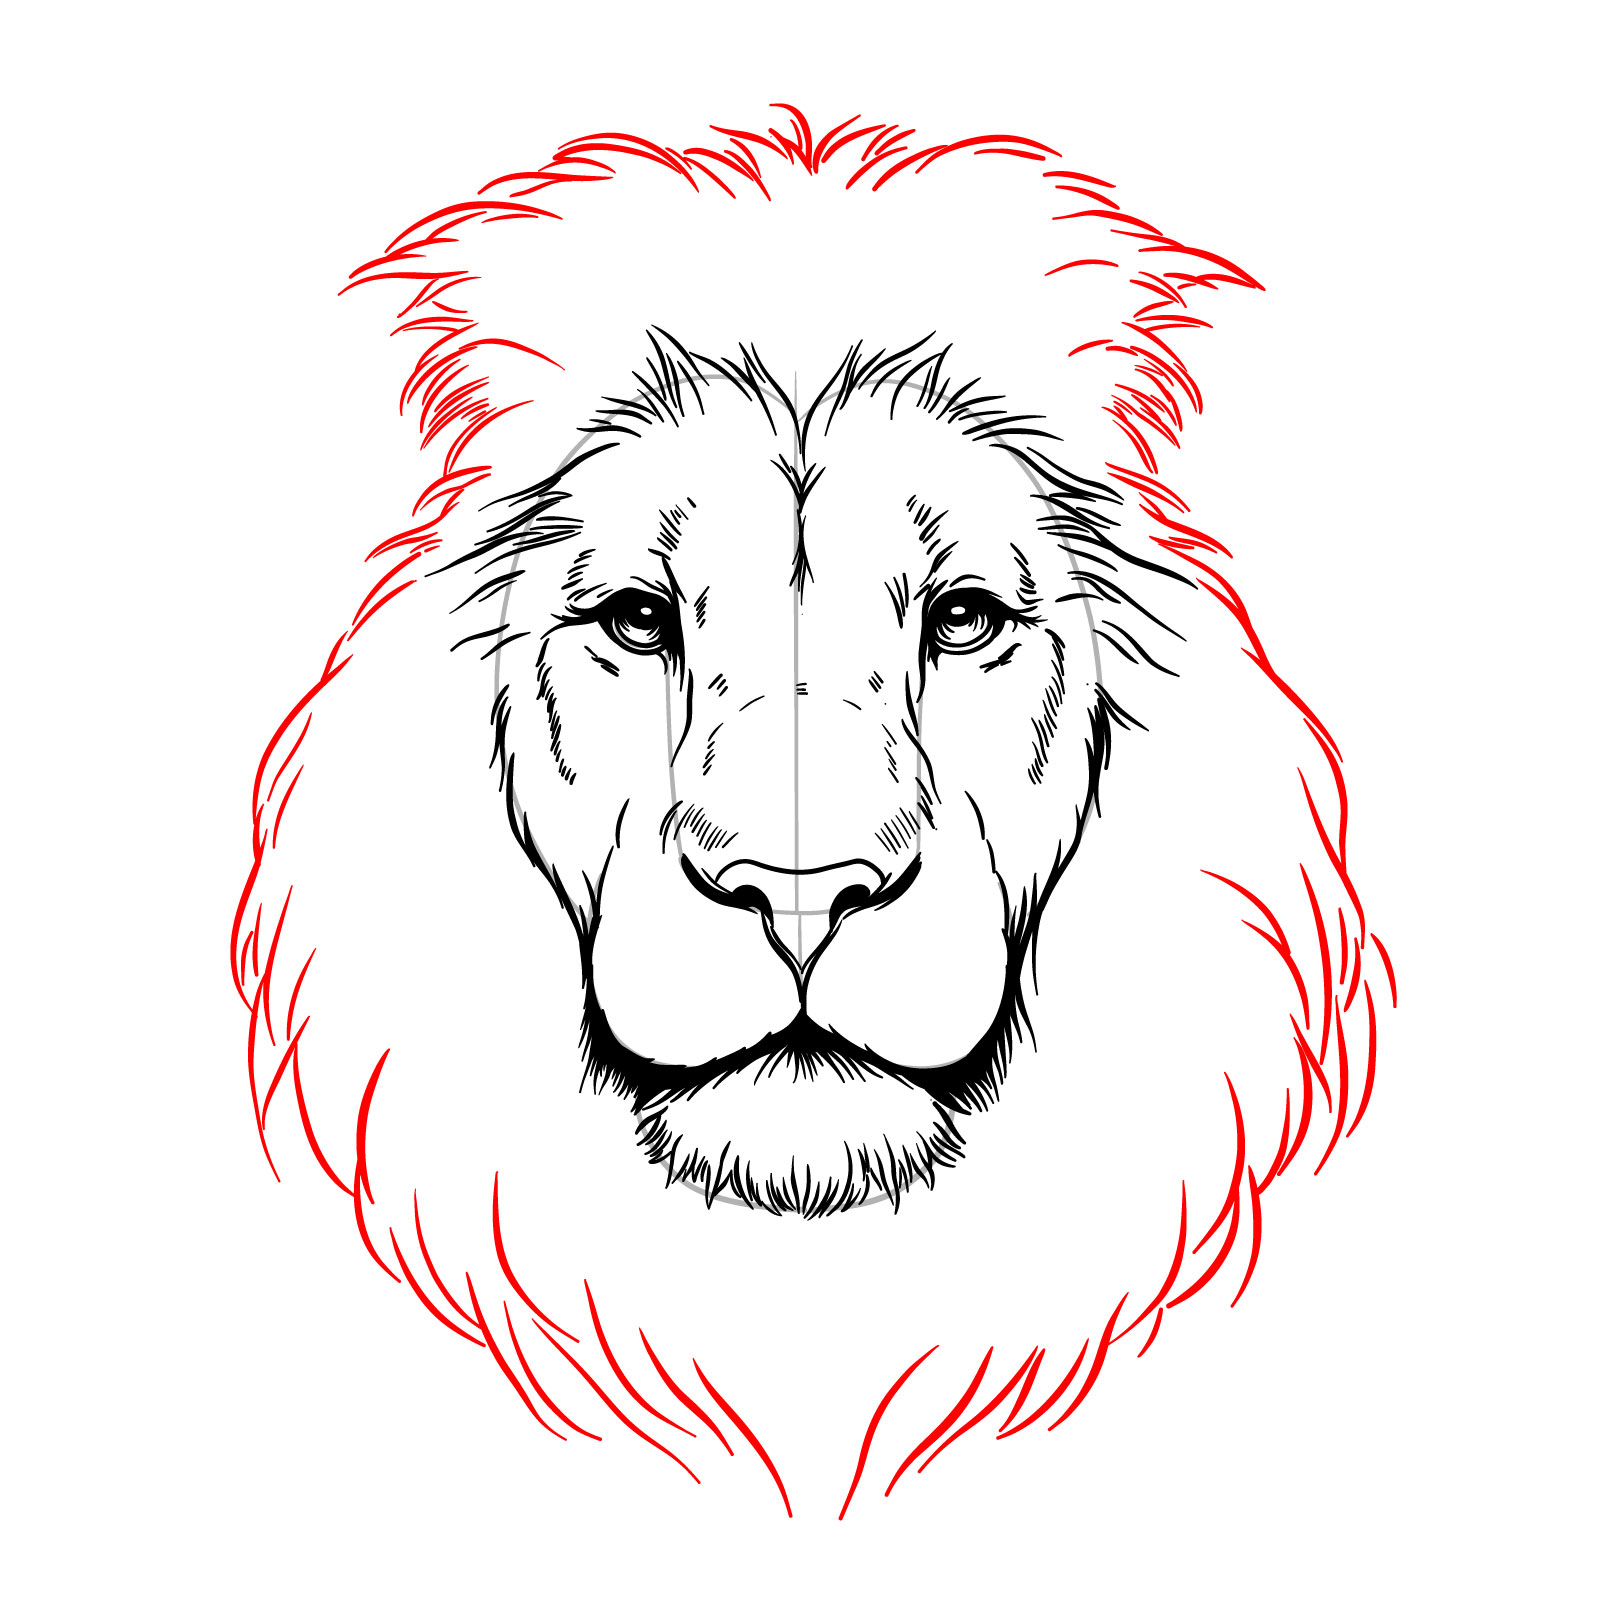
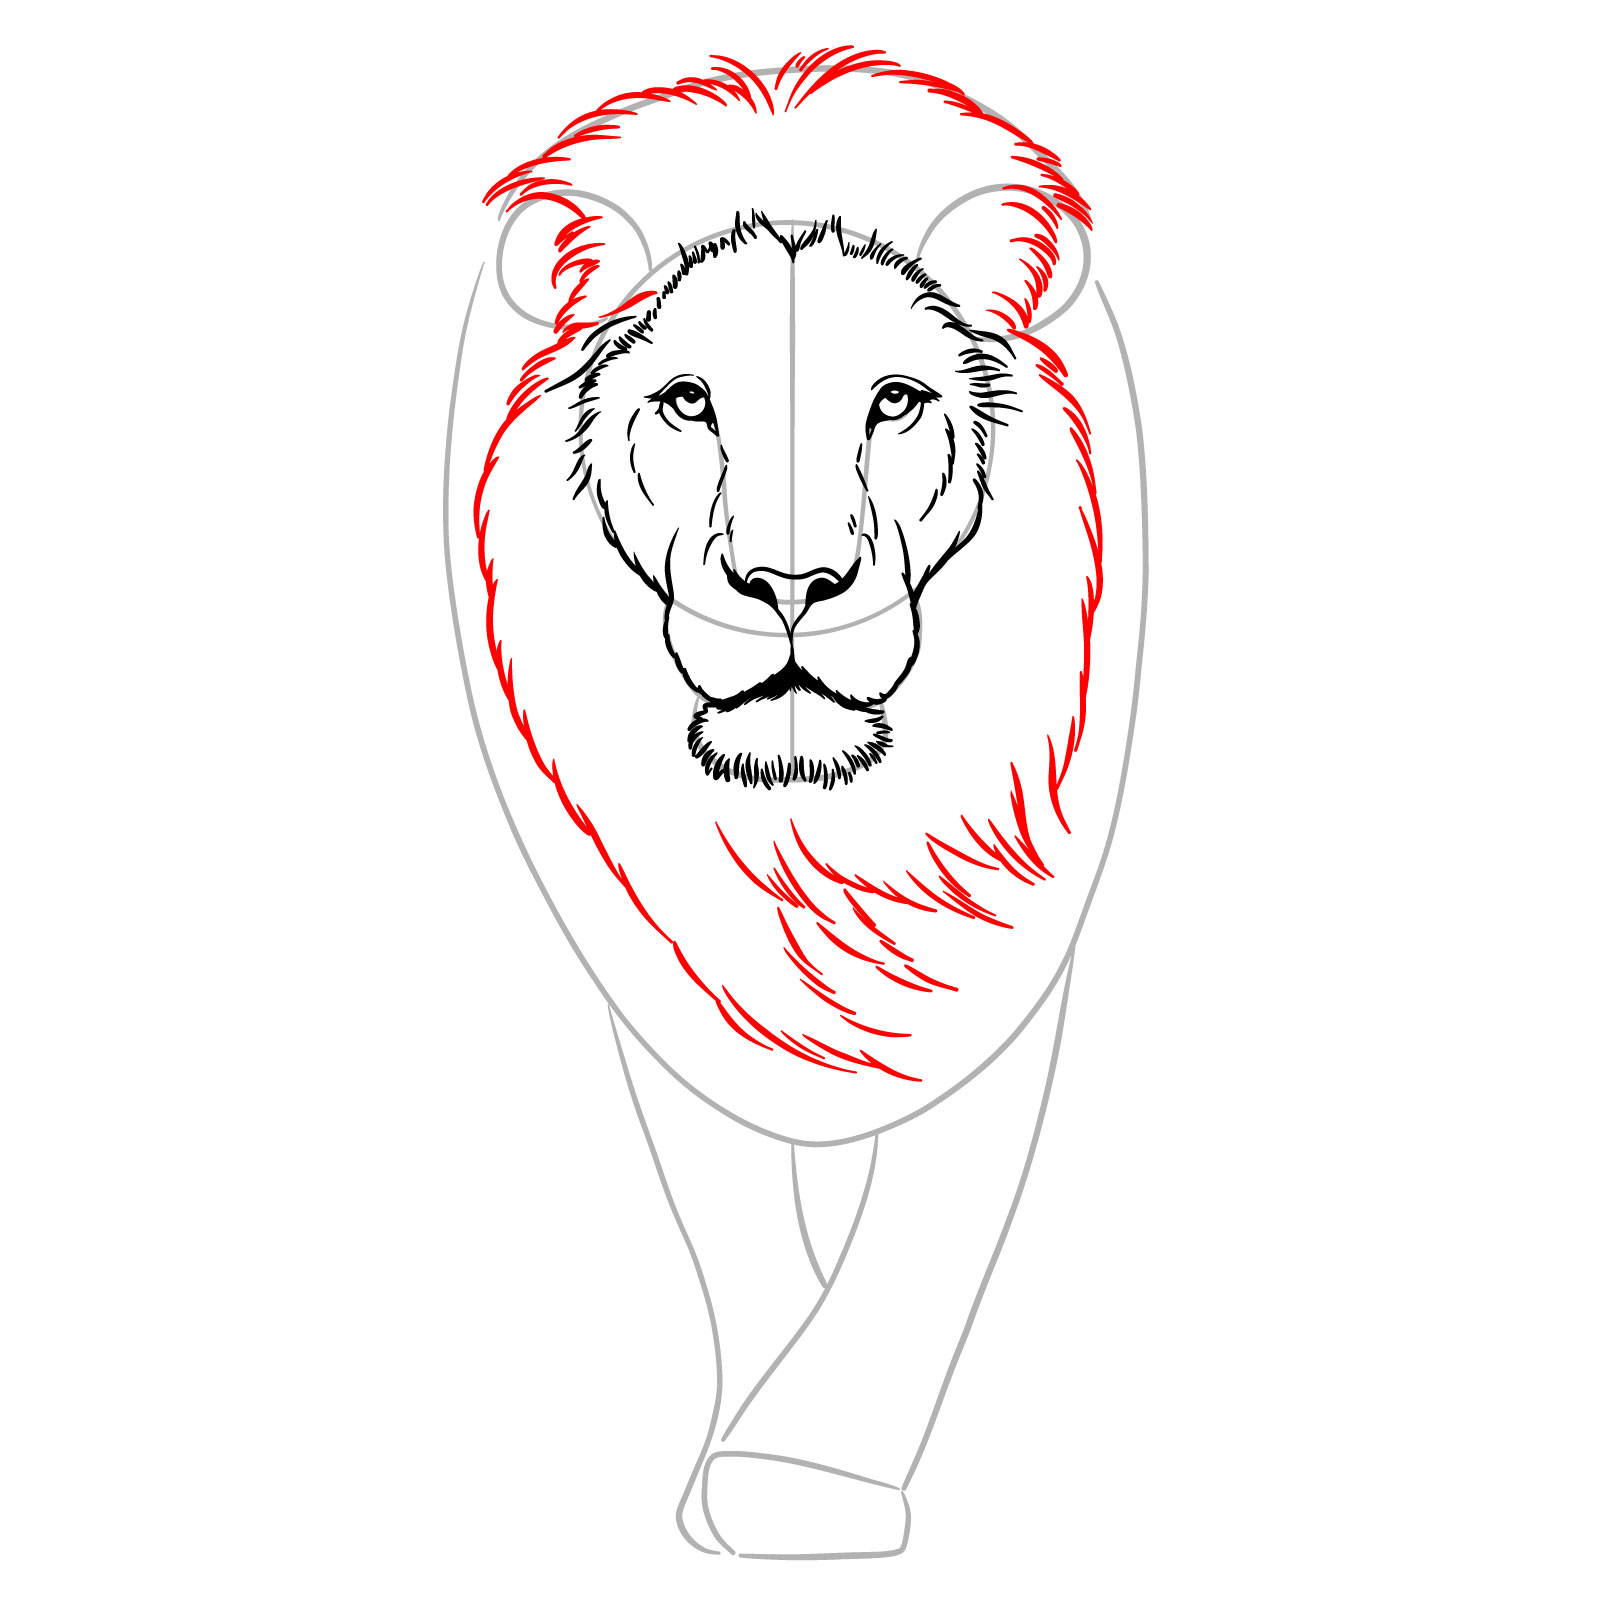
Step 10 – We used all the basic shapes from the first step and it’s time to go beyond them. Begin sketching the lion’s mane, using longer flowing lines to suggest the fullness and movement of the fur
Outlining the lion’s mane with flowing fur lines
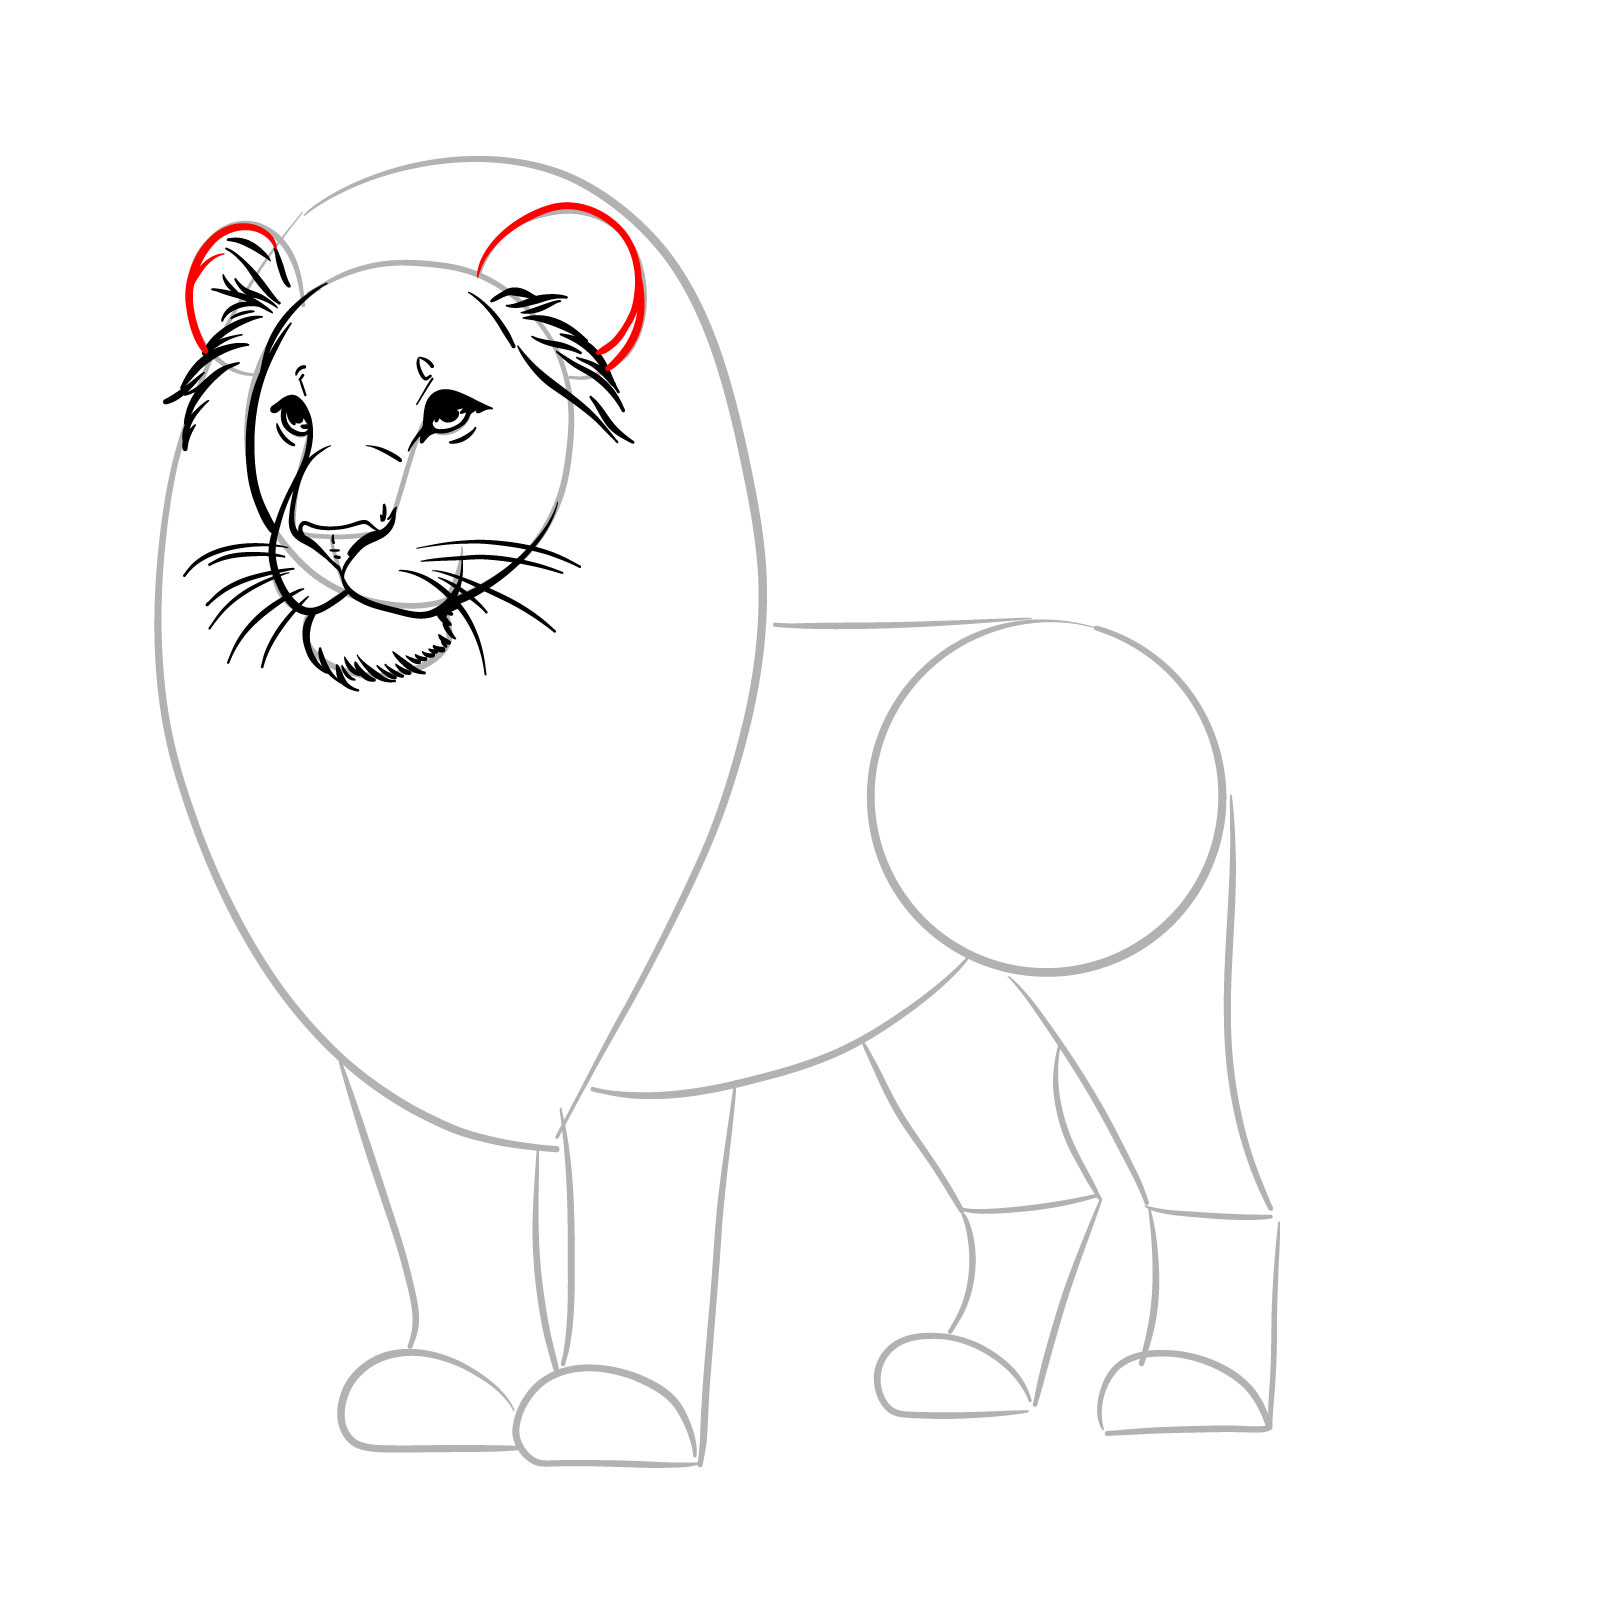
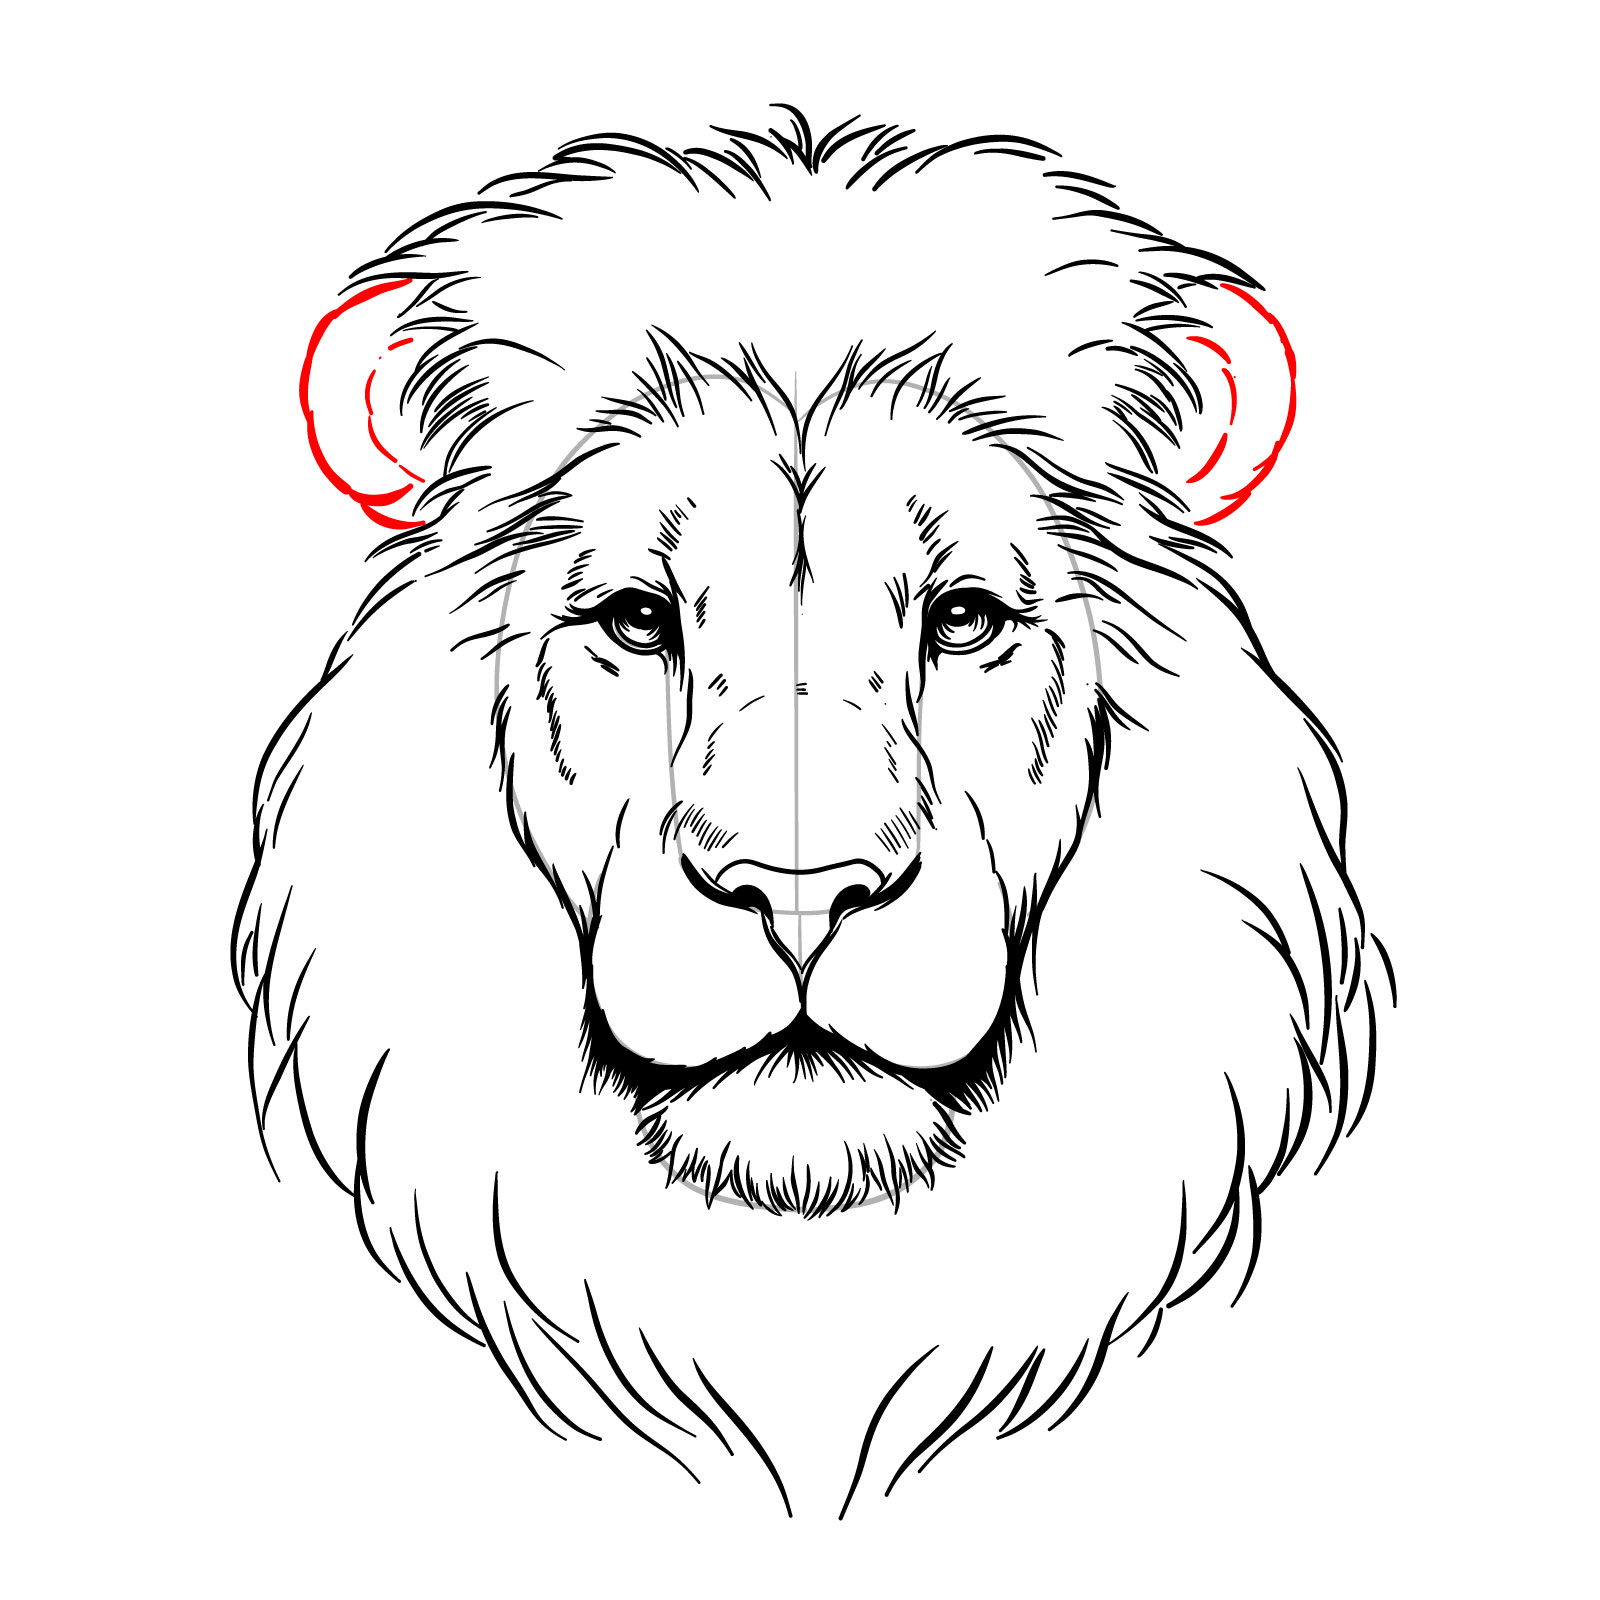
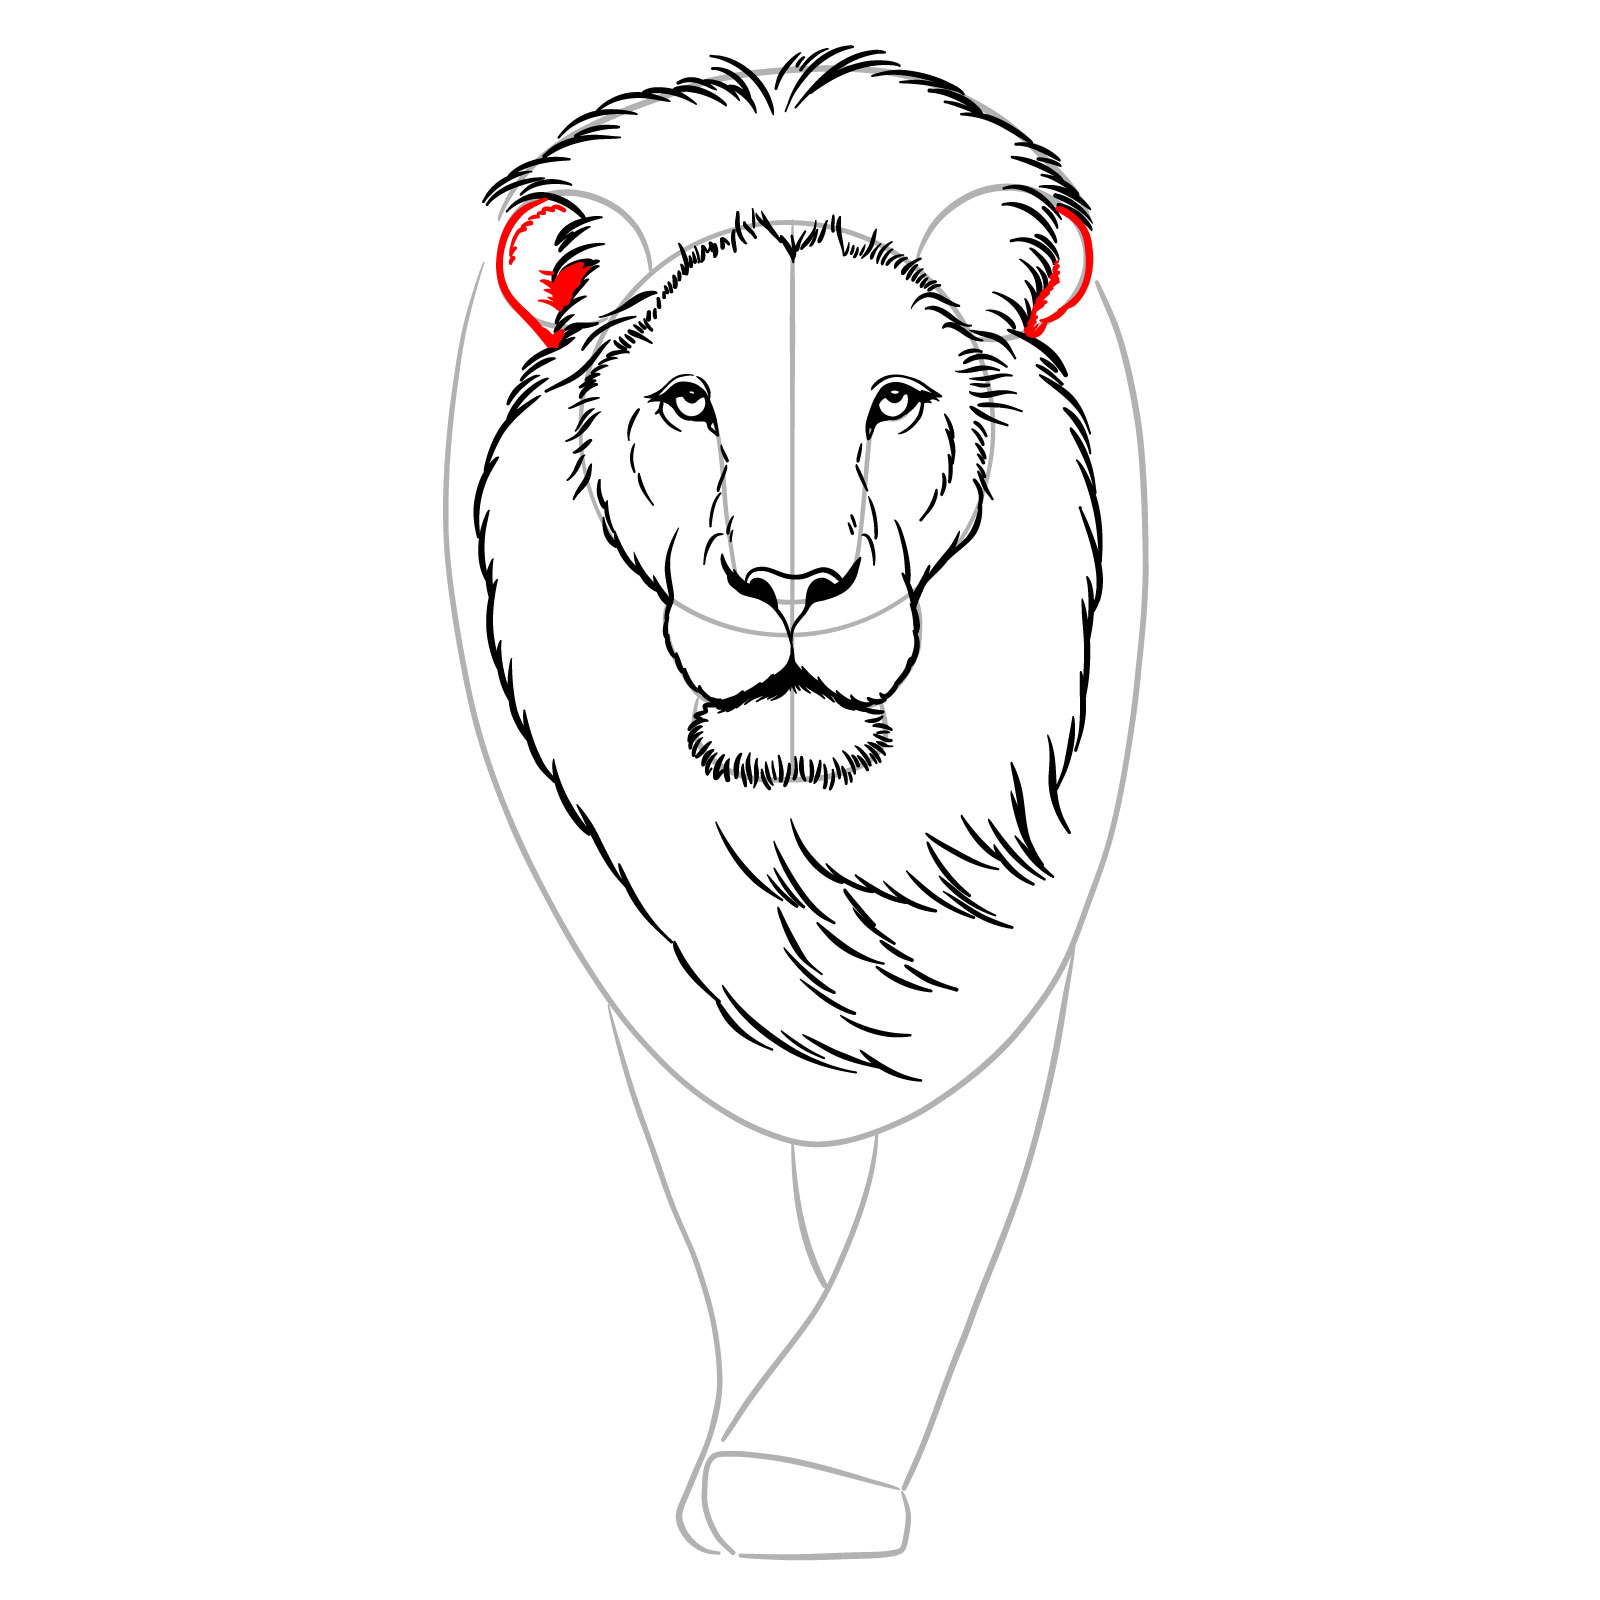
Step 11 – Draw the lion’s ears peeking out from the mane. Place them at the sides of the top of the head, ensuring they are partly obscured by the mane for a realistic placement
Adding ears to the lion’s face drawing
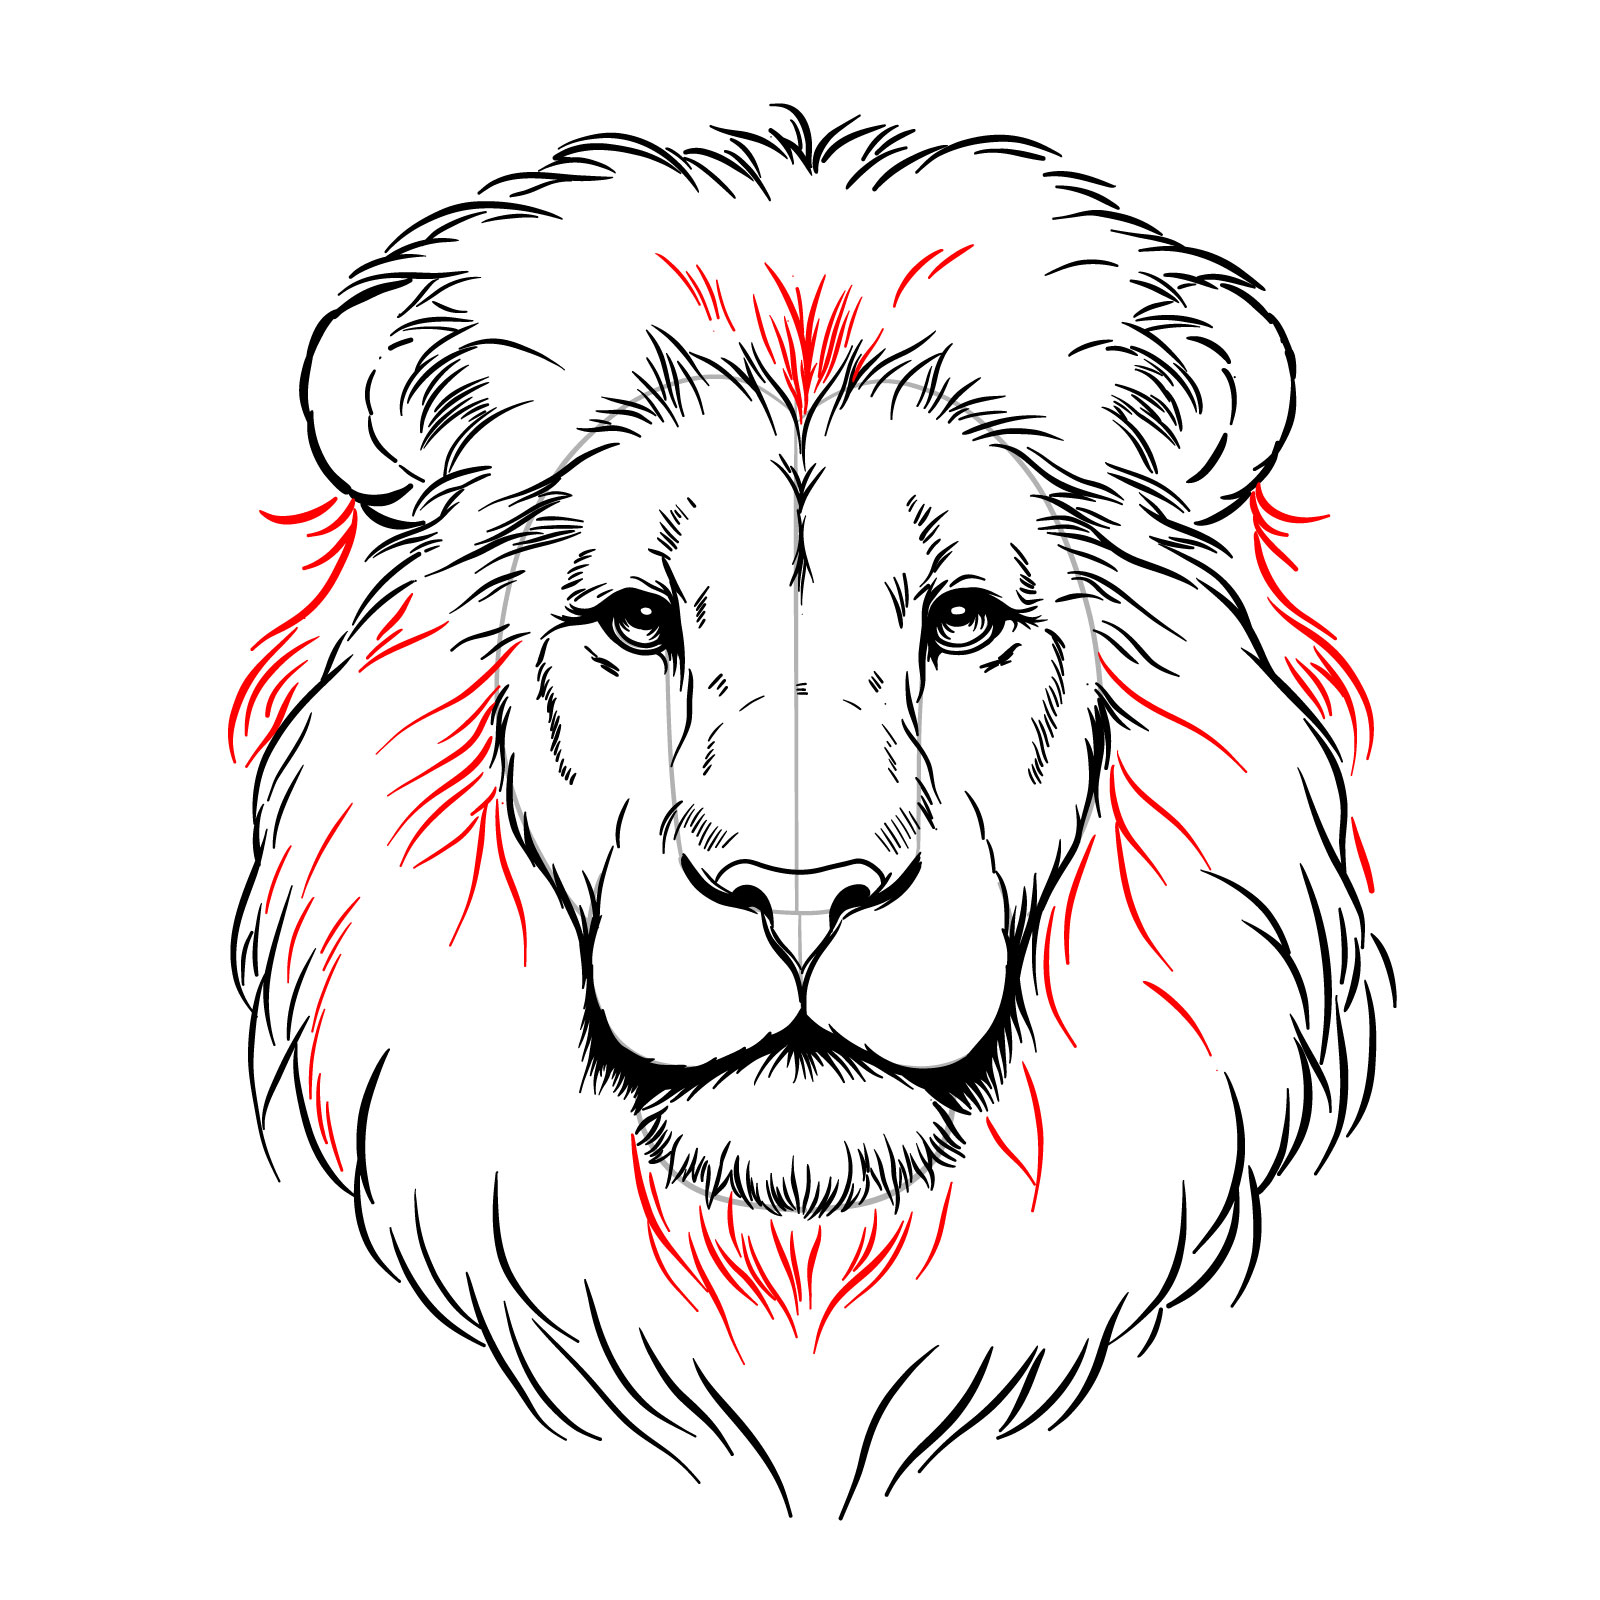
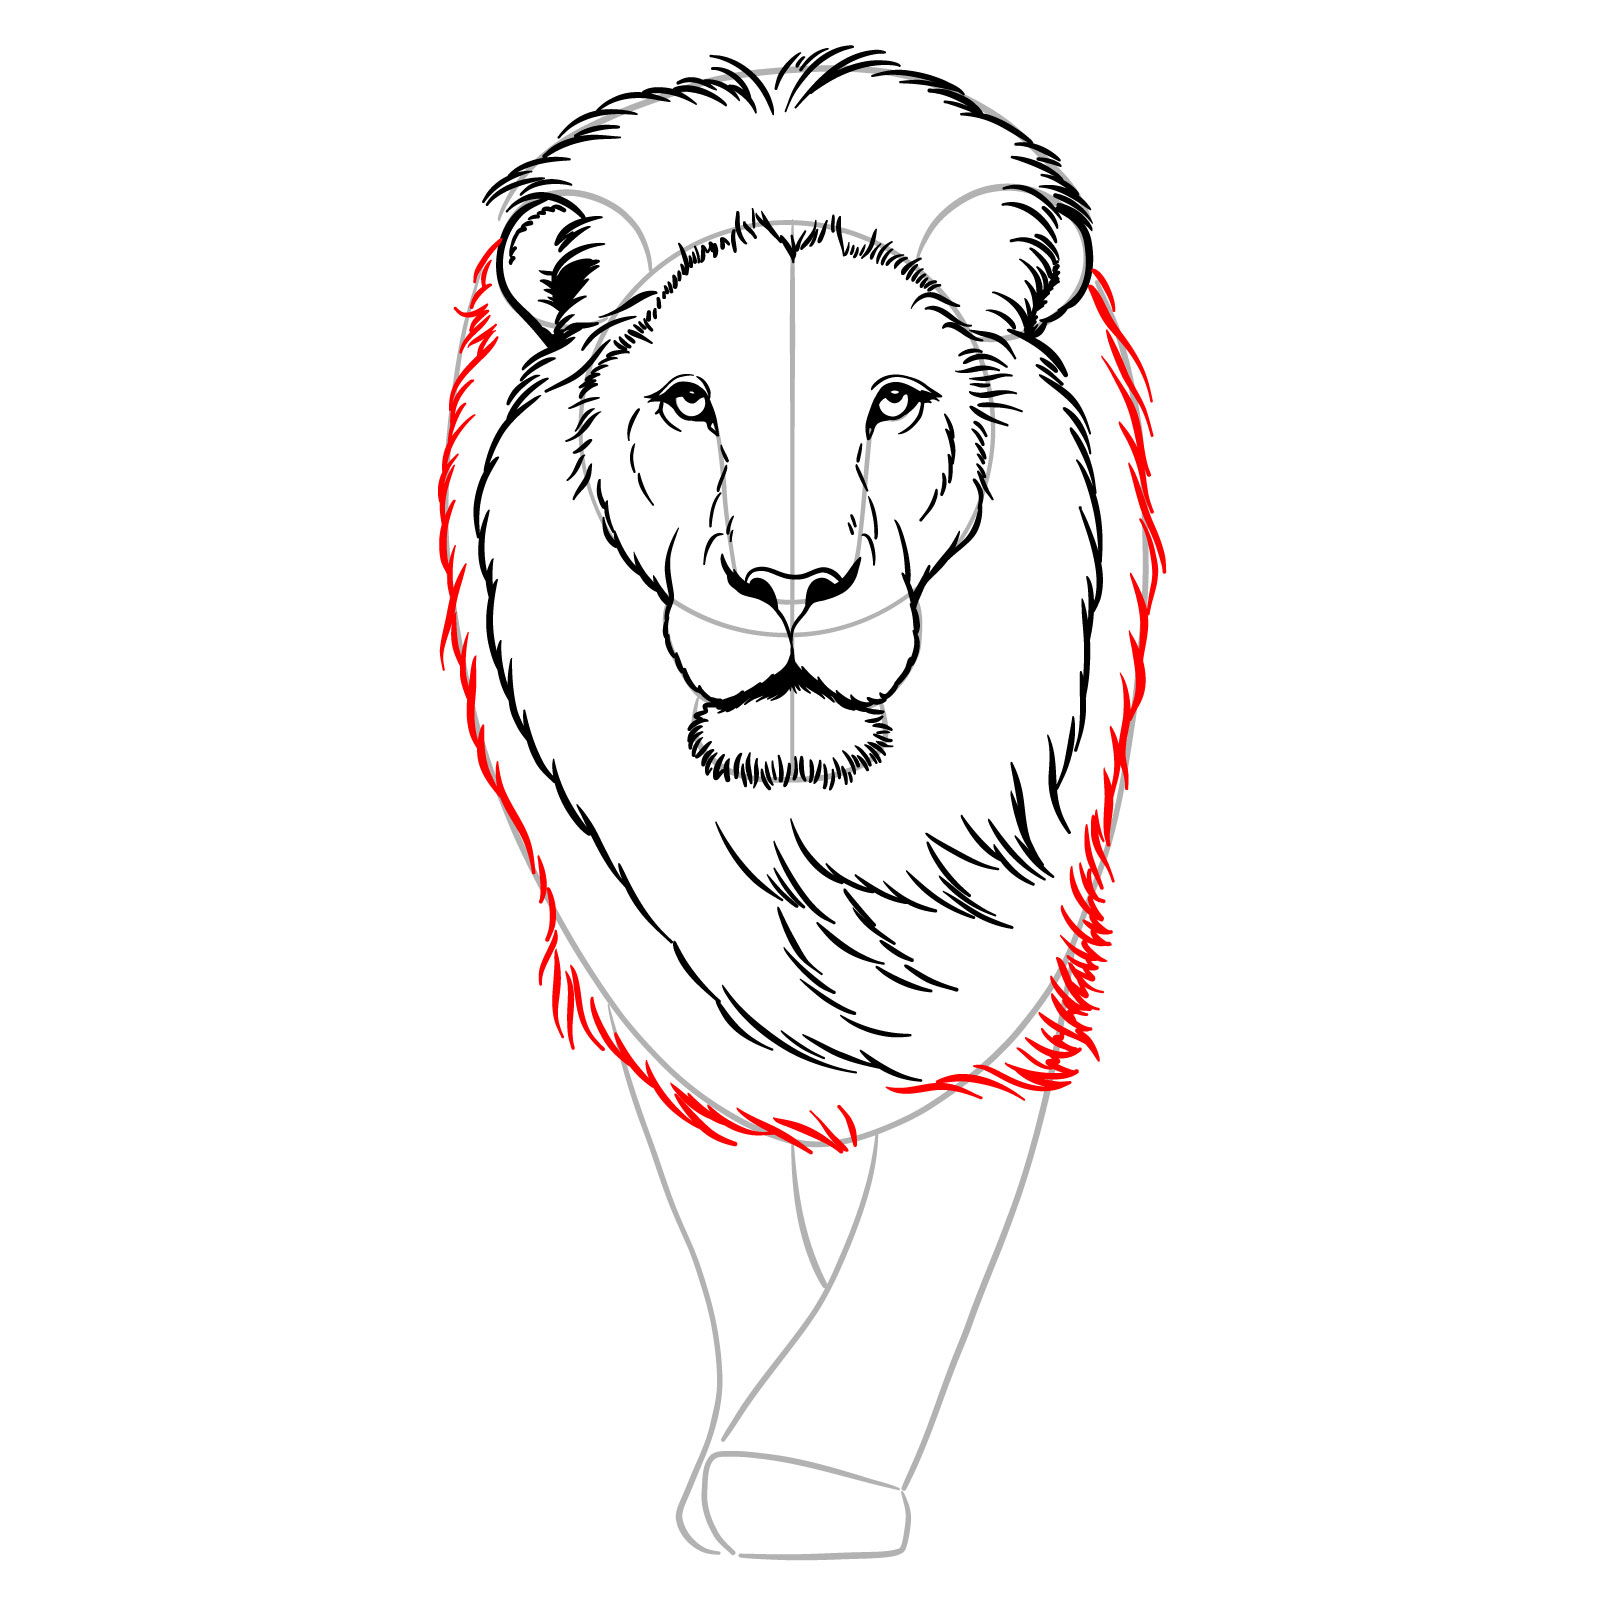
Step 12 – Add more detailed fur lines within the mane to create depth and texture. Vary the length and direction of the strokes to mimic the way the mane would naturally flow and fluff
Enhancing the mane with additional fur details
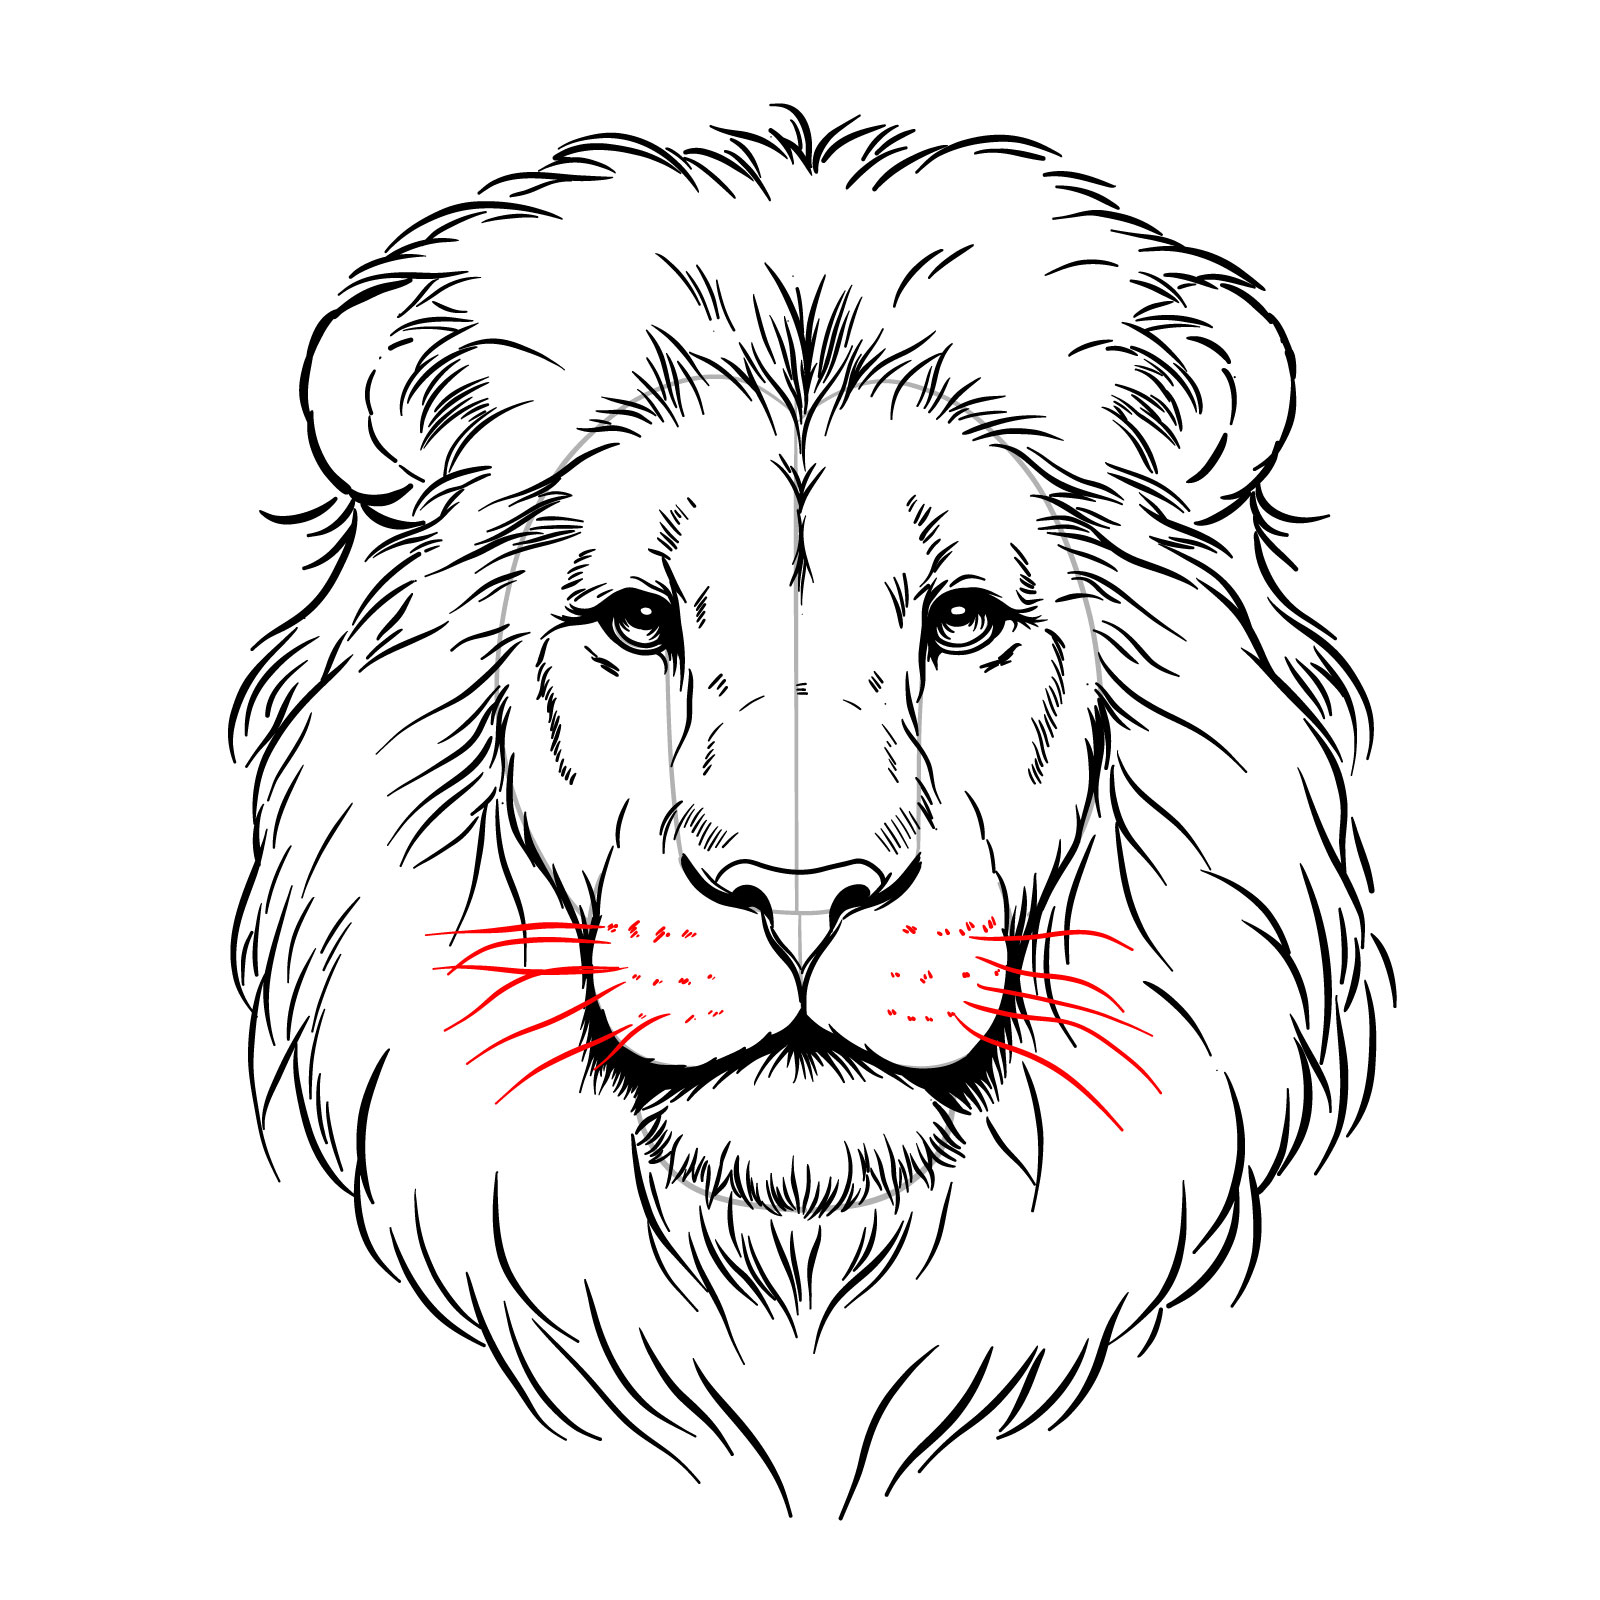
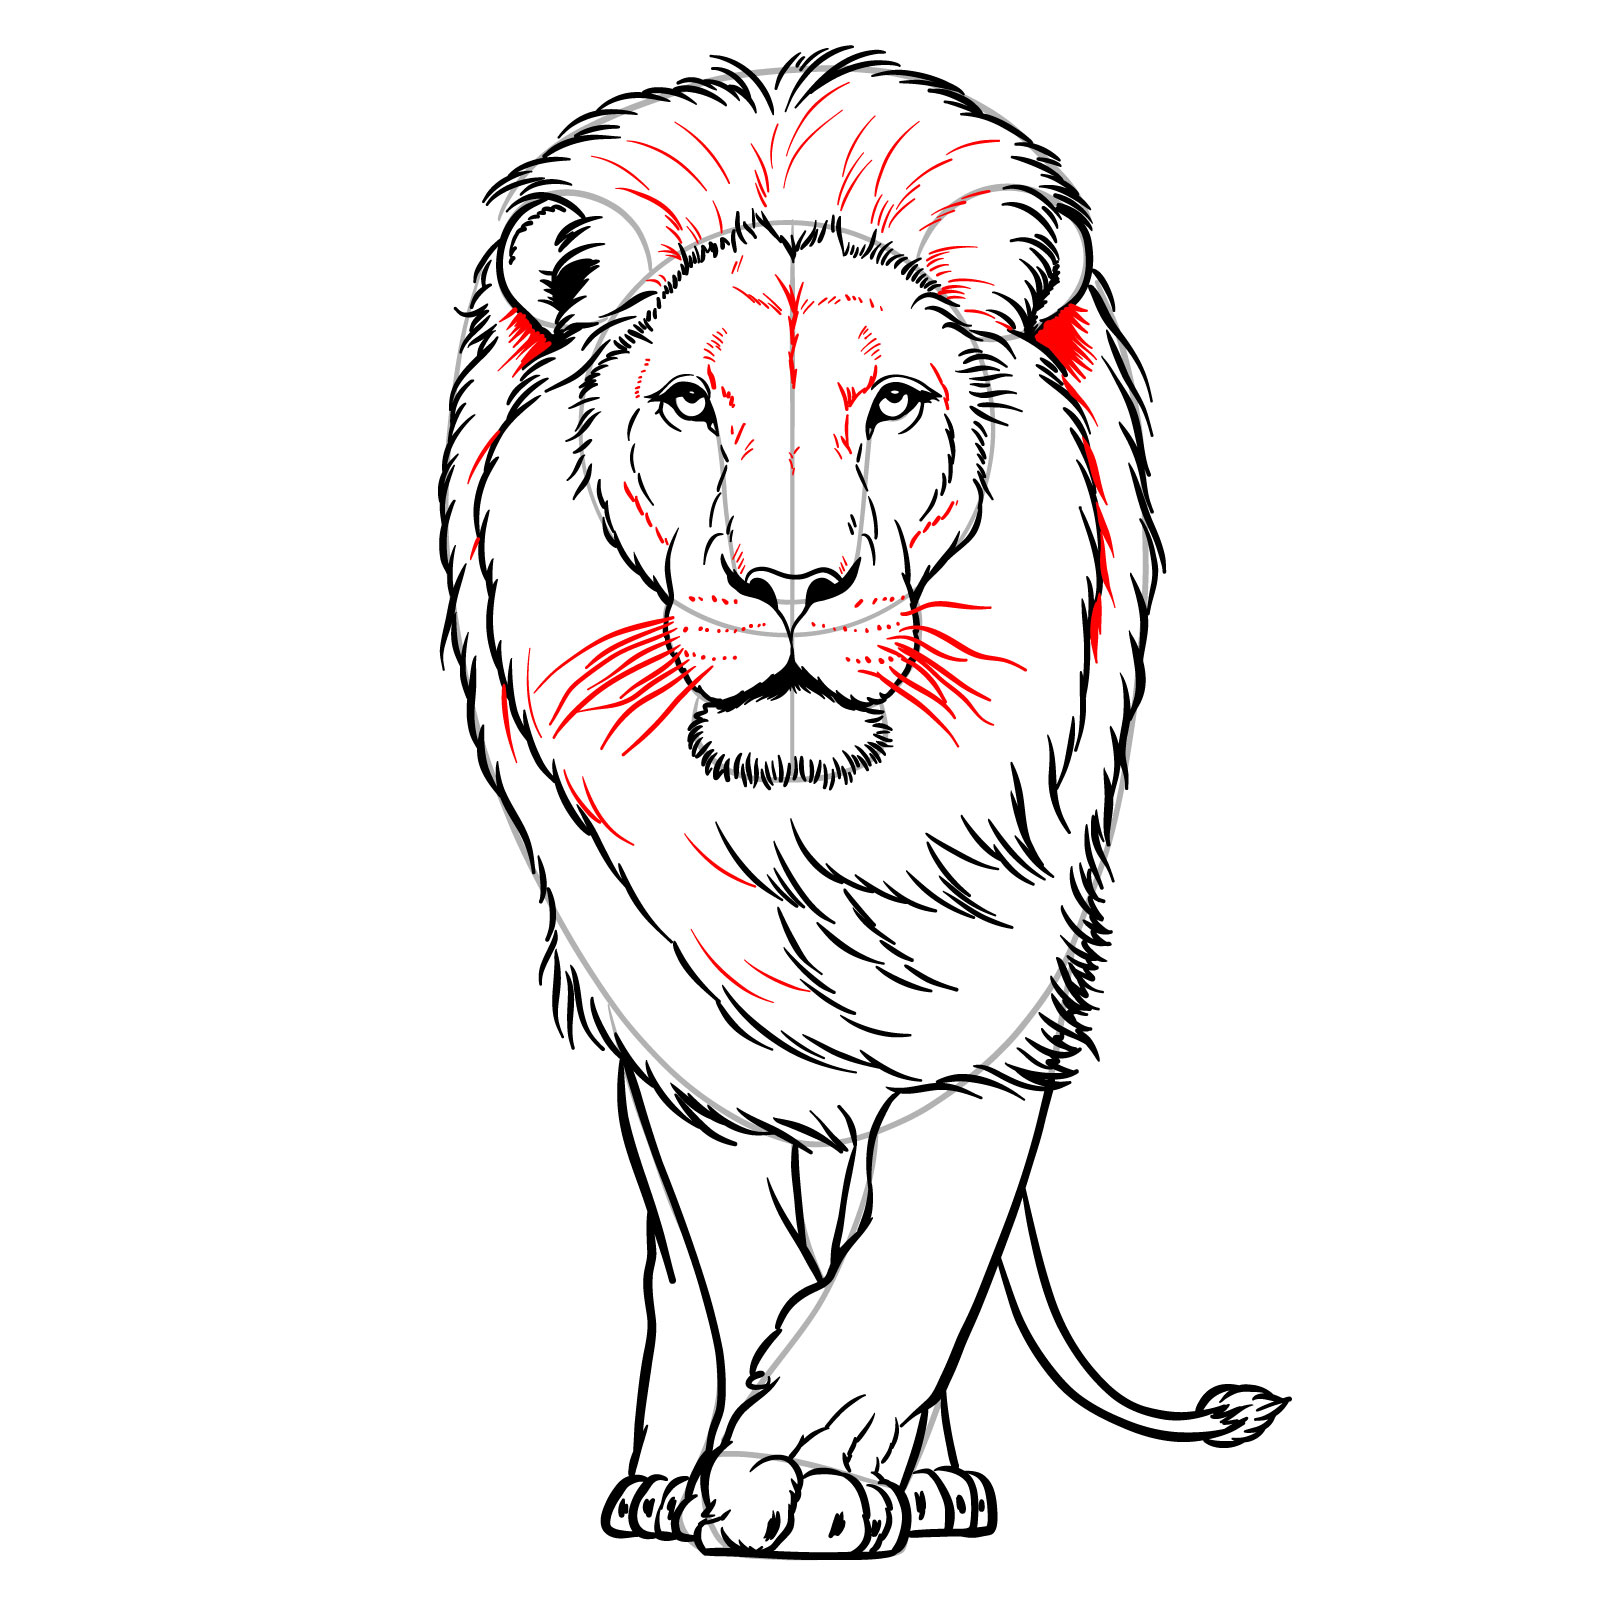
Step 13 – Sketch the lion’s whiskers with slightly curved, thin strokes emanating from the muzzle. Add small dots to represent where the whiskers emerge
Drawing whiskers and facial markings
Step 14 – Finish your drawing by gently erasing the basic sketch lines. If you wish to ink your sketch, do so carefully, allowing the ink to dry before removing any remaining pencil lines. This final step will leave you with a clean, detailed drawing of a lion’s face
Completing the lion’s face drawing
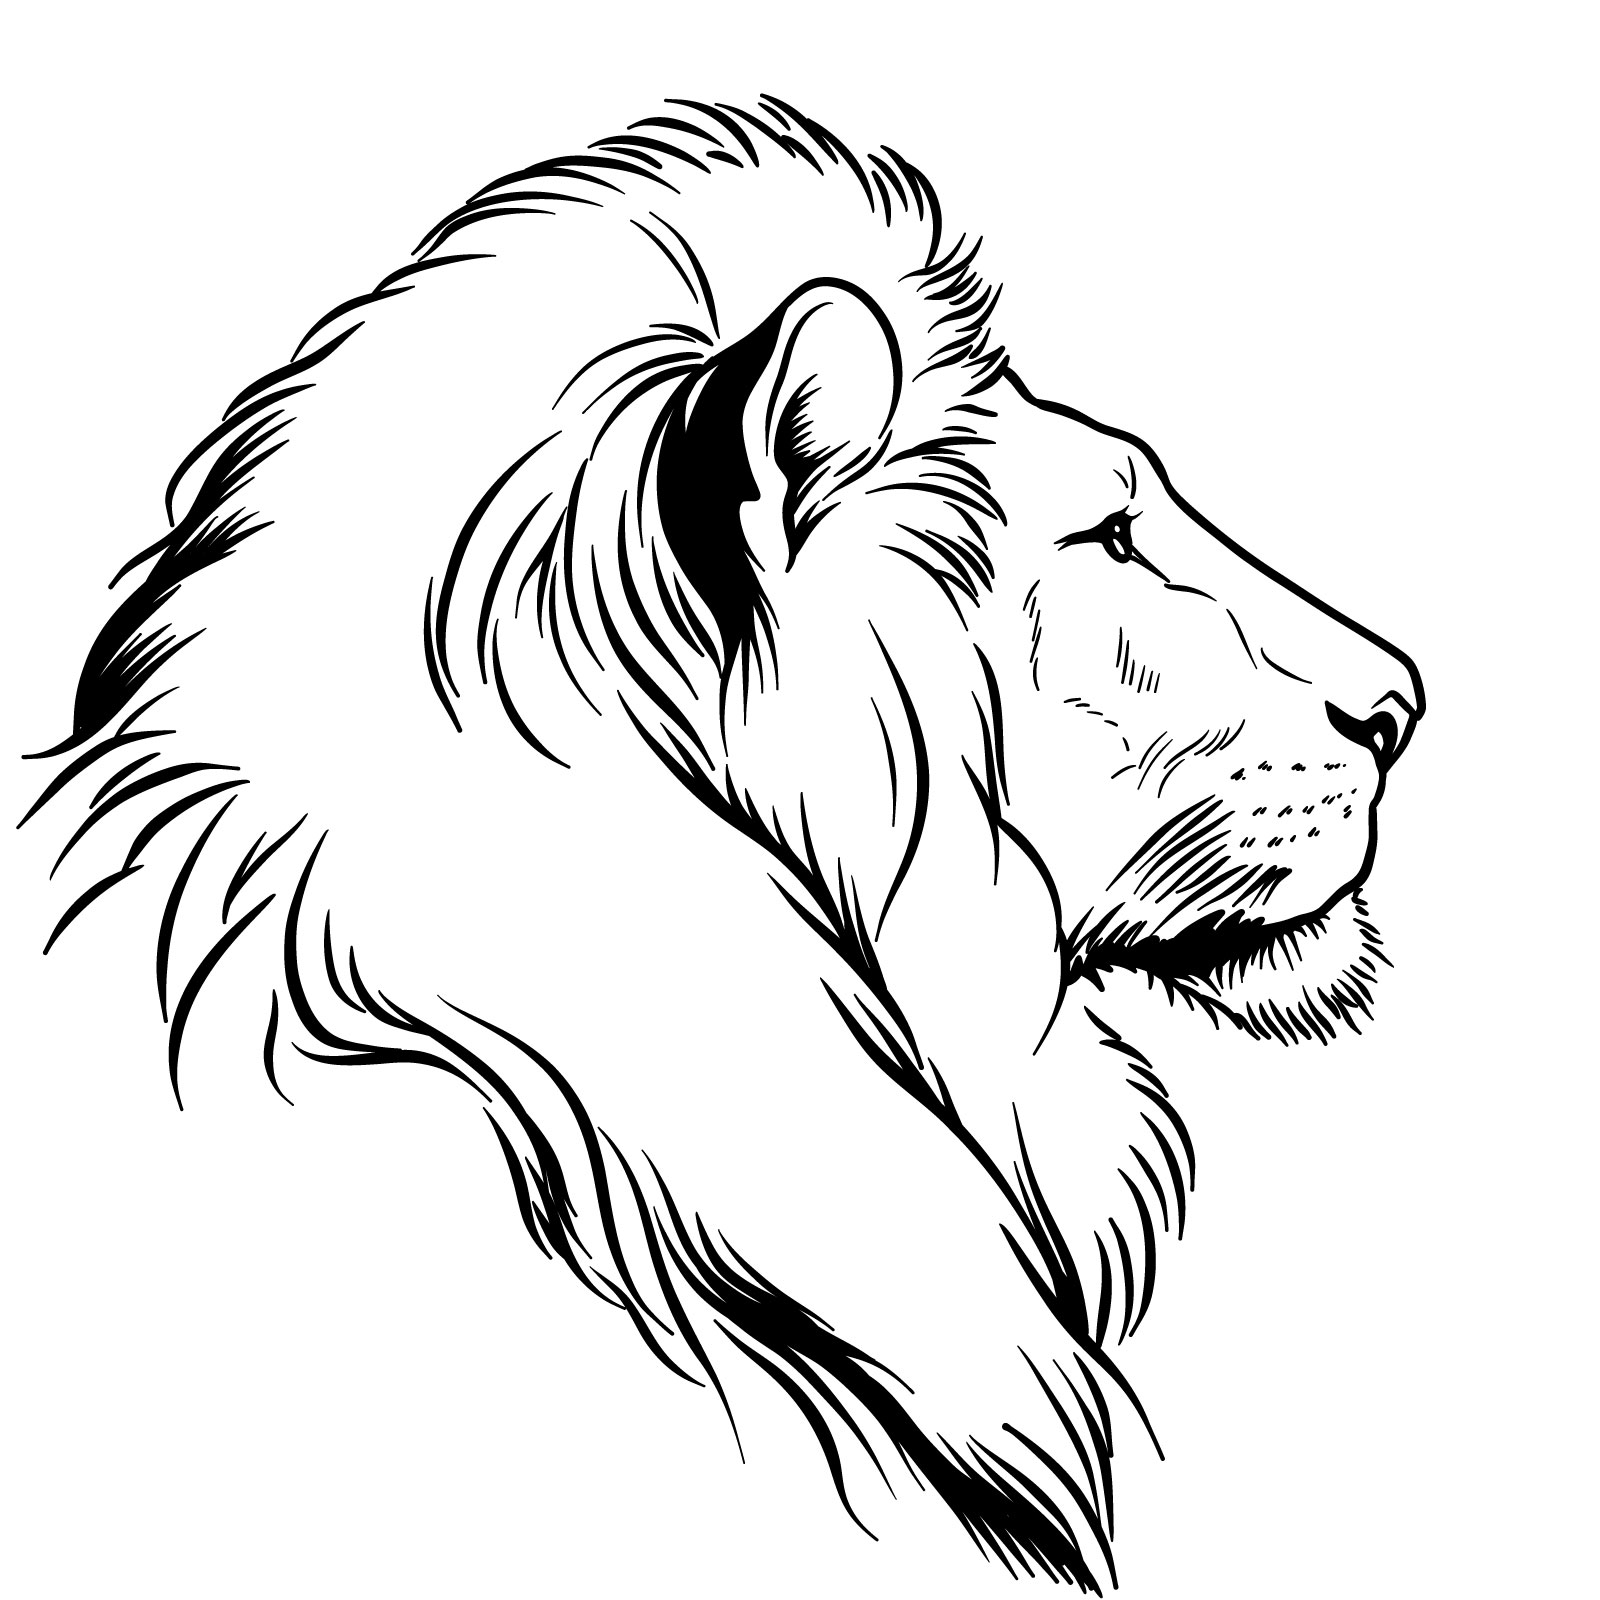
Guide 3: Lion’s Head Drawing – Side View
Lion’s head in side view – the finished drawing
For our third lesson, we’re going to draw a lion’s head from a side view in 10 simple steps. We’ll work on getting the profile right, showing off the lion’s noble forehead, the muzzle, and that distinct chin. The mane will be flowing back in this view, with less emphasis on the individual hairs and more on the overall shape and movement. It’s about getting the big parts in place – the ear, the eye, the nose, and the mouth – and making sure they all fit together to form the side profile of a lion’s head.
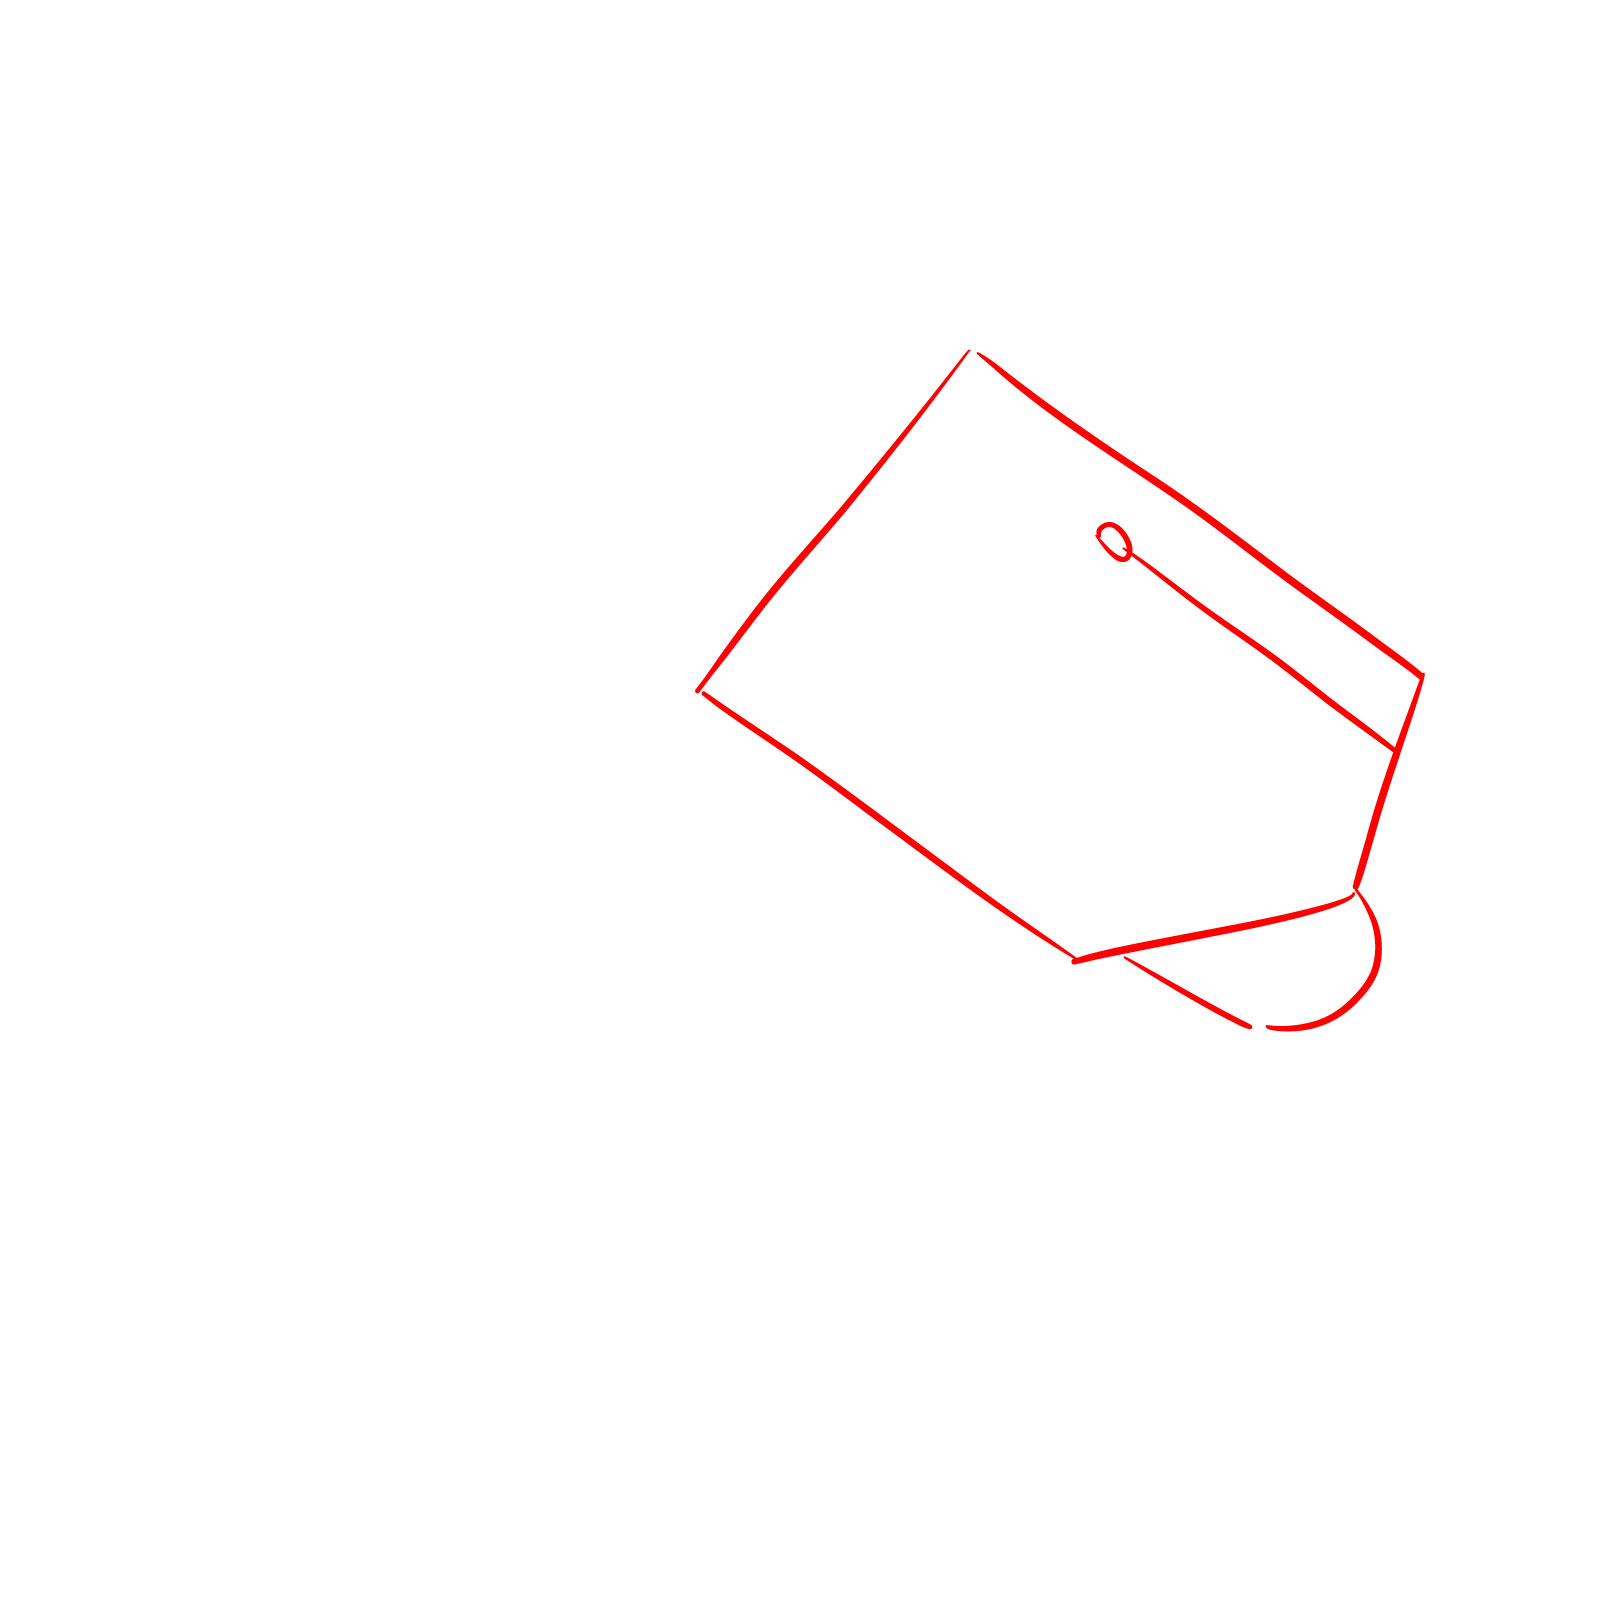
Step 01 – Begin by sketching a rectangular shape (as you see below) for the main structure of the head. Add a small oval within this rectangle towards the top left side for the eye placement, and draw a parallel line from to it. Below it, sketch a curved line for the chin’s basic shape
Sketching simple shapes for the head and jawline
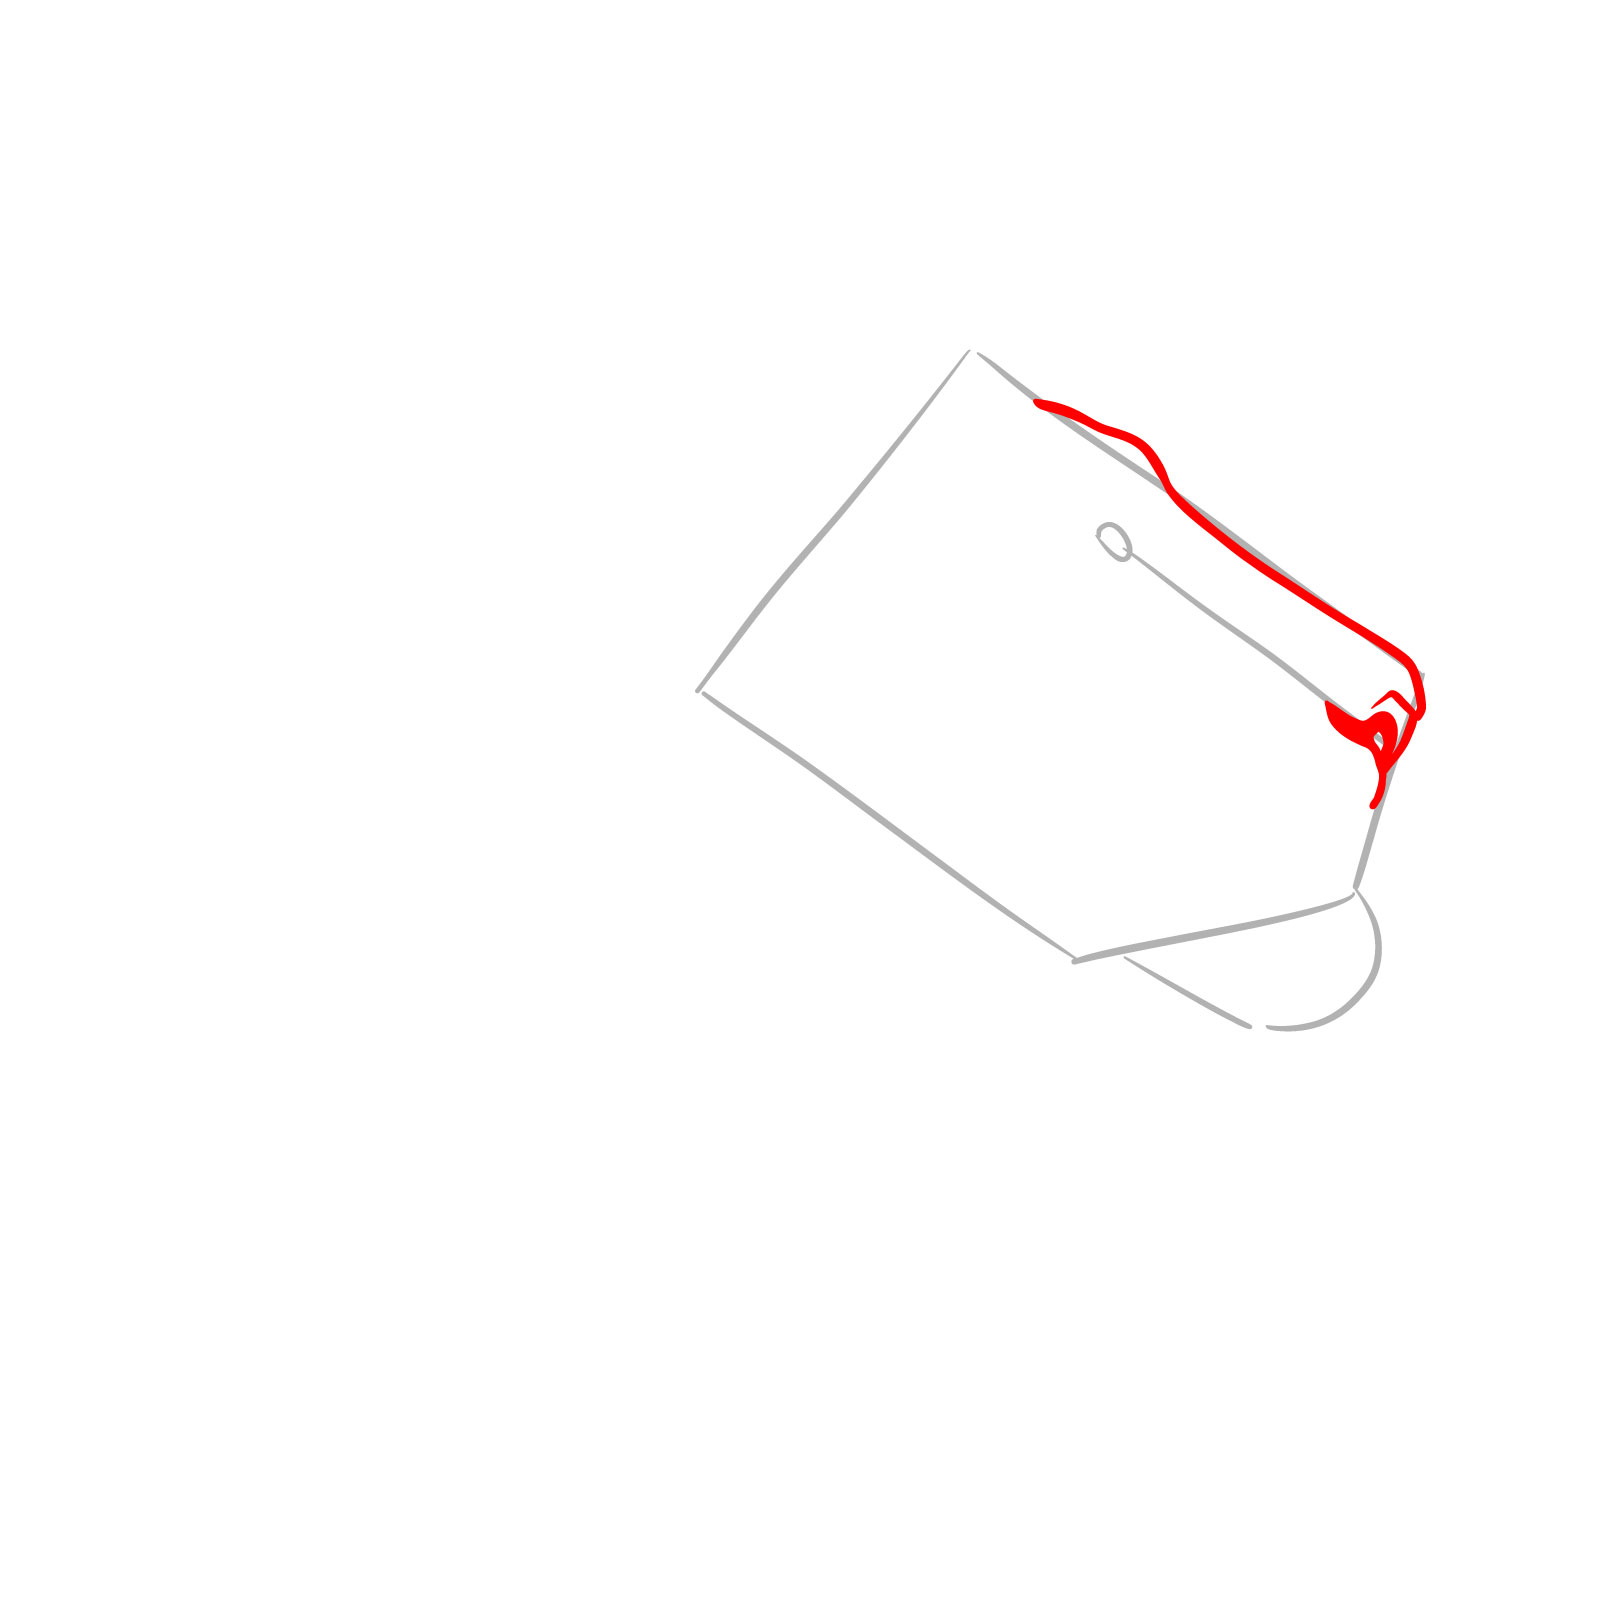
Step 02 – Draw a line beginning from the top of the head, bending slightly upwards above the eye area, curving down towards the snout to outline the forehead, the nose and the bridge of the nose
Outlining the forehead and nose of the lion’s head
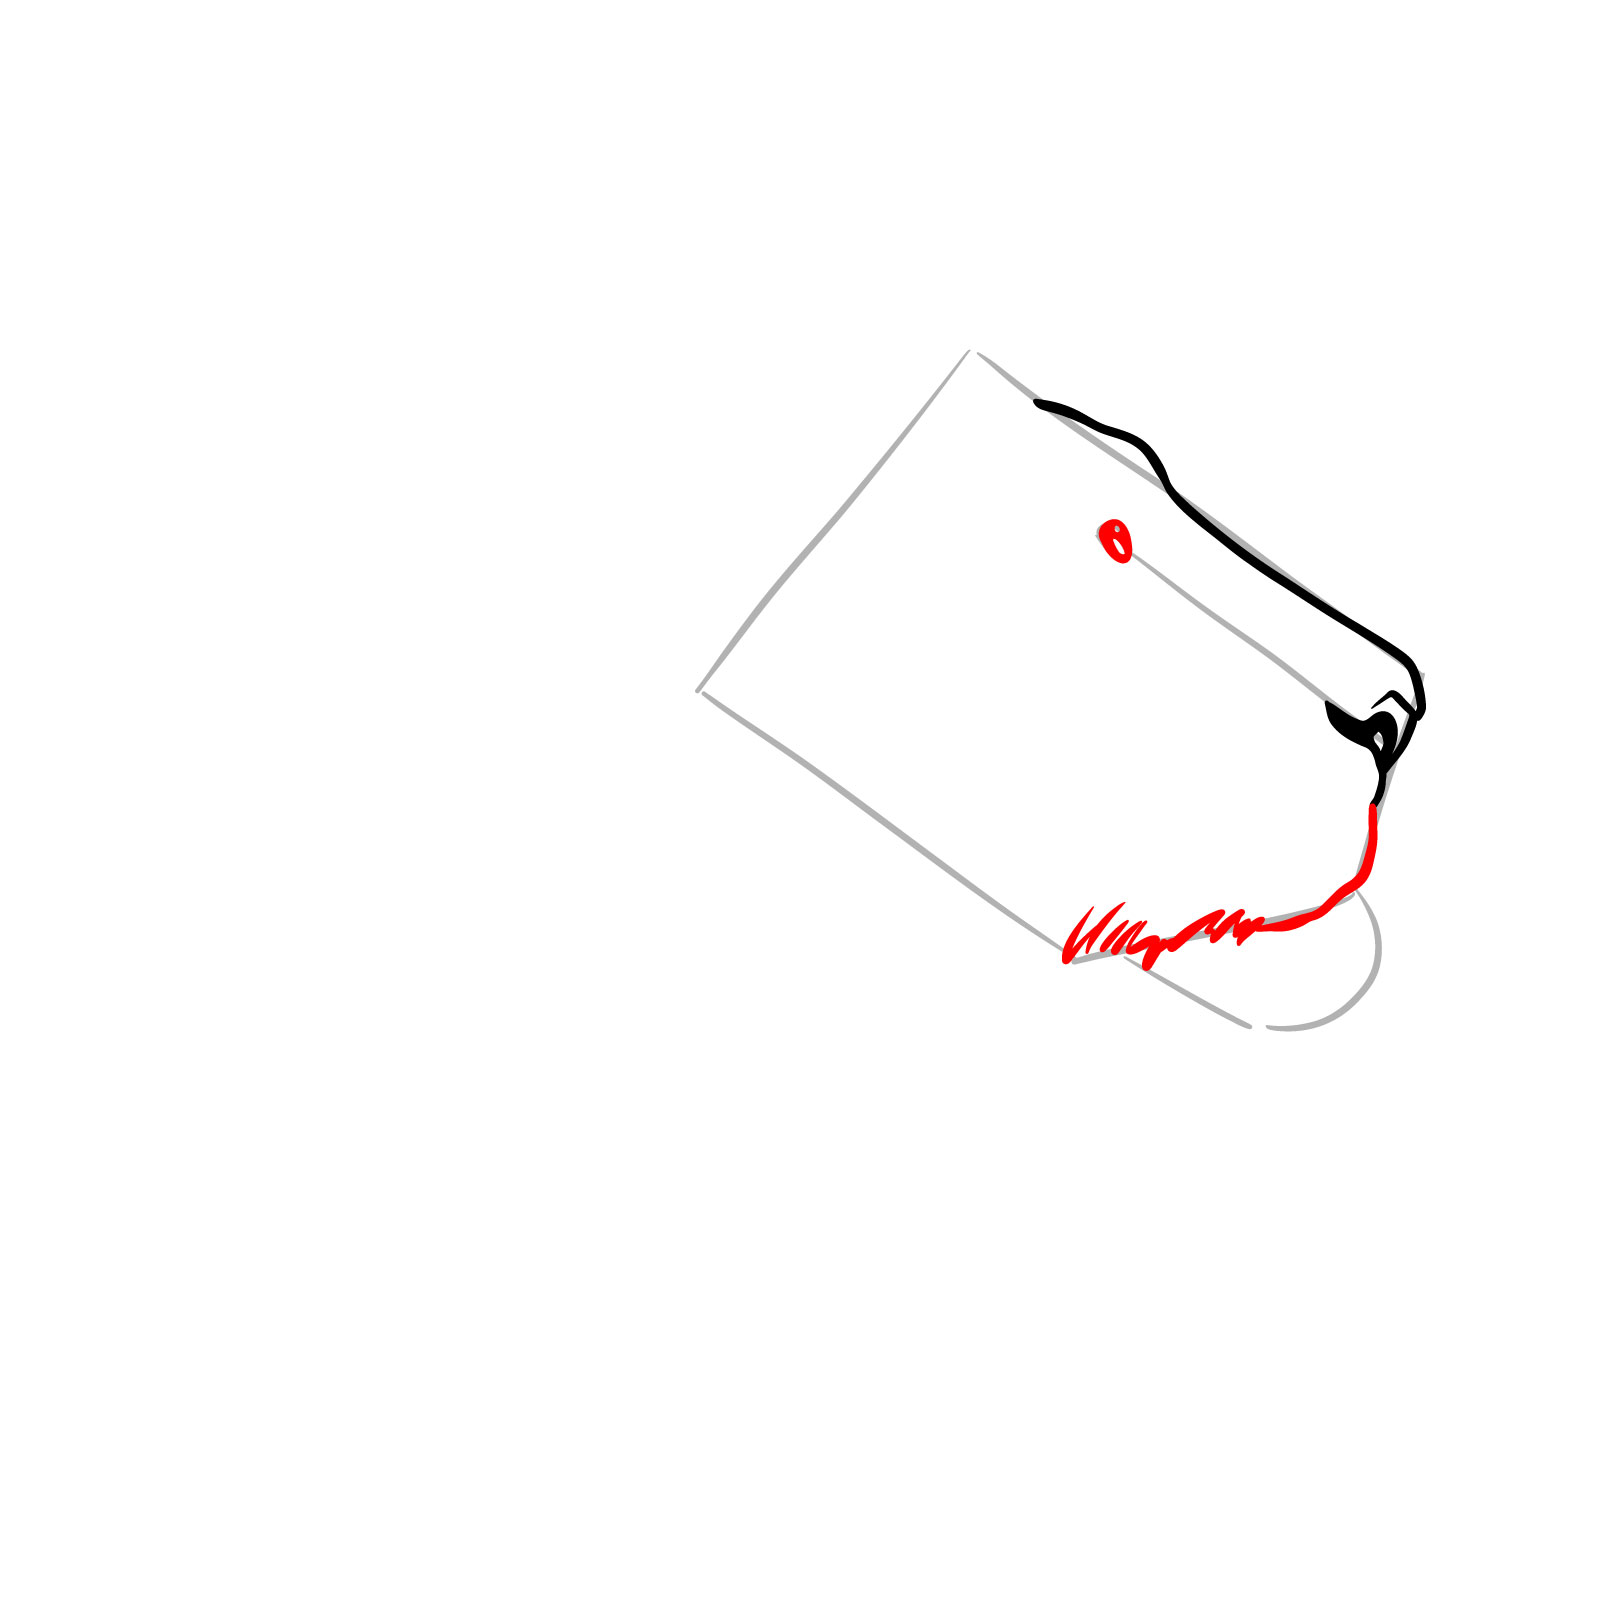
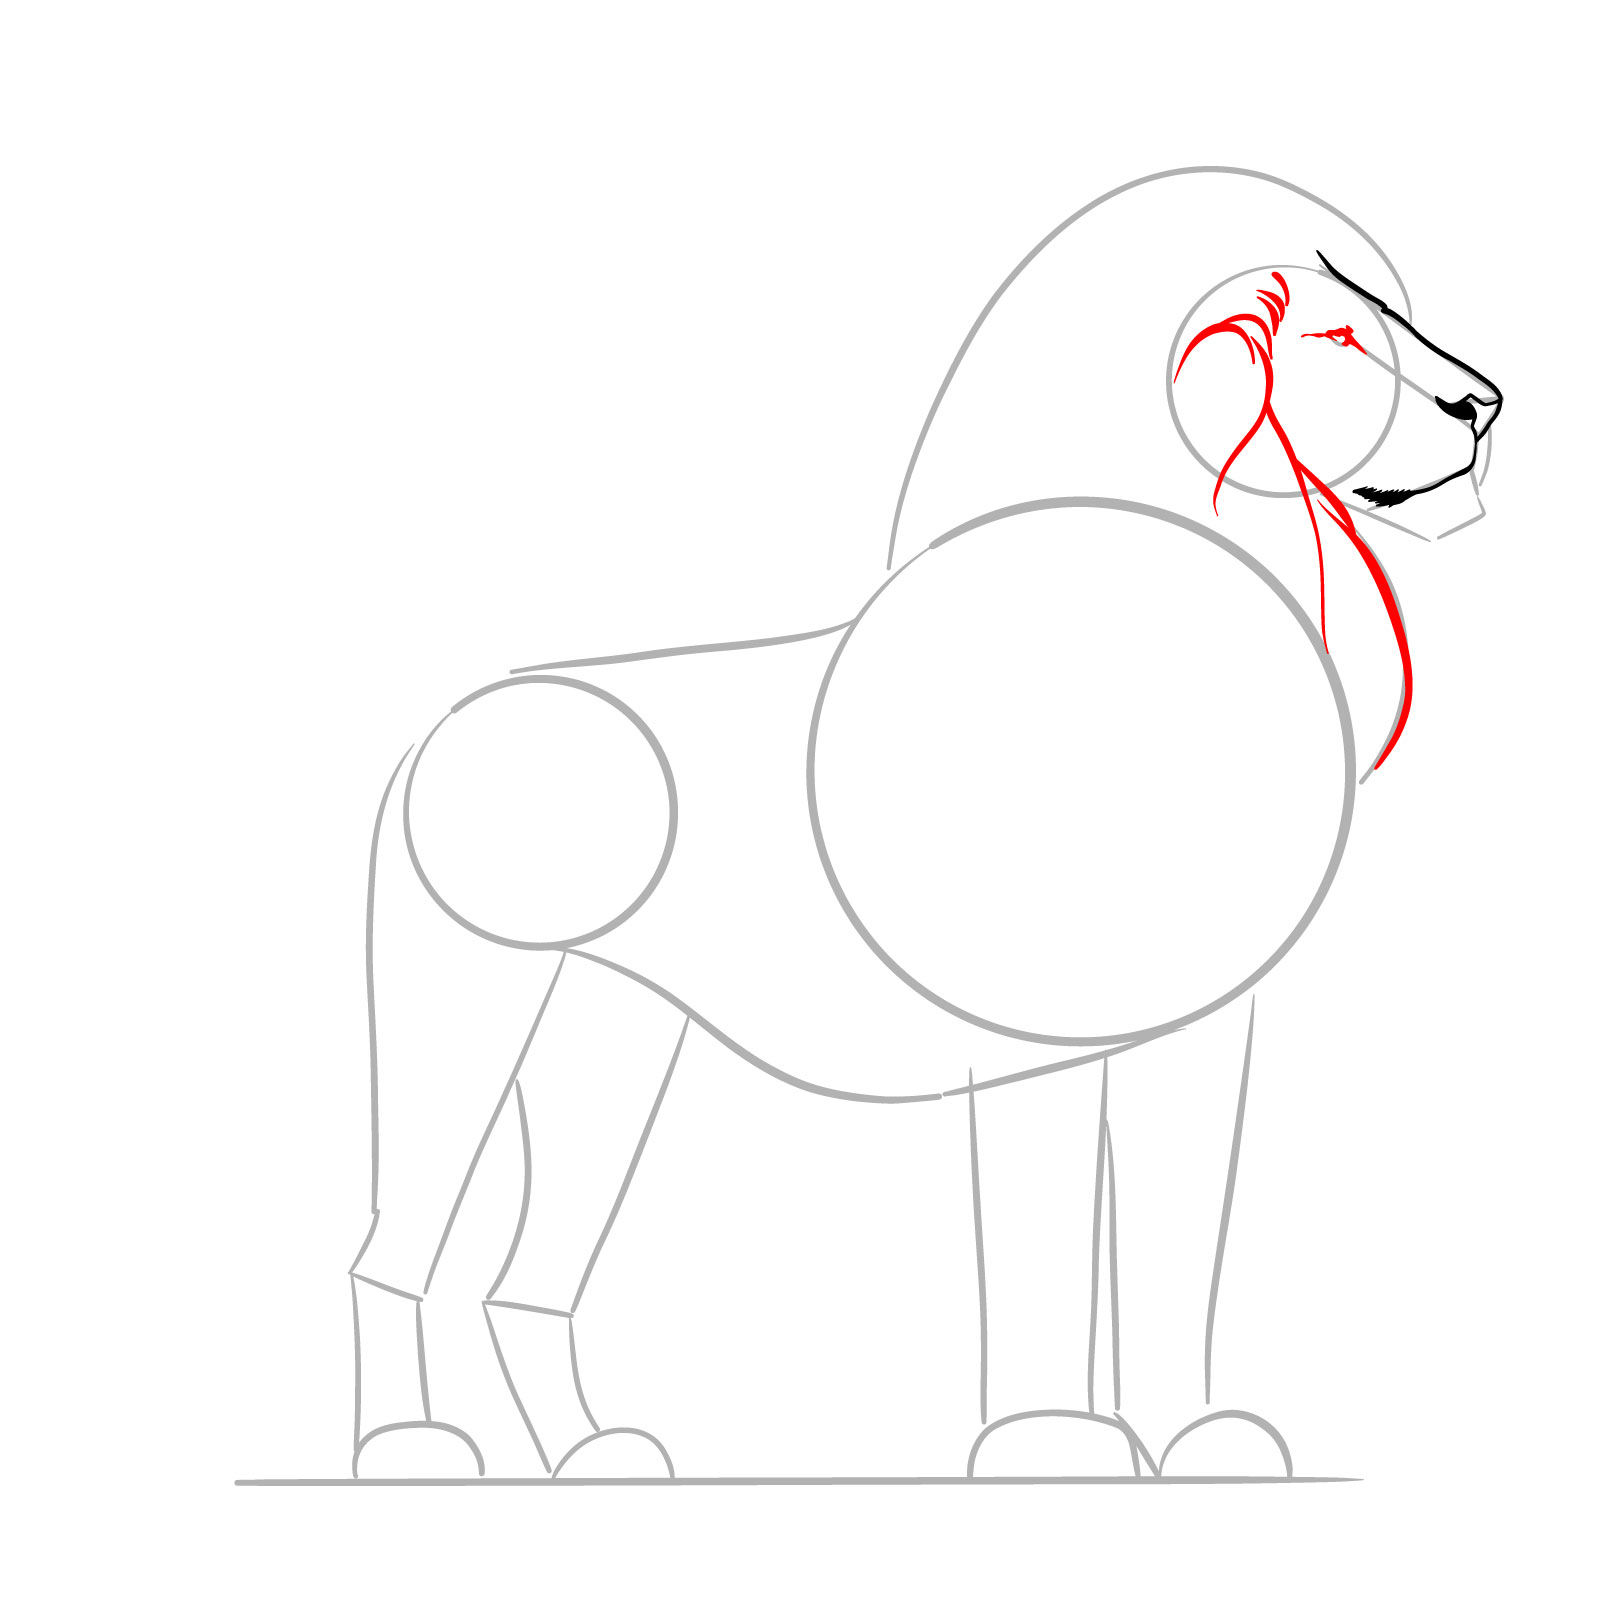
Step 03 – Sketch the muzzle from the bottom of the nose, down and around to define the mouth area. Fill in a small oval for the eye and leave blank spaces inside for highlights
Adding definition to the muzzle and eye
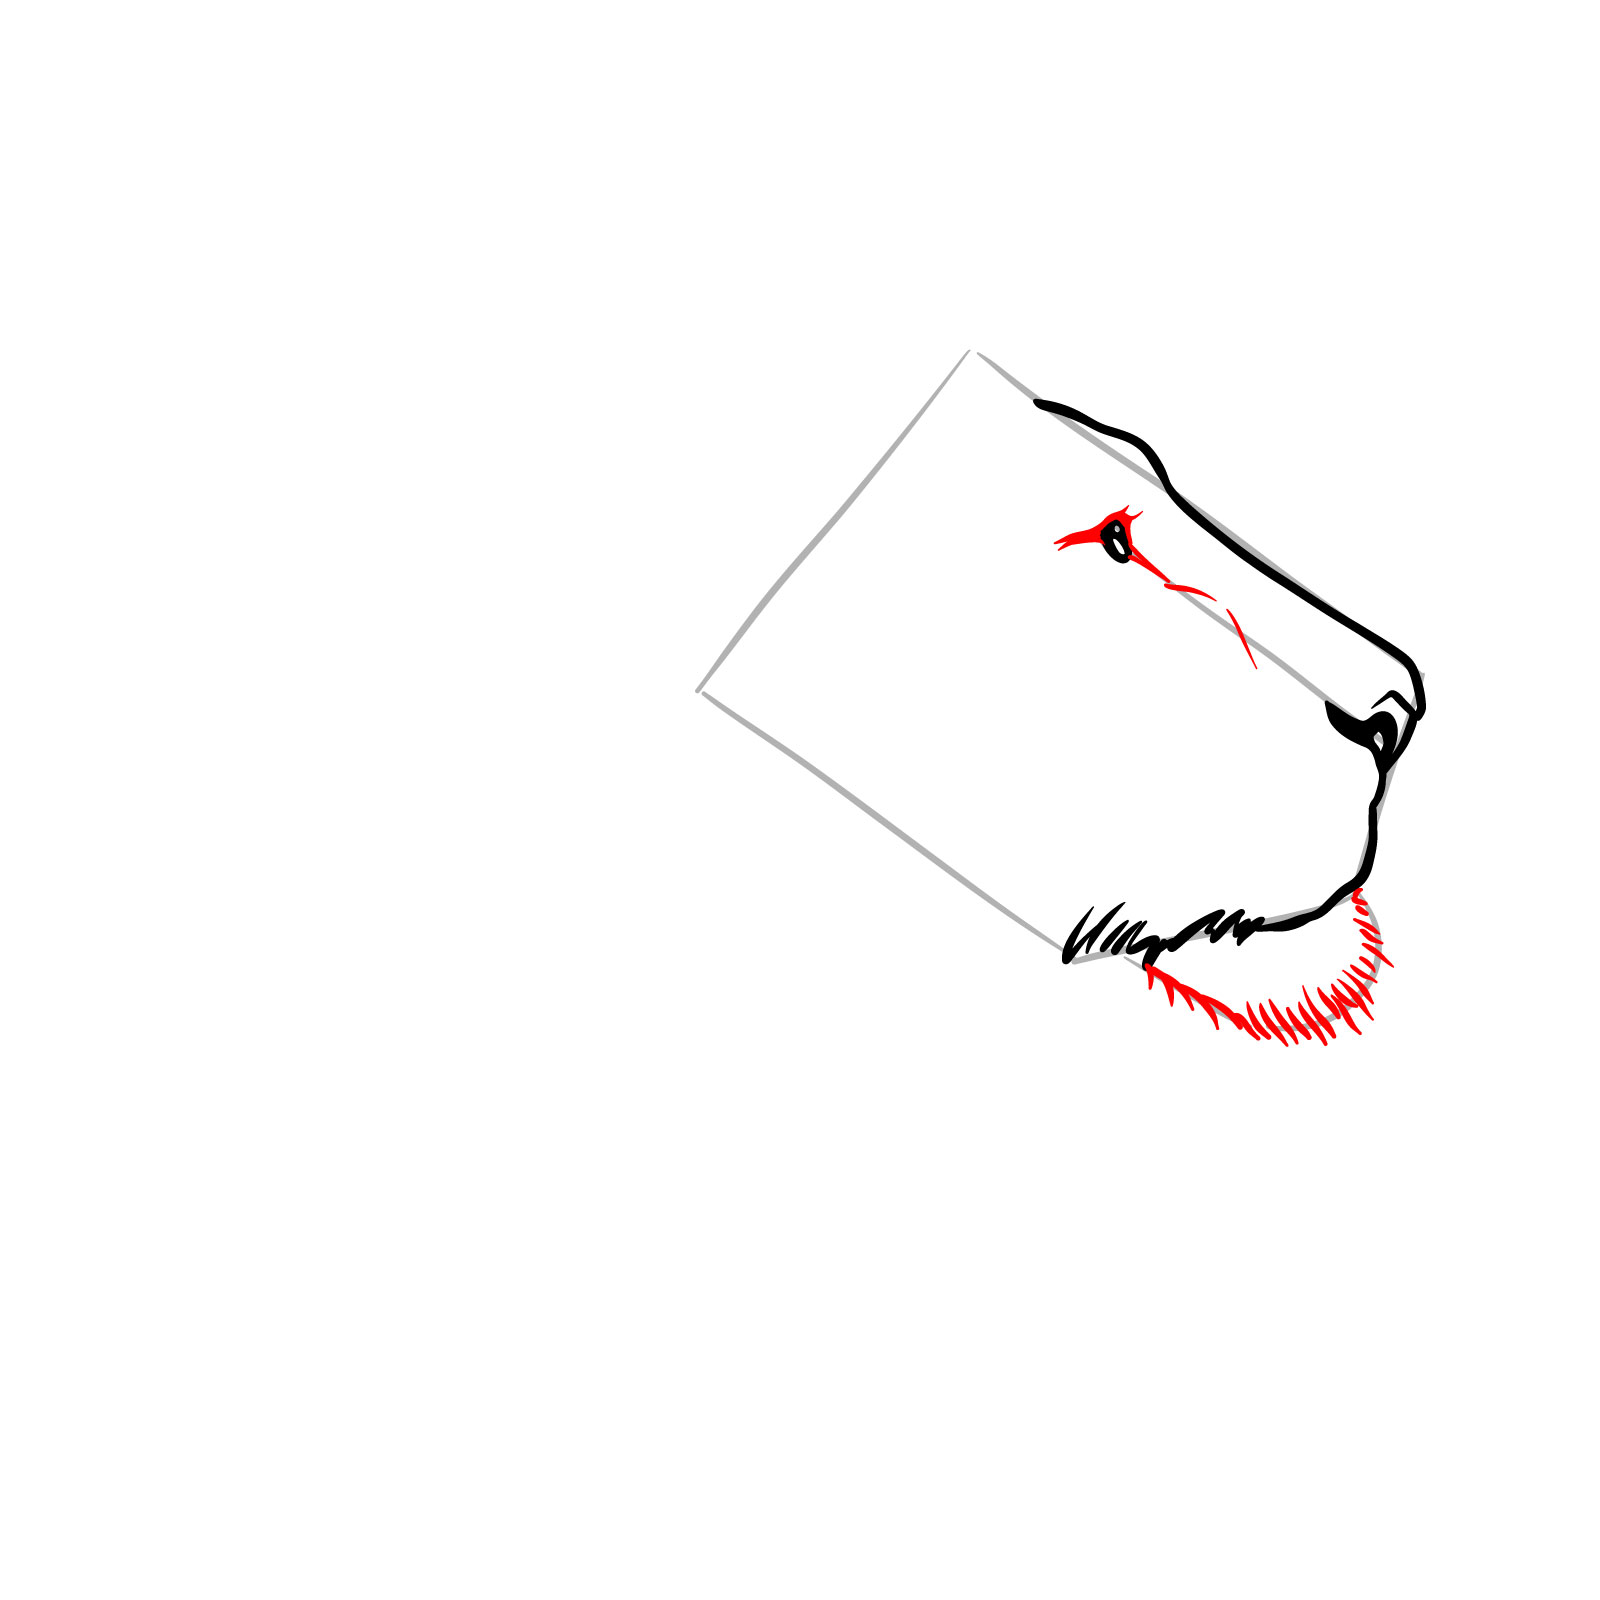
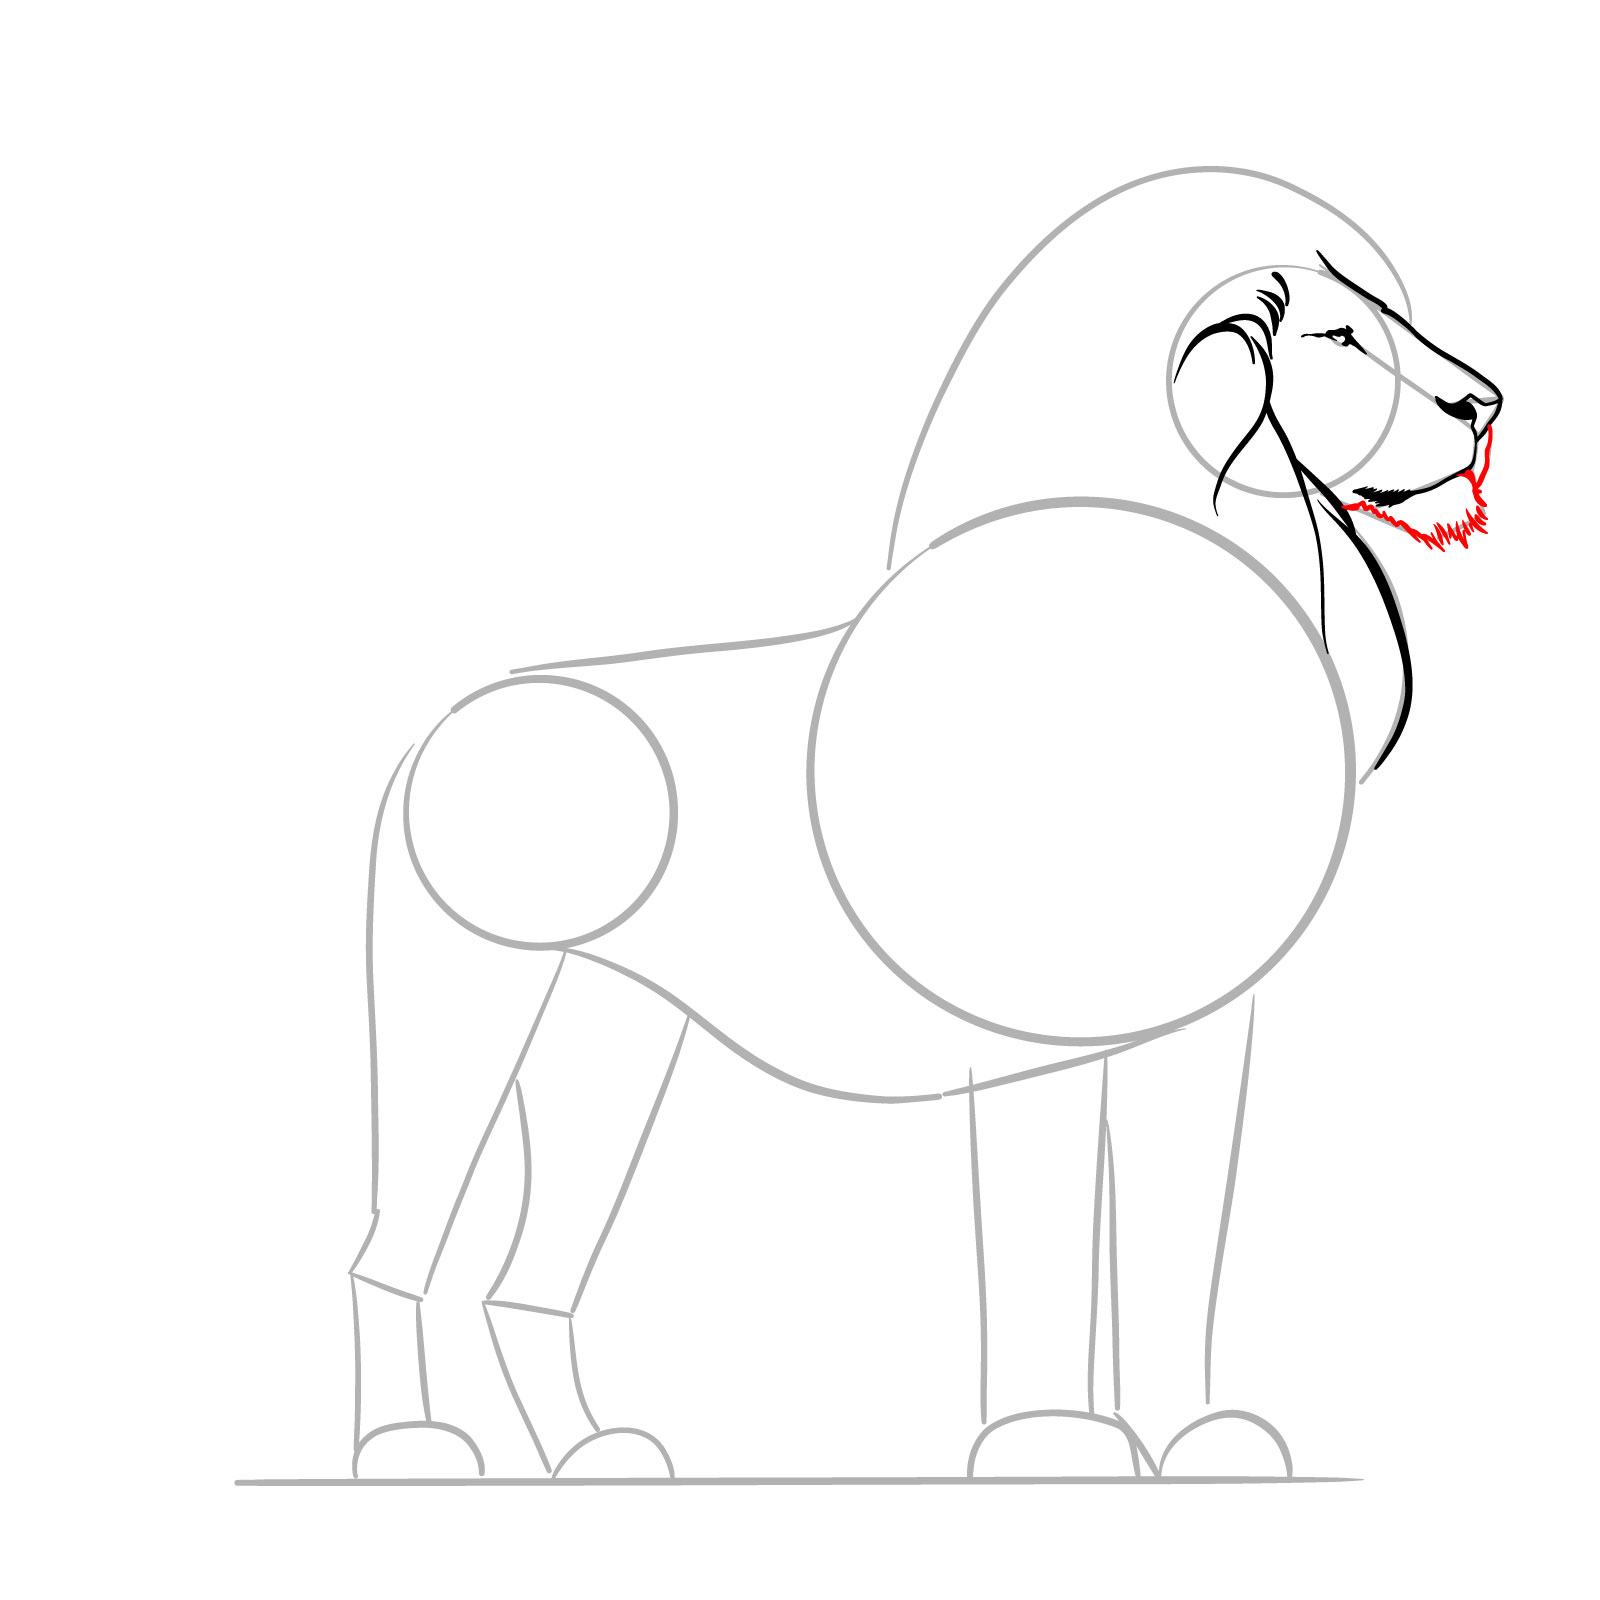
Step 04 – Create the chin by drawing short, fur-like strokes to form the lower jaw. Refine the eye with additional lines to indicate the eyelids and depth
Detailed chin and eye strokes
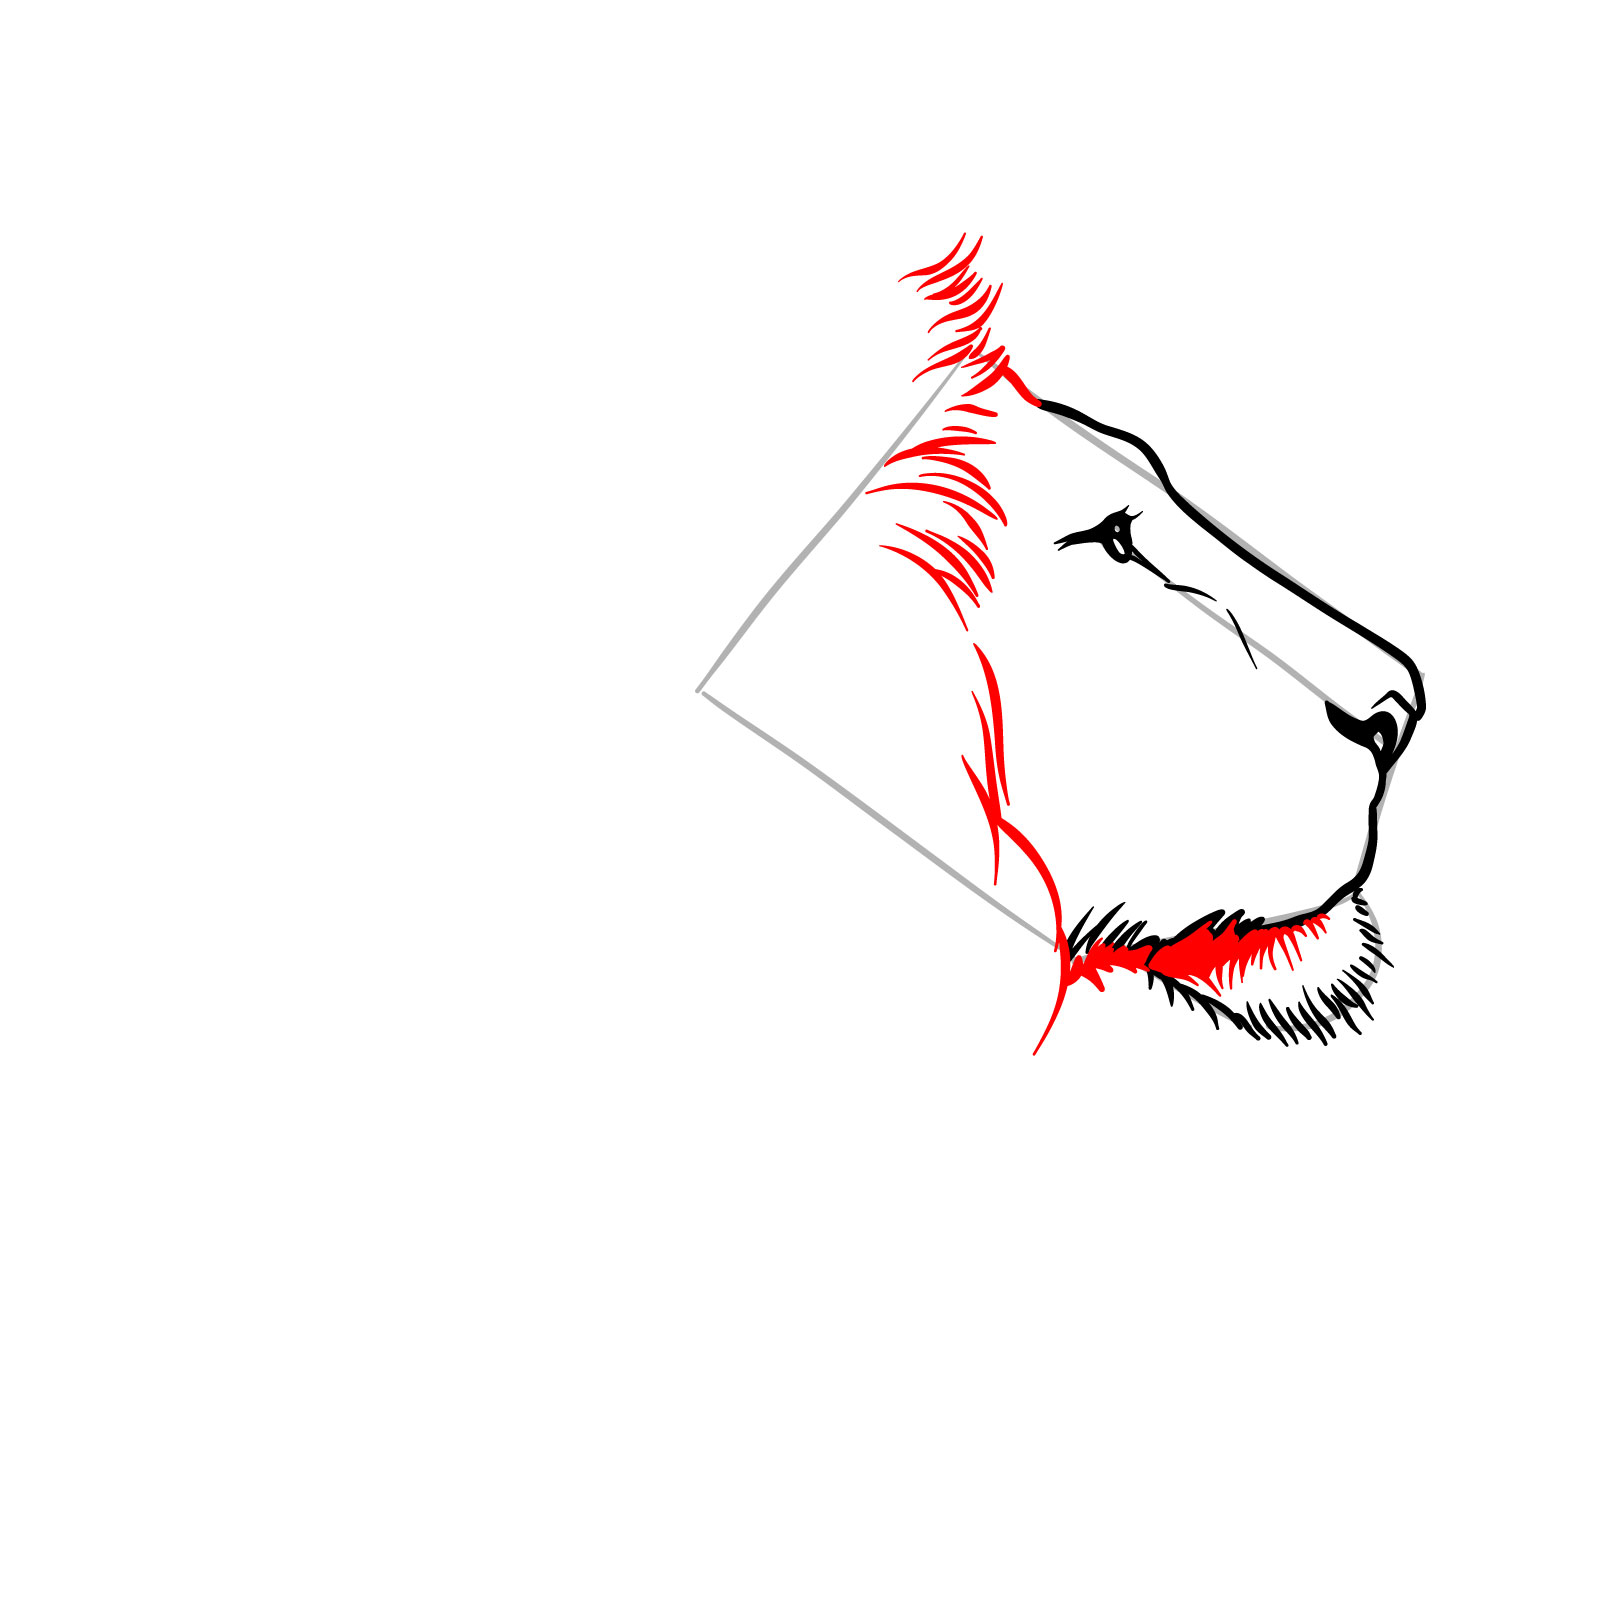
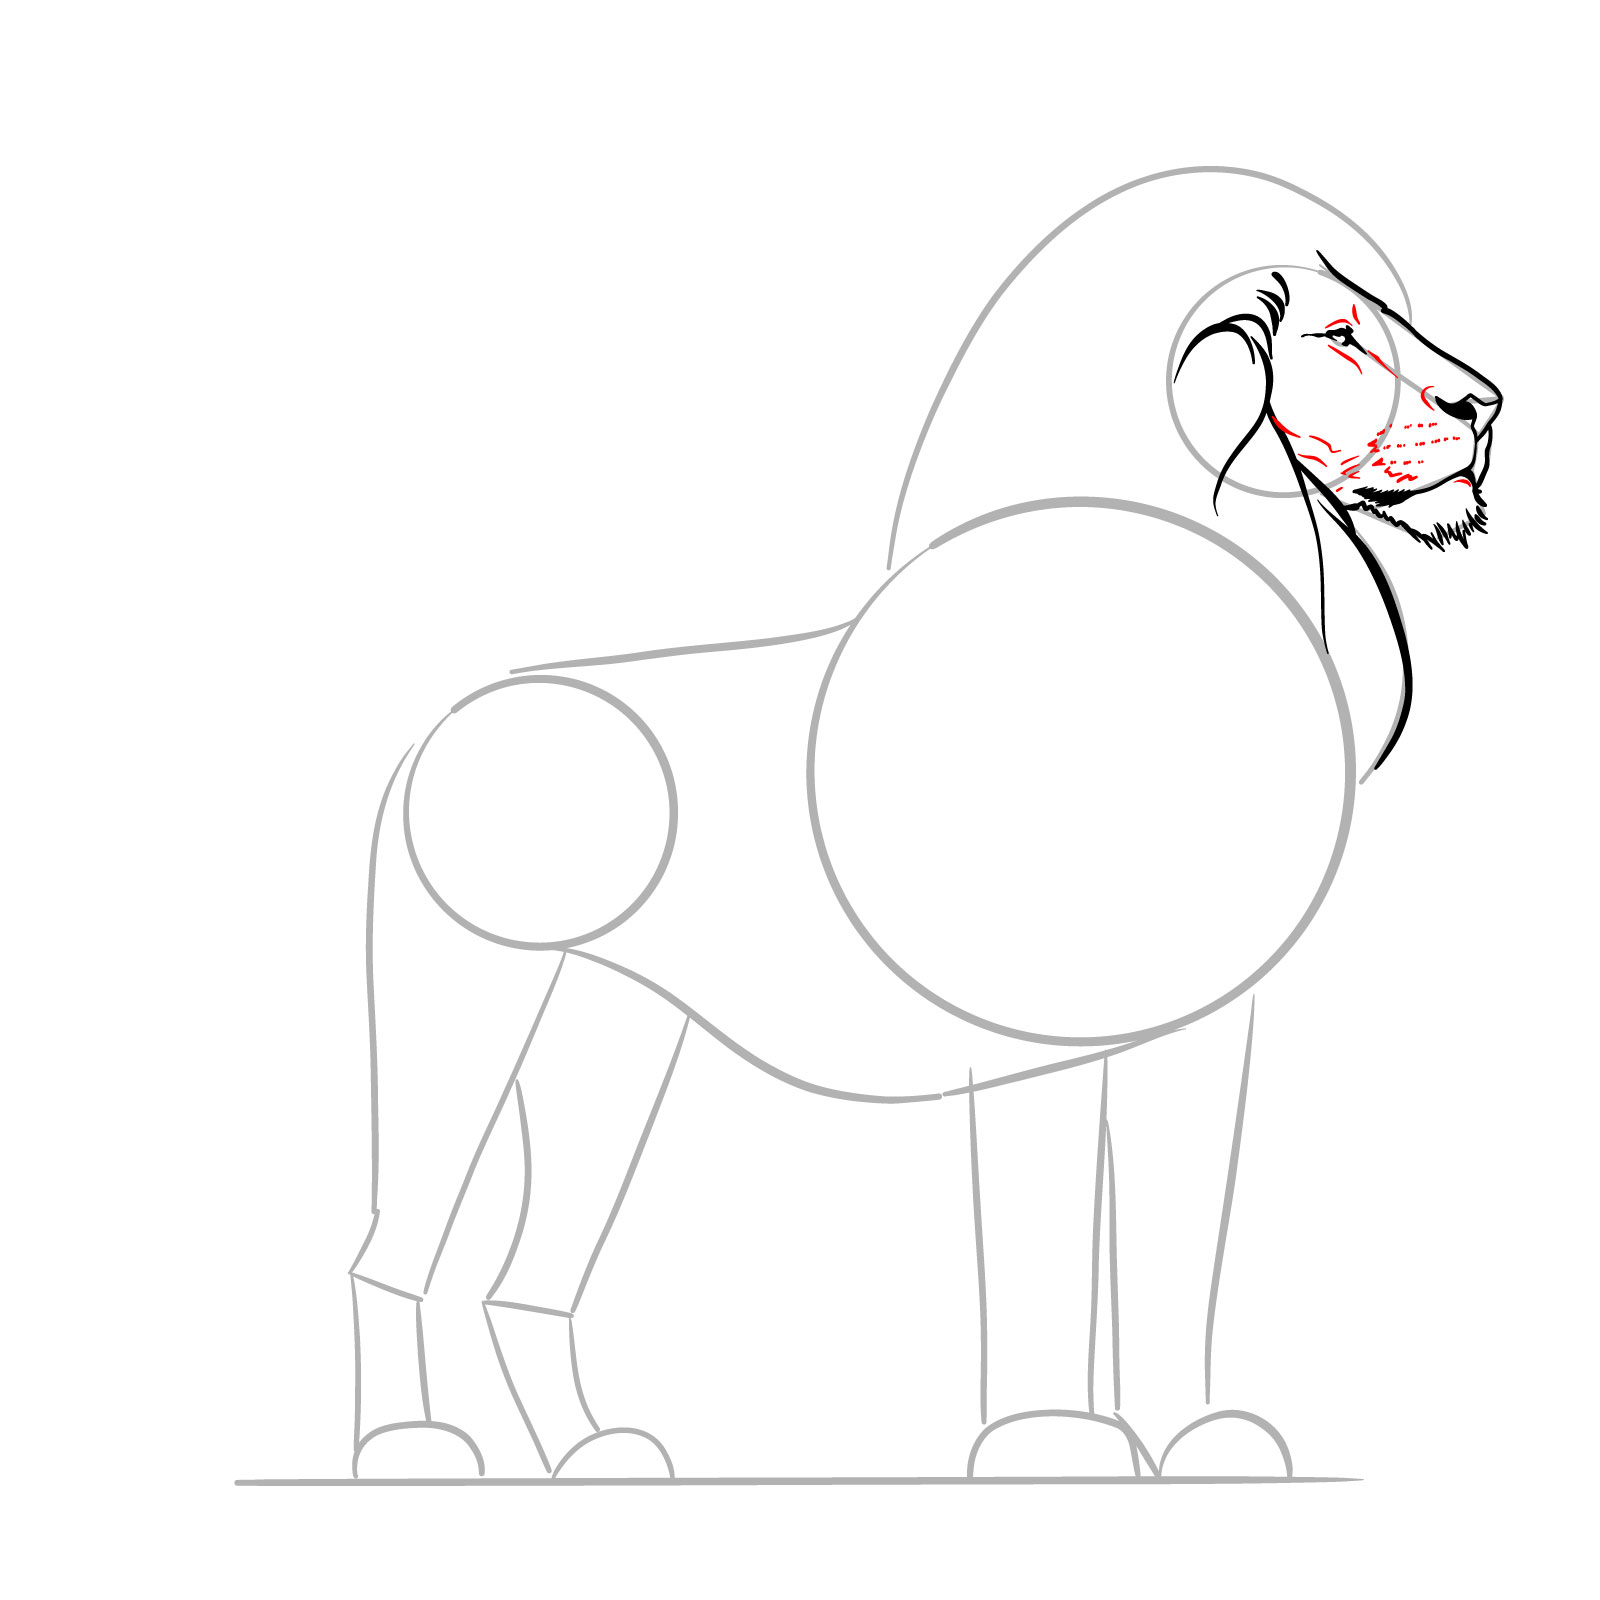
Step 05 – Frame the face with fur by drawing jagged lines along the cheek towards the forehead. Add some shaded strokes within the mouth area to suggest depth
Fur outline and shading around the mouth
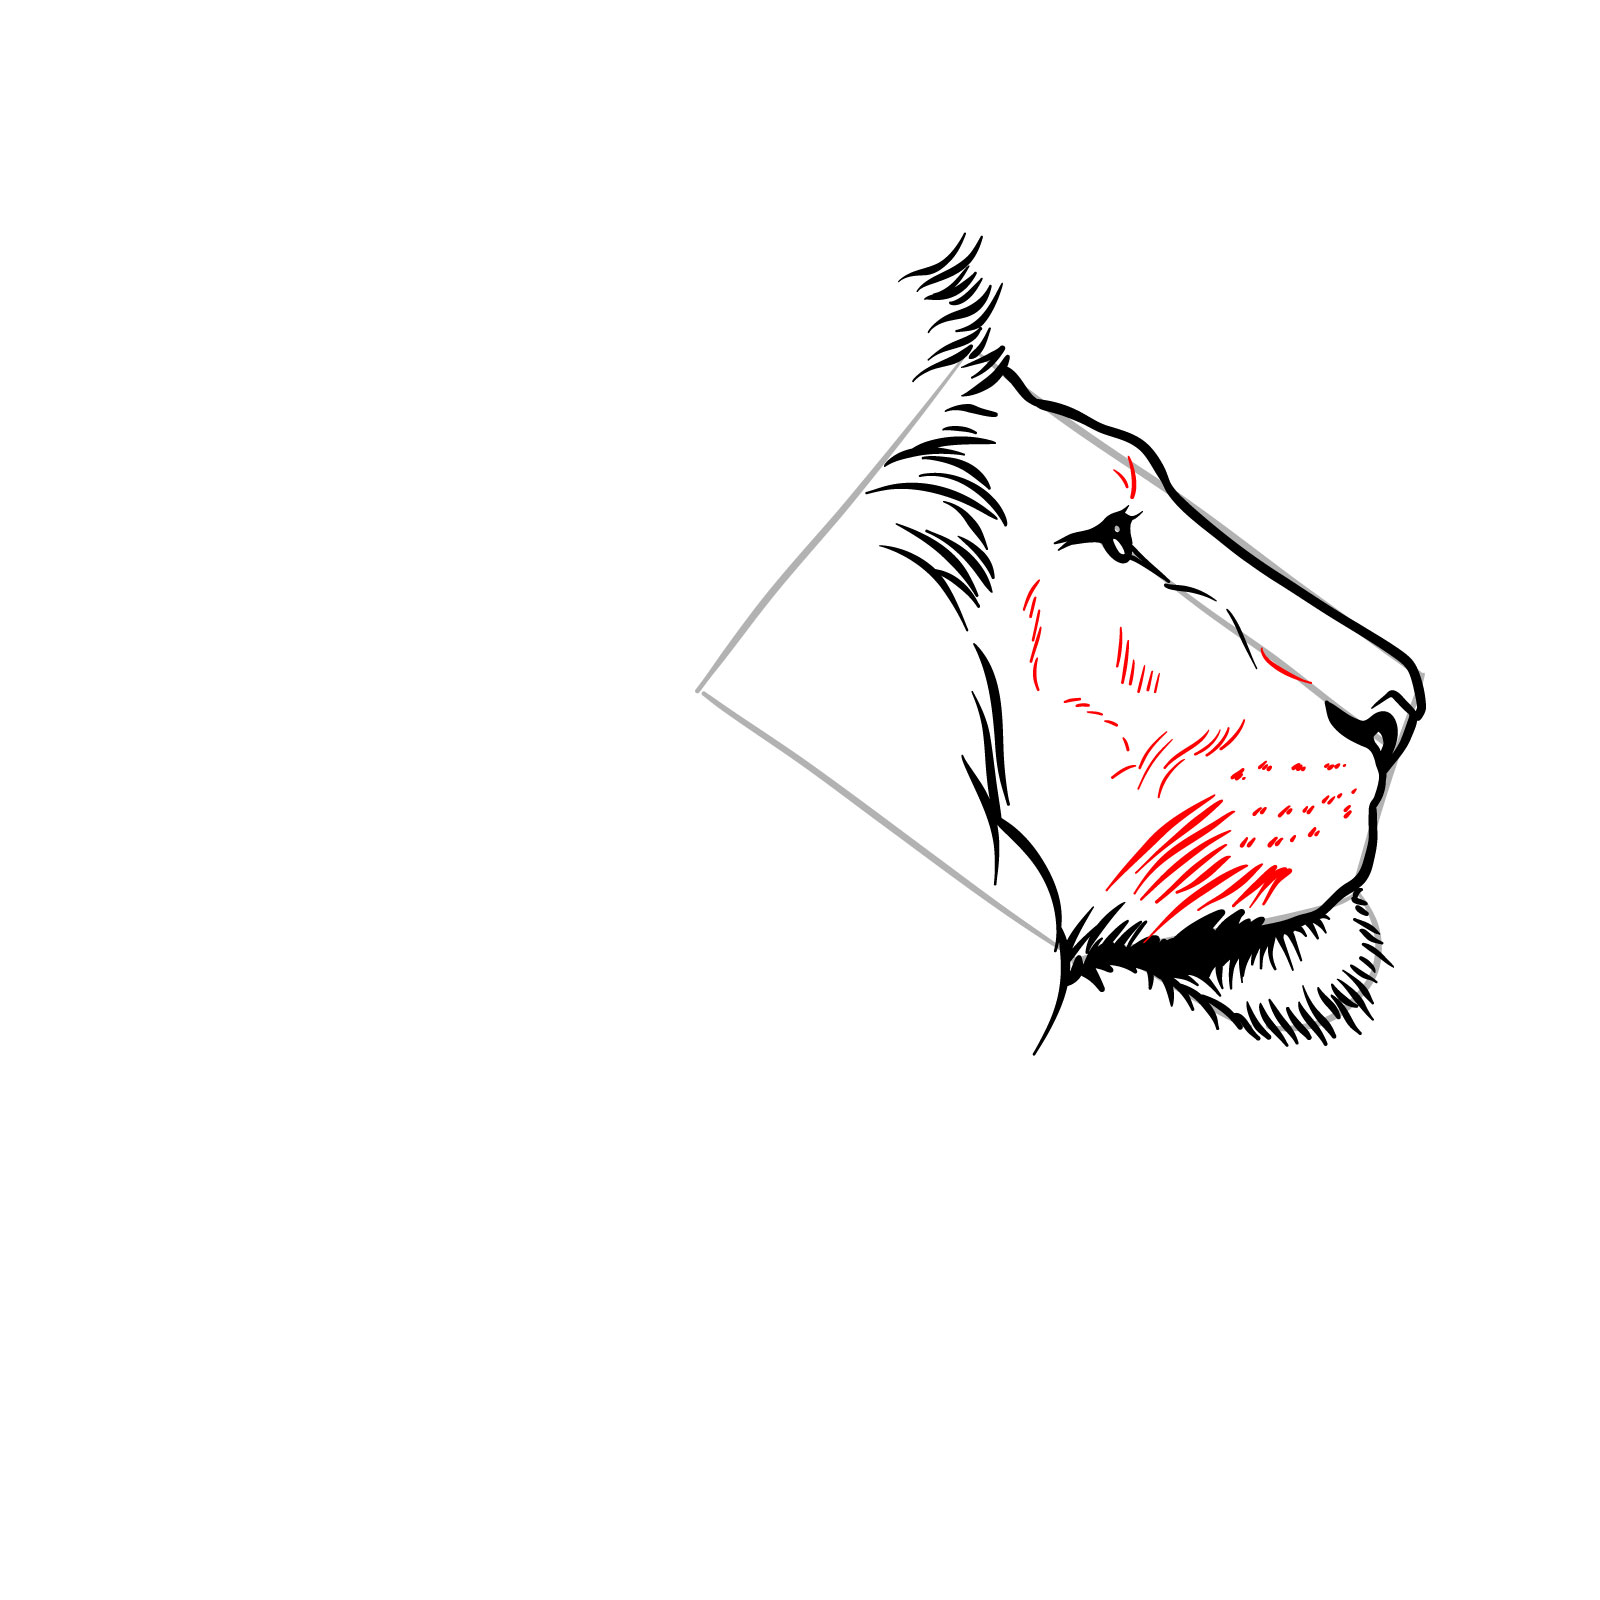
Step 06 – Add fine lines coming from the muzzle area to create the lion’s whiskers. Include small strokes on the face to suggest texture and detailing
Whiskers and texture detailing
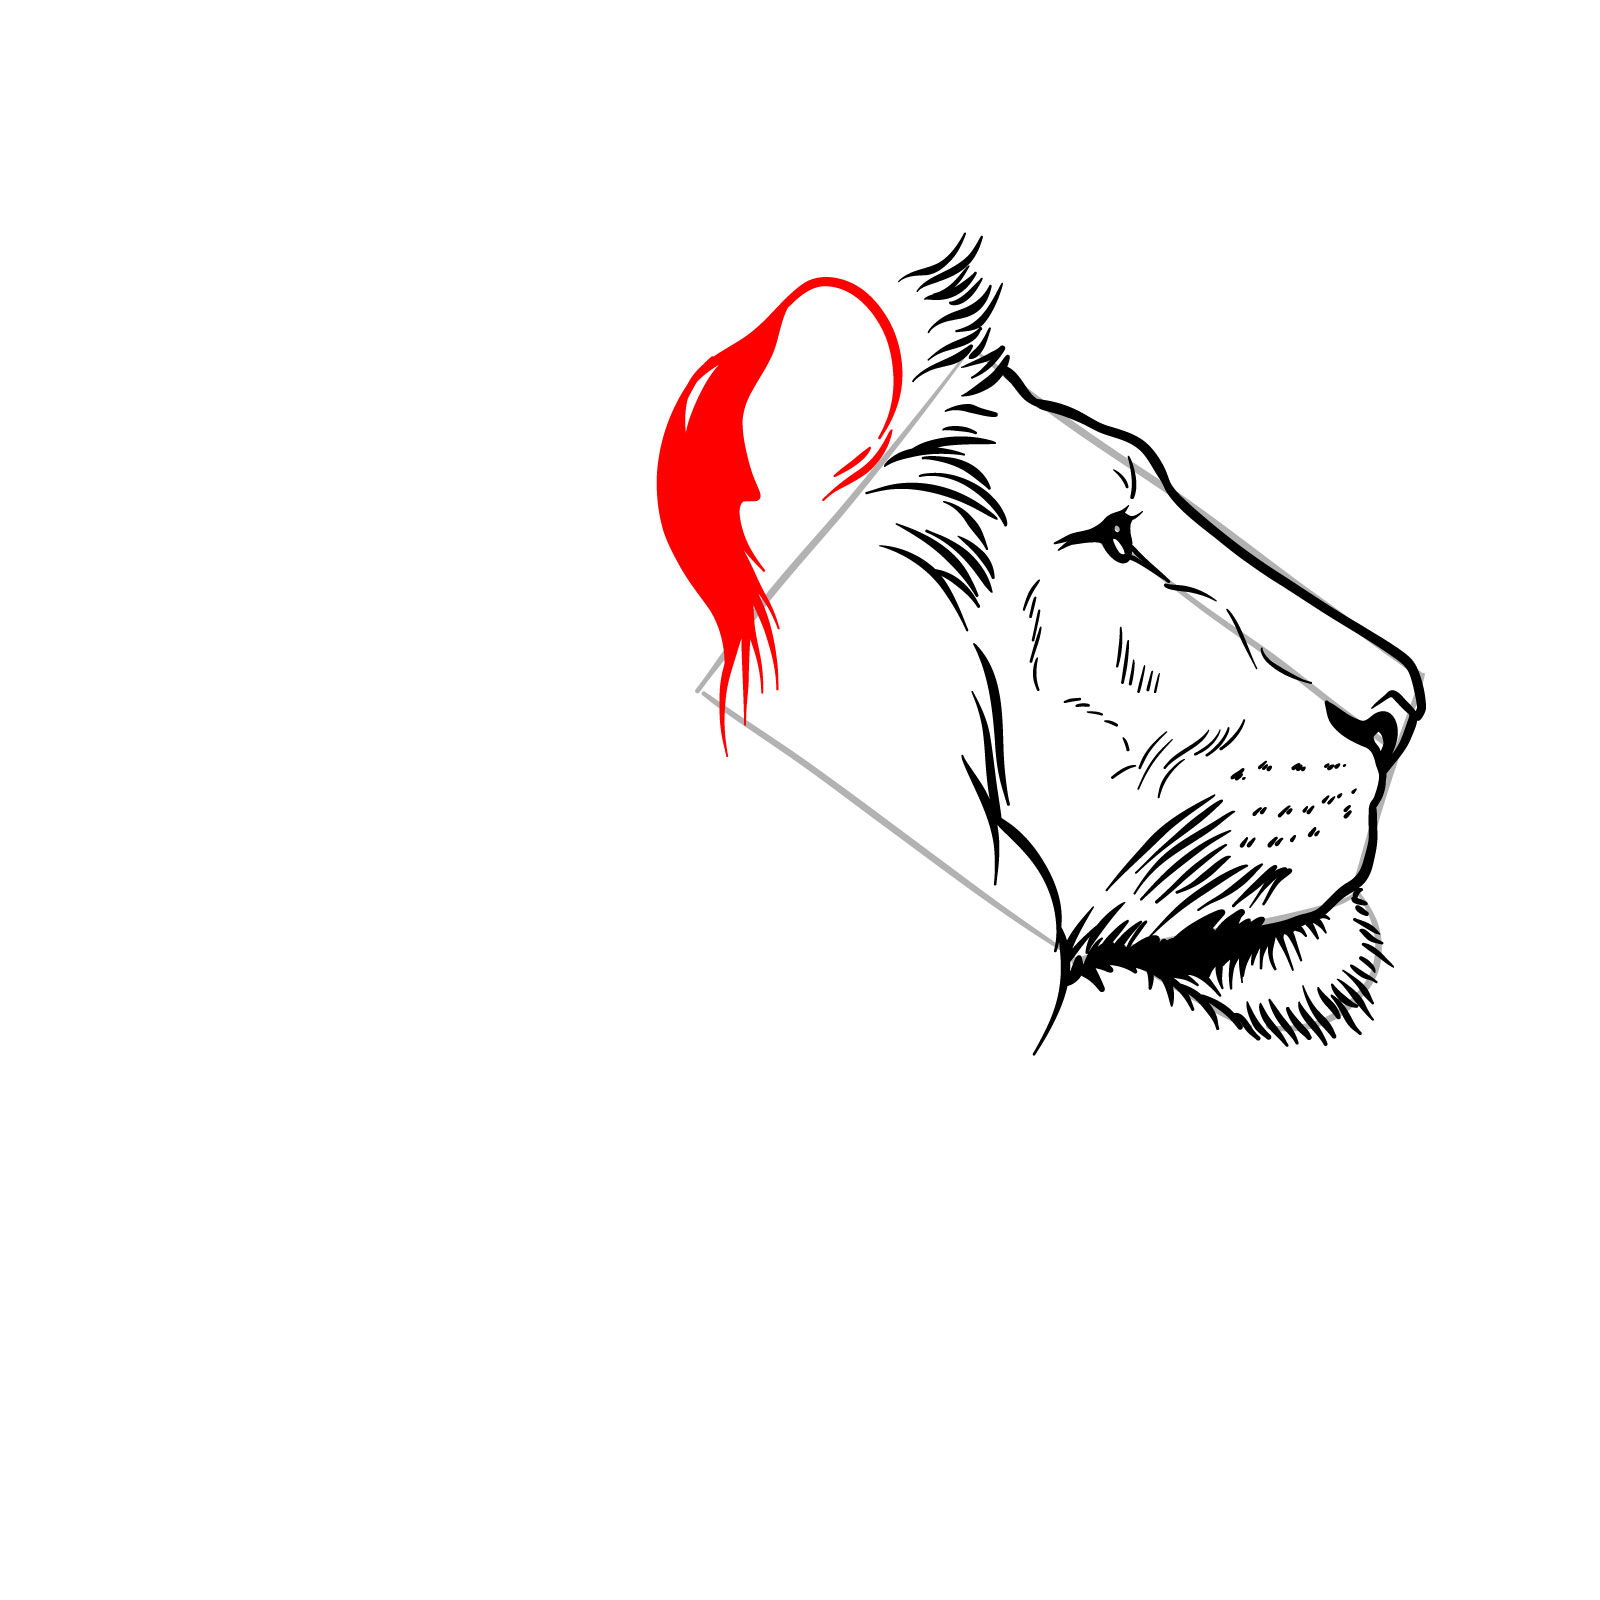
Step 07 – Focus on the lion’s ear by drawing the overall shape and adding shading to the rear side
Depicting the ear
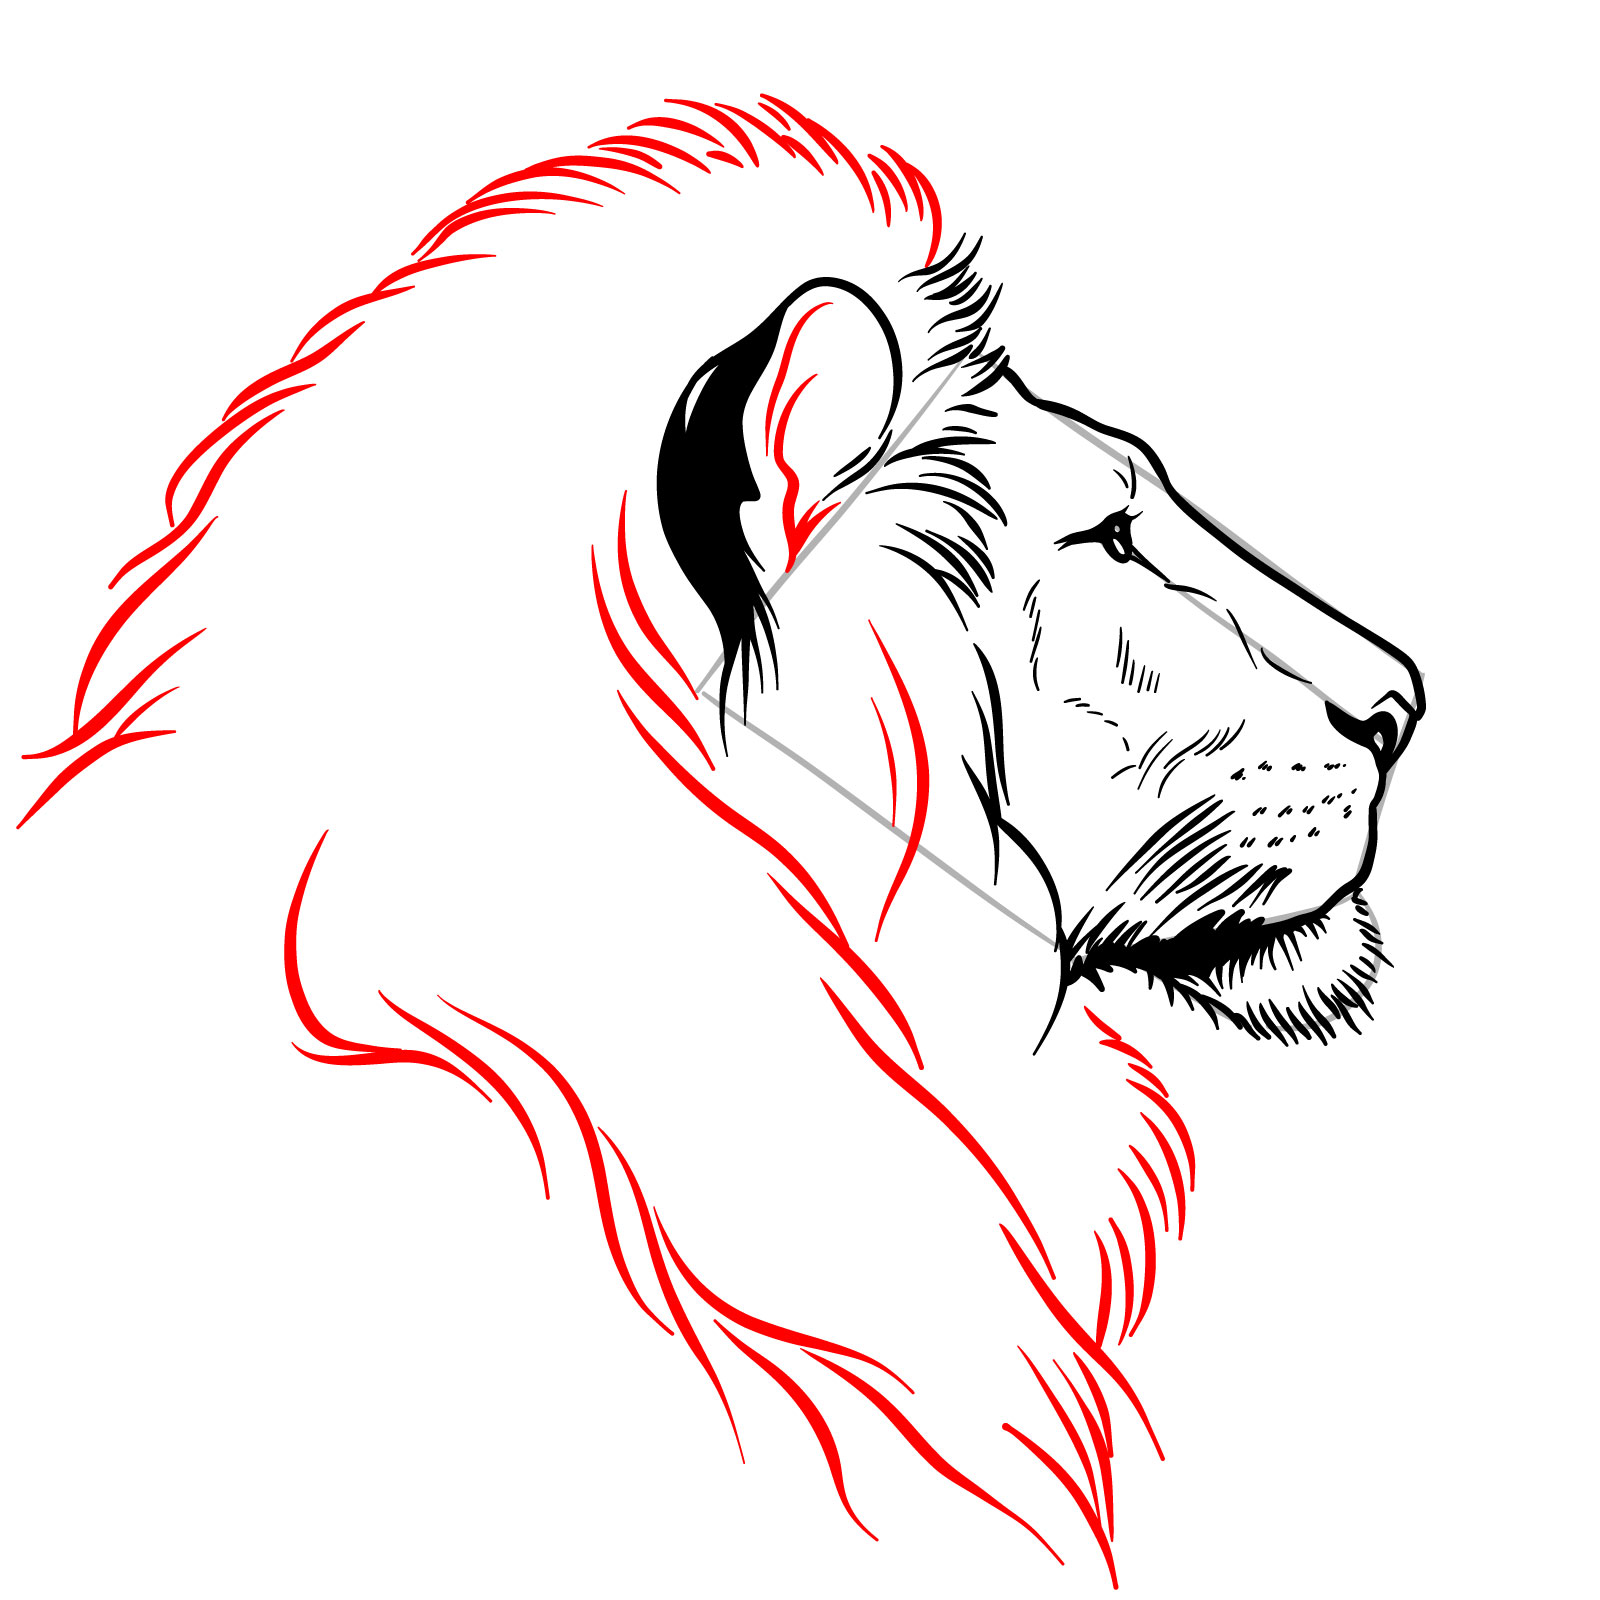
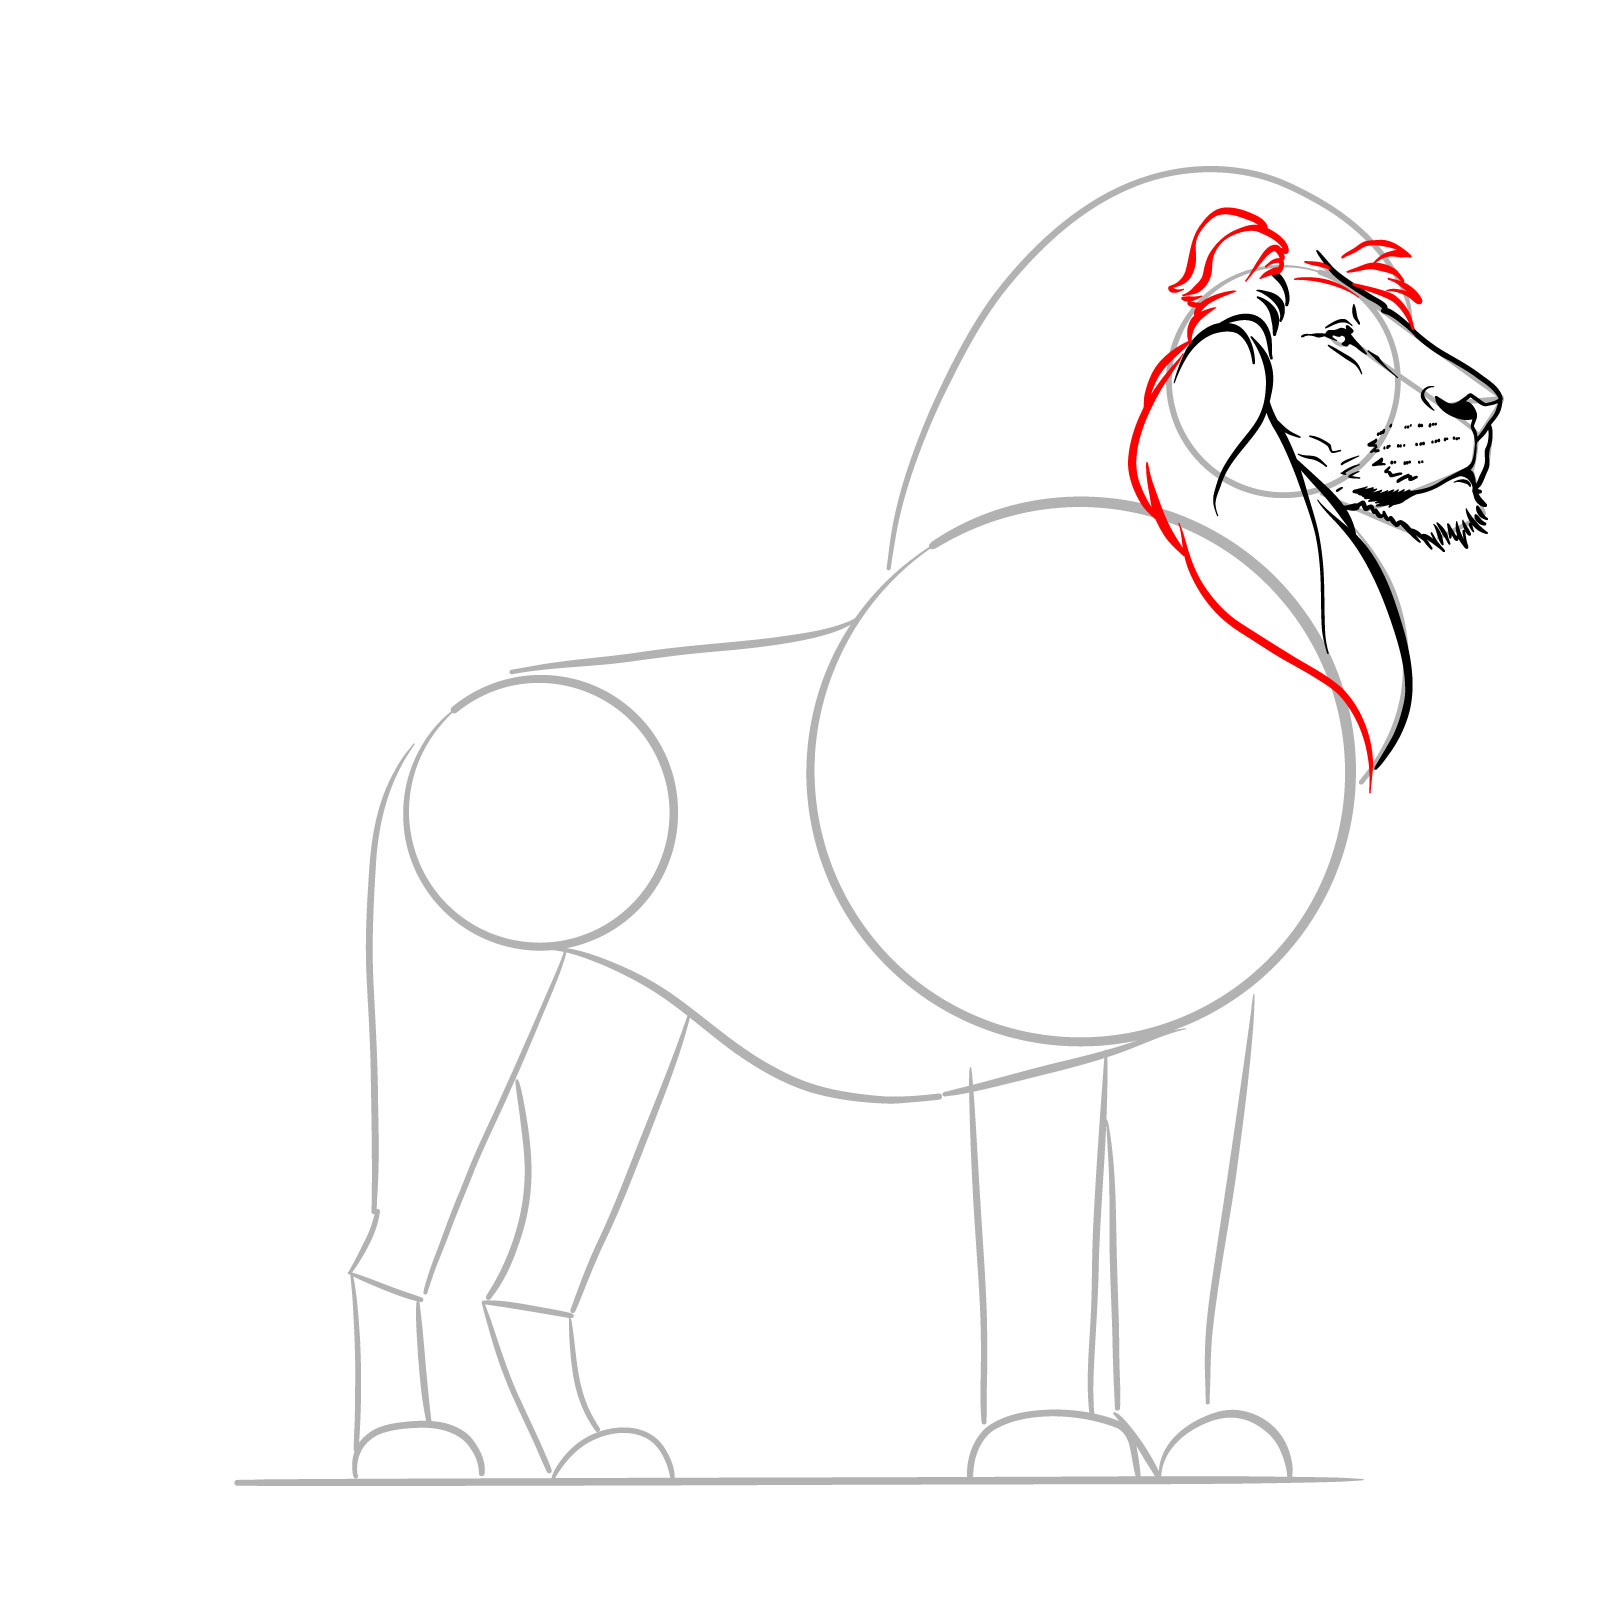
Step 08 – Draw long, flowing lines around the head to form the mane. Use varying strokes to represent the fur’s natural flow and texture
Sketching the mane’s outline and fur
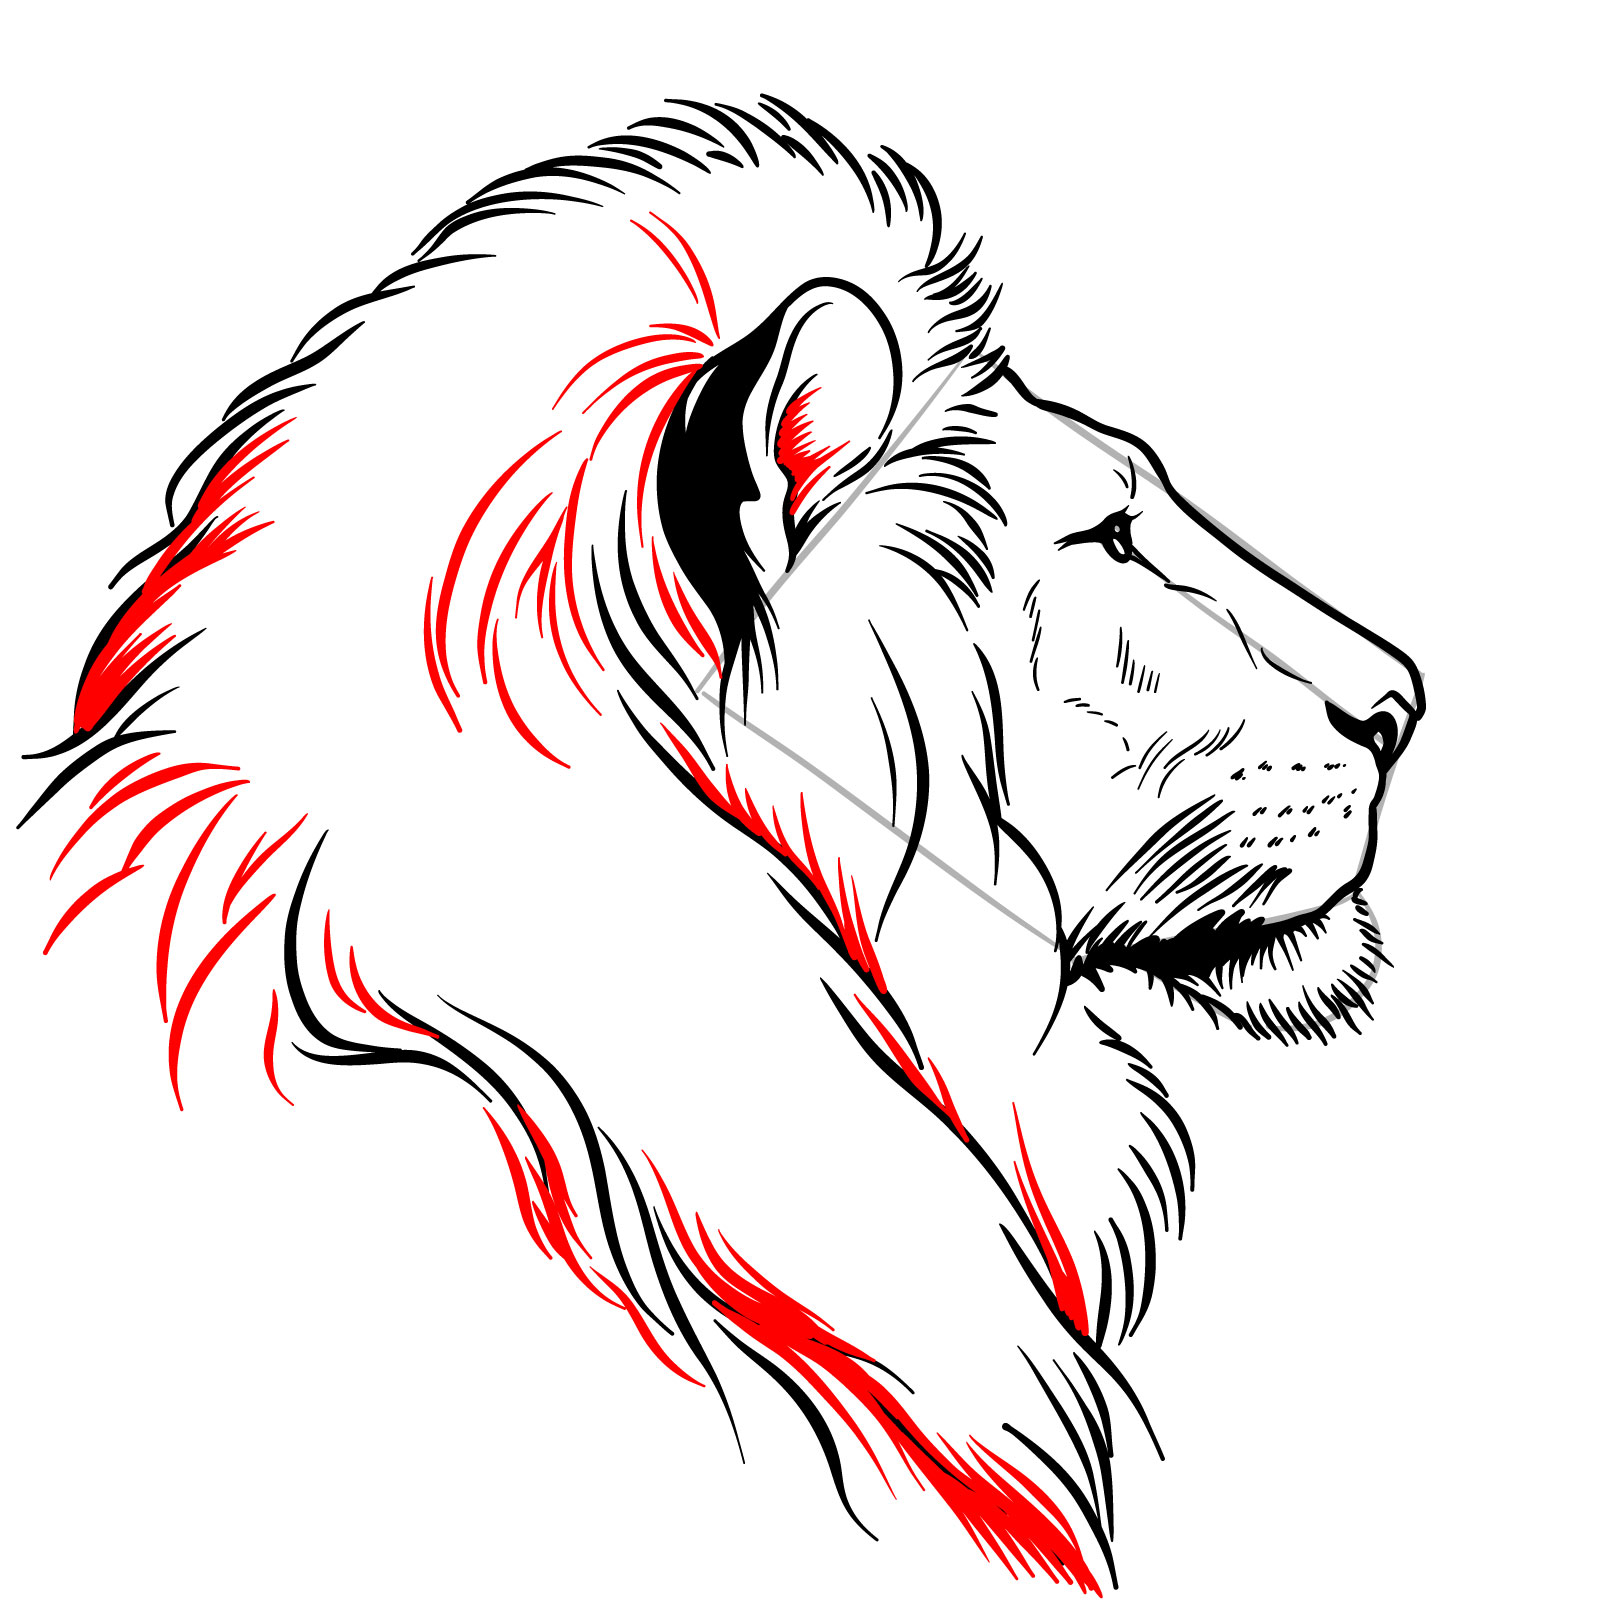
Step 09 – Continue to refine the mane by adding more layers of fur. Shade the inner part of the ear as well
Adding layers of fur to the mane and shade the inner ear
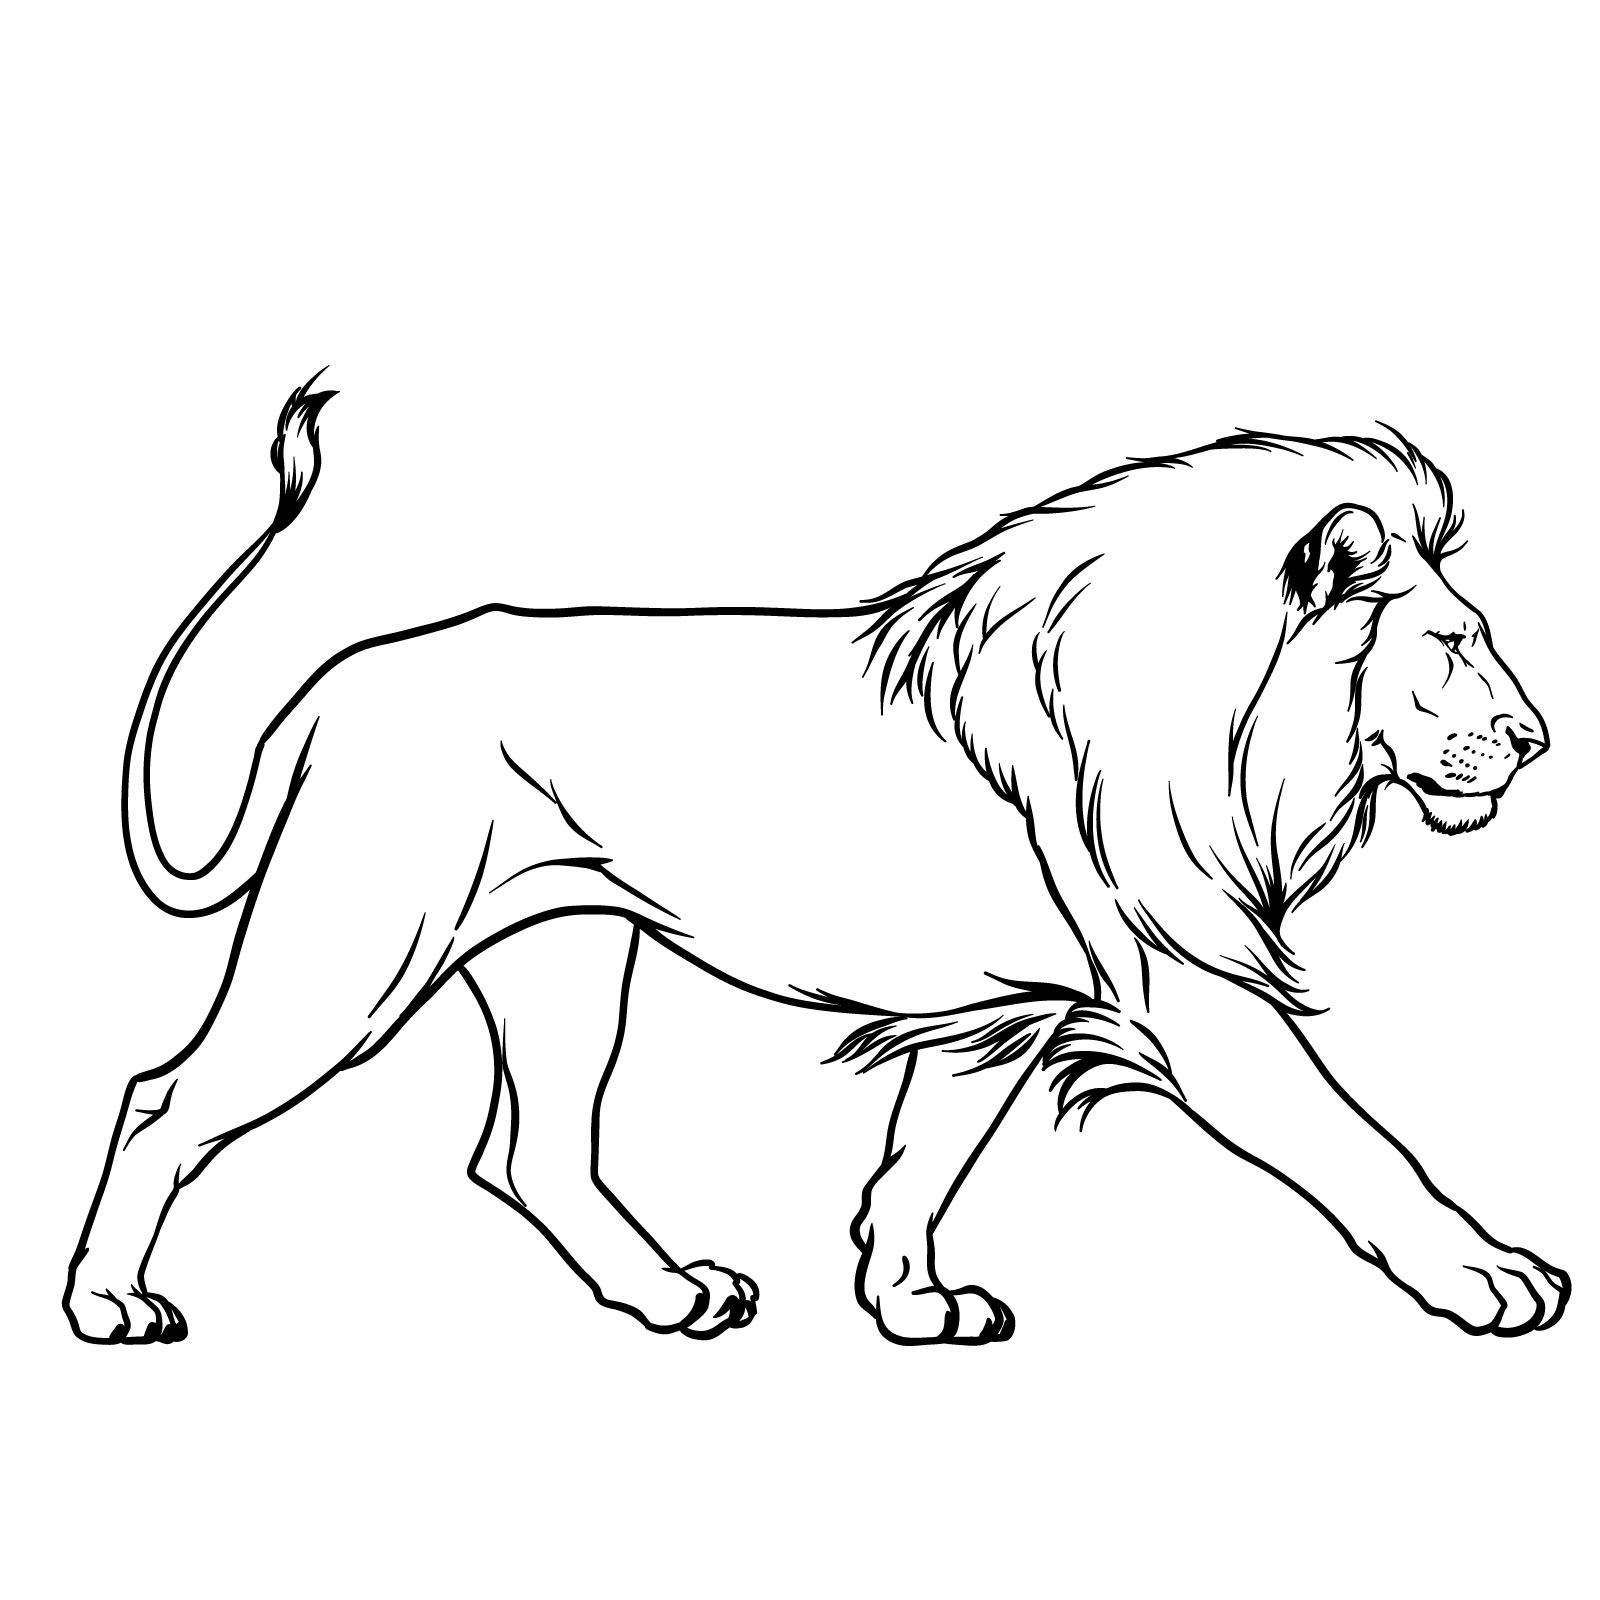
Step 10 – To complete the drawing, gently erase the underlying basic sketch or go over the drawing with ink to finalize the details. Your lion’s head drawing in side view should now have a clear structure and detailed fur
Finalize the guide on how to draw a lion’s head in side view
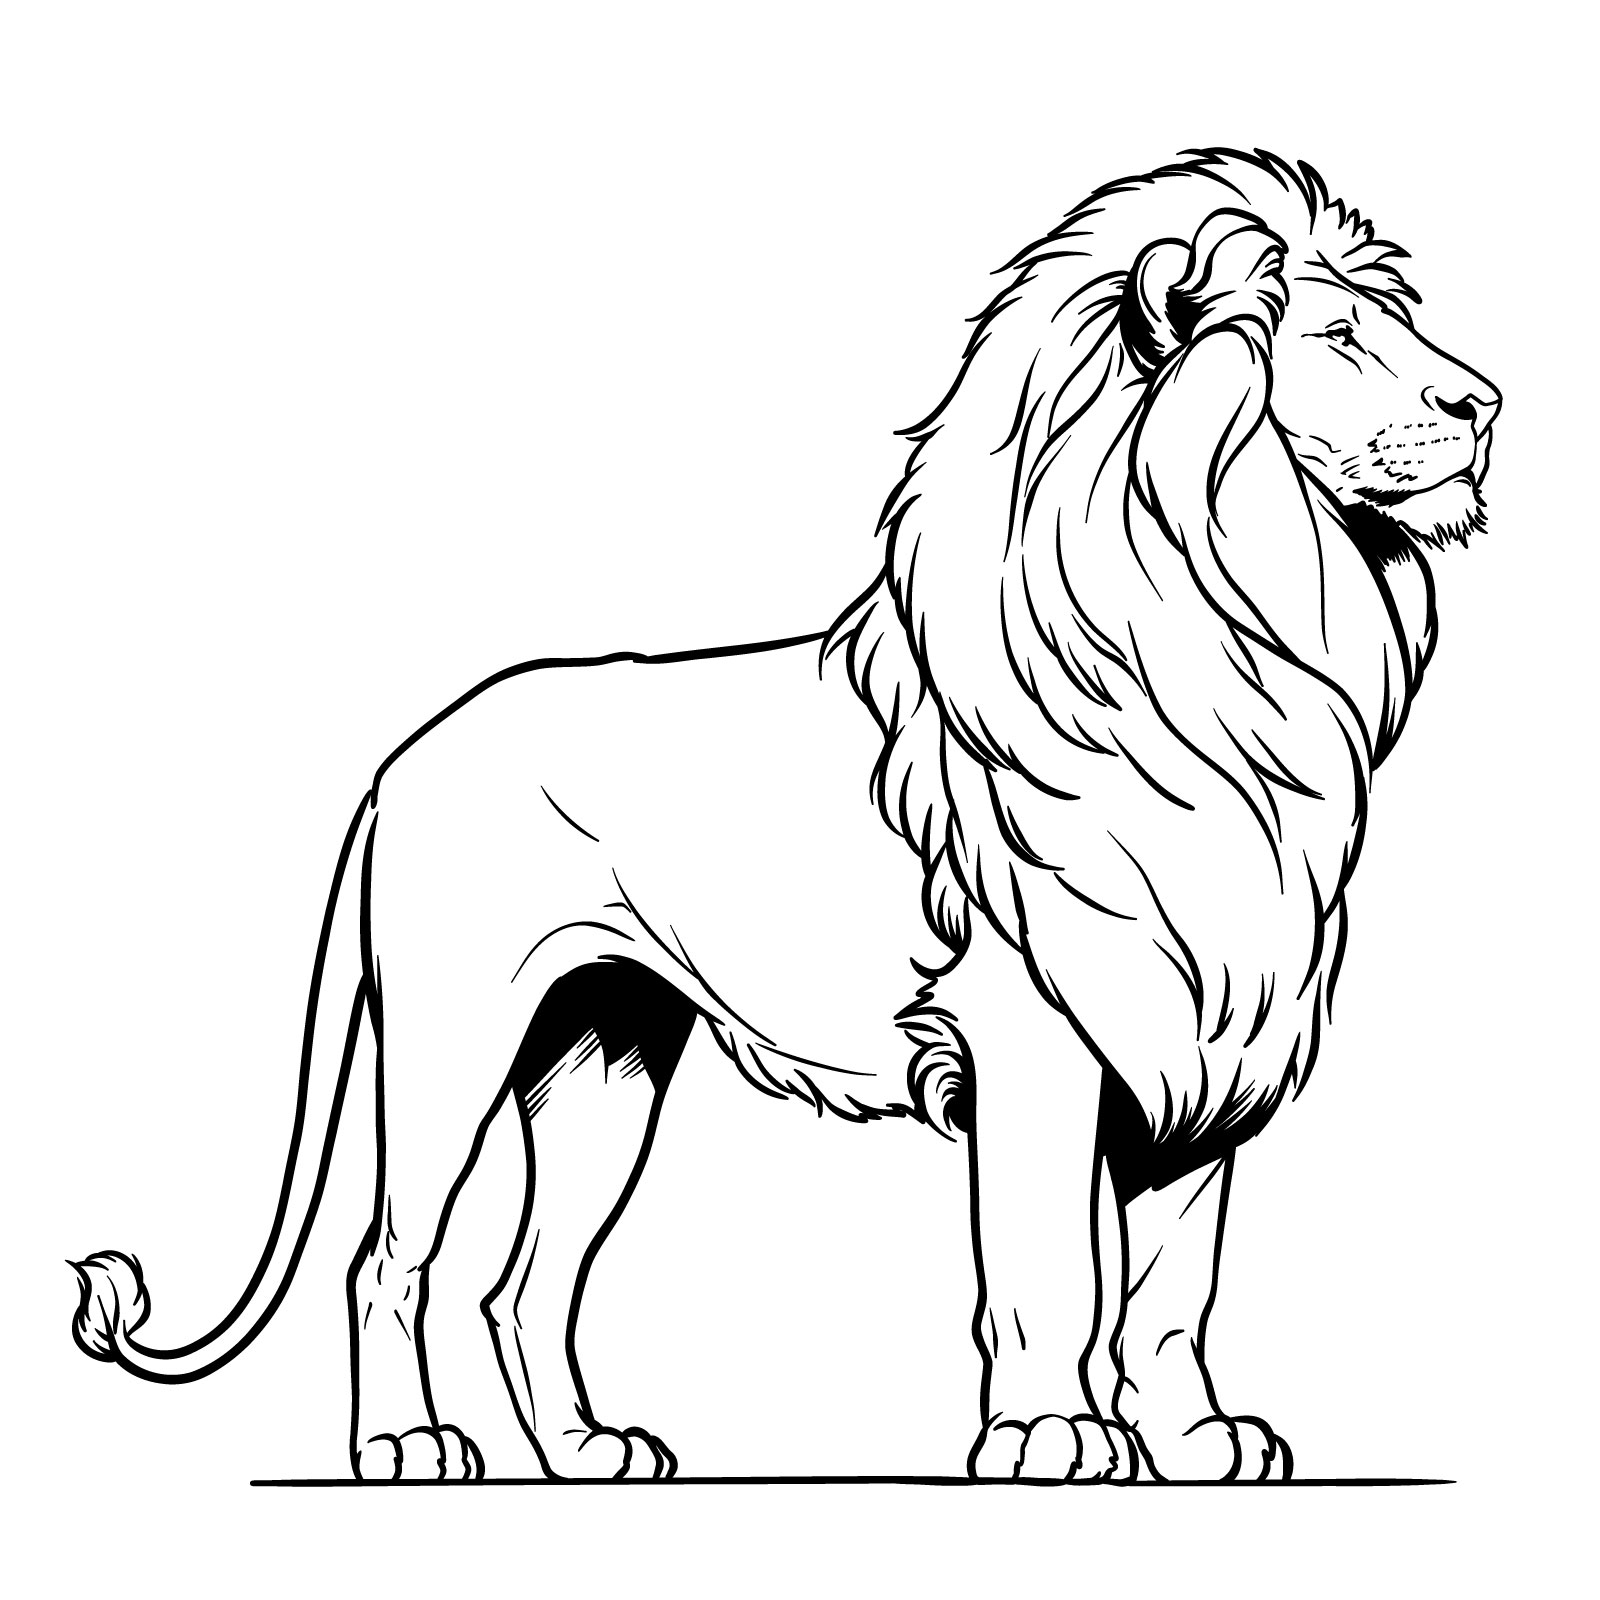
Guide 4: Standing Lion Drawing – Side View
How to draw a standing lion in side view
Now, let’s draw a standing lion from a side view. This will be broken down into 19 easy steps to help you capture the lion’s stature and calm demeanor. You’ll draw from the mane on its head to the tip of its tail, outlining the strong legs and the curves of its muscular body.
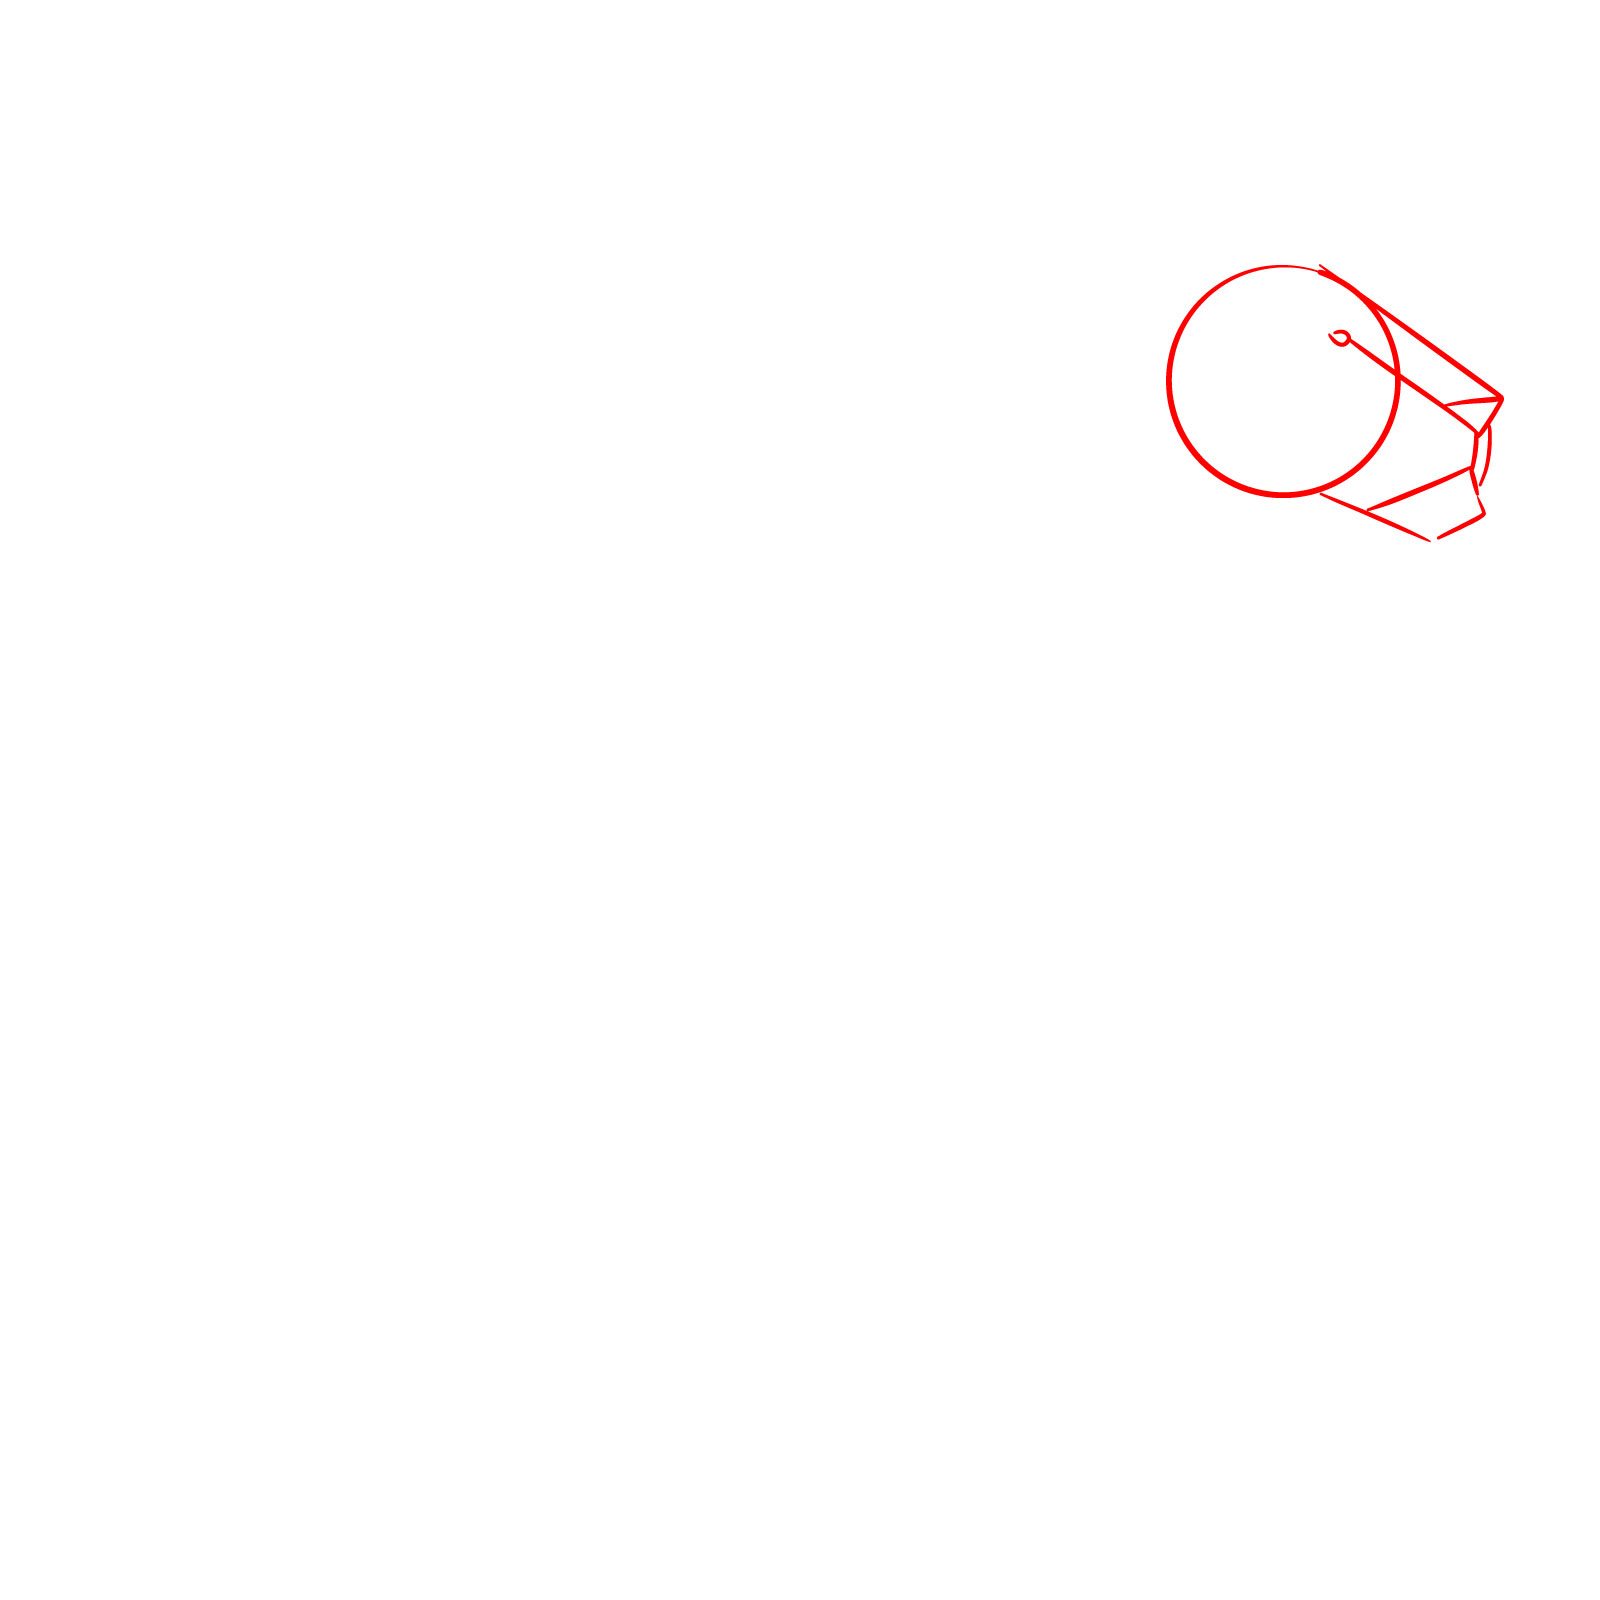
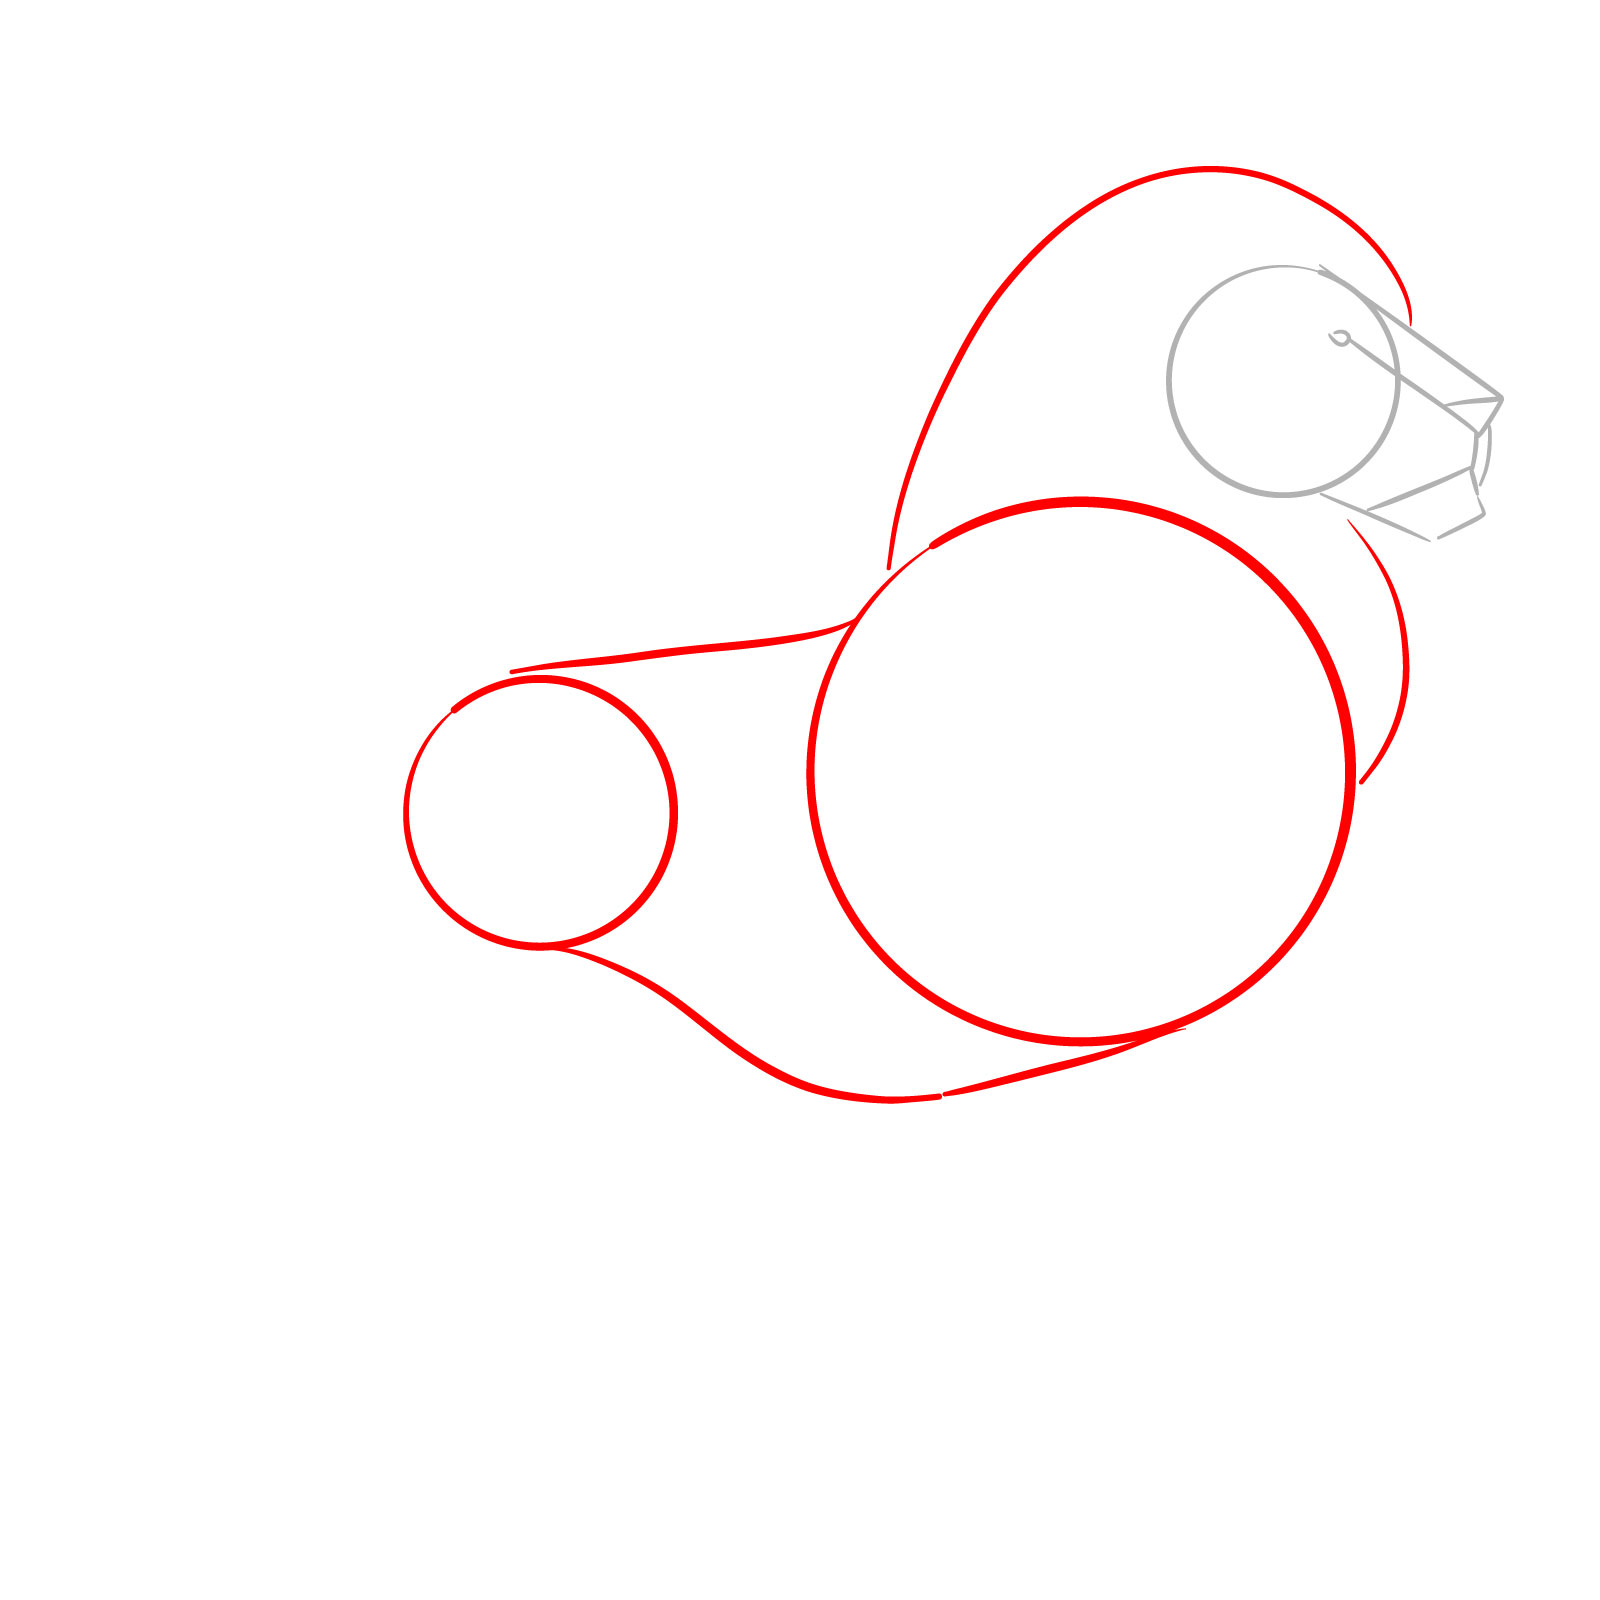
Step 01 – Draw a small circle to form the base of the lion’s head. Add a shape protruding from the top of this circle to outline the basic structure of the muzzle
Begin your standing lion drawing with a simple sketch of the head and muzzle
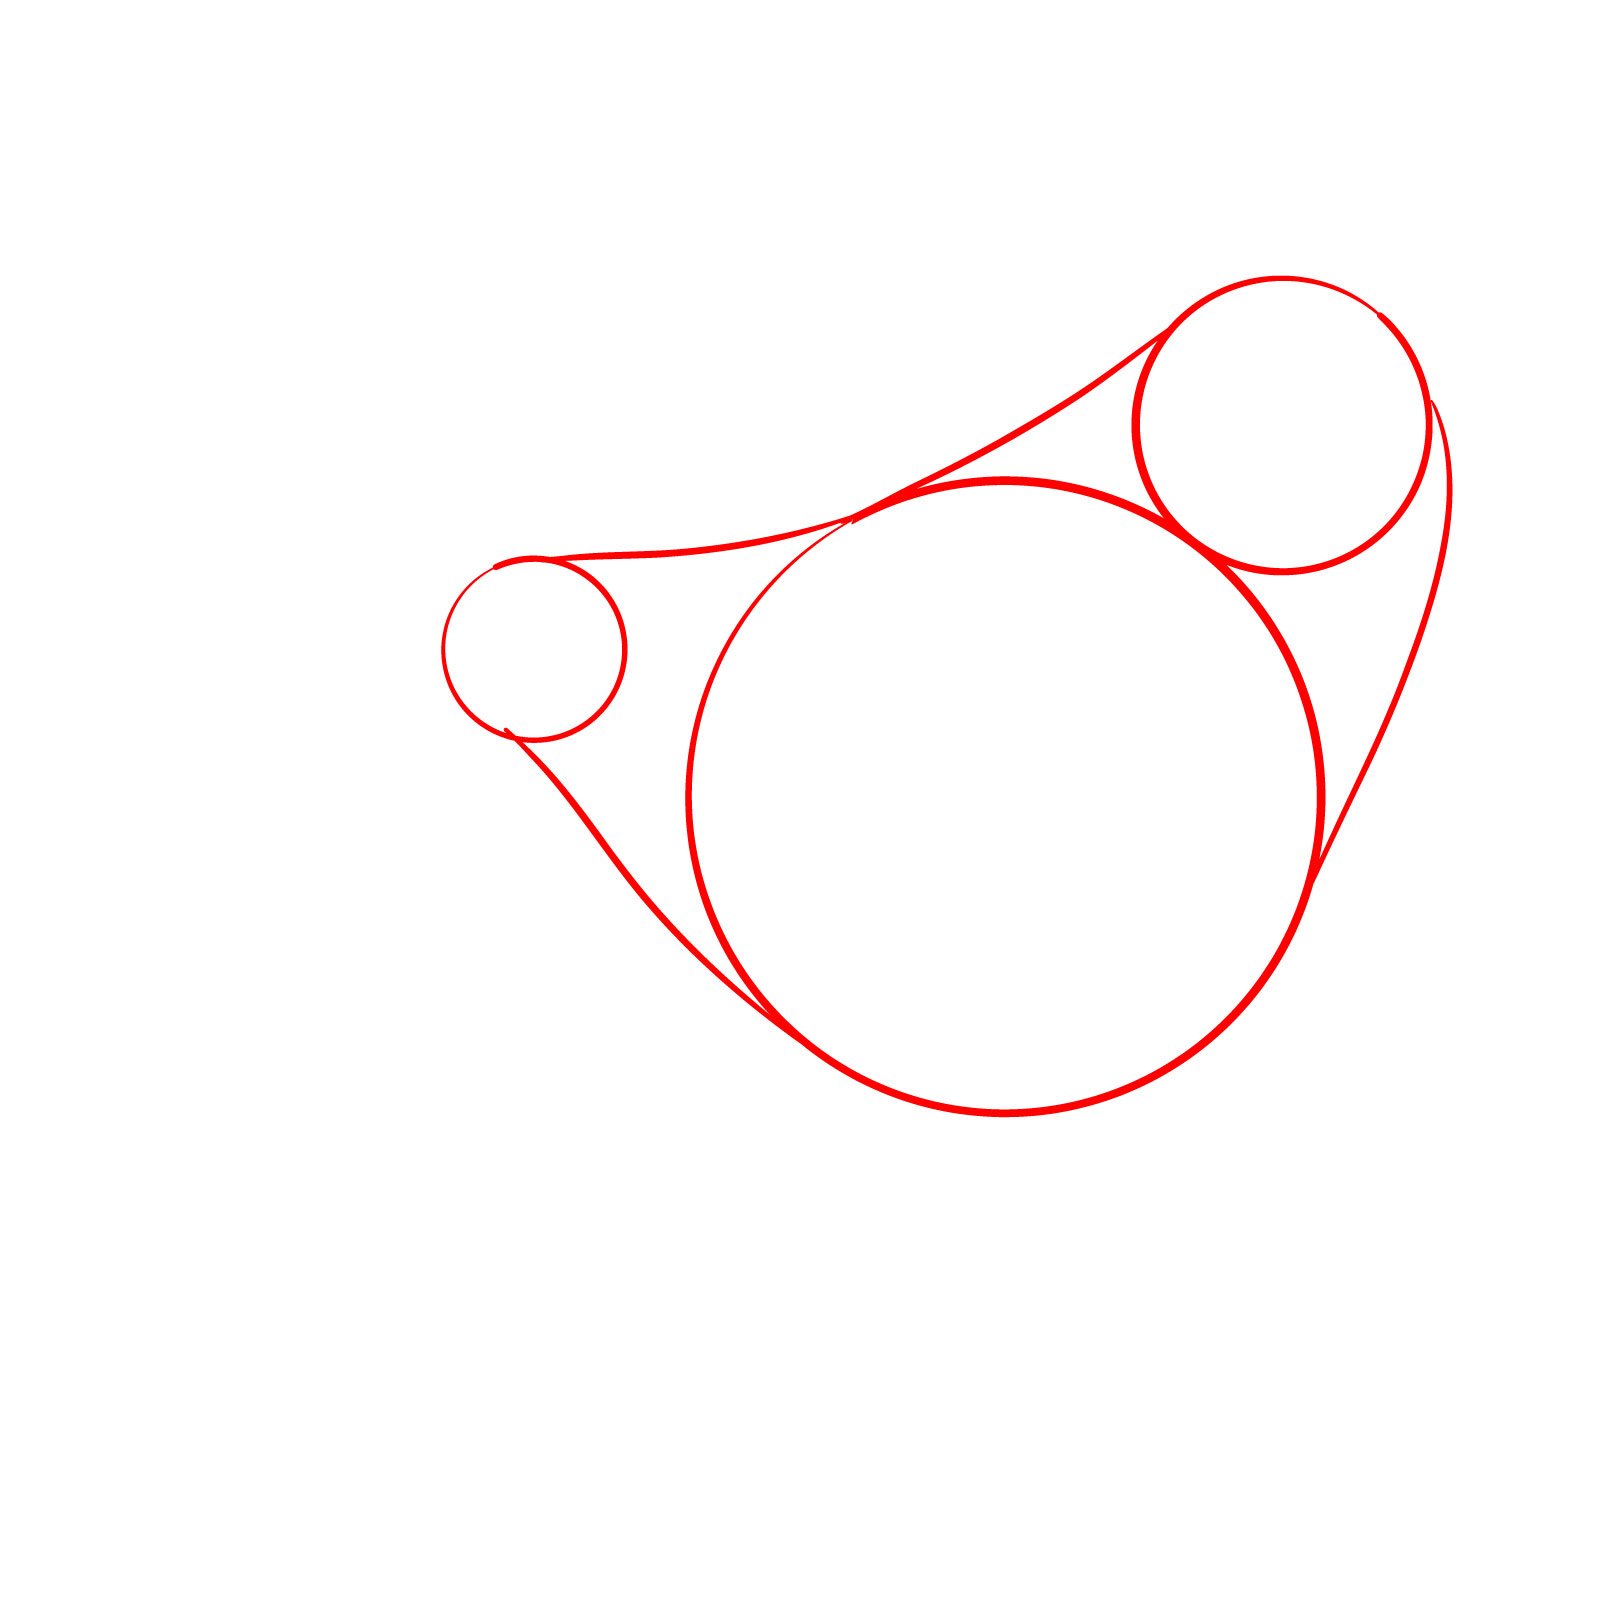
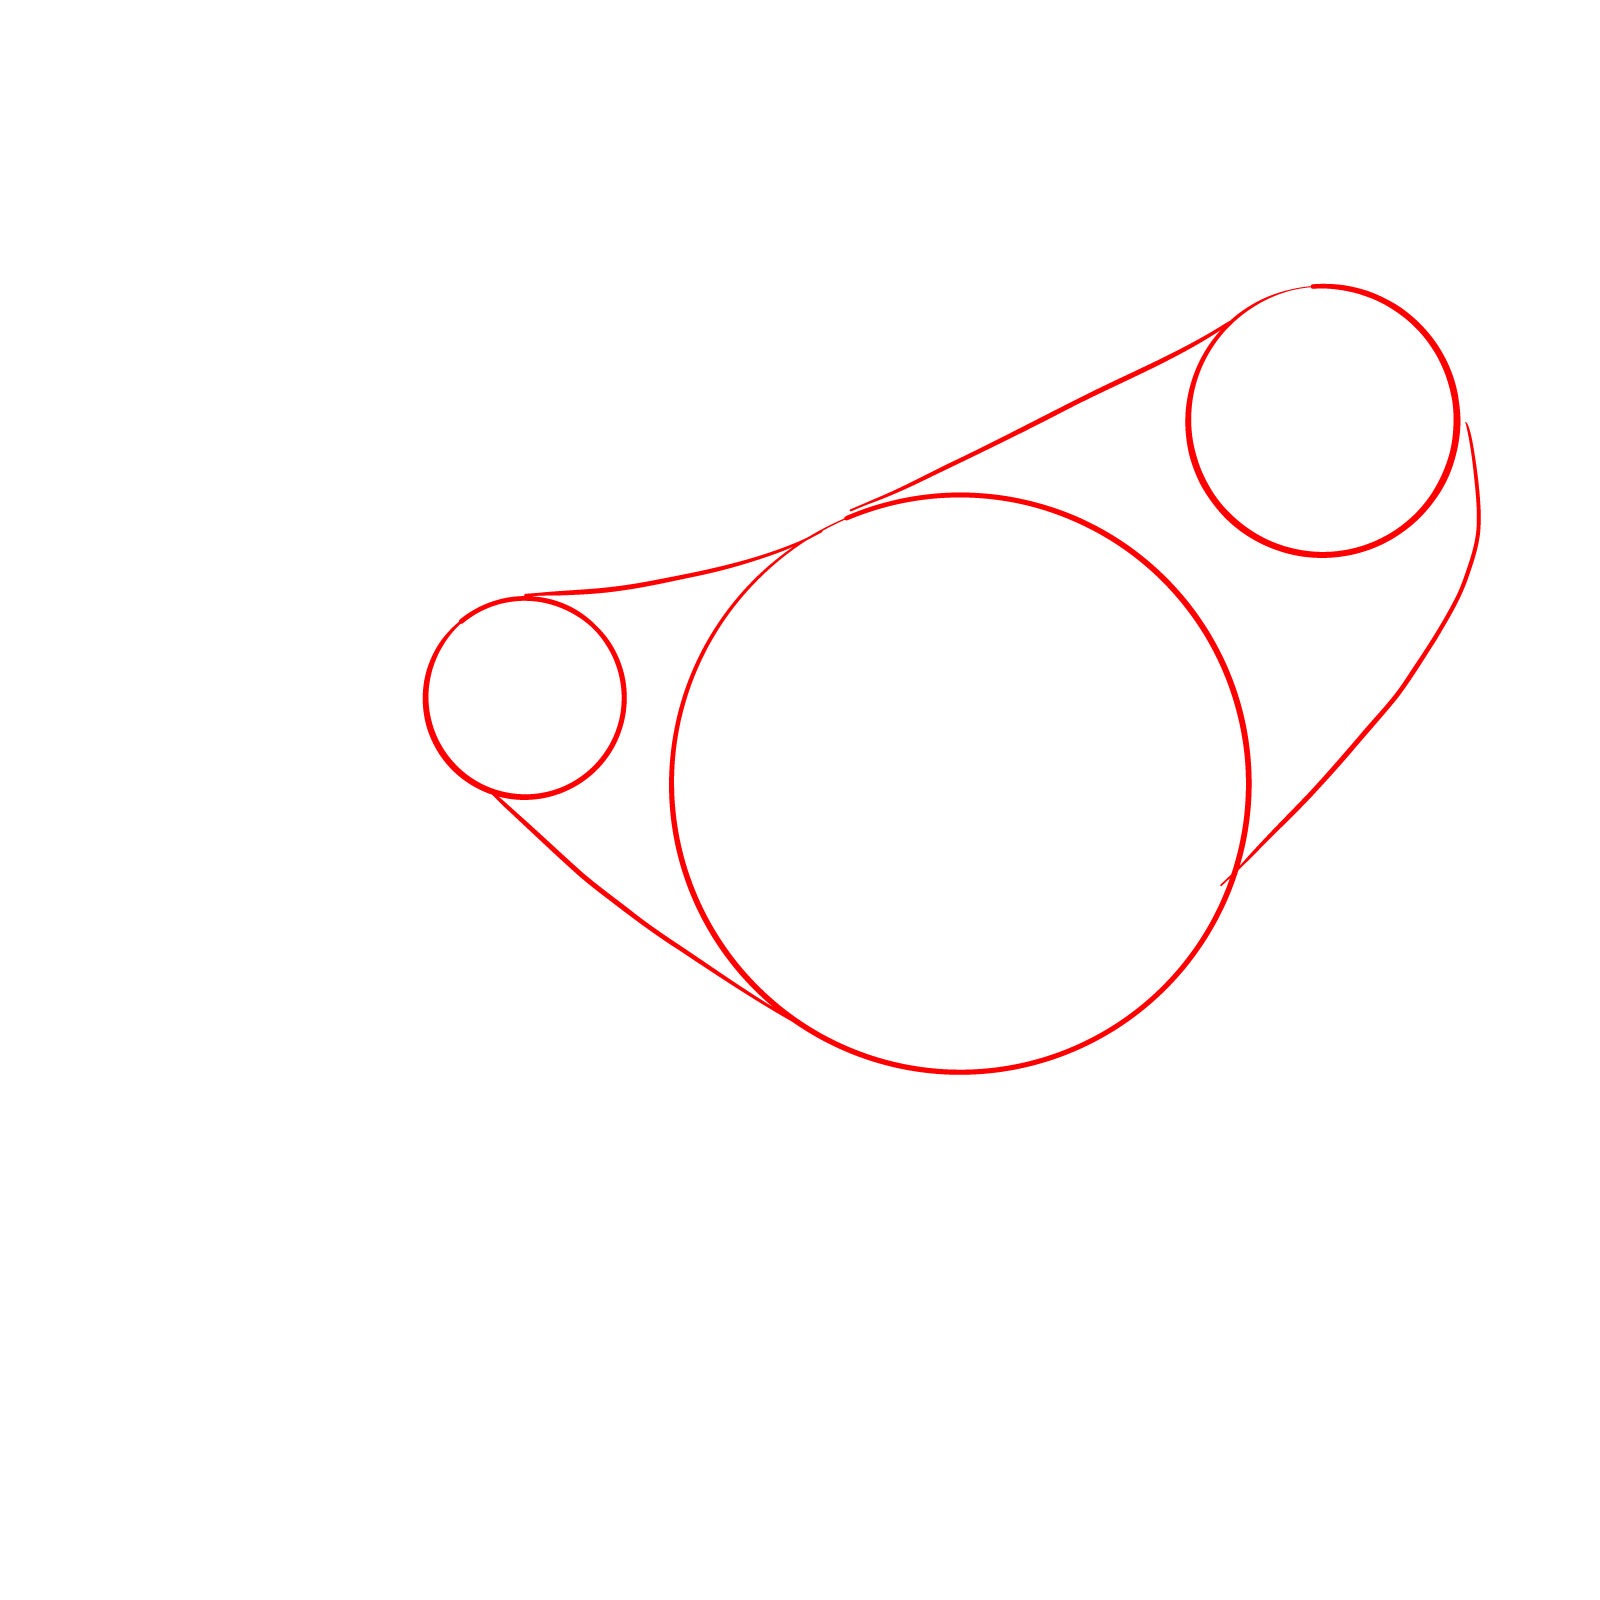
Step 02 – Draw a large circle for the chest and a small circle for the hips, placing them at a distance apart to establish the body’s length. Connect these circles with lines to define the body’s shape and add a curve above the chest circle to represent the mane’s base
Sketching the main body and mane outlines
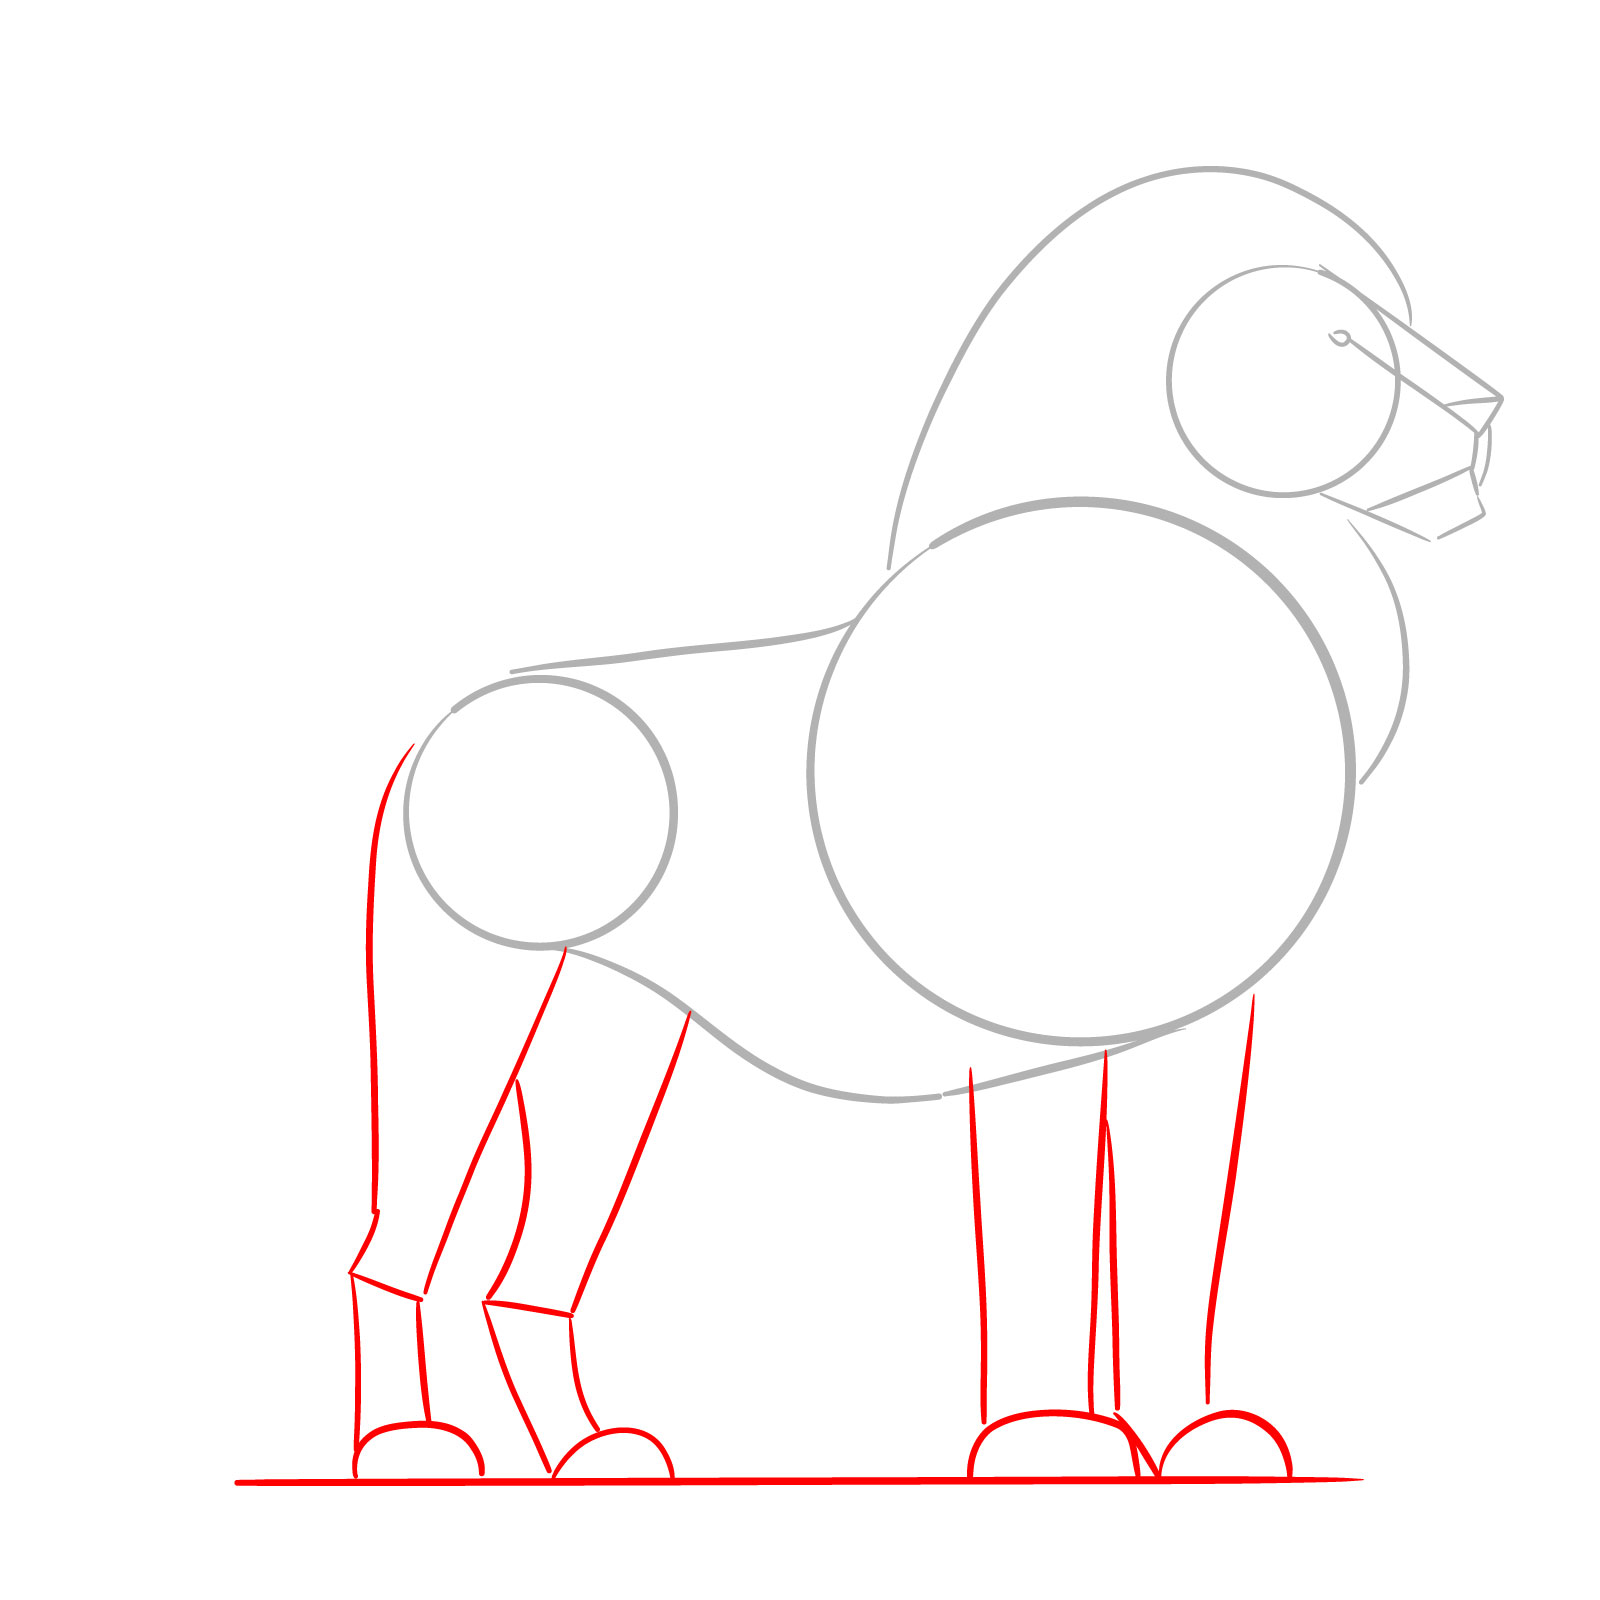
Step 03 – Sketch four vertical shapes downward from the body to position the legs. At the bottom of these lines, draw small half-circles for the paws. Add angled lines above the paws to indicate the joints and shape of the legs
Adding the foundational shapes for the legs
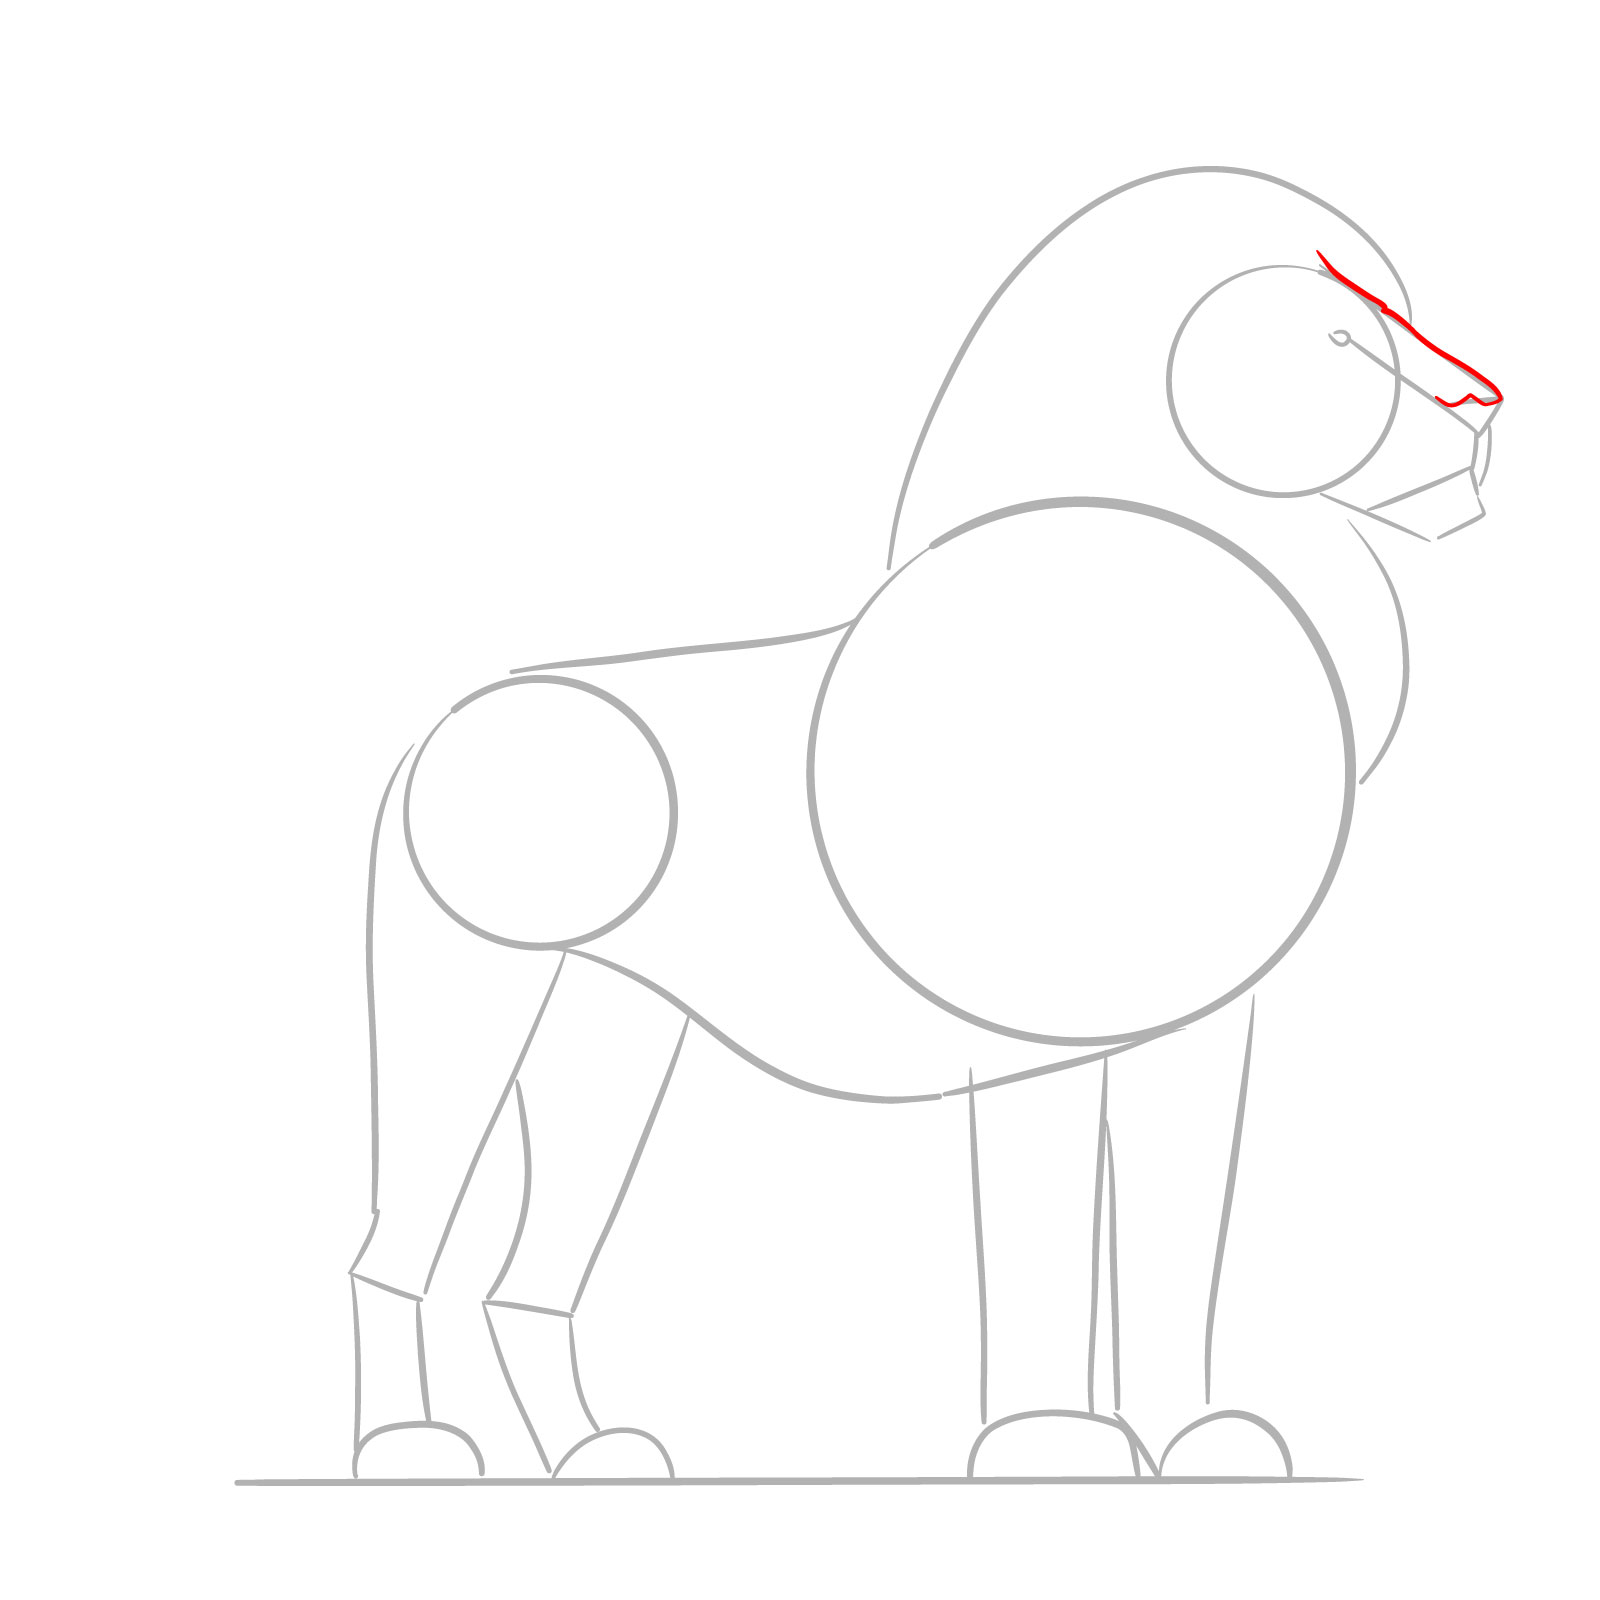
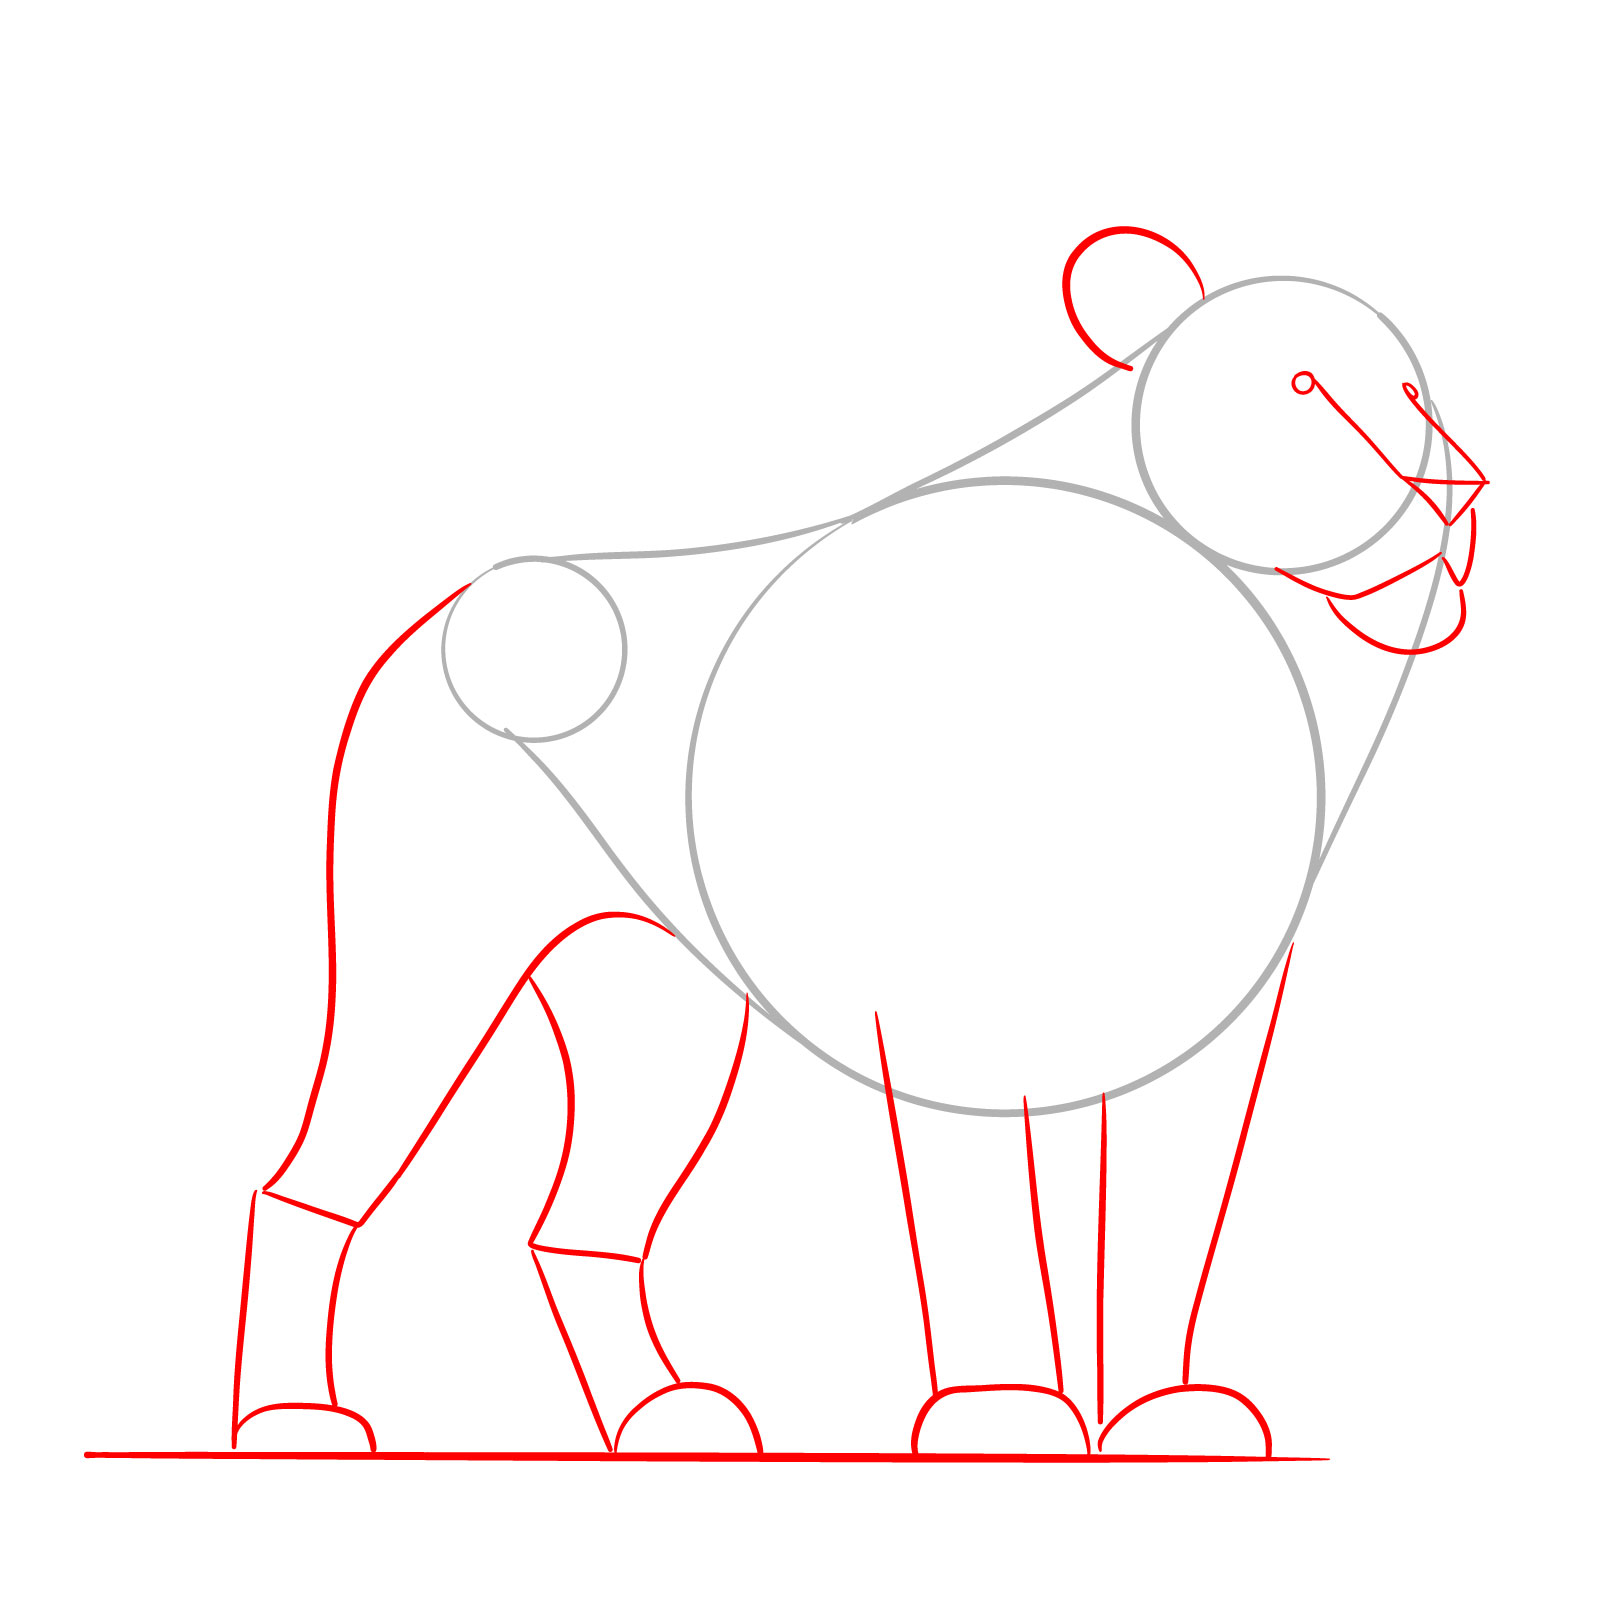
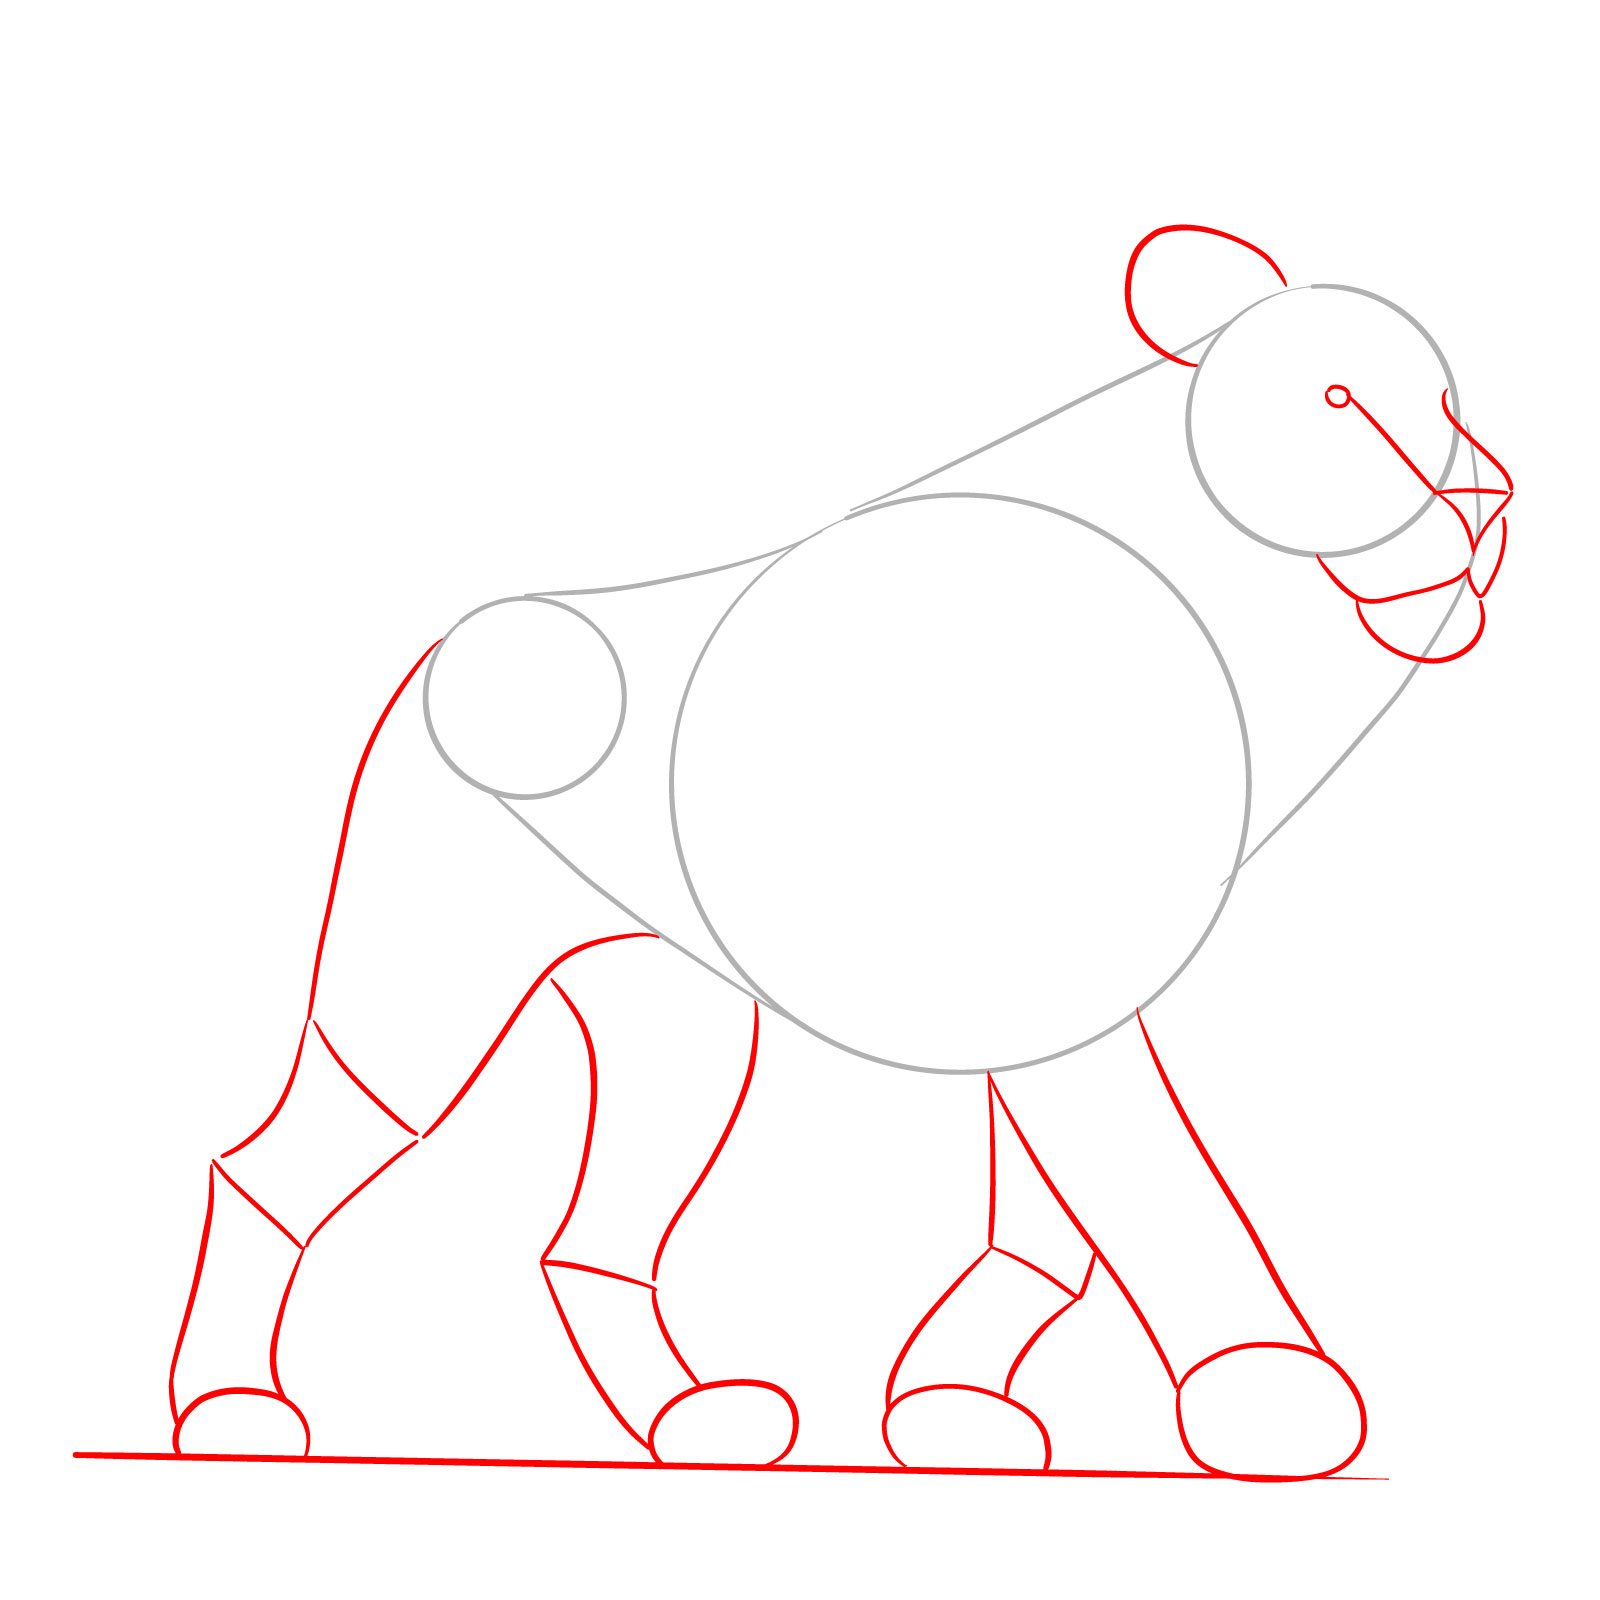
Step 04 – Refine the muzzle’s shape by adding an outline for the nose on the top part of the muzzle shape. Ensure the line is slightly curved inward to create the nose’s bridge
Shaping the upper part of the muzzle and nose in a standing lion drawing
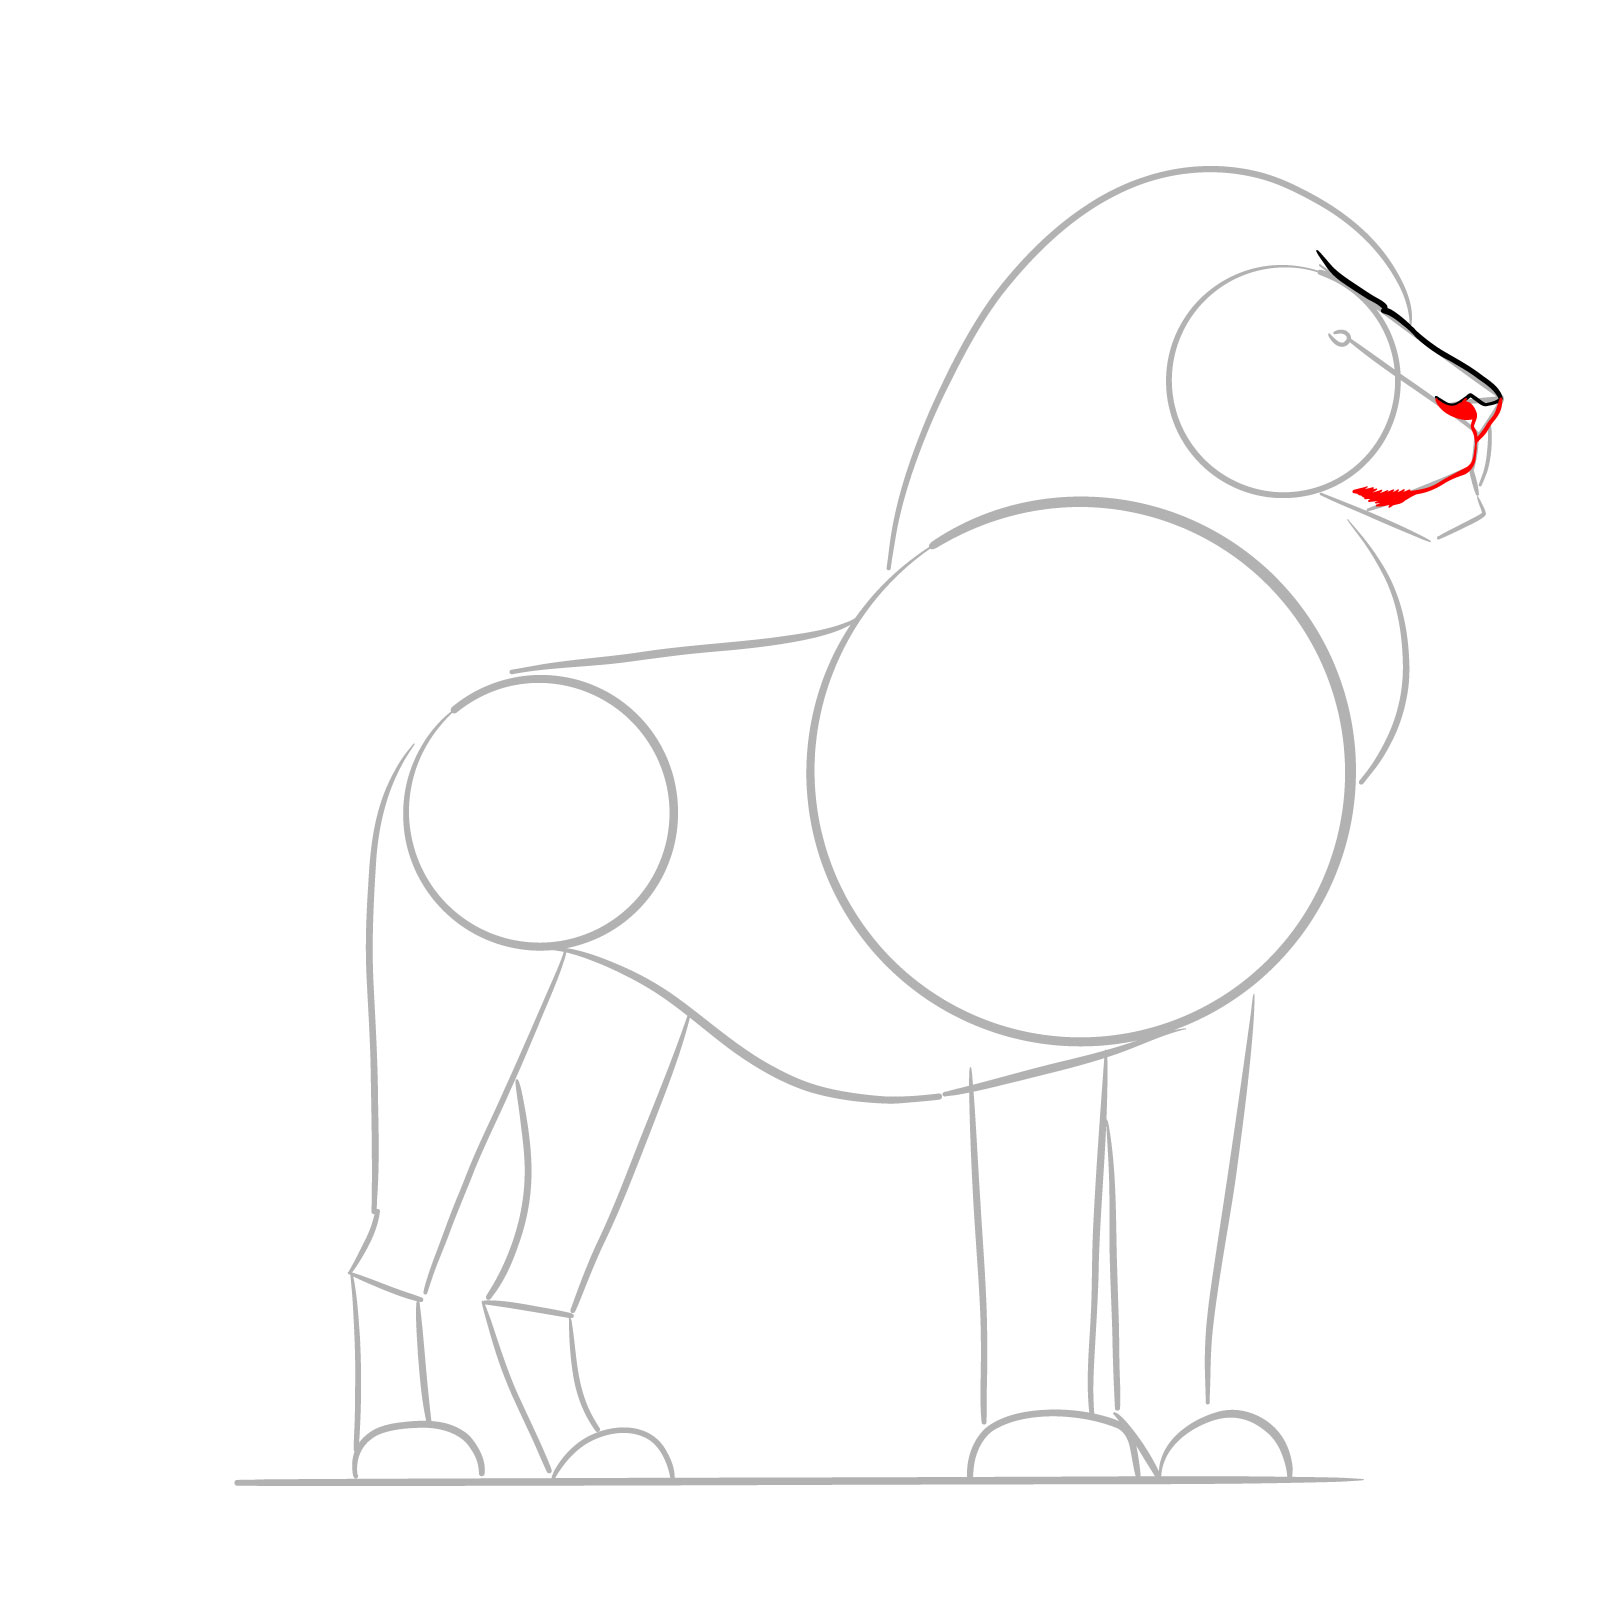
Step 05 – Draw a nose and a line for the mouth extending from the bottom of the nose outline down to the muzzle shape
Illustrating the mouth and chin of a standing lion
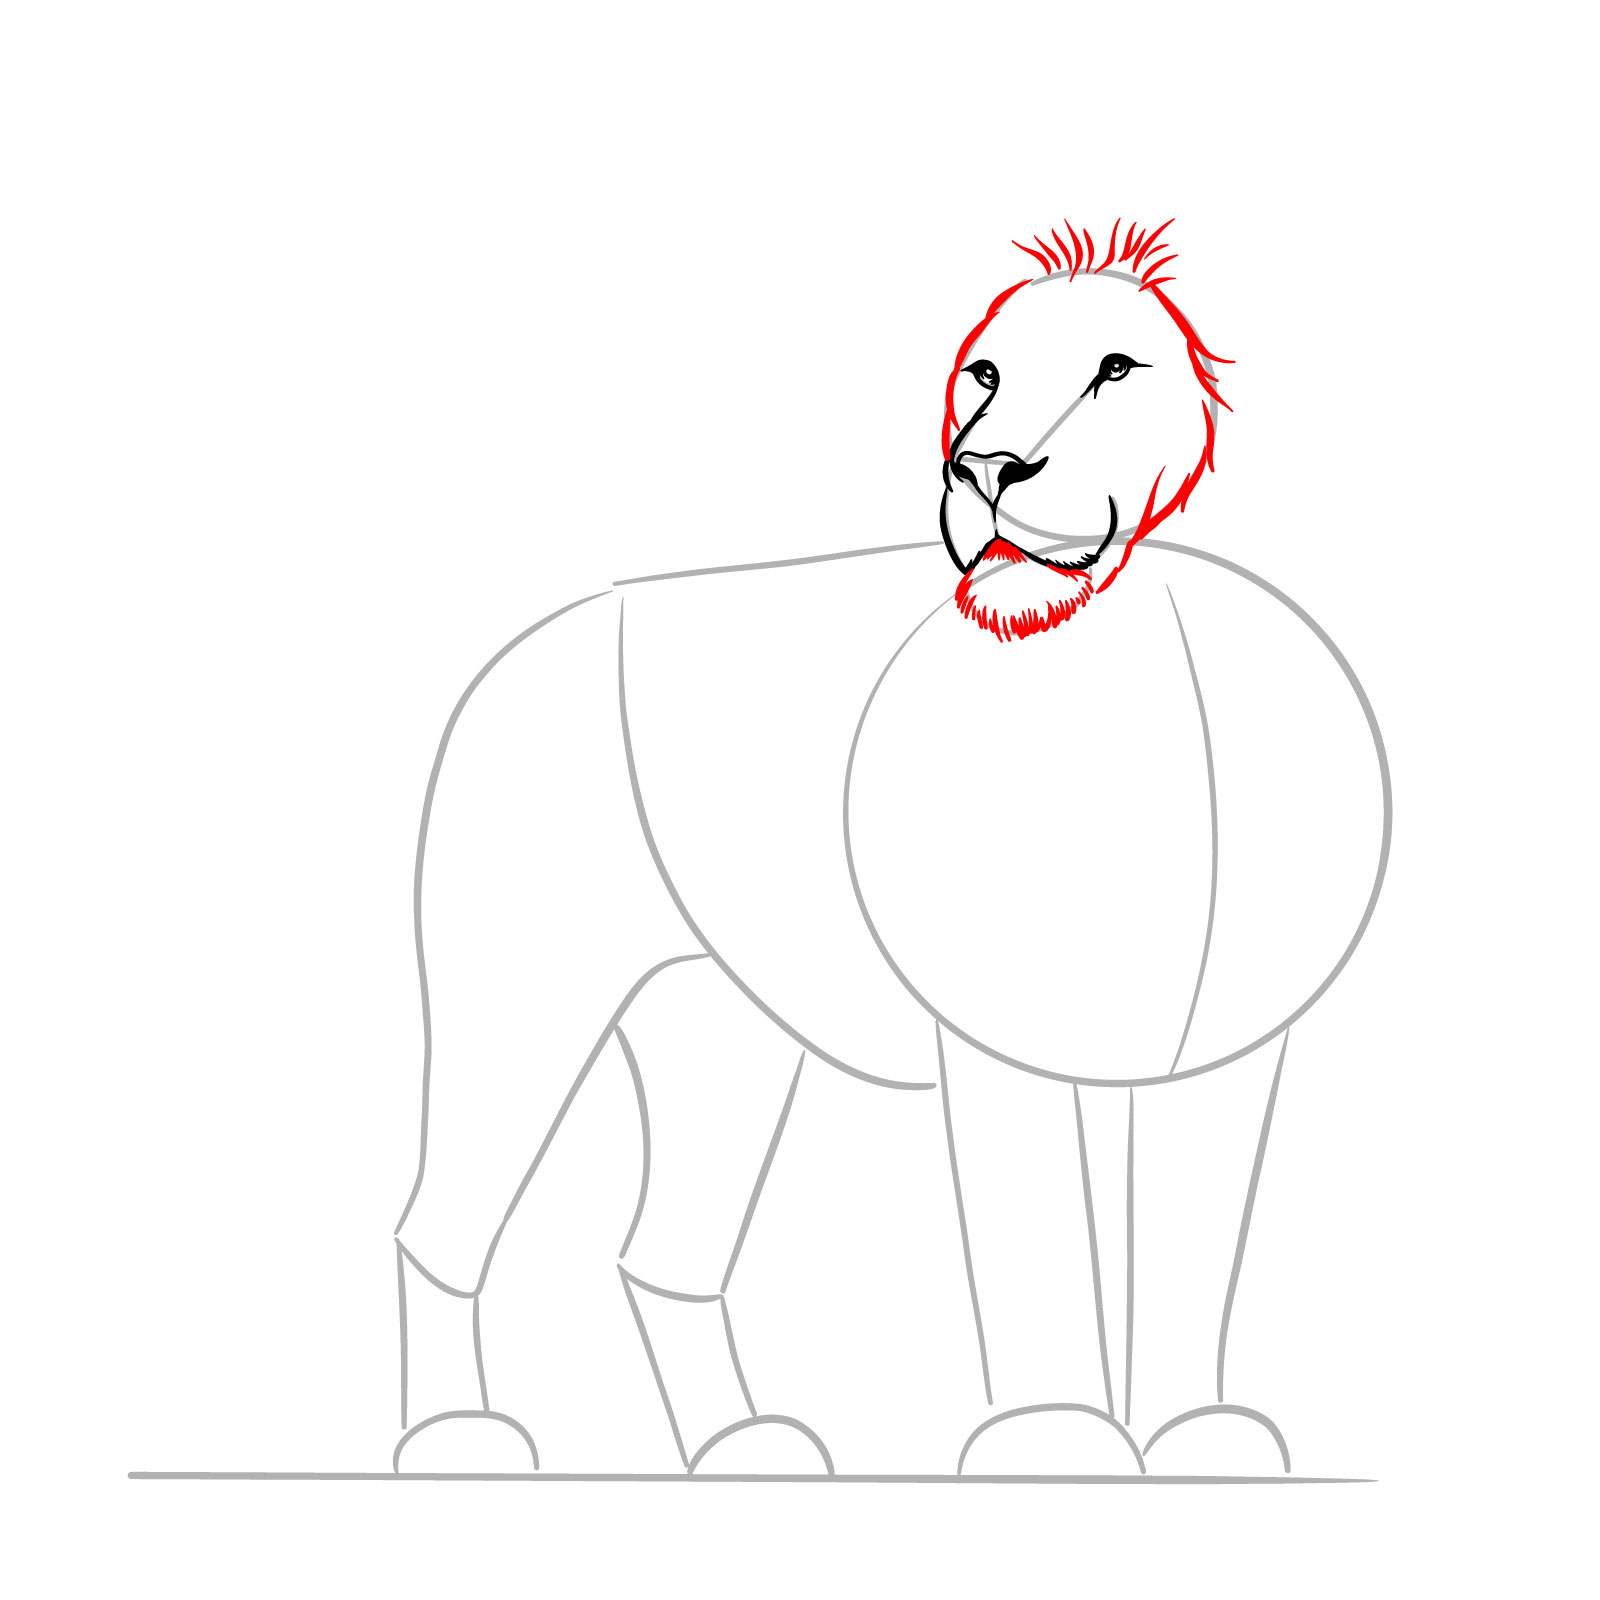
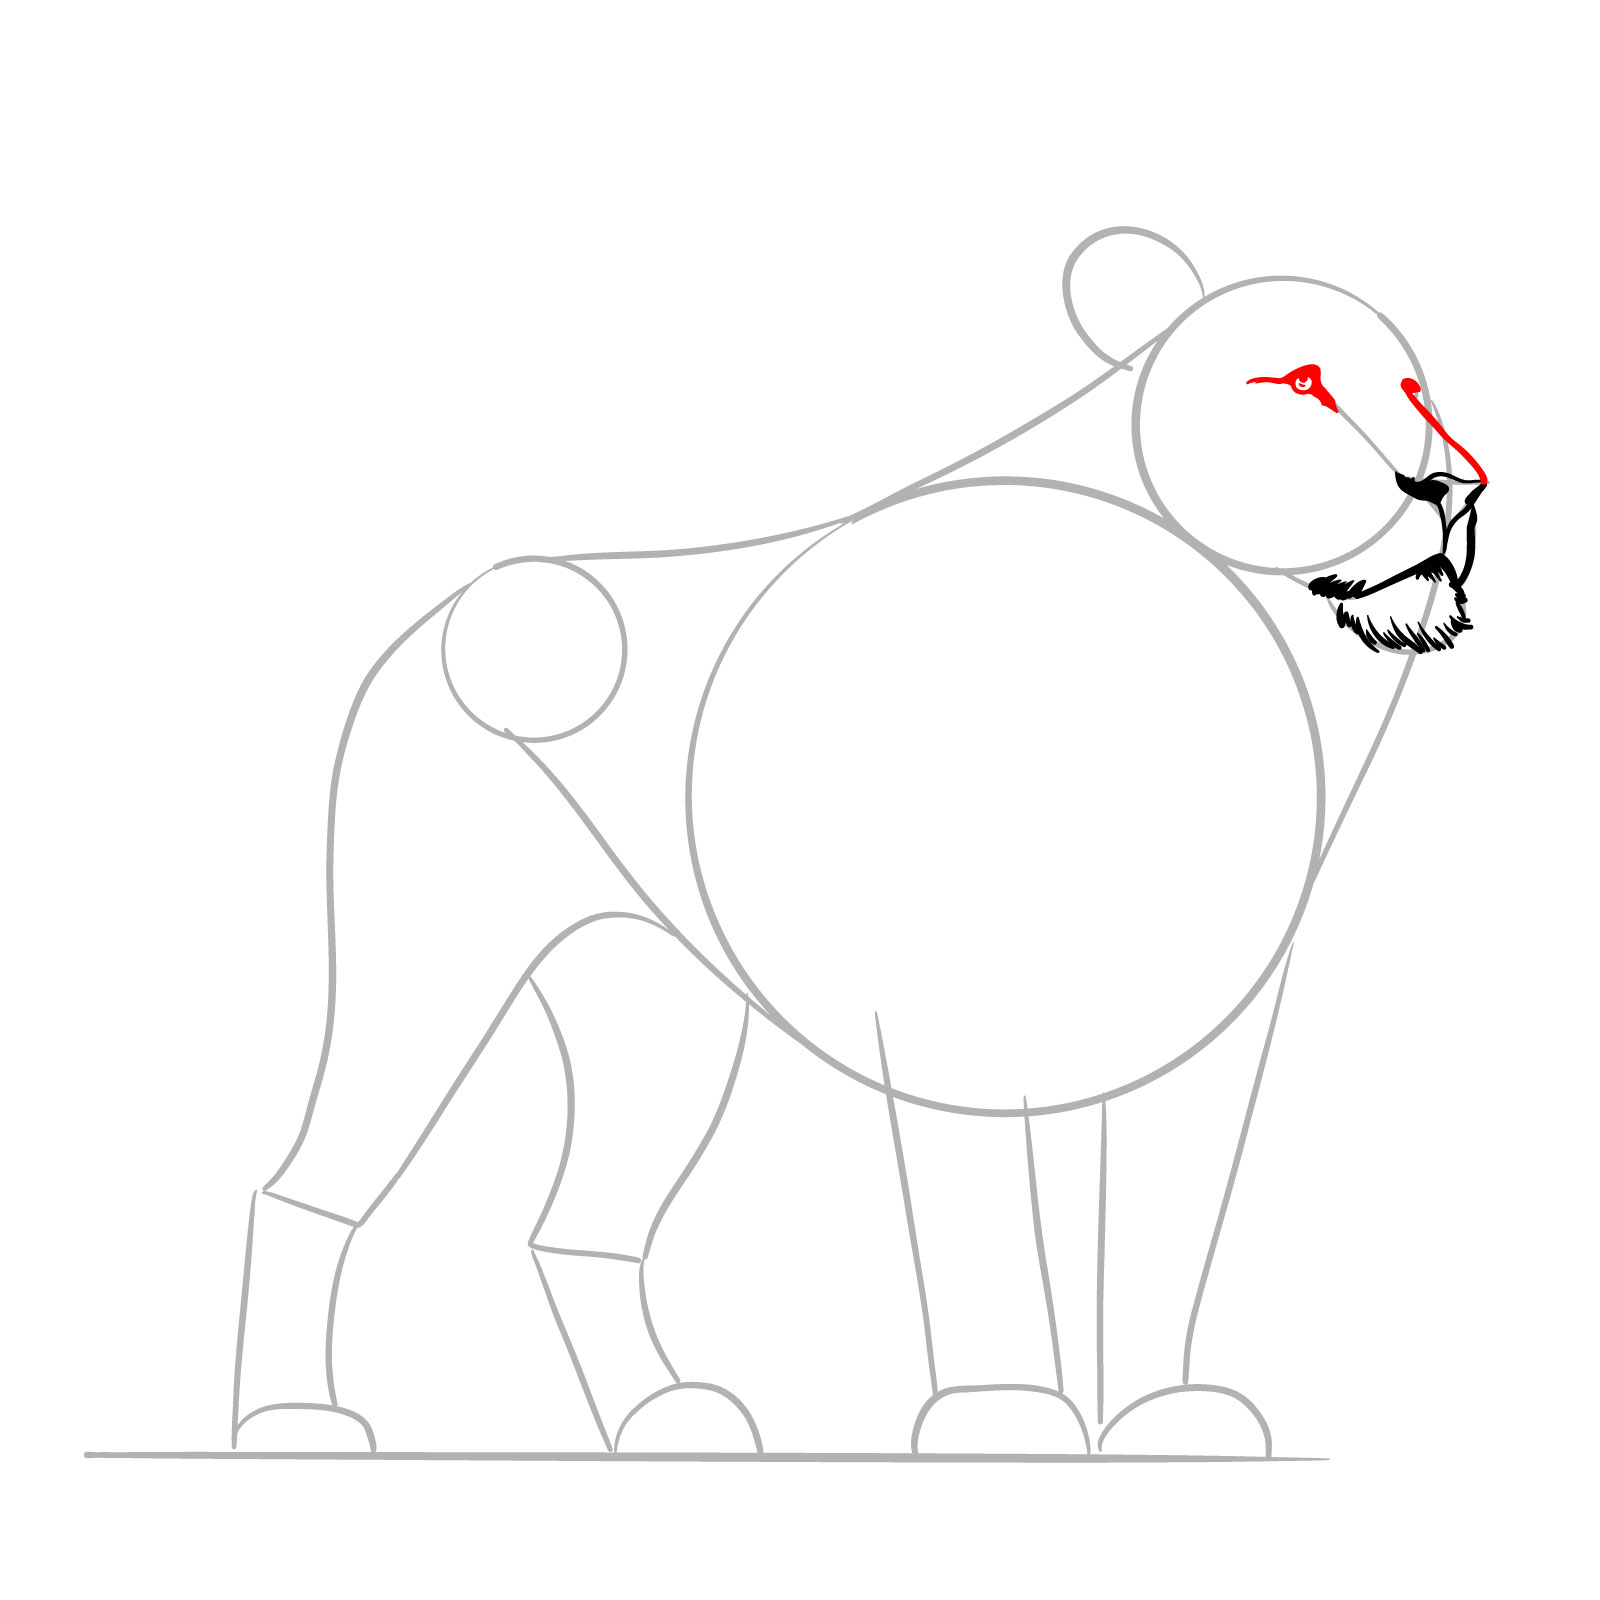
Step 06 – Sketch out the eye, and add a series of curved lines beside it to show the mane flowing down
Sketching the eye and flowing mane
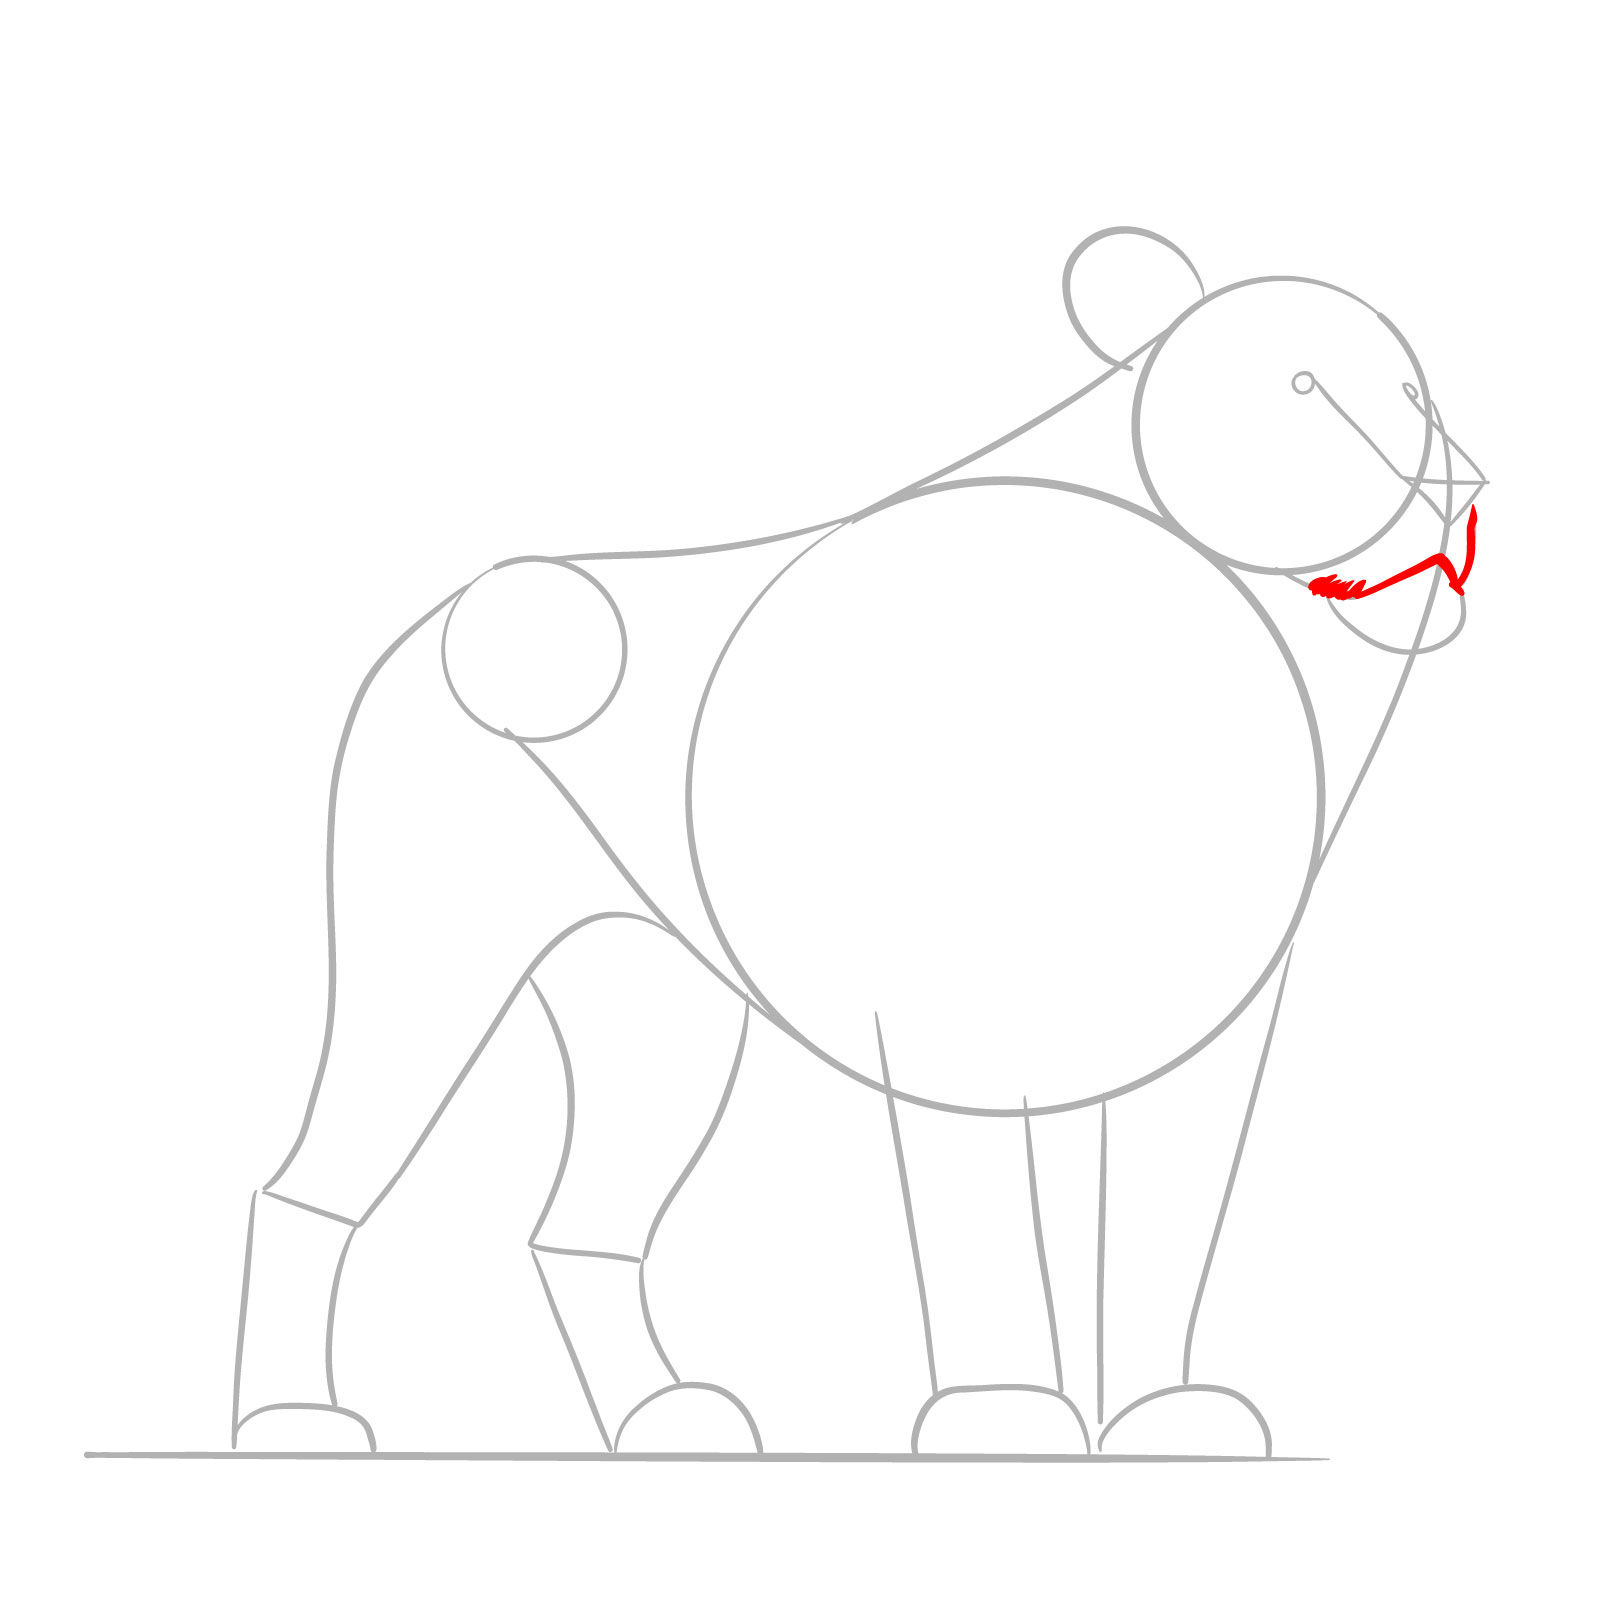
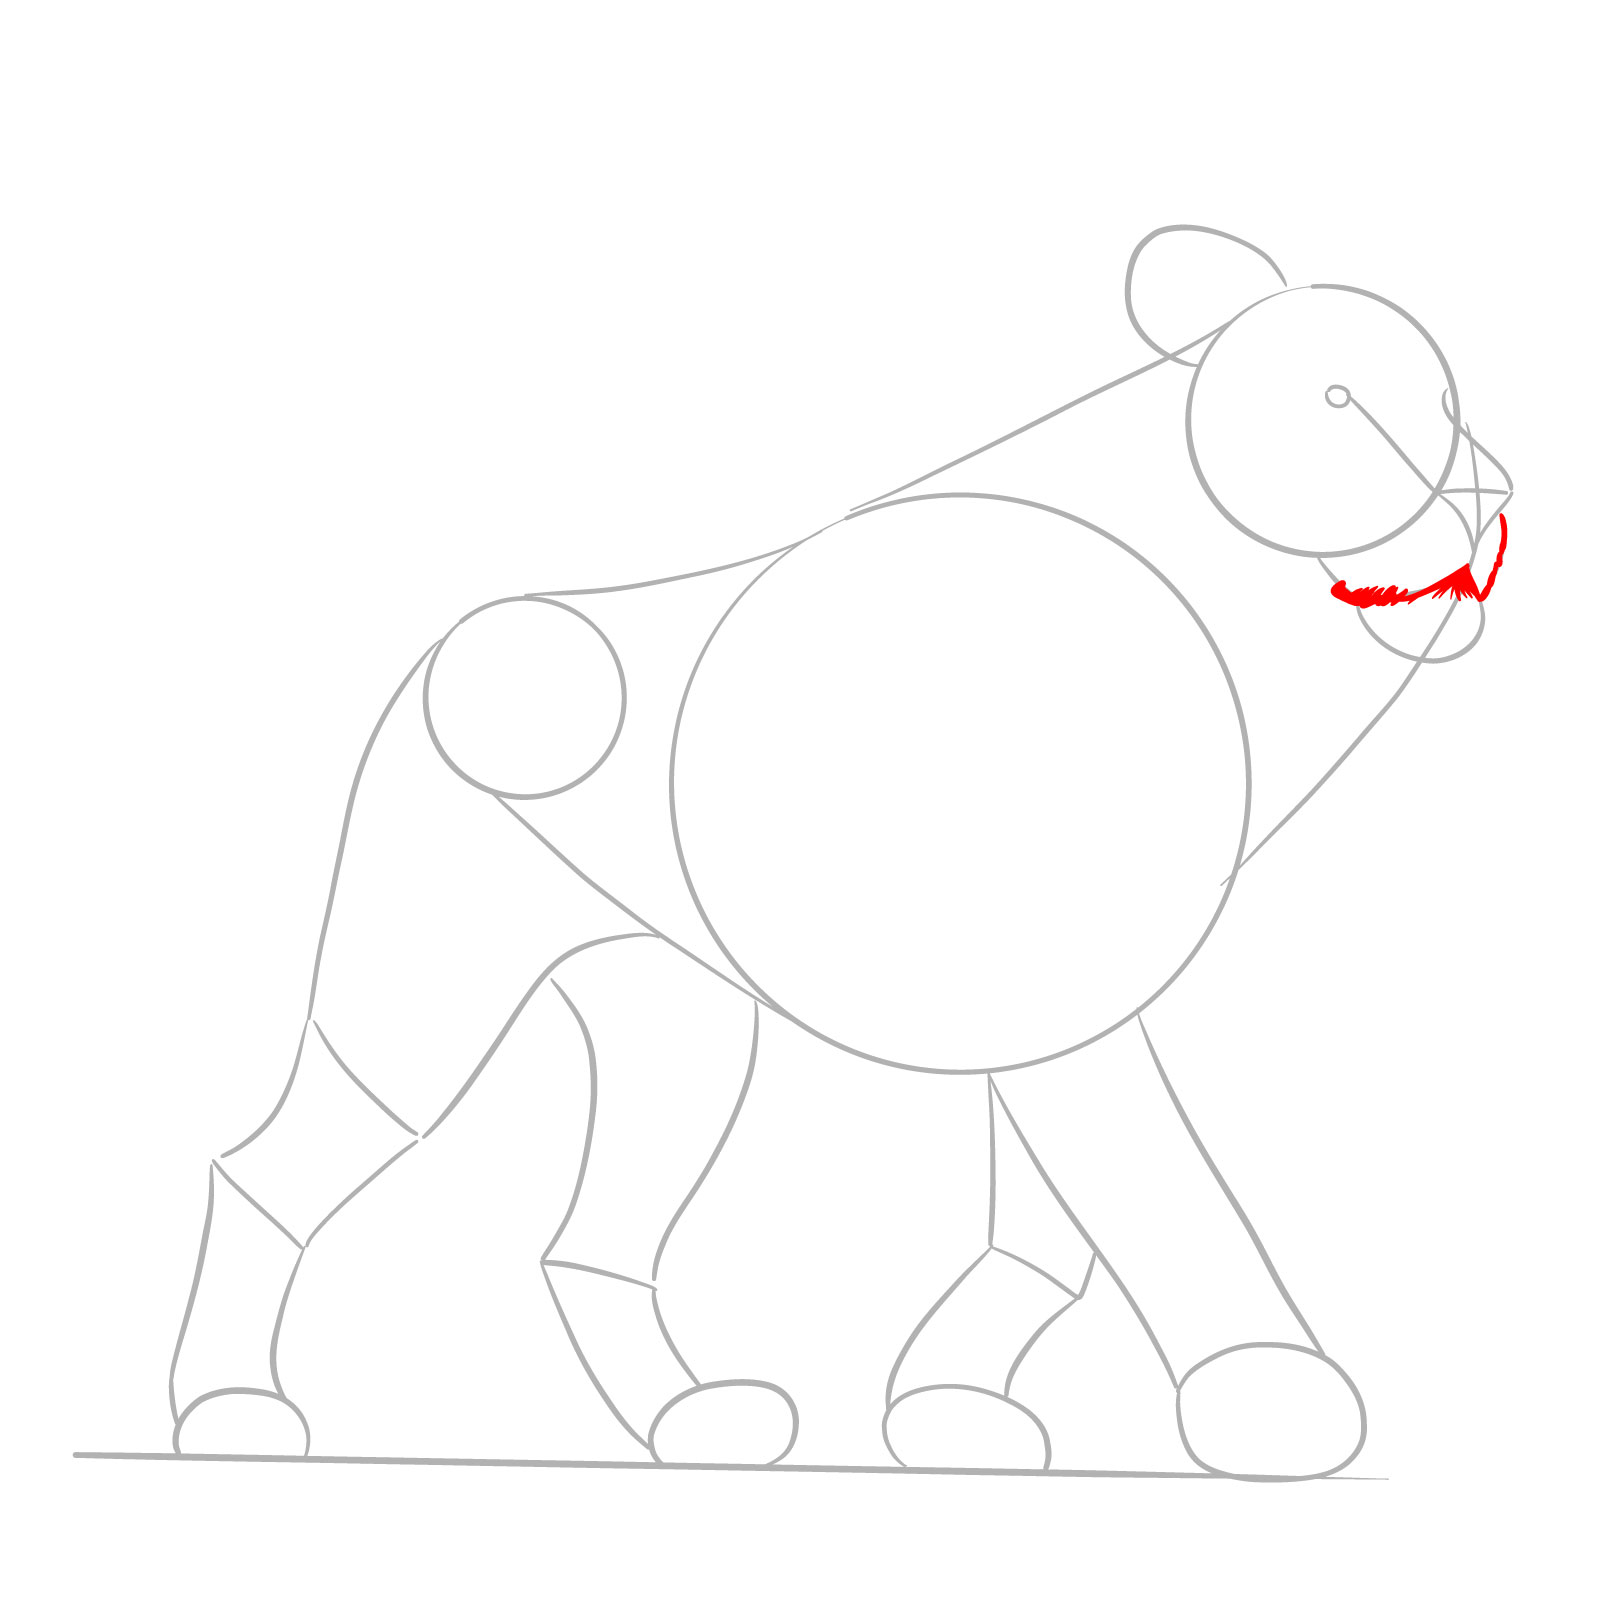
Step 07 – Draw the lower jawline by sketching short lines (mimicking fur) from the muzzle down and back up into the head circle, creating the chin and jawline
Defining the chin and lower jaw of a standing lion
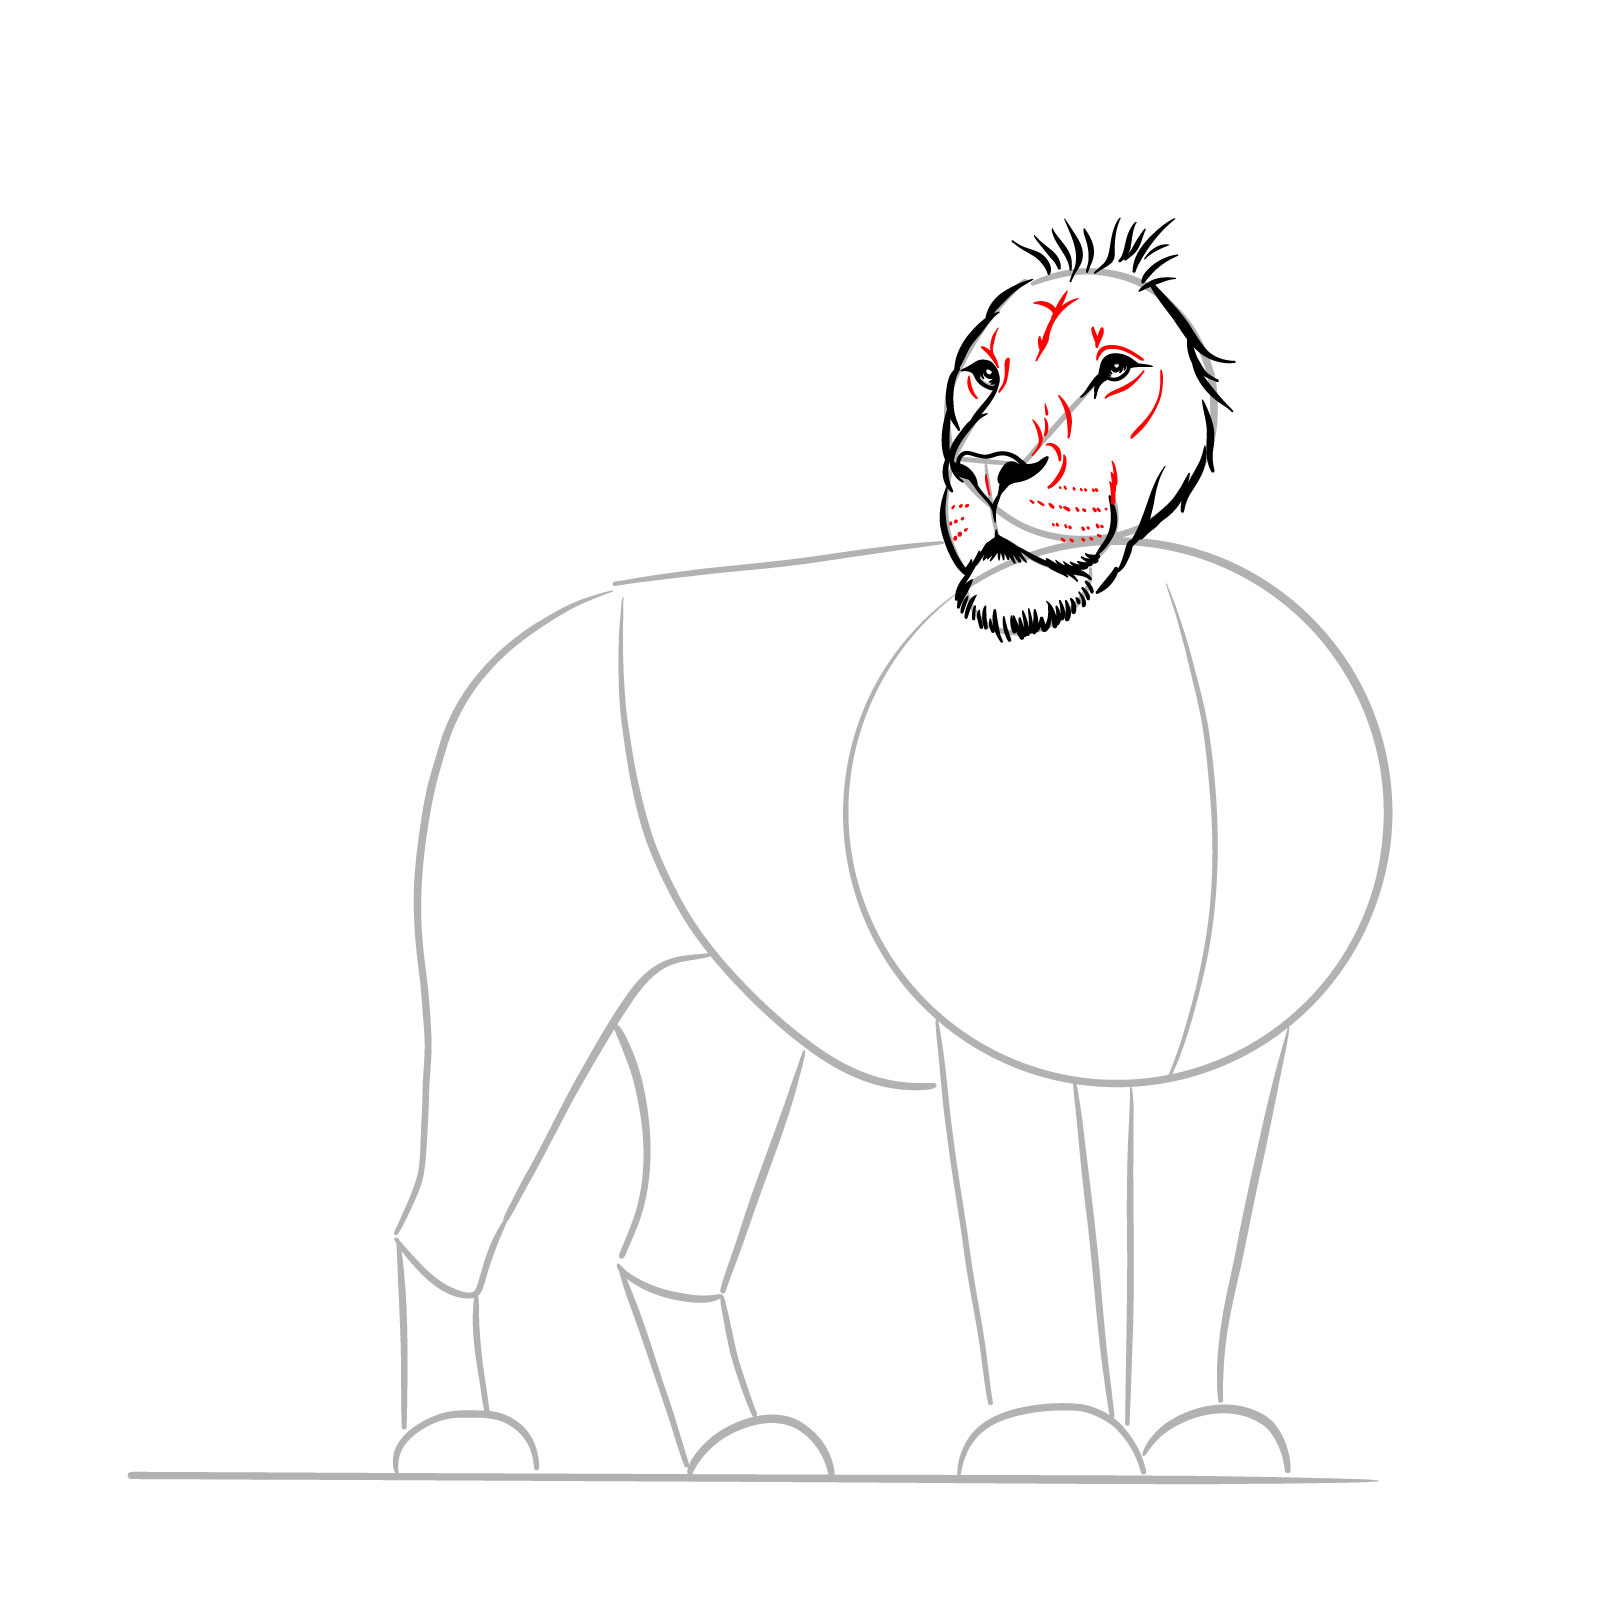
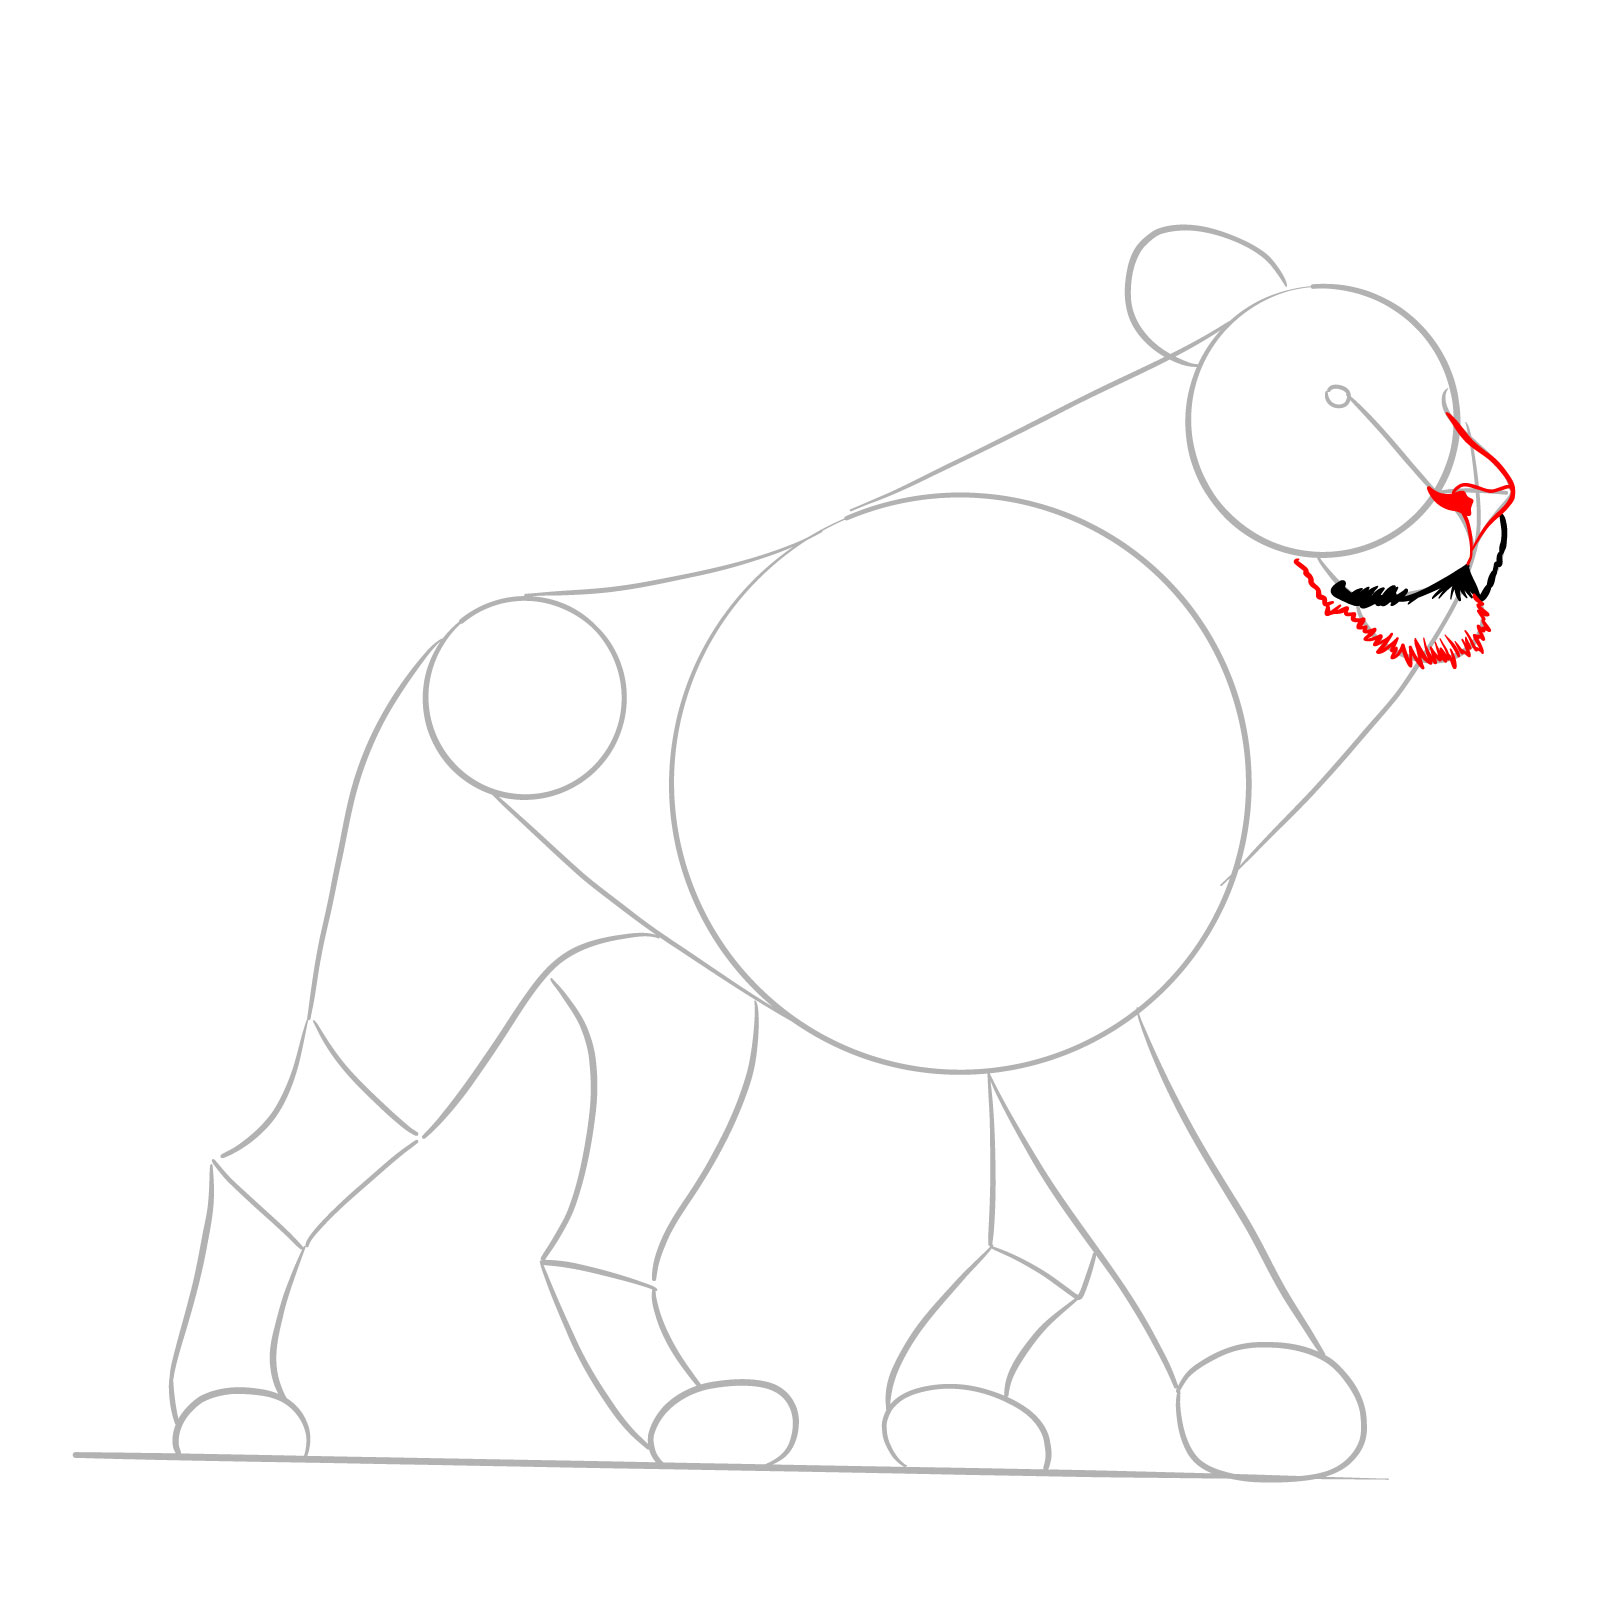
Step 08 – Add small lines on the muzzle for the whisker marks and refine the facial features with more details around the eye and nose
Crafting the whisker marks and facial details
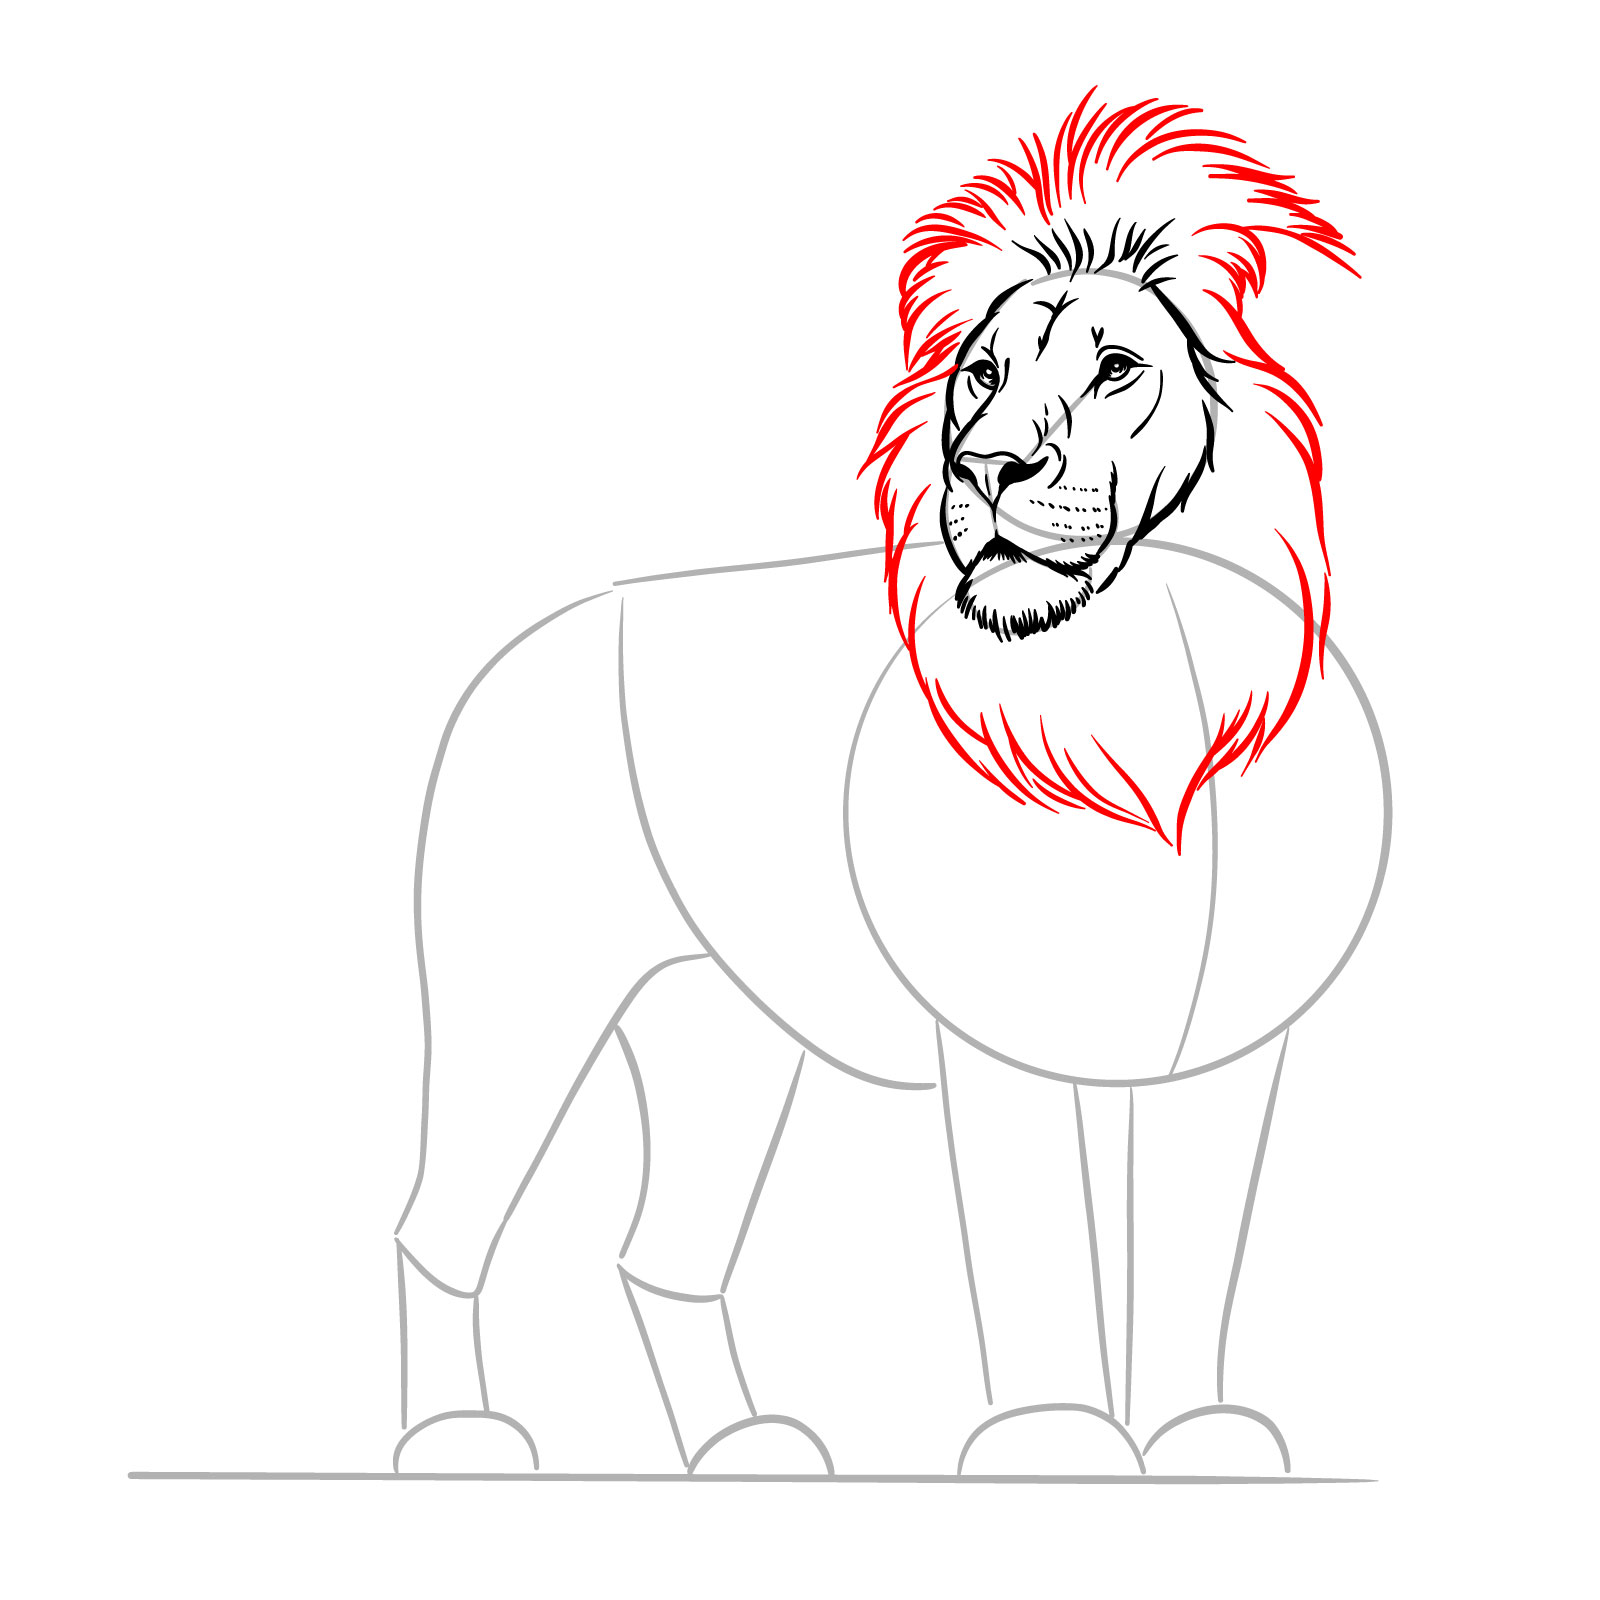
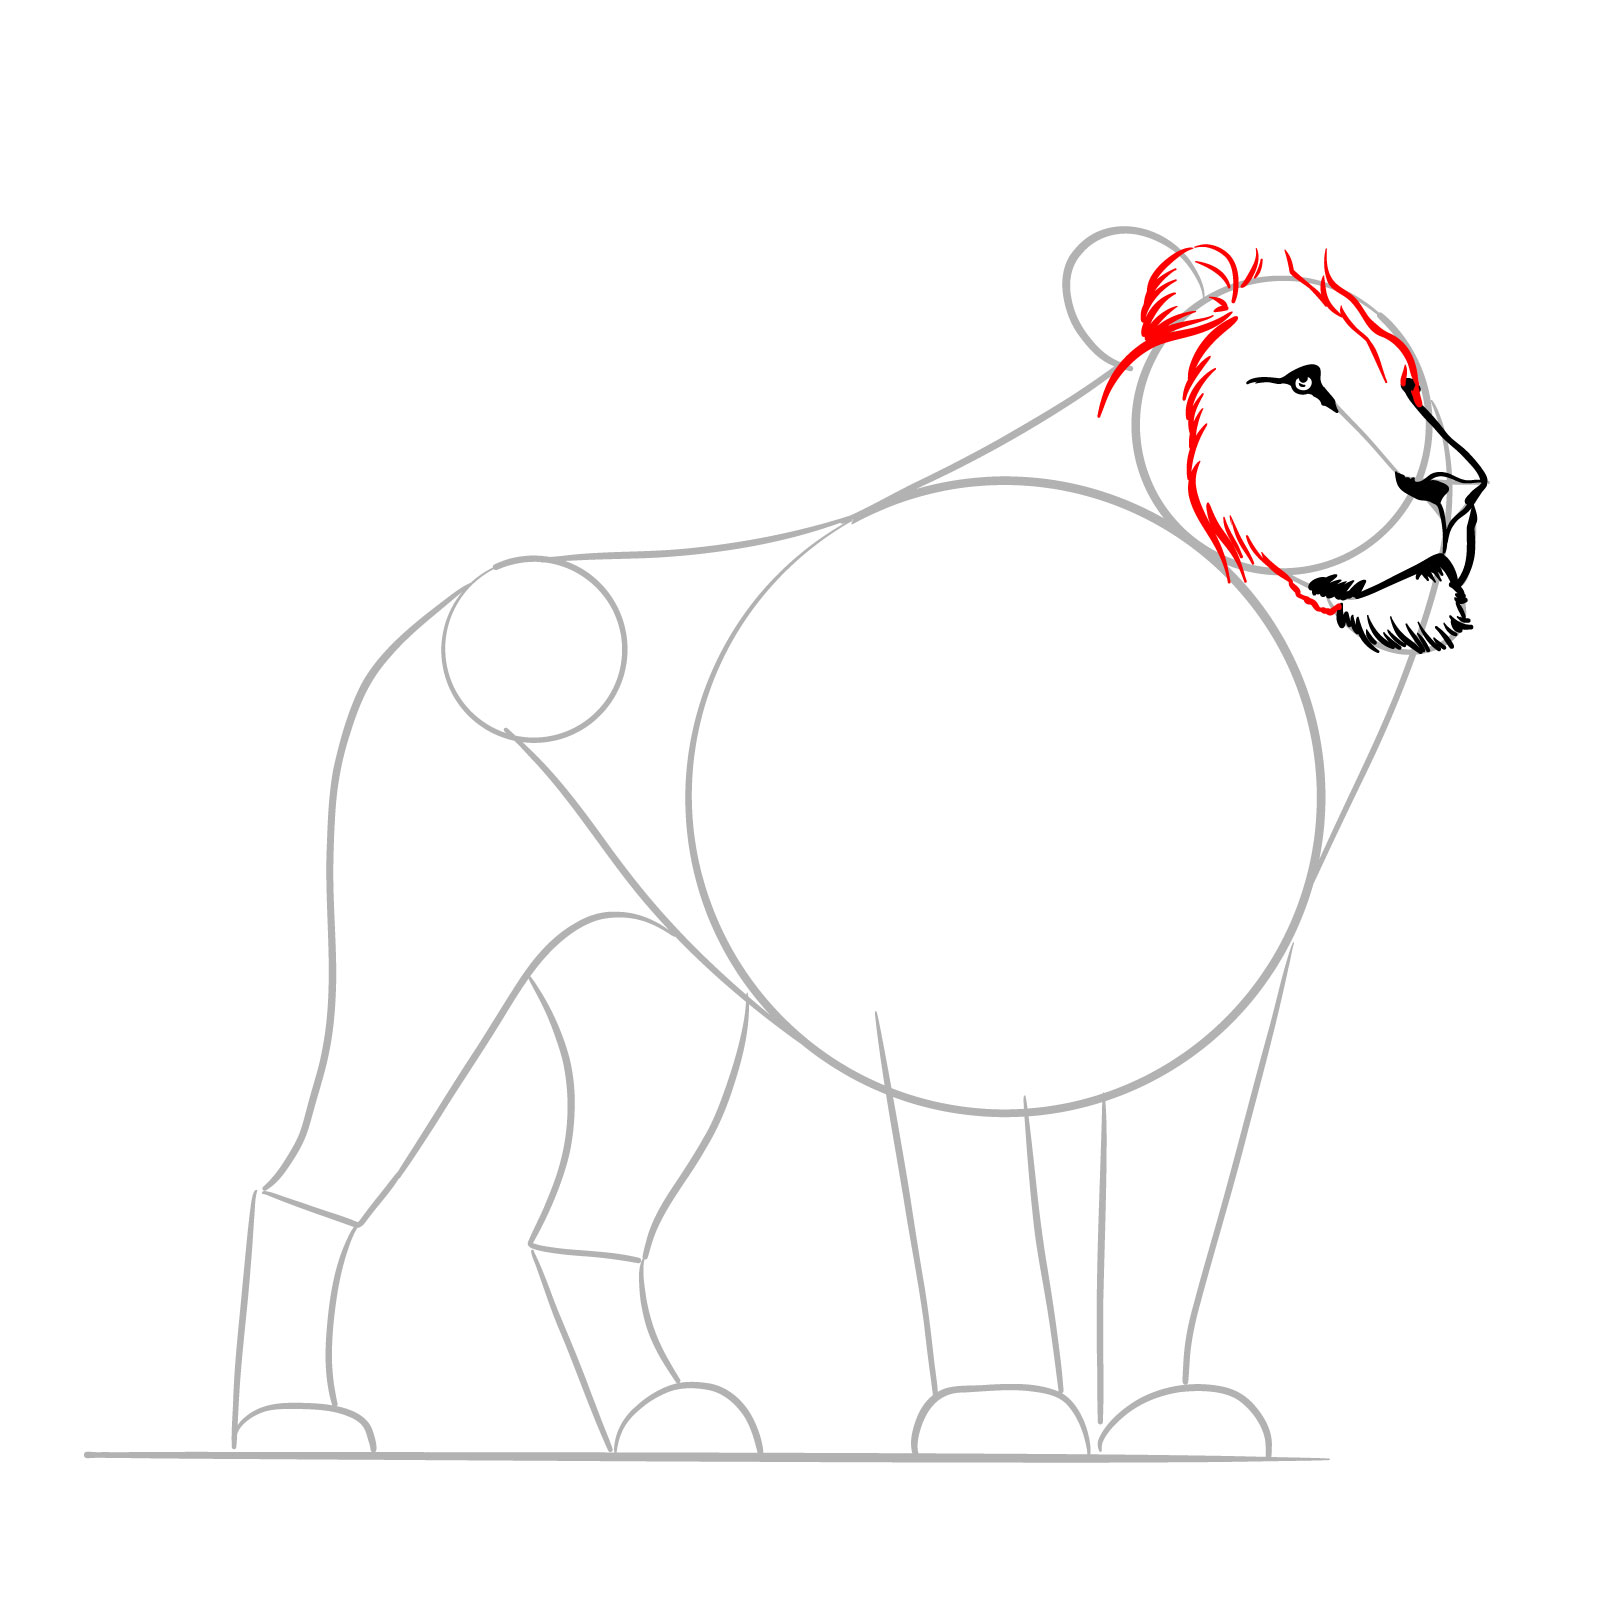
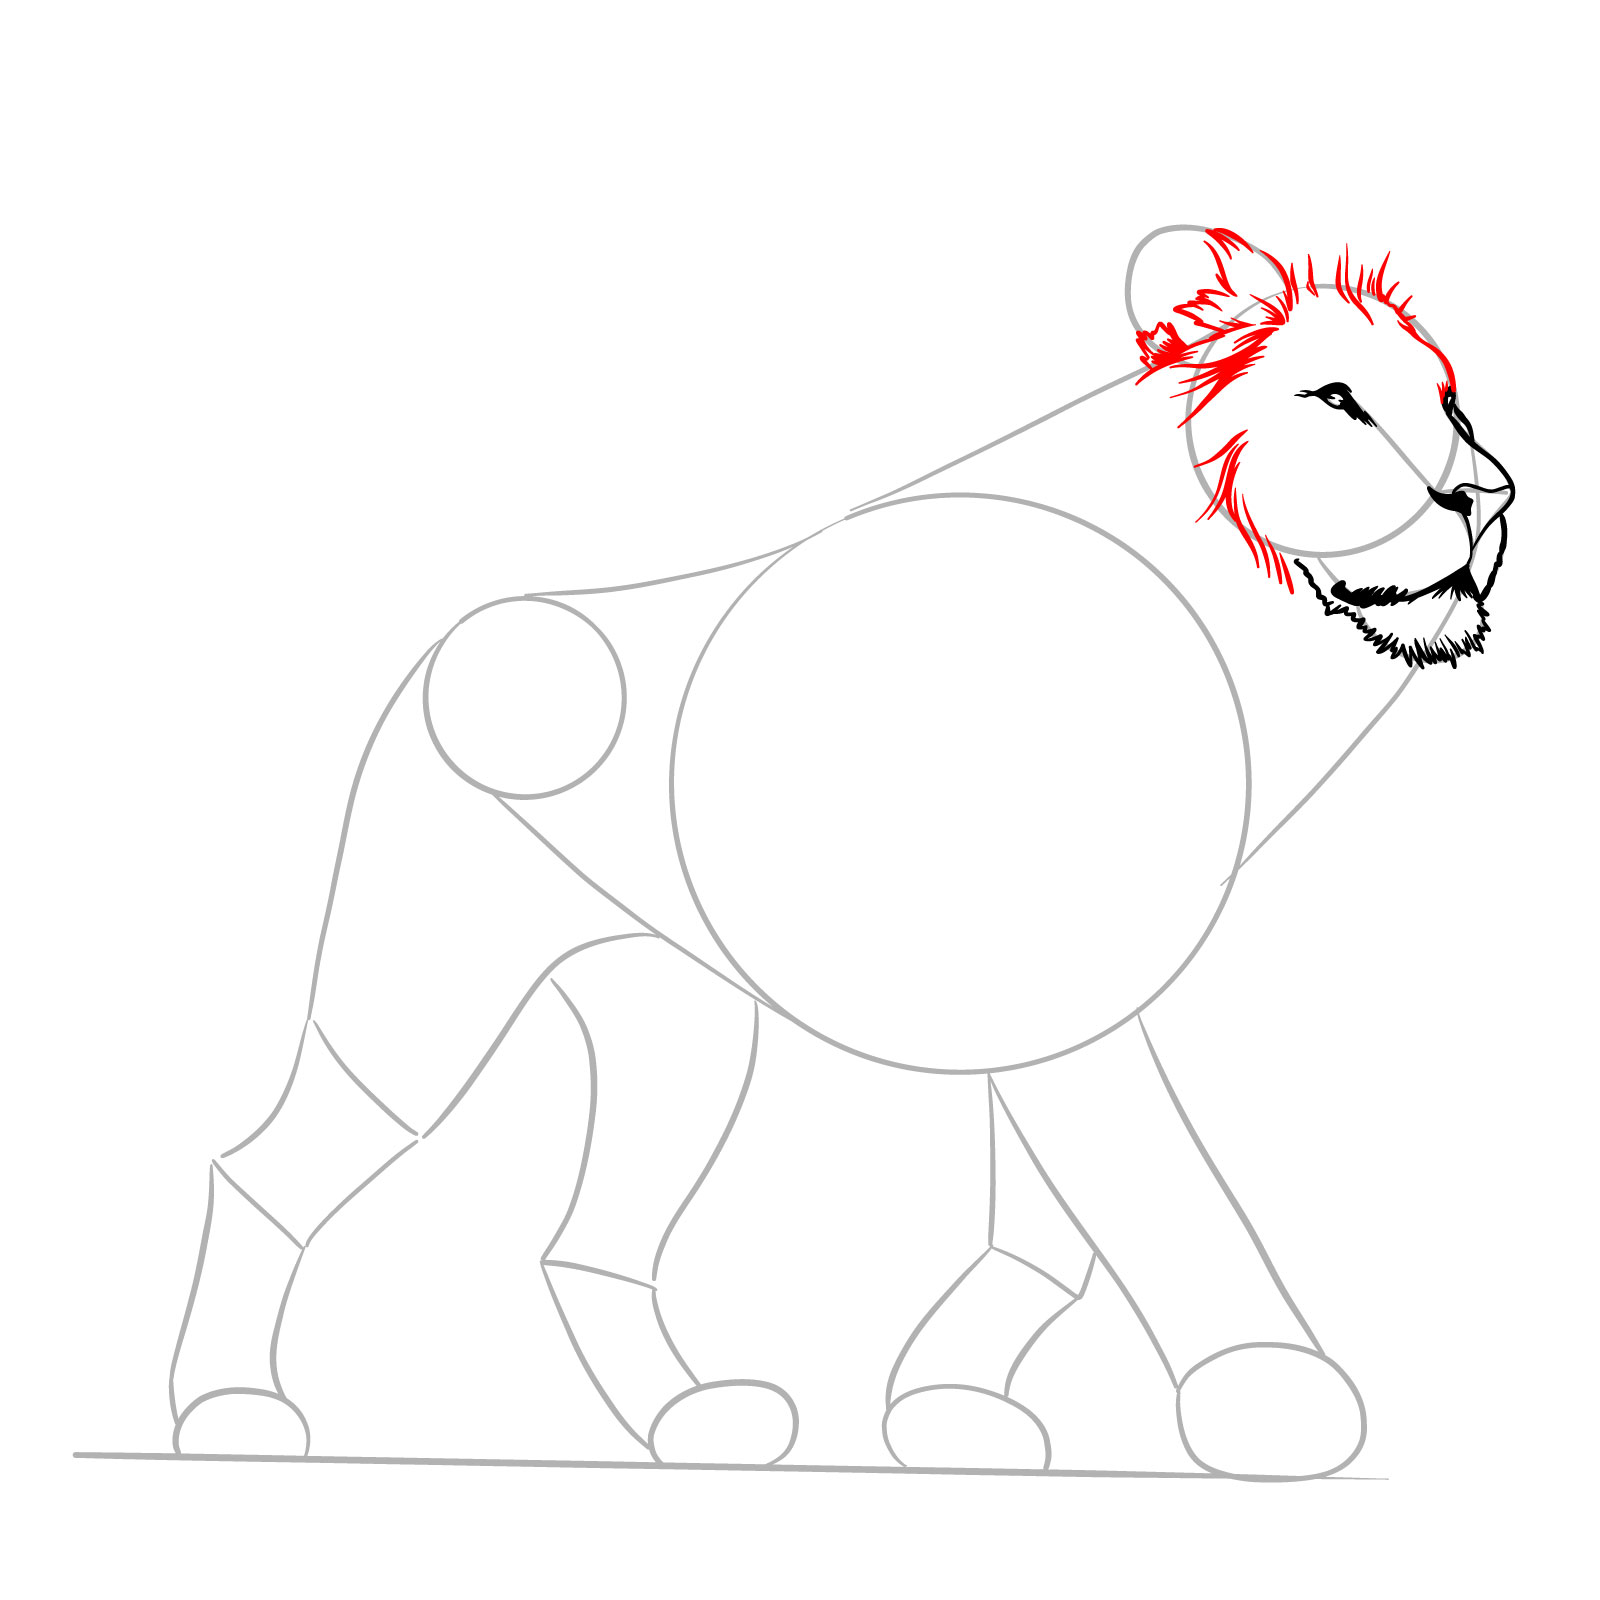
Step 09 – Further develop the mane by adding additional curved lines around the head, extending them from the top to the chest area
Continuing to shape the mane in a guide on how to draw a standing lion
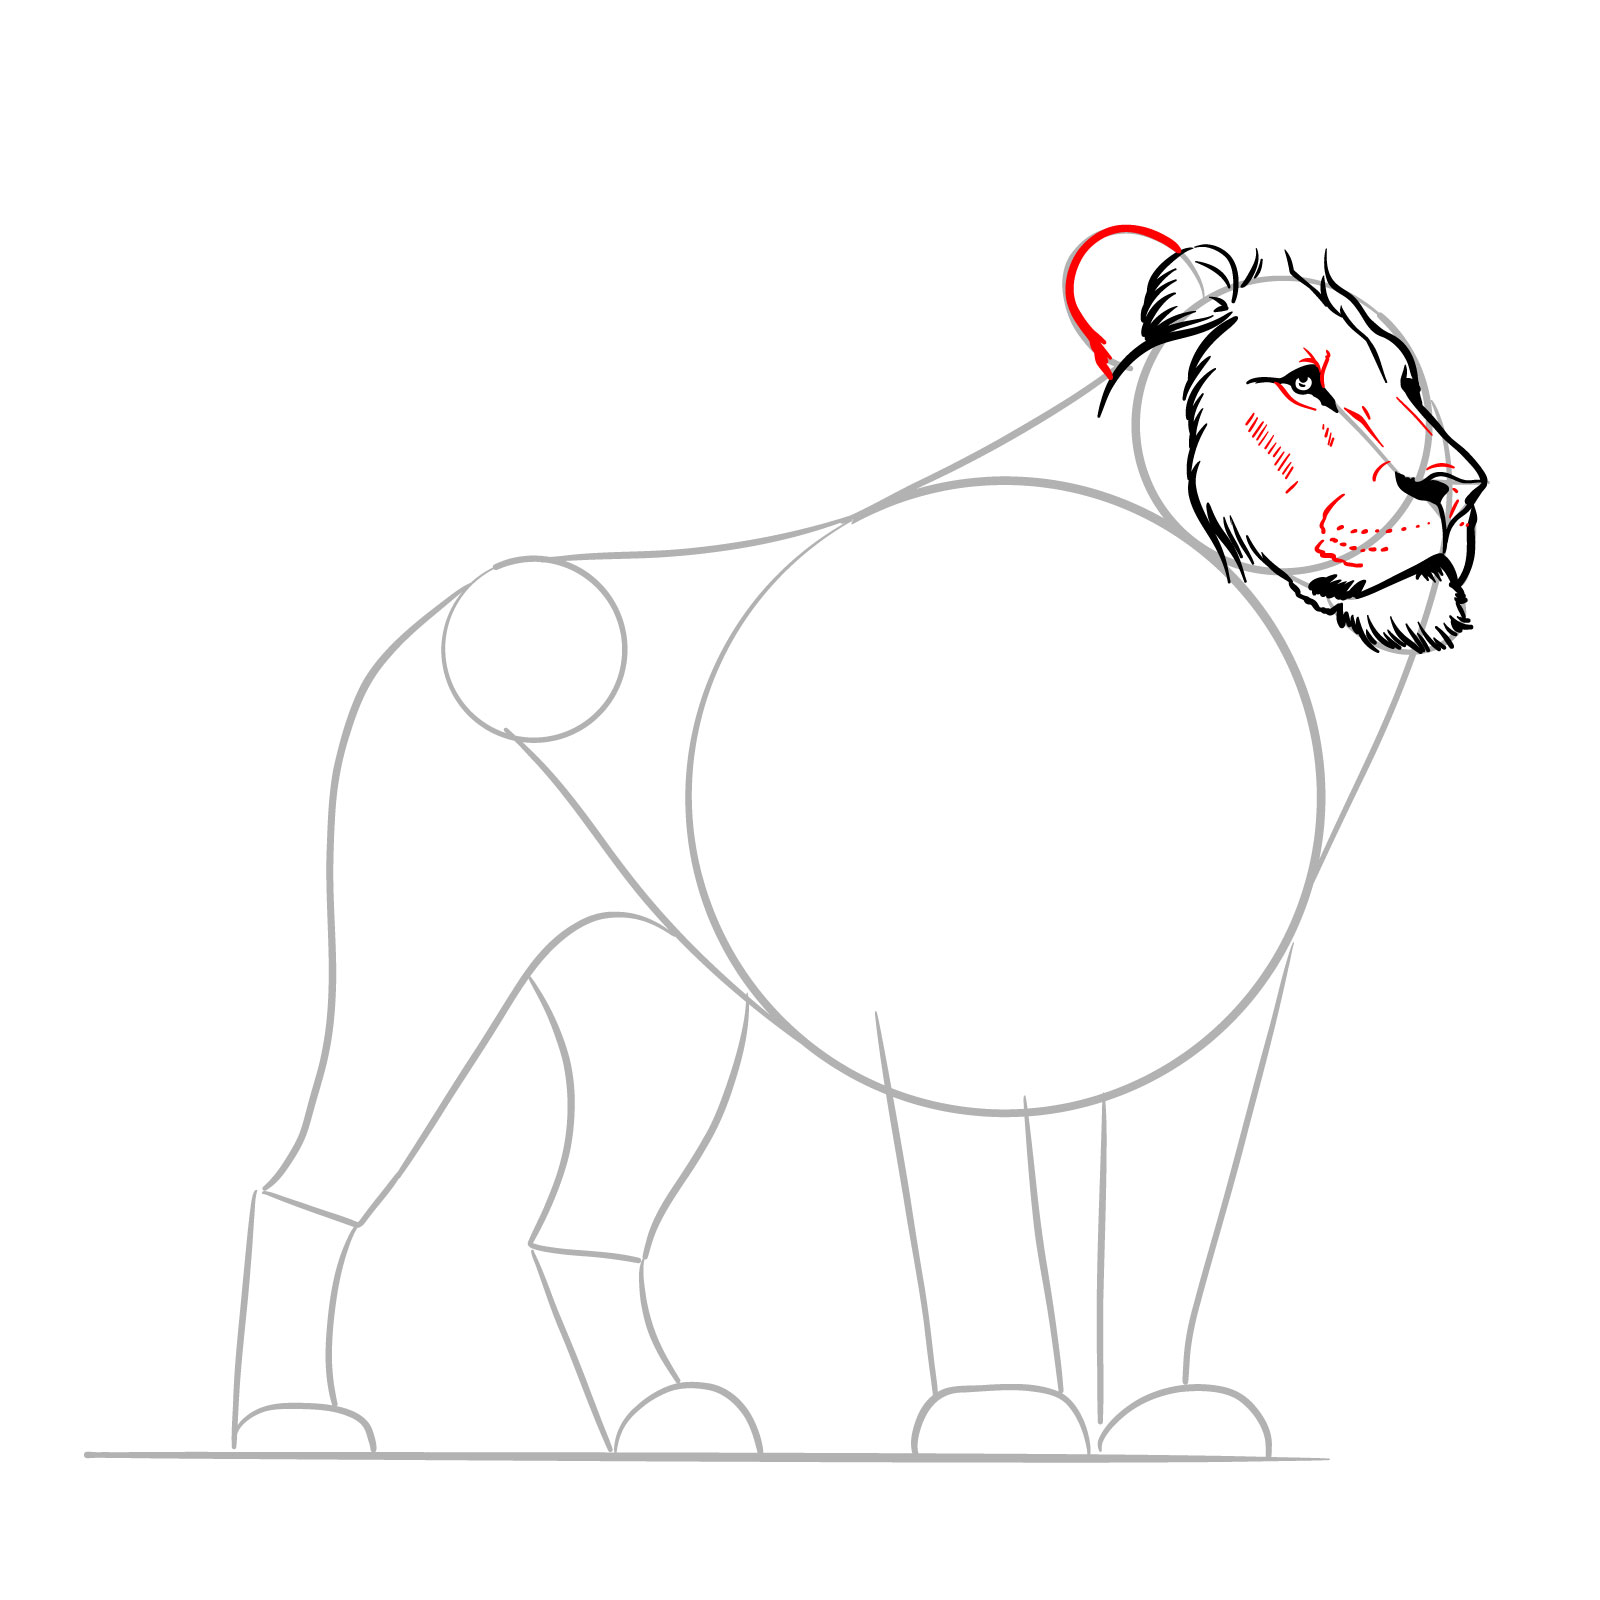
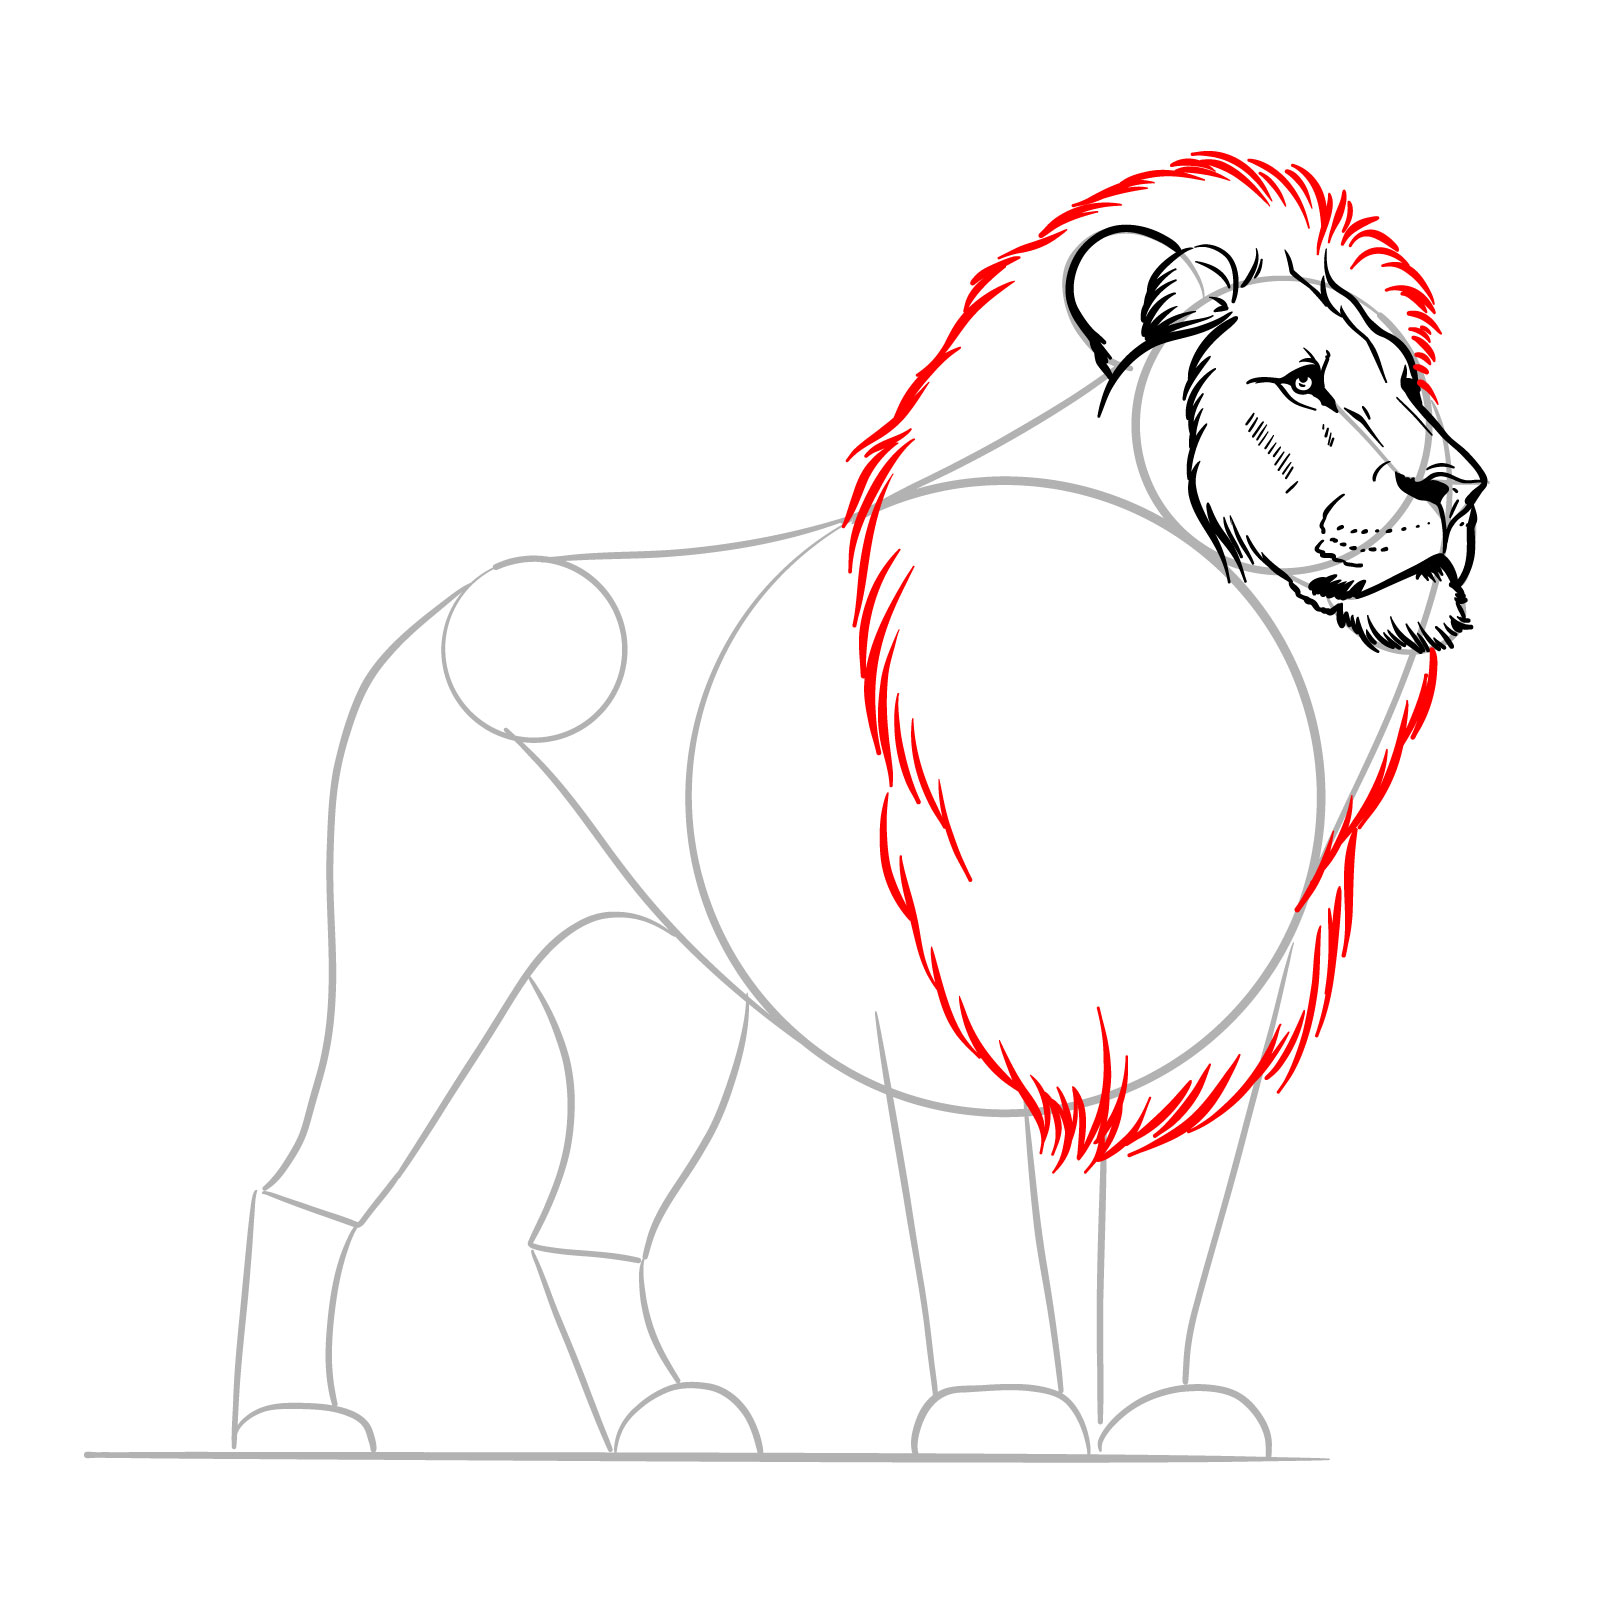
Step 10 – Draw the ear and add fluffy strokes above the head following the basic shape to indicate the thick, upper part of the mane
Shaping the ear and the upper part of the mane
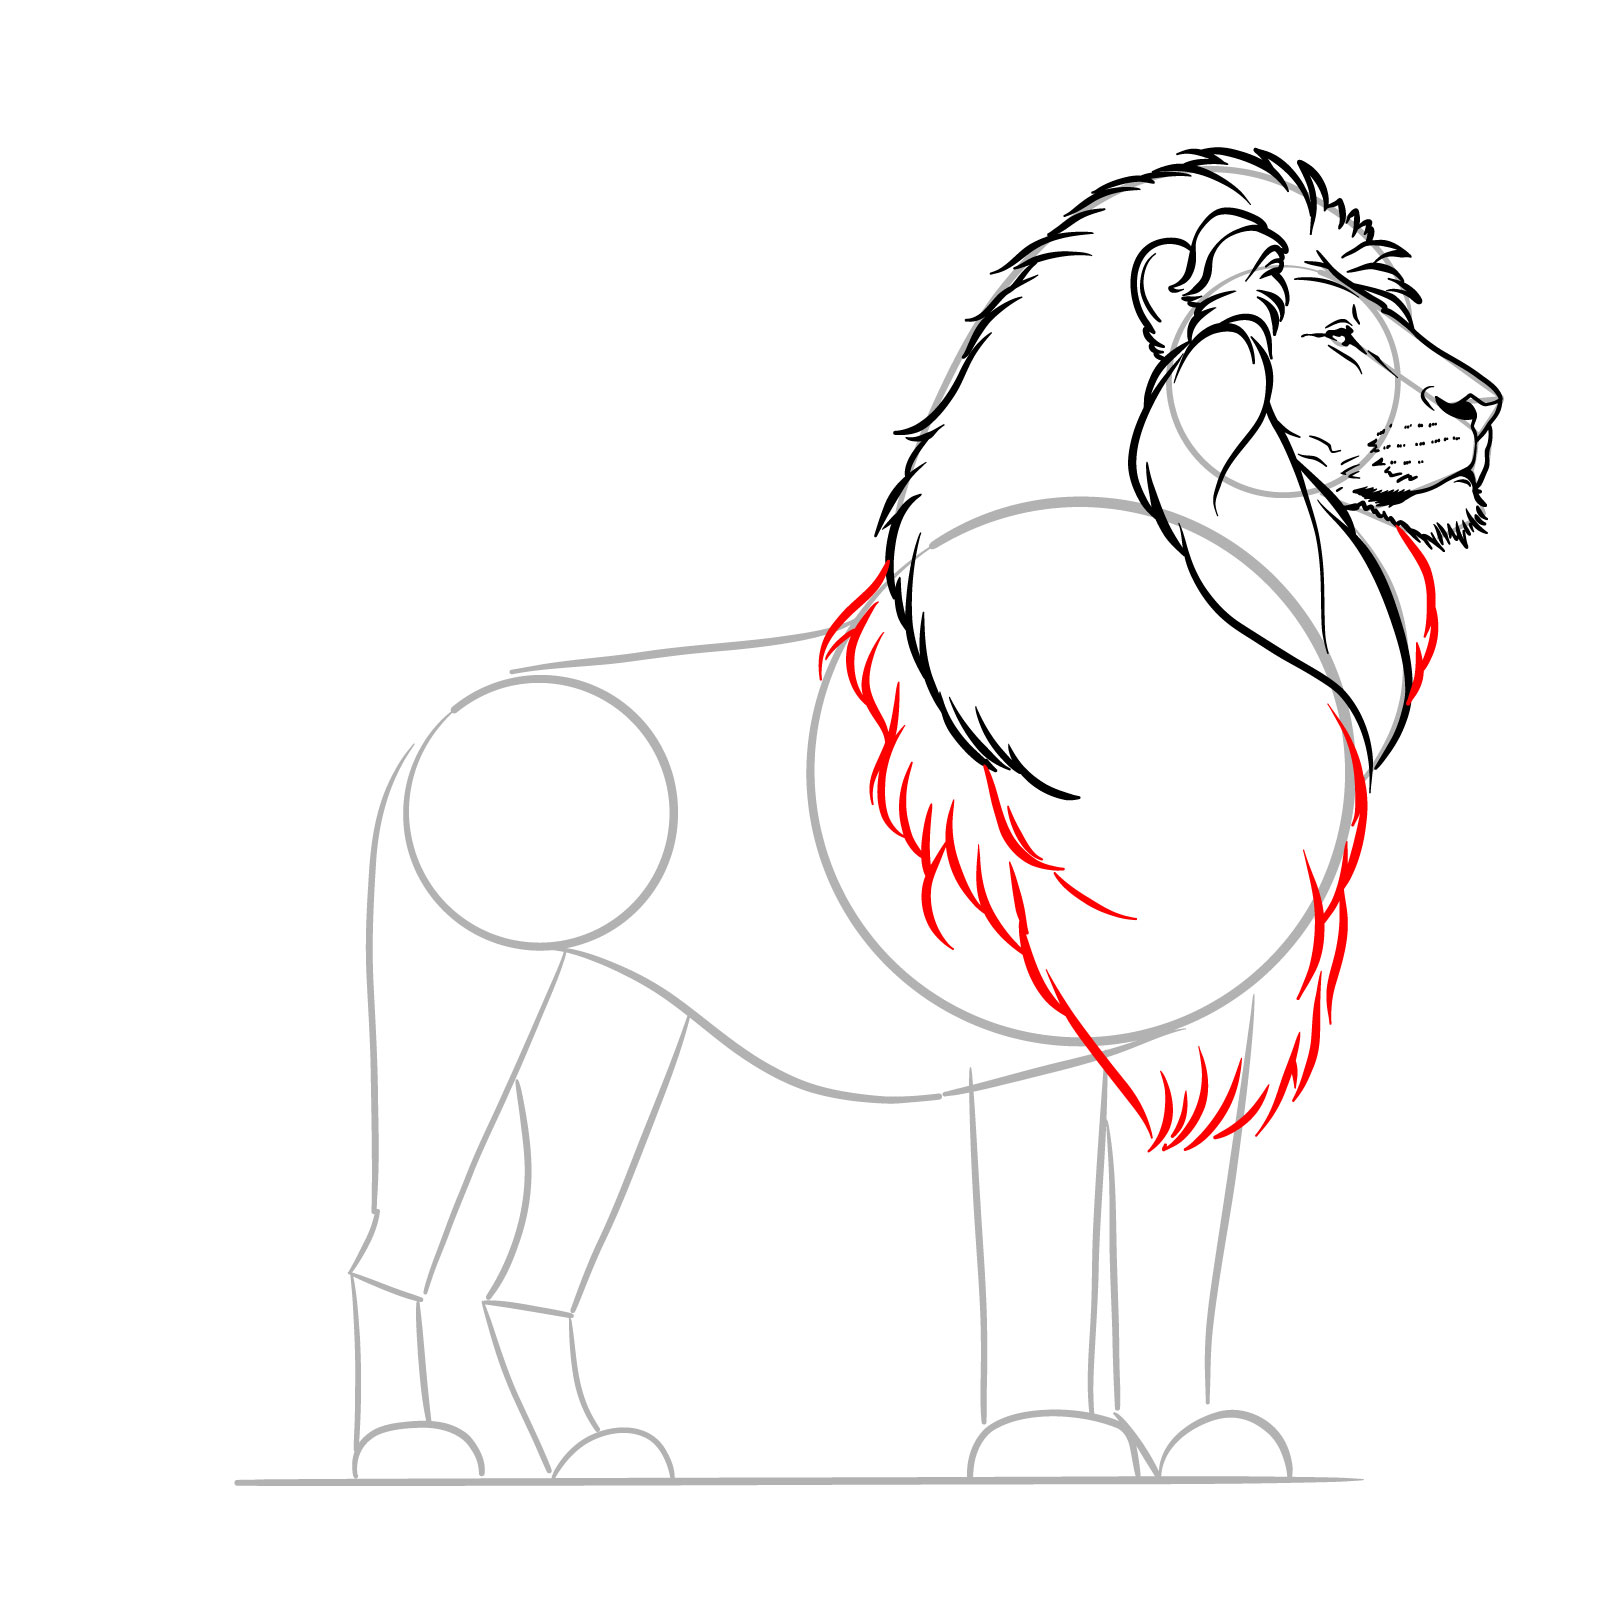
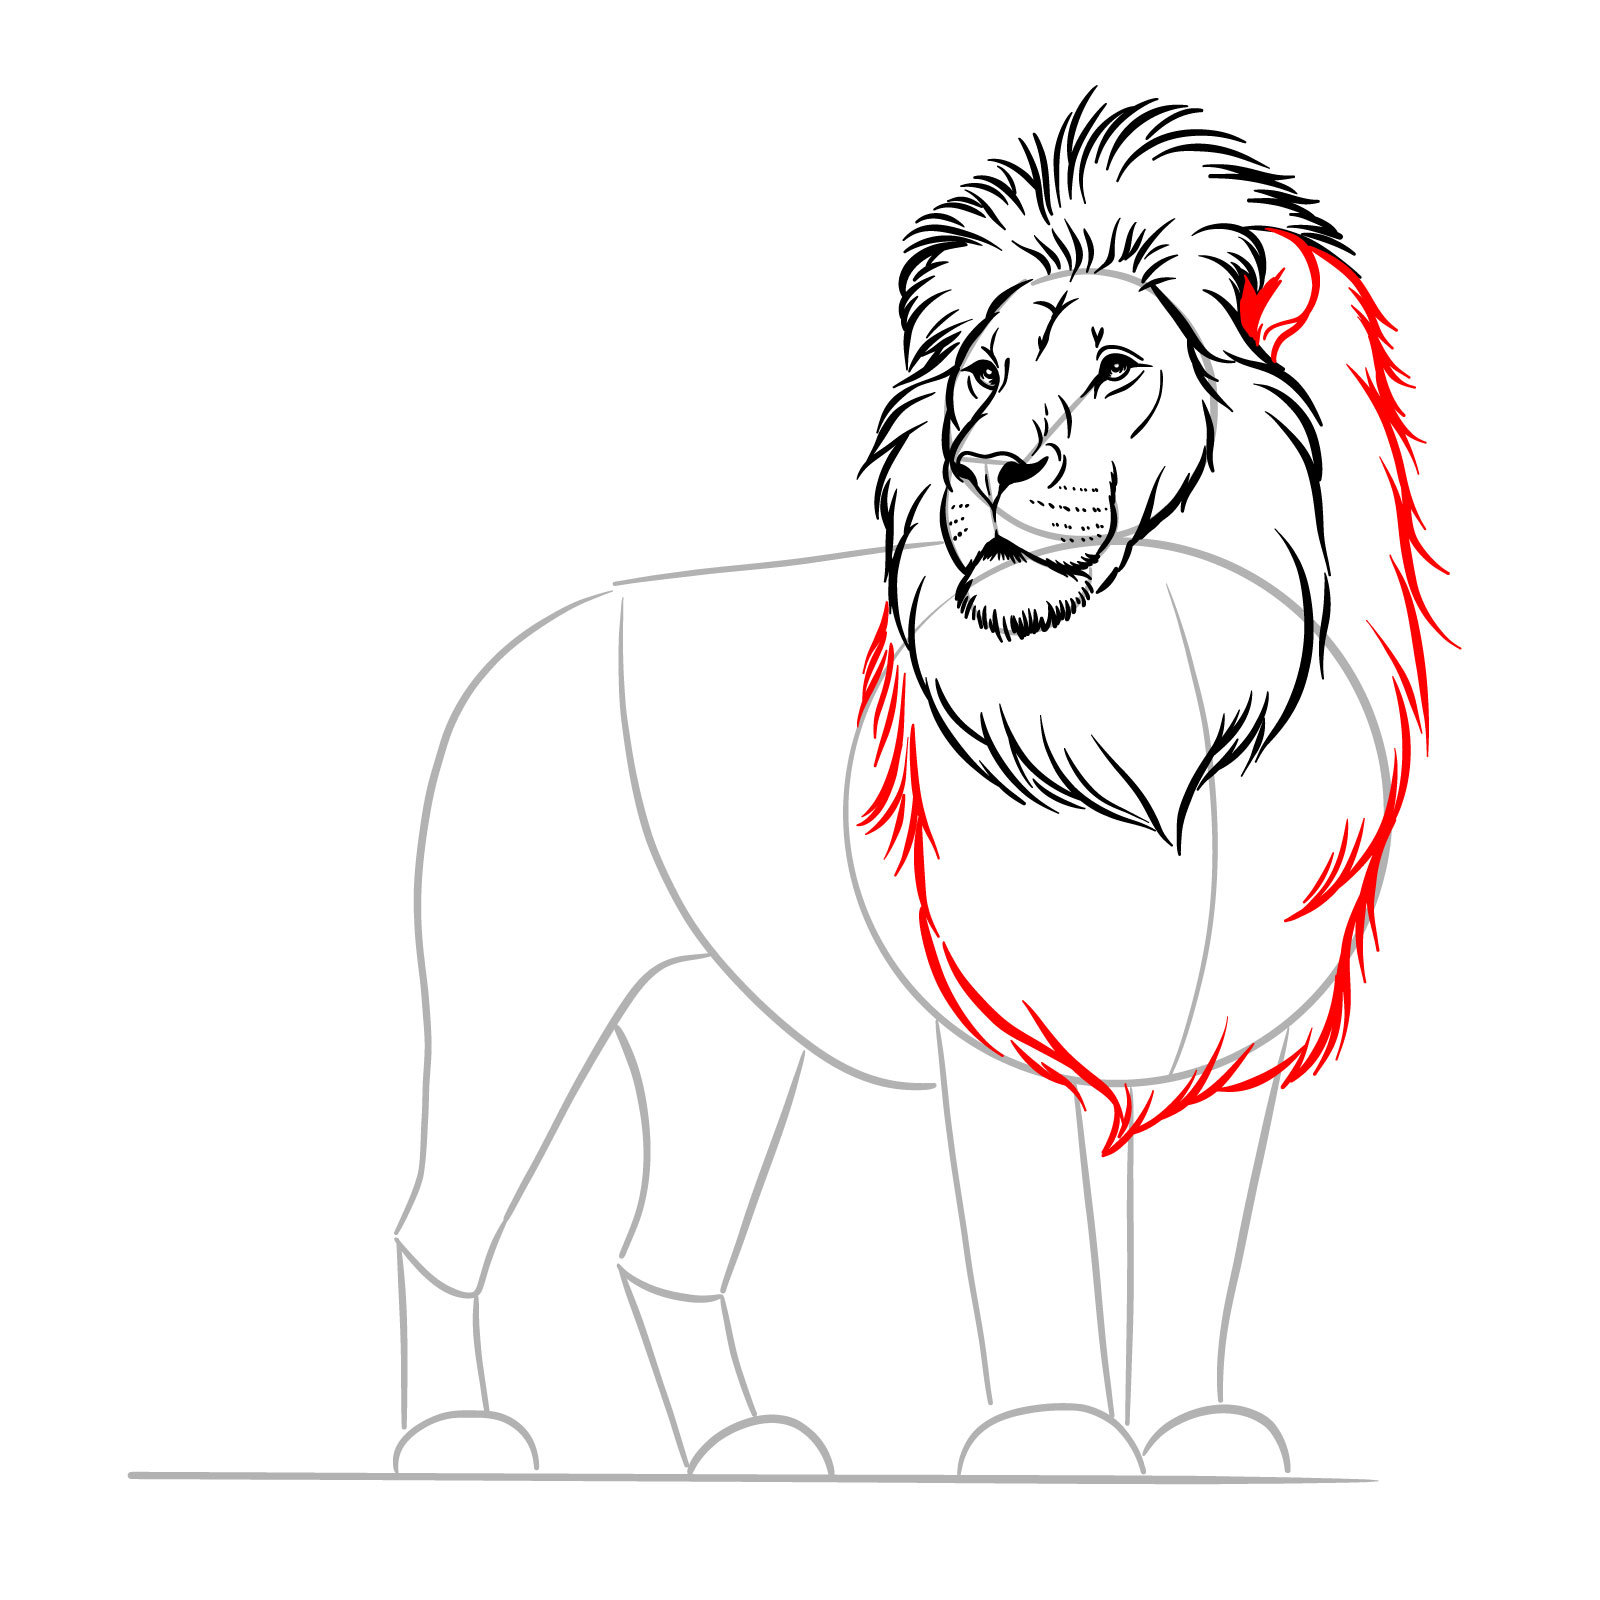
Step 11 – Extend the fluffy strokes around the chest, joining them with the mane’s base to create a full and bushy mane
Completing the mane outline
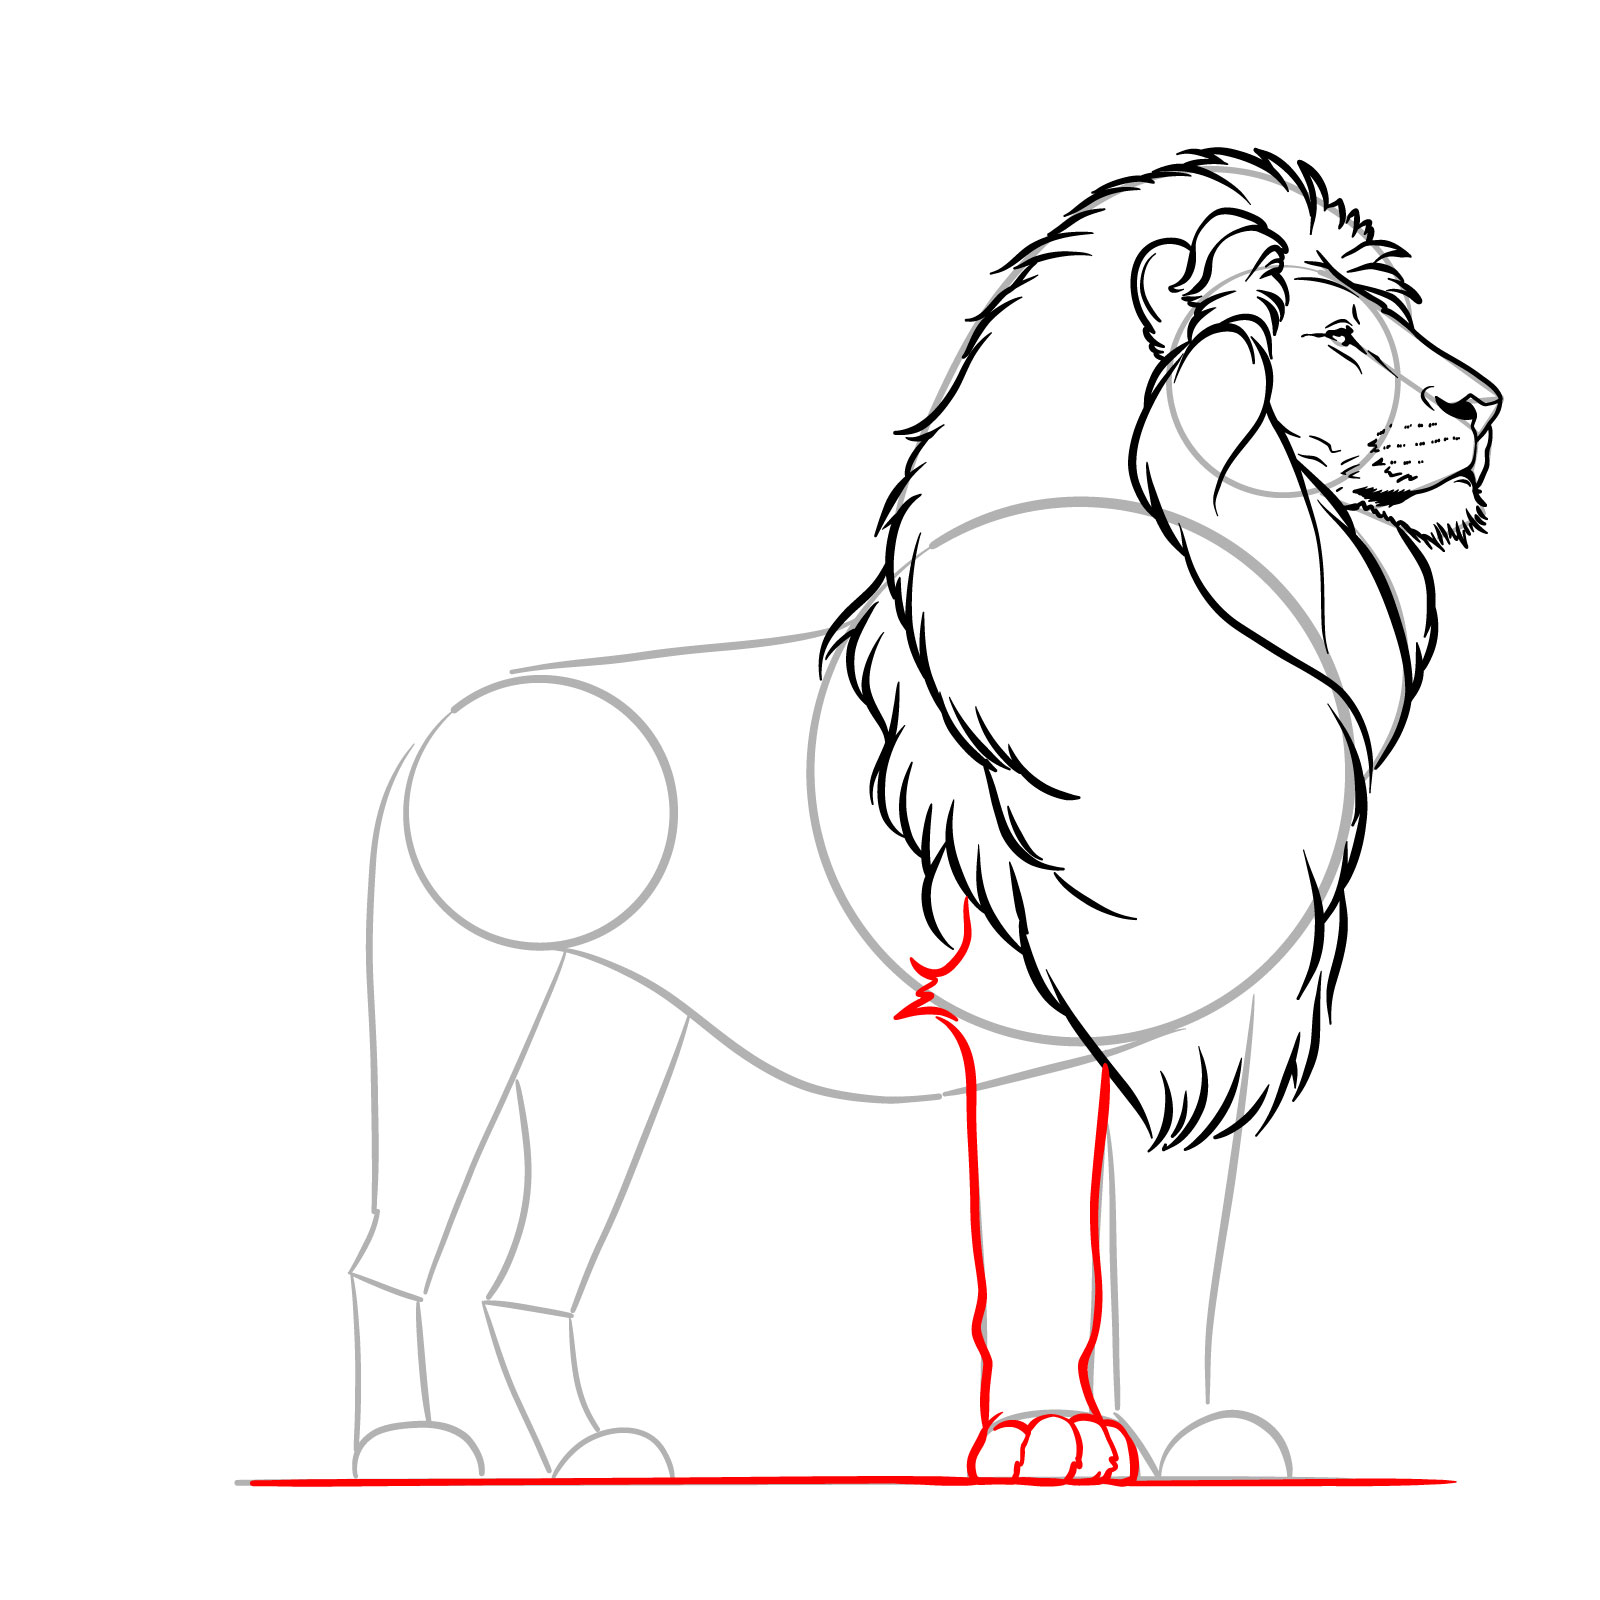
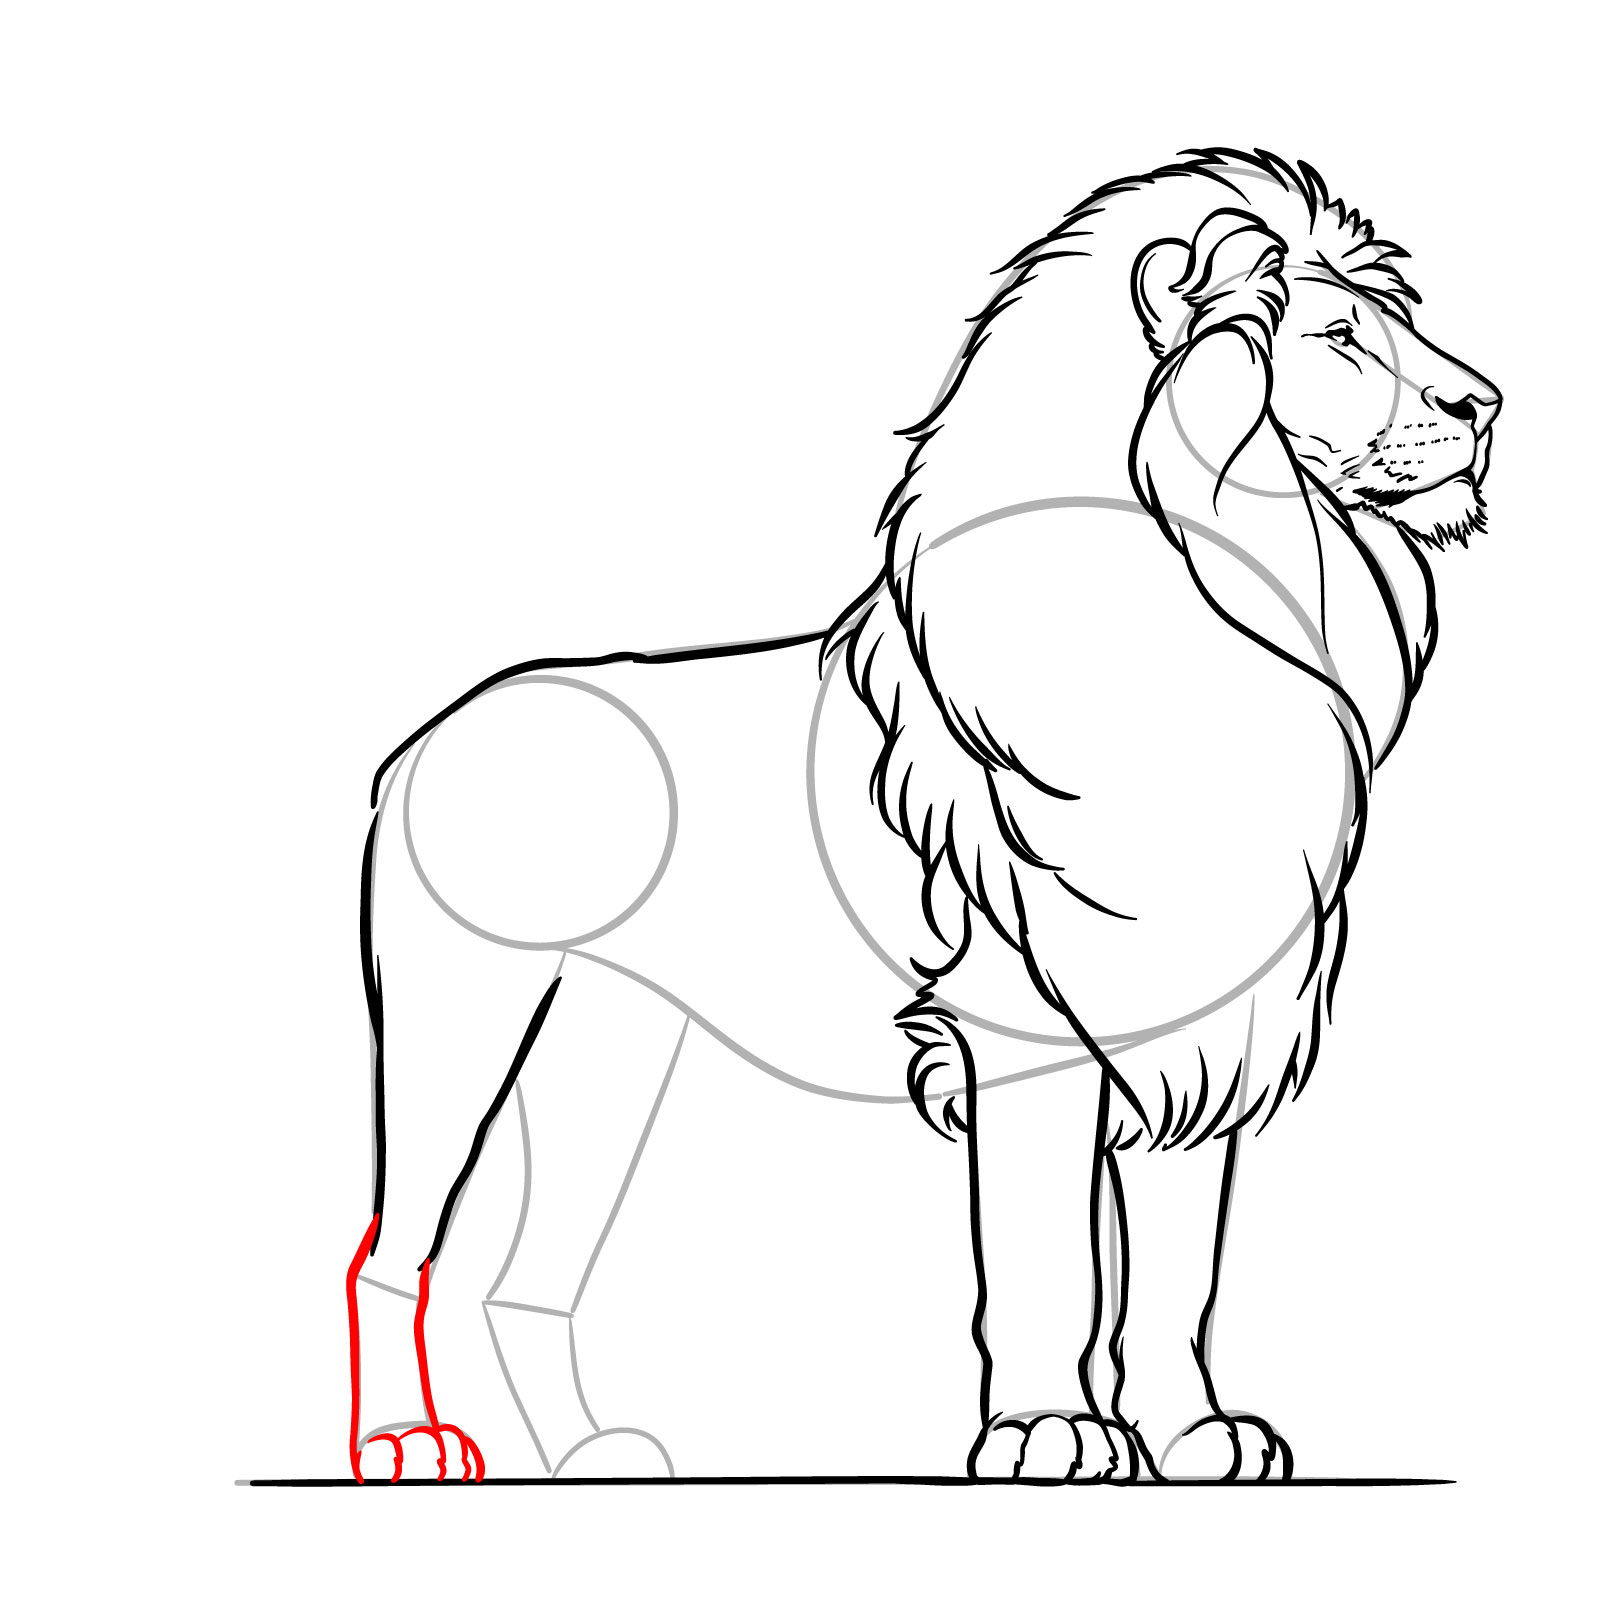
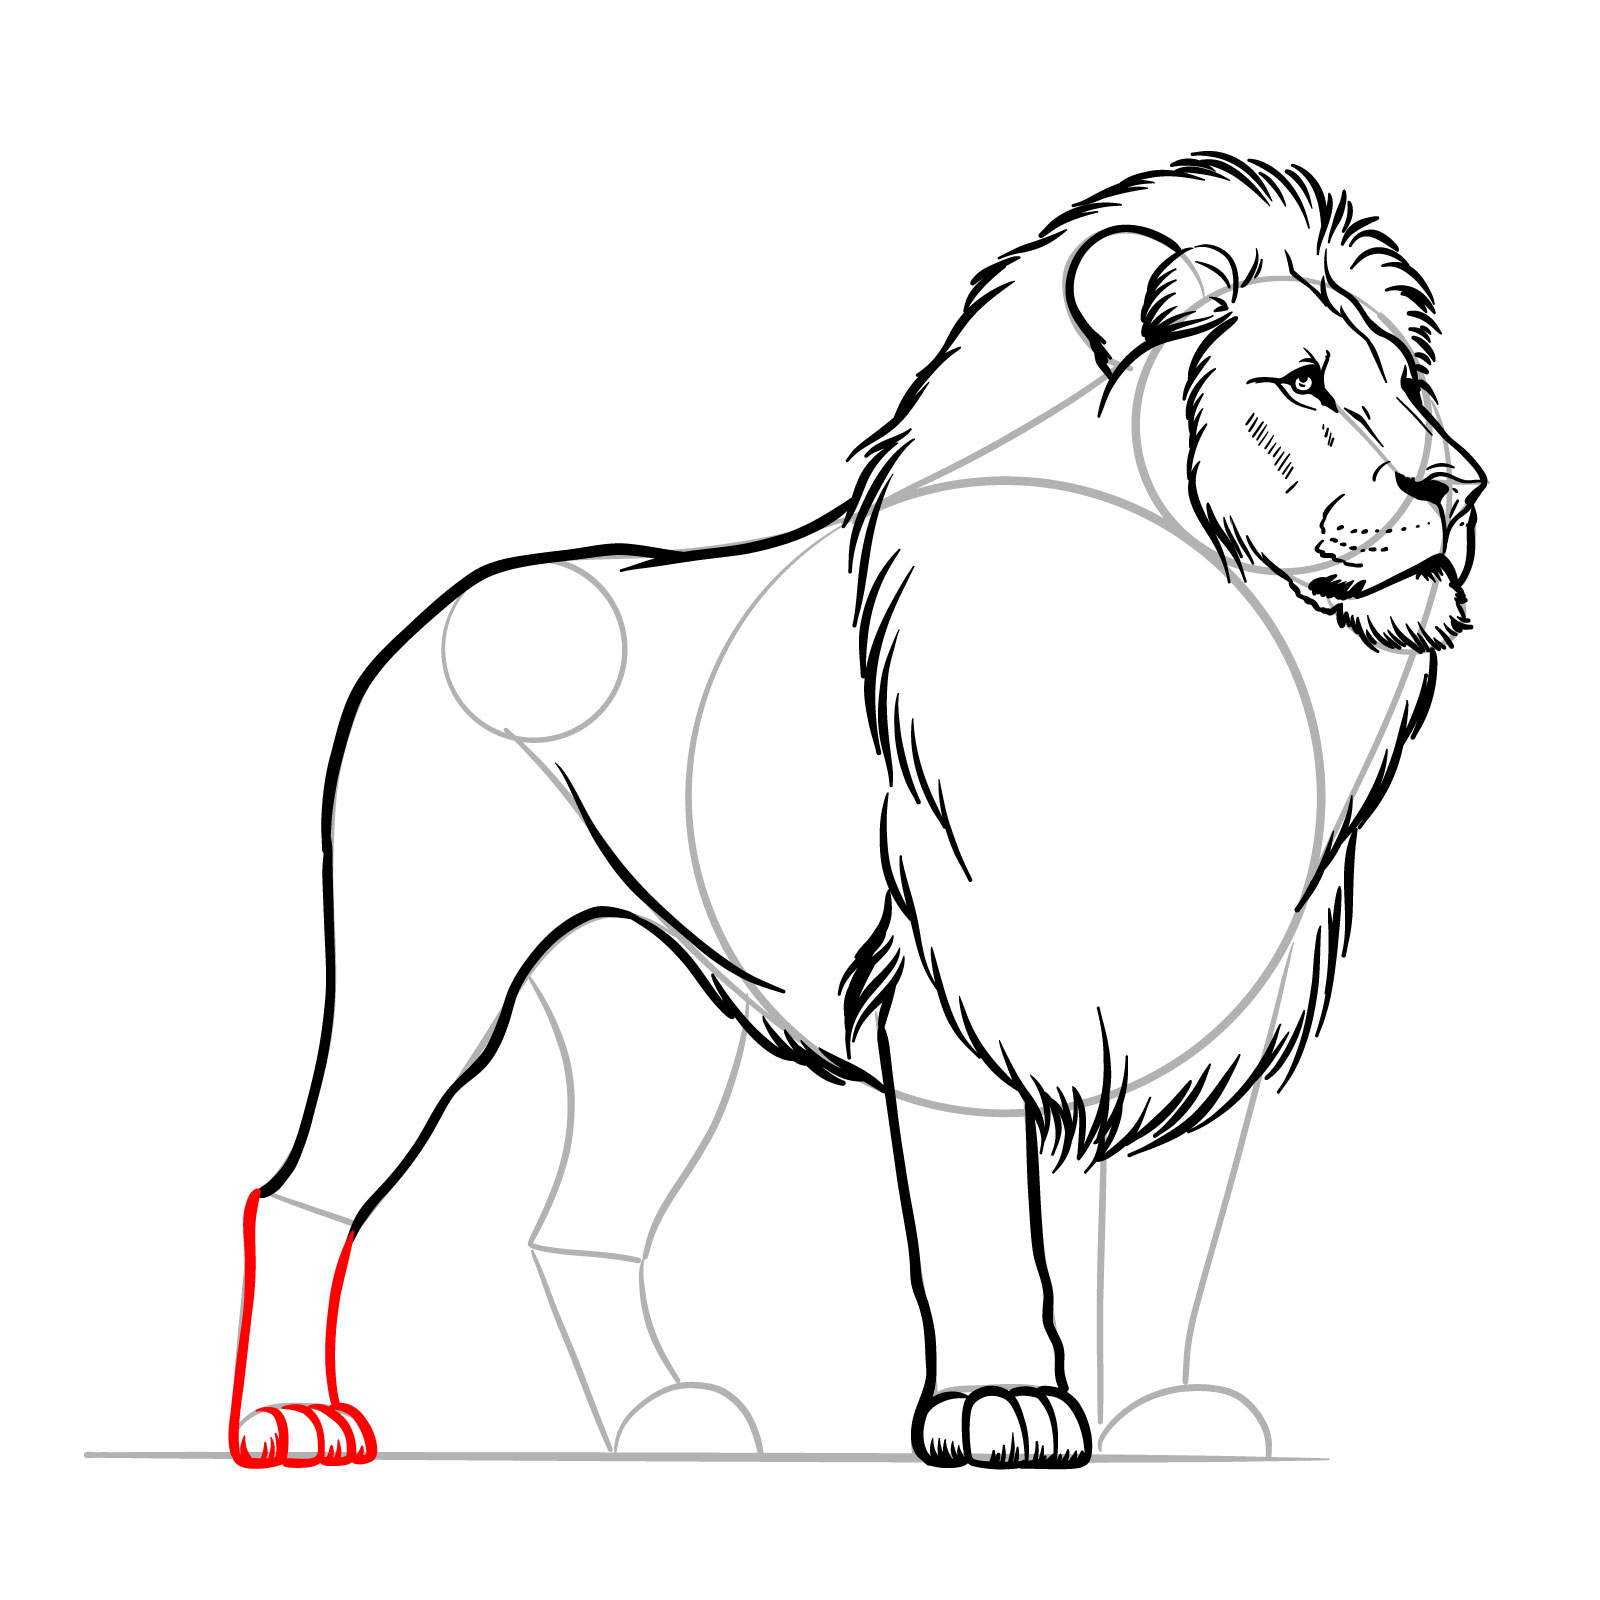
Step 12 – Draw the front right leg, starting with two parallel lines from the chest circle down to the paw, where you’ll add the shapes of the toes
Sketching the front right leg and paw for your standing lion drawing
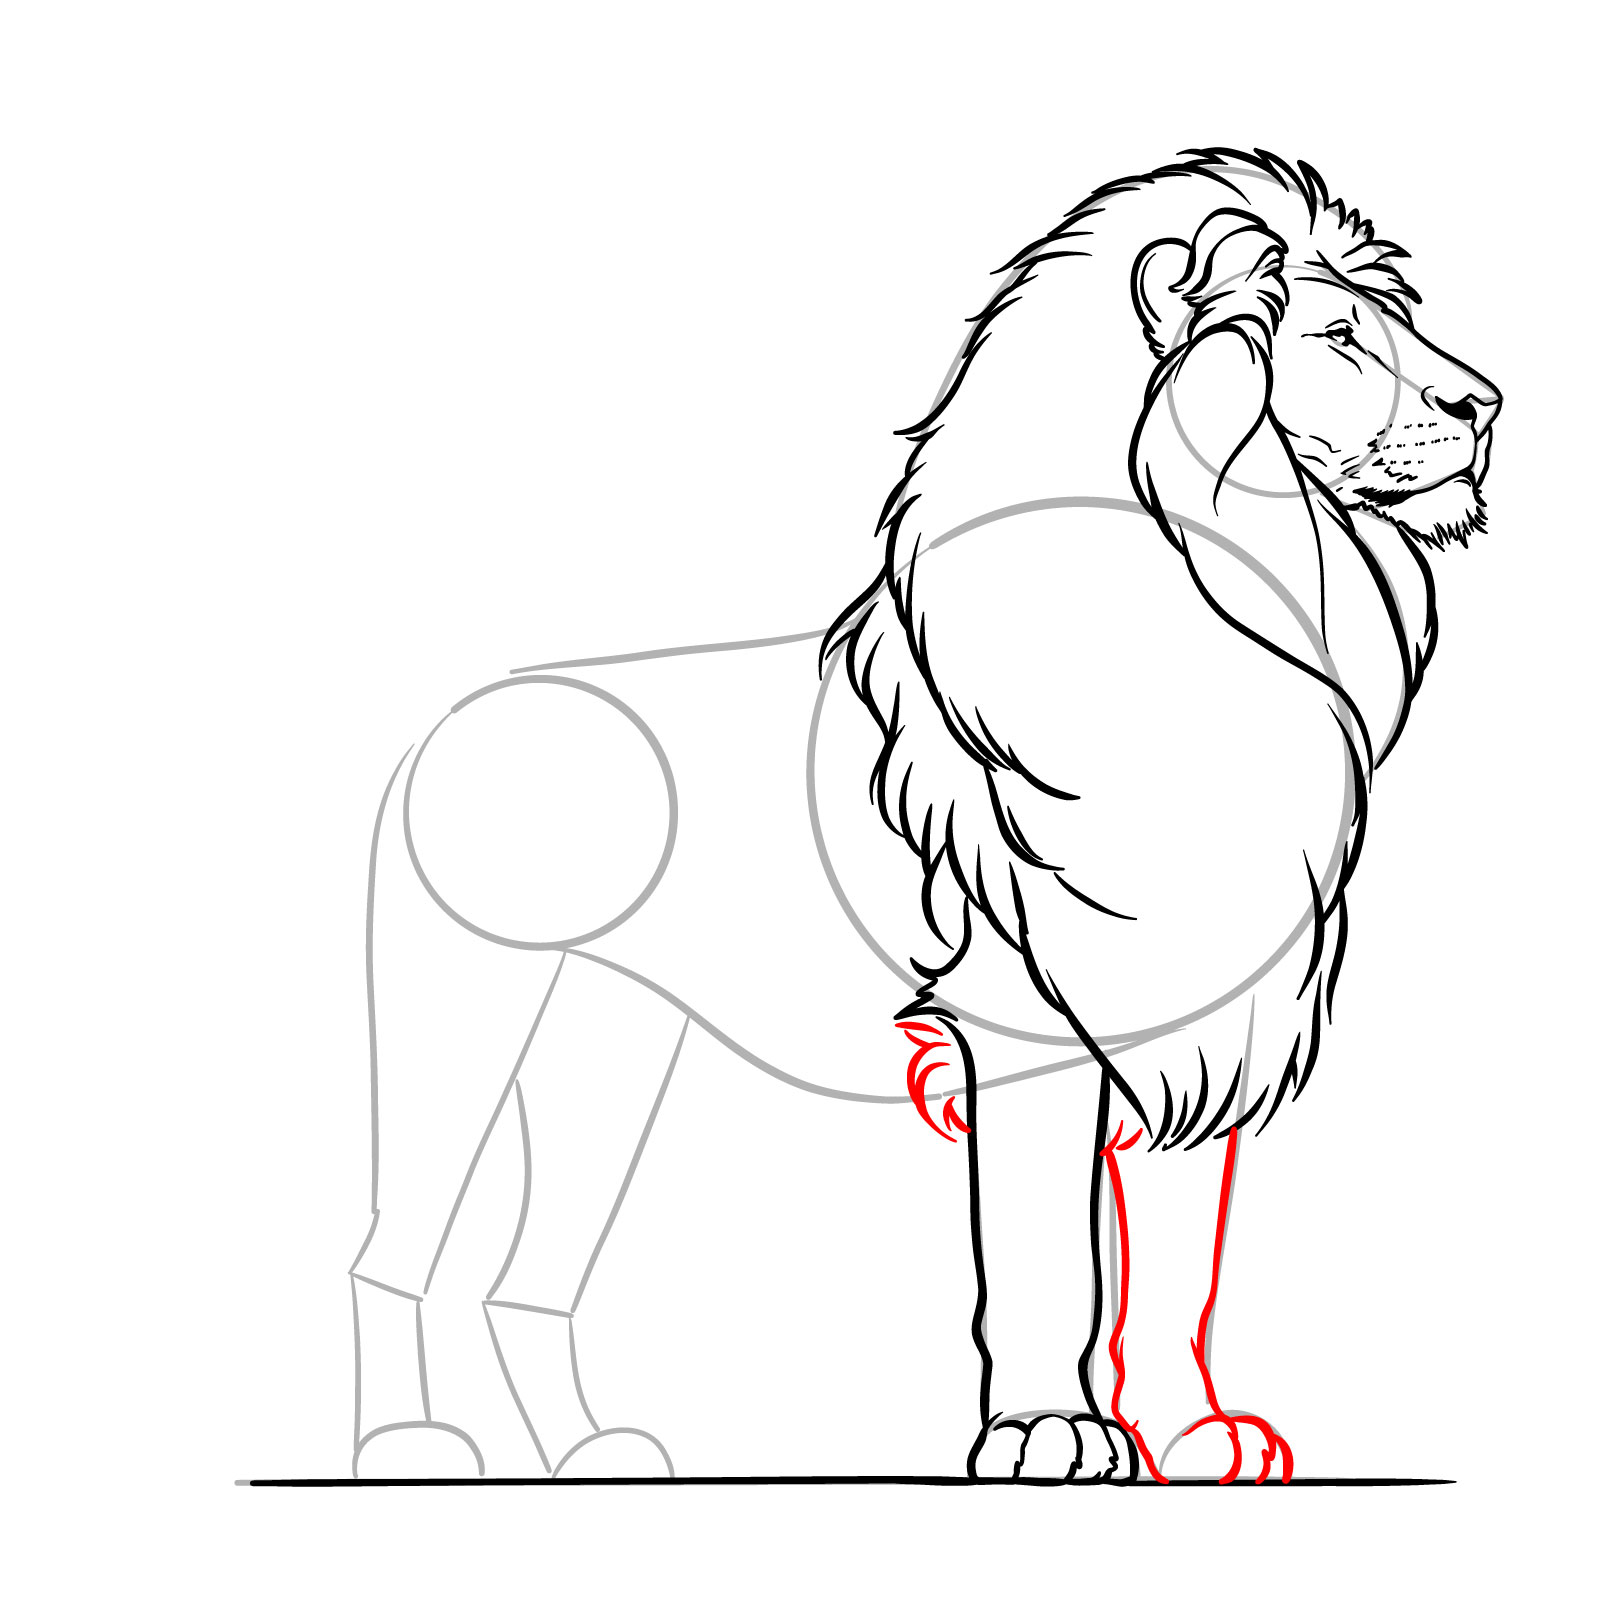
Step 13 – Illustrate the second front leg with two lines descending from the chest and draw the paw with distinct toes next to the first leg
Adding the second front leg and paw to the standing lion side view
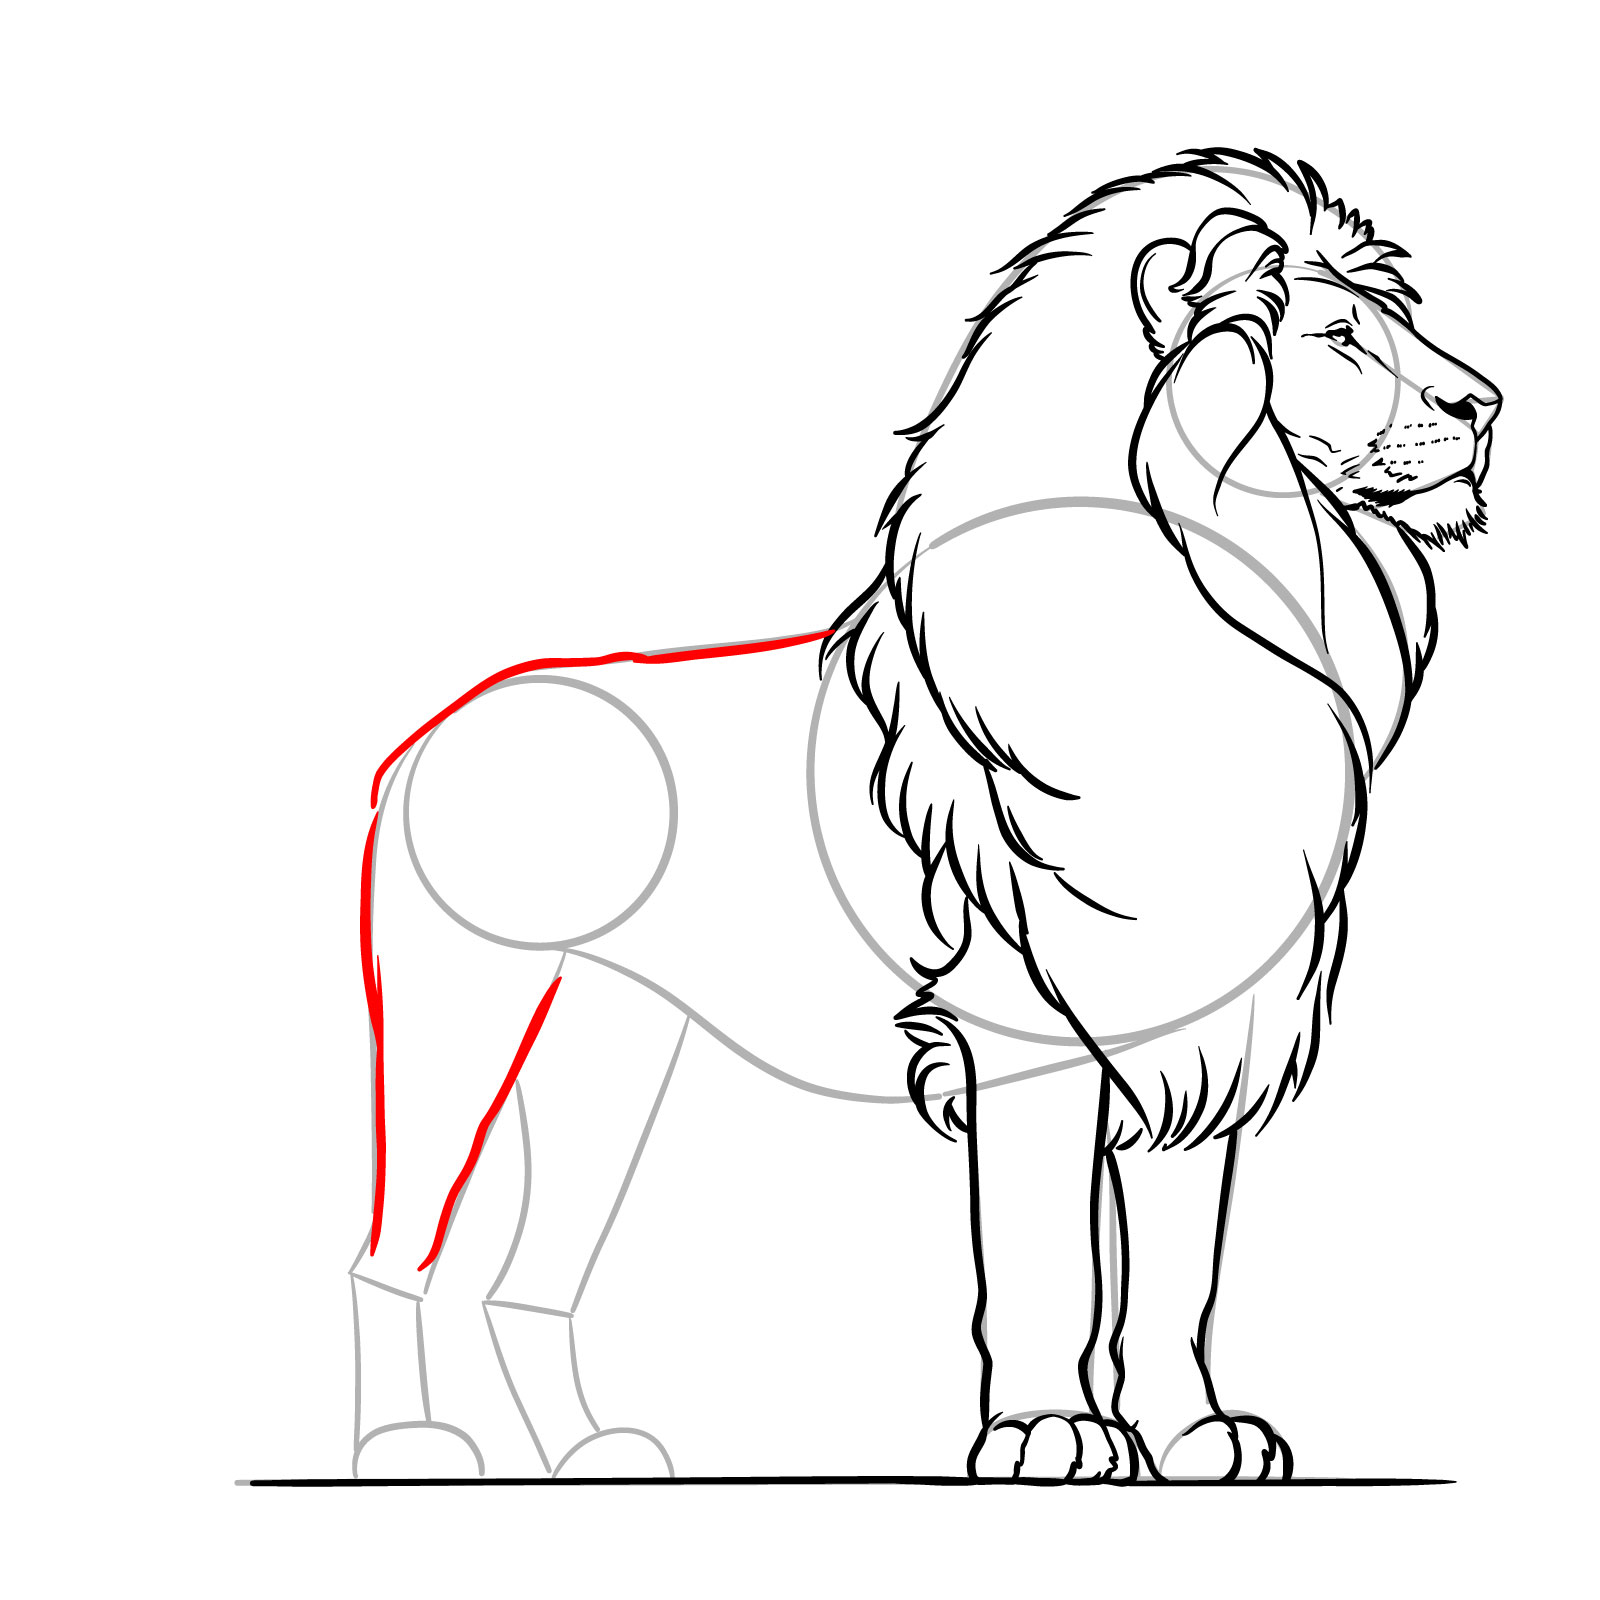
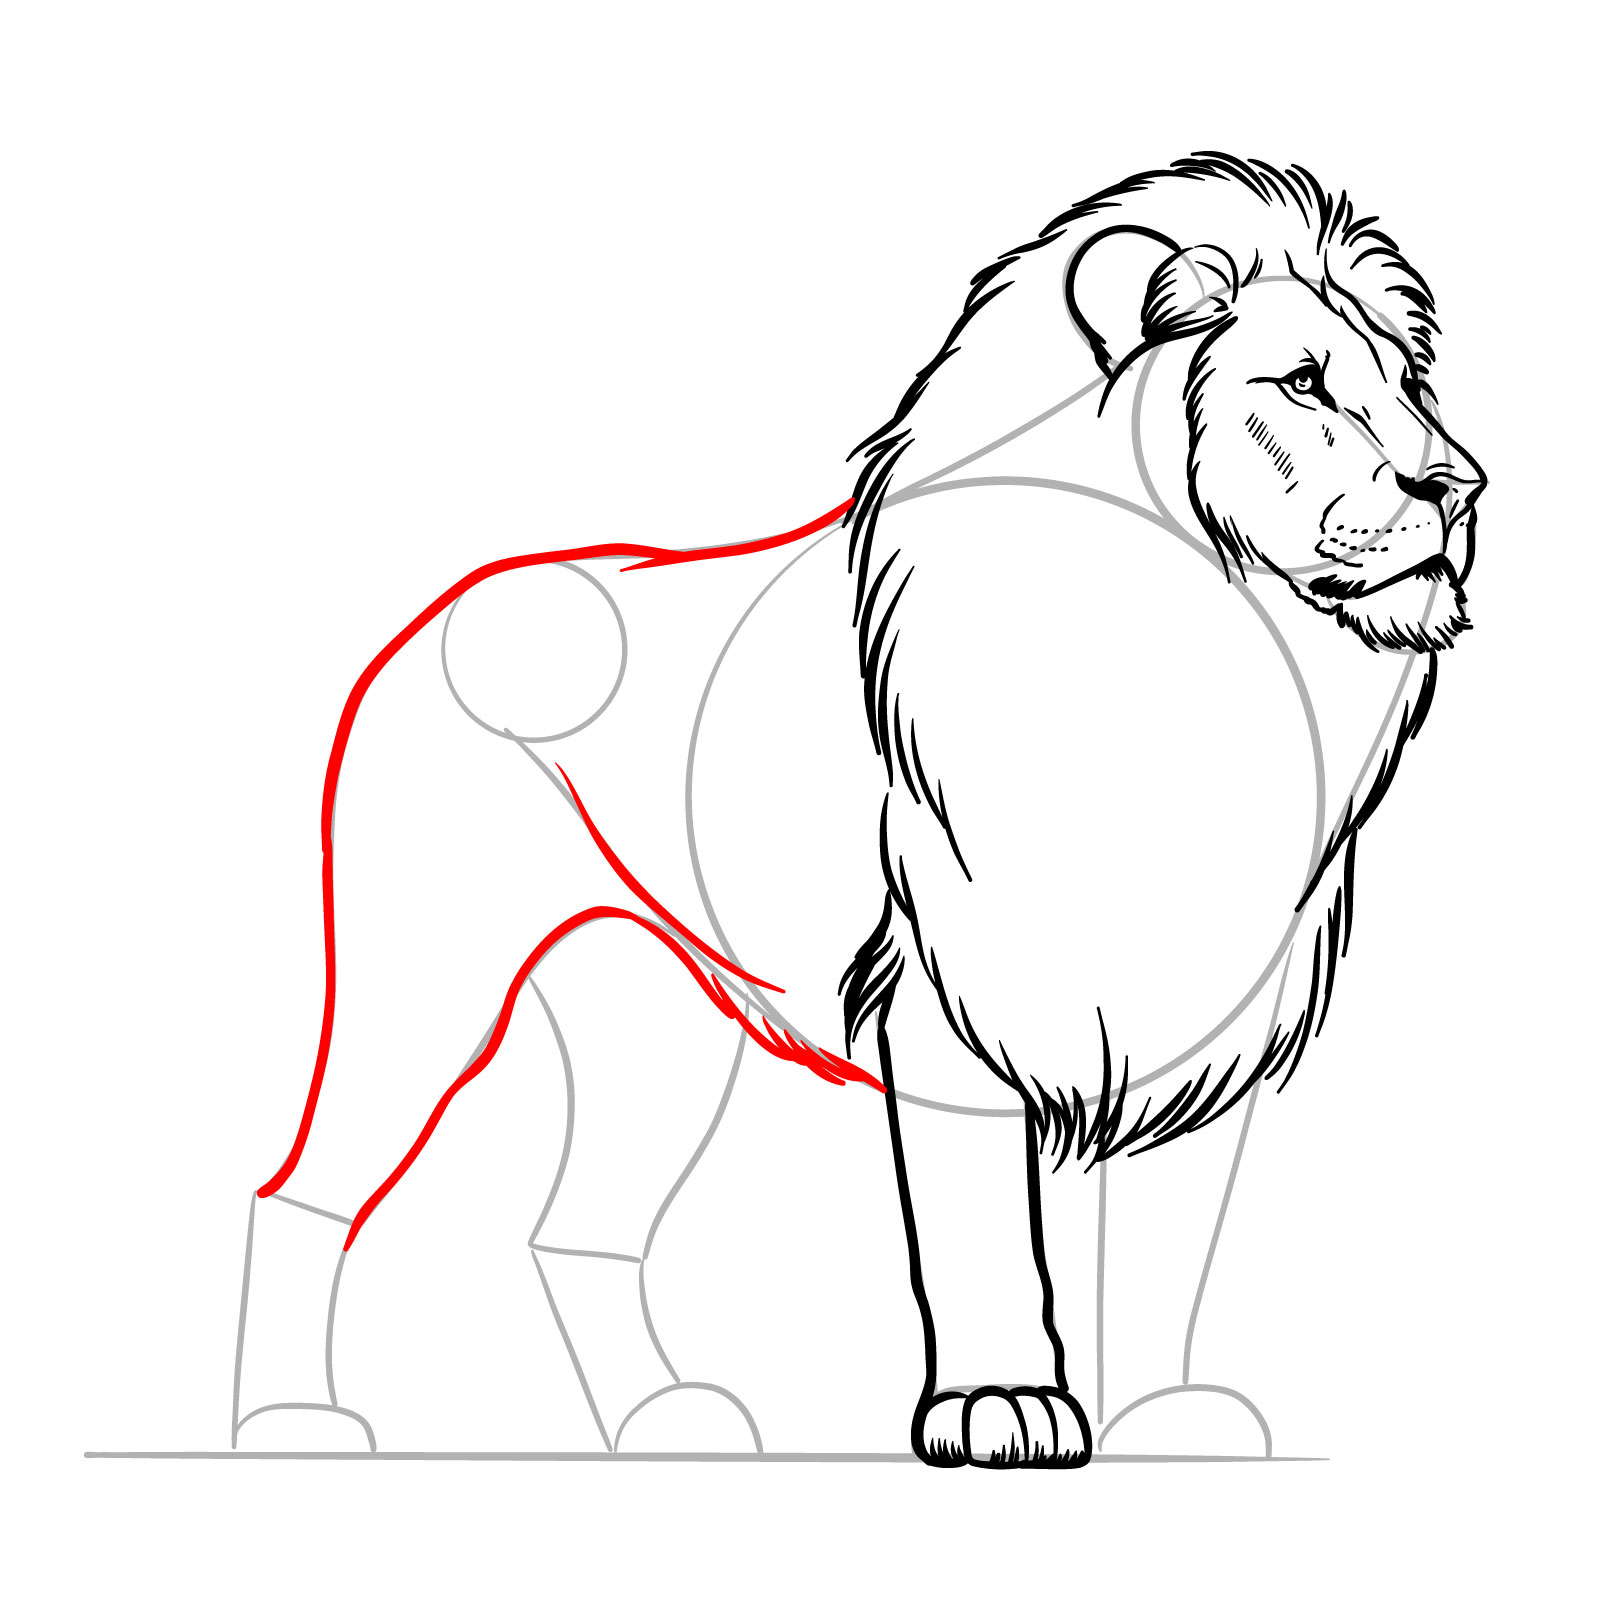
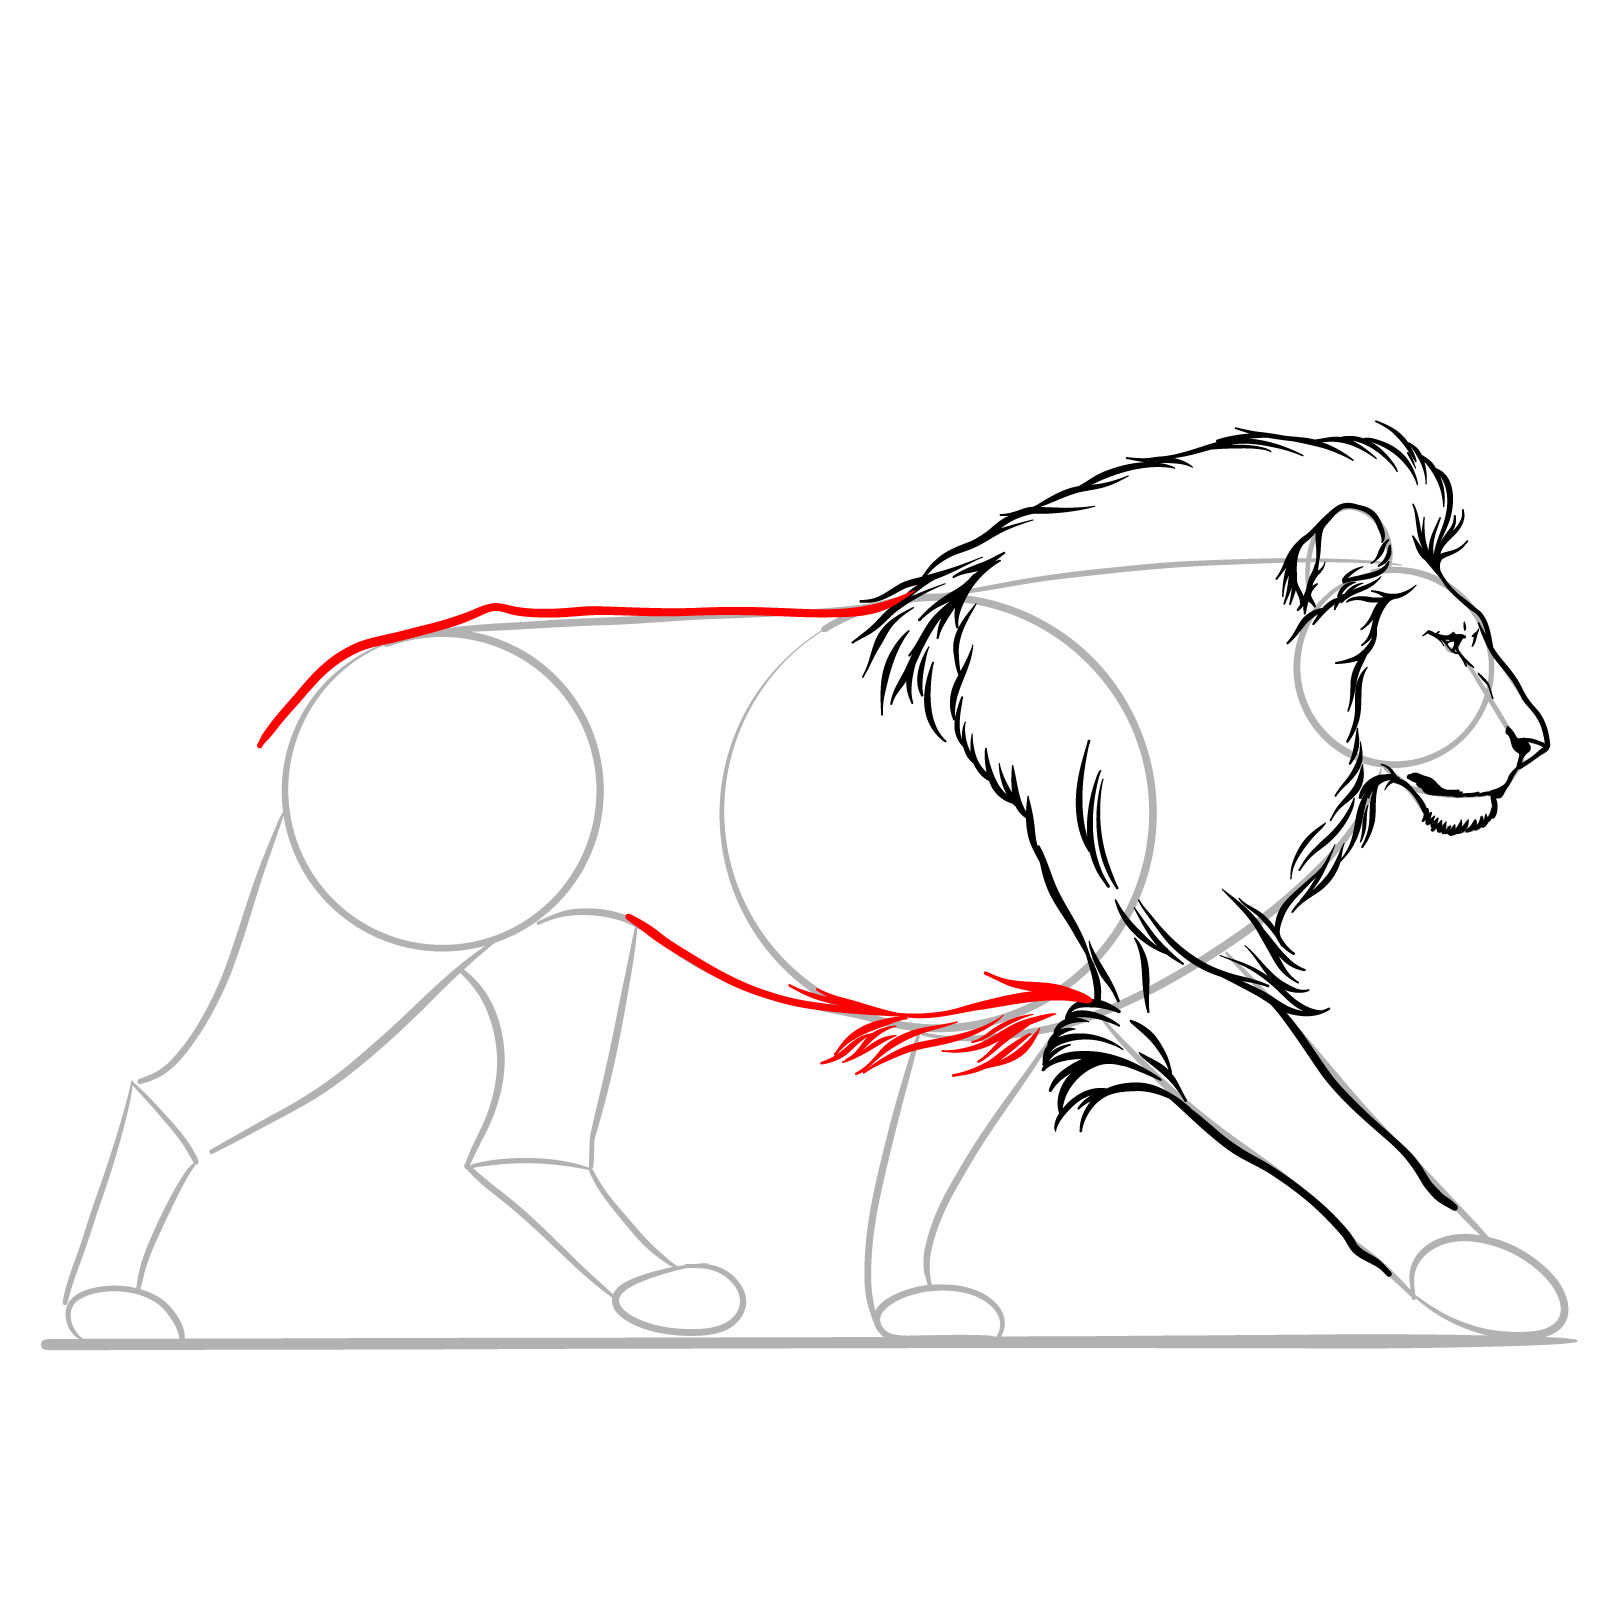
Step 14 – Sketch the back line from the mane down to the rump and begin the rear right leg with lines indicating the thigh and lower leg
Drawing the back and starting the rear right leg
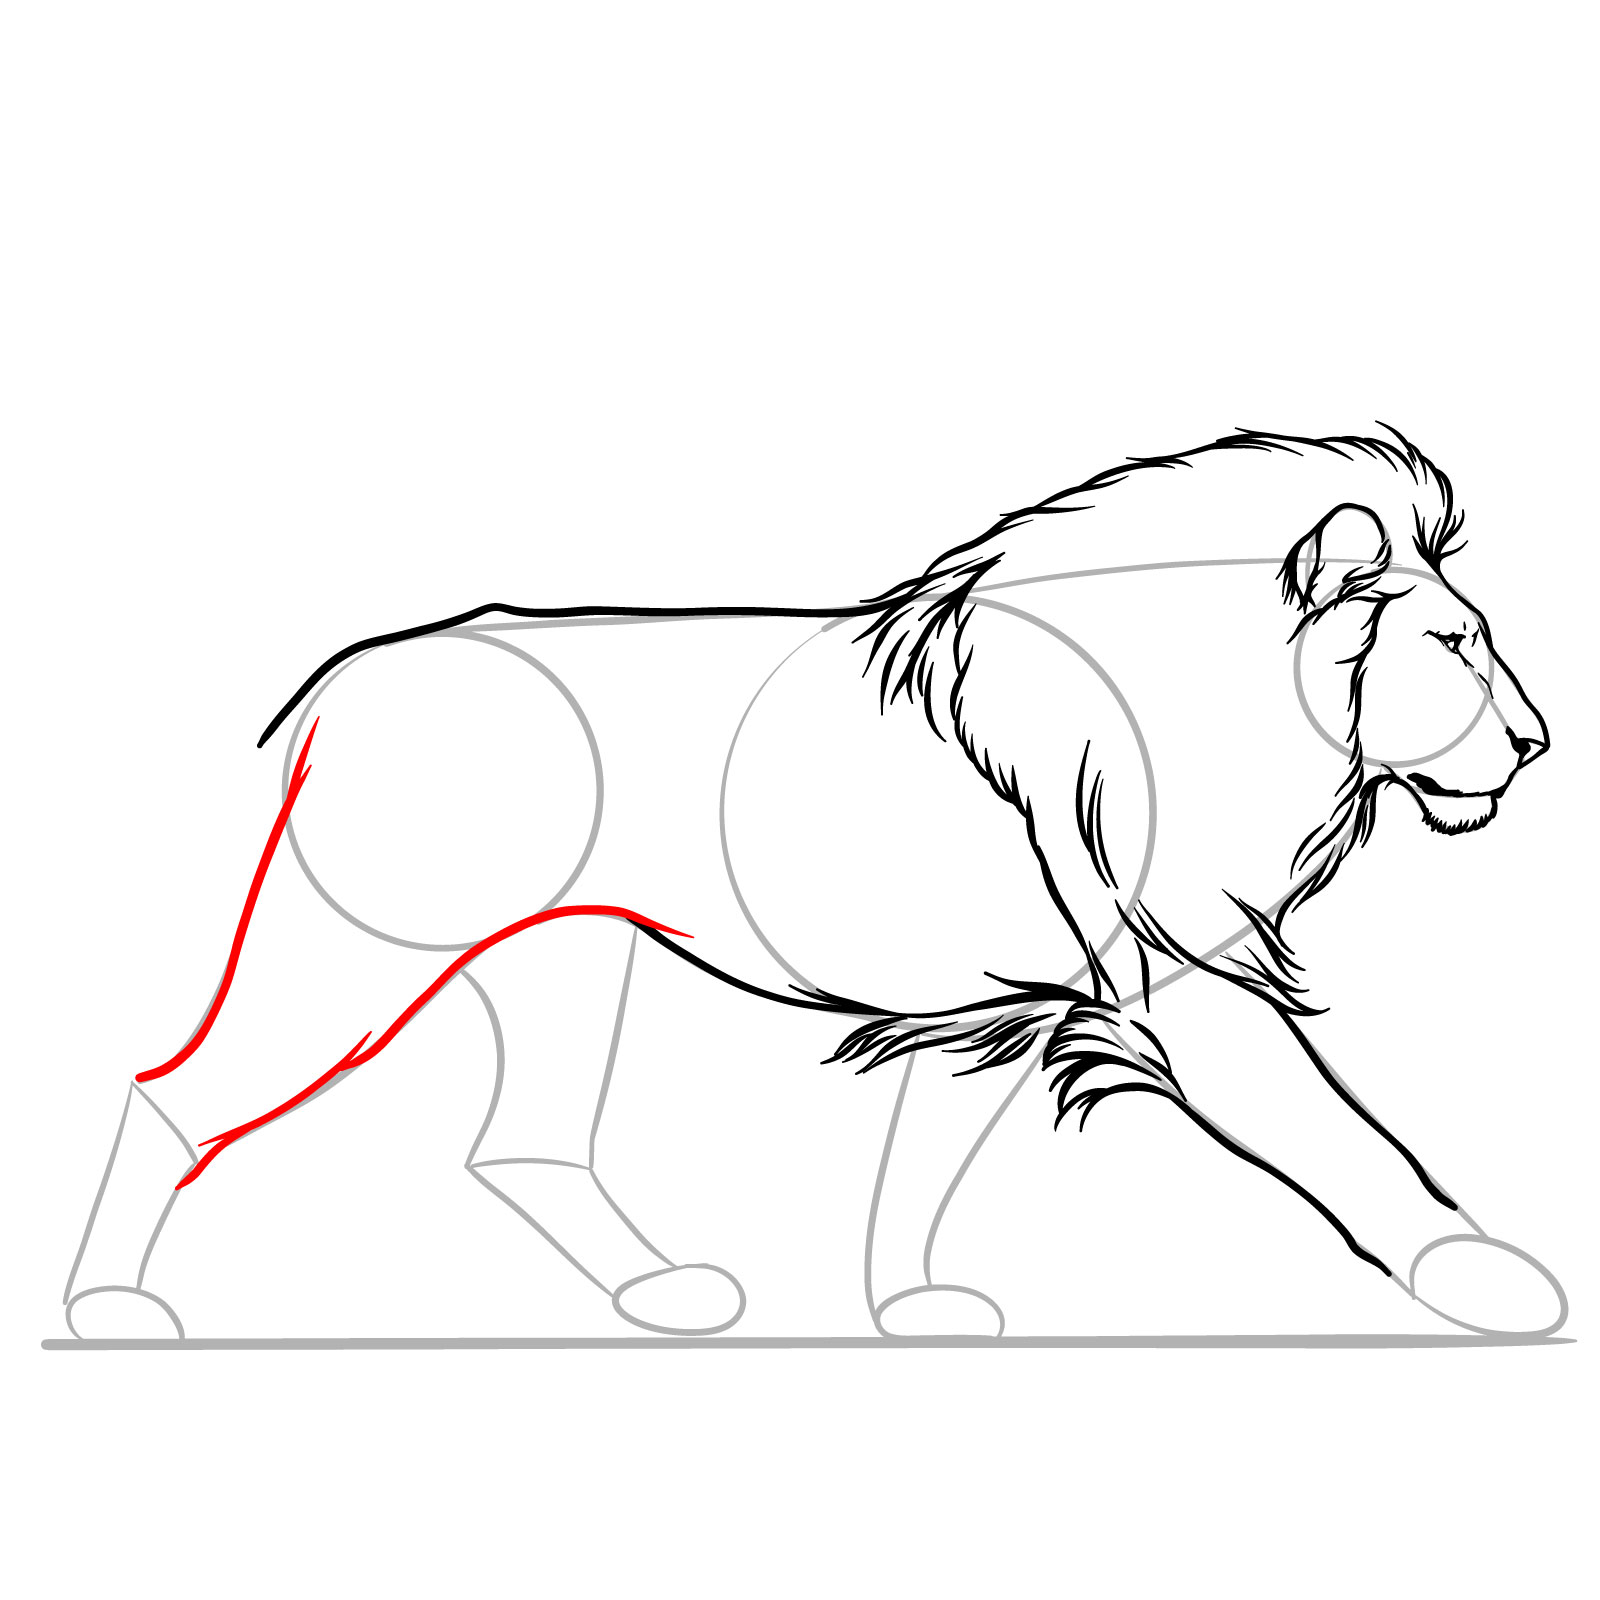
Step 15 – Continue the lines down from the thigh to form the rest of the rear right leg, finishing with the paw and toes
Finishing the rear right leg for a detailed standing lion illustration
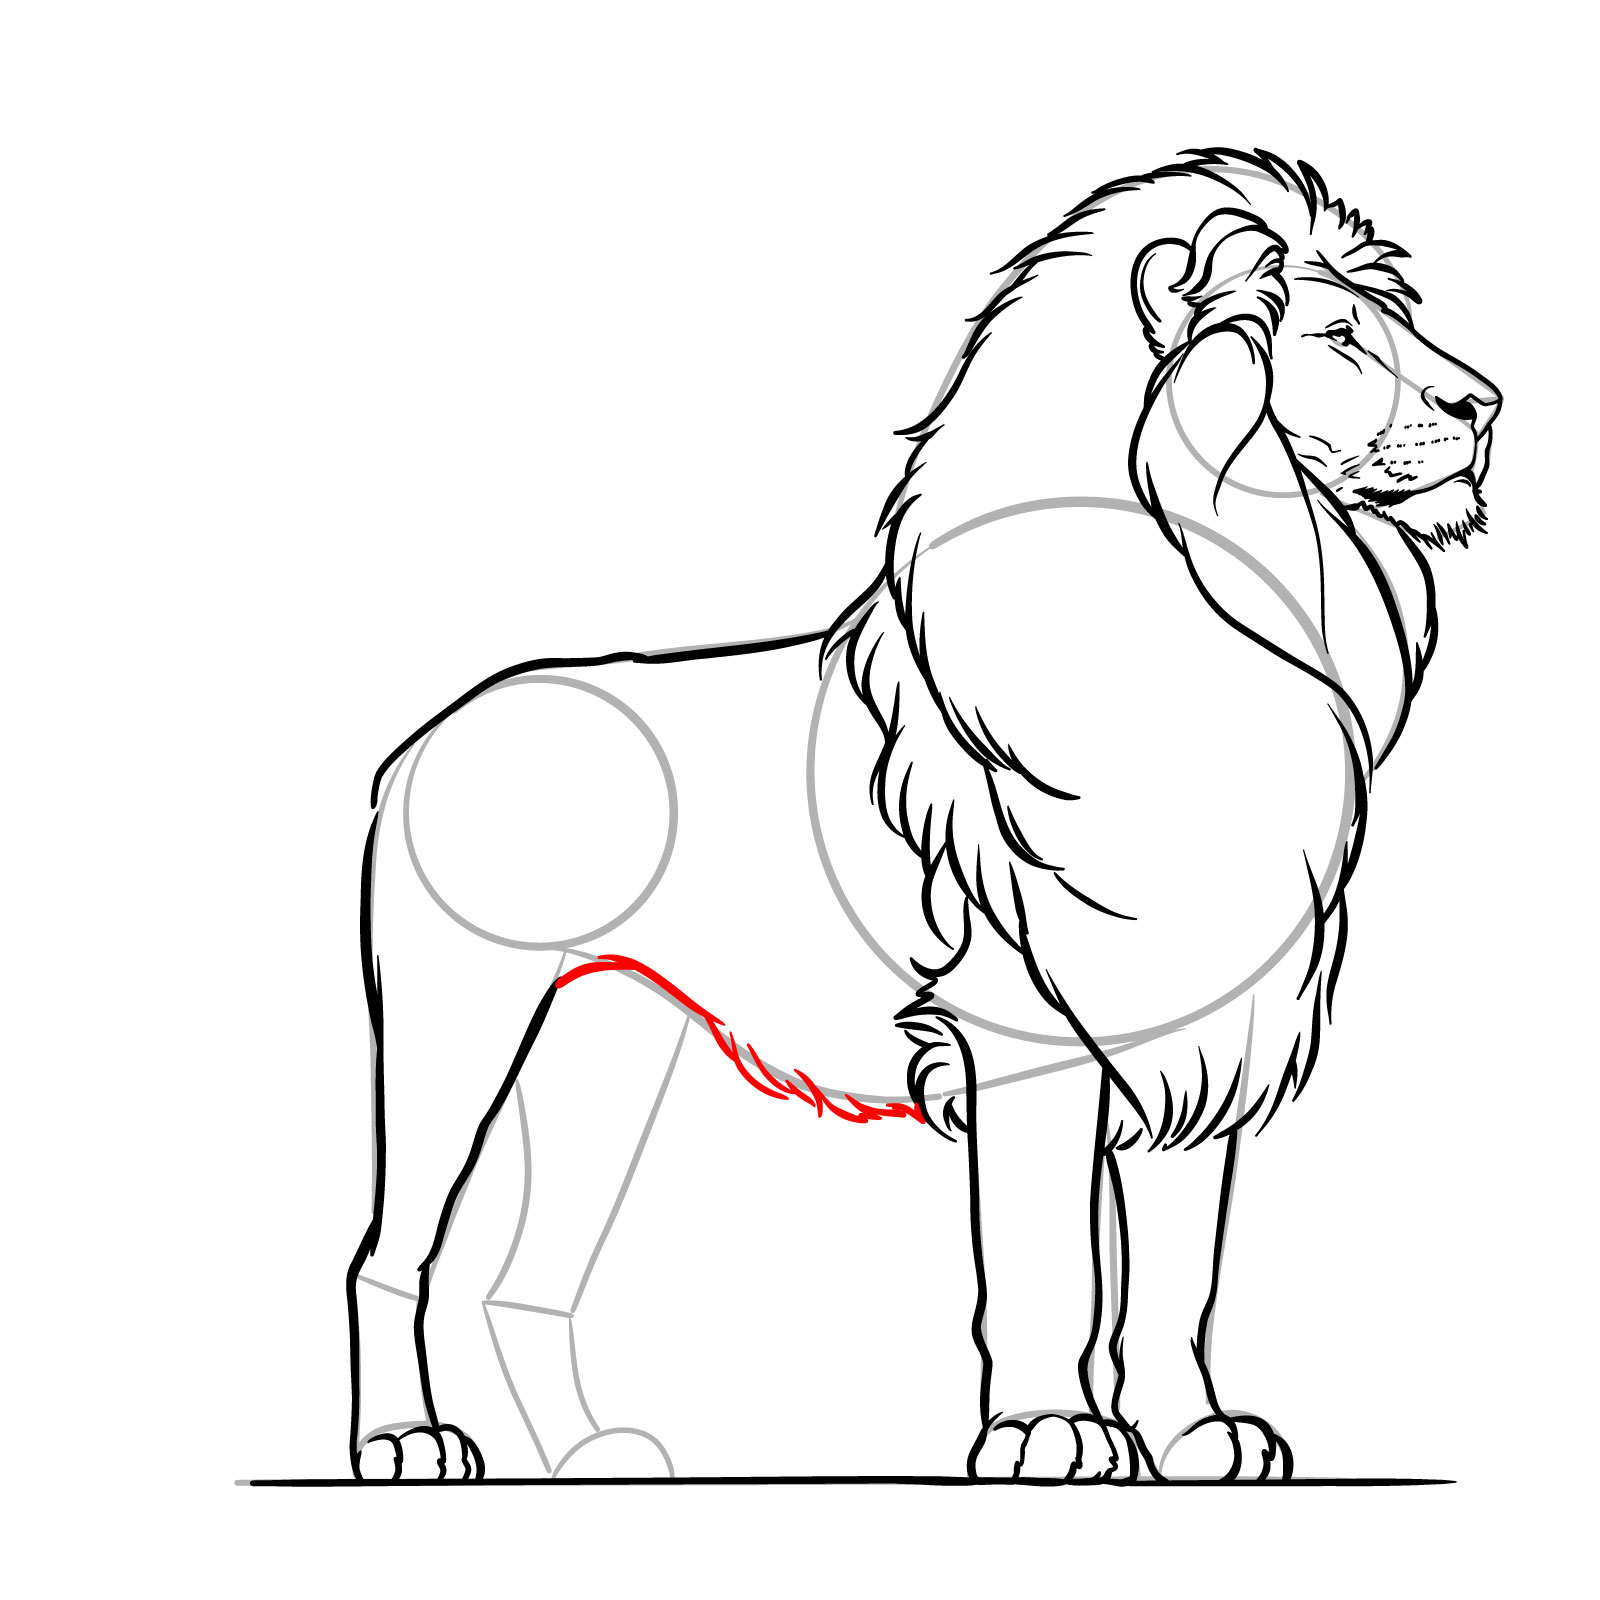
Step 16 – Sketch a curved line from the front right leg of the lion under the belly connecting to the inner thigh of the rear right leg
Creating the lower body outline in a guide on how to draw a lion
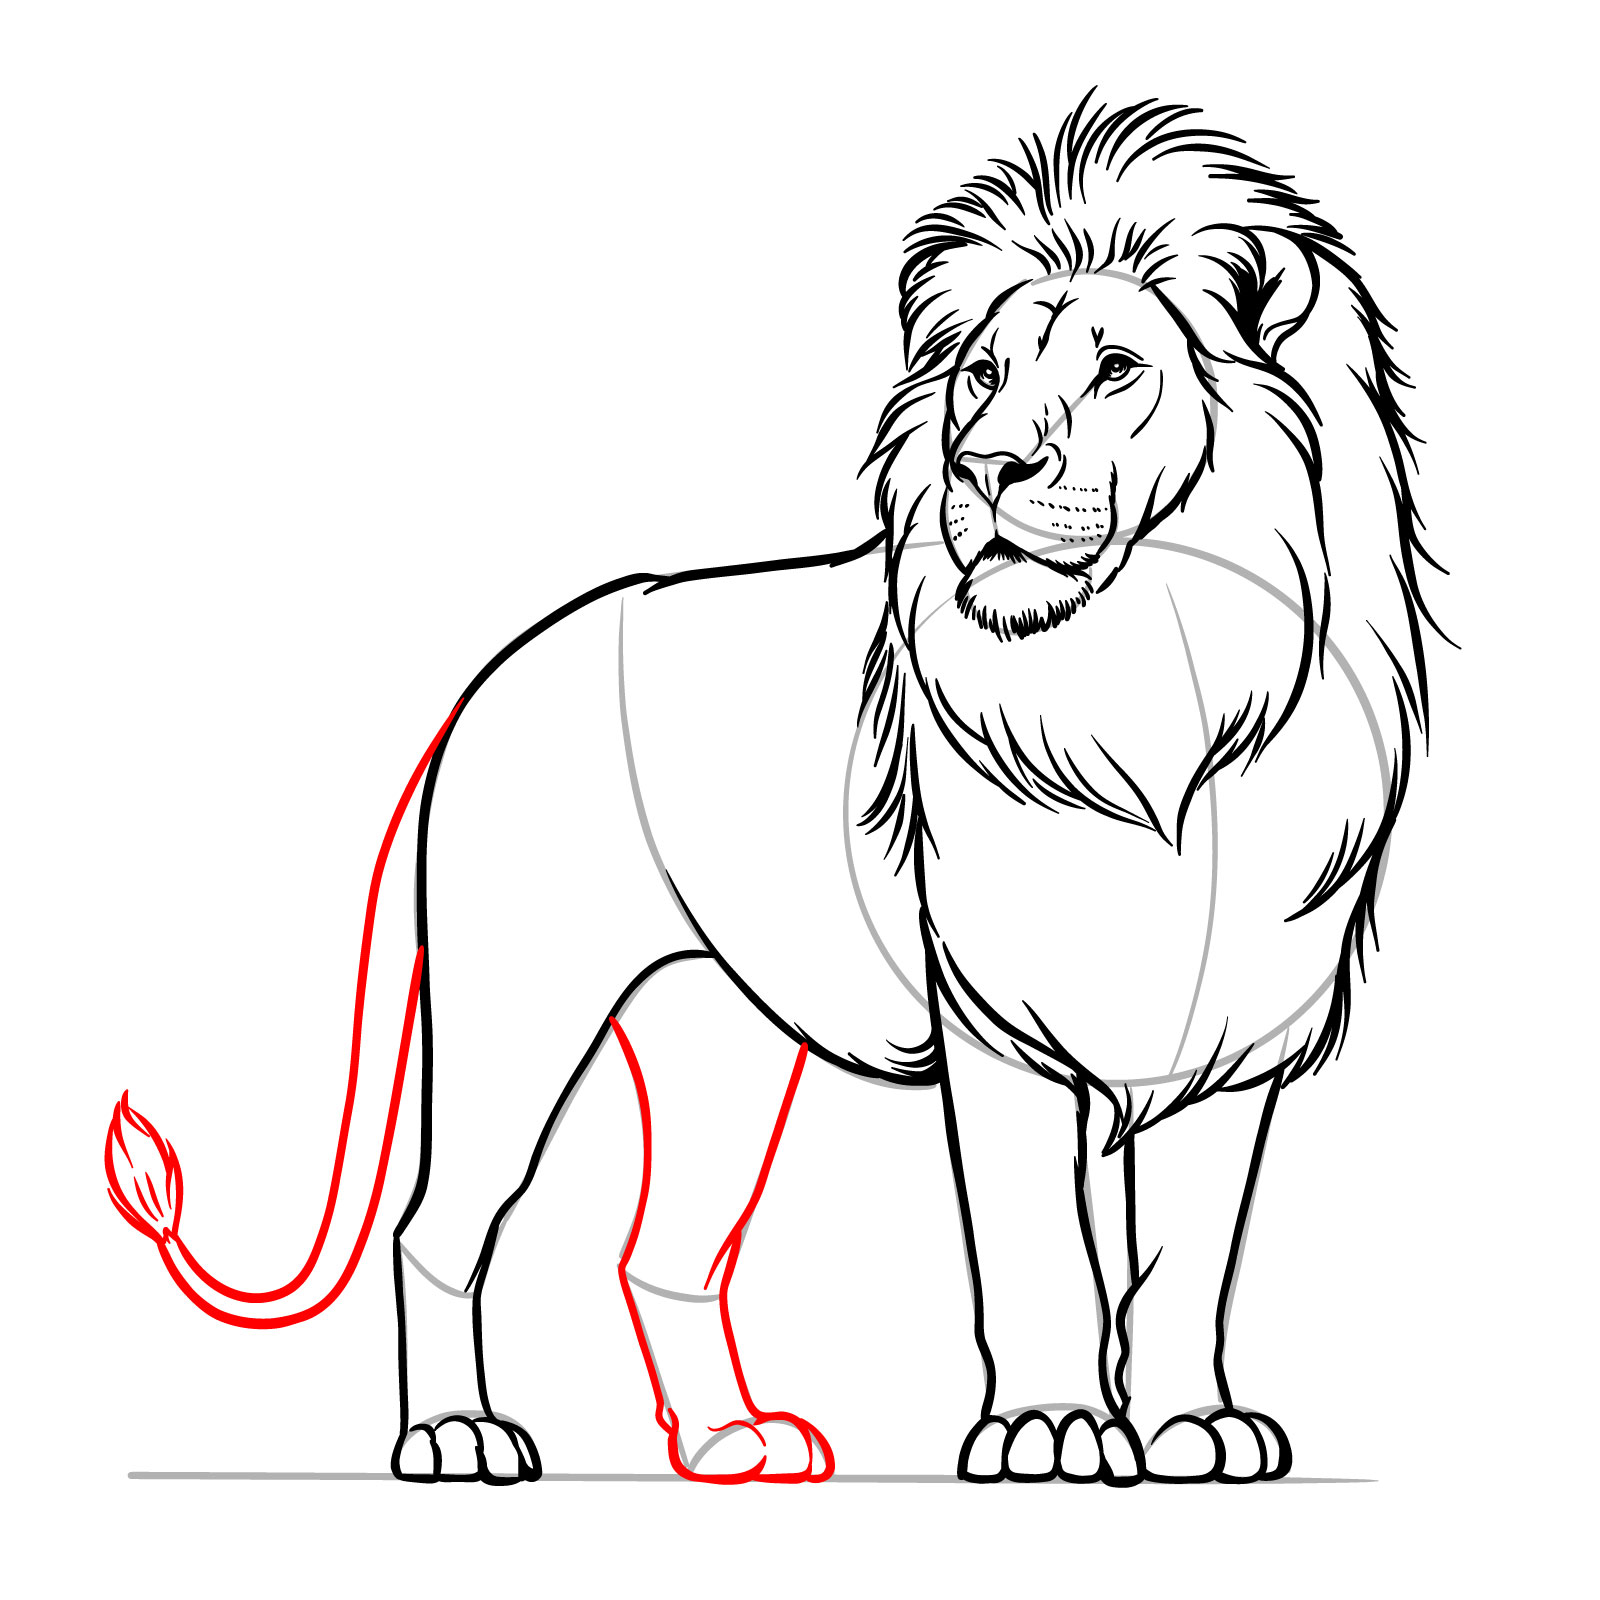
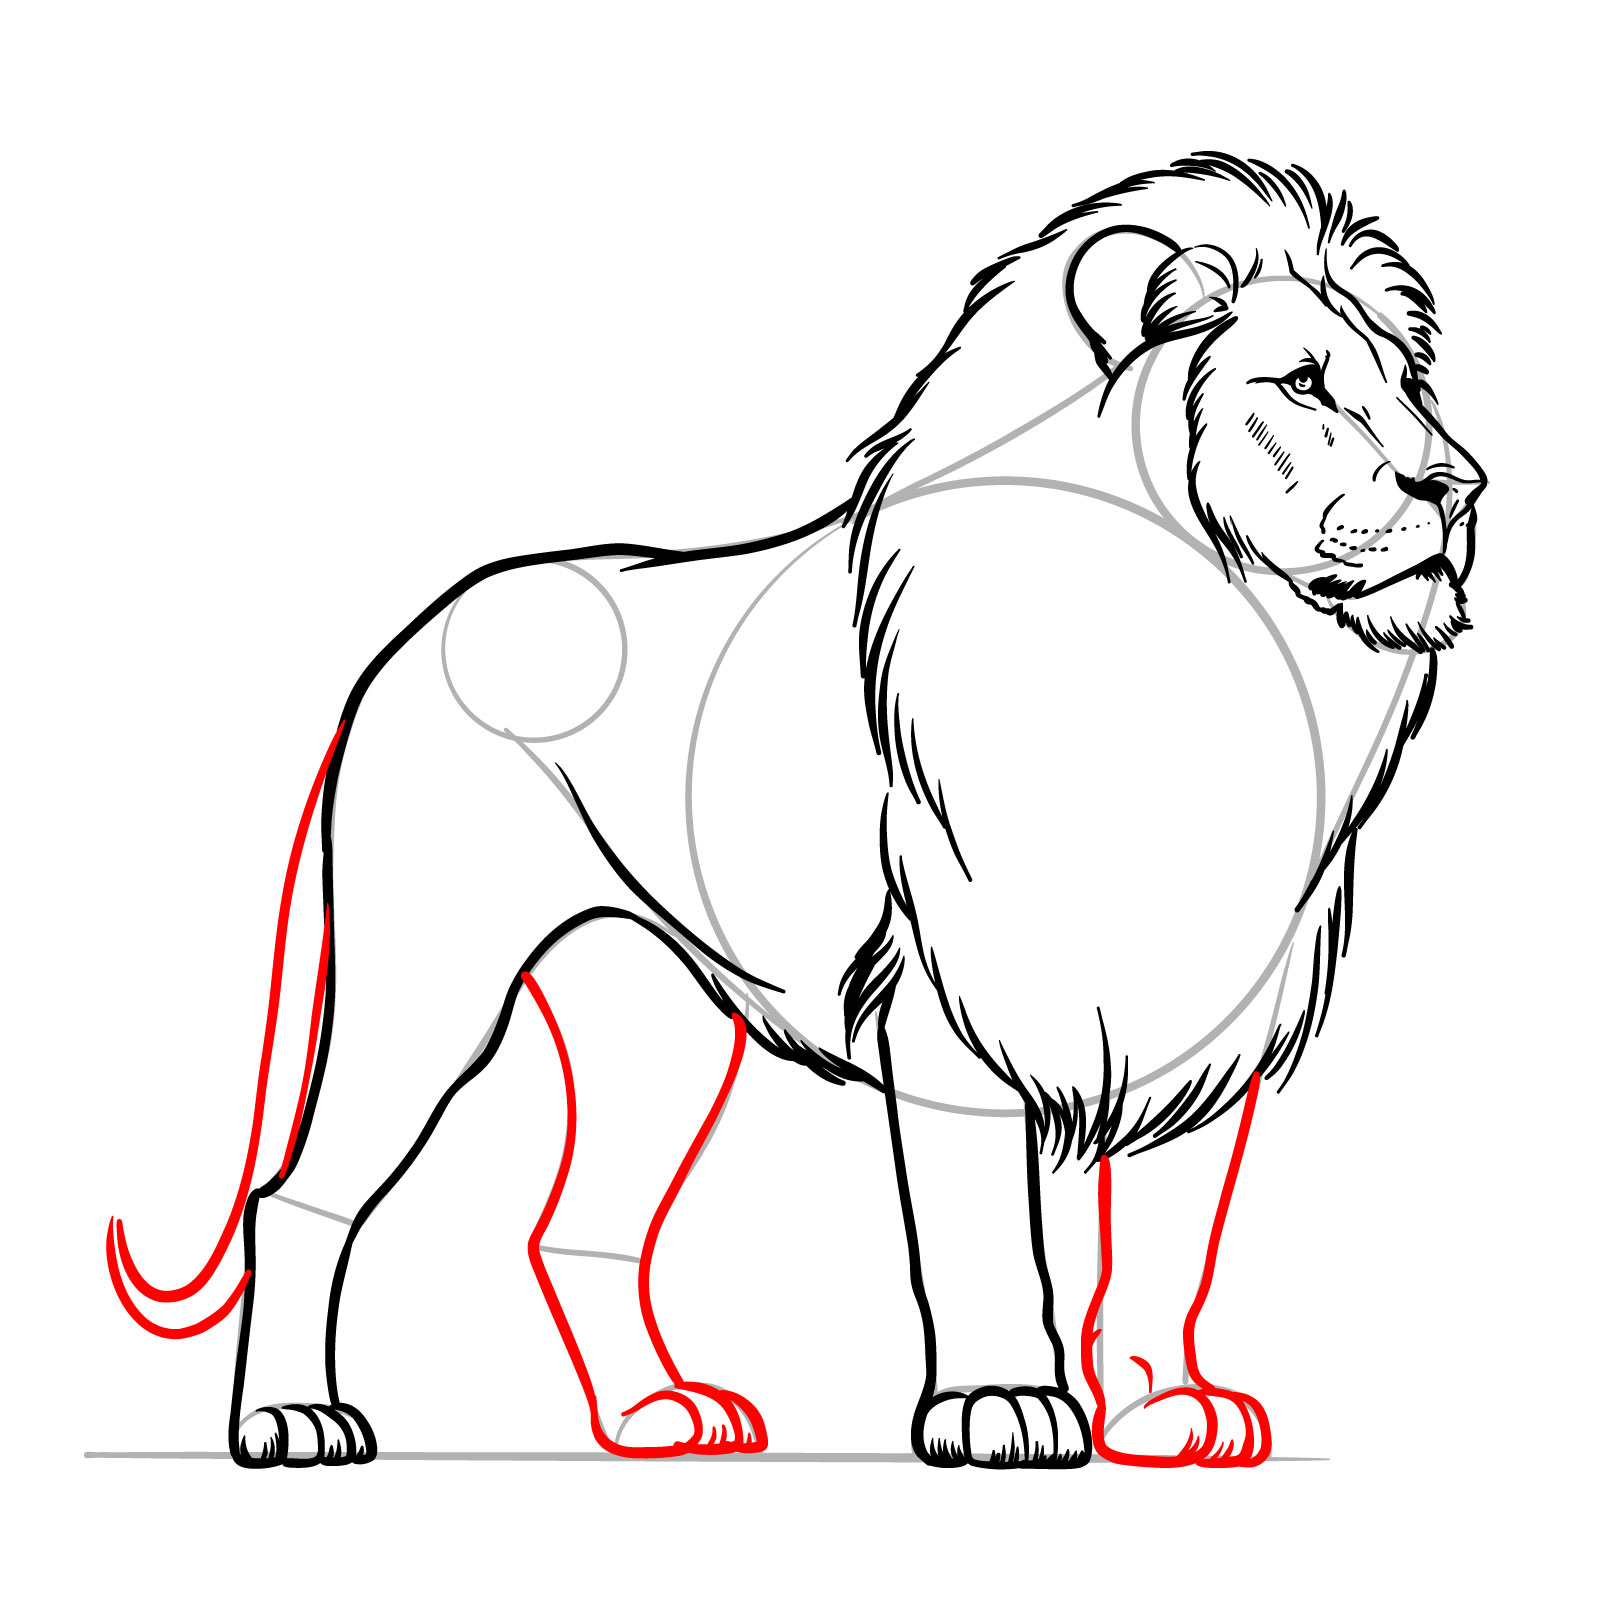
Step 17 – Draw the second rear leg, mirroring the first, with lines for the thigh and lower leg leading to the paw. Add long, curved lines extending from the rump to create the tail with a tuft at the end
Illustrating the second rear leg and tail
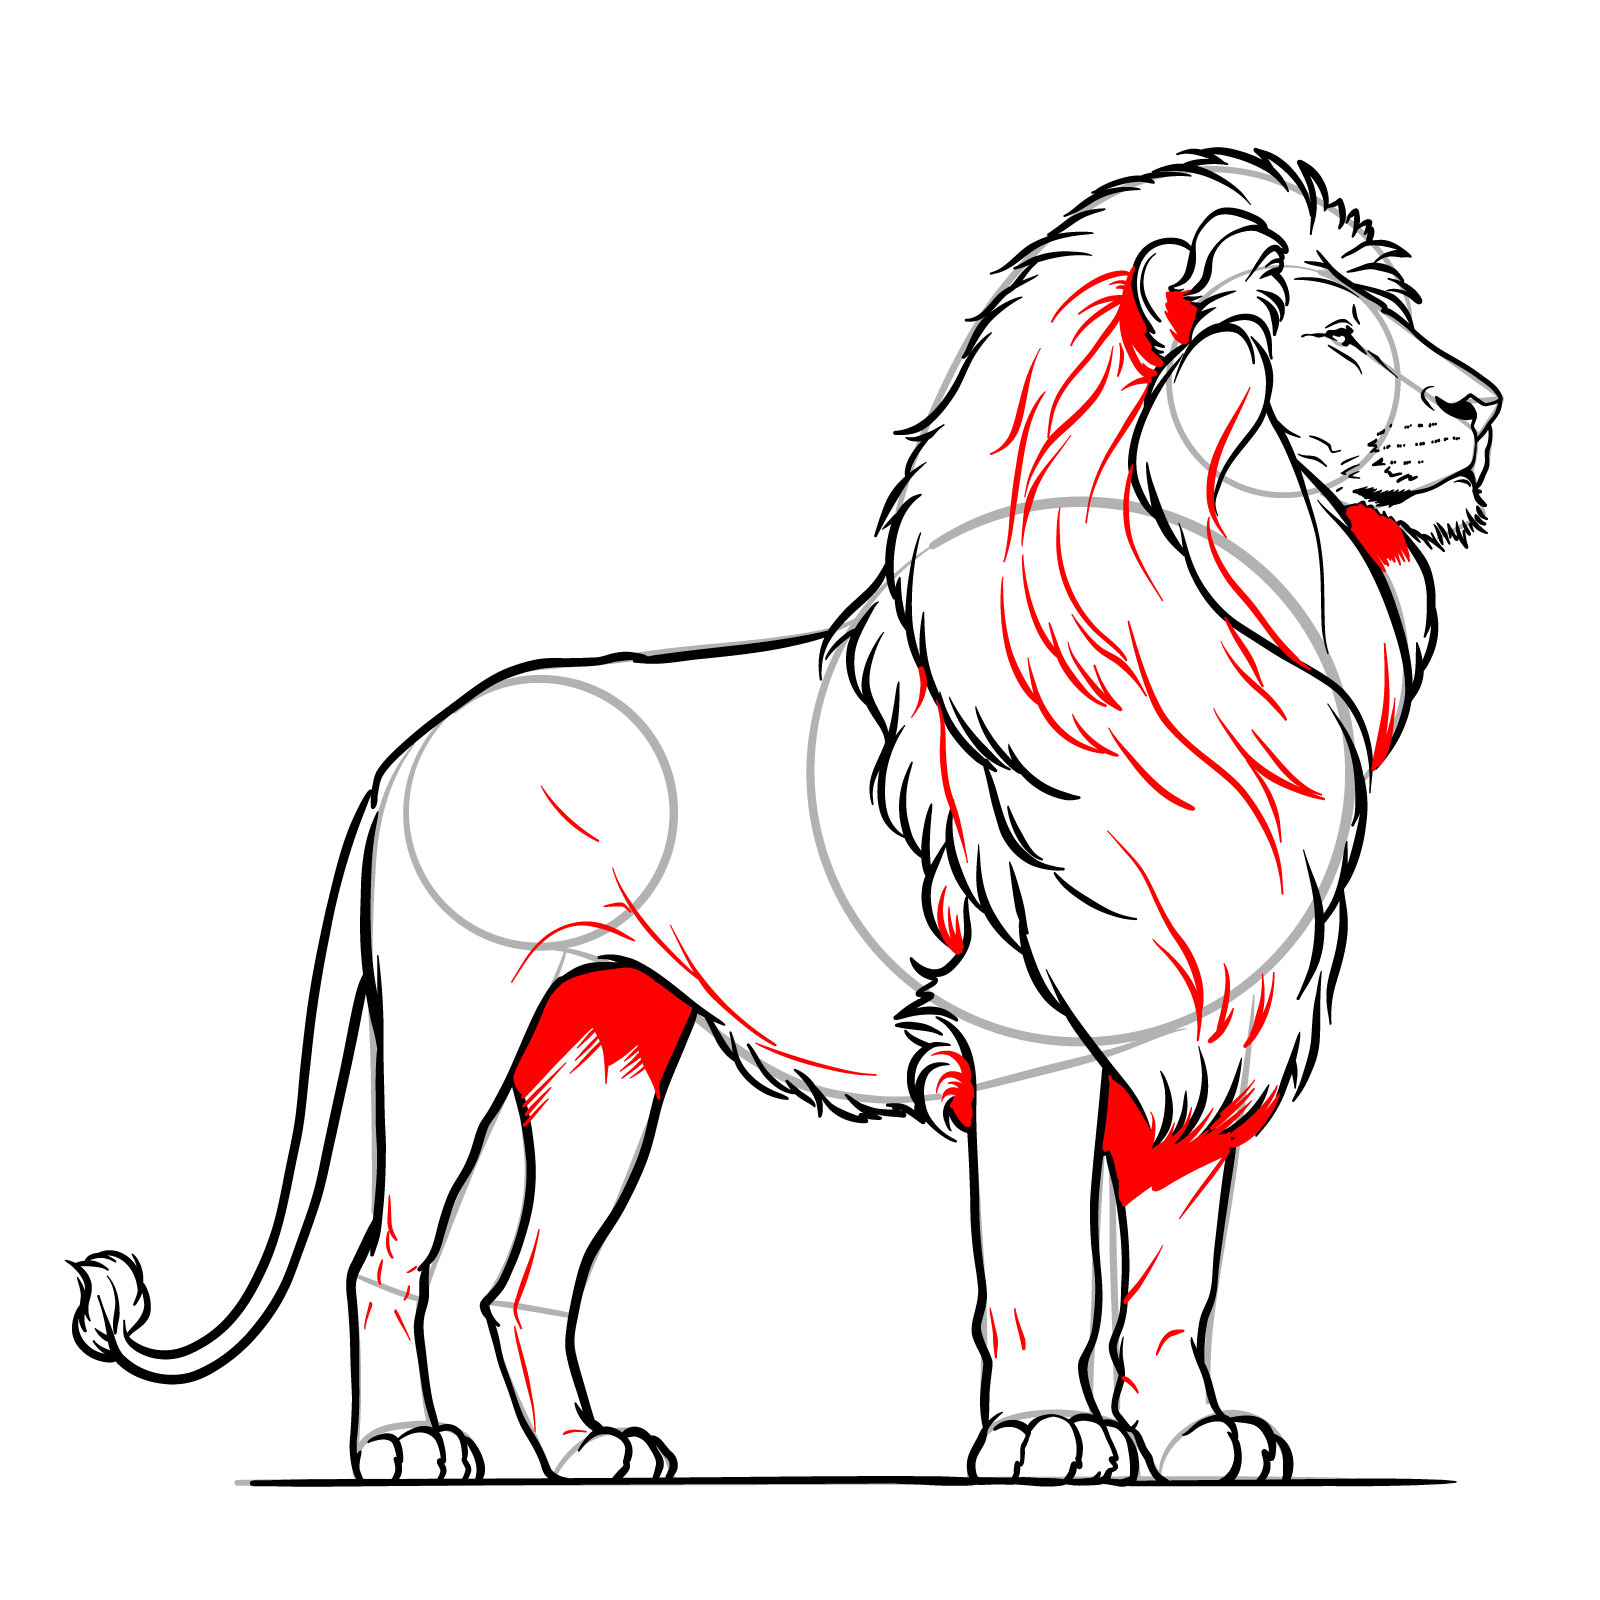
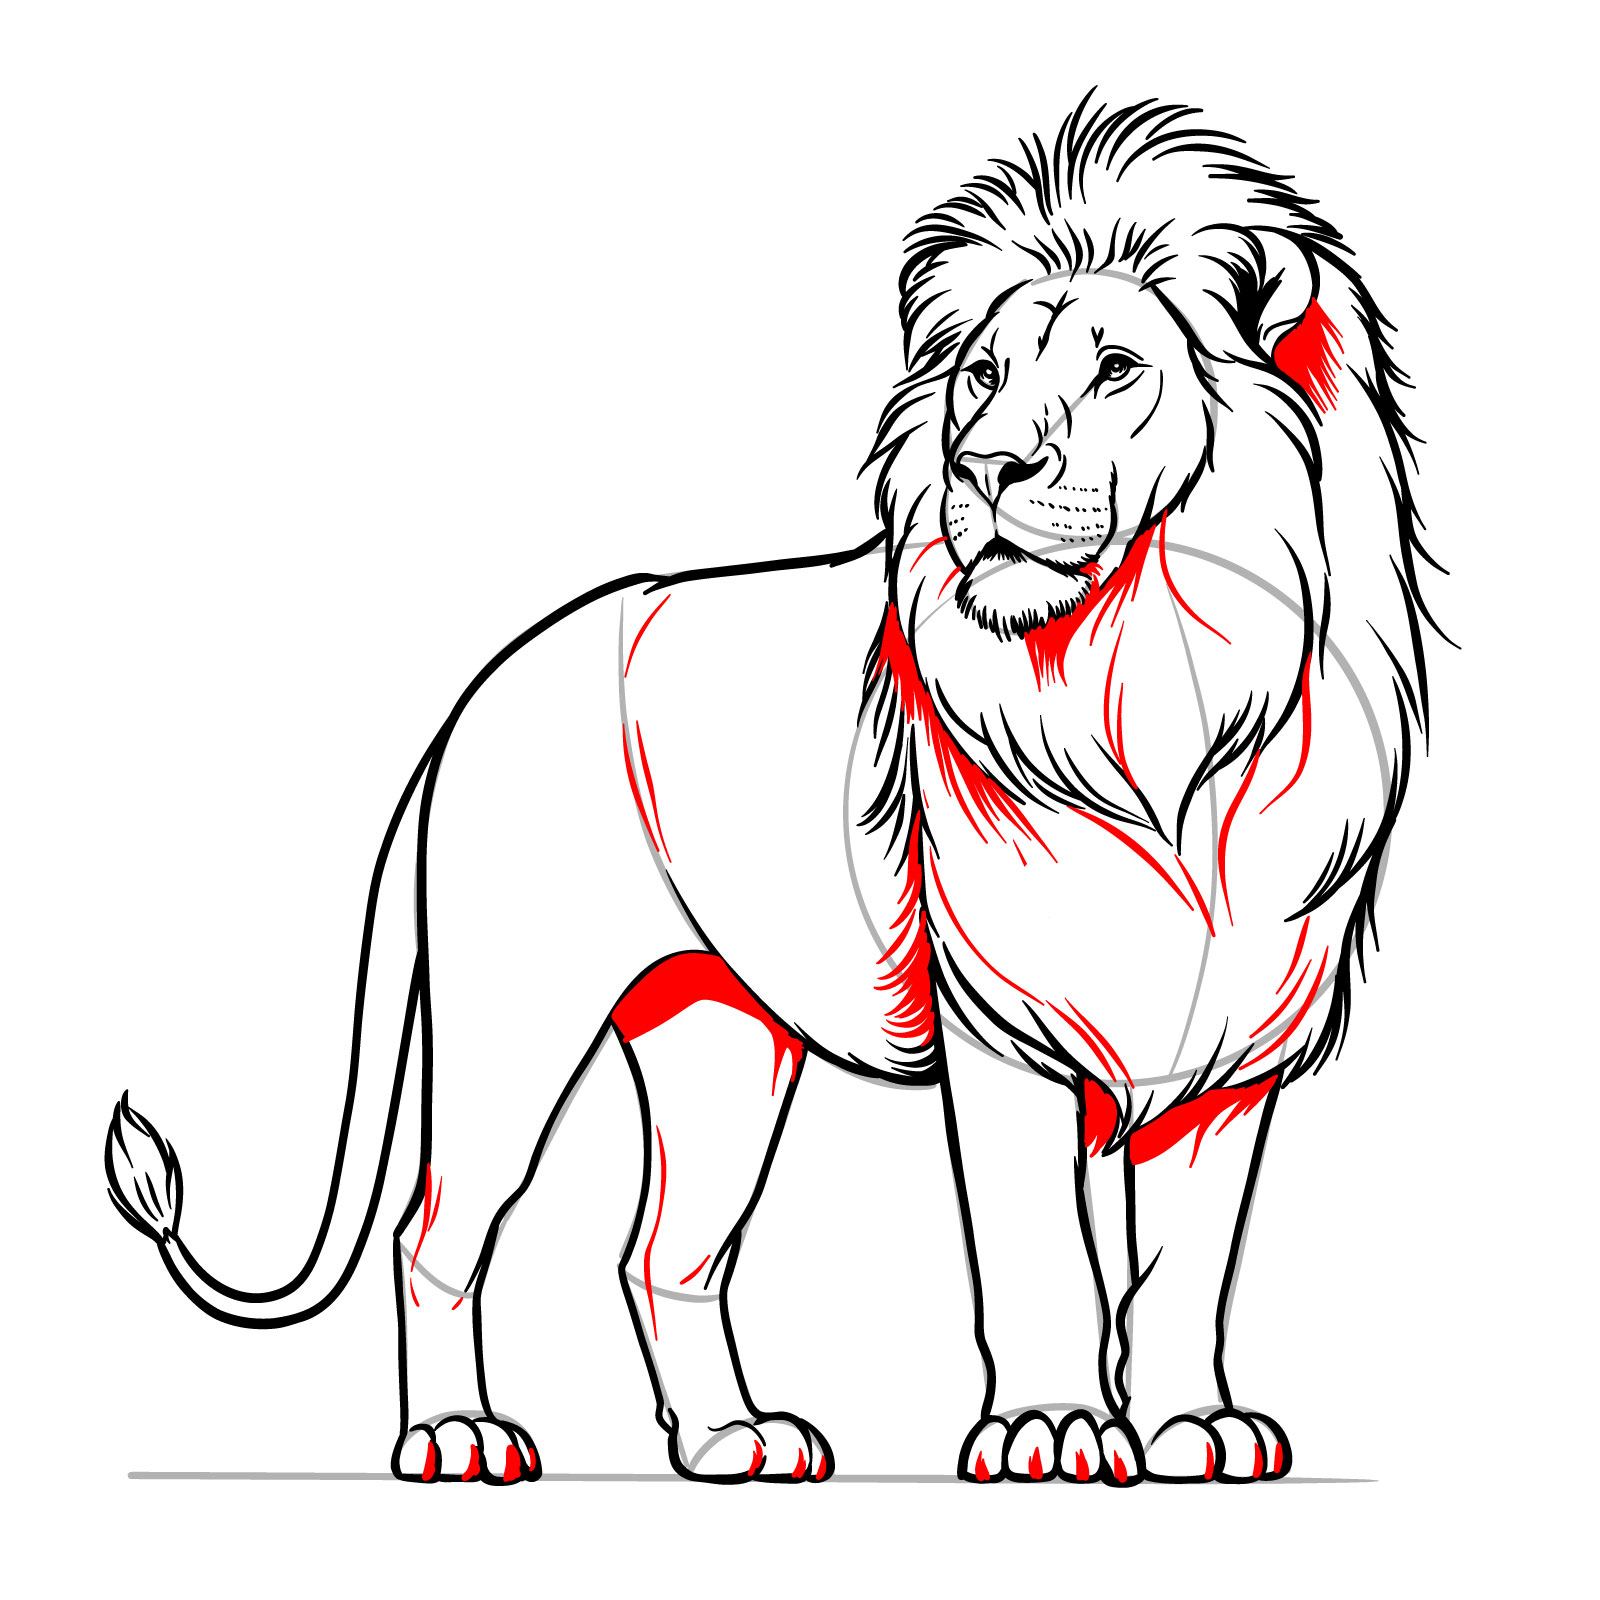
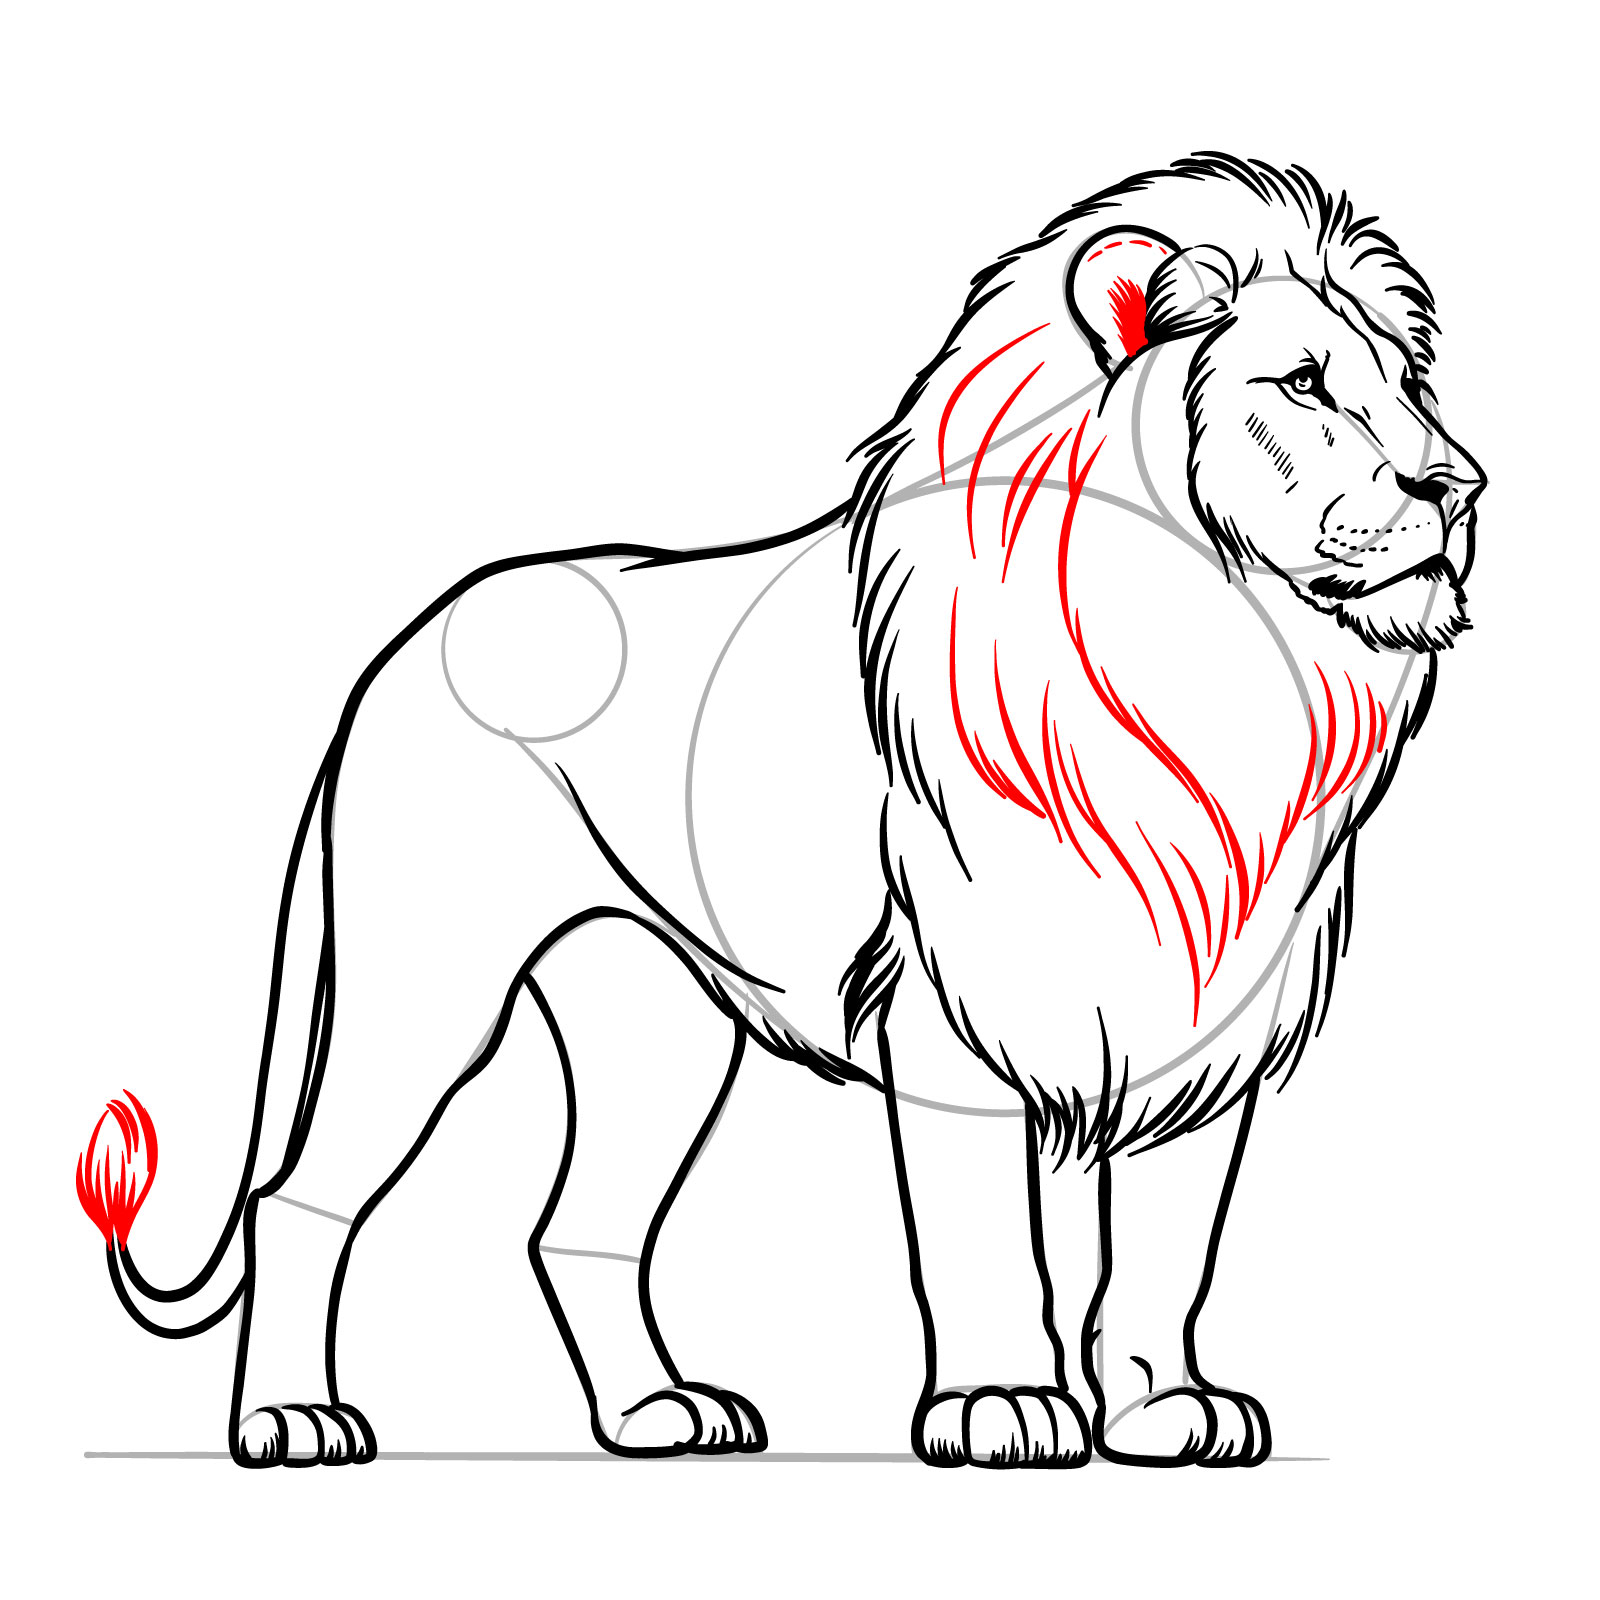
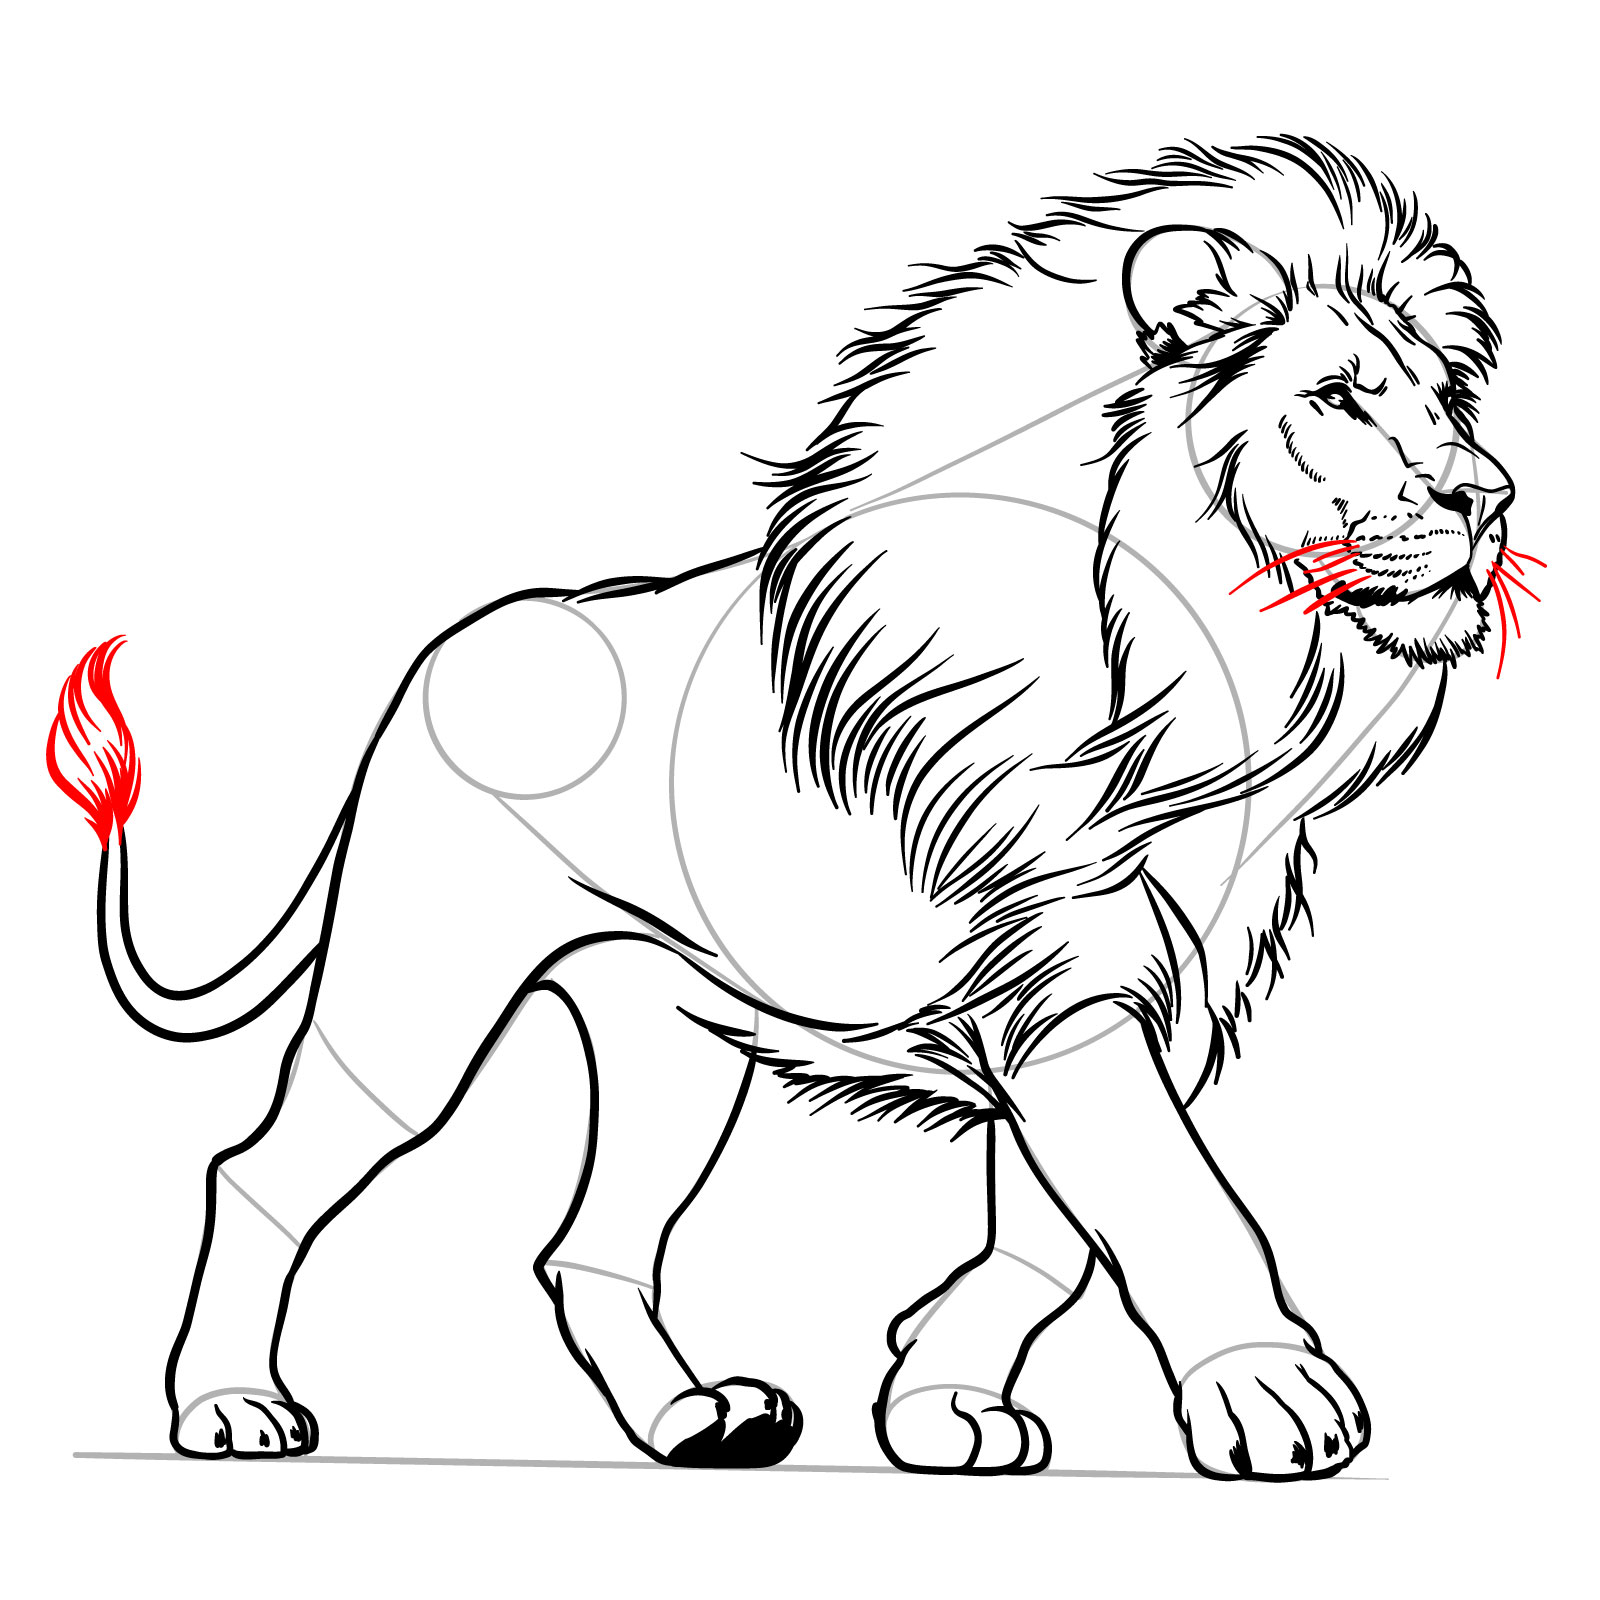
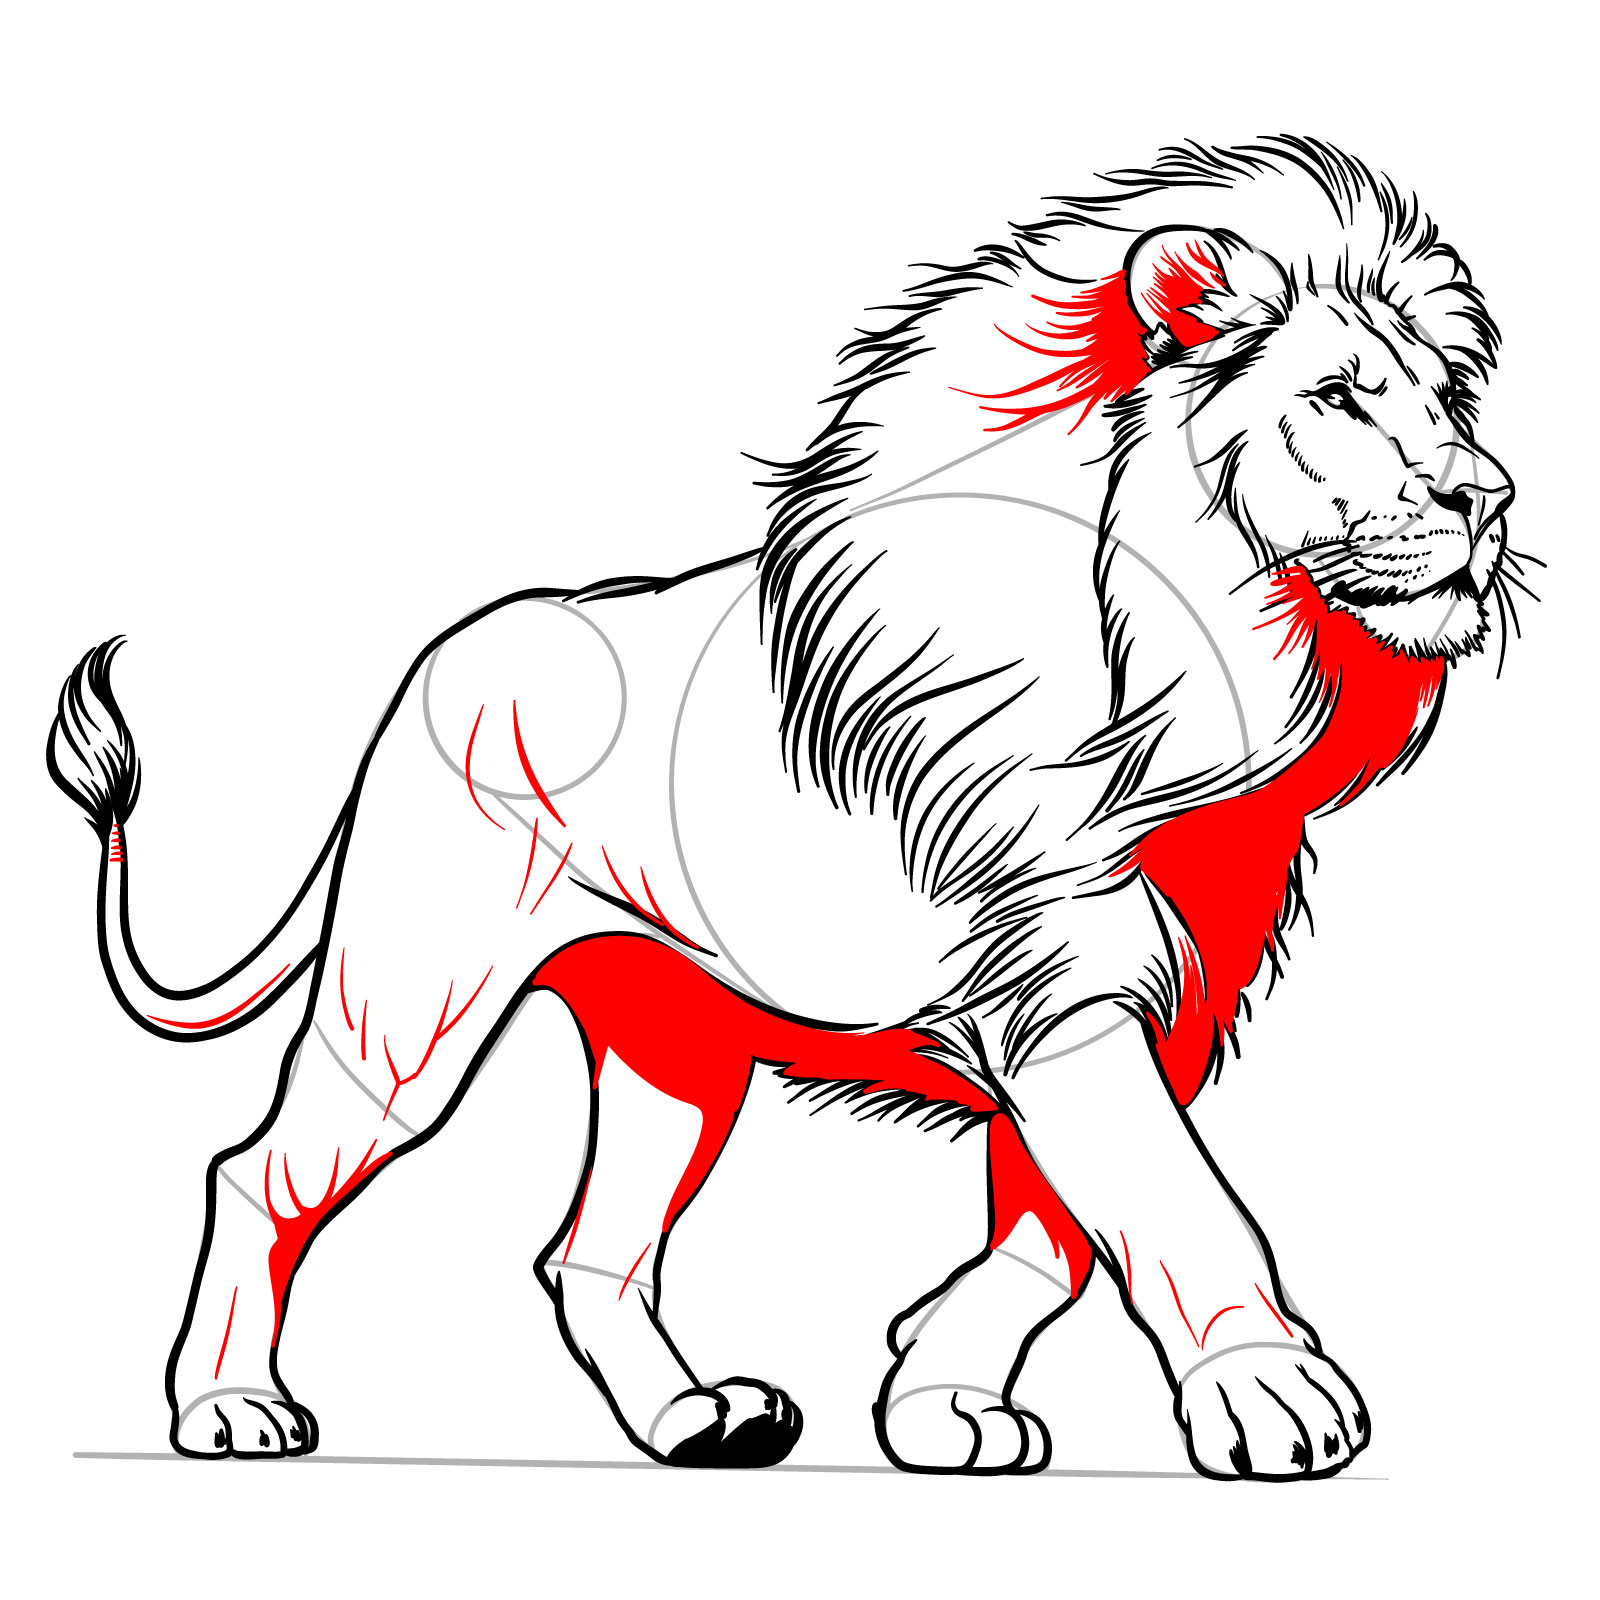
Step 18 – Add more lines to the mane for texture and draw small shadows under the belly and around the legs to suggest the lion’s musculature
Refining the mane and adding subtle details to the lion’s body in your drawing
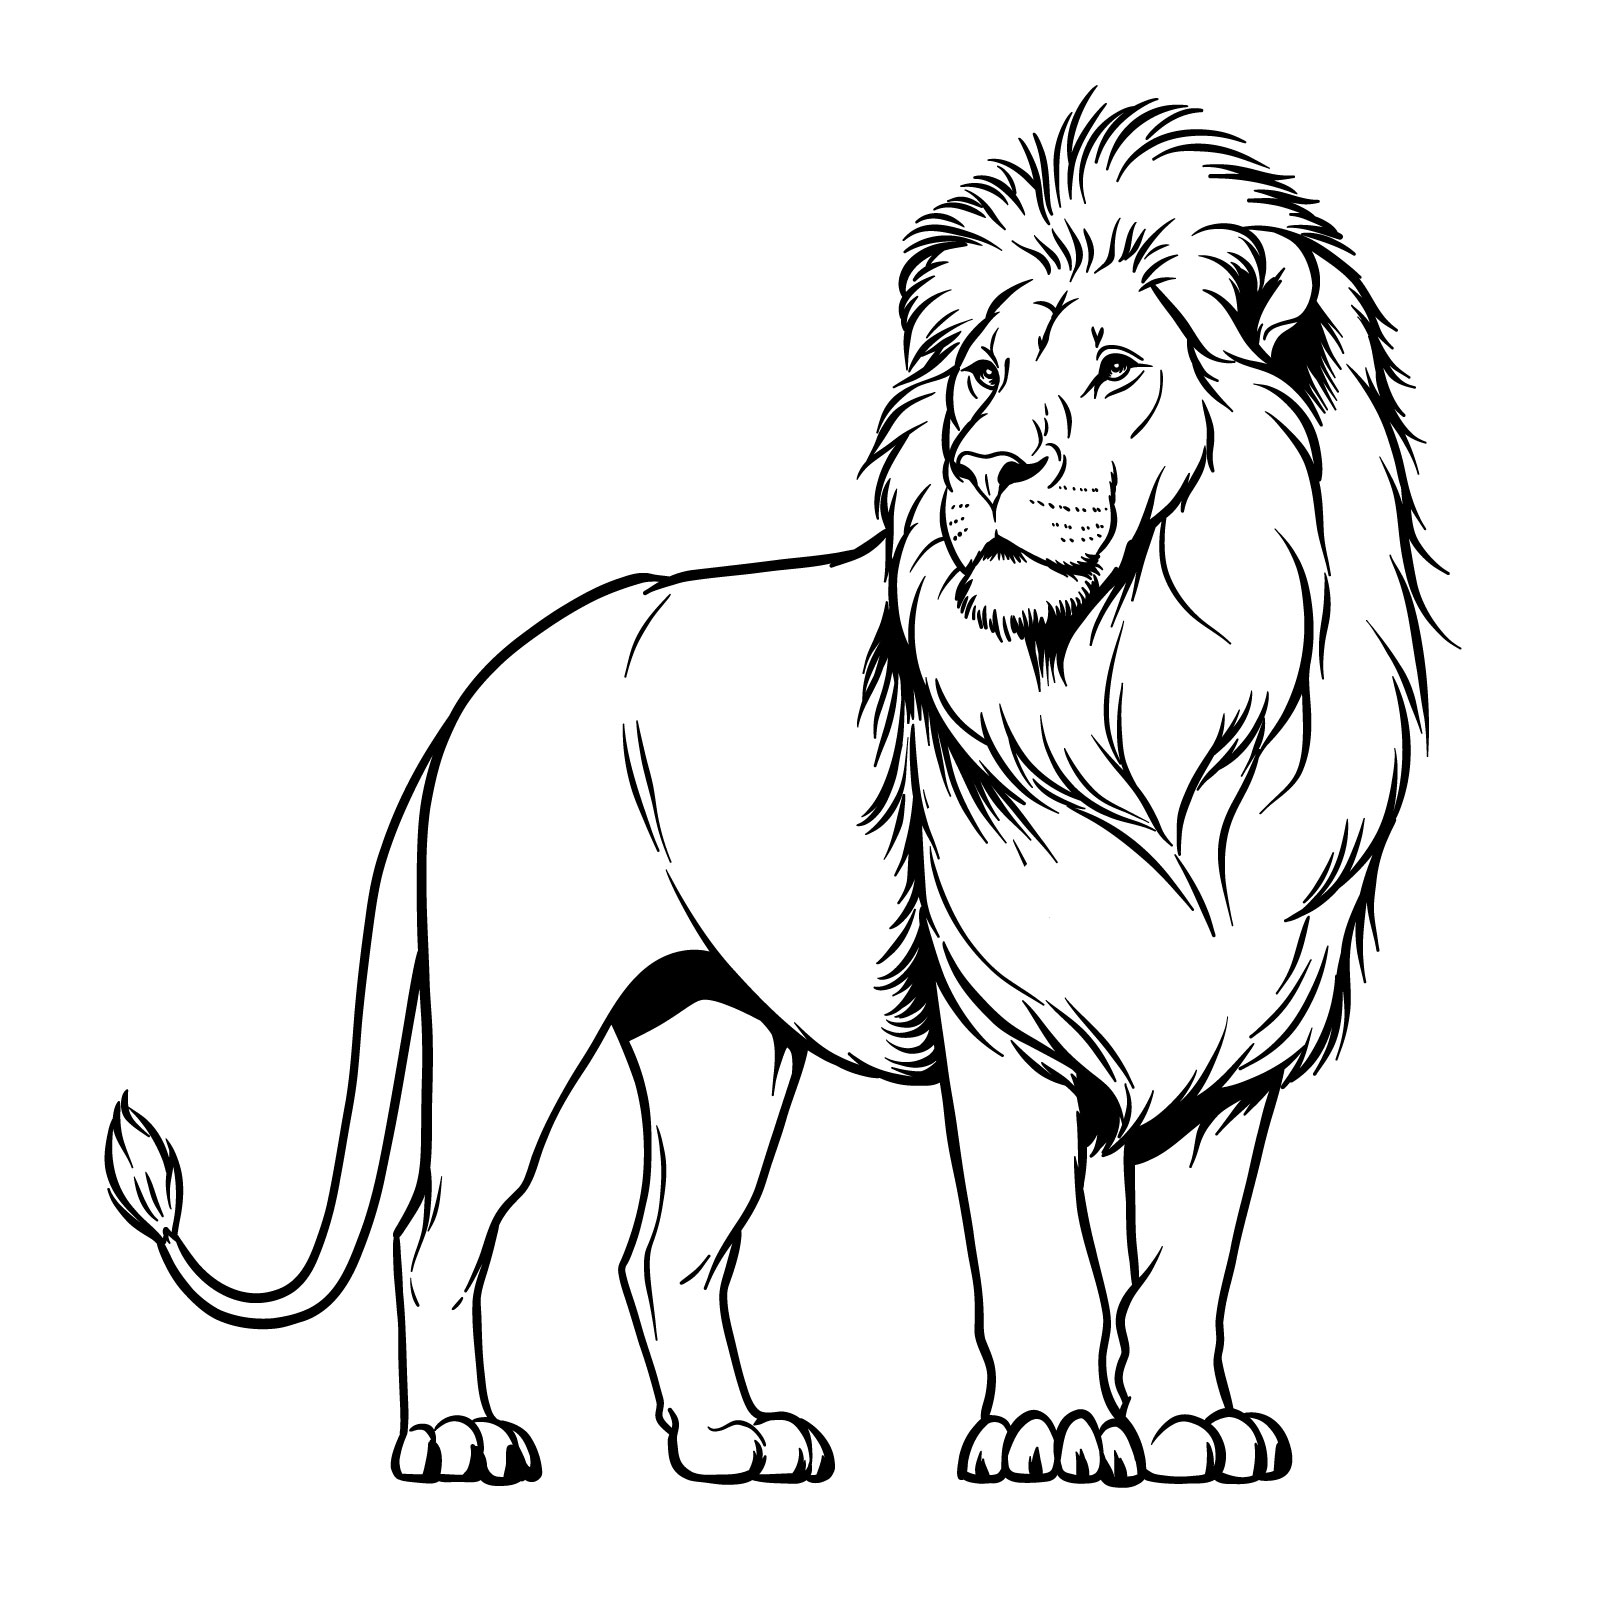
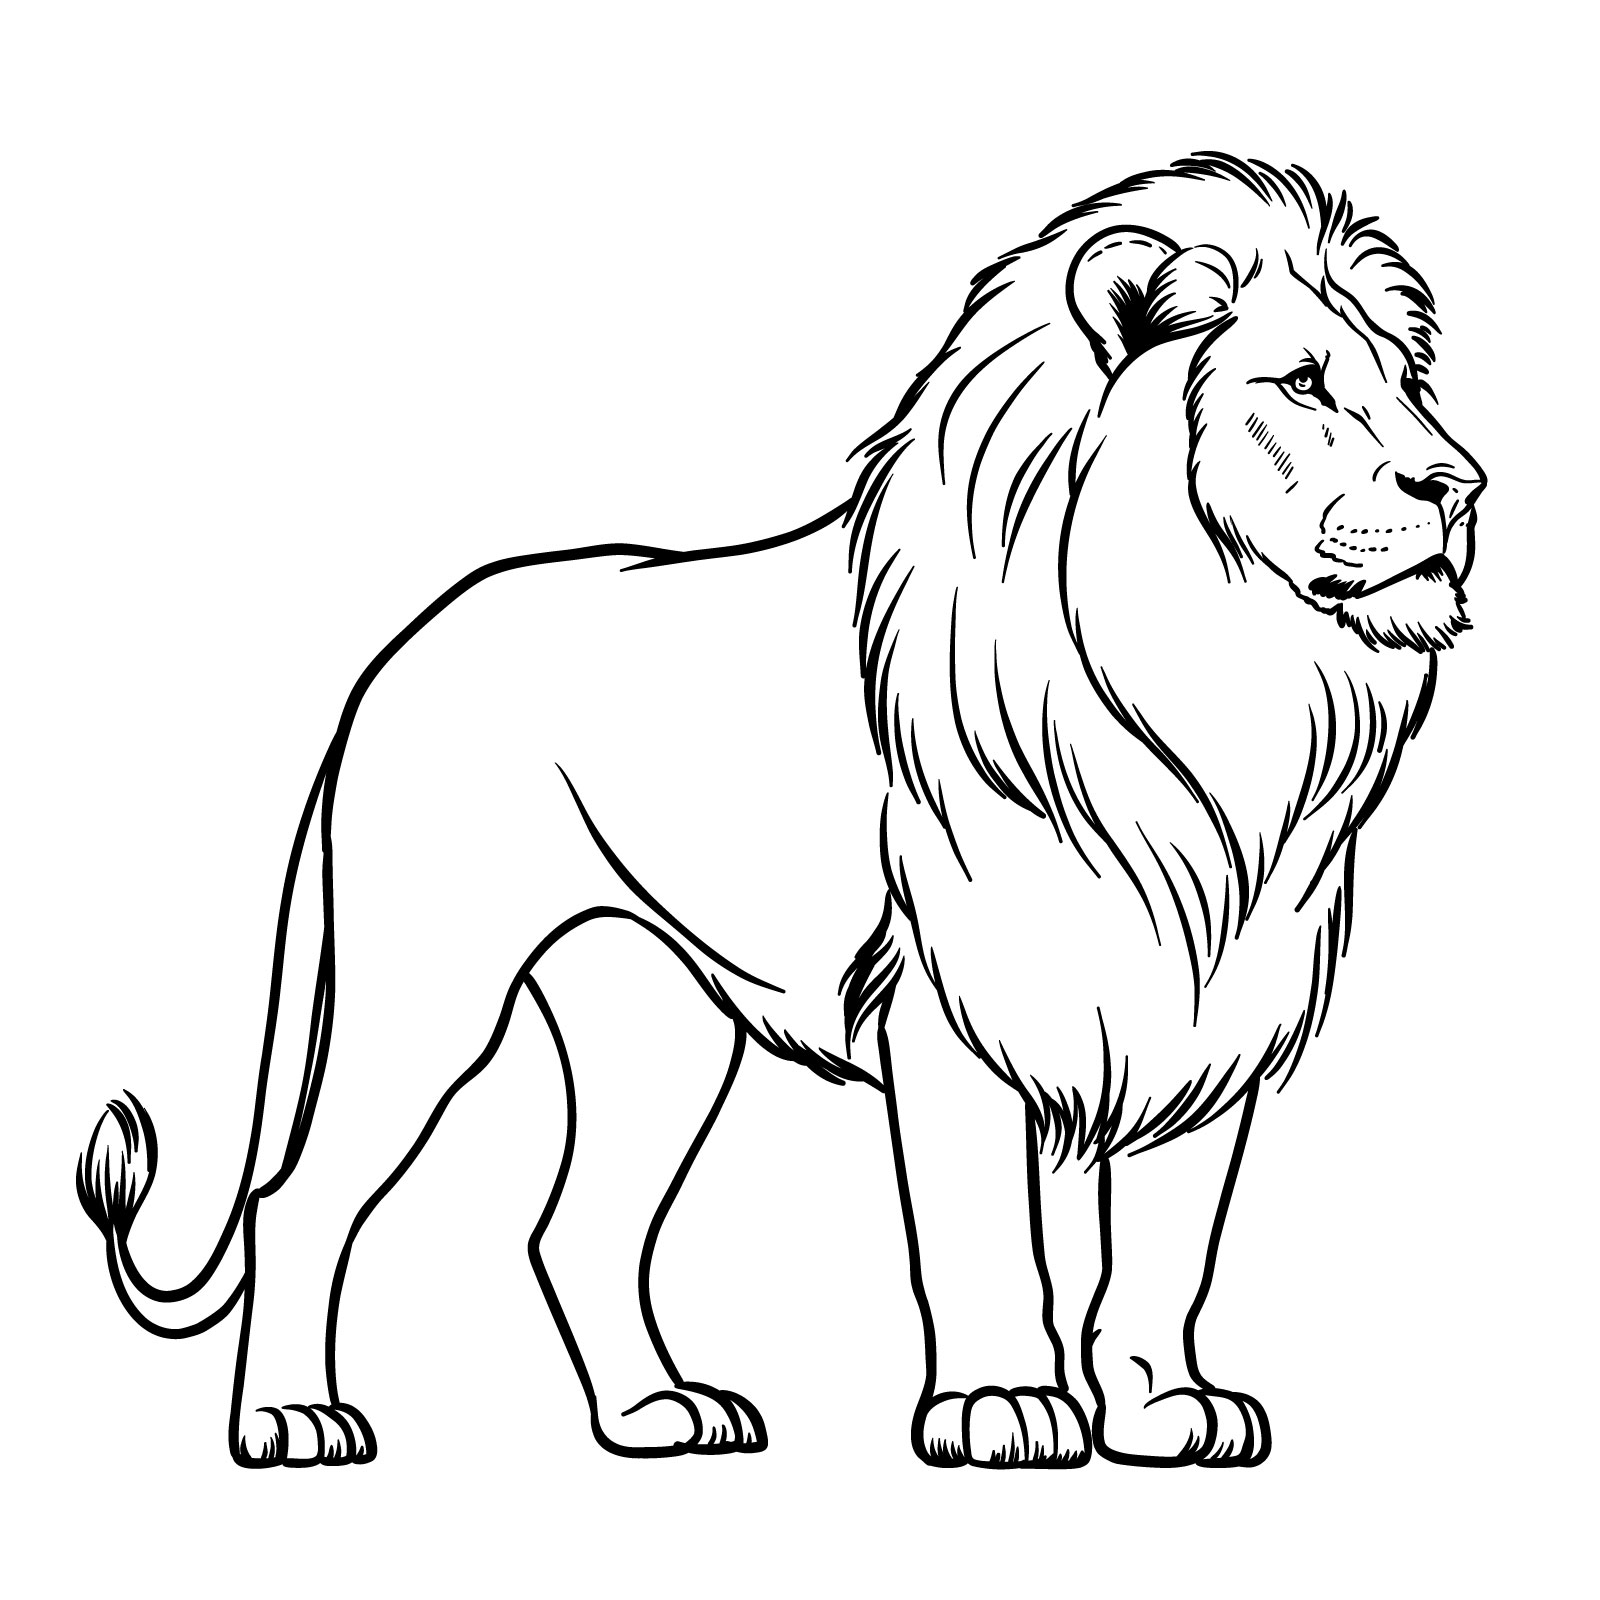
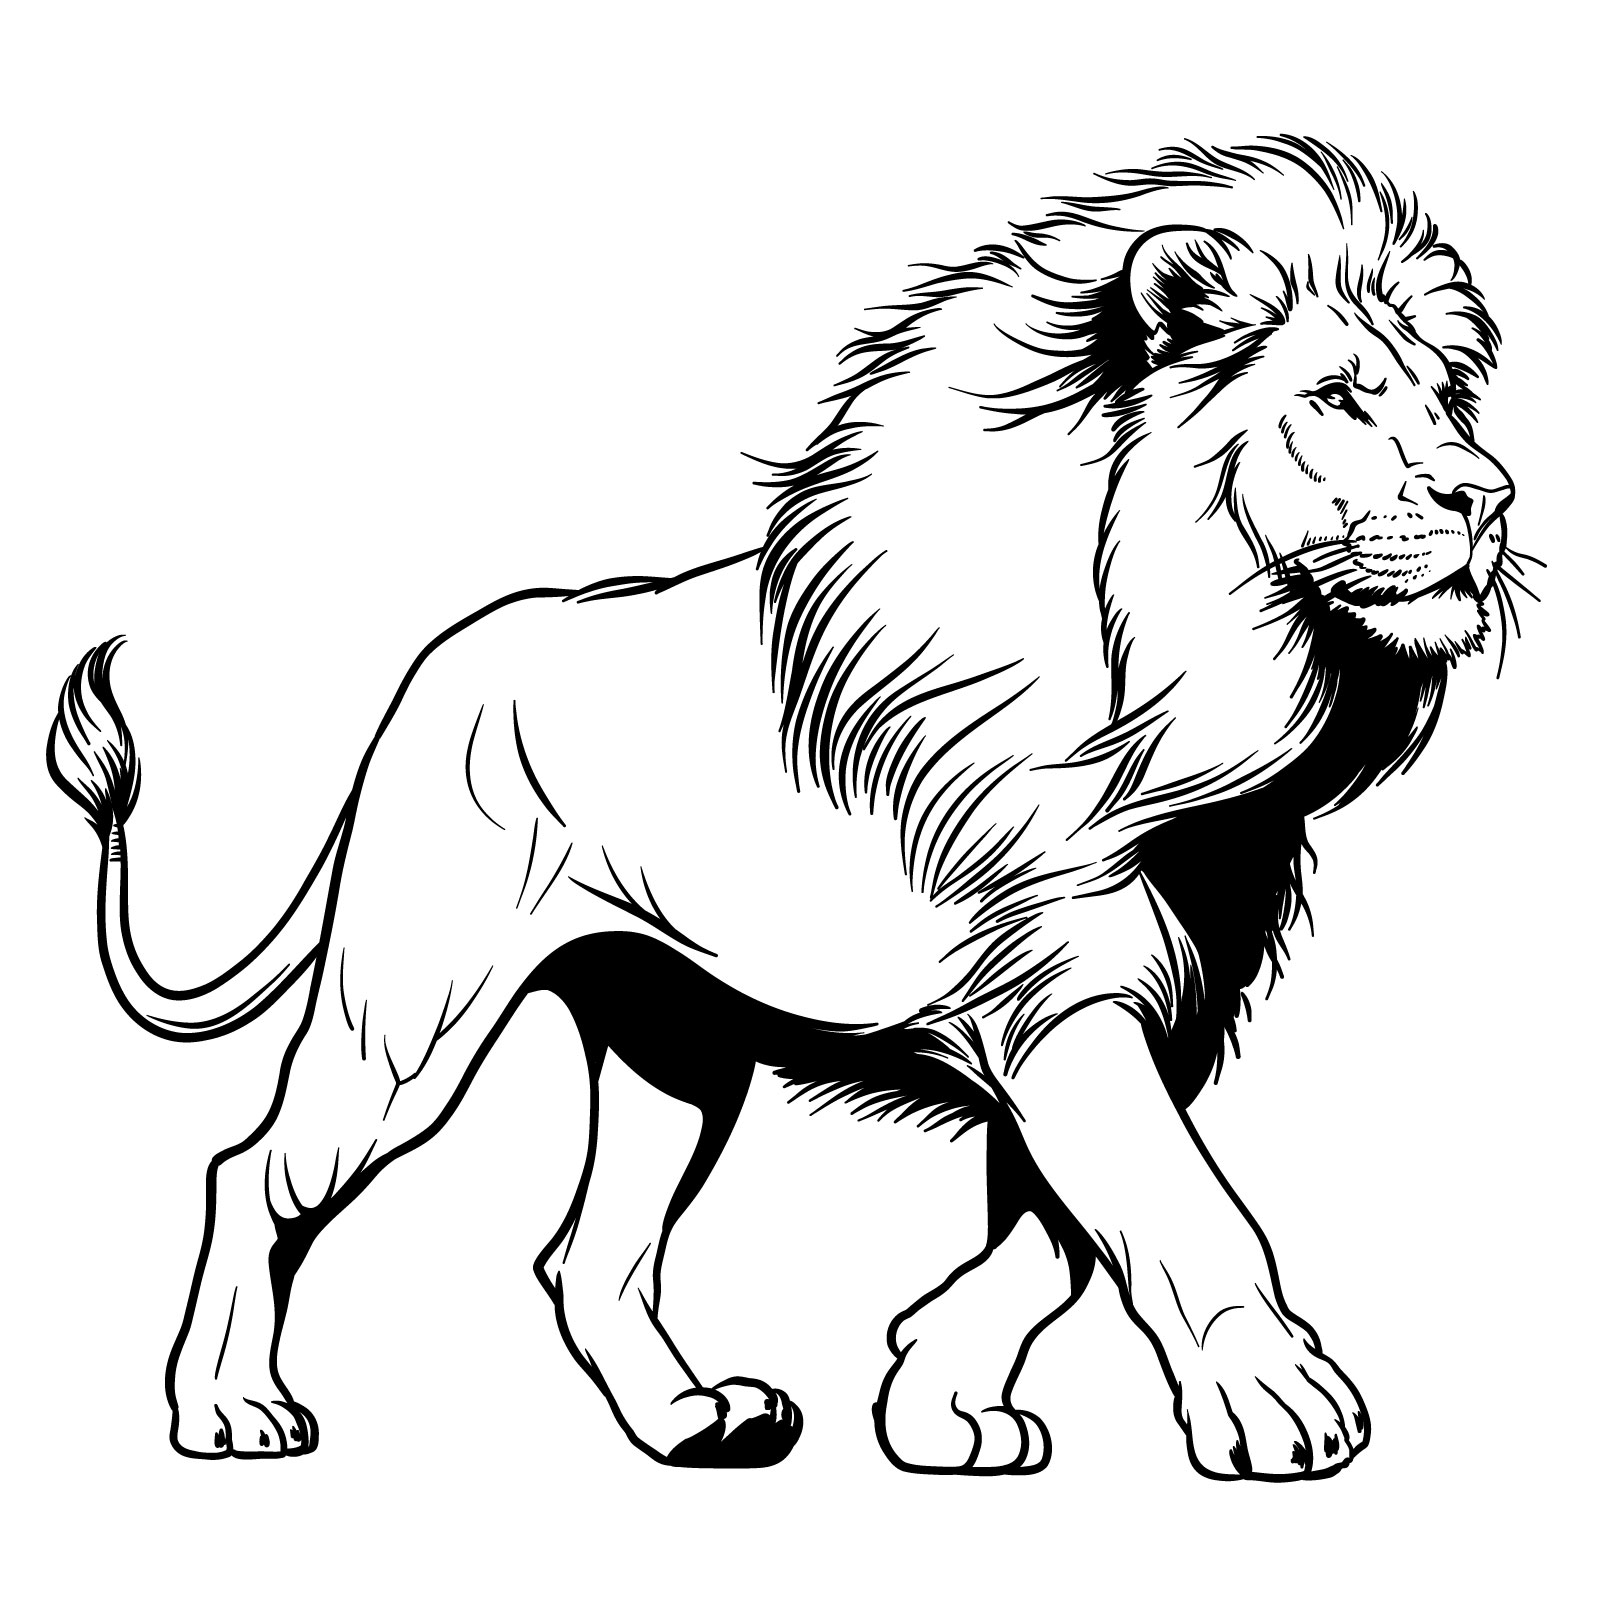
Step 19 – For a finished look, you can either go over the drawing with ink to make the lines stand out or gently erase the basic sketch lines for a clean, polished drawing. Be meticulous to preserve the details and contours you’ve developed through the steps. This final touch will bring clarity and crispness to your standing lion drawing
Finalizing your how to draw a standing lion side view with inking or erasing guidelines
Guide 5: Lion Standing in 3/4 View with Head Turned
How to draw a lion – standing pose, 3/4 view, head turned
Guide five presents a drawing of a lion standing in a 3/4 view, with its head turned. This pose provides some feeling of perspective and depth. In 15 steps, you’ll create the lion’s silhouette and add all the necessary details.
Step 01 – Draw a small circle to outline the head of the lion. Beneath it, slightly to the right, draw a larger circle that will serve as the chest area. Ensure that the circles are aligned for a proper side view stance of the standing lion
Begin your standing lion drawing by sketching two circles, the smaller for the head and larger for the chest
Step 02 – Add to your standing lion drawing by sketching the body’s basic shapes. Draw a shape for the torso, connecting to the chest circle. Sketch the outlines for the front and back legs using straight and curved lines to suggest the lion’s muscular build. For the face features – use the “U” shape, you should be familiar with from the guides above
Continue shaping your standing lion with the addition of body and leg structures
Step 03 – Within the head circle, draw the eyes of the lion using the “U” shape guide for placement. Above the eyes, sketch the upper part of the nose, ensuring it is centered between the eyes for a balanced look in your standing lion drawing
Start sketching the eyes and nose
Step 04 – Create the detailed outline of the lion’s nose. Beneath the nose, draw two curved lines for the mouth, giving your standing lion a distinctive expression. Pay attention to the curves that define the nose’s shape and nostrils
Shape the nose and mouth to bring expression to your standing lion drawing
Step 05 – Outline the mouth area and chin of the lion, and the face frame following the curve of the initial head circle. Use short jagged lines to suggest the texture of fur, shaping the overall frame of the lion’s face
Define the mouth area and chin, using the initial head circle as a guide
Step 06 – Add whisker marks and additional facial details to your standing lion in 3/4 drawing. These small touches will add realism to the lion’s face
Enhance the facial details of your lion with whisker marks and other features
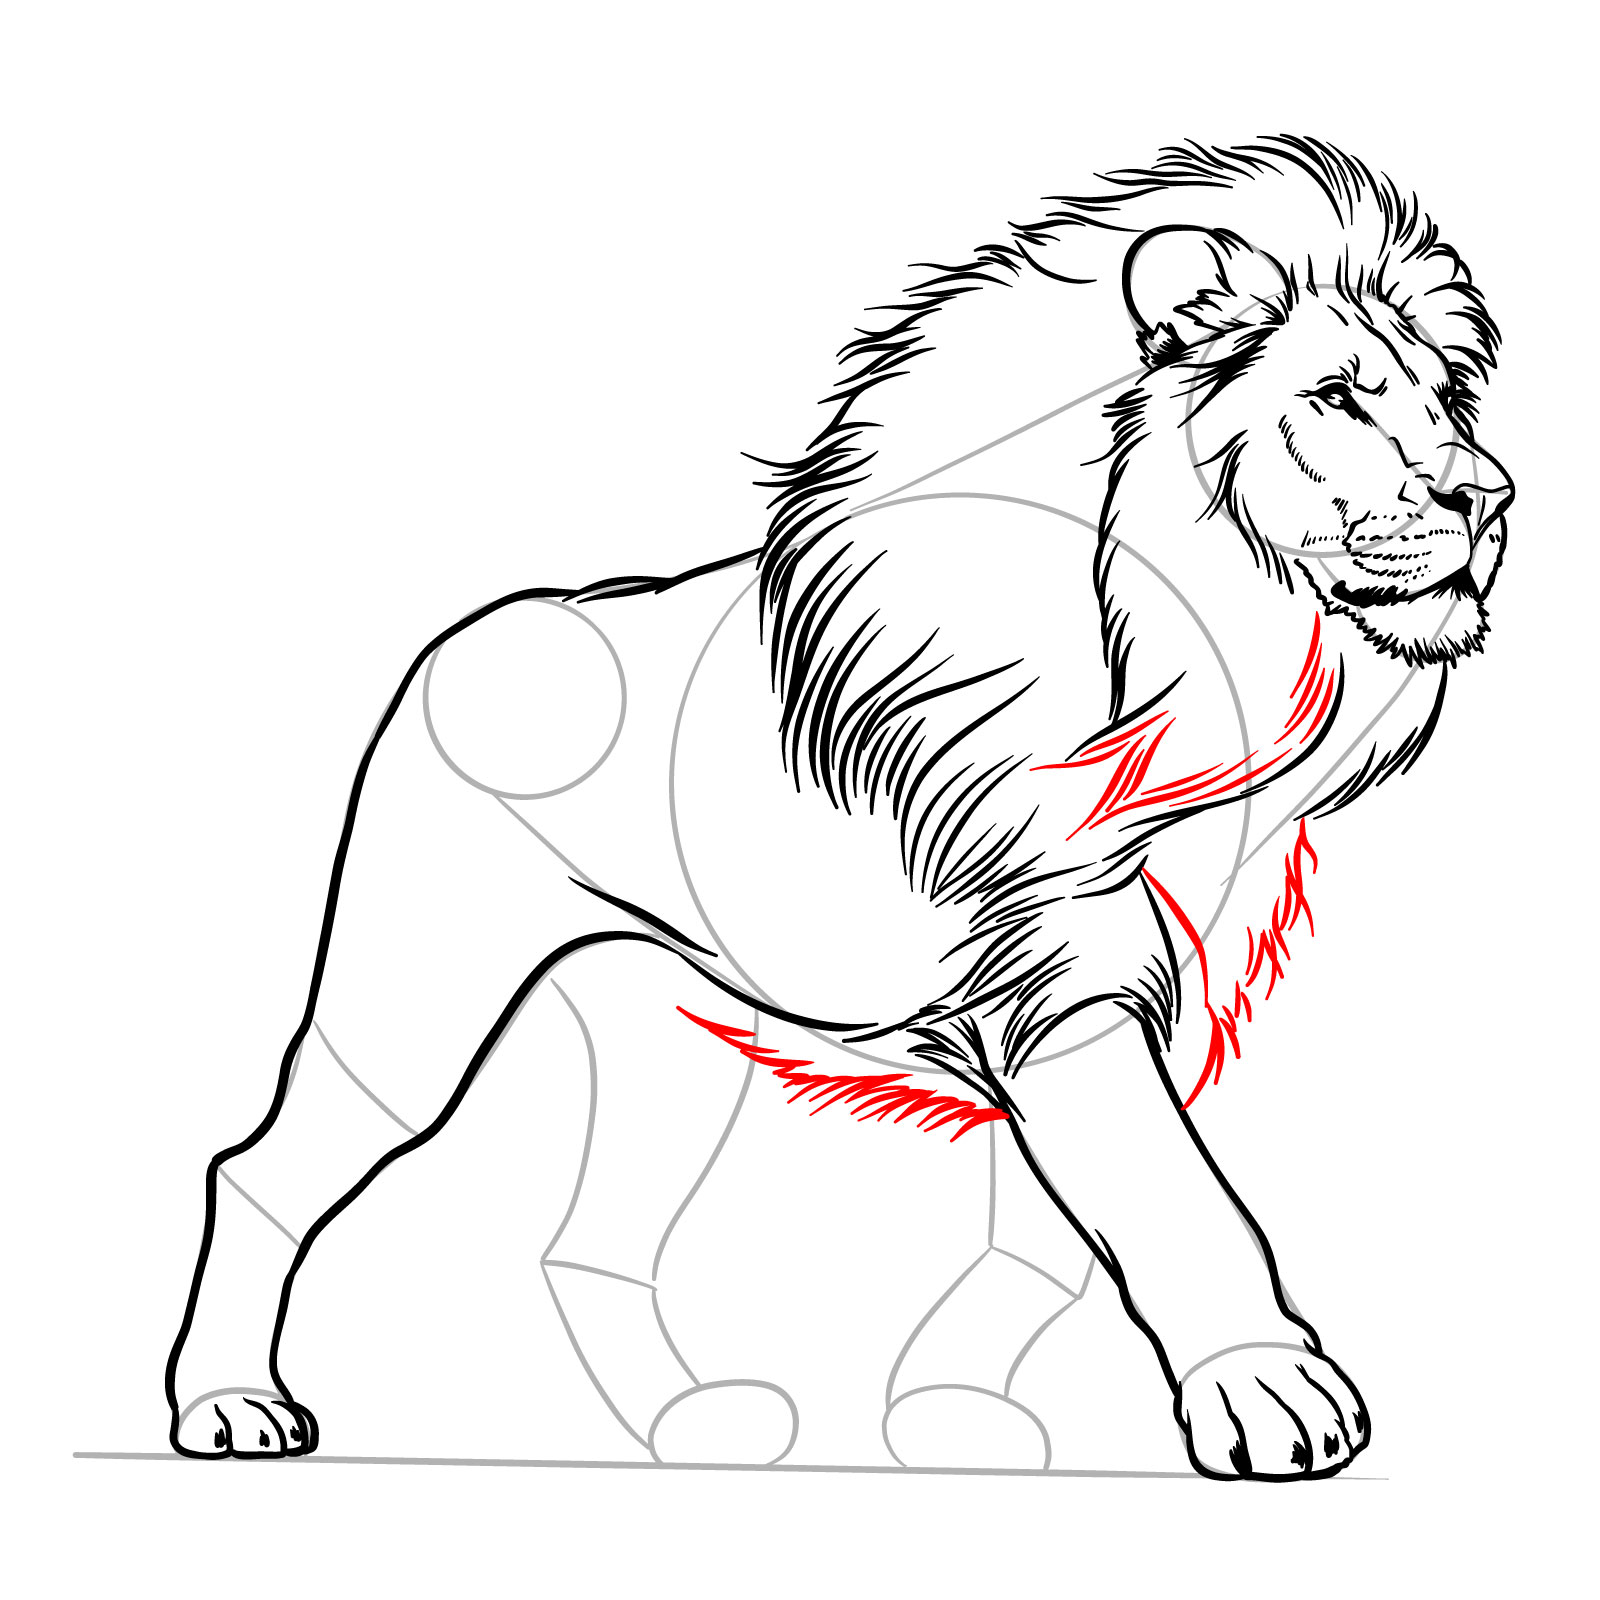
Step 07 – Sketch the outline of the lion’s mane with numerous short lines around the head. These lines represent the fur and should be drawn to form a full and natural-looking mane
Begin outlining the mane with short lines to suggest fur
Step 08 – Draw the lion’s ear peeking from the mane on the head’s upper side. Then, add a second layer of jagged lines around the mane for fullness and depth, creating a more realistic portrayal of the lion’s thick mane
Add depth to your standing lion’s mane by sketching the ear and an additional layer of fur
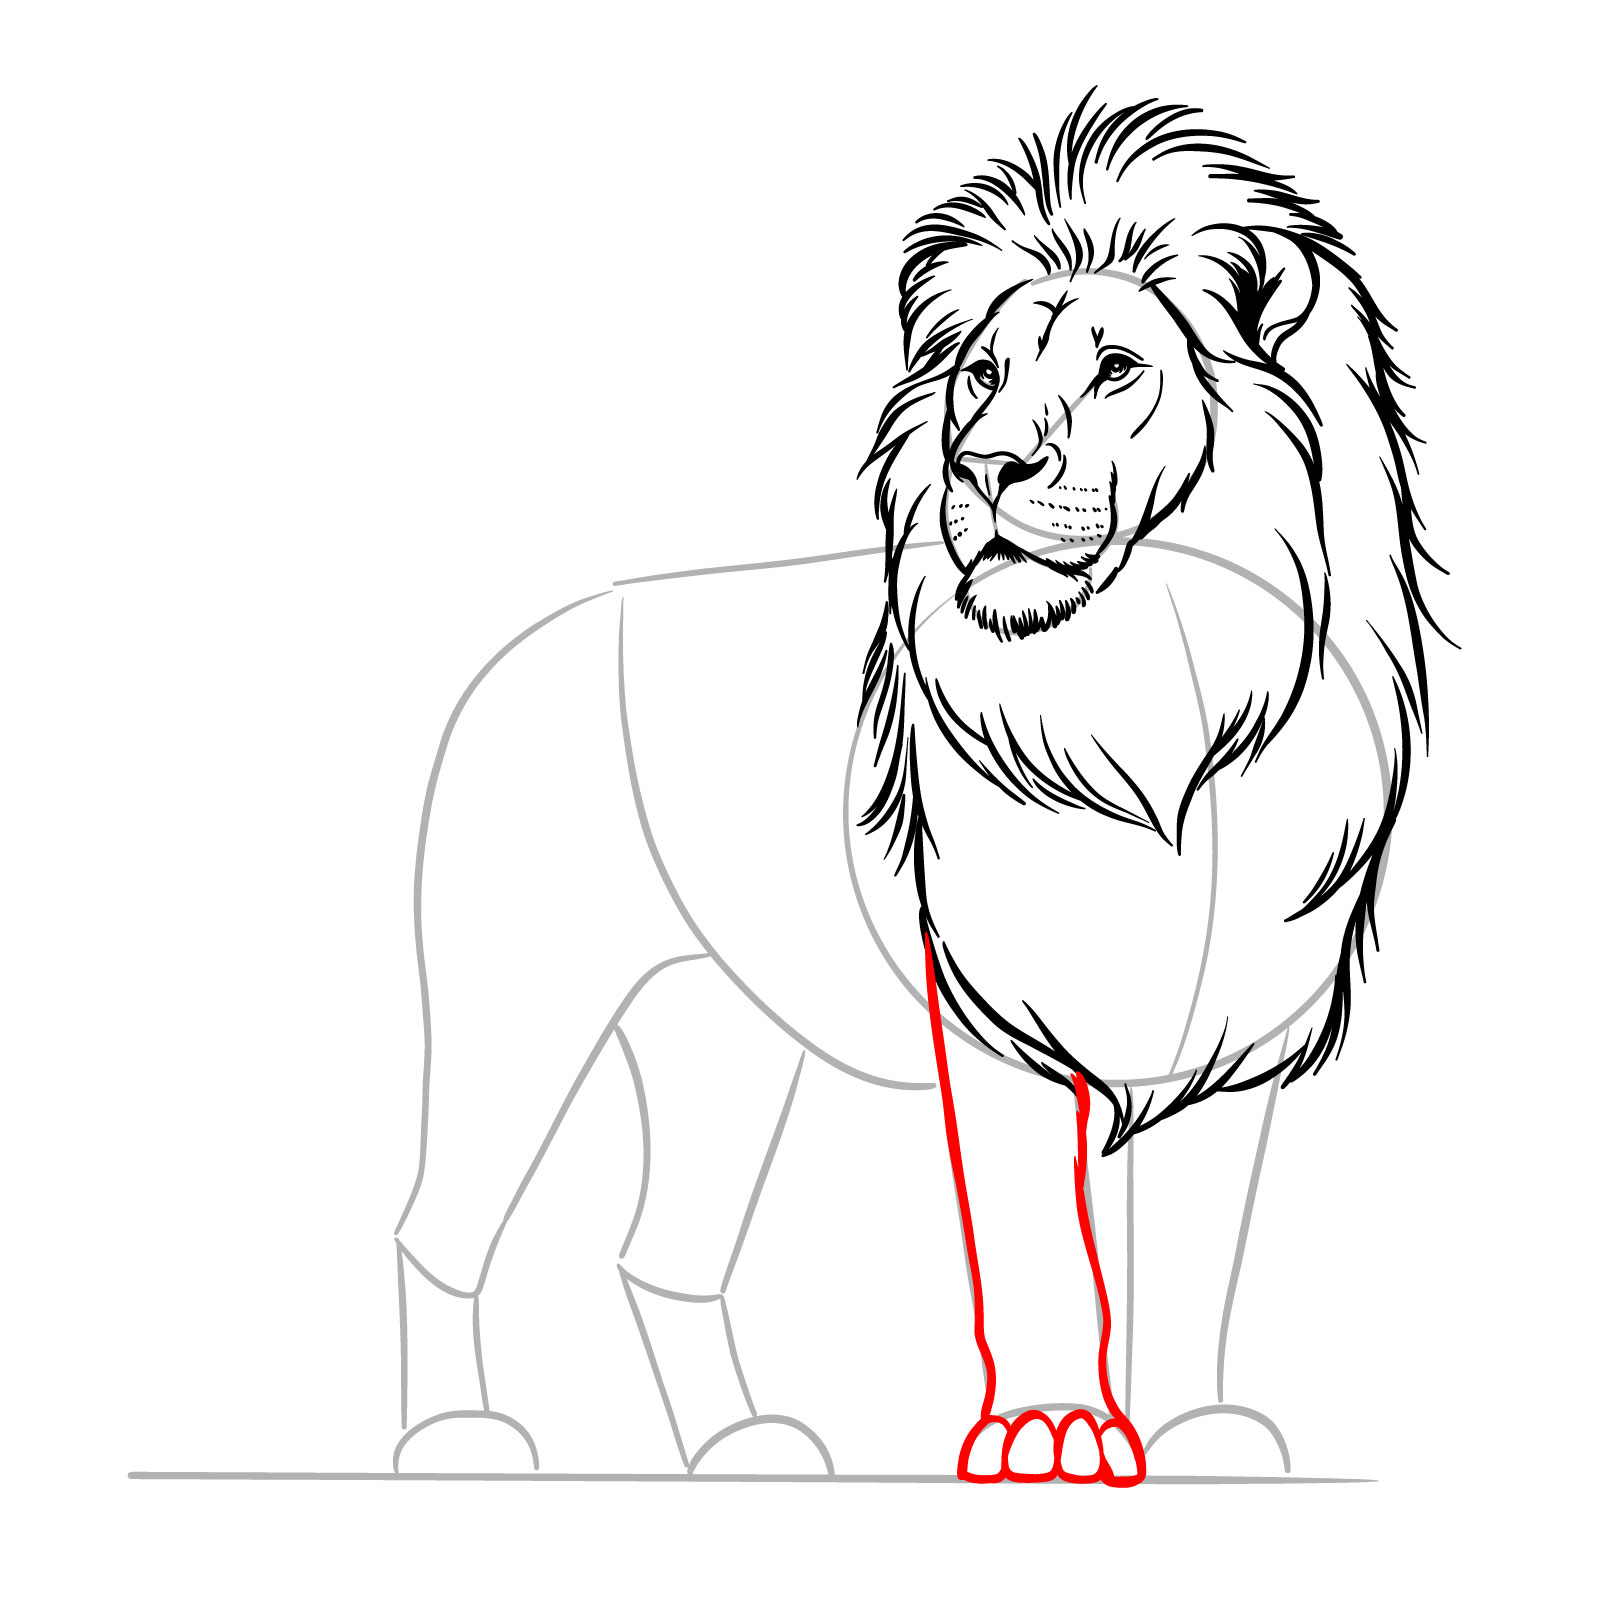
Step 09 – Draw the first front leg of the lion with two vertical lines for the limb, and add the paw at the bottom with curved lines for the toes
Sketch the first front leg and paw of the lion to establish its standing posture
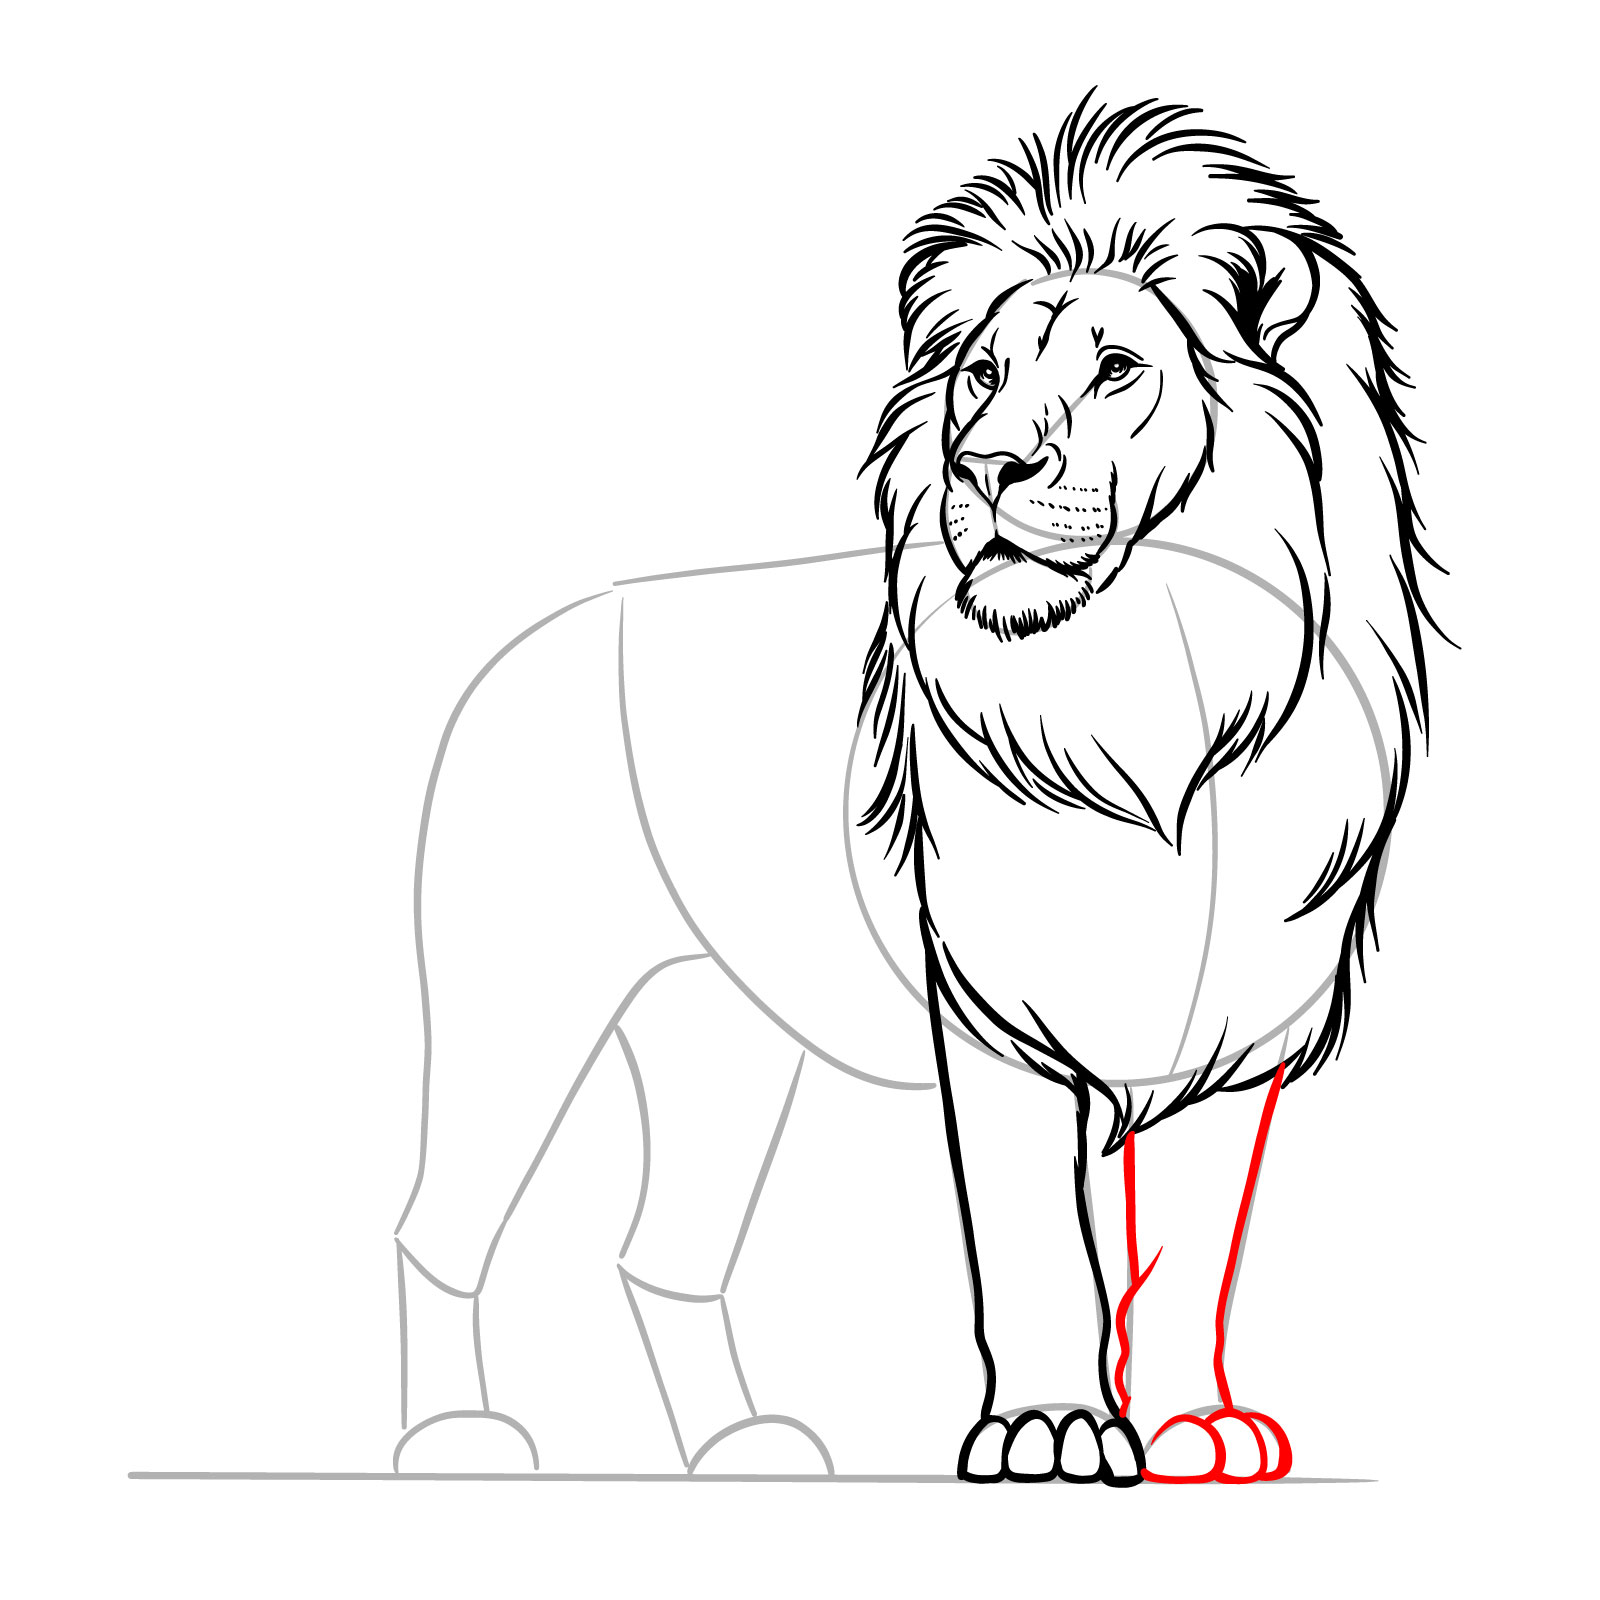
Step 10 – Create the second front leg, mirroring the first. Start with two lines down from the chest and shape the paw at the end, making sure it aligns with the first for a balanced look
Add the second front leg
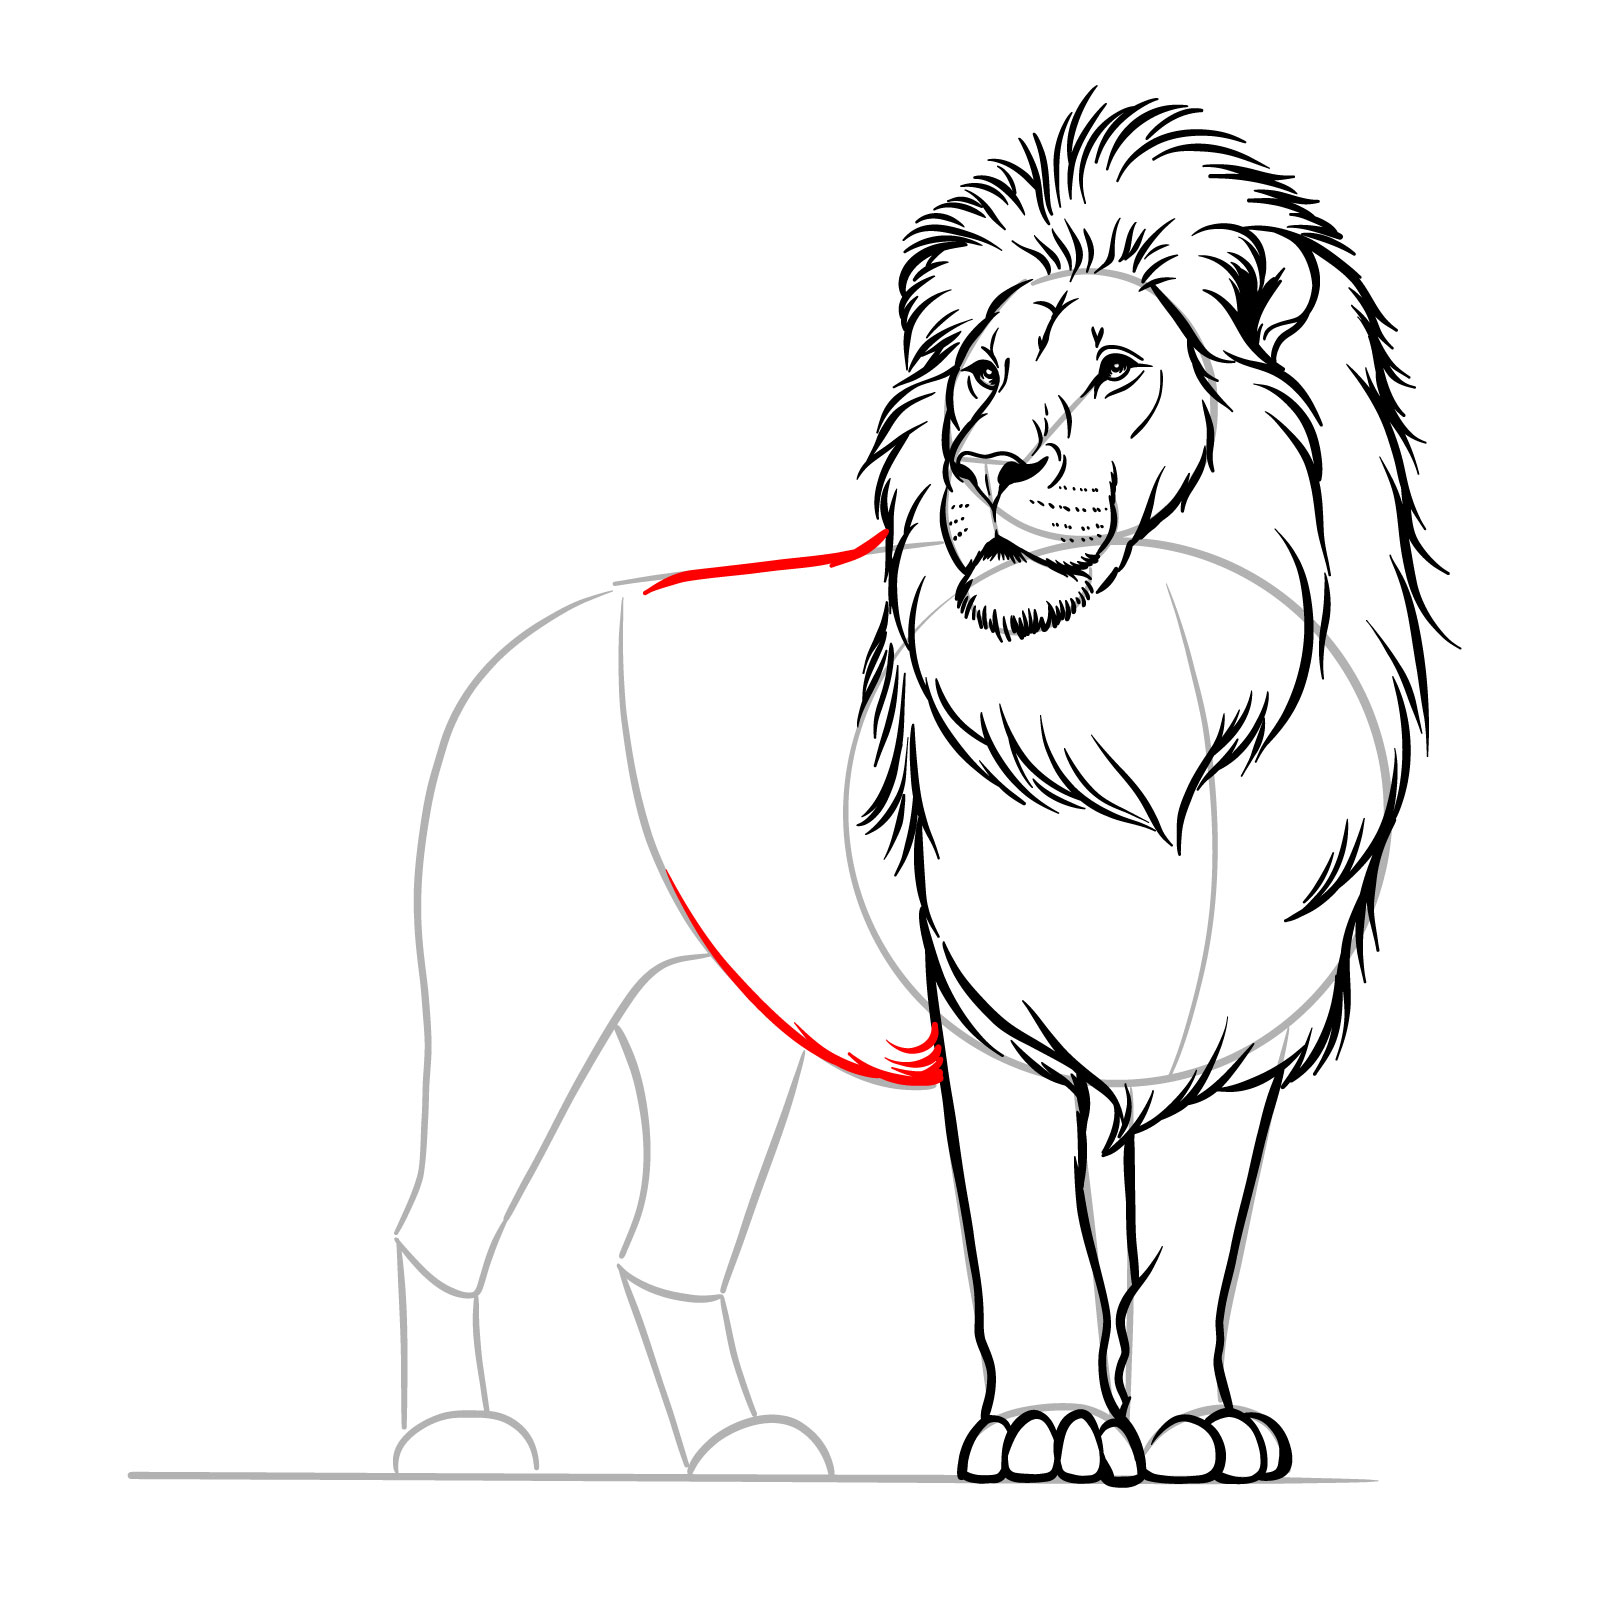
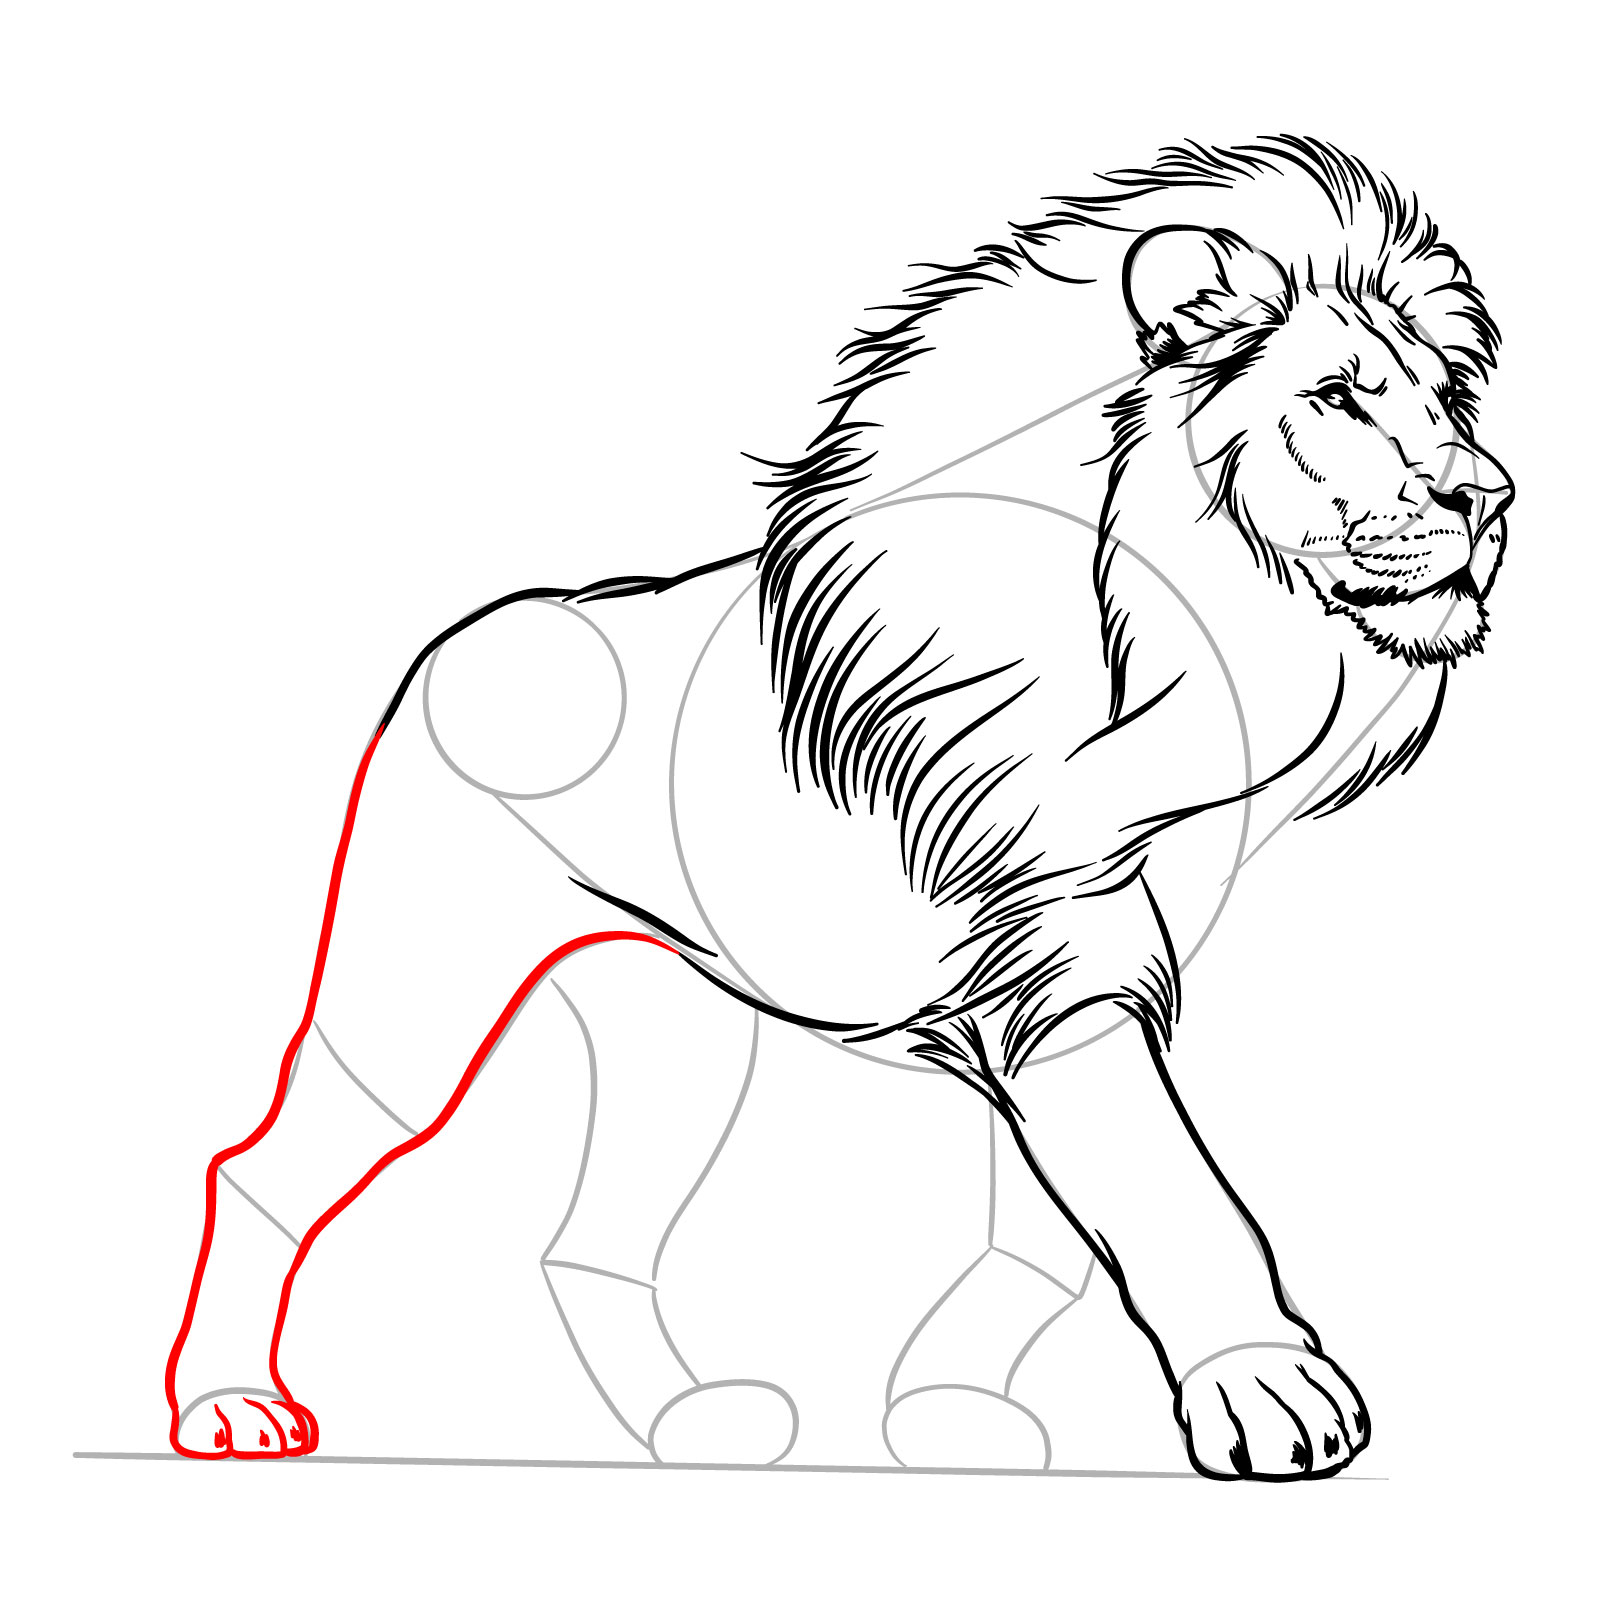
Step 11 – Sketch the lion’s back by drawing a slightly curved line from the mane to the rear. Then, add a gentle curve under it to suggest the belly, connecting to where the back leg will be
Define the middle body of your lion by drawing the back and belly outline
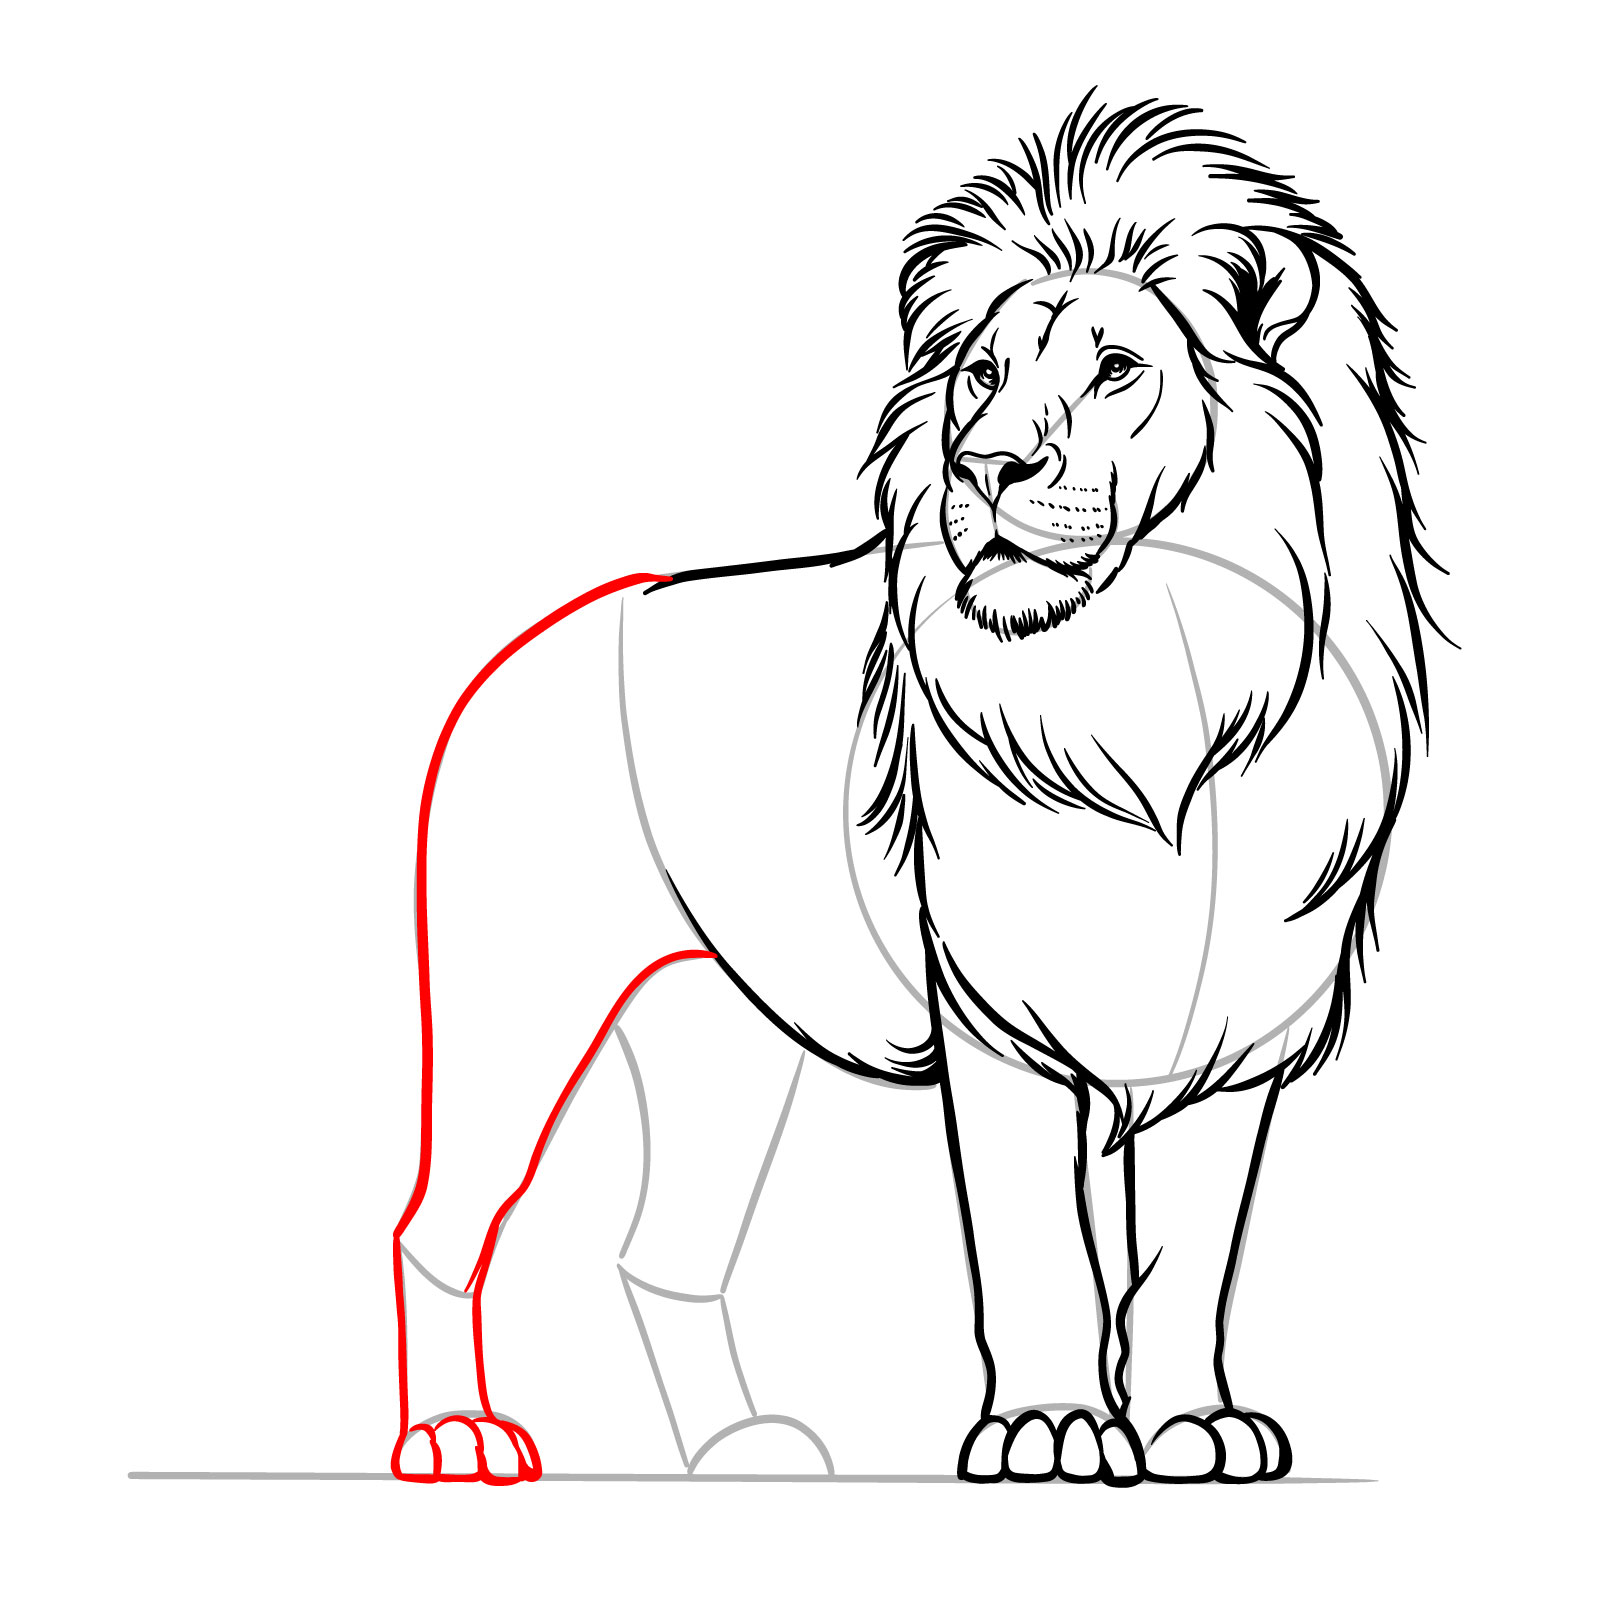
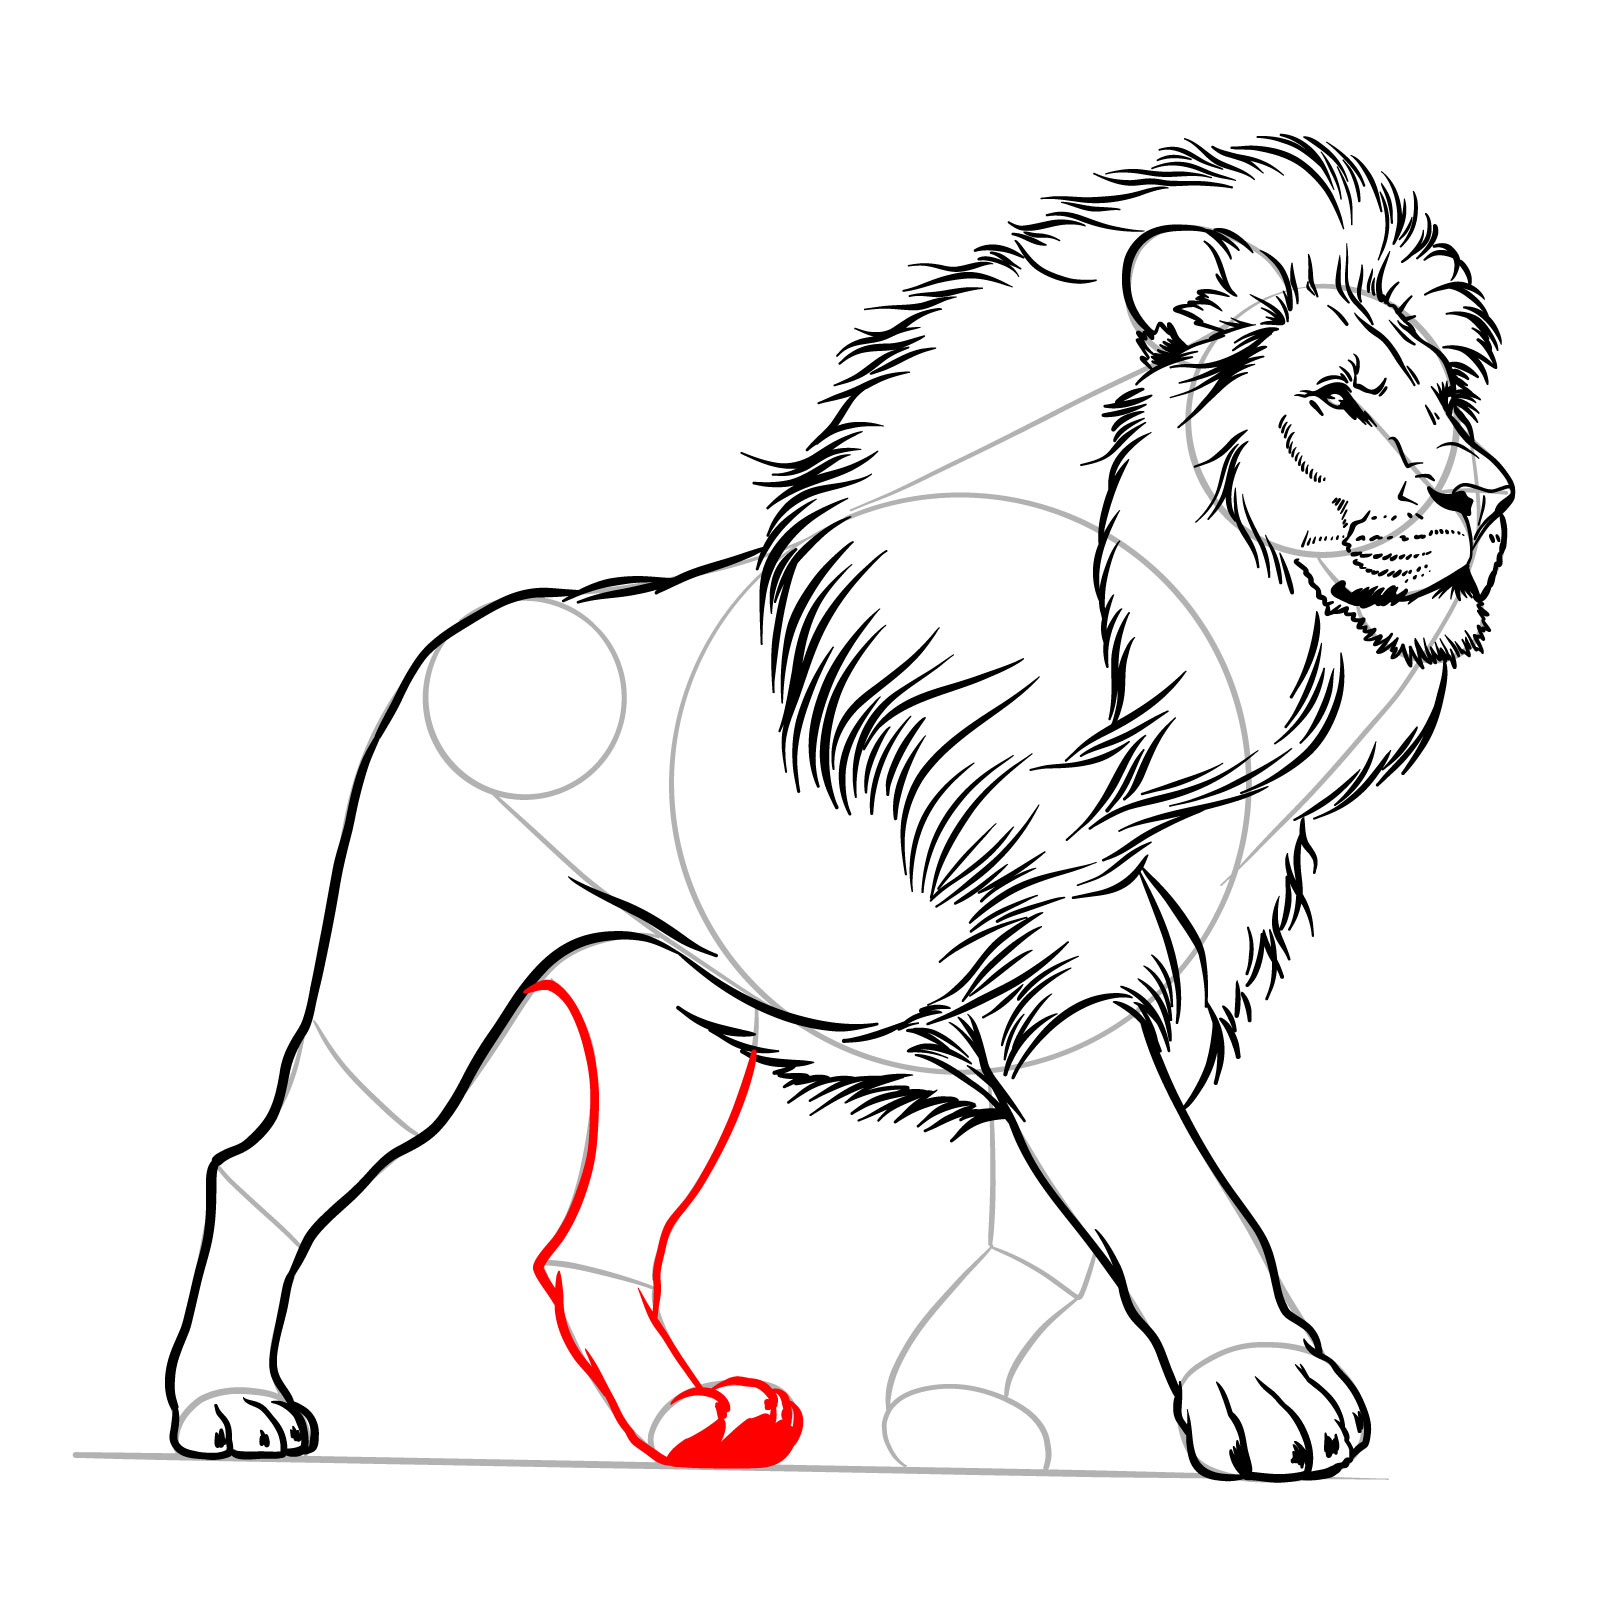
Step 12 – Continue the lion’s body outline by extending the belly line towards the hind leg and draw the right rear leg with two lines for the limb, ending in a rounded paw
Illustrate the right rear leg
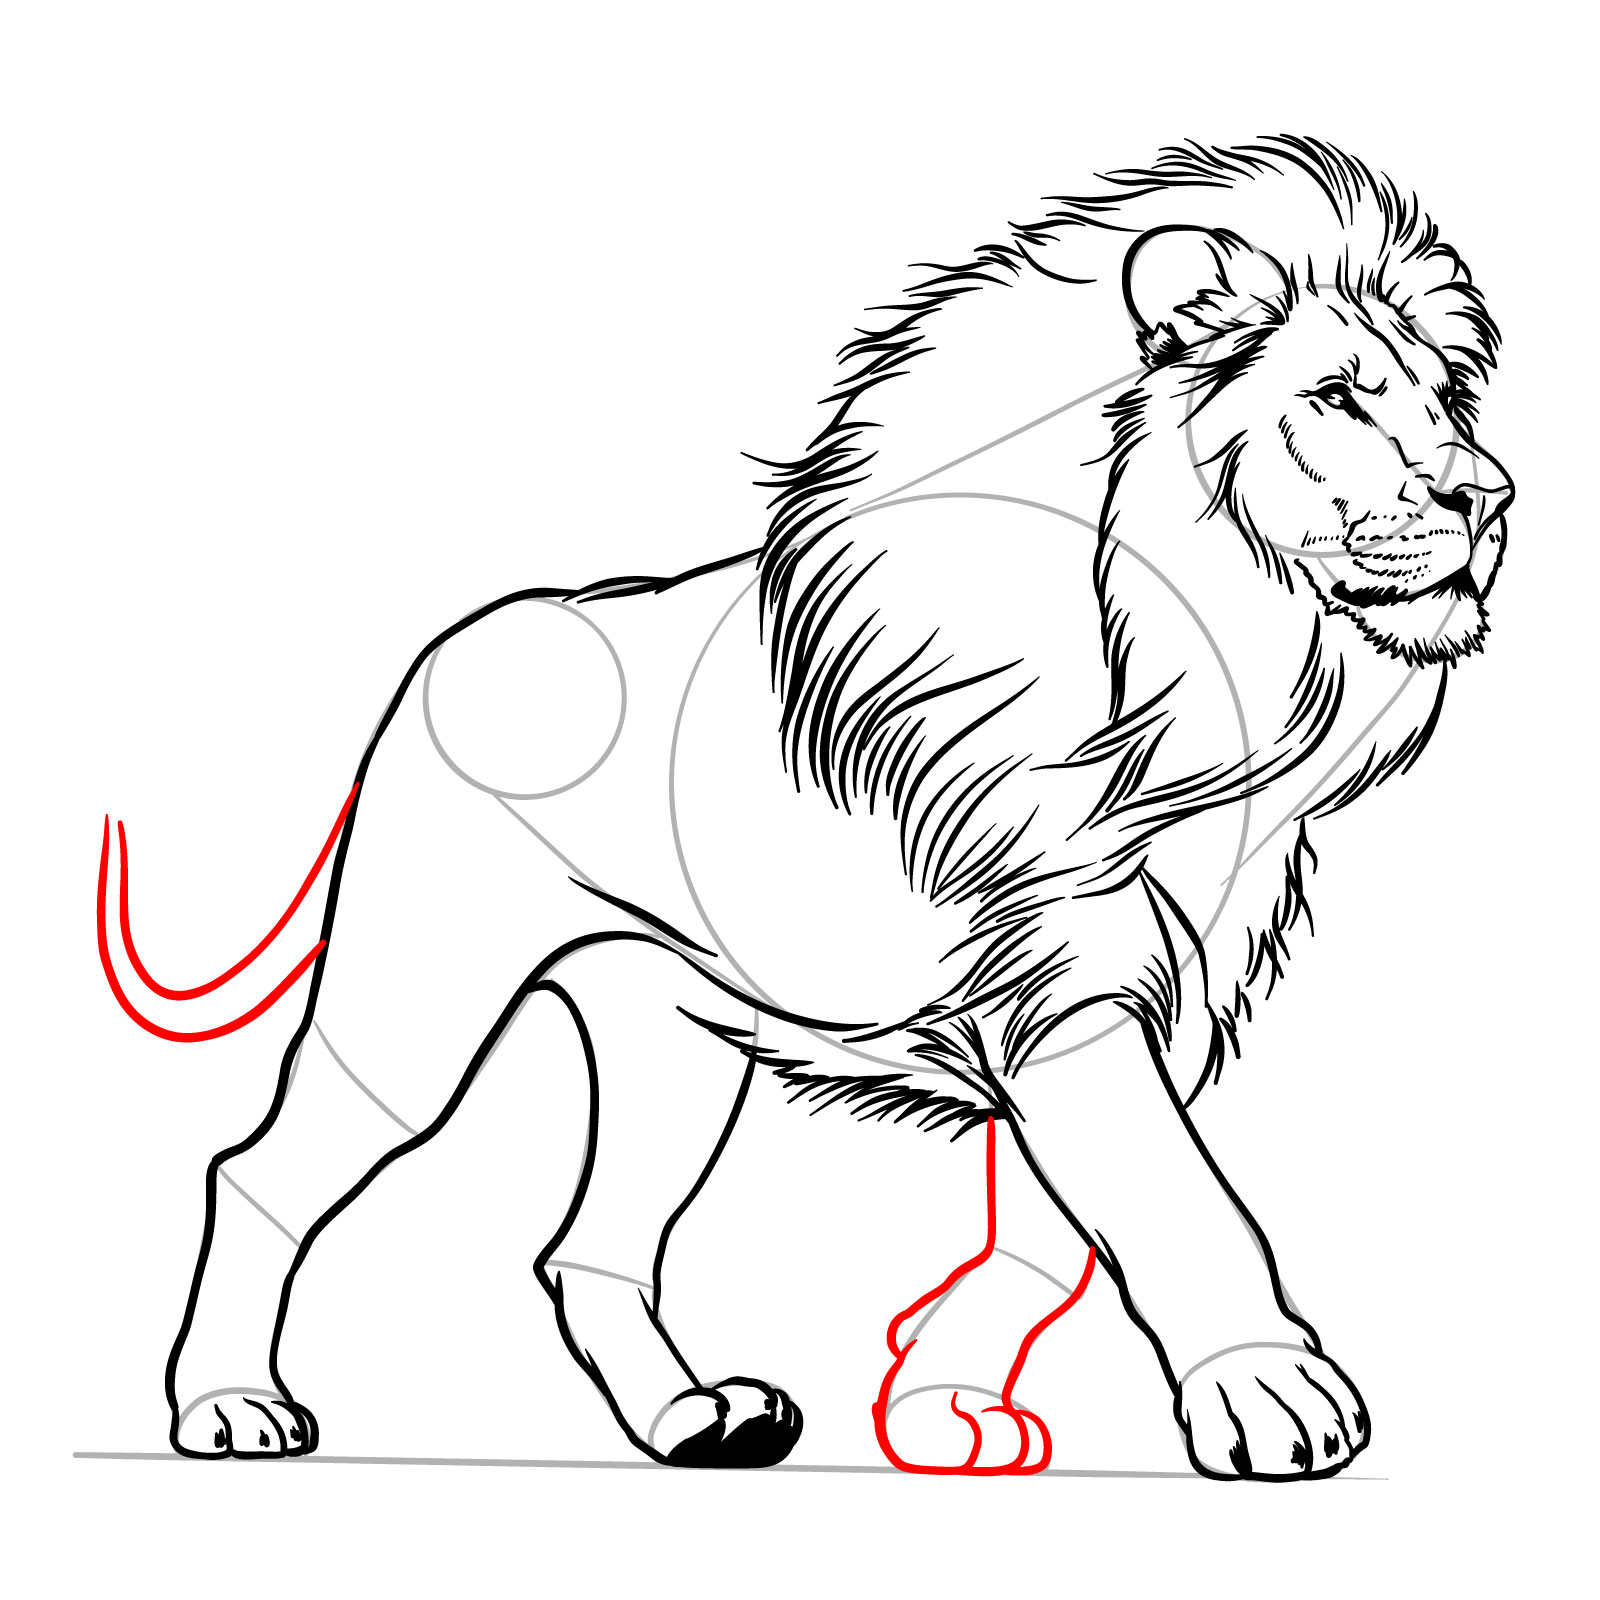
Step 13 – Draw the second rear leg with appropriate bends at the joints and a paw that matches the other rear leg. Add long, curving lines from the backside to create the tail with a tuft at the end
Sketch the second rear leg and the lion’s tail to bring your drawing closer to completion
Step 14 – Add small details such as fur texture, claws, and define the muscles with subtle lines. Apply soft shading to areas like the mane, underbelly, and legs to give the drawing more depth. Just wanted to remind you, that to create these tutorials, I use only bold colors. That’s why the shading is closer to a comic book style. But feel free to add shades in the way you want, that’s completely fine
Enhance your lion drawing by adding small details and shading for dimension
Step 15 – Gently erase the basic sketch lines and any extraneous marks to reveal your finished standing lion drawing. For a more defined look, you can opt to ink your sketch with a fine pen
Clean up your lion sketch by erasing the guide lines for a polished drawing
Guide 6: Standing Lion in 3/4, Looking Forward
Sketch of a lion – still in 3/4 and standing, but looking forward
Now, for the sixth guide, we’re moving to a standing lion in a 3/4 view, but this time with its head facing forward. Over 14 steps, you’ll see how a slight change in direction of the lion’s gaze can alter the drawing’s impact. This step-by-step guide will show you how to draw the lion’s mane, body, and tail, keeping the head aligned with the pose.
Step 01 – Start with a circle for the head, positioned on the upper right part of your drawing area. Below and to the left of this circle, draw a large circle for the lion’s torso, and add a small circle to the left to represent the rear part of the body. Connect these circle to for the body as shown below
Begin drawing another lion with the head facing forward by placing three key circles for the body structure
Step 02 – Starting inside the head circle, draw the familiar “U” shape with two smaller circles at each end to indicate the lion’s eyes position, with the bottom of the “U” suggesting the top of the nose. Sketch the ear on top of the head and add lines to define the leg shapes
Map the facial features using a “U” shape and add ear and leg structures
Step 03 – Draw the lion’s mouth starting below the bottom of the “U” shape, extending downward and curving around to define the upper jaw
Outline the lion’s mouth
Step 04 – Sketch the chin under the mouth line and refine the nose shape at the bottom of the “U”. Add some shading to the mouth to give it depth and dimension
Add details to the chin and nose and begin shading the mouth
Step 05 – In the eye circles, draw the lion’s eyes, adding the pupils and reflections for a realistic look. Connect the left eye with a line over the left side of “U” to create the nose bridge
Sketch the eyes and nose bridge
Step 06 – Using short lines, create the fur outline of the lion’s face, giving it texture and a natural appearance
Outline the face frame using short lines to suggest the lion’s fur
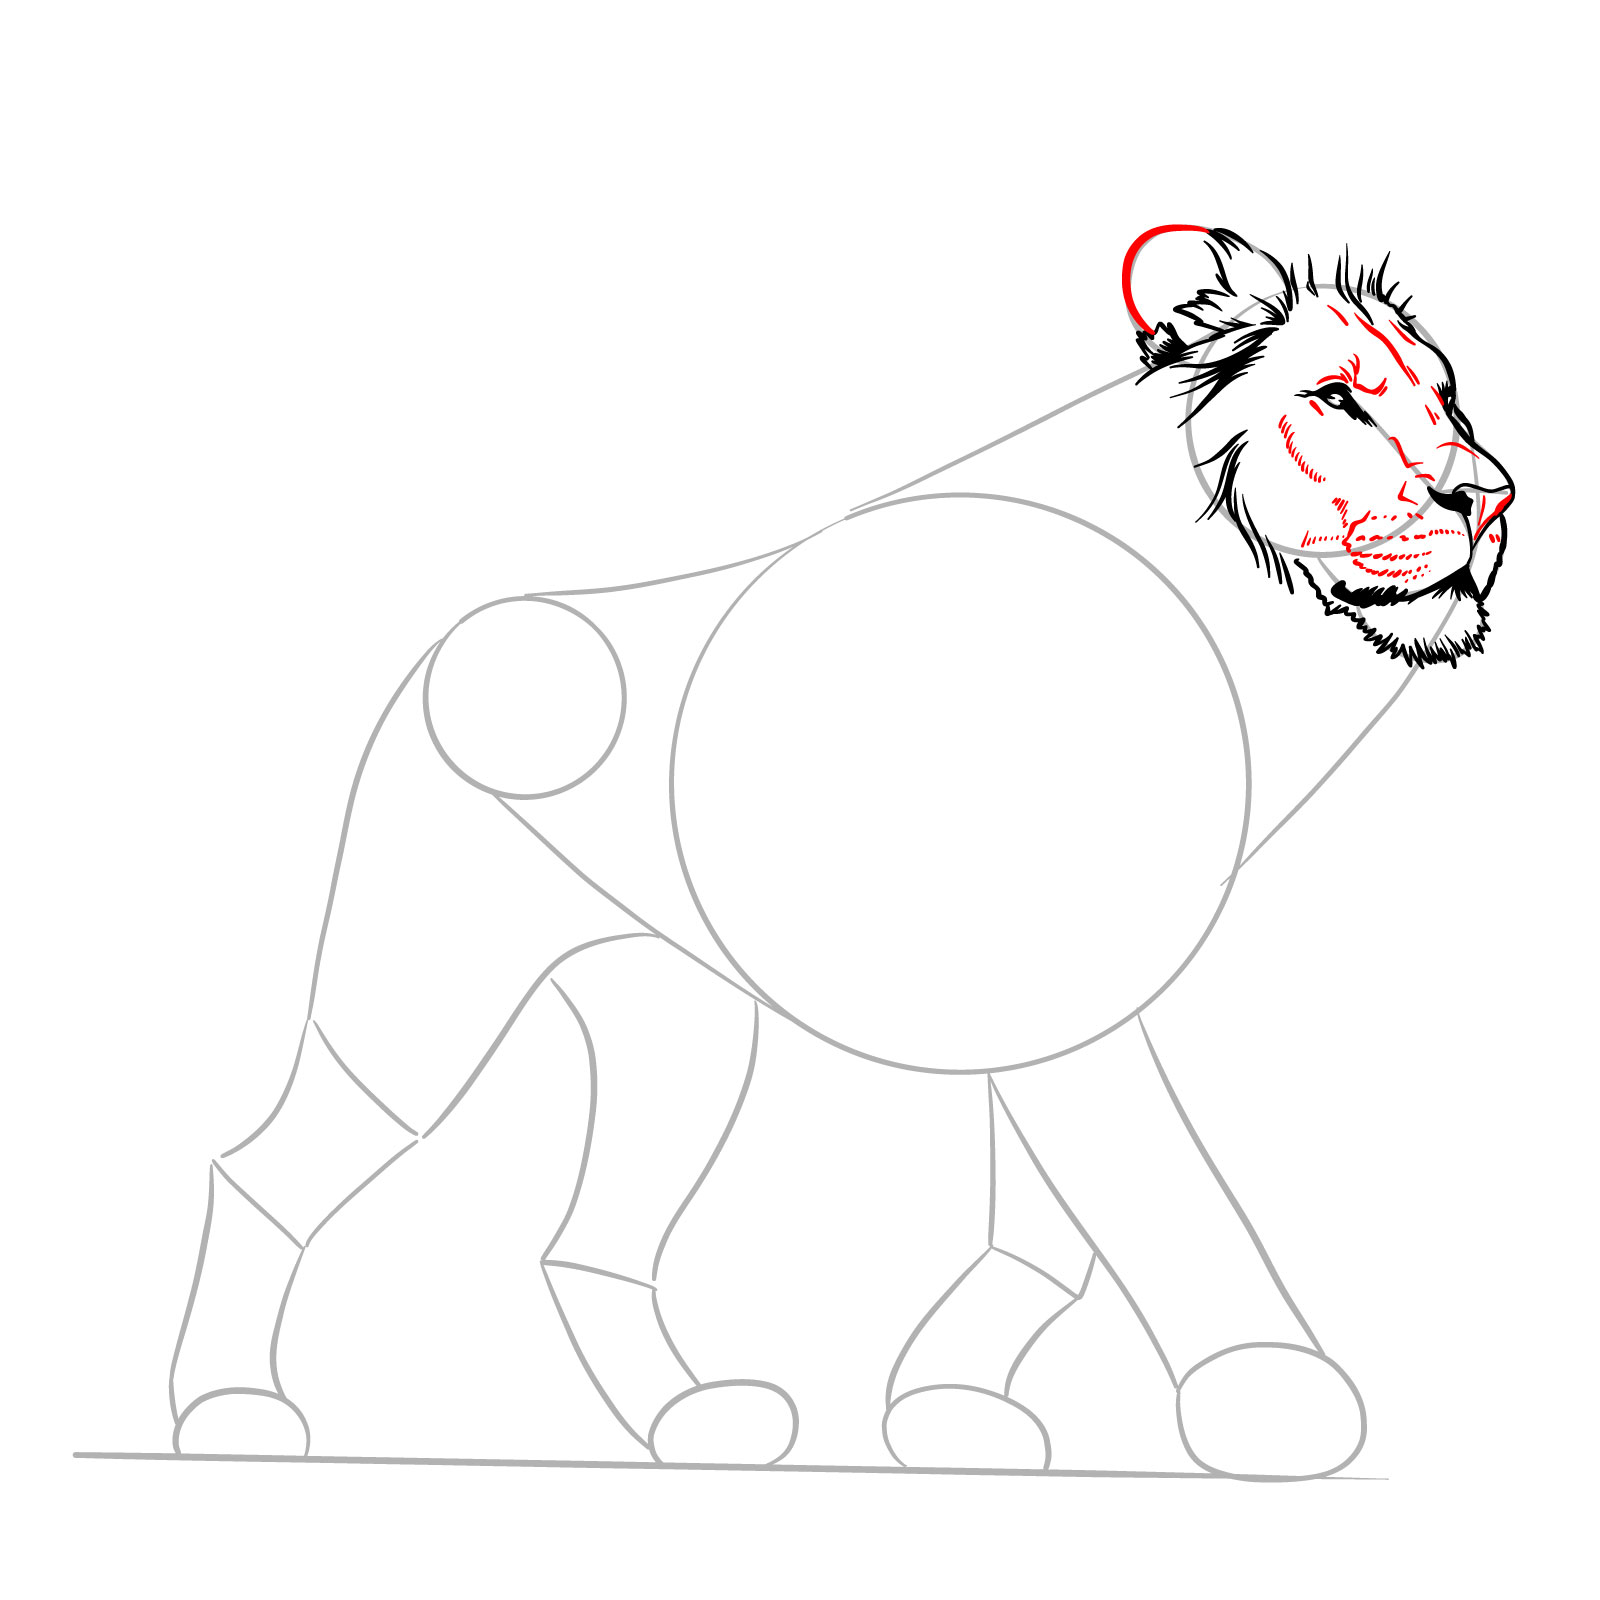
Step 07 – Refine the ear shape with an outline and add more details to the face, such as the lines around the nose and eyes, fur texture, and whisker marks
Add the ear outline and face details including whisker marks
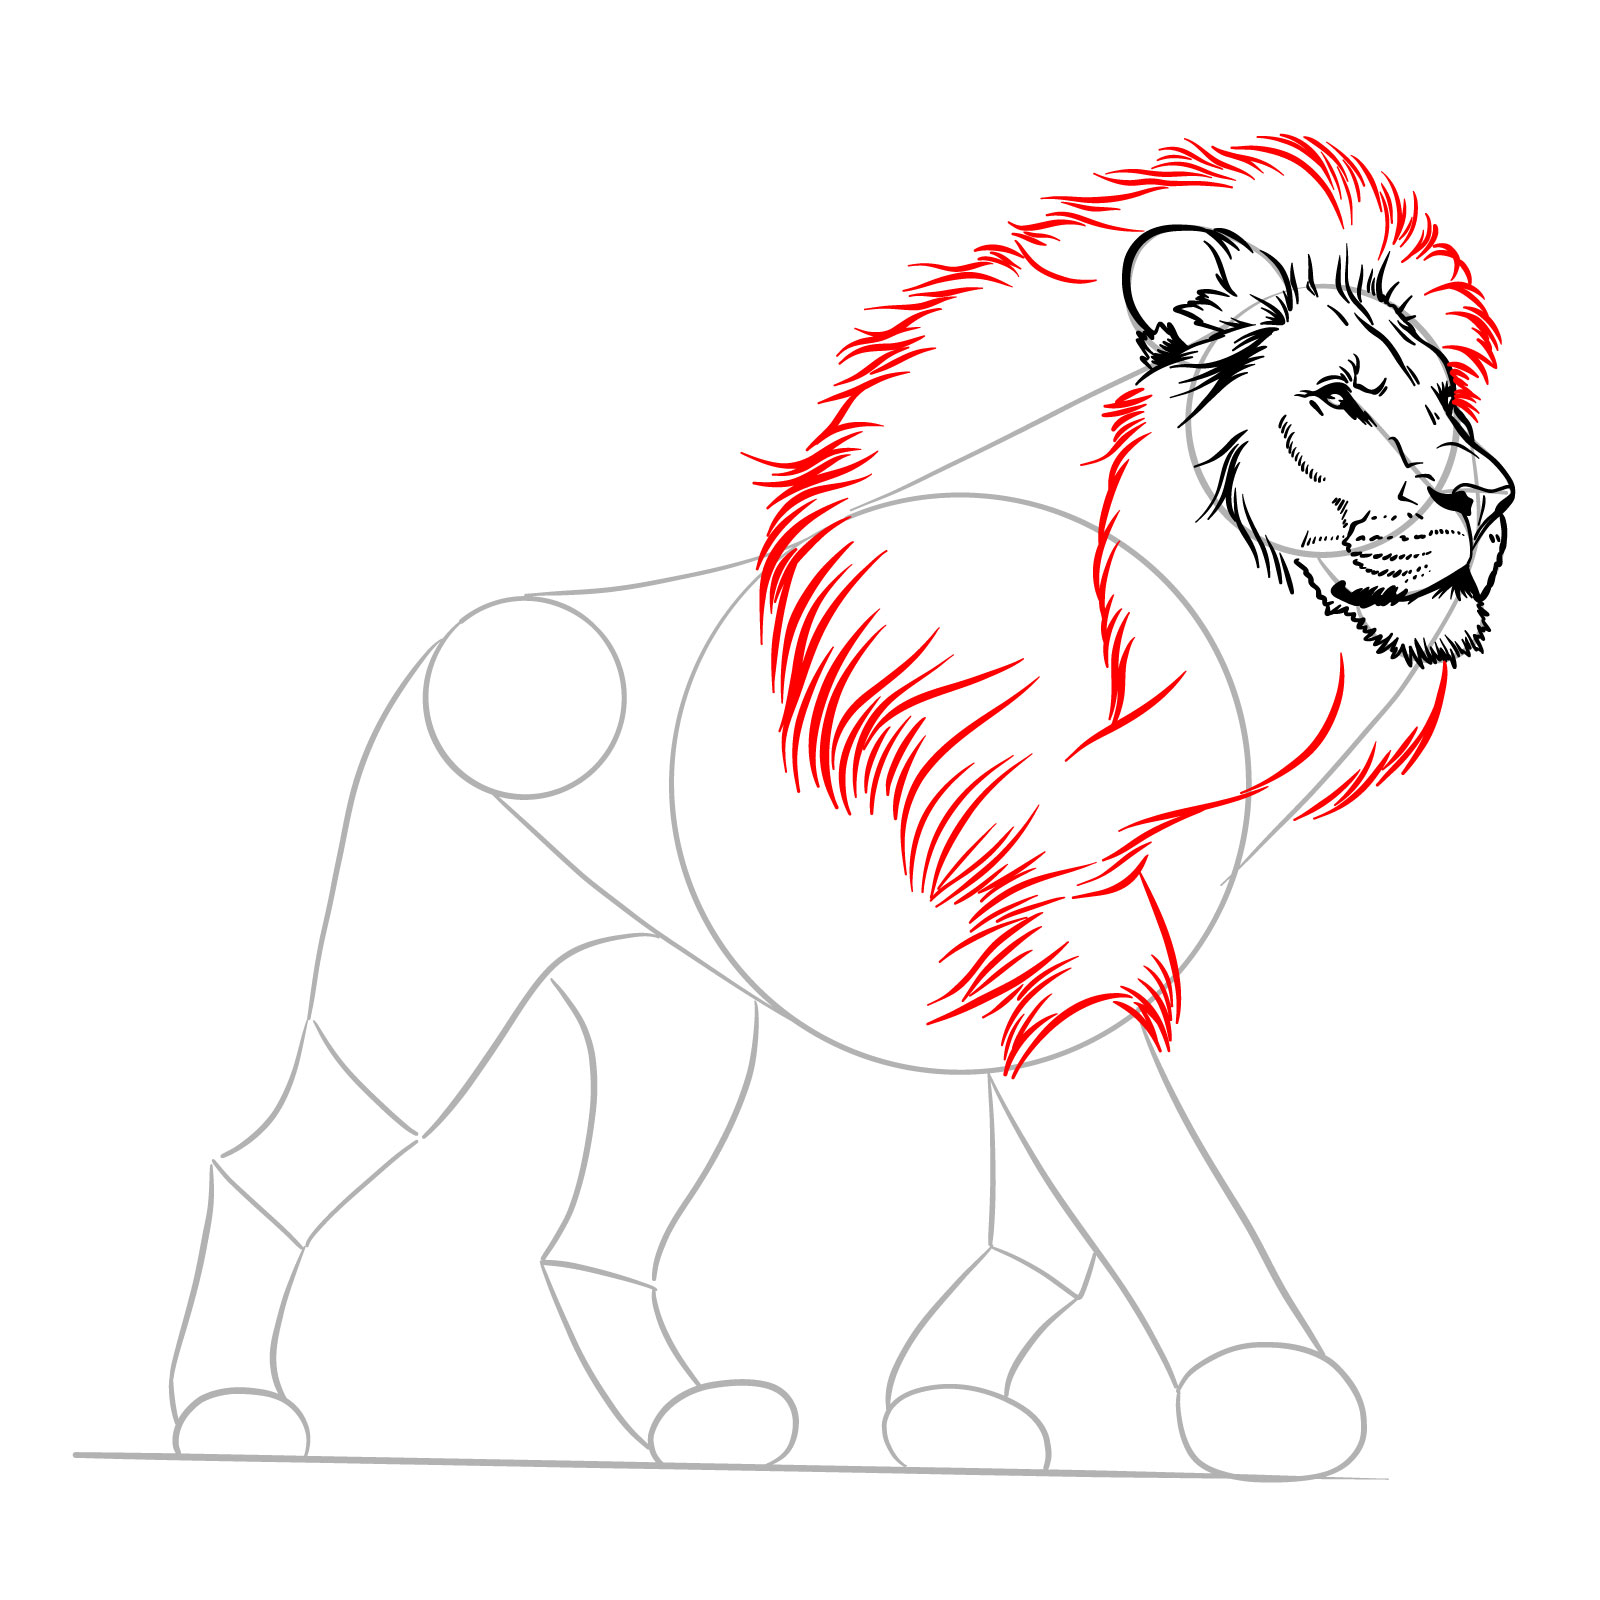
Step 08 – Create the lion’s mane by drawing a series of short lines around the head and extending down the neck and chest. These lines should suggest the flow and texture of the mane
Sketch the outline of the mane with dynamic short lines around the lion’s head
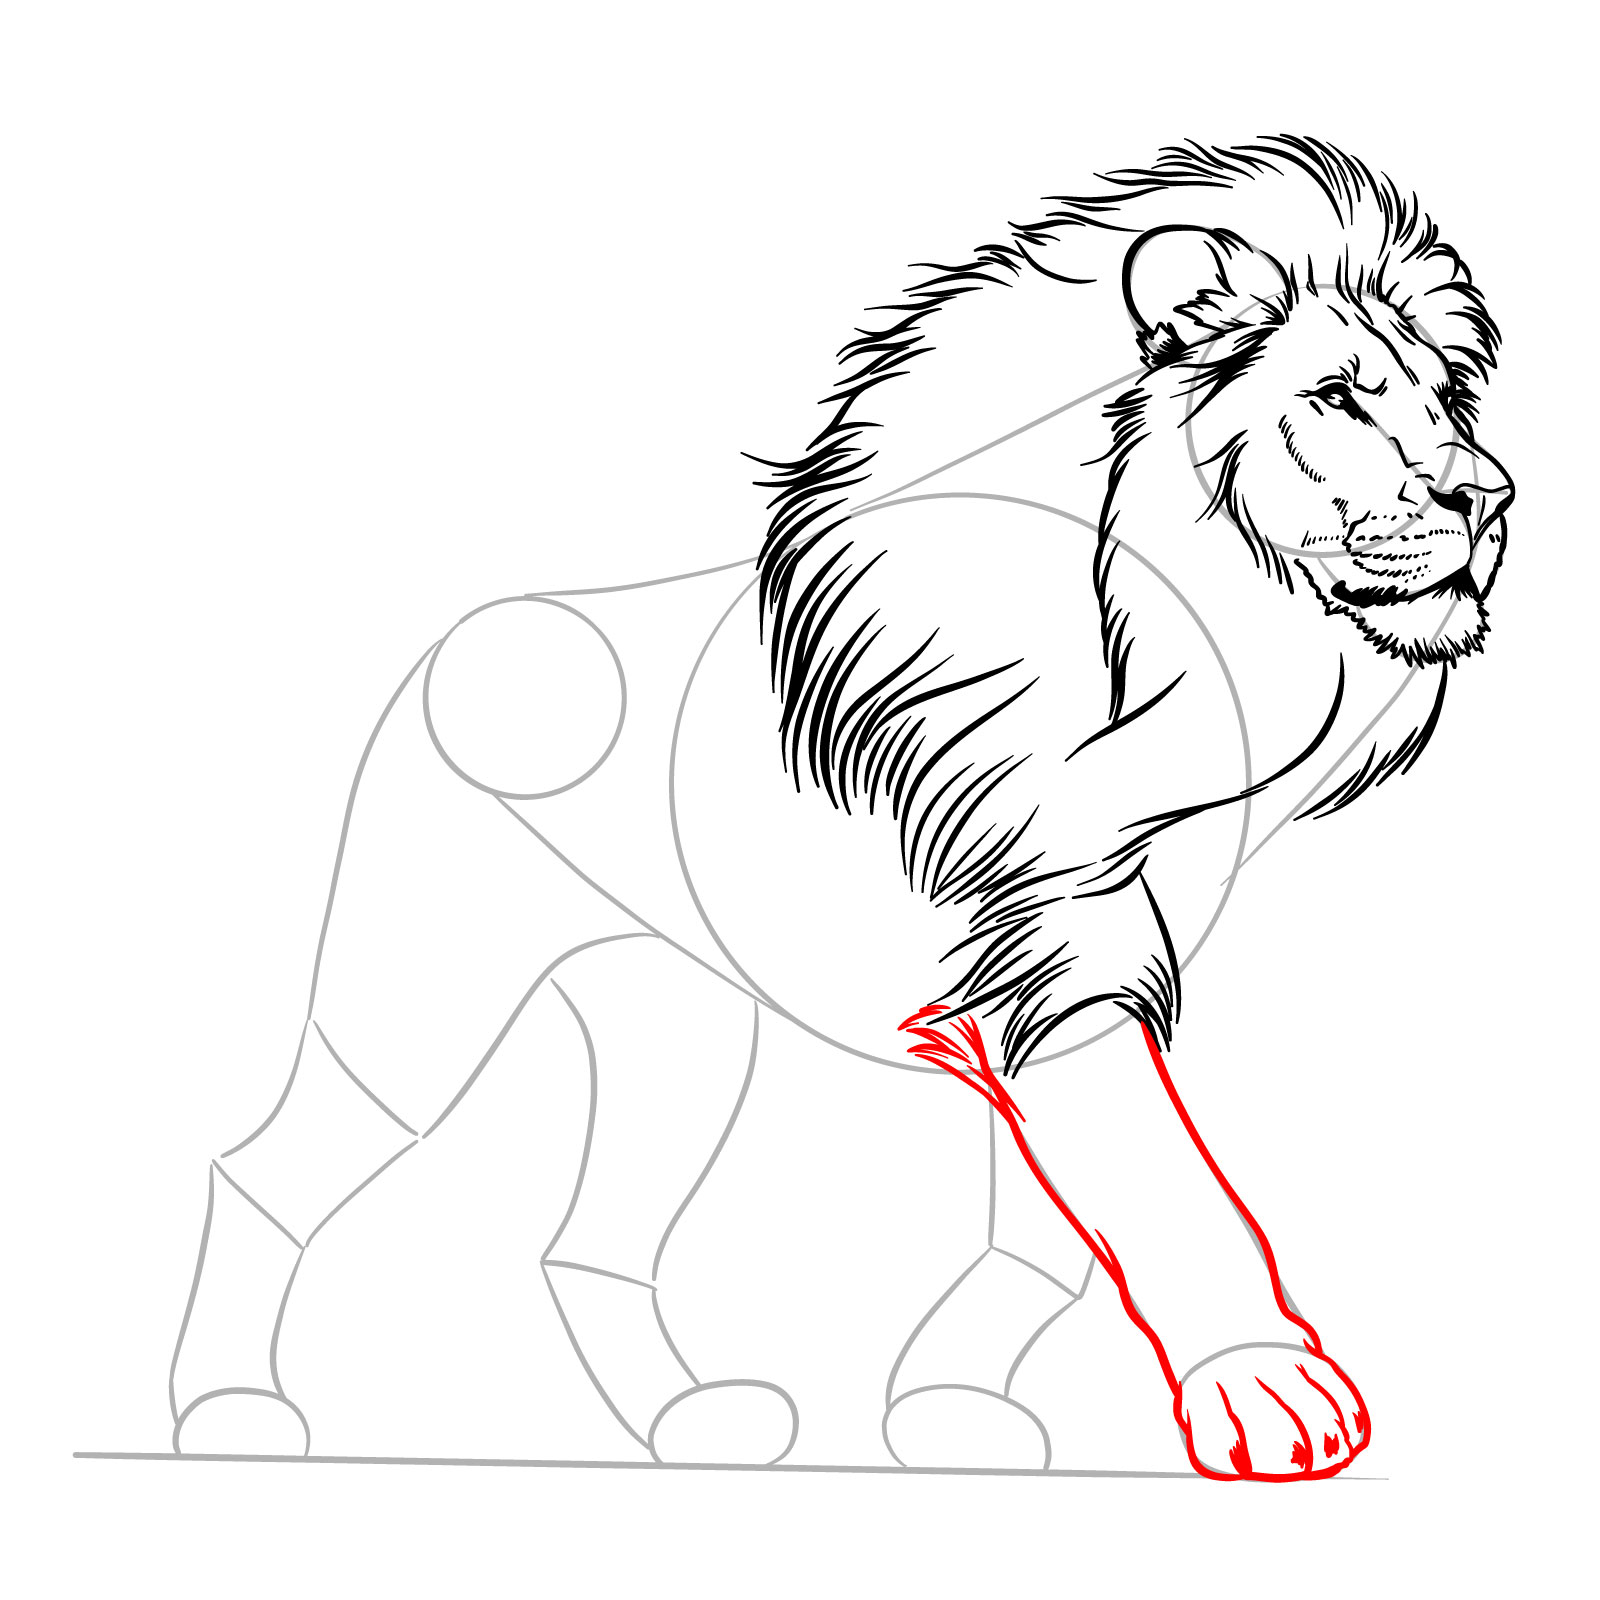
Step 09 – Draw the front right leg starting from the chest area, using two parallel lines to indicate the limb’s thickness. At the bottom, sketch the contours of the paw and toes
Illustrate the front right leg to support the lion’s standing posture
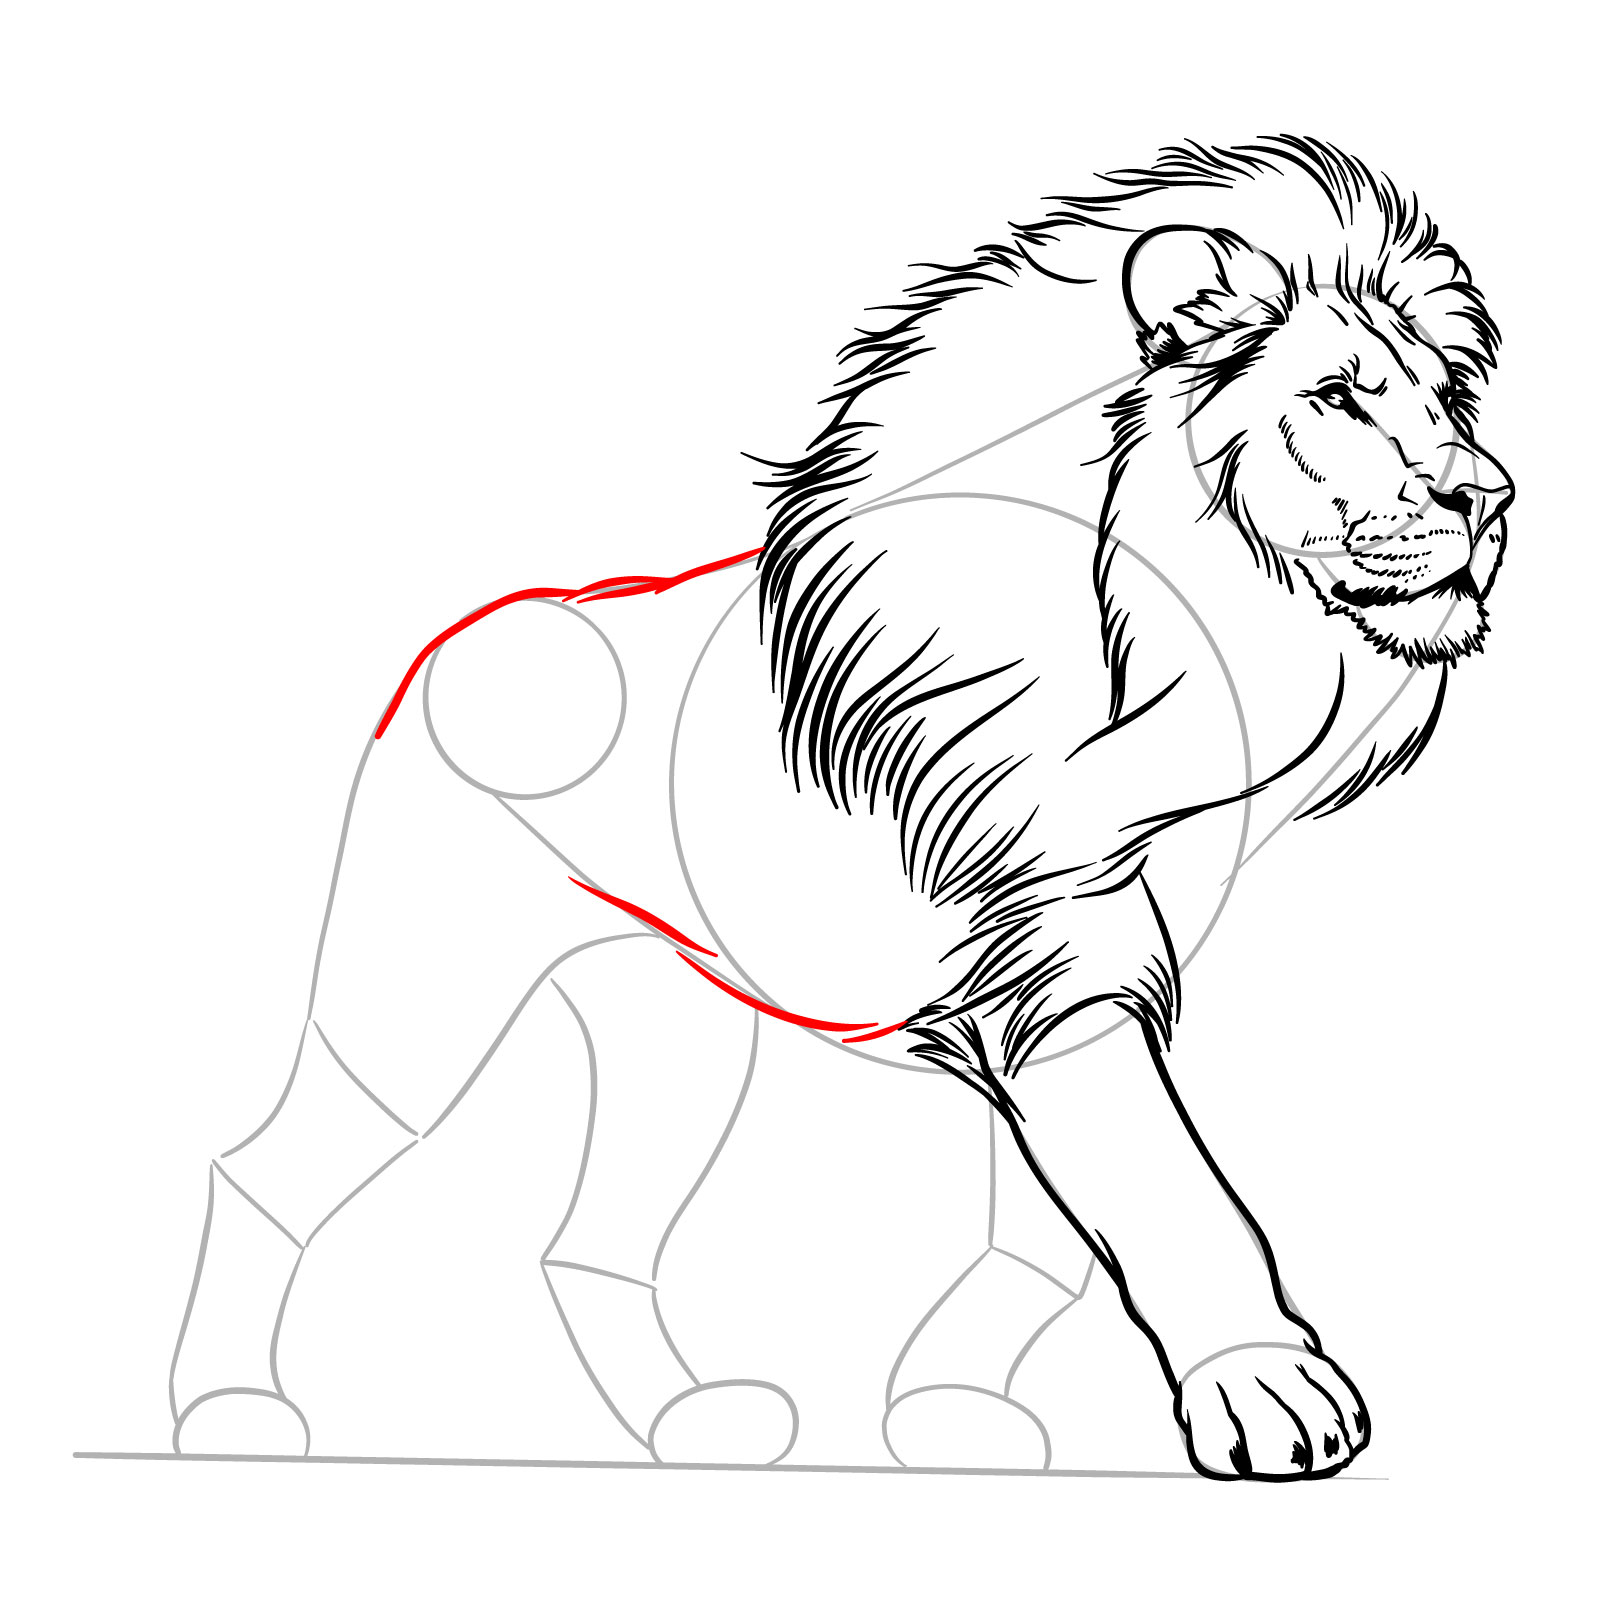
Step 10 – Shape the body by drawing two lines from the mane back and down to the hind leg area. Begin the rear right leg by adding lines that indicate the thigh’s muscle structure and joint placement. Add some fur details in the belly area
Outline the lion’s body and the upper part of the rear right leg
Step 11 – Continue the rear right leg by extending the lines down to the paw, ensuring you show the joints and muscles’ structure to reflect the lion’s strength
Finish detailing the rear right leg to complete its foundation
Step 12 – Draw the inside view of the rear left leg and the side view of the front left leg. For the tail, create a smooth curve. The tuft will be added in the next step
Sketch the remaining legs and the tail to build the lion’s full stance
Step 13 – Enhance the mane by adding more short lines within it to suggest volume and movement. For the tail, sketch the tuft at the end, giving it a bushy and realistic appearance
Add detailed lines to the mane and a tuft to the lion’s tail
Step 14 – Now you know how to draw a standing lion in 3/4 view. With your drawing complete, carefully erase the basic sketch lines and any unnecessary marks. If you’re ready to finalize your artwork, use ink to go over the drawing, wait for it to dry, and then erase any remaining pencil lines. This step will make your lion look clean and professional, perfect for displaying or adding to a portfolio
Finalize your lion drawing by cleaning up the sketch lines
Guide 7: Walking Lion Drawing – 3/4 View
How to draw a walking lion in 3/4
Next up, guide seven walks us through 17 steps to create a lion in motion, specifically a walking pose in a 3/4 view. This guide focuses on the fluidity of the lion’s movements – the careful placement of its paws and the subtle swing of its tail. You’ll learn to draw the body in a way that suggests forward motion while maintaining the lion’s dignified posture.
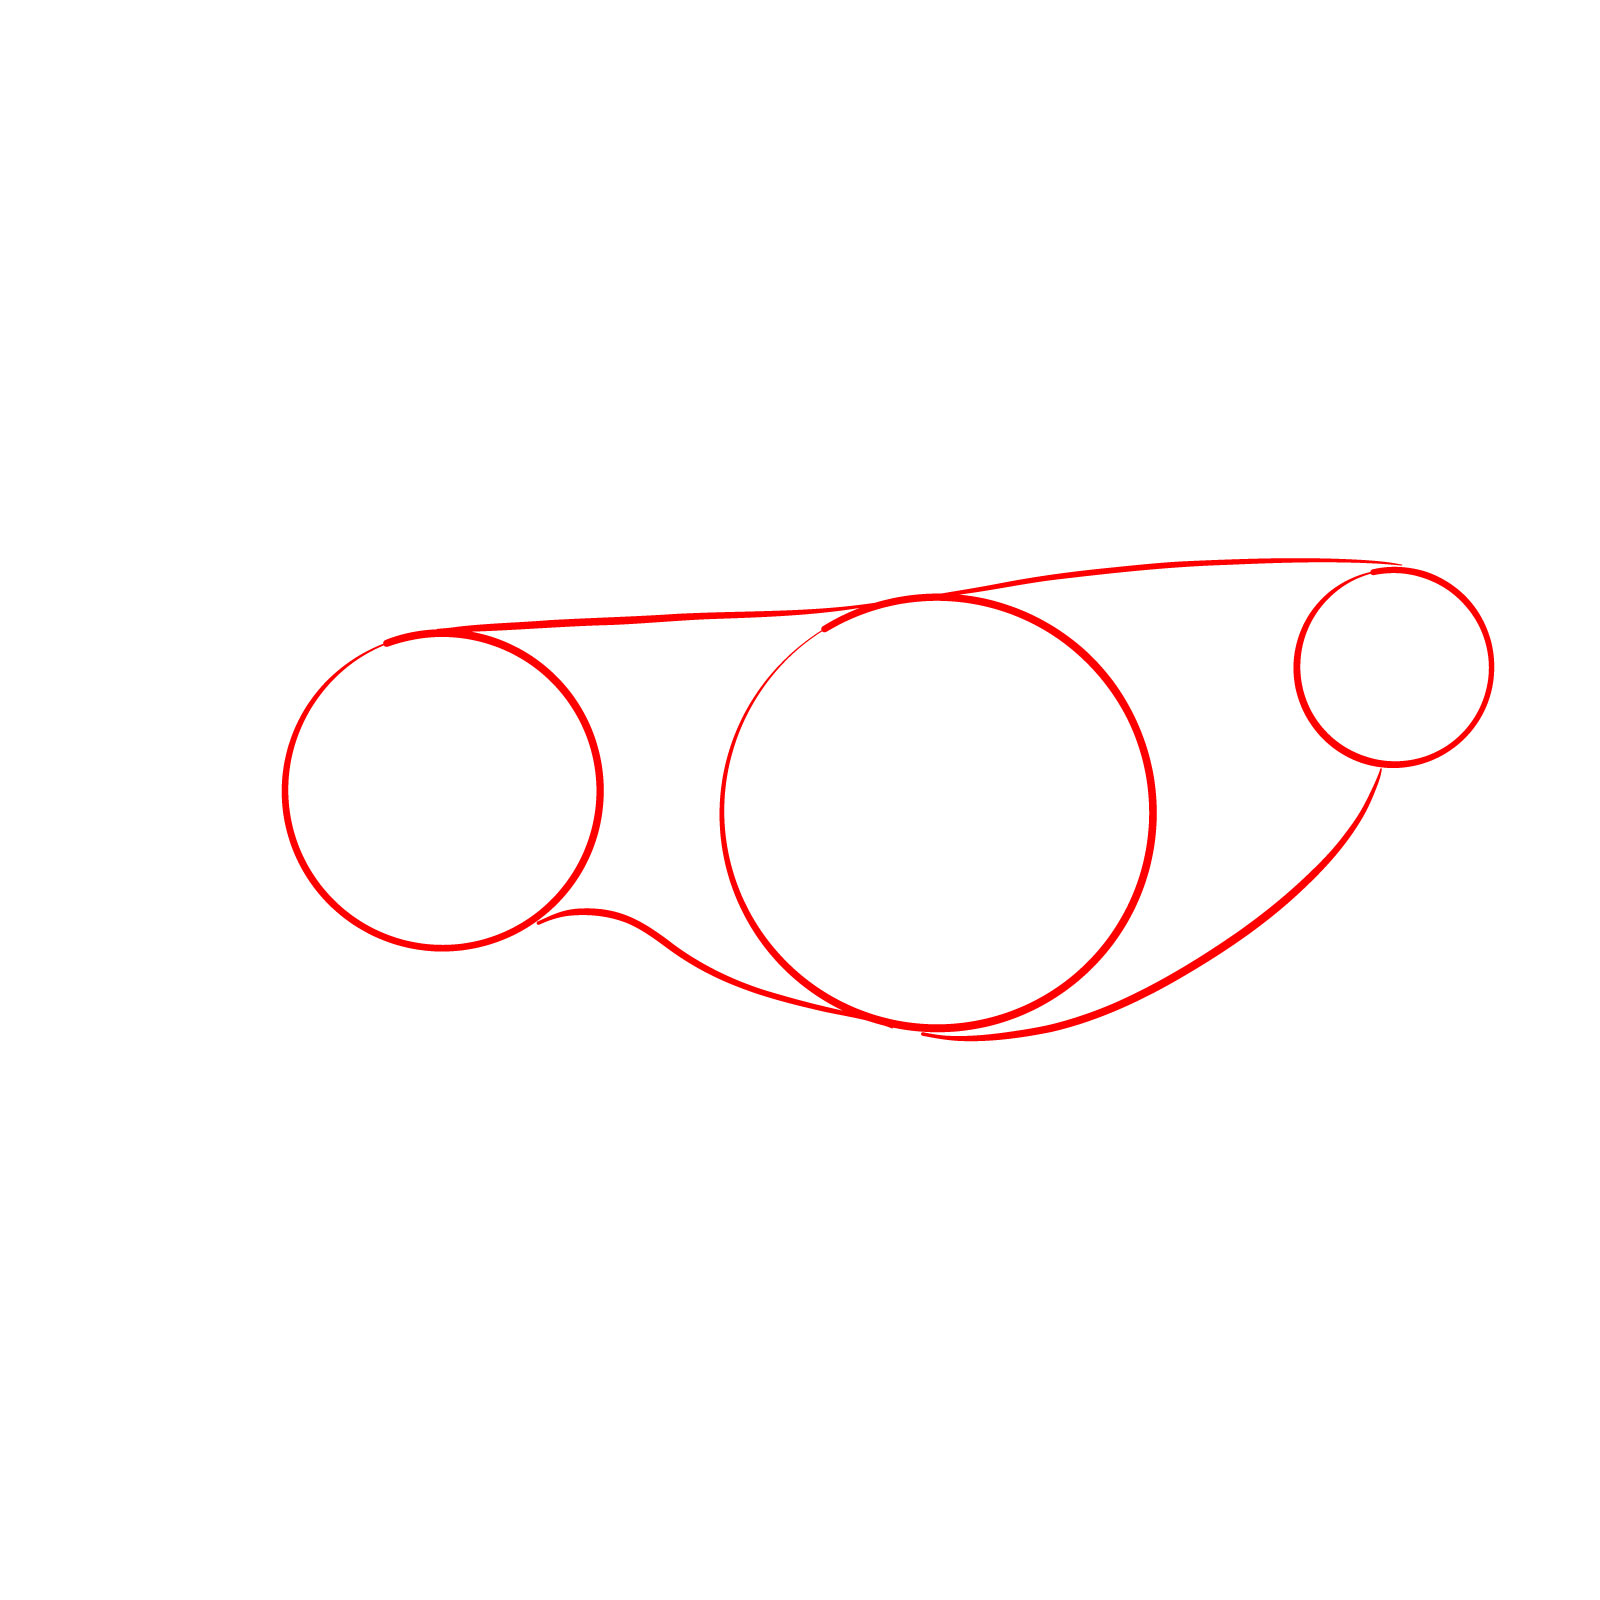
Step 01 – Begin by sketching three circles to form the main body parts: one small for the head, a large one for the chest area, and another slightly smaller than the head circle for the rear part of the body. Connect these circles with gentle curves to define the lion’s body outline, establishing the base for the head and body structure
Beginning the lion drawing with fundamental shapes
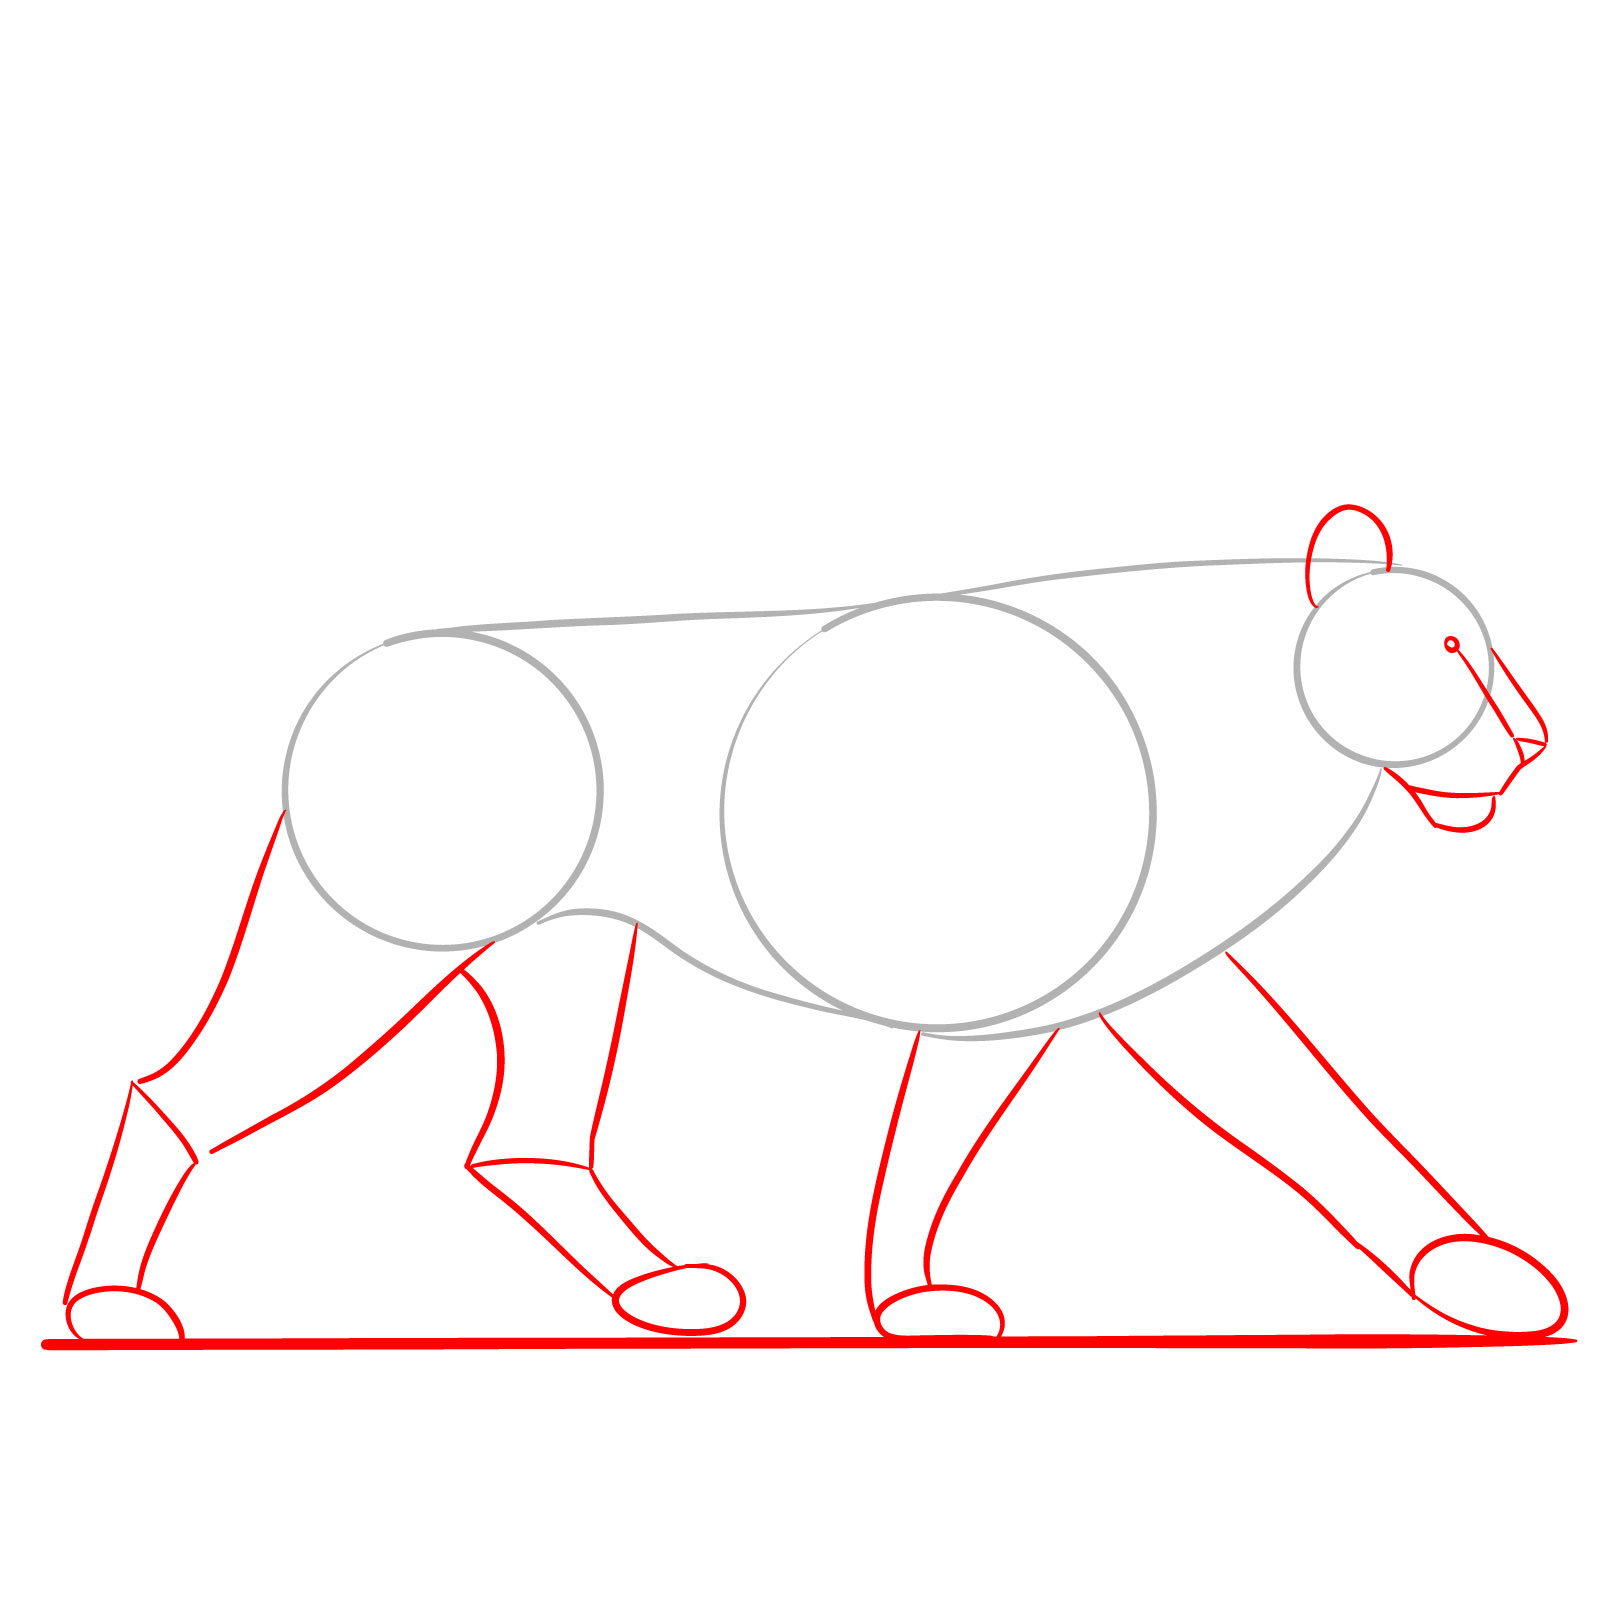
Step 02 – Draw the basic shapes for the lion’s legs to establish its stance. Add a ‘U’ shape for the eyes / nose bridge and an inverted triangle for the nose. Sketch the ear and the muzzle to outline the face
Adding legs and facial structure to the lion sketch
Step 03 – Detail the lion’s mouth by drawing the outline of the whisker pads with short lines, using the initial head sketch as a guide for placement
Sketching the lion’s mouth
Step 04 – Outline the lion’s nose and refine the chin and lower jaw, giving more definition to the facial structure
Refining the lion’s facial features
Step 05 – Draw the lion’s eyes within the circles of the ‘U’ shape, adding the pupils and the surrounding contours with shading
Defining the lion’s eyes
Step 06 – Create the fur texture around the lion’s face, drawing short lines around the cheeks and forehean to represent the beginning of its mane
Illustrating the fur around the lion’s face
Step 07 – Add details to the lion’s ear and include small lines around the muzzle for the whisker spots, and texture and details around the eyes, nose and the forehead
Enhancing facial details and the ear
Step 08 – Depict the main portion of the mane, drawing longer, flowing lines around the head and neck to create the thick mane
Sketching the main part of the mane
Step 09 – Focus on the front right leg, shaping the leg with muscular contours and ending with the paw, to show the lion’s powerful build as it walks
Drawing the front right leg of the lion
Step 10 – Sketch the curved lines of the belly extending from the rear circle to the lower part of the front body circle. Then, add the lion’s back by drawing a lines from the top of the rear body circle to the mane
Sketching the lion’s belly and back lines
Step 11 – Outline the right hind leg, making sure to show the muscle structure and joints leading to the paw, which should be placed firmly on the ground
Drawing the hind right leg
Step 12 – Add texture to the mane by drawing wavy lines in the neck, belly and chest area, giving the impression of thick fur
Enhancing the mane around the neck and chest
Step 13 – Move on to the left hind leg, drawing it with a slight bend to show movement and completing it with the contours of the paw
Shaping the left hind leg
Step 14 – Draw the front left leg, indicating the muscular build and the paw with toes. Sketch the tail with a slight curve upwards but leave the tip for the next step
Outlining the front left leg and tail
Step 15 – Complete the tail by adding a tuft at the end. Then, draw the whiskers emanating from the marked spots on the muzzle to give the face more realism
Finalizing the tail and facial whiskers
Step 16 – Shade the lion’s body, paying close attention to the mane, underbelly, and legs to give depth. Add small details such as fur texture and enhance any features that need more definition
Applying shading and small details
Step 17 – Carefully erase the basic sketch lines and any additional marks to clean up the drawing. Ensure that the defining lines of your lion are clear and distinct. This final step reveals your completed artwork of a walking lion in 3/4 view, showcasing your skill in how to draw a walking lion from beginning to end
Completing the walking lion drawing
Guide 8: Walking Lion – Front View
A walking lion drawing – step-by-step guide – 3/4 view
Continuing our journey, guide eight shows you how to draw a lion front view, specifically capturing the lion’s presence as it walks toward the viewer. In 15 detailed steps, you’ll sketch out the symmetrical power of the lion’s front aspect, the spread of its paws, and the direct gaze that commands attention. This perspective is key in lion drawing as it demonstrates the animal’s dominance and the grace of its movement.
Step 01 – Start with a circle to establish the base of the lion’s head. Add an upright ‘U’ shape in the center for the eyes and nose placement. Sketch two circles at the ends of the ‘U’ for where the eyes will be. Below, draw a wide ‘U’ for the chin and a curved “W” above it ‘U’ to suggest the whisker pads. Place a vertical line down the center of the circle to help maintain symmetry in the face, and add circular shapes for the ears
Beginning the lion’s head with basic shapes
Step 02 – Draw an upside-down egg-like shape surrounding the head for the mane base. Then, sketch two vertical shapes beneath the mane to represent the lion’s front legs, and small horizontal shapes for the paws
Outlining the mane and front legs
Step 03 – Refine the nose shape at the base of the vertical ‘U’ and form the upper part of the jaw around the curved “W,” adding dimension to the whisker pads
Shaping the nose and whisker pads
Step 04 – Draw the eyes within the previously sketched circles, adding the pupils and details for expressiveness. Then, define the upper line of the nose
Crafting the eyes and nose line
Step 05 – Add further details to the eyes for depth and realism. Sketch the bridge of the nose leading down to the lion’s snout
Finalizing the eyes and forming the nose bridge
Step 06 – Add short lines to represent fur on the chin and around the face, using the base head circle as a guide for the framing of the face
Illustrating fur on the chin and face
Step 07 – Begin the mane by drawing the first layer of fur, using flowing lines around the head for a natural mane appearance
Sketching the first layer of mane fur
Step 08 – Define the ears, making sure to capture their rounded shape and inner details, placing them at the top of the head partially hidden behind the mane
Drawing the lion’s ears
Step 09 – Add more layers to the mane with thicker, wavier lines to create a full and luxurious mane, ensuring it frames the face and flows over the shoulders
Enhancing the lion’s mane
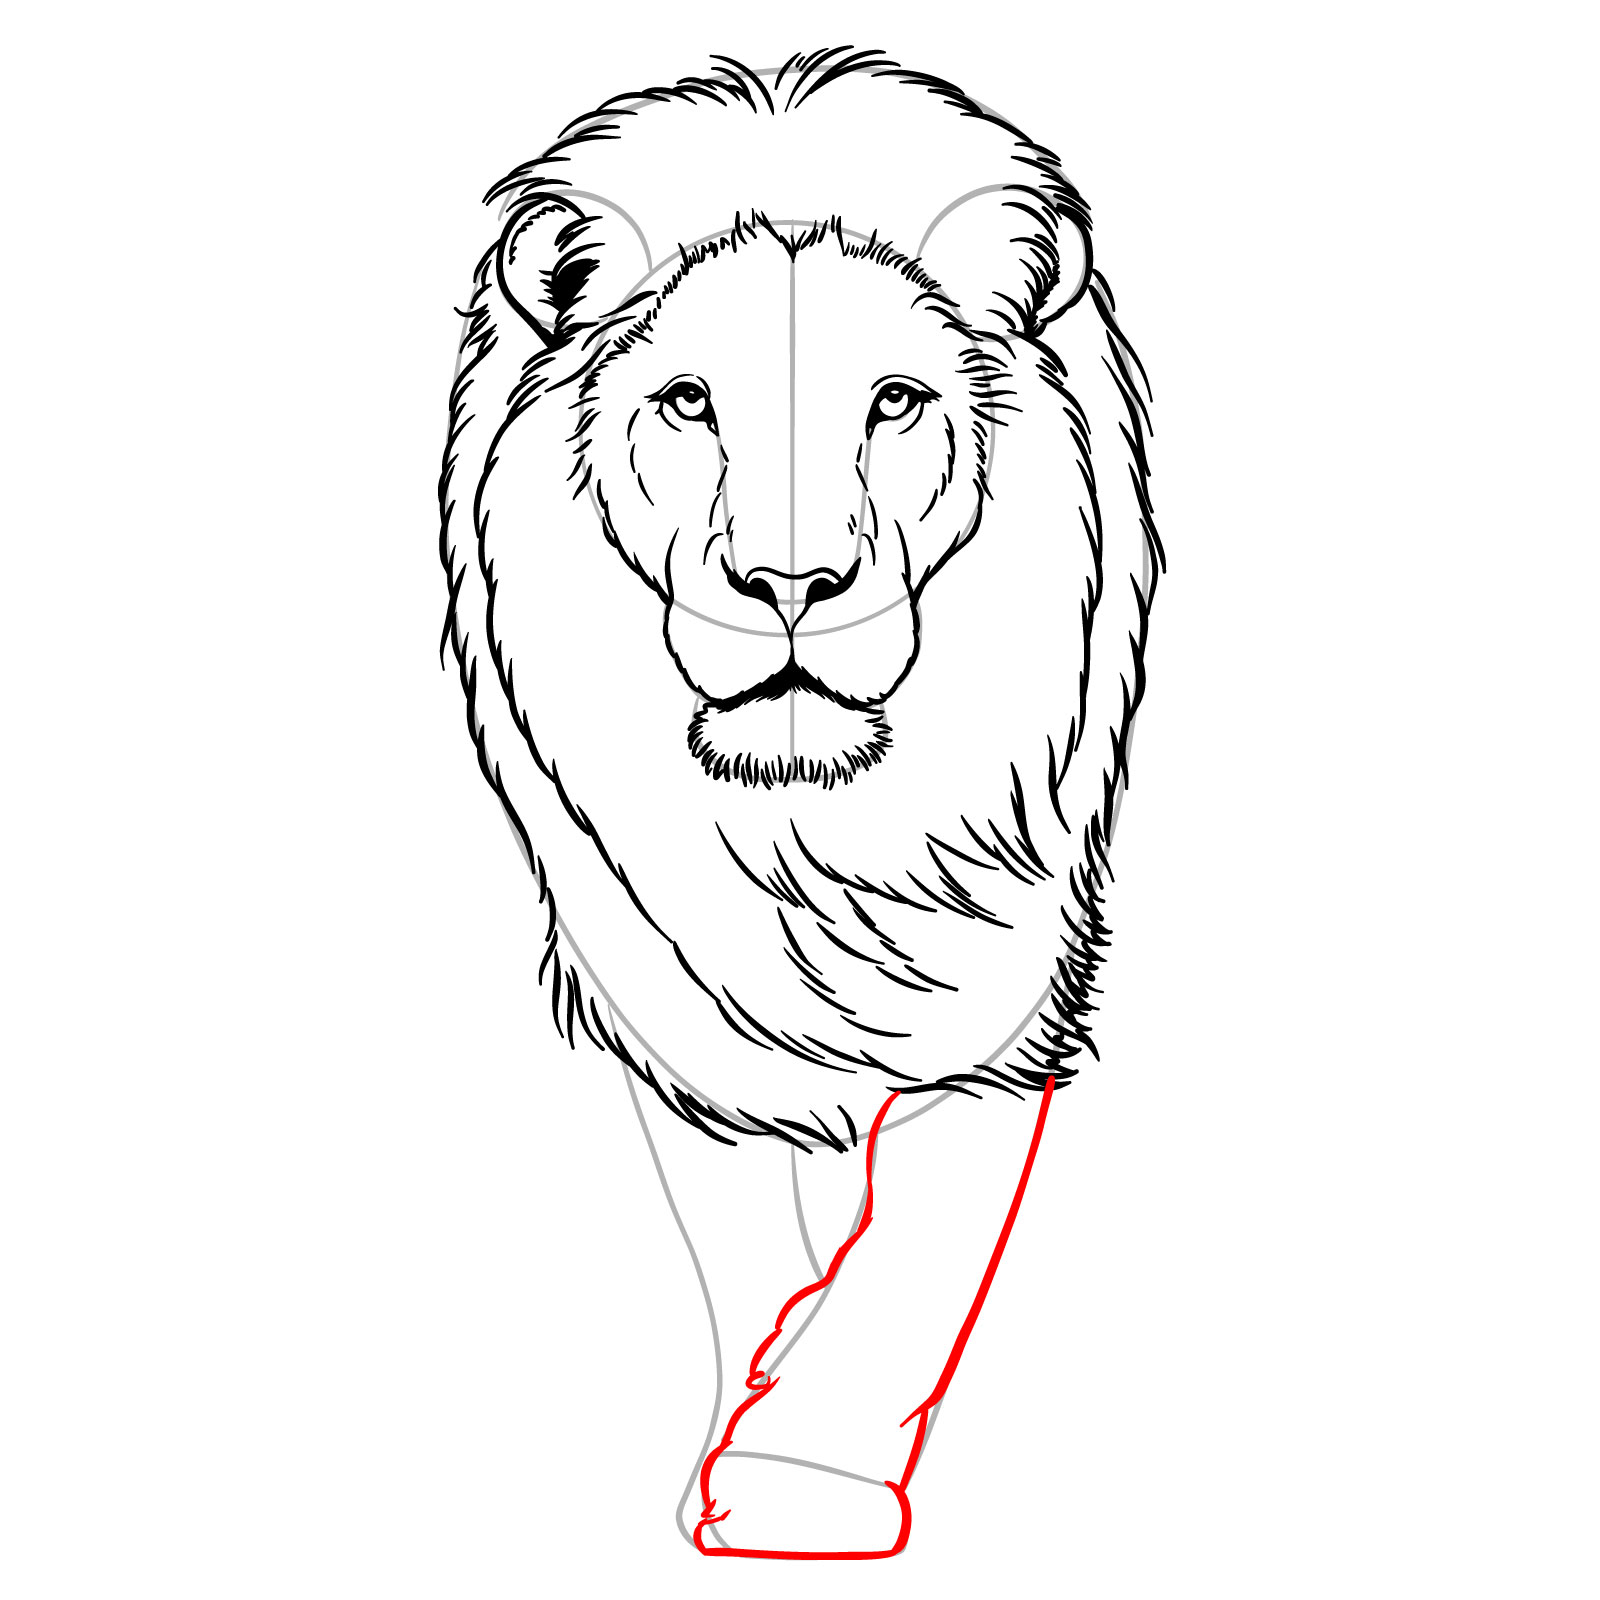
Step 10 – For the first front leg, draw the upper portion with two lines from the chest down to the paw. Ensure the leg has a strong and sturdy look, reflecting the lion’s muscular build
Outlining the first front leg
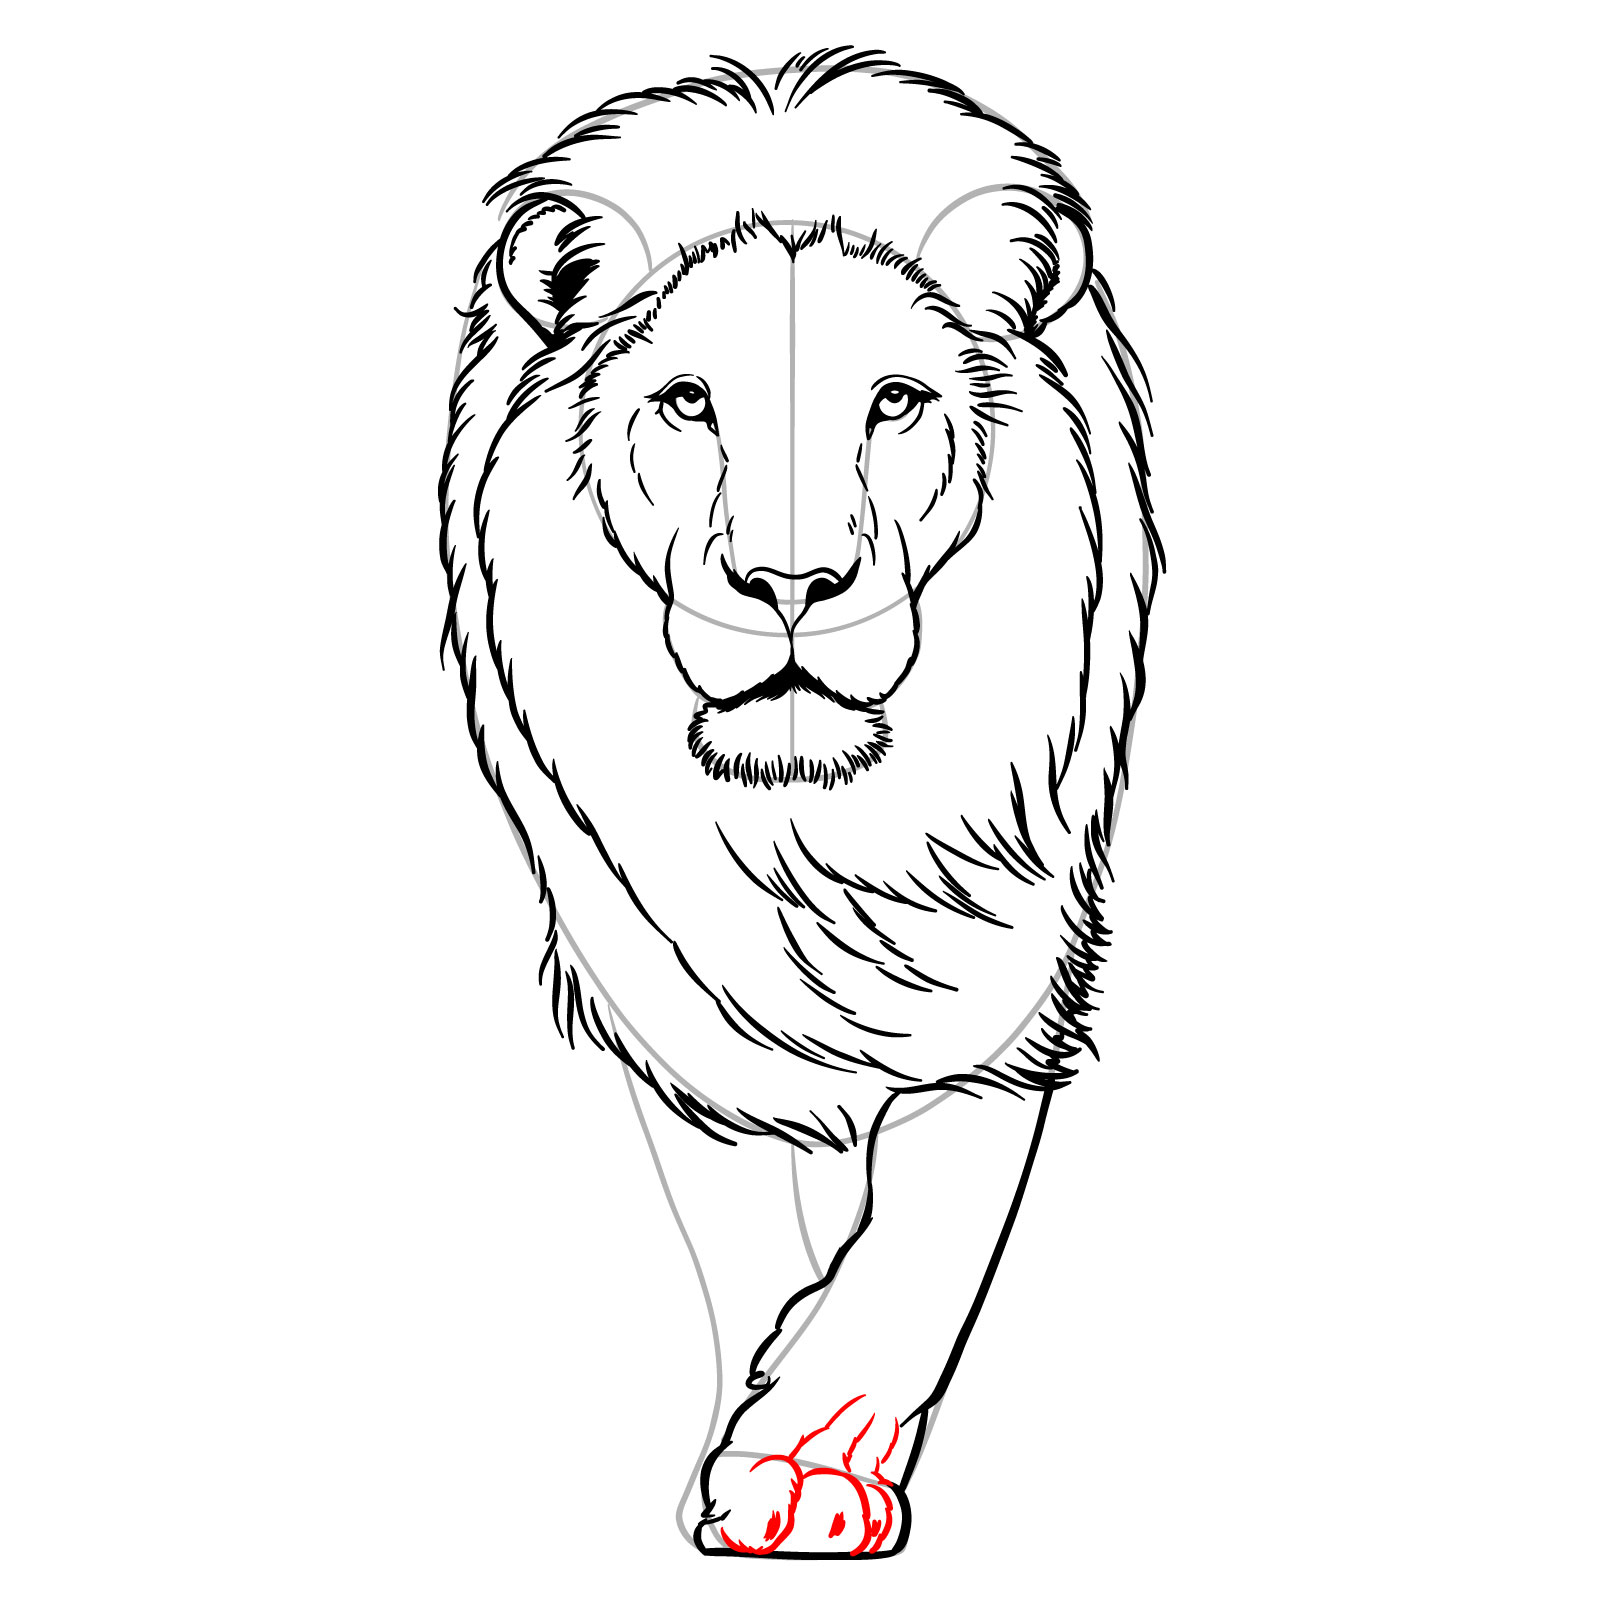
Step 11 – Define the paw by sketching the individual toes. Add curved lines at the tip of each toe to represent the claws, providing a realistic touch to the lion’s paw
Detailing the lion’s paw and claws
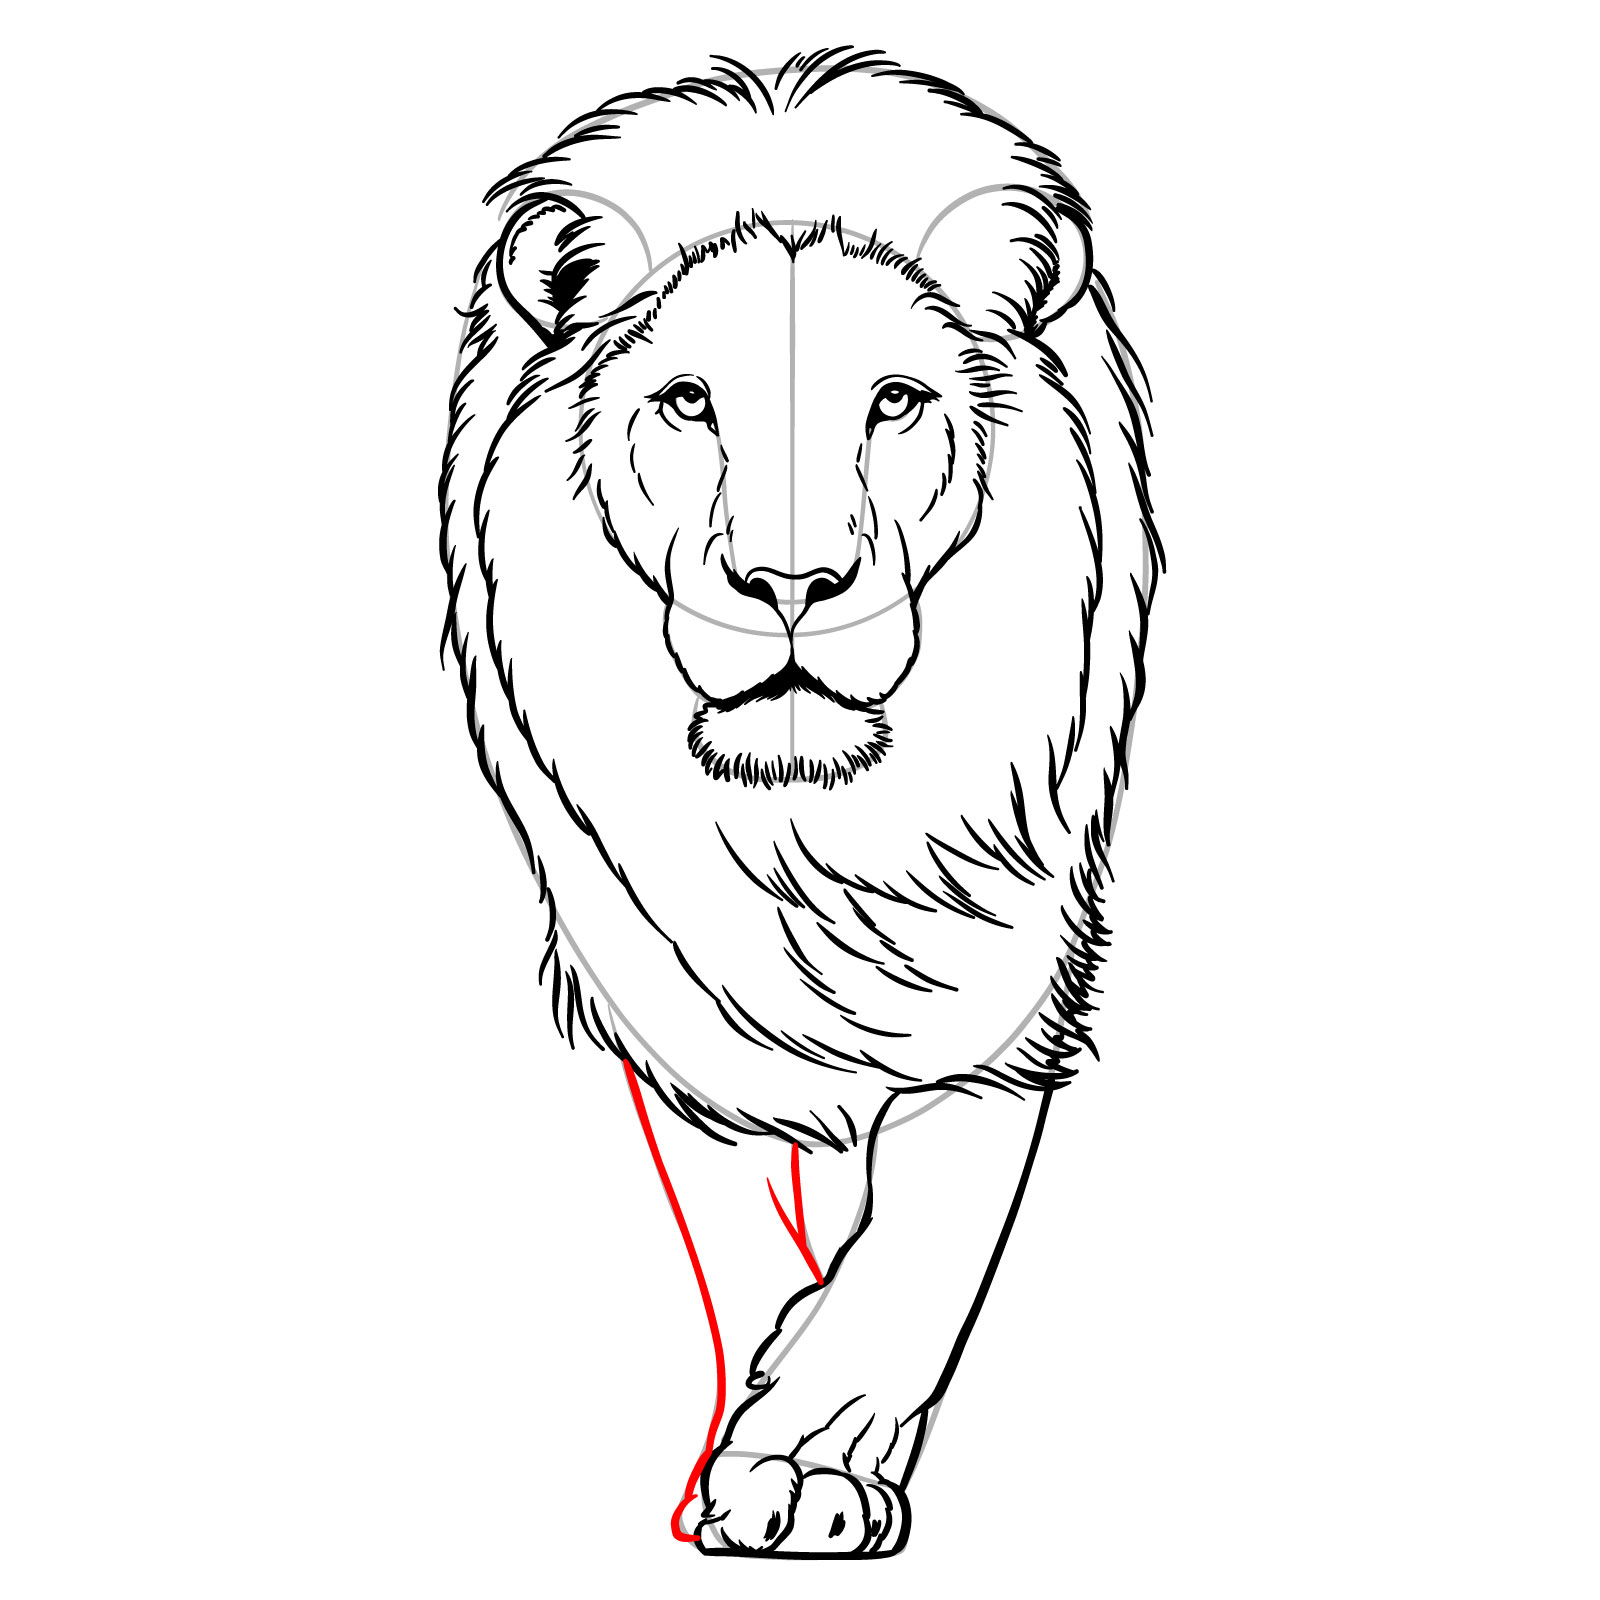
Step 12 – Draw the second front leg behind the first, mimicking its shape and volume. Show the leg’s angle and positioning to convey the movement
Drawing the second front leg
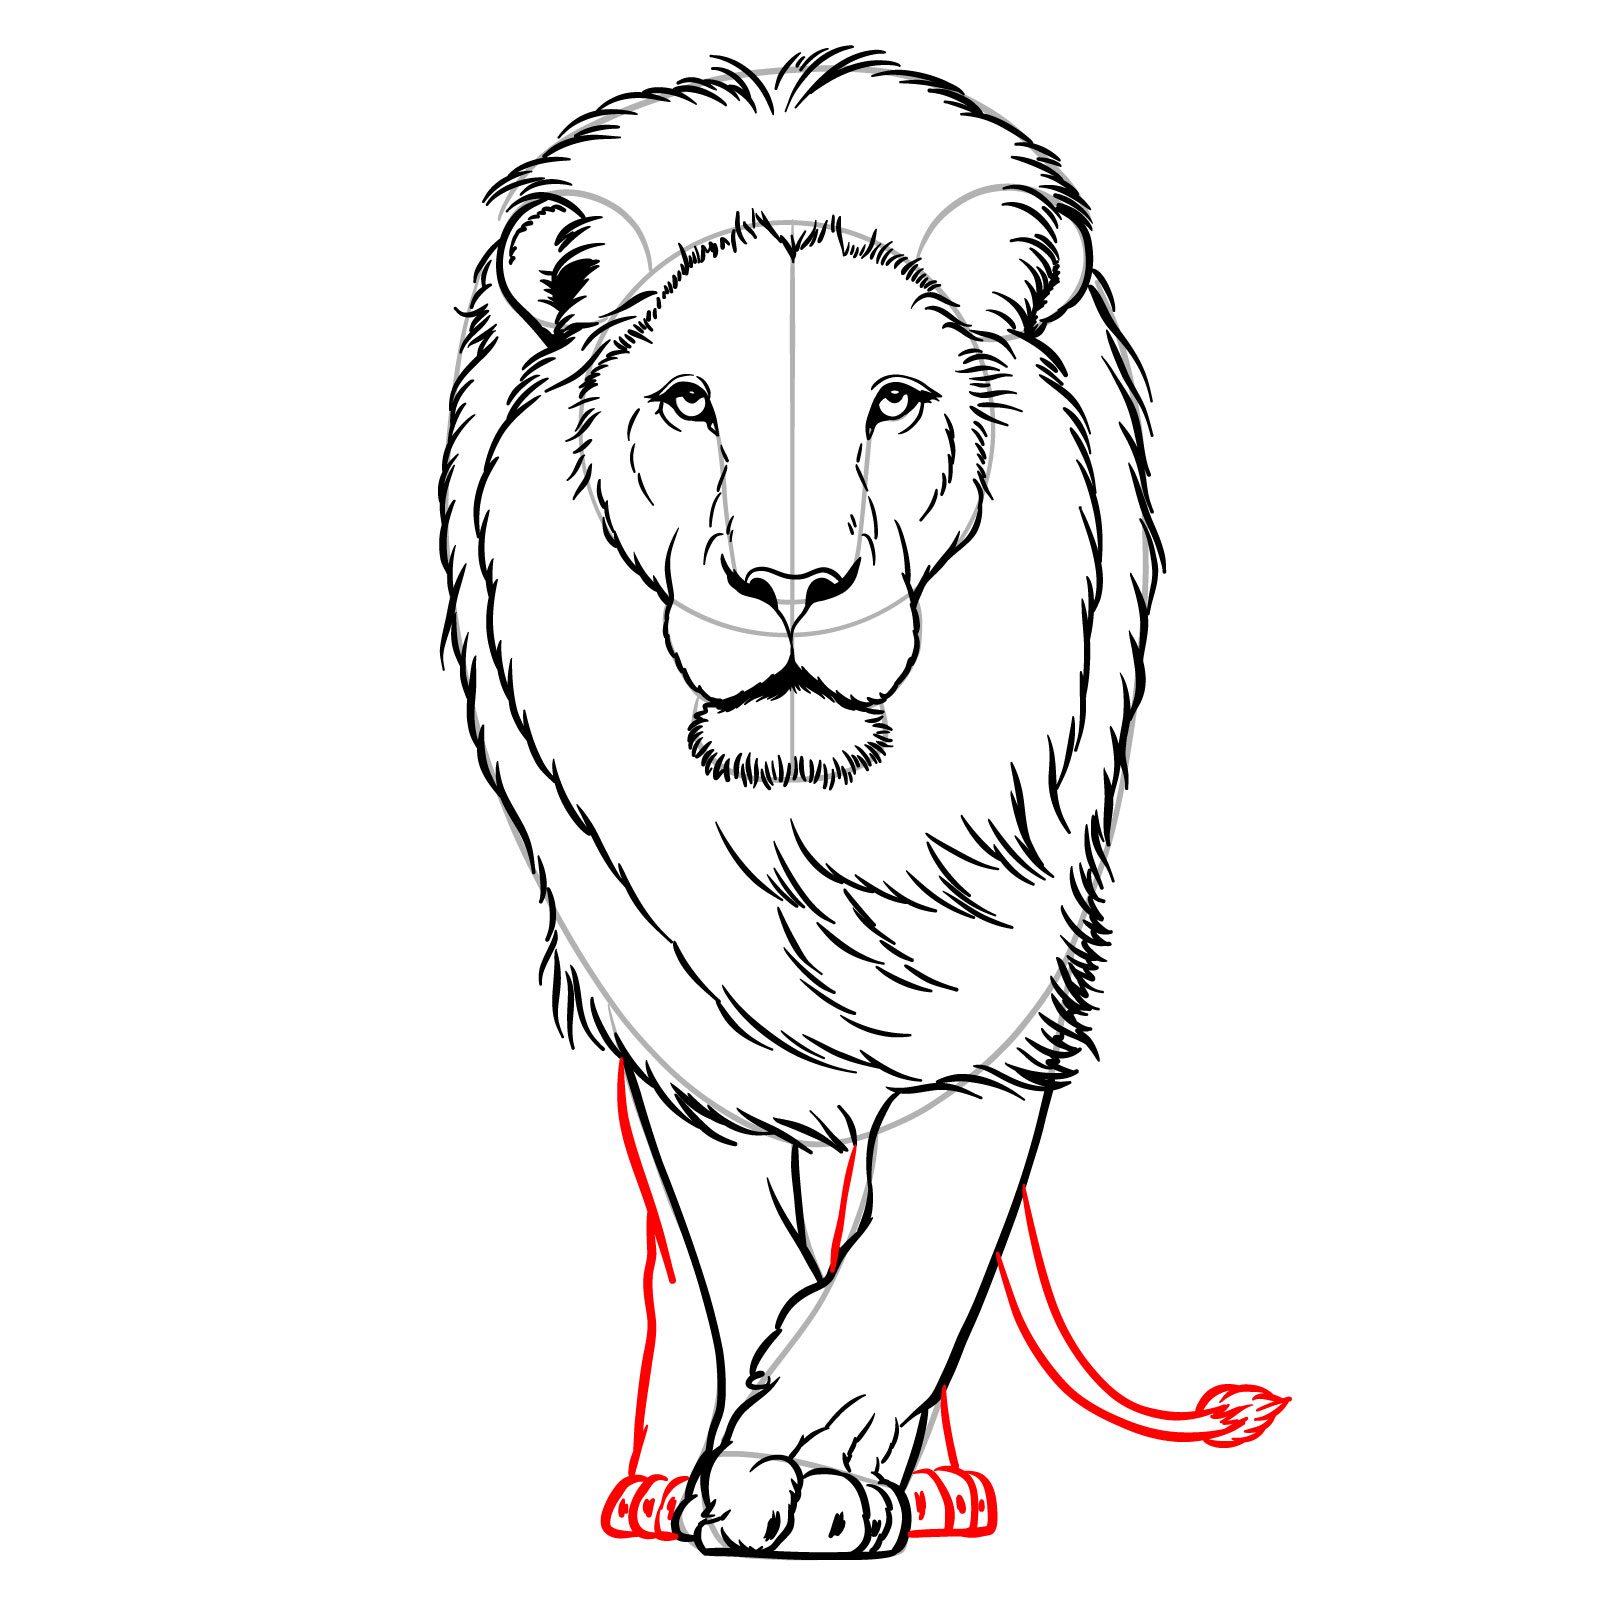
Step 13 – Outline the two hind legs to show their position behind the front legs. Add the tail with a relaxed curve, ending with a tuft
Sketching the hind legs and tail
Step 14 – Draw the whisker marks as small lines radiating from the whisker pads. Extend delicate whiskers from these marks. Add more lines to the mane for texture, and refine the facial details for a lifelike expression
Adding whiskers and facial details
Step 15 – Carefully erase any remaining guide lines to clean up your drawing, leaving a polished illustration of a walking lion in front view
Finalizing the lion drawing with texture
Guide 9: Walking Lion – Side View Drawing
How to draw a walking lion – side view guide
Guide nine is about simplicity and realism as we sketch a lion walking in side view. In 12 clear steps, you’ll draw the lean body of the lion, the stretch of its limbs, and the flick of its tail. I decided to avoid adding too much details and keep the drawing simple, but still pretty realistic.
Step 01 – Start with a small circle for the head base. Add a large circle for the front part of the body and a medium-sized circle for the rear. Connect these circles with curved lines to outline the lion’s body shape
Begin with basic shapes for the lion’s structure
Step 02 – Sketch the head’s outline including the ear, and draw simple shapes for the legs to establish their structure
Basic shapes for the head and limbs
Step 03 – Outline the chin and bottom jaw, and sketch the lion’s mouth
Shaping the lion’s chin and jaw
Step 04 – Draw the nose, bridge of the nose, and forehead. Add the side profile of the face with shorter lines to represent the fur texture
Defining the lion’s nose and forehead
Step 05 – Detail the inner ear and draw the eye
Adding the lion’s ear and eye
Step 06 – Create the outline for the lion’s mane with flowing lines to represent the fur
Illustrating the mane
Step 07 – Draw the outline of the first front leg, closest to us. Add the shoulder and upper limb, leaving space for the paw and toes to be added later
Sketching the first front leg of the lion
Step 08 – Sketch the curve of the belly with a hint of fur and draw the line defining the back
Outlining the lion’s belly and back
Step 09 – Outline the upper part of the first hind leg, showing the thigh and knee joint
Drawing the upper hind leg
Step 10 – Finish the first hind leg, add the two missing legs in the background, and sketch the first front leg’s paw and toes. Draw the tail with a clean line, preparing for the tuft detail to be added
Completing the lion’s legs and tail
Step 11 – Add the tuft at the tail’s end, refine the body with minor details, draw claws on the paws, shade the ear, enhance the mane with additional fur lines, and sketch the whisker marks and small facial features
Finalizing details on the lion
Step 12 – To complete your walking lion drawing, gently erase the basic sketch and marks. Review your drawing for any final adjustments to ensure the lion’s features are prominent and the stance is natural. With the sketch lines removed, your walking lion comes to life, ready to stroll off the page
Erasing the sketch marks to finish the lion drawing
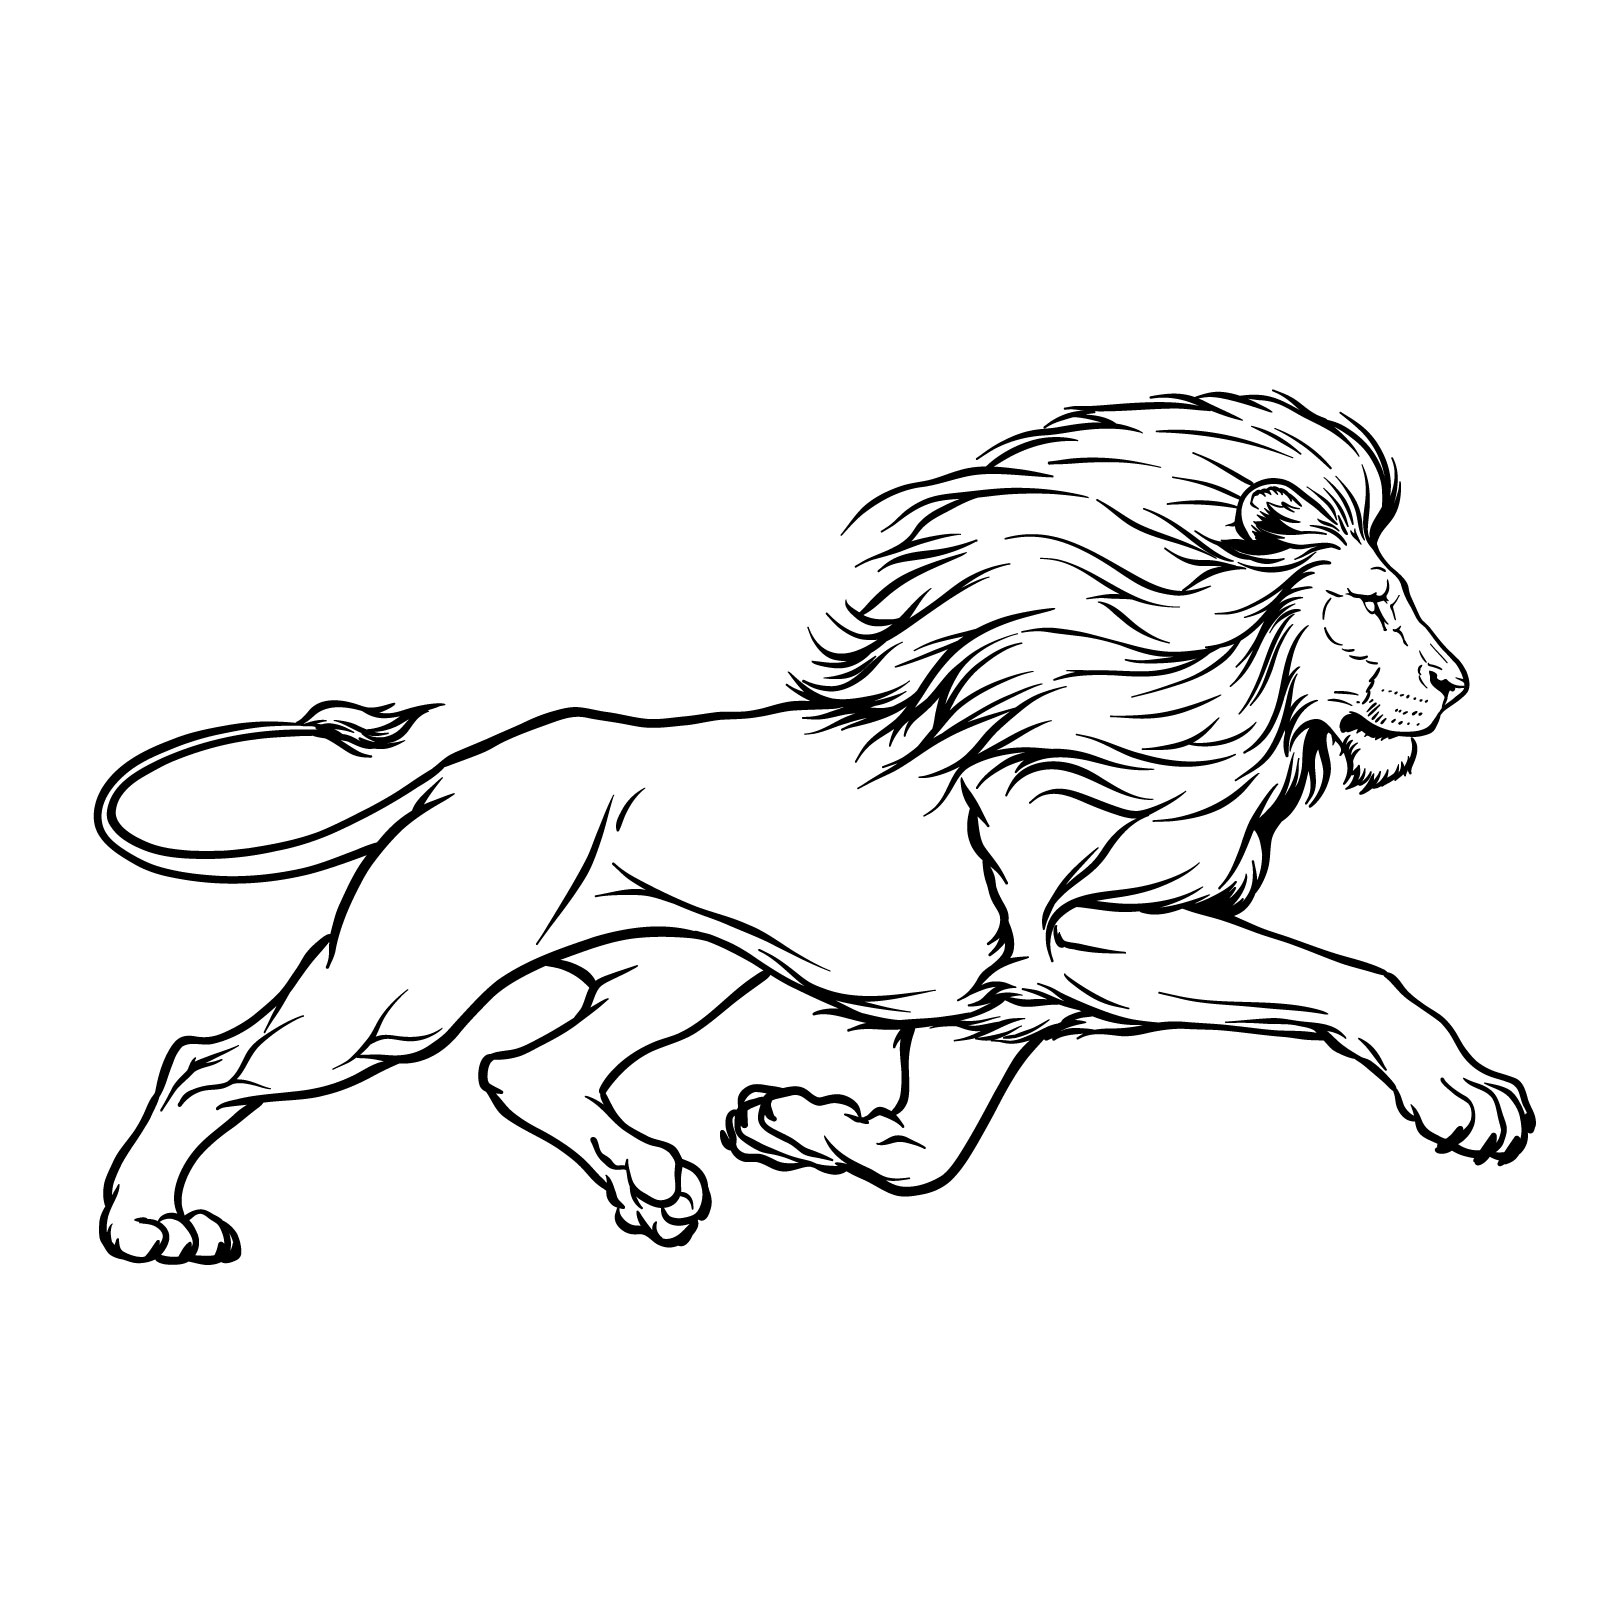
Guide 10: Running Lion Drawing – Side View
How to draw a running lion – side view sketch
This guide focuses on a realistic lion drawing that captures the raw energy of a lion in full sprint, viewed from the side. Across 15 steps, you will learn to render the leg muscles in action and the mane that seems to be pushed back by the wind, all contributing to the sense of speed and force. This exercise will help you in understanding the anatomy of a lion in dynamic poses.
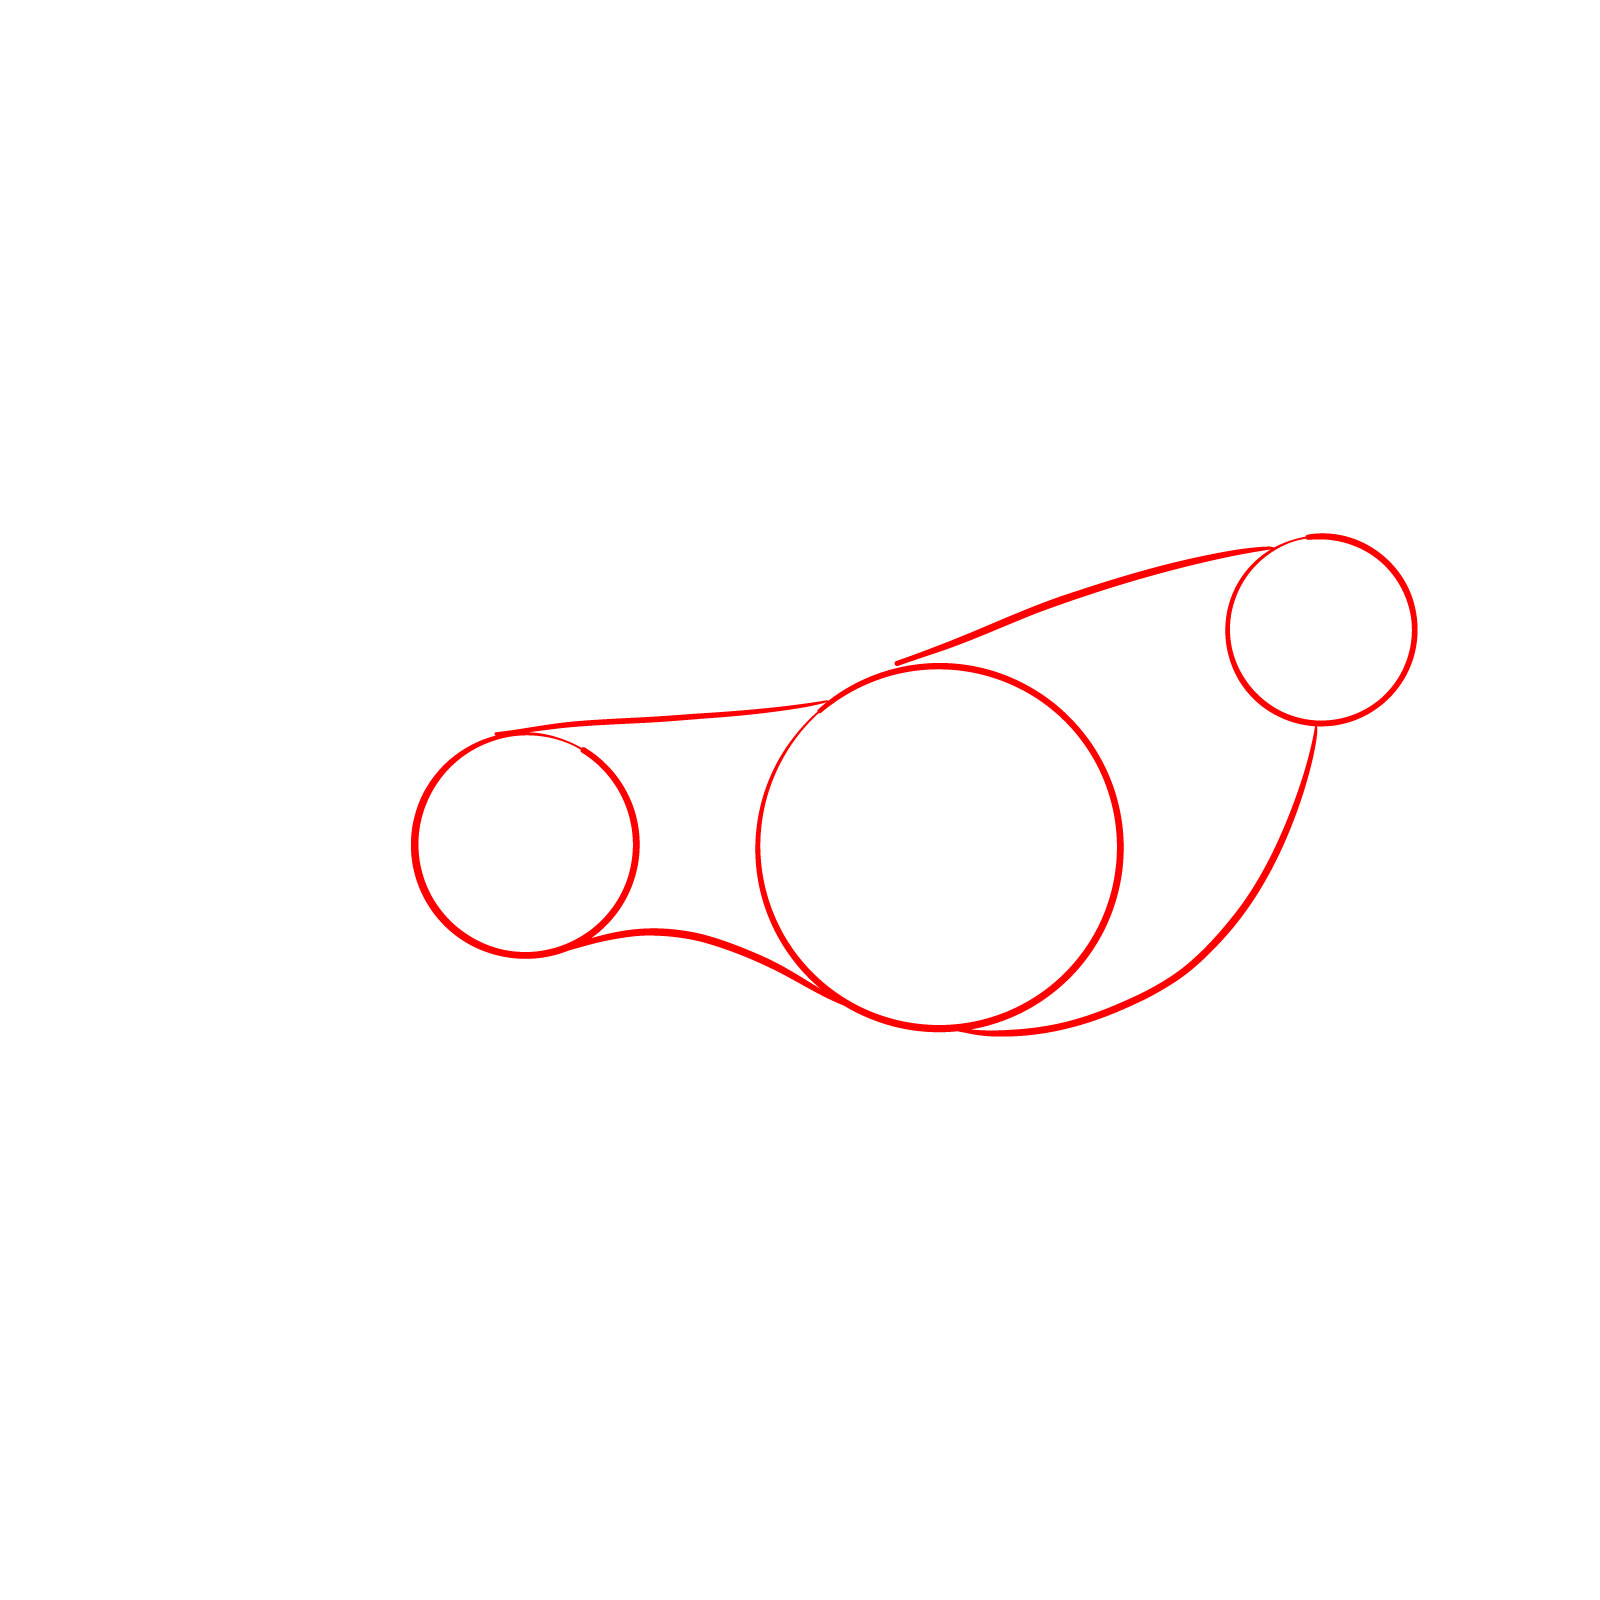
Step 01 – Draw a small circle for the head, a large circle for the chest, and a smaller circle for the hips. Connect these circles with curved lines to outline the lion’s body
Start with basic shapes for the lion’s body
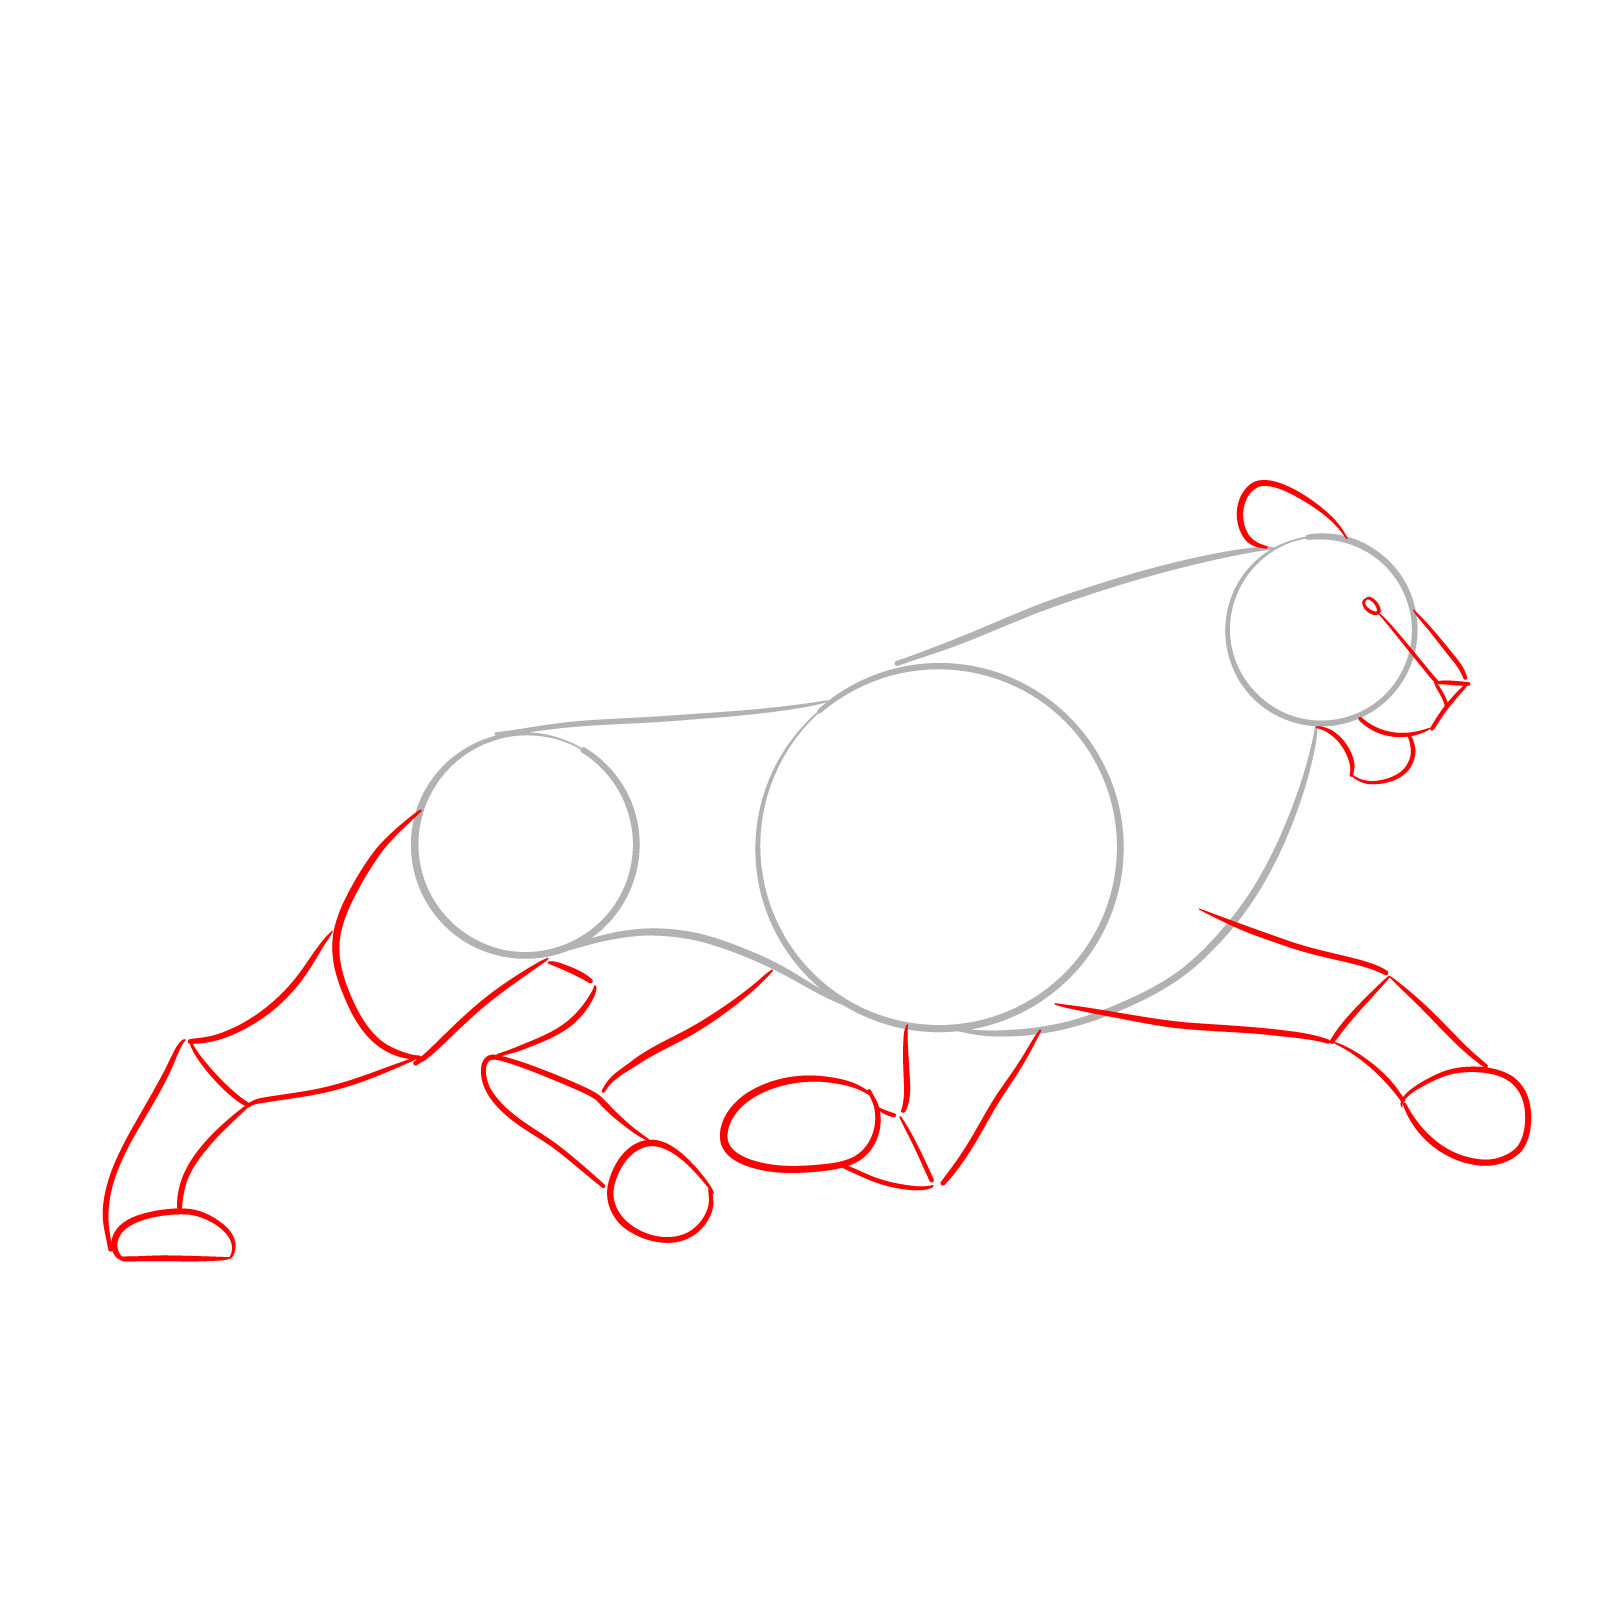
Step 02 – Sketch simple shapes for the lion’s legs to establish their position and movement. Add smaller shapes for the ear, eye, nose, and mouth to suggest facial features, almost the same as we did for the previous drawing
Add foundational shapes for limbs and face
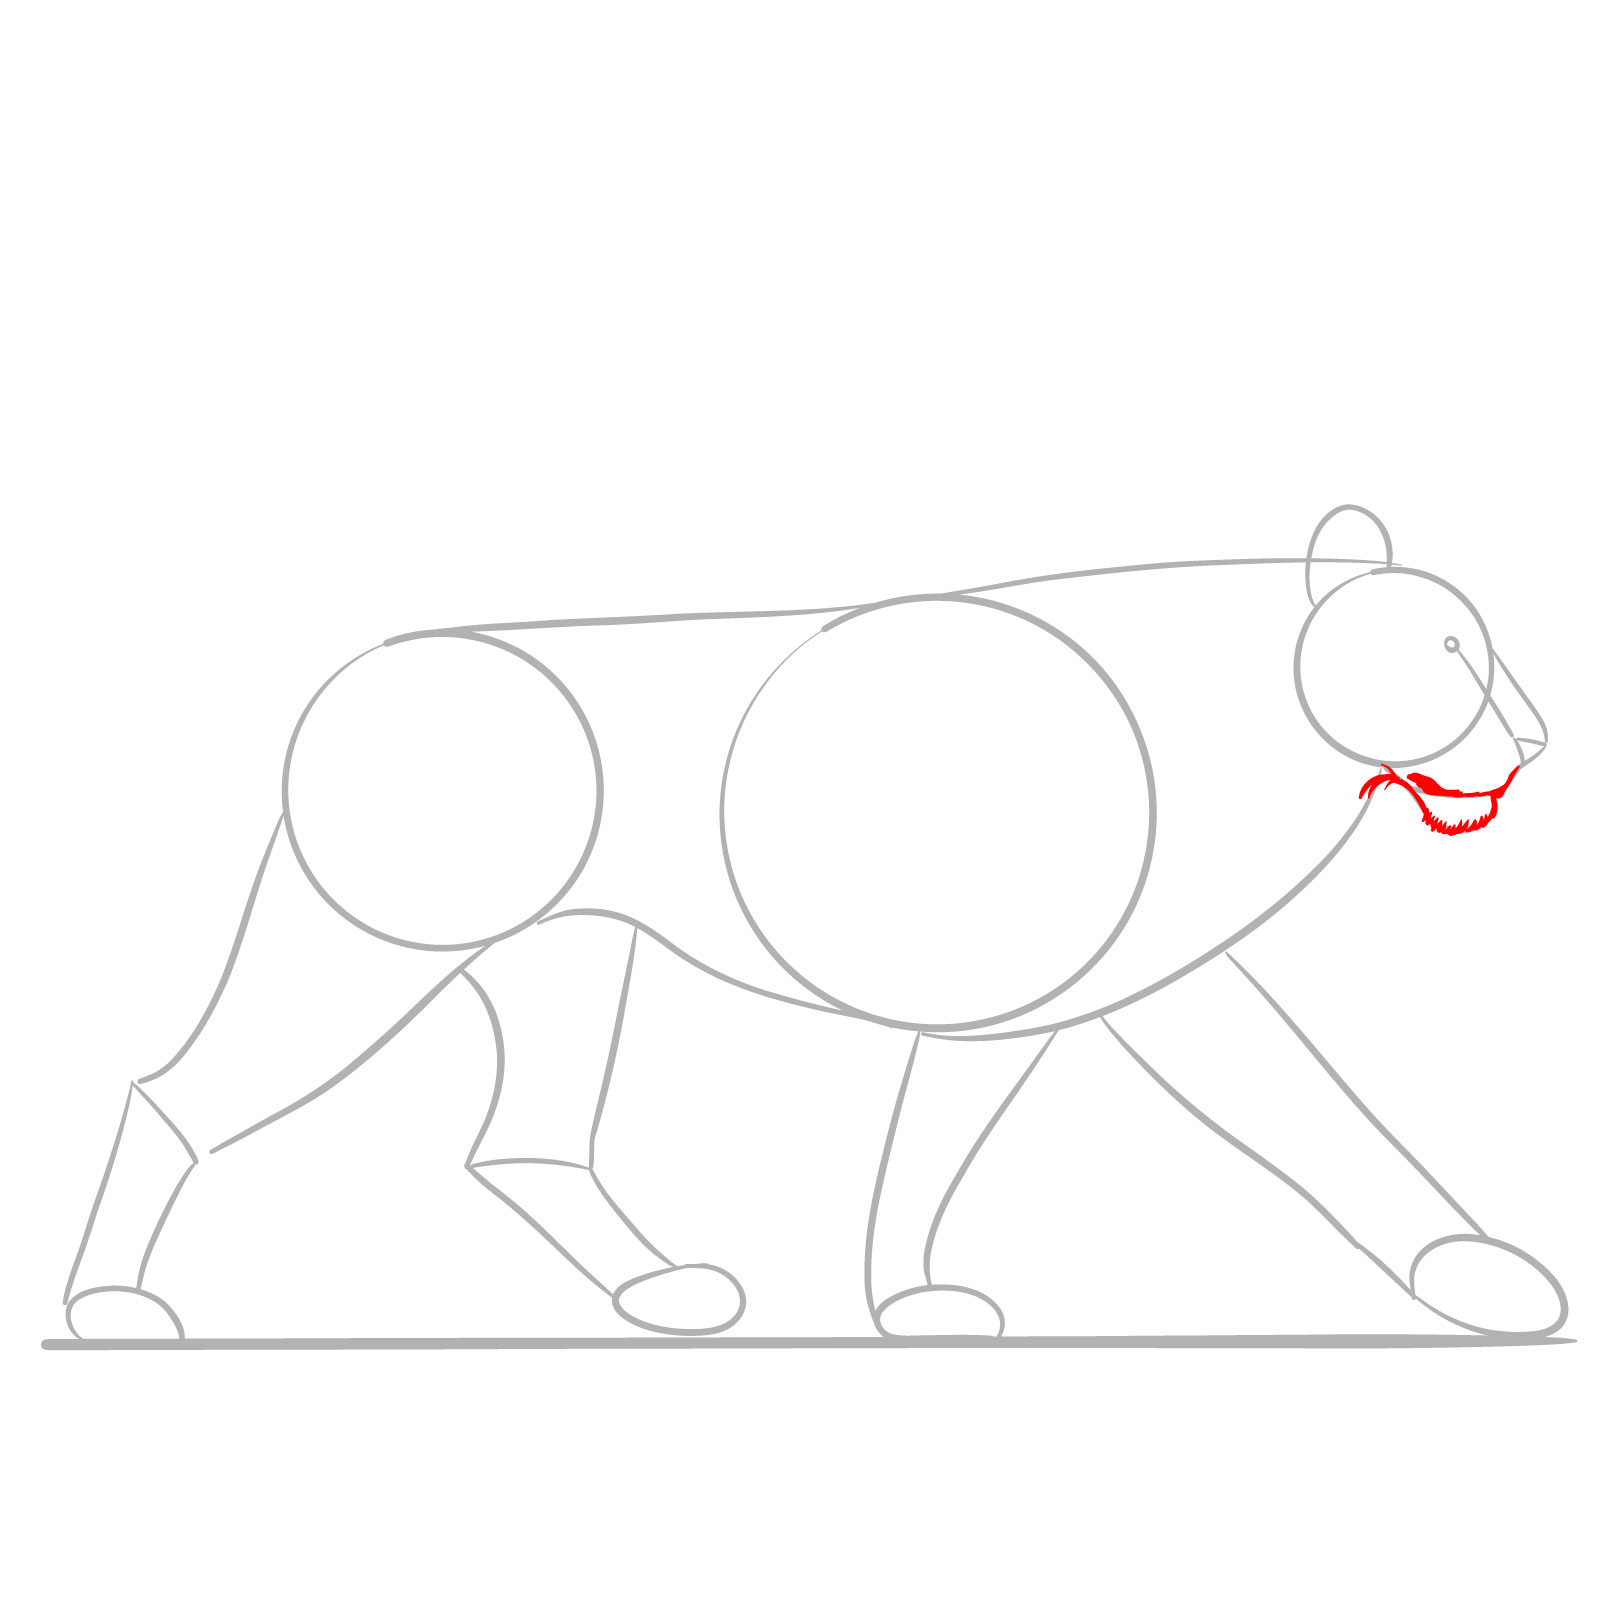
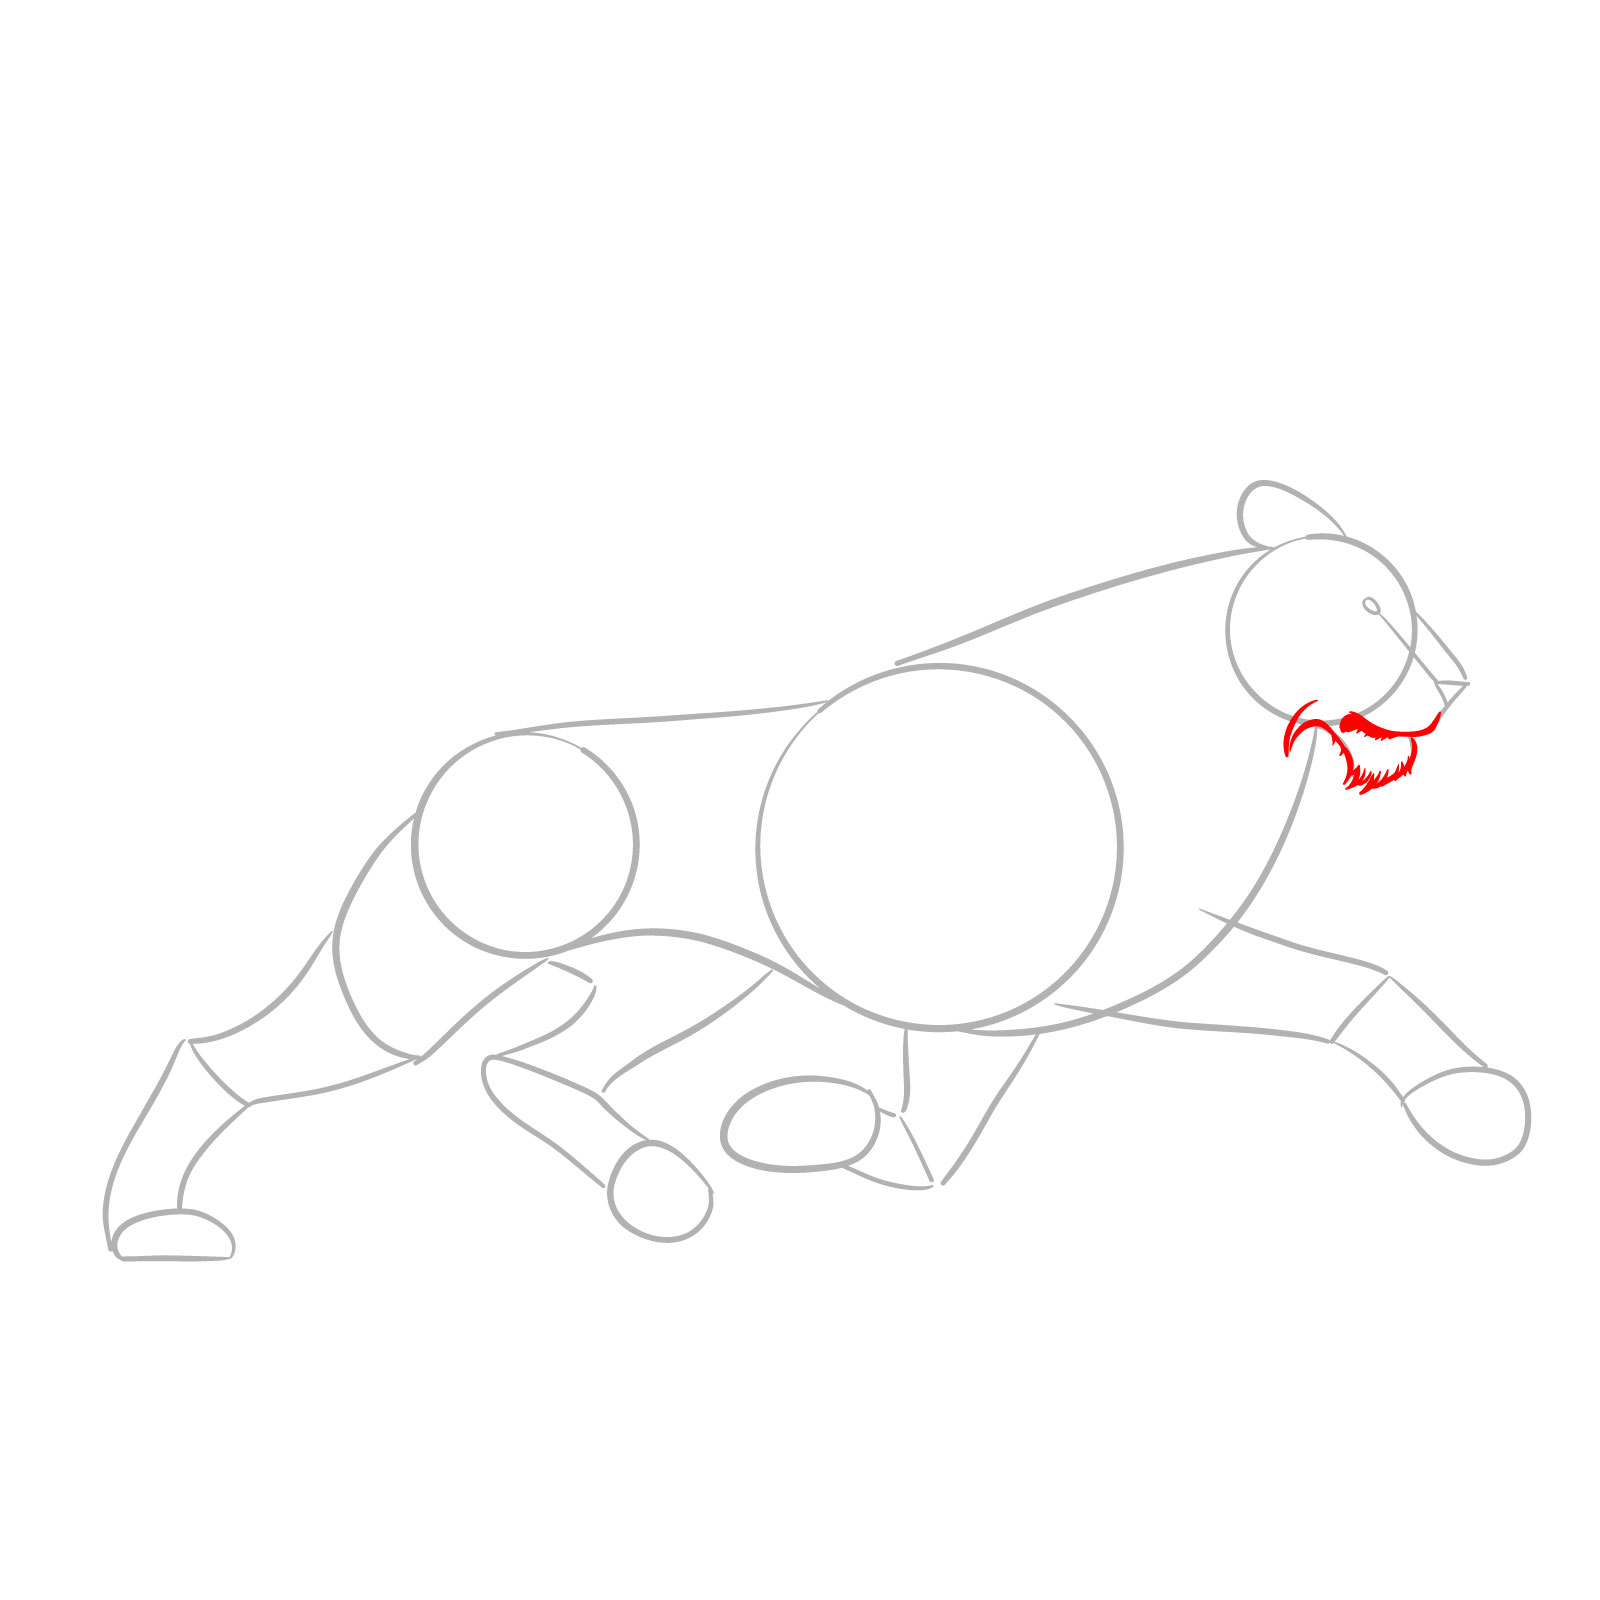
Step 03 – Refine the lower part of the face by drawing the lion’s mouth, chin, and the bottom part of the jaw, giving more detail to the facial structure
Shape the lion’s mouth and jaw
Step 04 – Outline the lion’s nose and extend the line up to shape the forehead
Define the lion’s nose and forehead
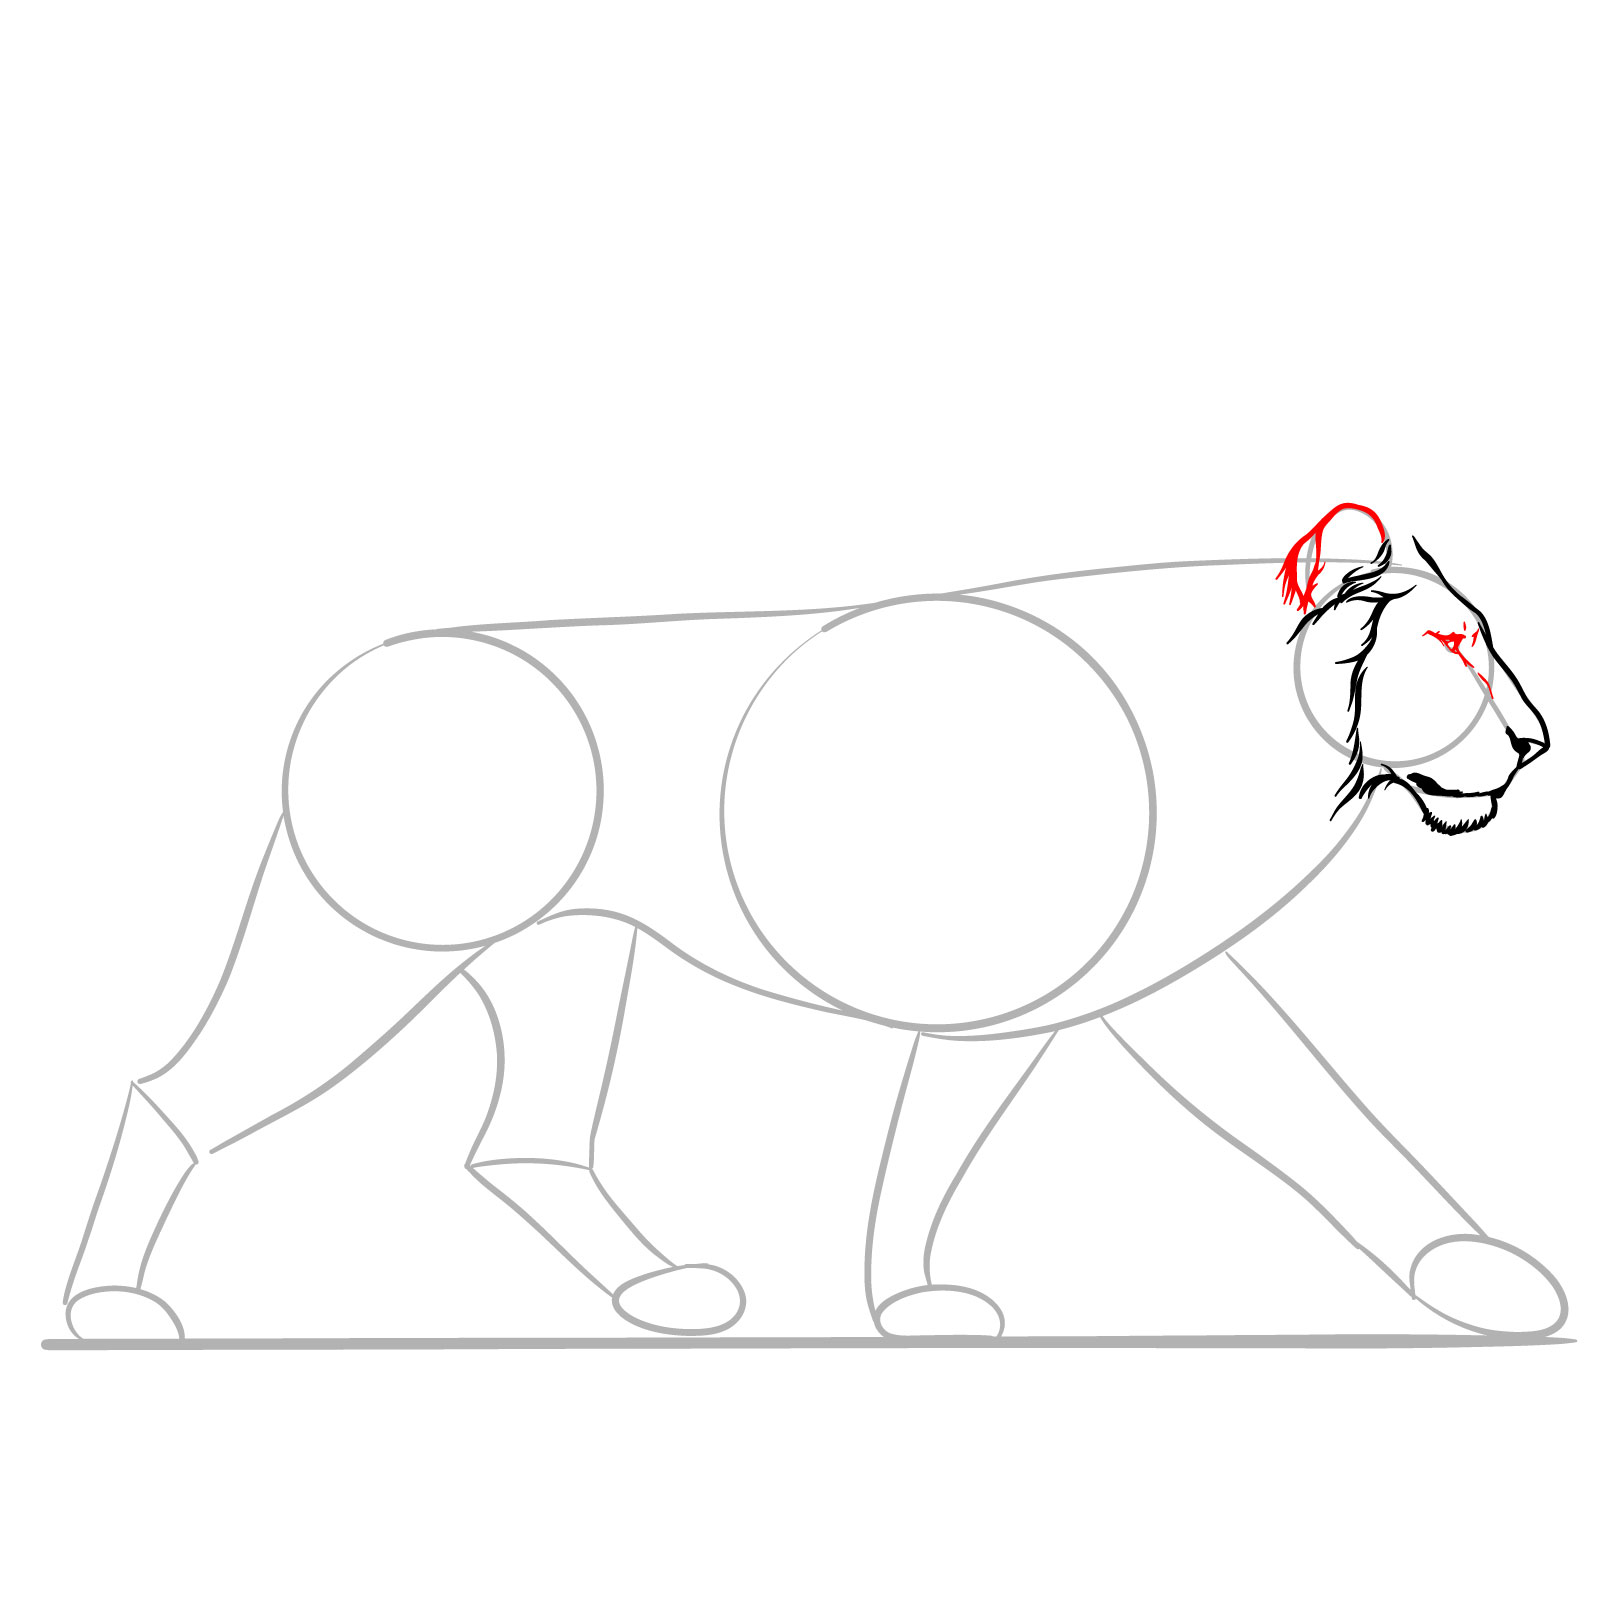
Step 05 – Draw a series of curved lines around the lion’s face
Sketch facial curves
Step 06 – Sketch the lion’s eye, detail the area around the eye, and add further definition to the face. Include whiskers and their marks as well
Detail the lion’s eye and face
Step 07 – Draw the lion’s ear, giving attention to its shape and size, and apply some shading at the base of it to enhance depth
Craft the lion’s ear and shading
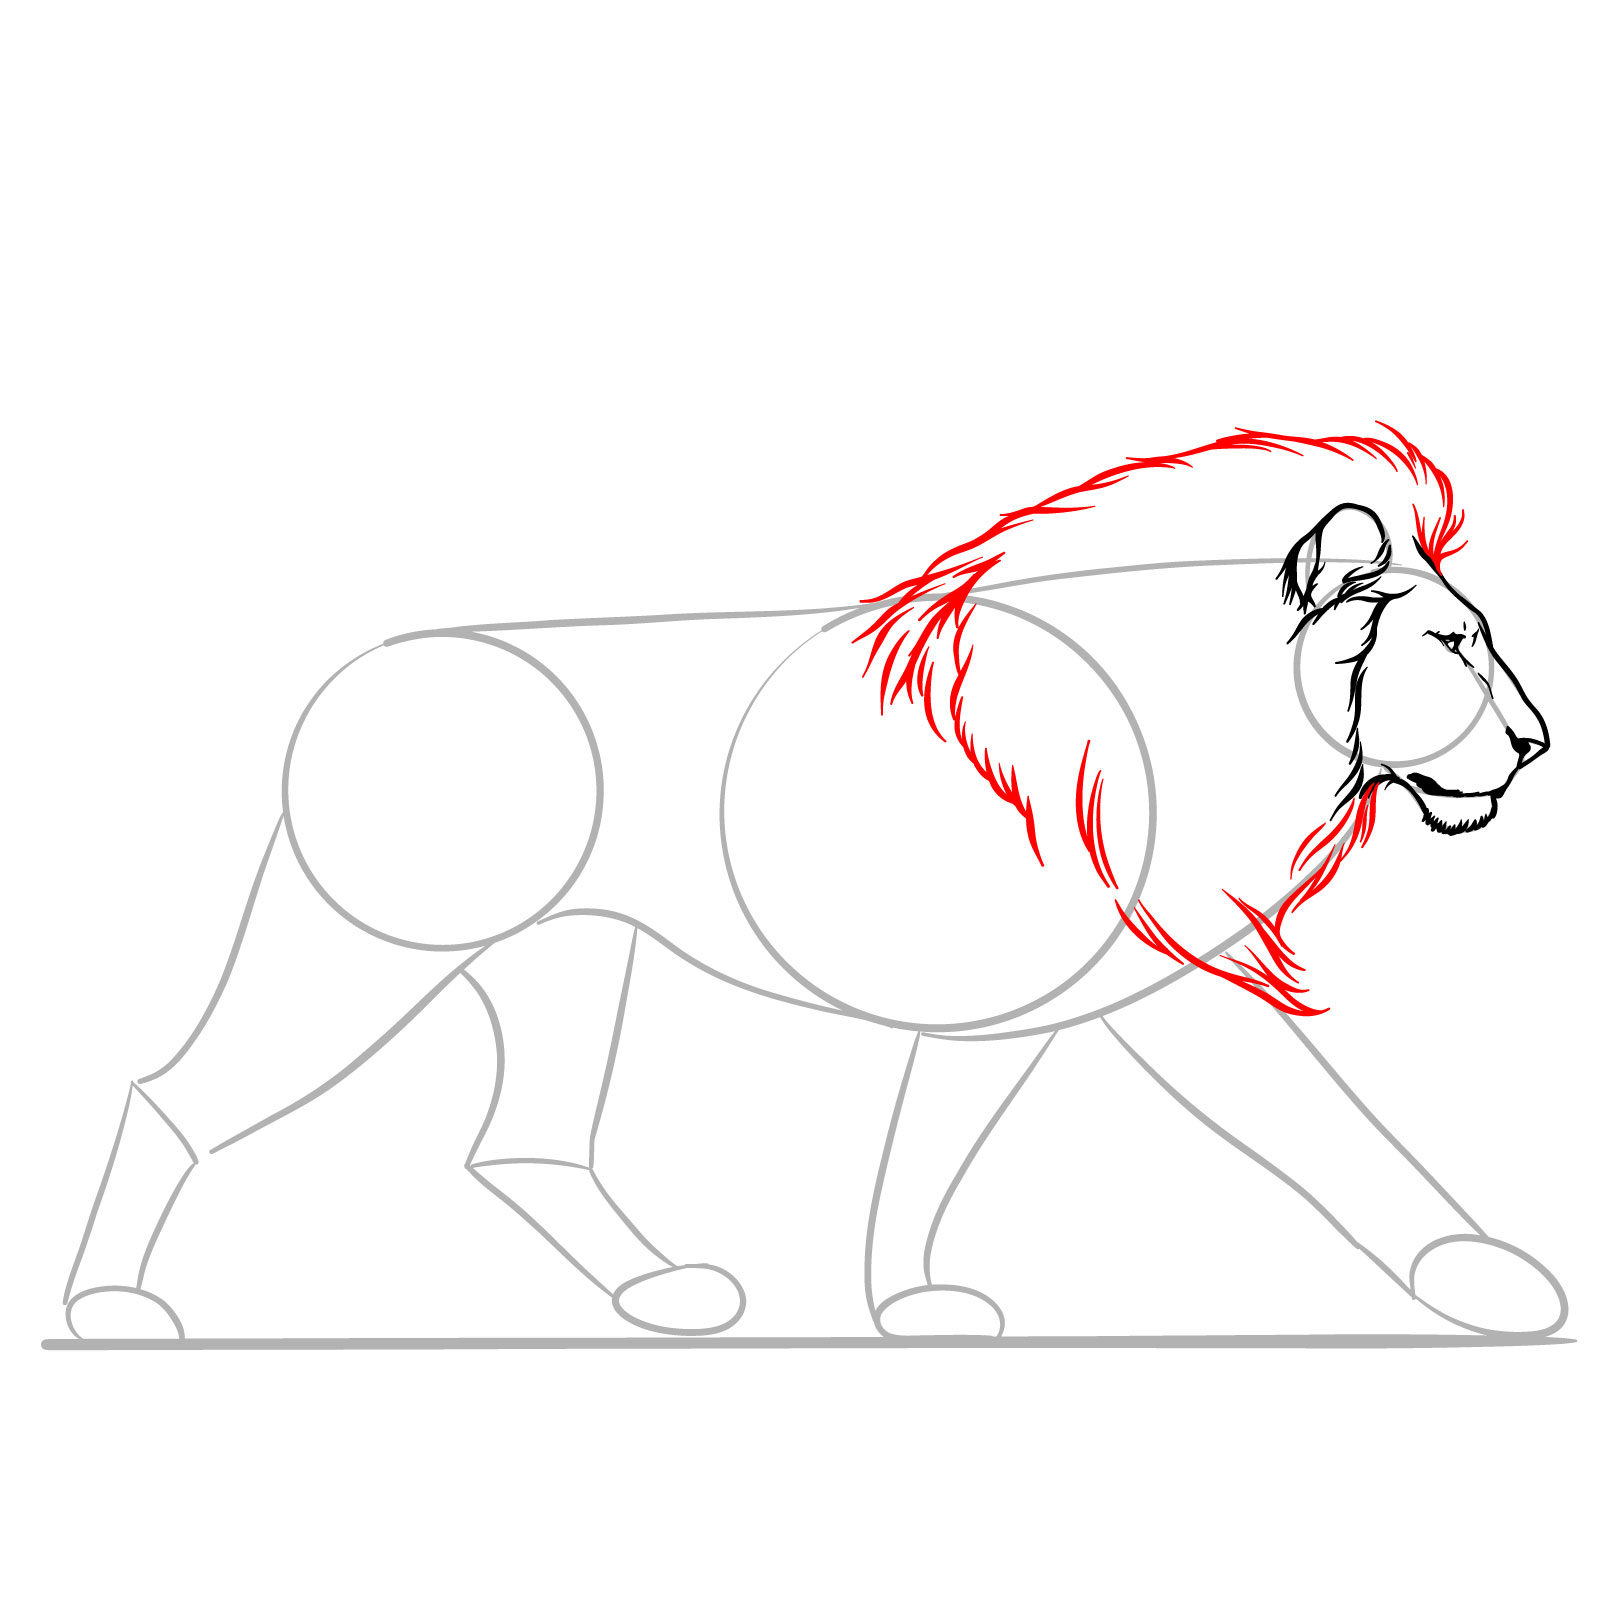
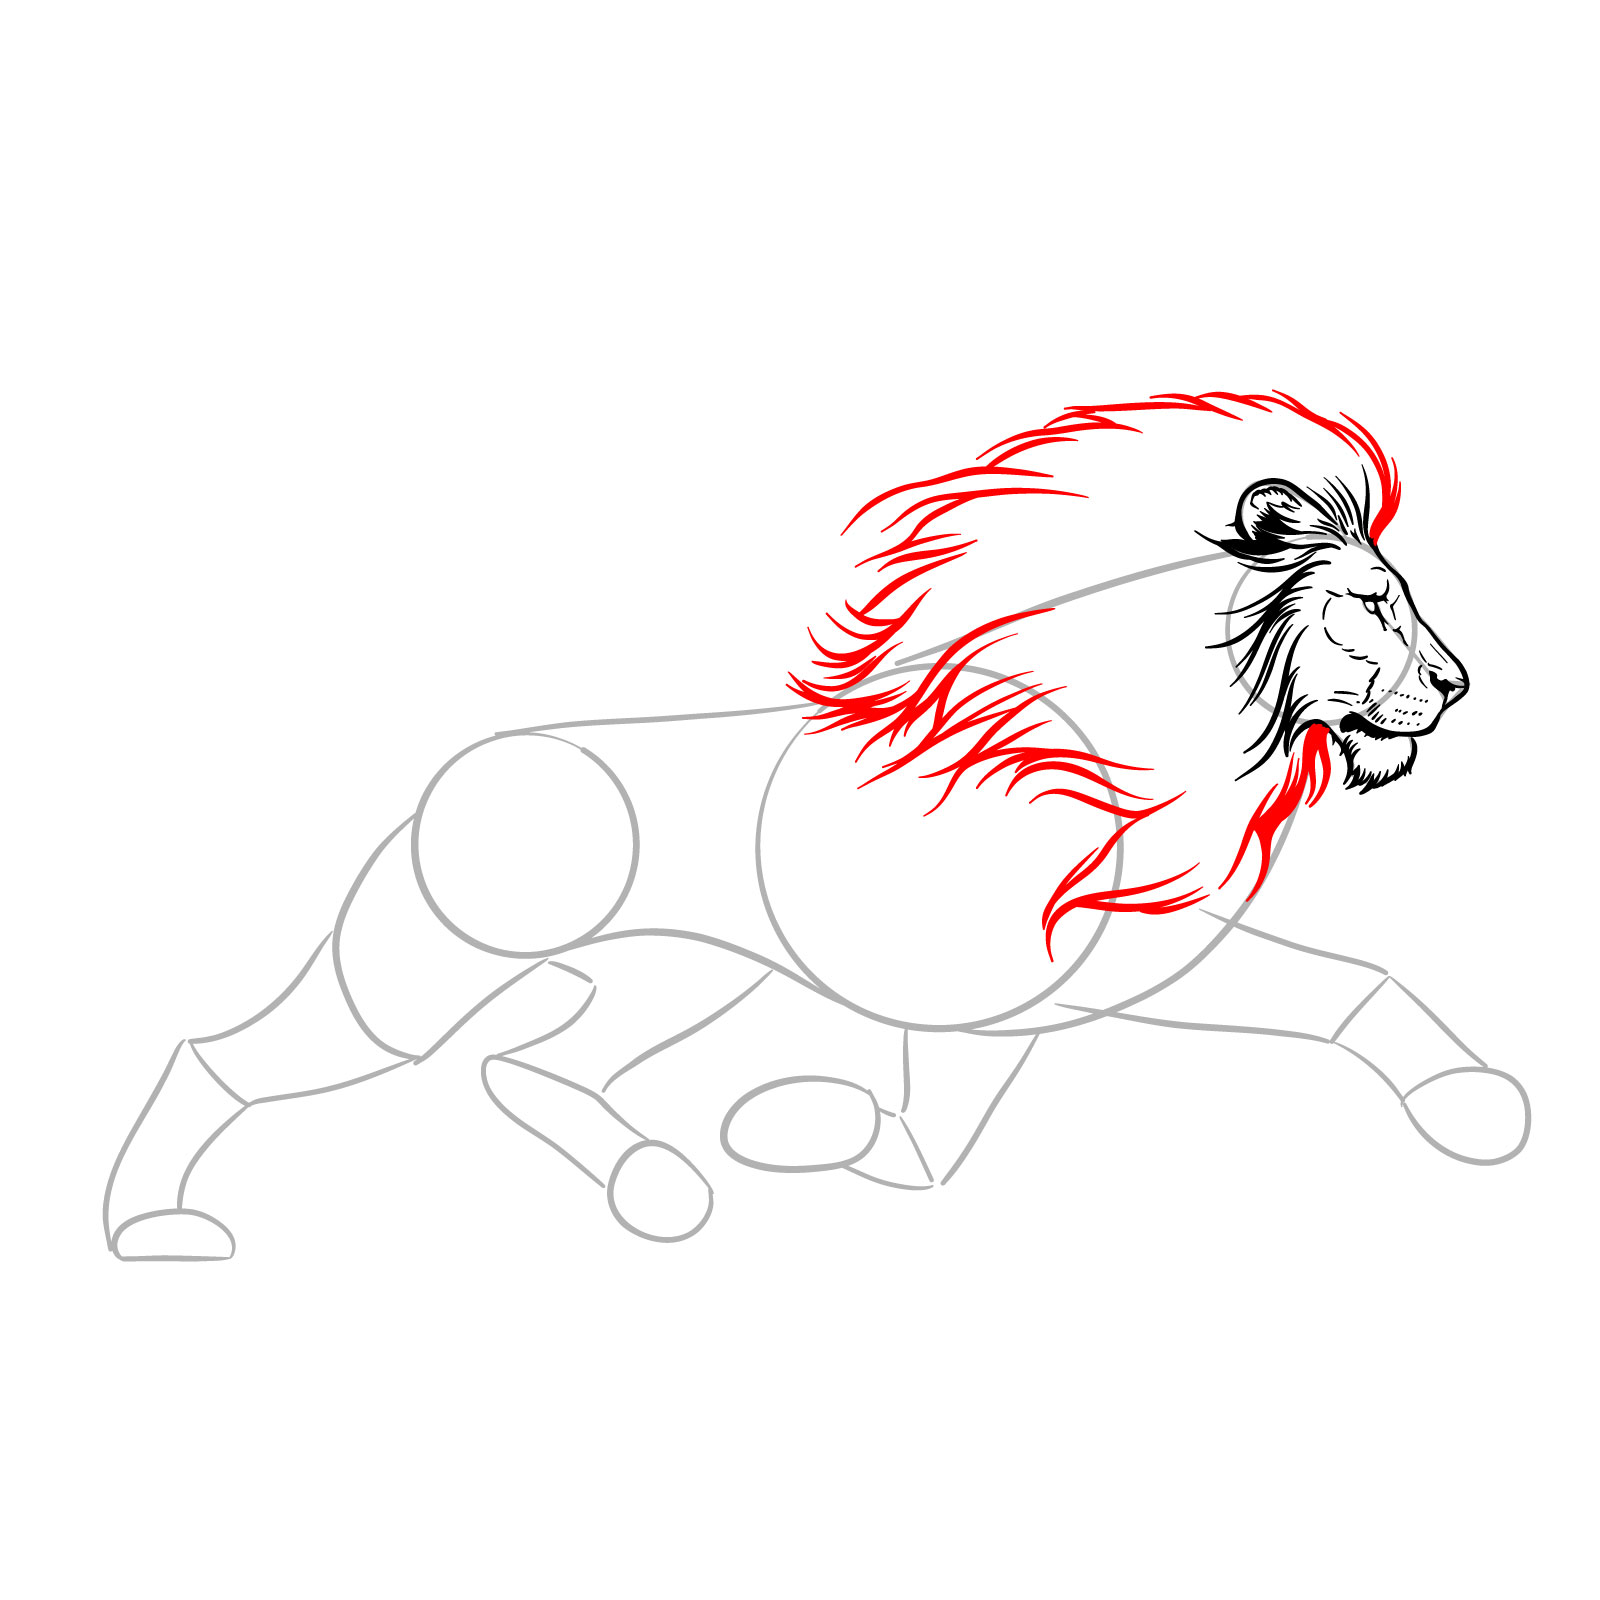
Step 08 – Add the mane to the lion’s head, using flowing lines to represent the fullness and movement of the hair
Illustrate the lion’s mane
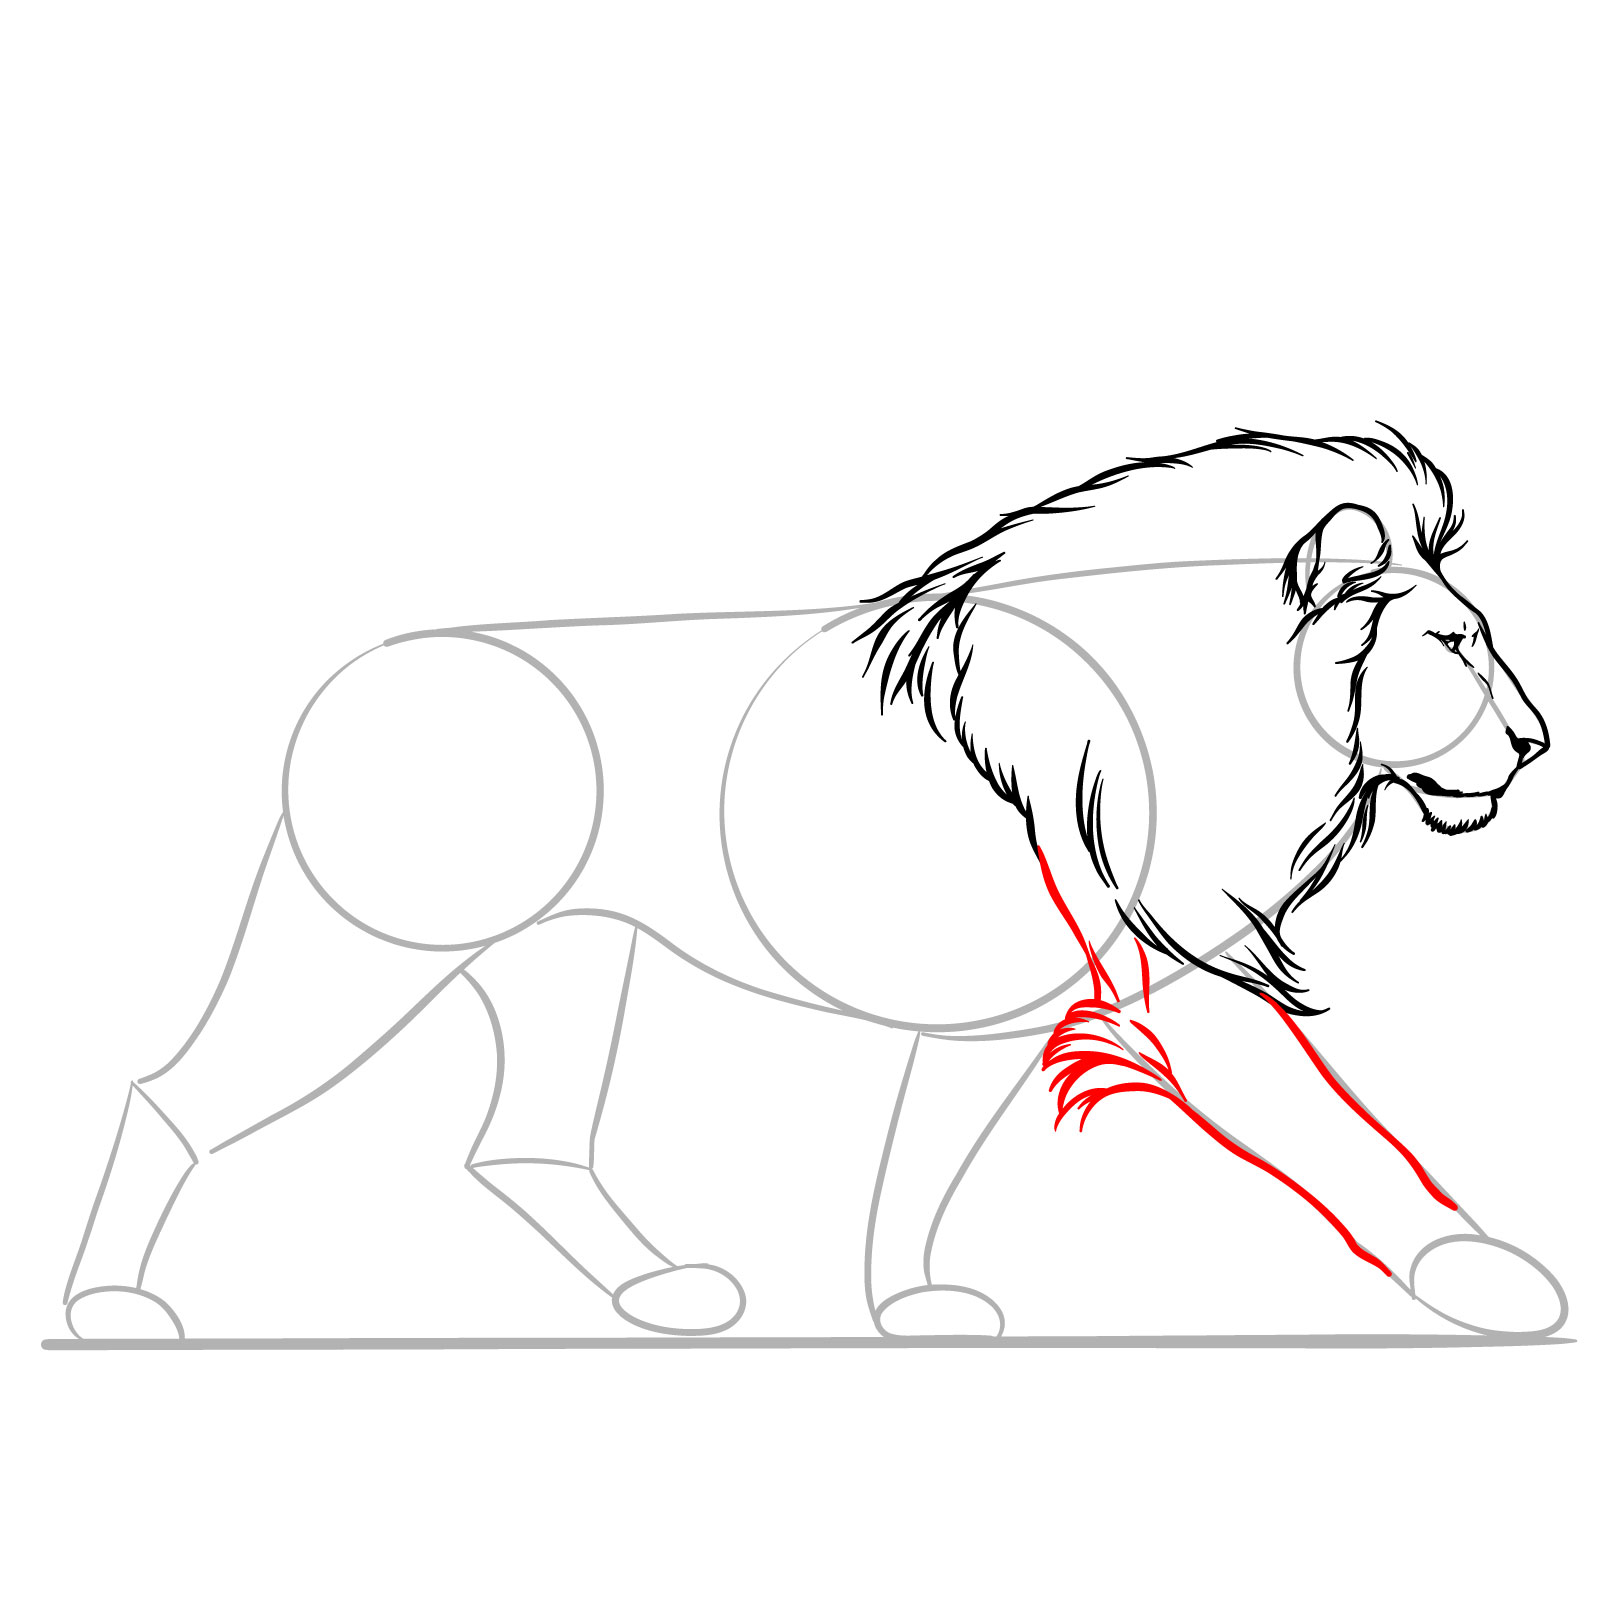
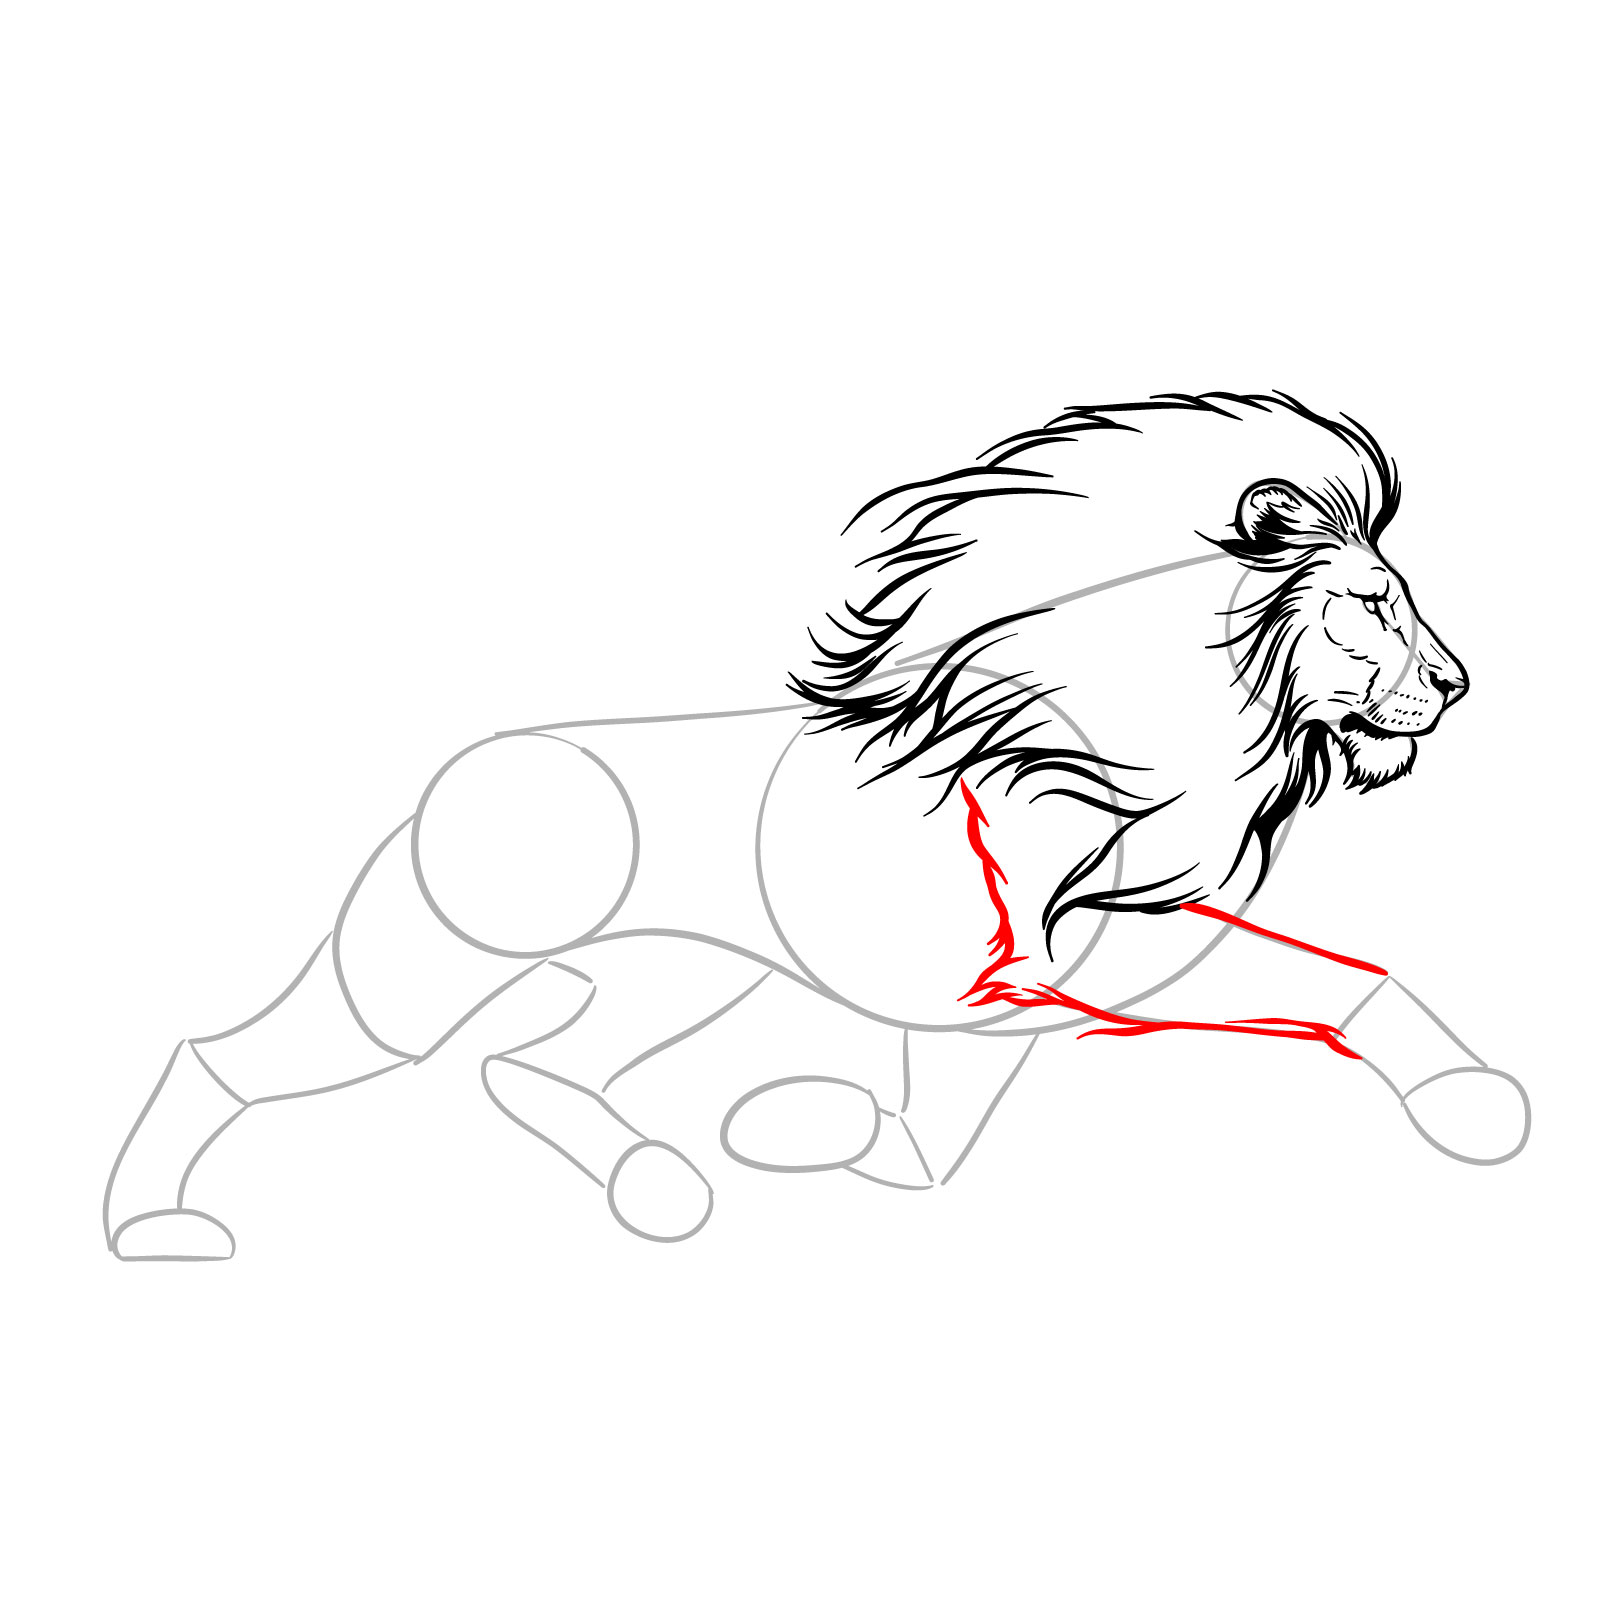
Step 09 – Begin drawing the first front leg by outlining up to the joint, capturing the motion and muscle structure
Start the lion’s front leg
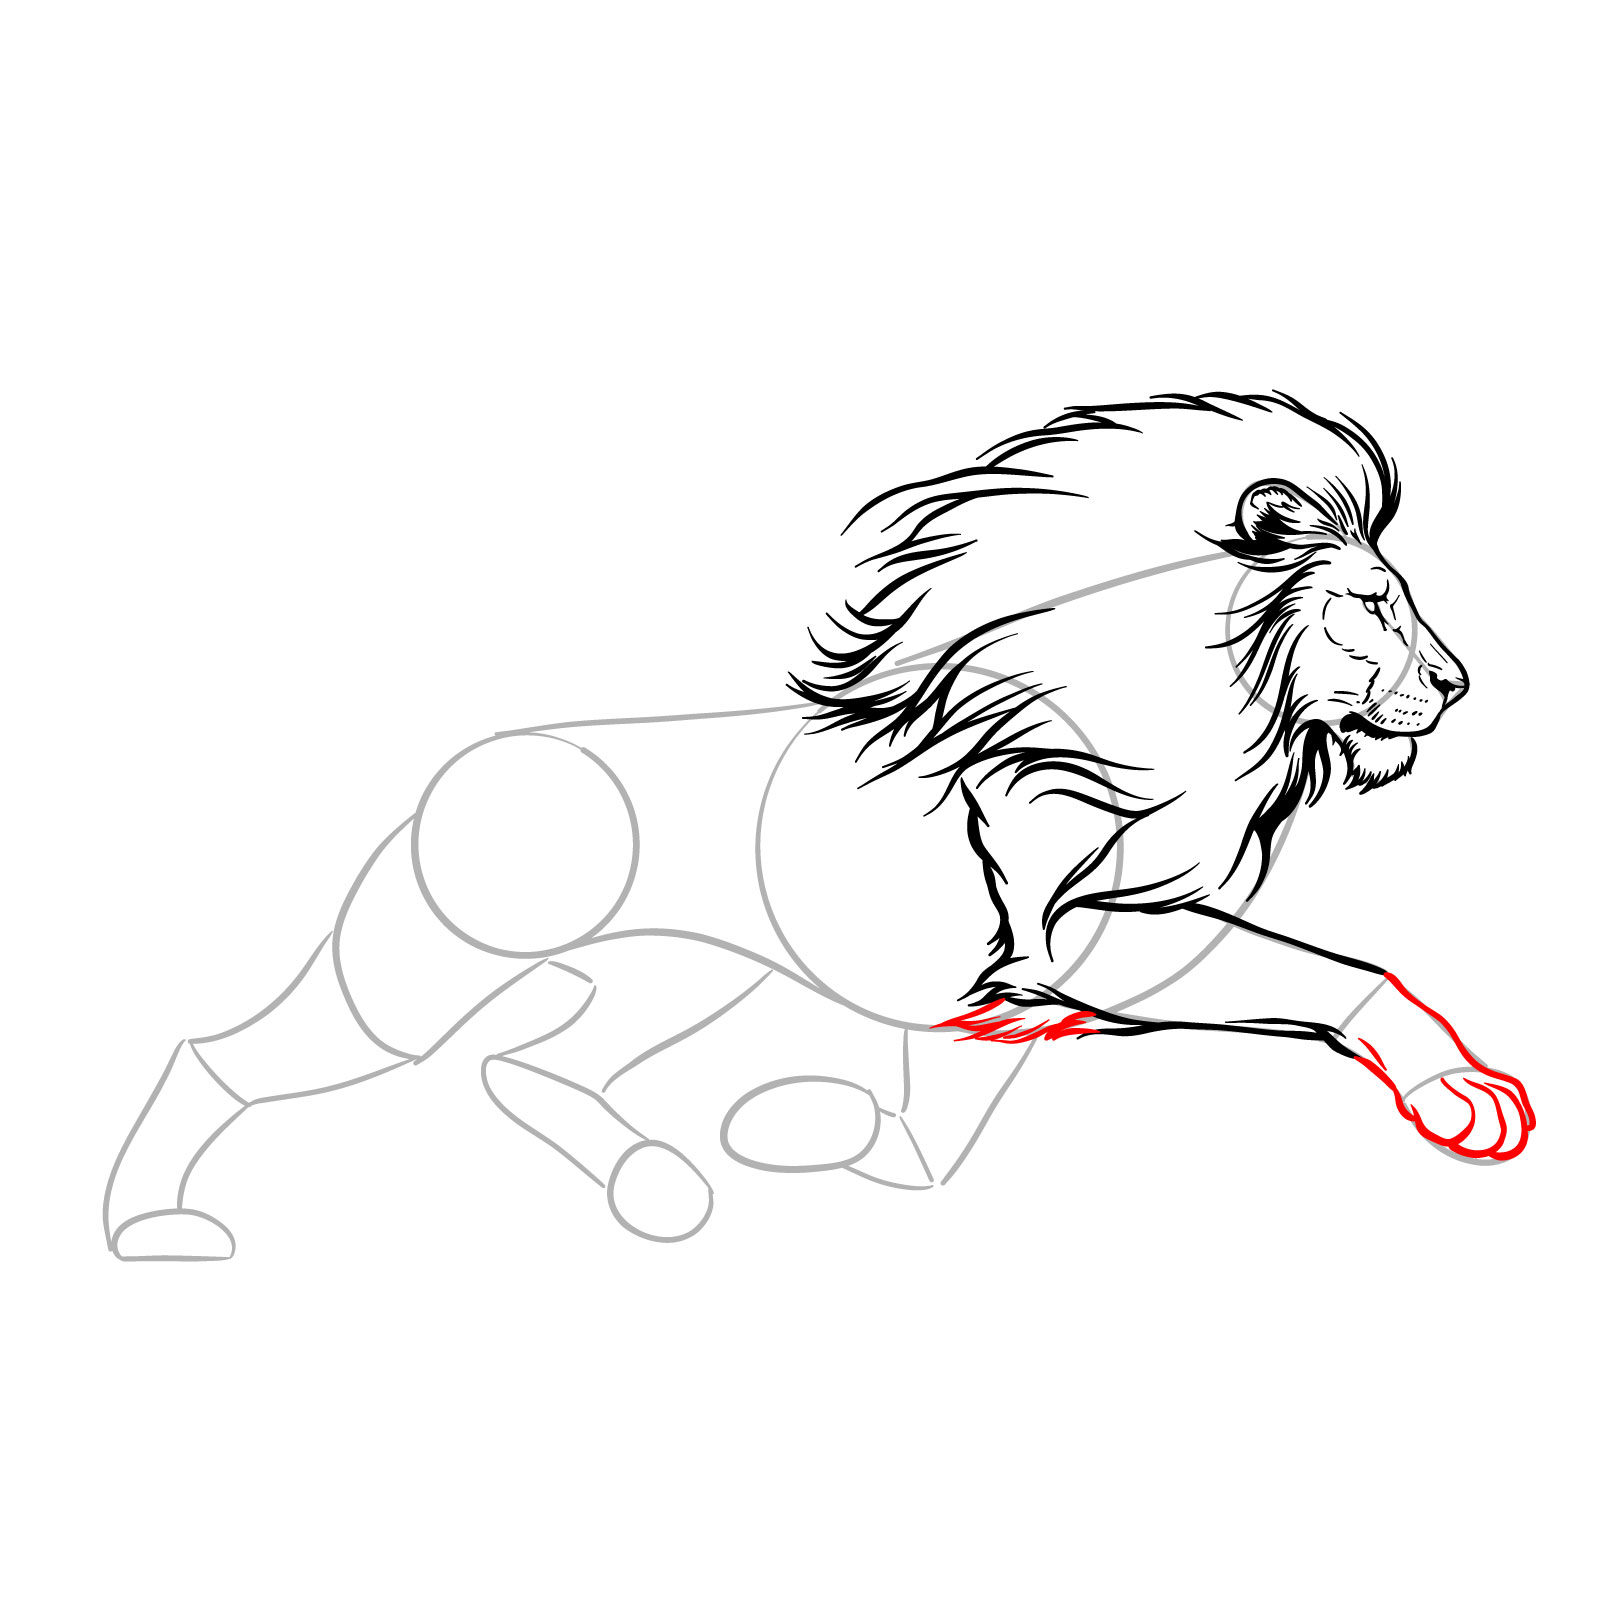
Step 10 – Complete the lion’s lower front leg by drawing the paw and toes. Add some fur texture to the joint area
Finish the lion’s front leg with paw details
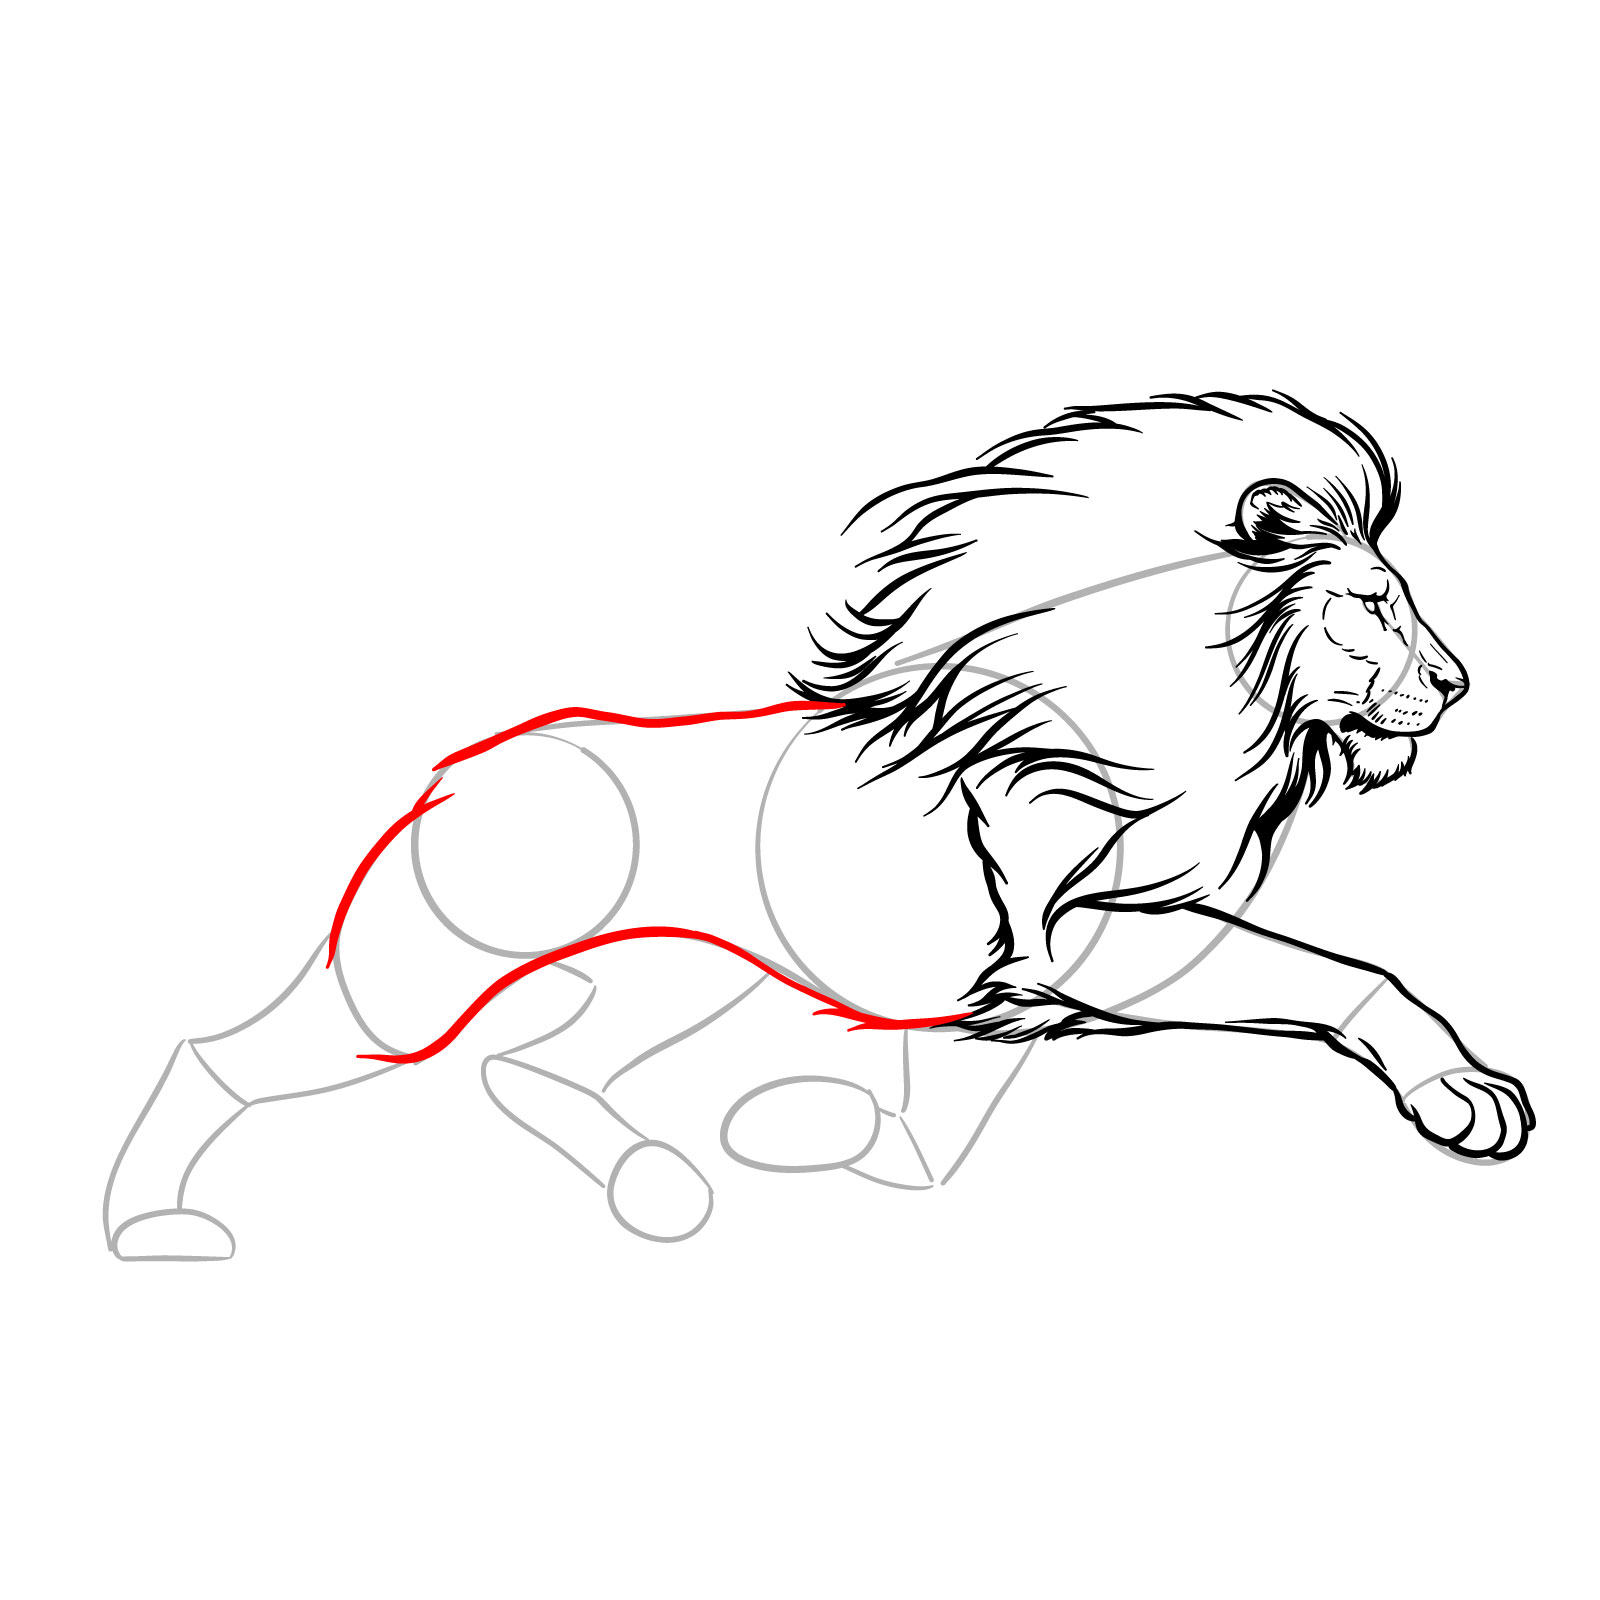
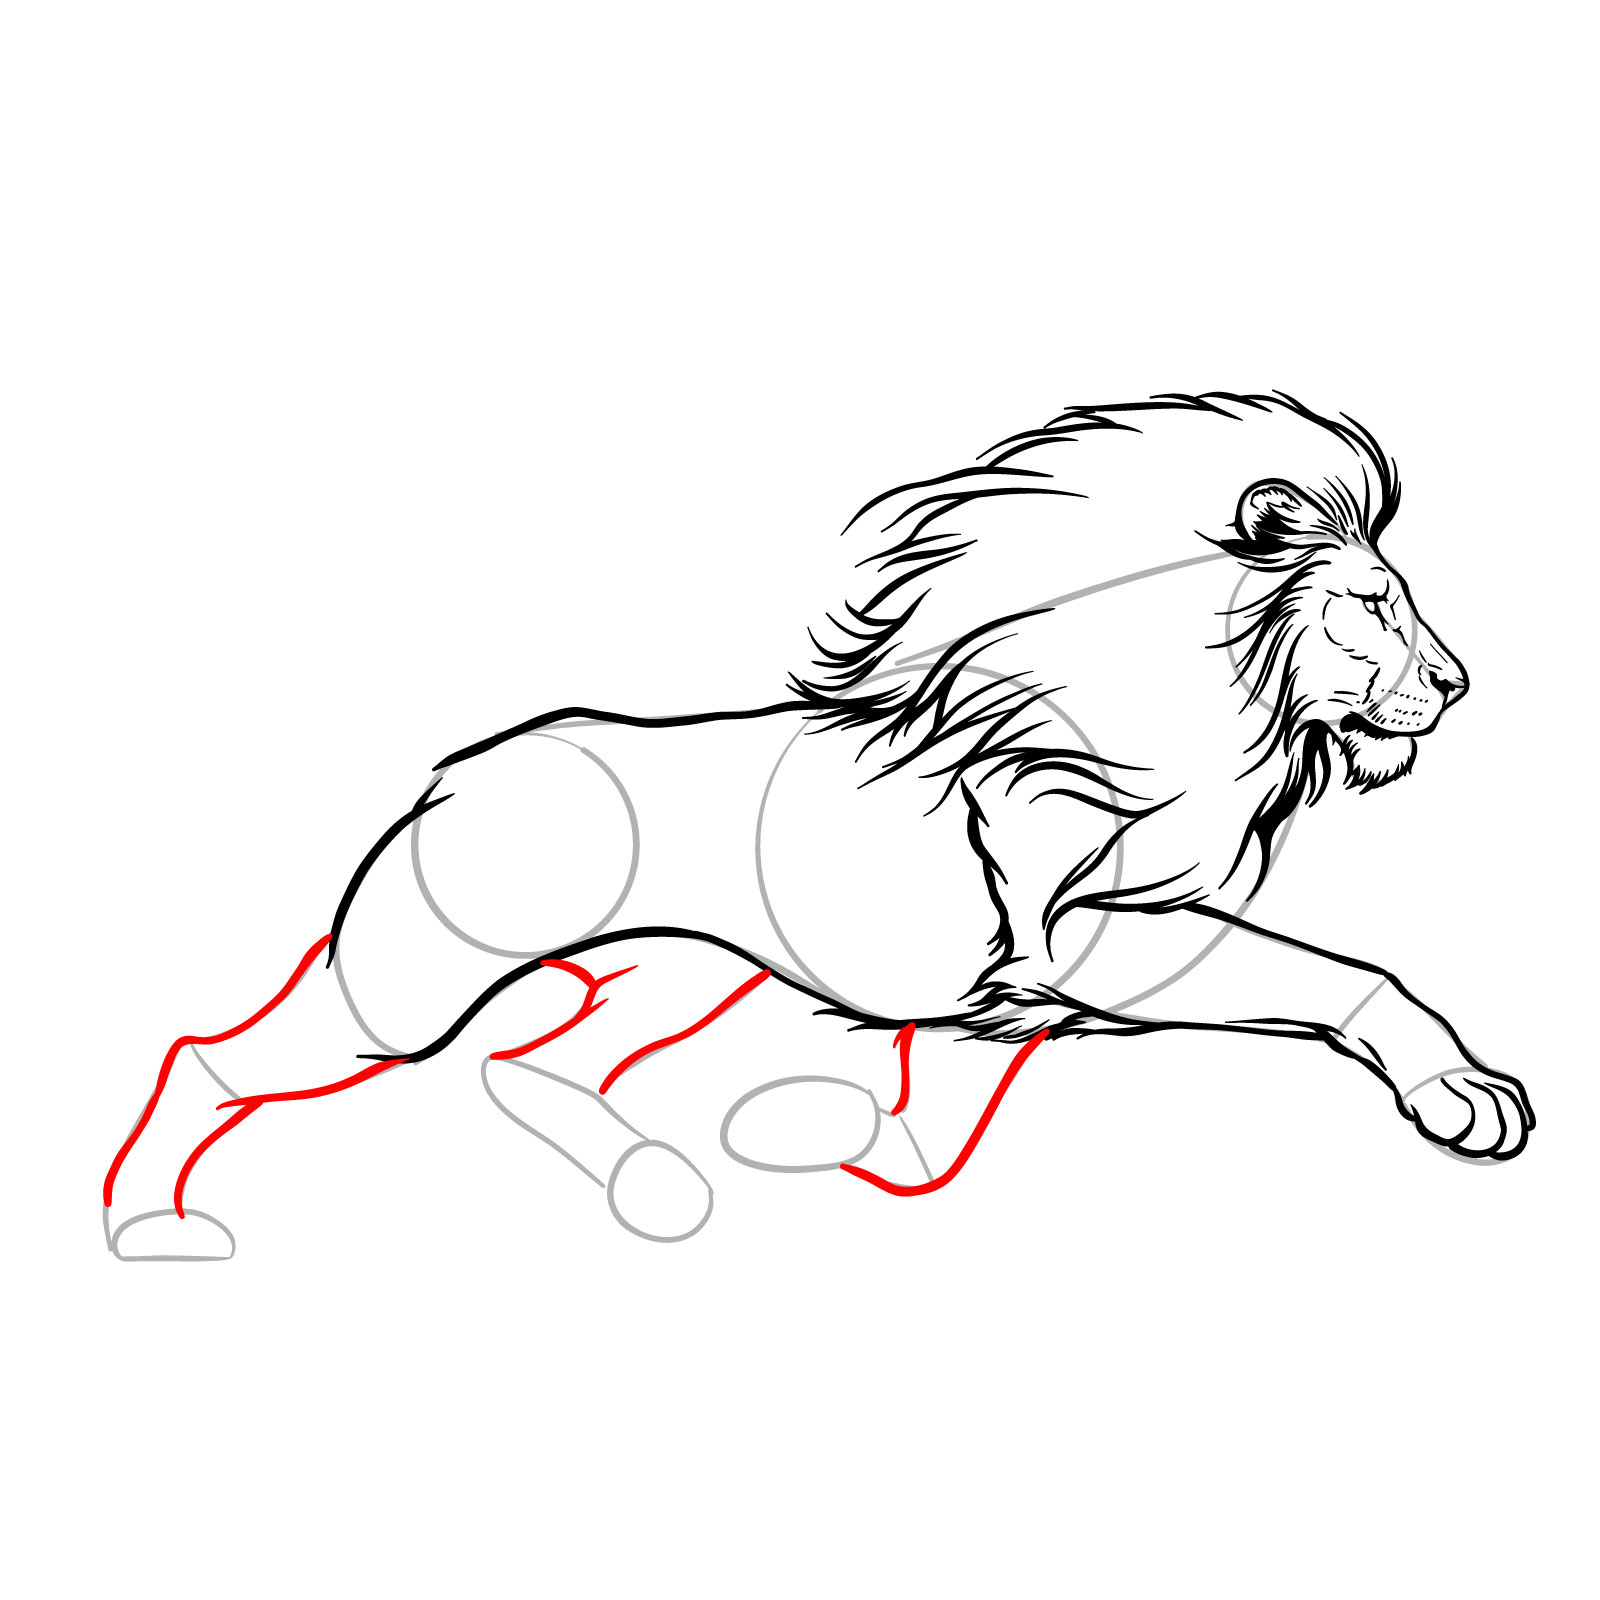
Step 11 – Draw the body outline of the lion and the upper part of the hind leg closest to us, ensuring the lines suggest the lion’s muscular build and motion
Outline the lion’s body and hind leg
Step 12 – Sketch the outlined shape of the lion’s leg down to the paw, include the other hind leg up to the knee, and the second front leg extending to the paw
Add outlines to legs
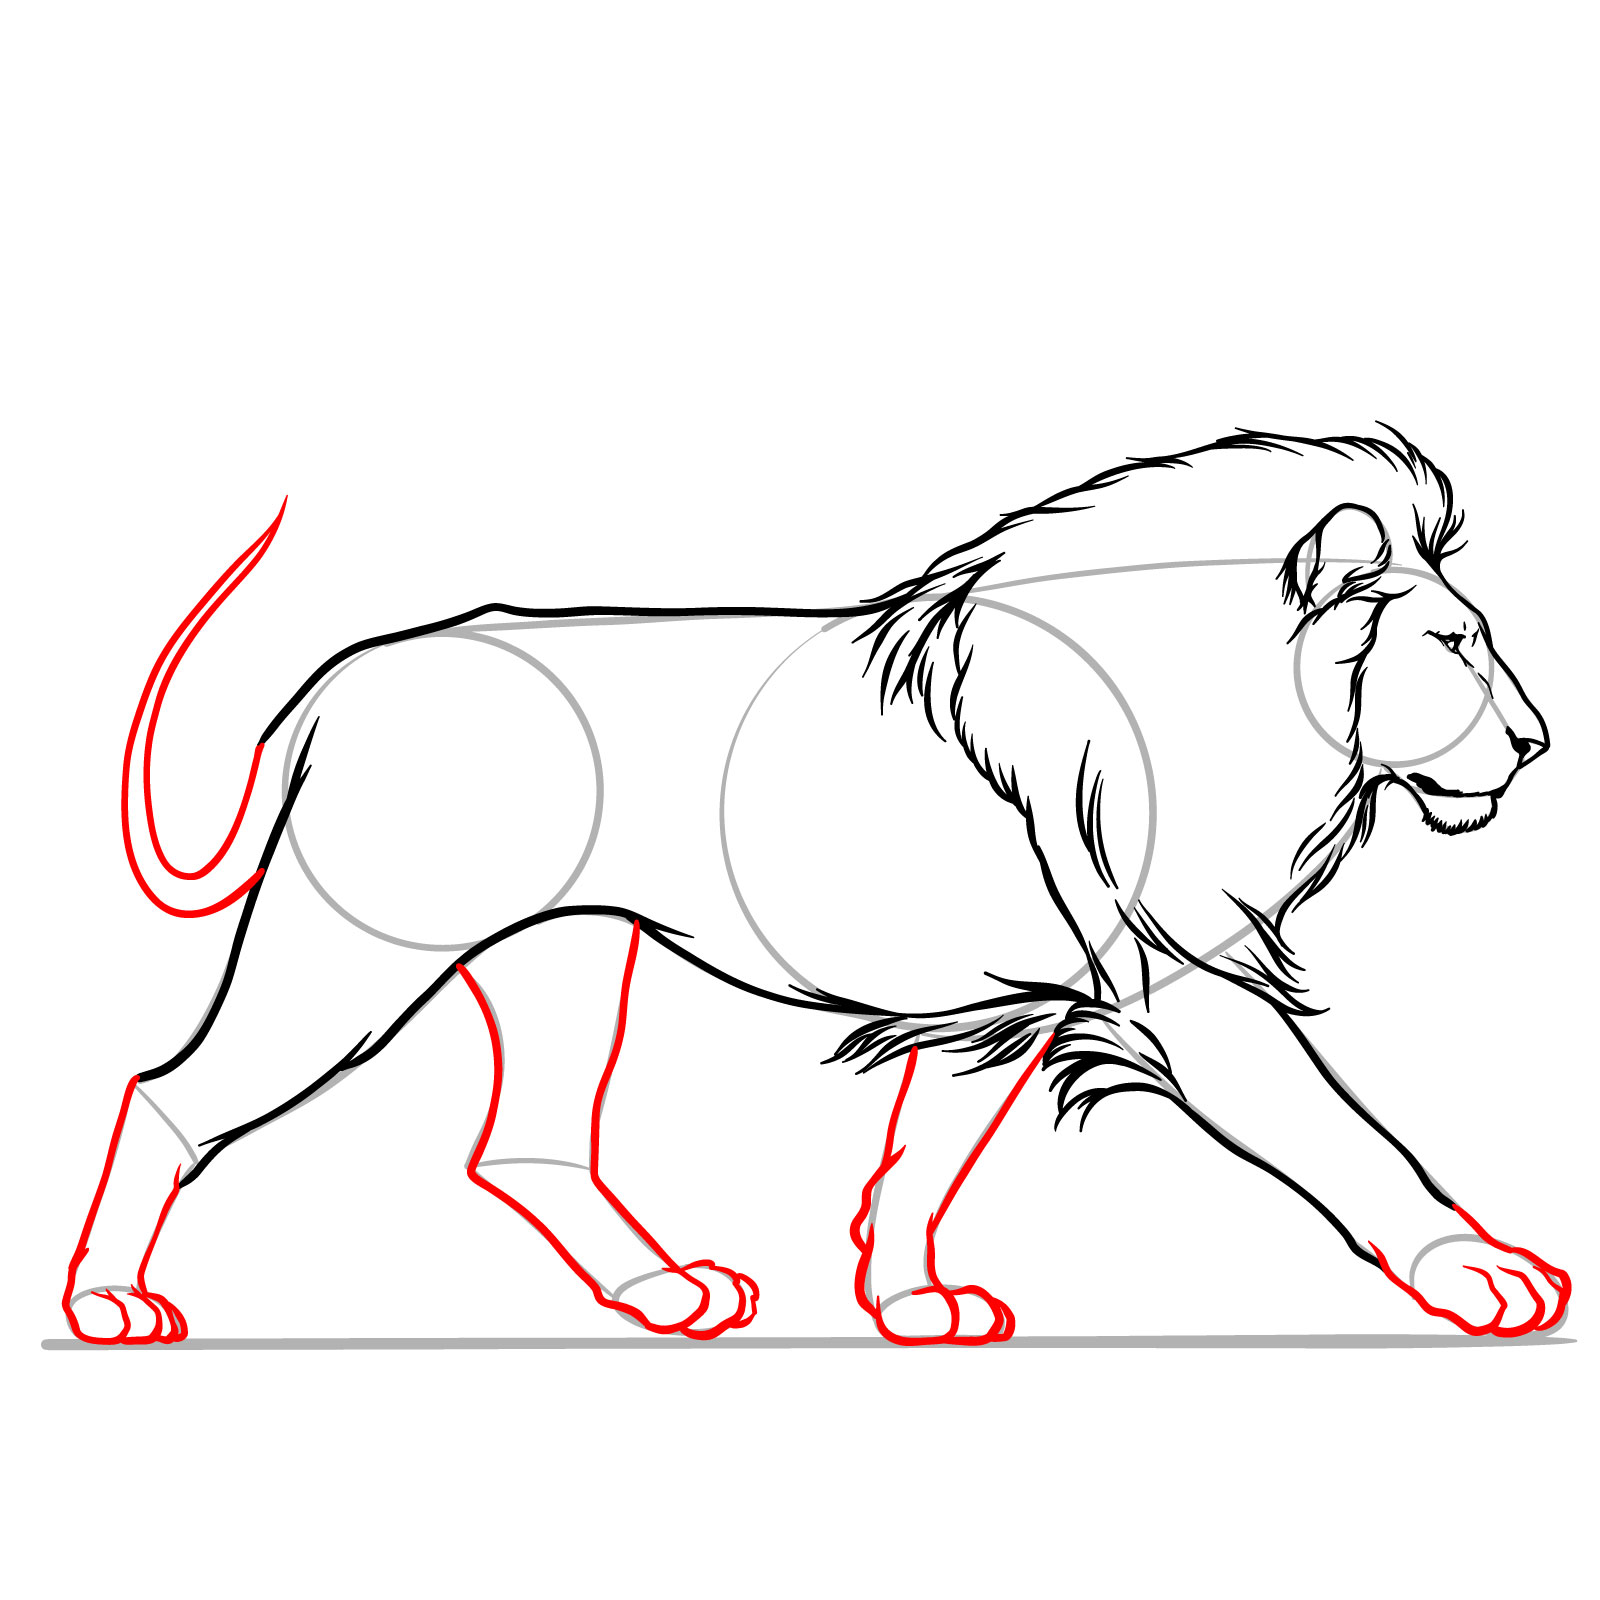
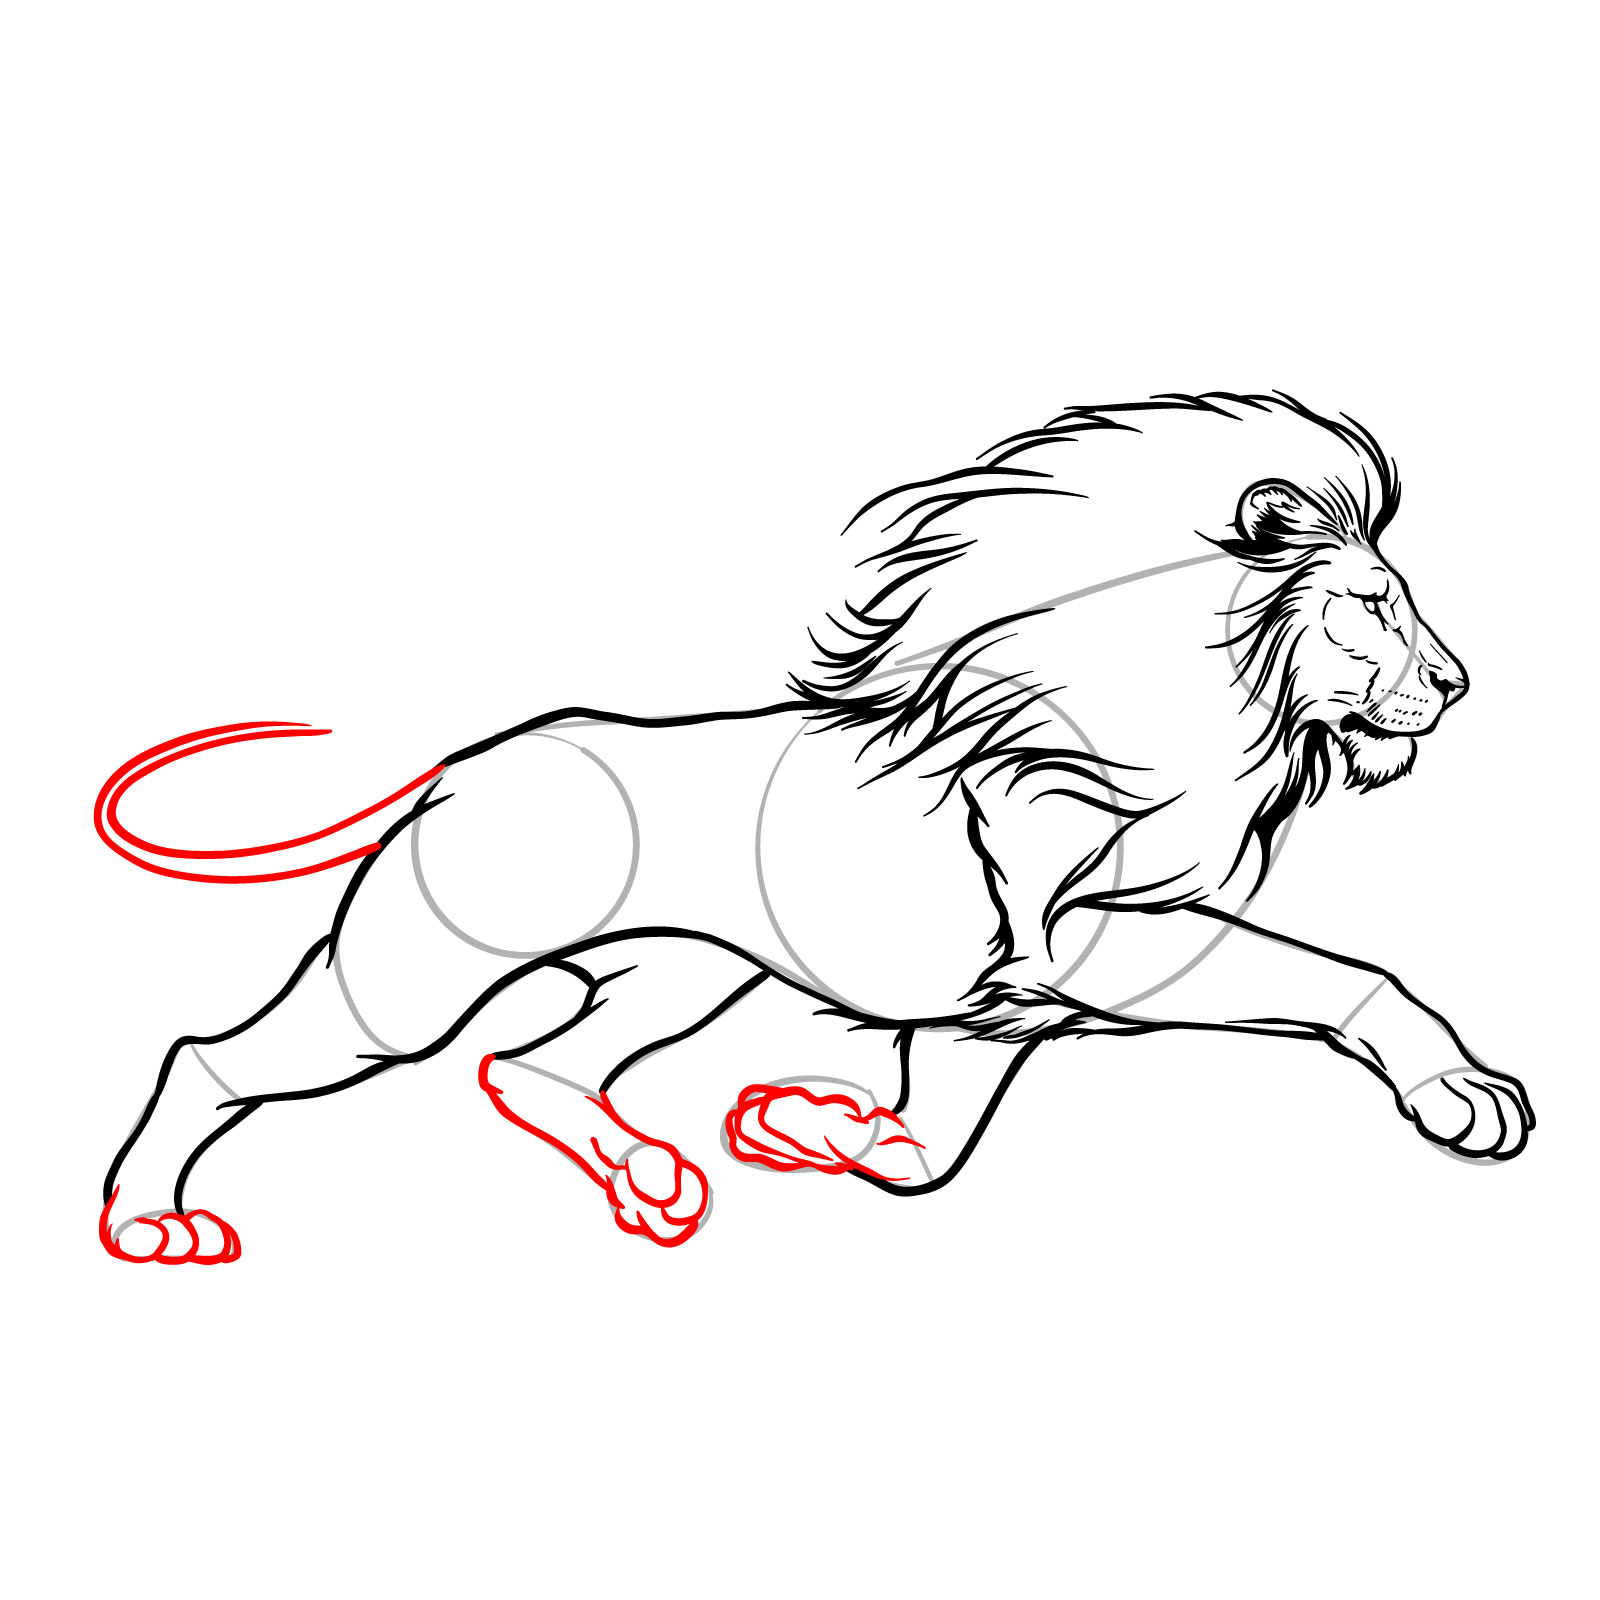
Step 13 – Draw the remaining parts of the legs, paws, and toes. Add the tail with a curve leading to where the tuft will be
Finish legs and sketch the tail
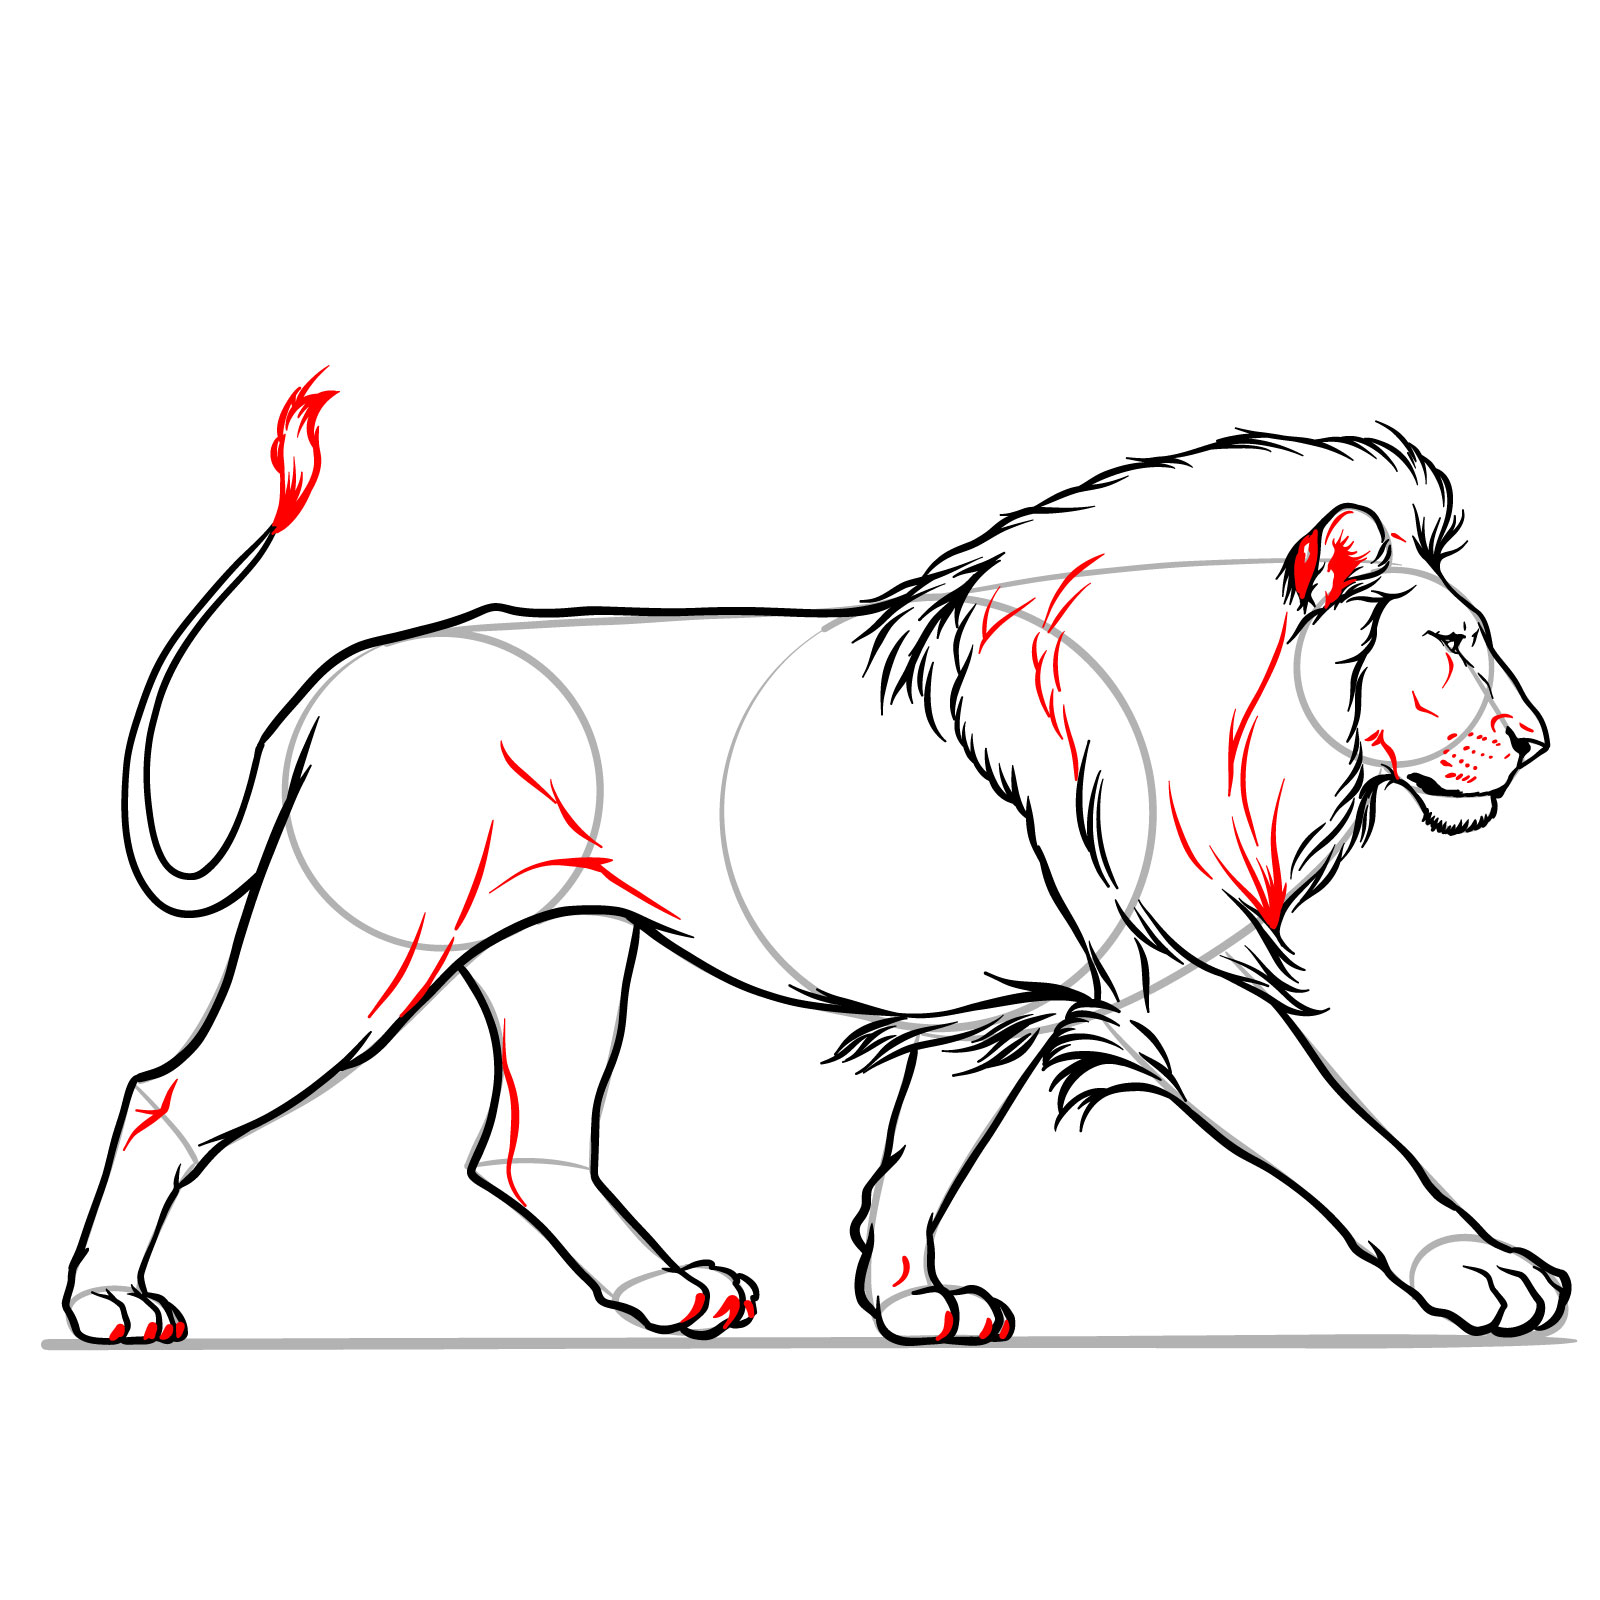
Step 14 – Detail the tail with a tuft at the end, enhance the body with muscle lines and claws, and give the mane a realistic fur texture
Detail body, add tail tuft and mane texture
Step 15 – Erase the basic sketch lines to reveal your completed drawing of a running lion
Final step to complete the lion drawing
Guide 11: Sitting Lion – Back View
Back view lion drawing – sitting pose step-by-step guide
Guide eleven presents a lion back view drawing, a sketch of a sitting lion seen from behind. In 13 steps, you’ll shape the gentle curve of the lion’s back, the softness of its mane trailing down, and the placement of the tail. This perspective might seem unusual, but it’s a great way to understand the contours and volume of a lion’s body in a relaxed state.
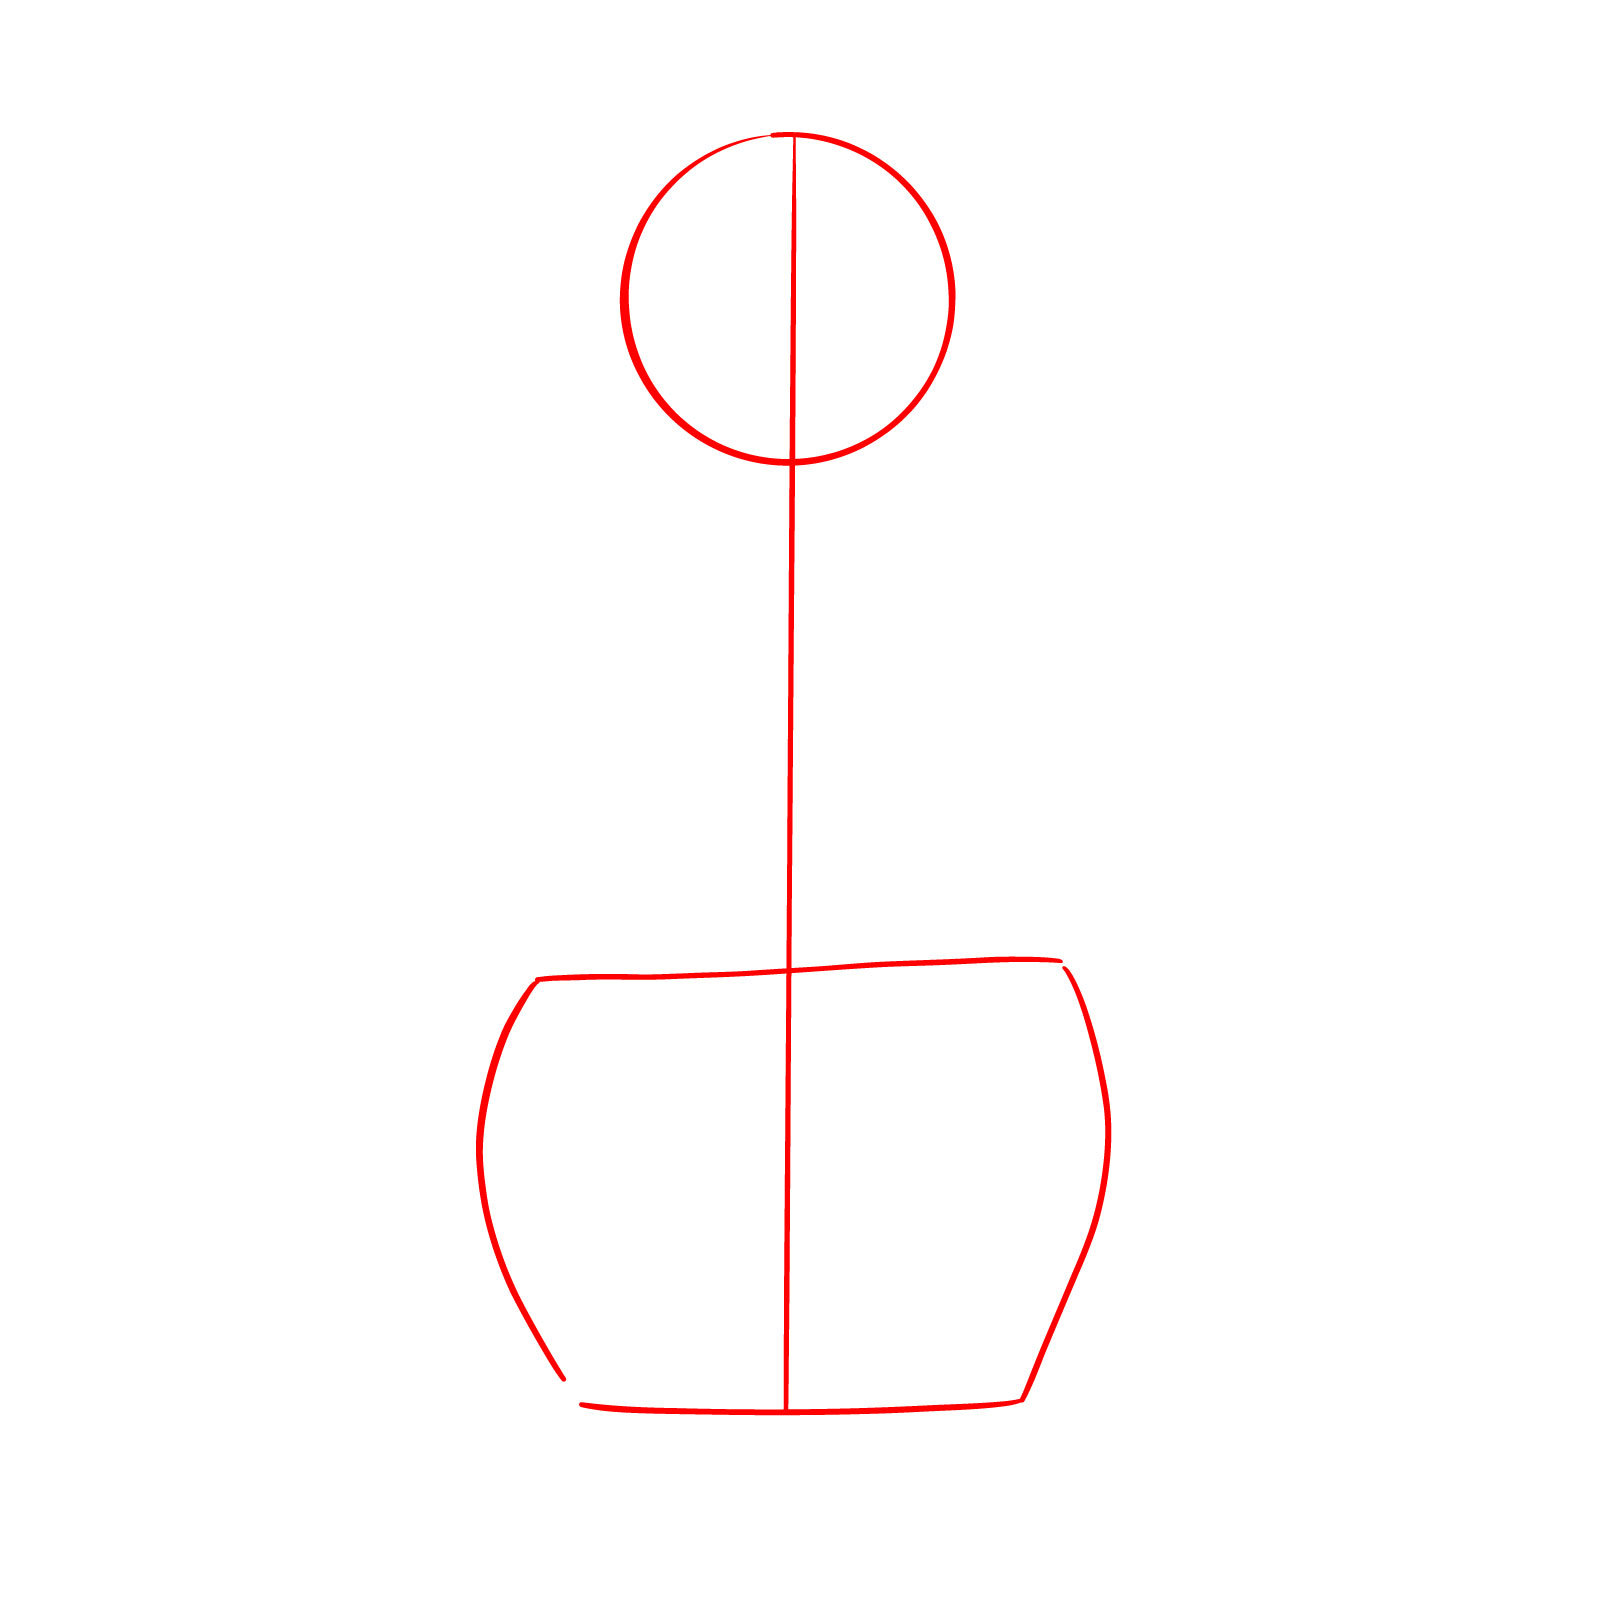
Step 01 – Begin by drawing a circle that will serve as the base of the lion’s head. Below the circle, draw a large rectangular shape with rounded sides for the lion’s sitting body. Then, draw a vertical line starting from the top of the circle down to the bottom of the rectangular shape. This line will divide the shapes in half and connect them, indicating the lion’s symmetry
Starting shapes for the sitting lion drawing
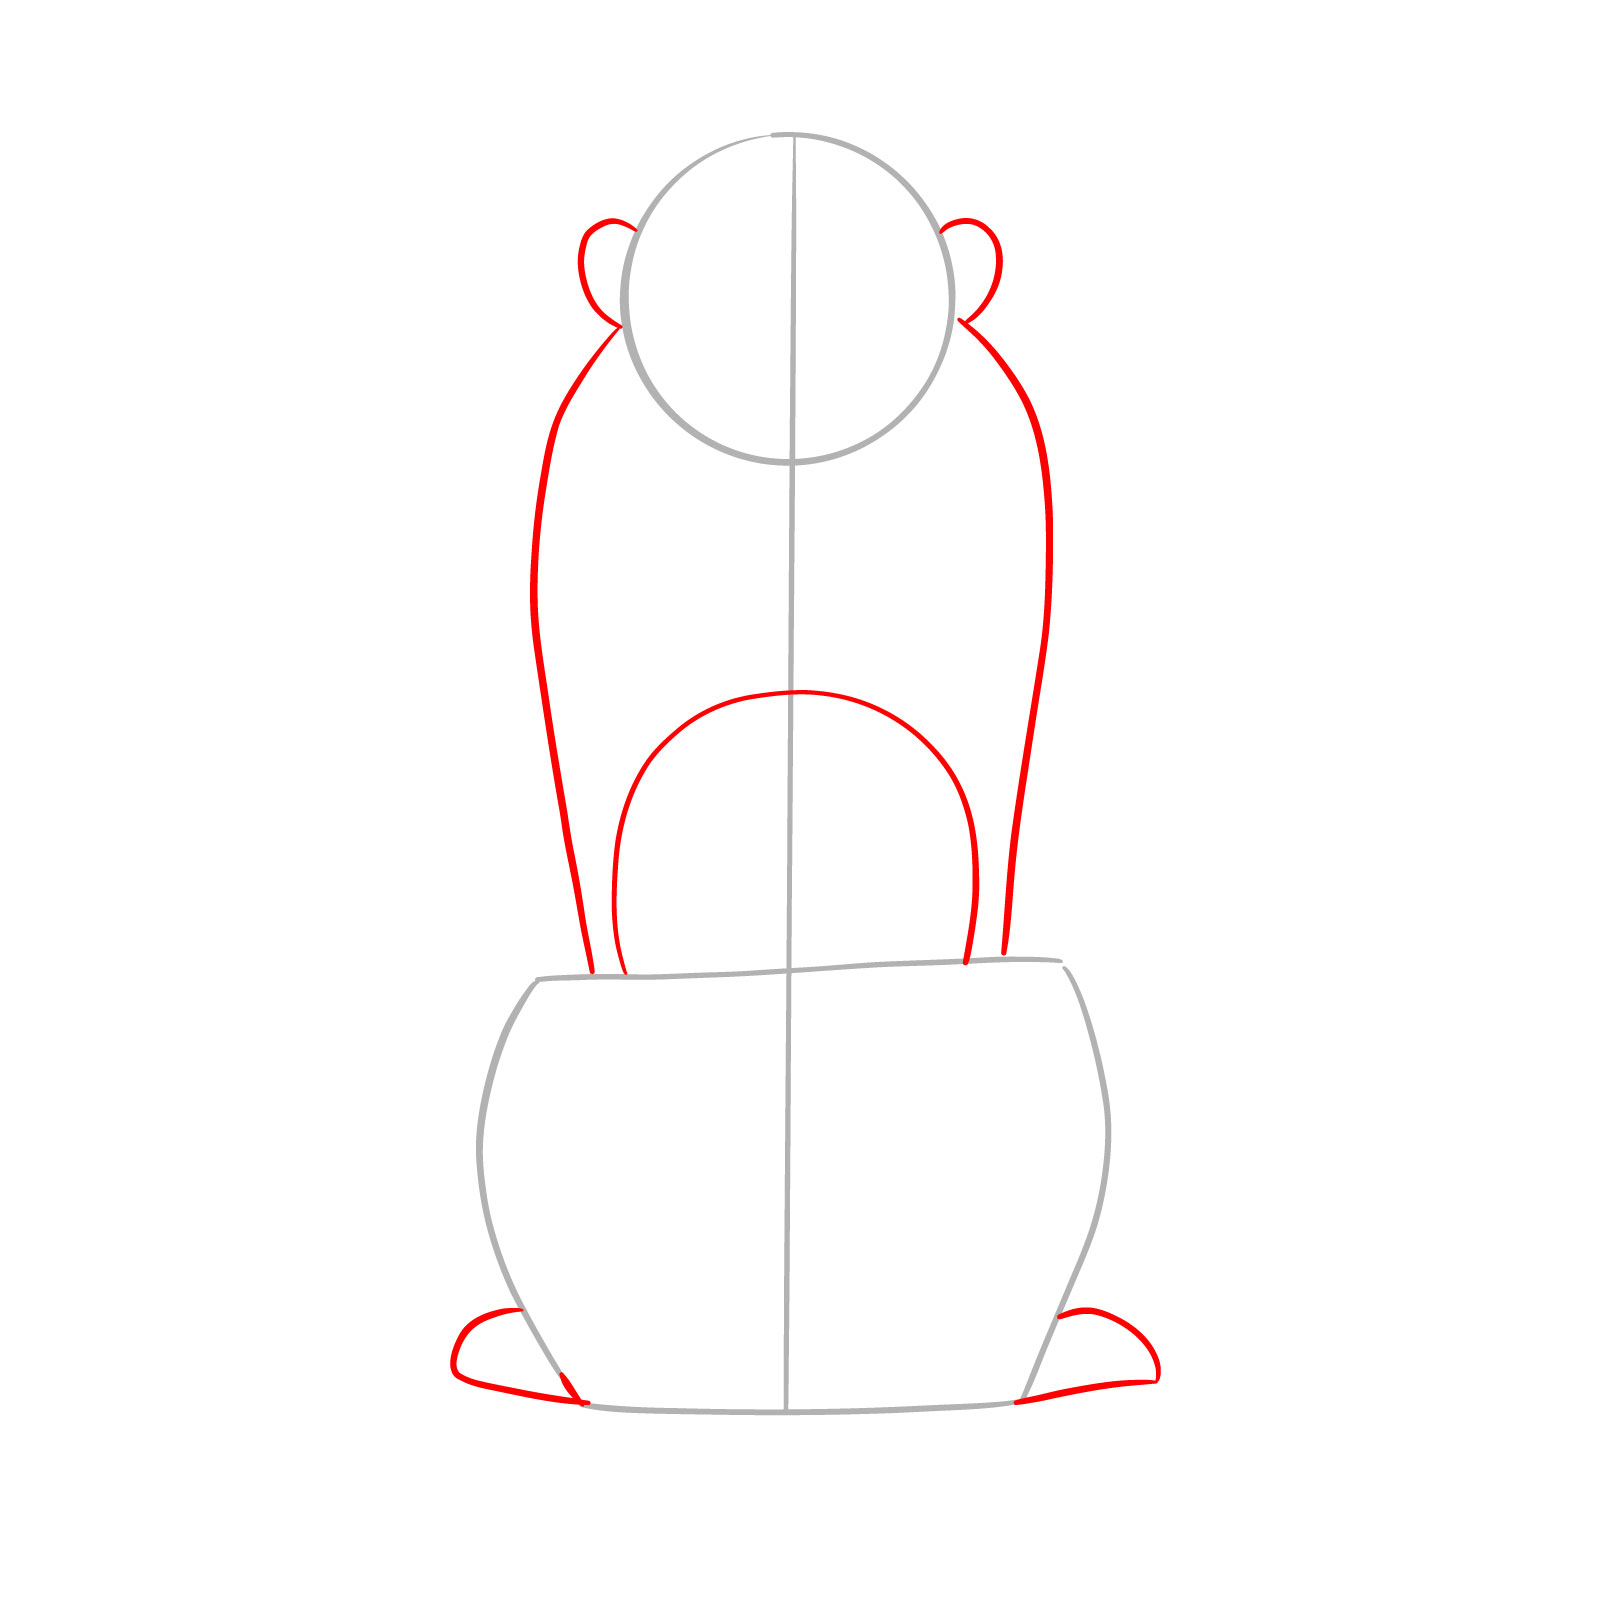
Step 02 – Place two small rounded lines at the top of the head circle for the ears. Next, add lines to connect the head and body shapes from the first step, giving structure to the lion’s body. On the sides at the base of the body shape, draw two additional shapes for the paws
Adding ears and body lines to the lion rough sketch
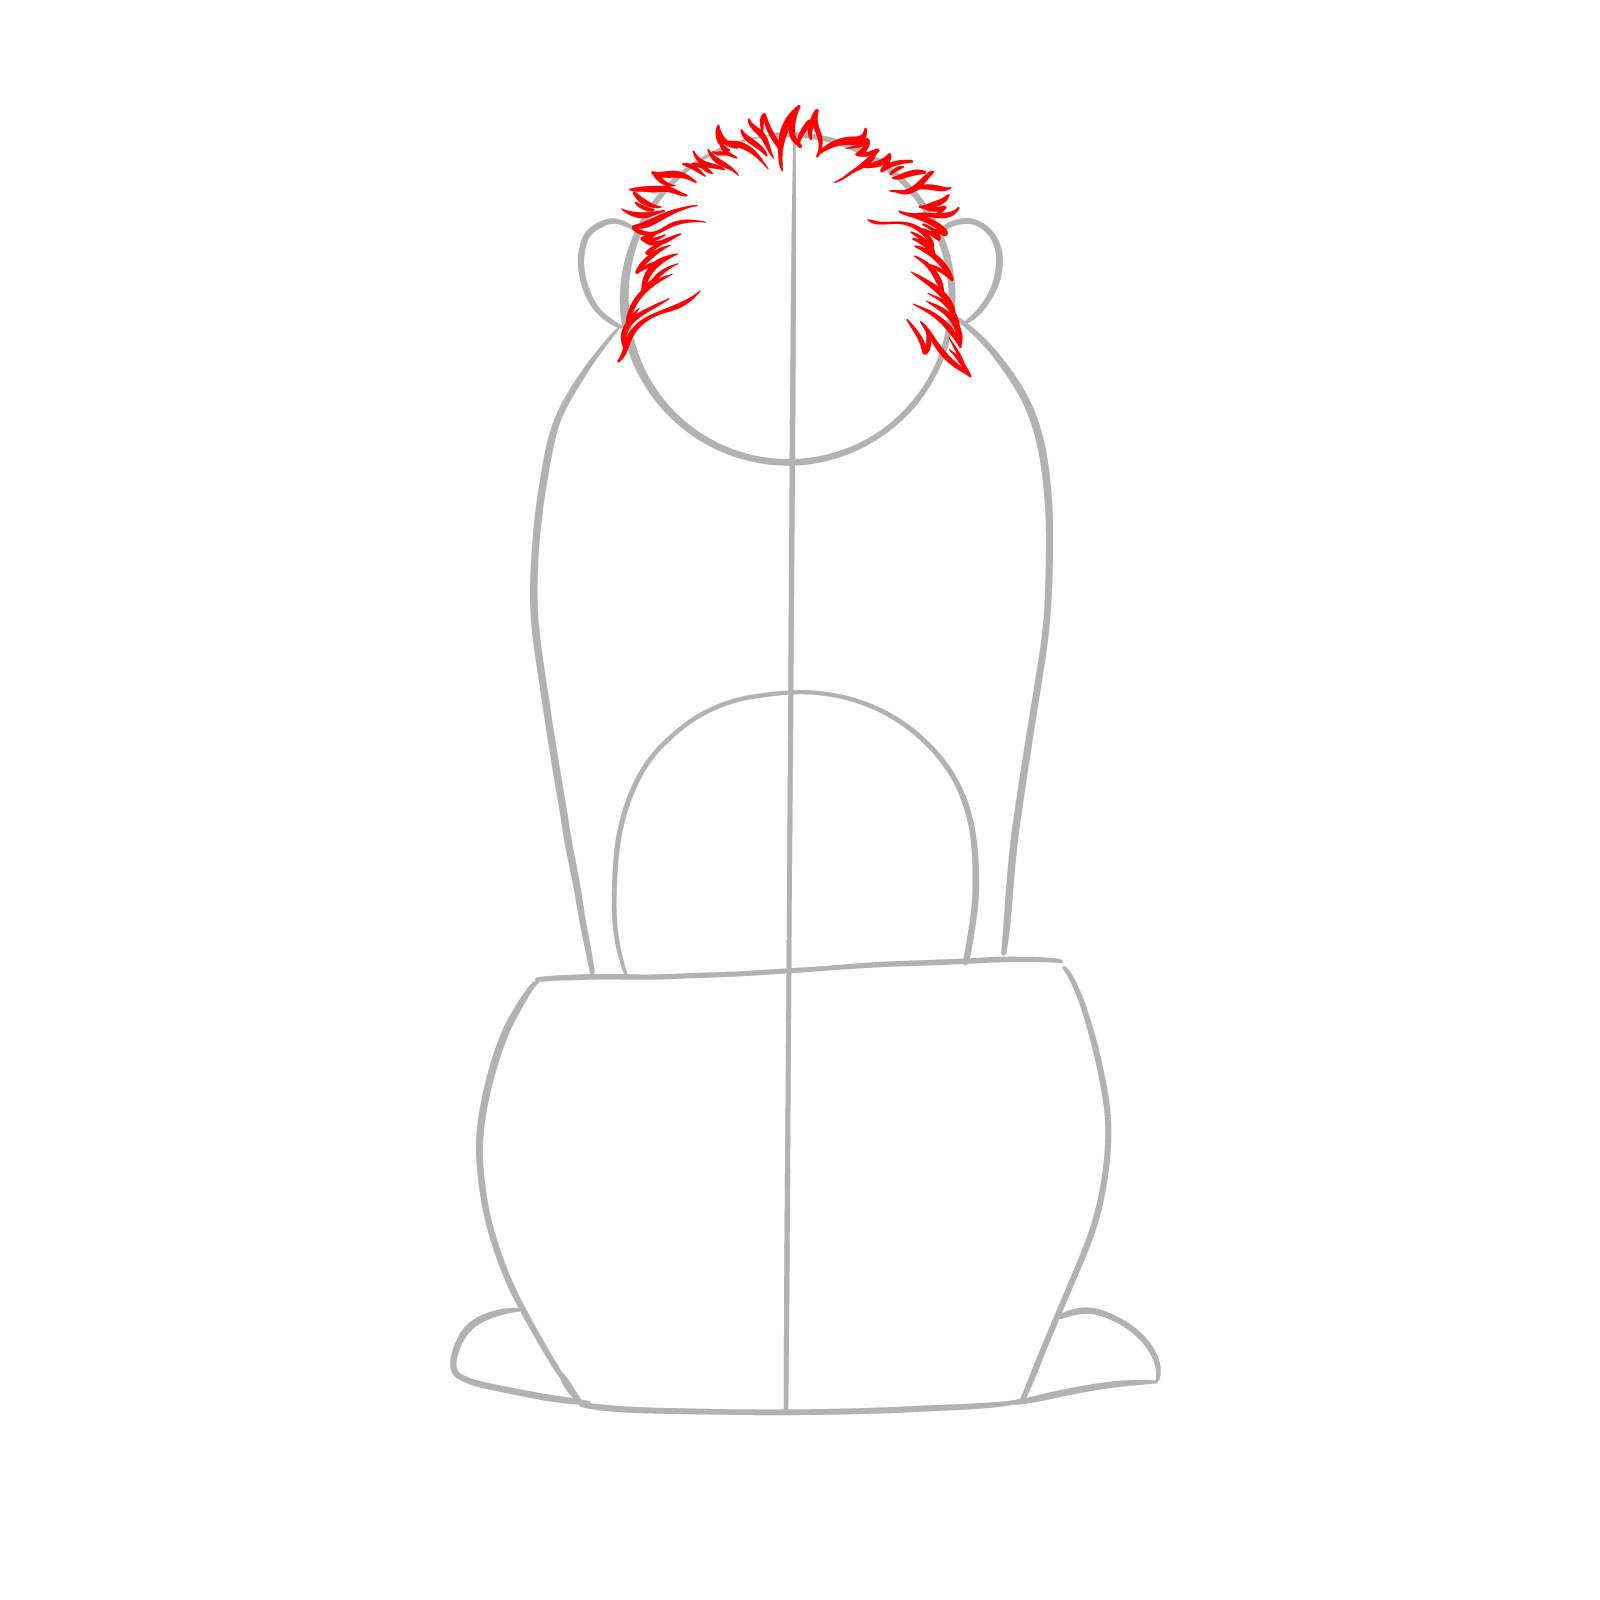
Step 03 – Add short lines on top and on the sides of the head to suggest fur. These lines should be jagged to mimic the natural roughness of the lion’s mane and should extend slightly beyond the original circle shape
Detailing the lion’s head with fur
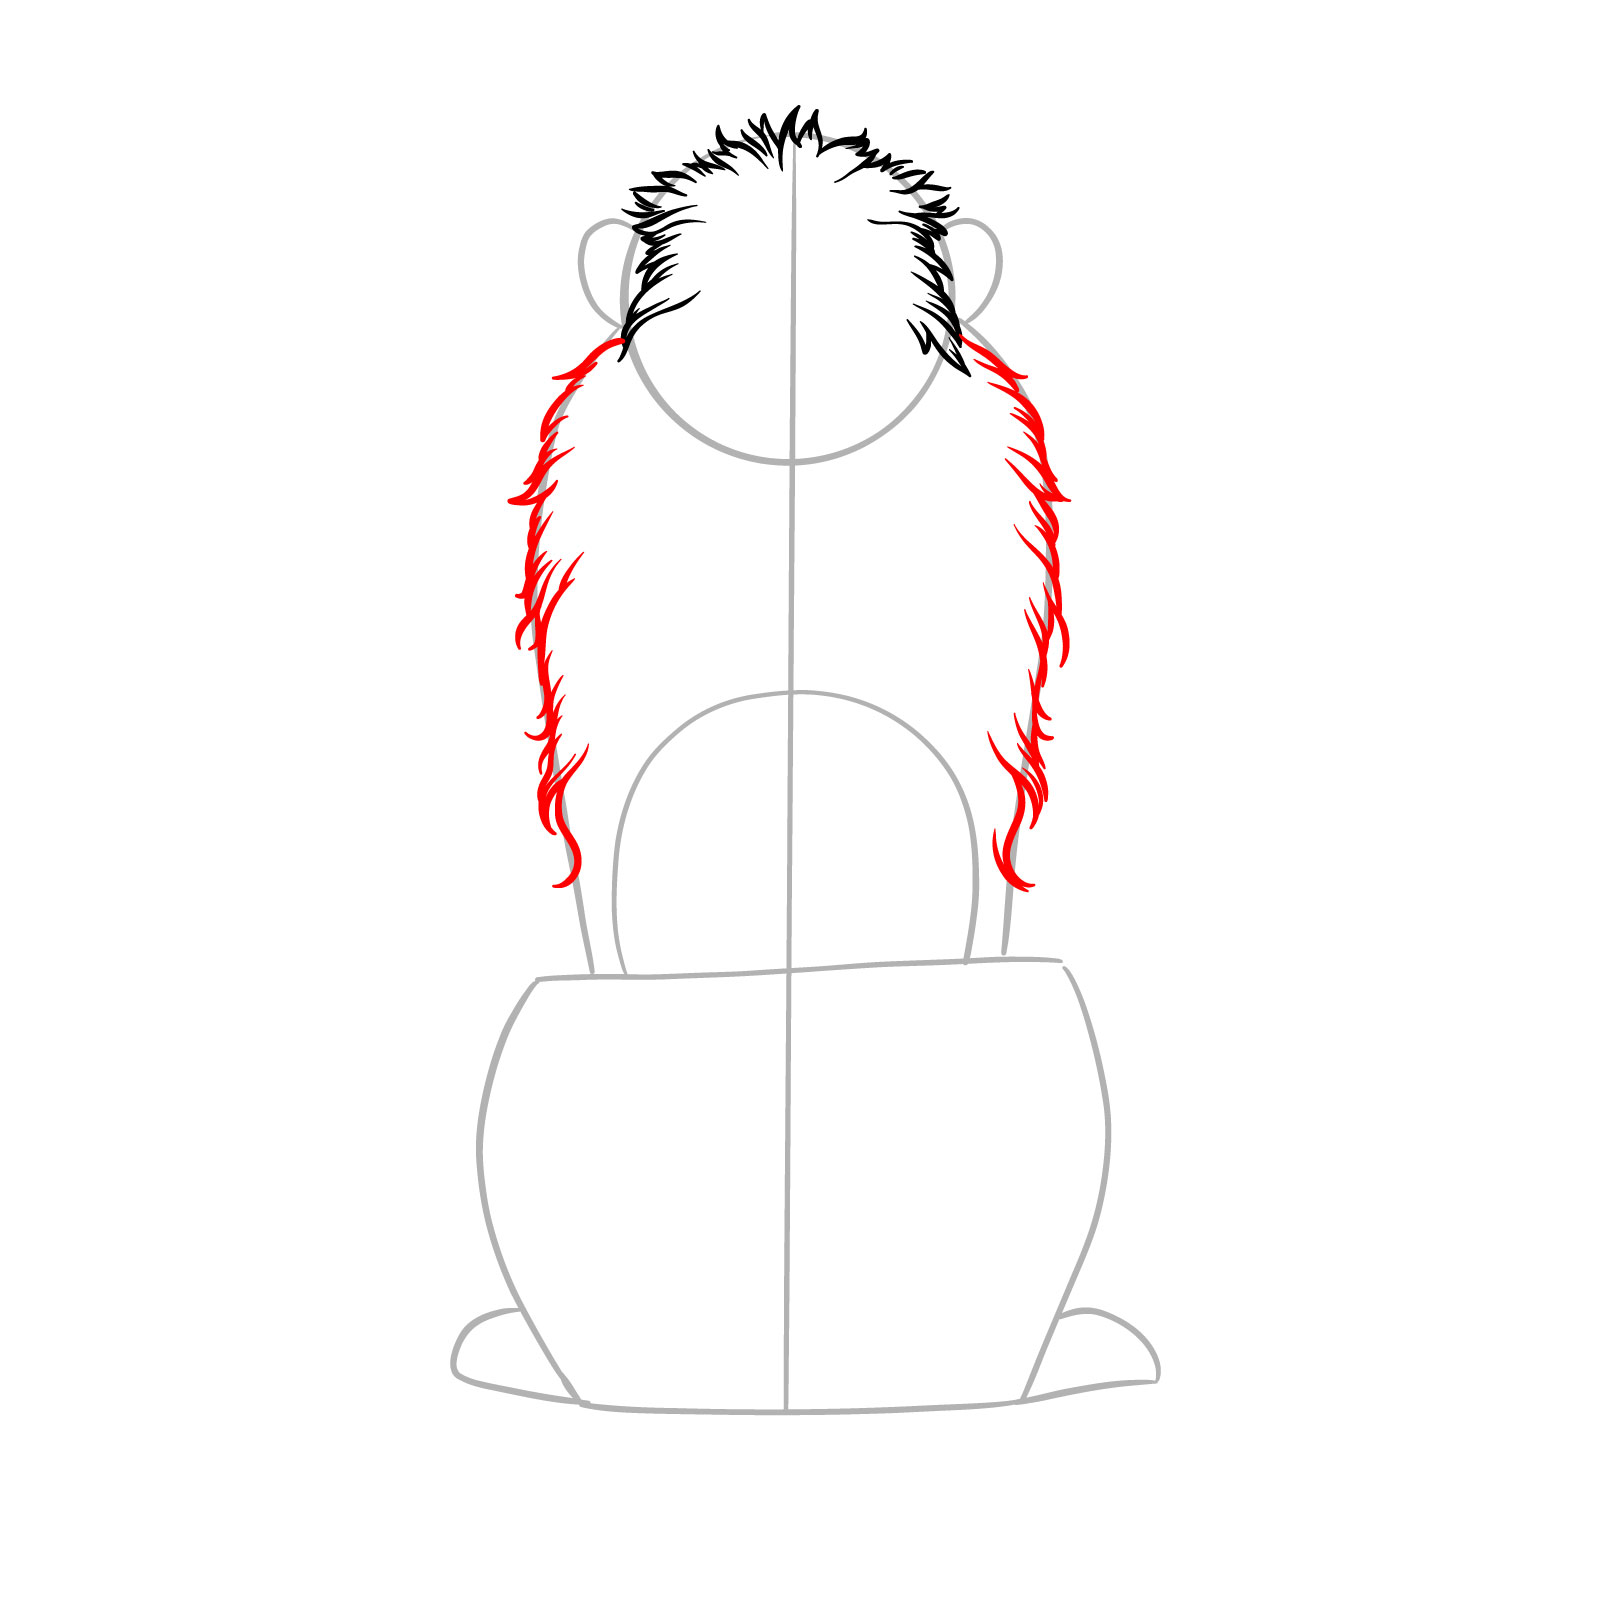
Step 04 – Draw short jagged lines along the sides of the body to represent the edges of the lion’s mane. The lines should be similar to the fur detail on the head, and will later give the impression of a thick, bushy mane
Sketching the mane details on the lion’s body
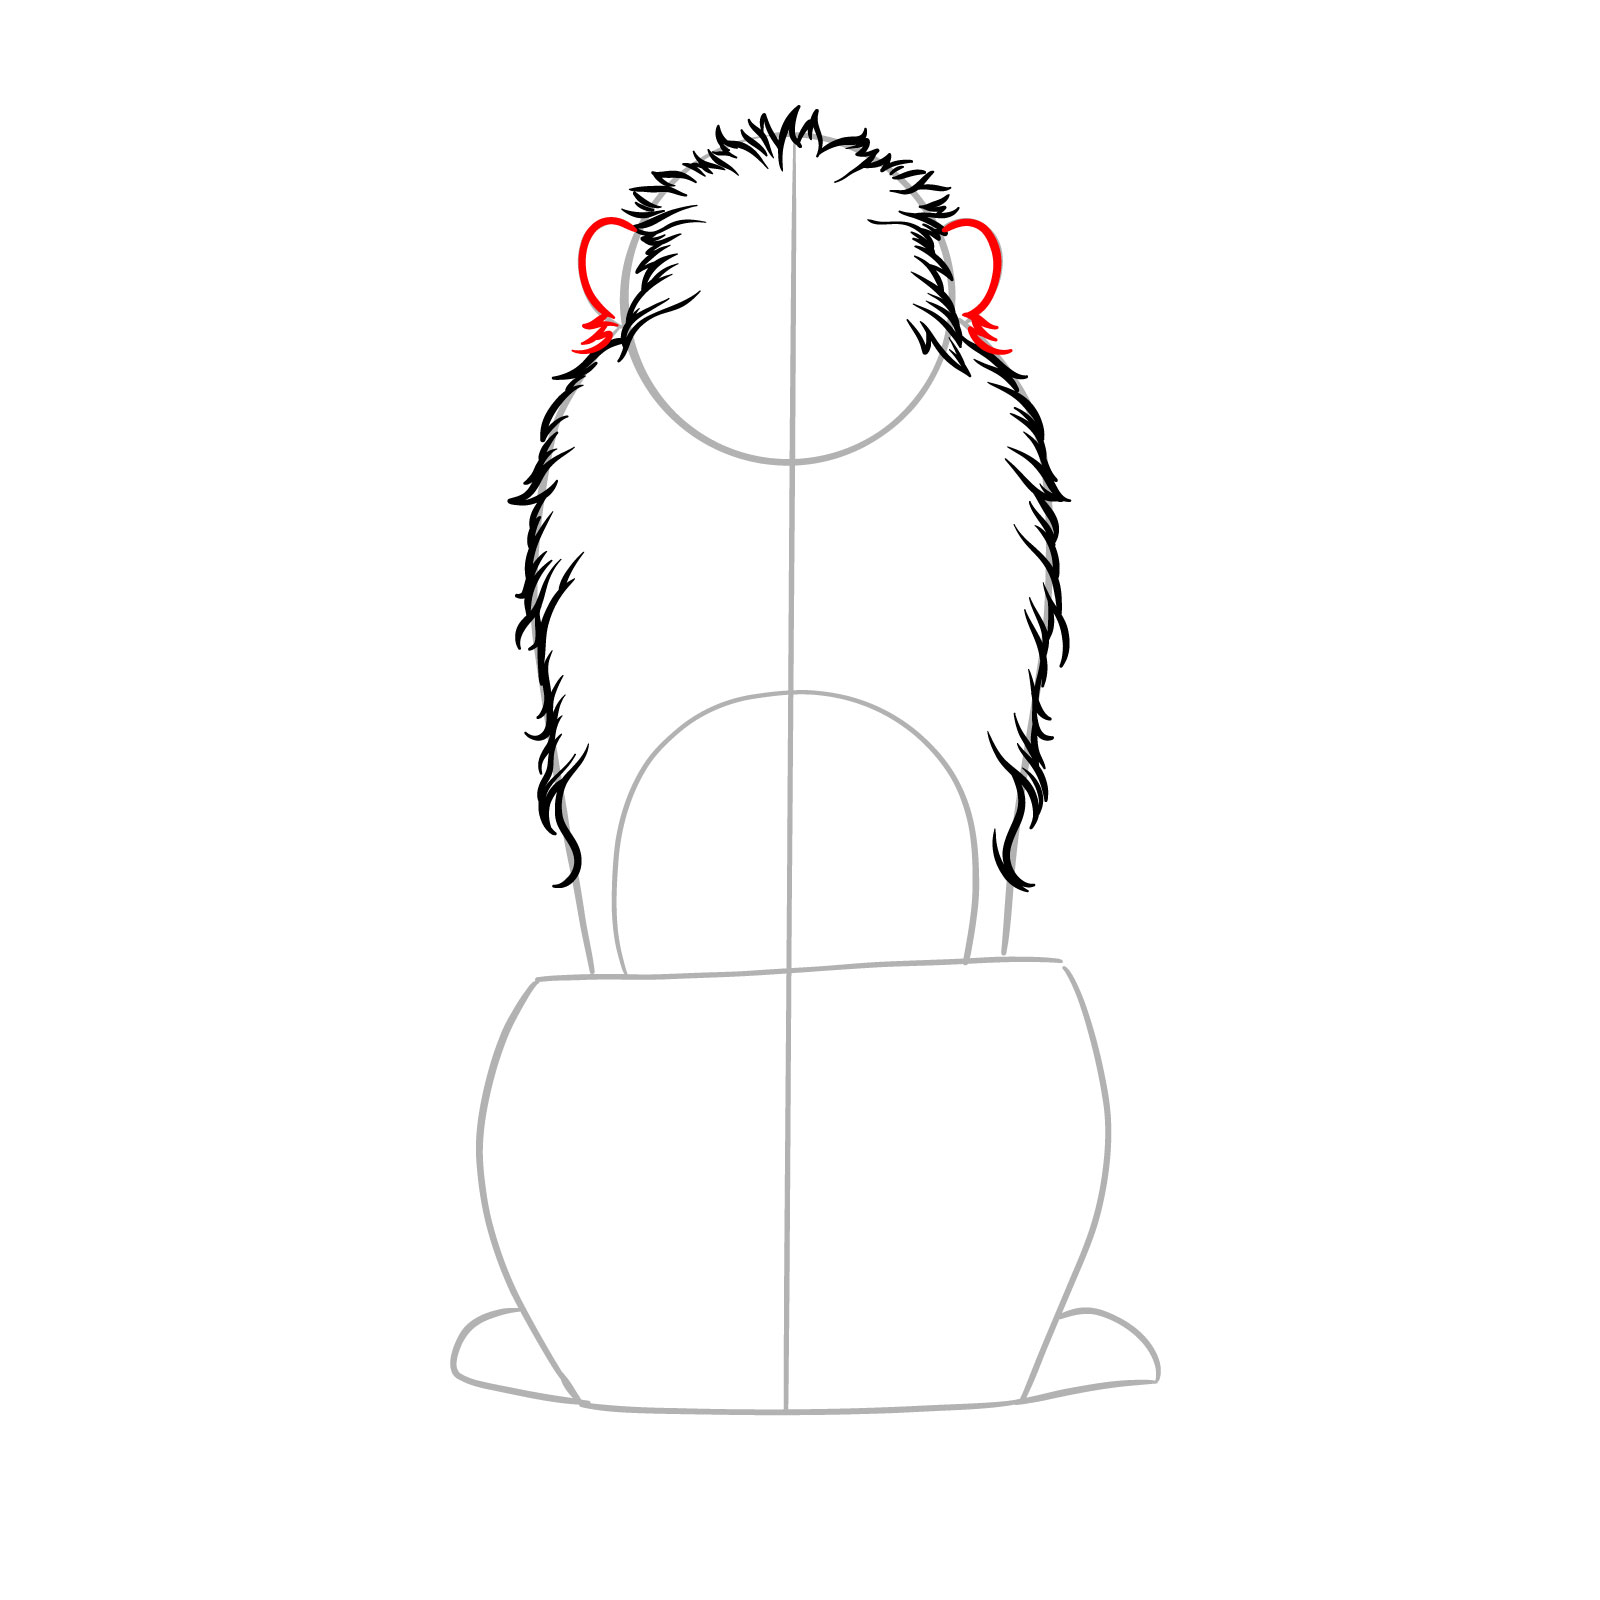
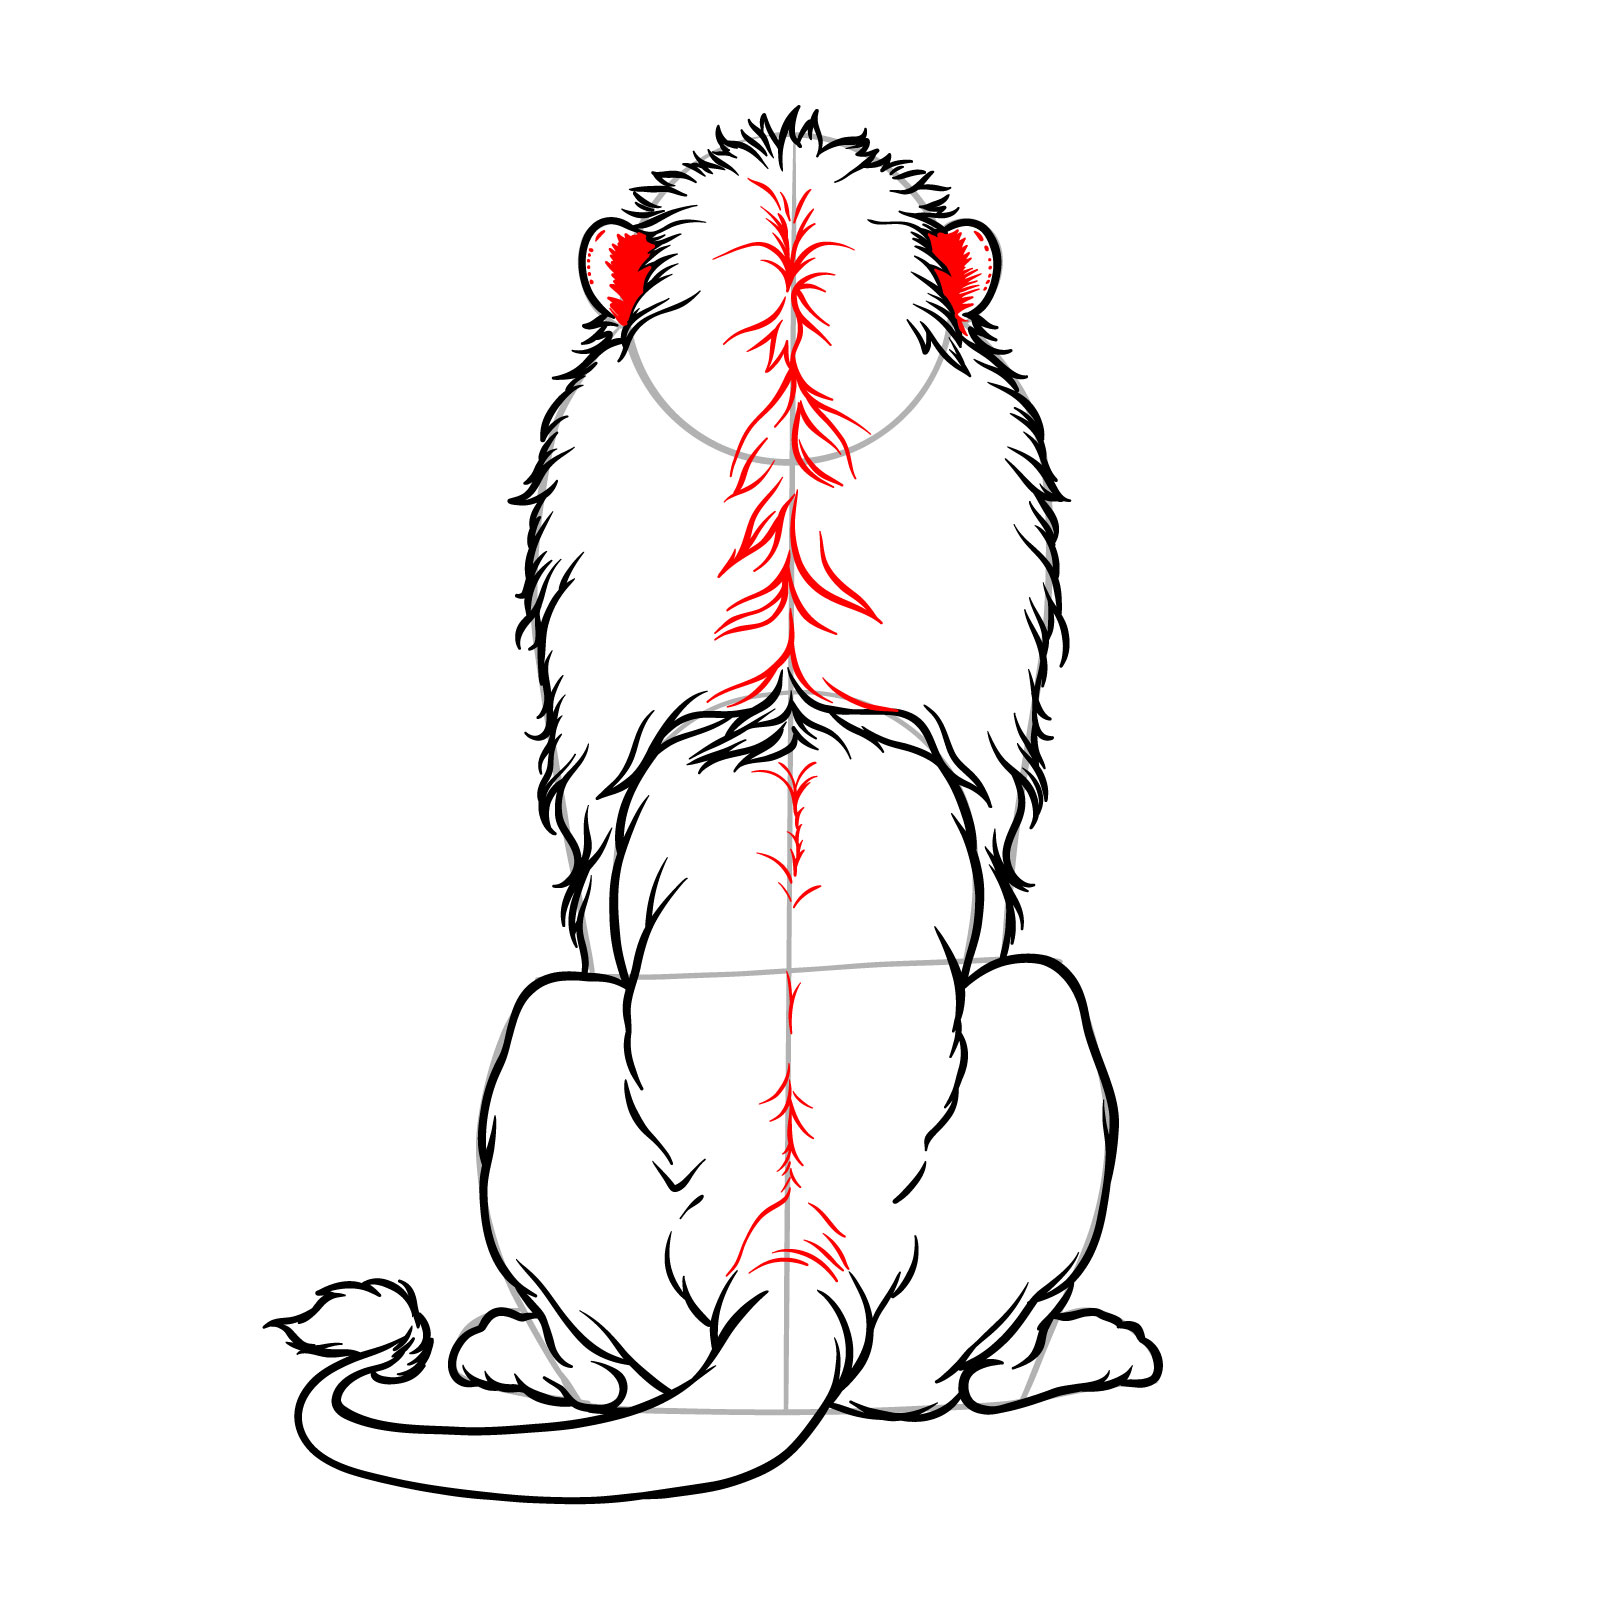
Step 05 – Refine the ears by outlining them more clearly at the top of the head and add a few jagged lines at the bottom of each ear to indicate fur
Defining the lion’s ears with fur
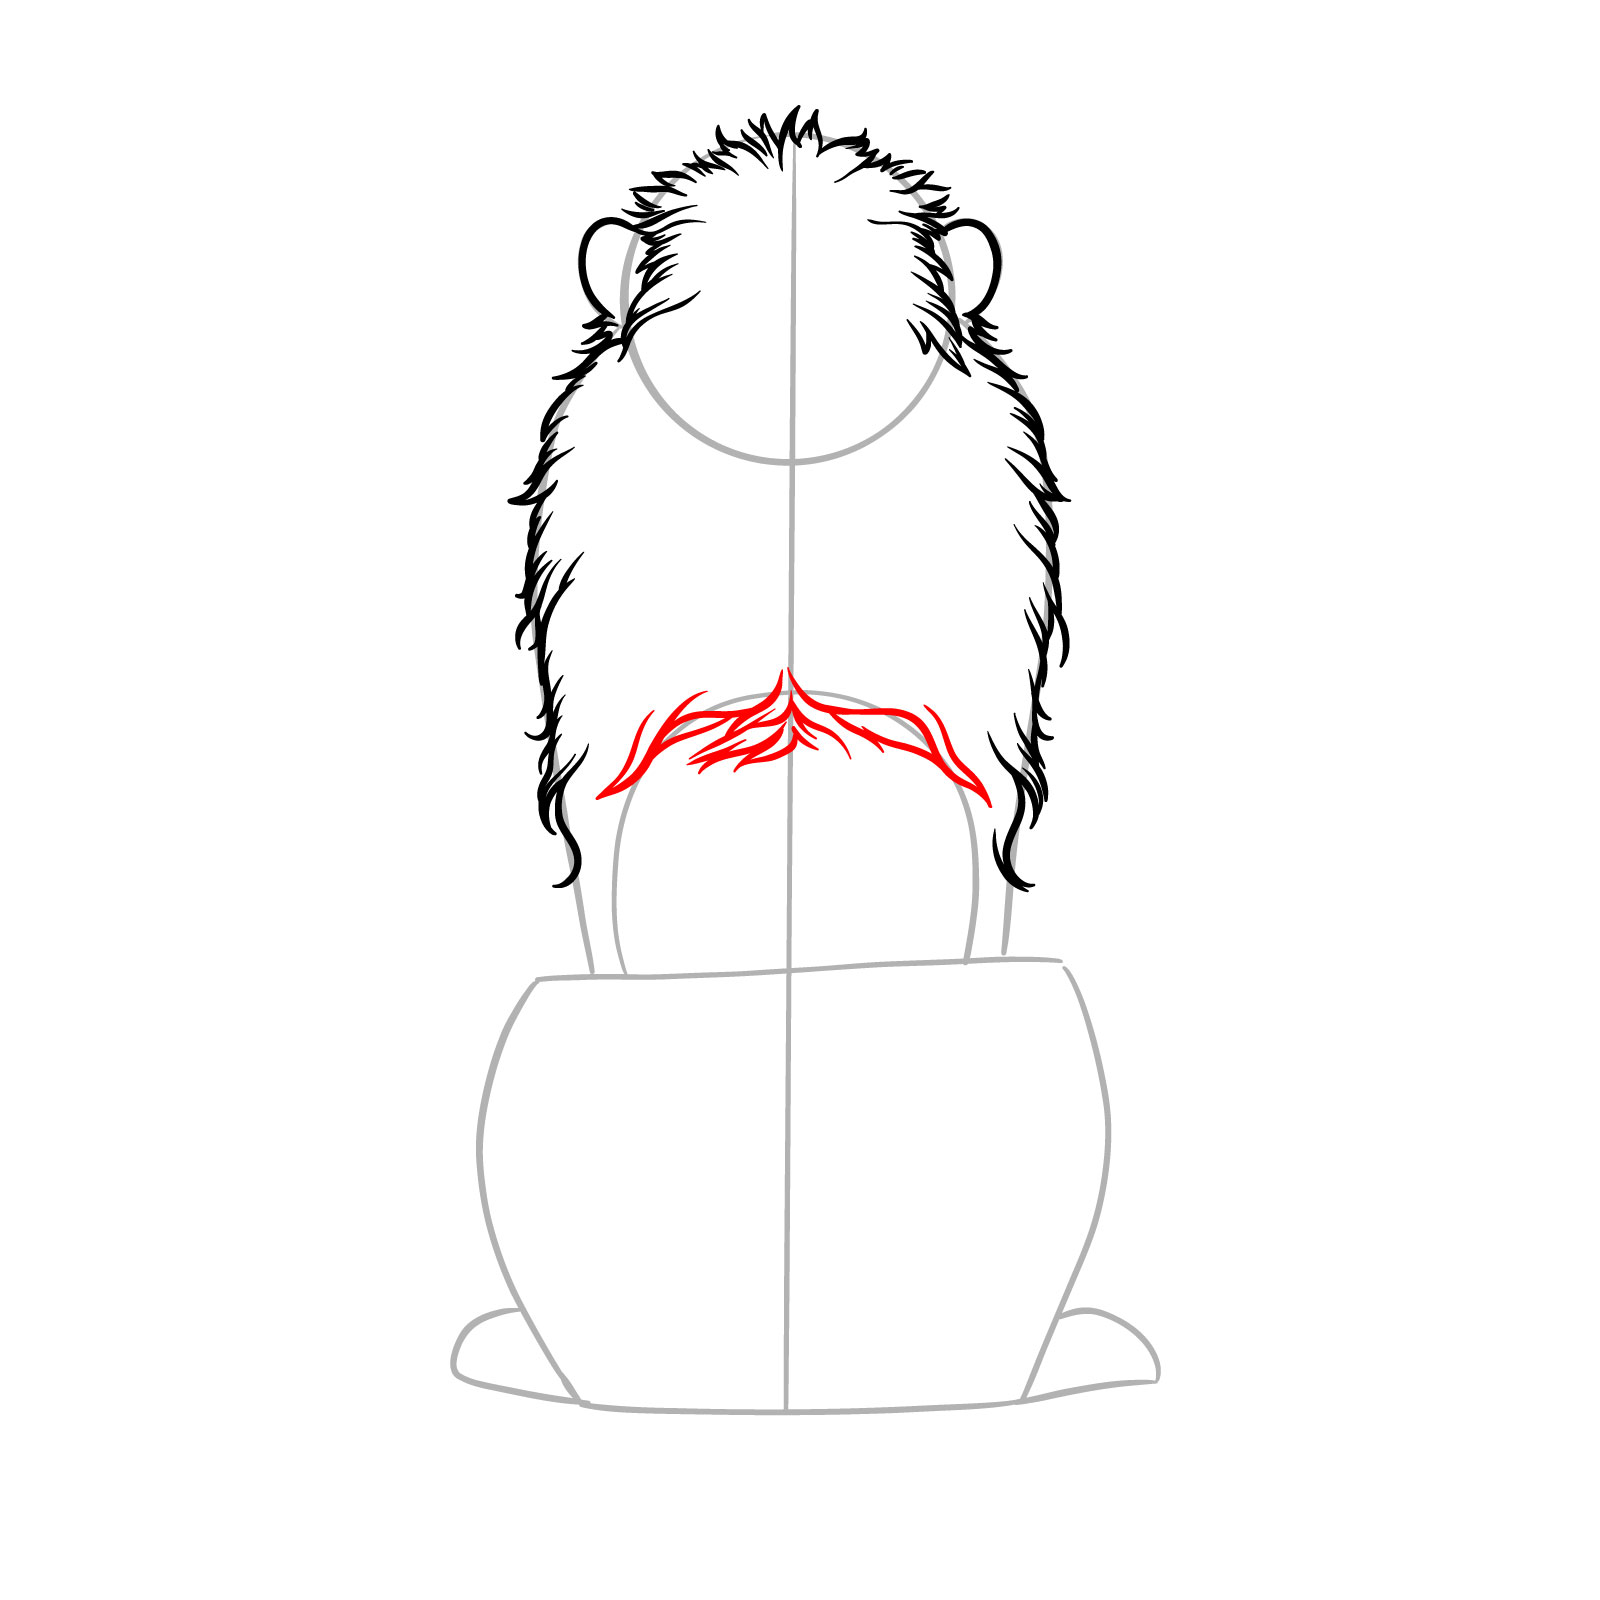
Step 06 – Sketch some jagged lines in the middle of the back, extending slightly down the sides to represent the mane fur
Adding mane fur to the lion’s back
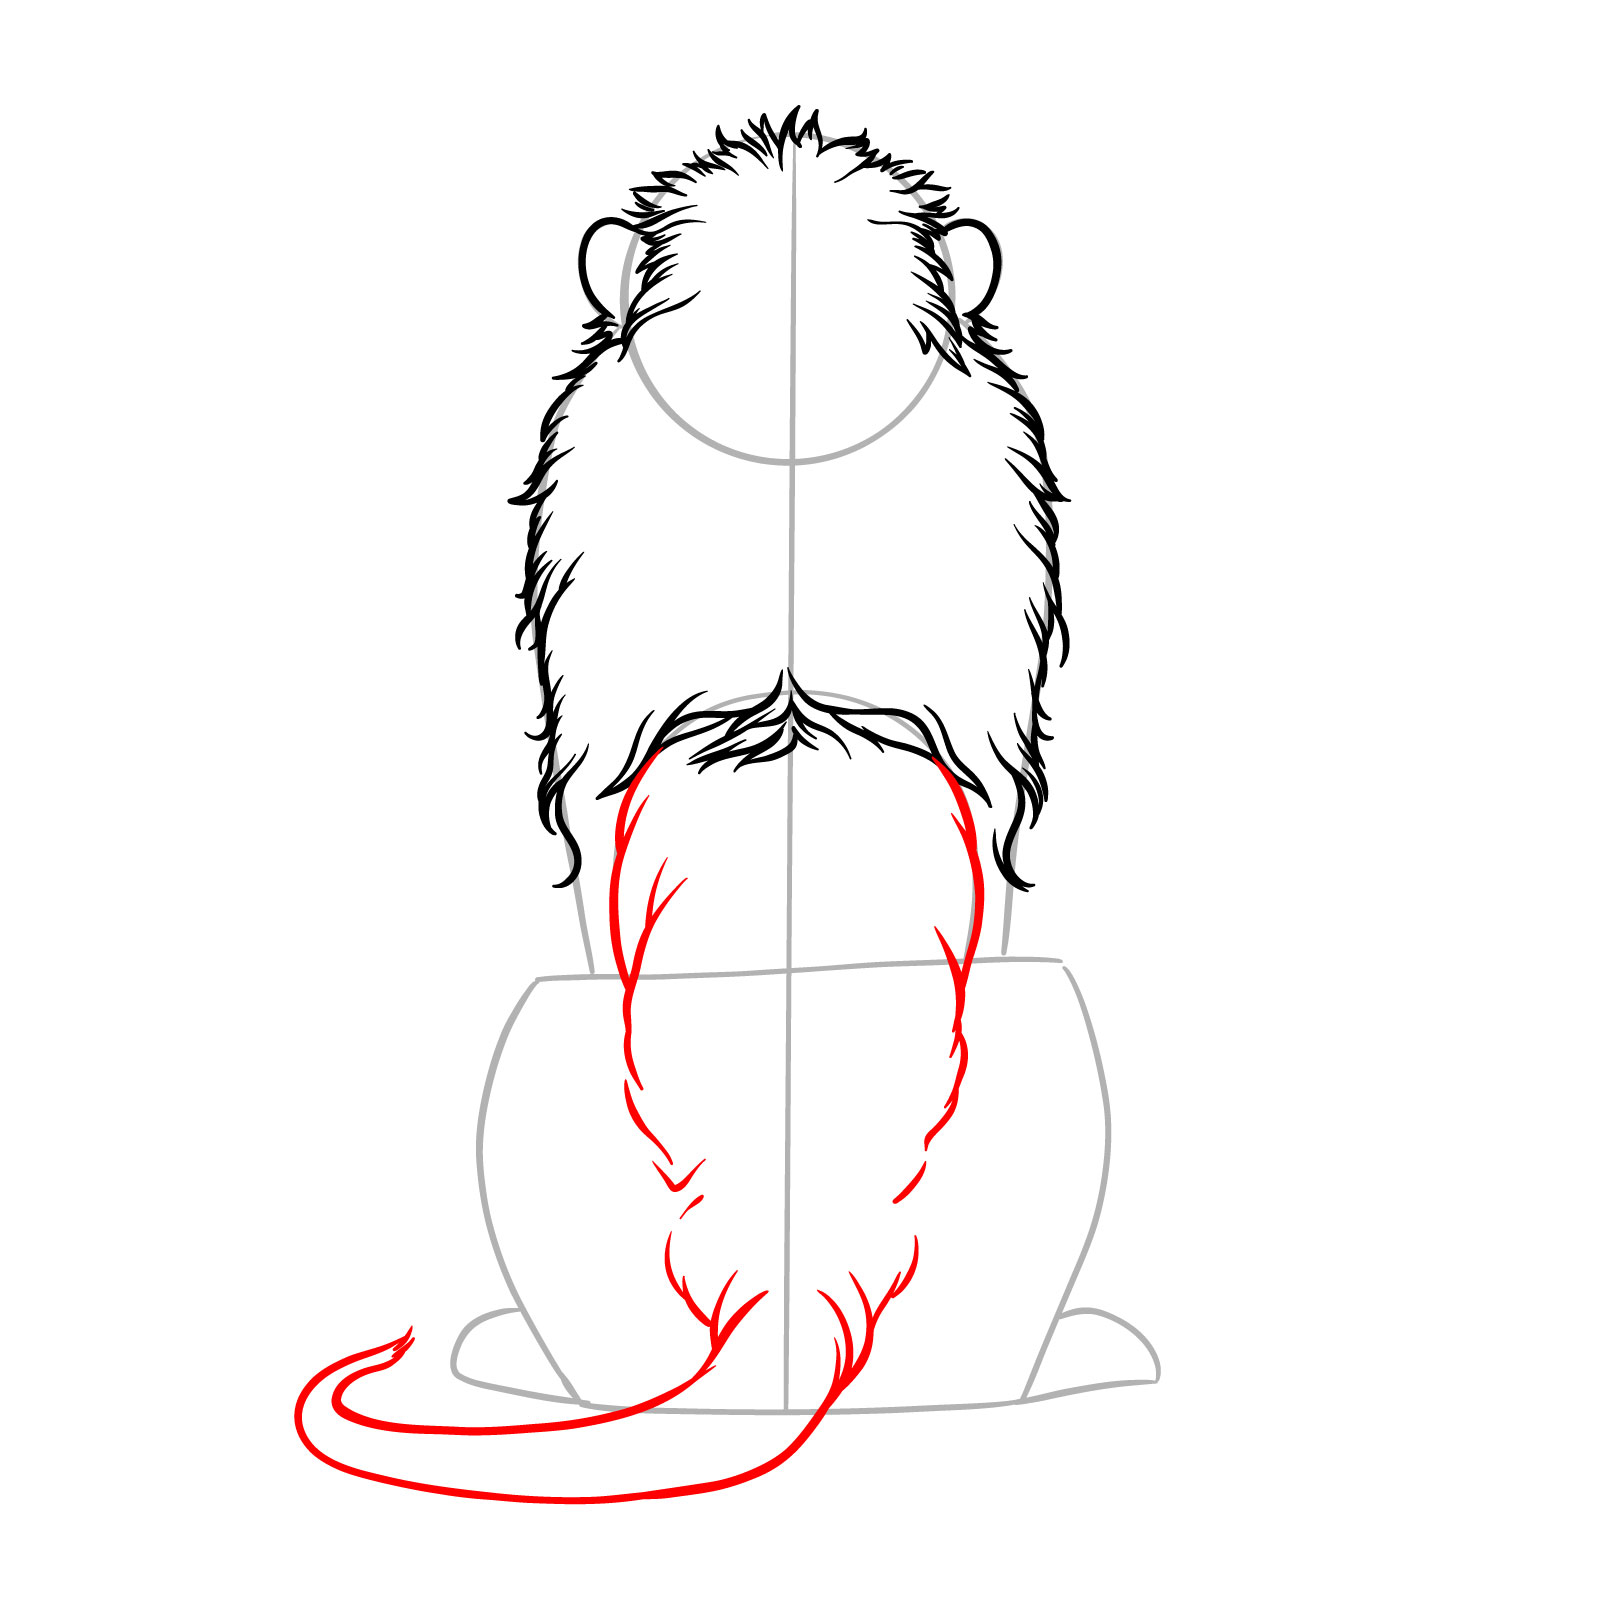
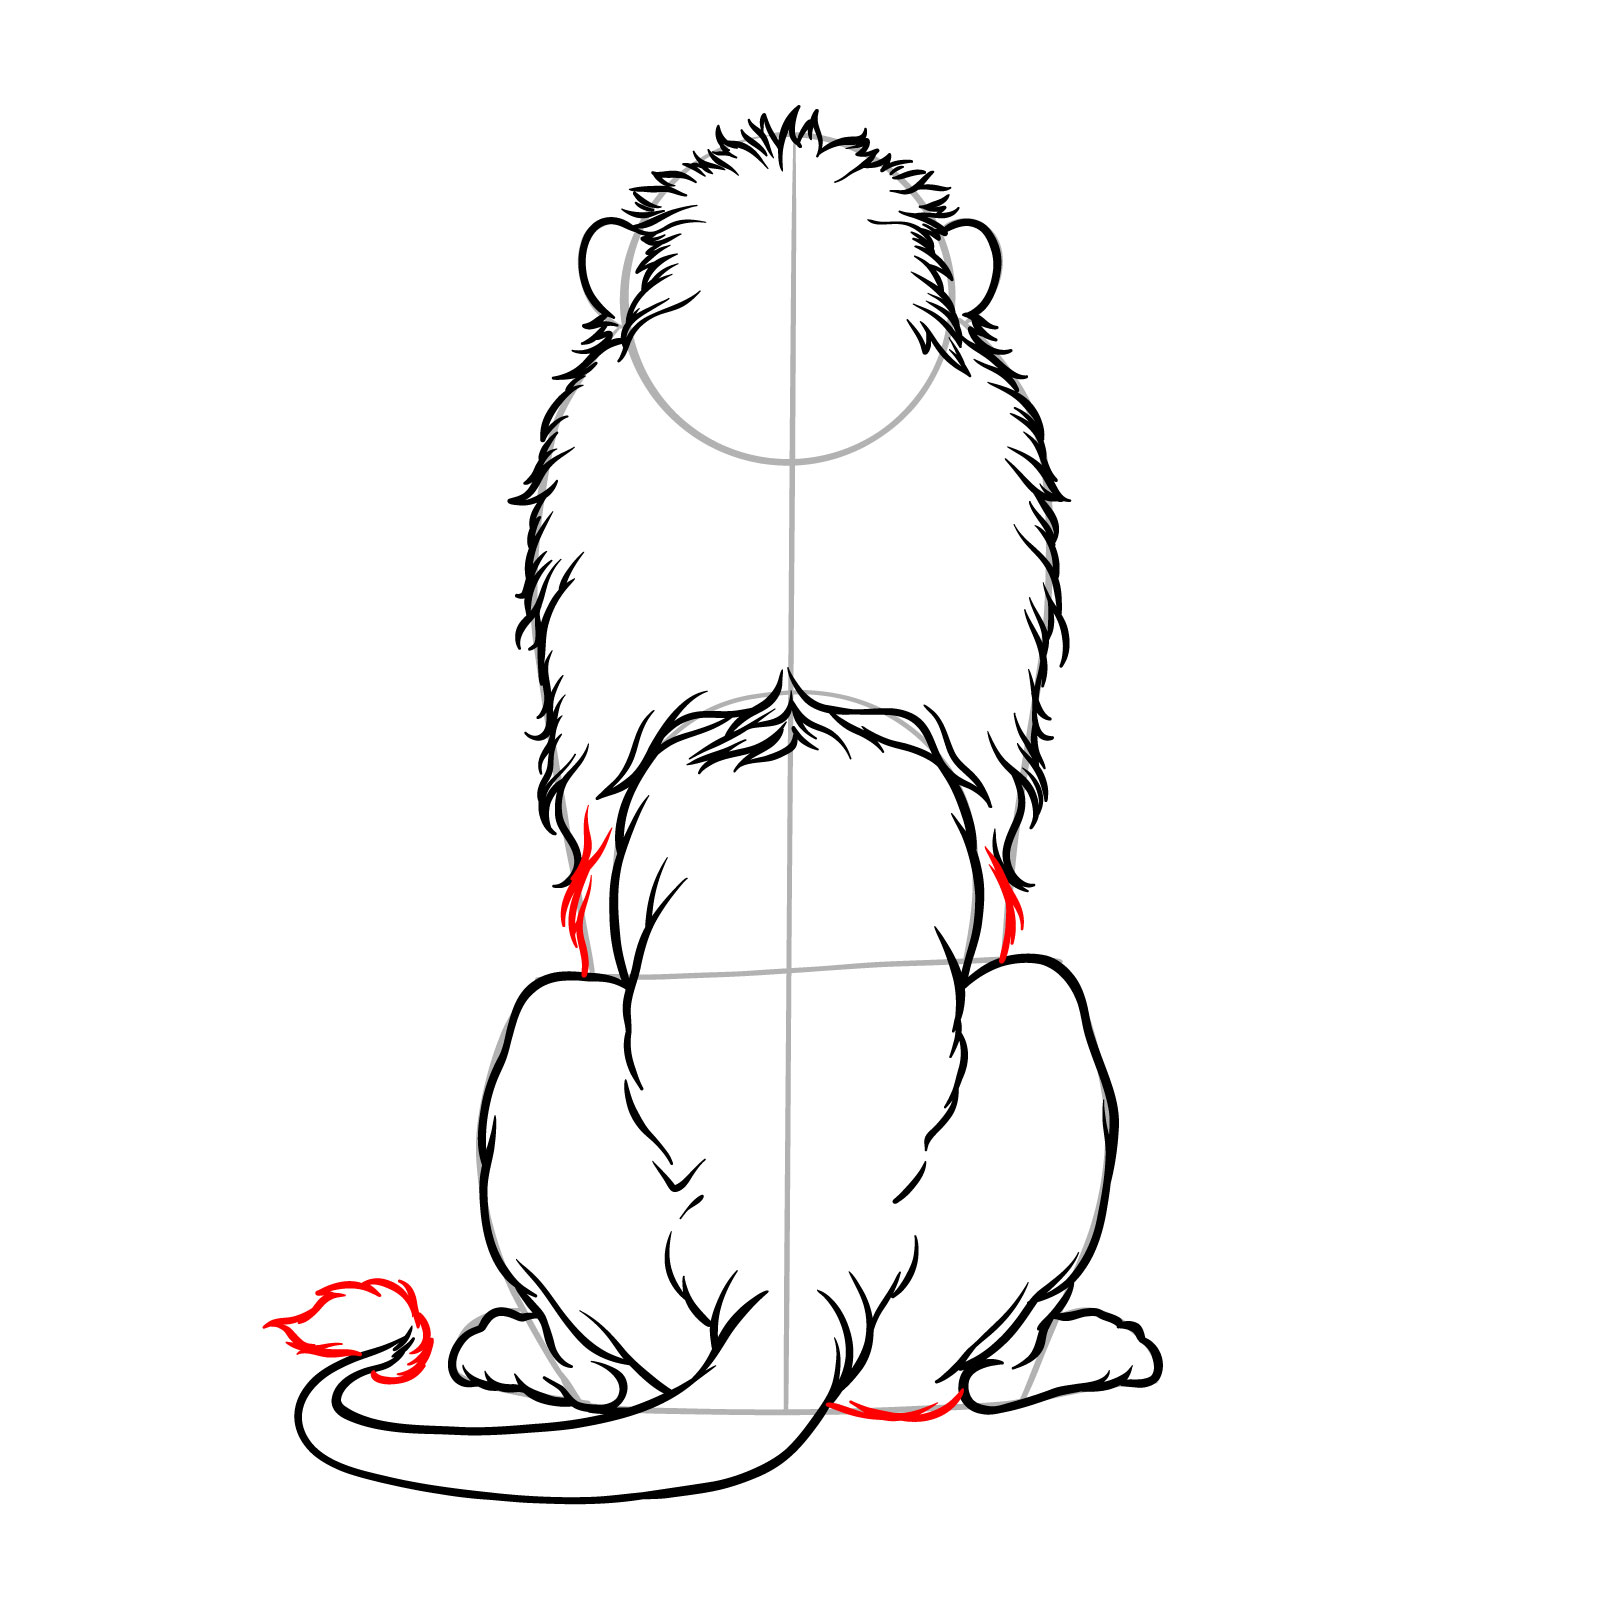
Step 07 – Draw lines along the back to suggest muscle structure. Add two long, curved lines for the tail, extending from the body without the tuft at the end
Sketching muscles and tail of the sitting lion
Step 08 – Sketch the outlines of the rear legs down to the bottom joints, keeping the lines uneven and curved to show the natural posture of the lion sitting
Outlining the rear legs of the lion
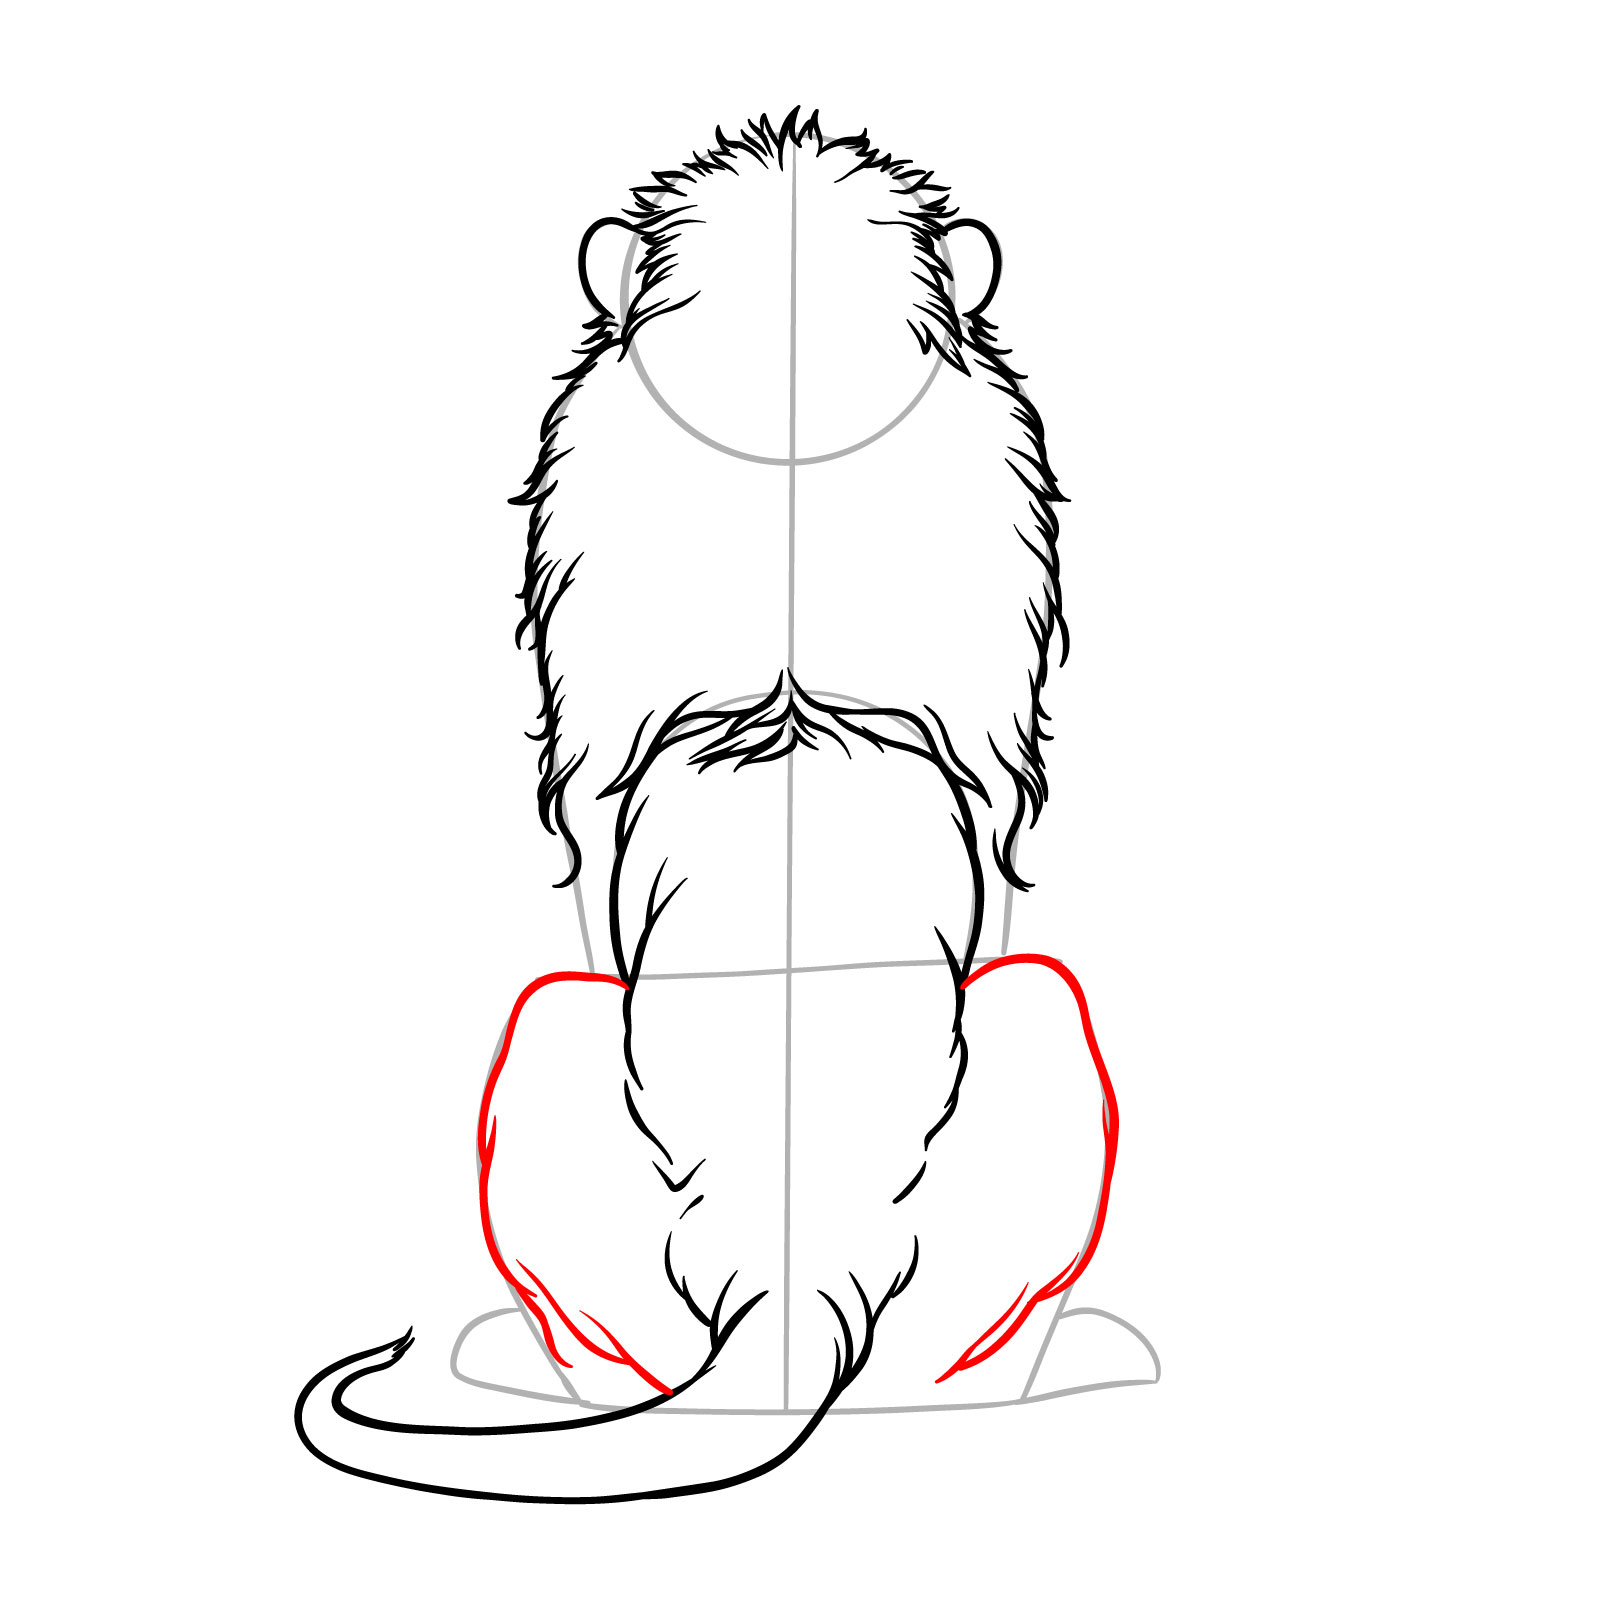
Step 09 – Finish drawing the parts of the legs that the lion is sitting on, showing the paws folded under its body
Completing the sketch of the lion’s rear legs
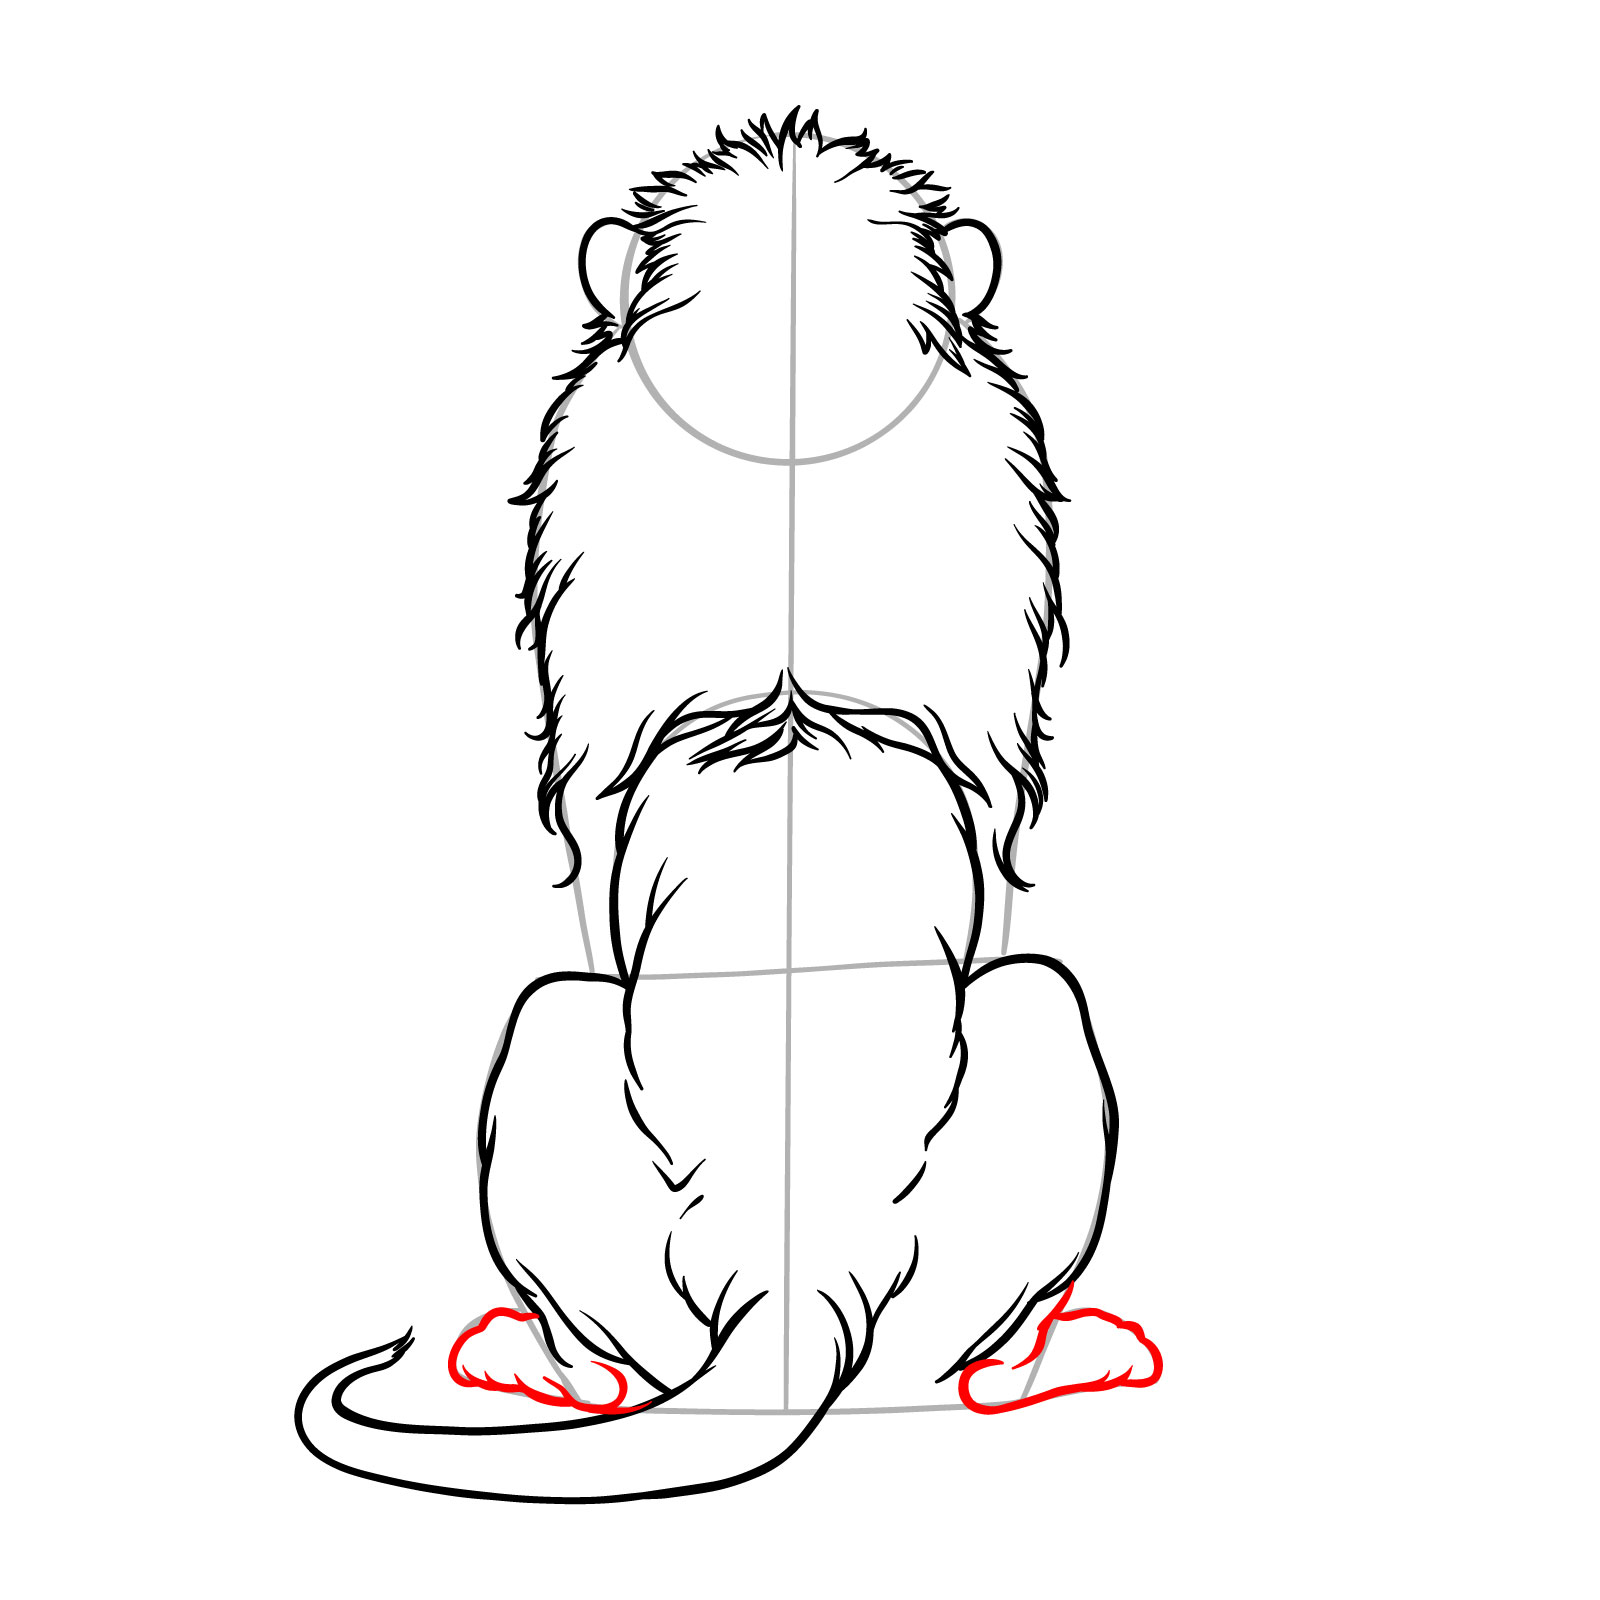
Step 10 – Sketch the sides of the body above the knees, add the furry tuft at the end of the tail, and outline a small part of the leg near the base of the tail
Adding details above the knees and the tuft
Step 11 – Shade the base of the ears and add more lines along the back for mane fur. Include small lines along the vertical line from Step 1 to show muscle creases
Shading the ears and detailing the back
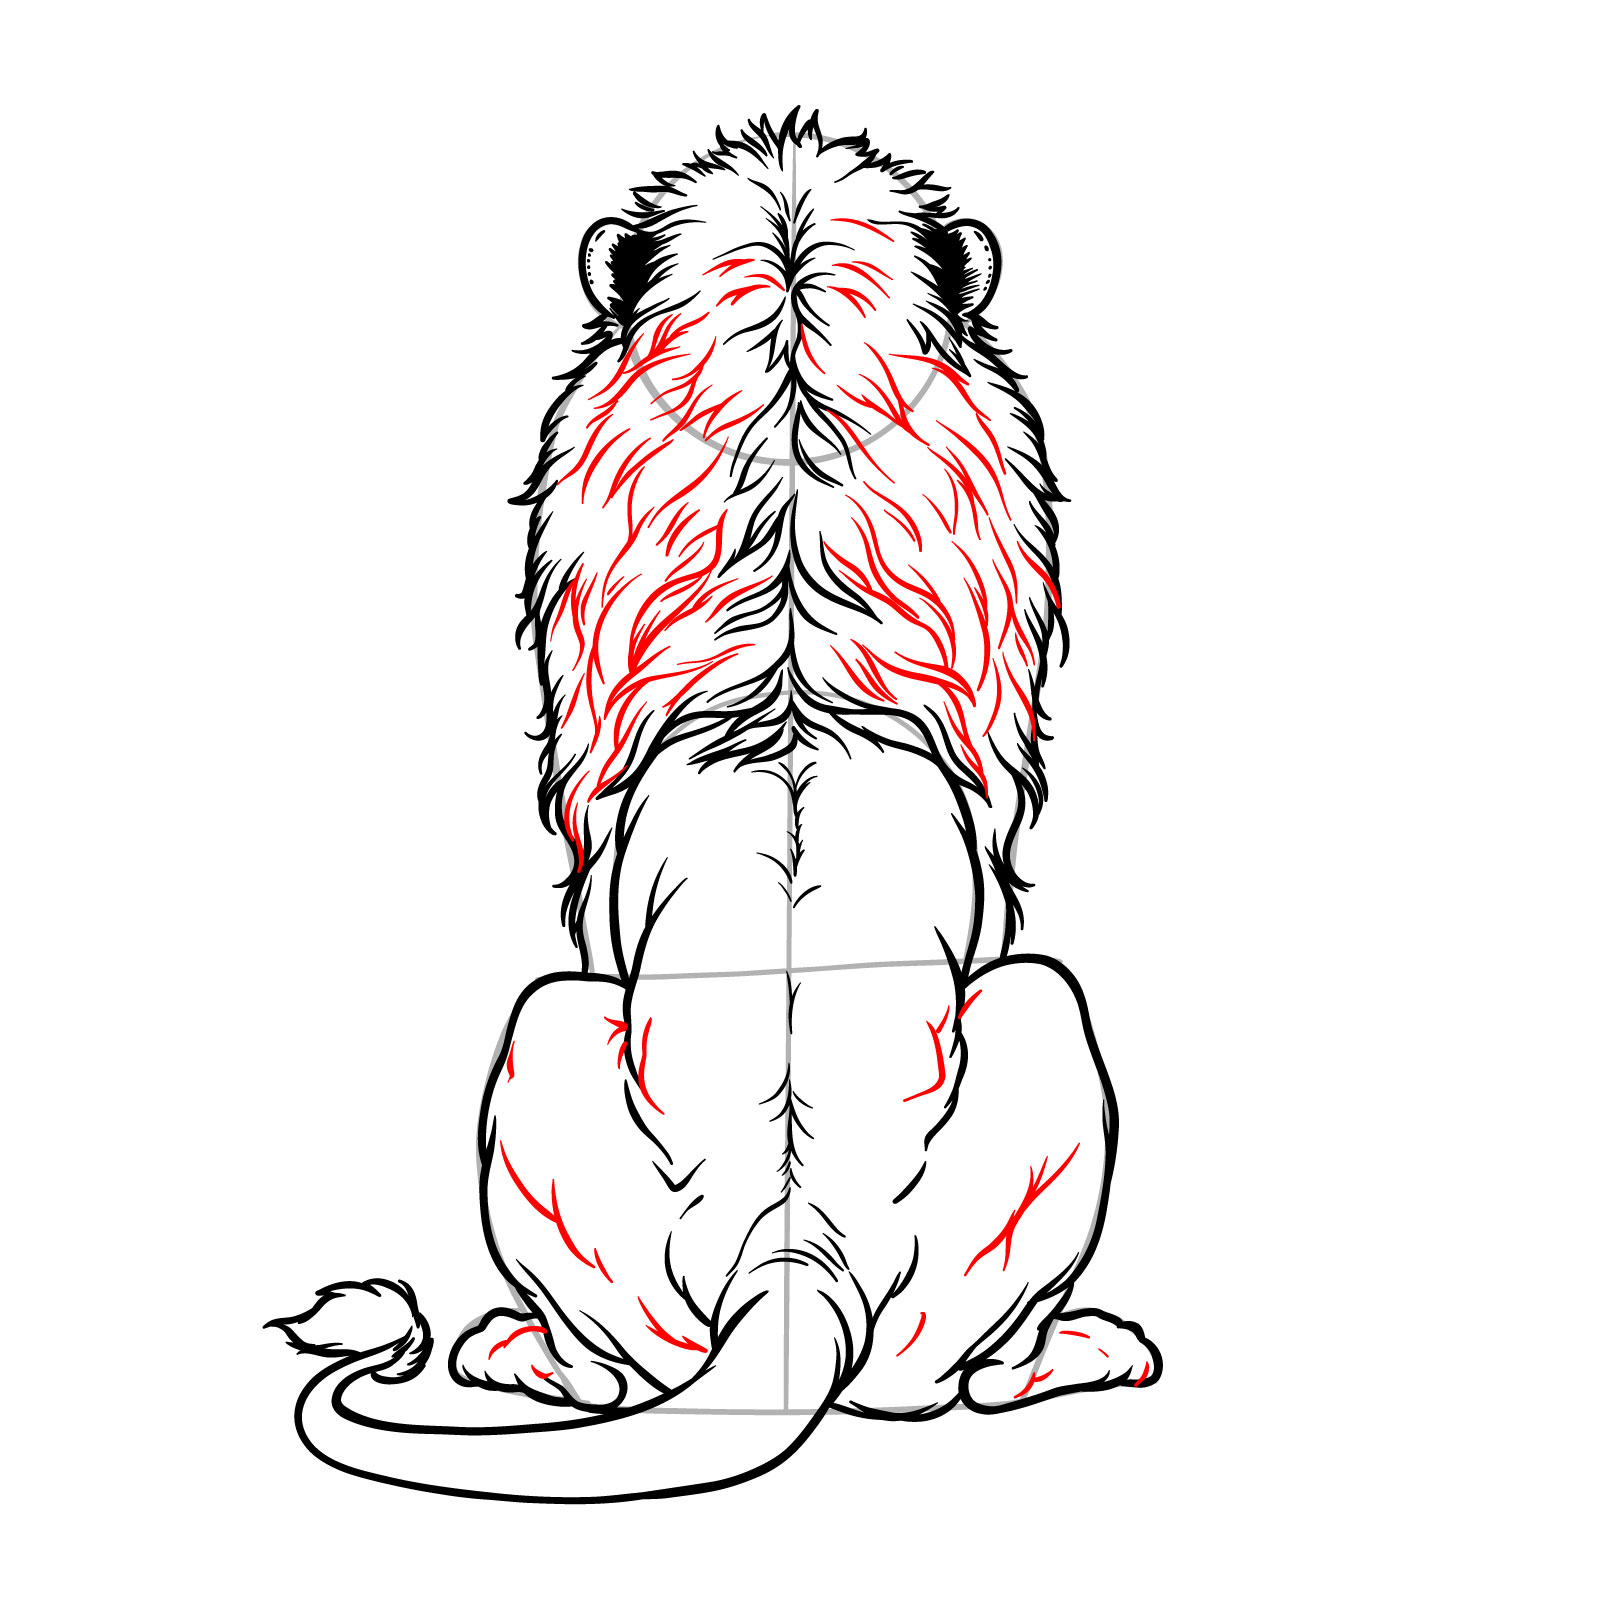
Step 12 – Intensify the fur texture on the mane by adding more jagged lines. Sketch additional lines to suggest muscle definition
Enhancing fur texture and muscles on the sitting lion
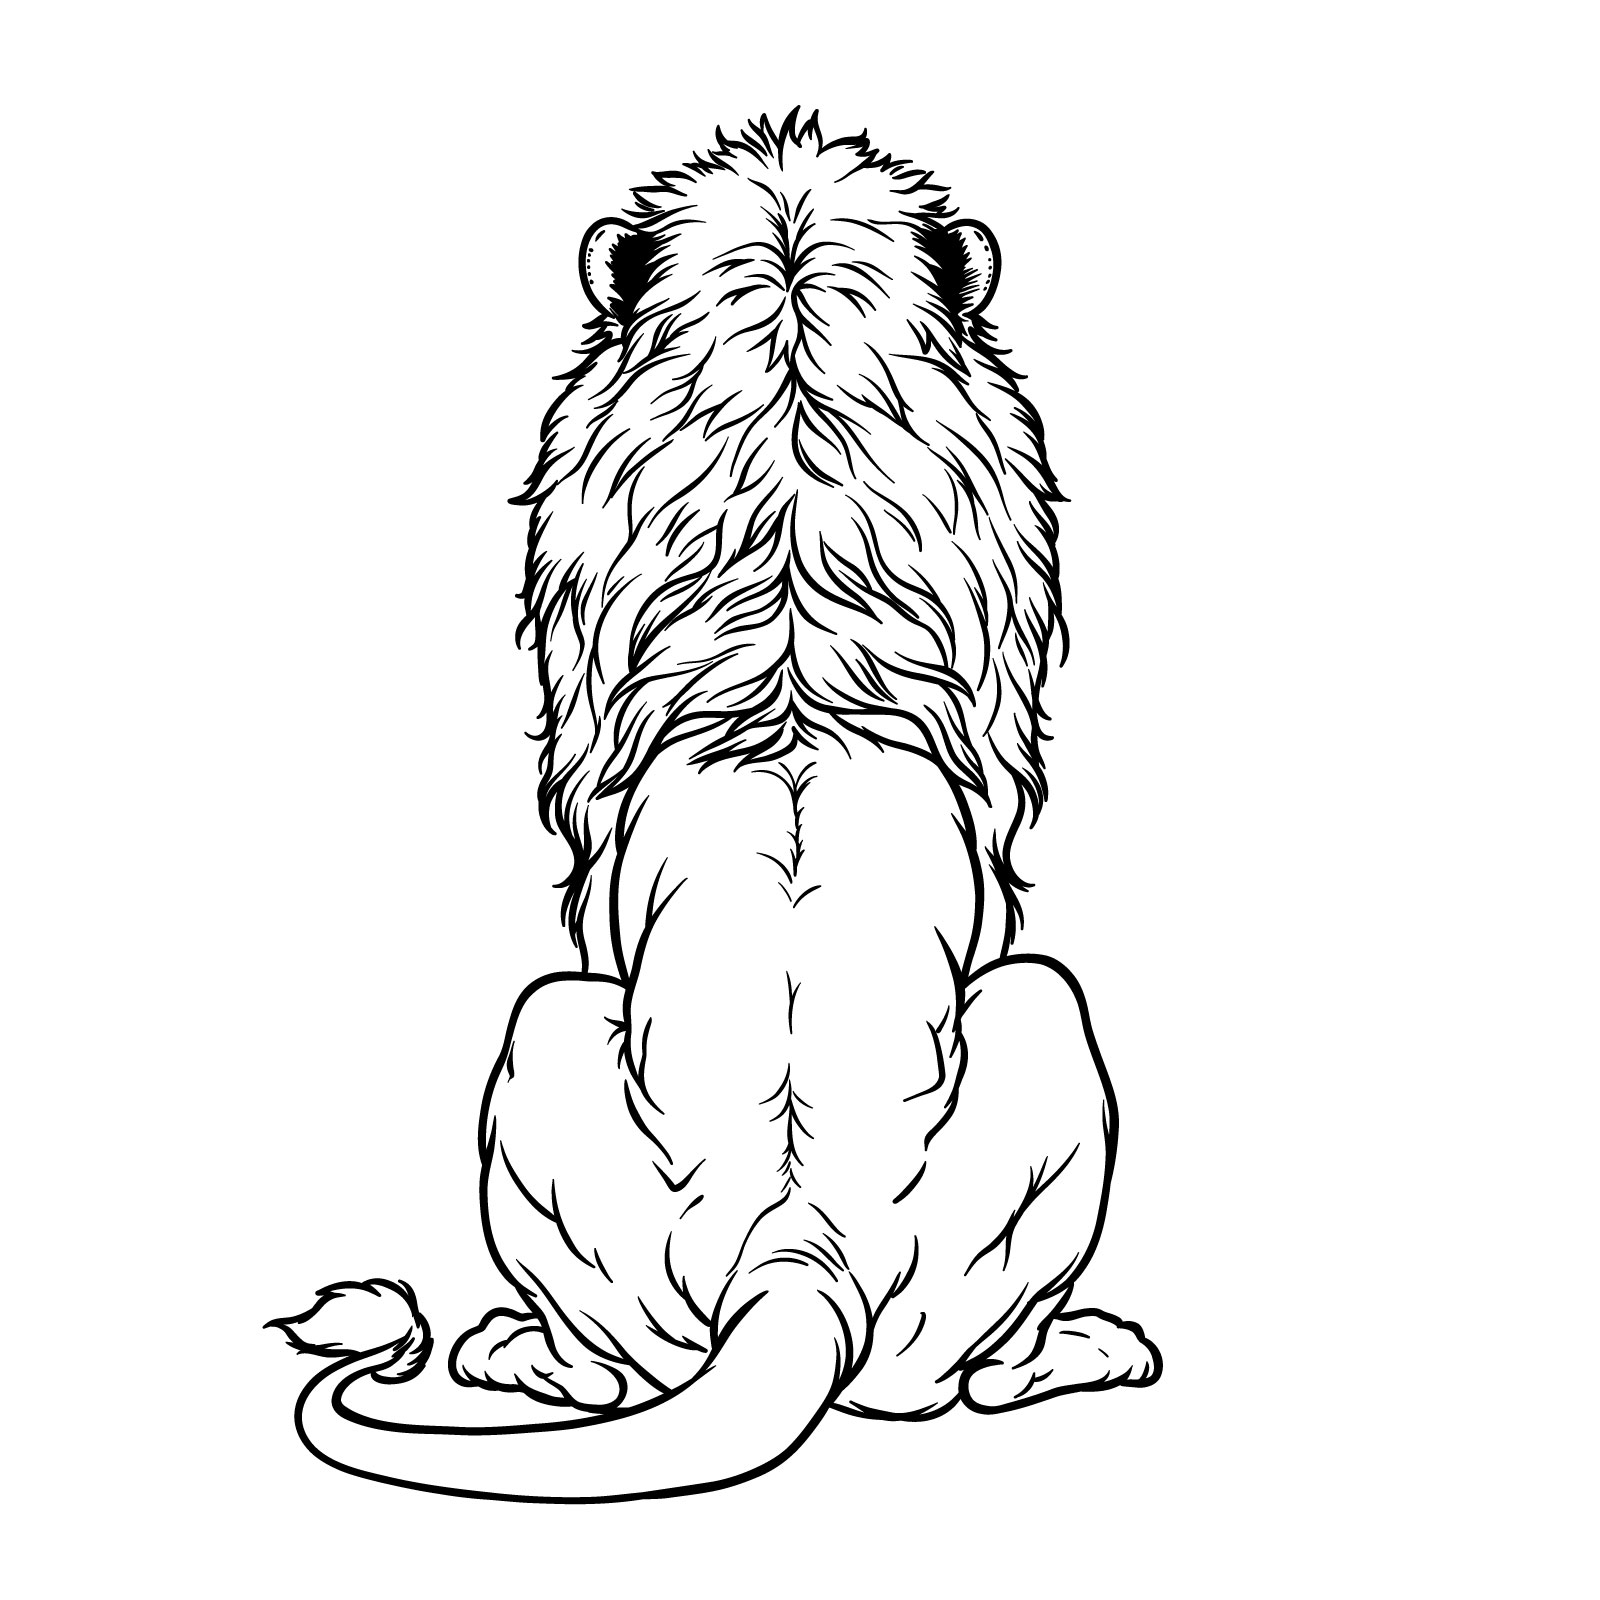
Step 13 – Gently erase the initial sketches to clean up the drawing. For a more finished look, use ink to trace over your pencil lines, ensuring all pencil marks are erased only after the ink has dried completely. This final step brings clarity and contrast to your sitting lion drawing, making the details pop
Finalizing and optionally inking the lion drawing
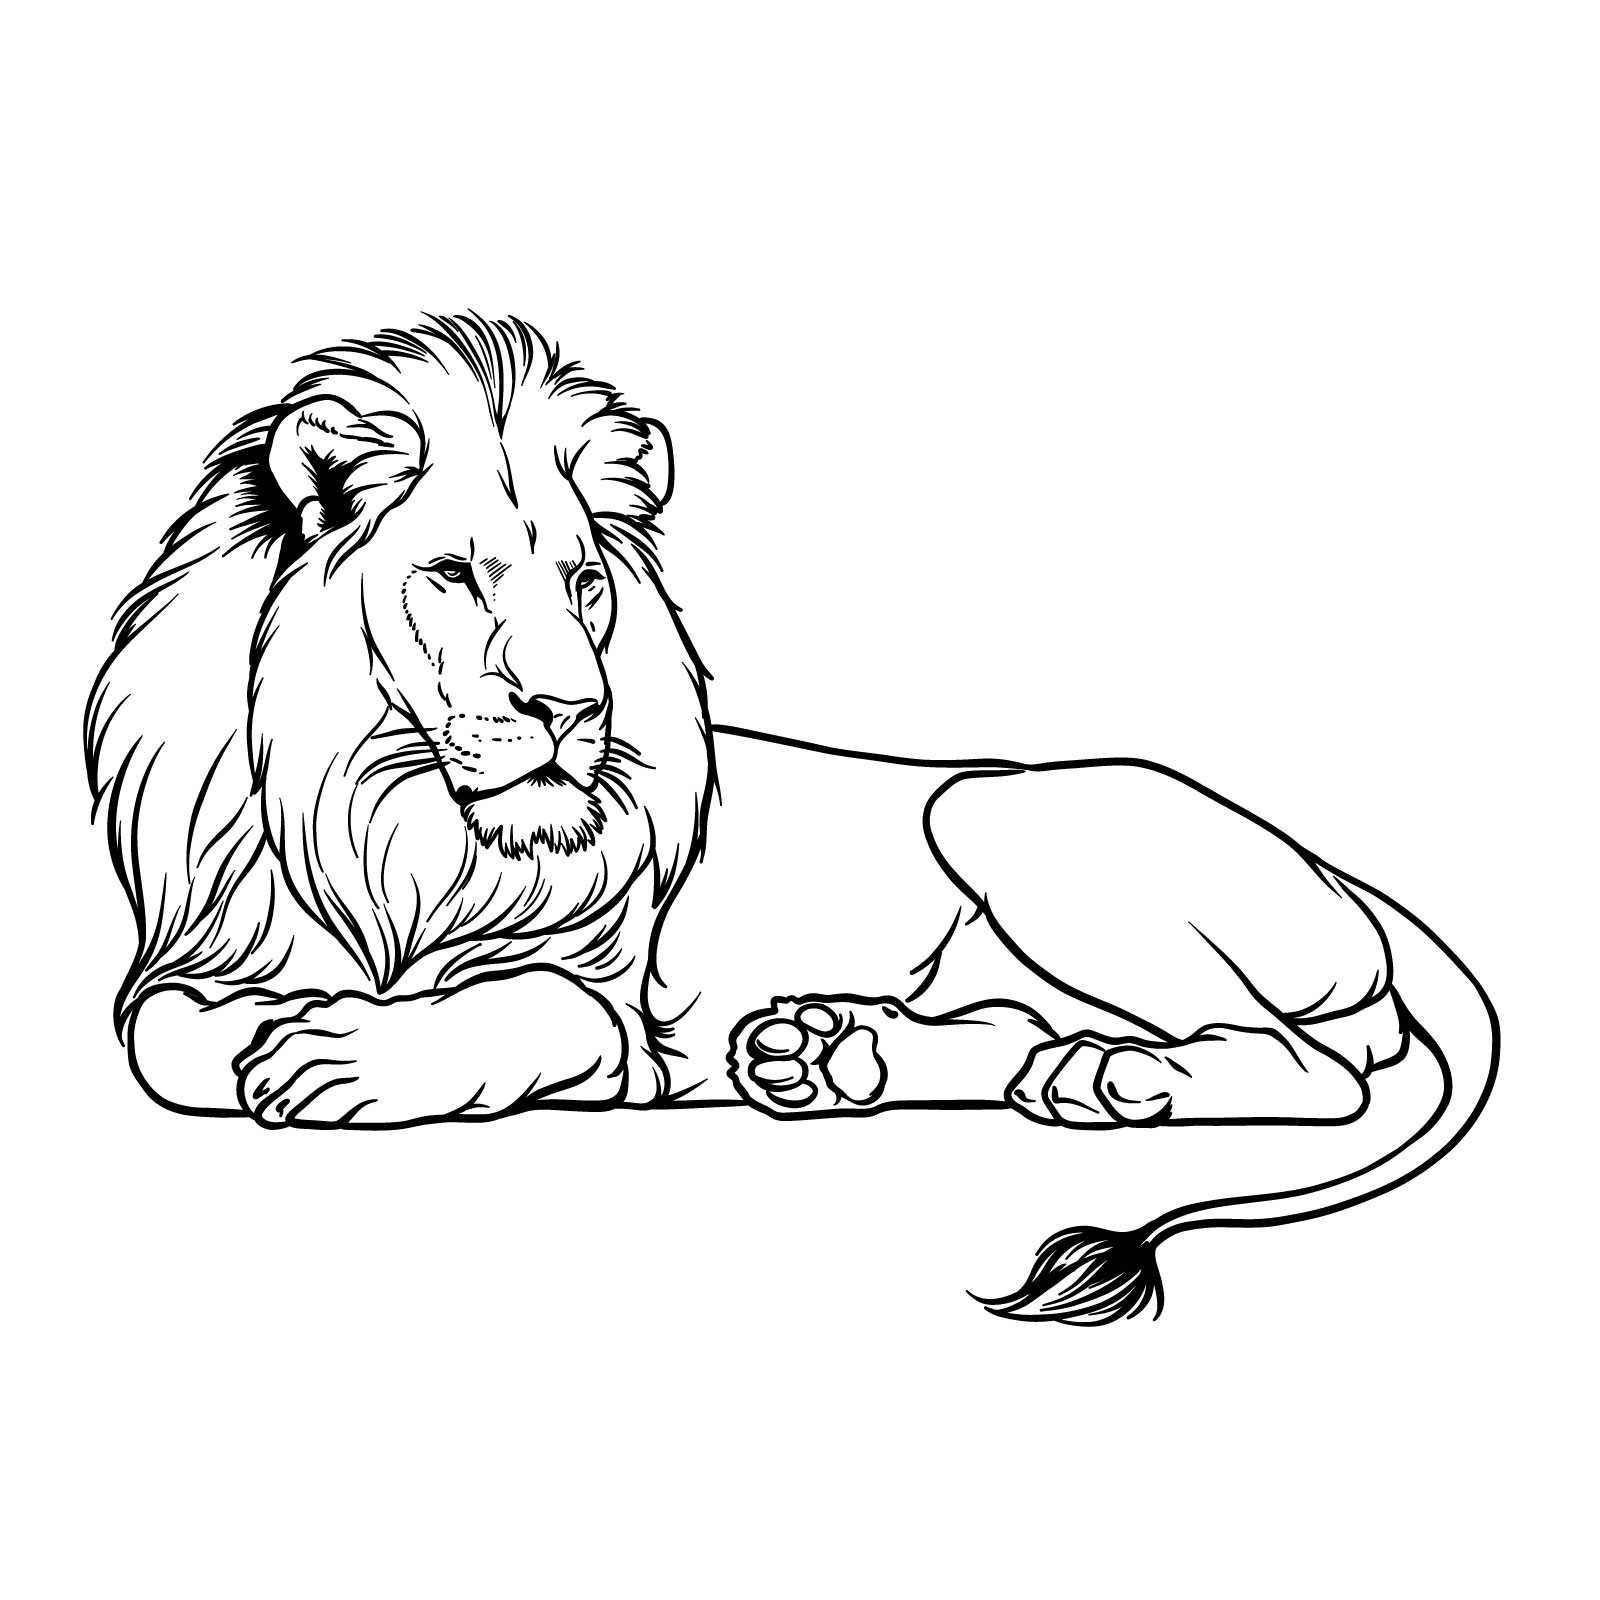
Guide 12: Lying Lion
How to draw a lion in lying pose, side view
In guide twelve, we’re going to draw a lion lying down, resting but alert. This 17-step guide will help you create a sense of weight and relaxation as the lion’s paws are tucked under its chest and the tail curls beside it.
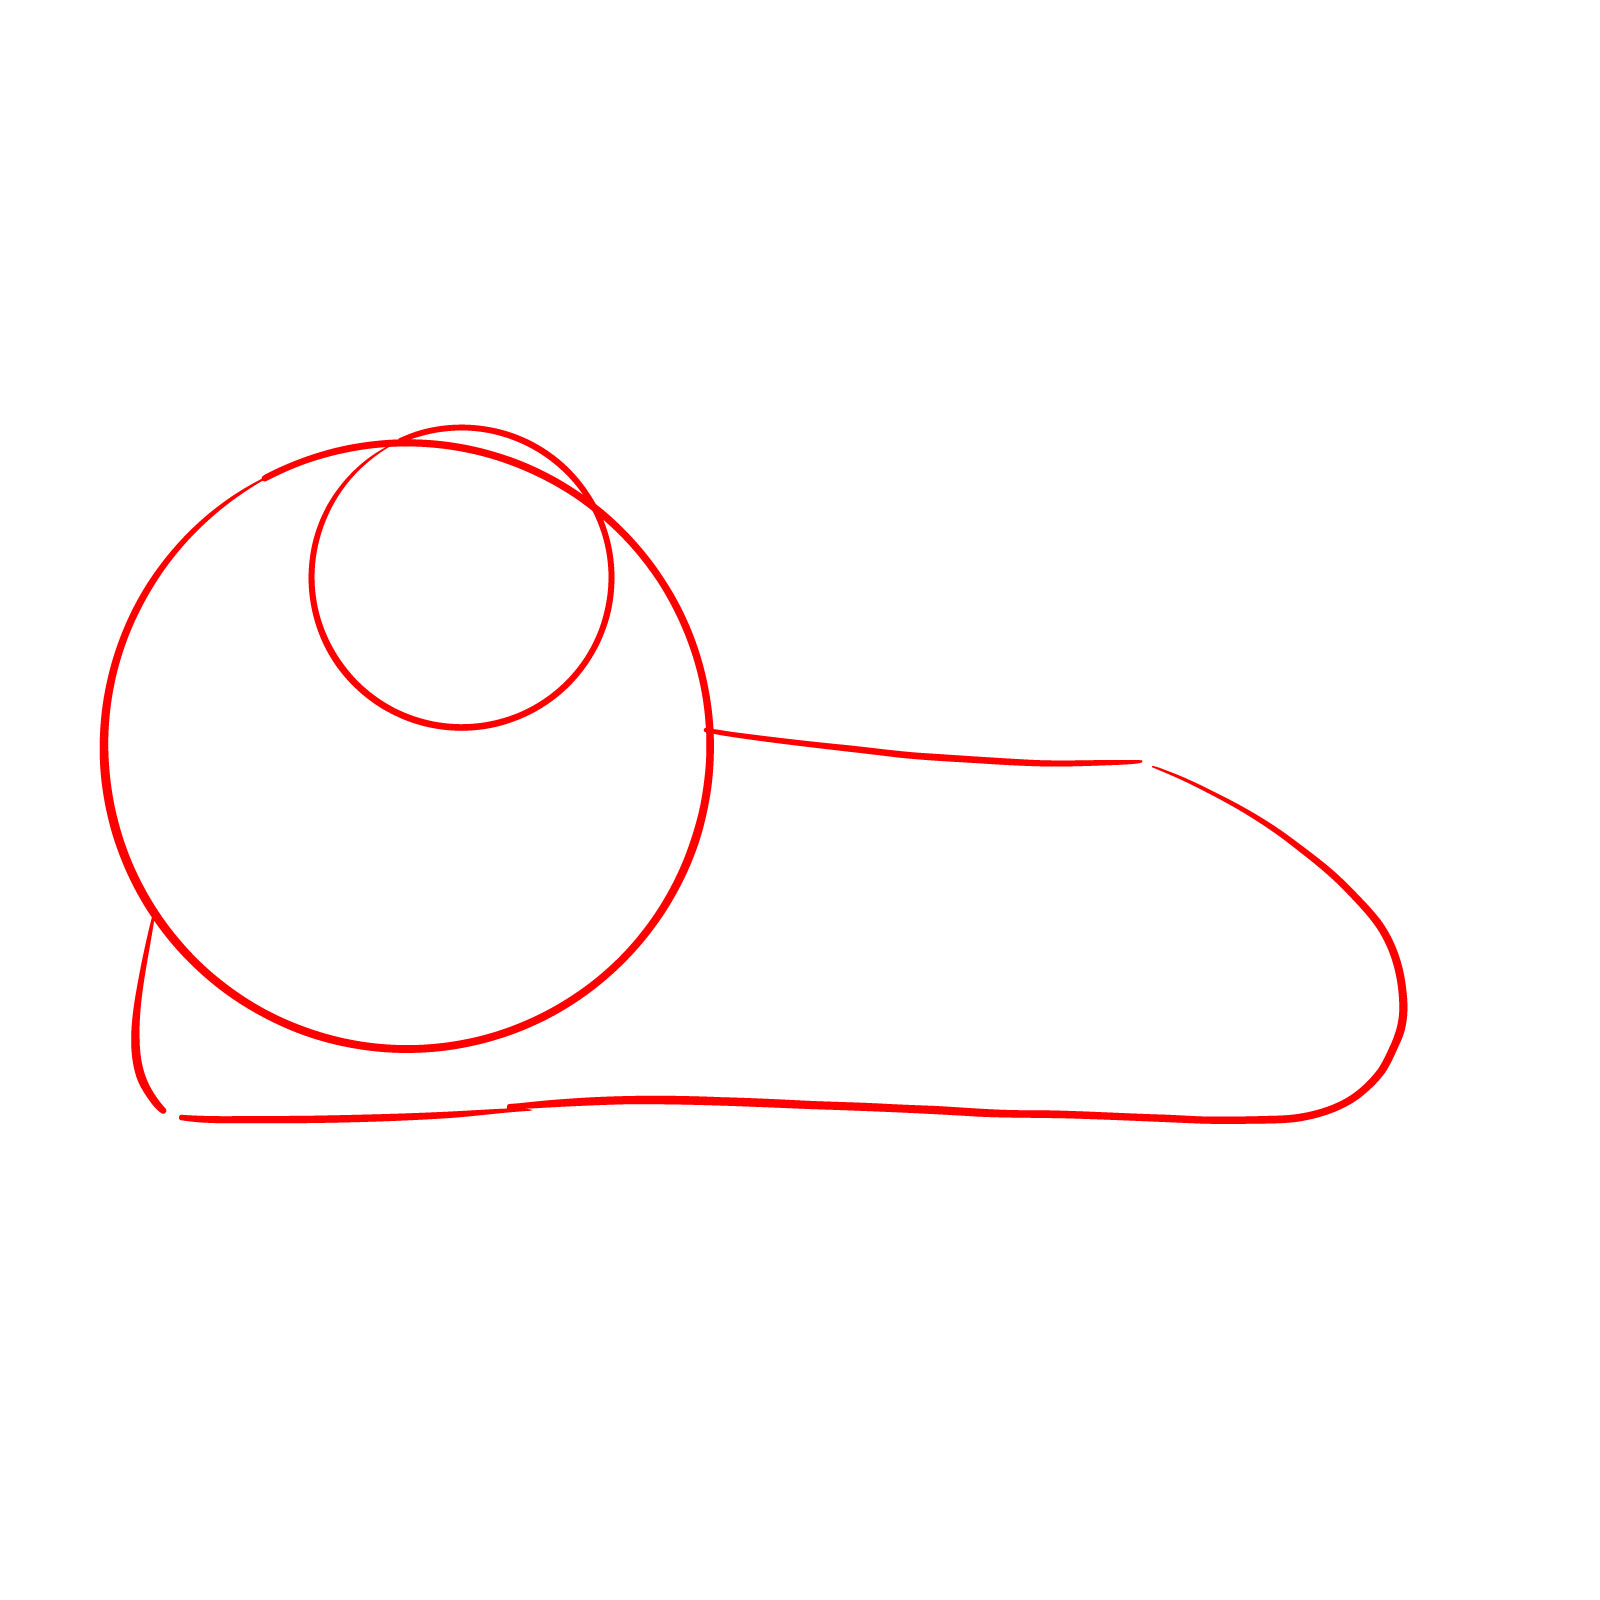
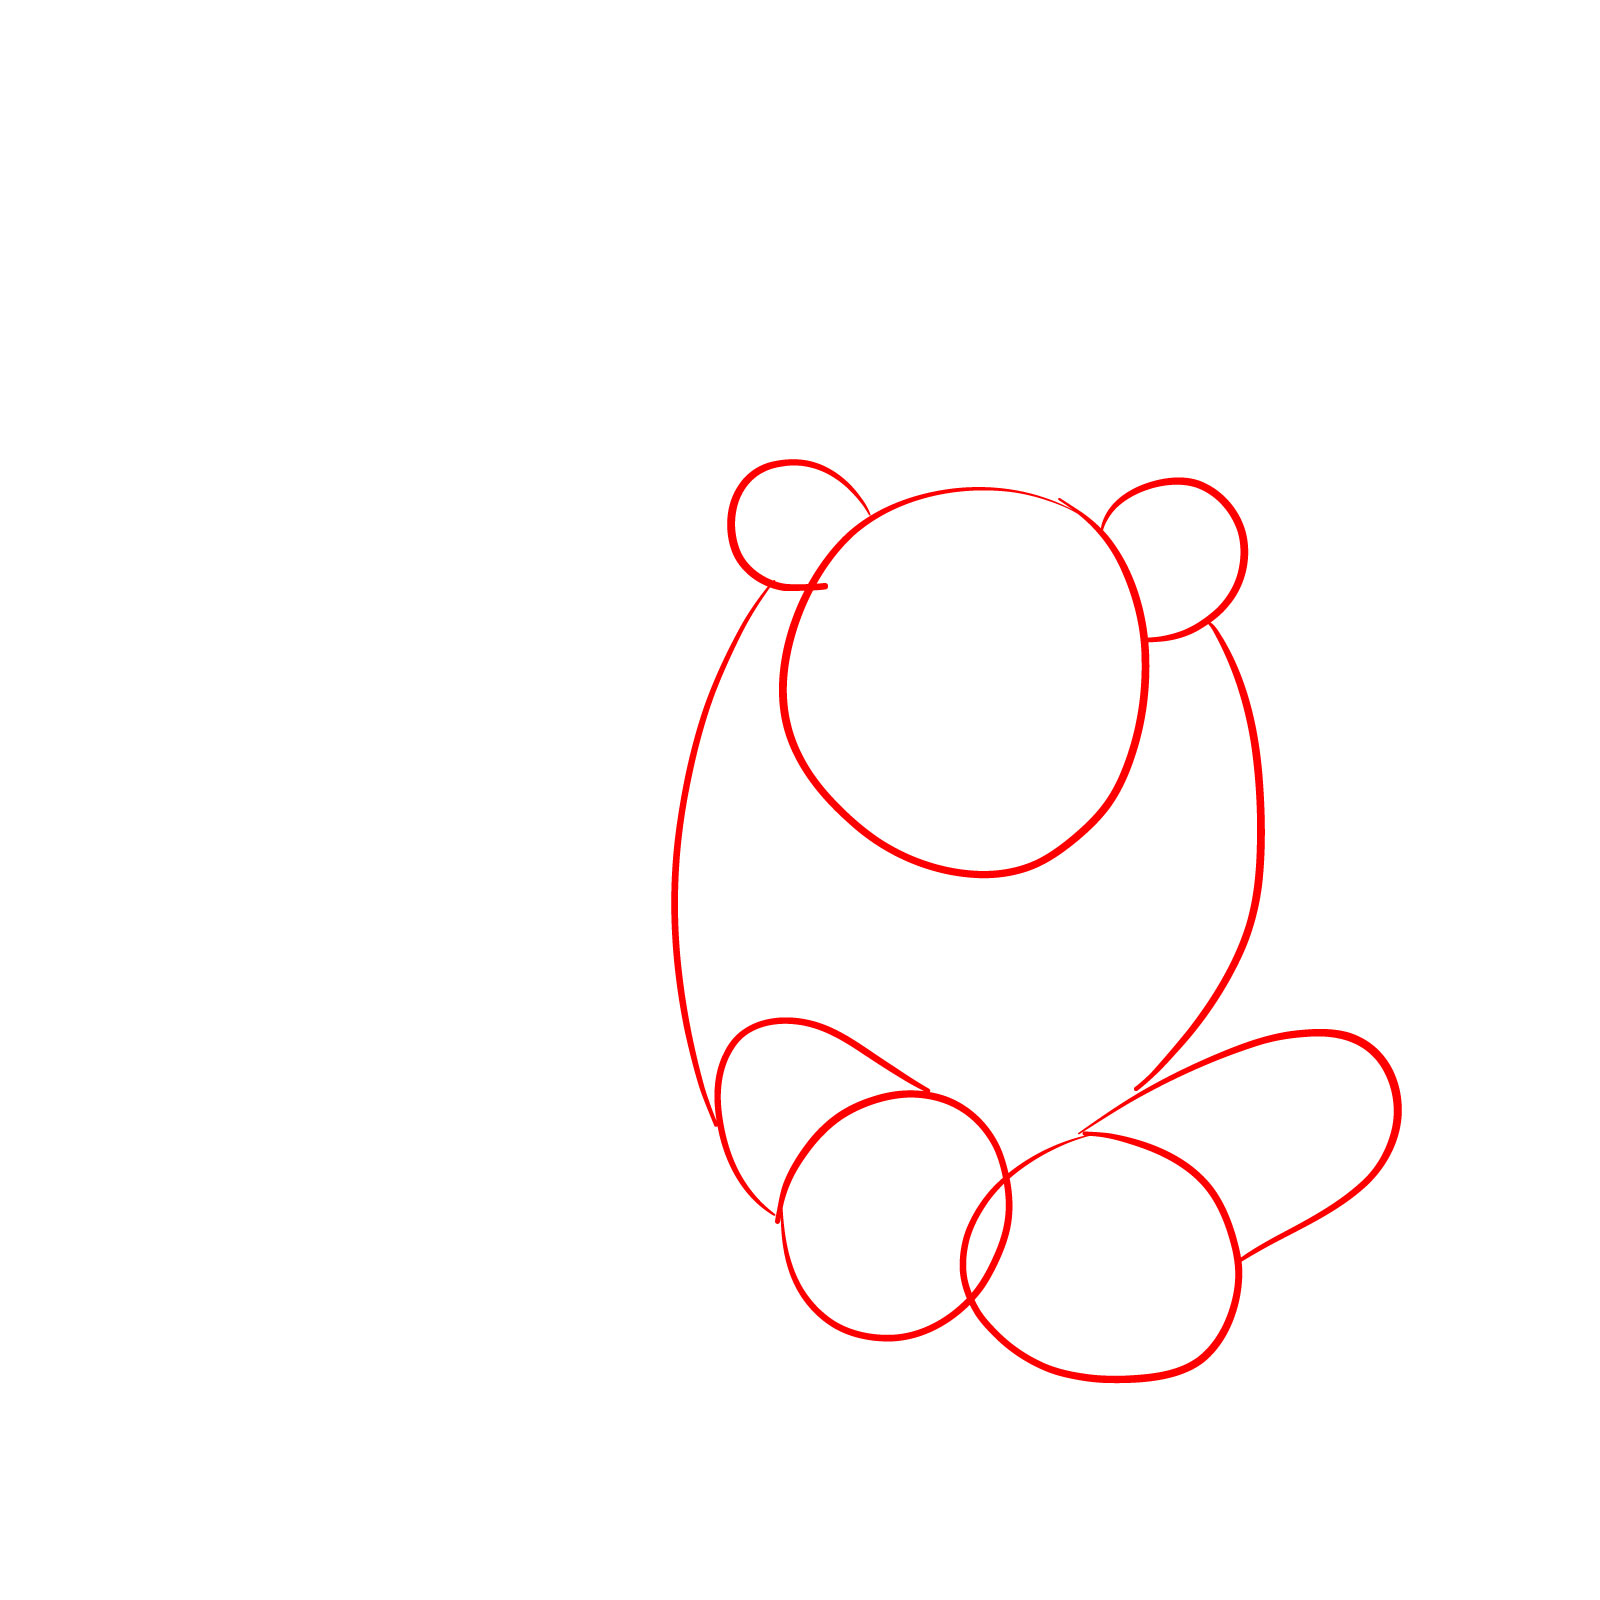
Step 01 – Start by drawing a circle for the base of the lion’s head. Add a larger circle over it to outline the mane. For the body, sketch a large rectangular shape curved at the corners and with a rounded rear-bottom corner, representing the lion’s torso
Initial basic shapes for head and body
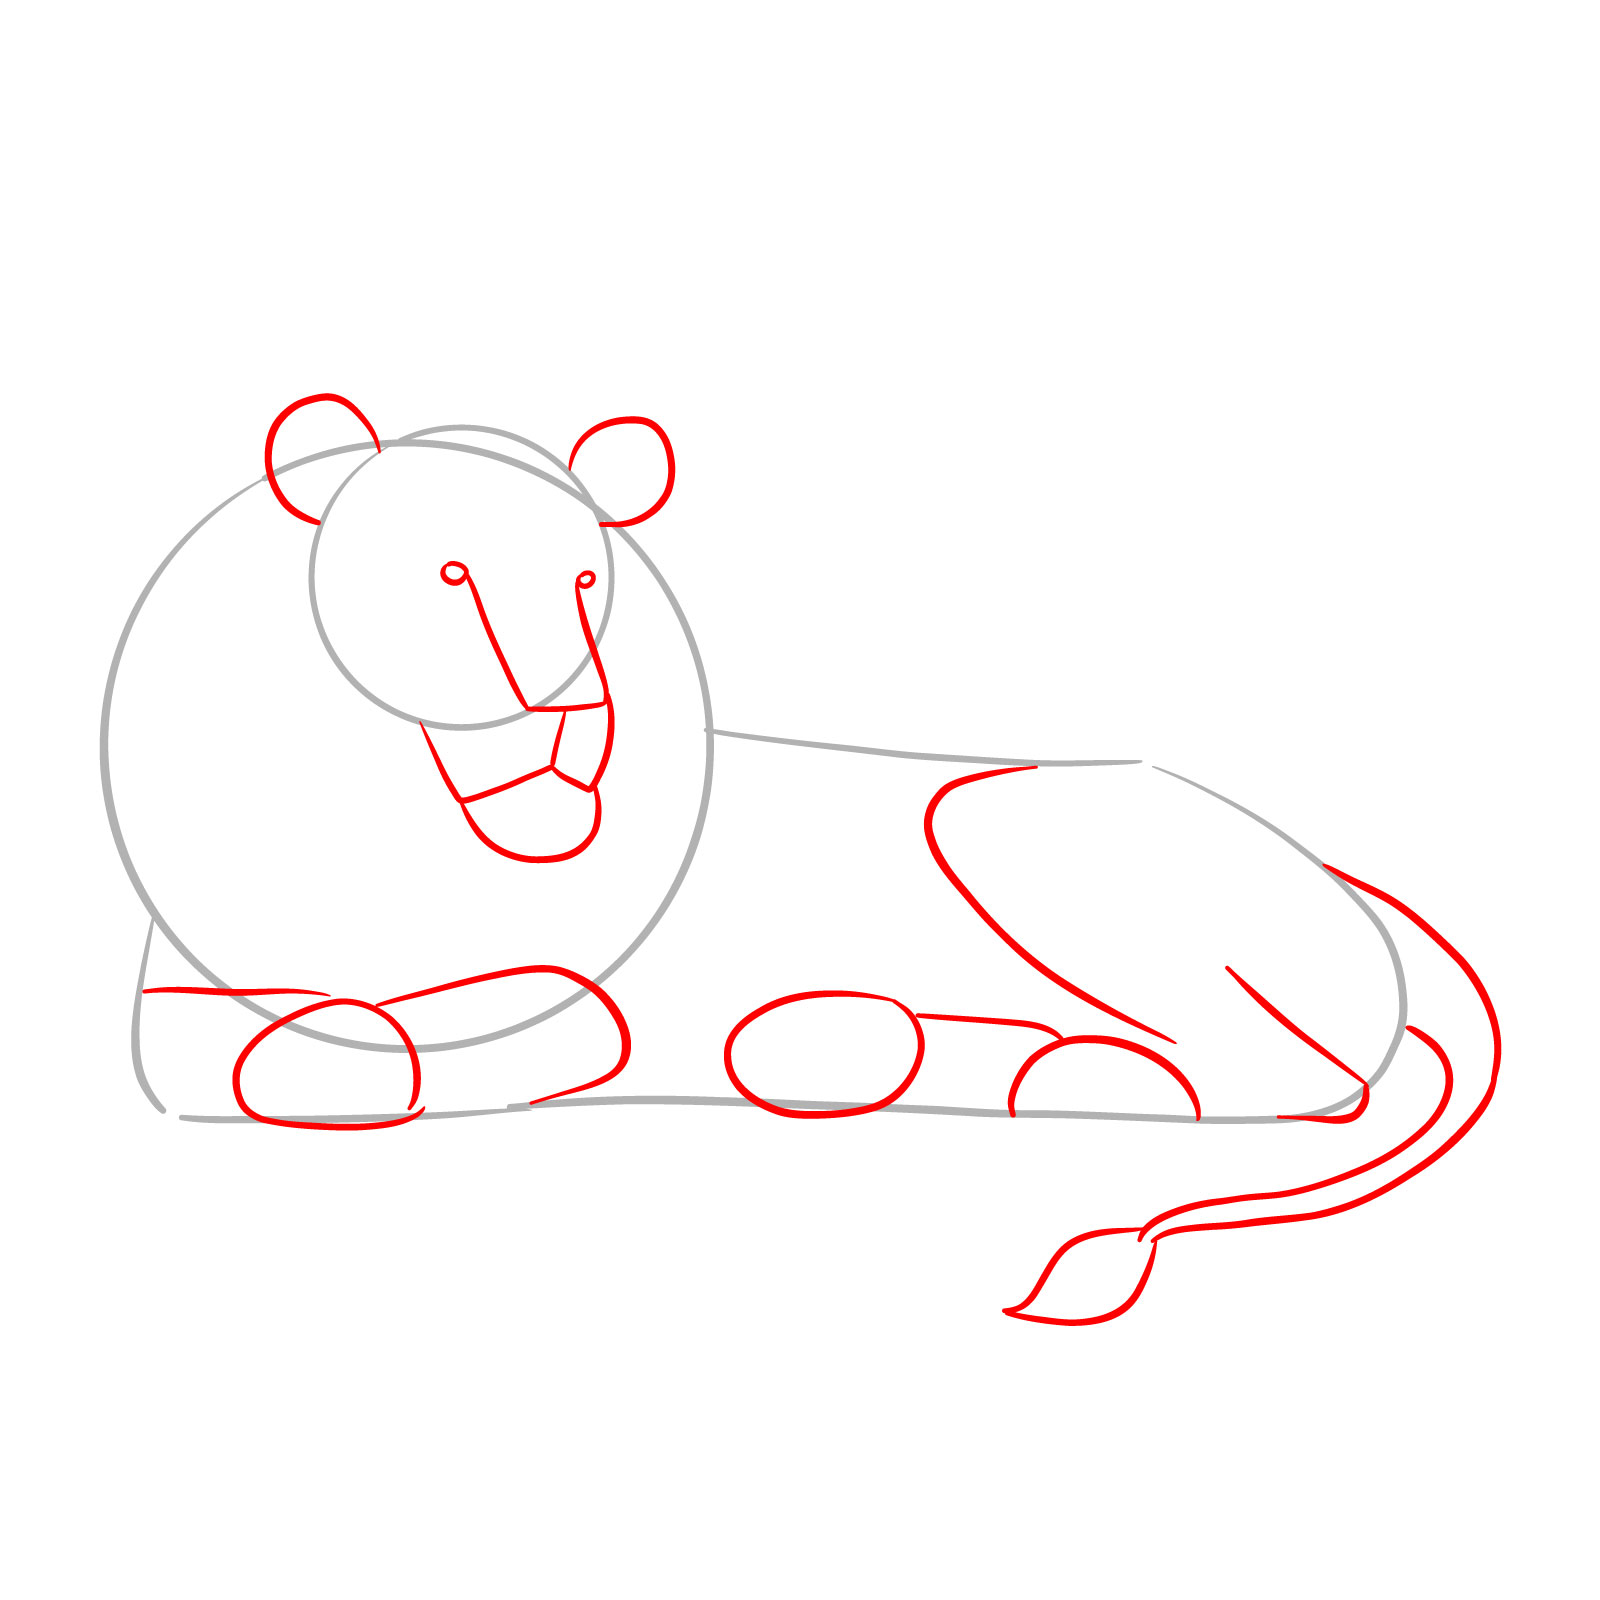
Step 02 – On the head, draw a “U” shape with circles at both ends to map out the eyes and nose area. Below this, sketch basic shapes that resemble the facial structure and main body parts. Follow the example image to replicate these shapes accurately
Defining facial and body shapes
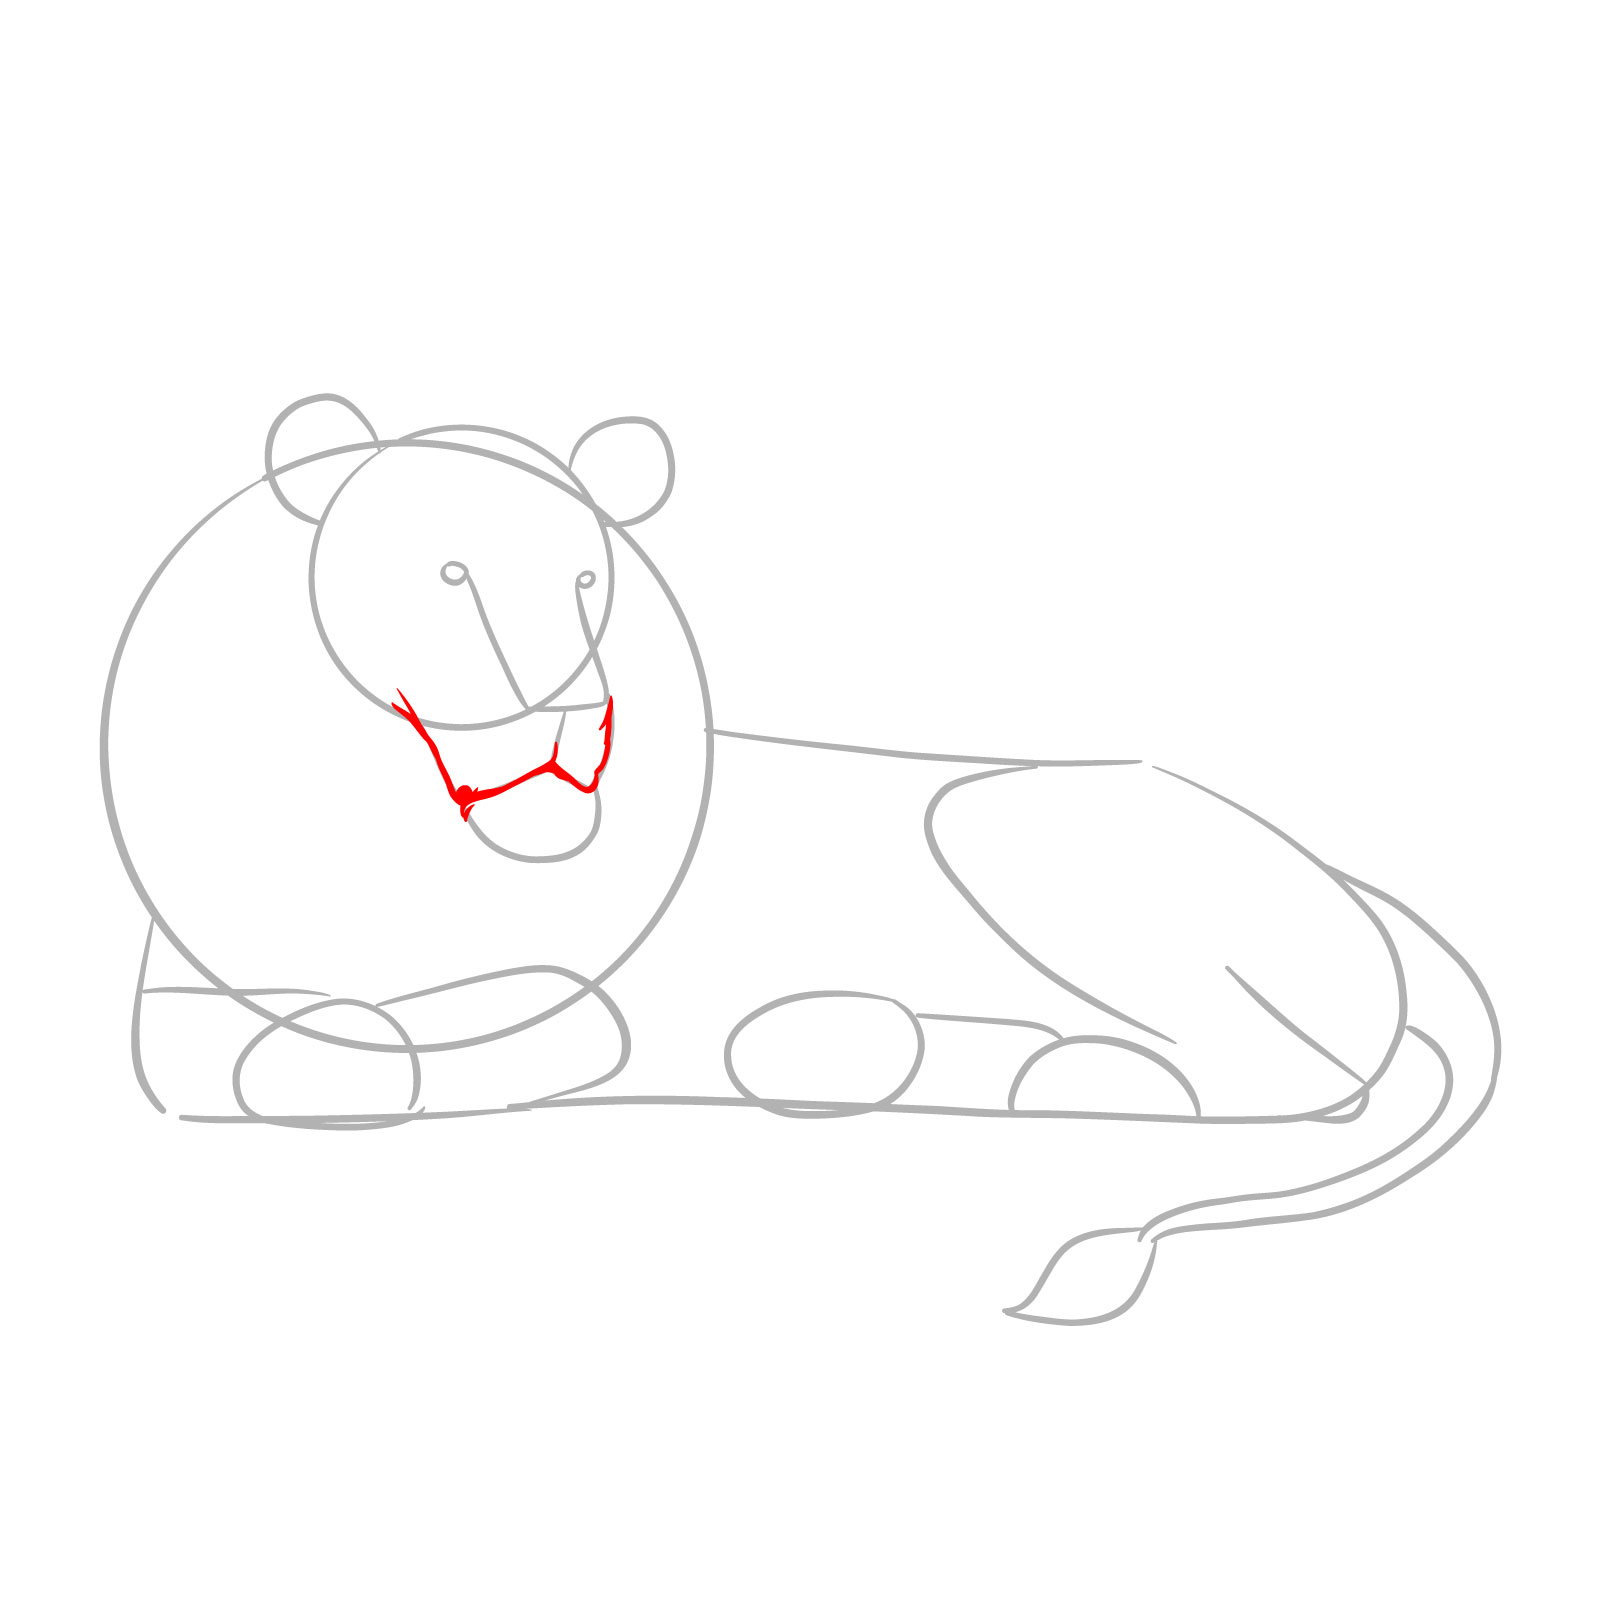
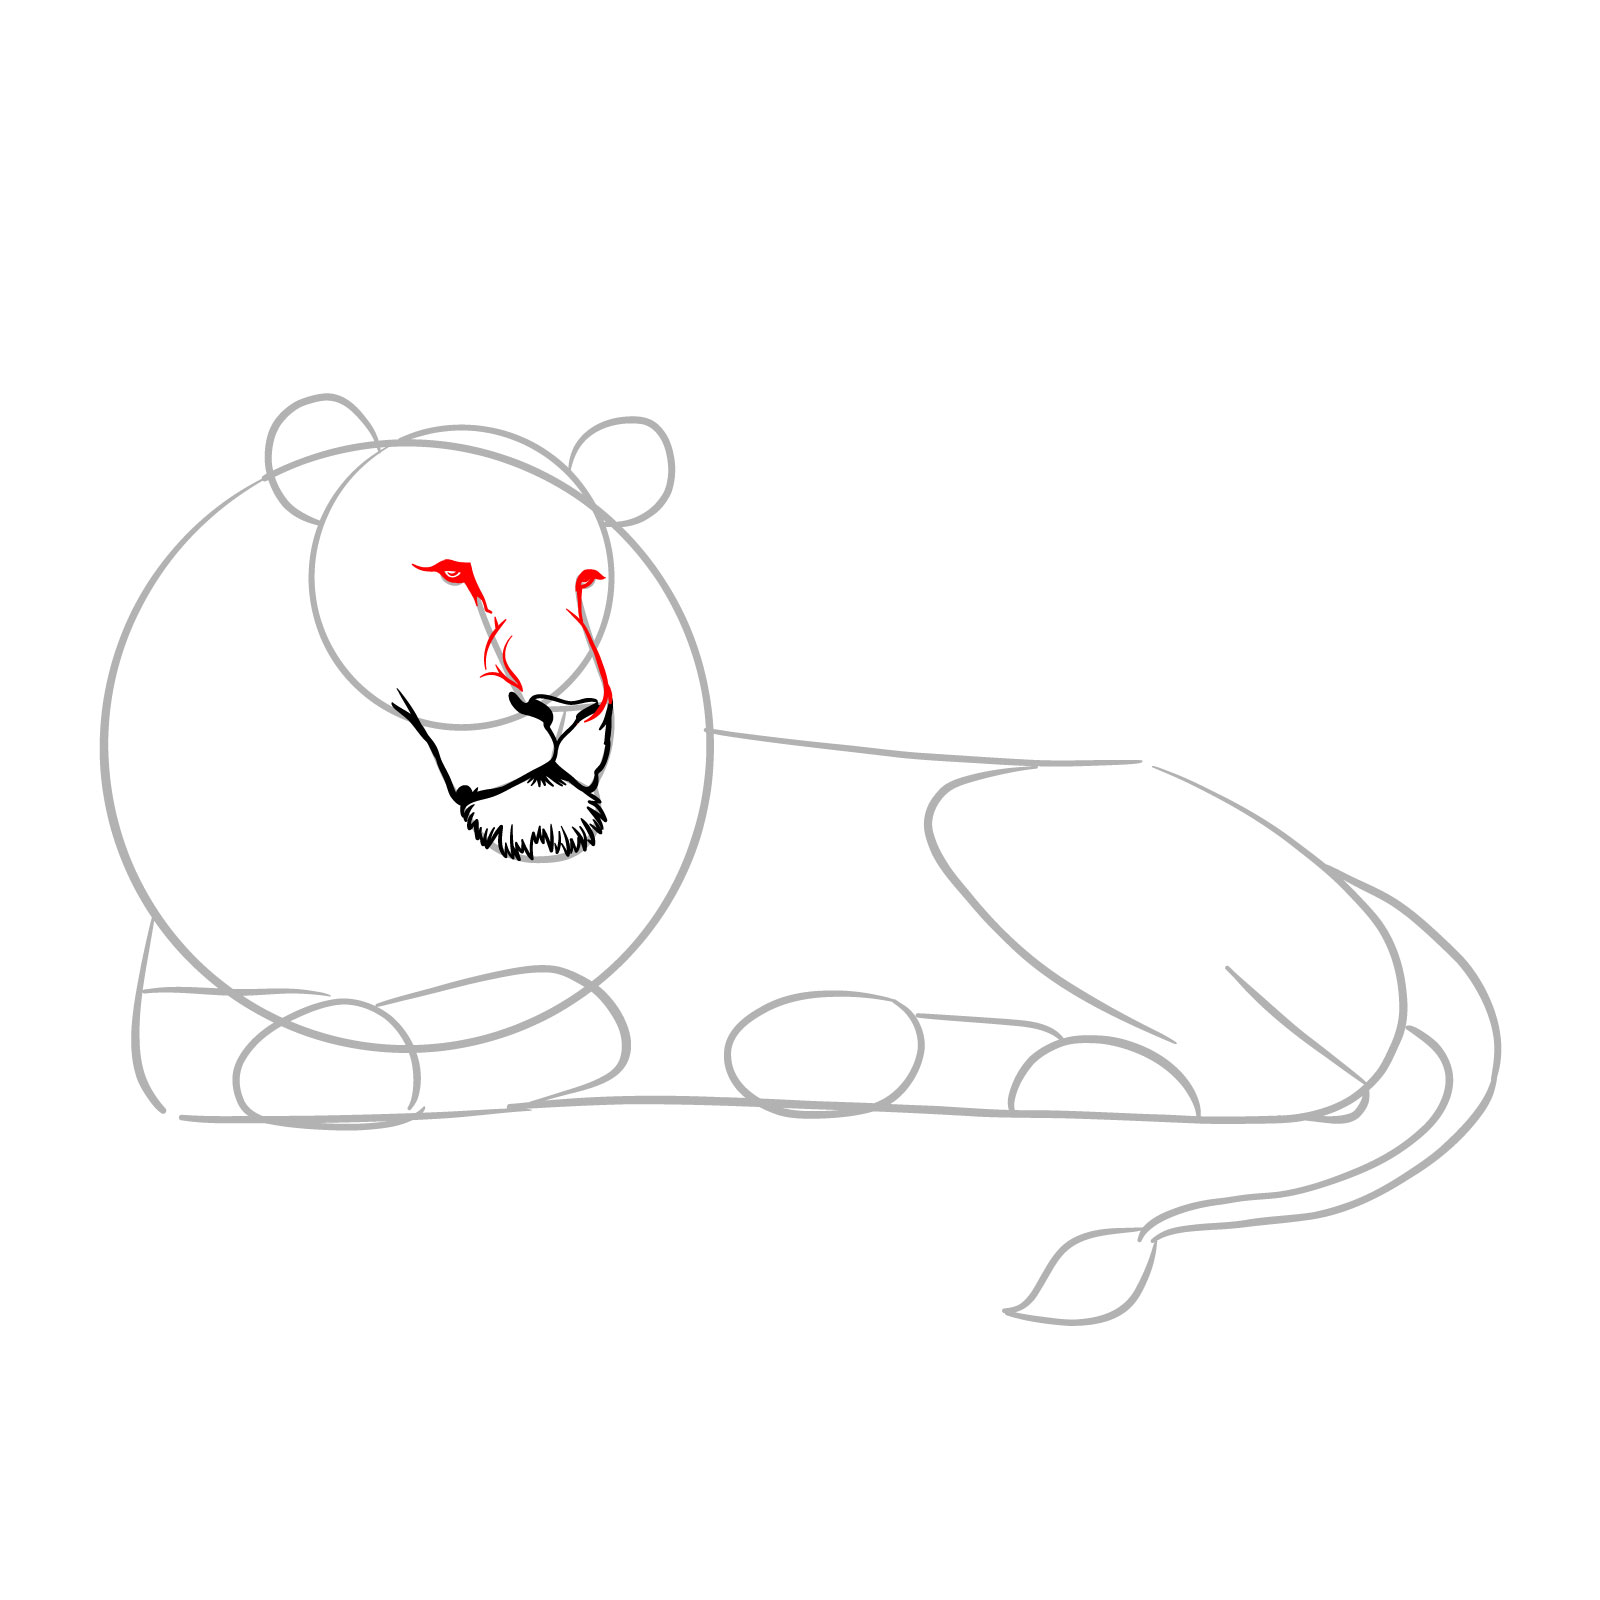
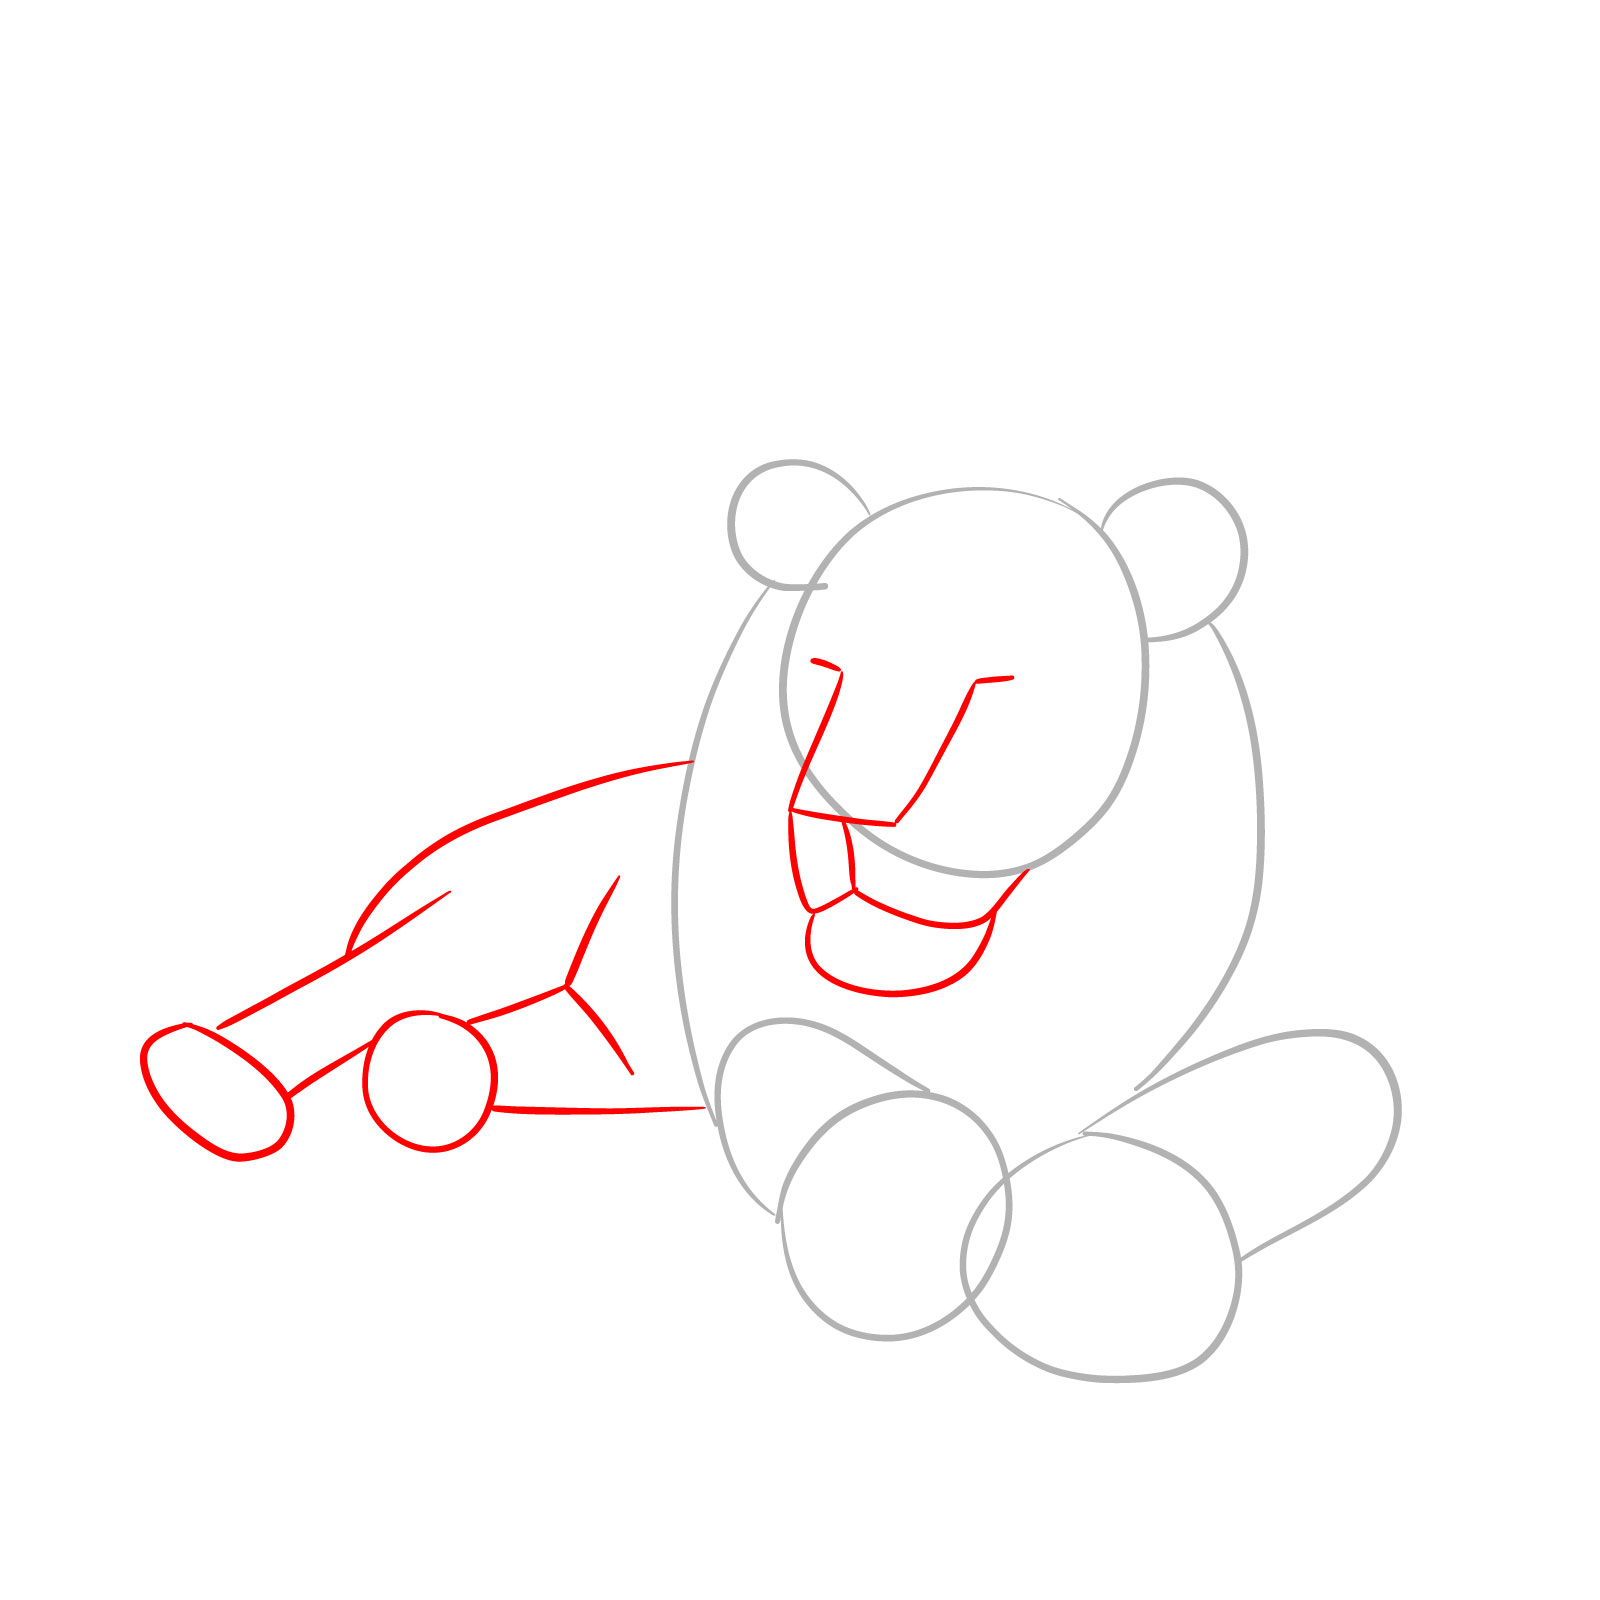
Step 03 – Focus on the muzzle area by sketching the outline of the mouth and whisker pads. Use a gentle, curved line to represent the the lion’s mouth
Muzzle details
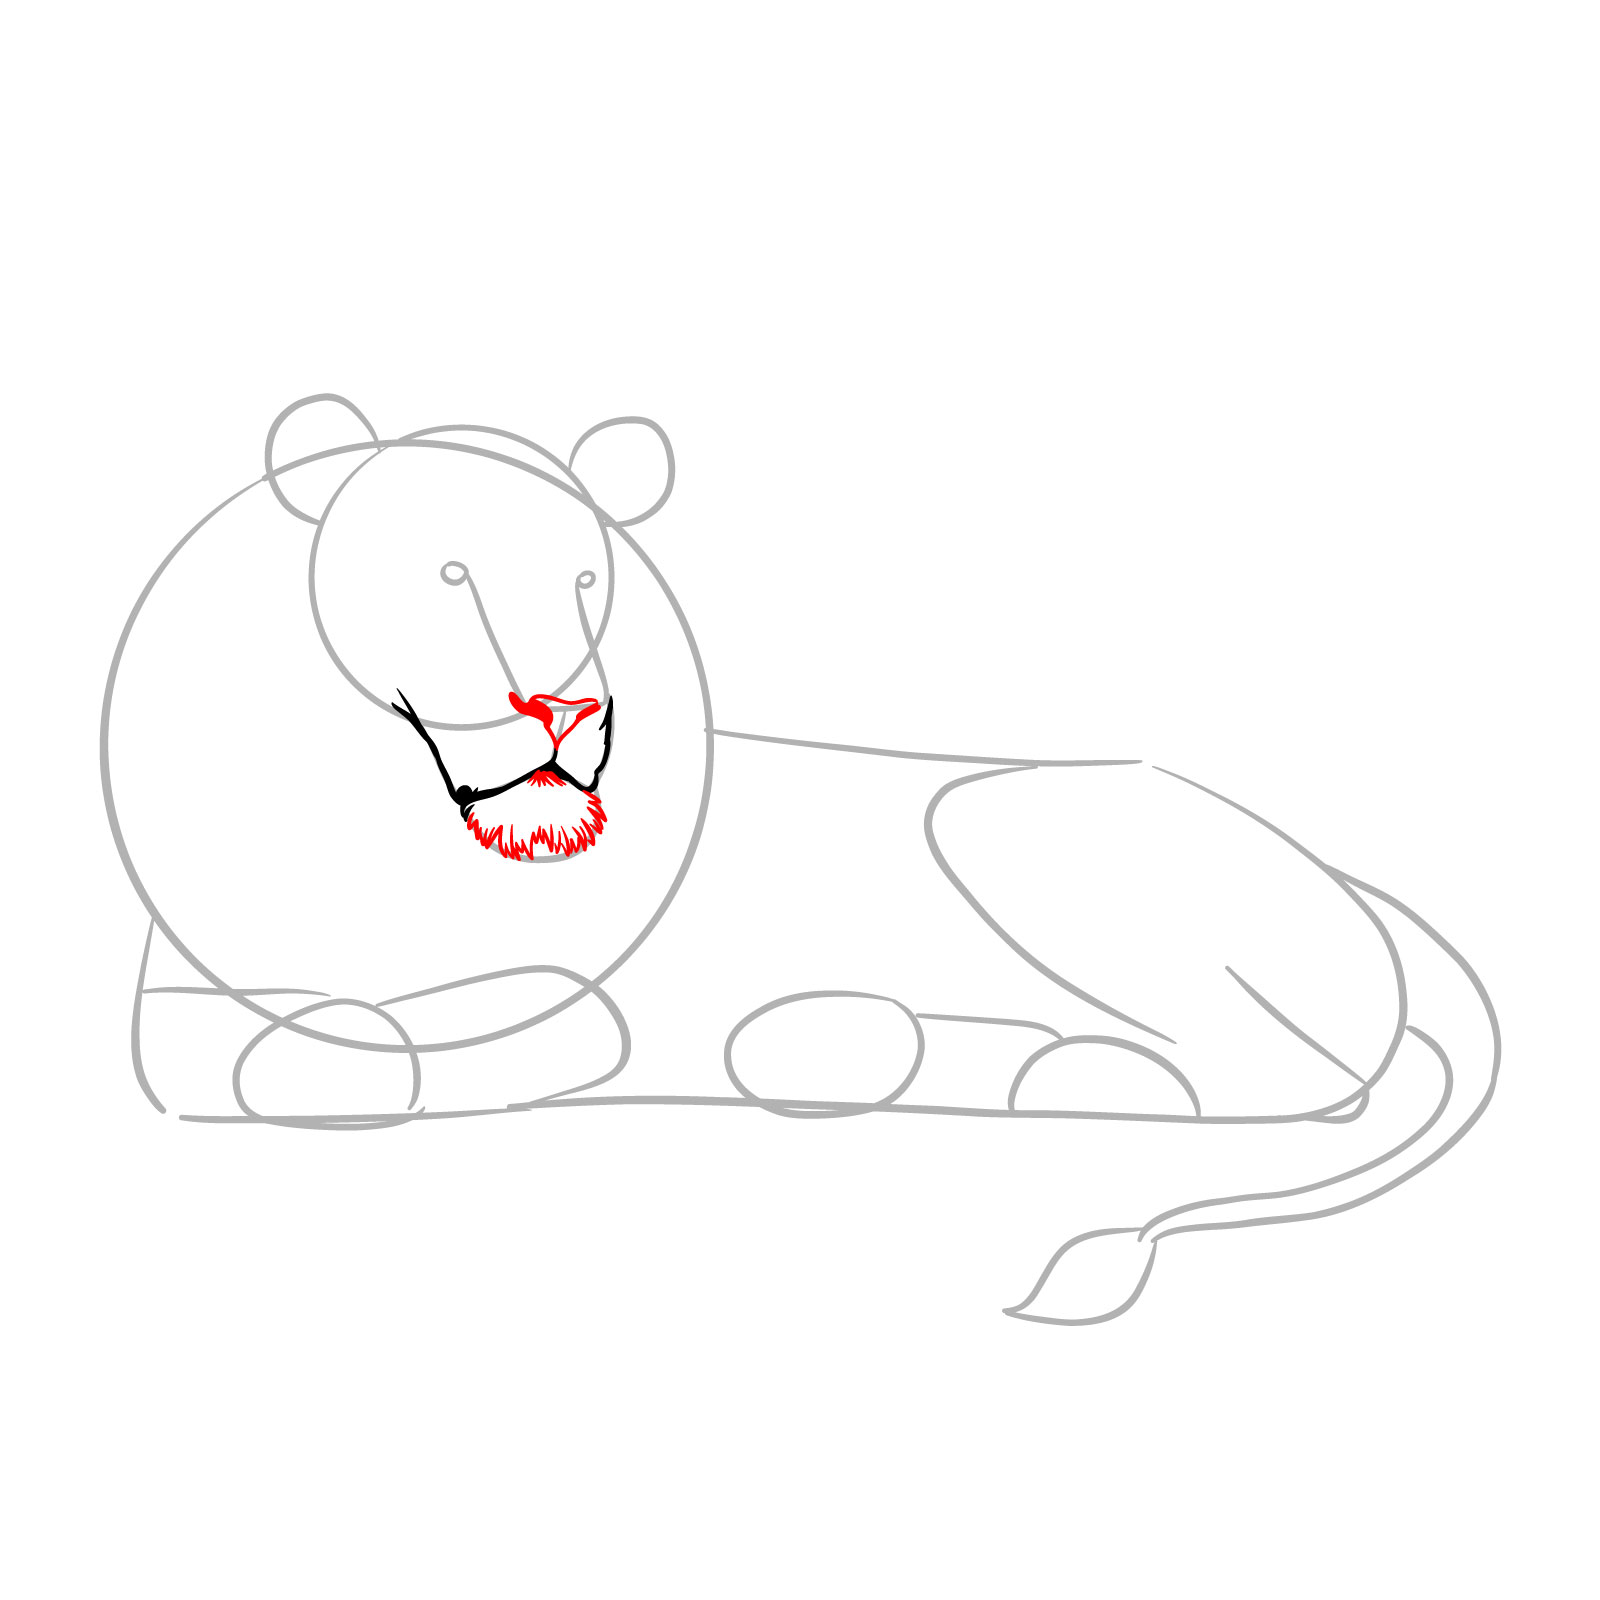
Step 04 – Add short jagged lines along the lower jaw to create a fur texture. Sketch small, jagged shading around the mouth. Outline the nose and fill in the nostrils with small, dark shapes to define them
Fur texture and nose details
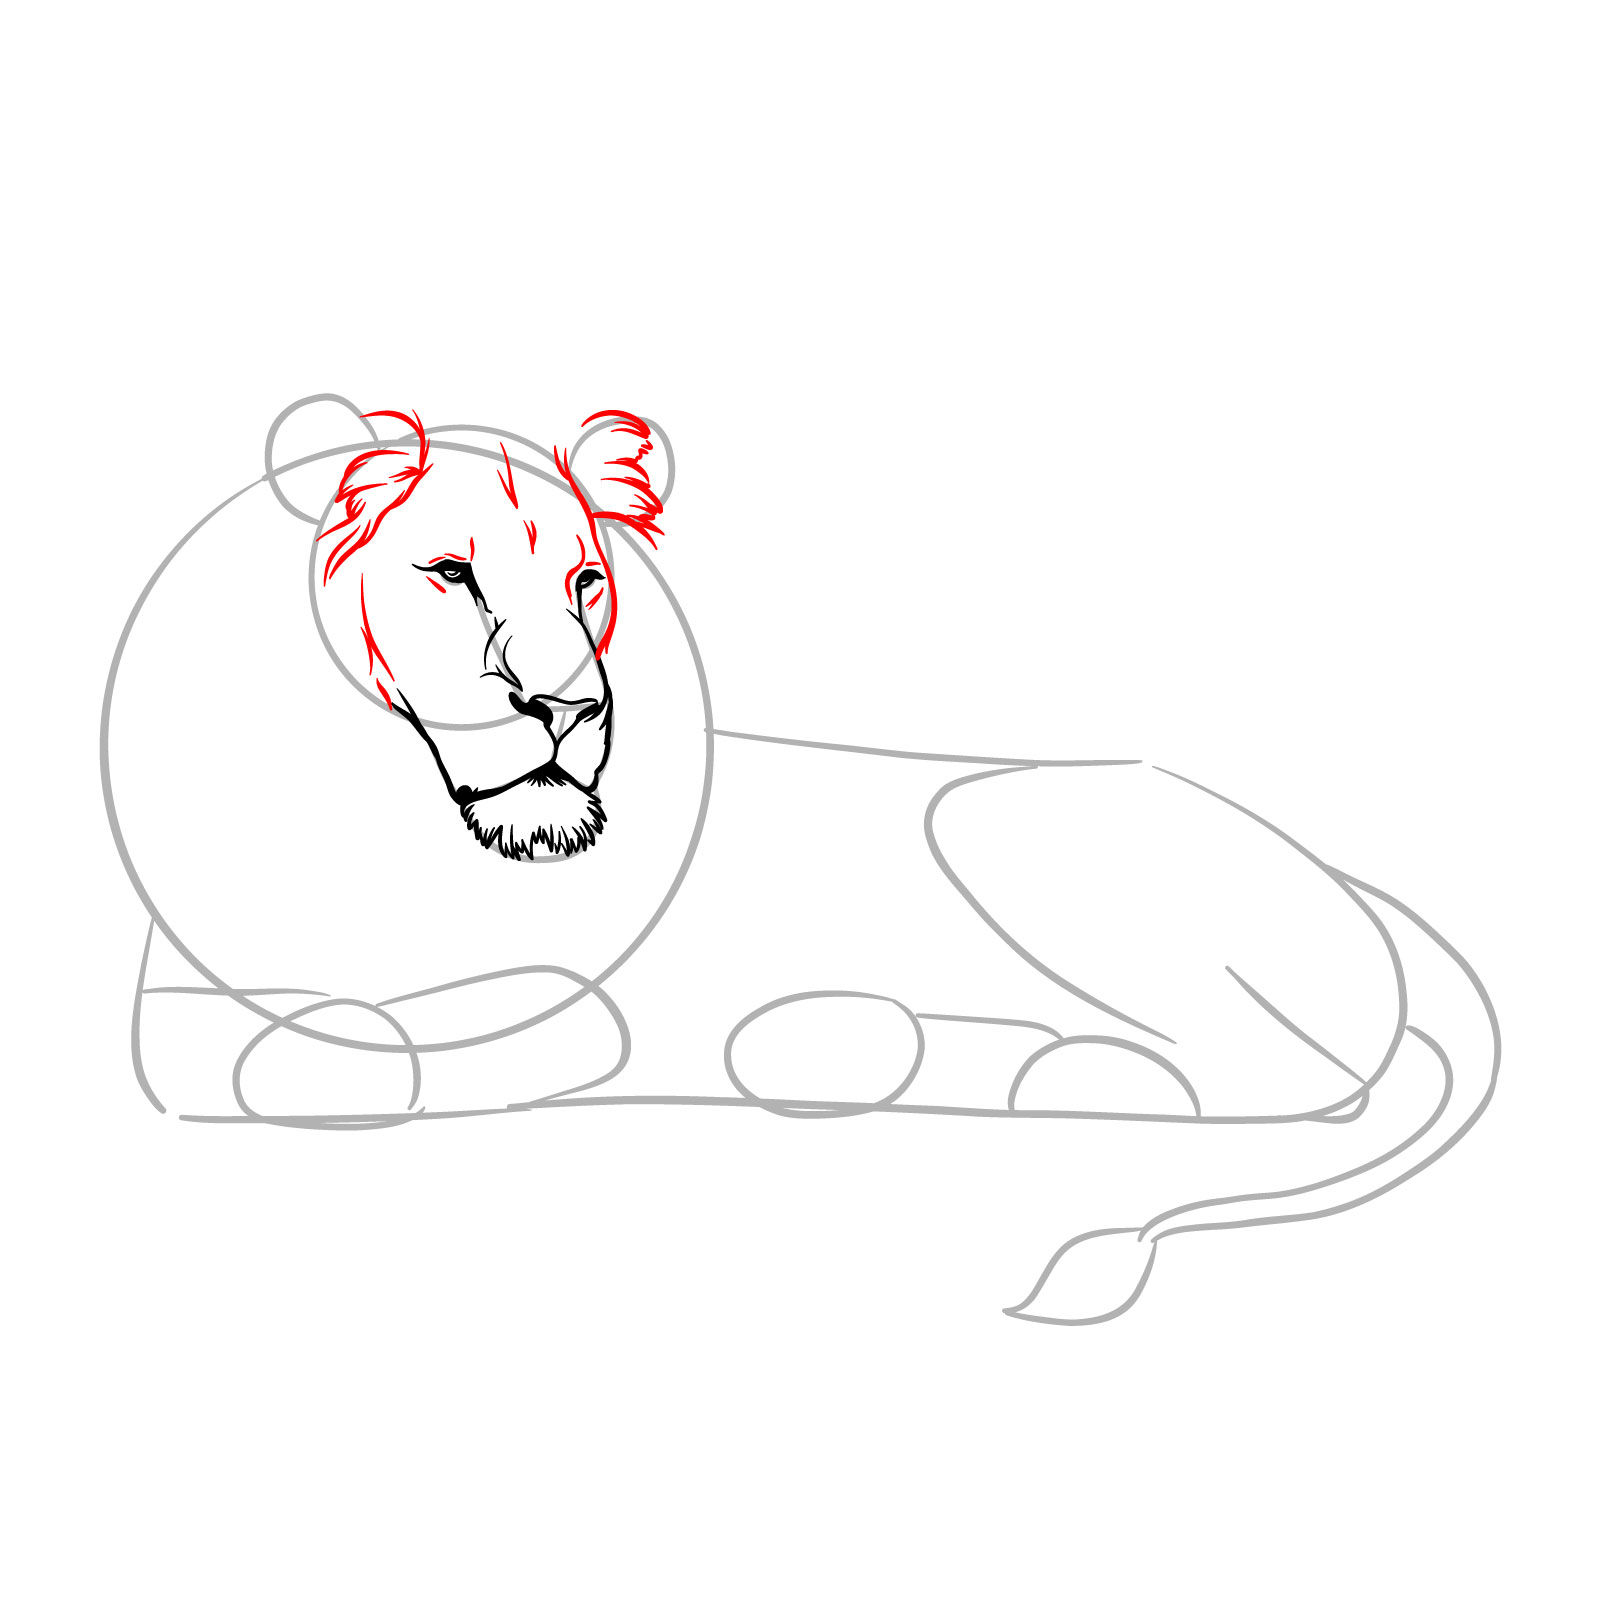
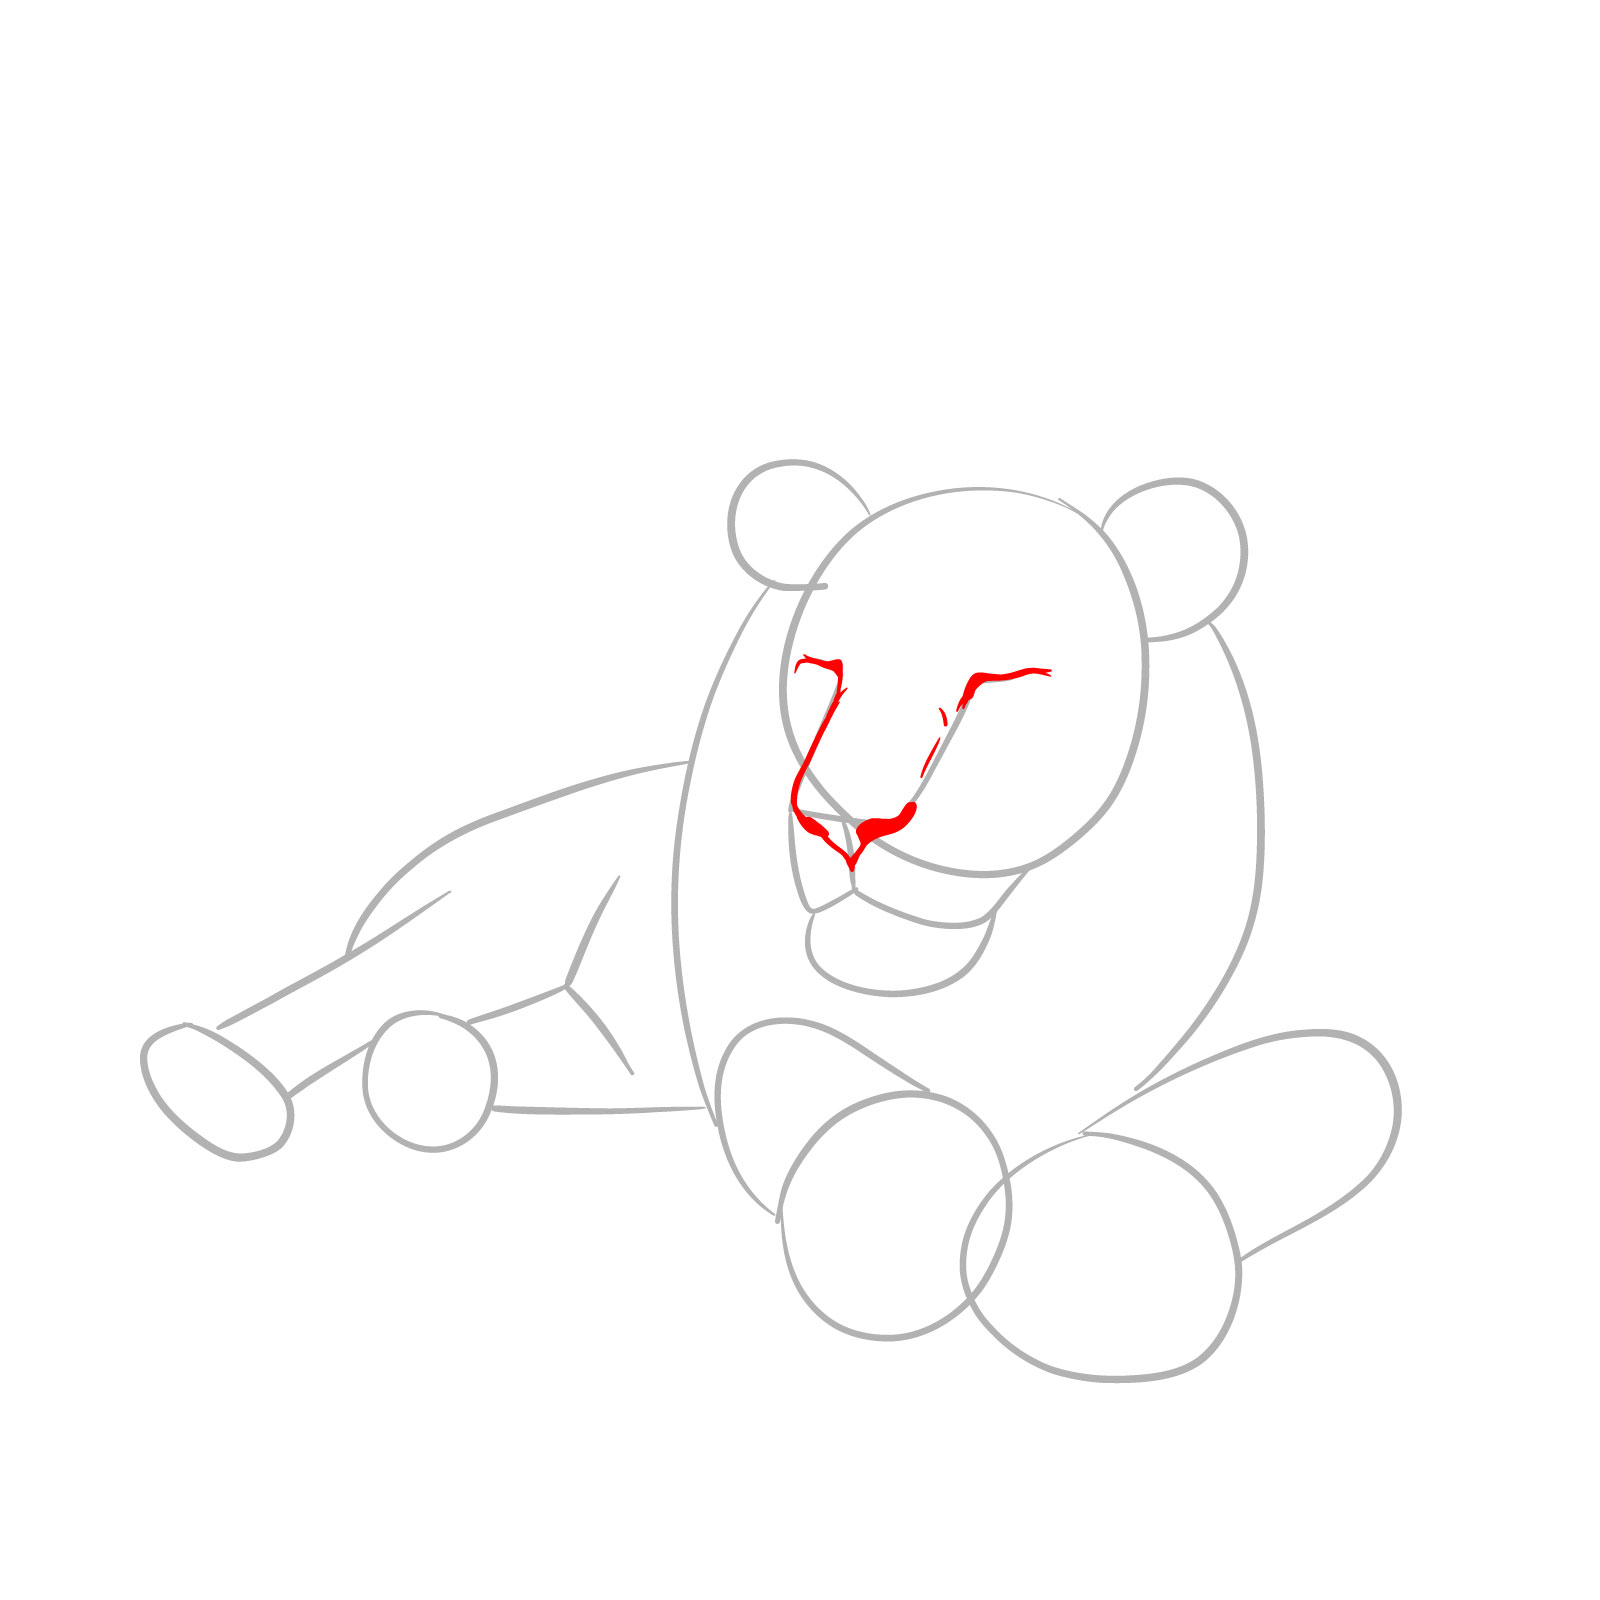
Step 05 – Sketch out the lion’s eyes with attention to their shape and position relative to the nose. Draw the bridge of the nose between the eyes, ensuring it aligns with the overall facial structure
Eyes and nose bridge
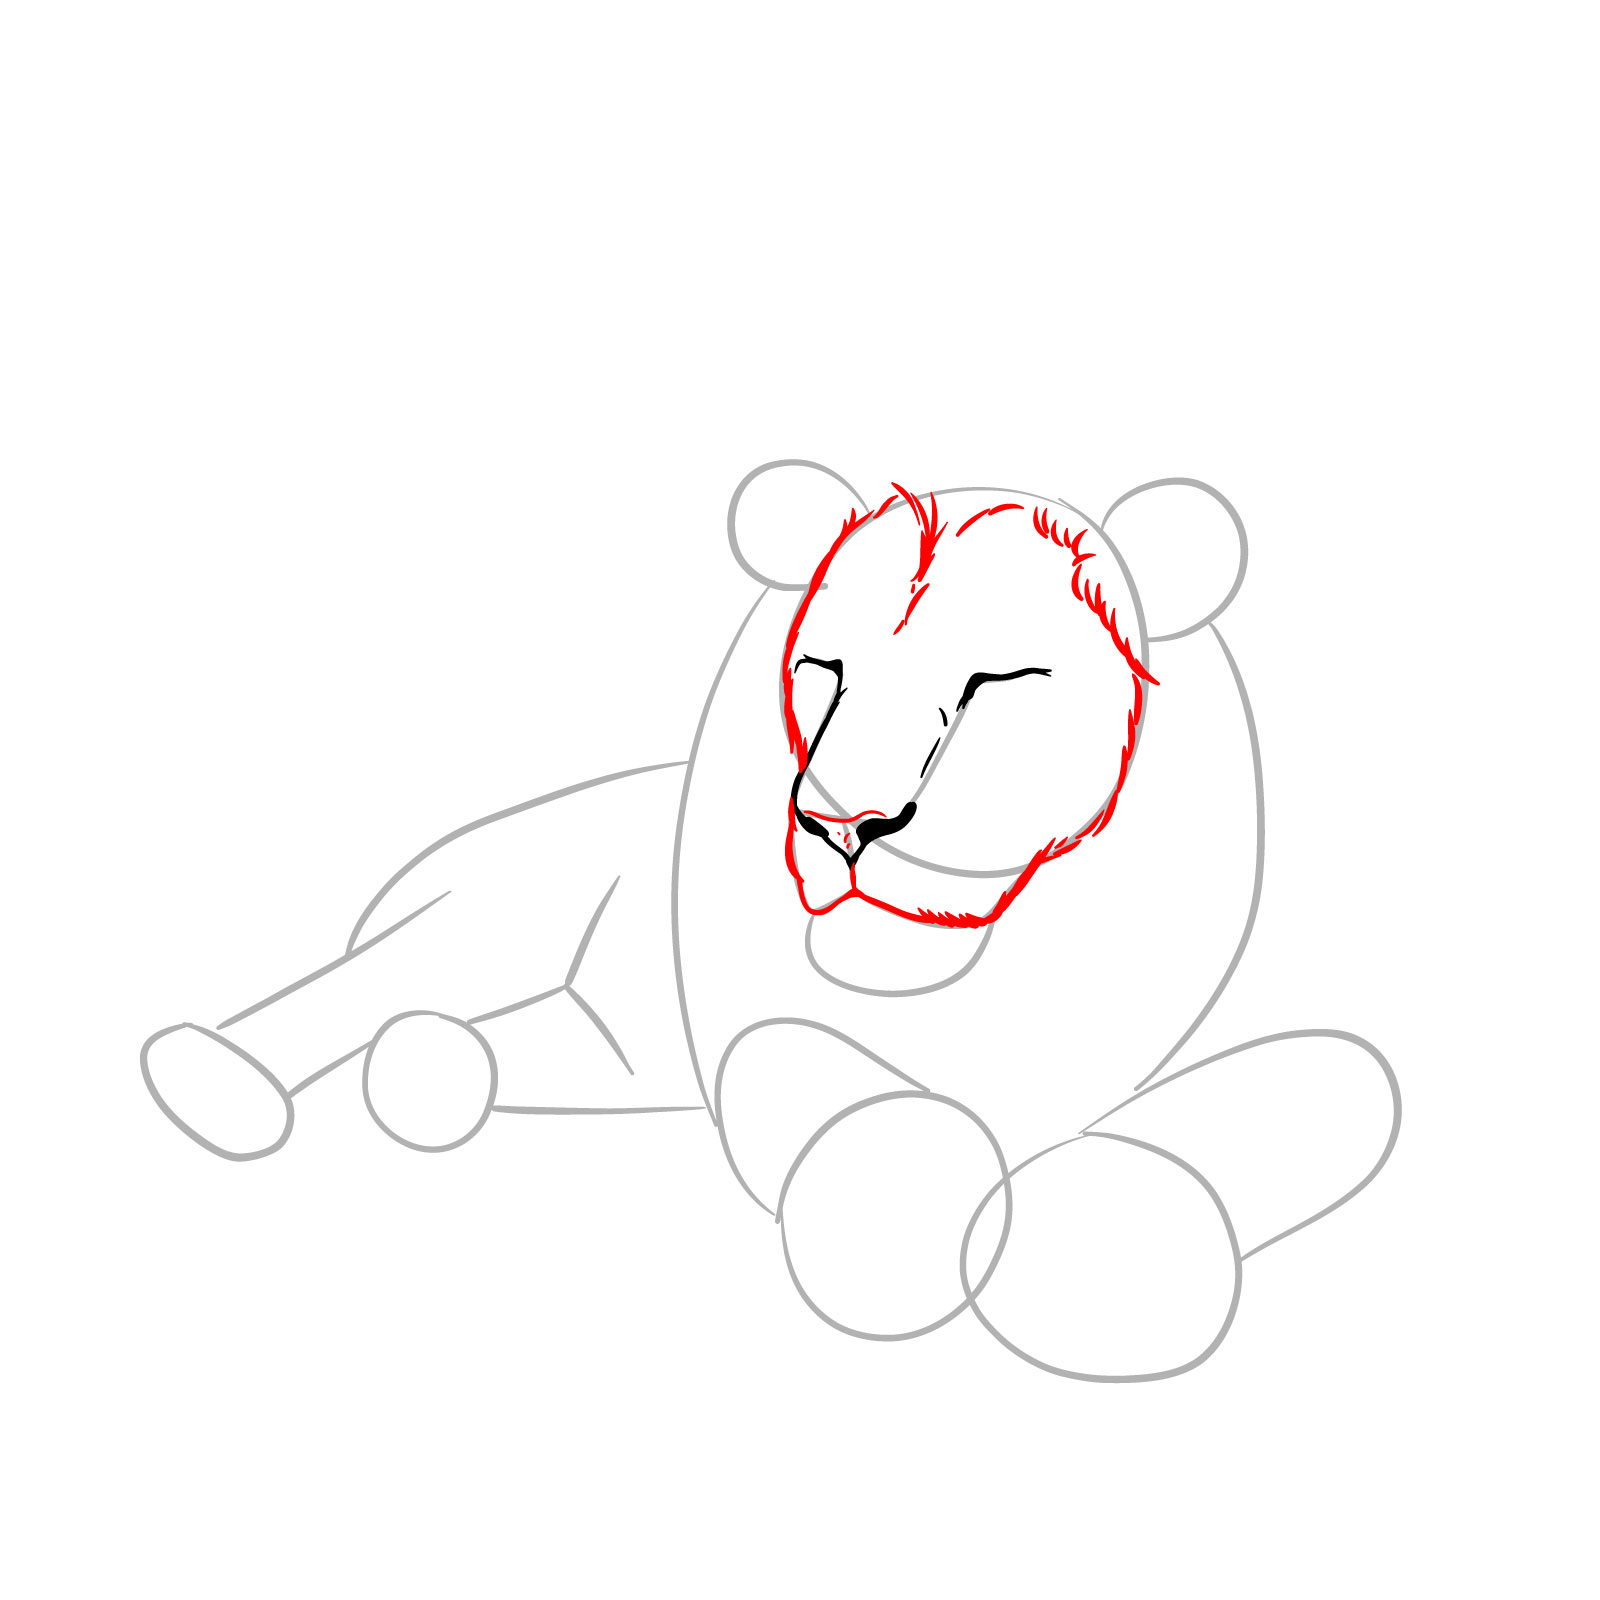
Step 06 – Add fur details around the base of the ears and across the face for a realistic look. Incorporate small details around the eyes and on the forehead to enhance the lion’s expression
Fur and facial detailing
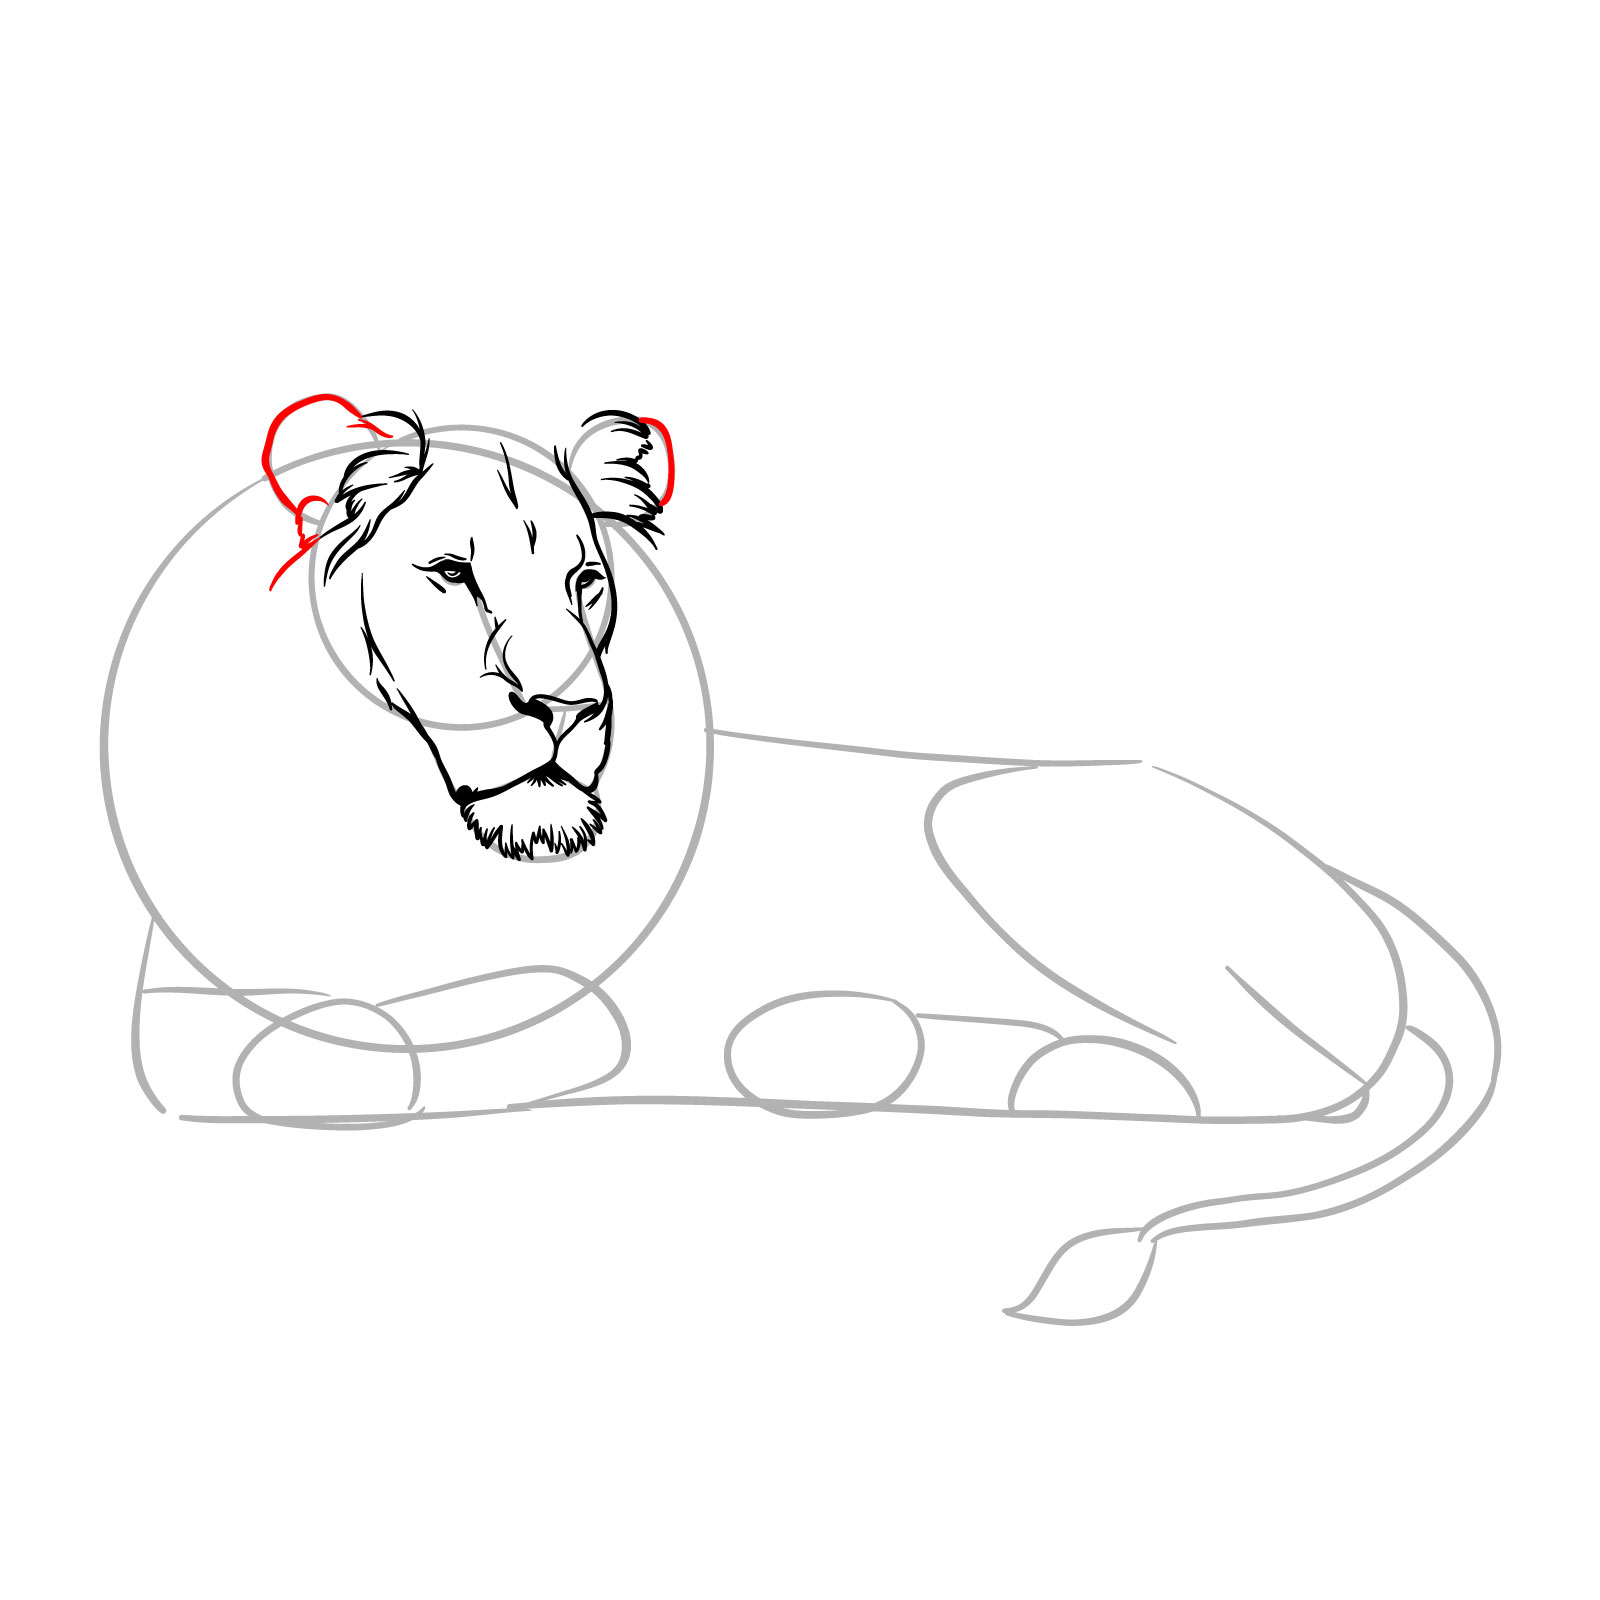
Step 07 – Outline the shape of the ears, ensuring they are proportional and correctly placed on the head.
Ear outlining
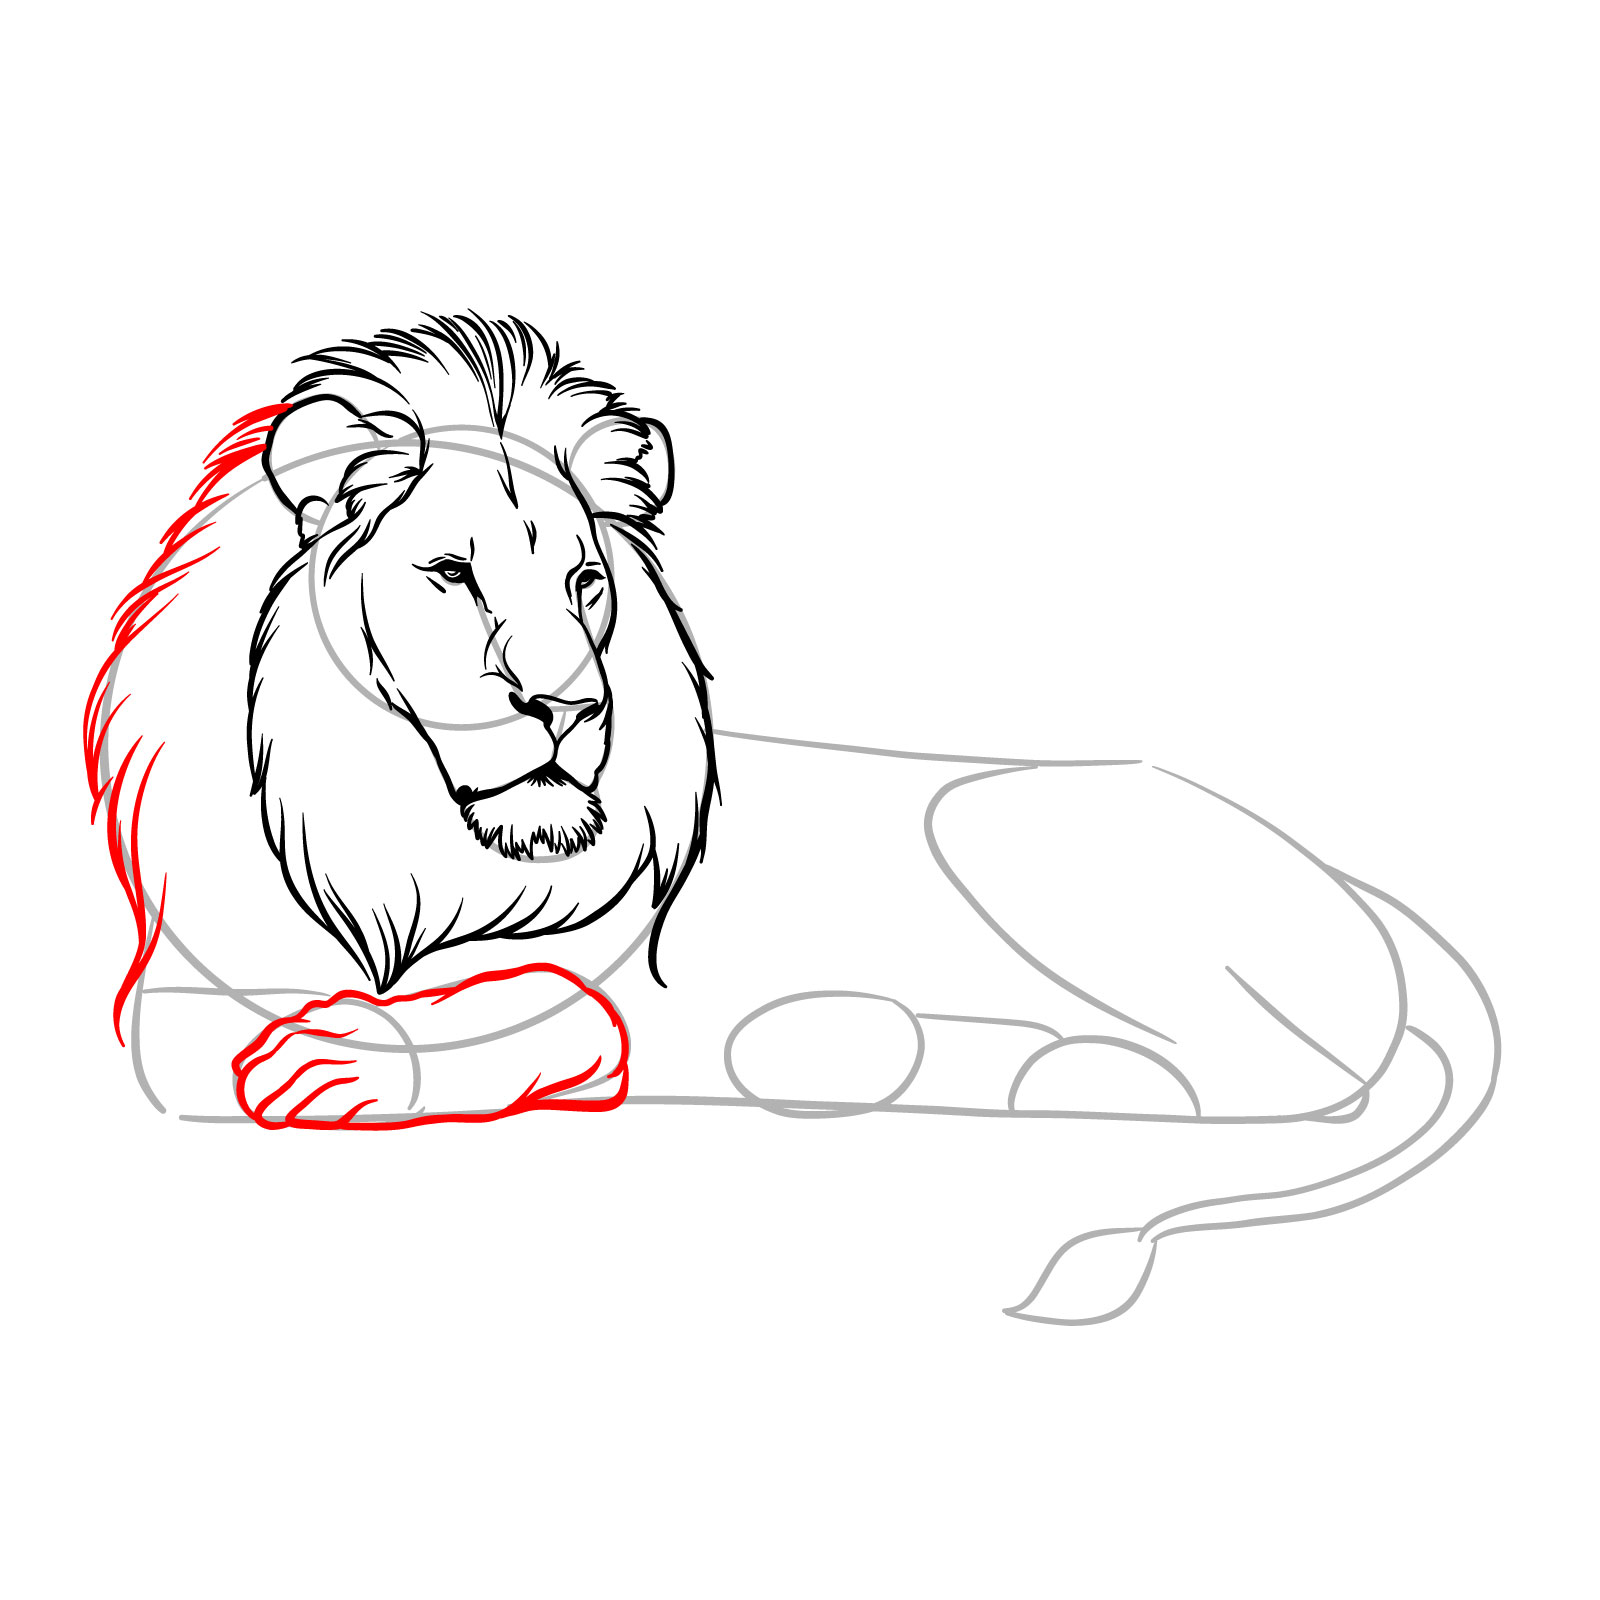
Step 08 – Start sketching the first layer of the mane, beginning just below the ears, and another part extending around the back of the head
Mane and head fur
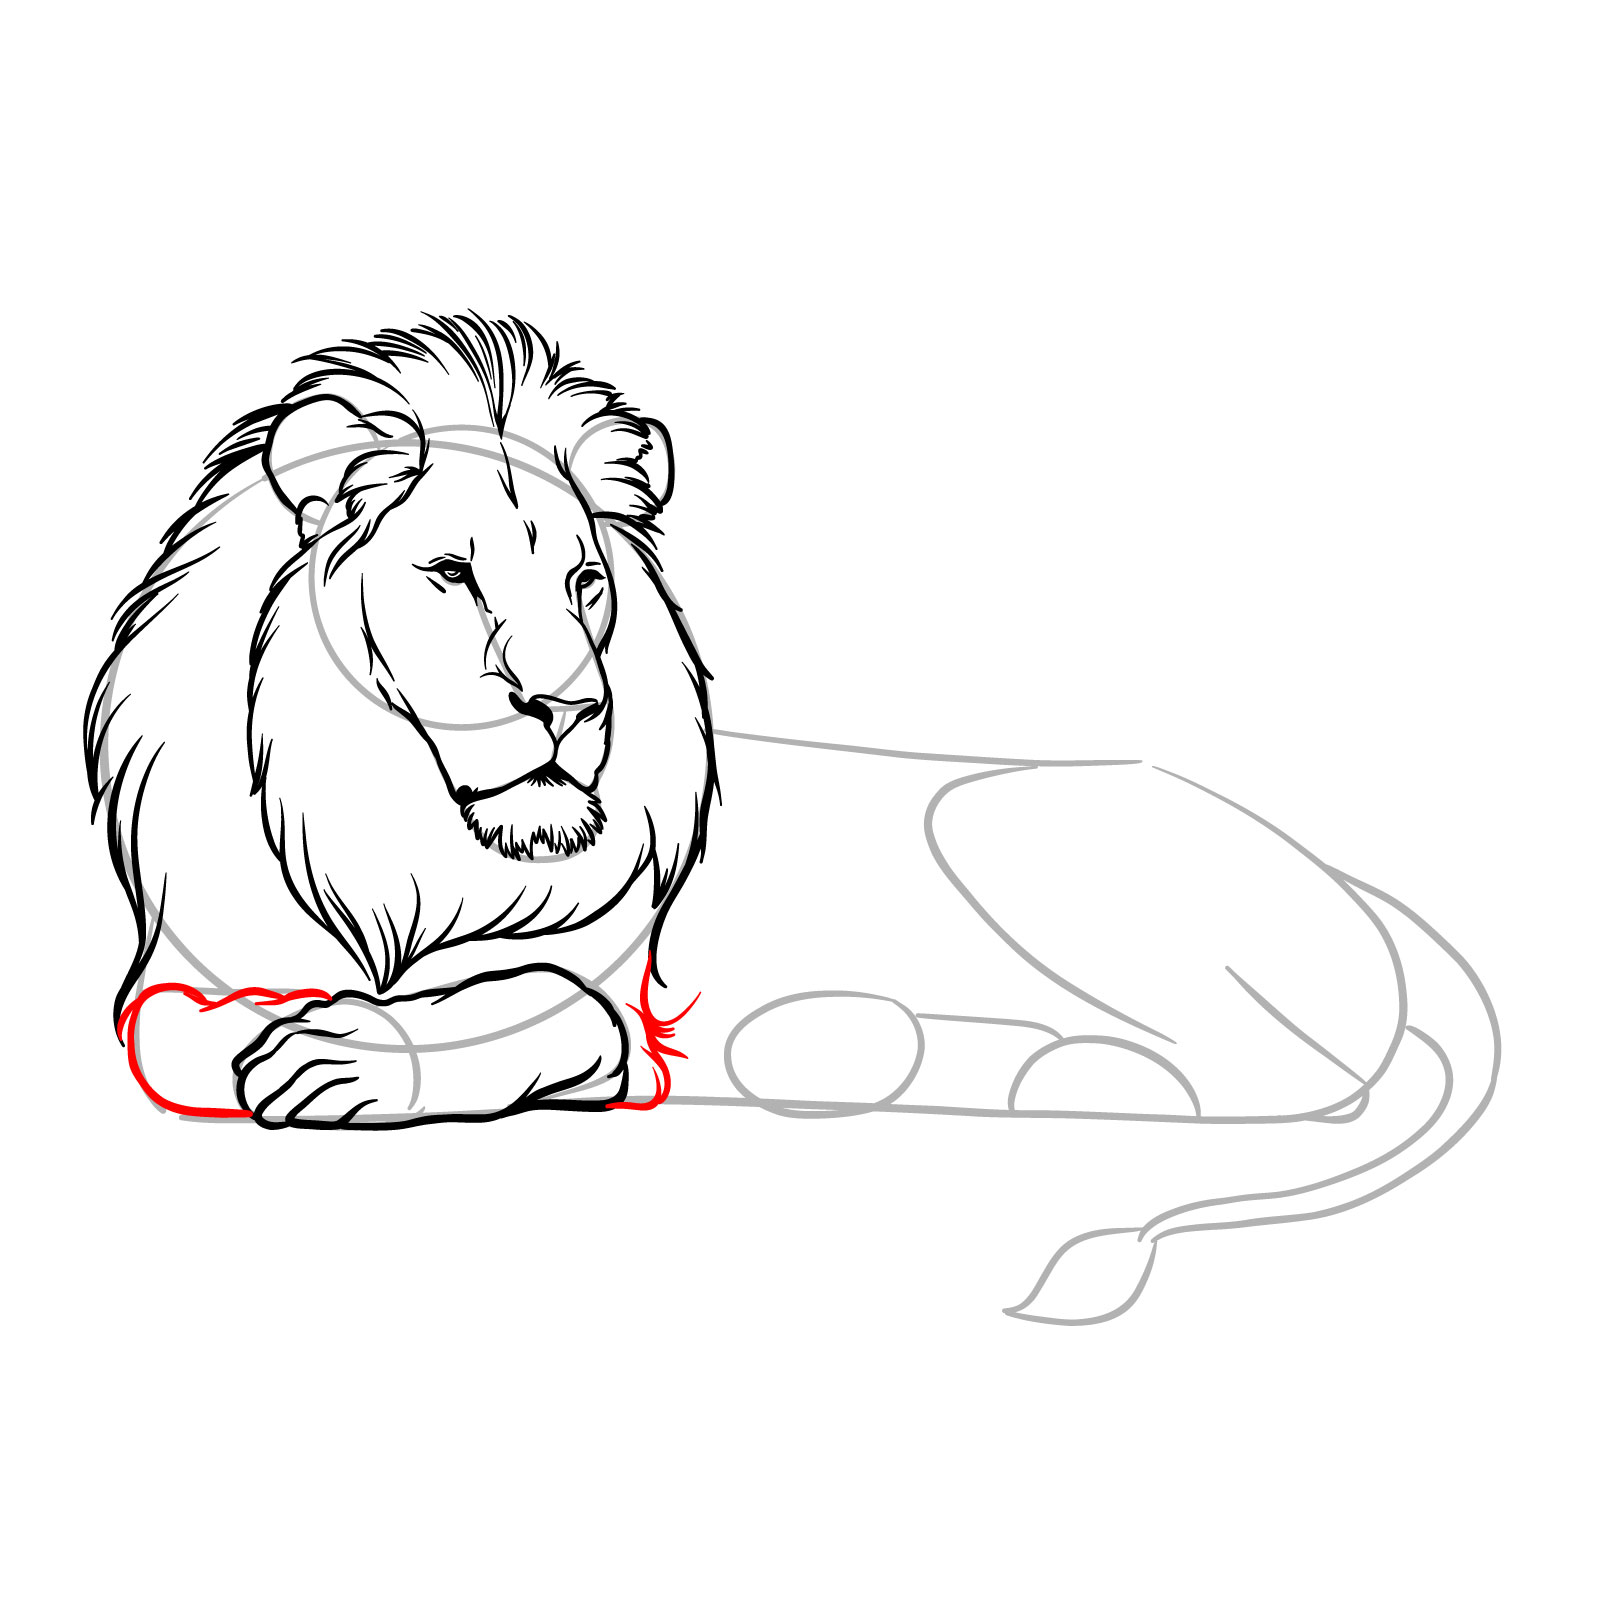
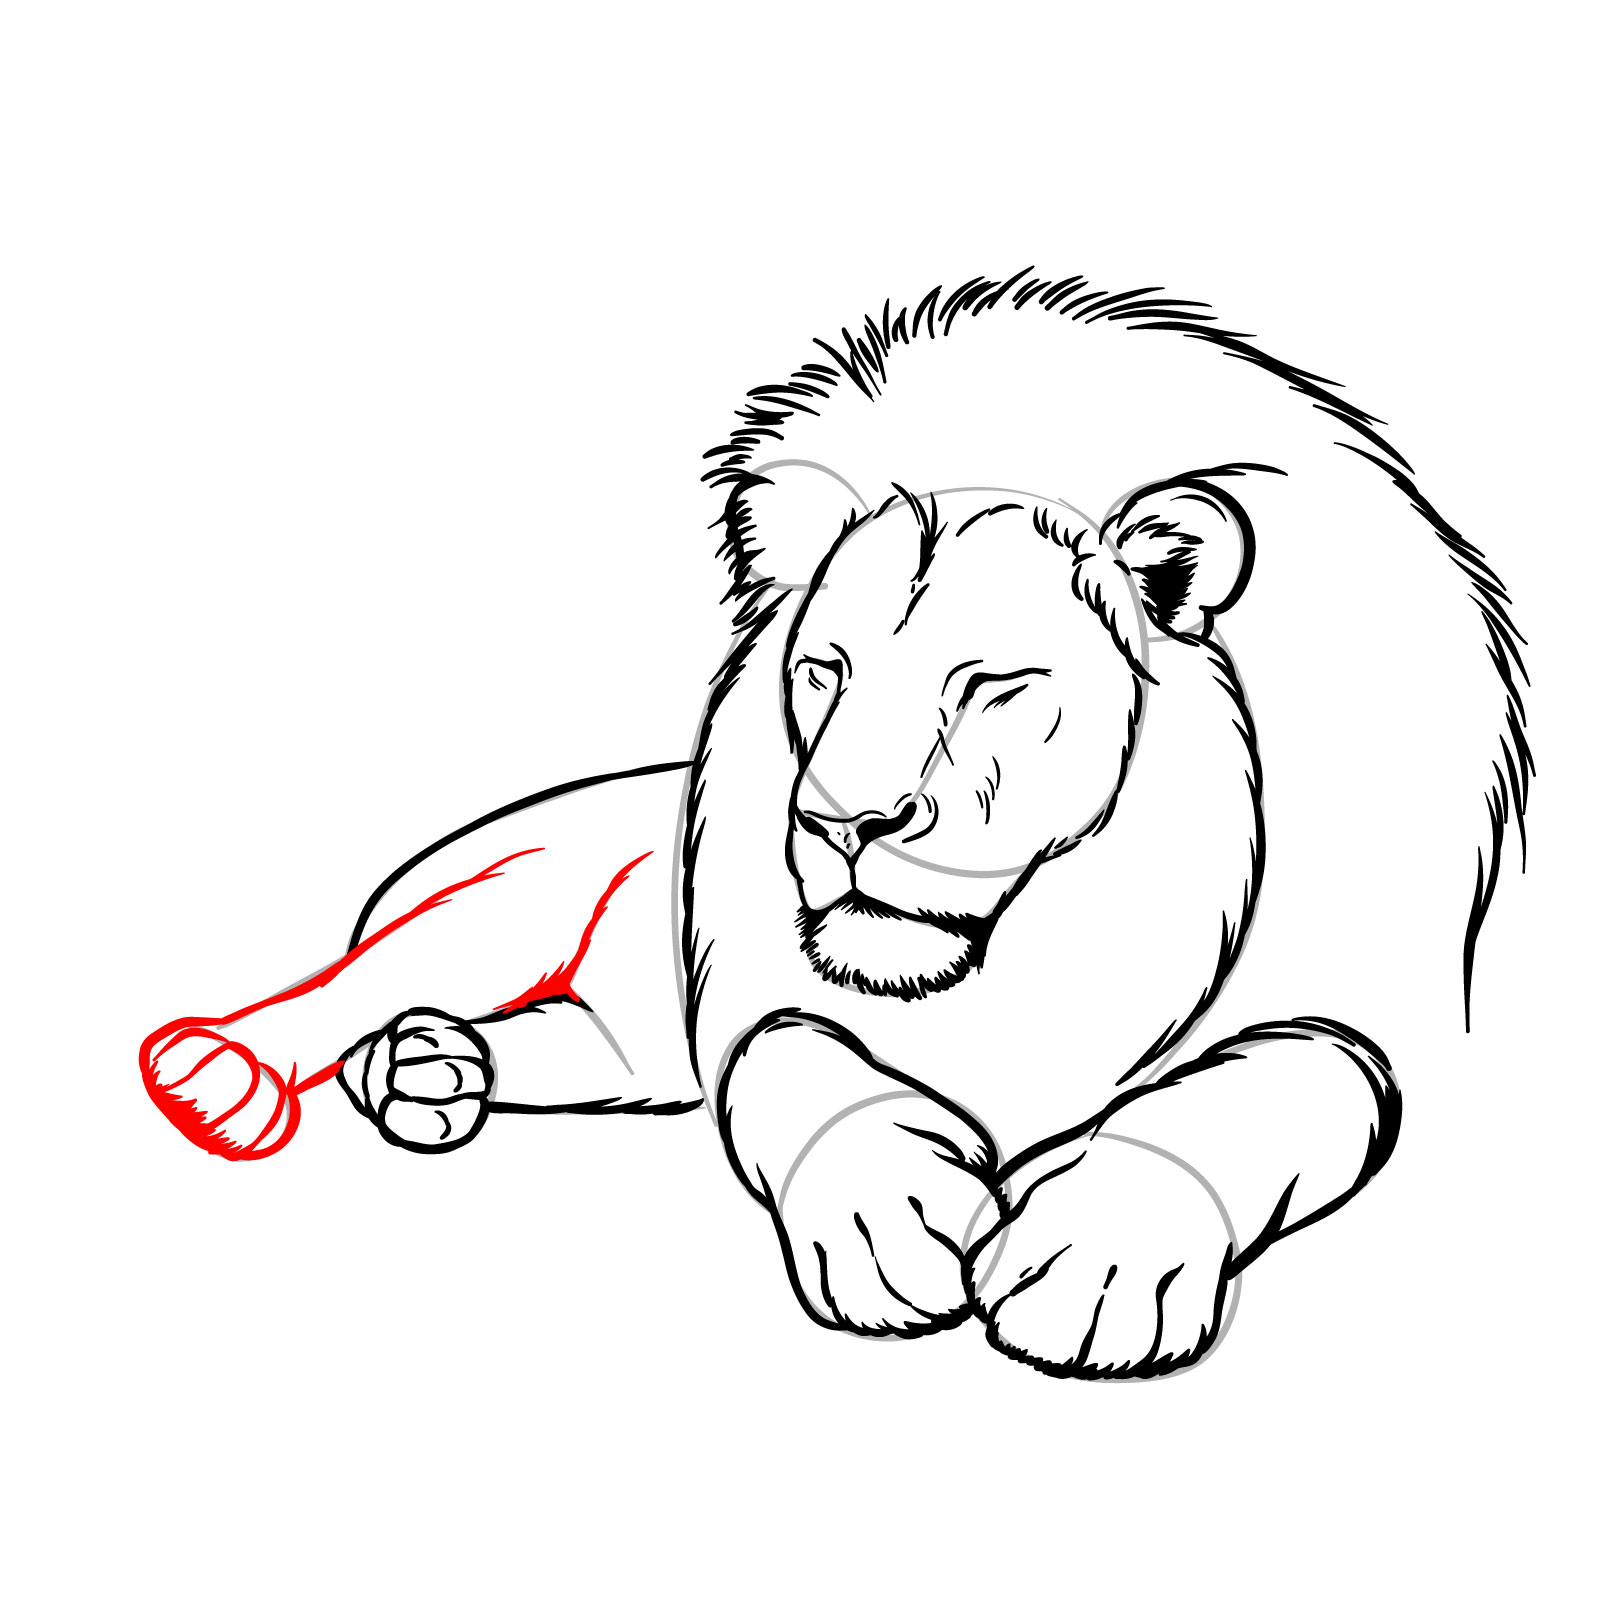
Step 09 – Sketch the outer part of the mane on the left side, creating a flowing and natural look. Outline the front leg closest to us, defining the shape and muscles, and sketch the toes to add detail
Mane and front leg outline
Step 10 – Draw the second front leg, which is partially obscured behind the first. Pay attention to its placement and perspective to maintain the lion’s realistic posture
Second front leg
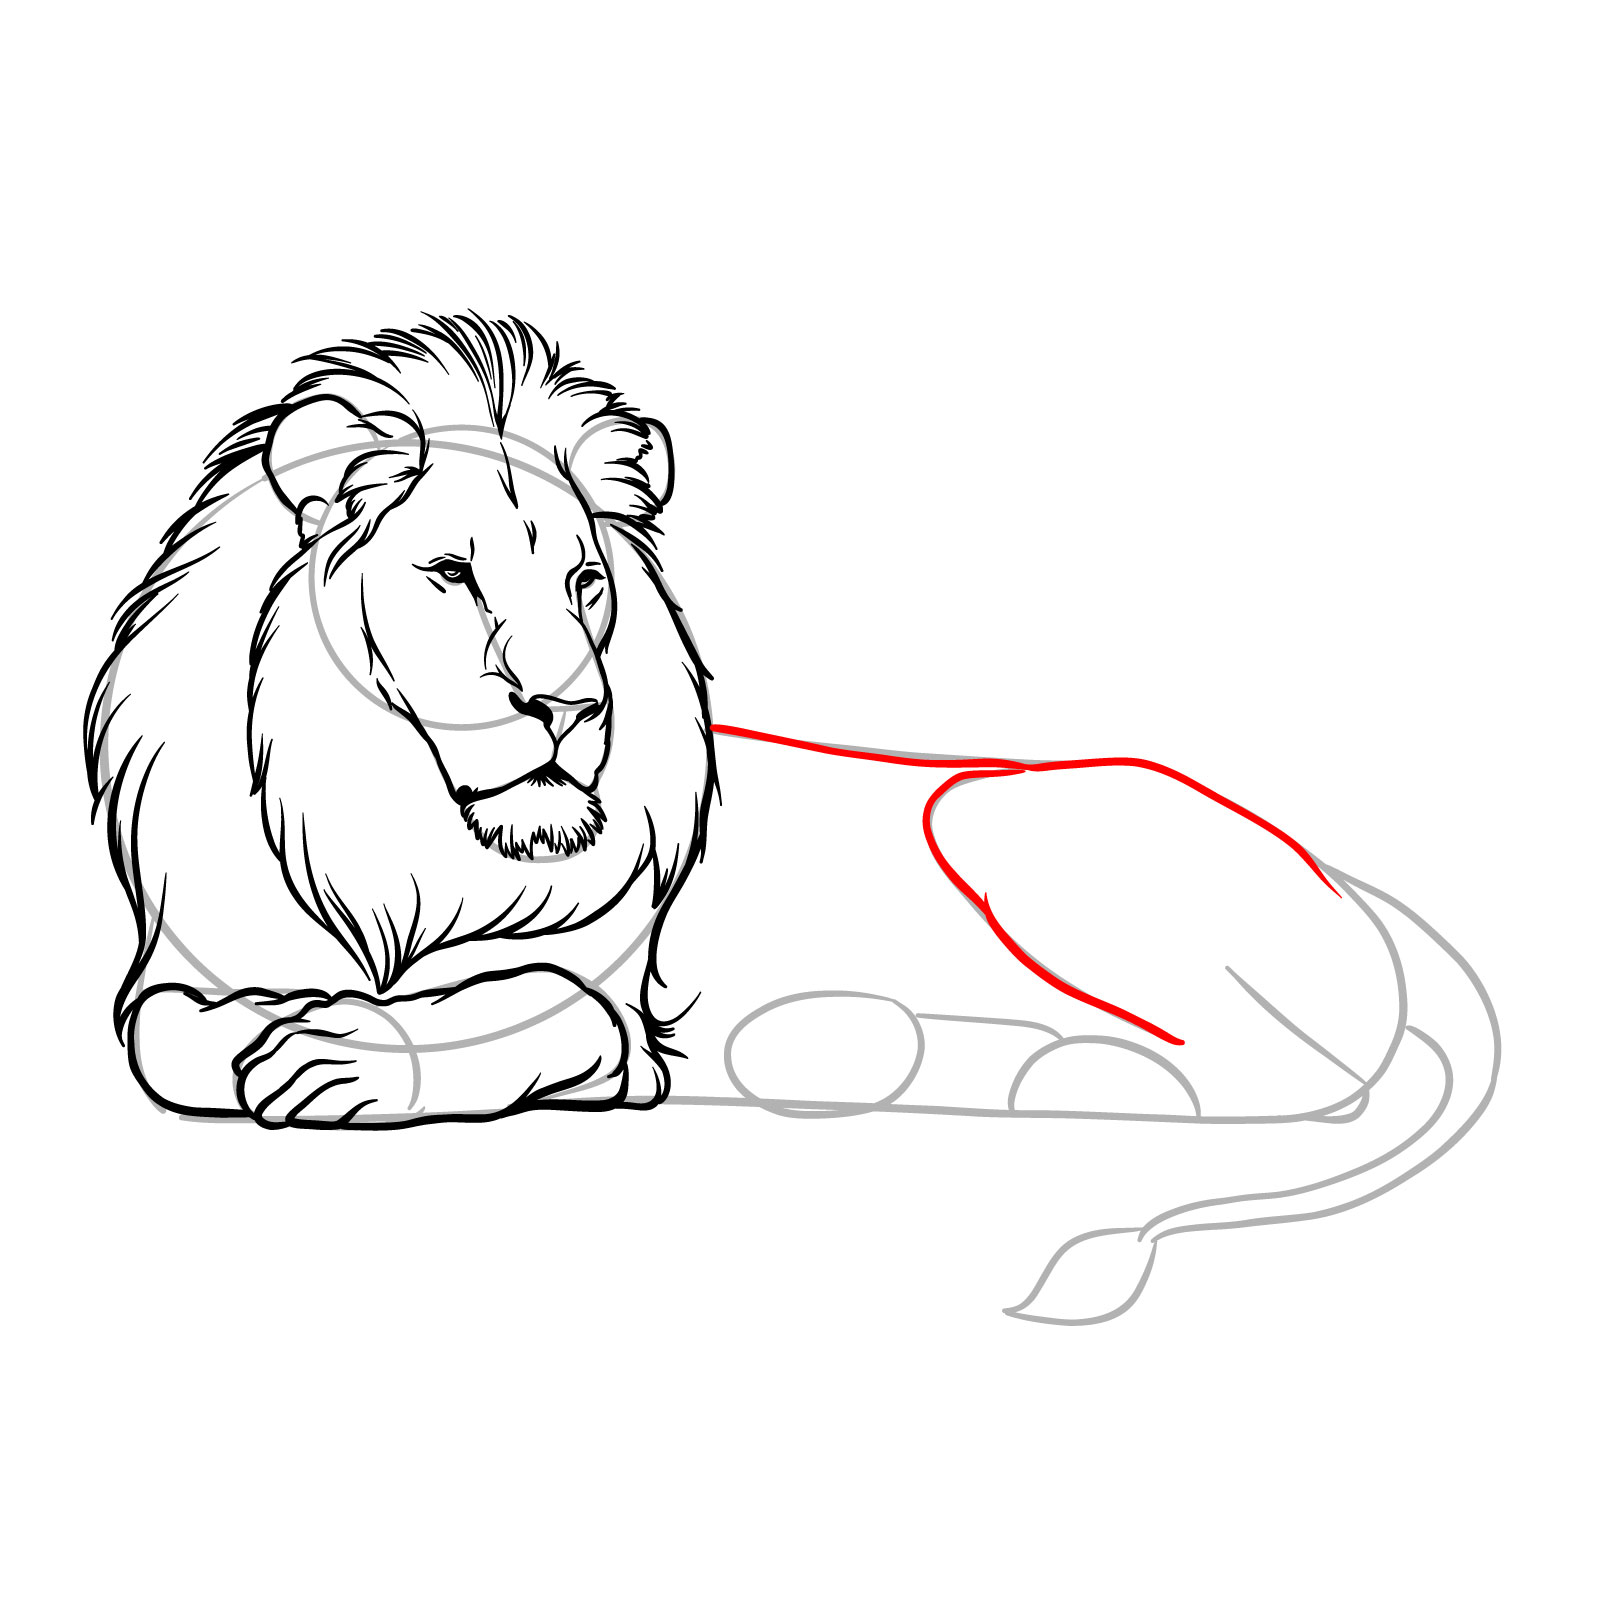
Step 11 – Outline the lion’s back, leading into the upper part of the rear leg that is closer to the viewer, stopping below the knee joint. Ensure the back line smoothly transitions into the leg
Back and upper rear leg
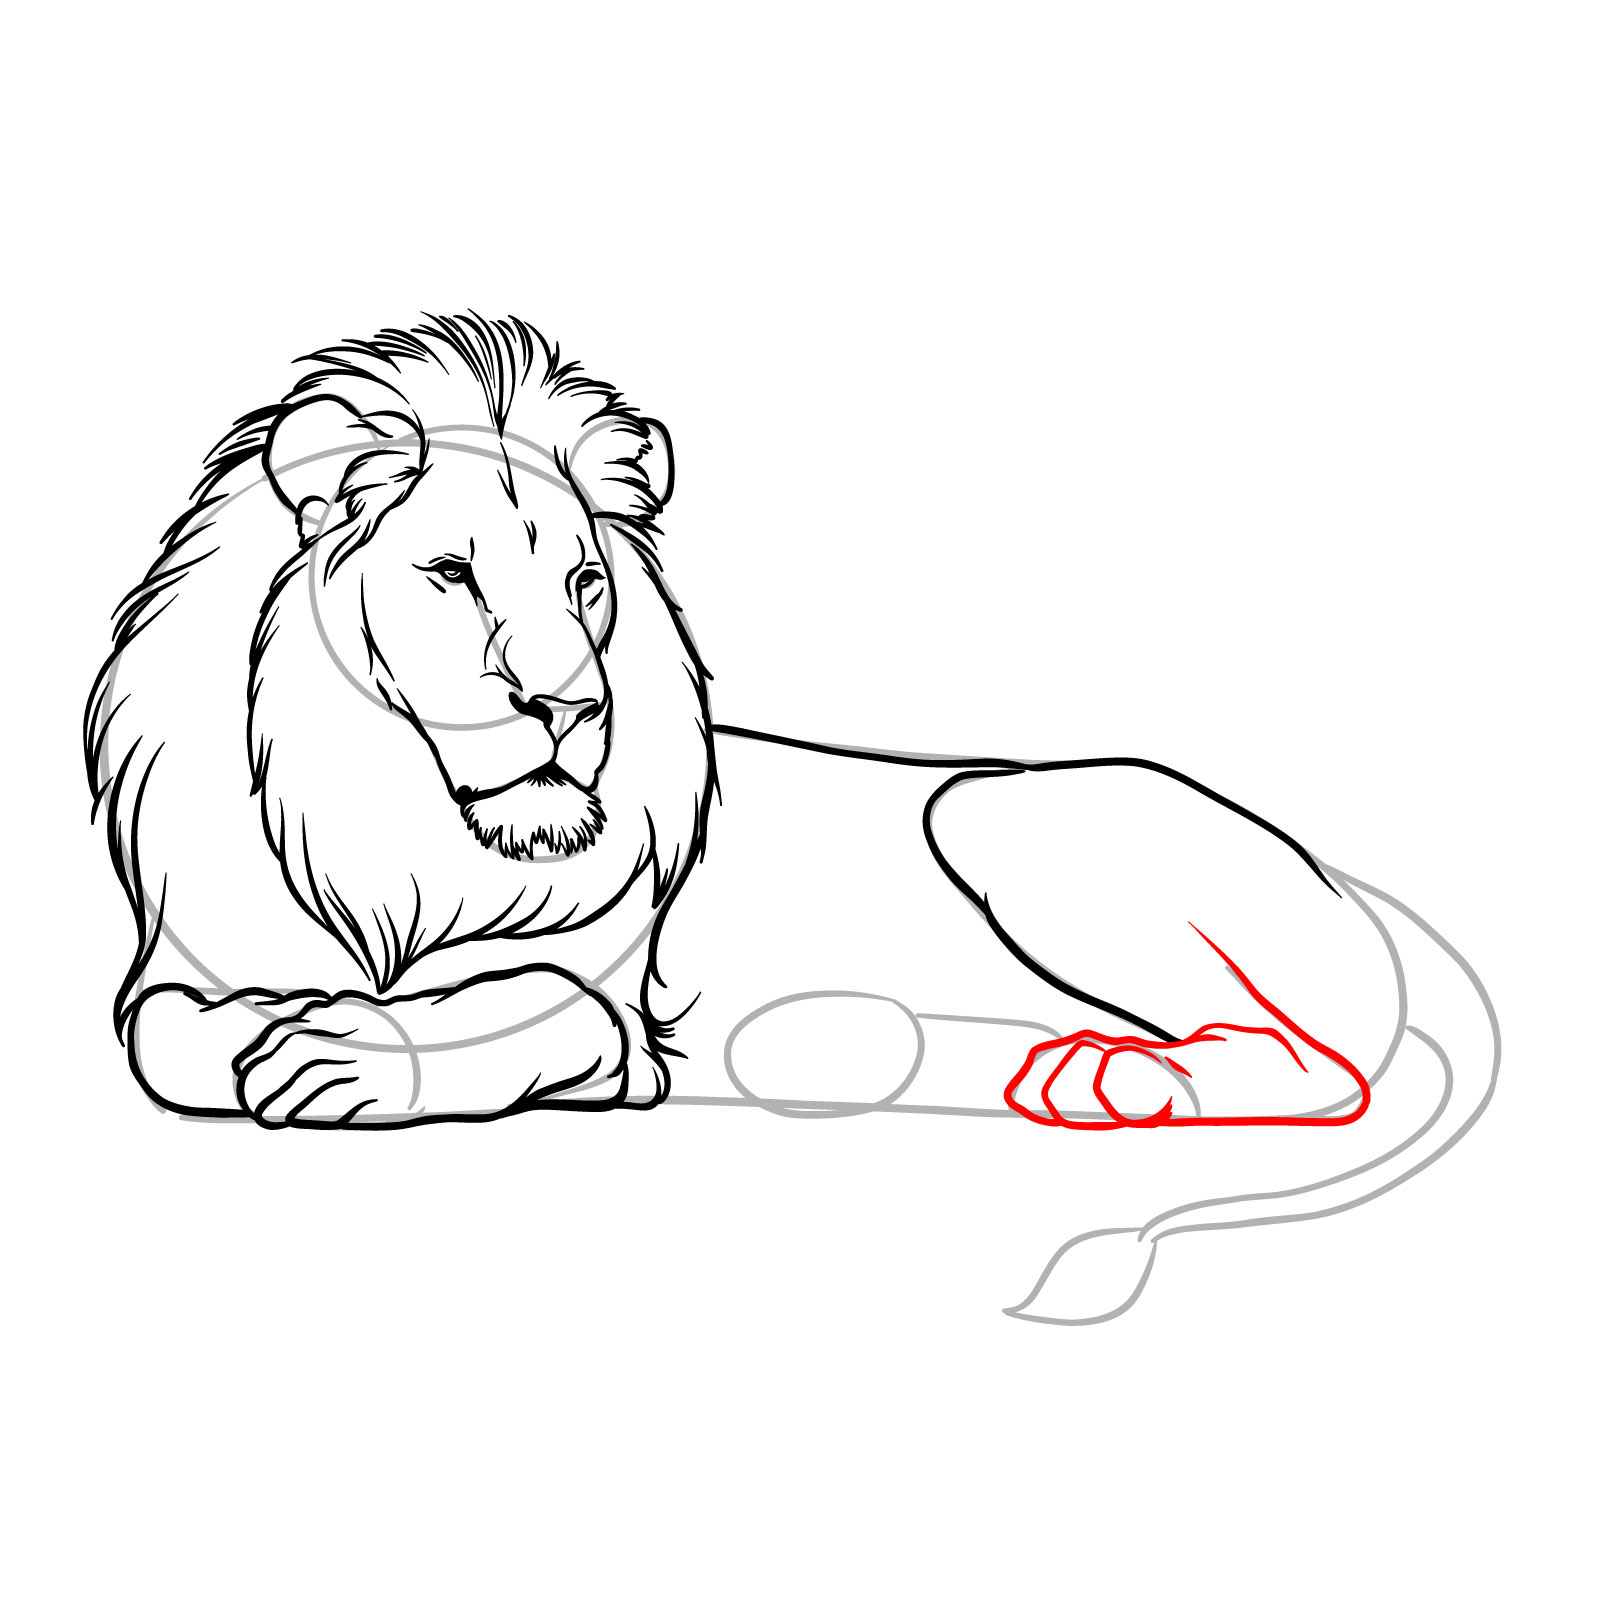
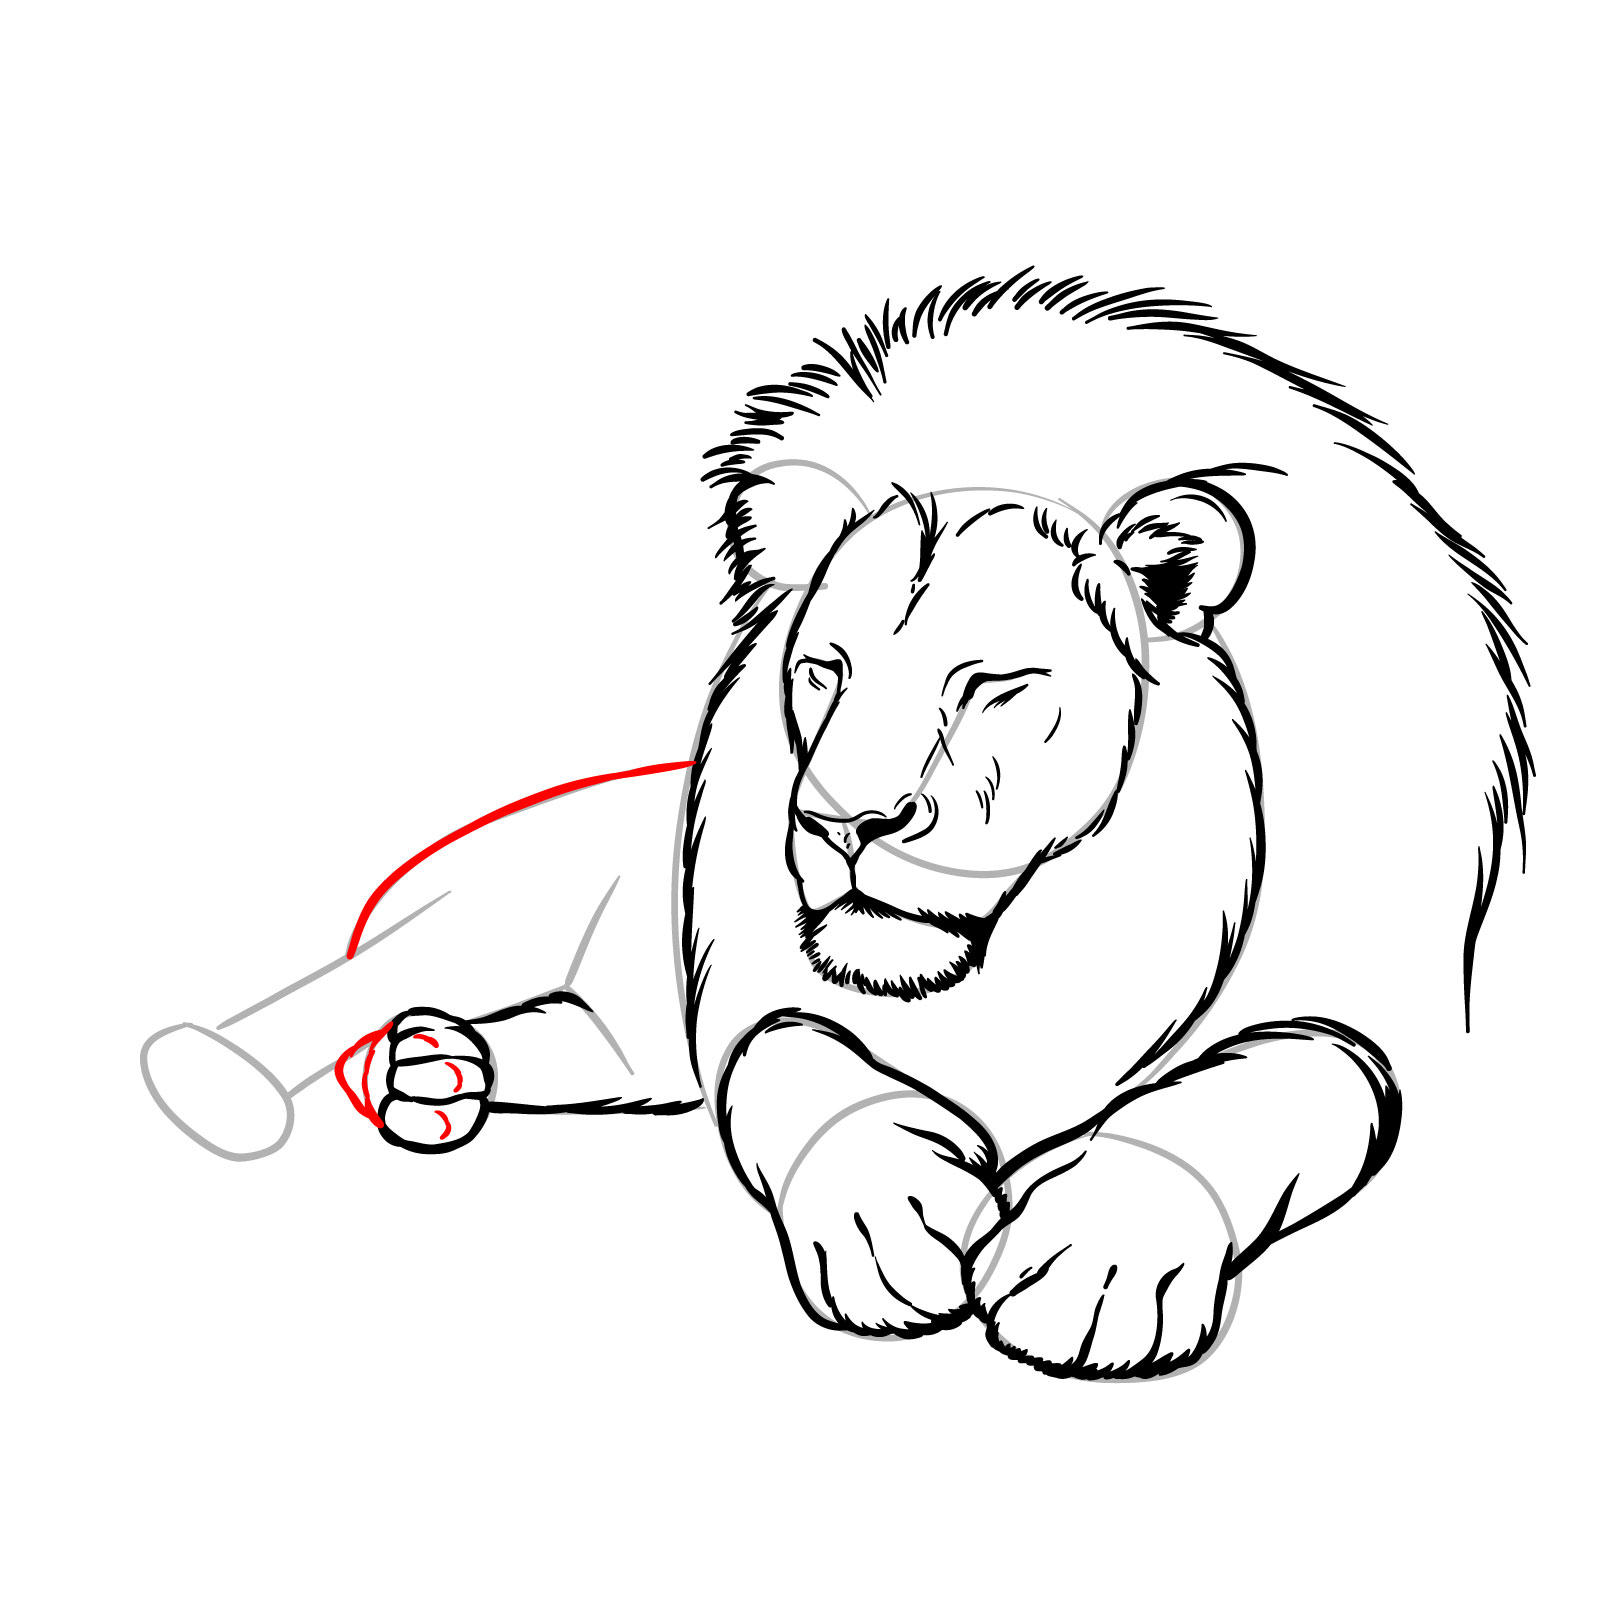
Step 12 – Continue the rear leg outline down to the paw and sketch the toes. Ensure that the leg’s contour and muscle definition are visible and realistic
Rear leg and toes
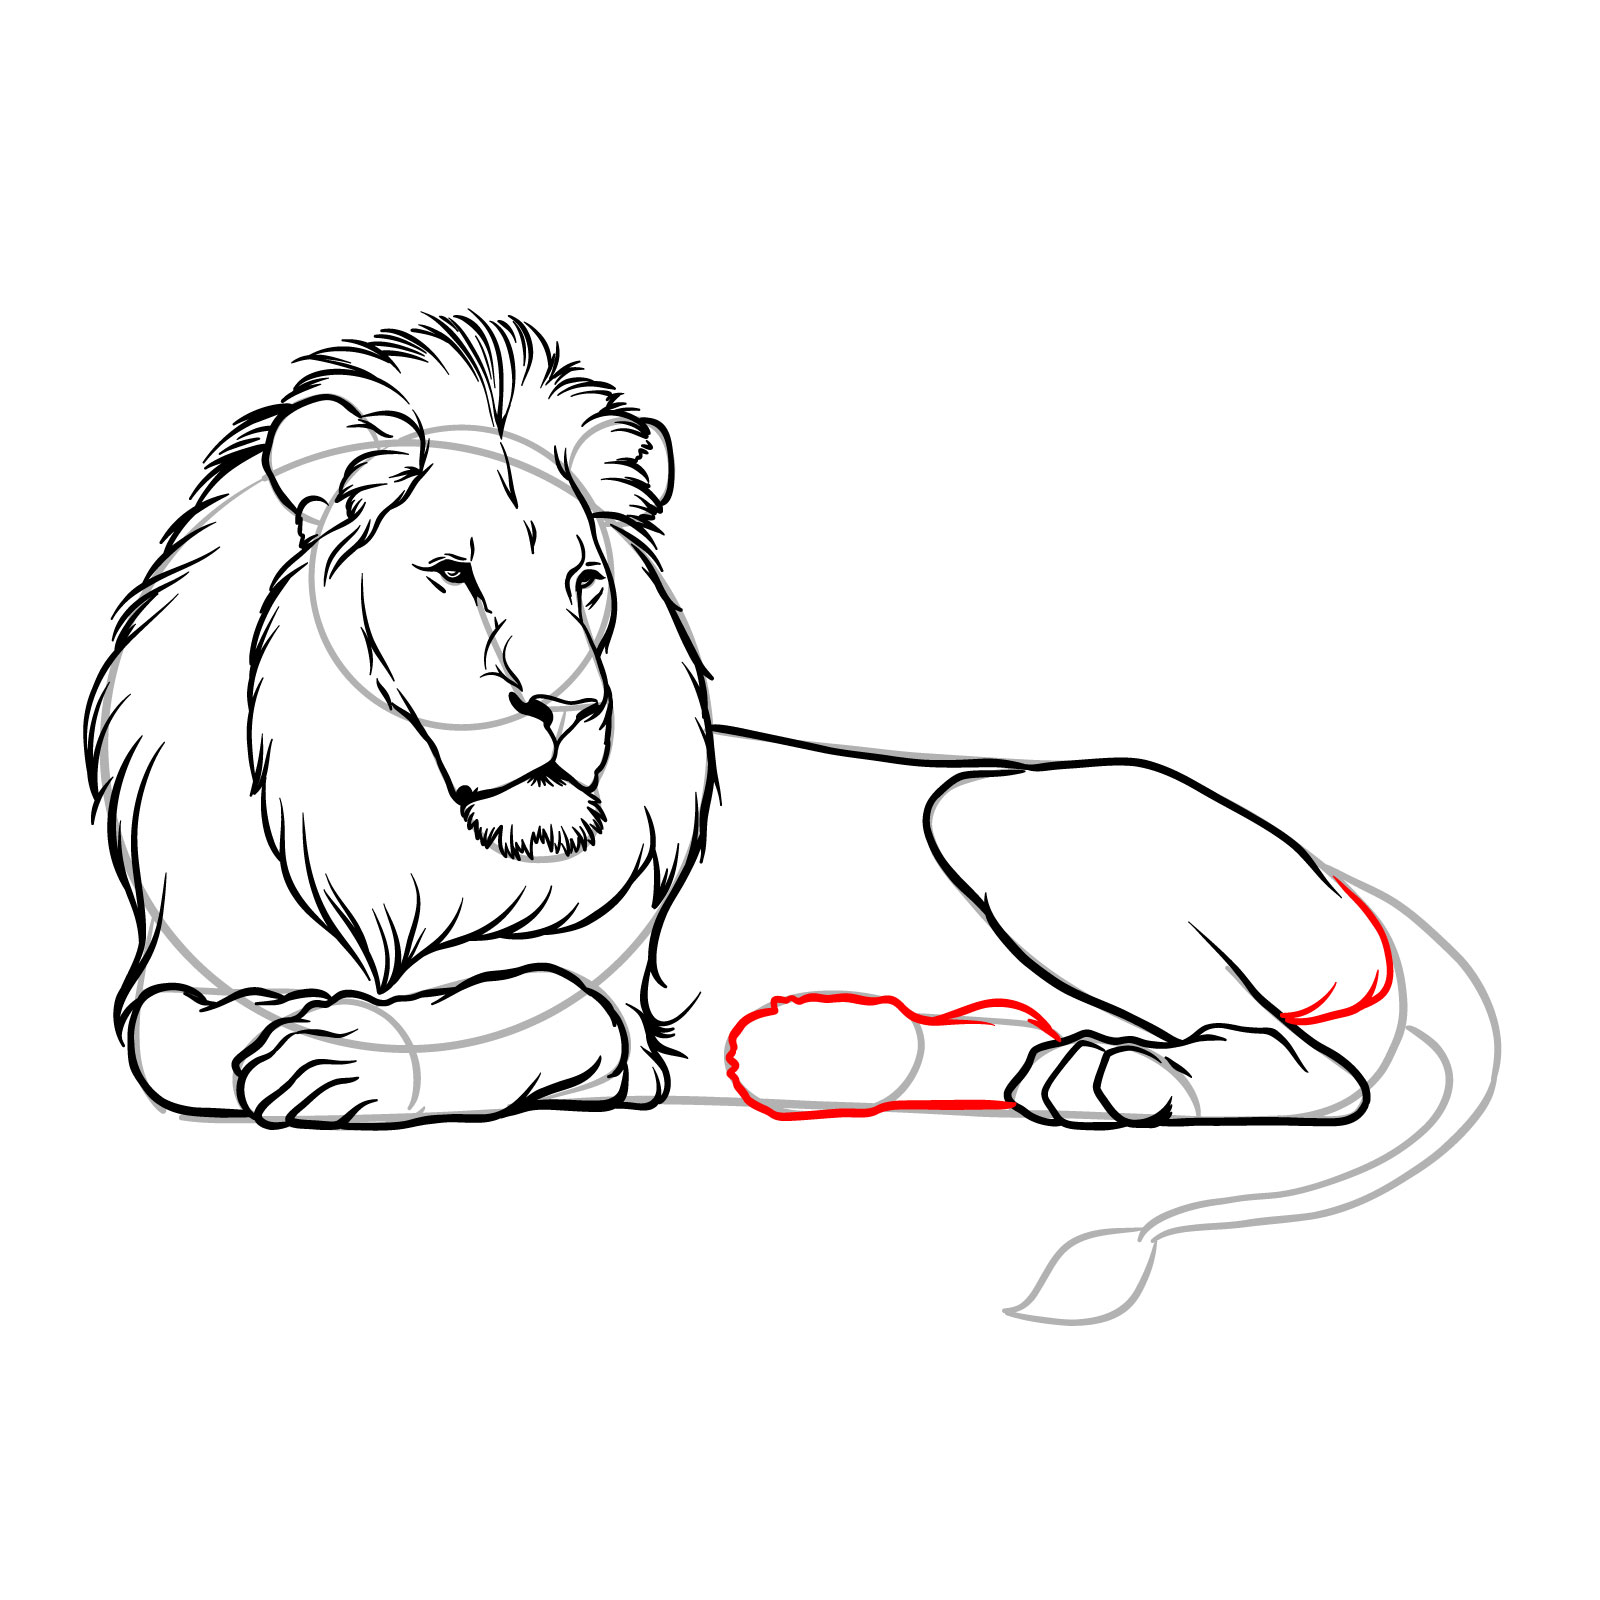
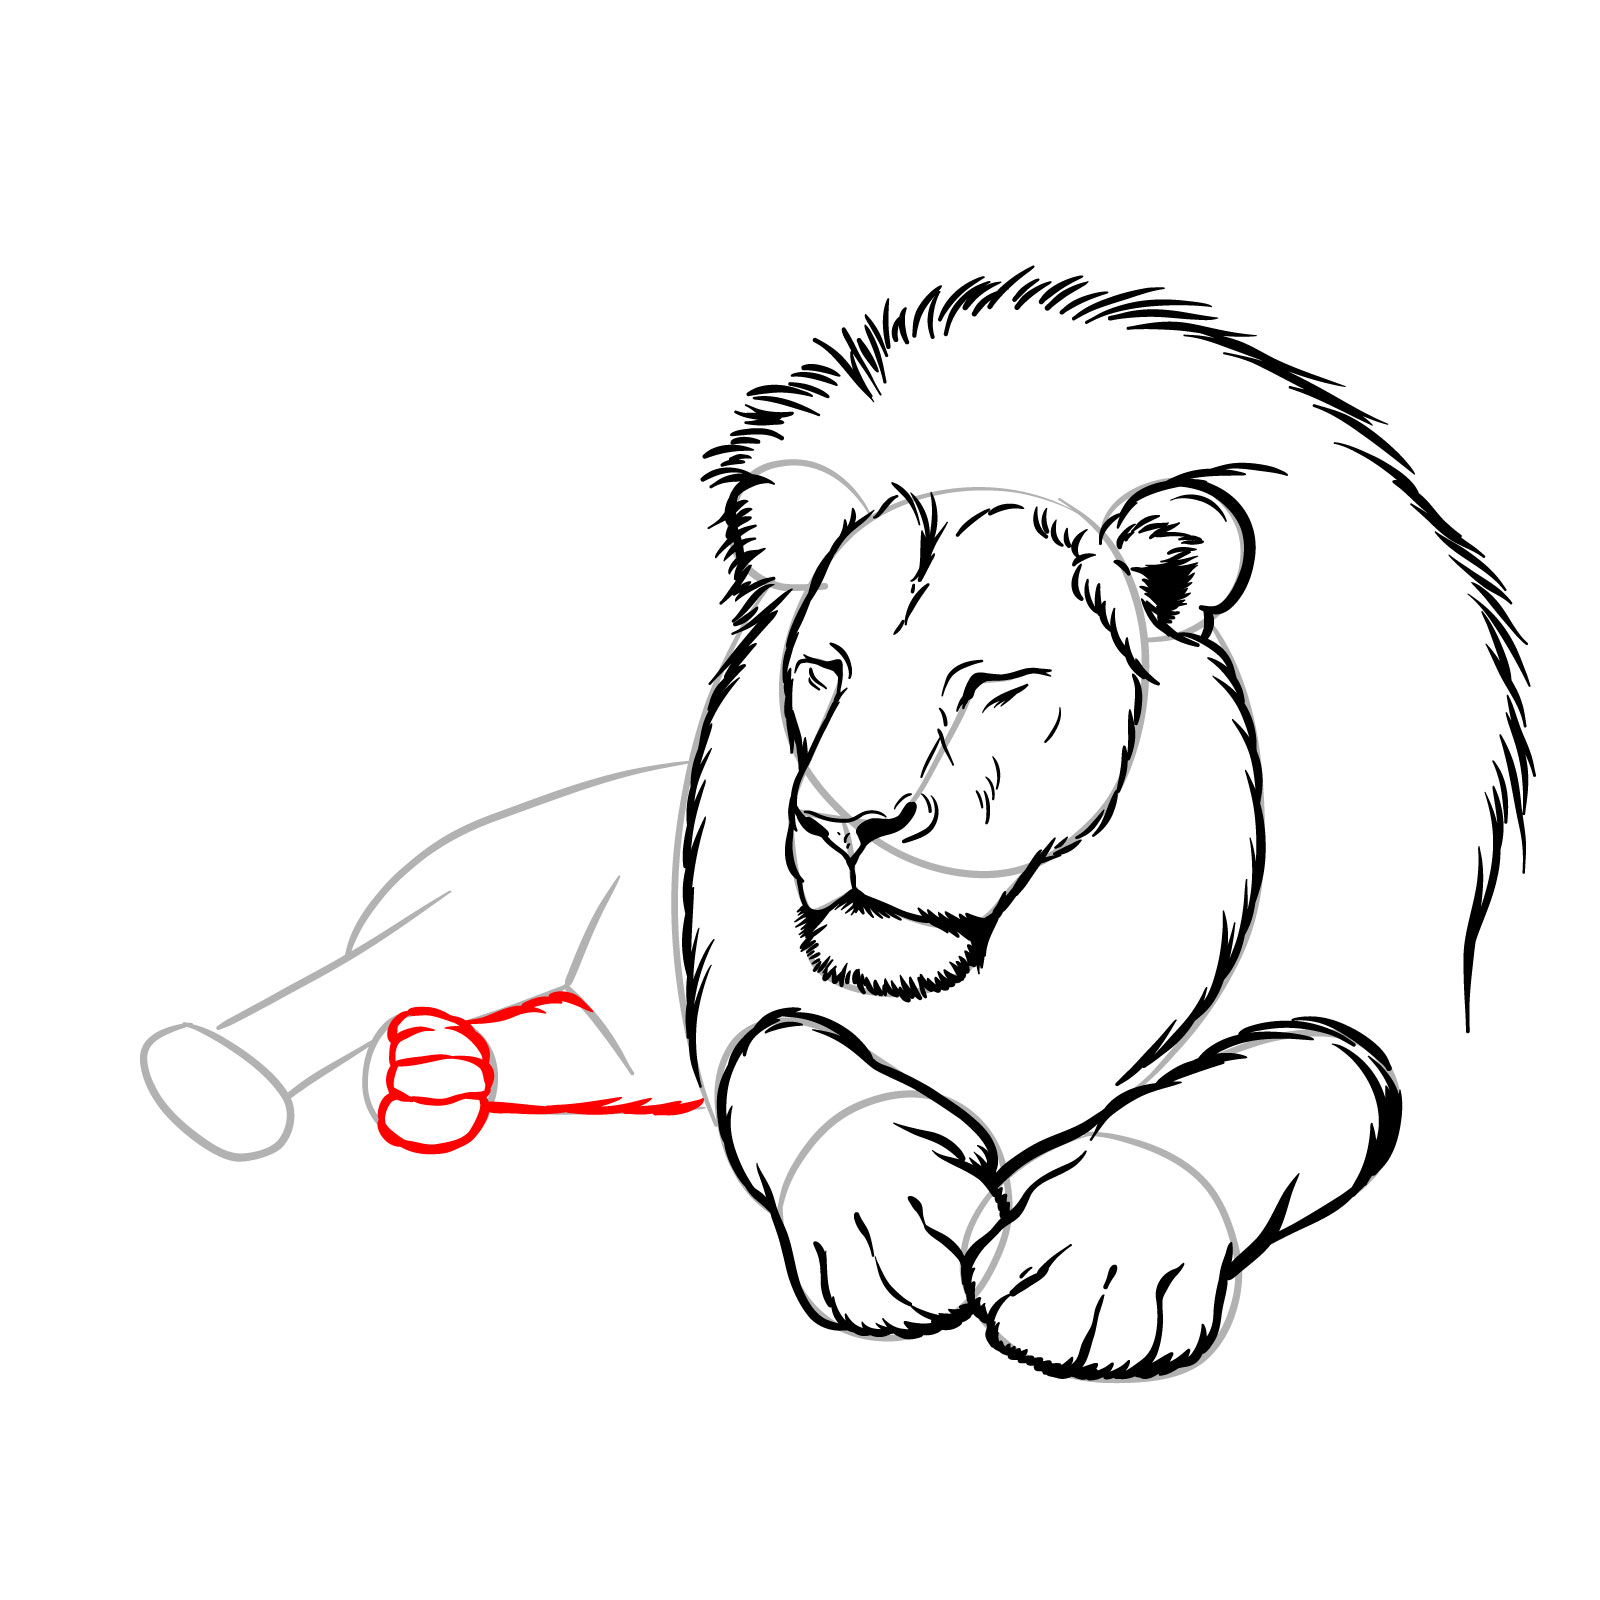
Step 13 – Draw the second rear leg, focusing on its bottom part facing the viewer in the lying pose. Simplify this step by not sketching the individual toes
Second rear leg
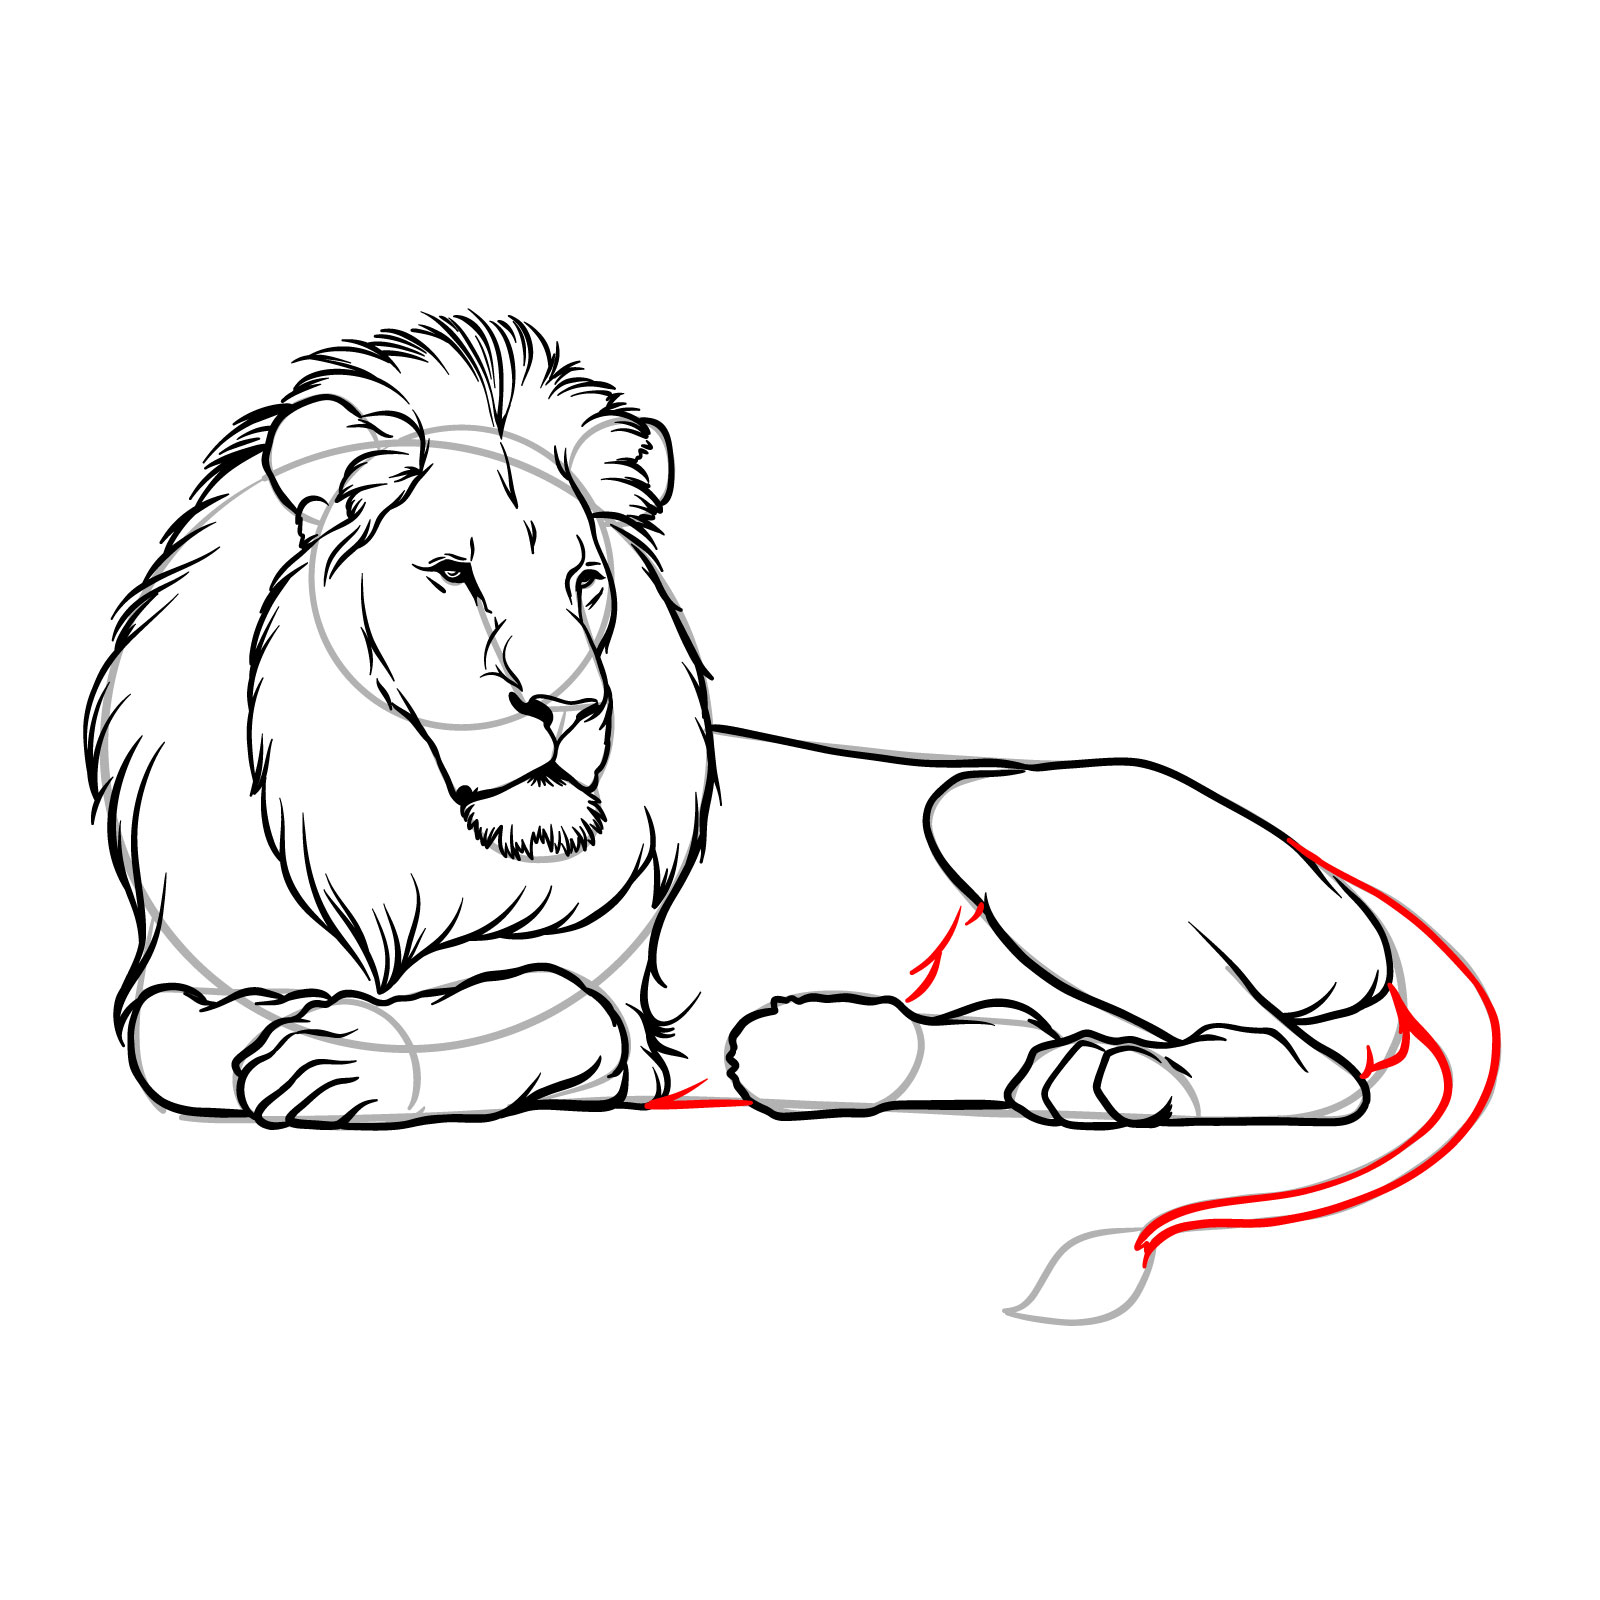
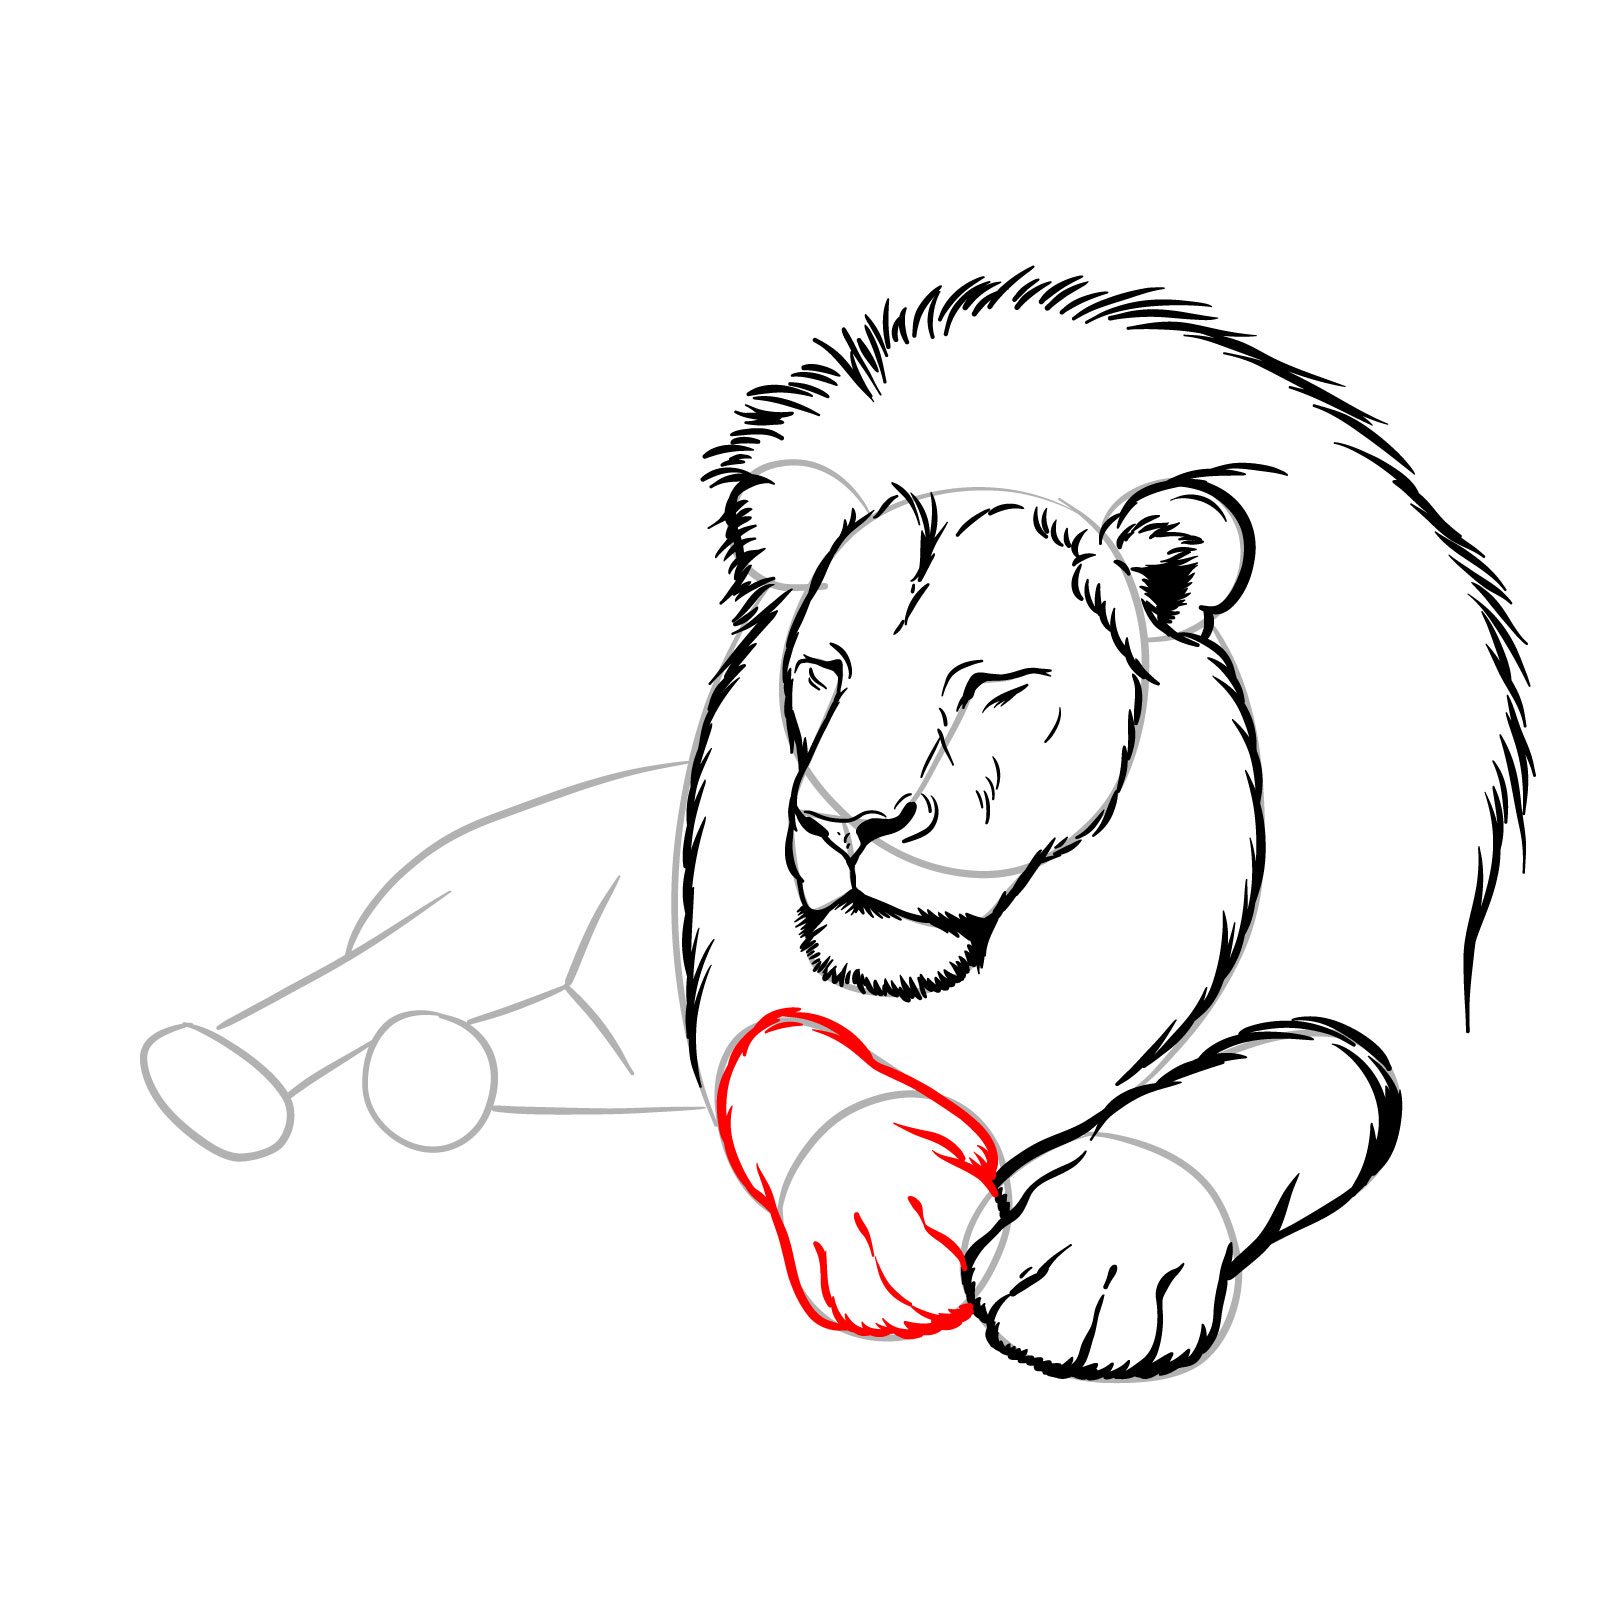
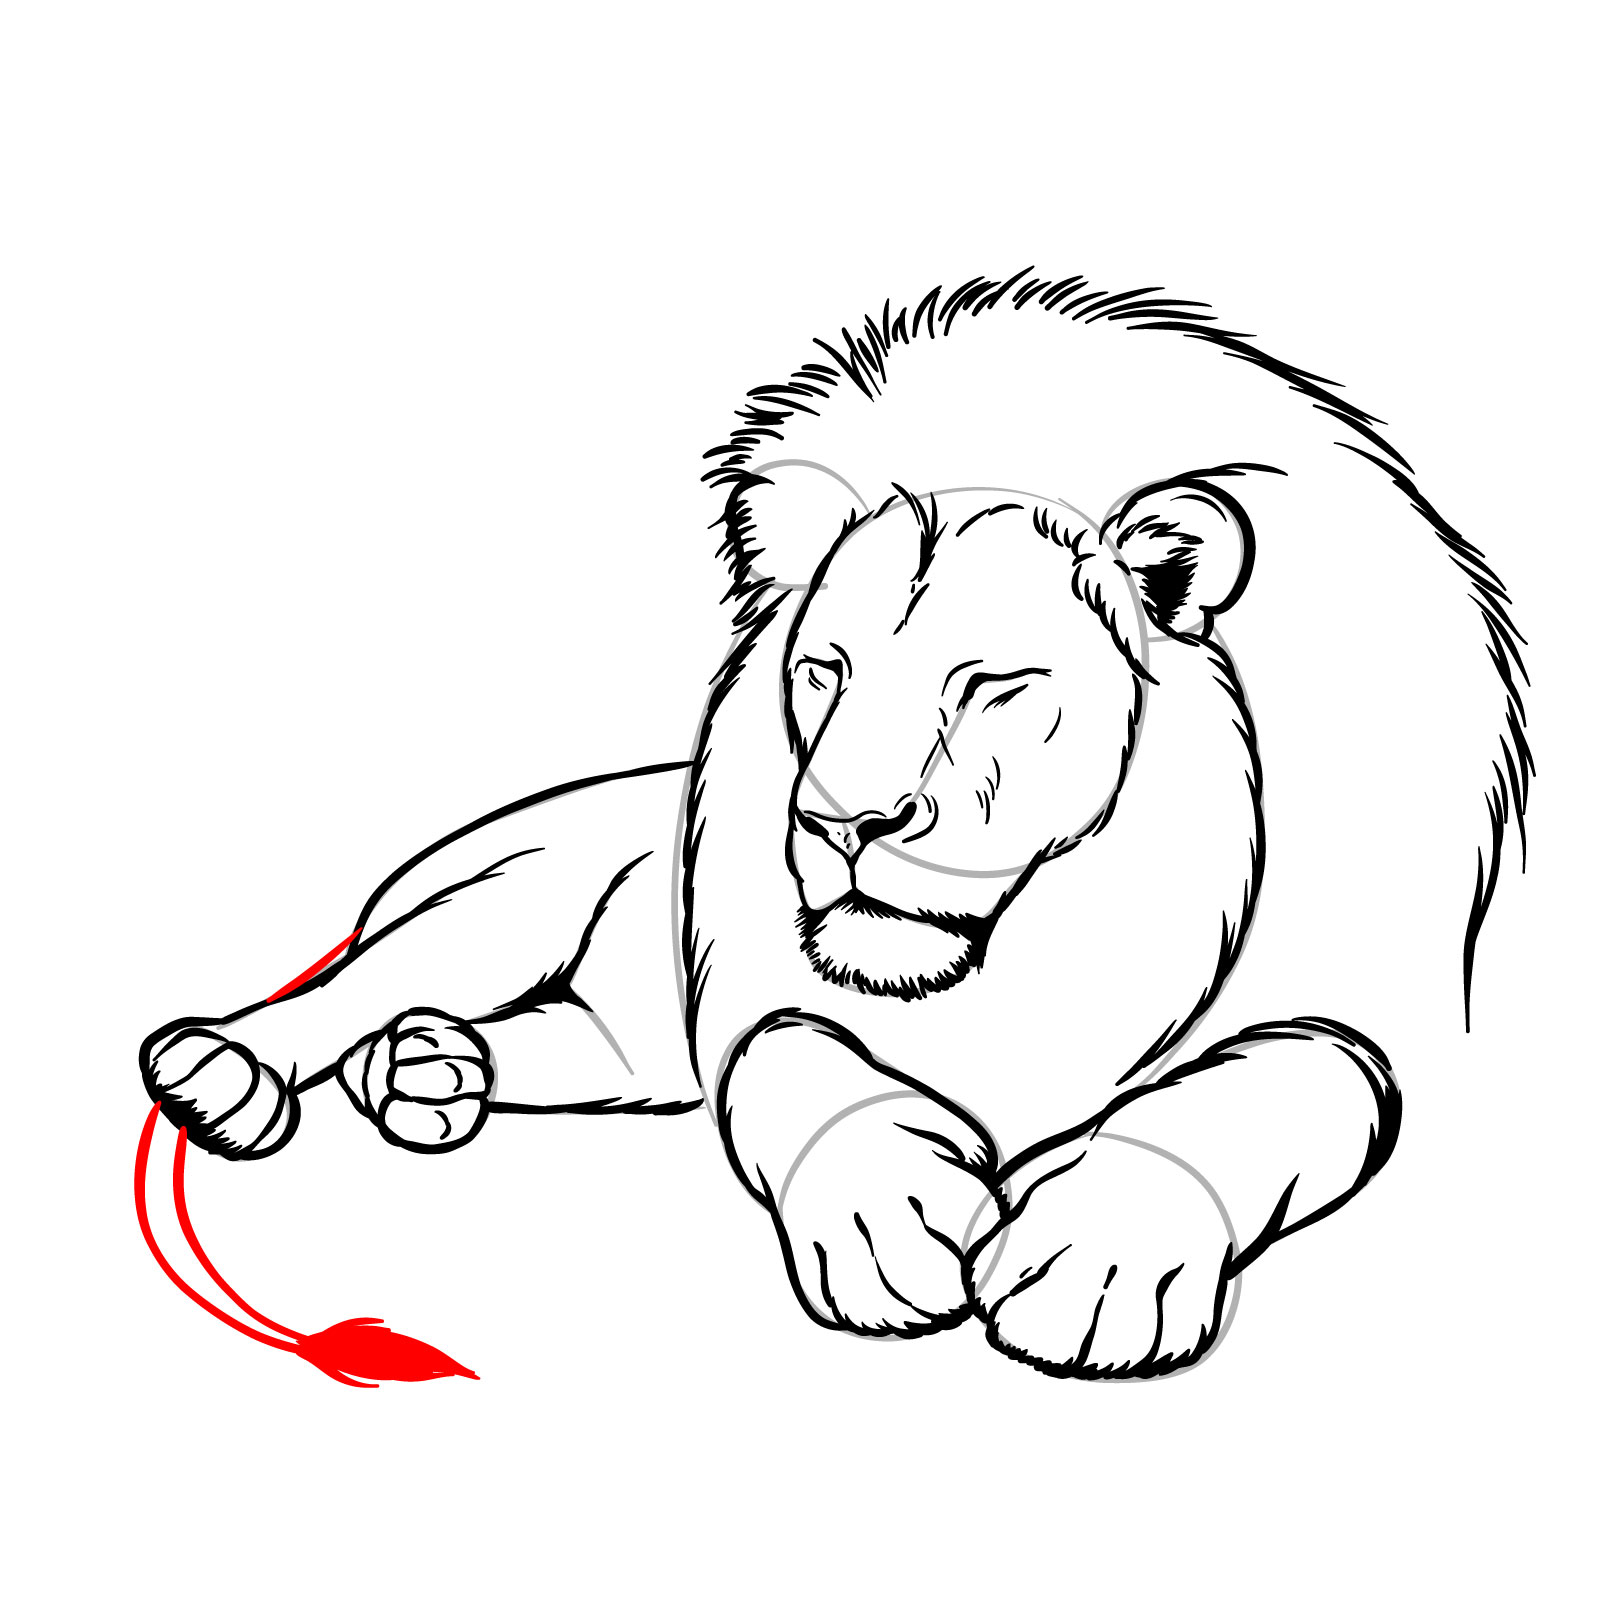
Step 14 – Sketch the small visible part of the body that is mostly hidden behind the legs. Add the tail, starting from the base and extending it outwards
Lower body and tail
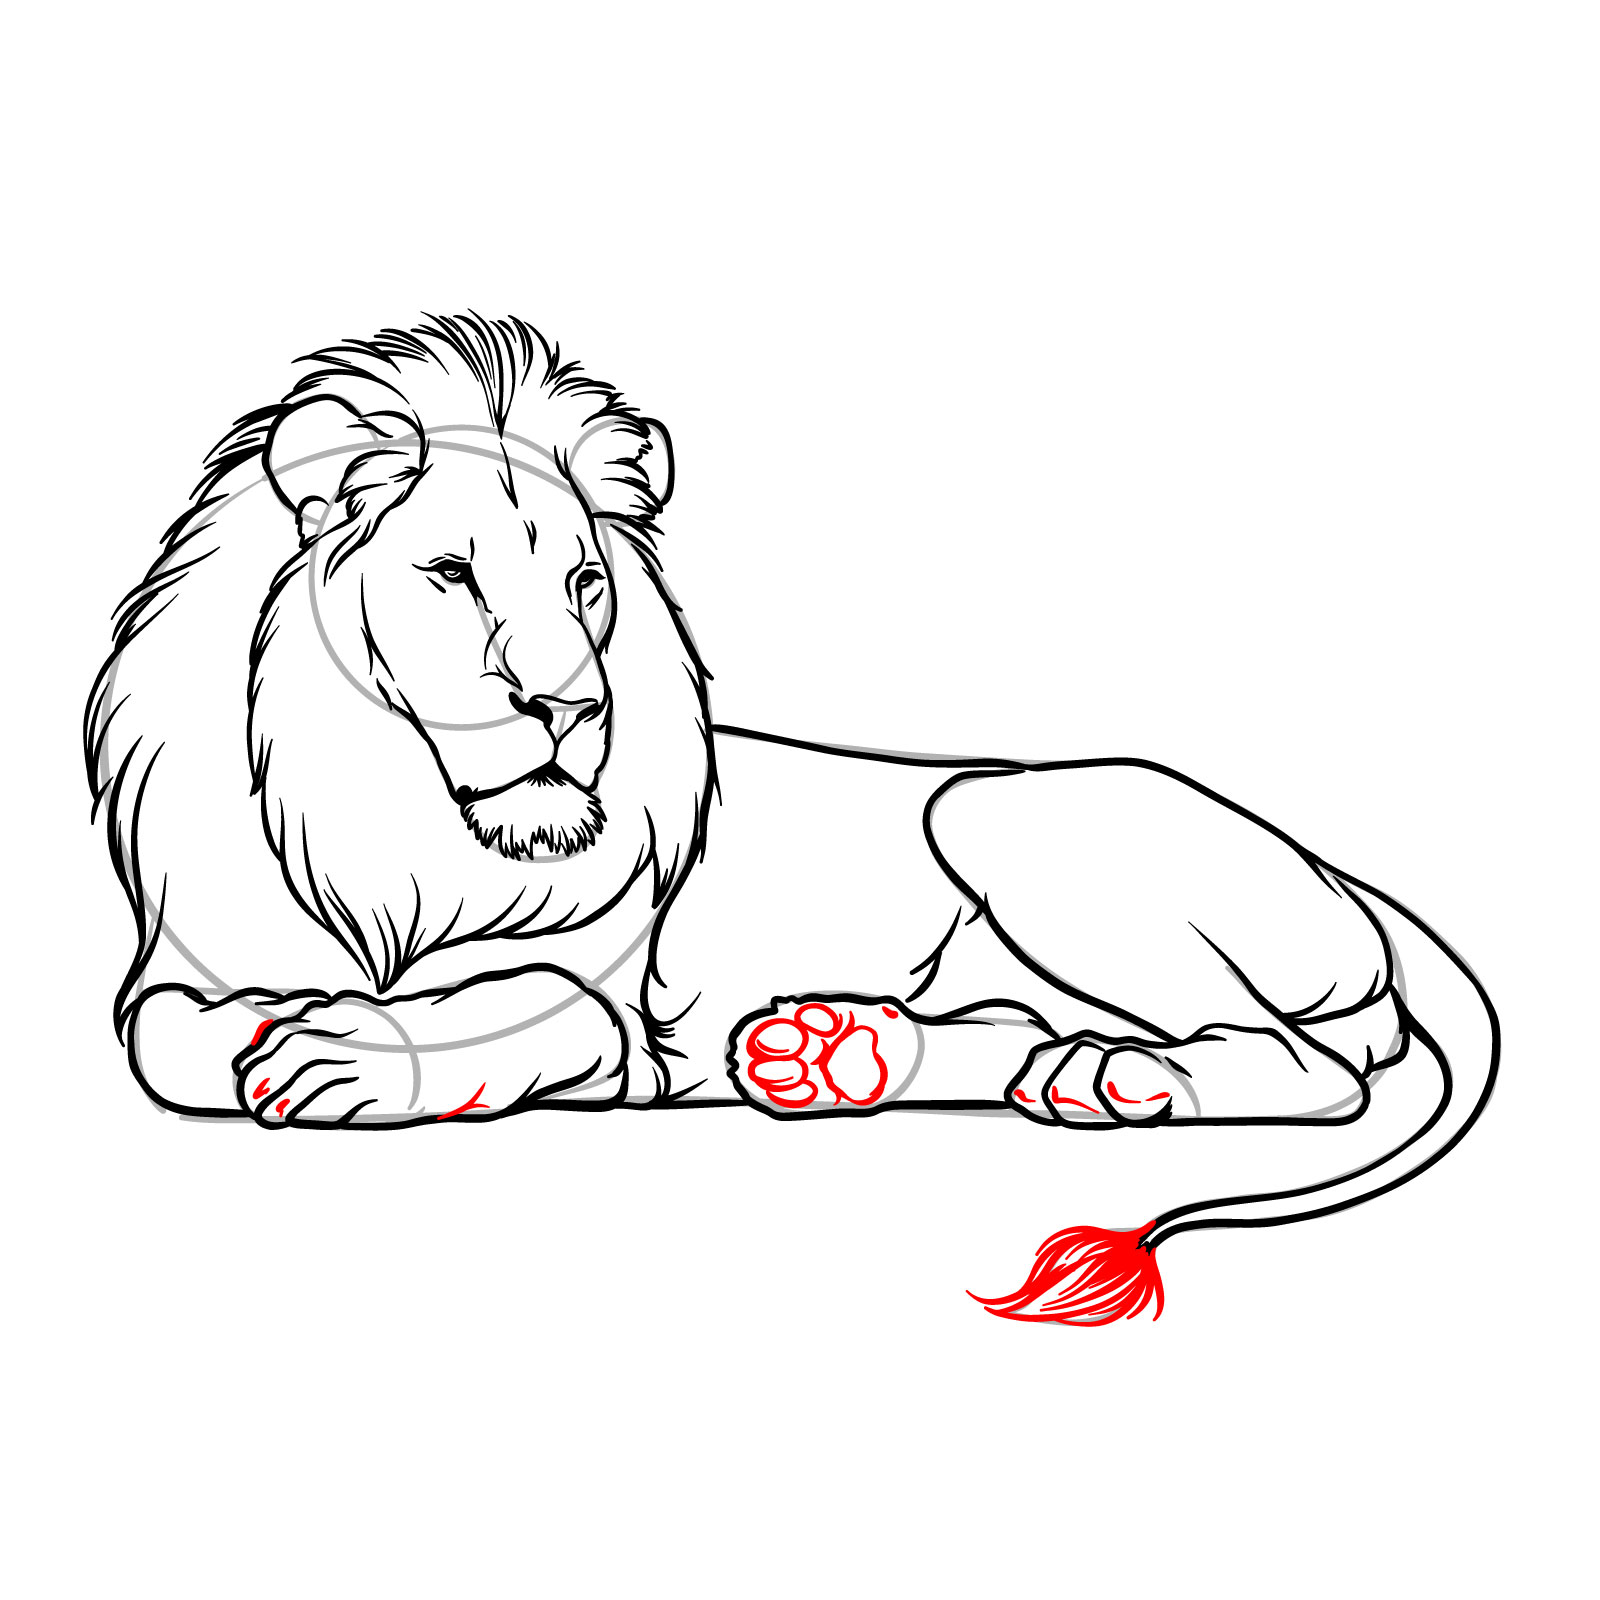
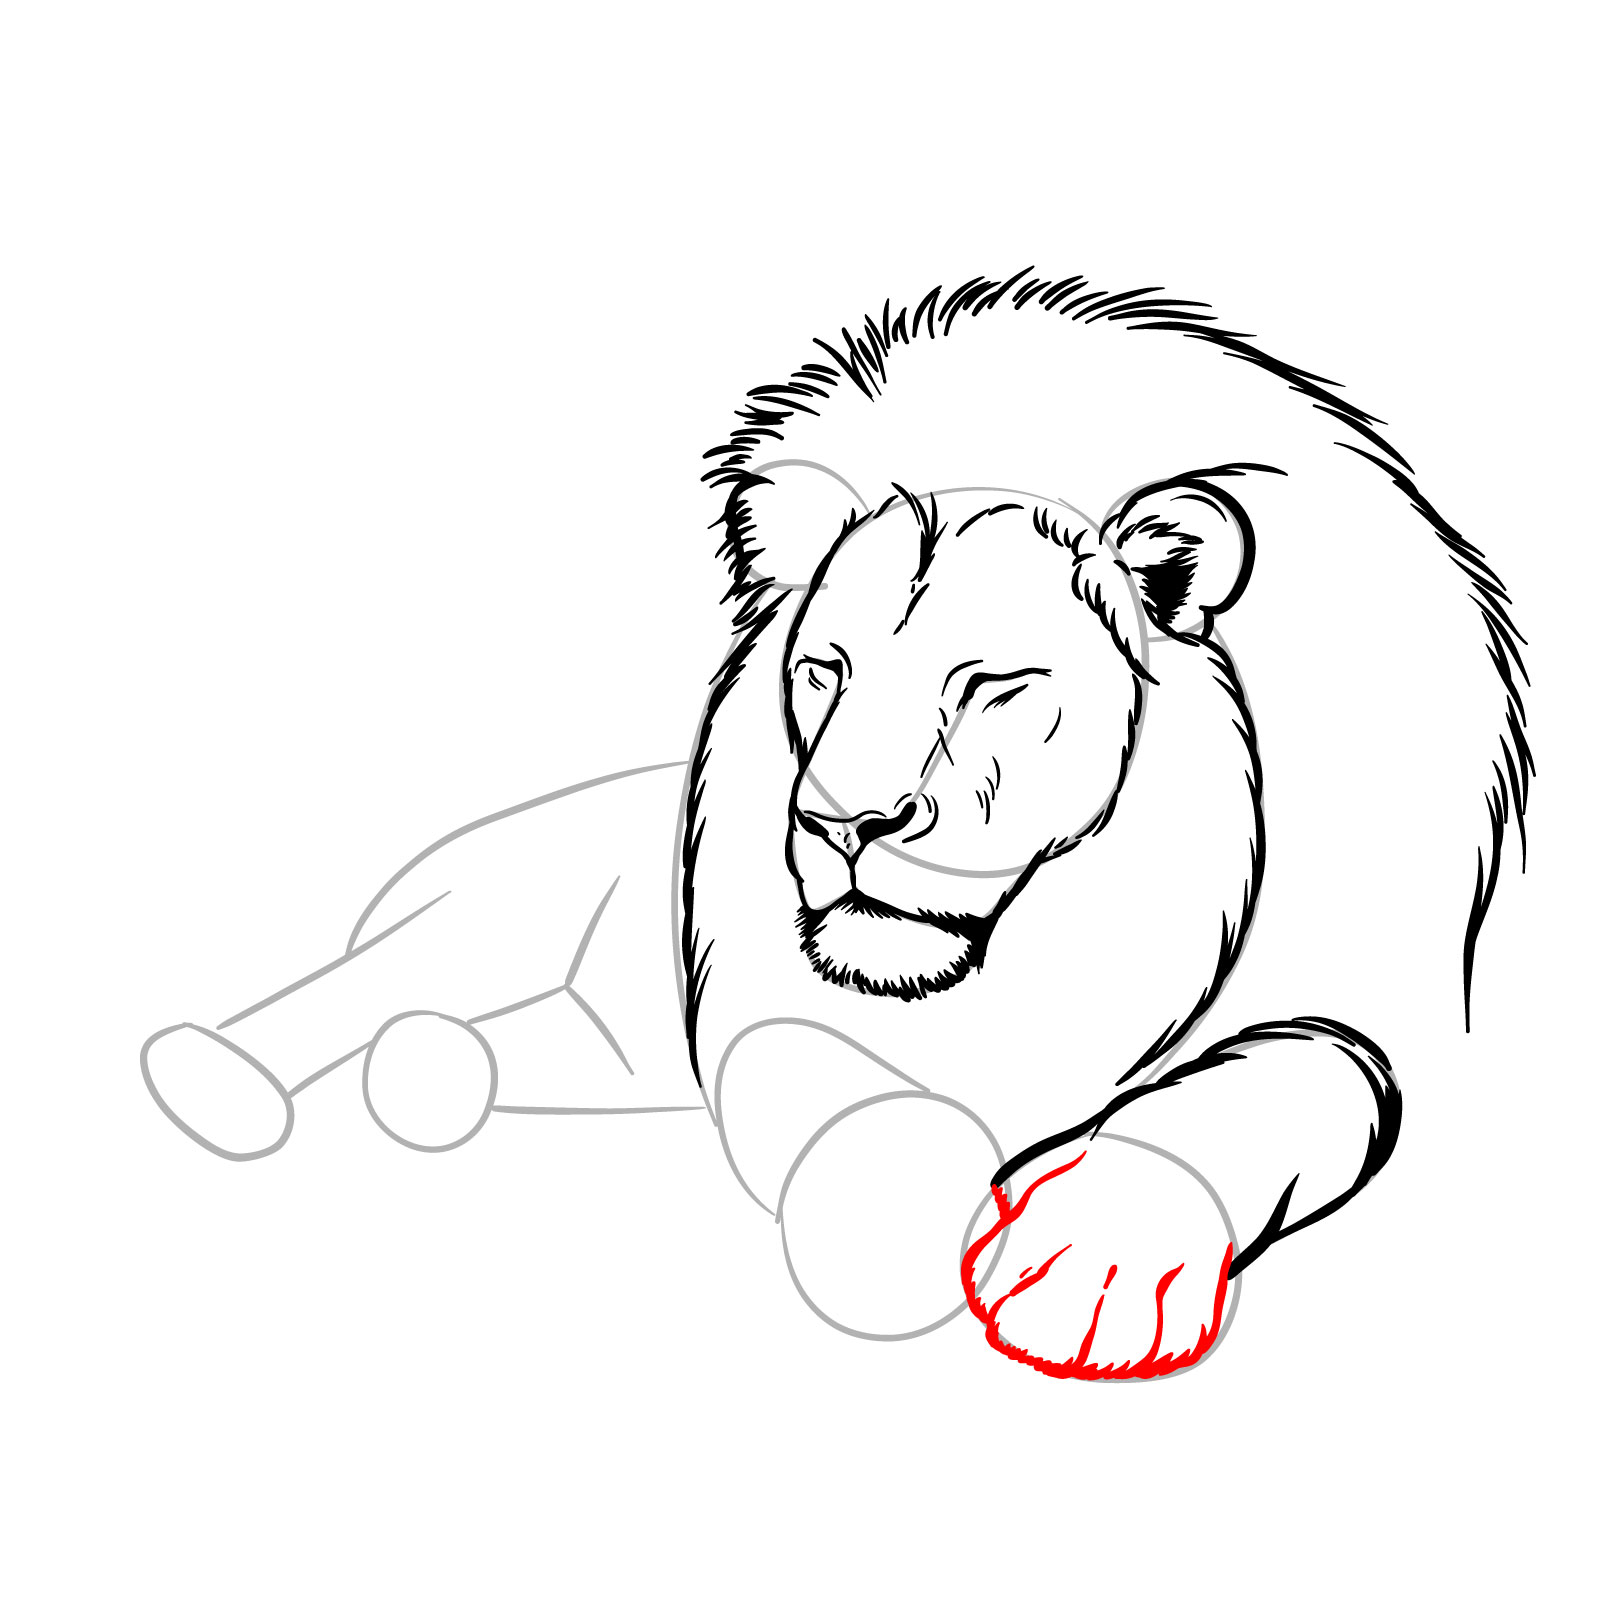
Step 15 – Add the paw pads to the second rear leg. Also, sketch the tuft and claws
Paw pads and leg details
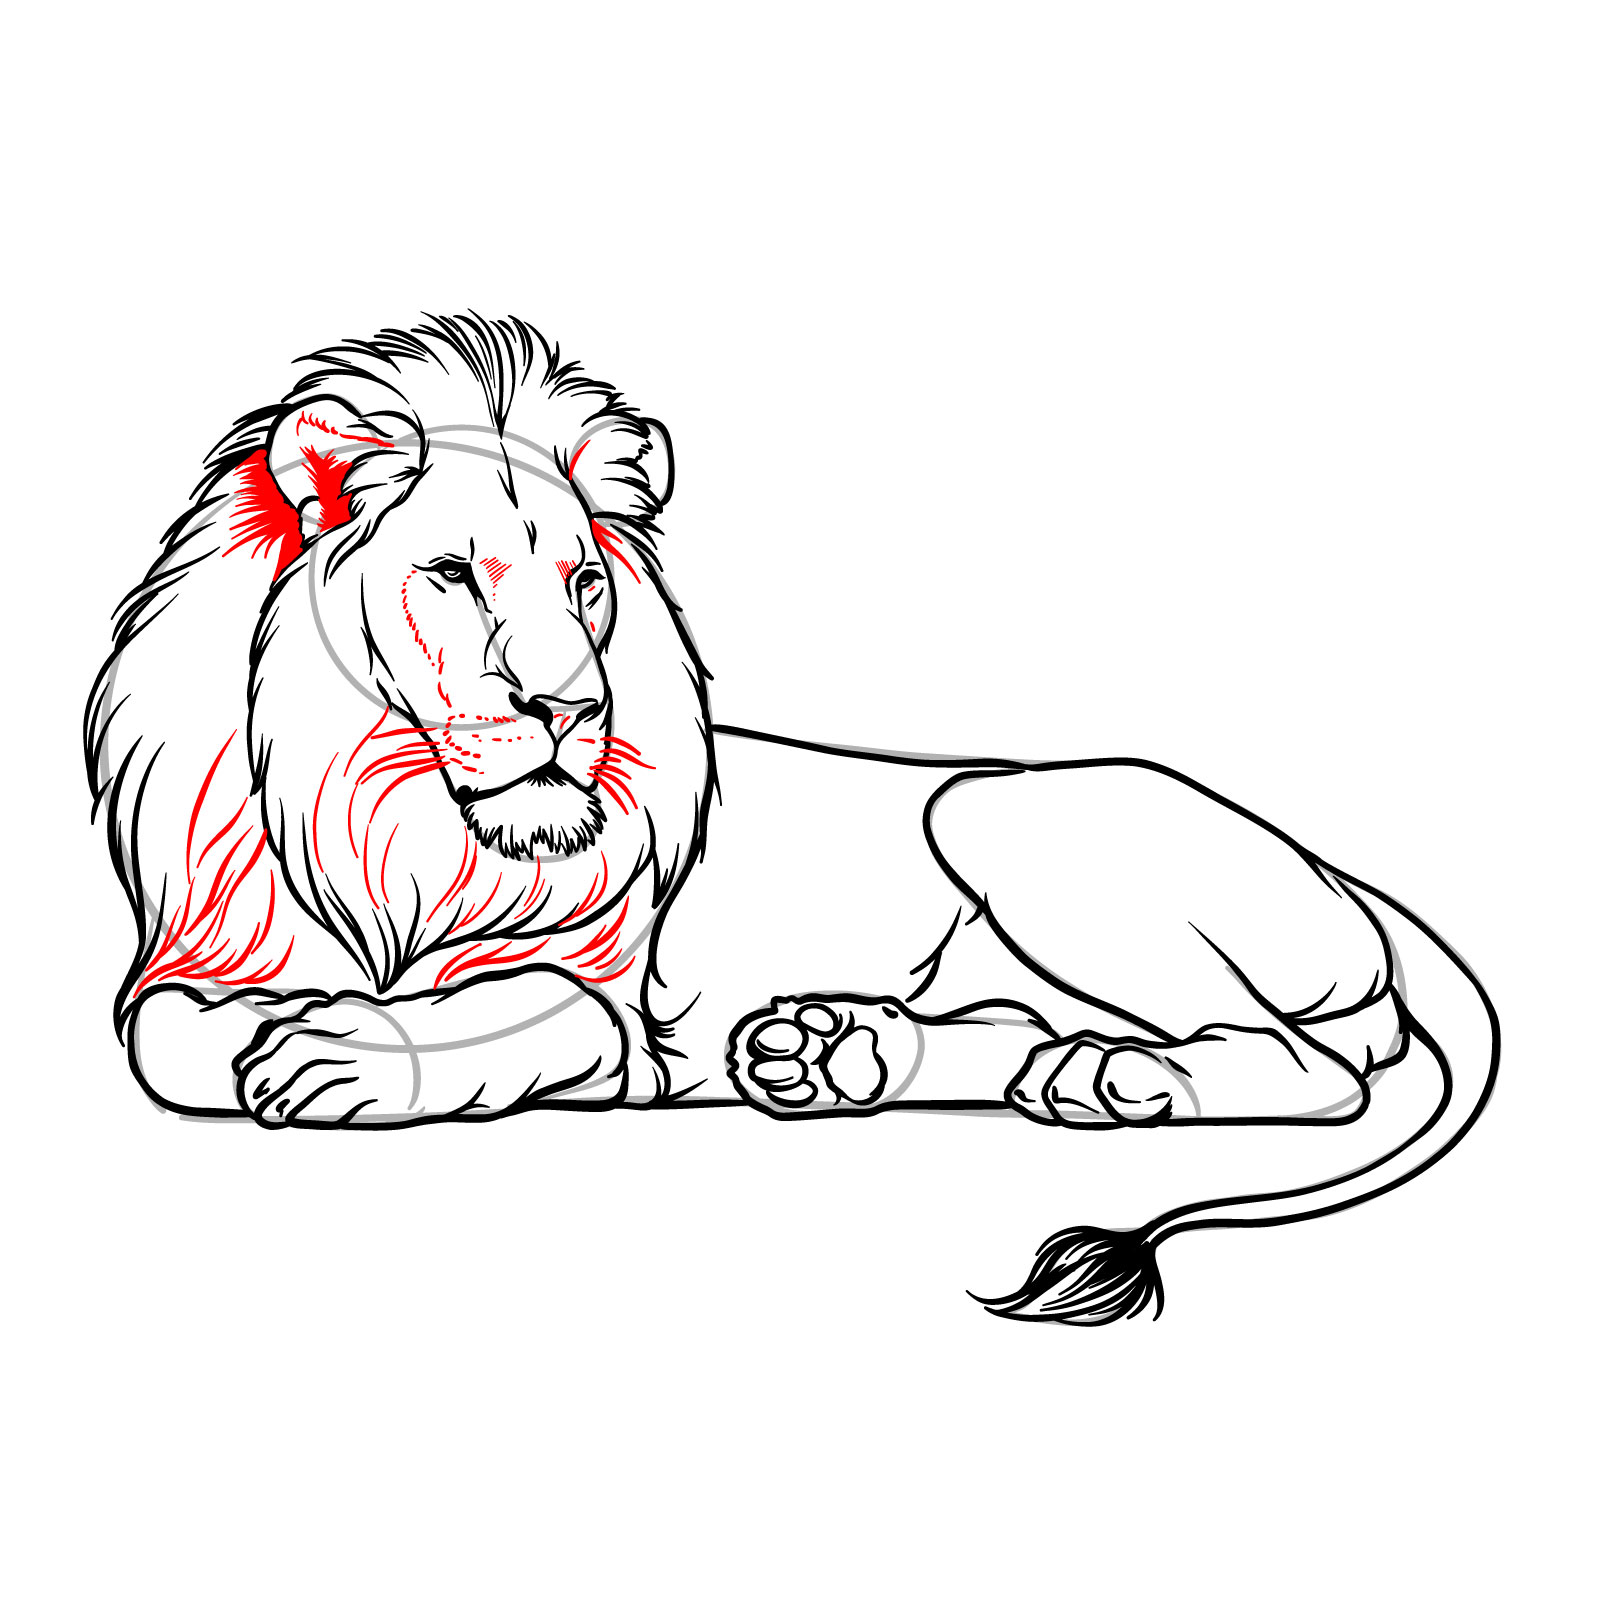
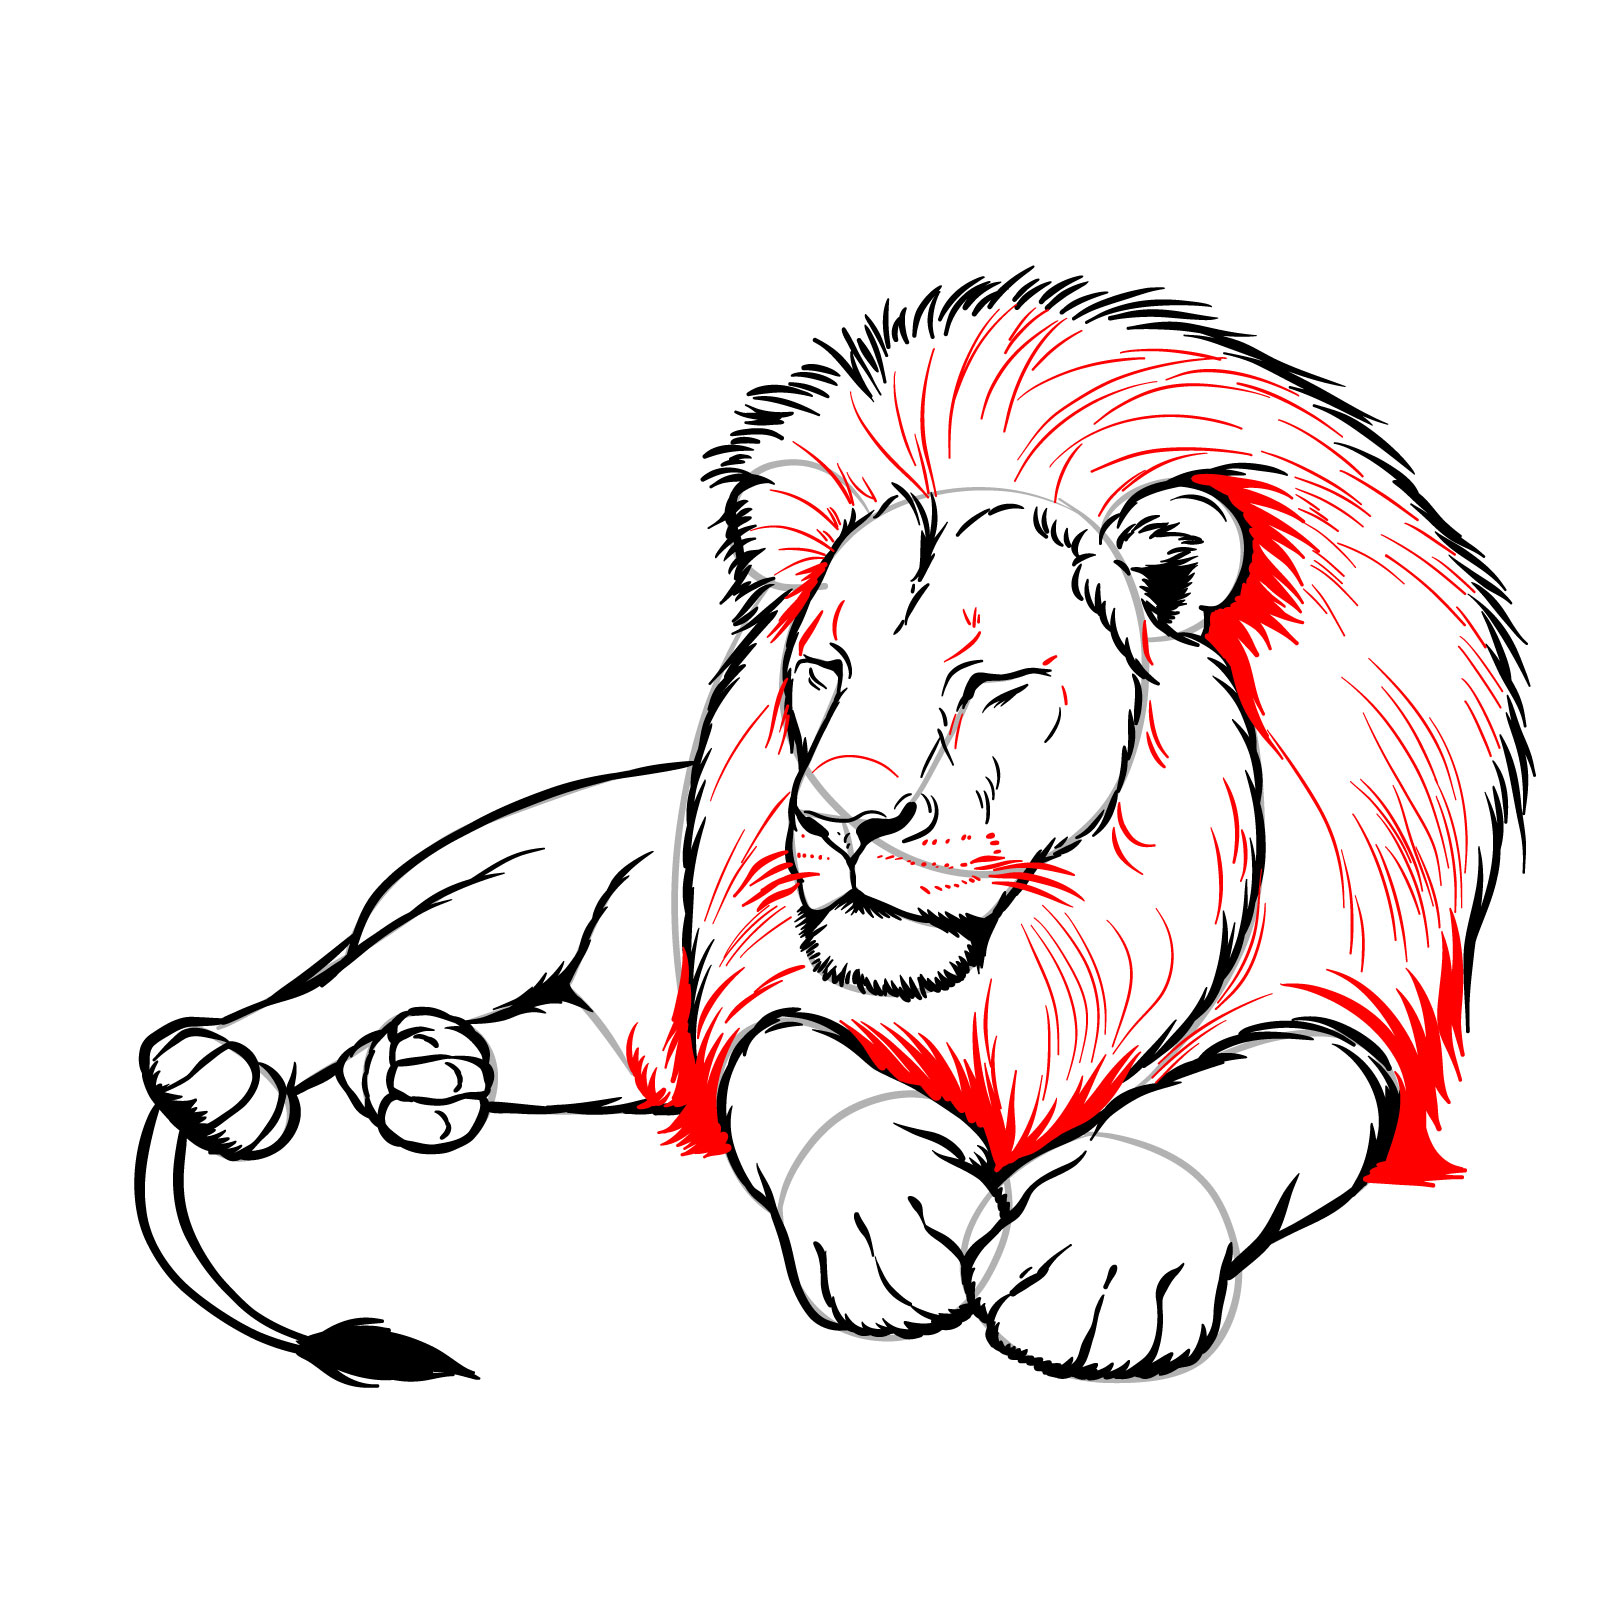
Step 16 – Shade around the ears and add fur texture to the mane for depth. Sketch whiskers, whisker marks, and small lines on the face to enhance the lion’s facial features
Ear shading and mane texture
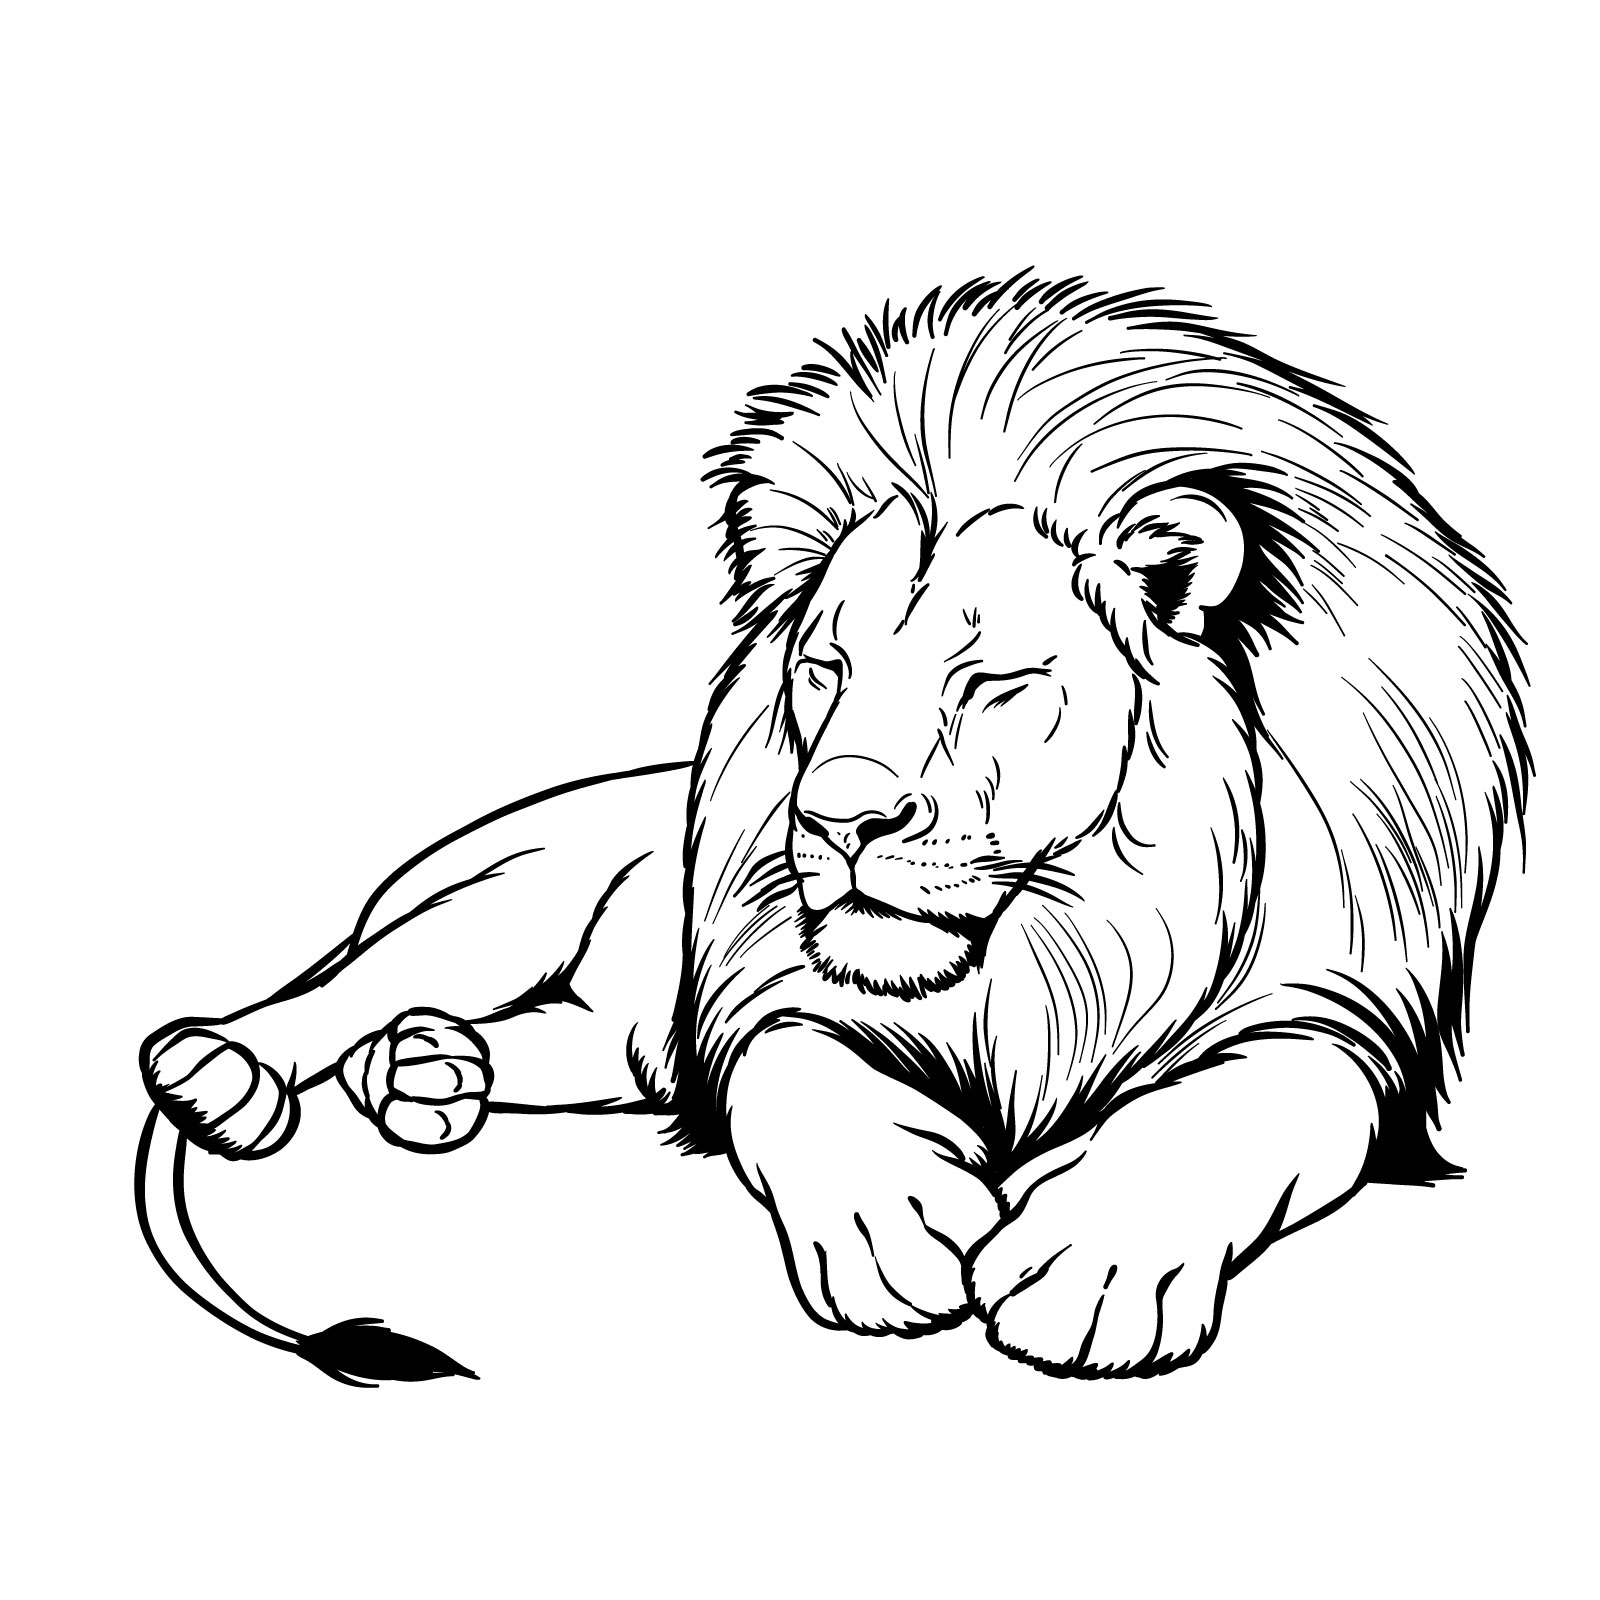
Step 17 – Gently erase any rough preliminary sketches. Your lion drawing is now complete. Optionally, you can ink the sketch to finalize it, enhancing the outlines and details for a more pronounced effect
Final drawing and optional inking
Guide 13: Sleeping Lion
How to draw a sleeping lion – fron view
In this exercise, we will learn how to draw a sleeping lion. With 16 steps, we’ll capture the tranquility of this beast at rest. The perspective is intimate, with the lion’s head larger and in the foreground, while its hind legs tuck away, smaller in the background.
Step 01 – Begin by drawing a circle to establish the base of the lion’s head. Add two incomplete circular shapes at the top of the head circle for the ears. Sketch overlapping circular shapes at the bottom of the drawing for the pads. Draw simple reversed U-shaped lines for the legs. Connect two curved lines from the ears down towards the legs to form the basic shape of the mane
Step 1: Initial shapes for head and body
Step 02 – Draw a “U” shape for the basic muzzle structure; use short lines at the ends for the sleeping eyes. Add shapes for the whisker pads and the chin below the “U”. Sketch a rough outline for the visible parts of the body and the rear legs in a lying pose
Step 2: Facial features and body outline
Step 03 – Sketch closed eyes, add a line for the nose bridge, and draw the nostrils. Ensure these features are softly defined to convey the lion’s relaxed, sleeping state
Step 3: Detailing the nose and closed eyes
Step 04 – Shape the frame of the face with short jagged lines to suggest fur texture. Outline the upper part of the nose
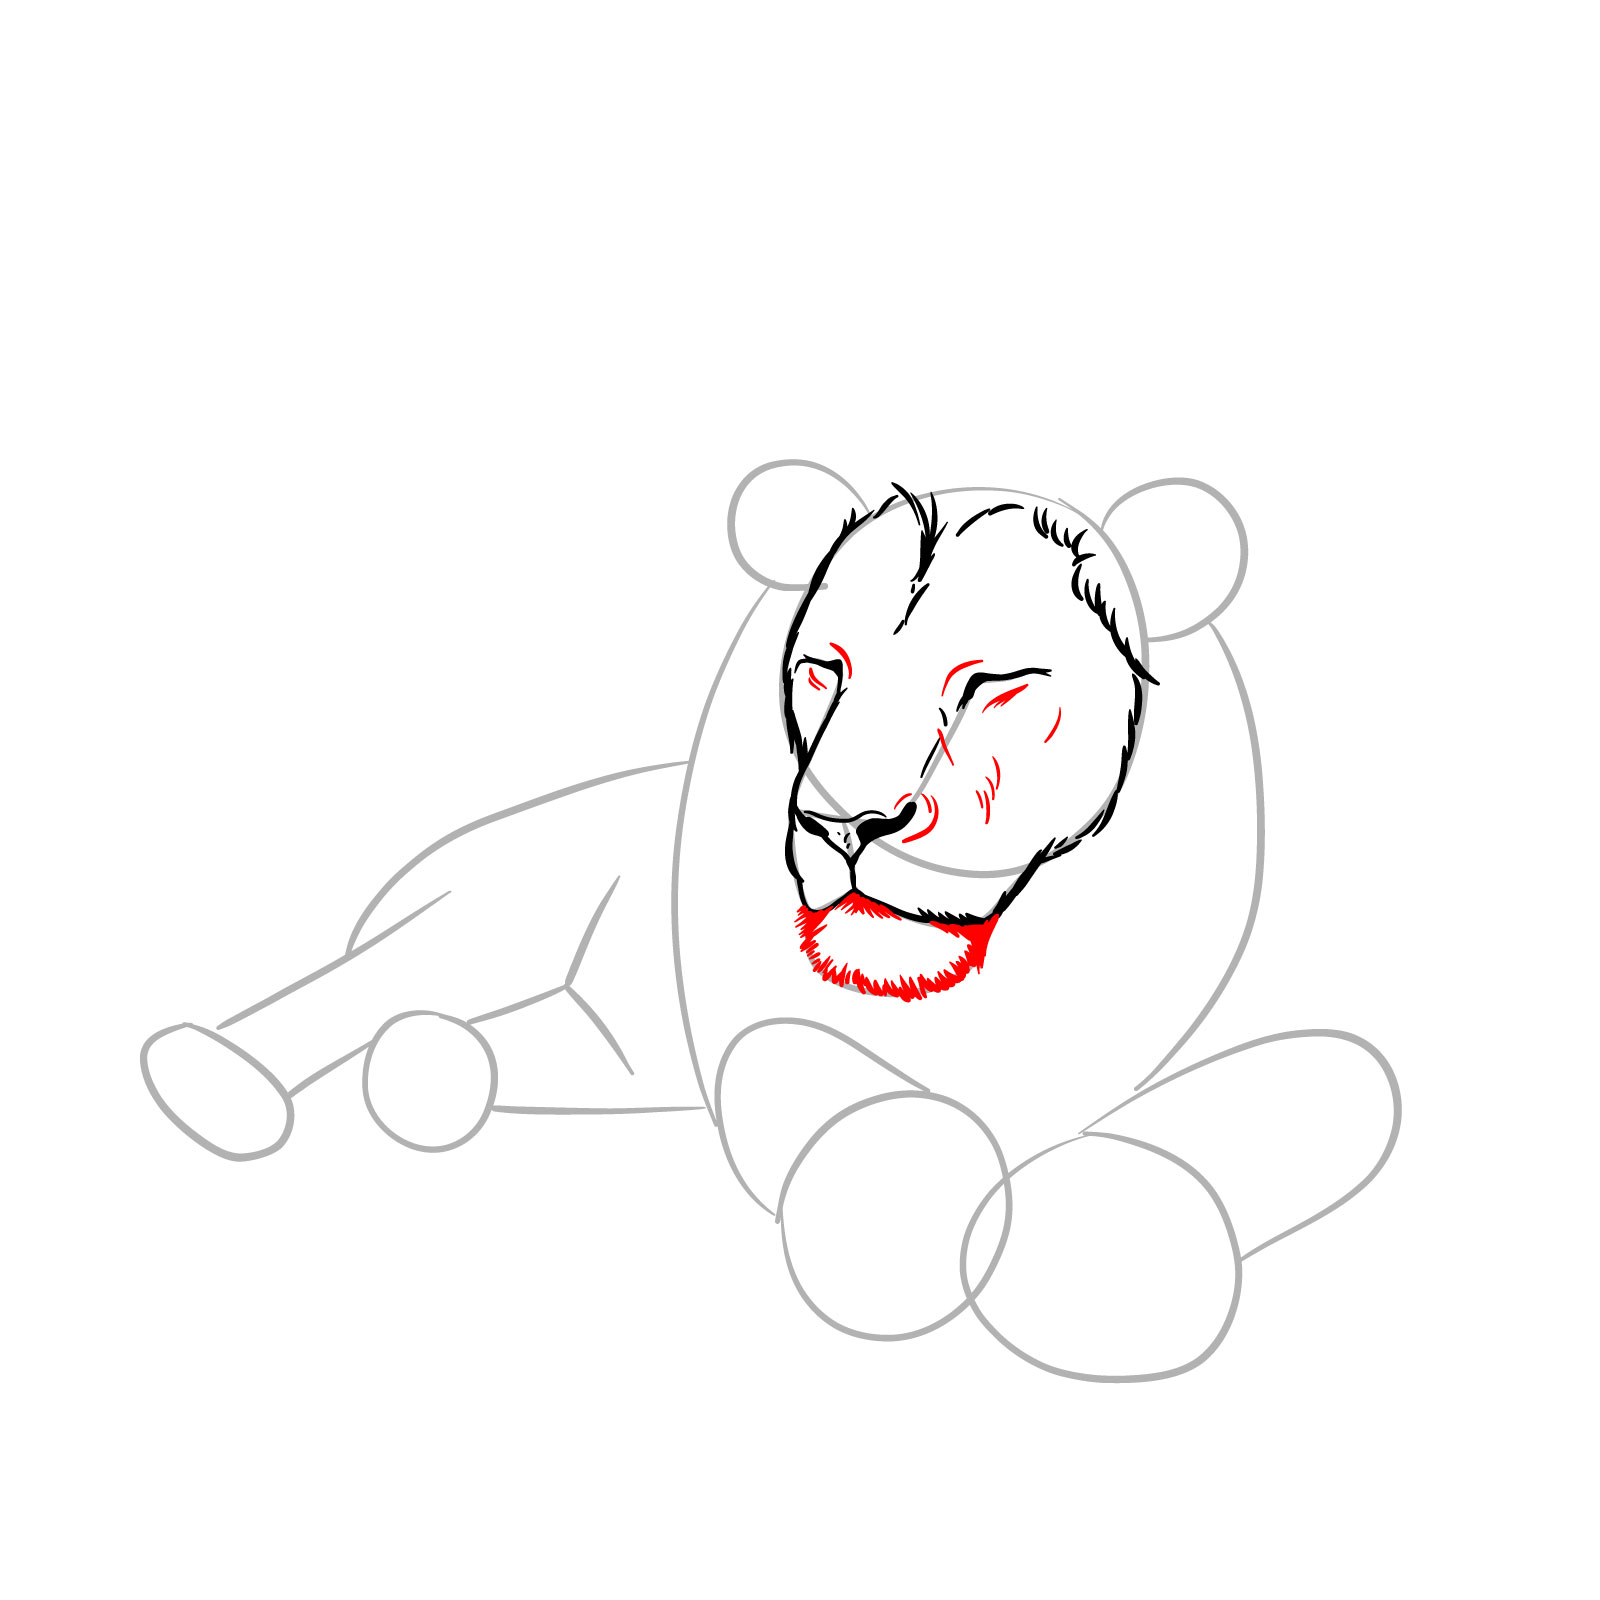
Step 4: Shaping the face
Step 05 – Add the chin below the muzzle. Detail the areas around the eyes and nose with small lines and shapes to enhance the facial features and add depth
Step 5: Adding chin and facial details
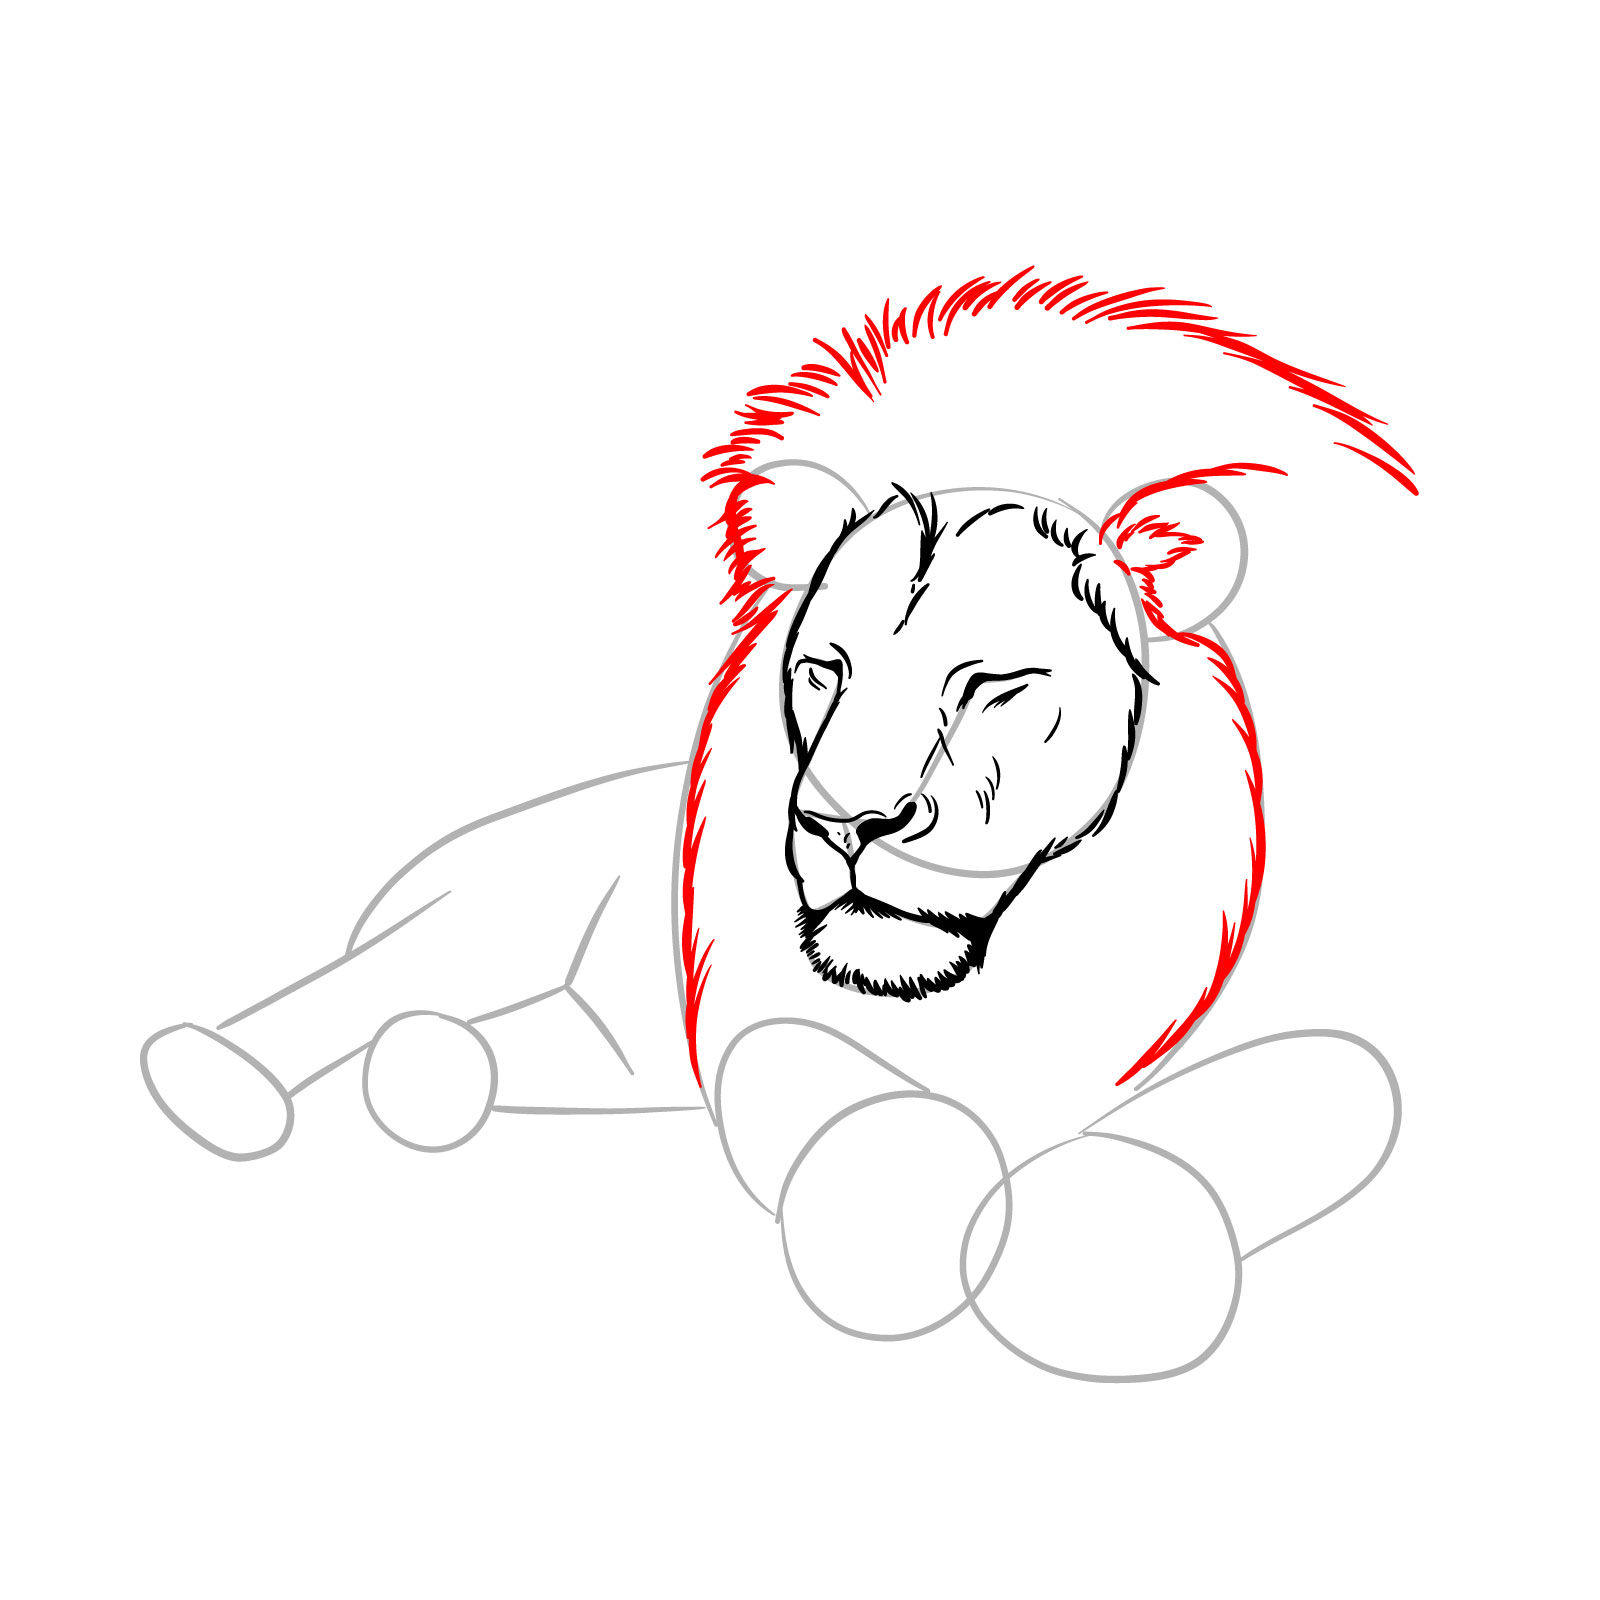
Step 06 – Sketch the fur at the base of the ear on the right side from our perspective. Add fur along the mane lines established in Step 1, including some on the top of the head for a fuller mane appearance
Step 6: Ear fur and mane detailing
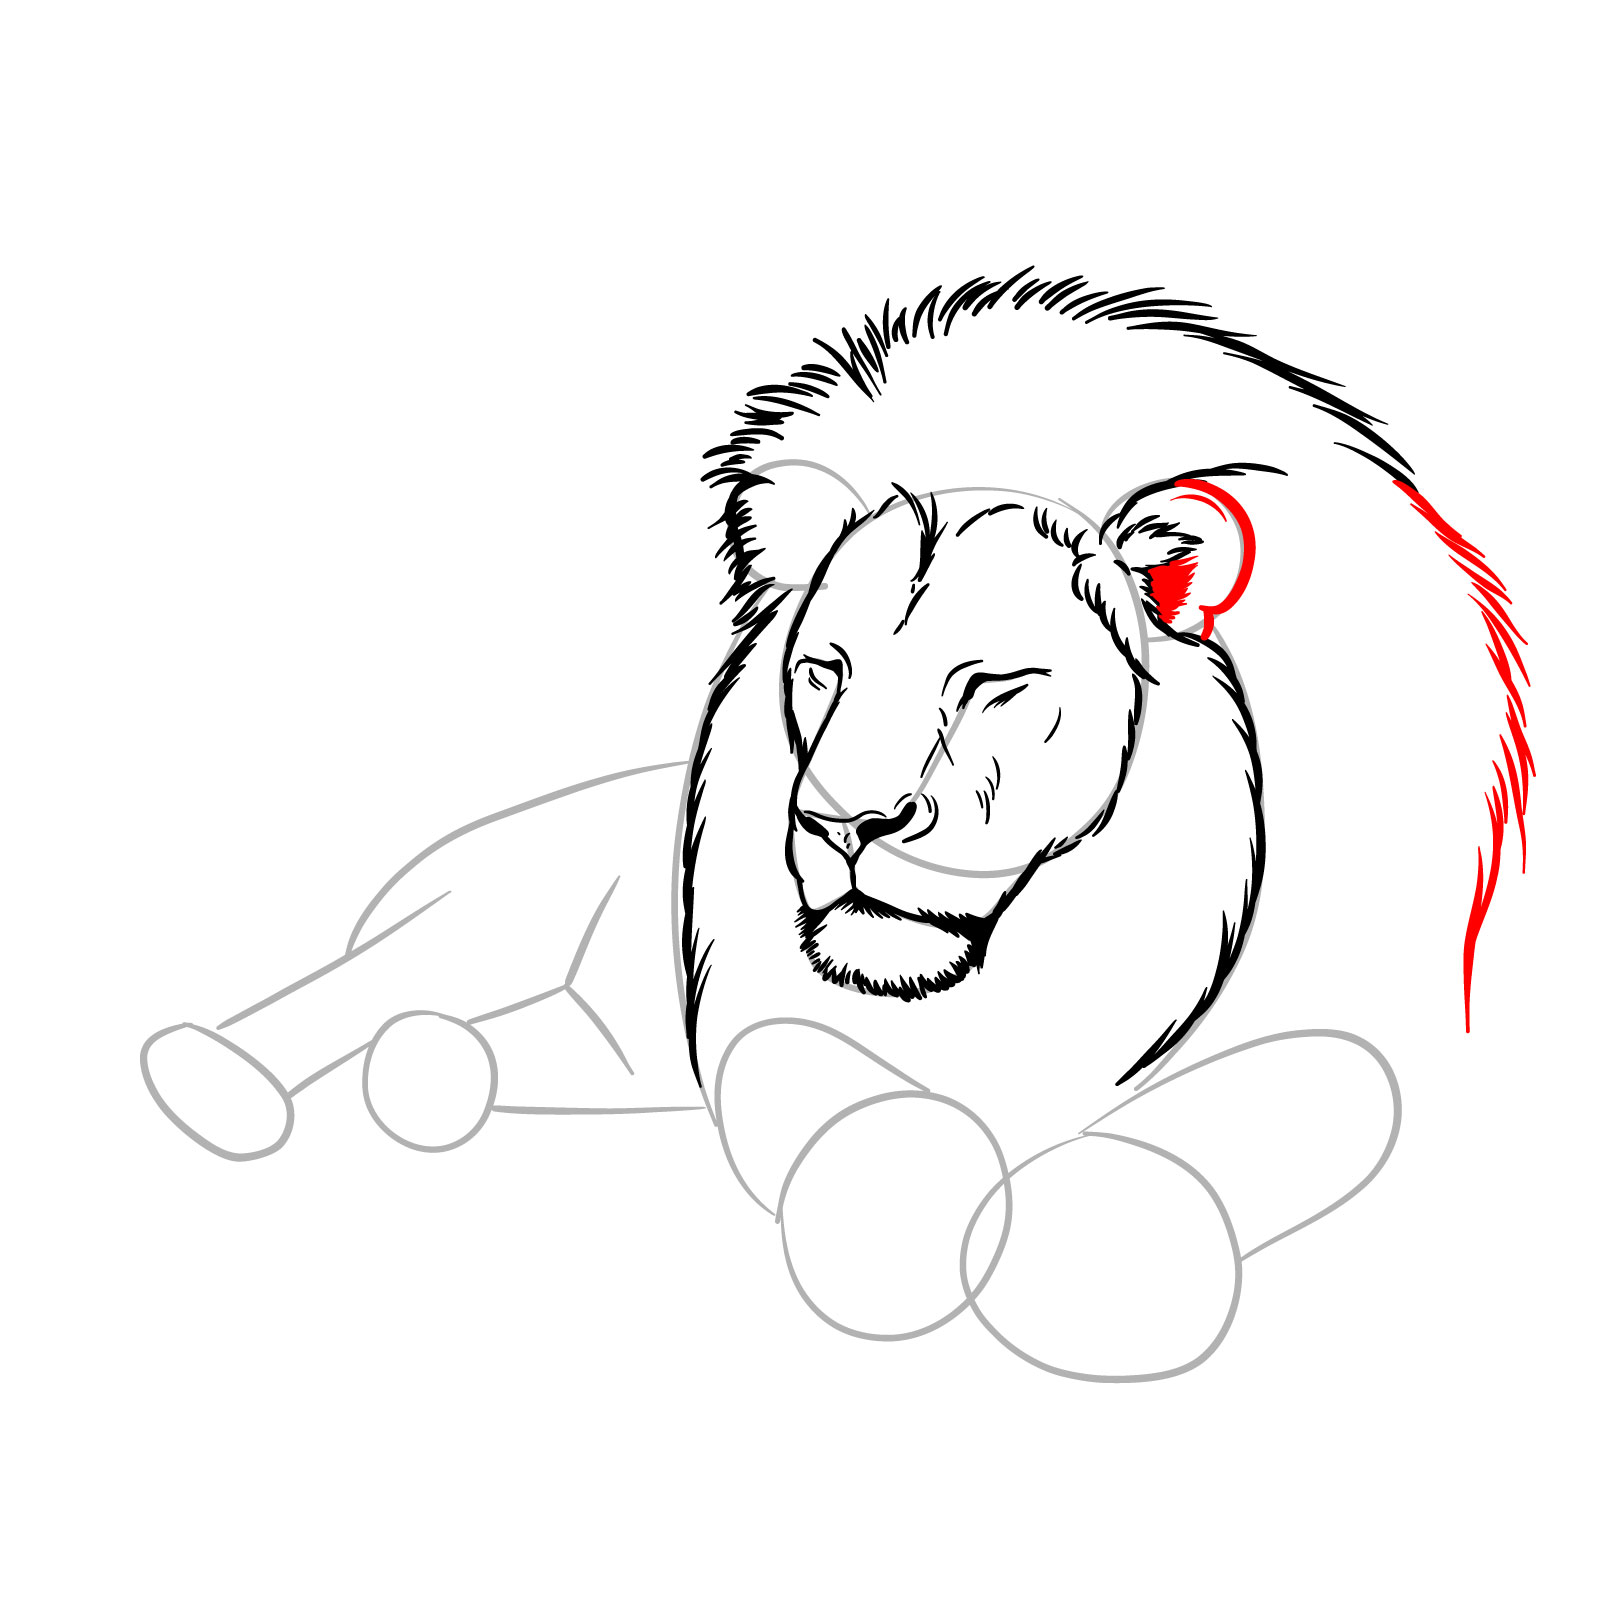
Step 07 – Outline the ear with some shading inside to add depth. Extend the mane’s outer part with additional fur lines to give it a more natural and thick appearance
Step 7: Detailed ears and mane
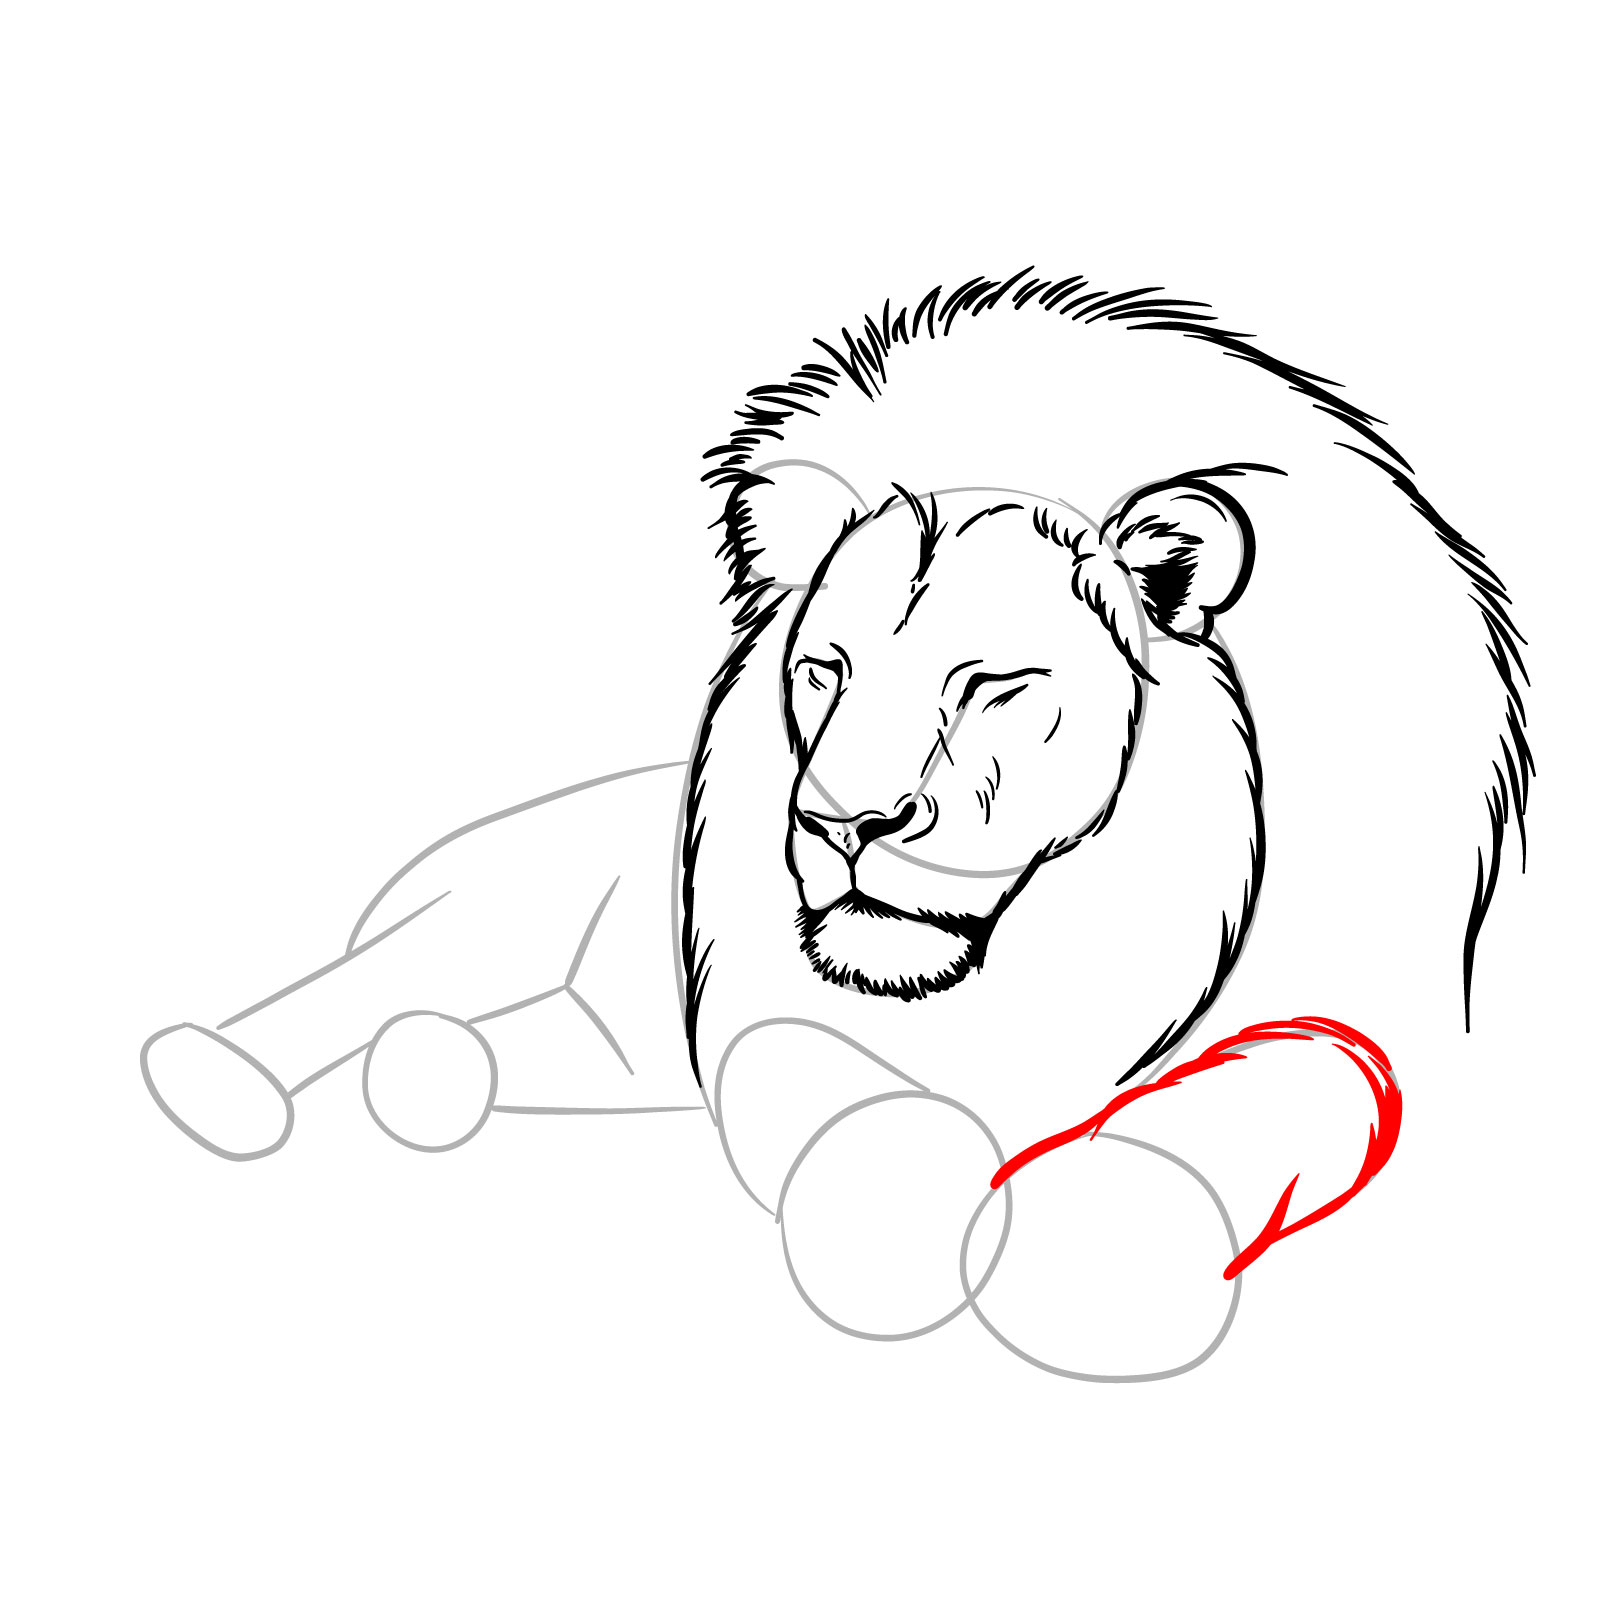
Step 08 – Outline the first leg (right side as viewed) extending down to the paw area. Ensure to depict the muscle and bone structure subtly, keeping in mind the relaxed pose of the sleeping lion
Step 8: First leg outline
Step 09 – Detail the toes on the first front leg you outlined. Draw individual toe pads and small creases on the pads to depict a relaxed paw
Step 9: Toe detailing on front leg
Step 10 – Sketch the second front leg, including all visible parts up to the toes. Ensure that the leg’s posture complements the relaxed state of the lion
Step 10: Second front leg and toes
Step 11 – Draw the first rear leg, making sure to include the toes
Step 11: First rear leg and toes
Step 12 – Add small details to the toes and sketch the body area extending towards the second rear leg. Include a small part below it to complete the underbody contour
Step 12: Rear body and leg details
Step 13 – Sketch the second rear leg. Ensure its position and size reflect the perspective, appearing smaller than the front legs
Step 13: Second rear leg outline
Step 14 – Draw the tail starting from behind the second rear leg’s paw, curving it towards the foreground. Add a fluffy tuft at the tail’s end to signify the lion’s relaxed posture
Step 14: Tail and tuft
Step 15 – Add whiskers and whisker marks on the face. Sketch small details around the face, enhance the fur texture of the mane, and add small shading areas behind the ear, between the front legs, and on their sides to create depth
Step 15: Facial and mane detailing
Step 16 – Carefully erase the initial basic sketches to clean up your work. Your sleeping lion drawing is now complete. This final step reveals the refined, detailed sketch, showing the peaceful scene of a sleeping lion in front view
Step 16: Final drawing completion
Guide 14: Lion in Action Pose
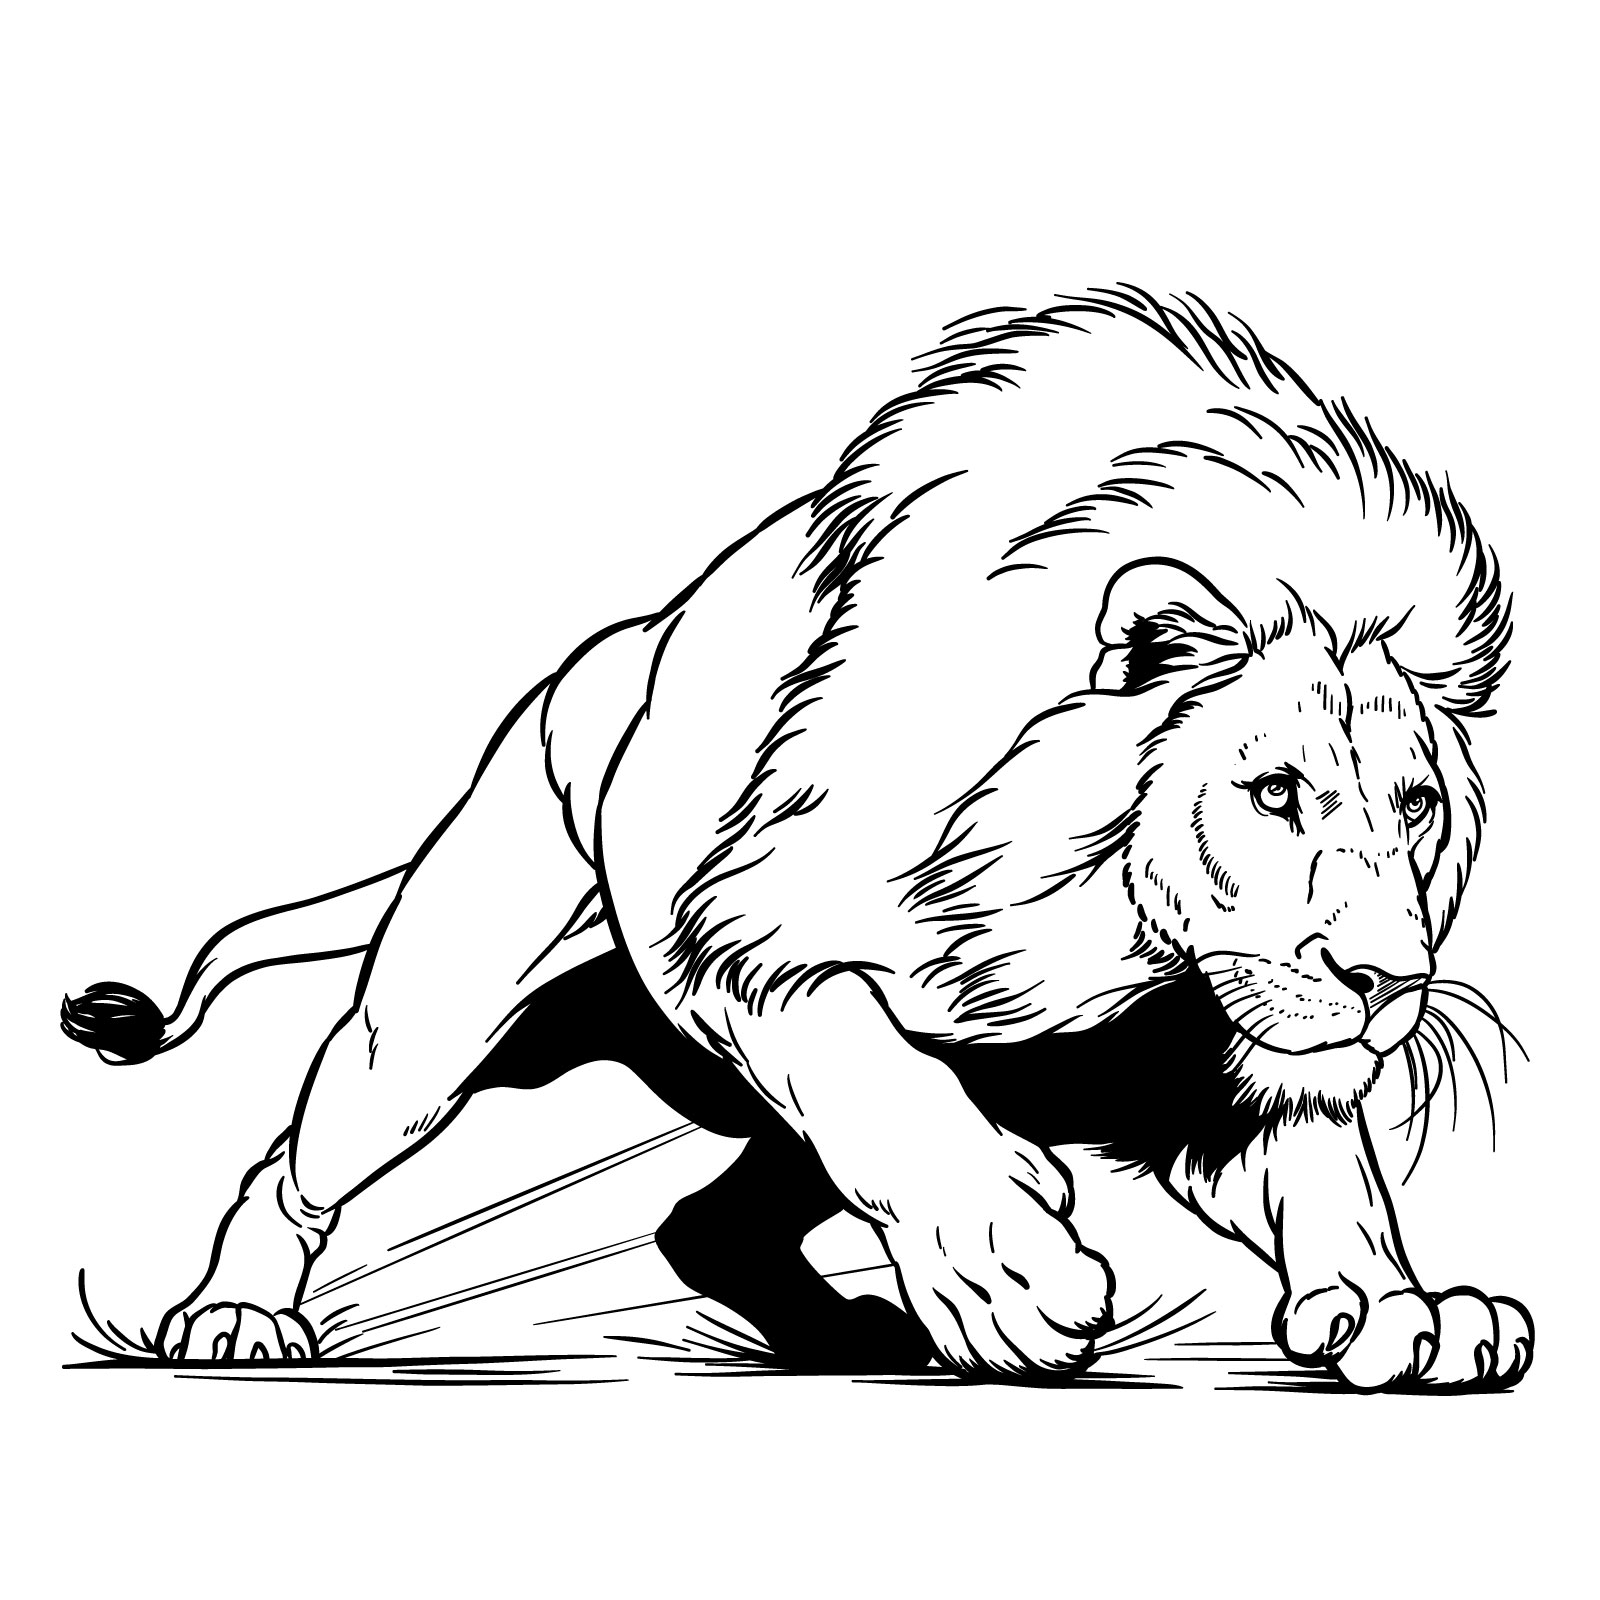
How to draw a fighting lion – action pose sketch
The final guide of the series takes on the challenge of drawing a lion in an action pose, which could be interpreted as either fighting or hunting. This dynamic sketch is built in 19 steps. You’ll draw the powerful muscles tensed for attack, the dust kicking up from its paws, and the ferocity in its gaze. This guide culminates the skills you’ve practiced so far, bringing movement to your realistic lion drawing.
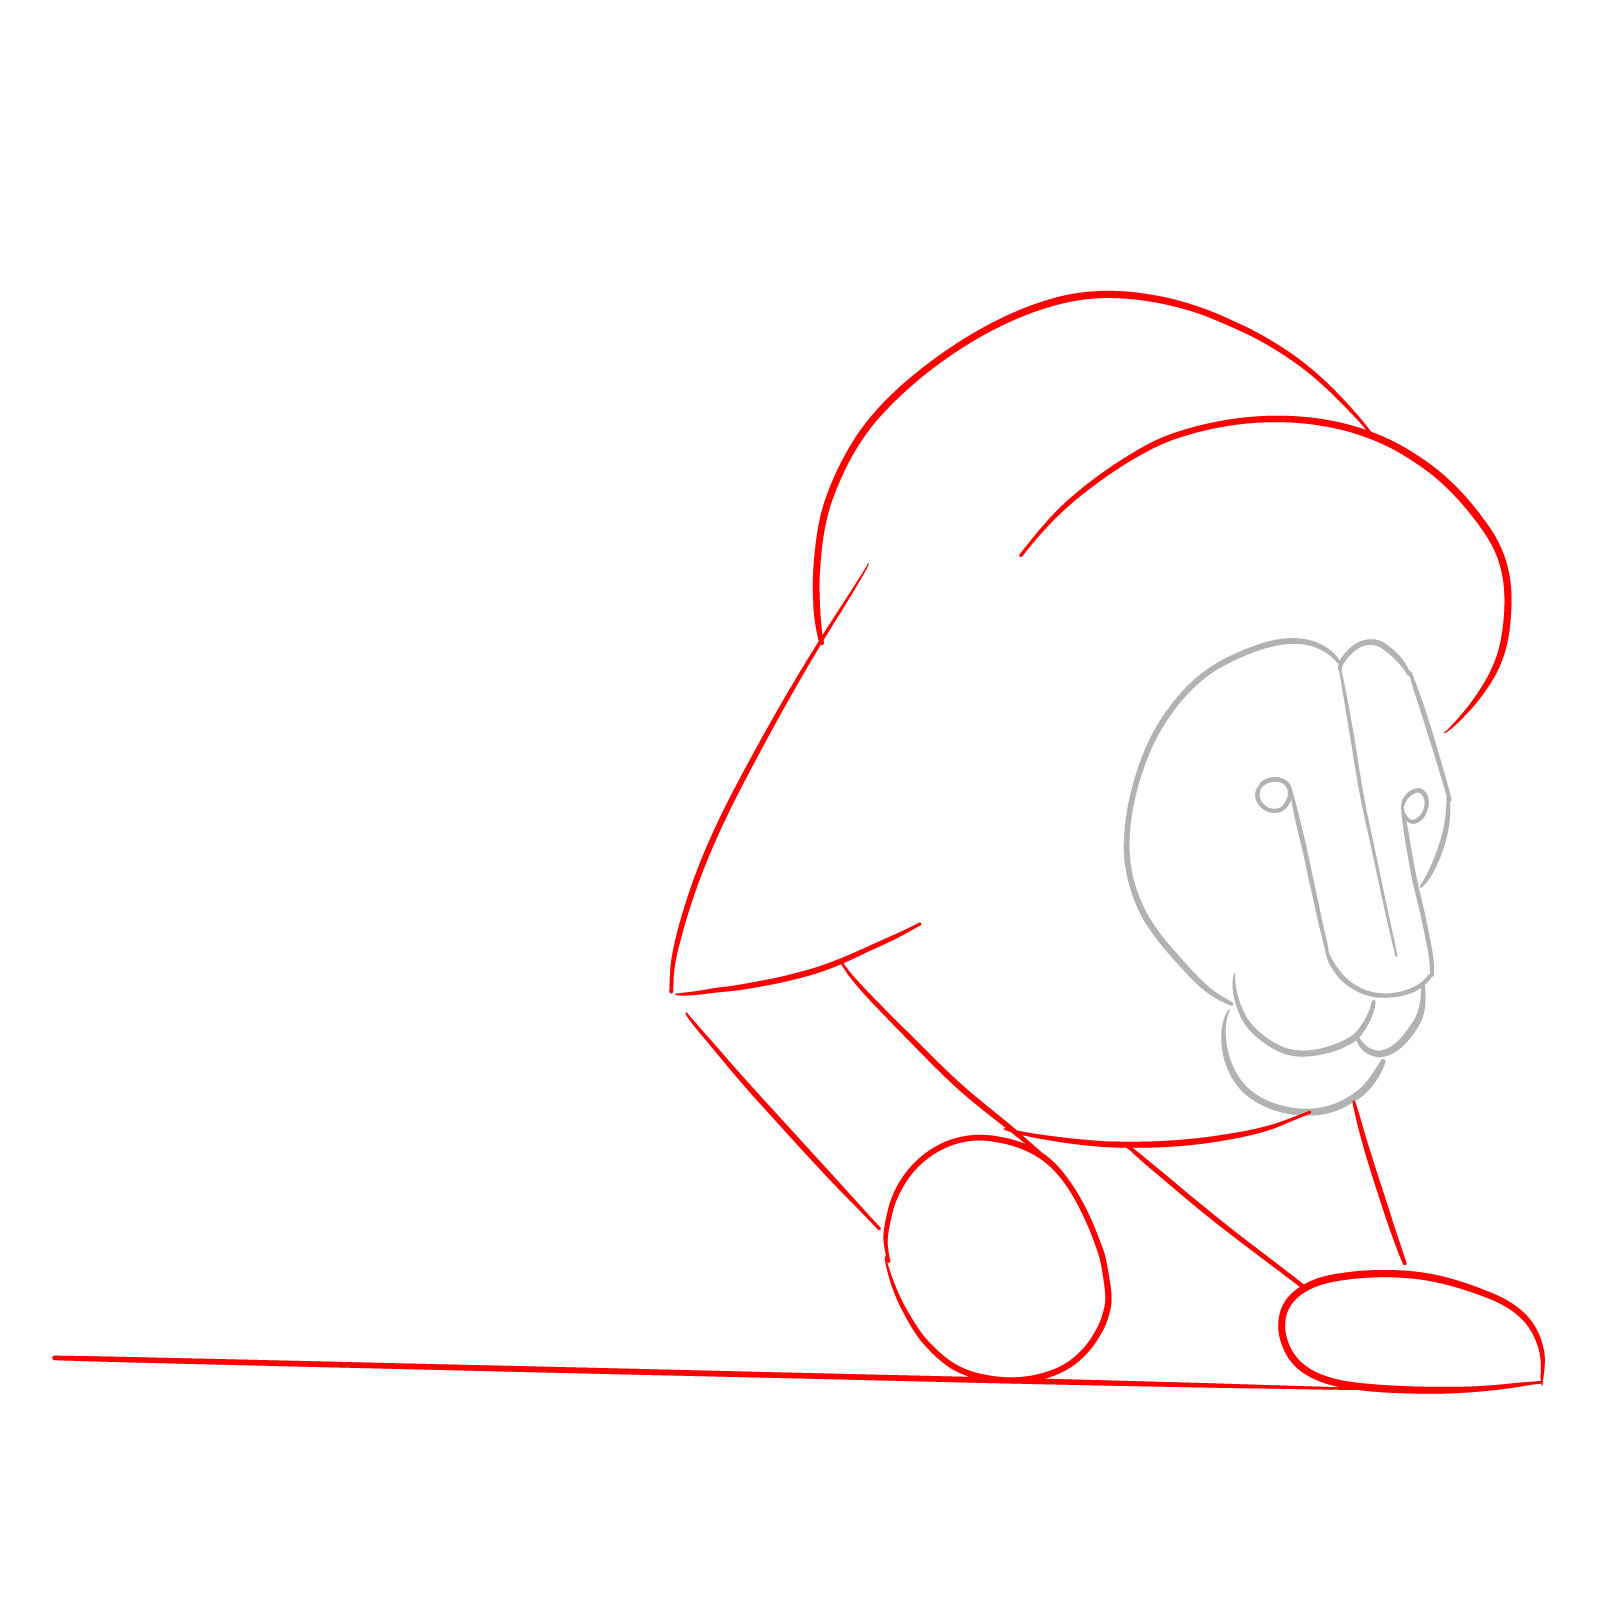
Step 01 – Start by drawing a “U” shape for the lion’s muzzle base, adding circles at both ends to indicate the placement of the eyes. Then, orm the face structure as it is shown in the image below
Step 1: Initial face shape
Step 02 – Draw a horizontal line at the bottom of your canvas to represent the ground. Above this line, place the basic shapes for the front legs. Use curved lines to sketch the beginning of the mane following the contours of the neck and back
Step 2: Ground line and leg shapes
Step 03 – Continue the rough sketch by forming the body’s shape in a dynamic hunting pose. Add the rear legs, capturing the action and energy of the stance
Step 3: Body and rear legs outline
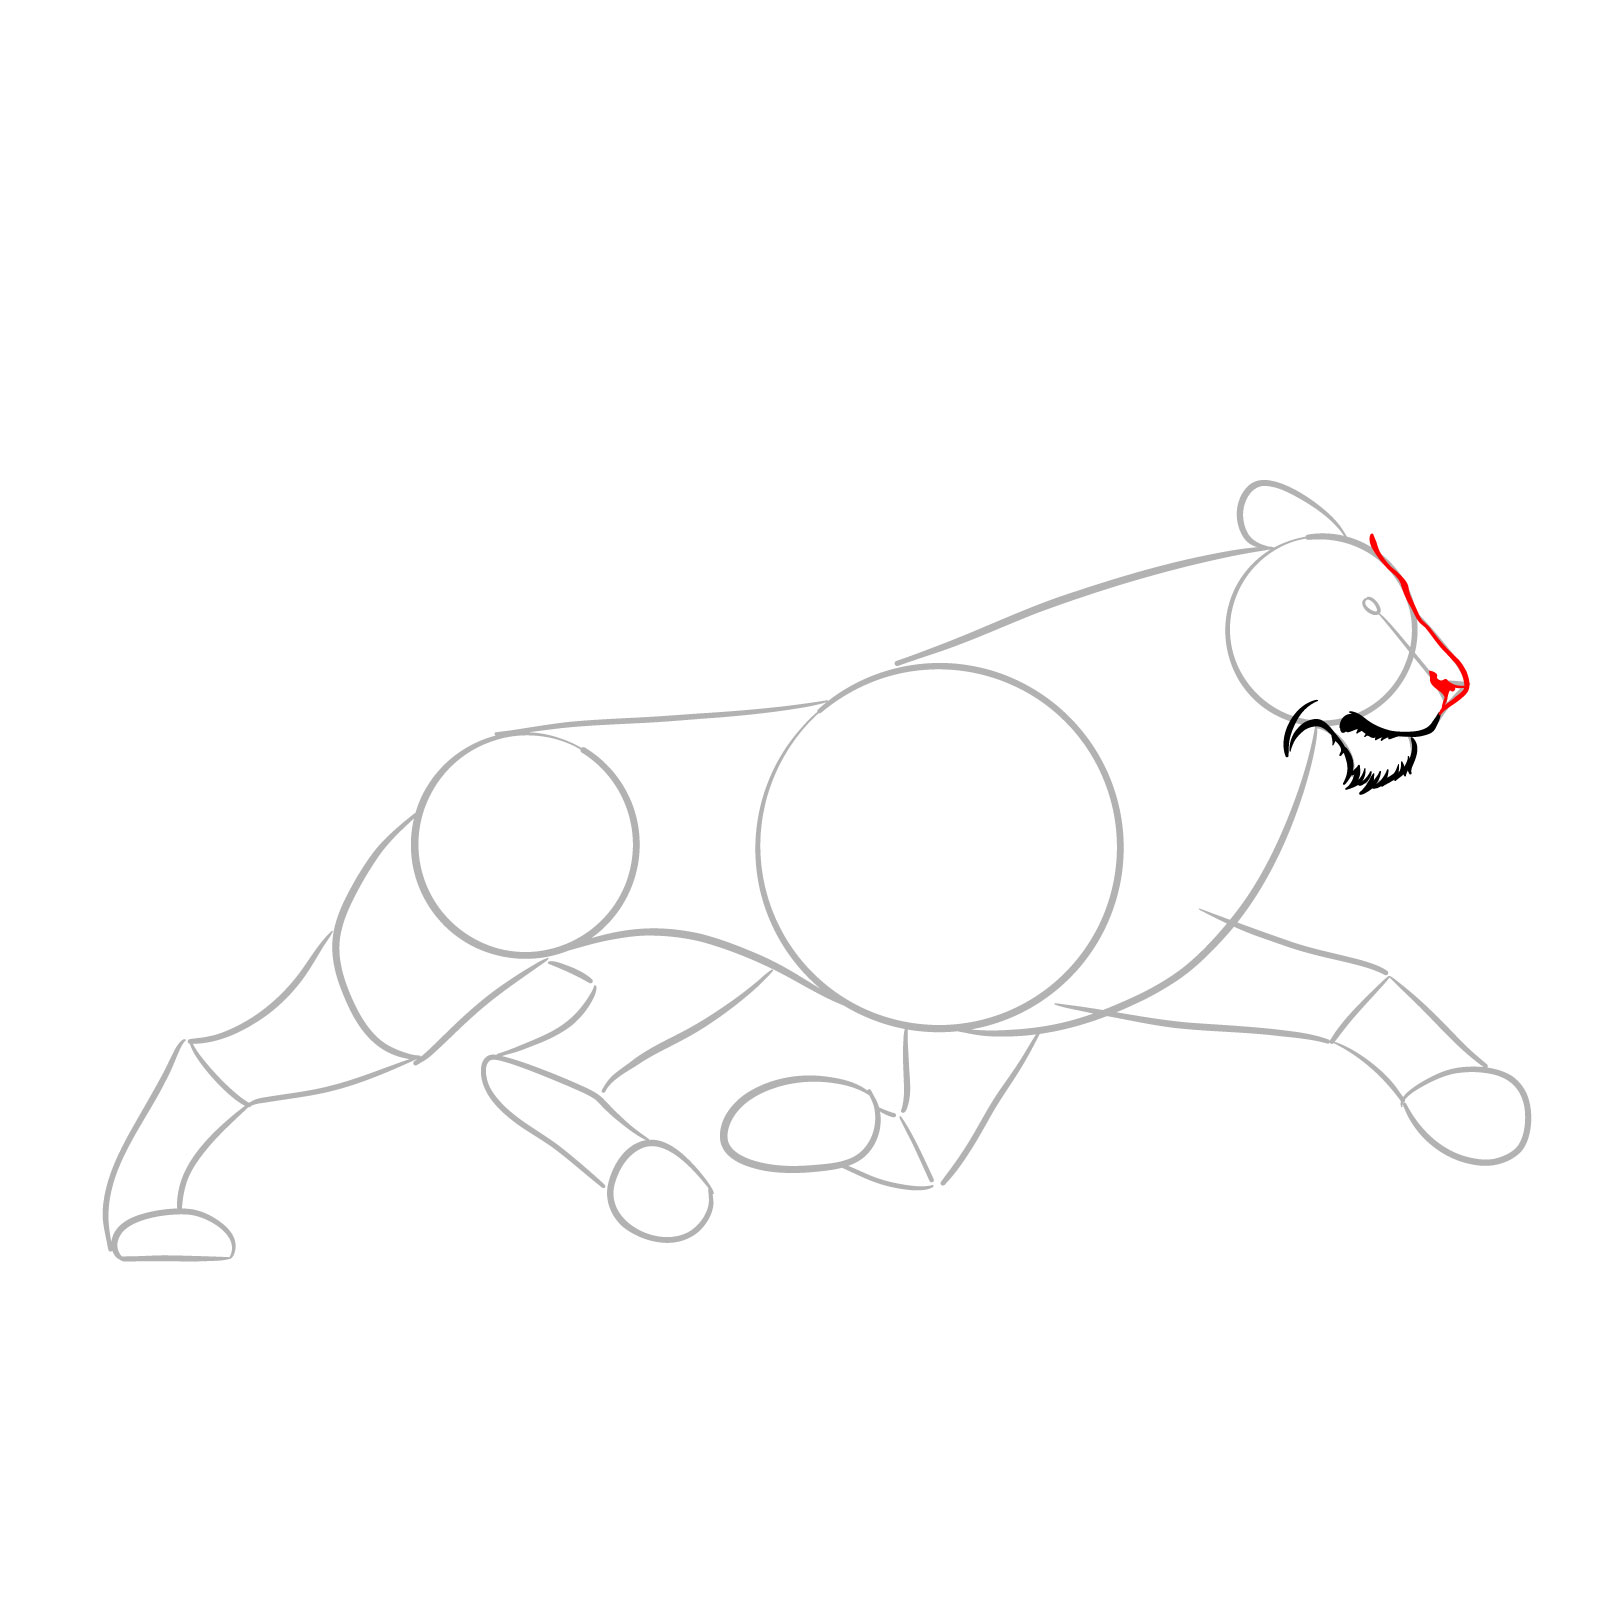
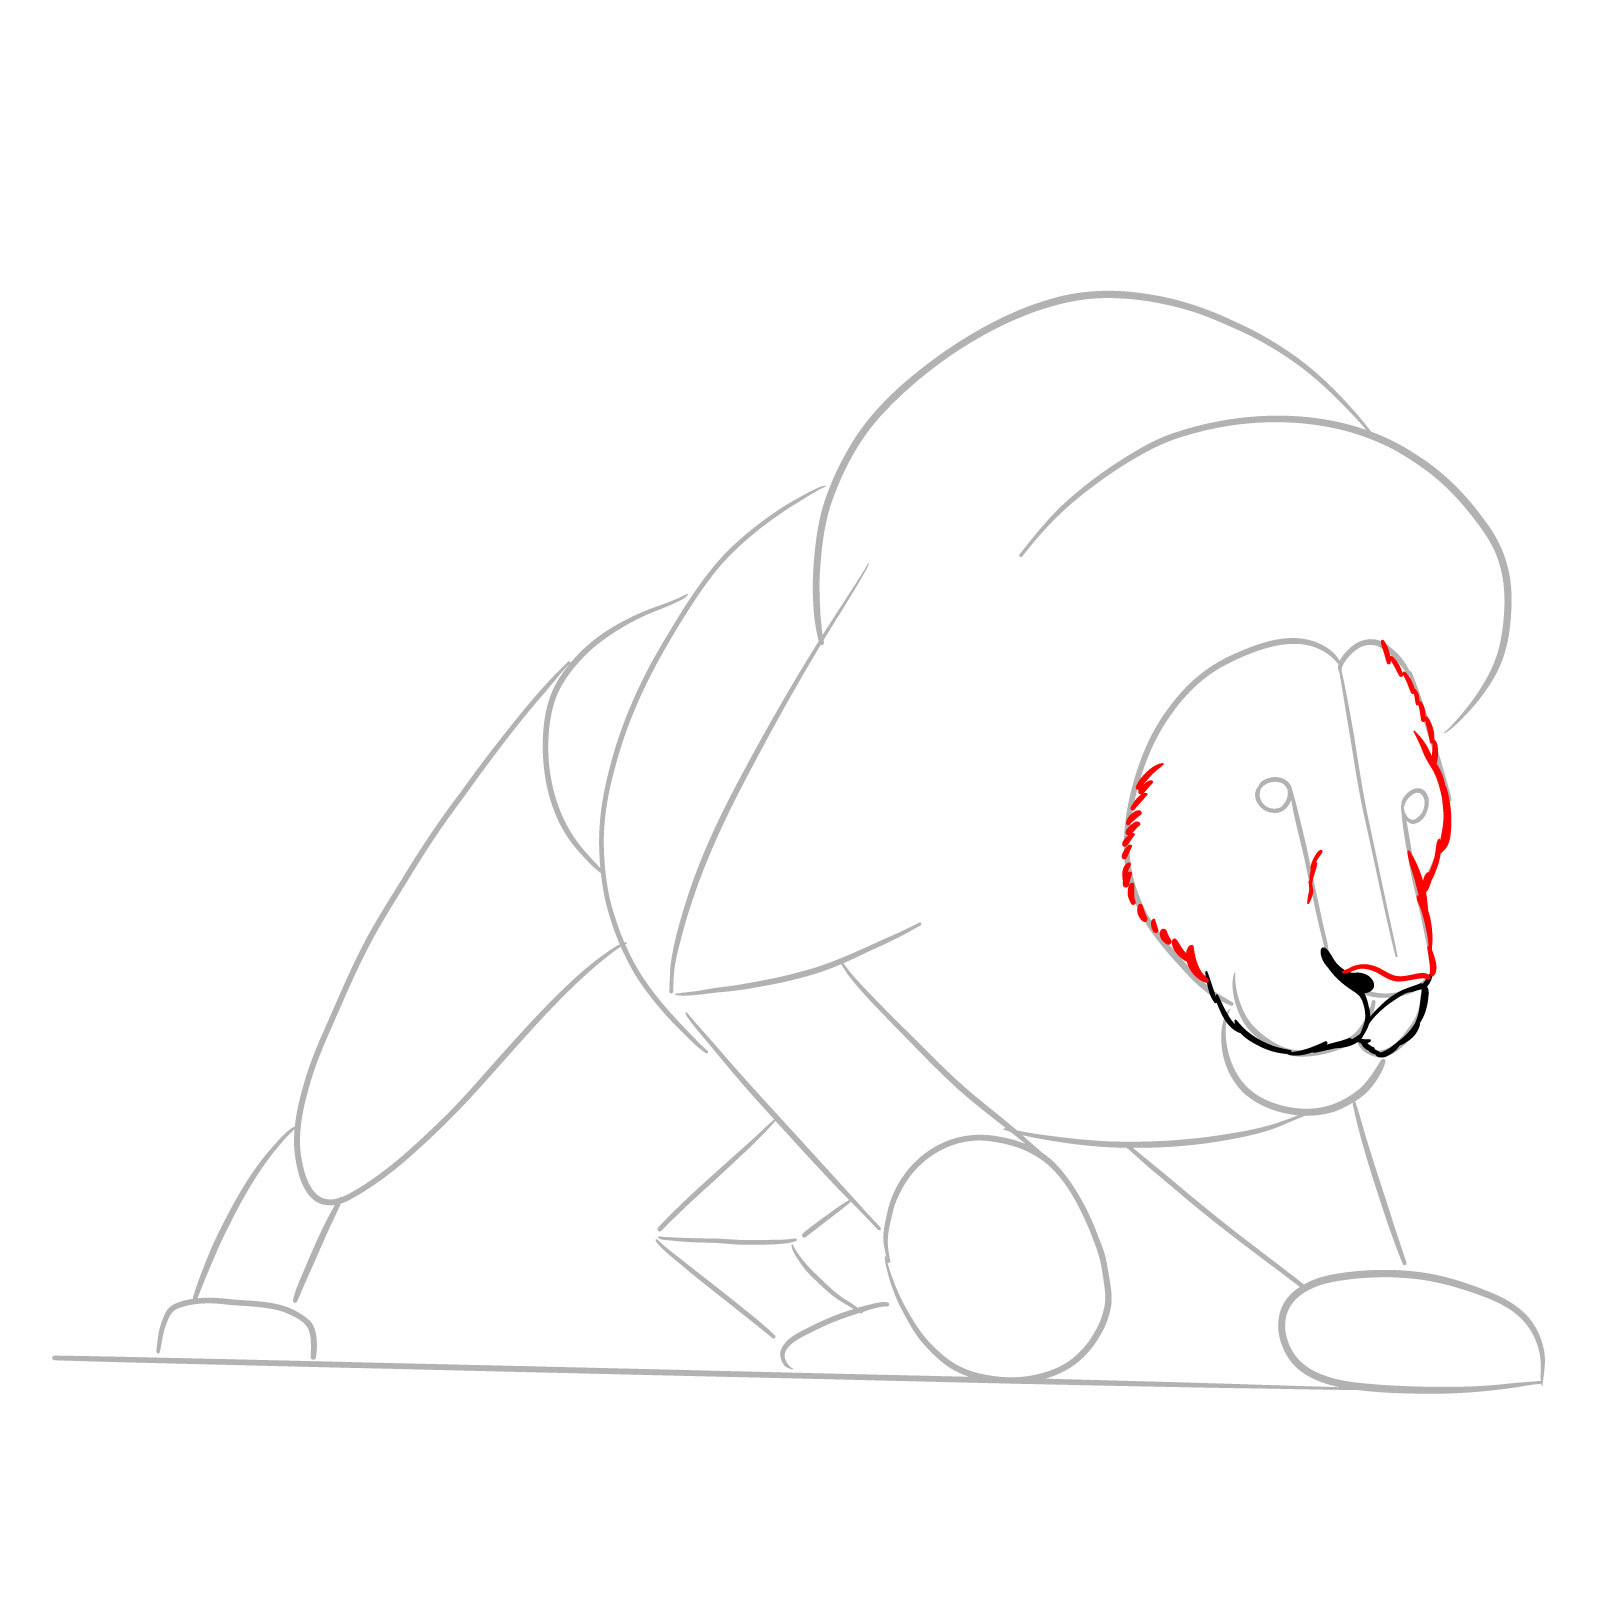
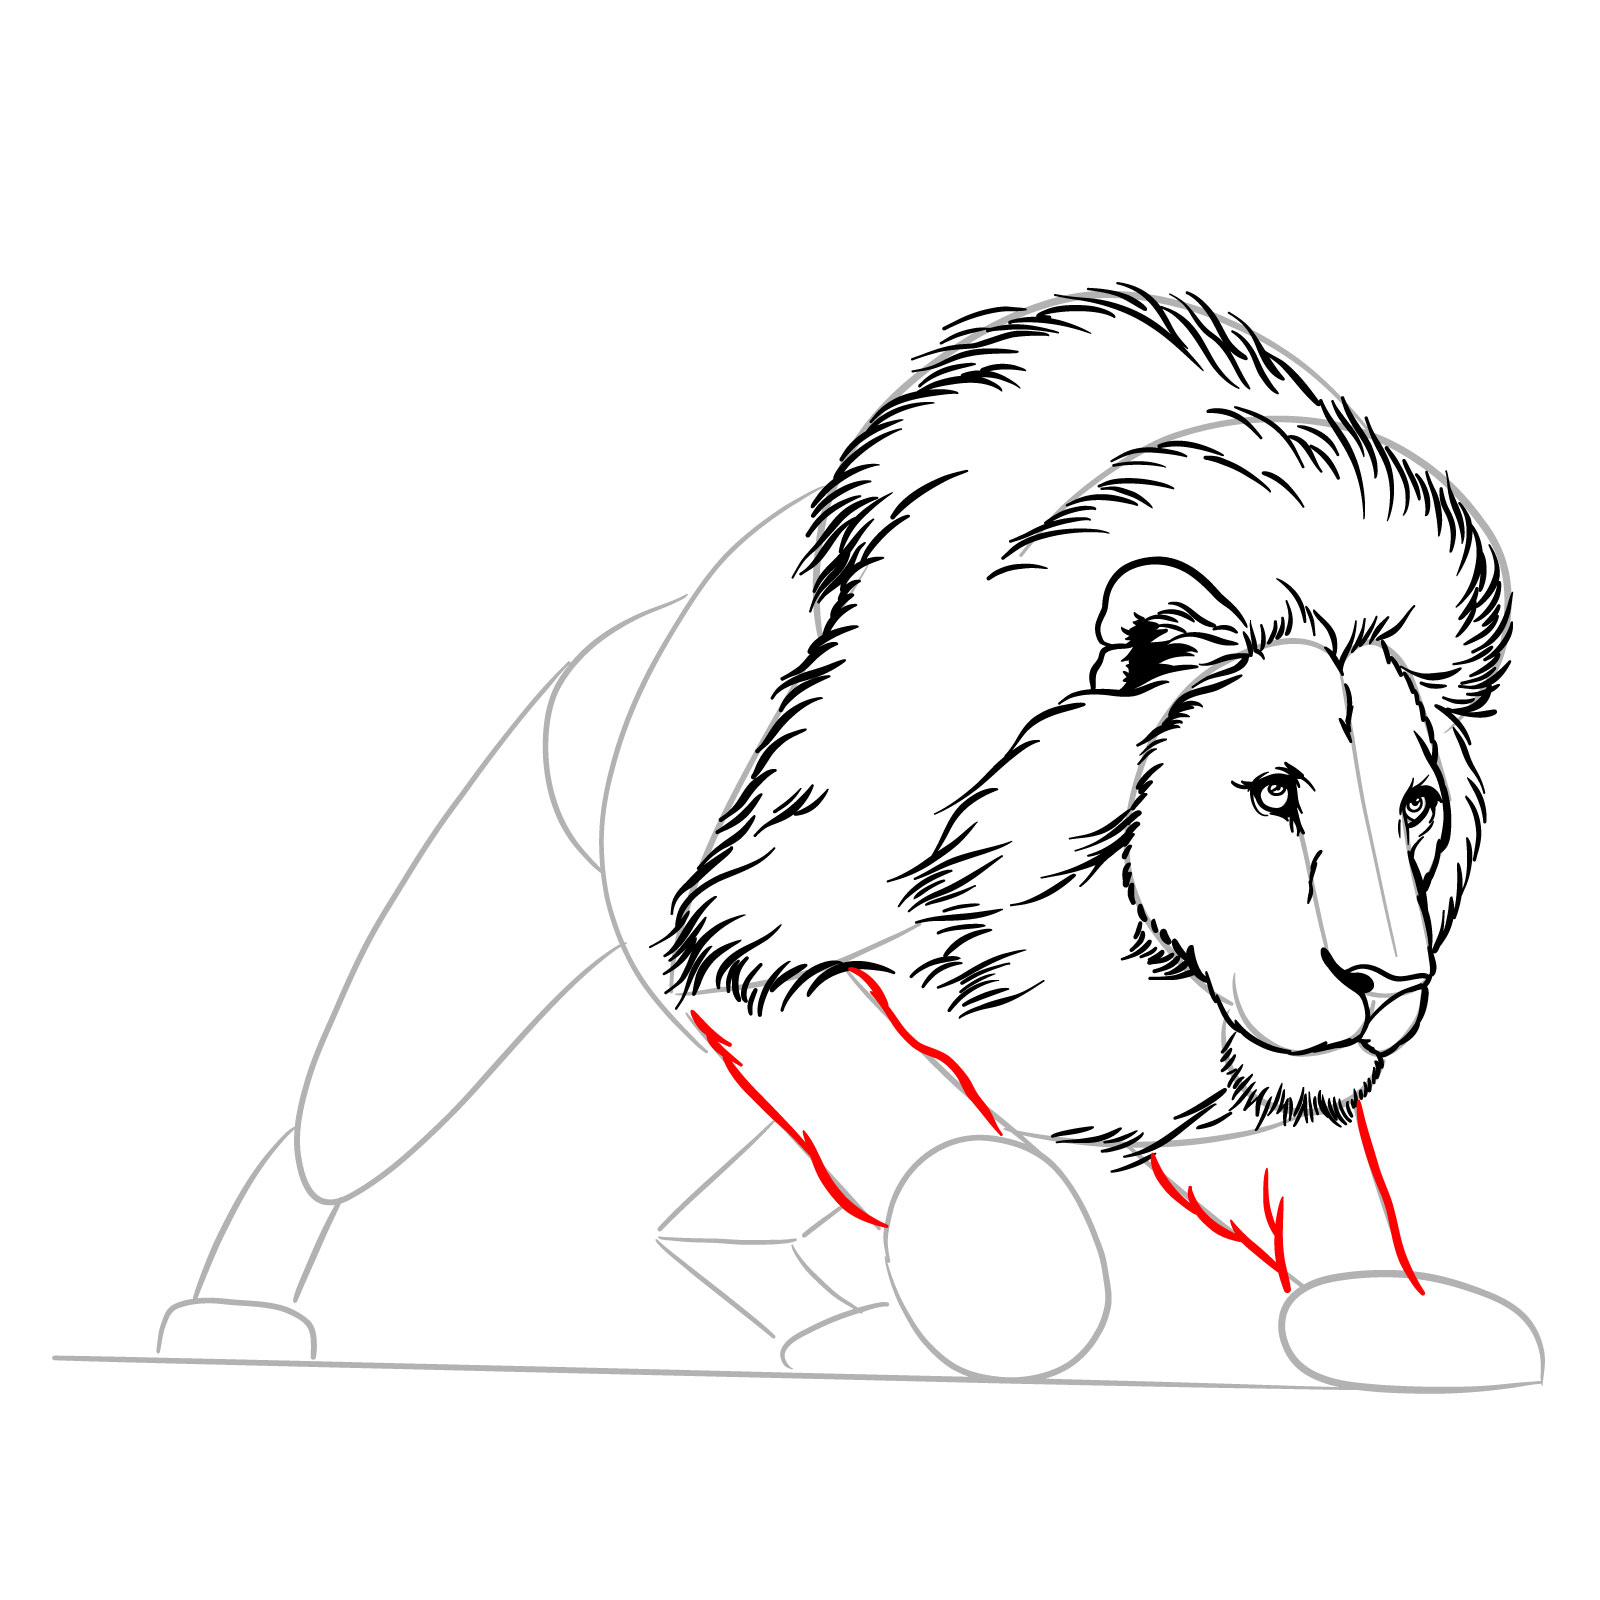
Step 04 – Sketch the nose with filled-in nostrils. Add the outline of the mouth and define the whisker pads, enhancing the lion’s facial expressions suited for hunting
Step 4: Nose and whisker pads
Step 05 – Finish the nose by outlining its upper part. Draw the nose bridge and add lines along the sides of the face to frame it, based on the initial sketch
Step 5: Detailing the nose and face frame
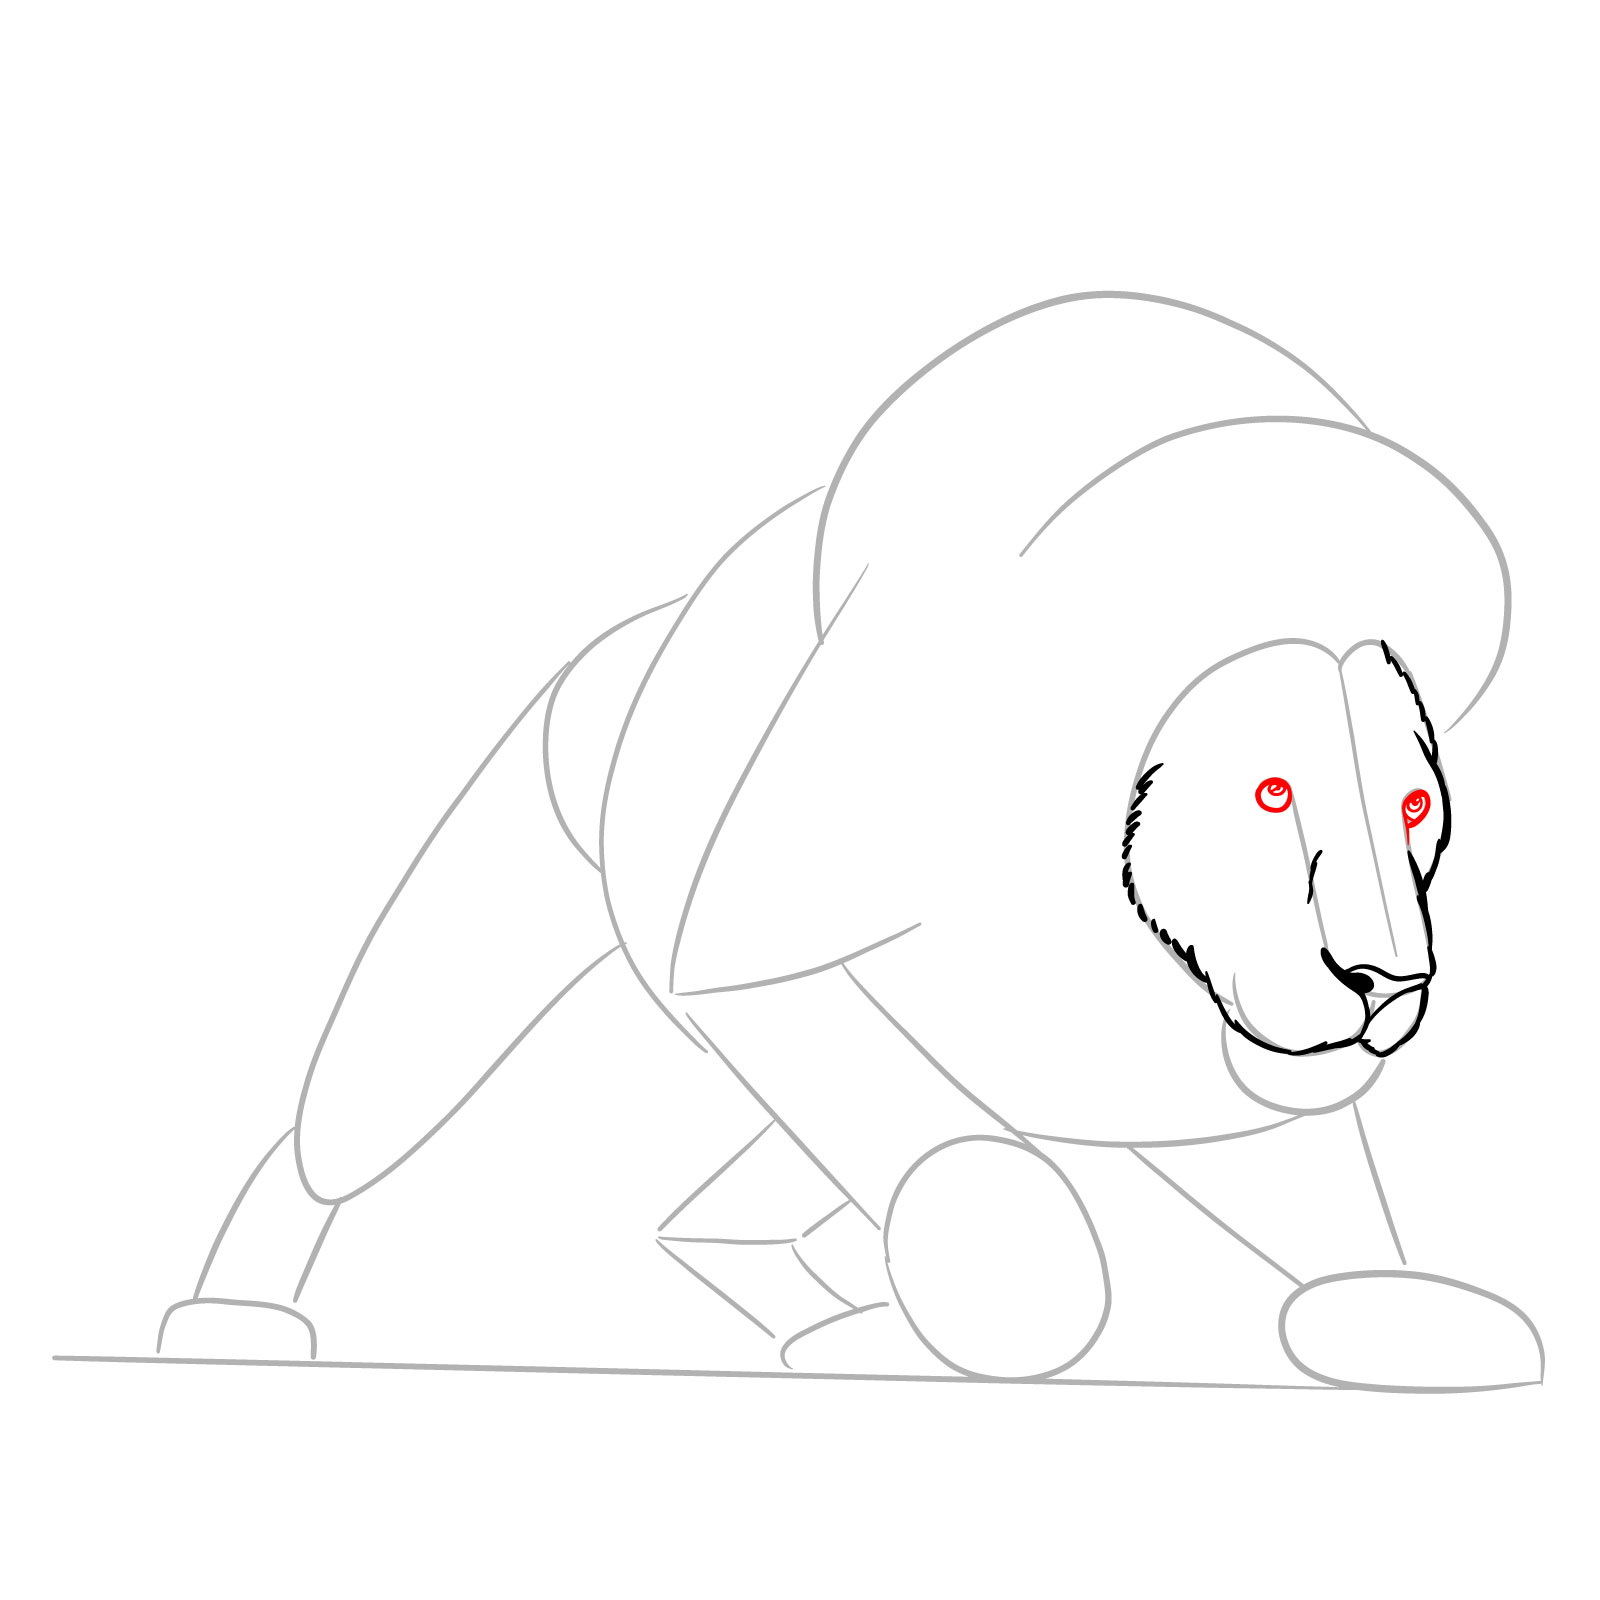
Step 06 – Outline the eyes with circles, then add pupils inside these, including small highlight circles to bring life and focus to the eyes
Step 6: Eyes outline and highlights
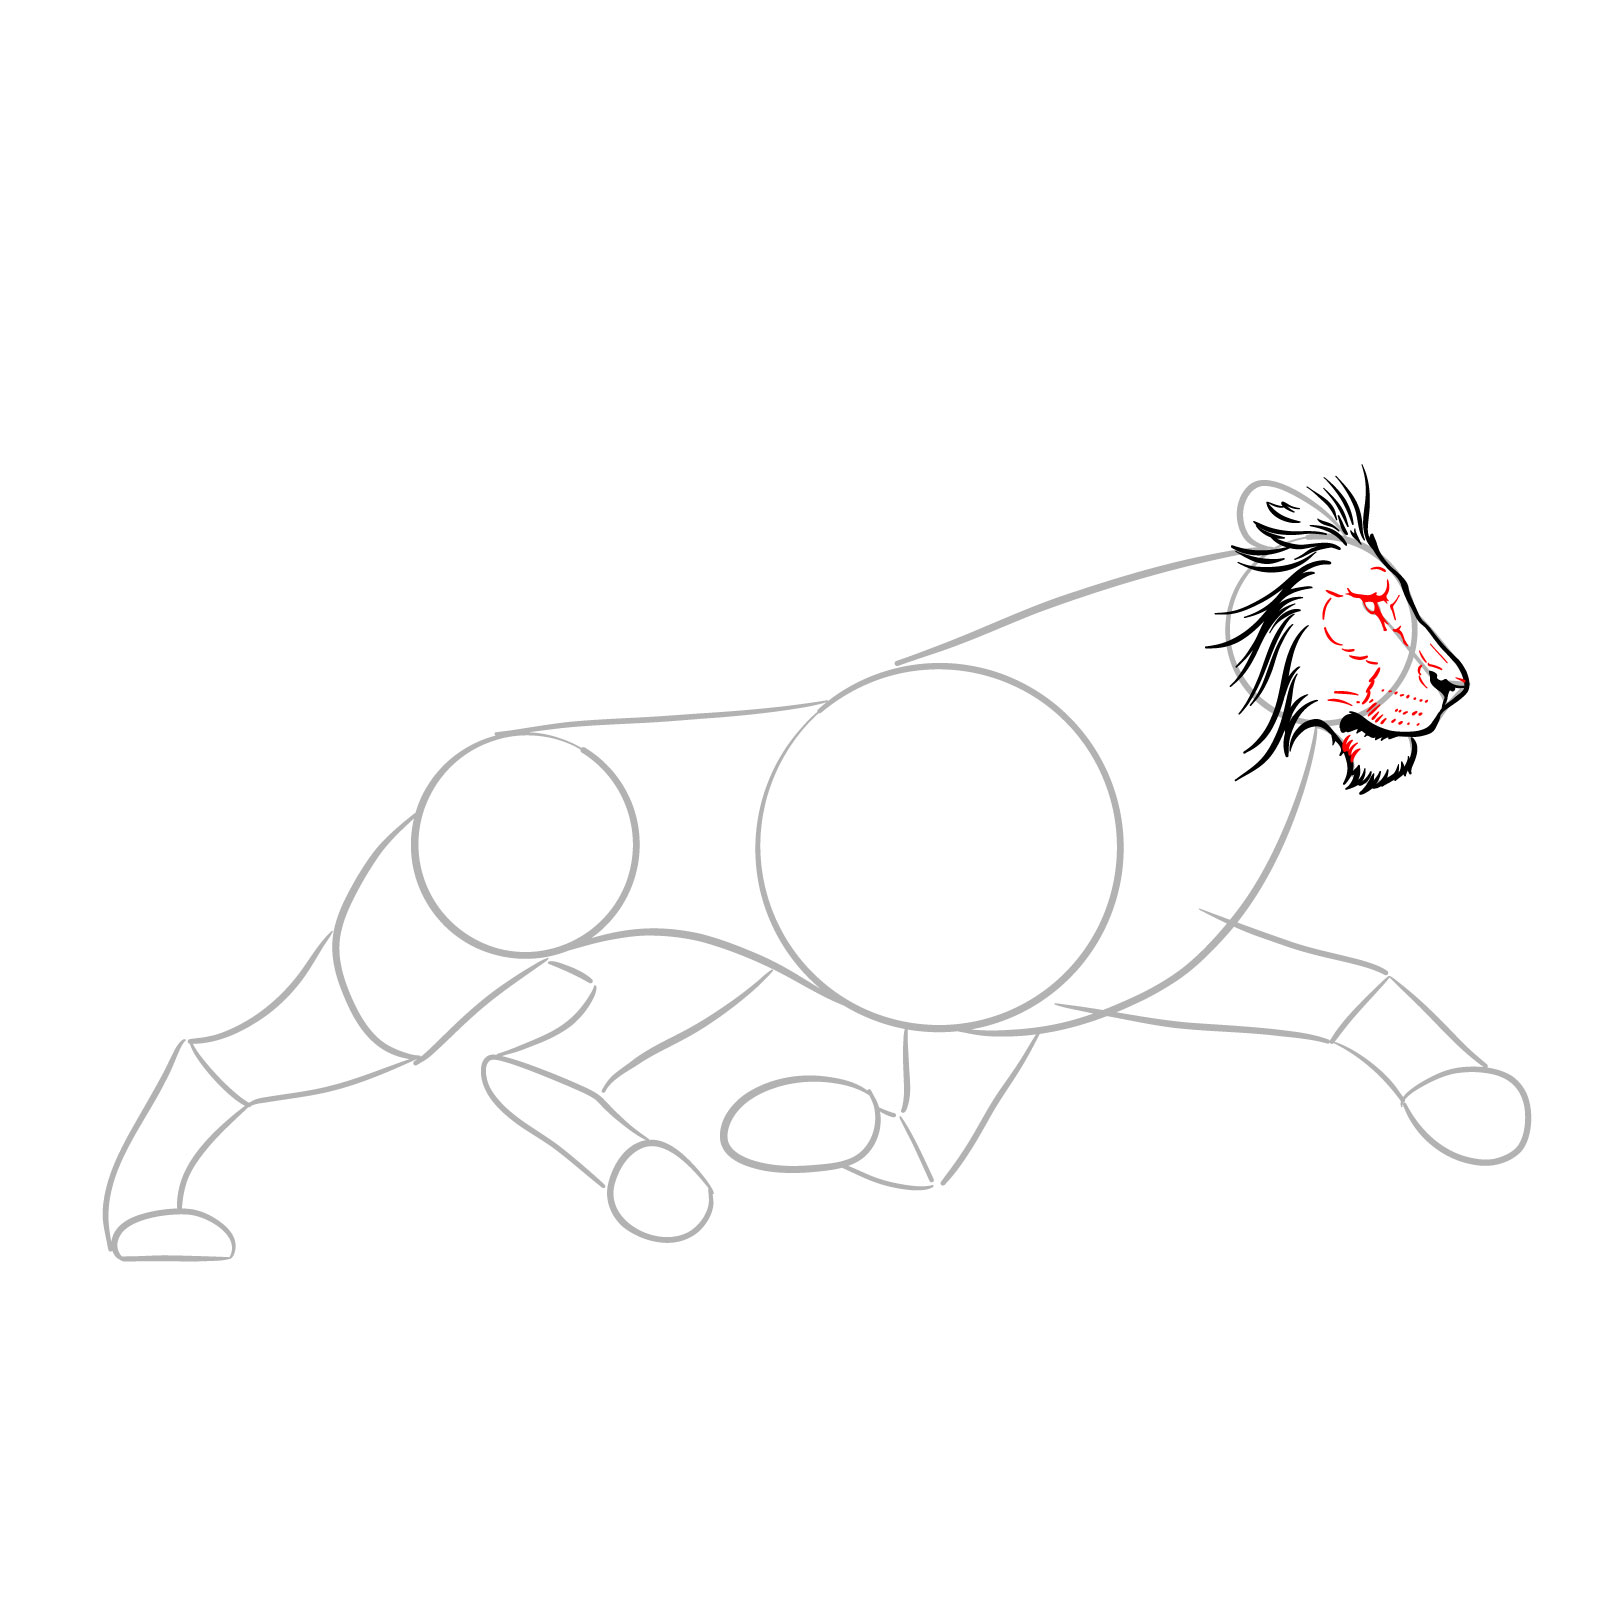
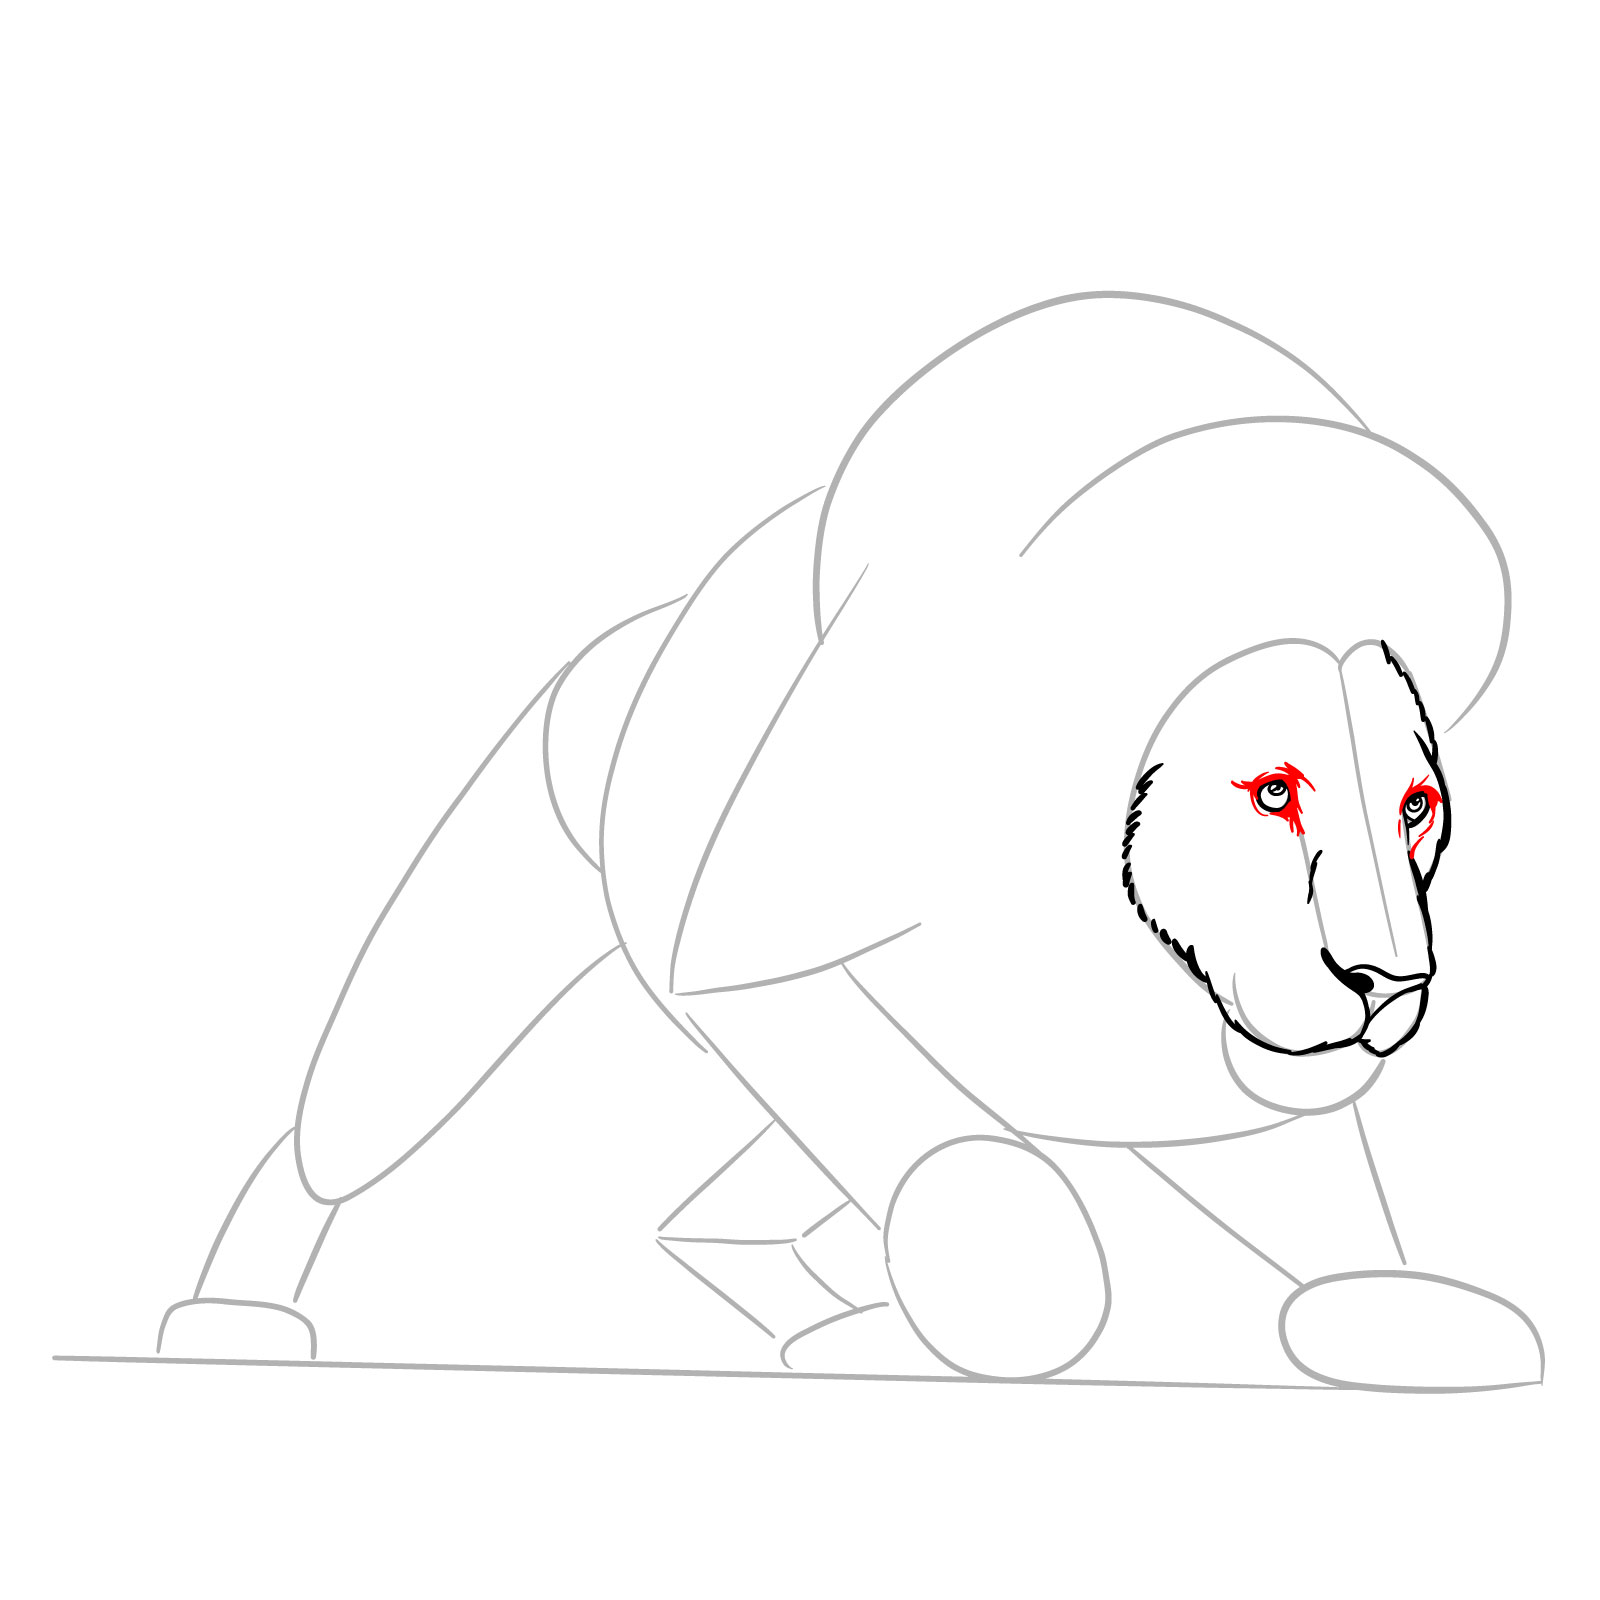
Step 07 – Detail the area around the eyes to add depth and intensity, which is crucial for expressing the lion’s aggressive hunting expression
Step 7: Eye area details
Step 08 – Sketch the chin with short jagged lines to simulate fur texture. Continue this technique to frame the face, giving a rough, natural fur appearance
Step 8: Chin and face texturing
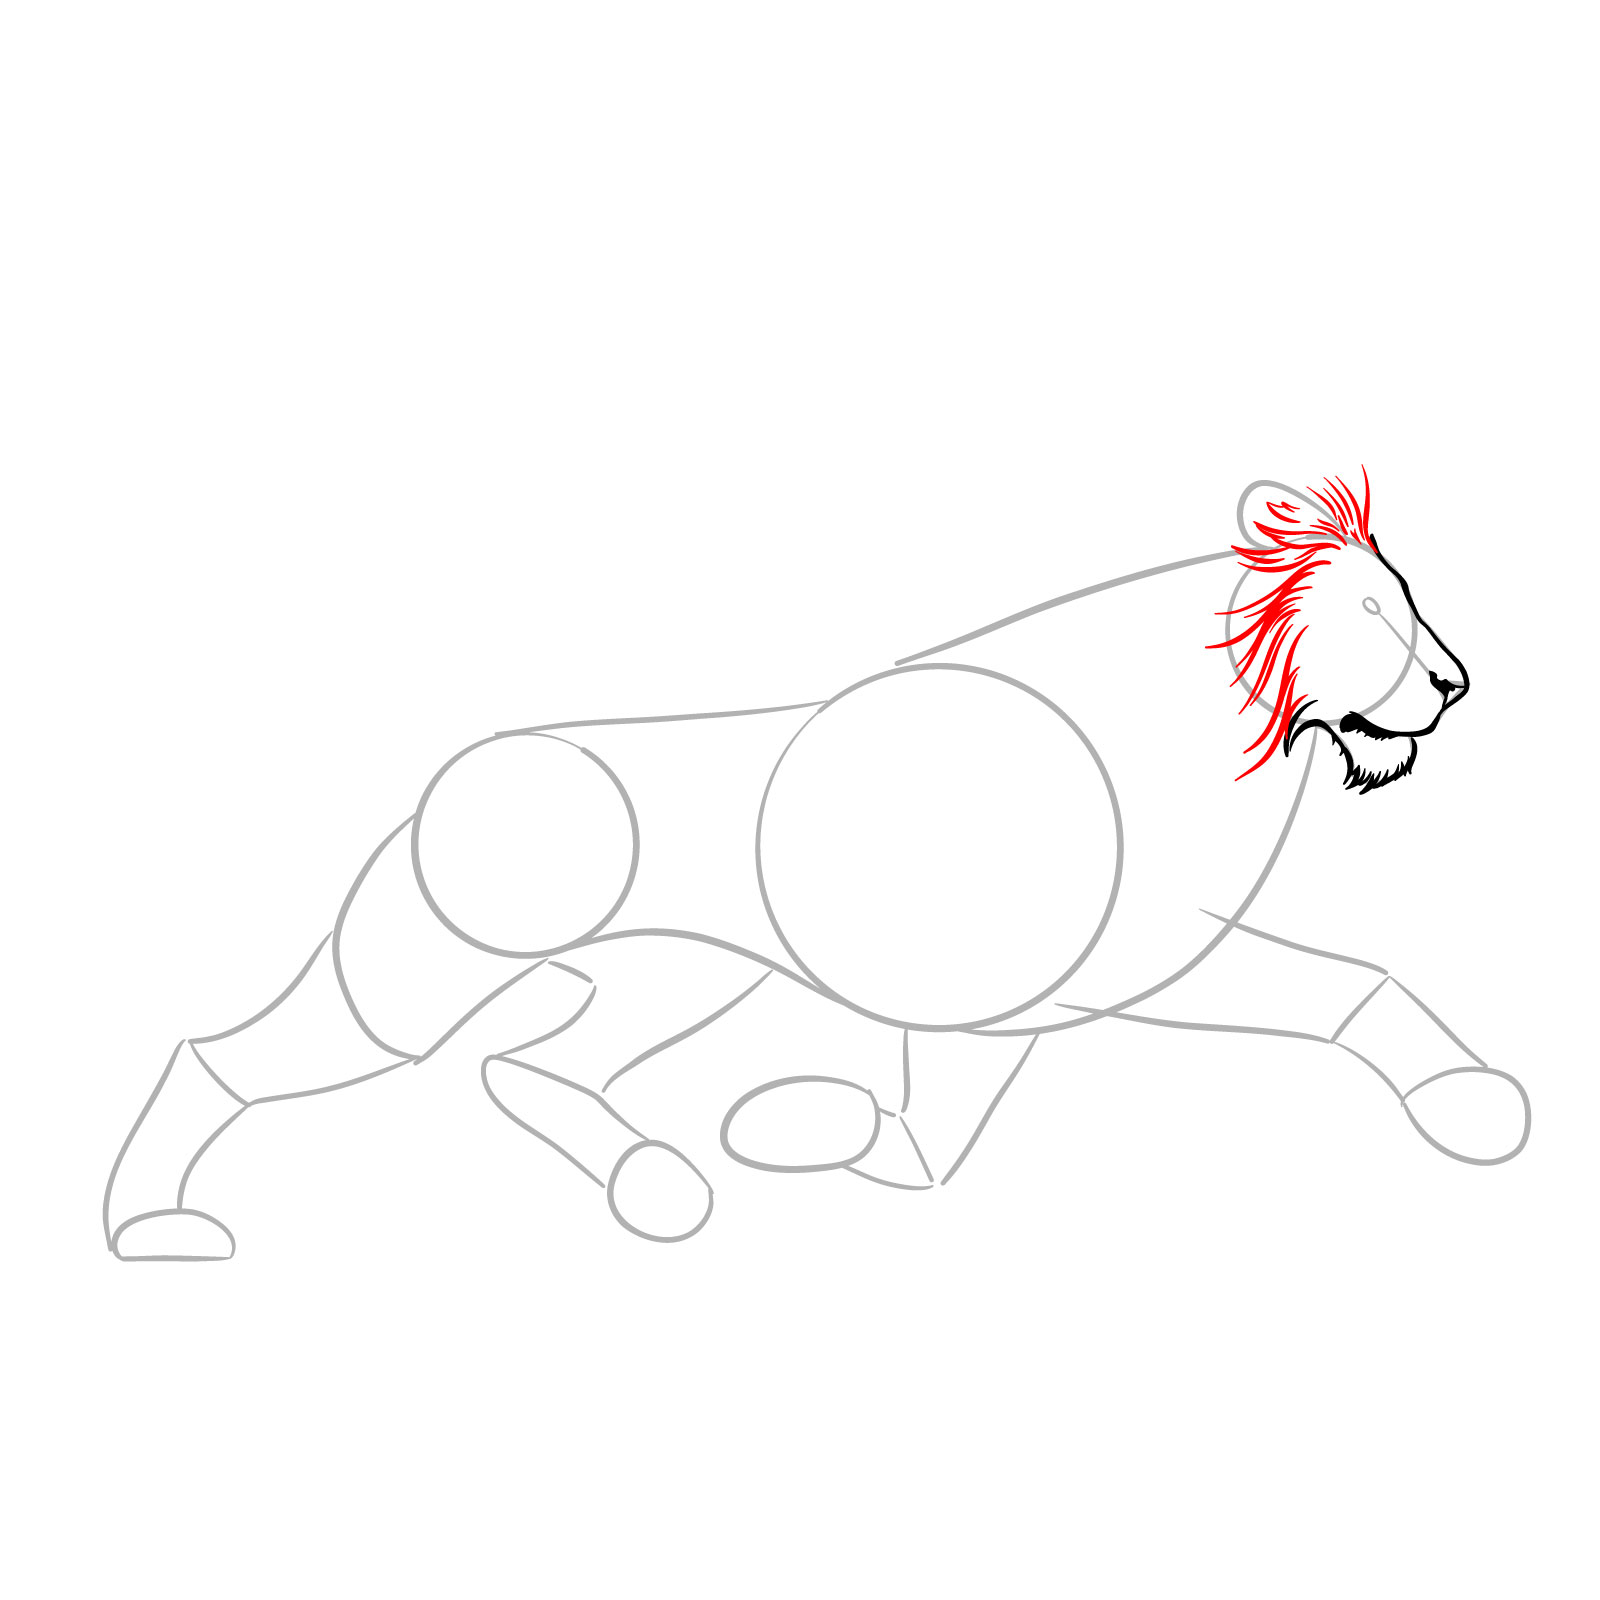
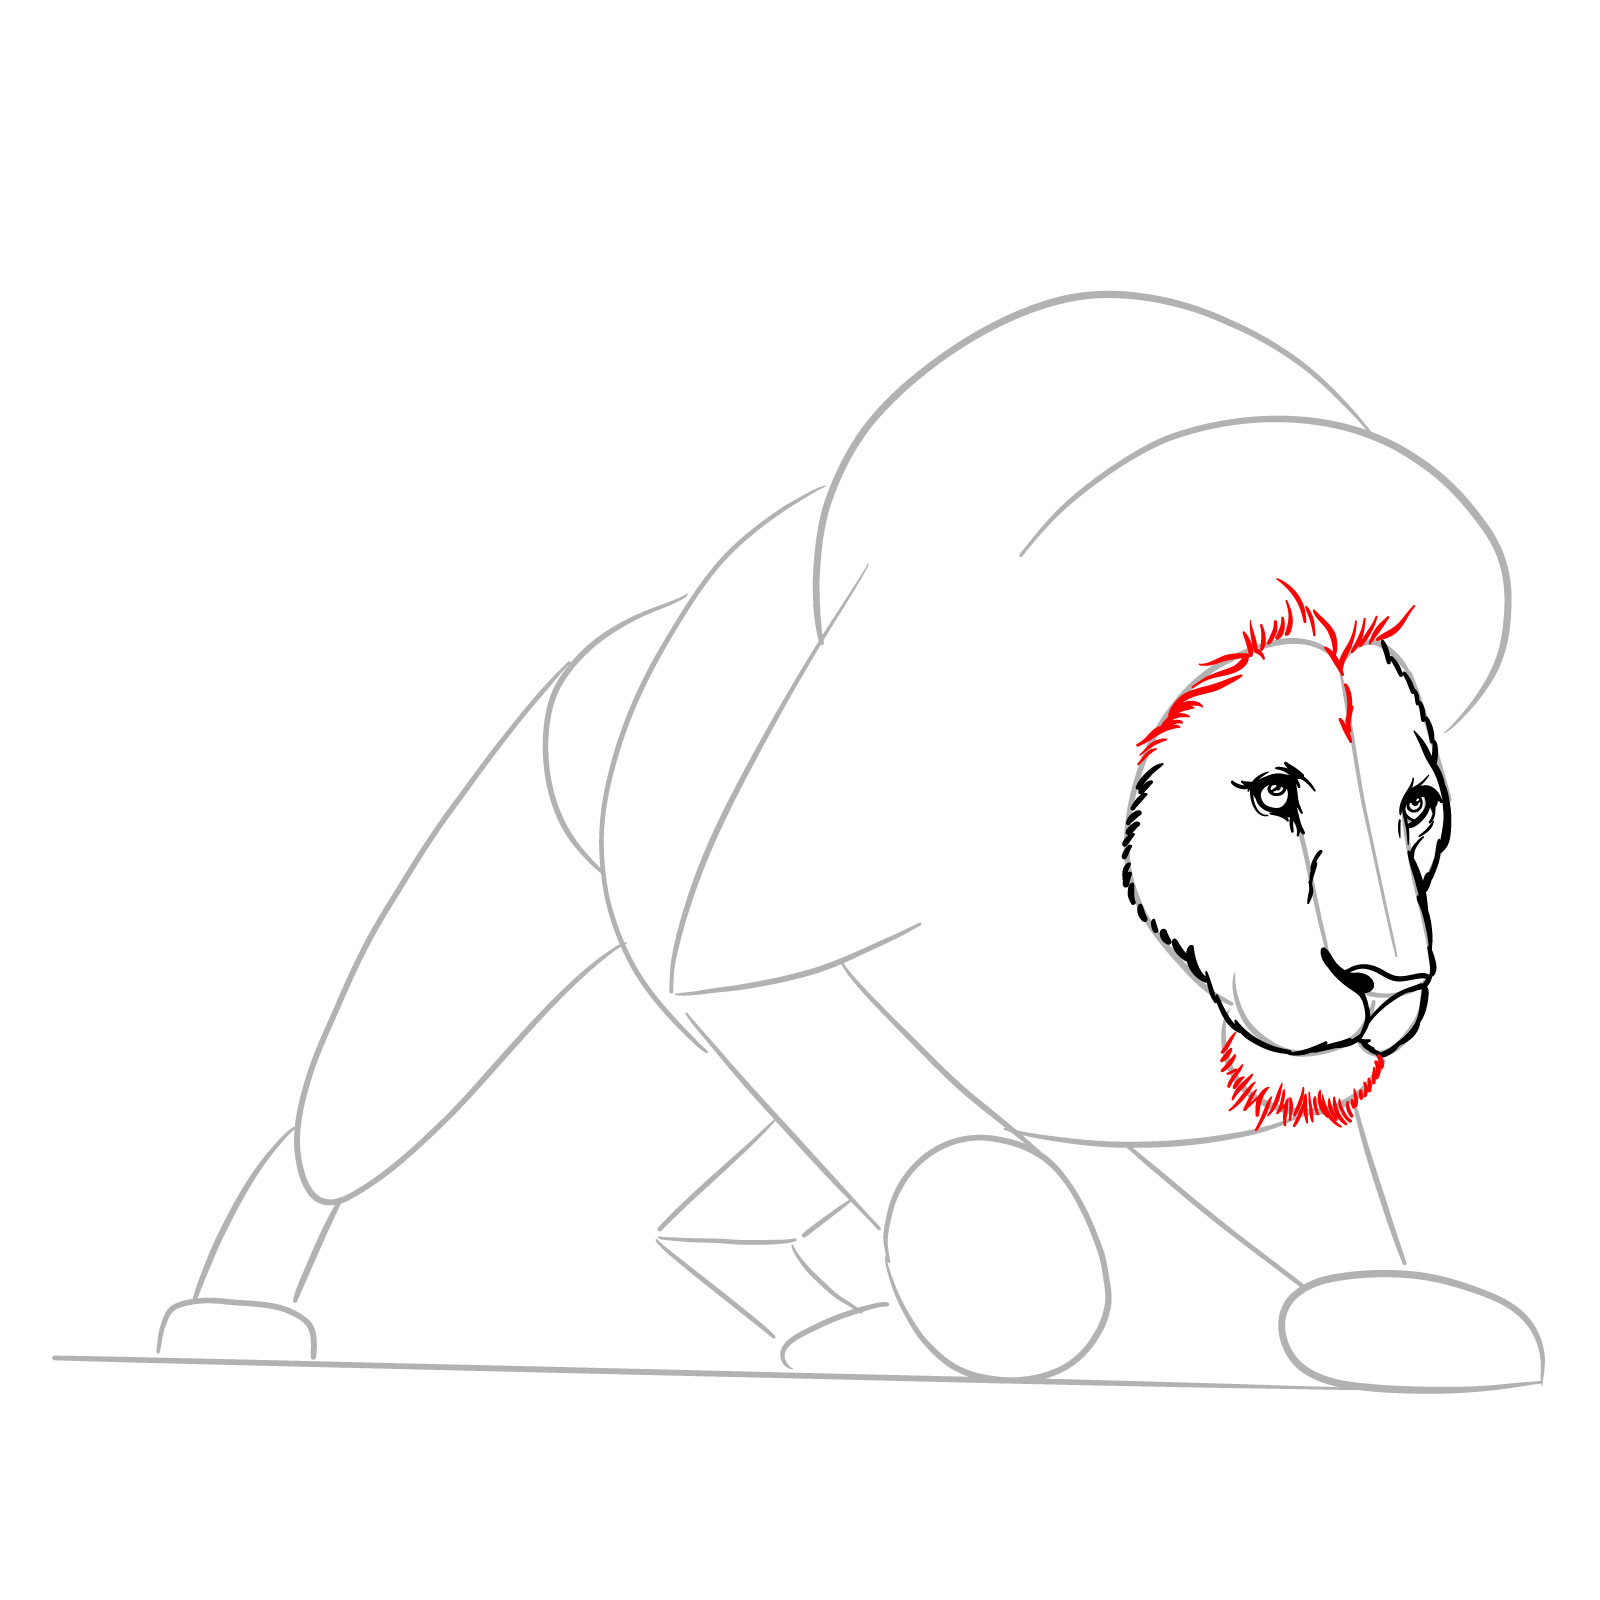
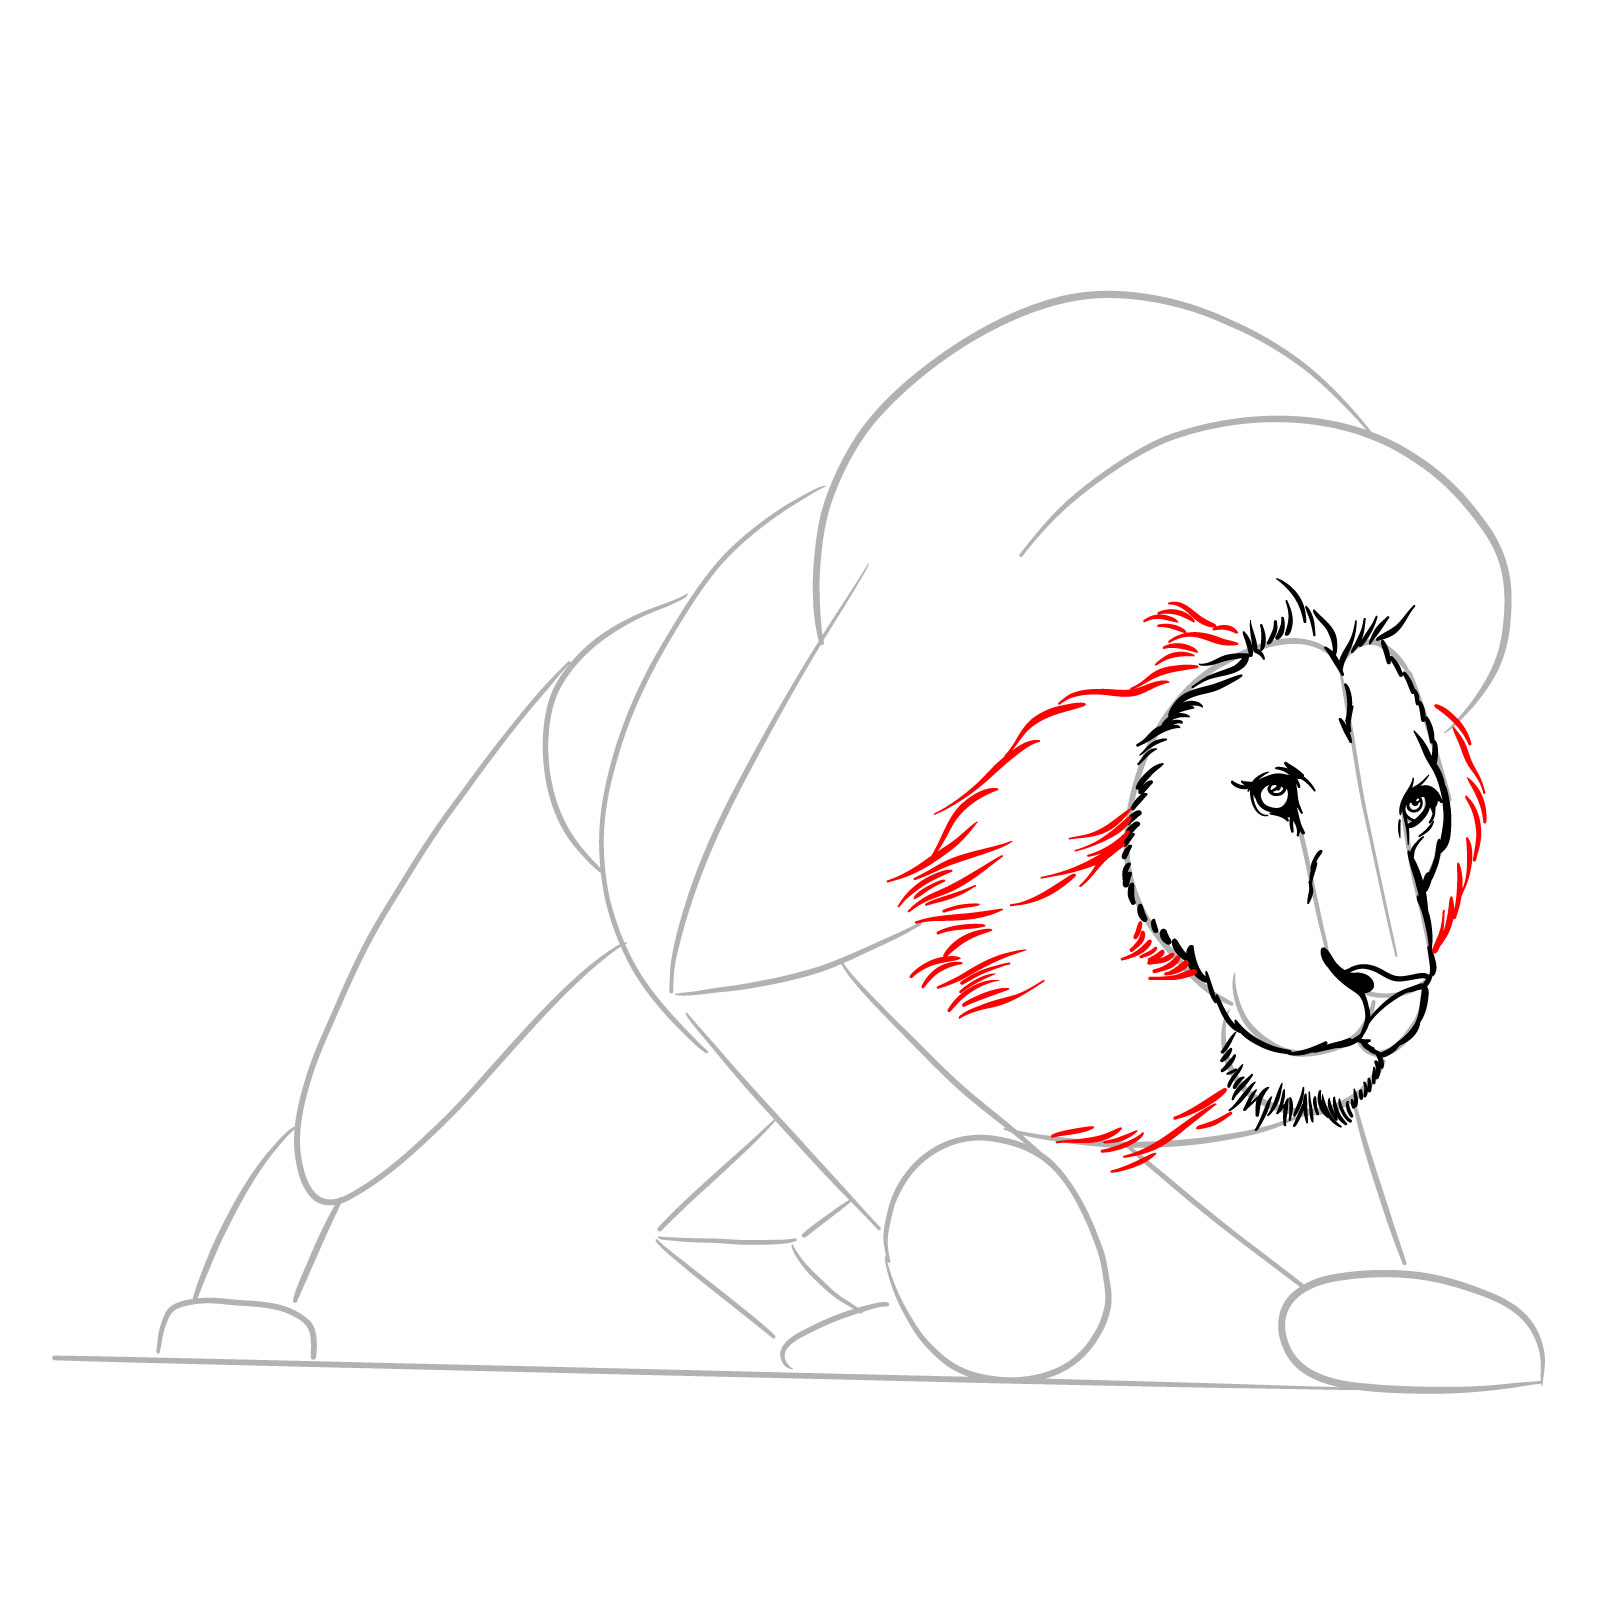
Step 09 – Begin sketching the first layer of the mane, starting from the sides and under the head. Draw the fur to look wild and unruly, suggesting movement
Step 9: Mane initial layer
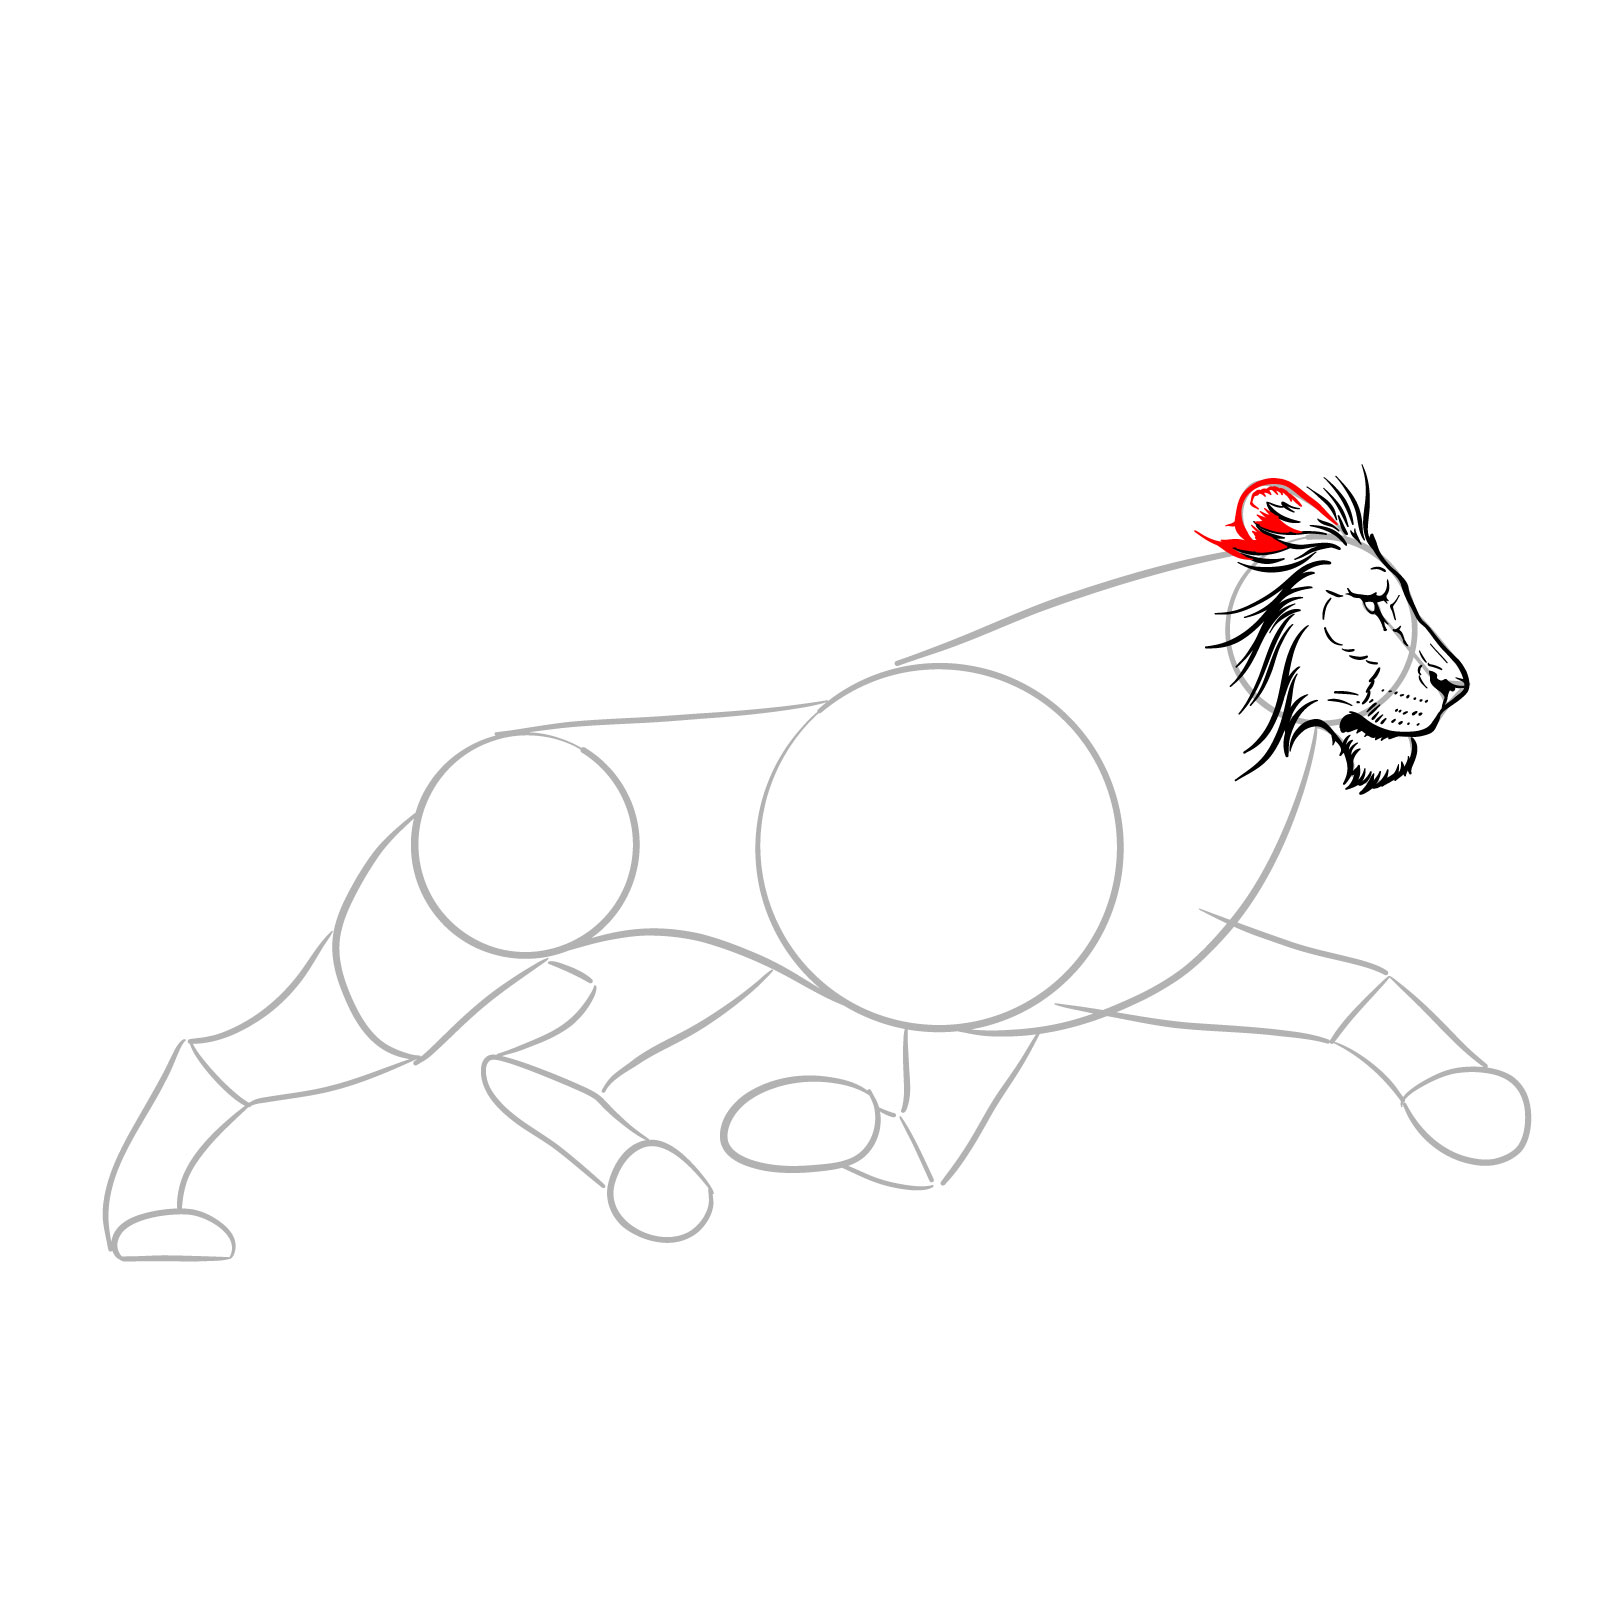
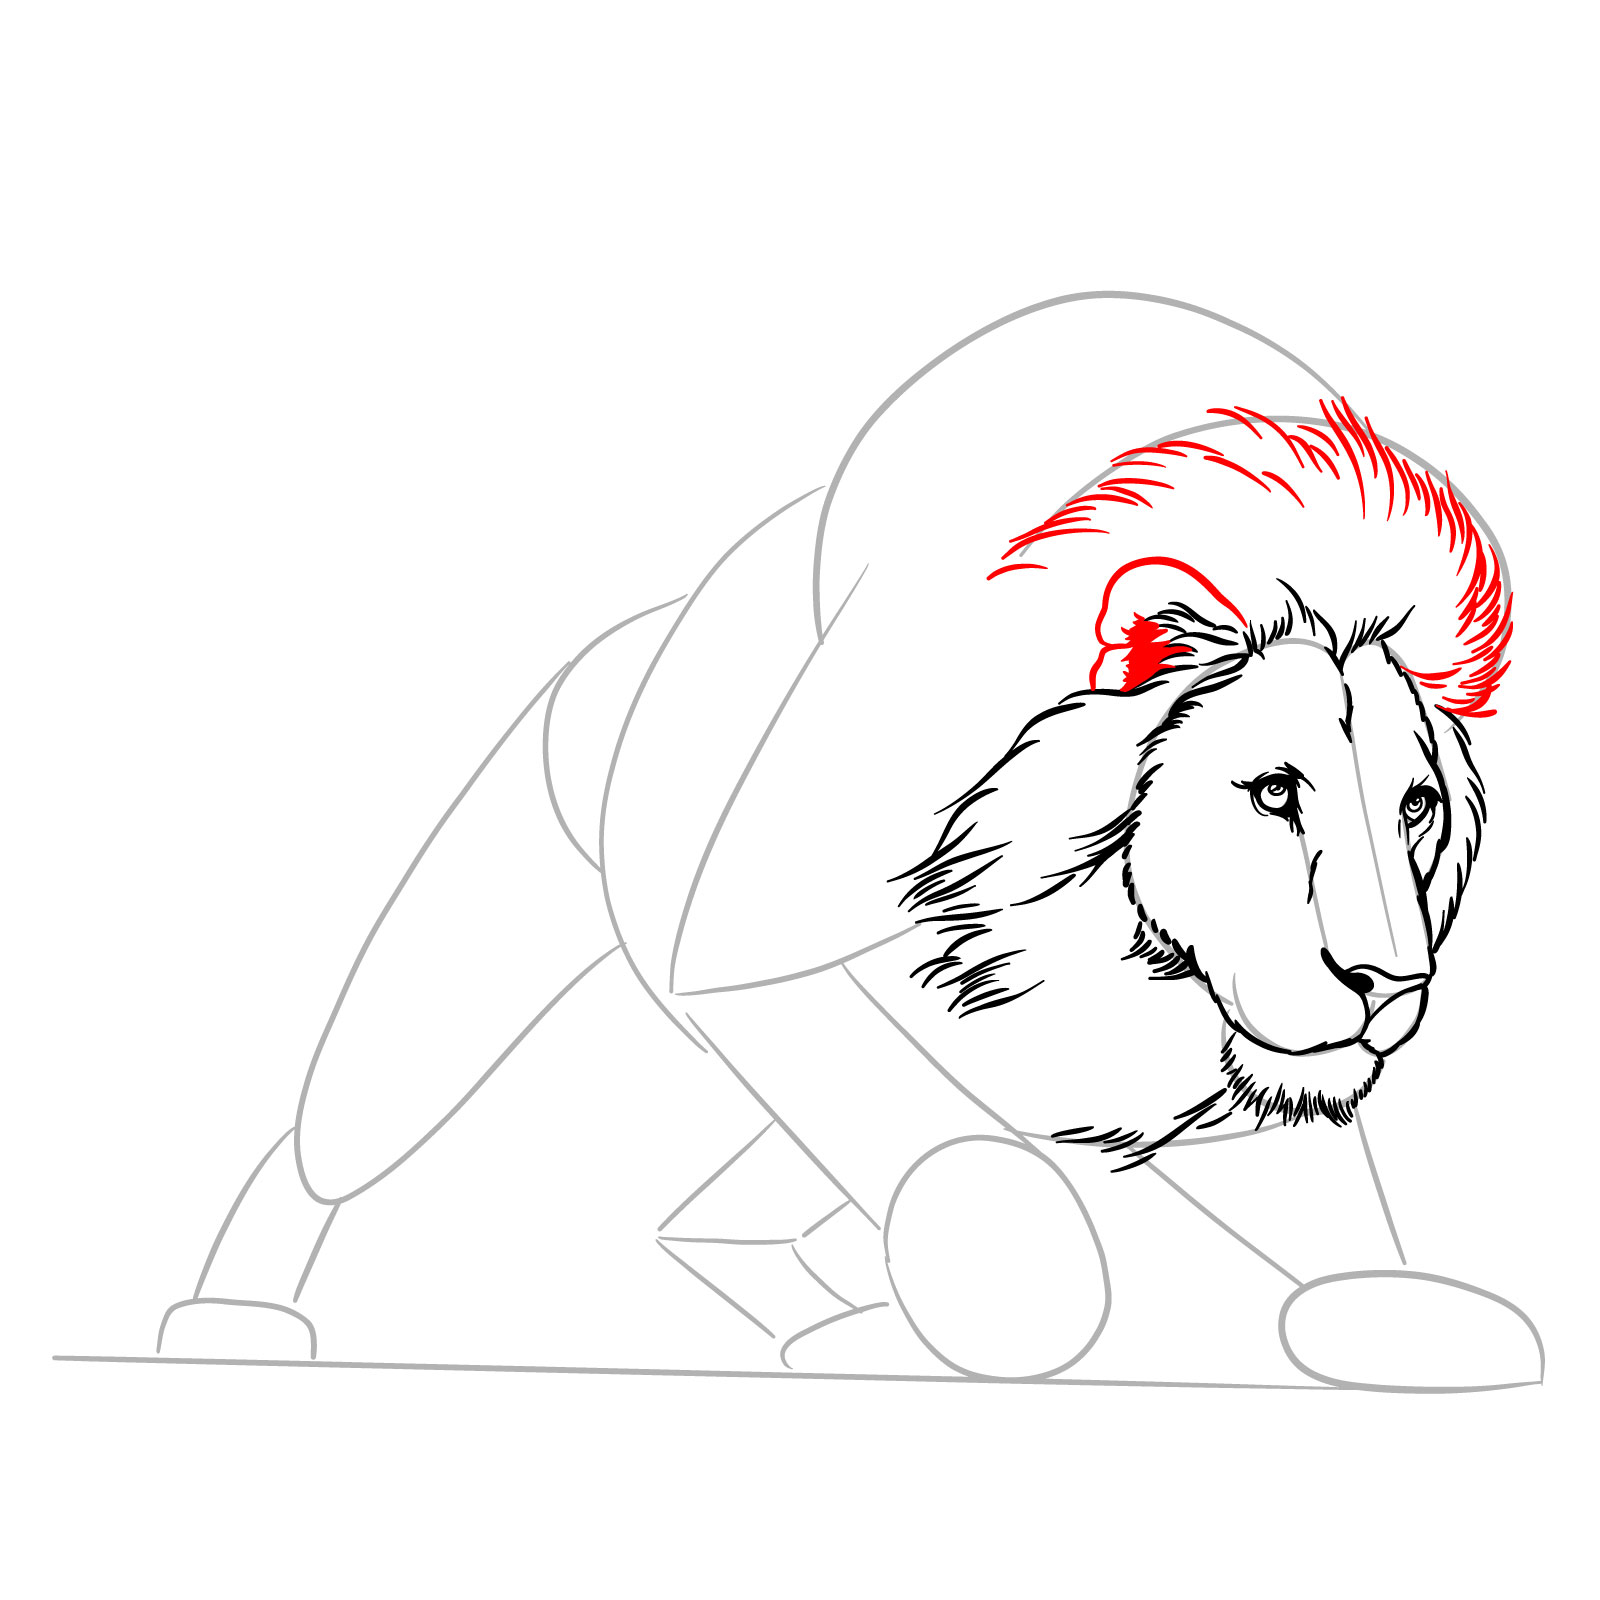
Step 10 – Sketch the visible ear and add shading inside. Start the mane above the head with short, curved lines to show the fur’s dynamic motion as the lion is in action
Step 10: Ear and upper mane sketch
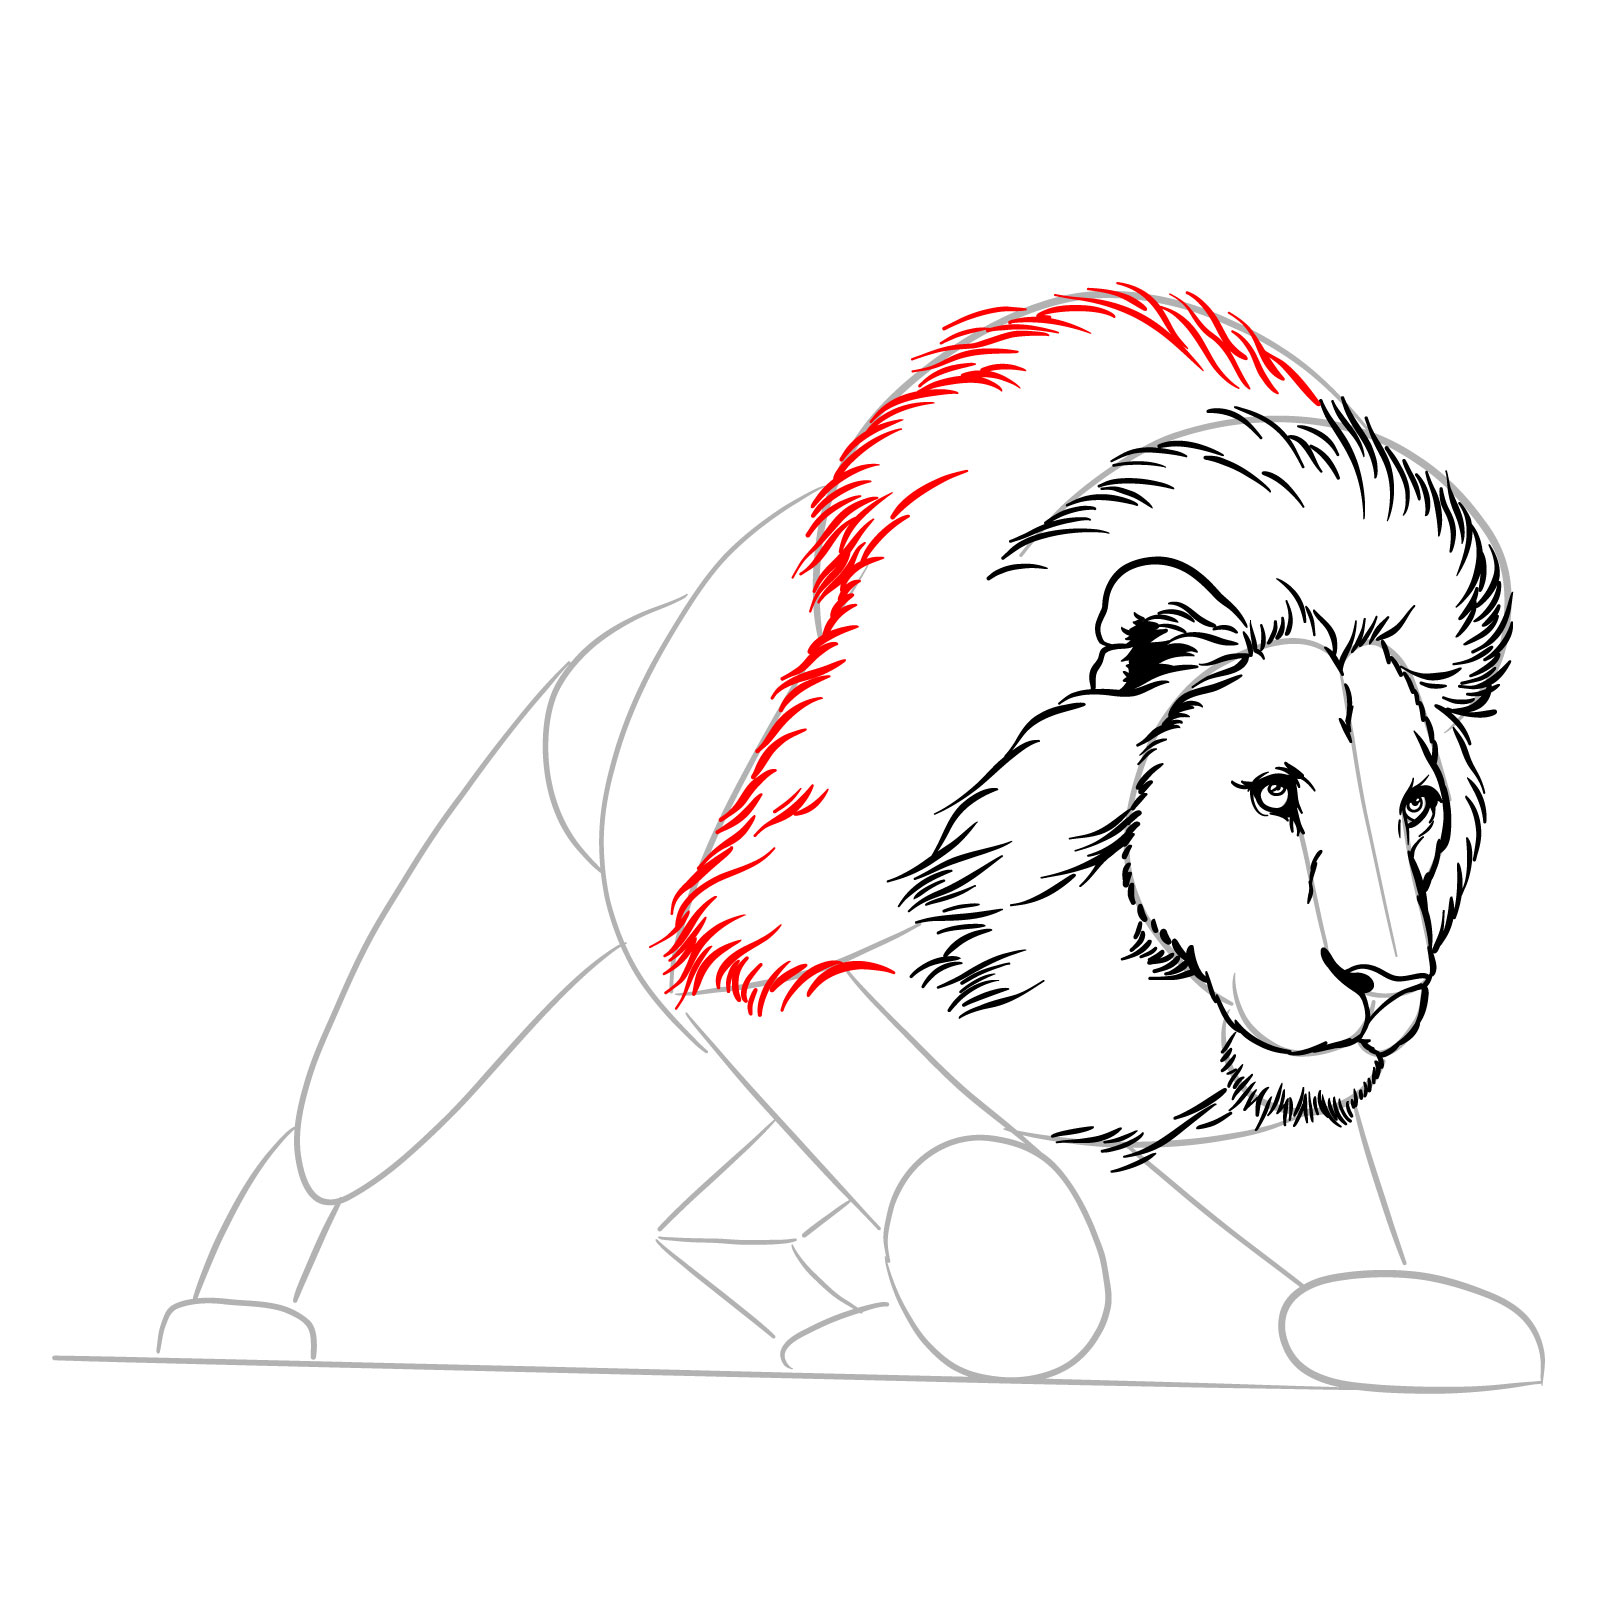
Step 11 – Add the main shape of the mane using short lines, starting from the top of the head and flowing down to the body. Ensure the mane slightly covers the front leg closest to us
Step 11: Main mane outline
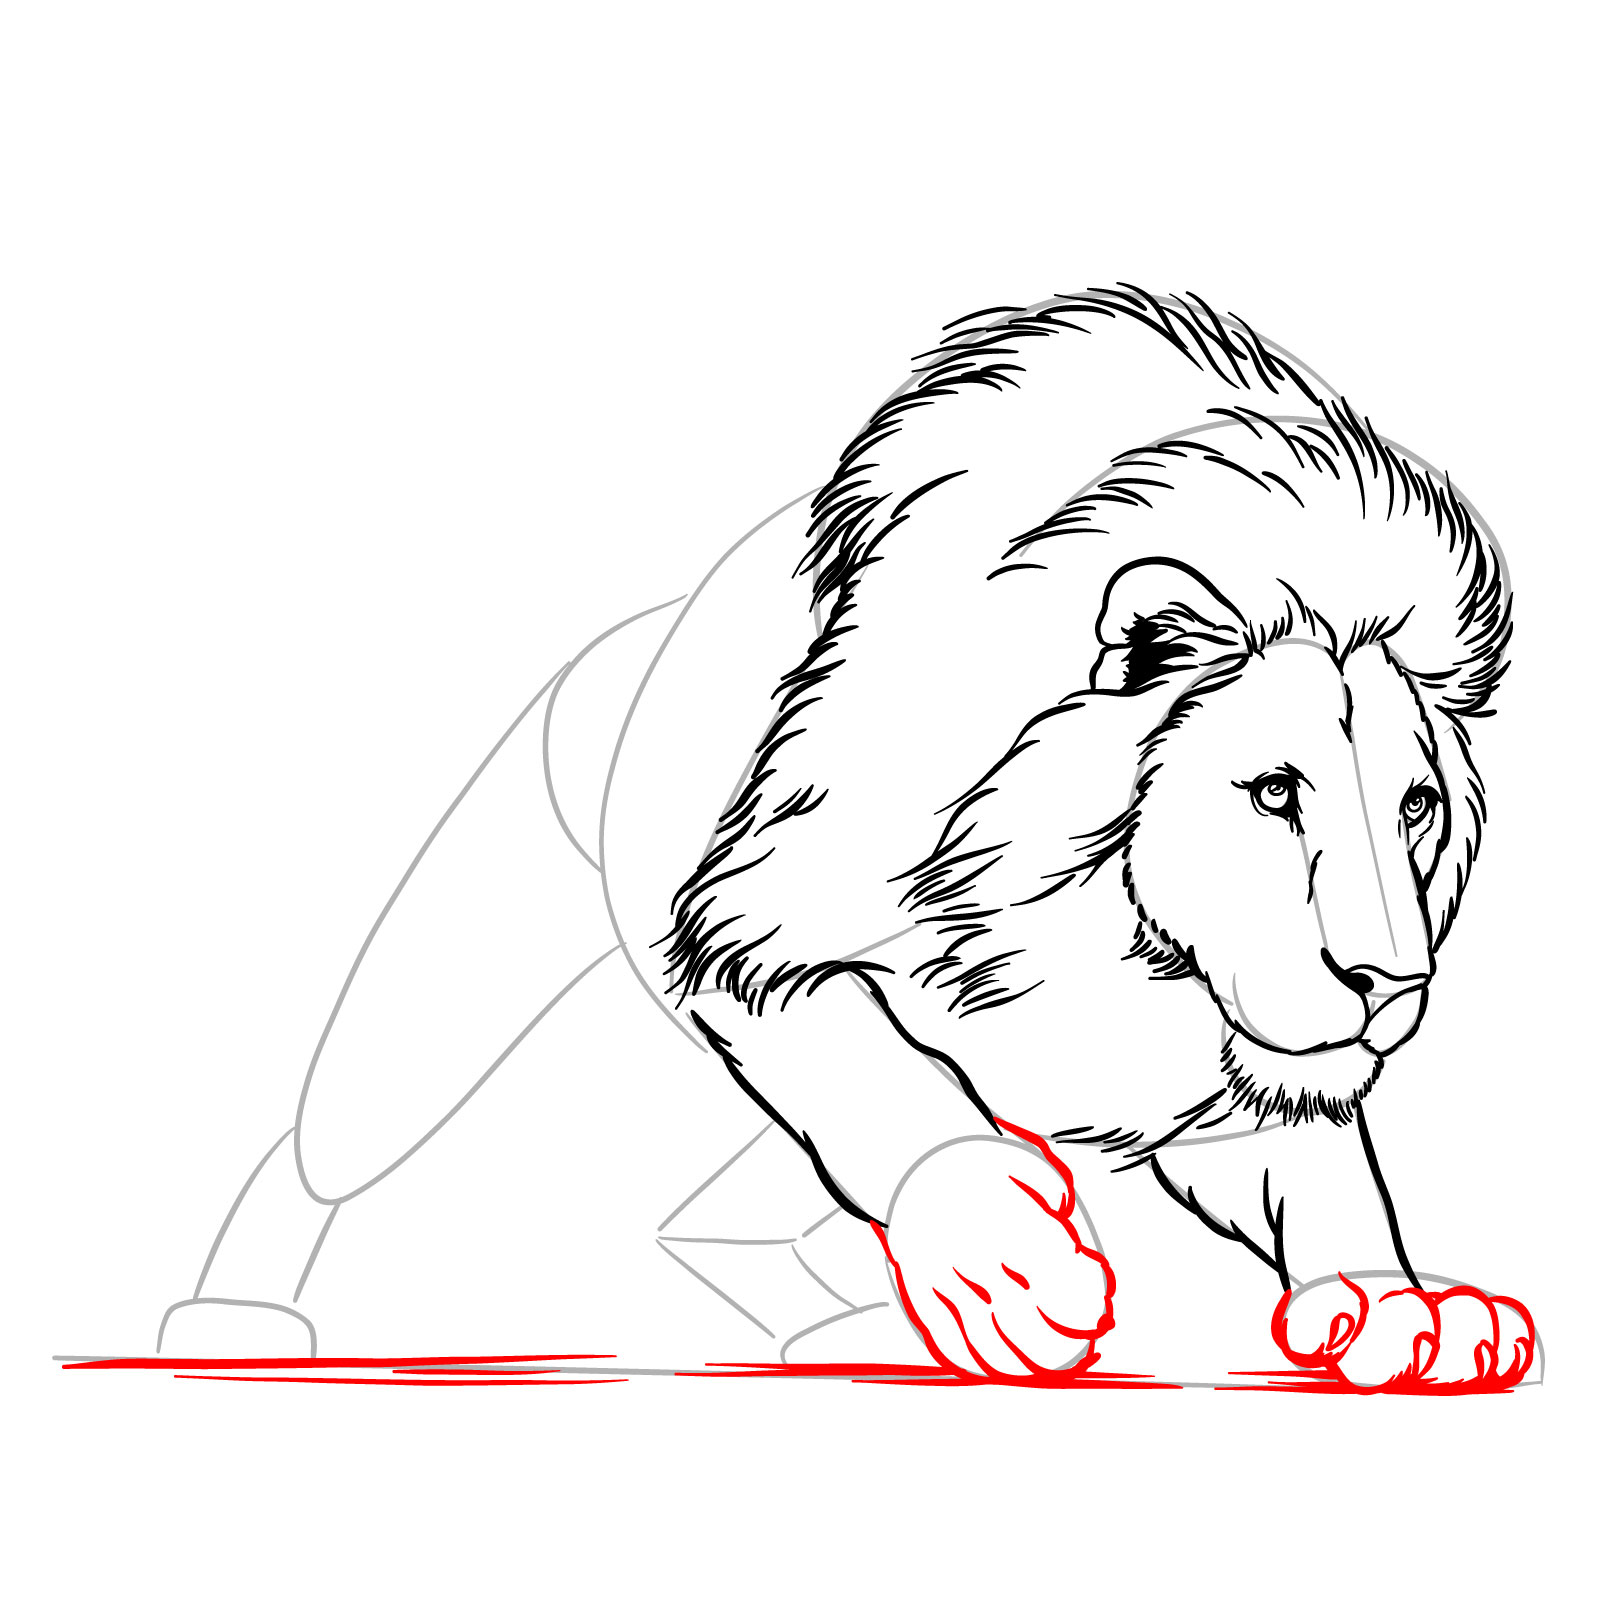
Step 12 – Sketch the front legs down to the pad area, capturing the muscle structure and strength of the legs as they support the lion’s body in this dynamic pose
Step 12: Front legs to pads
Step 13 – Detail the pads and toes on both front paws. Note that the paw of the leg closer to us is turned inward, ready to strike, while the other leg is pressed firmly against the ground. Add horizontal lines to represent the ground, enhancing the scene’s depth
Step 13: Pads and toes detailing
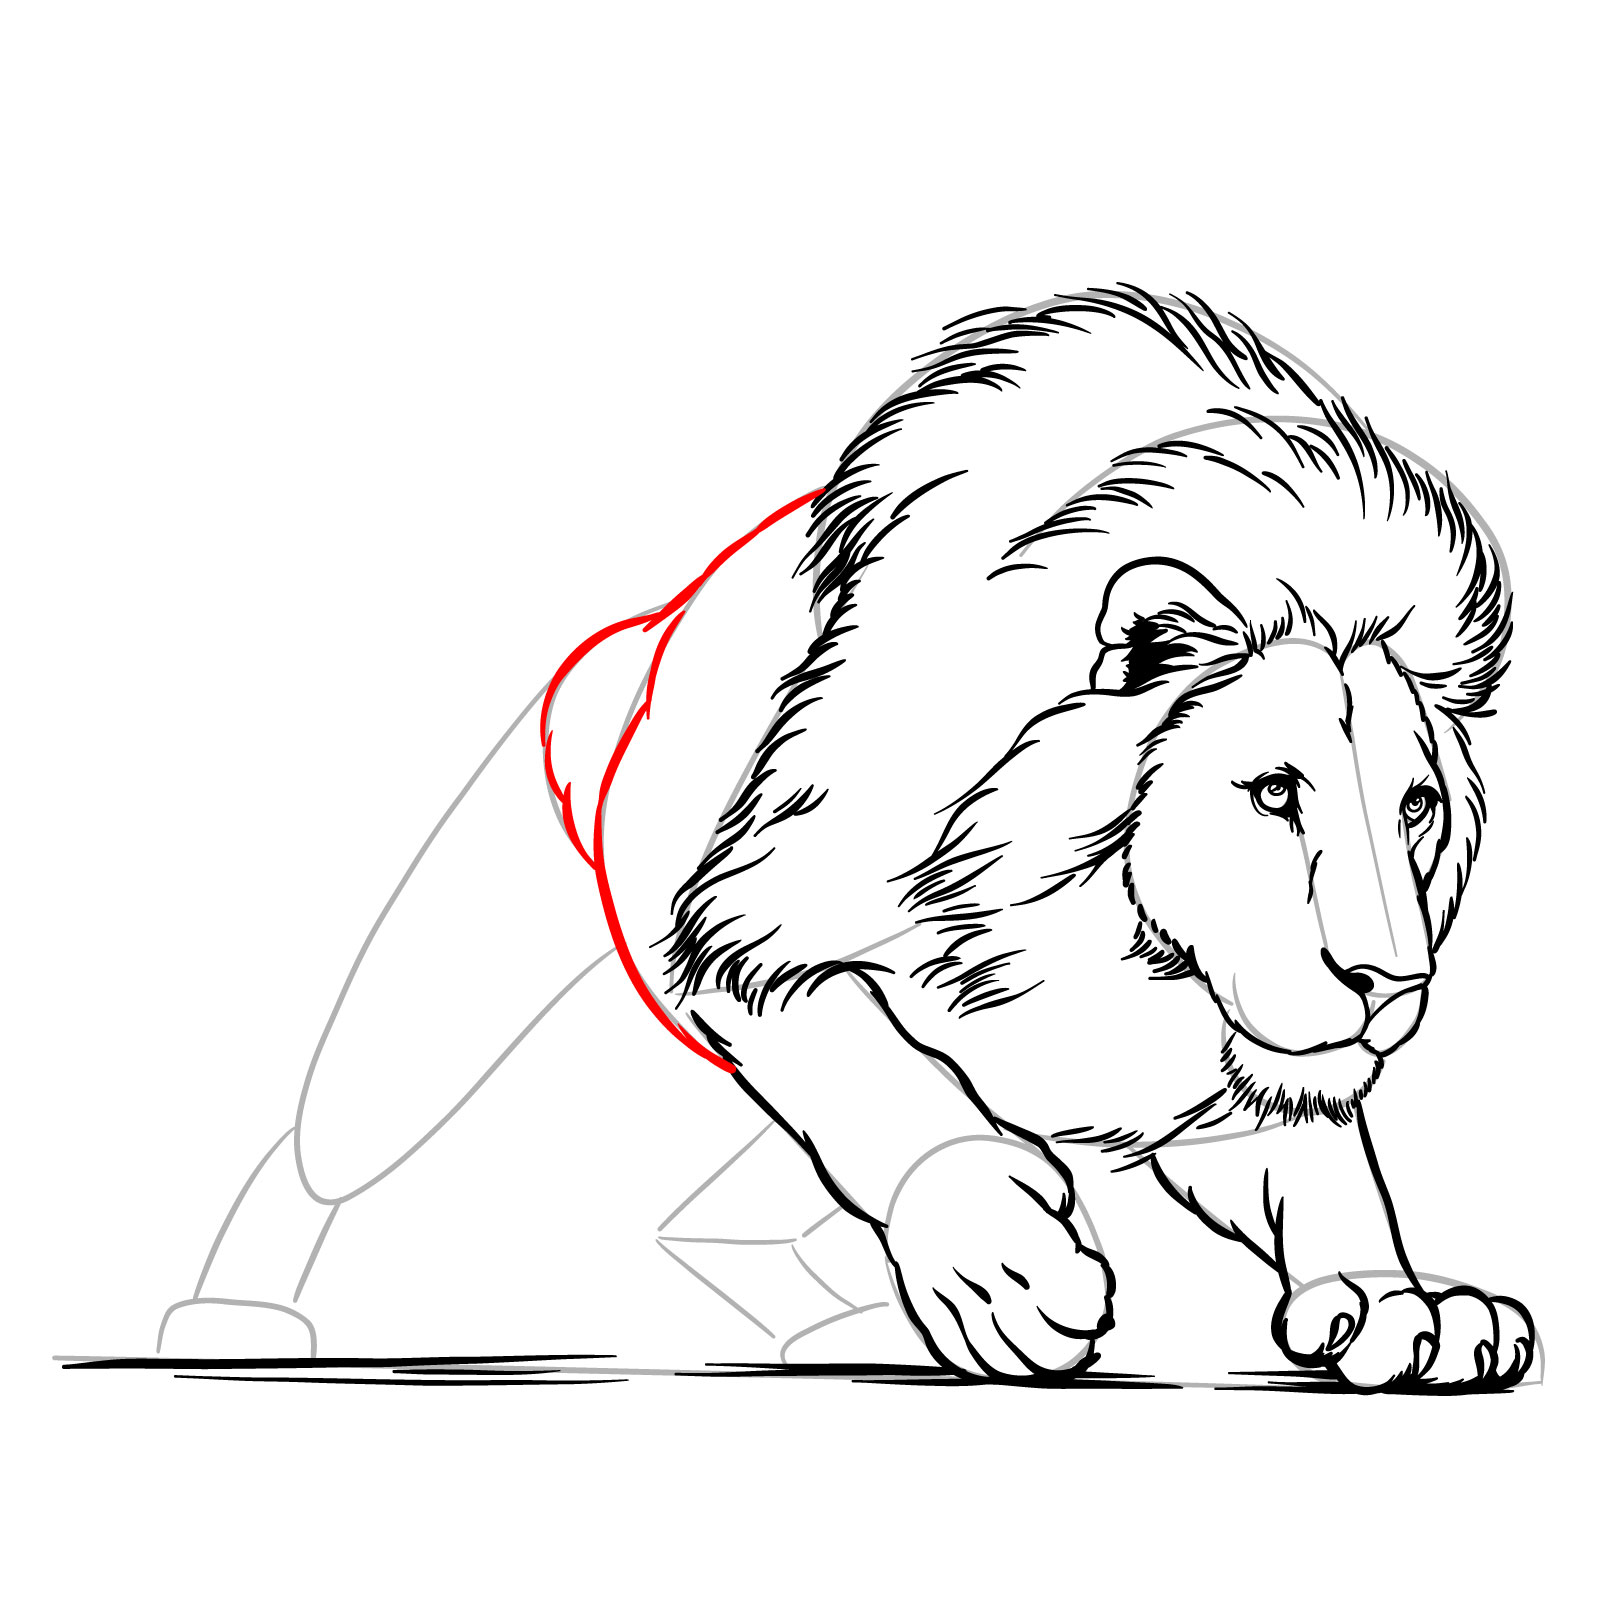
Step 14 – Outline the overall body of the lion, emphasizing the ribcage and abdominal muscles
Step 14: Body outline.
Step 15 – Sketch the first rear leg including the knee area. Show the leg’s positioning and muscle definition to convey the lion’s readiness to leap or strike
Step 15: First rear leg to knee
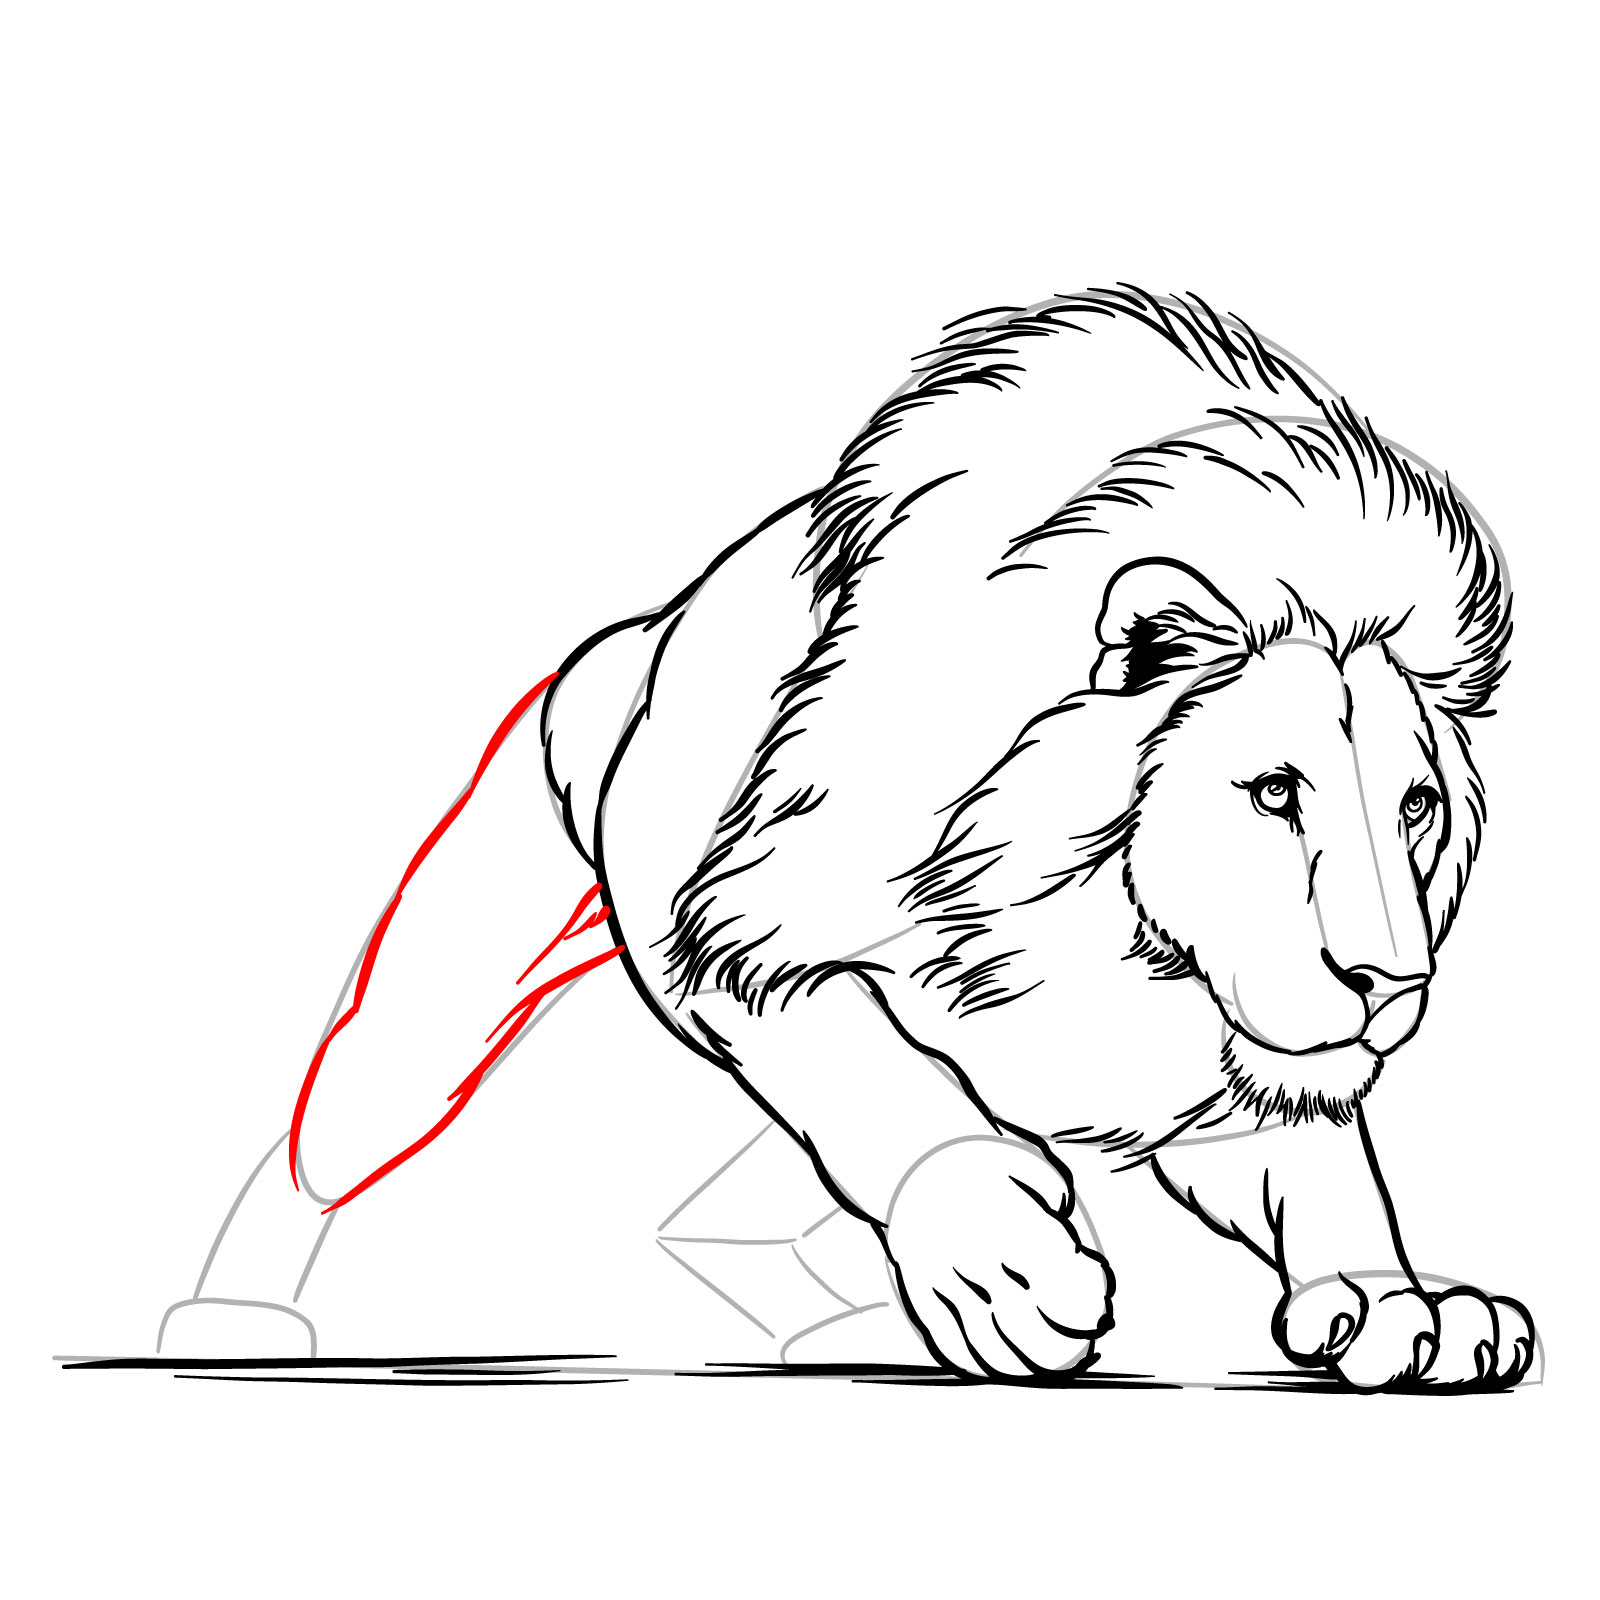
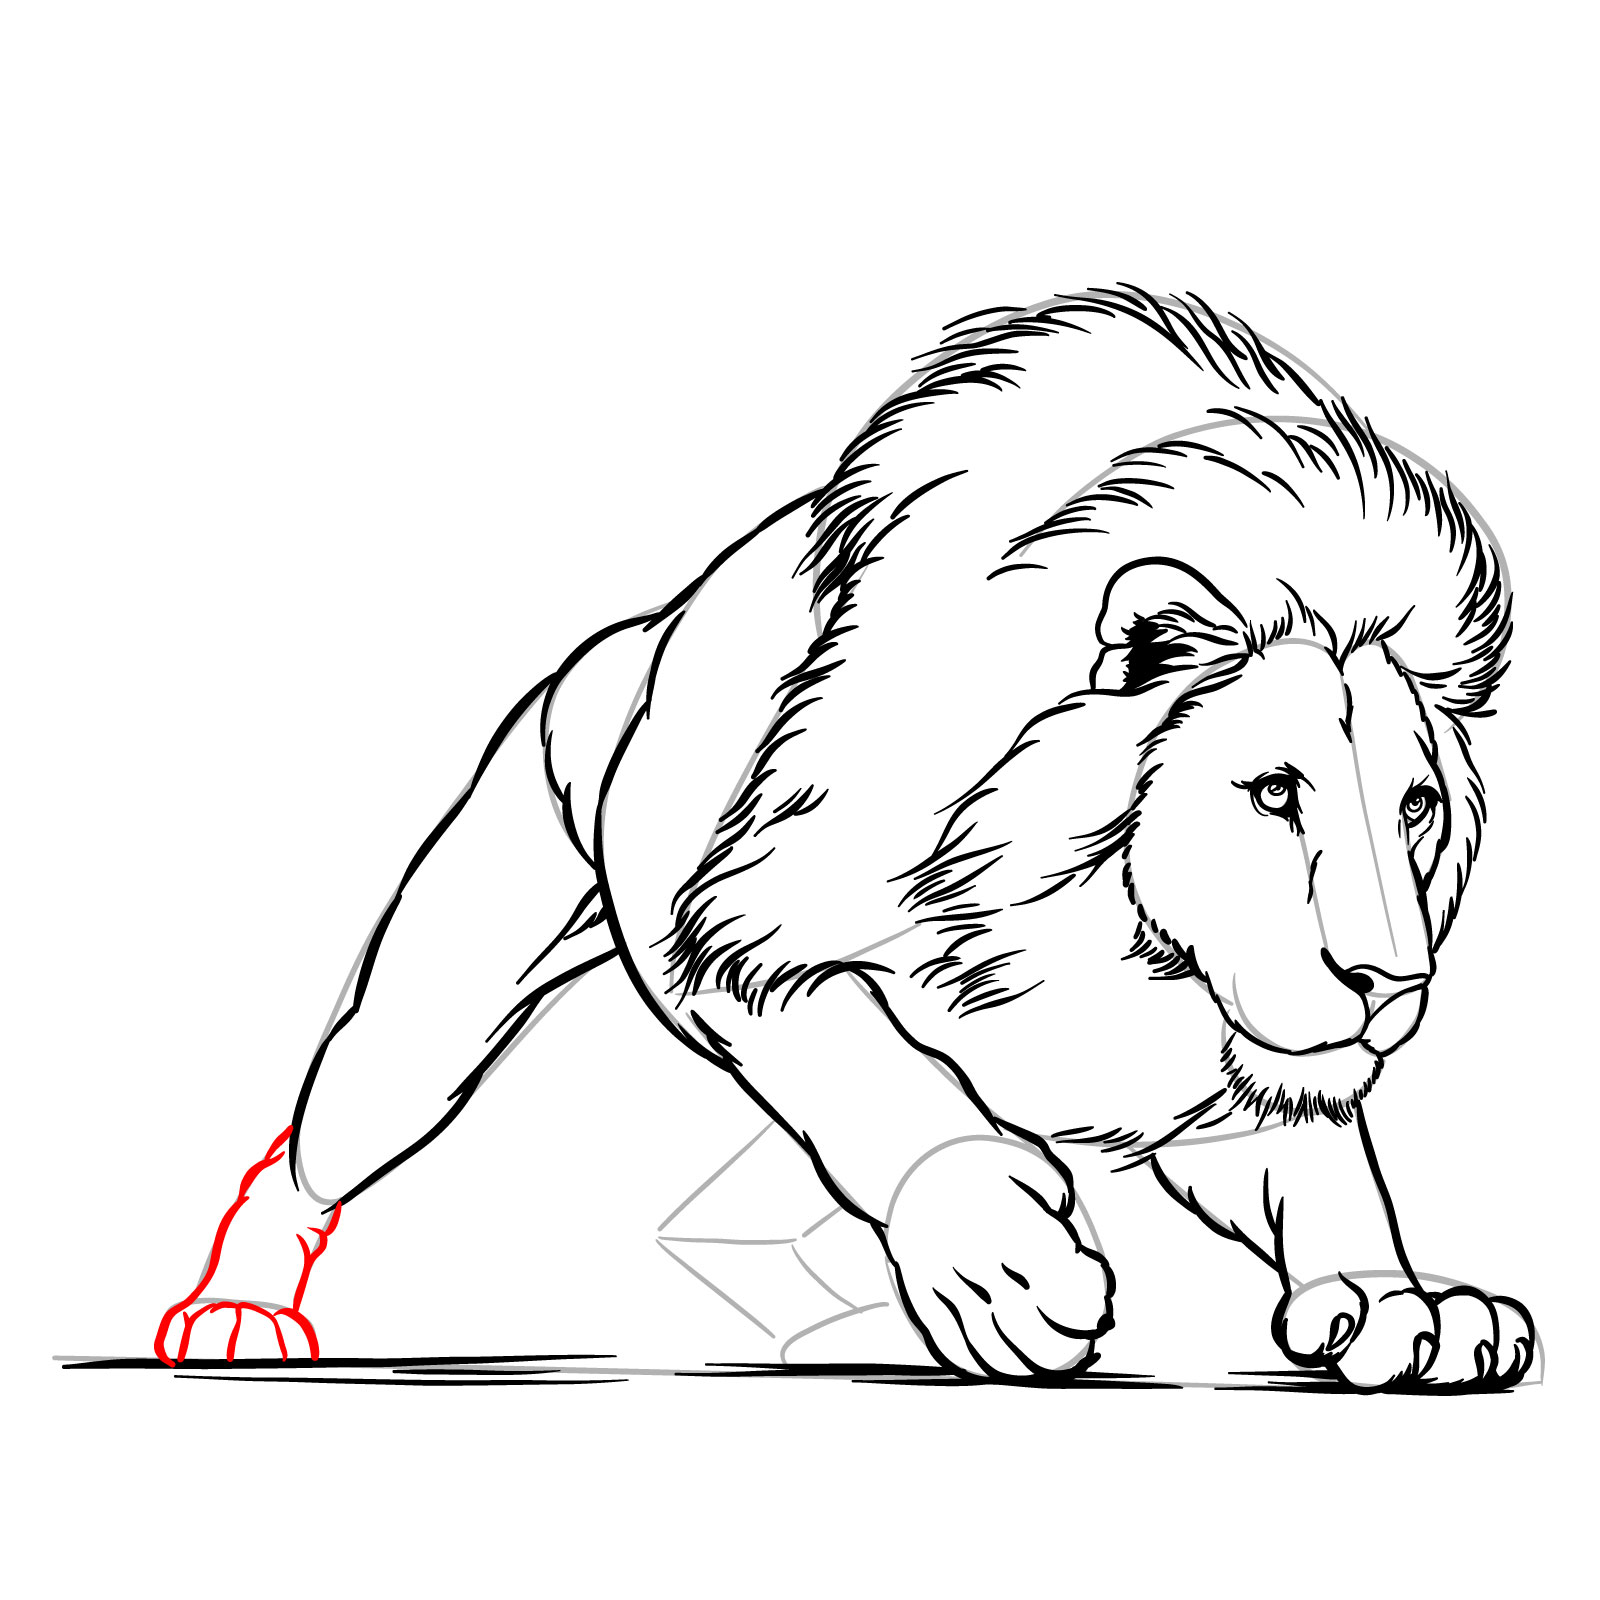
Step 16 – Finish the first rear leg by adding the lower part and toes. Ensure the anatomy is accurate to maintain the dynamic and realistic look
Step 16: Finish the first rear leg
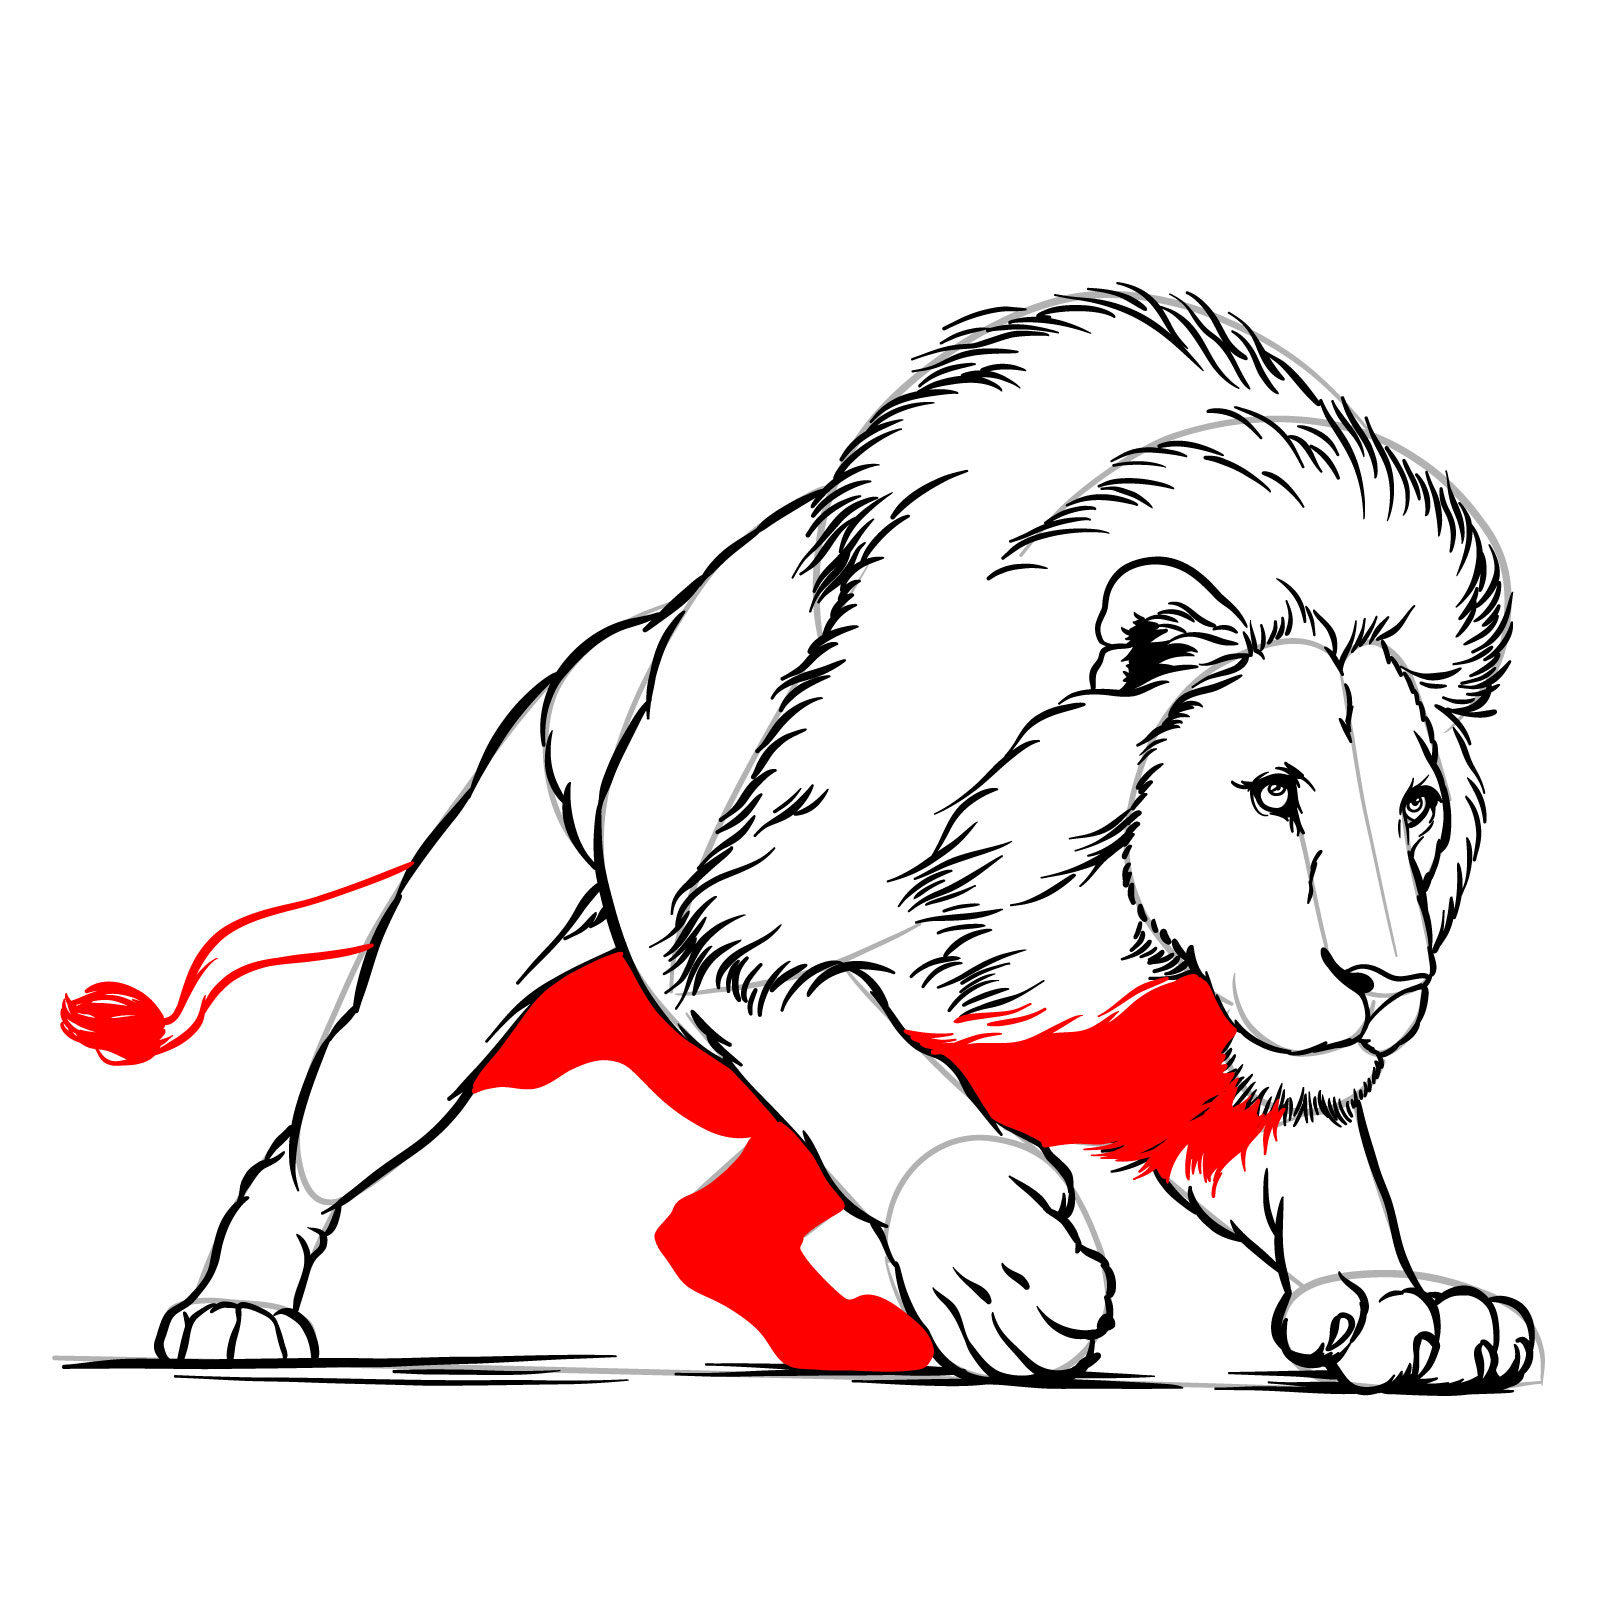
Step 17 – Sketch the second rear leg and the lower part of the body. Fill in these areas and the mane below the head with shading to create a sense of depth and volume. Add the tail with a tuft at the end
Step 17: Second rear leg and body shading
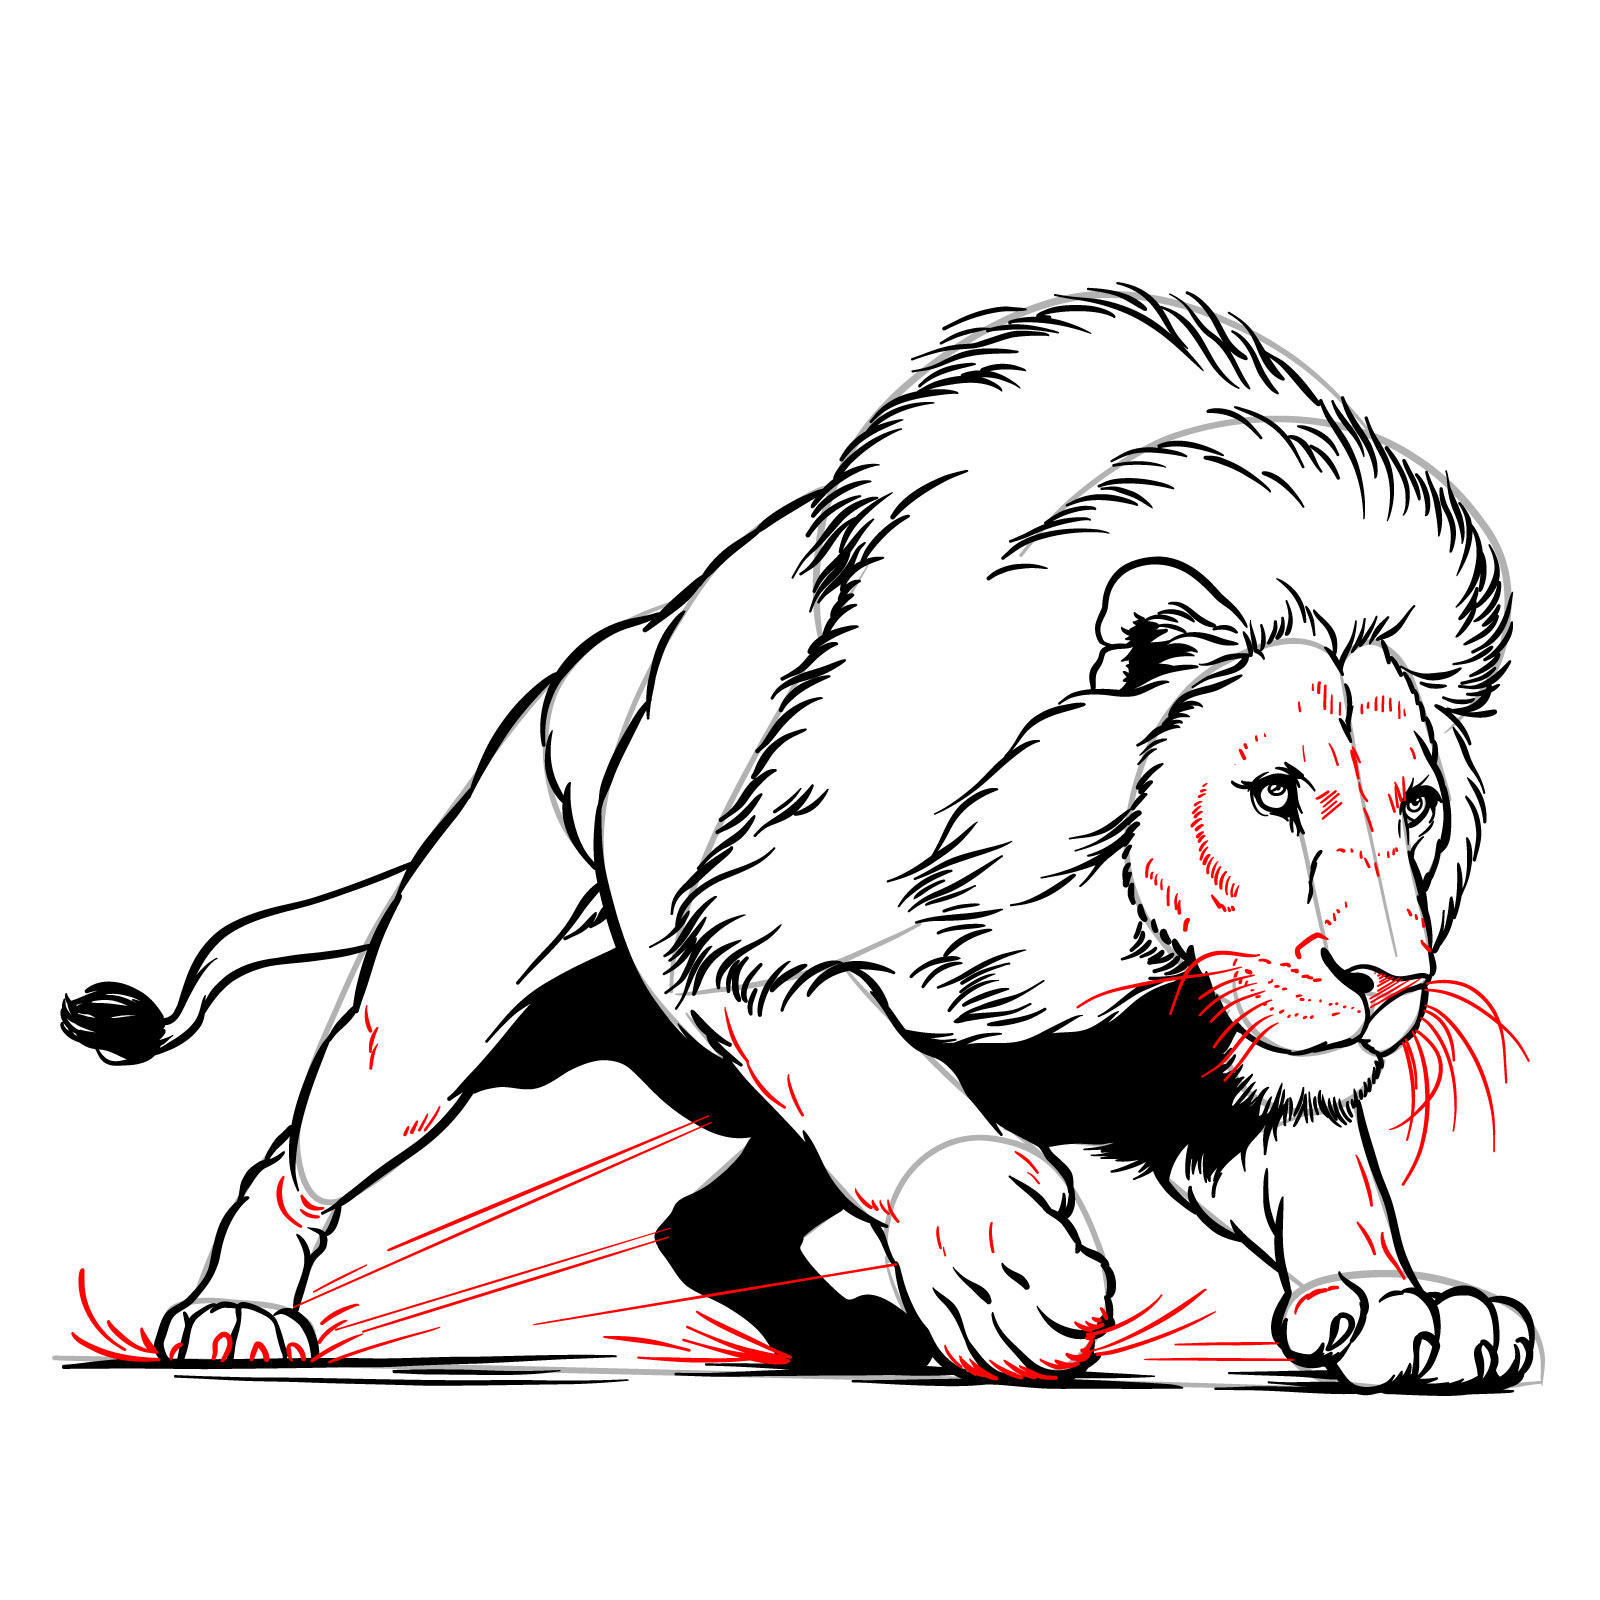
Step 18 – Add final details such as whiskers, whisker marks, small facial lines, and muscle definitions on the legs. Sketch claws on the rear leg and optionally include motion lines to emphasize movement and energy in the scene
Step 18: Adding final details
Step 19 – Erase any remaining rough sketch lines to clean up your drawing. Optionally, ink your sketch to define the lines sharply, suitable for a manga or comic book style. Experiment with shadows and textures to either maintain this style or shift towards a more realistic depiction of a hunting lion
Don't Miss New Tutorials! Follow SketchOk
I publish new step-by-step drawing guides every single day. Follow on your favorite platform so you never miss a tutorial. Thousands of artists are already drawing along and I can't wait you to join in!
On my Patreon you can grab unique hand-made coloring pages: each one drawn by me personally. Every purchase directly supports the creation of new drawing tutorials. It's the best way to practice your skills, keep the site going, and get something truly original at the same time.
Hope you enjoyed this safari into the art of how to draw realistic lions. Through these 14 guides, we’ve captured the king of the jungle in a variety of poses and expressions. Now you have the basic understanding of lion drawing, and I hope it will be useful in your own creations. Don’t be discouraged if it takes a few tries to get it just right, as each new attempt will hone your drawing skills.
If you’ve found these guides helpful, consider pinning this guide to Pinterest so you can easily revisit it anytime. Keep it handy as a quick reference or share it with fellow art enthusiasts! And I’ll be happy to see your drawings in the comments there, as it’s pretty easy to share them there.
Don’t forget to follow SketchOk for more great tutorials and updates:
Vector illustrator and the creator of Sketchok.com and TheHowToDraw.com. I publish free step-by-step drawing tutorials to help people of all levels learn to draw.
Disclaimer: This is a non-commercial, fan-made educational site. All characters belong to their respective owners. We are not affiliated with any rights holders.
Read full Disclaimer
2 thoughts on “How to Draw Lions in Different Poses: 14 Drawing Guides in 1”
Thank you for the instructions on how to draw a lion’s head! I only draw doodle art and stick figures because I am not a creative/artistic person. I wanted to draw a lion’s head for a card and thanks to your instructions, I am satisfied enough with my effort to give the card to someone special. I only found your website today but I will be coming back when I need more instruction for accurate drawings.


Thank you for the instructions on how to draw a lion’s head! I only draw doodle art and stick figures because I am not a creative/artistic person. I wanted to draw a lion’s head for a card and thanks to your instructions, I am satisfied enough with my effort to give the card to someone special. I only found your website today but I will be coming back when I need more instruction for accurate drawings.
Thank you for the feedback! Happy to hear that you enjoyed the experience. Welcome back anytime, I try to publish new guides on a daily basis.