Drawing a crow can be fun and easy, especially when you break down the process step by step. In this guide, you’ll learn how to draw a crow with simple shapes and detailed steps. Let’s get started!
Understanding the Crow’s Key Features
When drawing a crow, focus on these main points:
Sleek, streamlined body: Crows have a slender but well-defined body, with smooth, flowing lines.
Sharp beak: Their beak is slightly curved and strong, a prominent feature.
Dark feathers: Though often seen as pure black, their feathers have different shades and textures when observed closely.
Detailed claws: Crows have sharp claws that can be emphasized in your drawing.
Sharp eyes: Their eyes are small but keen.
You can also try drawing other birds like sparrows, ravens or even owls to expand your bird-drawing skills.
About the Guide: Color Guidelines
The steps in the drawing guide use a color-coded system to make each step clear:
Red Color: Highlights the current step to focus on.
Black Color: Shows lines you have previously drawn.
Grey Color: Represents the basic sketch and guidelines.
By following this system, you’ll be able to build up your drawing layer by layer.
Step 1 – Begin with the basic shapes. Draw one oval for the head and a larger oval for the body
Step 2 – Add simple guidelines for the wing, tail, legs, beak, and a circle for the eye
Step 3 – Refine the shape of the beak and the head, adding more definition
Step 4 – Draw the eye and fill it with black, leaving a small blank space for the highlight
Step 5 – Add a circle around the eye and draw lines to suggest feathers around the neck
Step 6 – Outline the body down to the legs and shape the rear part of the wing, including feathers at the bottom
Step 7 – Shape the wing by adding more defined feathers in the middle area
Step 8 – Add three lines for additional feathers above the mid-wing area and sketch the lower part of the body under the wing
Step 9 – Draw the part of the tail closer to us, giving it dimension
Step 10 – Finish the tail by drawing the remaining parts
Step 11 – Draw the section of the body where the legs extend down
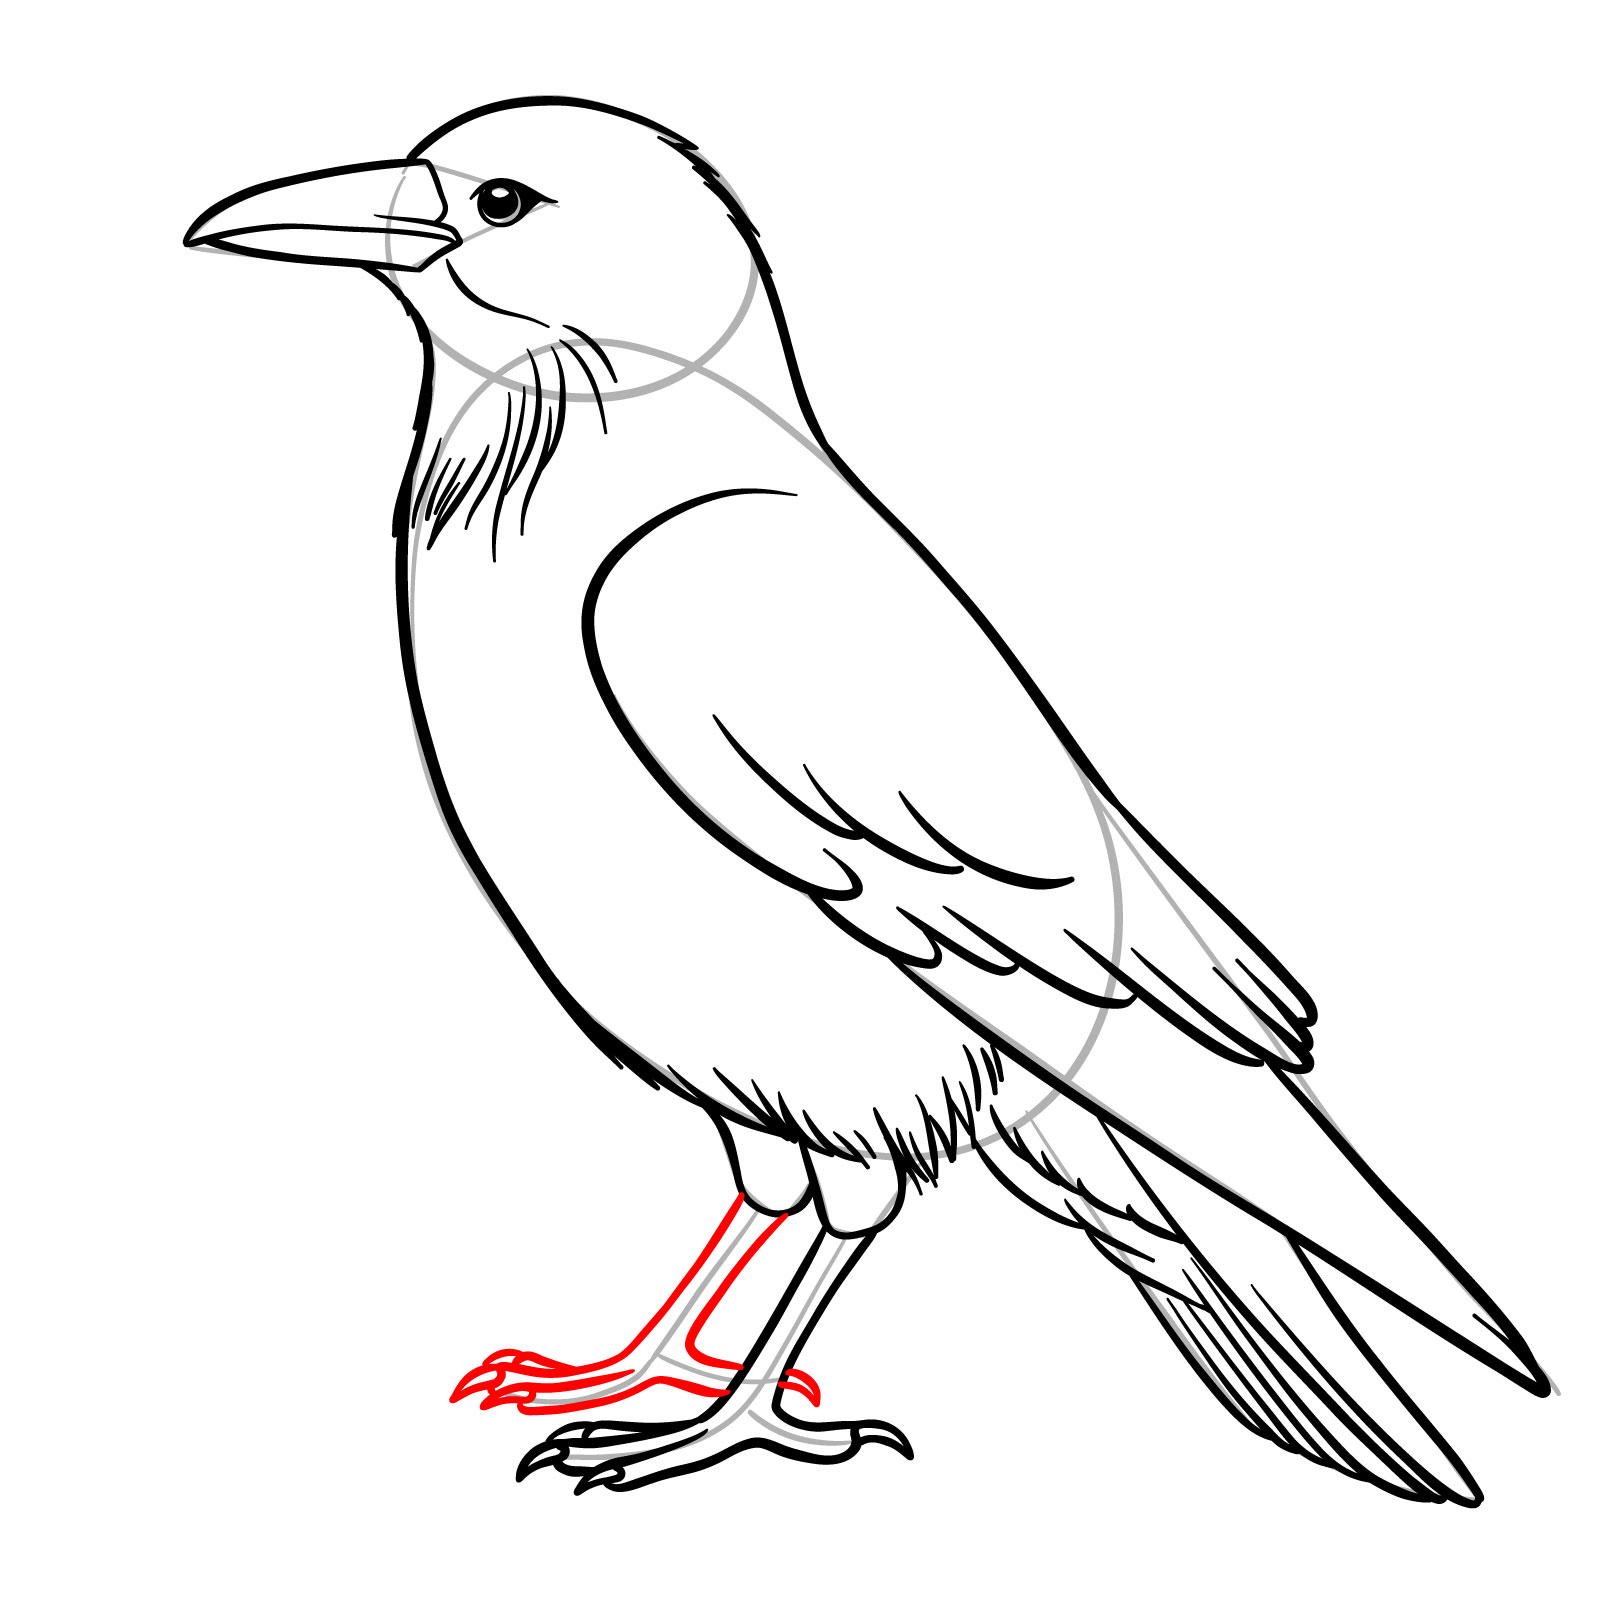
Step 12 – Draw the first leg, the one that is closest to us
Step 13 – Outline the second leg, completing the crow’s legs
Step 14 – Add additional lines for feather details on the body and wing to enhance texture
Step 15 – Review the entire crow drawing. Clean up the sketch by erasing unnecessary guidelines, and optionally ink the drawing for a cleaner look
Step 16 – Optionally, add colors to your crow drawing to bring it to life
Don't Miss New Tutorials! Follow SketchOk
I publish new step-by-step drawing guides every single day. Follow on your favorite platform so you never miss a tutorial. Thousands of artists are already drawing along and I can't wait you to join in!
On my Patreon you can grab unique hand-made coloring pages: each one drawn by me personally. Every purchase directly supports the creation of new drawing tutorials. It's the best way to practice your skills, keep the site going, and get something truly original at the same time.
Once you’ve completed your crow drawing, take a step back and admire your work. Adjust any small details and add shading to give the crow its true depth and character. If you enjoyed drawing this bird, feel free to explore other birds in the future.
If you’d like to see more drawing guides, follow Sketchok on social media for updates, and don’t forget to support me on Buy me a Coffee to keep the tutorials coming!
Disclaimer: All original artworks and photos used as references for the creation of these drawing tutorials are the property of their respective owners. If your work has been featured without proper credit, please kindly leave a comment below, and the issue will be promptly addressed. We greatly appreciate your exceptional art. Thank you.