Welcome to today’s drawing tutorial where we’ll be exploring the enchanting world of Middle-earth to learn how to draw a hobbit as portrayed in Peter Jackson’s The Lord of the Rings trilogy. Our hobbit will have a cheerful demeanor, complete with a smile and a walking stick, capturing the essence of the adventurous and heartwarming characters from the beloved series. Whether you’re a seasoned artist or a beginner, this guide will help you sketch your very own hobbit step by step. Grab your drawing tools, and let’s start this creative journey together!
Understanding the Drawing Guide for Our Hobbit
This Hobbit drawing guide consists of a series of 21 step-by-step images, each designed to progressively build upon the last, helping you visualize and create a detailed drawing of a hobbit. The guide is carefully structured to ensure a clear understanding of the artistic process, from basic forms to the final details.
Grey Color: Shows the basic sketch in the initial stages. This includes the first three steps where you outline the general proportions and posture of the hobbit.
Black Color: Represents the lines from previous steps, providing a reference that ensures each new addition is consistent with the overall design.
Red Color: Highlights the current step’s focus, directing your attention to the immediate areas that require detailing or adjustment.
The guide culminates in the inking process (optional). Once you’ve completed the pencil sketch, using a fine liner or ink pen, trace over your drawing to define the lines vividly. It’s important to allow the ink to dry completely before erasing any pencil marks to avoid smudging, ensuring a clean and professional finish. This final step enhances the sharpness and clarity of your hobbit drawing, making the character come to life on the page.
Step 01 – Start by drawing a simple circle for the head base, and a wide “U” shape for the bottom jawline. Below it, outline a stick figure to define the pose of the hobbit. This figure should include basic lines for arms and legs, and dots for joints
Initial sketch of head and pose
Step 02 – Draw the basic outline of the coat using simple lines. Start from the shoulders and let the lines flow down to where the coat will end, slightly below the waist, then add the sleeves
Sketching the coat shape
Step 03 – Sketch basic outlines for the legs and feet. Add shapes for hands at the ends of the arm lines. Draw a straight or slightly curved line to indicate the position of the walking stick
Shaping legs, feet, hands, and walking stick
Step 04 – Outline the lower part of the face, focusing on the jawline, to give the face its shape and structure
Outlining the jaw
Step 05 – Sketch the hair starting from the forehead and moving towards the temples, framing the top part of the face
Framing the face with hair
Step 06 – Outline the eyes and shape the nose. Draw a gently curved line for the mouth to depict a subtle smile
Sketching facial features
Step 07 – Draw the eyeballs and pupils within the eye outlines. Add lines to create chubby cheeks and a chin. Sketch the eyebrows and lines for eyelids above and below the eyes
Adding facial details
Step 08 – Draw the neckline of the shirt, peeking out from under the coat, to give depth to the clothing layers
Detailing the shirt neckline
Step 09 – Begin adding detail to the coat by sketching the collar and drawing lines from the collar down to the bottom of the coat, covering the shirt
Sketching the coat’s details
Step 10 – Draw the hobbit’s curly hair, focusing on creating volume and texture with swirls and curls around the head
Drawing curly hair
Step 11 – Continue outlining the coat by adding shoulders and sleeves. Sketch one sleeve fully with a cuff and the second up to the elbow. Add a pocket on one side and the strap of a bag over the shoulder, extending slightly below the coat’s bottom line
Finalizing coat details
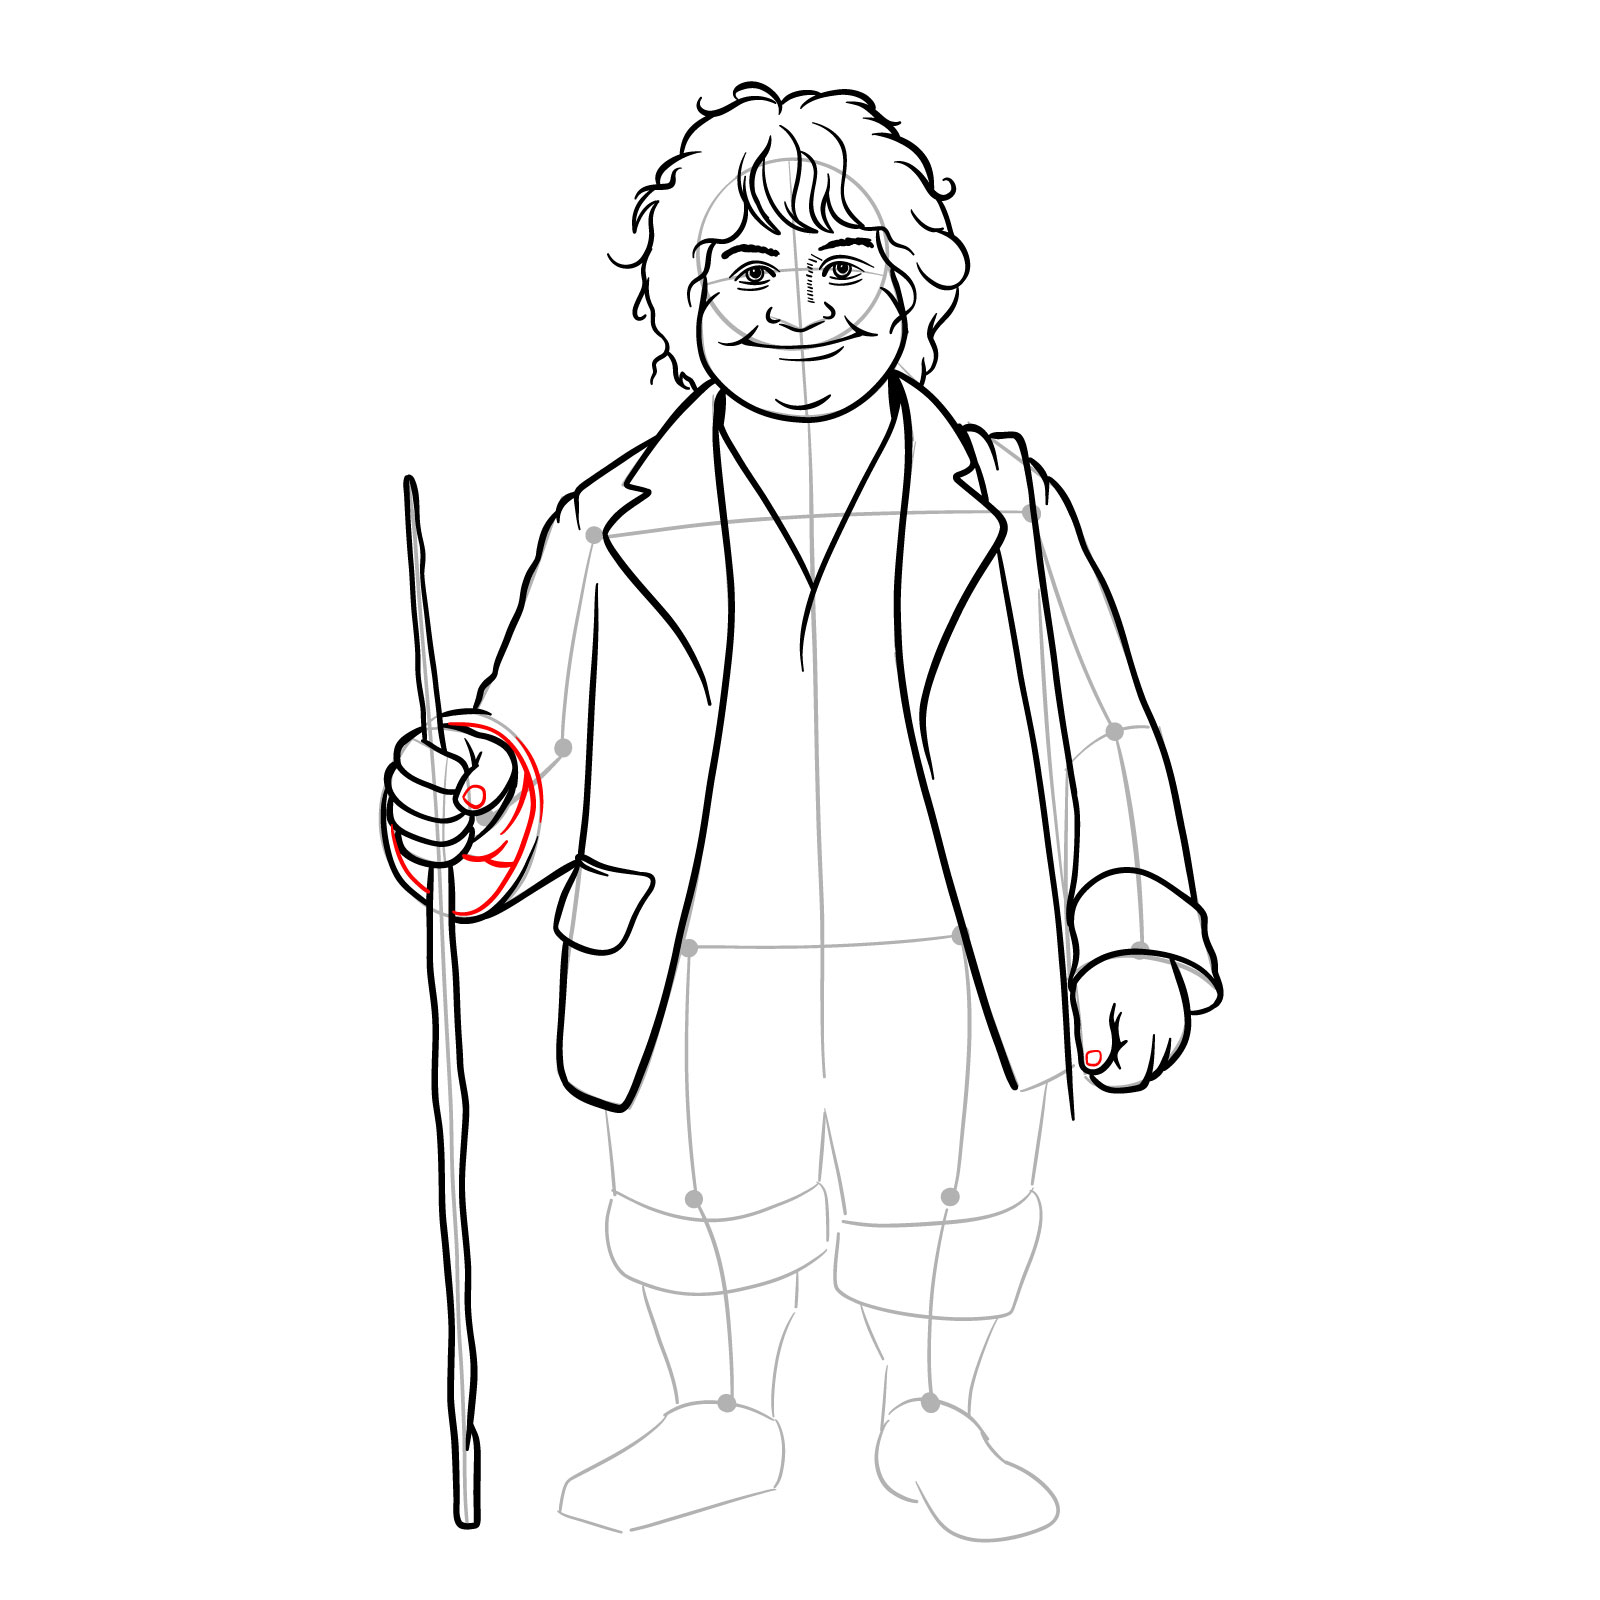
Step 12 – Draw the hands. The right hand is gripping the walking stick. Sketch the stick’s upper part as well. Ensure the fingers wrap naturally around the stick
Drawing hands and walking stick
Step 13 – Extend the shape of the walking stick from the hand down to the ground. Finish the outline of the coat sleeve
Detailing walking stick and sleeve
Step 14 – Sketch the nails on the thumbs for realism. Add the inner outline of the sleeve where the hand emerges, and sketch the small visible part of the shirt’s sleeve beneath the coat sleeve
Adding hand and sleeve details
Step 15 – Sketch the central visible part of the shirt, mostly covered by the coat. Outline the pants down to the rolled-up part, showing the style of the hobbit’s clothing
Sketching shirt and rolled-up pants
Step 16 – Draw the rolled-up part of the pants, focusing on the folds and how they bunch around the legs
Detailing rolled-up pants
Step 17 – Sketch the rest of the legs and the feet, paying attention to the proportion and stance of the hobbit
Drawing legs and feet
Step 18 – Draw the bag, showing how it hangs from the shoulder and rests against the body
Adding the bag
Step 19 – Sketch curls on the visible part of the chest above the shirt’s neckline. Add lines to suggest neck muscles and add texture to the hair by drawing many individual hair strands
Enhancing chest, neck, and hair details
Step 20 – Add nails to the toes and sketch lines to create a wooden texture on the walking stick. Detail creases and folds in the fabrics, sketch the shirt collar and add buttons, including the buttons on the coat
Final detailing
Step 21 – Erase any preliminary marks gently, clearing the basic sketch to clean up the drawing. Optionally, ink your sketch, let the ink dry, and then erase any remaining pencil lines
Don't Miss New Tutorials! Follow SketchOk
I publish new step-by-step drawing guides every single day. Follow on your favorite platform so you never miss a tutorial. Thousands of artists are already drawing along and I can't wait you to join in!
On my Patreon you can grab unique hand-made coloring pages: each one drawn by me personally. Every purchase directly supports the creation of new drawing tutorials. It's the best way to practice your skills, keep the site going, and get something truly original at the same time.
Thank you for joining me in this detailed guide on how to draw a hobbit inspired by Peter Jackson’s The Lord of the Rings. We’ve covered everything from the basic sketch to the final inking, and I hope you’ve found each step helpful and enriching for your drawing skills. Remember that each drawing you create is a step forward in your artistic journey.
I’d love to see your finished hobbits and hear about your drawing experience! Don’t forget to follow SketchOk on our social media channels for more fun and engaging drawing tutorials. You’ll find lots of new project ideas there:
Also, please Pin this guide to Pinterest. Not only will it help you to come back to it anytime you want to draw another hobbit or refine your skills, but it also helps us to share our passion for drawing with more people like you. Your support really makes a difference and helps keep this project alive!
Disclaimer: All original artworks and photos used as references for the creation of these drawing tutorials are the property of their respective owners. If your work has been featured without proper credit, please kindly leave a comment below, and the issue will be promptly addressed. We greatly appreciate your exceptional art. Thank you.