Last Updated on May 14, 2026
Are you a fan of the legendary law enforcer from Mega-City One? If so, this step-by-step drawing tutorial is for you! In this guide, we’ll teach you how to draw Judge Dredd, the iconic character created by writer John Wagner and artist Carlos Ezquerra. So, grab your pencils and let’s bring justice to the world of art!
The Man Behind the Helmet: Judge Dredd’s Story
Judge Dredd is a law enforcement and judicial officer in the dystopian future city of Mega-City One, which covers most of the east coast of North America. He is a “street judge,” empowered to summarily arrest, convict, sentence, and execute criminals. Dredd is a symbol of the facelessness of justice, and his entire face is never shown in the comic strip. In the world of Judge Dredd, time passes in real time, making the character age with the passing years. He has been portrayed in live-action films by Sylvester Stallone and Karl Urban.
Over the years, Judge Dredd has become a cultural icon, known for his satirical take on American and British culture. He has been ranked 35th among the top 100 comic book heroes of all time by IGN.
Art Supplies: Gearing Up for Justice
Before we dive into the drawing process, let’s gather our materials and tools. While you’re free to use any art supplies you prefer, we recommend the following:
- Pencils (HB and 2B)
- Erasers
- Sharpener
- Drawing paper
- Fineliner pens
- Colored pencils, markers, or paints (optional for coloring)
Step-By-Step Drawing Guide: From Sketch to Mega-City Masterpiece
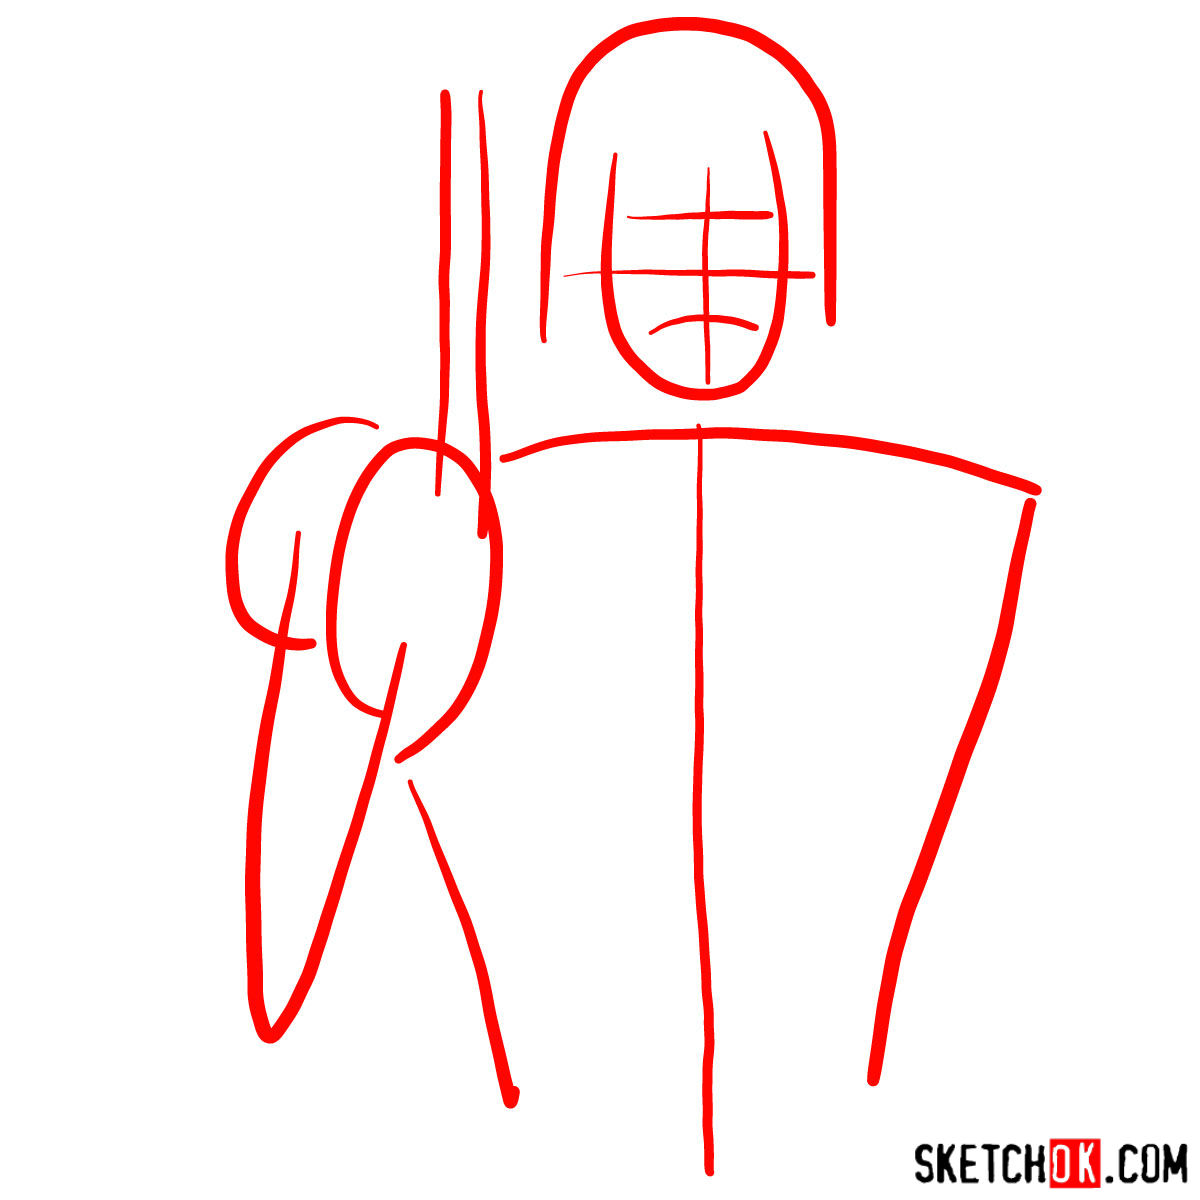
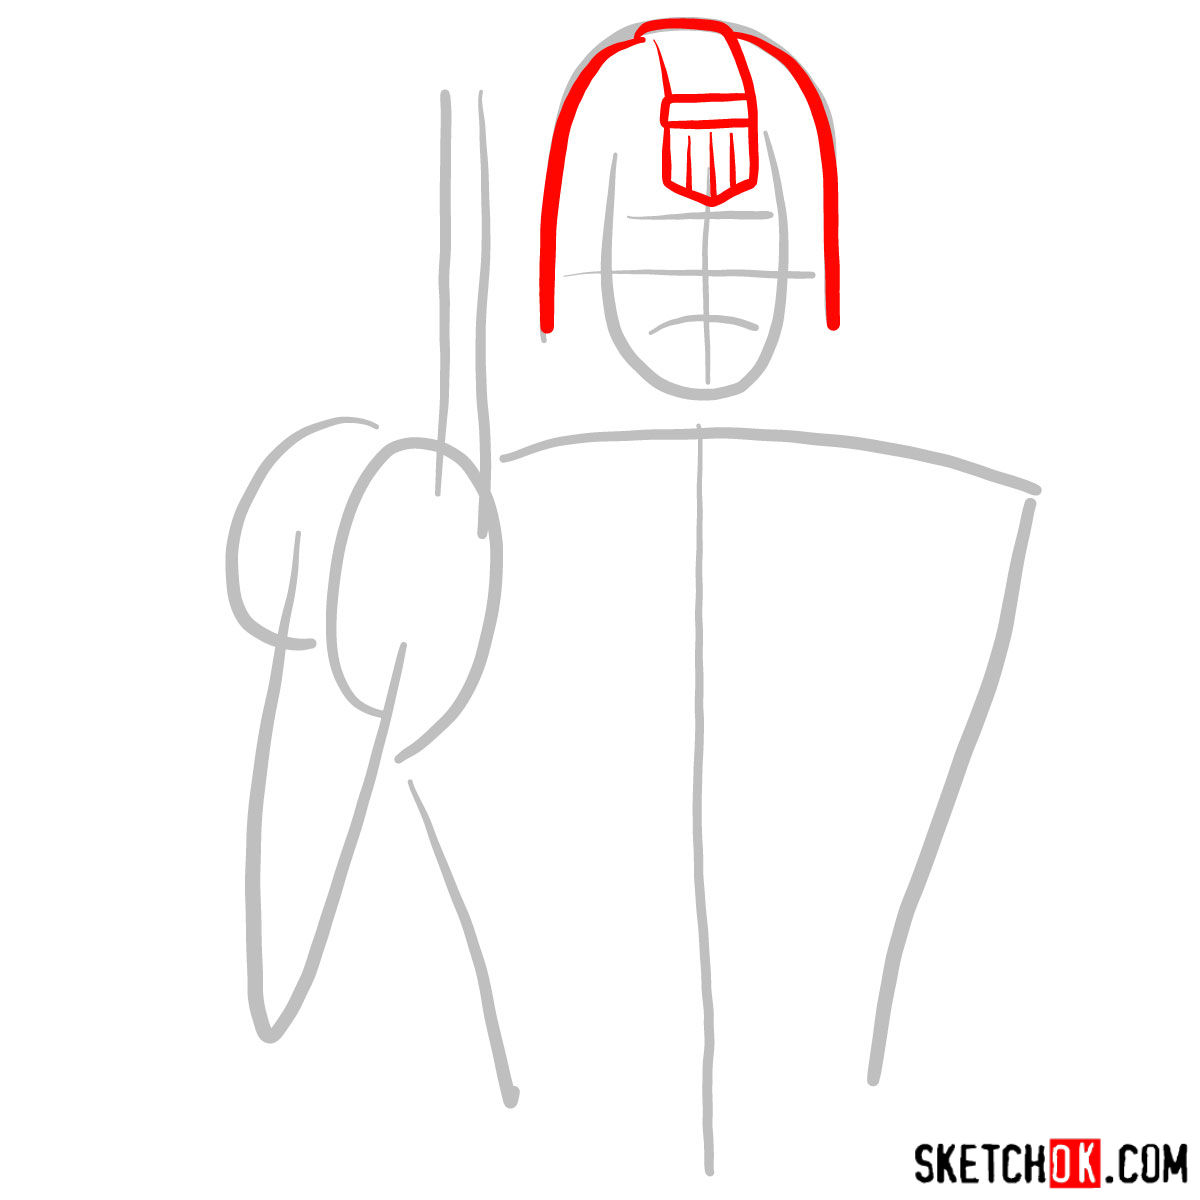
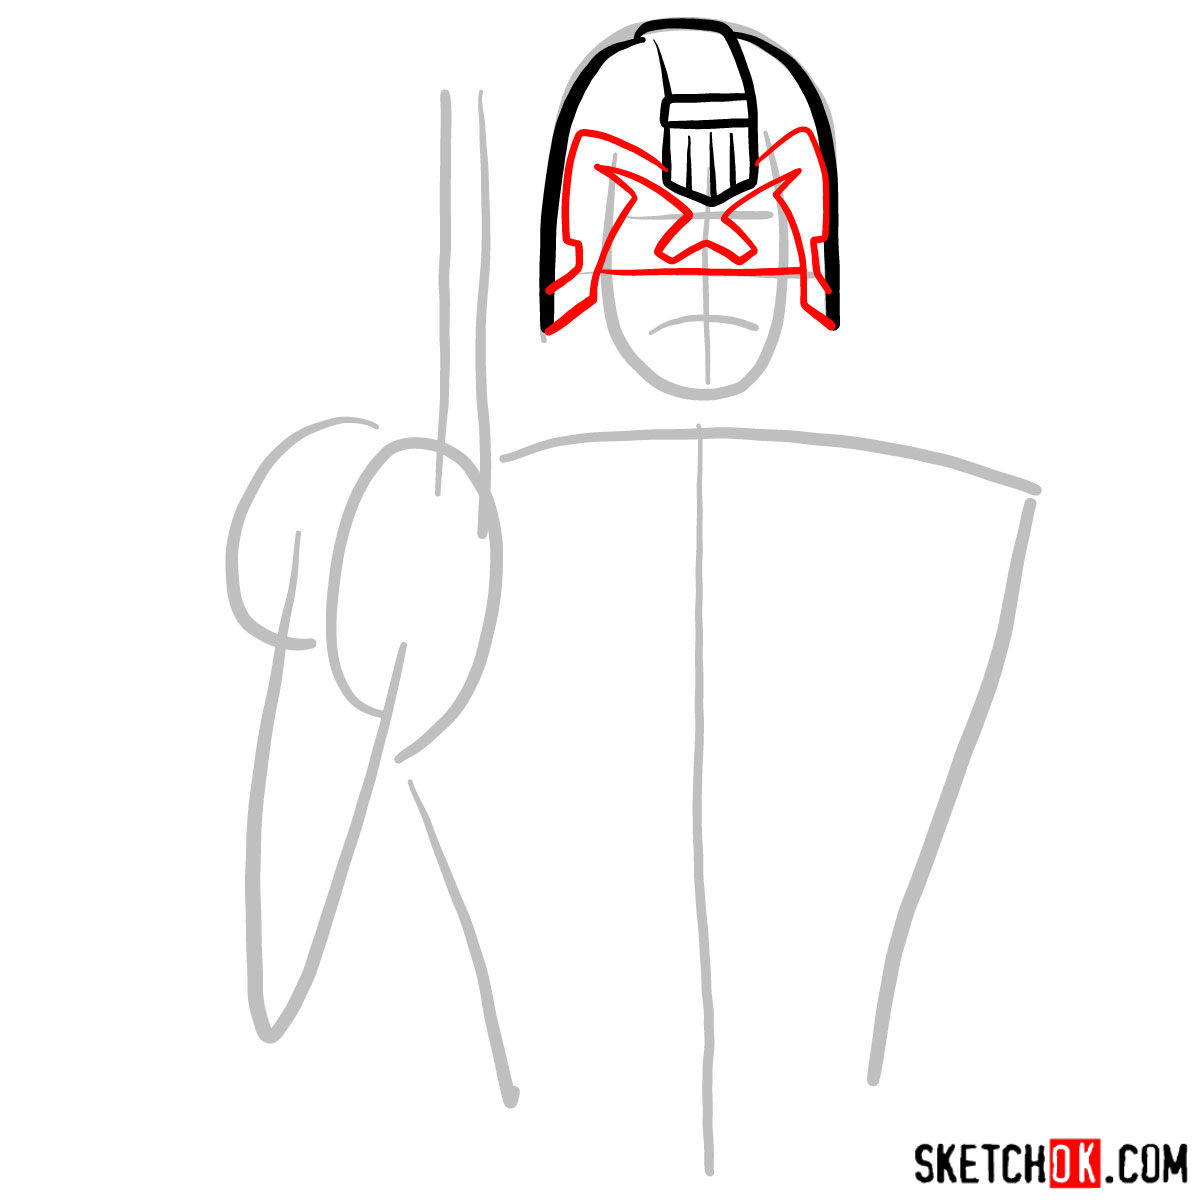
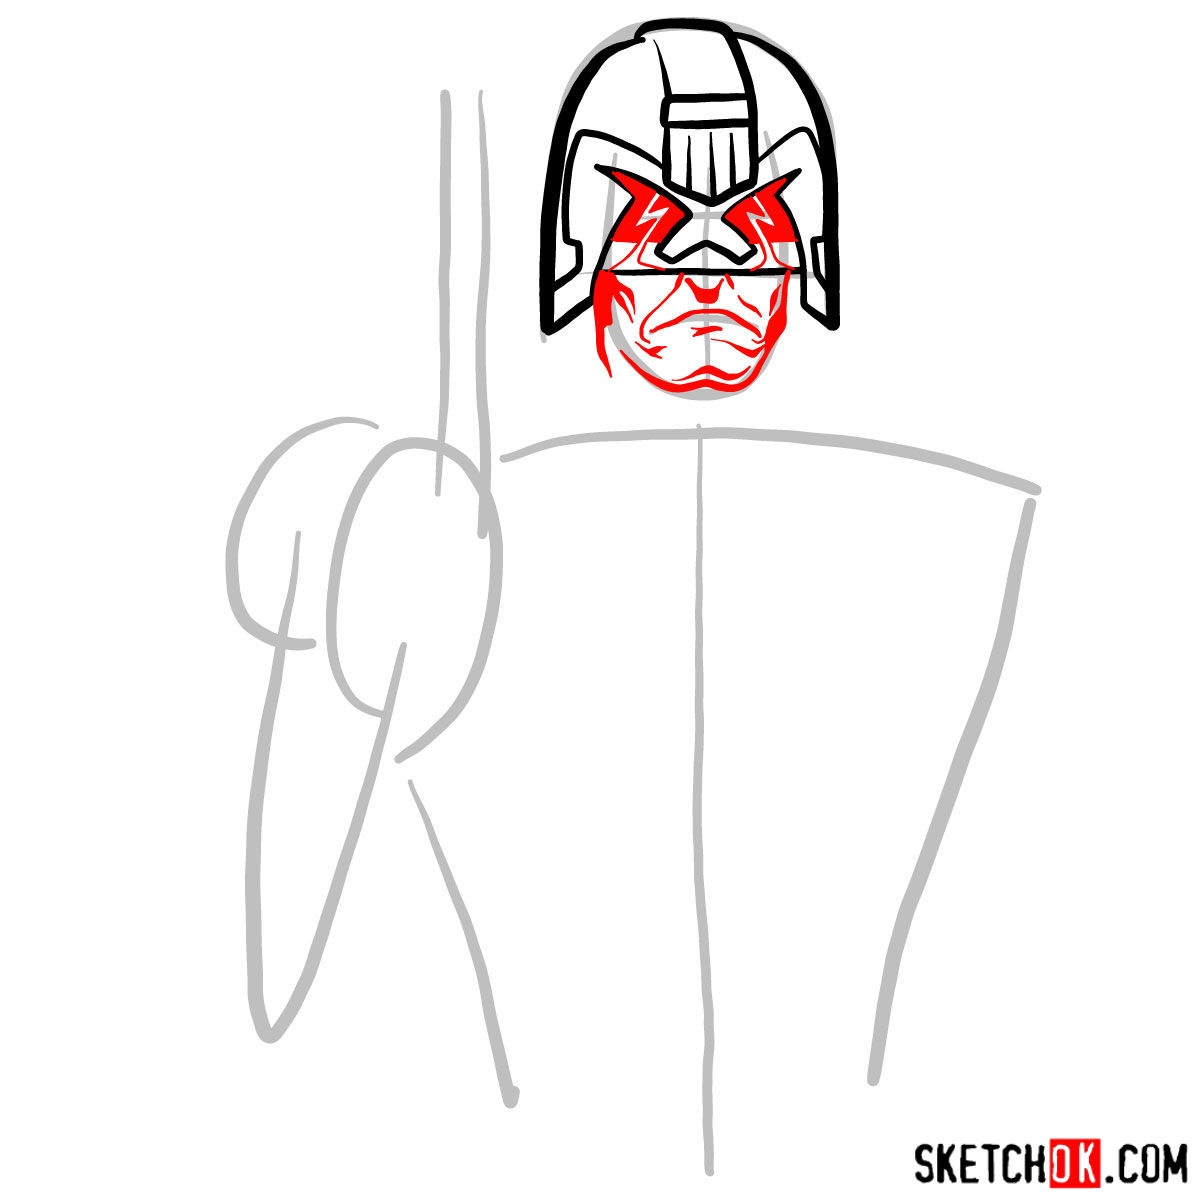
In this drawing tutorial, we’ll break down the process into four main parts. Remember that the guide images will feature red, grey, and black colors to indicate the current step, the basic proportions sketch, and the previously drawn lines, respectively.
Note: The original artwork that was used as reference is created by Cliff Robinson.
Part 1: Basic Sketch
Start by using light pencil strokes to create the basic structure and proportions of Judge Dredd’s figure. This stage is crucial as it lays the foundation for the rest of the drawing. Focus on capturing the overall shape and posture of the character, paying close attention to his iconic helmet and outfit.
Part 2: Refining the Sketch
Once you have the basic sketch in place, it’s time to refine it by adding details and improving proportions. Work on defining the features of Judge Dredd’s costume, such as the shoulder pads, badge, belt. Also, refine the shape of his helmet and the visible lower part of his face.
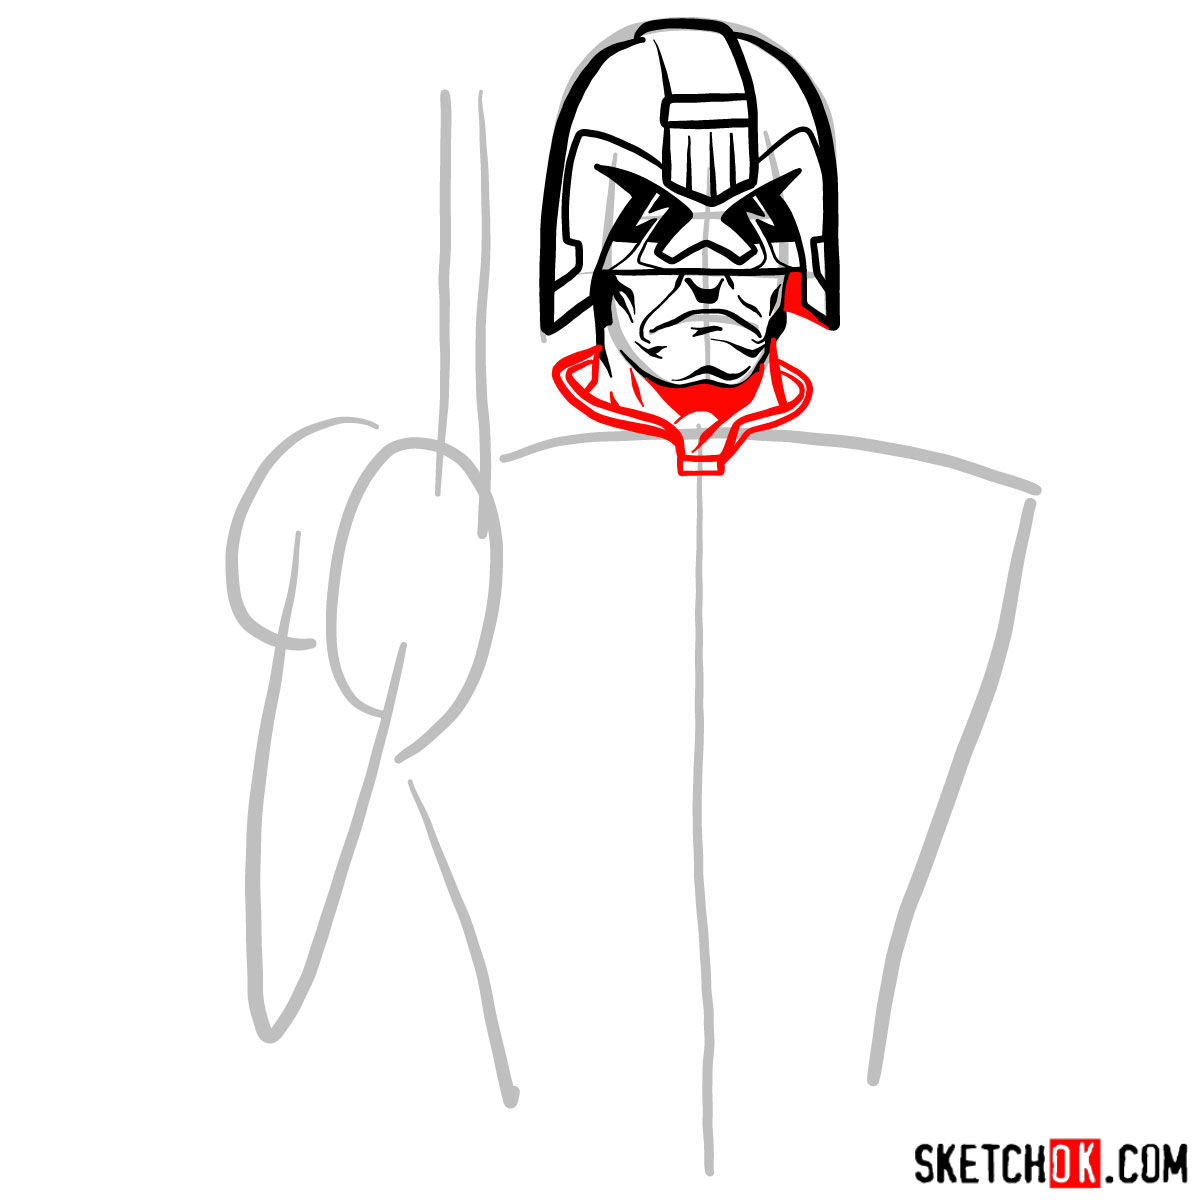
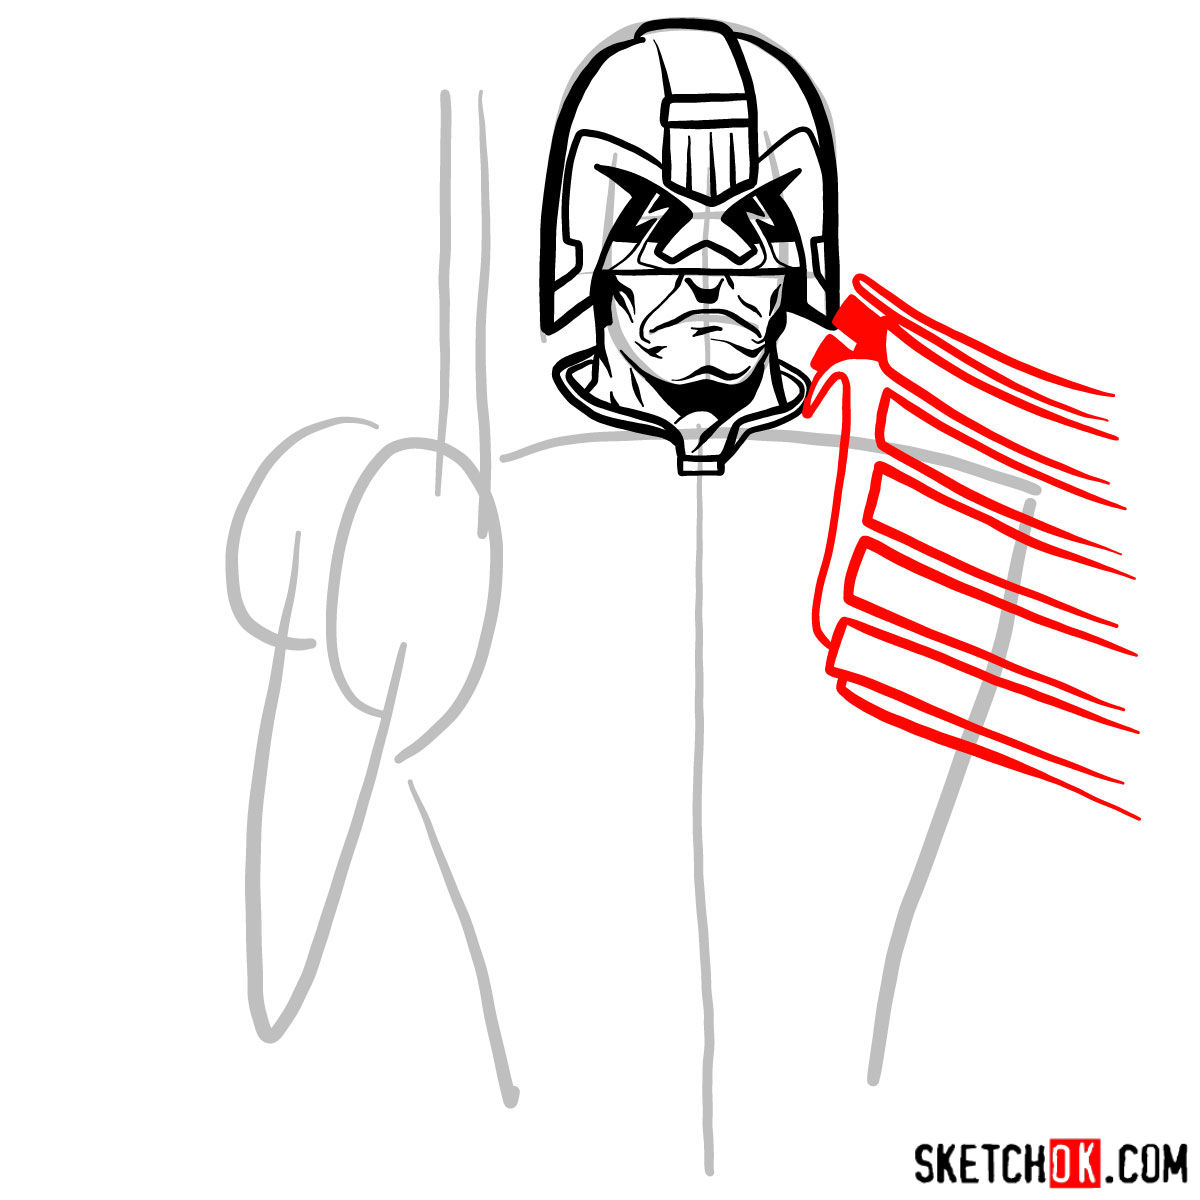
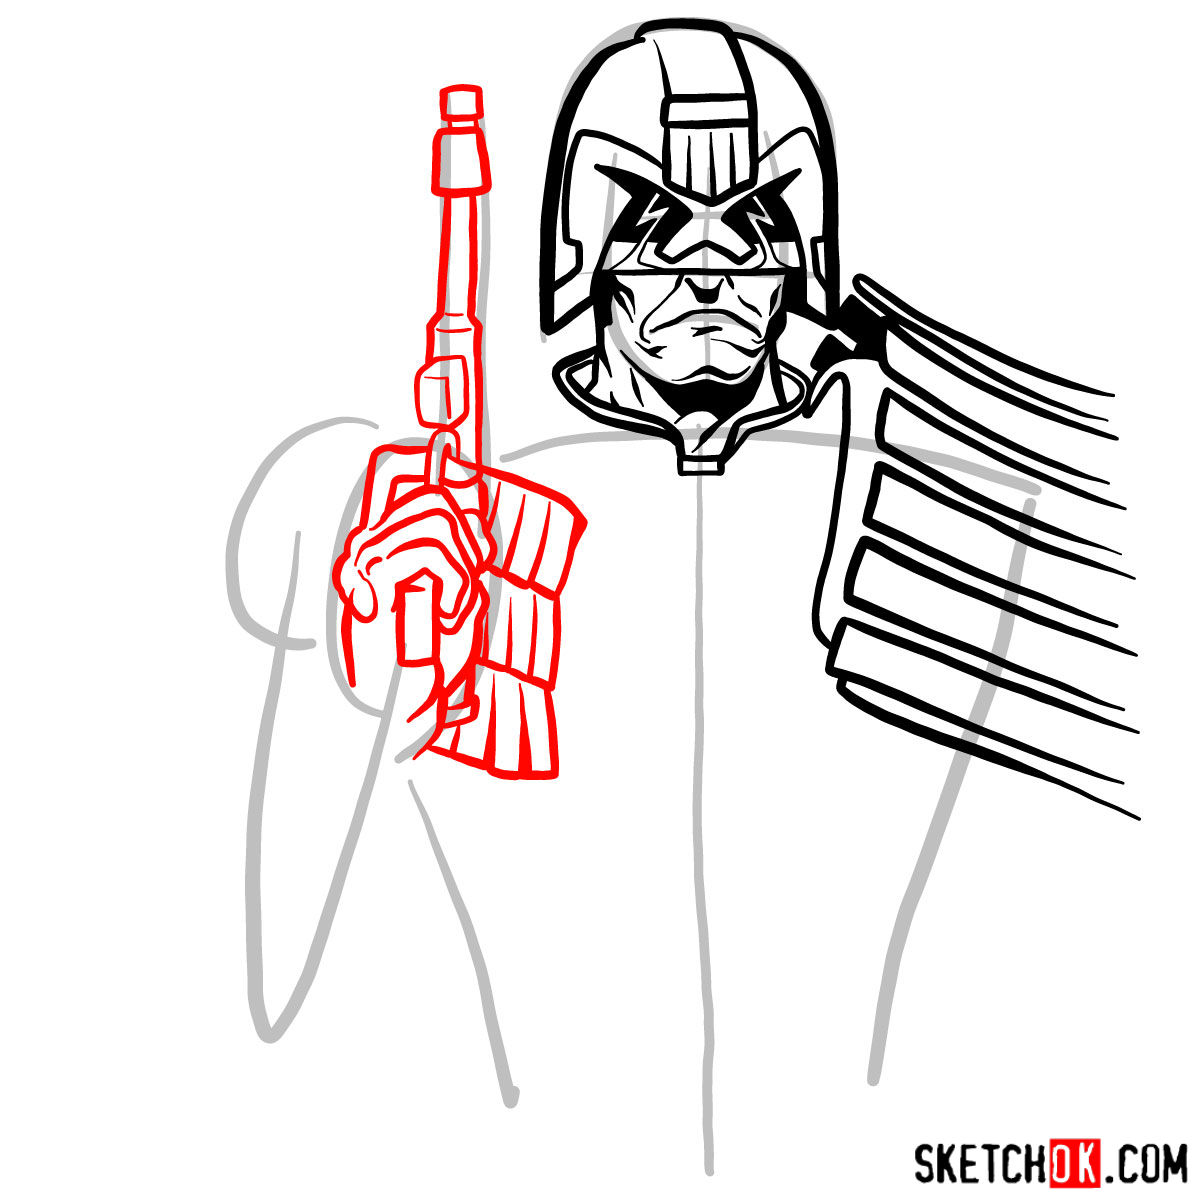

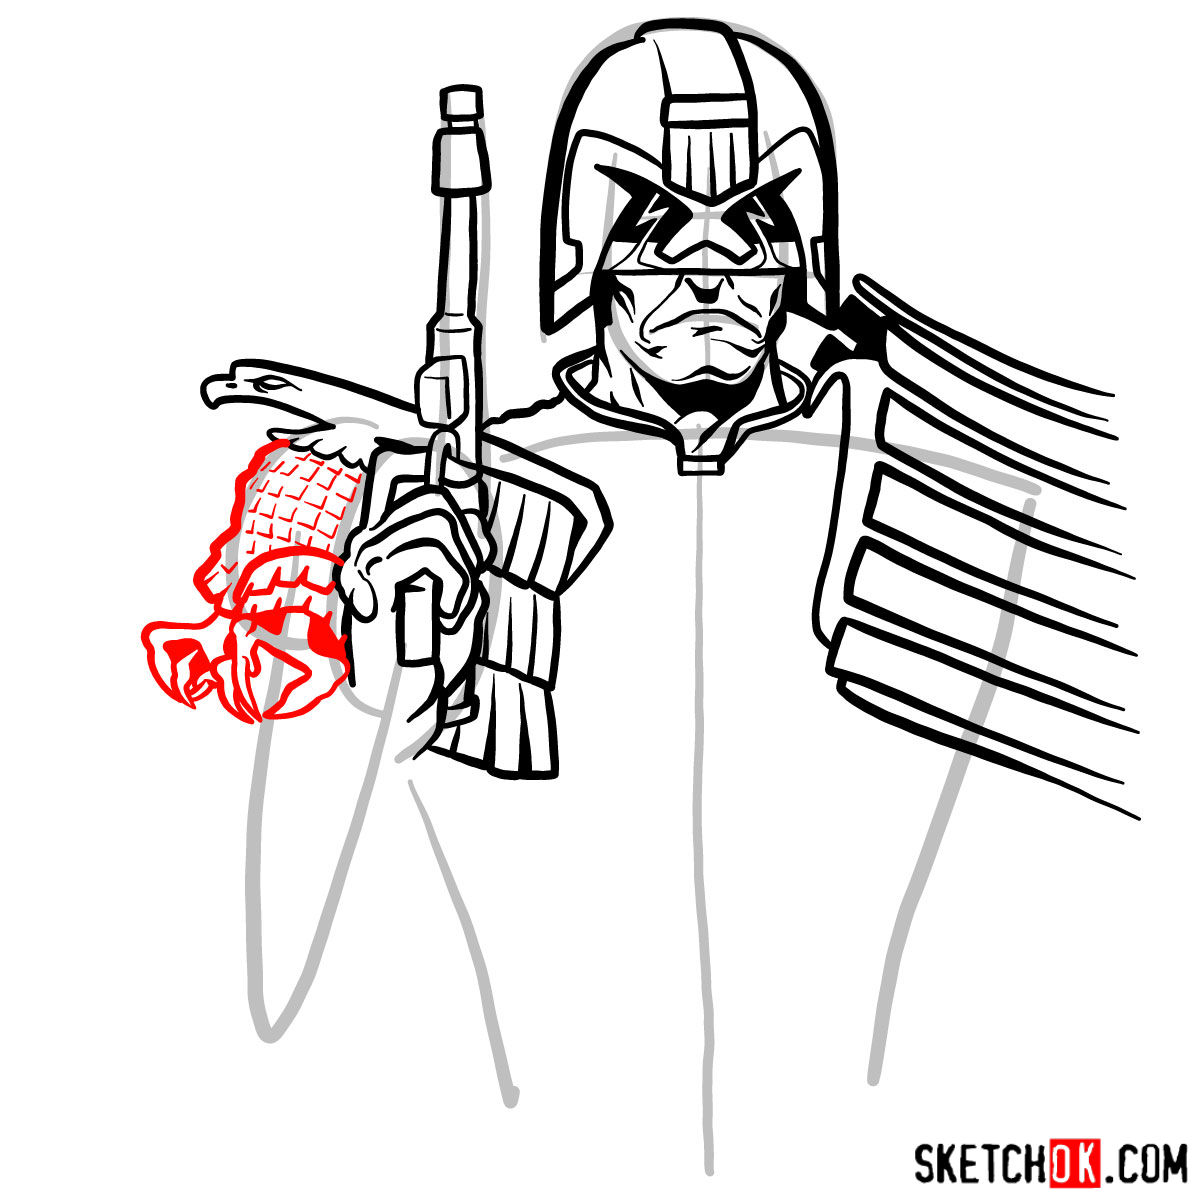
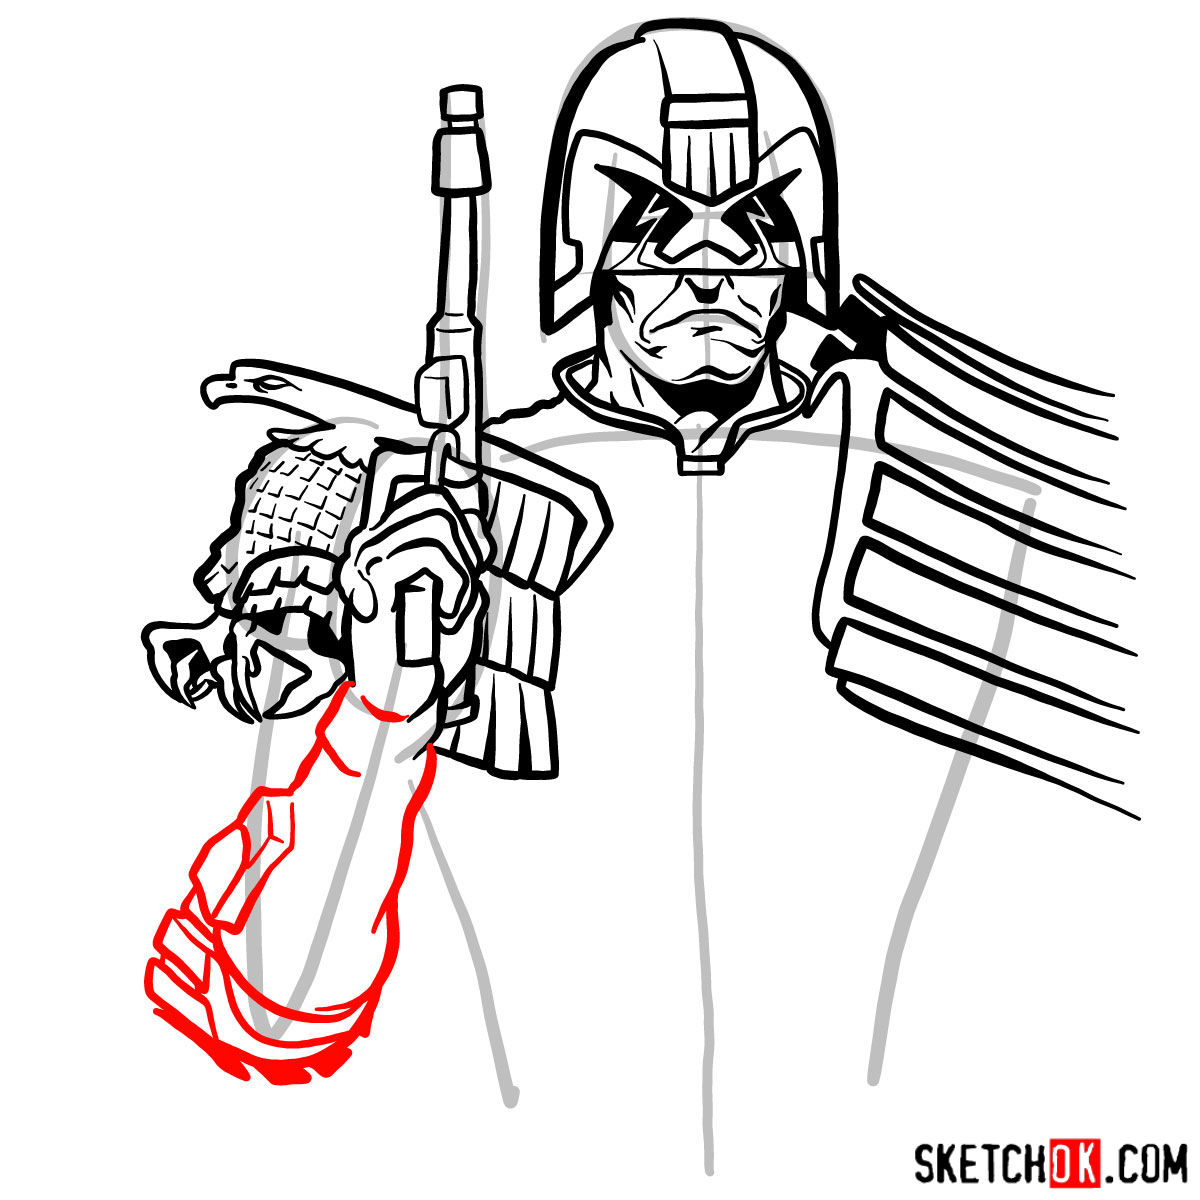
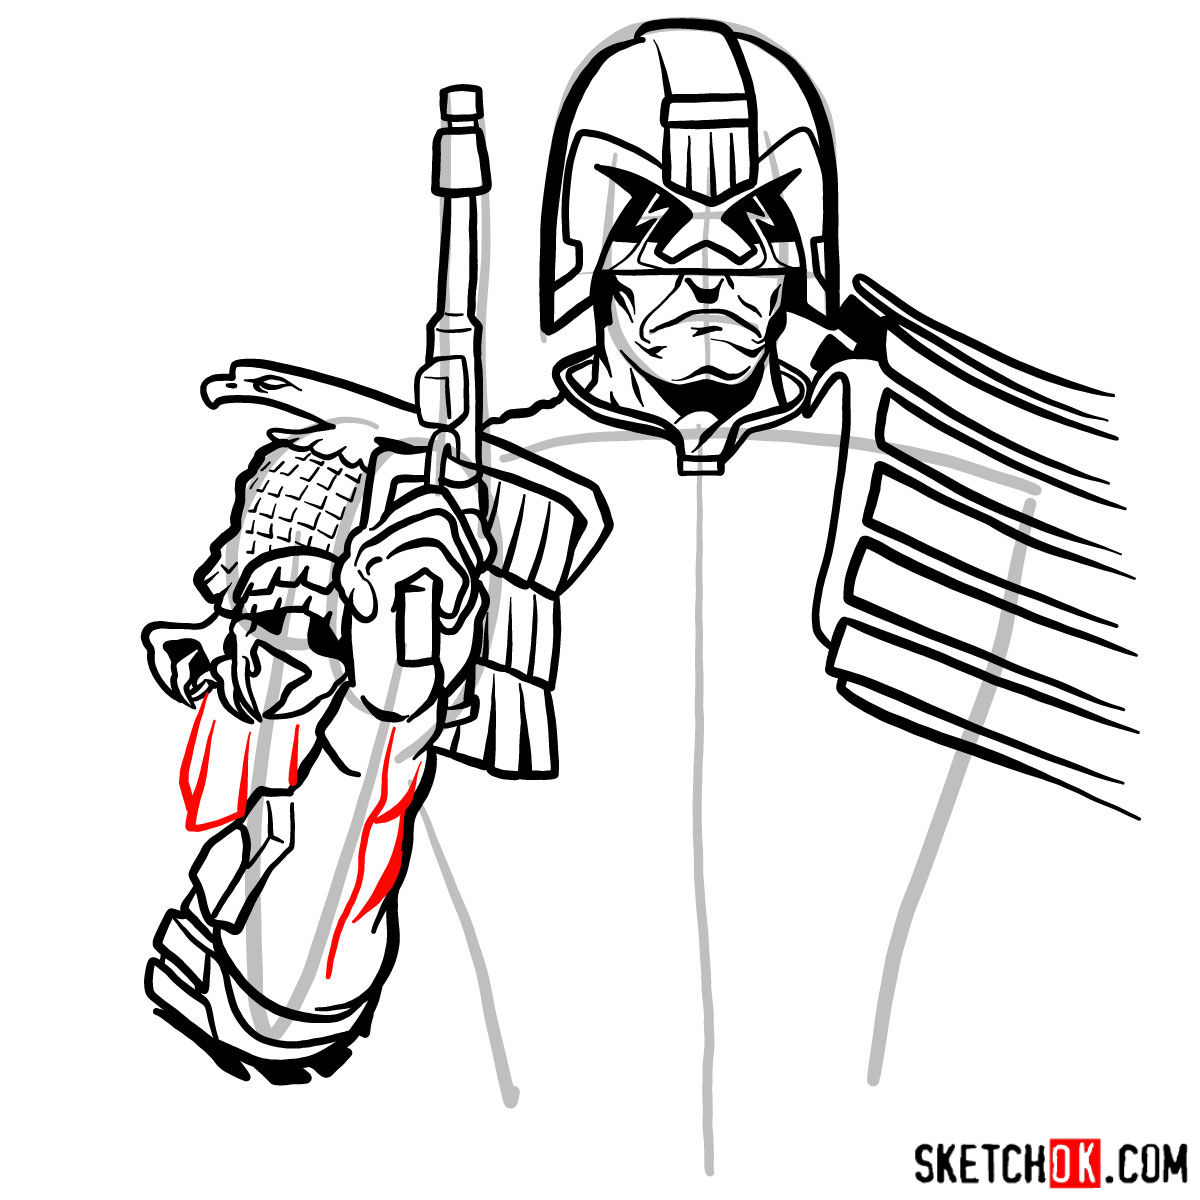

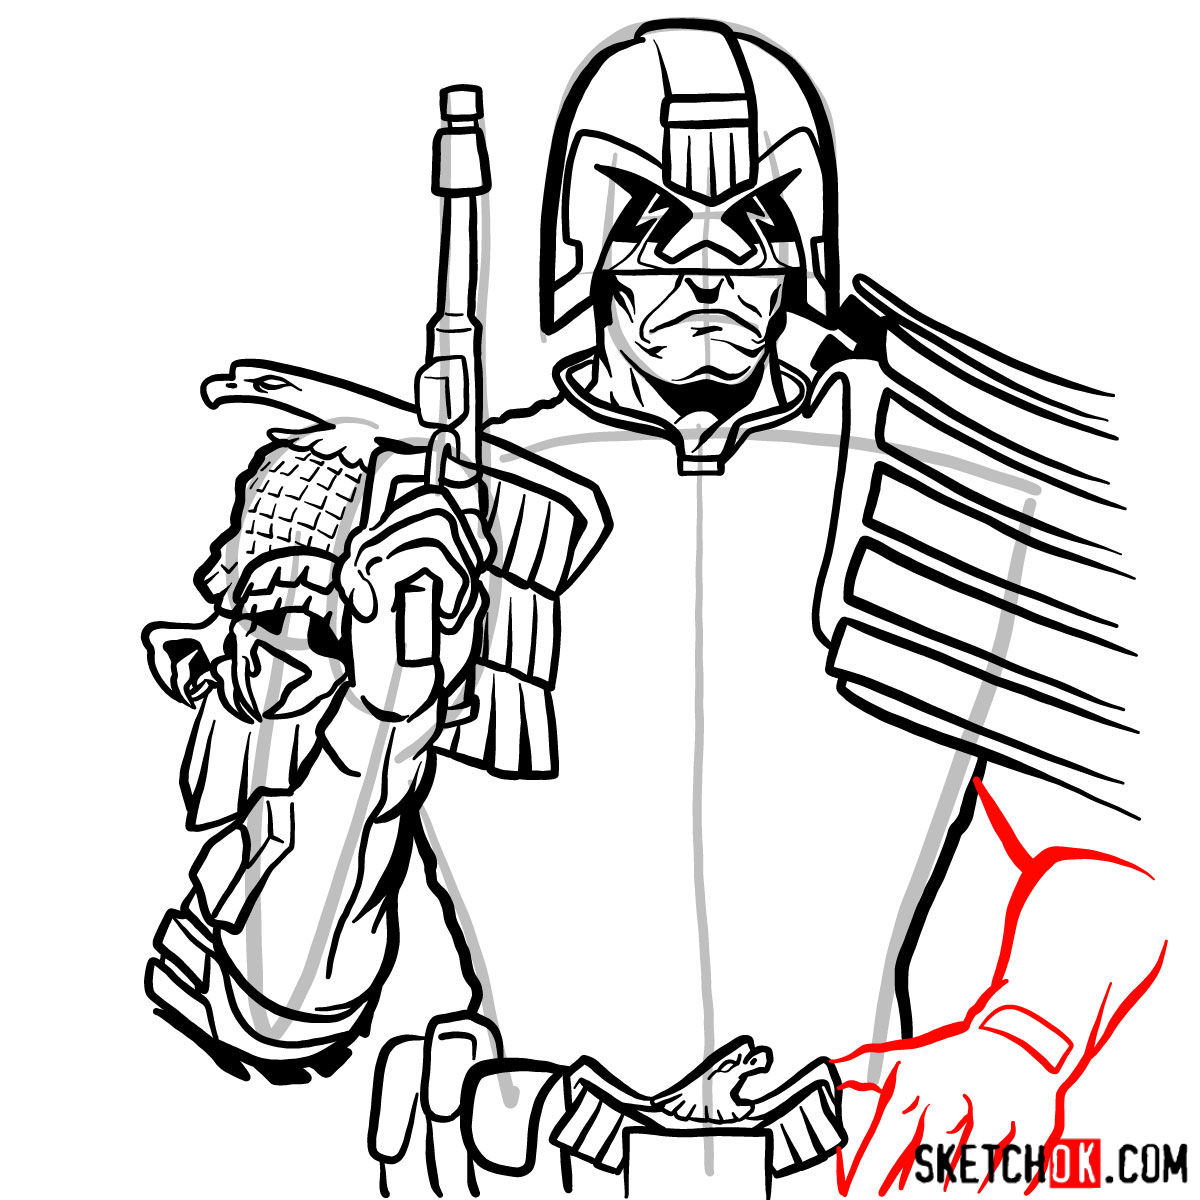
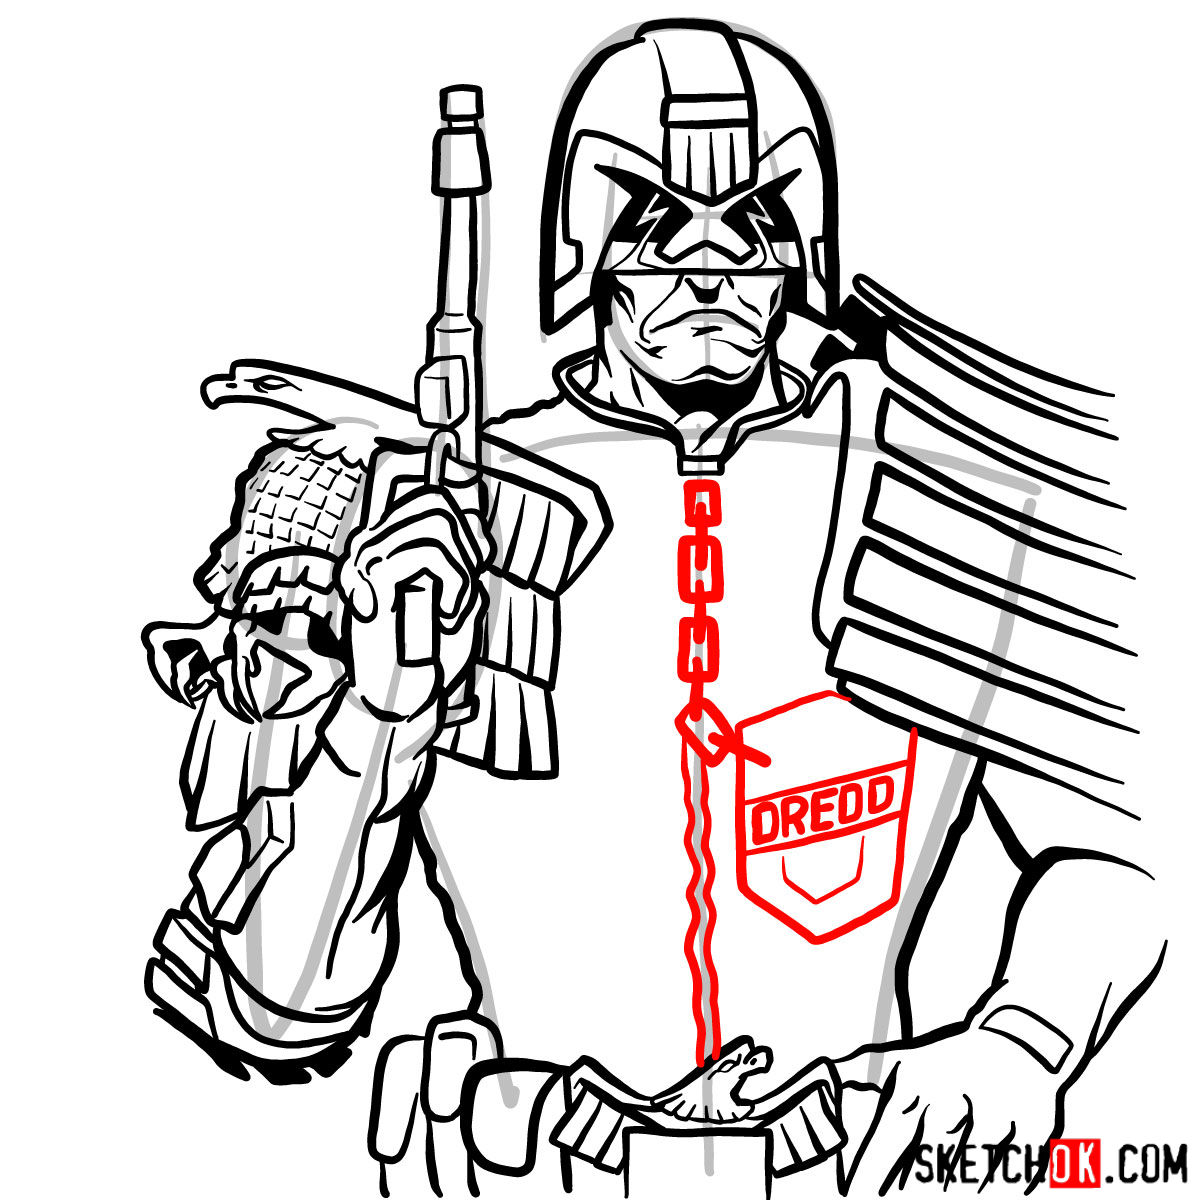
Part 3: Inking
With the refined sketch complete, proceed to the inking stage. Use a fineliner pen to carefully outline the refined sketch, adding more depth and definition to Judge Dredd’s features. This step requires a steady hand and patience, as you want your lines to be clean and precise. Once you’ve inked the entire drawing, erase any remaining pencil marks.
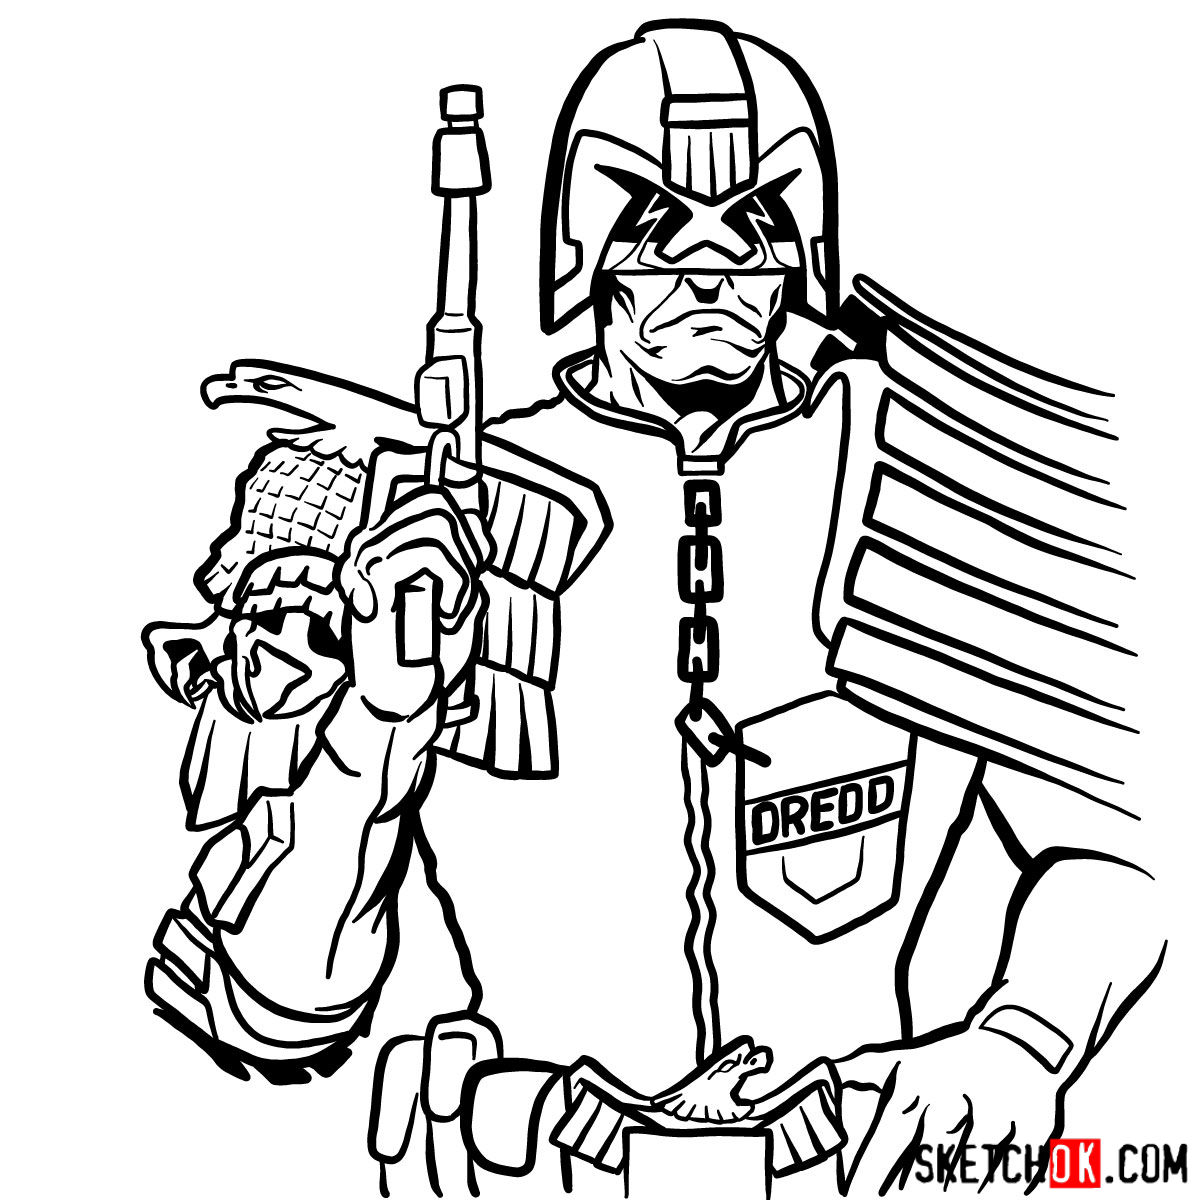
Part 4: Coloring and Shading
Now that your drawing is inked, you can bring Judge Dredd to life with colors and shading. Choose your preferred coloring medium, such as colored pencils, markers, or paints. Pay attention to the light source and add shading to create depth and dimension. Also, don’t forget to include highlights to make your artwork pop.
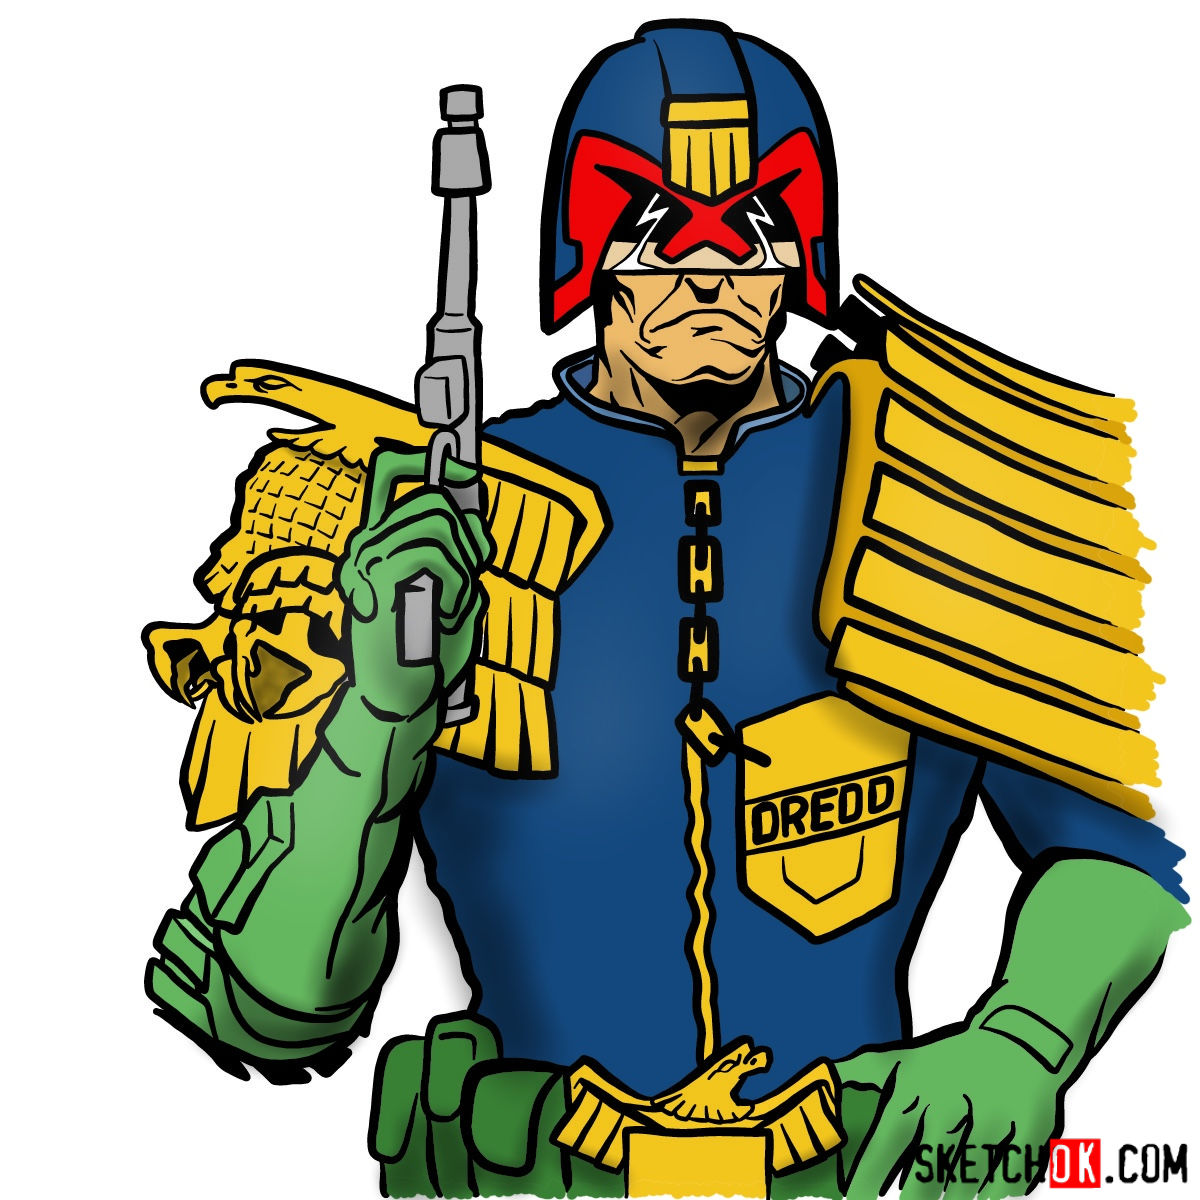
Working through how to draw Judge Dredd to the waist can feel a little tricky at first, especially getting that helmet and shoulder armor to sit right together, but a second pass usually makes those proportions click into place. Judge Dredd has a lot of stiff, angular detail that starts to make sense once you’ve run through the steps once and understand how the pieces relate to each other. If you want a fresh batch of tutorials showing up weekly, the signup form at the top of the page is the easiest way to stay in the loop.

Really good but not enough detail on the torso and too much on the arm